1
WDSRP
User’s Guide
Detection Systems’ Remote Programmer for Microsoft Windows®
For use with all Detection Systems’ security/fire control panels.
Detection Systems PTY Ltd.
Unit 21, 45 Gilby Road
Mount Waverley, Victoria 3149, Australia
61 3 9558 8088
Fax: 61 3 9558 8089
Copyright © 1994-96 Detection Systems, Inc.
Detection Systems PTY Ltd.
Unit 2, The Riverside Centre
148 James Ruse Drive
Parramatta, NSW 2150, Australia
61 2 891 4944 Fax: 61 2 891 5844
Detection Systems Int’l Inc.
19, Rue du 19 Mars-78130
Les Mureaux, France
Phone/Fax: 33 1 34 74 9576
Detection Systems, Inc., 130 Perinton Parkway, Fairport, New York, USA 14450-9199
(716) 223-4060 • (800) 289-0096 • Fax: (716) 223-9180
Detection Systems Ltd.
Unit 13-18, 17/F New Commerce Centre
19 On Sum Street, Shatin, N.T.
Hong Kong
852 2635 2815 Fax: 852 2648 7986
WDSRP User’s Guide P/N 27596C
TABLE OF CONTENTS
SOFTWARE LICENSE AGREEMENT ....................................................................................................................................... 4
INTRODUCTION......................................................................................................................................................................... 4
1.0 INSTALLING THE SOFTWARE ......................................................................................................................................... 5
1.1
Equipment Needs ..................................................................................................................................................... 5
1.1.1 Recommended Equipment ............................................................................................................................................. 5
1.1.2 Minimum Equipment Requirements ................................................................................................................................ 5
1.2
1.3
Existing DOS DSRP ................................................................................................................................................. 5
Running the Setup Program ..................................................................................................................................... 5
1.3.1 WDSRP Setup Welcome ................................................................................................................................................ 5
1.3.2 WDSRP Setup Destination ............................................................................................................................................. 5
1.3.3 WDSRP Setup Names .................................................................................................................................................... 5
1.3.4 WDSRP Setup Time Zone/Phone Lines ......................................................................................................................... 6
1.3.5 WDSRP Setup Confirm ................................................................................................................................................... 6
2.0 GETTING STARTED .......................................................................................................................................................... 6
2.1
2.2
2.3
2.4
Changing the Default Password ...............................................................................................................................6
Changing the Master Password ...............................................................................................................................7
Authority Levels ........................................................................................................................................................8
The HELP File .......................................................................................................................................................... 8
3.0 QUICK START GUIDE ....................................................................................................................................................... 9
3.1
3.2
3.3
3.4
3.5
How to Add Users ..................................................................................................................................................... 9
How to Create an Account ........................................................................................................................................9
How to Create a Template ......................................................................................................................................10
How to Call a Control Panel ................................................................................................................................... 10
How to Answer a Call from a Control Panel ........................................................................................................... 11
4.0 OPERATING GUIDE ......................................................................................................................................................... 11
4.1
4.2
Accounts ................................................................................................................................................................. 11
Account General Information .................................................................................................................................. 11
4.2.1 Account ID .................................................................................................................................................................... 12
4.2.2 Type .............................................................................................................................................................................. 12
4.2.3 Template ....................................................................................................................................................................... 12
4.2.4 Report ID ...................................................................................................................................................................... 12
4.3
Find Account Window - Commands ....................................................................................................................... 12
4.3.1 Communicate ................................................................................................................................................................ 12
4.3.2 Edit Data ....................................................................................................................................................................... 14
4.3.3 Status ............................................................................................................................................................................ 15
4.3.4 Program ........................................................................................................................................................................ 15
4.3.5 Options ......................................................................................................................................................................... 15
4.3.6 End Session .................................................................................................................................................................. 15
4.3.7 History Commands ....................................................................................................................................................... 16
4.3.8 Insert New Commands ................................................................................................................................................. 16
4.3.9 Template ....................................................................................................................................................................... 16
4.3.10 Edit Data ..................................................................................................................................................................... 17
General Information .................................................................................................................................................... 17
Keypad ........................................................................................................................................................................ 17
Output Assignments .................................................................................................................................................... 17
Partitions ..................................................................................................................................................................... 17
Phone Control ............................................................................................................................................................. 18
Remote Access ........................................................................................................................................................... 18
Zone Functions ........................................................................................................................................................... 18
Zone Programming ..................................................................................................................................................... 18
Reporting ..................................................................................................................................................................... 18
System Parameters ..................................................................................................................................................... 18
Pin Numbers ............................................................................................................................................................... 19
Commercial Fire .......................................................................................................................................................... 19
Time Windows ............................................................................................................................................................. 19
Zone Definitions .......................................................................................................................................................... 19
Page 2
Copyright © 1994-96 Detection Systems, Inc.
WDSRP User’s Guide
RS-232 Interface ......................................................................................................................................................... 19
ARDIS ......................................................................................................................................................................... 19
4.3.11 Delete .......................................................................................................................................................................... 20
4.3.12 Locate Key .................................................................................................................................................................. 20
4.3.13 Key Select ................................................................................................................................................................... 20
4.3.14 Reports ....................................................................................................................................................................... 21
Account General Information ...................................................................................................................................... 21
Mailing Labels ............................................................................................................................................................. 21
EEPROM Data ............................................................................................................................................................ 21
User PIN Information .................................................................................................................................................. 21
Zone Functions ........................................................................................................................................................... 21
Keypad Information ..................................................................................................................................................... 21
Output Programming ................................................................................................................................................... 21
Phone Settings ............................................................................................................................................................ 21
Zone Programming (7400 Style Panels) ..................................................................................................................... 21
Zone Programming (non-7400 Style Panels) .............................................................................................................. 21
Cross Matrix Programming ......................................................................................................................................... 21
Reporting Codes ......................................................................................................................................................... 21
4.4 Templates .................................................................................................................................................................. 21
4.4.1 Template General Information ....................................................................................................................................... 22
4.4.2 Find Template Window Commands .............................................................................................................................. 22
Insert New ................................................................................................................................................................... 22
Edit Data ..................................................................................................................................................................... 22
Delete .......................................................................................................................................................................... 23
Locate Key .................................................................................................................................................................. 23
Reports (not implemented) ......................................................................................................................................... 23
Export .......................................................................................................................................................................... 23
Import .......................................................................................................................................................................... 23
Close ........................................................................................................................................................................... 23
4.5 Users ......................................................................................................................................................................... 23
4.5.1 User General Information ............................................................................................................................................. 24
4.5.2 Find User window: Commands ..................................................................................................................................... 24
Insert New ................................................................................................................................................................... 24
Edit Data ..................................................................................................................................................................... 24
Delete .......................................................................................................................................................................... 25
Locate Key .................................................................................................................................................................. 25
Key Select ................................................................................................................................................................... 25
Reports (not implemented) ......................................................................................................................................... 25
Close ........................................................................................................................................................................... 25
5.0 HISTORY ........................................................................................................................................................................... 25
6.0 LOG OUT ........................................................................................................................................................................... 26
7.0 UTILITIES .......................................................................................................................................................................... 26
8.0 DIRECT CONNECTION ......................................................................................................................................................28
9.0 QUITTING WDSRP ............................................................................................................................................................. 28
10.0 TROUBLESHOOTING WDSRP ....................................................................................................................................... 28
10.1 The Status Bar ........................................................................................................................................................ 28
10.2 Troubleshooting Tips ............................................................................................................................................... 29
Index ......................................................................................................................................................................................... 30
WDSRP User’s Guide
Copyright © 1994-96 Detection Systems, Inc.
Page 3
SOFTWARE LICENSE AGREEMENT
Detection Systems’ Remote Programming Software for Microsoft
Windows®.
IMPORTANT: This software relates to security. Access should be
limited to authorized individuals. This software contains provisions
for setting security passwords. Appropriate security levels should be
established and passwords should be set before allowing operating
personnel access to this software. The original disk should be
safeguarded against unauthorized use. In addition, DS security/fire
controls contain passwords to prevent unauthorized access; these
passwords must also be set and their identity carefully safeguarded.
Please read the following license agreement prior to installing
and operating the software: Part of the software installation
procedure consists of entering your company name as an acceptance
of this license agreement. Do not complete this procedure unless you
agree to the following terms:
You MAY:
•
Use the WDSRP program only on a single computer.
•
Copy the program into another computer only for backup purposes in support of your use of the program on a single computer.
You may NOT:
•
Transfer this program or license to any other party without
the express written approval of Detection Systems, Inc.
Limited Warranty: Detection Systems, Inc. (DS) warrants that the
program will substantially conform to the published specifications and
documentation, provided that it is used on the computer hardware
and with the operating system for which it was designed. DS also
warrants that the magnetic media on which the program is distributed
and the documentation are free of defects in materials and
workmanship. No DS dealer, distributor, agent, or employee is
authorized to make any modification or addition to this warranty, oral
or written. Except as specifically provided above, DS makes no
warranty or representation, either express or implied, with respect to
this program or documentation, including their quality, performance,
merchantability, or fitness for a particular purpose.
Remedy: DS will replace defective media or documentation, or correct
substantial program errors at no charge, provided you return the item
with proof of purchase to DS within 90 days of the date of delivery. If
DS is unable to replace defective media or documentation, or correct
substantial program errors, DS will refund the license fee. These are
your sole remedies for any breach of warranty.
Because programs are inherently complex and may not be completely
free of errors, you are advised to verify your work. In no event will DS
be liable for direct, indirect, incidental, or consequential damages
arising out of the use of or inability to use the program or
documentation, even if advised of the possibility of such damages.
Specifically, DS is not responsible for any costs including, but not limited
to, those incurred as a result of lost profits or revenue, loss of use of
the computer programs or data, the cost of any substitute program,
claims by third parties, or for other similar costs. DS does not represent
that the licensed programs may not be compromised or circumvented.
In no case shall DS’s liability exceed the amount of the license.
Some states do not allow the exclusion or limitation of implied
warranties, or limitation of liability for incidental or consequential
damages, so the above limitation or exclusion may not apply to you.
Page 4
DS retains all rights not expressly granted. Nothing in this license
constitutes a waiver of DS’s rights under the U.S. Copyright laws or
any other Federal or state law.
Should you have any questions concerning this license, write to:
Detection Systems, Inc., 130 Perinton Parkway, Fairport, New York
14450.
INTRODUCTION
Welcome to Detection Systems’ WDSRP (Detection Systems’ Remote
Programming Software for Microsoft Windows®).
The WDSRP program will allow you access to all Detection Systems’
fire/security control panels.
This Users Guide is designed for the person performing a first time
exploration of WDSRP. This Guide does not assume that you have
any knowledge of WDSRP. It does assume, however, that you are
familiar with the Microsoft Windows® or OS/2 ® environment and that
you are familiar with using menus, icons, clicking and double-clicking.
It is run through Microsoft Windows® (version 3.1 or higher), for its
ease of use and accessibility.
This User’s Guide is divided into 9 sections:
•
Section 1: Installing the Software. This section will di
cuss how to install the WDSRP software onto your
computer.
•
Section 2: Getting Started. This section will discuss
procedures you should do as you first begin to use the
WDSRP program.
•
Section 3: Quick Start Guide. This section will orient
you with the most basic operations of the WDSRP program.
•
Section 4: Operating Guide. This section will take
you through the step by step operations of the WDSRP program.
•
Section 5: History
•
Section 6: Log-out. This section covers logging out from
WDSRP.
•
Section 7: Utilities. This section describes the various utilities available in WDSRP.
•
Section 8: Direct Connection. How to program panels directly from your computer without the use of a modem and
phone lines.
•
Section 9: Quitting WDSRP. The ways to exit the program.
•
Section 10: Troubleshooting. This section covers troubleshooting tips for WDSRP.
Your first task will be to install the WDSRP program onto your computer. For directions on this task, see Section 1.0 Installing the Software.
Copyright © 1994-96 Detection Systems, Inc.
WDSRP User’s Guide
1.0
INSTALLING THE SOFTWARE
The WDSRP Setup program will copy all the necessary files to your
hard drive and will configure your system by asking you a few simple
questions. A README.TXT file is now included on the installation
disks which contains valuable information regarding the latest release
of the software and modem compatibility. The README.TXT file is
copied into the WDSRP directory during setup. You may use any text
editor to read this file.
1.1
Equipment
Needs
1.1.1 Recommended Equipment
1.
2.
3.
4.
5.
6.
An 80486 DX (33 MHz or faster) PC with at least 10 Meg of
hard disk space free and at least 8 Meg of RAM.
A working version of Microsoft Windows® 3.1 or higher, Windows 95, or OS/2 Version 2.1 or higher.
DOS version 6.0 or higher.
A Hayes Smartmodem (300, 1200, 1200B, 2400, or
2400B). Open the README.TXT file for the latest information on modem compatibility.
A VGA or better monitor.
A mouse or other pointing device.
in a safe and secure area (under lock and key). It is only to be used in
the event of your system having software or hardware problems and
a reinstallation is needed.
NOTE: When upgrading an existing version of WDSRP, you should
install this new version over your old version. The setup
program will handle all necessary file conversions.
1.
2.
3.
4.
5.
6.
7.
8.
Start Microsoft Windows® (Version 3.1 or higher).
Insert WDSRP Disk 1 - Setup into the floppy drive.
Open Program Manager (Explorer in Windows 95).
Using any text editor, open the README.TXT file to review
any last minute additions and changes to the document.
Choose [File] [Quit] when finished.
From the Program Manager menu, choose [File] [Run].
Enter [A:\setup] or [B:\setup] depending on which drive contains the WDSRP Installation diskette.
Choose [OK].
Insert disks as prompted until installation is complete.
1.3.1 WDSRP Setup Welcome
After the initializing process, the WDSRP Setup Welcome window
will appear. Choose one of the three options at the bottom of the
window.
1.1.2 Minimum Equipment Requirements
NOTE: WDSRP will function with the equipment below; however,
the operation may be slower than desired and some loss of
functionality may occur such as the inability to use multiple
phone lines and print large reports.
Single phone line usage is recommended in this configuration.
1.
2.
3.
4.
5.
1.2
An 80386 SX (16 MHz) PC with at least 8 Meg of hard disk
space free and at least 4 Meg of RAM.
A working version of Microsoft Windows® 3.1.
DOS Version 3.1 or higher.
A Hayes Smartmodem (300, 1200, 1200B, 2400, or 2400B).
Open the README.TXT file for the latest information on modem compatibility.
An EGA or Hercules monitor.
1.3.2 WDSRP Setup Destination
The WDSRP Setup Destination window will appear after choosing
[Continue].
Existing DOS DSRP
The WDSRP Setup program will not effect your existing DOS data
files. After installing WDSRP, you may incorporate your existing DSRP
files into WDSRP by using the Merge function. See Section 7.0 Utilities.
CAUTION: Only convert your DOS data files to WDSRP data files
when you are ready to stop using DOS DSRP. The new
data file created when you convert your old files can not
be converted back to DOS DSRP. If you choose to use
WDSRP with your existing DOS files on a test basis, you
should make a copy of your data files and update the
copy.
1.3
Enter the drive path where you would like WDSRP installed. Typically,
the default path will read [C:\WDSRP].
NOTE: When upgrading an existing version of WDSRP, install the
new version over the old version. Do not change the “Install
to” path. The setup program will handle all necessary file
conversions.
Running the Setup Program
1.3.3 WDSRP Setup Names
Before running the WDSRP Setup Program, you should first disable
any anti-virus software that you may have loaded. You can re-enable
the anti-virus software after the WDSRP installation.
The WDSRP Setup Names window will appear after choosing
[Continue]. Enter your name and company name.
Make a backup copies of the WDSRP disks. Keep the backup copy
WDSRP User’s Guide
Copyright © 1994-96 Detection Systems, Inc.
Page 5
2.0
NOTE: These names will appear on all copies of WDSRP installed
from this diskette. This window will appear during the initial
installation only.
1.3.4 WDSRP Setup Time Zone/Phone Lines
Now that you have successfully installed the WDSRP software, you
are ready to begin the first steps toward successful usage of this
software.
When starting the WDSRP program, you have a choice of choosing
the [WDSRP Edit] icon or the [WDSRP 1, 2, 3, or 4] icons.
Note:
The WDSRP Setup Time Zone window will appear after choosing
[Continue]. Enter the number of hours away from UTC (Greenwich,
England) you are located and if daylight savings is observed. Enter a
positive number if you are West of UTC (e.g. United States), and a
negative number if you are East of UTC. For example, the East Coast
of the United States (Eastern Time Zone) is located 5 hours from UTC
and the West Coast is located 8 hours from UTC.
You will also be prompted to enter the number of phone lines that will
be connected to WDSRP via modems. If you will be using only one
line with one modem, no changes are necessary.
GETTING STARTED
The number of WDSRP Icons appearing will depend on the
number of phone lines selected during setup.
The WDSRP Edit icon is used for editing purposes only. It does not
communicate with the control panels. Use this selection when work
needs to be done to any of the WDSRP databases, but communication
to a control panel is not necessary.
In order to communicate with a control panel, choose one of the
WDSRP 1, 2, 3, or 4 icons. This selection will allow you to do all that
the WDSRP Edit selection can, but also enables you to communicate
with a control panel for the transfer of data. The 1, 2, 3, or 4 selections
represent the number of the phone line connected to WDSRP.
2.1
1.3.5 WDSRP Setup Confirm
The WDSRP Setup Confirm window will appear after choosing
[Continue]. If the information is correct, choose [Continue]. If the
information is incorrect, choose [Back] and change the incorrect
information. WDSRP Setup will install the program on your hard drive
after selecting [Continue]. [Exit] will cancel the installation.
Changing the Default Password
Start up the WDSRP program by double-clicking on the [WDSRP Edit]
icon from the WDSRP window. You will be prompted to enter your
password. The software is shipped with the password lev15. Enter
[lev15] then select [OK].
The following window will appear after successful installation.
Page 6
Copyright © 1994-96 Detection Systems, Inc.
WDSRP User’s Guide
Choose [Users] from the WDSRP Main window.
2.2
Changing the Master Password
The next task to perform is to change the Master Password. It is a
level 16 password that is your safeguard should anything happen to
the other passwords. The Master Password can never be deleted
and its authority level can never be changed. Once you have changed
the Master Password, do not use it as a working password, use the
Level 15 Password you just created (see Section 2.1). Write down
the Master Password and keep it in a secure place. You will NOT be
able to see the Master Password under User Information unless you
log in with it.
To change the Master Password:
1. Choose [Log-out] from the WDSRP Main window.
2. Enter [Master] for the password as you Log in.
3. Choose [Users] from the WDSRP Main window.
4. The Find User window will appear.
The Find User window will appear showing User (lev15) information.
1.
Choose the [Edit data] command from the right hand column
of command buttons. The Edit User Information window
will appear with the Password (lev15) highlighted.
2.
Replace all the necessary information in this window with the
information for yourself.
Create a new password for yourself. The password can be
up to 12 characters long. Do not use spaces or non-alpha
characters in your password. Keep authority level 15, the
highest normal level.
Supply the rest of the information as needed. Some fields
are automatically filled in by WDSRP; the Operator ID field,
Created Field, Modified Field, and the Modify Operator field.
Choose the [OK] button to return to the Find User window.
3.
4.
5.
WDSRP User’s Guide
5. Locate the Master user information by choosing the [Next]
command from the command buttons at the bottom of the window.
6. Choose the [Edit data] command from the right hand column
command buttons.
7. The Edit User Information window will appear with the password
“Master” highlighted. From this window you may edit all necessary
information.
8. Replace the information in this window with your own information.
9. Give yourself a new Master Password.
10. Supply the rest of the information as needed.
The authority Level and Operator ID fields can not be changed.
Once this task has been completed, log-out and log back in as the
level 15 password you previously created.
Copyright © 1994-96 Detection Systems, Inc.
Page 7
2.3
Authority
Levels
The authority level you give each user is critical. The authority level
given to each user will allow certain access privileges throughout the
WDSRP program. Each field within WDSRP (any place a user may
interact with) has its own authority levels. Authority levels affect the
user in two ways. The fields have a minimum authority level that a
user must meet just to view that field. They also have a minimum
authority level that each user must meet in order to edit that field.
Most fields are preset at authority level 5 for viewing and authority
level 10 for editing.
Authority level 15 should be reserved for the one or two individuals
that are trusted with all account information. Authority level 15 can
change the authority levels of other operators.
NOTE: In order to edit information concerning report codes, control
panel users and codes, report phone numbers and remote
communication parameters, etc., you must have an authority level of
15.
Windows 3.1 Help
To change the authority levels for any field or menu in WDSRP, highlight
the item and press the [F5] key. The Set Authority Levels window for
that particular item will appear. You must have at least a level 15
authority to use the F5 command. After changing select [OK].
To change the Menu Item Authority Levels, select (highlight) the menu
item and press the [F5] key. After changing, select [OK].
2.4
The HELP File
WDSRP has an extensive and easily accessible HELP file. The HELP
file is a user’s manual at your fingertips. It can be accessed anywhere
within WDSRP.
There are three ways to access the HELP File.
1.
The HELP Files are context sensitive. You can highlight any
item in the open window and press the [F1] key and the
HELP information about that item will appear.
2.
In Windows 3.1 only, placing the mouse cursor over the
item in the open window and pressing the right mouse button will display the HELP information about that item. Do not
attempt this in Windows 95 as it may cause a protection
fault.
3.
From the MAIN screen, the HELP File can be opened by selecting the HELP file menu with the mouse and pressing the
left mouse button. The style of the files will be different in
Windows 3.1 and Windows 95 as shown in the following examples:
Page 8
Windows 95 Help
The HELP file contains both general and very precise, context sensitive
information that this User’s Guide does not detail. Therefore, the HELP
file will be a significant resource regarding WDSRP and its functionality.
When in the HELP file, some of the text will be underlined, green text.
Clicking on this text with your mouse will result in further information
specific to that selection.
Copyright © 1994-96 Detection Systems, Inc.
WDSRP User’s Guide
3.0
QUICK START GUIDE
Now that you have completed some preliminary steps, you are ready
to begin customizing WDSRP to your specific needs.
3.1
How to Add Users
The User database is where you keep track of all the users of this
WDSRP program. Each individual record will list various information
describing each user (for a detailed description of a User record, see
Section 4.5, Users).
3.2
The account database is where you keep track of all the accounts that
WDSRP is in contact with. Each individual account record keeps track
of various general and programming information specific to the control panel for that account. For a detailed description of an account
record, see Section 4.1, Accounts.
1.
2.
1.
2.
3.
4.
5.
6.
7.
8.
9.
Start up the WDSRP program by double-clicking on a WDSRP icon from the WDSRP window.
You will be prompted to enter your password. Enter the everyday password you previously created.
Choose [OK] to complete the log-in.
Choose [Users] from the WDSRP Main window.
The Find User window will appear:
How to Create an Account
3.
4.
Start up the WDSRP program by double-clicking on the [WDSRP Edit] icon from the Program Manager window.
You will be prompted to enter your password. Enter the everyday password you previously created.
Choose [OK] to complete the log-in.
Choose [Accounts] from the WDSRP Main window. The
Find Account window will appear.
5.
Choose the [Insert New] command from the right hand column command buttons. The Select Initial Account Data
window will appear.
6.
Choose the source from which you will create the new Account. For now, select the [Blank] command. This command
will call-up a blank Edit Account - New Account window.
7.
Fill in all the necessary general information for this new Account.
Choose [OK] after completing. The Edit Account window for
Choose the [Insert New] command from the right hand column command buttons.
The Edit User Information window will appear with the cursor in the Password field.
From this window you may enter and edit all necessary information. Some fields are filled-in automatically by WDSRP:
the Operator ID field, Created Field, Modified field, and the
Modify Operator field.
Choose [OK] to include this record in the User database.
This will return you to the Find User window.
Choose [Close] to return to the Find User window and delete
the record you were working on.
WDSRP User’s Guide
8.
Copyright © 1994-96 Detection Systems, Inc.
Page 9
this new account will appear. It is here where you complete
all the programming information concerning this account.
See Section 4.0 for complete details concerning this window.
3.3
7.
When complete, choose [OK]. The Edit Template window
for this new template will appear.
How to Create a Template
The template database is where you keep track of all the templates
that you create. Each individual template record keeps track of various general and programming information specific to that template.
For a detailed description of a template record, see Section 4.4.
1.
2.
3.
4.
Start up the WDSRP program by double-clicking the [WDSRP Edit] icon from the WDSRP window.
You will be prompted to enter your password. Enter the everyday password you previously created.
Choose [OK] to complete the log-in.
Choose Template from the WDSRP Main window. The Find
Template window will appear.
It is here where you complete all the programming information concerning this template. See Section 4.0 for complete
details concerning this window.
3.4
How to Call a Control Panel
In order to call a control panel, the following requirements must first
be met:
•
•
•
5.
Choose the [Insert New] command from the right hand column command buttons. The Select Initial Template Data
window will appear.
Note:
The data phone number field must be filled in for the account
you wish to call (unless manual connect is used).
The control panel must either be programmed to answer the
phone, or someone must be on site to cause it to answer
from a keypad command.
If used, you must have the correct agency and remote codes
programmed.
If this is the first time the control panel will be contacted from
WDSRP, the agency and remote codes in the panel will be
blank; therefore, these codes will not be required in the
account database for this initial contact.
The steps to call a control panel are:
1.
2.
6.
Choose the source from which you will create the new template. For now, select the [Blank] command. This command
will call-up a blank Edit Template - New Template window.
From here you will fill in all the necessary general information
for this new template.
3.
4.
5.
6.
Page 10
Start up the WDSRP program by double-clicking the [WDSRP 1, 2, 3, or 4] icon from the WDSRP window.
You will be prompted to enter your password. Enter the everyday password you previously created.
Choose [OK] to complete the log-in.
Choose [Accounts] from the WDSRP Main window.
Choose the account you wish to communicate with. The
Find Account window will appear.
Choose the [Communicate] command from the right hand
column command buttons. The new right-hand column com-
Copyright © 1994-96 Detection Systems, Inc.
WDSRP User’s Guide
mand buttons will only show those commands necessary for
communication.
To manually answer an incoming call:
An incoming call produces a tone through the speaker of your computer. This is your notification that a call is incoming.
When this tone is heard proceed to the [Find Accounts] window and
select the [Communicate] command, then select the [Pickup] command. It may take a while for the incoming call to come on-line.
The [Pickup] command will prompt WDSRP to pickup the incoming
call. WDSRP will then be on-line with the control panel.
4.0
OPERATING GUIDE
4.1
Accounts
To access accounts, choose [Accounts] from the WDSRP Main window.
7.
8.
Choose the [Data Call] command from the right hand column
command buttons. This command will dial the phone number to reach this account’s control panel. This number will
call the control panel directly.
If the control panel answers your call, you will be on-line with
the control panel. From here you may upload or download
data as needed.
The Find Account window will appear. It is here where you keep
track of the various control panels/accounts that you supervise. This
window lists various general information concerning the accounts.
To end a call to a control panel:
1.
Choose the [End Session] command from the right hand column command buttons. This command will end this communications session with the control panel. It will bring you offline with the control panel. It will call up a verification window
asking you if you wish the connection to be dropped.
After this session is complete you will still be in the Find Account
window with the communications commands. Choose the [Cancel]
command to return to the original Find Account window.
3.5
How to Answer a Call from a Control
Panel
In order to answer a call from a control panel that already has an
account created for it, the following requirements must first be met:
1.
2.
Note:
The Reporting ID 1 and the Reporting Phone number 1 in the
account record must match those of the control panel.
Phone number 3 programmed in the control panel must be
for phone line connected to this WDSRP program.
You can scroll through the account database by using the command
buttons [Beginning], [Previous], [Next], or [End of File] at the bottom
of the window.
4.2
Account
General
Information
The general information consists of:
If an incoming call from a control panel does not have an
existing account, it will create its own account; therefore the
requirements in item 1 (above) will not have to be met. The
new unknown account will create an account number
starting with a $ (dollar sign) generally followed by an 8 digit
number.
To have WDSRP automatically answer an incoming call you must
be logged out.
To access the account calling in, perform the following:
1. After the call has gone on-line, Log in.
2. Choose [Accounts] from the WDSRP Main window.
3. The Find Accounts window will appear showing the account
that is on-line with WDSRP.
WDSRP User’s Guide
Copyright © 1994-96 Detection Systems, Inc.
Page 11
4.2.1 Account ID
This is the number/code you assign each account for identification
purposes. This number is used by WDSRP only; it will not be programmed into the control panel.
Data Call (DA)
4.2.2 Type
Notes
This is the type of control panel used on this account.
This field may be used for any additional notes you may have concerning this Account.
This is the phone number to reach this Account’s control/communicator. This number will call the control panel directly.
4.2.3 Template
This is the Template that this account uses (may be none).
The rest of the fields in the Find Account window are filled in automatically by WDSRP. They are:
4.2.4 Report ID
These are the Central Station Account Codes of the control panel.
The Account may have no Report ID (in the case of a local, non reporting system). Reporting systems require as few as one reporting
ID (in the case of one reporting phone number on a non-partitioned
system) to as many as 16 Account ID numbers (in the case of an eight
partition system with each partition reporting to two phone numbers).
They are the numbers transmitted to the Central Station receiver that
identify this particular control panel. These numbers uniquely identify
this control panel to the Central Station.
Note:
The number of Account Codes will differ depending on the
type of control/communicator selected.
Comm
This field lists the time and date of the last communication between
the control panel and WDSRP.
Image
This field lists the time and date of the last upload or download.
Status
This field will list such things as data transfer information, history upload/download information, and communication status.
Created
This field lists the time and date when this Account was created.
Name
This is the name of the residential or business subscriber of this Account.
Modified
Address, City, State, ZIP Code
Revision
This is the address of the residential or business subscriber of this
Account.
This field lists the last time this Account was modified by an operator.
This field lists the control panel’s ROM version.
Modify Oper
Contact
This field lists the Operator’s ID who last modified this Account.
This is the name of the individual at the site of the control panel whom
you may reach by voice call. This person’s phone number should be
listed in the Voice Call (VC) field.
Sort Key 1 and 2
These fields are used to enter another unique number/code, allowing
you another method of sorting the accounts. This is an optional entry
choice.
4.3
Find Account Window - Commands
4.3.1
Communicate
Choose the Communicate command from the right-hand column of
command buttons. This command is used to communicate with control panels.
Auto Service
This is the selected service that will automatically be performed whenever the control panel is brought on-line. You may choose from the
following:
ARMM
ARMP
CLRE
DWLD
HISA
HISC
NONE
PASS
RSET
TIME
UPLD
WRNP
WRNT
=
=
=
=
=
=
=
=
=
=
=
=
=
Master Arm System
Perimeter Arm System
Clear System Errors
Perform Complete Program Download
Upload New History Events
Upload All History Events
No Auto Services (Default)
Change Remote Code
Reset System After Contact
Set System Time
Perform Complete Program Upload
Set Non-resetable Warning
Set Keypad Resetable Warning
Voice Call (VC)
The Communicate buttons will appear. The right-hand column command buttons will only show those commands necessary for communication.
This is the phone number to reach this Account’s subscriber/voice
contact. This phone number will reach the person listed in the Contact field.
Page 12
Copyright © 1994-96 Detection Systems, Inc.
WDSRP User’s Guide
Reset Modem
This command will reset the modem. After resetting the modem, wait
for the Status field (bottom left of window) to display “Modem Reset
Successful” before attempting a call.
Pickup
This command will prompt WDSRP to pickup an incoming call . WDSRP will then be on-line with the control panel.
An incoming call produces a tone through the speaker of your computer. This is your notification that a call is incoming. When this tone
is heard, you must proceed to the Find Accounts window, choose the
[Communicate] command, then choose the [Pickup] command. It may
take a while for the incoming call to come on-line.
Voice Call
This command will dial the phone number to reach this Account’s subscriber/voice contact. This phone number will reach the person listed
in the Contact field.
Answering
Machine
This command will make WDSRP hang up and redial the phone number. This will allow control panels with answering machine override
programmed to answer this call from WDSRP.
Abort
This command will cancel this attempt to call and hang-up immediately.
CAUTION: Only use the abort command if communications are
locked-up or in the event of an emergency. The abort
command will cause the control panel to remain on-line
a few minutes before it times out.
The following commands will show when WDSRP is on-line with a
control panel:
Data Call
This command will dial the phone number to reach this Account’s control panel. This number will call the control panel directly.
Manual
This command allows you to switch from a Voice call to a Data call.
If you are speaking with your technician/subscriber on the same line
as the panel’s Data line, use the Manual command to switch access
to the panel. As soon as the subscriber hears a high-pitched tone, he
or she must enter the remote programming answer command sequence ( [PIN] [#] [86] ) on the control panel’s keypad, and both of you
should hang up.
WDSRP will then proceed to go on-line with the control panel.
Cancel
This command will return you to the original Find Account window.
From this window you may choose a different Account/control panel
to communicate with.
The following commands will show when WDSRP is dialing a phone
number:
WDSRP User’s Guide
Suspend
This command will only appear when WDSRP is actively engaged
with the control panel (e.g. uploading or downloading). This command will stop all data transfer without making changes to the WDSRP or control panel data.
Copyright © 1994-96 Detection Systems, Inc.
Page 13
Note:
History
This command should only be used if there is no history in
the open account as it may duplicate items in the account
database. Under normal circumstances, use the NEW
EVENTS command.
This command will allow you to perform the following History functions:
CANCEL: This command will return you to the previous screen.
Mode
This command will allow you to perform the following Mode functions:
View
This command will allow you to view, delete, and archive history events
that have been uploaded to this Account. When choosing this command, the History window will appear with the following commands:
•
AUTOMATIC: This command will automatically upload history, update the programming information, set the clock, and
then disconnect from the control panel.
•
MANUAL: This command will allow you to manually control
communications with the control panel.
•
CANCEL: This command will return you to the previous
screen.
4.3.2 Edit Data
This command will allow you to edit all Account information. It will
take you to the Edit Account window. From here you may choose the
categories/information you wish to edit.
•
FILTER : This command will allow you to view specific history
events by select categories and time range.
•
REPORTS: This command allows you to print out history reports.
•
DELETE: This command allows you to move the history
events to the History Archive, or to delete them completely.
•
CLOSE: This command will return you to the previous
screen.
NEW EVENTS: This command will upload only new History events
since the last History upload.
RESET: This command will upload the History buffer without saving
it.
COMPLETE: This command will upload all History events.
Page 14
Copyright © 1994-96 Detection Systems, Inc.
WDSRP User’s Guide
4.3.3 Status
The Clear Status command will clear the Status field in the Find Account window.
CAUTION: The automatic update command will make changes
based on the most current information in either the Account or the control panel. When you first contact a control panel, you should first perform a complete upload or
download.
•
UPLOAD: This command will upload all data from the control panel to WDSRP.
•
DOWNLOAD: This command will download system data,
user data, alpha data, or all data to the control panel from
WDSRP depending on which command you choose.
•
CANCEL: This command will return you to the previous
screen.
4.3.5 Options
This command will allow you to perform the following Optional functions:
The Status command will call up the Current Panel Status window.
This window will show you the status of system parameters specific
to this Account/control panel such as: zone status, output status, trouble status, arming state, partition state. You may also edit the status
of the control panel from this window.
All panels will have a Current Event text display at the bottom of the
window. This text block will display any event that occurs at the control panel site while you are on-line. This message is waiting to be
delivered to the central station and requires action by you. Because
you are on-line with the control panel, this message will not go further
than here. You must:
•
Acknowledge the event and deliver the message manually to
the central station operator for dispatch. You may continue
with your communications session.
•
End the session so the control panel can deliver the message to the proper receiver.
•
PANEL TIME: This command will display the control panel’s
time in the lower text block of the Find Account window.
•
RESET: This command will reset the control panel after this
communication session is complete. This will erase history
and time. Use this command only if the control panel is
locked-up.
•
TIME SET: This command will set the control panel’s clock.
•
ERROR CLEAR: This command will clear all troubles that
do not self-clear as well as perform a battery test.
•
FACTORY: This command will reset the control panel to the
factory set defaults.
•
CANCEL: This command will return you to the previous
screen.
4.3.4 Program
This command will allow you to perform the following Programming
functions:
4.3.6 End Session
This command will end this communications session with the control
panel, and will take you off-line with the control panel. It will also call
up a verification window asking you if you wish the connection to be
dropped.
•
AUTOMATIC UPDATE: This command will update all data
as needed.
WDSRP User’s Guide
After this session is complete, you will still be in the Find Account
window with the communications commands. Choose the [Cancel]
command to return to the original Find Account window.
Copyright © 1994-96 Detection Systems, Inc.
Page 15
you will fill in all the necessary general information for this new Account.
4.3.7 History Commands
Choose the [History] command from the right-hand column command
buttons. This command is used to access the Account’s history buffer.
The History window will appear. Your computer’s memory will determine the total amount of history events you will be able to scroll through.
Once the necessary information is filled-in, choose [OK]. The Edit
Account window for this new Account will appear. It is here where you
complete all the programming information concerning this Account.
•
A bottom row of command buttons will show those commands available. They are as follows:
•
FILTER: This command will allow you to view specific history events by categories and time range. By choosing this
command, the History Filter screen will appear. From this
screen you can choose the viewing parameters.
•
REPORTS: This command allows you to print out history reports.
•
DELETE: This command allows you to move the history
events to the History Archive or to delete them completely.
•
CLOSE: This command will return you to the previous
screen.
ACCOUNT: Choosing the command will allow you to create
a new Account using initial data from an existing Account.
Locate the Account you wish to copy from, then choose the [Insert
New] command. This command will call-up the Edit
Account window with the general information showing for the Account
you selected to copy. The cursor will be in the Account ID field waiting
for you to enter a new Account ID.
4.3.8 Insert New Commands
Choose the Insert New command from the right-hand column command buttons. This command is used to create a new Account. The
Select Initial Account Data window will appear.
Once you edit the necessary information from this window and choose
[OK], another Edit Account window for this new Account will appear.
It is here where you complete all the programming information concerning this Account.
4.3.9 Template
Choosing this command will allow you to create a new Account using
initial data from a template.
It is here where you choose the source from which you will create the
new Account. The choices are:
•
BLANK: Choosing this command will allow you to create a
new Account using no initial data. This Account will be created from scratch.
This command will call-up an Edit Account window with the default
information showing. From here you can edit the necessary general
information for this new Account. Be sure to select the template ID
from which you would like this Account based.
Once you complete the necessary information from this window and
choose [OK], the Edit Account window for this new Account will appear. It is here where you can edit all the programming information
concerning this Account.
This command will call-up a blank Edit Account window. From here
Page 16
Copyright © 1994-96 Detection Systems, Inc.
WDSRP User’s Guide
4.3.10 Edit Data
Choose the Edit Data command from the right-hand column command buttons. This command is used to edit all system data. The
Edit Account window will now appear:
Output Assignments
By choosing this command, the Edit Outputs window will appear. From
here you may edit the selected outputs and accompanying information.
It is here where you choose the categories from which to edit the
system information. The categories are as follows (Screens will vary,
depending on the panel type):
General Information
By choosing this command, the general information window will appear. From here you may edit information as needed. The cursor will
first appear in the Account ID field.
Partitions
By choosing this command, the Edit Partitions window will appear.
From here you may edit select information specific to partitioning.
When you are finished editing this data, choose [OK], or [Cancel].
[OK] will return you to the previous screen with your changes saved.
[Cancel] will return you to the previous screen with no changes made.
Keypad
By choosing this command, the edit keypad window will appear. From
here you may edit information as needed concerning the keypads.
WDSRP User’s Guide
Copyright © 1994-96 Detection Systems, Inc.
Page 17
Phone Control
By choosing this command, the edit phone control window will appear. From here you may identify phone numbers and other parameters used by the control panel to report alarms to the central station.
Zone Programming
By choosing this command, the Edit Zone Assignments window will
appear. From here you assign zone functions and partitions, and edit
input/output data.
Remote Access
By choosing this command, the Edit Remote Access window will appear. From here you may edit the parameters for remote programming access.
Reporting
By choosing this command, the Edit Report Codes window will appear. From here you may edit the values sent for each report.
Zone Functions
By choosing this command, the Edit Zone Functions window will appear. From here you define the zone functions and edit other related
information.
Page 18
System Parameters
By choosing this command, the Edit System Parameters window will
appear. From here you may edit the system-wide general operating
parameters.
Copyright © 1994-96 Detection Systems, Inc.
WDSRP User’s Guide
Pin Numbers
By choosing this command, the edit PIN NUMBERS (user codes) window will appear. From here you may program and edit PIN numbers.
Commercial Fire
DS7400, DS7400X, DS7400Xi and DS7400 Xi Ver. 3+. By choosing
this command the edit commercial fire window will appear. From here
you may edit parameters necessary for the commercial fire mode.
Time Windows
(DS7090TM, DS7090TMi, DS7100, DS7400Xi (ROM version 2.04 or
greater) and DS7400Xi VER. 3+ only) By choosing this command,
the Edit Auto Arming Times window will appear. From here you may
edit the arming times .
WDSRP User’s Guide
Zone Definitions
(DS7060, DS7080i, DS7090, DS7090i, DS7090TM, DS7090TMi, and
DS7100 only): By choosing this command, the Edit Zone Definitions
window will appear. From here you may define and edit related information concerning zones.
RS-232 Interface
DS7400Xi and DS7400Xi Ver. 3+ only. By choosing this command
the RS-232 screen will appear. This allows you to set the data rate
and flow controls for the DS7412 RS-232 Interface module
ARDIS
DS7400, DS7400X, DS7400Xi and DS7400Xi Ver. 3+ only. Choosing
this command will allow you to set up the ARDIS radio functions for
the ARDIS communication module.
Copyright © 1994-96 Detection Systems, Inc.
Page 19
Once you have completed the necessary editing, choose one of the
three commands to save or cancel these editions. They are as follows:
•
O.K. save changes and EXIT: This command will save all
the changes and return you back to the Find Account window.
•
Save and continue editing: This command will save all of
the changes and keep you at the Edit Account screen if more
editing is needed.
•
Cancel - no changes saved: This command will delete all
the changes you have just made and return you back to the
Find Account window. If you choose the Cancel command
the cancel challenge window will open.
If the Account ID is not known, one of the following information fields
may be filled in to locate a specific Account:
Equipment Type, template ID, Report IDs, Sort 1 and 2, Name (of the
residential or business subscriber), Address/City/State, Status, Voice
phone number, and Data phone number.
By entering one of the above fields, a number of Accounts will move
to the front of the Account database that have values for that field. For
example: if you enter an Equipment Type in the Locate Account window, all those Accounts with that Equipment Type (e.g. 7400) will move
to the front of the Account database.
You must choose to cancel the changes. If YES is selected
the changes will be discarded. If NO is selected, the changes
are saved and the program will return to the EDIT Account
screen. Cancel will return you to the EDIT ACCOUNTS
screen.
Only those Accounts that have values for the Search Key field will be
displayed.
To find the specific Account you are looking for, scroll through the
Account database by using the command buttons at the bottom of the
window (Beginning, Previous, Next, and End of File).
4.3.11 Delete
4.3.13 Key Select
Choose the Delete command from the right-hand column command
buttons in the Edit Account Screen. This command is used to delete
this Account permanently from record.
Choose the Key Select command from the right-hand column command buttons. This command is used to organize the Account database.
The Select Search Key window will appear. The Account database
may be organized according to the following:
A confirmation window will appear asking if you really wish to delete
this Account. Choose YES to permanently delete this Account and all
associated history events, or NO to keep this Account on record.
4.3.12 Locate Key
Choose the Locate Key command from the right-hand column command buttons. This command is used to find a specific Account and
have it displayed.
The Locate Account window will appear with the cursor in the blank
Account ID field. Fill-in the Account ID field (if known) and choose
O.K. The Account with that Account ID will now be displayed.
Page 20
Account ID, Equipment Type, template ID, Name, State, City Address,
Voice phone #, Data phone #, Reporting ID 1, 2, 3, or 4, Account
Status, Sort Key 1, or Sort Key 2. Only those Accounts that have
values for the Search Key field will be displayed.
Copyright © 1994-96 Detection Systems, Inc.
WDSRP User’s Guide
4.3.14 Reports
impact on the time required to generate a report.
Choose the Reports command from the right-hand column command
buttons. This command is used to print information on a single Account or a group of Accounts.
User PIN Information
This report generates a listing of the pin numbers and users in a system.
Zone Functions
Available on the DS7400, DS7400X, DS7400Xi and DS7400Xi Ver.
3+ only. This report generates a listing of the zone functions for an
account.
Keypad Information
Available on the DS7060, DS7080i, DS7400, DS7400X, DS7400Xi,
DS7400Xi Ver. 3+ only. This report defines what keypads are used
and what addresses are assigned to the keypads.
Output Programming
Available on the DS7060, DS7080i, DS7400, DS7400X, DS7400Xi
and DS7400Xi Ver. 3+ only. This report defines the settings of the
alarm, programmable and relay outputs.
Phone Settings
This report generates the phone number, communication format and
dialing method used by the communicator.T
Note:
Not all reports are available for all types of control/
communicators.
Account
General
Information
This report provides the account general information such as names,
addresses and contacts for the accounts in the database.
Mailing
Labels
This report generates mailing labels for all the accounts in the database.
EEPROM Data
Available on the DS7080i, DS7400, DS7400X, DS7400Xi and
DS7400Xi Ver. 3+ only. This report provides the programming addresses and control/communicator programming information as it
would be displayed on a keypad in a two digit hexadecimal format.
Note:
When using this or any other report, you may wish to use a
report filter. This can save a significate amount of time when
generating reports.
Zone Programming (7400 Style Panels)
This report generates information on the zone number, zone function,
module type and partition number.
Zone Programming (non-7400 Style Panels)
This report lists the zone parameters for all zones in a control/communicator. Included is information on: Zone number, type, bypass,
restore, 24 hour, response time, trouble, outputs, report code, restore
code and the zone name.
Cross Matrix Programming
DS7400X, DS7400Xi and DS7400Xi Ver. 3+ only. This report lists the
Output Functions and the zone and partition the output functions are
linked to.
Reporting Codes
This report lists all the reporting codes which are sent in reports to the
Central Station.
4.4
Templates
The purpose of a Template is to create a blueprint of commonly used
programming values. This will allow you to create new accounts quickly
based on the various Templates you have created.
For example: Many systems share the same information such as
central station phone numbers, reporting formats, bell timers, etc. A
Template can be created with these values. Subsequent accounts
created using the Template would automatically have this information. To set up a new account, the programmer would have to enter
the information that was specific to each new account such as user
codes and zone configuration.
To use the filter, enter the first and last Account ID numbers of the
accounts that you wish to include in the report. The default of the filter
is the account you are currently using. If you wish a report on only one
account, enter the account number as both the first and last accounts.
If you set the filter to no value, the report generator will search all
accounts in the database for information. This can have a significant
WDSRP User’s Guide
Whenever you modify a Template, all those accounts connected to it
will be updated as well. This allows you to edit multiple account types
from a single Template.
However, if you modify data in the accounts to differ from the Template, whenever you update that Template it will not update those fields
that have been changed in the accounts.
Copyright © 1994-96 Detection Systems, Inc.
Page 21
If data in the accounts has been changed back to match the Template, that field will then be updated whenever the Template is edited.
To access the Template database, select Templates from the WDSRP
Main window.
The Find Template window will appear. It is here where you keep
track of the various Templates.
The choices are:
•
Blank: Choosing this command will allow you to create a
new Template using no initial data. This Template will be created from scratch.
This command will call-up a blank Edit Template window. From here
you will fill in all the necessary general information for this new Template.
This window lists various general information concerning the Templates.
You can scroll through the Templates by using the command buttons
at the bottom of the window (Beginning, Previous, Next, and End of
File).
4.4.1 Template General Information
The general information consists of:
•
Equipment Type: This is the type of control panel that this
Template is for (DS7060, DS7080i, DS7090, DS7090i,
DS7090TM, DS7090TMi, DS7100, DS7400, DS7400X,
DS7400Xi, DS7400Xi Ver. 3+).
•
Template ID: This is the number/code you assign each Template for identification purposes.
•
Notes: This field may be used for any additional notes you
may have concerning this template.
The rest of the fields in the Find Template window are filled in automatically by WDSRP. They are:
•
Record created: This field lists the time and date when this
Template was created.
•
Last modification: This field lists the time and date when
this template was last modified.
•
Operator when modified: This field lists the operator’s
number who last modified this Template
Once you complete the necessary information from this window and
choose O.K., the Edit Template window for this new Template will
appear. It is here where you complete all the programming information concerning this Template.
•
This command will call-up an Edit Template window with the information showing from the current Template. From here you can edit the
necessary general information for this new Template. Be sure to select the Template ID from which you would like this Template based.
Once you complete the necessary information from this window and
choose O.K., another Edit Template window for this new Template will
appear. It is here where you can edit all the programming information
concerning this Template.
•
4.4.2 Find Template Window Commands
Insert
New
Cancel: Choosing this command will take you back to the
previous window.
Edit Data
Choose the Insert New command from the right-hand column command buttons. This command is used to create new Templates.
The Select initial template data window will appear. It is here where
you choose the source from which you will create the new Template.
Page 22
Template: Choosing this command will allow you to create a
new Template using initial data from the current Template
displayed.
Choose the Edit Data command from the right-hand column command buttons. This command is used to edit all system data for this
Template.
Copyright © 1994-96 Detection Systems, Inc.
WDSRP User’s Guide
If the Template ID is known, type it in its field in the Locate Template
screen and select O.K. The Template with that Template ID will be
displayed.
To be sure of calling-up a single specific Template, fill-in both the Equipment Type and Template ID fields. In order for the program to accept
a Template ID field entry, you must also enter the Equipment Type
field.
Reports (not implemented)
Choose the Reports command from the right-hand column command
buttons. This command is used to print information on a single Template or a group of Templates.
Export
The Edit Template window will appear (see figure above). It is here
where you choose the categories from which you will edit the system
information.
Delete
Choose the Delete command from the right-hand column command
buttons. This command is used to delete this Template permanently
from record.
Choosing the Export command from the right hand column of command buttons will allow you to export a template to another drive or
directory.
Import
A confirmation window will appear asking if you really wish to delete
this Template. Choose YES to permanently delete this Template, or
NO to keep this Template Account on record.
Locate
Choosing the import command will allow you to import a template
from another drive or directory.
Key
Choose the Locate Key command from the right-hand column command buttons. This command is used to find a specific Template and
have it displayed.
The Locate template window will appear with the cursor in the blank
Equipment Type field.
Close
Choose the Close command from the right-hand column command
buttons. This command will return you to the WDSRP Log-in window.
4.5 Users
To access Users (users of this WDSRP program), choose Users from
the WDSRP Main window.
The Find User window will appear. It is here where you keep track of
the various Users of this WDSRP program.
Fill-in the Equipment Type field (if known) and select O.K. The Templates with that Equipment Type will now be available to scroll through
(scroll through the Template database by using the commands at the
bottom of the window: Beginning, Previous, Next, and End of File).
WDSRP User’s Guide
Copyright © 1994-96 Detection Systems, Inc.
Page 23
•
Created: This field lists the time and date when this User
data was created.
•
Modified: This field lists the time and date when this User
data was last modified.
•
Modify op: This field lists the operator’s number who last
modified this User information.
4.5.2 Find User window: Commands
Insert
New
Choose the Insert New command from the right-hand column command buttons. This command is used to create a new WDSRP program User.
The Edit User Information window will appear. Most the fields will be
blank waiting for your in
This window lists various general information concerning the users.
You can scroll through the Find User database by using the command
buttons at the bottom of the window (Beginning, Previous, Next, and
End of File).
The Operator ID, Created, Modified, and Modify op. fields will be filled
in by WDSRP
4.5.1 User General Information
The general information consists of:
•
Password: This is the code given to each User that allows
them access to WDSRP. This password will be asked for
upon Log-in.
•
Authority Level: This is the level of authority that each User
will have.
The authority level you give each user is critical. The authority level
given to each user will allow that user certain access privileges throughout the WDSRP program. Each field within WDSRP (any place a user
may interact with) has its own authority levels. Authority levels affect
the user in two ways. The fields have a minimum authority level that a
user must meet just to view that field. They also have a minimal authority level that each user must meet in order to edit that field.
You can not add a user with an authority level higher than or equal to
your own.
•
Operator ID: This is the number assigned to each User by
WDSRP. You may use this number for organizational purposes.
•
Name: This is the name of the User.
•
Address, City, State, Zip Code: This is the address of the
User.
•
Phone Number: This is the phone number to reach this
User.
•
Notes: This field may be used for any additional notes you
may have concerning this User.
Edit Data
Choose the Edit Data command from the right-hand column command buttons. This command is used to edit the information concerning that User.
The rest of the fields in the Find User window are filled in automatically by WDSRP. They are:
Page 24
Copyright © 1994-96 Detection Systems, Inc.
WDSRP User’s Guide
The Edit User Information window will appear. It is here where you
may edit any or all information concerning this User.
Delete
Note:
You cannot delete a user of equal or greater authority than
your own. The Delete Button will not appear on user screens
that have equal authority to your own. You can not view or
modify users with greater authority.
Choose the Delete command from the right-hand column command
buttons. This command is used to delete this User permanently from
record.
A confirmation window will appear asking if you really wish to delete
this User.
This command is used to organize the User database.
The User database may be organized according to the following: Password, Name, Authority Level, or Operator ID.
Reports (not implemented)
Choose the Reports command from the right-hand column command
buttons. This command is used to print information on a single User
or a group of Users.
Close
Choose YES to permanently delete this User , or NO to keep this
User on record.
Locate
Choose the Close command from the right-hand column command
buttons. This command will return you to the WDSRP Log-in window.
5.0
Key
Choose the Locate Key command from the right-hand column command buttons. This command is used to find a specific User and have
his/her data displayed.
HISTORY
To access History, select History from the WDSRP Main window. The
History for all Accounts window will appear.
The Locate User window will appear with the cursor in the blank Password field.
Fill-in the Password field. Fill-in another field if the password is not
known and choose O.K. The User with that Password or information
will now be displayed.
Key Select
It is here where the history events for all Accounts will be displayed.
A bottom row of command buttons will show those commands available. They are as follows:
•
Filter: This command will allow you to view specific history
events by select categories and time range. By choosing this
command, the History Filter screen will appear. From here
you can select the viewing parameters.
•
Reports: This command allows you to print out history reports.
Choose the Key Select command from the right-hand column command buttons. The Select Search Key window will appear.
WDSRP User’s Guide
Copyright © 1994-96 Detection Systems, Inc.
Page 25
•
Delete: This command allows you to move the history
events to the History Archive or delete them completely.
•
Close: This command will return you to the previous screen.
vals. This will only update the database. The control panels
and WDSRP still must get in contact for this transfer of data
to take place (it will take place automatically upon contact).
• Dump Times: This selection will organize the Account database’s history dump times. It will arrange the control panel’s dump timers so they will call WDSRP at programmed
intervals. This will only update the database. The control
panels and WDSRP still must get in contact for this transfer
of data to take place (it will take place automatically upon
contact).
If you would like to view the History for a specific Account, select Account from the WDSRP Main window. Locate the Account you wish to
access History for, and choose the History command. The History for
that particular control panel will then be displayed.
6.0 LOG OUT
• Set Panel Time: This selection will cause each control panel timer to match the WDSRP timer (taking into account hours
from UTC). This will only update the database. The control
panels and WDSRP still must get in contact for this transfer
of data to take place (it will take place automatically upon
contact).
There are several ways to Log-out of WDSRP.
1-
Select Log-out from the WDSRP Main window. By choosing
this command you are exiting the WDSRP program as a
user. The Log-in password window will appear indicating that
log-out has taken place and that you must use your password to log in again.
• Remote Codes: This selection will assign each control panel
new account codes. This will only update the database. The
control panels and WDSRP still must get in contact for this
transfer of data to take place (it will take place automatically
upon contact).
• Upload Panel to WDSRP: This selection will have each
panel upload to their database to WDSRP upon next contact.
2-
• Download WDSRP to Panel: This selection will have each
panel receive a download from WDSRP upon next contact.
Selecting Log-out from the Windows Title bar will allow you to
log out and retain the WDSRP menu on the screen. You may
also select Log-out and Minimize, which will log out and reduce WDSRP to an icon in Windows 3.1 or a selection on the
Task bar in Windows 95.
• Clear all Auto Service: This selection will clear the Auto
Service field for all accounts. Therefore, no auto services
will occur at the next contact.
• Clear all Status: This selection will clear the Status filed for
all accounts upon next contact. It will also clear all current
control panel status information.
Remember: This is a communications program. The user is expected only to log-out, not quit the program. Quitting will terminate operation and communications will not be possible.
• Clear all Auto Call: (Not implemented)
7.0
UTILITIES
• Auto call all non-history panels: (Not implemented)
The Utilities menu can be accessed from the WDSRP Main window.
Choose Utilities from the pull-down menu items at the top of this window. From here you will be able to access the following categories.
•
• Auto call all panels: (Not implemented)
•
Backup: The Backup selection will enable you to backup
the Accounts, Templates, Users, History, and/or History Archive databases. The paths these backups are sent to are
set in the Preferences window.
•
Restore: The Restore selection will enable you to restore
the Accounts, Templates, Users, History, or History Archive
databases to the point of the last backup.
Organize: The Organize selection will enable WDSRP to
automatically organize Account database settings for ALL Accounts. The categories for organizing are as follows: (selecting these categories will call-up a confirmation window
where you decide whether or not to complete the action)
• Test Times: This selection will organize the Account database’s Test Times. It will arrange the control panel’s test timers so they will call the central station at programmed interPage 26
Copyright © 1994-96 Detection Systems, Inc.
WDSRP User’s Guide
•
Merge: The Merge selection allows you to merge data from
other WDSRP or DSRP databases into your own database.
The specific selections are as follows:
•
•
Time Zone: It is here where you can edit your hours from
UTC and whether or not daylight savings time is observed,
and update your clock for daylight savings.
•
Set panel times automatically: Check this box if you wish
to set each control panel’s timer to match the WDSRP timer
(taking into account hours from UTC) every time contact is
made.
•
Sound Alert Tones: Check this box if you wish alert tones to
be sounded at your PC. This will enable you to be alerted to
incoming phone calls and error messages. This selection
should be checked.
•
System has sound card: Check this selection if the PC
running WDSRP has a sound card installed.
•
Operating Mode: Check either the Master, Slave or Direct
Connect boxes. The Slave selection is used if WDSRP is operating from a portable PC. If so, the control panel will be instructed to call the Master PC to upload data if programmed
from a Slave PC. The Direct Connect is for connecting the
computer directly (without the use of a modem or phone line)
to a DS7400Xi (with ROM Version 2.04 or greater) or a
DS7400Xi Ver. 3+. See Section 8.0 Direct Connect.
•
Answer ring count: It is here where you determine how
many rings it will take before WDSRP will answer an incoming call.
•
Audit File: Check this box if you wish the Audit file function
to be in use. The Audit file keeps track of User activity within
WDSRP.
Modem: The Modem selection will enable you to set the parameters needed for proper modem operation.
Note:
•
•
Database Path: It is here where you determine the path
where the databases are located.
•
History Path: It is here where you determine the path where
the History and Archive databases are located.
Preferences: The Preferences selection will enable you to
edit/select certain WDSRP preferences.
WDSRP User’s Guide
Operation of the Audit File feature uses large amounts of
hard drive space with continual use.
Copyright © 1994-96 Detection Systems, Inc.
Page 27
•
Backup/restore Path: It is here where you determine the
path where each Backup/restore databases will be located.
•
Times: The Times selection will enable you to set time ranges for communicator tests, history dumps, and/or auto calls.
be via the modem, you will have to go back to the
“Preferences” selection, select your modem, then exit and
restart WDSRP.
Remember: Anytime you change from direct connect to modem or
from modem to direct connect, it is necessary to exit
WDSRP and restart the program.
4)
5)
6)
7)
From the main menu, select “Accounts”.
Locate the account for the panel you wish to communicate
with.
Select “Communicate”.
Select “Direct Connect”.
The WDSRP will establish communications with the control.
8.0 DIRECT CONNECTION
You can now upload and download as you normally would when remote programming over the telephone line.
WDSRP allows you to connect your computer directly to a DS7400Xi
control/communicator without the need of a modem or phone line. All
of the WDSRP features are available using Direct Connect.
Note:
Equipment Required:
•
DS7400Xi with control ROM version 2.04 or higher,
DS7400Xi Ver. 3+
•
WDSRP version 1.7R6 or higher
•
DS7412 RS232 Interface
•
DS7447 keypad
RS232 programming requires the correct settings in the
DS7412 section (addresses 0206 and 0207). If you change
these settings, and download them, the panel will disconnect
as soon as it burns the new settings into the EEPROM. If
you need to set the DS7412 differently, such as for a printer,
make sure you finish all other desired commands first.
9.0 QUITTING WDSRP
Setup:
1) Remove power from the DS7400Xi and install the DS7412.
2) Connect the RS232 cable between the RS232 connector on
the DS7412 and the RS232 Com port on your computer.
3) Apply power to the control
4) Program panel address 0206 as 10 and 0207 as 25, to enable the RS232 for remote communications.
5) Turn on your computer and start WDSRP.
There are several ways to quit WDSRP. In all cases you must return
to the main screen to quit. You may then select File from the title bar
in Windows and then select quit. In Windows 3.1, you may double
click the - symbol on the upper left corner of the title bar to quit. In
Windows 95, clicking the X in the upper right corner of the title bar will
quit the program.
Establishing Communications:
1) From the WDSRP Utilities menu, select “Preferences”.
2) Under operating mode, select “Direct Connect”
3) Exit WDSRP and restart the program to enable the change to
direct connect.
Note: If you used direct connect in the previous session with a panel,
you may skip steps 1-3. If your next session with a panel will
This section contains some tips for using WDSRP effectively and offers some solutions to problems you may encounter when using the
program.
Page 28
10.0 TROUBLESHOOTING WDSRP
10.1 The Status Bar
The Status Bar is one of the most important troubleshooting tools
Copyright © 1994-96 Detection Systems, Inc.
WDSRP User’s Guide
available in WDSRP. Located in the lower left hand corner of the active window screen, it provides programming information when you
are setting up accounts, templates, users and so forth. It also provides online status information when you are communicating with a
panel.
4. WDSRP does not communicate with panel.
•
The modem may be incompatible with WDSRP. Incompatible
modems may appear to work as they will dial out, the panel
will answer, but no communication takes place. See the
README.TXT file for compatible modems.
5. Panel answers the phone and then hangs up.
•
Log-in rejected because the agency or passcode do not
match. Observe the Status Bar as it will tell you why communications were terminated.
•
If there is a sudden termination of communications while uploading/downloading to the panel, investigate for noisy phone
lines.
6. New Account is generated when the panel calls in.
•
WDSRP will create a new account if the panel calling in does
not match any existing account. Phone number 1 and Reporting ID #1 must match. The panel will not create a new
account if there is an agency or passcode in the panel calling
in.
Status Bar
In the example above, the Locate Key is highlighted and the Status
Bar explains that the Locate Key will locate a specific record in the
database.
10.2 Troubleshooting Tips
Below are some problems you may encounter.
1- When starting WDSRP, I get a General Protection Fault or modem not found message.
•
You are running multiple instances (for example: you have
selected the WDSRP 1 icon twice) of WDSRP at the same
time on the computer. Minimize all operating programs and
the program manager to find the duplicate instance of WDSRP.
2- The panel does not answer.
•
The panel is not programmed to auto-answer. If panel is set
to factory default, it will not answer.
•
The manual line seize command is not issued correctly. Use
[PIN][#86] or [#86], not [#83], to seize the line.
•
The answering machine answers. Use answering machine
override or manually seize the line.
3. WDSRP does not answer the phone.
•
WDSRP is not programmed to answer. Go to Utilities, Preferences and set a valid ring count.
•
WDSRP is not logged out. It will not answer when you are
using the program unless you go to the Account screen and
select pickup. See Section 3.5.
WDSRP User’s Guide
Copyright © 1994-96 Detection Systems, Inc.
Page 29
Index
A
Import
23
Insert New Commands
Installing the Software
16
4
K
Key Select
20
Keypad
17
Keypad Information
21
26
L
Locate Key
LOG OUT
B
20, 23
26
M
Backup
26
Backup/restore Path
Mailing Labels
21
Master Password
7
Merge
27
Mode
14
Modem
27
28
C
Clear all Auto Call
26
Clear all Auto Service
26
Clear all Status
26
Commercial Fire
19
Communicate
10, 12
Cross Matrix Programming
O
Operating Guide
4
Operating Mode
27
Options
15
Output Assignments
17
Output Programming
21
21
D
Data Call
12, 13
Database Path
27
Default Password
6
Delete
20, 23
Direct Connection
28
DOS DSRP
5
DOWNLOAD
15
Download WDSRP to Panel
Dump Times
26
P
PANEL TIME
15
Partitions
17
Password, Default
6
Password, Master
7
Phone Control
18
Pickup
13
Pin Numbers
19
Preferences
27
Program
15
AUTOMATIC UPDATE
15
DOWNLOAD
15
UPLOAD
15
Programming functions:
15
26
E
Edit Data
14
Edit Template
10
EEPROM Data
21
End Session
15
Equipment Needs
5
Minimum Equipment Requirements
Recommended Equipment
5
ERROR CLEAR
15
Export
23
F
5
Q
QUICK START
9
Quick Start Guide
4
Quitting WDSRP
28
R
factory set defaults
15
G
4
H
HELP File
8
HISTORY
25
History
14
FILTER
16
Filter
25
REPORTS
16
Reports
25
View
14
DELETE
14
FILTER
14
NEW EVENTS
14
REPORTS
14
Page 30
16
I
Abort
13
Account
9
Account ID
12
Add Users
9
Answer ring count
27
Answering Machine
13
Ardis
19
Audit File
27
Authority Levels
8
Auto call all non-history panels
Auto call all panels
26
Auto Service
12
AUTOMATIC UPDATE
15
Getting St!Rted
History Commands
History Path
27
README.TXT
5
Remote Access
18
Remote Codes
26
report filter
21
Reporting
18
Reporting Codes
21
Reports
21
Account General Information
21
Cross Matrix Programming
21
EEPROM Data
21
Keypad Information
21
Mailing Labels
21
Output Programming
21
Reporting Codes
21
User PIN Information
21
Zone Functions
21
Zone Programming (7400 Style Panels)
21
Zone Programming (non-7400 Style Panels)
21
Copyright © 1994-96 Detection Systems, Inc.
WDSRP User’s Guide
RESET
15
Reset Modem
13
Restore
26
RS-232 Interface
19
S
Set Panel Time
26
Set panel times
27
Setup Program
5
Sort Key 1 and 2
12
sound card
27
Status
15
Status Bar
28
Suspend
13
System Parameters
18
T
Template
10, 16
Edit Data
17
Keypad
17
Output Assignments
17
Partitions
17
Phone Control
18
Remote Access
18
Templates
21
Test Times
26
TIME SET
15
Time Windows
19
Time Zone
27
Troubleshooting
28
U
unknown account
11
UPLOAD
15
Upload Panel to WDSRP
26
User PIN Information
21
Users
23
Delete
25
Edit Data
24
Insert New
24
Key Select
25
Locate Key
25
UTILITIES
26
Utilities
Organize
26
V
Voice Call
12, 13
W
Warranty, Limited
4
WDSRP Setup
5
Z
Zone Definitions
19
Zone Functions
18, 21
Zone Programming
18
WDSRP User’s Guide
Copyright © 1994-96 Detection Systems, Inc.
Page 31
Page 32
Copyright © 1994-96 Detection Systems, Inc.
WDSRP User’s Guide
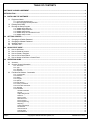

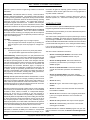

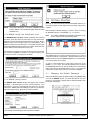

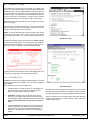
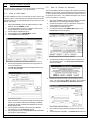
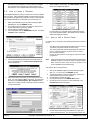

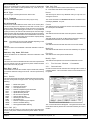
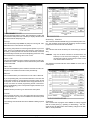


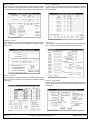


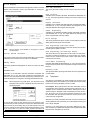

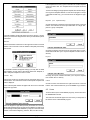
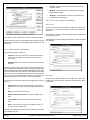

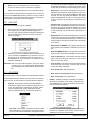
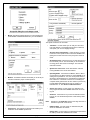


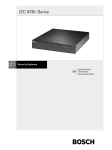
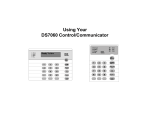
![Terms of Reference [ 462 KB]](http://vs1.manualzilla.com/store/data/005818895_1-55ed04ecdfa99aee80736235a8d4f256-150x150.png)
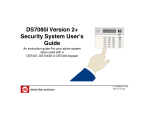

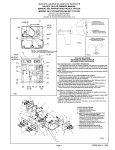
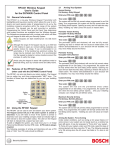
![Section VII - Technical Specifications [ 920 KB]](http://vs1.manualzilla.com/store/data/005668651_1-8dca2c6e1104d59f56f239e80ee70ed9-150x150.png)