1
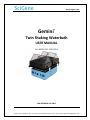
www.scigene.com Gemini® Twin Shaking Waterbath USER MANUAL Cat. #1051-20-1, 1051-20-2 FOR RESEARCH USE ONLY SciGene • 470 Lakeside Dr, Ste F, Sunnyvale, CA 94085 USA • 408-733-7337 • Fax 408-733-7336 • [email protected] Gemini® Twin Shaking Waterbath — USER MANUAL Serial Number The following serial number identifies the specific instrument you have purchased and must be referenced when requesting service. A copy is affixed to the instrument. Technical Service: (408) 733-7337, [email protected] Warranty SciGene warrants that the waterbath described in this manual shall be free of defects in materials and workmanship for a period of 12 months from date of delivery. This warranty does not cover adaptors or accessories. In the event of a defect during the warranty period, SciGene’s limit of liability will be to provide replacement parts at no charge or, at its sole discretion, replace the product. The foregoing warranty is void in the event the unit was abused or modified or used in a manner inconsistent with its intended purpose. SciGene makes no other warranty, expressed or implied including warranties of merchantability and fitness for a particular purpose. In no event shall SciGene be liable for any direct, indirect, special, incidental or consequential damagers or for any damages resulting from loss arising out of or in connection with the sale, use or performance of the product. Copyright Copyright ©2004-2012 SciGene Corporation. All rights reserved. SciGene is a trademark of SciGene Corporation, Sunnyvale, CA. All other trademarks used in this manual are the property of their respective owners. Version 1.3, April 2012 1 (408) 733-7337, [email protected] Gemini® Twin Shaking Waterbath — USER MANUAL Table of Contents I. SAFETY NOTICES ................................................................................................................... 3 A. Intended Use ............................................................................................................................ 3 B. Instrument Safety..................................................................................................................... 3 C. Symbols and Conventions ........................................................................................................ 3 II. UNPACKING AND SET UP ...................................................................................................... 4 A. Unpacking the Waterbath ........................................................................................................ 4 B. Parts Provided .......................................................................................................................... 4 C. Installation ............................................................................................................................... 4 III. USING YOUR GEMINI® TWIN SHAKING WATERBATH ............................................................ 5 A. Components, Controls and Accessories ................................................................................... 5 B. Filling the Baths ........................................................................................................................ 5 C. Using the Tray Adaptors........................................................................................................... 6 D. Using the EZ-Zone Temperature Controller ............................................................................. 6 E. Calibrating the EZ-Zone Temperature Controller .................................................................... 6 F. Setting the Waterbath Platform Speed ................................................................................... 7 IV. MAINTAINING YOUR WATERBATH ....................................................................................... 8 A. Checking and Replacing Fuses ................................................................................................. 8 B. Cleaning .................................................................................................................................... 8 V. TROUBLESHOOTING ............................................................................................................. 9 VI. SPECIFICATIONS ................................................................................................................... 9 VII. ADAPTORS AND ACCESSORIES .............................................................................................. 9 VIII. APPENDIX A – Using and Calibrating a Watlow SD31 Controller .......................................... 10 A. Using the Watlow SD31 Temperature Controller .................................................................. 10 B. Calibrating the Watlow SD31 Temperature Controller.......................................................... 10 Version 1.3, April 2012 2 (408) 733-7337, [email protected] Gemini® Twin Shaking Waterbath — USER MANUAL I. SAFETY NOTICES A. Intended Use This instrument is intended for the heating of laboratory samples. It should only be used according to the instructions provided in this manual. If the equipment is used in a manner not specified by the manufacturer, the protection provided by the equipment may be impaired. B. Instrument Safety Before operating the instrument, read the information in this section concerning hazards and potential hazards. Ensure that anyone involved with the instrument’s operation is instructed in both general safety practices for laboratories and specific safety practices for the instrument. C. Symbols and Conventions The following chart is an illustrated glossary of the electrical symbols that are used on the Gemini® Twin Shaking Waterbath. Whenever such symbols appear on instruments, please observe appropriate safety measures. 1. Warnings Failure to comply with the following warnings that are affixed to the product can lead to possible personal injury or death. 2. Cautions Failure to comply with the following cautionary statement affixed to the product may lead to possible personal injury. 3. Lifting and Moving the Unit The Gemini waterbath weighs about 35 lbs (19 kg). Use caution when lifting the unit to protect yourself and others from personal injury. Version 1.3, April 2012 3 (408) 733-7337, [email protected] Gemini® Twin Shaking Waterbath — USER MANUAL II. UNPACKING AND SET UP A. Unpacking the Waterbath Lift out the inner box and remove the foam end pieces. Open the inner box and remove the unit by lifting at the middle of the bottom edges. Remove the bubble wrap that protects the acrylic covers. Do not lift the unit by the baths. Carefully inspect the unit for damage. If there is evidence of damage, do not discard the shipping materials since they may be needed to return the unit. B. Parts Provided The following items are provided with the waterbath and are packaged separately: Power Cord User Manual Please verify that all items are received and are in good condition. C. Installation 1. Placement Place the unit on a stable, level surface within a few feet of the power source. There should be a minimum clearance of 3 inches along the back panel for air circulation. 2. Connecting the Power Plug the power cord provided into the back of the unit and then to a properly grounded outlet. Use only the power cord provided. Version 1.3, April 2012 4 (408) 733-7337, [email protected] Gemini® Twin Shaking Waterbath — USER MANUAL III. USING YOUR GEMINI® TWIN SHAKING WATERBATH A. Components, Controls and Accessories • Power Switches -Turns ON power to each of the two baths • Temperature Controllers - Used to set and observe waterbath temperatures • Speed Controller - Controls the speed of agitation • Acrylic Bath Covers – Helps to maintain bath temperature and directs condensation away from samples • Tray Adaptors - (sold separately) A variety of removable accessories are available for holding specific trays and plates. See section VII. • Temperature Probe - Senses and transmits water temperature to the controller • Bottom Grill - Aluminum mesh grid that protects the temperature probe from damage • Bath Drains - Plastic shut-off valve to control the drain of water from the baths B. Filling the Baths Ensure that the lever on the white drain valve on the left side of each bath is in the OFF position (90° from vertical). Add approximately 1.25 liters of distilled water to each bath so that water covers the tray adaptor. DO NOT turn on power until baths are filled with water! Version 1.3, April 2012 5 (408) 733-7337, [email protected] Gemini® Twin Shaking Waterbath — USER MANUAL C. Using the Tray Adaptors Tray adaptors are used to hold trays and plates in place while heating and agitating samples. A variety of adaptors are available that hold specific brands and designs. A list of adaptors is shown in Section VII. To use a tray adaptor, simply place it in the bath on top of the black grill plate that covers the bottom. D. Using the EZ-Zone Temperature Controller Do not operate your Gemini Waterbath without water! Add water to the baths before turning on power. Note: For instruments manufactured prior to July 2012, instructions for using the SD-31 controller can be found in the Appendix of this document. The Gemini® Twin Shaking Waterbath is equipped with two EZ-Zone temperature controllers. Each controller has two LED displays and four push buttons. The left display shows ACTUAL bath temperature in red. The right display shows the SET or programmed temperature in green. To enter the SET temperature, simply push the up and down arrows until the desired temperature is shown in the green display on the right. The unit will adjust the heat of the bath until the SET temperature is attained. The controllers are calibrated at the factory to provide accurate bath temperatures from 35 to 80°C. See section E. Calibrating the Temperature Controller for details. E. Calibrating the EZ-Zone Temperature Controller Note: For instruments manufactured prior to July 2012, instructions for calibrating the SD-31 controller can be found in the Appendix of this document. The temperature controller comes calibrated from the factory to provide accurate bath temperatures from 35 to 80°C. The temperature controller will require calibration only if: • When checking the bath temperature with a calibrated digital thermometer, the thermometer temperature differs by more than one degree (1°C) from the temperature shown on the controller display. A NIST calibrated digital thermometer (sold separately, SciGene Cat. #1051-52-0) is required to calibrate the unit. Version 1.3, April 2012 6 (408) 733-7337, [email protected] Gemini® Twin Shaking Waterbath — USER MANUAL Follow these steps to calibrate the EZ-Zone controller to the external thermometer. 1. Fill the baths with water, turn ON the instrument and set the controllers to 55°C. Allow 25 minutes for temperature to stabilize. 2. Using the cable provided with the digital thermometer, plug one end into the top blue receptacle (jack) found on the right side of the instrument and the other end into the digital thermometer. 3. Turn on the thermometer. Allow 1 minute for thermometer to stabilize. The actual temperature of the front bath will be displayed. 4. Calculate the difference between the temperature shown on the EZ-Zone controller and on the digital thermometer. For example, if the controller displays 55.0°C and the thermometer displays 56.5°C, the difference (offset) is 1.5°C. 5. On the controller, press the up and down arrows simultaneously for 3 seconds. The left display shows “A1” and the right display shows “oPEr”. 6. Press the Advance Button (green circle) 3 times until the right display shows “i.CA”. The left display will show the offset value between the controller and thermometer when the unit was last calibrated. 7. Use the up or down arrow to adjust the offset value to the temperature difference calculated in Step 4. For example, if the controller shows a temperature 1.5°C lower than the thermometer, adjust the offset by adding 1.5 to the value shown. 8. Press the Infinity Key (∞) twice to exit calibration and return to the operation display. Verify that the temperature on the thermometer matches the display. The front bath is now calibrated to provide accurate temperatures between 35 and 80°C. 9. Repeat the procedure for the back bath using the bottom blue receptacle (jack) on the right side of the instrument. F. Setting the Waterbath Platform Speed The speed of front to back motion of the waterbath platform is set using the rotary speed controller in the center of the front panel. Turn the dial clockwise to set the degree of agitation desired. Please note that the speed controller does not have an on/off switch and is operational when power is provided to the unit. Waterbath agitation can be operated independently, without heating. Version 1.3, April 2012 7 (408) 733-7337, [email protected] Gemini® Twin Shaking Waterbath — USER MANUAL IV. MAINTAINING YOUR WATERBATH A. Checking and Replacing Fuses Turn the power switch to the OFF position and unplug the power cord before performing any service procedure. Two fuses are located in a removable fuse bath below the power cord receptacle on the back of the unit. To check and replace fuses: 1. Unplug the cord and insert a small, flat blade screwdriver into the tab recess just below the plug receptacle. 2. Push down to release the fuse block. Slide out the fuse holder from the fuse block while holding the retaining tab out of the way. 3. Gently pry out the fuses. A blown fuse appears dark. Always replace fuses with those of the same amperage and voltage as shown on the label below the rear bath. B. Cleaning 1. Draining and Cleaning the Baths Remove the grill from the bottom of the bath. Drain the water by first placing an open container that can hold at least 2 liters under the stopcock that extends from the right side of each bath and then open the stopcock. Remove any residual water in the bath using paper towels. Clean the interior of the bath using a mild, detergent-based solution and a soft cloth. Do not use abrasive cleaners or scouring pads that can harm the finish. 2. Cleaning Exterior Surfaces and Acrylic Bath Covers Clean exterior surfaces using a mild, detergent-based spray cleaner and wipe with a soft cloth. Acrylic covers can be immersed and cleaned in warm, soapy water using a soft cloth. Do not use organic solvent-based cleaners that may damage the acrylic. Version 1.3, April 2012 8 (408) 733-7337, [email protected] Gemini® Twin Shaking Waterbath — USER MANUAL V. TROUBLESHOOTING Symptom Cause Power switch light does not turn on Blown fuse(s) Solution Replace fuse(s) on back of unit, beneath power cord receptacle. VI. SPECIFICATIONS Electrical Unit Cat. #1051-20-1 Cat. #1051-20-2 Dimensions Instrument (w/covers) Bath interior Weight Instrument Performance and Controls Temperature Range Temperature Regulation Bath Volume Agitation 115V AC, 50/60Hz, 4A 230V AC, 50/60 Hz, 8A 15 x 13 x 21 inches (38 x 33 x 53 cm) 2.35 (deep) x 11.5 x 8.25 inches (6.25 x 29 x 21 cm) 32 lbs (15kg) net 35°C to 80°C ± 0.2°C 1.2 Liters per bath Reciprocating motion, ½ inch stroke VII. ADAPTORS AND ACCESSORIES Cat. # 1051-30-0 1051-31-0 1051-32-0 1051-33-0 1051-34-0 1051-35-0 1051-36-0 1051-37-0 1051-38-0 1051-50-0 1051-51-0 1051-52-0 Description Adaptor for Perkin-Elmer Amplitype™ DNA Typing Tray, 8 Well. Adaptor for (2) Perkin-Elmer Quantiblot™ Hybridization Trays. Adaptor for Roche AMPLICOR™ Typing Tray, 20 Well. Adaptor for (2) Life Technologies Inc. Hybriboat™ Containers. Adaptor for (3) Innogenetics INNO-Lipa™ 8 Trough/Trays. Adaptor for (4) Innogenetics INNO-Lipa™ 12 Trough/Trays. Adaptor for (2) Tupperware Containers with Covers. Adaptor for (4) Standard Microplates. Adaptor for Roche 24-Well Tray & Lid (Cystic Fibrosis). Stainless Steel Bath Cover. Provides flat, non-skid surface. Tupperware Containers with covers, 5.15x4.80x1.50 inches. Digital Thermometer with NIST certificate and cable. Cat. #1051-38-0 Version 1.3, April 2012 Cat. #1051-35-0 9 UoM EA EA EA EA EA EA EA EA EA EA EA EA Cat. #1051-50-0 (408) 733-7337, [email protected] Gemini® Twin Shaking Waterbath — USER MANUAL VIII. APPENDIX A – Using and Calibrating a Watlow SD31 Controller For selected Gemini® Twin Shaking Waterbaths manufactured on or before June 2012. A. Using the Watlow SD31 Temperature Controller The SD31 controller has a single LED panel with four buttons. The set temperature is displayed if the SET key is pressed and held otherwise the ACTUAL bath temperature is displayed. To set the bath temperature: 1. Fill the baths with water and power on. 2. Hold in the SET button to view the previous set temperature. 3. While holding down the SET button, press the up or down arrow button until the desired set temperature is shown. 4. Release the SET button to display the actual temperature. The instrument will adjust bath heating until the SET temperature is attained. B. Calibrating the Watlow SD31 Temperature Controller Re-calibrating the SD31 controller is recommended only if the display varies by more than one degree (1°C) to a connected NIST-certified digital thermometer (SciGene cat. #1051-52-0). To adjust the controller to achieve accurate temperatures: 1. Fill the baths with water, turn on the instrument, and set the controllers to 55°C. Allow 25 minutes for temperature to stabilize. 2. Using the cable provided with the digital thermometer, plug one end into the top blue receptacle found on the right side of the Gemini Waterbath and the other end into the digital thermometer. 3. Turn on the thermometer. Allow 1 minute for thermometer to stabilize. The temperature of the front bath will be displayed. 4. Take the temperature shown on the digital thermometer and subtract the temperature shown on the controller to determine the calibration offset. For example, if the digital thermometer displays 56.5°C and the controller displays 55.0°C, the calibration offset is +1.5°C. 5. On the temperature controller, press the Infinity Key (∞) for three seconds until “OPEr” appears. 6. Press the down arrow four times until “Cal” appears. 7. Press and hold the SET key. The existing offset value between the controller and digital thermometer is displayed. 8. Press and hold the SET key and use the up/down arrows to adjust the offset value to the temperature difference calculated in Step 4. For example, if the controller shows a temperature 1.5°C lower than the thermometer, adjust the offset by adding 1.5 to the value shown. 9. Press the Infinity Key (∞) to exit calibration and return to the operation display. Verify that the temperature on the thermometer matches the display. The incubator is now calibrated to provide accurate temperatures from 35 to 80°C. Version 1.3, April 2012 10 (408) 733-7337, [email protected]