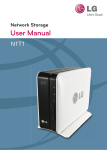
Download U-NAS USER MANUAL
Transcript
U-NAS v2.0 User Manual U-NAS USER MANUAL VERSION 2.0 YU TECHNOLOGIES, INC. (CHINA) Address: Pioneering Mansion, Ningbo Free Trade Zone, China Tel: 86-574-86995855 Website: www.u-nas.cn (Chinese) www.u-nas.com (English) Copyright 2012© All rights reserved. 1 YU Technologies, Inc U-NAS v2.0 User Manual About This Manual Congratulations on your purchasing your U-NAS system. U-NAS is designed with the utmost attention to the details to provide you with the highest standards in quality and performance. This manual is written for U-NAS system administrators and users. It provides information for the management and use of the U-NAS storage server system. Notice YU TECHNOLOGIES reserves the right to make changes to product descriptions and/or specifications at any time without notice. In no event will YU TECHNOLOGIES be held liable for any direct or indirect, incidental or consequential damage, loss of use, loss of data or other malady resulting from errors or inaccuracies of information contained in this document. Warning: Please backup your data. U-NAS does not assume any responsibility for data losses. Please note that U-NAS cannot replace backup. Copyright 2012© All rights reserved. 2 YU Technologies, Inc U-NAS v2.0 User Manual Safety Instructions 1 2 3 4 5 6 7 8 9 This device operates in an environment of 0~35°C temperature and 10%~80% humidity. Using this device under extreme temperature and humidity environments may damage the device. This device accepts 100~240V AC input. Incorrect power input may damage the device. Do not leave the device in a dusty place or a humid place. Please make sure you have enough ventilation for the device. Do not leave the device exposed to a heat source or in a high-temperature location, such as in the sun. Unplug the power cord and other cables before you clean the device. Use clean and dry cloth to clean the device. Do not use chemicals to clean the device. Do not leave the device on an uneven surface. Do not run the power cord under carpeting. Do not cover the power cord with throw rugs, runners, or similar coverings. Arrange the power cord away from traffic areas where it will not be tripped over. Do not block the ventilation hole of the device. Do not repair the device by yourself. Contact U-NAS.com for technical service. Copyright 2012© All rights reserved. 3 YU Technologies, Inc U-NAS v2.0 User Manual Table of Contents SAFETY INSTRUCTIONS ................................................................................................................... 3 TABLE OF CONTENTS ...................................................................................................................... 4 PART 1 INTRODUCTION........................................................................................................ 7 1.1 Overview ...................................................................................................................................... 7 1.2 U-NAS Package Contents ........................................................................................................... 10 1.3 U-NAS......................................................................................................................................... 11 PART 2 HARDWARE INSTALLATION ..................................................................................... 13 2.1 Install Hard Drives ...................................................................................................................... 13 2.2 Connect U-NAS to Network and Power ..................................................................................... 15 PART 3 QUICK SETTINGS .................................................................................................... 16 3.1 Connect to U-NAS ...................................................................................................................... 16 3.2 Quick Start ................................................................................................................................. 17 3.2.1 Easy Setup ....................................................................................................................... 17 3.2.2 Map Network Drive in Windows..................................................................................... 20 3.3 Change Admin Password ........................................................................................................... 23 PART 4 U-NAS MANAGEMENT ............................................................................................ 24 4.1 Account Management ............................................................................................................... 24 4.1.1 Group Management ....................................................................................................... 24 4.1.2 User Management .......................................................................................................... 28 4.1.3 User Quota ...................................................................................................................... 31 4.1.4 Group Quota ................................................................................................................... 33 4.2 Disk/Volumes Management ...................................................................................................... 34 4.2.1 Create HDD partitions ..................................................................................................... 34 4.2.2 Create RAID Members .................................................................................................... 38 4.2.3 RAID Setup ...................................................................................................................... 40 4.2.3.1 Add Spare Disk to a RAID Array............................................................................ 40 4.2.3.2 RAID Migration..................................................................................................... 42 4.2.3.3 RAID Expansion .................................................................................................... 44 4.2.4 HDD Diagnosis (Scan Disks)............................................................................................. 48 4.2.4.1 SMART Diagnosis ................................................................................................. 48 4.2.4.2 Fix Hard Disk Warnings 197(c5) and 198(c6) ....................................................... 50 4.2.4.3 Disk Speed Test .................................................................................................... 50 4.2.5 iSCSI-IPSAN ..................................................................................................................... 51 4.2.5.1 iSCSI Setup ........................................................................................................... 51 4.2.5.2 iSCSI Client Connection ........................................................................................ 54 4.3 Shares ........................................................................................................................................ 56 Copyright 2012© All rights reserved. 4 YU Technologies, Inc U-NAS v2.0 User Manual 4.3.1Create Shared Folders ...................................................................................................... 56 4.3.2 Set up Privilege for a Folder ............................................................................................ 57 4.3.3Hidding a Folder and Enable Trashbox............................................................................. 60 4.3.4 Enable Personal Folder ................................................................................................... 62 4.4Network Services ........................................................................................................................ 63 4.4.1 Samba/CIFS Configuration .............................................................................................. 63 4.4.2 FTP Configuration ........................................................................................................... 64 4.4.2.1 Set up FTP Server ................................................................................................. 64 4.4.2.2 Access to the FTP Server ...................................................................................... 66 4.4.3 Set up NFS ....................................................................................................................... 68 4.4.3.1 Enable NFS ........................................................................................................... 68 4.4.3.2 NFS Privilege Settings........................................................................................... 68 4.4.3.3 Access to NFS Server ............................................................................................ 71 4.4.4 Web Server ..................................................................................................................... 75 4.4.5 VPN Settings.................................................................................................................... 77 4.4.5.1 VPN Configuration ............................................................................................... 77 4.4.5.2 VPN Client ............................................................................................................ 79 4.4.6 Dynamic DNS (DDNS) Settings ........................................................................................ 80 4.4.7 uPnP ................................................................................................................................ 82 4.4.8 Bonjour ........................................................................................................................... 82 4.4.9 DFS Service...................................................................................................................... 84 4.4.9.1 DFS Settings ......................................................................................................... 84 4.4.9.2 Access DFS ........................................................................................................... 86 4.5 Authentication ........................................................................................................................... 88 4.5.1 LDAP ................................................................................................................................ 88 Standard Settings ............................................................................................................. 88 Advanced Settings............................................................................................................ 88 4.5.2 Active Directory .............................................................................................................. 89 4.6 Backups ...................................................................................................................................... 91 4.6.1 rSync ............................................................................................................................... 91 4.6.2 Time Machine ................................................................................................................. 93 4.7 Email Server ............................................................................................................................... 96 4.7.1 Email Server Settings ...................................................................................................... 96 4.7.2 Manage Email Accounts.................................................................................................. 99 4.7.3 Email Domain Name ..................................................................................................... 102 4.7.4 Web Email Client ........................................................................................................... 104 4.8 External Devices....................................................................................................................... 105 4.8.1 External Disks ................................................................................................................ 105 4.8.2 USB Printers .................................................................................................................. 106 4.9 System Settings ........................................................................................................................ 108 4.9.1 System Name and Port ................................................................................................. 108 4.9.2 Network Configurations ................................................................................................ 108 4.9.3 Time Settings ................................................................................................................ 112 4.9.4 Language Settings ......................................................................................................... 112 Copyright 2012© All rights reserved. 5 YU Technologies, Inc U-NAS v2.0 User Manual 4.9.5 Hardware Configuration ............................................................................................... 113 4.9.6 Notification Settings ..................................................................................................... 114 4.9.7 System Backup .............................................................................................................. 115 4.9.8 System Upgrade ............................................................................................................ 117 4.9.9 Restore Factory Settings ............................................................................................... 117 4.9.10 Shutdown/Restart ....................................................................................................... 118 PART 5 SYSTEM STATUS .................................................................................................... 120 5.1 System Information.................................................................................................................. 120 5.2 Online Users............................................................................................................................. 122 5.3 System Log ............................................................................................................................... 123 5.4 Error Messages ........................................................................................................................ 124 5.5 Standard Users ......................................................................................................................... 124 5.5.1 View User Space ........................................................................................................... 126 5.5.2 Change Password .......................................................................................................... 127 PART 6 APPLICATIONS ...................................................................................................... 129 6.1 iTunes ....................................................................................................................................... 129 6.1.1 Set up iTunes ................................................................................................................. 129 6.1.2 iTunes Connection ........................................................................................................ 130 6.2 Mounting ISO Image Files ........................................................................................................ 131 6.3 Surveillance Station ................................................................................................................. 134 6.3.1 USB Camera .................................................................................................................. 134 6.3.2 IP Camera ...................................................................................................................... 140 6.4 Web File Manager(eXtplorer)............................................................................................. 146 6.4.1 Account Management .................................................................................................. 146 6.4.2 Access eXtplorer using a Standard Account.................................................................. 149 PART 7 DOWNLOAD SERVICES .......................................................................................... 151 7.1 MLDonkey Download............................................................................................................... 151 7.2 BT/PT Download ...................................................................................................................... 154 PART 8 PERSONALIZATION ............................................................................................... 157 8.1 Change Backgroud ................................................................................................................... 157 8.2 Change Theme ......................................................................................................................... 160 Copyright 2012© All rights reserved. 6 YU Technologies, Inc U-NAS v2.0 User Manual Part 1 Introduction 1.1 Overview Welcome to U-NAS. U-NAS provides an integrated solution that enables storage and management of data and content to achieve your business/personal goals. One-Step Setup Users can configure the system by clicking one button. File Server U-NAS can be used as a file server. It supports SMB/CIFS and NFS. FTP Server U-NAS can be used as a FTP server. It supports SSL/TLS and passive mode. Users can also control the upload/download connections & speed. ITunes Server U-NAS has a built-in iTunes server. Users can use iTunes to play the music stored on U-NAS. VPN Server U-NAS has built-in VPN service supported. U-NAS VPN Server uses a public communication infrastructure, such as the internet, to provide remote offices or individual users with secure access to their private network. DDNS Server U-NAS DDNS Service allows user to create a hostname that points to his/her home or office IP address, providing an easy-to-remember URL (instead of IP) for quick access. Web Server U-NAS provides a PHP, MySQL and Apache2 (LAMP) . Users can setup up to five web sites on a single U-NAS unit by simply uploading the web site files. LDAP and AD Authentication U-NAS supports LDAP and AD authentication. Email Server Copyright 2012© All rights reserved. 7 YU Technologies, Inc U-NAS v2.0 User Manual U-NAS has a built-in professional Email server and a web-based management system. The email server and the web-based management system are integrated seamlessly in the U-NAS system. Remote Backup U-NAS can be used as a backup device. Local data on U-NAS can be saved on a remote machine and remote data can be backed up on U-NAS. Download Services U-NAS has built-in support of eMule, eDonkey and BT/PT file sharing. Printer Server U-NAS supports USB printers and can serve as a printer server over the network. iSCSI and RAID U-NAS supports RAID 0/1/5/6/10 and iSCSI. DFS Service U-NAS supports DFS Service to expand storage. uPnP and Bonjour U-NAS supports uPnP and Bonjour service. LVM and RAID U-NAS supports LVM+RAID 0/1/5/6/10. LVM provides a better way to manage data. Surveillance Station U-NAS supports both USB camera and IP camera. U-NAS supports unlimited USB/IP cameras and can monitor as many cameras as you want. U-NAS provides a cheapest way to set up a surveillance station. Copyright 2012© All rights reserved. 8 YU Technologies, Inc U-NAS v2.0 User Manual Copyright 2012© All rights reserved. 9 YU Technologies, Inc U-NAS v2.0 User Manual 1.2 U-NAS Package Contents U-NAS package includes the following components: Please contact us if any component is missing. Copyright 2012© All rights reserved. 10 YU Technologies, Inc U-NAS v2.0 User Manual 1.3 U-NAS Front 1. 2. 3. 4. 5. 6. Power Switch & Power LED Reset Switch USB 2.0 HDD Tray HDD Activity LED HDD Power LED Copyright 2012© All rights reserved. 11 YU Technologies, Inc U-NAS v2.0 User Manual Back 7. Network(eth1) 8. Network(eth0) 9/10. Reserved 11. USB 2.0 x 2 12. PS/2 Keyboardy 13. PS/2 Mouse Note: Your U-NAS model may have a different rear I/O panel. Copyright 2012© All rights reserved. 12 YU Technologies, Inc U-NAS v2.0 User Manual Part 2 Hardware Installation Caution: Please read the “Safety Instructions” carefully before you install the hardware. 2.1 Install Hard Drives 1. Remove HDD tray from the device 2. Mount hard drive on the tray (U-NAS hot-swap try supports 2.5" & 3.5" HDD) 3.5" HDD 2.5" HDD 3. Insert HDD tray into the device Copyright 2012© All rights reserved. 13 YU Technologies, Inc U-NAS v2.0 User Manual Copyright 2012© All rights reserved. 14 YU Technologies, Inc U-NAS v2.0 User Manual 2.2 Connect U-NAS to Network and Power Following the steps below to connect U-NAS to your network: 1. Connect U-NAS to your network using a network cable (plug into a network switch or router) or directly connect to a PC (if you don't have a network): 2. Plug in the power cord Note: If you need to use U-NAS as a printer server please connect the printer to U-NAS after U-NAS is fully loaded. Copyright 2012© All rights reserved. 15 YU Technologies, Inc U-NAS v2.0 User Manual Part 3 Quick Settings U-NAS is shipped with a built-in OS and therefore no software installation process is needed. The default IP address of U-NAS is 192.168.1.110 and the default hostname is u-nas. You may need to change the IP address of your PC (change to 192.168.1.X) in order to directly connect to U-NAS. 3.1 Connect to U-NAS Managing U-NAS with Windows or Mac U-NAS provides a WEB based management system. Users can use a web browser to login and manage U-NAS 。 1. The default IP of U-NAS is 192.168.1.110. You may also use “U-NAS” to access the device in an IE web browser (Mac users should use the IP address to connect to U-NAS). Please make sure your computer is in the same network with U-NAS (Your PC IP should be: 192.168.1.xxx), Otherwise you cannot access the U-NAS management center. You may connect U-NAS to your PC directly via a network cable. After changing the IP of you PC to 192.168.1.xxx you can access U-NAS management center (a PC reboot is needed). After you log in U-NAS, you can change the IP of U-NAS in “System SettingsNetwork” Launch a web browser and enter https://192.168.1.110 or https://u-nas (Windows only) Note: U-NAS only supports SSL connection. You have to use https, not http. 2. Login using username “admin” and the default password: “password”. You may choose the language before you login. Default username: admin Default password: password Copyright 2012© All rights reserved. 16 YU Technologies, Inc U-NAS v2.0 User Manual 3.2 Quick Start This section is provided for entry level users only. Please refer to Chapter 4 for advanced settings. 3.2.1 Easy Setup Warning: 1. “Easy Setup” will format all disks (including external USB disks) installed on U-NAS. All data on the hard drives will be removed. Please backup your data before you conduct “Easy Setup” 2. ”Easy Setup” does not support RAID/iSCSI. If you need RAID or iSCSI please follow the instructions shown in Chapter 4. 3. Please make sure there is NO external disk connected to U-NAS before “Easy Setup”. YU TECHNOLOGIES, INC (CHINA) does not assume any responsibility for damage or data losses due to incorrect installation and/or usage of the device. Copyright 2012© All rights reserved. 17 YU Technologies, Inc U-NAS v2.0 User Manual “Easy Setup” will format all disks connected to U-NAS to create a single logic volume group. After that a single logic volume will be created on the logic volume group and all available hard drive space will be allocated to the logic volume. 1) On U-NAS management webpage, click “Control Panel->Easy Setup” 2) Click the “Setup” button Copyright 2012© All rights reserved. 18 YU Technologies, Inc U-NAS v2.0 User Manual 3) Click “Easy Setup”. Copyright 2012© All rights reserved. 19 YU Technologies, Inc U-NAS v2.0 User Manual “Easy Setup” will create several default public shared folders: shares, itunes, media, bt and download. 3.2.2 Map Network Drive in Windows A network drive is a file folder located on U-NAS that has been configured for sharing over a LAN. The following instructions explain the process to map a network drive using Windows Explorer. 1) Access the U-NAS(for example: \\192.168.1.110 ),right click “shares”, then click “Map network driver”. Copyright 2012© All rights reserved. 20 YU Technologies, Inc U-NAS v2.0 User Manual 2) Click “Finish”. Copyright 2012© All rights reserved. 21 YU Technologies, Inc U-NAS v2.0 User Manual 3) When you look in “Computer” window, you’ll see the mapped drive under “Network Drives”. Copyright 2012© All rights reserved. 22 YU Technologies, Inc U-NAS v2.0 User Manual 3.3 Change Admin Password Hint: Please change the admin password immediately after you login U-NAS and keep the new password in a safe place! The default system administrator account is: Username: admin Password: password Select “U-NAS->Change Password”, input Current Password and New Password, then click “Apply” button. Note: Users can use a ssh client (such as PuTTY) to login U-NAS with this username/password. Copyright 2012© All rights reserved. 23 YU Technologies, Inc U-NAS v2.0 User Manual Part 4 U-NAS Management U-NAS provides a user-friendly web-based management center to manage the system. Users can manage U-NAS from anywhere using a web browser (if U-NAS is exposed to the internet). 4.1 Account Management In order to apply permission settings, administrator has to create user accounts and groups first. Users can enter “Control Panel->Account Manager” to manage accounts. 4.1.1 Group Management A user group is a collection of users with same access privilege. Click “Groups” to add groups. Select “LDAP Group”. Note: “everyone Group” is integrated in U-NAS OS, every user belongs to “everyone Group”. Copyright 2012© All rights reserved. 24 YU Technologies, Inc U-NAS v2.0 User Manual Input “Group Name”, then click “Add” button. Copyright 2012© All rights reserved. 25 YU Technologies, Inc U-NAS v2.0 User Manual Add Users to a Group We will use the following example to show how to add a user into a group. Assuming Company A hired a new employee David and we have created a user account (david, see “User Management”) for David. Now we want to add David into “Marketing” Group. 1) In the list of groups, find group “Marketing” and click the link “Edit Group” 2) In the Edit Group Window, select user “David” from available users and click “Add” button to add the account into the group. Click “Save” to complete the operation. Copyright 2012© All rights reserved. 26 YU Technologies, Inc U-NAS v2.0 User Manual Remove Users from the Group Select users you want to remove from Existing Users in the group and click the “Remove” button. Copyright 2012© All rights reserved. 27 YU Technologies, Inc U-NAS v2.0 User Manual Delete Group(s) You may click the link “Delete Group” to delete a group from U-NAS. Warning: Deleting a group may affect the access privilege of certain user accounts. 4.1.2 User Management Click Control Panel -> Account Manager->“Users”, and enter the page of “Account”. Copyright 2012© All rights reserved. 28 YU Technologies, Inc U-NAS v2.0 User Manual Add Users The following information is needed in order to add a user: Username Username can be a combination of letters, numbers, - and _. Password Password can be a combination of letters, numbers, “_” “-” “.” “@” “#” “$” “%”. Password is case sensitive. Group Select a group for the user. Copyright 2012© All rights reserved. 29 YU Technologies, Inc U-NAS v2.0 User Manual Delete User You may delete a user by clicking the link “Delete User” associated with the user. All data from the user will be removed from the system. Copyright 2012© All rights reserved. 30 YU Technologies, Inc U-NAS v2.0 User Manual Search You can quickly find certain users by typing a keyword in the search box. 4.1.3 User Quota U-NAS supports both user and group quota for better storage allocation. You may set disk quotas to a Group or individual users. Once a user exceeds the quota, he/she will no longer be able to save files on U-NAS. You can assign a quota to all users as shown below. You can also adjust individual user’s quota. Please note “0” means no limit. Copyright 2012© All rights reserved. 31 YU Technologies, Inc U-NAS v2.0 User Manual Copyright 2012© All rights reserved. 32 YU Technologies, Inc U-NAS v2.0 User Manual 4.1.4 Group Quota U-NAS supports group quota. Please note that if a group exceeds its quota limit all users in that group will not be able to save files on U-NAS. You may set a quota for all groups on U-NAS as shown below. You can also adjust the quota for any individual group. Please note “0” means no limit. Note: if Users set up “User Quota” and “Group Quota” at the same time, the smaller capacity becomes effective. Copyright 2012© All rights reserved. 33 YU Technologies, Inc U-NAS v2.0 User Manual 4.2 Disk/Volumes Management U-NAS uses Logical Volume Management (LVM) for storage virtualization. LVM provides a better method of allocating/managing space on mass-storage device that is more flexible than conventional partitioning schemes. Using LVM on U-NAS requires the following steps: Create HDD partitions (Individual disks or RAID members) or Create RAID array (if RAID members were created) Create Volume Groups Create Volumes 4.2.1 Create HDD partitions Enter Control Panel->Disks. Click Disks. Copyright 2012© All rights reserved. 34 YU Technologies, Inc U-NAS v2.0 User Manual Select disks to be created and click Create HDD. If you want to create RAID members for RAID Arrays, please see next section. Click “Create Volume Group”, then input “Volume Group Name”, select Devices, click “save” button. A Volume Group will be created. You may create as many Volume Groups as you want. Copyright 2012© All rights reserved. 35 YU Technologies, Inc U-NAS v2.0 User Manual Click “Add Volume”. Input “Volume Name”, “Volume Space” and select “File System Type”. Click “Save” button to create a Volume. U-NAS system will format the volume after it is created. Copyright 2012© All rights reserved. 36 YU Technologies, Inc U-NAS v2.0 User Manual Copyright 2012© All rights reserved. 37 YU Technologies, Inc U-NAS v2.0 User Manual 4.2.2 Create RAID Members Enter Control Panel->Disks->Disks, select the disks you want to use as RAID members and click “Create RAID Device” RAID Type The following RAID Levels can be used in U-NAS: RAID Level Description RAID 0 A RAID 0 splits data evenly across two or more disks with no parity information for redundancy. It is important to note that RAID 0 provides no data redundancy. RAID 0 is usually used to increase performance. A RAID 0 can be created with disks of differing sizes, but the storage space added to the array by each disk is limited to the size of the smallest disk. RAID 1 A RAID 1 creates an exact copy (or mirror) of a set of data on two or more disks. Such an array can only be as big as the smallest member disk. A classic RAID 1 mirrored pair contains two disks, which increases reliability over a single disk. RAID 5 A RAID 5 uses block-level striping with parity data distributed across all member disks. RAID 5 has achieved popularity because of its low cost of redundancy. A minimum of three disks is required for a complete RAID 5 configuration. RAID 6 RAID 6 extends RAID 5 by adding an additional parity block. RAID 6 provides good redundancy and data loss recovery capability. RAID 10 RAID 10 is implemented as a striped array whose segments are RAID 1 arrays. RAID 10 has the same fault tolerance as RAID level 1.RAID 10 has the same overhead for fault-tolerance as mirroring alone. High I/O rates are achieved by Copyright 2012© All rights reserved. 38 YU Technologies, Inc U-NAS v2.0 User Manual striping RAID 1 segments. Under certain circumstances, RAID 10 array can sustain multiple simultaneous drive failures. Excellent solution for sites that would have otherwise gone with RAID 1 but need some additional performance boost. Select Devices to be used in the array, RAID Type, Chunk Size, and as Member or Spare, Click Create to create the RAID Array. A synchronization operation will be performed automatically on the newly created RAID Array. Depending on the size of the array it may take a very long time to complete the synchronization operation. Copyright 2012© All rights reserved. 39 YU Technologies, Inc U-NAS v2.0 User Manual 4.2.3 RAID Setup 4.2.3.1 Add Spare Disk to a RAID Array You can add a “spare” member for backup when you use RAID 1/5/6/10. If one disk in the RAID array fails the “spare” member will be used to rebuild the RAID array automatically. 1).Create RAID Device to be used as the “spare” disk 2).Set the RAID Array Copyright 2012© All rights reserved. 40 YU Technologies, Inc U-NAS v2.0 User Manual Select the “spare” disk, and click “Add” button. Click “View Device”, you can see the Spare Devices. Also you can remove the Spare Device by clicking the Removable link. Copyright 2012© All rights reserved. 41 YU Technologies, Inc U-NAS v2.0 User Manual 4.2.3.2 RAID Migration Migrating RAID form one level to another higher level is very dangerous. So please be sure U-NAS is power-up when RAID is migrating. Lost power during the migration operation may cause complete data loss. Warning: 1. RAID status will be changed to “Active & degraded” when RAID is rebuilding the array. Please do NOT remove the hard drive during the process otherwise you may lose your data. 1).Select a RAID Array, and Click “Migration” button. Copyright 2012© All rights reserved. 42 YU Technologies, Inc U-NAS v2.0 User Manual 2). Choose the Migration mode shown in the list. For example: Migration from RAID5 to RAID6. RAID Array will be rebuilt. It will take some time to complete the migration operation. Depending on the size of the RAID Array it may take a long time to complete the migration. Copyright 2012© All rights reserved. 43 YU Technologies, Inc U-NAS v2.0 User Manual 4.2.3.3 RAID Expansion If a RAID Array is lack of space, you may expand the RAID. Make sure RAID synchronization is completed before you start expanding your RAID Array. 1) insert a new disk, enter Control panel->Disks, Create RAID Device Copyright 2012© All rights reserved. 44 YU Technologies, Inc U-NAS v2.0 User Manual 2) Select the RAID Array to be expanded and Click “Add Device” 3) Select Spare Device, then click “Expansion” button. Copyright 2012© All rights reserved. 45 YU Technologies, Inc U-NAS v2.0 User Manual 4) System will reshape the RAID. After being reshaped, the space will be lager. 5) Expand a Volume: Click “Properties” of the Volume to be expanded, Increase the size of the Volume and Click “Save” Copyright 2012© All rights reserved. 46 YU Technologies, Inc U-NAS v2.0 User Manual Copyright 2012© All rights reserved. 47 YU Technologies, Inc U-NAS v2.0 User Manual 4.2.4 HDD Diagnosis (Scan Disks) U-NAS uses S.M.A.R.T. to monitor the state of a hard drive. You may select any hard drive to see the S.M.A.R.T. information. Hard drives temperature and other information are also displayed on this page. Enter “Control panel”->”Disks”->”Scan Disks”. A list of hard drives will be displayed as shown below. 4.2.4.1 SMART Diagnosis Select one Hard Drive by clicking the hard drive in the table, and Click the “SMART” button. Copyright 2012© All rights reserved. 48 YU Technologies, Inc U-NAS v2.0 User Manual S.M.A.R.T is a monitoring system used to detect and report on various indicators of reliability, in the hope of anticipating failures. The purpose of S.M.A.R.T. is to warn a user of impending drive failure while there is still time to take action. S.M.A.R.T has two sets of attributes: Critical and Informative Attributes ①Critical Attributes: These are potential indicators of imminent electromechanical failure. ②Informative Attribute: These are indicators for hard drive status information. ID Attributes Description 01 Raw Read Error Rate 03 Spin Up Time 04 Start/Stop Count 05 Reallocated Sector Count 07 Seek Error Rate 09 Power-On Time Count 10(0A) Spin Retry Count 11(0B) Calibration Retry Count 12(0C) Power Cycle Count 192(C0) Power-Off Retract Count 193(C1) Load/Unload Cycle Count 194(C2) Temperature 196(C4) Reallocation Event Count 197(C5) Current Pending Sector Count 198(C6) Off-Line Uncorrectable Sector Count 199(C7) Ultra ATA CRC Error Rate Ultra ATA 200(C8) Write Error Rate Copyright 2012© All rights reserved. 49 YU Technologies, Inc U-NAS v2.0 User Manual 4.2.4.2 Fix Hard Disk Warnings 197(c5) and 198(c6) When Warnings 197(c5) and 198(c6) are shown in the table (Raw value is not zero), you may fix the problem by writing data into the hard disk. If the problem is due to a physical bad section, it will not fix the problem. If the problem is due to a logical bad section, writing to hard drive may fix the issue. Since writing data to the hard drive may cause data loss, please backup the data before you conduct this operation. Under Linux, you may use a ssh client (such as PuTTY) to login U-NAS. Then use command “dd” to write data into the hard drive: # dd if=/dev/zero of=/dev/sdx sdx is the device id Under Windows system, you can tools such as HD Tune to write data to the hard drive Warning: Backup your data before you conduct this operation. All data will be erased from the hard drive after this operation! 4.2.4.3 Disk Speed Test Select a Disk by clicking the disk in the table and Click “Disk Speed Test”. Two speed tests could be conducted: Reading cache and Reading device. Select the test you want to conduct and click “Test” Copyright 2012© All rights reserved. 50 YU Technologies, Inc U-NAS v2.0 User Manual 4.2.5 iSCSI-IPSAN U-NAS supports Internet Small Computer System Interface (iSCSI), an Internet Protocol (IP)-based storage networking standard for linking data storage facilities. 4.2.5.1 iSCSI Setup After a RAID Array or Hard Drive has been created, enter “Volume Group Manage” to create a Volume Group. If Volume Group has already been created you may skip this step. 1) Create Volume Group. Copyright 2012© All rights reserved. 51 YU Technologies, Inc U-NAS v2.0 User Manual 2) Create iSCSI by selecting File System Type “iSCSI Target Device”: 3) Enter ISCSI Management Page to edit the newly created iSCSI. Copyright 2012© All rights reserved. 52 YU Technologies, Inc U-NAS v2.0 User Manual 4) Setup username and password. Note: The length of the password should be more than 12. Copyright 2012© All rights reserved. 53 YU Technologies, Inc U-NAS v2.0 User Manual 4.2.5.2 iSCSI Client Connection Open iSCSI Initiator on your windows system (in Control PanelAdministrative Tools), Click “Discovery”. Click “Targets” tab and Select the iSCSI Target. Click Connect to setup the connection. Click “Advanced” button and select the IP, CHAP and input the iSCSI name and target secret. Copyright 2012© All rights reserved. 54 YU Technologies, Inc U-NAS v2.0 User Manual On your windows system, click Start->Control Panel-> Computer Manage->Disk Management Select the iSCSI drive shown in the table and users can format and use the iSCSI Disk like a local Copyright 2012© All rights reserved. 55 YU Technologies, Inc U-NAS v2.0 User Manual hard drive. 4.3 Shares Users can create and share file folders using the U-NAS management interface. A file folder can be created as public shared or private. There are two types of access privileges: Public Shared All users in the LAN can access the folder (read & write). Private Only authorized users (login with a username and password) can access the folder. Access Control: Read Only: users can read the files, but cannot write/create/delete the files. Read & Write: Users can create/read/write/delete the files. 4.3.1Create Shared Folders On U-NAS Web interface, click Control PanelShares and enter the Shared folders page: Click “Create Folder” and input the folder name. You may decide whether you want to share this Copyright 2012© All rights reserved. 56 YU Technologies, Inc U-NAS v2.0 User Manual folder with others or not. You can also set the privilege for this folder by selecting “Privileged” 4.3.2 Set up Privilege for a Folder 1).Read/Write by everyone Set Share as "Yes" and Privilege as “Public” 2). No Access for the Guest Users Click “Privilege” of the folder and select “No Access” for guests. Only authorized users have the right to access (read/write) to the folder Copyright 2012© All rights reserved. 57 YU Technologies, Inc U-NAS v2.0 User Manual Copyright 2012© All rights reserved. 58 YU Technologies, Inc U-NAS v2.0 User Manual 3). Read Only for Guest Users Click “Privilege” and select “Read Only” for Guest users. Only authorized users are allowed to read/write the folder. Copyright 2012© All rights reserved. 59 YU Technologies, Inc U-NAS v2.0 User Manual 4.3.3Hidding a Folder and Enable Trashbox 1).Set up the Trash Box and hiding a Folder Click “Edit” of a folder shown in Shares. Copyright 2012© All rights reserved. 60 YU Technologies, Inc U-NAS v2.0 User Manual Select “Yes” to Hide the folder and “Yes” to Enable Trashbox. 2). Accessing a Hidden Folder A hidden folder will not be displayed in the filer explorer. However authorized users can still access to the folder through:\\IP\share, for example: \\192.168.1.110\share Copyright 2012© All rights reserved. 61 YU Technologies, Inc U-NAS v2.0 User Manual 3). Accessing Trashbox When a file is deleted, a .recycle folder will be created under the same directory. You may access this folder for files deleted. 4.3.4 Enable Personal Folder A personal folder is only accessible by the owner and cannot be accessed by other users. To enable personal folder, go to “Network Services” “SMB” Copyright 2012© All rights reserved. 62 YU Technologies, Inc U-NAS v2.0 User Manual For the Personal Folder, Select a path for personal folder and click “Save”. A folder will be created using user’s name. Personal folder can be accessed through a file explorer. To access a personal folder, user name and password must be provided. 4.4Network Services U-NAS supports the following Network Services: Samba/CIFS, FTP, NFS, Web Server, VPN, DDNS, uPnP, Bonjour and DFS 4.4.1 Samba/CIFS Configuration Samba enables file and printer sharing between computers running Windows and computers running Unix. You may use this page to setup SMB Homes (Personal Folder) and SMB Trashbox. SMB Homes: When you setup the SMB Homes directory, users will have their individual private space on U-NAS. SMB Trashbox: When SMB Trashbox is enabled files deleted will be stored temporarily in this trashbox. Please note the trashbox is a hidden folder. Enter Control Panel Network Services SMB Enable the SMB service and input the NetBIOS. You may also set up Personal Folder and enable DFS on this page. Copyright 2012© All rights reserved. 63 YU Technologies, Inc U-NAS v2.0 User Manual 4.4.2 FTP Configuration FTP service is supported in U-NAS. Users can configure the built-in FTP Server using the following page. To access the FTP server on U-NAS, launch an explorer and enter: ftp://U-NAS_IP. You may also use a FTP client (such as WinSCP) to access the FTP server in U-NAS. 4.4.2.1 Set up FTP Server Enter Control Panel Network Services FTP Copyright 2012© All rights reserved. 64 YU Technologies, Inc U-NAS v2.0 User Manual Enable the service and select the port, speeds control and maximum connections. You may also configure the passive FTP service on this page. Protocol Type You may choose standard or SSL mode for FTP server. SSL mode provides a safer connection. Allow Anonymous Login Enable /Disable anonymous login. Connection Limits Setup maximum connections, upload/download speeds and connections/account. Passive Mode FTP Port Range You may choose a pre-defined port range (55536-56559) or define your own port range for the passive mode FTP service on this page. External IP for Passive FTP Copyright 2012© All rights reserved. 65 YU Technologies, Inc U-NAS v2.0 User Manual IP Address echoed to the remote client. 4.4.2.2 Access to the FTP Server Launch file explorer and enter the following URL: ftp://u-nas or ftp://192.168.1.110 (your U-NAS IP). Type in your username and password. 1. 2. You may also use a FTP client (such as FileZilla) to access the FTP server on U-NAS: Copyright 2012© All rights reserved. 66 YU Technologies, Inc U-NAS v2.0 User Manual Copyright 2012© All rights reserved. 67 YU Technologies, Inc U-NAS v2.0 User Manual 4.4.3 Set up NFS Network File System (NFS) is a network file system protocol originally developed to allow a user on a client computer to access files over a network in a manner similar to local storages. 4.4.3.1 Enable NFS Enter Control Panel Network Services NFS, Click “Enable NFS Service” and “Save”. 4.4.3.2 NFS Privilege Settings To set up NFS privilege, Enter Control PanelShares and click “NFS” under the folder. Copyright 2012© All rights reserved. 68 YU Technologies, Inc U-NAS v2.0 User Manual Click “Add” to add IP and privilege: Copyright 2012© All rights reserved. 69 YU Technologies, Inc U-NAS v2.0 User Manual Copyright 2012© All rights reserved. 70 YU Technologies, Inc U-NAS v2.0 User Manual 4.4.3.3 Access to NFS Server 1. Linux system: On a Linux machine, You may launch the following command to mount the NFS folder: mount -t nfs <U-NAS ip>:/<Network Share Name> <Directory to Mount> 2.Windows System In order to use NFS under Windows XP we have to install Microsoft Windows Services fo r UNIX 3.5. a) Download and run http://download.microsoft.com/download/a/1/c/a1ca7af1-a6e3-46e7-87 4a-4c5d8c0fb3b7/SFU35SEL_EN.exe. b) Run Setup.exe to install the program. After installation is completed click the menu “Windows Services for Unix -> Services for UNIX Administrator” c) Copy /etc/passwd and /etc/group from U-NAS to Windows. d) Click User Name Mapping and select the Configuration Tab. Complete the settings and click the “Apply” button. Copyright 2012© All rights reserved. 71 YU Technologies, Inc U-NAS v2.0 User Manual e) Click the Maps Tab “Show Group Maps” “List UNIX Users” f) Select the user from the list of “Windows users” and select the Unix user to be mapped from the list of “UNIX users”. Click the “Add” button and the “Apply” button to take effects. Copyright 2012© All rights reserved. 72 YU Technologies, Inc U-NAS v2.0 User Manual g) Repeat the above step to add all users to be mapped. Copyright 2012© All rights reserved. 73 YU Technologies, Inc U-NAS v2.0 User Manual h) Use the following command to mount the NFS folder: This command will mount the NFS to a local M: drive. i) In “My Computer” a new network drive will be displayed and you can use it as a regular windows drive. Copyright 2012© All rights reserved. 74 YU Technologies, Inc U-NAS v2.0 User Manual 4.4.4 Web Server U-NAS supports Linux, Apache2, MySQL and PHP (LAMP). Users can use this service to host up to five websites on U-NAS. Enter Control Panel Network Services Web Server, The following steps show how to setup the web server on U-NAS: 1) Enter the port number (default port number is 80. You may need to configure your router). 2) Select a folder to store the website files. The folder must be a public shared one. 3) Enter a domain name. A sub-folder will be created under the shared folder you selected in step 2. This sub-folder will be used to store the files for the domain name you entered. 4) Upload the website files to the sub-folder created in step 3. 5) You can access the website through: http://u-nas_IP (or http://U-NAS_IP:Port) Copyright 2012© All rights reserved. 75 YU Technologies, Inc U-NAS v2.0 User Manual Copyright 2012© All rights reserved. 76 YU Technologies, Inc U-NAS v2.0 User Manual 4.4.5 VPN Settings A virtual private network (VPN) is a network that uses a public communication infrastructure, such as the internet, to provide remote offices or individual users with secure access to their private network. 4.4.5.1 VPN Configuration Enter Control Panel Network Services VPN and enable VPN Service. Users can use the following page to configure the VPN service on U-NAS: Port Configure the VPN server port. You may need to configure your router accordingly. VPN Subnet IP VPN virtual network, must be different from the network of N-NAS. VPN Internal Subnet IP The internal network of U-NAS. Copyright 2012© All rights reserved. 77 YU Technologies, Inc U-NAS v2.0 User Manual External IP or Domain The IP or Domain name of U-NAS. Certificate A certificate is needed to use the VPN service on U-NAS. Copyright 2012© All rights reserved. 78 YU Technologies, Inc U-NAS v2.0 User Manual 4.4.5.2 VPN Client 1) Configure the port on your router: 2) Download the certificate from U-NAS and copy it to your Windows machine. The file name of the certificate is: openvpn.tar.gn. 3) Download and install OpenVPN GUI for Windows (you may use other VPN clients): 4) Unzip the certificate file (openvpn.tar.gz) and copy the file to the path of openvpn program (under the path “config”). 5) Launch openvpn on Windows XP and an red VPN icon will be shown in the system tray. Copyright 2012© All rights reserved. 79 YU Technologies, Inc U-NAS v2.0 User Manual 6) Right click the icon and select Connect. Enter the username and password of your U-NAS. 7) If the connection is successful, the openvpn icon will change to green: After the VPN connection is established your remote windows machine can use the local network. 4.4.6 Dynamic DNS (DDNS) Settings U-NAS allows users to create a hostname that points to your home or office IP address, providing an easy-to-remember URL for quick access through the DDNS service. U-NAS provides an update mechanism which makes the hostname work with your dynamic IP address. Users can access U-NAS via a hostname/URL if DDNS service is enabled and configured correctly. To set up DDNS service on U-NAS, enter Control Panel Network Services DDNS: Copyright 2012© All rights reserved. 80 YU Technologies, Inc U-NAS v2.0 User Manual U-NAS provides two methods to support DDNS service: 1) Domain Service Provider DDNS update URL; and 2) DDNS Service Provider (such as www.dyndns.com and www.3322.org ). 1. Some domain registration service providers allow users to use a URL to update their Dynamic IP for the hostname they registered. Please follow the instructions of the domain registration provider and enter the URL on this page. 2. U-NAS also allows users to use the DDNS services provided by www.dyndns.com and www.3322.org. In order to use their services you have to register a username with the providers. After the registration is completed you will be given a username and password by the provider. Please enter the username and password on this page. U-NAS will connect the service providers to update the dynamic IP. After DDNS service is configured successfully, users can use domain name instead of IP to access U-NAS. Copyright 2012© All rights reserved. 81 YU Technologies, Inc U-NAS v2.0 User Manual 4.4.7 uPnP uPnP is a technology for dynamically attaching devices directly to a computer. uPnP devices are “plug-and-play” when connected to a network. When you enable this service, the uPnP devices automatically establish working configurations with other devices. Enter Control Panel Network Services uPnP and enable uPnP Service 4.4.8 Bonjour Bonjour(zero-configuration networking)enables automatic discovery of computers, printers, devices, and services on IP networks. U-NAS uses Bonjour to facilitate the installation, configuration and use of network printers and other devices of Mac systems. To enable Bonjour Service, enter Control Panel Network Services Bonjour. Select and enable the Bonjour services in the table: Copyright 2012© All rights reserved. 82 YU Technologies, Inc U-NAS v2.0 User Manual How to use Bonjour in Apple OS Go to go->network Copyright 2012© All rights reserved. 83 YU Technologies, Inc U-NAS v2.0 User Manual 4.4.9 DFS Service Distributed File System (DFS) is a set of client and server services that allow an organization to organize many distributed SMB file shares into a distributed file system. DFS provides location transparency and redundancy to improve data availability in the face of failure or heavy load by allowing shares in multiple different locations to be logically grouped under one folder, or DFS root. U-NAS supports DFS to expand the storage. 4.4.9.1 DFS Settings 1).Setup Authentication(See Section 4.5) 2). Enter Control Panel-> Network Services -> DFS, if "DFS service is not enabled" message is shown, go to Control Panel-> Network Services -> SMB and enable DFS service. Enable DFS Service on the SMB Settings page to use the DFS service. Copyright 2012© All rights reserved. 84 YU Technologies, Inc U-NAS v2.0 User Manual Input DFS node IP, shared folder on the node and the new folder name on U-NAS, Click Save to save the changes. If the configuration is set successfully, the DFS node will be displayed in the DFS Node List: Copyright 2012© All rights reserved. 85 YU Technologies, Inc U-NAS v2.0 User Manual 4.4.9.2 Access DFS Input \\192.168.1.110, and the DFS folder will be shown in the file explorer: Copyright 2012© All rights reserved. 86 YU Technologies, Inc U-NAS v2.0 User Manual Double click the DFS folder, and input the user name and password, folders on other DFS systems will be displayed: Copyright 2012© All rights reserved. 87 YU Technologies, Inc U-NAS v2.0 User Manual 4.5 Authentication 4.5.1 LDAP U-NAS uses LDAP service for user authentication. U-NAS provides two ways for configuring LDAP authentication: 1) standard; and 2) Advanced. “Standard” Settings uses the LDAP service on U-NAS. “Advanced” Settings can use remote LDAP servers for authentication. “Advanced” settings are designed for advanced users only. Warning: Do not make changes on this page unless you know what you are doing. Standard Settings Input the LDAP password and “Save” Advanced Settings Server: localhost stands for local authentication. You may use other servers for authentication. Base DN, Root Bind DN: determined by the server configuration Password: used to connect to LDAP server Copyright 2012© All rights reserved. 88 YU Technologies, Inc U-NAS v2.0 User Manual Password Policy:allows user to change the password or not. 4.5.2 Active Directory Active Directory is an integral part of the Windows architecture created by Microsoft for directory service. Active Directory is a centralized and standardized system that automates network management of user data, security and distributed resources and enables interoperation with other directories. Active Directory is designed especially for distributed networking environments. Active Directory stores information and settings in a central database. U-NAS has built-in support of AD authentication. After U-NAS joins an AD Domain, it will load the user information to U-NAS automatically which allows AD users to login and use U-NAS. Copyright 2012© All rights reserved. 89 YU Technologies, Inc U-NAS v2.0 User Manual After Active Directory is configured correctly, user accounts will be displayed in the Account Management page. Copyright 2012© All rights reserved. 90 YU Technologies, Inc U-NAS v2.0 User Manual Note: AD accounts cannot be edited/deleted from U-NAS to assure security. 4.6 Backups 4.6.1 rSync U-NAS uses rSync service to allow users to backup the data on a remote machine to a local directory on U-NAS or vice versa. The following steps show how to backup local data to a remote machine. 1. Enable rSync service. 2. Setup the rSync Server Port (default value is 873. You may need to configure your router accordingly.) 3. Setup the username and password (to login the remote machine) 4. Select the local directory to be backed up and enter a name for the backup task. 5. The remote machine will do a backup for the data on U-NAS. (You may use another U-NAS to do this job) Create a backup task Copyright 2012© All rights reserved. 91 YU Technologies, Inc U-NAS v2.0 User Manual The following steps show how to backup data on a remote machine to U-NAS 1. Setup rSync service on the remote machine side. 2. Enter the IP of the remote machine and the port for rSync server on U-NAS. 3. Enter the username and password you want to use for rSync service authentication. 4. Enter a backup name 5. Select a directory on U-NAS for backup storage 6. Select a schedule for the backup task and click the “Add” button. Copyright 2012© All rights reserved. 92 YU Technologies, Inc U-NAS v2.0 User Manual 4.6.2 Time Machine U-NAS supports Apple Time Machine. Users can use U-NAS to backup Mac systems. Enter Control Panel-> Backup -> Time Machine, Select a folder and enable the service. Copyright 2012© All rights reserved. 93 YU Technologies, Inc U-NAS v2.0 User Manual How to backup an Apple OS Machine Go to “Time Machine”, Click ON. Copyright 2012© All rights reserved. 94 YU Technologies, Inc U-NAS v2.0 User Manual Select a U-NAS Time Machine , then click “Use Backup Disk”. Input Name and Password, Click “Connect”. Copyright 2012© All rights reserved. 95 YU Technologies, Inc U-NAS v2.0 User Manual 4.7 Email Server U-NAS is shipped with a built-in professional Email server and a web-based Email management system. The email server is suitable for mid size or small companies or can be used as an internal email server. Users must configure the Email Server first before using the email service on U-NAS. The following steps show how to setup the Email Server on U-NAS: 4.7.1 Email Server Settings Email Server Settings include email settings and email backup settings. 1. Email Settings: Configuring Email Settings includes three steps: 1) Select a folder for Email storage; 2) Setup Email domain; 3) import user accounts from U-NAS (optional). Create a folder in Shares and select this folder for email storage. Enter the email domain name Click the “Import” button to import users from U-NAS (if you want to assign users on U-NAS an email account). 2. Email Backup Settings Configuring Email Backup Settings includes two steps: 1) Select/create an email backup directory Copyright 2012© All rights reserved. 96 YU Technologies, Inc U-NAS v2.0 User Manual on U-NAS; 2) Run email backup by clicking the “Backup” button. You may also run a scheduled backup and configure the backup time on this page. Note: You may use Shares to create a folder for email backup. 3. Monitor Emails U-NAS allows you to monitor the emails sent from/received by a specific account. U-NAS provides a function to monitor email communications. A copy of emails to/from an account will be forwarded to another email when “Email Monitor” is configured. Copyright 2012© All rights reserved. 97 YU Technologies, Inc U-NAS v2.0 User Manual 4. Attachment Size U-NAS allows user to specify the maximum size of the email attachment. Copyright 2012© All rights reserved. 98 YU Technologies, Inc U-NAS v2.0 User Manual 4.7.2 Manage Email Accounts U-NAS provides a web-based Email Accounts management system. Users can use this system to add/delete/lock/edit email accounts. 1) Add Email Accounts In addition to the users imported from U-NAS, you can also add email accounts manually. (Please note the accounts added in this section cannot be used to login U-NAS.) Copyright 2012© All rights reserved. 99 YU Technologies, Inc U-NAS v2.0 User Manual 2) Lock Email Accounts You may “lock” an Email Account. If an account is “locked”, that user will no longer be able to use the email service. However the email server will continue receiving email for the locked accounts. 3) Delete Accounts You may delete an email account. Please note if an account is deleted all emails of the account will be removed from the system. Copyright 2012© All rights reserved. 100 YU Technologies, Inc U-NAS v2.0 User Manual 4) Edit Accounts You can use this service to change the information and password of an email account. Copyright 2012© All rights reserved. 101 YU Technologies, Inc U-NAS v2.0 User Manual 4.7.3 Email Domain Name In order to use the Email Server on U-NAS you have to specify an email domain name on U-NAS. Delete Domain Name: Copyright 2012© All rights reserved. 102 YU Technologies, Inc U-NAS v2.0 User Manual Edit Domain Name: Copyright 2012© All rights reserved. 103 YU Technologies, Inc U-NAS v2.0 User Manual 4.7.4 Web Email Client U-NAS also provides a web email client page so that user can access to the email server on U-NAS. This is very useful when users are traveling and cannot have an access to his/her email client programs. To access to the emails: Launch a web browser and input: https://IP/mail Copyright 2012© All rights reserved. 104 YU Technologies, Inc U-NAS v2.0 User Manual 4.8 External Devices U-NAS supports external disks and USB printers as external devices. 4.8.1 External Disks External disks (USB drives, digital cameras, digital camcorders…) can be connected to U-NAS. Users can manage the data on the external drives through U-NAS. Warning: 1. Please unmount the external disk(s) before you initialize hard drives. Disk Initialization will remove all data on the external disk(s). 2. After U-NAS mounts the external disk users can access the data in a file explorer from a PC. 3. It takes several seconds for U-NAS to mount the external disk. Please be patient. Copyright 2012© All rights reserved. 105 YU Technologies, Inc U-NAS v2.0 User Manual 4.8.2 USB Printers U-NAS can serve as a shared Printer Server. You can connect USB printer(s) to U-NAS using the USB ports. U-NAS will automatically mount the printers if they are supported by U-NAS. Install a Printer Connected to U-NAS on Your PC Follow the steps below to install and use the printer shared by U-NAS: 1) Launch the Windows program “Run” and enter \\U-NAS_IP to browse the shared items on U-NAS. 2) A printer icon (if the printer is supported by U-NAS) will be shown in the explorer. Double click the icon to install the printer on your Windows machine: Copyright 2012© All rights reserved. 106 YU Technologies, Inc U-NAS v2.0 User Manual 3) Install the printer driver: Copyright 2012© All rights reserved. 107 YU Technologies, Inc U-NAS v2.0 User Manual 4.9 System Settings Users can configure the system, time, network, hardware, languages, notifications, system backup and upgrade in this section. 4.9.1 System Name and Port Users can setup the system name and the port for U-NAS. The default name for the system is U-NAS and the default port is 443. Users can use either IP or system name (for Windows only) to access U-NAS (for example: https://u-nas or https://U-NAS_IP). If the port number has been changed to another value, you have to specify the port in the URL in order to access U-NAS (for example if you change the port number to 2010 and IP is 192.168.1.110, you can access U-NAS by https://U-NAS:2010 or https://192.168.1.110:2010). Enter Control Panel-> System Settings-> General Settings, Input the hostname and port: 4.9.2 Network Configurations Users can configure DNS and NIC for the system on this page. U-NAS supports NIC standard mode and bonding mode for aggregating multiple network interfaces into a single logical "bonded" interface. The bonded interface provides either hot standby or load balancing services. U-NAS can support unlimited amount of NICs. Copyright 2012© All rights reserved. 108 YU Technologies, Inc U-NAS v2.0 User Manual Enter Control Panel-> System Settings-> Network, Users can input DNS servers in this page: Network interface supports normal mode and bonding mode: 1) Normal Mode Copyright 2012© All rights reserved. 109 YU Technologies, Inc U-NAS v2.0 User Manual 2) Bonding Mode Copyright 2012© All rights reserved. 110 YU Technologies, Inc U-NAS v2.0 User Manual U-NAS supports the following Bonding Modes: Bonding Mode Description Balance-rr Transmit packets in sequential order from the first available slave through the last. This mode provides load balancing and fault tolerance. Active-backup Only one slave in the bond is active. A different slave becomes active if, and only if, the active slave fails. The bond's MAC address is externally visible on only one port (network adapter) to avoid confusing the switch. This mode provides fault tolerance. The primary option affects the behavior of this mode. Balance-xor Transmit based on [(source MAC address XOR'd with destination MAC address) modulo slave count]. This selects the same slave for each destination MAC address. This mode provides load balancing and fault tolerance. Broadcast Transmits everything on all slave interfaces. This mode provides fault tolerance. Creates aggregation groups that share the same speed and duplex settings. Utilizes all slaves in the active aggregator according to the 802.3ad specification. 802.3ad Balance-tlb Channel bonding that does not require any special switch support. The outgoing traffic is distributed according to the current load (computed relative to the speed) on each slave. Incoming traffic is received by the current slave. If the receiving slave fails, another slave takes over the MAC address of the failed receiving slave. Balance-alb Includes balance-tlb plus receive load balancing (rlb) for IPV4 traffic, Copyright 2012© All rights reserved. 111 YU Technologies, Inc U-NAS v2.0 User Manual and does not require any special switch support. The receive load balancing is achieved by ARP negotiation. The bonding driver intercepts the ARP Replies sent by the local system on their way out and overwrites the source hardware address with the unique hardware address of one of the slaves in the bond such that different peers use different hardware addresses for the server. 4.9.3 Time Settings Users can setup the time zone, date and time for U-NAS. Please note if time is not configured correctly it may cause the following problems: When you use shared folders you may find the time shown is not correct. System log may show incorrect event time. Enter Control Panel-> System Settings-> Notification, Select/input time/date or select using internet time server. 4.9.4 Language Settings Users can select a language for U-NAS user interface and a system char code for U-NAS. Enter Control Panel-> System Settings-> Language, select the system encoding. Copyright 2012© All rights reserved. 112 YU Technologies, Inc U-NAS v2.0 User Manual 4.9.5 Hardware Configuration Users can configure hard drive sleep mode, low disk space warning and remote network wakeup on this page. Enter Control Panel-> System Settings-> Hardware Copyright 2012© All rights reserved. 113 YU Technologies, Inc U-NAS v2.0 User Manual Hard Drive Sleep Mode Users can put hard drive into sleep mode when there is no read/write operations for certain amount of time. Low Disk Space Warning When the available disk space is less than a critical value, a message to warn the users will be displayed. Users can specify the critical value on this page. Network Wakeup U-NAS support remote network wakeup. Users may enable this function on this page. 4.9.6 Notification Settings Enter Control Panel-> System Settings-> Notification Copyright 2012© All rights reserved. 114 YU Technologies, Inc U-NAS v2.0 User Manual Receive Manufacturer Notifications When it is enabled, U-NAS will display the manufacturer messages on the homepage. Enable Audio Warning. When this function is enabled, U-NAS uses an audio warning to alert users for system failures. Email Notifications U-NAS also supports email notifications to alert users for system failures. In order to use this function you have to configure the SMTP service: SMTP Server Name, for example: smtp.gmail.com SMTP port: default value is 25. However gmail.com uses 465. Sender name Email address Password used to log in the SMTP server. SSL connection: if the SMTP requires a SSL connection you need to select this. 4.9.7 System Backup U-NAS provides two functions: 1) backup the system; and 2) backup the system configurations. We strongly recommend that you backup the system after you make any changes on U-NAS. Copyright 2012© All rights reserved. 115 YU Technologies, Inc U-NAS v2.0 User Manual You may also backup the system configuration regularly. You can restore the system by uploading a saved configuration file. This is very useful when you try to make changes on U-NAS (if you are not sure how to change something on U-NAS, you can backup the system configuration first. If anything goes wrong you can restore the system using the backup). Enter Control Panel-> System Settings-> System Backup, Select a path to store the backup image: click "Start" to backup U-NAS configurations. You can also restore the system by uploading a backup file Copyright 2012© All rights reserved. 116 YU Technologies, Inc U-NAS v2.0 User Manual 4.9.8 System Upgrade Users can upgrade U-NAS online. It may take several minutes (or much longer) to upgrade the system. Please backup your system before upgrading U-NAS. Please do not disturb the upgrading process otherwise it may damage the device. After the upgrading process is completed U-NAS will reboot automatically. Enter Control Panel-> System Settings-> System Upgrade, Select Upgrade U-NAS and/or Upgrade U-NAS System and click Upgrade. 4.9.9 Restore Factory Settings Users can restore U-NAS to the default factory settings. Please backup your system and data before you click the button. Restoring to default factory settings may remove all data on the hard drives. Warning: Restoring to factory settings will remove all data from the hard drives. Please backup your data before restoring to factory settings. Enter Control Panel-> System Settings-> Restore Factory Settings, Click "Restore Factory Settings" Copyright 2012© All rights reserved. 117 YU Technologies, Inc U-NAS v2.0 User Manual 4.9.10 Shutdown/Restart Users can shutdown or reboot U-NAS from this page. Enter Control Panel-> System Settings-> Restore Factory Settings and click “shutdown U-NAS” to power off U-NAS or click “Restart U-NAS” to reboot U-NAS Copyright 2012© All rights reserved. 118 YU Technologies, Inc U-NAS v2.0 User Manual U-NAS also support scheduled shutdown/restart: Copyright 2012© All rights reserved. 119 YU Technologies, Inc U-NAS v2.0 User Manual Part 5 System Status 5.1 System Information U-NAS system information, including system, hardware, memory usage and disks usage, will be displayed on this page. Copyright 2012© All rights reserved. 120 YU Technologies, Inc U-NAS v2.0 User Manual Copyright 2012© All rights reserved. 121 YU Technologies, Inc U-NAS v2.0 User Manual 5.2 Online Users This page shows the online users of NFS, SMB/CIFS and iSCSI. Copyright 2012© All rights reserved. 122 YU Technologies, Inc U-NAS v2.0 User Manual Note: If the DNS of U-NAS is configured as the IP of the router, the IP address can be reported correctly on this page. Otherwise it may display an incorrect IP. 5.3 System Log This page displays important events occurred. Users can search an event or clear the system log. Copyright 2012© All rights reserved. 123 YU Technologies, Inc U-NAS v2.0 User Manual 5.4 Error Messages All system failures/exceptions are shown on this page. 5.5 Standard Users Standard users (created in Accounts) can also login U-NAS to view their space usage or change their passwords. Copyright 2012© All rights reserved. 124 YU Technologies, Inc U-NAS v2.0 User Manual Copyright 2012© All rights reserved. 125 YU Technologies, Inc U-NAS v2.0 User Manual 5.5.1 View User Space The following steps show how standard users can view their user space and their group space on this page: 1) Select a volume: 2) User space and group space and the status will be displayed on this page. Copyright 2012© All rights reserved. 126 YU Technologies, Inc U-NAS v2.0 User Manual 5.5.2 Change Password Standard users can change their passwords using the following page after they login. Click U-NAS Change Password: Input current password and the new password, Click Apply. Copyright 2012© All rights reserved. 127 YU Technologies, Inc U-NAS v2.0 User Manual Copyright 2012© All rights reserved. 128 YU Technologies, Inc U-NAS v2.0 User Manual Part 6 Applications 6.1 iTunes U-NAS provides an iTunes Server that can stream your music library to iTunes. Users can enable/configure the iTunes service on this page and turn U-NAS into an iTunes server box. After you configure the iTunes server, upload music files to the selected folder. 6.1.1 Set up iTunes Enter Applications-> iTunes; Click “Basic” and enable iTunes Service. Click "Advanced", select a path for storing the media files, input server name and port and click “Apply” Copyright 2012© All rights reserved. 129 YU Technologies, Inc U-NAS v2.0 User Manual 6.1.2 iTunes Connection On a PC or Mac, launch iTunes Player, you should find the U-NAS iTunes Server. iTunes will automatically search for the music files on your U-NAS: Copyright 2012© All rights reserved. 130 YU Technologies, Inc U-NAS v2.0 User Manual 6.2 Mounting ISO Image Files U-NAS supports mounting iso files. After an iso image file is mounted on U-NAS, users can access to the contents of the iso image. Mount ISO Image File Enter Applications-> ISO Images; browse the file tree on the left panel and find the iso image file. Click “Mount” to mount the iso file. Copyright 2012© All rights reserved. 131 YU Technologies, Inc U-NAS v2.0 User Manual After the iso image is mounted, it will be displayed in the right panel as shown below: Access the contents of the ISO image: Launch a file explorer and browse to U-NAS shared folder and the iso contents will be displayed: Copyright 2012© All rights reserved. 132 YU Technologies, Inc U-NAS v2.0 User Manual Unmount ISO Image File Click on the “Unmount” from the ISO image list to unmount the ISO image Copyright 2012© All rights reserved. 133 YU Technologies, Inc U-NAS v2.0 User Manual 6.3 Surveillance Station U-NAS has a very powerful built-in Surveillance Station. U-NAS Surveillance Station supports USB Cameras and IP Cameras simultaneously. U-NAS Surveillance Station supports unlimited amount of IP Cameras and USB cameras. To set up Surveillance Station, enter Applications-> Surveillance Station. 6.3.1 USB Camera 1. Add USB Camera Plug the USB Camera into U-NAS. Enter Applications-> Surveillance Station-> USB Camera. Click “Add” to enter Add USB Camera page. Select the camera you want to add, input the name for the camera and select a path for storing the video. Copyright 2012© All rights reserved. 134 YU Technologies, Inc U-NAS v2.0 User Manual 2. Configure the USB camera Select the USB camera to be configured, click “Settings” to enter the configuration page: Copyright 2012© All rights reserved. 135 YU Technologies, Inc U-NAS v2.0 User Manual Camera name:User can specify a name for the camera. (For example: Front Door) Storage Path:Folders used for storing the video clips Port:Must be greater than 8080 and cannot be used by other applications. Resolution:Resolution is determined by the camera Picture Quality:Range 1-100 Frame rate: Range 1-100 Bit rate: range 2-31,2 stands for best image quality and 31 stands for worst image quality. Brightness:Default is 0, range 0-255 Contrast:Default is 0, range 0-255 Saturation: Default is 0, range 0-255 Video Length: Default setting is 3600seconds/avi file. Automatic Snapshot:Automatic image recording interval. 0 means disable this function. Start Recording:Start/stop recording Continuous Recording: Video will be recorded only when there is a motion if you select “No”. This can help to reduce the usage of the disk space. Note: If the user wants to access to the video camera from the WAN, port forwarding must be Copyright 2012© All rights reserved. 136 YU Technologies, Inc U-NAS v2.0 User Manual configured on your router (Port 443 and the port of the Camera set on this page) 3. Video Monitor Turn "ON" the camera and Click Monitor to start the Video Monitor page You need to have Java installed on your PC to view the video. Copyright 2012© All rights reserved. 137 YU Technologies, Inc U-NAS v2.0 User Manual If the camera is configured successfully, real-time video should be displayed on the screen. You may also click on the video listed in the left panel to view old video clips. Note: You may click “Refresh” if no video is shown in the right panel. Users can also control the monitor window by clicking the following icons: Copyright 2012© All rights reserved. 138 YU Technologies, Inc U-NAS v2.0 User Manual Monitor: Real-Time video Snapshot: Take a snapshot of the current video frame Start/Stop: Start or Stop the video recording. Copyright 2012© All rights reserved. 139 YU Technologies, Inc U-NAS v2.0 User Manual 6.3.2 IP Camera 1. Add IP Camera Plug the IP Camera into the network. Enter Applications-> Surveillance Station-> IP Camera. Click “Add” to enter Add IP Camera page. Input the URL of the IP Camera, the name for the camera, user name/password and select a path for storing the video. Click “Add” button to add the IP camera to U-NAS. IP Camera URL:Please consult with the camera manufacturer to obtain the URL for your IP Camera. Copyright 2012© All rights reserved. 140 YU Technologies, Inc U-NAS v2.0 User Manual 2. Configure the IP Camera Select the IP camera to be configured and click “Settings” to enter the configuration page: Copyright 2012© All rights reserved. 141 YU Technologies, Inc U-NAS v2.0 User Manual Camera name:User can specify a name for the camera. (For example: Front Door) Storage Path:Folders used for storing the video clips Port:Must be greater than 8080 and cannot be used by other application. Resolution:Resolution is determined by the camera Picture Quality:Range 1-100 Frame rate: Range 1-100 Bit rate: range 2-31,2 stands for best image quality and 31 stands for worst image quality. Brightness:Default is 0, range 0-255 Contrast:Default is 0, range 0-255 Saturation: Default is 0, range 0-255 Video Length: Default setting is 3600seconds/avi file. Automatic image recording:Automatic image recording interval. 0 means disable this Copyright 2012© All rights reserved. 142 YU Technologies, Inc U-NAS v2.0 User Manual function. Start Recording:Start/stop recording Continuous Recording: Video will be recorded only when there is a motion if you select “No”. This can help to reduce the usage of the disk space. Note: If the user wants to access to the video camera from the WAN, port forwarding must be configured on your router (Port 443 and the port of the Camera set on this page) 3. Video Monitor Turn "ON" the camera and Click Monitor to start the Video Monitor page You will need to have Java installed on your PC to view the video. Copyright 2012© All rights reserved. 143 YU Technologies, Inc U-NAS v2.0 User Manual If the camera is configured successfully, real-time video should be displayed on the screen. You may also click on the video listed in the left panel to view old video clips. Note: You may click “Refresh” if no video is shown in the right panel. Users can also control the monitor window by clicking the following icons: Copyright 2012© All rights reserved. 144 YU Technologies, Inc U-NAS v2.0 User Manual Monitor: Real-Time video Snapshot: Take a snapshot of the current video frame Start/Stop: Start or Stop the video recording. Copyright 2012© All rights reserved. 145 YU Technologies, Inc U-NAS v2.0 User Manual 6.4 Web File Manager(eXtplorer) U-NAS includes a web file manager (eXtplorer) for users to access the files on U-NAS using a web browser. 6.4.1 Account Management Users can manage the web explorer accounts (not U-NAS accounts) by clicking the “Admin” button: Copyright 2012© All rights reserved. 146 YU Technologies, Inc U-NAS v2.0 User Manual Change Admin Password Add Users 1). Click Add button to enter the Administration page: 2)Input the username, password, home directory and other information and click Save to create the account: Copyright 2012© All rights reserved. 147 YU Technologies, Inc U-NAS v2.0 User Manual Copyright 2012© All rights reserved. 148 YU Technologies, Inc U-NAS v2.0 User Manual 6.4.2 Access eXtplorer using a Standard Account Launch a web browser and input the url: htts://IP/filemanager. For example: https://192.168.1.110/filemanager Type in your username and password to login the web file explorer. Users can create/edit/copy/move/delete/rename files/folders, change privileges, view files online, upload/download files and zip/unzip files. Copyright 2012© All rights reserved. 149 YU Technologies, Inc U-NAS v2.0 User Manual Copyright 2012© All rights reserved. 150 YU Technologies, Inc U-NAS v2.0 User Manual Part 7 Download Services U-NAS supports eDonkey, eMule and BT/PT P2P file sharing. Warning: YU Technologies, Inc (China) does NOT assume any responsibility for sharing any copyrighted material using U-NAS. 7.1 MLDonkey Download MLDonkey Download is a wrapper of mldonkey to provide U-NAS users a user friendly web-based management system. Users can create downloading tasks, control the download process (start/pause/delete tasks) and view the downloading status through the MLDonkey Download page. Configuring MLDonkey Download includes: 1) select a directory to save the downloaded files; 2) setup maximum connections and speed limits. Enter U Download-> MLDonkey Download, Click Settings to configure MLDonkey Download: Copyright 2012© All rights reserved. 151 YU Technologies, Inc U-NAS v2.0 User Manual Click to enable the MLDonkey Download service, select a path for storing the downloaded files and input the connection/speed limits, Click Apply to save the changes. To add a download task, click “Add” and input the download URL and select the path for storing the downloaded files. Click Add to create a MLDonkey download task. Copyright 2012© All rights reserved. 152 YU Technologies, Inc U-NAS v2.0 User Manual Copyright 2012© All rights reserved. 153 YU Technologies, Inc U-NAS v2.0 User Manual 7.2 BT/PT Download U-NAS uses transmission to support BT/PT file sharing. U-NAS has an embedded management system but users can also use the web management system provided by transmission to control the BT/PT service. In order to use the BT/PT service users must set the path to store the downloaded files first. Enter U Download-> BT/PT, Click Enable BT/PT and select a path for storing the downloaded files. Click Save to save the changes. Copyright 2012© All rights reserved. 154 YU Technologies, Inc U-NAS v2.0 User Manual Add a new BT/PT Download Task Click “Open” to enter the "Upload Torrent Files" page. Browse to find the torrent file and click “Upload” to load the BT/PT torrent file. A BT/PT download task will be created if the torrent file is uploaded successfully. Users may click the Settings icon at the lower left corner to configure the BT/PT download service. Copyright 2012© All rights reserved. 155 YU Technologies, Inc U-NAS v2.0 User Manual Copyright 2012© All rights reserved. 156 YU Technologies, Inc U-NAS v2.0 User Manual Part 8 Personalization U-NAS provides an user friendly web os interface for managing the system. Users can personalize the U-NAS background or theme. 8.1 Change Backgroud Click U-NAS-> Personalize Click "Desktop Background" Copyright 2012© All rights reserved. 157 YU Technologies, Inc U-NAS v2.0 User Manual Select the backgound and click Save Copyright 2012© All rights reserved. 158 YU Technologies, Inc U-NAS v2.0 User Manual Copyright 2012© All rights reserved. 159 YU Technologies, Inc U-NAS v2.0 User Manual 8.2 Change Theme Click U-NAS-> Personalize: Select Theme: Copyright 2012© All rights reserved. 160 YU Technologies, Inc U-NAS v2.0 User Manual Copyright 2012© All rights reserved. 161 YU Technologies, Inc


