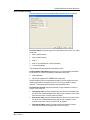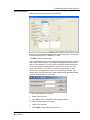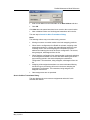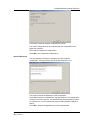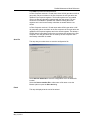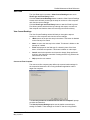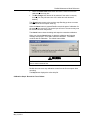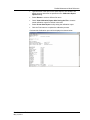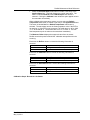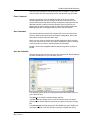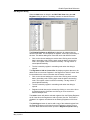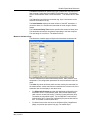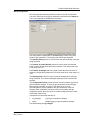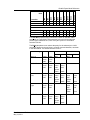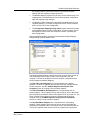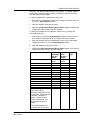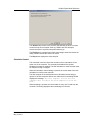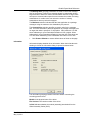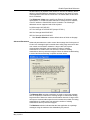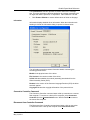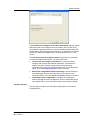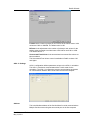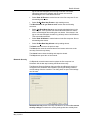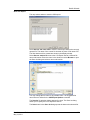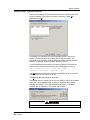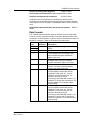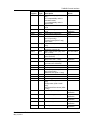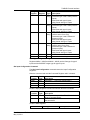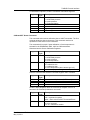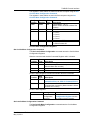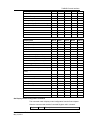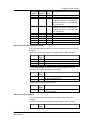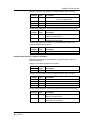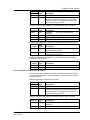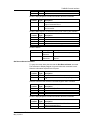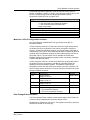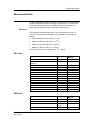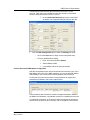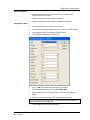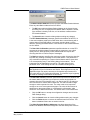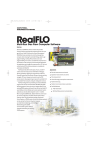
1
Realflo Reference and User Manual 5/19/2011 The information provided in this documensstation contains general descriptions and/or technical characteristics of the performance of the products contained herein. This documentation is not intended as a substitute for and is not to be used for determining suitability or reliability of these products for specific user applications. It is the duty of any such user or integrator to perform the appropriate and complete risk analysis, evaluation and testing of the products with respect to the relevant specific application or use thereof. Neither Schneider Electric nor any of its affiliates or subsidiaries shall be responsible or liable for misuse of the information contained herein. If you have any suggestions for improvements or amendments or have found errors in this publication, please notify us. No part of this document may be reproduced in any form or by any means, electronic or mechanical, including photocopying, without express written permission of Schneider Electric. All pertinent state, regional, and local safety regulations must be observed when installing and using this product. For reasons of safety and to help ensure compliance with documented system data, only the manufacturer should perform repairs to components. When devices are used for applications with technical safety requirements, the relevant instructions must be followed. Failure to use Schneider Electric software or approved software with our hardware products may result in injury, harm, or improper operating results. Failure to observe this information can result in injury or equipment damage. © 2011 Schneider Electric. All rights reserved Table of Contents Table of Contents ...................................................................... 1 Important Safety Information ................................................. 14 About The Book ........................................................................ 1 Introduction ............................................................................... 2 Overview ........................................................................................................... 2 System Requirements ....................................................................................... 4 Organization of the Manual ............................................................................... 4 Additional Documentation ................................................................................. 5 Installation ......................................................................................................... 6 Version Release Notes ..................................................................................... 7 Realflo Firmware Compatibility ....................................................................... 15 Realflo Maintenance Mode Reference ................................... 19 Selected Flow Computer ................................................................................. 21 Select Flow Computer Wizard ................................................................... 22 Open an Existing File ................................................................................. 22 Create a New File Wizard .......................................................................... 24 View Data ...................................................................................................... 121 View Current Readings ............................................................................ 121 Current Readings View ............................................................................ 122 Read Logs and Flow History.................................................................... 127 Maintenance.................................................................................................. 145 Connections for SCADAPack Sensor Calibration ................................... 145 Calibrate Inputs ........................................................................................ 146 Change Orifice Plate ................................................................................ 175 Force Inputs ............................................................................................. 187 Configuration ................................................................................................. 194 View and Change Configuration Wizard .................................................. 194 Switch to Expert Mode .................................................................................. 201 Realflo User Manual ..................................................................................... 201 Exit Realflo .................................................................................................... 201 Document (Version #.##.#) 5/19/2011 Table of Contents Realflo Expert Mode Reference ........................................... 202 User Interface Components .......................................................................... 202 Display Window............................................................................................. 203 Current Readings ..................................................................................... 203 Title Bar .................................................................................................... 205 Standard Toolbar ..................................................................................... 206 Maintenance Toolbar ............................................................................... 207 Configuration Toolbar .............................................................................. 208 Status Bar ................................................................................................ 209 Scroll Bars ................................................................................................ 209 Menu Bar ................................................................................................. 209 File Menu ...................................................................................................... 210 New Command ........................................................................................ 210 Open Command....................................................................................... 210 Close Command ...................................................................................... 211 Save Command ....................................................................................... 211 Save As Command .................................................................................. 211 Export Command ..................................................................................... 213 Print Command ........................................................................................ 221 Print Preview Command .......................................................................... 222 Print Setup Command ............................................................................. 222 Print Setup Command in PEMEX Mode .................................................. 223 Recent Files List ...................................................................................... 225 Exit Command ......................................................................................... 225 Edit Menu ...................................................................................................... 226 Copy Command ....................................................................................... 226 Select All Command ................................................................................ 226 Custom Views Command ........................................................................ 226 Register Command .................................................................................. 239 Write Initial Values Command ................................................................. 240 Template Steps ........................................................................................ 241 View Menu .................................................................................................... 243 Current Readings Command ................................................................... 243 Hourly History Command ......................................................................... 246 Daily History Command ........................................................................... 249 New Day Triggers .................................................................................... 250 Hourly Gas Quality History Command ..................................................... 252 Event Log Command ............................................................................... 254 Document Revised May 19, 2011 Table of Contents Alarm Log Command ............................................................................... 255 More Views Command ............................................................................ 256 Run 1 . . . Run 10 Commands ................................................................. 257 Change All Views Command ................................................................... 258 Toolbar Command ................................................................................... 258 Status Bar Command .............................................................................. 258 Maintenance Mode .................................................................................. 258 Start in Expert Mode ................................................................................ 258 Configuration Menu ....................................................................................... 260 Replace Flow Computer .......................................................................... 260 Initialize Command .................................................................................. 273 Real Time Clock....................................................................................... 276 Wireless Security Settings ....................................................................... 277 Flow Computer Information ..................................................................... 278 Setup ........................................................................................................ 288 Sensor and Display .................................................................................. 289 Flow Run .................................................................................................. 303 Process I/O .............................................................................................. 338 Serial Ports .............................................................................................. 343 IP Command ............................................................................................ 358 Register Assignment ................................................................................ 373 DNP ......................................................................................................... 380 Store and Forward ................................................................................... 380 Power Management Configuration .......................................................... 383 Pulse Input Configuration ........................................................................ 386 Gas Sampler Output Configuration.......................................................... 386 Modbus Mapping ..................................................................................... 388 Read Configuration .................................................................................. 399 Write Configuration .................................................................................. 400 Edit Script................................................................................................. 401 Run Script ................................................................................................ 405 Log Results .............................................................................................. 405 Options ..................................................................................................... 406 C/C++ Program Loader ........................................................................... 408 Accounts .................................................................................................. 409 Lock Flow Computer ................................................................................ 412 Unlock Flow Computer ............................................................................ 413 Override Flow Computer Lock ................................................................. 414 Document Revised May 19, 2011 Table of Contents Show Lock Status .................................................................................... 414 Maintenance Menu ....................................................................................... 415 Log On ..................................................................................................... 415 Read Logs/History ................................................................................... 415 Calibration ................................................................................................ 418 Calibration Report Options ...................................................................... 446 Change Orifice Plate ................................................................................ 447 Calculation Control .................................................................................. 458 Update Readings ..................................................................................... 459 Update Readings Once ........................................................................... 460 Force Inputs ............................................................................................. 460 Communication Menu ................................................................................... 465 PC Communications Settings Command ................................................ 465 Connect to Controller Command ............................................................. 524 Disconnect from Controller Command .................................................... 524 Window Menu ............................................................................................... 526 New Window Command .......................................................................... 526 Cascade Command ................................................................................. 526 Tile Command.......................................................................................... 526 Arrange All Command ............................................................................. 526 Open Window List .................................................................................... 526 Help Menu ..................................................................................................... 527 Contents Command ................................................................................. 527 About Command ...................................................................................... 527 Realflo Wizards ..................................................................... 528 Navigating Wizards ....................................................................................... 528 Create New File Wizard ................................................................................ 528 Read Configuration From the Flow Computer ......................................... 530 Create Configuration From a Template File ............................................ 535 Create Configuration Step-by-Step.......................................................... 576 Replace Flow Computer Wizard ................................................................... 619 Read Logs and Flow History Wizard............................................................. 626 Connect to Flow Computer ...................................................................... 626 Select Runs to Read ................................................................................ 627 Select Flow Computer Configuration ....................................................... 628 Select Alarm and Event Logs to Read ..................................................... 628 Select Hourly and Daily History to Read ................................................. 629 Document Revised May 19, 2011 Table of Contents Save Data ................................................................................................ 632 Export Data .............................................................................................. 633 Calibrate Inputs Wizard ................................................................................. 643 Connect to Flow Computer ...................................................................... 643 Sensor Calibration ................................................................................... 645 Run Calibration Procedure ...................................................................... 646 MVT Calibration Procedure ..................................................................... 660 Change Orifice Plate Wizard ......................................................................... 676 Connect to Flow Computer ...................................................................... 676 Select Meter Run ..................................................................................... 677 Choose Orifice Fitting Type Step ............................................................. 678 Dual Chamber Orifice .............................................................................. 679 Single Chamber Orifice ............................................................................ 684 Force Inputs Wizard ...................................................................................... 687 Connect to Flow Computer ...................................................................... 687 Select Run or Transmitter to Force ......................................................... 688 Force Run Inputs ..................................................................................... 689 Force MVT Inputs .................................................................................... 690 TeleBUS Protocol Interface .................................................. 692 Register Addresses ................................................................................. 692 TeleBUS Configuration Registers ................................................................. 708 Configuration Command Execution ......................................................... 709 Input Configuration .................................................................................. 710 MVT Configuration ................................................................................... 715 MVT Calibration ....................................................................................... 726 Contract Configuration ............................................................................. 729 AGA-3 Configuration ................................................................................ 731 AGA-7 Configuration ................................................................................ 733 Coriolis Meter Configuration .................................................................... 734 V-Cone Configuration .............................................................................. 736 AGA-8 Configuration ................................................................................ 739 NX-19 Configuration ................................................................................ 744 Orifice Plate Change ................................................................................ 746 User Account Configuration ..................................................................... 751 Meter Runs Configuration ........................................................................ 755 Flow Run Identification ............................................................................ 755 Flow Computer Execution Control ........................................................... 758 Document Revised May 19, 2011 Table of Contents Flow Computer ID Configuration ............................................................. 759 Enron Modbus Time Stamp Configuration .............................................. 760 Real Time Clock Configuration ................................................................ 761 SolarPack 410 Power Management Configuration.................................. 764 SolarPack 410 Gas Sampler Output........................................................ 766 SolarPack 410 Pulse Input Accumulation ................................................ 768 Display Control Configuration .................................................................. 770 Process Input / Output Configuration ...................................................... 776 Calibration Registers ............................................................................... 781 Force Inputs Registers ............................................................................. 788 Event and Alarm Log Data ....................................................................... 798 Log User Defined Events ......................................................................... 808 Hourly History Data .................................................................................. 809 Program Information Registers ................................................................ 812 Flow Computer Events and Alarms .............................................................. 814 Global Events and Alarms ....................................................................... 814 AGA-3 (1985) Events and Alarms ........................................................... 816 AGA-3 (1992) Events and Alarms ........................................................... 817 AGA-7 Events and Alarms ....................................................................... 818 AGA-11 Events and Alarms ..................................................................... 818 V-Cone Events and Alarms ..................................................................... 819 AGA-8 Events and Alarms ....................................................................... 820 NX-19 Events and Alarms ....................................................................... 821 Sensor Events and Alarms ...................................................................... 822 Calibration and User Defined Alarms and Events ................................... 834 Flow Computer Error Codes ......................................................................... 836 Calculation Engine Errors ........................................................................ 836 AGA-3 (1985) Calculation Errors ............................................................. 836 AGA-3 (1992) Calculation Errors ............................................................. 837 AGA-7 Calculation Errors ........................................................................ 838 AGA-11 Calculation Errors ...................................................................... 838 V-Cone Calculation Errors ....................................................................... 838 AGA-8 Calculation Errors ........................................................................ 839 NX-19 Calculation Errors ......................................................................... 840 Flow Calculation Engine Command Errors .............................................. 840 MVT Command Errors ............................................................................. 842 Coriolis Meter Errors ................................................................................ 843 SolarPack 410 Errors ............................................................................... 843 Document Revised May 19, 2011 Table of Contents AGA-3 Command Errors .......................................................................... 843 AGA-7 Command Errors .......................................................................... 843 AGA-11 Command Errors ........................................................................ 843 V-Cone Command Errors ........................................................................ 843 AGA-8 Command Errors .......................................................................... 844 NX-19 Command Errors .......................................................................... 844 Flow Computer Commands .......................................................................... 844 Flow Computer Register Grouping...................................... 847 Register Group Data ..................................................................................... 847 Configure Register Group Location .............................................................. 849 Flow Computer Application ID ............................................. 850 Application Identifiers .................................................................................... 850 Device Configuration Read Only Registers .................................................. 851 Application Identifier ................................................................................ 853 Company Identifier ................................................................................... 853 Enron Modbus Protocol Interface........................................ 854 Register Addresses ....................................................................................... 855 Variable Types ......................................................................................... 855 Flow Computer Variables ........................................................................ 856 Enron Modbus General Purpose Registers .................................................. 858 Register Mapping ..................................................................................... 858 Flow Computer Global Variables .................................................................. 860 Program Information Variables ................................................................ 860 Meter Runs Configuration Variable ......................................................... 860 Real Time Clock Variables ...................................................................... 860 Flow Computer ID Variables .................................................................... 861 Hourly / Daily Archive Records ................................................................ 861 Hourly Gas Quality Archive Records ....................................................... 863 Flow Computer Events Variables ............................................................ 864 User Account Events Variables ............................................................... 864 Event/Alarm Archive Variable .................................................................. 864 Event and Alarm Log Events Variables ................................................... 864 Meter Run 1 Data Variables.......................................................................... 867 Meter Run 1 Flow Computer Execution State Variable ........................... 867 Meter Run 1 Instantaneous and Accumulated Variables ........................ 867 Document Revised May 19, 2011 Table of Contents Meter Run 1 Input Configuration Variables ............................................. 870 Meter Run 1 Flow Computer Execution Control Variable ........................ 873 Meter Run 1 ID Variables ........................................................................ 873 Meter Run 1 Contract Configuration Variables ........................................ 874 Meter Run 1 AGA-3 Configuration Variables ........................................... 875 Meter Run 1 V-Cone Configuration Variables ......................................... 875 Meter Run 1 AGA-7 Configuration Variables ........................................... 876 Meter Run 1 AGA-8 Configuration Variables ........................................... 877 Meter Run 1 NX-19 Configuration Variables ........................................... 881 Plate Change Events Variables ............................................................... 881 Enron Forcing Events Variables .............................................................. 882 Meter Run 1 Flow Computer Events Variables ....................................... 883 Meter Run 2 Data Variables.......................................................................... 887 Meter Run 3 Data Variables.......................................................................... 887 Meter Run 4 Data Variables.......................................................................... 888 Meter Run 5 Data Variables .......................................................................... 888 Meter Run 6 Data Variables.......................................................................... 889 Meter Run 7 Data Variables.......................................................................... 889 Meter Run 8 Data Variables.......................................................................... 889 Meter Run 9 Data Variables.......................................................................... 890 Meter Run 10 Data Variables........................................................................ 890 MVT-1 Data and Configuration Variables ..................................................... 890 MVT-1 MVT Configuration Variables ....................................................... 891 MVT-1 Events Variables .......................................................................... 893 MVT-2 Data and Configuration Variables ..................................................... 894 MVT-3 Data and Configuration Variables ..................................................... 895 MVT-4 Data and Configuration Variables ..................................................... 895 MVT-5 Data and Configuration Variables ..................................................... 895 MVT-6 Data and Configuration Variables ..................................................... 896 MVT-7 Data and Configuration Variables ..................................................... 896 MVT-8 Data and Configuration Variables ..................................................... 897 MVT-9 Data and Configuration Variables ..................................................... 897 MVT-10 Data and Configuration Variables ................................................... 898 Event and Alarm Log .................................................................................... 899 Global Alarms and Events ....................................................................... 900 AGA-3 (1985) Alarms and Events ........................................................... 902 AGA-3 (1992) Alarms and Events ........................................................... 903 AGA-7 Alarms and Events ....................................................................... 904 Document Revised May 19, 2011 Table of Contents AGA-11 Alarms and Events ..................................................................... 904 V-Cone Alarms and Events ..................................................................... 904 AGA-8 Alarms and Events ....................................................................... 905 NX-19 Alarms and Events ....................................................................... 907 MVT Alarms and Events .......................................................................... 907 Coriolis Meter Alarms and Events ........................................................... 909 Calibration and User Defined Alarms and Events ................................... 909 Calculation Engine Errors ........................................................................ 909 AGA-3 (1985) Calculation Errors ............................................................. 910 AGA-3 (1992) Calculation Errors ............................................................. 910 AGA-7 Calculation Errors ........................................................................ 911 V-Cone Calculation Errors ....................................................................... 911 AGA-8 Calculation Errors ........................................................................ 911 NX-19 Errors ............................................................................................ 911 PEMEX Modbus Protocol Interface ..................................... 913 Register Addresses ....................................................................................... 913 Meter Run 1 Data Variables.......................................................................... 914 Meter Run 1 Instantaneous and Accumulated Variables ........................ 914 Meter Run 1 Historic Variables ................................................................ 915 Meter Run 2 Data Variables.......................................................................... 915 Meter Run 2 Instantaneous and Accumulated Variables ........................ 915 Meter Run 2 Historic Variables ................................................................ 916 Meter Run 3 Data Variables.......................................................................... 916 Meter Run 3 Instantaneous and Accumulated Variables ........................ 916 Meter Run 3 Historic Variables ................................................................ 917 Meter Run 4 Data Variables.......................................................................... 917 Meter Run 4 Instantaneous and Accumulated Variables ........................ 917 Meter Run 4 Historic Variables ................................................................ 918 Historic Data Variables ................................................................................. 918 Historic Record Format ............................................................................ 919 Gas Quality History Record Format ......................................................... 919 Meter Run 1 Configuration ............................................................................ 920 AGA Configuration ................................................................................... 920 Gas Composition Configuration ............................................................... 920 Meter Run 2 Configuration ............................................................................ 922 AGA Configuration ................................................................................... 922 Meter Run 3 Configuration ............................................................................ 922 Document Revised May 19, 2011 Table of Contents AGA Configuration ................................................................................... 922 Gas Composition Configuration ............................................................... 923 Meter Run 4 Configuration ............................................................................ 923 AGA Configuration ................................................................................... 923 Gas Composition Configuration ............................................................... 923 Configuration Values ..................................................................................... 923 Calculated Compressibility ...................................................................... 923 Tap Location ............................................................................................ 923 Run Enable .............................................................................................. 924 AGA Calculation Method ......................................................................... 924 Time Synchronization ................................................................................... 924 Event and Alarm Log .................................................................................... 924 Global Alarms and Events ....................................................................... 925 AGA-3 (1985) Alarms and Events ........................................................... 929 AGA-3 (1992) Alarms and Events ........................................................... 929 AGA-7 Alarms and Events ....................................................................... 930 AGA-11Alarms and Events ...................................................................... 931 V-Cone Alarms and Events ..................................................................... 931 AGA-8 Alarms and Events ....................................................................... 932 NX-19 Alarms and Events ....................................................................... 933 MVT Alarms and Events .......................................................................... 934 Coriolis Meter Alarms and Events ........................................................... 935 Calibration and User Defined Alarms and Events ................................... 935 Calculation Engine Errors ........................................................................ 936 AGA-3 (1985) Calculation Errors ............................................................. 937 AGA-3 (1992) Calculation Errors ............................................................. 937 AGA-7 Calculation Errors ........................................................................ 937 AGA-11 Calculation Errors ...................................................................... 938 V-Cone Calculation Errors ....................................................................... 938 AGA-8 Calculation Errors ........................................................................ 938 NX-19 Errors ............................................................................................ 938 Retrieval and Acknowledgment of Events and Alarms ................................. 939 Alarm or Event Record Format ................................................................ 939 Event Status Bits ..................................................................................... 939 Alarm Status Bits ..................................................................................... 939 Alarm Acknowledgement ......................................................................... 940 Measurement Units ............................................................... 941 Document Revised May 19, 2011 Table of Contents US1 Units ...................................................................................................... 941 US2 Units ...................................................................................................... 941 US3 Units ...................................................................................................... 942 US4 Units ...................................................................................................... 942 US5 Units ...................................................................................................... 943 US6 Units ...................................................................................................... 943 US7 Units ...................................................................................................... 944 US8 Units ...................................................................................................... 944 PEMEX Units ................................................................................................ 944 IP Units .......................................................................................................... 945 Metric1 Units ................................................................................................. 945 Metric2 Units ................................................................................................. 946 Metric3 Units ................................................................................................. 946 SI Units .......................................................................................................... 947 Input Averaging ..................................................................... 948 Flow-Dependent Time Weighted Linear Average ......................................... 948 Flow Weighted Linear Average ..................................................................... 948 No Flow Linear Average ............................................................................... 949 Creating Custom Realflo Applications ................................ 950 SCADAPack Controllers ............................................................................... 950 Telepace Files:......................................................................................... 950 ISaGRAF Files: ........................................................................................ 950 Modifying the Application ......................................................................... 951 Building the Application for Telepace Firmware ...................................... 952 Building the Application for ISaGRAF Firmware ...................................... 952 SCADAPack 314/330/334 and SCADAPack 350 Controllers ...................... 953 SCADAPack 32 Controllers .......................................................................... 953 Realfloi Files ............................................................................................ 953 Realflot Files ............................................................................................ 953 Modifying the Application ......................................................................... 954 Building the Application ........................................................................... 955 Measurement Canada Approved Version ........................... 956 Flow Computer Disabled Commands ........................................................... 956 Enron Protocol Disabled Commands ............................................................ 957 Measurement Canada Lockout Cable .......................................................... 958 Document Revised May 19, 2011 Table of Contents Measurement Canada Approved Flow Computers....................................... 958 SCADAPack 32........................................................................................ 958 SCADAPack 314 ..................................................................................... 958 SCADAPack 330/334 .............................................................................. 958 SCADAPack and SCADAPack LP........................................................... 959 SolarPack 410.......................................................................................... 959 SCADAPack 4203 DR ............................................................................. 959 SCADAPack 4203 DS ............................................................................. 960 SCADAPack 4202 DR ............................................................................. 960 SCADAPack 4202 DS ............................................................................. 961 DNP3 Protocol User Manual ................................................. 962 DNP Overview............................................................................................... 962 DNP Architecture ..................................................................................... 962 Modbus Database Mapping ..................................................................... 965 SCADAPack DNP Operation Modes ....................................................... 966 SCADAPack DNP Outstation ........................................................................ 966 How to Configure SCADAPack DNP Outstation ..................................... 967 SCADAPack DNP Master ............................................................................. 973 SCADAPack DNP Master Concepts ....................................................... 973 How to Configure SCADAPack DNP Master ........................................... 977 How to Configure SCADAPack Address Mapping .................................. 981 How to Configure SCADAPack DNP Mimic Master ................................ 982 SCADAPack DNP Router ............................................................................. 982 How to Configure a SCADAPack DNP Router ........................................ 983 Design Considerations .................................................................................. 986 Considerations of DNP3 Protocol and SCADAPack DNP Driver ............ 987 Typical Configuration Malpractices and Recommendations ................... 987 Configuration FAQ ................................................................................... 993 DNP Configuration Menu Reference ............................................................ 996 Application Layer Configuration ............................................................... 997 Data Link Layer Configuration ............................................................... 1002 Master .................................................................................................... 1005 Master Poll ............................................................................................. 1006 Address Mapping ................................................................................... 1012 Routing ................................................................................................... 1014 Binary Inputs Configuration ................................................................... 1017 Binary Outputs Configuration ................................................................. 1020 Document Revised May 19, 2011 Table of Contents 16–Bit Analog Inputs Configuration ....................................................... 1023 32-Bit Analog Inputs Configuration ........................................................ 1026 Short Floating Point Analog Inputs ........................................................ 1029 16-Bit Analog Outputs Configuration ..................................................... 1033 32-Bit Analog Outputs Configuration ..................................................... 1035 Short Floating Point Analog Outputs ..................................................... 1037 16–Bit Counter Inputs Configuration ..................................................... 1040 32-Bit Counter Inputs Configuration ...................................................... 1043 DNP Diagnostics ......................................................................................... 1046 DNP Status ............................................................................................ 1047 DNP Master Status ................................................................................ 1050 DNP Master Device Profile Document ........................................................ 1055 DNP Slave Device Profile Document .......................................................... 1071 Document Revised May 19, 2011 Important Safety Information Important Safety Information Read these instructions carefully, and look at the equipment to become familiar with the device before trying to install, operate, or maintain it. The following special messages may appear throughout this documentation or on the equipment to warn of potential hazards or to call attention to information that clarifies or simplifies a procedure. The addition of this symbol to a Danger or Warning safety label indicates that an electrical hazard exists, which will result in personal injury if the instructions are not followed. This is the safety alert symbol. It is used to alert you to potential personal injury hazards. Obey all safety messages that follow this symbol to avoid possible injury or death. DANGER DANGER indicates an imminently hazardous situation which, if not avoided, will result in death or serious injury. WARNING WARNING indicates a potentially hazardous situation which, if not avoided, can result in death or serious injury. CAUTION CAUTION indicates a potentially hazardous situation which, if not avoided, can result in minor or moderate. CAUTION CAUTION used without the safety alert symbol, indicates a potentially hazardous Document Revised May 19, 2011 Important Safety Information situation which, if not avoided, can result in equipment damage.. PLEASE NOTE Electrical equipment should be installed, operated, serviced, and maintained only by qualified personnel. No responsibility is assumed by Schneider Electric for any consequences arising out of the use of this material. A qualified person is one who has skills and knowledge related to the construction and operation of electrical equipment and the installation, and has received safety training to recognize and avoid the hazards involved. BEFORE YOU BEGIN Do not use this product on machinery lacking effective point-of-operation guarding. Lack of effective point-of-operation guarding on a machine can result in serious injury to the operator of that machine. CAUTION UNINTENDED EQUIPMENT OPERATION Verify that all installation and set up procedures have been completed. Before operational tests are performed, remove all blocks or other temporary holding means used for shipment from all component devices. Remove tools, meters, and debris from equipment Failure to follow these instructions can result in death, serious injury or equipment damage. Follow all start-up tests recommended in the equipment documentation. Store all equipment documentation for future references. Software testing must be done in both simulated and real environments. Verify that the completed system is free from all short circuits and grounds, except those grounds installed according to local regulations (according to the National Electrical Code in the U.S.A, for instance). If high-potential voltage testing is necessary, follow recommendations in equipment documentation to prevent accidental equipment damage. Before energizing equipment: Remove tools, meters, and debris from equipment. Close the equipment enclosure door. Remove ground from incoming power lines. Perform all start-up tests recommended by the manufacturer. Document Revised May 19, 2011 Important Safety Information OPERATION AND ADJUSTMENTS The following precautions are from the NEMA Standards Publication ICS 7.11995 (English version prevails): Regardless of the care exercised in the design and manufacture of equipment or in the selection and ratings of components, there are hazards that can be encountered if such equipment is improperly operated. It is sometimes possible to misadjust the equipment and thus produce unsatisfactory or unsafe operation. Always use the manufacturer‟s instructions as a guide for functional adjustments. Personnel who have access to these adjustments should be familiar with the equipment manufacturer‟s instructions and the machinery used with the electrical equipment. Only those operational adjustments actually required by the operator should be accessible to the operator. Access to other controls should be restricted to prevent unauthorized changes in operating characteristics. Document Revised May 19, 2011 About The Book About The Book At a Glance Document Scope This manual describes the Realflo programming environment for SCADAPack controllers. Validity Notes This document is valid for all versions of Realflo. Product Related Information WARNING UNINTENDED EQUIPMENT OPERATION The application of this product requires expertise in the design and programming of control systems. Only persons with such expertise should be allowed to program, install, alter and apply this product. Follow all local and national safety codes and standards. Failure to follow these instructions can result in death, serious injury or equipment damage. User Comments We welcome your comments about this document. You can reach us by email at [email protected]. Realflo User and Reference Manual May 19, 2011 1 Introduction Introduction Overview Realflo is a Man-Machine Interface to the Control Microsystems Gas Flow Computer. The Gas Flow Computer runs on any of the SCADAPack controllers (4202 DR, 4202 DS, 4203 DR or 4203 DS), SCADAPack 32, SCADAPack 300, SCADAPack, SCADAPack 100: 1024K, SCADAPack LP controllers and SolarPack 410. Realflo allows editing of the flow computer configuration parameters with configuration dialogs for process inputs, contract specifications, compressibility calculations, and flow calculations for each meter run. The operator may write configuration data to the flow computer or read it back. parameter checking is provided on user entries. The flow computer is an electronic natural gas flow computer providing the following industry standard calculations: AGA-3 (1992) for gas volume calculation with orifice meters; AGA-7 for gas volume calculation with turbine meters; AGA-11 for gas volume calculations with Coriolis meters (this calculation type is not supported on 16-bit controllers); V-Cone for gas volume calculation with V-Cone gas flow meters; AGA-8 Detailed calculation for gas compressibility calculation; and NX-19 for gas compressibility calculation in legacy applications. Realflo displays the flow computer current readings, historical logs, alarm logs, and event logs for each meter run. Realflo supports having multiple configuration and display windows open simultaneously to display data from multiple views. Realflo can be used to configure and calibrate the SCADAPack 4000, 4202, and 4203, as well as Rosemount MVT transmitters. The gas flow computer automatically polls the MVT transmitter for sensor information used in the gas flow calculations. Realflo generates customized reports for configuration data, historical data logs, gas quality historical data logs, event logs, alarm logs, and calibrations. Realflo can save configuration parameters, current readings, historical data logs, and event logs to spreadsheet files in csv format or in Flow-Cal cfx format. Realflo provides wizard-style dialogs to guide you through the configuration, maintenance and calibration procedures. The flow computer integrates with SCADA systems using Modbuscompatible communications. You can access data, configuration, and calculation factors over a SCADA network as well as locally at the flow computer. This manual describes the configuration and operation procedures for these systems. Realflo User and Reference Manual May 19, 2011 2 Introduction The flow computer supports Enron Modbus protocol. This protocol is used widely in the Oil and Gas industry to obtain data from electronic flow measurement devices. The protocol is a de-facto standard in many industries. The flow computer supports PEMEX Modbus protocol. This protocol is used in the Oil and Gas industry to obtain data from electronic flow measurement devices. Users may integrate the flow calculation capability with user applications written in Ladder Logic, IEC 61131-3 or C/C++. Realflo User and Reference Manual May 19, 2011 3 Introduction System Requirements Realflo 6.70 is supported on the following operating systems (32- and 64-bit platforms): Microsoft Windows 2000 Professional Microsoft Windows XP Professional Microsoft Windows Vista Ultimate on 32-bit and 64-bit platforms Microsoft Windows Vista Enterprise on 32-bit and 64-bit platforms The Realflo program requires the following minimum system configuration. Pentium 133MHz or better. Minimum screen resolution supported is 1024 by 768. Minimum 32 MB of RAM, 64MB recommended. Mouse or compatible pointing device. Hard disk with approximately 35 Mbytes of free disk space. Organization of the Manual New users should read the sections in order, to gain an understanding of underlying concepts before tackling detailed material. The Realflo Installation Procedure section describes how to install Realflo. The Realflo Maintenance Mode section describes how to use Realflo in the Maintenance Mode. The Realflo Expert Mode section describes how to use Realflo in the Expert Mode. The Realflo Wizards section describes how to use the configuration wizards available in Realflo. The Measurement Units section describes the available units of measure. The Creating Custom Realflo Applications section describes modifying the flow computer application. The following sections describe communication with a SCADA system. If you are using Realflo alone these sections are not needed. The TeleBUS Protocol Interface section describes interfacing the flow computer with a SCADA host. Flow Computer Register Grouping section describes how to group commonly read data from a SolarPack 410 flow computer. Flow Computer Application ID section describes the configuration registers that provide useful information on the flow computer, logic applications, and controller used in a Realflo application. The Enron Modbus Protocol Interface section describes interfacing the flow computer with an Enron Modbus host. The PEMEX Modbus Protocol Interface section describes interfacing the flow computer with a PEMEX Modbus host. The DNP3 User Manual section describes interfacing the flow computer with a DNP host. Realflo User and Reference Manual May 19, 2011 4 Introduction Additional Documentation The Control Microsystems Hardware User Manual is a complete reference to Flow Computer and 5000 I/O modules. The Telepace Ladder Logic Reference and User Manual describes the creation of application programs in the Ladder Logic language. The ISaGRAF User and Reference Manual describes the creation of application programs using IEC 61131-3 languages. The TeleBUS Protocols User Manual describes communication using Modbus compatible protocols. The TeleBUS DF1 Protocol User Manual describes communication using DF1 compatible protocols. Realflo User and Reference Manual May 19, 2011 5 Introduction Installation Before using Realflo, you need to install the Realflo program on your system. The installation is automated and takes only a few minutes. Some virus checking software may interfere with Setup. If you experience any difficulties with Setup, disable your virus checker and run Setup again. To install Realflo, follow these steps: (1) Insert the Realflo setup CD into CD drive. The CD loads automatically. Realflo and Firmware Loader need to be installed. (2) Select Install Realflo to start the Realflo install wizard. (3) Select Install Firmware Loader to start the Firmware Loader install wizard. (4) Select Install Adobe Reader to install the Adobe Acrobat reader. (5) Select Control Microsystems Web Site to open the CD version of the website. (6) Select Browse CD to open Windows Explorer and view the CD contents. (7) Select Exit to close the Realflo install menu. Flow computers used with Realflo need to have 1024K RAM and have the Flow Run option enabled. Contact Control Microsystems to purchase a memory upgrade or flow run option. Realflo User and Reference Manual May 19, 2011 6 Introduction Version Release Notes New Features in Realflo 6.77 Realflo 6.77 includes the following new features and enhancements. When restoring a configuration after a flow computer upgrade any forced values used in the configuration can be restored. The Enron Modbus Gas Analysis history is now available. Gas Quality History is available when the Gas Transmission option bit is enabled for the controller. Time stamping of Enron Modbus can be defined as time leads data or time lags data for flow data. Support for polling sensors for 10 runs in a SCADAPack 32 flow computer is added. Sensors and Coriolis meters can be polled using multiple serial ports and the flow computer manages the polling so that a 1 second poll of each sensors is achieved. Acknowledging of Alarms and Events is now configurable so the Host SCADA system can have control over how alarms and events are acknowledged. The selection of forward or reverse sensing is added. The direction status register can now be configured for the On status, i.e. forward indicated by On or reverse indicated by On. An indication of a configuration change in the flow computer density calculation is added. Registers provide the time and date of configuration changes to the AGA-8 calculation. This includes changes to the gas composition. New Features in Realflo 6.76 AGA-11, Coriolis Mass Flow Meter Support A new flow calculation type, AGA-11, is added to Realflo. The AGA-11 calculation supports the Endress and Hauser Promass 83 Coriolis meter. Bi-Directional Flow Support Realflo supports bi-directional flow. Flow direction, forward or reverse, is indicated by a value or status allowing flow rates and accumulation to be done for each flow direction. New Features in Realflo 6.75 Windows7 Support Added Realflo Supports for Windows 7 OS. New Features in Realflo 6.74 Realflo 6.74 includes the following new features and enhancements. When gas ratios are written to the flow computer using the Write Configuration command or the Set AGA8 command the new gas ratios are updated in the Configuration Proposed registers and in the Configuration Actual registers. This allows a Realflo user or SCADA host to immediately confirm the new ratios were written to the flow Realflo User and Reference Manual May 19, 2011 7 Introduction computer. The new gas ratios are not used by the flow computer until a new density calculation is started. The writing of Real Time Clock, AGA-8 and Orifice plate configuration changes from a host to the flow computer has been simplified with the addition of the Modbus Mapping Settings. Using Modbus Mapping run configuration changes can be written to the flow computer as a single block of registers without the need of TeleBUS Command sequences. Operator response time is significantly improved over previous versions of Realflo. This results in significant time savings when an operator first goes online with a flow computer and when monitoring online. Measurement Canada approval for SCADAPack 4203, SCADAPack 314/330/334, SolarPack 410 and SCADAPack 32 is added. New Features in Realflo 6.73 Wet gas correction factor is added for the two models of the V-Cone device: the V-Cone and the Wafer Cone. New Features in Realflo 6.72 Support for the SCADAPack 314 controller is added. New Features in Realflo 6.71 The V-Cone calculation is improved to include the Wafer Cone device. The V-Cone configuration now includes a selection for adiabatic expansion factor type when either V-Cone or Wafer Cone devices are used. New Features in Realflo 6.70 Realflo version 6.70 includes the following new features and enhancements: PEMEX Modbus Protocol Support New data columns to display the start time for the period, events logged during the period, and alarms logged during the period. New Volume PEMEX column on the Hourly and Daily History tables displays the corrected volume for a flow when PEMEX is configured. Realflo provides one set of base conditions for temperature and pressure as part of the contract configuration for a specific run. PEMEX Modbus requests a second default set of base conditions (secondary conditions). The default set of base conditions is: 20°C (68°F) and 1 kg/cm2 (14.22334 psi) The hourly history Volume PEMEX column displays the corrected volume for the flow. New Up-Time column added to the PEMEX Hourly and Daily History tables shows the measurement time (in minutes) in the contract day. New Average Heating Value column added to the PEMEX Hourly and Daily History tables displays the average heating value accumulated during the contract period. New Quality column added to the PEMEX Hourly and Daily History tables to indicate if there are alarms during the period. New Hourly and Daily History tables to display PEMEX-specific data. Realflo User and Reference Manual May 19, 2011 8 Introduction Gas Quality Control History The Gas Quality Control History feature has been added to the View menu. This feature includes the following: Gas Quality History feature now provides a method to record and store the average value of natural gas components in the hourly history event log. Flow Computer Report Quality History feature now provides a method to create, store, and print gas quality history reports for the calculations of the natural gas components in the hourly event history log. Realflo Display Quality History feature provides a method to display gas quality history reports for the calculations of the natural gas components in the hourly event history log. Realflo Display Quality History feature provides a method to read gas quality history reports of the natural gas components in the hourly event history log. Realflo Display Quality History feature provides a method to export gas quality history reports of the natural gas components in the hourly event history log. New Features in Realflo 6.51 Realflo version 6.51 includes the following new features and enhancements: Flow Computer Register Grouping Register grouping provides a method to group commonly read data from a SolarPack 410 flow computer. The data that is commonly read is in scattered register locations in the flow computer. Register grouping enables the SCADA Host to read a sequential block of data in a single read command. The start address for the register group is user defined. New Features in Realflo 6.50 Realflo version 6.50 includes the following new features and enhancements: Support for SCADAPack 330 and SCADAPack 334 Controllers The SCADAPack 330 and SCADAPack 334 controllers support up to four meter runs. The Flow Computer Information and Replace Flow Computer dialogs are displayed differently when the SCADAPack 330, SCADAPack 334 and SCADAPack 350 controller is used. These dialogs display the multiple C/C++ programs that can execute in the SCADAPack 330, SCADAPack 334 and SCADAPack 350 controller. New Features in Realflo 6.42 Realflo version 6.42 includes the following new features and enhancements: Enron General Purpose Registers Added Using fixed register mapping the flow computer mirrors standard Modbus registers into Enron Modbus registers. This allows the host to read and write data to Enron Modbus registers not directly associated with the flow computer. Realflo User and Reference Manual May 19, 2011 9 Introduction Remove AGA-3 (1985) Flow Calculations AGA-3 (1985) calculation type is removed for SCADAPack 5203/4, SCADAPack LP, SCADAPack 100 and SCADAPack 4202 flow computers. The following Modbus register commands have been removed. 351 Get AGA-3 (1985) Configuration 353 Set AGA-3 (1985) Configuration The following changes have been made to the Enron Modbus handler. Register 7101 and 7351: Flow calculation type 2 = AGA-3 (1985) is recognized by SCADAPack 5203/4, SCADAPack LP, SCADAPack 100 and SCADAPack 4202 flow computers up to version 6.41. Register 7151 to 7161 and 7401 to 7411: These registers read and write configuration for AGA-3 (1985 and 1992). For flow calculation type 2 = AGA-3 (1985) for SCADAPack 5203/4, SCADAPack LP, SCADAPack 100 and SCADAPack 4202 flow computers up to version 6.41. New Features in Realflo 6.41 Realflo version 6.41 includes the following new features and enhancements: Support for Application Identifier SCADAPack and SCADAPack 32 controllers are compatible with older firmware that does not provide the application identifier feature. Flow computers enable the register mapping feature. This is not compatible with older firmware for SCADAPack 32, SCADAPack 300, SolarPack 410, and SCADAPack 4203 controllers, or ISaGRAF applications that used these registers, for any controllers. Logic applications need to disable the mapping if they wish to use the registers for other uses. SCADAPack 300, SCADAPack 4203, and SolarPack 410 flow computers with the application identifier feature will not load on firmware that does not support the feature. The firmware needs to be updated to a version supporting the application identifier. New Features in Realflo 6.40 Realflo version 6.40 includes the following new features and enhancements: Support for SolarPack 410 Controllers The SolarPack 410 is a solar-powered one-run flow computer. This unit brings integrated solar power, intelligent battery charging and spreadspectrum communication to remote EFM installations. New Features in Realflo 6.30 Realflo version 6.30 includes the following new features and enhancements: Support for SCADAPack 4203 Controllers The SCADAPack 4203 controllers (4203 DR and 4203 DS), is now supported in Realflo. These controllers support up to two meter runs, are physically identical to the SCADAPack 4202 DR and 4202 DS), but are based on a 32-bit ARM7-TDMI processor. Realflo User and Reference Manual May 19, 2011 10 Introduction New Features in Realflo 6.21 Realflo version 6.21 includes the following enhancements: Changes to the Wet Gas Meter Parameter The Wet Gas Meter Factor can now be changed while the calculations are running. The calculations need to be stopped before any change in other the settings can be accepted. For Realflo versions 6.01 To 6.20, changing Wet Gas Meter Factor requires a new contract day to be started, as the flow calculation has to be stopped. For Realflo version 6.21 and later, changing the Wet Gas Meter Factor can be accomplished without stopping the flow calculations. This means that a new a new contract day does not have to be started when this parameter needs to be changed. AGA-7 Uncorrected Flow Volume- Turbine Meter Factor The AGA7 Uncorrected Flow Volume now has the option to include or exclude the turbine meter factor. The AGA-7 property page in Realflo includes an option to determine whether the M factor is included in the calculation of the Uncorrected Flow Volume. The default option is to include the M factor in the calculation. This option has no effect on corrected flow totals. CSV and CSX Export Enhancements The Export to File and Print commands now include the following parameters in the file and printed reports: The date and time that the report was exported or printed. The date and time of the last flow calculation update. The orifice tap, flange or pipe location, configuration. The lower range limit and upper range limit of the transmitter‟s sensor for each meter run input that uses a transmitter. The calculated, or entered, relative density. The calculated, or entered, heating value. The wet gas meter factor. New Features in Realflo 6.20 Realflo version 6.20 includes the following new features and enhancements: Support for SCADAPack 350 The SCADAPack 350 controller is now supported in Realflo. The SCADAPack 350 controller supports up to four meter runs. The Flow Computer Information and Replace Flow Computer dialogs are displayed differently when the SCADAPack 350 controller is used. These dialogs display the multiple C/C++ programs that can execute in the SCADAPack 350 controller. Flow Accumulator Time Stamps The time stamp of the flow accumulators is updated whenever the flow computer run is running, regardless of whether there is flow or not. This is Realflo User and Reference Manual May 19, 2011 11 Introduction so that under typical conditions that the time stamp of hourly and daily records will correspond to the end of the hour, the exception being configuration events that produce breaks in the records during the hours. New Features in Realflo 6.00 Realflo version 6.0 included the following features and enhancements: 4000 Transmitter Display Enhancements Custom items may now be added to the MVT display. Registers can be in the range 1 to 9999, 10001 to 19999, 30001 to 39999 and 40001 to 49999. A seven character description string is displayed below the value for the first half of the display period. A seven character units string is displayed below the value for the second half of the display period. This string may be scrolled to allow a scaling exponent to be displayed. Absolute / Gage Configuration of 4000 Transmitters Realflo now provides configuration of either absolute or gage mode for the SCADAPack transmitters. When gage mode is selected an entry is provided for the local atmospheric pressure. AGA-8 Composition Editing for Hexane Plus Added Realflo now allows the entering of a single value for hexane and higher components (n-Hexane, n-Heptane, n-Octane, n-Nonane, and n-Decane). For hexane and higher components, Realflo allows entering of the percent of the combined value used for each component. AGA-8 Heating Value and Specific Gravity Heating value and specific gravity may be calculated, as is currently done, or they may be entered as configuration parameters. CFX Export Enhancements Realflo provides an option to export one record per hour, rather than one record per period measured by the by the flow computer. When this option is selected Realflo merges records produced by the flow computer within a single hour into a single record. Realflo now provides an option to export data in a time leads data format. The time stamp on exported records is the time at the start of the hour containing the records. Realflo now provides an option to set the live value flags for gas analysis, energy, or gravity. The CFX file snapshot section contains four flags describing if certain values are live or static. Realflo does not provide a way to obtain live values for gas analysis, energy, or gravity and these flags are set to false in the CFX export. A user may write an application program to obtain the live values for gas analysis, energy, or gravity. Flow-Cal cannot accept file names longer than 30 characters. Previous versions of Realflo suggested file names that were longer than 30 characters in some cases. Realflo provides a number of options for the file name. A display window shows an example of the selected file name. Previous versions of Realflo would load the Run # (1, 2, 3, etc.) into the meter number and the Run ID was loaded into the meter name in the CFX Realflo User and Reference Manual May 19, 2011 12 Introduction file. Realflo now provides an option to use the Run ID for the meter number and to set the meter name to none. CSV Export Enhancements Realflo provides an option to export data in a time leads data format. The time stamp on exported records is the time at the start of the hour containing the records. Maintenance Mode Realflo Maintenance mode provides quick and easy access to commonly used functions. The Realflo application starts in Maintenance mode when first installed but can be configured to start in Expert Mode thereafter. Flow Computer Configuration Templates Realflo can save a configuration as a template file for new flow computers. Files can be created from a template using the New File wizard. A template is used to create a new flow computer from a pre-set configuration. The template specifies what data is pre-set and what needs to be entered when the template is used. Improved Flow Computer Setup Dialog The Flow Computer Setup dialog is now divided into four separate dialogs to improve setup and information functions. The Flow Computer Setup dialog defines the flow computer type, number of flow runs, and the Flow Computer ID. The Flow Computer Information dialog displays information about the flow computer. The Read Configuration dialog reads configuration from the flow computer. The Write Configuration wizard writes configuration to the flow computer. Forcing of Flow Calculation Inputs Realflo allows users to force an input to a flow calculation. Realflo indicates the input is forced on the Current Readings view and shows the forced value. Realflo displays live value of the input, while it is forced, on the Current Readings view. Improved History Download and Archive Realflo provides a wizard to automate the history download and archive process (Maintenance Mode only). Realflo allows the user to download new history data only. Realflo reads the information needed to archive the history, including information on the Current Readings view that is required for CFX exports. Improved Transmitter and Run Integration In previous versions of Realflo the MVT and Flow Run configurations were very much separate configurations. Some configuration was required to be entered in both the MVT configuration and the Run configuration. In this version of Realflo when a MVT transmitter is selected in the Run configuration Input Type selection for Temperature, Static Pressure or Differential Pressure the zero and full-scale entries are disabled and the Realflo User and Reference Manual May 19, 2011 13 Introduction values are forced to the MVT Lower Operating Limit and Upper Operating Limit respectively. New File Wizards New File wizards have been added to improve the creation of new files. Improved Plate Change Wizard Information The plate change wizard is enhanced to work with single and dual chamber orifices and to allow Back and Cancel operations to improve usability. Improved Process I/O Destination Restrictions Realflo displays an error if a destination register for Process I/O is reserved. Registers depend on the configured Flow Computer Type. SCADAPack LP, SCADAPack 100: 1024K, and SCADAPack 4200 or 4300 transmitter types assume two flow runs. Other 16-bit SCADAPack types assume three flow runs. 32-bit SCADAPack types assume ten flow runs. Improved Run ID length Realflo allows a Run ID of up to 32 characters. Improved Time Weighted Averages of DP, P, and T Realflo provides time-weighted averages of the static pressure and temperature during low DP (or low pulse) cutoff. The differential pressure (or meter pulses) is considered zero since it is the typical reason for halting flow accumulation. The hourly history Temperature column displays the average temperature in the period. When the Flow Time is zero, the value will be the average temperature for the entire hour or hour fragment. The hourly history Pressure column displays the average pressure in the period. When the Flow Time is zero, the value will be the average pressure for the entire hour or hour fragment. Calibration Reports Realflo creates, stores, and can print a calibration report for each calibration session performed. Current and Previous month totals Realflo displays the accumulated flow volume and flow time for the current month and the previous month. Data is copied from the current month (This Month) to the previous month (Last Month) at the end of the contract day at the end of the month, as measured by the real time clock. AGA-7 uncorrected flow Realflo displays the accumulated uncorrected flow volume for the current month and the previous month. Data is copied from the current month (This Month) to the previous month (Last Month) at the end of the contract day at the end of the month, as measured by the real time clock. Analog Measurement Rate Analog input measurements are taken every second regardless the number of flow runs. For SCADAPack flow computers the flow calculations are done Realflo User and Reference Manual May 19, 2011 14 Introduction every second for one run and every two seconds for two runs. The average value of the analog input measurement is used for each calculation. History Restore When a flow computer is replaced Realflo allows the user to read the flow history and logs from the existing flow computer and then initialize the new flow computer with the flow history and data. New I/O Module Support 5506 Analog Input module. 5505 RTD Input module. 5606 I/O module. Wet Gas Meter Factor (Realflo 6.10 and later) The Wet Gas Meter Factor is used when there is water in the flow. Realflo now allows an entry in the Contract Configuration for a Wet Gas Meter. This factor is used when there is water in the flow. Volume, mass and energy values will be adjusted according to this factor. For example the Wet Gas Meter Factor would be set to 0.95 when the water content is 0.05 (5 %). Realflo Firmware Compatibility The following table shows the relationship between Realflo and flow computer and the required version of firmware needed for the target controller. In the following table: SCADAPack includes SCADAPack, SCADAPack Plus, SCADAPack Light, SCADAPack LP, Micro16 and SCADAPack 4200 controllers. SCADAPack 32 includes SCADAPack 32 and SCADAPack 32P controllers. If you have any questions concerning the compatibility of Realflo applications and firmware versions, contact Control Microsystems Technical Support at [email protected] or phone 888-2266876. Realflo and Flow Computer Controller Firmware Version 2.02 Version 2.03 Version 2.05 Version 3.00 Version 3.10 Version 4.00 Version 4.10 SCADAPack firmware 1.40 and 1.42 SCADAPack firmware 1.43 SCADAPack firmware 1.45 SCADAPack firmware 1.45 SCADAPack firmware 1.47 SCADAPack firmware 1.47 and 1.49 SCADAPack firmware 1.50, 1.52 and 1.53 SCADAPack 32 firmware 1.10, 1.11, 1.13, 1.14 and 1.15 SCADAPack firmware 1.55 SCADAPack 32 firmware 1.16 SCADAPack firmware 1.55 and 1.56 SCADAPack 32 firmware 1.16, 1.17 and 1.18 Version 4.50 Version 4.51 Realflo User and Reference Manual May 19, 2011 15 Introduction Realflo and Flow Computer Controller Firmware Version 5.01 SCADAPack firmware 1.57 and 1.58 SCADAPack 32 firmware 1.19 and 1.20 SCADAPack firmware 1.58 SCADAPack 32 firmware 1.20 SCADAPack firmware 1.59 SCADAPack 32 firmware 1.21 SCADAPack firmware 1.59 and 1.60 SCADAPack 32 firmware 1.21 and 1.22 SCADAPack firmware 1.61 and 1.62 SCADAPack 32 firmware 1.23 SCADAPack firmware 1.62 SCADAPack 32 firmware 1.23 SCADAPack firmware 1.63 SCADAPack 32 firmware 1.23 SCADAPack firmware 1.63 and 1.64 SCADAPack 32 firmware 1.23 SCADAPack firmware 1.64 SCADAPack 32 firmware 1.23 SCADAPack firmware 1.64 SCADAPack 32 firmware 1.24 SCADAPack firmware 1.64 SCADAPack 32 firmware 1.24 and 1.25 SCADAPack firmware 1.64 and 1.65 SCADAPack 32 firmware 1.25 SCADAPack firmware 1.65 and 1.80 SCADAPack 32 firmware 1.31, 1.32 and 1.40 SCADAPack firmware 1.80, 1.81, 1.82 and 2.00 SCADAPack 32 firmware 1.40 SCADAPack firmware 2.00 and 2.10 SCADAPack 32 firmware 1.40 SCADAPack firmware 2.11, 2.12, 2.20 and 2.21 SCADAPack 32 firmware 1.40, 1.42, 1.50 and 1.51 SCADAPack firmware 2.21 and 2.30 SCADAPack 32 firmware 1.51 and 1.60 SCADAPack firmware 2.30 SCADAPack 32 firmware 1.60 SCADAPack firmware 2.30 SCADAPack 32 firmware 1.70 and 1.75 SCADAPack firmware 2.31 SCADAPack 32 firmware 1.79 SCADAPack firmware 2.31 SCADAPack 32 firmware 1.79 SCADAPack 350/SCADAPack 4203 firmware 1.10 SCADAPack firmware 2.31 SCADAPack 32 firmware 1.79 SCADAPack 350/SCADAPack 4203 firmware 1.10 SCADAPack firmware 2.31 SCADAPack 32 firmware 1.79 Version 5.02 Version 5.10 Version 5.11 Version 5.12 Version 5.14 Version 5.14a Version 5.15 Version 5.16 Version 5.20 Version 5.21 Version 5.22 Version 5.23 Version 5.24 Version 5.26 Version 5.27 Version 6.00 Version 6.01 Version 6.10 Version 6.11 Version 6.20 Version 6.21 Version 6.22 Realflo User and Reference Manual May 19, 2011 16 Introduction Realflo and Flow Computer Version 6.30 Version 6.31 Version 6.32 Version 6.33 Version 6.34 Version 6.35 Version 6.40 Version 6.41 Version 6.42 Version 6.50 Version 6.70 Version 6.71 Version 6.72 Realflo User and Reference Manual May 19, 2011 Controller Firmware SCADAPack 350/SCADAPack 4203 firmware 1.10 SCADAPack firmware 2.31 SCADAPack 32 firmware 1.79 SCADAPack 350/SCADAPack 4203 firmware 1.20 SCADAPack firmware 2.41 SCADAPack 32 firmware 1.80 SCADAPack 350/SCADAPack 4203 firmware 1.20 SCADAPack firmware 2.41 SCADAPack 32 firmware 1.80 SCADAPack 350/SCADAPack 4203 firmware 1.21 SCADAPack firmware 2.41 SCADAPack 32 firmware 1.80 SCADAPack 350/SCADAPack 4203 firmware 1.21 SCADAPack firmware 2.41 SCADAPack 32 firmware 1.80 SCADAPack 350/SCADAPack 4203 firmware 1.21 SCADAPack firmware 2.41 SCADAPack 32 firmware 1.80 SCADAPack 350/SCADAPack 4203 firmware 1.21 SCADAPack firmware 2.43 SCADAPack 32 firmware 1.90 SCADAPack 350/SCADAPack 4203 firmware 1.24 SolarPack 410 firmware 1.30 SCADAPack firmware 2.44 SCADAPack 32 firmware 1.92 SCADAPack 350/SCADAPack 4203 firmware 1.25 SolarPack 410 firmware 1.32 SCADAPack firmware 2.44 SCADAPack 32 firmware 1.92 SCADAPack 350/SCADAPack 4203 firmware 1.25 SolarPack 410 firmware 1.32 SCADAPack firmware 2.44 SCADAPack 32 firmware 1.92 SCADAPack 350/SCADAPack 4203 firmware 1.40 SCADAPack 33x firmware 1.40 SolarPack 410 firmware 1.40 SCADAPack firmware 2.44 SCADAPack 32 firmware 2.12 SCADAPack 350/SCADAPack 4203 firmware 1.45 SCADAPack 33x firmware 1.45 SolarPack 410 firmware 1.45 SCADAPack 300, SCADAPack 4203, and SolarPack 410 flow computers require firmware 1.45 or newer. SCADAPack 32 PEMEX and GOST flow computers require firmware 2.12 or newer. SCADAPack 32 standard flow computers require firmware 2.10 or newer. SCADAPack firmware 2.50 17 Introduction Realflo and Flow Computer Version 6.73 Version 6.74 Realflo User and Reference Manual May 19, 2011 Controller Firmware SCADAPack 32 firmware 2.10 SCADAPack 314, 33x, and 350 firmware 1.47 SCADAPack 4203 firmware 1.47 SolarPack 410 firmware 1.47 SCADAPack firmware 2.50 SCADAPack 32 firmware 2.10 SCADAPack 314, 33x, and 350 firmware 1.47 SCADAPack 4203 firmware 1.47 SolarPack 410 firmware 1.47 SCADAPack firmware 2.50 SCADAPack 32 firmware 2.16 SCADAPack 314, 33x, and 350 firmware 1.51 SCADAPack 4203 firmware 1.51 SolarPack 410 firmware 1.51 18 Realflo Maintenance Mode Reference Realflo Maintenance Mode Reference Realflo opens in Maintenance Mode when you start it on your computer. Maintenance Mode provides an interface into the commonly used functions associated with the maintenance of a flow computer installation. The Realflo Maintenance Mode main screen is shown below. The main screen displays a number of buttons grouped into sections. The buttons in each section let you to perform typical flow computer maintenance actions such as: Selecting or Creating a Flow Computer file. Viewing data and reading logs and history from the flow computer. Performing calibration and orifice plate change operations for the flow computer. Viewing and modifying the configuration of the flow computer. Tip: Each button on the screen has a tool tip. Moving your mouse pointer over the button will cause the tool tip to be displayed. The maintenance actions are explained in the following sections: Selected Flow Computer on page 21. View Current Readings on page 121. Read Logs and Flow History on page 127. Calibrate Inputs on page 146. Change Orifice Plate on page 175. Realflo User and Reference Manual May 19, 2011 19 Realflo Maintenance Mode Reference Force Inputs on page 187. View and Change Configuration on page 194. Switch to Expert Mode on page 201. Realflo User Manual on page 201. Exit Realflo on page 201. Realflo User and Reference Manual May 19, 2011 20 Realflo Maintenance Mode Reference Selected Flow Computer The topmost section of the Maintenance Mode screen is the Selected Flow Computer section. The section contains a Select Flow Computer button and display windows that will display the Flow Computer ID and the File Name of the flow computer you select for use. When you start Realflo, the Flow Computer ID and File Name display windows are blank as shown below. Click the Select Flow Computer button to start the Select Flow Computer wizard. The wizard leads you through the steps to open an existing flow computer file, create new flow computer file, or to read the flow computer file from an existing flow computer. Each step of in the wizard opens a dialog so that you can enter the parameters for that step. Each dialog contains four buttons to allow navigation through the wizard. <Back returns to the previous step in the wizard. This button is disabled on the first step of a wizard. Next> moves to the next step in the wizard. This button is hidden on the last step of a wizard. Cancel cancels the operation and closes the wizard. Steps performed thus far in the wizard are cancelled. Pressing the ESC key performs the same action as Cancel. Help opens the user manual. Finish is displayed on the final step of a wizard in place of the Next button. It finishes the operation. This button is hidden on other steps. Realflo User and Reference Manual May 19, 2011 21 Realflo Maintenance Mode Reference Select Flow Computer Wizard The Select Flow Computer wizard starts with the following dialog. The wizard offers two selections for selecting a file: (1) Open an existing file or (2) Create a new file. Select the Open an existing file option if you have a copy of the flow computer file on your PC or available on a CD or other media. See the Open an Existing File section below. Select the Create a new file option if you want to read the flow computer configuration from a flow computer, create a new configuration file using a template or create a new configuration file step-by-step. See the Create a New File Wizard section below. When you have selected an option, click Next> to move to the next step. The wizard advances through the necessary steps depending on the option you select. The following sections describe each option. Open an Existing File The default option for selecting a flow computer is to Open an existing file. When you click Next> the Open File dialog opens. You can select a local flow computer file to open using the using the Browse button or to open a recently used file from the Recently Used Files list. Realflo User and Reference Manual May 19, 2011 22 Realflo Maintenance Mode Reference The Browse button opens the File Open dialog as shown below. Use the Look in: dropdown selector to locate the flow computer file you wish to use. When the file has been located, click on the file to highlight it. The file name will be displayed in the File name: window. Click the Open button to close the dialog and return to the Open File dialog. Click the Finish button to close the Open File dialog and return to the Maintenance Mode main screen. The Recently Used Files list contains the last 10 flow computer files that have been used. To open one of these files: Realflo User and Reference Manual May 19, 2011 23 Realflo Maintenance Mode Reference Click on the file name to highlight it. The complete file name and path are displayed in the Select File to Open edit box. Click Finish to close the dialog and return to the Maintenance Mode main screen. The Flow Computer ID and File Name displays now contain flow computer information as shown in the example below. Create a New File Wizard To create a new flow computer file, select the Create a new file radio button, click Next>. The Create New File wizard opens. The Create New File dialog offers you three choices to create a new flow computer file: Read the configuration from the target flow computer (default selection). Create a new configuration from a template file. Create a new configuration step-by-step. The Create New File dialog is shown below. The How do you want to create a new file? selections determine how the new file is created. Select Read Configuration from the Flow Computer to read the configuration of an existing flow computer. Realflo will connect to the flow computer, read configuration parameters, and save the file. Follow the wizard steps described in the Read Configuration From the Flow Computer section when you select this option. Realflo User and Reference Manual May 19, 2011 24 Realflo Maintenance Mode Reference Select Create Configuration From a Template File to create a new configuration file based on a template. A template contains pre-defined settings requiring you to fill in configuration data specific this flow computer. Select the template file from the dropdown list. The last ten recently used templates are shown. The recently used template is selected by default. The selection edit box is blank if no recently used templates are available. Click Browse to choose another template file. A File Open dialog appears which allows you to select any template file. Template files are created in the Expert Mode. When templates are created some flow computer configuration parameters are preset and are not displayed in the Create Configuration from Template wizard steps. Follow the wizard steps described in the Create Configuration Stepby-Step section to configure the flow computer step by step. Read Configuration From the Flow Computer The Read Configuration from Flow Computer option enables you to connect to the flow computer and read the existing configuration from the flow computer. A communication link needs to exist between Realflo and the flow computer to use this option. The wizard prompts you for default communication settings or allows you to select new communication settings. When Realflo reads configuration from a 32-bit flow computer, Realflo reads the flowing fields for each flow run: Use Value on Sensor Fail (see section Value on Sensor Fail) Differential Pressure default value (see section Differential Pressure Tab) Static Pressure default value (see section Static Pressure Tab) Temperature default value (see section Temperature Tab) For flow computers not supporting this feature, Realflo reads the following fields for each flow run: Use Value on Sensor Fail = Last Known Good Value (see section Value on Sensor Fail) Differential Pressure default value = 0 (see section Differential Pressure Tab) Static Pressure default value = 0 (see section Static Pressure Tab) Temperature default value = 0 (see section Temperature Tab) When the Read Configuration from Flow Computer option is selected, the Connect to Flow Computer wizard leads you through the necessary steps. The sequence of steps to read the configuration from a flow computer is: Connect to Flow Computer wizard step. Read Configuration from Flow Computer wizard step. Save Configuration wizard step. Open File The Open File step lets you select the step Realflo User and Reference Manual May 19, 2011 25 Realflo Maintenance Mode Reference Connect to Flow Computer The Connect to Flow Computer step defines the communication settings for the connection between the PC running the Realflo application and the target flow computer. The How do you want to communicate with the flow computer? prompt provides two selections. The Use the Current Settings option sets the default communication settings for Realflo. These settings are for the PC that is running Realflo. (The communication settings for the PC running Realflo and the communication settings in the flow computer need to match). The default communication settings are: COM 1 (serial port on the PC) 9600 baud, no parity 8 Data bits 1 Stop bit The default Modbus address Realflo will connect to is station 1. Use this selection if the serial port on your PC is COM 1 and the serial port settings for the serial port on the flow computer are set for default (9600, 8,n,1 and Modbus address 1). Click the Next> button to begin communication with the flow computer and move to the next step in the wizard. The Choose/View Communication Setup option opens the PC Communication Settings dialog as shown below. This allows you to view the default settings and to change the PC communication setting for the type of connection you are using to communicate with the flow computer. Realflo User and Reference Manual May 19, 2011 26 Realflo Maintenance Mode Reference See the section Communication Menu >> PC Communications Settings Command in the Realflo Expert Mode Reference section of this manual for complete details on the parameter settings in this dialog. You need to know the communication settings for the connection to the flow computer to use this step. Once the communication settings have been selected click the OK> button to close the dialog and begin communication with the flow computer. Read Configuration from the Flow Computer The Read Configuration from Flow Computer step starts with the Create New File window as shown below. Click the Next> button to begin reading the flow computer configuration form the flow computer. The Communication progress displays the status of the reading of the configuration. Realflo User and Reference Manual May 19, 2011 27 Realflo Maintenance Mode Reference Save Configuration File Once the configuration has been read from the flow computer the Save File dialog is opened to prompt for a file name to save the configuration to. Select the Save to Realflo.tfc to save the configuration to the default Realflo.tfc file. This file will be located in the folder Realflo was installed in. Click the Next> button to save the configuration and move to the next step. Select the Save to another file to save the file to a specified name and location. When this option is selected the Save As dialog is opened as shown below. Realflo User and Reference Manual May 19, 2011 28 Realflo Maintenance Mode Reference Select the folder to save the file in the Save in: window. Use the dropdown selector to browse the available folders on your PC. Enter the file name in the File name: window. The file will automatically be saved with the Realflo .tfc extension. Click the Save button to save the configuration file and close the Save As dialog. Click the Next> button to move to the next step. Configuration Complete The Configuration Complete dialog is the last step in the Read Configuration from Flow Computer wizard. Click the Finish button to complete the wizard. Realflo User and Reference Manual May 19, 2011 29 Realflo Maintenance Mode Reference Create Configuration From a Template File When you choose to configure the flow computer using a template file, the Create New File wizard prompts you through the steps needed. Select File >> New from the Realflo command menu. The Create New File dialog is displayed and the wizard will lead you through the steps to create a congiuration file from a temple. Create New File Dialog (1) Select the Create Configuration from a Template File radio button. (2) Do one of the following: a. Select the template file from the dropdown list. The last ten recently used templates are shown. The recently used template is selected by default. b. Click Browse to choose another template file. A File Open dialog appears which allows you to select any template file. (3) Click Next > to continue. Template files are created in the Expert Mode. When templates are created some flow computer configuration parameters are preset and are not displayed in the Create Configuration from Template wizard steps. Follow the wizard steps described in the following sections to configure the flow computer using the selected template. Flow Computer Information Flow Computer Status Dialog When configuring the flow computer using a template file, select No when the Flow Computer Status dialog opens. This lets you choose the hardware type and firmware type manually. Hardware and Firmware Type Step Realflo User and Reference Manual May 19, 2011 30 Realflo Maintenance Mode Reference The Hardware and Firmware Type Dialog opens when you select No in the Flow Computer Status dialog. First, select the Hardware Type from the dropdown list. The template selected determines the default value when creating the configuration using a template. The options from which you can select are: Micro16 SCADAPack SCADAPack Plus SCADAPack Light SCADAPack LP SCADAPack 32 SCADAPack 32P 4202 DR SCADAPack 100: 1024K 4202 DS SCADAPack 314 SCADAPack 330 SCADAPack 334 SCADAPack 350 4203 DR 4203 DS SolarPack 410 Realflo User and Reference Manual May 19, 2011 31 Realflo Maintenance Mode Reference Second, select the Firmware Type from the dropdown list. The template selected determines the default value (either Telepace or ISaGRAF). If the firmware selected is Telepace, the I/O Module Type dialog opens, followed by the Flow Computer ID dialog. If the firmware type selected is ISaGRAF, the Flow Computer ID dialog opens. I/O Module Type Step This step selects the I/O module to use for the selected Hardware type. The register assignment in the new file is set to the default register assignment for the selected hardware type. Select the I/O module for the flow computer from the dropdown list. Selections displayed in the list depend on the flow computer hardware type. Hardware Type I/O Modules Available Micro16 Controller I/O only or Backwards compatible modules. 5601 I/O Module, 5604 I/O Module, or 5606 I/O Module 5601 I/O Module, 5604 I/O Module, or 5606 I/O Module 5602 I/O Module SCADAPack LP I./O 5601 I/O Module 5604 10V/40mA I/O module 5604 5V/20mA I/O module , 5604 I/O Module, or 5606 I/O Module SCADAPack 32P I/O 4202 DR or 4202 DR Extended/4203 DR I/O SCADAPack 100: 1024K I/O SCADAPack SCADAPack Plus SCADAPack Light SCADAPack LP SCADAPack 32 SCADAPack 32P 4202 DR SCADAPack 100: 1024K Realflo User and Reference Manual May 19, 2011 32 Realflo Maintenance Mode Reference Hardware Type I/O Modules Available 4202 DS SCADAPack 314 SCADAPack 330 SCADAPack 334 SCADAPack 350 4202/4203 DS I/O SCADAPack 314/33x I/O SCADAPack 330 Controller. SCADAPack 33x I/O SCADAPack 350 10V/40mA I/O SCADAPack 350 5V/20mA I/O 4202 DR Extended/4203 DR I/O 4202/4203 DS I/O 4203 DR 4203 DS SolarPack 410 Flow Computer ID Step This step sets the Flow Computer ID. Type the Flow Computer ID string in the edit box. This unique ID stops accidental mixing of data from different flow computers. The maximum length of the Flow Computer ID is eight characters. Any characters are valid. You can leave the Flow Computer ID edit box blank. Number of Flow Runs Step This step selects the number of flow runs in the flow computer. The wizard will step through the configuration of the first run and then each subsequent run if more than one run is selected. Realflo User and Reference Manual May 19, 2011 33 Realflo Maintenance Mode Reference Select the number of flow runs with the dropdown list. Valid values depend on the hardware type and the number of flow runs enabled for the flow computer. The template determines the default value when using a template. For Micro16, SCADAPack, SCADAPack Light and SCADAPack Plus Flow Computers, the maximum number of meter runs is three. The selection of three meter runs is available for older flow computers that could be enabled for three meter runs. For SCADAPack LP and SCADAPack (4202 and 4203) Flow Computers, the maximum number of meter runs is two. For SCADAPack 100: 1024K and SolarPack 410 Flow Computers, the maximum number of meter runs is one. For SCADAPack 314/330/334 and SCADAPack 350 Flow Computers the maximum number of meter runs is four. For SCADAPack 32 and SCADAPack 32P Flow computers the maximum number of runs you can select is ten. Flow Run ID Step This step sets the Flow Run ID for the meter run. This is the first step of a flow run configuration. The wizard will step you through the flow run configuration steps for the first run and then each subsequent run if you select more than one run. Realflo User and Reference Manual May 19, 2011 34 Realflo Maintenance Mode Reference The Flow Run ID helps to identify the flow run. Type a string up to 32 characters long. Any characters are valid. You can leave the Flow Run ID edit box blank. Older flow computers allow a string up to 16 characters. See the TeleBUS Protocol Interface section. For run 1 the next step is Flow and Compressibility Calculations . Copy Run Step This step controls how multiple runs are configured once the first run has been configured. The Step by Step Configuration radio button selects that the run will be configured step by step as was the previous run. Parameters for each step are configured one at a time. Realflo User and Reference Manual May 19, 2011 35 Realflo Maintenance Mode Reference The Copy configuration from radio button selects that the run will be configured the same as the run selected in the drop down window. Flow Calculation Configuration Flow and Compressibility Calculations Step This step selects the flow and compressibility calculations for the first run. Flow Calculation selects the type of flow calculation for the meter run. Valid values are: AGA-3 (1985 version) AGA-3 (1992 version) AGA-7 AGA-11 (not available for 16-bit controllers) V-cone calculations The template selected determines the default value. Compressibility Calculation selects the type of compressibility calculation for the meter run. Valid compressibility calculation values are: AGA-8 Detailed NX-19 (Not supported for PEMEX flow computers) AGA-8 Detailed is the recommended calculation for new systems as it has superior performance compared to NX-19. NX-19 is provided for legacy systems. The template selected determines the default value. Flow Direction Control selects the direction of flow indication, forward or reverse, for a meter run. Forward by Value selection indicates the flow direction is forward when the value from a differential pressure (DP) sensor is positive or the mass flow rate value from a Coriolis meter is positive. Realflo User and Reference Manual May 19, 2011 36 Realflo Maintenance Mode Reference Reverse by Value selection indicates the flow direction is reverse when the value from a differential pressure (DP) sensor is negative or the mass flow rate value from a Coriolis meter is negative. Forward by Status selection indicates the flow direction is forward when the Flow Direction Register has a value of 0 (OFF). Reverse by Status selection indicates the flow direction is reverse when the Flow Direction Register has a value of 1 (ON). Flow Direction Register specifies which register indicates the forward or reverse flow direction status. Any valid register for the flow computer controller can be used for this setting. The default register is 1. This edit control is disabled if Flow Direction Control selection is Value. This control is hidden in GOST mode flow computers. Flow Run Units Step This step lets you select the units that are used for input measurements and contracts. Input Units selects the units of measurement of input values for the meter run. Inputs may be measured in different units than the calculated results. This allows you to use units that are convenient to you for measuring inputs. A dropdown list allows the selection of the following unit types. The template selected determines the default value. US1 US2 US3 IP Metric1 Metric2 Metric3 Realflo User and Reference Manual May 19, 2011 37 Realflo Maintenance Mode Reference SI US4 US5 US6 US7 US8 PEMEX The reference list for the Input Units displays the parameters and units for these parameters: DP (Differential pressure) SP (Static pressure) Temperature Pipe and Orifice Diameter Viscosity Altitude Heating Value Contract Units selects the units of measurement of contract values. These units are used for the calculated results. A dropdown list allows the selection of the following unit types. The template selected determines the default value. US1 US2 US3 IP Metric1 Metric2 Metric3 SI US4 US5 US6 US7 US8 PEMEX The reference list for the Contract Units displays the parameters and units for these parameters when used for the contract. The parameters displayed depend on the contract units selected. The parameters are: Volume Realflo User and Reference Manual May 19, 2011 38 Realflo Maintenance Mode Reference Volume Rate Energy Energy Rate Base Pressure Base Temperature Mass Mass Flow Rate Density Flow Extension Heating Value Flow Run Inputs Step This step lets you configure the flow run inputs. One of two configuration dialogs is presented based on the input type you configure. Sensor Inputs Analog Inputs Sensor Inputs Select Internal Sensor (4202 DR/DS or 4203DR/DS or SolarPack 410) to use a SCADAPack internal transmitter as the input device. The transmitter is the input for pressure, differential pressure, and temperature. This is the only valid selection for run 1 of a SCADAPack flow computer. Other options are disabled. Realflo User and Reference Manual May 19, 2011 39 Realflo Maintenance Mode Reference Select Sensor to use a multivariable transmitter as the input device. The transmitter is the input for pressure, differential pressure, and temperature. This is the default selection, except for run 1 of a SCADAPack controller. The Where is sensor connected to the Flow Computer parameter enables the ability to select the serial or LAN port where the sensor is connected to the flow computer. Selections vary according to the flowcomputer type. Valid selections can include: com1 com2 com3 com4 LAN The What is the sensor model parameter selects the multivariable transmitter (MVT) type. The selections available are: 3095FB 4101 4102 4202 DR 4202 DS 4203 DR 4203 DS The What value should be used if the sensor fails parameter selects the specified value in this field as the live input value when communicating with a sensor. The dropdown list lets you select: Use Last Known Good Value Use Default Value When you open a file using an older file format, Realflo sets the default value of the Values on Sensor Fail field to Use Last Known Good. When the status to a sensor changes and you select the Use Default Value option, this is added to the Event Log. For flow computers 6.70 and later, when communication to a sensor fails and the configuration option “Use Last Known Good Value” is set to “Use Default Value,” the flow computer needs to use the specified default value in the configuration in place of a live input value. When communication to a sensor is restored and the configuration option for the Value on Sensor Fail field is set to use the default value, the flow computer uses the input value from the sensor as the live input value. For flow computers prior to 6.70, the value on sensor fail is ``Use Last Known Good Value.” Analog Inputs Realflo User and Reference Manual May 19, 2011 40 Realflo Maintenance Mode Reference Select Analog Inputs to use analog inputs to measure pressure, differential pressure, and temperature. Valid values are: Telepace Integer ISaGRAF Integer Float Raw Float The template selected determines the default value displayed. For AGA-7 calculations, the value is fixed and set automatically. The value is Telepace Long if Telepace firmware is running, otherwise it is an ISaGRAF integer if ISaGRAF firmware is running. The next step is Differential Pressure Settings if AGA-3 or V-Cone is configured. The next step is Turbine Settings if AGA-7 is configured. Differential Pressure Limits Step This step lets you configure the differential pressure input limits. One of two configuration dialogs is presented based on the input type you configure. Sensor Inputs Analog Inputs Sensor Inputs Input Type is a read-only field that identifies the sensor number for which you are setting the parameters using this dialog. Units are the differential pressure units. Values read from the transmitter are in these units. If the transmitter has a local display, the transmitter uses these units. Valid values depend on the MVT type: Realflo User and Reference Manual May 19, 2011 41 Realflo Maintenance Mode Reference For SCADAPack transmtters, valid units are: inches H2O at 68°F, Pascal (Pa) and kiloPascal (kPa). The default is inches H2O at 68°F. For the 3095 MVT valid units are: inches H2O at 60°F, Pascal (Pa), kiloPascal (kPa) and inches H2O at 68°F. The default is inches H2O at 60°F. Damping is the response time of the transmitter. It is used to smooth the process variable reading when there are rapid input variations. For SCADAPack transmitters the valid values are 0.0 (damping off), 0.5, 1.0, 2.0, 4.0, 8.0, 16.0, and 32.0 seconds. The template selected determines the default value displayed. For the 3095 MVT the valid values are 0.108, 0.216, 0.432, 0.864, 1.728, 3.456, 6.912, 13.824 and 27.648. The default is 0.864. Lower Operating Limit (LOL) is the lowest valid value from the sensor and needs to be less than the UOL. Alarms occur if the value is less than the LOL. The template selected determines the default value displayed. Valid values depend on the transmitter; refer to the transmitter band or user manual. Upper Operating Limit (UOL) is the highest valid value from the sensor and needs to be greater than the LOL. Alarms occur if the value is greater than the UOL. The template selected determines the default value displayed. Valid values depend on the transmitter; refer to the transmitter band or user manual. Low DP Cutoff is the differential pressure where flow accumulation will stop and needs to be less than the UOL. The template selected determines the default value displayed. Valid values depend on the transmitter; refer to the transmitter band or user manual. Low DP Hysteresis is the amount by which the differential pressure needs to rise above the Low DP Cutoff for flow accumulation to start. It may be a value using the DP units or may be a percentage of the operating span. The operating span is the difference between the Upper Operating Limit and the Lower Operating limit. Values depend on the transmitter. The flow accumulation level needs to be less than the Upper Operating Limit. The template selected determines the default value displayed. Default Value is enabled if you configured the field using the Flow Run Inputs dialog. Type the live input value to use when communicating with a sensor. The template selected determines the default value displayed. If you configured sensor inputs, go to the Static Pressure section. Analog Inputs The dialog below opens when analog inputs are selected. Realflo User and Reference Manual May 19, 2011 42 Realflo Maintenance Mode Reference Input Type is a read-only field that identifies the input type for which you are setting the parameters using this dialog. Input Register is the register address where the input value is stored. Valid values are 30001 to 39999 or 40001 to 49999. The default is selected based on the run number so that inputs have unique registers. Input at Zero Scale is value read from the sensor, in unscaled I/O units, when the sensor is at zero scale. Valid values depend on the input type. The template selected determines the default value displayed. This is enabled for Telepace integer, raw float and ISaGRAF integer types and disabled otherwise. Input at Full Scale is value read from the sensor, in unscaled I/O units, when the sensor is at full scale. Valid values depend on the input type. The template selected determines the default value displayed. This is enabled for Telepace integer, raw float and ISaGRAF integer types and disabled otherwise. DP at Zero Scale is the pressure that corresponds to the zero scale input, or if the input does not require scaling, the minimum pressure that can be read from the sensor. Valid values depend on the input type. The template selected determines the default value displayed. DP at Full Scale is the pressure that corresponds to the full-scale input, or if the input does not require scaling, the maximum pressure that can be read from the sensor. Valid values depend on the input type. The template selected determines the default value displayed. Low DP Cutoff is the differential pressure where flow accumulation will stop and needs to be less than the UOL. The template selected determines the default value displayed. Valid values depend on the transmitter; refer to the transmitter band or user manual. Low DP Hysteresis is the amount by which the differential pressure needs to rise above the Low DP Cutoff for flow accumulation to start. It may be a value using the DP units or may be a percentage of the operating span. The Realflo User and Reference Manual May 19, 2011 43 Realflo Maintenance Mode Reference operating span is the difference between the Upper Operating Limit and the Lower Operating limit. Values depend on the transmitter. The flow accumulation level needs to be less than the Upper Operating Limit. The template selected determines the default value displayed. Turbine Limits Step This step configures the turbine input for AGA-7 calculations. Input Register is the register address where the input value is stored. Valid values are 30001 to 39999 or 40001 to 49999. The default is selected based on the run number so that inputs have unique registers. Low Flow Pulse Limit is the number of pulses below which a low flow alarm will occur. The template selected determines the default value displayed. Low Flow Detect Time is the length of time the number of pulses needs to remain below the Low Flow Pulse Limit for a low flow alarm to occur. Valid values are 1 to 5 seconds. The template selected determines the default value displayed. Static Pressure Measurement Step This step lets you select how the static pressure is measured. Realflo User and Reference Manual May 19, 2011 44 Realflo Maintenance Mode Reference The pressure tap may be upstream or downstream of the orifice plate for AGA-3. Select Up Stream for an upstream static pressure tap. This is the default value. The control is disabled for AGA-7 and V-Cone calculations. Select Down Stream for a downstream static pressure tap. The control is disabled for AGA-7 and V-Cone calculations. Static Pressure Input Limits Step This step lets you define the limits for the static pressure input. One of two configuration dialogs is presented based on the Input Type configured for static pressure limits: Sensor Inputs Analog Inputs Sensor Inputs The dialog below is presented when sensor inputs are used. Realflo User and Reference Manual May 19, 2011 45 Realflo Maintenance Mode Reference Input Type is a read-only field that identifies the sensor number for which you are setting the parameters using this dialog. Units is the differential pressure units. Values read from the transmitter are in these units. If the transmitter has a local display it uses these units. Valid values are kiloPascal, MegaPascal, and psi (pounds per square inch). The default is psi. Damping is the response time of the transmitter. It is used to smooth the process variable reading when there are rapid input variations. For SCADAPack transmitters the valid values are 0.0 (damping off), 0.5, 1.0, 2.0, 4.0, 8.0, 16.0, and 32.0 seconds. The template selected determines the default value displayed. For the 3095 MVT the valid values are 0.108, 0.216, 0.432, 0.864, 1.728, 3.456, 6.912, 13.824 and 27.648. The default is 0.864. Lower Operating Limit (LOL) is the lowest valid value from the sensor and needs to be less than the UOL. Alarms occur if the value is less than the LOL. The template selected determines the default value displayed. Valid values depend on the transmitter; refer to the transmitter band or user manual. Upper Operating Limit (UOL) is the highest valid value from the sensor and needs to be greater than the LOL. Alarms occur if the value is greater than the UOL. The template selected determines the default value displayed. Valid values depend on the transmitter; refer to the transmitter band or user manual. Default Value is enabled if you gage pressure using the Static Pressure Options. Type the live input value to use when communicating with a sensor. The template selected determines the default value displayed. The pressure sensor may measure absolute or gage pressure. Select Absolute Pressure to measure absolute static pressure. Select Gage Pressure to measure gage static pressure. Realflo User and Reference Manual May 19, 2011 46 Realflo Maintenance Mode Reference Type the Atmospheric Pressure measured at the site. This control is disabled and set to zero if absolute pressure is selected. The atmospheric pressure entered needs to be greater than zero. The maximum upper limits for atmospheric pressure are: 30 psi and PEMEX units for US1, US2, US3, US4, US5, US6, US7, US8, 4320 lbf/ft2 for IP units 207 kPa for Metric1 units 2.07 bar for Metric2 units 0.207 MPa for Metric3 units 207000 Pa for SI units If you configured sensor inputs, see the Static Pressure Compensation section. Analog Inputs The dialog below is presented when analog inputs are used. Input Type is a read-only field that identifies the input type for which you are setting the parameters using this dialog. Input Register is the register address where the input value is stored. Valid values are 30001 to 39999 or 40001 to 49999. The default is selected based on the run number so that inputs have unique registers. Input at Zero Scale is value read from the sensor, in unscaled I/O units, when the sensor is at zero scale. Valid values depend on the input type. The template selected determines the default value displayed. This is enabled for Telepace integer, raw float, and ISaGRAF integer types and disabled otherwise. Realflo User and Reference Manual May 19, 2011 47 Realflo Maintenance Mode Reference Input at Full Scale is value read from the sensor, in unscaled I/O units, when the sensor is at full scale. Valid values depend on the input type. The template selected determines the default value displayed. This is enabled for Telepace integer, raw float and ISaGRAF integer types and disabled otherwise. SP at Zero Scale is the pressure that corresponds to the zero scale input, or if the input does not require scaling, the minimum pressure that can be read from the sensor. Valid values depend on the input type. The template selected determines the default value displayed. SP at Full Scale is the pressure that corresponds to the full-scale input, or if the input does not require scaling, the maximum pressure that can be read from the sensor. Valid values depend on the input type. The template selected determines the default value displayed. Static Pressure Compensation Step This step selects if compensation is applied for the location where calibration was performed. If you configured sensors or analog inputs from the Static Pressure Limits dialog, this is the next step in the configuration sequence. Select No if compensation is not required. This is the default value. Select Yes to compensate for the altitude and latitude. Type the Altitude of the location. Valid values are –30000 to 30000. The template selected determines the default value displayed. This control is disabled if No is selected. Type the Latitude of the location. Valid values are –90 to 90. The template selected determines the default value displayed. This control is disabled if No is selected. Temperature Limits Step Realflo User and Reference Manual May 19, 2011 48 Realflo Maintenance Mode Reference This step defines the limits for the temperature input. One of two configuration dialogs is presented based on the Input Type configured for static pressure limits: Sensor Inputs Analog Inputs Sensor Inputs The following dialog is presented when sensor (MVT) inputs are used. Input Type is a read-only field that identifies the sensor number for which you are setting the parameters using this dialog. Units is the differential pressure units. Values read from the transmitter are in these units. If the transmitter has a local display it uses these units. Valid values are kiloPascal, MegaPascal, and psi (pounds per square inch). The default is psi. Lower Operating Limit (LOL) is the lowest valid value from the sensor and needs to be less than the UOL. Alarms occur if the value is less than the LOL. The template selected determines the default value displayed. Valid values depend on the transmitter; refer to the transmitter band or user manual. Upper Operating Limit (UOL) is the highest valid value from the sensor and needs to be greater than the LOL. Alarms occur if the value is greater than the UOL. The template selected determines the default value displayed. Valid values depend on the transmitter; refer to the transmitter band or user manual. Analog Inputs The following dialog is presented when analog inputs are used. Realflo User and Reference Manual May 19, 2011 49 Realflo Maintenance Mode Reference Input Type is a read-only field that identifies the input type for which you are setting the parameters using this dialog. Input Register is the register address where the input value is stored. Valid values are 30001 to 39999 or 40001 to 49999. The default is selected based on the run number so that inputs have unique registers. Input at Zero Scale is value read from the sensor, in unscaled I/O units, when the sensor is at zero scale. Valid values depend on the input type. The template selected determines the default value displayed. This is enabled for Telepace integer, raw float and ISaGRAF integer types and disabled otherwise. Input at Full Scale is value read from the sensor, in unscaled I/O units, when the sensor is at full scale. Valid values depend on the input type. The template selected determines the default value displayed. This is enabled for Telepace integer, raw float and ISaGRAF integer types and disabled otherwise. Temperature at Zero Scale is the temperature that corresponds to the zero scale input, or if the input does not require scaling, the minimum pressure that can be read from the sensor. Valid values depend on the input type. The template selected determines the default value displayed. Temperature at Full Scale is the temperature that corresponds to the fullscale input, or if the input does not require scaling, the maximum pressure that can be read from the sensor. Valid values depend on the input type. The template selected determines the default value displayed. Contract Settings Step This step lets you set the contract settings for the run. Realflo User and Reference Manual May 19, 2011 50 Realflo Maintenance Mode Reference Input Average Weighting is the weighting method of the linear inputs. This applies to the differential pressure, static pressure, and temperature. Valid values are time-weighted or flow-weighted (see Input Averaging on page 948 for more information). The template selected determines the default value. Contract Hour is the hour of the day that starts a new contract day using a 24-hour clock. The contract day begins at 00 minutes and 00 seconds of the specified hour. Valid values are 0 to 23. The template selected determines the default value displayed. Standard Base Conditions are the default Base Temperature and Base Pressure (absolute) values. Base Temperature is the reference temperature to which contract flow values are corrected. Valid values are –40 to 200. The default value is given in the table below. Base Pressure is the reference pressure to which contract flow values are corrected. The base pressure is measured as absolute pressure (not a gauge pressure). Valid values are 0 to 32000. The default value is given in the table below. Contract Units Standard Base Temperature Standard Base Pressure US1 US2 US3 IP Metric1 Metric2 Metric3 SI 60 F 60 F 60 F 60 F 15 C 15 C 15 C 288.15 K 14.73 psi 14.73 psi 14.73 psi 2 2116.2281 lbf/ft 101.325 kPa 1.01325 bar 0.101325 MPa 101325 Pa Realflo User and Reference Manual May 19, 2011 51 Realflo Maintenance Mode Reference Contract Units Standard Base Temperature Standard Base Pressure US4 US5 US6 US7 US8 PEMEX 60 F 60 F 60 F 60 F 60 F 60 F 14.73 psi 14.73 psi 14.73 psi 14.73 psi 14.73 psi 14.73 psi Realflo for PEMEX flow computers provide a second set of base conditions. PEMEX Base Conditions are the default Base Temperature and Base Pressure (absolute) values when Realflo is operating in PEMEX mode. Base Temperature is the reference temperature to which contract flow values are corrected. The default is listed in the table below for each type of contract unit. Base Pressure is the reference pressure to which contract flow values are corrected. The base pressure is measured as absolute pressure (not a gauge pressure). Valid values are 0 to 32000. The default values are listed in the table below for each contract unit. Contract Units Standard Base Temperature Standard Base Pressure US1 US2 US3 IP Metric1 Metric2 Metric3 SI US4 US5 US6 US7 US8 PEMEX 60 F 60 F 60 F 60 F 15 C 15 C 15 C 288.15 K 60 F 60 F 60 F 60 F 60 F 68 F 14.73 psi 14.73 psi 14.73 psi 2 2116.2281 lbf/ft 101.325 kPa 1.01325 bar 0.101325 MPa 101325 Pa 14.73 psi 14.73 psi 14.73 psi 14.73 psi 14.73 psi 14.73 psi AGA-3 Settings Step This step sets the AGA-3 calculation parameters. Realflo User and Reference Manual May 19, 2011 52 Realflo Maintenance Mode Reference Orifice Material is the material from which the orifice plate for the meter run is made. Valid values are Stainless Steel, Monel, and Carbon Steel. The template selected determines the default value displayed. Pipe Material is the material from which the meter run pipe is made. Valid values are Stainless Steel, Monel, and Carbon Steel. The template selected determines the default value displayed. Orifice Diameter is the diameter of the meter run orifice. The template selected determines the default value displayed. Orifice reference temperature is the temperature at which the diameter of the meter run orifice was measured. The template selected determines the default value displayed. Pipe Diameter is the measurement of the meter run pipe inside diameter. The template selected determines the default value displayed. Pipe reference temperature is temperature at which the meter run pipe diameter was measured. The template selected determines the default value displayed. Beta Ratio is the ratio of orifice diameter to pipe diameter. It is displayed for information purposes only and cannot be edited. Realflo displays messages if the beta ratio is outside recommended limits. Isentropic Exponent is a thermodynamic property of gas used to predict the relationships between pressure, temperature, volume and energy. If you are unsure of this value, a typical value of 1.3 is commonly used. The template selected determines the default value displayed. Viscosity is a measure of the resistance of a measured gas to flow. Valid values are 0 to 1. The template selected determines the default value displayed. AGA-3 Deadband Settings Step This step sets AGA-3 calculation deadbands. Realflo User and Reference Manual May 19, 2011 53 Realflo Maintenance Mode Reference Temperature Deadband is the tolerated change in the flowing temperature before temperature dependent factors in the flow calculation are recalculated. Changes in the temperature smaller than the deadband will be ignored in determining the result. The template selected determines the default value displayed. The upper limit is 7°F or 4°C. Static Pressure Deadband is the tolerated change in the static pressure before static pressure dependent factors in the flow calculation are recalculated. Changes in the static pressure smaller than the deadband will be ignored in determining the result. A static pressure deadband setting of up to four percent of the typical static pressure level should have a small effect on the accuracy of the AGA-3 calculation. The template selected determines the default value displayed. The upper limit is 800 psi or 5500 kPa or the equivalent in other units. Differential Pressure Deadband is the tolerated change in the differential pressure before differential pressure dependent factors in the flow calculation are recalculated. Changes in the differential pressure smaller than the deadband will be ignored in determining the result. A change of N in the differential pressure input will cause a change of 0.5 N in the calculation volume at base conditions. It is recommended that the differential pressure deadband be set to zero. The template selected determines the default value displayed. The upper limit is 4.5 inWC or 1.1 kPa or the equivalent in other units. AGA-7 Settings Step This step lets you define the AGA-7 settings. Realflo User and Reference Manual May 19, 2011 54 Realflo Maintenance Mode Reference K Factor is the number of pulses per unit volume of the turbine meter. Valid values are 0.001 to 1000000. The template selected determines the default value displayed. M Factor is the adjustment to the number of pulses per unit volume for the turbine meter compared to an ideal meter. Valid values are 0.001 to 1000. The template selected determines the default value displayed. *Uncorrected Flow Volume is the measurement of the volume of gas during the contract period. The Uncorrected Flow Volume control is available in Realflo versions 6.20 and higher. AGA -11 Configuration Step AGA-11 configuration defines parameters unique to the AGA-11 calculation. The AGA-11 calculation communicates with a Coriolis meter for the calculation. The AGA-11 configuration sets the communication parameters for communication between the Coriolis meter and the flow computer. Realflo User and Reference Manual May 19, 2011 55 Realflo Maintenance Mode Reference Address This is the Modbus address of the Coriolis Meter for serial communications. Multiple Coriolis meters using the same serial port on the flow computer need to each have a unique Modbus address. Valid Modbus addresses are between 1 and 247. The default address is 247. Port This is the communication port on the flow computer that will be used to communicate with the Coriolis meter. Valid port selections depend on the type of controller the flow computer running on. The default port is the first valid port available on the controller. Timeout This is the time the flow computer waits for a response for Modbus read commands send to the Coriolis meter. When the timeout time is exceeded the command is unsuccessful and an alarm is added to the flow computer alarm list. Valid timeout values are from 0 to 1000 ms. The default value is 50 ms. V-Cone Settings Step V-Cone Configuration defines parameters unique to the V-Cone calculation. Realflo User and Reference Manual May 19, 2011 56 Realflo Maintenance Mode Reference Cone Material This is the material of the V-cone. Valid values are Carbon Steel, Stainless 304, and Stainless 316. The default value is determined by the template selected. Pipe Material This is the material from which the meter run pipe is made. Valid values are Carbon Steel, Stainless 304, and Stainless 316. The default value is determined by the template selected. Adiabatic Expansion Factor The Adiabatic Expansion Factor drop down list selects which calculation is used for the adiabatic expansion factor of the calculation. Select Legacy Calculation to use the older calculation method. This is the default selection. Flow computers prior to version 6.71 support only this selection. Select V-Cone to use the V-Cone specific calculation. This selection should be used with V-Cone devices. Select Wafer-Cone to use the Wafer-Cone specific calculation. This selection should be used with Wafer-Cone devices. This control is disabled and forced to Legacy Calculation if the controller type is not one of SCADAPack 32, SCADAPack 32P, SCADAPack 314/330/334, SCADAPack 350 SCADAPack 4203 or SolarPack 410. When reading from a flow computer that does not support the adiabatic expansion factor configuration, the method will be set to Legacy Calculation. When writing to a flow computer that does not support the adiabatic expansion factor method, the configuration registers will be ignored and the expansion factor will not be written. Cone Diameter Realflo User and Reference Manual May 19, 2011 57 Realflo Maintenance Mode Reference The diameter of the meter run cone used for the flow calculation. The measurement units are displayed depending on the input units selected. The default value is 3 inches. Cone Measurement Temperature This is the reference temperature at which the cone diameter for the meter run was measured. The measurement units are displayed depending on the input units selected. The default value is 59 degrees F. Pipe Inside Diameter This is the measurement of the meter run pipe inside diameter. The measurement units are displayed depending on the input units selected. The default value is 5 inches. Pipe reference temperature The temperature at which the meter run pipe diameter was measured. The measurement units are displayed depending on the input units selected. The default value is 59 degrees. Isentropic Exponent In general, this is a thermodynamic property of gas used to predict the relationships between pressure, temperature, volume and energy. If you are unsure of this value a typical value of 1.3 is commonly used. The default value is 1.3. Viscosity This is the viscosity of the measured gas. In general, this is the resistance of a gas or semi-fluid resistance to flow. The measurement units are displayed depending on the input units selected. Valid values are 0 to 1. The default value is 0.010268 centiPoise. Wet Gas Correction Factor The Wet Gas Correction Factor Method drop down list selects which calculation is used for the wet gas correction factor of the calculation. Select Legacy Method to use the older correction method. This is the default selection. Flow computers prior to version 6.73 support only this selection. Select V-Cone or Wafer Cone to use the V-Cone and Wafer Cone specific calculation. This selection should be used with V-Cone or Wafer Cone devices. This control is disabled and forced to Legacy Calculation if the controller type is not one of SCADAPack 32, SCADAPack 32P, SCADAPack 314/330/334, SCADAPack 350 SCADAPack 4203 or SolarPack 410. The V-Cone or Wafer Cone supported Beta Ratios are: For Fr (Froude Number) < 5 supported Beta Ratio is 0.55. For Fr (Froude Number) < 5 supported Beta Ratio is 0.75. For Fr (Froude Number) > 5 supported Beta Ratio is 0.75. When V-Cone or Wafer Cone is selected and if the current Beta ratio is not supported when executing verification, a message is displayed. Realflo User and Reference Manual May 19, 2011 58 Realflo Maintenance Mode Reference When V-Cone or Wafer Cone is selected, configuration of the fixed wet gas factor parameter, as set in the Contract tab, is disabled. When Legacy Method is selected, configuration of the parameters used by the V-Cone or Wafer Cone method is disabled. Mass Flow Rate of Liquid The Mass flow rate of liquid at flow conditions parameter is used by the VCone or Wafer Cone method and can be configured when V-Cone or Wafer Cone is selected. This information needs to be gathered using a sampling method or a tracer method. The default is 0. Density of Liquid The Density of liquid at flow conditions parameter is used by the V-Cone or Wafer Cone method and can be configured when V-Cone or Wafer Cone is selected. The default is 0. V-Cone Coefficients This step defines the V-Cone coefficients. Enter the V-Cone coefficient pairs from the meter-sizing report. The default list contains one pair: Re = 1000000; Cf = 0.82. Click Add to add a coefficient pair. In the original McCrometer V-Cone Application Sizing sheet that is included with V-Cone meters uses the terminology Cd (discharge coefficient) rather than Cf (flow coefficient). You will need to use the Re and Cd values from the V-Cone Application Sizing sheet for the Re and Cf entries. If the Re value is the same for every entry in the table only the first pair is used. McCrometer now supplies one value of Cd in the sizing document. You Realflo User and Reference Manual May 19, 2011 59 Realflo Maintenance Mode Reference need to enter one Re/Cd pair only. See the McCrometer Application Sizing sheet for the Re/Cd pair for your meter. To edit a coefficient pair in the table: Select a row in the list. Click Edit to open the Add/Edit Flow Coefficient dialog. To delete a coefficient pair in the table: Select a row in the list. Click Delete to delete the pair form the list. AGA-8 Options Step This step sets AGA-8 calculation options. Events can be logged each time an AGA-8 gas component changes. Select Yes to log each change to the gas composition. Use this option if the gas composition changes infrequently. This is the default selection. Select No to skip logging changes. Use this option if you are making frequent changes to the gas composition. The Relative Density and Heating values can be calculated from the AGA-8 calculation or determined in a laboratory. Realflo User and Reference Manual May 19, 2011 60 Realflo Maintenance Mode Reference Select Calculate the Values to have AGA-8 calculate the values. Select Use Laboratory Values to used fixed values. Relative Density sets the real relative density of the gas. Valid values are 0.07 to 1.52. The template selected determines the default value displayed. This control is disabled if Calculate the Values is selected. Heating Value sets the heating value of the gas. Valid values are 0 to 1800 3 BTU(60)/ ft or the equivalent in the selected units. The template selected determines the default value displayed. This control is disabled if Calculate the Values is selected. AGA-8 Hexanes+ Options This step lets you choose to enter Hexane and higher components individually or as a single combined value. Gas composition can be measured with individual values for hexane and higher components or use a combined value. Select Enter Each Component to use individual values for the higher components. This is the default selection. Select Use Combined Hexanes+ with these Ratios to use a combined value. Type the ratios of the higher components. n-Hexane defines the percentage of the Hexanes+ contributed by nHexane. n-Heptane defines the percentage of the Hexanes+ contributed by nHeptane. n-Octane defines the percentage of the Hexanes+ contributed by nOctane. n-Nonane defines the percentage of the Hexanes+ contributed by nNonane. Realflo User and Reference Manual May 19, 2011 61 Realflo Maintenance Mode Reference n-Decane defines the percentage of the Hexanes+ contributed by nDecane. The Total field displays the sum of all portions. This value cannot be edited. The total of portions needs to be 100 percent. AGA-8 Gas Composition Step This step lets you define the AGA-8 gas composition. One of two configuration dialogs opens based on how you elected to enter Hexane and higher components. Individual Components The dialog below lets you enter combined Hexanes+ composition. Type the gas composition according to the laboratory analysis. The total of components needs to be 100 percent. Normalize adjusts non-zero components so that the total of components is 1.0000 (or 100.00 percent). The ratio to each other for the components remains the same. NX-19 Settings This step defines the NX-19 calculation. NX-19 is not supported for PEMEX flow computers. Realflo User and Reference Manual May 19, 2011 62 Realflo Maintenance Mode Reference Specific Gravity is the specific gravity of the gas being measured. Valid values are 0.554 to 1.000. The template selected determines the default value displayed. Carbon Dioxide is the percent of carbon dioxide in the gas being measured. This value needs to be in the range 0 to 15. The template selected determines the default value displayed. Nitrogen is the percent of nitrogen in the gas being measured. This value needs to be in the range 0 to 15. Heating Value is the heating value of the gas being measured. Valid values 3 are 0 to 1800 BTU(60)/ft or the equivalent in the selected units. The template selected determines the default value displayed. Events can be logged each time the NX-19 configuration changes. Select Yes to log each change to the configuration. Use this option if the configuration changes infrequently. This is the default selection. Select No to skip logging changes. Use this option if you are making frequent changes to the configuration. Sensor Configuration The next step is Sensor Configuration if any transmitters were used in the input configuration. Otherwise the next step is Flow Computer Configuration Summary. Sensor Configuration This step lets you select how the transmitters are to be configured. Realflo User and Reference Manual May 19, 2011 63 Realflo Maintenance Mode Reference The Flow Runs are configured to use these transmitters dialog is a table that shows each of the configured flow run numbers, the Flow Run ID for each, and the transmitter that the run uses for the differential pressure (DP), static pressure (SP), and temperature sensors. If an analog input is used for the flow run, AIN will be displayed in the coresponding DP, SP, or Temp column. The How do you want to configure sensors? option lets you select how to continue configuring the sensors. The three options are: Connect now and configure transmitters to connect to the flow computer and configure the attached transmitters. This selection is disabled if the flow computer configuration was selected to be completed offline in the Flow Computer Status step. If you choose this option, go to the Configure Sensors section to continue. Edit sensor configuration without connecting to proceed directly to the editing pages, without connecting to the flow computer. If you choose this option, go to the Review Transmitters section to continue. Use default sensor configuration to complete the configuration without changing the sensor configuration. Sensor configuration will be set to default values. If you choose this option, the next step is Finish. Configure Sensors This step lets you select to use the Realflo configuration or the sensor‟s configuration file. Realflo User and Reference Manual May 19, 2011 64 Realflo Maintenance Mode Reference Select Use the configuration from Realflo to use the configuration data from the Realflo file. This is the default setting. Select Use the transmitter’s current configuration by reading from the transmitter to read configuration from a pre-configured transmitter. Sensor Search This step searches for sensors connected to the flow computer serial ports or LAN port. Realflo User and Reference Manual May 19, 2011 65 Realflo Maintenance Mode Reference Search Serial Option Select Search Serial to search for transmitters connected to a serial port of the flow computer. The Port parameter selects the flow computer serial port where the sensor is attached. Valid values are com1, com2, com3, and com4. The template selected determines the default value displayed. The Timeout parameter specifies the length of time the flow computer will wait for a response from a sensor. Valid values are 100 ms to 10000 ms. The default is 300 ms. Select Maximum to search for a number of MVT transmitters. The search operation will stop after finding the specified number of transmitters. The valid value is from 1 to 255. The default is 1. Select Range to search the addresses in a specified range. The range to search for is typed in the edit boxes to the right of the radio button. The value in To edit control needs to be equal or great than the value in the first edit control. The maximum search range that can be typed is for 255 transmitters. The default range is 1 to 247. Range Search supports addresses 1 to 255 in standard Modbus mode, and 1 to 65534 in extended address mode. The address mode of the flow computer serial port needs to be set to extended in order to search for transmitters with extended addresses. Select All to search the addresses of transmitters connected with the serial port selected in Port. Up to 255 addresses are searched. Click Next to start the search for sensors or 4000 transmitters. A search process dialog is displayed so that the search operation can be cancelled at any time. Search LAN Option Select Search LAN to search for transmitters connected to a LAN port of the flow computer. The IP Address parameter specifies the IP address of a 4000 transmitter. Valid entries are IP addresses in the format nnn.nnn.nnn.nnn where nnn are values between 0 and 255. The Protocol parameter selects the type of IP protocol used to query the transmitter. Valid IP protocol selections are Modbus/TCP and Modbus RTU in UDP. The IP port (for example port 502) for the selected protocol needs to be the same in the flow computer and the 4000 transmitter. The Timeout parameter specifies the length of time the flow computer will wait for a response from a 4000 transmitter. Valid values are 100 to 10000 milliseconds. The default is 5000 ms. Click Next to start the search for MVT transmitters or 4000 transmitters. A search process dialog is displayed so that the search operation can be cancelled at any time. If no transmitters were found, then a message is displayed and the search step is displayed again. Assign Sensors Realflo User and Reference Manual May 19, 2011 66 Realflo Maintenance Mode Reference This step assigns found transmitters to flow runs. The Available Sensors window shows the transmitters that have been configured and the transmitters that were found by the search. There may be more transmitters in the list than there are runs. The Sensor column shows the transmitter slots that have been configured. Transmitters that were found but not assigned are listed as Not assigned. The Status column indicates if configuration data for the transmitter exists. Found indicates a transmitter has been configured and the search found one with the same port, address and device type. Missing means a transmitter has been configured but the search did not find one with the same port, address and device type. The Port column displays the serial or LAN port the flow computer is using to communicate with the transmitter. The Address column displays the Modbus station address or IP address of the transmitter. The Tag column displays the Tag Name assigned to the transmitter. This column may be blank if a Tag Name has not been assigned to the transmitter. The Device type column displays type of transmitter. Valid values are 3095FB, 4101, 4102, 4202 DR, 4202 DS, 4203 DR, or 4203 DS. The Flow Runs window shows which MVTs are assigned to the runs. To Change the order of the sensors: Select a sensor in Available Sensors window. Click Move. The Move Sensor dialog opens: Realflo User and Reference Manual May 19, 2011 67 Realflo Maintenance Mode Reference In the Move Sensor dialog, use Move To selection to select the new location Click OK. To delete a sensor: Select a transmitter in Available Sensors Click Delete. To change the address of a Sensor: Select a transmitter in Available Sensors Click Change Address. The Change Address dialog opens: Enter a new address for the transmitter in the New Address: window. Click OK. Click Next when the transmitters have been moved to the correct location. Next is disabled if there are Not Assigned transmitters still in the list. The next step is Search for More Transmitters. Notes The following actions may occur when moving a Sensor. Moving one sensor to another results in the both swapping positions. When Use the configuration from Realflo was selected, assigning a Not assigned transmitter to a Sensor with status Missing and device type matching will result in the sensor adopting the transmitter‟s port and address and retaining the rest of the sensor configuration. The sensor, being assigned, will disappear from the list. When Read the configuration from the transmitter was selected, assigning a Not assigned transmitter to a sensor with status Missing and device type matching will result in the sensor adopting the transmitter‟s configuration. The transmitter, being assigned, will disappear from the list. Assigning a Not assigned transmitter to a sensor with status Missing and device type not matching will result in the sensor adopting the Realflo User and Reference Manual May 19, 2011 68 Realflo Maintenance Mode Reference transmitter‟s configuration. The transmitter, being assigned, will disappear from the list. Other assignments are not permitted. Search for More Sensors This step displays the current sensor assignments and asks if more searches are needed. Proposed Sensors shows the transmitters that have been configured and the transmitters that were found by the search. Flow Runs shows which sensors are assigned to the runs. Select Search for more transmitters to search again. The next step is Search for Transmitters. Select Finish searching and review configuration to use the current settings. This is the default button. Review Transmitters This step displays the transmitter assignments and allows editing the transmitter configuration. Realflo User and Reference Manual May 19, 2011 69 Realflo Maintenance Mode Reference The Sensors window shows the transmitters that have been configured. The Flow Runs window shows which sensors are assigned to the runs. Click Edit to review and modify the settings for each transmitter. Edit opens the Add/Edit Sensor Settings dialog. Changes to a transmitter address will be written to the transmitter without affecting current flow computer configuration. Once you have configured Run 1, the Flow Run ID dialog re-opens. Flow Computer Configuration Summary This step displays a summary of the flow computer settings. A summary of the flow computer configuration is shown. Realflo User and Reference Manual May 19, 2011 70 Realflo Maintenance Mode Reference The current configuration can be compared with the configuration in the target flow computer. Select Yes to compare the configurations. The next step is Review Differences. Select No to not compare the configurations. The next step is Save File. Review Differences This step displays a summary of changes in the flow computer configuration. You can select to write to the flow computer or not. A summary of the differences is the configuration is shown. Select Yes to write the configuration to the flow computer. The configuration is written to the flow computer. The Start Executing command will be written for each flow run. The communication progress dialog shows the stages of writing. Select No to write the configuration to the flow computer later. Click Next to perform the selected action. In Flow Computer versions 6.73 and older, when AGA-8 gas ratios or NX-19 gas quality values are written to the flow computer the new gas ratios are updated in the Proposed registers. The Actual registers are not updated until a new Density calculation is started with the new values. The new values are not available to SCADA host software reading the Actual registers until a until a new Density calculation is started with the new values. In Flow Computer versions 6.74 and newer when AGA-8 gas ratios or NX19 gas quality values are written to the flow computer the new gas ratios are updated in the Proposed registers and in the Actual registers. This allows a SCADA host to immediately confirm the new values were written to the flow computer. The new gas values are not used by the flow computer until a new density calculation is started. Realflo User and Reference Manual May 19, 2011 71 Realflo Maintenance Mode Reference Save File This step selects where to save the configuration file. Select the Save to Realflo.tfc to save the configuration file to the default file location. Select the Save to another file to either enter a file name or use the Browse option to open the Save As dialog. Finish This step is displayed at the end of the wizard. Click Finish to close the wizard. Notes 1. Views for extra runs are closed but new ones may be opened. 2. The history and event logs contain no information. Realflo User and Reference Manual May 19, 2011 72 Realflo Maintenance Mode Reference 3. The configuration data for supported runs in the file is set to usable values, so when the number of runs is changed there is useful data in the configuration. Create Configuration Step-by-Step When you choose to configure the flow computer step-by-step, the Create New File Wizard prompts you through the steps needed. The dialogs displayed are dependent upon the calculations you select. Step-by-Step Configuration Sequence for a Flow Computer The main steps in the configuration sequence to configure flow computer step-by-step are: Use Create New File Dialog to select how to create a new file. Use Hardware and Firmware Type Dialog to configure the hardware and firmware you are using. Use the I/O Module Dialog to configure your I/O module (Telepace only). Use the Flow Computer ID Dialog to assign an ID to the flow computer. Use the Flow Runs Dialog to configure the number of flow runs Use the Flow Run ID Dialog to assign an ID to the flow run. Use the Flow and Compressibility Calculations to select the flow and compressibility calculations for the meter run. Select the Flow Run Inputs to configure the type of inputs for the flow run. Select the Differential Pressure Limits to configure the differential pressure calibration to use for the run. Configure the Static Pressure for the run. Configure the Static Pressure Input Limits for the run. Use the Static Pressure Dialog to configure your sensors to compensate for the gravitation pull of the Earth according to altitude and latitude variations. Define the Temperature Limits for the run. Define the Contract Settings for the run. Select the * Flow Calculation for the run. Configure the Sensor Configuration for the run. Review the Flow Computer Configuration Summary to confirm the configuration settings. Use Save File to save the new configuration. Select the Create a new file? radio button from the Select File dialog to configure the flow computer step-by-step. Realflo User and Reference Manual May 19, 2011 73 Realflo Maintenance Mode Reference Create New File Dialog (1) Select the Create Configuration Step-by-Step radio button. (2) Click Next > to continue. Follow the wizard steps described in the following sections to configure the flow computer. Flow Computer Status Dialog When configuring the flow computer step-by-step, select No when the Flow Computer Status dialog opens. This lets you choose the hardware type and firmware type manually see Select Flow Computer Wizard. Hardware and Firmware Type Dialog The Hardware and Firmware Type Dialog opens when you select No in the Flow Computer Status dialog. First, select the Hardware Type from the dropdown list. The default value is SCADAPack 4202 DR. The options from which you can select are: Realflo User and Reference Manual May 19, 2011 74 Realflo Maintenance Mode Reference Micro16 SCADAPack SCADAPack Plus SCADAPack Light SCADAPack LP SCADAPack 32 SCADAPack 32P 4202 DR SCADAPack 100: 1024K 4202 DS SCADAPack 314 SCADAPack 330 SCADAPack 334 SCADAPack 350 4203 DR 4203 DS SolarPack 410 Second, select the Firmware Type from the dropdown list. The default value is Telepace. You can select ISaGRAF from the dropdown list for the firmware type. If the firmware selected is Telepace, the I?O Module Dialog opens, followed by the Flow Computer ID dialog. If the firmware type selected is ISaGRAF, the Flow Computer ID dialog opens. Realflo User and Reference Manual May 19, 2011 75 Realflo Maintenance Mode Reference I/O Module Type Dialog This step lets you select the I/O module to use for the selected Hardware type. The register assignment in the new file is set to the default register assignment for the selected hardware type. Select the I/O module for the flow computer from the dropdown list. The choices displayed depend on the flow computer hardware type. Hardware Type I/O Modules Available Micro16 Controller I/O only or Backwards compatible modules. 5601 I/O Module, 5604 I/O Module, or 5606 I/O Module 5601 I/O Module, 5604 I/O Module, or 5606 I/O Module 5602 I/O Module SCADAPack LP I./O 5601 I/O Module, 5604 I/O 10V/40mA Module 5604 I/O 5V/20mA Module 5606 I/O Module SCADAPack 32P I/O 4202 DR or 4202 DR Extended/4203 DR I/O SCADAPack 100: 1024K I/O SCADAPack SCADAPack Plus SCADAPack Light SCADAPack LP SCADAPack 32 SCADAPack 32P 4202 DR SCADAPack 100: 1024K 4202 DS SCADAPack 314 SCADAPack 330 SCADAPack 334 SCADAPack 350 Realflo User and Reference Manual May 19, 2011 4202/4203 DS I/O SCADAPack 314/33x I/O SCADAPack 330 Controller. SCADAPack 33x I/O SCADAPack 350 10V/40mA Module SCADAPack 350 5V/20mA Module SCADAPack 357 Module 76 Realflo Maintenance Mode Reference Hardware Type I/O Modules Available 4203 DR 4203 DS SolarPack 410 4202 DR Extended/4203 DR I/O 4202/4203 DS I/O N/A Flow Computer ID Dialog This step sets the Flow Computer ID. Type the Flow Computer ID string in the edit box. This unique ID stops accidental mixing of data from different flow computers. The maximum length of the Flow Computer ID is eight characters. Any character is valid. You can leave the Flow Computer ID edit box blank. The default value is blank. Flow Runs Dialog This step selects the number of flow runs in the flow computer. The wizard will step through the configuration of the first run and then each subsequent run if more than one run is selected. Realflo User and Reference Manual May 19, 2011 77 Realflo Maintenance Mode Reference Select the number of flow runs with the dropdown list. Valid values depend on the hardware type and the number of flow runs enabled for the flow computer. The default value is one. For Micro16, SCADAPack, SCADAPack Light and SCADAPack Plus Flow Computers, the maximum number of meter runs is three. The selection of three meter runs is available for older flow computers that could be enabled for three meter runs. For SCADAPack LP and SCADAPack (4202 and 4203) Flow Computers, the maximum number of meter runs is two. For SCADAPack 100: 1024K and SolarPack 410 Flow Computers, the maximum number of meter runs is one. For SCADAPack 314/330/334 and SCADAPack 350 Flow Computers the maximum number of meter runs is four. For SCADAPack 32 and SCADAPack 32P Flow computers the maximum number of runs you can select is ten. Flow Run ID This step sets the Flow Run ID for the meter run. This is the first step of a flow run configuration. The wizard will step you through the configuration of the first run and then each subsequent run if you select more than one run. Realflo User and Reference Manual May 19, 2011 78 Realflo Maintenance Mode Reference The Flow Run ID helps to identify the flow run. Type a string up to 32 characters long. Any character is valid. You can leave the Flow Run ID edit box blank. Older flow computers allow a string up to 16 characters. See the TeleBUS Protocol Interface section. For run 1 the next step is Realflo User and Reference Manual May 19, 2011 79 Realflo Maintenance Mode Reference Flow Calculations Dialog. Realflo User and Reference Manual May 19, 2011 80 Realflo Maintenance Mode Reference Flow Calculations Dialog This step selects the flow and compressibility calculations for the first run. Flow Calculation selects the type of flow calculation for the meter run. Valid values are: AGA-3 (1985 version) AGA-3 (1992 version) AGA-7 AGA-11 (not available for 16-bit controllers) V-cone calculations The template selected determines the default value. Compressibility Calculation selects the type of compressibility calculation for the meter run. Valid compressibility calculation values are: AGA-8 Detailed NX-19 (Not supported for PEMEX flow computers) AGA-8 Detailed is the recommended calculation for new systems as it has superior performance compared to NX-19. NX-19 is provided for legacy systems. The template selected determines the default value. Flow Direction Control selects the direction of flow indication, forward or reverse, for a meter run. Forward by Value selection indicates the flow direction is forward when the value from a differential pressure (DP) sensor is positive or the mass flow rate value from a Coriolis meter is positive. Reverse by Value selection indicates the flow direction is reverse when the value from a differential pressure (DP) sensor is negative or the mass flow rate value from a Coriolis meter is negative. Forward by Status selection indicates the flow direction is forward when the Flow Direction Register has a value of 0 (OFF). Realflo User and Reference Manual May 19, 2011 81 Realflo Maintenance Mode Reference Reverse by Status selection indicates the flow direction is reverse when the Flow Direction Register has a value of 1 (ON). Flow Direction Register specifies which register indicates the forward or reverse flow direction status. Any valid register for the flow computer controller can be used for this setting. The default register is 1. This edit control is disabled if Flow Direction Control selection is Value. This control is hidden in GOST mode flow computers. Flow Run Units Dialog This step selects the units that are used for input measurements and contracts. Input Units selects the units of measurement of input values for the meter run. Inputs may be measured in different units than the calculated results. This allows you to use units that are convenient to you for measuring inputs. A dropdown box allows the selection of the following unit types. US2 is the default value. US1 US2 US3 IP Metric1 Metric2 Metric3 SI US4 US5 US6 Realflo User and Reference Manual May 19, 2011 82 Realflo Maintenance Mode Reference US7 US8 PEMEX The reference list for the Input Units displays the parameters and units for these parameters: DP (Differential pressure) SP (Static pressure) Temperature Pipe and Orifice Diameter Viscosity Altitude Heating value Contract Units selects the units of measurement of contract values. These units are used for the calculated results. A dropdown box allows the selection of the following unit types. The default value is US2. US1 US2 US3 IP Metric1 Metric2 Metric3 SI US4 US5 US6 US7 US8 PEMEX The reference list for the Contract Units displays the parameters and units for these parameters when used for the contract. The parameters displayed depend on the contract units selected. The parameters are: Volume Volume Rate Energy Energy Rate Base Pressure Realflo User and Reference Manual May 19, 2011 83 Realflo Maintenance Mode Reference Base Temperature Mass Mass Flow Rate Density Flow Extension Heating Value Flow Run Inputs This step lets you configure the flow run inputs. One of two configuration dialogs is presented based on the input type you configure. Sensor Inputs. Analog Inputs. Select Internal Sensor (4202 DR/DS or 4203DR/DS or SolarPack 410) to use a SCADAPack internal transmitter as the input device. The transmitter is the input for pressure, differential pressure, and temperature. This is the only valid selection for run 1of a SCADAPack flow computer. Other options are disabled. Select Sensor to use a multivariable transmitter as the input device. The transmitter is the input for pressure, differential pressure, and temperature. This is the default selection, except for run 1 of a SCADAPack controller. The Where is sensor connected to the Flow Computer parameter enables the ability to select the serial or LAN port where the sensor is Sensor Inputs Realflo User and Reference Manual May 19, 2011 84 Realflo Maintenance Mode Reference connected to the flow computer. Selections vary according to the flowcomputer type. The default value is com1. Valid selections can include: o com1 o com2 o com3 o com4 o LAN The What is the sensor model parameter selects the multivariable transmitter (MVT) type. The selections available are: o 3095FB o 4101 o 4102 o 4202 DR o 4202 DS o 4203 DR o 4203 DS The What value should be used if the sensor fails parameter selects the specified value in this field as the live input value when communicating with a sensor. The dropdown list lets you select: o Use Last Known Good Value o Use Default Value When you open a file using an older file format, Realflo sets the default value of the Values on Sensor Fail field to Use Last Known Good. When the status to a sensor changes and you select the Use Default Value option, this is added to the Event Log. For flow computers 6.70 and later, when communication to a sensor fails and the configuration option “Use Last Known Good Value” is set to “Use Default Value,” the flow computer needs to use the specified default value in the configuration in place of a live input value. When communication to a sensor is restored and the configuration option for the Value on Sensor Fail field is set to use the default value, the flow computer uses the input value from the sensor as the live input value. For flow computers prior to 6.70, the value on sensor fail is ``Use Last Known Good Value.” Analog Inputs Select Analog Inputs to use analog inputs to measure pressure, differential pressure, and temperature. Valid values are: Telepace Integer ISaGRAF Integer Realflo User and Reference Manual May 19, 2011 85 Realflo Maintenance Mode Reference Float Raw Float The default value is Telepace integer if Telepace firmware is running and ISaGRAF integer if ISaGRAF firmware is running. For AGA-7 calculations, the value is fixed and set automatically. The value is Telepace Long if Telepace firmware is running and ISaGRAF integer if ISaGRAF firmware is running. The next step is Differential Pressure Input Limits if AGA-3 or V-Cone is configured. If AGA-7 is configured, the next step is Turbine Settings. Differential Pressure Input Limits This step lets you configure the differential pressure input limits. One of two configuration dialogs is presented based on the input type you configure. Sensor Inputs Analog Inputs Sensor Inputs Input Type is a read-only field that identifies the sensor number for which you are setting the parameters using this dialog. Units are the differential pressure units. Values read from the transmitter are in these units. If the transmitter has a local display, the transmitter uses these units. Valid values depend on the MVT type: For SCADAPack transmtters, valid units are: inches H2O at 68°F, Pascal (Pa) and kiloPascal (kPa). The default is inches H2O at 68°F. For the 3095 MVT valid units are: inches H2O at 60°F, Pascal (Pa), kiloPascal (kPa) and inches H2O at 68°F. The default is inches H2O at 60°F. Realflo User and Reference Manual May 19, 2011 86 Realflo Maintenance Mode Reference Damping is the response time of the transmitter. It is used to smooth the process variable reading when there are rapid input variations. For SCADAPack transmitters the valid values are 0.0 (damping off), 0.5, 1.0, 2.0, 4.0, 8.0, 16.0, and 32.0 seconds. The default value is 0 (damping off). For the 3095 MVT the valid values are 0.108, 0.216, 0.432, 0.864, 1.728, 3.456, 6.912, 13.824 and 27.648. The default is 0.864. Lower Operating Limit (LOL) is the lowest valid value from the sensor and needs to be less than the UOL. Alarms occur if the value is less than the LOL. The default value is 0. Valid values depend on the transmitter; refer to the transmitter band or user manual. Upper Operating Limit (UOL) is the highest valid value from the sensor and needs to be greater than the LOL. Alarms occur if the value is greater than the UOL. The default value is the upper range limit of the transmitter. Valid values depend on the transmitter; refer to the transmitter band or user manual. Low DP Cutoff is the differential pressure where flow accumulation will stop and needs to be less than the UOL. The default value is 0. Valid values depend on the transmitter; refer to the transmitter band or user manual. Low DP Hysteresis is the amount by which the differential pressure needs to rise above the Low DP Cutoff for flow accumulation to start. It may be a value using the DP units or may be a percentage of the operating span. The operating span is the difference between the Upper Operating Limit and the Lower Operating limit. Values depend on the transmitter. The flow accumulation level needs to be less than the Upper Operating Limit. The default value is 0. Default Value is enabled if you configured the field using the Flow Run Inputs dialog. Type the live input value to use when communicating with a sensor. The default value is 0. If you configured sensor inputs, go to the Realflo User and Reference Manual May 19, 2011 87 Realflo Maintenance Mode Reference Static Pressure Options Dialog section. Analog Inputs The dialog below opens when analog inputs are selected. Input Type is a read-only field that identifies the input type for which you are setting the parameters using this dialog. Input Register is the register address where the input value is stored. Valid values are 30001 to 39999 or 40001 to 49999. The default is selected based on the run number so that inputs have unique registers. Input at Zero Scale is value read from the sensor, in unscaled I/O units, when the sensor is at zero scale. Valid values depend on the input type. The default value is 0. This is enabled for Telepace integer, raw float and ISaGRAF integer types and disabled otherwise. Input at Full Scale is value read from the sensor, in unscaled I/O units, when the sensor is at full scale. Valid values depend on the input type. The default value is 32767. This is enabled for Telepace integer, raw float and ISaGRAF integer types and disabled otherwise. DP at Zero Scale is the pressure that corresponds to the zero scale input, or if the input does not require scaling, the minimum pressure that can be read from the sensor. Valid values depend on the input type. The default value is 0. DP at Full Scale is the pressure that corresponds to the full-scale input, or if the input does not require scaling, the maximum pressure that can be read from the sensor. Valid values depend on the input type. The default value is 16. Low DP Cutoff is the differential pressure where flow accumulation will stop and needs to be less than the UOL. The default value is 0. Valid values depend on the transmitter; refer to the transmitter band or user manual. Low DP Hysteresis is the amount by which the differential pressure needs to rise above the Low DP Cutoff for flow accumulation to start. It may be a value using the DP units or may be a percentage of the operating span. The operating span is the difference between the Upper Operating Limit and the Lower Operating limit. Values depend on the transmitter. The flow accumulation level needs to be less than the Upper Operating Limit. The default value is 0. Realflo User and Reference Manual May 19, 2011 88 Realflo Maintenance Mode Reference Turbine Settings This step configures the turbine input for AGA-7 calculations. Input Register is the register address where the input value is stored. Valid values are 30001 to 39999 or 40001 to 49999. The default is selected based on the run number so that inputs have unique registers. Low Flow Pulse Limit is the number of pulses below which a low flow alarm will occur. The default value is 10. Low Flow Detect Time is the length of time the number of pulses needs to remain below the Low Flow Pulse Limit for a low flow alarm to occur. Valid values are 1 to 5 seconds. The default value is 5. Realflo User and Reference Manual May 19, 2011 89 Realflo Maintenance Mode Reference Static Pressure Options Dialog This step lets you select how the static pressure is measured. The pressure tap may be upstream or downstream of the orifice plate for AGA-3. Select Up Stream for an upstream static pressure tap. This is the default value. The control is disabled for AGA-7 and V-Cone calculations. Select Down Stream for a downstream static pressure tap. The control is disabled for AGA-7 and V-Cone calculations. Static Pressure Input Limits This step defines the limits for the temperature input. One of two configuration dialogs is presented based on the Input Type configured for static pressure limits: Realflo User and Reference Manual May 19, 2011 90 Realflo Maintenance Mode Reference Sensor Inputs. Analog Inputs. Realflo User and Reference Manual May 19, 2011 91 Realflo Maintenance Mode Reference Sensor Inputs The dialog below is presented when sensor inputs are used. Input Type is a read-only field that identifies the sensor number for which you are setting the parameters using this dialog. Units is the differential pressure units. Values read from the transmitter are in these units. If the transmitter has a local display it uses these units. Valid values are kiloPascal, MegaPascal, and psi (pounds per square inch). The default is psi. Damping is the response time of the transmitter. It is used to smooth the process variable reading when there are rapid input variations. For SCADAPack transmitters the valid values are 0.0 (damping off), 0.5, 1.0, 2.0, 4.0, 8.0, 16.0, and 32.0 seconds. The default value is 0 (damping off). For the 3095 MVT the valid values are 0.108, 0.216, 0.432, 0.864, 1.728, 3.456, 6.912, 13.824 and 27.648. The default is 0.864. Lower Operating Limit (LOL) is the lowest valid value from the sensor and needs to be less than the UOL. Alarms occur if the value is less than the LOL. The default value is 0. Valid values depend on the transmitter; refer to the transmitter band or user manual. Upper Operating Limit (UOL) is the highest valid value from the sensor and needs to be greater than the LOL. Alarms occur if the value is greater than the UOL. The default value is the upper range limit of the transmitter. Valid values depend on the transmitter; refer to the transmitter band or user manual. Default Value is enabled if you gage pressure using the Static Pressure Options. Type the live input value to use when communicating with a sensor. The template selected determines the default value displayed. The pressure sensor may measure absolute or gage pressure. Realflo User and Reference Manual May 19, 2011 92 Realflo Maintenance Mode Reference Select Absolute Pressure to measure absolute static pressure. This is the default value unless the Compressibility Calculation type is set to NX-19. The Static Pressure is set to Gage and the Atmospheric pressure is 14.7psi when NX-19 is selected. Select Gage Pressure to measure gage static pressure. Type the Atmospheric Pressure measured at the site. This control is disabled and set to zero if absolute pressure is selected. The atmospheric pressure entered needs to be greater than zero. The maximum upper limits for atmospheric pressure are: 30 psi and PEMEX units for US1, US2, US3, US4, US5, US6, US7, US8, 4320 lbf/ft2 for IP units 207 kPa for Metric1 units 2.07 bar for Metric2 units 0.207 MPa for Metric3 units 207000 Pa for SI units If you configured sensor inputs, see the Static Pressure Compensation section. Analog Inputs The dialog below is presented when analog inputs are used. Input Type is a read-only field that identifies the input type for which you are setting the parameters using this dialog. Input Register is the register address where the input value is stored. Valid values are 30001 to 39999 or 40001 to 49999. The default is selected based on the run number so that inputs have unique registers. Input at Zero Scale is value read from the sensor, in unscaled I/O units, when the sensor is at zero scale. Valid values depend on the input type. The default value is 0. This is enabled for Telepace integer, raw float and ISaGRAF integer types and disabled otherwise. Realflo User and Reference Manual May 19, 2011 93 Realflo Maintenance Mode Reference Input at Full Scale is value read from the sensor, in unscaled I/O units, when the sensor is at full scale. Valid values depend on the input type. The default value is 32767. This is enabled for Telepace integer, raw float and ISaGRAF integer types and disabled otherwise. SP at Zero Scale is the pressure that corresponds to the zero scale input, or if the input does not require scaling, the minimum pressure that can be read from the sensor. Valid values depend on the input type. The default value is 0. SP at Full Scale is the pressure that corresponds to the full-scale input, or if the input does not require scaling, the maximum pressure that can be read from the sensor. Valid values depend on the input type. The default value is 20000. Static Pressure Compensation This step selects if compensation is applied for the location where calibration was performed. If you configured sensors or analog inputs from the Static Pressure Limits dialog, this is the next step in the configuration sequence. Select No if compensation is not required. This is the default value. Select Yes to compensate for the altitude and latitude. Type the Altitude of the location. Valid values are -30000 to 30000. The default value is 0. This control is disabled if No is selected. Type the Latitude of the location. Valid values are -90 to 90. The default value is 0. This control is disabled if No is selected. Temperature Limits This step lets you define the limits for the temperature input. One of two configuration dialogs is presented based on the Input Type configured for static pressure limits: Sensor Inputs Realflo User and Reference Manual May 19, 2011 94 Realflo Maintenance Mode Reference Analog Inputs Sensor Inputs The following dialog is presented when sensor (MVT) inputs are used. Input Type is a read-only field that identifies the sensor number for which you are setting the parameters using this dialog. Units is the differential pressure units. Values read from the transmitter are in these units. If the transmitter has a local display it uses these units. Valid values are kiloPascal, MegaPascal, and psi (pounds per square inch). The default is psi. Lower Operating Limit (LOL) is the lowest valid value from the sensor and needs to be less than the UOL. Alarms occur if the value is less than the LOL. The default value is 0. Valid values depend on the transmitter; refer to the transmitter band or user manual. Upper Operating Limit (UOL) is the highest valid value from the sensor and needs to be greater than the LOL. Alarms occur if the value is greater than the UOL. The default value is the upper range limit of the transmitter. Valid values depend on the transmitter; refer to the transmitter band or user manual. Realflo User and Reference Manual May 19, 2011 95 Realflo Maintenance Mode Reference Analog Inputs The following dialog is presented when analog inputs are used. Input Type is a read-only field that identifies the input type for which you are setting the parameters using this dialog. Input Register is the register address where the input value is stored. Valid values are 30001 to 39999 or 40001 to 49999. The default is selected based on the run number so that inputs have unique registers. Input at Zero Scale is value read from the sensor, in unscaled I/O units, when the sensor is at zero scale. Valid values depend on the input type. The default value is 0. This is enabled for Telepace integer, raw float and ISaGRAF integer types and disabled otherwise. Input at Full Scale is value read from the sensor, in unscaled I/O units, when the sensor is at full scale. Valid values depend on the input type. The default value is 32767. This is enabled for Telepace integer, raw float and ISaGRAF integer types and disabled otherwise. Temperature at Zero Scale is the temperature that corresponds to the zero scale input, or if the input does not require scaling, the minimum pressure that can be read from the sensor. Valid values depend on the input type. The default value is –40. Temperature at Full Scale is the temperature that corresponds to the fullscale input, or if the input does not require scaling, the maximum pressure that can be read from the sensor. Valid values depend on the input type. The default value is 200. Realflo User and Reference Manual May 19, 2011 96 Realflo Maintenance Mode Reference Contract Settings This step sets the contract settings for the run. Input Average Weighting is the weighting method of the linear inputs. This applies to the differential pressure, static pressure, and temperature. Valid values are time-weighted or flow-weighted (see Input Averaging on page 948 for more information). The default is time-weighted. Contract Hour is the hour of the day that starts a new contract day specified using a 24-hour clock. The contract day begins at 00 minutes and 00 seconds of the specified hour. Valid values are 0 to 23. The default value is 0 (midnight). Standard Base Conditions are the default Base Temperature and Base Pressure (absolute) values. Base Temperature is the reference temperature to which contract flow values are corrected. Valid values are -40 to 200. The default value is given in the table below. Base Pressure is the reference pressure to which contract flow values are corrected. The base pressure is measured as absolute pressure (not a gauge pressure). Valid values are 0 to 32000. The default value is given in the table below. Contract Units Standard Base Temperature Standard Base Pressure US1 US2 US3 IP Metric1 Metric2 Metric3 SI 60 F 60 F 60 F 60 F 15 C 15 C 15 C 288.15 K 14.73 psi 14.73 psi 14.73 psi 2 2116.2281 lbf/ft 101.325 kPa 1.01325 bar 0.101325 MPa 101325 Pa Realflo User and Reference Manual May 19, 2011 97 Realflo Maintenance Mode Reference Contract Units Standard Base Temperature Standard Base Pressure US4 US5 US6 US7 US8 PEMEX 60 F 60 F 60 F 60 F 60 F 60 F 14.73 psi 14.73 psi 14.73 psi 14.73 psi 14.73 psi 14.73 psi Realflo for PEMEX flow computers provide a second set of base conditions. PEMEX Base Conditions are the default Base Temperature and Base Pressure (absolute) values when Realflo is operating in PEMEX mode. Base Temperature is the reference temperature to which contract flow values are corrected. The default is listed in the table below for each type of contract unit. Base Pressure is the reference pressure to which contract flow values are corrected. The base pressure is measured as absolute pressure (not a gauge pressure). Valid values are 0 to 32000. The default values are listed in the table below for each contract unit. Contract Units US1 US2 US3 IP Metric1 Metric2 Metric3 SI US4 US5 US6 US7 US8 PEMEX Standard Base Temperature 60 F 60 F 60 F 60 F 15 C 15 C 15 C 288.15 K 60 F 60 F 60 F 60 F 60 F 68 F Standard Base Pressure 14.73 psi 14.73 psi 14.73 psi 2 2116.2281 lbf/ft 101.325 kPa 1.01325 bar 0.101325 MPa 101325 Pa 14.73 psi 14.73 psi 14.73 psi 14.73 psi 14.73 psi 14.73 psi Flow Calculations When configuring a flow computer, you can configure it to use the following calculations: AGA-Settings AGA-3 Deadband Settings AGA-7 Settings AGA-11 Settings Realflo User and Reference Manual May 19, 2011 98 Realflo Maintenance Mode Reference AGA-3 Settings This step lets you set the AGA-3 calculation parameters. Orifice Material is the material the orifice plate for the meter run is made of. Valid values are Stainless Steel, Monel, and Carbon Steel. The default value is Stainless Steel. Pipe Material is the material the meter run pipe is made of. Valid values are Stainless Steel, Monel, and Carbon Steel. The default value is Carbon Steel. Orifice Diameter is the diameter of the meter run orifice. The default value is 3 inches. Orifice reference temperature is the temperature at which the diameter of the meter run orifice was measured. The default value is 68°F. Pipe Diameter is the measurement of the meter run pipe inside diameter. The default value is 4.026 inches. Pipe reference temperature is temperature at which the meter run pipe diameter was measured. The default value is 68°F. Beta Ratio is the ratio of orifice diameter to pipe diameter. It is displayed for information purposes only and cannot be edited. Realflo displays a message if the beta ratio is outside recommended limits. Isentropic Exponent is a thermodynamic property of gas used to predict the relationships between pressure, temperature, volume and energy. If you are unsure of this value, a typical value of 1.3 is commonly used. The default value is 1.3. Viscosity is a measure of the resistance of a measured gas to flow. Valid values are 0 to 1. The default value is 0.010268 centipoise. Realflo User and Reference Manual May 19, 2011 99 Realflo Maintenance Mode Reference AGA-3 Deadband Settings This step lets you set AGA-3 calculation deadbands. Temperature Deadband is the tolerated change in the flowing temperature before temperature dependent factors in the flow calculation are recalculated. Changes in the temperature smaller than the deadband will be ignored in determining the result. The default value is 0. The upper limit is 7°F or 4°C. Static Pressure Deadband is the tolerated change in the static pressure before static pressure dependent factors in the flow calculation are recalculated. Changes in the static pressure smaller than the deadband will be ignored in determining the result. A static pressure deadband setting of up to four percent of the typical static pressure level should have a small effect on the accuracy of the AGA-3 calculation. The default value is 0. The upper limit is 800 psi or 5500 kPa or the equivalent in other units. Differential Pressure Deadband is the tolerated change in the differential pressure before differential pressure dependent factors in the flow calculation are recalculated. Changes in the differential pressure smaller than the deadband will be ignored in determining the result. A change of N in the differential pressure input will cause a change of 0.5 N in the calculation volume at base conditions. It is recommended that the differential pressure deadband be set to zero. The default value is 0. The upper limit is 4.5 inWC or 1.1 kPa or the equivalent in other units. Realflo User and Reference Manual May 19, 2011 100 Realflo Maintenance Mode Reference AGA-7 Settings This step lets you define AGA-7 settings. K Factor is the number of pulses per unit volume of the turbine meter. Valid values are 0.001 to 1000000. The default value is 100. M Factor is the adjustment to the number of pulses per unit volume for the turbine meter compared to an ideal meter. Valid values are 0.001 to 1000. The default value is 1. Uncorrected Flow Volume is the accumulated uncorrected flow volume at base conditions. The Uncorrected Flow Volume control is available in Realflo versions 6.20 and higher. AGA -11 Settings AGA-11 configuration defines parameters unique to the AGA-11 calculation. The AGA-11 calculation communicates with a Coriolis meter for the calculation. The AGA-11 configuration sets the communication parameters for communication between the Coriolis meter and the flow computer. Realflo User and Reference Manual May 19, 2011 101 Realflo Maintenance Mode Reference Address This is the Modbus address of the Coriolis Meter for serial communications. Multiple Coriolis meters using the same serial port on the flow computer need to each have a unique Modbus address. Valid Modbus addresses are between 1 and 247. The default address is 247. Port This is the communication port on the flow computer that will be used to communicate with the Coriolis meter. Valid port selections depend on the type of controller the flow computer running on. The default port is the first valid port available on the controller. Timeout This is the time the flow computer will wait for a response for Modbus read commands send to the Coriolis meter. When the timeout time is exceeded the command is unsuccessful and an alarm is added to the flow computer alarm list. Valid timeout values are from 0 to 1000 ms. The default value is 50 ms. V-Cone Settings V-Cone Configuration defines parameters unique to the V-Cone calculation. Cone Material This is the material of the V-cone. Valid values are Carbon Steel, Stainless 304, and Stainless 316. The default value is determined by the template selected. Pipe Material This is the material from which the meter run pipe is made. Valid values are Carbon Steel, Stainless 304, and Stainless 316. The default value is determined by the template selected. Adiabatic Expansion Factor The Adiabatic Expansion Factor drop down list selects which calculation is used for the adiabatic expansion factor of the calculation. Realflo User and Reference Manual May 19, 2011 102 Realflo Maintenance Mode Reference Select Legacy Calculation to use the older calculation method. This is the default selection. Flow computers prior to version 6.71 support only this selection. Select V-Cone to use the V-Cone specific calculation. This selection should be used with V-Cone devices. Select Wafer-Cone to use the Wafer-Cone specific calculation. This selection should be used with Wafer-Cone devices. This control is disabled and forced to Legacy Calculation if the controller type is not one of SCADAPack 32, SCADAPack 32P, SCADAPack 314/330/334, SCADAPack 350 SCADAPack 4203 or SolarPack 410. When reading from a flow computer that does not support the adiabatic expansion factor configuration, the method will be set to Legacy Calculation. When writing to a flow computer that does not support the adiabatic expansion factor method, the configuration registers will be ignored and the expansion factor will not be written. Cone Diameter The diameter of the meter run cone used for the flow calculation. The measurement units are displayed depending on the input units selected. The default value is 3 inches. Cone Measurement Temperature This is the reference temperature at which the cone diameter for the meter run was measured. The measurement units are displayed depending on the input units selected. The default value is 59 degrees F. Pipe Inside Diameter This is the measurement of the meter run pipe inside diameter. The measurement units are displayed depending on the input units selected. The default value is 5 inches. Pipe reference temperature The temperature at which the meter run pipe diameter was measured. The measurement units are displayed depending on the input units selected. The default value is 59 degrees. Isentropic Exponent In general, this is a thermodynamic property of gas used to predict the relationships between pressure, temperature, volume and energy. If you are unsure of this value a typical value of 1.3 is commonly used. The default value is 1.3. Viscosity This is the viscosity of the measured gas. In general, this is the resistance of a gas or semi-fluid resistance to flow. The measurement units are displayed depending on the input units selected. Valid values are 0 to 1. The default value is 0.010268 centiPoise. Wet Gas Correction Factor The Wet Gas Correction Factor Method drop down list selects which calculation is used for the wet gas correction factor of the calculation. Realflo User and Reference Manual May 19, 2011 103 Realflo Maintenance Mode Reference Select Legacy Method to use the older correction method. This is the default selection. Flow computers prior to version 6.73 support only this selection. Select V-Cone or Wafer Cone to use the V-Cone and Wafer Cone specific calculation. This selection should be used with V-Cone or Wafer Cone devices. This control is disabled and forced to Legacy Calculation if the controller type is not one of SCADAPack 32, SCADAPack 32P, SCADAPack 314/330/334, SCADAPack 350 SCADAPack 4203 or SolarPack 410. The V-Cone or Wafer Cone supported Beta Ratios are: For Fr (Froude Number) < 5 supported Beta Ratio is 0.55. For Fr (Froude Number) < 5 supported Beta Ratio is 0.75. For Fr (Froude Number) > 5 supported Beta Ratio is 0.75. When V-Cone or Wafer Cone is selected and if the current Beta ratio is not supported when executing verification, a message is displayed. When V-Cone or Wafer Cone is selected, configuration of the fixed wet gas factor parameter, as set in the Contract tab, is disabled. When Legacy Method is selected, configuration of the parameters used by the V-Cone or Wafer Cone method is disabled. Mass Flow Rate of Liquid The Mass flow rate of liquid at flow conditions parameter is used by the VCone or Wafer Cone method and can be configured when V-Cone or Wafer Cone is selected. This information needs to be gathered using a sampling method or a tracer method. The default is 0. Density of Liquid The Density of liquid at flow conditions parameter is used by the V-Cone or Wafer Cone method and can be configured when V-Cone or Wafer Cone is selected. The default is 0. Realflo User and Reference Manual May 19, 2011 104 Realflo Maintenance Mode Reference V-Cone Coefficients This step lets you define the V-Cone coefficients. Enter the V-Cone coefficient pairs from the meter sizing report. The default list contains one pair: Re = 1000000; Cf = 0.82. Click Add to add a coefficient pair. In the original McCrometer V-Cone Application Sizing sheet that is included with V-Cone meters uses the terminology Cd (discharge coefficient) rather than Cf (flow coefficient). You will need to use the Re and Cd values from the V-Cone Application Sizing sheet for the Re and Cf entries. If the Re value is the same for every entry in the table only the first pair is used. McCrometer now supplies one value of Cd in the sizing document. You need to enter one Re/Cd pair only. See the McCrometer Application Sizing sheet for the Re/Cd pair for your meter. To edit a coefficient pair in the table: Select a row in the list. Click Edit to open the Add/Edit Flow Coefficient dialog. To delete a coefficient pair in the table: Select a row in the list. Click Delete to delete the pair form the list. Realflo User and Reference Manual May 19, 2011 105 Realflo Maintenance Mode Reference Compressibility Calculations When configuring a flow computer, you can configure it to use the following compressibility calculations: AGA-8 Settings AGA-8 Hexanes+ Settings AGA-8 Gas Composition NX-19 Settings AGA-8 Settings This step sets AGA-8 calculation options. Events can be logged each time an AGA-8 gas component changes. Select Yes to log each change to the gas composition. Use this option if the gas composition changes infrequently. This is the default selection. Select No to skip logging changes. Use this option if you are making frequent changes to the gas composition. The Relative Density and Heating values can be calculated from the AGA-8 calculation or determined in a laboratory. Select Calculate the Values to have AGA-8 calculate the values. Select Use Laboratory Values to used fixed values. Relative Density sets the real relative density of the gas. Valid values are 0.07 to 1.52. The default value is 0.554. This control is disabled if Calculate the Values is selected. Heating Value sets the heating value of the gas. Valid values are 0 to 3 1800 BTU(60)/ ft or the equivalent in the selected units. The default 3 value is 1014 BTU(60)/ft or the equivalent in the selected units. This control is disabled if Calculate the Values is selected. Realflo User and Reference Manual May 19, 2011 106 Realflo Maintenance Mode Reference AGA-8 Hexanes+ Settings This step chooses if Hexane and higher components are entered individually or as a single combined value. Gas composition can be measured with individual values for hexane and higher components or use a combined value. Select Enter Each Component to use individual values for the higher components. This is the default selection. Select Use Combined Hexanes+ with these Ratios to use a combined value. Type the ratios of the higher components. n-Hexane defines the percentage of the Hexanes+ contributed by nHexane. n-Heptane defines the percentage of the Hexanes+ contributed by nHeptane. n-Octane defines the percentage of the Hexanes+ contributed by nOctane. n-Nonane defines the percentage of the Hexanes+ contributed by nNonane. n-Decane defines the percentage of the Hexanes+ contributed by nDecane. The Total field displays the sum of each portion. This value cannot be edited. The total of portions needs to be 100 percent. AGA-8 Gas Composition This step defines the AGA-8 gas composition. One of two configuration dialogs opens based on whether Hexane and higher components are entered individually or as a single combined value. Individual Components Realflo User and Reference Manual May 19, 2011 107 Realflo Maintenance Mode Reference The dialog below lets you enter combined Hexanes+ composition. Type the gas composition according to the laboratory analysis. The total of components needs to be 100 percent. Normalize adjusts non-zero components so that the total of components is 1.0000 (or 100.00 percent). The ratio to each other for the components remains the same. Realflo User and Reference Manual May 19, 2011 108 Realflo Maintenance Mode Reference Combined Hexanes+ The dialog below lets you enter combined Hexanes+ composition. Type the gas composition according to the laboratory analysis. The total of components needs to be 100 percent. Normalize adjusts non-zero components so that the total of components is 1.0000 (or 100.00 percent). The components remain in their current ratio to each other. NX-19 Settings This step lets you define the NX-19 calculation. NX-19 is not supported for PEMEX flow computers. Realflo User and Reference Manual May 19, 2011 109 Realflo Maintenance Mode Reference Specific Gravity is the specific gravity of the gas being measured. Valid values are 0.554 to 1.000. The default value is 0.554. Carbon Dioxide is the percent of carbon dioxide in the gas being measured. This value needs to be in the range 0 to 15. The default value is 0. Nitrogen is the percent of nitrogen in the gas being measured. This value needs to be in the range 0 to 15. Heating Value is the heating value of the gas being measured. Valid values 3 are 0 to 1800 BTU(60)/ft or the equivalent in the selected units. The default value is 1014.33 BTU(60)/ft3. Events can be logged each time the NX-19 configuration changes. Select Yes to log each change to the configuration. Use this option if the configuration changes infrequently. This is the default selection. Select No to skip logging changes. Use this option if you are making frequent changes to the configuration. Sensor Configuration Parameters The next step is MVT Configuration if any transmitters were used in the input configuration. Otherwise the next step is Flow Computer Configuration Summary. Sensor Configuration This step selects how the transmitters are to be configured. The Flow Runs are configured to use these transmitters window is a table that shows each of the configured flow run numbers, its Flow Run ID and the transmitter that it uses for the differential pressure (DP), static pressure (SP) and temperature sensors. If an analog input is used for the flow run AIN will be displayed in the coresponding DP, SP, or Temp column. Realflo User and Reference Manual May 19, 2011 110 Realflo Maintenance Mode Reference The How do you want to configure sensors? option lets you select how to continue configuring the sensors. The three options are: Connect now and configure transmitters to connect to the flow computer and configure the attached transmitters. This selection is disabled if the flow computer configuration was selected to be completed offline in the Flow Computer Status step. If you choose this option, go to the Configure Connected Transmitters section to continue. Edit sensor configuration without connecting to proceed directly to the editing pages, without connecting to the flow computer. If you choose this option, go to the Review Sensors Dialog section to continue. Use default sensor configuration to complete the configuration without changing the sensor configuration. Sensor configuration will be set to default values. If you choose this option, the next step is Finish. Configure Connected Transmitters This step lets you select to either use the Realflo configuration data or the configuration from a pre-configured transmitter. Select Use the configuration from Realflo to use the configuration data from the Realflo file. This is the default setting. Select Read the configuration from the transmitter to read configuration from a pre-configured transmitter. Sensor Search This step searches for sensors connected to the flow computer serial ports or LAN port. Realflo User and Reference Manual May 19, 2011 111 Realflo Maintenance Mode Reference Search Serial Option Select Search Serial to search for transmitters connected to a serial port of the flow computer. The Port parameter selects the flow computer serial port where the sensor is attached. Valid values are com1, com2, com3, and com4. The default value is com2 for a SCADAPack controller and com1 for other controllers. The Timeout parameter specifies the length of time the flow computer will wait for a response from a sensor. Valid values are 100 ms to 10000 ms. The default is 300 ms. Select Maximum to search for a number of MVT transmitters. The search operation will stop after finding the specified number of transmitters. The valid value is from 1 to 255. The default is 1. Select Range to search the addresses in a specified range. The range to search for is typed in the edit boxes to the right of the radio button. The value in To edit control needs to be equal or great than the value in the first edit control. The maximum search range that can be typed is for 255 transmitters. The default range is 1 to 247. Range Search supports addresses 1 to 255 in standard Modbus mode, and 1 to 65534 in extended address mode. The address mode of the flow computer serial port needs to be set to extended to search for transmitters with extended addresses. Select All to search the addresses of transmitters connected with the serial port selected in Port. Up to 255 addresses are searched. Realflo User and Reference Manual May 19, 2011 112 Realflo Maintenance Mode Reference Click Next to start the search for sensors or 4000 transmitters. A search process dialog is displayed so that the search operation can be cancelled at any time. Search LAN Option Select Search LAN to search for transmitters connected to a LAN port of the flow computer. The IP Address parameter specifies the IP address of a 4000 transmitter. Valid entries are IP addresses in the format nnn.nnn.nnn.nnn where nnn are values between 0 and 255. The Protocol parameter selects the type of IP protocol that will be used to query the transmitter. Valid IP protocol selections are Modbus/TCP and Modbus RTU in UDP. The IP port (for example port 502) for the selected protocol needs to be the same in the flow computer and the 4000 transmitter. The Timeout parameter specifies the length of time the flow computer will wait for a response from a 4000 transmitter. Valid values are 100 to 10000 milliseconds. The default is 5000 ms. Click Next to start the search for MVT transmitters or 4000 transmitters. A search process dialog is displayed so that the search operation can be cancelled at any time. If no transmitters were found, a message is displayed and the search step is displayed again. Assign Sensors This step lets you assign found transmitters to flow runs. The Available Sensors pane shows the transmitters that have been configured and the transmitters that were found by the search. There may be more transmitters in the list than there are runs. Realflo User and Reference Manual May 19, 2011 113 Realflo Maintenance Mode Reference The Sensor column indicates the transmitter slots that have been configured. Transmitters that were found but not assigned are listed as Not assigned. The Status column indicates if configuration data for the transmitter exists. Found indicates a transmitter has been configured and the search found one with the same port, address and device type. Missing indicates a transmitter has been configured but the search did not find one with the same port, address, and device type. The Port column displays the serial or LAN port the flow computer is using to communicate with the transmitter. The Address column displays the Modbus station address or IP address of the transmitter. The Tag column displays the Tag Name assigned to the transmitter. You can leave this column blank if a Tag Name has not been assigned to the transmitter. The Device type column displays the transmitter type. Valid values are 3095FB, 4101, 4102, 4202 DR, 4202 DS, 4203 DR, or 4203 DS. The Flow Runs window shows which MVTs are assigned to the runs. To Change the order of the sensors: Select a sensor in Available Sensors window. Click Move. The Move Sensor dialog opens: In the Move Sensor dialog, use Move To selection to select the new location Click OK. To delete a sensor: Select a transmitter in Available Sensors. Click Delete. To change the address of a Sensor: Select a transmitter in Available Sensors. Click Change Address. The Change Address dialog opens: Realflo User and Reference Manual May 19, 2011 114 Realflo Maintenance Mode Reference Enter a new address for the transmitter in the New Address: edit box. Click OK. Click Next when the transmitters have been moved to the correct location. Next is disabled if there are Not Assigned transmitters still in the list. The next step is Search for More Transmitters Dialog. Notes The following actions may occur when moving a sensor. Moving one sensor to another results in the both swapping positions. When Use the configuration from Realflo is selected, assigning a Not assigned transmitter to a Sensor with status Missing and device type matching result in the sensor adopting the transmitter‟s port and address and retaining the rest of the sensor configuration. The sensor, being assigned, will disappear from the list. When Read the configuration from the transmitter is selected, assigning a Not assigned transmitter to a sensor with status Missing and device type matching results in the sensor adopting the transmitter‟s configuration. The transmitter, being assigned, will disappear from the list. Assigning a Not assigned transmitter to a sensor with status Missing and device type not matching will result in the sensor adopting the transmitter‟s configuration. The transmitter, being assigned, will disappear from the list. Other assignments are not permitted. Search for More Transmitters Dialog This step displays the current sensor assignments and asks if more searches are needed. Realflo User and Reference Manual May 19, 2011 115 Realflo Maintenance Mode Reference Proposed Sensors shows the transmitters that have been configured and the transmitters that were found by the search. Flow Runs shows which sensors are assigned to which runs. Select Search for more transmitters to search again. Select Finish searching and review configuration to use the current settings. This is the default radio button. Review Sensors Dialog This step displays the transmitter assignments and allows you to edit the transmitter configuration. Realflo User and Reference Manual May 19, 2011 116 Realflo Maintenance Mode Reference The Sensors pane shows the transmitters that have been configured. The Flow Runs pane shows which sensors are assigned to the runs. Click Edit to review and modify the settings for each transmitter. Edit opens the Add/Edit Sensor Settings dialog. Changes to a transmitter address will be written to the transmitter without affecting current flow computer configuration. Copy Run Configuration Dialog The Copy Run step is displayed only if you selected more than one run is selected in the Number of Flow Runs step and you have configured the first run. The second flow run, and subsequent runs, may be configured step-by-step or by copying the configuration of a previous run. Select Create Configuration Step-by-Step to configure another run using the wizard without copying Run 1. Flow Computer Configuration Summary This step displays a summary of the flow computer settings. Realflo User and Reference Manual May 19, 2011 117 Realflo Maintenance Mode Reference A summary of the flow computer configuration is shown. The current configuration can be compared with the configuration in the target flow computer. Select Yes to compare the configurations. Select No to not compare the configurations. Review Differences This step displays a summary of changes in the flow computer configuration. You can select to write to the flow computer or not. The summary shows the differences in the configuration. Select Yes to write the configuration to the flow computer. The configuration is written to the flow computer. The Start Executing command will be written for each flow run. The communication progress dialog shows the stages of writing. Select No to write the configuration to the flow computer later. Realflo User and Reference Manual May 19, 2011 118 Realflo Maintenance Mode Reference Click Next to perform the selected action. In Flow Computer versions 6.73 and older, when AGA-8 gas ratios or NX-19 gas quality values are written to the flow computer the new gas ratios are updated in the Proposed registers. The Actual registers are not updated until a new Density calculation is started with the new values. The new values are not available to SCADA host software reading the Actual registers until a until a new Density calculation is started with the new values. In Flow Computer versions 6.74 and newer when AGA-8 gas ratios or NX19 gas quality values are written to the flow computer the new gas ratios are updated in the Proposed registers and in the Actual registers. This allows a SCADA host to immediately confirm the new values were written to the flow computer. The new gas values are not used by the flow computer until a new density calculation is started. Save File This step lets you select where to save the configuration file. Select Save to Realflo.tfc to save the configuration file to the default file location. Select the Save to another file to either enter a file name or use the Browse option to open the Save As dialog. Finish This step is displayed at the end of the wizard. Realflo User and Reference Manual May 19, 2011 119 Realflo Maintenance Mode Reference Click Finish to close the wizard. Realflo User and Reference Manual May 19, 2011 120 Realflo Maintenance Mode Reference View Data The View Data section contains a View Current Readings button and a Read Logs and Flow History button. Click the View Current Readings button to start the View Current Readings wizard, which will lead you through the steps to connect to a flow computer and view the current readings. Click the Read Logs and Flow History button to start the Read Logs and Flow History wizard, which will lead you through the steps to connect to a flow computer and read the alarm and event logs and the flow history. View Current Readings The View Current Readings wizard will lead you through the steps to connect to a flow computer and view the current readings. <Back returns to the previous step in the wizard. This button is disabled on the first step of a wizard. Next> moves to the next step in the wizard. This button is hidden on the last step of a wizard. Finish is displayed on the final step of a wizard in place of the Next button. It finishes the operation. This button is hidden on other steps. Cancel cancels the operation and closes the wizard. Steps performed thus far in the wizard are cancelled. Pressing the ESC key performs the same action as Cancel. Help opens the user manual. Connect to Flow Computer The connect to flow computer step defines the communication settings for the connection between the PC running the Realflo application and the target flow computer. The How do you want to communicate with the flow computer? prompt provides two selections. The Use the Current Settings option sets the default communication settings for Realflo. These settings are for the PC that is running Realflo. Realflo User and Reference Manual May 19, 2011 121 Realflo Maintenance Mode Reference (The communication settings for the PC running Realflo and the communication settings in the flow computer need to match). The default communication settings are: COM 1 (serial port on the PC) 9600 baud, no parity 8 Data bits 1 Stop bit The default Modbus address Realflo will connect to is station 1. Use this selection if the serial port on your PC is COM 1 and the serial port settings for the serial port on the flow computer are set for default (9600, 8,n,1 and Modbus address 1). Click the Next> button to begin communication with the flow computer and move to the next step in the wizard. The Choose/View Communication Setup option opens the PC Communication Settings dialog as shown below. This allows you to view the default settings and to change the PC communication setting for the type of connection you are using to communicate with the flow computer. See the section Communication >> PC Communication Settings Command in the Realflo Expert Mode Reference section of this manual for complete details on the parameter settings in this dialog. You need to know the communication settings for the connection to the flow computer to use this step. Once the communication settings have been selected click the OK> button to close the dialog and begin communication with the flow computer. Current Readings View The Current Readings view displays current measured and calculated values from the flow computer. The Current Readings view will appear differently depending on the run configuration. Realflo User and Reference Manual May 19, 2011 122 Realflo Maintenance Mode Reference The view is divided into eight sections. These sections are: Process Measurements This section displays the live and forced values for the flow calculation process inputs. The live values show the value read from the sensor. The forced values show the inputs to the flow calculation when they are forced. The Forced values are disabled when the input is live. The forced values are shown in red when the value is forced. The units of measurement displayed are those in effect when the readings were made. See Measurement Units for a description of the unit types. Process measurements not used by the flow calculation are disabled. Forced values are not displayed for flow computers older than 6.0. Calculated Compressibility This section displays the results of the compressibility calculation selected in the Input Configuration property page. The time of the last compressibility calculation update and any compressibility calculation errors are also displayed in this section. The units of measurement displayed are those in effect when the readings were made. See Measurement Units for a description of the unit types. Calculation Status The Calculation Status section displays the Calculation State of the flow computer calculations for the run. Refer to the Calculation Control command in the Flow Computer menu for further information on flow calculation control. The Calculation State Start and Stop button is disabled for users who have a read and view privileges account. The Calculation State can be changed using the start or stop button beside the Calculation State display. When the Current Readings are being updated and the calculation is stopped or not set then the button is labeled Start. When the Current Readings are being updated and the calculation is running then the button is labeled Stop. Realflo User and Reference Manual May 19, 2011 123 Realflo Maintenance Mode Reference When the Current Readings are not being updated the button is disabled and no text is displayed on it. Click on the button to change the Calculation State. If the calculations are stopped the following message box is displayed. If Yes is selected the flow calculations for the run are started. If No is selected the message box is closed and no further action is taken. If the calculations are running the following message box is displayed. If Yes is selected the flow calculations for the run are stopped. If No is selected the message box is closed and no further action is taken. The Last Flow Configuration displays the time stamp of the last time the flow configuration was changed. The Last Density Configuration displays the time stamp of the last time the compressibility configuration was changed. The Last Flow Configuration and Last Density Configuration values are not displayed for flow computers older than 6.0. Pulse Input Volume The Pulse Input Volume section is enabled when you configure a SolarPack 410, see section SolarPack 410. Calculated Flow at Base Conditions The Calculated Flow displays the instantaneous Flow Mas Rate, Standard Flow Volume Rate, Flow Energy Rate, Flow Product, Time of last update, and Input and Flow Calculation Status. The Flow Extension is displayed when the run is configured for AGA-3 (1990) calculations. The Flow Product is displayed when the run is configured for AGA-3 (1990) calculations. The time of the last flow calculation and input and flow calculation status are also displayed. The units of measurement displayed are those in effect when the readings were made. See Measurement Units for a description of the unit types. Calculated Flow (PEMEX) The Calculated Flow displays the instantaneous Flow Volume Rate, Standard Flow Volume Rate, Flow Energy Rate, Flow Product, Time of last Realflo User and Reference Manual May 19, 2011 124 Realflo Maintenance Mode Reference update, and Input and Flow Calculation Status. The Flow Extension is displayed when the run is configured for AGA-3 (1990) calculations. The Flow Product is displayed when the run is configured for AGA-3 (1990) calculations. The time of the last flow calculation and input and flow calculation status are also displayed. The units of measurement displayed are those in effect when the readings were made. See Measurement Units for a description of the unit types. Accumulated Flow The Accumulated Flow section displays the flow volume for the current contract day (Today) and the previous contract day (Yesterday). Data is copied from the current contract day (Today) to the previous contract day (Yesterday) at the end of the contract day, as measured by the real time clock. Data is not copied when a new day is started for other reasons. It also displays the standard flow volume, flow energy, the number of flow calculations. The units of measurement displayed are those in effect when the readings were made. See Measurement Units for a description of the unit types. This section also displays the accumulated flow volume and flow time for the current month and the previous month. Data is copied from the current month (This Month) to the previous month (Last Month) at the end of the contract day at the end of the month, as measured by the real time clock. Accumulated Flow (PEMEX) The Accumulated Flow section displays the PEMEX flow volume for the current contract day (Today) and the previous contract day (Yesterday). Data is copied from the current contract day (Today) to the previous contract day (Yesterday) at the end of the contract day, as measured by the real time clock. Data is not copied when a new day is started for other reasons. It also displays the standard flow volume, flow energy, the number of flow calculations. The units of measurement displayed are those in effect when the readings were made. See Measurement Units for a description of the unit types. This section also displays the accumulated flow volume and flow time for the current month and the previous month. Data is copied from the current month (This Month) to the previous month (Last Month) at the end of the contract day at the end of the month, as measured by the real time clock. AGA-7 Calculations Only Accumulated Uncorrected Flow The Accumulated Uncorrected Flow section displays the total calculated uncorrected flow volume (for the current contract day, the previous contract day, the current month and the last month. The accumulator holds a number between 0 and 999,999,999,999. It rolls over when the accumulated value is equal or greater than 1,000,000,000,000. The view is updated according to the status of the Update Readings selection in the Maintenance menu. Realflo User and Reference Manual May 19, 2011 125 Realflo Maintenance Mode Reference SolarPack 410 Views specific to SolarPack 410 are described below. The view has two additional sections. These sections are described below: Pulse Input Volume This section displays pulse and accumulated flow volumes for the onboard counter of a SolarPack 410. This section applies only to the SolarPack 410 system. Data displayed is as follows: Pulses: Raw instantaneous pulse count Today: An accumulation of today‟s total. Yesterday: An accumulation of yesterday‟s total. This Month: An accumulation of the totals for this month. Last Month: An accumulation of the totals for last month. Total: A running total volume since the beginning of this operation. Volumes are listed in the unit selected when configuring the Pulse Input. Battery Charger This section applies only to the SolarPack 410. The Battery Status indicates the current state of the battery charger. The Temperature Sensor indicates the current status of the battery charger temperature sensor. Realflo User and Reference Manual May 19, 2011 126 Realflo Maintenance Mode Reference Read Logs and Flow History The Read Logs and Flow History wizard will lead you through the steps to connect to a flow computer and read the alarm and event logs and the flow history. <Back returns to the previous step in the wizard. This button is disabled on the first step of a wizard. Next> moves to the next step in the wizard. This button is hidden on the last step of a wizard. Finish is displayed on the final step of a wizard in place of the Next button. It finishes the operation. This button is hidden on other steps. Cancel cancels the operation and closes the wizard. Steps performed thus far in the wizard are cancelled. Pressing the ESC key performs the same action as Cancel. Help opens the user manual. Connect to Flow Computer The connect to flow computer step defines the communication settings for the connection between the PC running the Realflo application and the target flow computer. The How do you want to communicate with the flow computer? prompt provides two selections. The Use the Current Settings option sets the default communication settings for Realflo. These settings are for the PC that is running Realflo. (The communication settings for the PC running Realflo and the communication settings in the flow computer need to match). The default communication settings are: COM 1 (serial port on the PC) Realflo User and Reference Manual May 19, 2011 127 Realflo Maintenance Mode Reference 9600 baud no parity 8 Data bits 1 Stop bit The default Modbus address Realflo will connect to is station 1. Use this selection if the serial port on your PC is COM 1 and the serial port settings for the serial port on the flow computer are set for default (9600, 8,n,1 and Modbus address 1). Click the Next> button to begin communication with the flow computer and move to the next step in the wizard. The Choose/View Communication Setup option opens the PC Communication Settings dialog as shown below. This allows you to view the default settings and to change the PC communication setting for the type of connection you are using to communicate with the flow computer. See the section Communication >> PC Communication Settings Command in the Realflo Expert Mode Reference section of this manual for complete details on the parameter settings in this dialog. You need to know the communication settings for the connection to the flow computer to use this step. Once the communication settings have been selected click the OK> button to close the dialog and begin communication with the flow computer. Realflo User and Reference Manual May 19, 2011 128 Realflo Maintenance Mode Reference Select Runs to Read This step selects the flow run or runs to read. The Select the Flow Run or Runs to Read selection determines if data for all runs or for a single run is read. The All Runs radio button selects reading data for all runs. The Selected Run radio button selects reading from a single run. The drop-down list selects the run to be read. Click the Next> button to move to the next step in the wizard. Realflo User and Reference Manual May 19, 2011 129 Realflo Maintenance Mode Reference Select Flow Computer Configuration This step selects whether to read the flow run configuration. Select Yes to read the flow run configuration. Select No to not read the flow run configuration. Select Alarm and Event Logs to Read This step selects which alarm and event logs to read. The Which Events do you want to read? selection determines which events to read from the flow computer. Select Just Read New Events to read unacknowledged events in the flow computer. If the operator has View, Read and Write Data or Administrator authorization then the events will be acknowledged after Realflo User and Reference Manual May 19, 2011 130 Realflo Maintenance Mode Reference reading the new events. If the events in the log are not acknowledged, the event log will fill with 700 events. Operator activity will be prevented until the events are read and acknowledged. The control is grayed under the following conditions: o The event log is not selected. o The user has Read and View account privileges. o The Restrict Realflo users to reading all alarms and events option is selected in the Expert Mode Options menu. Select Read All Events to read all events in the flow computer. This control is grayed if the Event Log control is not selected. Select Do Not Read Any Events to skip reading of events from the flow computer. The Which Alarms to you want to read? selection determines which alarm logs to read from the flow computer. Select Just Read New Alarms to read unacknowledged alarms in the flow computer. If the operator has View, Read and Write Data or Administrator authorization then the alarms will be acknowledged after reading the new events. If the events in the log are not acknowledged, the alarm log will fill with 300 events. Operator activity will be prevented until the alarms are read and acknowledged. The control is grayed under the following conditions: o The alarm log is not selected. o The user has Read and View account privileges. o The Restrict Realflo users to reading all alarms and events option is selected in the Expert Mode Options menu. The Read All Alarms radio button selects the reading of all alarms in the controller. The control is grayed if the Alarm control is not selected. The Do Not Read Any Alarms button selects not to read alarms from the flow computer. Click the Next> button to move to the next step in the wizard. Select Hourly and Daily History to Read This step selects which hourly and daily logs to read. Realflo User and Reference Manual May 19, 2011 131 Realflo Maintenance Mode Reference The Which Hourly Logs do you want to read? selection determines which hourly history is read. Select New Hours to read hourly history for hours after the current time in the file. If the file is empty then Realflo will read hourly history stored in the flow computer. This is the default selection. Select All Days to read hourly history for days stored in the flow computer. Select Selected Hours to read hourly history for the range of days selected with the From and to drop-down lists. Records are read for the contract days whose first hour is within the date range. Records for the contract day are read, regardless of their calendar date. This may result in records with calendar days outside the range being added to the log. For example, if the contract day is configured to start at 7:00 AM. Reading hourly history for September 23 would return the records where rd the first record in a day was between 7:00 on the 23 to 6:59:59 AM on th the 24 . The From control contains the oldest previous day for which the hourly history is to be read. The initial value is the current day. Change this date to avoid reading data that has previously been read into the log. The to control contains the recent previous day for which the hourly history is to be read. The initial value is the current day. The allowed range is the same or greater than the value in the From control. Change this date when wanting to read older data only. Leaving this date at its default will result in the recent data being read. Select the Do Not Read Hourly Logs to skip the reading of hourly logs. The Which Daily Logs do you want to read? selection determines which hourly history is read. Select New Days to read daily history for days after those in the current file. If the file is empty then Realflo will read all hourly history stored in the flow computer. This is the default selection. Realflo User and Reference Manual May 19, 2011 132 Realflo Maintenance Mode Reference Select All Days to read daily history for all days stored in the flow computer. Select Selected Days to read daily history for the range of days selected with the From and to drop-down lists. Records are read for the contract days whose first record is within the date range. Records for the contract day are read, regardless of their calendar date. This may result in records with calendar days outside the range being added to the log. For example, if the contract day is configured to start at 7:00 AM. Reading daily history for September 23 would return the daily rd records whose end time is in the range 7:00 on the 23 to 6:59:59 AM th on the 24 . The From control contains the oldest previous day for which the daily history is to be read. The initial value is the current day. Change this date to avoid reading data that has previously been read into the log. The to control contains the recent previous day for which the daily history is to be read. The initial value is the current day. The allowed range is the same or greater than the value in the From control. Change this date when wanting to read older data only. Leaving this date at its default will result in the recent data being read. Select the Do Not Read Hourly Logs to skip the reading of hourly logs. Click the Next> button to read the selected logs and history from the runs selected and move to the next step in the wizard. The Read Logs Results page displays the results of the Read Logs and History. Click the Next> button to move to the next step in the wizard. Save Data This step selects where to save the flow run configuration, logs and flow history. Realflo User and Reference Manual May 19, 2011 133 Realflo Maintenance Mode Reference Select Save to File name.tfc to save the data read to the currently opened file. The name of the current file is shown in place of file name.tfc. Select Save to another file and enter a file name or click the Browse button to open the Save As dialog. The following options allow you to specify the name and location of the file you're about to save: The Save in: box lists the available folders and files. The File name: box allows entry of a new file name to save a file with a different name. Realflo adds the extension you specify in the Save As type box. The Save as type: box lists the types of files Realflo can save. Realflo can open flow computer (TFC) files and flow computer Template files (RTC). Realflo User and Reference Manual May 19, 2011 134 Realflo Maintenance Mode Reference If the open file is a flow computer file and the Save as Type is a template file, Realflo will ask if the flow computer file should be saved before converting it to a template. This stops the missing of flow computer data when the file is converted. The Save button saves the file to the specified location. The Cancel button closes the dialog without saving. Realflo User and Reference Manual May 19, 2011 135 Realflo Maintenance Mode Reference Export Data This step selects whether to export the logs and history. Select Export to CFX format file to export the logs and history to a FlowCal CFX format file. This format is designed for importing into Flow-Cal. Data is exported to the CFX file from one flow run. The file includes data from the configuration, current readings, alarm log, event log and hourly history log. When this option is selected the Export Data to CFX dialog is opened when the Finish button is clicked. The CFX Export Setting button opens the CFX Export Settings dialog. The parameters for this dialog are described in the CFX Export Settings section below. Select Export to CSV format file to export the logs and history to a CSV (comma-separated values) format file. This format can be read by spreadsheet and database software. When this option is selected the Export Data to CSV dialog is opened when the Finish button is clicked. The CSV Export Setting button opens the CSV Export Settings dialog. The parameters for this dialog are described in the CSV Export Settings section below. Select No, Do not export to skip the Export Data step. When this option is selected the dialog is closed and the Read Logs Flow History wizard is ended when the Finish button is clicked. Realflo User and Reference Manual May 19, 2011 136 Realflo Maintenance Mode Reference Export Data to CFX Select All Alarms, Events and Hourly Logs to select all of the data in the flow run. This is the default button. Select Selected Days to select the data from the contract days in the From and To dropdown lists. The From dropdown list selects the oldest contract day. This control is enabled when the Selected Days radio button is selected. The To dropdown list selects the recent contract day. This control is enabled when the Selected Days radio button is selected. The Export Type dropdown list selects how export files are stored. Select Specific File to export to a single file. A standard file save dialog opens to allow you to select the file name. The default file name is <Realflo file name>(<FC ID>) - <Run Number> (<Run ID>).CFX. Select Dated CFX to export one file per day to a single folder per run. Realflo exports one file for each day. The file name is based on the time and date according to the CFX standard (YYYYMMDD.CFX). Realflo User and Reference Manual May 19, 2011 137 Realflo Maintenance Mode Reference Save CFX Export Select Save to File name.CFX to save the CFX Export data to the currently opened file. The name of the current file is shown in place of file name.CFX. The files that that will be created are shown in the display window. Select Save to another file to save the CFX Export data to a different file name and location. Enter the name in the window or select Browse to open the Save As dialog and select a name and location. The Save As dialog allows you to specify the file to export the data to. The Save button exports the data to the selected file. The Cancel button the export command and closes the dialogs. Click the Next> button to complete the Read Logs and Flow history wizard and close the dialog. Realflo User and Reference Manual May 19, 2011 138 Realflo Maintenance Mode Reference Export Data to CSV Select Hourly history to export the hourly history data. Select Daily history to export the daily history data. Select Alarm log to export the alarm log data. Select Event log to export the event log data. The Next> button moves to the Save CSV Export step in the wizard. Save CSV Export Select Save to File name.CSV to save the CSV Export data to the currently opened file. The name of the current file is shown in place of file name.CSV. The files that that will be created are shown in the display window. Realflo User and Reference Manual May 19, 2011 139 Realflo Maintenance Mode Reference Select Save to another file to save the CSV Export data to a different file name and location. Enter the name in the window or select Browse to open the Save As dialog and select a name and location. You may change the file name to any suitable name. The suggested file name format is defined in the CSV Export Options command. The Save As file selection dialog appears for views. The Save As dialog allows you to specify the file to export the data to. The Save button in the Save As dialog exports the data to the selected file. The Cancel button in the Save As dialog cancels the export command and closes dialogs. Export PEMEX Report to CSV This option is only available in the PEMEX version of Realflo. Select Run number to export the history data for a specific meter run. Select Hourly history to export the history data. Select Data to specify the dates for which to export the history data. . Click OK to open the Save As dialog. Click Save to save the hourly history data. Realflo User and Reference Manual May 19, 2011 140 Realflo Maintenance Mode Reference CFX Export Settings The CFX Export Options dialog sets options for exporting to Flow-Cal CFX files. The settings in this dialog apply to files opened by Realflo. They are stored in the Windows registry. The Hourly History section defines how records from the hourly history are exported. Select Export Partial Hour Records to export the records as they appear in Realflo. Some hours may contain more than one record due to power cycling or configuration changes. This is the default selection. Select Export One Record per Hour to export only one record per hour. Multiple records within an hour are merged into a single record for exporting. Hours that are not yet complete are not merged or exported. The following hourly record fields are summed: volume, mass, energy, pulses (turbine type). The following hourly record fields are averaged: termperature, static pressure, differential pressure (orifice types), relative density, flow product or flow extension. See Input Averaging on page 948 for more information. Select Time Leads Data Format to export the date and time at the start of the period. The time stamp on the record is the time at the start of the hour, even if the first record to be merged started later than that time. Realflo User and Reference Manual May 19, 2011 141 Realflo Maintenance Mode Reference This option is enabled only when Export One Record per Hour is checked. This option is unchecked by default. The File Description section defines some descriptive parameters in the CFX file. Meter Number defines the meter number parameter. The options are none, Flow Computer ID, Flow Run ID and Flow Run Number. The default value is Flow Computer ID. The parameter is 17 characters long in the file. Meter Name defines the meter name parameter. The options are none, Flow Computer ID, Flow Run ID and Flow Run Number. The default value is Flow Run ID. The parameter is 49 characters long in the file. Serial Number defines the meter serial number parameter in the file. The options are none, Flow Computer ID, Flow Run ID and Flow Run Number. The default value is Flow Run Number. The parameter is 11 characters long in the file. The Live Inputs Flags section defines which live input flags are set by Realflo. The CFX file contains four flags in the Live Inputs parameter. Realflo sets the T (temperature) flag to Y (live data). The other flags are normally set to N (not live), but can be modified using the following options. Check Set Live Gas Composition Flag when there is a program that updates the gas composition. This is flag A (analysis). This option is unchecked by default. Check Set Live Energy Flag when there is a program that updates the energy. This is flag B (heating value). This option is unchecked by default. Check Set Live Gravity Flag when there is a program that updates the specific gravity (relative density). This is flag G (gravity). This option is unchecked by default. The Default Name Format section defines what file names Realflo suggests when exporting. The names are combinations of the file name; Flow Computer ID; flow run number; and flow run ID. Format selects the name format. The valid values are listed below. The default is to include the file name; Flow Computer ID; flow run number; and flow run ID. o file name (Flow Computer ID) - Run# (run ID) o file name (Flow Computer ID) - Run# o file name (Flow Computer ID) - run ID o file name - Run# (run ID) o file name - Run# o file name - run ID o Flow Computer ID - Run# (run ID) o Flow Computer ID - Run# o Flow Computer ID - run ID o Run# (run ID) o run ID Realflo User and Reference Manual May 19, 2011 142 Realflo Maintenance Mode Reference The Example control shows the file name that will be suggested for the current file. The Dated CFX section defines where and how CFX files are exported. Select Use .CFX extension on folder names to create folders with a CFX extension when exporting Dated CFX files. The data for each month is stored in its own folder when using the Dated CFX format. The folder name may have a CFX extension or not. This option is unchecked by default. Select Export Dated CFX Files to the Folder to define a common folder for exports. Exported data is placed in this folder. The option is unchecked by default. When checked, the edit control holds the destination folder that will appear in the Save As dialog. Use Browse to search for another folder. CSV Export Settings The CSV Export Options command defines whether optional data is exported to CSV files. The settings in this dialog apply to files opened by Realflo. They are stored in the Windows registry. The Hourly and Daily Records section of the dialog defines optional data to include and how the data is time stamped. Select the Include Uncorrected Flow in AGA-7 Export option to export the Uncorrected Data column from the Hourly History Log and Daily History Log. This option applies to AGA-7 only. The option is unchecked by default. Select the Export in Time Leads Data Format option to export time stamps that mark the start of the period. Uncheck the option to export time stamps that mark the end of the period (Realflo format). This applies to the the Hourly History and Daily History only. The control is unchecked by default. The Default File Name Format section defines the file name that is suggested by Realflo when data is exported. The names are combinations of the file name; Flow Computer ID; flow run number; and flow run ID. The Format list selects the name format. The name is made up of the identifier format and a view format. The valid values for the identifier are listed below. The default is to include the file name; Flow Computer ID; flow run number; and flow run ID. Realflo User and Reference Manual May 19, 2011 143 Realflo Maintenance Mode Reference o file name (Flow Computer ID) - Run# (run ID) - Type o file name (Flow Computer ID) - Run# - Type o file name (Flow Computer ID) - run ID - Type o file name - Run# (run ID) - Type o file name - Run# - Type o file name - run ID - Type o Flow Computer ID - Run# (run ID) - Type o Flow Computer ID - Run# - Type o Flow Computer ID - run ID - Type o Run# (run ID) - Type o run ID - Type When the logs are exported the word Type is replaced by the following, according to the export selected. o Alarms o Events o Hourly Log o Daily Log o Current Readings o Custom View Name The Example control shows the file name that will be suggested for the current file. Realflo User and Reference Manual May 19, 2011 144 Realflo Maintenance Mode Reference Maintenance The Maintenance section of the Realflo main page contains Calibrate Inputs, Change Orifice Plate and Force Inputs buttons. Click the Calibrate Inputs button to start the Calibrate Inputs wizard, which will lead you through the steps to connect to a flow computer and calibrate the measurement inputs. Click the Change Orifice Plate button to start the Change Orifice Plate wizard, which will lead you through the steps to connect to a flow computer and change the orifice plate for a meter run. Click the Force Inputs button to start the Force Inputs wizard, which will lead you through the steps to connect to a flow computer and force the inputs. Connections for SCADAPack Sensor Calibration It should be noted that when an Absolute (Static) Pressure calibration is performed the bypass or cross feed valve on the manifold needs to be open. When performing a Differential Pressure calibration the bypass valve needs to be closed. Differential Pressure Calibration Connections Realflo User and Reference Manual May 19, 2011 145 Realflo Maintenance Mode Reference Absolute Pressure Calibration Connections Calibrate Inputs The Calibrate Inputs wizard is used to calibrate the temperature sensor, static pressure sensor, and differential pressure sensor or pulse counter input. The calibration dialogs lead you through the calibration procedure. When more than one sensor is selected, they are forced and then the calibration cycle will be allowed for each sensor in turn. This allows multiple variable transmitters such as the MVT to be calibrated. WARNING The same input sensor can be used for more than one flow run. When the sensor is calibrated for one run, Realflo only forces the input value for that run. When the sensor is disconnected to do the calibration, the live input to the other run will be disconnected and the value will not be correct. The flow computer does not support forcing of inputs during calibration on more than one run. For each step in the wizard a dialog is presented to enter the parameters for the step. Each dialog contains four buttons to allow navigation through the wizard. <Back returns to the previous step in the wizard. This button is disabled on the first step of a wizard. Next> moves to the next step in the wizard. This button is hidden on the last step of a wizard. Finish is displayed on the final step of a wizard in place of the Next button. It finishes the operation. This button is hidden on other steps. Cancel cancels the operation and closes the wizard. Steps performed thus far in the wizard are cancelled. Pressing the ESC key performs the same action as Cancel. Help opens the user manual. Realflo User and Reference Manual May 19, 2011 146 Realflo Maintenance Mode Reference Connect to Flow Computer The connect to flow computer step defines the communication settings for the connection between the PC running the Realflo application and the target flow computer. The How do you want to communicate with the flow computer? prompt provides two selections. The Use the Current Settings option sets the default communication settings for Realflo. These settings are for the PC that is running Realflo. (The communication settings for the PC running Realflo and the communication settings in the flow computer need to match). The default communication settings are: COM 1 (serial port on the PC) 9600 baud no parity 8 Data bits 1 Stop bit The default Modbus address Realflo will connect to is station 1. Use this selection if the serial port on your PC is COM 1 and the serial port settings for the serial port on the flow computer are set for default (9600, 8,n,1 and Modbus address 1). Click the Next> button to begin communication with the flow computer and move to the next step in the wizard. The Choose/View Communication Setup option opens the PC Communication Settings dialog as shown below. This allows you to view the default settings and to change the PC communication setting for the type of connection you are using to communicate with the flow computer. Realflo User and Reference Manual May 19, 2011 147 Realflo Maintenance Mode Reference See the section Communication >> PC Communication Settings Command in the Realflo Expert Mode Reference section of this manual for complete details on the parameter settings in this dialog. You need to know the communication settings for the connection to the flow computer to use this step. Once the communication settings have been selected click the OK> button to close the dialog and begin communication with the flow computer. Realflo User and Reference Manual May 19, 2011 148 Realflo Maintenance Mode Reference Sensor Calibration When the Calibration command is selected the Sensor Calibration dialog is displayed. The Run, or Sensor, to be calibrated is selected from this dialog. This dialog allows the selected meter run or Sensor to be calibrated. Select the Run radio button and then select a meter run to calibrate. Transmitters used for the meter run may be calibrated. This section is disabled if every run is using external sensors. Follow the steps in the Run Calibration Procedure. Select the Sensor radio button and select one of the tags to calibrate a Sensor or Transmitter. The tags that have been configured will be in Sensor selection box. Follow the steps in the Sensor Calibration Procedure. The <Back button returns to the previous step. Backing up does not erase events from the flow computer event log. The back button is not enabled on the first step since there is no previous step. The Next> button starts the calibration procedure. After the Run, or sensor, is selected, the configuration for the run is read from the flow computer. The Run, or sensor calibration page for the run is then displayed. The Cancel button closes the dialog and stops the transmitter calibration. When you click the Cancel button to abort the calibration the following message is displayed. Click Yes to abort the calibration. Click No to continue with the calibration. The default button is No. Realflo User and Reference Manual May 19, 2011 149 Realflo Maintenance Mode Reference WARNING Realflo uses live values from the sensor when calibration is cancelled. Connect sensors first. Realflo does not erase any calibration events from the flow computer when canceling. The Help button displays the online help file. Realflo User and Reference Manual May 19, 2011 150 Realflo Maintenance Mode Reference Run Calibration Procedure When the Run radio button is selected the Run Calibration dialog is displayed. The transmitters for the run are selected for calibration from this dialog. WARNING Realflo uses live values from the sensor when calibration is cancelled. Connect sensors first. The same input sensor can be used for more than one flow run. When the sensor is calibrated for one run, Realflo only forces the input value for that run. When the sensor is disconnected to do the calibration, the live input to the other run will be disconnected and the value will not be correct. The flow computer does not support forcing of inputs during calibration on more than one run. Select the sensors to be calibrated by checking the appropriate boxes. More than one sensor may be selected for calibration. The <Back button is not enabled as this is the initial step. The Next> button completes the selections and opens the Step 1: Force Value dialog. The Cancel button closes the dialog and stops the transmitter calibration. When you click the Cancel button to abort the calibration the following message is displayed. Click Yes to abort the calibration. Click No to continue with the calibration. The default button is No. Realflo User and Reference Manual May 19, 2011 151 Realflo Maintenance Mode Reference WARNING Realflo uses live values from the sensor when calibration is cancelled. Connect sensors first. Realflo does not erase any calibration events from the flow computer when canceling. The Help button displays the online help file. Calibration Step 1: Force Value The flow calculations continue to execute while calibrating sensors. The sensor value needs to be forced to either the current value or a fixed value during calibration. This dialog lets you select the current value of the input or a fixed value of your choice. If a sensor was forced before starting the execution of a calibration, the sensor will remain in a forced state after the calibration process is completed or even if the calibration process is cancelled before completion. When more than one sensor is selected, they need to be forced to a current or fixed value before any of the other steps are performed. A Step 1: Force Value dialog will be presented for each sensor selected for calibration. The input register associated with this input is displayed to aid you in determining which input you are calibrating. Check the Current Value radio button to use the current value for the sensor. Realflo User and Reference Manual May 19, 2011 152 Realflo Maintenance Mode Reference Check the Fixed Value radio button and enter a value to use for the calibration in the entry box. The No Change radio button will be selected if the value is currently forced. (You may still select one of the other two radio buttons if desired). The <Back button returns to the previous step. Backing up does not erase events from the flow computer event log. When the Next> button is pressed Realflo records the start of calibration for the sensor in the event log. The sensor input is forced. The sensor may now be disconnected from the process. The Cancel button closes the dialog and stops the transmitter calibration. When you click the Cancel button to abort the calibration the following message is displayed. Click Yes to abort the calibration. Click No to continue with the calibration. The default button is No. WARNING Realflo uses live values from the sensor when calibration is cancelled. Be sure to connect sensors first. Realflo does not erase any calibration events from the flow computer when canceling. The Help button displays the online help file. Calibration Step 2: Record As Found Values Realflo User and Reference Manual May 19, 2011 153 Realflo Maintenance Mode Reference As-found readings indicate how the sensor was calibrated before adjustment. These can be used to correct flow measurement errors resulting from an out of calibration sensor. Follow the procedure your company has set for taking as-found readings. You need to record at least one as-found reading. To take as-found readings: Apply a known signal to the sensor, or measure the signal applied to the sensor with a calibrated instrument. Enter the applied value in the Applied Value edit box. Check the measured value from the process in the Measured Value box. When it has settled, click on the Record button to record an asfound reading. Repeat the process to record additional readings. As readings are recorded they are automatically entered in the record window. The applied values are listed under the Applied column. The measured values are listed under the Measured column and the deviation between the readings is listed under the Deviation column. For Run Calibration the deviation is calculated as follows. The output full scale and zero scale are taken from the input configuration for the run. span = input full scale – input zero scale deviation = (measured - applied) / span The <Back button returns to the previous step. Backing up does not erase events from the flow computer event log. The Next> button proceeds to the next step. The Cancel button is greyed and an as found reading needs to be recorded. Realflo User and Reference Manual May 19, 2011 154 Realflo Maintenance Mode Reference When you click the Cancel button to abort the calibration the following message is displayed. Click Yes to abort the calibration. Click No to continue with the calibration. The default button is No. WARNING Realflo uses live values from the sensor when calibration is cancelled. Connect sensors first. Realflo does not erase any calibration events from the flow computer when canceling. The Help button displays the online help file. Calibration Step 3: Calibration Required The as-found readings indicate if calibration is required. Examine the list of as-found readings. If the sensor is in need of calibration, select Yes. Otherwise select No. As readings are recorded they are automatically entered in the record window. The applied values are listed under the Applied column. The Realflo User and Reference Manual May 19, 2011 155 Realflo Maintenance Mode Reference measured values are listed under the Measured column and the deviation between the readings is listed under the Deviation column. For Run Calibration the deviation is calculated as follows. The output full scale and zero scale are taken from the input configuration for the run. span = input full scale – input zero scale deviation = (measured - applied) / span The <Back button returns to the previous step. Backing up does not erase events from the flow computer event log. The Next> button proceeds to the next step. The Cancel button is greyed and an as found reading needs to be recorded. When you click the Cancel button to abort the calibration the following message is displayed. Click Yes to abort the calibration. Click No to continue with the calibration. The default button is No. WARNING Realflo uses live values from the sensor when calibration is cancelled. Connect sensors first. Realflo does not erase any calibration events from the flow computer when canceling. The Help button displays the online help file. Calibration Step 4: Calibrate Sensor Realflo User and Reference Manual May 19, 2011 156 Realflo Maintenance Mode Reference This dialog aids you in calibrating a sensor by displaying the measured value from the sensor and the as-found readings. Follow the procedure your company or the sensor supplier has set to calibrate the sensor. When the sensor calibration is complete, you may wish to check the as-left measurements that will be recorded in the next step. As readings are recorded they are automatically entered in the record window. The applied values are listed under the Applied column. The measured values are listed under the Measured column and the deviation between the readings is listed under the Deviation column. For Run Calibration the deviation is calculated as follows. The output full scale and zero scale are taken from the input configuration for the run. span = input full scale – input zero scale deviation = (measured - applied) / span Click on the Next> button when the calibration is complete. Calibration Step 5: Record As Left Values As-left readings indicate how the sensor was calibrated. These can be used to verify sensor calibration. Follow the procedure your company has set for taking as-left readings. You need to record at least one as-left reading. Realflo User and Reference Manual May 19, 2011 157 Realflo Maintenance Mode Reference To take as-left readings: Apply a known signal to the sensor, or measure the signal applied to the sensor with a calibrated instrument. Enter the applied value in the Applied Value edit box. Check the measured value from the process. When it has settled, click on the Record button to record an as-left reading. Repeat the process to record additional readings. As readings are recorded they are automatically entered in the record window. The applied values are listed under the Applied column. The measured values are listed under the Measured column and the deviation between the readings is listed under the Deviation column. For Run Calibration the deviation is calculated as follows. The output full scale and zero scale are taken from the input configuration for the run. span = input full scale – input zero scale deviation = (measured - applied) / span When required readings are taken, click on the Next> button. Calibration Step 6: Restore Live Input The sensors need to be reconnected to the process and the input hardware before calibration is complete. Reconnect sensors and verify connections are correct. Realflo User and Reference Manual May 19, 2011 158 Realflo Maintenance Mode Reference Click on the Next button when the sensor is connected. WARNING Realflo uses live values from the sensor when calibration is cancelled. Connect sensors first. Calibration Step 6: Calibration Report Comment Realflo User and Reference Manual May 19, 2011 159 Realflo Maintenance Mode Reference Realflo creates, stores, and prints calibration reports for each calibration session performed. Comments may be added to the calibration report using the Calibration Report Comment dialog as shown below. Enter any comments or leave the window blank. Click the Next button when completed entering comments. Calibration Step 7: Calibration Report The Calibration Report dialog allows the saving of the calibration report. Select Save Report to File to save the report. Realflo User and Reference Manual May 19, 2011 160 Realflo Maintenance Mode Reference Type the name of the report in the Save Report to File window. The default location and name are specified on the Calibration Report Options dialog. Select Browse to select a different file name. Check View Calibration Report After Saving the File to view the saved calibration report file. Default is checked. Select Do not Save Report to skip saving the calibration report. Click the Finis button to complete the calibration process. If selected the Calibration report will be displayed as shown below. Realflo User and Reference Manual May 19, 2011 161 Realflo Maintenance Mode Reference Sensor Calibration Procedure When the Sensor radio button is selected in the Sensor Calibration dialog the Sensor Calibration dialog is displayed. The transmitter number, transmitter tag name, the communication port and the transmitter address associated with this sensor are displayed to aid you in determining which input you are calibrating. Check the Calibrate Temperature Sensor check box to select the temperature sensor for calibration. This will add the Temperature to the Calibration order list box. Check the Calibrate Static Pressure Sensor check box to select the static pressure sensor for calibration. This will add the Static Pressure to the Calibration order list box. Check the Calibrate Differential Pressure Sensor check box to select the differential pressure sensor for calibration. This will add the Diff. Pressure to the Calibration order list box. The Calibration Order list displays the list of sensors to be calibrated. Sensors are calibrated in order from the top of the list. Select Move Up button to move the specified item in the list up. The button is disabled if highlight item is on the top of the list or the list is empty. Select Move Down button to move the specified item in the list down. The button is disabled if highlight item is on the bottom of the list or the list is empty. The <Back button is not enabled as this is the initial step. The Next> button completes the selections and opens the Step 1: Force Value dialog. The Cancel button closes the dialog and stops the transmitter calibration. Realflo User and Reference Manual May 19, 2011 162 Realflo Maintenance Mode Reference When you click the Cancel button to abort the calibration the following message is displayed. Click Yes to abort the calibration. Click No to continue with the calibration. The default button is No. WARNING Realflo uses live values from the sensor when calibration is cancelled. Connect sensors first. Realflo does not erase any calibration events from the flow computer when canceling. The Help button displays the online help file. Calibration Step 1: Force Value The flow calculations continue to execute while calibrating sensors. The sensor value needs to be forced to either the current value or a fixed value during calibration. This dialog lets you select the current value of the input or a fixed value of your choice. If a sensor was forced before starting the execution of a calibration, the sensor will remain in a forced state after the calibration process is completed or even if the calibration process is cancelled before completion. When more than one sensor is selected, they need to all be forced to a current or fixed value before any of the other steps are performed. Realflo User and Reference Manual May 19, 2011 163 Realflo Maintenance Mode Reference Select the value you wish to use, for each sensor, by clicking the appropriate radio button for each sensor. Check the Current Value radio button to use the current value for the sensor. Check the Fixed Value radio button and enter a value to use for the calibration in the entry box. The No Change radio button will be selected if the value is currently forced. (You may still select one of the other two radio buttons if desired). The <Back button returns to the previous step. Backing up does not erase events from the flow computer event log. When the Next> button is pressed Realflo records the start of calibration for the sensor in the event log. The sensor input is forced. The sensor may now be disconnected from the process. The Cancel button closes the dialog and stops the transmitter calibration. When you click the Cancel button to abort the calibration the following message is displayed. Click Yes to abort the calibration. Click No to continue with the calibration. The default button is No. Realflo User and Reference Manual May 19, 2011 164 Realflo Maintenance Mode Reference WARNING Realflo uses live values from the sensor when calibration is cancelled. Connect sensors first. Realflo does not erase any calibration events from the flow computer when canceling. The Help button displays the online help file. Calibration Step 2: Record As- Found Values As-found readings indicate how the sensor was calibrated before adjustment. These can be used to correct flow measurement errors resulting from an out of calibration sensor. Follow the procedure your company has set for taking as-found readings. You need to record at least one as-found reading. Realflo will record As Found values to the unit type selected for the meter run. If the units type for the meter run and the MVT are not the same then the MVT units are scaled to the meter run units. To take as-found readings: Apply a known signal to the sensor, or measure the signal applied to the sensor with a calibrated instrument. Enter the applied value in the Applied Value edit box. Check the measured value from the process in the Measured Value box. When it has settled, click on the Record button to record an asfound reading. Repeat the process to record additional readings. As readings are recorded they are automatically entered in the record window. The applied values are listed under the Applied column. The Realflo User and Reference Manual May 19, 2011 165 Realflo Maintenance Mode Reference measured values are listed under the Measured column and the deviation between the readings is listed under the Deviation column. For MVT Calibration the deviation is calculated as follows. The operating limits are read from the flow computer. span = upper range limit - lower range limit deviation = (measured - applied) / span The <Back button returns to the previous step. Backing up does not erase events from the flow computer event log. The Next> button proceeds to the next step. The Cancel button is greyed and an as found reading needs to be recorded. When you click the Cancel button to abort the calibration the following message is displayed. Click Yes to abort the calibration. Click No to continue with the calibration. The default button is No. WARNING Realflo uses live values from the sensor when calibration is cancelled. Connect sensors first. Realflo does not erase any calibration events from the flow computer when canceling. The Help button displays the online help file. Calibration Step 3: Calibration Required Realflo User and Reference Manual May 19, 2011 166 Realflo Maintenance Mode Reference The as-found readings indicate if calibration is required. Examine the list of as-found readings. If the sensor is in need of calibration, select Yes. Otherwise select No. As readings are recorded they are automatically entered in the record window. The applied values are listed under the Applied column. The measured values are listed under the Measured column and the deviation between the readings is listed under the Deviation column. For Run Calibration the deviation is calculated as follows. The output full scale and zero scale are taken from the input configuration for the run. span = input full scale – input zero scale deviation = (measured - applied) / span The <Back button returns to the previous step. Backing up does not erase events from the flow computer event log. The Next> button proceeds to the next step. The Cancel button is greyed and an as found reading needs to be recorded. When you click the Cancel button to abort the calibration the following message is displayed. Click Yes to abort the calibration. Click No to continue with the calibration. The default button is No. Realflo User and Reference Manual May 19, 2011 167 Realflo Maintenance Mode Reference WARNING Realflo uses live values from the sensor when calibration is cancelled. Connect sensors first. Realflo does not erase any calibration events from the flow computer when canceling. The Help button displays the online help file. Calibration Step 4: Calibrate SCADAPack 4102, 4202, or 4203 Step three in the calibration procedure varies depending on the type of transmitter being calibrated. Use this section if you are calibrating a SCADAPack 4102, 4202 or 4203 transmitter. Use the Calibration Step 4: Calibrate 4101 for the SCADAPack 4101 transmitter and use Calibration Step 4: Calibrate 3905 for the 3095 transmitter. This dialog aids you in calibrating a sensor by displaying the measured value from the sensor and the as-found readings. Follow the procedure your company or the sensor supplier has set to calibrate the sensor. When the sensor calibration is complete, you may wish to check the as-left measurements that will be recorded in the next step.. The Static Pressure can only have a span calibration performed if at least 5% of the rated pressure is applied. The RTD Zero can only be adjusted +/- 1% of the RTD upper limit, typically 8.5 degrees C, relative to the settings used when a reset sensor command was last issued. The list box displays as-found values listed in the list of Record As-Found Values dialog. The Measured Value displays the measured value from the sensor. Realflo User and Reference Manual May 19, 2011 168 Realflo Maintenance Mode Reference As readings are recorded they are automatically entered in the record window. The applied values are listed under the Applied column. The measured values are listed under the Measured column and the deviation between the readings is listed under the Deviation column. For MVT Calibration the deviation is calculated as follows. The operating limits are read from the flow computer. span = upper range limit - lower range limit deviation = (measured - applied) / span Calibration Step 4: Calibrate SCADAPack 4101 Step three in the calibration procedure varies depending on the type of transmitter being calibrated. Use this section if you are calibrating a SCADAPack 4101, 4202 or 4203 transmitter. The as-found readings, for each sensor, will indicate if calibration is required for the sensor. You are prompted to use the SCADAPack 4000 Configurator application to perform the calibration. The SCADAPack 4000 Configurator software is installed from the Control Microsystems Hardware Documentation CD. The Next> button proceeds to the next step. The Help button displays the online help file. Calibration Step 4: Calibrate 3095 MVT Realflo User and Reference Manual May 19, 2011 169 Realflo Maintenance Mode Reference Step four in the calibration procedure varies depending on the type of transmitter being calibrated. Use this section if you are calibrating a 3095 MVT transmitter. This dialog aids you in calibrating a sensor by displaying the measured value from the sensor and the as-found readings. Follow the procedure your company or the sensor supplier has set to calibrate the sensor. When the sensor calibration is complete, you may wish to check the as-left measurements that will be recorded in the next step. The list box displays as-found values listed in the list of Record As-Found Values dialog. As readings are recorded they are automatically entered in the record window. The applied values are listed under the Applied column. The measured values are listed under the Measured column and the deviation between the readings is listed under the Deviation column. For MVT Calibration the deviation is calculated as follows. The operating limits are read from the flow computer. span = upper range limit - lower range limit deviation = (measured - applied) / span The Calibrate Sensor section of the Calibrate Sensor dialog displays the current calibration settings and selectable radio buttons for configuring the sensor calibration. The Radio buttons enable the changing of the zero and span for the Temperature, Static Pressure and Differential Pressure sensors. For Temperature sensors, an additional radio button allows the user to fix the Temperature value in the event the temperature reading is outside the configured limits. Select the Re-Zero radio button to enable a new entry in the Applied Value field. This field displays the current zero value. The button is labeled Re-Zero if the Re-Zero radio button is selected. Clicking the Re-Zero button writes the zero applied value to the transmitter immediately. Realflo User and Reference Manual May 19, 2011 170 Realflo Maintenance Mode Reference Select the Calculate Span radio button to enable a new entry in the Applied Value field. This field displays the current span value. The button is labeled Calibrate if the Calibrate Span radio button is selected. Clicking the Calibrate button writes the span applied value to the transmitter immediately. When calibrating the temperature sensor you may select the Default Temperature radio button to enable a new entry in the Applied Value field. The button is labeled Set if the Default Temperature radio button is selected. The transmitter returns the fixed temperature value if the RTD is not working, or if the RTD is not connected. The valid range is –40 to 1200 F or –40 to 648.89 C. The default value is 60 F or 15.56 C. The new fixed temperature point is written to the transmitter immediately. The Measured Value displays the measured value from the sensor. Realflo records the points at which MVT calibration was performed in the event log. Each time the Re-Zero button is clicked the following information is recorded. Event Name New Value Previous Value Target Re-zero Temperature The applied value entered by the user The measured value from the flow computer Each time the Calibrate button is clicked the following information is recorded. Event Name New Value Previous Value Target Temperature Span The applied value entered by the user The measured value from the flow computer Each time the Set Default button is clicked the following information is recorded. Event Name New Value Previous Value Set Default Temperature The applied value entered by the user The measured value from the flow computer Calibration Step 4: Record As Left Values Realflo User and Reference Manual May 19, 2011 171 Realflo Maintenance Mode Reference As-left readings indicate how the sensor was calibrated. These can be used to verify sensor calibration. Follow the procedure your company has set for taking as-left readings. You need to record at least one as-left reading. Realflo will record As Found values to the units type selected for the meter run. If the units type for the meter run and the MVT are not the same then the MVT units are scaled to the meter run units. To take as-left readings: Apply a known signal to the sensor, or measure the signal applied to the sensor with a calibrated instrument. Enter the applied value in the Applied Value edit box. Check the measured value from the process. When it has settled, click on the Record button to record an as-left reading. As readings are recorded they are automatically entered in the record window. The applied values are listed under the Applied column. The measured values are listed under the Measured column and the deviation between the readings is listed under the Deviation column. For MVT Calibration the deviation is calculated as follows. The operating limits are read from the flow computer. span = upper range limit - lower range limit deviation = (measured - applied) / span Repeat the process to record additional readings. When required readings are taken, click on the Next> button. Calibration Step 5: Restore Live Input Realflo User and Reference Manual May 19, 2011 172 Realflo Maintenance Mode Reference The sensors need to be reconnected to the process and the input hardware before calibration is complete. Reconnect sensors and verify connections are correct. Click on the Finish button when the sensor is connected. WARNING The live value from sensors is used as soon as the Finish button is clicked. Connect sensors first. Calibration Step 6: Calibration Report Comment Realflo User and Reference Manual May 19, 2011 173 Realflo Maintenance Mode Reference Realflo creates, stores, and prints calibration reports for each calibration session performed. Comments may be added to the calibration report using the Calibration Report Comment dialog as shown below. Enter any comments or leave the window blank. Click the Next button when completed entering comments. Calibration Step 7: Calibration Report The Calibration Report dialog allows the saving of the calibration report. Select Save Report to File to save the report. Realflo User and Reference Manual May 19, 2011 174 Realflo Maintenance Mode Reference Type the name of the report in the Save Report to File window. The default location and name are specified on the Calibration Report Options dialog. Select Browse to select a different file name. Check View Calibration Report After Saving the File to view the saved calibration report file. Default is checked. Select Do not Save Report to skip saving the calibration report. Click the Finis button to complete the calibration process. If selected the Calibration report will be displayed as shown below. Change Orifice Plate The Change Orifice Plate wizard enables the orifice plate to be changed for AGA-3 meter runs. This wizard supports Dual Chamber Orifice fittings and Singe Chamber Orifice fittings. This wizard will prompt you through the plate change procedure. For each step in the wizard a dialog is presented to enter the parameters for the step. Each dialog contains four buttons to allow navigation through the wizard. <Back returns to the previous step in the wizard. This button is disabled on the first step of a wizard. Next> moves to the next step in the wizard. This button is hidden on the last step of a wizard. Finish is displayed on the final step of a wizard in place of the Next button. It finishes the operation. This button is hidden on other steps. Cancel cancels the operation and closes the wizard. Steps performed thus far in the wizard are cancelled. Pressing the ESC key performs the same action as Cancel. Help opens the user manual. Realflo User and Reference Manual May 19, 2011 175 Realflo Maintenance Mode Reference Connect to Flow Computer The connect to flow computer step defines the communication settings for the connection between the PC running the Realflo application and the target flow computer. The How do you want to communicate with the flow computer? prompt provides two selections. The Use the Current Settings option sets the default communication settings for Realflo. These settings are for the PC that is running Realflo. (The communication settings for the PC running Realflo and the communication settings in the flow computer need to match). The default communication settings are: COM 1 (serial port on the PC) 9600 baud no parity 8 Data bits 1 Stop bit The default Modbus address Realflo will connect to is station 1. Use this selection if the serial port on your PC is COM 1 and the serial port settings for the serial port on the flow computer are set for default (9600, 8,n,1 and Modbus address 1). Click the Next> button to begin communication with the flow computer and move to the next step in the wizard. The Choose/View Communication Setup option opens the PC Communication Settings dialog as shown below. This allows you to view the default settings and to change the PC communication setting for the type of connection you are using to communicate with the flow computer. Realflo User and Reference Manual May 19, 2011 176 Realflo Maintenance Mode Reference See the section Communication >> PC Communication Settings Command in the Realflo Expert Mode Reference section of this manual for complete details on the parameter settings in this dialog. You need to know the communication settings for the connection to the flow computer to use this step. Once the communication settings have been selected click the OK> button to close the dialog and begin communication with the flow computer. Realflo User and Reference Manual May 19, 2011 177 Realflo Maintenance Mode Reference Select Meter Run This step selects which meter run the orifice plate is to be changed. The Run dropdown selection displays runs using AGA –3 flow calculations. Select the run to change or inspect the orifice plate. The <Back button returns to the previous step. Backing up does not erase events from the flow computer event log. Realflo does not attempt to reverse the effect of a previous step when backing up. For example, backing up to the force values step does not restore the live values. The Next> button completes the run selection and the wizard moves to the next step. This button is greyed if there are no flow runs configured to use the AGA-3 flow calculation. The Cancel button aborts the plate change and displays the following message. Click Yes to abort the calibration. Click No to continue with the plate change. The default button is No. WARNING Realflo uses live values from the sensor when the plate change is cancelled. Realflo User and Reference Manual May 19, 2011 178 Realflo Maintenance Mode Reference Connect sensors first. Realflo does not erase any events from the flow computer when the plate change is cancelled. Realflo restores live values (ends forcing) when Cancel is clicked. The Help button displays the online help file. Realflo User and Reference Manual May 19, 2011 179 Realflo Maintenance Mode Reference Choose Orifice Fitting Type Step This page allows the user to select the type of orifice fitting. Select Dual Chamber Orifice Fitting if a dual chamber fitting is present. Flow accumulation with estimated values will continue during the plate change. Select Singe Chamber Orifice Fitting if a single chamber fitting is present. Flow accumulation will stop during the plate change. The Next button moves to the next step. The next step is described in the section Dual Chamber Orifice if a dual chamber fitting is selected. The next step is described in the section Single Chamber Orifice if a single chamber fitting is selected. The Cancel button closes the dialog and stops the plate change procedure. The Help button displays the online Help file. Realflo User and Reference Manual May 19, 2011 180 Realflo Maintenance Mode Reference Dual Chamber Orifice A dual chamber orifice allows the user to change, or inspect, the orifice plate without stopping the flow. These are generally large custody transfer sites where the orifice fitting is bypassed during the change or inspection procedure. The Change Orifice Plate Command forces the Static Pressure, Differential Pressure and Temperature inputs to a fixed value during the orifice plate change or inspection procedure. This command is disabled if the Update Readings command is enabled. The flow is estimated during the procedure using the fixed values. This command allows a user to place a flow run into estimation mode to allow an orifice plate to be changed or inspected. Changing the orifice plate involves the following steps. Set the estimated flow to be used during the orifice plate change by forcing inputs to fixed values. Change the orifice size. Complete the orifice plate change and resume normal flow measurement. The Flow Computer ID is checked when the Change Orifice Plate command is selected. If the Flow Computer ID does not match the ID Realflo displays the message “ The Flow Computer ID from the flow computer does not match the Flow Computer ID from the file.” The command is aborted. Force Input Step This step forces the flow run inputs. An estimated flow will be calculated while the plate change is in progress. The current values are updated every second. Select the value you wish to use, for each sensor, by clicking the appropriate radio button for each sensor. Realflo User and Reference Manual May 19, 2011 181 Realflo Maintenance Mode Reference Check the Current Value radio button to use the current value for the sensor. Check the Fixed Value radio button and enter a value to use for the calibration in the entry box. The <Back button returns to the previous step. Backing up does not erase events from the flow computer event log. Realflo does not attempt to reverse the effect of a previous step when backing up. For example, backing up to the force values step does not restore the live values. The Next> button completes the force inputs step and the wizard moves to the next step. Realflo records the start of the plate change procedure in the event log and forces the sensor inputs. The Cancel button aborts the plate change and displays the following message. Click Yes to abort the calibration. Click No to continue with the plate change. The default button is No. WARNING Realflo uses live values from the sensor when the plate change is cancelled. Connect sensors first. Realflo does not erase any events from the flow computer when the plate change is cancelled. Realflo restores live values (ends forcing) when Cancel is clicked. The Help button displays the online help file. Change Orifice Plate Step Realflo User and Reference Manual May 19, 2011 182 Realflo Maintenance Mode Reference The orifice plate can now be changed. The forced inputs are used while the change is in progress. This dialog allows you to enter the new orifice plate diameter. The Current Orifice Diameter and Current Pipe Diameter are displayed for reference. Enter the new orifice size in the New Orifice Diameter entry box. If the diameter is not valid, Realflo displays the following a message box. You need to enter a valid orifice diameter. Click the OK button to return to the Change Orifice dialog. The Beta Ratio is calculated and displayed for orifice diameter changes. The <Back button returns to the previous step. Backing up does not erase events from the flow computer event log. Realflo does not attempt to reverse the effect of a previous step when backing up. For example, backing up to the force values step does not restore the live values. The Next> button completes the change orifice step and the wizard moves to the last step. The Cancel button aborts the plate change and displays the following message. Realflo User and Reference Manual May 19, 2011 183 Realflo Maintenance Mode Reference Click Yes to abort the calibration. Click No to continue with the plate change. The default button is No. WARNING Realflo uses live values from the sensor when the plate change is cancelled. Connect sensors first. Realflo does not erase any events from the flow computer when the plate change is cancelled. Realflo restores live values (ends forcing) when Cancel is clicked. The Help button displays the online help file. Complete Orifice Plate Change The Finish Plate Change is the last step in the Plate Change wizard. The <Back button returns to the previous step. Backing up does not erase events from the flow computer event log. Realflo does not attempt to reverse the effect of a previous step when backing up. For example, backing up to the force values step does not restore the live values. The Finish button completes the orifice plate change wizard and closes the dialog. Realflo restores the sensor live values The Help button displays the online help file. Realflo User and Reference Manual May 19, 2011 184 Realflo Maintenance Mode Reference Single Chamber Orifice A single chamber orifice requires the flow be stopped while an orifice plate is changed. The Change Orifice Plate command prompts the user to stop the flow before changing the plate and start the flow after changing the plate. Changing the orifice plate involves the following steps. Confirm that flow has stopped. Change the orifice size. Complete the orifice plate change. The Flow Computer ID is checked when the Change Orifice Plate command is selected. If the Flow Computer ID does not match the ID Realflo displays the message “ The Flow Computer ID from the flow computer does not match the Flow Computer ID from the file.” The command is aborted. Stop Flow Step This step stops the flow run. The current inputs can be monitored while the flow is stopped. The <Back button returns to the previous step. Backing up does not erase events from the flow computer event log. Realflo does not attempt to reverse the effect of a previous step when backing up. For example, backing up to the force values step does not restore the live values. The Next> button completes the Stop Flow step and the wizard moves to the next step. Realflo records the start of the plate change procedure in the event log and forces the sensor inputs. The Cancel button aborts the plate change and closes the wizard. The Help button displays the online help file. Realflo User and Reference Manual May 19, 2011 185 Realflo Maintenance Mode Reference Change Orifice Plate Step The orifice plate can now be changed. The forced inputs are used while the change is in progress. This dialog allows you to enter the new orifice plate diameter. The Current Orifice Diameter and Current Pipe Diameter are displayed for reference. Enter the new orifice size in the New Orifice Diameter entry box. If the diameter is not valid, Realflo displays the following a message box. You need to enter a valid orifice diameter. Click the OK button to return to the Change Orifice dialog. The Beta Ratio is calculated and displayed for orifice diameter changes. The <Back button returns to the previous step. Backing up does not erase events from the flow computer event log. Realflo does not attempt to reverse the effect of a previous step when backing up. The Next> button completes the change orifice step and the wizard moves to the last step. The Cancel button aborts the plate change and closes the wizard. The Help button displays the online help file. Complete Orifice Plate Change The Finish Plate Change is the last step in the Plate Change wizard. Realflo User and Reference Manual May 19, 2011 186 Realflo Maintenance Mode Reference The <Back button returns to the previous step. Backing up does not erase events from the flow computer event log. Realflo does not attempt to reverse the effect of a previous step when backing up. The Finish button completes the orifice plate change wizard and closes the dialog. Realflo restores the sensor live values The Help button displays the online help file. Force Inputs The Force Sensor wizard allows forcing and unforcing of the value of the temperature sensor, static pressure sensor, differential pressure sensor, or pulse counter input. Flow calculations continue to execute while sensors are forced. The flow computer ID is checked when the Force Inputs command is selected. If the flow computer ID does not match the ID in the dialog Realflo displays the error message “ The Flow Computer ID from the flow computer does not match the Flow Computer ID from the file.” The command is aborted, For each step in the wizard a dialog is presented to enter the parameters for the step. Each dialog contains four buttons to allow navigation through the wizard. <Back returns to the previous step in the wizard. This button is disabled on the first step of a wizard. Next> moves to the next step in the wizard. This button is hidden on the last step of a wizard. Finish is displayed on the final step of a wizard in place of the Next button. It finishes the operation. This button is hidden on other steps. Cancel cancels the operation and closes the wizard. Steps performed thus far in the wizard are cancelled. Pressing the ESC key performs the same action as Cancel. Realflo User and Reference Manual May 19, 2011 187 Realflo Maintenance Mode Reference Help opens the user manual. Connect to Flow Computer The connect to flow computer step defines the communication settings for the connection between the PC running the Realflo application and the target flow computer. The How do you want to communicate with the flow computer? prompt provides two selections. The Use the Current Settings option sets the default communication settings for Realflo. These settings are for the PC that is running Realflo. (The communication settings for the PC running Realflo and the communication settings in the flow computer need to match). The default communication settings are: COM 1 (serial port on the PC) 9600 baud no parity 8 Data bits 1 Stop bit The default Modbus address Realflo will connect to is station 1. Use this selection if the serial port on your PC is COM 1 and the serial port settings for the serial port on the flow computer are set for default (9600, 8,n,1 and Modbus address 1). Click the Next> button to begin communication with the flow computer and move to the next step in the wizard. The Choose/View Communication Setup option opens the PC Communication Settings dialog as shown below. This allows you to view the Realflo User and Reference Manual May 19, 2011 188 Realflo Maintenance Mode Reference default settings and to change the PC communication setting for the type of connection you are using to communicate with the flow computer. See the section Communication >> PC Communication Settings Command in the Realflo Expert Mode Reference section of this manual for complete details on the parameter settings in this dialog. You need to know the communication settings for the connection to the flow computer to use this step. Once the communication settings have been selected click the OK> button to close the dialog and begin communication with the flow computer. Realflo User and Reference Manual May 19, 2011 189 Realflo Maintenance Mode Reference Select Run or Transmitter to Force This step selects the run or transmitter to force. Select Run to force the sensor inputs for a flow run using analog or pulse sensors. Select the run to be forced from the dropdown list. The Run controls are disabled if there are no runs using analog or pulse sensors. See the section Force Run Inputs below for information on forcing Run inputs. Select Sensor to force the inputs from an external transmitter. Select the sensor to be forced from the dropdown list beside it. The „Sensor” control is disabled if there are no transmitters configured. See the section Force Transmitter Sensor Inputs below for information on forcing transmitter inputs. The Back button is disabled, as this is the first step in the wizard. The Next starts the force procedure. The Cancel closes the wizard. The Help displays the online help file. Realflo User and Reference Manual May 19, 2011 190 Realflo Maintenance Mode Reference Force Run Inputs When the Force Run is selected the Force Input Values dialog is displayed as shown below. The Force Input Values step selects the analog inputs of a flow run which will be forced or unforced. It displays the inputs that can be forced. The Force Input Value dialog contains sections for Force Differential Pressure Input, Force Static Pressure Input and Force Temperature Input. When AGA-7 calculation type is used the dialog contains a section for Force Pulse Counter Input instead of Force Differential Pressure Input. For each input the following parameters are available: Select Current Value to use the current value for the sensor. The current value is shown beside the control and updates continuously. Select Fixed Value to use a fixed value. Type the value in the edit box. Select No Change, input is already forced to leave the input in its current state. This is selected by default if the value is already forced. This is disabled if the input is not forced. Select Remove to remove the existing forcing. This button is disabled if the input is not forced. The Back button moves back to the Select Run or Transmitter to Force step. Backing up does not erase events from the flow computer event log, or remove forcing from inputs previously processed. The Finish button completes the Force Input Value process and closes the dialog. Realflo User and Reference Manual May 19, 2011 191 Realflo Maintenance Mode Reference The Cancel button closes the wizard. This does not undo any changes. Any input that is already forced will remain forced. The Help displays the online help file. Force Sensor Inputs This step shows the selected sensor inputs. The inputs can be forced to the current value or a fixed value, left as it is, or the forcing can be removed. The transmitter number, transmitter tag name, the communication port and the transmitter address associated with this sensor transmitter are displayed to aid you in determining which input you are forcing. The Sensor Values dialog contains sections for Force Differential Pressure, Force Static Pressure and Force Temperature. For each input the following parameters are available: Select Current Value to use the current value for the sensor. The current value is shown beside the control and updates continuously. Select Fixed Value to use a fixed value. Type the value in the edit box. Select No Change, input is already forced to leave the input in its current state. This is selected by default if the value is already forced. This is disabled if the input is not forced. Select Remove Force to remove the existing forcing. This button is disabled if the input is not forced. If an input on a run is not forced currently, the initial (default value of the Fixed Value field) needs to be the default input value for the field. If the input type is a sensor and the Values on Sensor Fail field is set to use default value in the Run Configuration dialog. Realflo User and Reference Manual May 19, 2011 192 Realflo Maintenance Mode Reference The Back button moves back to the Select Run or Transmitter to Force step. Backing up does not erase events from the flow computer event log, or remove forcing from inputs previously processed. The Finish button completes the Force Input Value process and closes the dialog. The Cancel button closes the wizard. This does not undo any changes. Any input that is already forced will remain forced. The Help displays the online help file. The same transmitter can be used for more than one flow run. Realflo forces the value for each run. Realflo User and Reference Manual May 19, 2011 193 Realflo Maintenance Mode Reference Configuration The Configuration section of the Realflo main page contains a View and Change Configuration button. Click the View and Change Configuration button to start the View and Change Configuration wizard. The wizard will lead you through the steps to connect to a flow computer and view and modify the configuration. For each step in the wizard, a dialog is presented to enter the parameters for the step. Each dialog contains four buttons to allow navigation through the wizard. View and Change Configuration Wizard The View and Change Configuration wizard will lead you through the steps to connect to a flow computer and view and modify the configuration. For each step in the wizard a dialog is presented to enter the parameters for the step. Each dialog contains four buttons to allow navigation through the wizard. <Back returns to the previous step in the wizard. This button is disabled on the first step of a wizard. Next> moves to the next step in the wizard. This button is hidden on the last step of a wizard. Finish is displayed on the final step of a wizard in place of the Next button. It finishes the operation. This button is hidden on other steps. Cancel cancels the operation and closes the wizard. Steps performed thus far in the wizard are cancelled. Pressing the ESC key performs the same action as Cancel. Help opens the user manual. Realflo User and Reference Manual May 19, 2011 194 Realflo Maintenance Mode Reference Connect to Flow Computer The connect to flow computer step defines the communication settings for the connection between the PC running the Realflo application and the target flow computer. The How do you want to communicate with the flow computer? prompt provides two selections. The Use the Current Settings option sets the default communication settings for Realflo. These settings are for the PC that is running Realflo. (The communication settings for the PC running Realflo and the communication settings in the flow computer need to match). The default communication settings are: COM 1 (serial port on the PC) 9600 baud no parity 8 Data bits 1 Stop bit The default Modbus address Realflo will connect to is station 1. Use this selection if the serial port on your PC is COM 1 and the serial port settings for the serial port on the flow computer are set for default (9600, 8,n,1 and Modbus address 1). Click the Next> button to begin communication with the flow computer and move to the next step in the wizard. The Choose/View Communication Setup option opens the PC Communication Settings dialog as shown below. This allows you to view the default settings and to change the PC communication setting for the type of connection you are using to communicate with the flow computer. See the section Communication >> PC Communication Settings Command in the Realflo Expert Mode Reference section of this manual for complete details on the parameter settings in this dialog. Realflo User and Reference Manual May 19, 2011 195 Realflo Maintenance Mode Reference You need to know the communication settings for the connection to the flow computer to use this step. Once the communication settings have been selected click the OK> button to close the dialog and begin communication with the flow computer. Realflo User and Reference Manual May 19, 2011 196 Realflo Maintenance Mode Reference Edit Configuration The Edit Configuration dialog allows the viewing and editing of the flow computer parameters. The Edit Configuration dialog displays parameter types associated with a flow computer in the tree structure at the right side of the dialog. The Description field displays an overview of each of the parameter types. Click on a parameter type and a short description of the parameter is displayed in the Description field. The View/Edit button displays the configuration dialog for a selected parameter. Click on a parameter type to highlight it and then click the View/Edit button to open the configuration dialog for the parameter. Parameters in the tree are completely described in other sections of this user manual. A list of the parameters and the location of the complete description is shown below. Flow Computer Configuration For complete information on Flow Computer Type parameters refer to the Realflo Expert Mode Reference>> Configuration Menu >> Setup section. For complete information on Serial Ports parameters refer to the Realflo Expert Mode Reference>> Configuration Menu >> Serial Ports section of this user manual. For complete information on Register Assignments parameters refer to Realflo Expert Mode Reference>> Configuration Menu >>Register Assignment section of this user manual. For detailed information on DNP configuration refer to the DNP section. Realflo User and Reference Manual May 19, 2011 197 Realflo Maintenance Mode Reference Flow Run Configuration For complete information on Flow Run Configuration refer to the Realflo Expert Mode Reference>> Configuration Menu >>Flow Run section. Sensor and Display Configuration For complete information on Sensor and Display Configuration refer to the Realflo Expert Mode Reference>> Configuration Menu >>Sensor and Display section. Process I/O configuration For complete information on Process I/O Configuration refer to the Realflo Expert Mode Reference>> Configuration Menu >>Process I/O section. Flow Computer Configuration Summary This step displays a summary of the flow computer settings. A summary of the flow computer configuration is shown. The current configuration can be compared with the configuration in the target flow computer. Select Yes to compare the configurations. The next step is Review Differences. Select No to not compare the configurations. The next step is Save File. Review Differences Realflo User and Reference Manual May 19, 2011 198 Realflo Maintenance Mode Reference This step displays a summary of changes in the flow computer configuration. The user may select to write to the flow computer or not A summary of the differences is the configuration is shown. Select Yes to write the configuration to the flow computer. The configuration is written to the flow computer. The Start Executing command will be written for each flow run. The communication progress dialog shows the stages of writing. Select No to write the configuration to the flow computer later. Click Next to perform the selected action. In Flow Computer versions 6.73 and older, when AGA-8 gas ratios or NX-19 gas quality values are written to the flow computer the new gas ratios are updated in the Proposed registers. The Actual registers are not updated until a new Density calculation is started with the new values. The new values are not available to SCADA host software reading the Actual registers until a until a new Density calculation is started with the new values. In Flow Computer versions 6.74 and newer when AGA-8 gas ratios or NX19 gas quality values are written to the flow computer the new gas ratios are updated in the Proposed registers and in the Actual registers. This allows a SCADA host to immediately confirm the new values were written to the flow computer. The new gas values are not used by the flow computer until a new density calculation is started. Realflo User and Reference Manual May 19, 2011 199 Realflo Maintenance Mode Reference Save File This step selects where to save the configuration file. Select the Save to Realflo.tfc to save the configuration file to the default file location. Select the Save to another file to either enter a file name or use the Browse button to open the Save As dialog. Realflo User and Reference Manual May 19, 2011 200 Realflo Maintenance Mode Reference Switch to Expert Mode The Switch to Expert Mode button closes the Maintenance Mode window and opens the Expert Mode window. Files are not closed and connections to flow computers are not lost when the Switch to Expert Mode button is selected. Realflo User Manual The Realflo User Manual button opens this manual. Exit Realflo The Exit Realflo button closes Realflo. Realflo will display a message if any files are not saved or not yet written to the flow computer. Realflo User and Reference Manual May 19, 2011 201 Realflo Expert Mode Reference Realflo Expert Mode Reference The Realflo display window is divided into the following areas. Each area is described in the following sections of this manual. Display Window on page 203 File Menu on page 210 Edit Menu on page 226 View Menu on page 243 Configuration Menu on page 260 Communication Menu on page 465 Window Menu on page 526 Help Menu on page 527 User Interface Components The Title Bar is located along the top of the Realflo window and contains application file information and window control functions. The Menu Bar provides access to Realflo commands. This reference contains complete information on Realflo menu commands. The Tool Bar is located below the Menu Bar and provides quick mouse access to many Realflo functions. The Maintenance Tool Bar is a docking toolbar and provides single button access to flow computer maintenance functions. The Configuration Tool Bar is a docking toolbar and provides a structured tree of flow computer configuration data. The Status Bar is displayed across the bottom of the application window and describes actions of menu items as you use the arrow keys or mouse to navigate through menus. Realflo User and Reference Manual May 19, 2011 202 Realflo Expert Mode Reference Display Window The Expert Mode display window is shown below. Current Readings The Current Readings view is divided into five sections: The Process Measurements section displays the live and forced values for the flow calculation process inputs. The live values show the value read from the sensor. The forced values show the inputs to the flow calculation when they are forced. The Forced values are disabled when the input is live. The forced values are shown in red when the value is forced. The units of measurement displayed are those in effect when the readings were made. See Measurement Units for a description of the unit types. Process measurements not used by the flow calculation are disabled. Forced values are not displayed for flow computers older than 6.0. The Calculated Compressibility section displays the results of the compressibility calculation selected in the Input Configuration property page. The time of the last compressibility calculation update and any compressibility calculation errors are also displayed in this section. The units of measurement displayed are those in effect when the readings were made. See Measurement Units for a description of the unit types. The Calculation Status section displays the Calculation State of the flow computer calculations for the run. Refer to the Calculation Control command in the Flow Computer menu for further information on flow calculation control. The Calculation State can be changed using the start or stop button beside the Calculation State display. When the Current Readings are being updated and the calculation is stopped or not set then the button is labeled Start. When the Current Readings are being updated and the calculation is running then the button is labeled Stop. When the Current Readings are not being updated the button is disabled and no text is displayed on it. Realflo User and Reference Manual May 19, 2011 203 Realflo Expert Mode Reference Click on the button to change the Calculation State. If the calculations are stopped the following message box is displayed. If Yes is selected the flow calculations for the run are started. If No is selected the message box is closed and no further action is taken. If the calculations are running the following message box is displayed. If Yes is selected the flow calculations for the run are stopped. If No is selected the message box is closed and no further action is taken. The Last Flow Configuration displays the time stamp of the last time the flow configuration was changed. The Last Density Configuration displays the time stamp of the last time the compressibility configuration was changed. The Last Flow Configuration and Last Density Configuration values are not displayed for flow computers older than 6.0. The Calculated Flow at Base Conditions displays the instantaneous Flow Volume Rate, Flow Volume Rate and Flow Energy Rate at base conditions. The Flow Extension is displayed when the run is configured for AGA-3 (1990) calculations. The Flow Product is displayed when the run is configured for AGA-3 (1990) calculations. The Uncorrected Volume is displayed when the run is configured for AGA-7 calculations. The time of the last flow calculation and any flow calculation errors are also displayed. The units of measurement displayed are those in effect when the readings were made. See Measurement Units for a description of the unit types. The Accumulated Flow at Base Conditions section displays the accumulated flow at base conditions for the current contract day, the number of flow calculations and the flow time for the current contract day (Today) and the previous contract day (Yesterday). Data is copied from the current contract day (Today) to the previous contract day (Yesterday) at the end of the contract day, as measured by the real time clock. Data is not copied when a new day is started for other reasons. The units of measurement displayed are those in effect when the readings were made. See Measurement Units for a description of the unit types. Realflo User and Reference Manual May 19, 2011 204 Realflo Expert Mode Reference This section also displays the accumulated flow volume and flow time for the current month and the previous month. Data is copied from the current month (This Month) to the previous month (Last Month) at the end of the contract day at the end of the month, as measured by the real time clock. The Total Accumulated Flow at Base Conditions section displays the total accumulated flow volume at base conditions. The accumulator holds a number between 0 and 999,999,999,999. It rolls over when the accumulated value is equal or greater than 1,000,000,000,000. The units of measurement displayed are those in effect when the readings were made. See Measurement Units for a description of the unit types. The Accumulated Uncorrected Flow section displays the total calculated uncorrected flow volume (AGA-7 only) for the current contract day, the previous contract day, the current month and the last month. Title Bar The title bar is located along the top of a window. It contains the name of the application, Realflo, and the currently opened flow computer file. The current view and meter run are displayed in brackets. The title bar provides commands for control of the opened application and the window display. To move the window, drag the title bar. You can also move dialog boxes by dragging their title bars. The application control menu button is the Realflo icon in the upper left corner of the Realflo window. When selected the following commands are displayed. Use the Restore Command to return the active window to its size and position before you chose the Maximize or Minimize command. Use the Move Command to display a four-headed arrow so you can move the active window or dialog box with the arrow keys. This command is unavailable if you maximize the window. Using the mouse drag the window title bar to location required. Use the Size Command to display a four-headed arrow so you can size the active window with the arrow keys. This command is unavailable if you maximize the window. Use the mouse to drag the size bars at the corners or edges of the window. Use the Minimize Command to reduce the Realflo window or the view window to an icon. Use the mouse by clicking the minimize icon on the title bar. Use the Maximize Command to enlarge the active window to fill the available space. Use the mouse by clicking the maximize icon on the title bar; or double-click the title bar. Use the Close Command to close the active window or dialog box. Doubleclicking a Control-menu box is the same as choosing the Close command. If you have multiple windows open for a single document, the Close command on the document Control menu closes only one window at a time. You can close all windows at once with the Close command on the File menu. Keyboard keys CTRL+F4 closes a document window and ALT+F4 closes the Realflo window or dialog box. Use the Next Window Command to switch to the next open document window. Realflo determines which window is next according to the order in which you opened the windows. Use the keyboard keys CTRL+F6. Realflo User and Reference Manual May 19, 2011 205 Realflo Expert Mode Reference Use the Previous Window Command to switch to the previous open document window. Realflo determines which window is previous according to the order in which you opened the windows. Use the keyboard keys SHIFT+CTRL+F6. Standard Toolbar The Standard toolbar is displayed across the top of the application window, below the menu bar. The toolbar provides quick mouse access to many tools used in Realflo. To hide or display the Toolbar, choose Toolbar from the View menu. The following commands and functions are displayed on the Toolbar. Create a new file Open an existing file. Realflo displays the Open dialog box, in which you can locate and open the desired file. Save the active file with its current name. If you have not named the document, Realflo displays the Save As dialog box. Print data from the active view. View data as it would be printed. Edit Flow Computer configuration. Edit Flow Computer configuration. Read configuration from controller. Write configuration to the controller. Enable/Disable updating of Current Readings view. Read Logs/History from Flow Computer for the meter run. Display the Current Readings view for the meter run. Display the Hourly History view for the meter run. Display the Daily History view for the meter run. Display the Hourly Gas Quality History view for the meter run. Display the Event Log view for the meter run. Displays the Alarm Log view for the meter run. Show Run 1 in the current view. The view type is not changed. Show Run 2 in the current view. The view type is not changed. Realflo User and Reference Manual May 19, 2011 206 Realflo Expert Mode Reference Show Run 3 in the current view. The view type is not changed. Show Run 4 in the current view. The view type is not changed. Show Run 5 in the current view. The view type is not changed. Show Run 6 in the current view. The view type is not changed. Show Run 7 in the current view. The view type is not changed. Show Run 8 in the current view. The view type is not changed. Show Run 9 in the current view. The view type is not changed. Show Run 10 in the current view. The view type is not changed. Select whether all views or only the current view are affected by the Run 1, Run 2 and Run 3 commands. The toolbar may: Remain stationary along one side of its parent window; Be dragged and docked, or attached, by the user to any side or sides of the parent window you specify; Be floated, or detached from the frame window, in its own mini-frame window so the user can move it around to any convenient position; and Be re-sized while floating. To move the toolbar, click on the background of the toolbar. Drag the toolbar to the new location and release the mouse button. Maintenance Toolbar The maintenance toolbar organizes the maintenance operations together. The maintenance toolbar is a docking toolbar. Its initial position is below the main toolbar. You can move it, undock it, or hide it. The following commands and functions are displayed on the toolbar. The Maintenance Toolbar may: Realflo User and Reference Manual May 19, 2011 207 Realflo Expert Mode Reference Remain stationary below the main toolbar; Be dragged and docked, or attached, to either side of the parent window; Be floated, or detached from the frame window, in its own mini-frame window so the you can move it around to any convenient position; and Be resized while floating. The button layout automatically changes as the toolbar is resized. To move the toolbar, click the title bar of the toolbar. Drag the toolbar to the new location and release the mouse button. The toolbar can be enabled or disabled from the View menu. A check mark appears next to the menu item when the Maintenance Toolbar is displayed. Configuration Toolbar The configuration toolbar organizes configuration data in one place. The configuration toolbar is a docking toolbar. Its initial position is on the left side of the Realflo window. You can move it, dock it, or hide it. or hidden by the user. The configuration toolbar contains a tree of configurable items. Leaves are grouped under nodes. Double-clicking a leaf will open the dialog or property sheet for the item. The toolbar may: Remain stationary along one side of its parent window; Be dragged and docked, or attached, by the user to either side of the parent window you specify; Be floated, or detached from the frame window, in its own mini-frame window so the user can move it around to any convenient position; and Be re-sized while floating. Realflo User and Reference Manual May 19, 2011 208 Realflo Expert Mode Reference To move the toolbar, right click anywhere in the toolbar and select Allow Docking. The toolbar can be moved to a new location. To close the toolbar, right click anywhere in the toolbar and select Hide. Status Bar The Status Bar is displayed across the bottom of the application window. The left area of the status bar describes actions of menu items as you use the arrow keys to navigate through menus. It also shows messages that describe the actions of toolbar buttons as you depress them, before releasing them. If after viewing the description of the toolbar button command you wish not to execute the command, then release the mouse button while the pointer is off the toolbar button. The Username and security level are shown at the bottom right of the Status Bar. This provides an indication of the security level of the user. Some configuration toolbar items may be disabled depending of the security level of the user. The right areas of the status bar indicate which of the following keys are latched down: CAP Indicates the Caps Lock key is latched down. NUM Indicates the Num Lock key is latched down. SCRL Indicates the Scroll Lock key is latched down. To hide or display the Status Bar, choose Status Bar from the View menu. Scroll Bars Scroll bars are displayed at the right and bottom edges of the document window. The scroll boxes inside the scroll bars indicate your vertical and horizontal location in the document. You can use the mouse to scroll to other parts of the document. Scroll bars appear only when needed. If there is no visible data the scroll bar will not be shown. Menu Bar The menu bar displays the commands for configuration, communication, monitoring, and security and file management functions available with Realflo. Menu commands are displayed by clicking the mouse button on the menu item or by pressing the alt key and the underlined letter of the menu item. Realflo User and Reference Manual May 19, 2011 209 Realflo Expert Mode Reference File Menu The File menu contains commands to create, open and save Realflo files. File menu commands allow data to be exported to spreadsheet (csv), FlowCal (cfx) files and to be printed. User accounts are also configured using this menu. New Command Use this command to create a new Realflo file. When selected this command opens the New File Wizard. See the section Realflo Wizards >> New File Wizard for complete details on using the wizard. Open Command Use this command to open an existing Realflo file. When the Open command is used the File Open Dialog is displayed. The following options allow you to specify which file to open. The Look In: box lists the available folders and files. The File Name: box allows you to type or select the file name you want to open. This box lists files with the extension you select in the Files of Type box. The Files of Type: box lists the types of files Realflo can open. Realflo can open flow computer (TFC) files and flow computer Template files (RTC). When any account other than the ADMIN account has been created in the Realflo file the user needs to log on to an account when a flow computer file is opened. See the Accounts section for details. The Open button opens the selected file and closes all views for runs that are not supported by the file that is opened. The Cancel button closes the dialog without opening a file. Realflo User and Reference Manual May 19, 2011 210 Realflo Expert Mode Reference Only one flow computer file can be open at a time in Realflo. To view data from more than one flow computer at a time, start another copy of Realflo. Close Command Use this command to close all Realflo windows for the flow computer. Realflo suggests that you save changes to the flow computer file. If you close a flow computer file without saving, configuration changes made and data that has been read from the flow computer since the last time you saved it are not saved. Before closing an untitled file, Realflo displays the Save As dialog box and suggests that you name and save the file. Save Command Use this command to save the flow computer file to its current name and directory. Saving a file saves the flow computer configuration, Hourly and Daily history, and the Event and Alarm logs. When you save a file for the first time, Realflo displays the Save As dialog box so you can name your file. If you want to change the name or directory of the file, before you save it, choose the Save As command. Realflo 6.70 files are compatible with files saved using earlier versions of Realflo. Save As Command Use this command to save and name the flow computer file. Realflo displays the Save As dialog box so you can name your file. The following options allow you to specify the name and location of the file you're about to save: The Save in: box lists the available folders and files. The File name: box allows entry of a new file name to save a file with a different name. Realflo adds the extension you specify in the Save As type box. The Save as type: box lists the types of files Realflo can save. Realflo can open flow computer (TFC) files and flow computer Template files (RTC). Realflo User and Reference Manual May 19, 2011 211 Realflo Expert Mode Reference If the open file is a flow computer file and the Save as Type is a template file, Realflo will ask if the flow computer file should be saved before converting it to a template. The Save button saves the file to the specified location. The Cancel button closes the dialog without saving. To save a file with its existing name and directory, use the Save command. Flow Computer File Types Realflo uses separate files for flow computer configuration, current reading data, daily history data, hourly history data, alarm and event log data, process I/O configuration and custom views. All files are saved with the same file name and different file extensions. The table below indicates the file types and extensions. File Type Configuration Daily history Hourly history Gas Quality History Event log Alarm log Current readings Settings Process I/O Custom Views Settings File Contents Configuration of the Flow Computer Historical data for daily history view Historical data for hourly history view Historical data for gas quality history view Historical data for event log Historical data for alarm log Current readings data Configuration data not relating to flow calculations Process I/O configuration data Custom Views configuration Additional configuration data not relating to flow calculations. Includes SolarPack settings. Extension TFC TFD TFH TFG TFE TFA TFR TFS TFP TFV TFX Template File Types Realflo uses separate files for templates. All files are saved with the same file name and different file extensions. The table below indicates the file types and extensions. File Type Configuration Settings Process I/O Custom Views File Contents Flow Computer configuration Configuration data not relating to flow calculations Process I/O configuration Flow Run and Custom Views configuration Extension RTC RTS RTP RTV Managing Realflo Files When copying Realflo files from one PC to another, copy all the files for a flow computer. If history, event or alarm logs have grown too large, move the history and log files to another directory. New files will be created the next time you read Realflo User and Reference Manual May 19, 2011 212 Realflo Expert Mode Reference logs from the flow computer. If you export the data first, you can have easy access to the archived data from a spreadsheet and current data from Realflo. If you have created a copy of a flow computer for configuration of a new unit, you can delete the hourly and daily history, event and alarm logs by deleting the files with the TFD, TFH, TFE and TFA extensions. Export Command The Export command is used to select the type of file format to export Realflo data to. There are five selections: Export to CSV Export to CFX CSV Export Options CFX Export Options Export PEMEX Report Export to CSV Use the Export to CSV command to export the flow computer configuration data and the data from any view. Data is exported in the CSV (commaseparated values) format. This format can be read by spreadsheet and database software. Data is exported from the current window. Select the window containing the view you wish to export or change the view in the current window using the View menu. When the Export command is selected the Export data dialog appears for views that support the selection of records for exporting, such as the hourly history, daily history or event log views. For views not supporting the selection of records, for example, configuration views, the Save As dialog is opened. The All radio button selects all the data in the current view. This is the default button if no data is selected. The Selection radio button selects the data that is currently selected in the view. This is the default button if data is selected. The Selected Dates radio button selects the data from the contract days in the From and To dropdown lists. The From dropdown list selects the oldest contract day. This control is enabled when the Selected Dates radio button is selected. Realflo User and Reference Manual May 19, 2011 213 Realflo Expert Mode Reference The To dropdown list selects the recent contract day. This control is enabled when the Selected Dates radio button is selected. Clicking the Cancel button or pressing the Escape key closes the dialog. The OK button opens the Save As file selection dialog, with the file type CSV active. A file name is suggested for each type of file that is exported. You may change the file name to any suitable name. The suggested file name format is defined in the CSV Export Options command. The Save As file selection dialog appears for views. The Save As dialog allows you to specify the file to export the data to. The Save button in the Save As dialog exports the data to the selected file. The Cancel button in the Save As dialog cancels the export command and closes dialogs. Export to CFX Use the Export to CFX command to export data in the Flow-Cal CFX format. This format is designed for importing into Flow-Cal. Data is exported to the CFX file from one flow run. The file includes data from the configuration, current readings, alarm log, event log and hourly history log. The Run dropdown list selects the flow run to export. The default value is the flow run of the active view. Realflo User and Reference Manual May 19, 2011 214 Realflo Expert Mode Reference The All Alarms, Events and Hourly Logs radio button selects all of the data in the flow run. This is the default button. The Selected Days radio button selects the data from the contract days in the From and To dropdown lists. The From dropdown list selects the oldest contract day. This control is enabled when the Selected Days radio button is selected. The To dropdown list selects the recent contract day. This control is enabled when the Selected Days radio button is selected. The Export Type dropdown list selects how export files are stored. Select Specific File to export to a single file. A standard file save dialog opens to allow you to select the file name. The default file name is <Realflo file name>(<FC ID>) - <Run Number> (<Run ID>).CFX. Select Dated CFX to export one file per day to a single folder per run. Realflo exports one file for each day. The file name is based on the time and date according to the CFX standard (YYYYMMDD.CFX). A separate folder is created for each run. The folder is named <Realflo file name>(<FC ID>) - <Run Number> (<Run ID>).CFX. The Save As file selection dialog appears for views. The Save As dialog allows you to specify the file to export the data to. The Save button in the Save As dialog exports the data to the selected file. The Cancel button in the Save As dialog cancels the export command and closes dialogs. CFX File Version Data is exported in the CFX version 5 format. This format is not supported by some older versions of Flow-Cal. An upgrade may be available from Flow-Cal to allow older versions to read this file format. Contact Flow-Cal for details. Realflo User and Reference Manual May 19, 2011 215 Realflo Expert Mode Reference CSV Export Options Dialog The CSV Export Options command defines whether optional data is exported to CSV files. The settings in this dialog apply to files opened by Realflo. They are stored in the Windows registry. The Hourly and Daily Records section of the dialog defines optional data to include and how the data is time stamped. Select the Include Uncorrected Flow in AGA-7 Export option to export the Uncorrected Data column from the Hourly History Log and Daily History Log. This option applies to AGA-7 only. The option is unchecked by default. Select the Export in Time Leads Data Format option to export time stamps that mark the start of the period. Uncheck the option to export time stamps that mark the end of the period (Realflo format). This applies to the the Hourly History and Daily History only. The control is unchecked by default. The Default File Name Format section defines the file name that is suggested by Realflo when data is exported. The names are combinations of the file name; Flow Computer ID; flow run number; and flow run ID. The Format list selects the name format. The name is made up of the identifier format and a view format. The valid values for the identifier are listed below. The default is to include all information. o file name (Flow Computer ID) - Run# (run ID) - Type o file name (Flow Computer ID) - Run# - Type o file name (Flow Computer ID) - run ID - Type o file name - Run# (run ID) - Type o file name - Run# - Type o file name - run ID - Type o Flow Computer ID - Run# (run ID) - Type Realflo User and Reference Manual May 19, 2011 216 Realflo Expert Mode Reference o Flow Computer ID - Run# - Type o Flow Computer ID - run ID - Type o Run# (run ID) - Type o run ID - Type When the logs are exported the word Type is replaced by the following, according to the export selected. o Alarms o Events o Hourly Log o Daily Log o Current Readings o Custom View Name The Example control shows the file name that will be suggested for the current file. Realflo User and Reference Manual May 19, 2011 217 Realflo Expert Mode Reference CFX Export Options Dialog The CFX Export Options dialog sets options for exporting to Flow-Cal CFX files. The settings in this dialog apply to files opened by Realflo. They are stored in the Windows registry. The Hourly History section defines how records from the hourly history are exported. Select Export Partial Hour Records to export the records as they appear in Realflo. Some hours may contain more than one record due to power cycling or configuration changes. This is the default selection. Select Export One Record per Hour to export only one record per hour. Multiple records within an hour are merged into a single record for exporting. Hours that are not yet complete are not merged or exported. The following hourly record fields are summed: volume, mass, energy, pulses (turbine type). Realflo User and Reference Manual May 19, 2011 218 Realflo Expert Mode Reference The following hourly record fields are averaged: termperature, static pressure, differential pressure (orifice types), relative density, flow product or flow extension. See Input Averaging on page 948 for more information. Select Time Leads Data Format to export the date and time at the start of the period. The time stamp on the record is the time at the start of the hour, even if the first record to be merged started later than that time. This option is enabled only when Export One Record per Hour is checked. This option is unchecked by default. The File Description section defines some descriptive parameters in the CFX file. Meter Number defines the meter number parameter. The options are none, Flow Computer ID, Flow Run ID and Flow Run Number. The default value is Flow Computer ID. The parameter is 17 characters long in the file. Meter Name defines the meter name parameter. The options are none, Flow Computer ID, Flow Run ID and Flow Run Number. The default value is Flow Run ID. The parameter is 49 characters long in the file. Serial Number defines the meter serial number parameter in the file. The options are none, Flow Computer ID, Flow Run ID and Flow Run Number. The default value is Flow Run Number. The parameter is 11 characters long in the file. The Live Inputs Flags section defines which live input flags are set by Realflo. The CFX file contains four flags in the Live Inputs parameter. Realflo sets the T (temperature) flag to Y (live data). The other flags are normally set to N (not live), but can be modified using the following options. Check Set Live Gas Composition Flag when there is a program that updates the gas composition. This is flag A (analysis). This option is unchecked by default. Check Set Live Energy Flag when there is a program that updates the energy. This is flag B (heating value). This option is unchecked by default. Check Set Live Gravity Flag when there is a program that updates the specific gravity (relative density). This is flag G (gravity). This option is unchecked by default. The Default Name Format section defines what file names Realflo suggests when exporting. The names are combinations of the file name; Flow Computer ID; flow run number; and flow run ID. Format selects the name format. The valid values are listed below. The default is to include all information. o file name (Flow Computer ID) - Run# (run ID) o file name (Flow Computer ID) - Run# o file name (Flow Computer ID) - run ID o file name - Run# (run ID) o file name - Run# o file name - run ID o Flow Computer ID - Run# (run ID) Realflo User and Reference Manual May 19, 2011 219 Realflo Expert Mode Reference o Flow Computer ID - Run# o Flow Computer ID - run ID o Run# (run ID) o run ID The Example control shows the file name that will be suggested for the current file. The Dated CFX section defines where and how CFX files are exported. Select Use .CFX extension on folder names to create folders with a CFX extension when exporting Dated CFX files. The data for each month is stored in its own folder when using the Dated CFX format. The folder name may have a CFX extension or not. This option is unchecked by default. Select Export Dated CFX Files to the Folder to define a common folder for exports. Exported data will be placed in this folder. The option is unchecked by default. When checked, the edit control holds the destination folder that will appear in the Save As dialog. Use Browse to search for another folder. Export PEMEX Report to CSV Use the Export PEMEX Report to CSV command to export the flow computer configuration data and the data from any view. Data is exported in the CSV (comma-separated values) format. This format can be read by spreadsheet and database software. Data is exported from the current window. Select the window containing the view you wish to export or change the view in the current window using the View menu. When the Export command is selected, the Export PEMEX Report to CVS dialog appears for views that support the selection of records for exporting, such as the hourly history, daily history or event log views. This menu item is only visible if Realflo PEMEMX is launched. Select the Run to export from the Run dropdown list. The Type radio button lets you export hourly or daily records. Realflo User and Reference Manual May 19, 2011 220 Realflo Expert Mode Reference For views not supporting the selection of records, for example, Configuration views, the Save As dialog opens. The All radio button selects all the data in the current view. This is the default button if no data is selected. The Selected Dates radio button selects the data from the contract days in the From and To dropdown lists. The From dropdown list lets you select the oldest contract day. This control is enabled when the Selected Dates radio button is selected. The To dropdown list lets you select the recent contract day. This control is enabled when the Selected Dates radio button is selected. Clicking the Cancel button or pressing the Escape key closes the dialog. The OK button opens the Save As file selection dialog, with the file type CSV active. A file name is suggested for each type of file that is exported. You may change the file name to any suitable name. The suggested file name format is defined in the CSV Export Options command. The Save As file selection dialog appears for views. The Save As dialog allows you to specify the file to export the data to. The Save button in the Save As dialog exports the data to the selected file. The Cancel button in the Save As dialog cancels the export command and closes dialogs. Print Command Use this command to print data from the current view. Realflo displays the Print dialog. The following options allow you to specify the printer, the print range and the number of copies. The Name drop-down list box displays a list of configured printers. The Properties button defines the settings for the selected printer. The Print range radio buttons selects the data to be printed. Realflo User and Reference Manual May 19, 2011 221 Realflo Expert Mode Reference The All radio button prints all the data in the current view. This is the default button if no data is selected. The Pages radio button allows the printing of selected pages. The Selection radio button prints the data that is currently selected in the view. This is the default button if data is selected. The Number of copies selection indicates how many copies to print. If the printer selected in the Name box supports collating print jobs you may select Collate, otherwise the control is grayed out. The OK button prints the report. Selecting the Cancel button or pressing the Escape key closes the dialog. Print Preview Command Use this command to see how your printed report will look. The command opens a special view that shows data as it will be printed. To preview a report from a view select the window containing the view you wish to print or change the view in the current window using selections from the View menu. When hourly history, daily history or log views are selected you can select records to print that interest you by left-clicking the mouse button on them. A row of control buttons is available at the top of this view. These control buttons are described below. The Print button prints the report as shown. The Next Page button displays the next page. It is grayed if there are no more pages. The Prev Page button displays the previous page. It is grayed if there are no pages before the current page. The Two Page button changes the display to show two pages at a time. The One Page button changes the display to show one page at a time. The Zoom In button enlarges the page displayed so you can see details on the report. The Zoom Out button shrinks the page displayed so you see how the page is formatted. The Close button closes the Print Preview view. Print Setup Command Use this command to define how reports are printed. The font, page headings, margins, and the size of the columns on the hourly history, daily history or event log reports can be changed. Select from the options described below. The page headings section selects what is printed in the header of each report page. Selecting Title prints the title of the report centered on the page. Selecting Date and Time prints the date and time in the upper left-hand corner of the page. The date and time are printed in the long time format defined from the Windows Control Panel. Realflo User and Reference Manual May 19, 2011 222 Realflo Expert Mode Reference Selecting Page Numbers prints “Page” and the page number in the upper right hand corner of the page. The Start At edit box selects where the page numbers start. The Margins section defines the page margins. Left is the size of the left-hand margin on the page. Right is the size of the right hand margin on the page. Top is the size of the top margin on the page. Bottom is the size of the bottom margin on the page. Measurement Units is the units of measurement for the margins. It is one of Inches or mm. The units are converted into the other measurement system when this control is changed. The selected font section defines the font used for printing reports. The currently selected font is shown. The Change Font button opens a font selection dialog. The user may choose the font for printing reports. The column width section defines the widths of the columns on specific reports. The Report dropdown list selects the report to edit. The Column dropdown list displays columns on the selected report. The Width edit box displays the current column width and allows it to be changed. The Reset Report button resets columns on the current report to their default widths. Select the OK button to use the new settings. Select the Cancel button or press the Escape key to close the dialog. The Printer button opens the Printer dialog. The Help button displays help for this dialog. Print Setup Command in PEMEX Mode Use this command to define how reports are printed when Realflo is operating in PEMEX mode. The font, page headings, margins, and the size of the columns on the hourly history, daily history or event log reports can be changed. Select from the options described below. The page headings section selects what is printed in the header of each report page. Selecting Title prints the title of the report centered on the page. Selecting Date and Time prints the date and time in the upper left-hand corner of the page. The date and time are printed in the long time format defined from the Windows Control Panel. Selecting Page Numbers prints “Page” and the page number in the upper right hand corner of the page. The Start At edit box selects where the page numbers start. The Margins section defines the page margins. Realflo User and Reference Manual May 19, 2011 223 Realflo Expert Mode Reference Left is the size of the left-hand margin on the page. Right is the size of the right hand margin on the page. Top is the size of the top margin on the page. Bottom is the size of the bottom margin on the page. Measurement Units is the units of measurement for the margins. It is one of Inches or mm. The units are converted into the other measurement system when this control is changed. The selected font section defines the font used for printing reports. The currently selected font is shown. The Change Font button opens a font selection dialog. The user may choose the font for printing reports. The column width section defines the widths of the columns on specific reports. The Report dropdown list selects the report to edit. The Column dropdown list displays columns on the selected report. The Width edit box displays the current column width. To print a PEMEX Report, the default column widths need to be: Column Width Start Time and date (regional format) 21 End Time and date (regional format) 21 Time with active flow (seconds) 10 st Volume (1 base condition) st 12 Energy (1 base condition) 18 Temperature 12 Pressure 14 Differential pressure/Average frequency 12 Relative density 16 Flow extension/Uncorrected volume 12 Number of alarms 5 Number of events 5 Up time (minutes) 5 Volume (2 condition) nd base Heating value Realflo User and Reference Manual May 19, 2011 12 12 224 Realflo Expert Mode Reference Column Width Quality 5 The Reset Report button resets columns on the current report to the required default settings when operating in PEMEX mode. Select the OK button to use the new settings. Select the Cancel button or press the Escape key to close the dialog. The Printer button opens the Printer dialog. The Help button displays help for this dialog. Recent Files List Use the numbers and file names listed at the bottom of the File menu to open the last four files you closed. Choose the number that corresponds with the file you want to open. Exit Command Use this command to exit from Realflo. If changes have been made to the flow computer file, you will be asked if you want to save them. Realflo User and Reference Manual May 19, 2011 225 Realflo Expert Mode Reference Edit Menu The edit menu commands allow selected data to be copied to the clipboard. The selected data is then available for use in other applications. Copy Command Use this command to copy selected data onto the clipboard. This command is unavailable if the view does not contain data that can be selected. Copying data to the clipboard replaces the contents previously stored there. Select All Command Use this command to select all the records in the current view. This command is unavailable if the view does not contain data that can be selected. Custom Views Command Custom views provide a means for users to display and modify register data used in their custom applications. Custom applications include Telepace or IEC 61131-3 and custom C or C++ programs that are running on a controller in addition to the gas flow computer application. Any register the SCADAPack controller may be added to one or more custom views. The Custom Views command is used to create and edit custom views. When Custom Views are created they are assigned an Access Level for security purposes. The access levels are based on the User Account Access levels, described in the Accounts section. Based on the user‟s access level, views may be viewed or edited and initial values may be written to the registers in the view. When the Custom Views command is selected the Edit Custom Views dialog is displayed. Realflo User and Reference Manual May 19, 2011 226 Realflo Expert Mode Reference The View Name list displays the views that are available to the current user. Views that require a higher access level are not displayed. Refer to the Accounts section for more information on Access Levels. If there are no views created the list is blank. Click on a view in the list to select it. Double-click on a view in the list to edit it. Use Ctrl-click or Shift-click to select multiple views. Click on the column headings to sort the data. Clicking once sorts the data in ascending order. Clicking again sorts the data in descending order. The buttons at the side of the Edit Custom Views dialog are used to create and edit Custom Views. Click the Add button to open the Edit Table View dialog and add a new Custom Views. Click the Copy button to copy a selected Custom Views. The Edit Table View dialog is opened with a copy of the selected view. This button is disabled if no view is selected or if multiple views are selected. Click the Edit button to edit the selected Custom Views. The Edit Table View dialog is opened and will contain the selected view. This button is disabled if no view is selected or if multiple views are selected. Click the Delete button to delete the selected view or Custom Views. The button is disabled if no view is selected. After deletion the next view in the list is selected, or the last view in the list is selected. Realflo User and Reference Manual May 19, 2011 227 Realflo Expert Mode Reference The Update Rate edit box sets the rate, in seconds that data is polled from the flow computer to refresh the Custom Views. Valid values are 1 to 65535 seconds. The default value is 1 second. The OK button saves changes to the Custom Views and closes the dialog. The Cancel button closes the dialog without saving any changes to the Custom Views. Edit Table View Dialog When the Edit button is selected, or a view is double clicked, in the Edit Custom Views dialog the Edit Table View dialog is opened as shown below. The dialog contains information about the selected Custom Views. The dialog contents are described below. When the Add button is selected in the Edit Custom Views dialog the Edit Table View dialog is opened as shown below. The dialog contents are described below. Realflo User and Reference Manual May 19, 2011 228 Realflo Expert Mode Reference The View Name entry box contains the name of the Custom View. The View Name may be any character string up to 16 characters in length. A view name needs to be entered and it needs to be unique. The View Description entry box contains a description of the Custom View. The View Description may be any character string up to 64 characters in length. The Access Level Required dropdown menu selects the user account access level required to display the Custom Views. See the Accounts section for details on creating Realflo user account. Users with a lower access level than selected will not be able to see the view on menus. The menu selections are: View and read data. View, read and write data. Administrator. Access levels that are greater than the current user's access level are not available. This prevents a user from creating a view that he will not be able to edit because his access level is too low. The default value is View and read data. The Allow Sorting dropdown menu selects whether the user can change the sort order on the Custom View. The menu selections are: Yes No The default value is Yes. The Default Sort Column dropdown menu selects the default column by which the Custom View is sorted. The menu selections are: Tag Description Realflo User and Reference Manual May 19, 2011 229 Realflo Expert Mode Reference Address Value Forced Type Format Writeable Initial Value The default value is Tag. The Edit Table View list control displays the register data that will be included in the custom view. The register data is for each entry is displayed as a row in the list with column headings across the top of the list. Click on the column headings to sort the data by the heading. Clicking once sorts the data in ascending order. Clicking again sorts the data in descending order. The address and initial value columns are sorted numerically. The tag, description, type, format, and writeable columns are sorted alphanumerically. The list is sorted by address in ascending order when the dialog is opened. Click on a row in the list to select it. Double-click on a row in the list to open the Edit Register on View dialog. Use Ctrl-click or Shift-click to select multiple rows. The OK button saves the changes to the Custom View and closes the dialog. The Cancel button closes the dialog without saving any changes to the Custom View. Click the Add button to open the Add Registers dialog. This dialog is used to add registers to the Custom View. Click the Edit button to open the Edit Registers On View dialog. This button is disabled if no register is selected or multiple registers are selected. Click the Delete button to delete the selected register or registers. The button is disabled if no register is selected. After deletion the next register in the list is selected, or the last register in the list is selected. Click the Columns button to open the Columns dialog. This dialog is used to select the columns that will be displayed on the Custom View. This command does not affect the columns displayed in the Edit Table View dialog. Realflo User and Reference Manual May 19, 2011 230 Realflo Expert Mode Reference Add Registers Dialog When the Add button is clicked in the Edit Table View dialog the Add Registers dialog is opened. The dialog contents are described below. The Existing Registers on All Views list displays all registers that are defined in all views. The list displays all registers, even if they are already in the view. This allows adding them more than once with different format. Click on the column headings to sort the data. Clicking once sorts the data in ascending order. Clicking again sorts the data in descending order. The register column is sorted numerically. The tag column is sorted alphanumerically. The list is sorted by register in ascending order when the dialog is opened. The Registers to Add to Current View list displays registers that are to be added to the current view. Registers in the Registers to Add to Current View list are added to the current view when the OK button is clicked. Click on the column headings to sort the data. Clicking once sorts the data in ascending order. Clicking again sorts the data in descending order. The register column is sorted numerically. The tag column is sorted alphanumerically. The list is sorted by register in ascending order when the dialog is opened. Registers in both lists may be selected by clicking on a row in the list or by holding down the Ctrl button and clicking on a row to select or deselect multiple rows. The Add>> button will add the selected registers from the Existing Registers on All Views list to the Registers to Add to Current View list. This button is disabled if no registers are selected in the Existing Registers on All Views list. The Add Copy>> button is used to add a copy of the selected register from the Existing Registers on All Views list to the Registers to Add to Current View list. When selected this button opens the Register Properties dialog. Realflo User and Reference Manual May 19, 2011 231 Realflo Expert Mode Reference The button is disabled if no register is selected in the Existing Registers on All Views list. The New button adds a new register to the Registers to Add to Current View list. When the button is pressed the Register Properties dialog is opened. The Copy button adds a copy of the selected registers from the Existing Registers on All Views list to the Registers to Add to Current View list. When the button is pressed the Register Properties dialog is opened. This button is disabled if no registers are selected in the Existing Registers on All Views list. The Delete button deletes the selected registers from the Registers to Add to Current View list. The button is disabled if no registers are selected in the Registers to Add to Current View list. After deletion the next register in the list is selected, or the last register in the list is selected. The OK button adds the registers to the view and closes the dialog. Registers of type Boolean are added using the Boolean format. All other register types are added using the decimal format. The Cancel button closes the dialog without saving any changes. Register Properties Dialog The Register Properties dialog is used to edit the properties of a register object. Register objects are shared by all views. Editing these properties will affect all views that use the object. For example, if the register number is changed here, then all views that used the object will show the data from the new register. When the Add Copy>> button or the New button are selected in the Add Registers dialog the Register Properties dialog is opened. Realflo User and Reference Manual May 19, 2011 232 Realflo Expert Mode Reference The Tag entry box contains the tag name of the register. The Tag name may be any character string up to 16 characters in length. A tag name needs to be entered and it needs to be unique. The Description entry box contains a description of the register. The Description may be any character string up to 64 characters in length. The Address entry box contains the address of the register to be displayed. Valid entries are: 00001 to 09999; 10001 to 19999; 30001 to 39999; 40001 to 49999. The Data Type dropdown menu selects the type of register. Valid selections are: Boolean for address from 00001 to 09999 and from 10001 to 19999 Signed Integer for address from 30001 to 39999 and from 40001 to 49999 Unsigned Integer for address from 30001 to 39999 and from 40001 to 49999 Signed Double for address from 30001 to 39999 and from 40001 to 49999 Unsigned Double for address from 30001 to 39999 and from 40001 to 49999 Realflo User and Reference Manual May 19, 2011 233 Realflo Expert Mode Reference Floating Point for address from 30001 to 39999 and from 40001 to 49999 ISaGRAF Integer for address from 30001 to 39999 and from 40001 to 49999 The default value is Unsigned Integer. The Deadband entry is the amount by which the register needs to change value before Custom Views are updated. Valid entries depend on the register type selected. This control is disabled if Data Type is set to boolean. The following table shows the minimum and maximum values for each type of register. Type Signed Integer Unsigned Integer Signed Double Unsigned Double Floating Point ISaGRAF Integer Minimum Value -32768 0 -2147483648 0 Any -2147483648 Maximum Value 32767 65535 2147483647 4294967295 Any 2147483647 The Writeable dropdown menu selects whether the user can write to the register. Valid selections are Yes and No. The Use Initial Value dropdown menu selects whether an initial value is defined for the register. Valid selections are Yes and No. This control is disabled if Writeable is set to no. The Initial Value entry is the initial value for the register. Valid values depend on the register type as shown in the table below. This control is disabled if Use Initial Value is set to No or if Writeable is set to No. Type Boolean Signed Integer Unsigned Integer Signed Double Unsigned Double Floating Point ISaGRAF Integer Minimum Value OFF -32768 0 -2147483648 0 Any -2147483648 Maximum Value ON 32767 65535 2147483647 4294967295 Any 2147483647 The Labels section displays the defined labels for a register. Labels are used in Custom Views to display text in place of values. For example a label could be used for the On / Off status of a motor. When the status is On the label could display Running and when the status is Off the label could display Stopped. When labels are defined there needs to be at least two labels. The Value column displays the register value for which a label will be displayed. The Label column displays the text that will be displayed for a value. Click on a row in the list to select it. Double-click on a row in the list to open the Edit Label dialog. Hold down Ctrl and click on a row to select or deselect multiple rows. Realflo User and Reference Manual May 19, 2011 234 Realflo Expert Mode Reference The Add button is used to add a label to the list. When selected the Edit Label dialog is opened. The Edit button is used to edit the selected label in the list. When selected the Edit Label dialog is opened. This button is disabled if no label or more than one label is selected. The Delete button deletes the selected labels. The button is disabled if no label is selected. After deletion the next label in the list is selected, or the last label in the list is selected. The OK button saves the changes and closes the dialog. The Cancel button closes the dialog without saving any changes. Edit Label Dialog When the Add or Edit button is selected in the Register Properties dialog the Edit Label dialog is opened. The Value entry is the register value for which a label will be displayed. Valid entries depend on the register type as shown in the table below. The value needs to be unique for each label. Type Boolean Signed Integer Unsigned Integer Signed Double Unsigned Double Floating Point ISaGRAF Integer Minimum Value OFF -32768 0 -2147483648 0 Any -2147483648 Maximum Value ON 32767 65535 2147483647 4294967295 Any 2147483647 The Label entry is the text that will be displayed for a register value. The Label may be any character string up to 8 characters in length and needs to be unique. The OK button saves the changes and closes the dialog. The Cancel button closes the dialog without saving any changes Edit Register on View Dialog The Edit Register on View dialog is used to modify a register on a Custom View. This dialog is displayed when the Edit button in the Edit Table View is selected. Realflo User and Reference Manual May 19, 2011 235 Realflo Expert Mode Reference The Register dropdown menu selects the register object that is displayed on the view. The dropdown list displays defined registers by tag and register number. The Format dropdown menu selects how the register object will be displayed on the view. Valid selections are listed below. Boolean - displays the register value as a Boolean. If the value is 0 then OFF is displayed. If the value is non-zero then ON is displayed. Decimal - displays the register value in decimal (base 10). Hexadecimal - displays the register value in hexadecimal (base 16). Binary - displays the register value in binary (base 2). ASCII - displays bytes of the register value as ASCII characters. The number of characters displayed depends on the register Type. Label - displays labels in place of the register value. The labels are defined in the register properties. This selection is not available if labels are not defined for the register. Bit 00, Bit 01, … , Bit 31 - displays the selected bit from the register as a Boolean. If the bit is 0 then OFF is displayed. If the bit is non-zero then ON is displayed. I the register cannot be edited from the Table View if this format is selected. Valid values are Bit 00 to Bit 31 for 32-bit data types, and Bit 00 to Bit 15 for 16-bit data types. Realflo User and Reference Manual May 19, 2011 236 Realflo Expert Mode Reference The default selection value is Decimal. Changing selection doesn‟t affect the display of Register Properties. The selection will be changed to Decimal if the previous selection is no longer valid after changing register or editing register properties. The Register Properties displays the properties of the selected register. The properties are updated when the Register is changed. The OK button saves the changes and closes the dialog. The Cancel button closes the dialog without saving any changes. The Edit button is used to edit the register object properties. When selected the Register Properties dialog is opened. Columns Dialog The Columns dialog is used to define the columns displayed on the Table view and the Edit Register dialog. This does not affect the columns shown in the Edit Table View dialog. The columns to be displayed can be defined for each Access Level so different users see different information. Select the column to show it on in the Table view. Columns are enabled by default when a view is created. Tag - selects if the register tag is shown. Description - selects if the description is shown. Address - selects if the register address is shown. Value - selects if the register value is shown. Forced - selects if the force status is shown. Type - selects if the register type is shown. Format - selects if the display format is shown. Writeable - selects if the writeable status is shown. Initial Value - selects if the initial value is shown. Realflo User and Reference Manual May 19, 2011 237 Realflo Expert Mode Reference Custom View Window The Custom View window displays the registers for a custom view in a tabular format. Each row in the table displays one register. The Custom View window displays the following columns. Some columns may not appear if they are not enabled on the view. The Tag column displays the name of the register. The Description column displays the description of the register. The Address column displays the register address. The Value column displays the value of the register in the format defined for the view. If the Label format is selected and the value is not in the label list then Invalid (value) is displayed. If data is not available value shows ----. The Forced column displays if the register value is forced. If data is not available forced shows ----. The Type column displays the type of register. The Format column displays the format of the value. The Writeable column displays if the user can write to the register. A register is not writeable if the Format is set to Bit. The Initial Value column displays the initial value for the register if one is defined, or ---- if a value is not defined. Clicking on the column headings will sort the table, in ascending order, according to the column selected. Clicking subsequent times on the same column toggles the sort order between descending and ascending order. Click on any row to select it. Hold down Shift and click on any row to select the range from the currently selected row to the new row. Hold down Ctrl key and click on any row to toggle the selection of that row. To change the column width, position the cursor over the line separating the columns in the heading. The cursor changes to a vertical bar with arrows pointing left and right. Click on the line and slide the mouse left or right. Release the mouse button when the column is the desired width. Use the Flow Computer menu commands Update Readings or Update Readings Once to poll the flow computer for the value and force status of registers. Editing Data There are several ways to edit registers and data in a Custom View. Select a row and, from the Edit menu, choose the Register command to open the Edit Register Value dialog. Double-click on a row open the Edit Register Value dialog. Realflo User and Reference Manual May 19, 2011 238 Realflo Expert Mode Reference Select a row and press the Enter key to open the Edit Register Value dialog. The above commands are disabled if the Writeable parameter of the register is set to No, if the display format is set to Bit or if the Update Readings is not enabled. Printing and Exporting Data To print or export part of the data in the Custom View, select the desired rows then use the Print or Export function. Register Command The Register command is used to modify the value or force status of a selected register in a Custom View. This command is disabled if the Update Readings command is turned off. When this command is selected the Edit Register Value dialog is opened. The dialog appears as follows for the decimal, ASCII, hexadecimal, binary and BIT formats. The dialog appears as follows for the Boolean, and Label formats. The Value field is the register value for decimal, ASCII, hexadecimal, binary and BIT formats. For Boolean and Label formats a dropdown menu is used to select the Value. Realflo User and Reference Manual May 19, 2011 239 Realflo Expert Mode Reference Valid values depend on the register type as shown in the table below. Value initially shows the current value of the register in the format defined for the view. If the Label format is selected and the value is not in the label list then Invalid (value) is displayed. Type Minimum Value Maximum Value Boolean OFF ON Signed Integer -32768 32767 Unsigned Integer 0 65535 Signed Double -2147483648 2147483647 Unsigned Double 0 4294967295 Floating Point Any Any ISaGRAF Integer -2147483648 2147483647 Double register variables like counters use the Unsigned Double type with Telepace firmware and use the ISaGRAF integer type with ISaGRAF firmware. The Forced dropdown menu selects if the register value is forced. The selections are Yes or No. The Register, Tag, Description, Type, and Format fields display information about the register. These fields cannot be changed. Data is displayed only if the corresponding column appears in the Table View; otherwise the field is blank. The OK button writes the value and force status to the flow computer and closes the dialog. The Cancel button closes the dialog without any changes. The Initial Value button sets Value to the initial value defined for the register. This button is disabled if no initial value is defined. The Apply button writes the value and force status to the flow computer. Write Initial Values Command The Write Initial Values command is used to write initial values for all Custom Views or for selected Custom Views. This command is disabled if the Update Readings command is turned off. When this command is selected the Write Initial Values dialog is opened. Realflo User and Reference Manual May 19, 2011 240 Realflo Expert Mode Reference The All Views selection will write initial values to registers for all defined views. Registers with an initial value are written. The Selected Views writes initial values to registers on the selected views only. All registers with an initial value on the selected views are written. Click on a row in the list to select it. Hold down Ctrl and click on a row to select or deselect multiple rows. Hold down Shift and click on a row to select a range of rows. The OK button writes the initial values and closes the dialog. The Cancel button closes the dialog with no changes. Template Steps This command is available only when a template file is opened in Realflo. A template is used to create a new flow computer from a pre-set configuration. The template specifies what data is pre-set and what needs to be entered when the template is used. History, event, or alarm logs are not stored in templates. A history view can be opened in a template file, but it will be empty. This allows views to be arranged when the template is edited. The view arrangement is stored in the template. Creating a Template File Realflo can save a configuration as a template file for new flow computers. New flow computer files can then be created from a template using the New File wizard. To create a template file: Realflo User and Reference Manual May 19, 2011 241 Realflo Expert Mode Reference Open a Realflo configuration file (TFC) and use the Save As command to save the file as a Realflo Template (RTC). Selecting Template Steps When the Template Steps command is selected the Show Template Steps dialog is displayed as shown below. A template provides default data for many of the steps in a new file wizard. To make it easier to use a template, some steps in the New File wizard may be skipped. These steps can be configured for each flow computer template. All template steps are selected by default. To configure the steps shown for a template: Check the steps that should be displayed. Checking or a node automatically selects all the steps within that node. Click OK. Realflo User and Reference Manual May 19, 2011 242 Realflo Expert Mode Reference View Menu The view menu commands select the data that is displayed in the active window. This data includes current readings, hourly history, daily history, event and alarm Logs. Each record in the displayed data file is generated in response to a predefined trigger. Refer to the section for each data file for details on the list of triggers. The visibility of the Toolbar and Status Bar is controlled from the view menu. Current Readings Command Use this command to display the Current Readings view for the selected run. This view displays current measured and calculated values from the flow computer. The current readings view will appear differently depending on the run configuration. The dialog is a property sheet with tabs for each flow run configured in the flow computer. Click the Run1 tab to display run 1, Run 2 to display run2, and so on. The view is divided into five sections that are described below: Process Measurements This section displays the live and forced values for the flow calculation process inputs. The live values show the value read from the sensor. The forced values show the inputs to the flow calculation when they are forced. The forced values are disabled when the input is live. The forced values are shown in red when the value is forced. The units of measurement displayed are those in effect when the readings were made. See Measurement Units for a description of the unit types. Process measurements not used by the flow calculation are disabled. Forced values are not displayed for Flow Computers older than 6.0. Calculated Compressibility This section displays the results of the compressibility calculation selected in the Input Configuration property page. The time of the last compressibility calculation update and any compressibility calculation errors are also Realflo User and Reference Manual May 19, 2011 243 Realflo Expert Mode Reference displayed in this section. The units of measurement displayed are those in effect when the readings were made (see Measurement Units for a full description of the unit types). Calculation Status The Calculation Status section displays the Calculation State of the flow computer calculations for the run. Refer to the Calculation Control command in the Flow Computer menu for further information on flow calculation control. The Calculation State Start and Stop button is disabled for users who have a read and view privileges account. The Calculation State can be changed using the start or stop button beside the Calculation State display. When the Current Readings are being updated and the calculation is stopped or not set then the button is labeled Start. When the Current Readings are being updated and the calculation is running then the button is labeled Stop. When the Current Readings are not being updated the button is disabled and no text is displayed on it. Click on the button to change the Calculation State. If the calculations are stopped the following message box is displayed. If Yes is selected the flow calculations for the run are started. If No is selected the message box is closed and no further action is taken. If the calculations are running the following message box is displayed. If Yes is selected the flow calculations for the run are stopped. If No is selected the message box is closed and no further action is taken. The Last Flow Configuration displays the time stamp of the last time the flow configuration was changed. The Last Density Configuration displays the time stamp of the last time the compressibility configuration was changed. Realflo User and Reference Manual May 19, 2011 244 Realflo Expert Mode Reference The Last Flow Configuration and Last Density Configuration values are not displayed for flow computers older than 6.0. Pulse Input Volume This section displays pulse and accumulated flow volumes for the onboard counter of a SolarPack 410. This section applies only to the SolarPack 410 system. Data displayed is as follows: Pulses: Raw instantaneous pulse count Today: An accumulation of today‟s total. Yesterday: An accumulation of yesterday‟s total. This Month: An accumulation of the totals for this month. Last Month: An accumulation of the totals for last month. Total: A running total volume since the beginning of this operation. Volumes are listed in the unit selected when configuring the Pulse Input. Calculated Flow at Base Condition The Calculated Flow displays the instantaneous Flow Mass Rate, Standard Flow Volume Rate, Flow Energy Rate, Flow Product, Time of last update, and Input and Flow Calculation Status. The Flow Extension is displayed when the run is configured for AGA-3 (1990) calculations. The Flow Product is displayed when the run is configured for AGA-3 (1990) calculations. The time of the last flow calculation and input and flow calculation status are also displayed. The units of measurement displayed are those in effect when the readings were made. See Measurement Units for a description of the unit types. Calculated Flow (PEMEX) The Calculated Flow displays the instantaneous Flow Volume Rate, Standard Flow Volume Rate, Flow Energy Rate, Flow Product, Time of last update, and Input and Flow Calculation Status. The Flow Extension is displayed when the run is configured for AGA-3 (1990) calculations. The Flow Product is displayed when the run is configured for AGA-3 (1990) calculations. The time of the last flow calculation and input and flow calculation status are also displayed. The units of measurement displayed are those in effect when the readings were made. See Measurement Units for a description of the unit types. Accumulated Flow Base Conditions The Accumulated Flow section displays the flow volume for the current contract day (Today) and the previous contract day (Yesterday). Data is copied from the current contract day (Today) to the previous contract day (Yesterday) at the end of the contract day, as measured by the real time clock. Data is not copied when a new day is started for other reasons. It also displays the standard flow volume, flow energy, the number of flow calculations. The units of measurement displayed are those in effect when the readings were made. See Measurement Units for a description of the unit types. Realflo User and Reference Manual May 19, 2011 245 Realflo Expert Mode Reference This section also displays the accumulated flow volume and flow time for the current month and the previous month. Data is copied from the current month (This Month) to the previous month (Last Month) at the end of the contract day at the end of the month, as measured by the real time clock. Accumulated Flow (PEMEX) The Accumulated Flow section displays the PEMEX flow volume for the current contract day (Today) and the previous contract day (Yesterday). Data is copied from the current contract day (Today) to the previous contract day (Yesterday) at the end of the contract day, as measured by the real time clock. Data is not copied when a new day is started for other reasons. It also displays the standard flow volume, flow energy, the number of flow calculations. The units of measurement displayed are those in effect when the readings were made. See Measurement Units for a full description of the unit types. This section also displays the accumulated flow volume and flow time for the current month and the previous month. Data is copied from the current month (This Month) to the previous month (Last Month) at the end of the contract day at the end of the month, as measured by the real time clock. Accumulated Uncorrected Flow The Accumulated Uncorrected Flow section displays the total calculated uncorrected flow volume (AGA-7 only) for the current contract day, the previous contract day, the current month and the last month. The view is updated according to the status of the Update Readings selection in the Maintenance menu. Battery Charger This section applies only to the SolarPack 410. The Battery Status indicates the current state of the solar panel charger. The Temperature Sensor indicates the status of the battery charger temperature sensor. Hourly History Command Use this command to display the Hourly History view or the Hourly Gas Quality History view for the selected run. Hourly History View Select Hourly History from the View menu to view the Hourly History table. This view shows a table of flow measurements. Each row in the table represents one period (nominally one hour) of flow history. Data in this view is updated when Hourly History is read from the controller when you click Read Logs and History. The units of measurement displayed are those in effect when the readings were made. See Measurement Units for a description of the unit types. New Hour Triggers Realflo User and Reference Manual May 19, 2011 246 Realflo Expert Mode Reference A break in the hourly log is made when new hour is triggered. When a new hour is triggered the current hourly record is closed and a new hourly record is created. A new record is created and added to the hourly history when any of the following triggers occur: Power on. At the end of each hour. When the clock is changed to a new time that is within the current day. AGA-3 (1985 or 1992) configuration change. V-Cone configuration change. AGA-8 configuration change. An AGA-8 configuration change does not start a new hour if the flow computer is set to ignore gas quality changes. NX-19 configuration change. Flow calculation stopped. (Stopping calculations ends the current hour. Starting calculations starts the new hour). Any of the items marked with an asterisk under the Input Configuration is changed. Contract configuration change, all parameters except the Wet Gas Meter factor for versions 6.21 and newer. Realflo Standard and GOST Modes Hourly History Views The columns in the tables are listed below. Some columns are not used for some types of flow calculation. The Start Time column displays the date and time of the start of the period. For flow computers using earlier versions of Realflo, Realflo will display ``--`` in the Start Time column. For flow computers using Realflo 6.70 or higher, Realflo will display the start time for the period. The End Time column displays the date and time of the end of the period. The Flow Time column displays the time of flow, in seconds, for the period. The Volume column displays the corrected flow volume at standard conditions for the period. The Mass column displays the calculated flow mass for the period. The Energy column displays the calculated flow energy for the period based on real heating value. The Temperature column displays the average temperature in the period. When the Flow Time is zero, the value will be the average temperature for the entire hour or hour fragment. The Pressure column displays the average pressure in the period. When the Flow Time is zero, the value will be the average pressure for the entire hour or hour fragment. The Differential Pressure column displays the average differential pressure in the period. Realflo User and Reference Manual May 19, 2011 247 Realflo Expert Mode Reference The Meter Pulses column displays the number of meter pulses in the period (AGA-7 only). The Relative Density column displays the average relative density value for the period. The Flow Extension column displays the average flow extension value for the period. The flow extension is calculated based on the AGA-3 calculation being used: For AGA-3 (1985) Flow Extension = square root of the Flow Product Where Flow Product = Upstream Static Pressure * Differential Pressure For AGA-3 (1992) Flow Extension = square root of the Flow Product Where Flow Product = Density of the fluid at flowing conditions * Differential Pressure The Uncorrected Volume column displays the calculated uncorrected flow volume for the period (AGA-7 only). The Events column displays the number of Events if there are events in the Event Log within the period. Zero is displayed if there are no Events within the period. The Alarms column displays the number of Alarms if there are Alarms in the Alarm Log within the period. Zero is displayed if there are no Alarms within the period. For flow computers earlier than version 6.70, the events and alarms displayed will be calculated the number of events based on the event log. For flow computers version 6.70 or higher, Realflo will read the value from the flow computer. Realflo PEMEX Mode Hourly History View The columns for PEMEX are listed below. The Start Time column displays the date and time of the start of the period. See section Historic Record Format for information on the units used in the Daily History table. For flow computers using earlier versions of Realflo, Realflo will display ``--`` in the Start Time column. For flow computers using Realflo 6.70 or higher, Realflo will display the start time for the period. The End Time column displays the date and time of the end of the period. The Flow Time column displays the time of flow, in seconds, for the period. The Volume column displays the corrected flow volume at standard conditions for the period. The Volume PEMEX column displays the corrected flow volume at secondary conditions for the period. Realflo User and Reference Manual May 19, 2011 248 Realflo Expert Mode Reference The Energy column displays the calculated flow energy for the period based on real heating value. The Temperature column displays the average temperature in the period. When the Flow Time is zero, the value will be the average temperature for the entire hour or hour fragment. The Pressure column displays the average pressure in the period. When the Flow Time is zero, the value will be the average pressure for the entire hour or hour fragment. The Differential Pressure column displays the average differential pressure in the period. The Meter Pulses column displays the number of meter pulses in the period (AGA-7 only). The Relative Density column displays the average relative density value for the period. The Flow Extension column displays the average flow extension value for the period. The flow extension is calculated based on the AGA-3 calculation being used: For AGA-3 (1985) Flow Extension = square root of the Flow Product Where Flow Product = Upstream Static Pressure * Differential Pressure For AGA-3 (1992) Flow Extension = square root of the Flow Product Where Flow Product = Density of the fluid at flowing conditions * Differential Pressure The Uncorrected Volume column displays the calculated uncorrected flow volume (for the period (AGA-7 only). The Events column displays Events if there are events in the Event Log within the period. None is displayed if there are no Events within the period. The Alarms column displays Alarms if there are Alarms in the Alarm Log within the period. None is displayed if there are no Alarms within the period. For flow computers earlier than version 6.70, the events and alarms displayed will be calculated the number of events based on the event log. For flow computers version 6.70 or higher, Realflo will read the value from the flow computer. The Up Time column displays the time of flow in minutes for the day. The Heating value column displays average heating value for the period. The Quality column indicates if there are alarms during the period. It shows 1 if alarms occurred and 0 if no alarms occurred. Daily History Command Select Daily History from the View menu to view the Daily History table. Realflo User and Reference Manual May 19, 2011 249 Realflo Expert Mode Reference Use this command to display the Daily History view for the selected run. This view shows a table of flow measurements. Each row in the table represents one period (nominally one day) of flow history. Data in this view is updated when Daily History is read from the flow computer with the Read Logs and History command. The units of measurement displayed are those in effect when the readings were made. See Measurement Units for a full description of the unit types. New Day Triggers A new record is added to the daily history when any of the following triggers occur: Power on ( when contract hour passed while power was off); Time passed contract hour; Real time clock changed outside contract day; Change in input configuration of these parameters: o Flow calculation type o Compressibility calculation type Contract configuration change All parameters except the Wet Gas Meter factor for versions 6.21 and newer. Realflo Standard and GOST Modes Daily History Views The Daily History table contains the following information, divided into columns in the table. The columns in the table are listed below. Some columns are not used for some types of flow calculation. The Start Time column displays the date and time of the start of the period. For flow computers using earlier versions of Realflo, Realflo will display ``--`` in the Start Time column. For flow computers using Realflo 6.70 or higher, Realflo will display the start time for the period. The End Time column displays the date and time of the end of the period. The Flow Time column displays the time of flow, in seconds, in the period. The Volume column displays the corrected flow volume at standard conditions for the period. The Mass column displays the calculated flow mass for the period. The Energy column displays the calculated flow energy for the period based on real heating value. The Temperature column displays the average temperature in the period. The Pressure column displays the average pressure in the period. The Differential Pressure column displays the average differential pressure in the period. The Meter Pulses column displays the number of meter pulses in the period (AGA-7 only). The Relative Density column displays the average relative density value for the period. Realflo User and Reference Manual May 19, 2011 250 Realflo Expert Mode Reference The Flow Extension column displays the average flow extension value for the period. The flow extension is calculated based on the AGA-3 calculation being used: For AGA-3 (1985) Flow Extension = square root of the Flow Product Where Flow Product = Upstream Static Pressure * Differential Pressure For AGA-3 (1992) Flow Extension = square root of the Flow Product Where Flow Product = Density of the fluid at flowing conditions * Differential Pressure The Uncorrected Volume column displays the calculated uncorrected flow volume for the period (AGA-7 only). The Events column displays the number of Events if there are events in the Event Log within the period. Zero is displayed if there are no Events within the period. The Alarms column displays number of Alarms if there are Alarms in the Alarm Log within the period. Zero is displayed if there are no Alarms within the period. For flow computers earlier than version 6.70, the events and alarms displayed will be calculated the number of events based on the event log. For flow computers version 6.70 or higher, Realflo will read the value from the flow computer. Realflo PEMEX Mode Daily History View The PEMEX mode Daily History table contains the following information, divided into columns in the table. The columns in the table are listed below. Not all columns are used for all types of flow calculation. See section Historic Record Format for information on the units used in the Daily History table. The Start Time column displays the date and time of the start of the period. For flow computers using earlier versions of Realflo, Realflo will display ``--`` in the Start Time column. For flow computers using Realflo 6.70 or higher, Realflo will display the start time for the period. The End Time column displays the date and time of the end of the period. The Flow Time column displays the time of flow, in seconds, in the period. The Volume column displays the corrected flow volume at standard conditions for the period. The Volume PEMEX column displays the corrected flow volume at secondary conditions for the period. The Energy column displays the calculated flow energy for the period based on real heating value. The Temperature column displays the average temperature in the period. Realflo User and Reference Manual May 19, 2011 251 Realflo Expert Mode Reference The Pressure column displays the average pressure in the period. The Differential Pressure column displays the average differential pressure in the period. The Meter Pulses column displays the number of meter pulses in the period (AGA-7 only). The Relative Density column displays the average relative density value for the period. The Flow Extension column displays the average flow extension value for the period. The flow extension is calculated based on the AGA-3 calculation being used: For AGA-3 (1985) Flow Extension = square root of the Flow Product Where Flow Product = Upstream Static Pressure * Differential Pressure For AGA-3 (1992) Flow Extension = square root of the Flow Product Where Flow Product = Density of the fluid at flowing conditions * Differential Pressure The Uncorrected Volume column displays the calculated uncorrected flow volume for the period (AGA-7 only). The Heating value column displays average heating value for the period. The Events column displays the number of Events if there are events in the Event Log within the period. Zero is displayed if there are no Events within the period. The Alarms column displays number of Alarms if there are Alarms in the Alarm Log within the period. Zero is displayed if there are no Alarms within the period. For flow computers earlier than version 6.70, the events and alarms displayed will be calculated the number of events based on the event log. For flow computers version 6.70 or higher, Realflo will read the value from the flow computer. The Quality column indicates if there are alarms during the period. It shows 1 if alarms occurred and 0 if no alarms occurred. The Up Time column displays the time of flow in minutes for the day. Hourly Gas Quality History Command Use this command to display the accumulated gas component values for the period since the previous gas composition message or the beginning of the hourly record (whichever has the later time stamp). At the end of the period, a maximum one hour, the average gas component values are calculated. Select Hourly Gas Quality History from the View menu to view the Hourly Gas Quality History table. Realflo User and Reference Manual May 19, 2011 252 Realflo Expert Mode Reference This view shows a table of gas quality average values. Each row in the table represents one period (nominally one hour) of gas quality history. Data in this view is updated when Hourly Gas Quality History is read from the controller when you click Read Logs and History. New Hour Triggers A break in the hourly log is made when new hour is triggered. When a new hour is triggered the current hourly record is closed and a new hourly record is created. A new record is added to the hourly gas quality history when any of the following triggers occur: Power on. Time passed end of hour. When the clock is changed to a new time that is within the current day. V-Cone configuration change. AGA-8 configuration change. An AGA-8 configuration change does not start a new hour if the flow computer is set to ignore gas quality changes. AGA-7 configuration change. AGA-385 configuration change. AGA-392 configuration change. Flow calculation stopped. (Stopping calculations ends the current hour. Starting calculations starts the new hour.) Change to input configuration. Change to contract configuration. Start calculations (stopping calculations ends the current hour, starting calculations starts the new hour). Hourly Gas Quality History View The columns in the table are listed below. Gas Quality History Columns The Start Time column displays the date and time of the start of the period. The End Time column displays the date and time of the end of the period. The Operational Time column displays the value, in seconds, how long the meter run was running during the period. The Methane column displays the average percentage of methane in the gas composition for the period. The Nitrogen column displays the percentage of nitrogen in the gas composition for the period. The Carbon Dioxide column displays the average percentage of carbon dioxide in the gas composition for the period. The Ethane column displays the average percentage of ethane in the gas composition for the period. Realflo User and Reference Manual May 19, 2011 253 Realflo Expert Mode Reference The Propane column displays the average percentage of propane in the gas composition for the period. The Water column displays the average percentage of water in gas composition for the period. The Hydrogen Sulphide column displays the average percentage of hydrogen sulphide in the gas composition for the period. The Hydrogen column displays the average percentage of hydrogen in the gas composition for the period. The Carbon Monoxide column displays the average percentage of carbon monoxide in the gas composition for the period. The Oxygen column displays the average percentage of oxygene in the gas composition for the period. The i-Butane column displays the average percentage of i-Butane in the gas composition for the period. The n-Butane column displays the average percentage of n-Butane in the gas composition for the period. The i-Petane column displays the average percentage of i-Petane in the gas composition for the period. The n-Petane column displays the average percentage of n-Petane in the gas composition for the period. The n-Hexane column displays the average percentage of n-Hexane in the gas composition for the period. The n-Heptane column displays the average percentage of n-Heptane in the gas composition for the period. The n-Octane column displays the average percentage of n-Octane in the gas composition e for the period. The n-Nonane column displays the average percentage of n-Nonane in the gas composition for the period. The n-Decane column displays the average percentage of n-Decane in the gas composition for the period. The Helium column displays the average percentage of helium in gas composition for the period. The Argon column displays the average percentage of argon in the gas composition for the period. The Relative Density column displays the average relative density value for the period. The Heating Value column displays the average heating value in 3 BTU(60)/ft of the gas composition for the period. The HexanesPlus column displays the average percentage of hexaneplus in gas composition for the period. Event Log Command Use this command to display the Event Log view for the selected run. This view displays the event log from the flow computer. The view is a table, with Realflo User and Reference Manual May 19, 2011 254 Realflo Expert Mode Reference each row in the table representing one event, that being, a Realflo configuration change. Events are numbered sequentially from 1 to 65535, with automatic rollover allowing for verification that events have been duly recorded when reviewing event history. Data in this view is updated when Event Log is read from the flow computer with the Read Logs/History from Controller command. Data in this view is also updated when hourly history is read from the controller with the Read Logs/History command from the Flow Computer menu. To delete the events read from the log in the flow computer, select Just Read New Events. If the events in the log are not purged and the event log fills with 700 events, the oldest events are lost and the lost event counter is incremented. Events are numbered sequentially from 1 to 65535, with automatic rollover allowing for verification that events have been duly recorded when reviewing alarm history. Each event in the log contains the following information, divided into columns in the table. The Time column displays the date and time of the event in the short format defined from the Windows Control Panel. The Event Number column displays the unique event number for the event (module 65536) as read from the flow computer. The Event ID column displays the code identifying the event. The Event Type column displays the description of the Event ID code. The New Value column displays the new data associated with the event. If a configuration parameter was changed, for example, the new value of the parameter is displayed. The Previous Value column displays the previous data associated with the event. If a configuration parameter was changed, for example, the previous value of the parameter is displayed. Some events don‟t record a previous value. In that case a value of 0 is displayed. The userID column displays the code identifying the user that caused the event. The User Name column displays the account name of the user that caused the event. Alarm Log Command Use this command to display the Alarm Log view for the selected run. This view displays the alarm log from the flow computer. The view is a table, with each row in the table representing one alarm, that being, a dynamic change that affects the outcome of the calculations, for example, if communications are lost between the flow computer and sensor. Alarms are numbered sequentially from 1 to 65535, with automatic rollover allowing for verification that alarms have been duly recorded when reviewing alarm history. Data in this view is updated when Alarm Log is read from the flow computer with the Read Logs/History from Controller command. Data in this view is also updated when hourly history is read from the flow computer with the Realflo User and Reference Manual May 19, 2011 255 Realflo Expert Mode Reference Read Logs/History command. To delete the alarms read from the log in the flow computer, select Just Read New Alarms. If the alarms in the log are not acknowledged and the alarm log fills with 300 alarms, the oldest alarms are lost and the lost alarm counter is incremented. Alarms are numbered sequentially from 1 to 65535, with automatic rollover allowing for verification that all alarms have been duly recorded when reviewing alarm history. Each alarm in the log contains the following information, divided into columns in the table. The Time column displays the date and time of the alarm in the short format defined from the Windows Control Panel. The Alarm Number column displays the unique alarm number for the event (module 65536) as read from the flow computer. The Alarm ID column displays the code identifying the alarm. The Alarm Type column displays the description of alarm. The New Value column displays the new data associated with the alarm. The Previous Value column displays the previous data associated with the alarm. Some alarms don‟t include a previous value. In that case a value of 0 is displayed. The userID column displays the code identifying the user that caused the alarm. The User Name column displays the account name of the user that caused the alarm. More Views Command Use these commands to change the Custom View. The view type is not changed. If the Change All Views option is selected, opened views are changed to the selected Custom View. Otherwise, only the current view is changed. When more than nine custom views are available the More Views command is enabled. The Custom Views displayed will depend on the number of custom views created. The Custom Views displayed will have the format: 1 Custom View 2 Custom View 3 Custom View 4 Custom View 5 Custom View 6 Custom View 7 Custom View 8 Custom View 9 Custom View More Views When the More Views command is selected the Select Custom View dialog is opened. The Select Custom View dialog displays a list of custom views. The list shows the views that are available to the current user. Views that require a Realflo User and Reference Manual May 19, 2011 256 Realflo Expert Mode Reference higher access level are not shown. Refer to the Accounts section for more information on Access Levels. The views are sorted in alphabetical order. Click on a view in the list to select it. Double click on a view in the list to show the selected view in the current window and close the dialog. The OK button shows the selected view in the current window and closes the dialog. The Cancel button closes the dialog Run 1 . . . Run 10 Commands Use these commands to change the run being viewed to the selected run. The view type is not changed. If the Change All Views option is selected, opened views are changed to the selected run. Otherwise, only the current view is changed. The Runs displayed are: Run 1 Run 2 Run 3 Run 4 Run 5 Run 6 Run 7 Run 8 Run 9 Run 10 Commands for runs that are not enabled in the current file are grayed. Realflo User and Reference Manual May 19, 2011 257 Realflo Expert Mode Reference Change All Views Command Use this command to select if all views are affected by the Run commands, or if only the current view is affected. A checkmark appears to the left of the item if all views are selected. Modifying History and Log Views The history and log view tables may be modified using the following options. Sorting Data Clicking on the column headings will sort the table, in ascending order, according to the column selected. Click on the same column heading again to toggle the sort order from ascending to descending order. Sizing Columns Positioning the cursor over the line separating the columns in the heading can change the column widths. The cursor changes to a vertical bar with arrows pointing left and right. Click on the line then slide the mouse left or right. Release the mouse button when the column is the desired width. Selecting Data Click on any row to select it. Hold down Shift and click on any row to select the range from the currently selected row to the new row. Hold down Ctrl and click on any row to toggle the selection of that row. Printing and Exporting Data To print or export part of the data, select the desired rows then use the Print or Export function. Toolbar Command Use this command to display and hide the toolbars, which includes buttons for some of the common commands in Realflo. A check mark appears next to the menu item when the toolbar is displayed. See the Standard Toolbar section for help on using the toolbar. Status Bar Command Use this command to display and hide the Status Bar. The Status bar appears at the bottom of the main window. It displays information about the command selected and other status information. A check mark appears next to the menu item when the Status Bar is displayed. See Status Bar section for help on using the status bar. Maintenance Mode Use this command to switch to the Maintenance Mode screen in Realflo. Click the Maintenance Mode command to switch to Maintenance Mode. Start in Expert Mode Realflo starts in maintenance mode by default. Advanced users can select to have Realflo start in expert mode. Click the Start in Expert Mode command to have Realflo start with the Expert Mode window opened. Realflo User and Reference Manual May 19, 2011 258 Realflo Expert Mode Reference A check mark is displayed beside the Start in Expert Mode command indicating the selection. Realflo User and Reference Manual May 19, 2011 259 Realflo Expert Mode Reference Configuration Menu Replace Flow Computer The Replace Flow Computer command enables users to replace the flow computer. This is typically required only when a new version of flow computer is available. When selected, the command starts the Replace Flow Computer wizard to guide you through the steps to replace the flow computer (see the Replace Flow Computer Wizard section). Collect Logs and Flow History This step selects whether the logs and flow history are read before replacing the flow computer program and if the new flow computer is initialized with the logs and flow history from the current flow computer. The first question, Do you want to collect the flow history and logs? Determines if the flow history and logs are to be read from the current flow computer before it is replaced. Select Yes to collect the logs and flow history. This is the default selection. Select No to discard the uncollected logs and flow history. The second question, Do you want to initialize new Flow Computer with history values from the current Flow Computer? Selects whether the new flow computer will be initialized with the flow history and logs are read from the current flow computer once the new flow computer is written. Select Yes to initialize the new flow computer with history values. This is the default selection. Select No to discard the history values of the current Flow Computer. The Next button moves to the next step. The next step is Replace Account Codes if the current account includes some non-default account, otherwise the next step is Read Configurations if collect the logs and flow history option is selected, otherwise the next step is Replace Flow Computer. Realflo User and Reference Manual May 19, 2011 260 Realflo Expert Mode Reference The Cancel button closes the dialog and stops the wizard. The Help button opens the on-line manual. Replace Account Codes The Replace Account Codes dialog is be displayed if the current Realflo file includes some non-default account codes. Selections allow for the account codes to be written to the flow computer or to have the account codes set for the default settings. Select Yes, write to the Flow Computer to write the account codes. This is the default selection. The writing account codes will be done after writing the accumulated history in the Replace Flow Computer step. Select No, remain the default settings to not write the account codes. The Back button returns to the previous step. The Next button moves to the next step. The Cancel button closes the dialog and stops the wizard. The Help button opens the on-line manual. Read Configuration This step selects whether the current configuration is read from the flow computer. Selections provide for reading configurations from the flow computer or to not read configurations. See the Power Management Configuration section of this manual for further information on what information is read. Realflo User and Reference Manual May 19, 2011 261 Realflo Expert Mode Reference Select Yes, read configuration from Flow Computer to read the configurations from flow computer. This is a default option. Select No, do not read configuration from Flow Computer to skip reading configurations. The Back button returns to the previous step. The Next button reads the flow computer configuration, if selected, and moves to the next step, Select Alarms and Events. The Cancel button closes the dialog and stops the wizard. The Help button opens the on-line manual. Realflo User and Reference Manual May 19, 2011 262 Realflo Expert Mode Reference Select Event and Alarm Logs This step selects whether the alarms and events in the flow computer are read. The Which Events do you want to read? selection determines which events to read from the flow computer. Select Just Read New Events to read unacknowledged events in the flow computer. If the operator has View, Read and Write Data or Administrator authorization then the events will be acknowledged after reading the new events. If the events in the log are not acknowledged, the event log will fill with 700 events. Operator activity will be prevented until the events are read and acknowledged. The control is grayed under the following conditions: o The event log is not selected. o The user has Read and View account privileges. o The Restrict Realflo users to reading all alarms and events option is selected in the Expert Mode Options menu. Select Read All Events to read all events in the flow computer. This control is grayed if the Event Log control is not selected. Select Do Not Read Any Events to skip reading of events from the flow computer. The Which Alarms to you want to read? selection determines which alarm logs to read from the flow computer. Select Just Read New Alarms to read unacknowledged alarms in the flow computer. If the operator has View, Read and Write Data or Administrator authorization then the alarms will be acknowledged after reading the new events. If the events in the log are not acknowledged, the alarm log will fill with 300 events. Operator activity will be prevented until the alarms are read and acknowledged. The control is grayed under the following conditions: The alarm log is not selected. Realflo User and Reference Manual May 19, 2011 263 Realflo Expert Mode Reference The user has Read and View account privileges. The Restrict Realflo users to reading all alarms and events option is selected in the Expert Mode Options menu. The Read All Alarms radio button selects the reading of all alarms in the controller. The control is grayed if the Alarm control is not selected. The Do Not Read Any Alarms button selects not to read alarms from the flow computer. Click the Next> button to move to the next step in the wizard. The Which Events do you want to read? section has the following selections. Select Just Read New Events to read unacknowledged events in the flow computer. If the operator has Write authorization then the events will be acknowledged after reading the new events. If the events in the log are not acknowledged, the event log will fill with 700 events. Operator activity will be stopped until the events are read and acknowledged. This is the default selection. Select Read All Events to read all events in the flow computer. Do not acknowledge the events. Select Do Not Read Any Events to skip reading events. The Back button returns to the previous step. The Next button reads the selected alarms and events and moves to the next step, Select Hourly History. The Cancel button closes the dialog and stops the wizard. The Help button opens the on-line manual. Select Hourly and Daily History This step selects which hourly and daily history logs are read from the flow computer. The Which Hourly Logs do you want to read? section has the following selections. Realflo User and Reference Manual May 19, 2011 264 Realflo Expert Mode Reference Select New Hours to read hourly history for days after those in the file. If the file is empty then Realflo will read all hourly history stored in the flow computer. This is the default selection. Select All Hours to read hourly history for all days stored in the flow computer. Select Selected Hours to read hourly history for the range of days selected with the From and To drop-down lists. Records are read for the contract days whose first hour is within the date range. Records for the contract day are read, regardless of their calendar date. This may result in records with calendar days outside the range being added to the log. For example, if the contract day is configured to start at 7:00 AM. Reading hourly history for September 23 would return the records where rd the first record in a day was between 7:00 on the 23 to 6:59:59 AM on th the 24 . Select Do Not Read Hourly Logs to skip the reading of hourly history. The Which Daily Logs do you want to read? section has the following selections. Select New Days to read daily history for days after those in the file. If the file is empty then Realflo will read daily history stored in the flow computer. This is the default selection. Select All Days to read daily history for all days stored in the flow computer. Select Selected Days to read daily history for the range of days selected with the From and To drop-down lists. Records are read for the contract days whose first record is within the date range. Records for the contract day are read, regardless of their calendar date. This may result in records with calendar days outside the range being added to the log. For example, if the contract day is configured to start at 7:00 AM. Reading daily history for September 23 would return the daily rd records whose end time is in the range 7:00 on the 23 to 6:59:59 AM th on the 24 . Select Do Not Read Daily Logs to skip the reading of daily history. The From controls contain the oldest previous day for which the hourly or daily history is to be read. The initial value is 35 days before the current day. The control is enabled when the Selected Hours or Selected Days is selected. Change this date to avoid reading data that has previously been read into the log. The To controls contain the recent previous day for which the hourly or daily history is to be read. The initial value is the current day. The allowed range is the same or greater than the value in the From control. The control is enabled when the Selected Hours or Selected Days is selected. Change this date when wanting to read older data only. Leaving this date at its default will result in the recent data being read. The Back button returns to the previous step. The Next button reads the selected logs and then moves to the next step, Read Log Results. The Cancel button closes the dialog and stops the wizard. The Help button opens the on-line manual. Realflo User and Reference Manual May 19, 2011 265 Realflo Expert Mode Reference Read Log Results This step displays the results of the Read Logs and History steps. The Back button returns to the previous step. The Next button moves to the next step, Replace Flow Computer. The Cancel button closes the dialog and stops the wizard. The Help button opens the on-line manual. Realflo User and Reference Manual May 19, 2011 266 Realflo Expert Mode Reference Replace Flow Computer Wizard This step selects the flow computer file to write and writes the file to the flow computer. Use the Replace Flow Computer dialog to select the flow computer program to write to the flow computer. Select Flow Computer to write a basic flow computer program. Realflo selects the correct program file for the flow computer from the folder Realflo was started from, typically C:\Program Files\Control Microsystems\Realflo. The file selected will be Realflot v#.##.#.abs for Telepace firmware and Realfloi v#.##.#.abs for ISaGRAF firmware on 16-bit SCADAPack controllers, where #.##.# is the flow computer version number. This option is disabled if the controller type is a SCADAPack 32, SCADAPack 314/330/334, SCADAPack 350, SCADAPack 4203 and SolarPack 410. Select Flow Computer with Enron Modbus to write a flow computer program with Enron Modbus support. Realflo selects the correct program file for the flow computer from the folder Realflo was started from, typically C:\Program Files\Control Microsystems\Realflo. Flow computer files available will depend on the Realflo operating mode and the controller type. Standard Flow Computer Files RFEnront v#.##.#.abs for Telepace firmware and RFEnroni v#.##.#.abs for ISaGRAF firmware for 16-bit SCADAPack controllers. Realflot v#.##.#.out for Telepace SCADAPack 350 firmware and Realfloi v#.##.#.out for ISaGRAF SCADAPack 350 firmware. Realflo33xt v#.##.#.out for Telepace SCADAPack 330/334 firmware and Realflo33xi v#.##.#.out for ISaGRAF SCADAPack 330/334 firmware. Realflo31xt v#.##.#.out for Telepace SCADAPack 314 firmware and Realflo31xi v#.##.#.out for ISaGRAF SCADAPack 314 firmware. Realflo User and Reference Manual May 19, 2011 267 Realflo Expert Mode Reference Realflo4203t v#.##.#.out for Telepace SCADAPack 4203 firmware and Realflo4203i v#.##.#.out for ISaGRAF SCADAPack 4203 firmware. Realflo410t v#.##.#.out for SolarPack 410 firmware. Realflot v#.##.#.mot for Telepace SCADAPack 32 firmware and Realfloi v#.##.#.mot for ISaGRAF SCADAPack 32 firmware. GOST Flow Computer Files Realflo_GOST_t v#.##.#.abs for Telepace firmware and Realflo_GOST_i v#.##.#.abs for ISaGRAF firmware for 16-bit SCADAPack controllers. Realflo_GOST_33xt v#.##.#.out for Telepace SCADAPack 330/334 firmware and Realflo_GOST_33xi v#.##.#.out for ISaGRAF SCADAPack 330/334 firmware. Realflo_GOST_31xt v#.##.#.out for Telepace SCADAPack 314 firmware and Realflo_GOST_31xi v#.##.#.out for ISaGRAF SCADAPack 314 firmware. Realflo_GOST_4203t v#.##.#.out for Telepace SCADAPack 4203 firmware and Realflo_GOST_4203i v#.##.#.out for ISaGRAF SCADAPack 4203 firmware. Realflo_GOST_410t v#.##.#.out for SolarPack 410 firmware. Realflot v#.##.#.mot for Telepace SCADAPack 32 firmware and Realfloi v#.##.#.mot for ISaGRAF SCADAPack 32 firmware. PEMEX Flow Computer Files Realflo_PEMEX_t v#.##.#.abs for Telepace firmware and Realflo_PEMEX_i v#.##.#.abs for ISaGRAF firmware for 16-bit SCADAPack controllers. Realflo_PEMEX_33xt v#.##.#.out for Telepace SCADAPack 330/334 firmware and Realflo_PEMEX_33xi v#.##.#.out for ISaGRAF SCADAPack 330/334 firmware. Realflo_PEMEX_31xt v#.##.#.out for Telepace SCADAPack 314 firmware and Realflo_PEMEX_31xi v#.##.#.out for ISaGRAF SCADAPack 314 firmware. Realflo_PEMEX_4203t v#.##.#.out for Telepace SCADAPack 4203 firmware and Realflo_PEMEX_4203i v#.##.#.out for ISaGRAF SCADAPack 4203 firmware. Realflo_PEMEX_410t v#.##.#.out for SolarPack 410 firmware. Realflot v#.##.#.mot for Telepace SCADAPack 32 firmware and Realfloi v#.##.#.mot for ISaGRAF SCADAPack 32 firmware. Select Customer Flow Computer or C/C++ Program to write any C/C++ program to the flow computer. Select the file to write by: Entering the file name in the edit box. Selecting a recently used file by clicking the down arrow. Using the Browse button to select a file. The Browse button opens a file open dialog. The dialog shows files of type ABS if the flow computer is a SCADAPack. OUT, if the flow computer is a SCADAPack 314/330/334, Realflo User and Reference Manual May 19, 2011 268 Realflo Expert Mode Reference SCADAPack 350 or SCADAPack 4203, or MOT if the flow computer is a SCADAPack 32. The Back button returns to the previous step. The Next button writes the flow computer file and moves to the next step, Set Time. The Cancel button closes the dialog and stops the wizard. The Help button opens the on-line manual. Set Time This step sets the time in the flow computer. The following controls are available from the Real Time Clock dialog. The current Flow Computer Time shows the current time and date in the flow computer. It is updated continuously while the dialog is open. The time and date are displayed in the short time format as defined in the Windows Control Panel. The Yes, set to PC Time radio button selects setting the controller time to match the PC time. The current PC time and date are shown to the right of the button. The time and date are displayed in the short format as defined in the Windows Control Panel. The Yes, set to this time radio button selects setting the time and date to the values specified by the user in the Year, Month, Day, Hour, Minute and Second controls. If the Set to User Entered Time radio button is not selected these controls are grayed. The Back button returns to the previous step. The Finish button writes the time and ends the wizard. The Cancel button closes the dialog and stops the wizard. The Help button opens the on-line manual. Realflo User and Reference Manual May 19, 2011 269 Realflo Expert Mode Reference Write Flow Computer Configuration The Write Configuration command is used to write all or selected parts of the Flow Computer Configuration. When selected the command displays the Write Flow Computer Configuration dialog as shown below. The All Configuration radio button, when selected, results in the writing of all configuration data from the flow computer. The Selected Configuration radio button enables specific configuration data to be written to the flow computer. Select Communication and I/O Settings to write the serial port, register assignment configuration information and mapping table. Select Flow Run and MVT Configuration to write the flow run configuration and the MVT transmitter configuration. Select Process I/O Configuration to write the Process I/O configuration. Select Force Inputs to write the force status of any forced flow run inputs before the flow computer was updated. Click on the OK button to write the selected items to the flow computer. Realflo User and Reference Manual May 19, 2011 270 Realflo Expert Mode Reference Click the Cancel button to cancel the operation and close the dialog. The Flow Computer ID is checked before writing. If the Flow Computer ID does not match the ID in the dialog Realflo displays an error message. An error occurs if Controller Configuration is selected and the flow computer type is different from the flow computer type selected in the Controller Type dialog. An error message is displayed. In Flow Computer versions 6.73 and older, when AGA-8 gas ratios or NX-19 gas quality values are written to the flow computer the new gas ratios are updated in the Proposed registers. The Actual registers are not updated until a new Density calculation is started with the new values. The new values are not available to SCADA host software reading the Actual registers until a until a new Density calculation is started with the new values. In Flow Computer versions 6.74 and newer when AGA-8 gas ratios or NX19 gas quality values are written to the flow computer the new gas ratios are updated in the Proposed registers and in the Actual registers. This allows a SCADA host to immediately confirm the new values were written to the flow computer. The new gas values are not used by the flow computer until a new density calculation is started. Read Alarm and Event Logs This step selects whether the alarms and events in the flow computer are read. The Which Events do you want to read? section has the following selections. Select Just Read New Events to read unacknowledged events in the flow computer. If the operator has Write authorization then the events will be acknowledged after reading the new events. If the events in the log are not acknowledged, the event log will fill with 700 events. Realflo User and Reference Manual May 19, 2011 271 Realflo Expert Mode Reference Operator activity will be stopped until the events are read and acknowledged. This is the default selection. Select Read All Events to read all events in the flow computer. Do not acknowledge the events. Select Do Not Read Any Events to skip reading events. The Back button returns to the previous step. The Next button reads the selected alarms and events and moves to the next step, Select Hourly History. The Cancel button closes the dialog and stops the wizard. The Help button opens the on-line manual. Bluetooth Security If a Bluetooth connection was used to replace the flow computer in a SolarPack 410 the last step is setting the Bluetooth security. The Bluetooth Security Settings dialog specifies how Bluetooth security is configured in the SolarPack 410 controller. Opening the dialog reads the current settings from the controller. The dialog does not open if the settings can‟t be read. Bluetooth Security selects if security is enabled or not. Select Use current security settings to maintain the security settings that have already been established. Select Disable to operate the Bluetooth radio without security. Select Enable to use authentication and encryption. Select Enable and Change PIN to use authentication and encryption with a new PIN. Current PIN specifies the current value of the PIN. Valid values are up to 10 alphanumeric characters (a to z, A to Z, and 0 to 9). The PIN is case sensitive. Characters entered are masked. Copy and paste are disabled (so the user needs to type the PIN). The factory default PIN is default. New PIN specifies the new value of the PIN. This control is enabled if Enable and Change PIN is selected. Valid values are up to 10 alphanumeric characters (a to z, A to Z, and 0 to 9). The PIN is case Realflo User and Reference Manual May 19, 2011 272 Realflo Expert Mode Reference sensitive. Characters entered are masked. Copy and paste are disabled (so the user needs to type the PIN). Confirm New PIN specifies the new value of the PIN. This control is enabled if Enable and Change PIN is selected. Valid values are up to 10 alphanumeric characters (a to z, A to Z, and 0 to 9). The PIN is case sensitive. Characters entered are masked. Copy and paste are disabled (so the user needs to type the PIN). The two values of the new PIN needs to match before any settings are written to the controller. Click Finish to write the new settings to the controller. A message is displayed if the settings cannot be written to the controller and the dialog remains open. Click Cancel to close the dialog without making any changes. Initialize Command The Initialize command erases programs in the flow computer and sets the flow computer to default settings. This command is typically used when starting a new project with a flow computer. This command is disabled if the Update Readings command is enabled. The command opens the Initialize Flow Computer dialog. The dialog displayed will depend on whether Telepace or ISaGRAF firmware is used in the flow computer. Initialize Telepace Flow Computer Check Use Default Communication and I/O Settings to reset flow computer settings to default values and clear all registers in the I/O database. This includes the serial port settings. If you are communicating using settings other than the default, the PC Communications Settings Command will have to be changed once the command is complete. Realflo User and Reference Manual May 19, 2011 273 Realflo Expert Mode Reference Check Erase Register Assignment to erase the register assignments. This command applies only if Telepace firmware is loaded in the flow computer. The command is disabled if SCADAPack 314, SCADAPack 330, SCADAPack 334 or SCADAPack 350 is selected as the hardware type. Check Erase Ladder Logic to erase the Telepace Ladder Logic application in the flow computer. Check Erase Ladder Logic Program Flash to erase the Telepace Ladder Logic application in flash memory in the flow computer. This command applies only if Telepace firmware is loaded in the controller. Click on the Finish button to perform the requested initializations. Click on the Cancel button to exit without performing any action. Initialize IEC 61131-3 Flow Computer Check Use Default Communication and I/O Settings to reset flow computer settings to default values and clear registers in the I/O database. This includes the serial port settings. If you are communicating using settings other than the default, the PC Communications Settings Command will have to be changed once the command is complete. Check Erase Register Assignment to erase the register assignments. The command is disabled if ISaGRAF firmware is loaded. Check IEC 61131-3 Program to erase the IEC 61131-3 Logic application in the flow computer. Check Erase Ladder Logic Program Flash to erase the Telepace Ladder Logic application in flash memory in the flow computer. This command applies only if Telepace firmware is loaded in the controller. The command is disabled if ISaGRAF firmware is loaded. Click on the Finish button to perform the requested initializations. Click on the Cancel button to exit without performing any action. Realflo User and Reference Manual May 19, 2011 274 Realflo Expert Mode Reference Erasing Programs in Flash Erasing the flash memory requires stopping the Logic and C programs. If either flash erase command is selected the following message is displayed. Select OK to stop the Logic program and erase the flash memory. Select Cancel to abort the initialization of flash memory. Other selected initializations will still be performed. Initialize SCADAPack 4203 and SolarPack 410 Flow Computer When a SolarPack 410 is the controller type the following dialog is displayed when the Initialize command is selected. Check Use Default Communication and I/O Settings to reset flow computer settings to default values and clear registers in the I/O database. This includes the serial port settings. If you are communicating using settings other than the default, the PC Communications Settings Command will have to be changed once the command is complete. The Reset Sensor and Restore Factory Calibration check box will return the sensor to factory calibration. Note that the sensor calibration, operating limits and measurement units are reset to factory calibration. Realflo User and Reference Manual May 19, 2011 275 Realflo Expert Mode Reference Real Time Clock The Real Time Clock dialog sets the real time clock in the flow computer. This command is disabled if the Update Readings command is enabled. The user may set the clock to the PC time, to a user specified time or adjust the clock forward or back by a number of seconds. The following methods cannot to set the real time clock when using the flow computer. The CNFG Real Time Clock and Alarm register assignment in Telepace. The setclock function in IEC 61131-3. The Real Time Clock dialog in Telepace or IEC 61131-3. Using any of these methods to set the Real Time Clock may result in the flow computer logging data incorrectly. The Flow Computer clock was set at the factory. However, it may be set to the wrong time zone for your location. Set the clock before configuring the flow computer so that configuiration events are stored at the correct time. The following controls are available from the Real Time Clock dialog. Controller Time shows the current time and date in the controller. It is updated continuously while the dialog is open. The time and date are displayed in the short time format as defined in the Windows Control Panel. Realflo User and Reference Manual May 19, 2011 276 Realflo Expert Mode Reference The Set to PC Time radio button selects setting the controller time to match the PC time. The current PC time and date are shown to the right of the button. The time and date are displayed in the short format as defined in the Windows Control Panel. The Set to User Entered Time radio button selects setting the time and date to the values specified by the user in the Year, Month, Day, Hour, Minute and Second controls. If the Set to User Entered Time radio button is not selected these controls are grayed. The Adjust Forward or Backward radio button selects adjusting the time by the number of seconds specified in the Adjust Clock by Seconds edit box. The value can be negative or positive. The edit box is grayed if the Adjust by radio button is not selected. This option is useful if your communication network introduces a delay between the time the command is sent and when the flow computer receives it. The Close button closes the dialog. The Write button writes the selected time to the flow computer. The Help button displays the help for this dialog. Wireless Security Settings The Wireless Security Settings dialog specifies how wireless security is configured in the SolarPack 410 controller. Opening the dialog reads the current settings from the controller. The dialog does not open if the settings can‟t be read. The pictorial representation of the dialog and description of each field is given below. This command is available on the SolarPack 410 controllers only. Select Disable to operate the wireless radio without security. Select Enable to use authentication and encryption. Select Enable and Change PIN to use authentication and encryption with a new PIN. Current PIN specifies the current value of the PIN. Valid values are up to 10 alphanumeric characters (a to z, A to Z, and 0 to 9). The PIN is case sensitive. Characters entered are masked. Copy and paste are disabled (so the user needs to type the PIN). New PIN specifies the new value of the PIN. This control is enabled if Enable and Change PIN is selected. Valid values are up to 10 alphanumeric characters (a to z, A to Z, and 0 to 9). The PIN is case Realflo User and Reference Manual May 19, 2011 277 Realflo Expert Mode Reference sensitive. Characters entered are masked. Copy and paste are disabled (so the user needs to type the PIN). Confirm New PIN specifies the new value of the PIN. This control is enabled if Enable and Change PIN is selected. Valid values are up to 10 alphanumeric characters (a to z, A to Z, and 0 to 9). The PIN is case sensitive. Characters entered are masked. Copy and paste are disabled (so the user needs to type the PIN). The two values of the new PIN needs to match before any settings are written to the controller. Click OK to write the new settings to the controller. An error message is displayed if the settings cannot be written to the controller and the dialog remains open. Click Cancel to close the dialog without making any changes. Flow Computer Information The Flow Computer Information command is used to display information about the firmware, options, and programs installed in the flow computer. When selected, the command opens the Flow Computer Information dialog. The Flow Computer dialog displayed depends on the Firmware Type and Hardware Type that is running the flow computer. Telepace Flow Computer Information For SCADAPack 32, SCADAPack, SCADAPack 4202 and Micro16 controllers the following dialog is displayed. The Telepace firmware Program Status is shown in the following dialog. Runs Available is the maximum number of runs supported by the flow computer. The runs available may differ from the number of runs licensed in options section. This is typically due to other C applications and consuming Realflo User and Reference Manual May 19, 2011 278 Realflo Expert Mode Reference memory in the controller. For SCADAPack 32 controllers the maximum number of runs is 4 when the Gas Transmission option is enabled. Flow Computer Version is the version of the flow computer program. Controller Type is the type of controller hardware. Controller ID is the unique ID assigned to the controller at the factory. Firmware Version is the version of the firmware in the controller. Firmware Type is the type of firmware in the controller. It is one of Telepace, Telepace DNP, or ISaGRAF, or ISaGRAF DNP. Ethernet Address is the Ethernet address of the controller, if an Ethernet port is available. I/O Version is the version number of the internal I/O controller. Flow Computer Type is the type of flow computer licensed. You can select one of the following values for this field from the dropdown list: None Standard PEMEX GOST If you select an unlicensed flow computer type, an error message displays telling you to purchase the appropriate license. The Options area shows the current options enabled in the controller. The DF1 Protocol option enables communication using the AllenBradley full duplex and half-duplex protocols. The IEC 61131-3 option enables the IEC 61131-3 run-time engine. The DNP Protocol option enables communication using the DNP Protocol. The Telepace option enables communication using Telepace. The Flow Computer option enables support for the Realflo natural gas flow computer. The valid options from the dropdown list are: o Standard o PEMEX o GOST The Runs option displays the number of runs available for the flow computer. The Gas Transmission checkbox enables or disables calculating hourly gas quality history. If the Flow Computer option is set to None, the Runs Available and the Gas Transmission options are disabled. The Edit button opens the Edit Options Dialog. The Ladder Logic Program Status section indicates the state of the Ladder Logic program. A program can be loaded in RAM memory and in Realflo User and Reference Manual May 19, 2011 279 Realflo Expert Mode Reference Flash memory. Only one of the programs can be running. The state will be one of No Program, Stopped, or Running. The C/C++ Program (Flow Computer) Status section indicates the state of the C/C++ program. Usually this is the flow computer program, but it could be another program. The state will be one of No Program, Stopped, or Running. On a SCADAPack controller with Telepace firmware 1.65 or newer, a program can be loaded in RAM memory. The controller has operating system code in the C Program section of Flash. On a SCADAPack controller with Telepace firmware 1.64 or older, a program can be loaded in RAM memory and in Flash memory. Only one of the programs can be running. On a SCADAPack 32 controller a program is executed from RAM memory and saved in Flash memory. Click Run to run the C/C++ program (flow computer). If there is a program in both RAM and Flash, the program in RAM will run. Click Stop o stop the C/C++ program (flow computer). Close closes the dialog. Refresh button reads information from the flow computer. Help button opens the user manual. Realflo User and Reference Manual May 19, 2011 280 Realflo Expert Mode Reference Telepace SCADAPack 314/330/334, SCADAPack 350, SCADAPack 4203 and SolarPack 410 Flow Computer Information For SCADAPack 314/330/334, SCADAPack 350, SCADAPack 4202 and SolarPack 410 controllers the following dialog is displayed. The SCADAPack 314/330/334, SCADAPack 350 and SCADAPack 4203 controllers support multiple C/C++ applications. When this controller is used the Flow Computer Information dialog allows for the stopping and running of each C/C++ application independently. Runs Available is the maximum number of runs supported by the flow computer. The runs available may differ from the number of runs licensed in options section. This is typically due to other C applications or IEC 61131-3 applications running and consuming memory in the controller. Flow Computer Version is the version of the flow computer program. Controller Type is the type of controller hardware. Controller ID is the unique ID assigned to the controller at the factory. Firmware Version is the version of the firmware in the controller. Firmware Type is the type of firmware in the controller. It is one of Telepace, Telepace DNP, or ISaGRAF, or ISaGRAF DNP. Ethernet Address is the Ethernet address of the controller, if an Ethernet port is available. I/O Version is the version number of the internal I/O controller. Flow Computer Type is the type of flow computer licensed. This will be one of the following types: None Standard Realflo User and Reference Manual May 19, 2011 281 Realflo Expert Mode Reference PEMEX GOST If you select an unlicensed flow computer type, an error message displays telling you to purchase the appropriate license. The Options area shows the current options enabled in the controller. The DF1 Protocol option enables communication using the AllenBradley full duplex and half-duplex protocols. The IEC 61131-3 option enables the IEC 61131-3 run-time engine. The DNP Protocol option enables communication using the DNP Protocol. The Flow Computer option enables support for the Realflo natural gas flow computer. The valid options from the dropdown list are: o Standard o PEMEX o GOST The Runs option displays the number of runs available for the flow computer. The Gas Transmission checkbox enables or disables calculating hourly gas quality history. If the Flow Computer option is not set the Runs Available and the Gas Transmission options are disabled. The Edit button opens the Edit Options Dialog. The Ladder Logic Program Status section indicates the state of the Ladder Logic program. A program can be loaded in RAM memory and in Flash memory. Only one of the programs can be running. The state will be one of No Program, Stopped, or Running. The dialog displays the C/C++ Programs that are loaded in the controller. The status of each program is indicated as Running or Stopped. The Close button closes the dialog. The Refresh button reads information from the flow computer. The Help button opens the user manual. The Loaded C/C++ Programs section indicates the state of the C/C++ programs currently loaded in the controllers. Usually this is the flow computer program, but it could be another program. The state will be one of No Program, Stopped, or Running. The Run and Stop buttons apply to the C/C++ Program selected from the list of loaded C/C++ programs. Only one C/C++ Program may be selected from the list at one time. These buttons are disabled when there are no C/C++ Programs loaded. The Run button stops and restarts the selected C/C++ program in the controller. The Stop button stops the selected C/C++ program in the controller. Realflo User and Reference Manual May 19, 2011 282 Realflo Expert Mode Reference IEC 61131-3 Flow Computer Information The Flow Computer Information dialog is different for ISaGRAF firmware. The program status section appears as follows in the Flow Computer Information dialog. Runs Available is the maximum number of runs supported by the flow computer. The runs available may differ from the number of runs licensed in options section. This is typically due to other C applications or IEC 61131-3 applications running and consuming memory in the controller. For SCADAPack 32 controllers the maximum number of runs is 4 when the Gas Transmission option is enabled. Flow Computer Version is the version of the flow computer program. Controller Type is the type of controller hardware. Controller ID is the unique ID assigned to the controller at the factory. Firmware Version is the version of the firmware in the controller. Firmware Type is the type of firmware in the controller. It is one of Telepace, Telepace DNP, or ISaGRAF, or ISaGRAF DNP. Ethernet Address is the Ethernet address of the controller, if an Ethernet port is available. I/O Version is the version number of the internal I/O controller. Flow Computer Type is the type of flow computer licensed. This will be one of the following types: Standard PEMEX GOST Realflo User and Reference Manual May 19, 2011 283 Realflo Expert Mode Reference If the Flow Computer option is not set the Runs Available and the Gas Transmission options are disabled. The Options area shows the current options enabled in the controller. The DF1 Protocol option enables communication using the AllenBradley full duplex and half-duplex protocols. The Flow Computer option enables support for the Realflo natural gas flow computer. The Runs window displays the number of runs available for the flow computer. The IEC 61131-3 option enables the IEC 61131-3 run-time engine. The DNP Protocol option enables communication using the DNP Protocol. The Flow Computer option enables support for the Realflo natural gas flow computer. The valid options from the dropdown list are: o None o Standard o PEMEX o GOST The Runs option displays the number of runs available for the flow computer. The Gas Transmission checkbox enables or disables calculating hourly gas quality history. If the Flow Computer option is not set the Runs Available and the Gas Transmission options are disabled. The Edit button opens the Edit Options Dialog. The Program Status portion of the dialog depends on the controller type and the firmware. See the sections below for details. The IEC 61131-3 Program Status section indicates the state of the IEC 61131-3 program. The state will be one of No Program, Stopped, or Running. The C/C++ Program (Flow Computer) Status section indicates the state of the C/C++ program. Usually this is the flow computer program, but it could be another program. The state will be one of No Program, Stopped, or Running. Click on the Run button to run the C/C++ program (flow computer). Click on the Stop button to stop the C/C++ program (flow computer). The Close button closes the dialog. The Refresh button reads information from the flow computer. The Help button opens the user manual. IEC 61131-3 SCADAPack 314/330/334, SCADAPack 350 and SCADAPack 4203 Flow Computer Information For SCADAPack 314/330/334, SCADAPack 350 and SCADAPack 4203 controllers the following dialog is displayed. When this controller is used the Realflo User and Reference Manual May 19, 2011 284 Realflo Expert Mode Reference Flow Computer Information dialog allows for the stopping and running of each C/C++ application independently. Runs Available is the maximum number of runs supported by the flow computer. The runs available may differ from the number of runs licensed in options section. This is typically due to other C applications or IEC 61131-3 applications running and consuming memory in the controller. Flow Computer Version is the version of the Flow Computer program. Controller Type is the type of controller hardware. Controller ID is the unique ID assigned to the controller at the factory. Firmware Version is the version of the firmware in the controller. Firmware Type is the type of firmware in the controller. It is one of Telepace, Telepace DNP, or ISaGRAF, or ISaGRAF DNP. Ethernet Address is the Ethernet address of the controller, if an Ethernet port is available. I/O Version is the version number of the internal I/O controller. Flow Computer Type is the type of flow computer licensed. This will be one of the following types: Standard PEMEX GOST If the Flow Computer option is not set the Runs Available and the Gas Transmission options are disabled. The Options area shows the current options enabled in the controller. The DF1 Protocol option enables communication using the AllenBradley full duplex and half-duplex protocols. Realflo User and Reference Manual May 19, 2011 285 Realflo Expert Mode Reference The IEC 61131-3 option enables the IEC 61131-3 run-time engine. The DNP Protocol option enables communication using the DNP Protocol. The Flow Computer option enables support for the Realflo natural gas flow computer. The valid options from the dropdown list are: o None o Standard o PEMEX o GOST The Runs option displays the number of runs available for the flow computer. The Gas Transmission checkbox enables or disables calculating hourly gas quality history. If the Flow Computer option is not set the Runs Available and the Gas Transmission options are disabled. The Edit button opens the Edit Options Dialog. The Program Status portion of the dialog depends on the controller type and the firmware. See the sections below for details. The Close button closes the dialog. The Refresh button reads information from the flow computer. The Help button opens the user manual. The Loaded C/C++ Programs section indicates the state of the C/C++ programs currently loaded in the SCADAPack 314/330/334 or SCADAPack 350. Usually this is the flow computer program, but it could be another program. The state will be one of No Program, Stopped, or Running. The Run and Stop buttons apply to the C/C++ Program selected from the list of loaded C/C++ programs. Only one C/C++ Program may be selected from the list at one time. These buttons are disabled when there are no C/C++ Programs loaded. The Run button stops and restarts the selected C/C++ program in the controller. The Stop button stops the selected C/C++ program in the controller. Edit Options Dialog The Edit Options dialog modifies the firmware options. An activation code is required to change the options. See the Obtaining an Activation Code section below for details on obtaining an activation code. See the Applying an Activation Code section below for details on applying the activation code. Realflo User and Reference Manual May 19, 2011 286 Realflo Expert Mode Reference The Controller ID is shown at the top of the dialog. This is a unique ID for the controller and is set at the factory. It cannot be changed. The controllers Current Options are shown on the left. These are read from the controller when the Change Options command selected. The New Options available for the controller are shown on the right. Select the new options based on the Activation Code obtained from Control Microsystems. See the Obtaining an Activation Code section below for details on obtaining an activation code. The Activation Code edit box contains the activation code for the currently selected options. If you leave the activation code edit box blank, an error message displays. The OK button accepts the options and writes them to the controller. If the activation code is correct, the options are enabled. Otherwise the current options remain in effect. The Cancel button closes the dialog without making any changes. The Help button opens the user manual. Obtaining an Activation Code The activation code needs to be obtained from Control Microsystems. To obtain activation codes: Record the Controller ID, Current Options and New Options for each controller you wish to update. Contact Control Microsystems sales department, or your local representative, and report the information gathered in step 1. The sales representative will inform you of the cost of the options and arrange for payment. The activation codes will be sent to you upon receipt of payment. Applying an Activation Code Enter the same New Options as in item 1 of the Obtaining an Activation Code section. Realflo User and Reference Manual May 19, 2011 287 Realflo Expert Mode Reference Enter the Activation Code received from Control Microsystems and click OK. The options will be written to the flow computer. Stop flow runs using the Maintenance | Calculation Control menu item. Read logs and history using the Maintenance | Read Logs/History menu item. Replace the flow computer using the Configuration | Replace Flow Computer menu item. Replace the configuration using the Configuration | Write Configuration menu item. Flow runs will be started. Setup The Setup command is used to display and configure basic flow computer parameters. The hardware type, firmware type, number of flow runs enables and the flow computer ID are configurable. The Hardware Type selection sets the type hardware that the flow computer is executing on. Valid selections are Micro16, SCADAPack, SCADAPack Plus, SCADAPack Light, SCADAPack LP, SCADAPack 100: 1024K, SCADAPack 32, SCADAPack 32P, SCADAPack 4202 DR, SCADAPack 4202 DS, SCADAPack 4203 DR, SCADAPack 4203 DS, SCADAPack 314, SCADAPack 330, SCADAPack 334, SCADAPack 350 and SolarPack 410. The Firmware Type selection sets the firmware type for the flow computer. Valid sel;ections are Telepace and ISaGRAF. The default value is Telepace for step-by-step, or the value in the template. The Number of Runs selection sets the number of runs in the file. The number of runs available depends on the type of flow computer used. For Micro 16, SCADAPack, SCADAPack Light and SCADAPack Plus flow computers the maximum number of runs is three. Realflo User and Reference Manual May 19, 2011 288 Realflo Expert Mode Reference The selection of three meter runs is available for older flow computers that could be enabled for three meter runs. For SCADAPack LP and SCADAPack 4202 of flow computers the maximum number of meter runs is two. For SCADAPack 100: 1024K and SolarPack 410 Flow Computers the maximum number of meter runs is one. For SCADAPack 314/330/334 and SCADAPack 350 Flow Computers the maximum number of meter runs is four. For SCADAPack 32 and SCADAPack 32P the maximum number of runs available is ten without the gas transmission option enabled and four with the gas transmission option enabled. The Flow Computer ID entry is a unique ID for the flow computer. It stops accidental mixing of data from different flow computers. The Flow Computer ID is stored in the flow computer. Realflo will not perform operations if the ID in the flow computer and that in the configuration file are not the same. Enter a string of up to 8 characters for the Flow Computer ID. Any character is valid and the ID may be left blank. The Enron Timestamp selects the type of timestamp for Enron flow history logs. Realflo and flow computer versions 6.77 and higher support the selection of time leads data or time lags data for the timestamp. Time leads data selection time stamps the data for the period at the beginning of the period. Time lags data selection time stamps the data for the period at the end of the period. The configuration is valid for runs of the flow computer and is applied on the Enron Modbus enabled ports only. This control is hidden in PEMEX or GOST application modes. Sensor and Display Use this command to configure the sensor parameters of external transmitters. This command is disabled if the Update Readings command is enabled and opens the Transmitter Configuration dialog as shown below, when selected. Realflo User and Reference Manual May 19, 2011 289 Realflo Expert Mode Reference The Flow Runs list displays each of the configured flow runs. The list displays the Run number, Run ID and the transmitter that is used for the differential pressure (DP), static pressure (SP) and temperature sensors. The Run values are numbered 1 to N, in order. The Configuration list shows the transmitters that can be configured. Up to 10 transmitters can be configured, depending on number of flow runs available. The number of transmitters in the list is equal to the number of flow runs. Use the Setup dialog on the Flow Computer menu to set the number of flow runs. The configuration list displays the transmitter; the serial port the transmitter is connected to, the transmitter Modbus address, and the transmitter tag name. When a transmitter is used the first position in the dialog is reserved for the internal transmitter. In this case the following dialog is displayed. The list may be sorted by clicking on the column headings. Click on the column headings once to sort the list in ascending order. Click on the column a second time to sort the list in descending order. The Search button opens the Sensor Search Dialog. The search button is disabled for SCADAPack 4202 or 4203 transmitters if only one meter run is enabled. The Edit button opens the Edit Sensor Settings Dialog to edit the selected transmitter configuration. The button is disabled if no transmitter is selected or if more than one transmitter is selected. The Delete button deletes the configuration for selected transmitters in the list box. The button is disabled if no transmitter is selected. The OK button saves the settings and closes the dialog. The Cancel button closes the dialog without saving. The Help button opens the on-line manual. Realflo User and Reference Manual May 19, 2011 290 Realflo Expert Mode Reference Sensor Search Dialog The Sensor Search dialog allows searches for Multi-Variable Transmitters connected to the flow computer. Searches can be made using a serial connection and if the flow computer supports it using a LAN connection. The Search dialog cannot remove or replace a transmitter when the controller type is a SCADAPack. Search Serial The Search Serial area of the search dialog is highlighted in the picture above. The LAN Search is described in Search LAN section below. The following paragraphs describe the parameters of the Serial Search. The Port drop-down list box selects the controller serial port that will communicate with the transmitter. The valid ports are COM1, COM2, COM3 and COM4 for serial connections and LAN for LAN connections. The Timeout edit box specifies the length of time the flow computer will wait for a response from a transmitter. The valid range is from 100 ms to 10000 ms. The default is 300 ms. The radio buttons determine for which transmitters to search. Use the Maximum radio button to search for the specified number of transmitters. The search operation will stop after finding the specified number of transmitters. The valid value is from 1 to 247. The default is 1. Use the Range radio button to search the addresses in specified range. The range to search for is entered in the edit boxes to the right of the radio button. The value in To edit control needs to be equal or great than the value in the first edit control. The maximum search range that can be entered is for 255 transmitters. The default range is 1 to 247. Valid values are any range between 1 and 247 for the SCADAPack 4101 and 3095MVT. Realflo User and Reference Manual May 19, 2011 291 Realflo Expert Mode Reference 4000 transmitters support addresses 1 to 255 in standard Modbus mode, and 1 to 65534 in extended address mode. The address mode of the flow computer serial port needs to be set to extended to search for transmitters with extended addresses. The SCADAPack 4202 or 4203 transmitter support 1 to 255 addresses in the standard addressing mode and 1 to 65534 addresses in the extended addressing mode. The address mode of the SCADAPack 4202 or 4203 port needs to be set to extended in order to search for transmitters with extended addresses. Select the All radio button to search the addresses of transmitters connected with the serial port selected in Port. A maximum of 255 addresses are searched. The Serial Search button starts the search for MVT transmitters. A search process dialog is displayed so that the search operation can be cancelled at any time. The results of the search are added to the list box at the bottom of the dialog. The search result list box shows the transmitters that were found by the search. Additional searches may add to the list box. The list may be sorted by clicking on the column headings. Click on the column headings once to sort the list in ascending order. Click on the column a second time to sort the list in descending order. The list box displays the following columns: The Port column displays the serial or LAN port the controller is using to communicate with the transmitter. The Address column displays the Modbus station address of the transmitter. The Tag column displays the Tag Name assigned to the transmitter. This column may be blank if a Tag Name has not been assigned to the transmitter. The Serial Number column displays the transmitter factory serial number. The Manufacturer Code column displays the transmitter factory manufacturer code. The Status column indicates if configuration data for the transmitter exists. Configured indicates a transmitter with the same port, address, serial number, and factory code is in the list in the Sensor and Display Configuration dialog. Different means a transmitter with the same port and address is in the list in the Sensor and Display Configuration dialog. The tag, serial number, or factory code of the transmitter is different. New means that the transmitter is not in the list of configured transmitters. The Change button opens the Change Address Dialog to change the Modbus station address of the serial port on the remote transmitter. This action will change the Modbus station number of the serial port on the MVT connected to a SCADAPack controller. The button is grayed if the list is empty or if more than one transmitter is selected. Realflo User and Reference Manual May 19, 2011 292 Realflo Expert Mode Reference The Delete button removes the selected items from the list. The button is grayed if the list empty or no transmitter is selected. The OK button saves the settings and closes the dialog. Transmitters in the result list are added to the transmitter configuration in the Sensor and Display Configuration Dialog. If the transmitter status is configured the list is not changed. If the transmitter status is different the tag, serial number, and factory code in the list is updated with the new information from the transmitter. If the transmitter status is new the transmitter is added to the list in the first available position. If there are more new transmitters than there are free positions in the list an error dialog is displayed with the message “There are too many new transmitters. Please delete some new transmitters from the list.” The Cancel button closes the dialog without saving. The Help button opens the on-line manual. Search LAN The Search LAN area of the search dialog is highlighted in the picture below. The following paragraphs describe the parameters of the Search LAN function. The IP Address edit box specifies the known IP address of the 4000 transmitter. Valid entries are IP addresses in the format nnn.nnn.nnn.nnn where nnn are values between 0 and 255. The Protocol drop-down list box selects the type of IP protocol that will be used to query the transmitter. Valid IP protocol selections are Modbus/TCP and Modbus RTU in UDP. The IP port (for example port 502) for the selected protocol needs to be the same in the flow computer and the 4000 transmitter. The LAN Timeout edit box specifies the length of time the flow computer will wait for a response from a 4000 transmitter. The valid range is from 100 to 10000 milliseconds. The default is 5000 ms. The Search LAN button starts the search for the 4000 transmitters. A search progress dialog is displayed and the search operation can be cancelled at any time. The result of the search is added to the search results list box at the bottom of the MVT Search dialog. The search result list box shows the transmitters that were found by the search. Additional searches may add to the list box. The list may be sorted by clicking on the column headings. Click on the column headings once to sort the list in ascending order. Click on the column a second time to sort the list in descending order. The Port column displays the serial or LAN port the controller is using to communicate with the transmitter. The Address column displays the Modbus station address of the transmitter. The Tag column displays the Tag Name assigned to the transmitter. This column may be blank if a Tag Name has not been assigned to the transmitter. Realflo User and Reference Manual May 19, 2011 293 Realflo Expert Mode Reference The Serial Number column displays the transmitter factory serial number. The Manufacturer Code column displays the transmitter factory manufacturer code. The Status column indicates if configuration data for the transmitter exists. Configured indicates a transmitter with the same port, address, serial number, and factory code is in the list in the Sensor and Display Configuration dialog. Different means a transmitter with the same port and address is in the list in the Sensor and Display Configuration dialog. The tag, serial number, or factory code of the transmitter is different. New means that the transmitter is not in the list of configured transmitters. The Delete button removes the selected items from the list. The button is grayed if the list empty or no transmitter is selected. The OK button saves the settings and closes the dialog. Transmitters in the result list are added to the transmitter configuration in the Sensor and Display Configuration Dialog. If the transmitter status is configured the list is not changed. If the transmitter status is different the tag, serial number, and factory code in the list is updated with the new information from the transmitter. If the transmitter status is new the transmitter is added to the list in the first available position. If there are more new transmitters than there are free positions in the list the following message is displayed “There are too many new transmitters. Please delete some new transmitters from the list.” The Cancel button closes the dialog without saving. The Help button opens the on-line manual. Change Address Dialog The Change button opens the Change Address Dialog to change the Modbus station address of the serial port on the remote transmitter. This action will change the Modbus station number of the serial port on the MVT connected to a SCADAPack controller. The button is grayed if the list is empty or if more than one transmitter is selected. New SCADAPack 4101 transmitters have a default address of 99. It is recommended that transmitters be assigned an address other than 99. This will allow adding a new transmitter at any time. If a transmitter is left at address 99, then it will have to be disconnected to install a new transmitter. The Old Address window displays the current address of the transmitter. The New Address entry specifies the new address for the transmitter. The new address needs to be different from any existing addresses in the results Realflo User and Reference Manual May 19, 2011 294 Realflo Expert Mode Reference list of Sensor Search dialog. Valid values are any range between 1 and 247 for the SCADAPack 4101and 3095MVT. The SCADAPack 4202 or 4203 transmitters support 1 to 255 addresses in the standard addressing mode and 1 to 65534 addresses in the extended addressing mode. The OK button changes the transmitter address. A communication progress dialog opens while the information is written to the transmitter. Click on the Cancel button on the progress dialog to attempt to abort the command. This will close the progress dialog, bit the address of the transmitter already may be changed. The Cancel button closes the dialog without changing the transmitter address. Realflo User and Reference Manual May 19, 2011 295 Realflo Expert Mode Reference Edit Sensor Settings Dialog This dialog allows the editing of settings for transmitters connected to the flow computer. There are three selection tabs, shown at the top left corner of the dialog. When selected, each tab will display a page of configuration parameters in the dialog. The General Page contains sets communication and transmitter information for a transmitter. The Measured Variables page configures the three process measurements, and the Display Module Page configures the display on the transmitter. There are two columns of data on each page. The Proposed column contains the values that will be written to the controller. The Actual column contains the values that were in the controller the last time data was read from the controller. Values in the Proposed column are colored blue if they differ from the values in the Actual column; this enables the easy location of any differences. The OK button closes the dialog and saves the settings. The Read button reads the transmitter settings from the flow computer into the Actual column on all pages. If there is no transmitter configured in the flow computer then the flow computer will attempt to read the configuration from the Address in the Proposed column. A communication progress dialog is displayed while reading from the flow computer. The Copy Actual to Proposed button copies settings from the Actual column to the Proposed column on both pages. The button is disabled if the Actual column is empty. The Print button prints the current page display settings. The Export button exports the settings to a specified CSV file. The Help button opens the on-line manual. The flow computer ID is checked when the Read command is used. If the flow computer ID does not match the ID Realflo displays the message “ The Realflo User and Reference Manual May 19, 2011 296 Realflo Expert Mode Reference Flow Computer ID from the flow computer does not match the Flow Computer ID from the file.” The read is not performed. General Page The General page sets communication and generic information for a transmitter. The Address edit-box specifies the Modbus address of the transmitter for serial connections and the IP address of the transmitter for LAN connections. Transmitters on the same serial port need to have a unique Modbus address. Transmitters on the LAN port need to have a unique IP address. This edit box is disabled if the controller type is set to a SCADAPack 4202 or 4203 transmitter. Valid addresses are between 1 and 247 for the SCADAPack 4101and 3095MVT. 4000 transmitters support addresses 1 to 255 in standard Modbus mode, and 1 to 65534 in extended address mode. The SCADAPack 4202 or 4203 transmitters support 1 to 255 addresses in the standard addressing mode and 1 to 65534 addresses in the extended addressing mode. New SCADAPack 4101 transmitters have a default address of 99. It is recommended that transmitters be assigned an address other than 99. This will allow adding a new transmitter at any time. If a transmitter is left at address 99, then it will have to be disconnected to install a new transmitter. The Port drop-down list box specifies the flow computer serial port where the MVT is connected. The valid port selections are com1, com2, com3, and com4 for serial connections and LAN for LAN connections. This edit box is disabled if the controller type is set to a member of the SCADAPack 4202 or 4203 of controllers. Polling Sensors for SCADAPack 32 10 Runs The SCADAPack 32 supports 10 flow runs but can poll a maximum of 6 sensors in 1 second. So that all sensors and Coriolis meters are polled for all runs in 1 second the flow computer manages the polling using multiple serial communication ports. When using more than 5 runs on a SCADAPack 32 flow computer users need to distribute the communication for sensor and Coriolis meter data over multiple serial ports. For example if 10 runs are to be used poll for 5 sensors on one serial port and 5 sensors on another serial port. The Timeout edit-box specifies the time the flow computer waits for a response from the transmitter before the command is unsuccessful. The valid range is from 0 to 10000 ms. The default is 1000 ms. This edit box is disabled if the controller type is set to a member of the SCADAPack 4202 or 4203 of controllers. The flow computer polls each configured transmitter in turn. It waits for a response or timeout. If the transmitter does not respond it will take longer to poll it, than if it responded. The flow computer does not retry the transmitter. It moves on to the next transmitter. The transmitter will be polled again in the regular cycle. The communication failure alarm is raised if the transmitter does not respond for 3 consecutive polls. Realflo User and Reference Manual May 19, 2011 297 Realflo Expert Mode Reference The Device dropdown list specifies the type of transmitter connected to the flow computer. Valid values are 3095FB, SCADAPack 4101, SCADAPack 4102 or a SCADAPack 4202 or 4203 transmitter. The default value is 4202 DR. The Tag edit-box specifies the transmitter tag. Up to 8 characters can be entered. The default is no tag. The Serial Number displays the serial number of the MVT transmitter. It cannot be edited. It is set when the transmitter is found using the Search feature. The Turnaround Delay Time edit-box specifies the turnaround delay time. The transmitter will wait this long before responding to the flow computer. The valid range is 0 to 200 ms. The default is 50 ms. Measured Variables Page The Measured Variables page configures the transmitter measurements. The MVT transmitter measures differential pressure, static pressure, and temperature. The configuration parameters for each measurement are the same. The Units drop-down list boxes select the units used by the transmitter for the measurement. Values read from the transmitter are in these units. If the transmitter has a local display it uses these units. For Differential Pressure the valid units displayed will depend on the transmitter used. For SCADAPack 4202, 4203 or 4000 transmitters, valid units are: inches H2O at 68 F, Pascal (Pa) and kiloPascal (kPa). The default is inches H2O at 68°F. For the 3095 MVT valid units are: inches H2O at 60°F, Pascal (Pa), kiloPascal (kPa) and inches H2O at 60 F. The default is inches H2O at 60°F. For Static Pressure the valid units are kiloPascal (kPa), MegaPascal (Mpa), and pounds per square inch (psi). The default is psi. Realflo User and Reference Manual May 19, 2011 298 Realflo Expert Mode Reference For Temperature the valid units are degrees Celsius (C) and degrees Fahrenheit (F). The default is Fahrenheit (F). The Damping edit boxes specify the response time of transmitter in order to smooth the process variable reading when there are rapid input variations. For the SCADAPack 4202, 4203 or 4000 transmitters the valid values are 0.0 (damping off), 0.5, 1.0, 2.0, 4.0, 8.0, 16.0, and 32.0 seconds. The default value is 0 (damping off). Flow Temperature damping is disabled for the SCADAPack 4202, 4203 and 4000 transmitters. For the 3095 MVT the valid values are 0.108, 0.216, 0.432, 0.864, 1.728, 3.456, 6.912, 13.824 and 27.648. The default is 0.864. The Lower Operating Limit (LOL) and Upper Operating Limit (UOL) edit boxes specify the sensor operating values. These values are set in Realflo as a method to generate an alarm in the alarm log if the measured value is outside these limits The flow computer uses these values to record when the process value has transitioned into an unexpected value based on the predicted characteristics of the users application. The valid range depends upon the transmitter. The default is 0 for lower operating limit and 65534 for upper operating limit. The LOL and UOL needs to satisfy the following conditions. The user is responsible for selecting suitable values for LOL and UOL. LRL <= LOL < (UOL – URL/100) (LOL + URL/100) <= UOL <= URL Where LRL (Lower Range Limit) and URL (Upper Range Limit) are the upper and lower calibrated measurements for the transmitter as it is shipped from the factory. These are fixed values and not adjustable by the user. Refer to the calibration plate on the MVT transmitter or your MVT User Manual for calibrated LRL and URL ranges. Re-ranging is a concept that does not apply to the 4000 digital transmitters. The transmitters are shipped with a specific URL/LRL that defines the calibrated measurement range of the transmitter. The accuracy specifications of the transmitter are based on this calibrated range, and that range is not user adjustable. Older analog transmitters had an analog output to indicate the pressure reading. For applications where the measurement was only expected to take place over a portion of the full transmitter measurement range, this analog output could be 're-ranged' so that the full output analog range (4-20mA) would cover only a portion of the factory calibrated range, and therefore reduce some of the error associated with the digital-to-analog (D/A) conversion. Since there is no D/A conversion in the digital transmitters, the additional errors associated with the D/A conversion are not present and the concept of re-ranging that was done with analog transmitters no longer applies. The Pressure Type edit box specifies whether the static pressure is measured as gage or absolute pressure. Valid values are Absolute and Gage. The default value is Absolute. The control is enabled for the SCADAPack 4202 or 4203 and 4102 transmitters, and is disabled for other transmitters. The Atmospheric Pressure specifies the local atmospheric pressure. The atmospheric pressure is the weight of the atmosphere on the surface of the Realflo User and Reference Manual May 19, 2011 299 Realflo Expert Mode Reference Earth. Valid values are 0 to 30 psia, or equivalent values in other units. The default value is 0 psia. The control is disabled if the Pressure Type is Absolute. The control is enabled for the SCADAPack 4202, 4203 and 4102 transmitters, and is disabled for other transmitters. Realflo User and Reference Manual May 19, 2011 300 Realflo Expert Mode Reference Display Module Page The Display Module page sets items that will be displayed on the MVT transmitter display. The Available Items list will contain possible items that can be displayed. The number of available items will vary depending on how many flow runs are configured. The table below shows the available items. Item DP SP PT Current Time Run ID Orifice Plate Size Calculation State Flow Volume Rate Flow Mass Rate Flow Energy Rate Flow Time Today‟s Flow Volume Realflo User and Reference Manual May 19, 2011 Notes One selection for each flow run is available One selection for each flow run is available One selection for each flow run is available One selection for each flow run is available One selection for each flow run is available One selection for each flow run is available One selection for each flow run is available One selection for each flow run is available One selection for each flow run is available One selection for each flow run is available One selection for each flow run is available One selection for each flow run is available 301 Realflo Expert Mode Reference Item Yesterday‟s Flow Volume Pulses Relative Density Pipe Diameter Atmospheric pressure Battery Voltage Notes One selection for each flow run is available One selection for each flow run is available One selection for each flow run is available for flow computers with version 6.00 and higher. One selection for each flow run is available One selection for each flow run is available This item is available for SolarPack 410 controllers only. The Proposed Items list contains the items are ready to be displayed. The order of the items in the list is the same as the order that the items will be shown on the display. A maximum of 12 items can be added to the Proposed Items list. A maximum of 5 custom display registers can be added to the list. It is permitted to have the same item in the list multiple times. Clicking on the Add button will move selected items from the Available Items list to the Configured Items list. The Add button is disabled if there is not enough room in the Configured Items list to add the selected items, and when the Configured Items list is full. The Add button is also disabled if no items are selected in the Available Items list. Click Add Custom to open the Add/Edit Custom Item dialog with default settings. The resulting item will be placed at the end of the Proposed Items list. The Add Custom button is disabled when the Proposed Items list is full. A maximum of 5 custom display registers can be added. Clicking on the Remove button will remove selected items from the Configured Items list. Multiple items may be removed at once. The Remove button is disabled if no items are selected in the Configured Items list. The Display Update Interval edit-box shows the length of time that each measurement from the Configured Items list will be displayed. The valid range is from 2 to 60 seconds inclusive. The default setting is 4 seconds. The Move Up button will move the selected item(s) in the Configured Items list up one position each time it is clicked. The Move Up button is disabled if no item is selected in the Configured Items list or if multiple items are selected in the Configured Items list. The Move Down button will move the selected item(s) in the Configured Items list down one position each time it is clicked. The Move Down button is disabled if no item is selected in the Configured Items list or if multiple items are selected in the Configured Items list. The Actual Items list contains the items that read from the controller and Actual Display Update Rate text-box contains the display update rate that read from the controller. Custom Item Dialog Realflo User and Reference Manual May 19, 2011 302 Realflo Expert Mode Reference When the Add Custom button is used the Add/Edit Custom Item dialog is displayed as shown below. A maximum of 5 custom display registers can be added. Type the Register number. Registers can be in the range 1 to 9999, 10001 to 19999, 30001 to 39999 and 40001 to 49999. Select the Data Type format for the value in the register. Some data types will read two consecutive registers. The boolean data type reads a single bit. The types are: boolean, signed, unsigned, signed double, unsigned double, floating point and ISaGRAF integer. Type the seven character string in the Description control. This string will be displayed below the value for the first half of the display period. Type the seven character string in the Units control. This string will be displayed below the value for the second half of the display period. This string may be scrolled to allow a scaling exponent to be displayed. Flow Run Use this command to configure the parameters for a selected meter run. This command is disabled if the Update Readings command is enabled. The Flow Run command opens the Select Run to Configure dialog. This dialog selects the run to be configured. The Run drop-down list box lists the runs available. The number of runs available is set in the Flow Computer Setup dialog. The OK button opens the Configuration - Run N dialog with the data for the selected run. The Configuration - Run N dialog displays a maximum of eight selection tabs, depending on the flow calculation type, shown across the top of the dialog. When selected, each tab will display a page of configuration parameters in the dialog. This section provides an overview of the configuration parameters for each tab. Detailed explanations for the configuration parameters are found in the Inputs Tab section. Realflo User and Reference Manual May 19, 2011 303 Realflo Expert Mode Reference To select a tab move the pointer to the tab name and click the left mouse button. The seven tabs displayed will change depending on the type of flow calculation and type of compressibility calculation selected in the Input tab. The Inputs tab defines the type of flow calculation to be performed, the type of compressibility calculation to be performed, and the configuration of the sensor inputs. The Static Pressure tab defines the parameters for the static pressure sensor for the meter run. The Temperature tab defines the parameters for the temperature sensor for the meter run. The Differential Pressure tab defines the parameters for the differential pressure sensor for the meter run. The Contract tab defines parameters for the gas measurement contract. These parameters define the information operation of the flow computer. The AGA-3 tab defines parameters unique to the AGA-3 calculation. This tab is visible only if the AGA-3 calculation is selected on the Input configuration. The AGA-7 tab defines parameters unique to the AGA-7 calculation. This tab is visible only if the AGA-7 calculation is selected on the Input configuration. The V-Cone tab defines parameters unique to the V-Cone calculation. This tab is visible only if the V-Cone calculation is selected on the Input configuration. The AGA-11 tab defines parameters unique to the AGA-11 calculation. This tab is visible only if the AGA-11 calculation is selected on the Input configuration. This calculation type is not available for 16-bit controllers. The AGA-8 tab defines parameters unique to the AGA-8 Detailed calculation. This tab is visible only if the AGA-8 calculation is selected on the Input configuration. Realflo User and Reference Manual May 19, 2011 304 Realflo Expert Mode Reference The AGA-8 Hexanes+ tab defines the composition of the heavier gas components being measured The NX-19 tab defines parameters unique to the NX-19 calculation. This tab is visible only if the NX-19 calculation is selected on the Input configuration. Tabs work in the same manner. There are two columns of data on the page. The Proposed column contains the values that will be written to the controller. The Actual column contains the values that were in the controller the last time data was read from the controller. Values in the Proposed column are colored blue if they differ from the values in the Actual column; this lets you easily located differences. The Run Configuration dialog has the following controls at the bottom of the dialog. These controls are available and are independent of the tab selected. The OK button saves the modified settings and closes the Run Configuration dialog. The Cancel button closes the Controller Configuration dialog and discards any changes. The OK button is disabled if the user is logged on with an account that is read and view only. The Read Actual button reads the run configuration from the flow computer. Data for all property pages is read and placed in the Actual columns on the property pages. If the flow computer ID does not match the ID in the file Realflo displays the message “ The Flow Computer ID from the flow computer does not match the Flow Computer ID from the file.” In SCADAPack 4202 and SCADAPack 16-bit Flow Computers with multiple flow runs, the latest AGA-8 ratios may not be read back for several minutes. In SCADAPack 4203 and SCADAPack 314/330/334, SCADAPack 350 or SCADAPack32 Flow Computers with multiple flow runs, the latest AGA-8 ratios may not be read back for up to a minute. New gas ratio configurations may be delayed until the other flow run has completed its current AGA-8 calculation. The Print Run button prints the configuration data for the run. The Export Run button exports the configuration data, for the run, to a file. Refer to the Exporting section below. The Help button displays help for the currently open property page. Inputs Tab Inputs Tab defines the type of flow calculation to be performed, the type of compressibility calculation to be performed, and the configuration of the sensor inputs. The contents of the page will change depending on the selections made in the Flow Calculation and Compressibility Calculation selections. The flow calculation needs to be stopped in order to write some of the parameters on this page to the controller. These parameters are noted with an asterisk (*) beside the parameter title. Refer to the Calculation Control section for information on stopping and starting flow calculations in the flow computer. Realflo User and Reference Manual May 19, 2011 305 Realflo Expert Mode Reference Realflo does not allow configuration changes if the Event Log in the flow computer is full. Use the Maintenance Menu >> Read Logs/History command to empty the Flow Computer Event Log. The configuration of parameters for the Inputs page is done using entry fields or dropdown selections for each parameter. The following edit controls are displayed. Run ID The flow run identification string, Run ID, is used to identify the flow run. Enter a string up to 16 characters long in the Run ID edit box. For flow computer version 6.00 or higher, type a string up to 32 characters long. The flow run ID is displayed in the title bar of each view window beside the run number. The flow run ID is printed on report headers beside the run number. The run ID is not supported in older flow computers. Realflo will not read or write the run ID when an older flow computer is detected. * Input Units Select the units of measurement of input values for the meter run. Inputs may be measured in different units than the calculated results. This allows you to use units that are convenient to you for measuring inputs. The flow calculation needs to be stopped in order to write this parameter to the controller. A dropdown box allows the selection of the following unit types: US1 US2 US3 IP Metric1 Metric2 Metric3 Realflo User and Reference Manual May 19, 2011 306 Realflo Expert Mode Reference SI US4 US5 US6 US7 US8 PEMEX Refer to the Measurement Units section for information on unit types and how they are displayed. * Flow Calculation Select the type of flow calculation for the meter run. Realflo supports the AGA-3 (1985 version) and AGA-3 (1992 version) for orifice meters the AGA7 calculations for turbine meters and the V-Cone calculations for v-cone meters. A dropdown box allows the selection of: AGA-3 (1985) AGA-3 (1992) AGA-7 AGA-11 (not available for 16-bit controllers) V-Cone Notes: The SolarPack 410 does not support AGA-7 calculations. When a Realflo configuration file that is using AGA-11 flow calculation type is opened in a version of Realflo 6.75 or earlier the flow calculation type AGA-11 is not displayed and the window is blank. This is correct operation. When a new calculation type is entered, i.e. AGA-3(1992), the AGA-8 and AGA-8 Hexanes+ tabs are not displayed. To correct this select OK to close the Run Configuration dialog and then reopen it. The missing tabs are correctly displayed. * Compressibility Calculation Select the type of compressibility calculation for the meter run. AGA-8 Detailed and NX-19 compressibility calculations can be selected. AGA-8 Detailed is the recommended calculation for new systems as it has superior performance compared to NX-19. NX-19 is provided for legacy systems. The flow calculation needs to be stopped in order to write this parameter to the controller. A dropdown box allows the selection of: AGA-8 NX-19 (Not supported for PEMEX flow computers) When NX-19 calculation is used the Input Units type needs to be selected such that the Static Pressure is in psi (pounds per square inch). Low Flow Events Select whether to log or ignore flow events that occur for the meter run. Realflo can ignore all events or log low flow events. A dropdown box allows the selection of: Realflo User and Reference Manual May 19, 2011 307 Realflo Expert Mode Reference Ignore Log Low Flow Select Ignore if the measured flow experiences these events as part of normal operation. Ignoring these events will keep the Alarm Log from overflowing. Flow accumulation stops when this alarm occurs. When selected the Low Flow events are added to the Alarm log. Value on Sensor Fail The Value on Sensor Fail configuration option uses the specified value in this field as the live input value when communicating with a sensor. A dropdown list lets you select: Use Last Known Good Value Use Default Value When the Use Default Value option is selected the default value is entered in the Differential Pressure, Static Pressure and the Temperature tabs. The entry window Default Value is activated in each tab when this selection is made. When you open a file using an older file format, Realflo sets the default value of the Values on Sensor Fail field to Use Last Known Good. When the status to a sensor changes and you select the Use Default Value option, this is added to the Event Log. For flow computers 6.70 and later, when communication to a sensor fails and the configuration option “Use Last Known Good Value” is set to “Use Default Value,” the flow computer needs to use the specified default value in the configuration in place of a live input value. When communication to a sensor is restored and the configuration option for the Value on Sensor Fail field is set to use the default value, the flow computer uses the input value from the sensor as the live input value. For flow computers prior to 6.70, the value on sensor fail is “Use Last Known Good Value.” Run Direction Control The Run Direction Control option is used to indicate the direction of flow, forward or reverse, for a meter run. The flow computer calculates flow rates and accumulates flow volumes for one flow direction only for each flow run configured. In order to calculate flow rates and accumulate volume for another flow direction a second flow run needs to be configured, using the same run parameters but with an opposite flow direction setting. Flow direction is indicated using either the value from a Differential Pressure sensor or Coriolis meter or a status register. When using a value to indicate flow direction: Forward flow direction is indicated by a positive (plus) value from a differential pressure sensor for AGA-3 and V-Cone applications and a positive (plus) mass flow rate value from a Coriolis meter. Reverse flow direction is indicated by a negative (minus) value from a differential pressure sensor for AGA-3 and V-Cone applications and a negative (minus) mass flow rate value from a Coriolis meter. Realflo User and Reference Manual May 19, 2011 308 Realflo Expert Mode Reference When using status to indicate flow direction the flow direction is indicated by a status register and the On Indicates value for the status register. Forward flow direction is indicated by a status value of 1 or ON in the Flow Direction Register when the On Indication is set to Forward. Reverse flow direction is indicated by a status value of 1 or ON in the Flow Direction Register when the On Indication is set to Reverse. In many applications the flow direction is forward but in some applications there is a need to calculate reverse flow under certain conditions. An example of this would be a gas storage facility. The selections available for Flow Direction Control are: The Forward by Value selection will indicate the flow direction is forward when the value from a differential pressure (DP) sensor is positive or the mass flow rate value from a Coriolis meter is positive. When the flow direction is forward the flow computer calculates flow rates and accumulates volumes for the flow run. Using this setting when the value from a differential pressure (DP) sensor is negative or the mass flow rate value from a Coriolis meter is negative the flow computer does not calculate flow rates or accumulate volumes for the flow run. The Reverse by Value selection will indicate the flow direction is reverse when the value from a differential pressure (DP) sensor is negative or the mass flow rate value from a Coriolis meter is negative. When the flow direction is reverse the flow computer calculates flow rates and accumulates volumes for the flow run. Using this setting when the value from a differential pressure (DP) sensor is positive or the mass flow rate value from a Coriolis meter is positive the flow computer does not calculate flow rates or accumulate volumes for the flow run. The Forward by Status selection will indicate the flow direction is forward when the Flow Direction Register has a value of 1 (ON) and the On Indication value is set to Forward. When the flow direction is forward the flow computer calculates flow rates and accumulates volumes for the flow run. Using this setting when the Flow Direction Register has a value of 0 (OFF) the flow computer does not calculate flow rates or accumulate volumes for the flow run. The Reverse by Status selection will indicate the flow direction is reverse when the Flow Direction Register has a value of 1 (ON) and the On Indication value is set to Reverse. When the flow direction is reverse the flow computer calculates flow rates and accumulates volumes for the flow run. Using this setting when the Flow Direction Register has a value of 1 (ON) the flow computer does not calculate flow rates or accumulate volumes for the flow run. Flow Direction Register The Flow Direction Register edit-box specifies which register indicates the forward or reverse flow direction status. Valid registers for the flow computer controller can be used for this setting. The default register is 1. This edit control is disabled if Flow Direction Control selection is Value. This control is hidden in GOST mode flow computers. When using the flow direction register consider the following points: When two configured runs are using the same status register one run is configured for forward direction and second run is configured for reverse direction. Realflo User and Reference Manual May 19, 2011 309 Realflo Expert Mode Reference When more than two configured runs are using the same status register the configuration needs to be checked. There may be a logic application that uses a single status point for all runs. On Indicates The On Indicates drop-down selection list allows the selection of Forward or Reverse for the status register value. The default is Forward. The control does not show up in GOST mode. The control is disabled if Status Register control is disabled. Gas Quality Sources This parameter is available for PEMEX versions of Realflo only. The Gas Quality Sources control selects the source for the AGA-8 gas quality for PEMEX applications. A dropdown box allows the selection of Gas Quality Source as: Manual PEMEX Host When Manual is selected AGA-8 gas quality can be written from the Realflo application to the flow computer. The Modbus Mapping table can also be written if the user has an Admin level account. The PEMEX interface (PEMEX Host) cannot write gas quality settings when the source is set to manual. An error is returned to the PEMEX host if an attempt is made to write the settings to the flow computer. When PEMEX Host is selected AGA-8 gas quality cannot be written from the Realflo application to the flow computer. Writing the Modbus Mapping table will return an error code if an attempt is made to write the AGA-8 settings to the flow computer. The PEMEX interface (PEMEX Host) is able to write gas quality settings when the source is set to PEMEX Host. Hysteresis Units The Hysteresis Units control selects how hysteresis is configured for the high and low level hysteresis in the Pressure, Temperature and Differential Pressure tabs. A dropdown box allows the selection of: Percent Engineering Units Realflo User and Reference Manual May 19, 2011 310 Realflo Expert Mode Reference Differential Pressure Tab The controls in this tab are used to configure the differential pressure sensor for the meter run. The differential pressure controls are used only if the AGA-3 or the V-Cone flow calculation is selected. The configuration of parameters for the Differential Pressure page is done using entry fields or dropdown selections for each parameter. The following edit controls are displayed. Parameter ranges are determined by the selection of the Input Units. The tap location for the orifice meter as used in the gas flow calculation by Realflo is as follows: For AGA-3 1985 flange taps are used. For AGA-3 1992 flange taps are used. For V Cone meters the tap provided with the V-Cone element is used. * Input Type The type of register used for the Input Register. A dropdown box allows the selection of: Telepace Integer Float Raw Float Floating point register requiring scaling. ISaGRAF integer 4202 DR The internal 4202DR replaces the first MVT (transmitter 1) on the MVT list when the controller type is set to 4202 DR. 4202 DS The internal 4202 DS replaces the first MVT (transmitter 1) on the MVT list when the controller type is set to 4202 DS. 4203 DR The internal 4203 DR replaces the first MVT (transmitter 1) on the MVT list when the controller type is set to 4203 DR. 4203 DS The internal 4203 DS replaces the first MVT (transmitter 1) on the MVT list when the controller type is set to 4203 DS. Realflo User and Reference Manual May 19, 2011 16 –bit signed integer register. Floating-point register in engineering units. 32-bit signed integer register in ISaGRAF format. 311 Realflo Expert Mode Reference SolarPack 410 The internal SolarPack 410 replaces the first MVT (transmitter 1) on the MVT list when the controller type is set to SolarPack 410. Configured MVT If there are configured MVT transmitters they are displayed in the format number (tag name). Refer to the Sensor and Display section for details on configuring MVT transmitters. Refer to the Register Formats section for more information and examples for register types. * Input Register The Input Register is the address of the register in the Flow Computer I/O database that contains the reading from the differential pressure sensor. The I/O database register will be an input register (3xxxx) or a holding register (4xxxx). The flow calculation needs to be stopped in order to write this parameter to the controller. If an MVT or a SCADAPack 4202 or 4203 transmitter is selected in the Input Type selection this entry is disabled. Input at Zero Scale The value read from the sensor, in unscaled I/O units, when the sensor is at zero scale. This field is grayed if the register type does not require scaling. If an MVT or a SCADAPack 4202 or 4203 transmitter is selected in the Input Type selection this entry is disabled. Input at Full Scale The value read from the sensor, in unscaled I/O units, when the sensor is at full scale. This field is grayed if the register type does not require scaling. If an MVT or a SCADAPack 4202 or 4203 transmitter is selected in the Input Type selection this entry is disabled. Differential Pressure at Zero Scale The differential pressure that corresponds to the zero scale input, or if the input does not require scaling, the minimum DP that can be read from the sensor. If a MVT or a SCADAPack 4202 or 4203 transmitter is selected in the Input Type selection this entry is disabled and the value is forced to that of the MVT Lower Operating Limit. Differential Pressure at Full Scale The differential pressure that corresponds to the full scale input, or if the input does not require scaling, the maximum DP that can be read from the sensor. If an MVT or a SCADAPack 4202 or 4203 transmitter is selected in the Input Type selection this entry is disabled and the value is forced to that of the MVT Upper Operating Limit. Low DP Cutoff This is the scaled input differential pressure where flow accumulation will stop. Valid values depend on the transmitter: refer to the transmitter band or user manual. It needs to be less than the UOL. The default value is 0. Low DP Hysteresis This is the amount, in percent of span, that the differential pressure needs to rise above the Low DP Cutoff to clear the low alarm and allow the flow calculations to resume. Default Value Realflo User and Reference Manual May 19, 2011 312 Realflo Expert Mode Reference The Default Value edit box is enabled when the Input Type is set to a sensor and when the Values on Sensor Fail option on the Inputs tab is configured to Use Default Value. The value you can enter in Default Value edit box needs to be a range that is checked against the sensor configuration. The actual value needs to be uploaded from the controller when you click Read Actual. Realflo User and Reference Manual May 19, 2011 313 Realflo Expert Mode Reference Static Pressure Tab The controls in this tab are used to configure the static pressure sensor for the meter run. The static pressure used in the flow calculations is either gauge pressure or absolute. Gauge pressure is the pressure that a normal sensor would register. These sensors measure the pressure that is in excess of the atmospheric pressure. An atmospheric pressure value needs to be entered when gauge pressure sensors are used. Absolute pressure sensors measure pressure relative to zero pressure (vacuum). An atmospheric pressure value of zero needs to be entered when absolute pressure sensors are used. The configuration of parameters for the Static Pressure page is done using entry fields or dropdown selections for each parameter. The following edit controls are displayed. Parameter ranges are determined by the selection of the Input Units. The tap location for static pressure as used in the gas flow calculation by Realflo is as follows: For AGA-3 1985 flange taps are used. For AGA-3 1992 flange taps are used. For V Cone meters the tap provided with the V-Cone element is used. * Input Type The type of register used for the Input Register. A dropdown box allows the selection of: Telepace Integer 16 –bit signed integer register. Float Floating-point register in engineering units. Raw Float Floating point register requiring scaling. Realflo User and Reference Manual May 19, 2011 314 Realflo Expert Mode Reference ISaGRAF integer 32-bit signed integer register in ISaGRAF format. 4202 DR The internal 4202 DR replaces the first MVT (transmitter 1) on the MVT list when the controller type is set to 4202 DR. 4202 DS The internal 4202 DS replaces the first MVT (transmitter 1) on the MVT list when the controller type is set to 4202 DS. 4203 DR The internal 4203 DR replaces the first MVT (transmitter 1) on the MVT list when the controller type is set to 4203 DR. 4203 DS The internal 4203 DS replaces the first MVT (transmitter 1) on the MVT list when the controller type is set to 4203 DS. SolarPack 410 The internal SolarPack 410 replaces the first MVT (transmitter 1) on the MVT list when the controller type is set to SolarPack 410. Configured MVT If there are configured MVT transmitters they are displayed in the format number (tag name). Refer to the Sensor and Display section for details on configuring MVT transmitters. Refer to the Register Formats section for more information and examples for register types. * Input Register The Input Register is the address of the register in the Flow Computer I/O database that contains the reading from the pressure sensor. The I/O database register is an input register (3xxxx) or a holding register (4xxxx). The flow calculation needs to be stopped in order to write this parameter to the controller. If a SCADAPack 4202 or 4203 or MVT transmitter is selected in the Input Type selection this entry is disabled. Input at Zero Scale The value read from the sensor, in unscaled I/O units, when the sensor is at zero scale. This field is grayed if the register type does not require scaling. If a SCADAPack 4202 or 4203 or MVT transmitter is selected in the Input Type selection this entry is disabled. Input at Full Scale The value read from the sensor, in unscaled I/O units, when the sensor is at full scale. This field is grayed if the register type does not require scaling. If a MVT or a SCADAPack 4202 or 4203 transmitter is selected in the Input Type selection this entry is disabled. Pressure at Zero Scale The pressure that corresponds to the zero scale input, or if the input does not require scaling, the minimum pressure that can be read from the sensor. If a SCADAPack 4202 or 4203 or MVT transmitter is selected in the Input Type selection this entry is disabled and the value is forced to that of the MVT Lower Operating Limit. Pressure at Full Scale The pressure that corresponds to the full scale input, or if the input does not require scaling, the maximum pressure that can be read from the sensor. If a MVT transmitter or a SCADAPack 4202 or 4203 transmitter is selected in the Input Type selection this entry is disabled and the value is forced to that of the MVT Upper Operating Limit. * Tap Location Realflo User and Reference Manual May 19, 2011 315 Realflo Expert Mode Reference This is the location of the static pressure pipe tap. The flow calculation needs to be stopped in order to write this parameter to the controller. A dropdown box allows the selection of: Up upstream pressure tap location. Down downstream pressure tap location. Pressure Type The Pressure Type selects if the static pressure is measured as gage or absolute pressure. A dropdown box allows the selection of: Absolute Pressure Gage Pressure The control is disabled if the Input Type is set to MVT and the MVT is a SCADAPack 4202, 4203 or 4102 controller. Its value is set equal to the MVT pressure type. The control is disabled if the Compressibility Calculation type is set to NX19. The Static Pressure is set to Gage and the Atmospheric pressure is 14.7psi when NX-19 is selected. Atmospheric Pressure The atmospheric pressure is the weight of the atmosphere on the surface of the Earth. At sea level this value is approximately 101.3 kPa. The value entered needs to be the local atmospheric pressure for the flow computer. This control is disabled and forced to 0 if the Pressure Type is set to Absolute Pressure. The control is disabled if the Input Type is set to MVT and the MVT is a SCADAPack 4202, 4203 or 4102. Its value is set equal to the MVT atmospheric pressure. The control is disabled if the Compressibility Calculation type is set to NX-19. The Static Pressure is set to Gage and the Atmospheric pressure is 14.7psi when NX-19 is selected. The atmospheric pressure entered needs to be greater than zero. The maximum upper limits for atmospheric pressure are: 30 psi for US1, US2, US3, US4, US5, US6, US7, US8, and PEMEX units 4320 lbf/ft2 for IP units 207 kPa for Metric1 units 2.07 bar for Metric2 units 0.207 MPa for Metric3 units 207000 Pa for SI units Location Location compensation is only to be used for cases where the static pressure is calibrated using a dead-weight tester. Location compensation adjusts for differences in the gravitational effect on the weights which is primarily dependent on latitude, and elevation. This is due to the centripetal effect of the spinning earth counteracting the effects of gravity. The compensation is not to be used when a pressure measurement is used as a reference instead of placing a specific amount of weight on a dead-weight tester to establish the reference pressure. Realflo User and Reference Manual May 19, 2011 316 Realflo Expert Mode Reference Measurement of the static pressure can be compensated for altitude and latitude. An algorithm is given in the Manual of Petroleum Measurement Standards, Chapter 21, Section 2, Appendix E, published by the American Petroleum Association. The algorithm for pressure compensation is used and the temperature compensation factor is not used. The flow computer applies the compensation to the static pressure reading as it is input to the flow computer. The input pressure is multiplied by the compensation factor and then used by the flow computer whenever the static pressure is used or displayed. Shown below are some calculated location compensation factors for different locations below. Ottawa, ON: the compensation factor applied is 1.0000717 (Alt=374ft, Lat=45deg) Calgary, AB: the compensation factor applied is 0.994447 (Alt=3438Ft, Lat=51deg) Midland, TX: the compensation factor applied is 1.001445 (Alt=2800Ft, Lat=32deg) For example in Midland TX, an input pressure of 500psi with applied location compensation would result in: 500 psi * 1.001445 = 500.7225psi A dropdown box allows the selection of: Ignore Do not compensate for altitude and latitude. Compensate Compensate for altitude and latitude. Note that calibration needs to be performed at the location entered for the altitude and latitude compensation when Compensate is selected. Altitude The Altitude is the height above sea level of the location where the sensor is located. The altitude is measured in feet for US unit sets and meters for SI unit sets. This control is disabled if the Location is set to Ignore. Valid inputs are –30000 to 30000. Latitude The Latitude is the latitude in decimal degrees of the location where the sensor is located. This control is disabled if the Location is set to Ignore. Valid inputs are –90 to 90. Default Value The Default Value edit box is enabled when the Input Type is set to a sensor and when the Values on Sensor Fail option on the Inputs tab is configured to Use Default Value. The value you can enter in Default Value edit box needs to be a range that is checked against the sensor configuration. The actual value needs to be uploaded from the controller when you click Read Actual. Realflo User and Reference Manual May 19, 2011 317 Realflo Expert Mode Reference Temperature Tab The controls in this tab are used to configure the flow temperature sensor for the meter run. The configuration of parameters for the Temperature page is done using entry fields or dropdown selections for each parameter. The following edit controls are displayed. Parameter ranges are determined by the selection of the Input Units. * Input Type The type of register used for the Input Register. A dropdown box allows the selection of: Telepace Integer Float Raw Float Floating point register requiring scaling. ISaGRAF integer Coriolis Meter Temperature in engineering units read from the Coriolis meter. This selection is available only when AGA-11 is selected as the flow calculation type. 4202 DR The internal 4202 DR replaces the first MVT (transmitter 1) on the MVT list when the controller type is set to 4202 DR. 4202 DS The internal 4202 DS replaces the first MVT (transmitter 1) on the MVT list when the controller type is set to 4202 DS. 4203 DR The internal 4203 DR replaces the first MVT (transmitter 1) on the MVT list when the controller type is set to 4203 DR. 4203 DS The internal 4203 DS replaces the first MVT (transmitter 1) on the MVT list when the controller type is set to 4203 DS. SolarPack 410 The internal SolarPack 410 replaces the first MVT (transmitter 1) on the MVT list when the controller type is set to SolarPack 410. Realflo User and Reference Manual May 19, 2011 16 –bit signed integer register. Floating-point register in engineering units. 32-bit signed integer register in ISaGRAF format. 318 Realflo Expert Mode Reference Configured MVT If there are configured MVT transmitters they are displayed in the format number (tag name). Refer to the Sensor and Display section for details on configuring MVT transmitters. Refer to the Register Formats section for more information and examples for register types. * Input Register The Input Register is the address of the register in the Flow Computer I/O database that contains the reading from the temperature sensor. The I/O database register will be an input register (3xxxx) or a holding register (4xxxx). The flow calculation needs to be stopped in order to write this parameter to the controller. If an MVT or a SCADAPack 4202 or 4203 controller is selected in the Input Type selection this entry is disabled. Input at Zero Scale The value read from the sensor, in unscaled I/O units, when the sensor is at zero scale. This field is grayed if the register type does not require scaling. If an MVT or a SCADAPack 4202 or 4203 controller is selected in the Input Type selection this entry is disabled. Input at Full Scale The value read from the sensor, in unscaled I/O units, when the sensor is at full scale. This field is grayed if the register type does not require scaling. If an MVT or a SCADAPack 4202 or 4203 controller is selected in the Input Type selection this entry is disabled. Temperature at Zero Scale The temperature that corresponds to the zero scale input, or if the input does not require scaling, the minimum temperature that can be read from the sensor. If an MVT or a SCADAPack 4202 or 4203 controller is selected in the Input Type selection this entry is disabled and the value is forced to that of the MVT Lower Operating Limit. Temperature at Full Scale The temperature that corresponds to the full scale input, or if the input does not require scaling, the maximum temperature that can be read from the sensor. If an MVT or a SCADAPack 4202 or 4203 controller is selected in the Input Type selection this entry is disabled and the value is forced to that of the MVT Upper Operating Limit. Default Value The Default Value edit box is enabled when the Input Type is sset to a sensor and when the Values on Sensor Fail option on the Inputs tab is configured to Use Default Value. The value you can enter in Default Value edit box needs to be a range that is checked against the sensor configuration. The actual value needs to be uploaded from the controller when you click Read Actual. Realflo User and Reference Manual May 19, 2011 319 Realflo Expert Mode Reference Turbine Tab The controls in this tab are used to configure the turbine input for the meter run. The turbine controls are displayed only if the AGA-7 flow calculation is selected on the Inputs property page. The configuration of parameters for the Turbine page is done using entry fields or dropdown selections for each parameter. The following edit controls are displayed. * Input Type This is the type of value found in the Input Register. A dropdown box allows the selection of: Telepace long 32-bit unsigned integer in Telepace format. ISaGRAF integer 32-bit signed integer in ISaGRAF format. * Input Register The Input Register is the address of the register in the Flow Computer I/O database that contains the reading (number of pulses) from the turbine meter. The I/O database register will be an input register (3xxxx). The flow calculation needs to be stopped in order to write this parameter to the controller. Low Flow Pulse Limit The number of pulses below which a low flow alarm will occur. The default value is 10. Low Flow Detect Time The length of time the number of pulses needs to remain below the Low Flow Pulse Limit for a low flow alarm to occur. Valid values are 1 to 5 seconds. The default value is 5. Contract Tab Contract Configuration defines parameters for the gas measurement contract. This is referred to as contract configuration because these parameters are often defined by a contract for selling gas. Realflo User and Reference Manual May 19, 2011 320 Realflo Expert Mode Reference With Realflo versions 6.0 and newer the Input Error Action control is no longer available on the Contract tab. When the configuration is written to the flow computer and Realflo detects an older flow computer (5.28 flow computers and earlier) the Input Error Action is automatically written as Do Not Accumulate Flow. To enable flow accumulation for 5.28 flow computers and earlier check that the limits selected for the Differential Pressure, Static Pressure or Temperature inputs do not result in an Input Error condition for your application. Additional Notes: The flow calculation needs to be stopped to write the parameters on this page to the controller. If changes are written to the controller a new hour and day are started in the history logs. The configuration of parameters for the Contract page is done using entry fields or dropdown selections for each parameter. The following edit controls are displayed. Parameter ranges are determined by the selection of the Contract Units. * Contract Units These are the units of measurement for the contract (calculated) values. These units are used for outputs from the flow calculations for the meter run. This value may be different from the units used as inputs to the calculations. A dropdown box allows the selection of: US1 US2 US3 IP Metric1 Realflo User and Reference Manual May 19, 2011 321 Realflo Expert Mode Reference Metric2 Metric3 SI US4 US5 US6 US7 US8 PEMEX Pemex contract units are not supported on 16-bit controllers. Refer to the Measurement Units section of for information on unit types and how they are displayed. * Base Temperature This is the reference temperature to which contract flow values are corrected. The temperature units are displayed depending on the contract units selected. * Base Pressure This is the reference pressure to which contract flow values are corrected. The base pressure is measured as absolute pressure (not a gauge pressure). The pressure units are displayed depending on the contract units selected. Standard Conditions The Standard Conditions button sets default values for the Base Temperature and Base Pressure controls. The conditions are based on the Contract Units. Contract Units US1 US2 US3 IP Metric1 Metric2 Metric3 SI US4 US5 US6 US7 US8 PEMEX Standard Base Temperature 60 F 60 F 60 F 60 F 15 C 15 C 15 C 288.15 K 60 F 60 F 60 F 60 F 60 F 60 F Standard Base Pressure 14.73 psi 14.73 psi 14.73 psi 2 2116.2281 lbf/ft 101.325 kPa 1.01325 bar 0.101325 Mpa 101325 Pa 14.73 psi 14.73 psi 14.73 psi 14.73 psi 14.73 psi 14.73 psi * Contract Hour The hour of the day that starts a new contract day. The contract day begins at 00 minutes and 00 seconds of the specified hour. The contract hour is specified using a 24-hour clock, 00 through 23 hours. Realflo User and Reference Manual May 19, 2011 322 Realflo Expert Mode Reference ** Wet Gas Meter Factor This parameter is an adjustment to the volume, mass and energy values when there is water in the flow. Typically a test is conducted to determine the water content of the gas to be measured. The Wet Gas Meter Factor is applied to the volume, mass and energy values to get a corrected value. For example: if the water content is determined to be 5% then the meter factor is 0.95. For Realflo versions 6.01 To 6.20, changing Wet Gas Meter Factor requires a new contract day to be started, as the flow calculation has to be stopped. For Realflo version 6.21 and later, changing the Wet Gas Meter Factor can be accomplished without stopping the flow calculations. This means that a new a new contract day does not have to be started when this parameter needs to be changed. PEMEX Base Conditions * Base Temperature This is the reference temperature to which contract flow values are corrected. The temperature units are displayed depending on the contract units selected. * Base Pressure This is the reference pressure to which contract flow values are corrected. The base pressure is measured as absolute pressure (not a gauge pressure). The pressure units are displayed depending on the contract units selected. PEMEX Conditions Button The Secondary Conditions button sets default values for the secondary Base Temperature and Base Pressure controls. The conditions are based on the Contract Units. Contract Units US1 US2 US3 IP Metric1 Metric2 Metric3 SI US4 US5 US6 US7 US8 PEMEX Realflo User and Reference Manual May 19, 2011 Standard Base Temperature 60 F 60 F 60 F 60 F 15 C 15 C 15 C 288.15 K 60 F 60 F 60 F 60 F 60 F 68 F Standard Base Pressure 14.73 psi 14.73 psi 14.73 psi 2 2116.2281 lbf/ft 101.325 kPa 1.01325 bar 0.101325 Mpa 101325 Pa 14.73 psi 14.73 psi 14.73 psi 14.73 psi 14.73 psi 14.2233 psi 323 Realflo Expert Mode Reference AGA-3 Configuration AGA-3 Configuration defines parameters unique to the AGA-3 calculation. This tab is visible only if the AGA-3 calculation is selected on the Inputs tab for the meter run. The Warnings area shows messages if the parameters entered are outside the bounds of the regression database used to create the AGA-3 standard. The calculation may be used outside these bounds, but the results are extrapolated. The calculated flow may not be accurate. It is the user‟s responsibility to decide if the values used are appropriate. There are two messages on the configuration page. These are grayed if they unless they apply. If the orifice diameter is smaller than the specification suggests, the message “The orifice diameter is less than 0.45 inches (11.4 mm). The calculated flow may not be accurate. The user needs to accept responsibility for the selection.” is displayed. If the beta ratio is larger than the specification suggests, the message “The ratio of orifice diameter to pipe diameter (beta ratio) is greater than 0.75. The calculated flow may not be accurate. The user must accept responsibility for the selection.” is displayed. The configuration of parameters for the AGA-3 page is done using entry fields or dropdown selections for each parameter. The following edit controls are displayed. Orifice Material The material the orifice plate for the meter run is made of. A dropdown box allows the selection of: Stainless Steel Monel Carbon Steel Pipe Material Realflo User and Reference Manual May 19, 2011 324 Realflo Expert Mode Reference The material the meter run pipe is made of. A dropdown box allows the selection of: Stainless Steel Monel Carbon Steel Orifice Diameter The diameter of the meter run orifice used for the flow calculation. The measurement units are displayed depending on the input units selected. Orifice reference temperature This is the temperature at which the diameter of the meter run orifice was measured. The measurement units are displayed depending on the input units selected. Pipe Diameter This is the measurement of the meter run pipe inside diameter. The measurement units are displayed depending on the input units selected. Pipe reference temperature The temperature at which the meter run pipe diameter was measured. The measurement units are displayed depending on the input units selected. Isentropic exponent In general, this is a thermodynamic property of gas used to predict the relationships between pressure, temperature, volume and energy. If you are unsure of this value a typical value of 1.3 is commonly used. Viscosity This is the viscosity of the measured gas. In general, this is the resistance of a gas or semi-fluid resistance to flow. The measurement units are displayed depending on the input units selected. Temperature Deadband The tolerated change in the flowing temperature before temperature dependent factors in the flow calculation are recalculated. Changes in the temperature smaller than the deadband will be ignored in determining the result. The default value is 0. The upper limit is 7°F or 4°C. Static Pressure Deadband The tolerated changes in the static pressure before static pressure dependent factors in the flow calculation are recalculated. Changes in the static pressure smaller than the deadband will be ignored in determining the result. A static pressure deadband setting of up to four per cent of the typical static pressure level should have a small effect on the accuracy of the AGA3 calculation. The default value is 0. The upper limit is 800 psi or 5500 kPa or equivalent in other units. Differential Pressure Deadband The tolerated changes in the differential pressure before differential pressure dependent factors in the flow calculation are recalculated. Changes in the differential pressure smaller than the deadband will be ignored in determining the result. A change of N in the differential pressure input will cause a change of 0.5 N in the calculation volume at base conditions. It is recommended that the differential pressure deadband be set Realflo User and Reference Manual May 19, 2011 325 Realflo Expert Mode Reference to zero. The default value is 0. The upper limit is 4.5 inWC or 1.1 kPa or equivalent in other units. Realflo User and Reference Manual May 19, 2011 326 Realflo Expert Mode Reference AGA-7 Configuration AGA-7 Configuration defines parameters unique to the AGA-7 calculation. This tab is visible only if the AGA-7 calculation is selected in the Inputs tab section for the meter run. The configuration of parameters for the AGA-7 page is done using entry fields or dropdown selections for each parameter. The following edit controls are displayed. K Factor This is the number of pulses per unit volume of the turbine meter. Valid values are 0.001 to 1000000. The default value is 100. M Factor This is the adjustment to the number of pulses per unit volume for the turbine meter compared to an ideal meter. Valid values are 0.001 to 1000. The default value is 1. The SolarPack 410 does not support AGA-7 calculations. Realflo User and Reference Manual May 19, 2011 327 Realflo Expert Mode Reference AGA -11 Configuration AGA-11 configuration defines parameters unique to the AGA-11 calculation. This tab is visible only if the AGA-11 calculation is selected in the Flow Calculation type selection in the Inputs tab for the meter run. The AGA-11 configuration sets the Coriolis meter Modbus address, the flow computer serial port to use and the command timeout value for messages sent to the Coriolis meter. The flow computer communicates with one or more Coriolis meters using serial communication. When a direct connection is used, i.e. a single Coriolis meter connected, either RS-232 or RS-485 serial communication may be used. When the flow computer is communicating with multiple Coriolis meters, or Coriolis meters and other devices, then RS-485 communication needs to be used. The serial communication parameters for the flow computer and the Coriolis meter need to match for successful communication to take place. In order to use an Endress and Hauser Promass 83 Coriolis meter it needs to have the following parameters configured through the local display to match the settings that the Flow Computer will use: Address (factory setting is 247) Baud rate (factory setting is 19200) Parity (factory setting is Even) Write protection needs to be OFF (factory setting is OFF) Transmission mode needs to be RTU (factory setting is RTU) The flow computer serial port settings are configured from the Serial Ports command. The serial port settings for the serial port used by the flow computer and the Coriolis meter need to match. NOTES: If the Promass 83 is installed in a multi-drop fashion the only permitted Modbus master device is the Flow Computer (address 1) that is configured to poll the Promass 83. Additional master devices or a second Flow Computer polling the Promass 83 can result in communication not succeeding. SCADAPack 4102, 4012 and 4032 transmitters and Rosemount 3095 sensors have the parity setting fixed at No parity and 1 stop bit. The Promass 83 Coriolis meter No parity setting requires 2 stop bits. When these sensors are used by the flow computer they need to use another serial port on the flow computer. SCADAPack 4202 and 4203 sensors may be used on the same serial port as the Promass 83 Coriolis meter. Realflo User and Reference Manual May 19, 2011 328 Realflo Expert Mode Reference Address This is the Modbus address of the Coriolis Meter for serial communications. Multiple Coriolis meters using the same serial port on the flow computer need to each have a unique Modbus address. Valid Modbus addresses are between 1 and 247. The default address is 247. Port This is the communication port on the flow computer that will be used to communicate with the Coriolis meter. Valid port selections depend on the type of controller the flow computer running on. The default port is the first valid port available on the controller. Timeout This is the time the flow computer will wait for a response for Modbus read commands send to the Coriolis meter. When the timeout time is exceeded the command is unsuccessful and an alarm is added to the flow computer alarm list. Valid timeout values are from 0 to 1000 ms. The default value is 50 ms. Realflo User and Reference Manual May 19, 2011 329 Realflo Expert Mode Reference V-Cone Configuration V-Cone Configuration defines parameters unique to the V-Cone calculation. This tab is visible only if the V-Cone calculation is selected in the Flow Calculation type selection in the Inputs tab for the meter run. Cone Material This is the material of the V-cone. Valid values are Carbon Steel, Stainless 304, and Stainless 316. The default value is determined by the template selected. Pipe Material This is the material from which the meter run pipe is made. Valid values are Carbon Steel, Stainless 304, and Stainless 316. The default value is determined by the template selected. Adiabatic Expansion Factor The Adiabatic Expansion Factor drop down list selects which calculation is used for the adiabatic expansion factor of the calculation. Select Legacy Calculation to use the older calculation method. This is the default selection. Flow computers prior to version 6.71 support only this selection. Select V-Cone to use the V-Cone specific calculation. This selection should be used with V-Cone devices. Select Wafer-Cone to use the Wafer-Cone specific calculation. This selection should be used with Wafer-Cone devices. This control is disabled and forced to Legacy Calculation if the controller type is not one of SCADAPack 32, SCADAPack 32P, SCADAPack 314/330/334, SCADAPack 350 SCADAPack 4203 or SolarPack 410. When reading from a flow computer that does not support the adiabatic expansion factor configuration, the method will be set to Legacy Calculation. When writing to a flow computer that does not support the adiabatic expansion factor method, the configuration registers will be ignored and the expansion factor will not be written. Realflo User and Reference Manual May 19, 2011 330 Realflo Expert Mode Reference Cone Diameter The diameter of the meter run cone used for the flow calculation. The measurement units are displayed depending on the input units selected. The default value is 3 inches. Cone Measurement Temperature This is the reference temperature at which the cone diameter for the meter run was measured. The measurement units are displayed depending on the input units selected. The default value is 59 degrees F. Pipe Inside Diameter This is the measurement of the meter run pipe inside diameter. The measurement units are displayed depending on the input units selected. The default value is 5 inches. Pipe reference temperature The temperature at which the meter run pipe diameter was measured. The measurement units are displayed depending on the input units selected. The default value is 59 degrees. Isentropic Exponent In general, this is a thermodynamic property of gas used to predict the relationships between pressure, temperature, volume and energy. If you are unsure of this value a typical value of 1.3 is commonly used. The default value is 1.3. Viscosity This is the viscosity of the measured gas. In general, this is the resistance of a gas or semi-fluid resistance to flow. The measurement units are displayed depending on the input units selected. Valid values are 0 to 1. The default value is 0.010268 centiPoise. Wet Gas Correction Factor The Wet Gas Correction Factor Method drop down list selects which calculation is used for the wet gas correction factor of the calculation. Select Legacy Method to use the older correction method. This is the default selection. Flow computers prior to version 6.73 support only this selection. Select V-Cone or Wafer Cone to use the V-Cone and Wafer Cone specific calculation. This selection should be used with V-Cone or Wafer Cone devices. This control is disabled and forced to Legacy Calculation if the controller type is not one of SCADAPack 32, SCADAPack 32P, SCADAPack 314/330/334, SCADAPack 350 SCADAPack 4203 or SolarPack 410. The V-Cone or Wafer Cone supported Beta Ratios are: For Fr (Froude Number) < 5 supported Beta Ratio is 0.55. For Fr (Froude Number) < 5 supported Beta Ratio is 0.75. For Fr (Froude Number) > 5 supported Beta Ratio is 0.75. When V-Cone or Wafer Cone is selected and if the current Beta ratio is not supported when executing verification, an error message is displayed. Realflo User and Reference Manual May 19, 2011 331 Realflo Expert Mode Reference When V-Cone or Wafer Cone is selected, configuration of the fixed wet gas factor parameter, as set in the Contract tab, is disabled. When Legacy Method is selected, configuration of the parameters used by the V-Cone or Wafer Cone method is disabled. Mass Flow Rate of Liquid The Mass flow rate of liquid at flow conditions parameter is used by the VCone or Wafer Cone method and can be configured when V-Cone or Wafer Cone is selected. This information needs to be gathered using a sampling method or a tracer method. The default is 0. Density of Liquid The Density of liquid parameter is used by the V-Cone or Wafer Cone method and can be configured when V-Cone or Wafer Cone is selected. The default is 0. Density of Liquid The Density of liquid at flow conditions parameter is used by the V-Cone or Wafer Cone method and can be configured when V-Cone or Wafer Cone is selected. The default is 0. Flow Coefficients Reynolds number and flow coefficient pairs are entered in a table editor. The flow coefficient pairs are entered from the calibration data sheet that accompanies the V-Cone Meter. The table is a list view sorted by the Reynolds number column. The default list contains one pair: Re = 1000000; Cf = 0.82. The Add button adds an entry to the table. Up to 10 pairs may be added to the table. The button is grayed if the table is full. If the Re value is the same for all entries in the table only the first pair is used. The Edit button edits the selected entry. The button is grayed if no entry is selected. The Delete button removes the selected entry. The button is grayed if no entry is selected. In the original McCrometer V-Cone Application Sizing sheet that is included with V-Cone meters uses the terminology Cd (discharge coefficient) rather than Cf (flow coefficient). You will need to use the Re and Cd values from the V-Cone Application Sizing sheet for the Re and Cf entries. If the Re value is the same for all entries in the table only the first pair is used. McCrometer now supplies one value of Cd in the sizing document. You need to enter one Re/Cd pair only. See the McCrometer Application Sizing sheet for the Re/Cd pair for your meter. Realflo User and Reference Manual May 19, 2011 332 Realflo Expert Mode Reference AGA-8 Configuration AGA-8 Configuration defines parameters unique to the AGA-8 Detailed calculation. This tab is visible only if the AGA-8 calculation is selected in the Inputs tab for the meter run. In Flow Computer versions 6.74 and newer when gas ratios are written to the flow computer using the Write Configuration command the new gas ratios are updated in the Configuration Proposed registers and in the Configuration Actual registers. This allows a Realflo user or SCADA host to immediately confirm the new ratios were written to the flow computer. The new gas ratios are not used by the flow computer until a new density calculation is started. The configuration of parameters for the AGA-8 page are entered using entry fields or dropdown selections for each parameter. The following edit controls are displayed. The AGA-8 configuration defines the composition of the gas being measured. The gas composition can be made up of a number of components. These components are usually represented as either a percentage of the gas being measured i.e. 0 to 100% or as a fraction of the gas being measured i.e. 0 to 1.0000. For each component listed, enter the fraction of the gas that the component represents. See the AGA-8 Gas Component Range table below for the valid entry range of each gas component. The value entered needs to be in the range 0 to 1.0000 if Composition Units value is set to Mole Fractions. The value entered needs to be in the range 0 to 100% if Composition Units is set to Percent. Realflo User and Reference Manual May 19, 2011 333 Realflo Expert Mode Reference The Total of all Components field displays the sum of all components. The total of all components needs to be 1.0000 (+/- 0.00001) if Composition Units is set to Mole Fractions or 100% (+/- 0.00001%) if Composition Units is set to Percent. Hexane and higher components may be measured individually or may be combined. This affects the n-Hexane, n-Heptane, n-Octane, n-Nonane, and n-Decane components. This setting is on the AGA-8 Hexanes+ tab. Hexanes+ is the fraction of the gas that is composed of hexane and higher components. This value is included in the total of all components. This component is visible if Combined Hexanes+ Ratios are selected, and is hidden if individual ratios are selected. The Relative Density and Heating Value can be calculated from the AGA8 calculation or determined in a laboratory. Select Calculate the Values to have AGA-8 calculate the values. o The calculated Relative Density is displayed in the Calculated Compressibility section of the Current Readings view. This is the real relative density of the gas. o The calculated Heating Value is displayed in the Calculated Compressibility section of the Current Readings view. The heating value is calculated for dry gas. Select Use Laboratory Values to used fixed values. o Relative Density sets the real relative density of the gas. Valid values are 0.07 to 1.52. The default value is 0.554. This control is disabled if Calculate the Values is selected.. o Heating Value sets the heating value of the dry gas. Valid 3 values are 0 to 1800 BTU(60)/ ft or the equivalent in the 3 selected units. The default value is 1014 BTU(60)/ft or the equivalent in the selected units. This control is disabled if Calculate the Values is selected. The Configuration Events dropdown list control selects if the flow computer logs AGA-8 gas composition changes. The AGA-8 gas composition can be changed while the flow calculation is running. This allows an on-line gas chromatograph to provide updates to the gas composition. Frequent changes to the composition will result in the event log filling with gas composition events. When the log is full, further changes cannot be made until Realflo reads the log. A dropdown box allows the selection of: Log Changes Log all gas composition changes. Ignore Disable logging of gas composition changes. The default setting is Log Changes. The Composition Units drop-down list control selects the units used to enter the AGA-8 composition. Select Mole Fractions to enter the composition in fractions. Select Percent to enter the composition in percent. The default setting is Percent. Realflo User and Reference Manual May 19, 2011 334 Realflo Expert Mode Reference The Normalize button adjusts all non-zero components so that the total of all components is 1.0000 (or 100.00%). The components remain in their current ratio to each other. The Default button sets components to default values. The methane component is set to 1 (or 100%). All other components are set to 0. AGA-8 Gas Component Ranges The range of the fractional values of the components cannot be predetermined. The gas components are shown in the table below. There are two ranges shown for each gas component. Realflo accepts any value in the Expanded Range. Only values in the Normal Range will work in all circumstances. The run-time error message “Bracket derivative negative” occurs when the combination of the components at the current pressure and temperature results in an error. The AGA-8 calculation will produce a result even if the error occurs, but the accuracy of the result is not guaranteed. Component Normal Range Expanded Range Methane CH4 Nitrogen Carbon Dioxide Ethane C2H6 Propane C3H8 Water Hydrogen Sulfide Hydrogen Carbon Monoxide Oxygen Total Butanes iButane nButane Total Pentanes iPentane nPentane Total Hexane Plus nHexane nHeptane nOctane nNonane nDecane Helium Argon .4500 to 1.0000 0 to 0.5000 0 to 0.3000 0 to 0.1000 0 to 0.0400 0 to 0.0005 0 to 0.0002 0 to 0.1000 0 to 0.0300 0 0 to 0.0100 0 to 1.0000 0 to 1.0000 0 to 1.0000 0 to 1.0000 0 to 0.1200 0 to 0.0300 0 to 1.0000 0 to 1.0000 0 to 0.0300 0 to 0.2100 0 to 0.0600 0 to 0.0300 0 to 0.0400 0 to 0.0200 0 to 0.0400 0 to 0.0200 0 0 to 0.0300 0 to 0.0100 Realflo User and Reference Manual May 19, 2011 335 Realflo Expert Mode Reference AGA-8 Hexanes + AGA-8 Hexanes+ Configuration defines parameters unique to the AGA-8 Detailed calculation. This tab is visible only if the AGA-8 calculation is selected in the Inputs tab for the meter run. Settings on this tab affect settings on the AGA-8 tab. The AGA-8 Hexanes+ configuration defines the composition of the heavier gas components being measured. There are two options. The Individual option disables all controls on the property page and all gas components are entered on the AGA-8 tab. The Combined option enables the edit controls for the portion of the Hexanes+ ratio that is applied to each of the listed gas component. These portions are represented as a percentage of the gas components being measured i.e. 0 to 100%. n-Hexane defines the percentage of the Hexanes+ contributed by nHexane. n-Heptane defines the percentage of the Hexanes+ contributed by nHeptane. n-Octane defines the percentage of the Hexanes+ contributed by nOctane. n-Nonane defines the percentage of the Hexanes+ contributed by nNonane. n-Decane defines the percentage of the Hexanes+ contributed by nDecane. The Total field displays the sum of portions. This value cannot be edited. The total of portions needs to be 100 percent. The Copy Actual to Proposed button copies the values in the actual column to the proposed column. The Normalize button adjusts non-zero portions so that the total of portions is 100.00%. The portions remain in their current ratio to each other. Realflo User and Reference Manual May 19, 2011 336 Realflo Expert Mode Reference NX-19 Configuration NX-19 Configuration defines parameters unique to the NX-19 calculation. This tab is visible only if the NX-19 calculation is selected on the Inputs tab. This is not supported for PEMEX flow computers. The configuration of parameters for the NX-19 page is done using entry fields for each parameter. The following edit controls are displayed. The Specific Gravity edit box is used to enter the specific gravity of the gas being measured. The Fraction of Carbon Dioxide edit box is used to enter the fractional value of carbon dioxide in the gas being measured. This value needs to be in the range 0 to 0.15. The Fraction of Nitrogen edit box is used to enter the fractional value of nitrogen in the gas being measured. This value needs to be in the range 0 to 0.15. The Heating Value edit box is used to enter the heating value of the gas being measured. The units are displayed depending on the contract units selected. The Configuration Events control selects if the flow computer logs NX-19 gas composition changes. The NX-19 gas composition can be changed while the flow calculation is running. This allows an on-line gas chromatograph to provide updates to the gas composition. Frequent changes to the composition will result in the event log filling with gas composition events. When the log is full, further changes cannot be made until Realflo reads the log. A dropdown box allows the selection of: Log Changes Log all gas composition changes. Ignore Disable logging of gas composition changes. The default setting is Log Changes. Realflo User and Reference Manual May 19, 2011 337 Realflo Expert Mode Reference Select Log Changes to log all gas composition changes. Select Ignore to disable logging of gas composition changes. The default setting is Log Changes. Register Formats Input configuration values are stored in the controller I/O database registers in the following formats. Register Type Telepace integer Registers 1 Telepace long 2 float 2 raw float 2 ISaGRAF integer 2 Description Signed integer in the range –32768 to 32767 Unsigned long integer in the range 0 to 4,294,967,295. The lower numbered register contains the lower 16 bits of the number. Floating-point value in the IEEE 754 standard. The lower numbered register contains the upper 16 bits of the number. Floating-point value in the IEEE 754 standard. The lower numbered register contains the upper 16 bits of the number. Signed long integer in the range – 2,147,483,648 to 2,147,483,647. The lower numbered register contains the upper 16 bits of the number. Telepace Long Example The Telepace long integer 65550 is represented, in hexadecimal, as 0001000Eh. If this value is stored at register 30010 then: register 30010 contains the lower 16 bits of the value = 14 (000Eh) register 30011 contains the upper 16 bits of the value = 1 (0001h) Floating Point Example The floating-point value 1.0 is represented, in hexadecimal, as 3F800000h. If this value is stored at register 30004 then: register 30004 contains the upper 16 bits of the value = 16256 (3F80h) register 30005 contains the lower 16 bits of the value = 0 (0000h) ISaGRAF Integer Example The ISaGRAF integer 65550 is represented, in hexadecimal, as 0001000Eh. If this value is stored at register 30020 then: register 30020 contains the upper 16 bits of the value = 1 (0001h) register 30021 contains the lower 16 bits of the value = 14 (000Eh) Process I/O The Process I/O command configures scaling and alarms for input and output points used by your process. Input points convert integer values read from input modules into floating-point values. Output points convert floatingpoint values into integer values for output modules. Realflo User and Reference Manual May 19, 2011 338 Realflo Expert Mode Reference Process I/O is normally used with I/O points that are not related to the flow runs. Use the Run Configuration command to scale inputs to flow runs. Process I/O is available on SCADAPack 32, SCADAPack 314/330/334, SCADAPack 350, SCADAPack 4202 or 4203 controllers and the SolarPack 410. The Process I/O command opens the Process I/O dialog. Number of Inputs window indicates the number of inputs in the list. On SCADAPack, SCADAPack 4202 or 4203 controllers the maximum number of inputs is 10. For SCADAPack 32, SCADAPack 314/330/334, SCADAPack 350 or SCADAPack 4202 or 4203 controllers and SolarPack 410 the maximum number of inputs 30. Number of Outputs window indicates the number of outputs in the list. The maximum number of outputs is 10. The list box displays the configured process I/O points. Direction indicates if the point is an input or an output. Source shows the source register for the point. Destination shows the destination register for the point. Low Alarm shows the low alarm output register for the point. If no alarm is configured it shows "none". High Alarm shows the high alarm output register for the point. If no alarm is configured it shows "none". Click on a row to select the I/O point. Double-click on a row to edit the I/O point. Realflo User and Reference Manual May 19, 2011 339 Realflo Expert Mode Reference Click on the column headings to sort the data. Clicking once sorts the data in ascending order. Clicking again sorts the data in descending order. The OK button saves the configuration and closes the dialog. In PEMEX mode the OK button is not active if the user is not logged on with Administrator privileges. The Cancel button closes the dialog without saving changes. The Add Input button adds an input point. It opens the Process Input dialog. The button is disabled if the list already contains the maximum number of inputs. The Add Output button adds an output point. It opens the Process Output dialog. The button is disabled if the list already contains the maximum number of outputs. The Copy button adds a copy of the selected point. The button is disabled if no point is selected, or if the list already contains the maximum number of points of the selected type. The Edit button edits the selected point. It opens the Process Input dialog for input points and the Process Output dialog for output points. The button is disabled if no point is selected. The Delete button deletes the selected point from the list. The button is disabled if no point is selected. The Print button prints the Process I/O configuration. The Help button opens the user manual. Process Input Dialog The Process Input dialog edits the configuration of a process input point. Use an input point to scale a value read from a hardware input module. Source Register is the address of the register or registers that hold the value to be scaled. Valid values are 30001 to 39999, and 40001 to 49999 if the source format is Telepace Integer and 30001 to 39998, and 40001 to 49998 if the source format is ISaGRAF integer. Source Format is the format of the data in the register. Valid values are Telepace Integer and ISaGRAF Integer. The default value is Telepace integer. A Telepace integer is a 16-bit signed number stored in one register. An ISaGRAF integer is a 32-bit signed value stored in two registers. Source Range defines the range of the source register. The zero scale is the value of the input at its lowest value. The full scale is the value of the input at its highest value. Valid values are -32768 to 32767 for Telepace Realflo User and Reference Manual May 19, 2011 340 Realflo Expert Mode Reference Integer format, and –2,147,483,648 to 2,147,483,647 for the ISaGRAF Integer format. The default zero scale is 0. The default full scale is 32767. Destination Register is the address of the first of two registers that hold the floating-point result. Registers used by the flow computer are not permitted to be destination registers. These depend on the flow computer type. Valid values are displayed in the table below. Flow Computer Type Valid Register Ranges SCADAPack 4202 or 4203 SolarPack 410 Micro 16 SCADAPack SCADAPack Light SCADAPack Plus SCADAPack LP SCADAPack 100: 1024K SCADAPack 32 SCADAPack 32P SCADAPack 314/330/334 SCADAPack 350 40500 to 43179 43800 to 46498 40001 to 43179 43800 to 45498 40001 to 43179 Destination Format is the format of the data in the destination registers. Valid values are MSW First (most significant word first) and LSW First (least significant word first). The default value is MSW First. This is the format of floating point values used by Telepace and ISaGRAF. Destination Range defines the range of the destination register. The zero scale is the value corresponding to the input at its lowest value. The full scale is the value corresponding to the input at its highest value. Valid values are any floating-point number. The Destination Alarm section configures alarms for the destination register. A high and low alarm can be configured. Alarm Point is the coil register that will be turned on if an alarm occurs. Valid values are 0 and 00001 to 09999. Enter 0 to disable the alarm. The default value is zero. Setpoint is the value at which the alarm occurs. The low alarm occurs when the destination register is less than the low alarm setpoint. The high alarm occurs when the destination register is greater than the high alarm setpoint. Valid values are any floating-point number; Realflo does not check the setpoint values. The control is disabled if the corresponding alarm point is set to 0. Hysteresis keeps minor changes from causing multiple alarms. The Low Alarm Hysteresis is the amount above the setpoint that the value needs to rise to clear the alarm. The High Alarm Hysteresis is the amount below the setpoint that the value needs to fall to clear the alarm. Valid values are any floating-point number. The control is disabled if the corresponding alarm point is set to 0. The OK button saves the configuration and closes the dialog. All parameters are checked against their limits. The destination registers and alarm points are checked for conflicts with any other input or output points. The Cancel button closes the dialog without saving changes. Realflo User and Reference Manual May 19, 2011 341 Realflo Expert Mode Reference Process Output Dialog The Process Output dialog edits the configuration of a process output point. Use an output point to scale a value so it can be written to a hardware output module. Source Register is the address of the first of two registers that hold the floating-point value to be scaled. Valid values are 30001 to 39998, and 40001 to 49998. Source Format is format of the data in the source registers. Valid values are MSW First (most significant word first) and LSW First (least significant word first). The default value is MSW First: this is the format of floating point values used by Telepace and ISaGRAF. Source Range defines the range of the source register. The zero scale is the value corresponding to the output at its lowest value. The full scale is the value corresponding to the output at its highest value. Valid values are any floating-point number. Destination Register is the address of the register or registers that hold the result. Registers used by the flow computer are not permitted to be destination registers. These depend on the flow computer type. Valid values are displayed in the table below. Flow Computer Type Valid Register Ranges ISaGRAF Integer Valid Register Ranges Telepace Integer SCADAPack 4202 or 4203. SolarPack 410 40500 to 43179 43800 to 46498 40500 to 43179 43800 to 46499 40001 to 43179 43800 to 45498 40001 to 43179 43800 to 45499 40001 to 43179 40001 to 43179 The ISaGRAF Registers apply only to the SCADAPack 4203 controllers Micro16 SCADAPack SCADAPack Light SCADAPack Plus SCADAPack LP SCADAPack 100: 1024K SCADAPack 32 SCADAPack 32P SCADAPack 314/330/334 SCADAPack 350 Realflo User and Reference Manual May 19, 2011 342 Realflo Expert Mode Reference Destination Format is format of the data in the register. Valid values are Telepace Integer and ISaGRAF Integer. The default value is Telepace integer. A Telepace integer is a 16-bit signed number stored in one register. An ISaGRAF integer is a 32-bit signed value stored in two registers. Destination Range defines the range of the destination register. The zero scale is the value of the output at its lowest value. The full scale is the value in the register when the input is at its highest value. Valid values are -32768 to 32767 for Telepace Integer format, and –2,147,483,648 to 2,147,483,647 for the ISaGRAF Integer format. The default zero scale is 0. The default full scale is 32767. The Source Alarm section configures alarms for the source register. A high and low alarm can be configured. Alarm Point is the coil register that will be turned on if an alarm occurs. Valid values are 0 and 00001 to 09999. Enter 0 to disable the alarm. The default value is zero. Setpoint is the value at which the alarm occurs. The low alarm occurs when the source register is less than the low alarm setpoint. The high alarm occurs when the source register is greater than the high alarm setpoint. Valid values are any floating-point number; Realflo does not check the setpoint values. The control is disabled if the corresponding alarm point is set to 0. Hysteresis keeps minor changes from causing multiple alarms. The Low Alarm Hysteresis is the amount above the setpoint that the value needs to rise to clear the alarm. The High Alarm Hysteresis is the amount below the setpoint that the value needs to fall to clear the alarm. Valid values are any floating-point number. The control is disabled if the corresponding alarm point is set to 0. The OK button saves the configuration and closes the dialog. All parameters are checked against their limits. The destination registers and alarm points are checked for conflicts with any other input or output points. The Cancel button closes the dialog without saving changes. Serial Ports The Serial Ports command configures the serial ports on the flow computer. The command opens the Flow Computer Serial Port Settings dialog. The SCADAPack 4202 controllers support Sensor protocol only on com1. The serial port settings for com1 cannot be edited. The settings are described in the following sections. Realflo User and Reference Manual May 19, 2011 343 Realflo Expert Mode Reference The Port dropdown menu selects the controller serial port to configure. The settings for the port are displayed in the Port Settings controls section of the dialog. The valid serial ports depend on the controller type. The default serial port is com1. Controller Type com1 com2 Micro16 SCADAPack SCADAPack Plus SCADAPack Light SCADAPack LP SCADAPack 100 SCADAPack 32 SCADAPack 32P SCADAPack 314 SCADAPack 330/334 SCADAPack 350 X X X X X X X X X X X X X X X X X X X X X X Realflo User and Reference Manual May 19, 2011 com3 X X com4 X X X X X X X X 344 Realflo Expert Mode Reference Controller Type com1 com2 com3 SCADAPack 4202 DR SCADAPack 4202 DS SCADAPack 4203 DR SCADAPack 4203 DS SolarPack 410 X X X X X X X X X X X X X X X com4 The Protocol dropdown menu selects the communication protocol type. Valid protocols depend on the controller type as shown in the following table. Controller Type Valid Protocols Default Protocol Micro16 SCADAPack SCADAPack Plus SCADAPack Light SCADAPack LP SCADAPack 100 None Modbus RTU Modbus ASCII DF1 Full Duplex BCC DF1 Full Duplex CRC DF1 Half Duplex BCC DF1 Half Duplex CRC DNP * DF1 protocols are not supported on SCADAPack 100 controllers with firmware older than version 1.80. None Modbus RTU Modbus ASCII DF1 Full Duplex BCC DF1 Full Duplex CRC DF1 Half Duplex BCC DF1 Half Duplex CRC DNP PPP Com 1 fixed as Sensor. Com 2 and Com 3: None Modbus RTU Modbus ASCII DF1 Full Duplex BCC DF1 Full Duplex CRC DF1 Half Duplex BCC DF1 Half Duplex CRC DNP None Modbus RTU Modbus ASCII DF1 Full Duplex BCC DF1 Full Duplex CRC Modbus RTU SCADAPack 32 SCADAPack 32P SCADAPack family of programmable controllers (4202 DR, 4202 DS, 4203 DR and 4203 DS) SCADAPack 314/330/334 SCADAPack 350 Realflo User and Reference Manual May 19, 2011 Modbus RTU Com 1 fixed as Sensor. Com 2 and Com 3 default is Modbus RTU. Modbus RTU 345 Realflo Expert Mode Reference Controller Type SolarPack 410 Valid Protocols DF1 Half Duplex BCC DF1 Half Duplex CRC DNP Com 1 fixed as Sensor. Com 2 and Com 3: None Modbus RTU Modbus ASCII DF1 Full Duplex BCC DF1 Full Duplex CRC DF1 Half Duplex BCC DF1 Half Duplex CRC DNP Default Protocol Com 1 fixed as Sensor. Com 2 and Com 3 default is Modbus RTU. The Addressing dropdown menu selects the addressing mode for the selected protocol. The control is disabled if the protocol does not support it. Valid addressing modes depend on the selected protocol as shown in the following table. Protocol Valid Mode Default Mode Modbus RTU Modbus ASCII DF1 Full Duplex BCC DF1 Full Duplex CRC DF1 Half Duplex BCC DF1 Half Duplex CRC DNP PPP None Standard Extended Control is disabled Standard Control is disabled Control is disabled Control is disabled N/A N/A N/A N/A The Station entry sets the station address for the selected controller serial port. Valid addresses depend on the protocol and addressing mode selected, as shown in the table below. Protocol Valid Addresses Default Address Modbus RTU Modbus ASCII Standard addressing: 1 to 255 Extended addressing: 1 to 65534 0 to 254 1 Control is disabled Control is disabled Control is disabled N/A N/A N/A DF1 Full Duplex BCC DF1 Full Duplex CRC DF1 Half Duplex BCC DF1 Half Duplex CRC DNP PPP None N/A The Duplex dropdown menu selects full or half-duplex operation for the selected Port. Valid and default duplex settings depend on the serial port Realflo User and Reference Manual May 19, 2011 346 Realflo Expert Mode Reference and controller type, as shown in the table below. The duplex is forced to Half if a MVT transmitter is configured on the port. Controller Type com1 com2 com3 com4 Valid Def. Valid Def. Full Half Full Half Full Half Full Half Half Full Full Full Half Full Half Full Half Full Full Full Half Full Half Full Half Full Half Full Half Full Half Full Half Full Half Half Half Half Half Half Half Half Full Half Half Full Half Half SCADAPack 330/334 Full Half Half Half Half Full Full SCADAPack 350 Half Half Half Half Full Full SolarPack 410 Half Half Full Half Full Half Full Half Full Half Full Half Half Full Full Micro16 SCADAPack SCADAPack Plus SCADAPack Light SCADAPack LP SCADAPack 100 SCADAPack 32 SCADAPack 32P SCADAPack 4202 DR SCADAPack 4202 DS SCADAPack 4203 DR SCADAPack 4203 DS SCADAPack 314 Full Full Full Half Half Full Full Valid Def. Full Half Half Full Half Half Full Full Half Half Half Half Valid Def. Half Half Half Half Full Half Full Half Half Full Half Full Full Half The Baud Rate dropdown menu selects the communication speed for the selected serial port. Valid baud rates depend on the serial port and controller type, as shown in the table below. The default value is always 9600 baud. 1200 2400 4800 9600 19200 38400 X X X X X X X SCADAPack Com 1, Com 2 X X X X X X X X Realflo User and Reference Manual May 19, 2011 115200 600 X 57600 Controller Micro 16 Com 1, Com 2 300 Baud Rate 347 Realflo Expert Mode Reference X 115200 X 57600 SCADAPack32 Com 1, Com 2, Com 4 Com 3 38400 SCADAPack 100: 1024K Com 1, Com 2 X X 19200 X 9600 X X 4800 SCADAPack LP Com 1, Com 2 Com 3 X X 2400 SCADAPack Light Com 1, Com 2 Com 4 X 1200 SCADAPack Plus Com 1, Com 2 Com 3, Com 4 600 Controller Com 3 300 Baud Rate X X X X X X X X X X X X X X X X X X X X X X X X X X X X X X X X X X X X X X X X X X X X X X X X X X X X X X X X X X X X X X X X X X X X X X X X SCADAPack32P Com 1, Com 2, Com 4 X X X X X X X X X X SCADAPack 314 Com 1 and Com 2 X X X X X X X X X X SCADAPack 330/334 Com 1, Com 2, X Com 3 X X X X X X X X X SCADAPack 350 Com 1, Com2, Com3 X X X X X X X X X X SCADAPack of Programmable Controllers Com1 X Realflo User and Reference Manual May 19, 2011 348 Realflo Expert Mode Reference 19200 38400 57600 115200 X 9600 X 4800 X 2400 X 1200 SolarPack 410 Com1 (disabled) Com2 Com3 600 Controller Com2 Com3 300 Baud Rate X X X X X X X X X X X X X X X X X X X X X X X X The Data Bits dropdown menu selects the number of data bits. Valid selections are 7 and 8 bits. This parameter is forced to 8 bits when the protocol type is Modbus RTU, PPP or any DF1 protocol. The default selection is 8 bits. The Parity dropdown menu selects the parity for the selected port. Valid selections depend on the serial port, controller type and data bits, as shown in the table below. The default selection is none. Controller Type com1 com2 com3 7 bits Micro16 None even odd None even odd none even odd none even odd SCADAPack Plus None even odd none even odd SCADAPack Light none even odd none even odd SCADAPack LP none even odd none even odd SCADAPack Realflo User and Reference Manual May 19, 2011 com4 8 bits N/A even odd space mark even odd space mark N/A even odd space mark 7 bits 8 bits N/A none even odd mark none even odd mark none even odd N/A even odd space mark even odd space mark N/A none even odd mark none even odd mark mark 349 Realflo Expert Mode Reference Controller Type com1 com2 com3 7 bits SCADAPack 100 SCADAPack 32 SCADAPack 32P SCADAPack 4202 DR SCADAPack 4202 DS SCADAPack 4203 DR SCADAPack 4203 DS SCADAPack 314 SCADAPack 330/334 SCADAPack 350 SolarPack 410 com4 8 bits 7 bits none even odd none even odd none even odd none even odd none even odd none even odd none even odd none none even odd none even odd none none even odd none even odd none even odd none even odd none even odd N/A N/A none even odd N/A none none even odd none N/A even odd space mark N/A 8 bits mark none even odd N/A none even odd mark none even odd N/A The Stop Bits dropdown menu selects the number of stop bits for the selected serial port. Valid selections are 1 and 2. Valid selection for com3 is 1 stop bit. The default selection is 1. The Rx Flow dropdown menu selects the receiver flow control for the selected port. Valid selections depend on the protocol, controller type, and serial port, as shown in the table below. If there is only one valid value the control is disabled. If there is more than one possible value, the default selection is none. Protocol DF1 Full BCC DF1 Full CRC DF1 Half BCC DF1 Half CRC DNP Realflo User and Reference Manual May 19, 2011 Controller Micro16 SP SP Plus SP Light SP LP SP 100 SP 32 com1 None None None None None None None com2 None None None None None None None com3 N/A None None N/A None N/A None com4 N/A N/A None None N/A N/A None 350 Realflo Expert Mode Reference Protocol Modbus RTU Realflo User and Reference Manual May 19, 2011 Controller SP 32P SCADAPack 4202 DR SCADAPack 4202 DS SCADAPack 4203 DR SCADAPack 4203 DS SCADAPack 314/330/334 SCADAPack 350 SolarPack 410 Micro16 SP com1 None None com2 None None com3 None None Ignore CTS com4 None N/A None None None N/A None None None N/A None None None None None None N/A N/A N/A SP Plus None None SP Light None None None N/A Modbus RTU Modbus RTU N/A SP LP None None SP 100 SP 32 None Modbu s RTU SP 32P Modbu s RTU SCADAPack 4202 DR SCADAPack 4202 DS SCADAPack 4203 DR SCADAPack 4203 DS SCADAPack 330/334 SCADAPack 350 SCADAPack 314 SCADAPack 330/334 SCADAPack 350 SolarPack 410 None None Modb us RTU Modb us RTU None None Modbus RTU N/A Modbus RTU Modbus RTU Modbus RTU N/A N/A Modbus RTU Modbus RTU Modbus RTU None Ignore CTS N/A None None N/A None None None N/A None None N/A N/A None None None N/A None None None N/A 351 Realflo Expert Mode Reference Protocol None Modbus ASCII Controller Micro16 SP 32P none Modbu s RTU SCADAPack 4202 DR SCADAPack 4202 DS SCADAPack 4203 DR SCADAPack 4203 DS SCADAPack 330/334 SCADAPack 350 SCOLARPack 410 SCADAPack 314 SCADAPack 330/334 SCADAPack 350 SolarPack 410 None com2 None Xon/X off None Xon/X off None Xon/X off None Xon/X off None Xon/X off None Xon/X off none Modb us RTU none Modb us RTU None None None None N/A None None None N/A None None N/A N/A None None N/A N/A None None None N/A None None None N/A SP SP Plus SP Light SP LP SP 100 SP 32 Realflo User and Reference Manual May 19, 2011 com1 None Xon/Xo ff None Xon/Xo ff None Xon/Xo ff None Xon/Xo ff None Xon/Xo ff None Xon/Xo ff none Modbu s RTU com3 N/A com4 N/A none N/A none none N/A none none N/A N/A N/A none Modbus RTU none Modbus RTU none Modbus RTU none Modbus RTU None Modbus RTU N/A 352 Realflo Expert Mode Reference Protocol PPP Controller SP 32 SP 32P com1 Queue d Queue d com2 Queu ed Queu ed com3 Queued com4 Queued Queued Queued The Tx Flow dropdown menu selects the transmitter flow control for the selected port. Valid selections depend on the protocol, controller type, and serial port, as shown in the table below. The default selection is none. Protocol Controller com1 com2 com3 com4 Modbus RTU DF1 Full BCC DF1 Full CRC DF1 Half BCC DF1 Half CRC DNP Micro16 SP None None None None N/A N/A SP Plus None None SP Light None None N/A None Ignore CTS None Ignore CTS N/A SP LP None None SP 100 SP 32 None None Ignore CTS None Ignore CTS None None None Ignore CTS None Ignore CTS None None None None N/A None None N/A N/A None None None N/A None None Xon/Xo ff None None Xon/X off None N/A N/A N/A SP 32P None Modbus ASCII Realflo User and Reference Manual May 19, 2011 SCADAPack 4202 DR SCADAPack 4202 DS SCADAPack 4203 DR SCADAPack 4203 DS SCADAPack 314 SCADAPack 330/334 SCADAPack 350 SolarPack 410 Micro16 None Ignore CTS N/A None Ignore CTS N/A None Ignore CTS None Ignore CTS None Ignore CTS N/A N/A None Ignore CTS None Ignore CTS N/A 353 Realflo Expert Mode Reference Protocol Controller com1 com2 com3 com4 SP None Xon/Xo ff None Xon/Xo ff None Xon/Xo ff None Xon/Xo ff None Xon/Xo ff None Ignore CTS None Ignore CTS N/A None Xon/X off None Xon/X off None Xon/X off None Xon/X off None Xon/X off None Ignore CTS None Ignore CTS None None Ignore CTS None Ignore CTS N/A N/A N/A None None N/A None None N/A N/A None None None N/A None None Ignore CTS None Ignore CTS None None Ignore CTS None Ignore CTS None None Ignore CTS None Ignore CTS N/A None Ignore CTS None Ignore CTS SP Plus SP Light SP LP SP 100 SP 32 SP 32P PPP SCADAPack 4202 DR SCADAPack 4202 DS SCADAPack 4203 DR SCADAPack 4203 DS SCADAPack 314 SCADAPack 330/334 SCADAPack 350 SolarPack 410 SP 32 SP 32P None Ignore CTS N/A None Ignore CTS N/A None Ignore CTS None Ignore CTS None Ignore CTS N/A N/A None Ignore CTS None Ignore CTS N/A The Port Type dropdown menu selects the type of serial port. Valid selections depend on the serial port and controller type as shown in the table below. The default selection is RS-232. The options are as follows: RS-232: for a regular RS-232 connection. RS-232 Dial-up modem: If an external dial-up modem is used on the RS-232 connection. Realflo User and Reference Manual May 19, 2011 354 Realflo Expert Mode Reference RS-232 Collision Avoidance: RS-232 connection with collision avoidance based on the CD signal is available only when the DNP protocol type is selected on the serial port, and the serial port supports handshaking. When this flow control is enabled, the protocol uses the Carrier Detect (CD) signal provided by the serial port to detect if the communication medium is in use. If it is, it waits until the medium is free before transmitting. Prior to transmitting each Data Link (DL) frame, the controller will test the CD line. If it is active, a countdown equal to the DL timeout will be set and CD will be monitored every 100 ms throughout this countdown period. If the Data Link timeout is set to the minimum of 100 ms, the CD line will be tested once. If the CD line reports inactive (line not in use), a frame will be transmitted immediately, and a new DL timeout is started as normal. On the other hand, if CD remains active during the DL timeout, the transmission attempt will be unsuccessful. If a non-zero retry is configured in the Data Link layer, the test will be repeated until the number of retries has been exhausted. RS-232 Collision Avoidance is supported only on serial ports which support handshaking and whose protocol type is set for DNP. RS-485: for a regular RS-485 connection. Controller Type com1 com2, com4 com3 Micro16 SCADAPack SCADAPack Plus SCADAPack Light RS-232 RS-232 dial-up modem RS-232 Collision Avoidance RS-485 RS-232 RS-232 RS-232 dial-up modem RS-232 RS-232 RS-232 RS-232 dial-up modem RS-232 dial-up modem RS-232 dial-up modem SCADAPack 32 SCADAPack 32P RS-232 Collision Avoidance RS-232 dial-up modem RS-232 Collision Avoidance com4 is available on the SCADAPack Light and Plus only. RS-232 Collision Avoidance Port type RS-232 applies for RS-232 or RS-485 operation on COM1. Realflo User and Reference Manual May 19, 2011 355 Realflo Expert Mode Reference Controller Type com1 com2, com4 com3 Jumper J9 on the controller board needs to be installed to configure COM1 for RS-485 operation. Controller Type com1 com2, com3 SCADAPack Programmable Controllers (4202 DR, 4202 DS, 4203 DR and 4203 DS). N/A (RS-232) RS-232 RS-232 Dialup Up Modem (com 2 only) SCADAPack 100 RS-232 RS-232 Collision Avoidance RS-232 Port Type applies for RS-232 or RS-485 operation. Port type RS-232 applies for RS-232 or RS-485 operation on Com 1. SCADAPack LP RS-485 SCADAPack 314 RS-232 RS-232 dial-up modem RS-232 Collision Avoidance RS-485 Port type RS-232 applies for RS-232 or RS-485 operation on COM1. Jumper J8 on the controller board needs to be installed to configure COM1 for RS-485 operation. Realflo User and Reference Manual May 19, 2011 RS-232 RS-232 dial-up modem RS-232 Collision Avoidance Com 3: not available RS-232 RS-232 dial-up modem RS-232 Collision Avoidance RS-232 RS-232 dial-up modem RS-232 Collision Avoidance Port type RS-232 applies for RS-232 or RS-485 operation on COM2. Jumper J10 on the controller board needs to be installed to configure COM2 for RS-485 operation. 356 Realflo Expert Mode Reference Controller Type com1 com2, com3 SCADAPack 330/334 RS-232 RS-232 dial-up modem RS-232 Collision Avoidance RS-485 Port type RS-232 applies for RS-232 or RS-485 operation on COM1. Jumper J8 on the controller board needs to be installed to configure COM1 for RS-485 operation. RS-485 RS-232 RS-232 dial-up modem RS-232 Collision Avoidance Port type RS-232 applies for RS-232 or RS-485 operation on COM2. Jumper J10 on the controller board needs to be installed to configure COM2 for RS-485 operation. SCADAPack 350 SolarPack 410 RS-232 RS-232 RS-232 dial-up modem RS-232 Collision Avoidance Port type RS-232 applies for RS-232 or RS-485 operation on COM2. Jumper J13 on the controller board needs to be installed to configure COM2 for RS-485 operation. RS-232 The Store and Forward dropdown menu selects whether store and forward messaging is enabled for the port. Valid selections are enabled and disabled. If this option is enabled, messages will be forwarded according to the settings in the store and forward routing table. The default selection is disabled. This control is disabled when PPP protocol is selected for a serial port, or if any of the DF1 protocols are selected and for com 1 on the SCADAPack 4202 or 4203 of controllers. The Store and Forward menu selection changes to Routing menu selection when DNP protocol is selected for a serial port. Valid selections are enabled and disabled. Routing needs to be enabled on a serial port to enable routing of DNP messages. The Enron Modbus or PEMEX Modbus dropdown menu lets you enable or disable Enron Modbus or PEMEX Modbus for the port. If this option is enabled, the controller, in addition to regular Modbus messages, will handle Enron Modbus or PEMEX Modbus messages. Valid selections depend on the protocol as shown in the table below. This control is disabled when PPP protocol is selected for a serial port and for com 1 on the 4202 controllers. Protocol Valid Selections Default Selection Modbus RTU Modbus ASCII Enabled Disabled Disabled Realflo User and Reference Manual May 19, 2011 357 Realflo Expert Mode Reference Protocol Valid Selections Default Selection DF1 Full Duplex BCC DF1 Full Duplex CRC DF1 Half Duplex BCC DF1 Half Duplex CRC DNP None Control is disabled N/A Control is disabled Control is disabled N/A N/A The Enron Station or PEMEX Station entry selects the Enron Modbus or PEMEX Modbus station address for the serial port. Valid entries depend on the protocol. The station needs to be different from the Modbus station set in the Station control. This allows Enron Modbus or PEMEX Modbus and Modbus communication can occur on the same port. This entry is greyed out if Enron Modbus or PEMEX Modbus is not enabled. Protocol Valid Values Default Value Modbus RTU Modbus ASCII Standard addressing: 1 to 255 Extended addressing: 1 to 65534 Control is disabled 2 Control is disabled Control is disabled N/A N/A DF1 Full Duplex BCC DF1 Full Duplex CRC DF1 Half Duplex BCC DF1 Half Duplex CRC DNP None N/A The OK button saves the settings for all serial ports and closes the dialog. In PEMEX mode the OK button is not active if the user is not logged on with Administrator privileges. The Cancel button closes the dialog without saving. The Default button sets the parameters for the port to their default values. IP Command When the IP Configuration menu item is clicked under the Controller menu the IP Configuration dialog is opened. This dialog is available only when the controller type is set to SCADAPack 314/330/334, SCADAPack 350, SCADAPack 32 or SCADAPack 32P. The IP Configuration dialog has a tree control on the left side of the window. Headings on the tree control are enabled or disabled depending on the controller type. The SCADAPack 32 and SCADAPack 32P support Point-To-Point Protocol (PPP) on the serial ports. The tree control displays headings for com 1 Port through com 4 Port and PPP Login are displayed for configuring the serial ports for PPP. PPP is not supported on SCADAPack 314/330/334 and SCADAPack 350 the headings for com 1 Port through com 4 Port and PPP Login are not displayed. The SCADAPack 314/330/334 and SCADAPack 350 support an FTP (File Transfer Protocol) server. The tree control will display a heading for Realflo User and Reference Manual May 19, 2011 358 Realflo Expert Mode Reference FTP when these controllers are used. FTP is not supported on SCADAPack 32 and SCADAPack 32P. Each of the tree control selections is explained in the following sections of this user manual. The IP Configuration dialog has a tree control on the left side of the window. This tree control contains headings for: LAN Port Modbus Common Modbus/TCP Modbus RTU in UDP Modbus ASCII in UDP DNP in TCP DNP in UDP Friendly IP List When a tree control is selected by clicking the mouse on a heading, a property page is opened for the header selected. From the property page the IP configuration parameters for the selected header is displayed. The Default button selects the default values for the current property page. The OK button saves the configuration and closes the Controller IP Configuration dialog. In PEMEX mode, the OK button is not active if the user is not logged on with Administrator privileges. The Cancel button closes the Controller IP Configuration dialog without saving any changes. Realflo User and Reference Manual May 19, 2011 359 Realflo Expert Mode Reference LAN Port The LAN Port property page is selected for editing by clicking LAN Port in the tree control section of the Controller IP Configuration dialog. When selected the LAN Port property page is active. The IP Address is the address of the controller LAN port. The IP address is statically assigned. Contact your network administrator to obtain an IP address for the controller. The default value is 0.0.0.0. The Subnet Mask is determines the subnet on which the controller LAN port is located. The subnet mask is statically assigned. Contact your network administrator to obtain the subnet mask for the controller. The default value is 255.255.255.0. The Gateway determines how your controller communicates with devices outside its subnet. The LAN radio button selects the gateway specified in the LAN edit box. Enter the IP address of the gateway. The gateway is located on the LAN port subnet. The gateway is statically assigned. Contact your network administrator to obtain the gateway IP address. The default value is 0.0.0.0. The PPP radio button selects the serial port where the gateway is located. The PPP dropdown menu displays only those serial ports currently configured for the PPP protocol. Select a serial port from this menu to select its remote IP address as the gateway. The gateway is automatically assigned to the remote IP address of the selected serial port. SCADAPack 32 or SCADAPack 32P PPP Controls com1 Port The com1 Port property page is selected for editing by clicking com1 Port in the tree control section of the Controller IP Configuration dialog. When selected, the com1 Port property page is active. This page configures the IP settings for com1 when the PPP protocol is selected for this serial port. Realflo User and Reference Manual May 19, 2011 360 Realflo Expert Mode Reference The Enable Auto Answer (PPP Server) checkbox enables the PPP Server on this serial port. Check this box if you want to allow a remote PPP client to connect to this port. This checkbox enables the remaining settings in the page. The IP Address is the address of this serial port. The IP address is statically assigned. Contact your network administrator to obtain an IP address for this serial port. The Subnet Mask determines the subnet on which this serial port is located. The subnet mask is statically assigned. Contact your network administrator to obtain the subnet mask for this serial port. In a standard PPP configuration, a subnet mask of 255.255.255.255 is used to restrict routing on this serial port to a single host (i.e. the Remote IP Address). If another subnet mask is used, packets on that subnet will be forwarded to this serial port. Any address on that subnet in addition to the Remote IP Address can be used for the remote host in this case. The Remote IP Address is the address that will be assigned to the remote PPP client connected to this serial port. The Automatic radio button automatically selects the address to be the serial port‟s IP address + 1. The second radio button selects the address specified in the edit box. Enter the IP address to assign to the remote client. The Allow remote to specify its own IP address checkbox allows the remote PPP client to assign its own IP address. Check this box if you want to allow this option. The client may or may not request its own IP address. If the client does not make this request, the PPP Server will assign the IP address selected. The Authentication determines the login protocol used at the start of every PPP connection. The None radio button removes the login step. The PAP radio button selects the Password Authentication Protocol (PAP). The CHAP radio button selects the Challenge-Handshake Authentication Realflo User and Reference Manual May 19, 2011 361 Realflo Expert Mode Reference Protocol (CHAP). PAP and CHAP usernames and passwords are configured on the PPP Login page. The Inactivity Timeout is the inactivity timeout for this serial port. If there has been no activity on an existing PPP connection for the selected number of minutes, then the connection is automatically closed. If there is a modem connected it is hung up. Setting this value to zero disables the timeout. com2 Port The com2 Port property page is selected for editing by clicking com2 Port in the tree control section of the IP Configuration dialog. When selected the com2 Port property page is active. This page configures the IP settings for com2 when the PPP protocol is selected for this serial port. The com2 Port property page provides the same options as the com1 Port page. See the com1 Port page for a description of these options. com3 Port The com3 Port property page is selected for editing by clicking com3 Port in the tree control section of the IP Configuration dialog. When selected the com3 Port property page is active. This page configures the IP settings for com3 when the PPP protocol is selected for this serial port. The com3 Port property page provides the same options as the com1 Port page. See the com1 Port page for a description of these options. com4 Port The com4 Port property page is selected for editing by clicking com4 Port in the tree control section of the IP Configuration dialog. When selected the com4 Port property page is active. This page configures the IP settings for com4 when the PPP protocol is selected for this serial port. The com4 Port property page provides the same options as the com1 Port page. See the com1 Port page for a description of these options. PPP Login The PPP Login property page is selected for editing by clicking PPP Login in the tree control section of the IP Configuration dialog. When selected the PPP Login property page is active. This page configures the username and password list for PPP login authentication. The list is used only by those serial ports configured for the PPP protocol using PAP or CHAP authentication. Realflo User and Reference Manual May 19, 2011 362 Realflo Expert Mode Reference Select the Add button to enter a new username to the list. Selecting the Add button opens the Add PPP Username dialog. Select the Edit button to edit the username highlighted in the list. Selecting the Edit button opens the Edit PPP Username dialog. This button is disabled if there are no entries in the list. The Delete button removes the selected usernames from the list. This button is disabled if there are no entries in the list. Add PPP Username dialog This dialog selects a new PPP username and password. The Username edit box selects the username. A username is any alphanumeric string 1 to 16 characters in length, and is case sensitive. The Password edit box selects the password. A password is any alphanumeric string 1 to 16 characters in length, and is case sensitive. The Verify Password edit box selects the verify password. Enter the same string entered for the password. The Cancel button discards any changes made to this dialog and exits the dialog. The OK button to accept changes made to this dialog and exits the dialog. Edit PPP Username dialog Realflo User and Reference Manual May 19, 2011 363 Realflo Expert Mode Reference This dialog edits a PPP username and password selected from the list. The Username edit box selects the username. A username is any alphanumeric string 1 to 16 characters in length, and is case sensitive. The Password edit box selects the password. A password is any alphanumeric string 1 to 16 characters in length, and is case sensitive. The Verify Password edit box selects the verify password. Enter the same string entered for the password. The Cancel button discards any changes made to this dialog and exits the dialog. The OK button to accept changes made to this dialog and exits the dialog. Modbus Common The Modbus Common property page is selected for editing by clicking Modbus Common in the tree control section of the IP Configuration dialog. When selected the Modbus Common property page is active. The Addressing menu selects standard or extended Modbus addressing. Standard addressing allows 255 stations and is compatible with standard Modbus devices. Extended addressing allows 65534 stations, with stations 1 to 254 compatible with standard Modbus devices. The default value is standard. Realflo User and Reference Manual May 19, 2011 364 Realflo Expert Mode Reference The Station menu sets the station number of the controller. The valid range is 1 to 255 if standard addressing is used, and 1 to 65534 if extended addressing is used. The default value is 1. The Store and Forward selection controls forwarding of messages using IP based protocols. If this option is enabled, messages will be forwarded according to the settings in the store and forward routing table. The default value is disabled. The Enron Modbus box selects whether or not Enron Modbus is enabled for the port. If this option is enabled, the controller, in addition to regular Modbus messages, will handle Enron Modbus messages. The Enron Station box selects the Enron Modbus station address. The valid range for Enron Station is 1 to 255 if the Addressing control is set to Standard. The valid range for Enron Station is 1 to 65534 if the Addressing control is set to Extended. The Enron station needs to be different from the Modbus station set in the Station edit box. This allows Enron Modbus and Modbus communication to occur on the same port. Modbus/TCP The Modbus/TCP property page is selected for editing by clicking Modbus/TCP in the tree control section of the IP Configuration dialog. When selected the Modbus/TCP property page is active. The Server selection selects whether the server is enabled. If this option is enabled the controller supports incoming slave messages. Disabling this option stops the controller from processing slave messages. Master messaging is always enabled. The Master Idle Timeout determines when connections to a slave controller are closed. Setting this value to zero disables the timeout; the connection will be closed only when your program closes it. Any other value sets the timeout in seconds. The connection will be closed if no messages are sent in that time. This allows the slave device to free unused Realflo User and Reference Manual May 19, 2011 365 Realflo Expert Mode Reference connections. Valid timeout range is 0 to 4294967295 seconds. The default value is 10 seconds. The Server Idle Timeout determines when connections from a remote device are closed. Setting this value to zero disables the timeout; the connection will be closed only when the remote device closes it. Any other value sets the timeout in seconds. The connection will be closed if no messages are received in that time. This allows the controller to free unused connections. Valid timeout range is 0 to 4294967295 seconds. The default value is 250 seconds. The TCP Port sets the port used by the Modbus/TCP protocol. In all cases this should be set to 502. This is the well-known port number for Modbus/TCP. Modbus/TCP devices use 502 by default, and on many devices the value cannot be changed. It is suggested that you change this value only if this port is used by another service on your network. Valid port number range is 1 to 65534. Consult your network administrator to obtain a port if you are not using the default. Modbus RTU in UDP The Modbus RTU in UDP property page is selected for editing by clicking Modbus RTU in UDP in the tree control section of the IP Configuration dialog. When selected the Modbus RTU in UDP property page is active. The Server selection selects whether the server is enabled. If this option is enabled the controller supports incoming slave messages. Disabling this option keeps the controller from processing slave messages. Master messaging is always enabled. The UDP Port sets the port used by the protocol. Valid port number range is 1 to 65535. The default value is 49152. This is a recommendation only. Consult your network administrator to obtain a port if you are not using the default. Realflo User and Reference Manual May 19, 2011 366 Realflo Expert Mode Reference Modbus ASCII in UDP The Modbus ASCII in UDP property page is selected for editing by clicking Modbus ASCII in UDP in the tree control section of the IP Configuration dialog. When selected the Modbus ASCII in UDP property page is active. The Server selection selects whether the server is enabled. If this option is enabled the controller supports incoming slave messages. Disabling this option keeps the controller from processing slave messages. Master messaging is always enabled. The UDP Port sets the port used by the protocol. Valid port number range is 1 to 65534. The default value is 49153. This is a recommendation only. Consult your network administrator to obtain a port if you are not using the default. Realflo User and Reference Manual May 19, 2011 367 Realflo Expert Mode Reference DNP in TCP The DNP in TCP property page is selected for editing by DNP in TCP in the tree control section of the IP Configuration dialog. When selected the DNP in TCP property page is active. The Protocol selection selects whether the DNP in TCP protocol is enabled. If this option is enabled the controller supports DNP in TCP protocol. Disabling this option keeps the controller from processing DNP in TCP protocol messages. Master messaging is always enabled. The default selection is disabled. The Server Idle Timeout determines when connections from a remote device are closed. Setting this value to zero disables the timeout; the connection will be closed only when the remote device closes it. Any other value sets the timeout in seconds. The connection will be closed if no messages are received in that time. This allows the controller to free unused connections. Valid timeout range is 0 to 4294967295 seconds. The default value is 250 seconds. The Master Idle Timeout determines when connections to a slave controller are closed. Setting this value to zero disables the timeout; the connection will be closed only when your program closes it. Any other value sets the timeout in seconds. The connection will be closed if no messages are sent in that time. This allows the slave device to free unused connections. Valid timeout range is 0 to 4294967295 seconds. The default value is 10 seconds. The TCP Port sets the port used by the DNP in TCP protocol. Valid port number range is 1 to 65534. The default value is 20000. Consult your network administrator to obtain a port if you are not using the default. Realflo User and Reference Manual May 19, 2011 368 Realflo Expert Mode Reference DNP in UDP The DNP in UDP property page is selected for editing by DNP in UDP in the tree control section of the IP Configuration dialog. When selected the DNP in UDP property page is active. The Protocol selection selects whether the DNP in UDP protocol is enabled. If this option is enabled the controller supports DNP in UDP protocol. Disabling this option keeps the controller from processing DNP in UDP protocol messages and sending DNP in UDP master messages. The default selection is disabled. The UDP Port sets the port used by the DNP in UDP protocol. Valid port number range is 1 to 65534. The default value is 20000. Consult your network administrator to obtain a port if you are not using the default. Friendly IP List The Friendly IP property page is selected for editing by Friendly IP in the tree control section of the IP Configuration dialog. Realflo User and Reference Manual May 19, 2011 369 Realflo Expert Mode Reference The Enable Friendly IP List checkbox enables or disables the friendly IP list. Check this box to accept messages from only the IP addresses in the list. Uncheck this to accept message from any IP address. Select the Add button to enter a new row in the Friendly IP list. Selecting the Add button opens the Add Friendly IP address dialog. The button is disabled if the Enable Friendly IP List control is not checked. The button is disabled if the table is full. Up to 32 entries can be added to the table. Select the Edit button to edit range in the Friendly IP list. Selecting the Edit button opens the Edit Friendly IP address dialog. The button is disabled if the Enable Friendly IP List control is not checked. The Delete button removes the selected rows from the list. This button is disabled if there are no entries in the list. The button is disabled if the Enable Friendly IP List control is not checked. Click on the column headings to sort the list by that column. Click a second time to reverse the sort order. The order is indicated by the triangle next to the text. The settings are verified when the OK button is pressed or another settings page is selected. A message is displayed if the friendly IP list is enabled and the list is empty. A message is displayed if the IP address of the PC is not in the friendly IP table. Add Friendly IP Address Range Dialog The Add Friendly IP Address Range dialog specifies an IP address range to add to the Friendly IP list. Realflo User and Reference Manual May 19, 2011 370 Realflo Expert Mode Reference Start Address specifies the starting IP address in the range. Enter any valid IP address. End Address specifies the ending IP address in the range. Enter a valid IP address that is numerically greater than or equal to the IP Start Address. This field can be left blank if only a single IP address is required. The OK button adds the IP address range to the list and closes the dialog. A message is displayed if the address range is invalid. The Cancel button closes the dialog without making any changes. FTP When the FTP tree control is selected the FTP property page becomes active allowing for the configuration of the FTP server on the controller. FTP Server enables the FTP server in the controller. There are three selections available. Select Disabled to disable the FTP server and stop FTP access to the file system Select Login Required to enable the FTP server. A username and password are required to access the file system. Select Anonymous Allowed to enable the FTP server. A username and password may be used to access the file system. The server will accept an anonymous login; it will accept any username and password. Realflo User and Reference Manual May 19, 2011 371 Realflo Expert Mode Reference Username specifies the username for the FTP server account. It is used when Login Required is selected. Enter a User Name of 1 to 16 characters long. Password specifies the password for the FTP server account. It is used when Login Required is selected. Enter a password of 1 to 16 characters long. Verify Password specifies the password a second time to confirm the value. Enter the same value as for the password. The setftp function can be used to enable and disable the FTP server using program logic in the controller. FTP Server functions operate at a high priority in the controller. The execution of Telepace and IEC 61131-3 logic applications is impacted during file uploads and downloads. The logic applications will slow significantly during large file uploads to the controller. To reduce the impact on logic applications: Use a number of small files rather than a single large file. Use the LS (list) command rather than the DIR (directory) command. FTP usernames and passwords are transmitted in the clear when reading/writing controller configuration. In order to minimize the possibility of reading of credentials the controller should be kept locked against programming commands except when the configuration is being read or written. FTP Practices These practices should be followed to maximize the effectiveness of the FTP feature. Binary vs ASCII Mode Files can be transferred via either Binary or ASCII modes. Binary file transfers are recommended because they are more efficient. FTP clients will support both types of file transfers. File Locations The internal file system on the SCADAPack 330/334/350/357 controllers may use either of two available drives: The internal Controller Disk Drive is labeled /d0. The External USB Drive is labeled /bd0. The internal file system on the SCADAPack 314 and SCADAPack 4203 controllers has one drive: The internal Controller Disk Drive is labeled /d0. The controller internal flash drive d0 contains all system and user files. The system files should not be modified via FTP or user processes. Many system files can be found in the d0/SYSTEM folder. It is strongly recommended that only system files reside in this folder to prevent accidental corruption of controller settings. C programs can be found in the root directory d0. These programs have a suffix of “.out” and should not be modified. Realflo User and Reference Manual May 19, 2011 372 Realflo Expert Mode Reference Log files created by the data log to file functionality are stored in sub-folders of d0/LOGS/. These files may be read, but writing to or deleting these files is discouraged. The data log to file functionality will manage these files as required. Users are encouraged to create their own folders and store all files that they need to access in folders they create to minimize accidentally altering a system file. i.e. create a directory called d0/SCADA to keep files that will be modified via FTP in. Register Assignment The Register Assignment command is used to configure the register assignment for flow computers using Telepace firmware. When selected the command opens the Register assignment dialog and displays the current register assignment list. The user may edit the list or the entries in the list. This feature is available only on Telepace firmware. The settings have no effect on ISaGRAF firmware. For complete information on the Register Assignment modules available refer to the Telepace Studio User and Reference manual. Realflo uses the following registers for flow calculation data. These registers cannot be used in any register assignment. Configuration and Control Registers Requested Data Registers Meter Run 1 Data Registers Meter Run 2 Data Registers Meter Run 3 Data Registers Requested Daily History Registers Meter Run 4 Data Registers Meter Run 5 Data Registers Meter Run 6 Data Registers Meter Run 7 Data Registers Meter Run 8 Data Registers Meter Run 9 Data Registers Meter Run 10 Data Registers MVT Configuration Registers MVT Data Registers MVT Internal Registers Display Configuration Registers Process I/O Configuration Registers Uncorrected Accumulated Flow, runs 1 to 10 SolarPack Configuration / Accumulation 49500 to 49999 48500 to 49499. 47500 to 48499 46500 to 47499 45500 to 46499 44500 to 45499. 44400 to 44499 44300 to 44399 44200 to 44299 44100 to 44199 44000 to 44099 43900 to 43999 43800 to 43899 43700 to 43799 43600 to 43689 38000 to 38999 43470 to 43499 43400 to 43469 43300 to 43398 43180 to 43260 In addition to the above registers the SCADAPack 4202 and 4203 controllers use the following registers for transmitter parameters and data. These registers cannot be used in any register assignment if a SCADAPack 4202 or 4203 controller is used. SCADAPack 4202 and 4203 data and parameters registers 40499 Realflo User and Reference Manual May 19, 2011 40001 to 373 Realflo Expert Mode Reference The main portion of the dialog is a list showing the modules in the register assignment list. The module list displays the Module, Module Address, Start Register, End Register and the number of Registers for the module. The Module field displays the type and name of I/O modules that have been added to the Register Assignment. For modules that support more than one type of I/O, there are multiple lines in the row of the table, one for each input or output I/O type. The Address field displays the unique module address of the physical hardware, such as a 5000 5401 Digital I/O module. Some module types have no address that can be set by the user. The address is blank for these modules. The Start Register field displays the first register address in the I/O database where the module data is stored. A start register is required for each type of input or output on the module. The End Register field displays the last address in the I/O database used by the module. An end register is required for each type of input or output on the module. The Registers field displays the number of registers used by the module. A size is required for each type of input or output on the module. The OK button updates the register assignment list and closes the dialog. This is the default button. Pressing the ENTER key selects the OK button. The Cancel button exits the dialog without saving changes. If changes were made, the user is prompted for confirmation before exiting. Pressing the ESC key selects the Cancel button. If changes were made the following dialog appears. Realflo User and Reference Manual May 19, 2011 374 Realflo Expert Mode Reference Selecting Yes closes the Register Assignment dialog and the register assignment list is not changed. Selecting No returns to the Register Assignment dialog. The No button is the default selection. Pressing the Enter or ESC keys selects the No button. The Add button adds a new module to the register assignment. The Edit Register Assignment dialog opens. The Add Copy button adds a copy of the selected module to the register assignment. The Edit Register Assignment dialog opens. The Address field is set to the first unused address for the currently selected module type. Other fields are set to the values from the currently selected I/O module. The Add Copy button is grayed if the table is empty, or I/O modules of the given type are in use (i.e. modules are already defined for possible addresses for the selected module type). The Edit button modifies the selected module. The Edit Register Assignment dialog opens with data from the currently selected I/O module. The Edit button is grayed if the table is empty, or no module is selected in the table. The Delete function removes the selected module from the register assignment. The button is grayed if the table is empty, or no module is selected in the table. The Default button replaces the current Register Assignment with the Default Register Assignment for the controller. The controller type is selected using the Flow Computer Setup command. The dialog displayed is dependent on the type of controller used. See the Default Register Assignments section below. The I/O Module Error Indication check box determines if the controller displays I/O module communication errors. If enabled, the controller will blink the Status LED if there is an I/O error. See the DIAG Controller Status Code diagnostic module for information on the controller status code. If disabled, the controller will not display the module communication status. The module communication status is checked. This option controls only the indication on the Status LED. Module Selection Clicking anywhere in a row selects the module. Double clicking anywhere in a row selects the data for the module and invokes the Edit Register Assignment dialog. Sorting Click on the column headings to sort the data. Clicking once sorts the data in ascending order. Clicking again sorts the data in descending order. Realflo User and Reference Manual May 19, 2011 375 Realflo Expert Mode Reference If a module has more than one value in a column, data is sorted by the first value. Edit Register Assignment Dialog The Edit Register Assignment dialog modifies an entry in the register assignment. The following example shows the dialog editing a module with more than one I/O type. The Module drop-down list box shows the current module type. The dropdown list displays available modules. Refer to the Telepace Studio User and Reference manual for complete information on the Register Assignment module types available. The Address drop-down list box shows the current module address. The drop-down list displays addresses valid for the current module type that are not already used. If all addresses are in use, the list will be empty. There are up to four type description fields. The text displays the type of the input or output register. The type descriptions are 0xxxx, 1xxxx, 3xxxx and 4xxxx. Digital output data is read from coil (0xxxx) registers. The digital outputs are updated continuously with data read from the coil registers. Digital input data is stored in status (1xxxx) registers. The status registers are updated continuously with data read from the digital inputs. Analog input data is stored in input (3xxxx) registers. The input registers are updated continuously with data read from the analog inputs. Analog output data is stored in holding (4xxxx) registers. The analog output registers are updated continuously with data read from the holding registers. The Start edit box holds the starting register in the I/O database for the I/O type. The edit box allows any number to be entered. The End field shows the last register used by the module for the I/O type. The Registers field shows the number of registers in the I/O module. The Description field displays the I/O type for multiple I/O modules. Selecting OK checks the data entered. If the data is correct the dialog is closed and the Register Assignment dialog returns with the changes made. An error message is displayed if any data is incorrect. Pressing the ENTER key selects the OK button. Realflo User and Reference Manual May 19, 2011 376 Realflo Expert Mode Reference Selecting Cancel exits the dialog without saving changes. Pressing the ESC key selects the Cancel button. Realflo User and Reference Manual May 19, 2011 377 Realflo Expert Mode Reference Default Register Assignments SCADAPack 4202 or 4203 If the controller type is a SCADAPack 4202 or 4203 with controller board version 5 and terminal board version 6, the following dialog appears. SCADAPack 4202 DR manufactured after July 13, 2004 may use the 4202 DS Extended I/O register assignment. The 4202-DR needs to have controller board version 5 and terminal board version 6. Previous versions of the SCADAPack 4202 DR require the 4202 DR I/O register assignment module. If the controller type is a SCADAPack 4202 DS or 4203 DS the following dialog appears. SCADAPack, SCADAPack Plus, SCADAPack 32 If the controller type is a SCADAPack, SCADAPack Plus, or SCADAPack 32 the default register assignment will include the supported integrated I/O modules for the controller. Clicking the Default button in the Register Assignment opens a dialog displaying the supported integrated I/O modules. SCADAPack 5601 I/O module Realflo User and Reference Manual May 19, 2011 378 Realflo Expert Mode Reference SCADAPack 5604 10V/40mA I/O module SCADAPack 5604 5V/20mA I/O module SCADAPack 5606 I/O module SCADAPack 314 If the controller type is a SCADAPack 314 the following dialog appears. SCADAPack 330 If the controller type is a SCADAPack 330 the following dialog appears. SCADAPack 334 If the controller type is a SCADAPack 334 the following dialog appears. Realflo User and Reference Manual May 19, 2011 379 Realflo Expert Mode Reference SCADAPack 350 If the controller type is a SCADAPack 350 register assignment will include the supported integrated I/O modules for the controller. Clicking the Default button in the Register Assignment opens a dialog displaying the supported integrated I/O modules. SCADAPack 350 10V/40mA I/O module SCADAPack 350 5V/20mA I/O module SCADAPack 357 Controller (SCADAPack 350 and SCADAPack 5607 I/O module). DNP The DNP command is used to configure the DNP protocol settings for the controller. When selected the DNP Settings window is opened. For complete information on DNP configuration refer to the DNP3 Protocol User Manual section of this manual. Store and Forward The Store and Forward command configures the Store and Forward settings for a SCADAPack 32, SCADAPack 314/330/334, SCADAPack 350 controller or SolarPack 410. A controller configured for store and forward operation receives messages destined for a remote Slave Station on the Slave Interface. The controller forwards the message on the Forward Interface to the Forward Station. Refer to the following diagram as a reference for the terminology used in the following Store and Forward command reference. Realflo User and Reference Manual May 19, 2011 380 Realflo Expert Mode Reference Slave Interface The Ethernet port is set for Modbus address 2. The local SCADAPack 32 will respond to messages received for address 2. Messages that require forwarding cannot be addressed for station 2. SCADAPack 32 Controller Communication Interfaces LAN COM1 Message to be Forwarded The message, from a remote master station, that is to be forwarded by the SCADAPack 32 controller. The station address of the message needs to be in the Store and Forward table. In this example the station address cannot be 2. COM2 COM4 Forward Interface COM port 4 is set for Modbus address 2. The local SCADAPack 32 will respond to messages received for station 2. Messages that are forwarded cannot be addressed for station 2. Forwarded Message The forwarded message, to the remote slave station, that is forwarded by the SCADAPack 32 controller. The station address of the message needs to be in the Store and Forward table. In this example the station address cannot be 2. When the Store and Forward command is selected the Store and Forward dialog appears. This dialog displays the Store and Forward table for the controller. This command is available only when the controller type is set to SCADAPack 330/334, SCADAPack 350, SCADAPack 32, SCADAPack 32P or SolarPack 410. The Store and Forward table displays each Store and Forward translation as a row, with column headings, in the table. The table may have up to 128 entries. A vertical scroll bar is used if the list exceeds the window size. The Slave Interface heading displays the receiving slave interface the message is received from for each translation. The Slave Station heading displays the Modbus station address of the slave message. The Forward Interface heading displays the interface the message is forwarded from. When forwarding to a Modbus TCP or UDP network, the protocol type is selected for the Forward Interface. The IP Stack automatically determines the exact interface (e.g. LAN/PPP) to use when it searches the network for the Forward IP Address. If a serial port is selected for the Forward Interface, and the serial port is configured for PPP protocol, the message will not be forwarded. The Forward Station heading displays the Modbus station address of the forwarded message. Realflo User and Reference Manual May 19, 2011 381 Realflo Expert Mode Reference The Forward IP Address heading displays the IP address of the Forward Station. This field is blank unless a TCP or UDP network is selected for Forward Interface. The Time Out heading displays the maximum time (in tenths of seconds) the forwarding task waits for a valid response from the Forward Station. The time out should be equal to or less than the time out set for the master message received on the Slave Interface. The OK button saves the table data. No checking is done on the table data. The Cancel button closes the dialog without saving changes. Select the Add button to enter a new row in the store and forward table. Selecting the Add button opens the Add/Edit Store and Forward dialog. Select the Edit button to modify the selected row in the store and forward table. Selecting the Edit button opens the Add/Edit Store and Forward dialog containing the data from the selected row. This button is disabled if more than one row is selected. This button is disabled if there are no entries in the table. The Delete button removes the selected rows from the table. This button is disabled if there are no entries in the table. The Undo button undoes the action performed by the last button selection since the dialog was opened. This applies to the buttons Add, Edit, Delete and Undo. This button is disabled when the dialog is opened, and is enabled as soon as any of the applicable buttons are selected. The Sorted by menu box lists each of the five column headings. The rows are sorted according to the selected heading. Headings in the table are, by default, sorted by the Slave Interface heading. Add/Edit Store and Forward Dialog This dialog is used to edit an entry or add a new entry in the store and forward table. The Slave Interface is the receiving slave interface the message received from. The dropdown list allows the following selection: com1 com2 com3 com4 Realflo User and Reference Manual May 19, 2011 382 Realflo Expert Mode Reference LAN/PPP The Slave Station is the Modbus station address of the slave message. This address needs to be different from the Modbus address assigned to the Slave Interface. Valid range for Slave Station is: 1 to 255 when standard addressing is selected for the interface. 1 to 65534 when extended addressing is selected for the interface. The Forward Interface is the interface the message is forwarded from. The dropdown list allows the following selection: com1 com2 com3 com4 Modbus/TCP Modbus RTU in UDP Modbus ASCII in UDP The Forward Station is the Modbus station address of the forwarded message. This address needs to be different from the Modbus address assigned to the Forward Interface. Valid range for Forward Station is: 1 to 255 when standard addressing is selected for the interface. 1 to 65534 when extended addressing is selected for the interface. The Forward IP Address edit box is disabled and the address is forced to “0.0.0.0“ whenever the Forward Interface is set to com1, com2, com3 or com4. The Forward IP Address edit box is enabled only when the Forward Interface is set to a TCP or UDP network. Valid entries are 0 to 255 for each byte in the IP address. The Time Out is the maximum time the forwarding task waits for a valid response from the Forward Station, in tenths of second. Valid entries are 0 to 65535. The time out should be equal to or less than the time out set for the master message received on the Slave Interface. The OK button checks the data for this table entry. If the data is valid the dialog is closed. If the table data entered is invalid, a message is displayed and the dialog remains open. The table entry is invalid if any of the fields is out of range. The data is also invalid if it conflicts with another entry in the table. In PEMEX mode the OK button is not active if the user is not logged on with Administrator privileges. The Cancel button closes the dialog without saving changes. Power Management Configuration The SolarPack 410 provides power management features to minimize the power consumption. Power Management Dialog The power management dialog appears as follows. Realflo User and Reference Manual May 19, 2011 383 Realflo Expert Mode Reference The Continuous Wake Mode section specifies if the flow computer stays in the continuous power mode. The following parameters can be configured for this mode. Always Stay Awake specifies if the flow computer should stay awake. Valid values are Yes and No. The default value is No. Radio Power selects if the SCADA radio is powered. Valid values are ON or OFF. The default value is ON. Bluetooth Power selects if the Bluetooth radio is powered. Valid values are ON or OFF. The default value is ON. Display selects if the display is powered. Valid values are ON or OFF. The default value is ON. Display Backlight selects if the display backlight is powered. Valid values are ON or OFF. The default value is ON. This control is set to OFF when the display control is set to OFF. The Enable Input Activation section specifies what happens when the enable input is activated. Activating the enable input places the flow computer in the continuous power mode. A power off timer starts when entering continuous power mode. The flow computer remains in this mode until the power off timer expires, then enters the power saving mode. Realflo User and Reference Manual May 19, 2011 384 Realflo Expert Mode Reference The following parameters can be configured for this mode. These controls are disabled when the controller is in the continuous wake mode. Stay Awake For specifies the number of minutes until power off. Valid values are 1 to 240. The default value is 10 minutes. Radio Power selects if the SCADA radio is powered. Valid values are ON or OFF. The default value is OFF. Bluetooth Power selects if the Bluetooth radio is powered. Valid values are ON or OFF. The default value is ON. Display selects if the display is powered. Valid values are ON or OFF. The default value is ON. Display Backlight selects if the display backlight is powered. Valid values are ON or OFF. The default value is OFF. This control is set to ON when the display control is set to ON. The Scheduled Wake Mode section specifies when the flow computer should wake up. The flow computer stays awake for a fixed period of time in this mode. The controller is in the continuous power mode for the specified duration at the specified times, then it enters the power saving mode. The following parameters can be configured for this mode. These controls are disabled when the controller is in the continuous wake mode. Times to Wake lists the times at which the flow computer should wake. Up to 24 times can be added. The default value is an empty list. Stay Awake For specifies the number of minutes until power off. Valid values are 1 to 240. The default value is 20 minutes. Radio Power selects if the SCADA radio is powered. Valid values are ON or OFF. The default value is OFF. Bluetooth Power selects if the Bluetooth radio is powered. Valid values are ON or OFF. The default value is OFF. Display selects if the display is powered. Valid values are ON or OFF. The default value is OFF. Display Backlight selects if the display backlight is powered. Valid values are ON or OFF. The default value is OFF This control is set to ON when the display control is set to ON. Selecting Power Management Configuration In Expert mode do one of the following: Select the Power Management command on the Configuration menu to open the Power Management configuration dialog. Double-click the Power Management item in the configuration tree to open the Power Management configuration dialog. In Maintenance mode: Select View and Change Configuration. Advance to the Edit Configuration page. Double-click the Power Management item in the configuration tree. Realflo User and Reference Manual May 19, 2011 385 Realflo Expert Mode Reference Communication The power management settings are written to the flow computer with the flow computer configuration. The settings are read from the flow computer with the flow computer configuration. Pulse Input Configuration The SolarPack 410 flow computer can accumulate pulse inputs. The flow computer counts the number of pulses, multiplies by a K factor and accumulates the results. Total volume, today‟s volume, yesterday‟s volume, this month‟s volume, and last month‟s volume accumulators are provided. Pulse Input Configuration Dialog The Pulse Input Configuration dialog appears as follows. 3 Units specify the units for volume. Valid values are cubic feet (ft ) and cubic 3 metres (m ), litres, and US gallons, barrels (42 US gallons). The default value is cubic feet. K Factor specifies the factor by which the raw count is divided to obtain the volume. Valid values are any number greater than 0. The default value is 1.0. Units are pulses/volume. Selecting Pulse Input Configuration Select the Pulse Input command on the Configuration menu to open the Pulse Input configuration dialog. Double-click on the Pulse Input item in the configuration tree to open the Pulse Input configuration dialog. Communication The Pulse Input settings are written to the flow computer with the flow computer configuration. The settings are read from the flow computer with the flow computer configuration. Changes to settings can generate up to three events in the event log for run 1. Number 10096 10097 Description Set pulse input K factor Set pulse input units Gas Sampler Output Configuration The gas sampler output is pulsed based on the current flow. The pulse rate is configurable with a factor based on the current volume. The pulse width is user adjustable from 0.1 seconds to 5.0 seconds. Realflo User and Reference Manual May 19, 2011 386 Realflo Expert Mode Reference Gas Sampler Output Dialog The Gas Sampler Output dialog appears as follows. Volume/Pulse specifies the flow volume for each pulse output. The measurement units are the same as the contract units for run 1. Any positive 3 value is valid. The default value is 1,000,000 ft /pulse or the equivalent in the current unit set. Pulse Width specifies the pulse width. Valid values are 0.1 to 5.0 seconds in increments of 0.1 seconds. The default value is 1.0 seconds. Selecting Gas Sampler Output Configuration Select the Gas Sampler Output command on the Configuration menu to open the Gas Sampler Output configuration dialog. Double-click on the Gas Sampler Output item in the configuration tree to open the Gas Sampler Output configuration dialog. Communication The Gas Sampler Output settings are written to the flow computer with the flow computer configuration. The settings are read from the flow computer with the flow computer configuration. Realflo User and Reference Manual May 19, 2011 387 Realflo Expert Mode Reference Modbus Mapping Modbus mapping provides a simplified method for SCADA host software to make configuration changes to the gas quality ratios, orifice plate size and the real time clock settings in the flow computer. Using Modbus mapping a sequential block of registers containing the gas quality ratios and orifice plate size for a meter run can be written to the flow computer and applied to the flow computer configuration in one Modbus write from the SCADA host. The Modbus Mapping table cannot be modified unless the user is logged on with Administrator privileges. The OK button is grayed out in the Modbus Mapping Settings dialog if the account privileges are not at the ADMIN level. See the Accounts section for information on creating and using accounts in Realflo. If an attempt is made to write a Realflo configuration that contains a Modbus Mapping table that is different from the one in the flow computer by a user without Administration privileges a message is displayed and the Modbus Mapping table is not written to the flow computer. Modbus mapping may be applied to the following flow computer configurations: The Real Time Clock Registers table requires a sequential block of 9 holding registers. These registers are described in the Real Time Clock Registers section below. The Shared Read/Write Run Registers table requires a sequential block of 63 holding registers. These registers can be used to read or write to the AGA8 gas composition parameters and the orifice plate size for any meter run. These registers are described in the Shared Read/Write Run Data Registers section below. The Run Read/Write Registers table requires a sequential block of 62 holding registers. These registers can be used to read or write to the AGA8 gas composition parameters and the orifice plate size for the selected meter run. The number of meter runs displayed depends on the number of meter runs configured in the flow computer. These registers are described in the Meter Run Data Registers section below. The Run Read Only Registers table requires a sequential block of 60 input registers. These registers can be used to read the AGA8 gas composition parameters and the orifice plate size for the selected meter run. The number of meter runs displayed depends on the number of meter runs configured in the flow computer. These registers are described in the Meter Run Data Registers section below. The Modbus mapping table operates according to the following rules: The flow computer reads the registers, for each configured run, from the mapping table on each scan. Verification is done and the status of the current mapping table is reported via the Configuration Mapping Range status register for each table. Only valid new settings are used to update the flow computer configuration when the Apply Request register is set to 1. The Apply Request register is reset to zero after the request is executed. A Timer restricts incomplete configuration settings from staying in the Modbus mapping table forever. If changes have not been applied in a specified number minutes (default is 10 minutes), since the last change, Realflo User and Reference Manual May 19, 2011 388 Realflo Expert Mode Reference the mapping table is synchronized with the current flow computer settings and user mapping changes will be lost. The Modbus Mapping registers may be set to a user defined range. The mapping table is initialized with the current flow computer configuration when the mapping range changed. The Mapping Table registers are automatically updated when any flow computer interface (i.e. Realflo) changes the AGA-8, AGA-8 Hexanes+, AGA-3 or Real Time Clock configuration. The Configuration Mapping Range status register indicates the status of the Mapping Range for each configuration. A Host computer can use this register to know if other flow computer interface is updating the same configuration. When the Modbus Mapping command is selected the Modbus Mapping Settings dialog opens as shown below. The Modbus mapping dialog is divided into three columns and a number of rows depending on the number of meter runs configured in the flow computer. The rows in the table list the flow computer configurations that can be assigned to Modbus Mapping. The Real Time Clock Registers are a sequential block of 9 holding registers. The block of registers used cannot include any registers used by the flow computer. See the TeleBUS Registers Used by the Flow Computer section for a listing of flow computer registers. The Shared Read/Write Run Registers are a sequential block of 63 holding registers. These registers can be used to read or write to the AGA8 gas composition parameters and the orifice plate size for any meter run. The block of registers used cannot include any registers used by the flow computer. See the TeleBUS Registers Used by the Flow Computer section for a listing of flow computer registers. The Run Read/Write Registers are a sequential block of 62 holding registers. These registers can be used to read or write to the AGA8 gas composition parameters and the orifice plate size for the selected meter run. The block of registers used cannot include any registers used by the flow Realflo User and Reference Manual May 19, 2011 389 Realflo Expert Mode Reference computer. See the TeleBUS Registers Used by the Flow Computer section for a listing of flow computer registers. The Run Read Only Registers are a sequential block of 60 input registers. These registers can be used to read the AGA8 gas composition parameters and the orifice plate size for the selected meter run. The block of registers used cannot include any registers used by the flow computer. See the TeleBUS Registers Used by the Flow Computer section for a listing of flow computer registers. Using the Modbus Mapping Settings Table The mapping for each configuration is enabled or disabled by clicking your mouse in the box to the left of each configuration type. The Shared Read/Write Run Registers and the individual meter run Read/Write Registers mapping cannot be enabled at the same time. The Shared Read/Write Run Registers and the individual meter run Read Only Registers mapping may be enabled at the same time. The Real Time Clock Registers maybe used with any mapping selection. The Modbus Mapping table uses the default Start Register and End Register values unless the Start Register is changed. When the Start Register is changed the End Register automatically updates to the end of the configuration range. To change the Start Register: Click on the Start Register Modbus register. Press the keyboard Enter key to open the window for editing. Enter the new Start Register Modbus address and press the Enter key again. The Modbus registers used for Modbus Mapping cannot include any registers used by the flow computer. See the TeleBUS Registers Used by the Flow Computer section for a listing of flow computer registers. The Timer Interval selection is used to apply a timeout value for pending changes to a configuration table. If changes have not been applied in a specified number minutes (default is 10 minutes), since the last change, the mapping table is synchronized with the current flow computer settings and user mapping changes will be lost. The default timer interval value is 10 minutes. Any values between 1 and 1000 minutes may be entered. The Only check for range errors when closing dialog selection is used to limit range validation errors when configuring the mapping table. Each range is validated and needs to not overlap with another range or conflict with registers used by the flow computer. Using this control the validation will only be checked when the dialog is closed. Real Time Clock Registers The Real Time Clock Registers are a sequential block of 9 holding registers. The block of registers used cannot include any registers used by the flow computer. The following table describes the registers. The default registers are described, when the register range is changed the registers are offset from the entered Start Register. To write a complete Real Time Clock configuration from a Host: Realflo User and Reference Manual May 19, 2011 390 Realflo Expert Mode Reference Enter the Real Time Clock values into the range of registers and enter a 1 into the Apply Request register. Write the registers to the flow computer. Read the Configuration Mapping Range status register to confirm the changes have been made in the flow computer To write an incomplete Real Time Clock configuration from a Host (i.e. change the hour only): Enter a value of 100 in the Apply Request register to read the current flow computer settings and write this register to the flow computer. Enter the selected new Real Time Clock values into the appropriate register(s) and enter a 1 into the Apply Request register. Write the registers to the flow computer. Read the Configuration Mapping Range status register to confirm the changes have been made in the flow computer Description Years = 1997 to 2096 Months = 1 to 12 Days = 1 to 31, with exceptions Hours = 0 to 23 Minutes = 0 to 59 Seconds = 0 to 59 Seconds = -32000 to 32000, Increment / Decrement number of seconds Apply Request 0= No operation 1= Apply new setting 100 = Synchronize with Flow Computer Configuration Mapping Range status 0= Reset and Synchronized with Flow Computer by Apply Request commands 1 and 100. 1= Settings have changed. 2= The current settings are invalid. 3= Reset and Synchronized with Flow computer as a result of a timeout. 4= The event log is full and no further change events are allowed. 5= Invalid command Read/Write Register Range 42550 42551 42552 42553 42554 42555 42556 Register Type 42557 uint 42558 uint uint uint uint uint uint uint sint Shared Read/Write Run Data Registers The Shared Read/Write Run Registers are a sequential block of 63 holding registers. These registers can be used to read or write to the AGA8 gas composition parameters and the orifice plate size for any meter run. The following table describes the registers. The default registers are described, when the register range is changed the registers are offset from the entered Start Register. To write a complete Run Configuration from a Host: Realflo User and Reference Manual May 19, 2011 391 Realflo Expert Mode Reference Enter the meter run number in the Meter Run register. Enter the Run Configuration values into the range of registers and enter a 1 into the Apply Request register. Write the registers to the flow computer. Read the Configuration Mapping Range status register to confirm the changes have been made in the flow computer To write an incomplete Run Configuration from a Host (i.e. change the orifice plate size only): Enter the meter run in the Meter Run register. Enter a value of 100 in the Apply Request register to read the current flow computer settings and write this register to the flow computer. Enter the selected new Run Configuration values into the appropriate register(s) and enter a 1 into the Apply Request register. Write the registers to the flow computer. Read the Configuration Mapping Range status register to confirm the changes have been made in the flow computer. Description Shared Run Data Registers Meter Run = 1 to 10 Methane Nitrogen Carbon Dioxide Ethane Propane Water Hydrogen Sulfide Hydrogen Carbon Monoxide Oxygen iButane nButane iPentane nPentane Hexane and higher components may be measured individually or may be combined. This affects the n-Hexane, n-Heptane, nOctane, n-Nonane, and n-Decane components. See the Hexanes+ register for details. Default Read/Write Register Range 42480 to 42542 42480 42481 42483 42485 42487 42489 42491 42493 42495 42497 42499 42501 42503 42505 42507 Register Type uint float float float float float float float float float float float float float float The following registers are used when the Hexane and higher components are used. n-Hexane This register contains the n-Hexane value when individual components are Realflo User and Reference Manual May 19, 2011 float 42509 392 Realflo Expert Mode Reference Description Default Read/Write Register Range Register Type 42511 42513 42515 42517 42519 42521 42522 float float float float float float uint 42524 float 42526 float 42528 float 42530 float 42532 float selected. The register contains the total Hexanes+ when combined components are selected. See the Hexanes+ register description. n-Heptane n-Octane n-Nonane n-Decane Helium Argon Composition logging control This register selects if the flow computer logs AGA-8 gas composition changes. Frequent changes to the composition will result in the event log filling with gas composition events. When the log is full, further changes cannot be made until Realflo reads the log. 0 = log composition changes 1 = do not log composition changes Real Relative Gas Density 0 = calculate live value A non-zero value will be interpreted by the flow computer as the Real Relative Density. This value will be used with the Heating value register. Valid range for value 0 to 1800 BTU(60)/ft3. Heating Value 0 = calculate live value A non-zero value will be interpreted by the flow computer as the Heating Value. This value will be used with the Real Relative Density register. Valid range for value 0.07 to 1.52 Hexanes + The AGA-8 Hexanes+ configuration registers define the composition of the heavier gas components being measured. There are two options, individual components (selected above) or combined (selected below). The Hexanes+ register below determines which method is used. n-Hexane portion This register defines the percentage of the Hexanes+ contributed by n-Hexane. n-Heptane portion This register defines the percentage of the Hexanes+ contributed by n- Heptane. n-Octane portion This register defines the percentage of the Realflo User and Reference Manual May 19, 2011 393 Realflo Expert Mode Reference Description Hexanes+ contributed by n- Octane. n-Nonane portion This register defines the percentage of the Hexanes+ contributed by n- Nonane. n-Decane portion This register defines the percentage of the Hexanes+ contributed by n- Decane. The Hexanes+ register determines how the Hexanes+ values are entered. Default Read/Write Register Range Register Type 42534 float 42536 float 42538 uint 42539 42541 float uint 42542 uint 0= Use individual gas components (default) When 0 is entered for the register the Hexane+ registers are entered using registers for n- Hexane, n-Heptane, n-Octane, nNonane and n-Decane listed above (registers 42509 to 42518). 1= Use combined value for hexane and higher components. When 1 is entered (use registers 42528 to 42537) the portion of the Hexanes+ ratio that is applied to each of the n- Hexane, nHeptane, n-Octane, n-Nonane and n-Decane gas components. These portions are represented as a percentage of the gas components being measured i.e. 0 to 100%. The total of the Hexanes+ components needs to add to 100 percent. Orifice diameter Apply Request 0= No operation 1= Apply new setting 100 = Synchronize with Flow Computer Configuration Mapping Range status 0= Reset and Synchronized with Flow Computer by Apply Request commands 1 and 100. 1= Settings have changed. 2= The current settings are invalid. 3= Reset and Synchronized with Flow computer as a result of a timeout. 4= The event log is full and no further change events are allowed. 5= Invalid command Meter Run Data Registers The Meter Run Registers Read/ Write Registers are a sequential block of 62 holding registers. These registers can be used to read or write to the AGA8 gas composition parameters and the orifice plate size for the selected Realflo User and Reference Manual May 19, 2011 394 Realflo Expert Mode Reference meter run. The following table describes the registers. The default registers are described, when the register range is changed the registers are offset from the entered Start Register. To write a complete Run Configuration from a Host: Enter the Run Configuration values into the range of registers and enter a 1 into the Apply Request register. Write the registers to the flow computer. Read the Configuration Mapping Range status register to confirm the changes have been made in the flow computer To write an incomplete Run Configuration from a Host (i.e. change the orifice plate size only): Enter a value of 100 in the Apply Request register to read the current flow computer settings and write this register to the flow computer. Enter the selected new Run Configuration values into the appropriate register(s) and enter a 1 into the Apply Request register. Write the registers to the flow computer. Read the Configuration Mapping Range status register to confirm the changes have been made in the flow computer. Description Meter Run 1 Data Registers Methane Nitrogen Carbon Dioxide Ethane Propane Water Hydrogen Sulfide Hydrogen Carbon Monoxide Oxygen iButane nButane iPentane nPentane Hexane and higher components may be measured individually or may be combined. This affects the n-Hexane, n-Heptane, nOctane, n-Nonane, and nDecane components. See the Hexanes+ register for details. Default Read/Write Register Range 42559 to 42620 42559 42561 42563 42565 42567 42569 42571 42573 42575 42577 42579 42581 42583 42585 Default Read Register Range 39200 to 39259 39200 39202 39204 39206 39208 39210 39212 39214 39216 39218 39220 39222 39224 39226 Register Type float float float float float float float float float float float float float float The following registers are used when the Hexane and Realflo User and Reference Manual May 19, 2011 395 Realflo Expert Mode Reference Description higher components are used. n-Hexane This register contains the n-Hexane value when individual components are selected. Default Read/Write Register Range Default Read Register Range Register Type 42587 39228 float 42589 42591 42593 42595 42597 42599 42601 39230 39232 39234 39236 39238 39240 39242 float float float float float float uint 42602 39243 float 42604 39245 float The register contains the total Hexanes+ when combined components are selected. See the Hexanes+ register description. n-Heptane n-Octane n-Nonane n-Decane Helium Argon Composition logging control This register selects if the flow computer logs AGA-8 gas composition changes. Frequent changes to the composition will result in the event log filling with gas composition events. When the log is full, further changes cannot be made until Realflo reads the log. 0 = log composition changes 1 = do not log composition changes Real Relative Gas Density 0 = calculate live value A non-zero value will be interpreted by the flow computer as the Real Relative Density. This value will be used with the Heating value register. Valid range for value is 0.07 to 1.52. Heating Value 0 = calculate live value A non-zero value will be interpreted by the flow computer as the Heating Value. This value will be used with the Real Relative Realflo User and Reference Manual May 19, 2011 396 Realflo Expert Mode Reference Description Density register. Valid range for value is 0 to 1800 BTU(60)/ft3 Hexanes + The AGA-8 Hexanes+ configuration registers define the composition of the heavier gas components being measured. There are two options, individual components (selected above) or combined (selected below). See the Hexanes+ register below. n-Hexane portion This register defines the percentage of the Hexanes+ contributed by n-Hexane. n-Heptane portion This register defines the percentage of the Hexanes+ contributed by n- Heptane. n-Octane portion This register defines the percentage of the Hexanes+ contributed by n- Octane. n-Nonane portion This register defines the percentage of the Hexanes+ contributed by n- Nonane. n-Decane portion This register defines the percentage of the Hexanes+ contributed by n- Decane. The Hexanes+ register determines how the Hexanes+ values are entered. Default Read/Write Register Range Default Read Register Range Register Type 42606 39247 float 42608 39249 float 42610 39251 float 42612 39253 float 42614 39255 float 42616 39257 uint 0= Use individual gas components (default) When 0 is entered for the register the Hexane+ registers are entered using registers for n- Hexane, nHeptane, n-Octane, nNonane and n-Decane listed above (registers 42587 to 42600). 1= Use combined value for hexane and higher Realflo User and Reference Manual May 19, 2011 397 Realflo Expert Mode Reference Description components. When 1 is entered (registers 42606 to 42615)the portion of the Hexanes+ ratio that is applied to each of the nHexane, n-Heptane, nOctane, n-Nonane and nDecane gas components. These portions are represented as a percentage of the gas components being measured i.e. 0 to 100%. The total of the Hexanes+ components needs to add to 100 percent. Orifice diameter Apply Request 0= No operation 1= Apply new setting 100 = Synchronize with Flow Computer Configuration Mapping Range status 0= Reset and Synchronized with Flow Computer by Apply Request commands 1 and 100. 1= Settings have changed. 2= The current settings are invalid. 3= Reset and Synchronized with Flow computer as a result of a timeout. 4= The event log is full and no further change events are allowed. 5= Invalid command Meter Run 2 Data Registers See meter run 1 details. Meter Run 3 Data Registers See meter run 1 details. Meter Run 4 Data Registers See meter run 1 details. Meter Run 5 Data Registers See meter run 1 details. Meter Run 6 Data Registers See meter run 1 details. Meter Run 7 Data Registers See meter run 1 details. Realflo User and Reference Manual May 19, 2011 Default Read/Write Register Range Default Read Register Range Register Type 42617 42619 39258 N/A float uint 42620 N/A uint 42621 to 42682 42683 to 42744 42745 to 42806 42807 to 42868 42869 to 42930 42931 to 42992 39260 to 39319 39320 to 39379 39380 to 39439 39440 to 39499 39500 to 39559 39560 to 39619 398 Realflo Expert Mode Reference Description Meter Run 8 Data Registers See meter run 1 details. Meter Run 9 Data Registers See meter run 1 details. Meter Run 10 Data Registers See meter run 1 details. Default Read/Write Register Range 42993 to 43054 43055 to 43116 43117 to 43178 Default Read Register Range 39620 to 39679 39680 to 39739 39740 to 39799 Register Type Read Configuration The Read Configuration command is used to read all or selected parts of the Flow Computer Configuration. When selected the command displays the Read Flow Computer Configuration dialog as shown below. The All Configuration radio button, when selected, results in the reading of all configuration data from the flow computer. The Selected Configuration radio button enables specific configuration data to be read from the flow computer. Select Communication and I/O Settings to read the serial port and register assignment configuration information. Select Flow Run and MVT Configuration to read the flow run configuration and the MVT transmitter configuration. Select Process I/O Configuration to read the Process I/O configuration. Click on the OK button to read the selected items from the flow computer. Click the Cancel button to cancel the operation and close the dialog. The Flow Computer ID is checked before reading. If the Flow Computer ID does not match the ID in the dialog Realflo displays the following message. Realflo User and Reference Manual May 19, 2011 399 Realflo Expert Mode Reference Write Configuration The Write Configuration command is used to write all or selected parts of the Flow Computer Configuration. When selected the command displays the Write Flow Computer Configuration dialog as shown below. The All Configuration radio button, when selected, results in the writing of all configuration data from the flow computer. The Selected Configuration radio button enables specific configuration data to be written to the flow computer. Select Communication and I/O Settings to write the serial port, register assignment configuration information and mapping table. Select Flow Run and MVT Configuration to write the flow run configuration and the MVT transmitter configuration. Select Process I/O Configuration to write the Process I/O configuration. Click on the OK button to write the selected items to the flow computer. Click the Cancel button to cancel the operation and close the dialog. The Flow Computer ID is checked before writing. If the Flow Computer ID does not match the ID in the dialog Realflo displays a message. An error occurs if Controller Configuration is selected and the flow computer type is different from the flow computer type selected in the Controller Type dialog. A message is displayed. Realflo User and Reference Manual May 19, 2011 400 Realflo Expert Mode Reference In Flow Computer versions 6.73 and older, when AGA-8 gas ratios or NX-19 gas quality values are written to the flow computer the new gas ratios are updated in the Proposed registers. The Actual registers are not updated until a new Density calculation is started with the new values. The new values are not available to SCADA host software reading the Actual registers until a until a new Density calculation is started with the new values. In Flow Computer versions 6.74 and newer when AGA-8 gas ratios or NX19 gas quality values are written to the flow computer the new gas ratios are updated in the Proposed registers and in the Actual registers. This allows a SCADA host to immediately confirm the new values were written to the flow computer. The new gas values are not used by the flow computer until a new density calculation is started. Edit Script Use this command to edit Realflo script commands. Scripts are text files that contain a list of Realflo commands. The script files can be executed either manually, (under direct control of the user) or automatically, (under control of another program). The Edit Script command opens the Edit Script dialog. This command edits and saves script files that can be accessed by Realflo applications. The script file is not related to the currently open Realflo application. The script command line determines which Realflo application executes which script file. The Edit Script dialog consists of the currently opened script file name, a list of commands configured in the opened script, script configuration command buttons and Edit Script dialog command buttons. The currently opened script file name displays the file name of the currently opened script file. The format is X:\….…\file name.aut, where X is the disk drive letter assignment, \……\ is the subdirectory or subdirectories where the script file is located, file name is the script file name and .aut is the file name extension. Realflo User and Reference Manual May 19, 2011 401 Realflo Expert Mode Reference In the above example the opened script file is called Meter1 Script File.aut and is located in the C:\Program Files\Realflo subfolder. When the Edit Script command is selected, a script file is not yet open. The file name is displayed as [untitled file] in this case. The configured command list displays the commands that have be configured for the open script file. These commands are configured with the Add and Edit commands and are executed in the order that they appear in the command list. Listed commands may be acted upon by selecting the particular command, with the cursor, and then executing one of the script configuration commands. The script configuration commands are used to configure the script file. The Add command opens the Edit Script Command dialog for the configuring of a new script command. The Script command field displays the currently selected script command as determined by the Command field. The Commands dropdown menu displays the list of available commands for selection. Selecting the arrow icon with the cursor will make these commands visible for selecting. For commands the Run dropdown menu selects the meter run for the command. The commands are: Update Readings Once. Use this command to update the Current Readings once from the flow computer for the selected Run. Read Event Logs. Use this command to read the event log for the selected Run. The Option selection allows for All events or New events. Read Alarm Logs. Use this command to read the alarm log for the selected Run. The Option selection allows for All alarms or New alarms. Read Hourly History. Use this command to read the hourly history for the selected Run. The Option selection allows for All hourly history or for a selected Period. Read Daily History. Use this command to read the daily history for the selected Run. The Option selection allows for All daily history or for a selected Period. Export Readings. Use this command to export the Current Readings data in the flow computer to a CSV file. Name of CSV file is: <Realflo file name> - TFR< Run Number > <(Run ID)>.CSV Export Event Logs. Use this command to export the Event Log data in the flow computer to a CSV file. The Option selection allows for All Realflo User and Reference Manual May 19, 2011 402 Realflo Expert Mode Reference alarms or for a selected Period. Name of CSV file is: <Realflo file name> - TFE< Run Number > <(Run ID)>.CSV Export Alarm Logs. Use this command to export the Alarm Log data, for the selected Run, from the flow computer to a CSV file. The Option selection allows for All alarms or for a selected Period. The CSV file name is: <Realflo file name>-TFA<Run Number>.CSV Export Hourly History. Use this command to export the Hourly History data, for the selected Run, from the flow computer to a CSV file. The Option selection allows for All alarms or for a selected Period. The CSV file name is: <Realflo file name> - TFH<Run Number> <(Run ID)>.CSV Export Daily History. Use this command to export the Daily History data, for the selected Run, from the flow computer to a CSV file. The Option selection allows for All alarms or for a selected Period. The CSV file name is: <Realflo file name> - TFD<Run Number> <(Run ID)>.CSV Export Specific CFX. Use this command to export configuration, current readings, alarm log, event log and hourly history in the flow computer to a CFX file. Data are exported to a single file for each run. The Option selection allows for All events, alarms and logs or for a selected Period. The name of the CFX file is <Realflo file name>(<FC ID>) - <Run Number> (<Run ID>).CFX. Export Dated CFX. Use this command to export configuration, current readings, alarm log, event log and hourly history in the flow computer to a CFX file. Each day's data is exported to a separate file. The file name is based on the time and date according to the CFX standard (YYYYMMDD.CFX). The Option selection allows for All events, alarms and logs or for a selected Period. Files for each run are saved to a folder. The name of the folder is <Realflo file name>(<FC ID>) - <Run Number> (<Run ID>).CFX. Read Flow Run Configuration. Use this command to read the Flow Run Configuration for the selected Run. The Option selection allows for All runs to be read. Export Flow Run Configuration. Use this command to export the Flow Run Configuration, for the selected Run, from the flow computer to a CSV file. The Option selection allows for All runs. The CSV file name is: <Realflo file name> - TFC<Run Number> <(Run ID)>.CSV Save. Use this command to save the Realflo application files. Exit. Use this command to close Realflo. The Option dropdown menu is used to define the limits of some of the commands. The selections available depend on the command selected. The All selection specifies all the data for a command. The New selection specifies only new alarms and events for the Read Events and Read Alarms commands. The Period selection specifies a From and To period of data for the command. For hourly data the From entry is the oldest hour and the To entry is the newest hour. For daily data the From entry is the oldest contract day and the To entry is the newest contract day. For either entry 0 is the current hour or contract day, 1 is the previous hour or contract day, etc. Realflo User and Reference Manual May 19, 2011 403 Realflo Expert Mode Reference The OK button retains the settings for the current script command and closes the Edit Script Command dialog. The Cancel button discards any new changes to the current script command and closes the Edit Script Command dialog. The Help button displays help for the dialog. The Edit button opens the Edit Script Command dialog to edit the currently selected command. This command will appear in both the Script command and Command fields in the Edit Script Command dialog. See the Add command for details on the Edit Script Command dialog. This command is grayed if the command list is empty. The Delete button removes the currently selected command from the command list. This command is grayed if the command list is empty. The Delete All button removes all commands from the command list. This command is grayed if the command list is empty. The Move Up button moves the currently selected command up one position in the command list. This command is grayed if the command list is empty or if top command in the list is selected. The Move Down button moves the currently selected command down one position in the command list. This command is grayed if the command list is empty or if the bottom command in the list is selected. The edit script dialog commands are used to manage the script files for editing. The Close button closes the Edit Script dialog. If a script file has been configured but not yet saved, a dialog will appear prompting the user to save the changes to a script file. The Save As dialog is displayed. (see the Save As command section for more information). The New button is used to create a new script. If changes have been made to the current script you will be asked if you wish to save the changes first. Once the changes have been saved, or not, the Edit Script dialog is opened. The Open button opens an existing script file for editing. If the current command list has not yet been saved to a script file, a dialog will appear prompting the user to save the changes to a script file. When the Open command is used the Open dialog is displayed. The following options allow the user to specify which file to open. The Look in: box lists the available folders and files. The File name: box allows you to type or select the file name you want to open. This box lists files with the script file extension “aut”. The Files of type: box displays the only type of file that this command can open: Realflo script files, with the file extension “aut”. The Open command opens the script file that is displayed in the File name: box and closes the Open dialog. The commands contained in the script file are displayed in the command list. The Cancel command cancels the Open command and closes the Open dialog. The Save button saves the currently open script file. This command is grayed if the script file has not been saved using the Save As command. Realflo User and Reference Manual May 19, 2011 404 Realflo Expert Mode Reference The Save As button saves the current command list to either an existing or new script file. This command is grayed if the command list is empty. The Save As dialog is displayed with the following options to allow the user to specify the script file name. The Save in: box lists the available folders and files. The File name: box allows you to type or select the file name you want to save. The Save as type: box displays the only type of file that this command can save: Realflo script file, with the file extension “aut”. The Save command saves the current command list to the script file specified in the File name: box and closes the Save dialog. The Cancel command cancels the Save As command and closes the Save As dialog. Realflo 6.70 files are compatible with files saved using earlier versions of Realflo. The Help button displays help for the dialog. Run Script The Run Script command enables the user to manually execute Realflo script files. This command is disabled if the Update Readings command is enabled. The Run Script command opens the Run Script dialog. Enter the Realflo script file name and path in the Full Path of the Script File window or select the Browse button and find the Realflo script file. Once a Realflo script file is entered in the Full Path of the Script File window the View button opens the View Script window. The View Script window displays the Realflo script commands. Check the Do Not Wait for User Input to run the script without input from the user. The script will run without displaying dialog boxes to the user. This is equivalent to running a script in the No Window mode from the command line. The OK button closes the Run Script dialog and executes the script file. The Cancel button closes the Run Script dialog without executing the script file. The Help button displays help for the dialog. Log Results The Log Results command allows the user to set if the results of the script command execution is logged or not. When the Log Results menu is checked, the results of the script-enabled Realflo operations will be written into a log file. The results are saved in a text file as Realflo file name.LOG. Realflo User and Reference Manual May 19, 2011 405 Realflo Expert Mode Reference The log information consists of three parts as follows: Time stamp Operation Result The Time stamp indicates the date and time at the end of the operation. The date is recorded using the short date format defined in the Control Panel. The time is recorded using the time format defined in the Control Panel. The Operation indicates the script command that was executed. The Result indicates the normal result or error message. For example, 2001/05/28 15:20:30 – Update Readings 2001/05/28 15:20:30 -- Read Event Logs Run1 – 5 Events added, cancelled 2001/05/28 15:20:30 -- Read Alarm Logs Run2– Error: Controller did not respond 2001/05/28 15:20:30 -- Read Hourly History Run3 – 2 Hours added, Error: Controller did not respond Automatic Script Execution Automatic script execution allows the user to configure other applications to execute the Realflo script command automatically. Direct user-operation of Realflo is not necessary in this scenario. Realflo is completely run by another application. Applications that would typically run a Realflo script file include HMI packages and custom interface applications. Refer to the HMI or application reference material for information on executing external programs. Applications such as WindowsNT Scheduler enable tasks such as Realflo flow scripts to be executed on a timed basis. Refer to the Help files for your PC operating system for more information. To run the Realflo script automatically, a command line has to be configured in the user application. The command line is in following format: Realflo configfile.tfc /s=scriptfile.aut /NoWindow where /NoWindow is an option. If the command line doesn‟t include the /NoWindow option, a Realflo application window will be displayed during script execution. A communication dialog will allow user to cancel current operation at any time. If the command line includes the /NoWindow option then the Realflo application window is not displayed during script execution. The user cannot cancel script execution before it is completed. The application will exit after finishing the last script command, regardless of whether the script file includes the Exit command. Options The options command provides for configuration options to be set when writing flow computer configuration. Currently one option, Check if flow computer upgrade is required, is selectable. Realflo User and Reference Manual May 19, 2011 406 Realflo Expert Mode Reference Select Check if Flow Computer upgrade is required to enable tests of the flow computer version when writing flow computer configuration. Each time a configuration is written to the flow computer a check is made to see if the flow computer version is older than the version available in Realflo. This option is enabled by default. The Historic Views options determine how historic views timestamps are displayed. Timestamp selects if start times or end times are shown on historic records. Select Show Start Time (time leads data) to show the start time of the record. This is supported on flow computer 6.70 and later. This is the default value for PEMEX installations. Select Show End Time (time lags data) to show the end time of the record. This is the default setting for Standard and GOST installations. Some Flow computers do not support Start Time timestamps. If you have chosen to show start times, and the start time data is not available, you can select what timestamps are shown. These selections are disabled if end times are selected above. Select Show the start time anyway to show the start time even if there is no data. Dashes will show in the start time column. Select Show the end time to automatically show the end time for the record. Select Ask me what to do to have Realflo prompt you if start time data is not supported. This is the default selection. The Restrict Realflo Users to reading all alarms and events option defines how alarms and events are acknowledged. Selecting this option restricts all users to only reading all alarms or all events. Reading all alarms or all events does not acknowledge the alarms or events in the flow computer. Use this option to allow only the Host system to acknowledge alarms and events. This is the default selection. When this option Is not selected users with View, Read and Write Data and Administrator account privileges are able to Read New Events and Realflo User and Reference Manual May 19, 2011 407 Realflo Expert Mode Reference Read New Alarms. Reading new events and alarms will result in the events and alarms being acknowledged in the flow computer when they are read using Realflo. Click OK to save the settings. Click Cancel to discard changes and close the dialog. C/C++ Program Loader The C/C++ Program Loader command provides for downloading multiple C/C++ applications to a SCADAPack 314/330/334, SCADAPack 350 or SCADAPack 4203 controller. Each downloaded program can be individually started, stopped, erased, and loaded. This command is only available when the SCADAPack 314/330/334, SCADAPack 350, SCADAPack 4203 hardware type is selected from the Setup dialog. The command is greyed out for other hardware types. When C/C++ Program Loader command is selected, the controller type is polled by Realflo. If the controller type is a SCADAPack 314/330/334, SCADAPack 350, SCADAPack 4203then the C/C++ Program Loader dialog is displayed as shown below. The dialog displays the C/C++ Programs that are loaded in the SCADAPack 314/330/334, SCADAPack 350, SCADAPack 4203 controller. The status of each program is indicated as Running or Stopped. The Close button closes the dialog. The Add button writes a new C/C++ program to the controller. Selecting the Add button opens the Add C/C++ Program dialog. Only one flow computer program may be added to the C/C++ Programs list. The Run, Stop and Delete buttons apply to the C/C++ Program selected from the list of loaded C/C++ programs. Only one C/C++ Program may be selected from the list at one time. These buttons are disabled when there are no C/C++ Programs loaded. The Run button stops and restarts the selected C/C++ program in the controller. The Stop button stops the selected C/C++ program in the controller. Realflo User and Reference Manual May 19, 2011 408 Realflo Expert Mode Reference The Delete button stops and erases the selected C/C++ program in the controller. However, if the current selected file is a flow computer, the following error message dialog will be displayed. The Refresh button refreshes the list of loaded programs and their status. Click on the column headings to sort the list by that column. Click a second time to reverse the sort order. Add C/C++ Program Dialog The Add C++ Program dialog writes a C/C++ Program to the controller. Only one flow computer program may be added to the C/C++ Programs list. File Name specifies the C/C++ Program to write to controller. The file name may be selected in a number of ways. Click on the Browse button to open a standard file open dialog. Use the drop-down menu to select the file from a list of previously written files. Type the path and file name directly into the edit box. The Write button writes the selected file to the controller. The communication progress dialog box displays information about the write in progress, and allows you to cancel the write. If the file name is loaded already a prompt to replace the file or cancel is displayed. When using DNP communication between Realflo and the target controller the DNP Application Layer timeout may need to be increased if a large C/C++ application is added. The default Application Layer timeout of 5 seconds may not be long enough. The Cancel button exits the dialog without writing to the controller. Accounts The Accounts command in Realflo defines the security settings for Realflo and access to flow computers. The account information is stored both in Realflo and the flow computer. One user account, the ADMIN account, is automatically created. Up to 99 additional user accounts may be created. Realflo User and Reference Manual May 19, 2011 409 Realflo Expert Mode Reference When a new flow computer file is created, one Administrator level account is created with no PIN. Until the PIN is set or additional accounts are created, Realflo will automatically log on to this account. The user account name and security level are displayed in the Status Bar of the Realflo display. Account Information Each Realflo account consists of the following information. Item Description Limits User ID 8 characters string identifying the account maximum PIN PIN used to access flow computer range 1 to 65535 Access level Integer in functions user has access to one of: view and read data view, read data, and configure flow computer administrator (all of above plus administration of accounts) Account information is stored in the flow computer configuration file. PINs are encrypted. The user needs to log on to an account when a flow computer file is opened. If the account settings are not changed, then security is effectively disabled. For security when accounts are created the default ADMIN account should be deleted and the changes written to the flow computer. This allows that only with accounts can access the flow computer. When the Accounts command is selected the Accounts dialog is displayed as shown below. The Accounts dialog has the following controls. The Accounts list box displays the user ID for each defined account. The users IDs are listed in alphabetic order. Realflo User and Reference Manual May 19, 2011 410 Realflo Expert Mode Reference The Close button accepts the changes and closes the dialog. If the account that was active when the dialog was opened has been deleted, the user is logged off. The Add button opens the Add/Edit Account dialog. The button is grayed if the maximum number of accounts is reached. The Edit button opens the Add/Edit Account dialog. Fields in the dialog are set to the values for the currently selected account in the Accounts list box. This button is grayed if no account is selected. The Delete button removes the currently selected account in the Accounts list box. This button is grayed if the account selected is the last Administrator level account. The Write button writes the accounts to the flow computer. To write account information to the flow computer, a user needs to be logged on to an Administrator level account that has a corresponding account enabled on the flow computer. This button is grayed until accounts are read from the flow computer using the Read button. The Read button reads accounts from the flow computer. To read account information from the flow computer, a user needs to be logged on to an Administrator level account that has a corresponding account enabled on the flow computer. Account PINs are not stored in the flow computer. Reading an account from the flow computer that does not already exist in Realflo will result in an account with a blank PIN. The flow computer ID is checked when accounts are written to or read from the flow computer. If the flow computer ID does not match the ID in the dialog Realflo displays the message “ The Flow Computer ID from the flow computer does not match the Flow Computer ID from the file.” The Help button displays the help for this dialog. Add/Edit Account Dialog The Add/Edit Account dialog edits information for an account. This dialog pops up when New or Edit is selected in the Accounts dialog. It has the following controls. Realflo User and Reference Manual May 19, 2011 411 Realflo Expert Mode Reference The User ID edit-box lists the user ID for the account. Any combination of letters and numbers up to eight characters in length is permitted. User IDs are case sensitive. For example the user ID “ADMIN” is different from “admin”. A corresponding User Number (used by the flow computer) is assigned to each user ID, in increasing order. The ADMIN account is User Number 1). The PIN edit box contains the flow computer PIN for the account. This needs to be a number in the range 0 to 65535. The data in this field is masked with asterisks so it cannot be viewed. The Confirm PIN edit box contains a second copy of the flow computer PIN for the account. This needs to be a number in the range 0 to 65535. The data in this field is masked with asterisks so it cannot be viewed. The Access Level dropdown list contains the access level for the account. View and read data level users can view data in Realflo and read new data from the flow computer. Users can also view any Custom Views assigned this security level. They cannot change the configuration, start or stop the calculations, set the clock, perform calibration or replace the flow computer program. View, read and write data level users can view data in Realflo, read new data from the flow computer, change the configuration, start or stop the calculations, set the clock and perform calibration. Users can also view and write initial values for any Custom Views assigned this security level. Users with this access level cannot create or edit Accounts or replace the flow computer program. In PEMEX mode user at this level cannot make any changes to the communication settings, Process I/O, Sensor configuration or Store and Forward settings. Administrator level users can perform the above functions plus administration of accounts. Users can also view, edit and write initial values for any Custom Views assigned this security level. Users with this access level can create or edit Accounts or replace the flow computer program. The OK button accepts the entries and closes the dialog. The PIN and Confirm PIN fields need to match or a message is shown. Correct the values and press OK again. The Cancel button discards the changes and closes the dialog. The Help button displays the help for this dialog. Account PINs are not stored in the flow computer. Reading an account from the flow computer that does not already exist in Realflo will result in an account with a blank PIN. Lock Flow Computer Locking a flow computer stops unauthorized access. Commands sent to the flow computer when it is locked will be rejected. A flow computer that is unlocked operates without restriction. The Lock Flow Computer dialog specifies a password to be used to lock the controller and the commands that are locked. Realflo User and Reference Manual May 19, 2011 412 Realflo Expert Mode Reference Enter a password in the Password edit box. Re-enter the password in the Verify Password edit box. Any character string up to eight characters in length may be entered. Typing in these edit boxes is masked. An asterisk is shown for each character typed. The Prevent radio buttons select the commands that are locked. Locking the programming commands prevents modifying or viewing the program in the controller. Communication protocols can read and write the I/O database. Locking programming and database write commands prevents modifying or viewing the program and prevents writing to the I/O database. Communication protocols can read data from the I/O database, but cannot modify any data. Locking programming and database commands prevents modifying or viewing the program and prevents reading and writing the I/O database. Communication protocols cannot read or write the I/O database. The OK button verifies the passwords are the same and sends the lock controller command to the controller. The dialog is closed. If the passwords are not the same an error message is displayed. Control returns to the dialog. The Cancel button closes the dialog without any action. If the controller is already locked, a message indicating this is shown instead of the dialog. Unlock Flow Computer The Unlock Flow Computer dialog prompts the user for a password to be used to unlock the flow computer. If the flow computer is locked, the following dialog is displayed. Enter the password that was used to lock the flow computer in the Password edit box. Typing in this edit box is masked. An asterisk is shown for each character typed. The Cancel button closes the dialog without any action. Realflo User and Reference Manual May 19, 2011 413 Realflo Expert Mode Reference The OK button sends the Unlock Flow Computer command to the controller. If the password is correct the flow computer will be unlocked. If the password is not correct, the flow computer will remain locked. If you forget the controller password, the Override Flow Computer Lock command can be used to unlock the controller. It will erase programs in the controller. Override Flow Computer Lock The Override Flow Computer Lock dialog allows the user to unlock a flow computer without knowing the password. This can be used in the event that that the password is forgotten. To stop unauthorized access to the information in the flow computer, the C and Logic programs are erased. Selecting the Override Flow Computer Lock command displays the following dialog. The Yes button unlocks the flow computer and erases programs. The No button closes the dialog without any action. Show Lock Status The Show Lock Status command displays the flow computer lock state. It opens a dialog showing one of the following states: unlocked locked against programming commands locked against programming commands and database write locked against programming commands and database read/write The OK button closes the dialog. Realflo User and Reference Manual May 19, 2011 414 Realflo Expert Mode Reference Maintenance Menu Log On Use this command to log on to an account. This command is disabled if the Update Readings command is enabled. You need to enter the PIN for the account. This command is not available if there are no accounts created. The Log On dialog has the following controls. Enter the user ID in the User name edit box. Enter the PIN number in the PIN edit box. Text entered in this edit box is masked (i.e. asterisks are printed instead of the text). Click on OK button to accept the account name and PIN. If the PIN is correct, the user is given access. Otherwise the file is opened, but the user has no access to any data. The Cancel button closes the dialog. No changes are made. Read Logs/History Use this command to update the history and event logs with information from the controller. This command is disabled if the Update Readings command is enabled. The Read Logs/History command opens the Read Logs From Controller dialog. The flow computer ID is checked when the Read Logs/History command is selected. If the flow computer ID does not match the ID in the dialog Realflo displays the message “ The Flow Computer ID from the flow computer does not match the Flow Computer ID from the file.” Realflo User and Reference Manual May 19, 2011 415 Realflo Expert Mode Reference The Flow Run Range group of controls determines if data for all runs or for a single run is read. The All Runs radio button selects reading data for all runs. The Selected Run radio button selects reading from a single run. The drop-down list selects the run to be read. The Log Range group of controls determines what data is read. The controls apply to all runs selected using the Setup command. The Event Log check box selects if the event log is read. The Read All Events radio button selects the reading of all events in the controller. The control is grayed if the Event Log control is not selected. Select Just Read New Events to read unacknowledged events in the flow computer. If the operator has View, Read and Write Data or Administrator authorization then the events will be acknowledged after reading the new events. If the events in the log are not acknowledged, the event log will fill with 700 events. Operator activity will be prevented until the events are read and acknowledged. The control is grayed under the following conditions: o Realflo User and Reference Manual May 19, 2011 The event log is not selected. 416 Realflo Expert Mode Reference o The user has Read and View account privileges. o The Restrict Realflo users to reading all alarms and events option is selected in the Expert Mode Options menu. The Alarm Log check box selects if the alarm log is read. Select Just Read New Alarms to read unacknowledged alarms in the flow computer. If the operator has View, Read and Write Data or Administrator authorization then the alarms will be acknowledged after reading the new events. If the events in the log are not acknowledged, the alarm log will fill with 300 events. Operator activity will be prevented until the alarms are read and acknowledged. The control is grayed under the following conditions: o The alarm log is not selected. o The user has Read and View account privileges. o The Restrict Realflo users to reading all alarms and events option is selected in the Expert Mode Options menu. The Hourly History check box selects if the hourly history is read. The All Days radio button selects reading hourly history for all days stored in the controller. The Selected Days radio button selects reading hourly history for the range of days selected with the From and to drop-down lists. All records are read for the contract days whose first hour is within the date range. All records for the contract day are read, regardless of their calendar date. This may result in records with calendar days outside the range being added to the log. For example, if the contract day is configured to start at 7:00 AM. Reading hourly history for September 23 would return all the records where the first record in a day was between 7:00 on the rd th 23 to 6:59:59 AM on the 24 . The Daily History check box selects if the daily history is read. The All Days radio button selects reading hourly history for all days stored in the controller. The Selected Days radio button selects reading hourly history for the range of days selected with the From and to drop-down lists. All records are read for the contract days whose first record is within the date range. All records for the contract day are read, regardless of their calendar date. This may result in records with calendar days outside the range being added to the log. For example, if the contract day is configured to start at 7:00 AM. Reading daily history for September 23 would return all the daily records whose end time is in the range 7:00 on rd th the 23 to 6:59:59 AM on the 24 . The From controls contain the oldest previous day for which the hourly or daily history is to be read. The initial value is 35 days before the current day. The control is enabled when the Hourly History or Daily History checkbox is checked and the Selected Days radio button is selected. Change this date to avoid reading data that has previously been read into the log. The to controls contain the recent previous day for which the hourly or daily history is to be read. The initial value is the current day. The allowed range is the same or greater than the value in the From control. The control is enabled when the Hourly History or Daily History checkbox is checked Realflo User and Reference Manual May 19, 2011 417 Realflo Expert Mode Reference and the Selected Days radio button is selected. Change this date when wanting to read older data only. Leaving this date at its default will result in the recent data being read. The dates are formatted using the short date style from the Date page of the Regional Settings in the Control Panel. The OK button reads the selected logs from the controller. If no log is selected, the dialog is closed with no further action. The Cancel button closes the dialog. The Help button invokes the Help engine and displays the help page for this dialog. Calibration Use this command to calibrate the temperature sensor, static pressure sensor, and differential pressure sensor or pulse counter input. This command is disabled if the Update Readings command is enabled. The calibration dialogs lead you through the calibration procedure. When more than one sensor is selected, they are forced and then the calibration cycle will be allowed for each sensor in turn. This allows multiple variable transmitters such as the MVT to be calibrated. The flow computer ID is checked when the calibration command is selected. If the flow computer ID does not match the ID in the dialog Realflo displays the message “ The Flow Computer ID from the flow computer does not match the Flow Computer ID from the file.” WARNING The same input sensor can be used for more than one flow run. When the sensor is calibrated for one run, Realflo only forces the input value for that run. When the sensor is disconnected to do the calibration, the live input to the other run will be disconnected and the value will not be correct. The flow computer does not support forcing of inputs during calibration on more than one run. Inputs from an MVT may be used by more than one run. The flow computer supports calibration of an MVT that has inputs used by multiple flow runs. After the run is selected, the configuration for the run is read from the flow computer. The calibration selection page for the run is then displayed. Connections for SCADAPack Sensor Calibration It should be noted that when an Absolute (Static) Pressure calibration is performed the bypass or cross feed valve on the manifold needs to be open. When performing a Differential Pressure calibration the bypass valve needs to be closed. Differential Pressure Calibration Connections Realflo User and Reference Manual May 19, 2011 418 Realflo Expert Mode Reference Absolute Pressure Calibration Connections Realflo User and Reference Manual May 19, 2011 419 Realflo Expert Mode Reference Sensor Calibration When the Calibration command is selected the Sensor Calibration dialog is displayed. The Run, or Sensor transmitter, to be calibrated is selected from this dialog. The Sensor Calibration dialog allows the selection meter run or MVT for calibration. Select the Run radio button and then select a meter run to calibrate. Transmitters used for the meter run may be calibrated. This section is disabled if runs are using MVT transmitters. Follow the steps in the Run Calibration Procedure. Select Sensor radio button and select one of the MVT tags to calibrate a MVT transmitter. The MVT tags that have been configured will be in MVT selection box. Follow the steps in the Sensor Calibration Procedure. The <Back button returns to the previous step. Backing up does not erase events from the flow computer event log. The back button is not enabled on the first step since there is no previous step. The Next> button starts the calibration procedure. After the Run, or MVT, is selected, the configuration for the run is read from the flow computer. The Run, or MVT, calibration page for the run is then displayed. The Cancel button closes the dialog and stops the transmitter calibration. When you click the Cancel button to abort the calibration the following message is displayed. Click Yes to abort the calibration. Click No to continue with the calibration. The default button is No. Realflo User and Reference Manual May 19, 2011 420 Realflo Expert Mode Reference WARNING Realflo uses live values from the sensor when calibration is cancelled. Be sure to connect all sensors first. Realflo does not erase any calibration events from the flow computer when canceling. The Help button displays the online help file. Realflo User and Reference Manual May 19, 2011 421 Realflo Expert Mode Reference Run Calibration Procedure When the Run radio button is selected the Run Calibration dialog is displayed. The transmitters for the run are selected for calibration from this dialog. Realflo uses live values from the sensor when calibration is cancelled, connect all sensors first. WARNING The same input sensor can be used for more than one flow run. When the sensor is calibrated for one run, Realflo only forces the input value for that run. When the sensor is disconnected to do the calibration, the live input to the other run will be disconnected and the value will not be correct. The flow computer does not support forcing of inputs during calibration on more than one run. Select the sensors to be calibrated by checking the appropriate boxes. More than one sensor may be selected for calibration. The <Back button is not enabled as this is the initial step. The Next> button completes the selections and opens the Step 1: Force Value dialog. The Cancel button closes the dialog and stops the transmitter calibration. When you click the Cancel button to abort the calibration the following message is displayed. Click Yes to abort the calibration. Click No to continue with the calibration. The default button is No. Realflo User and Reference Manual May 19, 2011 422 Realflo Expert Mode Reference WARNING Realflo uses live values from the sensor when calibration is cancelled. Be sure to connect all sensors first. Realflo does not erase any calibration events from the flow computer when canceling. The Help button displays the online help file. Calibration Step 1: Force Value The flow calculations continue to execute while calibrating sensors. The sensor value needs to be forced to either the current value or a fixed value during calibration. This dialog lets you select the current value of the input or a fixed value of your choice. If a sensor was forced before starting the execution of a calibration, the sensor will remain in a forced state after the calibration process is completed or even if the calibration process is cancelled before completion. Realflo User and Reference Manual May 19, 2011 423 Realflo Expert Mode Reference When more than one sensor is selected, they each need to be forced to a current or fixed value before any of the other steps are performed. A Step 1: Force Value dialog will be presented for each sensor selected for calibration. The input register associated with this input is displayed to aid you in determining which input you are calibrating. Check the Current Value radio button to use the current value for the sensor. Check the Fixed Value radio button and enter a value to use for the calibration in the entry box. The No Change radio button will be selected if the value is currently forced. (You may still select one of the other two radio buttons if desired). The <Back button returns to the previous step. Backing up does not erase events from the flow computer event log. When the Next> button is pressed Realflo records the start of calibration for the sensor in the event log. The sensor input is forced. The sensor may now be disconnected from the process. The Cancel button closes the dialog and stops the transmitter calibration. When you click the Cancel button to abort the calibration the following message is displayed. Click Yes to abort the calibration. Click No to continue with the calibration. The default button is No. Realflo User and Reference Manual May 19, 2011 424 Realflo Expert Mode Reference WARNING Realflo uses live values from the sensor when calibration is cancelled. Be sure to connect all sensors first. Realflo does not erase any calibration events from the flow computer when canceling. The Help button displays the online help file. Calibration Step 2: Record As Found Values As-found readings indicate how the sensor was calibrated before adjustment. These can be used to correct flow measurement errors resulting from an out of calibration sensor. Follow the procedure your company has set for taking as-found readings. You need to record at least one as-found reading. To take as-found readings: Apply a known signal to the sensor, or measure the signal applied to the sensor with a calibrated instrument. Enter the applied value in the Applied Value edit box. Realflo User and Reference Manual May 19, 2011 425 Realflo Expert Mode Reference The measured value from the process is shown in the Measured Value box. When it has settled, click on the Record button to record an asfound reading. Repeat the process to record additional readings. As readings are recorded they are automatically entered in the record window. The applied values are listed under the Applied column. The measured values are listed under the Measured column and the deviation between the readings is listed under the Deviation column. For Run Calibration the deviation is calculated as follows. The output full scale and zero scale are taken from the input configuration for the run. span = input full scale – input zero scale deviation = (measured - applied) / span The <Back button returns to the previous step. Backing up does not erase events from the flow computer event log. The Next> button proceeds to the next step. The Cancel button is greyed and an as found reading needs to be recorded. When you click the Cancel button to abort the calibration the following message is displayed. Click Yes to abort the calibration. Click No to continue with the calibration. The default button is No. WARNING Realflo uses live values from the sensor when calibration is cancelled. Be sure to connect all sensors first. Realflo does not erase any calibration events from the flow computer when canceling. The Help button displays the online help file. Calibration Step 3: Calibration Required Realflo User and Reference Manual May 19, 2011 426 Realflo Expert Mode Reference The as-found readings indicate if calibration is required. Examine the list of as-found readings. If the sensor is in need of calibration, select Yes. Otherwise select No. As readings are recorded they are automatically entered in the record window. The applied values are listed under the Applied column. The measured values are listed under the Measured column and the deviation between the readings is listed under the Deviation column. For Run Calibration the deviation is calculated as follows. The output full scale and zero scale are taken from the input configuration for the run. span = input full scale – input zero scale deviation = (measured - applied) / span The <Back button returns to the previous step. Backing up does not erase events from the flow computer event log. The Next> button proceeds to the next step. The Cancel button is greyed and an as found reading needs to be recorded. When you click the Cancel button to abort the calibration the following message is displayed. Click Yes to abort the calibration. Click No to continue with the calibration. The default button is No. Realflo User and Reference Manual May 19, 2011 427 Realflo Expert Mode Reference WARNING Realflo uses live values from the sensor when calibration is cancelled. Be sure to connect all sensors first. Realflo does not erase any calibration events from the flow computer when canceling. The Help button displays the online help file. Calibration Step 4: Calibrate Sensor This dialog aids you in calibrating a sensor by displaying the measured value from the sensor and the as-found readings. Follow the procedure your company or the sensor supplier has set to calibrate the sensor. When the sensor calibration is complete, you may wish to check the as-left measurements that will be recorded in the next step. This confirms that you have calibrated the sensor correctly before placing it back in service. As readings are recorded they are automatically entered in the record window. The applied values are listed under the Applied column. The measured values are listed under the Measured column and the deviation between the readings is listed under the Deviation column. For Run Calibration the deviation is calculated as follows. The output full scale and zero scale are taken from the input configuration for the run. span = input full scale – input zero scale deviation = (measured - applied) / span Click on the Next> button when the calibration is complete. Calibration Step 5: Record As Left Values Realflo User and Reference Manual May 19, 2011 428 Realflo Expert Mode Reference As-left readings indicate how the sensor was calibrated. These can be used to verify sensor calibration. Follow the procedure your company has set for taking as-left readings. You need to record at least one as-left reading. To take as-left readings: Apply a known signal to the sensor, or measure the signal applied to the sensor with a calibrated instrument. Enter the applied value in the Applied Value edit box. The measured value from the process is shown. When it has settled, click on the Record button to record an as-left reading. Repeat the process to record additional readings. As readings are recorded they are automatically entered in the record window. The applied values are listed under the Applied column. The measured values are listed under the Measured column and the deviation between the readings is listed under the Deviation column. For Run Calibration the deviation is calculated as follows. The output full scale and zero scale are taken from the input configuration for the run. span = input full scale – input zero scale deviation = (measured - applied) / span When required readings are taken, click on the Next> button. Calibration Step 6: Restore Live Input The sensors need to be reconnected to the process and the input hardware before calibration is complete. Reconnect sensors and verify connections are correct. Realflo User and Reference Manual May 19, 2011 429 Realflo Expert Mode Reference Click on the Next button when the sensor is connected. WARNING Realflo uses live values from the sensor when calibration is cancelled. Be sure to connect all sensors first. Realflo User and Reference Manual May 19, 2011 430 Realflo Expert Mode Reference Calibration Step 7: Calibration Report Comment Realflo creates, stores, and prints calibration reports for each calibration session performed. Comments may be added to the calibration report using the Calibration Report Comment dialog as shown below. Enter any comments or leave the window blank. Click the Next button when completed entering comments. Calibration Step 8: Calibration Report The Calibration Report dialog allows the saving of the calibration report. Select Save Report to File to save the report. o Type the name of the report in the Save Report to File window. The default location and name are specified on the Calibration Report Options dialog. o Select Browse to select a different file name. Realflo User and Reference Manual May 19, 2011 431 Realflo Expert Mode Reference o Check View Calibration Report After Saving the File to view the saved calibration report file. Default is checked. o Select Do not Save Report to skip saving the calibration report. o Click the Finis button to complete the calibration process. If selected the Calibration report will be displayed as shown below. Realflo User and Reference Manual May 19, 2011 432 Realflo Expert Mode Reference Sensor Calibration Procedure When the Sensor radio button is selected in the Sensor Calibration dialog the Sensor Calibration dialog is displayed. The transmitter number, transmitter tag name, the communication port and the transmitter address associated with this transmitter are displayed to aid you in determining which input you are calibrating. Check the Calibrate Temperature Sensor check box to select the temperature sensor for calibration. This will add the Temperature to the Calibration order list box. Check the Calibrate Static Pressure Sensor check box to select the static pressure sensor for calibration. This will add the Static Pressure to the Calibration order list box. Check the Calibrate Differential Pressure Sensor check box to select the differential pressure sensor for calibration. This will add the Diff. Pressure to the Calibration order list box. The Calibration Order list displays the list of sensors to be calibrated. Sensors are calibrated in order from the top of the list. Select Move Up button to move the specified item in the list up. The button is disabled if highlight item is on the top of the list or the list is empty. Select Move Down button to move the specified item in the list down. The button is disabled if highlight item is on the bottom of the list or the list is empty. The <Back button is not enabled as this is the initial step. Realflo User and Reference Manual May 19, 2011 433 Realflo Expert Mode Reference The Next> button completes the selections and opens the Step 1: Force Value dialog. The Cancel button closes the dialog and stops the transmitter calibration. When you click the Cancel button to abort the calibration the following message is displayed. Click Yes to abort the calibration. Click No to continue with the calibration. The default button is No. WARNING Realflo uses live values from the sensor when calibration is cancelled. Be sure to connect all sensors first. Realflo does not erase any calibration events from the flow computer when canceling. The Help button displays the online help file. Calibration Step 1: Force Value The flow calculations continue to execute while calibrating sensors. The sensor value needs to be forced to either the current value or a fixed value during calibration. This dialog lets you select the current value of the input or a fixed value of your choice. If a sensor was forced before starting the execution of a calibration, the sensor will remain in a forced state after the calibration process is completed or even if the calibration process is cancelled before completion. Realflo User and Reference Manual May 19, 2011 434 Realflo Expert Mode Reference When more than one sensor is selected, they each need to be forced to a current or fixed value before any of the other steps are performed. Select the value you wish to use, for each sensor, by clicking the appropriate radio button for each sensor. Check the Current Value radio button to use the current value for the sensor. Check the Fixed Value radio button and enter a value to use for the calibration in the entry box. The No Change radio button will be selected if the value is currently forced. (Note: You may still select one of the other two radio buttons if desired). The <Back button returns to the previous step. Backing up does not erase events from the flow computer event log. When the Next> button is pressed Realflo records the start of calibration for the sensor in the event log. The sensor input is forced. The sensor can now be disconnected from the process. The Cancel button closes the dialog and stops the transmitter calibration. When you click the Cancel button to abort the calibration the following message is displayed. Click Yes to abort the calibration. Click No to continue with the calibration. The default button is No. Realflo User and Reference Manual May 19, 2011 435 Realflo Expert Mode Reference WARNING Realflo uses live values from the sensor when calibration is cancelled. Be sure to connect all sensors first. Realflo does not erase any calibration events from the flow computer when canceling. The Help button displays the online help file. Calibration Step 2: Record As- Found Values As-found readings indicate how the sensor was calibrated before adjustment. These can be used to correct flow measurement errors resulting from an out of calibration sensor. Follow the procedure your company has set for taking as-found readings. You need to record at least one as-found reading. Realflo will record As Found values to the units type selected for the meter run. If the units type for the meter run and the MVT are not the same then the MVT units are scaled to the meter run units. To take as-found readings: Realflo User and Reference Manual May 19, 2011 436 Realflo Expert Mode Reference Apply a known signal to the sensor, or measure the signal applied to the sensor with a calibrated instrument. Enter the applied value in the Applied Value edit box. The measured value from the process is shown in the Measured Value box. When it has settled, click on the Record button to record an asfound reading. Repeat the process to record additional readings. As readings are recorded they are automatically entered in the record window. The applied values are listed under the Applied column. The measured values are listed under the Measured column and the deviation between the readings is listed under the Deviation column. For Sensor Calibration the deviation is calculated as follows. The operating limits are read from the flow computer. span = upper range limit - lower range limit deviation = (measured - applied) / span The <Back button returns to the previous step. Backing up does not erase events from the flow computer event log. The Next> button proceeds to the next step. The Cancel button is grayed and an as found reading needs to be recorded. When you click the Cancel button to abort the calibration the following message is displayed. Click Yes to abort the calibration. Click No to continue with the calibration. The default button is No. WARNING Realflo uses live values from the sensor when calibration is cancelled. Be sure to connect all sensors first. Realflo does not erase any calibration events from the flow computer when canceling. The Help button displays the online help file. Calibration Step 3: Calibration Required Realflo User and Reference Manual May 19, 2011 437 Realflo Expert Mode Reference The as-found readings indicate if calibration is required. Examine the list of as-found readings. If the sensor is in need of calibration, select Yes. Otherwise select No. As readings are recorded they are automatically entered in the record window. The applied values are listed under the Applied column. The measured values are listed under the Measured column and the deviation between the readings is listed under the Deviation column. For Run Calibration the deviation is calculated as follows. The output full scale and zero scale are taken from the input configuration for the run. span = input full scale – input zero scale deviation = (measured - applied) / span The <Back button returns to the previous step. Backing up does not erase events from the flow computer event log. The Next> button proceeds to the next step. The Cancel button is grayed out and an “as found reading” needs to be recorded. When you click the Cancel button to abort the calibration the following message is displayed. Click Yes to abort the calibration. Click No to continue with the calibration. The default button is No. WARNING Realflo User and Reference Manual May 19, 2011 438 Realflo Expert Mode Reference Realflo uses live values from the sensor when calibration is cancelled. Be sure to connect all sensors first. Realflo does not erase any calibration events from the flow computer when canceling. The Help button displays the online help file. Calibration Step 4: Calibrate SCADAPack 4101, 4202 or 4203 Step four in the calibration procedure varies depending on the type of transmitter being calibrated. Use this section if you are calibrating a SCADAPack 4101, 4202 or 4203 transmitter. This dialog aids you in calibrating a sensor by displaying the measured value from the sensor and the as-found readings. Follow the procedure your company or the sensor supplier has set to calibrate the sensor. When the sensor calibration is complete, you may wish to check the as-left measurements that will be recorded in the next step. This confirms that you have calibrated the sensor correctly before placing it back in service. The Static Pressure can only have a span calibration performed if at least 5% of the rated pressure is applied. The RTD Zero can only be adjusted +/- 1% of the RTD upper limit, typically 8.5 degrees C, relative to the settings used when a reset sensor command was last issued. The list box displays the as-found values listed in the list of Record AsFound Values dialog. The Measured Value displays the measured value from the sensor. As readings are recorded they are automatically entered in the record window. The applied values are listed under the Applied column. The Realflo User and Reference Manual May 19, 2011 439 Realflo Expert Mode Reference measured values are listed under the Measured column and the deviation between the readings is listed under the Deviation column. For MVT Calibration the deviation is calculated as follows. The operating limits are read from the flow computer. span = upper range limit - lower range limit deviation = (measured - applied) / span Calibration Step 4: Calibrate SCADAPack 4101 Step four in the calibration procedure varies depending on the type of transmitter being calibrated. Use this section if you are calibrating a SCADAPack 4101 transmitter. The as-found readings, for each sensor, will indicate if calibration is required for the sensor. You are prompted to use the 4000 Configurator application to perform the calibration. The 4000 Configurator software is installed from the Control Microsystems Hardware Documentation CD. The Next> button proceeds to the next step. The Help button displays the online help file. Calibration Step 4: Calibrate 3095 Transmitter Step four in the calibration procedure varies depending on the type of transmitter being calibrated. Use this section if you are calibrating a 3905 transmitter. This dialog aids you in calibrating a sensor by displaying the measured value from the sensor and the as-found readings. Follow the procedure your company or the sensor supplier has set to calibrate the sensor. When the sensor calibration is complete, you may wish to check the as-left measurements that will be recorded in the next step. This confirms that you have calibrated the sensor correctly before placing it back in service. Realflo User and Reference Manual May 19, 2011 440 Realflo Expert Mode Reference The list box displays the as-found values listed in the list of Record AsFound Values dialog. As readings are recorded they are automatically entered in the record window. The applied values are listed under the Applied column. The measured values are listed under the Measured column and the deviation between the readings is listed under the Deviation column. For Sensor Calibration the deviation is calculated as follows. The operating limits are read from the flow computer. span = upper range limit - lower range limit deviation = (measured - applied) / span The Calibrate Sensor section of the Calibrate Sensor dialog displays the current calibration settings and selectable radio buttons for configuring the sensor calibration. The Radio buttons enable the changing of the zero and span for the Temperature, Static Pressure and Differential Pressure sensors. For Temperature sensors, an additional radio button allows the user to fix the Temperature value in the event the temperature reading is outside the configured limits. Select the Re-Zero radio button to enable a new entry in the Applied Value field. This field displays the current zero value. The button is labeled Re-Zero if the Re-Zero radio button is selected. Clicking the Re-Zero button writes the zero applied value to the transmitter immediately. Select the Calculate Span radio button to enable a new entry in the Applied Value field. This field displays the current span value. The button is labeled Calibrate if the Calibrate Span radio button is selected. Clicking the Calibrate button writes the span applied value to the transmitter immediately. When calibrating the temperature sensor you may select the Default Temperature radio button to enable a new entry in the Applied Value field. Realflo User and Reference Manual May 19, 2011 441 Realflo Expert Mode Reference The button is labeled Set if the Default Temperature radio button is selected. The transmitter returns the fixed temperature value if the RTD isnot working, or if the RTD is not connected. The valid range is –40 to 1200 F or –40 to 648.89 C. The default value is 60 F or 15.56 C. The new fixed temperature point is written to the transmitter immediately. The Measured Value displays the measured value from the sensor. Realflo records the points at which MVT calibration was performed in the event log. Each time the Re-Zero button is clicked the following information is recorded. Event Name New Value Previous Value Target Re-zero Temperature The applied value entered by the user The measured value from the flow computer Each time the Calibrate button is clicked the following information is recorded. Event Name New Value Previous Value Target Temperature Span The applied value entered by the user The measured value from the flow computer Each time the Set Default button is clicked the following information is recorded. Event Name New Value Previous Value Set Default Temperature The applied value entered by the user The measured value from the flow computer Calibration Step 4: Record As Left Values As-left readings indicate how the sensor was calibrated. These can be used to verify sensor calibration. Follow the procedure your company has set for taking as-left readings. You need to record at least one as-left reading. Realflo User and Reference Manual May 19, 2011 442 Realflo Expert Mode Reference Realflo will record the As Found values to the units type selected for the meter run. If the units type for the meter run and the transmitter are not the same then the transmitter units are scaled to the meter run units. To take as-left readings: Apply a known signal to the sensor, or measure the signal applied to the sensor with a calibrated instrument. Enter the applied value in the Applied Value edit box. The measured value from the process is shown. When it has settled, click on the Record button to record an as-left reading. As readings are recorded they are automatically entered in the record window. The applied values are listed under the Applied column. The measured values are listed under the Measured column and the deviation between the readings is listed under the Deviation column. For Sensor Calibration the deviation is calculated as follows. The operating limits are read from the flow computer. span = upper range limit - lower range limit deviation = (measured - applied) / span Repeat the process to record additional readings. When the required readings are taken, click on the Next> button. Calibration Step 5: Restore Live Input The sensors need to be reconnected to the process and the input hardware before calibration is complete. Reconnect sensors and verify connections are correct. Click on the Finish button when the sensor is connected. WARNING Realflo User and Reference Manual May 19, 2011 443 Realflo Expert Mode Reference The live value from all sensors is used as soon as the Finish button is clicked. Be sure to connect all sensors first. Calibration Step 6: Calibration Report Comment Realflo creates, stores, and prints calibration reports for each calibration session performed. Comments may be added to the calibration report using the Calibration Report Comment dialog as shown below. Enter any comments or leave the window blank. Click the Next button when completed entering comments. Calibration Step 7: Calibration Report Realflo User and Reference Manual May 19, 2011 444 Realflo Expert Mode Reference The Calibration Report dialog allows the saving of the calibration report. Select Save Report to File to save the report. Type the name of the report in the Save Report to File window. The default location and name are specified on the Calibration Report Options dialog. Select Browse to select a different file name. Check View Calibration Report After Saving the File to view the saved calibration report file. Default is checked. Select Do not Save Report to skip saving the calibration report. Click the Finis button to complete the calibration process. If selected the Calibration report will be displayed as shown below. Realflo User and Reference Manual May 19, 2011 445 Realflo Expert Mode Reference Recovering From a PC Crash During Calibration If power to the PC is disconnected or another event prevents the completion of the calibration procedure, the flow computer is left in calibration mode. The sensor input is left at the forced value. This needs to be corrected or the proper flow measurement will not be made. To recover, simply restart the calibration. From the Flow Computer menu, select Calibrate. Follow the on-screen instructions. You may have repeat steps already performed, depending on when the crash occurred. Recovering From a Power Loss During Calibration If power is lost to the flow computer during calibration, the calibration is aborted. The flow computer uses the live inputs from the sensors when power is restored. If you were part way through calibration when the power was lost, you will have to restart the calibration. If possible, restore the sensor to an operating state before restoring power to the flow computer. Replacing a Sensor When a sensor is not working it needs to be replaced. If you have a working sensor you can replace it immediately. Replacing a sensor is similar to calibration. At the As-Found stage it will be necessary to take at least one reading. If possible take enough readings to show how the sensor has stopped working. This may make it possible to correct previous flow readings. Answer Yes when asked if you want to calibrate the sensor. During the calibration step, remove the sensor and replace it with a working sensor. Take the same As-Left readings as you would for calibration. If a working sensor is not available, it may be possible to continue measuring flow by forcing a value for the sensor. Consult your company‟s procedures before attempting this. Forcing of input registers can be done using Telepace (see the Telepace manual for details). Calibration Report Options The calibration report options command specifies where the calibration report is stored when the Calibration Report Options dialog is displayed. Realflo User and Reference Manual May 19, 2011 446 Realflo Expert Mode Reference Realflo suggests report file names. The Format window selects the name format. The valid values are listed below. The default is to include all information. file name (Flow Computer ID) - Run# (run ID) file name (Flow Computer ID) - Run# file name (Flow Computer ID) - run ID file name - Run# (run ID) file name - Run# file name - run ID Flow Computer ID - Run# (run ID) Flow Computer ID - Run# Flow Computer ID - run ID Run# (run ID) run ID The Example control shows the file name that will be suggested for the current file. The text Calibration Report is appended to any suggestions. The Report File Location window is used to select where reports are stored: Type the folder where reports are to be stored. Click Browse to select a folder. These options are stored in the registry and apply to any files opened in Realflo. The default file name is file name (Flow Computer ID) - Run# (run ID) The default location when Realflo is first run is the Realflo installation folder. Change Orifice Plate The Change Orifice Plate command allows the orifice plate to be changed for AGA-3 meter runs. This command supports Dual Chamber Orifice fittings and Singe Chamber Orifice fittings. Realflo User and Reference Manual May 19, 2011 447 Realflo Expert Mode Reference When selected this command opens the Orifice Plate Change wizard is started and will prompt you through the plate change procedure. The flow computer ID is checked when the Change Orifice Plate command is selected. If the flow computer ID does not match the ID Realflo displays the message “ The Flow Computer ID from the flow computer does not match the Flow Computer ID from the file.” The command is aborted. Select Meter Run When the Change Orifice command is selected the Change Orifice Plate dialog is displayed. The Run dropdown selection displays the runs using AGA –3 flow calculations. Select the run to change or inspect the orifice plate. The <Back button returns to the previous step. Backing up does not erase events from the flow computer event log. Realflo does not attempt to reverse the effect of a previous step when backing up. For example, backing up to the force values step does not restore the live values. The Next> button completes the run selection and the wizard moves to the next step. This button is grayed out if there are no flow runs configured to use the AGA-3 flow calculation. The Cancel button aborts the plate change and displays the following message. Click Yes to abort the calibration. Realflo User and Reference Manual May 19, 2011 448 Realflo Expert Mode Reference Click No to continue with the plate change. The default button is No. Realflo User and Reference Manual May 19, 2011 449 Realflo Expert Mode Reference WARNING Realflo uses live values from the sensor when the plate change is cancelled. Be sure to connect all sensors first. Realflo does not erase any events from the flow computer when the plate change is cancelled. Realflo restores live values (ends forcing) when Cancel is clicked. The Help button displays the online help file. Choose Orifice Fitting Type Step This page allows the users to select the type of orifice fitting. Select Dual Chamber Orifice Fitting if a dual chamber fitting is present. Flow accumulation with estimated values will continue during the plate change. Select Singe Chamber Orifice Fitting if a single chamber fitting is present. Flow accumulation will stop during the plate change. The Next button moves to the next step. The next step is described in the section Dual Chamber Orifice if a dual chamber fitting is selected. The next step is described in the section Single Chamber Orifice if a single chamber fitting is selected. The Cancel button closes the dialog and stops the plate change procedure. The Help button displays the online Help file. Dual Chamber Orifice A dual chamber orifice allows the user to change, or inspect, the orifice plate without stopping the flow. These are generally large custody transfer sites Realflo User and Reference Manual May 19, 2011 450 Realflo Expert Mode Reference where the orifice fitting is bypassed during the change or inspection procedure. The Change Orifice Plate Command forces the Static Pressure, Differential Pressure and Temperature inputs to a fixed value during the orifice plate change or inspection procedure. This command is disabled if the Update Readings command is enabled. The flow is estimated during the procedure using the fixed values. This command allows a user to place a flow run into estimation mode to allow an orifice plate to be changed or inspected. Changing the orifice plate involves the following steps. Set the estimated flow to be used during the orifice plate change by forcing inputs to fixed values. Change the orifice size. Complete the orifice plate change and resume normal flow measurement. The Flow Computer ID is checked when the Change Orifice Plate command is selected. If the Flow Computer ID does not match the ID Realflo displays the message “ The Flow Computer ID from the flow computer does not match the Flow Computer ID from the file.” The command is aborted. Force Input Step This step forces the flow run inputs. An estimated flow will be calculated while the plate change is in progress. The current values are updated every second. Select the value you wish to use, for each sensor, by clicking the appropriate radio button for each sensor. Check the Current Value radio button to use the current value for the sensor. Check the Fixed Value radio button and enter a value to use for the calibration in the entry box. Realflo User and Reference Manual May 19, 2011 451 Realflo Expert Mode Reference If an input on a run is not currently forced, the default value configured for the Values for Sensor Fail field on the Configuration Tool Bar > Run n > Inputs tab needs to be entered for the Fixed Value The default value to use when the Value on Sensor Fail option on the Inputs tab is set to Use Default Value field. The <Back button returns to the previous step. Backing up does not erase events from the flow computer event log. Realflo does not attempt to reverse the effect of a previous step when backing up. For example, backing up to the force values step does not restore the live values. The Next> button completes the force inputs step and the wizard moves to the next step. Realflo records the start of the plate change procedure in the event log and forces the sensor inputs. The Cancel button aborts the plate change and displays the following message. Click Yes to abort the calibration. Click No to continue with the plate change. The default button is No. WARNING Realflo uses live values from the sensor when the plate change is cancelled. Be sure to connect all sensors first. Realflo does not erase any events from the flow computer when the plate change is cancelled. Realflo restores live values (ends forcing) when Cancel is clicked. The Help button displays the online help file. Change Orifice Plate Step The orifice plate can now be changed. The forced inputs are used while the change is in progress. This dialog allows you to enter the new orifice plate diameter. Realflo User and Reference Manual May 19, 2011 452 Realflo Expert Mode Reference The Current Orifice Diameter and Current Pipe Diameter are displayed for reference. Enter the new orifice size in the New Orifice Diameter entry box. If the diameter is not valid, Realflo displays the following a message box. You need to enter a valid orifice diameter. Click the OK button to return to the Change Orifice dialog. The Beta Ratio is calculated and displayed for orifice diameter changes. The <Back button returns to the previous step. Backing up does not erase events from the flow computer event log. Realflo does not attempt to reverse the effect of a previous step when backing up. For example, backing up to the force values step does not restore the live values. The Next> button completes the change orifice step and the wizard moves to the last step. The Cancel button aborts the plate change and displays the following message. Realflo User and Reference Manual May 19, 2011 453 Realflo Expert Mode Reference Click Yes to abort the calibration. Click No to continue with the plate change. The default button is No. WARNING Realflo uses live values from the sensor when the plate change is cancelled. Be sure to connect all sensors first. Realflo does not erase any events from the flow computer when the plate change is cancelled. Realflo restores live values (ends forcing) when Cancel is clicked. The Help button displays the online help file. Complete Orifice Plate Change The Finish Plate Change is the last step in the Plate Change wizard. The <Back button returns to the previous step. Backing up does not erase events from the flow computer event log. Realflo does not attempt to reverse the effect of a previous step when backing up. For example, backing up to the force values step does not restore the live values. The Finish button completes the orifice plate change wizard and closes the dialog. Realflo restores the sensor live values Realflo User and Reference Manual May 19, 2011 454 Realflo Expert Mode Reference The Help button displays the online help file. Realflo User and Reference Manual May 19, 2011 455 Realflo Expert Mode Reference Single Chamber Orifice A single chamber orifice requires the flow be stopped while an orifice plate is changed. The Change Orifice Plate command prompts the user to stop the flow before changing the plate and start the flow after changing the plate. Changing the orifice plate involves the following steps. Confirm that flow has stopped. Change the orifice size. Complete the orifice plate change. The Flow Computer ID is checked when the Change Orifice Plate command is selected. If the Flow Computer ID does not match the ID Realflo displays the message “ The Flow Computer ID from the flow computer does not match the Flow Computer ID from the file.” The command is aborted. Stop Flow Step This step stops the flow run. The current inputs can be monitored while the flow is stopped. The <Back button returns to the previous step. Backing up does not erase events from the flow computer event log. Realflo does not attempt to reverse the effect of a previous step when backing up. For example, backing up to the force values step does not restore the live values. The Next> button completes the Stop Flow step and the wizard moves to the next step. Realflo records the start of the plate change procedure in the event log and forces the sensor inputs. The Cancel button aborts the plate change and closes the wizard. The Help button displays the online help file. Change Orifice Plate Step Realflo User and Reference Manual May 19, 2011 456 Realflo Expert Mode Reference The orifice plate can now be changed. The forced inputs are used while the change is in progress. This dialog allows you to enter the new orifice plate diameter. The Current Orifice Diameter and Current Pipe Diameter are displayed for reference. Enter the new orifice size in the New Orifice Diameter entry box. If the diameter is not valid, Realflo displays the following a message box. You need to enter a valid orifice diameter. Click the OK button to return to the Change Orifice dialog. The Beta Ratio is calculated and displayed for orifice diameter changes. The <Back button returns to the previous step. Backing up does not erase events from the flow computer event log. Realflo does not attempt to reverse the effect of a previous step when backing up. The Next> button completes the change orifice step and the wizard moves to the last step. The Cancel button aborts the plate change and closes the wizard. The Help button displays the online help file. Complete Orifice Plate Change The Finish Plate Change is the last step in the Plate Change wizard. Realflo User and Reference Manual May 19, 2011 457 Realflo Expert Mode Reference The <Back button returns to the previous step. Backing up does not erase events from the flow computer event log. Realflo does not attempt to reverse the effect of a previous step when backing up. The Finish button completes the orifice plate change wizard and closes the dialog. Realflo restores the sensor live values The Help button displays the online help file. Calculation Control This command is used to control the execution of flow calculations for all meter runs in the controller. This command is disabled if the Update Readings command is enabled. The flow calculation for each selected meter run may be running or stopped. When the Calculation Control dialog is opened, the current state of the flow calculation is read from the controller. The flow computer ID is checked when the Calculation Control dialog is opened. If the flow computer ID does not match the ID in the dialog Realflo displays the message “ The Flow Computer ID from the flow computer does not match the Flow Computer ID from the file.” When the dialog is opened, the current state of every runs is read from the controller. The dialog displays a table containing four columns. Realflo User and Reference Manual May 19, 2011 458 Realflo Expert Mode Reference The Run column displays each run configured in Realflo. The Current Status column displays the flow calculation state of each run. Running indicates the flow calculation is executing. Stopped indicates the flow calculation is not executing. Not Set indicates the run state is not known. The New Status column displays the state of the flow calculation for each run. To change the state of the flow calculation, click on the cell or move the cursor to the cell with the arrow keys and press the space bar. The setting changes as follows: Running changes to Stopped Stopped changes to Running Not set changes to Running The Interval column displays the time between calculations for the run. This value cannot be changed. The OK button accepts the changes and writes them to the controller. When there are no changes, nothing is written to the controller. The Cancel button closes the dialog. The Help button displays the help page for this dialog. Update Readings This command is used to control updating of the Current Readings view. This command is disabled if the Update Readings command is enabled. When this command is selected readings are continuously updated from the flow computer. A check mark is shown next to the command when readings are updating. The flow computer ID is checked when the Update Readings command is selected. If the flow computer ID does not match the ID in the dialog Realflo displays the message “The Flow Computer ID from the flow computer does not match the Flow Computer ID from the file.” Realflo User and Reference Manual May 19, 2011 459 Realflo Expert Mode Reference The Current Readings view is updated continuously until the Update Readings command is selected again. Update Readings Once This command is used to control updating of the Current Readings view. When this command is selected readings are updated once from the flow computer. The flow computer ID is checked when the Update Readings Once command is selected. If the flow computer ID does not match the ID in the dialog Realflo displays the message “ The Flow Computer ID from the flow computer does not match the Flow Computer ID from the file.” The Current Readings view is updated once each time the Update Readings Once command is selected. Force Inputs The Force Sensor command allows forcing and unforcing of the value of the temperature sensor, static pressure sensor, differential pressure sensor, or pulse counter input. When selected the command opens the Force Sensor wizard. Flow calculations continue to execute while sensors are forced. The flow computer ID is checked when the Force Inputs command is selected. If the flow computer ID does not match the ID in the dialog Realflo displays the message “ The Flow Computer ID from the flow computer does not match the Flow Computer ID from the file.” When the Force Inputs command is selected the Select Run or Transmitter to Force dialog is opened as shown below. Realflo User and Reference Manual May 19, 2011 460 Realflo Expert Mode Reference Select Run to force the sensor inputs for a flow run using analog or pulse sensors. Select the run to be forced from the dropdown list. The Run controls are disabled if there are no runs using analog or pulse sensors. See the section Force Run Inputs below for information on forcing Run inputs. Select Sensor to force the inputs from a transmitter. Select the transmitter to be forced from the dropdown list beside it. See the section Force Transmitter Sensor Inputs below for information on forcing transmitter inputs. The Back button is disabled, as this is the first step in the wizard. The Next starts the force procedure. The Cancel closes the wizard. The Help displays the online help file. Force Run Inputs When the Force Run is selected the Force Input Values dialog is displayed as shown below. The Force Input Values step selects the analog inputs of a flow run which will be forced or unforced. It displays the inputs that can be forced . The Force Input Value dialog contains sections for Force Differential Pressure Input, Force Static Pressure Input and Force Temperature Input. When AGA-7 calculation type is used the dialog contains a section for Force Pulse Counter Input instead of Force Differential Pressure Input. For each input the following parameters are available: Select Current Value to use the current value for the sensor. The current value is shown beside the control and updates continuously. Realflo User and Reference Manual May 19, 2011 461 Realflo Expert Mode Reference Select Fixed Value to use a fixed value. Type the value in the edit box. Select No Change, input is already forced to leave the input in its current state. This is selected by default if the value is already forced. This is disabled if the input is not forced. Select Remove to remove the existing forcing. This button is disabled if the input is not forced. If an input on a run is not currently forced, the default value configured for the Values for Sensor Fail field on the Configuration Tool Bar > Run n > Inputs tab needs to be entered for the Fixed Value The default value to use when the Value on Sensor Fail option on the Inputs tab is set to Use Default Value field. The Back button moves back to the Select Run or Transmitter to Force step. Backing up does not erase the events from the flow computer event log or remove forcing from inputs previously processed. The Finish button completes the Force Input Value process and closes the dialog. The Cancel button closes the wizard. This does not undo any changes. Any input that is already forced will remain forced. The Help displays the online help file. Realflo User and Reference Manual May 19, 2011 462 Realflo Expert Mode Reference Force Transmitter Sensor Inputs This step shows the selected transmitter inputs. The inputs can be forced to the current value or a fixed value, left as it is, or the forcing can be removed. The transmitter number, transmitter tag name, the communication port and the transmitter address associated with this transmitter are displayed to aid you in determining which input you are forcing. The Sensor Values dialog contains sections for Force Differential Pressure, Force Static Pressure and Force Temperature. For each input the following parameters are available: Select Current Value to use the current value for the sensor. The current value is shown beside the control and updates continuously. Select Fixed Value to use a fixed value. Type the value in the edit box. Select No Change, input is already forced to leave the input in its current state. This is selected by default if the value is already forced. This is disabled if the input is not forced. Select Remove Force to remove the existing forcing. This button is disabled if the input is not forced. The Back button moves back to the Select Run or Transmitter to Force step. Realflo User and Reference Manual May 19, 2011 463 Realflo Expert Mode Reference Backing up does not erase events from the flow computer event log, or remove forcing from inputs previously processed. The Finish button completes the Force Input Value process and closes the dialog. The Cancel button closes the wizard. This does not undo any changes. Any input that is already forced will remain forced. The Help displays the online help file. The same transmitter can be used for more than one flow run. Realflo forces the value for each run. Realflo User and Reference Manual May 19, 2011 464 Realflo Expert Mode Reference Communication Menu The Communication menu contains the commands for configuring the communication between the flow computer and Realflo. PC Communications Settings Command The PC Communication Settings command defines the communication protocol and communication link to communicate between the personal computer (PC) and SCADAPack or 4202 controller. When the command is select the Communication Protocols Configuration dialog is displayed as shown below. The Communication Protocols dropdown list box presents available communication protocols. The default protocol is Modbus RTU. Click the dropdown list icon at the right of the window to display a list of available communication protocols. ClearSCADA DNP DNP/TCP DNP/UDP Modbus ASCII Modbus ASCII in TCP Modbus ASCII in UDP [Modbus RTU] Modbus RTU in TCP Modbus RTU in UDP Modbus/TCP Modbus/UDP Modbus/USB SCADAServer The Configure button opens configuration dialog for the selected communication protocol. Realflo User and Reference Manual May 19, 2011 465 Realflo Expert Mode Reference The Realflo Command Timeout edit box sets the length of time, in seconds, to wait for a response to a Realflo command. The valid range is 3 to 60 seconds and the default value is 10. Clicking the OK button will make the selected protocol the active one. Clicking the Cancel button abandons any and any changes made via this dialog. ClearSCADA The ClearSCADA protocol driver is used for communicating with a local or remote ClearSCADA server. The ClearSCADA server will then, in turn, communicate with devices as per its configuration. The ClearSCADA protocol driver communicates with the ClearSCADA server using a TCP connection. To configure a ClearSCADA protocol connection, highlight ClearSCADA in the Communication Protocols window and click the Configure button. The ClearSCADA Configuration window is displayed. To select a configured ClearSCADA protocol connection, highlight ClearSCADA in the Communication Protocols window and click the OK button. To close the dialog, without making a selection click the Cancel button. General Parameters When ClearSCADA protocol is selected for configuration the ClearSCADA Configuration dialog is opened with the General tab selected as shown below. The General tab component information section contains the name of Communication Component and the author, Control Microsystems. The Communications Settings grouping contains details necessary to establish communication to a device through a local or remote ClearSCADA installation. Realflo User and Reference Manual May 19, 2011 466 Realflo Expert Mode Reference The Modbus Station entry specifies the station address of the target device. Valid values are 1 to 65534. The Outstation Set entry specifies the ClearSCADA outstation set to which the target device is attached. The valid range is 0 to 65535. The default value is 0. The IP Address / Name entry specifies the Ethernet IP address in dotted quad notation, or a DNS host name that can be resolved to an IP address, of the PC where the ClearSCADA server is installed. The following IP addresses are not supported and will be rejected: 0.0.0.0 through 0.255.255.255 127.0.0.0 through 127.255.255.255 (except 127.0.0.1) 224.0.0.0 through 224.255.255.255 255.0.0.0 through 255.255.255.255. The TCP Port Number entry specifies the TCP port on the ClearSCADA server. The valid range is 0 to 65535. The default value is 49155 Click Restore Defaults to restore default values to fields on this page, except for the IP Address / Name field. The contents of this field will remain unchanged. Advanced Parameters Advanced parameters are used to control the message size for the protocol. Control over message length is needed when writing large amounts of data over certain communication networks. A larger value can improve communication speed but can increase the number of missing transmissions. A smaller value can reduce the number of missing transmissions but may reduce throughput. When the Advanced tab heading is clicked the Advanced dialog is opened as shown below. The protocol that ClearSCADA uses to communicate with the remote SCADAPack controller needs to be taken into account when determining the message size. In ClearSCADA the Modbus tab in the Channel object sets the maximum packet size ClearSCADA uses when communicating with the remote SCADAPack controller. Realflo User and Reference Manual May 19, 2011 467 Realflo Expert Mode Reference The Maximum selection indicates that the host application is to package messages using the maximum size allowable by the protocol. The Custom Value selection specifies a custom value for the message size. This value will indicate to the host application to package messages to be no larger than what is specified, if it is possible. Valid values are 2 to 264. The default value is 264. Click Restore Defaults to restore default values to fields on this page. Information Information displays detailed driver information. When the Information tab heading is clicked the Information dialog is opened as shown below. Realflo User and Reference Manual May 19, 2011 468 Realflo Expert Mode Reference Module is the physical name of the driver. File Version is the version number of the driver. In GAC indicates whether the module (assembly) was loaded from the Global Assembly Cache (GAC). Runtime is the version of the Common Language Runtime (CLR) the driver was built against. Copyright indicates the copyright information of the protocol driver. DNP The DNP protocol driver is used to communicate over a serial DNP network to SCADAPack controllers configured for DNP communication. To configure a DNP protocol connection, highlight DNP in the Communication Protocols window and click the Configure button. The DNP Configuration window is displayed. To select a configured DNP protocol connection, highlight DNP in the Communication Protocols window and click the OK button. To close the dialog, without making a selection click the Cancel button. General Parameters When DNP is selected for configuration the DNP Configuration dialog is opened with the General tab selected as shown below. Realflo User and Reference Manual May 19, 2011 469 Realflo Expert Mode Reference The General tab component information section contains the name of Communication Component and the author, Control Microsystems. The DNP Communication Settings logical grouping contains DNP specific communication settings including the DNP Station address, the timeout interval as well as the number of attempts. The RTU Station parameter sets the target DNP station number. Valid entries are 0 to 65519. The default address is 1. The Timeout parameter sets the length of time, in seconds, to wait for a response from the controller before retrying (see Attempts). Valid entries are 1 to 255. The default is 3. The Attempts parameter sets number of times to send a command to the controller before giving up and reporting this to the host application. Valid entries are 1 to 20. The default is 3. This Serial Port Settings grouping contains details directly related to the PC‟s communication port including the port number, the baud rate, parity, and stop bit settings. The Port parameter specifies the PC serial port to use. The DNP driver determines what serial ports are available on the PC and presents these in the drop-down menu list. The available serial ports list will include any USB to serial converters used on the PC. The default value is the first existing port found by the driver. Realflo User and Reference Manual May 19, 2011 470 Realflo Expert Mode Reference The Baud parameter specifies the baud rate to use for communication. The menu list displays selections for 300, 600, 1200, 2400, 4800, 9600, 19200, 38400, and 57600. The default value is 9600. The Parity parameter specifies the type of parity to use for communication. The menu list displays selections for none, odd and even parity. The default value is None. The Stop Bits parameter specifies the number of stop bits to use for communication. The menu list displays selections for 1 and 2 stop bits. The default value is 1 bit. The Connection Type parameter specifies the serial connection type. The DNP driver supports direct serial connection with no flow control, Requestto-send (RTS) and clear-to-send (CTS) flow control and PSTN dial-up connections. The menu list displays selections for Direct Connection, RTS/CTS Flow Control and Dial Up Connection. The default selection is Direct Connection. Select Direct Connection for RS-232 for RS-485 connections not requiring the hardware control lines on the serial ports. Select RTS/CTS Flow Control to communicate over radio or leasedline networks using modems that require RTS/CTS handshaking. Selecting RTS/CTS Flow Control adds a new tab, Flow Control, to the DNP Configuration dialog. Refer to the Flow Control Parameters section below for configuration details. Select Dial Up Connection to communication over dial up modems. Selecting Dial Up Connection adds a new tab, Dial Up, to the DNP Configuration dialog. Refer to the Dial Up Parameters section below for configuration details. Click Restore Defaults to restore default values to fields on this page. Flow Control Parameters Flow Control parameters are used to configure how RTS and CTS control is used. When RTS/CTS Flow Control is selected for Connection Type the Flow Control tab is added to the DNP Configuration dialog. When the Flow Control tab heading is clicked the Flow Control dialog is opened as shown below. Realflo User and Reference Manual May 19, 2011 471 Realflo Expert Mode Reference RTS/CTS Flow Control The RTS/CTS Flow Control grouping contains two mutually exclusive options, Use Hardware Control Lines and Use CTS Delay Time. These options enable the driver to communicate over radio or leased-line networks using modems that require RTS/CTS handshaking. The Use Hardware Control Lines option specifies a half-duplex connection requiring the use of the Request to Send (RTS) and Clear to Send (CTS) hardware control lines to control the flow of data. This selection is used with radios and dedicated telephone line modems. The driver turns on the RTS signal when it wants to transmit data. The modem or other device then turns on CTS when it is ready to transmit. The driver transmits the data, and then turns off the RTS signal. This selection is mutually exclusive of the Use CTS Delay Time selection described below. This is the default selection. The Use CTS Delay Time option is selected if the device cannot generate a CTS signal. The driver will assert RTS then wait the specified Delay Time, in milliseconds, before proceeding. This option is mutually exclusive with the Use Hardware Control Lines selection described above. The Delay Time parameter sets the time in milliseconds that the driver will wait after asserting RTS before proceeding. The value of this field needs to be smaller than the Time Out value set in the General parameters dialog. For example, if the Timeout value is set to 3 seconds, the CTS Delay Time can be set to 2999 milliseconds or less. The minimum value for this field is 0 milliseconds. The value is initially set to 0 by default. Realflo User and Reference Manual May 19, 2011 472 Realflo Expert Mode Reference The Hold Time parameter specifies the time, in milliseconds, that the driver will hold RTS after the last character is transmitted. This is useful for devices that immediately end transmission when RTS is turned off. The value of this field needs to be smaller than the Time Out value set in the General parameters dialog. For example, if the Timeout value is set to 3 seconds, the CTS Delay Time can be set to 2999 milliseconds or less. The minimum value for this field is 0 milliseconds. The value is initially set to 0 by default. Click Restore Defaults to restore default values to fields on this page. Dial Up Parameters Dial Up parameters are used to configure a dial up connection. When Dial Up is selected for Connection Type the Dial Up tab is added to the DNP Configuration dialog. When the Dial Up tab heading is clicked the Dial Up dialog is opened as shown below. The Dialing Prefix parameter specifies the commands sent to the modem before dialing. A maximum of 32 characters can be entered. Any character is valid. The default value is “&F0 &K0 S0=1 &W0 &Y0”. The Phone Number parameter specifies the telephone number of the remote controller. A maximum of 32 characters can be entered. Any character is valid. This field‟s default value is blank. The Dial Type parameter specifies the dialing type. Valid values are Pulse and Tone. The default value is Tone. Realflo User and Reference Manual May 19, 2011 473 Realflo Expert Mode Reference The Dial Attempts parameter specifies how many dialing attempts will be made. Valid values are 1 to 10. The default value is 1. The Connect Time parameter specifies the amount of time in seconds the modem will wait for a connection. Valid values are 6 to 300. The default value is 60. The Pause Time parameter specifies the time in seconds between dialing attempts. Valid values are 6 to 600. The default value is 30. Check the Inactivity Timeout check box to automatically terminate the dialup connection after a period of inactivity. The Inactivity Time edit box is enabled only if this option is checked. The default state is checked. Enter the inactivity period, in minutes, in the Inactivity Timeout box. The dialup connection will be terminated automatically after the specified number of minutes of inactivity has lapsed. This option is only active if the Inactivity Timeout box is checked. Valid values are from 1 to 30 minutes. The default value is 1. Click Restore Defaults to restore default values to fields on this page, except for the Phone Number field. The content of this field will remain unchanged. Advanced Parameters DNP Configuration Advanced parameters set the DNP master station address and message size control. When the Advanced tab heading is clicked the Advanced dialog is opened as shown below. Realflo User and Reference Manual May 19, 2011 474 Realflo Expert Mode Reference The Master Station parameter is the DNP station address assumed by this communication component. When this driver sends out commands, responses from the controller will be directed to this address. The default value is 100. The Message Size grouping parameters are used to control the message size for the protocol. Control over message length is needed when writing large amounts of data over certain communication networks. A larger value can improve communication speed but can increase the number of missing transmissions. A smaller value can reduce the number of missing transmissions but may reduce throughput. The Maximum selection indicates that the host application is to package messages using the maximum size allowable by the protocol. The Custom Value selection specifies a custom value for the message size. This value indicates to the host application to package messages to be no larger than what is specified, if it is possible. Valid values are 2 to 231. The default value is 231. Click Restore Defaults to restore default values to fields on this page. Information Information displays detailed driver information. When the Information tab heading is clicked the Information dialog is opened as shown below. Realflo User and Reference Manual May 19, 2011 475 Realflo Expert Mode Reference The Information grouping presents informative details concerning the executing protocol driver. Module is the physical name of the driver. File Version is the version number of the driver. In GAC indicates whether the module (assembly) was loaded from the Global Assembly Cache (GAC). Runtime is the version of the Common Language Runtime (CLR) the driver was built against. Copyright indicates the copyright information of the protocol driver. DNP/TCP The DNP/TCP protocol driver is used to communicate over an Ethernet DNP network to SCADAPack controllers configured for DNP/TCP communication. To configure a DNP/TCP protocol connection, highlight DNP/TCP in the Communication Protocols window and click the Configure button. The DNP/TCP Configuration window is displayed. To select a configured DNP/TCP protocol connection, highlight DNP/TCP in the Communication Protocols window and click the OK button. To close the dialog, without making a selection click the Cancel button. General Page When DNP/TCP protocol is selected for configuration the DNP/TCP Configuration dialog is opened with the General tab selected as shown below. Realflo User and Reference Manual May 19, 2011 476 Realflo Expert Mode Reference The DNP Communication Settings grouping contains DNP specific communication settings including the DNP Station address, the timeout interval as well as the number of attempts. The RTU Station parameter specifies the DNP station number of the target device. The valid range is 0 to 65519. The default is station 1. The Timeout parameter specifies the length of time, in seconds, to wait for a response from the controller before retrying (see Attempts). Valid values are 1 to 255. The default value is 3 seconds. The Attempts parameter specifies the number of times to send a command to the controller before giving up and reporting this to the host application. Valid values are 1 to 20. The default value is 3 attempts. The Host Network Details grouping contains information about the IP network including the target‟s IP address or name, and the TCP port number on which it is listening. More details on these below. IP Address / Name The IP Address / Name parameter specifies the Ethernet IP address of the target RTU, or a DNS name that can be resolved to an IP address. The default value is blank. The following IP addresses are not supported and will be rejected: 0.0.0.0 through 0.255.255.255 127.0.0.0 through 127.255.255.255 (except 127.0.0.1) 224.0.0.0 through 224.255.255.255 255.0.0.0 through 255.255.255.255. The TCP Port No. field specifies the TCP port of the remote device. Valid values are 0 to 65535. The default value is 20000. Click Restore Defaults to restore default values to fields on this page, except for the IP Address / Name field. The content of this field will remain unchanged. Advanced Page Advanced parameters are used to set the Master Station address and control the message size for the protocol. Control over message length is needed when writing large amounts of data over certain communication networks. A larger value can improve communication speed but can increase the number of missing transmissions. A smaller value can reduce the number of missing transmissions but may reduce throughput. When the Advanced tab heading is clicked the Advanced dialog is opened as shown below. Realflo User and Reference Manual May 19, 2011 477 Realflo Expert Mode Reference The Master Station parameter specifies the DNP station address of the Realflo application. When Realflo sends out commands, responses from the target controller will be directed to this address. The valid range is 0 to 65519, except that this value cannot be the same as the target RTU Station number. The default value is 100. The Maximum selection indicates that you want the host application to package messages using the maximum size allowable by the protocol. The Custom value selection specifies a custom value for message size. This value indicates to the host application to package messages to be no larger than what is specified if possible. The valid range for the Custom value field is from 2 to 231. Maximum is selected by default. Click Restore Defaults to restore default values to fields on this page. Information Page Realflo User and Reference Manual May 19, 2011 478 Realflo Expert Mode Reference The Information page displays detailed driver information. When the Information tab is clicked the Information dialog is opened as shown below. The Information grouping presents informative details concerning the executing protocol driver. Module is the physical name of the driver. File Version is the version number of the driver. In GAC indicates whether the module (assembly) was loaded from the Global Assembly Cache (GAC). Runtime is the version of the Common Language Runtime (CLR) the driver was built against. Copyright indicates the copyright information of the protocol driver. DNP/UDP The DNP/UDP protocol driver is used to communicate over an Ethernet DNP network to SCADAPack controllers configured for DNP/UDP communication. Realflo User and Reference Manual May 19, 2011 479 Realflo Expert Mode Reference To configure a DNP/UDP protocol connection, highlight DNP/UDP in the Communication Protocols window and click the Configure button. The DNP/UDP Configuration window is displayed. To select a configured DNP/UDP protocol connection, highlight DNP/UDP in the Communication Protocols window and click the OK button. To close the dialog, without making a selection click the Cancel button. General Page When DNP/UDP protocol is selected for configuration the DNP/UDP Configuration dialog is opened with the General tab selected as shown below. The DNP Communication Settings grouping contains DNP specific communication settings including the DNP Station address, the timeout interval as well as the number of attempts. The RTU Station parameter specifies the DNP station number of the target device. The valid range is 0 to 65519. The default is station 1. The Timeout parameter specifies the length of time, in seconds, to wait for a response from the controller before retrying (see Attempts). Valid values are 1 to 255. The default value is 3 seconds. The Attempts parameter specifies the number of times to send a command to the controller before giving up and reporting this to the host application. Valid values are 1 to 20. The default value is 3 attempts. Realflo User and Reference Manual May 19, 2011 480 Realflo Expert Mode Reference The Host Network Details grouping contains information about the IP network including the target‟s IP address or name, and the UDP port number on which it is listening. More details on these below. IP Address / Name The IP Address / Name parameter specifies the Ethernet IP address of the target RTU, or a DNS name that can be resolved to an IP address. The default value is blank. The following IP addresses are not supported and will be rejected: 0.0.0.0 through 0.255.255.255 127.0.0.0 through 127.255.255.255 (except 127.0.0.1) 224.0.0.0 through 224.255.255.255 255.0.0.0 through 255.255.255.255. The UDP Port No. field specifies the UDP port of the remote device. Valid values are 0 to 65534. The default value is 20000. Click Restore Defaults to restore default values to fields on this page, except for the IP Address / Name field. The content of this field will remain unchanged. Advanced Page Advanced parameters are used to set the Master Station address and control the message size for the protocol. Control over message length is needed when writing large amounts of data over certain communication networks. A larger value can improve communication speed but can increase the number of missing transmissions. A smaller value can reduce the number of missing transmissions but may reduce throughput. When the Advanced tab heading is clicked the Advanced dialog is opened as shown below. Realflo User and Reference Manual May 19, 2011 481 Realflo Expert Mode Reference The Master Station parameter specifies the DNP station address of the Realflo application. When Realflo sends out commands, responses from the target controller will be directed to this address. The valid range is 0 to 65519, except that this value cannot be the same as the target RTU Station number. The default value is 100. The Maximum selection indicates that you want the host application to package messages using the maximum size allowable by the protocol. The Custom value selection specifies a custom value for message size. This value indicates to the host application to package messages to be no larger than what is specified if possible. The valid range for the Custom value field is from 2 to 231. Maximum is selected by default. Click Restore Defaults to restore default values to fields on this page Information Page The Information page displays detailed driver information. When the Information tab is clicked the Information dialog is opened as shown below. The Information grouping presents informative details concerning the executing protocol driver. Module is the physical name of the driver. File Version is the version number of the driver. In GAC indicates whether the module (assembly) was loaded from the Global Assembly Cache (GAC). Realflo User and Reference Manual May 19, 2011 482 Realflo Expert Mode Reference Runtime is the version of the Common Language Runtime (CLR) the driver was built against. Copyright indicates the copyright information of the protocol driver. Modbus ASCII The Modbus ASCII protocol driver is used to communicate over a serial network, using Modbus ASCII framing, to SCADAPack controllers configured for Modbus ASCII protocol. To configure a Modbus ASCII protocol connection, highlight Modbus ASCII in the Communication Protocols window and click the Configure button. The Modbus ASCII Configuration window is displayed. To select a configured Modbus ASCII protocol connection, highlight Modbus ASCII in the Communication Protocols window and click the OK button. To close the dialog, without making a selection click the Cancel button. General Parameters When Modbus ASCII is selected for configuration the Modbus ASCII Configuration dialog is opened with the General tab selected as shown below. Realflo User and Reference Manual May 19, 2011 483 Realflo Expert Mode Reference The Modbus Communication Settings grouping contains Modbus specific communication settings including the addressing mode, the station address, the timeout interval as well as the number of attempts. The Addressing parameter selects standard or extended Modbus addressing. Standard addressing allows 255 stations and is compatible with standard Modbus devices. Extended addressing allows 65534 stations, with stations 1 to 254 compatible with standard Modbus devices. The default is Standard. The Station parameter sets the target station number. The valid range is 1 to 255 if standard addressing is used, and 1 to 65534 if extended addressing is used. The default is 1. The Timeout parameter sets the length of time, in seconds, to wait for a response from the controller before retrying (see Attempts). Valid entries are 1 to 255. The default is 3. The Attempts parameter sets number of times to send a command to the controller before giving up and reporting this to the host application. Valid entries are 1 to 20. The default is 3. This Serial Port Settings grouping contains details directly related to the PC‟s communication port including the port number, the baud rate, parity, and stop bit settings. The Port parameter specifies the PC serial port to use. The DNP driver determines what serial ports are available on the PC and presents these in the drop-down menu list. The available serial ports list will include any USB to serial converters used on the PC. The default value is the first existing port found by the driver. The Baud parameter specifies the baud rate to use for communication. The menu list displays selections for 300, 600, 1200, 2400, 4800, 9600, 19200, 38400, and 57600. The default value is 9600. The Parity parameter specifies the type of parity to use for communication. The menu list displays selections for none, odd and even parity. The default value is None. The Data Bits parameter specifies the number of data bits contained in the character frame. Valid values are for this field is 7 and 8 bits. The default value is 8 bits. The Stop Bits parameter specifies the number of stop bits to use for communication. The menu list displays selections for 1 and 2 stop bits. The default value is 1 bit. The Connection Type parameter specifies the serial connection type. The Modbus ASCII driver supports direct serial connection with no flow control, Request-to-send (RTS) and clear-to-send (CTS) flow control and PSTN dialup connections. The menu list displays selections for Direct Connection, RTS/CTS Flow Control and Dial Up Connection. The default selection is Direct Connection. Select Direct Connection for RS-232 for RS-485 connections not requiring the hardware control lines on the serial ports. Select RTS/CTS Flow Control to communicate over radio or leasedline networks using modems that require RTS/CTS handshaking. Selecting RTS/CTS Flow Control adds a new tab, Flow Control, to the Realflo User and Reference Manual May 19, 2011 484 Realflo Expert Mode Reference Modbus ASCII Configuration dialog. Refer to the Flow Control Parameters section below for configuration details. Select Dial Up Connection to communication over dial up modems. Selecting Dial Up Connection adds a new tab, Dial Up, to the Modbus ASCII Configuration dialog. Refer to the Dial Up Parameters section below for configuration details. Click Restore Defaults to restore default values to fields on this page. Modbus ASCII Configuration (Flow Control) Flow Control parameters are used to configure how RTS and CTS control is used. When RTS/CTS Flow Control is selected for Connection Type the Flow Control tab is added to the Modbus ASCII Configuration dialog. When the Flow Control tab heading is clicked the Flow Control dialog is opened as shown below. The RTS/CTS Flow Control grouping contains two mutually exclusive options, Use Hardware Control Lines and Use CTS Delay Time. These options enable the driver to communicate over radio or leased-line networks using modems that require RTS/CTS handshaking. The Use Hardware Control Lines option specifies a half-duplex connection requiring the use of the Request to Send (RTS) and Clear to Send (CTS) hardware control lines to control the flow of data. This selection is used with radios and dedicated telephone line modems. The driver turns on the RTS Realflo User and Reference Manual May 19, 2011 485 Realflo Expert Mode Reference signal when it wants to transmit data. The modem or other device then turns on CTS when it is ready to transmit. The driver transmits the data, and then turns off the RTS signal. This selection is mutually exclusive of the Use CTS Delay Time selection described below. This is the default selection. The Use CTS Delay Time option is selected if the device cannot generate a CTS signal. The driver will assert RTS then wait the specified Delay Time, in milliseconds, before proceeding. This option is mutually exclusive with the Use Hardware Control Lines selection described above. The Delay Time parameter sets the time in milliseconds that the driver will wait after asserting RTS before proceeding. The value of this field needs to be smaller than the Time Out value set in the General parameters dialog. For example, if the Timeout value is set to 3 seconds, the CTS Delay Time can be set to 2999 milliseconds or less. The minimum value for this field is 0 milliseconds. The value is initially set to 0 by default. The Hold Time parameter specifies the time, in milliseconds, that the driver will hold RTS after the last character is transmitted. This is useful for devices that immediately end transmission when RTS is turned off. The value of this field needs to be smaller than the Time Out value set in the General parameters dialog. For example, if the Timeout value is set to 3 seconds, the CTS Delay Time can be set to 2999 milliseconds or less. The minimum value for this field is 0 milliseconds. The value is initially set to 0 by default. Click Restore Defaults to restore default values to all fields on this page. Modbus ASCII Configuration (Dial Up) Dial Up parameters are used to configure a dial up connection. When Dial Up is selected for Connection Type the Dial Up tab is added to the Modbus ASCII Configuration dialog. When the Dial Up tab heading is clicked the Dial Up dialog is opened as shown below. Realflo User and Reference Manual May 19, 2011 486 Realflo Expert Mode Reference The Dialing Prefix parameter specifies the commands sent to the modem before dialing. A maximum of 32 characters can be entered. Any character is valid. The default value is “&F0 &K0 S0=1 &W0 &Y0”. The Phone Number parameter specifies the telephone number of the remote controller. A maximum of 32 characters can be entered. Any character is valid. This field‟s default value is blank. The Dial Type parameter specifies the dialing type. Valid values are Pulse and Tone. The default value is Tone. The Dial Attempts parameter specifies how many dialing attempts will be made. Valid values are 1 to 10. The default value is 1. The Connect Time parameter specifies the amount of time in seconds the modem will wait for a connection. Valid values are 6 to 300. The default value is 60. The Pause Time parameter specifies the time in seconds between dialing attempts. Valid values are 6 to 600. The default value is 30. Check the Inactivity Timeout check box to automatically terminate the dialup connection after a period of inactivity. The Inactivity Time edit box is enabled only if this option is checked. The default state is checked. Enter the inactivity period, in minutes, in the Inactivity Timeout box. The dialup connection will be terminated automatically after the specified number Realflo User and Reference Manual May 19, 2011 487 Realflo Expert Mode Reference of minutes of inactivity has lapsed. This option is only active if the Inactivity Timeout box is checked. Valid values are from 1 to 30 minutes. The default value is 1. Click Restore Defaults to restore default values to all fields on this page, except for the Phone Number field. The content of this field will remain unchanged. Advanced Parameters Advanced parameters are used to control the message size for the protocol. Control over message length is needed when writing large amounts of data over certain communication networks. A larger value can improve communication speed but can increase the number of missing transmissions. A smaller value can reduce the number of missing transmissions but may reduce throughput. When the Advanced tab heading is clicked the Advanced dialog is opened as shown below. The Message Size grouping parameters are used to control the message size for the protocol. Control over message length is needed when writing large amounts of data over certain communication networks. A larger value can improve communication speed but can increase the number of missing transmissions. A smaller value can reduce the number of missing transmissions but may reduce throughput. Realflo User and Reference Manual May 19, 2011 488 Realflo Expert Mode Reference The Maximum selection indicates that the host application is to package messages using the maximum size allowable by the protocol. The Custom Value selection specifies a custom value for the message size. This value indicates to the host application to package messages to be no larger than what is specified, if it is possible. Valid values are 2 to 250 when Addressing is set to Extended and Station is 255 or higher. When Addressing is set to Extended and Station is less than 255 valid values are 2 to 252. When Addressing is set to Standard valid values are 2 to 252. Click Restore Defaults to restore default values to fields on this page. Information Information displays detailed driver information. When the Information tab heading is clicked the Information dialog is opened as shown below. The Information grouping presents informative details concerning the executing protocol driver. Module is the physical name of the driver. File Version is the version number of the driver. In GAC indicates whether the module (assembly) was loaded from the Global Assembly Cache (GAC). Realflo User and Reference Manual May 19, 2011 489 Realflo Expert Mode Reference Runtime is the version of the Common Language Runtime (CLR) the driver was built against. Copyright indicates the copyright information of the protocol driver. Modbus ASCII in TCP Modbus ASCII in TCP message format is exactly same as that of the Modbus ASCII protocol. The main difference is that Modbus ASCII in TCP protocol communicates with a SCADAPack controller through the Internet and Modbus ASCII through the serial port. The Modbus ASCII in TCP protocol does not include a six-byte header prefix, as with the Modbus\TCP, but does include the Modbus „CRC-16‟ or „LRC‟ check fields. To configure a Modbus ASCII in TCP protocol connection, highlight Modbus ASCII in TCP in the Communication Protocols window and click the Configure button. The Modbus ASCII in TCP Configuration window is displayed. To select a configured Modbus ASCII in TCP protocol connection, highlight Modbus ASCII in TCP in the Communication Protocols window and click the OK button. To close the dialog, without making a selection click the Cancel button. General Parameters When Modbus ASCII in TCP is selected for configuration the Modbus ASCII in TCP Configuration dialog is opened with the General tab selected as shown below. Realflo User and Reference Manual May 19, 2011 490 Realflo Expert Mode Reference The Modbus Communication Settings grouping contains Modbus specific communication settings including the addressing mode, the station address, the timeout interval as well as the number of attempts. The Addressing parameter selects standard or extended Modbus addressing. Standard addressing allows 255 stations and is compatible with standard Modbus devices. Extended addressing allows 65534 stations, with stations 1 to 254 compatible with standard Modbus devices. The default is Standard. The Station parameter sets the target station number. The valid range is 1 to 255 if standard addressing is used, and 1 to 65534 if extended addressing is used. The default is 1. The Timeout parameter sets the length of time, in seconds, to wait for a response from the controller before retrying (see Attempts). Valid entries are 1 to 255. The default is 3. The Attempts parameter sets number of times to send a command to the controller before giving up and reporting this to the host application. Valid entries are 1 to 20. The default is 3. The Host Network Details grouping contains entries for the host‟s IP address or name and the TCP port on which it is listening. The IP Address / Name entry specifies the Ethernet IP address in dotted quad notation, or a DNS host name that can be resolved to an IP address, of the PC where the ClearSCADA server is installed. The following IP addresses are not supported and will be rejected: 0.0.0.0 through 0.255.255.255 127.0.0.0 through 127.255.255.255 (except 127.0.0.1) 224.0.0.0 through 224.255.255.255 255.0.0.0 through 255.255.255.255. The TCP Port No. field specifies the TCP port of the remote device. Valid values are 0 to 65535. The default value is 49153. Click Restore Defaults to restore default values to fields on this page, except for the IP Address / Name field. The content of this field will remain unchanged. Advanced Parameters Advanced parameters are used to control the message size for the protocol. Control over message length is needed when writing large amounts of data over certain communication networks. A larger value can improve communication speed but can increase the number of missing transmissions. A smaller value can reduce the number of missing transmissions but may reduce throughput. When the Advanced tab heading is clicked the Advanced dialog is opened as shown below. Realflo User and Reference Manual May 19, 2011 491 Realflo Expert Mode Reference The Message Size grouping parameters are used to control the message size for the protocol. Control over message length is needed when writing large amounts of data over certain communication networks. A larger value can improve communication speed but can increase the number of missing transmissions. A smaller value can reduce the number of missing transmissions but may reduce throughput. The Maximum selection indicates that the host application is to package messages using the maximum size allowable by the protocol. The Custom Value selection specifies a custom value for the message size. This value indicates to the host application to package messages to be no larger than what is specified, if it is possible. Valid values are 2 to 250 when Addressing is set to Extended and Station is 255 or higher. When Addressing is set to Extended and Station is less than 255 valid values are 2 to 252. When Addressing is set to Standard valid values are 2 to 252. Click Restore Defaults to restore default values to all fields on this page. Information Information displays detailed driver information. When the Information tab heading is clicked the Information dialog is opened as shown below. Realflo User and Reference Manual May 19, 2011 492 Realflo Expert Mode Reference The Information grouping presents informative details concerning the executing protocol driver. Module is the physical name of the driver. File Version is the version number of the driver. In GAC indicates whether the module (assembly) was loaded from the Global Assembly Cache (GAC). Runtime is the version of the Common Language Runtime (CLR) the driver was built against. Copyright indicates the copyright information of the protocol driver. Modbus ASCII in UDP Modbus ASCII in UDP protocol is similar to Modbus ASCII in TCP protocol. It has the same message format as the Modbus ASCII in TCP. The only difference between them is one uses TCP protocol and another uses UDP protocol. To configure a Modbus ASCII in TCP protocol connection, highlight Modbus ASCII in UDP in the Communication Protocols window and click the Configure button. The Modbus ASCII in UDP Configuration window is displayed. Realflo User and Reference Manual May 19, 2011 493 Realflo Expert Mode Reference To select a configured Modbus ASCII in TCP protocol connection, highlight Modbus ASCII in UDP in the Communication Protocols window and click the OK button. To close the dialog, without making a selection click the Cancel button. General Parameters When Modbus ASCII in UDP is selected for configuration the Modbus ASCII in UDP Configuration dialog is opened with the General tab selected as shown below. The Modbus Communication Settings grouping contains Modbus specific communication settings including the addressing mode, the station address, the timeout interval as well as the number of attempts. The Addressing parameter selects standard or extended Modbus addressing. Standard addressing allows 255 stations and is compatible with standard Modbus devices. Extended addressing allows 65534 stations, with stations 1 to 254 compatible with standard Modbus devices. The default is Standard. The Station parameter sets the target station number. The valid range is 1 to 255 if standard addressing is used, and 1 to 65534 if extended addressing is used. The default is 1. The Timeout parameter sets the length of time, in seconds, to wait for a response from the controller before retrying (see Attempts). Valid entries are 1 to 255. The default is 3. The Attempts parameter sets number of times to send a command to the controller before giving up and reporting this to the host application. Valid entries are 1 to 20. The default is 3. Realflo User and Reference Manual May 19, 2011 494 Realflo Expert Mode Reference The Host Network Details grouping contains entries for the host‟s IP address or name and the TCP port on which it is listening. The IP Address / Name entry specifies the Ethernet IP address in dotted quad notation, or a DNS host name that can be resolved to an IP address, of the PC where the ClearSCADA server is installed. The following IP addresses are not supported and will be rejected: 0.0.0.0 through 0.255.255.255 127.0.0.0 through 127.255.255.255 (except 127.0.0.1) 224.0.0.0 through 224.255.255.255 255.0.0.0 through 255.255.255.255. The UDP Port No. field specifies the UDP port of the remote device. Valid values are 0 to 65535. The default value is 49153. Click Restore Defaults to restore default values to fields on this page, except for the IP Address / Name field. The content of this field will remain unchanged. Advanced Parameters Advanced parameters are used to control the message size for the protocol. Control over message length is needed when writing large amounts of data over certain communication networks. A larger value can improve communication speed but can increase the number of missing transmissions. A smaller value can reduce the number of missing transmissions but may reduce throughput. When the Advanced tab heading is clicked, the Advanced dialog is opened as shown below. Realflo User and Reference Manual May 19, 2011 495 Realflo Expert Mode Reference The Message Size grouping parameters are used to control the message size for the protocol. Control over message length is needed when writing large amounts of data over certain communication networks. A larger value can improve communication speed but can increase the number of missing transmissions. A smaller value can reduce the number of missing transmissions but may reduce throughput. The Maximum selection indicates that the host application is to package messages using the maximum size allowable by the protocol. The Custom Value selection specifies a custom value for the message size. This value indicates to the host application to package messages to be no larger than what is specified, if it is possible. Valid values are 2 to 250 when Addressing is set to Extended and Station is 255 or higher. When Addressing is set to Extended and Station is less than 255 valid values are 2 to 252. When Addressing is set to Standard valid values are 2 to 252. Click Restore Defaults to restore default values to fields on this page. Information Information displays detailed driver information. When the Information tab heading is clicked the Information dialog is opened as shown below. The Information grouping presents informative details concerning the executing protocol driver. Realflo User and Reference Manual May 19, 2011 496 Realflo Expert Mode Reference Module is the physical name of the driver. File Version is the version number of the driver. In GAC indicates whether the module (assembly) was loaded from the Global Assembly Cache (GAC). Runtime is the version of the Common Language Runtime (CLR) the driver was built against. Copyright indicates the copyright information of the protocol driver. Modbus RTU Introduction The Modbus RTU protocol driver is used to communicate over a serial network, using Modbus RTU framing, to SCADAPack controllers configured for Modbus RTU protocol. To configure a Modbus RTU protocol connection, highlight Modbus RTU in the Communication Protocols window and click the Configure button. The Modbus RTU Configuration window is displayed. To select a configured Modbus RTU protocol connection, highlight Modbus RTU in the Communication Protocols window and click the OK button. To close the dialog, without making a selection click the Cancel button. General Parameters When Modbus RTU is selected for configuration the Modbus RTU Configuration dialog is opened with the General tab selected as shown below. Realflo User and Reference Manual May 19, 2011 497 Realflo Expert Mode Reference The Modbus Communication Settings grouping contains Modbus specific communication settings including the addressing mode, the station address, the timeout interval as well as the number of attempts. The Addressing parameter selects standard or extended Modbus addressing. Standard addressing allows 255 stations and is compatible with standard Modbus devices. Extended addressing allows 65534 stations, with stations 1 to 254 compatible with standard Modbus devices. The default is Standard. The Station parameter sets the target station number. The valid range is 1 to 255 if standard addressing is used and 1 to 65534 if extended addressing is used. The default is 1. The Timeout parameter sets the length of time, in seconds, to wait for a response from the controller before retrying (see Attempts). Valid entries are 1 to 255. The default is 3. The Attempts parameter sets number of times to send a command to the controller before giving up and reporting this to the host application. Valid entries are 1 to 20. The default is 3. This Serial Port Settings grouping contains details directly related to the PC‟s communication port including the port number, the baud rate, parity, and stop bit settings. The Port parameter specifies the PC serial port to use. The DNP driver determines what serial ports are available on the PC and presents these in Realflo User and Reference Manual May 19, 2011 498 Realflo Expert Mode Reference the drop-down menu list. The available serial ports list will include any USB to serial converters used on the PC. The default value is the first existing port found by the driver. The Baud parameter specifies the baud rate to use for communication. The menu list displays selections for 300, 600, 1200, 2400, 4800, 9600, 19200, 38400, and 57600. The default value is 9600. The Parity parameter specifies the type of parity to use for communication. The menu list displays selections for none, odd and even parity. The default value is None. The Stop Bits parameter specifies the number of stop bits to use for communication. The menu list displays selections for 1 and 2 stop bits. The default value is 1 bit. The Connection Type parameter specifies the serial connection type. The Modbus RTU driver supports direct serial connection with no flow control, Request-to-send (RTS) and clear-to-send (CTS) flow control and PSTN dialup connections. The menu list displays selections for Direct Connection, RTS/CTS Flow Control and Dial Up Connection. The default selection is Direct Connection. Select Direct Connection for RS-232 for RS-485 connections not requiring the hardware control lines on the serial ports. Select RTS/CTS Flow Control to communicate over radio or leasedline networks using modems that require RTS/CTS handshaking. Selecting RTS/CTS Flow Control adds a new tab, Flow Control, to the Modbus RTU Configuration dialog. Refer to the Flow Control Parameters section below for configuration details. Select Dial Up Connection to communication over dial up modems. Selecting Dial Up Connection adds a new tab, Dial Up, to the Modbus RTU Configuration dialog. Refer to the Dial Up Parameters section below for configuration details. Click Restore Defaults to restore default values to fields on this page. Modbus RTU Configuration (Flow Control) Flow Control parameters are used to configure how RTS and CTS control is used. When RTS/CTS Flow Control is selected for Connection Type the Flow Control tab is added to the Modbus RTU Configuration dialog. When the Flow Control tab heading is clicked the Flow Control dialog is opened as shown below. Realflo User and Reference Manual May 19, 2011 499 Realflo Expert Mode Reference The RTS/CTS Flow Control grouping contains two mutually exclusive options, Use Hardware Control Lines and Use CTS Delay Time. These options enable the driver to communicate over radio or leased-line networks using modems that require RTS/CTS handshaking. The Use Hardware Control Lines option specifies a half-duplex connection requiring the use of the Request to Send (RTS) and Clear to Send (CTS) hardware control lines to control the flow of data. This selection is used with radios and dedicated telephone line modems. The driver turns on the RTS signal when it wants to transmit data. The modem or other device then turns on CTS when it is ready to transmit. The driver transmits the data, and then turns off the RTS signal. This selection is mutually exclusive of the Use CTS Delay Time selection described below. This is the default selection. The Use CTS Delay Time option is selected if the device cannot generate a CTS signal. The driver will assert RTS then wait the specified Delay Time, in milliseconds, before proceeding. This option is mutually exclusive with the Use Hardware Control Lines selection described above. The Delay Time parameter sets the time in milliseconds that the driver will wait after asserting RTS before proceeding. The value of this field needs to be smaller than the Time Out value set in the General parameters dialog. For example, if the Timeout value is set to 3 seconds, the CTS Delay Time can be set to 2999 milliseconds or less. The minimum value for this field is 0 milliseconds. The value is initially set to 0 by default. The Hold Time parameter specifies the time, in milliseconds, that the driver will hold RTS after the last character is transmitted. This is useful for devices Realflo User and Reference Manual May 19, 2011 500 Realflo Expert Mode Reference that immediately end transmission when RTS is turned off. The value of this field needs to be smaller than the Time Out value set in the General parameters dialog. For example, if the Timeout value is set to 3 seconds, the CTS Delay Time can be set to 2999 milliseconds or less. The minimum value for this field is 0 milliseconds. The value is initially set to 0 by default. Click Restore Defaults to restore default values to fields on this page. Modbus RTU Configuration (Dial Up) Dial Up parameters are used to configure a dial up connection. When Dial Up is selected for Connection Type the Dial Up tab is added to the Modbus RTU Configuration dialog. When the Dial Up tab heading is clicked the Dial Up dialog is opened as shown below. The Dialing Prefix parameter specifies the commands sent to the modem before dialing. A maximum of 32 characters can be entered. Any characters are valid. The default value is “&F0 &K0 S0=1 &W0 &Y0”. The Phone Number parameter specifies the telephone number of the remote controller. A maximum of 32 characters can be entered. Any characters are valid. This field‟s default value is blank. The Dial Type parameter specifies the dialing type. Valid values are Pulse and Tone. The default value is Tone. The Dial Attempts parameter specifies how many dialing attempts will be made. Valid values are 1 to 10. The default value is 1. Realflo User and Reference Manual May 19, 2011 501 Realflo Expert Mode Reference The Connect Time parameter specifies the amount of time in seconds the modem will wait for a connection. Valid values are 6 to 300. The default value is 60. The Pause Time parameter specifies the time in seconds between dialing attempts. Valid values are 6 to 600. The default value is 30. Check the Inactivity Timeout check box to automatically terminate the dialup connection after a period of inactivity. The Inactivity Time edit box is enabled only if this option is checked. The default state is checked. Enter the inactivity period, in minutes, in the Inactivity Timeout box. The dialup connection will be terminated automatically after the specified number of minutes of inactivity has lapsed. This option is only active if the Inactivity Timeout box is checked. Valid values are from 1 to 30 minutes. The default value is 1. Click Restore Defaults to restore default values to fields on this page, except for the Phone Number field. The content of this field will remain unchanged. Advanced Parameters Advanced parameters are used to control the message size for the protocol. Control over message length is needed when writing large amounts of data over certain communication networks. A larger value can improve communication speed but can increase the number of missing transmissions. A smaller value can reduce the number of missing transmissions but may reduce throughput. When the Advanced tab heading is clicked the Advanced dialog is opened as shown below. Realflo User and Reference Manual May 19, 2011 502 Realflo Expert Mode Reference The Message Size grouping parameters are used to control the message size for the protocol. Control over message length is needed when writing large amounts of data over certain communication networks. A larger value can improve communication speed but can increase the number of missing transmissions. A smaller value can reduce the number of missing transmissions but may reduce throughput. The Maximum selection indicates that the host application is to package messages using the maximum size allowable by the protocol. The Custom Value selection specifies a custom value for the message size. This value indicates to the host application to package messages to be no larger than what is specified, if it is possible. Valid values are 2 to 250 when Addressing is set to Extended and Station is 255 or higher. When Addressing is set to Extended and Station is less than 255 valid values are 2 to 252. When Addressing is set to Standard valid values are 2 to 252. Click Restore Defaults to restore default values to fields on this page. Information Information displays detailed driver information. When the Information tab heading is clicked the Information dialog is opened as shown below. Realflo User and Reference Manual May 19, 2011 503 Realflo Expert Mode Reference The Information grouping presents informative details concerning the executing protocol driver. Module is the physical name of the driver. File Version is the version number of the driver. In GAC indicates whether the module (assembly) was loaded from the Global Assembly Cache (GAC). Runtime is the version of the Common Language Runtime (CLR) the driver was built against. Copyright indicates the copyright information of the protocol driver. Modbus RTU in TCP Modbus RTU in TCP message format is exactly same as that of the Modbus RTU protocol. The main difference is that Modbus RTU in TCP protocol communicates with a controller through the Internet and Modbus RTU protocol through the serial port. The Modbus RTU in TCP protocol does not include a six-byte header prefix, as with the Modbus\TCP, but does include the Modbus „CRC-16‟ or „LRC‟ check fields. The Modbus RTU in TCP message format supports Modbus RTU message format. Realflo User and Reference Manual May 19, 2011 504 Realflo Expert Mode Reference To configure a Modbus RTU in TCP protocol connection, highlight Modbus RTU in TCP in the Communication Protocols window and click the Configure button. The Modbus RTU in TCP Configuration window is displayed. To select a configured Modbus RTU in TCP protocol connection, highlight Modbus RTU in TCP in the Communication Protocols window and click the OK button. To close the dialog, without making a selection click the Cancel button. General Parameters When Modbus RTU in TCP is selected for configuration the Modbus RTU in TCP Configuration dialog is opened with the General tab selected as shown below. The Modbus Communication Settings grouping contains Modbus specific communication settings including the addressing mode, the station address, the timeout interval as well as the number of attempts. The Addressing parameter selects standard or extended Modbus addressing. Standard addressing allows 255 stations and is compatible with standard Modbus devices. Extended addressing allows 65534 stations, with stations 1 to 254 compatible with standard Modbus devices. The default is Standard. The Station parameter sets the target station number. The valid range is 1 to 255 if standard addressing is used and 1 to 65534 if extended addressing is used. The default is 1. Realflo User and Reference Manual May 19, 2011 505 Realflo Expert Mode Reference The Timeout parameter sets the length of time, in seconds, to wait for a response from the controller before retrying (see Attempts). Valid entries are 1 to 255. The default is 3. The Attempts parameter sets number of times to send a command to the controller before giving up and reporting this to the host application. Valid entries are 1 to 20. The default is 3. The Host Network Details grouping contains entries for the host‟s IP address or name and the TCP port on which it is listening. The IP Address / Name entry specifies the Ethernet IP address in dotted quad notation, or a DNS host name that can be resolved to an IP address, of the PC where the ClearSCADA server is installed. The following IP addresses are not supported and will be rejected: 0.0.0.0 through 0.255.255.255 127.0.0.0 through 127.255.255.255 (except 127.0.0.1) 224.0.0.0 through 224.255.255.255 255.0.0.0 through 255.255.255.255. The TCP Port No. field specifies the TCP port of the remote device. Valid values are 0 to 65535. The default value is 49152. Click Restore Defaults to restore default values to all fields on this page, except for the IP Address / Name field. The content of this field will remain unchanged. Advanced Parameters Advanced parameters are used to control the message size for the protocol. Control over message length is needed when writing large amounts of data over certain communication networks. A larger value can improve communication speed but can increase the number of missing transmissions. A smaller value can reduce the number of missing transmissions but may reduce throughput. When the Advanced tab heading is clicked the Advanced dialog is opened as shown below. Realflo User and Reference Manual May 19, 2011 506 Realflo Expert Mode Reference The Message Size grouping parameters are used to control the message size for the protocol. Control over message length is needed when writing large amounts of data over certain communication networks. A larger value can improve communication speed but can increase the number of missing transmissions. A smaller value can reduce the number of missing transmissions but may reduce throughput. The Maximum selection indicates that the host application is to package messages using the maximum size allowable by the protocol. The Custom Value selection specifies a custom value for the message size. This value indicates to the host application to package messages to be no larger than what is specified, if it is possible. Valid values are 2 to 250 when Addressing is set to Extended and Station is 255 or higher. When Addressing is set to Extended and Station is less than 255 valid values are 2 to 252. When Addressing is set to Standard valid values are 2 to 252. Click Restore Defaults to restore default values to fields on this page. Information Information displays detailed driver information. When the Information tab heading is clicked the Information dialog is opened as shown below. Realflo User and Reference Manual May 19, 2011 507 Realflo Expert Mode Reference The Information grouping presents informative details concerning the executing protocol driver. Module is the physical name of the driver. File Version is the version number of the driver. In GAC indicates whether the module (assembly) was loaded from the Global Assembly Cache (GAC). Runtime is the version of the Common Language Runtime (CLR) the driver was built against. Copyright indicates the copyright information of the protocol driver. Modbus RTU in UDP Modbus RTU in UDP protocol is similar to Modbus RTU in TCP protocol. It has the same message format as the RTU in TCP message. The only difference between them is one uses TCP protocol and another uses UDP protocol. To configure a Modbus RTU in UDP protocol connection, highlight Modbus RTU in UDP in the Communication Protocols window and click the Configure button. The Modbus RTU in UDP Configuration window is displayed. Realflo User and Reference Manual May 19, 2011 508 Realflo Expert Mode Reference To select a configured Modbus RTU in UDP protocol connection, highlight Modbus RTU in UDP in the Communication Protocols window and click the OK button. To close the dialog, without making a selection click the Cancel button. General Parameters When Modbus RTU in UDP is selected for configuration the Modbus RTU in UDP Configuration dialog is opened with the General tab selected as shown below. The Modbus Communication Settings grouping contains Modbus specific communication settings including the addressing mode, the station address, the timeout interval as well as the number of attempts. The Addressing parameter selects standard or extended Modbus addressing. Standard addressing allows 255 stations and is compatible with standard Modbus devices. Extended addressing allows 65534 stations, with stations 1 to 254 compatible with standard Modbus devices. The default is Standard. The Station parameter sets the target station number. The valid range is 1 to 255 if standard addressing is used and 1 to 65534 if extended addressing is used. The default is 1. The Timeout parameter sets the length of time, in seconds, to wait for a response from the controller before retrying (see Attempts). Valid entries are 1 to 255. The default is 3. The Attempts parameter sets number of times to send a command to the controller before giving up and reporting this to the host application. Valid entries are 1 to 20. The default is 3. Realflo User and Reference Manual May 19, 2011 509 Realflo Expert Mode Reference The Host Network Details grouping contains entries for the host‟s IP address or name and the TCP port on which it is listening. The IP Address / Name entry specifies the Ethernet IP address in dotted quad notation, or a DNS host name that can be resolved to an IP address, of the PC where the ClearSCADA server is installed. The following IP addresses are not supported and will be rejected: 0.0.0.0 through 0.255.255.255 127.0.0.0 through 127.255.255.255 (except 127.0.0.1) 224.0.0.0 through 224.255.255.255 255.0.0.0 through 255.255.255.255. The UDP Port No. field specifies the UDP port of the remote device. Valid values are 0 to 65535. The default value is 49152. Click Restore Defaults to restore default values to fields on this page, except for the IP Address / Name field. The content of this field will remain unchanged. Advanced Parameters Advanced parameters are used to control the message size for the protocol. Control over message length is needed when writing large amounts of data over certain communication networks. A larger value can improve communication speed but can increase the number of missing transmissions. A smaller value can reduce the number of missing transmissions but may reduce throughput. When the Advanced tab heading is clicked the Advanced dialog is opened as shown below. Realflo User and Reference Manual May 19, 2011 510 Realflo Expert Mode Reference The Message Size grouping parameters are used to control the message size for the protocol. Control over message length is needed when writing large amounts of data over certain communication networks. A larger value can improve communication speed but can increase the number of missing transmissions. A smaller value can reduce the number of missing transmissions but may reduce throughput. The Maximum selection indicates that the host application is to package messages using the maximum size allowable by the protocol. The Custom Value selection specifies a custom value for the message size. This value indicates to the host application to package messages to be no larger than what is specified, if it is possible. Valid values are 2 to 250 when Addressing is set to Extended and Station is 255 or higher. When Addressing is set to Extended and Station is less than 255 valid values are 2 to 252. When Addressing is set to Standard valid values are 2 to 252. Click Restore Defaults to restore default values to fields on this page. Information Information displays detailed driver information. When the Information tab heading is clicked the Information dialog is opened as shown below. The Information grouping presents informative details concerning the executing protocol driver. Module is the physical name of the driver. File Version is the version number of the driver. In GAC indicates whether the module (assembly) was loaded from the Global Assembly Cache (GAC). Realflo User and Reference Manual May 19, 2011 511 Realflo Expert Mode Reference Runtime is the version of the Common Language Runtime (CLR) the driver was built against. Copyright indicates the copyright information of the protocol driver. Modbus/TCP Modbus/TCP is an extension of serial Modbus, which defines how Modbus messages are encoded within and transported over TCP/IP-based networks. The Modbus/TCP protocol uses a custom Modbus protocol layer on top of the TCP protocol. Its request and response messages are prefixed by six bytes. These six bytes consist of three fields: transaction ID field, protocol ID field and length field. The encapsulated Modbus message has exactly the same layout and meaning, from the function code to the end of the data portion, as other Modbus messages. The Modbus „CRC-16‟ or „LRC‟ check fields are not used in Modbus/TCP. The TCP/IP and link layer (e.g. Ethernet) checksum mechanisms instead are used to verify accurate delivery of the packet. To configure a Modbus/TCP protocol connection, highlight Modbus/TCP in the Communication Protocols window and click the Configure button. The Modbus/TCP Configuration window is displayed. To select a configured Modbus/TCP protocol connection, highlight Modbus/TCP in the Communication Protocols window and click the OK button. To close the dialog, without making a selection click the Cancel button. General Parameters When Modbus/TCP is selected for configuration the Modbus/TCP Configuration dialog is opened with the General tab selected as shown below. Realflo User and Reference Manual May 19, 2011 512 Realflo Expert Mode Reference The Modbus Communication Settings grouping contains Modbus specific communication settings including the addressing mode, the station address, the timeout interval as well as the number of attempts. The Addressing parameter selects standard or extended Modbus addressing. Standard addressing allows 255 stations and is compatible with standard Modbus devices. Extended addressing allows 65534 stations, with stations 1 to 254 compatible with standard Modbus devices. The default is Standard. The Station parameter sets the target station number. The valid range is 1 to 255 if standard addressing is used and 1 to 65534 if extended addressing is used. The default is 1. The Timeout parameter sets the length of time, in seconds, to wait for a response from the controller before retrying (see Attempts). Valid entries are 1 to 255. The default is 3. The Attempts parameter sets number of times to send a command to the controller before giving up and reporting this to the host application. Valid entries are 1 to 20. The default is 3. The Host Network Details grouping contains entries for the host‟s IP address or name and the TCP port on which it is listening. The IP Address / Name entry specifies the Ethernet IP address in dotted quad notation, or a DNS host name that can be resolved to an IP address, of the PC where the ClearSCADA server is installed. The following IP addresses are not supported and will be rejected: 0.0.0.0 through 0.255.255.255 127.0.0.0 through 127.255.255.255 (except 127.0.0.1) Realflo User and Reference Manual May 19, 2011 513 Realflo Expert Mode Reference 224.0.0.0 through 224.255.255.255 255.0.0.0 through 255.255.255.255. The TCP Port No. field specifies the UDP port of the remote device. Valid values are 0 to 65535. The default value is 502. Click Restore Defaults to restore default values to fields on this page, except for the IP Address / Name field. The content of this field will remain unchanged. Advanced Parameters Advanced parameters are used to control the message size for the protocol. Control over message length is needed when writing large amounts of data over certain communication networks. A larger value can improve communication speed but can increase the number of missing transmissions. A smaller value can reduce the number of missing transmissions but may reduce throughput. When the Advanced tab heading is clicked the Advanced dialog is opened as shown below. The Message Size grouping parameters are used to control the message size for the protocol. Control over message length is needed when writing large amounts of data over certain communication networks. A larger value can improve communication speed but can increase the number of missing transmissions. A smaller value can reduce the number of missing transmissions but may reduce throughput. The Maximum selection indicates that the host application is to package messages using the maximum size allowable by the protocol. The Custom Value selection specifies a custom value for the message size. This value indicates to the host application to package messages to be Realflo User and Reference Manual May 19, 2011 514 Realflo Expert Mode Reference no larger than what is specified, if it is possible. Valid values are 2 to 246 when Addressing is set to Extended and Station is 255 or higher. When Addressing is set to Extended and Station is less than 255 valid values are 2 to 248. When Addressing is set to Standard valid values are 2 to 248. Click Restore Defaults to restore default values to fields on this page. Information Information displays detailed driver information. When the Information tab heading is clicked the Information dialog is opened as shown below. The Information grouping presents informative details concerning the executing protocol driver. Module is the physical name of the driver. File Version is the version number of the driver. In GAC indicates whether the module (assembly) was loaded from the Global Assembly Cache (GAC). Runtime is the version of the Common Language Runtime (CLR) the driver was built against. Copyright indicates the copyright information of the protocol driver. Realflo User and Reference Manual May 19, 2011 515 Realflo Expert Mode Reference Modbus/UDP Modbus/UDP communication mode is similar to Modbus/TCP communication mode. It has the same message format with the Modbus/TCP. The only difference between them is one uses TCP protocol and another uses UDP protocol. To configure a Modbus/UDP protocol connection, highlight Modbus/UDP in the Communication Protocols window and click the Configure button. The Modbus/ UDP Configuration window is displayed. To select a configured Modbus/UDP protocol connection, highlight Modbus/ UDP in the Communication Protocols window and click the OK button. To close the dialog, without making a selection click the Cancel button. General Parameters When Modbus/UDP is selected for configuration the Modbus/ UDP Configuration dialog is opened with the General tab selected as shown below. The Modbus Communication Settings grouping contains Modbus specific communication settings including the addressing mode, the station address, the timeout interval as well as the number of attempts. The Addressing parameter selects standard or extended Modbus addressing. Standard addressing allows 255 stations and is compatible with standard Modbus devices. Extended addressing allows 65534 stations, with stations 1 to 254 compatible with standard Modbus devices. The default is Standard. Realflo User and Reference Manual May 19, 2011 516 Realflo Expert Mode Reference The Station parameter sets the target station number. The valid range is 1 to 255 if standard addressing is used and 1 to 65534 if extended addressing is used. The default is 1. The Timeout parameter sets the length of time, in seconds, to wait for a response from the controller before retrying (see Attempts). Valid entries are 1 to 255. The default is 3. The Attempts parameter sets number of times to send a command to the controller before giving up and reporting this to the host application. Valid entries are 1 to 20. The default is 3. The Host Network Details grouping contains entries for the host‟s IP address or name and the TCP port on which it is listening. The IP Address / Name entry specifies the Ethernet IP address in dotted quad notation, or a DNS host name that can be resolved to an IP address, of the PC where the ClearSCADA server is installed. The following IP addresses are not supported and will be rejected: 0.0.0.0 through 0.255.255.255 127.0.0.0 through 127.255.255.255 (except 127.0.0.1) 224.0.0.0 through 224.255.255.255 255.0.0.0 through 255.255.255.255. The UDP Port No. field specifies the UDP port of the remote device. Valid values are 0 to 65535. The default value is 502. Click Restore Defaults to restore default values to fields on this page, except for the IP Address / Name field. The content of this field will remain unchanged. Advanced Parameters Advanced parameters are used to control the message size for the protocol. Control over message length is needed when writing large amounts of data over certain communication networks. A larger value can improve communication speed but can increase the number of missing transmissions. A smaller value can reduce the number of missing transmissions but may reduce throughput. When the Advanced tab heading is clicked the Advanced dialog is opened as shown below. Realflo User and Reference Manual May 19, 2011 517 Realflo Expert Mode Reference The Message Size grouping parameters are used to control the message size for the protocol. Control over message length is needed when writing large amounts of data over certain communication networks. A larger value can improve communication speed but can increase the number of missing transmissions. A smaller value can reduce the number of missing transmissions but may reduce throughput. The Maximum selection indicates that the host application is to package messages using the maximum size allowable by the protocol. The Custom Value selection specifies a custom value for the message size. This value indicates to the host application to package messages to be no larger than what is specified, if it is possible. Valid values are 2 to 246 when Addressing is set to Extended and Station is 255 or higher. When Addressing is set to Extended and Station is less than 255 valid values are 2 to 248. When Addressing is set to Standard valid values are 2 to 248. Click Restore Defaults to restore default values to fields on this page. Information Information displays detailed driver information. When the Information tab heading is clicked the Information dialog is opened as shown below. Realflo User and Reference Manual May 19, 2011 518 Realflo Expert Mode Reference The Information grouping presents informative details concerning the executing protocol driver. Module is the physical name of the driver. File Version is the version number of the driver. In GAC indicates whether the module (assembly) was loaded from the Global Assembly Cache (GAC). Runtime is the version of the Common Language Runtime (CLR) the driver was built against. Copyright indicates the copyright information of the protocol driver. Modbus/USB The Modbus/USB protocol specifies a Universal Serial Bus (USB) connection between SCADAPack controllers equipped with a USB peripheral port and the PC. Windows NT does not support USB. The Modbus/USB selection will be displayed but it will not work with Windows NT. This is a limitation of the Windows NT operating system. Realflo User and Reference Manual May 19, 2011 519 Realflo Expert Mode Reference To configure a Modbus/USB protocol connection, highlight Modbus/USB in the Communication Protocols window and click the Configure button. The Modbus/USB Configuration window is displayed. To select a configured Modbus/USB protocol connection, highlight Modbus/USB in the Communication Protocols window and click the OK button. To close the dialog, without making a selection click the Cancel button. General Parameters When Modbus/USB is selected for configuration the Modbus/USB Configuration dialog is opened with the General tab selected as shown below. The Connection Settings grouping presents two options for Modbus/USB connections. These options are Automatic Connection and Connect to controller with this Controller ID. Automatic Connection The Automatic Connection selection enables communication with any single SCADAPack controller equipped with a USB peripheral port. A message, as shown below, is displayed when more than one SCADAPack controller is detected on the Bus. Realflo User and Reference Manual May 19, 2011 520 Realflo Expert Mode Reference The Connect to controller with this Controller ID selection enables Modbus/USB communication to a specific controller regardless of the existence of multiple controllers on the bus. Each SCADAPack controller is uniquely identified through its Controller ID. The Controller ID list box will display the Controller ID for each controller on the Bus. The Controller ID may be entered in the entry window or selected from the list. The Restore Defaults button will restore the configuration dialog to the default state. The Automatic Connection option is selected, and the Connect to controller with this Controller ID selection will be disabled. If text was present in the Controller ID window when the button is pressed it will be displayed in grey. Information Information displays detailed driver information. When the Information tab heading is clicked the Information dialog is opened as shown below. The Information grouping presents informative details concerning the executing protocol driver. Module is the physical name of the driver. File Version is the version number of the driver. In GAC indicates whether the module (assembly) was loaded from the Global Assembly Cache (GAC). Runtime is the version of the Common Language Runtime (CLR) the driver was built against. Copyright indicates the copyright information of the protocol driver. SCADAServer The SCADAServer protocol specifies a SCADAServer Host connection. Applications will act as an OPC client and route programming commands through the SCADAServer Host to the SCADAPack controller. The type of Realflo User and Reference Manual May 19, 2011 521 Realflo Expert Mode Reference connection to the field device: no flow control, hardware flow control or dialup modem is configured in the SCADAServer Host itself. To configure a SCADAServer protocol connection, highlight SCADAServer in the Communication Protocols window and click the Configure button. The SCADAServer Configuration window is displayed. To select a configured SCADAServer protocol connection, highlight SCADAServer in the Communication Protocols window and click the OK button. To close the dialog, without making a selection click the Cancel button. General Parameters When SCADAServer is selected for configuration the SCADAServer Configuration dialog is opened with the General tab selected as shown below. The Communication Settings grouping contains details necessary to establish communication to a device through a local or remote SCADAServer installation. The Modbus Station parameter specifies the station address of the target device. The valid range is 1 to 65534. The default is station 1. The Access Path parameter specifies the access path to a SCADAServer connection. This parameter is entered as a string with a maximum size of 16 characters. This access path was named when a connection was defined within the SCADAServer installation. If the access path is left blank, the default SCADAServer connection will be used, as defined within the SCADAServer installation. The default for this entry is blank. The Use a remote server check box defines whether the SCADAServer connection uses a SCADAServer installation installed on the same physical PC as the client application or on a remote PC. If the SCADAServer installation is located on a separate machine, check this option and enter Realflo User and Reference Manual May 19, 2011 522 Realflo Expert Mode Reference the host name or IP address of the remote PC into the “IP Address / Name” edit box. If the SCADAServer installation is located on the same PC as the client application leave this box unchecked. The default state for this check box is unchecked. The IP Address / Name entry specifies the Ethernet IP address in dotted quad notation, or a DNS host name that can be resolved to an IP address, of the PC where the ClearSCADA server is installed. The following IP addresses are not supported and will be rejected: 0.0.0.0 through 0.255.255.255 127.0.0.0 through 127.255.255.255 (except 127.0.0.1) 224.0.0.0 through 224.255.255.255 255.0.0.0 through 255.255.255.255. Click Restore Defaults to restore default values to fields on this page. Advanced Parameters Advanced parameters are used to control the message size for the protocol. Control over message length is needed when writing large amounts of data over certain communication networks. A larger value can improve communication speed but can increase the number of missing transmissions. A smaller value can reduce the number of missing transmissions but may reduce throughput. When the Advanced tab heading is clicked the Advanced dialog is opened as shown below. The Message Size grouping parameters are used to control the message size for the protocol. Control over message length is needed when writing large amounts of data over certain communication networks. A larger value can improve communication speed but can increase the number of missing transmissions. A smaller value can reduce the number of missing transmissions but may reduce throughput. The Maximum selection indicates that the host application is to package messages using the maximum size allowable by the protocol. Realflo User and Reference Manual May 19, 2011 523 Realflo Expert Mode Reference The Custom Value selection specifies a custom value for the message size. This value indicates to the host application to package messages to be no larger than what is specified, if it is possible. Valid values are 2 to 246. Click Restore Defaults to restore default values to fields on this page. Information Information displays detailed driver information. When the Information tab heading is clicked the Information dialog is opened as shown below. The Information grouping presents informative details concerning the executing protocol driver. Module is the physical name of the driver. File Version is the version number of the driver. In GAC indicates whether the module (assembly) was loaded from the Global Assembly Cache (GAC). Runtime is the version of the Common Language Runtime (CLR) the driver was built against. Copyright indicates the copyright information of the protocol driver. Connect to Controller Command The Connect to Controller command starts a dial-up connection to a remote flow computer. To connect to a dial-up flow computer, select Connect to Controller from the Communication menu. Wait for Realflo to connect to the remote flow computer. Disconnect from Controller Command The Disconnect from Controller command terminates a dial-up connection. To disconnect from a dial-up flow computer select Disconnect From Realflo User and Reference Manual May 19, 2011 524 Realflo Expert Mode Reference Controller from the Communication menu. Wait for Realflo to disconnect with the remote flow computer. Communication Progress Dialog The Communication Progress dialog is displayed whenever Realflo is communicating with the flow computer. The dialog indicates the operation being performed and the status of the communication. If a long operation is being performed, a progress bar is displayed as well. Click on the Cancel button to abort the operation. This is useful if communication is not progressing or if you have initiated the operation in error. Communication Failures Communication with the flow computer may fail for one of the following reasons. The message to the flow computer was garbled or lost by the communication network. The response from the flow computer was garbled or lost by the communication network. The flow computer is not connected. The PC Serial Port Settings are not set correctly. The flow computer did not respond or responded too late. Setting the time-out value too small in the PC Communications Settings can cause this. If communication fails a message box appears. You have two options: Select Retry to attempt the communication again. This is useful when an occasional message is garbled by the communication system. Select Cancel to abort the command. Inactive Phone Connection Dialog The Inactive Phone Connection dialog is displayed when a dial-up phone connection has been inactive for longer than the period set in PC Communications Settings. The dialog notifies the user that the connection will be terminated. Click on OK to terminate the connection immediately. Click on Cancel to stay connected. Realflo User and Reference Manual May 19, 2011 525 Realflo Expert Mode Reference Window Menu The Window menu contains the commands for opening and arranging windows used in Realflo. New Window Command Use this command to create a copy of the currently selected window. You can change the view in the copy of the window so you can look at more than one view at a time. Cascade Command Use this command to arrange open, non-minimized windows, so they stack upon each other with an offset so the title bar of each window is visible. All minimized windows are collected at the bottom of the main window. Tile Command Use this command to arrange open, non-minimized windows, so that they are visible. Minimized windows are collected at the bottom of the main window. Arrange All Command Use this command to arrange icons (minimized windows) at the bottom of the main window. Open Window List Use the numbers and file names listed at the bottom of the Window menu to switch to any open window. Choose the number that corresponds with the window you want to activate. If there are more than nine open windows, the last item in the open window list will be the command More Windows. This will open a dialog with a list box showing open windows. Realflo User and Reference Manual May 19, 2011 526 Realflo Expert Mode Reference Help Menu The Help menu contains the commands for opening and using Realflo on line help and for viewing information about Realflo. Contents Command Use this command to open the Realflo help file using the Windows Help program. The Contents page of the help file is displayed. The F1 key on your keyboard will open the Realflo Help file. The help file has a general description of how the Realflo program operates and how to use the Realflo program. It also has specific descriptions for each view, dialog and command. About Command Use this command to display information about Realflo. Realflo User and Reference Manual May 19, 2011 527 Realflo Wizards Realflo Wizards The following sections describe the Realflo Wizards to make the tasks you need to perform easier. Create New File Wizard Replace Flow Computer Wizard Read Logs and Flow History Wizard Calibrate Inputs Wizard Change Orifice Plate Wizard Force Inputs Wizard Navigating Wizards The wizards display four navigation buttons until the final step of the wizard when the Finish button becomes visible. These buttons are: <Back returns to the previous step in the wizard. This button is disabled on the first step of a wizard. Next> moves to the next step in the wizard. This button is hidden on the last step of a wizard. Cancel cancels the operation and closes the wizard. Steps performed thus far in the wizard are cancelled. Pressing the ESC key performs the same action as Cancel. Help opens the on-line Realflo User and Reference Manual. Finish is displayed on the final step of a wizard in place of the Next button. It finishes the operation. This button is hidden on other steps. Create New File Wizard When the File New command is selected from the Expert Mode >> File menu >> New or when the Select Flow Computer command is selected from Maintenance Mode main screen, the New File wizard starts. In Expert Mode, the New File wizard is used to create a new Realflo configuration file. It offers four ways to create a new file. Read the configuration from the target flow computer. Create a new configuration from a template file. Create a new configuration step-by-step. Create 1-run Configuration with Default Values. (This option is available in Expert Mode only). When the New File Wizard starts, the Create New File dialog opens. Realflo User and Reference Manual May 19, 2011 528 Realflo Wizards The How do you want to create a new file? selections determine how the new file is created. Select Read Configuration from the Flow Computer to read the configuration of an existing flow computer. Realflo will connect to the flow computer, read configuration, and save the file. Follow the wizard steps described in the Read Configuration from the Flow Computer section below when this option is selected. Select Create Configuration from a Template File to create a new configuration file based on a template. A template contains pre-defined settings requiring you to fill in configuration data specific this flow computer. Select the template file from the dropdown list. The last ten recently used templates are shown. The recently used template is selected by default. The selection edit box is blank if no recently used templates are available. Click Browse to choose another template file. A File Open dialog appears which allows you to select any template file. Select Create Configuration from Template file to use a congiguration template to create the configuration. To create a template file, see Template Steps. When templates are created, some flow computer configuration parameters are preset and are not displayed in the Create Configuration from Template wizard steps. Follow the wizard steps described in the Create Configuration From a Template File section below when this option is selected. Select Create Configuration Step-by-Step to create a new configuration file. Realflo will lead you through the steps required using a wizard. You will need to modify the default data at each step. Follow the wizard steps described in the Create Configuration Stepby-Step section below when this option is selected. Realflo User and Reference Manual May 19, 2011 529 Realflo Wizards Select Create 1-run Configuration with Default Values option to create a new configuration file with a default configuration. A file with configuration for a 1-run flow computer, using a 4202 DR is created. You will need to edit the configuration manually. Once you select the radio button to create 1-run configuration with default values, do the following: Click Next. Click Finish. Read Configuration From the Flow Computer The Read Configuration from Flow Computer option enables you to connect to the flow computer and read the existing configuration from the flow computer. A communication link needs to exist between Realflo and the flow computer to use this option. The wizard prompts you for default communication settings or allows you to select new communication settings. When Realflo reads configuration from a 32-bit flow computer, Realflo reads the flowing fields for each flow run: Use Value on Sensor Fail (see Value on Sensor Fail section) Differential Pressure default value (see Differential Pressure Limits section) Static Pressure default value (see Static Pressure section) Temperature default value (see Temperature Limits section) For flow computers not supporting this feature, Realflo reads the following fields for each flow run: Use Value on Sensor Fail = Last Known Good Value (see Value on Sensor Fail section) Differential Pressure default value = 0 (see Differential Pressure Limits section) Static Pressure default value = 0 (see Static Pressure section) Temperature default value = 0 (see Temperature Limits section) When the Read Configuration from Flow Computer option is selected, the Connect to Flow Computer wizard leads you through the necessary steps. The sequence of steps to read the configuration from a flow computer is as follows. Realflo User and Reference Manual May 19, 2011 530 Realflo Wizards Flow Computer Status The flow computer status step selects whether a flow computer is connected to the PC running Realflo. Select Yes is a flow computer is connected to the PC or select No if no flow computer is connected. The Connect to Flow Computer step following is only displayed if the selection is Yes. Connect to Flow Computer The Connect to Flow Computer step defines the communication settings for the connection between the PC running the Realflo application and the target flow computer. The How do you want to communicate with the flow computer? prompt provides two option. Realflo User and Reference Manual May 19, 2011 531 Realflo Wizards The Use the Current Settings option sets the default communication settings for Realflo. These settings are for the PC that is running Realflo. (The communication settings for the PC running Realflo and the communication settings in the flow computer need to match). The default communication settings are: COM 1 (serial port on the PC) 9600 baud, no parity 8 Data bits 1 Stop bit The default Modbus address to which Realflo connects is station 1. Use this selection if the serial port on your PC is COM 1 and the serial port settings for the serial port on the flow computer are set for default (9600, 8,n,1 and Modbus address 1). Click Next> to begin communication with the flow computer and move to the next step in the wizard. The Choose/View Communication Setup option opens the PC Communication Settings dialog as shown below. This allows you to view the default settings and to change the PC communication setting for the type of connection you are using to communicate with the flow computer. See the section Communication >> PC Communications Settings Command in the Realflo Expert Mode Reference for complete details on the parameter settings in this dialog. You need to know the communication settings for the connection to the flow computer to use this step. Once the communication settings have been selected, click OK> to close the dialog and begin communication with the flow computer. Read Configuration from the Flow Computer The Read Configuration from Flow Computer step starts with the Create New File window as shown below. Realflo User and Reference Manual May 19, 2011 532 Realflo Wizards Click Next> to begin reading the flow computer configuration form the flow computer. The Communication progress displays the status of the reading of the configuration. Save Configuration File Once the configuration has been read from the flow computer, the Save File dialog is opened to prompt for a file name to which save the configuration. Realflo User and Reference Manual May 19, 2011 533 Realflo Wizards Select the Save to Realflo.tfc to save the configuration to the default Realflo.tfc file. This file will be located in the folder Realflo was installed in. Click Next> to save the configuration and move to the next step. Select the Save to another file to save the file to a specified name and location. When this option is selected the Save As dialog is opened as shown below. Select the folder to save the file in the Save in: window. Use the dropdown selector to browse the available folders on your PC. Enter the file name in the File name: window. The file will automatically be saved with the Realflo .tfc extension. Click Save to save the configuration file and close the Save As dialog. Click Next> to move to the next step. Realflo User and Reference Manual May 19, 2011 534 Realflo Wizards Configuration Complete The Configuration Complete dialog is the last step in the Read Configuration from Flow Computer wizard. Click Finish to complete the wizard. Create Configuration From a Template File When you choose to configure the flow computer using a template file, the Create New File wizard prompts you through the steps needed. Select File >> New from the Realflo command menu. The Create New File dialog is displayed and the wizard will lead you through the steps to create a congiuration file from a temple. Create New File Dialog Select the Create Configuration from a Template File radio button. Do one of the following: Realflo User and Reference Manual May 19, 2011 535 Realflo Wizards o Select the template file from the dropdown list. The last ten recently used templates are shown. The recently used template is selected by default. o Click Browse to choose another template file. A File Open dialog appears which allows you to select any template file. Click Next > to continue. Template files are created in the Expert Mode. When templates are created some flow computer configuration parameters are preset and are not displayed in the Create Configuration from Template wizard steps. Follow the wizard steps described in the following sections to configure the flow computer using the selected template. Flow Computer Information Flow Computer Status Dialog When configuring the flow computer using a template file, select No when the Flow Computer Status dialog opens. This lets you choose the hardware type and firmware type manually. Hardware and Firmware Type Step The Hardware and Firmware Type Dialog opens when you select No in the Flow Computer Status dialog. First, select the Hardware Type from the dropdown list. The template selected determines the default value when creating the configuration using a template. The options from which you can select are: Micro16 SCADAPack SCADAPack Plus SCADAPack Light SCADAPack LP SCADAPack 32 Realflo User and Reference Manual May 19, 2011 536 Realflo Wizards SCADAPack 32P 4202 DR SCADAPack 100: 1024K 4202 DS SCADAPack 314 SCADAPack 330 SCADAPack 334 SCADAPack 350 4203 DR 4203 DS SolarPack 410 Second, select the Firmware Type from the dropdown list. The template selected determines the default value (either Telepace or ISaGRAF). If the firmware selected is Telepace, the I/O Module Type dialog opens, followed by the Flow Computer ID dialog. If the firmware type selected is ISaGRAF, the Flow Computer ID dialog opens. I/O Module Type Step This step selects the I/O module to use for the selected Hardware type. The register assignment in the new file is set to the default register assignment for the selected hardware type. Select the I/O module for the flow computer from the dropdown list. Selections displayed in the list depend on the flow computer hardware type. Hardware Type I/O Modules Available Micro16 Controller I/O only or Backwards compatible Realflo User and Reference Manual May 19, 2011 537 Realflo Wizards Hardware Type SCADAPack SCADAPack Plus SCADAPack Light SCADAPack LP SCADAPack 32 SCADAPack 32P 4202 DR SCADAPack 100: 1024K 4202 DS SCADAPack 314 SCADAPack 330 SCADAPack 334 SCADAPack 350 4203 DR 4203 DS SolarPack 410 I/O Modules Available modules. 5601 I/O Module, 5604 I/O Module, or 5606 I/O Module 5601 I/O Module, 5604 I/O Module, or 5606 I/O Module 5602 I/O Module SCADAPack LP I./O 5601 I/O Module 5604 10V/40mA I/O module 5604 5V/20mA I/O module , 5604 I/O Module, or 5606 I/O Module SCADAPack 32P I/O 4202 DR or 4202 DR Extended/4203 DR I/O SCADAPack 100: 1024K I/O 4202/4203 DS I/O SCADAPack 314/33x I/O SCADAPack 330 Controller. SCADAPack 33x I/O SCADAPack 350 10V/40mA I/O SCADAPack 350 5V/20mA I/O 4202 DR Extended/4203 DR I/O 4202/4203 DS I/O Flow Computer ID Step This step sets the Flow Computer ID. Type the Flow Computer ID string in the edit box. This unique ID stops accidental mixing of data from different flow computers. The maximum length of the Flow Computer ID is eight characters. Any characters are valid. You can leave the Flow Computer ID edit box blank. Realflo User and Reference Manual May 19, 2011 538 Realflo Wizards Number of Flow Runs Step This step selects the number of flow runs in the flow computer. The wizard will step through the configuration of the first run and then each subsequent run if more than one run is selected. Select the number of flow runs with the dropdown list. Valid values depend on the hardware type and the number of flow runs enabled for the flow computer. The template determines the default value when using a template. For Micro16, SCADAPack, SCADAPack Light and SCADAPack Plus Flow Computers, the maximum number of meter runs is three. The selection of three meter runs is available for older flow computers that could be enabled for three meter runs. For SCADAPack LP and SCADAPack (4202 and 4203) Flow Computers, the maximum number of meter runs is two. For SCADAPack 100: 1024K and SolarPack 410 Flow Computers, the maximum number of meter runs is one. For SCADAPack 314/330/334 and SCADAPack 350 Flow Computers the maximum number of meter runs is four. For SCADAPack 32 and SCADAPack 32P Flow computers the maximum number of runs you can select is ten. Flow Run ID Step This step sets the Flow Run ID for the meter run. This is the first step of a flow run configuration. The wizard will step you through the flow run configuration steps for the first run and then each subsequent run if you select more than one run. Realflo User and Reference Manual May 19, 2011 539 Realflo Wizards The Flow Run ID helps to identify the flow run. Type a string up to 32 characters long. Any characters are valid. You can leave the Flow Run ID edit box blank. Older flow computers allow a string up to 16 characters. See the TeleBUS Protocol Interface section. For run 1 the next step is Flow and Compressibility Calculations . For subsequent runs, the next step is Copy Run Step. Copy Run Step This step controls how multiple runs are configured once the first run has been configured. The Step by Step Configuration radio button selects that the run will be configured step by step as was the previous run. Parameters for each step are configured one at a time. The Copy configuration from radio button selects that the run will be configured the same as the run selected in the drop down window. Realflo User and Reference Manual May 19, 2011 540 Realflo Wizards Flow Calculation Configuration Flow and Compressibility Calculations Step This step selects the flow and compressibility calculations for the first run. Flow Calculation selects the type of flow calculation for the meter run. Valid values are: AGA-3 (1985 version) AGA-3 (1992 version) AGA-7 AGA-11 (not available for 16-bit controllers) V-cone calculations The template selected determines the default value. Compressibility Calculation selects the type of compressibility calculation for the meter run. Valid compressibility calculation values are: AGA-8 Detailed NX-19 (Not supported for PEMEX flow computers) AGA-8 Detailed is the recommended calculation for new systems as it has superior performance compared to NX-19. NX-19 is provided for legacy systems. The template selected determines the default value. Flow Direction Control selects the direction of flow indication, forward or reverse, for a meter run. Forward by Value selection indicates the flow direction is forward when the value from a differential pressure (DP) sensor is positive or the mass flow rate value from a Coriolis meter is positive. Reverse by Value selection indicates the flow direction is reverse when the value from a differential pressure (DP) sensor is negative or the mass flow rate value from a Coriolis meter is negative. Realflo User and Reference Manual May 19, 2011 541 Realflo Wizards Forward by Status selection indicates the flow direction is forward when the Flow Direction Register has a value of 0 (OFF). Reverse by Status selection indicates the flow direction is reverse when the Flow Direction Register has a value of 1 (ON). Flow Direction Register specifies which register indicates the forward or reverse flow direction status. Any valid register for the flow computer controller can be used for this setting. The default register is 1. This edit control is disabled if Flow Direction Control selection is Value. This control is hidden in GOST mode flow computers. Flow Run Units Step This step lets you select the units that are used for input measurements and contracts. Input Units selects the units of measurement of input values for the meter run. Inputs may be measured in different units than the calculated results. This allows you to use units that are convenient to you for measuring inputs. A dropdown list allows the selection of the following unit types. The template selected determines the default value. US1 US2 US3 IP Metric1 Metric2 Metric3 SI US4 US5 Realflo User and Reference Manual May 19, 2011 542 Realflo Wizards US6 US7 US8 PEMEX The reference list for the Input Units displays the parameters and units for these parameters: DP (Differential pressure) SP (Static pressure) Temperature Pipe and Orifice Diameter Viscosity Altitude Heating Value Contract Units selects the units of measurement of contract values. These units are used for the calculated results. A dropdown list allows the selection of the following unit types. The template selected determines the default value. US1 US2 US3 IP Metric1 Metric2 Metric3 SI US4 US5 US6 US7 US8 PEMEX The reference list for the Contract Units displays the parameters and units for these parameters when used for the contract. The parameters displayed depend on the contract units selected. The parameters are: Volume Volume Rate Energy Energy Rate Realflo User and Reference Manual May 19, 2011 543 Realflo Wizards Base Pressure Base Temperature Mass Mass Flow Rate Density Flow Extension Heating Value Flow Run Inputs Step This step lets you configure the flow run inputs. One of two configuration dialogs is presented based on the input type you configure. Sensor Inputs Analog Inputs Sensor Inputs Select Internal Sensor (4202 DR/DS or 4203DR/DS or SolarPack 410) to use a SCADAPack internal transmitter as the input device. The transmitter is the input for pressure, differential pressure, and temperature. This is the only valid selection for run 1 of a SCADAPack flow computer. Other options are disabled. Select Sensor to use a multivariable transmitter as the input device. The transmitter is the input for pressure, differential pressure, and temperature. This is the default selection, except for run 1 of a SCADAPack controller. The Where is sensor connected to the Flow Computer parameter enables the ability to select the serial or LAN port where the sensor is connected to the flow computer. Selections vary according to the flowcomputer type. Valid selections can include: com1 com2 Realflo User and Reference Manual May 19, 2011 544 Realflo Wizards com3 com4 LAN The What is the sensor model parameter selects the multivariable transmitter (MVT) type. The selections available are: 3095FB 4101 4102 4202 DR 4202 DS 4203 DR 4203 DS The What value should be used if the sensor fails parameter selects the specified value in this field as the live input value when communicating with a sensor. The dropdown list lets you select: Use Last Known Good Value Use Default Value When you open a file using an older file format, Realflo sets the default value of the Values on Sensor Fail field to Use Last Known Good. When the status to a sensor changes and you select the Use Default Value option, this is added to the Event Log. For flow computers 6.70 and later, when communication to a sensor fails and the configuration option “Use Last Known Good Value” is set to “Use Default Value,” the flow computer needs to use the specified default value in the configuration in place of a live input value. When communication to a sensor is restored and the configuration option for the Value on Sensor Fail field is set to use the default value, the flow computer uses the input value from the sensor as the live input value. For flow computers prior to 6.70, the value on sensor fail is ``Use Last Known Good Value.” Analog Inputs Select Analog Inputs to use analog inputs to measure pressure, differential pressure, and temperature. Valid values are: Telepace Integer ISaGRAF Integer Float Raw Float The template selected determines the default value displayed. Realflo User and Reference Manual May 19, 2011 545 Realflo Wizards For AGA-7 calculations, the value is fixed and set automatically. The value is Telepace Long if Telepace firmware is running, otherwise it is an ISaGRAF integer if ISaGRAF firmware is running. The next step is Differential Pressure Settings if AGA-3 or V-Cone is configured. The next step is Turbine Settings if AGA-7 is configured. Differential Pressure Limits Step This step lets you configure the differential pressure input limits. One of two configuration dialogs is presented based on the input type you configure. Sensor Inputs Analog Inputs Sensor Inputs Input Type is a read-only field that identifies the sensor number for which you are setting the parameters using this dialog. Units are the differential pressure units. Values read from the transmitter are in these units. If the transmitter has a local display, the transmitter uses these units. Valid values depend on the MVT type: For SCADAPack transmtters, valid units are: inches H2O at 68°F, Pascal (Pa) and kiloPascal (kPa). The default is inches H2O at 68°F. For the 3095 MVT valid units are: inches H2O at 60°F, Pascal (Pa), kiloPascal (kPa) and inches H2O at 68°F. The default is inches H2O at 60°F. Damping is the response time of the transmitter. It is used to smooth the process variable reading when there are rapid input variations. For SCADAPack transmitters the valid values are 0.0 (damping off), 0.5, 1.0, 2.0, 4.0, 8.0, 16.0, and 32.0 seconds. The template selected determines the default value displayed. For the 3095 MVT the valid values are 0.108, 0.216, 0.432, 0.864, 1.728, 3.456, 6.912, 13.824 and 27.648. The default is 0.864. Realflo User and Reference Manual May 19, 2011 546 Realflo Wizards Lower Operating Limit (LOL) is the lowest valid value from the sensor and needs to be less than the UOL. Alarms occur if the value is less than the LOL. The template selected determines the default value displayed. Valid values depend on the transmitter; refer to the transmitter band or user manual. Upper Operating Limit (UOL) is the highest valid value from the sensor and needs to be greater than the LOL. Alarms occur if the value is greater than the UOL. The template selected determines the default value displayed. Valid values depend on the transmitter; refer to the transmitter band or user manual. Low DP Cutoff is the differential pressure where flow accumulation will stop and needs to be less than the UOL. The template selected determines the default value displayed. Valid values depend on the transmitter; refer to the transmitter band or user manual. Low DP Hysteresis is the amount by which the differential pressure needs to rise above the Low DP Cutoff for flow accumulation to start. It may be a value using the DP units or may be a percentage of the operating span. The operating span is the difference between the Upper Operating Limit and the Lower Operating limit. Values depend on the transmitter. The flow accumulation level needs to be less than the Upper Operating Limit. The template selected determines the default value displayed. Default Value is enabled if you configured the field using the Flow Run Inputs dialog. Type the live input value to use when communicating with a sensor. The template selected determines the default value displayed. If you configured sensor inputs, go to the Static Pressure section. Analog Inputs The dialog below opens when analog inputs are selected. Input Type is a read-only field that identifies the input type for which you are setting the parameters using this dialog. Input Register is the register address where the input value is stored. Valid values are 30001 to 39999 or 40001 to 49999. The default is selected based on the run number so that inputs have unique registers. Realflo User and Reference Manual May 19, 2011 547 Realflo Wizards Input at Zero Scale is value read from the sensor, in unscaled I/O units, when the sensor is at zero scale. Valid values depend on the input type. The template selected determines the default value displayed. This is enabled for Telepace integer, raw float and ISaGRAF integer types and disabled otherwise. Input at Full Scale is value read from the sensor, in unscaled I/O units, when the sensor is at full scale. Valid values depend on the input type. The template selected determines the default value displayed. This is enabled for Telepace integer, raw float and ISaGRAF integer types and disabled otherwise. DP at Zero Scale is the pressure that corresponds to the zero scale input, or if the input does not require scaling, the minimum pressure that can be read from the sensor. Valid values depend on the input type. The template selected determines the default value displayed. DP at Full Scale is the pressure that corresponds to the full-scale input, or if the input does not require scaling, the maximum pressure that can be read from the sensor. Valid values depend on the input type. The template selected determines the default value displayed. Low DP Cutoff is the differential pressure where flow accumulation will stop and needs to be less than the UOL. The template selected determines the default value displayed. Valid values depend on the transmitter; refer to the transmitter band or user manual. Low DP Hysteresis is the amount by which the differential pressure needs to rise above the Low DP Cutoff for flow accumulation to start. It may be a value using the DP units or may be a percentage of the operating span. The operating span is the difference between the Upper Operating Limit and the Lower Operating limit. Values depend on the transmitter. The flow accumulation level needs to be less than the Upper Operating Limit. The template selected determines the default value displayed. Turbine Limits Step This step configures the turbine input for AGA-7 calculations. Input Register is the register address where the input value is stored. Valid values are 30001 to 39999 or 40001 to 49999. The default is selected based on the run number so that inputs have unique registers. Realflo User and Reference Manual May 19, 2011 548 Realflo Wizards Low Flow Pulse Limit is the number of pulses below which a low flow alarm will occur. The template selected determines the default value displayed. Low Flow Detect Time is the length of time the number of pulses needs to remain below the Low Flow Pulse Limit for a low flow alarm to occur. Valid values are 1 to 5 seconds. The template selected determines the default value displayed. Static Pressure Measurement Step This step lets you select how the static pressure is measured. The pressure tap may be upstream or downstream of the orifice plate for AGA-3. Select Up Stream for an upstream static pressure tap. This is the default value. The control is disabled for AGA-7 and V-Cone calculations. Select Down Stream for a downstream static pressure tap. The control is disabled for AGA-7 and V-Cone calculations. Static Pressure Input Limits Step This step lets you define the limits for the static pressure input. One of two configuration dialogs is presented based on the Input Type configured for static pressure limits: Sensor Inputs Analog Inputs Sensor Inputs The dialog below is presented when sensor inputs are used. Realflo User and Reference Manual May 19, 2011 549 Realflo Wizards Input Type is a read-only field that identifies the sensor number for which you are setting the parameters using this dialog. Units is the differential pressure units. Values read from the transmitter are in these units. If the transmitter has a local display it uses these units. Valid values are kiloPascal, MegaPascal, and psi (pounds per square inch). The default is psi. Damping is the response time of the transmitter. It is used to smooth the process variable reading when there are rapid input variations. For SCADAPack transmitters the valid values are 0.0 (damping off), 0.5, 1.0, 2.0, 4.0, 8.0, 16.0, and 32.0 seconds. The template selected determines the default value displayed. For the 3095 MVT the valid values are 0.108, 0.216, 0.432, 0.864, 1.728, 3.456, 6.912, 13.824 and 27.648. The default is 0.864. Lower Operating Limit (LOL) is the lowest valid value from the sensor and needs to be less than the UOL. Alarms occur if the value is less than the LOL. The template selected determines the default value displayed. Valid values depend on the transmitter; refer to the transmitter band or user manual. Upper Operating Limit (UOL) is the highest valid value from the sensor and needs to be greater than the LOL. Alarms occur if the value is greater than the UOL. The template selected determines the default value displayed. Valid values depend on the transmitter; refer to the transmitter band or user manual. Default Value is enabled if you gage pressure using the Static Pressure Options. Type the live input value to use when communicating with a sensor. The template selected determines the default value displayed. The pressure sensor may measure absolute or gage pressure. Select Absolute Pressure to measure absolute static pressure. Select Gage Pressure to measure gage static pressure. Type the Atmospheric Pressure measured at the site. This control is disabled and set to zero if absolute pressure is selected. Realflo User and Reference Manual May 19, 2011 550 Realflo Wizards The atmospheric pressure entered needs to be greater than zero. The maximum upper limits for atmospheric pressure are: 30 psi and PEMEX units for US1, US2, US3, US4, US5, US6, US7, US8, 4320 lbf/ft2 for IP units 207 kPa for Metric1 units 2.07 bar for Metric2 units 0.207 MPa for Metric3 units 207000 Pa for SI units If you configured sensor inputs, see the Static Pressure Compensation section. Analog Inputs The dialog below is presented when analog inputs are used. Input Type is a read-only field that identifies the input type for which you are setting the parameters using this dialog. Input Register is the register address where the input value is stored. Valid values are 30001 to 39999 or 40001 to 49999. The default is selected based on the run number so that inputs have unique registers. Input at Zero Scale is value read from the sensor, in unscaled I/O units, when the sensor is at zero scale. Valid values depend on the input type. The template selected determines the default value displayed. This is enabled for Telepace integer, raw float, and ISaGRAF integer types and disabled otherwise. Input at Full Scale is value read from the sensor, in unscaled I/O units, when the sensor is at full scale. Valid values depend on the input type. The template selected determines the default value displayed. This is enabled for Telepace integer, raw float and ISaGRAF integer types and disabled otherwise. SP at Zero Scale is the pressure that corresponds to the zero scale input, or if the input does not require scaling, the minimum pressure that can be Realflo User and Reference Manual May 19, 2011 551 Realflo Wizards read from the sensor. Valid values depend on the input type. The template selected determines the default value displayed. SP at Full Scale is the pressure that corresponds to the full-scale input, or if the input does not require scaling, the maximum pressure that can be read from the sensor. Valid values depend on the input type. The template selected determines the default value displayed. Static Pressure Compensation Step This step selects if compensation is applied for the location where calibration was performed. If you configured sensors or analog inputs from the Static Pressure Limits dialog, this is the next step in the configuration sequence. Select No if compensation is not required. This is the default value. Select Yes to compensate for the altitude and latitude. Type the Altitude of the location. Valid values are –30000 to 30000. The template selected determines the default value displayed. This control is disabled if No is selected. Type the Latitude of the location. Valid values are –90 to 90. The template selected determines the default value displayed. This control is disabled if No is selected. Temperature Limits Step This step defines the limits for the temperature input. One of two configuration dialogs is presented based on the Input Type configured for static pressure limits: Sensor Inputs Analog Inputs Sensor Inputs The following dialog is presented when sensor (MVT) inputs are used. Realflo User and Reference Manual May 19, 2011 552 Realflo Wizards Input Type is a read-only field that identifies the sensor number for which you are setting the parameters using this dialog. Units is the differential pressure units. Values read from the transmitter are in these units. If the transmitter has a local display it uses these units. Valid values are kiloPascal, MegaPascal, and psi (pounds per square inch). The default is psi. Lower Operating Limit (LOL) is the lowest valid value from the sensor and needs to be less than the UOL. Alarms occur if the value is less than the LOL. The template selected determines the default value displayed. Valid values depend on the transmitter; refer to the transmitter band or user manual. Upper Operating Limit (UOL) is the highest valid value from the sensor and needs to be greater than the LOL. Alarms occur if the value is greater than the UOL. The template selected determines the default value displayed. Valid values depend on the transmitter; refer to the transmitter band or user manual. Analog Inputs The following dialog is presented when analog inputs are used. Realflo User and Reference Manual May 19, 2011 553 Realflo Wizards Input Type is a read-only field that identifies the input type for which you are setting the parameters using this dialog. Input Register is the register address where the input value is stored. Valid values are 30001 to 39999 or 40001 to 49999. The default is selected based on the run number so that inputs have unique registers. Input at Zero Scale is value read from the sensor, in unscaled I/O units, when the sensor is at zero scale. Valid values depend on the input type. The template selected determines the default value displayed. This is enabled for Telepace integer, raw float and ISaGRAF integer types and disabled otherwise. Input at Full Scale is value read from the sensor, in unscaled I/O units, when the sensor is at full scale. Valid values depend on the input type. The template selected determines the default value displayed. This is enabled for Telepace integer, raw float and ISaGRAF integer types and disabled otherwise. Temperature at Zero Scale is the temperature that corresponds to the zero scale input, or if the input does not require scaling, the minimum pressure that can be read from the sensor. Valid values depend on the input type. The template selected determines the default value displayed. Temperature at Full Scale is the temperature that corresponds to the fullscale input, or if the input does not require scaling, the maximum pressure that can be read from the sensor. Valid values depend on the input type. The template selected determines the default value displayed. Contract Settings Step This step lets you set the contract settings for the run. Realflo User and Reference Manual May 19, 2011 554 Realflo Wizards Input Average Weighting is the weighting method of the linear inputs. This applies to the differential pressure, static pressure, and temperature. Valid values are time-weighted or flow-weighted (see Input Averaging on page 948 for more information). The template selected determines the default value. Contract Hour is the hour of the day that starts a new contract day using a 24-hour clock. The contract day begins at 00 minutes and 00 seconds of the specified hour. Valid values are 0 to 23. The template selected determines the default value displayed. Standard Base Conditions are the default Base Temperature and Base Pressure (absolute) values. Base Temperature is the reference temperature to which contract flow values are corrected. Valid values are –40 to 200. The default value is given in the table below. Base Pressure is the reference pressure to which contract flow values are corrected. The base pressure is measured as absolute pressure (not a gauge pressure). Valid values are 0 to 32000. The default value is given in the table below. Contract Units Standard Base Temperature Standard Base Pressure US1 US2 US3 IP Metric1 Metric2 Metric3 SI US4 US5 US6 US7 60 F 60 F 60 F 60 F 15 C 15 C 15 C 288.15 K 60 F 60 F 60 F 60 F 14.73 psi 14.73 psi 14.73 psi 2 2116.2281 lbf/ft 101.325 kPa 1.01325 bar 0.101325 MPa 101325 Pa 14.73 psi 14.73 psi 14.73 psi 14.73 psi Realflo User and Reference Manual May 19, 2011 555 Realflo Wizards Contract Units Standard Base Temperature Standard Base Pressure US8 PEMEX 60 F 60 F 14.73 psi 14.73 psi Realflo for PEMEX flow computers provide a second set of base conditions. PEMEX Base Conditions are the default Base Temperature and Base Pressure (absolute) values when Realflo is operating in PEMEX mode. Base Temperature is the reference temperature to which contract flow values are corrected. The default is listed in the table below for each type of contract unit. Base Pressure is the reference pressure to which contract flow values are corrected. The base pressure is measured as absolute pressure (not a gauge pressure). Valid values are 0 to 32000. The default values are listed in the table below for each contract unit. Contract Units US1 US2 US3 IP Metric1 Metric2 Metric3 SI US4 US5 US6 US7 US8 PEMEX Standard Base Temperature 60 F 60 F 60 F 60 F 15 C 15 C 15 C 288.15 K 60 F 60 F 60 F 60 F 60 F 68 F Standard Base Pressure 14.73 psi 14.73 psi 14.73 psi 2 2116.2281 lbf/ft 101.325 kPa 1.01325 bar 0.101325 MPa 101325 Pa 14.73 psi 14.73 psi 14.73 psi 14.73 psi 14.73 psi 14.73 psi AGA-3 Settings Step This step sets the AGA-3 calculation parameters. Realflo User and Reference Manual May 19, 2011 556 Realflo Wizards Orifice Material is the material from which the orifice plate for the meter run is made. Valid values are Stainless Steel, Monel, and Carbon Steel. The template selected determines the default value displayed. Pipe Material is the material from which the meter run pipe is made. Valid values are Stainless Steel, Monel, and Carbon Steel. The template selected determines the default value displayed. Orifice Diameter is the diameter of the meter run orifice. The template selected determines the default value displayed. Orifice reference temperature is the temperature at which the diameter of the meter run orifice was measured. The template selected determines the default value displayed. Pipe Diameter is the measurement of the meter run pipe inside diameter. The template selected determines the default value displayed. Pipe reference temperature is temperature at which the meter run pipe diameter was measured. The template selected determines the default value displayed. Beta Ratio is the ratio of orifice diameter to pipe diameter. It is displayed for information purposes only and cannot be edited. Realflo displays messages if the beta ratio is outside recommended limits. Isentropic Exponent is a thermodynamic property of gas used to predict the relationships between pressure, temperature, volume and energy. If you are unsure of this value, a typical value of 1.3 is commonly used. The template selected determines the default value displayed. Viscosity is a measure of the resistance of a measured gas to flow. Valid values are 0 to 1. The template selected determines the default value displayed. AGA-3 Deadband Settings Step This step sets AGA-3 calculation deadbands. Realflo User and Reference Manual May 19, 2011 557 Realflo Wizards Temperature Deadband is the tolerated change in the flowing temperature before temperature dependent factors in the flow calculation are recalculated. Changes in the temperature smaller than the deadband will be ignored in determining the result. The template selected determines the default value displayed. The upper limit is 7°F or 4°C. Static Pressure Deadband is the tolerated change in the static pressure before static pressure dependent factors in the flow calculation are recalculated. Changes in the static pressure smaller than the deadband will be ignored in determining the result. A static pressure deadband setting of up to four percent of the typical static pressure level should have a small effect on the accuracy of the AGA-3 calculation. The template selected determines the default value displayed. The upper limit is 800 psi or 5500 kPa or the equivalent in other units. Differential Pressure Deadband is the tolerated change in the differential pressure before differential pressure dependent factors in the flow calculation are recalculated. Changes in the differential pressure smaller than the deadband will be ignored in determining the result. A change of N in the differential pressure input will cause a change of 0.5 N in the calculation volume at base conditions. It is recommended that the differential pressure deadband be set to zero. The template selected determines the default value displayed. The upper limit is 4.5 inWC or 1.1 kPa or the equivalent in other units. AGA-7 Settings Step This step lets you define the AGA-7 settings. Realflo User and Reference Manual May 19, 2011 558 Realflo Wizards K Factor is the number of pulses per unit volume of the turbine meter. Valid values are 0.001 to 1000000. The template selected determines the default value displayed. M Factor is the adjustment to the number of pulses per unit volume for the turbine meter compared to an ideal meter. Valid values are 0.001 to 1000. The template selected determines the default value displayed. *Uncorrected Flow Volume is the measurement of the volume of gas during the contract period. The Uncorrected Flow Volume control is available in Realflo versions 6.20 and higher. AGA -11 Configuration Step AGA-11 configuration defines parameters unique to the AGA-11 calculation. The AGA-11 calculation communicates with a Coriolis meter for the calculation. The AGA-11 configuration sets the communication parameters for communication between the Coriolis meter and the flow computer. Address This is the Modbus address of the Coriolis Meter for serial communications. Multiple Coriolis meters using the same serial port on the flow computer Realflo User and Reference Manual May 19, 2011 559 Realflo Wizards needs to each have a unique Modbus address. Valid Modbus addresses are between 1 and 247. The default address is 247. Port This is the communication port on the flow computer that will be used to communicate with the Coriolis meter. Valid port selections depend on the type of controller the flow computer running on. The default port is the first valid port available on the controller. Timeout This is the time the flow computer will wait for a response for Modbus read commands send to the Coriolis meter. When the timeout time is exceeded the command is unsuccessful and an alarm is added to the flow computer alarm list. Valid timeout values are from 0 to 1000 ms. The default value is 50 ms. V-Cone Settings Step V-Cone Configuration defines parameters unique to the V-Cone calculation. Cone Material This is the material of the V-cone. Valid values are Carbon Steel, Stainless 304, and Stainless 316. The default value is determined by the template selected. Pipe Material This is the material from which the meter run pipe is made. Valid values are Carbon Steel, Stainless 304, and Stainless 316. The default value is determined by the template selected. Adiabatic Expansion Factor The Adiabatic Expansion Factor drop down list selects which calculation is used for the adiabatic expansion factor of the calculation. Select Legacy Calculation to use the older calculation method. This is the default selection. Flow computers prior to version 6.71 support only this selection. Realflo User and Reference Manual May 19, 2011 560 Realflo Wizards Select V-Cone to use the V-Cone specific calculation. This selection should be used with V-Cone devices. Select Wafer-Cone to use the Wafer-Cone specific calculation. This selection should be used with Wafer-Cone devices. This control is disabled and forced to Legacy Calculation if the controller type is not one of SCADAPack 32, SCADAPack 32P, SCADAPack 314/330/334, SCADAPack 350 SCADAPack 4203 or SolarPack 410. When reading from a flow computer that does not support the adiabatic expansion factor configuration, the method will be set to Legacy Calculation. When writing to a flow computer that does not support the adiabatic expansion factor method, the configuration registers will be ignored and the expansion factor will not be written. Cone Diameter The diameter of the meter run cone used for the flow calculation. The measurement units are displayed depending on the input units selected. The default value is 3 inches. Cone Measurement Temperature This is the reference temperature at which the cone diameter for the meter run was measured. The measurement units are displayed depending on the input units selected. The default value is 59 degrees F. Pipe Inside Diameter This is the measurement of the meter run pipe inside diameter. The measurement units are displayed depending on the input units selected. The default value is 5 inches. Pipe reference temperature The temperature at which the meter run pipe diameter was measured. The measurement units are displayed depending on the input units selected. The default value is 59 degrees. Isentropic Exponent In general, this is a thermodynamic property of gas used to predict the relationships between pressure, temperature, volume and energy. If you are unsure of this value a typical value of 1.3 is commonly used. The default value is 1.3. Viscosity This is the viscosity of the measured gas. In general, this is the resistance of a gas or semi-fluid resistance to flow. The measurement units are displayed depending on the input units selected. Valid values are 0 to 1. The default value is 0.010268 centiPoise. Wet Gas Correction Factor The Wet Gas Correction Factor Method drop down list selects which calculation is used for the wet gas correction factor of the calculation. Select Legacy Method to use the older correction method. This is the default selection. Flow computers prior to version 6.73 support only this selection. Realflo User and Reference Manual May 19, 2011 561 Realflo Wizards Select V-Cone or Wafer Cone to use the V-Cone and Wafer Cone specific calculation. This selection should be used with V-Cone or Wafer Cone devices. This control is disabled and forced to Legacy Calculation if the controller type is not one of SCADAPack 32, SCADAPack 32P, SCADAPack 314/330/334, SCADAPack 350 SCADAPack 4203 or SolarPack 410. The V-Cone or Wafer Cone supported Beta Ratios are: For Fr (Froude Number) < 5 supported Beta Ratio is 0.55. For Fr (Froude Number) < 5 supported Beta Ratio is 0.75. For Fr (Froude Number) > 5 supported Beta Ratio is 0.75. When V-Cone or Wafer Cone is selected and if the current Beta ratio is not supported when executing verification, a message is displayed. When V-Cone or Wafer Cone is selected, configuration of the fixed wet gas factor parameter, as set in the Contract tab, is disabled. When Legacy Method is selected, configuration of the parameters used by the V-Cone or Wafer Cone method is disabled. Mass Flow Rate of Liquid The Mass flow rate of liquid at flow conditions parameter is used by the VCone or Wafer Cone method and can be configured when V-Cone or Wafer Cone is selected. This information needs to be gathered using a sampling method or a tracer method. The default is 0. Density of Liquid The Density of liquid at flow conditions parameter is used by the V-Cone or Wafer Cone method and can be configured when V-Cone or Wafer Cone is selected. The default is 0. V-Cone Coefficients This step defines the V-Cone coefficients. Enter the V-Cone coefficient pairs from the meter-sizing report. The default list contains one pair: Re = 1000000; Cf = 0.82. Click Add to add a coefficient pair. Realflo User and Reference Manual May 19, 2011 562 Realflo Wizards In the original McCrometer V-Cone Application Sizing sheet that is included with V-Cone meters uses the terminology Cd (discharge coefficient) rather than Cf (flow coefficient). You will need to use the Re and Cd values from the V-Cone Application Sizing sheet for the Re and Cf entries. If the Re value is the same for all entries in the table only the first pair is used. McCrometer now supplies one value of Cd in the sizing document. You need to enter one Re/Cd pair only. See the McCrometer Application Sizing sheet for the Re/Cd pair for your meter. To edit a coefficient pair in the table: Select a row in the list. Click Edit to open the Add/Edit Flow Coefficient dialog. To delete a coefficient pair in the table: Select a row in the list. Click Delete to delete the pair form the list. AGA-8 Options Step This step sets AGA-8 calculation options. Events can be logged each time an AGA-8 gas component changes. Select Yes to log each change to the gas composition. Use this option if the gas composition changes infrequently. This is the default selection. Select No to skip logging changes. Use this option if you are making frequent changes to the gas composition. The Relative Density and Heating values can be calculated from the AGA-8 calculation or determined in a laboratory. Realflo User and Reference Manual May 19, 2011 563 Realflo Wizards Select Calculate the Values to have AGA-8 calculate the values. Select Use Laboratory Values to used fixed values. Relative Density sets the real relative density of the gas. Valid values are 0.07 to 1.52. The template selected determines the default value displayed. This control is disabled if Calculate the Values is selected. Heating Value sets the heating value of the gas. Valid values are 0 to 1800 3 BTU(60)/ ft or the equivalent in the selected units. The template selected determines the default value displayed. This control is disabled if Calculate the Values is selected. AGA-8 Hexanes+ Options This step lets you choose to enter Hexane and higher components individually or as a single combined value. Gas composition can be measured with individual values for hexane and higher components or use a combined value. Select Enter Each Component to use individual values for the higher components. This is the default selection. Select Use Combined Hexanes+ with these Ratios to use a combined value. Type the ratios of the higher components. n-Hexane defines the percentage of the Hexanes+ contributed by nHexane. n-Heptane defines the percentage of the Hexanes+ contributed by nHeptane. n-Octane defines the percentage of the Hexanes+ contributed by nOctane. n-Nonane defines the percentage of the Hexanes+ contributed by nNonane. n-Decane defines the percentage of the Hexanes+ contributed by nDecane. Realflo User and Reference Manual May 19, 2011 564 Realflo Wizards The Total field displays the sum of portions. This value cannot be edited. The total of portions needs to be 100 percent. AGA-8 Gas Composition Step This step lets you define the AGA-8 gas composition. One of two configuration dialogs opens based on how you elected to enter Hexane and higher components. Individual Components The dialog below lets you enter combined Hexanes+ composition. Type the gas composition according to the laboratory analysis. The total of components needs to be 100 percent. Normalize adjusts non-zero components so that the total of components is 1.0000 (or 100.00 percent). The ratio to each other for the components remains the same. NX-19 Settings This step defines the NX-19 calculation. This is not supported for PEMEX flow computers. Realflo User and Reference Manual May 19, 2011 565 Realflo Wizards Specific Gravity is the specific gravity of the gas being measured. Valid values are 0.554 to 1.000. The template selected determines the default value displayed. Carbon Dioxide is the percent of carbon dioxide in the gas being measured. This value needs to be in the range 0 to 15. The template selected determines the default value displayed. Nitrogen is the percent of nitrogen in the gas being measured. This value needs to be in the range 0 to 15. Heating Value is the heating value of the gas being measured. Valid values 3 are 0 to 1800 BTU(60)/ft or the equivalent in the selected units. The template selected determines the default value displayed. Events can be logged each time the NX-19 configuration changes. Select Yes to log each change to the configuration. Use this option if the configuration changes infrequently. This is the default selection. Select No to skip logging changes. Use this option if you are making frequent changes to the configuration. Sensor Configuration The next step is Sensor Configuration if any transmitters were used in the input configuration. Otherwise the next step is Flow Computer Configuration Summary. Sensor Configuration This step lets you select how the transmitters are to be configured. Realflo User and Reference Manual May 19, 2011 566 Realflo Wizards The Flow Runs are configured to use these transmitters dialog is a table that shows each of the configured flow run numbers, the Flow Run ID for each, and the transmitter that the run uses for the differential pressure (DP), static pressure (SP), and temperature sensors. If an analog input is used for the flow run, AIN will be displayed in the coresponding DP, SP, or Temp column. The How do you want to configure sensors? option lets you select how to continue configuring the sensors. The three options are: Connect now and configure transmitters to connect to the flow computer and configure the attached transmitters. This selection is disabled if the flow computer configuration was selected to be completed offline in the Flow Computer Status step. If you choose this option, go to the Configure Sensors section to continue. Edit sensor configuration without connecting to proceed directly to the editing pages, without connecting to the flow computer. If you choose this option, go to the Review Transmitters section to continue. Use default sensor configuration to complete the configuration without changing the sensor configuration. Sensor configuration will be set to default values. If you choose this option, the next step is Finish. Configure Sensors This step lets you select to use the Realflo configuration or the sensor‟s configuration file. Realflo User and Reference Manual May 19, 2011 567 Realflo Wizards Select Use the configuration from Realflo to use the configuration data from the Realflo file. This is the default setting. Select Use the transmitter’s current configuration by reading from the transmitter to read configuration from a pre-configured transmitter. Sensor Search This step searches for sensors connected to the flow computer serial ports or LAN port. Search Serial Option Select Search Serial to search for transmitters connected to a serial port of the flow computer. Realflo User and Reference Manual May 19, 2011 568 Realflo Wizards The Port parameter selects the flow computer serial port where the sensor is attached. Valid values are com1, com2, com3, and com4. The template selected determines the default value displayed. The Timeout parameter specifies the length of time the flow computer will wait for a response from a sensor. Valid values are 100 ms to 10000 ms. The default is 300 ms. Select Maximum to search for a number of MVT transmitters. The search operation will stop after finding the specified number of transmitters. The valid value is from 1 to 255. The default is 1. Select Range to search the addresses in a specified range. The range to search for is typed in the edit boxes to the right of the radio button. The value in To edit control needs to be equal or great than the value in the first edit control. The maximum search range that can be typed is for 255 transmitters. The default range is 1 to 247. Range Search supports addresses 1 to 255 in standard Modbus mode, and 1 to 65534 in extended address mode. The address mode of the flow computer serial port needs to be set to extended in order to search for transmitters with extended addresses. Select All to search the addresses of all transmitters connected with the serial port selected in Port. Up to 255 addresses are searched. Click Next to start the search for sensors or 4000 transmitters. A search process dialog is displayed so that the search operation can be cancelled at any time. Search LAN Option Select Search LAN to search for transmitters connected to a LAN port of the flow computer. The IP Address parameter specifies the IP address of a 4000 transmitter. Valid entries are IP addresses in the format nnn.nnn.nnn.nnn where nnn are values between 0 and 255. The Protocol parameter selects the type of IP protocol that will be used to query the transmitter. Valid IP protocol selections are Modbus/TCP and Modbus RTU in UDP. The IP port (for example port 502) for the selected protocol needs to be the same in the flow computer and the 4000 transmitter. The Timeout parameter specifies the length of time the flow computer will wait for a response from a 4000 transmitter. Valid values are 100 to 10000 milliseconds. The default is 5000 ms. Click Next to start the search for MVT transmitters or 4000 transmitters. A search process dialog is displayed so that the search operation can be cancelled at any time. If no transmitters were found, then a message is displayed and the search step is displayed again. Assign Sensors This step assigns found transmitters to flow runs. Realflo User and Reference Manual May 19, 2011 569 Realflo Wizards The Available Sensors window shows the transmitters that have been configured and the transmitters that were found by the search. There may be more transmitters in the list than there are runs. The Sensor column shows the transmitter slots that have been configured. Transmitters that were found but not assigned are listed as Not assigned. The Status column indicates if configuration data for the transmitter exists. Found indicates a transmitter has been configured and the search found one with the same port, address and device type. Missing means a transmitter has been configured but the search did not find one with the same port, address and device type. The Port column displays the serial or LAN port the flow computer is using to communicate with the transmitter. The Address column displays the Modbus station address or IP address of the transmitter. The Tag column displays the Tag Name assigned to the transmitter. This column may be blank if a Tag Name has not been assigned to the transmitter. The Device type column displays type of transmitter. Valid values are 3095FB, 4101, 4102, 4202 DR, 4202 DS, 4203 DR, or 4203 DS. The Flow Runs window shows which MVTs are assigned to the runs. To Change the order of the sensors: Select a sensor in Available Sensors window. Click Move. The Move Sensor dialog opens: Realflo User and Reference Manual May 19, 2011 570 Realflo Wizards In the Move Sensor dialog, use Move To selection to select the new location Click OK. To delete a sensor: Select a transmitter in Available Sensors Click Delete. To change the address of a Sensor: Select a transmitter in Available Sensors Click Change Address. The Change Address dialog opens: Enter a new address for the transmitter in the New Address: window. Click OK. Click Next when the transmitters are moved to the correct location. Next is disabled if there are Not Assigned transmitters still in the list. The next step is Search for More Transmitters. Notes The following actions may occur when moving a Sensor. Moving one sensor to another results in the both swapping positions. When Use the configuration from Realflo was selected, assigning a Not assigned transmitter to a Sensor with status Missing and device type matching will result in the sensor adopting the transmitter‟s port and address and retaining the rest of the sensor configuration. The sensor, being assigned, will disappear from the list. When Read the configuration from the transmitter was selected, assigning a Not assigned transmitter to a sensor with status Missing and device type matching will result in the sensor adopting the transmitter‟s configuration. The transmitter, being assigned, will disappear from the list. Assigning a Not assigned transmitter to a sensor with status Missing and device type not matching will result in the sensor adopting the Realflo User and Reference Manual May 19, 2011 571 Realflo Wizards transmitter‟s configuration. The transmitter, being assigned, will disappear from the list. Other assignments are not permitted. Search for More Sensors This step displays the current sensor assignments and asks if more searches are needed. Proposed Sensors shows the transmitters that have been configured and the transmitters that were found by the search. Flow Runs shows which sensors are assigned to the runs. Select Search for more transmitters to search again. The next step is Search for Transmitters. Select Finish searching and review configuration to use the current settings. This is the default button. Review Transmitters This step displays the transmitter assignments and allows editing the transmitter configuration. Realflo User and Reference Manual May 19, 2011 572 Realflo Wizards The Sensors window shows the transmitters that have been configured. The Flow Runs window shows which sensors are assigned to the runs. Click Edit to review and modify the settings for each transmitter. Edit opens the Add/Edit Sensor Settings dialog. Changes to a transmitter address will be written to the transmitter without affecting current flow computer configuration. Once you have configured Run 1, the Flow Run ID dialog re-opens. Flow Computer Configuration Summary This step displays a summary of the flow computer settings. A summary of the flow computer configuration is shown. The current configuration can be compared with the configuration in the target flow computer. Select Yes to compare the configurations. The next step is Review Differences. Realflo User and Reference Manual May 19, 2011 573 Realflo Wizards Select No to not compare the configurations. The next step is Save File. Review Differences This step displays a summary of changes in the flow computer configuration. You can select to write to the flow computer or not. A summary of the differences is the configuration is shown. Select Yes to write the configuration to the flow computer. The configuration is written to the flow computer. The Start Executing command will be written for each flow run. The communication progress dialog shows the stages of writing. Select No to write the configuration to the flow computer later. Click Next to perform the selected action. In Flow Computer versions 6.73 and older, when AGA-8 gas ratios or NX-19 gas quality values are written to the flow computer the new gas ratios are updated in the Proposed registers. The Actual registers are not updated until a new Density calculation is started with the new values. The new values are not available to SCADA host software reading the Actual registers until a until a new Density calculation is started with the new values. In Flow Computer versions 6.74 and newer when AGA-8 gas ratios or NX19 gas quality values are written to the flow computer the new gas ratios are updated in the Proposed registers and in the Actual registers. This allows a SCADA host to immediately confirm the new values were written to the flow computer. The new gas values are not used by the flow computer until a new density calculation is started. Save File This step selects where to save the configuration file. Realflo User and Reference Manual May 19, 2011 574 Realflo Wizards Select the Save to Realflo.tfc to save the configuration file to the default file location. Select the Save to another file to either enter a file name or use the Browse option to open the Save As dialog. Finish This step is displayed at the end of the wizard. Click Finish to close the wizard. Notes Views for extra runs are closed but new ones may be opened. The history and event logs contain no information. The configuration data for supported runs in the file is set to usable values, so when the number of runs is changed there is useful data in the configuration. Realflo User and Reference Manual May 19, 2011 575 Realflo Wizards Create Configuration Step-by-Step When you choose to configure the flow computer step-by-step, the Create New File Wizard prompts you through the steps needed. The dialogs displayed are dependent upon the calculations you select. Step-by-Step Configuration Sequence for a Flow Computer The main steps in the configuration sequence to configure flow computer step-by-step are: Use Create New File Dialog to select how to create a new file. Use Hardware and Firmware Type Dialog to configure the hardware and firmware you are using. Use the I/O Module Dialog to configure your I/O module (Telepace only). Use the Flow Computer ID Dialog to assign an ID to the flow computer. Use the Flow Runs Dialog to configure the number of flow runs Use the Flow Run ID Dialog to assign an ID to the flow run. Use the Flow and Compressibility Calculations to select the flow and compressibility calculations for the meter run. Select the Flow Run Inputs to configure the type of inputs for the flow run. Select the Differential Pressure Limits to configure the differential pressure calibration to use for the run. Configure the Static Pressure for the run. Configure the Static Pressure Input Limits for the run. Use the Static Pressure dialog to configure your sensors to compensate for the gravitation pull of the Earth according to altitude and latitude variations. Define the Temperature Limits for the run. Define the Contract Settings for the run. Select the Flow Calculations Dialog for the run. Configure the Sensor Configuration for the run. Review the Flow Computer Configuration Summary to confirm the configuration settings. Use Save File to save the new configuration. Select the Create a new file? radio button from the Select File dialog to configure the flow computer step-by-step. Realflo User and Reference Manual May 19, 2011 576 Realflo Wizards Create New File Dialog Select the Create Configuration Step-by-Step radio button. Click Next > to continue. Follow the wizard steps described in the following sections to configure the flow computer. Flow Computer Status Dialog When configuring the flow computer step-by-step, select No when the Flow Computer Status dialog opens. This lets you choose the hardware type and firmware type manually see Select Flow Computer Wizard. Hardware and Firmware Type Dialog The Hardware and Firmware Type Dialog opens when you select No in the Flow Computer Status dialog. First, select the Hardware Type from the dropdown list. The default value is SCADAPack 4202 DR. The options from which you can select are: Realflo User and Reference Manual May 19, 2011 577 Realflo Wizards Micro16 SCADAPack SCADAPack Plus SCADAPack Light SCADAPack LP SCADAPack 32 SCADAPack 32P 4202 DR SCADAPack 100: 1024K 4202 DS SCADAPack 314 SCADAPack 330 SCADAPack 334 SCADAPack 350 4203 DR 4203 DS SolarPack 410 Second, select the Firmware Type from the dropdown list. The default value is Telepace. You can select ISaGRAF from the dropdown list for the firmware type. If the firmware selected is Telepace, the I/O Module Type Dialog opens, followed by the Flow Computer ID dialog. If the firmware type selected is ISaGRAF, the Flow Computer ID dialog opens. I/O Module Type Dialog This step lets you select the I/O module to use for the selected Hardware type. The register assignment in the new file is set to the default register assignment for the selected hardware type. Realflo User and Reference Manual May 19, 2011 578 Realflo Wizards Select the I/O module for the flow computer from the dropdown list. The choices displayed depend on the flow computer hardware type. Hardware Type I/O Modules Available Micro16 Controller I/O only or Backwards compatible modules. 5601 I/O Module, 5604 I/O Module, or 5606 I/O Module 5601 I/O Module, 5604 I/O Module, or 5606 I/O Module 5602 I/O Module SCADAPack LP I./O 5601 I/O Module, 5604 I/O 10V/40mA Module 5604 I/O 5V/20mA Module 5606 I/O Module SCADAPack 32P I/O 4202 DR or 4202 DR Extended/4203 DR I/O SCADAPack 100: 1024K I/O SCADAPack SCADAPack Plus SCADAPack Light SCADAPack LP SCADAPack 32 SCADAPack 32P 4202 DR SCADAPack 100: 1024K 4202 DS SCADAPack 314 SCADAPack 330 SCADAPack 334 SCADAPack 350 4203 DR 4203 DS SolarPack 410 4202/4203 DS I/O SCADAPack 314/33x I/O SCADAPack 330 Controller. SCADAPack 33x I/O SCADAPack 350 10V/40mA Module SCADAPack 350 5V/20mA Module SCADAPack 357 Module 4202 DR Extended/4203 DR I/O 4202/4203 DS I/O N/A Flow Computer ID Dialog This step sets the Flow Computer ID. Realflo User and Reference Manual May 19, 2011 579 Realflo Wizards Type the Flow Computer ID string in the edit box. This unique ID stops accidental mixing of data from different flow computers. The maximum length of the Flow Computer ID is eight characters. Any characters are valid. You can leave the Flow Computer ID edit box blank. The default value is blank. Flow Runs Dialog This step selects the number of flow runs in the flow computer. The wizard will step through the configuration of the first run and then each subsequent run if more than one run is selected. Select the number of flow runs with the dropdown list. Valid values depend on the hardware type and the number of flow runs enabled for the flow computer. The default value is one. For Micro16, SCADAPack, SCADAPack Light and SCADAPack Plus Flow Computers, the maximum number of meter runs is three. The selection of three meter runs is available for older flow computers that could be enabled for three meter runs. For SCADAPack LP and SCADAPack (4202 and 4203) Flow Computers, the maximum number of meter runs is two. For SCADAPack 100: 1024K and SolarPack 410 Flow Computers, the maximum number of meter runs is one. For SCADAPack 314/330/334 and SCADAPack 350 Flow Computers the maximum number of meter runs is four. For SCADAPack 32 and SCADAPack 32P Flow computers the maximum number of runs you can select is ten. Flow Run ID This step sets the Flow Run ID for the meter run. This is the first step of a flow run configuration. The wizard will step you through the configuration of the first run and then each subsequent run if you select more than one run. Realflo User and Reference Manual May 19, 2011 580 Realflo Wizards The Flow Run ID helps to identify the flow run. Type a string up to 32 characters long. Any characters are valid. You can leave the Flow Run ID edit box blank. Older flow computers allow a string up to 16 characters. See the TeleBUS Protocol Interface section. For run 1 the next step is Flow Calculations Dialog. For subsequent runs, the next step is Copy Run Configuration Dialog. Flow Calculations Dialog This step selects the flow and compressibility calculations for the first run. Flow Calculation selects the type of flow calculation for the meter run. Valid values are: AGA-3 (1985 version) AGA-3 (1992 version) AGA-7 Realflo User and Reference Manual May 19, 2011 581 Realflo Wizards AGA-11 (not available for 16-bit controllers) V-cone calculations The template selected determines the default value. Compressibility Calculation selects the type of compressibility calculation for the meter run. Valid compressibility calculation values are: AGA-8 Detailed NX-19 (Not supported for PEMEX flow computers) AGA-8 Detailed is the recommended calculation for new systems as it has superior performance compared to NX-19. NX-19 is provided for legacy systems. The template selected determines the default value. Flow Direction Control selects the direction of flow indication, forward or reverse, for a meter run. Forward by Value selection indicates the flow direction is forward when the value from a differential pressure (DP) sensor is positive or the mass flow rate value from a Coriolis meter is positive. Reverse by Value selection indicates the flow direction is reverse when the value from a differential pressure (DP) sensor is negative or the mass flow rate value from a Coriolis meter is negative. Forward by Status selection indicates the flow direction is forward when the Flow Direction Register has a value of 0 (OFF). Reverse by Status selection indicates the flow direction is reverse when the Flow Direction Register has a value of 1 (ON). Flow Direction Register specifies which register indicates the forward or reverse flow direction status. Any valid registers for the flow computer controller can be used for this setting. The default register is 1. This edit control is disabled if Flow Direction Control selection is Value. This control is hidden in GOST mode flow computers. Flow Run Units Dialog This step selects the units that are used for input measurements and contracts. Realflo User and Reference Manual May 19, 2011 582 Realflo Wizards Input Units selects the units of measurement of input values for the meter run. Inputs may be measured in different units than the calculated results. This allows you to use units that are convenient to you for measuring inputs. A dropdown box allows the selection of the following unit types. US2 is the default value. US1 US2 US3 IP Metric1 Metric2 Metric3 SI US4 US5 US6 US7 US8 PEMEX The reference list for the Input Units displays the parameters and units for these parameters: DP (Differential pressure) SP (Static pressure) Temperature Pipe and Orifice Diameter Viscosity Altitude Heating value Contract Units selects the units of measurement of contract values. These units are used for the calculated results. A dropdown box allows the selection of the following unit types. The default value is US2. US1 US2 US3 IP Metric1 Metric2 Metric3 Realflo User and Reference Manual May 19, 2011 583 Realflo Wizards SI US4 US5 US6 US7 US8 PEMEX The reference list for the Contract Units displays the parameters and units for these parameters when used for the contract. The parameters displayed depend on the contract units selected. The parameters are: Volume Volume Rate Energy Energy Rate Base Pressure Base Temperature Mass Mass Flow Rate Density Flow Extension Heating Value Flow Run Inputs This step lets you configure the flow run inputs. One of two configuration dialogs is presented based on the input type you configure. Sensor Inputs Analog Inputs Sensor Inputs Realflo User and Reference Manual May 19, 2011 584 Realflo Wizards Select Internal Sensor (4202 DR/DS or 4203DR/DS or SolarPack 410) to use a SCADAPack internal transmitter as the input device. The transmitter is the input for pressure, differential pressure, and temperature. This is the only valid selection for run 1of a SCADAPack flow computer. Other options are disabled. Select Sensor to use a multivariable transmitter as the input device. The transmitter is the input for pressure, differential pressure, and temperature. This is the default selection, except for run 1 of a SCADAPack controller. The Where is sensor connected to the Flow Computer parameter enables the ability to select the serial or LAN port where the sensor is connected to the flow computer. Selections vary according to the flowcomputer type. The default value is com1. Valid selections can include: o com1 o com2 o com3 o com4 o LAN The What is the sensor model parameter selects the multivariable transmitter (MVT) type. The selections available are: o 3095FB o 4101 o 4102 o 4202 DR o 4202 DS o 4203 DR o 4203 DS The What value should be used if the sensor fails parameter selects the specified value in this field as the live input value when communicating with a sensor. The dropdown list lets you select: Realflo User and Reference Manual May 19, 2011 585 Realflo Wizards o Use Last Known Good Value o Use Default Value When you open a file using an older file format, Realflo sets the default value of the Values on Sensor Fail field to Use Last Known Good. When the status to a sensor changes and you select the Use Default Value option, this is added to the Event Log. For flow computers 6.70 and later, when communication to a sensor fails and the configuration option “Use Last Known Good Value” is set to “Use Default Value,” the flow computer needs to use the specified default value in the configuration in place of a live input value. When communication to a sensor is restored and the configuration option for the Value on Sensor Fail field is set to use the default value, the flow computer uses the input value from the sensor as the live input value. For flow computers prior to 6.70, the value on sensor fail is ``Ùse Last Known Good Value.” Analog Inputs Select Analog Inputs to use analog inputs to measure pressure, differential pressure, and temperature. Valid values are: Telepace Integer ISaGRAF Integer Float Raw Float The default value is Telepace integer if Telepace firmware is running and ISaGRAF integer if ISaGRAF firmware is running. For AGA-7 calculations, the value is fixed and set automatically. The value is Telepace Long if Telepace firmware is running and ISaGRAF integer if ISaGRAF firmware is running. The next step is Differential Pressure Input Limits if AGA-3 or V-Cone is configured If AGA-7 is configured, the next step is Turbine Settings. Differential Pressure Input Limits This step lets you configure the differential pressure input limits. One of two configuration dialogs is presented based on the input type you configure. Sensor Inputs Analog Inputs Realflo User and Reference Manual May 19, 2011 586 Realflo Wizards Sensor Inputs Input Type is a read-only field that identifies the sensor number for which you are setting the parameters using this dialog. Units are the differential pressure units. Values read from the transmitter are in these units. If the transmitter has a local display, the transmitter uses these units. Valid values depend on the MVT type: For SCADAPack transmtters, valid units are: inches H2O at 68°F, Pascal (Pa) and kiloPascal (kPa). The default is inches H2O at 68°F. For the 3095 MVT valid units are: inches H2O at 60°F, Pascal (Pa), kiloPascal (kPa) and inches H2O at 68°F. The default is inches H2O at 60°F. Damping is the response time of the transmitter. It is used to smooth the process variable reading when there are rapid input variations. For SCADAPack transmitters the valid values are 0.0 (damping off), 0.5, 1.0, 2.0, 4.0, 8.0, 16.0, and 32.0 seconds. The default value is 0 (damping off). For the 3095 MVT the valid values are 0.108, 0.216, 0.432, 0.864, 1.728, 3.456, 6.912, 13.824 and 27.648. The default is 0.864. Lower Operating Limit (LOL) is the lowest valid value from the sensor and needs to be less than the UOL. Alarms occur if the value is less than the LOL. The default value is 0. Valid values depend on the transmitter; refer to the transmitter band or user manual. Upper Operating Limit (UOL) is the highest valid value from the sensor and needs to be greater than the LOL. Alarms occur if the value is greater than the UOL. The default value is the upper range limit of the transmitter. Valid values depend on the transmitter; refer to the transmitter band or user manual. Low DP Cutoff is the differential pressure where flow accumulation will stop and needs to be less than the UOL. The default value is 0. Valid values depend on the transmitter; refer to the transmitter band or user manual. Low DP Hysteresis is the amount by which the differential pressure needs to rise above the Low DP Cutoff for flow accumulation to start. It may be a Realflo User and Reference Manual May 19, 2011 587 Realflo Wizards value using the DP units or may be a percentage of the operating span. The operating span is the difference between the Upper Operating Limit and the Lower Operating limit. Values depend on the transmitter. The flow accumulation level needs to be less than the Upper Operating Limit. The default value is 0. Default Value is enabled if you configured the field using the Flow Run Inputs dialog. Type the live input value to use when communicating with a sensor. The default value is 0. If you configured sensor inputs, go to the Static Pressure Options Dialog section. Analog Inputs The dialog below opens when analog inputs are selected. Input Type is a read-only field that identifies the input type for which you are setting the parameters using this dialog. Input Register is the register address where the input value is stored. Valid values are 30001 to 39999 or 40001 to 49999. The default is selected based on the run number so that inputs have unique registers. Input at Zero Scale is value read from the sensor, in unscaled I/O units, when the sensor is at zero scale. Valid values depend on the input type. The default value is 0. This is enabled for Telepace integer, raw float and ISaGRAF integer types and disabled otherwise. Input at Full Scale is value read from the sensor, in unscaled I/O units, when the sensor is at full scale. Valid values depend on the input type. The default value is 32767. This is enabled for Telepace integer, raw float and ISaGRAF integer types and disabled otherwise. DP at Zero Scale is the pressure that corresponds to the zero scale input, or if the input does not require scaling, the minimum pressure that can be read from the sensor. Valid values depend on the input type. The default value is 0. DP at Full Scale is the pressure that corresponds to the full-scale input, or if the input does not require scaling, the maximum pressure that can be read Realflo User and Reference Manual May 19, 2011 588 Realflo Wizards from the sensor. Valid values depend on the input type. The default value is 16. Low DP Cutoff is the differential pressure where flow accumulation will stop and needs to be less than the UOL. The default value is 0. Valid values depend on the transmitter; refer to the transmitter band or user manual. Low DP Hysteresis is the amount by which the differential pressure needs to rise above the Low DP Cutoff for flow accumulation to start. It may be a value using the DP units or may be a percentage of the operating span. The operating span is the difference between the Upper Operating Limit and the Lower Operating limit. Values depend on the transmitter. The flow accumulation level needs to be less than the Upper Operating Limit. The default value is 0. Static Pressure Options Dialog This step lets you select how the static pressure is measured. The pressure tap may be upstream or downstream of the orifice plate for AGA-3. Select Up Stream for an upstream static pressure tap. This is the default value. The control is disabled for AGA-7 and V-Cone calculations. Select Down Stream for a downstream static pressure tap. The control is disabled for AGA-7 and V-Cone calculations. Static Pressure Input Limits This step defines the limits for the temperature input. One of two configuration dialogs is presented based on the Input Type configured for static pressure limits: Sensor Inputs Analog Inputs Sensor Inputs The dialog below is presented when sensor inputs are used. Realflo User and Reference Manual May 19, 2011 589 Realflo Wizards Input Type is a read-only field that identifies the sensor number for which you are setting the parameters using this dialog. Units is the differential pressure units. Values read from the transmitter are in these units. If the transmitter has a local display it uses these units. Valid values are kiloPascal, MegaPascal, and psi (pounds per square inch). The default is psi. Damping is the response time of the transmitter. It is used to smooth the process variable reading when there are rapid input variations. For SCADAPack transmitters the valid values are 0.0 (damping off), 0.5, 1.0, 2.0, 4.0, 8.0, 16.0, and 32.0 seconds. The default value is 0 (damping off). For the 3095 MVT the valid values are 0.108, 0.216, 0.432, 0.864, 1.728, 3.456, 6.912, 13.824 and 27.648. The default is 0.864. Lower Operating Limit (LOL) is the lowest valid value from the sensor and needs to be less than the UOL. Alarms occur if the value is less than the LOL. The default value is 0. Valid values depend on the transmitter; refer to the transmitter band or user manual. Upper Operating Limit (UOL) is the highest valid value from the sensor and needs to be greater than the LOL. Alarms occur if the value is greater than the UOL. The default value is the upper range limit of the transmitter. Valid values depend on the transmitter; refer to the transmitter band or user manual. Default Value is enabled if you gage pressure using the Static Pressure Options. Type the live input value to use when communicating with a sensor. The template selected determines the default value displayed. The pressure sensor may measure absolute or gage pressure. Select Absolute Pressure to measure absolute static pressure. This is the default value unless the Compressibility Calculation type is set to NX-19. The Static Pressure is set to Gage and the Atmospheric pressure is 14.7psi when NX-19 is selected. Select Gage Pressure to measure gage static pressure. Realflo User and Reference Manual May 19, 2011 590 Realflo Wizards Type the Atmospheric Pressure measured at the site. This control is disabled and set to zero if absolute pressure is selected. The atmospheric pressure entered needs to be greater than zero. The maximum upper limits for atmospheric pressure are: 30 psi and PEMEX units for US1, US2, US3, US4, US5, US6, US7, US8, 4320 lbf/ft2 for IP units 207 kPa for Metric1 units 2.07 bar for Metric2 units 0.207 MPa for Metric3 units 207000 Pa for SI units If you configured sensor inputs, see the Static Pressure Compensation section. Analog Inputs The dialog below is presented when analog inputs are used. Input Type is a read-only field that identifies the input type for which you are setting the parameters using this dialog. Input Register is the register address where the input value is stored. Valid values are 30001 to 39999 or 40001 to 49999. The default is selected based on the run number so that inputs have unique registers. Input at Zero Scale is value read from the sensor, in unscaled I/O units, when the sensor is at zero scale. Valid values depend on the input type. The default value is 0. This is enabled for Telepace integer, raw float and ISaGRAF integer types and disabled otherwise. Input at Full Scale is value read from the sensor, in unscaled I/O units, when the sensor is at full scale. Valid values depend on the input type. The default value is 32767. This is enabled for Telepace integer, raw float and ISaGRAF integer types and disabled otherwise. Realflo User and Reference Manual May 19, 2011 591 Realflo Wizards SP at Zero Scale is the pressure that corresponds to the zero scale input, or if the input does not require scaling, the minimum pressure that can be read from the sensor. Valid values depend on the input type. The default value is 0. SP at Full Scale is the pressure that corresponds to the full-scale input, or if the input does not require scaling, the maximum pressure that can be read from the sensor. Valid values depend on the input type. The default value is 20000. Static Pressure Compensation This step selects if compensation is applied for the location where calibration was performed. If you configured sensors or analog inputs from the Static Pressure Limits dialog, this is the next step in the configuration sequence. Select No if compensation is not required. This is the default value. Select Yes to compensate for the altitude and latitude. Type the Altitude of the location. Valid values are -30000 to 30000. The default value is 0. This control is disabled if No is selected. Type the Latitude of the location. Valid values are -90 to 90. The default value is 0. This control is disabled if No is selected. Realflo User and Reference Manual May 19, 2011 592 Realflo Wizards Turbine Settings This step configures the turbine input for AGA-7 calculations. Input Register is the register address where the input value is stored. Valid values are 30001 to 39999 or 40001 to 49999. The default is selected based on the run number so that inputs have unique registers. Low Flow Pulse Limit is the number of pulses below which a low flow alarm will occur. The default value is 10. Low Flow Detect Time is the length of time the number of pulses needs to remain below the Low Flow Pulse Limit for a low flow alarm to occur. Valid values are 1 to 5 seconds. The default value is 5. Temperature Limits This step lets you define the limits for the temperature input. One of two configuration dialogs is presented based on the Input Type configured for static pressure limits: Sensor Inputs Analog Inputs Sensor Inputs The following dialog is presented when sensor (MVT) inputs are used. Realflo User and Reference Manual May 19, 2011 593 Realflo Wizards Input Type is a read-only field that identifies the sensor number for which you are setting the parameters using this dialog. Units is the differential pressure units. Values read from the transmitter are in these units. If the transmitter has a local display it uses these units. Valid values are kiloPascal, MegaPascal, and psi (pounds per square inch). The default is psi. Lower Operating Limit (LOL) is the lowest valid value from the sensor and needs to be less than the UOL. Alarms occur if the value is less than the LOL. The default value is 0. Valid values depend on the transmitter; refer to the transmitter band or user manual. Upper Operating Limit (UOL) is the highest valid value from the sensor and needs to be greater than the LOL. Alarms occur if the value is greater than the UOL. The default value is the upper range limit of the transmitter. Valid values depend on the transmitter; refer to the transmitter band or user manual. Analog Inputs The following dialog is presented when analog inputs are used. Realflo User and Reference Manual May 19, 2011 594 Realflo Wizards Input Type is a read-only field that identifies the input type for which you are setting the parameters using this dialog. Input Register is the register address where the input value is stored. Valid values are 30001 to 39999 or 40001 to 49999. The default is selected based on the run number so that inputs have unique registers. Input at Zero Scale is value read from the sensor, in unscaled I/O units, when the sensor is at zero scale. Valid values depend on the input type. The default value is 0. This is enabled for Telepace integer, raw float and ISaGRAF integer types and disabled otherwise. Input at Full Scale is value read from the sensor, in unscaled I/O units, when the sensor is at full scale. Valid values depend on the input type. The default value is 32767. This is enabled for Telepace integer, raw float and ISaGRAF integer types and disabled otherwise. Temperature at Zero Scale is the temperature that corresponds to the zero scale input, or if the input does not require scaling, the minimum pressure that can be read from the sensor. Valid values depend on the input type. The default value is –40. Temperature at Full Scale is the temperature that corresponds to the fullscale input, or if the input does not require scaling, the maximum pressure that can be read from the sensor. Valid values depend on the input type. The default value is 200. Realflo User and Reference Manual May 19, 2011 595 Realflo Wizards Contract Settings This step sets the contract settings for the run. Input Average Weighting is the weighting method of the linear inputs. This applies to the differential pressure, static pressure, and temperature. Valid values are time-weighted or flow-weighted (see Input Averaging on page 948 for more information). The default is time-weighted. Contract Hour is the hour of the day that starts a new contract day specified using a 24-hour clock. The contract day begins at 00 minutes and 00 seconds of the specified hour. Valid values are 0 to 23. The default value is 0 (midnight). Standard Base Conditions are the default Base Temperature and Base Pressure (absolute) values. Base Temperature is the reference temperature to which contract flow values are corrected. Valid values are -40 to 200. The default value is given in the table below. Base Pressure is the reference pressure to which contract flow values are corrected. The base pressure is measured as absolute pressure (not a gauge pressure). Valid values are 0 to 32000. The default value is given in the table below. Contract Units US1 US2 US3 IP Metric1 Metric2 Metric3 SI US4 US5 US6 US7 US8 Realflo User and Reference Manual May 19, 2011 Standard Base Temperature 60 F 60 F 60 F 60 F 15 C 15 C 15 C 288.15 K 60 F 60 F 60 F 60 F 60 F Standard Base Pressure 14.73 psi 14.73 psi 14.73 psi 2 2116.2281 lbf/ft 101.325 kPa 1.01325 bar 0.101325 MPa 101325 Pa 14.73 psi 14.73 psi 14.73 psi 14.73 psi 14.73 psi 596 Realflo Wizards Contract Units PEMEX Standard Base Temperature 60 F Standard Base Pressure 14.73 psi Realflo for PEMEX flow computers provide a second set of base conditions. PEMEX Base Conditions are the default Base Temperature and Base Pressure (absolute) values when Realflo is operating in PEMEX mode. Base Temperature is the reference temperature to which contract flow values are corrected. The default is listed in the table below for each type of contract unit. Base Pressure is the reference pressure to which contract flow values are corrected. The base pressure is measured as absolute pressure (not a gauge pressure). Valid values are 0 to 32000. The default values are listed in the table below for each contract unit. Contract Units US1 US2 US3 IP Metric1 Metric2 Metric3 SI US4 US5 US6 US7 US8 PEMEX Standard Base Temperature 60 F 60 F 60 F 60 F 15 C 15 C 15 C 288.15 K 60 F 60 F 60 F 60 F 60 F 68 F Standard Base Pressure 14.73 psi 14.73 psi 14.73 psi 2 2116.2281 lbf/ft 101.325 kPa 1.01325 bar 0.101325 MPa 101325 Pa 14.73 psi 14.73 psi 14.73 psi 14.73 psi 14.73 psi 14.73 psi Flow Calculations When configuring a flow computer, you can configure it to use the following calculations: AGA-Settings AGA-3 Deadband Settings AGA-7 Settings AGA-11 Settings AGA-3 Settings This step lets you set the AGA-3 calculation parameters. Realflo User and Reference Manual May 19, 2011 597 Realflo Wizards Orifice Material is the material the orifice plate for the meter run is made of. Valid values are Stainless Steel, Monel, and Carbon Steel. The default value is Stainless Steel. Pipe Material is the material the meter run pipe is made of. Valid values are Stainless Steel, Monel, and Carbon Steel. The default value is Carbon Steel. Orifice Diameter is the diameter of the meter run orifice. The default value is 3 inches. Orifice reference temperature is the temperature at which the diameter of the meter run orifice was measured. The default value is 68°F. Pipe Diameter is the measurement of the meter run pipe inside diameter. The default value is 4.026 inches. Pipe reference temperature is temperature at which the meter run pipe diameter was measured. The default value is 68°F. Beta Ratio is the ratio of orifice diameter to pipe diameter. It is displayed for information purposes only and cannot be edited. Realflo displays messages if the beta ratio is outside recommended limits. Isentropic Exponent is a thermodynamic property of gas used to predict the relationships between pressure, temperature, volume and energy. If you are unsure of this value, a typical value of 1.3 is commonly used. The default value is 1.3. Viscosity is a measure of the resistance of a measured gas to flow. Valid values are 0 to 1. The default value is 0.010268 centipoise. AGA-3 Deadband Settings This step lets you set AGA-3 calculation deadbands. Realflo User and Reference Manual May 19, 2011 598 Realflo Wizards Temperature Deadband is the tolerated change in the flowing temperature before temperature dependent factors in the flow calculation are recalculated. Changes in the temperature smaller than the deadband will be ignored in determining the result. The default value is 0. The upper limit is 7°F or 4°C. Static Pressure Deadband is the tolerated change in the static pressure before static pressure dependent factors in the flow calculation are recalculated. Changes in the static pressure smaller than the deadband will be ignored in determining the result. A static pressure deadband setting of up to four percent of the typical static pressure level should have a small effect on the accuracy of the AGA-3 calculation. The default value is 0. The upper limit is 800 psi or 5500 kPa or the equivalent in other units. Differential Pressure Deadband is the tolerated change in the differential pressure before differential pressure dependent factors in the flow calculation are recalculated. Changes in the differential pressure smaller than the deadband will be ignored in determining the result. A change of N in the differential pressure input will cause a change of 0.5 N in the calculation volume at base conditions. It is recommended that the differential pressure deadband be set to zero. The default value is 0. The upper limit is 4.5 inWC or 1.1 kPa or the equivalent in other units. AGA-7 Settings This step lets you define AGA-7 settings. Realflo User and Reference Manual May 19, 2011 599 Realflo Wizards K Factor is the number of pulses per unit volume of the turbine meter. Valid values are 0.001 to 1000000. The default value is 100. M Factor is the adjustment to the number of pulses per unit volume for the turbine meter compared to an ideal meter. Valid values are 0.001 to 1000. The default value is 1. Uncorrected Flow Volume is the accumulated uncorrected flow volume at base conditions. The Uncorrected Flow Volume control is available in Realflo versions 6.20 and higher. AGA -11 Settings AGA-11 configuration defines parameters unique to the AGA-11 calculation. The AGA-11 calculation communicates with a Coriolis meter for the calculation. The AGA-11 configuration sets the communication parameters for communication between the Coriolis meter and the flow computer. Address This is the Modbus address of the Coriolis Meter for serial communications. Multiple Coriolis meters using the same serial port on the flow computer Realflo User and Reference Manual May 19, 2011 600 Realflo Wizards needs to each have a unique Modbus address. Valid Modbus addresses are between 1 and 247. The default address is 247. Port This is the communication port on the flow computer that will be used to communicate with the Coriolis meter. Valid port selections depend on the type of controller the flow computer running on. The default port is the first valid port available on the controller. Timeout This is the time the flow computer will wait for a response for Modbus read commands send to the Coriolis meter. When the timeout time is exceeded the command fails and an alarm is added to the flow computer alarm list. Valid timeout values are from 0 to 1000 ms. The default value is 50 ms. V-Cone Settings V-Cone Configuration defines parameters unique to the V-Cone calculation. Cone Material This is the material of the V-cone. Valid values are Carbon Steel, Stainless 304, and Stainless 316. The default value is determined by the template selected. Pipe Material This is the material from which the meter run pipe is made. Valid values are Carbon Steel, Stainless 304, and Stainless 316. The default value is determined by the template selected. Adiabatic Expansion Factor The Adiabatic Expansion Factor drop down list selects which calculation is used for the adiabatic expansion factor of the calculation. Select Legacy Calculation to use the older calculation method. This is the default selection. Flow computers prior to version 6.71 support only this selection. Select V-Cone to use the V-Cone specific calculation. This selection should be used with V-Cone devices. Realflo User and Reference Manual May 19, 2011 601 Realflo Wizards Select Wafer-Cone to use the Wafer-Cone specific calculation. This selection should be used with Wafer-Cone devices. This control is disabled and forced to Legacy Calculation if the controller type is not one of SCADAPack 32, SCADAPack 32P, SCADAPack 314/330/334, SCADAPack 350 SCADAPack 4203 or SolarPack 410. When reading from a flow computer that does not support the adiabatic expansion factor configuration, the method will be set to Legacy Calculation. When writing to a flow computer that does not support the adiabatic expansion factor method, the configuration registers will be ignored and the expansion factor will not be written. Cone Diameter The diameter of the meter run cone used for the flow calculation. The measurement units are displayed depending on the input units selected. The default value is 3 inches. Cone Measurement Temperature This is the reference temperature at which the cone diameter for the meter run was measured. The measurement units are displayed depending on the input units selected. The default value is 59 degrees F. Pipe Inside Diameter This is the measurement of the meter run pipe inside diameter. The measurement units are displayed depending on the input units selected. The default value is 5 inches. Pipe reference temperature The temperature at which the meter run pipe diameter was measured. The measurement units are displayed depending on the input units selected. The default value is 59 degrees. Isentropic Exponent In general, this is a thermodynamic property of gas used to predict the relationships between pressure, temperature, volume and energy. If you are unsure of this value a typical value of 1.3 is commonly used. The default value is 1.3. Viscosity This is the viscosity of the measured gas. In general, this is the resistance of a gas or semi-fluid resistance to flow. The measurement units are displayed depending on the input units selected. Valid values are 0 to 1. The default value is 0.010268 centiPoise. Wet Gas Correction Factor The Wet Gas Correction Factor Method drop down list selects which calculation is used for the wet gas correction factor of the calculation. Select Legacy Method to use the older correction method. This is the default selection. Flow computers prior to version 6.73 support only this selection. Select V-Cone or Wafer Cone to use the V-Cone and Wafer Cone specific calculation. This selection should be used with V-Cone or Wafer Cone devices. Realflo User and Reference Manual May 19, 2011 602 Realflo Wizards This control is disabled and forced to Legacy Calculation if the controller type is not one of SCADAPack 32, SCADAPack 32P, SCADAPack 314/330/334, SCADAPack 350 SCADAPack 4203 or SolarPack 410. The V-Cone or Wafer Cone supported Beta Ratios are: For Fr (Froude Number) < 5 supported Beta Ratio is 0.55. For Fr (Froude Number) < 5 supported Beta Ratio is 0.75. For Fr (Froude Number) > 5 supported Beta Ratio is 0.75. When V-Cone or Wafer Cone is selected and if the current Beta ratio is not supported when executing verification, a message is displayed. When V-Cone or Wafer Cone is selected, configuration of the fixed wet gas factor parameter, as set in the Contract tab, is disabled. When Legacy Method is selected, configuration of the parameters used by the V-Cone or Wafer Cone method is disabled. Mass Flow Rate of Liquid The Mass flow rate of liquid at flow conditions parameter is used by the VCone or Wafer Cone method and can be configured when V-Cone or Wafer Cone is selected. This information needs to be gathered using a sampling method or a tracer method. The default is 0. Density of Liquid The Density of liquid at flow conditions parameter is used by the V-Cone or Wafer Cone method and can be configured when V-Cone or Wafer Cone is selected. The default is 0. V-Cone Coefficients This step lets you define the V-Cone coefficients. Enter the V-Cone coefficient pairs from the meter sizing report. The default list contains one pair: Re = 1000000; Cf = 0.82. Click Add to add a coefficient pair. Realflo User and Reference Manual May 19, 2011 603 Realflo Wizards In the original McCrometer V-Cone Application Sizing sheet that is included with V-Cone meters uses the terminology Cd (discharge coefficient) rather than Cf (flow coefficient). You will need to use the Re and Cd values from the V-Cone Application Sizing sheet for the Re and Cf entries. If the Re value is the same for all entries in the table only the first pair is used. McCrometer now supplies one value of Cd in the sizing document. You need to enter one Re/Cd pair only. See the McCrometer Application Sizing sheet for the Re/Cd pair for your meter. To edit a coefficient pair in the table: Select a row in the list. Click Edit to open the Add/Edit Flow Coefficient dialog. To delete a coefficient pair in the table: Select a row in the list. Click Delete to delete the pair form the list. Compressibility Calculations When configuring a flow computer, you can configure it to use the following compressibility calculations: AGA-8 Settings AGA-8 Hexanes+ Settings AGA-8 Gas Composition NX-19 Settings AGA-8 Settings Realflo User and Reference Manual May 19, 2011 604 Realflo Wizards This step sets AGA-8 calculation options. Events can be logged each time an AGA-8 gas component changes. Select Yes to log each change to the gas composition. Use this option if the gas composition changes infrequently. This is the default selection. Select No to skip logging changes. Use this option if you are making frequent changes to the gas composition. The Relative Density and Heating values can be calculated from the AGA-8 calculation or determined in a laboratory. Select Calculate the Values to have AGA-8 calculate the values. Select Use Laboratory Values to used fixed values. Relative Density sets the real relative density of the gas. Valid values are 0.07 to 1.52. The default value is 0.554. This control is disabled if Calculate the Values is selected. Heating Value sets the heating value of the gas. Valid values are 0 to 3 1800 BTU(60)/ ft or the equivalent in the selected units. The default 3 value is 1014 BTU(60)/ft or the equivalent in the selected units. This control is disabled if Calculate the Values is selected. AGA-8 Hexanes+ Settings This step chooses if Hexane and higher components are entered individually or as a single combined value. Realflo User and Reference Manual May 19, 2011 605 Realflo Wizards Gas composition can be measured with individual values for hexane and higher components or use a combined value. Select Enter Each Component to use individual values for the higher components. This is the default selection. Select Use Combined Hexanes+ with these Ratios to use a combined value. Type the ratios of the higher components. n-Hexane defines the percentage of the Hexanes+ contributed by nHexane. n-Heptane defines the percentage of the Hexanes+ contributed by nHeptane. n-Octane defines the percentage of the Hexanes+ contributed by nOctane. n-Nonane defines the percentage of the Hexanes+ contributed by nNonane. n-Decane defines the percentage of the Hexanes+ contributed by nDecane. The Total field displays the sum of portions. This value cannot be edited. The total of portions needs to be 100 percent. AGA-8 Gas Composition This step defines the AGA-8 gas composition. One of two configuration dialogs opens based on whether Hexane and higher components are entered individually or as a single combined value. Individual Components The dialog below lets you enter combined Hexanes+ composition. Realflo User and Reference Manual May 19, 2011 606 Realflo Wizards Type the gas composition according to the laboratory analysis. The total of components needs to be 100 percent. Normalize adjusts non-zero components so that the total of components is 1.0000 (or 100.00 percent). The ratio to each other for the components remains the same. Combined Hexanes+ The dialog below lets you enter combined Hexanes+ composition. Type the gas composition according to the laboratory analysis. The total of components needs to be 100 percent. Normalize adjusts non-zero components so that the total of components is 1.0000 (or 100.00 percent). The components remain in their current ratio to each other. NX-19 Settings Realflo User and Reference Manual May 19, 2011 607 Realflo Wizards This step lets you define the NX-19 calculation. This is not supported for PEMEX flow computers. Specific Gravity is the specific gravity of the gas being measured. Valid values are 0.554 to 1.000. The default value is 0.554. Carbon Dioxide is the percent of carbon dioxide in the gas being measured. This value needs to be in the range 0 to 15. The default value is 0. Nitrogen is the percent of nitrogen in the gas being measured. This value needs to be in the range 0 to 15. Heating Value is the heating value of the gas being measured. Valid values 3 are 0 to 1800 BTU(60)/ft or the equivalent in the selected units. The default value is 1014.33 BTU(60)/ft3. Events can be logged each time the NX-19 configuration changes. Select Yes to log each change to the configuration. Use this option if the configuration changes infrequently. This is the default selection. Select No to skip logging changes. Use this option if you are making frequent changes to the configuration. Sensor Configuration Parameters The next step is MVT Configuration if any transmitters were used in the input configuration. Otherwise the next step is Flow Computer Configuration Summary. Sensor Configuration This step selects how the transmitters are to be configured. Realflo User and Reference Manual May 19, 2011 608 Realflo Wizards The Flow Runs are configured to use these transmitters window is a table that shows each of the configured flow run numbers, its Flow Run ID and the transmitter that it uses for the differential pressure (DP), static pressure (SP) and temperature sensors. If an analog input is used for the flow run AIN will be displayed in the coresponding DP, SP, or Temp column. The How do you want to configure sensors? option lets you select how to continue configuring the sensors. The three options are: Connect now and configure transmitters to connect to the flow computer and configure the attached transmitters. This selection is disabled if the flow computer configuration was selected to be completed offline in the Flow Computer Status step. If you choose this option, go to the Configure Connected Transmitters section to continue. Edit sensor configuration without connecting to proceed directly to the editing pages, without connecting to the flow computer. If you choose this option, go to the Review Sensors Dialog section to continue. Use default sensor configuration to complete the configuration without changing the sensor configuration. Sensor configuration will be set to default values. If you choose this option, the next step is Finish. Configure Connected Transmitters This step lets you select to either use the Realflo configuration data or the configuration from a pre-configured transmitter. Realflo User and Reference Manual May 19, 2011 609 Realflo Wizards Select Use the configuration from Realflo to use the configuration data from the Realflo file. This is the default setting. Select Read the configuration from the transmitter to read configuration from a pre-configured transmitter. Sensor Search This step searches for sensors connected to the flow computer serial ports or LAN port. Search Serial Option Select Search Serial to search for transmitters connected to a serial port of the flow computer. The Port parameter selects the flow computer serial port where the sensor is attached. Valid values are com1, com2, com3, and com4. The default value is com2 for a SCADAPack controller and com1 for other controllers. Realflo User and Reference Manual May 19, 2011 610 Realflo Wizards The Timeout parameter specifies the length of time the flow computer will wait for a response from a sensor. Valid values are 100 ms to 10000 ms. The default is 300 ms. Select Maximum to search for a number of MVT transmitters. The search operation will stop after finding the specified number of transmitters. The valid value is from 1 to 255. The default is 1. Select Range to search the addresses in a specified range. The range to search for is typed in the edit boxes to the right of the radio button. The value in To edit control needs to be equal or great than the value in the first edit control. The maximum search range that can be typed is for 255 transmitters. The default range is 1 to 247. Range Search supports addresses 1 to 255 in standard Modbus mode, and 1 to 65534 in extended address mode. The address mode of the flow computer serial port needs to be set to extended to search for transmitters with extended addresses. Select All to search the addresses of all transmitters connected with the serial port selected in Port. Up to 255 addresses are searched. Click Next to start the search for sensors or 4000 transmitters. A search process dialog is displayed so that the search operation can be cancelled at any time. Search LAN Option Select Search LAN to search for transmitters connected to a LAN port of the flow computer. The IP Address parameter specifies the IP address of a 4000 transmitter. Valid entries are IP addresses in the format nnn.nnn.nnn.nnn where nnn are values between 0 and 255. The Protocol parameter selects the type of IP protocol that will be used to query the transmitter. Valid IP protocol selections are Modbus/TCP and Modbus RTU in UDP. The IP port (for example port 502) for the selected protocol needs to be the same in the flow computer and the 4000 transmitter. The Timeout parameter specifies the length of time the flow computer will wait for a response from a 4000 transmitter. Valid values are 100 to 10000 milliseconds. The default is 5000 ms. Click Next to start the search for MVT transmitters or 4000 transmitters. A search process dialog is displayed so that the search operation can be cancelled at any time. If no transmitters were found, a message is displayed and the search step is displayed again. Assign Sensors This step lets you assign found transmitters to flow runs. Realflo User and Reference Manual May 19, 2011 611 Realflo Wizards The Available Sensors pane shows the transmitters that have been configured and the transmitters that were found by the search. There may be more transmitters in the list than there are runs. The Sensor column indicates the transmitter slots that have been configured. Transmitters that were found but not assigned are listed as Not assigned. The Status column indicates if configuration data for the transmitter exists. Found indicates a transmitter has been configured and the search found one with the same port, address and device type. Missing indicates a transmitter has been configured but the search did not find one with the same port, address, and device type. The Port column displays the serial or LAN port the flow computer is using to communicate with the transmitter. The Address column displays the Modbus station address or IP address of the transmitter. The Tag column displays the Tag Name assigned to the transmitter. You can leave this column blank if a Tag Name has not been assigned to the transmitter. The Device type column displays the transmitter type. Valid values are 3095FB, 4101, 4102, 4202 DR, 4202 DS, 4203 DR, or 4203 DS. The Flow Runs window shows which MVTs are assigned to the runs. To Change the order of the sensors: Select a sensor in Available Sensors window. Click Move. The Move Sensor dialog opens: Realflo User and Reference Manual May 19, 2011 612 Realflo Wizards In the Move Sensor dialog, use Move To selection to select the new location Click OK. To delete a sensor: Select a transmitter in Available Sensors. Click Delete. To change the address of a Sensor: Select a transmitter in Available Sensors. Click Change Address. The Change Address dialog opens: Enter a new address for the transmitter in the New Address: edit box. Click OK. Click Next when the transmitters are moved to the correct location. Next is disabled if there are Not Assigned transmitters still in the list. The next step is Search for More Transmitters Dialog. Notes The following actions may occur when moving a sensor. Moving one sensor to another results in the both swapping positions. When Use the configuration from Realflo is selected, assigning a Not assigned transmitter to a Sensor with status Missing and device type matching result in the sensor adopting the transmitter‟s port and address and retaining the rest of the sensor configuration. The sensor, being assigned, will disappear from the list. When Read the configuration from the transmitter is selected, assigning a Not assigned transmitter to a sensor with status Missing and device type matching results in the sensor adopting the transmitter‟s configuration. The transmitter, being assigned, will disappear from the list. Assigning a Not assigned transmitter to a sensor with status Missing and device type not matching will result in the sensor adopting the Realflo User and Reference Manual May 19, 2011 613 Realflo Wizards transmitter‟s configuration. The transmitter, being assigned, will disappear from the list. Other assignments are not permitted. Search for More Transmitters Dialog This step displays the current sensor assignments and asks if more searches are needed. Proposed Sensors shows the transmitters that have been configured and the transmitters that were found by the search. Flow Runs shows which sensors are assigned to which runs. Select Search for more transmitters to search again. Select Finish searching and review configuration to use the current settings. This is the default radio button. Review Sensors Dialog This step displays the transmitter assignments and allows you to edit the transmitter configuration. Realflo User and Reference Manual May 19, 2011 614 Realflo Wizards The Sensors pane shows the transmitters that have been configured. The Flow Runs pane shows which sensors are assigned to the runs. Click Edit to review and modify the settings for each transmitter. Edit opens the Add/Edit Sensor Settings dialog. Changes to a transmitter address will be written to the transmitter without affecting current flow computer configuration. Copy Run Configuration Dialog The Copy Run step is displayed only if you selected more than one run is selected in the Number of Flow Runs step and you have configured the first run. The second flow run, and subsequent runs, may be configured step-by-step or by copying the configuration of a previous run. Select Set by Step configuration to configure another run using the wizard without copying Run 1. Realflo User and Reference Manual May 19, 2011 615 Realflo Wizards Flow Computer Configuration Summary This step displays a summary of the flow computer settings. A summary of the flow computer configuration is shown. The current configuration can be compared with the configuration in the target flow computer. Select Yes to compare the configurations. Select No to not compare the configurations. Review Differences This step displays a summary of changes in the flow computer configuration. You can select to write to the flow computer or not. The summary shows the differences in the configuration. Select Yes to write the configuration to the flow computer. The configuration is written to the flow computer. The Start Executing command will be written for each flow run. The communication progress dialog shows the stages of writing. Select No to write the configuration to the flow computer later. Realflo User and Reference Manual May 19, 2011 616 Realflo Wizards Click Next to perform the selected action. In Flow Computer versions 6.73 and older, when AGA-8 gas ratios or NX-19 gas quality values are written to the flow computer the new gas ratios are updated in the Proposed registers. The Actual registers are not updated until a new Density calculation is started with the new values. The new values are not available to SCADA host software reading the Actual registers until a until a new Density calculation is started with the new values. In Flow Computer versions 6.74 and newer when AGA-8 gas ratios or NX19 gas quality values are written to the flow computer the new gas ratios are updated in the Proposed registers and in the Actual registers. This allows a SCADA host to immediately confirm the new values were written to the flow computer. The new gas values are not used by the flow computer until a new density calculation is started. Save File This step lets you select where to save the configuration file. Select Save to Realflo.tfc to save the configuration file to the default file location. Select the Save to another file to either enter a file name or use the Browse option to open the Save As dialog. Finish This step is displayed at the end of the wizard. Realflo User and Reference Manual May 19, 2011 617 Realflo Wizards Click Finish to close the wizard. Realflo User and Reference Manual May 19, 2011 618 Realflo Wizards Replace Flow Computer Wizard This step selects the flow computer file to write and writes the file to the flow computer. Use the Replace Flow Computer dialog to select the flow computer program to write to the flow computer. Select Flow Computer to write a basic flow computer program. Realflo selects the correct program file for the flow computer from the folder Realflo was started from, typically C:\Program Files\Control Microsystems\Realflo. The file selected will be Realflot v#.##.#.abs for Telepace firmware and Realfloi v#.##.#.abs for ISaGRAF firmware on 16-bit SCADAPack controllers, where #.##.# is the flow computer version number. This option is disabled if the controller type is a SCADAPack 32, SCADAPack 314/330/334, SCADAPack 350, SCADAPack 4203 and SolarPack 410. Select Flow Computer with Enron Modbus to write a flow computer program with Enron Modbus support. Realflo selects the correct program file for the flow computer from the folder Realflo was started from, typically C:\Program Files\Control Microsystems\Realflo. Flow computer files available will depend on the Realflo operating mode and the controller type. Standard Flow Computer Files RFEnront v#.##.#.abs for Telepace firmware and RFEnroni v#.##.#.abs for ISaGRAF firmware for 16-bit SCADAPack controllers. Realflot v#.##.#.out for Telepace SCADAPack 350 firmware and Realfloi v#.##.#.out for ISaGRAF SCADAPack 350 firmware. Realflo33xt v#.##.#.out for Telepace SCADAPack 330/334 firmware and Realflo33xi v#.##.#.out for ISaGRAF SCADAPack 330/334 firmware. Realflo31xt v#.##.#.out for Telepace SCADAPack 314 firmware and Realflo31xi v#.##.#.out for ISaGRAF SCADAPack 314 firmware. Realflo User and Reference Manual May 19, 2011 619 Realflo Wizards Realflo4203t v#.##.#.out for Telepace SCADAPack 4203 firmware and Realflo4203i v#.##.#.out for ISaGRAF SCADAPack 4203 firmware. Realflo410t v#.##.#.out for SolarPack 410 firmware. Realflot v#.##.#.mot for Telepace SCADAPack 32 firmware and Realfloi v#.##.#.mot for ISaGRAF SCADAPack 32 firmware. GOST Flow Computer Files Realflo_GOST_t v#.##.#.abs for Telepace firmware and Realflo_GOST_i v#.##.#.abs for ISaGRAF firmware for 16-bit SCADAPack controllers. Realflo_GOST_33xt v#.##.#.out for Telepace SCADAPack 330/334 firmware and Realflo_GOST_33xi v#.##.#.out for ISaGRAF SCADAPack 330/334 firmware. Realflo_GOST_31xt v#.##.#.out for Telepace SCADAPack 330/334 firmware and Realflo_GOST_31xi v#.##.#.out for ISaGRAF SCADAPack 330/334 firmware. Realflo_GOST_4203t v#.##.#.out for Telepace SCADAPack 4203 firmware and Realflo_GOST_4203i v#.##.#.out for ISaGRAF SCADAPack 4203 firmware. Realflo_GOST_410t v#.##.#.out for SolarPack 410 firmware. Realflot v#.##.#.mot for Telepace SCADAPack 32 firmware and Realfloi v#.##.#.mot for ISaGRAF SCADAPack 32 firmware. PEMEX Flow Computer Files Realflo_PEMEX_t v#.##.#.abs for Telepace firmware and Realflo_PEMEX_i v#.##.#.abs for ISaGRAF firmware for 16-bit SCADAPack controllers. Realflo_PEMEX_33xt v#.##.#.out for Telepace SCADAPack 330/334 firmware and Realflo_PEMEX_33xi v#.##.#.out for ISaGRAF SCADAPack 330/334 firmware. Realflo_PEMEX_31xt v#.##.#.out for Telepace SCADAPack 330/334 firmware and Realflo_PEMEX_31xi v#.##.#.out for ISaGRAF SCADAPack 330/334 firmware. Realflo_PEMEX_4203t v#.##.#.out for Telepace SCADAPack 4203 firmware and Realflo_PEMEX_4203i v#.##.#.out for ISaGRAF SCADAPack 4203 firmware. Realflo_PEMEX_410t v#.##.#.out for SolarPack 410 firmware. Realflot v#.##.#.mot for Telepace SCADAPack 32 firmware and Realfloi v#.##.#.mot for ISaGRAF SCADAPack 32 firmware. Select Customer Flow Computer or C/C++ Program to write any C/C++ program to the flow computer. Select the file to write by: Entering the file name in the edit box. Selecting a recently used file by clicking the down arrow. Using the Browse button to select a file. The Browse button opens a file open dialog. The dialog shows files of type ABS if the flow computer is a SCADAPack. OUT, if the flow computer is a SCADAPack 314/330/334, Realflo User and Reference Manual May 19, 2011 620 Realflo Wizards SCADAPack 350 or SCADAPack 4203, or MOT if the flow computer is a SCADAPack 32. The Back button returns to the previous step. The Next button writes the flow computer file and moves to the next step, Set Time. The Cancel button closes the dialog and stops the wizard. The Help button opens the on-line manual. Set Time This step sets the time in the flow computer. Setting the time allows that configuration events are recorded with the correct time. The following controls are available from the Real Time Clock dialog. The current Flow Computer Time shows the current time and date in the flow computer. It is updated continuously while the dialog is open. The time and date are displayed in the short time format as defined in the Windows Control Panel. The Yes, set to PC Time radio button selects setting the controller time to match the PC time. The current PC time and date are shown to the right of the button. The time and date are displayed in the short format as defined in the Windows Control Panel. The Yes, set to this time radio button selects setting the time and date to the values specified by the user in the Year, Month, Day, Hour, Minute and Second controls. If the Set to User Entered Time radio button is not selected these controls are grayed. The Back button returns to the previous step. The Finish button writes the time and ends the wizard. The Cancel button closes the dialog and stops the wizard. The Help button opens the on-line manual. Realflo User and Reference Manual May 19, 2011 621 Realflo Wizards Write Flow Computer Configuration The Write Configuration command is used to write all or selected parts of the Flow Computer Configuration. When selected the command displays the Write Flow Computer Configuration dialog as shown below. The All Configuration radio button, when selected, results in the writing of all configuration data from the flow computer. The Selected Configuration radio button enables specific configuration data to be written to the flow computer. Select Communication and I/O Settings to write the serial port, register assignment configuration information and mapping table. Select Flow Run and MVT Configuration to write the flow run configuration and the MVT transmitter configuration. Realflo User and Reference Manual May 19, 2011 622 Realflo Wizards Select Process I/O Configuration to write the Process I/O configuration. Click on the OK button to write the selected items to the flow computer. Click the Cancel button to cancel the operation and close the dialog. The Flow Computer ID is checked before writing. If the Flow Computer ID does not match the ID in the dialog Realflo displays a message. An error occurs if Controller Configuration is selected and the flow computer type is different from the flow computer type selected in the Controller Type dialog. A message is displayed. In Flow Computer versions 6.73 and older, when AGA-8 gas ratios or NX-19 gas quality values are written to the flow computer the new gas ratios are updated in the Proposed registers. The Actual registers are not updated until a new Density calculation is started with the new values. The new values are not available to SCADA host software reading the Actual registers until a until a new Density calculation is started with the new values. In Flow Computer versions 6.74 and newer when AGA-8 gas ratios or NX19 gas quality values are written to the flow computer the new gas ratios are updated in the Proposed registers and in the Actual registers. This allows a SCADA host to immediately confirm the new values were written to the flow computer. The new gas values are not used by the flow computer until a new density calculation is started. Read Alarm and Event Logs This step selects whether the alarms and events in the flow computer are read. The Which Events do you want to read? section has the following selections. Select Just Read New Events to read unacknowledged events in the flow computer. If the operator has Write authorization then the events will be acknowledged after reading the new events. If the events in the Realflo User and Reference Manual May 19, 2011 623 Realflo Wizards log are not acknowledged, the event log will fill with 700 events. Operator activity will be stopped until the events are read and acknowledged. This is the default selection. Select Read All Events to read all events in the flow computer. Do not acknowledge the events. Select Do Not Read Any Events to skip reading events. The Which Alarms do you want to read? section has the following selections. Select Just Read New Alarms to read unacknowledged alarms in the flow computer. If the operator has Write authorization then the alarms will be acknowledged after reading the new alarms. If the alarms in the log are not acknowledged, the alarm log will wrap around at 300 alarms. This is the default selection. Select Read All Alarms to read all alarms in the flow computer. Do not acknowledge the alarms. Select Do Not Read Any Alarms to skip reading alarms. The Back button returns to the previous step. The Next button reads the selected alarms and events and moves to the next step, Select Hourly History. The Cancel button closes the dialog and stops the wizard. The Help button opens the on-line manual. Bluetooth Security If a Bluetooth connection was used to replace the flow computer in a SolarPack 410 the last step is setting the Bluetooth security. The Bluetooth Security Settings dialog specifies how Bluetooth security is configured in the SolarPack 410 controller. Opening the dialog reads the current settings from the controller. The dialog does not open if the settings can‟t be read. Bluetooth Security selects if security is enabled or not. Select Use current security settings to maintain the security settings that have already been Realflo User and Reference Manual May 19, 2011 624 Realflo Wizards established. Select Disable to operate the Bluetooth radio without security. Select Enable to use authentication and encryption. Select Enable and Change PIN to use authentication and encryption with a new PIN. Current PIN specifies the current value of the PIN. Valid values are up to 10 alphanumeric characters (a to z, A to Z, and 0 to 9). The PIN is case sensitive. Characters entered are masked. Copy and paste are disabled (so the user needs to type the PIN). The factory default PIN is default. New PIN specifies the new value of the PIN. This control is enabled if Enable and Change PIN is selected. Valid values are up to 10 alphanumeric characters (a to z, A to Z, and 0 to 9). The PIN is case sensitive. Characters entered are masked. Copy and paste are disabled (so the user needs to type the PIN). Confirm New PIN specifies the new value of the PIN. This control is enabled if Enable and Change PIN is selected. Valid values are up to 10 alphanumeric characters (a to z, A to Z, and 0 to 9). The PIN is case sensitive. Characters entered are masked. Copy and paste are disabled (so the user needs to type the PIN). The two values of the new PIN need to match before any settings are written to the controller. Click Finish to write the new settings to the controller. A message is displayed if the settings cannot be written to the controller and the dialog remains open. Click Cancel to close the dialog without making any changes. Realflo User and Reference Manual May 19, 2011 625 Realflo Wizards Read Logs and Flow History Wizard The Read Logs and Flow History wizard will lead you through the steps to connect to a flow computer and read the alarm and event logs and the flow history. <Back returns to the previous step in the wizard. This button is disabled on the first step of a wizard. Next> moves to the next step in the wizard. This button is hidden on the last step of a wizard. Finish is displayed on the final step of a wizard in place of the Next button. It finishes the operation. This button is hidden on other steps. Cancel cancels the operation and closes the wizard. Steps performed thus far in the wizard are cancelled. Pressing the ESC key performs the same action as Cancel. Help opens the user manual. Connect to Flow Computer This step lets you define the communication settings for the connection between the PC running the Realflo application and the target flow computer. The How do you want to communicate with the flow computer? prompt provides two selections. The Use the Current Settings option sets the default communication settings for Realflo. These settings are for the PC that is running Realflo. (The communication settings for the PC running Realflo and the communication settings in the flow computer need to match). The default communication settings are: COM 1 (serial port on the PC), 9600 baud, no parity, 8 Data bits, and 1 Stop bit. The default Modbus address Realflo will connect to is station 1. Realflo User and Reference Manual May 19, 2011 626 Realflo Wizards Use this selection if the serial port on your PC is COM 1 and the serial port settings for the serial port on the flow computer are set for default (9600, 8,n,1 and Modbus address 1). Click the Next> button to begin communication with the flow computer and move to the next step in the wizard. The Choose/View Communication Setup option opens the PC Communication Settings dialog as shown below. This allows you to view the default settings and to change the PC communication setting for the type of connection you are using to communicate with the flow computer. See the section Communication >> PC Communication Settings Command in the Realflo Expert Mode Reference section of this manual for complete details on the parameter settings in this dialog. You need to know the communication settings for the connection to the flow computer to use this step. Select Runs to Read This step selects the flow run or runs to read. The Select the Flow Run or Runs to Read selection determines if data for all runs or for a single run is read. The All Runs radio button selects reading data for all runs. Realflo User and Reference Manual May 19, 2011 627 Realflo Wizards The Selected Run radio button selects reading from a single run. The drop-down list selects the run to be read. Click the Next> button to move to the next step in the wizard. Select Flow Computer Configuration This step selects whether the flow computer configuration is read from the flow computer with the logs and history. Select Yes to read the flow run configuration. Select No to not read the flow run configuration. Select Alarm and Event Logs to Read This step selects which alarms and events to read. The Which Events do you want to read? selection determines which events to read from the flow computer. Select Just Read New Events to read unacknowledged events in the flow computer. If the operator has View, Read and Write Data or Administrator authorization then the events will be acknowledged after Realflo User and Reference Manual May 19, 2011 628 Realflo Wizards reading the new events. If the events in the log are not acknowledged, the event log will fill with 700 events. Operator activity will be prevented until the events are read and acknowledged. The control is grayed under the following conditions: o The event log is not selected. o The user has Read and View account privileges. o The Restrict Realflo users to reading all alarms and events option is selected in the Expert Mode Options menu. Select Read All Events to read all events in the flow computer. This control is grayed if the Event Log control is not selected. Select Do Not Read Any Events to skip reading of events from the flow computer. The Which Alarms to you want to read? selection determines which alarm logs to read from the flow computer. Select Just Read New Alarms to read unacknowledged alarms in the flow computer. If the operator has View, Read and Write Data or Administrator authorization then the alarms will be acknowledged after reading the new events. If the events in the log are not acknowledged, the alarm log will fill with 300 events. Operator activity will be prevented until the alarms are read and acknowledged. The control is grayed under the following conditions: The alarm log is not selected. The user has Read and View account privileges. The Restrict Realflo users to reading all alarms and events option is selected in the Expert Mode Options menu. The Read All Alarms radio button selects the reading of all alarms in the controller. The control is grayed if the Alarm control is not selected. The Do Not Read Any Alarms button selects not to read alarms from the flow computer. Click the Next> button to move to the next step in the wizard. Select Hourly and Daily History to Read This step selects which hourly and daily logs to read. Realflo User and Reference Manual May 19, 2011 629 Realflo Wizards The Which Hourly Logs do you want to read? selection determines which hourly history is read. Select New Hours to read hourly history for hours after those current in the file. If the file is empty then Realflo will read all hourly history stored in the flow computer. This is the default selection. Select All Days to read hourly history for all days stored in the flow computer. Select Selected Hours to read hourly history for the range of days selected with the From and to drop-down lists. Records are read for the contract days whose first hour is within the date range. Records for the contract day are read, regardless of their calendar date. This may result in records with calendar days outside the range being added to the log. For example, if the contract day is configured to start at 7:00 AM. Reading hourly history for September 23 would return the records where rd the first record in a day was between 7:00 on the 23 to 6:59:59 AM on th the 24 . The From control contains the oldest previous day for which the hourly history is to be read. The initial value is the current day. Change this date to avoid reading data that has previously been read into the log. The to control contains the recent previous day for which the hourly history is to be read. The initial value is the current day. The allowed range is the same or greater than the value in the From control. Change this date when wanting to read older data only. Leaving this date at its default will result in the recent data being read. Select the Do Not Read Hourly Logs to skip the reading of hourly logs. The Which Daily Logs do you want to read? selection determines which hourly history is read. Select New Days to read daily history for days after those in the current file. If the file is empty then Realflo will read hourly history stored in the flow computer. This is the default selection. Realflo User and Reference Manual May 19, 2011 630 Realflo Wizards Select All Days to read daily history for all days stored in the flow computer. Select Selected Days to read daily history for the range of days selected with the From and to drop-down lists. Records are read for the contract days whose first record is within the date range. Records for the contract day are read, regardless of their calendar date. This may result in records with calendar days outside the range being added to the log. For example, if the contract day is configured to start at 7:00 AM. Reading daily history for September 23 would return the daily rd records whose end time is in the range 7:00 on the 23 to 6:59:59 AM th on the 24 . The From control contains the oldest previous day for which the daily history is to be read. The initial value is the current day. Change this date to avoid reading data that has previously been read into the log. The to control contains the recent previous day for which the daily history is to be read. The initial value is the current day. The allowed range is the same or greater than the value in the From control. Change this date when wanting to read older data only. Leaving this date at its default will result in the recent data being read. Select the Do Not Read Hourly Logs to skip the reading of hourly logs. Click the Next> button to read the selected logs and history from the runs selected and move to the next step in the wizard. The Read Logs Results page displays the results of the Read Logs and History. Click the Next> button to move to the next step in the wizard. Realflo User and Reference Manual May 19, 2011 631 Realflo Wizards Save Data This step saves the flow run configuration, if selected, and the logs and history. Select Save to File name.tfc to save the data read to the currently opened file. The name of the current file is shown in place of file name.tfc. Select Save to another file and enter a file name or click the Browse button to open the Save As dialog. The following options allow you to specify the name and location of the file you're about to save: The Save in: box lists the available folders and files. The File name: box allows entry of a new file name to save a file with a different name. Realflo adds the extension you specify in the Save As type box. The Save as type: box lists the types of files Realflo can save. Realflo can open flow computer (TFC) files and flow computer Template files (RTC). Realflo User and Reference Manual May 19, 2011 632 Realflo Wizards If the open file is a flow computer file and the Save as Type is a template file, Realflo will ask if the flow computer file should be saved before converting it to a template. Save saves the file to the specified location. The Cancel button closes the dialog without saving. Export Data This step selects the file type to export data to. Select Export to CFX format file to export the logs and history to a FlowCal CFX format file. This format is designed for importing into Flow-Cal. Data is exported to the CFX file from one flow run. The file includes data from the configuration, current readings, alarm log, event log and hourly history log. When this option is selected the Export Data to CFX dialog is opened when the Finish button is clicked. The CFX Export Setting button opens the CFX Export Settings dialog. The parameters for this dialog are described in the CFX Export Settings section below. Select Export to CSV format file to export the logs and history to a CSV (comma-separated values) format file. This format can be read by spreadsheet and database software. When this option is selected the Export Data to CSV dialog is opened when the Finish button is clicked. The CSV Export Setting button opens the CSV Export Settings dialog. The parameters for this dialog are described in the CSV Export Settings section below. Select No, Do not export to skip the Export Data step. When this option is selected the dialog is closed and the Read Logs Flow History wizard is ended when the Finish button is clicked. Export Data to CFX This step selects what data to export to CFX. Realflo User and Reference Manual May 19, 2011 633 Realflo Wizards Select All Alarms, Events and Hourly Logs to select all of the data in the flow run. This is the default button. Select Selected Days to select the data from the contract days in the From and To dropdown lists. The From dropdown list selects the oldest contract day. This control is enabled when the Selected Days radio button is selected. The To dropdown list selects the recent contract day. This control is enabled when the Selected Days radio button is selected. The Export Type dropdown list selects how export files are stored. Select Specific File to export to a single file. A standard file save dialog opens to allow you to select the file name. The default file name is <Realflo file name>(<FC ID>) - <Run Number> (<Run ID>).CFX. Select Dated CFX to export one file per day to a single folder per run. Realflo exports one file for each day. The file name is based on the time and date according to the CFX standard (YYYYMMDD.CFX). Realflo User and Reference Manual May 19, 2011 634 Realflo Wizards Save CFX Export This step selects where to save the CFX export. Select Save to File name.CFX to save the CFX Export data to the currently opened file. The name of the current file is shown in place of file name.CFX. The files that that will be created are shown in the display window. Select Save to another file to save the CFX Export data to a different file name and location. Enter the name in the window or select Browse to open the Save As dialog and select a name and location. The Save As dialog allows you to specify the file to export the data to. Save exports the data to the selected file. Cancel the export command and closes the dialogs. Click the Next> button to complete the Read Logs and Flow history wizard and close the dialog. Realflo User and Reference Manual May 19, 2011 635 Realflo Wizards Export Data to CSV This step selects what data to export to CSV. Select Hourly history to export the hourly history data. Select Daily history to export the daily history data. Select Alarm log to export the alarm log data. Select Event log to export the event log data. The Next> button moves to the Save CSV Export step in the wizard. Realflo User and Reference Manual May 19, 2011 636 Realflo Wizards Save CSV Export This step selects where to save the CSV export. Select Save to File name.CSV to save the CSV Export data to the currently opened file. The name of the current file is shown in place of file name.CSV. The files that that will be created are shown in the display window. Select Save to another file to save the CSV Export data to a different file name and location. Enter the name in the window or select Browse to open the Save As dialog and select a name and location. You may change the file name to any suitable name. The suggested file name format is defined in the CSV Export Options command. The Save As file selection dialog appears for views. The Save As dialog allows you to specify the file to export the data to. The Save button in the Save As dialog exports the data to the selected file. Realflo User and Reference Manual May 19, 2011 637 Realflo Wizards The Cancel button in the Save As dialog cancels the export command and closes dialogs. Realflo User and Reference Manual May 19, 2011 638 Realflo Wizards CFX Export Settings The CFX Export Options dialog sets options for exporting to Flow-Cal CFX files. The settings in this dialog apply to files opened by Realflo. They are stored in the Windows registry. The Hourly History section defines how records from the hourly history are exported. Select Export Partial Hour Records to export of the records as they appear in Realflo. Some hours may contain more than one record due to power disconnection or configuration changes. This is the default selection. Select Export One Record per Hour to export only one record per hour. Multiple records within an hour are merged into a single record for exporting. Hours that are not yet complete are not merged or exported. The following hourly record fields are summed: volume, mass, energy, pulses (turbine type). The following hourly record fields are averaged: termperature, static pressure, differential pressure (orifice types), relative density, flow product or flow extension. See Input Averaging on page 948 for more information. Select Time Leads Data Format to export the date and time at the start of the period. The time stamp on the record is the time at the start of the Realflo User and Reference Manual May 19, 2011 639 Realflo Wizards hour, even if the first record to be merged started later than that time. This option is enabled only when Export One Record per Hour is checked. This option is unchecked by default. The File Description section defines some descriptive parameters in the CFX file. Meter Number defines the meter number parameter. The options are none, Flow Computer ID, Flow Run ID and Flow Run Number. The default value is Flow Computer ID. The parameter is 17 characters long in the file. Meter Name defines the meter name parameter. The options are none, Flow Computer ID, Flow Run ID and Flow Run Number. The default value is Flow Run ID. The parameter is 49 characters long in the file. Serial Number defines the meter serial number parameter in the file. The options are none, Flow Computer ID, Flow Run ID and Flow Run Number. The default value is Flow Run Number. The parameter is 11 characters long in the file. The Live Inputs Flags section defines which live input flags are set by Realflo. The CFX file contains four flags in the Live Inputs parameter. Realflo sets the T (temperature) flag to Y (live data). The other flags are normally set to N (not live), but can be modified using the following options. Check Set Live Gas Composition Flag when there is a program that updates the gas composition. This is flag A (analysis). This option is unchecked by default. Check Set Live Energy Flag when there is a program that updates the energy. This is flag B (heating value). This option is unchecked by default. Check Set Live Gravity Flag when there is a program that updates the specific gravity (relative density). This is flag G (gravity). This option is unchecked by default. The Default Name Format section defines what file names Realflo suggests when exporting. The names are combinations of the file name; Flow Computer ID; flow run number; and flow run ID. Format selects the name format. The valid values are listed below. The default is to include all information. o file name (Flow Computer ID) - Run# (run ID) o file name (Flow Computer ID) - Run# o file name (Flow Computer ID) - run ID o file name - Run# (run ID) o file name - Run# o file name - run ID o Flow Computer ID - Run# (run ID) o Flow Computer ID - Run# o Flow Computer ID - run ID o Run# (run ID) Realflo User and Reference Manual May 19, 2011 640 Realflo Wizards o run ID The Example control shows the file name that will be suggested for the current file. The Dated CFX section defines where and how CFX files are exported. Select Use .CFX extension on folder names to create folders with a CFX extension when exporting Dated CFX files. The data for each month is stored in its own folder when using the Dated CFX format. The folder name may have a CFX extension or not. This option is unchecked by default. Select Export Dated CFX Files to the Folder to define a common folder for exports. Exported data will be placed in this folder. The option is unchecked by default. When checked, the edit control holds the destination folder that will appear in the Save As dialog. Use Browse to search for another folder. Realflo User and Reference Manual May 19, 2011 641 Realflo Wizards CSV Export Settings The CSV Export Options command defines whether optional data is exported to CSV files. The settings in this dialog apply to files opened by Realflo. They are stored in the Windows registry. The Hourly and Daily Records section of the dialog defines optional data to include and how the data is time stamped. Select the Include Uncorrected Flow in AGA-7 Export option to export the Uncorrected Data column from the Hourly History Log and Daily History Log. This option applies to AGA-7 only. The option is unchecked by default. Select the Export in Time Leads Data Format option to export time stamps that mark the start of the period. Uncheck the option to export time stamps that mark the end of the period (Realflo format). This applies to the the Hourly History and Daily History only. The control is unchecked by default. The Default File Name Format section defines the file name that is suggested by Realflo when data is exported. The names are combinations of the file name; Flow Computer ID; flow run number; and flow run ID. The Format list selects the name format. The name is made up of the identifier format and a view format. The valid values for the identifier are listed below. The default is to include all information. o file name (Flow Computer ID) - Run# (run ID) - Type o file name (Flow Computer ID) - Run# - Type o file name (Flow Computer ID) - run ID - Type o file name - Run# (run ID) - Type o file name - Run# - Type o file name - run ID - Type o Flow Computer ID - Run# (run ID) - Type o Flow Computer ID - Run# - Type o Flow Computer ID - run ID - Type o Run# (run ID) - Type o run ID - Type Realflo User and Reference Manual May 19, 2011 642 Realflo Wizards When the logs are exported the word Type is replaced by the following, according to the export selected. o Alarms o Events o Hourly Log o Daily Log o Current Readings o Custom View Name The Example control shows the file name that will be suggested for the current file. Calibrate Inputs Wizard The Calibrate Inputs wizard is used to calibrate the temperature sensor, static pressure sensor, and differential pressure sensor or pulse counter input. The calibration dialogs lead you through the calibration procedure. When more than one sensor is selected, they are each forced and then the calibration cycle will be allowed for each sensor in turn. This allows multiple variable transmitters such as the MVT to be calibrated. WARNING The same input sensor can be used for more than one flow run. When the sensor is calibrated for one run, Realflo only forces the input value for that run. When the sensor is disconnected to do the calibration, the live input to the other run will be disconnected and the value will not be correct. The flow computer does not support forcing of inputs during calibration on more than one run. For each step in the wizard a dialog is presented to enter the parameters for the step. Each dialog contains four buttons to allow navigation through the wizard. <Back returns to the previous step in the wizard. This button is disabled on the first step of a wizard. Next> moves to the next step in the wizard. This button is hidden on the last step of a wizard. Finish is displayed on the final step of a wizard in place of the Next button. It finishes the operation. This button is hidden on other steps. Cancel cancels the operation and closes the wizard. All steps performed thus far in the wizard are cancelled. Pressing the ESC key performs the same action as Cancel. Help opens the user manual. Connect to Flow Computer The connect to flow computer step defines the communication settings for the connection between the PC running the Realflo application and the target flow computer. Realflo User and Reference Manual May 19, 2011 643 Realflo Wizards The How do you want to communicate with the flow computer? prompt provides two selections. The Use the Current Settings option sets the default communication settings for Realflo. These settings are for the PC that is running Realflo. (The communication settings for the PC running Realflo and the communication settings in the flow computer need to match). The default communication settings are: COM 1 (serial port on the PC), 9600 baud, no parity, 8 Data bits, and 1 Stop bit. The default Modbus address Realflo will connect to is station 1. Use this selection if the serial port on your PC is COM 1 and the serial port settings for the serial port on the flow computer are set for default (9600, 8,n,1 and Modbus address 1). Click the Next> button to begin communication with the flow computer and move to the next step in the wizard. The Choose/View Communication Setup option opens the PC Communication Settings dialog as shown below. This allows you to view the default settings and to change the PC communication setting for the type of connection you are using to communicate with the flow computer. See the section Communication >> PC Communication Settings Command in the Realflo Expert Mode Reference section of this manual for complete details on the parameter settings in this dialog. You need to know the communication settings for the connection to the flow computer to use this step. Realflo User and Reference Manual May 19, 2011 644 Realflo Wizards Sensor Calibration When the Calibration wizard is selected the Sensor Calibration dialog is displayed. The Run, or Sensor, to be calibrated is selected from this dialog. The Sensor Calibration dialog allows the selection meter run or MVT for calibration. Select the Run radio button and then select a meter run to calibrate. Transmitters used for the meter run may be calibrated. This section is disabled if runs are using sensors Follow the steps in the Run Calibration Procedure. Select Sensor radio button and select one of the sensor tags to calibrate a sensor. Sensor tags that have been configured will be in sensor selection box. Follow the steps in the Sensor Calibration Procedure. The <Back button returns to the previous step. Backing up does not erase events from the flow computer event log. The back button is not enabled on the first step since there is no previous step. Realflo User and Reference Manual May 19, 2011 645 Realflo Wizards The Next> button starts the calibration procedure. After the Run, or sensor, is selected, the configuration for the run is read from the flow computer. The Run, or sensor, calibration page for the run is then displayed. The Cancel button closes the dialog and stops the transmitter calibration. When you click the Cancel button to abort the calibration the following message is displayed. Click Yes to abort the calibration. Click No to continue with the calibration. The default button is No. WARNING Realflo uses live values from the sensor when calibration is cancelled. Be sure to connect all sensors first. Realflo does not erase any calibration events from the flow computer when canceling. The Help button displays the online help file. Run Calibration Procedure When the Run radio button is selected the Run Calibration dialog is displayed. The transmitters for the run are selected for calibration from this dialog. WARNING The same input sensor can be used for more than one flow run. When the sensor is calibrated for one run, Realflo only forces the input value for that run. When the sensor is disconnected to do the calibration, the live input to the other run will be disconnected and the value will not be correct. The flow computer does not support forcing of inputs during calibration on more than one run. Realflo User and Reference Manual May 19, 2011 646 Realflo Wizards Select the sensors to be calibrated by checking the appropriate boxes. More than one sensor may be selected for calibration. The <Back button is not enabled as this is the initial step. The Next> button completes the selections and opens the Step 1: Force Value dialog. The Cancel button closes the dialog and stops the transmitter calibration. When you click the Cancel button to abort the calibration the following message is displayed. Click Yes to abort the calibration. Click No to continue with the calibration. The default button is No. The same input sensor can be used for more than one flow run. When the sensor is calibrated for one run, Realflo only forces the input value for that run. When the sensor is disconnected to do the calibration, the live input to the other run will be disconnected and the value will not be correct. The flow computer does not support forcing of inputs during calibration on more than one run. WARNING Realflo uses live values from the sensor when calibration is cancelled. Be sure to connect all sensors first. Realflo User and Reference Manual May 19, 2011 647 Realflo Wizards Realflo does not erase any calibration events from the flow computer when canceling. The Help button displays the online help file. Realflo User and Reference Manual May 19, 2011 648 Realflo Wizards Calibration Step 1: Force Value The flow calculations continue to execute while calibrating sensors. The sensor value needs to be forced to either the current value or a fixed value during calibration. This dialog lets you select the current value of the input or a fixed value of your choice. When more than one sensor is selected, they need to each be forced to a current or fixed value before any of the other steps are performed. A Step 1: Force Value dialog will be presented for each sensor selected for calibration. The input register associated with this input is displayed to aid you in determining which input you are calibrating. Check the Current Value radio button to use the current value for the sensor. Check the Fixed Value radio button and enter a value to use for the calibration in the entry box. The No Change radio button will be selected if the value is currently forced. (You may still select one of the other two radio buttons if desired). The <Back button returns to the previous step. Backing up does not erase events from the Flow Computer event log. When the Next> button is pressed Realflo records the start of calibration for the sensor in the event log. The sensor input is forced. The sensor can now be removed from the process. The Cancel button closes the dialog and stops the transmitter calibration. When you click the Cancel button to abort the calibration the following message is displayed. Click Yes to abort the calibration. Click No to continue with the calibration. The default button is No. Realflo User and Reference Manual May 19, 2011 649 Realflo Wizards WARNING Realflo uses live values from the sensor when calibration is cancelled. Be sure to connect all sensors first. Realflo does not erase any calibration events from the flow computer when canceling. The Help button displays the online help file. Realflo User and Reference Manual May 19, 2011 650 Realflo Wizards Calibration Step 2: Record As Found Values As-found readings indicate how the sensor was calibrated before adjustment. These can be used to correct flow measurement errors resulting from an out of calibration sensor. Follow the procedure your company has set for taking as-found readings. You needs to record at least one “asfound” reading. To take as-found readings: Apply a known signal to the sensor, or measure the signal applied to the sensor with a calibrated instrument. Enter the applied value in the Applied Value edit box. The measured value from the process in the Measured Value box. When it has settled, click on the Record button to record an as-found reading. Repeat the process to record additional readings. As readings are recorded they are automatically entered in the record window. The applied values are listed under the Applied column. The measured values are listed under the Measured column and the deviation between the readings is listed under the Deviation column. For Run Calibration the deviation is calculated as follows. The output full scale and zero scale are taken from the input configuration for the run. span = input full scale – input zero scale deviation = (measured - applied) / span <Back returns to the previous step. Backing up does not erase events from the flow computer event log. Next> proceeds to the next step. Realflo User and Reference Manual May 19, 2011 651 Realflo Wizards The Cancel button is greyed and an as found reading needs to be recorded. When you click Cancel to abort the calibration the following message is displayed. Click Yes to abort the calibration. Click No to continue with the calibration. The default button is No. WARNING Realflo uses live values from the sensor when calibration is cancelled. Be sure to connect all sensors first. Realflo does not erase any calibration events from the flow computer when canceling. The Help button displays the online help file. Realflo User and Reference Manual May 19, 2011 652 Realflo Wizards Calibration Step 3: Calibration Required The as-found readings indicate if calibration is required. Examine the list of as-found readings. If the sensor is in need of calibration, select Yes. Otherwise select No. As readings are recorded they are automatically entered in the record window. The applied values are listed under the Applied column. The measured values are listed under the Measured column and the deviation between the readings is listed under the Deviation column. For Run Calibration the deviation is calculated as follows. The output full scale and zero scale are taken from the input configuration for the run. span = input full scale – input zero scale deviation = (measured - applied) / span The <Back button returns to the previous step. Backing up does not erase events from the flow computer event log. The Next> button proceeds to the next step. The Cancel button is grayed and an as found reading needs to be recorded. When you click the Cancel button to abort the calibration the following message is displayed. Click Yes to abort the calibration. Click No to continue with the calibration. The default button is No. WARNING Realflo uses live values from the sensor when calibration is cancelled. Be Realflo User and Reference Manual May 19, 2011 653 Realflo Wizards sure to connect all sensors first. Realflo does not erase any calibration events from the flow computer when canceling. The Help button displays the online help file. Realflo User and Reference Manual May 19, 2011 654 Realflo Wizards Calibration Step 4: Calibrate Sensor This dialog aids you in calibrating a sensor by displaying the measured value from the sensor and the as-found readings. Follow the procedure your company or the sensor supplier has set to calibrate the sensor. When the sensor calibration is complete, you may wish to check the as-left measurements that will be recorded in the next step. This confirms that you have calibrated the sensor correctly before placing it back in service. As readings are recorded they are automatically entered in the record window. The applied values are listed under the Applied column. The measured values are listed under the Measured column and the deviation between the readings is listed under the Deviation column. For Run Calibration the deviation is calculated as follows. The output full scale and zero scale are taken from the input configuration for the run. span = input full scale – input zero scale deviation = (measured - applied) / span Click on the Next> button when the calibration is complete. Realflo User and Reference Manual May 19, 2011 655 Realflo Wizards Calibration Step 5: Record As Left Values As-left readings indicate how the sensor was calibrated. These can be used to verify sensor calibration. Follow the procedure your company has set for taking as-left readings. You need to record at least one as-left reading. To take as-left readings: Apply a known signal to the sensor, or measure the signal applied to the sensor with a calibrated instrument. Enter the applied value in the Applied Value edit box. When the measured value from the process has settled, click on the Record button to record an as-left reading. Repeat the process to record additional readings. As readings are recorded they are automatically entered in the record window. The applied values are listed under the Applied column. The measured values are listed under the Measured column and the deviation between the readings is listed under the Deviation column. For Run Calibration the deviation is calculated as follows. The output full scale and zero scale are taken from the input configuration for the run. span = input full scale – input zero scale deviation = (measured - applied) / span When the required readings are taken, click on the Next> button. Realflo User and Reference Manual May 19, 2011 656 Realflo Wizards Calibration Step 6: Restore Live Input The sensors need to be reconnected to the process and the input hardware before calibration is complete. Reconnect sensors and verify connections are correct. Click on the Next button when the sensor is connected. WARNING The live value from all sensors is used as soon as you click Next. Be sure to connect al sensors first. Realflo User and Reference Manual May 19, 2011 657 Realflo Wizards Calibration Step 6: Calibration Report Comment Realflo creates, stores, and prints calibration reports for each calibration session performed. Comments may be added to the calibration report using the Calibration Report Comment dialog as shown below. Enter any comments or leave the window blank. Click the Next button when completed entering comments. Realflo User and Reference Manual May 19, 2011 658 Realflo Wizards Calibration Step 7: Calibration Report The Calibration Report dialog allows the saving of the calibration report. Select Save Report to File to save the report. o Type the name of the report in the Save Report to File window. The default location and name are specified on the Calibration Report Options dialog. o Select Browse to select a different file name. Check View Calibration Report After Saving the File to view the saved calibration report file. Default is checked. Select Do not Save Report to skip saving the calibration report. Click the Finis button to complete the calibration process. If selected the Calibration report will be displayed as shown below. Realflo User and Reference Manual May 19, 2011 659 Realflo Wizards MVT Calibration Procedure When the MVT radio button is selected in the Sensor Calibration dialog the MVT Calibration dialog is displayed. The transmitter number, transmitter tag name, the communication port and the transmitter address associated with this MVT transmitter are displayed to aid you in determining which input you are calibrating. Check the Calibrate Temperature Sensor check box to select the temperature sensor for calibration. This will add the Temperature to the Calibration order list box. Check the Calibrate Static Pressure Sensor check box to select the static pressure sensor for calibration. This will add the Static Pressure to the Calibration order list box. Check the Calibrate Differential Pressure Sensor check box to select the differential pressure sensor for calibration. This will add the Diff. Pressure to the Calibration order list box. The Calibration Order list displays the list of sensors to be calibrated. Sensors are calibrated in order from the top of the list. Select Move Up button to move the specified item in the list up. The button is disabled if highlight item is on the top of the list or the list is empty. Select Move Down button to move the specified item in the list down. The button is disabled if highlight item is on the bottom of the list or the list is empty. The <Back button is not enabled as this is the initial step. The Next> button completes the selections and opens the Step 1: Force Value dialog. The Cancel button closes the dialog and stops the transmitter calibration. Realflo User and Reference Manual May 19, 2011 660 Realflo Wizards When you click the Cancel button to abort the calibration the following message is displayed. Click Yes to abort the calibration. Click No to continue with the calibration. The default button is No. The live value from each sensor is used as soon as you click Next. Connect al sensors first. WARNING Realflo uses live values from the sensor when calibration is cancelled. Be sure to connect all sensors first. Realflo does not erase any calibration events from the flow computer when canceling. The Help button displays the online help file. Realflo User and Reference Manual May 19, 2011 661 Realflo Wizards Calibration Step 1: Force Value The flow calculations continue to execute while calibrating sensors. The sensor value needs to be forced to either the current value or a fixed value during calibration. This dialog lets you select the current value of the input or a fixed value of your choice. When more than one sensor is selected, they need to each be forced to a current or fixed value before any of the other steps are performed. Select the value you wish to use, for each sensor, by clicking the appropriate radio button for each sensor. Check the Current Value radio button to use the current value for the sensor. Check the Fixed Value radio button and enter a value to use for the calibration in the entry box. The No Change radio button will be selected if the value is currently forced. (You may still select one of the other two radio buttons if desired). The <Back button returns to the previous step. Backing up does not erase events from the flow computer event log. When the Next> button is pressed Realflo records the start of calibration for the sensor in the event log. The sensor input is forced. The sensor can now be disconnected to the process. The Cancel button closes the dialog and stops the transmitter calibration. When you click the Cancel button to abort the calibration the following message is displayed. Click Yes to abort the calibration. Click No to continue with the calibration. The default button is No. Realflo User and Reference Manual May 19, 2011 662 Realflo Wizards Realflo uses live values from the sensor when calibration is cancelled. Connect sensors first. WARNING Realflo uses live values from the sensor when calibration is cancelled. Be sure to connect all sensors first. Realflo does not erase any calibration events from the flow computer when canceling. The Help button displays the online help file. Realflo User and Reference Manual May 19, 2011 663 Realflo Wizards Calibration Step 2: Record As-Found Values As-found readings indicate how the sensor was calibrated before adjustment. These can be used to correct flow measurement errors resulting from an out of calibration sensor. Follow the procedure your company has set for taking as-found readings. You need to record at least one as-found reading. Realflo will record As-Found values to the unit types selected for the meter run. If the units type for the meter run and the MVT are not the same then the MVT units are scaled to the meter run units. To take as-found readings: Apply a known signal to the sensor, or measure the signal applied to the sensor with a calibrated instrument. Enter the applied value in the Applied Value edit box. The measured value from the process is in the Measured Value box. When it has settled, click on the Record button to record an as-found reading. Repeat the process to record additional readings. As readings are recorded they are automatically entered in the record window. The applied values are listed under the Applied column. The measured values are listed under the Measured column and the deviation between the readings is listed under the Deviation column. For MVT Calibration the deviation is calculated as follows. The operating limits are read from the flow computer. span = upper range limit - lower range limit deviation = (measured - applied) / span The <Back button returns to the previous step. Backing up does not erase events from the flow computer event log. The Next> button proceeds to the next step. Realflo User and Reference Manual May 19, 2011 664 Realflo Wizards The Cancel button is grayed and an as found reading needs to be recorded. When you click the Cancel button to abort the calibration the following message is displayed. Click Yes to abort the calibration. Click No to continue with the calibration. The default button is No. WARNING Realflo uses live values from the sensor when calibration is cancelled. Be sure to connect all sensors first. Realflo does not erase any calibration events from the flow computer when canceling. The Help button displays the online help file. Realflo User and Reference Manual May 19, 2011 665 Realflo Wizards Calibration Step 3: Calibration Required The as-found readings indicate if calibration is required. Examine the list of as-found readings. If the sensor is in need of calibration, select Yes. Otherwise select No. As readings are recorded they are automatically entered in the record window. The applied values are listed under the Applied column. The measured values are listed under the Measured column and the deviation between the readings is listed under the Deviation column. For Run Calibration the deviation is calculated as follows. The output full scale and zero scale are taken from the input configuration for the run. span = input full scale – input zero scale deviation = (measured - applied) / span The <Back button returns to the previous step. Backing up does not erase events from the flow computer event log. The Next> button proceeds to the next step. The Cancel button is grayed and an as found reading needs to be recorded. When you click the Cancel button to abort the calibration the following message is displayed. Click Yes to abort the calibration. Click No to continue with the calibration. The default button is No. WARNING Realflo User and Reference Manual May 19, 2011 666 Realflo Wizards Realflo uses live values from the sensor when calibration is cancelled. Be sure to connect all sensors first. Realflo does not erase any calibration events from the flow computer when canceling. The Help button displays the online help file. Calibration Step 4: Calibrate SCADAPack 4101, 4202 or 4203 Step four in the calibration procedure varies depending on the type of transmitter being calibrated. Use this section if you are calibrating a SCADAPack 4102 or a SCADAPack 4202 or 4203. This dialog aids you in calibrating a sensor by displaying the measured value from the sensor and the as-found readings. Follow the procedure your company or the sensor supplier has set to calibrate the sensor. When the sensor calibration is complete, you may wish to check the as-left measurements that will be recorded in the next step. This confirms that you have calibrated the sensor correctly before placing it back in service. The Static Pressure can only have a span calibration performed if at least 5% of the rated pressure is applied. The RTD Zero can only be adjusted +/- 1% of the RTD upper limit, typically 8.5 degrees C, relative to the settings used when a reset sensor command was last issued. The list box displays as-found values listed in the list of Record As-Found Values dialog. The Measured Value displays the measured value from the sensor. As readings are recorded they are automatically entered in the record window. The applied values are listed under the Applied column. The measured values are listed under the Measured column and the deviation between the readings is listed under the Deviation column. Realflo User and Reference Manual May 19, 2011 667 Realflo Wizards For MVT Calibration the deviation is calculated as follows. The operating limits are read from the flow computer. span = upper range limit - lower range limit deviation = (measured - applied) / span Realflo User and Reference Manual May 19, 2011 668 Realflo Wizards Calibration Step 4: Calibrate SCADAPack 4101 Step four in the calibration procedure varies depending on the type of transmitter being calibrated. Use this section if you are calibrating a SCADAPack 4101 transmitter. The as-found readings, for each sensor, will indicate if calibration is required for the sensor. You are prompted to use the 4000 Configurator application to perform the calibration. The 4000 Configurator software is installed from the Control Microsystems Hardware Documentation CD. The Next> button proceeds to the next step. The Help button displays the online help file. Realflo User and Reference Manual May 19, 2011 669 Realflo Wizards Calibration Step 4: Calibrate 3095 MVT Step four in the calibration procedure varies depending on the type of transmitter being calibrated. Use this section if you are calibrating a 3905 transmitter. This dialog aids you in calibrating a sensor by displaying the measured value from the sensor and the as-found readings. Follow the procedure your company or the sensor supplier has set to calibrate the sensor. When the sensor calibration is complete, you may wish to check the as-left measurements that will be recorded in the next step. This confirms that you have calibrated the sensor correctly before placing it back in service. The list box displays as-found values listed in the list of Record As-Found Values dialog. As readings are recorded they are automatically entered in the record window. The applied values are listed under the Applied column. The measured values are listed under the Measured column and the deviation between the readings is listed under the Deviation column. For MVT Calibration the deviation is calculated as follows. The operating limits are read from the flow computer. span = upper range limit - lower range limit deviation = (measured - applied) / span The Calibrate Sensor section of the Calibrate Sensor dialog displays the current calibration settings and selectable radio buttons for configuring the sensor calibration. The Radio buttons enable the changing of the zero and span for the Temperature, Static Pressure and Differential Pressure sensors. For Temperature sensors, an additional radio button allows the user to fix the Temperature value in the event the temperature reading is outside the configured limits. Select the Re-Zero radio button to enable a new entry in the Applied Value field. This field displays the current zero value. The button is Realflo User and Reference Manual May 19, 2011 670 Realflo Wizards labeled Re-Zero if the Re-Zero radio button is selected. Clicking the Re-Zero button writes the zero applied value to the transmitter immediately. Select the Calculate Span radio button to enable a new entry in the Applied Value field. This field displays the current span value. The button is labeled Calibrate if the Calibrate Span radio button is selected. Clicking the Calibrate button writes the span applied value to the transmitter immediately. When calibrating the temperature sensor you may select the Default Temperature radio button to enable a new entry in the Applied Value field. The button is labeled Set if the Default Temperature radio button is selected. The transmitter returns the fixed temperature value if the RTD is not working, or if the RTD is not connected. The valid range is –40 to 1200 F or –40 to 648.89 C. The default value is 60 F or 15.56 C. The new fixed temperature point is written to the transmitter immediately. The Measured Value displays the measured value from the sensor. Realflo records the points at which MVT calibration was performed in the event log. Each time the Re-Zero button is clicked the following information is recorded. Event Name Current Value Previous Value MVT Re-zero The applied value entered by the user The measured value from the controller Each time the Calibrate button is clicked the following information is recorded. Event Name Current Value Previous Value Realflo User and Reference Manual May 19, 2011 MVT Span Calibration The applied value entered by the user The measured value from the controller 671 Realflo Wizards Calibration Step 5: Record As Left Values As-left readings indicate how the sensor was calibrated. These can be used to verify sensor calibration. Follow the procedure your company has set for taking as-left readings. You need to record at least one as-left reading. Realflo will record all As Found values to the units type selected for the meter run. If the units type for the meter run and the MVT are not the same then the MVT units are scaled to the meter run units. To take as-left readings: Apply a known signal to the sensor, or measure the signal applied to the sensor with a calibrated instrument. Enter the applied value in the Applied Value edit box. The measured value from the process is displayed. When it has settled, click on the Record button to record an as-left reading. As readings are recorded they are automatically entered in the record window. The applied values are listed under the Applied column. The measured values are listed under the Measured column and the deviation between the readings is listed under the Deviation column. For MVT Calibration the deviation is calculated as follows. The operating limits are read from the flow computer. span = upper range limit - lower range limit deviation = (measured - applied) / span Repeat the process to record additional readings. When required readings are taken, click on the Next> button. Realflo User and Reference Manual May 19, 2011 672 Realflo Wizards Calibration Step 6: Restore Live Input The sensors need to be reconnected to the process and the input hardware before calibration is complete. Reconnect sensors and verify connections are correct. Click on the Finish button when the sensor is connected. WARNING The live value from all sensors is used as soon as the Finish button is clicked. Be sure to connect all sensors first. Realflo User and Reference Manual May 19, 2011 673 Realflo Wizards Calibration Step 7: Calibration Report Comment Realflo creates, stores, and prints calibration reports for each calibration session performed. Comments may be added to the calibration report using the Calibration Report Comment dialog as shown below. Enter any comments or leave the window blank. Click the Next button when completed entering comments. Realflo User and Reference Manual May 19, 2011 674 Realflo Wizards Calibration Step 8: Calibration Report The Calibration Report dialog allows the saving of the calibration report. Select Save Report to File to save the report. o Type the name of the report in the Save Report to File window. The default location and name are specified on the Calibration Report Options dialog. o Select Browse to select a different file name. Check View Calibration Report After Saving the File to view the saved calibration report file. Default is checked. Select Do not Save Report to skip saving the calibration report. Click the Finis button to complete the calibration process. If selected the Calibration report will be displayed as shown below. Realflo User and Reference Manual May 19, 2011 675 Realflo Wizards Change Orifice Plate Wizard The Change Orifice Plate wizard enables the orifice plate to be changed for AGA-3 meter runs. This wizard supports Dual Chamber Orifice fittings and Singe Chamber Orifice fittings. This wizard will prompt you through the plate change procedure. For each step in the wizard a dialog is presented to enter the parameters for the step. Each dialog contains four buttons to allow navigation through the wizard. <Back returns to the previous step in the wizard. This button is disabled on the first step of a wizard. Next> moves to the next step in the wizard. This button is hidden on the last step of a wizard. Finish is displayed on the final step of a wizard in place of the Next button. It finishes the operation. This button is hidden on other steps. Cancel cancels the operation and closes the wizard. Steps performed thus far in the wizard are cancelled. Pressing the ESC key performs the same action as Cancel. Help opens the user manual. Connect to Flow Computer The connect to flow computer step defines the communication settings for the connection between the PC running the Realflo application and the target flow computer. The How do you want to communicate with the flow computer? prompt provides two selections. The Use the Current Settings option sets the default communication settings for Realflo. These settings are for the PC that is running Realflo. (The communication settings for the PC running Realflo and the communication settings in the flow computer need to match). The default communication settings are: COM 1 (serial port on the PC), 9600 baud, no parity, 8 Data bits, and 1 Stop bit. The default Modbus address Realflo will connect to is station 1. Realflo User and Reference Manual May 19, 2011 676 Realflo Wizards Use this selection if the serial port on your PC is COM 1 and the serial port settings for the serial port on the flow computer are set for default (9600, 8,n,1 and Modbus address 1). Click the Next> button to begin communication with the flow computer and move to the next step in the wizard. The Choose/View Communication Setup option opens the PC Communication Settings dialog as shown below. This allows you to view the default settings and to change the PC communication setting for the type of connection you are using to communicate with the flow computer. See the section Communication >> PC Communication Settings Command in the Realflo Expert Mode Reference section of this manual for complete details on the parameter settings in this dialog. You need to know the communication settings for the connection to the flow computer to use this step. Select Meter Run This step selects which meter run the orifice plate is to be changed. The Run dropdown selection displays runs using AGA –3 flow calculations. Select the run to change or inspect the orifice plate. Realflo User and Reference Manual May 19, 2011 677 Realflo Wizards The <Back button returns to the previous step. Backing up does not erase events from the flow computer event log. Realflo does not attempt to reverse the effect of a previous step when backing up. For example, backing up to the force values step does not restore the live values. The Next> button completes the run selection and the wizard moves to the next step. This button is grayed if there are no flow runs configured to use the AGA-3 flow calculation. The Cancel button aborts the plate change and displays the following message. Click Yes to abort the calibration. Click No to continue with the plate change. The default button is No. WARNING Realflo uses live values from the sensor when the plate change is cancelled. Be sure to connect all sensors first. Realflo does not erase any events from the flow computer when the plate change is cancelled. Realflo restores live values (ends forcing) when Cancel is clicked. The Help button displays the online help file. Choose Orifice Fitting Type Step This page allows the user to select the type of orifice fitting. Realflo User and Reference Manual May 19, 2011 678 Realflo Wizards Select Dual Chamber Orifice Fitting if a dual chamber fitting is present. Flow accumulation with estimated values will continue during the plate change. Select Singe Chamber Orifice Fitting if a single chamber fitting is present. Flow accumulation will stop during the plate change. The Next button moves to the next step. The next step is described in the section Dual Chamber Orifice if a dual chamber fitting is selected. The next step is described in the section Single Chamber Orifice if a single chamber fitting is selected. The Cancel button closes the dialog and stops the plate change procedure. The Help button displays the online Help file. Dual Chamber Orifice A dual chamber orifice allows the user to change, or inspect, the orifice plate without stopping the flow. These are generally large custody transfer sites where the orifice fitting is bypassed during the change or inspection procedure. The Change Orifice Plate Command forces the Static Pressure, Differential Pressure and Temperature inputs to a fixed value during the orifice plate change or inspection procedure. This command is disabled if the Update Readings command is enabled. The flow is estimated during the procedure using the fixed values. This command allows a user to place a flow run into estimation mode to allow an orifice plate to be changed or inspected. Changing the orifice plate involves the following steps. Set the estimated flow to be used during the orifice plate change by forcing inputs to fixed values. Change the orifice size. Complete the orifice plate change and resume normal flow measurement. The Flow Computer ID is checked when the Change Orifice Plate command is selected. If the Flow Computer ID does not match the ID Realflo displays the message “ The Flow Computer ID from the flow computer does not match the Flow Computer ID from the file.” The command is aborted. Realflo User and Reference Manual May 19, 2011 679 Realflo Wizards Force Input Step This step forces the flow run inputs. An estimated flow will be calculated while the plate change is in progress. The current values are updated every second. Select the value you wish to use, for each sensor, by clicking the appropriate radio button for each sensor. Check the Current Value radio button to use the current value for the sensor. Check the Fixed Value radio button and enter a value to use for the calibration in the entry box. The <Back button returns to the previous step. Backing up does not erase events from the flow computer event log. Realflo does not attempt to reverse the effect of a previous step when backing up. For example, backing up to the force values step does not restore the live values. The Next> button completes the force inputs step and the wizard moves to the next step. Realflo records the start of the plate change procedure in the event log and forces the sensor inputs. The Cancel button aborts the plate change and displays the following message. Click Yes to abort the calibration. Realflo User and Reference Manual May 19, 2011 680 Realflo Wizards Click No to continue with the plate change. The default button is No. WARNING Realflo uses live values from the sensor when the plate change is cancelled. Be sure to connect all sensors first. Realflo does not erase any events from the flow computer when the plate change is cancelled. Realflo restores live values (ends forcing) when Cancel is clicked. The Help button displays the online help file. Realflo User and Reference Manual May 19, 2011 681 Realflo Wizards Change Orifice Plate Step The orifice plate can now be changed. The forced inputs are used while the change is in progress. This dialog allows you to enter the new orifice plate diameter. The Current Orifice Diameter and Current Pipe Diameter are displayed for reference. Enter the new orifice size in the New Orifice Diameter entry box. If the diameter is not valid, Realflo displays the following a message box. You need to enter a valid orifice diameter. Click the OK button to return to the Change Orifice dialog. The Beta Ratio is calculated and displayed for orifice diameter changes. The <Back button returns to the previous step. Backing up does not erase events from the flow computer event log.