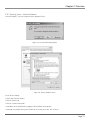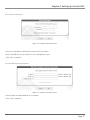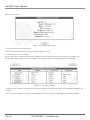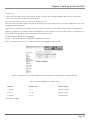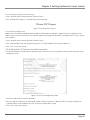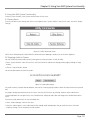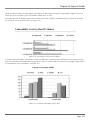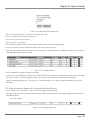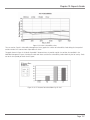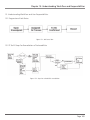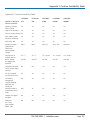
1
Black Box Tech Support: FREE! Live. 24/7. Tech support the way it should be. Great tech support is just 20 seconds away at 724-746-5500 or blackbox.com. About Black Box Black Box Network Services is your source for more than 118,000 networking and infrastructure products. You’ll find everything from cabinets and racks and power and surge protection products to media converters and Ethernet switches all supported by free, live 24/7 Tech support available in 20 seconds or less. © Copyright 2009. All rights reserved. 724-746-5500 | blackbox.com September 2009 LVN5200A LVN5600A LVN5250A LVN5800A LVN5400A Veri-NAC User’s Manual Veri-NAC—the fastest to deploy, easiest to use BOX Network Access Control (NAC) BLACK appliance for Intrusion Prevention, Vulnerability Management, and Regulatory Compliance. ® Customer Support Information Order toll-free in the U.S.: Call 877-877-BBOX (outside U.S. call 724-746-5500) FREE technical support 24 hours a day, 7 days a week: Call 724-746-5500 or fax 724-746-0746 Mailing address: Black Box Corporation, 1000 Park Drive, Lawrence, PA 15055-1018 Web site: www.blackbox.com • E-mail: [email protected] Veri-NAC User’s Manual Trademarks Used in this Manual Black Box and the Double Diamond logo are registered trademarks, and Veri-NAC is a trademark, of BB Technologies, Inc. Acrobat is a registered trademark of Adobe Systems, Inc. American Express is a registered trademark of American Express Company. Check Point is a registered trademark of Check Point Software Technologies Ltd. Cisco is a trademark of Cisco Technology, Inc. CA-Unicenter is a registered trademark of Computer Associates International. Discover is a service mark of Discover Financial Services Corporation. Google is a registered trademark of Google, Inc. HP and OpenView are registered trademarks of Hewlett-Packard Company. Intel Core, Xeon, Celeron are registered trademarks, and Atom is a trademark, of Intel Corporation. IBM and Tivoli are registered trademarks of International Business Machines Corporation. Juniper Networks and NetScreen are registered trademarks of Juniper Networks, Inc. Linux is a registered trademark of Linus Torvalds. MasterCard is a registered trademark of MasterCard International, Inc. Microsoft, Windows, Excel, and Internet Explorer are registered trademarks of Microsoft Corporation. Mozilla and Firefox are registered trademarks of Mozilla Foundation. Novell is a registered trademark of Novell, Inc. Opera is a registered trademark of Opera Software ASA. Symantec and Norton Utilities are registered trademarks of Symantec Corporation. Visa is a registered trademark of Visa International Service Association. Unix is a registered trademark of X/Open Company. Any other trademarks mentioned in this manual are acknowledged to be the property of the trademark owners. We‘re here to help! If you have any questions about your application or our products, contact Black Box Tech Support at 724-746-5500 or go to blackbox.com and click on “Talk to Black Box.” You’ll be live with one of our technical experts in less than 20 seconds. Page 2 724-746-5500 | blackbox.com FCC and IC RFI Statements Federal Communications Commission and Industry Canada Radio Frequency Interference Statements This equipment generates, uses, and can radiate radio-frequency energy, and if not installed and used properly, that is, in strict accordance with the manufacturer’s instructions, may cause interference to radio communication. It has been tested and found to comply with the limits for a Class A computing device in accordance with the specifications in Subpart B of Part 15 of FCC rules, which are designed to provide reasonable protection against such interference when the equipment is operated in a commercial environment. Operation of this equipment in a residential area is likely to cause interference, in which case the user at his own expense will be required to take whatever measures may be necessary to correct the interference. Changes or modifications not expressly approved by the party responsible for compliance could void the user’s authority to operate the equipment. This digital apparatus does not exceed the Class A limits for radio noise emission from digital apparatus set out in the Radio Interference Regulation of Industry Canada. Le présent appareil numérique n’émet pas de bruits radioélectriques dépassant les limites applicables aux appareils numériques de la classe A prescrites dans le Règlement sur le brouillage radioélectrique publié par Industrie Canada. Page 3 Veri-NAC User’s Manual Instrucciones de Seguridad (Normas Oficiales Mexicanas Electrical Safety Statement) 1. Todas las instrucciones de seguridad y operación deberán ser leídas antes de que el aparato eléctrico sea operado. 2. Las instrucciones de seguridad y operación deberán ser guardadas para referencia futura. 3. Todas las advertencias en el aparato eléctrico y en sus instrucciones de operación deben ser respetadas. 4. Todas las instrucciones de operación y uso deben ser seguidas. 5. El aparato eléctrico no deberá ser usado cerca del agua—por ejemplo, cerca de la tina de baño, lavabo, sótano mojado o cerca de una alberca, etc.. 6. El aparato eléctrico debe ser usado únicamente con carritos o pedestales que sean recomendados por el fabricante. 7. El aparato eléctrico debe ser montado a la pared o al techo sólo como sea recomendado por el fabricante. 8. Servicio—El usuario no debe intentar dar servicio al equipo eléctrico más allá a lo descrito en las instrucciones de operación. Todo otro servicio deberá ser referido a personal de servicio calificado. 9. El aparato eléctrico debe ser situado de tal manera que su posición no interfiera su uso. La colocación del aparato eléctrico sobre una cama, sofá, alfombra o superficie similar puede bloquea la ventilación, no se debe colocar en libreros o gabinetes que impidan el flujo de aire por los orificios de ventilación. 10. El equipo eléctrico deber ser situado fuera del alcance de fuentes de calor como radiadores, registros de calor, estufas u otros aparatos (incluyendo amplificadores) que producen calor. 11. El aparato eléctrico deberá ser connectado a una fuente de poder sólo del tipo descrito en el instructivo de operación, o como se indique en el aparato. 12. Precaución debe ser tomada de tal manera que la tierra fisica y la polarización del equipo no sea eliminada. 13. Los cables de la fuente de poder deben ser guiados de tal manera que no sean pisados ni pellizcados por objetos colocados sobre o contra ellos, poniendo particular atención a los contactos y receptáculos donde salen del aparato. 14. El equipo eléctrico debe ser limpiado únicamente de acuerdo a las recomendaciones del fabricante. 15. En caso de existir, una antena externa deberá ser localizada lejos de las lineas de energia. 16. El cable de corriente deberá ser desconectado del cuando el equipo no sea usado por un largo periodo de tiempo. 17. Cuidado debe ser tomado de tal manera que objectos liquidos no sean derramados sobre la cubierta u orificios de ventilación. 18. Servicio por personal calificado deberá ser provisto cuando: A: El cable de poder o el contacto ha sido dañado; u B: Objectos han caído o líquido ha sido derramado dentro del aparato; o C: El aparato ha sido expuesto a la lluvia; o D: El aparato parece no operar normalmente o muestra un cambio en su desempeño; o E: El aparato ha sido tirado o su cubierta ha sido dañada. Page 4 724-746-5500 | blackbox.com Table of Contents Quick Start Guide.....................................................................................................................................................................................10 1. Specifications..........................................................................................................................................................................................21 2. Overview................................................................................................................................................................................................ 23 2.1 Introduction....................................................................................................................................................................................... 23 2.2 What’s Included................................................................................................................................................................................. 24 2.3 Hardware Description......................................................................................................................................................................... 28 2.4 CVE Auditing..................................................................................................................................................................................... 28 2.4.1 Example of a CANdidate CVE.................................................................................................................................................... 28 2.4.2 CVE Compatibility..................................................................................................................................................................... 29 2.5 Self-Assessment for Credit Card Security Compliance......................................................................................................................... 29 2.6 User Management—Manager Access Limitations............................................................................................................................... 29 2.6.1 Managers, IT Staff, and NAC Users............................................................................................................................................ 29 2.6.2 User Account Restrictions.......................................................................................................................................................... 29 2.7 CVE Audit Configuration Options/Features......................................................................................................................................... 29 2.8 Workflow Management System......................................................................................................................................................... 29 2.8.1 Progression of Job Status........................................................................................................................................................... 30 2.8.2 Remediation of Vulnerabilities................................................................................................................................................... 30 2.9 Flagging False Positives....................................................................................................................................................................... 30 2.10 Length of Audit/Performance........................................................................................................................................................... 30 2.11 License—Warning about Exceeding.................................................................................................................................................. 30 2.12 Browser Support............................................................................................................................................................................... 30 2.12.1 Security Issues – Internet Explorer............................................................................................................................................ 31 2.12.2 Security Issues – Mozilla Firefox................................................................................................................................................ 32 2.13 Network Requirements..................................................................................................................................................................... 32 2.14 Dynamic Detection Network Requirements....................................................................................................................................... 32 2.15 Who Should Use This Manual........................................................................................................................................................... 33 2.16 Feature Availability............................................................................................................................................................................ 33 2.17 Sending Feedback to Black Box......................................................................................................................................................... 33 3. System and Audit Setup Guide............................................................................................................................................................... 34 3.1 Using the Veri-NAC IP Address........................................................................................................................................................... 34 3.2 Opening the Appropriate Port on Your Firewall.................................................................................................................................. 34 3.3 Logging In and Out............................................................................................................................................................................ 34 3.3.1 Logging into Veri-NAC.............................................................................................................................................................. 34 3.3.2 Logging out of Veri-NAC.......................................................................................................................................................... 36 3.4 Setting Up Internet Explorer for Best Results...................................................................................................................................... 36 3.5 Using an Analog Connection.............................................................................................................................................................. 37 4. Setting Up Veri-NAC.............................................................................................................................................................................. 38 4.1 Setting Company Information............................................................................................................................................................. 38 4.2 Customizing Reports.......................................................................................................................................................................... 38 4.3 Setting Report Notification Information.............................................................................................................................................. 39 4.4 Selecting Regulations and Security Programs for Compliance............................................................................................................. 40 4.5 SNMP and Syslog Notes......................................................................................................................................................................41 4.6 Setup SNMP Traps and Syslog.............................................................................................................................................................41 4.7 Setting System Date/Time.................................................................................................................................................................. 43 4.8 Setting Up User Accounts.................................................................................................................................................................. 43 4.8.1 Understanding Relationships between User Types..................................................................................................................... 43 4.8.2 Sample Users in Organizational Structure.................................................................................................................................. 44 4.8.3 Creating or Editing User Accounts............................................................................................................................................. 45 4.8.4 Account User Name.................................................................................................................................................................. 45 4.8.5 Veri-NAC Access Level.............................................................................................................................................................. 46 4.8.6 User Details............................................................................................................................................................................... 46 Page 5 Veri-NAC User’s Manual 4.8.7 Contact Information.................................................................................................................................................................. 47 4.8.8 Veri-NAC Account User Name................................................................................................................................................... 47 4.8.9 Created Account....................................................................................................................................................................... 48 4.8.10 Viewing List of User Accounts................................................................................................................................................. 48 4.8.11 Coordinating User Accounts with Asset Tracker User List......................................................................................................... 49 4.9 Setting Up 802.1q VLAN Tagging....................................................................................................................................................... 49 4.9.1 VLAN Configuration Steps......................................................................................................................................................... 50 4.9.2 Network Configuration..............................................................................................................................................................51 5. Setting Up Network Access Control....................................................................................................................................................... 53 5.1 Initiating Network Asset Discovery..................................................................................................................................................... 53 5.1.1 Enabling NetBIOS Scans............................................................................................................................................................. 55 5.1.2 Reviewing the List of IP Addresses............................................................................................................................................. 55 5.1.3 How Veri-NAC Generates the List of IP Addresses..................................................................................................................... 55 5.1.4 Performing Asset Discovery Using Multiple NICs........................................................................................................................ 55 5.2 Adding and Deleting Nodes from Subnet........................................................................................................................................... 55 5.2.1 Adding IP Addresses Manually................................................................................................................................................... 56 5.2.2 System Information Fields.......................................................................................................................................................... 57 5.2.3 List Categories.......................................................................................................................................................................... 57 5.3 Managing IP Addresses from Veri-NAC.............................................................................................................................................. 57 5.3.1 Manage IP Overview................................................................................................................................................................. 57 5.3.2 Manage IP Lists......................................................................................................................................................................... 58 5.4 IP Categories...................................................................................................................................................................................... 60 5.4.1 Trusted/Untrusted Assets.......................................................................................................................................................... 60 5.4.2 MAC IP Mismatch List............................................................................................................................................................... 60 5.4.3 Auditable/Audit-Exempt Systems...............................................................................................................................................61 5.4.4 Firewall and Smart Switch Safe List.............................................................................................................................................61 5.5 Deleting IP Addresses..........................................................................................................................................................................61 5.6 Determining Ping Response of Nodes on Subnet................................................................................................................................ 62 5.7 Interfacing to the Firewall................................................................................................................................................................... 62 5.7.1 Setting Up the Firewall Interface................................................................................................................................................ 63 5.7.2 Adding Rules to the Firewall...................................................................................................................................................... 65 5.8 Setting Up SmartSwitch Integration................................................................................................................................................... 65 5.9 Configuring Cisco Switch-Based Authentication................................................................................................................................. 66 5.10 Dynamic Detection and Vulnerability Quarantine.............................................................................................................................. 68 5.11 Setting Up Dynamic Detection and NAC Blocking............................................................................................................................. 68 5.12 Dynamic Detection System............................................................................................................................................................... 68 5.12.1 One-Click DDS Configuration................................................................................................................................................... 68 5.12.2 Enabling/Disabling DHCP Monitoring....................................................................................................................................... 69 5.12.3 Enabling NetBIOS Scans........................................................................................................................................................... 69 5.13 One-Click Packet Sniffing Range Configuration................................................................................................................................ 70 5.14 Enabling Static IP Detection via Packet Inspection............................................................................................................................. 69 5.15 Enabling NAC Blocking..................................................................................................................................................................... 70 5.15.1 One-Click NAC Block Range Configuration...............................................................................................................................71 5.15.2 Using an Asset List to Create a NAC Protect Range...................................................................................................................71 5.15.3 Excluding Assets from NAC Blocking....................................................................................................................................... 72 5.16 Viewing Assets Blocked with NAC Blocking...................................................................................................................................... 72 5.17 Viewing NAC Blocking Logs.............................................................................................................................................................. 73 5.18 Immediately Blocking an Untrusted Asset......................................................................................................................................... 73 5.19 Enabling NAC Unblocking Traffic.......................................................................................................................................................74 5.20 Enabling MAC Spoof Alerting...........................................................................................................................................................74 5.21 Enabling MAC Spoof Blocking...........................................................................................................................................................74 5.22 Viewing DDS Configuration Settings.................................................................................................................................................74 5.23 Preparing Your Network for Dynamic Detection............................................................................................................................... 75 5.24 Setting Up Inventory Alerts.............................................................................................................................................................. 77 Page 6 724-746-5500 | blackbox.com Table of Contents 6. Setting Up Asset Tracker........................................................................................................................................................................ 79 6.1 Viewing Systems List (Asset List) in Asset Tracker................................................................................................................................ 79 6.2 Viewing/Modifying/Adding Systems In The Systems List (Asset List)................................................................................................... 79 6.2.1 Editing/Adding System Information........................................................................................................................................... 80 6.2.2 Viewing Asset Report List......................................................................................................................................................... 81 6.2.3 Adding User Information........................................................................................................................................................... 81 6.2.4 Adding Software Information.................................................................................................................................................... 83 6.2.5 Adding Peripheral Information.................................................................................................................................................. 84 6.3 Associating Users, Software, and Peripherals With Systems................................................................................................................ 85 6.3.1 Associating Users with Systems................................................................................................................................................. 85 6.3.2 Associating Software with Systems........................................................................................................................................... 86 6.3.3 Associating Peripherals with Systems......................................................................................................................................... 87 6.3.4 Removing Systems/IP Addresses from Veri-NAC........................................................................................................................ 87 7. Creating and Managing Audits............................................................................................................................................................... 88 7.1 Running a One-Click Audit................................................................................................................................................................. 88 7.2 Defining A New Audit........................................................................................................................................................................ 89 7.2.1 Assigning an Audit Name.......................................................................................................................................................... 90 7.2.2 Setting Notification Information................................................................................................................................................ 90 7.2.3 Setting Vulnerability Threshold for Notification.......................................................................................................................... 90 7.2.4 Vulnerability Level Definitions.................................................................................................................................................... 91 7.2.5 Modifying Who Receives Reports.............................................................................................................................................. 92 7.2.6 Selecting Report Content.......................................................................................................................................................... 92 7.2.7 Audit Mode............................................................................................................................................................................... 92 7.2.8 Firewall Information................................................................................................................................................................... 93 7.2.9 Firewall Blocking Mode.............................................................................................................................................................. 94 7.2.10 Vulnerability Threshold for Smart Switch Blocking.................................................................................................................... 94 7.3 Scheduling Audits............................................................................................................................................................................... 94 7.3.1 Scheduling Audits with Norton Applications.............................................................................................................................. 94 7.3.2 Scheduling Backups and Audits................................................................................................................................................. 95 7.3.3 Scheduling Audits with Windows XP SP2 Installed..................................................................................................................... 95 7.3.4 Setting Audit Frequency and Start Time..................................................................................................................................... 95 7.4 Choosing IP Addresses From List......................................................................................................................................................... 96 7.4.1 Selecting/Grouping IP Addresses to Audit.................................................................................................................................. 97 7.4.2 Using the “Select All” Audit Wizard Checkbox.......................................................................................................................... 97 7.5 Saving the Audit................................................................................................................................................................................. 98 7.6 Activating/Managing Audits............................................................................................................................................................... 99 7.6.1 Scheduling an Audit to Run....................................................................................................................................................... 99 7.6.2 Starting an Audit....................................................................................................................................................................... 99 7.6.3 Deactivating an Audit.............................................................................................................................................................. 100 7.6.4 Removing an Audit.................................................................................................................................................................. 100 7.7 Modifying an Existing Audit’s Definition........................................................................................................................................... 100 7.8 Copying an Audit to Create a Variation.............................................................................................................................................101 7.9 Removing Systems/IP Addresses from an Audit..................................................................................................................................101 7.10 Viewing Lists of CVE Tests by OS and Application............................................................................................................................101 7.11 Managing Mismatched IPs...............................................................................................................................................................102 7.12 Viewing the Veri-NAC Schedule.......................................................................................................................................................103 7.13 Viewing the Monthly, Weekly, or Yearly Schedule........................................................................................................................... 104 7.14 Viewing the Daily Schedule............................................................................................................................................................. 104 7.15 Searching the Calendar................................................................................................................................................................... 105 7.16 Opening Audit/Scheduling FAQ in the Calendar View..................................................................................................................... 105 7.17 Managing In-Process Audits............................................................................................................................................................ 106 7.17.1 Reviewing Audits.................................................................................................................................................................... 106 7.17.2 Viewing Partial Reports...........................................................................................................................................................107 8. Setting Up Updates.............................................................................................................................................................................. 109 Page 7 Veri-NAC User’s Manual 8.1 Setting Up Automatic Vulnerability Updates..................................................................................................................................... 109 8.2 Retrieving Veri-NAC Service Packs/Version Updates.......................................................................................................................... 111 8.3 Purchasing And Entering Veri-NAC Upgrades.................................................................................................................................... 111 9. Using Veri-NAC System Functionality.................................................................................................................................................... 113 9.1 Factory Reset..................................................................................................................................................................................... 113 9.2 Stopping Audits In Process................................................................................................................................................................ 113 9.3 Rebooting Veri-NAC..........................................................................................................................................................................114 9.4 Shutting Down Veri-NAC..................................................................................................................................................................114 9.5 Backup and Restore...........................................................................................................................................................................114 9.5.1 Backup Now.............................................................................................................................................................................116 9.5.2 Restore.................................................................................................................................................................................... 117 9.6 Network Configuration.....................................................................................................................................................................118 9.7 Multiple Network Interface Card (NIC) Support.................................................................................................................................118 9.7.1 Configuring NICs......................................................................................................................................................................119 9.7.2 Performing Asset Discovery With Multiple NICs........................................................................................................................119 9.8 System Statistics................................................................................................................................................................................120 10. Setting Up The Command Center........................................................................................................................................................121 10.1 Command Center Appliance List......................................................................................................................................................121 10.1.1 Add Appliances Information....................................................................................................................................................121 10.1.2 Edit Appliances Information....................................................................................................................................................122 10.1.3 Removing Appliances..............................................................................................................................................................122 10.1.4 Adding/Managing Appliance Groups......................................................................................................................................122 10.1.5 Remote Operations.................................................................................................................................................................123 10.2 Configuring Microsoft Internet Explorer for Black Box Command Center.........................................................................................124 10.3 Command Center Syslog Messages.................................................................................................................................................125 10.4 Configuring the Syslog Server.........................................................................................................................................................127 10.5 Clearing Command Center Alerts....................................................................................................................................................127 10.6 National Vulnerability Database.......................................................................................................................................................128 11. Corporate Security Policy Development Guide.....................................................................................................................................130 11.1 Developing Corporate Policies..........................................................................................................................................................130 11.2 Understanding Regulations..............................................................................................................................................................130 11.3 Using The Basic Policy Builder..........................................................................................................................................................131 11.3.1 Modifying Policy Text..............................................................................................................................................................132 11.3.2 Revising Policy Document Status and Releasing Policy.............................................................................................................134 11.4 Using The ISO 27001/17799 Policy Builder.......................................................................................................................................135 11.4.1 Indicating Your Existing Security Status...................................................................................................................................136 11.4.2 Generating Draft Text for Your Security Policy........................................................................................................................138 12. Reports Guide.....................................................................................................................................................................................139 12.1 Overview of Report Types and Content............................................................................................................................................139 12.2 Understanding Veri-NAC Report Types............................................................................................................................................139 12.2.1 CVE Information in Reports....................................................................................................................................................139 12.2.2 Credit Card Merchant Security Program Information in Reports..............................................................................................139 12.3 Viewing Vulnerability Reports......................................................................................................................................................... 140 12.4 Interpreting and Understanding Reports..........................................................................................................................................141 12.4.1 Interpreting Complete Vulnerability Reports............................................................................................................................142 12.4.2 Interpreting Vulnerability Descriptions................................................................................................................................... 144 12.4.3 Interpreting Summary Reports................................................................................................................................................145 12.5 Remediation of Vulnerabilities in Reports.........................................................................................................................................147 12.6 Adding Custom Comments to Report Content................................................................................................................................147 12.6.1 Adding New Comments........................................................................................................................................................ 148 12.6.2 Editing/Removing Existing Comments................................................................................................................................... 148 12.6.3 Viewing Comments in Reports...............................................................................................................................................149 12.7 Finding Automatic Reports for Dynamically Detected Devices..........................................................................................................149 12.8 Removing a Report..........................................................................................................................................................................150 Page 8 724-746-5500 | blackbox.com Table of Contents 12.9 Saving a Report to Disk...................................................................................................................................................................150 12.10 Creating Custom Reports Using Queries........................................................................................................................................151 12.10.1 Querying Reports Database...................................................................................................................................................151 12.10.2 Printing Query Results...........................................................................................................................................................152 12.11 Requirements for Executive/Management Reports.........................................................................................................................153 12.12 Generating Management Reports..................................................................................................................................................154 12.13 Understanding Content of Management Reports...........................................................................................................................155 12.14 Generating Executive Reports........................................................................................................................................................158 12.15 Understanding Content of Executive Reports.................................................................................................................................159 13. Working with Logs..............................................................................................................................................................................161 13.1 Viewing Network Events Log...........................................................................................................................................................161 13.2 Viewing Veri-NAC System Events Log..............................................................................................................................................162 13.3 Generating and Viewing Asset Reports...........................................................................................................................................163 13.4 Generating and Viewing NAC Reports............................................................................................................................................163 13.5 Generating and Viewing IP History Reports.....................................................................................................................................163 14. Vulnerability Remediation Guide........................................................................................................................................................ 164 15. Understanding Workflow and User Responsibilities.............................................................................................................................165 15.1 Progression of Job Status.................................................................................................................................................................165 15.2 IT Staff: Steps For Remediation of Vulnerabilities.............................................................................................................................165 15.3 Managing Remediation—Responding to Events as Manager.......................................................................................................... 166 15.4 Users in an Organizational Structure............................................................................................................................................... 166 16. Using Workflow in Vulnerability Remediation..................................................................................................................................... 168 16.1 Navigation...................................................................................................................................................................................... 168 16.1.1 Setting/Viewing Time Allocated for Remediation................................................................................................................... 168 16.1.2 How Veri-NAC Calculates/Sets Due Dates...............................................................................................................................169 16.2 Viewing the Workflow Ticket Log....................................................................................................................................................169 16.2.1 Selecting and Assigning Jobs..................................................................................................................................................170 16.2.2 Recognizing a Job Is On Hold.................................................................................................................................................172 16.3 Viewing Logs of Assigned Jobs........................................................................................................................................................172 16.4 Viewing Vulnerability Reports..........................................................................................................................................................172 16.5 Using Links in Reports.....................................................................................................................................................................172 16.6 Updating Job Status........................................................................................................................................................................173 16.6.1 Updating Multiple IDs in a Single Job Ticket............................................................................................................................174 16.6.2 Tagging a Vulnerability as a False Positive...............................................................................................................................174 16.7 Dealing with Escalated Jobs (Managers Only)..................................................................................................................................174 16.8 Reassigning Jobs (Managers Only)...................................................................................................................................................175 16.9 Viewing Job Logs of Specific Resources (Managers Only).................................................................................................................177 16.10 Confirming False Positives (Managers Only)...................................................................................................................................177 16.11 Closing a Job (Managers Only).......................................................................................................................................................178 Appendix A. Quick Steps...........................................................................................................................................................................179 A.1 Setup Quick Steps.............................................................................................................................................................................179 A.2 Network Admission Control Quick Steps.......................................................................................................................................... 180 A.3 Asset Tracker Quick Steps.................................................................................................................................................................181 A.4 Creating and Managing Audits Quick Steps..................................................................................................................................... 183 A.5 Vulnerability Remediation Quick Steps............................................................................................................................................. 184 Appendix B. Creating a Serial Connection to HyperTerminal on a Windows PC........................................................................................ 186 Appendix C. Feature Availability Table.......................................................................................................................................................187 Appendix D. Frequency Asked Questions (FAQ)........................................................................................................................................ 188 Appendix E. License Agreement................................................................................................................................................................212 Page 9 Veri-NAC User’s Manual Quick Start Guide Q1. Setting Up the Veri-NAC Appliance The Veri-NAC appliance can help provide better network access control and help prevent intrusions on your network. There are five Veri-NAC models: LVN5200A, LVN5250A, LVN5400A, LVN5600A, and LVN5800A rackmountable 1U appliances. Q1.1 What’s Included Your package should include the following items. If anything is missing or damaged, contact Black Box Technical Support at 724-746-5500. LVN5200A, LVN5250A: • Veri-NAC appliance • (2) EVNSL81-0010 cables • Printed Quick Start Guide (QSG), a Default Password Sheet, and a read.me document • This QSG, full manual, read.me file, FAQ, and license agreement on CD-ROM LVN5400A, LVN5600A, LVN5800A: • Veri-NAC appliance • EVNSL81-0010 cables: ([4] for LVN5400A, [6] for LVN5600A, [8] for LVN5800A) • Printed QSG, a Default Password Sheet, and a read.me document • Printed full manual • This QSG, full manual, read.me file, FAQ, and license agreement on CD-ROM Q1.2 LVN5200A/LVN5250A and LVN5400A/LVN5600A/LVN5800A Applicances To set up the Veri-NAC appliance on your network, connect it to the first switch or hub inside your firewall. Then follow these steps: Step One: Connect to Your Network 1. A power cable is included with each Veri-NAC. Connect the power cable to the power jack on the rear side, on the far left end of the appliance and to a 3-prong grounded 120-VAC, 60-Hz outlet. NOTE: We strongly recommend that you plug your Veri-NAC appliance into a surge protector to ensure that your appliance is protected from voltage spikes. 2. Connect your local area network to the Ethernet 0 port (labeled Eth0) on the rear of the Veri-NAC appliance (see Figure Q1-2 or Q1-4). Page 10 724-746-5500 | blackbox.com Quick Start Guide Figure Q1-1 shows the LVN5200A/LVN5250A front panel. Table Q1-1 describes its components. 8 1 2 3 45 6 7 9 Figure Q1-1. LVN5200A/LVN5250A front panel. Table Q1-1. LVN5200A/LVN5250A front panel components. Number Component Description 1 System overheat LED Lights when the system overheats 2, 3 Network activity LEDs Light during activity on the network 4 Hard drive activity LED Lights during activity on the hard drive 5 Power LED Lights when the unit is powered on 6 System reset button Press this button to reset the system 7 Power ON/OFF button Press this button to turn power ON/OFF 8, 9 Vent holes for airflow Allows for system cooling Figure Q1-2 shows the LVN5200A/LVN5250A back panel. Table Q1-2 describes its components. 1 2 3 6 7 4 8 9 10 11 5 12 Figure Q1-2. LVN5200A/LVN5250A back panel. Page 11 Veri-NAC User’s Manual Table Q1-2. LVN5200A/LVN5250A back panel components. Number Component Description 1 IEC 320 power connector Connects to power 2 PS/2 mouse connector Links to PS/2 mouse 3, 12 Air holes Allow cooling 4 Not used — 5 Expansion slot cover Covers expansion slots 6 PS/2 keyboard connector Links to PS/2 keyboard 7 (2) USB Type A ports Link to USB peripherals 8 DB9 serial Links to serial connector 9 HD15 VGA Links to monitor 10 Eth 0 Connects to LAN 1 11 Eth 1 Connects to LAN 2 Figure Q1-3 shows the LVN5400A/LVN5600A/LVN5800A models’ front panel. Table Q1-3 lists its components. 1 2 345 6 7 8 9 Figure Q1-3. LVN5400A/LVN5600A/LVN5800A front panel. Table Q1-3. LVN5400A/LVN5600A/LVN5800A components. Number Component Description 1 System overheat LED Lights when the system overheats 2, 3 Network activity LEDs Light during activity on the network 4 Hard drive activity LED Lights during activity on the hard drive 5 Power LED Lights when the unit is powered on 6 System reset button Press this button to reset the system 7 Power ON/OFF button Press this button to turn power ON/OFF 8, 9 Vent holes for airflow Allow for system cooling Figures Q1-4 through Q1-6 show the LVN5400A/LVN5600A/LVN5800A models’ back panels. Table Q1-4 lists their components. Page 12 724-746-5500 | blackbox.com Quick Start Guide 1 2 5 3 6 4 7 8 11 12 9 10 Figure Q1-4. LVN5400A back panel. 1 1 2 3 5 6 2 5 4 7 9 10 Figure Q1-5. LVN5600A back panel. 3 6 8 11 12 13 14 4 7 8 16 15 12 11 10 9 17 18 Figure Q1-6. LVN5800A back panel. Table Q1-4. LVN5400A/LVN5600A/LVN5800A components. Number Component Description 1 IEC 320 power connector Connects to power 2 PS/2 mouse connector Links to PS/2 mouse 3 Air holes Allow cooling 4 Not used — 5 PS/2 keyboard connector Links to PS/2 keyboard 6 (2) USB Type A ports Link to USB peripherals 7 DB9 serial Links to serial connector 8 HD15 VGA Links to monitor 9 Eth 0 (LVN5400A, LVN5600A, LVN5800A) Connects to LAN 0 10 Eth 1 (LVN5400A, LVN5600A, LVN5800A) Connects to LAN 1 11 Eth 2 (LVN5400A, LVN5600A, LVN5800A) Connects to LAN 2 12 Eth 3 (LVN5400A, LVN5600A, LVN5800A) Connects to LAN 3 13 Eth 4 (LVN5600A) Connects to LAN 4 Page 13 Veri-NAC User’s Manual Table Q1-4 (continued). LVN5400A/LVN5600A/LVN5800A components. Number Component Description 14 Eth 5 (LVN5600A) Connects to LAN 5 15 Eth 4 (LVN5800A) Connects to LAN 4 16 Eth 5 (LVN5800A) Connects to LAN 5 17 Eth 6 (LVN5800A) Connects to LAN 6 18 Eth 7 (LVN5800A) Connects to LAN 7 NOTE: The network cable must be CAT5 cable or higher with RJ-45 connectors. Step Two: Connect the Monitor and Keyboard 1. Connect the monitor cable to the 15-pin (VGA color) Monitor port on the rear of the appliance. 2. Connect a keyboard to the Keyboard outlet on the rear of the appliance. 3. Press the Power button on the far right front panel of the appliance. The Power LED indicates that power is on, and the network LED flashes indicating network traffic is occurring. On the rear panel, adjacent to the Ethernet port, another LED begins flashing to indicate that network traffic is occurring. After a scan completes, a bootup screen appears. Step Three (A): If Your Environment Is DHCP In a DHCP environment, the IP address, subnet mask, and default gateway settings have been assigned automatically and should appear on the next menu. Do not make any selections or change any settings. Do not save any settings if you have not changed anything. 1. IMPORTANT: Write down the appliance IP address for later use. __________________________________________ 2. Disconnect the monitor, keyboard, and computer from the appliance. No further direct connection to the appliance is required. Step Three (B): If Your Environment Is Non-DHCP In a Non-DHCP environment, you must assign the IP address/other settings: 1. Type the number of a parameter at <Make a selection>, then press <Enter>. As prompted, type a new value and press <Enter>. To enter Network Configuration, press <1>. 2. IMPORTANT: Write down the appliance IP address. __________________________________________________ 3. To set the IP address, press <2> and press <Enter>. At the Enter new IP address prompt, type the IP address (i.e., 192.168.254.156) and press <Enter>. The list of settings is displayed with the IP address you entered. 4. Enter values for the Subnet mask <3>, Default gateway <4>, and Host name <6> that apply to your network. 5. To add a DNS server, press <5> and <Enter>. After you have added your DNS servers, press <3> to save your server values, then press <Q> and <Enter> to return to the Main Menu. 6. Disconnect the monitor and keyboard from Veri-NAC. No further direct connection to the appliance is required. Step Four: Open Ports for Automatic Download To enable downloads to take place, have your System Administrator or Network Engineer open port 443 on your firewall server. Next, access Veri-NAC through a Web browser window on any system on the same subnet or Local Area Network (LAN). Page 14 724-746-5500 | blackbox.com Quick Start Guide Step Five: Use a Browser to Configure Veri-NAC 1. To log on, open a secure browser window (with the protocol https instead of just http) using the IP address of Veri-NAC as the URL. For example, if Veri-NAC has IP address 192.168.254.156, the URL to open in your browser would be: https://192.168.254.156 (using the default SSL port) OR https://192.168.254.156:<custom SSL port number> 2. The Veri-NAC login window appears. 3. Enter the user name and password provided on the Password Sheet delivered with your appliance. 4. Click on the Login button. The License Agreement appears first. Accept this license using the button at the bottom of the screen. (This request to accept will appear at every log in until you accept it.) 5. Next, the Help/Product Overview page of Veri-NAC opens in the browser with brief descriptions and links to all the other product pages. CAUTION: To be sure that Veri-NAC produces accurate results, you must be sure you have downloaded the latest Common Vulnerabilities and Exposure (CVE) vulnerability signatures; later, when Veri-NAC updates itself regularly, it will download new signatures daily, but if you do not add all known vulnerabilities when it starts, it will not realize that it doesn’t have them. To be sure you have the latest CVEs initially, you must carry out the next step—Downloading CVE Tests. Step Six: Downloading CVE Tests (all models except LVN5200A) If you have the LVN5250A/LVN5400A/LVN5600A/LVN5800A unit, you should be able to run the built-in Common Vulnerabilities and Exposures (CVEs) auditing engine. Before you do anything else with Veri-NAC, you must download the latest CVE Tests into the Veri-NAC database: CAUTION: If you skip this step, Veri-NAC will not do its job effectively. 1. Go to the left frame menu bar and select UpdatesgVulnerability Signatures. 2. Click the Update Now button. 3. As long as the appliance is on a network connected to the Internet, you just need to click Download Updates and, after they download, click Install Now. 4. If your appliance is NOT on a network connected to the Internet, you must update from a machine that is. Go to that machine and log into Veri-NAC, then click Download Updates. Then browse to the file using the Browse button and click Upload Now to install the update on Veri-NAC. 5. After you have updated the vulnerability signatures, you may now return to the Vulnerability Signature Updates page and select Daily so that the updates automatically occur daily. Be sure to click Save to save the setting. Step Seven: Discovering All Your Network Assets Before you can turn on alerts and the blocking engine, create a list of all your trusted network assets. To do this: 1. Go to the left frame menu bar and select Network Access ControlgAsset Discovery. 2. If you use NetBIOS on any of your equipment, click the Use NetBIOS Scans for host names. 3. Click the Refresh IPs button and wait approximately 5-15 minutes while the appliance discovers all the trusted network assets on the current subnet. Your Veri-NAC is now up and running. Start reading through the User Guide. In particular, learn about the Network Access ControlgDynamic Detection System as well as the Inventory Alerts. Remember, one of the most powerful features of your VeriNAC appliance is your PeerBlock engine, so you’ll also need to look at the Manage IPs list to determine how to add and remove assets to and from your trust list. Page 15 Veri-NAC User’s Manual Q2. Configuring the Browser Veri-NAC has been verified with the following Web browsers: Microsoft® Internet Explorer® Versions 5.0, 6.0, 7.0, and 8.0; Mozilla® Firefox® Versions 2.x and 3.x; and Opera® Version 9.63. Q2.1 Internet Explorer—Cache Issues Occasionally, if you perform a task with Veri-NAC, Internet Explorer 6.0 does not immediately update the display. If, for example, you decide to add a custom comment to a report and then recreate the report, when you next open that report or view the Text of Vulnerabilities, your new comment may not display. Instead, you may see the older, cached version of the report. To be sure you see the newest version of the report every time, change your browser settings as follows (see Figure Q2-1): • Go to the Internet Explorer menu bar and select ToolsgInternet Options. • In the Internet Options window, click on the General tab, and then click the Settings button. • Under Check for newer versions of stored pages, select “Every visit to the page.” Figure Q2-1. Settings screen. This setting clears the cache and ensures all edits to reports display upon subsequent visits. Page 16 724-746-5500 | blackbox.com Quick Start Guide Q2.2 Internet Explorer—Security Issues In Internet Explorer, you may frequently receive prompts like this (see Figure Q2-2): Figure Q2-2. Security information prompt. To turn off this prompt: • Select ToolsgInternet Options. • Click on the Security tab. • Click on the Custom Level button. • Scroll down to the Miscellaneous category and find Display mixed content. • To change the prompt setting, select Enable for this setting, then click “OK” to save it (see Figure Q2-3). Page 17 Veri-NAC User’s Manual Figure Q2-3. Security settings. Page 18 724-746-5500 | blackbox.com Quick Start Guide Q2.3 Mozilla Firefox—Security Issues To get rid of certificate errors in Firefox: 1. On the screen that comes up when you get a certificate error, click on “Or you can add an exception” (see Figure Q2-4). 2. Click on “Add Exception.” 3. The appliance’s IP should be automatically filled in the Server Location field. 4. Click “Get Certificate,” then click on “Confirm Security Exception.” FIgure Q2-4. Secure connection failed screen. Page 19 Veri-NAC User’s Manual You may also run into a specific Firefox security error that reads Error code: sec_error_reused_issuer_and_serial. To remedy this problem: 1. Go to ToolsgOptionsgAdvancedgEncryption and click on “View Certificates” (see FIgure Q2-5). 2. In the Servers and Authorities tab, remove the appliance certificate by highlighting the appliance’s IP and clicking Delete. 3. Try refreshing the page and add the appliance to the exception list. Figure Q2-5. Options screen. Page 20 724-746-5500 | blackbox.com Chapter 1: Specifications 1. Specifications Built-In Devices: LED panel Compliance: CE, UL, TUV, cUL, EN 60950, IEC 60950, CCC, FCC Color: Black Fans: Internal: LVN5200A, LVN5250A: (2) 8500 RPM; LVN5400A, LVN5600A, LVN5800A: (1) 5000 RPM Form Factor: LVN5200A, LVN5250A: Rackmountable, 1U, 11.3" deep chassis support for maximum 9.6" x 9.6" (24 x 24 cm) motherboard size; LVN5400A, LVN5600A, LVN5800A: Rackmountable, 1U, 14" mini chassis support for maximum 12" x 9.6" (24 x 24 cm) motherboard size Cooling Components: Fan: (2) x 8500 RPM cooling fan; Air shroud: (1) Mainboard Size (Maximum): Micro ATX Mainboards Supported: Micro ATX Expansion Slots: (1) full-height, half-length PCI expansion slot (optional, riser card required); Drive bays: (1) internal, 3.5" (8.9 cm); Internal bay: (4) 2.5" (6.4 cm) internal drive support Processor Support: LVN5200A, LVN5250A: Intel Core® Duo, Xeon® 3000 series (up to 65 W), Intel Celeron® 400 series, Intel Atom™ 200/300 series; LVN5400A, LVN5600A, LVN5800A: Single Intel/AMD User Controls: (1) Power ON/OFF button, (1) System Reset button Connectors: LVN5200A, LVN5250A: (1) IEC power, (1) PS/2 mouse, (1) PS/2 keyboard, (1) expansion slot cover, (2) USB Type A, (1) DB9 serial, (1) HD15 VGA, (2) LAN for Eth0 and Eth1; LVN5400A: (1) IEC power, (1) PS/2 mouse, (1) PS/2 keyboard, (1) expansion slot cover, (2) USB Type A, (1) DB9 serial, (1) HD15 VGA, (4) LAN for Eth0, Eth1, Eth2, Eth3; LVN5600A: (1) IEC power, (1) PS/2 mouse, (1) PS/2 keyboard, (1) expansion slot cover, (2) USB Type A, (1) DB9 serial, (1) HD15 VGA, (6) LAN for Eth0, Eth1, Eth2, Eth3. Eth4, Eth5; LVN5800A: (1) IEC power, (1) PS/2 mouse, (1) PS/2 keyboard, (1) expansion slot cover, (2) USB Type A, (1) DB9 serial, (1) HD15 VGA, (8) LAN for Eth0, Eth1, Eth2, Eth3. Eth4, Eth5, Eth 6, Eth7 Indicators: (4) LEDs: (1) Power, (1) Hard drive activity, (2) Network activity, (1) System overheat Power: 100–240 VAC, 50/60 Hz, 200 watts, 4.2 amps, low-noise, high-frequency power supply with Power Factor Correction (PFC) Temperature Tolerance: Operating: 50 to 95° F (10 to 35° C); Storage: -40 to +158° F (-40 to +70° C) Humidity Tolerance: Operating: 8 to 90%, non-condensing; Storage: 5 to 95%, non-condensing Size: LVN5200A, LVN5250A: 1.7"H x 17.2"W x 11.3"D (4.3 x 43.7 x 28.7 cm); LVN5400A, LVN5600A, LVN5800A: 1.7"H x 16.8"W x 14"D (4.3 x 42.6 x 35.6 cm) Page 21 Veri-NAC User’s Manual Weight: LVN5200A, LVN5250A: 11 lb. (5 kg); LVN5400A, LVN5600A, LVN5800A: 12.8 lb. (5.8 kg) Page 22 724-746-5500 | blackbox.com Chapter 2: Overview 2. Overview 2.1 Introduction Veri-NAC is a patented Network Access Control (NAC) and Vulnerability Management system for Intrusion Prevention and Regulatory Compliance. It is a high-performance IT security and compliance solution for your organization. Simply add the appliance to your internal network, configure it in only a few minutes, and then go about your business while it carries out new and powerful security functions on your network. Veri-NAC also audits your network (LVN5250A, LVN5400A, LVN5600A, and LVN5800A Units only) for potential risks, testing for vulnerabilities that can allow an unauthorized user to: • Execute commands as another user • Access unauthorized data • Pose as another entity • Conduct a denial of service attack • Gather information • Block legitimate users from access • Conceal activity NOTE: LVN5200A appliances do not offer CVE® certified auditing. They feature NAC functionality only. LVN5250A and LVN5400A, LVN5600A, and LVN5800A units offer CVE® certified auditing as well as NAC functionality. • Provides remediation Workflow Management with automatic due date assignments and escalation of jobs past due. • Discovers newly connected equipment using our Dynamic Detection System (with built in NAC agent-less NAC blocking engine)—laptop computers and wired or wireless devices of all kinds—and immediately audits (if selected) that equipment for vulnerabilities. Detects MAC address spoofing. Immediately blocks all un-trusted assets. Helps detect rogue wireless routers. • Upon finding vulnerabilities, Veri-NAC Firewall Integration directs the Firewall to block traffic to/from vulnerable IP addresses and/or specific vulnerable ports. Its SmartSwitch Integration directs intelligent switches to block traffic to vulnerable IP addresses. Both boosters work without software on users’ computers—making Veri-NAC the first Clientless Quarantine system. • Upon finding vulnerabilities, Veri-NAC automatically alerts the IT manager to blocked IP addresses or ports. • Enables hierarchical management for multiple levels of appliances at various locations using the Command Center. The Command Center can be used to remotely manage multiple LVN5200A, LVN5250A, or LVN5400A, LVN5600A, and LVN5800A appliances. The Command Center links directly to the National Vulnerability Database to integrate publicly available U.S. government vulnerability resources as well as references. • Uses Asset Tracker to track equipment assets on your network by: - Providing Inventory Alerts when equipment is removed from the network. - Storing data to help track all computers, software, and peripherals on the network as well as all users who have access. - Providing the Reports engine with information about your equipment. Page 23 Veri-NAC User’s Manual • Provides comprehensive Vulnerability Assessment Reports with quick-click remediation, if this feature is available with your VeriNAC appliance. • Provides United States Regulatory Compliance reporting for 21 CFR FDA Part 11, ESIGN, GLBA, HIPAA, Sarbones-Oxley (SOX), and others. Also supports international regulations for Brazil, Canada, Colombia, Japan, Poland, Thailand, and the United Kingdom. • Provides Credit Card Merchant Security Program compliance reporting. • Provides tools to help build your organization’s Corporate Security Policy. • Automatically downloads new vulnerability tests and service packs to Veri-NAC itself. 2.2 What’s Included Your package should include the following items. If anything is missing or damaged, contact Black Box Technical Support at 724-746-5500. LVN5200A, LVN5250A: • Veri-NAC appliance • (2) EVNSL81-0010 cables • Printed Quick Start Guide (QSG), a Default Password Sheet, and a read.me document • This QSG, full manual, read.me file, FAQ, and license agreement on CD-ROM LVN5400A, LVN5600A, LVN5800A: • Veri-NAC appliance • EVNSL81-0010 cables: ([4] for LVN5400A, [6] for LVN5600A, [8] for LVN5800A) • Printed QSG, a Default Password Sheet, and a read.me document • Printed full manual • This QSG, full manual, read.me file, FAQ, and license agreement on CD-ROM 2.3 Hardware Description Figure 2-1 shows the LVN5200A/LVN5250A front panel. Table 2-1 describes its components. 8 9 Figure 2-1. LVN5200A/LVN5250A front panel. Page 24 724-746-5500 | blackbox.com 1 2 3 45 6 7 Chapter 2: Overview Table 2-1. LVN5200A/LVN5250A front panel components. Number Component Description 1 System overheat LED Lights when the system overheats 2, 3 Network activity LEDs Light during activity on the network 4 Hard drive activity LED Lights during activity on the hard drive 5 Power LED Lights when the unit is powered on 6 System reset button Press this button to reset the system 7 Power ON/OFF button Press this button to turn power ON/OFF 8, 9 Vent holes for airflow Allow for system cooling Figure 2-2 shows the LVN5200A/LVN5250A back panel. Table 2-2 describes its components. 1 2 3 6 7 4 8 9 10 11 5 12 Figure 2-2. LVN5200A/LVN5250A back panel. Table 2-2. LVN5200A/LVN5250A back panel components. Number Component Description 1 IEC 320 power connector Connects to power 2 PS/2 mouse connector Links to PS/2 mouse 3, 12 Air holes Allow cooling 4 Not used — 5 Expansion slot cover Covers expansion slots 6 PS/2 keyboard connector Links to PS/2 keyboard 7 (2) USB Type A ports Link to USB peripherals 8 DB9 serial Links to serial connector 9 HD15 VGA Links to monitor 10 Eth 0 Connects to LAN 1 11 Eth 1 Connects to LAN 2 Figure 2-3 shows the LVN5400A/LVN5600A/LVN5800A models’ front panel. Table 2-3 lists its components. Page 25 Veri-NAC User’s Manual 8 1 2 3 45 6 7 9 Figure 2-3. LVN5400A/LVN5600A/LVN5800A front panel. Table 2-3. LVN5400A/LVN5600A/LVN5800A components. Number Component Description 1 System overheat LED Lights when the system overheats 2, 3 Network activity LEDs Light during activity on the network 4 Hard drive activity LED Lights during activity on the hard drive 5 Power LED Lights when the unit is powered on 6 System reset button Press this button to reset the system 7 Power ON/OFF button Press this button to turn power ON/OFF 8, 9 Vent holes for airflow Allow for system cooling Figures 2-4 through 2-6 show the LVN5400A/LVN5600A/LVN5800A models’ back panels. Table 2-4 lists their components. 1 2 5 3 6 4 7 8 11 12 9 10 Figure 2-4. LVN5400A back panel. 1 2 3 5 6 4 7 8 9 11 12 13 14 10 Figure 2-5. LVN5600A back panel. Page 26 724-746-5500 | blackbox.com Chapter 2: Overview 1 2 5 3 6 4 7 8 16 15 12 11 10 9 17 18 Figure 2-6. LVN5800A back panel. Table 2-4. LVN5400A/LVN5600A/LVN5800A components. Number Component Description 1 IEC 320 power connector Connects to power 2 PS/2 mouse connector Links to PS/2 mouse 3 Air holes Allow cooling 4 Not used — 5 PS/2 keyboard connector Links to PS/2 keyboard 6 (2) USB Type A ports Link to USB peripherals 7 DB9 serial Links to serial connector 8 HD15 VGA Links to monitor 9 Eth 0 (LVN5400A, LVN5600A, LVN5800A) Connects to LAN 0 10 Eth 1 (LVN5400A, LVN5600A, LVN5800A) Connects to LAN 1 11 Eth 2 (LVN5400A, LVN5600A, LVN5800A) Connects to LAN 2 12 Eth 3 (LVN5400A, LVN5600A, LVN5800A) Connects to LAN 3 13 Eth 4 (LVN5600A) Connects to LAN 4 14 Eth 5 (LVN5600A) Connects to LAN 5 15 Eth 4 (LVN5800A) Connects to LAN 4 16 Eth 5 (LVN5800A) Connects to LAN 5 17 Eth 6 (LVN5800A) Connects to LAN 6 18 Eth 7 (LVN5800A) Connects to LAN 7 NOTE: The network cable must be CAT5 cable or higher with RJ-45 connectors. Page 27 Veri-NAC User’s Manual 2.4 CVE Auditing CVE is the Standard by which all information security professionals are judged and is the litmus test for regulatory compliance including HIPAA, GLBA, 21 CFR Part 11 FDA, ESIGN, and Sarbanes-Oxley (SOX) 404 as it relates to information assets. CVE auditing is a CPU-intensive process that can take only minutes—or it can take hours, depending upon the size and speed of your network and the number of vulnerabilities you have. Veri-NAC looks at tens of thousands of ports on each IP Address in your network for thousands of possible CVEs. The Common Vulnerabilities and Exposures (CVE) list functions similarly to a dictionary, providing common names for publicly known information security vulnerabilities and exposures. Using a common name makes it easier to share data across separate databases and tools that, until now, were not easily integrated. CVE is the key to information sharing. If a report from one of your security tools incorporates CVE names, you may then quickly and accurately access fix information in one or more separate, CVEcompatible databases to remediate the problem. The CVE — An Industry Standard funded by the Department of Homeland Security — is operated by MITRE. A CVE is: • One name for one vulnerability or exposure • One standardized description for each vulnerability or exposure • A dictionary rather than a database • The way disparate databases and tools can understand each other • A means to interoperability and better security coverage • A basis for evaluation among tools and databases • Accessible for review or download from the Internet • Industry endorsed via the CVE Editorial Board Some CVEs are currently Candidates (CANs) — keep an eye on both CVEs and CANidate CVEs. MITRE is in the process of updating all CANs into CVEs. CANs are being phased out. 2.4.1 Example of a CANdidate CVE CAN-2006-1148 (Under Review) A buffer overflow problem is described in GLSA-200603-17 (PeerCast: Buffer overflow). The problem is in the URL handling code. Buffers allocated on the stack can overflow inside of nextCGIarg()function. By sending a specially crafted request to the HTTP server, a remote attacker can cause a stack overflow, resulting in the execution of arbitrary code. There is no known workaround at this time. Black Box believes CVE auditing should be fast; efficient; accurate; non-invasive to network bandwidth, users, and assets; and should never cause a Denial of Service—except from tools, such as those from Symantec, that treat an audit as an attack. 2.4.2 CVE Compatibility Veri-NAC is a CVE-compatible product. Vulnerabilities found on Veri-NAC Reports can easily be searched for standard CVE names assigned by the MITRE Corporation. Details on each CVE Veri-NAC finds are explained in its reports; however, you can find more information on any CVE by searching the MITRE CVE web site (www.cve.mitre.org). Page 28 724-746-5500 | blackbox.com Chapter 2: Overview Veri-NAC uses the latest CVE database version. The Update Server is revised every day. When you download new tests, you are ensuring your reports will reference the latest known CVEs and CVE candidates available. 2.5 Self-Assessment for Credit Card Security Compliance Veri-NAC reports compliance with the following credit card merchant certification programs: Visa® CISP, MasterCard® SCP, American Express® DDS, and Discover™ DISC. 2.6 User Management—Manager Access Limitations User management lets you create three levels of users—managers, IT staff, and NAC users. The main account provided with VeriNAC is a manager, and is the only manager who can change his/her own login ID. When you create a user, you indicate the user’s manager, which enables Veri-NAC to send manager notifications when appropriate. 2.6.1 Managers, IT Staff, and NAC Users Managers, IT staff, and NAC users have different roles in the remediation process. Both managers and IT staff can assign jobs, but IT staff can only assign jobs to themselves. Although both managers and IT staff can remediate vulnerabilities, only managers can confirm remediation. Managers receive notifications about jobs. NAC users have network access control functionality only and cannot view workflow. They are able to manage assets, set up DDS, and configure NAC blocking. NAC User accounts should be created for IT staff who will not be involved in the vulnerability remediation process but will aid in setup and maintenance of VeriNAC as well as the systems to be audited. If a manager is taking remediation action on a job, the manager’s role becomes that of an IT staff user — unable to view his/her own jobs when they are in a To Be Confirmed state. Only the manager’s manager or the main account can view To Be Confirmed jobs and either change their status to Closed or revert it to In Process. For more information, see the Chapter 14, Vulnerability Remediation. 2.6.2 User Account Restrictions Any user currently logged into Veri-NAC is able to edit his/her own account, subject to the following limitations. A user may not change their own: • Access level • Manager • Login ID (unless you are main account) 2.7 CVE Audit Configuration Options/Features NOTE: The LVN5200A does not offer auditing. It features network access control functionality only. LVN5250A, LVN5400A, LVN5600A, and LVN5800A units offer auditing as well as NAC functionality. You can create any number of Veri-NAC audits. Veri-NAC audits check for thousands of Common Vulnerabilities and Exposures (CVEs), defined at the MITRE Corporation web site (www.cve.mitre.org). Some CVE tests have a greater effect on the performance of your network than others. Veri-NAC lets you control the timing and scope of various audits to optimize your system performance while guaranteeing your ability to keep your system protected. 2.8 Workflow Management System NOTE: The Branch appliance does not provide Workflow/Vulnerability Remediation features. LVN5250A, LVN5400A, LVN5600A, and LVN5800A units offer these features. The Workflow Management System creates a single job ticket for each vulnerability found on the network. Each report has a ticket. Veri-NAC breaks down into individual jobs. You can then assign due dates to each job. Each ticket progresses as shown in Section 2.8.1: Page 29 Veri-NAC User’s Manual 2.8.1 Progression of Job Status Both Managers and IT Staff can remediate vulnerabilities. If a job is not complete by the due date set, the job becomes escalated. Figure 2-7. Job status flow. 2.8.2 Remediation of Vulnerabilities The individual who completes the necessary work on a vulnerability modifies its status to To Be Confirmed. The person designated as his/her manager receives notification. When the manager receives that message, he/she clicks on it and is taken to the log where vulnerability comments are stored. When the manager agrees the vulnerability is corrected, the manager can Close it. If it appears more work is required to fix the vulnerability, the manager can change its status back to In Process. In addition, each manager can reassign jobs, receive notifications about escalated jobs (past due), and search for jobs of anyone in the manager’s group. 2.9 Flagging False Positives Individuals working on vulnerabilities can also flag a vulnerability as a false positive. His/her manager must confirm the false vulnerability status before Veri-NAC will store it in the reporting database. 2.10 Length of Audit/Performance The audit length varies depending on the number and type of applications running on each system. To improve performance, program a script to turn off any personal firewalls that are on the target system before the audit starts, and turn them back on when the audit is complete. Veri-NAC works with Endpoint Defender to provide this capability for Windows XP® workstations. Refer to the on-line Scheduling Audits Guide available in the Veri-NAC Help menu. 2.11 License—Warning about Exceeding If you are close to exceeding your license limit for the number of IPs you can audit, you receive a warning when you reach the Review Settings page in the Audit Wizard. 2.12 Browser Support Veri-NAC has been verified with the following Web browsers: Microsoft Internet Explorer Versions 5.0, 6.0, 7.0, and 8.0; Mozilla Firefox Versions 2.x and 3.x; and Opera Version 9.63. Page 30 724-746-5500 | blackbox.com Chapter 2: Overview 2.12.1 Security Issues—Internet Explorer In Internet Explorer®, you may frequently receive prompts like this: Figure 2-8. Security information prompt. Figure 2-9. Internet Explorer screen. To turn off this prompt: • Select ToolsgInternet Options. • Click the Security tab. • Click the Custom Level button. • Scroll down to the Miscellaneous category and find Display mixed content. • To change the prompt setting, select Enable for this setting, then click “OK” to save it. Page 31 Veri-NAC User’s Manual 2.12.2 Security Issues – Mozilla Firefox Figure 2-10. Options screen. To get rid of certificate errors in Firefox: 1. On the screen that comes up when you get a certificate error, click on “Or you can add an exception.” 2. Click on “Add Exception.” 3. The appliance’s IP should be automatically filled in the Server Location field. 4. Click “Get Certificate,” then click on “Confirm Security Exception.” You may also run into a specific security error that reads Error code: sec_error_reused_issuer_and_serial. To remedy this problem: 1. Go to ToolsgOptionsgAdvancedgEncryption and click on “View Certificates.” (See Figure 2-10.) 2. In the Servers and Authorities tab, remove the appliance certificate by highlighting the appliance’s IP and clicking Delete. 3. Try refreshing the page and add the appliance to the exception list. 2.13 Network Requirements We recommend you install Veri-NAC off the first switch inside the firewall. 2.14 Dynamic Detection Network Requirements The Dynamic Detection feature is available for both DHCP and static (assigned) IP networks. Page 32 724-746-5500 | blackbox.com Chapter 2: Overview 2.15 Who Should Use This Manual This Veri-NAC User Guide is for the system administrator or manager responsible for maintaining the company’s internal networks. The manual assumes you are familiar with your network and the operating systems in the environment. 2.16 Feature Availability The features listed in this manual may or may not apply to your appliance, depending on the type of Veri-NAC you have purchased. Throughout the manual, we’ll note which models have specific features. For more information, refer to Feature Availability Table in the Appendix. 2.17 Sending Feedback to Black Box To provide feedback or ask questions, contact Black Box Technical Support at 724-746-5500 or www.blackbox.com. Page 33 Veri-NAC User’s Manual 3. System and Audit Setup Guide 3.1 Using the Veri-NAC IP Address You must know Veri-NAC’s IP address so you can log on through the browser-based interface. When you install Veri-NAC in a DHCP environment, the DHCP server automatically assigns the Veri-NAC appliance a network address, called a Dynamic IP address. Retrieve this address following the instructions in the Veri-NAC Installation Guide. In nonDHCP environments, you must assign the static IP address. 3.2 Opening the Appropriate Port on Your Firewall Before you configure Veri-NAC software, open Port 443 on your firewall server. This port must remain open while Veri-NAC is operating so you can receive service packs, updates to Veri-NAC code, and updates to vulnerability tests from Black Box. NOTE: If you do not open the port on the firewall, you cannot receive automatic vulnerability signature updates or Black Box Veri-NAC service packs. 3.3 Logging In and Out 3.3.1 Logging into Veri-NAC You access and control Veri-NAC through a Web browser that supports Secure Socket Links (SSL). You can also control some features of Veri-NAC by attaching a monitor directly to the appliance, allowing you to configure your appliance without using a Web interface. For information on how to do this, refer to Chapter 10. NOTES: Veri-NAC has been tested with the following browsers: Microsoft Internet Explorer Versions 5.0, 6.0, 7.0, and 8.0; Mozilla Firefox Versions 2.x and 3.x; Opera Version 9.63 Your monitor should be set to a resolution of 800 x 600 or greater. To log in and start operations, open a secure browser window (with the protocol https instead of http) using the IP address of Veri-NAC as the URL. The IP address is determined during installation. You may have changed the port number during installation. For example, if the Veri-NAC appliance has IP address 192.168.254.159, open the following URL in your browser (as long as you are using the default port of 443): https://192.168.254.159 If you changed the default port in the installation process, you must enter a colon followed by the port number. For instance, for port number 10000, enter the following URL: https://192.168.254.159:10000 NOTE: You may see a Security Alert or other message from your system. Click Continue to proceed with the login. The Login area appears: Figure 3-1. Login screen. Page 34 724-746-5500 | blackbox.com Chapter 3: System and Audit Setup Guide The default, case sensitive, User ID and password for logging into this secure Web interface is: User ID: MainAccount Password: changeme If you need to statically configure the appliance IP address, stop blocking and audit events, then login through your keyboard, video and, mouse (KVM) without using a User ID and with the same password “changeme” You can link to each Veri-NAC page through the left vertical menu bar. This menu gives you access to all major Veri-NAC areas as shown here. The options listed in the menu will vary depending on the access level of the user currently logged in. Figure 3-2. Left vertical menu bar. Page 35 Veri-NAC User’s Manual 3.3.2 Logging out of Veri-NAC To log out of the Veri-NAC session, click the Logout icon at the bottom of the left menu bar. A statement confirming the logout displays. The Login fields appear. 3.4 Setting Up Internet Explorer for Best Results Figure 3-3. Internet Explorer screen. Occasionally, if you take action in Veri-NAC, Internet Explorer 6.0 does not immediately update the display. If, for example, you decide to add a custom comment to a report and then recreate the report, when you next open that report or view the Text of Vulnerabilities, your new comment may not display. Instead, you may see the older, cached version of the report. To be sure you see the newest version of the report every time, change your browser settings as follows: • Go to the Internet Explorer menu bar and select ToolsgInternet Options. • In the Internet Options window, click on the General tab, and then click the Settings button. • Under Check for newer versions of stored pages, select Every visit to the page as shown in Figure 3-3. This setting clears the cache and ensures all edits to reports display upon subsequent visits. Page 36 724-746-5500 | blackbox.com Chapter 3: System and Audit Setup Guide 3.5 Using an Analog Connection Connecting a monitor directly to the appliance creates an analog connection that does not require Internet access. This enables you to configure the appliance without using the Web interface. This can be useful if network access to the appliance has been blocked for some reason. To manually configure your appliance using an analog connection: • Connect a monitor directly to the appliance. • Reboot the appliance. The following screen is shown on the monitor (see Figure 3-4): Figure 3-4. Enter password screen. NOTE: The default console password is either changeme or your Main Account password. When changing this password, store the password in a secure location. Black Box may not be able to access the console if you lose your password. • Select Network Configuration to perform network configuration actions on your appliance. You may only configure one network card while using an analog interface with your appliance. You may not configure multiple NICs without using the Web browser interface. • Select Allowed Access Control to allow a particular IP address to access the network. Use this feature if all IPs become blocked. Allowed Access Control is the first level of network access control. It creates a of whitelist IPs that are allowed to access the network. You can set the next two levels— encrypted sessions and user management—using the Web interface. • Select Disable NAC Blocking to disable NAC Blocking and stop blocking any assets currently being blocked. Use this feature if all assets become blocked and the appliance becomes inaccessible. • Select Reset Network Interfaces to clear configurations for NICs. Configuration for all NICs except ETH0—the first network card used by your appliance—will be cleared. Use this feature if misconfigured NICs render the appliance inaccessible. • Select Change Console Password to change the password required to view the console menu. You will be asked to provide the current password and confirm the new password. Please save your password for future use. Figure 3-5. Change browser settings. Page 37 Veri-NAC User’s Manual 4. Setting Up Veri-NAC 4.1 Setting Company Information Set up your company data after installing the appliance. Veri-NAC uses this information in your reports. For example, your company name appears on the first report page. To enter company information: • Select SetupgCompany Information from the left menu. The Company Information box appears. Figure 4-1. Company information screen. • In the Company Name field, type the name of your company, division, or department, as you would like it to appear on reports generated by Veri-NAC. Only one company name can be specified for each Veri-NAC appliance. • Enter additional company information in the remaining fields. You may include dashes or spaces in the Phone or Fax Number fields. • Click either “Next” to proceed to Custom Reports or “Save” to retain all settings. 4.2 Customizing Reports You can customize reports that Veri-NAC generates with your company name and logo. You may also use the default setup with the Black Box name and logo. • Select SetupgCustomize Reports from the left menu to go directly to Custom Reports. Page 38 724-746-5500 | blackbox.com Chapter 4: Setting Up the Veri-NAC Figure 4-2. Customize reports screen. • If you’d like the Black Box company name and logo to appear on your reports, do not check the Customize Reports box. Click either “Next” to proceed to the following item or “Save” to retain all settings. • If you’d like to include your company name and logo on all reports, check the “Customize Reports” box at the top of the Custom Reports box. • Select a logo option—either a large logo that contains your company name or a small logo without the name. • Click “Upload Logo” to add your company graphic to the reports. NOTE: The company logo must be in JPEG format. If it does not include company name, the logo should be no larger than 480x65 pixels. If it does include the company name, the logo should be no larger than 480x95 pixels. You are prompted if the .jpeg image cannot be loaded. • Click either “Next” to proceed to Notification Information or “Save” to retain all settings. 4.3 Setting Report Notification Information To specify who to contact each time an audit runs and reports are available for review, equipment is missing/non-responsive (potentially crashed), or new systems have been dynamically detected: Figure 4-3. Notification screen. • Select SetupgNotification from the left menu to go directly to Notification Information. Page 39 Veri-NAC User’s Manual • In the System Admin. Email field, type the e-mail address(es) of people who should be notified. You may indicate up to 10 e-mail addresses, separated by commas, semicolons, or spaces. We recommend listing at least one e-mail address. NOTE: E-mails and cell phone numbers you provide here apply to all types of alerts. Later you have the option of adding or removing e-mail addresses for Inventory Alerts (missing equipment) or DDS (dynamic detection) alerts, as well as setting contacts only for asset alerts. • In the SMTP Mail Server field, type the name of the outgoing mail server for sending the e-mail notifications (for example, mailsrv.mycompany.com). • Type the name of the POP mail server you wish to use for sending e-mail notifications in the POP Mail Server field. • Enter the username and password to the POP mail server account for Veri-NAC in the Username and Password fields. If you have not set up a separate account for Veri-NAC, you can use another POP mail server account. • Click the check box if your outgoing mail server requires authentication. • Click either “Next” to proceed to Regulations and Security Programs, “Previous” to return to the earlier item, or “Save” to retain all settings. 4.4 Selecting Regulations and Security Programs for Compliance Companies are becoming increasingly reliant on various regulations to ensure their businesses are run within legal parameters. Veri-NAC allows you to specify regulations and security programs important to your company. • Select “SetupgRegulations” from the left menu to go directly to Regulations and Security Programs. The Regulations and Security Programs box appears. Figure 4-4. Regulations and security programs screen. There are three sections in the Regulations and Security Programs box: U.S. Regulations, International Regulations, and several credit card merchant Security Programs. • Select the appropriate U.S. or International Regulations. U.S. Regulations are defined in Table 4-1. You may choose as many as required for your company. • Select the credit card merchant program that you need to comply with under Security Programs. • Click either “Next” to proceed to SNMP Trap Setup, “Previous” to return to the earlier item, or “Save” to retain all settings. Page 40 724-746-5500 | blackbox.com Chapter 4: Setting Up the Veri-NAC Table 4-1. U.S. regulations and applicable industries. Regulation Full Title Industry ESIGN Electronic SignatureAny industry using electronic signatures, including banking and retail. Bank Secrecy Act Bank Secrecy Act Banking and financial. Sarbanes-Oxley Sarbanes-Oxley Act Public companies that provide or employ auditing services. 21 CFR Part 11 FDA Food and Drug Administration Pharmaceutical companies. Title 21 CDR, Part 11 DoD Compliance Department of Defense Compliance Compliance with all arms control agreements that require protection of sensitive data. ISO-27001/17799 International Standards Organization Any industry concerned with security and developing a sound security policy; they are standards, not regulations. GLBA Gramm-Leach Bliley Act Banking and financial. HIPAA Health Insurance Portability and Accountability Act Health care providers and insurers. 4.5 SNMP and Syslog Notes The Veri-NAC SNMP Trap includes summary vulnerability information for each audit performed. This information consists of IP addresses and their number of vulnerabilities. Black Box LVN5400A, LVN5600A, and LVN5800A OID is 1.3.6.1.4.1.26392, and Trap ID is 1.3.6.1.4.1.26392.1. Trap message is in the format of: Host|serious, high, medium, low| Veri-NAC Syslog message is detailed vulnerability information for each audit performed. Syslog message is in the format of: host|service|testNumber|riskLevel|details|solution|CVE|BID 4.6 Setup SNMP Traps and Syslog • Select “SetupgSyslog/SNMP Traps” from the left menu to go directly to the SNMP Trap Setup and Syslog Message Setup boxes. • Select “SNMP Version.” Enter the SNMP Trap Port, SNMP Community, and Manager IP Address that the Veri-NAC will send trap messages to. By default, Veri-NAC uses UDP port 162. Figure 4-5. SNMP Trap Setup screen. Page 41 Veri-NAC User’s Manual • Enter the Syslog Port Number and Syslog Server IP Address. By default, Veri-NAC uses UDP port 514. • Click “Save.” Figure 4-6. Syslog Message Setup screen. Figure 4-7. Notification/Reporting Information and Regulations and Security Programs screens. Page 42 724-746-5500 | blackbox.com Chapter 4: Setting Up the Veri-NAC 4.7 Setting System Date/Time Set the date and time the first time you log into Veri-NAC. • Click “SystemgDate and Time” to set the date and time on your initial Veri-NAC use. The Change Date box appears. Figure 4-8. Change Date box. • Click the arrows to set or update the system date and time information. Then click the “Change” button to put the new date and time into effect. Daylight savings time changes occur automatically. • Click “Save.” 4.8 Setting Up User Accounts Create Veri-NAC user accounts on three levels—manager, IT staff, and NAC user—based on actions you wish the user to be allowed to take. The main account that comes with Veri-NAC is a manager. Only manager users can create other users. All manager accounts can create accounts for subordinate managers and IT staff, but the main account can create the entire structure of users if he/she desires. NAC users have Network Access Control functionality only—they can control setup and maintenance of the Veri-NAC and systems to be audited, but are not involved in vulnerability remediation. 4.8.1 Understanding Relationships between User Types Any manager may reassign a job to another user (IT user or manager) who works for him/her. If a job is not assigned and becomes escalated, all managers receive an e-mail about the job escalation. IT staff can view reports, but only manager users can create Executive/Manager reports or query the database through Reports→ Query. A summary of the actions each user type can take is listed in Table 4-2. NOTE: The user’s direct manager receives an e-mail after a job is assigned to the user or when a job assigned to the user is escalated (past its due date). Table 4-2. User types. ol *Manager **IT Staff • All administrative tasks • Add more users • Access all levels of reporting • Set person-hour allocations • Reassign tasks • Access all information in workflow management system • Access workflow to see open tickets/jobs • Access Network Access Control • Select jobs (assign to oneself) menu only • Access vulnerability reports • Can perform NAC functions only— • Enter workflow comments on assigned jobs cannot access workflow NAC User menu *Managers can perform all IT staff functions. **IT staff can perform all NAC user functions. Page 43 Veri-NAC User’s Manual NOTE: As main account, create all top-level managers first. You may also create IT staff accounts that work directly for you. Delegate creation of remaining accounts in Veri-NAC. Any manager creating accounts should enter subordinate managers first, then IT staff users. 4.8.2 Sample Users in Organizational Structure The main account is created when you set up Veri-NAC. You cannot remove it, but you may change the login/password. The main account cannot create peer managers and remains the lone top-level user in the hierarchy. Main account is not required to create any other managers, and, if you have a simple structure, all other users may be IT staff users. In this scenario, only Martin or the main account can delete Susan. If you’re the main account and you delete Susan, both Marilyn and Janet will automatically be under Martin. If you delete Andy, Russell will then be under both Doreen and Michael. Tina, as an IT staff user, can work directly for the main account. Bob, another IT staff user, can work for both Martin and main account, as long as the main account creates the latter relationship. An IT staff user cannot work for another IT staff user. When Michael logs in, he sees only Andy, Russell, Linda, and Clarissa, all in the hierarchy below him. When Doreen logs in, she sees only Jack, Andy, and Russell. The main account sees all others. Figure 4-9. Organizational structure. The main account is the only user who can change his/her own login ID. For all other users, the parent manager must make that change. The currently logged in user can change his/her account, with the following restrictions: A user may not change his/her own: • Access level (from Manager to IT staff or vice versa) • Manager • Login ID, unless you are main account Page 44 724-746-5500 | blackbox.com Chapter 4: Setting Up the Veri-NAC 4.8.3 Creating or Editing User Accounts To create or modify user accounts: • Select “SystemgUser Management” from the left menu. A list of existing users appears (initially, only main account is shown). Figure 4-10. Veri-NAC user accounts. 4.8.4 Account User Name To add a user: • Click the “Add User” button to go to the User Account Wizard. The Veri-NAC Account User Name box appears. (We suggest you add managers first.) Figure 4-11. Account user name box. • Click the “Select Existing User” button to select a person already in the Asset Tracker database. • Or, you may create a new user account by filling in the requested name fields. • Click “Next” to continue. Page 45 Veri-NAC User’s Manual 4.8.5 Veri-NAC Access Level • Enter Managers first. Veri-NAC puts managers into a pull-down list you later use to assign managers to each user. If an IT Staff user is not assigned a manager, whoever creates the user account is automatically considered that user’s manager. Figure 4-12. Access level screen. ¨• Click “Next” to continue. 4.8.6 User Details Figure 4-13. User details. • Enter requested information for Title, Location, and Business Unit. • Select a manager. Only the manager field is required. If you do not select a manager for the new account, Veri-NAC assigns you—the creator of the account—as the manager. If you do not assign an IT staff user a manager, whoever creates the user account is automatically the manager. • Click “Next” to continue. Page 46 724-746-5500 | blackbox.com Chapter 4: Setting Up the Veri-NAC 4.8.7 Contact Information Figure 4-14. Contact Information screen. • Enter the e-mail address and cell phone number for the new account. NOTE: E-mail addresses must be unique in the User Management system. • Click “Next” to continue. 4.8.8 Veri-NAC Account User Name Figure 4-15. Account User Name screen. • Enter the login ID and password for the user account. • Click “Next” to continue. Page 47 Veri-NAC User’s Manual 4.8.9 Created Account Figure 4-16. Created Account screen. • Check the data you entered for accuracy. • Click “Done” (below the box) to see the new account appear in the list. 4.8.10 Viewing List of User Accounts You see your name at the top of the Audit User Accounts list with no check box next to it if you log in as a manager user. Everyone who works for you, at every level, appears in the list below you with a check box to the left of each name. Figure 4-17. List of User Accounts. • To remove a user, select the check box next to the name and click the Remove User button. You are prompted to confirm the deletion. • Click “Continue” to confirm or “Cancel” to change your mind. You’ll return to User Management: Audit User Accounts. Page 48 724-746-5500 | blackbox.com Chapter 4: Setting Up the Veri-NAC To edit a user: • Click on the name and link to the User Account Wizard. (The name of the manager logged in does not have a check box in front of it because you can’t delete your own account.) 4.8.11 Coordinating User Accounts with Asset Tracker User List When you create a Veri-NAC account for a user who is already in the Asset Tracker User List, Veri-NAC recognizes the user name and coordinates the information. If you delete a user from the Asset Tracker User List, Veri-NAC also removes the user account created under User Management. However, if you delete a user account under User Management, the user remains in the Asset Tracker User List. Theoretically, the person could still be an employee but no longer have access to the Veri-NAC. 4.9 Setting Up 802.1q VLAN Tagging Example 1: Two Network Interface Cards (NICs) enabled on the Veri-NAC. Eth0 is a management interface; Eth1 is connected to the trunk (tagged) port of the switch. Figure 4-18. Black Box Smart Switch (LGB1002A-R2, LGB1003A-R2, or LGB1005A-R2) VLAN configuration. Table 4-3. VLAN ID/Member Port/Subnet setting, VLAN ID Member Port Subnet Setting 1 (Default) 1, 7, 8 192.168.254.0/24 2 (Dev) 2, 3, 4, 8 192.168.22.0/24 3 (Payroll) 5, 6, 8 192.168.33.0/24 NOTE: Port 8 is tagged. Page 49 Veri-NAC User’s Manual Veri-NAC version 7.1 includes the following menu: Figure 4-19. System menu. 4.9.1 VLAN Configuration Steps 1. Select “SystemgVLAN Tag Configuration.” 2. Select the physical interface that connects to the tagged port of the switch (eth1). 3. Enter the VLAN Tag number, IP, and subnet mask for the tagged interface. 4. Check “Enable.” 5. Click “Save” to activate the tagged interface. Page 50 724-746-5500 | blackbox.com Chapter 4: Setting Up the Veri-NAC Figure 4-20. VLAN tag configuration. 4.9.2 Network Configuration Follow these steps: 1. Go to SystemgNetwork Configuration 2. Select “NIC eth1.” 3. Set up a static IP information on eth1 to any number (do not duplicate an existing interface/VLAN configuraton). 4. Click “Save.” Figure 4-21. System menu, Network Configuration screen. To find assets on the VLANs: 1. Go to Network Access ControlgAsset Discovery. Page 51 Veri-NAC User’s Manual 2. Select the sub-interface for the VLANs for which you want to discover assets (eth1.1 or eth1.2). 3. Click “Refresh IPs.” Figure 4-22. System menu, Asset Discovery screen. After the Asset Discovery process is finished, you will be redirected to the Manage IPs page. Figure 4-23. Manage IPs screen. NOTE: If you have multiple VLANs, repeat this process again and just change the sub-interface. Page 52 724-746-5500 | blackbox.com Chapter 5: Setting Up Network Access Control 5. Setting Up Network Access Control 5.1 Initiating Network Asset Discovery Before Veri-NAC can check your assets, it must first find them on your network. All you have to do is press a button and VeriNAC will discover assets on its own. To ensure Veri-NAC finds all assets, be sure all assets are powered on before you initiate the discovery process. Different types of Black Box appliances can detect and protect varying amounts of network devices on varying numbers of subnets: Table 5-1. Devices protected by Veri-NAC. Appliance (Part Number) Number of Devices Protected Number of Accessible Subnets LVN5200A Up to 250 One subnets LVN5250A Up to 500 Two subnets LVN5400A Up to 6000 via LVN5200A/LVN5250As Up to four local subnets Up to 51,500 via LVN5200A/ LVN5250As Up to six local subnets LVN5600A LVN5800A Up to 100,000 via LVN5200A/LVN5250As Up to eight local subnets • Select Network Admission ControlgAsset Discovery from the left menu. This takes you to the Find Network Assets box. Figure 5-1. Find Network Assets screen. • Enter the IP Subnet Range of IP addresses you want Veri-NAC to include (or the range of additional addresses if you already executed an initial discovery), the Base IP Address, and Subnet Mask. Use the same subnet mask you used for your network definition. Page 53 Veri-NAC User’s Manual To determine the subnet mask in Windows, start a command prompt window and enter the command ipconfig. To determine the subnet mask in Linux, enter the command ifconfig at the command line prompt. • Check the “Use deeper probes for low bandwidth networks” box to give Veri-NAC more time to scan your assets on low bandwidth networks. NOTE: Deeper probes perform a more intensive search for information about your systems and take longer. If you Refresh IPs and don’t get the information you thought you would find, check the “Use deeper probes for low bandwidth” networks box and Refresh IPs again. We suggest you run the Refresh IPs without deeper probes initially and then use deeper probes later if necessary. • Click the “Refresh IPs” button below the Find Network Assets box. efresh IPs directs Veri-NAC to examine the network and discover IP addresses of machines on the network, including routers, R firewalls, printers, and other devices as well as desktops, workstations, and servers. Later, you can include these systems in audits. fter the refresh runs for some time, a text box appears with addresses found to date. The list first shows IP addresses found A quickly and fills in the Host Name and Operating System as found. You can scroll up and down the list using the scroll bar to the right. The results show IP Address, Host Name, Operating System, and MAC Address. • You can wait for the refresh to complete or you can stop it in process by clicking the “Stop Refresh” button (below the list) at any time. A text box listing the information gathered so far appears. Figure 5-2. Refresh Network Assets results. Page 54 724-746-5500 | blackbox.com Chapter 5: Setting Up Network Access Control When you stop the refresh mid-stream, you have three options for saving the information to the database. Table 5-2. Saving Veri-NAC information. Option Action Don’t Save Takes you back to the Find Network Assets box. Save Completed List Saves only those assets for which all four fields have been filled in to date. Save Entire List Saves all data including assets with only partial information. 5.1.1 Enabling NetBIOS Scans Enabling NetBIOS Scans for Windows host names or MAC addresses will enable Veri-NAC to use NetBIOS scans to scan assets for host names or MAC addresses when none are found via the usual reverse DNS scan. • Select “Network Access ControlgAsset Discovery.” • Click “Enable NetBIOS Scans For Windows Host Names” or “Enable NetBIOS Scans for MAC Addresses.” • Click “Save.” 5.1.2 Reviewing the List of IP Addresses After the Refresh IPs process completes, Veri-NAC takes you to the Manage IPs page. You can review your asset list from here. 5.1.3 How Veri-NAC Generates the List of IP Addresses By default, if the discovery process finds any IPs that duplicate existing ones, the latest hostname and operating system overwrite the old ones. NOTE: On some systems, the operating system that IP Refresh finds may not be the one you entered when you added the IP address manually. NOTE: Any IP address behind a firewall could remain hidden from the IP Refresh operation and may not appear in the list. Add any unfound addresses manually if you want them audited, or disable the Firewall and run the Asset Discovery again. 5.1.4 Performing Asset Discovery Using Multiple NICs To perform an Asset Discovery using multiple Network Interface Cards (NICs), please refer to Section 9.7. 5.2 Adding and Deleting Nodes from Subnet When you add or delete nodes on your network, you can run the refresh utility to update the IP address database by clicking the “Refresh IPs” button on the Asset Discovery page. The refresh operation runs immediately. You must click “Refresh IPs” every time you make a change to the number of IPs on your network. Note that if a node is powered off when Veri-NAC runs the refresh operation, Veri-NAC will not find that IP address. Page 55 Veri-NAC User’s Manual 5.2.1 Adding IP Addresses Manually After you run an asset discovery process, you may want to manually add more IPs. • You can manually add IP addresses by selecting “Network Admission ControlgAdd Assets.” This takes you to the System Information box. The IP Address field is required. Figure 5-3. System Information box. If you are unsure of the MAC address, click the “Detect MAC” button after you enter the IP address. The MAC address is filled in automatically if the asset is online. If you have to add an asset manually because the Asset Discovery process failed to find it, the Detect MAC button will probably not find it either. Host Name, Operating System and Manufacturer may also be filled in automatically, depending on current information available for that IP Address. NOTE: Required fields (marked with an asterisk) must contain information. After you add system data, check the System Information page again. The MAC Address, Host Name, Operating System, and Manufacturer may be filled in for you. We strongly recommend you only change the MAC Address and Host Name fields if it is absolutely necessary. NOTE: If Veri-NAC detects the MAC address, the asset is tracked with that address. If, at some point, the IP address of a known MAC address changes, it does not affect your license. If Veri-NAC is unable to determine the MAC address during the discovery process, the asset is still added to the database. However, if the IP address of an asset with an unknown MAC address changes, it does affect your license. • Fill in the remaining fields on the page. Table 5-3 gives an overview for each field. Page 56 724-746-5500 | blackbox.com Chapter 5: Setting Up Network Access Control 5.2.2 System Information Fields Table 5-3. System information fields options. Field Overview IP Address (required) A standard IP address in ###.###.###.### format. MAC Address Veri-NAC may fill this field in for you. If you are unsure of the address, click the “Detect MAC” button. Host NameIf you do not include the information, this field may be supplied by Veri-NAC. Operating SystemThe software system used on the asset. Veri-NAC may complete this field for you. Manufacturer Name of company that produced the product. Value Monetary value of the asset. Choose from more than 35 international currencies. System Name The name of the asset—not necessarily the host name. This name is for your own use. It allows you to identify the system. You can use alphanumeric characters, hyphens, and underscores. System TypeSystem type—such as laptop, desktop, e-mail server, wireless. Choose from 14 options such as application server, file server, router, etc. from the pull-down menu. Serial Number Alphanumeric characters as well as hyphens are allowed. Location Description of the system location, such as building, wing, office area, lab, etc. Data Outlet Number The number of the line that plugs into the computer, such as A3. Asset NotesAnything you may wish to note about the asset that does not fall into the other fields provided. Maintained byName of individual who maintains the system—such as the system administrator responsible for the asset’s subnet or the manager of the user’s group. • The four radio buttons at the bottom of the box allow you to place the asset into one of four categories. You can manage your assets more efficiently if you use specific classifications. List categories are defined below. More information is available in Section 5.4, IP Categories. 5.2.3 List Categories Table 5-4. List catgeory options. List Category Description Untrust Asset that has not been given permission to be on the network. Trust and Audit-exempt Known, clean asset that does not need to be scanned regularly. Trust and Firewall/SmartSwitch safeKnown, clean asset that does not need to be blocked/quarantined at the Firewall or smart switch. Trust Known, clean asset considered part of the company’s resources. • When you finish, click “Add System” below the System Information box to enter the asset into the database. 5.3 Managing IP Addresses from Veri-NAC 5.3.1 Manage IP Overview • Select “Network Access ControlgManage IPs.” Page 57 Veri-NAC User’s Manual T he Manage IPs page appears. This page allows you to oversee and administer your IP addresses. For example, you can add or remove IPs from specific lists, delete an IP or the entire subnet, change an asset’s trust level, etc. Figure 5-4. Manage IPs page. You can view assets and make changes from the Manage IPs page. All IPs are classified based on the category you assigned to it when you added the asset to the database (Trust, Untrust, Trust and Audit-Exempt, Trust and Firewall/Smart Switch Safe). The five Manage IP lists and actions you may take for each are described in the two tables below. 5.3.2 Manage IP Lists Table 5-5. Manage IP lists options. List Description Systems Displayed User Actions Trust/Untrust Shows all company resources All systems except considered “trustworthy,” MAC IP mismatch. except mismatched assets with no assigned IP address. Move a system from Trusted to Untrusted, and vice versa. Auditable/ Audit-Exempt Subset of Trust list. These are assets you want Veri-NAC to scan during an audit. All trusted systems except MAC IP mismatch. Move a system from Auditable to Audit-exempt and vice versa. MAC IP mismatch Assets that have changed IP address since the last scan. (May be trusted or untrusted). Any system where the Run a full Asset Discovery or MAC address is known manually update the IP address to but the IP address is not. resolve the mismatch. Firewall Smart Assets deemed secure or assets Trusted systems that are Switch Safe for which it is essential to retain not Audit-Exempt. full access. Not blocked under MAC IP mismatch items any conditions. are not included. Add or remove trusted, auditable systems to the Safe List. Assets in the Safe List are not blocked at either the Firewall or Smart Switch. More information about these lists is available in IP Categories, Section 5.4. Each list shows assets in that category. If an IP address row is red, it is an Untrusted Asset. If it is green, it is a Wireless Access Point (WAP). Audit Exempt and Firewall/Smart Switch Safe assets as well as those allowing the Firewall to be disabled are marked with icons. Page 58 724-746-5500 | blackbox.com Chapter 5: Setting Up Network Access Control Table 5-6. Icon/condition. All five Manage IP lists display the IP address, the host name, and the operating system for each asset in that list. The fourth column varies depending on the list. For example, the Auditable List contains a column to flag Audit Exempt items; the Trust List tells you if an asset is deemed Trusted, etc. You may also take different actions depending on the list. For instance, the Endpoint Defender List allows you to Deactivate Client Firewalls during Audits (and vice versa), or you can add or remove assets from the Audit Exempt List on the Auditable List page. Options for all five lists are shown below. Trust/Untrust List Figure 5-5. Trust/Untrust Assets buttons. Auditable/Audit-Exempt List Figure 5-6. Audit Excempt buttons. MAC IP Mismatch List Figure 5-7. MAC IP Mismatch screen. Page 59 Veri-NAC User’s Manual Firewall and Smart Switch Safe List Figure 5-8. Safe List buttons. 5.4 IP Categories All system information discovered on the network is stored in the Veri-NAC database. This data includes the MAC address and last known IP address for each individual asset, as well as the asset’s host name and operating system (if known or provided). You may enter asset information from several places in Veri-NAC, including the Network Admission ControlgAdd Assets page, the Network Admission ControlgManage IPs page, or the Asset TrackergSystems page. Here, you can assign an asset to one of the following four IP categories/lists: • Trusted/Untrusted Assets • MAC IP Mismatch List • Auditable/Audit-Exempt Systems • Firewall and Smart Switch Safe List 5.4.1 Trusted/Untrusted Assets All assets on a network can be broken down into two main categories: Trusted Assets and Untrusted Assets. Trusted Assets are considered part of the company’s resources. Trusted assets meet requirements of the company policy allowing them to be on the network. Untrusted Assets are not considered part of the company’s resources or have not been given permission to be connected to the network. (These systems are highlighted in red on the Network Admission ControlgManage IPs page.) Figure 5-9. Trusted/Untrusted Assets. 5.4.2 MAC IP Mismatch List At times, a system in the Veri-NAC database has a known MAC address but an unknown IP address. This occurs when a system initially has a MAC address (say MAC1) and IP address (say IP1). Later, Veri-NAC discovers a second system with MAC address of MAC2 and IP address of IP1. At this point, the IP address of MAC1 is unknown to Veri-NAC, so the MAC1 system is labeled with a MAC IP Mismatch. This may occur, for example, when a DHCP lease expired for the first system (MAC1). MAC IP Mismatched systems may be trusted or untrusted assets. Figure 5-10. MAC IP Mismatch. Page 60 724-746-5500 | blackbox.com Chapter 5: Setting Up Network Access Control There are three ways a MAC IP mismatch may be rectified: 1. The new IP address is determined via the Asset Discovery feature. 2. A user can manually enter the new IP address by editing the system information through the Asset TrackergSystems page. 3. The Dynamic Detection System discovers the new IP address. 5.4.3 Auditable/Audit-Exempt Systems Trusted Assets may be designated as Auditable or Audit-Exempt systems. For obvious reasons, network administrators prefer that Audit-Exempt assets do not undergo an audit process. These assets might include network printers or the CEO’s laptop computer. If a Trusted Asset is placed in the Audit-Exempt list, that asset does not appear in the Audit Wizard where you select the IP addresses for an audit. (These systems are highlighted with this icon on the Network Admission ControlgManage IPs page.) Figure 5-11. Audit-Exempt screen. 5.4.4 Firewall and Smart Switch Safe List Trusted Assets that are not Audit-Exempt are considered “safe.” These assets may be placed into a Firewall and Smart Switch Safe List. Assets in the Safe List will never be quarantined at a firewall or smart switch even if high vulnerabilities are found on those systems. One example of a “safe” system is a critical server where any downtime could cost the company money and productivity. (These systems are highlighted on the Network Admission ControlgManage IPs page.) 5.5 Deleting IP Addresses You can delete an IP from any of the four lists. • To delete all IPs from a subnet, click the check box next to the subnet you want to remove. When you do this, all IPs for that subnet are automatically selected. Click either “Remove Selected IPs” or “Remove All.” Or, you can click “Remove All” to delete all IPs from the subnet selected. • To delete individually selected IP addresses from the list of IPs, click the check boxes next to the IP addresses and then click the “Remove Selected IPs” button. Figure 5-12. Deleting IP addresses screen. A confirmation screen showing the IPs to remove will appear. You can either cancel or continue with the deletion. Page 61 Veri-NAC User’s Manual 5.6 Determining Ping Response of Nodes on Subnet You can create a chart showing the ping results for all IP addresses displayed in your audit. • Select Network Admission ControlgPing Latency Chart. The chart shows IP addresses and the number of milliseconds it took the node to respond to the ping. The bars compare the length of time for each node’s response. Systems may not respond because they choose not to, are powered down or disconnected, or cannot respond in a timely manner. To see if the patterns are persistent, click the Refresh button and update the data. Ping latency data is also available from the Audit Wizard page. Figure 5-13. Ping Latency chart. 5.7 Interfacing to the Firewall One of Veri-NAC’s key features is its ability to block traffic to and from vulnerable nodes at your firewall and smart switch. Before you can use this feature, however, you must set up Veri-NAC to integrate with your Firewall. Veri-NAC can be integrated with several firewalls and Cisco smart switch: • CyberGuard SnapGear 570 & 575 • Juniper NetScreen 5GT • CyberGuard Classic K51000 • Check Point • Secure Computing Sidewinder • Any Firewall that uses IP tables (refer to Firewall's documentation) • Cisco PIX Page 62 724-746-5500 | blackbox.com Chapter 5: Setting Up Network Access Control 5.7.1 Setting Up the Firewall Interface To set up the firewall interface for the Veri-NAC: • Select “Network Admission ControlgFirewall Integration” from the left menu. Figure 5-14. Firewall Interface screen. NOTE: You must set up an SSH account on your firewall for the Veri-NAC to use. If you do not have one already set up, stop now and set up that account before proceeding. NOTE: For Check Point firewalls only, you must start the SSHD daemon on the Check Point firewall. You must also enter a timeout in the Firewall Information page for Check Point firewalls. If you do not, the quarantine will remain in place indefinitely unless you remove it through a command line interface for the firewall. You cannot remove the quarantine rule through the GUI for that firewall. You provide information about the interface to the firewall in the Firewall Information box. • Firewall Brand—Select the appropriate Firewall brand. Figure 5-15. Select firewall brand. Once you make your choice, the fields are updated based on that brand. Every field that displays is required. The brands from which to choose are listed by company followed by model name. To work with a firewall that uses IP tables but is not listed, select CyberGuard SG (formerly SnapGear). Page 63 Veri-NAC User’s Manual Figure 5-16. Firewall information screen. • IP Address—Enter the IP address of the Firewall. • SSH Username—Enter the username required to access the firewall. Veri-NAC requires only one firewall username. It is the SSH account username. • SSH Password—Enter the SSH account password. If you are also entering a root password in a separate field, then enter the user-level password (rather than the admin-level password) required to access the firewall. To access the CyberGuard SG Firewall, the root password is required. For that model, the value of this field is preset to root. • PDM Username and PDM Password (Cisco only)—The PIX Device Manager username and password. • Timeout (Check Point only)—Enter the time (hours and minutes) to maintain the quarantine at the firewall. This should be based on the time you need to fix the vulnerability. After the timeout expires, you can control access to the port through the firewall interface. Move down on the page and find the IP Address(es) to Never Block at Firewall box. The list to the left contains all IP addresses the firewall could block traffic to/from. The right list contains the Safe List of IP addresses—those you do not want Veri-NAC to have the Firewall block traffic to/from. Figure 5-17. Blocking/not blocking traffic screen. Click the arrows to move addresses from one list to the other. Moving an IP to or from the Safe List automatically retains the information, although clicking “Save” is required to retain the other firewall settings. If Veri-NAC cannot talk to the firewall after you click “Save,” it displays a warning message. Page 64 724-746-5500 | blackbox.com Chapter 5: Setting Up Network Access Control 5.7.2 Adding Rules to the Firewall All firewalls that use IP tables, including CyberGuard SG (formerly SnapGear) firewalls, require you to set up some rules to allow Veri-NAC to interact with them. Inside the profile interface for the firewall, as documented in the firewall manufacturer’s user manual, go to the Rules section and enter the following: iptables -N PWDenySource iptables -N PWDenyDest iptables -I INPUT 1 -j PWDenyDest iptables -I INPUT 2 -j PWDenySource iptables -I FORWARD 1 -j PWDenyDest iptables -I FORWARD 2 -j PWDenySource iptables -I OUTPUT 1 -j PWDenyDest Then click the “Apply” button. Refer to the manufacturer’s user or installation guide for more information. 5.8 Setting Up Smart Switch Integration If you have one or more smart switches on your network, you can have Veri-NAC block traffic to and from a vulnerable system at one of these switches, rather than at the firewall. To set up the switches on Veri-NAC: Select “Network Admission ControlgSmartSwitch Integration” from the left menu. The SmartSwitch Integration page appears. The first step is to add switches. Figure 5-18. SmartSwitch Integration page. • Click the “Add Switch” button at the top of the page to open the SmartSwitch Information window. • Choose the smart switch brand—Black Box, Cisco, 3Com, or HP ProCurve. The SmartSwitch Information window changes based on the brand you choose. All four brands ask for: • IP address Page 65 Veri-NAC User’s Manual • Location • Smart switch password • Uplink port number Remaining fields vary based on brand. See your smart switch user’s manual for more information. NOTE: Be sure the Uplink Port Number is correct or the integration will fail. • Fill in requested information for your switches. Be sure to enter data in required fields. NOTE: You can configure the HP ProCurve Switch to work without a login ID or password, so password is not a required field for the HP ProCurve Switch. • Click “Save” to keep the data or “Cancel” to delete your entries. 5.9 Configuring Cisco Switch-Based Authentication • Select “Network Access ControlgSmartSwitch Information” from the left menu to go directly to the SmartSwitch Information screen. Select an existing smart switch or add a new device. Figure 5-19. Cisco SmartSwitch Information screen. • Select “Enabled” next to Switch Based Authentication. • Enter the username into the SmartSwitch Username field. • Enter the password into the SmartSwitch Password field. • Select the Connection type.(SSH or Telnet) • The Timeout (seconds) selection determines the time period, in seconds, after communication with the switch will “time out” if there is no response or an error in communication. • Enter the switch uplink ports into the Uplink Port Number field. NOTE: Uplink ports will never be blocked on the switch. Page 66 724-746-5500 | blackbox.com Chapter 5: Setting Up Network Access Control • Click “Save” to save your settings. • Clicking “Save” or “Cancel” returns you to the SmartSwitch Integration page. The top of the page displays the smart switch(es) entered into the system to date. Brand, location, and IP address are shown. Manage your switches here by adding or deleting items. Figure 5-20. Add/Remove switch screen. • Click the check box to the left of any switch, and then click the “Remove Selected” button to delete switches from the list. The Blocking Safe List and Blocking Rules appear at the bottom of the SmartSwitch Integration page. Figure 5-21. Blocking Safelist/Blocking Rules. • View the IP addresses listed in the Blocking Safe List box. You may decide to add certain assets to the Safe List. Move those you never want blocked at the switch to the Safe List in the right column. Note that the Safe List for the firewall and smart switch are one and the same. NOTE: You can move assets to a Safe List in several places in Veri-NAC. In addition to the SmartSwitch Integration screen, you may also designate Safe List assets on the Network Admission ControlgFirewall Integration page, as well as the Firewall and Smart Switch Safe List on the Network Admission ControlgManage IPs page. If Dynamic Detection is enabled, systems will be detected even if they plug into the smart switch; they will be audited if you have enabled Audit on Detection. • View the Blocking Rules box. Take appropriate action. Use rules only after Veri-NAC interacts with the smart switch. (Blocking occurs after dynamic detection or a configured audit [through the Audit Wizard]). When an asset is blocked, a corresponding rule appears in the Blocking Rules box. Here you have two options: 1. You can clean up the asset and unblock it. A confirmation screen appears. 2. You may want to discard a rule. If someone unblocks an asset directly (at the smart switch), the rule is still on the list, but is no longer valid; click the “Discard Selected Rules” button to remove it. Page 67 Veri-NAC User’s Manual 5.10 Dynamic Detection and Vulnerability Quarantine When a new device plugs into the network, Veri-NAC dynamically detects its presence and immediately audits the device for vulnerabilities, regardless of the type of device. Set the levels at which you want it to audit and the actions you want it to take upon detecting vulnerabilities. If Veri-NAC finds vulnerabilities on the device, it can send a message to the firewall or smart switch to block traffic to and from the node. This Intelligent Quarantine™ feature helps keep rogue devices off the network and is effective with any device. No client software is required—Veri-NAC provides Clientless Quarantine™. You ultimately control the system: Based on the type and level of vulnerabilities detected to be present, you can choose to have Veri-NAC immediately tell the firewall to block ports and/or the entire IP address of an asset. You can also choose to never block particular IP addresses. When a device is blocked, Veri-NAC sends an alert to the IT manager (or whichever user was earlier designated to receive the alert). The IT manager receives a message indicating blocked ports or IP addresses. Knowing the network is safe, the IT manager can then ensure proper vulnerability remediation is complete before unblocking the ports and/or IP addresses at the firewall. 5.11 Setting Up Dynamic Detection and NAC Blocking CAUTION: NAC is an easy to deploy and use Network Access Control. NAC blocking is also a very powerful network control. Please read the instructions carefully before turning this feature on. Make sure that notifications are enabled and a valid e-mail address is entered so that a system administrator will be aware of any access blocking that occurs and can then take the appropriate action. 5.12 Dynamic Detection System • When the dynamic detection system is enabled, DHCP event tracking is automatically enabled and will detect new devices obtaining DHCP leases. You can also choose to use NetBIOS scans to scan for assets. • If you wish to also track static IP devices coming on line, static IP detection also needs to be activated, as shown below. 5.12.1 One-Click DDS Configuration The Veri-NAC supports One-Click DDS Configuration: • Select Network Access ControlgDynamic Detection System from the left menu to go directly to the Dynamic Detection System Configuration screen. • Select one of the common predefined DDS configurations. Figure 5-22. Disable Dynamic Detection. • Review the settings. • Click “Save” to save the settings. Page 68 724-746-5500 | blackbox.com Chapter 5: Setting Up Network Access Control 5.12.2 Enabling/Disabling DHCP Monitoring • Select “Network Access ControlgDynamic Detection System.” • Click “Monitor DHCP Requests” to enable DHCP traffic monitoring. Figure 5-23. Monitor DHCP requests. 5.12.3 Enabling NetBIOS Scans NetBIOS Scans use NetBIOS protocol to discover NetBIOS-enabled devices. Enabling this option will cause the appliance to use NetBIOS scans to scan assets for host names and MAC addresses during dynamic detection. Use NetBIOS scans if there is no DNS server available. • Select “Network Access ControlgDynamic Detection System.” • Click “Enable NetBIOS Scans For Windows Host Names” or “Enable NetBIOS Scans For MAC Addresses.” • Click “Save” to save the settings. 5.13 Enabling Static IP Detection via Packet Inspection • Select Network Access ControlgDynamic Detection System from the left menu to go directly to the Dynamic Detection System configuration screen. Figure 5-24. One-click configuration options. • Select the Enable Static IP Detection check box. • Enter the range of IP addresses the DDS should monitor via packet inspection. IP addresses within the range extracted from inspected packets will be handled by the DDS using current configuration settings. • Click “Save” to save your settings. Page 69 Veri-NAC User’s Manual 5.14 One-Click Packet Sniffing Range Configuration • Select Network Access ControlgDynamic Detection System from the left menu to go directly to the Dynamic Detection System Configuration screen. • Click Auto-Fill Based On Appliance Address(es) below the Packet Sniffing Range. Figure 5-25. Enable Packet Sniffing screen. • Review the settings. • Click “Save” to save the settings. NOTE: Ranges will be based on IP address(es) assigned to the appliance network interface cards. 5.15 Enabling NAC Blocking NAC blocking works by blocking communication routes from untrusted or unknown blocked assets to protected assets on the network. All assets, blocked and protected, must reside on the same subnet as the Veri-NAC. NOTE: A full asset discovery should be run prior to enabling NAC Blocking. Assets within the NAC Blocking Range will be blocked if they are unknown or untrusted. NOTE: Packet Sniffing and NAC Block Ranges will be based on IP address(es) assigned to the appliance network interface cards. The appliance asset list will be used for the protect range. All IP addresses contained in the asset list, trusted and untrusted, will be protected from assets blocked with NAC blocking. • Select “Network Access ControlgDynamic Detection System” from the left menu to go directly to the Dynamic Detection System configuration screen. Figure 5-26. Blocking screen. Page 70 724-746-5500 | blackbox.com Chapter 5: Setting Up Network Access Control • Select the “Enable NAC Blocking” check box. • In the Block Range field, enter the range of IP addresses that the DDS will attempt to block using NAC blocking if an asset is unknown or untrusted. • In the Protect Range field, enter the range of IP addresses that the DDS will prevent a blocked asset from communicating with. • Select the Enable NAC Check Alive check box to cause the DDS to periodically determine if the blocked asset exists on the network. If the blocked asset no longer exists, the blocking will be stopped. Recommended Setting: Enabled • Select the Enable NAC UnBlocking Traffic check box to cause the DDS to send traffic that will attempt to immediately allow network access to an asset that is being unblocked. Recommended Setting: Enabled • Click “Save” to save your settings. 5.15.1 One-Click NAC Block Range Configuration It is simple to create a range of IP addresses within which you wish NAC to block: • Select “Network Access ControlgDynamic Detection System” from the left menu to go directly to the Dynamic Detection System Configuration screen. Figure 5-27. Block Range screen. • Click “Auto-Fill Based On Appliance Address(es)” below the NAC Block Range. • Review the settings. • Click “Save” to save the settings. NOTE: Ranges will be based on IP address(es) assigned to the appliance network interface cards. 5.15.2 Using an Asset List to Create an NAC Protect Range You can also create a range of IP addresses that you always want NAC to protect: • Select “Network Access ControlgDynamic Detection System” from the left menu to go directly to the Dynamic Detection System Configuration screen. • Click Use “Asset List For Protect Range” below the NAC Protect Range. • Click “Save” to save the settings. NOTE: All IP addresses contained in the asset list, trusted and untrusted, will be protected from assets blocked with NAC blocking. Page 71 Veri-NAC User’s Manual 5.15.3 Excluding Assets from NAC Blocking You can choose to have a predefined list of trusted assets that will never be blocked by NAC blocking. • Select Network Access ControlgNAC Exclude List to manage the NAC Blocking Exclude List. All assets included in the list will never be blocked by NAC Blocking. Figure 5-28. Blocking Exclude List. • You may add and remove assets to and from the exclude list from this menu. • Click Save to save the list. 5.16 Viewing Assets Blocked With NAC Blocking At any time, you may view a list of all assets currently being blocked by NAC. • Select Network Access ControlgNAC Blocking from the left menu to go directly to the NAC Blocking screen, which displays assets currently blocked with NAC Blocking. Figure 5-29. Assets blocked screen. • Click Unblock to stop blocking the asset with NAC Blocking. Assets will also be marked as trusted when unblocked. NOTE: Marking an asset as trusted simultaneously stops the asset from being blocked with NAC blocking. Page 72 724-746-5500 | blackbox.com Chapter 5: Setting Up Network Access Control 5.17 Viewing NAC Blocking Logs To view logs of which assets NAC has blocked in the past, and when: • Select “LogginggNetwork” from the left menu to go directly to the logging screen. Figure 5-30. Logging screen. • Select “NAC Blocking Started.” Click “Show Logs” to view the log containing NAC Blocking started data. • Select “NAC Blocking Stopped.” Click “Show Logs” to view the log containing NAC Blocking stopped data. 5.18 Immediately Blocking an Untrusted Asset To manually set an asset to be blocked every time it attempts to connect to the system: • Select Network Access ControlgManage IPs from the left menu to go directly to the Manage IPs screen. Figure 5-31. Block Untrusted Asset. • Select the check box next to the asset to be untrusted. Page 73 Veri-NAC User’s Manual Figure 5-32. Add or remove from trusted asset list. • Click the “Remove from Trusted Assets List” button. NOTE: The asset marked as untrusted must be on-line and within the NAC Blocking Range for blocking to be initiated. 5.19 Enabling NAC Unblocking Traffic Unblocking traffic will be sent when a blocked asset is marked as trusted. • Select “Network Access ControlgDynamic Detection System” from the left menu to go directly to the Dynamic Detection System configuration screen. • Select the “Enable NAC Unblocking Traffic” check box. 5.20 Enabling MAC Spoof Alerting If MAC Spoof Alerting is enabled, Veri-NAC will send an alert when multiple IP addresses are detected for a single MAC address. Figure 5-33. Enable MAC Spoof Alerting. • Select “Network Access ControlgDynamic Detection System” from the left menu to go directly to the Dynamic Detection System configuration screen. • Select the “Enable MAC Spoof Alerting” checkbox. 5.21 Enabling MAC Spoof Blocking If MAC Spoof Blocking is enabled, Veri-NAC will initiate NAC blocking when multiple IP addresses are detected for a single MAC address. All assets assigned to the single MAC address will be blocked. • Select “Network Access ControlgDynamic Detection System” from the left menu to go directly to the Dynamic Detection System configuration screen. • Select the “Enable MAC Spoof Blocking” check box. 5.22 Viewing DDS Configuration Settings To view your previously set DDS configuration settings at any time: • Select Network Access Control from the left menu to go directly to the Dynamic Detection System configuration screen. Page 74 724-746-5500 | blackbox.com Chapter 5: Setting Up Network Access Control Figure 5-34. Network information screen. 5.23 Preparing Your Network for Dynamic Detection Veri-NAC detects newly plugged in devices all the way up a defined hierarchy until it hits a DHCP server. The best network structure for using dynamic detection is one that places all DHCP servers at the highest hierarchical level on the network—all on the same level—rather than in subnets. If you are using an LVN5400A, LVN5600A, and LVN5800A Veri-NAC and your network requires certain subnets to have their own DHCP servers, you can use a LVN5200A or LVN5250A Veri-NAC on each subnet. Dynamic Detection discovers new devices (such as laptops or wireless routers) upon plug-in or connection to the network. When new assets are detected, Veri-NAC can: • Quarantine and notify appropriate personnel upon detection of an untrusted asset. • Send an e-mail notification when a new system is detected. • Audit the new system immediately. • Block traffic to/from the new system at the firewall or smart switch when vulnerabilities are detected. NOTE: For firewall and smart switch blocking to take effect, set up an interface to the firewall and smart switch. • Block traffic at the port or IP address level. To create a protocol for Veri-NAC to follow upon discovering new assets, complete the following fields in the Dynamic Detection System window under Network Access ControlgDynamic Detection System: Figure 5-35. Dynamic Detection System window. Page 75 Veri-NAC User’s Manual • All untrusted assets are secluded upon identification if you check the Quarantine and Notify on Detection of an Untrusted Asset checkbox. The quarantine takes place immediately and designated contacts are notified. • Enable Audit Upon Detection—Decide if you want Veri-NAC to audit certain assets upon discovery. Check the appropriate boxes to enable the audit For All Assets or just Un-trusted assets. Enter the network address range(s) to indicate the level at which to detect changes on the network. For instance, you may wish to enable detection for levels at which laptops normally plug in, but not levels at which you know you have only stationary desktops and servers. If that subnet goes down, you won’t need (or want) dynamic detection alerts on every system when the subnet comes back up. Figure 5-36. Range screen. Enter distinct IP ranges separated by commas, as shown in Figure 5-36. • Firewall Blocking Threshold—Select the level of vulnerability at which you wish to start blocking traffic to and from the IP address (effectively quarantining the system from the Internet). Choose from Never (to never block traffic), Low, Medium, High, or Serious vulnerability level thresholds. Figure 5-37. Blocking settings. Page 76 724-746-5500 | blackbox.com Chapter 5: Setting Up Network Access Control • Firewall Blocking Mode—Select Full IP Blocking to block all IPs at which Veri-NAC finds vulnerabilities at the previously set threshold level or Port Level Blocking to block traffic only to/from ports that are vulnerable. • SmartSwitch Blocking Threshold—Select the level of vulnerability at which you wish to start blocking traffic to and from the IP address (effectively quarantining the system from the Internet). Choose from either Never (to never block traffic) or from Low, Medium, High, or Serious vulnerability level thresholds. • Notify by Email—Click the check box to receive e-mail notifications. Modify the e-mail address(es) to change the person or people to notify. By default, the same people you designated under Notifications earlier will be notified. Figure 5-38. Notify by e-mail. Decide if you want notifications sent For All Assets discovered or only when Untrusted assets are discovered, and click the appropriate button. You may also designate the range of IP addresses that require notification. Enter distinct IP ranges separated by commas here. You may also select the frequency at which you wish to receive untrusted asset alerts. You may also designate e-mail addresses for which you only want to receive asset alerts. NOTE: Click Save to preserve the Dynamic Detection settings. 5.24 Setting Up Inventory Alerts When a system is unresponsive for any reason—whether it shut down, was removed from the network, or has crashed—VeriNAC highlights that system in the Systems (Asset) List on the Asset Tracker page and alerts the designated contact via e-mail. The NetworkMonitor engine monitors assets when Inventory Alerts is enabled and determines when a system is non-responsive. During normal business hours, the NetworkMonitor engine performs a simple ping test on each asset at preset intervals (every 1, 5, 10, 20, 30, or 60 minutes). If an asset does not respond, NetworkMonitor pings it again in 5 minutes. If the asset does not respond to the second ping, an e-mail alert is sent to the designated contact and the asset is highlighted in red on the Asset TrackergSystems page. Set up Inventory Alerts for specific system groups. This allows you to more easily control the assets monitored and resources responsible. To set up Inventory Alerts: • Select “Network Admission ControlgInventory Alerts” from the left menu. The Inventory Alerts page appears. Figure 5-39. Create new group screen. Page 77 Veri-NAC User’s Manual • Click the “Create New Group” button to add the first group of assets for monitoring. This takes you to the Inventory Alerts: Add Group page. Figure 5-40. Add group page. • Type the Group Name in the box. We suggest you categorize systems in a meaningful way so they are easier to manage (for example, Servers, Desktops, Sales Department, etc.). • Enter the e-mail address(es) for the designated contact(s). You can enter multiple names separated by a space, colon, or semicolon. Enter e-mail addresses separated by semi-colons. If no e-mail address is specified, you are prompted to provide one. Figure 5-41. E-mail address section of Add Group page. • Select times and Polling Interval. 24 hours— Choose this option if you want the alerts running all day. Start Time and End Time—Select times here if you want the alerts running within a specific time interval. Polling Interval—Select the interval most appropriate for your environment (every 1, 5, 10, 20, or 30 minutes; hourly, twice daily, or daily) • Click the “Save” button to retain your choices or “Cancel” to return to the Inventory Alerts page. Your new group(s) appears in the list. Groups are listed in alphabetical order. iew the Group Name and Status here. Buttons on the right side allow you to Enable the alert or Remove each group from the V list, as required. Page 78 724-746-5500 | blackbox.com Chapter 6: Setting Up Asset Tracker 6. Setting Up Asset Tracker Complete an Asset Discovery process from Network Admission Control on the left menu before you use Asset Tracker. Once VeriNAC scans the network and gathers all the asset information possible for every system on your network, it stores what it knows in a database. Veri-NAC functions are integrated with this database for asset tracking. 6.1 Viewing Systems List (Asset List) in Asset Tracker To display a list of current assets: • Select “Asset TrackergSystems” in the left menu to open Asset Tracker. The Asset Tracker: Systems page appears. This list, referred to as the Systems List or Assets List, shows all systems on the network. These assets were either entered manually or discovered by the Veri-NAC automatic discovery engine during the Asset Discovery process. Figure 6-1. Asset List. As the key indicates: • A system highlighted in red is not accessible and may be in trouble. • You can click on a system name in the Host Name column to view details about that asset. • You can select a system’s IP address (in IP Address column) to find all reports with information about that system. 6.2 Viewing/Modifying/Adding Systems In The Systems List (Asset List) Your assets are listed on the Asset Tracker: Systems page. Figure 6-2. Changing asset list. Page 79 Veri-NAC User’s Manual Figure 6-3. Associate peripheral or software with system information. To view an existing asset in the list, click on its Host Name in the far left column. The Asset Tracker: System Information Overview display opens. All known information about the system is displayed: its host name, IP address, MAC ID, etc. Veri-NAC generates a link between the system information and reports generated by audits to assist the IT manager in asset tracking. The date and time (24-hour time is used) the system was last audited is indicated near the bottom of the left-most column. The asset in this example has yet to be audited. Associated Users is the last item in the first column. No names are associated with the system shown. You may add users, peripherals, and software to the database and associate them with particular systems at any time. See the section called Adding User Information for more information on users. 6.2.1 Editing/Adding System Information You can edit existing system information or add new systems from Asset Tracker. To edit an existing system: • Select Asset TrackergSystems from the left menu. • Click the Host Name you wish to modify. The Asset Tracker: System Information Overview page appears. • Click the Edit button at the bottom of the page to reach the Asset Tracker: System Information page and make the necessary changes. Be sure to click “Update System” at the bottom of the page to save your revisions. To add new systems: • Select Asset TrackergSystems from the left menu. • Click the “Add System” button to the upper left of the Asset List. The Asset Tracker: System Information page appears. Page 80 724-746-5500 | blackbox.com Chapter 6: Setting Up Asset Tracker Figure 6-4. System Information screen. (You can also get to the Asset Tracker: System Information page by selecting Network Admission ControlgAdd Assets.) • Fill in the requested data. For more information about these fields, see Adding IP Addresses Manually, Section 5.2.1. • Click “Add System” to save your entry. NOTE: Required fields (marked with an asterisk) must contain information. After you add system data, check the System Information page again. The MAC Address, Host Name, Operating System, and Manufacturer may be filled in for you. We strongly recommend you only change the MAC Address and Host Name fields if it is absolutely necessary. After you modify the list in any way, you should see changes in the Systems List (Asset List). NOTE: W hen generating report summaries on critical servers (in Executive and Management reports), Veri-NAC refers to systems with the word Server in the System Type field. If no systems are listed as Server, Veri-NAC reports instead on most vulnerable systems under the heading Most Vulnerable Critical Servers. 6.2.2 Viewing Asset Report List Veri-NAC generates a variety of reports you can use to more effectively manage your assets. • Select Asset TrackergSystems from the left menu. • Click on the IP Address of interest. The Available Reports list for that IP address appears. See Overview of Report Types and Content for more information on reports. 6.2.3 Adding User Information You can add users on your network independent of an individual asset. Later, you may associate users with particular systems (see Associating Users, Software, and Peripherals With Systems, Section 6.3). When you create user accounts under SystemgUser Management, you may choose from users you have previously added here. To add user information: • Select “Asset TrackergUsers” from the left menu. The Asset Tracker: Users page displays with current individuals entered in the system. Initially, this list is empty. Page 81 Veri-NAC User’s Manual Figure 6-5. Asset Tracker: Users screen. • Click the “Add User” button to the upper left. The Add User dialog opens. Figure 6-6. Add User dialog box. • Enter the requested information. See the guidelines in Table 6-1. Page 82 724-746-5500 | blackbox.com Chapter 6: Setting Up Asset Tracker Table 6-1. Add user guidelines. Item Guideline First Name (Required) Given name. Middle NameNot required. May be useful if you have more than one person with the same first and last name Last Name (Required) Family name. Email Address (Required) Must be a valid e-mail address. Security LevelSecurity level of user, up to five digits. This element is a custom designation for your network. Title Other TitleIf you selected “Other” from the Title dropdown list, you may enter a title of your choice here. Location User’s location—building, wing, office area, lab, etc. Business Unit User’s department. Phone User’s phone number. User’s role. When you complete all information about the new user, click “Add User” to save the data and return to the Asset Tracker: Users page. As you add users, they are listed in alphabetical order with their e-mail addresses and security levels. 6.2.4 Adding Software Information You can add software on your network independent of an asset. Later, you may associate software with particular systems (see Associating Users, Software, and Peripherals With Systems, Section 6.3). To enter software: • Select Asset TrackergSoftware from the left menu. Figure 6-7. Add software screen. The Asset Tracker: Software List displays. (Initially, this list is empty, as shown.) Page 83 Veri-NAC User’s Manual • Click the “Add Software” button to the left. The Add Software dialog opens. • Enter requested data in the form. See Guidelines in the table below. Table 6-2. Add software guidelines. Item Guideline Software Name (Required)Do not include the manufacturer’s name in the product name, e.g., enter Office, not Microsoft Office. ManufacturerEnter the name of the software manufacturer without Corporation, Incorporated, or Inc. The manufacturer’s name is pre-appended to the product name. • Click the “Add Software” button at the bottom of the page when you finish entering software data. This saves the information and returns you to the Asset Tracker: Software list. Figure 6-8. Asset Tracker: Software List screen. You can remove a software package from the list by clicking the check box to the left of its name, then clicking the “Remove Selected” button. 6.2.5 Adding Peripheral Information You can add peripherals on your network independently of an asset and later link the equipment to particular system assets. This list helps you keep track of monitors, printers, and a variety of other important equipment that may or may not need to be audited, but nevertheless has value to the company. Later, you may associate peripherals with particular systems (see Associating Users, Software, and Peripherals With Systems, Section 6.3). To add information about peripherals on your network: • Select “Asset TrackergPeripherals” from the left menu. The Peripherals list displays. Initially, this list is empty, as shown below. Figure 6-9. Asset Tracker: Peripherals List screen. Click the “Add Peripheral” button to the upper left to open the Add Peripheral Device dialog. Page 84 724-746-5500 | blackbox.com Chapter 6: Setting Up Asset Tracker • Fill in requested peripheral data. Fields with an asterisk are required; others are optional. See Guidelines in Table 6-3. Figure 6-10. Add Peripheral Device screen. Table 6-3. Peripherals list. Item Guideline Model (Required) Alphanumeric characters and hyphens allowed. Manufacturer (Required) Alphanumeric characters and hyphens allowed. Serial Number (Required) Alphanumeric characters and hyphens allowed. DescriptionEnter up to 75 characters describing the peripheral. You may wish to include other relevant information, such as cartridge model numbers, year purchased, etc. • Click the “Add Peripheral” button at the bottom of the page to save peripheral data. This returns you to the Peripherals List. ou may remove a peripheral from the list by clicking the check box to the left of its name, and then the Remove Selected Y button. 6.3 Associating Users, Software, and Peripherals With Systems Once you add users, software, and peripherals to your database, you can associate them with specific systems. Start at the Systems List (Asset List) to make these associations. • Select “Asset TrackergSystems” from the left menu to go to the Asset Tracker: Systems page. • Click the Host Name of the selected system. The Asset Tracker: System Information Overview page opens. The Associate User, Associate Peripheral, and Associate Software buttons are at the top of the page. These functions allow you to make links with the selected Host Name. Figure 6-11. Associate user, peripheral, and software buttons. 6.3.1 Associating Users with Systems • Click the “Associate User” button on the Asset Tracker: System Information Overview page shown above. A list of Unassociated/Associated Users appears. Page 85 Veri-NAC User’s Manual Figure 6-12. Unassociated/Associated users. • Select users from the Unassociated Users list on the left and click the arrows in the middle to move them to the Associated Users list. • Click the “Associate the User” button below the box to complete the changes. • When the Asset Tracker: System Information Overview page redisplays, notice that the user(s) you selected now appear in the list of users associated with the system (bottom of first column). You may associate as many users as required with any system. 6.3.2 Associating Software with Systems • Click the “Associate Software” button on the Asset Tracker: System Information Overview page shown above. A list of Unassociated/Associated Software appears. Figure 6-13. Unassociated/Associated Software screen. • Select software from the Unassociated Software list on the left and click the arrows in the middle to move them to the Associated Software list. • Click the “Associate the Software” button below the box to complete the changes. Page 86 724-746-5500 | blackbox.com Chapter 6: Setting Up Asset Tracker When in the Asset Tracker: System Information Overview page redisplays, notice the software you selected now appears in the list of software associated with the system. You may associate as much software as required with any system. 6.3.3 Associating Peripherals with Systems • Click the “Associate Peripherals” button on the Asset Tracker: the System Information Overview page appears. A list of Unassociated/Associated Peripherals appears. • Select peripherals from the Unassociated Peripherals list on the left and click the arrows in the middle to move them to the Associated Peripherals list. • Click the “Associate the Peripheral” button below the box to complete the changes. • When the Asset Tracker: System Information Overview page redisplays, notice that the peripheral(s) you selected now appear in the list of peripherals associated with the system. You may associate as many peripherals as required with any system. 6.3.4 Removing Systems/IP Addresses from Veri-NAC To remove IP addresses from all configured audits and the IP Address List: • Select “Asset TrackergSystems” from the left menu to open the Asset List. • Click the check box next to IP addresses you wish to remove from the list. • Click the “Remove Selected” button to the upper right of the list. Confirm when prompted. Page 87 Veri-NAC User’s Manual 7. Creating and Managing Audits NOTE: Black Box LVN5200A units do not offer auditing. They feature Network Access Control functionality only. Black Box LVN5250A and LVN5400A, LVN5600A, and LVN5800A units offer auditing as well as NAC functionality. The first step to managing audits is to define a series of audits and save them. Later, as required, you activate each audit. To define an audit, specify the timing and IP scope, and when and how Veri-NAC should block traffic at the firewall or smart switch if vulnerabilities are found. Define as many audits as you wish. Separate audits can target specific groups of machines. For example, one audit can address a server group, another a switch group, and a third a group of laptops. All these audits may run in parallel for efficiency – with some restrictions: Table 7-1. Number of Audits. Appliance Number of Possible Simultaneous Audits LVN5200A None (auditing engine not included) LVN5250A 10 LVN5400A 50 LVN5600A 100 LVN5800A 254 Once you define an audit, either run it immediately or schedule the audit and wait for Veri-NAC to run it as specified. You need only tweak your audit definitions occasionally. This chapter describes how to define, execute, and manage audits. 7.1 Running a One-Click Audit To audit a single IP address in a hurry: • Select “AuditsgOne-Click Audit” from the left menu. The One-Click Audit Wizard appears with the Audit Now box. Figure 7-1. Audit Now box. • Enter the desired IP address (#.#.#.# format) and click Audit Now. Page 88 724-746-5500 | blackbox.com Chapter 7: Creating and Managing Audits If Veri-NAC has trouble finding a system with that IP address, it pops up another box asking you to confirm the IP address. If it is correct, click the “Continue” button to proceed. As soon as the audit starts, the Reports page appears. Figure 7-2. Reports page. • Look at the Reports column. • Click on the Audit that’s listed in the Reports column (for example, VoIP Systems Audit) to get more detail on the audit. See Figure 7-3. Figure 7-3. VoIP Systems Audit, critical reports detail. The name of the Report entry starts with Quick_audit, the IP address, the date, and a suffix. The audit is automatically a Full audit. When the report is complete, you will see an “S” in the Summary column and a “C” in the Complete column. In the meantime, you will see the count of vulnerabilities found so far. Select ReportsgView Audit Results from the left menu if you want to leave this page and return to it in a few minutes. For more information on reports, including how to add custom comments, identify and hide false positives, and restrict the content you view to selected levels of vulnerabilities, refer Chapter 12. To see how vulnerabilities in reports are assigned to IT staff for remediation, refer to Chapter 15, Understanding Workflow and User Responsibilities. 7.2 Defining A New Audit To create a new audit description (also called an audit definition): • Click “AuditsgWizard” from the left menu. The Audit Wizard appears. Audit Name and Notification Information are on the first page. Page 89 Veri-NAC User’s Manual Figure 7-4. Audit Wizard screen. 7.2.1 Assigning an Audit Name Enter the name of the new audit definition in the Audit Name field. The name must be one word and may consist of up to 30 letters, numbers, underscores, hyphens, and spaces, as well as the following three special characters: # & ‘ Figure 7-5. Audit Name screen. We recommend using the name of the department to which the machines belong as the audit name. This naming convention assists various audit report users in understanding report contents without opening and studying the report. The name must be unique to the particular audit. NOTE: It’s a good idea to name audits based on the department performing the audits. Later, all reports from that source have the same name. When managers/executives create reports, they choose from a list of audits from which to cull information. If reports have the department name, they can readily select those of interest. 7.2.2 Setting Notification Information Specify one or more e-mail addresses that you want to receive notification when this audit completes. To enter more than one e-mail address, separate them with a comma “,”. You may also send this notification to a cellular telephone if your provider supports email (for example [email protected]). If you check “attach Summary report to e-mail notification,” you may incur additional data charges by your cellular telephone service provider. Also you will need to make sure your phone supports e-mail attachments and can display Adobe Acrobat PDF files. 7.2.3 Setting Vulnerability Threshold for Notification • Click an option to indicate the level of vulnerability required for Veri-NAC to send a notification via e-mail or cell phone. See Guidelines in Table 7-2. Page 90 724-746-5500 | blackbox.com Chapter 7: Creating and Managing Audits Figure 7-6. Vulnerability threshold screen. Table 7-2. Notification guidelines. Item Guideline Any Any vulnerability, however minor. MediumAt least one medium level vulnerability, as indicated in the table of Vulnerability Levels Definitions (see below). High At least one high level vulnerability. Serious Only when a serious level of vulnerability occurs. Refer to Table 7-3 for vulnerability definitions. (You may want to initially focus on high and serious level vulnerability conditions, and then pursue low or medium level issues.) NOTE: The Any Vulnerability Threshold for Notification selection includes the Notes and Low levels described in the following table. NOTE: You may see Notes or Info Reporting Levels in your reports. These levels may describe open ports, operating systems running, services running, and versions. They may also provide security suggestions. They are at the same level as Notes described above. 7.2.4 Vunerability Level Definitions Table 7-3. Vulnerability Level definitions. Reporting Level Notes Vulnerabilities Important notes—show you which ports are open. Get in the habit of reading Notes on a regular basis since they may indicate malware running on a port. Check open ports and confirm you want them open. LowLess important vulnerability—harder to exploit and usually causes little or no damage to your network assets. Always fix Serious and High vulnerabilities first and then review Medium and Low vulnerabilities. Decide if Low has potential consequence to your organization. If not, use the Comment field to indicate you don't consider this vulnerability an issue. MediumSlightly more important than a Low-level vulnerability but usually hard to exploit. Medium level vulnerabilities might allow an attacker to gain access to your network. Always fix Serious and High vulnerabilities first, and then review Medium and Low. Decide if Medium has potential consequence to your organization. If not, use the Comment field to indicate you don't consider this vulnerability an issue. HighVery important vulnerability that may be easy to exploit and allow an attacker to cause serious damage to your network. Fix this vulnerability as soon as possible. If you cannot patch the problem, you may have to reconfigure the system, shut down a service or process and/or tune your firewall and other countermeasures to pick up and block an attack against this vulnerability. Page 91 Veri-NAC User’s Manual Table 7-3 (continued). Vulnerability Level definitions. Reporting Level Vulnerabilities SeriousExtremely important vulnerability that may be easy to exploit and allow an attacker to cause critical damage to your network. Fix this vulnerability as soon as possible. If you cannot patch the problem, you may have to reconfigure the system, shut down a service or process and/or tune your firewall and other countermeasures to pick up and block an attack against this vulnerability. 7.2.5 Modifying Who Receives Reports • Fill in the notification fields with appropriate e-mail addresses and cell phones (optional): E-mail—By default, all e-mail addresses from the Notification page appear here, separated by commas, semicolons, or spaces. You can remove any of them and continue to add other addresses within a 100-character limit. Figure 7-7. Who Receives Reports screen. Check the “Attach Summary report to email notification box” if you want a Summary Report included with the notification. ell Number—Enter the designated phone number for all types of notifications with contiguous numbers—no dashes, spaces, or C other characters. You may enter up to 10 cell phone numbers, separated by commas, semicolons, or spaces. T he numbers must be 10-digit North American phone numbers (with an area code for a North American location). The phone must be capable of receiving text messages and the service designated to receive them must be activated with the provider. S NMP Server and Syslog Server – when checked, information about a completed audit will be sent to either the SNMP or Syslog server, provided you have configured these for use with Veri-NAC. Messages will contain the number and level of vulnerabilities found at each IP address. • Click “Next” to proceed to the next page of the Audit Wizard. You will be prompted for any missing information before you can proceed. 7.2.6 Selecting Report Content Set “Audit Mode and Firewall Information” on Page 2 of the Audit Wizard. 7.2.7 Audit Mode • Select an Audit Mode to define the audit scope. You may choose between Full, Differential, Incremental, and Top 20 audits. See Guidelines in the table below. Figure 7-8. Audit Mode screen. Page 92 724-746-5500 | blackbox.com Chapter 7: Creating and Managing Audits • Select an Audit Mode to define the audit scope. You may choose between Full, Differential, Incremental, and Top 20 audits. See Guidelines in the Table 7-4. Table 7-4. Audit Mode descriiptions. Setting Description Full Reports will contain all results of all tests on all selected IP addresses. DifferentialReports will compare results with previous reports from this audit definition. Reports will contain: • New vulnerabilities • Vulnerabilities fixed since the last report • Vulnerabilities still open from the last report for this audit IncrementalReports will contain only results of new vulnerability tests that were not included in the last report from this audit. Report will only show results for vulnerability signatures you downloaded since the last report. Reports will contain only the 20 latest and most significant vulnerabilities. Top 20 This selection also contains a link to the SANS web site where the current top 20 vulnerabilities are explained. See www.sans.org for more information. The first time you audit your network, you should run a Full audit. Later, you can edit the audit definition to make it Differential, but be sure to save it with the same audit name. Otherwise, if you create a new audit definition with a different name and make it Differential, it runs a Full audit the first time and subsequently runs a Differential audit. (See Modifying an Existing Audit’s Definition, Section 7.7.) NOTE: Since a Differential audit performs a full audit the first time, we suggest you run Differential audits from the start, rather than change them later. If you want to run only new vulnerability tests on a machine or group of machines, use the Incremental option. Incremental never runs a Full audit. Veri-NAC keeps track of tests run on any given IP address, and runs only those not run before. Incremental audits, therefore, run quicker than other audits and save time. 7.2.8 Firewall Information Vulnerability Threshold for Firewall Blocking This setting lets you choose the minimum vulnerability required to initiate blocking to/from a vulnerable asset at the firewall. You can choose from several options described in the table below: Table 7-5. Firewall blocking. Setting Description Never Never block traffic at firewall, regardless of vulnerability level. Low Block traffic at firewall when at least one low-level vulnerability exists. Medium Block traffic at firewall when at least one medium-level vulnerability exists. If only low-level vulnerabilities exist, traffic will not be blocked. High Block traffic at firewall when at least one high-level vulnerability exists, If only medium or low level vulnerabilities exist, traffic will not be blocked. Serious Block traffic at firewall when at least one serious-level vulnerability exists, If only low, medium, or high level vulnerabilities exist, traffic will not be blocked. When Veri-NAC blocks traffic at the firewall, it makes note of that action in the e-mail notification it sends. Page 93 Veri-NAC User’s Manual Once traffic to and from the firewall to a particular IP address is blocked, Veri-NAC never unblocks that traffic without input from a user (except on the CyberGuard Classic firewall). A system administrator must unblock the firewall manually. 7.2.9 Firewall Blocking Mode Select from two options described in FIgure 7-9 and Table 7-6. Figure 7-9. Firewall Blocking mode screen. Table 7-6. Firewall Blocking mode. Setting Description Full IP Blocking Block all traffic to and from IP address at firewall. Port Level Block Block only traffic through the vulnerable port. 7.2.10 Vulnerability Threshold for Smart Switch Blocking Smart switch blocking is identical to firewall blocking, except there is no option for port-level blocking. Figure 7-10. Vulnerability Threshold for Firewall Blocking screen. 7.3 Scheduling Audits Before you take the next step in the Audit Wizard, you need to think about the logistics of scheduling your audits and all related issues in your particular work environment. The following sections include Scheduling Audits and Setting Audit Frequency and Start Time. This information should help you decide appropriate settings for your company. Take several factors into consideration when determining an audit schedule. 7.3.1 Scheduling Audits with Norton Applications If you have Norton Anti-Virus running on a server you plan to audit, be aware that Norton interferes with many products. If Norton Anti-Virus is running when you perform an audit, Norton interprets Veri-NAC actions as a denial of service attack (DoS) and sends messages to the system administrator indicating a DoS attack is in progress. It then crashes the server. To avoid this situation, take the following steps: • To estimate how long your audit will take, run your first audit (or series of audits) at midnight and see what time the report notifications are sent to you. The length of time an audit takes tends to remain consistent. To judge how long an audit may run, see Estimating Audit Length. • Schedule your audits when the system will not be busy with other activities, such as in the early morning hours. Page 94 724-746-5500 | blackbox.com Chapter 7: Creating and Managing Audits • Shut down all Norton® applications a few minutes before running an audit. Run a script to automate that shutdown. • Allow enough time for the audit to complete before restarting the Norton application. 7.3.2 Scheduling Backups and Audits Do not overlap your backup schedule with the audit schedule. To avoid overlap, be aware of how long the audit may take. Refer to Estimating Audit Length. As a precaution, if you know how long your backup usually takes, schedule it to run first and schedule audits after you expect the backup to be complete. 7.3.3 Scheduling Audits with Windows XP SP2 Installed If you are running Service Pack 2 on a Windows XP system, be aware that this service pack activates a personal firewall on the client that blocks probing of the machine by many products. Turning off the fsirewall activated by Windows XP does not affect other Firewalls on your network. To give Veri-NAC a chance to retrieve information from the client and to ensure the SP2 Firewall is turned off, allow at least an hour between setting up a daily audit and running. Always allow this one-hour interval between making a change to this setting or setting up the daily audit to ensure the Windows client and the Veri-NAC server are coordinated. 7.3.4 Setting Audit Frequency and Start Time The third page of the Audit Wizard allows you to set audit frequency and timing. Figure 7-11. Set Audit Frequency and Start Time screens. The Frequency of Audit and Start Time fields indicate when and how often this audit runs once it is started from the Audits: Manage page. • Set Frequency of Audit to one of the settings shown. See setting descriptions in Table 7-7. Figure 7-12. Frequency of Audit screen. Page 95 Veri-NAC User’s Manual Table 7-7. Audit Frequency options. Setting Description NowRuns the audit as soon as it is activated. (Audit automatically returns to Inactive setting after completion). DailyRuns the audit at the same time each day. Use the pulldown menus in the Start Time fields to specify the time of day to begin the test. Any Day of Week you set is ignored. Once activated, the audit runs every day at the specified time. WeeklyRuns the audit at the same time each week as soon as it is activated. Use the pulldowns to select the Start Time and Day of Week. Once activated, the audit runs every week at the specified time. MonthlyRuns the audit every month on the Day of Week and at the Start Time you select as soon as it is activated. For example, if you select Monday, the test will run on the next Monday in the current month, then on the first Monday in succeeding months. Once activated, the audit runs every month at the specified time. PostUpdateRuns the audit immediately after a CVE update is downloaded. (Audit immediately returns to Inactive status after completion and remains Inactive until the next CVE update is downloaded.) NOTE: An audit set to Now runs each time you start it, then reverts to the Inactive state. • Set the audit Start Time, if appropriate. (For an audit set to Now or PostUpdate frequency, the time does not apply.) Figure 7-13. Start Time screen. Choose the Hour and Minute you want to schedule the audit to start, and then select the day of the week from the pull down menu. 7.4 Choosing IP Addresses From List The fourth page of the Audit Wizard allows you to choose specific IP Addresses for auditing. Figure 7-14. Selecting IP Addresses from List screen. Information about your auditing capacity is shown at the top of the page, including: • Number of IP addresses your license allows you to audit (variable depending on which appliance you own) • Number of IP addresses currently selected (IP addresses are selected when the box to the left of the entry is checked) • Number of IP addresses already audited Page 96 724-746-5500 | blackbox.com Chapter 7: Creating and Managing Audits • Link to upgrade the number of IPs in your license • Link to list of IPs audited so far and their status • Green (or alternate color, based on browser settings) box that flags wireless access points • Icon (case with a line through it) that indicates the IP address is in the Firewall Safe List and will never be blocked The complete list of your IP Addresses appears below. After Veri-NAC collects IP addresses on the network, it instantly recognizes: • Wireless access points • Assets on the Safe List • Missing systems • Blocked systems or systems with a blocked port 7.4.1 Selecting/Grouping IP Addresses to Audit Each IP address is listed with a check box to its left. Use the check box to select individual IPs for audit. The listing also shows IP addresses of subnets; subnets do not have host name or operating system data. Figure 7-15. Selecting IP Addresses to Audit screen. You must select at least one IP address to audit. 7.4.2 Using the “Select All” Audit Wizard Checkbox • Select “AuditsgWizard” from the left menu to initiate the Audit Wizard. Figure 7-16. Select All Audit Wizard screen. When presented with the asset selection screen during the Audit Wizard, click the checkbox next to the IP Address header to toggle selection on all existing IP addresses. Page 97 Veri-NAC User’s Manual Tips for Completion Table 7-8. Tips for completion. Objective Action Clear the list of individually selected IPsClick twice on the check box for the subnet containing the individual addresses (once to toggle them all on and again to toggle them all off). Select an entire subnet Click the check box next to the subnet name. Beware, however, an entire subnet audit takes longer to complete than the audit of several individual IP addresses, making the reports very large. An optimal approach is to classify the IPs into logical groups such as “servers” and “laptops,” and create a separate audit definition for each group. • Click the “Review” button at the bottom of page four of the Audit Wizard to review your settings or click “Edit” to go back and make changes. 7.5 Saving the Audit Review your settings on the Audit Settings page. Figure 7-17. Audit Settings page. NOTE: Before you proceed, ensure no red text appears in the Audit Settings display. If any IP addresses are shown in red, you either exceeded the number of IP addresses your license allows you to audit, or an existing audit may show an unknown IP Address (MAC-IP Mismatch). (See the sections on IP MAC Mismatches for more information. These mismatched assets are preceded by the word Previously.) If you’ve exceeded your license, Veri-NAC indicates the number of IPs in excess of your license in a message at the top of the window. You must click Edit and deselect enough IPs to reduce the number below the limit, or you can increase your license limit. Click “Review” before saving again. (Your license is not affected until you click “Save” in the “Audit Settings” window and audit those assets. Save is “grayed out” until you are within your license range.) • Click “Save” to preserve the audit and exit from the Audit Wizard. This takes you to the Manage Audits page that displays all defined audits. Page 98 724-746-5500 | blackbox.com Chapter 7: Creating and Managing Audits 7.6 Activating/Managing Audits You can manage all audits you create and save on the Manage Audits page. Here you may start, stop, or delete audits depending on your daily needs. After you save an audit, Veri-NAC automatically displays this page. To get here at any time: • Select AuditsgManage from the left menu. Figure 7-18. Manage Audits page. The Manage Audits page displays all audits saved in the system as well as their audit/CVE test parameters. The Status column shows the current state (Auditing, Inactive, or Scheduled) of each audit. 7.6.1 Scheduling an Audit to Run The Manage Audits page gives an overview of audit parameters you set earlier. The first column shows Audit Name. Each audit has its own row with Start, Stop, and Remove (Command) buttons to the far right. A Status column just to the left of the Command buttons indicates the audit’s current condition. The initial status of any audit is Inactive. Inactive audits do not run. To run them, use the Command buttons to the right. Figure 7-19. Audit page. 7.6.2 Starting an Audit • Click the Start command button in the audit row. udit Status becomes Scheduled. The audit starts running at the specified Audit Time and Start Time. If an audit is scheduled for A Now, it starts auditing immediately after you click Start, and the Status changes to Auditing. Figure 7-20. Start Audit page. NOTE: If you start an audit scheduled for Now, you are directed to the Reports page. Audit information is shown next. Page 99 Veri-NAC User’s Manual Figure 7-21. Audit information page. Once it starts, an audit’s Status changes to Auditing (see the Manage Audits page for more information). When an audit finishes, its Status automatically reverts to Scheduled, unless it is a Now audit. (Now audits revert to Inactive upon completion, but can be run again at any time by clicking Start.) When an audit is complete and reports are available, contacts designated in the Audit Wizard are notified. Any number of audits can be Scheduled or Auditing at a given time without interference. To see the reports: • Select “ReportsgView” from the left menu bar. For details on how to work with reports, see Chapter 12. 7.6.3 Deactivating an Audit When you no longer want a particular audit to run but wish to keep it in the system, you can make it Inactive. • Select “AuditsgManage” from the left menu. • Click the “Stop” button (far right in the row) for the audit. The Status column indicates it is Inactive. Figure 7-22. Deactivating an Audit screen. The audit stays in the system, but does not run until you change its status to Scheduled again by clicking Start. 7.6.4 Removing an Audit You can remove a specific audit when you no longer need it. • Select “AuditsgManage” from the left menu. The audit is deleted from the system and no longer appears on the Manage Audits page. • Click the audit’s “Remove” button, to the right of the Stop button. 7.7 Modifying an Existing Audit’s Definition You can also change parameters for an existing audit from the Manage Audits page. • Select “AuditsgManage” from the left menu. • Click the “Audit Name” in the first column. The Audit Wizard opens and displays information for that audit. • Make the desired changes as you proceed through the Audit Wizard pages. • Click “Review” and check your settings before clicking “Save.” NOTE: To run an audit, you must activate it from the Manage Audits page. Page 100 724-746-5500 | blackbox.com Chapter 7: Creating and Managing Audits 7.8 Copying an Audit to Create a Variation To create a new audit with some or all the parameters from an existing audit definition: • Select “AuditsgManage” from the left menu page. • Click the “Audit Name” of the existing audit. The Audit Wizard opens and displays the information for that audit. • Enter the name for the new audit in the Audit Name field. Be sure it is unique. • Change the parameters as you click through the Audit Wizard pages. • Click the “Save” button to save the variant audit. 7.9 Removing Systems/IP Addresses from an Audit To remove system/IP addresses from a particular audit, deselect that IP address in the list, and then re-save the audit. • Select “AuditsgManage” from the left menu. • Select the Audit Name and click on the link. This takes you to the Audit Wizard for the selected audit. • Page through the Audit Wizard using the Next button until you reach the list of IP Addresses. • Click check boxes next to the IP addresses you want to remove to deselect them. • Click the Review button to verify your changes. • Click “Save” to retain the changes once you are satisfied with your edits. 7.10 Viewing Lists of CVE Tests by OS and Application You can view information about tests Veri-NAC runs for each operating system or application at any time. • Select “AuditsgView Vulnerability Tests” from the left menu. The View Test List by OS & Applications box opens. Figure 7-23. View test list screen. Page 101 Veri-NAC User’s Manual • Select “All OS,” “Windows,” or “UNIX/Linux.” • Click the Display List button to see a list of the CVE tests available for All Applications for that OS. You can also select a particular group of tests by clicking the arrow next to All Applications. T hen choose the tests you want to see, such as Web Servers or Denial of Service, from the pull-down menu. For example, if you choose Novell® Server from the pull-down list, you’ll see a list of tests Veri-NAC will run on your Novell Server. Click the Display List button to view the results. A sample list for Mail Servers is shown (cut short) in Figure 7-24. The text indicates when the test checks for a particular CVE. Figure 7-24. Sample Mail List screen. 7.11 Managing Mismatched IPs Sometimes the audits you create contain mismatched IPs—assets that changed their IP Address for various reasons since the last scan. One way to view and manage Mismatched IPs is from the Manage IPs page. Figure 7-25. Manage IPs page. • Select “Network AccessgAdmission ControlgManage IPs” from the left menu. • Select “MAC IP Mismatch List” from the pull-down menu to view a screen similar to the one above. If you click on the link for the first IP address above, you go to the Asset Tracker System Information Overview page. Page 102 724-746-5500 | blackbox.com Chapter 7: Creating and Managing Audits The System Information portion of the Asset Tracker System Information Overview shows previously known information about this asset. The change in IP address is shown in red. • Click the Edit button below this box to go the System Information page for this asset. Figure 7-26. System Information page. This IP Address is currently Unknown. If you know what it has changed to, you can manually enter the new IP Address here. The other option for resolving this mismatch is to either remove the mismatched asset(s) from the audit or run an Asset Discovery. 7.12 Viewing the Veri-NAC Schedule If you want a visual overview of all audits, you can display a schedule in a calendar view. • Select “AuditsgSchedule” from the left menu. Initially, a weekly view of the schedule displays. The illustration shows an example of a weekly schedule. Time is blocked out for each audit. More time is blocked out for audits Veri-NAC estimates will take longer to run. Hold the mouse over any audit name in the calendar (as shown for Wednesday’s audit in the illustration) to view a box showing estimated length of time required for the audit as well as a list of the IP addresses included in the audit. Page 103 Veri-NAC User’s Manual Figure 7-27. Veri-NAC schedule. 7.13 Viewing the Monthly, Weekly, or Yearly Schedule Additional schedule formats can be viewed from pull-down lists, located near the bottom of the page, labeled Month, Week, and Year. Month—To see the schedule for a particular month, select that month from the pulldown at the lower left of the page and click “Go.” You see scheduled audits listed on the days they will occur along with scheduled times. Week—To see the schedule for a particular week, select that week from the pulldown on the bottom center of the page and click “Go.” You can also click My Calendar (lower left corner) from any view to see the Weekly view. Year—To see the schedule for a particular year view, select that year from the pulldown in the lower right corner of the page and click “Go.” NOTE: If you have not clicked the Start button for the audit on the Manage Audits page, the audit will not show in the calendar because it is not yet scheduled. 7.14 Viewing the Daily Schedule When viewing the yearly schedule, you can click on any specific day to see audits scheduled for that day in a daily calendar display. Viewing the Daily Schedule Details To see details of the schedule for a particular day, click on the actual audit in the Monthly, Weekly, or Daily view. The audit schedule description appears, including: • Audit name • IP addresses to be audited • Audit frequency • Scheduled start time Page 104 724-746-5500 | blackbox.com Chapter 7: Creating and Managing Audits • Expected audit duration 7.15 Searching the Calendar You can search the calendar for a particular audit. • Select “Search” below the Month field in the lower left corner. Figure 7-28. Searching Calendar screen. • Enter the search parameters in the Keywords field. Figure 7-29. Enter Search Parameters. Search for words that appear in the name of the audit. • The search results indicate the number of matches found and the names of reports containing those search items. 7.16 Opening Audit/Scheduling FAQ in the Calendar View Select “FAQ” below the Month field in the lower left corner of the Calendar to view answers to frequently asked questions about audits and reports. Figure 7-30. Selecting FAQ screen. The FAQ page appears. Figure 7-31. FAQ screen. If you do not find the answer you need, contact Black Box Technical Support at 724-746-5500 or www.blackbox.com. Page 105 Veri-NAC User’s Manual 7.17 Managing In Process Audits 7.17.1 Reviewing Audits There are several options for reviewing in-process audits. Let’s say you create an audit called Sales Department. If you select “AuditsgManage” from the left menu, you will see it listed. Figure 7-32. Reviewing audit. • Click the Servers Start button to begin the audit. Once the audit begins, you are automatically taken to the Reports Page (ReportsgView Audit Results) and shown an overview of the audit as it progresses. Here, the audit has started, but no vulnerabilities have been discovered yet. Figure 7-33. Reports page. • Click on “Servers” link to go to the audit details. The next illustration shows the status of the Servers audit after a few minutes. Figure 7-34. Servers status page. NOTE: 15 vulnerabilities have been discovered so far. Three are of high priority. The data will change as the audit progresses. Now there are 48 total vulnerabilities. The final audit screen is shown next. There are 51 total vulnerabilities present. NOTE: Once the audit is complete, the status column disappears and a new column appears on the right hand side—Firewall/ SmartSwitch Update. After the Servers audit finished, the SmartSwitch blocked the IPs showing high vulnerabilities. (You specify the Firewall and SmartSwitch blocking requirements when you create the audit in the Audit Wizard.) IP Address 192.168.1.2 in the illustration shows three high vulnerability items. This address was blocked at SmartSwitch 192.168.254.23 on Unit 1, Port 12. NOTE: This IP Address was also blocked at the firewall. Page 106 724-746-5500 | blackbox.com Chapter 7: Creating and Managing Audits You can also specify Firewall and SmartSwitch blocking requirements on the Network Admission ControlgDynamic Detection System page. Blocking rules for this action are displayed on the Network Admission ControlgSmartSwitch Integration page. 7.17.2 Viewing Partial Reports At times it may be helpful to view actual report data before an audit is fully completed—perhaps to check how things are going, or to view the status of a particular asset. Let’s say you create an audit called VoIP Systems Audit. If you select “AuditsgManage” from the left menu, you will see it listed. Figure 7-35. Reports screen. • Click the VoIP Systems Audit Start button to begin the audit. You are automatically taken to the Reports Page (ReportsgView Audit Results), where you see an overview of the audit. Figure 7-36. Partial Reports page. Initially, there are 0 vulnerabilities discovered, but this number will change as the audit updates. Make sure you check the Refresh this page every seconds button at the bottom of the page to get updates. Adjust the refresh rate if necessary. We recommend setting the refresh rate to every 45 seconds. As the audit progresses, the page will be updated, and you can proceed. • Click the Generate Report link for this audit to get a partial report (the report is partial because the audit is still In Progress). This takes you to the Generate Report page. Here you have four options: • Create a partial report and continue with the audit. • Create a partial report and stop auditing. • Stop the audit without creating a report. • Continue auditing without creating a partial report. NOTE: A partial audit may affect your license agreement because you can only audit a specific number of MAC addresses with a limited license agreement. You are licensed to audit “N” specific addresses, not “N” addresses total. • Decide which Partial Report option works best for you and select the appropriate button. Your choice takes you back to the Reports Page. In this example, we chose Create a partial report and continue with the audit. • Click on the button to get your partial report. The report opens in a PDF file. The Summary and Complete Reports are both available after the audit completes. Page 107 Veri-NAC User’s Manual Figure 7-37. Complete report screens. Page 108 724-746-5500 | blackbox.com Chapter 8: Setting Up Updates 8. Setting Up Updates 8.1 Setting Up Automatic Vulnerability Updates You can schedule updates at any time to ensure you are up to date on all the latest tests. • Select “UpdatesgVulnerability Signatures” from the left menu. The Automatic Vulnerability Signature Update box appears. Figure 8-1. Automatic Vulnerability Signature Update screen. Here you set the schedule for receiving updated vulnerability tests over the Internet from the Update Server. Downloads from Black Box are secure transmissions that access only the Veri-NAC appliance. • Choose the automatic download schedule most appropriate for your environment. See Table 8-1. Table 8-1. Automatic download schedule. Option Action Never No updates are scheduled Daily Update is performed once a day NOTE: For automatic downloads to occur, you must open port 443 on your firewall. NOTE: The normal setting is Daily. If you click “Never,” no automatic downloads occur. You may still run updates when you wish by clicking the Update Now button – a single download will occur immediately, but no periodic updates will be scheduled. • Choose “Update Now” or “Undo Update” to continue. Figure 8-2. Download Updates screen. Page 109 Veri-NAC User’s Manual Update Now—Click this button to immediately receive updated vulnerability tests from the Update Server. You can also request a single download of vulnerabilities at any time. (This may be necessary later if you initially select the Never option in this setup.) When you select “Update Now,” you move to a new screen, where you can choose to Download Updates if your Veri-NAC appliance is connected directly to the Internet. Or you may choose to download the updates to your own machine, and then upload them to the appliance. NOTE: We recommend you select Update Now when you first set up Veri-NAC as well as whenever daily updates have not been performed for a length of time. NOTE: Do not change the name of the update file. If the file needs to be accessed later, Veri-NAC will only be able to locate it if it retains the same name. NOTE: Sometimes Windows renames the tar.gz update file to tar.tar or other variations thereof when it downloads the file. Make sure the file is named tar.gz after the download. After you click Download Updates or Upload Now, you receive a list of new vulnerability tests (sample shown below). Peruse this list and then decide on your next step. Options are shown below. Table 8-2. Vulnerability tests. Option Description Ignore This set of tests is not installed Install Now New vulnerability tests are installed Undo Update Returns you to the previous set of vulnerability tests. Example: Did you update vulnerability tests but are not sure that you should have? Click this button. The previous set of vulnerability tests is stored in a file, so it can be restored. You can Cancel if you click this button by mistake. Opening Update Notifications from Email The person who receives the e-mail notification on updates receives an attachment named updates.txt. Open this file in WordPad rather than NotePad. Figure 8-3. Updates email notification screen. Page 110 724-746-5500 | blackbox.com Chapter 8: Setting Up Updates 8.2 Retrieving Veri-NAC Service Packs/Version Updates You may download service pack updates at any time. • Select UpdatesgService Packs from the left menu. A screen similar to the one to the left appears. Click “Install Patches” now or “Install Later,” based on the updates you see here. Figure 8-4. New Patch Descriptions screen. Configuring a Proxy for Service Pack and Vulnerability Updates The Veri-NAC supports the use of a proxy server for both service pack updates and vulnerability signature updates. • Select “SystemgProxy Configuration” from the left menu to go to the Proxy Configuration screen. • Select “Use Proxy” to direct the appliance to use a proxy server for outgoing connections. • Enter the proxy server IP address in the IP Address field. • Enter the proxy server port in the Port field. • Select “Proxy Requires Login” if the proxy server requires a username and password to log in. • Enter the proxy server username in the Username field. • Enter the proxy server password in the Password field. • Click “Save” to save the configuration. 8.3 Purchasing and Entering Veri-NAC Upgrades You may wish to add to your current Veri-NAC license by purchasing one of the following three options: • The ability to audit more IP addresses • An upgrade from the Basic Policy Builder to the ISO 27001/17799 Policy Builder • An unlimited IP option To purchase any of these upgrades: • Contact your Black Box Sales representative at 724-746-5500 to place your order. The representative will process your changes and the technical staff will issue you a license upgrade code. • Select the upgrade type—Licensed IPs or ISO 27001/17799 Policy Upgrade. • Select “UpdatesgUpgrades and License” from the left menu to enter the upgrade code into Veri-NAC. Enter the code in the box provided. • Enter the New License Limit if you upgraded to a higher number of licenses. • Click the Upgrade button. No reboot is necessary; improved capabilities are available immediately. Page 111 Veri-NAC User’s Manual Figure 8-5. License and Policy Upgrade screen. Page 112 724-746-5500 | blackbox.com Chapter 9: Using Veri-NAC System Functionality 9. Using Veri-NAC System Functionality To access system functions, select SystemgUtilities from the left menu. 9.1 Factory Reset To return Veri-NAC to the settings with which it was shipped, select “SystemgUtlities” from the left menu, then click “Factory Settings.” Figure 9-1. Utility Commands screen. NOTE: Alerts should always be cleared from the command center following a factory reset on the client appliance. 9.2 Stopping Audits In Process You may need to terminate audits currently running for any variety of reasons. To halt all audits: • Select “SystemgUtilities” from the left menu. (You can also halt an audit on the Manage Audits page by clicking the Stop button.) • Click the “Stop All Audits” button. You are asked to confirm or cancel the action. Figure 9-2. Stop audits prompt. Any audits currently in process do not complete. You receive a warning saying in-process audits will stop and must be restarted later. Any reports already generated remain on the system. You may still view them by selecting “ReportsgView Audit Results.” A halted audit does not run again until its next scheduled time. Halting all audits does not change their Scheduled or Inactive status. To restart an audit sooner than the next scheduled time: • Select “AuditsgManage” from the left menu. • Select the audit to open it in the Audit Wizard. Click through Audit Wizard pages until you reach the screen with audit frequency settings. Set the Frequency of Audit to Now. Page 113 Veri-NAC User’s Manual • Click “Next” until you complete the Audit Wizard steps, and “Save” the audit. When the Manage Audits page opens, click the Start button to begin the audit. 9.3 Rebooting Veri-NAC Restart Veri-NAC without losing any saved information if an exceptional condition occurs. • Select “SystemgUtilities” from the left menu. • Click the Reboot button. Confirm or cancel the reboot. If you proceed, the browser window displays the message Reboot in Progress. Rebooting does not change the Scheduled or Inactive status of an audit profile. Any audits in process when the reboot occurs are not completed. You will receive a warning informing you that they are currently in process, will stop, and must be restarted later. NOTE: Wait at least five minutes for the reboot to complete. If you refresh the screen or attempt any operations before the reboot finishes, you may get a Window not Available error. After one or two minutes, click the Back button to return to the Help/ Product Overview page. 9.4 Shutting Down Veri-NAC To shut down the Veri-NAC appliance: • Select “SystemgUtilities” from the left menu. • Click the Shutdown button. You are asked to confirm or cancel the shutdown. If you proceed, the Veri-NAC will power down. To restart Veri-NAC, you must manually press the Power button on the appliance. Shutting down does not change the Scheduled or Inactive status of any audit. Any audits in process when the shutdown occurs will stop. You must restart them when Veri-NAC is powered up again. 9.5 Backup and Restore You will want to back up and restore your Veri-NAC information regularly. Veri-NAC performs this function for you and sends it to the server of your choice on a periodic basis. • Select “SystemgBackup and Restore” from the left menu. Your settings, if any, are displayed on the Backup and Restore page. Figure 9-3. Backup and Restore page. Page 114 724-746-5500 | blackbox.com Chapter 9: Using Veri-NAC System Functionality • Click the Change Backup Settings button to enter or revise your backup information. The Backup and Restore Settings page appears. Figure 9-4. Backup and Restore Settings screen. • Select the Type of FTP Server/Type of File Server from the pulldown. You have two choices: Windows or Linux/Unix servers. The information displayed varies depending on your server type. • Fill in the requested technical information for your server. Windows systems require a username and password for access. Linux/Unix servers need a certificate to allow interaction with the Linux® server. • Click the Linux link at the top of the page, if necessary. This takes you to the Linux Certificate Instruction page. Figure 9-5. Linux certificate instruction page. • Review the instructions and make the appropriate changes on your system. • Click the Back button. • Select a frequency and time for backup in the Backup and Restore Settings box. You can schedule the backup to run Never, Monthly, Quarterly, Half Yearly, or Yearly, at a specific time of day. • Click “Save” to retain your settings or “Cancel” to delete the information. You return to the Backup and Restore page. Page 115 Veri-NAC User’s Manual 9.5.1 Backup Now Veri-NAC creates a compressed backup file of Reports and Workflow, Audit Configurations, Asset Tracking Data, Veri-NAC Settings, and Veri-NAC Log(s) when you backup. The Backup Now feature provides on-demand backups. Figure 9-6. Backup and Restore screen. Click “Backup Now” on the Backup and Restore page to start the backup process. This takes you to the System Backup page (shown below). You can proceed with the backup or cancel the operation at this point. Figure 9-7. Backup Now or Cancel screen. • Click Backup Now to continue to the next screen. • Click the link in the message displayed to identify a destination for the backup file used for archival storage. This file may be used to restore the Veri-NAC appliance (or a replacement appliance) to the state at which the backup file was created. NOTE: You cannot open the backup file. You can only save it to your local machine. NOTE: Do not change the name of the backup file. Otherwise, it will be unrecognizable to Veri-NAC if you need to access it later. NOTE: When you back up this file, remember the Login ID/passwords you use. You will need them if you must back up again later. • Click “Delete Backup on Black Box Appliance” and “Proceed” once the download completes. NOTE: We suggest you delete the backup file from Veri-NAC to save valuable space. Page 116 724-746-5500 | blackbox.com Chapter 9: Using Veri-NAC System Functionality 9.5.2 Restore Restore allows you to select a backup file and re-establish the Veri-NAC appliance settings to their state at the time the backup was created. NOTE: The version and patch state of the Veri-NAC is not restored. Only the data and configuration information reverts to the former state. • Select “SystemgBackup and Restore” from the left menu. This takes you to the Backup and Restore page. Figure 9-8. Backup and Restore screen. • Click the Restore button. This takes you to the following screen. Figure 9-9. System screen. • Select the file from your system using the Browse button. • Click Upload File Now. This takes you to the following screen: Figure 9-10. Backup Successful screen. Page 117 Veri-NAC User’s Manual NOTE: When you upload the new file, remember this process will stop all currently running audits. NOTE: Be sure you keep track of all your Login IDs and passwords—new and old. Once this file is restored, all other versions are gone. NOTE: Don’t forget: If you must restore this file from an older version, you will lose your most recent data. You might want to back up the current state before returning to the previous state. 9.6 Network Configuration The network configuration information you enter controls how Veri-NAC accesses the network. To set up your configuration: • Select “SystemgNetwork Configuration” from the left menu. The Network Configuration screen appears. Here you enter data about your servers and network. You must designate whether your network server is a DHCP server (dynamic IP address-based). Figure 9-11. Network Configuration screen. NOTE: For DHCP Environments, the IP Address, Subnet Mask, and Default Gateway, and DNS Server settings were assigned automatically during your installation. You cannot change these values here. Host Name and SSL Port may be edited. NOTE: For non-DHCP Environments, you entered the IP Address, Subnet Mask, and Default Gateway, and DNS Server settings manually during your installation. You may change these settings here, if necessary. Host Name and SSL Port may also be edited. NOTE: SSL Port is typically 443. This is the default for https. If you use a different value, your URL will be slightly different. • Enter additional or new information if required and click Save to retain the settings. 9.7 Multiple Network Interface Card (NIC) Support Veri-NAC supports multiple NICs for auditing and network access control. The NICs can be configured for completely separate VLANs or subnets, allowing Veri-NAC to monitor physically disconnected segments. For pricing and instructions on enabling multiple NICs, contact Black Box Technical Support at 724-746-5500 or www.blackbox.com. Most Veri-NAC operations will choose the appropriate NIC for the operation in the background. There are some areas where a NIC must be specified. NOTE: Although the Veri-NAC supports multiple NICs, these NICs cannot be configured to reside on the same subnet or VLAN at this time. Page 118 724-746-5500 | blackbox.com Chapter 9: Using Veri-NAC System Functionality 9.7.1 Configuring NICs • Select “SystemgNetwork Configuration” from the left menu to go directly to the Network Configuration screen. Figure 9-12. Network Configuration screen. • Select the appropriate NIC by selecting the interface from the pull-down menu. • Enter the configuration information for the NIC and press “Save.” Ensure that the IP ranges you enter do not intersect. NOTE: The IP ranges you enter for each individual NIC must not intersect. 9.7.2 Performing Asset Discovery with Multiple NICs • Select Network Access ControlgAsset Discovery from the left menu to go directly to the Asset Discovery screen. Figure 9-13. Find Network Assets screen. • Select the appropriate NIC by selecting the interface from the pull-down menu. • Click “Refresh IPs” to perform an asset discovery. NOTE: Subnets monitored by multiple NICs must be discovered one at a time. ALL DDS functionality should be disabled prior to performing asset discovery. Page 119 Veri-NAC User’s Manual 9.8 System Statistics Check the Veri-NAC System Statistics page if you’d like to know how much space is left on your system. • Select “SystemgSystem Statistics” from the left menu. Figure 9-14. Users List screen. The System Statistics page displays a pie chart (see Figure 9-15) indicating the amount of hard disk space left on the system after Veri-NAC uses what it needs. Figure 9-15. Disk Usage graph. Users currently logged into the system are shown for each IP address. All users have access to the statistics for their system(s), but only MainAccount can see all systems in use. When the disk space usage is deemed critical (75%), Veri-NAC displays a scrolling warning at the bottom of the page. Page 120 724-746-5500 | blackbox.com Chapter 10: Setting Up the Command Center 10. Setting Up The Command Center The Command Center offers the ability to command and control remote Veri-NAC appliances across your network: • Remote Veri-NAC appliances can be added and groups of remote appliances can be created. • In one action, policies and configurations can be saved to all remote appliances included in a group. • Remote actions can be performed on remote appliances. • Group and appliance status can be quickly viewed on a single screen, providing an easy-to-use management console. The number of appliances the Command Center is able to manage varies depending on the type of LVN5400A, LVN5600A, and LVN5800A appliance you have purchased. Table 10-1. Number of appliances managed. Appliance Number of Possible Managed Appliances LVN5400A Up to 10 LVN5600A Up to 100 LVN5800A Unlimited NOTE: The Black Box Command Center can be used to remotely manage multiple LVN5200A, LVN5250A, or LVN5400A, LVN5600A, and LVN5800A appliances. NOTE: Intermediate devices, such as firewalls, must be configured to allow traffic from the Command Center to each remote, managed appliance. Consult your firewall documentation for more information on port/traffic forwarding. 10.1 Command Center Appliance List • Select Command CentergManaged Appliances from the left menu. The Managed Appliance page displays a list of Veri-NAC appliances (see figure below). Figure 10-1. Veri-NAC appliance list. 10.1.1 Add Appliances Information • Select Command CentergManaged AppliancesgAdd. • This takes you to the Appliance Information box. Fields with a red asterisk are required: Appliance Name, URL, and Serial Number. • Enter appliance information. If you enter the username and password for the appliance, you will not be asked for that information when you log on to it while using the Veri-NAC interface. The remaining optional fields are for information that may be useful to the network administration group, such as the location of the appliance or locations serviced by the appliance. • Click “Add Appliance” to enter the information or “Cancel” to ignore entries. Page 121 Veri-NAC User’s Manual 10.1.2 Edit Appliances Information • Click on a specific Veri-NAC appliance to see the current information on the Appliance Information page (see Figure 10-1). Modify as desired. 10.1.3 Removing Appliances • To remove one or more appliances from the list, click the check box next to the appliance name(s). When you select all appliances you wish to remove, click the Remove Selected button in the upper right corner of the page. 10.1.4 Adding/Managing Appliance Groups Some organizations may have hierarchies of Veri-NACs appliances. For example, a bank may have an LVN5400A, LVN5600A, and LVN5800A appliance in their main office and smaller LVN5200A/LVN5250A appliances in branch offices. Appliances in the branches may be centrally managed from the home office. • Select “Command CentergGroupsgAdd” to add groups using the Add Group Wizard. ** The add and manage options use the same wizard for entering group information and policies, which can be saved to remote appliances. • Select “Command CentergGroupsgManage” to select a group to manage using the Group Wizard. Figure 10-2. Group Managed Appliances screen. • Select the group to be managed. • Use the Group Wizard to enter group information, add managed appliances to the group, and select group policies, which can be saved to remote appliances. Click “Save” to save the group. Page 122 724-746-5500 | blackbox.com Chapter 10: Setting Up the Command Center 10.1.5 Remote Operations Figure 10-3. Remote Operations screen. You can perform a variety of operations on your remote appliances: • Select “Command CentergManaged AppliancesgRemote Operations” from the left menu. A list of your previously defined groups will be displayed, accompanied by colored icons indicating the status of the appliances in that group. Click on a group menu bar to display appliances included in the group, or click the link provided to view the status icon legend. Figure 10-4. Status Icons Legend screen. • Click on an appliance menu bar to display direct access to remote operations, appliance consoles, and system and network alerts. • Click on a remote operation menu bar to quickly perform remote operations on a managed appliance. • Click on “Appliance Console” to open an authenticated session with a managed appliance. Appliance Console opens in a new window. • Click on an alert menu bar to display the 50 most recent alerts. Page 123 Veri-NAC User’s Manual 10.2 Configuring Microsoft Internet Explorer for Command Center The Command Center uses authenticated connections to perform remote operations. Internet Explorer must be configured for each appliance to allow the Command Center to maintain authenticated connections. Each managed appliance should be added as a managed Web site. A setting of always allow should be selected for each managed website. The following simple steps will ensure that the Command Center will work to its fullest potential using Internet Explorer. • Select “ToolsgInternet Options” from the Internet Explorer menu. Figure 10-5. Internet Options screen, Privacy tab. • Select the Privacy tab and click “Sites.” Page 124 724-746-5500 | blackbox.com Chapter 10: Setting Up the Command Center Figure 10-6. Per Site Privacy Actions screen. • Add the IP address of a managed appliance. • Click “Allow.” • Click “OK” to save the managed sites. 10.3 Command Center Syslog Messages The Command Center parses remote client appliance logs and sends the events as syslog messages. Remote client appliance logs will be queried on regular intervals and the following syslog messages will be sent to the preconfigured syslog server. The syslog server should be configured on the appliance on which the command center is running; see Configuring the Syslog Server, Section 10.4. Page 125 Veri-NAC User’s Manual Table 10-2. Network Syslog Messages. Message Description Asset UntrustedIP Address of Client Appliance | Log ID | IP_Untrust | Date/Time of Operation | Number of IPs Affected | IP Addresses Affected | MAC Address of Affected Asset Asset TrustedIP Address of Client Appliance | Log ID | IP_Trust | Date/Time of Operation | Number of IPs Affected | IP Addresses Affected | MAC Address of Affected Asset Asset RemovedIP Address of Client Appliance | Log ID | IP_Remove | Date/Time of Operation | Number of IPs Affected | IP Addresses Affected | MAC Address of Affected Asset Multiple Assets RemovedIP Address of Client Appliance | Log ID | Removed_IP_Addresses | Date/Time of Operation NAC Blocking StartedIP Address of Client Appliance | Log ID | NAC_Blocking_Started | Date/Time of Operation | Number of IPs Affected | IP Addresses Affected | MAC Address of Affected Asset NAC Blocking Stopped IP Address of Client Appliance | Log ID | NAC_Blocking_Stopped | Date/Time of Operation | Number of IPs Affected | IP Addresses Affected | MAC Address of Affected Asset Unknown Asset Detected IP Address of Client Appliance | Log ID | Unknown_IP_Detected | Date/Time of Operation | Number of IPs Affected | IP Addresses Affected | MAC Address of Affected Asset Untrusted Asset DetectedIP Address of Client Appliance | Log ID | Untrusted_IP_Detected | Date/Time of Operation | Number of IPs Affected | IP Addresses Affected | MAC Address of Affected Asset Asset Discovery IP Address of Client Appliance | Log ID | Asset_Discovery | Date/Time of Operation Table 10-3. System Syslog Messages. Message Dynamic Detection System StartedIP Address of Client Appliance | Log ID | DDS_started | Date/Time of Operation Command Center Unable to Communicate with Client Appliance Service Pack UpdateIP Address of Client Appliance | Log ID | Service_Pack_Update | Service Pack Name | Date/Time of Operation Activated AuditIP Address of Client Appliance | Log ID | Activated_Audit | Audit Name | Date/ Time of Operation Edit AuditIP Address of Client Appliance | Log ID | Edit_Audit | Audit Name | Date/Time of Operation CVE UpdateIP Address of Client Appliance | Log ID | CVE_Update | Date/Time of Operation Deactivate AuditIP Address of Client Appliance | Log ID | Deactivate_Audit | Audit Name | Date/Time of Operation Page 126 Description IP Address of Client Appliance | Appliance_Offline | Date/Time of Operation 724-746-5500 | blackbox.com Chapter 10: Setting Up the Command Center Table 10-3 (continued). System Syslog Messages. Message Description Reboot IP Address of Client Appliance | Log ID | Reboot | Date/Time of Operation Dynamic Detection System StoppedIP Address of Client Appliance | Log ID | DDS_Stopped | Date/Time of Operation ShutdownIP Address of Client Appliance | Log ID | Shutdown | Date/Time of Operation Create AuditIP Address of Client Appliance | Log ID | Create_Audit | Audit Name | Date/ Time of Operation Remove AuditIP Address of Client Appliance | Log ID | Remove_Audit | Audit Name | Date/ Time of Operation Stop All AuditsIP Address of Client Appliance | Log ID | Stop_All_Audits | Date/Time of Operation Factory SettingsIP Address of Client Appliance | Log ID | Factory_Settings | Date/Time of Operation 10.4 Configuring the Syslog Server • Select SetupgSyslog / SNMP Traps from the menu. Figure 10-7. Syslog Message Setup screen. • Enter your syslog server port into the Syslog Port Number field • Enter your syslog server IP into the Syslog Server IP Address field • Click Save. 10.5 Clearing Command Center Alerts Clearing Command Center Alerts will remove all alerts for the selected appliance from the command center log database. The alerts will not be removed from the selected appliance’s database. Command Center Alerts should always be cleared following a factory reset. • Select Command CentergManaged AppliancesgManage from the menu. • Select a managed appliance by clicking on the Black Box Appliance Host Name. Figure 10-8. Clear Command Center Alerts screen. • Click Clear Command Center Alerts. • Click OK to confirm. Page 127 Veri-NAC User’s Manual Figure 10-9. Delete command center log entries prompt. NOTE: Alerts should always be cleared from the command center following a factory reset on the client appliance. 10.6 National Vulnerability Database The Command Center also provides a direct link to the National Vulnerability Database maintained by the National Institute of Standards and Technology (NIST) and sponsored by the Department of Homeland Security. Here you will find a vulnerability database that integrates publicly available U.S. Government vulnerability resources as well as references. • Select “AuditsgNat. Vulnerability Database” from the left menu to go to this site. Figure 10-10. National Vulnerability Database screen. Page 128 724-746-5500 | blackbox.com Chapter 10: Setting Up the Command Center • Enter the CVE number of the vulnerability you wish to look up. Figure 10-11. NVD Database screen. • Select the data elements you wish to include in the lookup. • Click the Search button to view results. Figure 10-12. CVE data. • Click the browser’s back button to return to Veri-NAC when you complete your research. Page 129 Veri-NAC User’s Manual 11. Corporate Security Policy Development Guide 11.1 Developing Corporate Policies This chapter presents step-by-step use of Veri-NAC Policies and Regulations options. You can develop security-related policies with this feature to keep ahead of regulations that concern you. NOTE: ISO 27001 and ISO 17799 are international standards used as the basis for developing other regulations. Some laws, such as GLBA, HIPPA, and COPPA, are specific to the United States. If you are in compliance with ISO 27001/17799, you are in compliance with all security regulations covered by Veri-NAC. NOTE: Within Veri-NAC documents and this manual you see references to BS 7799 and ISO 17799 and ISO 27001. B S 7799 stands for British Standard 7799. This is an internationally recognized standard that describes protection of information assets. It was first published in two parts. Most likely, you’ll see them referred to by their ISO names, but you may also see references to BS 7799 Parts 1 and 2 in the literature. (The ISO standards evolved from the BS 7799 standards.) ISO 17799 (BS 7799 Part 1) is a “code of practice” for information security management. It describes best practices and contains a list of controls or safeguards a company can follow to secure information and assets. ISO 27001 (BS 7799 Part 2) provides a standard specification for implementing an Information Security Management System (ISMS). Here, you select security practices that meet the unique needs/risks of your environment. It is a development methodology for creating an ISMS. ISO 27001 is the standard against which certifications are made. ISO 17799 and ISO 27001 are actually two different documents designed to support each other. They are also aligned with other standards such as ISO 9000. For easier reference within the Veri-NAC environment, we refer to the two standards as one (ISO 27001/17799). If you want to build an ISO 27001/17799 compliant policy, work with the ISO 27001/17799 Policy Builder. Use the Basic Policy Builder if you prefer to work with a simpler tool and/or are not concerned with ISO 27001/17799 compliance. NOTE: The Black Box Micro appliance does not feature the advanced ISO 27001/17799 Policy Builder. However, it does provide the Basic Policy Builder. 11.2 Understanding Regulations • Select “Policies and RegulationsgRegulatory Documents.” This takes you to a page with a list of PDF-format documents (see Figure 11-1). Each PDF document contains text of an individual compliance bill. The file names match bills you probably recognize, such as the Bank Secrecy Act (BSA), 21 CFR Part 11 FDA (CFR21FDA11), Electronic Signature (ESIGN), Gramm-Leach Bliley Act (GLBA), and so on. Page 130 724-746-5500 | blackbox.com Chapter 11: Corporate Security Policy Development Guide Figure 11-1. Regulatory Documents screens. NOTE: To use these documents, you need Acrobat Reader Version 5.0 or newer. You also need a browser to read HTML pages. 11.3 Using The Basic Policy Builder The Basic Policy Builder contains 26 customizable IT “Best Practice Security Policies.” Each policy includes an introduction; a sample overview; information about scope and purpose; the policy; compliance tips; key questions; key statements; document control; and a listing of current policy status. We recommend you start by printing the sample policies and using them as a worksheet. Note changes you require to meet company needs, modify the Veri-NAC samples, and fill in the blanks to obtain a customized, professionally generated set of IT security policies based on industry “Best Practices.” Once you complete your policies, use the printed versions as is or copy and paste into a word-processing program. To start the Basic Policy Builder: • Select “Policies and RegulationsgBasic Policy Builder” from the left menu. The Basic Policy Builder Overview page appears. Figure 11-2. Basic Policy Builder Overview page. Page 131 Veri-NAC User’s Manual • Click the Instructions button to see tips for editing your customized policies. Figure 11-3. Best Practice Security Policies screen. The Overview button on this screen returns you to the Basic Policy Builder Overview page. • Click the Policy Status button on either the Basic Policy Builder Overview page or the Basic Policy Builder Instruction page to see the current status of each policy. The first 13 policies appear in an initial display. Click Next or Previous to toggle between the first and last 13 policies. Figure 11-4. Best Practices Security Policies List. Initially, the Policy Status column reads Not started and the Policy Owner field is empty. • Click the Select Page… pulldown on either the Basic Policy Builder Overview page or the Basic Policy Builder Instruction page. Here, you can select any of the 26 policies in the list as well as the overview, instructions, or policy status for each policy listing. 11.3.1 Modifying Policy Text • To modify a policy, click the Select Page… pulldown menu on either the Basic Policy Builder Overview page or the Basic Policy Builder Instruction page. Page 132 724-746-5500 | blackbox.com Chapter 11: Corporate Security Policy Development Guide Figure 11-5. Select Page screen. • Select a policy from the drop down list, such as 7—Data Backup Policy. • The Introduction to Policy section appears with a gray background. Figure Data 11-6. Backup—Introduction to policy screen. The gray background indicates text that does not actually appear in the policy but is there to instruct or explain. Only text that appears on a white background remains in the policy. • Click “Next” to move to the following screen and edit the text of the Overview, Purpose, and Scope sections of the policy. There are separate white text blocks for each item. Page 133 Veri-NAC User’s Manual Figure 11-7. Data Backup screen. • Edit the text of each section and click Save (for each section). • Click Next to move to the following section of the policy and proceed until all edits are complete. At any time, you may click Previous to return to the prior screen. • Click View Policy to see a formatted display of the policy and your updates. (Updates only appear if you click the Save button.) 11.3.2 Revising Policy Document Status and Releasing Policy Change policy status and related information on the last page of the Policy Builder. Figure 11-8. Enter/Select Information screen. • Complete fields as requested. See the Guidelines in Table 11-1. Page 134 724-746-5500 | blackbox.com Chapter 11: Corporate Security Policy Development Guide Table 11-1. Guidelines Item Guideline Policy Status Will read Not started, In Process, Complete, or Released Revision Assign an appropriate revision number Supercedes Enter the previous revision number Written by (Policy Owner) Enter name of individual responsible for policy 1st Approval Enter name of first person giving approval and the date 2nd Approval Enter name of second person giving approval and the date Date Released Enter date when material is ready for release • Click Save (above the box) to retain the edited data and the entire policy. • Click View Policy to review the entire text of the policy. 11.4 Using The ISO 27001/17799 Policy Builder The ISO 27001/17799 Policy Builder is an Excel file you use for guidance in building a policy document for your organization. The policy document can be completed in any word processor. NOTE: LVN5400A, LVN5600A, and LVN5800A appliances feature the ISO 27001/17799 Policy Builder. • Select Policies and RegulationsgISO 27001/17799 Builder from the left menu. The IT-Policy-Builder.xls file opens. (Make sure you have Microsoft Office Excel on your system.) If you are on a Windows system, Excel may ask if you want to open or save the file. Click Open to proceed. Figure 11-9. IP Security Audit screen. Page 135 Veri-NAC User’s Manual • Notice the tabs for Intro and Standards along the bottom of the screen, and the additional, numbered tabs corresponding to the section numbers shown in the table. Figure 11-10. Tabs. The tabs are labeled: Table 11-2. Tab labels. Intro 8. Comm & Ops Management Standards 9. Access Control 3. Security Policy 10. System Dev & Maint 4. Organizational Security 11. Business Continuity 5. Asset Classification Control 12. Compliance 6. Personnel Security Baseline Results 7. Phy & Env Security Final Results The Intro tab is first and gives some instructions. Click the Standards tab to see text explaining each section of the standard. Section 3 is the Security Policy and 3.1 is the Information Security Policy. Scroll down to find Section 4, Organization Security, and 4.1, Information Security Infrastructure. To see the existing compliance document for a specific section, click the section number, which appears in your browser’s hyperlink color. A document opens, giving you a summary of requirements under each numbered section as well as some sample text you can insert into your own compliance document. At any time, you can open a word processing program and copy any text you need to form the foundation for your company’s compliance policy document. Figure 11-11. Hyperlink. 11.4.1 Indicating Your Existing Security Status For best results, don’t attempt to exit the .xls document until you are ready to save your work. Answer all the questions in a single session. Do not click on any hyperlinks inside the .xls file until you complete all compliance questions under all tabs. Page 136 724-746-5500 | blackbox.com Chapter 11: Corporate Security Policy Development Guide Figure 11-12. Baselne Audit Status screen. • For a preview, click on the Final results tab. Final results is a chart showing percentage of compliance you have achieved based on the parts of the standard you have fulfilled. Right now, that percentage will be 0, so nothing appears in the chart above. Below the chart is a small table that shows Sections 3 through 12, the sections of the ISO 27001/17799 specification. Figure 11-13. Final chart. • Click the Security Policy tab (3). Questions for this section of the audit process appear in Sections 3.1, 3.1.1, and 3.1.2 of the chart. Provide either a number zero (0) for No or one (1) for Yes / OK under the columns to the right for the Baseline Audit and the Final Audit (see Figure 11-14). Page 137 Veri-NAC User’s Manual Figure 11-14. Questions. If you have not yet done a final audit, only enter Yes responses (1s) under the Baseline column, and leave the final column blank. Look to the bottom of each column to see the percentage complete for this portion of the security policy document. • Repeat these steps for each of the remaining numbered tabs. • After you answer the questions on a few tabs, click the Baseline Results tab or the Final Results tab to see how you are progressing in completing your compliance requirements. 11.4.2 Generating Draft Text for Your Security Policy When you finish answering the questions under each tab (as described in the previous section), you are ready to retrieve compliance information and text from the hyperlinked .doc files provided. • Return to the first numbered tab, 3. Security Policy, and click on it. T o the far left, near the top of the spreadsheet, you will see an underlined number – 3.1.1. Click on this hyperlink section number to open the associated Word document with compliance text and sample policy text. Start the word processor outside the browser and create a document for your own policy. • Copy text as needed into that document and be sure to save it. • Click the browser’s Back button to return to the spreadsheet file. • Select the next tab and proceed in the same way you did with the previous document. At some point in this process, you will see a prompt asking you to save the .xls file. • Click Yes to save the document to your local disk, since you cannot save it to Veri-NAC. All your data is stored in your copy only. NOTE: No data you enter in the original .xls file is ever stored on Veri-NAC. You must store it on your local disk. • Return to the original .xls file in your browser and click on the hyperlink in the next numbered section to open the associated .doc file. Copy the text from that file into your own draft compliance policy. You can do all subsequent work on the .xls file in your local copy, but to use the hyperlinks to the compliance text for each section from your local copy, you must copy all the .doc files from Veri-NAC to your local disk. To avoid copying files to your local directory, always return to the original .xls file on Veri-NAC to access links. You can later edit and complete your compliance policy at your own pace. NOTE: Be sure to use the Back button on your browser to exit the Excel file. If you select FilegExit, you exit Veri-NAC instead. Page 138 724-746-5500 | blackbox.com Chapter 12: Reports Guide 12. Reports Guide 12.1 Overiew of Report Types and Content The LVN5200A, LVN5250A, LVN5400A, LVN5600A, and LVN5800A units produce a wide range of reports for CVE discovery and remediation. You can run and view these reports while auditing and blocking are in progress. LVN5200A units do not provide CVE auditing functionality. If you are interested in this functionality, contact Black Box at www. blackbox.com or 724-746-5500 for information about our LVN5250A, LVN5400A, LVN5600A, and LVN5800A units. 12.2 Understanding Veri-NAC Report Types When an audit is complete, it generates two vulnerability report types for administrators: Summary and Complete reports. Full and Differential reports contain complete data about all current vulnerabilities; Incremental reports contain only new vulnerabilities. Veri-NAC also places data from those vulnerability assessments and other security information stored on the appliance into a database the reporting engine then uses to create higher-level Management and Executive reports on demand. You can also query this database to generate a custom report. There are four types of reports, all saved in PDF format: • Complete Vulnerability Reports (intended for Network Administrators & IT Staff) • Summary Vulnerability Reports (intended for Network Administrators) • Executive Reports (intended for Executives) • Management Reports (intended for Managers) The System Administrator and other designated individuals receive e-mail notification when new Summary and Complete vulnerability reports are ready. Manager users can generate Executive/Management and Query reports any time, on demand. Veri-NAC Complete Vulnerability reports provide: • Comprehensive Vulnerability Assessment with quick-click remediation links • Links to Common Vulnerabilities and Exposures (CVE) information, where it applies • Regulatory Compliance reporting for HIPAA, GLBA, 21 CFR Part 11 FDA, SOX, and others • Credit Card Merchant Security Program compliance reporting 12.2.1 CVE Information in Reports Veri-NAC is a CVE-compatible product. This means you can search for standard names of Common Vulnerabilities and Exposures (CVEs) assigned by MITRE Corporation. Details on each CVE Veri-NAC finds are explained in its reports; however, you can find more information on any CVE by searching the MITRE CVE web site (www.cve.mitre.org). Veri-NAC searches for the latest known CVEs. Because the Update Server is refreshed every day, you know you have the most upto-date CVEs and CVE candidates available when you download new tests. When Veri-NAC finds a CVE, it indicates the name (CVE followed by several digits) on the report. Veri-NAC reports also include CVE candidates, which are issues MITRE is confirming before making them official CVEs. 12.2.2 Credit Card Merchant Security Program Information in Reports Veri-NAC reports compliance with the following credit card merchant certification programs: Visa CISP, MasterCard SCP, American Express DDS, Discover DISC. Page 139 Veri-NAC User’s Manual 12.3 Viewing Vulnerability Reports Selecting Content Presented in Reports • Select ReportsgView Audit Results to open the Reports page. Figure 12-1. Recreate Report screen. The Recreate Report box is at the top of the Reports page. Here you choose parameters for creating your final report. Select how to sort the report, the level of CVE to detail in the report, and whether or not to include vulnerabilities Veri-NAC believes may be false positives (Potential) and/or those you have previously confirmed as false positives in the workflow process. To see only the most serious vulnerabilities, select High. Detailed information for the levels is shown in the table below. Table 12-1. Vulnerability levels. Setting Description Low Includes all levels of system vulnerabilities, including low, medium, and high level. MediumIncludes only vulnerabilities at the medium and high level. You may want to select this option after you remediate high-level vulnerabilities. HighFocuses on the most serious vulnerabilities present on the system and reports only those. You should start by determining the most serious vulnerabilities and clean them up before addressing others. Below the Recreate Report section is a list of all reports generated by all audits. They are identified by audit report name, the date/time the audit finished, audit mode (Full, Differential, Incremental, or Top 20), and ticket number. To view the Complete report from a given audit, click the symbol in its row. To view the Summary report, click the S icon. The Complete report details vulnerabilities and identifies risks by level of severity: Low, Medium, High, and Serious vulnerability types. By default, the report is sorted by vulnerability IDs (ranked with Serious first). Reports contain technical information relating to each detected risk, with live links to fixes, patches, and updates that provide resolutions to these vulnerabilities. Page 140 724-746-5500 | blackbox.com Chapter 12: Reports Guide Table 12-2. Vulnerability types. Risk Level Vulnerability Type NotesImportant notes—show you which ports are open. Get in the habit of reading Notes on a regular basis since they may indicate malware running on a port. Check open ports and confirm you want them open. LowLess important vulnerability—harder to exploit and usually causes little or no damage to your network assets. Always fix Serious and High vulnerabilities first and then review Medium and Low vulnerabilities. Decide if Low has potential consequence to your organization. If not, use the Comment field to indicate you don't consider this vulnerability an issue. MediumSlightly more important than a Low-level vulnerability but usually hard to exploit. Medium level vulnerabilities might allow an attacker to gain access to your network. Always fix Serious and High vulnerabilities first, and then review Medium and Low. Decide if Medium has potential consequence to your organization. If not, use the Comment field to indicate you don't consider this vulnerability to an issue. HighVery important vulnerability that may be easy to exploit and allow an attacker to cause serious damage to your network. Fix this vulnerability as soon as possible. If you cannot patch the problem, you may have to reconfigure the system, shut down a service or process and/or tune your firewall and other countermeasures to pickup and block an attack against this vulnerability. SeriousExtremely important vulnerability that may be easy to exploit and allow an attacker to cause critical damage to your network. Fix this vulnerability as soon as possible. If you cannot patch the problem, you may have to reconfigure the system, shut down a service or process and/or tune your firewall and other countermeasures to pickup and block an attack against this vulnerability. NOTE: Y ou may see Notes or Info Reporting Levels in your reports. These levels may describe open ports, operating systems running, services running, and versions as well as provide security suggestions. 12.4 Interpreting and Understanding Reports All reports contain two types of information—graphical and descriptive. The graphical data gives an overview of the risk situation, whereas the descriptive information provides details about each vulnerability. Within each report type, the various audit scopes produce slightly different results. The four scopes are Full, Differential, Incremental, and Top 20. Table 12-3. Reports descriptions. Type Description FullReport will contain all vulnerabilities. This data is included in Executive and Manager reports as well as Complete and Summary reports intended for Managers. Incremental DifferentialReport will contain differential analysis of vulnerabilities since last audit, including charts and graphs on Fixed Vulnerabilities vs. Open Vulnerabilities in Summary, Executive, and Manager reports as well as details in Complete vulnerability reports. Top 20Report will contain only the most significant top 20 vulnerability tests. This report data is available only in Complete and Summary reports. Report will contain only new vulnerabilities. This data is available only to Managers. Page 141 Veri-NAC User’s Manual 12.4.1 Interpreting Complete Vulnerability Reports The Audit Results section of the Summary reports sums up Regulatory Compliance Status and Credit Card Merchant Program Status. Each title links to the details about compliance issues. Figure 12-2. Regulatory Compliance Status and Credit Card Merchant Program Status screen. Below the Compliance information is information about the audit itself, such as the Veri-NAC IP address, the last date/time updates to CVEs were downloaded, the length of the audit (audit duration), and other basic facts. In addition, you see how many hosts were active and how many were blocked at the Firewall or SmartSwitch. Figure 12-3. Audit information. Complete vulnerability reports contain a vertical bar chart like the one shown in Figure 12-4 that indicates the prevalence of each type of risk on the network. Figure 12-4. Risk type prevalence. Figure 12-5. Critical vulnerabilities percentage. Page 142 724-746-5500 | blackbox.com Chapter 12: Reports Guide Complete reports also show the percentage of vulnerabilities per operating system type in a single graph. In Figure 12-5 you see almost 30% of the vulnerable systems are Windows and over 60% are Linux. A horizontal bar chart in Complete reports shows more details on each IP address—indicating exactly the number of vulnerabilities at each risk level on particular hosts. (See Figure 12-6.) Figure 12-6. Vulnerability Levels by Host IP Address. In Complete Differential reports (created from a Differential audit only), a special bar chart titled Differential Vulnerability Analysis shows the vulnerability totals broken down by type for the Current vs. Previous Audits, so you can see the progress being made in the remediation of these vulnerabilities. (See Figure 12-7.) Figure 12-7. Differential Vulnerability Analysis chart. Page 143 Veri-NAC User’s Manual 12.4.2 Interpreting Vulnerability Descriptions Complete reports (typically read by system administrators and other IT personnel) contain entries sorted based on selections you made earlier under Recreate Report. You can search for particular CVEs in the PDF report using the Acrobat® search feature and standard CVE names. A typical serious risk is fully explained in the example shown. In addition, the report provides details on how to respond to the risk and/or a link to more data about that vulnerability and how to correct it. Figure 12-8. Interpreting Vulnerability descriptions. You may also encounter CVE candidates (with the CAN prefix). Figure 12-9. CVE candidates. Tabular data in Complete reports indicates the number of vulnerabilities on each machine and a list of the most critically vulnerable hosts, the number of vulnerabilities they have, and their operating systems. At the end of the report, an Appendix provides more data on compliance with regulations and credit card merchant programs. Page 144 724-746-5500 | blackbox.com Chapter 12: Reports Guide 12.4.3 Interpreting Summary Reports The Audit Results section of Summary reports sums up Regulatory Compliance Status and Credit Card Merchant Program Status (see Figure 12-10). Each of the titles shown links to details about compliance issues, similar to Figure 12-11. Figure 12-10. Compliance issues sample screen. Figure 12-11. Compliance Status screen. In addition, this report section presents the three most prevalent critical vulnerabilities on the network and the three most critically vulnerable servers on the network. There are links to more details about top vulnerabilities and to a table about the top three critically vulnerable systems. (See Figure 12-12.) Figure 12-12. Sample Full Audit screen. NOTE: To allow Summary reports to identify a system as a server, be sure to select a System Type that includes the word Server when completing the System Information in the Asset Tracker. You can select, for instance, Mail Server or Web Server, as long as the name includes the word Server. If the reporting engine cannot find any systems labeled Server, it will report on the three most vulnerable systems rather than the three most vulnerable servers. Page 145 Veri-NAC User’s Manual Summary reports display a pie chart that shows the percentage of vulnerabilities at each risk level and includes actual totals in the legend to the left of the screen as in Figure 12-13. Figure 12-13. Percentage vulnerabilities pie chart. The most serious vulnerabilities always appear in red, high in orange, medium in yellow, and low in green. The color-coded legend names each level of risk in its color. Details on the top three critical vulnerabilities are similar to those provided in the Complete report. (See Figure 12-14.) Figure 12-14. Top 3 Critical Vulnerabilities Report. The table for the top three critical servers summarizes the number of serious and high vulnerabilities on those servers and indicates the server type. Figure 12-15. Serious and high vulnerabilities. Page 146 724-746-5500 | blackbox.com Chapter 12: Reports Guide 12.5 Remediation of Vulnerabilities in Reports To remediate a vulnerability, open Veri-NAC in a browser from the system to be fixed and review the information. Click on the live links in the Description section of the Complete report for details. 12.6 Adding Custom Comments to Report Content You can add your own comments to any vulnerability in the report. Those comments remain linked to that vulnerability even after the audit executes at its next scheduled time and Veri-NAC generates a new version of the report. To enter comments to a vulnerability report: • Select “ReportsgView Audit Results” from the left menu. This takes you to the Reports page. • Click the link for your chosen report. This takes you to the Report Details page. Vulnerability Details are listed at the top of the page as in Figure 12-16. Figure 12-16. Vulnerability details. The description lists the IP addresses of all the machines audited for this report and indicates the number of vulnerabilities at each level. This information appears even while the audit is in process. NOTE: Details of the report content, shown in the subsequent steps, are available only if the audit is completed. • Move down the screen to see the Text of Vulnerabilities box (see Figure 12-17). You can scroll through the report and copy text to another file. Figure 12-17. Text of Vulnerabilities screen. A numbered list of the comments you entered will appear below the report text. Initially, the list is empty. See instructions on the next page to add comments. Page 147 Veri-NAC User’s Manual 12.6.1 Adding New Comments Use the Edit or Add Comments box below the list to add a comment to Existing Comments. • Enter the Title and Test Numbers, and then insert your new comment in the Comment field. See Guidelines below. Figure 12-18. Edit or Add Comments screen. Table 12-4. Comments guidelines. Field Guideline TitleOnly required field. You can enter up to 50 characters. Only the text you enter in the Comment field appears in the report. Information in the Title field does not. Test NumbersEnter at least one test number (the five-digit vulnerability test number, not the CVE number) so VeriNAC knows when to add the comment to a report. You can enter up to 42 test numbers in the field, separated by commas. No space is needed after the comma. Comment The comment field may contain up to 300 characters. NOTE: The required Title field can be anything you want as a reminder. It allows you to keep better track of your comments. • Click “Save” to retain the comment. Veri-NAC assigns a number to the comment and it appears in the list. 12.6.2 Editing/Removing Existing Comments To edit a comment from the Existing Comments list, scroll to the right of list. • Enter the number of the comment you want to edit, and then click the Edit button. The information stored in that comment appears in the Edit or Add Comments box below the list. (You can also delete a comment by entering its number and clicking “Remove.”) (See Figure 12-19.) Page 148 724-746-5500 | blackbox.com Chapter 12: Reports Guide Figure 12-19. Edit/Remove Existing comments. • Edit the text of the comment in the Comment field and click “Save.” The new text appears in the Existing Comments list. 12.6.3 Viewing Comments in Reports To see Comments in your reports: • Click the Back to Reports button (near the top of the page) to return to the main Reports page. • In the list of reports, click the check box for each report name you want to review. • Click “Recreate Selected” button at the top center of the page. The modified reports are highlighted in yellow (or an alternative color depending on your browser settings). Figure 12-20. Viewing comments. • Click the Report link to go to the Report Details page. • Search the Text of Vulnerabilities box for the test number with which the comment is associated. Scroll to the end of the section for that test number. The comment appears under User Comments at the end of the vulnerability test information. pen the report by clicking on the C icon. When the vulnerability appears in the report, the comment follows the end of the O description. 12.7 Finding Automatic Reports for Dynamically Detected Devices • Select “ReportsgView Audit Results” from the left menu to go to the Reports page. hen you need a report on a dynamically detected device, look in the Report column of the Reports page for a profile name in W the following format: Auto_<ip_address> Figure 12-21. Find report profile name. Page 149 Veri-NAC User’s Manual • Click on the Report link. This takes you to the Report Details page where you can review available data, shown below, as well as Text of Vulnerabilities and Comments fields. 12.8 Removing a Report Use the Reports page to remove a set of reports for a particular audit name. Click the check box to the left of the audit name. Click the Remove Selected button to the upper or lower right of the reports list (see Figure 12-22). Figure 12-22. Remove Selected report button. A window appears to confirm the removal. Click Continue to return to the Reports page. The entire row is deleted from the Reports page. NOTE: IT staff users are not able to remove reports. 12.9 Saving a Report to Disk To save a report to disk, go to its Reports page. Select “ReportsgView Audit Results for Summary and Complete Reports.” Select “ReportsgGenerate Exec. Reports for Executive Reports.” Select “ReportsgGenerate Mgmt. Reports for Management Reports.” NOTE: We recommend you always store reports only on Veri-NAC to ensure they remain confidential. If you must save a report locally, do so only on a secure server. • Right click on the , , , or report icon, as required. • Select “Save Target As” and save to a place in a secure area on a protected machine. • Select the destination and file name. • Click “Save” to retain the report. Page 150 724-746-5500 | blackbox.com Chapter 12: Reports Guide 12.10 Creating Custom Reports Using Queries 12.10.1 Querying Reports Database • Select “ReportsgQuery Vulnerabilities” from the left menu. This takes you to the Report Query page (see Figure 12-23). Figure 12-23. Report Query screen. • Choose a search topic: - IP Address - Audit Name - Vulnerability ID • Choose either “IP” or “Vulnerability ID” in the Sort by field. • Select “None,” “Potential,” “Confirmed,” or “Both” in the Include False Positives field. • Click the Next button to continue. • Select the Date Range. Figure 12-24. Date Range. • The From date defaults to the earliest date for which data is available. The To date defaults to today’s date. • Click “Next” to continue. Page 151 Veri-NAC User’s Manual • Select the risk level(s) from the choices shown. (See Figure 12-25.) Figure 12-25. Risk level. • Click “Next” to see the query results. Some sample results from the Report Query page are shown in Figure 12-26: Figure 12-26. Sample Report Query results. The Report Query page shows vulnerability ID, risk level, service name, and job status for each IP address listed. Click an individual IP address in the first column to link to data from the asset database. You can also click on a particular vulnerability ID to open information about that ID. Sometimes you may need to use this data for various company and regulatory reports. You can download in CSV format all data for each report you generate. This will allow you to use it in Excel or other reporting systems. If you save the data to a CSV file, you are prompted for a location on your hard drive or network. 12.10.2 Printing Query Results To print the query results like a report, be sure you have the page set up to print in landscape mode from the browser print settings. Then print the report using browser print functions. Page 152 724-746-5500 | blackbox.com Chapter 12: Reports Guide 12.11 Requirements for Executive/Management Reports The Veri-NAC automatically creates vulnerability reports when an audit completes. Veri-NAC also places data from vulnerability assessments and other security information from the appliance into a database, which the reporting engine uses to create highlevel Management and Executive reports on demand. Only manager level users can generate these two report types. Some trend charts in Management and Executive reports require minimum amounts of data to be useful. We recommend you allow at least a month of data to accumulate before expecting meaningful trend results. Understading Risk Levels in Reports All vulnerabilities have a risk level of Serious, High, Medium, or Low. Detailed definitions for the levels are shown in the table on the next page. Veri-NAC generates vulnerability reports and stores this data in its database each time it audits the network. Table 12-5. Risk Level/Vulnerability Type descriptions. Risk Level Vulnerability Type Notes Important notes—show you which ports are open. Get in the habit of reading Notes on a regular basis since they may indicate malware running on a port. Check open ports and confirm that you want them to open. LowLess important vulnerability—harder to exploit and usually causes little or no damage to your network assets. Always fix Serious and High vulnerabilities first and then review Medium and Low vulnerabilities. Decide if Low has potential consequence to your organization. If not, use the Comment field to indicate you don’t consider this vulnerability an issue. MediumSlightly more important than a Low-level vulnerability but usually hard to exploit. Medium level vulnerabilities might allow an attacker to gain access to your network. Always fix Serious and High vulnerabilities first, and then review Medium and Low. Decide if Medium has potential consequence to your organization. If not, use the Comment field to indicate you don't consider this vulnerability to be an issue. HighVery important vulnerability that may be easy to exploit and allow an attacker to cause serious damage to your network. Fix this vulnerability as soon as possible. If you cannot patch the problem, you may have to reconfigure the system, shut down a service or process and/or tune your firewall and other countermeasures to pickup and block an attack against this vulnerability. SeriousExtremely important vulnerability that may be easy to exploit and allow an attacker to cause critical damage to your network. Fix this vulnerability as soon as possible. If you cannot patch the problem, you may have to reconfigure the system, shut down a service or process and/or tune your firewall and other countermeasures to pick up and block an attack against this vulnerability. NOTE: Y ou may see Notes or Info Reporting Levels in your reports. These levels may describe open ports, operating systems running, services running, and versions, and may also provide security suggestions. Page 153 Veri-NAC User’s Manual 12.12 Generating Management Reports NOTE: System Administrator: Be sure to supply managers, executives, and IT staff with the username and password you assign to them when you create their account. You must be a manager level user to access Management or Executive reporting features. To generate a report: • Select “ReportsgGenerate Mgmt. Reports” from the left menu. The Create Management Report box appears. (See Figure 12-27.) Figure 12-27. Create Management Report box. • Enter the Report Name. • Select the Report Type based on the period you want covered—Weekly, Bi-Weekly, Monthly, or Quarterly. • Fill in Ending Date. • Choose one or more audits to include in the report from the Audit Names List. To select more than one, hold down Ctrl while selecting. • When the report is ready, it will appear in the list of reports along with all other reports you have created. Page 154 724-746-5500 | blackbox.com Chapter 12: Reports Guide 12.13 Understanding Content of Management Reports The report type (e.g. Monthly Management Report) and date created are shown at the top of the Management Report below the report name. Report dates are in the Summary section below the heading. Although regulatory and credit card compliance information reported is shown in all reports, other Summary information in the Management report differs from that in vulnerability reports, since it targets management concerns. Figure 12-28. Management report. This report summarizes the number of open, fixed, and new vulnerabilities. It also indicates how many resources/hours were used for remediation and how many jobs were escalated (for being past due). See Figure 12-28. Figure 12-29 shows an overview of current vulnerabilities in bar chart form, indicating the number at each risk level. Figure 12-29. Current Vulnerabiltites Overview chart. Figure 12-30. Vulnerability Totals/Levels chart. Page 155 Veri-NAC User’s Manual Figures 12-30 and 12-31 show Vulnerability Status by Risk Level—indicating how many vulnerabilities at each risk level are new, fixed, and in the process of being fixed. Figure 12-31. Vulnerability Status by Risk Level. Trends in Vulnerability Status is the next section. This section presents trend graphs indicating how many vulnerabilities at each level have been open and how many new ones were introduced over the reporting period. NOTE: The number of data points in the graph depends on the dates of the audits. If you include weekly audits, you only see weekly data points. If you include daily audits, you see more data points. For quarterly, semi-annual, and annual reports, you may choose to use monthly vulnerability reports for an overview of the data or daily vulnerability reports to see the most detail. Figures 12-32 and 12-33 indicate the number and severity of both open and new vulnerabilities over the reporting period. Figure 12-32. Open Vulnerabilities chart. Page 156 724-746-5500 | blackbox.com Chapter 12: Reports Guide Figure 12-33. New Vulnerabilities chart. The next section, Trends in Vulnerability Management Status, graphs the number of vulnerabilities fixed during the time period and the number of IT resource hours expended to fix them. The graph shown in Figure 12-34 details Expended IT Resource Hours. It provides a quick view of data, also available in the Workflow Management System, showing the total work hours used for the vulnerabilities, broken down by level of severity. Totals are for the time period you chose for the report. Figure 12-34. IT Resource hours breakdown by risk level. Page 157 Veri-NAC User’s Manual Figure 12-35 show the final three graphs, which detail critical vulnerabilities as well as the IT resources currently working to resolve them. Figure 12-35. Critical vulnerabilities/IT resources. A table of Critical Vulnerabilities gives the manager a quick view of the most significant problems on the network, the number of systems affected, and the status of each. Another table shows Critically Vulnerable Systems to give the manager a quick view of which systems are in the most trouble. The last table summarizes the IT Resources working on these vulnerabilities. Compliance details appear in the Appendix of the report. 12.14 Generating Executive Reports Executive reports provide a broad overview of the company’s network vulnerability status at an executive level. Manager level users may create executive reports themselves or allow executives to log on and create their own reports as needed. Only a manager level user can generate executive reports. To generate a report: • Select “ReportsgGenerate Exec. Reports” from the left menu. The Create Executive Report box appears. • Enter the Report Name in the name field. • Select the Report Type - Monthly, Quarterly, Semi-Annual, or Annual. • Fill in the Ending Date. • Select the audit from the Audit Name List for which you need the report. To select more than one audit name, hold down Ctrl while selecting. • Click the Create Report button below the Create Executive Report box. Page 158 724-746-5500 | blackbox.com Chapter 12: Reports Guide When the report is available, it appears in the list of reports along with all other reports you have created (until you delete them). • Click the C icon from the report’s rightmost column to view the report. Understanding Content of Executive Reports The report type (e.g. Executive Monthly Report) and date created are shown at the top of the report below the name. Report dates are in the Summary section below the heading. Regulatory and credit card compliance information appears next. Figure 12-36. Regulatory and credit card compliance information. Other summary information in the executive report is less concerned with details, but provides a view of the general health of the network. This report type summarizes the number of open/fixed vulnerabilities and how many resource hours were expended on remediation. The executive report indicates the threshold level for quarantining systems and the number of firewall/switch blocking events that occurred in the time period the report covers. This information provides the executive with a high level view of the impact of vulnerabilities on productivity. The first page in the executive report, shown in Figure 12-37, displays a pie chart showing percentages of vulnerabilities at each level, a basic overview of the vulnerability status. Figure 12-37. Percentage vulnerabilities pie chart. Page 159 Veri-NAC User’s Manual Two line graphs show Trends in Vulnerability Status. These graphs are identical to those described in the Understanding Content of Management Reports section earlier in this chapter. Executive reports have two additional tables with information focusing on the Top 10 Critical Vulnerabilities and the Top 10 Critically Vulnerable Systems, shown in Figure 12-38, found in the time period the report covers. Figure 12-38. Top 10 Critical Vulnerabilities charts. If your network has ten or fewer critically vulnerable systems, you’ll see all of them in this tabular section of the report. If the network has more than ten, this section indicates the top ten systems with vulnerabilities. Compliance details appear in the Appendix of the report (see Figure 12-39). Figure 12-39. Appendix: Compliance with Regulations and Credit Card Merchant Programs screen. Page 160 724-746-5500 | blackbox.com Chapter 13: Working with Logs 13. Working with Logs This chapter describes how to use Veri-NAC logs. You must be a manager user type to access logs. NOTE: Different types of Black Box appliances have different log storage capacity: Table 13-1. Log storage capacity. Appliance Amount of Storage Estimated Storage Time LVN5200A 160 GB 12 months LVN5250A 250 GB 1–2 years LVN5400A 320 GB 2–3 years LVN5600A 500 GB 2–3 years LVN5800A 1000 GB 3+ years The Veri-NAC logs two types of events: network and system. • Network Events—Occur on the network Veri-NAC is auditing/monitoring. • System Events—Occur on the Veri-NAC unit itself. You can export both logs to a CSV format file. Use this to meet forensic analysis and regulatory compliance requirements. 13.1 Viewing Network Events Log Network Events Logs show significant Veri-NAC monitored changes on your network. • Select “LogginggNetwork” from the left menu. The Logging box appears. (See Figure 13-1.) Figure 13-1. Logging box. • Select an event type from the pulldown list. • Choose from: - Asset Discovery - Manually Added IP Address - Manually Added Asset - IP Address(es) Removed - Dynamically Detected IP Addresses - Firewall Edited Page 161 Veri-NAC User’s Manual • Enter the date range. • Click “Show Logs,” and the log displays (see Figure 13-2). Figure 13-2. Asset Discovery log. You can either perform a New Search to view logs for another parameter or you can Download Log to a CSV format file. If you save the data to a CSV file, the system prompts you for a location on your hard drive or network. 13.2 Viewing Veri-NAC System Events Log You can also view a log of significant events that occurred on Veri-NAC itself. • Select “LogginggSystem” from the left menu. The Logging dialog appears (see Figure 13-3). Figure 13-3. Logging dialog. Page 162 724-746-5500 | blackbox.com Chapter 13: Working with Logs • Select an event type from the list shown in the pulldown. • Enter the date range. • Click “Show Logs,” and the resulting log displays. You can either perform a New Search to view logs for another parameter or you can Download Log to a CSV format file. If you save the data to a CSV file, you are prompted for a location on your hard drive or network. 13.3 Generating and Viewing Asset Reports • Select “ReportsgView Audit Results” from the left menu to go directly to the Audit Results screen. • Select an audit result to generate an Asset Report for that audit. Assets will also be marked as trusted when unblocked. • Click “Generate Asset Report.” Figure 13-4. Generate Asset Report. • Click on one of the generated links to view the report. NOTE: Asset reports combine Black Box and National Vulnerability Database (NVD) data. Reports are available in PDF and XML formats. XML schema is also available. 13.4 Generating and Viewing NAC Reports • Select “ReportsgNAC Reports” from the left menu to go directly to the NAC Reports screen. • Select a start date for the NAC report. Assets will also be marked as trusted when unblocked. • Select an end date for the NAC report. • Click “Generate NAC Report.” • Click on the generated link to view the report. 13.5 Generating and Viewing IP History Reports • Select “ReportsgNAC Reports” from the left menu to go directly to the NAC Reports screen. • Enter an IP address. Assets will also be marked as trusted when unblocked. • Select a start date for the IP History report. Assets will also be marked as trusted when unblocked. • Select an end date for the IP History report. • Click “Generate IP History Report.” • Click on the generated link to view the report. Page 163 Veri-NAC User’s Manual 14. Vulnerability Remediation Guide This chapter describes how to use the Veri-NAC Workflow feature to manage vulnerability remediation across your organization. NOTE: To use workflow features, you must create accounts for all users accessing Veri-NAC. NOTE: When working on vulnerability remediation, work with vulnerability reports. For more information on reports, refer to the Reports Guide (Chapter 12). The Veri-NAC Vulnerability Remediation Guide is for all IT staff responsible for maintaining the company’s internal networks and performing remediation of vulnerabilities on those networks. • Set the guidelines Veri-NAC will use to allocate person hours to remediate vulnerabilities at each level. • Veri-NAC creates report tickets based on vulnerabilities it finds in reports. • Each report ticket can contain multiple jobs. Fixing each individual vulnerability is one job ticket. • Veri-NAC uses time guidelines you set (and assumes an 8:00 A.M. to 5:00 P.M. workday) to generate a due date for each job. • Veri-NAC lets IT Staff choose their own jobs. When an IT Staff user chooses a vulnerability, the individual is assigned all instances of that vulnerability across the entire network. • Veri-NAC automatically checks to see if jobs are past due twice a day (8:00 AM and 12:00 [noon]), then escalates any jobs it finds to be past due by sending an e-mail to the IT manager(s). • Manager level users can reassign jobs to different IT staff members or adjust person hours for remediation. • While a job is in the process of being assigned, the job is placed on hold, so no other manager can assign it. • If you have a manager account, you can assign work to any user who works for you. You may have both IT staff users and other managers working for you. Any IT staff or manager may have multiple managers. Page 164 724-746-5500 | blackbox.com Chapter 15: Understanding Workflow and Responsibilities 15. Understanding Workflow and User Responsibilities 15.1 Progression of Job Status Figure 15-1. Job Status flow. 15.2 IT Staff: Steps For Remediation of Vulnerabilities Figure 15-2. Steps for vulnerabilities remediation. Page 165 Veri-NAC User’s Manual 15.3 Managing Remediation—Responding to Events as Manager Figure 15-3. Manager‘s response to events. 15.4 Users in an Organizational Structure Every user is designated either a manager, an IT staff, or a NAC user member when the initial user sets up all user accounts. The initial user, MainAccount, is always a manager. Responsibilities and privileges of each user type are distinct. Managers can assign work to themselves or any one of their direct reports, regardless of other manager levels existing within the group. Managers, and only managers, can modify time allocated for remediation of vulnerabilities at different risk levels, assign tasks to other users, confirm false positives, and close jobs. IT staff and NAC users are on the same level in the hierarchy, but have different responsibilities. IT Staff users can select jobs they want to work on, change a job status to To Be Confirmed, or tag a vulnerability as a potential false positive for a particular system. IT staff cannot close jobs or confirm false positive status of a vulnerability. NAC users can only access Network Access Control functionality and are not involved in vulnerability remediation. Manager users can also access and create all types of reports. IT staff can only view reports. Manager users can remove users from their own organizations. If a manager removes a sub-manager, those who report directly to that sub-Manager are automatically assigned as reporting to the higher-level Manager (see the example in Figure 15-4). Figure 15-4. Sample Veri-NAC users structure in an organization. Page 166 724-746-5500 | blackbox.com Chapter 15: Understanding Workflow and Responsibilities Any user’s direct manager receives all notifications of his/her jobs escalated, ready to confirm, or tagged potential false positives. Note that a manager can work for a manager, and a manager can do anything an IT staff user can do. If a manager is taking remediation action on a job, the manager’s role changes to an IT staff user—unable to view his/her own jobs when they are in a To Be Confirmed state. Only the manager’s manager can view the To Be Confirmed jobs and change their status to Closed or revert them to In Process. The exception is the main account can view his/her own jobs when they are in a To Be Confirmed state and change their status to Closed or revert them to In Process. Page 167 Veri-NAC User’s Manual 16. Using Workflow in Vulnerability Remediation NOTE: Some steps described below are only for managers. 16.1 Navigation Navigate Veri-NAC using the vertical menu bar on the left of the browser window. For IT staff users, the left menu on the browser page contains four top-level selections: • Reports • Workflow • Help • Logout Use these menus to help you remediate vulnerabilities. Manager users see a more complete menu, as shown in the System and Audit Setup Guide. When you are ready to log out, click the Logout selection at the bottom of the menu. 16.1.1 Setting/Viewing Time Allocated for Remediation • Select “WorkflowgTime Allocation Setup” from the left menu. The Auto Time Allocation Setup box appears (see Figure 16-1). Figure 16-1. Auto Time Allocation Setup screen. Veri-NAC assigns a due date for each vulnerability found based on the time allocated for each risk level. The calculation uses the time indicated in the Auto Time Allocation Setup dialog. Manager users can change the number of person hours allowed for remediation. If the work is not complete before the due date (Veri-NAC automatically checks for past-due jobs at 8:00 A.M. and 12:00 P.M. every day), Veri-NAC escalates the job by sending e-mail to the assigned user’s manager. Page 168 724-746-5500 | blackbox.com Chapter 16: Using Workflow in Vulnerability Remediation If no user has been assigned the job, Veri-NAC sends the escalation message to all manager users. We recommend you choose trial settings to start. If you find people need more time, tweak the settings. New settings affect open unassigned jobs only. Although all users may view these settings, only a manager user may set the values in this dialog. • Click the Save Changes button when complete. 16.1.2 How Veri-NAC Calculates Sets/Due Dates Jobs are made up of all instances of a vulnerability on all machines from all Veri-NAC reports. For Serious and High vulnerabilities, every instance of a vulnerability is allowed the number of hours you initially set, but Medium and Low vulnerabilities operate under a sliding time scale. For example, if you set Medium vulnerabilities to two days, the first instance of a Medium vulnerability is assigned those two days. Additional instances of the same vulnerability will be allowed a quarter of that time (in this instance, a half day each), since once the research on a vulnerability is done, subsequent fixes should not require as much time. The time clock on a job starts ticking as soon as the job is assigned. For scheduling purposes, Veri-NAC assumes workdays are Monday – Friday, 8:00 A.M. to 5:00 P.M., with one hour for lunch. Manager users can adjust due dates and person hour allocations for individual jobs. 16.2 Viewing the Workflow Ticket Log • Select WorkflowgWorkflow Log from the left menu to open the Workflow Ticket Log as shown in Figure 16-2. Figure 16-2. Workflow ticket log. Each audit’s report and number of vulnerabilities are grouped into one of three status categories: • Open/Unassigned • Open/Assigned • Fixed • To assign work (only as a manager), choose a report that has unassigned vulnerabilities and click on its number in the far left Report Tkt column. The complete list of open jobs associated with that ticket displays (see Figure 16-3). Page 169 Veri-NAC User’s Manual Figure 16-3. Open jobs associated with a particular ticket. If a job is escalated before it is assigned, Veri-NAC recalculates the due date as if it were assigned using the date and time the job is assigned as the Start Time. 16.2.1 Selecting and Assigning Jobs NOTE: When you select a job, you are choosing to fix a particular vulnerability across all systems on the network Veri-NAC audits. Notice that each IP on which the vulnerability exists is shown in the IP (Report Tkt) column. To select a job: • Select “WorkflowgWorkflow Log” from the left menu. The Workflow Ticket Log box appears (see Figure 16-4). Figure 16-4. Workflow Ticket Log. • Select a Report Tkt from the far left column. The box with Open Vulnerabilities for that report and ticket number opens (see Figure 16-5). Page 170 724-746-5500 | blackbox.com Chapter 16: Using Workflow in Vulnerability Remediation Figure 16-5. Open vulnerabilities for a particular ticket. Here you may assign the job to a resource (or yourself) by selecting a name from the Resources pulldown menu. Don’t forget to check the box on the left to select the item. Once you select a job, you see a list of your jobs, including the new one(s) you just selected. Another example is shown below. The new job(s) remain Open/Unassigned until you confirm the assignment (see Figure 16-6). You have three minutes to accept the assignment. The message displayed shows the minutes and seconds remaining. Figure 16-6. Open/unassigned jobs. If you do not click the Continue button below the list to accept jobs within the time limit, the jobs revert to not on hold, and you receive a message indicating you exceeded the time limit. If a job is past its due date and time and still not ready to confirm, the Escalate column is highlighted in red and displays Yes (see Figure 16-7). Veri-NAC automatically escalates open unassigned and assigned jobs past due, and sends an e-mail to the appropriate manager. Figure 16-7. Escalate column. To summarize: • To select jobs to assign, click the check boxes on the left. Multiple IDs selected at the same time are assigned to a single person and are given a single job number. Page 171 Veri-NAC User’s Manual • Select a person to resolve the issues by clicking the pulldown in the Resources column. Managers can select either themselves or IT staff employees who work for them. • After selecting and assigning jobs, click the Assign Selected Job(s) button above the table. • Click “Continue” to proceed. You receive a confirmation the job is assigned to you (or your IT staff member). The status of the job now becomes In Process. 16.2.2 Recognizing a Job is On Hold While you are assigning a job, it remains on hold until the assignment is complete so that no one else will attempt to assign the same job. If the job is on hold when you view it in the Open Jobs List, its check box is shaded in gray. If you are unable to assign a vulnerability, someone else is already in the process of assigning it (the check box is gray). 16.3 Viewing Logs of Assigned Jobs • Select “WorkflowgMy Tickets Log” from the left menu to see only jobs assigned to you (see Figure 16-8). Figure 16-8. Viewing logs of assigned jobs. Veri-NAC identifies you by your login, and delivers a complete list of open jobs with your name. As you work on jobs, you may make comments in the Workflow Comments dialog, where you can view the history of the job and modify its status (see Updating Job Status). If you are a manager, you can view the job log of anyone who works for you. 16.4 Viewing Vulnerability Reports Vulnerabilities must be remediated before their job statuses can be changed. First view the associated vulnerability report. • Select “ReportsgView Audit Results” from the menu. • Look for the title of the report in the leftmost column of the Reports table and click on the corresponding “C” icon for the Complete vulnerability report. For details on sorting reports and other features of reports, refer to the Reports Guide (Chapter 12). 16.5 Using Links in Reports Each vulnerability has a number, which you will find in the detailed section of the report. Each vulnerability report includes information like that in the example shown in Figure 16-9. A typical serious risk is fully explained. In addition, the report provides details on how to respond to the risk and/or a link to more data about that vulnerability and information about how to correct it. Page 172 724-746-5500 | blackbox.com Chapter 16: Using Workflow in Vulnerability Remediation Figure 16-9. Serious risk explanation. There are various steps you can take to research CVEs or CANs. Examples and suggestions follow: Check the bottom of the vulnerability description in the report to see if there are any user comments (under the heading labeled User Comments). Someone else in your organization may have provided comments, which can be helpful to your research. You should also add your own entries as you learn about each vulnerability. This information is stored in the Veri-NAC database and becomes part of its knowledge base. Refer to the Reports Guide for more details on adding comments to reports. Click on the link provided for more information and/or click on the CVE or CAN (candidate CVE) name to see more data at the MITRE-run CVE site. Look under References at the MITRE web site for further information. You may also wish to search Google® or other search engines for more details. After research is completed, you should have the data necessary to remediate the vulnerability. Once complete, update the job status. In some cases, you may determine a vulnerability is a false positive. Should you come to this conclusion, tag the vulnerability as such so it can be reviewed, confirmed, and removed from the report. Tagging a false positive is covered in Tagging a Vulnerability as False Positive. 16.6 Updating Job Status The status of each job progresses from Open (unassigned) to In Process (assigned) to To Be Confirmed (when marked as such by the worker assigned to it) to Closed (after manager verification of completion). An overview of steps is shown below. • Select “WorkflowgMy Tickets Log” to view your open jobs (see Figure 16-6). Page 173 Veri-NAC User’s Manual Figure 16-10. View your open jobs. Once assigned, a job’s status remains In Process until you set it to To Be Confirmed. Veri-NAC immediately notifies your manager of the new To Be Confirmed status. Your manager can then verify the vulnerability is fixed and change its status to Closed (or back to In Process if there is still an issue). 16.6.1 Updating Multiple IDs in a Single Job Ticket If there is more than one job in a single ticket, they are listed in order by priority. You see the Comments icon for only the first job in the ticket. Set it to To Be Confirmed (if you are IT staff). Managers may see the ticket during the reassignment process and set the job to Closed. No icon appears for subsequent jobs until the first one is Closed or To Be Confirmed. 16.6.2 Tagging a Vulnerabiliity as a False Positive • Select “WorkflowgMy Tickets Logs” from the left menu. The vulnerability exists on a series of IP addresses, listed under the IP (Report Tkt) column. If you believe a vulnerability to be a false positive, click the icon to the right of the IP address. This opens the Workflow False Positive dialog. 16.7 Dealing with Escalated Jobs (Managers Only) You can reassign jobs only if you are a manager (for example, if someone goes on vacation, you may want to reassign that person’s jobs). Often, you may need to reassign jobs after they are escalated. If you assigned a job to any user in your group (IT staff or another manager), and the job becomes escalated, you (as the Manager) receive an e-mail notification stating the job is escalated. Click the link in the e-mail to go to a screen where you may take action on that job. If an open, unassigned job becomes escalated, all manager users receive e-mail notification and any manager can reassign it. Before you reassign any jobs, be sure to take a look at the entire list of escalated jobs. Viewing Escalated Jobs • Select “WorkflowgShow Escalated” from the left menu to view escalated jobs. Page 174 724-746-5500 | blackbox.com Chapter 16: Using Workflow in Vulnerability Remediation You may choose to View Escalated Assigned Jobs (see FIgure 16-11) or View Escalated Open Jobs (see Figure 16-12). Depending on your choice, you go to one of the following screens: Figure 16-11. All escalated open jobs. From the unassigned jobs list, you may assign jobs to yourself. A manager may assign jobs to anyone in his/her group. Figure 16-12. All escalated assigned jobs. 16.8 Reassigning Jobs (Managers Only) To reassign jobs (escalated or not): • Select “WorkflowgReassign Tickets” from the left menu. The Workflow Job Reassignment box appears (see Figure 16-13). • Select either the Job Number or a combination of Resource Name(s), Job Status and one of the Escalated, Not Escalated, or Both radio buttons. Figure 16-13. Reassigning jobs. • Click the Search Jobs button to begin the search. • After a list of jobs appears, select the job(s) you want to reassign using the check box(es) in the far left column (Figure 16-14). Page 175 Veri-NAC User’s Manual If you see multiple jobs in a single ticket, the Comments icon will appear for only the first job in the ticket. No comments can be entered for subsequent jobs until the first one is set to either Closed or In Process. You must set the first job in the ticket to either Closed or In Process before you can make Comments on the next job in the same ticket. The Reassignment log is the only place you can take this action. Figure 16-14. Reassignment log. • Click the Reassign Selected Jobs button. A list of jobs appears with a list of resources working for you (see Figure 16-15). • Choose the resource(s) from the list. • If necessary, adjust the number of Man-Hours to do the work. Figure 16-15. Job reassignment details. Figure 16-16. Reassignment results. • Click the Continue button. The Reassignment Results appear showing Ticket number, Risk Level, and the assigned Resource just below the table heading (see Figure 16-16). If you selected more than one resource, you’ll see a separate list for each resource. If you want to change the results, click “Change Again” to return to the previous screen. Page 176 724-746-5500 | blackbox.com Chapter 16: Using Workflow in Vulnerability Remediation 16.9 Viewing Job Logs of Specific Resources (Managers Only) View job logs for a specific resource from: • My Tickets Log • Reassign Tickets Manager users can view the job log of any resource in their group. • Select “WorkflowgReassign Tickets” from the left menu. The Workflow Ticket Reassignment dialog appears. Figure 16-17. Workflow job reassignment dialog. • Select the resource’s name from the Resource Name list. • Choose “Any,” “In Process,“ or “To Be Confirmed” from the Job Status list, depending on how comprehensive you want the log to be. • Choose “Escalated,” “Not Escalated,” or “Both” depending on how comprehensive the log needs to be. • Click “Search Jobs.” A list of the resource’s jobs appears. From this list, you can reassign a job (see Reassigning Jobs) or adjust the number of hours allowed for remediation. 16.10 Confirming False Positives (Managers Only) If you are a manager user and a member of your IT staff notes a vulnerability as a false positive, you will receive an e-mail notification. You must then either confirm or deny the false positive status. To review a false positive: • Click the link in the e-mail message. The False Positive dialog pops up. • Read the explanation the IT staff user provided. If you agree the vulnerability is a false positive, click “Yes;” if not, click “No.” You may also enter comments in the lower text box. • Click “Save” to retain the changes and “Close” to close the dialog. Once confirmed as a false positive, the vulnerability no longer appears in executive and management level reports for that system. Administrators and IT staff have the option of showing or hiding false positives in vulnerability reports by using Recreate Reports options (covered in Chapter 12, Reports Guide). Page 177 Veri-NAC User’s Manual 16.11 Closing a Job (Managers Only) Managers receive e-mail notification when IT staff members mark a job’s status as To Be Confirmed. To respond: • Click the link in the e-mail message. The Workflow Job Reassignment Details dialog pops up. • Click the icon in the comments field to read Workflow Comments and to change the job status. (See Figure 16-18.) • Select either the In Process or Closed radio button in the Comments dialog box, depending on the results of a re-audit. The To Be Confirmed radio button is not available. Figure 16-18. Closing a job. Page 178 724-746-5500 | blackbox.com Appendix A: Quick Steps Appendix A. Quick Steps A.1 Setup Quick Steps Step Description Action 1 Company Info • Select SetupgCompany Information • Enter company data • Click “Next” to go to Step 2 2 Customize Reports • If No customization desired…. • Click “Next” and go to Step 3 • If Yes … - Check “Customize Reports” box - Select logo option - Upload logo • Click “Next” to go to Step 3 3 Contact for Report Notification • Enter e-mail address - SMTP Mail Server - POP Mail Server - Username - Password • Check box if outgoing server requires authentication • Click “Next” to go to Step 4 4 Regulations and Security Programs • Choose U.S. +/or International Regulations • Select Security Programs • Click “Next” to go to Step 5 5 If No SNMP Traps/Syslog Messages enabled…. • Click “Save” and go to Step 6 If Yes…. SNMP Traps and Syslog Messages 6 Basic Setup is Complete • You’ve now completed setting up the basic information • Check “Enable SNMP Traps” • Enter SNMP Server IP Address • Click “Save” to go to Step 6 Now you should procede to Step 7 so you can review your basic information 7 Review Setup • Check information entered • Click “Save” to retain settings • Proceed to Step 8 8 Set Date and Time Set the first time you log in. • Select SystemgDate and Time • Choose Date, Time, and Time Zone • Click “Change Date” to confirm • You will be logged out • Proceed to Step 9 9 User Accounts • Select SystemgUser Management Enter managers first, then repeat for IT users - Click “Add User” button - Enter User Information, Click “Next” to proceed - Enter Access Level (manager, IT user, or NAC user), Click “Next” to proceed - Enter User Details, Click “Next” to proceed - Specify Contact Info, Click “Next” to proceed - Enter user Login ID and Password, Click “Next” to proceed - Review information - Click “Done” Page 179 Veri-NAC User’s Manual A.2 Network Admission Control Quick Steps Item Description Action 1 Initiate Asset Discovery • Select “Network Admission ControlgAsset Discovery” • Enter subnet information if not automatically found • Click “Refresh IPs” 2 Add IPs Manually • Select “Network Admission ControlgAdd Assets” • Enter system data • Assign List Category • Click “Add System” 3 Manage IPs • Select “Network Admission ControlgManage IPs” • Select list category of interest (Trust/Untrust, Audit/Audit-exempt, Endpoint Defender, MAC IP Mismatch, Firewall SmartSwitch Mismatch) • Add/Remove IPs as required • Update each category list as required 4 Delete IPs • Select “Network Admission ControlgManage IPs” • Select “List Category” • Click check box for each IP to be removed (or subnet) • Click “Remove All” or “Remove Selected IPs” 5 Determine Ping Response • Select “Network Admission ControlgPing Latency Chart” • Click “Refresh” to repeat test and view trends in data 6 Interface to Firewall • Select “Network Admission ControlgFirewall Integration” • Select Firewall brand • Enter Firewall information, click “Save” • Select “IPs to never block at firewall” • View rules and unblock firewall rules Page 180 724-746-5500 | blackbox.com Appendix A: Quick Steps A.2 Network Admission Control Quick Steps (Continued) Item Description Action 7 SmartSwitch Integration • Select “Network Admission ControlgSmartSwitch Integration” • Click “Add Switch” • Select switch brand • Enter switch information • Click “Save” • Move assets to Blocking Safe List • View rules and unblock SmartSwitch rules 8 Enable Dynamic Detection • Select “Network Admission ControlgDynamic Detection System” • Select quarantine and audit options • Complete firewall and smart switch information • Complete e-mail notification information • Click “Save” • Click “Enable Dynamic Detection System” 9 Inventory Alerts • Select “Network Admission ControlgInventory Alerts” • Click “Create New Group” • Enter group name • Enter contact e-mail • Set time frame • Set polling interval • Click “Save” A.3 Asset Tracker Quick Steps Item Description Action 1 View Asset List Select “Asset TrackergSystems” 2 View/Modify/Add Systems to Asset List View - Click on Host Name - Review Overview page Modify - Click on Host Name - Click “Edit” - Make changes - Click “Update System” Add - Click “Add System” - Enter System Info - Click “Add System” 3 View Asset Reports • Select “Asset TrackergSystems” • Click IP Address of interest • Choose Report to view Page 181 Veri-NAC User’s Manual A.3 Asset Tracker Quick Steps (Continued) Item Description Action 4 Add Users • Select “Asset TrackergUsers” • Click “Add User” button • Enter User information • Click “Add User” button to save 5 Add Software • Select “Asset TrackergSoftware” • Click “Add Software” button • Enter Software information • Click “Add Software” button to save 6 Add Peripherals • Select “Asset TrackergPeripherals” • Click “Add Peripheral” button • Enter Peripheral information • Click “Add Peripheral” button to save 7 Associate User with Asset • Select “Asset TrackergSystems” • Click “Host Name” • Click “Associate User” button • Select user and move to Associated User List • Click “Associate the User” button to save 8 Associate Software with Asset • Select “Asset TrackergSystems” • Click “Host Name” • Click “Associate Software” button • Select software and move to Associated Software List • Click “Associate the Software” button to save 9 Associate Peripheral with Asset • Select “Asset TrackergSystems” • Click “Host Name” • Click “Associate Peripheral” button • Select peripheral and move to Associated Peripherals List • Click “Associate the Peripheral” button to save Page 182 724-746-5500 | blackbox.com Appendix A: Quick Steps A.4 Creating and Managing Audits Quick Steps Item Description Action 1 One-Click Audit • Select “AuditsgOne-Click Audit” • Enter IP Address • Click “Audit Now” 2 Define New Audit • Select “AuditsgWizard” • Assign audit name • Set notification information • Designate contact • Set audit mode • Designate firewall and smart switch information • Set audit frequency and start time • Choose IP addresses to audit • Review selections and edit, if necessary • Click “Save” 3 Manage Audits • Select “AuditsgManage” • Click “Start” to begin audit, click “Stop” to deactivate audit • Click “Remove” to delete audit 4 Copy Audit to Create Variation • Select “AuditsgManage” • Click Audit Name to be copied • Enter new Audit Name • Click through rest of Audit Wizard and edit information, as needed • Click “Save” 5 Remove IP Addresses from Audit • Select “AuditsgManage” • Click Audit Name to be copied • Click through Audit Wizard to IP Address page • Deselect IP Addresses • Review selections • Click “Save” 6 View CVE Tests by OS and Application • Select “AuditsgView Vulnerability Tests” • Select desired OS • Select desired applications • Click “Display List” 7 Manage Mismatched IPs • Select “Network Admission ControlgManage IPs” • Select “MAC IP Mismatch List” • Click on IP link to resolve • Manually enter IP Address, or remove mismatched asset, or resolve mismatch by running an Asset Discovery 8 Manage Schedules • Select “AuditsgSchedule” • Choose schedule view – Day, Week, Month, Year 9 Manage In Process Audits • Select “AuditsgManage” • Click “Audit Start” button • Click “Audit Name” link to review audit details Page 183 Veri-NAC User’s Manual A.4 Creating and Managing Audits Quick Steps (Continued) Item Description 10 View Partial Reports Action • Select “AuditsgManage” • Click “Audit Start” button • Click “Generate Report” link • Choose Partial Report option and click “Proceed” • Click “C” button to get partial report A.5 Vulnerability Remediation Quick Steps Item Description Action 1 Set Times for Remediation (Managers) Only • Select “WorkflowgTime Allocation Setup” • Enter time for each Remediation Level • Click “Save Changes” 2 • Select “WorkflowgWorkflow Log” • Click “Show All Open Jobs” (open jobs associated with all tickets) View Workflow Ticket Log (Manager and/or IT staff) To assign work: • Select report with unassigned vulnerabilities • Click its report ticket • Click checkbox of job to be assigned and select resource • Click “Assign Selected Job(s)” • Click “Continue” 3 View Logs of Assigned Jobs (Managers and/or IT staff) • Select “WorkflowgMy Tickets Log” • Review your jobs currently open • Click View <Your name>’s Closed Jobs to see history 4 • Select “ReportsgView Audit Results” • Click “C” for report desired View Vulnerability Reports (Managers and/or IT staff) 5 Update Job Status (Managers and/or IT staff) • Select “WorkflowgMy Tickets Log” • Select icon under Comments • Enter Comments • Modify Status (only managers can change to Closed) • Click “Save” • Click “Close” 6 Tag Vulnerability as False Positive (Managers and/or IT staff) • Select “WorkflowgMy Tickets Log” • Click icon to right of IP Address • Enter comments • Set to “To Be Confirmed” • Click “Save” • Click “Close” 7 Escalated Jobs (Managers Only) • Select “WorkflowgShow Escalated” • Select “View Escalated Assigned Jobs” or “View Escalated Open Jobs” • Assign jobs as needed to yourself or another resource Page 184 724-746-5500 | blackbox.com Appendix A: Quick Steps A.5 Vulnerability Remediation Quick Steps (Continued) Item Description Action 8 Reassign Jobs (Managers Only) • Select “WorkflowgReassign Tickets” • Select “Job No.” or “Resource Names“, “Job Status” and “Escalation status” • Click “Search Job”s • Select job to reassign • Select new resource • Click “Reassign Selected Job Resource” • Click “Continue” • Change info, if necessary • Click “Continue” 9 Confirm False Positive (Managers only) • Click link in email message received • Review information and make decision • Click “Yes” or “No” • Enter comments, if necessary • Click “Save” • Click “Close” 10 Close Job (Managers only) • Click link in email message received • Click icon to read comments and change job status • Select “In Process” or “Closed” • Click “Save” • Click “Close” 724-746-5500 | blackbox.com Page 185 Veri-NAC User’s Manual Appendix B. Creating a Serial Connection to HyperTerminal on a Windows PC 1. Start up a Windows laptop. 2. Plug in power cord to Veri-NAC. 3. Connect serial cable from Veri-NAC to laptop. 4. Connect Ethernet cable to both Veri-NAC and laptop. 5. Open a HyperTerminal window on the laptop. Start MenugPrograms gAccessoriesgCommunicationgHyperTerminal a. “New Connection” window i. Name =<your choice> ii. Icon = <your choice> b. “Connect To” window – “Connection using” = COM1 c. “COM1 Properties” i. Bits per second = 9600 ii. Data bits = 8 iii. Parity = None iv. Stop bits = 1 v. Flow Control = Hardware d. “HyperTerminal” Window i. Select from “FilegProperties” ii. Select from the “Settings” tab iii. Backspace key sends = Del 6. Push start button on top of Veri-NAC. After a minute or so, the network configuration information displays on the laptop HyperTerminal window. 7. If you would like to make any changes to the network settings from this HyperTerminal screen, make them now. Otherwise, close the HyperTerminal window and proceed to Step 8. 8. Open a Web browser and enter: https://<ipaddress> where <ipaddress> is the IP address displayed on the HyperTerminal network screen. If you changed the default port in the installation process, you must enter a colon followed by the port number. For instance, for port number 10000, enter the following URL: https://192.168.254.159:10000 Page 186 724-746-5500 | blackbox.com Appendix C: Feature Availability Table Appendix C. Feature Availability Table LVN5250A LVN5400A LVN5600A LVN5800A Number of Network 250 Devices Protected 500 6,000 50,000 100,000 Agentless Network Access Control Yes Yes Yes Yes Yes Auto Device Discovery Yes Yes Yes Yes Yes Device Inventory Alerting Yes Yes Yes Yes Yes MAC Address Spoof Detection & Blocking Yes Yes Yes Yes Yes Basic Policy Tool Yes Yes Yes Yes Yes Number of remote LVN5200A or LVN5250As able to control/ manage None None Up to 10 Up to 100 Unlimited May connect to mulitple subnets? Yes - 2 Yes - 2 Yes - up to 4 Yes - up to 6 Yes - up to 8 Built-in storage for Logging and Reporting 160 GB 250 GB 320 GB 500 GB 1000 GB Integrated Command Center Remote Mgmt Software No No Yes Yes Yes Can be managed via Command Center Yes Yes Yes Yes Yes Vulnerability Management w/Audit reporting, Workflow and Compliance No Yes Yes Yes Yes Possible number of simultaneous device audits N/A 10 50 100 254 Multiple User Logins for Mgmt No Yes Yes Yes Yes Advanced ISO- 27001 Policy Auditor Builder Tool No No Yes Yes Yes LVN5200A 724-746-5500 | blackbox.com Page 187 Veri-NAC User’s Manual Appendix D. Frequently Asked Questions D.1. Deployment Guide QUESTION: What are the roles of NAC users? ANSWER: NAC users can only access Network Access Control functionality and are not involved in vulnerability remediation. This means that they can access Setup, Network Access Control, System, and Asset Tracker in the sidebar. QUESTION: What are the roles of IT staff users? ANSWER: IT staff users work with managers on vulnerability remediation. They can select jobs they want to work on (or have jobs assigned to them), change a job status to “To be Confirmed,” or tag a vulnerability as a potential false positive. They can also access all network access control functionality available to NAC Users. QUESTION: What are the roles of managers? ANSWER: NOTE: Managers control all users assigned to them in the hierarchy. They can assign work to themselves or anyone in their group, regardless of other manager levels existing within the group (there can easily be multiple levels of Managers). Managers can modify time allocated for remediation of vulnerabilities at different risk levels, assign tasks to other users, confirm false positives, and close jobs. Managers can access and create all types of reports and add or remove any sub-manager, IT staff user, or NAC user beneath them in the hierarchy. MainAccount is always the highest-level manager, and there can be only one. QUESTION: In my large network, I intend to have Veri-NAC appliances for each segment. Is there way to centrally control all these Veri-NAC appliances? Do they share a common trusted MAC list? Can they share the same policy set? ANSWER: Managers control all users assigned to them in the hierarchy. They can assign work to themselves or anyone in their group, regardless of other manager levels existing within the group (there can easily be multiple levels of Managers). Managers can modify time allocated for remediation of vulnerabilities at different risk levels, assign tasks to other users, confirm false positives, and close jobs. Managers can access and create all types of reports and add or remove any sub-manager, IT staff user, or NAC user beneath them in the hierarchy. QUESTION: We have multiple subnets in our networks (local and remote). How should we deploy Veri-NAC? ANSWER: You should deploy one Veri-NAC LVN5400A, LVN5600A, or LVN5800A unit in your data center or main rack at the IT headquarters subnet. Veri-NAC LVN5200A or LVN5250A units, which are centrally manageable using the built-in Command Center running in your LVN5400A, LVN5600A, or LVN5800A unit, can be deployed at each additional subnet. We understand that each network is unique. We offer free support to help you best plan out your deployment around your own network topology. Contact Black Box Technical Support at 724-746-5500 for more information. QUESTION: I purchased a Veri-NAC Enterprise with multiple physical Ethernet ports; can I use each of these Network Interface Cards (NICs) on the same subnet? ANSWER: Page 188 Yes, as long as the IP ranges don’t intersect. 724-746-5500 | blackbox.com Appendix D: Frequently Asked Questions QUESTION: Should each VLAN have its own device? ANSWER: It depends on your network configuration: if the Veri-NAC can see MAC addresses, it can block. If not, place a LVN5200A or LVN5250A unit on that particular subnet and control that unit from the LVN5400A, LVN5600A, or LVN5800A unit with Command Center. QUESTION: I got an alert e-mail from Veri-NAC stating that it detected a new untrusted asset, but blocking didn’t happen. I can ping from that untrusted device to other PCs in the intranet. The Dynamic Detection System is enabled and the PeerBlock Blocking option is selected. ANSWER: The Protect Range entered on the DDS page may be the issue. Let’s say you’re on the class C subnet 192.168.0.1/24 and the Protect Range is set to 192.168.0.40-60. This will prevent a blocked asset from being able to communicate with IP addresses within 192.168.0.40-60. Assets outside of this range, for example 192.168.0.1, will still be reachable by the blocked asset(s). In this example, set the protect range to 192.168.0.1-254 to solve this problem. QUESTION: Does the PeerBlock clientless method block the communication between untrusted IPs and selected IPs inside the network and if so, is it a good idea to put all my LANs into both Block and Protect Range? ANSWER: The Block Range is the range that is always blocked upon plugging in. The Protect Range causes all the IPs in its range to be invisible to the attacker. If you set the entire subnet(s) where you actually have assets, this will work perfectly. The only exception would be to set the protect range to some unbelievably large and unrealistic network scheme like a full class A network, when you might only have 100 or 1000 computers. By setting the protect range way too high, you would make far too much traffic during a block event. D.2. General Use QUESTION: How do I change the date on which Auto-Update will run? ANSWER: Auto-Update is automatically updated daily, but you can run a manual update by clicking “Update Now.” The appliance runs a Web-based secure subscription service in the background. QUESTION: What methods of SNMP traps are supported? ANSWER: SNMP traps, versions 1 and 2c are supported. QUESTION: When does Veri-NAC check for new devices that connect to the network? ANSWER: On the left menu of the Veri-NAC Web interface, go to Network Access ControlgPeerBlock Blocking or Network Access ControlgManage IPs. The assets with IP addresses highlighted in red are currently being blocked. QUESTION: How do I remove a client that is listed under “MAC IP Mismatch”? ANSWER: Go to Network Access Control Manage IPs and, from the drop-down Manage… menu at the top left of the screen, select MAC IP Mismatch List. This will show all clients in the MAC IP Mismatch list. Select the one you want to delete. QUESTION: Is there a way to clean out the database in Veri-NAC? I plan to travel using a unit to audit different sites, and I’d like to have old information wiped out, to prevent a difficult-to-manage information load. ANSWER: We do not allow users to clear out the IP database for forensic/historical reasons. However, you may choose to do a factory reset, which will restore your unit to factory settings: Go to SystemgUtilitiesgFactory Settings. This will clean out everything, except the database of IPs that have been audited. Page 189 Veri-NAC User’s Manual QUESTION: Why do I get a security certificate error in Internet Explorer®/Firefox®? ANSWER: We assign the Veri-NAC certificate ourselves. Internet Explorer (IE) version 7 considers all self-assigned certificates untrusted, so you will see a certificate error message when opening Veri-NAC’s login page in IE 7. You can accept and install the certificate to get rid of this error message by following these steps: 1. Ignore the warning and proceed by clicking on “Continue to this website (not recommended).” 2. Your address bar will be highlighted in red next to a Certificate Error icon. 3. Click on the Certificate Error icon to open the information window. Click on “View Certificate.” Then click on “Install Certificate.” You'll see yet another warning. Click on “Yes,” and then you're done. To get rid of certificate errors in Firefox: 1. On the screen that comes up when you get a certificate error, click on “Or you can add an exception.”. 2. Click on “Add Exception.” 3. The appliance’s IP should be automatically filled in the “Server Location” field. 4. Click Get CertificategConfirm Security Exception and you’re done. QUESTION: I keep getting this certificate error in Firefox: “(Error code: sec_error_reused_issuer_and_serial).” What can I do about it? ANSWER: 1. Go to ToolsgOptiongAdvanced Encryption and click on View Certificates. 2. In the Servers and Authorities tab, remove the appliance certificate by highlighting the appliance’s IP and clicking “Delete.” 3. Try refreshing the page and add the appliance to the exception list. QUESTION: My updates are failing. What can I do? ANSWER: Make sure the System Date and Time is set correctly. QUESTION: What is the control status of PeerBlock after a power reset? ANSWER: When Veri-NAC is power cycled, it will resume packet scanning and asset blocking upon restart if these features were enabled when the unit was powered down. QUESTION:I am concerned about how a large number of Veri-NAC appliances can be managed centrally. For example, I have 5000+ computers in 50 segments, which means I need to have 50 devices. For Veri-NAC authentication, it seems that we have to maintain one pair of IDs/passwords for each administrator in each Veri-NAC appliance, so a total of 50 passwords need to be assigned to each staff. Manageability becomes an issue. Am I able to customize the passwords for every unit? ANSWER: All 50 units can have the same password. Every unit has a default admin-level username called MainAccount, which is capable of making password changes. Using MainAccount, you can also add more users with admin privileges if you want. QUESTION: ANSWER: Can I authenticate my PCs or desktops based on their MAC address, so that PCs or desktops whose MAC addresses are not in the database will not be granted network access? Yes, Veri-NAC allows you do this. This mode of authentication requires that any new PCs or desktops connected to the network be authenticated based on this MAC address database. If the MAC address is not in the database, the new PC is not given network access. Page 190 724-746-5500 | blackbox.com Appendix D: Frequently Asked Questions QUESTION: When the Veri-NAC box is introduced into the network, will all assets detected be put on the untrusted list by default, during Asset Discovery? ANSWER: No — they are all automatically trusted, unless you start the Dynamic Detection and blocking system with NO assets in the trusted asset list. We recommend turning off Dynamic Detection System first (default setting) and doing an asset discovery Network Access ControlgAsset Discovery then reviewing this trust list at Network Access Controlg Manage IPs. QUESTION: ANSWER: Can I set a policy to define that any “untrusted” asset can only see a few IP addresses, such as an Internet proxy IP address? In other words, I want asset exclusion to be based on IP addresses, not MAC addresses. Yes, you can—easily. When an untrusted asset is being blocked, it can’t see IPs that are in the defined protect range. However, it can see IPs that are not in the protect range. For example: Let’s say you want to block a contractor’s laptop for access to critical servers, but this person can have access to the Internet, printers, and anything else. Assume the internal network is class C range from 192.168.1.1254. The gateway IP address for access to the Internet is 192.168.1.1, the Veri-NAC IP is 192.168.1.9. The critical servers cluster resides from 192.168.100-110. Here is how you would set up this policy on the Veri-NAC: From Network Access Control Dynamic Detection System: Click the checkbox for “Enable PeerBlock blocking” Enter “192.168.1.1-254” in the Block Range, “192.168.100-110” in the Protect Range. Now, click “Save” at the bottom of the page. Result: When an outside contractor plugs in her laptop, she wouldn’t be able to see any of the critical servers. However, she can have access to the Internet and other non-critical servers without knowing that critical servers exist. When you are in admin view on the Veri-NAC Web interface, you will see that her laptop is being blocked (red highlight on the Manage IPs page). QUESTION: ANSWER: What is the IP/MAC Mismatch list for? Let’s look at a sample scenario: A network asset, PC1 has the IP address 192.168.1.183. and PC2 has the IP address 192.168.1.207. Both PCs are on the trusted list. PC1 goes offline. PC2 either statically reassigns its own IP to 192.168.1.183 or PC2 requests a new IP, and the DHCP server leases 192.168.1.183 to PC2. Veri-NAC will move PC1 to the mismatch list and give the reason “IP address unknown.” The PC2 info will overwrite the PC1 data on the Manage IPs page. PC2 can access the network normally. Later, when both PCs revert to their original IP addresses, PC1 will be removed from the IP Mismatch list. You can also choose to remove IPs in the Mismatch list manually. D.3. Advanced Use QUESTION: In our network environment, ICMP traffic is blocked; does this affect the Asset Discovery function? Is Veri-NAC still able to discover the server(s)? Does the Veri-NAC appliance use only the ping packet to discover assets? ANSWER: Veri-NAC’s Dynamic Detection feature detects DHCP lease requests. If packet sniffing is enabled, the appliance will inspect network packets to detect new assets, including static IP devices. QUESTION: What protocol does Veri-NAC use to dynamically detect assets? ANSWER: Veri-NAC uses ping combined with other technologies to discover assets. Even when ICMP traffic is blocked, Veri-NAC will be able to discover assets. Page 191 Veri-NAC User’s Manual QUESTION: If the log space on the hard disk is full, what does Veri-NAC do? Will it overwrite the old logs? ANSWER: System Statistics shows disk usage. It will give warnings when the disk is at least 75% full. However, we recommend frequent backups, because Veri-NAC will overwrite old logs if necessary. QUESTION: What is the amount of bandwidth difference between the low bandwidth probe and normal bandwidth probe? ANSWER: The appliance contains a “smarter scanning engine” that manages bandwidth usage automatically. If an audit has six or fewer IP addresses being audited at the same time, it will run in low bandwidth mode, using approximately 20 kbps. If an audit has more than six IP addresses being audited at once (this could include dozens, hundreds, or even thousands), it will throttle up to high bandwidth mode, but never go over 140 kbps network usage (on average). QUESTION: Does Veri-NAC authenticate MAC addresses and block MAC spoofing? ANSWER: Veri-NAC does provide MAC spoofing detection and blocking. If two or more devices are on-line at the same time, you will receive an e-mail, and you can have them blocked on detection. QUESTION: What technique is used to block unknown computers and other devices? Does it affect performance in a “busy” end user network? ANSWER: The appliance uses a patented methodology to block untrusted devices from getting on the network. Generally speaking, it is confusing the untrusted asset by feeding it wrong information and creating a low-bandwidth denial of service using PeerBlock, or through rule changes on smart switches (Black Box part number LGB1002A-R2, LGB1003A-R2, or LGB1005A-R2) and firewalls. PeerBlock uses 7 kbps of bandwidth to block, network activity whatsoever. “Normal conditions” means only a few untrusted assets at a time, not an abnormal situation, such as 100 untrusted assets simultaneously attempting to access a small network. The stream of only 7 kbps to block unwanted users is very little bandwidth usage. That’s the most bandwidth usage per IP blocking event the appliance will use. Network traffic generated while Veri-NAC is auditing or vulnerabilities ranges from 40 to 120 kbps, therefore, is almost invisible to users even while it discovers their common vulnerabilities and exposures. However, there are some dos and don’ts we recommend to make traffic smooth and invisible. These are covered in the README FIRST! document you received with Veri-NAC and include not auditing a critical overloaded server during busy work hours and dealing with alerts from intrusion detection systems (IDS). QUESTION: Is MAC addressing the criteria for blocking unknown devices and if so, what if I move the Ethernet NIC to another computer? ANSWER: Yes, that is the criteria. So if you move the NIC to another computer, you will be triggering the MAC spoof detection mechanism. Run Asset Discovery to update the Veri-NAC database. QUESTION: Does the Veri-NAC appliance have a guest policy in which guest computers can only access the Internet, not the internal network? ANSWER: Page 192 Yes. Veri-NAC has a Protect Range feature—anything in the range is going to be invisible to the untrusted asset. Any exclusion in the range will be visible. For example: if you exclude a router that leads to the Internet, the untrusted asset will think there is only one asset on the network and communicate with it. That router will provide access to the Internet while other peer devices are “invisible” to the guest. 724-746-5500 | blackbox.com Appendix D: Frequently Asked Questions QUESTION: How does Veri-NAC deal with internal threat propagation? How does the appliance identify and quarantine the endpoint? ANSWER: Veri-NAC has the capability to preemptively block the vulnerable asset or port at the smart switch (for example, Black Box part number LGB1002A-R2, LGB1003A-R2, or LGB1005A-R2 and firewalls). It handles malware more proactively through starvation—eliminate the vulnerability, and you become more immune to exploits. Finally, if a system is propogating malware, in real-time, remove it from the trust list and make sure the PeerBlock engine is enabled. This should kill the malware propogation and data leakage risk from the infected endpoint. QUESTION: Is it possible to provide a Web page forwarding the unhealthy endpoints to remediation facilities? ANSWER: There’s really no good automated way to fully remediate an unhealthy system, yet. We recommend that you fix the vulnerabilities by patch or system reconfiguration instead of sending users to Web pages. QUESTION: Can I administer and consolidate an asset list across multiple appliances? ANSWER: Currently Veri-NAC appliances do not share their asset lists between each appliance, however, you can access and control these asset lists from a single appliance running the Command Center. QUESTION:Cisco also has MAC authentication control at the smart switch port layer. How does Veri-NAC compare with Cisco’s solution? ANSWER: In testing, we have found that a $20 hub can render Cisco’s solution ineffective. If you place a small, low-cost hub on the subnet, the untrusted MAC address device is still able to attack and eavesdrop on its peers across the hub. Also, Cisco’s 802.1x methodology is costly, requires complete infrastructure upgrades, and is frequently hacked. Veri-NAC also offers the ability to communicate with Cisco smart switches, even the older Catalyst, using a simple block methodology. QUESTION: How does the Veri-NAC appliance detect when a PC or laptop is connecting to the network? ANSWER: It uses static IP Detection (at the ARP event level) and DHCP Detection (at the IP Broadcast event level). QUESTION: How does Veri-NAC block PCs or laptops that are not authenticated? ANSWER: The Veri-NAC appliance uses three layers of blocking, depending on which you choose to use — firewall rules change, smart switch port bloc,k and, our favorite, PeerBlock blocking which uses a lightweight ARP-level packetblocking engine running a low bandwidth 7 kbps per untrusted asset during a block event. QUESTION: Can Veri-NAC appliance integrate with the CA-Unicenter®, HP® OpenView®, or IBM® Tivoli®? ANSWER: Yes. These information management systems accept both Syslog and SNMP traps, so you can consolidate alerts from one or more Veri-NAC appliances into one console. D.4. S mart Switches and Firewall QUESTION: What kind of smart switches does Veri-NAC send quarantine information to, as an optional blocking method? ANSWER: Under smart switch quarantine, there are dropdown selections for the smart switches the appliance can communicate with, which is not required for PeerBlock quarantine, they are 3Com®, HP®, Extreme Networks, Cisco™, and Black Box (Black Box® part numbers LGB1002A-R2, LGB1003A-R2, or LGB1005A-R2) smart switches. Page 193 Veri-NAC User’s Manual QUESTION: When Dynamic Detection is enabled, newly connected devices are blocked as they connect. Why is this happening? ANSWER: Depending upon how you configured the appliance, as each new, untrusted device connects, a rule blocking that device is created automatically.The Veri-NAC will block using three optional methodologies: a. Block at the firewall (if supported) b. Block at the smart switch (if supported). Methods include blocking physical switch ports and 802.1Q VLAN tagging with black holing. c. PeerBlock, by targeting a Denial of Service (DoS) at the invader on the network (this is the best, easiest way to block, using very little traffic, about one 7-kbps stream per invader). QUESTION: How long does a Dynamic Detection-created rule on the smart switch or firewall remain active? ANSWER: The rule remains as long as there is an untrusted device or port-level vulnerability. However, the admin receives an alert when the rule is created and can manually make changes to the rule if so desired. QUESTION: When I unplug the Veri-NAC from the network, the smart switch or firewall seems to continue applying standing rules created during Dynamic Detection. How can I stop this? ANSWER: You need to delete the rules manually from the smart switch (for example, Black Box part number LGB1002A-R2, LGB1003A-R2, or LGB1005A-R2) or firewall. Please see the user’s manual for your smart switch or firewall for more details. QUESTION: Can I integrate more than one smart switch within the same network LAN? ANSWER: Yes. QUESTION: When integrating our Veri-NAC with a compatible smart switch or firewall, are we only required to configure Veri-NAC, or do we have to make a manual configuration on the smart switch or firewall as well? ANSWER: In most cases, as long as your Veri-NAC appliance has an admin access to and can successfully communicate with the smart switch (for example, Black Box part number LGB1002A-R2, LGB1003A-R2, or LGB1005A-R2) or firewall, there is no need for manual configuration on the smart switch or firewall. However, each firewall has different rules. The Veri-NAC user guide explains how to set up your firewall to be compatible with Veri-NAC. Using the Juniper Networks® NetScreen® firewall, for example, you first log into the firewall and make/delete a rule. The Juniper firewall won't allow remote rule creation without first doing this once. Other firewalls do not require this step. However, if you tell a firewall by default to only allow, say, IP address 192.168.254.2 to log in, and your Veri-NAC is at .3, then it will block your Veri-NAC from remotely (SSH/TELNET/API) connecting in, even if you have the user ID and password. Make sure Veri-NAC is on the “allow” list of firewall admin users. QUESTION: To use the Internet for automatic updates, I need to go through an authenticated proxy server. What is the IP address or Web site that Veri-NAC uses to update its signatures and patches, so that I can configure my firewall accordingly? ANSWER: Page 194 The appliance connects to https://ssl.perfora.net/updateauditor.com for its updates. The outgoing ports used by the appliance vary; however, the starting port number the appliance will use is 36280. The incoming port used by the server is 443. The protocol is https. The proxy setting can be created or modified by going to System Proxy Configuration. 724-746-5500 | blackbox.com Appendix D: Frequently Asked Questions QUESTION: What protocol is used between Veri-NAC and a smart switch (for example, Black Box part number LGB1002A-R2, LGB1003A-R2, or LGB1005A-R2) or firewall? ANSWER: SSH or TELNET. QUESTION: Does Veri-NAC work on all smart switches? Are any configuration changes required on the smart switches? ANSWER: If the only feature in use is PeerBlock blocking, Veri-NAC is compatible with all smart switches. If the smart switch blocking feature is in use as well, then access to the smart switch via Telnet/SSH will be required. Our currently supported smart switches are Black Box part numbers LGB1002A-R2, LGB1003A-R2, and LGB1005A-R2; Cisco; 3Com; Extreme Networks; and HP. QUESTION: Can Veri-NAC integrate with the Check Point firewall? ANSWER: Yes, it works with the Check Point® firewall. QUESTION: Does Veri-NAC work with the Alcatel SmartSwitch or the Cisco ASA Firewall? ANSWER: It does not currently integrate directly with these models. Use the PeerBlock blocking feature, which will work independently of any smart switches or firewalls regardless of type. D.5. Audits QUESTION: When I try to edit previously scheduled audits, I can only delete them. They are not underlined and are not available for edit. Is this a bug or a feature? ANSWER: This is a feature, not a bug. You have to stop a scheduled audit before you can edit it if it is “running,” that is, scheduled. Press the Stop button. Even though it's not running now, you will be able to edit it. QUESTION: What is the impact of Veri-NAC on the performance of a network during the auditing process? Will it slow down the network or network-based applications and servers we are running? ANSWER: The appliance has minimal to no impact on network performance or bandwidth, with a few exceptions: Although Veri-NAC performs non-invasive network asset probing and Common Vulnerabilities and Exposures inspection, make sure you don’t audit a critical server during a critical time the very first time you use the appliance. First, auditing your DNS server during working hours is not recommended. Auditing an Intrusion Detection System (IDS) is also not recommended, as the IDS might think that the Veri-NAC appliance is a “hacker” and send out network alerts that are false positives. In addition, Symantec Antivirus software for Microsoft Exchange acts like an IDS on your mail server, so you have to be very careful if and when you audit this system. The same holds true for your firewall, VPN, and other information security countermeasures, which send alerts when they are probed for information. You may be able to add Veri-NAC to a trust list so it is not perceived as an “insider” threat on your networks when auditing these security systems. Second, make sure that, when you log into the appliance for the very first time, you click UpdatesgVulnerabilitiesgSignaturesgUpdate Now to make sure your appliance has the latest CVE tests. Third, make sure that you have the newest service pack installed on Veri-NAC system by following Updatesg Service PacksgInstall Patches. Finally, the bandwidth usage is as follows on a Class C network (or larger): No more than 100 kbps/no less than 40 kbps during a full audit. No more than 7 kbps per PeerBlock block session against a single untrusted asset (if PeerBlock is blocking, the asset will be inaccessible). Page 195 Veri-NAC User’s Manual QUESTION: Some Intrusion Detection Systems (IDS) and Host-Based Intrusion Detection Systems (HIPS) detect when they are being audited and think it is a hacker or a port scanner. How does the Veri-NAC bypass this detection? ANSWER: Some HIPS and IDS are able to detect the Veri-NAC activity as a port scan. Veri-NAC is doing a port scan along with more detailed analysis of CVEs. Whenever possible, configure HIPS and IDS to allow the Veri-NAC traffic as an exception, without escalation and alerting. QUESTION: How does Veri-NAC handle licenses for a virutal environment? For example, if I have 10 different servers’ operating systems (OSs) or applications running within a virtual server, such as VMware, all on one piece of physical computer hardware, what license would be required to audit all the applications or operating systems? ANSWER: Unfortunately, the current release of Veri-NAC does not consider a virtual OS with the same MAC address a different “virtual” computer and would treat it as a MAC/IP mismatch for NAC purposes, and CVE auditing results would vary. QUESTION: How do I quickly stop all currently running/scheduled audits? ANSWER: Navigate to System Utilities and select “Stop All Audits.” QUESTION: Under AuditsgView Vulnerability Tests, only Windows® and Linux® operating systems are shown. What about other devices and operating systems, such as printers, VoIP phones, etc? ANSWER: These groupings allow you view tests relevant to these operating systems. To view all tests, select “All OS.” D.6. Workflow/Ticket Management QUESTION: Can the workflow engine be automated so vulnerabilities are automatically fixed? ANSWER: Fixing CVEs is not as simple as running patch updates in most cases. Some remediation of vulnerabilities can be done with patches, many require fixing configuration issues, and some require upgrades. In addition, it is essential that CVEs are remediated correctly, as incorrect patches and configuration changes can cause more problems and troubleshooting issues. It is best to do system hardening manually. QUESTION: An audit discovered one particular vulnerability ID that is located across 100 PCs on my network. As far as I can see, I can only assign the task of fixing these 100 PCs to one person, which may take a long time. Would it be possible to assign groups of those 100 PCs to different IT staff users? For example, one staff member gets a task of 50 PCs, and another staff member takes care of the other 50? ANSWER: Yes. Assign this job to an IT staff user first, and then reassign it to multiple persons using the Workflow/Reassign Tickets menu. QUESTION: There are some jobs that I cannot close. They show up as “N/A” in my menu. ANSWER: Page 196 This is because a staff member is working on a job ticket containing more than one vulnerability. A manager can assign more than one vulnerability ID (VID) to an IT staff using one Job Ticket Number. For example, the manager can assign ub-task VID 22222 (risk level: serious) and VID 10397 (risk level: low) as Job Ticket #1. An IT staff member will then work on these sub-tasks serially in order of their risk level. In this case, he must work on VID 22222 first, then VID 10397. While he's working on VID 22222, the Start Date, Complete Date, and Comments columns for VID 10397 will display as “N/A.” 724-746-5500 | blackbox.com Appendix D: Frequently Asked Questions QUESTION: I assigned one VID to one IT staff member. Why do some of the Report Tickets that have same Vulnerability ID have the value of 2 and 3? Shouldn’t the number be “1,” because it is only 1 ID assigned? ANSWER: Workflow counts the number of vulnerabilities and number of tasks differently. Using your example, if you click the link of the Report Ticket for this newly assigned VID, under column IP (Report Ticket), you will see there are two vulnerabilities for Report Ticket #38 and #33, and three for Ticket #21. That's because this VID is found at two IPs for Report Ticket #38 and #33, and three IPs for Ticket #21. QUESTION: There is a disparity between the numbers reported under the “Unassigned” header in “Workflow Ticket Log” and the actual number of unassigned tasks. For example, the number of unassigned tasks reported may be 6, but when I click the link to view details, I may find only 5 unassigned tasks. Is there a problem? ANSWER: If the same vulnerability (VID) is found at two different IPs, the Veri-NAC reports them as two vulnerabilities, while Workflow counts them as one task (because they have the same VID). Workflow counts number of vulnerabilities and number of tasks differently. When you click to view details, you see 5 unassigned tasks, but if you look at the IP (Report Ticket) column, you will find 6 vulnerabilities for this Report Ticket. QUESTION: How do I keep track of vulnerabilities that have been fixed? ANSWER: Go to WorkflowgMy Ticket LoggView MainAccount's Closed Jobs. You can then see the detailed information of the closed jobs for MainAccount. QUESTION: While running the Veri-NAC system, I found managing and tracking vulnerabilities to be somewhat difficult. As the sole user of the device, it is difficult for me to add comments to a report and then move it to different stages “to be determined” and “closed”. Although I am the sole user of the device, I can't simply do these things myself, having instead to log on as the system administrator if I wish to move an issue on to the next stage. Also, is there a way for me to reopen and modify a job which has already been closed? ANSWER:Workflow is designed in such a way that only an administrator, not an IT staff member, can close a job. Unfortunately, after a job is closed, no changes can be added, but you can view the history of any closed job at My Tickets Log. You can make yourself an administrator of the appliance by logging in as MainAccount. QUESTION: When does the Veri-NAC check if jobs are past due? ANSWER: Twice a day (8:00 A.M. and 12:00 P.M.). If it finds jobs past due, it then sends an e-mail to the IT manager(s) for escalation. QUESTION: Why can’t I close the ticket of the job I just completed? ANSWER: Only your manager or MainAccount can close your job ticket. Even Manager-level users cannot close tickets for jobs they are assigned to. QUESTION: One of my staff members went on vacation, and she still has open job tickets assigned to her in Workflow. Can I reassign her tickets to other staff members? ANSWER: Yes. Go to WorkflowgReassign tickets and follow the steps. You may want to consult the Veri-NAC user’s manual. Please look in Section 16.8, Reassigning Jobs. Page 197 Veri-NAC User’s Manual QUESTION: Can I assign multiple resources for an individual job? ANSWER: Yes. Go to WorkflowgReassign tickets. Select the job number you’d like to reassign. On the next page, select any amount of resources you’d like (use the CTRL key when selecting), adjust the assigned man hours as needed, then click “Continue.“ D.7. Policies, Regulations, and Reports QUESTION: Why am I unable to upgrade the ISO 27001/17799 Policy? The selection button is grayed out. ANSWER: If you already have the policy tool installed, then no upgrade is available. Go to the Policies and Regulationsg ISO 27001/17799. If this opens a spreadsheet, you are fine. If not, call Black Box Technical Support at 724-746-5500. QUESTION: What is the purpose of the “Open Vulnerabilities” and “New Vulnerabilities” graphs in the “Trend in Vulnerability Status” section of a Management or Executive report? ANSWER: An Open vulnerability is a vulnerability that is listed in Workflow tickets and has not been resolved. A New vulnerability is a new CVE in the Workflow database. An example in Executive/Management Report: Currently open vuls*: 36 Fixed vuls: 20 Total Discovered vul =currently open vuls + Fixed vuls = 56 New vuls: 8* vul = vulnerability QUESTION: I fixed all vulnerabilities present in my job tickets and then generated a report. Despite all vulnerabilities being fixed, the “Fixed Vulnerabilities Graph” does not match the “Total Discovered Vulnerabilities.” The graphs seem to indicate that there are still open vulnerabilities. If I look at the report, it says that the jobs are closed and all vulnerabilities are fixed. ANSWER: Even though the job status for this vulnerability is set as “fixed,” the Veri-NAC doesn’t consider it to be. You should to run an audit again to ensure that this vulnerability is really fixed. QUESTION: Once I complete a policy in Basic Policy Builder, is there a way to print out the policy that I created so I can keep a hard copy? ANSWER: Yes. Go to File Print or press CTRL-P on your keyboard. To ensure your policy is what gets printed, make sure this window is the highlighted browser window — click inside the final policy window with the mouse to be sure, then press CTRL-P. QUESTION: Basic Policy Builder lists 26 default policies; is there a way to create a new policy other than those 26 items (creating policy 27, 28, and so on)? ANSWER: Unfortunately, in the present version you cannot create a new policy. However, feel free to open up Microsoft Word, copy your final policies into a Word document, and then begin editing your new policies 27, 28, and so on. QUESTION: ANSWER: How does Veri-NAC know if my network is in compliance with ISO 27001 for reporting purposes? Veri-NAC tests for Common Vulnerabilities and Exposures (CVEs) which could cause a breach of Confidentiality, Availability, and/or Integrity (CIA), which would create the risk of being out of ISO compliance. Knowing that your network is free of CVEs eliminates this particular compliance risk. Also, the ISO 27001/17799 policy builder tool included with our larger enterprise appliances helps companies to audit, test, and build ISO-compliant policies Page 198 724-746-5500 | blackbox.com Appendix D: Frequently Asked Questions that are corporate wide and out of the core scope of the appliance but fully ISO 27001 compliant. QUESTION: Is Veri-NAC compatible with the Committee on Payment and Settlement Systems? ANSWER: Veri-NAC is compatible with the Committee on Payment and Settlement Systems (CPSS), but it does not guarantee that transactions are secure. By detecting and removing CVEs that could breach CIA, as well as using our best-practices ISO 27001 and basic policy tools, you can show steps of due care and due diligence for CPSS. QUESTION: Does my company’s logo only show on first page of a report? ANSWER: Yes, the logo appears only on the report’s first page, while your company name and address is on the bottom of every page. QUESTION: When I view an audit report, it reads “The remote host is not available, so it cannot be audited.” I have checked to make sure the machine is turned on. Why can’t I audit that machine? ANSWER: Make sure any local host-based software firewalls running on that machine are turned off before running an audit. D.8. Backup and Restore QUESTION: Does Veri-NAC appliance have a backup and restore facility? ANSWER: Veri-NAC does have backup/restore capability. Please see documentation on System Backup and Restore. QUESTION: Can I change the name of the file that is created during a backup? ANSWER: No, do not do this. The file will then be unrecognizable to Veri-NAC should it need to run a restore. QUESTION: Do I need to delete the backup file from Veri-NAC? ANSWER: It is not required, but we recommend doing so to save hard drive space. QUESTION: After I perform a restore on Veri-NAC, will my updated patches be restored back to the earlier version? ANSWER: No. Only the data and configuration information reverts to the former state. Please make sure you keep track of all login IDs and passwords — new and old. You might need this to log back in. QUESTION: What is included in a Backup/Restore? ANSWER: The Veri-NAC appliance will back up the following: Reports and Workflow Audit Configurations Asset Tracking Data Veri-NAC appliance Settings Veri-NAC appliance Log(s) QUESTION: I use a Linux®/Unix® File Server. When I back up the system in the “Backup and Restore” section, is my Linux username and password required since to write files to the OS, I need to use my username and password to grant permission? Page 199 Veri-NAC User’s Manual ANSWER: See Backup and Restore in the Veri-NAC User Guide: From System Backup and Restore, click Change Backup Settings. Click “Important steps required” for Linux servers to work. Follow the provided instructions. If you have questions, call Black Box Technical Support at 724-746-5500. D.9. Command Center QUESTION: What is the Command Center? ANSWER: The LVN5400A, LVN5600A, or LVN5800A Command Center offers the ability to command and control remote Veri-NAC appliances across our network. Remote appliances can be added, and groups of remote appliances can be created. In one action, policies and configurations can be saved to all remote appliances included in a group. Remote actions can be performed on remote appliances. Group and appliance status can be quickly viewed on a single screen, providing an easy-to-use management console. QUESTION: I am planning a project for a large network; I need to understand more about manageability so I can be confident when it goes into operational mode. Can you please share with me the operation/ deployment model Veri-NAC has used for large-size customers? ANSWER: Management can be either local (console) or remote (https). The units can be grouped and managed remotely from the LVN5400A, LVN5600A, or LVN5800A unit using the Command Center on networks of any size. It really depends upon how many VLANs, subnets, and physical locations there are. With this information, you should be able to deploy one or more Veri-NAC appliances to protect your entire network. QUESTION: Can the Veri-NAC LVN5400A, LVN5600A, or LVN5800A unit with Command Center have the same trusted list database as another sub-unit? ANSWER: Yes, it can. QUESTION: What is the default port Veri-NAC LVN5400A, LVN5600A, or LVN5800A uses to communicate with managed LVN5200A or LVN5250A units and can I change it? ANSWER: Port 443 (SSL) is the default. You can change the port to any number you like as long as both the LVN5400A, LVN56500A, or LVN5800A and all managed appliances use the same port. Don’t forget to open the port on your firewall to allow traffic from the Veri-NAC LVN5400A, LVN56500A, or LVN5800A Command Center to each remote Veri-NAC LVN5200A or LVN5250A unit. Page 200 724-746-5500 | blackbox.com Appendix D: Frequently Asked Questions QUESTION: I added a Veri-NAC LVN5200A or LVN5250A unit to my Command Center group. When I look at my managed appliances, I see a red icon next to the LVN5200A or LVN5250A unit. When I click on it, it displays the message “Appliance Unavailable.” What’s wrong? ANSWER: This means the Command Center cannot communicate with that Veri-NAC unit. Please check the following: - Is the Veri-NAC LVN5200A or LVN5250A unit turned on? - Is the Ethernet cable plugged in properly? - Can the Command Center receive information from the IP address of the remote unit? Make sure the LVN5200A or LVN5250A unit’s IP isn’t accidentally in the Block Range. - Can the LVN5200A or LVN5250A unit be accessed locally from the browser (https)? - Is the default port the same for both the LVN5200A and LVN5250A; and LVN5400A, LVN5600A, and LVN5600A units? - Did you configure the firewall or other intermediate devices to forward the SSL port traffic properly? QUESTION: Why would I use 802.1q VLAN tagging? ANSWER: This feature is very useful if you want to efficiently use less Veri-NAC hardware to protect a larger or more complicated network that uses VLANs. When you want to have one Ethernet port of your Veri-NAC appliance see and help manage network access and vulnerabilities in up to ten (10) VLANs per physical Ethernet connector, you simply tag all these VLANs and plug Eth0 of your Veri-NAC appliance into the physical port on your smart switch where you have the tagged VLANs mapped. QUESTION: I enabled 802.1q VLAN tagging in my smart switch and now my network seems to have gone down. What happened? ANSWER: Use 802.1q VLAN tagging only if you fully understand how to properly configure this feature both in your smart switch (for example, Black Box part numbers LGB1002A-R2, LGB1003A-R2, or LGB1005A-R2) and your Veri-NAC appliance. This feature is optional and not required to use your Veri-NAC appliance. 802.1q VLAN is a very powerful feature of your smart switch. If you misconfigure the physical tagged ports of your smart switch, the switch itself might send tagged traffic over your network causing devices to appear to lose connectivity or be offline, when they are not actually offline. Make sure the physical smart switch port that you have bound to the tagged VLANs is plugged into one of the enabled Ethernet ports of your Veri-NAC appliance. QUESTION: Why can’t I open the ISO 27001 policy tool on my Veri-NAC (LVN5400A, LVN5600A, or LVN5800A)? ANSWER:If you open this tool using Internet Explorer®, it will open an Excel file remotely from the Veri-NAC appliance. You might have to click on an Internet Explorer popup dialog box to agree to download this content. When you do so, it should open fine. Then, if you attempt to click a hyperlink in one of the Excel® tabs from within your Internet Explorer browser, you will go through the same process to open one of the many sample policies in the Word document format. If you are using Firefox®, by default it will attempt to download the Excel spreadsheet locally. By doing so, the embedded Word document hyperlinks will not work because they are looking for files on a relative path. You will need to run this tool using Internet Explorer as your default browser. Page 201 Veri-NAC User’s Manual Appendix E. License Agreement Copyright © 2009 Black Box Corporation. All Rights Reserved Worldwide. Black Box and the Double Diamond logo are registered trademarks, and Veri-NAC is a trademark, of BB Technologies, Inc. Any other trademarks mentioned in this document are acknowledged to be the trademarks of their respective owners. Information in this document is subject to change without notice. No part of this document may be reproduced or transmitted in any form or by any means, electronic or mechanical, for any purpose without receiving written permission from: Black Box Corporation 1000 Park Drive Lawrence, PA 15055-1018 www.blackbox.com Veri-NAC Appliances Version 7.1 Models: 5200, 5250, 5400, 5600, 5800 Part Numbers: LVN5200A, LVN5250A, LVN5400A, LVN5600A, LVN5800A Do not use the Veri-NAC Appliance until you read and accept this Agreement. By installing or using Veri-NAC you accept the terms of this Agreement. By accepting this Agreement you agree to abide by the RMA policy displayed at the end of this document. This Veri-NAC Appliance incorporates proprietary software as well as software protected under the GNU General Public License, the terms of which are included at the end of this license. 1. Licensee. Licensee is the person, company, or entity who installs or uses this Veri-NAC Appliance. The Licensee must accept and agree to this Agreement before installing or using the Veri-NAC Appliance. 2. Veri-NAC Appliance. The “Veri-NAC Appliance” includes two categories of computer code: Black Box Software and GPL Software. 3. Software. The term Software is used to mean any or all of Black Box proprietary and GPL-protected software. Because of the intrinsic vulnerability of computer software, Black Box has performed extensive system hardening and wrapping around GPLprotected modules to provide the Licensee integrated access to reliable unified continuous network access control, vulnerability assessment, and intrusion detection. Although under the GPL, Black Box cannot limit the Licensee's ability to obtain source code and copy, modify, and distribute the software, the Black Box packaging and representations as to the functionality of the Veri-NAC Appliance depend completely upon maintaining the integrity of the code embedded in the Appliance and the underlying hardware. If the hardware, software, or code is modified in any way by the Licensee, Black Box disclaims all representations and warranties, express or implied, as to the functionality and maintenance of the Veri-NAC Appliance. (a) " Black Box Software" refers to the proprietary code developed to integrate, activate, and control the functions of numerous open source software under a common administrative management console, installed specifically on hardware selected by Black Box. Black Box owns the copyrights and intellectual property in and to each item of Black Box Software. Black Box Software is licensed by Black Box to Licensee through the License of Section 5 on page 3. Licensee is not entitled to any Black Box Software source code unless, and only to the extent that, such source code is included by Black Box in the VeriNAC Appliance. Page 202 724-746-5500 | blackbox.com Appendix E: License Agreement (b) “GPL Software” consists of the following computer programs: Various open source software packages as selected, arranged and coordinated by Black Box for inclusion in this Veri-NAC distribution. GPL Software is not owned by Black Box: it is distributed by Black Box to Licensee for use by Licensee. GPL Software is distributed under the terms of the GNU General Public License, Version 2, June 1991, a copy of which is included at the end of this Black Box License Agreement. The GNU General Public License governs the GPL Software and the copying, distribution, and modification of the GPL Software. GPL Software source code may be obtained by Licensee by contacting [email protected]. (c) L icensed, Not Sold. Black Box and GPL Software are not sold, but are licensed and distributed to Licensee. Any reference to the purchase or sale of the Veri-NAC Appliance means, with respect to the Black Box Software, a purchase or sale of the applicable licenses. The Veri-NAC purchase price includes the license fees. Black Box does not charge a fee for any GPL Software license, but includes a fee for distribution (for example, installing a copy or copies on Licensee’s Veri-NAC Appliance) in the Veri-NAC purchase price. The applicable license agreement governs ownership of copies of Black Box Software and GPL Software. (d) Maintenance Releases. All maintenance releases, fixes, patches, work-around solutions, upgrades, and updates for or to the Black Box or GPL Software made available by Black Box or its distributors, OEMs, VARs, or other resellers to Licensee are part of the Black Box Software or GPL Software, as applicable, and are governed by this Agreement and the agreements referred to herein, unless a different license agreement is provided with or made applicable to such maintenance releases, fixes, patches, work-around solutions, upgrades, and updates. 4. Documentation. "Documentation" refers to the on-line documentation and printed documentation, if any, provided to Licensee in connection with the Veri-NAC. Whenever the context reasonably permits, any reference in this Agreement to Black Box Software also applies to Documentation. The Documentation may be used by Licensee, but only in connection with this VeriNAC distribution. 5. License of Black Box Software. Subject to the other provisions of this Agreement, Black Box grants to Licensee a non-exclusive, non-transferable license to use the Black Box Software (the "License"). Rights to Black Box Software not expressly granted to Licensee in this Agreement are reserved by Black Box. 6. Copies of Black Box Software. Licensee may make copies of Black Box Software provided that all Black Box trademark and copyright notices are faithfully reproduced and included on copies made by Licensee. 7. Protection of the Veri-NAC Appliance. Except as expressly authorized in this Agreement and the incorporated General Public License, Licensee may not: (i) disassemble, decompile, or otherwise reverse engineer the Veri-NAC Appliance, (ii) create derivative works based upon Black Box Software embedded on the Veri-NAC Appliance, (iii) rent, lease, sublicense, distribute, or transfer the Veri-NAC Appliance, or (iv) modify the Veri-NAC Appliance (including any deletion or addition of code). 8. Limited Warranty. (a) M edia And Documentation. Black Box warrants that if the Veri-NAC hardware, media, or printed Documentation, if any, provided by Black Box are in a damaged or physically defective condition when delivered and if they are returned to Black Box (postage prepaid) within thirty (30) days of the date of purchase, then Black Box will provide Licensee with a replacement at no charge. (b) Black Box Software. Black Box warrants that if the Black Box Software fails to substantially conform to the specifications in the Documentation or to any other Black Box Software specifications published by Black Box, and the Licensee reports the nonconformity in writing to Black Box within thirty (30) days from the date the License is purchased, then Black Box shall either remedy the nonconformity or offer to refund the purchase price to Licensee upon a return of the Veri-NAC Appliance (including all packaging, media, and documentation) to Black Box. If the Licensee returns the Appliance to Black Box and receives a refund, this License shall terminate. Page 203 Veri-NAC User’s Manual 9. Disclaimers And Limitations. (a) D isclaimer Of Warranties. Black Box makes no warranty, promise, or representation not expressly set forth in this agreement. The Black Box software is provided “as is” without warranty or representation of any kind. GPL software is provided “as is” without warranty or representation of any kind. Black Box disclaims and excludes all implied warranties including, without limitation, the implied warranties of noninfringement, merchantability, and fitness for a particular purpose. Black Box does not warrant that any of the software will satisfy licensee’s requirements, or that it is without defect or error, or that the operation thereof will be uninterrupted. This agreement gives licensee specific legal rights. Licensee might have other rights, which vary from state/jurisdiction to state/jurisdiction. (b) L imitation On Liability. Black Box is not liable to you or any other person for indirect, special, incidental, or consequential damages of any character, whether based in contract, tort, warranty, strict liability, malpractice, fraud, and/or any other legal theory, arising from or relating to this agreement or any of the software, including, but not limited to damages for loss of goodwill, business interruption, loss of business information or profits, computer failure or malfunction, or any other commercial damages or losses. Black Box will not be liable for aggregate damages in excess of the price paid for the VeriNAC, even if such damages are possible, because some states/jurisdictions do not allow the exclusion or limitation of liability, so the above limitation may not apply. (c) R esponsibility For Decisions. Licensee is responsible for decisions made and actions taken with respect to the use and configuration of the Veri-NAC. (d) Non-Parties. The Black Box officers, directors, employees, shareholders, and representatives are not parties to this Agreement and shall have no obligation or liability to Licensee relating to this Agreement or the Software. 10. Sole Remedy And Allocation Of Risk. LICENSEE'S SOLE AND EXCLUSIVE REMEDY IS SET FORTH IN THIS AGREEMENT. This Agreement defines a mutually agreed-upon risk allocation, and the License fees reflect such risk allocation. 11. Support. Nothing in this Agreement entitles Licensee to any support, maintenance, or new versions or distributions of any Software. Licensee may contact Black Box at [email protected] to determine the relationship with respect to support, maintenance, new versions, and distributions of the Software, and the fees, terms, and conditions that apply. 12. Governing Law. This Agreement shall be governed by the laws of the state of Pennsylvania and the United States of America without giving effect to conflict or choice of law principles. This Agreement is not governed by the United Nations Convention on the International Sale of Goods or the Uniform Computer Information Transactions Act (or its enactment into state law), the application of which are expressly excluded. Any litigation between the parties shall be conducted exclusively in Pennsylvania courts or the federal district courts within Pennsylvania. The parties agree and submit to such exclusive jurisdiction and venue. 13. Entire Agreement. This Agreement sets forth the entire understanding and agreement between the parties relating to the subject matter of this Agreement. No vendor, distributor, OEM, VAR, reseller, dealer, retailer, salesperson, or other person is authorized by Black Box to modify this Agreement or to make any warranty, representation, or promise which is different than, or in addition to, the warranties, representations, and promises of this Agreement. 14. Termination. The License shall automatically terminate if Licensee materially breaches this Agreement. If the License terminates, Licensee must stop using the Veri-NAC Appliance and shall destroy all copies of the Black Box Software within the possession or control of Licensee and must return the original Veri-NAC Appliance, and Black Box Software and Documentation, if any, to Black Box. Page 204 724-746-5500 | blackbox.com Appendix E: License Agreement 15. Government End Users. A “U.S. Government End User” means any United States agency or entity. If Licensee is a U.S. Government End User, then this Subsection applies. The Veri-NAC Appliance is a “commercial item,” as defined in 48 C.F.R. 2.101 (Oct. 1995), consisting of “commercial computer software” and “commercial computer software documentation,” as defined in 48 C.F.R. 12.312 (Sept. 1995).Consistent with 48 C.F.R. 12.312 and 48 C.F.R. 227.7202-1 through 227.7202-4 (June 1995), all U.S. Government End Users acquire the Black Box Software with only those rights set forth herein. The Black Box Software (including related documentation) is provided to U.S. Government End Users: (a) only as a commercial end item; and (b) only pursuant to this Agreement. 16. Export Laws. Licensee must not export, disclose, or distribute Veri-NAC or any included Software in violation of any applicable laws or regulations, including the export laws and regulations of the United States, and must comply with all such laws and regulations. 17. Construction. In the construction and interpretation of this Agreement, no rule of strict construction applies against either party. 18. Severability. If any provision in this Agreement is invalid or unenforceable or contrary to applicable law, such provision shall be construed, limited, or altered, as necessary, to eliminate the invalidity or unenforceability or the conflict with applicable law, and all other provisions of this Agreement shall remain in effect. 19. Proper Usage. The Veri-NAC appliance is licensed to the end-user to help protect the network against untrusted devices and malicious access, in discovering network vulnerabilities, and to help improve the quality of the network through ongoing vulnerability assessment and provide guidance in due care and due diligence. The appliance should not be used for software product improvements or development. 20. Tampering. Licensee shall not reverse engineer, decompile, disassemble, or attempt to view or tamper with the software in any form or fashion. Black Box and the Double Diamond logo are registered trademarks, and Veri-NAC is a trademark, of BB Technologies, Inc. Page 205 Veri-NAC User’s Manual GNU General Public License Version 2, June 1991 Copyright © 1989, 1991 Free Software Foundation, Inc. 59 Temple Place - Suite 330, Boston, MA02111-1307, USA Everyone is permitted to copy and distribute verbatim copies of this license document, but changing it is not allowed. TERMS AND CONDITIONS FOR COPYING, DISTRIBUTION AND MODIFICATION 1. This License applies to any program or other work that contains a notice placed by the copyright holder saying it may be distributed under the terms of this General Public License. The “Program,” below, refers to any such program or work, and “work based on the Program” means either the Program or any derivative work under copyright law: that is, work containing the Program or a portion of it, either verbatim or with modifications and /or translated into another language. (Hereinafter, translation is included without limitation in the term “modification.”) Each licensee is addressed as “you.” T his license does not cover activities other than copying, distribution and modification; they are outside its scope. Running the Program is not restricted, and the output from the Program is covered only if its contents constitute a work based on the Program (independent of having been made by running the Program). Whether that is true depends on what the Program does. 2. You may copy and distribute verbatim copies of the Program's source code as you receive it, in any medium, but you must conspicuously and appropriately publish on each copy an appropriate copyright notice and disclaimer of warranty; keep intact all the notices that refer to this License and to the absence of any warranty; and give any other recipients of the Program a copy of this License along with the Program. Y ou may charge a fee for the physical act of transferring a copy, and you may at your option offer warranty protection in exchange for a fee. 3. You may modify your copy or copies of the Program or any portion of it, thus forming a work based on the Program, and copy and distribute such modifications or work under the terms of Section 1 above, but you must also meet all of these conditions: a) The modified files must carry prominent notices stating that you changed the files and the date of any change. b) You must cause any work that you distribute or publish, that in whole or in part contains or is derived from the Program or any part thereof, to be licensed as a whole at no charge to all third parties under the terms of this License. c) If the modified program normally reads commands interactively when run, when running it for ordinary interactive use to print or display an announcement including an appropriate copyright notice and a notice that there is no warranty (or else, saying that you provide a warranty) and that users may redistribute the program under these conditions, and telling the user how to view a copy of this License. (Exception: if the Program itself is interactive but does not normally print such an announcement, your work based on the Program is not required to print an announcement.) T hese requirements apply to the modified work as a whole. If identifiable sections of that work are not derived from the Program, and can be reasonably considered independent and separate works in themselves, then this License, and its terms, do not apply to those sections when you distribute them as separate works. But when you distribute the same sections as part of a whole which is a work based on the Program, the distribution of the whole must be on the terms of this License, whose permissions for other licensees extend to the entire whole, and thus to each and every part regardless of who wrote it. T hus, we do not intend to claim rights or contest your rights to work written entirely by you; rather, the intent is to exercise the right to control the distribution of derivative or collective works based on the Program. Page 206 724-746-5500 | blackbox.com Appendix E: License Agreement addition, mere aggregation of another work not based on the Program with the Program (or with a work based on the In Program) on a volume of a storage or distribution medium does not bring the other work under the scope of this License. 4. You may copy and distribute the Program (or a work based on it, under Section 2) in object code or executable form under the terms of Sections 1 and 2 above provided that you also do one of the following: a) Accompany it with the complete corresponding machine-readable source code, which must be distributed under the terms of Sections 1 and 2 above on a medium customarily used for software interchange; or, b) A ccompany it with a written offer, valid for at least three years, to give any third party, for a charge no more than your cost of physically performing source distribution, a complete machine-readable copy of the corresponding source code, to be distributed under the terms of Sections 1 and 2 above on a medium customarily used for software interchange; or, c) A ccompany it with the information you received as to the offer to distribute corresponding source code. (This alternative is allowed only for noncommercial distribution and only if you received the program in object code or executable form with such an offer, in accord with Subsection b above.) T he source code for a work means the preferred form of the work for making modifications to it. For an executable work, complete source code means all the source code for all modules it contains, plus any associated interface definition files, plus the scripts used to control compilation and installation of the executable. However, as a special exception, the source code distributed need not include anything that is normally distributed (in either source or binary form) with the major components (compiler, kernel, and so on) of the operating system on which the executable runs, unless that component itself accompanies the executable. If distribution of executable or object code is made by offering access to copy from a designated place, then offering equivalent access to copy the source code from the same place counts as distribution of the source code, even though third parties are not compelled to copy the source along with the object code. 5. You may not copy, modify, sublicense, or distribute the Program except as expressly provided under this License. Any attempt otherwise to copy, modify, sublicense or distribute the Program is void, and will automatically terminate your rights under this License. However, parties who have received copies, or rights, from you under this License will not have their licenses terminated so long as such parties remain in full compliance. 6. You are not required to accept this License, since you have not signed it. However, nothing else grants you permission to modify or distribute the Program or its derivative works. These actions are prohibited by law if you do not accept this License. Therefore, by modifying or distributing the Program (or any work based on the Program), you indicate your acceptance of this License to do so, and all its terms and conditions for copying, distributing or modifying the Program or works based on it. 7. Each time you redistribute the Program (or any work based on the Program), the recipient automatically receives a license from the original licensor to copy, distribute or modify the Program subject to these terms and conditions. You may not impose any further restrictions on the recipients’ exercise of the rights granted herein. You are not responsible for enforcing compliance by third parties to this License. 8. If, as a consequence of a court judgment or allegation of patent infringement or for any other reason (not limited to patent issues), conditions are imposed on you (whether by court order, agreement or otherwise) that contradict the conditions of this License, they do not excuse you from the conditions of this License. If you cannot distribute so as to satisfy simultaneously your obligations under this License and any other pertinent obligations, then as a consequence you may not distribute the Program at all. For example, if a patent license would not permit royalty-free redistribution of the Program by all those who receive copies directly or indirectly through you, then the only way you could satisfy both it and this License would be to refrain entirely from distribution of the Program. If any portion of this section is held invalid or unenforceable under any particular circumstance, the balance of the section is intended to apply and the section as a whole is intended to apply in other circumstances. Page 207 Veri-NAC User’s Manual It is not the purpose of this section to induce you to infringe any patents or other property right claims or to contest validity of any such claims; this section has the sole purpose of protecting the integrity of the free software distribution system, which is implemented by public license practices. Many people have made generous contributions to the wide range of software distributed through that system in reliance on consistent application of that system; it is up to the author/donor to decide if he or she is willing to distribute software through any other system and a licensee cannot impose that choice. This section is intended to make thoroughly clear the consequences of the rest of this License. 9. If the distribution and/or use of the Program are restricted in certain countries either by patents or by copyrighted interfaces, the original copyright holder who places the Program under this License may add an explicit geographical distribution limitation excluding those countries, so that distribution is permitted only in or among countries not thus excluded. In such case, this License incorporates the limitation as if written in the body of this License. 10. The Free Software Foundation may publish revised and/or new versions of the General Public License from time to time. Such new versions will be similar in spirit to the present version, but may differ in detail to address new problems or concerns. E ach version is given a distinguishing version number. If the Program specifies a version number of this License which applies to it and “any later version,” you have the option of following the terms and conditions either of that version or of any later version published by the Free Software Foundation. If the Program does not specify a version number of this License, you may choose any version ever published by the Free Software Foundation. 11. If you wish to incorporate parts of the Program into other free programs whose distribution conditions are different, write to the author to ask for permission. For software that’s copyrighted by the Free Software Foundation, write to the Free Software Foundation; we sometimes make exceptions for this. Our decision will be guided by the two goals of preserving the free status of all derivatives of our free software and of promoting the sharing and reuse of software generally. NO GPL SOFTWARE WARRANTY 12. Because the GPL portions of the software program is licensed free of charge, there is no warranty for the software program, to the extent permitted by applicable law. Except when otherwise stated in writing, the copyright holders and/or other parties provide the program “as is” without warranty of any kind, either expressed or implied, including, but not limited to, the implied warranties of merchantability and fitness for a particular purpose. The entire risk as to the quality and performance of the program is with you. Should the program prove defective, you assume the cost of all necessary servicing, repair, or correction. 13. In no event unless required by applicable law or agreed to in writing will any copyright holder, or any other party who may modify and/or redistribute the program as permitted above, be liable to you for damages, including any general, special, incidental, or consequential damages arising out of the use or inability to use the program (including but not limited to loss of data or data being rendered inaccurate or losses sustained by you or third parties or a failure of the program to operate with any other programs), even if such holder or other party has been advised of the possibility of such damages. Page 208 724-746-5500 | blackbox.com Appendix E: License Agreement Return Material Authorization (RMA) Policy General Return Policy All Veri-NAC appliances carry a 30-day, money-back guarantee. If you are not happy for any reason, please contact Black Box Corporation for a Return Authorization (RA) number within 30 days of receiving the unit. The returned item(s) must be 100% complete, in original condition, with all packaging, manuals, and accessories. We reserve the right to refuse a return on any product that does not meet these requirements. For units containing the auditing function (part numbers LVN5250A, LVN5400A, LVN5600A, and LVN5800A), only four device audits may have been conducted to be eligible for the 30-day return. Auditing more than four devices constitutes an acceptance of the product and removes the ability to return the product under the 30-day policy. If an item appears not to be functioning properly, please contact Black Box Technical Support at 724-746-5500 (press 1, then 2, then 4) for troubleshooting assistance. If we confirm that the product requires repair or replacement, the Technical Support team will provide you with an RA number. Customers pay for return shipping on all returns. The Veri-NAC includes a standard one-year warranty. Extended warranties and service plans are available: contact Black Box Technical Support at 724-746-5500 for details. Page 209