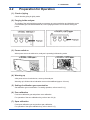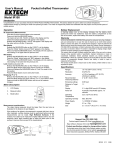
1
User’s Manual MODEL IR100 Universal Infrared Gas Analyzer IM 11G2L1-01E R IM 11G2L1-01E 5th Edition INTRODUCTION Thank you for purchasing the IR100 Universal Infrared Gas Analyzer. Before using this manual, thoroughly read it for correct use instructions. n DO NOT store or install the stack gas analyzing system in the following locations: • Areas subject to vibration. Vibration may loosen tubing connections. • Areas with high temperatures and humidity. The IR100 gas analyzer main units are designed for use in areas where the ambient temperature is -5 to 45 °C (-15 to 45 °C for cold-climate specifications) and the maximum ambient humidity is 90% RH. The allowable storage temperature ranges from -20 to 60 °C. • Areas where corrosive gases are present. Also avoid storage in dusty locations. While the system is in storage, keep the sample gas inlet closed to prevent dust from entering the connection. 5th Edition : June 2007 (YK) All Rights Reserved Copyright © 2007, Yokogawa Electric Corporation IM 11G2LI-01E 5th Edition : June 20, 2007-00 User’s Manual MODEL IR100 Universal Infrared Gas Analyzer Supplement Thank you for selecting our Model IR100 Universal Infrared Gas Analyzer. User's Manual, IM 11G2L1-01E, 5th Edition, supplied with the product, some revisions/additions have been made. Please replace the corresponding pages in your copy with the attached, revised pages. Revisions: - Page 1-4, - Page 1-6, - CMPL Section 1.6.1, "IR100A, IR100B (horizontal type)," Fuse (provided as a standard accessory): Changed of Parts Number. Section 1.6.2, "IR100TA, IR100TB (vertical type)," Fuse (provided as a standard accessory): Changed of Parts Number. "CMPL 11G2L1-01E," Fuse: Changed of Parts Number. CMPL No. revised to 4th edition. All Rights Reserved, Copyright © 2007, 1st Edition: Aug. 2011 (YK) Subject to change without notice. IM 11G2L1-01E 5th Edition <1. GENERAL> 1.6 1-4 Model and Suffix Codes 1.6.1 IR100A, IR100B (horizontal type) 1. Single-gas analyzer (IR100A) Model Suffix code Option code IR100A ·········· ·········· Single-gas analyzer ·········· ·········· ·········· CO CO2 CH4 A·········· B·········· C·········· D·········· E·········· F·········· G·········· H·········· J·········· K·········· L·········· M·········· P·········· Q·········· R·········· S·········· ·········· ·········· ·········· ·········· ·········· ·········· ·········· ·········· ·········· ·········· ·········· ·········· ·········· ·········· ·········· ·········· 0 to 500 ppm (not available for CH4) 0 to 1000 ppm 0 to 2000 ppm 0 to 2500 ppm 0 to 5000 ppm 0 to 1 % 0 to 2 % 0 to 5 % 0 to 10 % 0 to 20 % 0 to 50 % 0 to 100 % 0 to 3 % 0 to 30 % 0 to 40 % 0 to 70 % A········ B········ C········ D········ E········ F········ G········ H········ J········ K········ L········ M········ N········ ·········· ·········· ·········· ·········· ·········· ·········· ·········· ·········· ·········· ·········· ·········· ·········· ·········· 0 to 500 ppm (not available for CH4) 0 to 1000 ppm 0 to 2000 ppm 0 to 2500 ppm 0 to 5000 ppm 0 to 1 % 0 to 2 % 0 to 5 % 0 to 10 % 0 to 20 % 0 to 50 % 0 to 100 % Not available ·········· ·········· ·········· ·········· ·········· ·········· 100V AC 50Hz 100V AC 60Hz 115V AC 50Hz 115V AC 60Hz 220V AC 50Hz 220V AC 60Hz A···· B···· C···· ·········· ·········· ·········· Desk top 19-inch rack-mounted Panel-mounted J·· A·· ·········· ·········· Rc1/4 1/4NPT ·········· ·········· Japanese English Measured gas Primary range Secondary range Power supply Construction Piping Panel Additional functions -1·········· -2·········· -3·········· -5······ -6······ -7······ -8······ -3······ -4······ -J -E /P·········· /J·········· Description Automatic calibration Remote range switching function and range identification functions Fuse (provided as a standard accessory) Part number Specification K9358DP 125/250 V, 500 mA IM 11G2L1-01E 5th Edition : June 20, 2007-00 <1. GENERAL> 2. 1-5 Dual-gas analyzer (IR100B) Suffix code Option code IR100B ············ ·········· Measured gas -G·········· Primary range of CO2 Primary range of CO Secondary range of CO Power supply Construction Piping Panel Additional functions Dual-gas analyzer CO2 + CO ·········· CO2 / CO (Primary gas / secondary gas) ·········· ·········· ·········· ·········· ·········· ·········· ·········· ·········· 0 to 500 ppm (0 to 500 ppm cannot be specified for CO) 0 to 1 % 0 to 2 % 0 to 5 % 0 to 10 % 0 to 20 % 0 to 50 % 0 to 100 % ·········· ·········· ·········· ×2 ×2.5 Not available A········ B········ C········ D········ E········ F········ G········ H········ J········ K········ L········ M········ ·········· ·········· ·········· ·········· ·········· ·········· ·········· ·········· ·········· ·········· ·········· ·········· 0 to 500 ppm 0 to 1000 ppm 0 to 2000 ppm 0 to 2500 ppm 0 to 5000 ppm 0 to 1 % 0 to 2 % 0 to 5 % 0 to 10 % 0 to 20 % 0 to 50 % 0 to 100 % 1······ 2······ N······ ·········· ·········· ·········· ×2 × 2.5 Not available -5······ -6······ -7······ -8······ -3······ -4······ ·········· ·········· ·········· ·········· ·········· ·········· 100 V AC 50 Hz 100 V AC 60 Hz 115 V AC 50 Hz 115 V AC 60 Hz 220 V AC 50 Hz 220 V AC 60 Hz A···· B···· C···· ·········· ·········· ·········· Desk top 19-inch rack-mounted Panel-mounted ·········· ·········· Rc1/4 1/4NPT ·········· ·········· Japanese English E·········· F·········· G·········· H·········· J·········· K·········· L·········· M·········· Secondary range of CO2 1 Description 1·········· 2·········· N·········· J·· A·· -J -E /P·········· /J·········· Automatic calibration (for both gases) Remote range switching function and range identification functions Fuse (provided as a standard accessory) Part number Specification K9358DP 125/250 V, 500 mA IM 11G2L1-01E 5th Edition : June 20, 2007-00 GENERAL Model <1. GENERAL> 1.6.2 1-6 IR100TA, IR100TB (vertical type) 1. Single-gas analyzer (IR100TA) Model IR100TA Measured gas Primary range Secondary range Power supply Construction Piping Panel Additional functions Suffix code Option code Description ·········· ·········· Single-gas analyzer -1·········· -2·········· -3·········· ·········· ·········· ·········· CO CO2 CH4 A·········· B·········· C·········· D·········· E·········· F·········· G·········· H·········· J·········· K·········· L·········· M·········· P·········· Q·········· R·········· S·········· ·········· ·········· ·········· ·········· ·········· ·········· ·········· ·········· ·········· ·········· ·········· ·········· ·········· ·········· ·········· ·········· 0 to 500 ppm (not available for CH4) 0 to 1000 ppm 0 to 2000 ppm 0 to 2500 ppm 0 to 5000 ppm 0 to 1 % 0 to 2 % 0 to 5 % 0 to 10 % 0 to 20 % 0 to 50 % 0 to 100 % 0 to 3 % 0 to 30 % 0 to 40 % 0 to 70 % A········ B········ C········ D········ E········ F········ G········ H········ J········ K········ L········ M········ N········ ·········· ·········· ·········· ·········· ·········· ·········· ·········· ·········· ·········· ·········· ·········· ·········· ·········· 0 to 500 ppm (not available for CH4) 0 to 1000 ppm 0 to 2000 ppm 0 to 2500 ppm 0 to 5000 ppm 0 to 1 % 0 to 2 % 0 to 5 % 0 to 10 % 0 to 20 % 0 to 50 % 0 to 100 % Not available ·········· ·········· ·········· ·········· ·········· ·········· 100 V AC 50 Hz 100 V AC 60 Hz 115 V AC 50 Hz 115 V AC 60 Hz 220 V AC 50 Hz 220 V AC 60 Hz C···· D···· ·········· ·········· Panel-mounted Wall-mounted J·· A·· ·········· ·········· Rc1/4 1/4NPT ·········· ·········· Japanese English /P········ /J········ Automatic calibration Remote range switching function and range identification functions -5······ -6······ -7······ -8······ -3······ -4······ -J -E Fuse (provided as a standard accessory) Part number Specification K9358DP 125/250 V, 500 mA IM 11G2L1-01E 5th Edition : June 20, 2007-00 <1. GENERAL> 1-7 2. Dual-gas analyzer (IR100TB) Suffix code Option code IR100TB ············ ·········· Measured gas Secondary range of CO2 Primary range of CO Secondary range of CO Power supply Construction Piping Panel Additional functions Dual-gas analyzer CO2 + CO ·········· CO2 / CO (Primary gas / secondary gas) ·········· ·········· ·········· ·········· ·········· ·········· ·········· ·········· 0 to 5000 ppm (0 to 500 ppm cannot be specified for CO) 0 to 1 % 0 to 2 % 0 to 5 % 0 to 10 % 0 to 20 % 0 to 50 % 0 to 100 % ·········· ·········· ·········· ×2 × 2.5 Not available A········ B········ C········ D········ E········ F········ G········ H········ J········ K········ L········ M········ ·········· ·········· ·········· ·········· ·········· ·········· ·········· ·········· ·········· ·········· ·········· ·········· 0 to 500 ppm 0 to 1000 ppm 0 to 2000 ppm 0 to 2500 ppm 0 to 5000 ppm 0 to 1 % 0 to 2 % 0 to 5 % 0 to 10 % 0 to 20 % 0 to 50 % 0 to 100 % 1······ 2······ N······ ·········· ·········· ·········· ×2 × 2.5 Not available -5······ -6······ -7······ -8······ -3······ -4······ ·········· ·········· ·········· ·········· ·········· ·········· 100 V AC 50 Hz 100 V AC 60 Hz 115 V AC 50 Hz 115 V AC 60 Hz 220 V AC 50 Hz 220 V AC 60 Hz C···· D···· ·········· ·········· Panel-mounted Wall-mounted ·········· ·········· Rc1/4 1/4NPT ·········· ·········· Japanese English /P········ /J········ Automatic calibration (for both gases) Remote range switching function and range identification functions -G·········· Primary range of CO2 1 Description E·········· F·········· G·········· H·········· J·········· K·········· L·········· M·········· 1·········· 2·········· N·········· J·· A·· -J -E Fuse (provided as a standard accessory) Part number Specification K9358DP 125/250 V, 500 mA IM 11G2L1-01E 5th Edition : June 20, 2007-00 GENERAL Model Customer Maintenance Parts List Model IR100 Universal Infrared Gas Analyzer All Rights Reserved, Copyright © 1996, Yokogawa Electric Corporation. Subject to change without notice. Yokogawa Electric Corporation CMPL 11G2L1-01E 4th Edition : Sep 2011 (YK) 2 CMPL 11G2L1-01E 4th Edition : Sep 2011 (YK) 3 4th Edition : Sep 2011 (YK) CMPL 11G2L1-01E ii n Contents of this manual This manual describes all aspects of the <IR100 Universal Infrared Gas Analyzer> including the installation, operation, inspection and maintenance procedures. Therefore, note that this manual may involve devices and systems that are beyond your specifications. Keep this in mind when you read this manual. Table 1.1 Manual Contents Summary and Guide to Sections by Task Chapter Content When to read, by task To Install 1. Specifications Gives standard specifications, model codes (or part number), and outline drawings for each device. 2. Component names and functions Gives names and brief functional descriptions of IR100 main unit components. 3. Installation Describes requirements and procedures for installation of IR100 analyzer main units and external sampling systems. 4. General operation Explains the basic procedure to be followed to bring an IR100 system to operational status. This section gives sufficient general knowledge to put a system into operation. 5. Detailed key and display operations Provides details concerning operating panel key operations and displays. 6. Maintenance Gives procedures for inspection and replacement of parts subject to deterioration, to maintain IR100 performance. 7. Troubleshooting Gives procedures for dealing with error messages and for corrective action in the event of a failure. CMPL (Parts list) Lists user-replaceable parts. :R ead and understand completely before beginning work. :R ead once before beginning operation. Then refer to when necessary. To Operate To Maintain : Recommend reading. IM 11G2LI-01E 5th Edition : June 20, 2007-00 iii Safety Precautions n Safety, Protection, and Modification of the Product • In order to protect the system controlled by the product and the product itself and ensure safe operation, observe the safety precautions described in this user’s manual. We assume no liability for safety if users fail to observe these instructions when operating the product. • If this instrument is used in a manner not specified in this user’s manual, the protection provided by this instrument may be impaired. • If any protection or safety circuit is required for the system controlled by the product or for the product itself, prepare it separately. • Be sure to use the spare parts approved by Yokogawa Electric Corporation (hereafter simply referred to as YOKOGAWA) when replacing parts or consumables. • Modification of the product is strictly prohibited. • The following symbols are used in the product and user’s manual to indicate that there are precautions for safety: Indicates that caution is required for operation. This symbol is placed on the product to refer the user to the user’s manual in order to protect the operator and the equipment. In the user’s manuals you will find precautions to avoid physical injury or death of the operator, including electrical shocks. Identifies a protective grounding terminal. Before using the product, ground the terminal. Identifies a functional grounding terminal. Before using the product, ground the terminal. Indicates an AC supply. Indicates a DC supply. Indicates that the main switch is ON. Indicates that the main switch is OFF. IM 11G2LI-01E 5th Edition : June 20, 2007-00 iv n Notes on Handling User’s Manuals • Please hand over the user’s manuals to your end users so that they can keep the user’s manuals on hand for convenient reference. • Please read the information thoroughly before using the product. • The purpose of these user’s manuals is not to warrant that the product is well suited to any particular purpose but rather to describe the functional details of the product. • No part of the user’s manuals may be transferred or reproduced without prior written consent from YOKOGAWA. • YOKOGAWA reserves the right to make improvements in the user’s manuals and product at any time, without notice or obligation. • If you have any questions, or you find mistakes or omissions in the user’s manuals, please contact our sales representative or your local distributor. n Warning and Disclaimer The product is provided on an “as is” basis. YOKOGAWA shall have neither liability nor responsibility to any person or entity with respect to any direct or indirect loss or damage arising from using the product or any defect of the product that YOKOGAWA can not predict in advance. n Notes on Hardware l Appearance and Accessories Check the following when you receive the product: • Appearance • Standard accessories Contact our sales representative or your local distributor if the product’s coating has come off, it has been damaged, or there is shortage of required accessories. l Model and Suffix Codes The name plate on the product contains the model and suffix codes. Compare them with those in the general specification to make sure the product is the correct one. If you have any questions, contact our sales representative or your local distributor. IM 11G2LI-01E 5th Edition : June 20, 2007-00 n Symbol Marks Throughout this user’s manual, you will find several different types of symbols are used to identify different sections of text. This section describes these icons. CAUTION Identifies instructions that must be observed in order to avoid physical injury and electric shock or death of the operator. WARNING Identifies instructions that must be observed in order to prevent the software or hardware from being damaged or the system from becoming faulty. IMPORTANT Identifies important information required to understand operations or functions. TIP Identifies additional information. SEE ALSO Identifies a source to be referred to. Clicking a reference displayed in green can call up its source, while clicking a reference displayed in black cannot. IM 11G2LI-01E 5th Edition : June 20, 2007-00 vi u After - Sales Warranty l Do not modify the product. l During the warranty period, for repair under warranty carry or send the product to the local sales representative or service office. Yokogawa will replace or repair any damaged parts and return the product to you. lBefore returning a product for repair under warranty, provide us with the model name and serial number and a description of the problem. Any diagrams or data explaining the problem would also be appreciated. l If we replace the product with a new one, we won’t provide you with a repair report. l Yokogawa warrants the product for the period stated in the pre-purchase quotation. Yokogawa shall conduct defined warranty service based on its standard. When the customer site is located outside of the service area, a fee for dispatching the maintenance engineer will be charged to the customer. l In the following cases, customer will be charged repair fee regardless of warranty period. • Failure of components which are out of scope of warranty stated in instruction manual. • Failure caused by usage of software, hardware or auxiliary equipment, which Yokogawa did not supply. • Failure due to improper or insufficient maintenance by user. • Failure due to misoperation, misuse or modification which Yokogawa does not authorize. • Failure due to power supply (voltage, frequency) being outside specifications or abnormal. • Failure caused by any usage out of scope of recommended usage • Any damage from fire, earthquake, a storm and flood, lighting, disturbance, riot, warfare, radiation and other natural changes. l Yokogawa does not warrant conformance with the specific application at the user site. Yokogawa will not bear direct/indirect responsibility for damage due to a specific application. l Yokogawa will not bear responsibility when the user configures the product into systems or resells the product. l Maintenance service and supplying repair parts will be covered for five years after the production ends. For repair this product, please contact the nearest sales office described in this instruction manual. IM 11G2LI-01E 5th Edition : June 20, 2007-00 vii MODEL IR100 Universal Infrared Gas Analyzer IM 11G2L1-01E 5th Edition CONTENTS INTRODUCTION........................................................................................................i Safety Precautions..................................................................................................iii u After - Sales Warranty..................................................................................vi 1. GENERAL................................................................................................... 1-1 1.1 Standard Specifications.................................................................................... 1-1 1.2 Characteristics................................................................................................... 1-2 1.3 Interfering Gas.................................................................................................... 1-2 1.4 Installation Conditions...................................................................................... 1-2 1.5 Sample Gas Conditions (without sampling system)..................................... 1-3 1.6 Model and Suffix Codes.................................................................................... 1-4 1.7 1.8 2. IR100A, IR100B (horizontal type)....................................................... 1-4 1.6.2 IR100TA, IR100TB (vertical type)....................................................... 1-6 Dimensions......................................................................................................... 1-8 1.7.1 IR100A, IR100B (horizontal type)....................................................... 1-8 1.7.2 1R100TA, IR100TB (vertical type).................................................... 1-10 External Connection Terminal........................................................................ 1-10 DESCRIPTIONS OF COMPONENTS........................................................ 2-1 2.1 2.2 3. 1.6.1 Descriptions of Components........................................................................... 2-1 2.1.1 IR100A, IR100B type.......................................................................... 2-1 2.1.2 IR100TA, IR100TB type...................................................................... 2-2 Descriptions of Display and Operation Panel..................................................2-3 INSTALLATION.......................................................................................... 3-1 3.1 Mounting............................................................................................................. 3-2 3.2 Piping.................................................................................................................. 3-3 3.3 Sampling............................................................................................................. 3-5 3.4 3.3.1 Sample gas conditioning..................................................................... 3-5 3.3.2 Flow rate of sample gas...................................................................... 3-5 3.3.3 Preparation of calibration gases......................................................... 3-5 3.3.4 Purging interior of the analyzer case.................................................. 3-5 3.3.5 Pressure at the outlet of sampling gas............................................... 3-5 Wiring.................................................................................................................. 3-6 3.4.1 Power source terminals...................................................................... 3-7 IM 11G2L1-01E 5th Edition : June 20, 2007-00 viii 4. 5. 6. COMP1 input / output terminals.......................................................... 3-8 3.4.3 COMP2 input / output terminals.......................................................... 3-8 3.4.4 AUTO CAL input / output terminals..................................................... 3-9 OPERATION............................................................................................... 4-1 4.1 Operation Procedures....................................................................................... 4-1 4.2 Preparation for Operation................................................................................. 4-2 4.3 Measurement...................................................................................................... 4-3 4.4 Stop..................................................................................................................... 4-3 DESCRIPTION OF DISPLAY AND CONTROL PANEL............................ 5-1 5.1 Description of Display and Control Panel....................................................... 5-1 5.2 General Operation.............................................................................................. 5-2 5.2.1 Setting of calibration concentration..................................................... 5-3 5.2.2 Setting of hold..................................................................................... 5-4 5.2.3 Setting of remote range (Option)........................................................ 5-6 5.2.4 Auto calibration (Option)..................................................................... 5-7 5.2.5 Setting of key lock ON/OFF.............................................................. 5-14 5.2.6 Zero calibration................................................................................. 5-15 5.2.7 Span calibration................................................................................ 5-16 MAINTENANCE.......................................................................................... 6-1 6.1 Points of Daily Check........................................................................................ 6-1 6.2 Measuring Cell Cleaning................................................................................... 6-2 6.3 7. 3.4.2 6.2.1 How to disassemble and reassemble measuring cell........................ 6-2 6.2.2 How to clean cell................................................................................. 6-7 Inspection and Maintenance of Limited Service-life Components.............. 6-8 TROUBLESHOOTING............................................................................... 7-1 7.1 Error-Codes and How to Repair....................................................................... 7-2 7.2 Other Troubleshooting...................................................................................... 7-3 Customer Maintenance Parts List..................................................................CMPL 11G2L1-01E Revision Information................................................................................................i IM 11G2L1-01E 5th Edition : June 20, 2007-00 1. <1. GENERAL> 1-1 GENERAL 1.1 Standard Specifications • Model : Horizontal type IR100A (single-gas analyzer) and IR100B (dual-gas analyzer) Vertical type IR100TA (single-gas analyzer) and IR100TB (dual-gas analyzer) • Operating principle : Non-dispersive infrared absorption, deflection method, single infrared-source, single-flux (single-beam) • Measured gas and measuring range [Single-gas dual-range analyzer] CO2, CO, CH4; CO2 : 0 to 500 ppm, 0 to 100 % CO : 0 to 500 ppm, 0 to 100 % CH4 : 0 to 1000 ppm, 0 to 100 % [Dual-gas dual-range analyzer] CO2, CO; CO2 : 0 to 5000 ppm, 0 to 100 % CO : 0 to 500 ppm, 0 to 100 % For the secondary range of the IR100B, you can specify the range as none, two or 2.5 times that of the primary range. • Output signals : Output 1: 0 to 1 V DC, non-insulated, linearized output signals Output 2: 4 to 20 mA (maximum allowable load resistance : 550 Ω), simultaneous, non-insulated, or linearized output signals • Material exposed to gas Connection port : SUS 304 Cell window : CaF2 Cell material : SUS 304 O-ring : Neoprene • Power supply : 100 V AC ± 10%, 50 / 60 Hz 115 V AC ±10%, 50 / 60 Hz 220 V AC ±10%, 50 / 60 Hz • Power consumption : Max. 37 VA • Ambient temperature : -5 °C to 45 °C • Ambient humidity : 90 % RH or less • Casing : Steel, for indoor use. IM 11G2L1-01E 5th Edition : June 20, 2007-00 1 GENERAL Model IR100 Universal Infrared Gas Analyzer is a multi-functional and easy-handling non-dispersive type infrared gas analyzer, employing thermal flow sensor which is popular in various fields, highly sensitive, and liable and microprocessor to measure concentrations of gaseous components like CH4, CO2, CO etc. 1-2 <1. GENERAL> • Structure : IR100A, IR100B ; Select out of desktop model, 19-inch rack-mounted model and panel-mounted model : IR100TA, IR100TB ; Select out of panel-mounted, wallmounted model • Weight : Approx. 12 kg • Storage conditions : Temperature : -20 °C to 60 °C Humidity 1.2 : 90 % RH or less (Avoid condensation.) Characteristics • Repeatability : ± 0.5 % FS for the primary range (lower range) ± 1.0 % FS for the secondary range (higher range) • Zero drift : ± 2 % FS/week • Span drift : ± 2 % FS/week • Response time (90% response): 15 sec or less including the time required for substitution of the sample cell 1.3 Interfering Gas Influence of interfering gas Interfering gas and its concentration CO meter CO2 meter CH4 meter — ≤5 ppm ≤ 10 ppm CO2 20 % ≤ 5 ppm — ≤ 10 ppm H2O saturation at 20 °C ≤ 15 ppm ≤ 5 ppm ≤ 10 ppm CH4 5000 ppm ≤ 10 ppm ≤ 5 ppm — SO2 1000 ppm ≤ 2 ppm ≤ 2 ppm ≤ 2 ppm CO 1000 ppm Note: For gases other than the above, contact this company directly. 1.4 Installation Conditions • Ambient temperature : -5 °C to 45 °C • Ambient humidity : 90 % RH or less • Vibration : should be avoided • Direct sunlight : should be avoided • Atmospheric gas concentration : CO2 2000 ppm or less CO 100 ppm or less SO2 5 ppm or less CH4 100 pm or less IM 11G2L1-01E 5th Edition : June 20, 2007-00 1.5 <1. GENERAL> 1-3 Sample Gas Conditions (without sampling system) 1 : Approx. 1 l/min. • Pressure : 500 Pa or more • Temperature : 0 °C to 50 °C • Dust : 100 μg / Nm3 with the particle size of 1 μm or less • Mist : None • Humidity : Avoid concentration • Corrosive gases sampled : NOX 1000 ppm or less SO2 1000 ppm or less HCl 1 ppm or less Others None GENERAL • Flow rate Applications • Blast furnace : CO; 0 to 40 %,0 to 50 % CO2; 0 to 30 %, 0 to 40 % • Converter : CO; 0 to 100 % CO2; 0 to 100 % • Electric furnace : CO; 0 to 100 % CO2; 0 to 100 % • Coke oven : CO; 0 to 100 % CO2; 0 to 100 % • Reverberatory furnace : CO; 0 to 20 % CO2; 0 to 20 % • Cement kiln : CO; 0 to 1 %, 0 to 5 % • Coal kiln : CO; 0 to 1 %, 0 to 5 % • Carbonizing furnace : CO2; 0 to 1 %, 0 to 2 % • Transforming furnace : CO2; 0 to 0.5%, 0 to 1 % • Inert gas generator : CO2; 0 to 10%, 0 to 20 % (O2; 0 to 2 %) • Waste incinerator : CO2; 0 to 20 % • Boiler : CO; 0 to 500 ppm, 0 to 1000 ppm (O2; 0 to 10 %, 0 to 25 %) • Leak gas detection : CO, CH4 • Plant carbon dioxide assimilation: CO2;0 to 500 ppm, 0 to 1000 ppm • Apple storage facility CO2;0 to 5 %, 0 to 10 % : (O2; 0 to 10 %, 0 to 25 %) • Rice storage facility : CO2;0 to 50 %, 0 to 100 % • Fermentation plant : CO2;0 to 10 %, 0 to 20 % • Brewery : CO2;0 to 5 % IM 11G2L1-01E 5th Edition : June 20, 2007-00 <1. GENERAL> 1.6 1-4 Model and Suffix Codes 1.6.1 IR100A, IR100B (horizontal type) 1. Single-gas analyzer (IR100A) Model Suffix code Option code IR100A ·········· ·········· Single-gas analyzer ·········· ·········· ·········· CO CO2 CH4 A·········· B·········· C·········· D·········· E·········· F·········· G·········· H·········· J·········· K·········· L·········· M·········· P·········· Q·········· R·········· S·········· ·········· ·········· ·········· ·········· ·········· ·········· ·········· ·········· ·········· ·········· ·········· ·········· ·········· ·········· ·········· ·········· 0 to 500 ppm (not available for CH4) 0 to 1000 ppm 0 to 2000 ppm 0 to 2500 ppm 0 to 5000 ppm 0 to 1 % 0 to 2 % 0 to 5 % 0 to 10 % 0 to 20 % 0 to 50 % 0 to 100 % 0 to 3 % 0 to 30 % 0 to 40 % 0 to 70 % A········ B········ C········ D········ E········ F········ G········ H········ J········ K········ L········ M········ N········ ·········· ·········· ·········· ·········· ·········· ·········· ·········· ·········· ·········· ·········· ·········· ·········· ·········· 0 to 500 ppm (not available for CH4) 0 to 1000 ppm 0 to 2000 ppm 0 to 2500 ppm 0 to 5000 ppm 0 to 1 % 0 to 2 % 0 to 5 % 0 to 10 % 0 to 20 % 0 to 50 % 0 to 100 % Not available ·········· ·········· ·········· ·········· ·········· ·········· 100V AC 50Hz 100V AC 60Hz 115V AC 50Hz 115V AC 60Hz 220V AC 50Hz 220V AC 60Hz A···· B···· C···· ·········· ·········· ·········· Desk top 19-inch rack-mounted Panel-mounted J·· A·· ·········· ·········· Rc1/4 1/4NPT ·········· ·········· Japanese English Measured gas Primary range Secondary range Power supply Construction Piping Panel -1·········· -2·········· -3·········· -5······ -6······ -7······ -8······ -3······ -4······ -J -E Additional functions /P·········· /J·········· Description Automatic calibration Remote range switching function and range identification functions Fuse (provided as a standard accessory) Part number Specification K9358CY 125 V, 1 A K9358CZ 250 V, 1 A IM 11G2L1-01E 5th Edition : June 20, 2007-00 <1. GENERAL> 1-5 2. Dual-gas analyzer (IR100B) 1 Suffix code Option code IR100B ············ ·········· Dual-gas analyzer CO2 + CO ·········· CO2 / CO (Primary gas / secondary gas) ·········· ·········· ·········· ·········· ·········· ·········· ·········· ·········· 0 to 500 ppm (0 to 500 ppm cannot be specified for CO) 0 to 1 % 0 to 2 % 0 to 5 % 0 to 10 % 0 to 20 % 0 to 50 % 0 to 100 % ·········· ·········· ·········· ×2 ×2.5 Not available A········ B········ C········ D········ E········ F········ G········ H········ J········ K········ L········ M········ ·········· ·········· ·········· ·········· ·········· ·········· ·········· ·········· ·········· ·········· ·········· ·········· 0 to 500 ppm 0 to 1000 ppm 0 to 2000 ppm 0 to 2500 ppm 0 to 5000 ppm 0 to 1 % 0 to 2 % 0 to 5 % 0 to 10 % 0 to 20 % 0 to 50 % 0 to 100 % 1······ 2······ N······ ·········· ·········· ·········· ×2 × 2.5 Not available -5······ -6······ -7······ -8······ -3······ -4······ ·········· ·········· ·········· ·········· ·········· ·········· 100 V AC 50 Hz 100 V AC 60 Hz 115 V AC 50 Hz 115 V AC 60 Hz 220 V AC 50 Hz 220 V AC 60 Hz A···· B···· C···· ·········· ·········· ·········· Desk top 19-inch rack-mounted Panel-mounted ·········· ·········· Rc1/4 1/4NPT ·········· ·········· Japanese English Measured gas -G·········· Primary range of CO2 E·········· F·········· G·········· H·········· J·········· K·········· L·········· M·········· Secondary range of CO2 Primary range of CO Secondary range of CO Power supply Construction Piping Panel 1·········· 2·········· N·········· J·· A·· -J -E Additional functions /P·········· /J·········· Description Automatic calibration (for both gases) Remote range switching function and range identification functions Fuse (provided as a standard accessory) Part number Specification K9358CY 125 V, 1 A K9358CZ 250 V, 1 A IM 11G2L1-01E 5th Edition : June 20, 2007-00 GENERAL Model <1. GENERAL> 1.6.2 1-6 IR100TA, IR100TB (vertical type) 1. Single-gas analyzer (IR100TA) Model IR100TA Measured gas Primary range Secondary range Power supply Construction Piping Panel Suffix code Option code ·········· ·········· Single-gas analyzer -1·········· -2·········· -3·········· ·········· ·········· ·········· CO CO2 CH4 A·········· B·········· C·········· D·········· E·········· F·········· G·········· H·········· J·········· K·········· L·········· M·········· P·········· Q·········· R·········· S·········· ·········· ·········· ·········· ·········· ·········· ·········· ·········· ·········· ·········· ·········· ·········· ·········· ·········· ·········· ·········· ·········· 0 to 500 ppm (not available for CH4) 0 to 1000 ppm 0 to 2000 ppm 0 to 2500 ppm 0 to 5000 ppm 0 to 1 % 0 to 2 % 0 to 5 % 0 to 10 % 0 to 20 % 0 to 50 % 0 to 100 % 0 to 3 % 0 to 30 % 0 to 40 % 0 to 70 % A········ B········ C········ D········ E········ F········ G········ H········ J········ K········ L········ M········ N········ ·········· ·········· ·········· ·········· ·········· ·········· ·········· ·········· ·········· ·········· ·········· ·········· ·········· 0 to 500 ppm (not available for CH4) 0 to 1000 ppm 0 to 2000 ppm 0 to 2500 ppm 0 to 5000 ppm 0 to 1 % 0 to 2 % 0 to 5 % 0 to 10 % 0 to 20 % 0 to 50 % 0 to 100 % Not available ·········· ·········· ·········· ·········· ·········· ·········· 100 V AC 50 Hz 100 V AC 60 Hz 115 V AC 50 Hz 115 V AC 60 Hz 220 V AC 50 Hz 220 V AC 60 Hz C···· D···· ·········· ·········· Panel-mounted Wall-mounted J·· A·· ·········· ·········· Rc1/4 1/4NPT ·········· ·········· Japanese English /P········ /J········ Automatic calibration Remote range switching function and range identification functions -5······ -6······ -7······ -8······ -3······ -4······ -J -E Additional functions Description Fuse (provided as a standard accessory) Part number Specification K9358CY 125 V, 1 A K9358CZ 250 V, 1 A IM 11G2L1-01E 5th Edition : June 20, 2007-00 <1. GENERAL> 1-7 2. Dual-gas analyzer (IR100TB) 1 Suffix code Option code IR100TB ············ ·········· Dual-gas analyzer CO2 + CO ·········· CO2 / CO (Primary gas / secondary gas) ·········· ·········· ·········· ·········· ·········· ·········· ·········· ·········· 0 to 5000 ppm (0 to 500 ppm cannot be specified for CO) 0 to 1 % 0 to 2 % 0 to 5 % 0 to 10 % 0 to 20 % 0 to 50 % 0 to 100 % ·········· ·········· ·········· ×2 × 2.5 Not available A········ B········ C········ D········ E········ F········ G········ H········ J········ K········ L········ M········ ·········· ·········· ·········· ·········· ·········· ·········· ·········· ·········· ·········· ·········· ·········· ·········· 0 to 500 ppm 0 to 1000 ppm 0 to 2000 ppm 0 to 2500 ppm 0 to 5000 ppm 0 to 1 % 0 to 2 % 0 to 5 % 0 to 10 % 0 to 20 % 0 to 50 % 0 to 100 % 1······ 2······ N······ ·········· ·········· ·········· ×2 × 2.5 Not available -5······ -6······ -7······ -8······ -3······ -4······ ·········· ·········· ·········· ·········· ·········· ·········· 100 V AC 50 Hz 100 V AC 60 Hz 115 V AC 50 Hz 115 V AC 60 Hz 220 V AC 50 Hz 220 V AC 60 Hz C···· D···· ·········· ·········· Panel-mounted Wall-mounted ·········· ·········· Rc1/4 1/4NPT ·········· ·········· Japanese English /P········ /J········ Automatic calibration (for both gases) Remote range switching function and range identification functions Measured gas -G·········· Primary range of CO2 Secondary range of CO2 Primary range of CO Secondary range of CO Power supply Construction Piping Panel E·········· F·········· G·········· H·········· J·········· K·········· L·········· M·········· 1·········· 2·········· N·········· J·· A·· -J -E Additional functions Description Fuse (provided as a standard accessory) Part number Specification K9358CY 125 V, 1 A K9358CZ 250 V, 1 A IM 11G2L1-01E 5th Edition : June 20, 2007-00 GENERAL Model 1.7 1.7.1 <1. GENERAL> 1-8 Dimensions IR100A, IR100B (horizontal type) (1) Rack mounting (2) Panel mounting IM 11G2L1-01E 5th Edition : June 20, 2007-00 <1. GENERAL> 1-9 (3) Desktop model 1 GENERAL How to mount Mount on 19-inch rack, put flush on the panel or place on the desk Remarks :Bear at least 70% of the unit weight by the case bottom. [When putting in the panel or mounting on 19-inch rack, provide a support to bear the case rear.] IM 11G2L1-01E 5th Edition : June 20, 2007-00 1.7.2 1.8 <1. GENERAL> 1-10 1R100TA, IR100TB (vertical type) External Connection Terminal IM 11G2L1-01E 5th Edition : June 20, 2007-00 <2. DESCRIPTIONS OF COMPONENTS> 2. DESCRIPTIONS OF COMPONENTS 2.1 Descriptions of Components 2 IR100A, IR100B type DESCRIPTIONS OF COMPONENTS 2.1.1 2-1 Names of parts Descriptions Names of parts Descriptions Handle Used to draw out the inside (base) of the unit. Purge gas inlet Used to feed purge gas to piping. Set screw Used to hold the unit with its case. Used to input and output Primary component. Power switch The power for the inside of the unit is closed at ON of this switch. The LED display will light 1 - 2 seconds later. COMP1 (Primary component) input/output terminal Used to input and output Secondary component. Display / operation panel Displays gas density and measurement ranges. It is provided with function keys necessary for operation and setting (see Item 2.2). COMP2 (Secondary component) input/output terminal AUTO CAL input / output terminal (option): Used for auto calibration functions. Sample gas inlet Used to feed measuring gas to piping. Power source terminal Used to supply power to the unit. Sample gas outlet Used to feed measured gas to piping. IM 11G2L1-01E 5th Edition : June 20, 2007-00 2.1.2 <2. DESCRIPTIONS OF COMPONENTS> 2-2 IR100TA, IR100TB type Names of parts Descriptions Set screw Used to hold the unit with its case. Display / operation panel Displays gas density and measurement ranges. It is provided with function keys necessary for operation and setting (see Item 2.2). Power source terminal Used to supply power to the unit. Sample gas outlet Used to feed measured gas to piping. Sample gas inlet Used to feed measuring gas to piping. Purge gas inlet Used to feed purge gas to piping. Names of parts Descriptions AUTO CAL input / output terminal (option) Used for auto calibration functions. COMP2 (Secondary component) input/output terminal Used to input and output Secondary component COMP1 (Primary component) input/output terminal Used to input and output Primary component Power switch The power for the inside of the unit is closed at ON of the power switch. The LED display will light 1 - 2 seconds later. IM 11G2L1-01E 5th Edition : June 20, 2007-00 2.2 <2. DESCRIPTIONS OF COMPONENTS> 2-3 Descriptions of Display and Operation Panel 2 DESCRIPTIONS OF COMPONENTS Names of parts Descriptions Names of parts Descriptions Component display Kinds of measuring gas are displayed. Function key Setting mode is selected at a press of each key. Main display Measured density is displayed, in addition to set values for auto calibration functions (option). Component select key Setting component is selected in each setting mode. Unit display lamp Unit of measured gas density is displayed. Digital shift key Digits are shifted from the first to the last at a press of key. Sub display Measuring range is displayed, in addition to error codes and set values. Numeral input key Increment of selected digit is made at a press of key. Range select key Used to select measuring ranges; high range at press of key and low range at press of key. ENT key By pressing this key, set data is stored in memory and becomes valid. Function display lamp Lamps will light with the following functions. MEAS: This lamp lights when the unit is in measurement mode. SPAN: This lamp flickers when the unit is in calibrated density setting mode. HOLD: This lamp flickers when the unit is in hold setting mode and lights when the unit is in hold function operation mode. RMT RANGE: This lamp flickers when the unit is in remote range setting mode and lights during operation of remote range function. AUTO CAL: This lamp flickers when the unit is in auto calibration setting mode and lights during operation of auto calibration function. Zero calibration key Used for zero calibration (lamp flickers in zero calibration mode). Span calibration key Used for span calibration (lamp lights in span calibration mode). Calibration start key This is a manual calibration start key. Zero calibration is started by pressing and keys. Span calibration is started by pressing and keys (CAL lamp lights during calibration). IM 11G2L1-01E 5th Edition : June 20, 2007-00 Blank Page 3. <3. INSTALLATION> 3-1 INSTALLATION WARNING • This unit is not explosion-proof type. Do not use it in a place with explosive gases to prevent explosion, fire or other serious accidents. • For installation, observe the attentions on it given in the instruction manual and select a place where the weight of gas analyzer can be endured. Installation at an unsuited place may cause turnover or fall and there is a risk of injury. • For lifting the gas analyzer, be sure to wear protective gloves. Bare hands may invite an injury. • Before transport, fix the casing so that it will not open. Otherwise, the casing may be separated and fall to cause an injury. • The gas analyzer is heavy. It should be transported carefully. Otherwise, body may be damaged or injured. • During installation work, care should be taken to keep the unit free from entry of cable chips or other foreign objects. Otherwise, it may cause fire, trouble or malfunction of the unit. IM 11G2L1-01E 5th Edition : June 20, 2007-00 INSTALLATION CAUTION 3 3.1 3-2 <3. INSTALLATION> Mounting The following mountings are provided according to types. <IR100A, IR100B> Type Ext. dimensions of analyzer (Unit: mm) Dimensions for mounting Mounting method ———— ———— 19” Rack mount Panel mount Desk top <IR100TA, IR100TB> Type Ext. dimensions of analyzer (Unit: mm) Dimensions for mounting Mounting method Panel mount Wall mount IM 11G2L1-01E 5th Edition : June 20, 2007-00 <3. INSTALLATION> 3-3 1)Mounting Mount front side of the analyzer so as to be vertically positioned. 2)Caution on installation When the IR100A or the IR100B is mounted in a 19-inch rack or on a panel, at least 70 % of its weight should be supported by the bottom of the case. (When the analyzer is mounted in a panel or a 19-inch rack, a support should be provided to support the rear of the case) INSTALLATION 3.2 3 Piping WARNING l In piping, the following precautions should be observed. Wrong piping may cause gas leakage. If the leaking gas contains a toxic component, there is a risk of serious accident being induced. Also, if combustible gas is contained, there is a danger of explosion, fire or the like occurring. • Connect pipes correctly referring to the instruction manual. • Exhaust should be led outdoors so that it will not remain in the locker and installation room. • Exhaust from the analyzer should be relieved in the atmospheric air in order that an unnecessary pressure will not be applied to the analyzer. Otherwise, any pipe in the analyzer may be disconnected to cause gas leakage. • For piping, use a pipe and a pressure reducing valve to which oil and grease are not adhering. If such a material is adhering, a fire or the like accident may be caused. IM 11G2L1-01E 5th Edition : June 20, 2007-00 <3. INSTALLATION> 3-4 1)Piping Connect piping with gas inlet-outlet of the analyzer. Connect the analyzer with a sampling system by means of corrosive-resistant tubing like TEFLON stainless steal or polyethylene etc. Do not use rubber or soft vinyl tubing even in any uncorrosive case to avoid incorrect indication due to adsorption of gas onto piping materials. Rc1/4 (or 1/4NPT) female threads connectors are equipped for piping connection. Be sure to minimize piping length as short as possible in order to ensure quicker response. Adequate tubing bore is 4 mm. Use clean tubings and connections as dust inhaling may cause improper operation. Location of pipe connectors of the analyzer is shown below. 2)Piping layout Next, the piping layout for measuring 2 components is shown below. IM 11G2L1-01E 5th Edition : June 20, 2007-00 <3. INSTALLATION> 3.3 3-5 Sampling WARNING • When handling the standard gas such as calibration gas, read the instruction manual of the standard gas carefully and use the gas correctly. Sample gas conditioning 1) Remove dust in sample gas completely through filters. For final stage filtering, use a filter capable of removing particles of dust larger than 0.3 µm. 2) Dew point of sample gas must be lower than ambient temperature in order to eliminate moisture to drain inside the analyzer. In case that moisture is contained in sample gas, bring dew point of the sample gas down to about 0 °C through a dehumidifier. 3) When SO3 mist is contained in sample gas, remove it through a mist-filter and cooler etc. Remove other moist by similar procedures. 4) Note and take care, the life of the analyzer is to be shorted when such heavy corrosive gases as Cl2, F2 and HCI etc. are much contained in sample gas. 5) Allowable temperature range of sample gas is 0 °C to 50 °C. Be careful not to bring hot gas into the analyzer directly. 3.3.2 Flow rate of sample gas Keep flow rate of sample gas at 1 l/min. ± 0.5 l/min. Prepare flowmeter so as to measure flow rate. 3.3.3 Preparation of calibration gases Prepare calibration gases for zero and span calibration. Zero gas N2 gas Span gas Each component should have concentration more than 80 % of full scale. 3.3.4 Purging interior of the analyzer case Purging inside the analyzer is generally unneeded, however, proceed with purging with instrumentation air or N2 gas for the following cases. Purging flow rate is to be approx. 1 l/min. When dust & mist are contained in purge gas, utilize it after their complete removal. 1) When combustible gases are contained in the gas to be measured. 2) When corrosive gas exists in the environmental air of the installing location. 3) When the same or interfering gas component with the gas to be measured, exists in the environmental air of the installing location. 3.3.5 Pressure at the outlet of sampling gas Keep pressure at the outlet of sample gas so as for it to be atmospheric pressure. IM 11G2L1-01E 5th Edition : June 20, 2007-00 INSTALLATION 3.3.1 3 3.4 <3. INSTALLATION> 3-6 Wiring CAUTION • Before wiring, turn OFF all power. Otherwise electric shock may occur. • Enforce construction of grounding by all means. If the specified grounding construction is neglected, a shock hazard or fault may be caused. • Use wiring materials which conform to the device ratings. Otherwise, a fire may occur. • Use a specified power source. Connecting a source which is not as specified may cause a fire. • To prevent fire accidents, use 600 V vinyl-insulated wires (JIS C3307) or better wires or cables. • Before turning ON power, earth the unit with 100 Ω or lower earth resistance. • For power wiring and earth wiring, use insulated sleeve compression terminal (for 4 mm threads). • Provide the power line with a switch for disconnecting the unit from main power. Proceed with wiring of each terminal as shown in the Figures in items 3.4.1 ~ 3.4.4. Terminal screw is M3.5. (Power source terminal is M4.) Use shield wire for wiring of output signal in order to reduce the influence of noise. <IR100A, IR100B type> <IR100TA, IR100TB type> IM 11G2L1-01E 5th Edition : June 20, 2007-00 3.4.1 <3. INSTALLATION> 3-7 Power source terminals Layout of power source terminals is shown in the Figure. Proceed with earthing of earth terminal and connect power source terminals to a power source. Use crimp terminal (for M4 screw) for connecting. 3 INSTALLATION Caution on installation near noise source Do not install the instrument near an electric device (high-frequency furnace, electric welder, etc.) which generates power noise. When the instrument is installed near such a device, the power line should be separated from other lines to avoid noise. If power noise enters a relay or a solenoid valve, connect a varister or a spark killer to a noise generating source as illustrated. When it is connected away from a noise generating source, noise cannot be eliminated. IM 11G2L1-01E 5th Edition : June 20, 2007-00 <3. INSTALLATION> 3.4.2 COMP1 input / output terminals COMP1 Terminals are input & output terminals for primary measuring component. Connection is to be referred to in the connection diagram below. 3-8 <Remote hold input> (Option) To hold output signal, input 5 V DC between and of COMP1 input/output terminals. <Range identification signal output> (Option) When the low range is selected, the line between and is closed. When the high range is selected, the line between and opens. 1a contact 250 V AC, 2 A(resistive load) <FAULT> Contact output at occurrence of fault in the analyzer: 1a contact 250 V AC, 2 A (resistive load) <Remote range input> (Option) 3.4.3 COMP2 input / output terminals COMP2 Terminals are input & output terminals for secondary measuring component. Connection is to be referred to in the connection diagram below. The low range is selected when 5 V DC is inputted between and . The high range is selected when there is no input between and . *) If the output signal cable is extended in excess of 3 m, it picks up external noise. In such a case, use an insulating transformer. *) When the instrument is installed in a panel, the power line should be separated from signal lines. IM 11G2L1-01E 5th Edition : June 20, 2007-00 <3. INSTALLATION> 3.4.4 AUTO CAL input / output terminals AUTO CAL Terminals are input & output terminals for automatic calibration and the connection is shown in the connection diagram below. 3-9 <Contact output during auto calibration> The contact is ON during auto calibration. 1 a contact 250 V AC, 2 A (resistive load) <Zero gas contact output> Contact output for driving zero gas solenoid valve: <Span gas 1 contact output> Contact output for driving primary component span gas solenoid valve: 1 a contact 250 V AC, 2 A (resistive load) <Span gas 2 contact output> Contact output for driving secondary component span gas solenoid valve: 1a contact 250 V AC, 2 A (resistive load) Each contact output turns ON and OFF according to the time chart of auto calibration (see Item 5.2, (4)). When key is pressed during manual calibration, the zero gas contact output turns ON. When key is pressed and the primary component lamp flickers, the span gas 1 contact output turns ON and when the secondary component lamp flickers, the span gas 2 contact output turns ON. <Auto calibration fault contact output> Contact output at occurrence of fault during auto calibration <Remote start input> Input an external signal at start of auto calibration. Auto calibration is started when one-shot pulse of 5 V DC, more than 100 msec is inputted between and . IM 11G2L1-01E 5th Edition : June 20, 2007-00 INSTALLATION 1a contact 250 V AC, 2 A (resistive load) 3 Blank Page 4. <4. OPERATION> 4-1 OPERATION CAUTION • Avoid continuous operation with the casing drawn out. • During operation, avoid opening the casing and touching the internal parts. Otherwise, you may suffer a burn or shock hazard. 4 Operation Procedures Set the instrument in operation using the following procedure. To start operating, press the function keys on the front panel of the instrument. When using it as an analyzer, be sure to read the instruction manual for the device before operating. IM 11G2L1-01E 5th Edition : June 20,2007-00 OPERATION 4.1 4.2 4-2 <4. OPERATION> Preparation for Operation (1) Check of piping Check whether piping is rightly made. (2) Purging inside analyzer The inside of the unit should be purged as necessary to prevent explosion and indication errors. If combustible gas is included ambient air, feed a purge gas about 3 hours before closing the power. (3) Power switch on When power source is switched on, analyzer is operating in Measuring mode. (4) Warming up After power source is switched on, warm up the analyzer. Warming up is finished when indication comes to be stabilized (approx. 2 hours). (5) Setting of calibration gas concentration Set calibration gas concentration. For setting operation, refer to Item 5.2 (1). (6) Zero calibration Feed zero calibration gas and perform zero calibration. For operation of the zero calibration key, refer to Item 5.2 (6). (7) Span calibration Feed span calibration gas and perform span calibration. For operation of the span calibration key, refer to Item 5.2 (7). IM 11G2L1-01E 5th Edition : June 20,2007-00 4.3 4.4 <4. OPERATION> 4-3 Measurement Feed sample gas before starting measurement. Stop Stop the sample gas and feed a dry nitrogen gas for about 10 minutes to purge the inside of the measuring cell. Turn OFF the power switch on the unit. 4 The set value is still stored in memory even when the power is turned OFF. On the time to start auto calibration, the value at power OFF is backed up. So, when the power is ON, auto calibration is started after the termination of the remaining time. Note that the backup function is lost after 4 hours. In such a case, turn ON the power again and input the correct value once again. IM 11G2L1-01E 5th Edition : June 20,2007-00 OPERATION *) Blank Page 5-1 <5. DESCRIPTION OF DISPLAY AND CONTROL PANEL> 5. DESCRIPTION OF DISPLAY AND CONTROL PANEL 5.1 Description of Display and Control Panel Display/control panel are composed in the following order. Key Function FUNC Sub display Function display lamp Page Measured value Range MEAS lights 5- 2 Calibration concentration Range SPAN flickers 5- 3 Setting mode Calibration concentration setting HOLD setting ON or OFF HOLD flickers 5- 5 FUNC REMOTE RANGE setting (option) ON or OFF RMT RANGE flickers 5- 7 FUNC Auto calibration start time setting Hour/min. RMT CAL flickers 5-10 Auto calibration cycle setting Hour AUTO CAL flickers 5-11 Calibration gas feed time setting Hour AUTO CAL flickers 5-12 Calibration gas feed mode setting Mode No. AUTO CAL flickers 5-13 AUTO CAL flickers 5-14 FUNC FUNC FUNC Auto calibration (option) FUNC FUNC Auto calibration change over ON or OFF FUNC Key lock change over ON or OFF 5-15 ZERO Zero calibration Measured value Range Zero key display flickers 5-16 SPAN Span calibration Measured value Range Span key display flickers 5-17 • In the setting mode, analog output signal is held to the value just before it enters the setting mode. • When the unit is not provided with option functions, the data of the functions are not displayed. IM 11G2L1-01E 5th Edition : June 20,2007-00 5 DESCRIPTION OF DISPLAY AND CONTROL PANEL FUNC Measurement mode Main display 5.2 <5. DESCRIPTION OF DISPLAY AND CONTROL PANEL> 5-2 General Operation The unit is set in measuring mode at power ON. At this time, gas concentration appears on the main display, and the range to be used appears on the sub display. Advice to operation ● Selection of range Press the key in the setting mode as shown at right. In this way, the high range can be selected. To select the low range, press the key. ● Selection of gas component key in the setting mode and Press gas component will be ready for setting. Example) When the primary component lamp flickers, press key and the flicker will shift to the secondary component as shown at right. In this way, the secondary component is ready for setting. Note) Single-component analyzer does not have key. ● Release of zero / span When the unit is operated incorrectly for zero/span calibration, it should be released using the following procedure as shown at right. When key is pressed instead of key by mistake, press key once again and the calibration will be released. When key is pressed instead of key by mistake, press key once again and the calibration will be released. IM 11G2L1-01E 5th Edition : June 20,2007-00 <5. DESCRIPTION OF DISPLAY AND CONTROL PANEL> 5.2.1 5-3 Setting of calibration concentration Set calibration gas concentration (span value) using the following procedure. Press key in measuring mode and the span value which was set previously will appear on the main display. At this time, LED of function display lamp (SPAN) flickers. Press key and the first digit on the 1st COMP main display flickers, indicating that the span value is ready for setting. Then, press and keys to select the range. After the range is selected, set the span value under this condition. key, the numerical value increases. By pressing key, the digit to be set is selected. DESCRIPTION OF DISPLAY AND CONTROL PANEL By pressing 5 When selecting components following the 2nd COMP and its range, press key and then press key while the 1st COMP main display is flickering, and the main display for the setting component will flicker. Select the range by pressing and keys. After the span value is set, press key. This completes the setting operation. (Switch of span calibration method) Perform the following operation and setting. When the first digit on the 1st COMP main display flickers, press key and “ ” appears on the main display and “ ” appears on the sub display. It is changed to “ ” by pressing key. - Meaning of set value : Effective only at that range and is ready for span calibration without regard to each range. : When 1 range is used for span calibration, other ranges are interlocked with it for span calibration. When selected, press tion is completed. key and the setting opera- IM 11G2L1-01E 5th Edition : June 20,2007-00 <5. DESCRIPTION OF DISPLAY AND CONTROL PANEL> 5.2.2 5-4 Setting of hold This setting is required to hold the output signal during calibration (it is not held on display). Hold can be set for each component. When this setting is not used, set it to OFF. Press key in measurement mode to display “ ”. At this time, LED of function display lamp “Hold” flickers. Press key and hold is ready for setting. The sub display flickers. Press Select hold “ key to select gas component. ” or “ ” by pressing After setting the hold, press key. key. Setting operation is completed. At ON of hold, the function display lamp “HOLD” will light during hold operation. *) Refer to Caution on Hold Function (next page). IMPORTANT When the setting is “ display is not held. ”, output is held but its IM 11G2L1-01E 5th Edition : June 20,2007-00 5-5 <5. DESCRIPTION OF DISPLAY AND CONTROL PANEL> Cautions on Hold Functions <Output hold function after manual calibration> This is an output hold function after manual calibration (zero or span). It can be released automatically after 30 minutes or released by key operation (manual release). 1. Action 5 Release procedure 1) Auto release After setting hold (ON / OFF), press key or key to start output hold. Calibrakey and is automatically released after 30 minutes of tion is completed by pressing hold. 2) Manual release Calibration is released by pressing key and key at the same time. Note 1) Calibration contact output between the auto calibration output terminals (1-2) is invalid during manual calibration. Note 2) Output hold is valid only for the component which has been set to hold function Note 3) When manual release is made during auto calibration, the auto calibration action is also interrupted. <Auto calibration output hold function> This is an output hold function during auto calibration or at the time of permutation. For the action, refer to Item 4 of this section. <Remote hold function> (Option) This function is used to hold output with external signal. 1. Action 2. Operation The component which has been set to hold function “ ” starts operating when 5 V DC is inputted to the 1st COMP input/output terminals (10,12) (+, -). Note 1) The display during operation is the same as that of hold during calibration. Note 2) This function is valid only when the unit is provided with remote range and range identification functions (option). Note 3) This function is valid only for the standard type 1 and 2 range instruments. IM 11G2L1-01E 5th Edition : June 20,2007-00 DESCRIPTION OF DISPLAY AND CONTROL PANEL 2. 5.2.3 <5. DESCRIPTION OF DISPLAY AND CONTROL PANEL> 5-6 Setting of remote range (Option) This is used for range selection with external signal. Press key in measurement mode to display “ ” and LED of function display lamp “RMT RANGE” will flicker. Press key and remote range can be set. The sub display flickers. Select remote range “ key. ” or “ ” by pressing This setting is valid for all components. After remote range is set, press pletes the setting operation. key. This com- When remote range is set to ON, LED of function display lamp “RMT RANGE” will light at all times, so the range selection cannot be made with and keys. IM 11G2L1-01E 5th Edition : June 20,2007-00 5.2.4 5-7 <5. DESCRIPTION OF DISPLAY AND CONTROL PANEL> Auto calibration (Option) By using auto calibration function (option), an external solenoid valve can be driven with signals from the input/output terminals on the rear panel of the unit for calibrating zero point and span point automatically using standard gas. Auto calibration is effected by setting (1) auto calibration start time, (2) auto calibration cycle, (3) calibration gas feed time, (4) calibration gas feed mode and (5) auto calibration ON/OFF. Cautions on Operation 1. When auto calibration start time comes on during key operation, it starts immediately. At this time, none of the keys can be used until auto calibration is finished. 5 2. When auto calibration is started and needs to be interrupted manually, press key and key at the same time. After it is interrupted, the unit is reset to measurement mode and all the keys are ready for operation. Only the interrupted auto calibration is canceled and the following auto calibrations will be performed at initially specified intervals. DESCRIPTION OF DISPLAY AND CONTROL PANEL 3. When auto calibration is not being made, key operation is possible for all settings (span value, hold, remote range) including manual calibration. 4. Auto calibration can also be started by applying input signals (pulse voltage of 5 V DC, 100 msec or more). In this case, calibration is started without regard to auto calibration ON / OFF setting. IM 11G2L1-01E 5th Edition : June 20,2007-00 5-8 <5. DESCRIPTION OF DISPLAY AND CONTROL PANEL> When setting “3” on automatic calibration gas feed mode as an example Auto calibration fault : When calibration fault arises during auto calibration, an auto calibration fault contact output signal is outputted, and an error is displayed at the end of auto calibration. At this time, the next component is calibrated but the component with calibration fault is not calibrated. IM 11G2L1-01E 5th Edition : June 20,2007-00 <5. DESCRIPTION OF DISPLAY AND CONTROL PANEL> 5-9 (1)Setting of auto calibration start time Auto calibration start time can be set by the following procedure. This setting determines the period to 1st auto calibration started after installation. Press key in measurement mode and LED of function display lamp “AUTO CAL” will flicker. Press key and the start time can be set. The calibration start time appears on the sub display. Press key and the digits can be selected. By pressing large. key, the numerical value becomes 5 DESCRIPTION OF DISPLAY AND CONTROL PANEL Setting range: 0.1 (10 min) to 199.0 hrs After setting the auto calibration start time, press key to store the data in memory. When key is pressed, the set time is counted down while it is being displayed. After the start of auto calibration, the next calibration cycle set data is counted down while it is being displayed. The calibration cycle set data is counted and displayed without regard to auto calibration ON / OFF. After setting the auto calibration start time, be sure to set the auto calibration cycle in succession. IM 11G2L1-01E 5th Edition : June 20,2007-00 <5. DESCRIPTION OF DISPLAY AND CONTROL PANEL> 5-10 (2)Setting of auto calibration cycle When calibration start time is displayed, press key to display “ ”, and LED of function display lamp “AUTO CAL” will flicker. Press key and auto calibration cycle will be ready for setting. At this time, the digits will flicker on the sub panel. Press key and the digits can be selected. By pressing key, the numerical value becomes large. “Time” can be set within the range of 1-199 hours. After setting the calibration cycle, press store the data in memory. key to After setting auto calibration cycle, be sure to set auto calibration gas feed time in succession. IM 11G2L1-01E 5th Edition : June 20,2007-00 <5. DESCRIPTION OF DISPLAY AND CONTROL PANEL> 5-11 (3)Setting of calibration gas feed time When calibration cycle is displayed, press key to display “ ”, and LED of function display lamp “AUTO CAL” will flicker. Press key, and auto calibration gas feed time is ready for setting. Set calibration gas feed time on the sub display. Press key to select digits. By pressing key, digits can be selected. By pressing comes large. key, the numerical value be- 5 Setting range = 100 to 599 seconds DESCRIPTION OF DISPLAY AND CONTROL PANEL After setting calibration gas feed time, press key. The data is stored in memory. After setting auto calibration gas feed time, be sure to set auto calibration gas feed mode. IM 11G2L1-01E 5th Edition : June 20,2007-00 5-12 <5. DESCRIPTION OF DISPLAY AND CONTROL PANEL> (4)Setting of calibration gas feed mode Select calibration gas feed mode according to the number of components to be calibrated. When calibration gas feed time is displayed, press key to display “ ”, and LED of function display lamp “AUTO CAL” will flicker. Press key, and auto calibration gas feed mode is ready for setting. Press key and set feed mode No. (the meaning of feed mode No. is shown below). After setting calibration gas feed mode, press key and the data is stored in memory. Meaning of feed mode Mode No. 0 : Zero gas Mode No. 1 : Zero gas - primary component span gas Mode No. 2 : Zero gas - secondary component span gas Mode No. 3 : Zero gas - primary component span gas - secondary component span gas * Calibration gases are fed sequentially by order of Mode No. setted. After setting auto calibration gas feed mode, be sure to set auto calibration ON / OFF. IM 11G2L1-01E 5th Edition : June 20,2007-00 <5. DESCRIPTION OF DISPLAY AND CONTROL PANEL> 5-13 (5)Setting of auto calibration ON/OFF Select auto calibration function. When auto calibration is not required, it should be set to “ ”. When calibration gas feed mode is displayed, press key to display “ ” and LED of function display lamp “AUTO CAL” will flicker. Press key and auto calibration ON / OFF is ready for setting. By pressing display. key, set “ ” or “ ” on the sub After setting auto calibration ON / OFF, press key. 5 DESCRIPTION OF DISPLAY AND CONTROL PANEL Setting operation is now completed. IM 11G2L1-01E 5th Edition : June 20,2007-00 5.2.5 <5. DESCRIPTION OF DISPLAY AND CONTROL PANEL> 5-14 Setting of key lock ON/OFF This is a function to prevent misoperation of keys. When the key lock is set to “ ”, all the keys other than cannot be operated. To release this function, set the key lock to “ Press “ ”. ”. key in measurement mode to display By pressing key, the key lock is ready for setting and the sub display flickers. Press key to set key lock ON / OFF. After setting key lock, press operation is now completed. key. The setting IMPORTANT When the key lock is set to “ than cannot be used ”, all the keys other IM 11G2L1-01E 5th Edition : June 20,2007-00 5.2.6 <5. DESCRIPTION OF DISPLAY AND CONTROL PANEL> 5-15 Zero calibration This function is used for zero point adjustment. After feeding zero gas, wait until its reading is stabilized. When it is stabilized, press and the measuring range for calibration. keys to select Zero calibration performs calibrations of all components and all ranges at the same time. Press key. The DESCRIPTION OF DISPLAY AND CONTROL PANEL Then press The 5 key lamp flickers. key for zero calibration. key lamp lights during calibration. After calibration, the unit is reset to measurement mode. After press key, press again will release the calibration. key once IM 11G2L1-01E 5th Edition : June 20,2007-00 5.2.7 <5. DESCRIPTION OF DISPLAY AND CONTROL PANEL> 5-16 Span calibration Perform span calibration after feeding calibration gas with concentration set as span value. Feed calibration gas (1.0 l/min). Under this condition, wait until its reading is stabilized. Then perform span calibration. Press key. The key lamp flickers. When a number of components are measured, the main display showing components which can be calibrated will flicker. By pressing key, gas component to be calibrated is changed. When the required gas component is determined, press and keys to select the range. Next, press The key for span calibration. key lamp lights during calibration. After calibration, the unit is reset to measurement mode. Perform calibration for each component and range in succession. After press key, press again will release the calibration. key once IM 11G2L1-01E 5th Edition : June 20,2007-00 5-17 <5. DESCRIPTION OF DISPLAY AND CONTROL PANEL> n When error has appeared by wrong operation (1) Press and simultaneously and then key to select the maintenance mode. 5 (2) At a status displayed like this, press the key. Each press of Each press of key to display and press key increases the value. key decreases the value. To exit from the relevalt mode, press key. Then, the above display is resumed. IM 11G2L1-01E 5th Edition : June 20,2007-00 DESCRIPTION OF DISPLAY AND CONTROL PANEL When the maintenance mode is posted, the display is as follows. 5-18 <5. DESCRIPTION OF DISPLAY AND CONTROL PANEL> (3) When this mode is posted, the display appears as follows. Pressing key clears (to 1) the zero and span calibrating coefficient and gives a display as on the lower. (If it is not desired to clear the calibrating coefficient, press (4) Press or key until key. appears and press key. (5) When this mode is posted, the display is as shown on the right. Pressing key blinks By key, change over / . / until on appears. CAUTION If this operation is not reset, no self-diagnostic function errors will appear. If this mode is kept ON, the self-diagnostic function reveals no error. Turning OFF power and starting up automatically turns OFF this mode. If errors occur on account of too many quantities to calibrate for zero or span particularly, turning ON this mode reveals no error and allows a calibration. (6) Press registers the setting and stops blinking. (7) Press key and (or ) key to display twice to resume the measuring mode. and press key (8) At this status, no error will be revealed. After the end of calibration, be sure to reset power. IM 11G2L1-01E 5th Edition : June 20,2007-00 6-1 <6. MAINTENANCE> 6. MAINTENANCE WARNING • When doors are open during maintenance or inspection for adjusting the optical system, etc., be sure to purge sufficiently the inside of the gas analyzer as well as the measuring gas line with nitrogen or air, in order to prevent poisoning, fire or explosion due to gas leaks. CAUTION • Before working, take off a wrist watch, finger ring or the like metallic accessories. And never touch the instrument with a wet hand. Otherwise, you will have a shock hazard. • Replacement parts such as a maintenance part should be disposed of as incombustibles. 6.1 Points of Daily Check Table 6-1 Maintenance and check list Parts to be checked Recorder indication Every day Every week Every year Phenomena Lower indication Check for purge gas flow if Standard flow rate is purging the sampling gas 1L/min. It is not within flow instrument. the range of the specified flow rate of 0.5 to 1.5 L/min. Replacement of Monitor filter (mamblane filter) Much clogged Zero point of gas analyzer Out of zero point Cause Remedy 1) Dust is mixed in the sample cell. 1) Clean sampling cell and check for sampling device, especially gas filter. 2) Air is sucked in anywhere in the sampling tube. 2) Check for leak of the sampling line and repair, if required. — Primary filter is damaged. Adjust the flow rate with flow rater needle valve. 1) Replace primary filter. 2) Replace filter (filter paper). — Zero calibration (Refer to subsection 5.2.6) Span point of gas analyzer Out of the standard point — Span calibration(Refer to subsection 5.2.7) Replacement of monitor filter (membrane filter) Irrespective of phenomena — Replace filter (paper). Gas analyzer Irrespective of phenomena — Overhaul. Optical signal After overhaul. — Difference of instrument. IM 11G2L1-01E 5th Edition : June 20,2007-00 MAINTENANCE • Do not use a replacement part other than specified by the instrument maker. Otherwise, adequate performance will not be provided. Besides, an accident or fault may be caused. 6 6.2 6-2 <6. MAINTENANCE> Measuring Cell Cleaning When measuring cell inside is contaminated by dust or mist, a drift of measured value may be caused. Clean the interior of the measuring cell if contaminated. At the same time, check sampling system devices, especially filter, in order to eliminate any cause of contamination of cell interior by dust & mist. 6.2.1 How to disassemble and reassemble measuring cell There are 2 types of measuring cell, one is a block cell (cell lengths: 4 mm, 8 mm, 16 mm & 32 mm) and the other is a pipe cell (cell lengths: 64 mm, 125 mm & 250 mm). In case of a dual components analyzer, there is a combination cell type, which is composed of both types of cells in the optical system. For this type, disassemble pipe cell first then the block cell. (Refer to Fig. 6.3) (1) How to disassemble and reassemble pipe cell (refer to Fig.6.1) 1) Shut sample gas glow down. When toxic gas is contained purge measuring cell interior with zero gas sufficiently. 2) Turn power switch off. 3) <IR100A, IR100B type> : Loosen 2 fixing screws of the front panel and draw out the inner part until stopped by stoppers inside the case. When complete drawing-out of the inner part from the case is needed, hold the front panel up and draw it out beyond stop carefully. <IR100TA, IR100TB type>: Loosen 4 fixing screws of the front panel and open the door. 4) Detach piping connection to the measuring cell. 5) Displace the infrared source unit (No.5 in Fig. 6.1) by loosening 2 fixing screws (No.1 in Fig.6.1) to base plate so as to make a gap between pipe cell (No.12 in Fig.6.1) and IR source unit. 6) Loose n and detach 4 screws (No.7 in Fig.6.1) of the cell holders (No.11 in Fig. 6.1) 7) Remove the cell from optical unit then detach both windows (No. 14 in Fig. 6.1) by rotating the window holders anticlockwise. 8) A window plate made of calcium-fluoride is fixed to the window holder and reflector plate inside cell is fixed to cell wall, therefore both are unremovable. 9) Proceeded with reassembling in reverse to disassembling procedures. In reassembly, make a space of approx. 0.5 mm both between infrared source unit & cell and between cell & detector. IM 11G2L1-01E 5th Edition : June 20,2007-00 No. <6. MAINTENANCE> Name 1 Screw (for infrared source unit fixing) 2 Screw (for detector fixing) 3 Screw (for base plate fixing) 4 Base plate 5 Infrared source unit 6 Screw (for support fixing) 7 Screw (for holder fixing) 8 6-3 Connector for chopper motor (9) Filter 10 Support Holder Pipe cell 13 O-ring 14 Window 15 Detector 16 Bridge circuit board 17 Bridge resistor (18) Detector for the secondary component (19) Screw for the secondary component detector fixing 6 MAINTENANCE 11 12 Fig. 6.1 Exploded view of measuring unit (Pipe cell) IM 11G2L1-01E 5th Edition : June 20,2007-00 6-4 <6. MAINTENANCE> (2) How to disassemble and reassemble block cell (refer to Fig.6.2 on next page) 1) to 4) Proceed with the same procedures described in 1) to 4) of (1) how to disassemble pipe cell. 5) Remove a connector of detector output cord from p.c.b.. In case of the dual components analyzer, remove connector of output cord of the secondary component detector (No.13 in Fig.6.2) from the secondary component printed circuit board, then remove the secondary component detector by loosening 2 screws (No.14 in Fig.6.2). 6) Loosen 2 screws (No.10 in Fig.6.2), with which the detector and the infrared source unit are mounted together, then remove the detector from the infrared source. In this removal, the cell is also removed together with detector. 7) Remove the cell from the detector by loosening 2 fixing screws (No.6 in Fig.6.2). A window (No.6 in Fig.6.2) on one side of block cell is not fixed but only inserted between detector and block cell, therefore hold the detector upside while disassembling not so as to drop the window down. 8) Proceed with reassembling in reverse to disassembling procedures. Locate an O-ring between the window holder and the cell. Be sure not to mislocate the O-ring. For the dual components analyzer, the secondary component detector should be assembled after finishing assemble of the primary component detector. Make sure not to make space between primary and secondary detectors. Also, make sure that 2 cpnnectors of detector output cord are connected properly to the primary and secondary component p.c.b. (3) How to disassemble measuring unit 1) to 4) Proceed with the same procedures described in 1) to 4) of (1) how to disassemble pipe cell. 5) Remove connectors of output cord of detector form printed circuit boards. 6) Remove both wiring to 2 pin terminals of the infrared source unit and 2 pin connectors (No.8 in Fig.6.1) of the chopper motor. 7) Remove 4 screws (No.4 in Fig.6.1) for fixing the base plate (No.3 in Fig.6.1) and take out the measuring unit. WARNING • Do not give any rough handling to both pipings of detector and infrared source unit during disassembling & reassembling measuring cell. Pipe deforming may lead to irregular action due to leakage of sealed gas. IM 11G2L1-01E 5th Edition : June 20,2007-00 No. 1 (2) <6. MAINTENANCE> 6-5 Name Screw (for infrared source unit fixing) Filter 3 Screw (for base plate fixing) 4 Base plate 5 Infrared source unit 6 Screw (for block cell fixing) 7 Block cell 8 Window 9 O-ring 10 Screw (for detector fixing) 11 Connector of shopper motor 12 Detector Detector for the secondary component (14) Screw for the secondary component detector fixing 6 MAINTENANCE (13) Fig. 6.2 Exploded view of measuring unit (Block cell) IM 11G2L1-01E 5th Edition : June 20,2007-00 No. <6. MAINTENANCE> 6-6 Name 1 Screw (for infrared source unit fixing) 2 Screw (for detector fixing) 3 Base plate 4 Infrared source unit 5 Screw (for block cell fixing) 6 Block cell 7 Window 8 O-ring 9 Detector 10 Screw (for support fixing) 11 Support 12 Screw (for holder fixing) 13 Holder 14 Pipe cell 15 O-ring 16 Window 17 Screw (for detector fixing) 18 Detector Fig. 6.3 Exploded view of measuring unit (Combination cell) IM 11G2L1-01E 5th Edition : June 20,2007-00 6.2.2 6-7 <6. MAINTENANCE> How to clean cell (1) At cleaning of cell inside and infrared ray window, firstly wipe out with soft brush etc. for rather big particles of dust, then with soft cloth lightly. Do not use hard cloth for cleaning. WARNING • Handle window carefully as it is easily broken. Care should be taken not to flaw the window by rubbing it forcibly. (2) In case of a heavily dirty window, clean it with alcohol or acetone moistened soft cloth. (3) If the window is corroded, rub off the scale from the window lightly with a soft cloth to which chrome oxide powder is applied. If it is excessively corroded, it should be replaced with new one. Connect piping rightly so as not to leak during operation. Also, be sure to connect piping rightly without forced bent portion. IM 11G2L1-01E 5th Edition : June 20,2007-00 MAINTENANCE (4) After cleaning of cell and window, reassemble them according to disassembling & reassembling procedures of cell. 6 6-8 <6. MAINTENANCE> 6.3 Inspection and maintenance of limited service-life components The analyzer uses limited-life components. The recommended replacement periods are listed in the below table. 1. Limited service-life components are those which wear out or for which failure is presumed within five years under normal operating or storage conditions. Components with more than five years of service life are the exception. 2. The previous table only involves the recommended periods for conducting preventive maintenance for limited service-life components; these periods do not guarantee that accidental failures will not occur. 3. The recommended replacement preiods are tentative and depend on operating conditions. 4. The recommended replacement preiods may vary depending on the field dete. Recommended check and maintenance periods Every five years Every two years Once a year Every six months Every three months Once a month Once a week Infrared gas analyzer Procedure and criteria Routine Checkpoint Check and maintenance items 1. Light source Recommneded replacement period: Every five years (*1) « 2. Sector motor Recommended replacement periods: Every five years (*1) « 3. Detector without O2 sensor Recommended replacement period: Every five years (*1) « 4. O-ring Recommended replacement period: Once a years, inspect it when cleaning of measuring cell. 5. Measuring cell Set up an appropriate maintenance period (by refering to the check results) (*) In the check and maintenance columns, place a check mark ( replacement. (*1)These are seviceperson’s work, contact our sevicepersons. « ) for check and cofirmation work, a dark star ( « ) for l Precautions to be taken while checking 1. When handling reference gas (during calibration), carefully read the reference-gas instruction manual to use the gas correctly. In particular, special attention must be taken in handling carbon monoxide gases; otherwise, you may suffer from fas poison-ing. 2. During maintenance checks, be sure to keep the near fan on. If any gas leaks, you may suffer from gas poisoning. 3. When replacing the analyzer gas filter or conducting maintenance service of the washer, completely shut the calibration-gas valve. Otherwise, you may suffer from gas poisoning. IM 11G2L1-01E 5th Edition : June 20,2007-00 7. <7. TROUBLESHOOTING> 7-1 TROUBLESHOOTING CAUTION • If the cause of any fault cannot be determined despite reference to the instruction manual, be sure to contact Yokogawa’s office or your dealer. If the instrument is disassembled carelessly, you may have a shock hazard or injury. • Before working, take off a wrist watch, finger ring or the like metallic accessories. And never touch the instrument with a wet hand. Otherwise, you will have a shock hazard. • If the fuse is blown, eliminate the cause, and then replace it with the one of the same capacity and type as before. Otherwise, shock hazard or fault may be caused. 7 TROUBLESHOOTING IM 11G2L1-01E 5th Edition : June 20,2007-00 7.1 7-2 <7. TROUBLESHOOTING> Error-Codes and How to Repair As self diagnostic functions are provided in the analyzer, an error-code is displayed on occasion of error. In case an error is displayed, carry out checking and/or repairing according to the following table. Error code Error details Error of digital part Error of sensor signal procedure Check or repair procedure If error is not displayed again after the error display goes off by pressing key, check that the display and output when the zero gas and span gas flow indicate the normal values and use as is. Turn off the power supply and turn on it again if error is displayed again by even pressing key. When error is displayed, replacement of P.C.B. is required. Contact our engineer. Correction amount in calibration is out Clean the interior of the cell according to 6.2 Item. If calibration of allowable range can not be made after the cell is cleaned, it is necessary to check the detector. Contact our engineer. Correction amount of zero exceeding 50% of measurement range Correction amount of span exceeding Check the span concentration set value meets the span gas 50% of measurement range concentration. Supplemental explanations on error codes 1. Error-code is displayed on the sub-display screen in the single component analyzer and on the sub-display screen of the 1st component in the dual components analyzer. 2. At the occasion of plural errors, the error codes are to be displayed in turn from the lower error-codes No. by depressing key. After displaying all error codes, the error codes display is once off by further depression of key, however, the error codes appear again while the error state continues. 3. After error occurs, if the causes of error are removed, the device continues to operate normally. The error code continues to display as it is to inform of the occurrence of error. Error display goes off by pressing key. 4. When the calibration error is not removed on display, refer to 5-18. 5. In case an error-code is displayed, firstly check whether power supply and gas piping are in good order or not. 6. In case an error-code is displayed, firstly check whether power supply and gas piping are in good order or not. 7. At occasion of error, the contact output of FAULT closes. If error display does not go off or error is often displayed, contact the nearest Yokogawa’s office. IM 11G2L1-01E 5th Edition : June 20,2007-00 7.2 7-3 <7. TROUBLESHOOTING> Other Troubleshooting The following table shows how to remedy other troubles, such as faulty readings. Symptom Checking Item Remedy, etc. Drift * Check if the sample gas is supplied to the analyzer at the specified flow rate. * Check the optical system, e.g., the sample cell window, O-ring, detector window and inside of the cell for heavy dirt. * Locate and check gas leaking points, and take the proper remedy. (See Section 3.2.) * Clean the cell and window. Replace the part. (See Section 6.2.) Readings are abnormally high * Check if the sample gas contains interfering components (water and CO2) in large quantities or not. * Investigate the components of the samplegas and then contact our serviceperson. See address information on the end cover. Readings do not increase * Check if the sample gas is supplied to the analyzer at the specified flow rate. * Check if the zero and span calibration is enabled. * Locate and check gas leaking points, and take the proper remedy. (See Section 3.3.) * If enable, sampling (check the points relating only to the sample gas and take the proper remedy.) * If not enabled, check the calibration related error items. (See Error code. 4 to 7 in Section 7.1.) 7 TROUBLESHOOTING IM 11G2L1-01E 5th Edition : June 20,2007-00 Blank Page 4th Edition : Mar.03,2007-00 Revision Information Title : Model IR100 Universal Infrared Gas Analyzer Instruction Manual Manual No. : IM 11G2L1-01E Jun. 2007/5th Edition Corrected and revised all over. e.g.: After Sales Warranty, Revision Information etc. are added IM Format and Style renewal (As a result of changing Data Source from paper to electric files and of applying Indesign) Sep. 2005/4th Edition Sep. 1996/1st Edition Newly published n If you want have more information about Yokogawa products, you can visit Yokogawa’s homepage at the following web site. Homepage: http://www.yokogawa.com/ Environmental & Analytical Product PMK Dept. n Written by IA (Industrial Automation) Div., Pruduct Business Center, Yokogawa Electric Corporation n Published by Yokogawa Electric Corporation 2-9-32 Nakacho, Musashino-shi, Tokyo 180-8750, JAPAN n Printed by KOHOKU PUBLISHING & PRINTING INC. IM 11G2L1-01E 5th Edition : Jun.20,2007-00 Blank Page User’s Manual MODEL IR100 Universal Infrared Gas Analyzer Supplement Thank you for selecting our Model IR100 Universal Infrared Gas Analyzer. User's Manual, IM 11G2L1-01E, 5th Edition, supplied with the product, some revisions/additions have been made. Please replace the corresponding pages in your copy with the attached, revised pages. Revisions: - Page 1-4, - Page 1-6, - CMPL Section 1.6.1, "IR100A, IR100B (horizontal type)," Fuse (provided as a standard accessory): Changed of Parts Number. Section 1.6.2, "IR100TA, IR100TB (vertical type)," Fuse (provided as a standard accessory): Changed of Parts Number. "CMPL 11G2L1-01E," Fuse: Changed of Parts Number. CMPL No. revised to 4th edition. All Rights Reserved, Copyright © 2007, 1st Edition: Aug. 2011 (YK) Subject to change without notice. IM 11G2L1-01E 5th Edition <1. GENERAL> 1.6 1-4 Model and Suffix Codes 1.6.1 IR100A, IR100B (horizontal type) 1. Single-gas analyzer (IR100A) Model Suffix code Option code IR100A ·········· ·········· Single-gas analyzer ·········· ·········· ·········· CO CO2 CH4 A·········· B·········· C·········· D·········· E·········· F·········· G·········· H·········· J·········· K·········· L·········· M·········· P·········· Q·········· R·········· S·········· ·········· ·········· ·········· ·········· ·········· ·········· ·········· ·········· ·········· ·········· ·········· ·········· ·········· ·········· ·········· ·········· 0 to 500 ppm (not available for CH4) 0 to 1000 ppm 0 to 2000 ppm 0 to 2500 ppm 0 to 5000 ppm 0 to 1 % 0 to 2 % 0 to 5 % 0 to 10 % 0 to 20 % 0 to 50 % 0 to 100 % 0 to 3 % 0 to 30 % 0 to 40 % 0 to 70 % A········ B········ C········ D········ E········ F········ G········ H········ J········ K········ L········ M········ N········ ·········· ·········· ·········· ·········· ·········· ·········· ·········· ·········· ·········· ·········· ·········· ·········· ·········· 0 to 500 ppm (not available for CH4) 0 to 1000 ppm 0 to 2000 ppm 0 to 2500 ppm 0 to 5000 ppm 0 to 1 % 0 to 2 % 0 to 5 % 0 to 10 % 0 to 20 % 0 to 50 % 0 to 100 % Not available ·········· ·········· ·········· ·········· ·········· ·········· 100V AC 50Hz 100V AC 60Hz 115V AC 50Hz 115V AC 60Hz 220V AC 50Hz 220V AC 60Hz A···· B···· C···· ·········· ·········· ·········· Desk top 19-inch rack-mounted Panel-mounted J·· A·· ·········· ·········· Rc1/4 1/4NPT ·········· ·········· Japanese English Measured gas Primary range Secondary range Power supply Construction Piping Panel Additional functions -1·········· -2·········· -3·········· -5······ -6······ -7······ -8······ -3······ -4······ -J -E /P·········· /J·········· Description Automatic calibration Remote range switching function and range identification functions Fuse (provided as a standard accessory) Part number Specification K9358DP 125/250 V, 500 mA IM 11G2L1-01E 5th Edition : June 20, 2007-00 <1. GENERAL> 2. 1-5 Dual-gas analyzer (IR100B) Suffix code Option code IR100B ············ ·········· Measured gas -G·········· Primary range of CO2 Primary range of CO Secondary range of CO Power supply Construction Piping Panel Additional functions Dual-gas analyzer CO2 + CO ·········· CO2 / CO (Primary gas / secondary gas) ·········· ·········· ·········· ·········· ·········· ·········· ·········· ·········· 0 to 500 ppm (0 to 500 ppm cannot be specified for CO) 0 to 1 % 0 to 2 % 0 to 5 % 0 to 10 % 0 to 20 % 0 to 50 % 0 to 100 % ·········· ·········· ·········· ×2 ×2.5 Not available A········ B········ C········ D········ E········ F········ G········ H········ J········ K········ L········ M········ ·········· ·········· ·········· ·········· ·········· ·········· ·········· ·········· ·········· ·········· ·········· ·········· 0 to 500 ppm 0 to 1000 ppm 0 to 2000 ppm 0 to 2500 ppm 0 to 5000 ppm 0 to 1 % 0 to 2 % 0 to 5 % 0 to 10 % 0 to 20 % 0 to 50 % 0 to 100 % 1······ 2······ N······ ·········· ·········· ·········· ×2 × 2.5 Not available -5······ -6······ -7······ -8······ -3······ -4······ ·········· ·········· ·········· ·········· ·········· ·········· 100 V AC 50 Hz 100 V AC 60 Hz 115 V AC 50 Hz 115 V AC 60 Hz 220 V AC 50 Hz 220 V AC 60 Hz A···· B···· C···· ·········· ·········· ·········· Desk top 19-inch rack-mounted Panel-mounted ·········· ·········· Rc1/4 1/4NPT ·········· ·········· Japanese English E·········· F·········· G·········· H·········· J·········· K·········· L·········· M·········· Secondary range of CO2 1 Description 1·········· 2·········· N·········· J·· A·· -J -E /P·········· /J·········· Automatic calibration (for both gases) Remote range switching function and range identification functions Fuse (provided as a standard accessory) Part number Specification K9358DP 125/250 V, 500 mA IM 11G2L1-01E 5th Edition : June 20, 2007-00 GENERAL Model <1. GENERAL> 1.6.2 1-6 IR100TA, IR100TB (vertical type) 1. Single-gas analyzer (IR100TA) Model IR100TA Measured gas Primary range Secondary range Power supply Construction Piping Panel Additional functions Suffix code Option code Description ·········· ·········· Single-gas analyzer -1·········· -2·········· -3·········· ·········· ·········· ·········· CO CO2 CH4 A·········· B·········· C·········· D·········· E·········· F·········· G·········· H·········· J·········· K·········· L·········· M·········· P·········· Q·········· R·········· S·········· ·········· ·········· ·········· ·········· ·········· ·········· ·········· ·········· ·········· ·········· ·········· ·········· ·········· ·········· ·········· ·········· 0 to 500 ppm (not available for CH4) 0 to 1000 ppm 0 to 2000 ppm 0 to 2500 ppm 0 to 5000 ppm 0 to 1 % 0 to 2 % 0 to 5 % 0 to 10 % 0 to 20 % 0 to 50 % 0 to 100 % 0 to 3 % 0 to 30 % 0 to 40 % 0 to 70 % A········ B········ C········ D········ E········ F········ G········ H········ J········ K········ L········ M········ N········ ·········· ·········· ·········· ·········· ·········· ·········· ·········· ·········· ·········· ·········· ·········· ·········· ·········· 0 to 500 ppm (not available for CH4) 0 to 1000 ppm 0 to 2000 ppm 0 to 2500 ppm 0 to 5000 ppm 0 to 1 % 0 to 2 % 0 to 5 % 0 to 10 % 0 to 20 % 0 to 50 % 0 to 100 % Not available ·········· ·········· ·········· ·········· ·········· ·········· 100 V AC 50 Hz 100 V AC 60 Hz 115 V AC 50 Hz 115 V AC 60 Hz 220 V AC 50 Hz 220 V AC 60 Hz C···· D···· ·········· ·········· Panel-mounted Wall-mounted J·· A·· ·········· ·········· Rc1/4 1/4NPT ·········· ·········· Japanese English /P········ /J········ Automatic calibration Remote range switching function and range identification functions -5······ -6······ -7······ -8······ -3······ -4······ -J -E Fuse (provided as a standard accessory) Part number Specification K9358DP 125/250 V, 500 mA IM 11G2L1-01E 5th Edition : June 20, 2007-00 <1. GENERAL> 1-7 2. Dual-gas analyzer (IR100TB) Suffix code Option code IR100TB ············ ·········· Measured gas Secondary range of CO2 Primary range of CO Secondary range of CO Power supply Construction Piping Panel Additional functions Dual-gas analyzer CO2 + CO ·········· CO2 / CO (Primary gas / secondary gas) ·········· ·········· ·········· ·········· ·········· ·········· ·········· ·········· 0 to 5000 ppm (0 to 500 ppm cannot be specified for CO) 0 to 1 % 0 to 2 % 0 to 5 % 0 to 10 % 0 to 20 % 0 to 50 % 0 to 100 % ·········· ·········· ·········· ×2 × 2.5 Not available A········ B········ C········ D········ E········ F········ G········ H········ J········ K········ L········ M········ ·········· ·········· ·········· ·········· ·········· ·········· ·········· ·········· ·········· ·········· ·········· ·········· 0 to 500 ppm 0 to 1000 ppm 0 to 2000 ppm 0 to 2500 ppm 0 to 5000 ppm 0 to 1 % 0 to 2 % 0 to 5 % 0 to 10 % 0 to 20 % 0 to 50 % 0 to 100 % 1······ 2······ N······ ·········· ·········· ·········· ×2 × 2.5 Not available -5······ -6······ -7······ -8······ -3······ -4······ ·········· ·········· ·········· ·········· ·········· ·········· 100 V AC 50 Hz 100 V AC 60 Hz 115 V AC 50 Hz 115 V AC 60 Hz 220 V AC 50 Hz 220 V AC 60 Hz C···· D···· ·········· ·········· Panel-mounted Wall-mounted ·········· ·········· Rc1/4 1/4NPT ·········· ·········· Japanese English /P········ /J········ Automatic calibration (for both gases) Remote range switching function and range identification functions -G·········· Primary range of CO2 1 Description E·········· F·········· G·········· H·········· J·········· K·········· L·········· M·········· 1·········· 2·········· N·········· J·· A·· -J -E Fuse (provided as a standard accessory) Part number Specification K9358DP 125/250 V, 500 mA IM 11G2L1-01E 5th Edition : June 20, 2007-00 GENERAL Model Customer Maintenance Parts List Model IR100 Universal Infrared Gas Analyzer All Rights Reserved, Copyright © 1996, Yokogawa Electric Corporation. Subject to change without notice. Yokogawa Electric Corporation CMPL 11G2L1-01E 4th Edition : Sep 2011 (YK) 2 CMPL 11G2L1-01E 4th Edition : Sep 2011 (YK) 3 4th Edition : Sep 2011 (YK) CMPL 11G2L1-01E