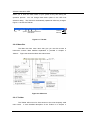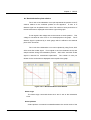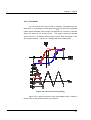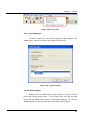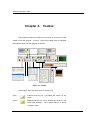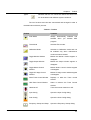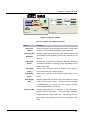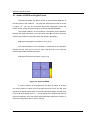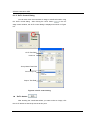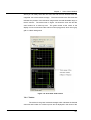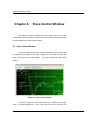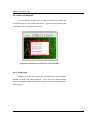
1
XEP Data Acquisition Program for XE series SPM Software Manual Version 1.5 Copyright © 2004 PSIA Corporation. All rights reserved. PSIA Advanced Scanning Probe Microscopes Copyright Notice Copyright © Feb. 2004 PSIA Corporation. All rights reserved. No part of this publication may be reproduced or transmitted in any form or by any means (electronic or mechanical, including photocopying) for any purpose without prior written permission from PSIA. PSIA will have no responsibility or liability for accidental or inevitable damage that may result from unauthorized accessing or modifications. This document may contain errors or inaccuracies, and it may be revised without advance notice. This manual is updated frequently. PSIA welcomes any recommendations or criticism regarding this manual. Customer feedback is always welcome, as it helps us to continuously improve upon the quality of our products. If you have any comments or advice, please feel free to contact PSIA. PSIA Corp Induspia 5F, SangDaewon-Dong 517-13 Sungnam, Korea 462-120 Tel:82-31-734-2900 www.psia.co.kr PSIA Inc 47339 Warm Springs Blvd. Fremont, CA 94539 www. advancedspm.com Preface This document is a reference manual for the XEP Data Acquisition program which controls the XE series SPM instruments from PSIA. This manual discusses in detail the software features of the XEP interface. Unlike the User’s Manual, which explains the procedural steps of operation in accordance with analyzing a sequence of samples, this document describes, in detail, every feature that is available in the XE data acquisition program. Therefore, it is recommended that users be familiar with both manuals for most efficient operation of the XE system. You may also selectively refer to this manual to further clarify points made in the User’s Manual The contents of this manual are organized as follows. First, an introduction to the main categories of XEP is provided. Then, overall features of the XEP screen are elucidated in detail. Lastly, this software manual pays attention to all control windows and their functions so that you can make better use of them. Thus, the manual is organized to allow the user to skip straight to items of interest without any difficulty. This is a blank page. Contents Contents Chapter 1. Introduction to XEP ............................................... 1 1-1. Introduction to Software for XE Systems................................. 1 1-2. XE Data Acquisition Program .................................................... 1 1-3. Save as TIFF................................................................................ 2 1-3-1. What is TIFF? .............................................................................................2 1-3-2. Why TIFF format?......................................................................................3 1-3-3. TIFF’s Security ...........................................................................................3 1-4. Installation of ‘PSIA XEP’ Software........................................... 4 1-4-1. Uninstallation of the old version ‘PSIA XEP’ program ..........................4 1-4-2. Installation of the new version ‘PSIA XEP’ program .............................6 Chapter 2. Overview of XEP .................................................. 11 2-1. Overall Features in XEP ........................................................... 11 2-1-1. Rearrangement of the Control Windows ..............................................12 2-1-2. ‘Allow docking’ and ‘Hide’ .......................................................................14 2-2. Functions of Features on XEP................................................. 17 2-2-1. Title Bar .....................................................................................................17 2-2-2. Menu Bar...................................................................................................18 2-2-3. Toolbar.......................................................................................................18 2-2-4. Scan Control Window..............................................................................19 2-2-5. Scan Image View .....................................................................................20 2-2-6. Trace Control Window.............................................................................21 2-2-7. Buffer Window ..........................................................................................21 2-2-8. Output Window.........................................................................................22 2-2-9. Monitor Window .......................................................................................22 2-2-10. XY Stage Control Window ....................................................................23 2-2-11. Motors (Z Stage and Focus Stage) Control Window ........................23 2-2-12. Status Bar ...............................................................................................24 Chapter 3. Menus ................................................................... 25 3-1. File Menu ................................................................................... 25 3-2. View Menu ................................................................................. 26 i Software Manual for XEP 3-2-1. Status Bar ................................................................................................. 27 3-2-2. Toolbar ...................................................................................................... 27 3-2-3. Show Trace Control Window ................................................................. 27 3-2-4. Hide Trace Control Window ................................................................... 28 3-2-5. Motors Control Window .......................................................................... 29 3-2-6. XY Stage Control Window...................................................................... 30 3-2-7. Output Window ........................................................................................ 30 3-2-8. Monitor Window....................................................................................... 31 3-2-9. Scan Control Window ............................................................................. 31 3-2-10. Buffer Window ....................................................................................... 32 3-2-11. Tile Docked Windows............................................................................ 33 3-3. Mode Menu ................................................................................34 3-3-1. Head On. .................................................................................................. 35 3-3-2. Scan Mode ............................................................................................... 35 3-3-2-1 Line Profile ......................................................................................... 36 3-3-2-2 F/D Spectroscopy.............................................................................. 39 3-3-2-3 I/V Spectroscopy ............................................................................... 47 3-3-2-3 NanoIndentation................................................................................ 50 3-3-3. Trace Mode .............................................................................................. 57 3-3-4. Calib Mode ............................................................................................... 61 3-3-5. Maintenance Mode.................................................................................. 63 3-3-6. Change Password................................................................................... 63 3-4. Setup Menu ................................................................................64 3-4-1. Input Config .............................................................................................. 65 3-4-2. Scan Config.............................................................................................. 70 3-4-3. Approach................................................................................................... 73 3-4-4. XY ServoScan.......................................................................................... 75 3-4-5. Frequency Sweep ................................................................................... 77 3-4-6. Part Config................................................................................................ 80 3-4-7 Current Amplifier....................................................................................... 81 3-4-8 Aux DAC .................................................................................................... 82 3-5. Tools Menu ................................................................................82 3-5-1. Layout Manager....................................................................................... 83 3-5-2. Session Manager .................................................................................... 85 3-5-3. Preferences .............................................................................................. 87 ii Contents 3-5-4. XEI (for Image Processing) ....................................................................90 3-6. Help Menu.................................................................................. 91 Chapter 4. Toolbar .................................................................. 92 Chapter 5. Monitor Window ................................................... 96 5-1. Quad-cell PSPD and Digital Panels......................................... 98 5-2. Error Signal Bar ........................................................................ 99 5-3. Z Scanner Bar ........................................................................... 99 Chapter 6. Move Control Windows ..................................... 102 6-1. XY Stage Control Window...................................................... 102 6-1-1. XY Stage .................................................................................................103 6-1-2. ‘GoTo’ Control Dialog ............................................................................104 6-2. Motors (Z stage and Focus stage) Control Window............ 112 6-2-1. Z Stage .................................................................................................... 112 6-2-2. Focus Stage............................................................................................ 114 Chapter 7. Scan Control Window ........................................ 118 7-1. Normal Mode ........................................................................... 121 7-1-1. Repeat, Two way, and X, Y ..................................................................121 7-1-2. Slope........................................................................................................123 7-1-3. Scan Size................................................................................................124 7-1-4. Offset X, Y...............................................................................................125 7-1-5. Rotation ...................................................................................................125 7-1-6. Scan Rate ...............................................................................................126 7-1-7. Set Point..................................................................................................126 7-1-8. Z Servo....................................................................................................127 7-1-9. Z Servo Gain ..........................................................................................128 7-1-10. Drive ......................................................................................................129 7-1-11. Tip and Sample Bias ...........................................................................129 7-1-12. NCM ASetup.........................................................................................129 7-1-13. Scan Here.............................................................................................129 7-2. Scan Area Mode ...................................................................... 130 7-2-1. Tracker.....................................................................................................131 7-2-2. How to Change the Scan Size in the Scan Area mode....................132 iii Software Manual for XEP 7-2-3. How to Change the Scan Location in the Scan Area mode ............ 134 7-2-4. How to Rotate the Scan Area in the Scan Area mode ..................... 134 Chapter 8. Trace Control Window........................................136 8-1. Trace Control Window ............................................................136 8-1-1. Signal Name List ................................................................................... 137 8-1-2. Hold ......................................................................................................... 138 8-1-3. FT............................................................................................................. 138 8-1-4. AC ............................................................................................................ 139 8-1-5. Auto ......................................................................................................... 139 8-2. Trace Line Analysis.................................................................140 8-2-1. Show Origin............................................................................................ 140 8-2-2. DC Center Origin ................................................................................... 141 8-2-3. Show Pair Cursor .................................................................................. 142 8-2-4. Show Line Cursor.................................................................................. 143 8-2-5. Show Leveling Bar ................................................................................ 143 8-2-5. Setup Cursor Avg. Range .................................................................... 144 Chapter 9. Scan Image View & Buffer Window...................147 9-1. Scan Image View .....................................................................147 9-1-1. Image View Control Window................................................................ 148 9-1-2. Image View Scale Window .................................................................. 150 9-1-3. Status Display ........................................................................................ 151 9-1-4. Buffer Layer in the Scan Image View ................................................. 153 9-1-5. Point-to-point Measurements .............................................................. 154 9-2. Buffer Window .........................................................................157 9-2-1. Buffer Window........................................................................................ 157 9-2-2. Image Information Dialog ..................................................................... 162 9-2-3. How to Add Comments to a Buffer image.......................................... 165 Index.........................................................................................169 iv Figure Contents Figure Contents Figure 1-1. Icons of XEP and XEI ....................................................................... 1 Figure 1-2. XEP Interface.................................................................................... 2 Figure 1-3. Both ‘psia’ folder and ‘psia old’ folder (a) and ‘Add and Remove Program’ window (b)............................................................................................ 5 Figure 1-4. Procedure to remove the ‘PSIA XEP’ program ................................. 5 Figure 1-5. Setup the ‘PSIA XEP’ program ......................................................... 7 Figure 1-6. Procedure to install the ‘PSIA XEP’ program.................................... 7 Figure 1-7. ‘Setup Type’ and ‘Install Shield Wizard Complete’ dialogs ............... 8 Figure 1-8. Desktop after installation of the ‘PSIA XEP’ program ....................... 9 Figure 2-1. XEP - Data Acquisition program ..................................................... 11 Figure 2-2-1. One way to rearrange the control window................................... 13 Figure 2-2-2. Another way to rearrange the control window ............................. 14 Figure 2-3. Deselect ‘Allow docking’ ................................................................. 15 Figure 2-4. Select ‘HIde’.................................................................................... 15 Figure 2-5. Resize the control window .............................................................. 16 Figure 2-6. Hide the control window.................................................................. 17 Figure 2-7. Title bar ........................................................................................... 18 Figure 2-8. Menu bar......................................................................................... 18 Figure 2-9. Toolbar ............................................................................................ 19 Figure 2-10. Scan control window..................................................................... 20 Figure 2-11. Scan image view and Image view control window........................ 20 Figure 2-12. Trace control window .................................................................... 21 Figure 2-13. Buffer window ............................................................................... 21 Figure 2-14. Output window .............................................................................. 22 Figure 2-15. Monitor window............................................................................. 22 Figure 2-16. XY stage control window .............................................................. 23 Figure 2-17. Motors control window .................................................................. 23 Figure 2-18. Status bar...................................................................................... 24 Figure 3-1. Menu bar......................................................................................... 25 Figure 3-2. Exit menu ........................................................................................ 26 Figure 3-3. ‘Exit’ cofirmation message box ....................................................... 26 Figure 3-4. View menu ...................................................................................... 27 Figure 3-5. Status bar........................................................................................ 27 v Software Manual for XEP Figure 3-6. Toolbar ............................................................................................ 27 Figure 3-7. Show Trace control window ............................................................ 28 Figure 3-8. Hide Trace control window.............................................................. 29 Figure 3-9. Motors control window .................................................................... 29 Figure 3-10. XY stage control window............................................................... 30 Figure 3-11. Output window .............................................................................. 31 Figure 3-12. Monitor window ............................................................................. 31 Figure 3-13. Scan control window ..................................................................... 32 Figure 3-14. Buffer window ............................................................................... 33 Figure 3-15. XEP screens before(above) and after (below) clicking ‘Tile Docked Windows’ in the View menu............................................................................... 34 Figure 3-16. Mode menu ................................................................................... 35 Figure 3-17. Scan mode.................................................................................... 36 Figure 3-18-1. Line Profile mode....................................................................... 37 Figure 3-18-2. Scan config dialog in Line profile mode..................................... 38 Figure 3-19-1. F/D spectroscopy mode............................................................. 39 Figure 3-19-2. Move Here command ................................................................ 40 Figure 3-19-3. Add Point command .................................................................. 41 Figure 3-19-4. Delete Point command .............................................................. 41 Figure 3-19-5. F/D spectroscopy control window.............................................. 42 Figure 3-19-6. F/D curve plots window.............................................................. 44 Figure 3-19-7. Image Information window......................................................... 46 Figure 3-20-1. I/V spectroscopy mode .............................................................. 47 Figure 3-20-2. I/V spectroscopy control window ............................................... 48 Figure 3-21-1. Single Indentation cycle in Z scanner mode (left) and Setpoint mode (right) ....................................................................................................... 50 Figure 3-21-2. Indenter Control Window ........................................................... 51 Figure 3-21-3. NanoIndentation Plots Window.................................................. 53 Figure 3-22-1. Process of Trace plotting ........................................................... 57 Figure 3-22-2. Trace mode ................................................................................ 58 Figure 3-23. Driving Source and Definition of From / To, and Period, .............. 59 Figure 3-24-1. Calib mode................................................................................. 62 Figure 3-24-2. Advanced Calibration dialog ...................................................... 63 Figure 3-25. Change password ......................................................................... 64 Figure 3-26. Setup menu................................................................................... 65 Figure 3-27. Input Config dailog ........................................................................ 66 vi Figure Contents Figure 3-28. Selected Input dailog (a) and click ‘Remove all’button (b) ........... 67 Figure 3-29. Selecting units for signals ............................................................. 68 Figure 3-30. Scan Config dialog........................................................................ 70 Figure 3-31. Standard scanning and Interace scanning ................................... 73 Figure 3-32. Approach dialog ............................................................................ 74 Figure 3-33. XY Scanner Setup dialog.............................................................. 75 Figure 3-34. Scanner Setup On vs. Hold .......................................................... 76 Figure 3-35. Frequency Sweep dialog .............................................................. 78 Figure 3-36. XEP Part selection dialog ............................................................. 80 Figure 3-37 Current Amp................................................................................... 82 Figure 3-38 Aux DAC ........................................................................................ 82 Figure 3-39. Tools menu.................................................................................... 83 Figure 3-40. Layout manager............................................................................ 83 Figure 3-41. Session manager.......................................................................... 86 Figure 3-42. Preference dialog.......................................................................... 88 Figure 3-43. XEI - Image Processing Program ................................................. 91 Figure 4-1. Toolbar ............................................................................................ 92 Figure 5-1. Monitor window ............................................................................... 97 Figure 5-2. Quad cell PSPD .............................................................................. 98 Figure 5-3. Error signal bar ............................................................................... 99 Figure 5-4. Z scanner bar................................................................................ 100 Figure 6-1. XY stage control window............................................................... 102 Figure 6-2. Directions of the XY stage’s motion.............................................. 103 Figure 6-3. GoTo control dialog....................................................................... 104 Figure 6-4. ‘GoTo’ text field and ‘GoTo’ button ................................................ 105 Figure 6-5. How to use the ‘Get Point’ button ................................................. 106 Figure 6-6. How to use the ‘Add Point’ button................................................. 106 Figure 6-7. How to use the ‘Delete Point’ button............................................. 107 Figure 6-8. How to use the ‘Get’ button........................................................... 108 Figure 6-9. How to use the ‘Store’ button ........................................................ 109 Figure 6-10. How to use the ‘StepTo’ button ................................................... 110 Figure 6-11. ‘Advanced’ button.........................................................................111 Figure 6-12. Motors control window ................................................................ 113 Figure 6-13. Reset stage dialog ...................................................................... 116 Figure 7-1. Scan control window..................................................................... 119 Figure 7-2. Scan direction ............................................................................... 122 vii Software Manual for XEP Figure 7-3 Concept of the Set point in NC-AFM ............................................. 127 Figure 7-4 Concept of Z servo in NC-AFM...................................................... 128 Figure 7-5. Send to “scan area control” .......................................................... 130 Figure 7-6. Scan Area mode screen ............................................................... 131 Figure 7-7. How to increase (above) and decrease (below) the scan size in the Scan Area mode.............................................................................................. 133 Figure 7-8. How to change scan location in the Scan Area mode .................. 134 Figure 7-9. How to rotate the scan area in the Scan Area mode .................... 135 Figure 8-1. Trace control window .................................................................... 136 Figure 8-2. Several Input signals..................................................................... 138 Figure 8-3. FT mode of the trace line .............................................................. 139 Figure 8-4. Context menu in the Trace control window................................... 140 Figure 8-5. Show Origin .................................................................................. 141 Figure 8-6. DC Center Origin .......................................................................... 142 Figure 8-7. Show Pair Cursor.......................................................................... 142 Figure 8-8. Show Line Cursor ......................................................................... 143 Figure 8-9. Before and after using Leveling bar at point 1 and 2.................... 144 Figure 8-10 Function of the cursor average range.......................................... 144 Figure 8-11. Range of the line cursors and leveling bar.................................. 146 Figure 9-1. Scan image view during scanning ................................................ 148 Figure 9-2. Selection of the image color ......................................................... 149 Figure 9-3. Zoomed in images at 200% (above) and 800%(below)................ 150 Figure 9-4. Image scale window...................................................................... 151 Figure 9-5. Different statuses of an image ...................................................... 153 Figure 9-6. How to remove (left) and store (right) buffer images in the Scan image view....................................................................................................... 154 Figure 9-7. Markers in the Scan image view................................................... 156 Figure 9-8. How to measure the distance between two features.................... 156 Figure 9-9. Buffer window with context menu ................................................. 157 Figure 9-10. Delete File................................................................................... 158 Figure 9-11. Remove Tiff ................................................................................. 159 Figure 9-12. Insert Tiff ..................................................................................... 160 Figure 9-13. Reload Tiff................................................................................... 160 Figure 9-14. Image Size .................................................................................. 161 Figure 9-15. Send to XEI................................................................................. 162 Figure 9-16. Image Information dialog ............................................................ 163 viii Figure Contents Figure 9-17. Procedure to add or edit comments in the Image Information dialog ......................................................................................................................... 166 Figure 9-18. ‘Save As’ dialog........................................................................... 167 Figure 9-19. ‘Save’ confirmation message box ............................................... 167 ix Chapter 1. Introduction to XEP Chapter 1. Introduction to XEP This chapter introduces the characteristics of XEP and describes in detail XEP’s data file format, ‘TIFF’ and the installation procedure for XEP. 1-1. Introduction to Software for XE Systems The software for XE systems, SPM instruments from PSIA, is composed of two software programs, XEP and XEI. XEP is the software program for operating and controlling the XE hardware system. On the other hand, XEI is the image processing and analyzing tool that allows a user to analyze data that has been previously acquired. This document focuses on the XEP software. If you want to know how to process images with XEI, please consult the software manual for XEI. Figure 1-1 shows the respective icons of ‘XEP’ and ‘XEI’. Figure 1-1. Icons of XEP and XEI 1-2. XE Data Acquisition Program The XE Data Acquisition Program, XEP, is the software that communicates with the XE Control Electronics in order to control the XE SPM stage. The XEP interface is the means that allows the user to investigate and analyze a sample surface. That is, XEP controls and operates the XE system to collect sample data. Figure 1-2 shows the common XEP interface. 1 Software Manual for XEP This manual provides you with instructions on how to use the XEP program to control the XE system. For example, through XEP, you can select a wide variety of measurement modes depending on the properties of the samples you want to observe. These modes include AFM, Non-Contact AFM (NC-AFM), Dynamic Force Microscopy (DFM), Lateral Force Microscopy (LFM), Electrostatic Force Microscopy (EFM) and others. Also, you can set or adjust several parameters in taking an image of your sample. This manual describes, in detail, what each parameter means and how these parameters are applied to the images so that you can acquire better images, leading to more accurate analysis of the collected data. In addition, it is recommended that you read this software manual together with the User’s manual, in order to best understand the XE system operation and the variety of operating modes. Figure 1-2. XEP Interface 1-3. Save as TIFF 1-3-1. What is TIFF? Unlike other common file formats, the ‘TIFF’ file has a tag. The ‘TIFF’ file includes a header and many tagged fields. The tagged fields can describe 2 Chapter 1. Introduction to XEP dimensional information such as the width and the height of the images so that the software that handles the ‘TIFF’ file can read these tagged fields and then extract information from them in order to generate images to display in the image viewer. Consequently, the ‘TIFF’ does not affect the original image file and has superior compressibility as well as no resolution limit. These advantages make the TIFF format ideal for handling larger, capacious files. 1-3-2. Why TIFF format? The data files produced by conventional SPM instruments are not a common image file format. Thus, to see these acquired images in an Image viewer and the traditional Windows Explorer display, it is necessary to change the file format saved by individual SPM instruments into the image file format by using image processing software. If the collected data is saved as a common image file format, it may be quite convenient to view the images without any special software conversion process of the information file. However, this is difficult since conventional image file formats include only image data (R, G, B) and cannot save the large amount of sample data which is measured by the XE systems. Considering these difficulties, the TIFF format is a more flexible means of storing SPM images. Therefore, in the XE system, the image data is saved as a ‘TIFF’ file format, in which a huge amount of data can be saved in the private-tagged area and the acquired images from this data can be saved in the standard-tagged fields as an image file so that it can be viewed in the common image viewer. 1-3-3. TIFF’s Security When you see the XE system’s acquired data in the common image viewer, you can identify this data as a familiar sample image, and you can process the images without transforming original measurement data. The part changed in the common Image viewer is the information that is saved in the standard-tagged fields of the data file. Therefore, the collected data saved in the private-tagged field will be secure from the transformation of the data in the image viewer, and also this data may be changed or processed in the XEI image processing program. 3 Software Manual for XEP 1-4. Installation of ‘PSIA XEP’ Software The XEP software program for XE systems can be run in Windows XP Home edition. Thus, if an operating system of your computer is Window 2000 series or Windows XP Pro, and not Windows XP Home edition, it is necessary to start with the ‘Administrator’ login. 1-4-1. Uninstallation of the old version ‘PSIA XEP’ program If you have a previous version ‘PSIA XEP’ program, you should first remove this old version. The procedure to uninstall the old XEP program is as follows: 1. Copy ‘psia’ folder and rename it ‘psia_old’ so that there will be two folders associated with XE-SPM, ‘psia’ and ‘psia_old’ (see Figure 13(a)). This step is necessary to make a backup folder for the calibrated DB files. 2. Remove ‘PSIA XEP’ program by using ‘Add or Remove Program’ in the Control panel of the local disk, C (see Figure 1-3(b)). 3. At first, the ‘Install Shield Wizard; dialog will be opened. Select ‘Remove’ and click the ‘Next’ button (see Figure 1-4(a)). 4. When ‘Confirm Uninstall’ message box asks you again if you want to completely remove this ‘PSIA XEP’ program, click ‘OK’ to perform the uninstallation process (see Figure 1-4(b)). 5. After completing removal of the old ‘PSIA XEP’ program, you will see the ending message, “Maintenance Complete” in the Install shield wizard window (see Figure 1-4.(c)and (d)). 4 Chapter 1. Introduction to XEP (a) (b) Figure 1-3. Both ‘psia’ folder and ‘psia old’ folder (a) and ‘Add and Remove Program’ window (b) (a) (c) (b) (d) Figure 1-4. Procedure to remove the ‘PSIA XEP’ program 5 Software Manual for XEP 1-4-2. Installation of the new version ‘PSIA XEP’ program The procedure to install the new version ‘PSIA XEP’ is as follows: 1. To install the new ‘PSIA XEP’ software, double-click the ‘Setup’ icon in your PSIA software folder as seen in Figure 1-5. 2. Step1: Preparing to Install - Installation will start as shown in Figure 16 (a). 3. Step2: Welcome to the Install Shield Wizard for PSIA XEP - Click the ‘Next’ button to continue the install setup (see Figure 1-6 (b)). 4. Step3: Customer Information - Enter ‘User Name’ and ‘Company Name’ as shown in Figure 1-6 (c). 5. Step4: Choose Destination Location - The ‘psia’ folder is made in the C directory by this installation procedure. This is the base directory of XE software (ex, ‘C:\psia’ like Figure 1-6 (d)). Of course, you can also select another destination in your computer as you want by selecting ‘Browse’. Click the ‘Next’ button. 6. Step5: Setup Type - Select the ‘Typical’ setup type to install and then click the ‘Next’ button (see Figure1-7 (a)). The two options for the setup type are described in detail as follows: a. Typical - Program will be installed with most common options. Recommended for most users. XEP program, Device Driver will be installed. b. Custom - You may choose the options you want to install. Recommended for advanced users. Driver and XE DB files can be installed. 6 XEP program, Device Chapter 1. Introduction to XEP Figure 1-5. Setup the ‘PSIA XEP’ program (a) (b) (c) (d) Figure 1-6. Procedure to install the ‘PSIA XEP’ program When the setup is completed, the ‘Install Shield Wizard Complete’ window appears, click the ‘Finish’ button as shown in Figure 1-7 (b). When you have finished the XEP installation procedure, XEP folder is 7 Software Manual for XEP created in the ‘PSIA’ folder as a subfolder. Its shortcut will be automatically created in your desktop and the ‘PSIA XEP’ program will be made as shown in Figure 1-8. (a) (b) Figure 1-7. ‘Setup Type’ and ‘Install Shield Wizard Complete’ dialogs Finally, you should restore the backup DB file. Copy the ‘DB’ folder from ‘psia old’ which you have saved before uninstalling the old ‘PSIA XEP’ program and paste it in the ‘XEP’ folder. These Data Base (DB) files include the calibration values for the scanners, stages, and so on. It is recommended to turn off the XE Control Electronics and then to turn it on just after DB initialization. Now, you can use the new version XEP program. This software also will be upgraded for your system and many more various application modes will be supported. 8 Chapter 1. Introduction to XEP Figure 1-8. Desktop after installation of the ‘PSIA XEP’ program 9 Software Manual for XEP This is a blank page. 10 Chapter 2. Overview of XEP Chapter 2. Overview of XEP This chapter provides an overview of all available features found in XEP and it is a good reference point for becoming more familiar with XEP. 2-1. Overall Features in XEP The XEP program is opened by double-clicking the ‘XEP program’ icon on the desktop of your computer. Figure 2-1 shows the main components of the XEP program. Title Bar Scan Image View Trace Control Window Menu Bar Toolbar Scan Control Window Buffer Window Status Bar Monitor Widow Status Bar XY Stage Control Window Z Stage Control Window Output Window Figure 2-1. XEP - Data Acquisition program 11 Software Manual for XEP 2-1-1. Rearrangement of the Control Windows The default arrangement of the Control Windows is suitable for monitor resolution of 1280x1024. It is therefore recommended to set your monitor resolution to 1280x1024. Otherwise, you can locate the various control windows as best suits your preference. Then, this layout can be saved as a new default layout using the Layout manager which can be selected in the Tools menu. Please refer to the Tools menu section in Chapter 3. “Menus” for more information on the layout manager. There are two ways to rearrange the control windows in your XEP screen. The first one is to click the title bar of the control window and drag it to the new location on your XEP screen. Figure 22-1 shows an example of rearranging the Monitor window. (a) (b) 12 Chapter 2. Overview of XEP Figure 2-2-1. One way to rearrange the control window Another way to rearrange the control windows is to move the control window to another location after disallowing docking of the control window. To disable the control window’s docking, double-click its title bar or deselect the ‘Allow docking’ option from the context menu which is generated when you right-click the cursor onto any spaces in the control window. After you deselected the ‘Allow docking’, move it to a new location and select the ‘Allow docking’ option again to fix it in the new location. You can also use the control window with ‘Allow docking’ deselected (see Figure 2-2-2) (a) (b) 13 Software Manual for XEP (c) (d) Figure 2-2-2. Another way to rearrange the control window 2-1-2. ‘Allow docking’ and ‘Hide’ Allow docking By default, ‘Allow docking’ is selected for all control windows on the screen so that they are fixed in position. However, you can move or resize the control window after deselecting the ‘Allow docking’ as shown in Figure 2-3. At first, you can move the control window by dragging it after clicking the cursor on the title bar of the control window. Also, you can adjust the size of the control 14 Chapter 2. Overview of XEP window by dragging the arrow-cursor that is generated when you point your mouse onto one of the four corners of the control window as shown in Figure 25. Figure 2-3. Deselect ‘Allow docking’ Hide You can make a control window disappear from your screen by selecting the ‘Hide’ option as shown in Figure 2-4. For example, the Buffer window was hidden by selecting the ‘Hide’ option (see Figure 2-6) and the hidden control widow can reappear by selecting the related control window in the View menu (see the circle in Figure 2-6 (b)) or clicking its icon in the Toolbar. Figure 2-4. Select ‘HIde’ 15 Software Manual for XEP (a) (b) Figure 2-5. Resize the control window 16 Chapter 2. Overview of XEP (a) (b) Figure 2-6. Hide the control window 2-2. Functions of Features on XEP 2-2-1. Title Bar The Title bar displays the software title and important settings such as Head mode, XY & Z scanner voltage mode, and the type of cantilever. This 17 Software Manual for XEP allows you to know the basic status of your system at any time during the operation process. You can change these basic options in the ‘XEP Part selection’ dialog. The Title bar is automatically updated to reflect any changes. Figure 2-7 shows the Title bar. Icon Title System Head Voltage Cantilever Mode Mode Minimize Maximize Close Figure 2-7. Title bar 2-2-2. Menu Bar The Menu bar lists menu items that give you one-click access to instrument controls. More detailed explanation is provided in Chapter 3. “Menus”. Figure 2-8 shows the Menu bar and its items. Figure 2-8. Menu bar 2-2-3. Toolbar The Toolbar offers icons for direct access to the most frequently used menu items. 18 A more detailed description of the Toolbar is in Chapter 4. Chapter 2. Overview of XEP “Toolbar”. Figure 2-9 shows the Toolbar and related windows. Figure 2-9. Toolbar 2-2-4. Scan Control Window The Scan control window provides you with both several scan control parameters (such as the scan type, scan size, offset value, rotation angle, and scan rate) and several feedback parameters (such as set point, Z servo gain, and tip bias). The Scan Control Windows is described in detail in Chapter 7, “Scan Control Window”. Figure 2-10 shows the Scan control window. 19 Software Manual for XEP Figure 2-10. Scan control window 2-2-5. Scan Image View As shown in Figure 2-11 below, the Scan image view shows an image as it is generated line by line. Multiple images may be acquired simultaneously. Also, the Image view control window is displayed on the left side of the Scan image view. The Scan image view is described in detail in Chapter 9, “Scan Image View & Buffer Window”. Figure 2-11. Scan image view and Image view control window 20 Chapter 2. Overview of XEP 2-2-6. Trace Control Window The Trace control window shows the individual scanned trace line in real time that is provided by the Oscilloscope while an image is “built up” in the Scan image view. This trace line provides the height profile of an individual line as it is scanned in the whole scan area being imaged. The Trace Control Window is described in detail in Chapter 8, “Trace Control Window”. Figure 212 shows the Trace control window. Figure 2-12. Trace control window 2-2-7. Buffer Window The Buffer window stores every newly acquired image. ‘Automatic Image Storing’ icon Since the is selected by default, these images can be saved on your hard disk automatically. The Buffer window is described in detail in Chapter 9, “Scan Image View and Buffer Window”. Figure 2-13 shows the Buffer window. Figure 2-13. Buffer window 21 Software Manual for XEP 2-2-8. Output Window The Output window displays error messages that may be used for basic trouble-shooting when system issues occur. Figure 2-14 shows the Output window, which will display error messages in red letters (the boxed are in Figure 2-14). Figure 2-14. Output window 2-2-9. Monitor Window The Monitor window includes a quad-cell PSPD (Position Sensitive Photo Detector) display, an Error signal bar, and a Z scanner bar. The Monitor window can help you to view the status of the feedback as well as the Z scanner position and to align the laser beam onto the backside of the tip in the cantilever. This Monitor window is described in detail in Chapter 5. “Monitor Window”. Figure 2-15 shows the Monitor window. Figure 2-15. Monitor window 22 Chapter 2. Overview of XEP 2-2-10. XY Stage Control Window The XE-150 provides a motorized XY stage for large sample positioning beneath the AFM probe. The XY stage control window includes a square XY stage pad and a ‘GoTo’ control button that controls the XY stage’s motion more specifically. XY stage control window is described in detail in Chapter 6. ”Move Control Windows”. Figure 2-16 shows the XY stage control window. Figure 2-16. XY stage control window 2-2-11. Motors (Z Stage and Focus Stage) Control Window As shown in Figure 2-17, the Motors control window includes Z stage and Focus stage pads for controlling the motorized Z stage and the optical microscope of your system. Slow Fast Figure 2-17. Motors control window 23 Software Manual for XEP 2-2-12. Status Bar As is common in Windows-based software, the Status bar reports the function of the toolbars on which you place the cursor and also reports the mode of software as being either manual or maintenance mode. About conversion of the mode from the manual mode to the maintenance mode, please consult the section 3-3. Mode menu. Also, another status bar below the Buffer window displays the selected input signals which are used to generate images, the numbers of line that generate images in real time from start point, and the coordinates x and y of the marker you point at in an image. The two status bars are shown below in Figure 2-18. Figure 2-18. Status bar 24 Chapter 3. Menus Chapter 3. Menus The Menu bar directly below the Title bar contains a list of menus. This Menu bar contains menu items that you can use in order to control the XE system. Figure 3-1 shows the Menu bar and its corresponding items. Figure 3-1. Menu bar 3-1. File Menu The first item of the Menu bar is the File menu. When you open it, you can see the Exit menu, which closes the XEP program (see Figure 3-2). After you click ‘Exit’, you will see the ‘Exit’ confirmation message box asking if you want to close the XE data acquisition program. You can terminate the XEP by clicking the ‘Yes’ button as shown in Figure 3-3. 25 Software Manual for XEP Figure 3-2. Exit menu Figure 3-3. ‘Exit’ cofirmation message box 3-2. View Menu The View menu lists many different control windows which can be displayed on your XEP screen. In this View menu, you can select how control windows are displayed on the screen. In general, as soon as you open the XEP software, most all control windows will be displayed and you can add or hide various view menus to your screen as suits your preference. Figure 3-4 shows the contents of the View menu. 26 Chapter 3. Menus Figure 3-4. View menu 3-2-1. Status Bar The Status bar menu item is normally fixed on the bottom of the screen. Deselecting the Status bar from the View menu makes it disappear. As seen in Figure 3-5, the Status bar briefly describes the function of the toolbars as you point to them with the cursor, and it also indicates the modes of your software as being either manual mode or maintenance mode. In addition, another status bar below the Buffer window displays the selected input signals which are used to generate images, the numbers of line that generate images in real time, and the coordinates x and y of the marker you point at in an image. Figure 3-5. Status bar 3-2-2. Toolbar The Toolbar is also fixed automatically under the Menu bar. Though deselecting the Toolbar from the View menu makes it disappear, it is recommended that you should not hide the Toolbar, because it provides you with many icons, which will provide easy access to the most frequently used menu items. Figure 3-6 shows the Toolbar of the XEP program and the functions of each icon in the Toolbar are described in detail in Chapter 4. “Toolbar”. Figure 3-6. Toolbar 3-2-3. Show Trace Control Window You can view many signal traces at each Trace control window by selecting the ‘Show Trace Control Window’ in the View menu, which displays 27 Software Manual for XEP different signal traces of the Oscilloscope in real time during scanning. Furthermore, if you wish to display multiple signal traces simultaneously, you can add up to four trace control windows on your screen as shown in Figure 3-7. In this case, the ‘Show Trace Control Window’ menu and icon will no longer be enabled (see the outlined box in Figure 3-7). Figure 3-7. Show Trace control window 3-2-4. Hide Trace Control Window You can also hide all Trace control windows individually by selecting the ‘Hide Trace Control Window’ in the View menu or the ‘Hide Trace Control Window’ icon . Figure 3-8 shows the screen which has no more trace control windows displayed. In this case, ‘Hide Trace Control Window’ icon is no longer enabled (see the outlined box in Figure 3-8). 28 Chapter 3. Menus Figure 3-8. Hide Trace control window 3-2-5. Motors Control Window When you control the movement of the Z stage and Focus stage, you should display the ‘Motors Control Window’. By default, the Motors control window is always shown on the computer’s screen so that you can use the Motors control window while you make the tip approach to the sample surface with controlling the Focus stage. If the Motors control window is closed, you should select the ‘Motors Control Window’ in the View menu or click the ‘Motors Control Window’ icon to open the Motors control window (see Figure 3-9). Chapter 6. “Move Control Windows” discusses the Motors control window in detail. Figure 3-9. Motors control window 29 Software Manual for XEP 3-2-6. XY Stage Control Window By default, the XY stage control window is enabled and selected in the View menu of XEP for XE systems equipped with the motorized XY stage like XE-150. Therefore, the XY stage control window is shown on the XEP screen (Figure 3-10). You can make the XY stage control window disappear by deselecting the XY stage control window in the View menu or by clicking the ‘XY Stage Control Window’ icon . In the XY stage control window, you can make the probe head travel around the sample surface, covering an area of up to 150mm×150mm, by using the motorized XY stage. Further detailed description of the XY stage control window is provided in Chapter 6. “Move Control Windows”. Figure 3-10. XY stage control window 3-2-7. Output Window Selecting the ‘Output Window’ icon appear. makes the Output window This Output window is selected automatically at first. You can remove it from the XEP screen by deselecting it in the View menu. Figure 3-11 shows the Output window in which important information about the status of your system during operating is displayed. 30 Chapter 3. Menus Figure 3-11. Output window 3-2-8. Monitor Window By default, the Monitor window is selected in the View menu. So the Monitor window is already displayed in the XEP screen (see Figure 3-12). The Monitor window consists of three components: PSPD (Position Sensitive Photo Detector), the digital signal panels (A-B, C-D, and A+B), and Error signal bar and Z scanner bar. These items in the Monitor window will be described in detail in Chapter 5. “Monitor Window”. Figure 3-12. Monitor window 3-2-9. Scan Control Window Automatically selected ‘Scan Control Window’ in the View menu displays the Scan control window upon opening the XEP program (see Figure 3-13). Deselecting the ‘Scan Control Window’ in the View menu will make the Scan control window disappear on your screen. However, it is recommended 31 Software Manual for XEP not to deselect the ‘Scan Control Window’ since parameters in the Scan control window may need to be adjusted during scanning. Figure 3-13. Scan control window 3-2-10. Buffer Window By default, the Buffer window is selected in the View menu. So the Buffer window is already displayed upon opening the XEP screen (see Figure 3-14). The Buffer window displays and stores each newly generated image. These images are saved on your hard disk automatically when the ‘Automatic Image Storing’ icon is selected. NOTE! 32 Chapter 3. Menus If the ‘Automatic Image Storing’ icon is not selected, any images cannot automatically be stored and displayed in the Buffer window. In this case, you should manually store or save buffer images in the Scan image view (Please refer to chapter 9). Figure 3-14. Buffer window 3-2-11. Tile Docked Windows Whenever you click the ‘Tile Docked Windows’ in the View menu, docked windows that were selected in the View menu will be tiled in the same size on the XEP screen. Figure 3-15 compares the XEP screens before and after selecting the ‘Tile Docked Windows’. 33 Software Manual for XEP (a) (b) Figure 3-15. XEP screens before(above) and after (below) clicking ‘Tile Docked Windows’ in the View menu 3-3. Mode Menu The Mode menu contains several options that you may select to 34 Chapter 3. Menus change from Scan mode to either Trace mode or Calib mode Also, you can switch the Manual mode to the Maintenance mode. In addition, the ‘Change Password’ option is also included in this Mode menu. Figure 3-16 shows several mode menus that are available when you click the Mode menu. Figure 3-16. Mode menu 3-3-1. Head On. The ‘Head On’ is pre-selected in the Mode menu and this item turns the laser in the probe head On or Off. The probe head and the scanner must be turned off by deselecting the ‘Head On’ in the Mode menu or by clicking the ‘Head On/Off’ icon . 3-3-2. Scan Mode By default, the initiated XEP program window is set to be displayed in Scan mode. This display setup includes the Scan control window, for setting up a scan and acquiring an image, as well as the Scan image view where an image is displayed as it is acquired during a scan. Figure 3-17 shows the typical XEP screen when Scan mode is selected. 35 Software Manual for XEP Figure 3-17. Scan mode In addition, the Scan mode has three sub modes: Line Profile, F/D spectroscopy, and IV spectroscopy. These modes are described in detail below. 3-3-2-1 Line Profile The Line Profile mode supports the acquisition and saving of a line profile of a sample surface. You can activate Line Profile mode by selecting ‘Line Profile’ in the Mode menu or by clicking the ‘Line Profile Mode’ icon , on the Toolbar while XEP is operating in the scan mode. While in Line Profile mode, the scan image view window is replaced by the Line profile plot of either the Z detector or Topography. The Image view control window is replaced by the Low Pass Filter control window. Figure 318-1 shows the general Line Profile mode. The control functions for these windows are explained below. 36 Chapter 3. Menus Figure 3-18-1. Line Profile mode Acquiring and Saving a Line Profile A line profile can be acquired by clicking the ’Profile’ button (this correlates to the ‘Image’ button in Scan mode) on the Scan control window. The system repeatedly scans the Line profile measurement according to the number of times set by the user in the Scan config dialog. The measured profiles are then averaged and the single resulting Line profile is displayed. The acquired profile is not saved automatically to the buffer window. It should be saved to the buffer window manually by selecting the ‘Store’ command from the context menu (dotted rectangle in Fig 3-18-1) which appears when you right click the tab at the bottom of the Line profile plot window. Low Pass Filtering window Checking the LPF checkbox in the Low Pass Filtering window means that a low pass filter will be applied to the line profile. The cutoff wavelength can be adjusted by the slide bar or by entering a number into the text field. Averaging may be applied by using one of three options: • None - No averaging is applied. • All - All scanned lines are averaged and the result is displayed 37 Software Manual for XEP • Mov. - The center line and the adjacent two lines (if present) are averaged. Line profile plot window The Line profile is displayed in the Line Profile Plot window. . Right click on the obtained Line profile and a context menu like the one seen in the dotted rectangle of Fig 3-18-1 appears. This Line profile context menu is the same as the context menu displayed in the Trace control window and it is explained in detail in chapter 8-2. Input and Scan configuration The Input Configuration and Scan configuration dialog for Line profile mode is slightly different from those associated with Scan mode. In the Input Configuration dialog for Line profile mode, only the ‘Z detector’ or ‘Topography’ channel can be selected as inputs to be plotted in the Trace control window. In the Scan configuration dialog of Line profile mode, shown in Figure 3-18-2, ‘Points’ is the number of data points that will be used to acquire the Line profile, and ‘Lines’ is the number of times the line profile is to be measured before being averaged to display a single resulting Line profile. By default, these numbers are set to be 256 and 3, respectively. For a detailed explanation of the all parts of the Scan configuration dialog, refer to chapter 34-2. Figure 3-18-2. Scan config dialog in Line profile mode 38 Chapter 3. Menus 3-3-2-2 F/D Spectroscopy F/D spectroscopy mode supports the acquisition of Force vs. Distance curves which are useful for the investigation of a sample’s mechanical properties. The F/D curve is a plot of the force between the tip and the sample as a function of the extension of the Z scanner. You can activate F/D spectroscopy mode by selecting ‘F/D Spectroscopy’ in the Mode menu or by clicking the ‘F/D Spectroscopy Mode’ icon , on the Toolbar while XEP is in Scan mode. Figure 3-19-1 shows the F/D spectroscopy mode interface. CAUTION! F/D Spectroscopy Mode may cause serious damage to both the tip and the sample if excessive forces are applied to the cantilever. Figure 3-19-1. F/D spectroscopy mode display 39 Software Manual for XEP Scan Image view window You can select the points from the Image View window to indicate where you want to obtain F/D curves within the scan area . Commands related to this action are in the context menu which appears when you right click on the scan image. These commands include ‘Move Here’, ‘Add Point’, ‘Delete’ Point’, ‘Marker’, ‘Measure’ and ‘None’. ‘Move Here’ The ‘Move Here’ command moves the green crosshair on the image. The green crosshair is placed on the image where the right click was made and represents the position of the tip. Figure 3-19-2 shows how to move the crosshair from point A to point B using the ‘Move here’ command. Figure 3-19-2. Move Here command ‘Add Point’ The ‘Add point’ command adds a blue numbered crosshair to the point where the right click was made to make the context menu appear. The coordinates of these points are stored in the ‘Point list’ of the Spectroscopy control window. The Origin of the coordinate system is the center of the image. Figure 3-19-3 illustrates the addition of a point on the image and ‘Point list’. 40 Chapter 3. Menus Figure 3-19-3. Add Point command ‘Delete Point’ The ‘Delete Point’ command does not appear in the context menu unless a right mouse click is made at the point marked with a numbered blue crosshair by the ‘Add point’ command. With the ‘Delete Point’ command, you can cancel marking points created by the ‘Add Point’ command. To delete a point move the mouse pointer to the marked point and select ‘Delete point’ from the context menu. Figure 3-19-4 illustrates how to position the mouse pointer. Figure 3-19-4. Delete Point command ‘Marker’, ‘Measure’, ‘None’ These commands are explained in detail in chapter 9-1-5 41 Software Manual for XEP F/D Spectroscopy control window The Spectroscopy control window is displayed in Figure 3-19-5. This window contains many controls used for F/D curve acquisition. Functions of each control are described in detail in Table 3-1 Figure 3-19-5. F/D spectroscopy control window Table 3-1. Controls in the F/D spectroscopy mode Controls Function Repeat When ‘Repeat’ is checked, clicking the ‘Start’ button will result in the repeated acquisition of force vs. distance curves at the selected point. 42 Chapter 3. Menus Min Z scanner extends (toward the sample) until it reaches the min value distance from the offset position Max Z scanner retracts (away from the sample) to the max value distance from the offset position Auto Offset When ‘Auto Offset’ is checked, the offset position is determined by the set point value in the scan control window. When it is unchecked, the offset position can be modified manually from the spinner which appears below the checkbox when it is unchecked. Time Interval Minimum time elapsed between the acquisition of each F/D curve at different points when several curves are obtained in sequence. Average Number of F/D curves acquired in sequence before being averaged to a single resulting F/D curve. Points Number of data points in an F/D curve. Start Starts the acquisition of an F/D curve at the current position of the XY scanner which is marked by a green cross on the image view window. Stop Stops F/D curve acquisition. Clipboard Copies the most recent F/D curve data to a clipboard. You can paste (Ctrl+V) the copied data to Notepad or Excel. Down Speed Speed of Z scanner extension. Up Speed Speed of Z scanner retraction. Force Limit When force applied to the cantilever exceeds the force limit, the Z scanner does not extend any further. To protect the tip, lower the force limit. Acquire Acquires F/D curves for all the points listed in the point list. The result is saved to the Buffer window and may be exported as a text file from the Buffer window. Grid Divides the scan area into 32x32 or 64x64 grid. You can automatically acquire F/D curves at all the intersection points of the grid by clicking the ‘Acquire’ button. Point List Displays the coordinates of the points marked by ‘Add points’ in the Image view window. 43 Software Manual for XEP F/D curve plots window The x axis of the F/D curve plot represents the distance between the Z scanner and sample in the z direction. The default signal plotted on the x axis is Z scan, which is the voltage sent to the scanner to set its position. This voltage is converted to units of nm or Å to be displayed on the graph. The Z detector signal may also be plotted. This signal is produced by a strain gauge which is affixed to the stacked piezo of the Z scanner. The number of units per division of the horizontal axis is displayed at the bottom right of the graph. The y axis of this plot represents the force exerted on the cantilever. The signal plotted on the y axis represents the vertical deflection of the cantilever. The number of units per division for the vertical axis is displayed at the top left of the graph. The red portion of the F/D curve is obtained as the Z scanner is extended toward the sample and the blue portion is obtained as the Z scanner is retracted from the sample surface. Figure 3-19-6. F/D curve plots window Cal button The Cal button calibrates the vertical axis with a unit of force by calculating the relationship between the A-B signal and the Z scanner. Auto Scale Curves can be automatically scaled by clicking the ‘Auto’ button or by using the Auto Scale command in the context menu. 44 Chapter 3. Menus Show Origin The Show Origin command shows the X and Y axis of the F/D curve. Show Pair Cursor When you select the ‘Show Pair Cursor’, a pair of red vertical lines appear. These lines allow you to measure both the vertical distance and the horizontal distance between the two points that meet the trace line. Figure 8-7 shows an example of using the pair cursor. Show Line Cursor When you select the ‘Show Line Cursor’, one red line is generated in the F/D curve plot window. You can identify the coordinates(x, y) of any location on the trace line. Figure 8-8 shows an example of using the pair cursor. Scale Up/Down There are three ways to adjust the vertical scale of the F/D curve: using the ‘Scale Up/Down’ command in the context menu, using the spinner next to ‘Auto’ button, and using the mouse wheel. Zoom In/Out To zoom in to a region of the F/D curve, click and drag the mouse pointer to select the zoom region as shown in the left figure of Figure 319-6. To zoom out, use the ‘Zoom out’ command in the context menu. Acquiring and saving an F/D curve. There are two ways of obtaining an F/D curve. One is to use the ‘Start’ button, and the other is to use the ‘Acquire’ button. If you click the ‘Start’ button in the spectroscopy control window, An F/D curve will be obtained at the point marked by a green cross and displayed on the monitor. Then the obtained F/D curve data can be saved to the clipboard by clicking the ‘Clipboard’ button in the Spectroscopy control window. Data saved to the clip board can be pasted to Notepad or Excel by typing Ctrl+V. In 45 Software Manual for XEP this case, only the data is saved in the text file and the F/Dcurve itself is not saved. If you click the ‘Acquire’ button in the spectroscopy control window, F/D curves will be acquired at all the points in the F/D point list. That is, the points indicated by a blue cross will be obtained and displayed. In this case, the curve itself is saved as a tiff file in the buffer window and can be exported later as a text file. To save the image to a file from the buffer window, Right click on the saved images in the buffer window and select View information. The Image Information dialog will appear. Figure 3-19-7. Image Information window The Image Information window consists of the ‘Point list’ and the ‘F/D curve plots window’. Click the point in the list. The number and the coordinates of the clicked point will appear in bold and the F/D curve at the clicked point will be displayed in the F/D curve plots window. The displayed curve can be analyzed in the F/D curve plot windows as explained in the previous section. The displayed curve can be saved as a tiff file by clicking the ‘Save As’ button and it may be exported as a text file by clicking the ‘Export’ button. 46 Chapter 3. Menus 3-3-2-3 I/V Spectroscopy I/V spectroscopy mode supports the acquisition of Current (I) vs. Voltage (V) curves to investigate electrical properties of a sample surface. An I/V curve is a plot of the current as a function of the tip bias voltage that is applied to the sample. You can enable the I/V spectroscopy mode by selecting I/V spectroscopy in the Mode menu or by clicking the ‘I/V Spectroscopy’ icon in the Toolbar while the XEP is in Scan mode. In I/V spectroscopy mode, the Scan control window and Trace control window are replaced by the Spectroscopy control window and the I/V curve plot window, respectively. Figure 3-20-1 shows the I/V spectroscopy mode interface. Figure 3-20-1. I/V spectroscopy mode Scan Image view window As in F/D spectroscopy mode, you can select the coordinate locations where you will obtain the I/V curves in the Image View window. Commands related to this action are in the context menu which appears when you right click on the image. Commands in the context menu are the same as for F/D 47 Software Manual for XEP spectroscopy mode. Please see chapter 3-3-2-2 for further explanation. I/V Spectroscopy control window Table 1, shown below, lists each control in the Spectroscopy control window with a brief description of its function. Figure 3-20-2. I/V spectroscopy control window Table 1. Controls in the I/V spectroscopy mode Controls Function Repeat When ‘Repeat’ is checked, clicking the start button will result in the repeated acquisition of I/V curves. Min 48 Minimum tip bias value Chapter 3. Menus Max Maximum tip bias value. Period Time elapsed while changing the tip bias from the minimum to the maximum value to obtain the I/V curve. Time Interval Minimum time elapsed between the acquisitions of each I/V curve at different points when several curves are obtained.. Exact time interval is not guaranteed. Average Number of the times the I/V curves are measured before they are averaged to display a single resulting I/V curve. Points Number of data points in an I/V curve. Start Starts the acquisition of an I/V curve at the current position marked by a green cross. Stop Stops the acquisition of I/V curves. Clipboard Copies the most recent IV curve data to a clipboard. You can paste (Ctrl+V) the copied data to Notepad or Excel. Piezo- Acquires a hysteresis curve starting from 0V response Acquire Acquires I/V curves for all the points given in the point list. The result is saved to the Buffer window and may be exported as a text file from the Buffer window. Grid Divides the scan area into a 32x32 or a 64x64 grid. You can automatically acquire F/D curves at all the intersection points of the grid by clicking the ‘Acquire’ button. Point List Displays the coordinates of the points marked by ‘Add points’ in the Image view window. I/V curve plots window The x axis of the I/V plot represents sample bias, and the y axis of this plot represents the resulting current or log current. The default signal plotted on the horizontal axis is sample bias. The number of units per division for the horizontal axis and the vertical axis is displayed at the right bottom and top left of the graph respectively. The red portion of the I/V curve is obtained while the voltage is increased from minimum to maximum value, and the blue portion of the curve is obtained while the voltage is decreased from the maximum to minimum value. 49 Software Manual for XEP The commands and the user interface of the I/V curve plots window is the same as in the F/D curve plots window. Please see ‘F/D curve plots window’ in chapter 3-3-2-2 for a detailed explanation. Acquiring and saving an I/V curve The process of acquiring and saving an I/V spectroscopy curve is identical to the process for acquiring an F/D spectroscopy curve. Please see chapter 3-3-2-2 for the detailed process. 3-3-2-4 NanoIndentation NanoIndentation enables the users to perform indentation tests to measure the material properties such as hardness and Elasticity in nano scale. You can enable the NanoIndentation mode by selecting NanoIndentation in the Mode menu or by clicking the ‘NanoIndentation’ icon in the Toolbar while the XEP is in Scan mode. Single indentation cycle consists of loading, holding and unloading processes. A whole indentation measurement process may consist of a single cycle, or can be divided into many cycles with gradually increasing loads. Figure 3-21-1. Single Indentation cycle in Z scanner mode (left) and Setpoint mode (right) Setpoint mode and Z scanner mode NanoIndentation has two sub-modes, Setpoint mode and Z scanner 50 Chapter 3. Menus mode. Each sub-mode uses the different parameters to control the indentation cycle. In ‘Setpoint mode’, the force (load) between the tip and sample is varied as a linear function of time while the corresponding position of the Z scanner is measured. In ‘Z scanner mode’, the Z scanner position is varied as a linear function of time while the corresponding load applied to the tip is measured. Indenter control window. Parameters related to controlling the measurement process can be changed from the Indenter Control Window. Figure 3-21-2. Indenter Control Window Table 1. Controls in the NanoIndentation mode Controls Function Load Control When this box is checked, NanoIndentation is performed in setpoint mode. When unchecked, NanoIndentation is performed in Z scanner mode Min / Max Minimum / maximum value of the parameter (Z scanner 51 Software Manual for XEP position in Z Scanner Mode, and force applied to the tip in Setpoint Mode) that determines the travel range of the indenter during the whole indentation measurement Hold time Amount of the time per cycle that the indenter is held at the deepest indentation position before it is lifted Points Data points in the obtained indentation curve Unload limit Ratio of the unload distance respect to the Travel distance per cycle Drift measure Amount of the time that the indenter measures the drift of the scanner after all cycles are complete Start /Stop Starts and stops the measurements. Obtained curves are stored in the buffer window Clipboard button Copies the measured data to clipboard, so that it can be pasted to other programs such as Notepad or Excel Down/Up Speed of the indenter movement speed Loading Cycle Number of the indentation cycle into which the whole indentation process will be divided 52 Chapter 3. Menus NanoIndentation plots window The X axis of the indentation curve plot represents the position of the Z scanner relative to the cantilever position at the approach. Z scan or Z detector signal can be plotted on the x axis. The number of units per division of the horizontal axis is displayed at the bottom right of the graph. Z scan signal is the voltage sent to the scanner to set its position. This voltage is converted to units of nm or Å to be displayed on the graph. The Z detector signal is produced by a strain gauge which is affixed to the stacked piezo of the Z scanner. The Y axis of the indentation curve can be plotted by using Force, ADC AUX1 and ADC AUX2 signal. Force signal is the force between the tip and sample surface during the indentation process. ADC AUX1 and ADC AUX2 signal is reserved for customized experiments. The number of units per division for the vertical axis is displayed at the top left of the graph. Figure 3-21-3. NanoIndentation Plots Window Show Origin The Show Origin command shows the X and Y axis of the indentation curve. Scale Up/Down Scale Up/Down command increases/decreases the vertical scale of the 53 Software Manual for XEP indentation curve. Vertical scale of the curve can be also adjusted by using the spinner next to ‘Auto’ button or by using the mouse wheel after clicking the curve once. . Auto Scale Auto Scale command automatically adjusts the vertical scale of the indentation curve so that the curve fits in the plot window. Clicking the ‘Auto’ button has the same function. Zoom In/Out To zoom in to a region of the F/D curve, click and drag the mouse pointer to select the part of the curve to be zoomed in. To zoom out, use the ‘Zoom out’ command in the context menu. Acquiring NanoIndentation measurements 1. Turn on the system and load the XEP program. Nanoindentation functions are enabled in XEP versions 1.2.8 or higher. 2. Turn off the laser by clicking clicking . Select ‘C-AFM’ as your head mode with ‘Indenter’ for your cantilever type. 54 . Enter the ‘Part Config’ dialog by Chapter 3. Menus 3. Approach the tip to the sample. For detailed instructions, please see the XE-100 User’s Manual. 4. First, obtain the topography of the region where the nanoindentation will be done. 5. Select [Mode] ->[Scan Mode] -> [Nanoindentation] from the menu bar, or click from the toolbar. 6. Then place the mouse pointer on the point of the image where the indentation will be done, right click and select ‘Move here’ to bring the tip to the point. The selected point will be marked with green crosshair. 7. Set the appropriate parameters for indentation and click ‘Start’ button to start an indentation. 8. The obtained indentation curve will be displayed in the indentation curve plot window. Also the curve will be automatically saved in the buffer window of the XEP if the ‘Automatic Image Storing’ button in the toolbar is activated. 9. Analyze the curve from either Indentation curve plots window or from 55 Software Manual for XEP Image information window. Image information is activated by right clicking on the indentation curve saved in the buffer window and select ‘view information’ command. Save the data as image or text file if needed. 10. Exit from the NanoIndentation mode and obtain the image of the sample surface again. You can see the indented points on the image. Send the obtained image to the XEI and analyze. Figure in the next page shows the topography image of the sample after the indentation experiment. Indented points and materials piled up around the indented points can be seen. Maximum load for point 1, 2, 3 was 1000 nN, 2000 nN, 3000 nN respectively. Obviously, the indentation depth increases with the increasing maximum load. Point 4 was indented with maximum load 3000 nN two times, thus more indented materials are piled up around the indented point. 1 4 1 2 3 2 3 56 Chapter 3. Menus 3-3-3. Trace Mode You can convert to the Trace mode by selecting ‘Trace Mode’ from the Mode menu or by clicking the ‘Trace Mode’ icon . You can plot any available system signal selectable from the input configuration as a function of another signal you select as the ‘driving source’. The system drives the selected ‘driving source’ by a sawtooth wave function of time while the change in the input signal is plotted. Figure 3-21-1 displays the trace mode process. Figure 3-22-1 Process of Trace plotting Figure 3-21-2 shows the typical Trace mode display which consists of the XY Trace control window and the XY Trace plot. 57 Software Manual for XEP Figure 3-22-2. Trace mode XY Trace Plot window The input signal is plotted as a function of the driving signal in the Trace Plot window. Each signal selected in the Input Config dialog. (See section 3-41) will be plotted in a separate Trace plot window. The horizontal X axis of the plot displays the signal you selected as the driving source. The vertical Y axis of the plot displays the signal you selected from the signal Input Config dialog. The units per division of both the x and y axis are displayed in the upper left corner and lower right corner of the graph, respectively. The red trace curve is a trace of the input signal while the driving source is increasing. In figure 3-21-1 the red trace curve corresponds to a dotted curve which is plotted while the driving source changes from 0 to 4. The blue trace curve is a trace of the input signal while the driving source is decreasing. In figure 3-21-1 the blue trace curve corresponds to the solid line. You can analyze the trace curve utilizing the commands available in the 58 Chapter 3. Menus context menu. These are the same commands seen in the context menu of the F/D curve plots window. Please see the ‘F/D curve plots window’ in chapter 3-3-2-2 for a more detailed explanation. XY Trace Control Window Driving Source The ‘Driving Source’ list displays the list of signals that can be selected as a driving source. The signal selected as the driving source will be driven by a sawtooth wave function of time. Figure 3-22 shows the sets of signals available in the Driving Source list. The ‘Z scan’ is selected by default as the driving source since the Z scan, which represents the driving voltage of the Z scanner, is the most frequently used signal to generate a trace scan. Figure 3-23. Driving Source and Definition of From / To, and Period, ‘From’ and ‘To’ 59 Software Manual for XEP You can set the limits of the sweep range of the driving source in the ‘From and To’ text fields. You can specify each item by changing the value in the ‘From’ text field and the ‘To’ text field respectively. The maximum available range is from -1 to +1. This range is selected by default. The value of ‘-1’ in the ‘from’ text field represents the minimum output voltage. The value of ‘+1’ represents the maximum output voltage. For example, If the available voltage range of the driving source is from 0 to 50, and ‘From’ and ‘To’ is set -0.5 and 0.5 respectively, the voltage range will be from 12.5V to 37.5V. It is recommended to use the maximum allowed range, but you can adjust the range by entering new values in the ‘From’ and ‘To’ spinners (i.e. text field and spin button). See Figure 3-22. Period In the ‘Period’ spinner, you can specify the sweep velocity (period of the sawtooth signal) of the scanner. The allowed range of values is from 0.1 to 100 seconds. The smaller the period value, the faster the sweep velocity. See Figure 3-22 Points In the ‘Points’ list, you can select the number of data points (64, 128, 256, 512, 1024, 2048, or 4096) that are collected to generate the plot. To get a higher resolution plot, you should set the spinner to collect more data points. Sweep Clicking the ‘Sweep’ button initiates sweeping the scanner (or other selected drive sources) in order to generate the trace plot. Stop button Stops the sweeping of the drive signal. 60 Chapter 3. Menus XY Scanner ON(OFF) Turns the XY scanner On or Off. You should turn off the XY scanner before sweeping the drive signal. Z servo Turns the Z servo On or Off. You should disable the Z feedback loop by turning the Z servo off before you sweep the Z scanner’s motion (that is when you use the Z Scan as the driving source). Clipboard button Saves the data of the current curve on the trace plot window to the clipboard. 3-3-4. Calib Mode Selecting Calibration mode opens several Calibration dialogs which allow you to calibrate the various instrument components such as XY scanner, Z scanner, and Approach. Initially, Calib mode is disabled and you can enable the Calib mode after you enter the password which is requested when you select Maintenance mode. After entering the password, you can then select the Calib mode in the Mode menu or by clicking the ‘Calib Mode’ icon . For calibration, all you need to do is to enter both the measured values and the desired values and then click the ‘Calibrate’ button . As a result, the instrument component is automatically calibrated. For example, when you measure the standard sample which has a 3µm×3µm Grating and 130nm step heights, the desired value of three gratings in x (or y) direction would be 9µm (3µm×3gratings=9µm). However, if the actual measured value is 9.8µm, it is necessary to calibrate the x scanner or the y scanner. So, you should enter 9.8µm in the ‘Measured value’ text field and 9µm in the ‘Desired value’ text field. For detector’s coarse calibration, you should enter the Offset value, how the detector shifts from the origin in x and y direction. You can estimate the Offset values when the x and y coordinates of the origin are nonzero in the Oscilloscope screen despite the scan size and the offset value (x, and y) are 61 Software Manual for XEP set to be zero. Then, the x and y detectors can be calibrated by entering the Offset value and then clicking ‘Coarse cal’ button . As shown in Figure 3-23-1, the Calib mode consists of three sub modes: XY scanner, Z scanner, and Approach. Furthermore, the advanced calibration can be performed by selecting the ‘Advanced Calibration’ option in the Tools menu while the XEP is in Calib mode. After you select the ‘Advanced Calibration’ , you can calibrate many components manually by entering the numbers. However, only experienced users are recommended to use this advanced calibration method. Figure 3-23-2 shows the Advanced Calibration dialog. Figure 3-24-1. Calib mode 62 Chapter 3. Menus Figure 3-24-2. Advanced Calibration dialog 3-3-5. Maintenance Mode For advanced or more experienced users, some more skillful options can be supported at this Maintenance mode. However, beginners are recommended not to use this mode which may bring about serious damage on the system. Maintenance mode allows you to move the probe head even though the beam bounced laser intensity is too low (in that case, you cannot make the probe head approach to the sample surface in the Manual mode). Furthermore, only in Maintenance mode, you can enable Calib mode. To open Calib mode, you should first change from the manual mode to the maintenance mode and enter the required password. 3-3-6. Change Password When you want to convert from the manual mode to the maintenance mode, you need to input the required password into the software. Also, it is possible to change password for your security. By default, the first original 63 Software Manual for XEP password is set to be ‘cantilever’. It is recommended to change the password for your security. Changing password goes through three steps: First, enter the original password. Second, enter the new password. Finally, enter the new password again. Figure 3-24 shows the process of changing the password. Step 1 Step 2 Step 3 Figure 3-25. Change password 3-4. Setup Menu The Setup menu contains menu items used to set important operating parameters for your instrument. The Setup menu consists of Input Config, Scan Config, Approach, XY ServoScan, Frequency Sweep, Part Config, current Amplifier, and Aux DAC. click the Setup menu. 64 Figure 3-25 shows the Setup menu items when you Chapter 3. Menus Figure 3-26. Setup menu 3-4-1. Input Config The ‘Input Config’ dialog (see Figure 3-26) is opened when you select the ‘Input Config’ from the Setup menu or click the ‘Input Config’ icon ,. The following options are available in the Input Config dialog: z You can select input signals such as Topography, Error signal, Z detector, etc, which can be used to generate images. (Up to 8 signals for Image pixel resolutions ranging from 64×64 to 2048×2048 and up to 4 signals for an image resolution of 4096×4096.) z The units used to display the signal trace on the Trace control window can also be selected here. z Additionally, you can select the desired image processing modes that will be used for collecting data (AC track and AutoFlat) and the scan direction for the fast scan direction (forward and/or backward). The controls in the Input Config dialog are described below in further detail. NOTE! 65 Software Manual for XEP The Input Config menu item is deactivated when the probe head is Off. If the probe head is Off, you can turn it On by either selecting Head On from the Mode menu or by clicking the Head On/Off icon on the Toolbar. Figure 3-27. Input Config dailog ‘Setup’ button By clicking the ‘Setup’ button , you can open the ‘Select Input’ dialog which shows a list of signals that can be used to generate images (Figure 3-27(a)). You can select the signals that are used frequently for acquiring data from the list of ‘Available Inputs’. The selected signal will be registered to the ‘Selected Input’ list in the Input Config dialog. Any signals you selected from this Selected Input list will be listed in the ‘Signal Name’ list in the Trace control window (see Figure 8-2) and be monitored in real time on the Trace control window. Up to 8 signals for Image pixel resolution ranging from 64×64 to 2048×2048 and up to 4 signals for 4096×4096 can be listed and monitored. Figure 3-27 shows the ‘Selected Input’ dialog. The ‘Remove all’ button makes all of the input signals disappear in the Selected Input list. 66 Chapter 3. Menus (a) (b) Figure 3-28. Selected Input dailog (a) and click ‘Remove all’button (b) Selected Input Displays the list of signals that have been selected from the ‘Select Input’ dialog. These signals will be used to generate images. The Topography signal is selected by default. Unit The Unit combo box enables you to select the units that are used to display the signal trace on the trace control window. Depending on the type of signal you are collecting, you can select from an appropriate list of units for the signal in the ‘Unit’ text field (see Figure 3-28). 67 Software Manual for XEP Figure 3-29. Selecting units for signals LPF The ‘LPF’ field enables you to select the time interval (from 0 to 10 in arbitrary units) used to replace each data pixel with an averaged value from the collected data. An increase in the number corresponding to the ‘pixel’ means that more sampling data points are averaged to obtain each data pixel. LPF is applied during a scan and permanently affects your data. It is recommended to set the time interval between 0 and 1 by either entering the numbers directly or by clicking the spin button to increase or decrease the LPF value. When surface features are hidden by high frequency noise, the LPF decreases the effect of such high frequency contributions. AC Track AC track is a data processing routine that adds or subtracts an offset to each line of data relative to the average offset of the surrounding line(s) of data.. AC track is automatically applied during the image obtaining process to prevent the image color scale from saturating by keeping the average color level of each line of data constant. But this “real time” applied AC track is canceled after the image acquisition is complete. This is the reason why the image you see during the imaging process and the image you see after imaging is complete are different. 68 Chapter 3. Menus However, If the ‘AC Track’ check box is checked, AC track is not canceled even after the image acquisition is complete and the data line averaging is permanently applied to the image. NOTE! In order to select the AC track data processing mode for an image, you should first select the appropriate input signal that will be used to generate the image from the ‘Select Input’ dailog. AC track is especially useful when the sample is quite uniform in that the probe tip does not experience sharp slopes or valleys after the first line of data is acquired in the slow scan direction. AC track is recommended for relatively flat samples with fine structures and uniform features. AC track is not recommended for samples with large surface topography differences. AutoFlat To apply an automatic slope correction to an image after it is acquired, you should select the ‘AutoFlat’ check box. A first order flattening will be applied to the data. Auto Flat will compensate for tilt of the sample surface relative to the sample scan plane. Scan Direction The scan direction check boxes are used to activate data collection in the forward and backward scan directions, respectively. The forward scan is selected by default. You can select the scan directions for each signal you have selected as input signals by checking these ‘Scan Direction’ check boxes. If x is set to be the fast scan direction, by default, the forward scan direction check box is enabled and data is collected in the forward scan direction (from left to right). You can change the scan direction easily by disabling the forward scan check box and then enabling the backward scan direction check box . As a result, the scan direction will be reversed (from right to left). On the other hand, if y is set to be the fast scan direction from the scan control window, data is collected in the forward scan direction (from bottom to top) by default. The data can be collected in both forward and backward scan 69 Software Manual for XEP directions by enabling both check boxes. 3-4-2. Scan Config The ‘Scan Config’ dialog (see Figure 3-29) is opened when you select ‘Scan Config’ from the Setup menu or click the ‘Scan Config’ icon . The following options are available in the Scan Config dialog: • Select the number of data pixels in an image (for example, 64×64, 128×128, 256×256, 512×512, 1024×1024, 2048×2048, or 4096×4096). • Acquire each line trace in the fast scan direction using a sine waveform instead of a sawtooth waveform to eliminate glitches that may occur at the edge of an image • Enter the Over Scan percentage of the scan area. The ‘Over scan’ area will not be displayed in the Scan image view NOTE! The Scan Config menu item is enabled only when the probe head is turned on. Be sure that the head is on by clicking the Head On/Off icon . Figure 3-30. Scan Config dialog Image pixel size You can specify the resolution of an image by selecting the appropriate 70 Chapter 3. Menus image pixel size from the ‘Image pixel size’ text field (see outlined box at the left side of the Scan Config dialog in Figure 3-29). The ‘Image pixel size’ text field enables you to select the number of data points used to collect an image: 64×64, 128×128, 256×256, 512×512, 1024×1024, 2048×2048, or 4096×4096. To select 4096×4096, the total number of selected input signals must be 4 or less. . If the number of selected signals exceeds 4, a warning message, ‘Too much memory required’ will appear. For the same scan area, the larger the selected pixel size value will offer a higher lateral resolution but, image acquisition times will be longer. Thus, in order to increase the lateral resolution of an image, it is recommended to decrease the scan size while keeping the pixel size constant Sine scan If the ‘Sine scan’ option is active, the voltage applied to the piezo actuator of the XY scanner is in a sine waveform instead of a sawtooth waveform which is ordinarily used. The piezo actuator stretches as an applied voltage increases, and it contracts as the applied voltage decreases. Hence, the speed of the actuator’s movement, which is the time derivative of the actuator’s stretching and contracting, is proportional to the time derivative of the voltage applied to the actuator. In ordinary cases, a sawtooth waveform has a constant derivative and thus there is a constant actuator speed. In the case of a sine waveform, however, the derivative is not constant and is almost zero when the applied voltage reaches the highest value. Thus the scanner does not move at constant velocity and the scanner moves slowly at both ends of each scan line and faster in the middle of each scan line, giving the scanner time to adjust its position before collecting the next line of data. On some samples, selecting Sine scan may help to eliminate glitches at the ends of scan lines that result from abrupt directional changes of the probe. Over scan ‘Over scan’ is selected to adjust the range of movement of the scanner in the fast scan direction beyond the selected scan size that is to be acquired in the Scan image view. You can set the scanner’s motion to a value greater than the image size by entering a percentage value for Over scan. While scanning at the edge of a scan area, interactions between the tip and the 71 Software Manual for XEP sample or scanner instabilities at the scanner’s turnaround point may produce streaks at the edge of an image. This problem can be eliminated by adjusting the Over scan. For example, if you specify a scan size of 20µm in the ‘Scan Size’ text field in the Scan control window, and an over scan value of 10%, the actual scan size used to collect the image will be 20µm+20µm×10%=22µm but only 20µm of the 22µm image will be shown in the Scan image view and saved as data. Image Reformat When the ‘Image Reformat’ is selected, the XEP program will automatically reformat the image to fix any inaccuracies in the image data created by the Piezo hysteresis after the imaging is completed. The actual x, y motion from the piezo actuators are tracked by the x, y scanner detector, and the raw data is calibrated with the actual x, y motion data. Interlace In standard scanning (when ‘Interlace’ is disabled), the probe always moves across the same line trace twice, once in the forward scan direction and once in the reverse direction. When the ‘Interlace’ option is enabled, however, the probe does not move across the same line trace twice. This item will be available in the future. Table 3-3 compares standard scanning with Interlace scanning. The advantage of Interlace scanning is to collect data over the same area more quickly than with standard scanning. Figure 3-30 shows the differences between Standard scanning and Interlace scanning. Table 3-3. Standard scanning vs. Interlace scanning Standard scanning • • The probe moves along a line Interlace scanning • trace in the fast-scan direction and trace in the forward fast-scan collects data points. direction and collects data points. The probe moves back along the • same line trace in the opposite direction. • 72 The probe moves along a line The probe steps in the slow-scan The probe steps in the slow-scan direction to the next line trace. • The probe moves along the next line in the reverse fast-scan Chapter 3. Menus direction to the next line trace. • direction and collects data. The probe scans the next line trace in the fast-scan direction and collects data. Standard scanning Interlace scanning Figure 3-31. Standard scanning and Interace scanning Detector driven ‘Detector driven’ image acquisition enhances the Servo Scan’s performance by controlling the time intervals between sampling data points. In this case, data points are acquired when the detector outputs match the intended x, y position of the scanner. However, when detector driven is not selected, data points are still taken at equal time intervals during the signal trace in the fast direction. Compress Image Data When you save image data that has a large image pixel size (for example, 1024×1024, 2048×2048, and 4096×4096), you can save this data with a smaller file size on your hard disk by compressing it. This item will be available in the future. 3-4-3. Approach The Approach is the process by which the Z scanner is moved toward the sample surface with a controlled velocity until the reference signal reaches the set point value. The Approach dialog is used to select the Approach type that will be used to control the motion of the Z scanner during the approach process. In general, the Approach parameters are optimized by default based on your hardware configuration. Therefore, you do not have to adjust the 73 Software Manual for XEP approach parameters. The Approach type may be changed, however, using this dialog. The Approach dialog shown in Figure 3-31, is opened when you select ‘Approach’ from the Setup menu. Combine mode is only used for the industrial version of the XEP. Figure 3-32. Approach dialog Approach Type: Incremental, Quick, Slow The ‘Incremental’ approach type brings the tip close to the sample surface in incremental sets of motor steps. The system checks if the set point has been reached after each set of motor steps until the reference signal reaches the set point. The incremental approach is recommended to best preserve the tip’s sharpness. On the other hand, the ‘Quick’ or the ‘Slow’ approach type brings the tip close to the sample surface in continuous motor steps without checking until the reference signal reaches the set point. The difference between the ‘Quick’ and the ‘Slow’ approach type is the speed used to bring the tip close to the sample surface. The velocity of the tip’s approach can be adjusted in the Approach section of Calib mode. 74 Chapter 3. Menus Z Scanner Position The Z Scanner Position setting allows for the adjustment of the height of the Z Scanner when the tip comes in contact with the sample surface. A zero value will set the scanner position in the center of the Z scanner bar, while a positive and negative values will set the scanner in a contracted or extended position respectively. 3-4-4. XY Scanner Setup XY Scanner Setup is the feedback loop designated to correct the nonlinearity of the XY scanner. You can enable and disable the XY Scanner Setup and also set several parameters that control the operation of the XY Scanner Setup. However, these parameters do not need to be adjusted since the system automatically optimizes the XY Scanner Setup. You can open the ‘XY Scanner Setup’ dialog (see Figure 3-32) by selecting the ‘XY Scanner Setup’ from the Setup menu. The XY Scanner Setup mechanism uses an XY detector to continuously monitor and adjust the position of the XY scanner. This detector is connected to the x,y feedback loop when the XY Scanner Setup is activated. The X and Y feedback parameters control the operation of the x,y feedback loop for Scanner Setup. There are several controls in the XY Scanner Setup dialog as follows. Figure 3-33. XY Scanner Setup dialog 75 Software Manual for XEP ON Selecting the ‘ON’ option enables the x,y feedback loop for Scanner Setup. The feedback loop corrects for scanner nonlinearity in the x and y directions by adding a correction to the voltage that is sent to the xy detector of the scanner. OFF Selecting the ‘OFF’ option turns off the x,y feedback loop for Scanner Setup. The x,y feedback loop is disabled and cannot correct nonlinearity in the scanner’s x, y position. If you want to acquire an image with a scan size that is less than 1µm, it is recommended that you turn the Scanner Setup off since images with the XY Scanner Setup on will have a higher noise level. Hold When the Scanner Setup is disabled by selecting ‘Off’, the extra voltage applied to the scanner to correct error from nonlinearity suddenly vanishes and the position of the probe changes. Selecting the Hold option, however, disables Scanner Setup while maintaining the position of the probe on the sample surface. ‘Hold’ is useful when you need to take an image with Scanner Setup on for a large scan area, and then image an area of less than 1µm from within the original data with the Scanner Setup turned off. For instance, when you want to image a 1µm area within a 40µm scan area that was imaged with Scanner Setup, it is convenient to use the Hold option for acquiring the 1µm image. Figure 3-33 indicates the scan area where the ‘Hold’ option should be applied. Hold 1µm 40µm Scanner Setup on Figure 3-34. Scanner Setup On vs. Hold 76 Chapter 3. Menus Integral Gain You can adjust the gain value of the x,y feedback loop when Scanner Setup is On, by entering values in the ‘Integral Gain’ text field for the X and Y filters. The available range of values is from 0.1 to 1 in arbitrary units. Be sure that the same values are used for both the X and Y filters. Integral Ratio You can adjust the damping frequency of the X and Y filters by entering values in the ‘Integral Ratio’ text field. The available range of values for the integral ratio is from 0.1 to 1 in arbitrary units. Make sure that the Integral Ratio values for the X and Y filters are the same. OK Your new selections will be applied to the system and the dialog is closed. Cancel This button ignores any changes you made in the XY Scanner Setup dialog and returns the parameters to their previous values and closes this dialog. 3-4-5. Frequency Sweep You can open the ‘Frequency Sweep’ dialog by selecting the ‘Frequency sweep‘ option from the Setup menu or by clicking the ‘Frequency sweep and setup’ icon from the Toolbar. The Frequency sweep dialog is used to set some important scan parameters which are necessary for taking an image in NC-AFM, DFM, EFM, MFM, and FMM mode. Figure 3-34 shows the Frequency Sweep dialog which includes a Frequency sweep plot, a Report section and some Controls. NOTE! 77 Software Manual for XEP The Frequency Sweep dialog can be enabled only when the probe head is On. If the probe head is Off, turn it on by either selecting ‘Head On’ from the Setup menu or by clciking on the related icon . Frequency Sweep plot The Frequency Sweep dialog displays the system response curve by, plotting the cantilever’s vibration amplitude vs. frequency which is generated when the system drives the cantilever through a frequency sweep. You can determine the resonant frequency of the cantilever by using this plot. Figure 3-35. Frequency Sweep dialog Report • Start Freq - Represents the starting frequency of the response curve in units of Hz. • Selected Freq - Represents the drive frequency for cantilever vibration. The drive frequency is the selected frequency of the AC voltage signal from the sine wave generator that drives the cantilever to vibrate. The drive frequency is selected based on the value of the cantilever’s free space resonant frequency. The crosshair located near the main resonant peak on the resonant curve marks the drive frequency for the cantilever. 78 Selected frequency can be changed by dragging the Chapter 3. Menus crosshair with your mouse. • Set Point - Displays the set point value. This is the reference value of the cantilever vibration that is maintained constant by the feedback loop during a scan. The default value of the set point is represented by a horizontal red line that cuts across the response curve at about 2/3 of the maximum peak height. You can adjust the set point value easily by dragging the horizontal red line up or down on the response curve. The new set point value is automatically updated. Also, the set point value can be changed in the scan control window while imaging. Control • Drive % spinner - You can set the drive amplitude of the drive signal for cantilever vibration by entering the numbers directly in this text field or scrolling the spin button. The drive amplitude is the amplitude of the AC voltage signal from the sine wave generator that drives the cantilever to vibrate. This number ranges from 0.1 to 100 percent of the maximum allowable applied voltage to the piezoelectric transducer which oscillates the cantilever. The default value is 25%. In the NCAFM or MFM mode, too small drive amplitude may result in decreased sensitivity as the system attempts to adjust to very small changes in the vibration amplitude while scanning. Otherwise, amplitude that is too large may result in contact between the sample surface and the tip which may damage the tip and the sample surface. It is recommended to adjust the drive amplitude to make the strongest peak fall within the first three units of the vertical scale. • Refresh button - You can have the system regenerate the frequency response curve for the cantilever by clicking the refresh button. • Zoom In or Out Button – Number on the top left of the frequency sweep plot is the size of vertical scale unit which is the amplitude and the number on the bottom right is the size of horizontal scale unit which is the frequency. You can zoom in or out from the horizontal frequency range by clicking the Zoom In or out button. To Zoom In or Out from the vertical frequency range use wheel of the mouse. 79 Software Manual for XEP • Show Phase check box - You can view the phase of the response curve by checking this check box. • Amplitude Feedback check box - You can make the system perform the amplitude feedback without phase signal when you want to take an image with only the amplitude signal. It is recommended to use this option when the phase noise is too large. 3-4-6. Part Config You can open the ‘XEP Part selection’ dialog (see Figure 3-35) when you select ‘Part Config’ from the Setup menu or click the ‘Part Config’ icon from the Toolbar. The XEP Part selection dialog is used to configure the software to match your system’s hardware configuration. Configuration of the software means that you select calibration parameters for the hardware components that are installed on your system. NOTE! The Part Config menu item is deactivated when the probe head is On. Thus, turn it off by either deselecting ‘Head On’ from the Mode menu or clicking the Head On/Off icon . Figure 3-36. XEP Part selection dialog Table 3-4 shows several parameters in the XEP Part selection dialog 80 Chapter 3. Menus for your XE system Table 3-4. Parameters in the XEP Part selection dialog Parameter Function Head Mode Allows you to select the type of probe head that is installed (ex. C-AFM, NC-AFM, EFM, MFM, FMM and so forth) XY Voltage Mode Allows you to switch XY voltage mode between High and Low voltage mode Z Voltage Mode Allows you to switch Z voltage mode between High and Low voltage mode. Z Scanner Range Allows you to specify the Z scanner range from 0 to 1. Cantilever Allows you to select the cantilever type from a customized list. Closes the XEP Part selection dialog with change any OK selections you made out. Closes the XEP Part selection dialog without change any Cancel selections you made out. Advanced In addition to several parameters above, other components can be specified in the advanced XEP Part selection dialog. High and Low voltage modes and Z scanner ranges are described in detail in Chapter 5. “Setup Scanner mode” in the User’s manual. Please refer to this document for better selection of XY and Z voltage modes. 3-4-7 Current Amplifier The Current Amplifier is used for I-AFM or STM mode. From this menu, you can select the type of current amplifier for your XE system. There are two types of current amplifier, ‘internal’ or ‘external’. Select one according to the type of amplifier you are using for I-AFM or STM. For ‘external’ amplifier, you also need to set the gain of the external amplifier in the gain check box. The gain of the amplifier that is checked in this menu must correspond to the actual gain setting of the amplifier hardware. Click ‘Ok’ to save your settings. 81 Software Manual for XEP Figure 3-37. Current Amplifier 3-4-8 Aux DAC You can change the output voltage of the Aux DAC connector on the back panel of the XE control electronics using the Setup Aux DAC feature. Figure 3-38. Aux DAC 3-5. Tools Menu As shown in Figure 3-36, the Tools menu includes the following items: Layout Manager, Session Manager, Preference, and XEI (for Image Processing). These menu items are a useful accessory to help you to manage or optimize the XEP interface. 82 Chapter 3. Menus Figure 3-39. Tools menu 3-5-1. Layout Manager As seen in Figure 3-37, the Layout manager has three Options, ‘Get default layout’, ‘Store current layout’ and ‘Open previous layout’. Figure 3-40. Layout manager Get default layout Selecting the ‘Get default layout’ option allows you to get a default layout that was previously saved. If your system does not have a default layout, the ‘Get default layout’ option is automatically disabled. So, the only available options are ‘Store Current layout’ and ‘Open previous layout’. 83 Software Manual for XEP Store current layout Selecting the ‘Store current layout’ allows you to store a current layout with a new layout. As default layout Checking the ‘As default layout’ allows you to store a current layout as a new default layout. Layout Name You can name or edit the layout name in the ‘Layout Name’ text field. This text field is enabled when the ‘As default layout’ is deselected. Enter the name of a current layout and then click the ‘OK’ button If there is an existing layout of the same name, you will see the following message box when you click the ‘OK’ button. If you select the name as ‘Default’, even though the default layout already exists, the following message box appears when you click the ‘OK’ button. Open previous layout You can open any previously saved layout by selecting ‘Open previous layout’. 84 Chapter 3. Menus ‘Open Layout’ List You can select or delete displayed layouts in the ‘Open Layout’ list. If you select one of the layouts to be displayed in this list, when you click the ‘OK’ button, the selected layout will replace the current layout. There are two methods to delete the existing layout. The first is that you may select a layout you wish to remove in the ‘Open Layout’ list, and then press “Delete” key. Another is that you may select a layout you want to remove in the ‘Open Layout’ list and then right-click and select the ‘Delete’ option in the context menu. 3-5-2. Session Manager A session is the folder in which a new image file can be saved. The Session manager generates a new session and sets this new session as the current session. The current session is the session in which a newly created image file will be saved. Open previous session recently used When this check box is unchecked, the Session manager will create a new session and set it as the current session. When this check box is checked, the Session manager sets a selected previous session as the current session for saving new files. 85 Software Manual for XEP Figure 3-41. Session manager Session Name Allows you to name a newly created session. Location You can easily select the location of a session in the ‘Browse for Folder’ dialog that is generated after you click the ‘Location’ button. This will allow you to fill the ‘Location’ text field by utilizing the standard Windows directory menu. 86 Chapter 3. Menus ‘Open Session’ List You can select or delete a session in the ‘Open Session’ list. This list is arranged in order of the most recently used. So, the first session is the session you used last. When you select one of the sessions in this list and click the ‘OK’ button, the current session will be replaced by the selected session. You can delete the existing session by pressing the “Delete” key or right -clicking the mouse to select the ‘Delete’ option in the context menu. 3-5-3. Preferences Preferences help you to set up some options for your XEP preferences. Figure 3-39 shows the ‘Preference’ dialog. 87 Software Manual for XEP Figure 3-42. Preference dialog Output filename generation rule Filename Format If you move your mouse in this area, the following tool tip will be displayed. This tool tip will help you to edit a new filename generation format. 88 Chapter 3. Menus Filename Ex Below the ‘Filename Format’ text field, the ‘Filename Ex’ displays an illustrative example of your input text so that you can remember the meaning of the different letters in the file names. ? If you click this button, you will see the ‘Output Filename Generation Help’ dialog that explains some rules and provides you with some illustrative examples. Run session manager on start up 89 Software Manual for XEP If you check this button, the Session manager is automatically popped up when you start the XEP program. Advanced In the maintenance mode, you will set up some advanced preferences. If the XEP program is not in the maintenance mode, you should enter your password (‘cantilever’ or your own password that is set in the Change Password dialog of the mode menu) at first. After you click the ‘Advanced’ button, a new option appears as follows (see red bordered rectangle in the Preference dialog in Figure 3-39. Don’t use safety interlock for Z stage at manual mode If you check this check box, you cannot use safety interlock for Z stage even at the manual mode. 3-5-4. XEI (for Image Processing) You can open the XEI program, the image processing program that can provide elaborate tools for quantitative analysis, getting better images and reporting images and measurements results. About this XEI program, please consult the software manual for XEI. XEI, image processing program. 90 Figure 3-40 shows the user interface of Chapter 3. Menus Figure 3-43. XEI - Image Processing Program 3-6. Help Menu This item will be offered a little after in the future. 91 Software Manual for XEP Chapter 4. Toolbar This chapter describes the meaning or functions of icons found on the Toolbar in the XEP program. Figure 4-1 shows the Toolbar which is displayed automatically when the XEP program is opened. Figure 4-1. Toolbar In the Toolbar, there are three types of Toolbar icons: Type 1. Indicates that the icon is enabled and shown on the screen Type 2. Indicates that the icon can be enabled and shown on the screen after clicking it. Once clicked this icon, it will be changed to type 1. 92 Chapter 4. Toolbar Indicates that the icon cannot be used at this time but it Type 3. can be enabled under different system conditions. The icon functions and roles are summarized and arranged in order in the table below with their pictures. Table 4-1. Toolbar Toolbar Function Scan Mode Always automatically enabled when you selected and activate XEP program. Trace Mode Switches Trace mode. Calibration Mode Switches to Calibration mode and can be enabled only when maintenance mode has been activated. Toggle Monitor Window Makes the Monitor window appear or disappear. Toggle Output Window Makes the Output window appear or disappear. Toggle Motors Control Makes Motors control window appear Window or disappear. Toggle XY Stage Control Makes XY stage control window appear Window or disappear. Show Trace Control Window Displays or adds the Trace control window. Hide Trace Control Window Hides or reduces the Trace Control window. Head On.Off Turns the scanner head On or Off. Input Config Opens the Input Config dialog. Scan Config Opens the Scan Config dialog. Frequency Sweep and Setup Opens the Frequency Sweep dialog. 93 Software Manual for XEP Select Parts Opens XEP part selection dialog. Toggle Scan Control Window Makes the Scan control window appear or disappear. Toggle Buffer Window Makes the Buffer window appear or disappear. Toggle Image View Control Makes the Image view control window Window appear or disappear. Toggle Image View Scale Makes the Image view scale window Window appear or disappear. Automatic Image Storing Saves the newly generated images automatically on your hard disk. Line Profile Mode Switches to Line Profile mode. F/D Spectroscopy Mode Switches to F/D spectroscopy mode. I/V Spectroscopy Mode Switches to I/V spectroscopy mode. NanoIndentation Mode Switches to NanoIndentation mode. Store and Retrieve Layout Opens Layout Manager dialog. Create and Open Session Opens Session Manager dialog. Change Preference settings Opens Preferences dialog. Save Calibrations Appears in the toolbar only in ‘Calibration mode’. Saves the new calibrations on your hard disk. 94 Chapter 4. Toolbar This is a blank page. 95 Software Manual for XEP Chapter 5. Monitor Window This chapter explains the ‘Monitor Window‘ which is used for aligning the laser beam bounced off the cantilever and detecting the cantilever’s deflection during the scanning. The Monitor window has two modes: Head and Custom modes (see Figure 5-1). Head mode is initially displayed in the Monitor window. As shown in Figure 5-1, in the Monitor window, you will see the quad-cell PSPD (Position Sensitive Photo Detector), which has a cross-hair display with a black scale bar to its right, and three digital panels (A-B, C-D, A+B) in voltage units. Also, in this Monitor window, there is an Error signal bar and a Z scanner bar to view the status of the feedback loop and the Z scanner in real time while operating your XE system through XEP. In Custom mode, you can select several inputs and monitor it through Digital panels in real time. When you open XEP, the Monitor window is displayed automatically, so that you can always check the laser beam’s condition. You can make the Monitor window disappear by deselecting the ‘Monitor Window’ from the View menu or clicking the ‘Toggle Monitor Window’ icon in the Toolbar. The controls in the Monitor window are listed in Table 5-1 below. 96 Chapter 5. Monitor Window Figure 5-1. Monitor window Table 5-1. Panels in the Monitor window. Panel Function Quad CellPSPD Shows the position of the reflected laser beam on the PSPD so that you can monitor the deflection of the cantilever. Laser Intensity Displays graphically the intensity of the reflected laser beam Scale Bar on the PSPD, which generate a yellow bar proportional to its intensity. A-B Digital Monitors the signal such as cantilever deflection, amplitude Panel of cantilever vibration or tunneling current depending on your experimental setup. C-D Digital Panel A+B Digital Panel Monitors the LFM signal, which is related to the change in the surface friction on a sample surface Monitors the intensity of the reflected laser beam on the PSPD. Error Signal Displays graphically the value of the error signal from PSPD Bar relative to the set point value. The value of the Error signal is represented by the orange color bar, and the set point value is represented by the red bar. Z Scanner Bar Displays graphically the Z extension of the piezoelectric scanner within its total range. The value of the Z extension is represented by a bluish green bar. The working range of the Z scanner is represented by this bar during each scan line. 97 Software Manual for XEP 5-1. Quad-cell PSPD and Digital Panels The quad-cell PSPD can detect vertical as well as lateral deflection of the laser beam of the cantilever. The quad-cell PSPD has four cells as shown in Figure 5-2. You can get information about both topography (AFM) and surface friction (LFM) during scanning by monitoring the laser deflection. The vertical deflection of the cantilever is measured as the difference between the upper cells (A=a+c) and the lower cells (B=b+d) of the quad-cell PSPD and provides the information about the sample’s topography. A-B signal=Topographic information= (a+c)-(b+d) The lateral deflection of the cantilever is measured as the difference between the left cells (C=c+d) and the right cells (D=a+b) of the quad-cell PSPD and provides frictional information. C-D signal=Frictional information= (a+b)-(c+d) c a d b Figure 5-2. Quad cell PSPD In order to perform an auto approach and take an image, in general, you should make the value of the A-B signal less than ±0.3V (the red point should be positioned at the center of the quad-cell PSPD display) and the value of the A+B signal greater than 2V. You can adjust the A-B signal and the A+B signal mechanically using the PSPD forward/backward adjustment screws on the probe head (please refer to User’s manual). 98 Chapter 5. Monitor Window 5-2. Error Signal Bar The Error signal bar graphically shows the values of the error signal from the PSPD relative to the set point value, the reference signal for the feedback loop. During a scan, deflection of the cantilever changes as the tip responds to the surface topography. The z feedback loop operates to keep this deflection constant during a scan, by adjusting the z position of the scanner. The deflection sensor monitors the amount of cantilever bending and sends a deflection signal to the feedback electronics. There, the deflection signal is compared to a reference signal(deflection at setpoint) and an error signal is generated. This error signal is used to generate a feedback signal, which is sent to the z scanner so that it causes the scanner to extend or retract. This feedback signal can also be used to generate an image of the sample surface. Figure 5-3 shows the Error signal bar. The orange part represents the value of the Error signal and the red line represents the set point value. The feedback loop is optimized when the Error signal bar matches the set point value. Set Point value Error signal Figure 5-3. Error signal bar 5-3. Z Scanner Bar The Z scanner bar monitors the extension or contraction of the Z scanner in response to the feedback voltage. In the Z scanner bar, the bluish green part represents the extension of the piezoelectric Z scanner within its total allowable range of motion, and the sky-blue part represents the working range of the scanner during scanning (see Figure 5-4). The upper end of the Z scanner bar represents the scanner’s position when it is fully contracted. The lower end of the Z scanner bar 99 Software Manual for XEP represents the scanner’s position when it is fully extended. When you turn on your system at first, the Z scanner bar is uncolored, which means the Z scanner is fully contracted. After you set up the set point value, the z scanner bar is going to fill with a bluish green to the lower end of the Z scanner bar. This means that the Z scanner bar is fully extended and is ready to approach the sample surface. Once the tip approach is completed, you will see that half of the Z scanner bar is filled with a bluish green. During scanning, when the probe tip encounters peaks on the surface, the Z scanner retracts (the bluish green bar and the sky-blue bar go towards the upper end of the Z scanner bar) and when the tip encounters valleys on the sample surface, the Z scanner extends (the bluish green bar and the sky-blue bar go towards the lower end of the Z scanner bar). The Z scanner bar always represents the Z scanner’s maximum range of motion. Thus, depending on the Z voltage mode and Z scanner range, its relative motion is scaled differently. In Low voltage mode, the change of the Z scanner bar is displayed relative to a smaller overall range than in the High voltage mode. Figure 5-4. Z scanner bar 100 Chapter 5. Monitor Window This is a blank page. 101 Software Manual for XEP Chapter 6. Move Control Windows This chapter discusses ‘Move Control Windows‘ which control the XY stage, Z stage and Focus stage. Move control windows allow you to find the position you want to take an image and move the tip to the sample surface area and helps you to follow the tip’s position with the optical microscope. The move control windows are applied to three main stages; the XY stage, Z stage, and Focus stage, which engage in controlling the motorized XY stage (XE-150), Z stage and Focus stage(optical microscope). 6-1. XY Stage Control Window The XY stage control window, enabled only in the systems equipped with the motorized XY stage (i.e. XE-150 system) allows control of the motorized XY stage so that the tip may be positioned around the sample surface (sample size up to 150mm×150mm) with ease. You will see the XY stage control window on the XEP screen of XE-150 system. Figure 6-1 shows the XY stage control window. Figure 6-1. XY stage control window 102 Chapter 6. Move Control Windows 6-1-1. XY Stage Pad The XY stage can be moved in both the x and y directions and moves the sample relative to the probe. The XY stage pad controls both the direction and the speed of the XY stage. NOTE! Before you use the XY stage pad, be sure to lift the tip off the sample using the Z stage pad. Otherwise, both the tip and your sample may incur serious damage. The red point in the XY stage pad means indicates the tip’s position. In order to move the tip to the sample surface where you want to take an image, you should click and hold the mouse on the XY stage pad. The position you click on the XY stage pad will determine the direction and the speed of the tip movement. The position vector of a clicked point on the XY Stage pad is equal to the velocity vector of the tip’s movement. The tip will move parallel to the direction of the line connecting the point of origin and the clicked point, and the further, the clicked point is from the origin (hence the larger the magnitude of the position vector) the faster the tip’s movement. Actually, what is moving is the XY Stage, not the tip. So the XY stage moves in the opposite direction than the tip should move while the tip remains stationary. The XY stage’s motion directions are shown in Figure 6-2. Figure 6-2. Direction of the XY stage’s motion 103 Software Manual for XEP 6-1-2. ‘GoTo’ Control Dialog You can also move the motorized XY stage to a defined location using the ‘GoTo’ control dialog. After clicking the ‘GoTo’ button in the XY stage control window, the GoTo control dialog is displayed as shown in Figure 6-3. ‘GoTo’ Text Field Point List ‘Group Name’ Text Field Point Group List ‘Step to’ Text Field Figure 6-3. GoTo control dialog ‘GoTo’ button After entering the coordinates where you want to take an image, click the ‘GoTo’ button so that the tip moves to this point. 104 Chapter 6. Move Control Windows (a) (b) Figure 6-4. ‘GoTo’ text field and ‘GoTo’ button Point List You can add or edit points where you took an image, or where you want to take an image, to be displayed in the Point list. ‘Get Point’ button You can add the current location to the Point list by clicking the ‘Get Point’ button. Figure 6-5 shows an example of the GoTo control dialog before and after you click the ‘Get Point’ button. 105 Software Manual for XEP (a) (b) (c) Figure 6-5. How to use the ‘Get Point’ button ‘Add Point’ button When you want to specify a position in which you are interested, you should enter the coordinates (x, y) and the individual point will be included in the Point list after you click the ‘Add Point’ button. Whenever you click this button once, one point text field will appear in the Point list as shown in Figure 6-6(a) and (b). Also, you can use the scroll bars in the Point list, if needed (see Figure 6-6(c)). (a) (b) (c) Figure 6-6. How to use the ‘Add Point’ button 106 Chapter 6. Move Control Windows ‘Delete point’ button You can delete points that are no longer needed from the Point list by clicking the ‘Delete Point’ button. Select the point you want to remove and then click the ‘Delete Point’ button. Figure 6-7 shows the way to use the ‘Delete Point’ button. (b) (a) (c) Figure 6-7. How to use the ‘Delete Point’ button Point Group List Allows you to group a set of points. ‘Get’ button In the Point Group list’, you can select a group of points to display in the Point list using the ‘Get’ button. After you select one among many point groups and click the ‘Get’ button (see Figure 6-8(a) and (b)), the points corresponding to the selected group are listed in the Point list as shown in Figure 6-8(c). 107 Software Manual for XEP (a) (b) (c) Figure 6-8. How to use the ‘Get’ button ‘Store’ button You can store any list of points as a group in the Point Group list. After one group of points is defined in the Point list, you may name the new point group and click the ‘Store’ button. At this time, the ‘Edit Check’ message box will appear. position file. This dialog asks if you really want to insert the new XY You click ‘OK’ button and this new group will be created in the Point Group list. For example, three points in the Point list are grouped and named as “GROUP1” in the Group Name dialog. Click the ‘Store’ button and click the ‘OK’ button in the ‘Edit check’ message box as shown in Figure 6-9(a) and (b). As a result, the new group, “GROUP1” will be created in the Point Group list (see Figure 6-9(c)). 108 Chapter 6. Move Control Windows (a) (b) (c) Figure 6-9. How to use the ‘Store’ button Step to You can specify a stage step from the current position in the ‘Step to’ text field. This text filed allows you to set how far the tip will move from the current location to a new location that is (dx, dy) away from the current position. For example, the current tip location is (30008.0, 0.0) as shown in Figure 610(a). After inserting the numbers (100, 100) in the ‘Step to’ text field, click the ‘Step To’ button. The tip will move 100µm in both the x and y direction respectively from the current location (30008.0, 0.0) to a new location (30108.0, 100.0) shown in Figure 6-10(c)). 109 Software Manual for XEP (b) (a) (c) Figure 6-10. How to use the ‘StepTo’ button Green lamp The green lamp indicates the status of the XY stage’s motion. At ordinary times, this lamp is dark green, but when the XY stage performs movement, this lamp will flicker. X, Y(µm) The X(µm), and Y(µm) digital panels display the coordinates of the head, the red point on the XY stage pad. ‘R. Origin’ button The ‘R. Origin’ button makes the head, which is represented by the red point on the XY stage pad, return to the stage center (0, 0) checking H/W limit sensors. 110 Chapter 6. Move Control Windows ‘Stop’ button You can stop the XY stage’s motion by clicking the ‘Stop’ button. Servo On Off Since it functions automatically, you cannot manually control the ‘Servo’. While the XY stage moves, the ‘Servo’ is automatically turned On and the ‘Servo’ is automatically turned Off when the XY stage stops. ‘Advanced’ button Only in the maintenance mode, can you use the ‘Advanced’ option. Thus, you should convert from the manual mode to the maintenance mode by selecting the ‘Maintenance Mode’ in the Mode menu. Then, after you click the ‘Advanced’ button, you can see several items below the ‘Advanced’ button in the XY stage control window as shown in Figure 6-11. Figure 6-11. ‘Advanced’ button Reset button Resets the motorized XY stage controller. After resetting the motorized XY stage, you should perform ‘R. Origin’ for consistency of the position x and y. 111 Software Manual for XEP Upload button Uploads the stage control parameters from the stage controller so that you can adjust them. Download button Allows you to reapply the stage control parameters to the stage controller after you have modified the stage parameters. WARNING! You should not arbitarily adjust the stage patameters. Doing so may seriously damage the XY stage as well as your system. 6-2. Motors (Z stage and Focus stage) Control Window 6-2-1. Z Stage Z stage pad The Z stage pad can be used to move the tip up and down in the z direction relative to the sample. The Z stage pad controls both the direction and the speed of the Z stage. As shown in Figure 6-12, the upper half of the Z stage pad moves the Z stage up, and the lower half of the Z stage pad moves the z stage pad down. You can control the speed of the Z stage by clicking the cursor far from the center of the Z stage pad. The further from the center of the Z stage pad you click, the faster the Z stage moves up or down. The closer to the center you click, the slower the speed of the Z stage. 112 Chapter 6. Move Control Windows Slow Fast Figure 6-12. Motors control window WARNING! If the Z stage is lowered too fast, the cantilever may “crash” into the sample surface. Such a forceful interaction may break the probe tip, damage or destroy the sample, and/or seriously damage the Z scanner. Lift Z In addition to clicking the upper half of the Z stage, the ‘Lift Z’ button is another way to lift the Z stage. After clicking this button, the Z stage moves upward at faster speed and this button’s label is changed to ‘Stop’ . Approach Approaches the tip to the sample automatically with controlled velocity, until the value of the reference signal reaches the ‘set point’ value of the scan control window. (See section 7-1-7 for detailed explanation of the ‘set point’) To take an image, it is necessary to bring the tip very close (from a few angstroms to hundreds of angstroms) to the sample surface so that the tip can interact with the sample surface. There are several things you must do before beginning an auto approach: • Load a sample and a tip 113 Software Manual for XEP • Make sure the sample is directly under the tip • Make sure the probe head is ON • Check the alignment of the deflection sensor • Make sure the Scan size is zero for the protection of the tip and sample Before performing an auto approach, you should lower the tip to just above the sample surface using the Z direction pad. ‘Approach’ button to perform an auto approach. Then, click the Approach is automatically completed when the value of the reference signal reaches the set point value. Z(µm) The Z(µm) digital panel displays the coordinate of the Z stage in the vertical direction. The coordinate of the Z stage is set to be 30000.0µm at the maximum ‘upper limit’ at which the Z stage is fully raised. Therefore, the Z stage’s position at 0.0µm is where the Z stage is 30000.0µm away from the maximum upper limit. 6-2-2. Focus Stage Focus stage pad Allows you to move the Focus stage up and down like Z stage. You can see the sample surface and cantilever with the help of the Focus stage’s movement. Focus stage can be moved in the same way as the Z stage. The farther part away the center you click, the faster you can move Focus stage up and down. Focus Follow The ‘Focus Follow’ option is selected by default in XE-100 equipped with the ‘Focus Follow’ option. When ‘Focus Follow’ is selected, the optical view travels in synch with the Z stage, thus allowing the optical view to stay focused on the probe tip when the tip is raised or lowered. If necessary, you can disable the ‘Focus Follow’ option by deselecting it. In this case, the movement of the Focus stage is not synched with the Z stage and the tip’s movement. Usually, when you preview the sample surface with the optical 114 Chapter 6. Move Control Windows view, disable the ‘Focus Follow’ option to in order to keep the focus on the sample surface before an auto approach of the tip. F(µm) The F(µm) digital panel displays the coordinate of the Focus stage in the vertical direction. The coordinate of the Focus stage is set to be 25000.0µm at the maximum ‘upper limit’ at which the Focus stage is fully lifted. Therefore, the Focus stage’s position at 0.0µm indicates the Focus stage’s position when it is 25000.0µm away from its maximum upper limit. Green lamp The green lamp indicates the status of the Z stage’s motion. At ordinary times, this lamp is dark green. When the Z stage performs an auto approach after you click the Approach button , the dark green lamp will twinkle. Reset The ‘Reset’ button opens the ‘Reset stage’ dialog which allows you to reset the Focus stage and the motorized Z stage of your instrument. When the coordinates are no longer displayed in the Z(µm) and F(µm) digital panels or the Focus stage and the Z stage do not work when you click the Z stage and the Focus stage pads. You should reset the Focus stage and/or the Z stage. Resetting the stage can make the Z stage and/or Focus stage return to the origin, the upper limit point (Z stage: 30000.0µm and Focus stage : 25000.0µm), checking H/W limit sensors and redefines the position of the Z stage and the Focus stage in the coordinate system of the software. Figure 613 shows the Reset stage dialog, and the function of the controls in the Reset stage dialog is summarized in Table 6-1. 115 Software Manual for XEP Figure 6-13. Reset stage dialog Table 6-1. Controls in the Reset stage dialog Control Function Z stage Selects the motorized Z stage to be reset. Focus Selects the motorized Focus stage to be reset. R.Origin Resets the motorized Focus stage and/or the Z stage. Stop Stops the movement of the motorized the Z stage and the Focus stage. Done Enables the reset coordinate system of the motorized Focus stage and the Z stage with closing the Reset stage dialog. 116 Chapter 6. Move Control Windows This is a blank page. 117 Software Manual for XEP Chapter 7. Scan Control Window This chapter gives a detailed explanation of the ‘Scan Control Window’ used for setting up a scan and taking an image. The Scan control window consists of two modes: Normal and Scan Area mode (see the box area in Figure 7-1). In the Normal mode , you can set several scan and feedback parameters by entering values or adjusting a spin button. On the other hand, in the Scan Area mode , you can change the scan size and the X, Y offset using a previously acquired image as a reference. After you load a sample and perform an approach so that the tip reaches the sample surface, you can adjust scan parameters such as the scan size, scan rate, the slope in the x and y directions, and the X and Y offsets. Also, you can specify the type of scan by selecting between a single or continuous scan as well as activating a two way scan. Furthermore, you can control several feedback parameters such as set point, Z servo, and Z servo gain. Figure 7-1 shows the Scan control window in the Normal mode. 118 Chapter 7. Scan Control Window Figure 7-1. Scan control window To acquire the best images, you should fully understand the functions of these scan controls and how they affect your system. Scan and feedback controls on the Scan control window change according to the SPM mode selected by the user. Table 7-1 shows the list of the general scan and feedback controls that are used in most SPM modes. For the explanation of the special scan and feedback controls that are used in specific modes, refer to the operating manual of the corresponding mode. Table 7-1. Scan and Feedback Controls Control Function Repeat Scans the same area repeatedly, generating a continuous series of images in the Scan image view. These images are stored in the Buffer window and saved on your hard disk automatically when the ‘Automatic Image Storing’ icon is enabled. Two way Enables you to alternate the slow scanning direction for successive images when you select ‘Two way’. X, Y Chooses the fast scan axis in which data is taken. You 119 Software Manual for XEP can change the fast scan axis by clicking either X or Y. Slow Scan Reverses the Slow Scan direction when selected. It is Reverse similar to ‘Two way’ scan. Slope Enables you to adjust the x or y slope of the signal trace in the Trace control window so that you can acquire images with the tip movement parallel to the sample slope during scanning in the x or y direction, respectively. Scan off Once the tip is approached to the surface, even when it is not imaging, XE system is always automatically scanning the surface. ‘Scan off’ enables you to stop this scanning in such cases when you expect that caution is necessary or you want to protect the tip in unfavorable situations. Image Starts a single scan. During a scan, this button is replaced by a ‘Cancel’ button Image Storing’ icon . If the ‘Automatic is enabled, each newly generated image is stored in the Buffer window and automatically saved on your hard disk. Otherwise, the acquired images are not saved on your hard disk. Scan Size X ,Y Enables you to select a specific scan size. Usually, all scans are square. The scan size is displayed in the ‘Scan Size’ text field. = Equalize the scan size between X and Y. Turn this off if you need to scan in rectangular area Offset X, Y Enables you to specify X or Y scanner coordinates for the next scan to change the position of a scanned image. The scanner coordinates are the distance from the center of the scanner’s range. Rotation Enables you to change the scan direction to various angles. You can specify a different angle by inserting it in the text field. Scan Rate Enables you to adjust the scan rate. This value may be adjusted while collecting an image. Set Point Enables you to specify the reference signal of the feedback loop. In Contact mode (AFM, LFM), set point specifies a value for the vertical force between the tip and the sample that results in bending of the cantilever. In Non-Contact 120 Chapter 7. Scan Control Window mode (NC-AFM, IC-AFM, MFM), set point specifies a value for the amplitude of the cantilever’s vibration. In STM mode, set point specifies a value for the tunneling current between the tip and the sample. Tip Bias Enables you to adjust the tip-to-sample bias by applying a bias voltage to the tip for STM imaging and for AFM, NCAFM, IC-AFM, MFM, and LFM. Z Servo Enables you to enable or disable feedback. When the feedback is disabled, you can either extend or retract the scanner while monitoring the scanner’s position relative to the sample surface. Z Servo Gain Enables you to control how much the error signal in the feedback loop is amplified before being used to generate a feedback voltage to the scanner. Allows you to control the strength of the drive amplitude Drive used for cantilever vibration. Sample Bias The sample bias is the electric potential difference between the sample and the ground Scan here ‘Scan here’ simply the ’Image’ functions. combines the ‘Approach’ and With a touch of a button, ‘Scan here” will automatically approach and start to image the sample. 7-1. Normal Mode 7-1-1. Repeat, Two way, X, Y, and Slow scan reverse Repeat When ‘Repeat’ is enabled, a continuous series of images will be 121 Software Manual for XEP generated in the Scan image view. This ‘Repeat’ option allows you to automatically acquire multiple images of the same scan area. These images are displayed in the Buffer window and saved on your hard disk automatically when the’ Automatic Image Storing’ icon is selected. Two way The ‘Two way’ scan automatically alternates the slow scan direction for successive images. The ‘Two way‘ option is selected by default. When ‘Two way’ is selected, if X is set to be the fast scan direction , then the slow scan direction, Y, alternates from bottom-to-top and top-tobottom for successive images. If Y is selected as the fast scan direction , the slow scan direction, X, alternates from left-to-right and right-to-left for successive images. In general, there is no significant difference in the images whether the ‘Two way’ option is selected or not. However, in some cases, you may be able to distinguish effects that are due to tip anisotropy X, Y In the X, Y check box, you can set the fast scan axis in which the data will be collected. The Fast scan axis is selected to be x by default. This means the system collects one fast scan-line of data parallel with the selected x axis. In addition, the fast scan direction refers to the scan direction of each line which is collected by the computer and the slow scan direction is the direction in which each line of data is interweaved to generate the image. Figure 7-2. Scan direction 122 Chapter 7. Scan Control Window Slow Scan Reverse Slow scan reverse is similar to the ‘Two way’ scan, in which it reverses the slow scan direction. If this box is selected, the slow scanning will be done in a opposite order. This function allows the slow scan direction to be selected freely, while the ‘Two way’ scan automatically reverses the slow scanning direction after each scan is completed. In general, the slow scan direction has no significant effect in the image quality. However, in some cases, certain effects due to tip anisotropy may be distinguished. 7-1-2. Slope In general, the sample surface is not flat relative to the scanning plane. Because of this, you should adjust the X and Y slope in the ‘Slope’ text field. The Slope is a linear correction that is added digitally to the scanner’s x, y position. These corrections to the scanner’s position eliminate a slight tilt or slope of the sample surface. The tilted signals on the Trace control window should be adjusted in both x and y directions. You can remove most of the tilt by adjusting the slope. In order to adjust the slope in the x or y direction, switch to the appropriate fast scan direction and enter the number for the slope correction, or increase or decrease the number in the ‘Slope’ text field using the spin button . Before you set the x slope parameter in the ‘Slope’ text field, x should be the fast direction. Likewise, after you select y as a fast direction, you can set the y slope parameter in the ‘Slope’ text field. The range of the slope parameter value is from -1.00 to 1.00 in arbitrary units. If the slopes cannot be adjusted in this range, you should try to reload the sample on the sample holder since the sample surface is excessively tilted. In addition to adjusting the slope in the ‘Slope’ text field, there is two ways you can eliminate the intrinsic slope from an image. One method is to apply an automatic slope correction to an image by subtracting a planar 123 Software Manual for XEP correction. This can be performed by checking AutoFlat in the Input Config dialog. The Input Config dialog is explained in detail in section 3-4, Setup Menu. Another slope correction can be done in the Image processing program, XEI that supports the Flattening process. For more details, please refer to the software manual for XEI. To adjust the slope in the x and y direction: Click the X (or Y) option to set x (or y) as the fast scan axis. Enter a value in the text field and then press the “Enter” key on your keyboard, or use the spin button with your mouse. Adjust the value until the signal trace becomes horizontal in the Trace control window 7-1-3. Scan Size The ‘Scan Size’ means the width of the scan. You can set the scan width by entering a value directly in the ‘Scan Size’ text field. There are two ‘Scan Size’ text fields, X and Y, but you only have to set the scan size once (usually, set the scan size X) since all scans are square. If you want to perform a rectangular scan, click the ‘=’ button and the Y ‘Scan Size’ text field will be enabled. The units for the scan size, from Ǻ to µm are displayed in the scan size text field. What features you want to see in an image will determine the scan size. It is important to find the proper scan size related to the features of interest on the sample surface. The maximum available scan size is dependent on the range of the scanner. For example, using a 100µm scanner, the maximum scan size is 100µm. The resolution of the XY scanner (<0.15nm), Z scanner (0.05nm) as well as the external noise affect the minimum allowable scan size. Another way to select the scan size is in the Scan Area mode. Setting the scan size in the Scan Area mode will be explained in the next section of this chapter. 124 Chapter 7. Scan Control Window 7-1-4. Offset X, Y In the ‘Offset X, Y’ text fields, you can specify x and y scanner coordinates for the next scan. The scanner coordinates are referenced to the center of the XY scanner. The coordinates at the center of the scanner are (0, 0). The Offset value X is the scanner coordinate that moves from left to right in the optical microscope view. Also, the Offset value Y is the scanner coordinate that moves from bottom to top in the optical microscope view. To set the specific Offset value X and Y, you should enter the desired x coordinate and y coordinate in the ‘Offset X, Y’ text fields. In addition, you can change the scanner coordinates x and y by dragging the imported image into the Scan Area mode of the Scan control window (see the next section). 7-1-5. Rotation You can take an image in various scan directions by rotating the scan direction. You can change the scan direction in the ‘Rotation’ text field. In general, the rotated scan direction will not affect the image’s features. The ‘Rotation’ option is useful only when you want to take an image with a slightly different scan direction. In addition, you can discover some inconsistencies in the shape of the scanning tip when subsequent images are generated after changing the rotation angle of the scan direction. Also, you can distinguish between the “true” features on the sample surface and the “false” features in the image that may result from external noise or a tip effect. The true image is much the same at different angles but a changed feature or image at a rotated angle is not “true”. The ‘Rotation’ degree may be varied from (-45.0) to (45.00). 125 Software Manual for XEP 7-1-6. Scan Rate The ‘Scan Rate’ text field allows you to adjust the scan rate while an image is being generated or for the next scan. The scan rate means the frequency of the back and forth rastering of the sample. A 1Hz scan rate indicates that one line of data is collected per second. You should remember that for better image quality, you should decrease the scan rate. This is because the feedback loop will have more time to respond to the surface topography in the case of a slower scan rate. But at slower scan rates, thermal drift (expansion or contraction caused by non uniform temperature in scanner and sample) tends to cause distortion in an image. Since the scan rate depends on the scan size and the roughness of your sample, you should experiment and take images at various scan rates to determine the best setting for a particular sample. 7-1-7. Set Point The ‘Set Point’ spinner allows you to specify the value of the reference signal of the feedback loop that is maintained during an auto approach and a scan. During the approach or while scanning, the system will send the feedback signal to the Z scanner in order to maintain a constant set point value. The meaning of the set point value differs depending on the scan mode. In Contact mode (AFM, LFM), the set point correlates to a value for the vertical force between the sample and the tip that results in cantilever bending. On the other hand, in Non-Contact mode (NC-AFM, DFM, MFM), the set point value correlates to a value for the amplitude of the cantilever vibration. In STM mode, the set point is a value for the tunneling current between the tip and the sample. In any of the three cases mentioned above, the set point value is proportional, though not linear, to the tip sample distance. As you increase the set point value, the tip-to-sample distance decreases. Thus, the set point value can be understood as a measure of the tip-sample distance. In order to protect the tip, you should not make the tip approach too 126 Chapter 7. Scan Control Window close to the sample surface. This is because the tip may crash into and damage the sample surface and/or itself. Subsequent images taken after such a crash may produce incorrect information. Figure 7-3 Concept of the Set point in NC-AFM 7-1-8. Z Servo You can enable or disable feedback with the ‘Z Servo’ check box. When the ‘Z Servo’ is checked, the feedback is On and its sensitivity is controlled by adjusting the Z servo gain. When the Z Servo is deactivated, the ‘Z Servo’ text field is displayed below the Z servo check box. You may manually extend or retract the Z scanner by entering a value in this field. You can monitor the position of the scanner with the Z scanner bar. The scanner extension is expressed in units of microns as seen below. When feedback is On, the Z scanner’s motion matches the surface topography. The error signal is used to generate a feedback voltage, which is 127 Software Manual for XEP sent to the scanner, instructing it to extend or retract to generate an image of the sample surface. When feedback is On, the Topography signal is used to generate an image of the sample surface. When feedback is Off, the error signal is primarily used to generate an image. In this case, the sample or the probe tip is not raised or lowered to minimize the error signal. Figure 7-4 Concept of Z servo in NC-AFM 7-1-9. Z Servo Gain The error signal is amplified by an appropriate factor controlling the ‘Z Servo Gain’ value before the signal is sent to the scanner. The range of the Z servo gain value is from 0 to 20, in arbitrary units related to the Z scanner’s range of motion. A number of factors (such as the scan rate, the scan size, and the sample topography) can affect the optimum value of the Z servo gain parameter. If the Z servo gain is too low, fine topographical features will be lost. On the other hand, if the Z servo gain is too high, the Z-scanner will oscillate. 128 Chapter 7. Scan Control Window 7-1-10. Drive In Non-Contact mode, you can control the strength of the drive amplitude used for cantilever vibration in the ‘Drive’ window. The drive amplitude is the amplitude of the AC voltage signal from the signal wave generator that drives the cantilever to vibrate. This number is a fixed percentage (from 1 to 100) of the maximum allowed voltage to the piezoelectric transducer which oscillates the cantilever. To change the drive amplitude, enter a new percentage value in the ‘Drive’ text field or use the spin button. 7-1-11. Tip and Sample Bias The ‘Tip Bias’ and the ‘Sample Bias’ parameters set the tip-to-sample bias applied during a scan. The tip bias is the electric potential difference between the tip and the ground. The sample bias is the electric potential difference between the sample and the ground. Both the tip and the sample bias can have positive or negative values. Depending on the modes available on your instrument,, these windows may be displayed in the XEP software. 7-1-12. NCM ASetup When you click this button (NCM Amplitude Setup), both the drive amplitude and the set point value are automatically calculated and set by the XEP software. This is helpful for beginners as they learn the effect of the parameters used in the vibrating cantilever modes. 7-1-13. Scan Here ‘Scan here’ is a simple task which combines the ‘Approach’ and the ’Image’ functions. With a touch of a button, ‘Scan here” will automatically approach and start to image the sample. 129 Software Manual for XEP 7-2. Scan Area Mode You can easily set a new scan size and scan location for the next scan by using the Scan Area mode of the Scan control window. You can import images from the previously obtained images in the Scan image view by selecting ‘Send to scan area control’ in the popup menu (see Figure 7-4), which appears when you click the right mouse button on the preferred image. In detail, you may take an image with a larger scan size in order to preview the sample surface. Then, position the cursor onto this already acquired image displayed as a buffer layer in the Scan image view, and click the right mouse button. This will allow you to send the image to the Scan Area mode in the Scan control window. Figure 7-4 depicts how to send the image into the Scan Area mode. The image will then appear in the Scan Area mode display. In this window it is more convenient to select the new scan size and scan location since you can preview the image of the sample surface and its relative location. Figure 7-5. Send to “scan area control” As shown in Figure 7-5, the Scan Area mode has two background windows that are different in view size. The upper display is the Micro view 130 Chapter 7. Scan Control Window where you can easily select the new scan size and the scan location within the magnified view of the reference image. The lower window is the Tele view that indicates the position of the reference image within the total allowable range of the XY scanner. The tracker seen in Figure 7-6 shows the scan size and the scan location for a follow-up scan. The green tracker at the center of the display can be moved around the scanner motion playground, which has a gray grid on a black background. Micro view Tracker Tele view Tracker 20µm Figure 7-6. Scan Area mode screen 7-2-1. Tracker The tracker is the green bordered rectangle which indicates the desired scan size and location for a follow-up scan and is displayed in the center of the 131 Software Manual for XEP scanner’s motion playground. You can specify the new scan size by extending and reducing the size of the tracker. Also, you can move the scan location by moving the tracker from one place to another. As you change the size of the tracker, the scan size is continuously corrected in the ‘Scan Size’ text field. As you move the tracker to a new location, the scanner coordinates are continuously corrected in the ‘Offset X, Y’ text fields. Although it is easier to change the scan size and move to a new scan location using the tracker, sometimes you need a specific scan size or scan location. In such cases, you can specify a particular scan size in the ‘Scan Size’ text field and/or scanner coordinates in the ‘Offset X, Y’ text fields. This method is more precise than arbitrarily dragging the tracker. to the method used to set a specific scan size and scanner coordinates is introduced in the previous section. Be sure that the tracker is not positioned close to the edge of the scanner range, because a “cut” image may be generated. The cut part of the image appears as white stripes at the edge of an image. This occurs because the scanner stops moving when it reaches the end of its allowable range. Thus, if you want to take a scan near the edge of the scanner’s range, you should lift the tip and move the XY stage in the desired direction. NOTEI The Scan Area mode screen of the Scan control window does not represent the previous screen after you use the XY stage to position a follow-up scan. 7-2-2. How to Change the Scan Size in the Scan Area mode Place the mouse pointer on one of the four corners of the tracker. The mouse pointer will change to a two headed arrow (see circled area in figure 7-6). Click and drag the corner to increase or decrease the scan size until you reach the desired scan size. As you change the size of the tracker, the scan size is continuously updated in the ‘Scan Size’ text field. Figure 7-6 shows how to increase and decrease the scan size (10µm×10µm) using the imported image in the Scan Area mode of the Scan control window. 132 Chapter 7. Scan Control Window Figure 7-7. How to increase (above) and decrease (below) the scan size in the Scan Area mode 133 Software Manual for XEP 7-2-3. How to Change the Scan Location in the Scan Area mode Place the mouse pointer at the center of the tracker and the cursor will be changed to a cross-arrow (see circled area in Figure 7-5). Click and drag the cross-arrow until you reach the desired scan location. As you drag the tracker, the scanner coordinates (x, y) are continuously corrected in the ‘Offset X,Y’ text fields. Figure 7-7 shows the procedure to move the tracker to another location. Figure 7-8. How to change scan location in the Scan Area mode 7-2-4. How to Rotate the Scan Area in the Scan Area mode Place the mouse pointer on the corner of the tracker marked with the point as shown in Figure 7-8. The handle will change to a circled arrow. At this time, you can rotate the tracker to the desired orientation. You will notice that the scan direction is changed to the corresponding angle of the rotated tracker in the Scan area mode. The precise rotation angle is updated in the ‘Rotation’ text field of the Scan control window. Figure 7-8 shows how to 134 Chapter 7. Scan Control Window rotate the tracker in the Scan area mode. Figure 7-9. How to rotate the scan area in the Scan Area mode 135 Software Manual for XEP Chapter 8. Trace Control Window This chapter provides information about the signal trace in the Trace control window which displays the line profile of the sample surface and several controls related to the Trace control window. 8-1. Trace Control Window The Trace control window is an oscilloscope window which can be used to display selected signals in real time. Signals can be viewed only when the scan is ‘On’ in the scan control window Figure 8-1 shows the Trace control window, Figure 8-1. Trace control window As shown in Figure 8-1, the Oscilloscope screen is divided by gray grid lines on a green background. 136 In the lower right corner and the upper left Chapter 8. Trace Control Window corner, the distance per grid division in both the horizontal and the vertical direction are displayed, respectively. Signals displayed on the oscilloscope screen are obtained along the fast scan direction. The signal obtained from the forward scan direction is represented by a yellow trace line on the Oscilloscope screen. If the backward scan direction is selected from the ‘Input Config window’, a blue trace line will also be displayed on the screen. 8-1-1. Signal Name List The ‘Signal Name’ list displays a list of signals you can monitor on the green Oscilloscope display. When you click the downward arrow, to the right side the window, you will see a list of the signals (squared area in Figure 8-2) currently selected in the Input Config dialog. Depending on the selected Input signals, their units may be different. For more details about the Input Config, dialog, see section 3-4-1 ‘Input Config’ menu in Chapter 3. You can add up to 8 signals (4 for image pixel size of 4096*4096) from the Input Config dialog to the Signal Name List. Several trace windows and signals can be viewed simultaneously by selecting the ‘Show Trace Control Window’ in the View menu or by clicking the ‘Show Trace Control Window’ icon to add a new trace window for each signal. You can add up to 4 Trace control windows. Also, you can hide a Trace control window by either selecting ‘Hide Trace Control Window’ in the View menu or by clicking the ‘Hide Trace Control Window’ icon . 137 Software Manual for XEP Figure 8-2. Several Input signals 8-1-2. Hold The signal displayed on the trace window continuously changes since the tip continuously scans the surface to obtain the signal. The Hold button captures the displayed signal so that you can easily analyze individual trace lines in the Trace control window. 8-1-3. FT(Fourier Transform) The FT button shows a one dimensional FT (Fourier Transform) of the signal in real time. This FT shows the information of the frequency of the trace line, on which a Fast Fourier Transformation has been performed. The FT signal is useful for determining the presence of external noise while measuring the sample surface with the XE system. Figure 8-3 shows both the topographic trace line (above) and its FT mode trace (below). 138 Chapter 8. Trace Control Window Figure 8-3. FT mode of the Topography trace line 8-1-4. AC The AC button converts the trace mode display from DC coupling to AC coupling on the oscilloscope screen. 8-1-5. Auto The Auto button automatically rescales the display so that the peak-topeak maximum of the data fits on the screen. The scale can also be controlled manually by using the spin button located next to the ‘Auto’ button. The vertical axis on the green grid screen may be rescaled with the spin buttons or by using the mouse wheel. 139 Software Manual for XEP 8-2. Trace Line Analysis You can open the context menu for trace line analysis by clicking the right mouse button on the Oscilloscope screen. Figure 8-4 shown below is the context menu for the analysis of trace lines. Figure 8-4. Context menu in the Trace control window 8-2-1. Show Origin Displays an X axis line so that you can identify the vertical distance between the origin and feature locations. The X axis is the bold horizontal white line displayed in Figure 8-5 and the Y axis line is the left edge of the trace control window. 140 Chapter 8. Trace Control Window Figure 8-5. Show Origin 8-2-2. DC Center Origin The DC center origin command is effective only when the oscilloscope screen is set to DC coupling. Selecting DC Center Origin brings the DC center origin to the center line of the Oscilloscope screen. If you deselect this ‘DC Center Origin’, the bottom of the Oscilloscope screen will be the DC center origin. As shown in Figure 8-6, when the ‘DC Center Origin’ is deselected (left), the DC center is at the bottom of the Oscilloscope screen. On the other hand, when the ‘DC center origin’ is checked (right), the DC center is overlaid on the origin. 141 Software Manual for XEP Figure 8-6. DC Center Origin 8-2-3. Show Pair Cursor When you select ‘Show Pair Cursor’, pair of red vertical lines appears. These lines allow you to measure both the vertical distance and the horizontal distance between two points on the trace line. Figure 8-7 shows the Trace control window after selecting ‘Show Pair Cursor’. H[Ǻ] 80 W[µm] 2.65 Figure 8-7. Show Pair Cursor 142 Chapter 8. Trace Control Window 8-2-4. Show Line Cursor When you select the ‘Show Line Cursor’, one red line is generated in the Oscilloscope screen. You can identify the coordinates(x, y) of any location in the trace line as shown in Figure 8-8. You will see both the horizontal distance (X[µm]) and the vertical distance (Y[Ǻ]) from the origin in the upper right hand corner of the Oscilloscope screen. Y[Ǻ] 46 (0, 0) X[µm] 2.93 Figure 8-8. Show Line Cursor 8-2-5. Show Leveling Bar After you select ‘Show Leveling Bar’, you will see two white bars in the Oscilloscope screen. You can use these bars to easily subtract the background slope. Point your mouse at each bar and the cursor will change to a left-right arrow. Drag each bar to two different points you believe to be at the same height. The slope of the trace line will change accordingly so that the two different points are brought to the same level. Figure 8-9 illustrates this feature. 143 Software Manual for XEP Figure 8-9. Before and after using Leveling bar at point 1 and 2 8-2-5. Setup Cursor Avg. Range The Cursor Average Range is the width of the transparent strip extending from the centered line cursor. When using Line cursor, Pair cursor and Leveling bar, the Y coordinate of the intersection point of the line of the cursor and the trace line is actually calculated by averaging the Y coordinates of the points within the cursor average range. The figure below shows the function of the cursor average range. In the left figure, the Y coordinate of point A measured by the line cursor is 2000 nm. But in the right figure, the Y coordinate of point A measured by the line cursor is 1500 nm, which is the average of the Y coordinates of the points within the range of the cursor bar. Figure 8-10 Function of the cursor average range 144 Chapter 8. Trace Control Window If you select the ‘Setup Cursor Avg. Range’ in the context menu, the ‘Number of Average point’ dialog box will be opened. As shown in Figure 8-11(a), the ‘Number of Average point’ dialog has two text fields: ‘Cursors’ and ‘Leveling bar’. By default, the range of both the cursors and that of leveling bar are set to be 0.0 and 0.1 respectively. A number ‘1’ in the text field indicates the width of the Oscilloscope screen in the Trace control window. Thus, 0.1 is one tenth of the range of the Oscilloscope screen. You can set the range of the line cursors in the ‘Cursors’ text field. This setting will be applied to the line cursors that are used when you select ‘Show Pair Cursor’ or ‘Show Line Cursor’ from the trace context menu. Also, you can set the range of the leveling bar in the ‘Leveling bar’ text field. Figure 8-11(b) shows the range of the line cursors and leveling bar when set to 0.2 and 0.1 respectively. 145 Software Manual for XEP (a) (b) Line Cursor Leveling Bar Figure 8-11. Range of the line cursors and leveling bar 146 Chapter 9. Scan Image View & Buffer Window Chapter 9. Scan Image View & Buffer Window This chapter covers the feature and functions of the ‘Scan Image View and Buffer Window’, which shows and stores the newly generated images in real time. 9-1. Scan Image View The Scan image view shows an image being acquired line by line during a scan. After the tip approach is performed, you should adjust several scan parameters and feedback parameters while utilizing the Trace control window. Then, click the ‘Image’ button to initialize the image acquisition process. You will see an image generated line by line as the scan progresses. Up to sixteen images can be displayed simultaneously based on the input signals selected in the ‘Input Config’ dialog. The image is set automatically by the selected palette but you can change it to another palette. You can also adjust the image’s contrast level and range, and make point-topoint measurements in the Scan image view. Figure 9-1, shown below, is the Scan image view as it appears on the XEP screen during scanning. 147 Software Manual for XEP Figure 9-1. Scan image view during scanning 9-1-1. Image View Control Window In the Image view control window, the left side of the Scan image view, there are several parameters which you can adjust to improve the image’s appearance without changing the true data. Palette There are five different available Palette colors from which you can select as the image colors. By default, the gold color is selected. As shown in Figure 9-2, when you point your mouse to a different color, the selected palette name is displayed in bold blue letters. You can change the image color by selecting from another. Figure 9-2 shows an example that the gold color is changed to aqua one in the Scan image view. 148 Chapter 9. Scan Image View & Buffer Window Figure 9-2. Selection of the image color Zoom You can increase or decrease the image size in the ‘Zoom’ text field. The image size can be changed to 50%, 100%, 200%, 400%, 800% and 1600%. 100% is automatically selected when starting. Figure 9-3 shows two images after zooming in at 200% and 800%. When zooming, the Image view scale bar is increased in proportion to the incremental change of the image size and the scroll bars are displayed automatically since the increased image size will not display in the original window. 149 Software Manual for XEP Figure 9-3. Zoomed in images at 200% (above) and 800%(below) 9-1-2. Image View Scale Window The Image view scale window is displayed above and to the left side of the image in the Scan image view as shown in Figure 9-4. The unit of the scale window is displayed in the Status display (see the box area, x10.0000um in Figure 9-4). Also, you can specify a position on the sample surface with the cursor, which is indicated as a crosshair when placed over the image. The coordinates of the cursor are also displayed in the Status bar which is below the Buffer window. For example, the coordinates of the cursor in the image in Figure 9-4 is 20.0391µm and 10.1953µm from the origin in both the x and y directions within the scan area of 30µm×30µm. 150 Chapter 9. Scan Image View & Buffer Window Figure 9-4. Image scale window 9-1-3. Status Display The Status display is composed of three parts: the group name/the status description/the unit of the scale window in the scanned image as shown below. By default, the group name is automatically named as the sequence of imaging since you initiated the XEP software program. Then, the status of the image is described as one of four types: ‘Ready’, ‘Imaging’, ‘Stored’, and ‘Unstored’. Status display Group name Status Unit Ready ‘Ready’ indicates that the system is ready to take an image (see Figure 151 Software Manual for XEP 9-5(a)). Imaging While the image is being generating line by line, the status of the image is indicated as ‘Imaging’ (see Figure 9-5(b)). Stored The ‘Stored’ status appears in the case that the ‘Automatic Image Storing’ icon is enabled. Thus, the newly acquired images is stored in the Buffer window and saved on your hard disk automatically (see Figure 9-5(c)). Unstored The ‘Unstored’ status appears in the case that the ‘Automatic Image Storing’ icon is disabled (see Figure 9-5(d)). Thus, the generated image will not be automatically saved on your hard disk. However, you can save this data without difficulty by right-clicking the temporary file number which appears at the bottom of the Scan image view (see Figure 9-6). 152 Chapter 9. Scan Image View & Buffer Window (a) (b) (c) (d) Figure 9-5. Different statuses of an image 9-1-4. Buffer Layer in the Scan Image View In the Scan image view, there are buffer layers which pile up with the newly generated images. Numbered tabs, which correlate to previously acquired images, are displayed beneath the image with a maximum of 10 image windows. When you click the numbered tab, the corresponding images are displayed. The ‘Scan Image’ is always the real time image during scanning. Also, if you right-click your mouse onto a numbered tab, you can remove this image before it is saved or you can store the unstored image on your hard disk as shown in Figure 9-6. 153 Software Manual for XEP Figure 9-6. How to remove (left) and store (right) buffer images in the Scan image view 9-1-5. Point-to-point Measurements You can make point-to-point measurements between features of an image in the Scan image view during the scanning process. When you click the right mouse button, three items (Marker, Measure, and Non except the ‘Send to scan area control’) will appear as shown in Figure 9-7. How to use these selections is described below. Marker The position on simultaneous image can be compared using the ‘Marker’ command. The ‘Marker’ command adds a circle to each image to identify features. The marker can be moved anywhere on the image by dragging the circle across the image. 154 Chapter 9. Scan Image View & Buffer Window (a) (b) 155 Software Manual for XEP Figure 9-7. Markers in the Scan image view Measure In order to measure the distance (w) and height difference (h) between the two features, at first, select the ‘Measure’ option in the context menu and move the crosshair to the feature you want to measure. By dragging the cursor away from the original position, a measuring bar will appear. Release the mouse button once the measuring bar is at the desired length. Do not click the cursor again. The distance between the two points and the height difference of the image will be displayed automatically at the right side of the cursor (see Figure 9-8 (a), (b), and (c)). Figure 9-8. How to measure the distance and the height difference between two points on the sample 156 Chapter 9. Scan Image View & Buffer Window None Allows you to cancel or end Marker or Measure commands (see Figure 9-8 (d)). 9-2. Buffer Window 9-2-1. Buffer Window By default, the Buffer window displays all newly generated images and these images are automatically saved on your hard disk. If you deselect the ‘Automatic Image Storing’ icon , the buffer images will not be saved automatically on your hard disk. Figure 9-9 shown below is the Buffer window with several images. The context menu in the Buffer window may be displayed by clicking the right mouse button as seen below and described further in the following section. NOTE! If the ‘Automatic Storing’ icon is not selected, any images cannot be stored and displayed in the Buffer window. In this case you should store or save manaully buffer images in the Scan image view. Figure 9-9. Buffer window with context menu Delete File This selection deletes the file itself of the selected image in the Buffer window. Once you select the ‘Delete File’ option, the ‘Confirm File Delete’ message box appears and asks you if you want to delete the selected file. However, the deleted file from the Buffer window will be sent to the recycle bin of your computer, so you can restore the deleted file later. Figure 9-10 shows the process of selecting the ‘Delete File’ option in the Buffer window. 157 Software Manual for XEP (a) (b) (c) (d) Figure 9-10. Delete File Remove Tiff This menu selection removes the ‘Tiff’ file of the selected image from the Buffer window. This option just removes the image from the Buffer window with its Tiff file remaining on your hard disk. Figure 9-11 shows the process to 158 Chapter 9. Scan Image View & Buffer Window select the ‘Remove Tiff’. (a) (b) Figure 9-11. Remove Tiff Insert Tiff This option inserts an image you select from your hard disk into the Buffer window. Using the ‘Insert Tiff’ option, the selected image can be inserted into the front buffer layer in the position that you select by pointing the cursor. After you select the ‘Insert Tiff’ option, the file select dialog appears. You can search for image files, and then click ‘OK’ button to insert the selected image. Figure 9-12 shows this process. Reload Tiff When you perform image processing on an image file and save the modified image file as the name of the original file, you can replace the original image with the modified image by selecting ‘Reload Tiff’ Figure 9-13 shows the buffer windows before (above) and after (below) selecting ‘Reload Tiff’. 159 Software Manual for XEP (a) (b) (c) (d) Figure 9-12. Insert Tiff (a) (b) Figure 9-13. Reload Tiff 160 Chapter 9. Scan Image View & Buffer Window View Information This is linked to the Image Information dialog (see Figure 9-16) that offers information of the selected image. The ‘Image Information’ dialog is described in detail in the next section. Image Size You can change the pixel size of the images in the Buffer window. By default, the image’s pixel size is set to be 128×128 as shown in Figure 9-14(a). According to the number of buffer images you want to load, you can reduce the images’ pixel size from 128×128 to 32×32 or 64×64. Figure 9-14 shows the buffer windows that have their pixel size set at 128×128(a), 32×32(b) and 64×64(c). (a) (b) (c) Figure 9-14. Image Size Send to XEI You can open the image processing program, XEI, with the selected 161 Software Manual for XEP image loaded into the XEI program so that you can perform image processing and data analysis. (a) (b) Figure 9-15. Send to XEI 9-2-2. Image Information Dialog In the Buffer window, you can open the Image Information dialog by double-clicking on the image of interest. In this dialog, you can view a list of scan parameters related to an image and you can add comments. You can also change the imaging color, the contrast range and level just as in the Scan image view. Thus, you can save or save as the modified file. Figure 9-16 shows the Image information for a selected image. 162 Chapter 9. Scan Image View & Buffer Window File Path Text Field Image View Control Window Selected Image Scan Parameter List Figure 9-16. Image Information dialog On the left side of the Image information dialog, there are both the ‘File Path’ text field and the Scan parameter list. The ‘File Path’ text field shows the file path of the selected image. The Scan parameter list shows the scan parameters related to the selected image. The scan parameters are described in detail in the following sections Head Mode Shows the Head mode type for the selected image in the Image Information dialog. This information correlates to the selection that was made in the XEP Part selection dialog in preparation for scanning. This information allows you to know which head mode was used to acquire an image. Source Shows the signal used to collect the data (for example Topography, Error signal, Lateral Force, etc,) which was selected in the Input Config dialog. Fast Scan Axis Displays the fast scan direction(x or y) that was used to acquire the image. 163 Software Manual for XEP Fast Scan Dir Shows the fast scan direction in which the data was collected. For X scan axis, data is collected from either left to right or vice versa. For Y scan axis, data is collected from either bottom to top or vice versa. Slow Scan Dir Shows the fast scan direction in which data was collected. For X scan axis, data is collected from either bottom to top or vice versa. For Y scan axis, data is collected from left to right or vice versa. Data Width Indicates the number of pixels (i.e. 64, 128, 256, 512, 1024, etc.) per horizontal scan line, which was selected in the Scan Config dialog of the Setup menu. Data Height Shows the number of pixels per vertical scan line which were selected in the Scan Config dialog. X Scan Size Shows the X scan size. In general, the X scan size is the same as the Y scan size since all scans are square. Y Scan Size Shows the Y scan size. In general, the Y scan size is the same as the X scan size since all scans are square. X Scan Offset Shows the specific X offset value of the Z scanner from its default midpoint value of (0, 0). Y Scan Offset Shows the specific Y offset value of the Z scanner from its default midpoint value of (0, 0). Rotation Shows the scan orientation, or the degree of rotation of the fast scan 164 Chapter 9. Scan Image View & Buffer Window direction. Scan Rate Displays the scan rate used to collect the image. Data Gain Shows the Z feedback gain value that was used to take an image. Set Point Shows the set point value used during imaging. Sample Bias Shows the sample bias used while collecting the image. Tip Bias Shows the tip bias used while collecting the image. Comments Enables you to read and/or add comments related to the image. How to use this item is explained below. 9-2-3. How to Add Comments to a Buffer image You can open the Image information dialog when you double-click on any image in the Buffer window. Then, double-click onto the ‘Comment’ text field, which is the last row of the scan parameter list. This will allow you can either edit or add comments to the original image file. Also, you can copy an image file with the new comments. Figure 9-17 shows how to add comments to a buffer image. The procedure for adding comments to a buffer image is described in detail as follows: 1. After clicking anywhere in the ‘Comment’ text field, the cursor is changed to a text bar, which enables you to input information using the keyboard 2. Add comments about the selected buffer image. 3. Press the “Enter” key. The comments will become blue in color 4. If you want to edit the comments, click the cursor again while on 165 Software Manual for XEP the ‘Comment’ text field. The text field will be filled with a blue color. 5. Edit the comments and click “Enter” key. This data can be saved by clicking the ‘Save As’ or ‘Save’ button, which is explained later. Step 1 Step 3 Step 2 Step 4 Step 5 Figure 9-17. Procedure to add or edit comments in the Image Information dialog Save As button You can copy an image with the new comments by clicking the ‘Save As’ button . Figure 9-18 shows the ‘Save As’ dialog that appears when you click the ‘Save As’ button. In the ‘Save As’ dialog, you can rename the modified file and convert the file type to save it in a specified directory. Save button After you edit or add some comments to the original ‘.tiff’ file, you can overwrite the comments in the original ‘.tiff’ file by clicking the ‘Save’ button 166 Chapter 9. Scan Image View & Buffer Window . Figure 9-19 shows the ‘Save’ confirmation message box which asks if you want to save the edited data. Figure 9-18. ‘Save As’ dialog Figure 9-19. ‘Save’ confirmation message box Close When you are finished, you can close the Image Information dialog by clicking the ‘Close’ button. 167 Software Manual for XEP This is a blank page. 168 Index Index Avg, Line Profile, 37 A B A+B signal, 91 A-B signal, 91 Buffer window, 21, 32, 149 AC Track, 63 Delete File, 149 AC, Trace Control Window, 131 Image Size, 153 Acquire, 43, 49 Insert Tiff, 151 Add Point Reload Tiff, 151 GoTo control dialog, 99 Remove Tiff, 150 Scan image view, 40 Send to XEI, 153 Advanced View Information, 153 Calibration, 56 C GoTo control dialog, 104 Part Config, 75 Cal, F/D Spectroscopy, 44 Preferences, 83 calibration Allow docking, 14 advanced, 56 Amplitude Feedback, 74 coarse, 55 Approach Calibration, 55 button, 106 Cantilever, type selection, 75 Type setup, 68 C-D signal, 91 Auto Change Password, 58 contrast range, 141 Compress Image Data, 68 Offset, 43 Current Amplifier, 76 Scale, 44, 131 Custom mode, Monitor Window, 89 AutoFlat, 64 Custom, Installation, 6 Automatic image storing, 149 Aux Dac, 76 Average, 43 D DC Center Origin, 133 169 Software Manual for XEP deflection signal, 92 Force Limit, 43 Delete File, 149 Frequency Sweep, 72 Plot, 72 Delete point GoTo control dialog, 100 Selected Freq, 73 Set Point, 73 Delete Point Scan image view, 41 Start Freq, 73 Detector driven, 67 frictional information, 91 Down Speed, 43 From and To, 53 Download, GoTo control dialog, 105 FT(Fourier Transform), 130 Drive G Amplitude, 73, 121 Frequency Sweep, 73 Get Point, 98 Scan Control, 121 GoTo control dialog, 97 Driving source, 50 Add Point, 99 Driving Source, 53 Delete Point, 100 Get, 100 E Get Point, 98 Error signal, 92, 120 GoTo, 97 Error signal bar, 92 Point Group List, 100 Exit, 25 Point List, 98 Step to, 102 F F/D curve, 39 Store, 101 Grid, 43, 49 F/D Spectroscopy, 39 H Acquiring and Saving, 45 Plot, 44 Head mode, Monitor Window, 89 Scan Control Window, 42 Head mode, Part Config, 75 Scan Image View, 40 Head On, 35 fast scan direction, 115 Hide, 15 feedback signal, 92 Hold File Menu, 25 Trace Control Window, 130 Filename Ex, 82 XY Servo Scan, 70 Filename Format, 82 I Focus Stage Focus Follow, 107 Focus stage pad, 107 170 I/V curve, 47 I/V Spectroscopy, 47 Index L Acquiring and Saving, 50 Plot, 49 Scan Control Window, 48 Scan Image View, 47 Image, 113 Image information dialog, 154 Image Information dialog, 46 Image pixel size, 65 Image Size, 153 Image view control window, 140 Auto, 141 Offset, 141 Palette, 140 Range, 141 Zoom, 141 Image view control window, Line Profile, 37 Image view scale window, 142 Status display, 143 lateral deflection, 91 Layout Manager, 77 Get default, 78 List, 79 Name, 78 Open previous, 79 Set as default, 78 Store current, 78 Lift Z, 106 Line Profile, 36 Acquiring and Saving, 37 Avg, 37 Input and Scan Config, 38 LPF, 37 Plot, 38 LPF Input Config, 63 Line Profile, 37 Incremental, 69 M Input Config, 60 AC Track, 63 Auto Flat, 64 LPF, 63 Scan Direction, 64 Selected Input, 62 Unit, 62 Insert Tiff, 151 Installation Custom, 6 Typical, 6 Integral Gain, 71 Integral Ratio, 71 Interlace, 67 Maintenance Mode, 58 Marker, 41, 146 Measure, 41, 147 Menu Bar, 18 Menus File Menu, 25 Help, 84 Mode Menu, 34 Setup, 59 Tools, 77 View Menu, 26 Mode Menu, 34 Calibration Mode, 55 Change Password, 58 Head On, 35 171 Software Manual for XEP Maintenance, 58 Voltage Mode, 75 Scan Mode, 35 Z Scanner Range, 75 Trace Mode, 50 Z Voltage Mode, 75 Monitor Window, 22, 31, 89 Period, I/V Spectroscopy, 49 Custom mode, 89 Period, Trace Mode, 54 Error Signal bar, 92 Piezo-response, 49 Head Mode, 89 Point list, F/D Spectroscopy, 43 Z Scanner bar, 92 Point list, GoTo control dialog, 98 Motors Control Window, 23, 29 Point list, I/V Spectroscopy, 49 Move Control Windows, 95 Points, F/D Spectroscopy, 43 Focus Stage, 107 Points, I/V Spectroscopy, 49 XY stage control Window, 95 Points, Trace Mode, 54 Z Stage, 105 Pont Group list, 100 Preferences, 81 Move Here, 40 Advanced, 83 N Output filename generation rule, 82 NanoIndentation, 50 Q NCM ASetup, 121 None, 41, 148 quad-cell PSPD, 91 Normal mode, Scan Control Window, Quick, 69 111 R O Offset R. Origin, XY Stage, 103 R.Origin, 109 Image view control window, 141 X, Y, 113, 117, 126 Range, 141 Image view control window, 141 Oscilloscope screen, 128 reference signal, 92, 118 Output filename generation rule, 82 Refresh, 74 Output Window, 22, 30 Reload Tiff, 151 Over scan, 66 Remove Tiff, 150 Repeat, 112, 114 P Repeat, F/D Spectroscopy, 42 Palette, 140 Repeat, I/V Spectroscopy, 49 Part Config, 74 Reset Advanced, 75 Focus Stage, 108 Cantilever, 75 XY Stage, 104 172 Index Normal mode, 111 Z Stage, 108 Rotation, 113, 117, 126 Scan Area Mode, 111 Scan Direction, 64 S Scan Image View, 20, 139 Sample Bias, 121 F/D Spectroscopy, 40 Scale Up/Down, 45 I/V Spectroscopy, 47 Scan Area Mode, 111, 121 Scan Mode, 35 Change Scan Location, 125 F/D Spectroscopy, 39 Change Scan Size, 124 I/V Spectroscopy, 47 Rotate Scan Area, 126 Line Profile, 36 Tracker, 123 Scan Config, 65 Scan off, 113 Scan Rate, 113, 118 Compress Image Data, 68 Scan Size, 116, 124 Detector Driven, 67 Scan Size X ,Y, 113 Image pixel size, 65 scanner nonlinearity, 70 Interlace, 67 Selected Freq, 73 Over Scan, 66 Selected Input, 62 Sine Scan, 66 Servo On Off, 104 Scan Control Session Drive, 121 List, 81 NCM ASetup, 121 Location, 80 Offset X,Y, 117, 126 Name, 80 Repeat, 114 Open Previous, 79 Rotation, 117, 126 Session Manager, 79 Sample Bias, 121 Set Point, 73, 113, 118 Scan Rate, 118 Setup, 59 Scan Size, 116, 124 Approach, 68 Set Point, 118 Aux DAC, 76 Slope, 115 Current Amplifier, 76 Tip Bias, 121 Frequency Sweep, 72 Two way, 114 Input Config, 60 Z servo, 119 Part Config, 74 Z Servo Gain, 120 Scan Config, 65 Scan Control Window, 19, 31, 111 F/D Spectroscopy, 42 I/V Spectroscopy, 48 XY Servo Scan, 69 Setup Cursor Avg. Range, 136 Number of Average Point, 137 173 Software Manual for XEP Show Leveling Bar, 135 Auto Scale, 131 Show Line Cursor, 45, 135 FT, 130 Show Origin, 45, 132 Hold, 130 Show Pair Cursor, 45, 134 Signal Name List, 129 Show Phase, 74 Trace Control Window, 21 Signal Name List, 61, 129 Hide, 28 Sine scan, 66 Show, 27 Slope, 113, 115 Trace Control Window, F/D Slow, 69 Spectroscopy, 44 slow scan direction, 115 Start Freq, 73 Trace Control Window, I/V Spectroscopy, 49 Status Bar, 24, 27 Status display, 143 Step to, 102 Trace Control Window, Line Profile, 38 Trace Line Analysis, 132 Store, 37, 101 DC Center Origin, 133 Sweep, 54 Setup Cursor Avg Range, 136 range, 54 Show Leveling Bar, 135 velocity, 54 Show Line Cursor, 135 Show Origin, 132 T Tiff Show Pair Cursor, 134 Trace Mode, 50 Security, 3 Driving Source, 53 What is, 2 From and To, 53 Why, 3 Period, 54 Tile Docked Windows, 33 Points, 54 Time Interval, 43, 49 XY Scanner ON OFF, 55 Tip Bias, 113, 121 XY Trace Control window, 53 Title Bar, 17 XY Trace Plot window, 52 Toolbar, 18, 27, 85 Z Servo, 55 Tools Menu, 77 Tracker, 123 Layout Manager, 77 Two way, 112, 114 Preferences, 81 Typical, Installation, 6 Session Manager, 79 U Topographic information, 91 Trace control Window, 128 AC, 131 174 Uninstallation, 4 Unit, 62 Index Up Speed, 43 XY Servoscan, 69 Upload, GoTo control dialog, 105 Hold, 70 Integral Gain, 71 V vertical deflection, 91 Integral Ratio, 71 XY Stage Control Window, 23, 30, 95 Advanced, 104 View Buffer window, 32 Download, 105 Hide Trace Control Window, 28 GoTo control dialog, 97 Monitor Window, 31 R. Origin, 103 Motors Control Window, 29 Reset, 104 Output Window, 30 Servo On Off, 104 Scan Control Window, 31 Upload, 105 Show Trace Control Window, 27 XY Stage Pad, 96 Status Bar, 27 XY Trace Control window, 53 Toolbar, 27 XY Trace Plot window, 52 XY Stage Control Window, 30 XY Voltage mode, 75 View Information, 153 Z View Menu, 26 Z feedback loop, 55, 92 W Windows Z scanner bar, 92 Z Scanner Range, 75 Allow Docking, 14 Z servo, 55, 119 Hide, 15 Z Servo, 114 Rearrangement, 12 Z Servo Gain, 114, 120 Tile Docked, 33 Z stage Approach, 106 X X, Y, 112 XEI, 1 Lift Z, 106 Z Stage, 105 Z Stage pad, 105 for Image rocessing, 83 Z Voltage mode, 75 Send to, 153 Zoom XEP, 1 F/D Spectroscopy, 45 XEP Part selection, 74 Frequency Sweep window, 74 XY Scanner ON OFF, 55 Image view control window, 141 175 Software Manual for XEP This is a blank page. 176 Customer’s Document Feedback Form In an effort to ensure that the content of this manual is updated and accurate, PSIA welcomes any and all customer feedback. If, during the course of using this manual, you come upon any errors, inaccuracies, or procedural inconsistencies, or if you have other content suggestions, please take the time to forward your comments to us for consideration in future manual revisions. Please check that you think this comment is critical ( ) or moderate ( ) or minor ( ). Comments: Customer Information Name: Date: Company/Institution: System model: Address: E-mail: Fax: Phone: Country: You may fax this form or e-mail to PSIA: Homepage: www.advancedspm.com E-mail: [email protected] Address: Induspia 5F, Sang-Daewon-Dong 517-13, Sungnam, Korea 462-120 Fax: +82-31-734-2995 Phone: +82-31-734-2900 Customer’s Document Feedback Form In an effort to ensure that the content of this manual is updated and accurate, PSIA welcomes any and all customer feedback. If, during the course of using this manual, you come upon any errors, inaccuracies, or procedural inconsistencies, or if you have other content suggestions, please take the time to forward your comments to us for consideration in future manual revisions. Please check that you think this comment is critical ( ) or moderate ( ) or minor ( ). Comments: Customer Information Name: Date: Company/Institution: System model: Address: E-mail: Fax: Phone: Country: You may fax this form or e-mail to PSIA: Homepage: www.advancedspm.com E-mail: [email protected] Address: Induspia 5F, Sang-Daewon-Dong 517-13, Sungnam, Korea 462-120 Fax: +82-31-734-2995 Phone: +82-31-734-2900