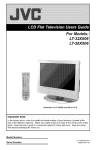
1
TIPS ON THE CARE OF Y
OUR CENTRAL V
ACUUM SYSTEM
YOUR
VA
Your power unit is warranted against defective materials and workmanship but not against misuse. There is a service
charge for repairing or replacing damaged or misused components of the system or for unnecessary service calls.
Your built-in system is a lifetime improvement for you and your family. Follow these simple tips and you will enjoy
it for many years:
1) DO NOT PLACE ANYTHING ON TOP OF THE POWER UNIT
To do so would cause the motor to overheat as it will impair the cooling air flow.
2) DO NOT OVERFILL YOUR DIRT CANISTER
Allowing the dirt canister to fill up to the bottom of the plastic cone will nullify the cyclonic separator system
and could cause debris to be drawn into the upper screen which may, in time, damage your power unit.
3) USE ONE INLET AT A TIME TO MAINTAIN PROPER AIR FLOW
Using more than one vacuum inlet at a time reduces the air flow to a level below that which is required to effectively
deep clean your carpets.
4) STORE YOUR HOSE AND TOOLS PROPERLY
When not in use, always hang up your hose and store the cleaning tools and wands in a place where they
will not be damaged.
5) HOLD THE INLET DOOR OPEN WHEN REMOVING THE HOSE
After removing the hose from the inlet, hold the inlet door open for a few seconds to:
a) Make sure the unit has stopped.
b) Clear any residual dirt out of the vacuum tubing
6) DO NOT PICK UP ANY LIQUIDS
Do not pull liquids into the vacuum tubing since any liquid left in the tubing may:
a) Drain back out of the wall inlet and cause streaking of the walls.
b) Cause dirt build-up in the tubing that could eventually clog the system.
Wet Pick-up Units are available for this type of use. Contact your local dealer.
7) BE CERTAIN TO FILL OUT AND RETURN THE WARRANTY CARD
Take just a few moments to fill out the warranty card, cut it out, place a stamp on it and drop it in the mail.
- IMPORTANT SERIAL NUMBER LOCATION FOR CENTRAL
VACUUM SYSTEM
ON ALL SR36 & SR36C POWER UNITS:
This unit comes equipped
with an internal thermal
switch. When tripped it
requires up to 10 (ten)
minutes to reset before
using.
The serial number for your wall mounted central vacuum system
can be found located under the unit model label (see representative diagram below). The unit model label will be found on the
left or right side of the unit near the top and close to the wall.
Unit Label
Cette unite vient equipe d’un
commutateur thermique
interne. Une fois declenche
inutes pour remettre a zero
avant utilisation.
(representative onlyyours may differ)
Date Code
XXXX
(representative only.
Yours may differ)
Serial Number
XXXXXXXXXXX
For more information, visit our website at
www
.lindsaymfg
.com
www.lindsaymfg
.lindsaymfg.com
(representative only.
Yours may differ)
©Lindsay Manufacturing, Inc. 2007
Owners Manual
TABLE OF CONTENTS
Safety Instructions
Grounding Instructions
Operating Your Central Vacuum
Maintenance
Single Piece Cyclonic Units
Split Canister Cyclonic Units
Servicing Air Channel
Inverted Bag Units
Paper Bag Units
Troubleshooting Guide
Warranty
Vacu-Maid & Silent Partner
Astro Vac
Tips on the Care of Your Central Vacuum
Serial Number Location
Printed in USA by LMI
05/07
Pg. 1-2
Pg. 2-3
Pg. 4
Pg.
Pg.
Pg.
Pg.
Pg.
Pg.
5
6
7
8
9
10-12
Pg.
Pg.
Pg.
Pg.
13
14
15
15
IMPOR
TANT
IMPORT
ANT:: Carefully read and retain this booklet.
Lindsay Manufacturing, Inc.
15
L653
CENTRAL VACUUM SYSTEMS
www.lindsaymfg.com
This appliance is for residential or commercial use
Astro-Vac®
IMPORT
ANT SAFETY INSTRUCTIONS
IMPORTANT
Central Vacuum Systems
LIFETIME LIMITED* WARRANTY
When using an electrical appliance, basic precautions should always be followed, including
the following:
This Warranty gives you specific legal rights, you may also have other rights
which vary from State to State (or Province).
*
Read all instructions before using this appliance.
WARNING:
*
To reduce the risk of fire, electric shock or injury:
Always follow these safety instructions
1. Do not leave room when hose is plugged in to the inlet. Disconnect power before servicing.
2. Electric shock could occur if used on wet surfaces.
3. Do not allow to be used as a toy. Close attention is necessary when used by or near children.
4. Use only as described in this manual. Use only those attachments that are recommended.
5. Do not use with damaged cord or plug. If applicance is not working as it should, has been dropped,
damaged, left outdoors, or dropped into water, return it to a service center.
6. Do not pull or carry by cord, use cord as a handle, close a door on cord, or pull cord around
sharp edges or corners. Do not run appliance over cord. Keep cord away from heated
surfaces.
7. Do not unplug by pulling on cord. To unplug, grasp the plug, not the cord.
8. Do not handle plug or appliance with wet hands.
9. If your system is equipped with an electrical vacuum hose, do not use if damaged. Do not
pull hose around sharp corners, and keep hose away from heated surfaces. Do not run other
appliances over vacuum hose.
10. Do not unplug system by pulling on vacuum hose. To unplug, grasp the cuff, located on
the end of the hose. If you have a standard non-electric hose, pull out with a twisting motion. If your
hose is an electric hose with direct connect plug in, pull straight out.
11. Do not put anything into vacuum inlets or vents. Keep all inlets and vents free of things that
might slow airflow, such as lint, dust and hair. Do not use the vacuum system if something
is blocking an opening.
12. If equipped with an air turbine power brush unplug the vacuum hose before attaching
power brush. Keep fingers, hands and toes away from the base of the power brush. Failure to
do so could result in injury from moving parts.
13. Do not use the electric vacuum hose if it is damaged, cut or punctured. Do not pick up sharp
objects with the vacuum nozzle or hose. Hose may contain electrical wires.
14. In the event the power unit should get wet, do not use the vacuum system until it has been properly
serviced and examined by a serviceman or installer.
1
ITEMS COVERED
*ASTRO-VAC power unit canisters carry a lifetime limited warranty to the original owner against defects in material and workmanship
until a time when the original owner ceases to own the ASTRO-VAC system, or the building it was originally installed in. The
motor and all internal electrical components of a ASTRO-VAC system are warranted for a period of 5 years. Hoses, power brushes,
floor brushes, and cleaning tools purchased in a DUSTMATE tool kit are warranted for a period of 2 years. All warranties commence
from the original date of purchase. Any warranted defects will be repaired or replaced without cost to the customer except for
transportation charges and/or charges associated with removal and reinstallation. This Warranty is given only to the original owner
and cannot be transferred.
ITEMS NOT COVERED
This Warranty does not cover such conditions as normal wear to the power unit resulting from normal usage or from damage caused
by accidents, negligence, misuse, or improper alteration, or from damage by fire, flood, or other acts of God. Motor brush wear
is normal and is not considered to be a defect in material or workmanship. Further, this Warranty does not apply to vacuum tubing,
fittings, wall inlets, or to the act of installing the ASTRO-VAC Central Vacuum Systems.
TERMS OF WARRANTY AND RESTRICTIONS
*The Lifetime / 5 year / 2 year terms of this limited Warranty is effective for single family residential applications only. In commercial/
industrial and other applications, this limited warranty is valid for ninety (90) days from the date of installation for all components
of the system. In commercial/industrial and other applications, this warranty shall be for the benefit of the original owner of the
ASTRO-VAC Central Vacuum System. Warranty will be void if service is provided by anyone other than an authorized ASTROVAC dealer using ASTRO-VAC replacement parts.
REQUIRED REGISTRATION
Included with the papers which accompany the ASTRO-VAC product is a Warranty registration card. Please fill out and return
this Warranty registration card or register online at www.lindsaymfg.com/registration so that the required warranty information is
on file. We also recommend keeping copies of receipts and delivery slips so that there is no discrepancy on date of installation
or purchase.
HOW TO INVOKE THIS WARRANTY
If it should ever become necessary to invoke the rights and privileges of this Warranty during the period of effectiveness the following
procedures should be followed:
a) Refer to operating maintenance instructions to ascertain that a malfunction of the power unit has actually occurred.
b) Notify the authorized ASTRO-VAC dealer-installer who sold the unit, that you have a problem and
describe the nature of your difficulty.
c) If the ASTRO-VAC distributor-installer has not solved your problem within a reasonable time (but in all
events within 45 days of when you became aware of a defect), write or call Lindsay Manufacturing, Inc., to
obtain instructions for warranty service.
DISCLAIMER OF OTHER WARRANTIES
LINDSAY MANUFACTURING, INC., HEREBY DISCLAIMS ALL LIABILITY WHATSOEVER FOR ANY INCIDENTAL OR CONSEQUENTIAL DAMAGES WHICH OCCUR AS A RESULT OF DEFECTS IN MATERIAL AND WORKMANSHIP IN THE PRODUCT.
LINDSAY MANUFACTURING, INC., ALSO HEREBY DISCLAIMS ALL IMPLIED WARRANTIES, INCLUDING THE WARRANTIES OF
MERCHANTABILITY AND FITNESS FOR A PARTICULAR PURPOSE.
SOME STATES (or provinces) DO NOT ALLOW THE EXCLUSION OR LIMITATION OF INCIDENTAL OR CONSEQUENTIAL
DAMAGES, SO THE ABOVE LIMITATION OR EXCLUSION MAY NOT APPLY TO YOU. SOME STATES (or provinces) DO NOT
ALLOW LIMITATIONS ON HOW LONG AN IMPLIED WARRANTY LASTS, SO THE ABOVE LIMITATIONS MAY NOT APPLY TO YOU.
TO THE EXTENT THAT ANY LAW PROHIBITS, IN WHOLE OR PART, THE LIMITATION OF IMPLIED WARRANTIES, ANY IMPLIED
WARRANTY APPLICABLE TO THE PRODUCT SHALL NOT EXCEED A PERIOD OF LIFETIME / 3 YEARS / 2 YEARS FOR SINGLE
RESIDENTIAL APPLICATIONS OR 90 DAYS FOR COMMERCIAL/INDUSTRIAL AND OTHER APPLICATIONS.
This warranty is exclusive and is in lieu of all other expressed warranties, and in lieu of all other obligations or liabilities on the
part of Lindsay Manufacturing, Inc., for damage to person or property. We do not authorize any person, including any dealer, agent,
supplier, or representative of Lindsay Manufacturing, Inc., to make any other warranty or guarantee on our behalf, or assume for
us any liability on the ASTRO-VAC Central Vacuum System other than that contained herein. No oral representations regarding
warranty shall be binding upon Lindsay Manufacturing, Inc., whether extended before or after sale of that product.
LINDSAY MANUFACTURING, INC.
/
P.O. BOX 1708
/
PONCA CITY, OK 74602-1708
ASTRO-VAC and DUSTMATE are registered trademarks of Lindsay Manufacturing, Inc.
14
/
580-762-2457
15. Do not handle electric hose or inlets with wet hands.
Vacu-Maid®
16. Keep hair, loose clothing, fingers and all parts of the body away from wand, other openings
and moving parts.
Central Vacuum Systems
LIFETIME LIMITED* WARRANTY
17. If so equipped, do not use your central vacuum system without dustbag and/or filters in place.
This Warranty gives you specific legal rights, you may also have other rights
which vary from State to State (or Province).
ITEMS COVERED
*VACU-MAID power unit canisters carry a lifetime limited warranty to the original owner against defects in material and workmanship
until a time when the original owner ceases to own the VACU-MAID system, or the building it was originally installed in. The motor
and all internal electrical components of a VACU-MAID system are warranted for a period of 10 years. Hoses, power brushes, floor
brushes, and cleaning tools purchased in a VACU-MAID or DUSTMATE tool kit are warranted for a period of 2 years. All warranties
commence from the original date of purchase. Any warranted defects will be repaired or replaced without cost to the customer
except for transportation charges and/or charges associated with removal and reinstallation. This Warranty is given only to the
original owner and cannot be transferred.
ITEMS NOT COVERED
This Warranty does not cover such conditions as normal wear to the power unit resulting from normal usage or from damage caused
by accidents, negligence, misuse, or improper alteration, or from damage by fire, flood, or other acts of God. Motor brush wear
is normal and is not considered to be a defect in material or workmanship. Further, this Warranty does not apply to vacuum tubing,
fittings, wall inlets, or to the act of installing the VACU-MAID Central Vacuum Systems.
TERMS OF WARRANTY AND RESTRICTIONS
*The Lifetime / 10 year / 2 year terms of this limited Warranty is effective for single family residential applications only. In commercial/
industrial and other applications, this limited warranty is valid for ninety (90) days from the date of installation for all components
of the system. In commercial/industrial and other applications, this warranty shall be for the benefit of the original owner of the
VACU-MAID Central Vacuum System. Warranty will be void if service is provided by anyone other than an authorized VACU-MAID
dealer using VACU-MAID replacement parts.
REQUIRED REGISTRATION
Included with the papers which accompany the VACU-MAID product is a Warranty registration card. Please fill out and return
this Warranty registration card or register online at www.lindsaymfg.com/registration so that the required warranty information is
on file. We also recommend keeping copies of receipts and delivery slips so that there is no discrepancy on date of installation
or purchase.
HOW TO INVOKE THIS WARRANTY
If it should ever become necessary to invoke the rights and privileges of this Warranty during the period of effectiveness the following
procedures should be followed:
a) Refer to operating maintenance instructions to ascertain that a malfunction of the power unit has actually occurred.
b) Notify the authorized VACU-MAID dealer-installer who sold the unit, that you have a problem and
describe the nature of your difficulty.
c) If the VACU-MAID distributor-installer has not solved your problem within a reasonable time (but in all
events within 45 days of when you became aware of a defect), write or call Lindsay Manufacturing, Inc., to
obtain instructions for warranty service.
DISCLAIMER OF OTHER WARRANTIES
LINDSAY MANUFACTURING, INC., HEREBY DISCLAIMS ALL LIABILITY WHATSOEVER FOR ANY INCIDENTAL OR CONSEQUENTIAL DAMAGES WHICH OCCUR AS A RESULT OF DEFECTS IN MATERIAL AND WORKMANSHIP IN THE PRODUCT.
LINDSAY MANUFACTURING, INC., ALSO HEREBY DISCLAIMS ALL IMPLIED WARRANTIES, INCLUDING THE WARRANTIES OF
MERCHANTABILITY AND FITNESS FOR A PARTICULAR PURPOSE.
SOME STATES (or provinces) DO NOT ALLOW THE EXCLUSION OR LIMITATION OF INCIDENTAL OR CONSEQUENTIAL
DAMAGES, SO THE ABOVE LIMITATION OR EXCLUSION MAY NOT APPLY TO YOU. SOME STATES (or provinces) DO NOT
ALLOW LIMITATIONS ON HOW LONG AN IMPLIED WARRANTY LASTS, SO THE ABOVE LIMITATIONS MAY NOT APPLY TO YOU.
TO THE EXTENT THAT ANY LAW PROHIBITS, IN WHOLE OR PART, THE LIMITATION OF IMPLIED WARRANTIES, ANY IMPLIED
WARRANTY APPLICABLE TO THE PRODUCT SHALL NOT EXCEED A PERIOD OF LIFETIME/5 YEARS/2 YEARS FOR SINGLE
RESIDENTIAL APPLICATIONS OR 90 DAYS FOR COMMERCIAL/INDUSTRIAL AND OTHER APPLICATIONS.
This warranty is exclusive and is in lieu of all other expressed warranties, and in lieu of all other obligations or liabilities on the
part of Lindsay Manufacturing, Inc., for damage to person or property. We do not authorize any person, including any dealer, agent,
supplier, or representative of Lindsay Manufacturing, Inc., to make any other warranty or guarantee on our behalf, or assume for
us any liability on the VACU-MAID Central Vacuum System other than that contained herein. No oral representations regarding
warranty shall be binding upon Lindsay Manufacturing, Inc., whether extended before or after sale of that product.
LINDSAY MANUFACTURING, INC.
/
P.O. BOX 1708
/
PONCA CITY, OK 74602-1708
VACU-MAID and DUSTMATE are registered trademarks of Lindsay Manufacturing, Inc.
13
/
580-762-2457
18. Always disconnect vacuum system before emptying dirt canister, cleaning filters or replacing
dustbag.
19. Use extra care when cleaning on stairs.
20. Do not use to pick up flammable or combustible liquids such as gasoline or use in areas
where such liquids may be present.
21. Do not use to pick up dry wall or cement dust. Doing so will void warranty.
22. Do not pick up anything that is burning or smoking, such as cigarettes, matches or hot ashes.
23. When finished put the vacuum hose and attachments away to prevent tripping accidents.
24. For a grounded appliance, connect to a properly grounded outlet only. See grounding instructions.
25. For electric vacuum hose, connect to a properly wired 2-pole polarized outlet.
26. Electric vacuum hose, use only with the electric power brush for use with the central vacuum
system.
27. The extension cord provided may only be used with the electric power brush for use with
the central vacuum system.
28. DO NOT USE the electric vacuum hose or extension cord with any appliance other than the
central vacuum electric power brush for which it is intended.
CAUTION: Do not use when rug (or floor) is wet.
ATTENTION: Ne pas utiliser lorsque le tapis (ou le plancher) est moduille.
SAVE THESE INSTRUCTIONS
-WARNING
ARNING-ELECTRIC SHOCK COULD OCCUR IF USED ON WET SURFACES
GROUNDING INSTRUCTIONS
FOR CORD CONNECTED APPLIANCE
This appliance must be grounded. If it should malfunction or breakdown, grounding provides a path
of least resistance for electric current to reduce the risk of electric shock. Your central vacuum system
is supplied with an electrical cord having a grounding pin. It is recommended that this plug be used
only with an appropriate outlet that is properly installed and grounded in accordance with all local
codes and ordinances. This appliance is for use on a nominal 120-volt circuit (U.S. only) or 230/250
volt circuits where applicable, and has a grounded plug that looks like the plug shown in Figure A. A
temporary adapter, that looks like the adapter illustrated in Figure B, may be used to connect this plug
to a 2-pole receptacle as shown in Figure B if a properly grounded outlet is not available.
The temporary adapter should be used only until a properly grounded outlet (Figure A) can be installed
by a qualified electrician. NOTE: Temporary adapters are not permitted in Canada
Canada. The green
colored rigid ear, lug or the like, extending from the adapter, must be connected to a permanent
ground such as a properly grounded outlet box cover. Whenever the adapter is used, it must be held
in place by a metal screw.
ADAPTER
GROUNDED
OUTLET
METAL
SCREW
TAB FOR
GROUNDING SCREW
GROUNDING
PIN
FIGURE A
FIGURE B
DANGER--- Improper connection of the equipment - grounding conductor can result in a
risk of electric shock. Check with a qualified electrician or your installer if you are in doubt as to
whether the outlet is properly grounded. Do not modify the plug provided with the appliance - if it
will not fit the outlet use a temporary adaptor as shown and have a proper outlet installed by a
qualified electrician as soon as possible.
GROUNDING INSTRUCTIONS
FOR PERMANENTLY CONNECTED APPLIANCE
This appliance must be connected to a grounded metal, permanent wiring system; or an equipmentgrounding conductor must be run with the circuit conductors and connected to the equipmentgrounding terminal or lead on the appliance.
OPTIONAL EQUIPMENT
FOR ELECTRIC HOSE OR VACUUM HOSE USED WITH EXTENSION CORD
This appliance must be connected to a polarized (2-pole receptacle), permanent wiring system.
RECEIVER BOX FOR REMOTE CONTROL
This receiver box must be directly plugged into a polarized (2-pole receptacle) permanent wiring
system. Do not use an adapter.
DANGER --- Do not use the receiver box for any other purpose except for use with the intended
central vacuum system, 24 volt remote control system. Any other use may cause malfunction or
breakdown of the receiver box.
3
12. Dirt Canister - Over Filled - Whenever low airflow is experienced the first thing to check is the dirt canister
for over filling or clogged filter bag (some models). Refer to Number 13. Read the Operations section of this
manual for information on how to clean your dirt canister.
13. Filter Bag - Clogged (some models) - Read the Operations section of this manual for information on how to
remove and clean your filter bag.
14. Dirt Canister Lid - Off - On those models with lift off dirt canister lids, (check the Operations section of this
manual) the lid must be replaced squarely on top of the canister or it will allow a vacuum leak.
15. Dirt Canister Gasket - Loose - If the dirt canister gasket has been pulled loose, it will allow a vacuum leak. The
gasket may be reattached with contact cement or any of the so called "super glues".
16. Outside Exhaust - Blocked - Check the exhaust system by removing the tubing from the motor blower exhaust
and compairing the airflow at this point versus the airflow reaching the outside. If blockage is detected and cannot
be removed, contact you service technician.
17. Dirt Canister - Not Attached - If the dirt canister latches (some models) are not properly closed, it will cause an
air leak along the gasket and reduce your cleaning ability.
18. Another Wall Inlet Door - Open - Check all the inlet valves to make sure that only one inlet is in use at a time.
Attempting to clean from two or more inlets at a time will reduce the airflow below the level required to deep clean
your carpets.
19. Motor Protection Screen - Clogged - This usually occurs due to allowing the dirt canister to over fill, or a broken
filter bag (some models). Refer to the Operations section of this manual for instructions on cleaning the blower
protection screen.
20.. Relay Stuck - On - Refer to Number 9. If after using the procedures described in Number 9 it appears
20
that the relay is sticking on, unplug the power cord to cut off all electricity to the power unit. Caution: Checking the wiring in the power unit should only be attempted by a qualified service technician.
21. Relay Stuck - Off - If the procedures described in Numbers 1, 2, 3, 4, 5, 6 or 7, do not correct the power unit
not starting, then it could be a malfunction of the relay, the low voltage transformer could be burned out, or there
could be a loose wire in the power unit. If you suspect a malfuntion in the power unit, contact your service technician.
22. Transformer - Burned Out - Refer to Number 21.
23. Loose Wire In the Power Unit - Refer to Number 21.
24. A Hose Plugged Into Another Inlet Valve - Cleaning from more than one inlet at a time will reduce the airflow
to less than is required to deep clean your carpets.
25. P.C. Board Relay stuck on - Refer to Number 9. If after using the procedures described in Number 8
itappears that the relay is sticking on, unplug the power cord to cut off all electricity to the power unit. Caution: Checking the wiring in the power unit should only be attempted by a qualified service
technician.
26. P.C. Board Transformer burned out - If the procedures described in Numbers 1, 2, 3, 4, 5, 6 or 7, do not
correct the power unit not starting, then it could be a malfunction of the relay, the low voltage transformer could be
burned out, or there could be a loose wire in the power unit. If you suspect a malfunction in the power unit, contact
your service technician.
27. LED Light- Some units have an LED light at the unit. If the LED light is not on, refer to number 5. If you have
power at the unit but LED light is off, contact your local service technician.
IF YOU CANNOT DIAGNOSE OR REPAIR YOUR TROUBLE, CONTACT THE NEAREST DISTRIBUTOR.
12
3. Circuit Breaker in House Panel - Check your house breaker panel - If the circuit breaker if off, you may have
too many appliances utilizing that circuit. For best results, your power unit should be on a separate circuit.
Try to remove some of the extra circuit load by unplugging other devices. If the breaker continues to cut off call your service technician.
4. Internal Thermal Switch in Unit - If your unit comes equipped with an internal thermal switch and quits running,
it may require 10 minutes to cool off before resetting itself.
5. Electrical Wall Outlet Plug - Sometimes the electric wiring from the house breaker panel to the wall outlet plug
can become loose or broken. Plug a lamp or another electric appliance into the outlet to assure that you are
getting power. If not, call your electrical contractor.
6. Switch in the Wall Inlet Stuck in Off Position - Plug your flexible hose into the other wall inlets - if your unit
functions normally then the problem lies in the switch or remote control circuit to the inoperative inlet valve. The
bolts holding the micro-switch in the inlet valve may have loosened allowing it to move out of position. Remove
the wall inlet face plate and tighten the bolts or call your service man.
7. Switch in the Wall Inlet Stuck in On Position - Use your finger to roll the steel ball located in the top of
the neck of the inlet. Some foreign material may have become lodged in the hole with the ball, preventing
it from moving into its proper position. Caution: if this procedure does not turn your unit off,
unplug the power cord and notify your service technician.
8. Remote Control Wire - Broken - Usually, if more than one wall inlet is inoperative, the trouble is in the remote
control wiring, and the wire is either loose or broken, and should be tightened or replaced.
9. Remote Control Wire - Shorted - Unplug one of the remote control wires that is attached to the side of
the power unit - if the unit stops, it indicates that the remote control wire is shorted or one of the wall inlet
switches is stuck in the on position. If the procedure for number 6 does not shut the unit off and you cannot
locate the short, notify your service man. If the unit does not stop running when you unplug the remote
control wire - either the short is in the power unit wiring or the relay is stuck. Refer to number 20. Caution:
Checking the wiring in the power unit should only be attempted by a qualified service
technician.
10. Flexible Hose - Plugged - If proper airflow is not obtained through the hose, remove the hose from the
vacuum inlet, then start the power unit by activating the wall inlet switch. If the airflow, at the inlet, is good, then
this will normally indicate a blockage in the hose or wand. If blockage is in the wand, it can be disassembled
and cleaned. If blockage is in the hose, the hose should first be laid out straight, then with the hose plugged
into the inlet valve and the power unit running, pick up the hose, starting at the end furthest from the valve and
gently stretch about two feet of it at a time as you proceed along the length of the hose toward the inlet valve.
It this does not clear the stoppage, then remove the hose cuffs by unscrewing them, and switch them to the other
ends of the hose (these cuffs have left hand screw threads so rotate them in a clockwise direction to unscrew from
the hose). After this has been done replace the hose in the inlet valve and with the power unit operating, repeat
the process of stretching the hose. If this fails to unclog the hose, run (handle first) a screwdriver with at least a
3/4" diameter handle through the hose.
11. Tubing in Wall - Clogged - Check the airflow at the power unit. If the airflow is good here but not at locations
further from the power unit, your tubing is either clogged or has broken open. If you cannot repair this, contact
your service man. If you turn the power unit on and leave the inlet valve furthest from the power unit open and
then check the exhaust from the power unit, you can determine whether you have a break in the tubing or whether
the tubing is clogged. If very little air is coming out of the exhaust of the power unit, then it is probably an
obstruction in the tubing and not a break.
11
OPERATING YOUR CENTRAL VACUUM
Your central vacuum system has been engineered for a long, trouble-free service life. Your
power unit is covered by a factory limited warranty that is enclosed with these instructions.
Please read your limited warranty carefully. If your owners manual came with a warranty
card, fill it out and return to the factory. You should fill out your registration card within ten
(10) days of installation and return to address listed on the card. This will validate our factory
warranty. Remember, your warranty does not cover abuse or misuse of the equipment.
If your owners manual did not come with a warranty card, contact your dealer for warranty
information.
CLEANING TOOLS - Since there are several tool kits available, the use and care of these
tools is explained in a separate booklet packed with each of the tool kits. It is very important to
utilize the tool that is designed to perform a particular cleaning job, in order to obtain full
efficiency from your system. Each of the tools and their designed use is explained in the
booklet packed with your particular tool kit. Also, other special carpet & flooring tools are
available, which are not included as part of the normal tool kits. A few of these are a vibrating
upholstery tool, a pet grooming tool, and a hand held air turbine. In addition, there are
accessories designed to allow you to safely pick up liquids with your cleaning system such as
the Wet Pick-Up. Each of these tools is available for purchase from your local dealer; if you
would like to know more about a certain tool, please contact them.
VACUUM INLETS - When opening the door of the vacuum inlet valve to insert the cleaning hose,
care should be taken not to distort the door by forcing it too far open. Do not turn the system on
and try to open the door of another inlet, since this will tend to pull the rubber gasket from the door.
If inlet does not have remote on/off hose activated, leave door open for a few seconds after
removing hose from inlet so the cyclonic filtration has time to shut down and debris can settle back
down into the dirt can. If the power unit continues to run after the hose is removed from the inlet,
the small ball which activates the low voltage switch at the inlet should be checked to make sure
it has not become lodged in some way. Should this not shut the unit off, disconnect the electrical
supply to the power unit and notify your local dealer or serviceman.
VACUUM POWER UNIT - Your power unit does not require any oil. The bearings in the motor
are greased and sealed for life. The motor of the unit has contact brushes inside. As the unit is
used, the brushes will wear, even when functioning properly. Because of this, the brushes in most
power units will need to be replaced after 700 to 1,500 hours of use. Brush life is also affected
by humidity, altitude, temperature and the number of starts and stops. So, there is a wide spread
in the actual life of the motor brushes. On average the life of the motor brush, when used in a
normal manner, will be from ten to twenty years. The cost of replacing your motor brushes is not
great; but, the damage that can be done to the motor through not replacing the brushes before
they are completely worn out is considerable. We recommend that you have your unit and motor
brushes inspected by a qualified serviceman every 4-6 years.
THANK YOU FOR CHOOSING A PRODUCT OF LINDSAY MANUFACTURING, INC.
4
MAINTENANCE
TROUBLESHOOTING GUIDE
The mass of dirt and debris picked up by your central vacuum system is deposited in the dirt canister. The dirt canister is attached to the bottom of your power unit (single canister units) or filter
canister (if split system unit) and will need to be emptied on a periodic basis. To empty the dirt can,
follow these simple steps:
Please read the Warranty certificate before attempting any service on your power unit. The motor in your
power unit DOES NOT require oiling. The bearings have been lubricated and sealed at the factory.
Tampering in any way with the motor blower will invalidate your warranty. Your central vacuum system has
been engineered to provide many years of carefree service. Should your system for some reason fail to
function properly, the following chart and instructions should help you to restore efficient service promptly.
Check the chart for symptoms and then read across to determine the probable cause. The probable causes
are numbered for your convenience and after you have found your symptom refer to the directions for
checking that item.
Cyclonic Systems
Single Canister Units
1 To remove the dirt canister, support the bottom of the canister with your knee*
(see figure 1a), then unsnap the two dirt canister latches by grasping the
Note:
lower end of each latch and pulling straight away from the canister. (Note:
The latches may be tight, but do not try to adjust them. They need to latch
tightly, to ensure a proper seal, which is important in the operation of the
cyclonic separation.)
SYMPTOM
NO
AIRFLOW
Figure 1a
2 Carefully lower the dirt container and empty the debris into any suitable trash container. (If
equipped with an air channel and plastic bag, see page 7 for more instructions.)
3 Check the vacuum pump protection screen by looking up or feeling up inside
the dirt canister to remove any debris that may have become stuck on the
screen up inside the metal cone. A plastic bag may be placed over the bottom
portion of the top canister. Then, while holding the plastic bag tightly around
the canister with one hand, push the bag up inside with the other hand and
brush the screen surface (see figure 2a). In this way, the screen can be
cleaned without getting any dust or debris on the floor or hands.
Figure 2a
TIP
TIP:: When cleaning the up inside the can, try using a toilet bowl brush or something similar.
This will allow you to reach up inside more easily than just by using your arm. Still use the
plastic bag, as this will keep the dirt from falling on you or your floor.
Some units may have an optional Electro-Static screen. To remove the screen, pull down on
the tab until the screen comes down through the metal cone. Clean the electrostatic screen
TANT
by vacuuming, rinsing with water, or shaking. IMPOR
IMPORT
ANT:: If you rinse the screen, make
Figurefold
3a
sure it is dry before placing it back in the unit or it will void warranty. To replace the screen,
it and place it inside of the top of the metal cone. Then, allow the Electro-Static screen to
expand until it covers the entire opening.
4 Replace the dirt canister by slipping the rim of the dirt canister over the lip of the top can until it
is seated against the rim gasket. Then while holding the canister in place with your knee* (see
Figure 1a), fasten the two latches. Do this by hooking the top lip of each latch over the rim of the
top can and then press straight in on the bottom of the latches until they lock.
*If you have trouble removing or replacing the dirt canister using your knee, try supporting the can with one hand, unlatching (or
relatching) one side with the other hand. Then, reverse your hands to unlatch (or relatch) the other side.
5
LOW
AIRFLOW
POWER
UNIT
DOES
NOT RUN
Check each X for
POWER UNIT
CONTINUES
TO RUN
X
X
X
X
X
X
X
X
X
X
CYCLES
OFF
AND ON
X
X
X
X
X
X
X
X
X
X
X
X
X
X
X
X
X
X
X
X
X
X
X
X
X
X
X
X
X
X
X
X
X
X
PROBABLE CAUSE
1. Power Cord
2. Push-to-reset Circuit Breaker on Unit
3. Circuit Breaker in House Panel
4. Internal Thermal Switch in Unit (some models)
5. Electrical Wall Outlet Plug
6. Switch in the Wall Inlet Stuck Off
7. Switch in Wall Inlet Stuck On
8. Remote Control Wire Broken
9. Remote Control Wire - Shorted
10.Flexible Hose Plugged
11.Tubing in Walls Clogged
12.Dirt Canister Overfilled
13.Filter Bag - Clogged (some models)
14.Dirt Canister Lid - Off
15.Dirt Canister Gasket Loose
16.Outside Exhaust Blocked
17.Dirt Canister Not Latched
18.Another Wall Inlet Door Open
19.Blower Protection Screen Clogged
20.Relay Stuck - On
21.Relay Stuck - Off
22.Transformer Burned Out
23.Loose Wire in Power Unit
24.A Hose Plugged into another Inlet
25. P.C. Board Relay Stuck ON
26. P.C. Board Transformer burned out
27. LED Light
1. Power Cord - Make sure that the power cord is plugged into an operating receptacle of the proper voltage
and current for your unit.
2. Push-to-Reset Circuit Breaker - If your unit has experienced an over current or extremely high temperature,
the button will pop out. To reset, simply push the button in until it protrudes about 1/8 inch and stays in. If
the breaker pops out again when the unit is used - call your service technician.
10
Sealed PPaper
aper Bag Systems
Split System Units
Sealed paper bag units incorporate a two-layer disposable paper bag for superior filtration. These
paper bags are also inexpensive and easy to throw away making vacuum maintenance easy. The
mass of dirt and debris picked up by your central vacuum system is deposited in the filter bag inside
the dirt canister. To remove this accumulation, follow these simple steps:
1
To remove the dirt canister, support the bottom of the canister with your
knee* (see figure 1b), then unsnap the two dirt canister latches by grasping
the lower end of each latch and pulling straight away from the canister.
Note: The latches may be tight, but do not try to adjust them. They need
(Note:
to latch tightly, to ensure a proper seal, which is vital in the operation of the
cyclonic separation.)
2
Carefully lower the dirt container and empty the debris into any suitable
trash container. (If equipped with an air channel and plastic bag, see page
7 for more instructions.)
1
2
Remove the lid by lifting straight up (figure 1d). There are no hinges or
clamps.
Remove the bag by sliding the rubber gasket that surrounds the hole
in the paper bag off the plastic inlet stem that protrudes through the
side of the canister (figure 2d).
Once the bag is off of the inlet stem, seal the bag by removing the
backing from the tab and cover the hole with the flap. Press the flap
so that it securely seals over the hole (figure 3d). This will help prevent
dirt and dust from escaping.
Now, lift the paper bag from the dirt canister and place in a suitable
trash container.
3
Take a new bag and extend it fully (figure 4d), place it in the canister,
and slide the rubber gasket onto the inlet stem until the rubber gasket
drops into place in the ridge that is around the inlet stem (figure 5d).
4
Carefully replace the lid onto the dirt canister to ensure that it seals
properly or it could cause a vacuum leak and reduce the cleaning
efficiency of your system.
5
Figure 1d
Figure 2d
4
Figure 4d
Replace the dirt canister by slipping the rim of the dirt canister over the lip of the top can until it
is seated against the rim gasket. Then while holding the canister in place with your knee* (see
Figure 1b), fasten the two latches. Do this by hooking the top lip of each latch over the rim of the
top can and then press straight in on the bottom of the latches until they lock.
If you notice a lack of suction or power, lint screen or Electro-Static screen may be blocked. Remove lid and clean.
If bag breakage does occur, it is necessary to lift the plate located under
the bag and clean the small screen.
Figure 5d
HOW OFTEN SHOULD I CHECK OR EMPTY THE PAPER BAG?
The filter bag should be changed or cleaned when there is 3-6 inches of dirt or anytime there is a noticeable
reduction of air flow at the cleaning tool. Initially, the dirt canister should be checked or emptied weekly
until some idea can be obtained as to how long it takes to half fill the canister under your normal cleaning routine.
All vacuum systems will function more effectively if it is emptied frequently. Under no circumstances should you
allow your dirt canister to become more than 3/4 full before emptying. (Note: The canister will fill more rapidly if NEW
carpets are being cleaned for there is usually a tremendous quantity of loose fibers that are retained in the carpet
from the manufacturing process. In some instances it may take several months before all of these loose fibers are removed.)
9
Figure 2b
These units may have an optional Electro-Static screen which can be lifted
out and cleaned by vacuuming, rinsing with water, or shaking. Before
replacing the Electro-Static screen make certain it is completely dry or it will void warranty. To replace
the screen, simply place the Electro-Static screen over the stand pipe and push down to insure that it
seats on the metal screen. With this type of unit, there is no need to look or reach up into the canister
from the bottom of the unit. When replacing the lid, care should be taken to insure that it is placed
squarely on the top of the canister; otherwise, it will allow a vacuum leak.
Figure 3d
NOTE: This step is only required in the event that the bag breaks.
?
Please note that for split systems, those systems which have the powerhead
mounted separately from the filter canister, the screen may be cleaned by
just lifting straight up on the lid of the dirt canister (see Figure 2b). Optional
maintenance: The underneath of the screen can also be cleaned. To do
so, remove the two screws, lift screen and wipe the underneath of the
screen clean. Place screen back into unit and secure with the two screws.
3
Figure 1b
?
HOW OFTEN SHOULD I CHECK OR EMPTY MY DIRT CANISTER?
Initially, the dirt canister should be checked or emptied weekly until some idea can be obtained as to
how long it takes to half fill the canister under your normal cleaning routine. All vacuum systems will function
more effectively if the filter system is emptied frequently. Under no circumstances should you allow your dirt canister
to become more than 3/4 full before emptying.
Note: The canister will fill more rapidly if NEW carpets are being cleaned for there is usually a tremendous
quantity of loose fibers that are retained in the carpet from the manufacturing process. In some instances it
may take several months before all of these loose fibers are removed.
*If you have trouble removing or replacing the dirt canister using your knee, try supporting the can with one hand, unlatching (or relatching)
one side with the other hand. Then, reverse your hands to unlatch (or relatch) the other side.
6
SERVICING Y
OUR DIR
T CAN WITH AIR CHANNEL
YOUR
DIRT
1.
2.
Inverted Bag Systems
4.
3.
Inverted bag units provide a permanent filter and require occasional cleaning. To clean the inverted
bag units, follow these steps:
1 Remove the dirt canister by supporting the bottom canister with your knee*.
Then, unsnap the two dirt canister latches by grasping the lower end of each
latch and pulling straight away from the canister (see figure 1c).
5.
Step 1: Place knee
under bottom dirt
canister to support
the weight of the
can, while you unlatch it.
Step 2: Set the dirt can
on the floor.
Step 3: Remove edge of
the plastic bag from the
bag clip.
Step 5: When plastic bag
is high enough, wrap up
the open end of the bag
for a mess-free disposal.
2 Carefully lower the dirt canister, dump the contents into trash container
Figure 2c
8.
7.
3
It is not necessary to remove the inverted bag to clean. A plastic bag may be
placed over the bottom portion of the top canister. Then, while holding the
plastic bag tightly around the canister with one hand, push the bag up inside
with the other hand, and brush/shake the bag surface to loosen any dust and
debris that may have accumulated on the bag (see figure 3c). In this way, the
bag can be cleaned without getting any dust or debris on the floor or hands.
4
Replace the dirt canister by slipping the rim of the dirt canister over the lip of the
top can until it is seated against the rim gasket. Then while holding the canister
in place with your knee* (see Figure 1c) fasten the two latches. Do this by hooking
the top lip of each latch over the rim of the top can and then press straight in on
the bottom of the latches until they lock.
Bag Clip
Step 6: Lift up the top
lid.
Step 7: Clean debris
from top screen as you
would a dryer lint screen
by wiping debris off of
screen and deposit debris into used plastic
bag.
Figure 1c
(figure 2c), and then set aside.
Air Channel
SOME MODELS WITH SEPARATE
DIRT CANISTER ONLY
6.
Step 4: Lift the plastic bag
from the dirt can.
4 Mill. Plastic Bag
Step 8: Throw away the
used plastic bag.
Note: Do not store your replacement
plastic bags on top of your central
vacuum system. This can cause
severe damage to your central vacuum
system by not allowing the motor to get
cool clean air.
INST
ALLA
TION OF NEW PLASTIC BA
G
INSTALLA
ALLATION
BAG
Figure 3c
?
HOW OFTEN SHOULD I CHECK OR EMPTY MY DIRT CANISTER?
Initially, the dirt canister should be checked or emptied weekly until some idea can be obtained as to
how long it takes to half fill the canister under your normal cleaning routine. All vacuum systems will function
more effectively if it is emptied frequently. Under no circumstances should you allow your dirt canister to become
more than 3/4 full before emptying. (Note: The canister will fill more rapidly if NEW carpets are being cleaned
for there is usually a tremendous quantity of loose fibers that are retained in the carpet from the manufacturing
process. In some instances it may take several months before all of these loose fibers are removed.)
Step 1: Place a clean Step 2: Wrap the edges of
plastic bag into the the plastic bag around the
edge of the dirt can.
dirt can.
Step 3: Place the portion
of the plastic bag around
the Air Channel under
the bag clip.
7
Step 4: Use your hands and
press the plastic bag up
against the sides of the dirt
can.
Step 5: Lift dirt can
back to the bottom
of the dirt canister.
Use your knee to
support the can as
you re-latch it.
HOW OFTEN SHOULD I CLEAN THE INVERTED BAG?
The inverted bag should be cleaned approximately 3-4 times a year or every time the dirt canister is dumped. If
your inverted bag should ever need replaced, contact your local dealer.
*If you have trouble removing or replacing the dirt canister using your knee, try supporting the can with one hand, unlatching (or relatching)
one side with the other hand. Then, reverse your hands to unlatch (or relatch) the other side.
8
Sealed PPaper
aper Bag Systems
Split System Units
Sealed paper bag units incorporate a two-layer disposable paper bag for superior filtration. These
paper bags are also inexpensive and easy to throw away making vacuum maintenance easy. The
mass of dirt and debris picked up by your central vacuum system is deposited in the filter bag inside
the dirt canister. To remove this accumulation, follow these simple steps:
1
To remove the dirt canister, support the bottom of the canister with your
knee* (see figure 1b), then unsnap the two dirt canister latches by grasping
the lower end of each latch and pulling straight away from the canister.
Note: The latches may be tight, but do not try to adjust them. They need
(Note:
to latch tightly, to ensure a proper seal, which is vital in the operation of the
cyclonic separation.)
2
Carefully lower the dirt container and empty the debris into any suitable
trash container. (If equipped with an air channel and plastic bag, see page
7 for more instructions.)
1
2
Remove the lid by lifting straight up (figure 1d). There are no hinges or
clamps.
Remove the bag by sliding the rubber gasket that surrounds the hole
in the paper bag off the plastic inlet stem that protrudes through the
side of the canister (figure 2d).
Once the bag is off of the inlet stem, seal the bag by removing the
backing from the tab and cover the hole with the flap. Press the flap
so that it securely seals over the hole (figure 3d). This will help prevent
dirt and dust from escaping.
Now, lift the paper bag from the dirt canister and place in a suitable
trash container.
3
Take a new bag and extend it fully (figure 4d), place it in the canister,
and slide the rubber gasket onto the inlet stem until the rubber gasket
drops into place in the ridge that is around the inlet stem (figure 5d).
4
Carefully replace the lid onto the dirt canister to ensure that it seals
properly or it could cause a vacuum leak and reduce the cleaning
efficiency of your system.
5
Figure 1d
Figure 2d
4
Figure 4d
Replace the dirt canister by slipping the rim of the dirt canister over the lip of the top can until it
is seated against the rim gasket. Then while holding the canister in place with your knee* (see
Figure 1b), fasten the two latches. Do this by hooking the top lip of each latch over the rim of the
top can and then press straight in on the bottom of the latches until they lock.
If you notice a lack of suction or power, lint screen or Electro-Static screen may be blocked. Remove lid and clean.
If bag breakage does occur, it is necessary to lift the plate located under
the bag and clean the small screen.
Figure 5d
HOW OFTEN SHOULD I CHECK OR EMPTY THE PAPER BAG?
The filter bag should be changed or cleaned when there is 3-6 inches of dirt or anytime there is a noticeable
reduction of air flow at the cleaning tool. Initially, the dirt canister should be checked or emptied weekly
until some idea can be obtained as to how long it takes to half fill the canister under your normal cleaning routine.
All vacuum systems will function more effectively if it is emptied frequently. Under no circumstances should you
allow your dirt canister to become more than 3/4 full before emptying. (Note: The canister will fill more rapidly if NEW
carpets are being cleaned for there is usually a tremendous quantity of loose fibers that are retained in the carpet
from the manufacturing process. In some instances it may take several months before all of these loose fibers are removed.)
9
Figure 2b
These units may have an optional Electro-Static screen which can be lifted
out and cleaned by vacuuming, rinsing with water, or shaking. Before
replacing the Electro-Static screen make certain it is completely dry or it will void warranty. To replace
the screen, simply place the Electro-Static screen over the stand pipe and push down to insure that it
seats on the metal screen. With this type of unit, there is no need to look or reach up into the canister
from the bottom of the unit. When replacing the lid, care should be taken to insure that it is placed
squarely on the top of the canister; otherwise, it will allow a vacuum leak.
Figure 3d
NOTE: This step is only required in the event that the bag breaks.
?
Please note that for split systems, those systems which have the powerhead
mounted separately from the filter canister, the screen may be cleaned by
just lifting straight up on the lid of the dirt canister (see Figure 2b). Optional
maintenance: The underneath of the screen can also be cleaned. To do
so, remove the two screws, lift screen and wipe the underneath of the
screen clean. Place screen back into unit and secure with the two screws.
3
Figure 1b
?
HOW OFTEN SHOULD I CHECK OR EMPTY MY DIRT CANISTER?
Initially, the dirt canister should be checked or emptied weekly until some idea can be obtained as to
how long it takes to half fill the canister under your normal cleaning routine. All vacuum systems will function
more effectively if the filter system is emptied frequently. Under no circumstances should you allow your dirt canister
to become more than 3/4 full before emptying.
Note: The canister will fill more rapidly if NEW carpets are being cleaned for there is usually a tremendous
quantity of loose fibers that are retained in the carpet from the manufacturing process. In some instances it
may take several months before all of these loose fibers are removed.
*If you have trouble removing or replacing the dirt canister using your knee, try supporting the can with one hand, unlatching (or relatching)
one side with the other hand. Then, reverse your hands to unlatch (or relatch) the other side.
6
MAINTENANCE
TROUBLESHOOTING GUIDE
The mass of dirt and debris picked up by your central vacuum system is deposited in the dirt canister. The dirt canister is attached to the bottom of your power unit (single canister units) or filter
canister (if split system unit) and will need to be emptied on a periodic basis. To empty the dirt can,
follow these simple steps:
Please read the Warranty certificate before attempting any service on your power unit. The motor in your
power unit DOES NOT require oiling. The bearings have been lubricated and sealed at the factory.
Tampering in any way with the motor blower will invalidate your warranty. Your central vacuum system has
been engineered to provide many years of carefree service. Should your system for some reason fail to
function properly, the following chart and instructions should help you to restore efficient service promptly.
Check the chart for symptoms and then read across to determine the probable cause. The probable causes
are numbered for your convenience and after you have found your symptom refer to the directions for
checking that item.
Cyclonic Systems
Single Canister Units
1 To remove the dirt canister, support the bottom of the canister with your knee*
(see figure 1a), then unsnap the two dirt canister latches by grasping the
Note:
lower end of each latch and pulling straight away from the canister. (Note:
The latches may be tight, but do not try to adjust them. They need to latch
tightly, to ensure a proper seal, which is important in the operation of the
cyclonic separation.)
SYMPTOM
NO
AIRFLOW
Figure 1a
2 Carefully lower the dirt container and empty the debris into any suitable trash container. (If
equipped with an air channel and plastic bag, see page 7 for more instructions.)
3 Check the vacuum pump protection screen by looking up or feeling up inside
the dirt canister to remove any debris that may have become stuck on the
screen up inside the metal cone. A plastic bag may be placed over the bottom
portion of the top canister. Then, while holding the plastic bag tightly around
the canister with one hand, push the bag up inside with the other hand and
brush the screen surface (see figure 2a). In this way, the screen can be
cleaned without getting any dust or debris on the floor or hands.
Figure 2a
TIP
TIP:: When cleaning the up inside the can, try using a toilet bowl brush or something similar.
This will allow you to reach up inside more easily than just by using your arm. Still use the
plastic bag, as this will keep the dirt from falling on you or your floor.
Some units may have an optional Electro-Static screen. To remove the screen, pull down on
the tab until the screen comes down through the metal cone. Clean the electrostatic screen
TANT
by vacuuming, rinsing with water, or shaking. IMPOR
IMPORT
ANT:: If you rinse the screen, make
Figurefold
3a
sure it is dry before placing it back in the unit or it will void warranty. To replace the screen,
it and place it inside of the top of the metal cone. Then, allow the Electro-Static screen to
expand until it covers the entire opening.
4 Replace the dirt canister by slipping the rim of the dirt canister over the lip of the top can until it
is seated against the rim gasket. Then while holding the canister in place with your knee* (see
Figure 1a), fasten the two latches. Do this by hooking the top lip of each latch over the rim of the
top can and then press straight in on the bottom of the latches until they lock.
*If you have trouble removing or replacing the dirt canister using your knee, try supporting the can with one hand, unlatching (or
relatching) one side with the other hand. Then, reverse your hands to unlatch (or relatch) the other side.
5
LOW
AIRFLOW
POWER
UNIT
DOES
NOT RUN
Check each X for
POWER UNIT
CONTINUES
TO RUN
X
X
X
X
X
X
X
X
X
X
CYCLES
OFF
AND ON
X
X
X
X
X
X
X
X
X
X
X
X
X
X
X
X
X
X
X
X
X
X
X
X
X
X
X
X
X
X
X
X
X
X
PROBABLE CAUSE
1. Power Cord
2. Push-to-reset Circuit Breaker on Unit
3. Circuit Breaker in House Panel
4. Internal Thermal Switch in Unit (some models)
5. Electrical Wall Outlet Plug
6. Switch in the Wall Inlet Stuck Off
7. Switch in Wall Inlet Stuck On
8. Remote Control Wire Broken
9. Remote Control Wire - Shorted
10.Flexible Hose Plugged
11.Tubing in Walls Clogged
12.Dirt Canister Overfilled
13.Filter Bag - Clogged (some models)
14.Dirt Canister Lid - Off
15.Dirt Canister Gasket Loose
16.Outside Exhaust Blocked
17.Dirt Canister Not Latched
18.Another Wall Inlet Door Open
19.Blower Protection Screen Clogged
20.Relay Stuck - On
21.Relay Stuck - Off
22.Transformer Burned Out
23.Loose Wire in Power Unit
24.A Hose Plugged into another Inlet
25. P.C. Board Relay Stuck ON
26. P.C. Board Transformer burned out
27. LED Light
1. Power Cord - Make sure that the power cord is plugged into an operating receptacle of the proper voltage
and current for your unit.
2. Push-to-Reset Circuit Breaker - If your unit has experienced an over current or extremely high temperature,
the button will pop out. To reset, simply push the button in until it protrudes about 1/8 inch and stays in. If
the breaker pops out again when the unit is used - call your service technician.
10
3. Circuit Breaker in House Panel - Check your house breaker panel - If the circuit breaker if off, you may have
too many appliances utilizing that circuit. For best results, your power unit should be on a separate circuit.
Try to remove some of the extra circuit load by unplugging other devices. If the breaker continues to cut off call your service technician.
4. Internal Thermal Switch in Unit - If your unit comes equipped with an internal thermal switch and quits running,
it may require 10 minutes to cool off before resetting itself.
5. Electrical Wall Outlet Plug - Sometimes the electric wiring from the house breaker panel to the wall outlet plug
can become loose or broken. Plug a lamp or another electric appliance into the outlet to assure that you are
getting power. If not, call your electrical contractor.
6. Switch in the Wall Inlet Stuck in Off Position - Plug your flexible hose into the other wall inlets - if your unit
functions normally then the problem lies in the switch or remote control circuit to the inoperative inlet valve. The
bolts holding the micro-switch in the inlet valve may have loosened allowing it to move out of position. Remove
the wall inlet face plate and tighten the bolts or call your service man.
7. Switch in the Wall Inlet Stuck in On Position - Use your finger to roll the steel ball located in the top of
the neck of the inlet. Some foreign material may have become lodged in the hole with the ball, preventing
it from moving into its proper position. Caution: if this procedure does not turn your unit off,
unplug the power cord and notify your service technician.
8. Remote Control Wire - Broken - Usually, if more than one wall inlet is inoperative, the trouble is in the remote
control wiring, and the wire is either loose or broken, and should be tightened or replaced.
9. Remote Control Wire - Shorted - Unplug one of the remote control wires that is attached to the side of
the power unit - if the unit stops, it indicates that the remote control wire is shorted or one of the wall inlet
switches is stuck in the on position. If the procedure for number 6 does not shut the unit off and you cannot
locate the short, notify your service man. If the unit does not stop running when you unplug the remote
control wire - either the short is in the power unit wiring or the relay is stuck. Refer to number 20. Caution:
Checking the wiring in the power unit should only be attempted by a qualified service
technician.
10. Flexible Hose - Plugged - If proper airflow is not obtained through the hose, remove the hose from the
vacuum inlet, then start the power unit by activating the wall inlet switch. If the airflow, at the inlet, is good, then
this will normally indicate a blockage in the hose or wand. If blockage is in the wand, it can be disassembled
and cleaned. If blockage is in the hose, the hose should first be laid out straight, then with the hose plugged
into the inlet valve and the power unit running, pick up the hose, starting at the end furthest from the valve and
gently stretch about two feet of it at a time as you proceed along the length of the hose toward the inlet valve.
It this does not clear the stoppage, then remove the hose cuffs by unscrewing them, and switch them to the other
ends of the hose (these cuffs have left hand screw threads so rotate them in a clockwise direction to unscrew from
the hose). After this has been done replace the hose in the inlet valve and with the power unit operating, repeat
the process of stretching the hose. If this fails to unclog the hose, run (handle first) a screwdriver with at least a
3/4" diameter handle through the hose.
11. Tubing in Wall - Clogged - Check the airflow at the power unit. If the airflow is good here but not at locations
further from the power unit, your tubing is either clogged or has broken open. If you cannot repair this, contact
your service man. If you turn the power unit on and leave the inlet valve furthest from the power unit open and
then check the exhaust from the power unit, you can determine whether you have a break in the tubing or whether
the tubing is clogged. If very little air is coming out of the exhaust of the power unit, then it is probably an
obstruction in the tubing and not a break.
11
OPERATING YOUR CENTRAL VACUUM
Your central vacuum system has been engineered for a long, trouble-free service life. Your
power unit is covered by a factory limited warranty that is enclosed with these instructions.
Please read your limited warranty carefully. If your owners manual came with a warranty
card, fill it out and return to the factory. You should fill out your registration card within ten
(10) days of installation and return to address listed on the card. This will validate our factory
warranty. Remember, your warranty does not cover abuse or misuse of the equipment.
If your owners manual did not come with a warranty card, contact your dealer for warranty
information.
CLEANING TOOLS - Since there are several tool kits available, the use and care of these
tools is explained in a separate booklet packed with each of the tool kits. It is very important to
utilize the tool that is designed to perform a particular cleaning job, in order to obtain full
efficiency from your system. Each of the tools and their designed use is explained in the
booklet packed with your particular tool kit. Also, other special carpet & flooring tools are
available, which are not included as part of the normal tool kits. A few of these are a vibrating
upholstery tool, a pet grooming tool, and a hand held air turbine. In addition, there are
accessories designed to allow you to safely pick up liquids with your cleaning system such as
the Wet Pick-Up. Each of these tools is available for purchase from your local dealer; if you
would like to know more about a certain tool, please contact them.
VACUUM INLETS - When opening the door of the vacuum inlet valve to insert the cleaning hose,
care should be taken not to distort the door by forcing it too far open. Do not turn the system on
and try to open the door of another inlet, since this will tend to pull the rubber gasket from the door.
If inlet does not have remote on/off hose activated, leave door open for a few seconds after
removing hose from inlet so the cyclonic filtration has time to shut down and debris can settle back
down into the dirt can. If the power unit continues to run after the hose is removed from the inlet,
the small ball which activates the low voltage switch at the inlet should be checked to make sure
it has not become lodged in some way. Should this not shut the unit off, disconnect the electrical
supply to the power unit and notify your local dealer or serviceman.
VACUUM POWER UNIT - Your power unit does not require any oil. The bearings in the motor
are greased and sealed for life. The motor of the unit has contact brushes inside. As the unit is
used, the brushes will wear, even when functioning properly. Because of this, the brushes in most
power units will need to be replaced after 700 to 1,500 hours of use. Brush life is also affected
by humidity, altitude, temperature and the number of starts and stops. So, there is a wide spread
in the actual life of the motor brushes. On average the life of the motor brush, when used in a
normal manner, will be from ten to twenty years. The cost of replacing your motor brushes is not
great; but, the damage that can be done to the motor through not replacing the brushes before
they are completely worn out is considerable. We recommend that you have your unit and motor
brushes inspected by a qualified serviceman every 4-6 years.
THANK YOU FOR CHOOSING A PRODUCT OF LINDSAY MANUFACTURING, INC.
4
The temporary adapter should be used only until a properly grounded outlet (Figure A) can be installed
by a qualified electrician. NOTE: Temporary adapters are not permitted in Canada
Canada. The green
colored rigid ear, lug or the like, extending from the adapter, must be connected to a permanent
ground such as a properly grounded outlet box cover. Whenever the adapter is used, it must be held
in place by a metal screw.
ADAPTER
GROUNDED
OUTLET
METAL
SCREW
TAB FOR
GROUNDING SCREW
GROUNDING
PIN
FIGURE A
FIGURE B
DANGER--- Improper connection of the equipment - grounding conductor can result in a
risk of electric shock. Check with a qualified electrician or your installer if you are in doubt as to
whether the outlet is properly grounded. Do not modify the plug provided with the appliance - if it
will not fit the outlet use a temporary adaptor as shown and have a proper outlet installed by a
qualified electrician as soon as possible.
GROUNDING INSTRUCTIONS
FOR PERMANENTLY CONNECTED APPLIANCE
This appliance must be connected to a grounded metal, permanent wiring system; or an equipmentgrounding conductor must be run with the circuit conductors and connected to the equipmentgrounding terminal or lead on the appliance.
OPTIONAL EQUIPMENT
FOR ELECTRIC HOSE OR VACUUM HOSE USED WITH EXTENSION CORD
This appliance must be connected to a polarized (2-pole receptacle), permanent wiring system.
RECEIVER BOX FOR REMOTE CONTROL
This receiver box must be directly plugged into a polarized (2-pole receptacle) permanent wiring
system. Do not use an adapter.
DANGER --- Do not use the receiver box for any other purpose except for use with the intended
central vacuum system, 24 volt remote control system. Any other use may cause malfunction or
breakdown of the receiver box.
3
12. Dirt Canister - Over Filled - Whenever low airflow is experienced the first thing to check is the dirt canister
for over filling or clogged filter bag (some models). Refer to Number 13. Read the Operations section of this
manual for information on how to clean your dirt canister.
13. Filter Bag - Clogged (some models) - Read the Operations section of this manual for information on how to
remove and clean your filter bag.
14. Dirt Canister Lid - Off - On those models with lift off dirt canister lids, (check the Operations section of this
manual) the lid must be replaced squarely on top of the canister or it will allow a vacuum leak.
15. Dirt Canister Gasket - Loose - If the dirt canister gasket has been pulled loose, it will allow a vacuum leak. The
gasket may be reattached with contact cement or any of the so called "super glues".
16. Outside Exhaust - Blocked - Check the exhaust system by removing the tubing from the motor blower exhaust
and compairing the airflow at this point versus the airflow reaching the outside. If blockage is detected and cannot
be removed, contact you service technician.
17. Dirt Canister - Not Attached - If the dirt canister latches (some models) are not properly closed, it will cause an
air leak along the gasket and reduce your cleaning ability.
18. Another Wall Inlet Door - Open - Check all the inlet valves to make sure that only one inlet is in use at a time.
Attempting to clean from two or more inlets at a time will reduce the airflow below the level required to deep clean
your carpets.
19. Motor Protection Screen - Clogged - This usually occurs due to allowing the dirt canister to over fill, or a broken
filter bag (some models). Refer to the Operations section of this manual for instructions on cleaning the blower
protection screen.
20.. Relay Stuck - On - Refer to Number 9. If after using the procedures described in Number 9 it appears
20
that the relay is sticking on, unplug the power cord to cut off all electricity to the power unit. Caution: Checking the wiring in the power unit should only be attempted by a qualified service technician.
21. Relay Stuck - Off - If the procedures described in Numbers 1, 2, 3, 4, 5, 6 or 7, do not correct the power unit
not starting, then it could be a malfunction of the relay, the low voltage transformer could be burned out, or there
could be a loose wire in the power unit. If you suspect a malfuntion in the power unit, contact your service technician.
22. Transformer - Burned Out - Refer to Number 21.
23. Loose Wire In the Power Unit - Refer to Number 21.
24. A Hose Plugged Into Another Inlet Valve - Cleaning from more than one inlet at a time will reduce the airflow
to less than is required to deep clean your carpets.
25. P.C. Board Relay stuck on - Refer to Number 9. If after using the procedures described in Number 8
itappears that the relay is sticking on, unplug the power cord to cut off all electricity to the power unit. Caution: Checking the wiring in the power unit should only be attempted by a qualified service
technician.
26. P.C. Board Transformer burned out - If the procedures described in Numbers 1, 2, 3, 4, 5, 6 or 7, do not
correct the power unit not starting, then it could be a malfunction of the relay, the low voltage transformer could be
burned out, or there could be a loose wire in the power unit. If you suspect a malfunction in the power unit, contact
your service technician.
27. LED Light- Some units have an LED light at the unit. If the LED light is not on, refer to number 5. If you have
power at the unit but LED light is off, contact your local service technician.
IF YOU CANNOT DIAGNOSE OR REPAIR YOUR TROUBLE, CONTACT THE NEAREST DISTRIBUTOR.
12
15. Do not handle electric hose or inlets with wet hands.
Vacu-Maid®
16. Keep hair, loose clothing, fingers and all parts of the body away from wand, other openings
and moving parts.
Central Vacuum Systems
LIFETIME LIMITED* WARRANTY
17. If so equipped, do not use your central vacuum system without dustbag and/or filters in place.
This Warranty gives you specific legal rights, you may also have other rights
which vary from State to State (or Province).
ITEMS COVERED
*VACU-MAID power unit canisters carry a lifetime limited warranty to the original owner against defects in material and workmanship
until a time when the original owner ceases to own the VACU-MAID system, or the building it was originally installed in. The motor
and all internal electrical components of a VACU-MAID system are warranted for a period of 10 years. Hoses, power brushes, floor
brushes, and cleaning tools purchased in a VACU-MAID or DUSTMATE tool kit are warranted for a period of 2 years. All warranties
commence from the original date of purchase. Any warranted defects will be repaired or replaced without cost to the customer
except for transportation charges and/or charges associated with removal and reinstallation. This Warranty is given only to the
original owner and cannot be transferred.
ITEMS NOT COVERED
This Warranty does not cover such conditions as normal wear to the power unit resulting from normal usage or from damage caused
by accidents, negligence, misuse, or improper alteration, or from damage by fire, flood, or other acts of God. Motor brush wear
is normal and is not considered to be a defect in material or workmanship. Further, this Warranty does not apply to vacuum tubing,
fittings, wall inlets, or to the act of installing the VACU-MAID Central Vacuum Systems.
TERMS OF WARRANTY AND RESTRICTIONS
*The Lifetime / 10 year / 2 year terms of this limited Warranty is effective for single family residential applications only. In commercial/
industrial and other applications, this limited warranty is valid for ninety (90) days from the date of installation for all components
of the system. In commercial/industrial and other applications, this warranty shall be for the benefit of the original owner of the
VACU-MAID Central Vacuum System. Warranty will be void if service is provided by anyone other than an authorized VACU-MAID
dealer using VACU-MAID replacement parts.
REQUIRED REGISTRATION
Included with the papers which accompany the VACU-MAID product is a Warranty registration card. Please fill out and return
this Warranty registration card or register online at www.lindsaymfg.com/registration so that the required warranty information is
on file. We also recommend keeping copies of receipts and delivery slips so that there is no discrepancy on date of installation
or purchase.
HOW TO INVOKE THIS WARRANTY
If it should ever become necessary to invoke the rights and privileges of this Warranty during the period of effectiveness the following
procedures should be followed:
a) Refer to operating maintenance instructions to ascertain that a malfunction of the power unit has actually occurred.
b) Notify the authorized VACU-MAID dealer-installer who sold the unit, that you have a problem and
describe the nature of your difficulty.
c) If the VACU-MAID distributor-installer has not solved your problem within a reasonable time (but in all
events within 45 days of when you became aware of a defect), write or call Lindsay Manufacturing, Inc., to
obtain instructions for warranty service.
DISCLAIMER OF OTHER WARRANTIES
LINDSAY MANUFACTURING, INC., HEREBY DISCLAIMS ALL LIABILITY WHATSOEVER FOR ANY INCIDENTAL OR CONSEQUENTIAL DAMAGES WHICH OCCUR AS A RESULT OF DEFECTS IN MATERIAL AND WORKMANSHIP IN THE PRODUCT.
LINDSAY MANUFACTURING, INC., ALSO HEREBY DISCLAIMS ALL IMPLIED WARRANTIES, INCLUDING THE WARRANTIES OF
MERCHANTABILITY AND FITNESS FOR A PARTICULAR PURPOSE.
SOME STATES (or provinces) DO NOT ALLOW THE EXCLUSION OR LIMITATION OF INCIDENTAL OR CONSEQUENTIAL
DAMAGES, SO THE ABOVE LIMITATION OR EXCLUSION MAY NOT APPLY TO YOU. SOME STATES (or provinces) DO NOT
ALLOW LIMITATIONS ON HOW LONG AN IMPLIED WARRANTY LASTS, SO THE ABOVE LIMITATIONS MAY NOT APPLY TO YOU.
TO THE EXTENT THAT ANY LAW PROHIBITS, IN WHOLE OR PART, THE LIMITATION OF IMPLIED WARRANTIES, ANY IMPLIED
WARRANTY APPLICABLE TO THE PRODUCT SHALL NOT EXCEED A PERIOD OF LIFETIME/5 YEARS/2 YEARS FOR SINGLE
RESIDENTIAL APPLICATIONS OR 90 DAYS FOR COMMERCIAL/INDUSTRIAL AND OTHER APPLICATIONS.
This warranty is exclusive and is in lieu of all other expressed warranties, and in lieu of all other obligations or liabilities on the
part of Lindsay Manufacturing, Inc., for damage to person or property. We do not authorize any person, including any dealer, agent,
supplier, or representative of Lindsay Manufacturing, Inc., to make any other warranty or guarantee on our behalf, or assume for
us any liability on the VACU-MAID Central Vacuum System other than that contained herein. No oral representations regarding
warranty shall be binding upon Lindsay Manufacturing, Inc., whether extended before or after sale of that product.
LINDSAY MANUFACTURING, INC.
/
P.O. BOX 1708
/
PONCA CITY, OK 74602-1708
VACU-MAID and DUSTMATE are registered trademarks of Lindsay Manufacturing, Inc.
13
/
580-762-2457
18. Always disconnect vacuum system before emptying dirt canister, cleaning filters or replacing
dustbag.
19. Use extra care when cleaning on stairs.
20. Do not use to pick up flammable or combustible liquids such as gasoline or use in areas
where such liquids may be present.
21. Do not use to pick up dry wall or cement dust. Doing so will void warranty.
22. Do not pick up anything that is burning or smoking, such as cigarettes, matches or hot ashes.
23. When finished put the vacuum hose and attachments away to prevent tripping accidents.
24. For a grounded appliance, connect to a properly grounded outlet only. See grounding instructions.
25. For electric vacuum hose, connect to a properly wired 2-pole polarized outlet.
26. Electric vacuum hose, use only with the electric power brush for use with the central vacuum
system.
27. The extension cord provided may only be used with the electric power brush for use with
the central vacuum system.
28. DO NOT USE the electric vacuum hose or extension cord with any appliance other than the
central vacuum electric power brush for which it is intended.
CAUTION: Do not use when rug (or floor) is wet.
ATTENTION: Ne pas utiliser lorsque le tapis (ou le plancher) est moduille.
SAVE THESE INSTRUCTIONS
-WARNING
ARNING-ELECTRIC SHOCK COULD OCCUR IF USED ON WET SURFACES
GROUNDING INSTRUCTIONS
FOR CORD CONNECTED APPLIANCE
This appliance must be grounded. If it should malfunction or breakdown, grounding provides a path
of least resistance for electric current to reduce the risk of electric shock. Your central vacuum system
is supplied with an electrical cord having a grounding pin. It is recommended that this plug be used
only with an appropriate outlet that is properly installed and grounded in accordance with all local
codes and ordinances. This appliance is for use on a nominal 120-volt circuit (U.S. only) or 230/250
volt circuits where applicable, and has a grounded plug that looks like the plug shown in Figure A. A
temporary adapter, that looks like the adapter illustrated in Figure B, may be used to connect this plug
to a 2-pole receptacle as shown in Figure B if a properly grounded outlet is not available.
This appliance is for residential or commercial use
Astro-Vac®
IMPORT
ANT SAFETY INSTRUCTIONS
IMPORTANT
Central Vacuum Systems
LIFETIME LIMITED* WARRANTY
When using an electrical appliance, basic precautions should always be followed, including
the following:
This Warranty gives you specific legal rights, you may also have other rights
which vary from State to State (or Province).
*
Read all instructions before using this appliance.
WARNING:
*
To reduce the risk of fire, electric shock or injury:
Always follow these safety instructions
1. Do not leave room when hose is plugged in to the inlet. Disconnect power before servicing.
2. Electric shock could occur if used on wet surfaces.
3. Do not allow to be used as a toy. Close attention is necessary when used by or near children.
4. Use only as described in this manual. Use only those attachments that are recommended.
5. Do not use with damaged cord or plug. If applicance is not working as it should, has been dropped,
damaged, left outdoors, or dropped into water, return it to a service center.
6. Do not pull or carry by cord, use cord as a handle, close a door on cord, or pull cord around
sharp edges or corners. Do not run appliance over cord. Keep cord away from heated
surfaces.
7. Do not unplug by pulling on cord. To unplug, grasp the plug, not the cord.
8. Do not handle plug or appliance with wet hands.
9. If your system is equipped with an electrical vacuum hose, do not use if damaged. Do not
pull hose around sharp corners, and keep hose away from heated surfaces. Do not run other
appliances over vacuum hose.
10. Do not unplug system by pulling on vacuum hose. To unplug, grasp the cuff, located on
the end of the hose. If you have a standard non-electric hose, pull out with a twisting motion. If your
hose is an electric hose with direct connect plug in, pull straight out.
11. Do not put anything into vacuum inlets or vents. Keep all inlets and vents free of things that
might slow airflow, such as lint, dust and hair. Do not use the vacuum system if something
is blocking an opening.
12. If equipped with an air turbine power brush unplug the vacuum hose before attaching
power brush. Keep fingers, hands and toes away from the base of the power brush. Failure to
do so could result in injury from moving parts.
13. Do not use the electric vacuum hose if it is damaged, cut or punctured. Do not pick up sharp
objects with the vacuum nozzle or hose. Hose may contain electrical wires.
14. In the event the power unit should get wet, do not use the vacuum system until it has been properly
serviced and examined by a serviceman or installer.
1
ITEMS COVERED
*ASTRO-VAC power unit canisters carry a lifetime limited warranty to the original owner against defects in material and workmanship
until a time when the original owner ceases to own the ASTRO-VAC system, or the building it was originally installed in. The
motor and all internal electrical components of a ASTRO-VAC system are warranted for a period of 5 years. Hoses, power brushes,
floor brushes, and cleaning tools purchased in a DUSTMATE tool kit are warranted for a period of 2 years. All warranties commence
from the original date of purchase. Any warranted defects will be repaired or replaced without cost to the customer except for
transportation charges and/or charges associated with removal and reinstallation. This Warranty is given only to the original owner
and cannot be transferred.
ITEMS NOT COVERED
This Warranty does not cover such conditions as normal wear to the power unit resulting from normal usage or from damage caused
by accidents, negligence, misuse, or improper alteration, or from damage by fire, flood, or other acts of God. Motor brush wear
is normal and is not considered to be a defect in material or workmanship. Further, this Warranty does not apply to vacuum tubing,
fittings, wall inlets, or to the act of installing the ASTRO-VAC Central Vacuum Systems.
TERMS OF WARRANTY AND RESTRICTIONS
*The Lifetime / 5 year / 2 year terms of this limited Warranty is effective for single family residential applications only. In commercial/
industrial and other applications, this limited warranty is valid for ninety (90) days from the date of installation for all components
of the system. In commercial/industrial and other applications, this warranty shall be for the benefit of the original owner of the
ASTRO-VAC Central Vacuum System. Warranty will be void if service is provided by anyone other than an authorized ASTROVAC dealer using ASTRO-VAC replacement parts.
REQUIRED REGISTRATION
Included with the papers which accompany the ASTRO-VAC product is a Warranty registration card. Please fill out and return
this Warranty registration card or register online at www.lindsaymfg.com/registration so that the required warranty information is
on file. We also recommend keeping copies of receipts and delivery slips so that there is no discrepancy on date of installation
or purchase.
HOW TO INVOKE THIS WARRANTY
If it should ever become necessary to invoke the rights and privileges of this Warranty during the period of effectiveness the following
procedures should be followed:
a) Refer to operating maintenance instructions to ascertain that a malfunction of the power unit has actually occurred.
b) Notify the authorized ASTRO-VAC dealer-installer who sold the unit, that you have a problem and
describe the nature of your difficulty.
c) If the ASTRO-VAC distributor-installer has not solved your problem within a reasonable time (but in all
events within 45 days of when you became aware of a defect), write or call Lindsay Manufacturing, Inc., to
obtain instructions for warranty service.
DISCLAIMER OF OTHER WARRANTIES
LINDSAY MANUFACTURING, INC., HEREBY DISCLAIMS ALL LIABILITY WHATSOEVER FOR ANY INCIDENTAL OR CONSEQUENTIAL DAMAGES WHICH OCCUR AS A RESULT OF DEFECTS IN MATERIAL AND WORKMANSHIP IN THE PRODUCT.
LINDSAY MANUFACTURING, INC., ALSO HEREBY DISCLAIMS ALL IMPLIED WARRANTIES, INCLUDING THE WARRANTIES OF
MERCHANTABILITY AND FITNESS FOR A PARTICULAR PURPOSE.
SOME STATES (or provinces) DO NOT ALLOW THE EXCLUSION OR LIMITATION OF INCIDENTAL OR CONSEQUENTIAL
DAMAGES, SO THE ABOVE LIMITATION OR EXCLUSION MAY NOT APPLY TO YOU. SOME STATES (or provinces) DO NOT
ALLOW LIMITATIONS ON HOW LONG AN IMPLIED WARRANTY LASTS, SO THE ABOVE LIMITATIONS MAY NOT APPLY TO YOU.
TO THE EXTENT THAT ANY LAW PROHIBITS, IN WHOLE OR PART, THE LIMITATION OF IMPLIED WARRANTIES, ANY IMPLIED
WARRANTY APPLICABLE TO THE PRODUCT SHALL NOT EXCEED A PERIOD OF LIFETIME / 3 YEARS / 2 YEARS FOR SINGLE
RESIDENTIAL APPLICATIONS OR 90 DAYS FOR COMMERCIAL/INDUSTRIAL AND OTHER APPLICATIONS.
This warranty is exclusive and is in lieu of all other expressed warranties, and in lieu of all other obligations or liabilities on the
part of Lindsay Manufacturing, Inc., for damage to person or property. We do not authorize any person, including any dealer, agent,
supplier, or representative of Lindsay Manufacturing, Inc., to make any other warranty or guarantee on our behalf, or assume for
us any liability on the ASTRO-VAC Central Vacuum System other than that contained herein. No oral representations regarding
warranty shall be binding upon Lindsay Manufacturing, Inc., whether extended before or after sale of that product.
LINDSAY MANUFACTURING, INC.
/
P.O. BOX 1708
/
PONCA CITY, OK 74602-1708
ASTRO-VAC and DUSTMATE are registered trademarks of Lindsay Manufacturing, Inc.
14
/
580-762-2457
TIPS ON THE CARE OF Y
OUR CENTRAL V
ACUUM SYSTEM
YOUR
VA
Your power unit is warranted against defective materials and workmanship but not against misuse. There is a service
charge for repairing or replacing damaged or misused components of the system or for unnecessary service calls.
Your built-in system is a lifetime improvement for you and your family. Follow these simple tips and you will enjoy
it for many years:
1) DO NOT PLACE ANYTHING ON TOP OF THE POWER UNIT
To do so would cause the motor to overheat as it will impair the cooling air flow.
2) DO NOT OVERFILL YOUR DIRT CANISTER
Allowing the dirt canister to fill up to the bottom of the plastic cone will nullify the cyclonic separator system
and could cause debris to be drawn into the upper screen which may, in time, damage your power unit.
3) USE ONE INLET AT A TIME TO MAINTAIN PROPER AIR FLOW
Using more than one vacuum inlet at a time reduces the air flow to a level below that which is required to effectively
deep clean your carpets.
4) STORE YOUR HOSE AND TOOLS PROPERLY
When not in use, always hang up your hose and store the cleaning tools and wands in a place where they
will not be damaged.
5) HOLD THE INLET DOOR OPEN WHEN REMOVING THE HOSE
After removing the hose from the inlet, hold the inlet door open for a few seconds to:
a) Make sure the unit has stopped.
b) Clear any residual dirt out of the vacuum tubing
6) DO NOT PICK UP ANY LIQUIDS
Do not pull liquids into the vacuum tubing since any liquid left in the tubing may:
a) Drain back out of the wall inlet and cause streaking of the walls.
b) Cause dirt build-up in the tubing that could eventually clog the system.
Wet Pick-up Units are available for this type of use. Contact your local dealer.
7) BE CERTAIN TO FILL OUT AND RETURN THE WARRANTY CARD
Take just a few moments to fill out the warranty card, cut it out, place a stamp on it and drop it in the mail.
- IMPORTANT SERIAL NUMBER LOCATION FOR CENTRAL
VACUUM SYSTEM
ON ALL SR36 & SR36C POWER UNITS:
This unit comes equipped
with an internal thermal
switch. When tripped it
requires up to 10 (ten)
minutes to reset before
using.
The serial number for your wall mounted central vacuum system
can be found located under the unit model label (see representative diagram below). The unit model label will be found on the
left or right side of the unit near the top and close to the wall.
Unit Label
Cette unite vient equipe d’un
commutateur thermique
interne. Une fois declenche
inutes pour remettre a zero
avant utilisation.
(representative onlyyours may differ)
Date Code
XXXX
(representative only.
Yours may differ)
Serial Number
XXXXXXXXXXX
For more information, visit our website at
www
.lindsaymfg
.com
www.lindsaymfg
.lindsaymfg.com
(representative only.
Yours may differ)
©Lindsay Manufacturing, Inc. 2007
Owners Manual
TABLE OF CONTENTS
Safety Instructions
Grounding Instructions
Operating Your Central Vacuum
Maintenance
Single Piece Cyclonic Units
Split Canister Cyclonic Units
Servicing Air Channel
Inverted Bag Units
Paper Bag Units
Troubleshooting Guide
Warranty
Vacu-Maid & Silent Partner
Astro Vac
Tips on the Care of Your Central Vacuum
Serial Number Location
Printed in USA by LMI
05/07
Pg. 1-2
Pg. 2-3
Pg. 4
Pg.
Pg.
Pg.
Pg.
Pg.
Pg.
5
6
7
8
9
10-12
Pg.
Pg.
Pg.
Pg.
13
14
15
15
IMPOR
TANT
IMPORT
ANT:: Carefully read and retain this booklet.
Lindsay Manufacturing, Inc.
15
L653
CENTRAL VACUUM SYSTEMS
www.lindsaymfg.com