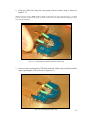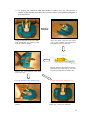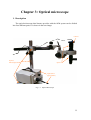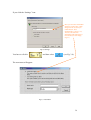
1
SPM user manual 1 Dear friend, Thank you very much for selecting Nanotec Electronica SPM products. The Nanotec team hopes that you will enjoy them and we are sure they will satisfy all your SPM measurement requirements. In the following pages, you will find instructions for the different parts of the system. Please read them carefully, paying special attention to the safety recommendations included for optimal results. Also, you will find with your system a WSxM 2.0 software manual with explanations about the different software options. Please note that at http://www.nanotec.es, you can subscribe to NanotecForum, a discussion forum to which all Nanotec Electronica SPM users are welcome. Best regards, The Nanotec Electronica Team Centro Empresarial Euronova 3 Ronda de Poniente, 2 Edificio 2 - 1ª Planta – Oficina A Tres Cantos E-28760 Madrid SPAIN Phone number: +34-918 043 347 Fax: +34-918 043 348 e-Mail: [email protected] 2 Instruction Manual Index Chapter 1: Dulcinea electronics Description.........................................................................................................p.4. Safety instructions..............................................................................................p.6. Installation instructions......................................................................................p.7. Use of the electronics.........................................................................................p.7. Chapter 2: AFM Hardware Description.........................................................................................................p.9. Installation instructions....................................................................................p.14. CEB instructions..............................................................................................p.18. Instructions for changing the rubber strip........................................................p.24. Safety instructions............................................................................................p.34. Chapter 3: Optical microscope Description.......................................................................................................p.35. Installation instructions....................................................................................p.36. Safety instructions............................................................................................p.42. Use of the optical microscope..........................................................................p.42. Chapter 4: First Use of System: Hardware & Software Starting WSxM................................................................................................p.46. Laser Alignment..............................................................................................p.47. Head Position and Manual Approach..............................................................p.52. Approach in Dynamic Mode...........................................................................p.54. Approach in Contact Mode.............................................................................p.63. Approach in Jumping Mode............................................................................p.68. How to Acquire Images...................................................................................p.71. How to Save Images........................................................................................p.73. Turning Off Dulcinea......................................................................................p.74. Measurements in Liquid Environment............................................................p.75. Chapter 5: Tutorial on HOPG. Use of Air STM Head Use of Air STM Head......................................................................................p.82. Appendix A: Dynamic Menu......................................................................................p.90. Appendix B: Basic Channels Viewer and Control Commands...................................p.92. Appendix C: Jumping Mode.......................................................................................p.97. Appendix D: X,Y and Z Gains....................................................................................p.98. Atomic force microscope images of a DNA molecule partially covered with gold. The right image shows a modification introduced by the AFM tip. From LNM (Laboratorio de Nuevas Microscopias), Departmento Física de la Materia Condensada UAM. 3 Chapter 1: Dulcinea electronics 1. Description Dulcinea is an electronic system specifically designed to control SPM equipment. While the most immediate application is to the control Nanotec Electronica SPM products, Dulcinea is designed in an open and modular way in order to facilitate interfacing with any other AFM/SNOM/STM system. Dulcinea Front View Configurable BNC connectors for monitoring Graphic display 240x128 10 turn adjustable potentiometer (Software activated) LED “active” Indicator Push switch Fig. 1.1 Dulcinea Front View - - - - Graphic display: Notifies the user about events like the start/end of the communication with the computer and gain changes. It is also available for future implementations. Z-Manual: 10 turn adjustable potentiometer (Software activated): This potentiometer can be used for manually adjusting the Z Offset applied to the piezo. For its use, it needs first to be enabled by software using WSxM (selection available in the Control Menu). During normal operation the Z Offset is set by software and this knob is only used for special applications. It is important to only enable/disable it by first moving to the intermediate (50) position. The maximum offset you can apply is +/-50V. Z-Manual: LED active Indicator: This LED will be on when the manual offset is active. Z Secure push switch: At any moment you can press this button to generate an offset voltage of +150V to the Z piezo voltage. This allows fast withdrawal of the tip from the sample without using the software. BNC connectors for signal monitoring (A, B, C, D): Software configurable BNC monitors. Using the Scanning/Dulcinea outputs menu in WSxM software 4 you can select a specific signal to monitor. Please note that A and B BNCs have a low pass filter of 50KHz while C and D have a low pass filter of 800KHz. Dulcinea Back View BNC Connectors IDC 50 Connectors-P (three places) IN: ADC auxiliary channels OUT : DAC auxiliary channels RS 232 DB9 Connector-P HV Connector BNC Connectors IDC 20 Connectors-P Power 90 to 240 V ac 50 / 60 Hz Fuse 2A Fig. 1.2 Dulcinea Back View - BNC connectors: target specific signals to monitor and allows for external inputs: o AC Mode BNCs (only useful when Dynamic Board is installed): VCO Out: Driving signal to vibrate cantilever (+/-10V). PID Out: Phase Lock Loop (PLL) output (only useful when PLL has been activated in WSxM software). I. Out: Driving signal for magnetic cantilever oscillation. It is an AC current source with the same frequency as the VCO Out (selected in the WSxM tapping menu). Ext. In: [Input signal]. Allows input of an external signal for the dynamic mode reference (+/- 10V). o General use BNCs Sum: Output sum of the four photodiode quadrants. Z Mod: [Input signal]. Allows input of a modulation voltage to be applied to the Z piezo voltage with gain = 1. It has an allowed input range of +/-10V. The maximum input frequency allowed is 10 KHz. Bias Mod: [Input signal]. Allows input of a modulation voltage to the Bias Voltage between the tip and the sample with gain = 1. It has an allowed range of +/-150V. The maximum input frequency allowed is 10 KHz. - IDC50 Connectors-P: IDC50 male connectors for low voltage communication with the SPM head and the Digital Signal Processor (DSP) (which is inserted in a PC slot inside the computer): 5 - o To Head: Connector with the low voltage (+/-10 V) signals that go to the SPM head. In Nanotec Electronica systems, you will have to connect here the cable labelled “To Head” o From DSP Analog: Connector with the low voltage (+/-10V) analog signals coming from the DSP. You will have to connect here the multicolour cable labelled “From DSP Analog” o From DSP Digital: Connector with TTL control signals coming from the DSP. You will have to connect here the gray cable labelled “From DSP Digital” IDC20 Connector-P Digital In/Out: IDC20 male connector with user available in/out digital signals. It gives trigger signals (configurable by software in the WSxM View/Digital Signals menu) and it receives digital inputs from the Nanotec Electronica counter electronics. - BNC Connectors o In: ADC Auxiliary channels: Four input channels (8, 7, 6, 5) are available for the user to introduce any low voltage (+/-10V) signals. These signals will automatically be measured by WSxM software, and they will be acquired synchronous with the scan generation, allowing the user to map these signals with respect to the piezo scan. You can view and save these signals by selecting the channel in the Viewer Options menu of the WSxM software. o Out: DAC Auxiliary channels: Three output channels (12, 13, 14) are available for the user through these BNC connectors. They can be used for DC output voltages and multiple feedbacks. In addition the SCRIP (Lithography) in WSxM allows user program outputs. o Frequency Mod: Only useful when the Dynamic Board is installed, this monitor BNC will allow you to visualize the voltage that comes from the DSP board controls the frequency modulation in the 3dModes Frequency/Z or in the digital PLL working mode. - HV Connector: This connector has all the high voltage (usually +/-150V) outputs coming from the Dulcinea electronics. - RS-232 DB9 connector-P: Serial connection with the computer. - Power 90 to 240 V ac, 50/60Hz. Fuse 2A: Power supply input. Compatible with power supplies from 90V to 240V (including American 110V and European 220V) and AC frequencies of 50 to 60 Hz (Universal power supply), it comes with a 2Amperes fuse for short-circuit prevention and there is also a replacement 2A fuse included in the same place. 2. Safety instructions - Never touch the High Voltage part of the electronics while the unit is powered on. It has dangerous voltages that can cause severe damage including death. When powering off the electronics, please take care of waiting a minimum of 30 seconds before powering it on again. Keep the electronics away from water. Keep the electronics away from electromagnetic radiation sources. 6 - Never open the electronics unit without the previous agreement of the manufacturers. Never change the fuses for a different type. 3. Installation instructions In your Dulcinea-based system, you will need the following items: - Dulcinea electronics Computer system (CPU, screen, keyboard and mouse) with preinstalled Digital Signal Processor (DSP)* RS-232 Serial cable * : Please notice that your computer has a DSP installed if two flat cables (IDC50) are coming out from the rear panel. Before starting the installation, please make sure that you have all the needed components and that both the electronics and the computer have the power supply cable unplugged. The RS-232 cable communicates between the computer and the Dulcinea electronics. It is needed for WSxM to recognize that Dulcinea electronics is installed. Connect this cable from COM1 or COM2 serial port in the computer to the Dulcinea rear panel RS 232 connector. The cables labelled “From DSP analog” (multi-color) and “From DSP digital” (gray) going out from the computer carry real time signals required for the proper working of the electronics. You should connect “From DSP analog” cable to the “From DSP analog” connector located on the rear of Dulcinea and “From DSP digital” cable to the “From DSP digital” connector. Finally, you should connect the “To Head” and “To Head HV” connectors to your SPM head (or to any extra intermediate electronics) using the cable/s for this purpose. Now you can power on the electronics and the computer and start WSxM software to control it. 4. Use of the electronics WSxM software is used to control the Dulcinea electronics. First, start the WSxM software (WSxM 3.0 or later required). When starting the Data Acquisition part of the software (File/Acquisition, Acquisition/Start), WSxM will recognize that the Dulcinea electronics is connected and will display the serial number and software version. Dulcinea electronics will also respond to this communication and will update messages on the screen. 7 If the Secure button is pressed, WSxM software will detect it and prevent you from beginning the Data Acquisition before unpressing the Secure button. This button is generating an extra offset to the Z piezo voltage that will not allow you to work properly. With the acquisition started, you can use the button besides the Z Off parameter (Z Offset) in the Control menu to enable manual handling of the Z Offset to the piezo. You can use the Scanning/Dulcinea outputs menu for selecting the signals you want to monitor. In some cases these signals can be used to interface third party systems. 8 Chapter 2: AFM Hardware 1. Description The Nanotec AFM mechanical system can be divided into two main parts, the chassis and the head. In the following images, a general view of the different components is provided. Labels provide a description of the different components: Head Parking Piezo scanner Motor base Security brakes to fix the optical table while transporting it Micrometer screws to move the optical table Sorbothane balls Optical table Fig.2.1 Chassis 9 To Head cable DB37 connector from Dulcinea LEMO female connector for the head To Head HV cable Security brakes to fix the optical table while moving it Micrometer motorapproach screw Retaining springs Sample holder Micrometer manual-approach screws Fig.2.2 Chassis top view 10 Laser Optical cubes Photodiode LEMO male connector Micrometer screws for laser alignment on the cantilever Screws for coarse adjustment of the photodiode Micrometer screws for fine adjustment of the photodiode Fig.2.3 SPM Head Photodiode Cantilever holder Cantilever Motor base Fig.2.4 SPM Head cutaway view. Detail of the SFM head showing the laser path through the optical system (in red) 11 Fig.2.5 Piezo scanners (long and short) Fig.2.6 Cantilever holder A glass cover (bell jar) is provided with the system to reduce acoustic and environmental noise, as well as to perform atmosphere control. Fig.2.7 Glass cover 12 The Cantilever Exchange Bay (CEB) is a metallic base and fork designed for easy placement and removal of cantilevers. Fig.2.8 Cantilever exchange bay (CEB) Other elements which are not shown in the images: x Metallic cover for the chassis (you will see it in Fig.2.12). x Standard cantilevers for starting up. x Silver paint and scalpel to fix/remove the cantilever on/from the cantilever holder, in case you prefer this method instead of the mechanical one. x Rubber strips for cantilever fixing x Computer with DSP inside and computer monitor. CD with WSxM software and DSP drivers (already installed) 13 2. Installation instructions When you receive your AFM system, it should appear as in figure 2.1, except the piezo scanner, it will not be installed. Take the sorbothane balls out of their package and place them under the chassis as shown in Fig.2.1. If you have an optical table, after you have placed the chassis in your laboratory, loosen the optical table brakes to easily move the optical table with the micrometer screws. Since the piezo scanner is one of the most fragile parts of the system, it is packed separately from the rest of the chassis, and you will have to place it in position. To do this, refer to the next diagram: Grooved brass screws Piezo scanner Fig.2.9 Piezo scanner assembly x The grooved brass screws are already placed in their final position, in the motor base, so you will find them there. You have to fix the piezo scanner to the motor base with them, but you do not have to tighten them very strongly, stop when you realize they are getting to the end in order to avoid damage to the piezo. x Connect the piezo scanner to the chassis through the LEMO connectors (see Fig. 2.9), making sure that you align the red points in each of them. Listen for a “click” when connecting them together. The high voltage signal to the piezo scanner is supplied through this connector. 14 The next step is to check that the motor is properly connected (see Fig. 2.10): Fig.2.10 Motor connection x Make sure you connect the MOLEX connector as shown in Fig. 2.10. In case it is connected in the opposite way, the motor will approach when you want to withdraw. 15 Now it is time to place the head. To do that, follow the next diagram: Fig.2.11 AFM head assembly x You have to place the head onto the three micrometer screws at the motor base, matching them with the appropriate holes in the head (see Fig.2.11). You can also place it at the parking head (see Fig.2.1). x Connect the head to the chassis through the LEMO connectors ( see Fig. 2.11), making sure that you align the red points and that you hear a “click” when connecting them.. 16 At this point, once you have assembled all the mechanical components. Now you must connect the mechanical system to Dulcinea. Metallic cover * Fig.2.12 Dulcinea connection *Note: the screws in the DB37 connector do not screw into the chassis, just plug in the connector and make sure it is well connected. DB37 CONNECTOR To Head To Head HV Fig.2.13 Dulcinea connection. Detail in Fig. 2.2 showing the DB37 connector and the cables coming from Dulcinea Fig.2.14 Dulcinea connection. Dulcinea back view 17 Now you have to insert a cantilever into the cantilever holder. If you use silver paint to fix the cantilever, place a small drop of it on the cantilever holder and then insert the cantilever chip, waiting at least 2-3 minutes to allow the silver paint to dry. If you use the mechanical fixing method, follow the next instructions: INSTRUCTIONS FOR USING THE CANTILEVER EXCHANGE BAY (CEB) To use the cantilever exchange bay (CEB) to exchange cantilever chips, an SPM user will need the parts illustrated in Fig. 2.15 below. Tweezers CEB stop CEB fork Cantilever holder Magnets CEB base Fig. 2.15: Required parts. 1. Place the cantilever holder on the CEB base as shown in Fig.2.16. Fig. 2.16: Positioning the cantilever holder on the CEB base. iti i 18 2. Using the CEB fork, align the two prongs with the rubber strip as shown in Figure 2.17. NOTE. If you are using a MFM cantilever holder (which does not have a magnetic base), you must be more careful. You must position the cantilever holder with one hand while stretching the rubber strip with the CEB fork. Fig. 2.17: Positioning the CEB fork under the rubber strip. 3. Once you have positioned the CEB fork under the rubber strip, stretch the rubber strip by pushing the CEB as shown in Figure 2.18. Fig. 2.18: Stretching the rubber strip. 19 The entire CEB fork will now fit onto the CEB base. The CEB stop (see Fig. 2.15 and Fig. 2.19) will clamp the CEB fork into position with the rubber strip stretched as shown in Fig. 2.18, leaving an open space in which to place the cantilever chip. CEB fork CEB base CEB stop Fig. 2.19: Diagram showing the CEB fork position, held in place on the CEB base by the CEB stop after stretching the rubber strip. 4. Using the tweezers, slide a cantilever chip into the appropriate position as shown in Figure 2.20. Fig. 2.20: Inserting the cantilever chip. 20 5. Once you have inserted the cantilever chip, carefully re-position the rubber strip with the CEB fork, being careful not to touch the cantilever chip as this may result in damage to the cantilevers. Fig. 2.21: Final positioning of the cantilever chip underneath the rubber strip. 6. When you have moved the rubber strip over the cantilever chip as shown in Figure 2.21, lower the rubber strip and remove the CEB fork (see Figure 2.22). If the cantilever chip needs slight adjustment in the cantilever holder, you can adjust the cantilever chip position using the tweezers. Fig. 2.22: Removing the CEB fork. 21 7. Finally, you have the cantilever holder with the cantilever chip in place and ready for use (see Figure 2.23). Fig. 2.23: Cantilever holder ready for use. 22 8. To remove the cantilever chip and replace it with a new one, the process is similar to that already described, but in reverse order. An explanatory diagram is provided below. Using the CEB fork, stretch the rubber strip, unclamping the cantilever chip from the cantilever holder. Once the rubber strip has been lifted, push it back, holding the CEB fork on the CEB base with the CEB stop. CEB fork CEB stop CEB base Remove the old cantilever chip and insert a new one. If you do not insert a new cantilever chip Release the rubber strip to its natural position. Diagram showing the CEB fork position, held against the CEB base by the CEB stop after pushing back the rubber strip. If you insert a new cantilever chip Clamp the cantilever chip with the rubber strip, remove the CEB fork. 23 INSTRUCTIONS FOR CHANGING THE RUBBER STRIP To change the rubber strip of the cantilever holder you will need a screwdriver and tweezers. 1. Using the screwdriver, loosen the four screws in the cantilever holder to release the top part (blue one) as shown in Fig.2.24. Notice that it is not necessary to unscrew them entirely. Fig. 2.24: Releasing the top part of the cantilever holder 2. You will now have two separate parts as shown in Fig. 2.25. Fig. 2.25: Removing the top part of the cantilever holder 24 3. Using the tweezers, remove one side of the rubber strip, holding it with the tweezers as shown in Fig. 2.26. Then, do the same with the other side, removing the rubber strip from the top part of the cantilever holder. Fig. 2.26: Removing the rubber strip 4. Take a new rubber strip and place it in the top part of the cantilever holder. The two points in the rubber strip show the position of the holes used to fix it to the top part of the cantilever holder. Place one side of the rubber strip, holding it with your fingers and the tweezers. A possible way to do this is shown in Fig. 2.27. Fig. 2.27: Placing a new rubber strip 25 5. Place the other side of the rubber strip, as shown in Fig. 2.28. Fig. 2.28: Placing a new rubber strip 6. Finally, replace the top part of the cantilever holder to its original position, and tighten the screws with the screwdriver, pressing the top part down with your fingers, as shown in Fig. 2.29, to get the top part properly fixed while tightening. Fig. 2.29: Replacing the top part of the cantilever holder with a new rubber strip 26 7. Finally, you have your cantilever holder with a new rubber strip, ready for placement of a cantilever chip (see Fig. 2.30). Fig. 2.30: Cantilever holder with a new rubber strip 27 Once you have mounted a cantilever, you can place the cantilever holder in the head, as shown in the next image. Two magnets will hold it at the right position. (In case of MFM, there are no magnets, the cantilever holder is fastened by two clamps).The three ball system ensures a good stability for the cantilever holder. Fig.2.31 Cantilever holder in the head x Finally, once you have properly assembled the AFM system (computer, Dulcinea and the hardware), you can check that everything is properly connected by switching on the system, running WSxM, turning On/Off the laser in the Photodiode Menu and moving the motor up and down with the commands Withdraw/Approach in the Approach Menu. To do this, follow these instructions: 1. Turn Dulcinea electronics on and run WSxM. You will find the following options: Fig.2.32 2. Select the Data Acquisition option by pressing appear: . Then the following icons will Fig.2.33 28 3. Check that the parameters of the system you are going to work with are suitable. For that, click on . Fig.2.34 Select the piezo you are using, changing the calibration values if necessary. Your piezos have been calibrated at Nanotec, and the calibration values are written on a label attached to the piezo cables. (Please check that the sign of Zcal is correct. For Dulcinea users, it must be negative). The motor you have is a DC motor, Sign: Negative. Make sure that the checkbox ‘Active’ in the top of the window is checked before exit. If this box is not activated, your changes will not be updated. Now click “OK”. Then press menus: and Dulcinea electronics will initiate, enabling the rest of the Fig.2.35 29 4. Turn on the laser by clicking on . The Photodiode Menu will appear: Fig.2.36 x Select On to turn it on. The laser should turn on. To turn it off, select Off. 5. Select the Approach Menu by pressing Fig.2.37: Fig.2.37 . You will see the window shown in Fig.2.38 30 The Approach Menu controls the motor. There are two options, Move and Step. x Move: the screw rotates in a continuous movement. x Step: the screw rotates in a discrete way, with short displacements in each ‘step’. Press Move/Withdraw and the motor should start moving, raising the screw. To stop it, the Move/Withdraw button will change into a Stop button (see Fig.2.38). If you press Stop, the motor will stop. While withdrawing, if the motor goes down (then it is approaching), it means that probably the motor connection (see Fig. 2.10) is connected the wrong way, so check it. If the laser and/or the motor do not work, stop the acquisition, pressing . In Dulcinea electronics a shutdown message will be received, then turn it off. Check all the system connections and make sure all of them are firmly fastened, especially the DB37 connector on the base of the hardware (see Fig. 2.13). Repeat the above process and try again. The laser and the motor should now work. 31 x To finish with the AFM Hardware, we will discuss how to use the Retaining Springs (see Fig. 2.2). Once you have placed a sample on the sample holder, you will position the AFM head (with the cantilever holder and a cantilever) on the micrometer approach screws (see Fig. 2.2). At this time, you have to use the Retaining Springs to fix the head to the chassis. These springs act as a final antivibration measure. With one hand take the head, while with the other take a retaining spring, as shown in the next image: Fig.2.39 32 You will notice that the handling piece of the retaining spring, the L-shaped one, has a hole (see dotted arrow in Fig.2.39). You have to place the head side screw (see continuous arrow in Fig.2.39) in the retaining spring hole, as shown in the next image: Fig.2.40 After placing one of the Retaining Springs, do the same with the other spring. NOTE. While you place the first retaining spring with one hand, with the other one hold the head. If you are using a MFM head you have to be more careful. In this case, the head has no magnets, so it is not magnetically fixed to the chassis. When placing the Retaining Springs, while you place the first one with one hand, always hold the head with your other hand, and after placing this first retaining spring, do not let go of the head until placing the other one. 33 3. Safety instructions x If you have an optical table, remember to slacken the optical table brakes, in order to move the optical table with the micrometer screws. x Be very careful while placing (or changing) the piezoelectric scanner. It is one of the most fragile parts of the system. x Never try to disassemble any mechanical hardware or electronic component of the system without previous authorization from the manufacturer or authorized representative. x The micrometric motor-approach screw in the chassis (see Fig. 2.2) can also be moved by hand after pushing down the motor. If you move it in this way, make sure that after the movement the white, plastic coupling piece is perfectly aligned, otherwise, the micrometer screw will not move with the motor. x The AFM head can be safely handled as shown in the next figure: Fig.2.41. Handling the AFM head Do not touch the optical parts in the AFM head (optical cubes, laser, photodiode…). Take special care not to touch the laser or its cable, since this might cause misalignment. It is also advisable not to touch the micrometer screws after you have positioned the laser on the cantilever and performed the photodiode tune. x If you use silver paint to fix the cantilever to the cantilever holder, do not use liquids to clean the silver paint from the holder. Particles of silver paint could get between the different parts of the holder producing undesired electrical contacts. 34 Chapter 3: Optical microscope 1. Description The optical microscope that Nanotec provides with the AFM system can be divided into four different parts. It is shown in the next image: Camera Optical Microscope Stand Optics Light source (optical fiber) Fig. 3.1 Optical Microscope 35 2. Installation instructions First of all, it is necessary to assemble the optical microscope stand. A diagram showing the different parts is given below. We will follow that diagram to explain the steps of the assembly (See figure 3.2). 3.b Grey Block Manual screw 3.a Arm 3.c Leg Base Allen screws Fig. 3.2 Optical microscope stand diagram 36 x Fix the upright column of the stand (the metallic cylinder we refer to as “leg”, part 3 in the diagram) to the base of the stand (part 2) using the three allen screws (parts 1) and their respective pressure washers. x Place the “arm” of the stand, (the long, black cylinder part 3.a), into the orifice of the grey block that comes with the leg (part 3.b). This grey support block is fixed to the leg by means of one of the two screws equipped with black knobs that come separately. This screw is the one that enables the horizontal movement of the optical microscope when it comes over the AFM head. Make sure the part that supports the grey block to the leg (black cylindrical part with a manual screw, part 3.c) is very well fixed, because it is the part that supports all the weight of the optical microscope. The other manual screw with a black knob is used to fix the arm to the grey block. In order to balance the microscope system, it is recommended to position the grey block in the middle of the arm (as shown in Fig. 3.1). x At the end of the arm, unscrew the part called part 7 in the diagram, with its washer (part 6) and insert the final part of the stand (part 5), replacing parts 6 and 7 to their initial position. x Place the optics (part 4 in the diagram) into part 5 of the stand, leaving the connection for the optical fiber on the right side. x Connect the light source with the optical microscope by means of the optical fiber, leaving the light source and the AFM chassis on different tables (usually the AFM chassis is placed on an anti-vibration table). x You will receive the digital camera placed on the top of the optics. You can change its orientation by loosening the coupling part (the one on the top of the optics, fixed with three allen screws). Plug the camera into a USB port in the CPU. The software is already installed. The CD with the drivers and the software is provided separately. To access the different sections of the digital camera software, you must click on the shortcut Fig.3.3 Icon for the optical microscope software that you have in the desktop on your computer. 37 The next screen you should see looks like: Click here to start the digital camera video visualization Fig. 3.4 Then, the live video will start, and you will see the next options: Resolution while live video Captured photo resolution If you check this box, the software will save the images with a default name in a default folder Photo capture Video capture Fig.3.5 Live video 38 If you click the “Settings” icon: Here you can select the default directory to store files, where images will be saved if you check the box ‘Save automatically’ (see Fig. 3.5). You have to select the destination and create there a new album (see next image, Fig.3.7) Fig.3.6 Settings You have to click in and then select (see Fig. 3.4). The next menu will appear: Fig.3.7 Add Album 39 The other possibility is to select “Use an existing folder as album”: Fig.3.8 Add Album Then you can select the folder you want to save your files in. Finally, if you click, (see Fig. 3.5), a dialog will appear: In this menu you can change all the usual camera control parameters (brightness, contrast,…) in order to improve the image which is being given by the digital camera Fig.3.9 Properties 40 Fig. 3.10 Example of a complete system configuration IMPORTANT x For a proper use of the optical microscope, the stand should be placed behind the AFM chassis, placing the optical microscope above the AFM head moving the optical arm from the right. That is why it is advisable to plug the optical fiber coming out from the right, in order not to have anything above the AFM head when the optical microscope is removed. This arrangement insures that it is possible to place the glass cover while using the AFM system. x The light source induces mechanical vibration, please do not place it on the same table as the AFM chassis and head. 41 3. Safety instructions x When operating with the optical microscope, you will need to tighten and loosen the manual screws in order to position the microscope head and place it in the right position above the optical cube of the AFM head. Until you are familiar with the optical system, practice with it away from the AFM system to avoid damage if you do something wrong. x When installing and operating with the optical system, make sure it does not touch any part of the AFM head. Position it in such a way that the optical microscope can be moved/removed above the AFM head properly. While looking for the optimum focus position, take special care that any part of the optical microscope does not touch the laser or its cable, as it could misalign it. 4. Use of the optical microscope Once the optical microscope is installed, the first thing you must do is to turn on the light source and to start the software of the digital camera in the CPU. x Then, you have to place the optical microscope objective above the optic cube of the AFM head. x Probably you will not see anything at first. You have to look for the right vertical distance between the optical microscope and the AFM head, in order to have the sample in focus. The correct focus is about 2-3 cm above the head. You also will have to take into account the zoom of the microscope. It is advisable to begin with the lowest zoom as possible, and then, once you have an image, change it as required. (See figure 3.11). 42 USB cable Camera Zoom Focus Fine Adjustment Optical Fiber Fig. 3.11 Optics in the optical microscope 43 The other important fact is the light intensity delivered by the source. In order to have a clear and sharp view of the sample with the optical microscope, you will have to adjust the light intensity delivered by the light source. Besides, it is useful not to have the optics totally vertical. Instead, you can try to place it in a similar way as shown in the next picture: Laser Optics AFM head Fig. 3.12 It is advisable not to place the optics completely parallel to the laser of the AFM head 44 x Finally, you can try changing the camera settings in the software in order to see the best image as possible with the best resolution. Fig. 3.13 Example of image taken with the optical microscope system. Gold electrodes with metallic contacts 45 Chapter 4: First Use of the System STARTING WSxM 1. Before turning on Dulcinea electronics, put the sample on the magnetic support of the piezo (or non magnetic sample holder in MFM case). 2. Make sure the height of the micrometer support screws is enough to hold the head above the sample without crashing the cantilever. Place the cantilever chip in the cantilever holder and then insert the cantilever holder into the head (see Chapter 2). 3. Turn Dulcinea electronics on and run WSxM. You will find the following options: Fig. 4.1 4. Select the Data Acquisition option by pressing appear: . Then the following icons will Fig. 4.2 5. Check that the parameters of the system you are going to work with are suitable. For that, click on . Fig. 4.3 46 Select the piezo you are using, changing the calibration values if necessary. Your piezos have been calibrated at Nanotec, and the calibration values are written on a label attached to the piezo cables. (Please check that the sign of Zcal is correct. For Dulcinea users, it must be negative). The motor you have is a DC motor, Sign: Negative. Make sure that the checkbox ‘Active’ in the top of the window is checked before exit. If this box is not activated, your changes will not be updated. Now click “OK”. Then press menus: and Dulcinea electronics will initiate, enabling the rest of the Fig.4.4 LASER ALIGNMENT AND PHOTODIODE TUNE 6. Turn on the laser by clicking on . The Photodiode Menu will appear: Fig. 4.5 x Select On to turn it on. x Adjust the laser beam to be focused on the cantilever by using the micrometer screws closest to the laser (screws #1 and #2 in Fig. 4.13). You will know when the laser beam is falling on the cantilever because the typical diffraction pattern will appear. 47 To align the laser and to tune the photodiode, place the SPM Head on the Head Parking supports (see Fig.4.6). Head Parking Parking screen Fig 4.6 Hand-held screen Fig. 4.7 48 Now follow these steps: x Place the laser beam on the chip which contains the cantilever, you will see just a diffuse red light on the parking screen and the shadow of the chip cantilever (Fig.4.8). The approximate dimensions of the cantilever chip’s shadow are | 2 x 3 mm2. x Then, move the laser beam along the chip (parallel to the cantilever, use screw #1, see Fig. 4,13) until arriving and surpassing the edge of the chip. You will know when you surpass it because you will see a clear spot under the cantilever holder (Fig. 4.9) (it is advisable to place a ‘paper screen’ at the base of the Head Parking, as shown in Fig.4.6). x Once the laser beam is beside the edge of the chip, move it perpendicular to the cantilever with screw #2, searching for the cantilever until you find its diffraction pattern. x To make the final adjustment, you can use a little piece of paper (Hand-held screen), placed as shown in Fig.4.7 to visualize the diffraction pattern. Move the laser perpendicular to the cantilever length (use screw #2) until it is positioned in the middle of the cantilever (diffraction pattern with maximum intensity). Then move the laser beam along the cantilever length (use screw #1) until the spot is at the edge of the cantilever (you will notice that because the diffraction pattern gets distorted, with ‘rings’ appearing in addition to the maximum). Fig. 4.9 Fig. 4.8 The next three diagrams shows an approximation to the diffraction patterns corresponding with the most usual cantilever geometries. Diffraction patterns for three of the most common cantilever geometries are shown. Parking Screen Diffraction Pattern Hand-held Screen Diffraction Patterns OK (Please, observe that the drawing is not to scale) Fig. 4.10 49 Parking Screen Diffraction Pattern Hand-held Screen Diffraction Patterns OK (Please, observe that the drawing is not to scale) Fig. 4.11 Parking Screen Diffraction Patterns Hand-held Screen Diffraction Patterns (Please, observe that the drawing is not to scale) OK Fig. 4.12 50 Screw #3’, for coarse vertical adjustment of the photodiode Screw #2, for laser alignment on the cantilever Screw #5, for fine horizontal adjustment of the photodiode Screw #1, for laser alignment on the cantilever Screw #6, for fine vertical adjustment of the photodiode Screw #3, for coarse vertical adjustment of the photodiode Screw #4, for coarse horizontal adjustment of the photodiode Fig. 4.13 7. Adjust the photodiode position in such a way that the laser spot reflected from the cantilever is centered on the photodiode. To do this click on .. A window to help you align the photodiode will appear. Two screws control the coarse movement (vertical movement, screws #3 and #3’, and horizontal movement, screw #4). The other two screws (horizontal movement, screw #5, and vertical movement, screw #6) control fine movement. The coarse movement allows you to position the whole photodiode holder with your hands (see Fig.4.15). The blue bar labeled Optical Power must be as high as possible and the red cross must be centered inside the blue square. Note that, when having some optical power, the green cross appears when the red cross is inside the blue square (see Fig.4.16). The green cross is a magnified view of the red cross. With the fine movement screws you can precisely adjust the photodiode making the red and the green crosses coincide by using screws #5 and #6 as shown in Fig.4.17. After this process, the blue bar in the Photodiode Menu, which corresponds to the total Optical Power, should be as high as possible (usually at least over the mid point) and the crosses in the photodiode window should be centered. (Do not worry if you do not have the maximum Optical Power. It depends on the laser adjustment, the optics in the head and the cantilever you are using, since they have different backside coatings) 51 NO INTENSITY Fig. 4.14 BAD BETTER BEST Fig. 4.15 Fig. 4.16 Fig. 4.17 (Notice in Fig 4.14 that if you do not have signal in the photodiode, red and green crosses appear centered, but you know there is no signal because there is no blue bar) HEAD POSITION AND MANUAL APPROACH 8. Turn Off the laser (by clicking Off in the Photodiode window) and place the head above the sample (the head fixes to the support screws magnetically unless you are using a MFM). Make sure not to touch any head micrometer screws, in order not to change the previous laser tune, and also make sure not to crash the tip. If there is any doubt about crashing, raise even more the support screws before placing the head. Once it is placed, you can fix the head with the two L-shaped parts anchored to the base with springs (Retaining Springs, see Fig.4.18). Three micrometer screws placed in a triangular pattern make the head support, (see Fig. 4.18). The two screws at the front can be moved by hand, while the other is motorized and controlled through WSxM (but it can be also moved by hand, pushing the motor down with one hand and moving the screw with the other. If you move it in this way, after the movement, make sure the motor is well coupled to the micrometer. If not, the motor will not move the micrometer). Micrometer motorapproach screw Retaining springs Micrometer manual-approach screws Fig. 4.18 52 To fix the Retaining Springs, follow the next instructions: Fig. 4.19 With one hand steady the head, while with Fig. 4.20 After placing one of the Retaining Springs, do the other hold a retaining spring. You will notice that the same with the one on the other side. the L-shaped piece of the retaining spring has a hole NOTE. While you insert the first retaining spring with one hand, with other hand you must hold the head. If you are using a MFM head (marked by the orange dotted arrow). You have to the you have to be more careful. In this case, the head has no magnets, so it place the L-shaped piece into the side screw (marked is not magnetically fixed to the chassis. After placing the first retaining with a continuous green arrow), using the retaining spring, always hold the head with the other hand, do not let go of the head until placing the second retaining spring. spring hole. 9. Once you have secured the head, use the two manual screws to approach tip and sample until they are close, but without crashing. It is advisable to move them with your thumbs, as shown in the next images (see Fig.4.21 and 4.22). If you turn the screws clockwise the head will approach to the sample and if you turn them in the other direction the head will withdraw. Fig. 4.21 Fig. 4.22 10. Turn on the laser and check again the photodiode position. Once it is tuned, cover the AFM head with the glass cover. Fig. 4.23 53 APPROACH IN DYNAMIC MODE 11. Select the Dynamic Menu by pressing appear: . Then the following window will Fig. 4.24 12. Check that the parameter values are the proper ones for your cantilever and if not, change them. Usually, cantilever manufacturers specify the applications for each cantilever. While soft cantilevers (< 1 N/m) are commonly used in Contact mode, in some cases they can also be used in Dynamic modes. The most important parameters are the Minimum and Maximum Frequencies, the Amplitude of the voltage applied to the cantilever driving piezo and the Delay. Briefly, the delay is the number of times the amplitude of the cantilever at the resonant frequency (X component) and its phase (Y component) are measured to obtain an average value. You should know roughly the value of the resonance frequency of the cantilever you are using. In this way you can fit the limits of the frequency searching interval (Minimum and Maximum Frequencies) in a rational way. For example, for a cantilever with f # 71 kHz (and k < 1 N/m), the default values in the 54 dynamic window should be OK (we will refer to this cantilever in following examples as cantilever_1). However, for one with f # 250 kHz (and k | 40 N/m) (cantilever_2 in following examples), you have to change, at least, the Maximum Frequency to, for example, 450000 Hz. Another important parameter is the Amplitude of the voltage applied to the cantilever driver piezo. You have to select a value in order to get a reasonable resonance peak (see Fig.4.25b). It is recommended to start with a low value (| 0.25 V) and increase/decrease it if necessary, depending on how much you want the cantilever to oscillate. If the amplitude of the cantilever driving piezo is too large, your resonance peak would resemble that shown in Fig. 4.25a. The other important parameter is the Delay. The system needs some time to perform a good dynamic tune. It is advisable to place a Delay value higher than 150. (To learn more on Dynamic Mode, see Appendix A) 13. Once you have set the parameters discussed above, press and WSxM will search automatically for the resonance frequency of the cantilever. The next figure shows two images as an example. The one in the left corresponds to a saturated resonance peak and the one in the right to a non-saturated resonance peak. Fig. 4.25a Fig. 4.25b NOTE. The optimal Total Amplitude value for the cantilever to oscillate will depend on many parameters, including sample roughness and the selected cantilever. If the sample is very flat, you can usually use a small value, but if it is rough you should use larger ones (typical values range from | 0.2 V to | 5 V). It is advisable to use the lowest input Amplitude possible to avoid instabilities. To implement this, you can adjust the Gain in located in the dynamic window (see Appendix A). Once you have found the cantilever’s resonance frequency, check that it is similar to the expected value and exit the Dynamic Menu. Once Dynamic Menu is closed, while measuring, you can see and change the Dynamic parameters by pressing the button (see Fig. 4.26, Dynamic Settings). 55 Fig. 4.26 14. In the Control Menu (see Fig. 4.27. This menu is usually already opened, button ), insert the scanning Frequency (Freq (Hz)) and the Number of Points in one scan line. Fig. 4.27 x As a general rule, set the initial Frequency to 1 Hz and the Number of Points to 256 (Fields colored in grey must be changed using the arrows on their right. Some fields can be changed and the new value will be directly updated, and in other fields, when changing the value, the background turns yellow. When this happens, they must be updated by first pressing the Update button (or Enter key on the keyboard)). (To learn more about the other parameters in Control Menu, see Appendix B) 56 15. In the Scan Options Menu (see Fig. 4.28. This menu is usually already opened, button ). Select Dynamic among the possible measurement modes. In case none of them is selected, the system will work in Contact Mode. The final configuration should be: Dynamic: Yes, Jumping: No and Retrace: No. Fig. 4.28 Wait a few seconds to give time for the system to change into Dynamic Mode, and press Update in the Control Menu. Then the values of the different channels will be updated in the Channels Values Menu. This menu is usually already opened. If not, you can see it by pressing (see Fig. 4.29). Fig. 4.29 x The Set Point value in the Control Menu (Fig. 4.27) will be used by the feedback system to control the tip-sample distance. In Dynamic Mode, the feedback channel is the Amplitude of the cantilever oscillation, CH15 (you can see it in the Feedback Menu, Fig. 4.30). The system keeps it constant, by comparing the Set Point value with the value from CH15 (you can see it in the Channels Values Menu, Fig. 4.29), changing the tip-sample distance to keep the Amplitude constant. To set an initial value for the Set Point, before approaching, check the Amplitude value (channel 15, CH15) in the Channels Values Menu (see Fig. 4.29). When you approach to the sample, the oscillation amplitude will decrease due to the tip-sample interactions but also due to the cantilever-sample interactions (the latter is a long range interaction with a low variation with the distance. For some cantilevers, this interaction can produce false stopping points when approaching). That is why you have to put an initial Set Point value lower than the amplitude shown in CH15, this implies a Set Point value closer to 0 than that found in CH15. 57 x If you are using a cantilever similar to cantilever_1, the initial Set Point value should be around 1/2 the initial value in CH15. x If you are using a cantilever similar to cantilever_2, the initial Set Point value should be | 3/4 the initial value in CH15. 16. In the Feedback Menu (see Fig. 4.30. This menu is usually already opened, button ). Insert feedback parameters P and I (Proportional-Integral). As a general rule, take P = 20 and I = 10 as initial values. Fig. 4.30 17. Selecting the images to display. x In the Viewer Options Menu (see Fig. 4.31. This menu is usually already opened, button ). You will have: Fig. 4.31 The next figure summarizes (Fig. 4.32) the above discussion by showing a typical configuration for the screen with the most important menus opened. 58 Channels Values menu Control menu Main Window Viewer Options menu Dynamic Settings Feedback menu Different views Scan Options menu Fig. 4.32 In the Viewer Options menu, for each image, as initial settings, select the options shown in Fig. 4.32 (you can display the parameters controlling each view in the Viewer Options menu by just clicking on the corresponding image). For example, in Fig. 4.32 the parameters for View Nº2 are the ones shown in Fig. 4.31. As another example, for view Nº1 we have: Channel: Topo (topography), Oscilloscope mode On (button pressed), and Fwd/Bck signals at the same time On (button pressed). There are two traces, one for the left to right scanning direction (called Forward, Fwd, colored in blue) and the other one for the opposite sense (Backward, Bck, colored in red)). To activate a particular view in the Main window (View Nº0), double click in the view and WSxM will take it to the Main window. (You can learn more about viewer options and other menus in the WSxM software manual) 59 18. Now is the time to approach tip and sample. Select the Approach Menu by pressing . You will see the following window: Fig. 4.33 The Approach Menu controls the motor. There are two options, Move and Step. x Move: the screw rotates in a continuous movement until it is “in range”. The parameter to control the Move Approach option is Amplitude reduction to range (%). You will change this value depending on the cantilever you are using and how careful you want to be while approaching. For example, with cantilever_1 it could be OK to use a value of 10% approximately, while with cantilever_2, which is more fragile than the other and usually has longer tips, a value of 5% should be OK. (For the latter case, since the tip is longer, the cantilever is further away from the sample while approaching, so the electrostatic interaction is lower, and almost all the amplitude reduction is due to the tip-sample interaction) (As the amplitude will reduce constantly during the approach due to the long range cantilever-sample interaction, the Amplitude reduction to range tells the system to look for a sudden change of the Amplitude equal to that selected in this field) x Step: the screw rotates in a discrete way, with short displacements for each ‘step’. The parameter to control the Step option is Motor Step Time (ms). It is usual to use a value of 100 ms when tip and sample are still “far” and 50 ms when they are closer. The other parameter you can change is Motor Voltage (V), which controls the motor speed. It is usual to use a value of 6-8 V approximately. 19. Once the parameters are set, press in the Move option. If Z Gain in the Control Menu is not 15 (the maximum one), WSxM will suggest you to change it to this value, to let the piezo move all the Z range if necessary. The screw will move until the tip is “in range”. Then, the motor will stop and the piezo will extend/retract (you can notice this by looking at the vertical green bar shown in the Control menu and in the Approach Menu, which represents the Z-piezo displacement. If the piezo is fully extended, the green bar will be at its maximum. If the piezo is fully retracted, then the green bar will disappear. You will also notice it because there will be no topography Fwd/Bck traces). 60 x How to know when the tip is close enough to the sample: When the system is working properly, the Fwd/Bck traces should be similar. (At the beggining, before scanning (Size = 0), display the Topo view in oscilloscope mode with a viewing scale of 2 nm and Filter: Offset). This means that the tip is close enough to the sample and the system has the proper feedback settings. Just after the whole approaching process, since the sample is not moving and the tip is just oscillating above the sample, there is no topography variation. This is why the Fwd/Bck traces should be flat and constant, equal to cero. If the Fwd/Bck traces are not similar just after motor approach, you must make further adjustments. There is a number of possibilities to consider: A- If the piezo is fully-extended (maximum green bar in the Control Menu and in the Approach Menu. You will also notice it because there will be no topography Fwd/Bck traces variation), continue to approach the tip toward the sample. For this, x Use the Step option in the Approach Menu giving the necessary steps to center the green bar (it is advisable to get it centered while measuring because then the Z-piezo will move over the maximum range in both directions (up and down)). x Increase the Set Point value (since it is negative, you have to change it to values closer to 0) until getting Fwd/Bck traces the same, reaching this state with a sudden flattening of them. If the piezo gets fully-extended again before the traces flattening, repeat the above process. When Fwd/Bck traces become equal, center the green bar by making step approaches. When the green bar is centered, close the Approach Menu. B- If the piezo is not fully-extended, there are two possibilities: x Fwd/Bck traces are flat and constant, having reached this state by the appearance of a sudden onset of flattening. The system is in the proper feedback range. Center the green bar by making step approaches/withdrawals and close the Approach Menu after the green bar is centered. x Fwd/Bck traces are not flat and constant. Increase the Set Point value (since it is negative, you have to change it to values closer to 0). If Fwd/Bck traces get the same with a sudden flattening o OK, you are in the right conditions to measure. Center the green bar with step approaches/withdraws and close the Approach Menu. If the piezo gets fully-extended, go to case A. 61 Fig. 4.34 Fig. 4.35 Fig. 4.36 Fig. 4.37 Fig.4.34: after the motor Move approach stops, the system is ‘in range’, but tip and sample are not close enough. Fig.4.35: after changing the Set Point and making some Step approaches, Fwd/Bck traces start to be flat and equal. Changing just a little more the Set Point will lead to a sudden flattening of Fwd/Bck traces. Fig.4.36: Fwd/Bck traces after doing what has been said in Fig.4.35. Fig.4.37: the system is in the proper feedback range, obtained after waiting one or two seconds from Fig. 4.36. IMPORTANT: Once you have done the Motor Move Approach, then some Step Approaches and also some Set Point increments, if the system is not in the proper feedback range, you can set a scan size (for example 2000-3000 nm) and continue with the Approach. Instead of seeing a sudden flattening of Fwd/Bck traces, when the system gets the proper range you will see topography traces, which can be more visual to know when the tip is close enough to the sample. NOTE. You can change the Set Point value directly, typing its value, but you can do it also using the arrows in the dialog box. You will get large value changes by clicking the arrow. To produce smaller changes, click the arrow while pressing SHIFT (or CRTL for even smaller ones). This is important, even more when you are very close to the right position between tip and sample, in order to achieve the proper Set Point value. (All the parameters in WSxM can change in this way) An alternative way of approaching tip and sample you can use in very special situations consists on increasing the Amplitude to the cantilever driving piezo, but this is a CRITICAL process. In case you do it, make sure you take low increments for the amplitude (for example, increments of 0.01 V and watching what happens). Once you have the tip close to the sample, with Fwd/Bck signals equal and flat, it could happen that the green bar, which tells you how much elongated is your piezo scanner, is not centered. If the green bar is far away from the center and the Z Gain is 15 or 10, we do recommend to step the motor in the Approach Menu. After scanning for a while, you may notice that the green bar has drifted from its centered position. You do not have to make Step approaches to re-center the green bar. Instead, you can use the Z offset (Zoff) in the Control Menu. There are two options, by software and/or by hardware. To do it by hardware, first of all make sure the knob in Dulcinea is in the middle range (| 5). Then enable the icon beside the Zoff, , and you will be able to center the green bar by turning the knob. To do it by software, take a look to the Z values, on the top of the Channels Values Menu (see Fig. 4.29). This value is telling you the Z off in nm. Just add that number to your Z off and the green bar will be centered. As a general rule, anytime you want to center it, add the value you see in the Channels Values Menu to the current value placed in the Zoff dialog. 62 (For example, if Z value = -200 nm and you have a Zoff = 300 nm, to center the green bar you should place Zoff | 100 nm) APPROACH IN CONTACT MODE 20. In the Control Menu, set the initial scan Frequency to 1 Hz and the Number of Points to 256. The Set Point value will be used by the feedback system to control the tipsample distance. In Contact Mode, the feedback channel is the Normal Force, CH1 (you can see it in the Feedback Menu, Fig. 4.30). The system keeps it constant, comparing the Set Point value with the Normal Force value from CH1 (you can see it in the Channels Values Menu, Fig. 4.29), changing the tip-sample distance to keep the Normal Force constant. To set an initial value for the Set Point, before approaching, check the Normal Force value (channel 1, CH1) in the Channels Values Menu (see Fig. 4.29). Since you have tuned the photodiode in the Photodiode Menu, making the red and the green crosses coincide, the Normal Force and the Lateral Force should be | 0. Place the initial Set Point around 0.2-0.4 V, as shown in the next figure: Fig. 4.38 21. In the Scan Options (see Fig. 4.39) select Dynamic: No, Jumping: No and Retrace: No. Then the system will work in Contact Mode. (If you have not done a Dynamic tune, then the Dynamic Mode option will be disabled, as shown in the next figure). 63 Fig. 4.39 You can see the values of the different channels in the Channels Values Menu (see Fig. 4.29). 22. Selecting the images to display. x In the Viewer Options Menu (see Fig. 4.31) select the views as shown in the next figure: Fig. 4.40 64 In the Viewer Options (Fig. 4.31), for each image, as initial settings, select the options shown in Fig. 4.40. (How to do it is explained in step 17). 23. Now is the time to approach tip and sample. Select the Approach Menu by pressing . You will see the following window: Fig. 4.41 The parameter to control the Move Approach option is Force difference to range (V). The value shown in Fig. 4.41, 0.2 V, should be OK, but if you want to be very careful with your tip, you can reduce it until | 0.1 V. (As the zero force level will drift during approach due to long range cantilever-sample interaction, the Force difference to range tells the system to look for a sudden change of the Normal Force equal to the selected in this field) 24. Once the parameters are set, press in the Move option. If Z Gain in the Control Menu is not 15 (the maximum one), WSxM will suggest that it be changed to this value to allow the Z piezo to move through its entire range if necessary. The screw will move until the tip is “in range”. Then, the motor will stop and the piezo will extend/retract (you can notice this by looking at the vertical green bar shown in the Control menu and in the Approach Menu, which represents the Z-piezo displacement. If the piezo is fully extended, the green bar will be at its maximum. If the piezo is fully retracted, then the green bar will disappear. You will also notice that there will be no topography Fwd/Bck traces). x How to know when the tip is close enough to the sample: When the system is working properly, the Fwd/Bck traces should be similar. (At the beggining, before scanning (Size = 0), display the Topo view in oscilloscope mode with a viewing scale of 2 nm and Filter: Offset). This means that the tip is close enough to the sample and the system is in the proper feedback range. Since the sample is not scanning and the tip is just 65 above the sample, there is no topography variation. This is why Fwd/Bck traces should be flat and constant. If the Fwd/Bck traces are not similar, you must make further adjustments. There are a number of possibilities to consider: A) If the piezo is fully-extended (maximum vertical green bar shown in the Control Menu and in the Approach Menu. You will also notice it because there will be no topography in the Fwd/Bck traces), continue to approach the tip toward the sample. For this, x Use the Step option in the Approach Menu giving the necessary steps to center the green bar (it is advisable to get it centered while measuring because then the Z-piezo will be in terms to move in the maximum range in both directions (up and down)). x Increase the Set Point value until getting Fwd/Bck traces the same, reaching this state with a sudden flattening of them. If the Z piezo becomes fully-extended again before the traces flattening, repeat the above process. When the Fwd/Bck traces become equal, center the green bar by making step approaches. When the green bar is centered, close the Approach Menu. B) If the piezo is not fully-extended, there are two possibilities: x Fwd/Bck traces are flat and constant, having reached this state by the appearance of a sudden onset of flattening. The system is in the proper feedback range. Center the green bar by making step approaches/withdrawals. When the green bar is centered, close the Approach Menu. x Fwd/Bck signals are not flat and constant, increase the Set Point value. If Fwd/Bck signals become the same by suddenly flattening o OK, you are in the right conditions to measure. Center the green bar with step approaches/withdrawals and close the Approach Menu. If the piezo gets fully-extended, go to case A above. If the piezo is fully-retracted (check the vertical green bar shown in the Control Menu and in the Approach Menu, this represents the Z-piezo displacement. If the piezo is fully retracted, there will be no green bar. Also there will be no evident variations in the Fwd/Bck traces), check the Normal Force value (CH1) in the Channels Values Menu (see Fig. 4.29). You should find that the CH1 value is higher than the Set Point, which is why the piezo has retracted. You must enter a Set Point a bit higher than the CH1 value (for example, if CH1 = 0.6 V, you could enter | 0.65-0.70 V). The piezo will extend and you the situation will be covered by the above discussion - either the piezo will or will not be fully-extended. Follow the suitable instructions given above, depending on the system state. 66 Fig. 4.41 Fig. 4.42 Fig. 4.43 Fig. 4.44 Fig. 4.41: after the motor Move approach stops, the system is ‘in range’, but tip and sample are not close enough. Fig. 4.42: after changing the Set Point and making some Step approaches, Fwd/Bck traces start to be flat and equal. Changing just a little more the Set Point will lead to a sudden flattening of Fwd/Bck traces. Fig. 4.43: Fwd/Bck signals after doing what has been said in Fig. 4.42. Fig. 4.44: the system is in the proper feedback range, obtained after waiting a few seconds after Fig. 4.43 IMPORTANT: Once you have performed the Motor Move Approach, then some Step Approaches and also some Set Point increments, if the system is not in the proper feedback range, you can enter a scan size (for example 2000-3000 nm) and continue with the Approach. Instead of seeing a sudden flattening of the Fwd/Bck traces, when the system achieves the proper range you will see topography traces, which also can be used to indicate when the tip is close enough to the sample. NOTE. You can change the Set Point value directly, typing its value, but you can do it also using the arrows in the dialog box. You will get large value changes clicking the arrow. To produce smaller changes, click the arrow while pressing SHIFT (or CRTL to even smaller ones). This is important, even more when you are very close to the right position between tip and sample, in order to properly achieve the Set Point value. (Note that all the parameters in WSxM can be changed in this way). Once you have the tip close to the sample, with Fwd/Bck traces equal and flat, it could happen that the green bar, which tells you how much elongated is your piezo scanner, is not centered. If the green bar is far away from the center and the Z Gain is 15 or 10, we do recommend stepping the motor in the Approach Menu. After scanning for a while, you may notice that the green bar has drifted from its centered position. You do not have to make Step approaches to re-center the green bar. Instead, you can use the Z offset (Zoff) in the Control Menu. There are two options, by software or by hardware. To do it by hardware, first of all make sure the knob on the front panel of Dulcinea is in the middle range (| 5). Then enable the icon beside Zoff, and you will be able to center the green bar by turning the knob. To do it by software, take a look at the Z values listed on the top of the Channels Values Menu (see Fig. 4.29). This value indicates the Z offset in nm. Just add that number to your Z Offset and the green bar will be centered. As a 67 general rule, anytime you want to center it, add the value you can see in the Z values in the Channels Values Menu to the current value placed in the Zoff. (For example, if Z value = -200 nm and you have a Zoff = 300 nm, to center the green bar you should enter Zoff | 100 nm) APPROACH IN JUMPING MODE 25. In the Control Menu, set the Number of Points to 256. In Jumping Mode, the Z piezo scanner ‘jumps’ at each point in the image, essentially performing an FZ curve. For this reason, the Frequency in the Control Menu is not relevant. Other parameters control the movement, as we will see later, and that is why working in Jumping Mode the Frequency in the Control Menu is disabled. In Jumping Mode, the feedback channel is the Normal Force, CH1 (you can see it in the Feedback Menu, Fig. 4.30). The system keeps it constant, comparing the Set Point value with the Normal Force value from CH1 (you can see it in the Channels Values Menu, Fig. 4.29), and the tip-sample distance is changed to keep the Normal Force constant. To set an initial value for the Set Point, before approaching, check the Normal Force value (channel 1, CH1) in the Channels Values Menu (see Fig. 4.29). As you have tuned the photodiode in the Photodiode Menu, making the red and the green crosses to coincide, the normal force and the lateral force should be | 0. Place the initial Set Point around 0.2-0.4 V. 26. Open the Jumping Parameters Menu by pressing : Fig. 4.45 Now we will explain the parameters. To learn more about Jumping Mode, see Appendix C. 68 - Topo From: in this box, the user can select how to process the data points that WSxM will use to construct the topography of the sample. The DSP continuously acquires data while the feedback loop is closed (which means that the tip is in contact with the sample). During this time, many Z data points are acquired by the DSP. The exact number depends on the value entered into the Control cycles dialog box. Choose Average of Control Points if you want to use the average of all the data points acquired on during contact to make the topographic image, or choose Last Control Point if you want to use only the latest data point measured. The Z motion box allows you to input three important parameters. They are: - Jump off: maximum distance between the tip and the sample on every jump. If you are using a short piezo scanner, insert an initial value of | 500 nm. If you are using a long one, use an initial value |1500 nm. - Jump sample: the number of steps taken during each jump. This number is inversely proportional to the scanning speed. As initial value, use | 60. - Control cycles: the time the tip spends with the feedback closed (in contact with the sample) after every jump. It is also inversely proportional to the scanning speed. As initial value, use | 20. These three parameters control the speed of the piezo scanner movement. As we have already emphasized, the Frequency in the Control Menu is not relevant. It is possible during a jump image that the Z-piezo may drift. To compensate for this possibility, an Offset correction dialog box is provided. The Offset correction allows you to keep the Normal Force applied by the tip to the sample constant; that is, you can make the difference between the Set Point and the point of zero force (when the tip is far from the sample) always the same. If you select None, the system will identify the point of zero force as the value you set when you made the photodiode tune. If you select Fast/Slow, you will activate the offset correction at different times during the scan. The Fast offset correction will adjust the point of zero force at the end of each scan line while the Slow offset will perform the adjustment after each jumping point. 69 27. In the Scan Options (see Fig. 4.46) select Dynamic: No, Jumping: Yes and Retrace: No. (If you have not done a Dynamic tune, then the Dynamic Mode option will be disabled, as shown in Fig. 4.46). Fig. 4.46 You can see the values of the different channels in the Channels Values Menu (see Fig. 4.29). 28. Selecting the images to display. x In the Viewer Options Menu (see Fig. 4.31) select the views as shown in Fig 4.47: Fig. 4.47 70 In the Viewer Options (Fig. 4.31), for each image, as initial settings, select the options shown in Fig. 4.47. (How to do this is explained in step 17). As you can see in Fig. 4.47, in Jumping Mode, the system is performing an F-Z curve at each point in the image. From this data it is possible to make Adhesion and Stiffness maps. This can be done by simply selecting Adhesion and Stiffness as channels to display. 29. Now it is time to approach tip and sample. The process is the same as in Contact Mode, so follow the instructions given in steps 23 and 24. HOW TO ACQUIRE IMAGES 30. Once tip and sample are close enough and in the proper feedback range, start scanning. To do this, assign a value to the Size in the Control Menu (the resulting image will be a square, with the size you just specified equal to the length of one side). It is advisable to start the scanning with the maximum Zgain, to allow the piezo to move over its entire range to avoid crashes. Enter a Size that is not too large (around 20004000 nm) by entering the proper parameters to obtain a reliable image before increasing the scanning Size. It is very important to fit the value of XY Gain in the Control Menu to get the best resolution possible. Place the minimum XY Gain that WSxM allows. (Note that you can also use automatic XY Gain if you are using a Develop version of WSxM, then WSxM will do the work for you). You can learn more about the meaning of XY Gain, as well as the other Control parameters, by reading Appendix B. You must understand that the Z Gain is also very important. Once you are scanning and obtaining images, it is very important to work with a Z Gain as low as possible to get the best possible resolution. The Z values are monitored using an indicator bar in the Channels Values Menu (see Fig. 4.29). The width of this indicator bar displays the range of the data along the Z axis. If the indicator bar width is very small compared to the range of the scanner, you will observe an indicator bar that appears as a short vertical line (onepixel in width, as in Fig.4.29). This means that your gain is large (you have a lot of extra range). - To improve image quality you can, step by step, decrease the Z Gain. After each step, you will perhaps find out that you need to readjust the Z Offset. - At one moment, you will see that the red vertical line for the Z value in the Channels Values Menu is not a line but a bar. As you lower the gain, the bar gets wider. That means that you are using a Z range comparable to the range of your data, so your image will be improved. Take care not to decrease the gain too much 71 because this might move the tip out of range, you might obtain saturated data, or (much worse) you might crash your tip. For more information about the XY and Z Gains, see Appendix D 31. In order to obtain good images you will need to adjust some parameters. Dynamic and Contact Mode The important parameters in these modes are Scanning Frequency (Freq (Hz)) and Set Point in the Control Menu, and the Feedback parameters P and I (ProportionalIntegral) in the Feedback Menu (button ). x Increase/decrease the Set Point value to approach/withdraw tip and sample by piezo movements. x You need to set a Frequency value which allows the system to react to the changes in the topography of the sample. Scanning frequency value is usually in the range from 0.5 to 2.5 Hz. x In terms of Feedback parameters, first of all, it is usual to take P = 2·I (but this is not a hard and fast rule). A higher value for the feedback (this means P and I higher) allows a faster response of the system. There will come a time, if these parameters are set too high, at which the system will begin to oscillate (in Dynamic Mode you can easily see this by looking at the Amplitude and Phase images, channels CH15 and CH16 respectively. In Contact Mode, it is useful to monitor channels CH1 and CH2, the Normal force and Lateral Force). It is important to find optimum values for these two parameters. They should be as high as possible, but without introducing spurious oscillations into the system. Jumping Mode The important parameters in this mode are Set Point in the Control Menu, Jump off, Jump sample and Control cycles in Jumping Parameters Menu and the Feedback parameters P and I in the Feedback Menu. x Increase/decrease the Set Point value to approach/withdraw the tip and sample by piezo movement. x As we have said previously, the Frequency value in the control Menu is not relevant. To control the speed of the system you must adjust the Jump off, Jump sample and Control cycles. All of them are inversely proportional to the scanning speed, so you can try to reduce them as much as possible, but you must allow the system to faithfully react to changes in the topography of the sample in order to obtain the best image possible. x In terms of Feedback parameters, it is determined in much the same way as in Dynamic and Contact Mode. 72 HOW TO SAVE IMAGES 32. To save images, select the images you want to save by enabling the Save checkbox for each of them in the Viewer Options menu (see Fig.4.31). In the ) Acquisition Menu select Saving Options... (or click Fig. 4.48 A window will appear as shown in Fig.4.48. You can select the folder where you want to save the images, their name and a number counter which will appear in the image name and which will increase automatically each time you save an image. The extension in the image file name will show the type of image acquired and if it has been acquired using the Fwd or Bck signal. For example, *.f.top means a Fwd Topography image, *.b.ch15 means a Bck Amplitude image, *.f.ch16 means a Fwd Phase signal image, *.f.ch1 means a Fwd Normal Force image, and *.b.ch2 means a Bck Lateral Force image.) Fig. 4.49 Once you have selected a folder, specified a name for the images, and selected the ones you want to save by pressing in the Control Menu, the Save icon will turn yellow, as well as the headings of the images to be saved. Note that when the Save button is not pressed, these headings are red, and the ones which will not be saved are blue. When the scanning reaches the end of the scanning square (top or bottom), the images get saved and the Save button switches off. If you select Continuous Saving, the save button will change into and after pressing it, the system will not switch it off until after sequentially saving your files. 73 When the Continuous Saving option is selected, the selected images will be saved every time the scanner reaches the top and the bottom of the scanning square. TURNING OFF DULCINEA 33. Stopping the acquisition and turning off the system. BEFORE TURNING OFF Dulcinea electronics ALWAYS EXIT WSxM. x To exit WSxM, stop scanning. This is easily accomplished by entering a value of 0 to the Size in the Control Menu. x After the scanning has stopped, move away the sample from the tip using the Approach menu by clicking in the Move option, allow the tip to withdraw a reasonable distance, and turn off the motor (The Withdraw button will change into a Stop button and you will have to press it to stop withdrawing). Using the two micrometer screws (see Fig. 4.22) withdraw totally the tip from the sample. x Leave the Feedback parameters on P = 20 and I = 10. x Put the X, Y and Z offsets to 0. x Just in case, leave the gains on 10 (if not, while closing WSxM, this will automatically occur). Once you have completed these steps, you can finish the acquisition, by pressing the STOP button . In principle it is not necessary to switch off Dynamic Mode (if it is ON) or to turn off the laser. WSxM will automatically perform these tasks. A shutdown message will appear on the front screen of Dulcinea. Then you can turn Dulcinea off. 74 MEASUREMENTS IN A LIQUID ENVIRONMENT Scanning Probe measurements under liquids are performed using a specially designed liquid cell that is shown schematically in Fig. 4.50. The instructions below assume you already have a basic knowledge of the Nanotec Electronica SPM Hardware as described in this manual. support magnet laser beam support magnet sapphire window liquid pool liquid meniscus substrate Figure 4.50: A schematic diagram of the liquid cell (not to scale). Pay Attention!! When using the liquid cell, no liquid must enter into the piezo scanner. If this happens, switch off the system and contact us. To use the liquid cell, follow the instructions below: x Put the desired sample into the plastic liquid pool. You can fix it firmly with grease. Fixing the sample to the pool is critical to avoid movements while measuring, which in the case of a liquid environment could be especially important. x Clean the sapphire window of the cantilever holder as required. Chloroform or a cleaner for screen filters gives the best results. A clean window is critical to achieve high sensitivity. 75 Fig. 4.51: Place a small drop of vacuum grease onto the cantilever holder. Then place the chip cantilever, sliding it to its final position. x Mount the cantilever to the cantilever holder designed for liquid environments. You can fix it either with grease (see Fig. 4.51) or with a rubber strip (Fig. 4.52), depending on your application. Fig. 4.52: Move the rubber strip to expose the chip mounting platform. Place the chip cantilever, and then hold the chip with the rubber strip. x Align the laser onto the cantilever with the help of the parking screen. x Due to the sapphire window, two different laser spots will appear on the Hand-held screen. The spot corresponding to the sapphire window will always be there, while the spot related to the reflection from the cantilever will only appear when the laser is properly aligned onto the cantilever (usually showing a characteristic diffraction pattern). x Put the SPM microscope head onto the three micrometer adjustment screws. 76 x Before putting any liquid into the pool, manually approach (or use the motor) the cantilever to the sample until you see a distance of about 1 mm between the chip of the cantilever and its reflection on the sample. (After you introduce the liquid, the cantilever-sample distance will not be easily seen) x Remove the SPM head from its normal position and fill the pool with liquid. x Now return the SPM head to its position over the sample. A liquid capillary will form between the cantilever holder and the liquid surface (see Fig. 4.53). Please check that the cantilever is fully inside the liquid and the liquid is touching the sapphire window. If this is not the case, either you need to approach the tip to the sample or you need to add more liquid into the pool. Fig. 4.53 Liquid capillary marked by red arrow x Due to the presence of the liquid, the position of the laser on the cantilever needs to be readjusted in the normal direction (along the cantilever). You should realign it while you check on the Hand-held screen until you have again the 2 spots. x Adjust the photodiode position as in standard SFM. Contact mode: Proceed in a similar way as in standard Contact Mode. Jumping mode: Proceed in a similar way as in standard Jumping Mode. However please realize that the adhesion force between tip and sample is much smaller because there is no capillary 77 and/or liquid neck formed between the tip and the sample. Therefore, there is no capillary contribution to the adhesion force (see Fig. 4.54). Liquid - environment e c r o F 15 10 5 A 0 -5 -10 -15 -20 Fad -25 -30 -35 -40 -45 0 0.4 C Fap B Fuerza (nN) Fuerza (nN) Air - standard e c r o F Ida Vuelta D 20 40 60 80 100 0.3 0.2 Ida Vuelta 0.1 0.0 0 5 10 15 20 25 30 Distance Extension Z (nm) 120 Distance Extensión Z (nm) Fig. 4.54 Force vs Distance curves in air and in liquids. In liquids, the adhesion force is greatly reduced. As a consequence, the values for the parameters of the Jumping Mode are slightly different than those used when working in an air environment. For example: x Jump off: can be as small as 10 nm x Jump sample: when jump off is very small, use a number of steps higher than the jump off (the higher the jump sample, the more stable the measurement will be, but it will take longer as well – you need to find a compromise) x Control cycles: since the jump sample is not as large as in air, the number of cycles can also be small. Minimum value allowed is 4 cycles (the higher this number, the more stable the measurement will be, but it will take a longer time as well – you need to find a compromise). 78 35 Dynamic mode: The cantilever holder for measurements in liquid environment has a piezoelectric (see Fig.4.55) in order to oscillate the cantilever for Dynamic Mode. Fig. 4.55 Piezoelectric (marked by red arrow) in the liquid cell. In this case the piezoelectric is far from the cantilever to avoid contact with the liquid environment and the whole cantilever holder is vibrated. This implies some important differences with respect to Dynamic Mode in air. - The spectrum will show not only the peak corresponding to the cantilever resonance frequency, but other peaks corresponding to mechanical resonances of the whole system (cantilever holder, plus cantilever) (see Fig. 4.56) - When working in liquids the resonance freq of the cantilever decreases (to approximately 1/3 of its value in water) (see Fig. 4.57) - The Q of the cantilever decreases in liquids and the peak is wider. 79 0.45 0.4 Amplitude [V] 0.35 0.3 0.25 0.2 0.15 0.1 0.05 0 10000 1.5e 4 2e 4 2.5e 4 3e 4 3.5e 4 4e 4 4.5e 4 Frequency [Hz] Fig. 4.56 A typical resonance frequency peak and the mechanical resonances of the liquid cell system. (Note the range of the Frequency in the figure, going from 10 kHz to around 500 kHz) 0.5 0.7 Total Amplitude [V] Total Amplitude [V] 0.8 0.6 0.5 0.4 0.3 0.2 0.4 0.3 0.2 0.1 0.1 0 6.5e 4 0 7e 4 7.5e 4 8e 4 8.5e 4 9e 4 9.5e 4 Frequency [Hz] Fig. 4.57(a) Resonance freq. peak in air F = 81 kHz 2.4e 4 2.6e 4 2.8e 4 3e 4 3.2e 4 3.4e 4 Frequency [Hz] Fig. 4.57(b) Resonance freq. peak in water F = 28 kHz Final Remarks for operation in liquid environment: x Values for the feedback parameters (Proportional and Integral) in liquid environment are usually different from those used when operating in air (usually smaller). x Anytime you introduce liquid, thermal drift is usually strong. You will need to allow some time for the system to stabilize. x Jumping Mode allows an accurate control of the force applied to the sample. Dynamic Mode does not. 80 A few relevant references: - I. L. Ivanovska, P. J. de Pablo, B. Ibarra, G. Sgalari, F. C. MacKintosh, J. L. Carrascosa, C. F. Schmidt,and G. J. L. Wuite, PNAS 101, 7600-7605 (2004). - F. Moreno-Herrero, P. J. de Pablo, R. Fernández-Sánchez, J. Colchero, J. GómezHerrero, and A. M. Baró , Applied Physics Letters. 81, 2620-2622 (2002). - F. Moreno-Herrero, J. Colchero, J. Gómez-Herrero, and A. M. Baró, Phys. Rev. E 69, 031915 (2004). Pay Attention!! No liquid must enter into the piezo scanner. If this happens, switch off the system and contact us. 81 Chapter 5: Tutorial on HOPG. Use of Air STM Head Highly Ordered Pirolityc Graphite (HOPG) is a laminar compound. Its surface is extremely inert and flat. Using Scanning Tunnelling Microscopy it is simple to obtain atomic resolved images of this surface. In this tutorial, the process to obtain those images is described. 1. Stick the HOPG sample to a thin plate of a ferromagnetic material. A conducting epoxy is the best choice of adhesive. If conducing epoxy is not available, use a regular epoxy to stick the sample and contact the edge of the sample with the metal plate using silver paint. 2. Stick a piece of Scotch tape to the surface of the HOPG sample. Pull the tape to obtain a fresh surface. This cleaving process usually leaves graphite flakes on the surface; using the edges of the tape, remove as many flakes as possible. 3. Place the sample on the scanning piezo. With a multimeter, check the resistance between the sample and ground (the external side of any BNC in the electronic is grounded). The resistance must be a few ohms otherwise the silver paint is not getting a good electrical contact. 4. Cut a a1.5 cm platinum-iridium wire. Fig. 5.1 Air STM Head 82 5. Take the STM head and partially unscrew the two screws that hold the triangular plates (tip holder). The screws must be loosened just a little bit in order to allow the platinum-iridium wire to be inserted between both plates. Fig. 5.2 Loosen the top plate 6. Insert the wire leaving about 7 mm protruding out of the plates and tighten the screws. Fig. 5.3 Insert the tip wire 83 7. Cut the very end of the protruding wire at an angle of about 45º. 8. Raise the three micrometer screws so that when the STM head is placed on these screws, the tip will not touch the sample. The front two micrometer screws must be moved by hand; the third screw is moved using the motor, but can also be moved by hand. To move the third scew using the motor, open WSxM, go to Data Acquisition click on and then click on . Once in the Data Acquisition Menu, and the Approach Menu will appear. Fig. 5.4 Approach menu 9. Click on Withdraw to move the motor until the micrometer shaft lengths are long enough to hold the head and tip above the sample. 84 10. Place the STM head on top of the 3 micrometer screws and clamp the head to the base using the retaining springs. Make sure that the tip is not touching the sample. 11. By using the 2 manual-approach screws and the motor, approach the tip to the surface until the distance is smaller than 1 millimeter. Watch the tip reflection on the surface; it helps to approach tip and sample. A magnifing lens and good illumination may help to approach tip and sample. Try to keep the STM head level. Fig. 5.5 Manual coarse tip approach. Watch the tip reflection on the surface 12. Cover the microscope with the bell jar, and, if possible, with a box to isolate from acoustical noise as much as possible. 13. Close the Approach Menu and then click first on and then on . 14. Check that the Head Parameters match those in figure 5.5*. 15. Click again on and set all the parameters of the Control and Feedback Menus as in the next figure. 85 Fig. 5.6 Head and Control parameters * The calibration parameters shown in Piezo Settings vary depending on the piezoelectric scanner 4 2 Fig. 5.7 Feedback and Scan parameters 86 16. Using the Viewer Options , set the channels as follows: Channel 0: Current (nA); F-plane Channel 1: Topography (nm); F-plane Channel 2; Current (nA); F-plane Channel 3: Topography (nm); oscilloscope mode; FB-offset Channel 4: Current (nA); oscilloscope mode; FB-offset 17. Set the manual z-piezo position knob to 5 (0 V offset). This knob is on the front of Dulcinea, to the right of the LCD screen. 18. If you want to enable the manual positioning of the z-piezo, check the z-manual icon to the left of Z off(set) in the Control Menu to make the manual position knob active. Be careful, this knob overrides the current-tip distance feedback system. If the z-manual icon is not checked, this knob will not be active and the Zoffset will be changed only by software. 19. Now we are ready to approach the tip. Open again the Approach Menu and go to Advanced. Fig. 5.8 Approach menu 87 20. Set the parameters as shown in the figure and click on Fine Approach. The green bar will start to move up and down. This motion reflects the motion of the Z piezo element. At the central position of the green bar the motor is switched on during the time indicated in Motor Time. After several steps, the head will be in range. Be patient, depending on the tip sample distance that you have left after step 11, this process can last for several minutes. 21. When the “In range” message shows up, click on Update (Control Menu); the green bar will go all the way up. If Fwd/Bck current signals are oscillating, reduce P and I as necessary (i.e. 0.6 and 0.3 respectively, or even lower) to avoid the oscillations. Click on Step/Approach until the green bar will be slightly above the center. 22. Close the Approach Menu and incrementally decrease the Z gain to 0.29. If you are using the manual positioning of the z-piezo, adjust the z-manual knob as necessary to keep the green bar near center. 23. Change the Zoffset in the Control Menu (or using the knob in Dulcinea if it is selected) to set back the green bar to the central position. 24. Start to scan by setting 8 in the Size (nm) field in the Control Menu. 25. Reduce the Bias voltage to 100 mV. 26. In the Freq. (Hz) field in the Control Menu set 14. 27. In the Round Percent field in the Scan Options set a high value (| 70) to avoid the effects of the high scan speed of the piezo. 28. You should see some kind of periodic structure on the screen. If the scan size is increased the number of features should increase accordingly. 29. Try to improve the image by playing with the Bias voltage and Set Point values. 30. As a general rule the image will improve by itself as the time goes by. 31. Try to increase the value of the P and I. The periodic structure will appear also in the Topo image (P = 2 and I = 1 could be reasonable values, but you can try higher ones, though always avoid oscillations). 32. If you want to save the images select the path and name using the Saving Options . 33. Remember, there are not clear conditions to obtain good images. You have to take into account the next facts: x Small Bias between 25 and 300 mV is usually a good option. x The Set Point can be between | 0.5 nA and | 8 nA. 88 x As smaller the P,I values the response of the system will be slower. That usually gives good current images but poor quality topographic images. x Experiment also with the frequency and the number of points to improve the image. x You can change the X,Yoffsets to scan another place on the surface. x Change the Angle to scan using another side of the tip. 34. If after 30 minutes playing around you are not able to obtain a periodic structure, withdraw the head, cut the tip and try again. You can also take a new fresh HOPG surface using a piece of tape, as explained in step 2. 35. If you have cut the tip 3 times without good results, something else is wrong. TOPOGRAPHY 1.0nm TUNNELLING CURRENT 1.0nm Fig. 5.9 Example of Air STM Topography and Tunnelling Current images 89 Appendix A: Dynamic Menu When pressing Tune in the Dynamic Menu, WSxM will go through different kinds of scans to find the resonance frequency. First, it will make a scan over the frequency range selected by the user on a logarithmic scale, that way it will roughly find the resonance frequency. Secondly, it makes a linear scan over a shorter frequency range, set by the results of the first scan, to fine tune the resonance frequency. Then it performs a phase scan to determine the phase of the incoming signal. The ultimate result is a determination of the amplitude of the oscillation and its phase. The Nanotec system assigns the phase signal as the input to Channel 16, and the amplitude as the input to Channel 15. When performing the phase scan, the resonance frequency might change. Therefore, to finish the search, WSxM goes through a last linear scan to get the actual resonance frequency. The values shown in the parameter boxes will usually be different from those set at the beginning. They will be the last parameters determined from the last scan. You can make WSxM repeat any of these processes separately by using the buttons on the left bottom corner, Scan Phase and Linear Scan. - Minimum frequency: Enter the lower limit for the frequency range over which the resonance frequency is going to be searched. - Maximum frequency: Enter the higher limit for the frequency range over which the resonance frequency is going to be searched. - Frequency: WSxM will display in this box the value of the active frequency. - Delay: The number of times the amplitude of the cantilever at the resonant frequency (X component) and its phase (Y component) values are measured to obtain an average value. Setting the delay properly insures you obtain an accurate value for the amplitude (square root of the square of these values) of the signal from the dynamic board. - Amplitude: Amplitude of the excitation applied by the dynamic board to the dither piezo in the cantilever holder. If the tip were free (oscillating without feedback), increasing this amplitude would result in a larger oscillation of the cantilever. However, because of the feedback attempts to maintain a given set point amplitude, increasing the oscillation causes the tip to approach the sample since the feedback attempts to keep the amplitude constant. - Phase: Phase difference between the oscillation of the cantilever and the signal applied to the dither piezo. 90 - Filter out: Upper limit for the low pass filter used to eliminate high frequency noise that may be present in the signal going to the dynamic board. A typical value is about 8 KHz. - Gain in: Amplification factor of the normal force signal coming from the head to the dynamic board. You should increase the gain if the output signal (from CH15 or CH16) is too low (for example if the output signal is smaller than 0.3 V). - Gain out: Amplification factor of the signal coming out of the dynamic board and going to the DSP. You can use it for the same reason you use the Gain in amplification. It is better to use the Gain in amplification because the dynamic board works with the amplified signal. Be careful not to saturate the output. - Default limits: Click on this button to set the WSxM default values for the Max and Min frequencies. Info box: In this box WSxM will display information about the normal force signal coming out of the head into the dynamic board. - Resonance Frequency of the cantilever oscillation. When running the cursor over the graphs it will turn into a crosshair. Use it to click on any point you want to obtain numeric information. WSxM will provide you with the following information about the point: - Frequency value of the point selected by the cursor. - X component of the signal coming out of the dynamic board plotted as a vector. It is written in red because it corresponds to the red curve in the upper window. - Y component of the signal coming out of the dynamic board plotted as a vector. It is written in blue because it corresponds to the blue curve in the upper window. - Amplitude of the signal coming out of the dynamic board plotted as a vector; therefore, its value is the square root of the squares of the X and Y values. It is written in green because it corresponds to the green curve in the lower window. Use the buttons on the bottom of this box to perform a Phase Scan or a Linear Scan independently of the other scans. You can use them to fine-tune the frequency of resonance, or if you have lost the resonance frequency for any reason and you do not think it is necessary to go over every step of the tuning. When working on Dynamic Mode, the phase is set in such way that the X component (amplitude) is negative. Increasing the Set Point (bringing it closer to zero) therefore moves the tip closer to the sample, as is the usual case in SPM. 91 Appendix B: Basic Channels Viewer and Control commands Size: determines the size of the portion of the sample that will be scanned. Freq: determines the frequency, in Hz (lines per second i.e. 1Hz means one line per second), at which the sample will be scanned. It is proportional to the speed at which the tip will move across the sample. Points: determines how many data points will define the image. Start with a low number of points if you plan to test a new or different feature. That way, the test scanning will take less time. X and Y off.: determine the X and Y offsets on the sample. You can view the portion that is being scanned using the Position Window (see Fig. B.1 below). Z off.: determine the Z offset on the sample. Angle: determines the angle in the X-Y plane at which the sample will be scanned. The effect of changing the angle can be viewed using the Position Window. Bias: use it to set the voltage between the tip and the sample (if you have a conducting tip). The voltage will be applied to the tip. Set Point: determines the reference normal force between the tip and the sample, or the reference tunnel current for STM. Depending on the mode that is being used, the Set Point has negative or positive values. When working in Dynamic Mode, it is negative, and the closer to zero it is, the closer the tip is to the sample. In Contact Mode, the value should be positive, and the bigger it is, the harder the tip is pressing against the sample. Usually, the Set Point is displayed in volts, or nA for STM, however, when Force Calibration has been applied, it may also be displayed in nN or in nm. If you enter a value too high, WSxM will warn you, and will set an allowed Set Point value. Signal Gain: determines the gain for the incoming signal to Dulcinea. This Gain should not be modified unless, for some reason, the incoming signal is extremely low. There are only four allowed values for this box: 0.654, 1, 5 and 9.808. Z Gain: determine the factor by which the Z signal will be amplified in Dulcinea. There are six allowed values for this box: 0.06, 0.29,1, 5, 10 and 15. Use a value that suits the Z scale of the sample. If you do not know the scale (as is customary for the first time the sample is scanned), use the highest value and modify it as needed when scanning. XY Gain: determine the factor by which the X and Y signals will be amplified in Dulcinea. As for Z Gain, there are six allowed values for this box: 0.06, 0.29,1, 5, 10 and 15. Use the minimum value that allows you to scan over the desired area of the sample. The maximum area allowed on the Position window is determined by this value. Please observe that in order to obtain large scanning areas with a piezo, high voltages have to be applied. 92 The buttons in the low part of the box are used as follows: Up, Middle and Down: click on them when you want the tip to move to the upper, middle or bottom part of an image while you are scanning. They are useful when modifications to the scan parameters have been done while the tip is scanning. Y Scan: this button is pressed by default. It makes the tip scan in the Y direction. If this button is not pressed the scanning will be only done in the X direction. If the Y scan is deactivated, the scan will be done over the same line (on the X direction) every time. This feature can be useful when a particular feature on the substrate is being investigated as a function of time. Smooth: During normal operation, at every scanned point, several measurements are acquired but only one is selected to represent a data point. If this option is selected, WSxM will use an average of all of the measurements taken as the representative data point. In most cases it is better to use this mode when acquiring data. Secure: use this button to withdraw the tip when needed. This is done by retracting the Z-piezo, preventing the tip from crashing into the sample during times when the stability of the AFM head is being disturbed. While withdrawal is being done, WSxM will show a notice box in the screen. To elongate the Z-piezo after the changes have been done, click on Update or click on Secure again. There are two bars on the right of the box: The green bar on the right monitors the Z-piezo elongation. Since the best position for scanning is the midway position, a red mark is used to indicate this optimal spot. The red bar on the left monitors the error achieved when measuring. This error represents the difference between the Set Point and the actual value of the normal force. The lower this bar is, the more accurate scan you get. There may be many contributions to this error. The error scale number is the one in the box below the two bars. It represents the scale at which the error bar is shown. You can change its value either by entering it in the box, or by using the back and forth buttons on the right of the box. Using them, you will get a change in one unit if the number is higher than two, and a 10% change for the other values, no matter whether the CTRL or SHIFT keys are pressed or not. Some of the parameters discussed above are set by default by WSxM. Usually, the default values are the ones you entered when you last used the program. To change a parameter, just type a new value into the dialog box associated with the parameter. Any modifications entered into a dialog box, are highlighted with a yellow background until they are implemented. IMPORTANT: To make any modifications effective, you have to click on the Update button located in the lower part of the box. The changes can be implemented by pressing Intro immediately after the change is entered. Otherwise the background will remain yellow and no changes will be made to the existing scanning parameters. 93 The updating will take an amount of time required for the tip to finish scanning the current line. However, if you change the Set Point or the Bias value by using the cursor, the update will occur automatically as soon as the tip finishes scanning the current line. In this case, the Update button does not need to be clicked. Quality representation buttons: Use an appropriate quality representation when changing the size of your windows. Low quality representation: WSxM plots one fourth of the data points on each line. Medium quality representation: WSxM plots one half of the data points on each line. High quality representation: WSxM plots every data point on each line. Repaint: Often, the scale of an image is changed in the course of a scan. All scan lines after the change will acquire a new look since the color scale has been modified. To update the entire image, you can the repaint button. Scale: The scale associated with each of the images is displayed in the right hand side of the top banner that contains the names of the views. You can change each of these values by typing in the desired value or you can use the arrow buttons located to the right of each number. These values are only used for real time imaging and do not affect the data saved in the hard disk. The icons on top of the image in the main window are used as follows: Zoom: use it to zoom in on an image. Click on its icon, and select the center of the square region that is going to be zoomed by clicking on it. On the Status bar two boxes will show you the matrix and the real points over which the cursor is positioned. Click the mouse button again and the zooming process will begin. WSxM will start scanning the zoomed portion of the image, therefore the Size and the Offsets on the Control Menu will change. Measure: use this command to measure over the image. On oscilloscope view, it is used to measure the horizontal and vertical distance between two points on the profile of the sample. Click on this icon and select the two points by moving the markers over the profile. The vertical and horizontal distances will be displayed on the status bar. When using this command on an image view, the status bar will display the matrix coordinate (equivalent to pixel coordinates) and the real coordinate (equivalent to the spatial coordinates). To measure distances between two points, click on one point and extend the line to the other one. The status bar will also display the modulus of the vector between the two points (length of the line between the two points), and if you draw more than one line, the angle between both lines will also be shown. 94 Center: Use it to redefine the center of the portion of the sample being scanned. On the Status bar two boxes will show you the matrix coordinate (equivalent to pixel coordinates) and the real coordinate (equivalent to the spatial coordinates) where the cursor is positioned. Click on this icon and then click on the point you want to define as the new center of the image. WSxM will re-center the image. You can also redefine a new center using the features of the Position Window. To open the Position Window, press will appear: in the toolbar. The following graph Fig. B.1 Use this window to visualize and change the area over which you are scanning. Use it also to check the orientation of your sample and the size of the area you are scanning. The dashed square represents the maximum area that can be scanned (given the selected XY Gain on the Control Menu) whereas the blue square represents the area that is actually being scanned. -To change the size of the scanned area, use Size in the Control Menu. -To change the maximum area that can be scanned, use XY Gain in the Control Menu. This will force the dashed square to change its size. -To change the angle of the scanned area, use Angle in Control Menu. One of the sides of the square has a different color. This feature is used as a reference line that allows you to determine the angle you are scanning with. (0º is when this side is at the bottom) -To change the portion of area over which you are scanning, click once on the point where you want to go. If you have clicked on the wrong point, double-click on any point to return to the original point. 95 These actions will be displayed in a yellow square, showing the change made, but they will not be updated until you click Update in the Control Menu. The change of position will be shown on the Control Menu automatically, displaying the new X-Y Offset values. When you click Update a progress bar will show you the progress of the Offset movement, and it will also be represented as the movement of the yellow square. When all the parameters have been updated, the computer will continue measuring. 96 Appendix C: Jumping Mode Non contact sampling: sometimes the properties of the sample need to be measured when the tip is far from the sample. To do this, you can make the tip stop approaching for a while at a determined distance from the sample while you perform a measurement. You can select the available Air (i.e. Non-contact) Channels on Viewer Options when working in Jumping Mode. - Distance: tip-sample distance at which a specific measurement will be done. Set this number by typing it in or use the arrow buttons. - Delay: Set here the number of cycles this new measurement will require. Type in the number or use the arrow buttons. - Stiffness: The stiffness is defined as the slope of the jumping Force-Distance data after jump-to-contact. A least squares fit to a straight line is performed to accurately estimate the slope. - Points: set here the number of points used to a fit line to the contact region of the force vs. distance data. Type in the number, or use the arrow buttons. - Bias always on: select it if you want the Bias always on. Otherwise, the bias will be on only when measurements are being done as non contact sampling. You can learn more about the jump mode by consulting the following references: Jumping Mode in Scanning Force Microscopy by` P.J. de Pablo, J. Colchero, J. Gómez Herrero and A.M. Baró. App. Phys. Lett. 73, 3300 (1998). Jumping Mode and Tapping Mode by F. Moreno-Herrero, P. J. de Pablo, J. Colchero, J. Gómez Herrero and A. Baró. Surface Science 453, 152-158 (2000). Atomic Force Microscopy Contact, Tapping, and Jumping modes for Imaging Biological Samples in Liquids by F. Moreno-Herrero, J. Colchero, J. Gómez-Herrero, and A. M. Baró. Phys Rev E 69, 031915 (2004). 97 Appendix D: XY and Z Gains In any digital acquisition system, in order to obtain data with the best resolution, you should take care that the data you want to measure fits as well as possible into the range of your system. In this way you will avoid digitalization problems. The Dulcinea SPM controller is based on 16-bit DACs (Digital to Analog Converters) and ADCs (Analog to Digital Converters). This means that for any continuous value that you enter, the maximum number of different values will be 216= 65536. Those 65536 different values are correlated to voltage values between -10V and +10V. With the maximum gain (15) you can produce up to +/-150V. If the topography you want to measure is rough (i.e. one micron), your measurements will use about 10000 different values, so you will get good data, but if you want to measure very small features (like 1nm heights), the data will have only 10 different values, so you will not have very good data, and you will find that the data is limited by your digital system resolution. So, the ideal way of measuring small features is to have a small voltage range, like 5-10 times the range of your data (it is better not to adjust it too much because you could get out of range), but you would like this small voltage range to be centered around the maximum limits set by your piezo elongation. This is why it is so important to center the green bar and reduce the XY and Z Gains. 98 Low coverage images showing Pb adsorbed on a Si(111)7x7 superstructure. The UHV-STM images have been simultaneously taken using the retrace facility in WSxM. Image size 6nmx6nm. From LNM (Laboratorio de Nuevas Microscopias), Departmento Física de la Materia Condensada UAM. 99 Centro Empresarial Euronova 3 Ronda de Poniente, 2 Edificio 2 - 1ª Planta – Oficina A Tres Cantos E-28760 Madrid SPAIN Phone number: +34-918 043 347 Fax: +34-918 043 348 e-Mail: [email protected] 100