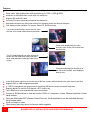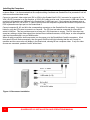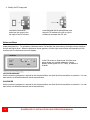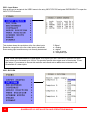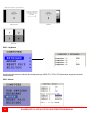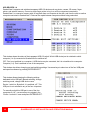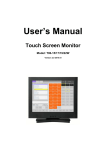
1
QuadraVista 2 INSTALLATION and OPERATIONS MANUAL Quad Video Controller LIMITED WARRANTY Rose Electronics® warrants the QuadraVista™ 2 to be in good working order for one year from the date of purchase from Rose Electronics or an authorized dealer. Should this product fail to be in good working order at any time during this one-year warranty period, Rose Electronics will, at its option, repair or replace the Unit as set forth below. Repair parts and replacement units will be either reconditioned or new. All replaced parts become the property of Rose Electronics. This limited warranty does not include service to repair damage to the Unit resulting from accident, disaster, abuse, or unauthorized modification of the Unit, including static discharge and power surges. Limited Warranty service may be obtained by delivering this unit during the one-year warranty period to Rose Electronics or an authorized repair center providing a proof of purchase date. If this Unit is delivered by mail, you agree to insure the Unit or assume the risk of loss or damage in transit, to prepay shipping charges to the warranty service location, and to use the original shipping container or its equivalent. You must call for a return authorization number first. Under no circumstances will a unit be accepted without a return authorization number. Contact an authorized repair center or Rose Electronics for further information. ALL EXPRESS AND IMPLIED WARRANTIES FOR THIS PRODUCT INCLUDING THE WARRANTIES OF MERCHANTABILITY AND FITNESS FOR A PARTICULAR PURPOSE, ARE LIMITED IN DURATION TO A PERIOD OF ONE YEAR FROM THE DATE OF PURCHASE, AND NO WARRANTIES, WHETHER EXPRESS OR IMPLIED, WILL APPLY AFTER THIS PERIOD. SOME STATES DO NOT ALLOW LIMITATIONS ON HOW LONG AN IMPLIED WARRANTY LASTS, SO THE ABOVE LIMITATION MAY NOT APPLY TO YOU. IF THIS PRODUCT IS NOT IN GOOD WORKING ORDER AS WARRANTIED ABOVE, YOUR SOLE REMEDY SHALL BE REPLACEMENT OR REPAIR AS PROVIDED ABOVE. IN NO EVENT WILL ROSE ELECTRONICS BE LIABLE TO YOU FOR ANY DAMAGES INCLUDING ANY LOST PROFITS, LOST SAVINGS OR OTHER INCIDENTAL OR CONSEQUENTIAL DAMAGES ARISING OUT OF THE USE OF OR THE INABILITY TO USE SUCH PRODUCT, EVEN IF ROSE ELECTRONICS OR AN AUTHORIZED DEALER HAS BEEN ADVISED OF THE POSSIBILITY OF SUCH DAMAGES, OR FOR ANY CLAIM BY ANY OTHER PARTY. SOME STATES DO NOT ALLOW THE EXCLUSION OR LIMITATION OF INCIDENTAL OR CONSEQUENTIAL DAMAGES FOR CONSUMER PRODUCTS, SO THE ABOVE MAY NOT APPLY TO YOU. THIS WARRANTY GIVES YOU SPECIFIC LEGAL RIGHTS AND YOU MAY ALSO HAVE OTHER RIGHTS WHICH MAY VARY FROM STATE TO STATE. NOTE: This equipment has been tested and found to comply with the limits for a Class B digital device, pursuant to Part 15 of the FCC Rules. These limits are designed to provide reasonable protection against harmful interference when the equipment is operated in a commercial environment. This equipment generates, uses, and can radiate radio frequency energy and, if not installed and used in accordance with the instruction manual, may cause harmful interference to radio communications. Operation of this equipment in a residential area is likely to cause harmful interference in which case the user will be required to correct the interference at his own expense. IBM, AT, and PS/2 are trademarks of International Business Machines Corp. Microsoft and Microsoft Windows are registered trademarks of Microsoft Corp. Any other trademarks mentioned in this manual are acknowledged to be the property of the trademark owner. Copyright Rose Electronics 2011. All rights reserved. No part of this manual may be reproduced, stored in a retrieval system, or transcribed in any form or any means, electronic or mechanical, including photocopying and recording, without the prior written permission of Rose Electronics. Rose Electronics Part # MAN-QV2 Printed In the United States of America - Revision DECLARATION OF CONFORMITY Declaration of Conformity This declaration is valid for the following product: Equipment: Video, Keyboard, Mouse, USB Switching System Type: QuadraVista 2 Hereby the equipment is confirmed to comply with the requirements set out in the Council Directive on the Approximation of the Laws of the Member States relating to Electromagnetic Comparability (2004/103/EC) and the Council Directive relating to Low Voltage (73/23/EC). The measurements were carried out in accredited laboratories. For the evaluation of above mentioned Council Directives for Electromagnetic compatibility and for Low Voltage following standards were consulted: DIN EN 55022 class A: (Emission) DIN EN 61000-3.2: DIN EN 61000-3.3 (Harmonic current emission) (Flicker) DIN 61000-6.2 (Immunity) DIN EN 61000-4.2 DIN EN 61000-4.3 DIN EN 61000-4.4 DIN EN 61000-4.5 DIN EN 61000-4.6 DIN EN 61000-4.11 TABLE of CONTENTS Contents Page # System Introduction ....................................................................................................................................................1 Features ..................................................................................................................................................................2 Model Description .......................................................................................................................................................3 Product Installation......................................................................................................................................................5 Installing the KVM station ........................................................................................................................................5 Installing the Computers ..........................................................................................................................................6 Installing the USB devices .......................................................................................................................................7 POWERING UP THE SYSTEM ...............................................................................................................................7 On Screen Menu System ............................................................................................................................................8 OSD - Navigation with keyboard ..............................................................................................................................9 OSD – Navigation with the front panel buttons.........................................................................................................9 Main Menu .............................................................................................................................................................10 Hotmouse Menu ....................................................................................................................................................14 Quad Mode ............................................................................................................................................................17 OSD Position .........................................................................................................................................................18 OSD Language ......................................................................................................................................................18 OSD Security Levels..............................................................................................................................................19 System / Disable Channel......................................................................................................................................23 System / Control ....................................................................................................................................................23 DCP Control ..........................................................................................................................................................24 Serial Cable Information ........................................................................................................................................58 Touch-Screen ........................................................................................................................................................60 Video Inputs Supported .........................................................................................................................................61 Video Outputs supported .......................................................................................................................................62 Specifications ............................................................................................................................................................64 Safety Guidelines ......................................................................................................................................................65 Maintenance and Repair ........................................................................................................................................66 Technical Support ..................................................................................................................................................66 Figures Page # Figure 1. Front Panel Description ................................................................................................................................3 Figure 2. Rear Panel Description ................................................................................................................................4 Figure 3. Local KVM Console Installation ....................................................................................................................5 Figure 4. Video source installation ..............................................................................................................................6 Figure 5. Typical configuration ....................................................................................................................................7 Figure 6. OSD Menu ...................................................................................................................................................9 Figure 7. OSD (Main menu) ......................................................................................................................................10 Figure 8. OSD (System menu) ..................................................................................................................................10 Figure 9. OSD (System / Hotkey menu) ....................................................................................................................11 Figure 10. OSD (System / Hotkey Enable menu) ......................................................................................................12 Introduction System Introduction Thank you for choosing the Rose Electronics QuadraVista™2. The QuadraVista 2 is the result of Rose Electronics commitment to providing state-of-the-art KVM switching solutions for today’s demanding workplace. The QuadraVista has proven to be a valuable investment for any business or office that has a need to monitor, maintain, or control four or more computers simultaneously from a common workstation. The QuadraVista 2, Quad Video KVM Switch represents the latest in KVM switching technology. A user can connect to, display, and control four computers from a single KVM station. To add additional computers to the system, the QuadraVista 2 can easily connect to additional QuadraVista 2’s or interface to a KVM switch and connect to 1,000’s of computers. The advanced design of the QuadraVista 2 provides four viewing modes; Quad Screen, Dual screen, Picture-inPicture (PiP) and Full Screen. Control of a selected computer can be done while in any of the four modes. View four computers in the quad screen mode and control any one of them while monitoring, in real time, the other three computers. In the PiP mode you can view one display on a full screen while monitoring smaller thumbnails of the other three computers. The KVM Station can be switched to any computer by simple keyboard commands or using the on-screen menu system. This makes configuring, monitoring, and computer switching quick and easy. With a few simple key commands, you can switch to any connected computer, change views, customize the PiP position and size, set-up security for controlling access to the QuadraVista, enable or disable selected channels, and much more. The QuadraVista 2 supports all combinations of both VGA and DVI video cards and monitors. Each video port on the QuadraVista will automatically be configured for VGA or DVI. Be more productive, organized and efficient with the dynamic new QuadraVista 2 Quad Video KVM switch from Rose Electronics. • View four computers simultaneously in the quad mode. • Switch keyboard and mouse control to any computer while viewing, in real time, the other three computers. • The QuadraVista handles analog VGA and digital DVI video simultaneously. • All combinations of VGA and DVI video cards and monitors are supported. Mixing VGA and DVI monitors and graphic cards is no problem for the QuadraVista. QUADRAVISTA 2 INSTALLATION AND OPERATIONS MANUAL 1 Features On-screen menus for easy set-up, console configuration, computer switching, and use Crisp, clear, high quality video with resolution up to 1920 x 1200 @ 60Hz Automatic or selectable video in and video out resolutions Supports DVI and VGA video DVI and VGA video signals are processed simultaneously Keyboard commands and front panel controls for changing modes and channel selection Four display modes available, Full screen, Quad, PiP, and Dual mode Full screen mode displays one of the four video sources in full screen and maximum resolution. Quad mode displays all four video sources, each in one of four equal size screen areas The PiP mode displays one video source full screen and the other three video sources in three small windows on the right side of the screen. The dual mode displays the left half of two full screen images, each displayed side by side In the Quad mode, switch to and control any of the four screens while monitoring the other three in real time Supports PS/2 or USB configured computers 4 - USB 2.0 transparent high speed ports for switching USB devices to the connected computers Supports digital DVI devices (DVD players, HDTV tuners, etc) Two USB ports for local keyboard and mouse connections Connect to KVM switches to view and control 1,000’s of computers, routers, Ethernet switches or other serial devices Using an XLM-based DCP (Device Control Protocol), the QuadraVista II can be controlled remotely using a serial cable Quick and simple to install Flash memory technology allows for fast and reliable upgrades 2 QUADRAVISTA 2 INSTALLATION AND OPERATIONS MANUAL Models Model Description Front Panel Buttons 1–4 activate the corresponding computer port Full Selects full screen mode Quad Selects / switches to quad mode (Secondary function – exit) PiP Enables the PiP mode (picture in picture) (Secondary function – select) Figure 1. Front Panel Description Pressing both Quad and PiP buttons for longer than 1 second displays the on-screen menu system Pressing buttons 1 and 2 for longer than 1 second sets the output resolution to 640 x 480 @ 60Hz. Holding buttons 1 and 2 cycles through the following video modes: VGA - 640 x 480 @ 60Hz SVGA – 800 x 600 @ 60Hz XGA – 1024 x 768 @ 60Hz UXGA – 1600 x 1200 @ 60Hz Preferred video resolution detected in the monitor’s EDID table Pressing buttons 3 and 4 for longer than 4 seconds resets the unit (video + keyboard + mouse) Rear Panel 1 2 3 5 6 4 7 4 7 4 7 4 7 8 1 - Power 2 - Reset 3 - Monitor / DVI-I output (console) 4 - Four DVI-I inputs (video source) 5 - RS232 / RJ45 port 6 - USB for keyboard, mouse, touch or trackball (console) 7 - USB or PS2 keyboard and mouse (computer) 8 - Four transparent high-speed USB 2.0 ports QUADRAVISTA 2 INSTALLATION AND OPERATIONS MANUAL 3 Figure 2. Rear Panel Description (See next page for a more detailed description of the rear panel connectors) 1 - Power Plug for enclosed power cable. 2 - Reset Press this button, using a suitable pointed object (e.g. ballpoint pen), for an entire reset of QuadraVista 2.Note: Due to the “keep alive” function of keyboard and mouse, turning power off/on resets only the video circuit. If you experience problems with mouse or keyboard, we therefore recommend executing a complete RESET by either pressing the RESET button on the rear panel or by simultaneously pressing buttons 3 and 4 on the front panel for longer than 4 seconds. 3 - Monitor / DVI-I output Connect your analog or digital display to this DVI-I port. 4 - DVI-I inputs Connect the analog or digital video signal of your up to four sources to these four DVI-I ports. 5. RS 232 / RJ45 port Connect external serial control devices to this RJ-45 port to operate QuadraVista 2 remotely, e.g. connect to this port to access the OSD menu from a computer using the ConfDev device configuration tool (see page 67). The serial RS 232 port is also used for firmware updates (see page 69). 6 - USB for keyboard, mouse, touch or trackball (console) Two USB ports allow connecting keyboard, mouse, touch screen or trackball. Using a USB-Hub, you can connect multiple keyboards and mice. They will work in share mode with an inactivity timeout of 3 seconds. 7 - USB or PS2 keyboard and mouse (computer) Each computer source can be connected with PS/2 or USB-B for keyboard and mouse. 8 - Four transparent high-speed USB 2.0 ports USB devices (printer, memory stick, finger printer, 3D mouse) are connected to the four transparent USB ports. This transparent USB 2.0 matrix switches USB 2.0 peripherals to computer sources connected to QuadraVista 2. 4 QUADRAVISTA 2 INSTALLATION AND OPERATIONS MANUAL Product Installation Please refer to the safety section first before proceeding with any installation or configuration of the QuadraVista 2. Installation of the QuadraVista 2 consists of connecting the computers and KVM workstation to the unit. The following steps can be used as a guideline for installing your QuadraVista 2. It is recommended that you locate the QuadraVista 2 as close as possible to the computers being connected. Installing the KVM station Connect your KVM user station to the QuadraVista 2 as shown below. Connect a USB mouse and USB keyboard to the corresponding USB ports on QuadraVista 2. If a PS/2 keyboard and mouse are used, a PS/2 to USB converter must be used. Next, connect a VGA (HD15F) or DVI monitor to the DVI-I port. If a VGA monitor is used, a VGA (HD15F) to DVI converter cable must be used. Figure 3. Local KVM Console Installation QUADRAVISTA 2 INSTALLATION AND OPERATIONS MANUAL 5 Installing the Computers Connect up to four computers to the corresponding video (DVI-I), keyboard and mouse ports on the QuadraVista 2 as shown below. It is recommended that the computers being connected and QuadraVista 2 be powered off until all cable connections have been made. Connect a computer's video output port (DVI or VGA) to the QuadraVista 2's DVI-I connector for computer #1. If a VGA (HD15F) connector is on the computer, a VGA to DVI cable must be used. Next connect a USB cable from the computer's keyboard/mouse USB port to the QuadraVista 2's USB input port. If the keyboard and mouse ports on the computer are PS/2, use a PS/2 "Y" cable to connect from the computer's keyboard and mouse PS/2 ports to the PS/2 keyboard/mouse input port on the QuadraVista 2. Connect computer #2, #3, and #4 to the corresponding connectors on the QuadraVista 2's rear panel. You are not limited in using the CPU ports to connect to a computer. The CPU port can also be connected to a Rose KVM switch’s KVM port. This can provide access to as many as 1,000 computers or servers. The DVI video input can accept any analog or digital video signal from devices like surveillance cameras, a DVD player, or other compatible video sources and display it on your KVM monitor. When all cable connections have been made, turn the power on to the QuadraVista 2 and the computers. All six front panel LEDs will flash momentarily, then the green QUAD led will light indicating that the unit is ready for operation and the user monitor will display in the Quad mode, showing all four computers video. If only two video sources are connected, quadrant 3 and 4 will be blank. PS/2 “Y” cable Or USB cable (A / B) DVI to DVI Or VGA to DVI cable Figure 4. Video source installation 6 QUADRAVISTA 2 INSTALLATION AND OPERATIONS MANUAL Installing the USB devices Connect your USB device to one of the four transparent USB ports as shown below. The USB device can be use with the computers connected to QuadraVista 2. It supports transparent USB devices such as printer, external memory, 3D mouse, and finger printer. The USB devices (1-4) are configured from the OSD menu system. (See the OSD section for details) Figure 5. Typical configuration POWERING UP THE SYSTEM - Switch on QuadraVista 2 with the power switch on the rear panel. All front panel LEDs light up briefly indicating that QuadraVista 2 is ready for operation. QuadraVista 2 is now in Quad mode (default). - Power up all connected computers. QuadraVista 2 recognizes all input video sources automatically and displays them on your monitor screen. - To select another display mode, use the relevant keyboard commands (see page 65f) or buttons on the front panel. QUADRAVISTA 2 INSTALLATION AND OPERATIONS MANUAL 7 ON SCREEN MENU SYSEM On Screen Menu System The QuadraVista 2 has an easy to use menu system that enables you to customize the “System”, “Mode”, “Configuration”, “Console”, “Video”, “Computers”, USB Device 1-4, and “Help”. Each section is described in detail on the following pages. The On screen Menu System structure is shown below. SECTION System SUB-SECTION Hotkey HotMouse Quad Mode OSD Position OSD Language Security Test Pattern Disable Channel Control FEATURES . Multiple Hotkey / Double Click Hotkey HotMouse recognition / timeout Timeout for channel selection Position of OSD window English / German Set security level (1 – 8) Cross hairs – Color gradient – Rhombus Rectangle – Stripes (3) deactivate unused channel(s) Control the QuadraVista externally using the serial port Mode PiP Start Size, zoom, position, display mode Set start configuration Configuration Backup Recall Factory Reset Save current parameters Restore last saved configuration Reset to factory default settings Console Video Output Keyboard Touchscreen Facd Multi-Monitor EDID Output resolution and frequency Keyboard layout Calibration / Mouse key emulation / Enlarge on touch Smooth transitions Assigning mouse & keyboard to video Display EDID data of monitor Video Video Status DVI/VGA Brightness Contrast Horiz. Position Vert. Position Screen Width Phase Format Displays video input resolutions Setting: DVI-VGA-VGA/DVI-DVI/VGA Set brightness (analog mode only) Set contrast (analog mode only) Horizontal screen position Vertical screen position Set screen width (analog mode only) Adjust phasing (analog mode only) Fit input format to screen Computer Keyboard Mouse Reset PS/2 EDID/DDC Display keyboard type (PC1, 2, 3, or USB) Display mouse type (PS/2, PS/2 wheel, or USB) Resets PS/2 mouse and keyboard Program Input EDID Help Command Info Contact List of keyboard commands Revision level – Firmware / hardware Contact information 8 QUADRAVISTA 2 INSTALLATION AND OPERATIONS MANUAL There are three ways to open the OSD main menu: use keyboard command „hotkey“ + „O“ simultaneously press front panel buttons „Quad“ + „PiP“ for longer than one second remotely open the OSD via ConfDev program on an external PC with serial connection The main menu displays in the center of the screen (on top of the video image). To display the main OSD window, simultaneously press and hold the “Quad” and “PiP” buttons for longer than 1 second. The main OSD will display. To navigate within the OSD window, use the up / down arrow keys below port 1 and port 2 on the front panel or use the local console keyboard’s arrow keys. Figure 6. OSD Menu OSD - Navigation with keyboard To navigate from one field to the next in the OSD menu use the UP and DOWN arrow keys or TAB and SHIFT-TAB keys. Use the LEFT and RIGHT arrow or + (PLUS) and – (MINUS) keys to change the value in the current field. Press ENTER to select a menu item. Press ESC to return to the previous window (higher menu level) or exit the OSD. Changes in parameters are saved automatically. OSD – Navigation with the front panel buttons Navigation using the buttons on the front panel is analogous to using the console keyboard. Buttons 1 and 2 correspond to the UP and DOWN arrow keys and buttons 3 and 4 to the LEFT and RIGHT arrow keys or +/- keys. Confirm your entry by pressing the PiP / select button. Press the Quad / exit button to return to the previous page (higher menu level) or exit the OSD. Changed settings are saved automatically. The following pages define each of the OSD menu system items. QUADRAVISTA 2 INSTALLATION AND OPERATIONS MANUAL 9 Main Menu The Main Menu is called up by pressing the assigned HotKey + O (not zero) key. You can also simultaneously press the Quad and PiP front panel buttons. This is the starting point for the OSD menus. From the main menu you can set-up the system, select the start-up mode, and configure the system features. Each OSD menu feature is described in this section. Figure 7. OSD (Main menu) Using the up / down arrow keys on the front panel or the console keyboard, select “System” and press enter. The System menu will display as shown below. The system Menu is called up by highlighting SYSTEM from the main menu and pressing enter. From the system menu you can set-up: The Hotkey Hotmouse Quad Mode OSD Position Change OSD languages Security Display the different test patterns to fine tune the video Disable channels and Set-up remote control features Figure 8. OSD (System menu) 10 QUADRAVISTA 2 INSTALLATION AND OPERATIONS MANUAL Highlighting “HOTKEY” and pressing enter will display the two Hotkey options shown in Figure 9. Two different hotkey modes are available: - For multiple hotkey commands you can define one to four keys which are pressed simultaneously to enter the command mode. Selectable keys are: Control, SHIFT, ALT and WINDOWS. - For double click hotkey commands you can choose one key, which is double clicked to enter the command mode. Selectable keys are: Control, SHIFT, ALT and SCROLL. To change the hotkey mode or select another hotkey, navigate with the TAB or ARROW UP/DOWN keys to the respective field and use the ARROW LEFT/RIGHT or the +/- keys to change the setting. Figure 9. OSD (System / Hotkey menu) QUADRAVISTA 2 INSTALLATION AND OPERATIONS MANUAL 11 Enabling the HOTMOUSE feature, you can perform several functions using only the mouse: (Switch channels, size PiP window, and other features) When activated, your mouse cursor becomes a Hotmouse Cursor - a gray and white rectangle - that allows performing all Hotmouse functions. Figure 10. OSD (System / Hotkey Enable menu) To activate the Hotmouse Cursor function, move / shake your console mouse rapidly four times in alternating horizontal direction. The Hotmouse Cursor will change depending on its position on the screen (arrows in vertical or horizontal direction, and number of channel). The Hotmouse Cursor can perform the following functions: in Fullscreen mode: in Quad mode: in PiP mode: Switch to another fullscreen channel Select another active channel (keyboard, mouse) Modify position and size of PiP images Change active channel Activating the Hotmouse in the Full screen mode will temporarily display the PiP images of the non-selected channels (see below). Moving the cursor to a PiP image and clicking on the left mouse button will switch, full screen, to that channel. 12 QUADRAVISTA 2 INSTALLATION AND OPERATIONS MANUAL Activating the Hotmouse in the Quad screen mode will display a box cursor with the active channel number in the box (see below). Moving the cursor to any quadrant and clicking on the left mouse button will switch control (keyboard / mouse) to that channel. Active channel Activating the Hotmouse in the PiP mode has three features; 1- Switch active full screen channels Channel 2 active Activate Hotmouse, Move cursor to PiP 3 Press left mouse key Channel 3 active (Keyboard/ mouse) 2- Move the PiP images vertically Channel 2 active Activate Hotmouse, Move cursor to PiP windows Press/hold left mouse key, move PiP windows vertically Release mouse key, PiP windows are in new vertical position QUADRAVISTA 2 INSTALLATION AND OPERATIONS MANUAL 13 3- Modify the PiP image size Activate the Hotmouse and move the cursor to the left edge of the PiP window. Press and hold the left mouse button and drag the PiP window to the left or right to increase or decrease the PiP size. Hotmouse Menu A menu is associated with the Hotmouse that can be called up to perform various functions based on what screen mode the system is in. To activate the Hotmouse menu, first activate the Hotmouse by moving the cursor rapidly to the left and right 4 times. When the Hotmouse cursor appears, click the right mouse button and depending on the screen mode, the Hotmouse menu will display. In the Full screen or Quad mode, the Hotmouse menu allows you to switch channels, change display modes (quad, full, PiP, Dual), or activate a channel. FULLSCREEN MODE Use the mouse to navigate to a channel in the Hotmouse Menu and click the left mouse button to activate it. You can also switch to a different mode with the left mouse button. QUAD MODE Use the mouse to navigate to a channel in the Hotmouse Menu and click the left mouse button to activate it. You can also switch to a different mode with the left mouse button. 14 QUADRAVISTA 2 INSTALLATION AND OPERATIONS MANUAL The Hotmouse menu allows you to: Switch / select channels Change the display mode Change the position, size, and zoom of the PiP images Change PiP mode (gap, no gap, tile) The Help feature provides additional information on this function. PIP MODE Use the mouse to navigate to a channel in the Hotmouse Menu and click the left mouse button to activate it. Change position and size of PiP images, and PiP zoom. Change PiP mode (triple / triple gap / single fixed / single direct / single scan) and scan time. Triple gap selection displays the PiP images with a gap in place of the active channel Triple no gap selection displays the PiP images with no gap Triple tile selection optimizes the size of the main image and the PiP images. The main image and the PiP images are shown as large as possible without overlapping. QUADRAVISTA 2 INSTALLATION AND OPERATIONS MANUAL 15 Single fixed: One selected PiP image is permanently displayed. Single direct: Press the front panel buttons 1, 2, 3, or 4 to directly select the PiP channel needed. Single dual: The left half of the first channel is displayed at full size next to the left half of the second channel. Use the „active“ setting to select the active channel. Single scan: Cycles through the PiP images at a set interval. 16 QUADRAVISTA 2 INSTALLATION AND OPERATIONS MANUAL Quad Mode To select the Quad mode window, navigate in the System menu and select (Highlight) QUAD MODE and press ENTER/SELECT. The below “QUAD MODE” window will open. Channel selection timeout defines the period (1 to 30 seconds) after which the selector will close automatically. Default setting is 5 seconds. Selector In Quad mode, use hotkey ‘Q’ to open the selector. The selector indicates the active channel (mouse and keyboard enabled). Alternatively, press front button “Quad”. Press hotkey + arrow key to switch the selector (active channel) from one channel to the next. After expiry of the selector timeout, the selector closes. QUADRAVISTA 2 INSTALLATION AND OPERATIONS MANUAL 17 OSD Position Use arrow keys to navigate in the SYSTEM menu to the entry OSD POSITION and press ENTER/SELECT to open the OSD POSITION window. The will set the OSD position. Use the UP / DOWN / LEFT / Right / + / or – key to position the OSD window to any position on the screen OSD Language Use arrow keys to navigate in the SYSTEM menu to the entry OSD LANGUAGE and press ENTER/SELECT to open the OSD LANGUAGE window. The default language is “English”. Set the language to Deutsch (German) or Espanol (Spanish) 18 QUADRAVISTA 2 INSTALLATION AND OPERATIONS MANUAL OSD Security Levels Use arrow keys to navigate in the SYSTEM menu to the entry SECURITY and press ENTER/SELECT to open the SECURITY window. The SECURITY feature allows you to reduce the functional range of QuadraVista 2. Eight security levels are available for this purpose. By default, all functions are enabled (security level 0). To change the security level, you must first enter a predefined password. This six-digit password is enclosed separately with the deliverables of QuadraVista 2 and should only be accessible to authorized persons (administrators etc.). After entering the password on the keyboard or front panel (password is not displayed in password field), the SECURITY window opens. Enter the desired security level (0 to 8) under “Select security level”. Note: Before changing the security level, please set the configuration you wish to work with to the higher security level, under MODE START. This configuration will be maintained QuadraVista 2 is reset, in case of power failure, or when power is turned off and on again. QUADRAVISTA 2 INSTALLATION AND OPERATIONS MANUAL 19 Security Levels LEVEL 0 This is the default setting of QuadraVista 2. All settings are allowed and all functions are enabled. LEVEL 8 Security level 8 allows you to work only on one channel (computer) in a predefined display mode (Quad, Fullscreen or PiP mode). No settings can be changed, apart from the SECURITY menu item, where you can change the security level. Level 7 Same as security level 8, but only the OSD windows that show display modes and device settings. SYSTEM SECURITY CONSOLE VIDEO OUTPUT/EDID VIDEO INPUT STATUS COMPUTER KEYBOARD/MOUSE/EDID/DDC HELP HOTKEY/ABOUT/CONTACT Level 6 Same as security level 7 with the following additional operations: SYSTEM CONTROL CONSOLE FADE - Setting of active channel using front panel buttons, hotkeys or hotmouse - Selecting channel with PiP button in Quad mode - Changing the directly selectable PiP channel in PiP mode single direct Level 5 Same as security level 6 with the following additional operations: SYSTEM TEXT PATTERN Level 4 Same as security level 5 with the following additional operations: SYSTEM OSD POSITION MODE PiP / START CONFIGURAION RECALL VIDEO FORMAT 20 QUADRAVISTA 2 INSTALLATION AND OPERATIONS MANUAL Level 3 Same as security level 4 with the following additional operations: SYSTEM OSE LANGUAGE VIDEO BRIGHTNESS / CONTRAST / HORIZ POSITION / VERT POSITION / SCREEN WIDTH / PHASE USB DEVICES 1-4 Level 2 Same as security level 3 with the following additional operations: SYSTEM HOTKEY / HOTMOUSE / QUAD MODE CONSOLE KEYBOARD / TOUCHSCREEN Level 1 Same as security level 2 with the following additional operations: SYSTEM DISABLE CHANNEL CONSOLE MULTI-MONITOR / VIDEO OUTPUT VIDEO DVI / VGA COMPTER MOUSE / RESET PS/2 QUADRAVISTA 2 INSTALLATION AND OPERATIONS MANUAL 21 OSD TEST PATTERN Use arrow keys to navigate in the SYSTEM menu to the entry TEST PATTERN and press ENTER/SELECT to open the TEST PATTERN window. Use the Test Pattern to check the function of internal video circuits or to check the quality of the connected console monitor. It’s recommended to use all the test patterns for the test procedure. There are nine test patterns to assist in adjusting the colors and skew. CROSSHAIRS COLOR GRADIENT RHOMBUS RECTANGLE STRIPES (3) RGB CONVERGENCE MANUFACTURER 22 QUADRAVISTA 2 INSTALLATION AND OPERATIONS MANUAL System / Disable Channel Using this feature, the connected computers should be connected to the channel ports in ascending order. Connecting computers to channel 1, 2, and 4 and selecting the number of channels to be 3, channel 4 can not be displayed. Use the Disable Channel function to select the number of channels to display. If computers are connected to channel 1, 2, and 3, then select 3. System / Control The system / control feature allows setting up of the QuadraVista from a computer or external device connected to the serial port. Selecting control allows external control of the OSD. Selecting synchronize will keep cascaded QuadraVista units in the same video mode. See the Serial Operations Section. The DCP (Device Control Protocol) offers three modes, off, control and synchronize. Set the DCP mode to “Control” if a single QuadraVista 2 will be controlled from an external computer. Set the mode to “Synchronize” if you system features several linked QuadraVista 2’s. When in this mode the QuadraVista 2 status is transmitted to the external computer. For local unit operation, set the mode to off. See the Serial Operations section for detailed information on the DCP mode. QUADRAVISTA 2 INSTALLATION AND OPERATIONS MANUAL 23 DCP Control This mode allows direct control of a single QuadraVista 2 by means of a control device, e.g. a computer. The control device can query and change the mode of QuadraVista 2. QuadraVista 2 responds to each DCP message sent by the control device with a DCP reply. This reply includes the values of all settings queried or set by means of the last message. If the message sent by the control unit contains errors, the QuadraVista 2 will reply by sending an error message. Example of DCP control A QuadraVista 2 is controlled via DCP-XML by a computer connected by serial cable. DCP Synchronize Use this mode to keep several QuadraVista 2 devices in the same mode. Every change in settings initiated in the first QuadraVista 2 by Hotkeys, Hotmouse, Front panel buttons, or a controlling device synchronizes the modes of all connected devices via DCP messages. Special serial Y cables are used for this purpose NOTE: Each time you restart QuadraVista 2 set to synchronize, it will send all its settings to the next connected device. This process also takes place after activating synchronize in the OSD menu. When starting a chain of devices, always start by first switching on the device at the end of the chain. When the device has completed its startup phase and sent its DCP messages, switch on the next device in the chain. Finally, switch on the first device in the chain, which synchronizes the settings of all other devices in the chain with its own settings as it starts up. 24 QUADRAVISTA 2 INSTALLATION AND OPERATIONS MANUAL Example of DCP synchronization QuadraVista #1 QuadraVista #2 QuadraVista #3 QuadraVista 2 - 2 and 3 are synchronized with QuadraVista 2 - 1. To synchronize, QuadraVista 2 #1 sends every change in settings as a DCP message via the serial Y cable to the RX input of QuadraVista 2 #2. QuadraVista #2 adopts the settings and sends a DCP message via TX output over the Y cable to the RX input of QuadraVista 2 #3 The synchronization chain can have any length. Do not connect the last device in the chain to the first device (i.e. do not create a loop). QUADRAVISTA 2 INSTALLATION AND OPERATIONS MANUAL 25 SECURITY LEVELS The security level settings in the OSD menu also apply to control via DCP messages. Queries are possible up to security level 7. The table below shows the maximum security levels for simple element settings. These settings may be changed via DCP up to the specified protection level. Maximum security level for: CONSOLE CHANNEL VIDEO CHANNEL VIDEO LAYOUT PIP LAYOUT PIP SIZE PIP OFFSET PIP ZOOM PIP CHANNEL DUAL CHANNELS (L/R) PIP SCAN TIME 6 6 5 4 4 4 4 4 6 4 PiP (Picture in Picture Function) Use arrow keys to navigate in the MODE menu to the entry PIP and press ENTER/SELECT to open the PIP window. In the PIP window you can configure PiP size, position, and display mode. PiP size Adjust the size of PiP images to your requirements. 12 (single mode) or 9 (triple mode) different sizes are available: Single: 3 % - 5 % - 7 % - 10 % - 15 % - 20 % - 25 % - 28 % - 33 % - 38 % - 44 % - 50 % Triple: 3 % - 5 % - 7 % - 10 % - 15 % - 20 % - 25 % - 28 % - 33 % 50 % equals the size of one quad screen (one quarter of a full size screen). 26 QUADRAVISTA 2 INSTALLATION AND OPERATIONS MANUAL PIP zoom factor Use this option to zoom the center of the PiP images by a factor of 2. Offset from top Use this option to change the position of PiP images. PiP images Note: All settings also possible via Hotmouse menu, PIP Display Modes The following PiP modes are available: PIP display mode triple: All other video sources are displayed (three PiP images) Triple gap: PiP images are displayed with a gap in place of the active channel. Triple no gap: PiP images are displayed without a gap. Triple tile: The size of the main image and the PiP images is optimized so that the main image and the PiP images are shown as large as possible without overlapping. QUADRAVISTA 2 INSTALLATION AND OPERATIONS MANUAL 27 PIP Display Modes (continued) PIP display mode single: One PiP image is displayed. You can choose between different display modes: Single fixed: One channel is selected to be displayed as permanent PiP image. Only the active channel (full image) can be switched. Press front panel buttons 1, 2, 3, or 4 to switch the full image. Single direct: One channel is selected to be displayed as permanent full image (active channel). Only the PiP can be switched. Press front panel buttons 1, 2, 3, or 4 to switch the full image. 28 QUADRAVISTA 2 INSTALLATION AND OPERATIONS MANUAL PIP Display Modes (continued) Single dual: In Dual mode the left halves of the fullscreen images from two video sources are displayed side by side. You can choose the left or the right image as the active channel. To switch the active channel use the OSD, hotkeys or front buttons. Single scan: Within a PiP image, the three other video sources are displayed one after the other; the delay can be set to between one and nine seconds. QUADRAVISTA 2 INSTALLATION AND OPERATIONS MANUAL 29 START (Set start mode) Use arrow keys to navigate in the MODE menu to the entry START and press ENTER/SELECT to open the START window. This feature allows you to define the start configuration, i.e. the display mode (Quad, Fullscreen, or PiP), active channel, and PiP settings which QuadraVista 2 uses after a reset or when the system is powered up. When the START menu is called up, the current start configuration is displayed. To modify your start configuration, change parameters in the channel, mode, and PiP fields. Press ESC to save the new parameters and exit the START menu. Choose “Use current mode” to adopt the current settings as start mode. Use arrow keys to navigate to “Use current mode” and confirm by pressing ENTER. The factory default start mode is Quad-mode with active channel 1. Default start screen 30 Example of a start screen configuration QUADRAVISTA 2 INSTALLATION AND OPERATIONS MANUAL OSD _ Configuration Use arrow keys to navigate in the CONFIGURATION menu to the entry BACKUP and press ENTER/SELECT to open the BACKUP window. The recall command replaces the current settings with the latest backup. The Factory Reset command resets the unit to the original factory settings QUADRAVISTA 2 INSTALLATION AND OPERATIONS MANUAL 31 Use this function to reset the current settings of QuadraVista 2 to the factory default configuration. All four input EDIDs are also reseted to their default values. If necessary, save your current settings before using the DEFAULTS command. Execution of this command results in a complete reset and reboot with factory defaults. FACTORY DEFAULTS: SYSTEM HOTKEY HOTMOUSE QUAD MODE OSD POSITION OSD LANGUAGE SECURITY DISABLE CHANNEL = Multiple Hotkey / Hotkey = Ctrl + Alt = ON / Hotmouse timeout = 5 sec. = Channel selection timeout = 5 sec. = centered = English = None (security level = 0) = All four channels are active CONTROL = Off MODE PIP = Size = 15 % Zoom factor = 1 Display mode = triple Active channel = gap; Offset from top = 0 % Start configuration = Quad / active channel = 1 CONSOLE VIDEO OUTPUT KEYBOARD TOUCHSCREEN = auto = English = Mouse emulate right click / Quad remains / PiP switches = Off = Monitor 1 --> Channel 1; Monitor 2 --> Channel2; Monitor 3 --> Channel 3; Monitor 4 --> Channel4; = DVI / VGA (all channels) = +0 (all channels) = 56 % (all channels) = auto (all channels) = auto (all channels) = +0 (screen-width correction of all channels) = +0 (all channels) = No (all channels) USB mouse positioning = relative (all channels) 1600x1200@60, 1920x1200@60, digital = Off / manual switching w. warning / name: Device 1 (-4) FADE MULTI MONITOR VIDEO COMPUTER 32 VIDEO INPUT BRIGHTNESS CONTRAST HORIZ POSITION VERT POSITION SCREEN WIDTH PHASE FORMAT Fit to screen MOUSE EDID / DDC USB DEVICE 1-4 QUADRAVISTA 2 INSTALLATION AND OPERATIONS MANUAL OSD - VIDEO OUTPUT Use arrow keys to navigate in the CONSOLE menu to the entry VIDEO OUTPUT and press ENTER/SELECT to open the VIDEO OUTPUT window. Use the VIDEO OUTPUT menu to choose an output resolution supported by your monitor. Press ENTER/SELECT to enter the selection menu. Use arrow keys to select the desired line in the list shown on the right and press ENTER/SELECT for the new video format. When the output mode is set to ‘auto’, QuadraVista 2 chooses a resolution by reading the connected monitor’s EDID data. Choose the EDID menu item to check whether the connected monitor provides this data. If the monitor does not offer this data, QuadraVista 2 sets VGA mode (640x480@60Hz) as default and activates Sync on Green. Sync on Green can be deactivated on QuadraVista 2. The new output mode is visible for 10 seconds. Within this time you can either accept the new setting by pressing ENTER/SELECT or return to your original setting by pressing ESC/EXIT. QUADRAVISTA 2 INSTALLATION AND OPERATIONS MANUAL 33 OSD – LANGUAGE Use arrow keys to navigate in the CONSOLE menu to the entry KEYBOARD and press ENTER/SELECT to open the KEYBOARD window. Set the keyboard layout to the desired language, English, Deutsch (German), Español (Spanish), Français (French), Italiano (Italian) or Japanese. 34 QUADRAVISTA 2 INSTALLATION AND OPERATIONS MANUAL OSD – Touch screen QuadraVista 2 enables the user to use a touchscreen to control and switch between four computers as well as change display modes. QuadraVista 2 supports a great number of USB touch screens with commonly integrated touch controllers. To control QuadraVista 2 using a touchscreen, connect the touchscreen to QuadraVista 2 by connecting the VGA or DVI cable from the QuadraVista 2 monitor port to the input of the touchscreen. Connect the USB port of the touchscreen to the QuadraVista 2I console USB port. Please see page 8ff for a description of the QuadraVista 2 ports. Calibration After connecting a touchscreen to QuadraVista 2 for the first time, calibrate the touchscreen. Open CONSOLE TOUCHSCREEN menu, choose CALIBRATE, and press ENTER/SELECT. Four markers will be displayed in the corners of the touchscreen. The diagram shows the first marker in the top left corner of the screen. Touching the center of the markers as accurately as possible yields best calibration results. Then repeat for the other three markers to complete calibration. QUADRAVISTA 2 INSTALLATION AND OPERATIONS MANUAL 35 Mouse key emulation QuadraVista 2 offers three modes of interpreting the user input as mouse clicks. 1. Mouse: When touching the touchscreen, the mouse button is pressed. When the finger is released from the touchscreen, the mouse button is released. This mode can be used for drag and drop operations. 2. Click on touch: When touching the touchscreen, a mouse click is generated at the position of the touch. 3. Click on release: When the finger is released from the touchscreen, a mouse click is generated at the last position of the finger. By default, „mouse” is set as mode. You could use your finger on the touchscreen similarly to using your mouse. “Click on touch” and “click on release” are suited for kiosk applications or environments where touchscreens are used instead of keyboards and mice, such as in medical industries for hygienic reasons, in industrial production and automation for operation with gloves, or in vehicles and aircraft where robust components are required. Touch in quad mode: Check this box to switch a quadrant from Quad mode temporarely to full screen when touching the quadrant. This activates keyboard and mouse of that quadrant and allows operating the computer in full screen. The other sources are not visible during this time. After a timeout of 5 seconds without keyboard/mouse activity, QuadraVista 2 automatically switches back to Quad mode. The timeout can be set to values between 1 and 10 seconds. Touch a PiP: Check this box to activate keyboard and mouse on a computer shown as PiP. When touching a PiP, keyboard and mouse become active in this PiP. This activated channel now remains a little PiP and does not switch to full image. In this PiP you can operate the computer with keyboard and mouse. When unchecked (by default), a PiP is switched to full image as soon as it is touched. The full image gets exchanged with the other sources remaining visible as PiPs. Right mouse button Press and hold your finger on the touchscreen to emulate the right mouse button. This only works in „mouse” emulation mode, not in “click on touch” or “click on release”. By default „Emulate right click” is set in order to perform a right mouse click. Some touch controller models do not support right mouse click. Using touch screens with such controllers requires unchecking the box „Emulate right click”. Hotmouse and Hotmouse menu To open the Hotmouse menu, tap the screen twice, and leave your finger pressed on the touchscreen after the second tap (tap – hold, like a double click without lifting the finger on the second click), until the Hotmouse menu opens. By clicking outside the Hotmouse menu, you can open the Hotmouse cursor to enlarge and reposition PiPs (only in PiP mode), and switch channels (see page 54ff for a description of the Hotmouse function). After you are finished using the Hotmouse cursor, the Hotmouse menu will reopen. TOUCHSCREEN (continued) 36 QUADRAVISTA 2 INSTALLATION AND OPERATIONS MANUAL Mouse position Absolute mouse position QuadraVista 2 works best together with touchscreens when using absolute mouse positioning mode with the connected computers. To enable absolute mouse positioning mode, use the menu COMPUTER MOUSE in the OSD. This mode works when a computer is connected via USB, and with most modern operating systems. Relative mouse position When using relative mouse positioning, please check the configuration of the computers connected to ensure that mouse acceleration is switched off and mouse scaling is set to 1:1. Resetting the mouse position: When using relative positioning mode, the actual position of the mouse cursor and the position of your finger on the touchscreen may not match in certain cases when a computer switches resolution or changes the mouse position (e.g. when the system is configured to place the mouse pointer over the ‘OK’ button of a window). In these cases, to reset the mouse position, either switch to a different channel, and back again, or tap the touchscreen three times, and leave your finger pressed on the touchscreen after the third tap (tap – tap – hold), until the mouse cursor moves to the top left corner of the screen. FADE Use arrow keys to navigate in the CONSOLE menu to the entry FADE and press ENTER/SELECT to open the FADE window. Fade Through Black is an elegant visual effect for presentations: When switching channels or display modes, the previous image fades to black, and the next image is faded in smoothly. To enable fade through black, check the box “Smooth transitions”. The “Speed” setting controls the speed of the transition, with 1 being the slowest, and 5 the fastest transition. QUADRAVISTA 2 INSTALLATION AND OPERATIONS MANUAL 37 MULTI MONITOR Use arrow keys to navigate in the CONSOLE menu to the entry MULTI MONITOR and press ENTER/SELECT to open the MULTI MONITOR window. Multi Monitor is used if computers with multiple video output are connected to QuadraVista 2 but only one keyboard and mouse to operate the computer. If you use graphics cards with multiple video outputs, you must assign the computer’s mouse and keyboard to the corresponding video output (channels 1-4). Example: If a computer with quad-head graphics card is connected to QuadraVista 2, and keyboard and mouse are connected to channel 1, you must assign console „channel 1” to all video channels („Monitor 1 - 4”). 38 QUADRAVISTA 2 INSTALLATION AND OPERATIONS MANUAL EDID (display of monitor data) Use arrow keys to navigate in the CONSOLE menu to the entry EDID and press ENTER/SELECT to open the EDID window. Use the EDID command to read and display monitor data (manufacturer, monitor name, serial number etc.) from the monitor’s EDID memory. If VIDEO OUTPUT is set to “auto”, QuadraVista 2 uses the optimum output resolution offered by the EDID. EDID (Extended Display Identification Data) is a VESA standard data format that contains basic information about a monitor and its capabilities. This information is stored in the monitor by the manufacturer and can be read by QuadraVista 2 or graphics card via a monitor cable’s Display Data Channel (DCC) interface. QUADRAVISTA 2 INSTALLATION AND OPERATIONS MANUAL 39 OSD – Input Status Use arrow keys to navigate in the VIDEO menu to the entry INPUT STATUS and press ENTER/SELECT to open the INPUT STATUS window. This window shows the resolutions at the four video inputs Resolution recognition at the four video inputs is automatic. Some analog input resolutions may not correctly be detected. S Signal a = analog d = digital g = sync on green c = composite sync Note: Fluid video performance in Quad mode: With digital input and a resolution of 800x600, the input frame rate may be increased up to 180 Hz. This provides smooth video output even in Quad mode. To use this feature, it is necessary to choose this resolution and refresh rate on all devices connected to the QuadraVista 2I’s video inputs. OSD - DVI /VGA 40 QUADRAVISTA 2 INSTALLATION AND OPERATIONS MANUAL Go to “Select input signal” and define which video signal (VGA or DVI) is to be displayed. If the setting „DVI/VGA” is selected, QuadraVista 2 will first check the digital input. If there is no signal at this input, the analog signal input will be checked. This function can be used to connect e.g. 8 sources (4x VGA + 4x DVI) via Y-cables to QuadraVista 2. OSD - Horiz / Vert Position In case of incorrect horizontal position of a computer screen, use this feature to adjust the computer screen manually. Use the arrow keys to navigate to the AUTO/MAN field and set MAN for manual. Use the “+” or “-” keys in the value field to adjust the vertical position between –20 and +20, and the horizontal position between –63 and +63. OSD - Screen Width (Analog input only) QUADRAVISTA 2 INSTALLATION AND OPERATIONS MANUAL 41 Normally, screen width (number of horizontal pixels) is defined by the VESA standard. If the screen appears blurred, change this setting to improve screen quality. OSD – Phase Incorrect phase (sampling time of pixel color value) may result in blurring, bad contrast, or poor legibility. Use this setting to adjust phase. OSD – Format When using a wide-screen monitor (aspect ratio 16:10) in Quad mode, a video input with a different aspect ratio is normally displayed with black borders to the left and right. If „fit to screen” is enabled, the image is resized to fill the entire quadrant in Quad mode. 42 QUADRAVISTA 2 INSTALLATION AND OPERATIONS MANUAL By default, „fit to screen” is disabled to display each source in its native aspect ratio in all display modes (Quad, PiP, Full) of QuadraVista 2. PiP mode for wide-screen monitors If you use a wide-screen monitor (for example with an aspect ratio of 16:10) and the active channel does not have a wide-screen aspect ratio (e.g. 4:3), PiPs are placed aside the full image of the active channel in the black bar on the right side. The full image of the active channel is displayed left-aligned on the screen resulting in a black bar on the right side. Provided appropriate PiP size (20%) is set, PiP images are thus placed entirely outside the full screen channel. No screen content is overlapped. All content of all sources is visible. QUADRAVISTA 2 INSTALLATION AND OPERATIONS MANUAL 43 OSD – Keyboard Use this display feature to identify which keyboard type (USB, PC1, PC2 or PC3) has been recognized at which computer port. OSD – Mouse 44 QUADRAVISTA 2 INSTALLATION AND OPERATIONS MANUAL The upper half of the MOUSE window shows which mouse type (USB, PS/2 or PS/2 wheel) has been recognized at which computer port. USB – mouse positioning For USB ports, you may specify absolute or relative mouse positioning. Choose absolute mouse positioning if a device is connected to the console that supports absolute coordinates, such as graphic trays, screen pads or KVM extenders. OSD - Reset PS/1 Use arrow keys or “+” and “-” keys to select the channel (1 to 4) you wish to reset and confirm by pressing ENTER/SELECT OSD – EDID / DDC Use arrow keys to select one EDID and press ENTER/SELECT to open the window with detailed settings for this EDID. QUADRAVISTA 2 INSTALLATION AND OPERATIONS MANUAL 45 In this window two freely selectable video modes can be programmed in the input EDID visible to the connected computer at the input port. It is recommended to program the preferred video modes for the connected signal source. QuadraVista 2 also uses these entries to distinguish between confusable analog input video signals. The following groups of analog input signals are difficult to distinguish automatically: WUXGA 1920x1200 60 Hz UXGA 1600x1200 60Hz UXGA 1600x1200 60Hz with reduced blanking WUXGA 1920x1200 50 Hz UXGA 1600x1200 50Hz UXGA 1600x1200 50Hz with reduced blanking SXGA+ 1400x1050 60Hz WSXGA 1680x1050 60Hz XGA 1024x768 60Hz WXGA 1280x768 60Hz WXGA 1360x768 60Hz If you experience problems with the automatic input detection of an analog input signal in these groups you can overwrite the automatic detection by programming the expected video signal into the input EDID. Note: Please keep in mind that this setting will overwrite the automatic analog input mode detection. If you connect a different video source, or change the video mode from the PC, you may need to change this setting again to get correct results. For the detection of digital input signals this setting has no effect. Use arrow keys to navigate to the first video mode entry and press ENTER/SELECT to open the window with a list of selectable video modes. In this window use arrow keys to select the desired line in the list shown on the right and press ENTER/ SELECT for the video format. Use arrow keys to navigate to the second video mode entry and press ENTER/SELECT to open the window with a list of selectable video modes. Use arrow keys to navigate to “Signal“ and press ENTER/SELECT to switch between analog or digital. This setting specifies whether the EDID should identify the QuadraVista 2 as an analog or digital device. Usually it is safe to leave this setting at “digital”. Use arrow keys to navigate to the following write options: WRITE WRITE TO ALL INPUTS SAME AS DISPLAY EDID 46 save the changes in the current input EDID. save the changes to all four input EDIDs. write the contents of the display EDID to the current input EDID. QUADRAVISTA 2 INSTALLATION AND OPERATIONS MANUAL Press ENTER/SELECT to start the selected write option and wait until “successful” is displayed in the bottom status line. Note: If a display EDID was written to an input EDID then a subsequent write command will restore the content of the input EDID to the default QuadraVista 2 values. This window gives an overview of the contents of the display EDID. It has the following write options: WRITE TO INPUT 1 WRITE TO INPUT 2 WRITE TO INPUT 3 WRITE TO INPUT 4 WRITE TO ALL INPUTS write the monitor EDID to input 1 write the monitor EDID to input 2 write the monitor EDID to input 3 write the monitor EDID to input 4 write the monitor EDID to all inputs Note: The content of the input EDIDS can be reset to default by the OSD function CONFIGURATION / FACTORY RESET. QUADRAVISTA 2 INSTALLATION AND OPERATIONS MANUAL 47 USD DEVICES 1-4 QuadraVista 2 supports and switches transparent USB 2.0 devices such as printer, camera, 3D mouse, finger printer, and external memory. Connect a single finger printer to log in on all four computers connected to QuadraVista 2; or connect a memory stick to copy data from one computer to the stick, and from the stick to another computer connected to QuadraVista 2: Data can be copied between computers without being networked. This window shows the status of the transparent USB 2.0 switch: Which USB device/port is switched to which computer (1 to 4) connected to QuadraVista 2 or switched off. OFF: Port is not switched to a computer. A USB device may be connected, but it is not switched to a computer. Computer (1-4): Port is switched to one of the computers. This window also allows changing port and switching settings. Use arrow keys to select one of the four USB ports and open its submenu by pressing ENTER/SELECT. This window allows changing the following settings dedicated to this USB port: Manual switching, change switching mode, change USB device name. Device 1 switch to: By default, it is switched „off”: This USB port is not switched to any of the four computers. To manually switch this USB port to one of the four computers or “off”, use arrow keys to navigate in the “Device 1 switch to” menu and press ENTER/SELECT. 48 QUADRAVISTA 2 INSTALLATION AND OPERATIONS MANUAL Switching mode: By default, switching mode is „manual switching with warning”. To change the switching mode use the arrow keys to navigate to „CHANGE SWITCHING MODE” and press ENTER/SELECT. Use arrow keys to choose one of the following modes to change the switching mode: 1. Manual switching with warning: This mode allows switching the USB port manually by selecting one of the computers connected. But before executing the switching the following warning message is displayed: „In order to prevent data loss, stop the USB device before switching!” To execute the switching press ENTER/SELECT. This switching mode is recommended for USB devices with risk of data loss (e.g. USB stick, printer, external memory) 2. Manual switching without warning: This mode allows switching the USB port manually by selecting one of the computers connected. The switching is executed immediately. This switching mode is recommended for USB devices without risk of data loss. 3. Automatically with active channel: In this mode, the USB device/port is always switched automatically with the active channel. When switching channel/computer this USB device/port will automatically be switched to the activated channel/computer. Note: After power on, all USB devices are disconnected from computers except devices with switching mode “automatically with active channel”. QUADRAVISTA 2 INSTALLATION AND OPERATIONS MANUAL 49 Change device name: In the “USB DEVICE. / USB DEVICE” menu chose “Change device name” and press ENTER/SELECT to change the name of the connected USB device. Use the keyboard to rename the USB device or use the front panel buttons (as described in the OSD). Exit the menu. The new name will automatically be saved and displayed in the other menus. Note: Use hotkey + „u” (by default: hotkey = Ctrl + Alt) to quickly access the USB DEVICE 1-4 menu. This allows quick access to this menu when switching manually. To directly open the switching menu of e.g. USB device/port 1 use hotkey + „F1” (by default: hotkey = Ctrl + Alt). OSD – HELP Use arrow keys to navigate in the HELP menu to the desired line and press ENTER/SELECT to open the corresponding window. 50 QUADRAVISTA 2 INSTALLATION AND OPERATIONS MANUAL The HELP / HOTKEY window lists keyboard commands and their functions. The HELP / ABOUT windows show the current revision levels of QuadraVista 2 hardware and firmware. QUADRAVISTA 2 INSTALLATION AND OPERATIONS MANUAL 51 The HELP / CONTACT window contains information on how to contact Rose Electronics support. 52 QUADRAVISTA 2 INSTALLATION AND OPERATIONS MANUAL KEYBOARD COMMANDS KEYBOARD COMMANDS QuadraVista 2 supports two types of hotkey: „multiple keys” and „double click”. The default is set to „multiple keys”. Use the OSD menu to choose the hotkey type and keys. Multiple keys: Press multiple keys plus command key. COMMAND = Hotkey and Command key together The following hotkeys are available for selection: Ctrl / Shift / Alt / Win By Default: HOTKEY = Ctrl + Alt Further examples:HOTKEY = Ctrl + Win + Alt HOTKEY = Ctrl + Shift HOTKEY = Alt Double click key: Double click one key (=hotkey) and right after press the command key within 2 seconds. COMMAND = Hotkey and Command key in sequence As double click hotkey you can choose one of the following keys: Ctrl / shift / Alt / scroll Examples: HOTKEY = Scroll / Scroll HOTKEY= Ctrl / Ctrl Note: In command mode (hotkey is activated) LED flashing on the keyboard. In double click hotkey mode, pressing an invalid key leaves the command mode. While OSD is open hotkey = Ctrl QUADRAVISTA 2 INSTALLATION AND OPERATIONS MANUAL 53 Keyboard Commands Selecting display modes HotKey + Q = Quad mode HotKey + F = Fullscreen mode HotKey + P = PiP mode Selecting active channel in Fullscreen / Quad / PiP mode HotKey + 1 = Computer 1 HotKey + 2 = Computer 2 HotKey + 3 = Computer 3 HotKey + 4 = Computer 4 You can also use hotkey and the arrow keys to switch the active channel. In Dual mode, you can select the channel on the right using the 1, 2, 3, or 4 keys on the numeric keypad. Switch the active channel with hotkey and the arrow keys. In PiP mode, the active channel automatically is displayed as full image. Open USB device switch menu HotKey + F1 = Open USB device/port 1 switch menu HotKey + F2 = Open USB device/port 2 switch menu HotKey + F3 = Open USB device/port 3 switch menu HotKey + F4 = Open USB device/port 4 switch menu Other Commands HotKey + O = Open OSD HotKey + U = Directly open OSD USB Device 1-4 HotKey + V = Safe output resolution HotKey + I = Directly open OSD PiP menu (In the background display mode switches to PiP as long as menu is open) 54 QUADRAVISTA 2 INSTALLATION AND OPERATIONS MANUAL DEVICE CONFIGURATION PROGRAM Installation of Device Configuration Program (CONFDEV) The Device Configuration Program allows you to remotely operate the OSD of V-Switch quad II on an external Windows computer via serial connection. To install the device configuration software CONFDEV, you need • A Windows computer with a free RS 232 COM-port • Your QuadraVista 2 • The installation CD containing the confdevEn.exe program • The enclosed „serial cable” (RJ45-DB9 adaptor + RJ45 CAT5 cable) Use the serial cable to connect the COM port of the Windows computer with the serial port of your QuadraVista 2. Insert the installation CD into the CD-ROM drive and start the confdevEn.exe program. The Device Configuration Program (CONFDEV) window opens: Click to open the OSD (device configuration) remotely. Click to change settings, like COM port. QUADRAVISTA 2 INSTALLATION AND OPERATIONS MANUAL 55 Settings Click the “device configuration” button to open the SETTINGS window. This window allows you to set the font size for the OSD window, log parameters, and the COM port QuadraVista 2 is connected to. Remote OSD operation Click the green arrow Windows computer. to open the On Screen Display (OSD) of QuadraVista 2 remotely on your external Now, the main OSD menu is open and ready for navigation. Navigation Use arrow keys on the keyboard of your remote Windows computer to navigate to the desired line in the OSD menu and confirm by pressing ENTER. Use the ESC key to return to the previous menu. 56 QUADRAVISTA 2 INSTALLATION AND OPERATIONS MANUAL Update firmware of QuadraVista 2 To execute a firmware update, you need: • a computer with serial port • the enclosed „serial cable” (RJ45-DB9 adaptor + RJ45 CAT5 cable) • the current executable firmware file Use the serial cable to connect the COM port of your computer to the RS232 port on QuadraVista 2. Start the executable firmware file. Set the desired COM port and press „Update”. All LEDs on the front panel of QuadraVista 2 flash (blue) during the upgrade. Additionally, the upgrade process is indicated by |an OSD window on your remote computer. A notice will display stating that the QuadraVista 2 Software upgrade is running. Wait until the upgrade completes. After successful update, QuadraVista 2 restarts without changing configuration. QUADRAVISTA 2 INSTALLATION AND OPERATIONS MANUAL 57 SERIAL CABLE Serial Cable Information For serial remote control, QuadraVista 2 requires a special adaptor to connect a CAT5 cable to the serial RJ45 port at the rear panel of QuadraVista 2. This adaptor is connected to your external serial control device (e.g. computer). To the adaptor any CAT5 cable can be connected. The CAT5 cable again is connected to the RJ45 port of QuadraVista 2. The adaptor (plus a standard CAT5 cable (in green)) always is delivered with QuadraVista 2. 58 QUADRAVISTA 2 INSTALLATION AND OPERATIONS MANUAL DCP – XML REMOTE CONTROL DCP-XML permits remote control of QuadraVista 2 by a computer or other devices using the RS-232 serial port of QuadraVista 2. To connect to this port, use the „serial cable” + DB9 adaptor + standard RJ45 CAT5 cable). DCP is an XML-based protocol. Using DCP, all important settings of QuadraVista 2 can be queried and changed. A general description of XML can be found at http://www.w3.org/XML/ The XML scheme for DCP can be found on the enclosed CD, under the name „dcp.xsd”. For a detailed description on how to use DCP-XML with QuadraVista 2 please see the “DCP-XML Manual” on CD supplied with QuadraVista 2. DCP Modes DCP has two modes of operation: 1. Control This mode is intended for direct control of a QuadraVIsta 2, for example using a computer. 2. Synchronize This mode is used to synchronize multiple, linked devices. In Synchronize mode, QuadraVIsta 2 sends all settings changes as DCP messages. Thus, a chain of linked QuadraVIsta 2 can be controlled synchronously. QUADRAVISTA 2 INSTALLATION AND OPERATIONS MANUAL 59 TOUCH-SCREEN SUPPORT Touch-Screen QuadraVista 2 supports USB touch screens having built in one of the following controllers: Tyco ELO Touch System: - AccuTouch Five-Wire Resistive Touch Technology includes models 1215L, 1229L, 1515L, 1522L, 1528L Medical, 1529L, 1537L, 1715L, 1729L, 1739L, 1915L, 1928L, 1928L Medical, 1939L, 2020L - IntelliTouch Surface Wave Touch Technology elo 2701 Controller Series (IntelliTouch, SecureTouch) - CarrollTouch Infrared Touch Technology (not supported: Acoustic Pulse Recognition (APR)) TSharc: TSharc Octopus Controller widely used, including in touch screens manufactured by 3M, Microtouch, TrollTouch, The Bergquist Company XanQ: USB-R5W-HT580-R by XanQ Technology Corporation 3M MicroTouch: - MicroTouch™ EX II (new release delivered since 2009 with support of HID) - MicroTouch™ DST, only restrict: (first calibrate it at computer, then same procedure but while connected at QuadraVista 2; only left mouse key support, right mouse key has no function). E.g. integrated at display NEC Multeos 32” und 40“ LCD with touch option. ET&T Technology: ETouch IR™ infra red touch screen, aluminium frame, 26” up to 65” eGalaxy eMPIA Technology Inc. (EETI): S5000UEGG; 4/5-Wire Resistive Touch Technology; USB; Note: If your USB touch screen does not feature one of the controllers listed above, please contact Rose Electronics technical support to determine compatibility. 60 QUADRAVISTA 2 INSTALLATION AND OPERATIONS MANUAL Supported Video Inputs Video Inputs Supported Mode CGA CGA EGA EGA VGA VGA VGA VGA SVGA SVGA SVGA SVGA SVGA XGA XGA XGA XGA XGA XGA/B SUN HDTVp HDTVp WXGA UWXGA UWXGA SXGA SXGA SXGA SXGA SXGA WXGA SXGA+ SXGA+ SGI UXGA UXGA UXGAr UXGAr WSXGA HDTVp HDTVp HDTVp WUXGAr WUXGAr Resolution 640x350 640x400 720x400 720x400 640x480 640x480 640x480 640x480 800x600 800x600 800x600 800x600 800x600 1024x768 1024x768 1024x768 1024x768 1024x768 1152x864 1152x900 1280x720 1280x720 1280x768 1280x960 1280x960 1280x1024 1280x1024 1280x1024 1280x1024 1280x1024 1360x768 1400x1050 1400x1050 1600x1024 1600x1200 1600x1200 1600x1200 1600x1200 1680x1050 1920x1080 1920x1080 1920x1080 1920x1200 1920x1200 Sync Polarity H/V +/-/+ +/+ -/+ -/-/-/-/+/+ +/+ +/+ +/+ +/+ -/+ -/-/+/+ +/+ +/+ +/+ +/+ +/+ -/+ +/+ +/+ g +/+ g +/+ +/+ +/+ -/+ -/+ +/+ +/+ +/+ +/+ +/+ -/+ +/+ +/+ +/+ +/+ +/+ Refresh rate analog digital* Hz Hz 85 85 70 85 60 72 75 85 56 60 72 75 85 50 60 70 75 85 75 66 50 60 60 60 85 50 60 72 75 85 60 50 60 60 50 60 50 60 60 --50 60 50 60 85 85 70 85 22 - 60 72 75 85 22 - 56 60 72 75 85 - 180 22- 50 60 70 75 85 75 66 22 - 50 60 60 60 85 50 60 72 75 85 22 - 60 22 - 50 60 60 50 60 50 60 60 22 - 24 50 60 22 - 50 60 Set in EDID x x x x x x x x x x x x x x x x x x x x x VESA / CEA Standard DMT DMT CVT DMT DMT DMT DMT DMT DMT DMT DMT DMT DMT CVT DMT DMT DMT DMT DMT CVT CEA-861-E CEA-861-E DMT DMT DMT CVT DMT CVT DMT DMT DMT CVT DMT CVT CVT DMT CVT CVT DMT CEA-861-E CEA-861-E CEA-861-E CVT DMT QUADRAVISTA 2 INSTALLATION AND OPERATIONS MANUAL 61 Video Outputs supported Mode VGA VGA VGA SVGA SVGA SVGA XGA XGA XGA XGA XGA SXGA SXGA SXGA SXGA+ SXGA+ UXGA UXGA UXGAr UXGAr XGA/B UWXGA UWXGA SUN WXGA WXGA WSXGA WUXGAr WUXGAr WUXGAr HDTVp HDTVp HDTVp HDTVp Horizontal 640 640 640 800 800 800 1024 1024 1024 1024 1024 1280 1280 1280 1400 1400 1600 1600 1600 1600 1152 1280 1280 1152 1280 1366 1680 1920 1920 1920 1280 1920 1920 1920 Vertical 480 480 480 600 600 600 768 768 768 768 768 1024 1024 1024 1050 1050 1200 1200 1200 1200 864 960 960 900 768 768 1050 1200 1200 1200 720 1080 1080 1080 Hz 60 75 85 60 75 85 50 60 70 75 85 50 60 75 50 60 50 60 50 60 75 60 85 66 60 60 60 40 50 60 50 24 50 60 Note: When set to auto (by default) QuadraVista 2 reads the EDID of the monitor connected and automatically supports its resolution. Note: Fluid video performance: With digital input and a resolution of 800x600, the input frame rate may be increased up to 180 Hz. This provides smooth video output even in Quad mode. To use this feature, it is necessary to choose this resolution and refresh rate on all devices connected to the QuadraVista 2’s video inputs. 62 QUADRAVISTA 2 INSTALLATION AND OPERATIONS MANUAL CASCADING CASCADING multiple QuadraVista 2 units - more than 4 sources on a single display QuadraVista 2 can be cascaded in order to display more than 4 sources simultaneously on a single display. In this master-slave-system, any QuadraVista 2 can be used as master or slave. It is the same hardware. One QuadraVista 2 is used as master unit. To the output of the master unit the console with keyboard mouse and display or touch screen is connected. To each input of the master unit, a slave QuadraVista 2 can be connected. In this way, each quadrant on the display can be split in four more quadrants. Example: In a setup with one master and four slave QuadraVista 2 a total of 16 sources can be displayed simultaneously on a single console. All display modes: Display modes (Quad, PiP, Dual, Fullscreen) of slaves and master can individually be set, combined, and switched, e.g. the master unit could be set to Quad mode, while the first slave is set to PiP, the second slave to Fullscreen, the third slave to Quad, and the fourth slave to Dual mode. Any combination is possible. Keyboard and mouse operation: Keyboard and mouse can be activated on any of the up to 16 computers connected to operate these. Hotkeys for switching: Use hotkeys to quickly activate any of the e.g. 16 channels or to switch the display mode of any of the QuadraVista 2 units in the master-slave-system. Different levels (master or slave) require different types of hotkeys. For example, keep the hotkey default setting HOTKEY1 = Ctrl + Alt for all slave QuadraVista 2. Just change the hotkey settings for the master QuadraVista 2 to e.g. HOTKEY2 = Ctrl + Win Example: In a cascaded QuadraVista 2 setup with one master, 4 slaves, and 16 computers connected you can activate keyboard and mouse of computer 16 by pressing the following hotkey combination: HK2 + 4 (to activate the channel 4 on the master level), then HK1 + 4 (to activate the channel 4 on the slave QuadraVista 2 connected to port 4 of the master) Example: To change a display mode of e.g. the slave QuadraVista 2 connected to port 4 of the master QuadraVista 2 press the following hotkey combination: HK2 + 4 (to activate the channel 4 on the master level), then HK1 + P to switch from default Quad mode to PiP mode in this quadrant. The result is a screen split in four equal quadrants. All quadrants are split again in four equal quadrants (Quad mode), just the quadrant in the lower right corner (channel 4) is showing its four sources in PiP mode. Note: Use a programmable keyboard for comfortable switching of cascaded V-Switch quad II. Behind a single key you can program a combination of hotkeys. By pressing a single key you can activate keyboard and mouse of one of e.g. 16 computers connected or the switch display mode of the master or any of the four slave VSwitch quad II. QUADRAVISTA 2 INSTALLATION AND OPERATIONS MANUAL 63 SPECIFICATIONS Specifications Casing: Desktop or 19“, black (RAL 9005) Dimensions WxDxH: 43.6 x 23.4 x 4.4 cm Weight: 2.9 kg Operating controls: Front panel: Indicators: Four active channel indicator LEDs, one Quad mode LED, one PiP mode LED, one Fullscreen mode LED Computer ports: 4 x DVI-I (analog and digital), 4 x PS/2, 4 x USB Console ports: 1 x DVI-I, 2 x USB for keyboard and mouse Four channel selection buttons, one Quad mode button, one PiP mode button, one Fullscreen mode button Rear panel: One Power On/Off switch, one Reset button Transparent USB 2.0 ports: 4 x transparent high-speed USB 2.0 Maximum distance: Video (DVI / VGA) up to 20 meters; keyboard / mouse up to 5 meters Input and output resolutions: up to 1920 x 1200 @ 60 (DVI and VGA) * EDID adjustments: EDID at each input port customizable Supported Keyboard layouts: German, English, French, Italian, Spanish, Japanese Power supply: Internal AC adapter, 100 to 240V 50/60 Hz Power consumption: 40 watts Operating temperature: 5 to 45°C Storage temperature: -10 to 60 °C Rel. humidity: 5 to 65% non-condensing 64 QUADRAVISTA 2 INSTALLATION AND OPERATIONS MANUAL SAFETY Safety Guidelines WARNING: To avoid risk of electric shock do not open the device or remove any part of the casing. Please contact our technical support if the device requires servicing. Please read this manual carefully before putting the device into operation. Observe all warnings and instructions on the device and in the operation manual. Keep this user manual for future reference. Power supply: Only connect the device to a grounded power supply. Installation: Ensure that the device is disconnected from the mains before performing any installation work. Unplug the device or disconnect the power supply. Cables: Only use the cables supplied by Rose Electronics together with the device. Damage resulting from the use of thirdparty cables is not covered by warranty. Take care not to create tripping hazards when laying cables. Location: Electronic devices should never be placed on the ground between the cables. Never obstruct any vents the device may have. Take care to ensure adequate ventilation. QUADRAVISTA 2 INSTALLATION AND OPERATIONS MANUAL 65 SUPPORT and MAINTENANCE Maintenance and Repair This Unit does not contain any internal user-serviceable parts. In the event a Unit needs repair or maintenance, you must first obtain a Return Authorization (RA) number from Rose Electronics or an authorized repair center. This Return Authorization number must appear on the outside of the shipping container. See Limited Warranty for more information. When returning a Unit, it should be double-packed in the original container or equivalent, insured and shipped to: Rose Electronics Attn: RA__________ 10707 Stancliff Road Houston, Texas 77099 USA Technical Support If you are experiencing problems, or need assistance in setting up, configuring or operating your QuadraVista 2, consult the appropriate sections of this manual. If, however, you require additional information or assistance, please contact the Rose Electronics Technical Support Department at: Phone: (281) 933-7673 E-Mail: [email protected] Web: www.rose.com Technical Support hours are from: 8:00 am to 6:00 pm CST (USA), Monday through Friday. Please report any malfunctions in the operation of this Unit or any discrepancies in this manual to the Rose Electronics Technical Support Department. 66 QUADRAVISTA 2 INSTALLATION AND OPERATIONS MANUAL 10707 Stancliff Road Houston, Texas 77099 Phone (281) 933-7673 www.rose.com