1
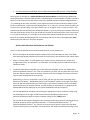
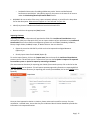
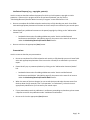
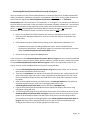
The University of Texas at San Antonio Office of the Vice Provost for Institutional Effectiveness Digital Measures UTSA Official Vita User’s Manual Revised: 11/12/15 UTSA Official Vita User’s Manual In this manual you will find: I. How to log in to Digital Measures. II. How to add and/or edit items in an activity. III. How to run reports in Digital Measures. IV. General information. Page | i Table of Contents Introduction .................................................................................................................................................. 1 Log in to Digital Measures............................................................................................................................. 1 Overview of Working in Digital Measures .................................................................................................... 2 Manage Your Activities ............................................................................................................................. 2 General Guidance for Making Data Entries .............................................................................................. 3 Time-Saving Tips: ...................................................................................................................................... 5 Search:........................................................................................................................................... 5 Import Citations ............................................................................................................................ 5 Updating Status............................................................................................................................. 5 Enabled/Disabled Accounts .......................................................................................................... 5 Read Only ...................................................................................................................................... 6 Locked ........................................................................................................................................... 6 Other ............................................................................................................................................. 6 Dates ............................................................................................................................................. 6 Text Box Expansion ....................................................................................................................... 6 Punctuation ................................................................................................................................... 7 Special Characters ......................................................................................................................... 7 Spell-Check .................................................................................................................................... 7 Location of Faculty Activities in the Vita ....................................................................................................... 8 General Information Section..................................................................................................................... 8 Personal and Contact Information ........................................................................................................ 8 Administrative Data .............................................................................................................................. 8 Academic, Government, Industry, Military and Professional Positions ............................................... 8 Administrative Assignments ................................................................................................................. 9 Awards, Honors, and Biographical Listings ........................................................................................... 9 Consulting ............................................................................................................................................. 9 Education and Faculty Credentialing .................................................................................................... 9 External Connections and Partnerships .............................................................................................. 10 Faculty Development Activities Attended .......................................................................................... 10 Page | ii Licensures and Certifications .............................................................................................................. 10 Media Contributions ........................................................................................................................... 11 Professional Memberships.................................................................................................................. 11 Teaching Section ..................................................................................................................................... 11 Scheduled Teaching ............................................................................................................................ 11 Directed Student Learning (e.g., theses, dissertations) ...................................................................... 12 Other Instructional Activities .............................................................................................................. 13 Academic Advising .............................................................................................................................. 13 Student Evaluations of Teaching......................................................................................................... 13 Workload Information ........................................................................................................................ 14 Scholarship/Research/Creative Works Section ...................................................................................... 14 Guidance pertaining to all screens under the Scholarship/Research/Creative Works section. ......... 14 For those who publish under an alternate name ........................................................................ 14 For those who have published with a collaborator whose DM account is disabled ................... 15 Artistic and Professional Performances and Exhibits: ........................................................................ 15 Contracts, Fellowships, Grants, Sponsored Research and Residencies .............................................. 16 Intellectual Contributions ................................................................................................................... 16 Intellectual Property (e.g., copyrights, patents) ................................................................................. 17 Presentations ...................................................................................................................................... 18 Service Section ........................................................................................................................................ 20 GENERAL NOTE ................................................................................................................................... 20 Department ......................................................................................................................................... 20 College................................................................................................................................................. 20 University ............................................................................................................................................ 20 UT System ........................................................................................................................................... 20 Professional ......................................................................................................................................... 21 Public ................................................................................................................................................... 21 Other Screen Guidance ............................................................................................................................... 21 Rapid Reports .......................................................................................................................................... 22 PasteBoard .............................................................................................................................................. 23 Manage Data ........................................................................................................................................... 23 Page | iii Run Reports............................................................................................................................................. 23 Logging Off and Automatic System Time Out ......................................................................................... 27 A Final Note on Vita Customization ............................................................................................................ 28 Page | iv UTSA OFFICIAL VITA USER’S MANUAL Introduction This UTSA Official Vita User’s Manual is organized to aid you in entering and editing your vita activities in Digital Measures. General advice and instructions are provided on the first six pages of the manual. Starting on page seven, the manual provides instructions for each vita category and subcategory about which you can report, in the order they are listed on the DM home page (Manage Activities). Information about compiling your vita, other utilities, printing the vita, and logging off follows. Log in to Digital Measures In the address field of your preferred browser, type: http://my.utsa.edu. Click on Digital Measures under Faculty/Staff Resources: You will be taken to the Digital Measures landing page. (You may wish to save this landing page to your Favorites or Bookmarks in your preferred browser.) From the landing page, click on the orange UTSA Digital Measures button on the upper right side of the page to reach the Digital Measures log-in page. Log in using your myUTSA ID (abc123) and passphrase. Page | 1 Overview of Working in Digital Measures The menu on the upper left portion of the Digital Measures home page displays the utilities available to you, based on the type of access you have. Faculty, staff, and administrators will have different types of access, so the menu bar may be slightly different in each case. Manage Activities. This is the tool you use to enter the activities, accomplishments, and publications that will display on your vita and annual report. For faculty, DM will default to this page upon opening. Manage Your Activities Activities are grouped logically from the viewpoint of the university faculty member. There are: 13 screens in the General Information section 6 screens in the Teaching section 6 screens in the Scholarship/Research/Creative Works section 6 screens in the Service section 3-5 screens in the Faculty Reports and Evaluations section (See the UTSA Annual Report User’s Manual under ‘Resources’ on the Digital Measures landing page for instructions on using screens in this section.) Depending on your DM role (Faculty, Department, Administrator, etc.), you may not have access to every screen in DM; therefore, your DM home page may not display all of the screens listed above. A screen shot of the UTSA Digital Measures home page for faculty can be viewed on the next page. (The entire home page may not display on your device, depending on your computer settings; you may need to scroll down to view the sections at the bottom of the screen.) Page | 2 General Guidance for Data Entry The Manage Activities screen is the starting point for entering vita accomplishments. You will enter activities by creating new records under the appropriate screen. Links to each of the screens appear on the Manage Activities page (the first screen you see when you open Digital Measures). When you first visit this page, you should spend a few minutes familiarizing yourself with the links that will take you to the different screens where you will enter your activities. To access a screen, click on its name (for example: Awards, Honors, Endowed Positions, and Biographical Listings or Intellectual Contributions). The activity’s summary screen will open to display a list of the records that are already stored for that activity, if there are any. In the example shown in the screen shot at the top of the next page, one record is displayed on this user’s Professional Memberships summary screen. Page | 3 There are four potential actions you can take from an activity’s summary screen (as illustrated in the screen shot below). o To add a new record in a given activity, click the [+Add New Item] button at the top right side of the screen. A new unfilled screen will open where you can enter information. o To view and/or edit an existing record, click on the name of the record. The screen for the entry will open to allow changes. o To copy a record, click the box to the far right of the item and then click the [Duplicate] box at the top right side of the screen. This will create and open an exact duplicate of the selected record. You may then edit and change the duplicate entry before saving it. This feature may be helpful if you have similar records and don’t want to retype duplicate information. (For instance, if you publish two chapters in the same book, you could enter all information for one chapter, save the record, and then copy the record. When the duplicate record opens, make the changes necessary for the second chapter and save that record.) o To delete a record, click the box to the far right of the entry and then click the trashcan icon at the top right side of the page. A dialogue box will open asking if you are sure you want to delete the item. When you click on [Delete] the item will be deleted. Once you have added, edited, or copied an item, you will save (or cancel) your actions, using one of the three buttons found in the top right portion of the entry screen. (Screen shot on next page.) Page | 4 o o o To save the record, click on the [Save] button. The record will be saved and you will return to the summary screen for the activity. If you then wish to enter information in a different screen, click on the red [Manage Activities] box at the top left side of screen and you will return to the DM home screen. If you need to add more of the SAME type of activity, click on the [Save + Add Another] button. This will save your work and open a new blank data entry screen for the same type of activity. If you are just browsing a screen or change your mind and do not want to save your work, click on the [Cancel] button. This will cancel the screen without saving and return you to the activity’s summary screen. If you have entered any data, a dialog box will ask if you are sure you want to leave the page without saving your changes. Time-Saving Tips: Search: You can do a search from the DM home screen, as well as each summary screen in Digital Measures. (The Personal and Contact Information and Permanent Data screens are single records and therefore do not have summary screens.) The “Search” window at the top right side of each summary screen allows you to search the records for that screen (i.e., Intellectual Contributions) using one or more words that appear in a record. This can be especially helpful when you have numerous publications and are looking for a specific article; you can search by any word(s) that might appear in the title, the abstract, the publisher, the dates or any other field for that record. For instance, if you published a journal article in the 1980s and you wish to pull up that particular record on your Intellectual Contributions screen, but can’t remember the year or the title, you could search by your co-author’s name, or the name of the publisher, or a keyword or keywords that you remember from the title. (Please keep in mind, if you have multiple publications with a coauthor and you search on his/her name, DM will return all of the publication records that contain the co-author’s name.) If you are uncertain which screen to search, you can search from the Manage Activities page. This will search the entire database. Import Citations: This feature allows you to import your publication citations directly from other online publication databases or reference managers. See page 17 for more information and instructions. Updating Status: It is important to update the current status of items in the Scholarship/Research/Creative Works section of DM as changes in status occur. If you originally entered an article as submitted, once it is accepted, you should edit the record for that article and change the status. You should do the same for each step of the article’s process. Once it is published, you should change the status to reflect that, and update all the pertinent fields with publication information. Enabled/Disabled Accounts: When using DM (specifically, when running reports), you will notice there are times that you have the option of including accounts which are “Enabled Only,” “Disabled Only,” or “Enabled and Disabled.” Faculty who are active in Banner for the present term have enabled accounts. Faculty who are inactive in Banner for the present term, or who are no longer at the university, have disabled accounts. Those whose accounts are disabled in Digital Measures will appear in drop-down lists and reports with a “zz” in front of their name. This can create a minor issue for faculty members who have collaborated with other faculty who are no longer active in DM; on the vita or annual report, Page | 5 citations that include the inactive faculty member will display with the “zz” in front of the name. There is a workaround for this situation, which can be found on page 15 of this manual. Read Only: Read-only items have a red superscript (R) next to the field title. You may view these items, but not edit or delete them. If read-only items need revision, contact your department administration. Administrative staff within your college/department with the appropriate permissions may be able to make changes to these items directly in Digital Measures. Locked: Locked items (indicated by a gray lock icon) are similar to read-only items; faculty can view but cannot edit or delete them. The data in these fields has been uploaded from other UTSA databases, such as Banner or PeopleSoft. An example of a set of locked items is the information about your courses in the “Scheduled Teaching” screen. If a locked item needs revision, contact your department administration. Administrative staff within your college/department may be able make the revisions within the appropriate UTSA database, which will then be automatically updated after the next Digital Measures ‘refresh,’ or may need to contact the UTSA Digital Measures Administrator to discuss needed corrections. Other: Throughout, if you choose the “Other” option from a drop-down list, be sure to fill in the “Explanation of Other” field below it, or the information will be blank on the vita and other reports. Dates: Throughout, where there is a date range to choose and an activity is ongoing, leave the “End Date” field blank. Digital Measures will insert the word “Present” on your vita and reports when no end date is indicated. If an activity took place on one day or during one year, leave the “Start Date” field blank and complete only the appropriate “End Date” field(s). This date will display on your vita and/or annual report. Most screens with date fields will require you to complete at least one date field to save the record. You may complete the year; the month and year; or the month, day, and year. If the screen requires a date to be entered, you will be prompted if you attempt to save the screen without doing so. Text Box Expansion: When entering records into DM, you can expand some text boxes to make entering large amounts of text easier. To do so, click and drag the bottom right side of the text box. (See screen shot below.) Some text boxes within Digital Measures note to use 30 or 50 words or fewer in the description. This is only a recommendation. The text boxes can be expanded to hold up to 20,000 characters. Page | 6 Punctuation: When entering data into fields for titles of publications or presentations, do not include formatting-type punctuation in those fields, unless the punctuation occurs within the title. Do include commas, a colon, a dash, etc. in the title if such punctuation is part of the title, but do not enter quote marks around the title or periods/commas after the title. The vita is set up to format the information appropriately. Any additional punctuation that you include outside the title will result in duplicate punctuation marks on the vita. EXAMPLES: Correct: San Antonio: America’s Unique City San Antonio – America’s Unique City Incorrect: All of the following (note punctuation outside the title itself): “San Antonio: America’s Unique City” San Antonio: America’s Unique City. San Antonio: America’s Unique City, Special Characters: When you need to use a special character in a text field, such as a Greek letter, a superscript, or a subscript, you must copy and paste the character or symbol from a separate Word document, following these steps: Open a Word document. Click on the Insert tab near the top left of the screen. Click on the small down triangle to the right of the blue “Ω” icon above the word “Symbols” found on the far right side of the toolbar to see your choices. (You may have to click on it twice to open the pop-up box.) If the symbol is not in the original pop-up box, click on “More Symbols” at the bottom of the pop-up box, then scroll until you find the symbol you need. Click on the symbol you have chosen and it will be inserted into your open Word document. Copy the symbol from the Word document and paste it either directly in the appropriate DM text field or in the PasteBoard (see below). Spell-Check: Google Toolbar (http://toolbar.google.com) and Yahoo Toolbar (http://toobar.yahoo.com) are two applications that have spell-check. These applications work with all of the websites you use, not just Digital Measures, allowing you to use the words you add to your custom dictionary with all sites you visit. Page | 7 Location of Faculty Activities in the Vita The following pages identify where specific activities should be entered in Digital Measures. The descriptions follow the order of the screens found on the Manage Activities screen. Familiarize yourself with the screens described below, including the different options available in drop-down lists, to make sure you are entering and/or selecting the correct elements. General Information Section Personal and Contact Information: This is a self-explanatory screen and the information is useful for a variety of reporting purposes. The text fields on the lower half of the screen (Brief Biography, Undergraduate Courses Taught, Graduate Courses Taught, Teaching Interests, and Research Interests) are editable. If you wish for this information to appear on your vita, you will need to complete the fields on this page. If you want items in these text fields to appear as a list, be sure to hit “Enter” after each item; otherwise they will appear in paragraph form. If desired, you can store your photograph by using the link at the bottom of the page to access a photo file. Administrative Data: Permanent Data: This has important benchmark dates in your career. Note that the items in this field are locked. This means that you cannot edit these items; however, administrative staff in your department should have access to make changes on the ‘Permanent Data’ screen. If any of the information on your ‘Permanent Data’ screen is incorrect, please contact your department administration to discuss and make changes as appropriate and supportable. Yearly Data: You will have a record for each academic term you are active faculty. Much of the information in ‘Yearly Data’ is automatically loaded from your current year’s appointment, but there are additional fields on the screen that you can complete. If you are a member of the Graduate Faculty, check “Yes” in the drop-down list. The AACSB information in the lower half of the screen is only relevant to College of Business faculty. Note that all the AACSB information is marked read-only and can only be entered by the COB dean’s office rather than by the faculty member. Academic, Government, Industry, Military and Professional Positions: This screen should be used to enter UTSA and non-UTSA university teaching positions, as well as other professional positions you have held. It should also be used to enter P-12 teaching positions (useful for COEHD) and nonacademic positions held, current and past. Page | 8 Faculty should use this screen to enter all experience information consistent with academic and nonacademic faculty credentialing information. Each job or experience should be entered separately. Remember that leaving the “End Date” field blank will display as “Present” on the vita and reports. Be sure to click on the appropriate [Save] button. Administrative Assignments: If you have held or are holding an administrative assignment at UTSA or another institution, use this screen. Review the drop-down list for positions that fall into this category. Add each administrative position separately. Be sure to click on the appropriate [Save] button. Awards, Honors, Endowed Positions, and Biographical Listings: Use this screen to provide details about your internal and external recognitions. This information is occasionally requested by government entities or UT System. Add each item separately. Be sure to click on the appropriate [Save] button. Consulting: Use this screen to provide details about all of your consulting engagements (paid and pro-bono). Record each engagement separately. Be sure to click on the appropriate [Save] button. Education and Faculty Credentialing: This screen is used to collect faculty qualification information for reporting to UTSA’s official accrediting body, the Southern Association of Colleges and Schools Commission on Colleges. It also contains information about your completed degrees for your official UTSA vita. Page | 9 You cannot modify this screen but can view the information. If the information is incorrect, please notify your department administration. External Connections and Partnerships: This screen should be used to describe activities you have engaged in that build relationships between UTSA and other entities, and which are not appropriate for another area(s) of the vita. Therefore, use this screen only when your accomplishment does not fit elsewhere. It should NOT be used in lieu of Academic, Government, Industry, Military and Professional Positions (above), Faculty Development Activities Attended, Licensures and Certifications, Media Contributions, or Professional Memberships or for any of the Teaching, Scholarship/Research/Creative Work, or Service activities below. Record each instance separately. Be sure to click on the appropriate [Save] button. Faculty Development Activities Attended: Use this screen to describe activities that have enhanced your skills as a UTSA faculty member, such as workshops, continuing education courses, etc. Record each activity separately. Be sure to click on the appropriate [Save] button. Licensures and Certifications: Use this screen to record all formal licenses and certificates you hold or have held. Enter each certification or license separately. The date obtained will be the date you first received this license/certificate. The expiration date is self-explanatory. (Remember, leaving the “End Date” blank will display as “Present” on your vita and reports.) Add each item separately. Be sure to click on the appropriate [Save] button. Page | 10 Media Contributions: Use this screen to provide details about all of your media activities (TV, radio, newspaper, magazine, internet, other). Select the type of medium in which your activity occurred from the drop-down list. Type the other information into the text fields. Record each activity separately. Be sure to click on the appropriate [Save] button. Professional Memberships: Use this screen to identify memberships that do not fall under the Professional or Public Service screens. An example might be membership in an organization through which you might be able to obtain faculty or professional development, but which you are not otherwise involved. If you contribute to the activities of the organization, use one of the two service screens. Record each membership separately. Be sure to click on the appropriate [Save] button. Teaching Section Scheduled Teaching: The courses for which you are the instructor of record are automatically loaded from Banner/ASAP, both organized classes (specific time, day, location) and nonorganized classes (such as an Independent Study). Each course for each semester is listed separately. The gray lock icon beside some items means that they are not editable by faculty. However, there are also selections and information that can be entered by you. Make the appropriate selection from each drop-down list in the editable fields, if you wish. There are three text fields where you can provide detailed information regarding your teaching of the course. o o o Pedagogical innovations you introduced to the course that semester New teaching material you developed for the course that semester Activities in your course that enhanced student learning and/or contact with the community Page | 11 TIP: Take advantage of these text fields. While the memory of your teaching experience for the course is fresh, provide a description in each of the text fields that applies. This information will not appear on the vita. However, it will appear in your annual report; it will serve as a reminder of special accomplishments for each course and will help you document your contribution to the mission of the department when you complete the UTSA Faculty Annual Report. If desired, or if your department requires that you do so, you may attach a copy of your syllabus: o o o o Click on the [Choose File…] button, Browse until you find the syllabus, then Click on the file you wish to upload. It will be available for future reference. Be sure to click on the appropriate [Save] button. Directed Student Learning (e.g., theses, dissertations): This screen is for entering information about dissertation or thesis committees on which you serve or which you chair, as well as any internships or research you oversee, and/or any publications by your students on which you were not an author. You should include this information for students you are working with now and those you have worked with in the past. Select “Involvement type” from the drop-down list; If you choose “Other” from the drop-down list, also complete the “Explanation of Other” field, or your role will be blank. Fill out the fields in which you can provide information about the student with whom you are working. o o o o o o o o Student’s name Home Department (This is the department for the degree, not the specific degree.) Title of the student’s work Course reference (select if you are the instructor of record only) Stage of completion Comments Date started Date completed The information you enter in the Description field will not appear on your vita but will appear on your annual report. If the student(s) with whom you worked did not earn academic credit use “Other Instructional Activities” below. Be sure to click on the appropriate [Save] button. Page | 12 Other Instructional Activities: This screen is reserved for any other instruction-related activities in which you engaged, for which student(s) do not earn academic credit hours. This includes workshops you offered, guest lectures, etc. Make sure the activity in which you have engaged does not fall into either of the two Teaching screens above. Select the appropriate activity from the drop-down list. (If you choose “Other,” don’t forget to provide an explanation.) Provide other information related to the activity as appropriate, such as o Audience o Sponsoring organization o Number of participants o Academic or professional instruction The information you enter in the Description field will not appear on your vita, but will appear on your annual report. Be sure to click on the appropriate [Save] button. Academic Advising: This screen is appropriate for faculty who are assigned as the undergraduate or graduate advisor of record. If you are not an advisor of record, this is the location to identify students for whom you provided significant mentoring, and to describe the nature of your work with them. Enter information about the number of students you advised. The information you enter in the Description field will not appear on your vita, but will appear on your annual report. Be sure to click on the appropriate [Save] button. Student Evaluations of Teaching: The summary evaluation of teaching information from each course found on this screen is automatically loaded from UTSA’s official student evaluations of teaching reports. You cannot modify the screen but you can view the information. If the information is not consistent with the report you received for a course, notify the Office of the Vice Provost for Institutional Effectiveness (VPIE). This information will not appear on your vita, but will appear on your annual report. Page | 13 Workload Information: Workload credits and justifications for being below the minimum workload requirements by term (used to comply with Regents’ Rule 31006) are found on this screen. The workload information on this screen is entered by your college/department administrative staff. You cannot modify the screen but can view the information. If the information is incorrect, please notify your department administration. Scholarship/Research/Creative Works Section Guidance pertaining to all screens under the Scholarship/Research/Creative Works section. For those who publish (or have published) under an alternate name: When you enter a record into any of the screens under the Scholarship/Research/Creative Works section, by default you will be the first performer/investigator/author/presenter listed. Your name will display as the name by which you are officially known at UTSA (i.e., in PeopleSoft, Banner, etc.) In cases where you may publish (or have published) under a different name, you can alter the name that will display on DM reports (including your vita) for the record you are entering. In the boxes to the right of where your name appears, type the name you wish to use for that citation. Your vita and reports will display that entry with the alternate name. (Note: This will only affect the record for which the information is entered. The information must be entered into each record for which you want this name to be displayed. You may edit existing records to make this adjustment.] Page | 14 For those who have published with a collaborator whose DM account is now disabled: You may have a record(s) on a Scholarship/Research/Creative Works screen(s) listing a collaborator whose DM account is disabled. (DM accounts are disabled when a faculty member is listed as inactive in Banner for the current term or has left the university.) Disabled accounts in DM are designated with a “zz” preceding the last name; therefore, on any reports on which the inactive faculty member may be listed as a collaborator, his/her name will display with a “zz” in front of it. You may notice this when you run your vita or annual report. If you don’t wish for the “zz” to appear, there is a way to correct it. You should locate the record(s) where the collaborator appears – you may wish to use the Search function to help you locate all the records. Then you will edit the record(s) by removing his/her name from the box it is in (click the small gray ‘x’ to the right of the name) and manually entering the correct name in the boxes for First Name, Middle Name/Initial, and Last Name. Be sure to click on the appropriate [Save] button when your edits on a record are complete. Artistic and Professional Performances and Exhibits: Use this screen to describe artistic activities/works (fine art, music, theatre, etc.). Be sure to complete all the fields related to each activity to fully describe your work. Some fields assist with appropriate placement of the item on the vita; others are reflected in your annual report. Select a “Current Status” or it will appear as on ‘orphan’ item by itself on the vita. As the work changes status (from “In Preparation” to “Submitted,” for example), be sure to edit the record to update the status. To identify others who worked with you on the performance/exhibit, click on the “Add another Performer/Exhibitor/Lecturer” link. If the co-contributor is at UTSA, you may select her or his name from the “Select or type a name” drop-down list on the left. (Start typing the first letter of the last name to move through the list more quickly.) Alternatively, or if the co-contributor is not at UTSA, you may type the name in the blank fields below the ”First Name”, “Middle Name/Initial” and “Last Name” captions to the right of the dropdown list. We recommend entering co-contributors in this manner, because if the co-contributor leaves the university or becomes inactive, you will not have an issue with the ‘zz’ designation (for disabled DM accounts) displaying on your reports (explained at the top of page 15). You can add additional contributors by selecting the appropriate number of authors to add, using the drop-down list to the right of ‘Add another Performer/Exhibitor/Lecturer in the Performers/Exhibitors/Lecturers section, and then clicking on the [+Add] button. You can reorder the names to designate a first contributor other than yourself by clicking on the up and down arrows on the far right side of the titles “1st Performer/Exhibitor/Lecturer”, “2nd Performer/Exhibitor/Lecturer”, etc. Click the up arrow to move a person’s name up or the down arrow to move a person’s name down. You must wait for the name to move before clicking it up or Page | 15 down to move it into a higher or lower position in the list. Names will appear on the vita in the order that you designate. You may also remove a contributor by clicking on the trashcan icon next to the up/down arrows. WARNING: Be sure to select if the entry is peer-reviewed, refereed, or juried from the drop-down list for that description. Otherwise it will display under a subheading as “non-refereed” on your vita. Identify any Areas of Collaborative Excellence into which the work falls. Be sure to click on the appropriate [Save] button. Contracts, Fellowships, Grants, Sponsored Research and Residencies: Use this screen to describe your activities/works that are supported by outside funding. Be sure to complete all the fields related to each activity to fully describe your work. Some fields assist with appropriate placement of the item on the vita and/or are reflected in your annual report. Please identify others who worked with you on the proposal by clicking on the “Add another Investigator” link. o See detailed instructions for adding collaborators under “Artistic and Professional Performances and Exhibits” (third bullet, page 15); the process is the same for all screens under the Scholarship/Research/Creative Works section. When the status of the item changes, be sure to edit the item and select the new status from the drop-down list (for example, from “Submitted” to “Completed”), so that the item is appropriately identified on your vita and annual report. Be sure to click on the appropriate [Save] button. Intellectual Contributions: Use this screen to describe nonartistic or nonmusical written works. Be sure to complete all the fields related to each activity to fully describe your work, with one exception – the AACSB classification field should be completed by faculty in the College of Business only. Some fields assist with appropriate placement of the item on the vita and/or are reflected in your annual report. Select a “Current Status” or it will appear as on ‘orphan’ item by itself on the vita. As the work changes status (from “In Preparation” to “Submitted,” for example), be sure to edit the record to update the status. Please identify any co-authors by clicking on the “Add another Author” link. Page | 16 o See detailed instructions for adding collaborators under “Artistic and Professional Performances and Exhibits” (third bullet, page 15); the process is the same for all screens under the Scholarship/Research/Creative Works section. WARNING: Be sure to select if the entry is peer-reviewed, refereed, or juried form the drop-down list for that description. Otherwise it will appear as “non-refereed” on your vita. Identify any Areas of Collaborative Excellence into which the work falls. Be sure to click on the appropriate [Save] button. Importing Citations: Importing your citation information will populate the fields of the Intellectual Contributions screen automatically. With just a few quick clicks, you can import citations of your publications into Intellectual Contributions from online reference management systems such as EndNote, Mendeley, RefWorks, Zotero, Google Scholar, PubMed, Scopus, or Web of Science. You can choose to: Export the record as a BibTeX file, which can then be imported into Digital Measures (Option A), or Directly import items from PubMed (Option B). To use the import feature, click on the [Import Items] box at the top of the Intellectual Contributions summary screen. This will take you to a screen where you can choose Option A: Import a file exported from another system or Option B: Import by connecting to PubMed. (For more extensive directions for exporting your citation from another system, click on the link on the software systems link in Option A. This will open a separate page with information on exporting BibTeX files. For more extensive directions for importing your records from PubMed, click on the PubMed link in Option B.) Once you have imported a citation or citations, please review each record for accuracy. For peerreviewed or –refereed items, insure that they are so indicated. Not all citation databases provide that information in the exported citations. Page | 17 Intellectual Property (e.g., copyrights, patents): Use this screen to describe intellectual property for which you hold a patent, copyright or similar protection. If the work is in progress and has not yet been submitted, you may use the “Scholarship/Research/Creative Works Currently in Progress” screen described on P. 19. Be sure to complete all the fields related to each activity to fully describe your work. Some fields assist with appropriate placement of the item on the vita and/or are reflected in your annual report. Please identify any additional inventors on the patent/copyright by clicking on the “Add another Inventor” link. o See detailed instructions for adding collaborators under “Artistic and Professional Performances and Exhibits” (third bullet, page 15); the process is the same for all screens under the Scholarship/Research/Creative Works section. Be sure to click on the appropriate [Save] button. Presentations: Use this screen to describe your presentations. Be sure to complete all the fields related to each activity to fully describe your work. Some fields assist with appropriate placement of the item on the vita and/or are reflected in your annual report. Please identify any co-presenters/authors by clicking on the “Add another Presenter/Author” link. o See detailed instructions for adding collaborators under “Artistic and Professional Performances and Exhibits” (third bullet, page 15); the process is the same for all screens under the Scholarship/Research/Creative Works section. When the status of the item changes, be sure to edit the item and select the new status from the drop-down list (for example, from “In Preparation” to “Submitted”), so that the item is appropriately identified on your vita and in your annual report. If your presentation results in publication in conference proceedings or elsewhere, please create a separate record for the publication under ‘Intellectual Contributions.’ Be sure to click on the appropriate [Save] button. Page | 18 Scholarship/Research/Creative Works Currently in Progress: You may choose to use this screen to describe works or research that have not yet been submitted for exhibit, performance, publication, protection or presentation. Alternately, you may prefer to enter the works under the appropriate Scholarship/Research/Creative Works screen (i.e., Intellectual Contributions) with a Current Status of “In Preparation” or “In Progress.” It is probably more efficient to enter the work in that manner so that as the work is submitted, reviewed, accepted, etc., you need only update status and dates for that particular record. Please enter the information on one screen or the other, i.e., either ‘Scholarship/Research/Creative Works Currently in Progress’ or ‘Intellectual Contributions.’ You should not create a record for the same work on both screens. Be sure to complete all the fields related to each activity to fully describe your work. Some fields assist with appropriate placement of the item on the vita and/or are reflected in your annual report. Please identify any other collaborators by clicking on the “Add another Collaborator” link. o See detailed instructions for adding collaborators under “Artistic and Professional Performances and Exhibits” (second bullet, page 15); the process is the same for all screens under the Scholarship/Research/Creative Works section. Be sure to click on the appropriate [Save] button. If you choose to use the Scholarship/Research/Creative Work in Progress screen to record unsubmitted works or research, once you submit, exhibit, perform, publish or present the item, it needs to be moved from the Scholarship/Research/Creative Work in Progress screen to the appropriate screen for the activity. You can use the PasteBoard tool to assist you in moving the data. From the Scholarship/Research/Creative Work in Progress summary screen, click on the item that has been submitted to open the record. Then click on PasteBoard in the red box on the upper left side of screen. A pale yellow box will open at the bottom right side of your screen. Copy/paste all the descriptions from the record onto the PasteBoard. (Copy text from each field one at a time; drop-down information cannot be copied.) After you have copied everything you wish to move, click Manage Activities in the red box on the upper left side of screen, then click on the appropriate screen in the Scholarship/Research/Creative Work section, and select [+Add New Item]. Copy the information from the PasteBoard into the appropriate fields in that screen, using copy/paste or drag-and-drop. To avoid losing and having to retype information from scratch, do not delete the item from the Scholarship/Research/Creative Work in Progress summary screen until you are sure you have gotten all the information saved in the new screen. Once you are sure everything has been moved, delete the original record by going back to the Scholarship/Research/Creative Work in Progress summary screen, checking the box to the far right of the item to be deleted, and clicking on the trashcan icon in the top right portion of the screen. Page | 19 Service Section GENERAL NOTE: For Service screens, you may enter the service once and identify the date fields that apply. However, during those periods when you have served in an official role(s) (chairperson, president, etc.), rather than only as a member of an organization, enter the service for that ‘official’ time period separately, to stress the higher level of service required. Department: Use this screen to describe the service you provide(d) to your academic department at UTSA and/or any other universities prior to joining UTSA. Familiarize yourself with the screen, including the drop-down lists. Fill in all blank fields and select appropriate drop-down list descriptions. Be sure to click on the appropriate [Save] button. College: Use this screen to describe the service you provide(d) to your college at UTSA and/or any other universities prior to joining UTSA. Familiarize yourself with the screen, including the drop-down lists. Fill in all blank fields and select appropriate drop-down list descriptions. Be sure to click on the appropriate [Save] button. University: Use this screen to describe the service you provide(d) to UTSA and/or any other universities prior to joining UTSA. Familiarize yourself with the screen, including the drop-down lists. Fill in all blank fields and select appropriate drop-down list descriptions. Be sure to click on the appropriate [Save] button. UT System: Use this screen to describe the service you provide(d) to The University of Texas System and/or to any other university system prior to joining UTSA. Familiarize yourself with the screen, including the drop-down lists. Fill in all blank fields and select appropriate drop-down list descriptions. Be sure to click on the appropriate [Save] button. Page | 20 Professional: Use this screen to describe the service you provide(d) to your academic discipline (whether an academic or a professional organization). It should be used for service while employed by UTSA and for service prior to joining UTSA. Familiarize yourself with the screen, including the drop-down lists. Fill in all blank fields and select appropriate drop-down list descriptions. Be sure to click on the appropriate [Save] button. Public: Use this screen to describe the service you provide(d) to organization/entities not related to your academic discipline. Examples might be president of the PTA, Little League Coach (assuming your discipline is not athletics), etc. It should be used for service while employed by UTSA and/or for service prior to your joining UTSA. Familiarize yourself with the screen, including the drop-down lists. Fill in all blank fields and select appropriate drop-down list descriptions. Be sure to click on the appropriate [Save] button. Other Screen Guidance When you log in to Digital Measures, several options (aside from the default option of Manage Activities) are available to you, depending on your role and level of access. A description of their functions follows. SCREEN SHOT OF FACULTY ACCESS: Page | 21 SCREEN SHOT OF DEPARTMENTAL ADMINISTRATION ACCESS: Rapid Reports: The Rapid Reports function (located under Manage Activities in the red box on the upper left side of the screen) provides a quick way to run reports that are available to you – for example, your vita. • Click on Rapid Reports. A white dialog box will open. • Select “UTSA Official Vita” from the drop-down list. (The drop-down list reflects the reports that are available to you.) • Choose the Start Date and End Date range you want the vita to reflect. • Choose the File Format you prefer from the drop-down list. • Click the [Run Report] button. Your vita will display in the file format you selected. You can then save it to your personal location to further edit, print or share. (Please remember that any edits that you make to this separate document will not be captured in Digital Measures.) Follow the same steps to run any of the reports available to you on the “Report” drop-down list. Page | 22 PasteBoard: The PasteBoard can be a time-saving feature. To access the PasteBoard, click on PasteBoard in the red box on the upper left side of the screen under Rapid Reports. This feature allows you to copy text from another document, such as your vita in Microsoft Word, and paste it into the PasteBoard. You can also copy/paste text from one screen in Digital Measures to another. After you have pasted text into the PasteBoard, you can then copy/paste or drag/drop selected text into the respective fields. To close the PasteBoard, click on the ‘X’ in the top right corner of the PasteBoard. Manage Data: This tab will only be available if you have permission to manage data for others and is normally used by administrative personnel at the department/college level. If you have this menu option, you can click on Manage Data (underneath Rapid Reports and PasteBoard on the menu in the upper left portion of the screen) and you will see this screen: Click on the down-arrow or start typing a last name in the ‘User’ field to locate the faculty members in your department, college, or the university (depending on your level of access). Once the name is visible in the ‘User’ field, click on [Continue] to begin managing data for the faculty member. Run Reports: This utility allows you to run the prefabricated reports available to you. Not all users have access to all reports; the reports that are available to you will appear in the drop-down list in Step 1. (These are the same reports that you can access using the Rapid Reports tab discussed earlier.) Depending on your level of access, your Run Reports screen may be configured slightly differently than the example screen shot on the next page. Page | 23 To run a report, choose the report from the drop-down menu (Step 1), select the appropriate start and end date (Step 2), choose who you wish this report to include by clicking on Change selection…. A white dialog box will open where you can select either individual(s), department(s), or college(s). Select whether you wish to include ‘Enabled Only’ (active faculty), ‘Disabled Only’ (inactive faculty, including faculty who have left the university), or ‘Enabled and Disabled.’ A reminder note: Disabled (inactive) faculty will appear in drop-down lists and reports with a “zz” in front of their names. After making your selection(s) and clicking on [Save], the report’s file format and size will be preselected in Step 4. You do not need to change or select anything. To run the report, click on [Run Report] on the top right side of the screen. The report will open as a separate document in the selected format. (Most reports are in Microsoft Word format.) Please note that any changes or edits you make to this document will not be reflected in Digital Measures. Page | 24 Create a New Report Some users, mostly department/college administrative users, have the ability to design personalized reports using the data available in Digital Measures. (This feature replaces what was previously known as Ad Hoc reporting.) If you do not see the line “Create a new report” when you click on: you probably have access only to run the custom reports in your drop-down list. For instance, faculty do not generally have access to ‘Create a new report.’) To create a specialized report for your needs, follow the steps for Run Reports (previous page). In Step 1, instead of selecting an existing report, you will click on “Create a new report”. Page | 25 The following page will open: For Step 2, select the Date Range you wish to capture in your report. For Step 3, choose who you wish this report to include by clicking on Change selection…. A white dialog box will open where you can select either individual(s), department(s), or college(s). Select whether you wish to include ‘Enabled Only’ (active faculty), ‘Disabled Only’ (inactive faculty, including faculty who have left the university), or ‘Enabled and Disabled.’ A reminder note: Disabled (inactive) faculty will appear in drop-down lists and reports with a “zz” in front of their names. For Step 4, you will select the data you wish to include in your report. Click on Change selection….. A white dialog box will open. Click on the right-pointing arrows to expand each section in the box. Each item under Common Items represents a corresponding screen in Digital Measures (the same screens displayed on the Manage Activities page). When you click the arrow next to the screen name, a list of all of the fields on that screen will drop down and you can select the data you wish to capture by checking the appropriate boxes. PLEASE NOTE: It is best to select only one screen name per created report; however, you may select multiple fields under that screen name. If you select multiple screen names, the results will display as a separate report for each screen. DM Page | 26 does not have the capability to combine data from multiple screens on one created report. (If you need to have information from multiple screens on one report, you can choose to run the report in “CommaSeparated Value (.csv)” format, which will display as a Microsoft Excel file and allow you more flexibility in manipulating the data.) In Step 5, select how you want the data grouped. For more information about this, click on the question mark icon next to “Grouping Method” on the screen. Step 6 is an optional feature that will allow you to search for data containing specific text. Click on the question mark icon next to “Search Keywords” to read more detailed information on using this feature. Select your report format in Step 7. Click on the question mark icon next to “File Format” for more detailed information. When all of the steps are completed, you have two options. You can: 1. Click the [Save] box in the top right portion of the screen. A white dialog box will open with a text box for ‘Report Name’. You may name the report you have created and save it. It will then appear in the list of custom reports available to you each time you run a report. This report will be available only to you and will not display on any other Digital Measures users’ screens. ---- OR ---2. Click the [Run Report] box in the top right portion of the screen. The report will open in the selected format, but the report will not be saved for future use. (Remember that any edits you make to this document will not be reflected in Digital Measures.) Logging Off and Automatic System Time Out When you are finished with your work session, click on the light blue down arrow to the right of your personal “Welcome” banner on the top left side of your screen, and then click Log Off. Because you log in to Digital Measures using the same Shibboleth authentication (your MyUTSA ID and passphrase) that is used by other UTSA platforms such as Blackboard, it is best to close your browser entirely after logging out of DM. If you are logged in but are not actively working, the Digital Measures system will time you out and log you out of the system after 90 minutes. It will give you a warning message before doing so, but be sure to save your work on a screen if you know you are going to have to interrupt your work. Page | 27 A Final Note on Vita Customization: The UTSA Official Vita was developed with input from faculty members from every college. If necessary, custom vita formats can be developed for specific departments and/or colleges at the request of the department chair or college dean. For more information, please contact your Digital Measures Administrator, Tia Palsole, at [email protected]. Page | 28