1
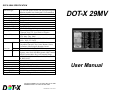
DOT-X 29MV SPECIFICATION
CRT Size/Type
Dot Pitch (mm)
Maximum Resolution
Horizontal Frequency
Vertical Frequency
Bandwidth
Video Input Signal
VGA Input/Output
RS-232 Input/Output
Sync Input
Compatability
Keys
Picture
Functions
Color
Special
Connectors
Power
Power Factor
Display Area (mm)
Dinmension (mm)
Net Weight (kg)
Operating Enviroment
Storage Enviroment
27V Pure flat square screens with 108 degree magnetic
deflection, dynamic focus forming and 53.5% transmission.
0.68mm
XGA: 1024 x 768 (N/I)
30 kHz auto sync
50 - 120 Hz
65 MHz
Analog (0.7 Vp-p)
15 pin D-Sub
9 pin D-Sub (Female/Male)
Seperate Sync, TTL Level Positive/Negative
Composite Sync TTL Level Positive/Negative
VGA, SVGA, XGA, VESA
DTV: 480p, 720p, 1080i
DEGAUSS (TV/PC/AV), MENU, SEL/CH+, SEL/CH, VOL+, VOL-, TV/CATV
Contrast, Brightness, H/V Size, H/V Position,
Pincushion,Trapezoid, Top-Corner, Bottom-Corner,
. Pin Balance, Parallelogram, Rotation, Recall
Color (9300K/6500K/5500K/USER
ID-Number, Instant ON, Degauss, Auto Saving, Auto
Degauss, Auto Shift, OSD Background, OSD Contrast,
OSD H/V Position, Moire, Key Lock, Password Change
AC IN, VGA IN, VGA OUT, Audio IN (R/L), RS232
IN, RS232 OUT
AC 100V-240V Universal: 210 W (Max)
Up to 0.9
520 x 390 (Factory Preset)
615 (W) x 487 (H) x 500 (D)
50 Kg
T: 5 to 35 degree C H: 30 to 80% RH
T: -20 to +60 degree C H: 10 to 90% RH
160 FIRST STREET S.E. ST. PAUL, MN 55112-7894
PHONE 651-633-1742 FAX: 651-633-1065
Publication No. 01127 Rev B
DOT-X 29MV
User Manual
USING THE REMOTE CONTROL
a. ID Number
Using remote control instead of the control panel is convenient to operate the
monitor. Some of the keys must to work by connect with MATE, and these are
DISP, SLEEP, MTS, JUMP, ADD / ERASE, AUTO, TV, VIDEO, S-VHS,
COMPONENT, TV / PC / AV, TV / CATA, PIC-STD, PIC / PAGE, PIC-SEL,
SYSTEM, FINE TUNING, CH-LOCK, FIELD, LANG, CAP / TXT, CCD.
Through DM RS232 VO.9 (Serial Transmission Communication interface) to remote control the device. To
identify the monitor, you must to set an ID number (ID=
1-99) to each of the monitor under DM RS232 VO.9
Control page.
1. Select the ID number (1 -99) by
tab.
2. After you set the ID, choose high/light to identify the
monitor with has been set with a valid number. The
monitor will correspond with the current status, and this
could control the OSD function directly.
b. Instant-On
Enable / Disable the INSTANT-ON. Set the INSTANTON YES, the Monitor will start up immediately while
the Power switch on and the green LED is lit on. The
monitor will stay in the saving mode till the power is
turned-on again while the INSTANT-ON is switch off,
and the red LED is lit on.
c. Auto Saving
The power will shut down automatically and be in the
power- saving status while the Auto Saving switch is on.
e. Degauss
Enable / Disable the AUTO DEGAUSS.
The AUTO DEGAUSS will be executed automatically
by every 24 hours since switch on the function.
f. Auto Shift
Active AUTO SHIFT to protect the screen from result in
the image-remain. The picture will be auto-shift once
every 6 hours.
g. Moire
For some modes, it is better to switch the moire off to
get better video performance, and this option is provided
when Moire is ON, adjust MOIRE pops out, and adjust
moire by using + / - key. In TV / AV mode, moire can’t
be adjusted.
h. Key Lock
Enable / Disable the front panel function operation.
i. Password
To release the disable front panel function operation by
set the password.
j. OSD
Background
Switch the OSD background ON or OFF to adapt to
different software background of the PC.
Following lists the function keys on the OSD:
Following lists the function keys on the remote control:
Note:
1. Press the Menu button on the control panel or the remote control to display
the main menu.
2. Press the SEL +/- buttons on the control panel or remote control to scroll
through the menu.
3. Press the VOL +/- buttons on the control panel or the remote control to
adjust the setting values.
4. Press Sub-menu to return to upper level while in any sub-menu. To exit the
mode, press the menu button while in the top-level menu.
POWER
Starts or stops the monitor function.
POWER ON/OFF
To Start or stop the multiple monitors function in the mean
while. In general, this function is used well with multiple
monitors control.
DISP
Display the current mode on the present status.
SLEEP
To set the sleep timer, each press will increase the sleep
timer in 10-minute intervals up to 120 minutes (then back to
00). When the sleep count reaches the last 5 minutes, the
screen will show up every minute for 3 seconds. During the
last minute, and it will display every 10 seconds.
MTS
Multi-Sound selection.
MUTE
Cuts audio and turns audio back on. (not available)
JUMP
Returns to the previous channel.
ADD / ERASE
Allows the user to Add / Erase channels manually.
AUTO
Automatically scan all the channels by signal responds, and
to set them on the preset mode.
MENU
Enable/Disables the On-Screen Display Menu.
MAIN MENU
Picture Menu
Fine tunes the Picture image quality manually:
CONTRAST - BRIGHTNESS - H/V SIZE - H/V
POSITION - PINCUSHION - TRAPEZOID - TOPCORNER - BOTTOM-CORNER - PIN-BALANCE PARALLELORGAM - ROTATION and RECALL.
Note:
a. Recall will replace current settings by the factory-preset values. You can only
recall factory settings when the PC mode is in one of the 14 predefined
modes. See Table for preset modes. Color recall is used to call back the
factory setting of R.G.B.
b. Above parameters is for PC mode only, and can’t be reached in TV / AV
mode. In TV /AV mode, you can adjust the TVparameters by remote control.
Color Menu
Select the color temperature to make colors more pure
and vivid. Select user item to adjust the color intensity
by VOL + / -key.
MIC
MIC
VOL+
Special Menu
Fine tunes and sets the special functions manually:
ID-NUMBER ( 1-99 ) - INSTANT-ON - DEGAUSS AUTO-SAVING - AUTO DEGAUSS - AUTO SHIFT OSD BACKGROUND - OSD CONTRAST - AND OSD
H / V-POSITION - MOIRE, KEY LOCK - PASWORD.
SEL+
SEL-
This is a dual function key:
a. Press SEL + / - to serve as menu item selection.
b. MIC for R mode.
This is a dual function key:
a. Press VOL+ / - to control volume in any mode. (optional)
b. Press VOL+ to control the selection function while in
menu mode.
Note- Volume control function will effect while connect with Vision Converter.
SET
Through DM RS232 VO.9 (Serial Transmission Communication interface) to remote control the device. To identify
the monitor, you must to set an ID number (ID= 1-99) to
each of the monitor under DM RS232 VO.9 Control page.
ID
To set the ID number to control the monitor from the other.
TV
Select TV source.
VIDEO
Select VIDEO source.
S-VHS
Select S-VHS source.
Component
Select a Compound signal source:
Y,Pb,Pr -For High definition component inputs.(CT1890/CT-1820).
Y,Cb,Cr-For Conventional component inputs.(CT-1890 /
CT-1892 / CT-1820).
VGA 1
Select VGA I source.
VGA 2
Select VGA 2 source.
TV PC / AV
Select TV / PC / VIDEO / S-Vidso / COMPONENT
switch source.
TV CATV
Select TV / CATV source.
CH+ / CH-
Steps through the channels.
PIC-STD
Factory preset.
PIC / PAGE
Control and select items PIC-SEL button.
PIC-SEL
User video adjustment screens.
SYSTEM
Changes the video system on TV, Video, and S-VHS.
System types are PAL, PAL-M, PAN-N, and SECAM.
FINE TUNING
Allows for fine-tuning of channels.
CH-LOCK
For Parental Control.
FIELD
A FIELD I or FIELD 2 toggle. (Useable only when CCD
is on).
LANG
Language Selection (I or 2).
CAP / TXT
Accessible only when CCD is on.
CCD
Caption control.
ACCESSING THE MAIN MENU
Access the OSD menu by control panel on the monitor or the remote control to
make the operation.
OSD Function Chart