1
© 2001 The 3DO Company. All Rights Reserved. 3DO, Legends of Might and Magic, Might and Magic, New World
Computing, and their respective logos, are trademarks or registered trademarks of The 3DO Company in the U.S.
and other countries. Creative, Environmental Audio, and their respective logos, are trademarks or registered
trademarks of Creative Technology, LTD. in the U.S. and other countries. This product contains the LITHTECH game
engine licensed from LithTech Inc. LITHTECH game engine© 1997-2000 LithTech, Inc. All Rights Reserved.
LITHTECH and the LithTech logo are trademarks of LithTech, Inc. GameSpy and the GameSpy logo are trademarks
of GameSpy Industries, Inc. All other trademarks belong to their respective owners. New World Computing is a
division of The 3DO Company.
The software and related manual for this 3DO product are copyrighted. No portion of this product may be photocopied,
scanned, translated, reproduced , copied or reduced to any tangible or electronic medium or machine-readable
form, or publicly performed or displayed, without the prior written consent of The 3DO Company. The owner of
this product is entitled to use the software and related manual for his or her own use, but is not entitled to reproduce
and distribute any copies of the software or manual to any other individual or entity; nor to rent or lease this product
or any copy thereof to any third party.
Uses Bink Video Technology. © 1997-2001 by RAD Game Tools, Inc.
Uses Miles Sound System. © 1991-2001 by RAD Game Tools, Inc.
Windows95, Windows98, DirectPlay, and DirectX are trademarks of the Microsoft Corporation.
CONTENTS
GETTING STARTED............. 2
GAMEREFERENCE ............ 15
INST'A..LLATION ..................... 2
SCENARIO TYPES ................ 15
Sword in the Stone ....................... 15
Rescue the Princess ...........•..•....... 15
Warlord Escape ......................... 15
Slay the Dragon .... ................. ... . 15
PRE-GAME INTERFACE .. .. ... 2
MAINMENU ......................... 2
2
3
HOSTGAME ......................... 3
General Server Info ....................... 3
Game Timers ............................ 4
Other Server Options ...................... 4
World List .............................. 5
Advanced Host Options .................... 5
JOINGAME .......................... 6
Server List .............................. 6
Player List ond Rule List ................... 6
Fevor~te Servers . . . . . . . . . . . . . . . . . . . . . . . . . . . 7
Advanced Join Opt;ons .... . .. ..... .. . .. ... 7
LEGENDS GALLERY ............... 7
Gome Screen .............................
Options Screen ...........................
PRACTICE OFFLINE ............... 7
OPTIONS ............................. 7
CONTROLSETUP ................... 7
GAMEPLAYOPTIONS ............. 8
VIDEO OPTIONS . . ..... ....... ..... 8
SOUND SETUP ...................... 8
IN-GAME INTERFACE.......... 9
CHARACTER SELECTION ........ 9
Working for the Greeter Good ...... •. ....... 9
Turning to the Dork Side .................. 10
Letting the Fates D ecide ................... 10
THE BUY MENU ................... 11
Purcl10se Zones ......................... 11
Equipment Categories ..................... 11
MAIN GAME SCREEN ..... . ...... 12
S elect;ng W eapons . .. . ................... 12
Reading the Main Game Screen ............. 13
Act;vating the Console .... .. .............. 14
Ex;tingtheGame .......................• 14
WEAPON AND ARMOR
REFERENCE ....................... 16
ST'A..RTING WEAPONS .. ......... 16
BUY MENU WEAPONS ........ .. 16
Might Weapons ......................... 16
Magic Weapons ..................... .... 18
ARMOR. ................ .... .. ... .. .. 20
SINGLE-USE ITEMS ............... 21
Buy M enu Items . ..... ..... . ........... . 21
Secret Location Items ..................... 21
APPENDIX A:
BASIC GAMEPLAY TIPS ......... 22
APPENDIXB:
DEFAULT GAME CONTROLS .... 23
CUSTOMER SUPPORT ........ 24
GETTING STARTED
INS'IALLATION
Insert the Legends ofMght and Mag;c™ CD into your CD-ROM dr;ve. If your computer has AutoPlay
enabled, installat;on will start automat;cally. If your computer does not have AutoPlay enabled. click Run
from the Start Menu and type "D:\ setup.exe", where D: represents your CD-ROM dr;ve, then press ENTER.
For more complete installation, instructions refer to the Quick Install instructions that are ;ncluded ;n the
Legends of Mght and Mag;c jewel case booklet or the README.ffi file in the d;rectory on your Legends CD.
PRE-GAME INTERFACE
MAIN MENU
The Ma;n Menu is the first screen that appears after viewing the Game Intro. From here, you can choose to
proceed to a game, configure game settings, view the Legends Intro or Cred;ts, or E~t the game.
GAME
Selecting this option w;ll take players to the Game screen. It is from here that you will choose to host or
join a game, view the Gallery or use the practice offEne mode.
OPTIONS
Choosing OPTIONS will allow you to configure any of your game sett;ngs, including the controllers, display
and sound sett;ngs.
VrnwlNTRo
Choos;ng this option replays the Legends of Might and Magic Intro Mov;e.
CREDITS
Choose this opt;on to view the game credits for Legends of Mght and Mag;c.
ExlT
Quits Legends ofMght and Magic. You will be prompted to confirm this decision.
GAME SCREEN
Hosr
Choosing HOST wal bring up the Host Setup screen. It is from this screen that you
will start a new game session.
JOIN
Choosing th;s option w;ll d;splay the Server List screen. Use this option to join a
game session that is already in progress.
GALLERY
Th;s opt;on takes you to the Legends Gallery, where you can view ;uformat;on on the characters, weapons
and monsters that you will encounter ;n the game.
PRACTICE 0FFLINE
Th;s opt;on w;ll allow you to check out any of the game's levels and characters. Though ;t uses the same
;nterface as the Host Game screen, the game that ;s created w;ll not be made ava;lable onhne for other
players to j o; n.
OPTIONS SCREEN
CONTROLS
Choosing th;s takes you to the Control Setup screen. It ;s from here that you can set up your keyboard and
mouse or any other compat;ble game controllers.
GAME OPTIONS
The Game Opt;ons screen allows you to configure such settings as mouse sens;t;v;ty, crossha;r select;on
and other personal preferences.
VIDEO OPTIONS
Displays the V;deo Opt;ons screen. This w;ll allow you to choose and configure your video hardware,
choose a screen resolution and select any graph;c detail options.
SOUND OPTIONS
The Sound Options screen allows you to choose and configure your sound hardware.
HOST GAME
The Host Setup screen allows you to create a new game session. Clicking on Options will display a
separate screen where specific host settings can be adjusted.
GENERAL SERVER INFO
SERVER NAME
Every game server must have a name.
SERVER PASSWORD
If des; red, you may "lock" the server
the game.
by ass;gn;ng it a password. Only players w;th the password may join
If a password ;s not spec;£ed, the game session w;lJ be open to any player.
MAx:.PLAYERS
Here you can specify the max;mum number of players that may join the game at one t;me. It can be any
number from 1 to 16. Default Value= 16
GAME TIMERS
MAP Ro1:A.l'ION
Spec;£es the amount of t;me, ;n minutes, a spec;ftc scenar;o w;Jl be ;n play. When th;s t;me exp;res, the
map w;ll change when the current round has been completed. Dur;ng the game, you may v;ew l1ow much
time rema;ns by pressing and l10ld;ng the TAB key to display the Player Scores Est. The rema;n;ng t;me is
d;splayed in the top-r;ght corner of th;s screen. Default Value= 20
RoUNDTIME
Allows you to set a max;mum t;me. ;n minutes, that any given round w;ll last before declaring a w;nner and
starting a new round. Default Value= 5
PuRCHASE TIME
Spec;£es, ;n seconds, how much "freeze" t;me players w;l! have before the Round Timer begins at the tart
of a new round. This w;Jl give players a chance to purchase ;tems/equ;p themselves at the start of a round
w;thout losing any actual time ;n the round. When the Purchase Time exp;res, the Round Time begins
count;ng down and players w;ll be able to move normally. Default Value= 5
OTHER SERVER OPTIONS
F RIENDLY F IRE
When ON, players can injure or k;U teammates. When OFF, teammates suHer no damage from each other's
attacks. Default Value= OFF
ALLOW VOTING
When ON, players can vote to change to a d;fferent scenario ;n the map rotat;on, or vote to remove other
t>layers from the game. When OFF, only the server host has the ab;J;ty to remove players or change the
scenario before the map rotation time exp;res. D efault Value= ON
B ALANCE T EAMS
Th;s opt;on ;s used to ma;nta;n even teams. Players w;Jl only be able to join a team w;th fewer player (or
any team ;f numbers are equal), but the game w;l! check every other round to make sure the balance st;U
ex;sts. If at a checkpoint one team has 2 or more players than the other team, players w;l! be moved to the
other team unt;J the player d;fference ;s 0 or 1. Default Value= ON
When ON, th;s game sess;on w;ll use the computer as a dedicated server. A player w;ll not be
able to "play" the game from th;s mach;ne. Default Value= OFF
All of the maps conta;n at least a handfu l of monsters w h ;ch w; ll attack any player. If you
t>refer to play w;thout monsters, change th;s sett;ng to OFF. Note that the Dragon and the
Pr;ncess are not affected by th;s sett;ng as they are M;ss;on O bject;ves ;n scenar;os ;n
wh;ch they appear. Default Value= ON
When a game ;s set to LAN O nly. ;t w;U not offer or allow any connect;on to the
Internet. O nly players on the LAN will see the game server on the server l;st. Default
Valu e= OFF
WoRLnL1sT
The World L;st box contains any maps that are properly installed on your computer. You may select a
world to play from this l;st. or you may create a rotat;on order by selecting a world and using the Down
arrow located between the world and rotat;on lists. The rotation list can be any length and can conta;n the
same world multiple times.
0
Please note that if the rotation list ;s left empty, the World List will be used as a '"random rotat;on° list.
'fu remove a map from
the rotation order, select it and use the Up arrow located between the world and
rotation lists.
ADVANCED HOST OPTIONS
Clic~ng on the OPTIONS button on the Host (or Join) Game screen will d;splay a I;st of options that you
can use to hne tune your network settings and how you look for and connect to games. If at any time you
£.nd that the settings you have changed on this screen prevent you from connecting to games. you may use
the DEFAULT button to reset your settings.
PORT
This is the default port which the game will attempt to use to connect.
NEIWORK TYPE
Choosing the Network Type allows you to limit the amount of data wh;ch your computer will accept.
Setting this higher can improve data flow to the server, but sett;ng it too high can actually reduce
performance.
PING
This is a £.lter opt;on. Use this when look;ng to join a game to hide any servers that report a ping above this
number (i.e. setting this to 100 will only display servers to wh;ch you have faster than a 100 ping-time).
MIN. # OF PLAYERS
Hides games on the server list with less than this number of players currently in the game.
DEDICATED ONLY
When on, the server hst will only display games running on a dedicated server.
BUDDY LIST
Entering character names of your friends into the Buddy List will allow you to see servers that they are
playing on. 'fu add a player to the I;st. just type their name into the top box and click the ADD button. Once
on the list, you can remove them by h;ghlight;ng their name on the l;st and clicking the REMOVE button.
The Server List screen wal allow you to join a game that is currently in progress. To join a game. you may
either double-click on one of the games on the server list. or select a game on the server list and click the OK
button at the bottom of the screen. Selecting the OPTIONS button w;U display a separate screen where players
can set specific network settings.
SERVER LIST
The Server List is the main part of this screen. It shows any Legends game that can be detected through
GameSpyTM, over the Internet or LAN. You may enter the specific IP of o server you wish to join, and it
displays drnt game server's name, the map currently in play, the current and maximum number of t>loyers and
the average Internet ping-time to that server. The REFRESH button at the bottom of the screen will update the
Server List. You may also refresh an individual server by right clicking on it and selecting "Refresh Server".
Clicking on any of the column headings will sort the Server List, by category, in alphanumeric order.
Clicking a second time will sort the list in reverse olt>honumeric order.
SERVER NAME
Every game server must have a name. The Jlerson hosting the game will usually put some clue as to the game style
being played (i.e. House of No CamJling, Nothing but Sword In Stone, etc.) but it could be anything the host desires.
MAP NAME
This displays which maJl is currently being played. You can sort by this column to find your favorite.
PLAYERs/MAx
This dist>loys two numbers. The first is the number of players currently in the game and the second is the
maximum number of players allowed in the game at any given time.
PING
This displays the average ping-time, in milliseconds, from you to this server. Lower is better.
GAME TYPE
Displays the tyJ:le of scenario being played. FOr a list of game types, refer to the GAME REFERENCE section of this manual.
PLAYER LIST AND RULE LIST
Whenever you select a game server. the Player List and Rule List wal uJldate to show details about that game.
PLAYER LIST
This shows the names of players currently in the game, along with how many kills and
deaths each one has.
RULE LIST
Any setting that tl1e host player has control over when starting the game (Round Time,
Purchase Time, Friendly Fire, etc.) is displayed in this Jlanel along with its status.
The Rule List includes:
* Round Time (in minutes)
* Allow Voting (Yes/No)
* Map Rotation Time (in minutes)
* Purchase Time (in seconds)
Balance ~ams (Yes/No)
*Monsters C'ks!No)
* &iendly Fire (Yes/No)
*LAN Only (Yes/No)
*
FAVORITE SERVERS
Legends allows you to keep track of your fevor;te game servers. To add a server to you r Favor;tes L ;st, r;gh t
chck on that server ;n your l;st and select "Add to Favor;tes". To remove a server from your Favor;tes L ;st,
r;gh t click on th at server and select "R emove Favor;te".
ADVANCED JOIN OPTIONS
Cl;cbng on the OPTIONS button on the J o;n Game screen w;U d;splay a hst of opt;ons that you can use to
fine tune your network sett;ngs, and how you look for and connect to games. T h;s ;s the same screen that ;s
access;ble from the Host Game screen.
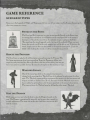
LEGENDS GALLERY
The Legends Gallery J19s three sect;ons: L egends, Monsters and Weapons. The L eft and R;ght arrows
cycle through each of the galler;es. Chck;ng the BACK button w;ll return you to the prev;ous menu.
LEGENDS ;ncludes ;nformat;on about the s;x character classes, the two Warlords and the Pr;ncess. Th;s
sect;on ;s excellent for learn;ng to recogn;ze the d;fferent characters. wh;ch w;U ult;mately help you to
d;st;ngu;sh between fr;end and foe.
MONSTERS g;ves a bas;c descr;pt;on of each of the monsters you w;Jl encounter wh;Ie play;ng. These ;mages
are not to scale, as you w;ll qu;ckly d;scover the first t;me you see a Titan or the Dragon.
WEAPONS prov;des ;nformat;on on what each of the weapons can do. Th;s sect;on ;s also extremely helpful
for learn;ng to ;dent;fy one of these treasures should you come across one ;n the game.
PRACTICE OFFLINE
Select;ng Pract;ce Offl;ne w;U allow you to choose any teem, character or map. It allows you to explore
and learn the "lay of the land" w;thout hav;ng other players around to get ;n the way. There ;s no t;me hm;t
;nan offhne sess;on, but w;n/loss cond;t;ons can st;U be met. Play ;s normal ;n all other respects.
OPTIONS
CONTROL SETUP
Th;s screen allows you to conbgure your keyboard and mouse sett;ngs (or any other compat;ble controller).
Every act;on can have a pr;mary and secondary control ass;gned to ;t.
To set a command, double-chck on the sett;ng you w;sh to change, th en press the key or button you w;sh
to use for t hat act;on. If you choose a key that ;s already ;n use elsewhere, the ol d sethng w; ll be removed
;n favor of the new one.
Cl;ck;ng OKAY w;U save your sett;ngs. cl;c k;ng CANCEL w;ll close the w;ndow w;thout saving changes and
t he DEFAULT button resets the ent;re command Est to ;ts or;g;nal default settings.
GAMEPLAY OPTIONS
There are an assortment of wscellaneous Preferences which you may adjust here. 10 change a sett;ng, either
click on the current sett~g (example: click;ng on the word ON changes ;t to OFF), or cl; ck on the sl;der bar.
Opt;ons on th;s screen include:
INvERT MOUSE
Use this to flip the mouselook Y:ax;s.
MOUSE SENSITIVITY
Ad ju ts the speed of the mouse. Setting th;s to the r;ght wJl increase your mouse pointer and mouselook speed.
CROSSHAIR
Allows you to choose the look of your ;n-game crossha;r. Click on the crossha;r ;con to cycle through the
available crosshairs. Selecting NONE w;U completely hide the crossha;r.
CROSSHAIR COLOR
c1;ck on the color box to cycle through the available crosshair colors.
TURN SPEED
Th;s behaves exactly like the Mouse Sensit;v;ty setting, but affects the speed at wh;ch you can turn when
using the keyboard.
HEAD BOB
When on, your character's view of the world will bob and sway slightly as he or she moves around.
ALWAYS
RUN
When on, your character defaults to "run" speed for all movement. Holding down the left SHIFT key causes
your character to walk. Setting th;s to OFF reverses the run/walk funct;on of the SHIFT key.
SHOW PLAYER NAMES
By default. target;ng a teammate ;n the game w;ll display the;r name and health just above the crosshairs.
Setting th;s to OFF w;U suppress th;s d;splay.
AMMo DISPLAY
This has two settings, Graph;c and Numer;c. Graphic will display your character's health and ammo as bars,
while Numeric removes the bars and replaces them with numeric values.
HEALTH AND
VIDEO OPTIONS
Use this screen to mod;fy any of your d;splay sett;ngs, or change the graphic detail levels ;n the
game. Selecting any of the options on the Options l;st w;ll d;splay a descr;ption of that option.
Double-clicking on any of the options w;ll change its setting.
SOUNDSETUP
This screen allows you to modify your sound sett;ngs. The three slider bars
are used for sett;ng the volume of the sound eHects (SFX), voices and mus;c.
Addit;onally. you can enable or disable EAX™ hardware support or turn
the vo;ce commands ON/OFF.
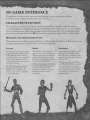
IN-GAME INTERFACE
Though there are diHerent ways to get into a game (hosting, joining or practicing), everything
works the same for all players once they enter a game session.
CHARACTER SELECTION
The first thing you will see ;s the Character Selection screen. Bas;c information about the scenario
currently being played is d;splayed here, along w;th the specific goals of each team. It's up to you to decide
wh;ch team/character you w;sh to play and make a selection by pressing one of the correspond;ng number
keys. You may also press and hold the TAB key to view the current player stat;stics before mab.ng a choice.
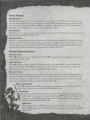
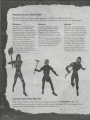
WORKING FOR THE GREATER Goon
Three characters are available to the s;de of Good - the Palad;n, Druid and Sorceress. Each has their own
strengths and weaknesses, and each are better su;ted to particular tasks.
PALADIN
DRUID
SORCERESS
The Paladin ;s a true champ;on. willing
to lay down his life for those to whom
he hos pledged his loyalty. Though
more likely to take up a sword and wade
into the thick of battle. h;s tra;ning
with some of the more uruque crossbows
should not be ignored.
The elves have a natural talent for
magic. and the Druid is no exception.
Though equally adept w; th melee and
ranged combat. the true power of the
Druid lies in h;s ability to manipulate
the elements to do h;s bidd;ng.
Also of elven descent. the Sorceress is
capable of unmatched feats of magic.
She ;s the master of long-range combat.
employing her skills in the tight against
the forces of Evil.
The Paladin beg;ns play armed with
a Long Sword and a Crossbow. The
Crossbow fires a single bolt as its
pr;mary attack, and fires a trjple-shot
as its secondary attack.
The Druid begins play w;th a Scin~tar
and a Staff. The Staffs primary attack
is a magical projectile. while its
secondary attack releases a projectile
which explodes into a cloud of
po;sonous gas.
The Sorceress starts w; th a Dagger
and a Wand. The Wand fires a tightly
focused magical beam as its j>rimary
attack. Holding down the right mouse
button will eause the beam to rema~n
on, allowing you to do continuous
damage to a target.
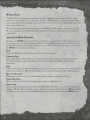
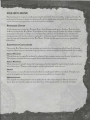
TURNING TO THE DARK SIDE
The forces of Evil have three available characters - the Warrior, Heretic and Archer.
As with the characters of Good, each of the Evil characters has unique abilities and disadvantages.
WARRIOR
HERETIC
ARCHER
The Warr;or ;. the true melee fighter.
Armed w;th a mass;ve dual-handed
Berserker Axe. she is nearly unslopp.ble.
and ill1)' who attempt to flee from her are
just as likely to fall to her deadly accurate
throw;ng bves and axes. Her special
The l'Ierebc represents a balance of
nught vs. llUlg;e, constantly using ks
talents to attempt clestruchon of the
Chrunp;ons of Good. W. th the powers
of darkness et h;s commencl. he;. capable
of the stuH that nightmares are made of.
The Archer ;s not su;ted for me lee
combat. Nol that he needs to be. as h;s
sbJI w;th a bow r;vels the meg;c of the
Sorceress, and those who have faced him
;n combat would tell you h;s arrows at
hmes seem possessed by dork sorcery.
The l'Ierehc begjns w;th a War Hammer
and a magjcal Roel. The Rod's pr;mary
attack fires a s;ngle mag;cal bolt toward
;ts target. Its secondary attack fires a
shorter-range, st>read-fire attack.
The Archer beg;ns wjth a Si:iear as
h;s melee weapon. I-Ls starting Bow.
however, ;s enchanted w;th tl1e 1>ower
of Far S;ght. By 1>ress;ng the r;ght
mouse button. the Archer's v;ew is
magnified, allowing h;m better e]m.
Press;ng the right mouse button a
weapon. a myst~cal hammer. ~s rumored
to make even the earth tremble.
In add;t;on to the Berserker Axe, the
Werr;or begins play w;th a supt>ly of
Throw;ng Axes. The Throw;ng Axe's
prinU1ry attack is a throw straight at
its target, wh;Je the secondary attack
;. a lobbed throw wh;ch w;Jl bounce
off the first th;ng ;t h;ts.
second bme returns the ~ew to normal.
LETTING THE FATES DECIDE
Rather than choos;ng a specific character, you may ;nstead choose the AUTO SELECT, w h;ch will
automatically make a team selection based on which team has less players. O nce the computer selects
a team, it will randomly assign one of that team's characters to you.
THE BUY MENU
Starting characters are g;ven a small amount of gold with which they can purchase weapons and armor. As
each round of the game is played out, players will earn (or in some cases, lose) gold. At the beginrung of any
round. characters may spend some or all of their gold on equipment.
Plrn.CHASE ZONES
All characters start a round in a Purchase Zone. Any character standing in a Purchase Zone may press
the B key to activate the Buy Menu. 10 purchase on item, simply press the number key which corresponds
to the item on the menu - as long as it is a valid purchase, the item will be added to your inventory or
equipment roster. If you do not have enough gold, or if the item cannot be purchased by your character
class, the ;tem will be grayed out on the Buy Menu. You can exit the menu at any time by pressing the
0 (zero) key.
EQUIPMENT CATEGORIES
Once on the Buy Menu, players may purchase any item(s) their characters can afford from the follow;ng
categories. Some items are restricted to specific character classes and w;ll be greyed out on the list of ;terns.
MIGHT WEAPONS
Though they can be magically enchanted or enhanced, these weapons require some physical strength to use.
Th;s category ;ncludes throwing weapons {knives, axes. hammers), bows and crossbows.
MAGIC WEAPONS
These ;terns aren't typically known for be;ng weapons, but their powerful magic certainly makes up for any
lack of brute force. Weapons in this category include various wands, rods and staves.
ARMOR
Not everyone can wear all types of armor, but there is something available for everybody. Though armor
cannot be dropped, you lose any armor in your possession when your character dies.
MISCELLANEOUS
This includes everything that does not fit neatly into the other three categories. Mostly defensive in
nature, these are typically single-use items that, when used properly, could turn the tide of a battle.
MAIN GAME SCREEN
SELECTING WEAPONS
You can select a weapon by us;ng one of the correspond;ng number keys, or by rolhng the mouse wheel.
Add1t;onally, you can use the"[" and "J" keys to sw1tch to the next and prev;ous weapons. or
the G key to drop your pr;mary weapon or s1ngle-use items on the ground. All weapons w;U fall into one
of the follow;ng categor;es:
PRIMARY RANGED WEAPON
Selected by the 1 key. th;s ;s the weapon that you wal use most of the t;me. Each t;me you are k;lled.
your primary weapon drops to the ground and can be picked up by another player. You can only carry one
primary weapon, so 1f you wish to pick up another player's dropped weapon, you must first drop the one
you are carrying.
SECONDARY RANGED WEAPON
Selected with the 2 key, this is a class-specific backup weapon. It cannot be dropped. even when you die.
MELEE WEAPON
The 3 key equips the character's class-specific melee weapon. Like the secondary ranged weapon, the
melee weapon cannot be dropped.
SINGLE-USE ITEMS
Since it is possible to be carrying more than one s1ngle-use ;tern, you can cycle through them using the
4 key. Single-use ;terns may be dropped us;ng the G key.
1
I
l
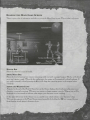
llEA.nING THE
MAIN GAME SCREEN
There ;s qu;te a bit of information available to you on the Ma;n Game screen. Th;s is what ;tall means.
HEALTH BAR
Shows the character's current health.
AMMo/MANA BAR
m
Shows the level of ammun:it;on or power rema;n:ing
the currently equipped weapon. The bar will shrink
as an ;tern's power ;s used. When the bar reaches zero, the weapon will automatically reload/recharge. If
you wish to manually reload, press;ng the R key w;ll dump the rema;ning power in the weapon before
reloading.
ARMOR AND WEAPON ICONS
Attached to the end of the Health/ Ammo bars is the Armor display. which ind;cates what armer your
character ;s currently wearing. Whenever you equip or change weapons, a siwlar Weapon ;con will be
d;splayed for a few seconds to ;nd;cate what weapon your character is now w;elding.
In the upper-left corner of the Armor icon is a smaller ;con which ;ndicates your character's class.
This icon also appears on the Player Scores screen (accessible by holding the TAB key in game) for easy
idenhhcation of each player's character cho;ce.
SECONDARY ArrAcK INDICA'.IOR
On the bottom-right corner of the Armor icon is a green gemstone.
If you are wield~g a weapon that is
capable of performing a secondary attack. tbs gem will light up to indicate that the attack can be used.
Note that some secondary attacks also use ammo/mana.
CRYSTAL BALL
The Crystal Ball shows you the location of any of your teammates in relation to your position. Dots in the
top of the display indicate tenmmates that are in front of you. Up and Down arrows represent teammates
that ore on higher or lower elevations relative to your current position.
ROUND TIMER
This timer displays how much time remains in the current round.
PRE-ROUND BUY TIMER
If the game host allows for purchase time (usually a few seconds), the Round Timer will count down this
time before the normal round time begins. During the Purchase Time, you will not be able to move or
attack. but you can buy and equip weapons. armor and other items.
TOTAL PLAYER GoLD
Displays the current amount of gold the player possesses.
A spinning gold coin above your total indicates
that your character is standing in a Purchase Zone. During play, any green or red numbers above your total
indicate changes in your gold total.
CHAT TEXT/GAME MESSAGES
Any Chat ~t between players appears along the left side of the game screen. where it will remain for a
few moments before disappearing. Game or system messages also appear in this display, but in different
colors to help distinguish the type of message. To send game chat, press the T key and begin typing your
message. then hit ENTER to send it. To send game chat to just your teammates, press the Y key.
ACTIVATING THE CONSOLE
During a game, some settings or advanced features can be activated using the Console. Press the""' key to
toggle the Console ON/OFF. Any information reported to the Console will appear here, including
Chat Text which has already disappeared from the Main Game screen. For a full explanation of the
Console and its commands, please refer to the README.TXT file in your Legends of Might and Magic Folder.
EXITING THE GAME
Pressing the ESC key at any time dur;ng play will display the Pause Menu. From here you may resume
the game, exit the Legends of Might and Magic game. access the Options screen or return to the Main
Menu. Choosing Exit or Main Menu will remove you from the current game session.
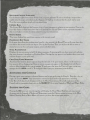
GAME REFERENCE
SCENARIO TYPES
Scenarios in the Legends of Mght and Magic game fall into one of four categor;es. ln all cases, el;minating the
other team counts as a v;ctory.
SWORD IN THE STONE
The Good and Evil teams are in a race to retrieve the Sword in the Stone from
its resting place and deliver it to a location on the map (specified in the scenar;o
descr;pt;on). 10 pull the sword from the pedestal. target it and press the E key.
(You must keep the sword targeted unt;l it is free of the pedestal.) Once you have
drawn the sword, it will be the only weapon you w;ll be able to use. 10 deliver the
sword, simply move to the area designated in the scenar;o description. If you are
killed while holding the sword, it wJl be returned to its pedestal.
RESCUE THE PRINCESS
The Good team is tasked with infiltrating an area and rescuing the Princess. The
Evil team must prevent them from succeeding. 10 get the Princess to follow you,
target her and press the E key. She will follow to the best of her ab;t; ty, but may get
lost ;f you move too quickly for her. 10 rescue her, bring her to the waiting carriage.
WARLORD ESCAPE
One of the teams (spec;fied in the scenario description) ;s
charged with escorting their Warlord (one of the players) to safety past the other
team. The Warlord cannot purchase equipment, but starts with the best armor and
weapon available to his/her class. 10 win, the team w;th the Warlord must escort
him to safety by getting him to the location specified in the scenario description.
The team without the Warlord wins by killing the other team's Warlord.
SLAY THE DRAGON
Both teams are in a race to be the first to slay the Dragon located on the
map. The Dragon is exceptionally powerful. and is more than a match for
a single adventurer. The team who strikes the final blow receives the kill
and the victory.
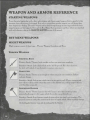
WEAPON AND ARMOR REFERENCE
STARTING WEAPONS
Every character beg;us play with a bas;c melee weapou aud a basic rauged weapou which is spec;ftc to that
character class aud can never be dropped. Even when you purchase another weapon, you w;U always have
these weapons as a backup. The melee weapons ;rJhct above-average damage to your target, wh;le the bas;c
ranged weapons are best upgraded through the Buy Menu. Starting weapons and their effects are described
w;th each character class in the CHARACTER SELECTION section of the manual.
BUY MENU WEAPONS
MIGHT WEAPONS
Might weapons consist of t h ree types -Thrown Weapons, Crossbows and Bows.
THROWN WEAPONS
THROWING KNIFE
Primary Attack: Throws a knife straight at where you po;nt your crossha;rs.
Secondary Attack: Lobs a knife which st;cks into the ground. For a short duration,
the kn;fe w;ll explode ;f any character or creature comes near it.
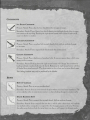
Primary Attack: Throws an axe straight at where you point your crosshairs. Inflicts
moderate damage.
Secondary Attack: Lobs an axe which acts as its own gravity well. Players, monsters and
loose objects will be pulled toward the center of the affected area, making escape difficult
until the effect wears off.
EARnlQUAKE HAMMER
Primary Attack: Throws a hammer that will "bounce" off of the first thing it hits,
potentially allowing it to hit targets which the wielder cannot directly see.
Secondary Attack: Arcs a hammer toward the 1>oint where you a;med your crosshairs. The
projectile causes an earthquake. centered at the point of ;mpact, which in:fl;cts incred;ble damage.
The Earthquake Hammer may only be purchased by the Warrior.
CROSSBOWS
ICE BLAST CROSSBOW
Primary Attack: fires a shard of ice which directly damages its target.
Secondary Attack: Fires a blast of ice which shatters into multiple shards when it comes
into contact with anything. Pressing the right mouse button while a blast is active will
cause it to shatter in midair.
TRACKING CROSSBOW
Primary Attack: fires a crossbow bolt straight ahead which inflicts moderate damage
to its target.
Secondary Attack: fires a magical bolt which tracks the nearest enemy.
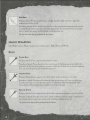
GATLING CROSSBOW
Primary Attack: fires a haastorm of crossbow bolts. In narrow spaces, there is little your
enemy can do to escape.
Secondary Attack: Holding down the right mouse button will "charge" the crossbow by
loading multiple crossbow bolts into the barrel. Releasing the right mouse button will fire
all loaded shots simultaneously. The shots scatter, so this is best used at point-blank range.
The Gatling Crossbow may only be purchased by the Paladin.
Bows
Bow OF CARNAGE
Primary Attack: fires an arrow straight ahead.
Secondary Attack: Arcs an arrow toward the point where you aimed your crosshairs. The
arrow explodes when it contacts any creature or object, dealing damage to anyone nearby.
DEATH BLOSSOM Bow
Primary Attack: fires a magical shot straigl1t ahead. Inflicts moderate damage.
Secondary Attack: Arcs a magical shot into the air which, after a short time, will explode
into multiple shots, raining down a magical hre that damages anyone in the area. Pressing
the right mouse button while the initial shot is in the air will cause ;t to detonate early.
En Bow
Pr;mary Attack: f;res a powerful arrow straight ah ead. Its h;gh rate of fire makes th;s
weapon part;cularly deadly.
Secondary Attack: f;res a magical eye which you then control and attempt to gu;de toward
its target. Excellent for scouting or for long-range attack. the eye explodes for area damage
when it comes into contact with anything, ~ncluding enemy fire.
The Eye Bow may only be purchased by the Archer.
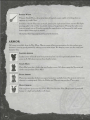
MAGIC WEAPONS
Like Might weapons, Magic weapons come in three types - Rods. Staves and Wands.
Rons
FLARE R OD
Primary Attack: Fires a magical bolt toward its target.
Secondary Attack: Fires a hot-white flare ;nto the world, lighting up an area brightly for a
short time. If the flare hits a player or monster, it will st;ck to them for its durat;on, lighting
them up and making them easy targets for enemy fire.
CHARGE ROD
Primary Attack: F;res a magical bolt which inflicts moderate damage on its target.
Secondary Attack: Pressing and holding the right mouse button will draw available mana
into the rod, which ;shred when the mana bar ;s empt;ed or when you release the right
mouse button. Th;s charged shot is capable of devastat;ng damage.
ROD OF SOULS
Pr;mary Attack: Fires a magical bolt wh;ch inflicts significant damage on any target ;t h;ts.
Secondary Attack: Fires the "soul seeker" which ruthlessly tracks its target. It explodes for
area damage when ;t comes into contact w;th anyth;ng, including enemy fire.
The Rod of Souls may only be purchased by the Heretic.
STAVES
STAFF OF SPARKING
Primary Attack: F;res a single electrical bolt which travels straight toward ;ts target and
bounces up to three t;mes before detonating.
Secondary Attack: Fires mult;ple electr;cal bolts which bounce oH any soEd object, caus;ng
damage to any player, creature or object they touch along the way.
FIRE RING S TAFF
Primary Attack: Fires a magical projectile which travels straight toward its target. Explodes
for area damage.
Secondary Attack: Creates a short-duration ring of magical fire around you which damages
any object, player or monster which gets too close. Excellent for close-quarters fighting.
DRAGON STAFF
Primary Attack: Launches a fireball toward ;ts target which explodes and causes significant
area-eHect damage.
Secondary Attack: P ress;ng and hold;ng th e right mouse button wi ll cause a stream of
dragon fire to spray from t he end of the staff causing devastating area damage.
The Dragon
Staff may only be purchased by the Druid.
WAND OF
FORCE
WANDS
Pr;mary Attack: Fires a prec;se mag;cal beam wbch will knock back your target, ;n addit;on
to infhcting damage.
Secondar y Attack: Press;ng the right mouse button engages the Far Sight ability. P ressing
t he r;ght mouse button aga;n returns s;ght to normal.
L I GHTNING WAND
Primary Attack: Fires a prec;se electr;cal beam wh;ch ;nflicts moderate damage on its target.
Secondary Attack: Press;ng the right mouse button engages the Far Sight ability. Pressing
the right mouse button again returns s;ght to normal.
SUNRAY WAND
Primary Attack: Fires a devastat;ng beam of mag;cal energy capable of stribng down an
opponent in a single blow.
Secondary Attack: Not really an attack. pressing the right mouse button activates Far Sight,
granting sight to the wielder at a greatly increased magnification. Pressing the right mouse
button a second time will further increase the magnification, and press;ng the right mouse
button aga;n returns sight to normal.
The Sunray Wand may only be purchased by the Sorceress.
ARMOR
All armor is available from the Buy Menu. Heavier armor offers more protection, but also reduces your
character's running speed, potentially making you an easier target. You keep any armor you buy until your
character dies.
LEATHER .ARMOR
Leather armor offers the most basic protect;on, but ;t is still significantly better than no
armor at all. All classes may purchase Leather armor.
CHAIN MAIL
Chain Mail provides a slight edge over Leather armor. All classes except for Sorceress and
Archer may purchase Chain Mail.
PLATE .ARMOR
Plate armor provides the best non-magical protection available, but at the greatest cost to your
character's running speed. Only the Paladin and Warrior may purchase Plate armor.
MAGIC.ARMOR
Offering better protection than Chain Mail. but less than Plate. Magic armor is preferred
because it ;slight and available to all classes.
SINGLE-USE ITEMS
s;ngle-U se Items re1>resent scrolls and other miscellaneous ;tems. Most of these items are available on the
Buy Menu, but two can only be !>;eked ut> from secret locat;ons with;n the game. You may only carry one
of each ;tern at any g;ven t;me.
BUY MENU ITEMS
IJ
•
•
JUMP SCROLL
For o short durat;on, your jumt>;ng
he;ght and d;stance are dramat;cally
increased .
FEAl'llER FALL SCROLL
For a short durat;on, you may fall
any d;stance w;thout taking damage.
LAVA PROTECTION SCROLL
For the durat;on of the s1>ell. ;t
allows you to sw;m ;n 1>ools of
lava without taking any damage.
11
•[i]
WIZARD'S EYE SCROLL
Using this scroll will briefly d;st>lay
the locat;ons of your enem;es with;n
the Crystal Ball.
TELEPOR'.r SCROLL
When used, this scroll telet>orts you
back to your starting location.
H.H.G.A.
The H.H.G.A. ;s a holy ert;fact of
tremendous 1>ower. Throw it ;n the
direct;on of your enem;es and run awoy,
because the wrath of this wea1>on does
not discr;minate friend from foe.
SECRET LOCATION ITEMS
These ;terns are not available for t>urchase. They can only be found as random ;terns w:i.th:i.n certa;n scenar;os .
•
HAsTE SCROLL
INvlsmILllY SCROLL
Using th;s scroll will dramatically
;ncrease your character's running s1>eed
for a short bme.
When used, your character w;ll
vanish for a short time, leaving only
your wea1>on v;sible.
•
APPENDIX A: BASIC GAMEPLAY TIPS
Though tbs is by no means intended as a comprehensive strategy section, there are a few things you can do
to increase your ch ances of winning, or even surviving, a given round ;n any of the scenarios.
S TICK TOGETHER
A team that sticks together wal win much more often than one that doesn't. You can watch each others'
backs, concentrate weapon :hre against any stragglers from the other team, and, ;f someone is killed, ;t is
more likely that a teammate will p;ck up their weapon, rather than it potent;ally falling into the hands of
the enemy.
B E PATIENT
Whenever people are faced with a time l;mit, the natural tendency is to rush. However, even a 5 minute
time limit is quite a long time. and sometimes it's best to approach a situat;on slowly where you have the
chance to pick off a few of the enemy before charging right in.
P ICK A LEADER
It sometimes helps to have one person on your team calling the shots, especially if you' re going for a patient,
coordinated approach. Of course, having a leader really only works ;f the team is wilhng to follow.
S AVE MONEY
Sometimes. you are better off going a few rounds without buy;ng any equipment rather than spending
everything you have each round. By saving up, you put yourself into a position to buy your ch aracter's
super-weapon, and maybe even some armor to help protect your investment. Also, you can always pick up
the weapon of a fallen friend or foe.
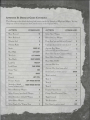
APPENDIX B: DEFAULT GAME CONTROLS
The following are the default keyboard and mouse controls for Legends of Might and Mng;c. You may
change any of these settings from the Controls screen in the Options Menu.
COMMAND
w
s
ACTION
Move Forward
Move Backward
COMMAND
ACTION
Select Next Weapon
Select Prev;ous Weapon
---~~-
--
Sidestep Left
A
Drop Item (not available on all ;terns)
G
Sidestep Right
D
Use (open door, activate switch, etc.)
E
Act;vate Buy Menu
(only available in purchase zones)
B
Show/ Hide Spoken Command Menu
Z
Show/H;de Voting Menu
v
Show/ Hide HUD
\
Activate Chat Line
T
Activate Chat Line (team only)
y
----
RIGHT ALT
Strafe
Run/Welk
LEFT SHIFT
furn Left
LEFT ARROW
RIGHT ARROW
'furn Right
- - - - - - - - - - - - - -PAGE UP
Look Up
Look Down
PAGE DOWN
Center View
END
Send Chat Line (when active)
Jump
SPACE
LEFT CTRL
Crouch
Primary Attack
Secondary Attack
(ranged weapons only)
LEFT MOUSE BUTTON
RIGHT MOUSE BUTTON
Reload /Recharge Weapon
R
~unt (random)
H
~unt 1
J
~unt2
K
~unt 3
L
Display Player Scores
Select Primary (purchased) W eapon
ENTER
Change 'learn/Character Class
TAB
I
- - 1 1 - --
Select Secondary (default) Weapon
2
'h>ggle Console
Select Melee Weapon
3
~ke Screenshot
Select S;ngle-Use Weapon/Item
4
Exit Game (or active menu)
-----
F8
ESC
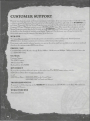
CUSTOMER SUPPORT
However you choose to contact us, there are some pieces of ;nformation about your computer that we w;ll need ;n order
to help you t?ropcrly. IOu can get this information by following these steps: f;rst, right-chck on the MY COMPUTER icon
and choose "Properties". On this System Properties screen you will find the following information that we will need:
Comt?uter OS type (Windows version). amount of RAM and CPU type. After you get this information. exit the
System Prot?erties screen, then double left-click on the MY COMPUTER icon. On this screen, right-click on the icon of
the hard drive that the game is installed on and cl10ose "Properties". On this screen. you wiJI need to find out the
drive's total capac;ty ond the amount of free space left on the drive.
WEBSITE
Visit www.3do.com/subport for late-breaking news and ;nformation, answers to frequently Asked Questions
(FAQ's). Jinks to hardware manufacturers' web sites, and the latest product updates.
If you want to ask a specific technical question, you can use the online email form available at our web site or send mail
directly to the [email protected] address.
PHONE/FAX
Call (650) 385-3193, Monday through Friday, 9:00am - 12:00 noon and 2:00pm - 5:00pm. Paci:hc Time; or fax
us at(650) 385-3181.
U.S. MAIL
Customer Support
The 3DO Company
100 Cardinal Way
Redwood City. CA 94063
BUY DIRECT
H you wish to purchase additional copies or other titles from Tl1e 3DO Company please visit the
3DO Direct Online Store at http://store.3do.com
or call
3DO Direct Sales- (800) 336-3506 in the United States
(650) 385-3187 in Canada and Mexico
TROUBLESHOOTING
For general troubleshooting tips, see the README.TXT tile located on the CD-ROM or in the Start Menu after you
have installed the game.
WORLD WIDE WEB
http://www.3do.com
THE 300 COMPANY LIMITED 90-DAY WARRANTY
The 3DO Company ('3DO') warrants to the original consumer purchaser of this 3DO software product that the media
on which the underlying computer program is recorded is free from defects in materials and workmanship under
normal, recommended use for ninety (90) days from the date of purchase. The 3DO software program recorded on
such a media is provided on an 'as is' basis, without any warranty or condition of any kind , and 3DO shall not be liable
for any losses or damage of any kind or nature resulting from the use or inability to use such program.
3DO's entire liability and the original consumer purchaser's exclusive remedy for breach of any warranty (express or
implied) shall be, at 3DO's option, either: (a) to replace, free of charge, this 3DO software product, or (b) to return to
the original consumer purchaser the price paid for this 3DO software product. The preceding warranty shall not be
applicable and 3DO shall not be obligated to replace this 3DO software product or to return any such sum to the
original consumer unless this 3DO software product is returned within the 90-day warranty period, postage pre-paid
with proof of purchase to The 3DO Company, 100 Cardinal Way, Redwood City, CA 94063, Attn.: Customer Support
Dept., and the preceding warranty shall be void if any defect in this 3DO software product arises through accident,
negligence, use in any application for which this 3DO software product was not designed or intended, modification
without the prior consent of 3DO, any cause external to the product (e.g., heat), or by any other cause unrelated to
defective materials or workmanship.
EXCEPT FOR THE LIMITED WARRANTY SET FORTH ABOVE, ALL OTHER REPRESENTATIONS, WARRANTIES,
CONDITIONS, TERMS AND OBLIGATIONS, WHETHER EXPRESSED OR IMPLIED, INCLUDING, BUT NOT LIMITED TO,
ANY IMPLIED WARRANTIES OF MERCHANTABILITY, FITNESS FOR ANY PARTICULAR PURPOSE AND/OR NONINFRINGEMENT REGARDING THIS 3DO SOFTWARE PRODUCT (RELATING TO EITHER THE MEDIA, THE SOFTWARE OR OTHERWISE) ARE EXCLUDED TO THE MAXIMUM EXTENT ALLOWED BY APPLICABLE LAW.
3DO neither assumes nor authorizes any other person or entity to assume for 3DO (or any related or affiliated entity)
any other liability in connection with this 3DO software product.
IN NO EVENT SHALL 3DO BE LIABLE FOR ANY INCIDENTAL, CONSEQUENTIAL (INCLUDING LOSS OF PROFITS),
SPECIAL AND/OR OTHER DAMAGES OF ANY KIND OR NATURE RESULTING FROM THE PURCHASE, POSSESSION,
USE, OR INABILITY TO USE THIS 3DO SOFTWARE PRODUCT, EVEN IF 3DO HAS BEEN ADVISED OF THE POSSIBILITY OF
SUCH DAMAGES OR LOSS. IN NO EVENT SHALL 3DO'S LIABILITY TO THE ORIGINAL CONSUMER PURCHASER
EXCEED THE AMOUNT ACTUALLY PAID FOR THIS 3DO SOFTWARE PRODUCT. SOME STATES/COUNTRIES DO NOT
ALLOW LIMITATIONS ON HOW LONG AN IMPLIED WARRANTY LASTS AND/OR THE EXCLUSION OR LIMITATION OF
INCIDENTAL OR CONSEQUENTIAL DAMAGES, SO THE ABOVE LIMITATIONS AND/OR EXCLUSION OR LIMITATION OF
LIABILITY MAY NOT APPLY TO YOU. THIS WARRANTY GIVES YOU SPECIFIC LEGAL RIGHTS AND YOU MAY ALSO
HAVE OTHER RIGHTS WHICH VARY FROM JURISDICTION TO JURISDICTION.
300 has endeavored to ensure that the end user manual and promotional materials regarding this 300 software product
accurately reference the product. However, because of ongoing improvements and updating of 3DO software products,
3DO cannot guarantee the accuracy of printed materials after the date of publication, and 3DO disclaims any loss,
liability and/or damages, whether in contract, tort or otherwise, arising out of or resulting from the manual and
promotional materials, including, without limitation, any loss or liability resulting from changes, errors or omissions
with respect to any of such items.
SEQUEL TO THE GAME RECOGNIZED AS ONE OF THE...
Top/OGames
of All-Time!
- ComputEr Gaming World (Mar 'O I)
2000's Best Baseball Video Game
- Sports lllustratEd (DEC '00)
" The finEst basEbal/ gamE on any
systEm, ever "
- PCGamEr
Sports Game of the Year
2 Years Running
- ComputEr Gaming World (Mar 'Of)
" BEst PC Sports Game of 2000 "
- GamEpEn.com
www.highheat.com