1
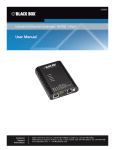
AUGUST 2003
MD650A-85
MD650A-13
Universal Fiber Optic Line Driver
CUSTOMER
SUPPORT
INFORMATION
Order toll-free in the U.S. 24 hours, 7 A.M. Monday to midnight Friday: 877-877-BBOX
FREE technical support, 24 hours a day, 7 days a week: Call 724-746-5500 or fax 724-746-0746
Mail order: Black Box Corporation, 1000 Park Drive, Lawrence, PA 15055-1018
Web site: www.blackbox.com •
E-mail: [email protected]
MD650A-85 / MD650A-13
TRADEMARKS
TRADEMARKS USED IN THIS MANUAL
UL is a registered trademark of Underwriters Laboratories Incorporated.
Any other trademarks used in this manual are acknowledged to be the
property of the trademark owners.
FCC STATEMENT
FEDERAL COMMUNICATIONS COMMISSION
AND
CANADIAN DEPARTMENT OF COMMUNICATIONS
RADIO FREQUENCY INTERFERENCE STATEMENTS
This equipment generates, uses, and can radiate radio frequency energy and if not
installed and used properly, that is, in strict accordance with the manufacturer’s
instructions, may cause interference to radio communication. It has been tested and
found to comply with the limits for a Class A computing device in accordance with
the specifications in Subpart B of Part 15 of FCC rules, which are designed to
provide reasonable protection against such interference when the equipment is
operated in a commercial environment. Operation of this equipment in a residential
area is likely to cause interference, in which case the user at his own expense will
be required to take whatever measures may be necessary to correct the interference.
Changes or modifications not expressly approved by the party responsible for
compliance could void the user’s authority to operate the equipment.
This digital apparatus does not exceed the Class A limits for radio noise emission
from digital apparatus set out in the Radio Interference Regulation of the Canadian
Department of Communications.
Le présent appareil numérique n’émet pas de bruits radioélectriques dépassant les
limites applicables aux appareils numériques de la classe A prescrites dans le
Règlement sur le brouillage radioélectrique publié par le ministère des Communications du Canada.
1
MD650A-85 / MD650A-13
NOM STATEMENT
Normas Oficiales Mexicanas (NOM)
Electrical Safety Statement
INSTRUCCIONES DE SEGURIDAD
1. Todas las instrucciones de seguridad y operación deberán ser leídas antes de
que el aparato eléctrico sea operado.
2. Las instrucciones de seguridad y operación deberán ser guardadas para
referencia futura.
3. Todas las advertencias en el aparato eléctrico y en sus instrucciones de
operación deben ser respetadas.
4. Todas las instrucciones de operación y uso deben ser seguidas.
5.El aparato eléctrico no deberá ser usado cerca del agua—por ejemplo, cerca de la
tina de baño, lavabo, sótano mojado o cerca de una alberca, etc.
6. El aparato eléctrico debe ser usado únicamente con carritos o pedestales que
sean recomendados por el fabricante.
7. El aparato eléctrico debe ser montado a la pared o al techo sólo como sea
recomendado por el fabricante.
8. Servicio—El usuario no debe intentar dar servicio al equipo eléctrico más allá
a lo descrito en las instrucciones de operación. Todo otro servicio deberá ser
referido a personal de servicio calificado.
9. El aparato eléctrico debe ser situado de tal manera que su posición no
interfiera su uso. La colocación del aparato eléctrico sobre una cama, sofá,
alfombra o superficie similar puede bloquea la ventilación, no se debe colocar
en libreros o gabinetes que impidan el flujo de aire por los orificios de
ventilación.
10. El equipo eléctrico deber ser situado fuera del alcance de fuentes de calor
como radiadores, registros de calor, estufas u otros aparatos (incluyendo
amplificadores) que producen calor.
2
MD650A-85 / MD650A-13
NOM STATEMENT
11. El aparato eléctrico deberá ser connectado a una fuente de poder sólo del tipo
descrito en el instructivo de operación, o como se indique en el aparato.
12. Precaución debe ser tomada de tal manera que la tierra fisica y la polarización
del equipo no sea eliminada.
13. Los cables de la fuente de poder deben ser guiados de tal manera que no sean
pisados ni pellizcados por objetos colocados sobre o contra ellos, poniendo
particular atención a los contactos y receptáculos donde salen del aparato.
14. El equipo eléctrico debe ser limpiado únicamente de acuerdo a las
recomendaciones del fabricante.
15. En caso de existir, una antena externa deberá ser localizada lejos de las lineas
de energia.
16. El cable de corriente deberá ser desconectado del cuando el equipo no sea
usado por un largo periodo de tiempo.
17. Cuidado debe ser tomado de tal manera que objectos liquidos no sean
derramados sobre la cubierta u orificios de ventilación.
18. Servicio por personal calificado deberá ser provisto cuando:
A: El cable de poder o el contacto ha sido dañado; u
B: Objectos han caído o líquido ha sido derramado dentro del aparato; o
C: El aparato ha sido expuesto a la lluvia; o
D: El aparato parece no operar normalmente o muestra un cambio en su
desempeño; o
E: El aparato ha sido tirado o su cubierta ha sido dañada.
CE INFORMATION
Standards to which conformity is declared:
EN 55022 : 1998
3
MD650A-85 / MD650A-13
ITEMS INCLUDED
Included with this product, you should have received:
1) 1 - MD650A-85 or MD650A-13 fiber optic line driver
2) 1 - Universal input AC power supply with 1 power connector
3) 1 - North American line cord
4) User’s Manual
QUICK INSTALLATION GUIDE
The following is a quick installation guide for the Universal Fiber Optic Line
Driver. It is intended for users familiar with the installation of fiber optic transmission
systems to get “up and running” in minimal time. Since these units are capable of being
configured for operation in many different modes, we strongly suggested that you
consult the appropriate sections of this manual.
Optical
Connectors
Power
Connector
Power Indicator
LED
Signal Indicator
LEDs
Signal
Connector
For protocol and
mode selection see
User'sManual for
proper DIP switch
settings
4
MD650A-85 / MD650A-13
GENERAL INFORMATION
Introduction:
The Universal Fiber Optic Line Driver is fully compatible with EIA standards for
RS-232, RS-422 and RS-485 at data rates from 0 (DC) to 2.1 mbps (200 kbps for RS232) in the low speed mode or from 10 kbps to 10 mbps in the high speed mode. It may
be used for simplex or full duplex asynchronous transmissions in both point-to-point
systems and drop-and-repeat data networks. It may also be used as a protocol converter. Although there are no operating controls, the user must configure the unit for
the protocol, speed and mode of operation desired.
Specifications:
System Protocols*................................ EIA RS-232, RS-422, RS-485
2-wire or 4-wire
System Data Rate*...............................Low speed:
RS-232, DC-200 kbps,
RS-422/485, DC to 2.1 mbps
High speed:
RS-422/485, 10 kbps to 10 mbps
Modes of Operation*............................ Simplex, duplex, drop-and-repeat,
Asynchronous, RTS or
Data Derived T/R control
Optical Loss Budget ............................ 62.5µ MM or 8/10µ SM Fiber
0-18 dB in low speed mode,
0-15dB in high speed mode
Operating Wavelength.......................... 850 nm or 1310 nm
Optical Connectors............................... ST (MM)
Operating Temperature...................... -35 to +75 degrees C
* Note that as provided from the factory, the universal data transceiver is set to the RS-232 point-topoint (200 kbps) and low speed modes of operation. In the low speed mode the unit will operate with
all duty cycles including DC (logic 0 or logic 1 continuously). In the high speed mode of operation, the
system will operate properly with all duty cycles from 50-50% to 70-30%.
5
MD650A-85 / MD650A-13
INSTALLATION
Installation Procedure:
There are no operating controls on the Universal Fiber Optic Line Driver. Simply
set the mode of operation with the internal DIP switches and then connect the signal,
power supply and fiber optic cables between the two units.
1. Connect the data processing equipment to be used to the 6 position terminal block
on the transmission units. Refer to the signal and power connections section
on page 7 for specifics. Be certain that the various connections are made properly. Also be sure to only use the positions called out for any particular protocol.
2. Set the internal DIP switches for the protocol, speed and mode of operation
according to the instructions beginning on page 8. Note: As provided from the
factory, the unit is set for RS-232, point-to-point.
3. Connect operating power.
4. Connect the two units together with two conductor fiber optic cable. Be certain
that the “Transmit” connector of one unit is connected to the “Receive” connector
of the other unit.
5. The system should now be operational.
The transmitting element in the MD650A-13 uses a solid state Laser Diode
located in the “Transmit” or “Tx” optical connector on the unit. This device
emits invisible infrared electro-magnetic radiation which, if viewed at close
range without a fiber optic cable connected to the optical connector, may be
of sufficient intensity to cause instantaneous damage to the retina of the eye.
As a result, direct viewing of this radiation should be avoided at all times.
Signal and Power Connections:
The power terminal block connections for the model 5012 are as follows: +10 to
+18 VDC, position 2. DC return, position 1. Note that this input is also reverse-polarity
protected.
6
MD650A-85 / MD650A-13
INSTALLATION
RS-232 Signal Connections:
Description
EIA Designation Terminal Positions
Chassis Ground/Common
(AA)
1
Transmit Data
(BA) (input)
2
Receive Data
(BB) (output)
4
Signal Common
(AB)
1
All other terminal block positions should not be connected for this
format.
RS-422 Signal Connections:
Chassis Ground
1
Transmit Data (+)
(input)
2
Transmit Data (-)
(input)
3
Receive Data (+)
(output)
4
Receive Data (-)
(output)
5
All other terminal block positions should not be connected for this
format.
RS-485 2-Wire Signal Connections:
Chassis Ground
1
Transmit/Receive Data (+)
(input/output) 2
Transmit/Receive Data (-)
(input/output) 3
RTS Enable (when used)
(input)
6
All other terminal block positions should not be connected for this
format.
7
MD650A-85 / MD650A-13
INSTALLATION
RS-485 4-Wire Signal Connections:
Chassis Ground
Transmit Data (+)
Transmit Data (-)
Receive Data (+)
Receive Data (-)
RTS Enable (when used)
(input)
(input)
(output)
(output)
(input)
1
2
3
4
5
6
All other terminal block positions should not be connected for this format.
When the RTS mode of operation is used, the input to terminal 6 must be “high”
for the unit to transmit data and “low” to receive data.
Modes of Operation:
The Universal Fiber Optic Line Driver has two internal DIP switches that are
accessible on the bottom of the housing. These must be set to configure the desired
mode of operation.
Setting the MODE DIP switch
For all protocols, positions 1 and 2 of the MODE DIP switch should be set
as follows:
· Low speed mode (DC to 2.1 mbps):
· High speed mode (10 kbps to 10 mbps):
Position 1 = ON, Position 2 = OFF
Position 1 = OFF, Position 2 = ON
For RS-232, the data rate is limited to 200 kbps. For RS-422/485, the data rate
is as above.
The universal data transceiver will not operate properly if positions 1 and 2 are
both set to either ON or OFF.
8
MD650A-85 / MD650A-13
INSTALLATION
Use the following protocol-specific settings to finish configuring the MODE
DIP switch on your universal data transceiver.
____________
RS-232 Point-to-Point (Factory-Default Setting)
· 8 position “MODE” DIP switch:
3
4
5
6
7
8
Off
Off
Off
On
Off
Off
· 6 position “T/R” DIP switch: All switches OFF
____________
RS-232 Drop-and-Repeat
· 8 position “MODE” DIP switch:
3
4
5
6
7
8
Off
Off
Off
On
Off
On
· 6 position “T/R” DIP switch: All switches OFF
When using this mode of operation, any RS-232 driver not transmitting data
must be in the low or - voltage state as per EIA RS-232D.
____________
9
MD650A-85 / MD650A-13
INSTALLATION
RS-422 Point-to-Point
· 8 position “MODE” DIP switch:
3
4
5
6
7
8
Off
Off
On
On
Off
Off
· 6 position “T/R” DIP switch: All switches OFF
No end-of-line terminating resistors are provided. If required, they must be connected externally.
____________
RS-422 Drop-and-Repeat
· 8 position “MODE” DIP switch:
3
4
5
6
7
8
Off
Off
On
On
Off
On
· 6 position “T/R” DIP switch: All switches OFF
No end-of-line terminating resistors are provided. If required, they must be connected externally. In this mode, any RS-422 driver not transmitting data must be
in the “low” state (terminal block position 2, negative with respect to position 3).
____________
RS-485 2-Wire Point-to-Point RTS Enable
· 8 position “MODE” DIP switch:
3
4
5
6
7
8
On
On
On
On
On
Off
· 6 position “T/R” DIP switch: All switches OFF
In this mode, the input to terminal 6 must be “high” for the unit to transmit data
and “low” to receive data. No end-of-line terminating resistors are provided. If
required, they must be connected externally.
10
MD650A-85 / MD650A-13
INSTALLATION
RS-485 2-Wire Drop-and-Repeat RTS Enable
· 8 position “MODE” DIP switch:
3
4
5
6
7
8
On
On
On
On
On
On
· 6 position “T/R” DIP switch: All switches OFF
In this mode, the input to terminal 6 must be “high” for the unit to transmit
data and “low” to receive data. No end-of-line terminating resistors are
provided. If required, they must be connected externally.
____________
RS-485 2-Wire Point-to-Point Data Derived T/R
· 8 position “MODE” DIP switch:
3
4
5
6
7
8
On
On
On
Off
On
Off
6 position “T/R” DIP switch:
Baud Rate
T/R Time
1
2400
4.73 ms
Off
4800
2.20 ms
9600
2
3
5
6
Off Off Off
Off
On
Off
Off Off Off
On
Off
1.10 ms
Off
Off Off On
Off
Off
19.2K
620
us
Off
Off On
Off
Off
Off
38.4K
300
us
Off
On
Off Off
Off
Off
57.6K
180
us
On
Off Off Off
Off
Off
76.8K
150
us
On
Off On
On
Off
Off
115.2 K
110
us
On
On
Off
Off
Off
On
4
See next page
11
MD650A-85 / MD650A-13
INSTALLATION
After transmitting the last data bit, the above settings will determine how long the
transceiver continues to wait in the transmit mode for data before reverting to
the receive state. The times specified are only recommendations but will be correct for most applications. If desired, they can be varied to meet specific data
requirements. No end-of-line terminating resistors are provided. If required, they
must be connected externally.
____________
RS-485 2-Wire Drop-and-Repeat Data Derived T/R
· 8 position “MODE” DIP switch:
3
4
5
6
7
8
On
On
On
Off
On
On
· 6 position “T/R” DIP switch:
Baud Rate
T/R Time
1
2400
4.73 ms
Off
4800
2.20 ms
9600
5
6
Off Off Off
Off
On
Off
Off Off Off
On
Off
1.10 ms
Off
Off Off On
Off
Off
19.2K
620
us
Off
Off On
Off
Off
Off
38.4K
300
us
Off
On
Off Off
Off
Off
57.6K
180
us
On
Off Off Off
Off
Off
76.8K
150
us
On
Off On
On
Off
Off
115.2 K
110
us
On
On
Off
Off
Off
12
2
3
On
4
MD650A-85 / MD650A-13
INSTALLATION
After transmitting the last data bit, the above settings will determine how long the
transceiver continues to wait in the transmit mode for data before reverting to
the receive state. The times specified are only recommendations but will be correct for most applications. If desired, they can be varied to meet specific data
requirements. No end-of-line terminating resistors are provided. If required, they
must be connected externally.
____________
RS-485 4-Wire Point-to-Point RTS Enable
· 8 position “MODE” DIP switch:
3
4
5
6
7
8
Off
Off
On
On
On
Off
· 6 position “T/R” DIP switch: All switches OFF
In this mode, the input to terminal 6 must be “high” for the unit to transmit data
and “low” to receive data. No end-of-line terminating resistors are provided. If
required, they must be connected externally.
RS-485 4-Wire Drop-and-Repeat RTS Enable
· 8 position “MODE” DIP switch:
3
4
5
6
7
8
Off
Off
On
On
On
On
· 6 position “T/R” DIP switch: All switches OFF
In this mode, the input to terminal 6 must be “high” for the unit to transmit data
and “low” to receive data. No end-of-line terminating resistors are provided. If
required, they must be connected externally.
13
MD650A-85 / MD650A-13
INSTALLATION
RS-485 4-Wire Point-to-Point Data-Derived T/R
· 8 position “MODE” DIP switch:
3
4
5
6
7
8
Off
Off
On
Off
Off
Off
· 6 position “T/R” DIP switch:
Baud Rate
T/R Time
1
2400
4.73 ms
Off
4800
2.20 ms
9600
2
3
5
6
Off Off Off
Off
On
Off
Off Off Off
On
Off
1.10 ms
Off
Off Off On
Off
Off
19.2K
620
us
Off
Off On
Off
Off
Off
38.4K
300
us
Off
On
Off Off
Off
Off
57.6K
180
us
On
Off Off Off
Off
Off
76.8K
150
us
On
Off On
On
Off
Off
115.2 K
110
us
On
On
Off
Off
Off
On
4
After transmitting the last data bit, the above settings will determine how long the
transceiver continues to wait in the transmit mode for data before reverting to
the receive state. The times specified are only recommendations but will be correct for most applications. If desired, they can be varied to meet specific data
requirements. No end-of-line terminating resistors are provided. If required, they
must be connected externally.
14
MD650A-85 / MD650A-13
INSTALLATION
RS-485 4-Wire Drop-and-Repeat Data-Derived T/R
· 8 position “MODE” DIP switch:
3
4
5
6
7
8
Off
Off
On
Off
Off
On
4
5
6
· 6 position “T/R” DIP switch:
Baud Rate
T/R Time
1
2
3
2400
4.73
ms
Off
Off Off Off
Off
On
4800
2.20 ms
Off
Off Off Off
On
Off
9600
1.10
ms
Off
Off Off On
Off
Off
19.2K
620
us
Off
Off On
Off
Off
Off
38.4K
300
us
Off
On
Off Off
Off
Off
57.6K
180
us
On
Off Off Off
Off
Off
76.8K
150
us
On
Off On
On
Off
Off
115.2 K
110
us
On
On
Off
Off
Off
On
After transmitting the last data bit, the above settings will determine how long
the transceiver continues to wait in the transmit mode for data before reverting
to the receive state. The times specified are only recommendations but will be
correct for most applications. If desired, they can be varied to meet specific
data requirements. No end-of-line terminating resistors are provided. If
required, they must be connected externally.
15
MD650A-85 / MD650A-13
INSTALLATION
Optical Fiber:
Versions of the Universal Fiber Optic Line Driver are available to drive most
multimode (MM) and single-mode (SM) optical fibers. The specific models are identified as follows:
Fiber Size
Connector
Model #
Wavelength
50 or 62.5µ MM
ST
MD650A-85
850 nm
8/10 50µ SM
ST
MD650A-13
1310 nm
Indicator LEDs:
The Universal Fiber Optic Line Driver has three green signal indicator LEDs that
continuously monitor operation. One, labeled “Power (or PWR)”, lights when operating power is present. The other two, labeled “Transmit (or Tx)” and “Receive (or
Rx)”, turn on whenever the transmitted or received data is in the “high” state and off
when it is in the “low” state. As a result, they actually blink at the rate of the operating
data. However, most data rates are so fast that these LEDs will usually appear to be
on continuously.
16
MD650A-85 / MD650A-13
CONFIGURING A RING OR LOOP-TYPE DATA BUS
In addition to point-to-point transmissions, the Universal Fiber Optic Line Driver
can be used to implement a ring or loop-type data bus. This is accomplished by setting
the internal DIP switches as shown in the following diagram.
Fiber Optic Cable
Data
Fiber Optic
Transceiver
To Host Computer
Set to point-to-point
mode of operation
Fiber Optic
Transceiver
Fiber Optic
Transceiver
Fiber Optic
Transceiver
Drop 1
Drop 2
Drop 3
Set to drop-and repeat
mode of operation
Set to drop-and-repeat
mode of operation
Set to drop-and-repeat
mode of operation
Ring or Loop-type Data Bus Configuration
When the Universal Fiber Optic Line Driver is used in this mode, any location can
receive or insert data into the ring/loop but only one station at a time is permitted to
insert data. All other stations will receive the data but must maintain their individual
input lines in the low state (RS-232, terminal block position 2 negative with respect to
position 1; RS-422, terminal block position 2, negative with respect to position 3) to
prevent loop lock-up. RS-485 operation does not have the above restriction due to the
fact that it is in the tri-state mode when not transmitting.
Note that the first (or host) location is set to the point-to-point mode. All other
locations are set to the drop-and-repeat mode. This is to prevent loop lock-up or data
“echos”.
17
MD650A-85 / MD650A-13
OPERATING CONSIDERATIONS FOR FIBER OPTIC CABLE
The Universal Fiber Optic Line Driver, as supplied, operates with most common
fiber optic cables. However, it is important to use the correct type of fiber optic cable
as required by your particular transceiver model.
When using any type of fiber optic cable, be careful not to cause excessive strains,
especially at the cable-to-connector junctions. Also, do not subject the cable to sharp
bends or pull it around sharp corners. Whenever possible, service loops or extra slack
should be provided in any installation. While excessive precautions are not necessary,
fiber optic cable should be treated with moderate care as it does contain thin, fragile
strands of glass.
Notes Regarding Fiber Optic Cable:
Multimode fiber optic cable contains an optical fiber with a light carrying “core”
that is only .0025 inches (62.5µ) diameter. Single-mode fiber optic cable has an even
smaller “core”, only 00032 to .0004 inches (8-10µ). This is smaller than a human hair!
Any minute particle of dirt or dust can easily block this fiber from accepting or radiating light. As a result, the key word is cleanliness. Always use the dust caps provided
with all optical connectors whenever they are exposed to air. Also, it is a good idea to
gently clean the tip of an optical connector with alcohol whenever dust is suspected.
Mechanical butt splices or optical feedthroughs must be installed properly. Multimode devices will not operate properly with single-mode devices even though they
may look the same. Using the wrong device can easily add more attenuation than
specified, resulting in impaired performance.
TROUBLESHOOTING TECHNIQUES
If your system is not operating properly, the following checklist may help to diagnose the problem:
A. Check Transmitter or Transmit Section of a Transceiver
1. Is operating power (DC, AC, Voltages) correct?
2. Are you using the correct pins on the connector or terminal block?
18
MD650A-85 / MD650A-13
TROUBLESHOOTING TECHNIQUES
3. Is the correct signal level present at transmitter input?
4. Is the optical connector on the transmitting LED clear of any
obstruction or minute dirt particles?
5. Is there a short circuit anywhere in the system due to common
power ground, signal ground and case?
* The above visual check should only be attempted with LEDs.
NEVER LOOK DIRECTLY AT AN OPERATING LASER DIODE,
REGARDLESS OF THE OF THE OPERATING WAVELENGTH!!!
US Government regulations require that all equipment using Laser Diodes
be clearly identified with warning labels.
B. Check Optical Connectors
1. Are the connectors the correct size for the fiber?
2. Are the ends of the connectors free of all dust or dirt? If not, gently
clean the tip of the connector with a clean cloth or gauze moistened
with alcohol.
3. Is the fiber broken in the connector? A quick inspection with an
inexpensive jeweler’s loop can determine this.
4. Is the fiber protruding from the tip of the connector? If so,
refinishing will be necessary.
C. Check Fiber Optic Cable
1. Is the fiber optic cable pulled too tightly around a sharp corner?
19
MD650A-85 / MD650A-13
TROUBLESHOOTING
2. Is the correct fiber size being used with the correct transmitter/
receiver combination?
3. Does the fiber pass light at all? A small penlight or flashlight can
usually be used for this test.
4. Does the fiber have too much attenuation for the system? The
attenuation measured on the installed cable will always be different
than when the cable was still on the reel.
5. When using lengths shorter than 10 meters (30 feet), overloading of
the receiver may occur. The shorter the length of the fiber, the
greater the possibility for this condition. Be sure there is adequate
attenuation in any system. For very short distances, contact the
factory for assistance.
D. Check Receiver or Receiving Section of a Transceiver
Follow the same steps as for checking the Transmitter. However, instead of
checking the LED for light, check the receiving end of the fiber optic cable.
MAINTENANCE
The Universal Fiber Optic Line Driver has been manufactured using the latest
semiconductor devices and techniques that electronic technology has to offer. It has
been designed for long, reliable, and trouble free service and is not normally field
repairable.
The only maintenance that can be provided by the user is to ascertain that optical
connectors are free of dust or dirt that could interfere with light transmission and that
electrical connections are secure and accurate. All other questions or comments should
be directed to Black Box Tech Support. It should be noted that many “problems” can
easily be solved by a simple telephone call.
20
© Copyright 2003. Black Box Corporation. All rights reserved.
1000 Park Drive • Lawrence, PA 15055-1018 • 724-746-5500 • Fax: 724-746-0746