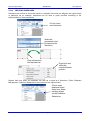
1
DISCON Specialists MetaBuilder User Manual i DESKTOP EDITION USER MANUAL VERSION 3.0 Version 3.0 Page 1 of 82 DISCON Specialists MetaBuilder User Manual TABLE OF CONTENTS INTRODUCTION ............................................................................................................................ 5 1. METABUILDER OVERVIEW ................................................................................................. 9 1.1 ABOUT THE WORK AREA.................................................................................................... 9 1.2 STENCIL PANE ..................................................................................................................... 9 1.3 CANVAS PANE ................................................................................................................... 10 1.4 META PROPERTIES PANE ................................................................................................ 11 1.5 TASKS PANE ...................................................................................................................... 11 1.6 MENU AND TOOL BAR ....................................................................................................... 11 1.7 THE STATUS BAR .............................................................................................................. 12 2. CHANGING HOW METABUILDER WORKS FOR YOU ...................................................... 13 2.1 SETTING THE TOOL OPTIONS.......................................................................................... 13 2.2 SETTING THE VIEW PREFERENCES................................................................................ 17 3. UNDERSTANDING THE BASICS........................................................................................ 18 3.1 MANAGING YOUR WORKSPACES .................................................................................... 18 3.2 WORKING WITH DIAGRAMS ............................................................................................. 21 3.2.1 CREATING OR OPENING A DIAGRAM………………………………………………………..21 3.2.2 CHANGING THE DIAGRAM META PROPERTIES…………………………………………...21 3.2.3 RESIZING THE PAGE FRAME………………………………………………………………….22 3.2.4 SAVING THE DIAGRAM………………………………………………………………………….22 3.2.5 PRINTING THE DIAGRAM……………………………………………………………………….24 3.2.6 CLOSING THE DIAGRAM………………………………………………………………………..25 3.2.7 EXIT METABUILDER……………………………………………………………………………..25 3.3 WORKING WITH OBJECTS ................................................................................................ 26 3.3.1 PLACING STENCIL SHAPES ONTO THE CANVAS………………………………………….26 3.3.2 MOVING OBJECTS ON THE CANVAS…………………………………………………………26 3.3.3 CHANGING THE META PROPERTIES OF OBJECTS……………………………………….26 3.3.4 ASSOCIATING OBJECTS WITH ONE ANOTHER……………………………………………27 3.3.5 SMART OBJECTS………………………………………………………………………………...29 3.3.6 ADDING AN ARTEFACT…………………………………………………………………………29 3.3.7 ADDING A RATIONALE………………………………………………………………………….30 3.3.8 OBJECT STATUS AND SOURCE CONTROL INDICATORS……………………………….31 3.3.9 CREATING BOUND SUBGRAPHS…………………………………………………………….32 3.3.10 CREATING SWIMLANES………………………………………………………………………..34 3.3.11 CREATING SHALLOW COPIES………………………………………………………………..36 3.3.12 VIEW IN CONTEXT………………………………………………………………………………37 Version 3.0 Page 2 of 82 DISCON Specialists MetaBuilder User Manual 3.3.13 HIGHLIGHT CONNECTED OBJECTS………………………………………………………….40 3.3.14 REMOVING AND DELETING OBJECTS……………………………………………………….41 3.3.15 META CONVERT OBJECTS……………………………………………………………………..42 3.3.16 UPDATE SHAPES…………………………………………………………………………………43 3.4 WORKING WITH SHAPES NOT ASSOCIATED TO THE DATABASE ................................ 43 3.5 SHAPE BASICS .................................................................................................................. 47 3.5.1 UNDO AND REDO………………………………………………………………………………...47 3.5.2 CUT, COPY AND PASTE………………………………………………………………………...47 3.5.3 SELECTING OBJECTS…………………………………………………………………………..48 3.5.4 FIND………………………………………………………………………………………………...49 3.5.5 FORMATTING OBJECTS………………………………………………………………………..49 3.5.6 ALIGNING OBJECTS……………………………………………………………………………..51 3.5.7 LAYOUT SHAPES………………………………………………………………………………...52 3.5.8 ORDER……………………………………………………………………………………………..55 3.5.9 DISTRIBUTE……………………………………………………………………………………….55 3.5.10 GROUPING………………………………………………………………………………………...55 4. TOOLS ................................................................................................................................ 56 4.1 META MAPPER ................................................................................................................... 56 4.2 CONVERTING ALL COMMENTS TO RATIONALES ........................................................... 57 4.3 RELATIONSHIP MANAGER................................................................................................ 57 4.4 SWOT ANALYSIS ............................................................................................................... 61 4.5 IMPORT TO DIAGRAM ....................................................................................................... 61 4.6 HIERARCHY NUMBERING ................................................................................................. 62 4.7 VALIDATE MODEL .............................................................................................................. 62 5. WORKING WITH THE DATABASE ..................................................................................... 64 5.1 LOAD FROM DATABASE.................................................................................................... 64 5.2 REFRESH OBJECTS .......................................................................................................... 66 5.3 CHANGED OBJECTS ......................................................................................................... 66 5.4 IMPORT............................................................................................................................... 67 5.5 EXPORT .............................................................................................................................. 68 5.6 DATABASE MANAGEMENT ............................................................................................... 70 5.6.1 RECYCLE OBJECTS……………………………………………………………………………..71 5.6.2 MANAGE RECYCLED OBJECTS……………………………………………………………….71 5.6.3 DELETE ORPHANED OBJECTS………………………………………………………………..72 5.6.4 DELETE REDUNDANT SERVER OBJECTS…………………………………………………..72 5.6.5 MANAGE UPLICATE OBJECTS………………………………………………………………...73 5.6.6 RECYCLE ASSOCIATIONS……………………………………………………………………..75 Version 3.0 Page 3 of 82 DISCON Specialists MetaBuilder User Manual 5.6.7 MANAGE RECYCLED ASSOCIATIONS……………………………………………………….75 5.6.8 MANAGE DIAGRAMS…………………………………………………………………………….75 5.6.9 WORKSPACE TRANSFERS…………………………………………………………………….76 5.6.10 WORKSPACE MANAGER……………………………………………………………………….76 5.6.11 EMPTY SANDBOX WORKSPACE……………………………………………………………...77 5.6.12 BACKUP DATABASE……………………………………………………………………………..77 5.6.13 CLEAR DATABASE……………………………………………………………………………….77 5.6.14 RUN SCRIPT ON DATABASE…………………………………………………………………...77 5.7 SYNCHRONISING WITH THE SERVER ............................................................................. 77 6. REPORTING ....................................................................................................................... 78 7. HELP ................................................................................................................................... 79 7.1 ABOUT ................................................................................................................................ 79 7.2 QUICK START GUIDE ........................................................................................................ 79 7.3 REGISTRATION .................................................................................................................. 79 7.4 KEYBOARD SHORTCUTS .................................................................................................. 80 Version 3.0 Page 4 of 82 DISCON Specialists MetaBuilder User Manual INTRODUCTION MetaBuilder at a Glance The effort to describe the Enterprise Architecture should be holistic and therefore requires the use of a comprehensive modelling toolset in order to analyse and optimise the complete portfolio of business objects across the architectural layers. The selected toolset must have the functionality to accurately and comprehensively support the development, storage, presentation and enhancement of the business objects contained in the chosen Enterprise Architecture Framework, as well as the associations between these business objects. MetaBuilder is a Business Engineering tool developed as an integral part of the delivery mechanism for DISCON Specialists internationally acclaimed Business Engineering methodology. Business Engineering is not just the practice of business process re-engineering which delivers only isolated benefit at the level of the process being engineered. Business Engineering is also not simply the revamping of a business within itself, all be it organisation wide. Business Engineering Target Benefit Strategic Positioning Business Transformation Business Revamp Performance Optimisation Business Process Reengineering Single Process Organisation Wide Industry Wide Scope of Change Business Engineering is the discipline of continuous strategic positioning of an organisation, or any element thereof, within the scope, content and context of the entire industry wide value chain, within which it must perform successfully to survive. Strategic positioning is the determination of an ideal architecture aligned across all architectural layers relevant to the influences of the organisation’s target and external environments, and where the goals of Project and Change Management are to deliver that strategy. MetaBuilder ensures that an organisation have a sufficient business modelling tool giving them the ability to apply an accurate and continuous Business Engineering approach within the organisation. Version 3.0 Introduction Page 5 of 82 DISCON Specialists MetaBuilder User Manual MetaBuilder, through its embedded rules-based metamodel, ensures the accurate delivery of all aspects of the Business Engineering approach. This user manual serves to document the functionality and user interfaces of the MetaBuilder tool. Graphical User Interface Rules Engine Tool Automation Customisation Integrity Viewpoints Sharing Content Management Repository The graphical user interface enables modelling of all aspects of the Enterprise Architecture Framework, within the scope of an organisation specific methodology. It supports the development, presentation and enhancement of the models and serves as an input and extraction mechanism. The allowed relationships between objects are controlled by rules encapsulated within the metamodel. These rules ensure the accurate delivery of the metamodel. Capturing the models is often the most time consuming part of the development activity. By providing support for automating parts of the Enterprise Architecture development processes, MetaBuilder can help speed up the overall development activity. Any organisation is unique and therefore will have unique requirements for Enterprise Architecture. By allowing the modification of the existing metamodel, or adding a completely new metamodel Metabuilder can be customised to support the organisation’s unique Enterprise Architecture requirements. It is critical to maintain the integrity of the documented information. Failing to do so will result in having a distorted view of the organisation that in turn will lead to bad decision making. MetaBuilder provides the ability to view any architectural component in context with the rest of the components around it. MetaBuilder support the sharing of data between various tools. MetaBuilder allows for a large number of people to contribute to and share stored data. It controls access to data, based on user roles, aid in easy storage and retrieval of data and reduce repetitive duplicate input. All these elements are supported by an intelligent repository for the control and storage of artefacts, model diagrams, associations between artefacts and their associated business intelligence. The repository provide for data management functions, including the ability to support versioning, the ability to roll back to previous versions, the ability to lock parts of the content against change, and the ability to control access to part or the entire knowledge base, etc. Version 3.0 Introduction Page 6 of 82 DISCON Specialists MetaBuilder User Manual MetaBuilder is available in two editions namely, Desktop and Server. The purpose of these two editions varies in the following ways: Desktop Edition. Allows users to perform basic tasks such as creating diagrams, reusing objects, view in context, etc. Server Edition. Provides all the functionality of the desktop edition with the added functionality that allows users to synchronise diagrams and data to a central repository with access control. This allows other users to re-use existing objects that were not created by them. It also allows for an organisation wide “view in context”, as opposed to the Desktop Edition’s limited view in context. Revision and access control is a must-have for a multi-user environment, especially when reporting is required. Important Terminology The terminology described under this heading is to aid users in understanding how MetaBuilder functions as a complete system. In understanding these terms the explanations in the rest of the document should be clearer to you. Class In the MetaBuilder environment, a Class defines the abstract characteristics of a thing (object), including the thing's characteristics (its attributes, fields or properties). For example, the class Employee would consist of traits (properties) shared by all employees, such as a Name, Surname and Employee Number. Object An Object is a particular instance of a class. The class of Employee defines all possible employees by listing the characteristics that they can have. In MetaBuilder jargon, the object Billy is an instance of the Employee class. Association An Association is a link between two objects indicating the type of relationship. One instance of an association can only be of one type e.g. mapping, decomposition, etc and it may be linked to artefacts. Artefact An Artefact is an object that is linked to an association. It may also be linked to other objects. Object Re-use Within MetaBuilder, objects can be re-used across diagrams and workspaces without the need of having to re-create the objects. Users should strive to capture each object only once. As soon as the object has been saved to the database users can gain access to it from the database making it possible to use it on other diagrams, etc. Shape A Shape is a graphical element on a canvas, sometimes bound to an instance of a specific class. One class may have multiple shapes associated with it for different diagramming techniques. Shallow Copy A shallow copy refers to multiple occurrences of a single instance of an object on one or more diagrams. If the object’s properties are modified both shapes will reflect that change immediately. Version 3.0 Introduction Page 7 of 82 DISCON Specialists MetaBuilder User Manual General Placing objects on the diagram creates instances of the classes that they are bound to. Users can edit the properties of each object, add associations and save the document. When saving, the file is stored on the hard-drive, and also in the database. The objects (including their properties) and associations are also saved in the database, from where they can be retrieved at a later stage for re-use, modification or deletion. Every time you save a document, a “snapshot” is stored in the database, enabling you to retrieve prior versions of each document. The objects on that diagram will also be “snapshots”, containing the data of the document version’s specific point in time. Version 3.0 Introduction Page 8 of 82 DISCON Specialists MetaBuilder User Manual SECTION ONE 1. METABUILDER OVERVIEW 1.1 ABOUT THE WORK AREA The primary work area of MetaBuilder is made up of four distinct information windows (panes) and three information bars. The information windows form the main work area of MetaBuilder and comprise the Stencil, Canvas, Meta Properties and Tasks panes. The information bars comprise the Menu, Tool and Status bars. Menu and Tool Bar 1.2 Stencil Pane Status Bar Canvas Pane Tasks Pane Meta Properties Pane STENCIL PANE All the MetaBuilder graphical elements (shapes) are grouped in stencil sets according to various architecture domains and modelling techniques. In some instances a shape can be found in multiple stencil sets. The Stencil Pane provides access to all the available stencils that can be used during modelling. When a stencil set has been selected, the available shapes for the selected modelling technique / domain will be displayed. Multiple stencil sets can be opened at the same time. Note: Refer to Appendix A for the default stencil sets. Version 3.0 MetaBuilder Overview Page 9 of 82 DISCON Specialists Click to open symbol store and select required stencil set MetaBuilder User Manual Click to dock or close the stencil pane Click to close the stencil set or make active a different set Alter the width of the pane by dragging the pane to the required size 1.3 CANVAS PANE The Canvas Pane is the primary work area upon which models are created and maintained. When a new diagram is created or an existing diagram is opened, it is displayed within the Canvas Pane. Click to close the diagram or make active a different diagram Version 3.0 MetaBuilder Overview Page 10 of 82 DISCON Specialists 1.4 MetaBuilder User Manual META PROPERTIES PANE The Meta Properties Pane displays the Meta properties of any object selected on a diagram as defined in the Meta model. All values for the object are editable in the Meta properties. Click to sort properties alphabetical or per category Click to dock or close the properties pane Alter the width of the pane by dragging the pane to the required size 1.5 TASKS PANE The Tasks Pane displays a warning when a potential duplicate object is created. Double-clicking on a task will open the Merge Objects dialog. (Refer to Database Management: Manage Duplicates). Click to dock or close the tasks pane Alter the width of the pane by dragging the pane to the required size 1.6 MENU AND TOOL BAR The Menu and Tool Bar provides access to most of the functionality provided by MetaBuilder. The menu and tool bar is dynamic, and available options change depending on the usage status of the tool at a given point in time. Some of the functionality only becomes available when a relevant object is selected, for example the option Edit when an object is selected on the canvas. Menu items that are available are always clearly visible on the menu and dropdowns, whilst items not available appear to be greyed out. Version 3.0 MetaBuilder Overview Page 11 of 82 DISCON Specialists 1.7 MetaBuilder User Manual THE STATUS BAR The Status Bar is a horizontal bar at the bottom of the tool that displays information about the active workspace and the saving progress. Click to change to a different active workspace (Not enabled while a diagram is open) Version 3.0 MetaBuilder Overview Page 12 of 82 DISCON Specialists MetaBuilder User Manual SECTION TWO 2. CHANGING HOW METABUILDER WORKS FOR YOU 2.1 SETTING THE TOOL OPTIONS MetaBuilder allows you to change certain global settings to suit your specific needs. Click to open tool options User Information options contain information regarding the user of the tool that is used to automatically populate some of the document properties of a new diagram when opened for the first time. Default Paths options contain information regarding the file paths for the repositories used by MetaBuilder. Depending on the type of user licence, users will be able to only edit certain of the paths. When a file path value is found to differ from the default value it can be restored to its default state as follows: Path Value Diagrams %installdirectory% //MetaData//Diagrams Export %installdirectory% //MetaData//Export Symbols %installdirectory% //MetaData//Symbols MetaBuilder keeps a log for troubleshooting purposes of certain actions and critical issues that may occur while using the tool. As default the Verbose Logging option will be selected. When this option is not selected MetaBuilder will only log those issues which are deemed critical. This option may be changed should any performance issues occur. Version 3.0 Changing How Metabuilder Works for You Page 13 of 82 DISCON Specialists MetaBuilder User Manual Diagramming options is divided into three sub-categories called Canvas and Grid, Data Validation and Printing. Canvas and Grid options can be used to change settings that influence the way the canvas and grid are displayed during modelling. Setting Description Default diagram size Sets the default width and height size for any new diagrams. As default the width and height is set to match a standard A3 paper size. Smoothing Mode Sets the quality used to render the grid between High (HighQuality) and Low (HighSpeed) resolution. Default setting is set to high but it could be required to change to low to improve performance issues in some cases. Show Grid Sets the grid lines to visible or invisible. Drag Snaps to Grid When selected will cause objects to snap to the grid during modelling. Version 3.0 Changing How Metabuilder Works for You Page 14 of 82 DISCON Specialists MetaBuilder User Manual Setting Description Resize Snaps to Grid When selected will cause objects to snap to the grid during resizing. Grid Cell Size This value indicates the dimensions of a grid “block”. Arrow Move Large When changing the grid cell size this value must also be changed to allow the Snap to Grid feature to snap an object to the grid. This value must always be equal or larger than the grid cell size. Arrow Move Small This value is used when the Snap to Grid feature is disabled to specify the number of pixels that the object must move when moved with the Ctrl + arrow keys. AutoSave When selected will enable the auto save feature. The auto save time intervals can be changed to suite your needs. The auto save feature does not affect any database content. Only a snapshot of the diagram will be saved in the file system. As soon as the diagram is manually saved the auto save file will be removed. The auto save file will also be removed as soon as MetaBuilder is closed. The only time that the auto save file will remain available is when a MetaBuilder issue causes the tool to close, to enable one to retrieve the saved information. Enable Quick Panel Sets the quick panel to active or inactive. (Refer to Working with Objects: Quick Panel). Enable Shallow Copy Colour Enables the formatting of shallow copy X1 to affect shallow copy X2, X3, X4. Double click the shallow copy to apply the affect. Default Port Settings When objects are added (load from database, textual import, etc) and associations need to be added, the default port of each object is respectively used to create an association. Data Validation options can be used to change settings that influence the way data is validated during modelling. Version 3.0 Changing How Metabuilder Works for You Page 15 of 82 DISCON Specialists MetaBuilder User Manual Setting Description Compare and Refresh Data Sets how data on a diagram is refreshed from the database. Data can either be automatically refreshed when the diagram is opened or users will first be informed of changes within the database from where different actions then can be taken. When the Never option is selected the data will never refresh nor will users be informed of any changes. Duplicate Checking If selected the tool will check for any duplicate objects that already exists within the database when a new object is created. Select if the tool must search for duplicate objects only within the current workspace or across workspaces. Spellchecker MetaBuilder provides a spellchecker that can help you correct any spelling mistakes faster. Enabling the spellchecker will flag any potential spelling mistakes. After typing a word and pressing the spacebar the spellchecker will check the word for correctness and list suggested corrections. Intellisense Intellisense allows users to quickly access database content for re-use. Printing options can be used to specify additional printing preferences. Setting Description Print Comments By default, any comments on the diagram will not print. Selecting the Print Comments option allows for the printing of comments with the diagram. Print Artefact Pointers By default, any artefact pointers on the diagram will not print. Selecting the Print Artefact Pointers option allows for the printing of artefact pointers with the diagram. Print Source Control Indicators This feature allows users to select if the source control indicators, e.g. MarkedforDelete, must be printed with the diagram. Version 3.0 Changing How Metabuilder Works for You Page 16 of 82 DISCON Specialists MetaBuilder User Manual Advanced options can be used to change the database instances used by MetaBuilder. The value stored in Local Instance indicates the connection string used to connect to the database instance used during modelling on the “local machine” or in the “stand alone” version of the tool. The second value called Synchronisation Server indicates the connection string used to connect to the “server unit” when synchronising data to the central server. This information can only be changed in the Server Edition. Note: It is not advised to unnecessarily change any of these values. 2.2 SETTING THE VIEW PREFERENCES Click to show / hide stencil pane Click to show / hide meta properties pane Click to show / hide task pane Click to show / hide object ports Click to show / hide artefact pointers Click to select an appropriate zoom setting The view Stencil / Meta Properties / Tasks Pane menu items allows users to show or hide the various panes within the work area. The Zoom feature allows users to zoom the view displayed in the canvas to the desired level. In addition to changing the zoom level, users can also select to fit the drawing’s width, height, or entire dimensions to the screen whilst keeping the aspect ratio. Ports allow objects to be associated with each other. If the Ports option is not selected, all ports in the current diagram will be invisible and users will not be able to add new associations to objects. Invisible ports will automatically become visible if a new object is placed onto the canvas. Version 3.0 Changing How Metabuilder Works for You Page 17 of 82 DISCON Specialists MetaBuilder User Manual SECTION THREE 3. UNDERSTANDING THE BASICS 3.1 MANAGING YOUR WORKSPACES A workspace is a grouping of architecture knowledge items for a specific domain or purpose such as a project, organisation unit or logical grouping of related architecture items. Workspaces can be used to group related diagrams and objects together. Objects in different workspaces are visible to each other which mean that associations can be added between objects residing in different workspaces. Workspace associations also make finding objects within the database easier and faster. When using MetaBuilder for the first time the Sandbox workspace is set as the default workspace. Metabuilder will always open with the default workspace set as active. The Sandbox workspace is normally used as a temporary environment in which unfinished and draft copies of diagrams could be created before transferring them to the specific workspace. The Sandbox workspace has an additional feature that allows one to clear the Sandbox, purging it of all diagrams and objects that have not yet been moved to other workspaces. (Refer to the Database Management: Empty Sandbox Workspace). Click to open the workspace manager User-defined workspaces can be created using the workspace manager. Existing workspaces can also be selected for a session. Version 3.0 Understanding the Basics Page 18 of 82 DISCON Specialists MetaBuilder User Manual Click to create new workspace Click to set selected workspace as the default workspace Click to set selected workspace as the active workspace An association between a workspace and a diagram (including the objects) is created when the diagram is saved for the first time. The workspace association will be that of the selected workspace as displayed in the status bar. As soon as new objects are created and saved the workspace association will be created for those objects. Note: A workspace association is only created the first time the diagram / object are saved. This implies that re-using an object in a different workspace, and then saving that object, will not change the workspace association. The only way a workspace association can be changed is by means of a workspace transfer. This transfer can be done in any of the following ways: When deleting a workspace and transferring the contents to a new workspace (as mentioned below). When doing a workspace transfer using the Workspace Transfer Manager (Refer to Database Management: Workspace Transfers). Workspaces can be deleted by right-clicking on the workspace in the workspace manager and selecting the Delete Workspace option. Select to either transfer the contents of the current workspace to another before deleting the workspace, or permanently delete the workspace and its contents. When selecting the option to delete the workspace and contents users are prompted to type “DELETE” in the edit box before clicking on the OK button. Note: The Sandbox workspace can never be deleted. When all workspaces are deleted the workspace will default to the Sandbox workspace. Deleting a default workspace will make Sandbox the default workspace. Version 3.0 Understanding the Basics Page 19 of 82 DISCON Specialists MetaBuilder User Manual When selecting the option to transfer the contents into another workspace, users are prompted to select the new workspace before clicking on the OK button. When the diagram is transferred in this manner you will be informed of the workspace transfer the next time that the diagram is opened. Switching between workspaces is allowed. A different workspace can be selected from the status bar provided that there are no open diagrams. Always ensure that the correct workspace is selected before opening a diagram. When a diagram is opened in a workspace that is not associated with that diagram users will be informed of the conflict. MetaBuilder will switch the workspace to whatever workspace is associated with the diagram when the diagram is opened. The workspace displayed in the status bar will reflect the workspace association with the active diagram. Any new objects that will be created will be associated with this workspace. Although the workspace displayed in the status bar reflects that of the active diagram, the selected workspace is still active in the background. This implies that any new diagram and objects on the new diagram will still be associated with the selected workspace when saved. The workspace displayed in the status bar will reflect the workspace association with the active diagram. The reason for this functionality is to assist users in ensuring that all the objects on a diagram is associated with the same workspace, unless when existing objects is re-used on the diagram. The only other time that a diagram and its objects will change a workspace association, is when a workspace has been deleted and the diagram that is still associated with the deleted workspace is opened. The workspace association will in this case default to the current selected workspace, unless the deleted workspace is again created before opening the diagram. Version 3.0 Understanding the Basics Page 20 of 82 DISCON Specialists MetaBuilder 3.2 WORKING WITH DIAGRAMS 3.2.1 CREATING OR OPENING A DIAGRAM User Manual Click to open a new diagram Click to open an existing diagram Click to display a list of the last few diagrams you opened in the tool If you close a diagram and then move it to another location, such as by using Windows Explorer, the link to that diagram in the tool no longer works. When the New Diagram feature is selected, a new empty diagram is displayed in the canvas pane. The New Diagram feature is also presented on the tool bar for quick access. The Open feature presents users with the default File Open dialog. The dialog defaults to the Diagrams folder within the MetaBuilder directory which is the default folder for storage of diagrams created in MetaBuilder. Other directories may also be browsed to select the required diagram. Multiple files can be selected and opened simultaneously by using the dialog and a combination of the shift and control keys. The Open feature is also presented on the tool bar for quick access. The Recent feature allows users to select and open a diagram from a list of the last few diagrams opened in the tool. 3.2.2 CHANGING THE DIAGRAM META PROPERTIES The Meta properties for the diagram are displayed at the top of the page frame. By double clicking on the fields users can edit the following properties: Property Description Title Distinct title of the current diagram Description Basic information about the diagram Company Organisational unit name File Name File name (System Variable) Author Name of the diagram author Version 3.0 Understanding the Basics Page 21 of 82 DISCON Specialists MetaBuilder User Manual Last Saved Date Date when diagram last saved (System Variable) Version Diagram version 3.2.3 RESIZING THE PAGE FRAME Resize the Page Frame to a required size by double-clicking on an empty space anywhere within the page frame or by right-clicking and choosing the Select Frame feature. Once the page frame is selected the frame will be highlighted in red. Resize the page frame by dragging the edit points to the desired locations. By right-clicking again and choosing the Deselect Frame feature will deselect the frame and resize the page size to fit the size of the document frame. 3.2.4 SAVING THE DIAGRAM Click to save the diagram Click to save the diagram as a new diagram When selecting the Save feature users are presented with the Save Diagram dialog if the diagram has not been saved previously. The dialog defaults to the diagrams folder within the MetaBuilder directory which is the default folder for storage of diagrams created in MetaBuilder. Users are also able to browse other directories to save any diagram files. If the file has been previously saved the save diagram dialog is not displayed and MetaBuilder overwrites the current file with the new version of the file. Users are able to input the desired file name before saving. The save process is explained by means of the following diagram: Version 3.0 Understanding the Basics Page 22 of 82 DISCON Specialists MetaBuilder User Manual When an object is saved for the first time it is allocated a system generated PKID, which is a unique identification number, as well as the workspace association is created. Unlike the workspace association that can change, the PKID will never change, even if the object is deleted from the database and re-saved at a later stage with an older diagram. The saving of a version of the snapshot in the database allows users to open any previously saved versions of a diagram (Refer to Database Management: Manage Diagrams). The Save As feature presents users with two options. Select to either create a new diagram file with new objects and associations by selecting ‘Yes’ or create a new diagram but keep the existing object and association references intact by selecting ‘No’. Version 3.0 Understanding the Basics Page 23 of 82 DISCON Specialists MetaBuilder User Manual The Yes option will create a copy of the diagram with its objects. All the PKIDs will be removed and new PKIDs will be created as soon as the diagram is saved with the new file name. In other words, this will be a complete new diagram with new objects that only have the same name properties as objects currently saved in the database. The No option will only save the diagram with a different file name. All the object references will still point to the same objects within the database. Although the original file will still exist within the file system, it is only a previous version of the new file that is also stored within the file system. Note: The newly saved diagram will become the active diagram. The previously opened diagram will close without saving any changes. 3.2.5 PRINTING THE DIAGRAM Click to print the diagram The Print feature presents users with the Print Preview dialog and allows for printing of the active diagram. The Print Preview is active, thus allowing users to make layout decisions in the view of printing constraints. Printer and Page Size. If a printer other than the default printer must be used, the printer can be changed by double clicking on the current displayed printer and selecting a new printer from the list of installed printers. The page setup can also be changed using the options available in the Page Setup dialog. Orientation. The page setup can be alternated between Portrait and Landscape. Version 3.0 Understanding the Basics Page 24 of 82 DISCON Specialists MetaBuilder User Manual Scaling and Page Breaks. Users have the option to scale the diagram to a specified page size by either selecting the Reduce to Paper Size or Inflate to Paper Size options. The Show Page Breaks checkbox allows for the previewing of page breaks. If required, the diagram can also be fitted across multiple pages by either selecting the Fit Page(s) Across or Fit Page(s) Down options. The Print Black and White option will temporarily disable the colour fill properties of the objects on the diagram for printing purposes. Note: If a diagram is printed across multiple pages and an object is positioned directly on a page break, the object can be dragged to a more appropriate position by selecting the object and dragging the object to its new position. The object will not only be moved in the print preview but on the active diagram as well. When multiple objects are selected the object with a green frame can be used to position the selection. Resize Frame to Sheet. When clicking the Resize Frame to Sheet button, the diagram frame will be resized to fit the specified page size. Print. When the clicking the Print button the document will print to the selected printer. Note: Before printing ensure that the document frame has been cropped tightly around the objects on the diagram. This will ensure that the objects fit optimally on the specified page size. 3.2.6 CLOSING THE DIAGRAM When clicking on the Close feature the active diagram will close. If the current active diagram has been changed since it was last saved, users will be prompted to save the changes prior to closing the diagram. When clicking on the Close All feature the active diagram and all other open diagrams will close. 3.2.7 EXIT METABUILDER Click to exit MetaBuilder If there are any open diagrams that have been changed since they were last saved, the tool prompts users to save these changes before exit. Version 3.0 Understanding the Basics Page 25 of 82 DISCON Specialists MetaBuilder 3.3 WORKING WITH OBJECTS 3.3.1 PLACING STENCIL SHAPES ONTO THE CANVAS User Manual Click and drag onto the canvas Click on a shape in the Stencil Pane, and “drag” it with the mouse to the required position on the canvas. Multiple shapes can be placed onto the canvas by first selecting all the required shapes and then dragging them onto the canvas. 3.3.2 MOVING OBJECTS ON THE CANVAS When it is required to move an object(s) on the canvas it can be done in a few ways. First select the object by clicking on it with the mouse pointer. Multiple objects can be selected by holding down the control key on the keyboard and clicking with the mouse pointer on the required objects. When an object is selected, a red frame around the object will indicate the selection. When more than one object is selected, only the first object selection will indicate a red frame while the other selections will be indicated with a blue frame. Objects can now be moved on the canvas by dragging it/them to the required position. Objects can also be moved on the canvas using the arrow keys on the keyboard. 3.3.3 CHANGING THE META PROPERTIES OF OBJECTS Meta properties of an object can be modified by changing the properties of an object within the Meta properties pane or by modifying specific properties directly on the object by double-clicking on the required label and editing the information. Right-click on an object and select the Select Label feature to display a list of properties that can be modified directly on the object Version 3.0 Understanding the Basics Page 26 of 82 DISCON Specialists 3.3.4 MetaBuilder User Manual ASSOCIATING OBJECTS WITH ONE ANOTHER An association defines a relationship between classes of objects. Only objects, which originated from a stencil, and are currently placed on the canvas, can be associated with one another. The allowed association types between objects are enforced as specified in the metamodel. Right-click on an object and select the Allowed Connections feature to view all possible associations for an object as per Meta model Note: It will not be possible to associate objects with each other unless the ports of both objects are displayed. Left-click a port and drag the mouse pointer to a port on the destination object. Release the mouse button once the association snaps to a port on the destination object It is possible to change the default association to any of the allowed association types. This feature will not be available if no other association types are allowed according to the Meta model. Right-click and select Change Association to display the list of allowed associations Click to select new association type Note: Changing an association that was already saved to the database will cause the status of that association to change to ‘MarkedforDelete’ (Refer Object Status and Source Control Indicators). Version 3.0 Understanding the Basics Page 27 of 82 DISCON Specialists MetaBuilder User Manual Should the association be changed back to the previous association type, MetaBuilder will redraw the association but the status will still be ‘MarkedforDelete’. Metabuilder allows users to restore Marked for Delete associations without using the database manager. Right-click on association and select Restore Selected Association It may sometimes be required to affect the association path to obtain the required layout. You can determine the course of an association by clicking at the relevant positions on the association and inserting angle points. For instance, this makes it possible to customise the association path and lead it around an object. After inserting the point you can drag the point to the required position. Right-click on an association and select the Insert Point feature to insert a new angle point Select the Remove Point feature to remove an angle point Inserting points and altering the association path will disable the auto-routing feature of associations. Right-click on an association and select Enable Auto-routing feature to enable automatic routing for the association Version 3.0 Understanding the Basics Page 28 of 82 DISCON Specialists 3.3.5 MetaBuilder User Manual SMART OBJECTS Smart objects allow users to add additional data columns / attributes / elements to the object (i.e. Data Table, Data View, etc). These data columns / attributes / elements are also saved as objects within the database. The Remove Item feature will remove the data column / attribute / element from such an object without deleting the object from the database. Click to hide / display the data columns / attributes Double-click to add additional data columns / attributes 3.3.6 Right-click and select Remove Item to remove data column / attribute ADDING AN ARTEFACT An artefact further describes the relationship between classes of objects in the context of the association (i.e. condition, flow description, etc) and is defined within the Meta model. Refer Appendix A for a description of the default set of allowed artefacts. Double-click to change the artefact’s meta properties Click on the required artefact to link the artefact to the association Right-click and select Add Artefact to display list of allowed artefacts An artefact is an intelligent database object; is stored as such with its properties and associations; and the properties and associations of the artefact can be queried from the database (Refer Database Management: Load from Database for an overview of the object finder). Version 3.0 Understanding the Basics Page 29 of 82 DISCON Specialists MetaBuilder User Manual Click to open database object finder from where existing artefacts can be loaded 3.3.7 ADDING A RATIONALE The Rationale object provides for a means to insert a textual description or explanation of reasons such as logic, principles, requirements, philosophy, etc employed in consciously arriving at a decision. The Rationales usually document why a particular choice was made, how the basis of its selection was developed, why and how the particular information or assumptions were relied on, and why the conclusion is deemed credible or realistic. Edit the Rationale by clicking within the Rationale and typing the required text Right-Click on an object or association and select Add Rationale to load The Rationale is an intelligent database object; is stored as such with its properties and associations; and the properties and associations of the Rationale can be queried from the database (refer Database Management: Load from Database for an overview of the object finder). Once a rationale has been loaded onto the drawing canvas it can be linked to an association or an object. Click to open database object finder from where a rationale can be loaded Version 3.0 Understanding the Basics Page 30 of 82 DISCON Specialists 3.3.8 MetaBuilder User Manual OBJECT STATUS AND SOURCE CONTROL INDICATORS Rules are configured within MetaBuilder that manage the status transition of objects within the database. When working with the Metabuilder client edition only the following object status will be relevant. Indicator will not display for new objects Create object (Not saved to database) Save object (Status – None) Delete object Mark for delete object Restore object Status – None Only if re-used on other diagrams When a previously created diagram is opened and the objects on the diagram are not currently saved in the database the objects will be labelled as ‘Not in Database’. Associations that are not saved in the database will appear orange in colour. As soon as the diagram is saved the objects will be saved to the database and the status control indicators will be removed. Not in Database associations Associations with a status of ‘Marked for Delete’ will appear red in colour. Marked for Delete associations Version 3.0 Understanding the Basics Page 31 of 82 DISCON Specialists 3.3.9 MetaBuilder User Manual CREATING BOUND SUBGRAPHS The Bound SubGraph feature allows users to group objects within a clearly defined frame. The Bound SubGraph is an object itself and will be saved within the database. Any object that exists within the database can be represented by means of a Bound SubGraph. SubGraphs can also be created within other subgraphs. Click to insert new Bound SubGraph Select the appropriate class to represent the Bound SubGraph Click to minimize SubGraph and hide objects within Drag object to within boundaries of SubGraph Objects that exist within the database can also be re-used as a Bound SubGraph. (Refer Database Management: Load from Database for an overview of the object finder). Click to open database object finder from where existing objects can be loaded as Bound SubGraphs Other objects can now be associated with the Bound SubGraph by dragging the objects into the subgraph. Depending on the allowed connections the default relationship will be created for the association. Version 3.0 Understanding the Basics Page 32 of 82 DISCON Specialists MetaBuilder User Manual Once an object has been associated with the Bound Subgraph the default class association for the subgraph can be edited. Double-click on the Bound SubGraph and select the Class Default Associations tab. Click on the dropdown menu under associations for the object class. Select the default association from the list of allowed associations. The selected association will now be created for all new instances of the object associations added (of the same class). Click to display allowed associations Single object associations can also be edited. Double-click on the Bound SubGraph and select the Instance Associations tab. Click on the dropdown menu under associations for the object class. Select the new association from the list of allowed associations. Click to display allowed associations Click to select instance associations Version 3.0 Understanding the Basics Page 33 of 82 DISCON Specialists 3.3.10 MetaBuilder User Manual CREATING SWIMLANES Swimlanes are vertical or horizontal bands in a diagram that divide the diagram into logical areas or partitions. As an example, swimlanes can be used to group activities according to the responsibilities of those swimlanes. Click to insert new Swimlane Select the appropriate class to represent the Swimlane Drag edit points to the required size Right-click and select the required header position Objects that exist within the database can also be re-used as a Swimlane. (Refer Database Management: Load from Database for an overview of the object finder). Click to open database object finder from where existing objects can be loaded as Swimlanes Version 3.0 Understanding the Basics Page 34 of 82 DISCON Specialists MetaBuilder User Manual Objects can now be associated with the swimlane by dragging the objects into the swimlane. Depending on the allowed connections the default relationship will be created for the association. Objects can be associated with multiple swimlanes by overlapping the object with more than one swimlane. Once an object has been associated with the swimlane the default class association for the swimlane can be edited. Double-click on the swimlane header and select the Class Default Associations tab. Click on the dropdown menu under associations for the object class. Select the default association from the list of allowed associations. The selected association will now be created for all new instances of the object associations added (of the same class). Click to display allowed associations Single object associations can also be edited. Double-click on the swimlane and select the Instance Associations tab. Click on the dropdown menu under associations for the object class. Select the new association from the list of allowed associations. Version 3.0 Understanding the Basics Page 35 of 82 DISCON Specialists MetaBuilder User Manual Click to remove object associations Click to display allowed associations Click to select instance associations Users can remove object associations with swimlanes. Clicking the remove button will prompt you to either remove the association within the diagram’s context only or mark the association as delete. Caution: Removing the association does not physically move the object from the swimlane. Once the association is removed or marked for delete, the object should be moved from the swimlane before saving the diagram. Saving the diagram while the object is still within the swimlane will recreate the association. 3.3.11 CREATING SHALLOW COPIES A shallow copy is a duplicate reference to an already existing object within the database. It is in contrast with a normal copy, which is an actual duplicate of the data. When you create a shallow copy you create a new object symbol for an existing object. It is helpful to create a shallow copy if an existing object must be re-used at various points in the same model or in different models. Any changes to an object apply to all shallow copies. If you want to rename Process 1 to Process A, for example, you only need to do this for one of the shallow copies. All other shallow copies are changed to Process A at the same time. Right-click and select Create Shallow Copy to create a shallow copy on the same model The Add Shallow Copy to Clipboard feature places a shallow copy of the selected object into the clipboard. This is handy when it is required that shallow copies be re-used on multiple diagrams The object that is in the clipboard can be pasted onto the canvas or any other diagram canvas. Version 3.0 Understanding the Basics Page 36 of 82 DISCON Specialists MetaBuilder User Manual Multiple shallow copies can be made at the same time by selecting the object(s) and using the F8 shortcut to add the shallow copies to the clipboard. The object(s) that is in the clipboard can be pasted onto the canvas or any other diagram canvas. Both the original object and the shallow copy will receive a shadow frame to indicate that a shallow copy exists for the object on the diagram. You can also load objects from the database onto the diagram (Refer Database Management: Load from Database for an overview of the object finder). These object symbols for existing objects will also be shallow copies of existing content. 3.3.12 VIEW IN CONTEXT When selecting the View in Context feature the selected object is displayed in context of all other objects it is connected to and all diagrams on which the object appear. Right-click and select Client Workspaces to view the selected object in context The selected object will be displayed in context of all the other objects it is connected to. The following context will be shown: All diagrams associated with the selected object. All direct connections to the selected object. All direct connections from the selected object. Workspace associated with the selected object. Version 3.0 Understanding the Basics Page 37 of 82 DISCON Specialists MetaBuilder User Manual Users are allowed to perform the following actions when viewing an object in context: Drag the objects to obtain a certain view. Parent nodes can be further exploded. Right-click to further explode the view in context Export object context to Microsoft Excel. When selecting the Explode to Excel feature users are presented with a Microsoft Excel report containing information for the object context (Refer Database: Export Object Context for an explanation of this report). Hide / show all objects in the context view of a certain class. Version 3.0 Understanding the Basics Page 38 of 82 DISCON Specialists MetaBuilder Click to hide/show the object class from the view in context Right-click on canvas to display the list of relevant object classes User Manual Hide / show the workspace legend. Click to hide / show the workspace legend Print the view in context. Click to save the view in context Version 3.0 Click to print the view in context Understanding the Basics Page 39 of 82 DISCON Specialists MetaBuilder User Manual Save the view in context. Click on File -> Open and change file type to Saved Context View to open previously saved view in context 3.3.13 HIGHLIGHT CONNECTED OBJECTS The Highlight Connected Objects feature allows users to visually display all connected objects for an object. This is similar to the view in context but in this case it only displays connected objects relevant to the active diagram. This is extremely helpful if you quickly want to view connected objects on very detail diagrams. Right-click and select Highlight Connected Objects to highlight all connected objects Users can navigate to the connected object on the canvas. Version 3.0 Understanding the Basics Page 40 of 82 DISCON Specialists MetaBuilder User Manual Click to navigate to the connected objects on the drawing canvas Right-click on canvas to remove all highlights 3.3.14 REMOVING AND DELETING OBJECTS When removing and deleting objects and associations the following scenarios apply: Selecting the Remove feature allows users to remove the selected object(s) or association(s) from the active diagram. This is typically used when objects are no longer required on a diagram but the object is still associated with other diagrams or the object must remain in the database for future use. Removing objects from a diagram does not change its status and thus are not ‘Marked for Delete’ within the database. It only deletes the diagram association provided that a shallow copy does not exist on the diagram. CAUTION: The delete key on the keyboard performs the same functionality as the remove feature. Right-click and select Remove to remove selected object Version 3.0 Understanding the Basics Page 41 of 82 DISCON Specialists MetaBuilder User Manual Press the Shift and Delete keys on the keyboard to remove an object(s) / association(s) from the active diagram as well as change the status of the removed object / association to ‘Marked for Delete’ within the database. After closing a diagram without saving, and opening the diagram again, the deleted object / association will be displayed, but be marked for delete. Right-click and select Delete to remove and Mark for Delete selected object CAUTION: Undo for a Mark for Delete action will only replace the object / association on the diagram but the status will remain ‘MarkedforDelete’. Once an object has been marked for delete, no associations can be made to or from the object. No attributes can be changed for this object either. Shallow copies of the object on other diagrams will also appear as marked for delete. The object / association can now be permanently deleted or restored from the database (Refer Database Management: Add Objects / Associations to Recycler). 3.3.15 META CONVERT OBJECTS MetaBuilder provides users with the ability to convert an object class to any other object class (provided a stencil exists for the selected class). The Meta Convert feature is typically used when updates to the Meta model has been made and object classes should be aligned. Right-click and select Meta Convert to convert object class to new class Meta properties which are available on both object classes will carry over to the new class. Meta properties that are not will not be transferred to the new object class but will however not change on the old object if it was previously saved. Any associations which may have been connected will be checked to see if they are supported by the change and if not a message is displayed informing and providing you a choice on whether you would like to continue and lose the associations or not. NOTE: This feature is under development. For more information contact DISCON Specialists. Version 3.0 Understanding the Basics Page 42 of 82 DISCON Specialists 3.3.16 MetaBuilder User Manual UPDATE SHAPES Users can replace the shape(s) selected with a new shape of the same class that is available within the stencil set. Right-click and select Update Shape to convert object shape to new shape NOTE: This feature is under development. For more information contact DISCON Specialists. 3.4 WORKING WITH SHAPES NOT ASSOCIATED TO THE DATABASE This section relates to shapes that are not available in the Stencil Pane and can be inserted onto a diagram. These shapes are not associated with the Meta model in any way, and are typically used to enhance the appearance of diagrams. These shapes are stored within a diagram and not in the database. Click to insert shape Object Description Shape Rectangle While holding down the left mouse button, drag the crosshair until the required shape and size have been obtained. Release the mouse button. Triangle Ellipse Version 3.0 Understanding the Basics Page 43 of 82 DISCON Specialists MetaBuilder User Manual Object Description Other Shapes Select Other Shapes from the Insert menu and then select any of the following shapes: Polygon Curved Polygon Select either Curved Polygon or Line Polygon from the Other Shapes menu. Click with the crosshair on the outline corners of the Polygon. Once the correct shape has been obtained press the Return button to create the Polygon. Press the Escape button to cancel the object. Line Polygon Trapezoid Select Trapezoid from the Other Shapes menu. The Trapezoid is inserted onto the canvas. Cube Select Cube from the Other Shapes menu. The Cube is inserted onto the canvas. Cylinder Select either Vertical Cylinder or Horizontal Cylinder from the Other Shapes menu. The cylinder is inserted onto the canvas. Vertical Cylinder Horizontal Cylinder Hexagon Select Hexagon from the Other Shapes menu. The Hexagon is inserted onto the canvas. Parallelogram Select Parallelogram from the Other Shapes menu and click on the diagram. While holding down the left mouse button, drag the crosshair until the required shape and size have been obtained. Release the mouse button. Octagon Select Octagon from the Other Shapes menu. The Octagon is inserted onto the canvas. Diamond Select Diamond from the Other Shapes menu. The Diamond is inserted onto the canvas. House Shape Select House Shape from the Other Shapes menu. The House Shape is inserted onto the canvas. Arrow Select Arrow from the Other Shapes menu. The Arrow is inserted onto the canvas. Version 3.0 Understanding the Basics Page 44 of 82 DISCON Specialists MetaBuilder User Manual Object Description Block Arrow Select Block Arrow from the Other Shapes menu. The Block Arrow is inserted onto the canvas. Stroke Select Stroke from the Insert menu and then choose between either Line or Bezier. Both types of objects are inserted by clicking with the crosshair on the corners of the stroke. Once the correct shape has been obtained press the Return button to create the stroke. Press the Escape button to cancel the stroke. Line Bezier Text Label Select Label from the Insert menu. The Label is inserted onto the canvas. Edit the Label by clicking within the Label and typing the required text. RichText Select RichText from the Insert menu. The RichText is inserted onto the canvas. Edit the RichText by double clicking within the RichText. The RichText Edit Form (see below) will be displayed where users can now type in or edit the required text. This edit form can typically be used to insert text from a Word document. Hyperlink Select Hyperlink from the Insert menu. The Hyperlink is inserted onto the canvas. Double-click on the hyperlink to edit the hyperlink’s properties and Ctrl + Click to follow the hyperlink. Select File to insert a hyperlink pointing to a file. Edit the Label Caption by changing the text in the edit box. Click on the Browse button to select the required file. To hyperlink to a specific place within the file (only applicable for MS Word files), click the Get Bookmarks button and select the applicable bookmark. Select Diagram to insert a hyperlink pointing to a MetaBuilder diagram. Edit the Label Caption by changing the text in the edit box. Click on the Browse button to select the required diagram. Version 3.0 Understanding the Basics Page 45 of 82 DISCON Specialists Object MetaBuilder User Manual Description Select URL to insert a hyperlink pointing to a URL. Edit the URI by changing the text in the edit box. Edit the Label Caption by changing the text in the edit box. Comment Select Comment from the Insert menu to insert it onto the canvas. Edit the Comment by clicking within the Comment and typing the required text. Comments can also be inserted by right-clicking on the canvas. Balloon Comment Select Balloon Comment from the Insert menu. The Balloon Comment is inserted onto the canvas. Edit the Balloon Comment by clicking within the Balloon Comment and typing the required text. The Balloon Comment can be anchored to a shape by dragging the anchor point onto a shape. Balloon Comments can also be inserted by right-clicking on any object. Picture Select Picture from the Insert menu. Browse the Open File dialog and select Open to insert the required picture onto the diagram. Supported file formats are jpg, gif, bmp, png and ico. File Attachment When selecting the File Attachment option from the Insert Menu, the standard Open File dialog appears. Browse the Open File dialog and select Open to insert the required file into the diagram. Any file format type can be inserted into a diagram. When a File Attachment is inserted into a diagram the file is saved as part of the diagram. Legend Select Legend from the Insert menu. A legend can be inserted to contain either the various classes or colours used on the diagram or both. Edit the Legend by clicking within the Legend text and typing the required text. Version 3.0 Understanding the Basics Page 46 of 82 DISCON Specialists MetaBuilder Object User Manual Description Note: Reshape or resize any of the objects by clicking with the mouse cursor on any of the edit points and dragging the edit point to obtain the new shape or size. An object can also be moved on the canvas by clicking with the mouse cursor on the object and then dragging it to its new position. For more accurate positioning the arrow keys can be used. 3.5 SHAPE BASICS 3.5.1 UNDO AND REDO When selecting the Undo feature, the last action(s) performed during diagramming is undone. The number of undo levels is unlimited. Changes that impact the database cannot be undone. When selecting the Redo feature, the last user action that has been undone is performed again. This implies that Redo is the inverse of Undo, and can only follow an Undo action. It is important to note that multiple Undo actions can be followed by multiple Redo actions to redo the actions that have been rolled-back. Click to Undo Click to Redo 3.5.2 CUT, COPY AND PASTE In MetaBuilder, when you copy/cut an object or shape, it creates a duplicate of that item in the computer's temporary memory (Clipboard). All Meta properties for an object will be copied with the object but not the PKID. Cutting an object or shape will remove it from the diagram and hold it in memory, as above. Any associations to other objects will be marked for delete. Click to Cut Click to Copy Click to Paste Note: The clipboard can only contain one set of objects. This means that if information is placed within the clipboard by using the Cut or Copy action, all existing information in the clipboard is replaced by the information that was cut or copied. Once that the selected object or shape is copied/cut into memory, you can paste it somewhere else. When pasting items from the clipboard they remain available within the clipboard. Version 3.0 Understanding the Basics Page 47 of 82 DISCON Specialists MetaBuilder User Manual Provided that the duplicate checking option is enabled within the tool options, MetaBuilder checks for potential duplicates within the database when an object is pasted (copy only) onto the canvas. This check is done against the object’s Name property. If potential duplication is found within the database, the new object will be encapsulated within a red frame informing users that a possible duplication exists. A new task will be generated in the Task Pane (Refer to Database Management: Manage Duplicates) from where the objects can be merged, if required. Note: A duplicate warning will also be generated for a new object that is placed on the canvas from the Stencil Pane and the name is changed to that of an existing object within the database. Note: If the object is saved at this point in time the red frame will disappear and a new object will be created in the database. There will now be two objects within the database with the same name property but with different PKID’s. 3.5.3 SELECTING OBJECTS The Select All feature allows for the selection of all the objects on the current active drawing canvas. Click to select all objects The Select Tree feature allows users to select the parent node with all its connected children nodes. User can either select the main parent node of a tree or branches within the tree. Right-click on the required parent node and click on Select Tree to highlight the selected parent node with all its connected children nodes The Select All Items of this Type feature allows users to select all the objects of the same class as the selected object. Version 3.0 Understanding the Basics Page 48 of 82 DISCON Specialists MetaBuilder User Manual Right-click on the required class node and click on Select All Items of this Type to highlight the same class nodes on the diagram 3.5.4 FIND The Find feature provides a searching capability and allows users to find objects on the active canvas which contains the specified text. Click to open the Find dialog 3.5.5 FORMATTING OBJECTS All functionality grouped under the Format menu relates to the way in which objects can be formatted to change their appearance. Multiple objects can be formatted simultaneously if they are selected together. Click to open the Edit Fill dialog Click to apply quick fill formatting The Edit Fill dialog can be used to change the fill properties of selected objects. The objects can be filled with a solid colour or by applying a gradient. Version 3.0 Understanding the Basics Page 49 of 82 DISCON Specialists MetaBuilder User Manual Click to open the colour palette Click to fill with solid colour Click to select the direction of the gradient Click to fill with gradient colour Click to select the second gradient colour Click to select the first gradient colour Click to open the colour palette Click to change the opacity level The Text Formatting dialog can be used to change the text properties of selected objects. Version 3.0 Understanding the Basics Page 50 of 82 DISCON Specialists MetaBuilder User Manual Click to open the Text Formatting dialog Click to change the font face Click to change the text style Click to change the font colour Click to change the font size Click to apply multiline formatting Click to apply the strikethrough formatting Click to wrap text at specified pixels Click to underline the text MetaBuilder allows users to copy formatting from one object to another. Click to apply formatting Select an appropriate object that has the required fill and text properties that needs to be replicated. Click the Format Painter button and then select the object that needs to be painted with the selected fill and text properties. When multiple objects need to be painted, double-click on the Format Painter button after selecting the object that has the required fill and text properties. Click on the objects that need to be painted. To stop the format painter, double-click on the Format Painter button again to deselect the feature. 3.5.6 ALIGNING OBJECTS The Align feature allows users to align objects in a specified manner. Click to apply alignment Version 3.0 Understanding the Basics Page 51 of 82 DISCON Specialists MetaBuilder User Manual Aligning objects may cause them to stack on top of each other. Make sure objects are correctly positioned relative to one another before aligning. The first object selected will act as a marker and the rest of the objects will align with reference to the marker. 3.5.7 LAYOUT SHAPES MetaBuilder has several features to help you lay out objects on the diagram using layout algorithms. Click to open Layered-Digraph layout settings The layout settings for the Layered Digraph can be altered using the options available in the Layered Digraph Layout Settings dialog. Specify the Layer and Column Spacing for the layered digraph. The value for the Layer spacing will influence the vertical spacing of the digraph and the Column spacing the horizontal spacing. Click to specify the direction of the layered digraph When distributing objects in a “Tree” fashion there are a lot of variables that can be set to alter the way the end result looks. Click to open Tree layout settings Note: The Tree Layout Settings defaults to their original settings every time the dialog is opened. The user must verify that the values displayed are correct before applying any new changes. Version 3.0 Understanding the Basics Page 52 of 82 DISCON Specialists MetaBuilder User Manual Setting Description Tree Growth Direction Indicates the direction in which the tree will grow or expand in. Spacing Spacing determines how far apart objects will be placed from one another in the same layer, and also indicates the distance between layers. Users can also indicate if the graph should be compacted or not. Tree Construction Path Indicates the direction that should be followed when creating the tree. There are two available options: Destinations are Children. The child nodes in the diagram will be used as the children nodes in the tree. Sources are Children. The child nodes in the diagram will be used as the parent nodes in the tree. Forest Arrangement The values under the heading Forest Arrangement deal with the distribution of multiple trees on the same diagram, hence the name “Forest Arrangement”. Users can set the default layout direction of trees in the forest and default spacing between trees in the forest: Arrangement. Arrange multiple trees horizontally or vertically. If the option Fixed Roots is selected, the position of the parent nodes will remain fixed if the trees are automatically rearranged. Spacing. Specify the distance between the multiple trees. The Width (W) value determines the spacing if a horizontal arrangement is selected and the Height (H), if a vertical arrangement is selected. Version 3.0 Understanding the Basics Page 53 of 82 DISCON Specialists MetaBuilder User Manual Setting Description Maximum Tree Size Can be used to set the Maximum Tree Size. Users can limit the Maximum Width of the tree as well as override the default spacing between nodes on the same layer by specifying the Row Spacing between children. The row spacing will only be applicable if a value has been specified for the maximum width Parent to Children Alignment The way in which the parent nodes are aligned to their children nodes can be set using the settings under the Parent to Children Alignment section. By default the parent node will be centred between its children nodes, but users have the ability to change the layout to align the parent nodes as follows: Centre Subtrees. Aligns the parent node to the centre of the subtrees. Centre Children. Aligns the parent node to the centre of its children nodes. Start. Aligns the parent node with the first child node. End. Aligns the parent node with the last children node. The Indent setting specifies the indent of the children nodes. The maximum value allowed is 100. Ordering of Children Allows users to specify the order in which the children nodes are arranged. Users can select to keep the order of the children unchanged, reversed, or sort them alphabetically under the same parent. Tree Style The Tree Style can be set to Layered, Alternating or Last Parent. This value affects how the child nodes are laid out relative to the parent node. If the tree is layered then all nodes are laid out in the same direction, and if alternating is selected the child nodes can be alternated. For instance, the child nodes can be laid out vertically while the parent nodes are distributed horizontally. Auto Re-link Indicates if MetaBuilder should recalculate the ports used when linking objects after the layout has been completed. If the option is not selected, the links will remain connected to the same ports, and if the option is checked, the tool will recalculate the shortest path between objects and place the link on the shortest path. The Layout Artefacts feature allows users to automatically rearrange any Artefacts that were inserted on the diagram. Click to layout artefacts Version 3.0 Understanding the Basics Page 54 of 82 DISCON Specialists 3.5.8 MetaBuilder User Manual ORDER MetaBuilder allows users to stack individual objects so that one appears in front of another. Click to bring the selected object up one level so that it is in front of more objects Click to send the selected object back one level so that it is hidden behind more objects 3.5.9 Click to bring selected object to the front of all other objects Click to send the selected object behind all other objects DISTRIBUTE MetaBuilder allows users to distribute multiple objects equal distances from each other, either vertically or horizontally. Distributing shapes means that the distance between the borders of the shapes is equal. Click to distribute objects evenly 3.5.10 GROUPING A Group is a collection of objects that behave as one for the purpose of moving, resizing, etc. A group can be composed of multiple sets of groups. Click to group or ungroup selected objects Version 3.0 Understanding the Basics Page 55 of 82 DISCON Specialists MetaBuilder User Manual SECTION FOUR 4. TOOLS 4.1 META MAPPER Meta Mapper is a visual thinking tool that helps users easily create and gather information. It can be used during planning, meetings, brainstorming and problem solving to generate, visualise, structure, classify ideas, organising information, solving problems and making decisions. A Meta map can be created around a single concept to which associated representations of ideas are added. Major ideas are connected directly to the central concept, and other ideas branch out from those. Click to open Meta Mapper Meta mapper is independent from the MetaBuilder Meta model and no content is saved to the database. Drag from the edge of the node to draw a new link Double-click on the node to edit Double-click on the canvas to create new nodes Hold Ctrl and double-click on a node to create a new connected node Hold Shift and doubleclick on a node to create multiple connected nodes Meta mapper auto layout the nodes as soon as any nodes are added or linked to other nodes. Press escape to stop any ongoing auto layout or disable the feature in the tools menu. Fill and text properties can be adjusted from within the format menu. Version 3.0 Tools Page 56 of 82 DISCON Specialists MetaBuilder Click to save or open meta map User Manual Click to change shape for node Click to print meta map Click to close meta map 4.2 CONVERTING ALL COMMENTS TO RATIONALES Comments inserted to the diagram are not stored in the database. MetaBuilder allows users to convert those comments to rationales so that they can be stored within the database and re-used across diagrams. Click to convert all or selected comments to rationales 4.3 RELATIONSHIP MANAGER The Relationship Manager allows users to manage associations between objects and their associated artefacts from within the database. Click to open relationship manager Users can work with existing associations or create new associations between objects. When you create an association matrix, you can conveniently select objects from the entire database. Version 3.0 Tools Page 57 of 82 DISCON Specialists MetaBuilder Click to open Click to save saved matrices association matrix User Manual Click to export association matrix Column pane Row pane Artefact pane Association matrix Click to select between local / server associations When opening the Relationship Manager the object finder will be available to select the objects which must be loaded into the rows (parent objects) and then after selection be available to select the objects to be loaded in the columns (child objects) (refer Database Management: Load from Database for an overview of the object finder). Objects can also be loaded at a later stage with the Add Items feature. Right-click within row / column pane and click Add Items to open object finder You can view all existing associations, add new associations and delete associations (Mark for Delete). Version 3.0 Tools Page 58 of 82 DISCON Specialists MetaBuilder Select to add or delete association User Manual Click to display allowed associations If the Meta model allows an artefact to be added to the association, users are able to view any artefact that exists on the selected association. The class of artefact as well as any existing artefacts will be displayed in the artefact pane. Click to view linked artefacts New artefacts can be created and linked to the association. Artefacts created in this manner are automatically saved to the database. Existing Artefacts can also be added to an association using the object finder. Version 3.0 Tools Page 59 of 82 DISCON Specialists MetaBuilder User Manual Right-click and select New to create a new artefact for the selected association Right-click and select Open to load and link an existing artefact for the selected association Click to save artefact after editing Artefacts can be removed from an association by right-clicking on an artefact in the list and selecting the Remove feature. Artefacts removed in this manner are not automatically deleted from the database. The matrix view can be exported to Microsoft Excel in one of two ways: The Normal Export option exports the view as it displays on the screen, with visual indicators where objects are associated. The Detailed Export option exports a description of the association between the objects in the below format. Version 3.0 Tools Page 60 of 82 DISCON Specialists 4.4 MetaBuilder User Manual SWOT ANALYSIS The SWOT Analysis feature allows users to generate a SWOT Analysis report from pre-defined ‘implications’ stored within the database. Click to open SWOT Analysis tool Users can select the implications that should be displayed on the SWOT report. Click to print SWOT report Click to open object finder Click to select or deselect implications to display 4.5 IMPORT TO DIAGRAM MetaBuilder can import any hierarchical structured content from a textual format provided that the structure of the textual document meets the necessary requirements (Refer to Database: Import Textual Structure Diagram for requirements). Objects imported in this manner will not be imported directly to the database but only be loaded onto a new diagram. Version 3.0 Tools Page 61 of 82 DISCON Specialists MetaBuilder User Manual Click to select import file 4.6 HIERARCHY NUMBERING The Hierarchy Numbering feature allows the user to add hierarchical numbering to any hierarchical structure on a diagram. It is important to note that the numbers assigned to objects will not be stored in the database since they are generally regarded as having meaning in the context of a diagram, but not across all diagrams. The top / parent object needs to be selected before the Hierarchy Numbering feature is selected. Numbering can be removed with the Remove Numbering feature. Click to add / remove numbering 4.7 VALIDATE MODEL The Validate Model feature allows users to test the accuracy of a model according to the defined modelling rules for the specific modelling technique. Note: Model validation is under development and new validation features will be implemented on a continuous basis. Contact DISCON Specialists for more updates or specific requirements. The rules that will apply for each validation feature are described within separate guidelines for the specific modelling technique. Click to open validation results Version 3.0 Tools Page 62 of 82 DISCON Specialists MetaBuilder User Manual Users will be notified if the validation is successful and has the option to review the validation results. When errors are present in the model the Validation Failed message will appear and Validation results as per below example should be viewed and corrected. Items in the Validation Results log are typically grouped per error type and can be collapsed or expanded by selecting the plus or minus symbol on the left of the item. Any item that form part of the Validation Results log can be traced and viewed on the model by double clicking on the specific item in the log. A drop down list provides possible actions that can be performed for the specific technique when the validation has been successful. Version 3.0 Tools Page 63 of 82 DISCON Specialists MetaBuilder User Manual SECTION FIVE 5. WORKING WITH THE DATABASE 5.1 LOAD FROM DATABASE The Load from Database feature allows users to re-use existing objects saved within the database. Users can search the database for objects using a variety of filters, select one or more, and add it to the current diagram. If associations exist between objects that are added, it will also be added to the current diagram. Click to open object finder Filter the database in the following ways in order to find the required object(s): Select Workspace to filter the workspace in which the object finder must search for any objects. Select Diagram to filter the diagram in which the object finder must search for any objects. Select Class to filter a specific class for which the object finder must search. Select Class Type to filter for a specific class type. Class filter must be selected. Select Status to filter for objects with a specific status. This filter will typically only be used when the Desktop edition in used in conjunction with a Server edition. All five, or a combination, of these filters can be used together. Users can narrow the search by specifying a more detailed description of the required object. By typing the information into the Search For edit box the object finder will search for objects containing the information specified in the edit box. Click on the Find button to execute the search based on the specified criteria. If no criteria have been specified, the object finder will search for all the objects it can find within the database. All objects that were found will be displayed in the Search and Select window. Users can now choose to select individual objects by clicking inside their checkboxes or by clicking the Select All button to select all the available objects. Click on the Select None button to deselect all the objects. When the Clear Results checkbox is selected the previous search results and selection are cleared every time the user launches a new search. When not selected, new search results are added to the bottom of the result grid. Version 3.0 Reporting Page 64 of 82 DISCON Specialists MetaBuilder User Manual The Object Name, Class Type, Workspace, PKID, Machine ID and Status will be displayed for each of the found objects. In addition to this, clicking on the More Info […] button for an object will display a variety of information pertaining to the selected object. No property changes can be made from here. When selecting the Current Selection window, all the objects that have been checked in the Search and Select window will be displayed. An object can be removed from the current selection by deselecting its associated checkbox. Clicking on the Ok button again will place the selected objects on the canvas. If more than one object is selected and there are associations between those objects, the associations will also be loaded. Objects will be loaded onto the canvas in the top left-hand corner of the canvas pane, unless auto layout is selected. Objects can also be loaded from the database using the Intellisense feature, provided the option is selected within tool options. Place a new object on the canvas from the stencil or double click on the name of an existing object. Start typing the name of the object that needs to be loaded from the database. Then press the Ctrl + Space Bar keys to filter all the objects of the specific object class in the database that matches the name or portion of the name typed. Press Ctrl + spacebar to filter available database objects Left-click on the name in the list to create a duplicate copy of the object Version 3.0 Right-click on the name in the list to create a shallow copy of the object Reporting Page 65 of 82 DISCON Specialists 5.2 MetaBuilder User Manual REFRESH OBJECTS In some cases it may be required to manually refresh the objects on the diagram to reflect the current status of the objects in relation to the database. Click to refresh diagram objects Refreshing the objects retrieve the latest data for objects that were saved in the database and updates them on the active diagram. This might be used when opening an older version of a diagram from the diagram manager that contains objects that have changed. Two options are available: Select Whole Document to refresh all objects on the diagram. Select Selection to refresh only the selected objects on the diagram. 5.3 CHANGED OBJECTS Users will in most cases be informed of any changes between the objects on the diagram and the database by means of the status control indicators (i.e. MarkedforDelete). In some cases however it could be required to manually add indicators to reflect the current status of the objects. Click to add or remove status control indicators Selecting the Add indicators feature will compare all objects on the diagram with the objects in the database and search for any differences. If any differences are found for an object’s Meta properties the object will be labelled with an indicator “Differs from DB”. These objects can now be refreshed using the Refresh Objects feature. Version 3.0 Reporting Page 66 of 82 DISCON Specialists 5.4 MetaBuilder User Manual IMPORT MetaBuilder allows users to import data directly into the database from a Microsoft Excel (.xlsx) or text (.txt) file. Click to import data When data has been entered into a MetaBuilder generated template it can be imported via the “Excel Template” importer (refer to Export Excel Template). Once the Excel file has been selected the tool will automatically recognise the class that should be imported from the file, and import the data into the database. By importing an Excel template, existing content can also be updated. When importing the data into the database the tool will check for existing objects, and if found, update any properties for an object that were found. This will prevent the creation of any unnecessary duplicates in the database. Only the Meta Properties for the object need to be filled in. The workspace association will be created for whatever workspace is active when the import command is executed. An example of an Excel template for the class Function is shown below. MetaBuilder can import any hierarchical structured content in textual format provided that the structure of the content meets the requirements described below. Note: The format of the import text file should always be exactly as specified below: All objects must be of the same class, e.g. Function. The indenture-level of objects must be represented using “tabs”. No hierarchical numbering must be given to objects. The association type must be displayed in square brackets immediately after the last tab space, and should be followed by a space, e.g. [C]. If the association type is omitted a decomposition connection type will be created. Valid values are [A], [C] and [M]. These values represent Auxiliary, Classification and Mapping, respectively. The name property should follow the last “tab” or association type specification, where applicable, e.g. [C] Manage Employees. There must be no extra spaces after the name property. The text file must be saved as a text document, e.g. Employee List.txt. Version 3.0 Reporting Page 67 of 82 DISCON Specialists MetaBuilder User Manual An example of a text file that is ready for import is shown below. When selecting a text file for importing, the tool will prompt the user for the Class to be Imported. Default Field to Populate specifies the property that you are importing. This will usually be the primary property, e.g. Name. It informs the tool which property of each imported object will be used when assigning the value in the text file. Once the class has been defined the tool will test the content validity of the import file. If any errors are encountered during the validation process, the user will be notified and the importing aborted. Once all validation tests have been passed, the file will be imported into the database. 5.5 EXPORT MetaBuilder allows users to export data directly from the database to a Microsoft Excel (.xlsx) or text (.txt) file. Click to export data Version 3.0 Reporting Page 68 of 82 DISCON Specialists MetaBuilder User Manual Export Excel Template MetaBuilder allows users to generate a Microsoft Excel import template for any class defined in the Meta model. The template will contain columns for each Meta property of the class as defined in the Meta model. The template will be exported to the “Export” directory defined in the “Paths” tab. The template generated can be used for mass data imports into the database. When generating a template users are presented with a choice of exporting any existing data onto the template. If this is done the user can edit the existing data and add new data to the same sheet within Microsoft Excel. Any changes made will overwrite the database content once imported. Note: MetaBuilder currently do not have any filtering capability for exporting existing data. All database content of the selected class will be exported. This feature is under development. Export Hierarchical Structured Data MetaBuilder can export any hierarchical structured content into a text file. The structure can be exported in any one of the following formats: Hierarchical Data (Tabbed). Data will not be numbered, but the depth of an object relative to the root object will be indicated using tabs. Hierarchical Data (Numbered). Data will not be indented, but a system generated number indicating the position of an object relative to the root object will be displayed next to the object. Hierarchical Data (Tabbed and Numbered). The depth of an object relative to the root object will be indicated using tabs and a system generated number indicating the position of an object relative to the root object will be displayed next to the object. Click to export hierarchical data to a text file When selecting this feature the user is prompted to select the class and Meta property to export. Version 3.0 Reporting Page 69 of 82 DISCON Specialists MetaBuilder User Manual Within the object finder filter the data to be exported. Only select the “top (parent) node” of the hierarchical structure that should be exported. The structure will be traversed in a depth-first manner, and exported accordingly. Export Associations MetaBuilder allows users to export object associations to Microsoft Excel. You can select to do a workspace specific export. Select the parent and child class as well as the type of association to export. 5.6 DATABASE MANAGEMENT The Database Management feature allows users to perform a variety of actions on objects and associations stored within the database. Click to open database management Management of the database can be altered between the client database and server database (provided a server connection exists). Version 3.0 Reporting Page 70 of 82 DISCON Specialists 5.6.1 MetaBuilder User Manual RECYCLE OBJECTS The Recycle Objects feature allows users to mark objects for deletion from within the database. Objects that still appear on diagrams will be flagged with a ‘Marked for Delete’ indicator as a result of the status of the objects that has changed within the database, from None to Marked for Delete. Click to select object Click to mark selected object(s) as deleted 5.6.2 MANAGE RECYCLED OBJECTS The Manage Recycled Objects feature allows users to either permanently delete objects from the database or restore marked for delete objects within the database. Objects that still appear on diagrams will be flagged with a ‘Not in Database’ indicator when permanently deleted from the database. The PKID will remain the same, even if the object is permanently deleted and then saved again on an existing diagram. Version 3.0 Reporting Page 71 of 82 DISCON Specialists MetaBuilder User Manual Click to select object Click to permanently delete selected object(s) from database 5.6.3 Click to restore selected object(s) to status of None within database DELETE ORPHANED OBJECTS Orphaned objects are those objects that still exist within the database but all occurrences of those objects have been removed from diagrams. In other words, orphaned objects are not being used on any diagram and have potentially become redundant. Those orphans can savely be delted from the database. Click to select object Click to permanently delete selected object(s) 5.6.4 DELETE REDUNDANT SERVER OBJECTS The delete redundant server objects feature allows you to search through your client database for all the objects that currently exist on your machine which were once synchronised with the server database. any of these objects which no longer exist on the server because they have been permanently deleted through actions like merge duplicates will be placed into a list from which you Version 3.0 Reporting Page 72 of 82 DISCON Specialists MetaBuilder User Manual can select the objects you would like to delete. Upon deleting the selected objects they will be permanently deleted from your client database as well. 5.6.5 MANAGE DUPLICATE OBJECTS The Manage Duplicate Objects feature is used to find database objects of the same class where the name property is the same. Users have the option to merge those objects to a single object that exist within the database. Click to select object Click to open the merge manager Note: Only one of the duplicate objects will be displayed in the object finder as it doesn’t matter which one is selected to start the merge process. Version 3.0 Reporting Page 73 of 82 DISCON Specialists MetaBuilder User Manual The Merge Manager comprises the Master and Reference Windows. The first object in the master list will be selected by default. A different master may also be selected. Select the reference object and then click on the Merge button to merge the selected objects. Users are able to view information on an object before choosing to merge the objects. Multiple duplicates may first be managed by clicking on the Next and Previous buttons before the merge can be performed. As the changes will be reflected in the database but not yet on any diagrams saved in the file system, users will after merging the objects be informed of any diagrams that were influenced by the merge process. Version 3.0 Reporting Page 74 of 82 DISCON Specialists 5.6.6 MetaBuilder User Manual RECYCLE ASSOCIATIONS The Recycle Associations feature allows users to mark associations for deletion from within the database. Associations that still appear on diagrams will be flagged with a ‘Marked for Delete’ indicator as a result of the status of the associations that has changed within the database, from None to Marked for Delete. 5.6.7 MANAGE RECYCLED ASSOCIATIONS The Manage Recycled Associations feature allows users to either permanently delete associations from the database or restore marked for delete associations within the database. Associations that still appear on diagrams will be flagged with a ‘Not in Database’ indicator when permanently deleted from the database. The PKID will remain the same, even if the associations is permanently deleted and then saved again on an existing diagram. 5.6.8 MANAGE DIAGRAMS The Diagram Manager allows users to open or delete previous database versions of a diagram. Users are presented with a list of diagrams (snapshots) that are stored within the database. After selecting the diagram you can click on the Open Selected Diagram(s) button to open the diagram(s) in the canvas pane. Deleting a diagram will only remove that version of the snapshot from the database. This will have no effect on the objects, etc in the database. It is not possible to delete the latest version of any diagram using the diagram manager. Whenever a previous version is opened that contains objects with properties that differs from the properties within the database you have the option to refresh either the properties on the diagram or the database. Any such objects on the diagram will be flagged with a ‘Differs from DB’ indicator. Caution: Depending on the refresh setting in the tool options the objects on the diagram will automatically refresh, should any changes exist. If set to prompt, you will need to first select if the changes should refresh by clicking on the Yes button. If yes is selected the properties on the diagram will automatically refresh with the data in the database. If the properties on the diagram are the preferred data, click on the No button to open the diagram without refreshing any data. Saving the diagram will update the database with the data from the diagram. Users can, after selecting No but before saving the diagram, still choose to refresh the objects on the diagram using the Refresh Objects feature. Version 3.0 Reporting Page 75 of 82 DISCON Specialists MetaBuilder User Manual Note: Any previous version that is opened and saved will now become the latest version. The version number will however carry on from whatever the number is from the earlier version. If for example, the version numbers extend from 0.1 to 0.10, and the previous version that were opened is version 0.4, the new version will now be version 0.5 and not 0.11. If any later version numbers still exist it is advised to delete those versions to prevent any confusion. 5.6.9 WORKSPACE TRANSFERS The Workspace Transfers feature allows users to transfer items between workspaces. Typically this could involve moving items from the Sandbox workspace to a project specific workspace or a Server workspace. Click to select diagram / object to transfer Click to add selected items to the transfer list Click to embed objects in the transfer when diagram is selected Select the Source Workspace and then select the diagram to be transferred by clicking within the checkbox next to the diagram. Now select the Target Workspace and click on the Add Items to Transfer List button. Click on the Transfer button to finalise the transfer. Individual Objects can also be transferred in the same manner. When the Include Embedded Objects option is selected all objects that appear on a diagram are included in the diagram transfer. 5.6.10 WORKSPACE MANAGER A workspace is a grouping of architecture knowledge items for a specific domain or purpose such as a project, organisation unit or logical grouping of related architecture items. Workspaces can be used to group related diagrams and objects together. Objects in different workspaces are visible to each other which mean that associations can be added between objects residing in different Version 3.0 Reporting Page 76 of 82 DISCON Specialists MetaBuilder User Manual workspaces. Workspace associations also make finding objects within the database easier and faster. Refer to Section 3: Managing Your Workspaces. 5.6.11 EMPTY SANDBOX WORKSPACE Metabuilder allows users to only clear database content that are associated with the Sandbox workspace. 5.6.12 BACKUP DATABASE The Backup Database feature presents users with the ability to make a backup of the database. Clicking on the Backup Database button will prompt you to specify the path location of where the backup must be saved. Note: Depending on the permissions of your local computer you may be prompted to change some settings on your SQL server. By selecting the following path: “C:\Program Files\Microsoft SQL Server\MSSQL.1\MSSQL\Backup” the backup should be created. Refer to the Quick Help in the installation folder for help on restoring your database. 5.6.13 CLEAR DATABASE The Clear Database feature allows users to clear the database of all content. It is strongly recommended to make a backup of the database before clearing the database. 5.6.14 RUN SCRIPT ON DATABASE The Run Script on Database feature is used to run an official MetaBuilder update script on the database. This will typically be used when update scripts are received from DISCON Specialists for MetaBuilder. 5.7 SYNCHRONISING WITH THE SERVER Synchronisation helps keep architecture knowledge items (diagrams / objects) up to date and allows users to re-use items created elsewhere. MetaBuilder offers desktop clients the ability to synchronise to a pre-defined workspace (project or architecture domain) within a central (server) repository. Click to synchronise to a server repository MetaBuilder has the ability to control how and what users can access on the server repository. The permissions feature allows users to set permissions for the server repository. Note: A valid server license is required and a synchronisation server string created within the tool options before synchronisation is allowed. Refer to the MetaBuilder Server edition for more information. Version 3.0 Reporting Page 77 of 82 DISCON Specialists MetaBuilder User Manual SECTION SIX 6. REPORTING MetaBuilder Report Manager provides a wide variety of pre-defined reports enabling you to deliver relevant information where needed. MetaBuilder Report Manager also enables users to create their own reports by using the Custom SQL Report Builder. The following reporting options are available: Basic. Generate a list report for the class of object selected. General. A report will be created containing a list of the specified parent and child classes with the specified association. Select the parent and child class as well as the type of association. Pre-defined. Generate a pre-defined report by selecting from the available reports. Custom. Create user-defined reports by writing your own SQL statements. Version 3.0 Reporting Page 78 of 82 DISCON Specialists MetaBuilder User Manual SECTION SEVEN 7. HELP 7.1 ABOUT The About feature provides users with the edition and version information for MetaBuilder. Click to open About 7.2 QUICK START GUIDE The Quick Start Guide serves the purpose of introducing the interface and features of MetaBuilder. Click to open the Quick Start Guide 7.3 REGISTRATION The Demo version of MetaBuilder is valid for 14 days after installation and before registration is compulsory. Users can register MetaBuilder by clicking on the Register button. Once the Registration Form is completed, click on the Register Application button to submit the registration application. The following information is compulsory: First Name. Last Name. E-mail. Licence Key. NOTE: An internet connection is required to complete the registration. Version 3.0 Help Page 79 of 82 DISCON Specialists MetaBuilder User Manual Once registration is successful the user will be presented with the Registration Successful dialog. 7.4 KEYBOARD SHORTCUTS Click to open the Shortcuts Help Shortcut Action F1 Opens the MetaBuilder help. F3 Opens the Find Text dialog. F4 Place the focus on the selected object’s shallow copy. F5 Refresh the attribute / columns of a shallow copy of a composite shape such as a Data View, Entity and Table. Items to be refreshed must be selected first. Version 3.0 Help Page 80 of 82 DISCON Specialists MetaBuilder User Manual Shortcut Action F8 Creates a shallow copy of the selected object(s) in the clipboard. Right-click / Ctrl + V to paste. Can be used to create a shallow copy of multiple objects. F10 Moves the tab focus to the File menu . Ctrl + F4 Close the active diagram Ctrl + A Select all objects and associations on the canvas. Ctrl + C Copy selected objects. Ctrl + O Opens the Open Diagram dialog. Ctrl + P Opens the Print Setup dialog. Ctrl + S Saves the active diagram. Ctrl + V Paste the clipboard content. Ctrl + Y Redo. Ctrl + Z Undo. Insert Add field to composite shape. Shift + Delete Mark the selected object for delete Ctrl + Scroll Up/Down Zoom In/Out of the active diagram Ctrl + Drag (Left Mouse Button) Copy selected shape(s). Release Left Mouse button before Ctrl Shift + Drag (Left Mouse Button) Move selected shape(s), Horizontally or Vertically Ctrl + Shift + Drag (Left Mouse Button) Copy selected shape(s), Horizontally or Vertically. Release Left Mouse button before Ctrl Ctrl + Shift + Left Mouse Button Zoom In Ctrl + Shift + Right Mouse Button Zoom Out Ctrl + Scroll Up/Down Zoom In/Out of the active Zoom view Version 3.0 Help Page 81 of 82 DISCON Specialists MetaBuilder User Manual Shortcut Action Shift + Scroll Up/Down Pan Left and Right in the Zoom View Ctrl + Space Bar + Right Click on Name Start Typing in Object - Crtl + Space Bar - List all Possible Names in Database of the selected class Select Required Name - Right Click - Creates a Shallow Copy Ctrl + Space Bar + Double Left Click on Name Start Typing in Object - Crtl + Space Bar - List all Possible Names in Database of the selected class Double Left Click on the required name - Creates a duplicate of the object Ctrl + Enter View Selected Object in Context Ctrl + TAB Next Document Ctrl + Shift + Tab Previous Document Arrow Keys Nudge shapes Ctrl + Arrow Keys Nudge shapes to the specified size within tool options (snap to grid option must be deselected) Version 3.0 Help Page 82 of 82