1
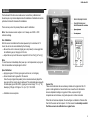
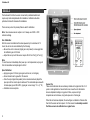
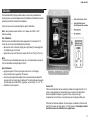
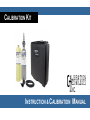
CALIBRATION KIT3
INSTRUCTION & CALIBRATION MANUAL
Calibration Kit3
Table of Contents
General description ………………………………………………...…. 3
Installation………………………………….…………………………… 3
Locating the GasGuardian-2 …………………………. …………. 4
Installation guidelines………………………………………………. 4
Wiring………………………………………………………………… 5
Operation ………………………………………………………………. 6
Start-up ……………………………...……………………………… 6
Keypad ……………………………….….…………………………. 6
LCD Operator Interface…………………………………………… 6
Navigating the Menu……………………………………………….. 7
Normal operating mode………………………………………... 7
Channel view…………………………………………………… 7
Main menu……………………………………………………… 7
Alarm log………………………………………………………… 7
Calibration mode……………………………………………….. 7
Last calibration date…………………………………………… 8
Config menu……………………….…………………………… 8
Clock……………………………………………………………. 9
Contrast………………………………………………………… 9
Relay test………………………………………………………. 9
Maintenance…………………………………………………………… 10
Specifications…………………………………………………………. 10
Warranty……………………………………………………………….. 11
2
3Calibration Kit
Table of Contents
General description ………………………………………………...…. 4
Getting Started ……………………………………………………...…. 4
GG-NH3………………………………….………………………..…… 5
GG-NH3-2% ……………………………………………………..……. 6
GG-VL……………………….………………………………………….. 7
GG-LEL…………………………………………………………………. 8
GG-CO …………………………………………………………………. 9
GG-CL ……………………………...…………………………………. 10
GG-O3 ………………………………………………………………… 11
GG-H2-1% …………………………….….………………………….. 12
GG-H2S ……………………………………………….……………… 13
GG-CO2………………………………..………………….………….. 14
GG-R……………………………………….……………………......... 15
GG-O2 ………………………………………………..………………. 16
NH3 Responder………………………………………….…………... 17
CO2 Responder………………………………………………….…… 18
Warranty ………………………………………………….…………... 19
Calibration Technologies
866-394-5861
3
Calibration Kit3
General Description
The gas sensor Calibration Kit and replacement cylinders allow for field
calibration of most fixed and portable gas detectors. This manual has been
prepared to aid in the calibration of Calibration Technologies gas sensors.
Please refer to the manual shipped with each piece of equipment for further
information.
The calibration kit may contain either one or two disposable bottles filled with
the dry gas appropriate for the sensor. Also included in the kit are the following:
•
•
•
Regulator with pressure gauge
(2) Calibration adapters
Hose
The disposable certified gas cylinders are N.I.S.T. traceable. After initial
purchase, replacement cylinders can be ordered at any time. Standard cylinder
sizes include either 17 or 29 liter cylinders. The 17L cal kit will include a
regulator (female fitting) for use with the CGA600 outlet fitting (male fitting) of
the 17L cylinder. The 29L cal kit will include a regulator (male fitting) for use
with the C-10 outlet fitting (female fitting) of the 29L cylinder. Because
calibration gas has a shelf life, each bottle has an expiration date printed on it.
Do not use the calibration gas after the expiration date.
Each regulator is preset for 0.8 liters per minute with an easy on/off valve and
includes a cylinder pressure gauge. The Calibration Kit also includes 3 feet of
Norprene tubing and flexible calibration adaptors designed to fit most standard
size gas cells and sensors. All kit accessories are enclosed in a durable hard
carrying case with foam inserts.
Getting Started
Startup:
Refer to sensor manual for power-up/warm-up procedures if power has recently
been applied to the sensor, as some sensors may require a stabilization period
before calibration is possible.
It may be suitable to bypass external alarms and other equipment until the
calibration of the sensor is completed, so as not to disrupt plant operations.
Verification of alarm functions is recommended on a yearly basis.
Alarm and readout verification:
Because sensors are normally located at a distance from the main unit, the test
time required and accuracy of the response checks will be improved if two
people perform the start-up procedures and use radio contact.
Ensure that the calibration gas concentration is equal to or greater than the
alarm setpoints if alarm verification is required.
Cell / sensor replacement:
Below are a few response characteristics which may be an indication that the
gas sensor is at or near the end of its useful life. If any of these are observed,
the sensor should be replaced:
• Slow response to / recovery from calibration gas.
• Failure of the output to reach 50% of the calibration gas value prior to span
adjustment.
• Unable to achieve correct span output during calibration.
Refer to sensor manual for more details.
Calibration Guidelines:
In highly critical areas, a response test should be performed between
calibrations to verify proper sensor response and alarm functions. This can be
done with bump gas, calibration gas or a gas sample. The response test is
not required if multiple like sensors are installed in the same room.
All tests and calibrations must be logged.
4
3Calibration Kit
GG-NH3
The GasGuard NH3 ammonia sensor comes factory calibrated and should
require only minimal adjustments after installation. Calibration should be
performed at 6-month intervals after installation.
There are two pots on the preamp that are used for calibration.
Note: Never measure sensor output in mA. Always use mVDC or VDC
voltmeter settings.
Zero Calibration:
After the sensor is installed and has been powered up for a minimum of 8
hours, the unit can be zero calibrated by the following:
• Be sure the unit is in clean air (target gas is not present) or apply Zero Air
calibration gas at 0.8 L/min.
• Adjust the zero pot until the sensor outputs 40 mV from Test [-] to Test [+].
Note:
To zero the sensor immediately after power up or cell replacement, unplug the
cell from the transmitter and adjust signal to 40 mV.
Span Calibration:
• Apply span gas at 0.8 L/min (span gas must be balanced in air, not
nitrogen).
• Sensor should react to gas within 15 seconds.
• Once the output signal has peaked (or two minutes maximum) adjust the
span pot until the correct output is achieved. The calculated span value with
full-scale span gas is 200 mVDC. ((span gas / sensor range * 16 + 4) *10).
Example: ((100 ppm / 250 ppm x 16 + 4) x 10) = 104 mVDC.
• Calibration is now complete.
Sensor Life:
These electrochemical cells are extremely reliable with a typical cell life of 2-3
years in most applications. Several factors can cause the cell chemicals to
become depleted including a long period of time, exposure to high
temperatures and continuous, long term exposure to ammonia gas.
When the cell becomes depleted, the unit will give no indication of failure other
than that the sensor will not respond. For this reason it is absolutely essential
that these sensors be calibrated on a regular basis.
5
Calibration Kit3
GG-NH3-2%
The GasGuard NH3 2% ammonia sensor comes factory calibrated and should
require only minimal adjustments after installation. Calibration should be
performed six months after installation. There are two pots on the preamp that
are used for calibration.
Note:
Never measure sensor output in mA.
settings.
Always use mVDC or VDC voltmeter
Calibration Mode:
Cal mode is required for calibrating the sensor. It clears the deadband (factory
set at 4.8 mA) and averaging. Pressing the CAL switch enables cal mode and
the green LED will flash. To exit out of cal mode, press the CAL switch or after
4 minutes it will automatically time-out.
Zero Calibration:
After the unit is installed and has been powered up for a minimum of 1 hour, the
unit can be zero calibrated by the following:
• Be sure the unit is in clean air with no noticeable ammonia vapors.
• Press the CAL switch once to enter cal mode. Do not adjust the zero pot if
the green LED is not flashing.
• Adjust the zero pot until the sensor outputs 40 mV from TP [-] to TP [+] .
Span Calibration:
Do not remove sensor housing cap during calibration.
• If green LED is not flashing, press the CAL switch once to enter cal mode.
• Apply 2% NH3 span gas at 0.8 L/min (span gas must be balanced in air, not
nitrogen).
• Sensor should react to gas within 15 seconds.
• Once the output signal has peaked (or two minutes maximum) adjust the
span pot until the correct output is achieved (200 mV).
• Calibration is now complete.
6
4mA adjustment:
Sometimes a fine adjustment of the 4mA signal may be desired to compensate
for a slight positive or negative zero-signal reading on the control panel.
• Make sure the sensor is NOT in calibration mode.
• Adjust the 4mA pot until the control panel reads zero.
Sensor life:
These catalytic-bead long-life sensors have an expected life of 5-7 years in
mechanical room applications.
3Calibration Kit
GG-VL
The GasGuard Vent Line sensor comes factory calibrated and should not
require any adjustments after installation. If any adjustments are required,
there are two pots on the preamp that are used for calibration.
Note:
Never measure sensor output in mA. Always use mVDC or VDC voltmeter
settings.
Response Test:
It is recommended that the GasGuard Vent Line sensor be response tested
only, every six months. If sensor calibration is required, refer to the Zero and
Span calibration procedures on this page.
1) One person removes the ½” plug in the tee and injects a small amount of
propane/butane from an unlit plumber’s torch.
2) The second person stays at the control panel to determine that each
sensor, when exposed to the gas, is connected to the proper input and
responds, causing appropriate alarm functions.
Zero Calibration:
After the unit is installed and has been powered up for a minimum of 24 hours,
the unit can be zero calibrated by the following:
• Be sure the unit is in clean air with no noticeable vapors or else apply Zero
Air calibration gas at 0.8 L/min.
• Adjust the zero pot until the sensor outputs 40 mV from Test [-] to Test [+].
Span Calibration:
• Unscrew the union nut of mounting kit, making sure to support weight of
sensor assembly. This will expose the sensor and allow for a more
accurate span calibration.
• Apply 1% NH3 span gas at 0.8 L/min. Use full-scale target gas if sensor is
used for gases other than detection of ammonia.
• Once the output signal has peaked (or one minute maximum) adjust the
span pot until the sensor outputs 200 mV from Test [-] to Test [+].
• Calibration is now complete.
7
Calibration Kit3
GG-LEL
The GasGuard LEL sensor comes factory calibrated and should require only
minimal adjustments after installation. Calibration should be performed at 6month intervals after installation. There are two pots on the preamp that are
used for calibration.
Note: Never measure sensor output in mA. Always use mVDC or VDC
voltmeter settings.
Zero Calibration:
After the unit is installed and has been powered up for a minimum of 24 hours,
the unit can be zero calibrated by the following:
• Be sure the unit is in clean air (target gas is not present) or else apply Zero
Air calibration gas at 0.8 L/min.
• Adjust the zero pot until the sensor outputs 40 mV from Test [-] to Test [+].
Span Calibration:
• Perform zero calibration before spanning.
• Refer to the gas table on this page for the correct span value for the target
gas.
• Apply span gas at 0.8 L/min.
• Sensor should react to gas within 15 seconds
• Once the output signal has peaked (or two minutes maximum) adjust the
span pot until the correct output is achieved.
• Calibration is now complete.
The combustible gas sensor has a slightly different response to each
combustible gas or vapor. Because of these factors, a combustible transmitter
must be adjusted differently if the system is meant to detect a gas or vapor
other than methane. A 1% methane gas standard may still be used for
calibration of combustible transmitters when used for other gases. However, the
voltage that you set at the transmitter test point will be different for each gas.
The table on this page provides the voltage setting for various gases, and the
corresponding percent LEL reading for each.
8
(using 1% CH4 calibration gas)
Gas
Voltage (mVDC)
Methane
72
Propane
98
n-Butane
96
n-Pentane
109
n-Hexane
127
Hydrogen
82
Methanol
77
Ethanol
83
Isopropyl Alcohol
109
Acetone
102
Toluene
120
Acetylene
98
Di-ethyl Ether
109
Ammonia
67
% LEL
20
36
35
43
56
26
23
27
43
39
50
36
43
16
3Calibration Kit
GG-CO
The GasGuard CO carbon monoxide sensor comes factory calibrated and
should require only minimal adjustments after installation. Calibration should be
performed at 6-month intervals after installation.
There are two pots on the preamp that are used for calibration.
Note: Never measure sensor output in mA. Always use mVDC or VDC
voltmeter settings.
Zero Calibration:
After the sensor is installed and has been powered up for a minimum of 12
hours, the unit can be zero calibrated by the following:
• Be sure the unit is in clean air (target gas is not present) or else apply Zero
Air calibration gas (or nitrogen) at 0.8 L/min.
• Adjust the zero pot until the sensor outputs 40 mV from Test [-] to Test [+].
Note:
To zero the sensor immediately after power up or cell replacement, unplug cell
from the transmitter and adjust signal to 40 mV.
Span Calibration:
• Apply span gas at 0.8 L/min (span gas must be in air, not nitrogen).
• Sensor should react to gas within 15 seconds.
Once the output signal has peaked (or two minutes maximum) adjust the
span pot until the correct output is achieved. The calculated span value with
full-scale span gas is 200 mVDC. ((span gas / sensor range * 16 + 4) *10)
Example: ((100 ppm / 200 ppm x 16 + 4) x 10) = 120 mVDC.
• Calibration is now complete.
Sensor Life:
These electrochemical cells are extremely reliable with a typical cell life of 5
years in most applications. Several factors can cause the cell chemicals to
become depleted including a long period of time, exposure to high
temperatures and continuous, long term exposure to carbon monoxide.
When the cell becomes depleted, the unit will give no indication of failure other
than that the sensor will not respond. For this reason it is absolutely essential
that these sensors be calibrated on a regular basis.
9
Calibration Kit3
GG-CL2
The GasGuard CL2 chlorine sensor comes factory calibrated and should
require only minimal adjustments after installation. Calibration should be
performed at 6-month intervals after installation.
There are two pots on the preamp that are used for calibration.
Note: Never measure sensor output in mA. Always use mVDC or VDC
voltmeter settings.
Zero Calibration:
After the sensor is installed and has been powered up for a minimum of 12
hours, the unit can be zero calibrated by the following:
• Be sure the unit is in clean air (target gas is not present) or else apply Zero
Air calibration gas at 0.8 L/min.
• Adjust the zero pot until the sensor outputs 40 mV from Test [-] to Test [+].
Note:
To zero the sensor immediately after power up or cell replacement, unplug cell
from the transmitter and adjust signal to 40 mV.
Span Calibration:
• Apply span gas at 0.8 L/min (span gas must be in air, not nitrogen).
• Sensor should react to gas within 15 seconds.
• Once the output signal has peaked (or two minutes maximum) adjust the
span pot until the correct output is achieved. The calculated span value with
full-scale span gas is 200 mVDC. ((span gas / sensor range * 16 + 4) *10)
• Calibration is now complete.
Sensor Life:
These electrochemical cells are extremely reliable with a typical cell life of 2-3
years in most applications. Several factors can cause the cell chemicals to
become depleted including a long period of time, exposure to high
temperatures and continuous, long term exposure to chlorine gas.
When the cell becomes depleted, the unit will give no indication of failure other
than that the sensor will not respond. For this reason it is absolutely essential
that these sensors be calibrated on a regular basis.
10
3Calibration Kit
GG-O3
The GasGuard O3 ozone sensor comes factory calibrated and should require
only minimal adjustments after installation. Calibration should be performed at
6-month intervals after installation.
There are two pots on the preamp that are used for calibration.
Note: Never measure sensor output in mA. Always use mVDC or VDC
voltmeter settings.
Zero Calibration:
After the unit is installed and has been powered up for a minimum of 12 hours,
the unit can be zero calibrated by the following:
• Be sure the unit is in clean air (target gas is not present) or else apply Zero
Air calibration gas at 0.5 to 1.0 L/min.
• Adjust the zero pot until the sensor outputs 40 mV from Test [-] to Test [+].
Span Calibration:
Never adjust the span pot without an ozone generator.
• Perform zero adjustment before spanning.
• Apply span gas at 0.5 to 1.0 L/min.
• Sensor should react to gas within 20 seconds.
• Once the output signal has peaked (or five minutes maximum) adjust the
span pot until the correct output is achieved.
• Calibration is now complete.
Note:
If an ozone generator is not available, the unit can be calibrated with chlorine.
The relative response of the ozone sensor to chlorine is 1.33. To calibrate with
chlorine, apply 0.5 ppm and adjust output to 14.64 mA.
Sensor Life:
These electrochemical cells are extremely reliable with a typical cell life of 2
years in most applications. Several factors can cause the cell chemicals to
become depleted including a long period of time, exposure to high
temperatures and continuous, long term exposure to ozone gas.
When the cell becomes depleted, the unit will give no indication of failure other
than that the sensor will not respond. For this reason it is absolutely essential
that these sensors be calibrated on a regular basis.
11
Calibration Kit3
GG-H2-1%
The GasGuard H2 1% hydrogen sensor comes factory calibrated and should
require only minimal adjustments after installation. Calibration should be
performed six months after installation. There are two pots on the preamp that
are used for calibration.
Note:
Never measure sensor output in mA. Always use mVDC or VDC voltmeter
settings.
GASGUARD H2 1%
Calibration Mode:
Cal mode is required for calibrating the sensor. It clears the deadband (factory
set at 4.8 mA) and averaging. Pressing the CAL switch enables cal mode and
the green LED will flash. To exit out of cal mode, press the CAL switch or after
4 minutes it will automatically time-out.
Zero Calibration:
After the unit is installed and has been powered up for a minimum of 1 hour, the
unit can be zero calibrated by the following:
• Press the CAL switch once to enter cal mode. Do not adjust the zero pot if
the green LED is not flashing.
• Apply Zero Air calibration gas (or nitrogen) at 0.8 L/min.
• Adjust the zero pot until the sensor outputs 40 mV from TP [-] to TP [+] .
Span Calibration:
Do not remove sensor housing cap during calibration.
• If green LED is not flashing, press the CAL switch once to enter cal mode.
• Apply 1% H2 span gas at 0.8 L/min (span gas must be in air, not nitrogen).
• Sensor should react to gas within 15 seconds.
• Once the output signal has peaked (or two minutes maximum) adjust the
span pot until the correct output is achieved (200 mV).
• Press the CAL switch again to exit cal mode (green LED will stop flashing)
• Calibration is now complete.
12
4mA adjustment:
Sometimes a fine adjustment of the 4mA signal may be desired to compensate
for a slight positive or negative zero-signal reading on the control panel.
• Make sure the sensor is NOT in calibration mode.
• Adjust the 4mA pot until the control panel reads zero.
Sensor life:
These catalytic-bead long-life sensors have an expected life of 5 years in most
applications.
3Calibration Kit
GG-H2S
The GasGuard H2S hydrogen sulfide sensor comes factory calibrated and
should require only minimal adjustments after installation. Calibration should be
performed at 6-month intervals after installation.
There are two pots on the preamp that are used for calibration.
Note: Never measure sensor output in mA. Always use mVDC or VDC
voltmeter settings.
Zero Calibration:
After the sensor is installed and has been powered up for a minimum of 12
hours, the unit can be zero calibrated by the following:
• Be sure the unit is in clean air (target gas is not present) or else apply Zero
Air calibration gas at 0.8 L/min.
• Adjust the zero pot until the sensor outputs 40 mV from Test [-] to Test [+].
Note:
To zero the sensor immediately after power up or cell replacement, unplug cell
from the transmitter and adjust signal to 40 mV.
Span Calibration:
• Apply span gas at 0.8 L/min (span gas must be in air, not nitrogen).
• Sensor should react to gas within 15 seconds.
• Once the output signal has peaked (or two minutes maximum) adjust the
span pot until the correct output is achieved. The calculated span value with
full-scale span gas is 200 mVDC. ((span gas / sensor range * 16 + 4) *10)
• Calibration is now complete.
Sensor Life:
These electrochemical cells are extremely reliable with a typical cell life of 3-4
years in most applications. Several factors can cause the cell chemicals to
become depleted including a long period of time, exposure to high
temperatures and continuous, long term exposure to hydrogen sulfide gas.
When the cell becomes depleted, the unit will give no indication of failure other
than that the sensor will not respond. For this reason it is absolutely essential
that these sensors be calibrated on a regular basis.
13
Calibration Kit3
GG-CO2
The GasGuard CO2 carbon dioxide sensor comes factory calibrated and should
require only minimal adjustments after installation. Calibration should be
performed at 6-month intervals after installation.
There are two pots on the preamp that are used for calibration.
Note: Never measure sensor output in mA. Always use mVDC or VDC
voltmeter settings.
Zero Calibration:
After the unit is installed and has been powered up for a minimum of 2 hours,
the unit can be zero calibrated by the following:
• Apply Zero Air calibration gas (or nitrogen) at 0.8 L/min.
• Adjust the zero pot until the sensor outputs 40 mVDC from test points TP [-]
to TP [+].
Span Calibration:
• Perform zero calibration prior to spanning.
• Connect tubing to the calibration port of the infrared tube.
• Apply span gas at 0.8 L/min.
• Sensor should react to gas within 10 seconds.
The adjustment response is dampened. Make slight adjustments (no more
than ½ turn of the potentiometer) and wait for output response. Once the
output signal has peaked (or two minutes maximum) adjust the span pot
until the correct output is achieved. The calculated span value with full-scale
span gas is 200 mVDC. ((span gas / sensor range * 16 + 4) *10)
Example: ((1% / 3% x 16 + 4) x 10) = 93.3 mVDC.
• Calibration is now complete.
14
Sensor Life:
Typical sensor life of the GasGuard CO2 is five to seven years. Failure of the
infrared sensor happens normally when the infrared source opens or breaks,
similar to an incandescent light bulb filament. If this occurs, the sensor will
produce a continuous fault indication signal of 0.5 mA and the fault LED will be
lit. Contact Calibration Technologies for a sensor replacement.
3Calibration Kit
GG-R
The GasGuard-R refrigerant sensor comes factory calibrated and should
require only minimal adjustments after installation. Calibration should be
performed at 6-month intervals after installation.
There are two pots on the preamp that are used for calibration.
Note: Never measure sensor output in mA. Always use mVDC or VDC
voltmeter settings.
Zero Calibration:
After the unit is installed and has been powered up for a minimum of 2 hours,
the unit can be zero calibrated by the following:
• Be sure the unit is in clean air (target gas is not present) or else apply Zero
Air calibration gas (or nitrogen) at 0.8 L/min.
• Adjust the zero pot until the sensor outputs 40 mVDC from test points TP [-]
to TP [+].
Span Calibration:
• Perform zero calibration prior to spanning.
• Connect tubing to the calibration port of the infrared tube.
• Apply span gas at 0.8 L/min.
• Sensor should react to gas within 10 seconds.
The adjustment response is dampened. Make slight adjustments (no more
than ½ turn of the potentiometer) and wait for output response. Once the
output signal has peaked (or two minutes maximum) adjust the span pot
until the correct output is achieved. The calculated span value with fullscale span gas is 200 mVDC. ((span gas / sensor range * 16 + 4) *10)
Example: ((500 ppm / 1000 ppm x 16 + 4) x 10) = 120 mVDC.
• Calibration is now complete.
Sensor Life:
Expected sensor life of the GasGuard-R is ten years. Typical failure of the
infrared sensor happens normally when the infrared source opens or breaks.
If this occurs, the sensor will produce a continuous fault indication signal of 0.5
mA and the fault LED will be lit. Contact Calibration Technologies for a sensor
replacement.
15
Calibration Kit3
GG-O2
The GasGuard O2 oxygen sensor comes factory calibrated and should require
only minimal adjustments after installation. Calibration should be performed at
6-month intervals after installation.
There are two pots on the preamp that are used for calibration.
Note: Never measure sensor output in mA. Always use mVDC or VDC
voltmeter settings.
Zero Calibration:
If zero adjustment is required, the following procedure will span the unit:
• Apply zero calibration gas (nitrogen or 15% oxygen, depending on full-scale
range of sensor) at 0.8 L/min.
• Sensor should react to gas within 30 seconds.
• Adjust the zero pot until the sensor outputs 40 mV from Test [-] to Test [+].
Span Calibration:
• Apply 20.9% O2 span gas at 0.8 L/min.
• Once the output signal has peaked (or three minutes maximum) adjust the
span pot until the correct output is achieved (see Note below).
• Calibration is now complete.
Note:
Calculated span value for 15/25% range is 134.4 mV from Test [-] to Test [+].
Calculated span value for 0/25% range is 173.7 mV from Test [-] to Test [+].
Sensor Life:
These galvanic electrochemical cells are long-life sensors with a typical life of
5-7 years in 20.9% oxygen.
16
3Calibration Kit
NH3 Responder
The NH3 Responder portable ammonia detector comes factory calibrated and
should require only minimal adjustments after purchase. Calibration should be
performed at 6-month intervals.
Note:
Verify that the calibration gas being used matches the span concentration
values that are set for the detector in the Use Option Menu. Refer to Span Gas
Value section on page 8 of the operating manual. Correction factors are not
applied during calibration. Correction factors that were set prior to calibration
are restored when the detector returns to normal operation.
Selecting sensor(s) to be calibrated (during Auto Span) is not necessary for
calibration of the PID and LEL sensors as the cal gas being used will only be
detected by its corresponding sensor.
Apply Span Gas Now
4. Attach the calibration hose and apply gas to the unit at a flow rate of 0.5 to
0.8 l/min. The cal gas cylinder icon flashes as the detector initially detects the
calibration gas. After 30 seconds the detector beeps and the cal gas cylinder
stops flashing. Auto Span flashes while spanning the respective sensor until
the detector has attained a sufficient level of the expected gas.
5. When the span is complete, the following screens are displayed:
- Calibration successful
- Press
to apply new cal gas (repeat step #4)
- Press
to end span
Remove hose and turn off cal gas. The display then advises to press
or
to bypass the calibration due dates.
to set
Required calibration gas:
PID: 250 ppm Ammonia, balance air
LEL: 50% LEL Methane (2.5%), balance air
Start Calibration
1. To enter calibration, press and hold
and simultaneously as the detector
beeps, flashes, and vibrates to the corresponding countdown. The detector
then reads Starting calibration.
Auto Zero
2. Auto Zero flashes while the detector automatically zeroes the sensors. Do
not apply calibration gas during this process, otherwise the auto zero step
will fail.
Auto Span
3. Next, three screens are displayed:
- Apply span gas now to calibrate (recommended) (skip to step #4)
- or press
to select sensor(s)
- or press
to skip calibration (skip to step #5)
17
Calibration Kit3
CO2 Responder
The CO2 Responder portable carbon dioxide detector comes factory calibrated
and should require only minimal adjustments after purchase. Calibration should
be performed at 6-month intervals.
Note:
Verify that the calibration gas being used matches the span concentration
value(s) that are set for the detector in the User Options Menu. Refer to Span
Gas Value section in the operating manual.
Required calibration gas:
CO2: 1% CO2 balance air
Start Calibration
1. To enter calibration, press and hold
and simultaneously as the detector
beeps, flashes, and vibrates to the corresponding countdown. The detector
then reads Starting calibration.
Auto Zero
2. Auto Zero flashes while the detector automatically zeroes the sensors. Do
not apply calibration gas during this process, otherwise the auto zero step
will fail.
Auto Span
3. Next, three screens are displayed:
- Apply span gas now to calibrate (recommended) (skip to step #4)
- or press
to select sensor(s)
- or press
to skip calibration (skip to step #5)
Apply Span Gas Now
4. Attach the calibration hose and apply gas to the sensor(s) at a flow rate of
500 ml/min. The cal gas cylinder icon flashes as the detector initially detects
the calibration gas. After 30 seconds the detector beeps and the cal gas
cylinder stops flashing. Auto Span flashes while spanning the sensors until
the detector has attained a sufficient level of the expected gas.
18
5. When the span is complete, the following screens are displayed:
- Calibration successful
- Press
to apply new cal gas (repeat step #4)
- Press
to end span
Remove hose and turn off cal gas. The display then advises to press
or
to bypass the calibration due dates.
to set
Limited Warranty & Limitation of Liability
Calibration Technologies, Inc. (CTI) warrants this product to be free from defects in material and workmanship under normal use and service for a period of two years,
beginning on the date of shipment to the buyer. This warranty extends only to the sale of new and unused products to the original buyer. CTI’s warranty obligation is limited, at
CTI’s option, to refund of the purchase price, repair, or replacement of a defective product that is returned to a CTI authorized service center within the warranty period. In no
event shall CTI’s liability hereunder exceed the purchase price actually paid by the buyer for the Product.
This warranty does not include:
a) routine replacement of parts due to the normal wear and tear of the product arising from use;
b) any product which in CTI’s opinion, has been misused, altered, neglected or damaged by accident or abnormal conditions of operation, handling or use;
c) any damage or defects attributable to repair of the product by any person other than an authorized dealer or contractor, or the installation of unapproved parts on the
product
The obligations set forth in this warranty are conditional on:
a) proper storage, installation, calibration, use, maintenance and compliance with the product manual instructions and any other applicable recommendations of CTI;
b) the buyer promptly notifying CTI of any defect and, if required, promptly making the product available for correction. No goods shall be returned to CTI until receipt by the
buyer of shipping instructions from CTI; and
c) the right of CTI to require that the buyer provide proof of purchase such as the original invoice, bill of sale or packing slip to establish that the product is within the warranty
period.
THE BUYER AGREES THAT THIS WARRANTY IS THE BUYER’S SOLE AND EXCLUSIVE REMEDY AND IS IN LIEU OF ALL OTHER WARRANTIES, EXPRESS OR
IMPLIED, INCLUDING BUT NOT LIMITED TO ANY IMPLIED WARRANTY OF MERCHANTABILITY OR FITNESS FOR A PARTICULAR PURPOSE. CTI SHALL NOT BE
LIABLE FOR ANY SPECIAL, INDIRECT, INCIDENTAL OR CONSEQUENTIAL DAMAGES OR LOSSES, INCLUDING LOSS
OF DATA, WHETHER ARISING FROM BREACH OF WARRANTY OR BASED ON CONTRACT, TORT OR RELIANCE OR ANY OTHER THEORY.
19
Cal Kit 06/2014