1
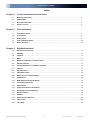
User’s Manual · U5101
Index
Chapter 0
Control elements and connections
0.1.
Receiver front panel..................................................................................................................... 4
0.2.
VFD-Display..............................................................................................................................
0.3.
Receiver back panel...................................................................................................................... 5
0.4.
Remote control............................................................................................................................. 6
Chapter 1
4
First installation
1.1.
Complete Content…...................................................................................................................... 7
1.2.
Accessories .................................................................................................................................. 8
1.3.
Safety rules.................................................................................................................................... 9
1.4.
Fast installation guide.................................................................................................................. 10
1.5.
Menu overview............................................................................................................................. 16
Chapter 2
Standard functions
2.0.
Switch on the receiver.................................................................................................................. 17
2.1.
Standby……………………............................................................................................................. 17
2.2.
Teletext.......................................................................................................................................
2.3.
Mute……........................................................................................................................................ 17
2.4.
Numeric keyboard on remote control......................................................................................... 17
2.5.
Switch channels............................................................................................................................ 17
2.6.
Change between TV and Radio channels................................................................................... 17
2.7.
Volume........................................................................................................................................... 17
2.8.
Stop functions…........................................................................................................................... 18
2.9.
Open Main menu........................................................................................................................... 18
2.10.
Watch the last viewed channel.................................................................................................... 18
2.11.
Channel list.................................................................................................................................... 18
2.12.
EPG Electronic Program Guide................................................................................................... 18
2.13.
Favourite channel list.................................................................................................................. 19
2.14
Menu Audio................................................................................................................................... 19
2.15.
Signal and channel information.................................................................................................. 19
2.16.
Changing favourite channels ...................................................................................................... 19
2.17.
Zoom Function.............................................................................................................................. 19
2.18.
Subtitle........................................................................................................................................... 19
17
2.19.
Short-circuit protection................................................................................................................ 20
2.20.
Fast record..................................................................................................................................... 20
2.21.
Time Shift ………………………..................................................................................................... 20
Reserved of technical modifications and/or errors
-1-
U5101
Version en_1.1
Univers by FTE
User’s Manual · U5101
Chapter 3
3.1
Chapter 4
Channel management
TV-Channel list.............................................................................................................................. 21
3.1.1.
Skip channels................................................................................................................... 21
3.1.2.
Lock channels................................................................................................................... 21
3.1.3.
Delete channels................................................................................................................ 21
3.1.4.
Delete channels groups or all channels......................................................................... 22
3.1.5.
Edit Channel...................................................................................................................... 22
3.1.6.
List of favourite channels…………………………........................................................... 22
PVR management
4.1
Play record..................................................................................................................................... 23
4.2
Lock record……............................................................................................................................ 23
4.3
Delete record................................................................................................................................. 23
4.4
Movies, MP3, Photos..................................................................................................................... 23
4.5
Sorting........................................................................................................................................... 24
4.6
Chapter 5
HDD management......................................................................................................................... 24
4.6.1.
Folder management......................................................................................................... 24
4.6.2.
Delete folder..................................................................................................................... 24
4.6.3.
Lock folder........................................................................................................................ 24
4.6.4.
Add folder.......................................................................................................................... 25
4.6.5.
Move file............................................................................................................................ 25
Timers
5.1
Sorting............................................................................................................................................ 26
5.2
Delete Timer …….......................................................................................................................... 26
5.3
Edit / Add Timer ............................................................................................................................ 26
Chapter 6
Tools
6.1
Calculator....................................................................................................................................... 28
6.2
Calendar……................................................................................................................................. 28
Chapter 7
System settings
7.1.
Menu Language............................................................................................................................. 29
7.2.
Audio Language............................................................................................................................ 29
7.3.
Time Zone...................................................................................................................................... 29
7.4.
TV Settings.................................................................................................................................... 30
7.5.
Recording Settings....................................................................................................................... 31
7.6.
OSD Settings................................................................................................................................. 31
7.7.
Version........................................................................................................................................... 32
7.8.
Factory Default.............................................................................................................................. 32
7.9.
Software upgrade......................................................................................................................... 32
Reserved of technical modifications and/or errors
-2-
U5101
Version en_1.1
Univers by FTE
User’s Manual · U5101
Chapter 8
Parental Control
8.1.
Set Lock..........................................................................................................................................33
8.2.
Channel Lock................................................................................................................................. 33
8.3.
Record Lock.................................................................................................................................. 33
8.4.
Installation Lock............................................................................................................................ 33
8.5.
Change Password......................................................................................................................... 33
Chapter 9
Installation
9.1.
Connection Type…....................................................................................................................... 34
9.2.
Antenna Configuration................................................................................................................. 35
9.3.
Channel Search............................................................................................................................. 36
9.4.
Satellite Management................................................................................................................. 37
9.5.
Transponders Management..........................................................................................................38
9.6.
SatcoDX Update……….................................................................................................................. 38
9.7.
Backup............................................................................................................................................39
Chapter 10 Equipment Features
10.1.
Technical data............................................................................................................................... 40
Reserved of technical modifications and/or errors
-3-
U5101
Version en_1.1
Univers by FTE
User’s Manual · U5101
Chapter 0 Control elements and connections
0.1. Receiver front panel
1
2
1
POWER:
2
3
STAND-BY-LED:
Front Buttons:
4
5
6
7
VFD-DISPLAY:
IR-SENSOR:
Front Cover:
USB:
3
4
5
6
7
Switches the receiver ON or in Standby mode. For total switching off, use the main
switch at the back side of the receiver.
Shows if the receiver is in Standby mode (when LPC mode is ON).
Buttons for administrating, the buttons have the same functions like the buttons on
the Remote Control.
Shows information like channel name and receiver functions.
Reception device for signals coming from the remote control.
Cover for USB connector. There are no card readers installed inside.
Connector for external USB 2.0 HighSpeed devices.
0.2. VFD-Display
1
2
3
4
5
6
7
8
9
10
11
1
12
13
14
15 16
17
18
19
13
Channel is locked by password
Tuner 1 signal OK
2
USB-device is connected
14
3
Channel has EPG- information
15
Tuner 2 signal OK
4
Subtitle available
16
Without function currently
5
Channel have TXT information
17
Without function currently
6
Audio signal in AC3 available
18
Time shifting is working
Record is playing
7
20 21
Without function currently
Without function currently
19
8
Without function currently
20
Record will be moved backward
9
Receiver records one channel
21
Record will be moved forward
10
Alpha numeric display
22
Sleep mode is active
11
Bar to show adjusted volume
23
Without function currently
12
Channel is coded
24
Without function currently
Reserved of technical modifications and/or errors
-4-
U5101
Version en_1.1
22
23 24
Univers by FTE
User’s Manual · U5101
0.3. Receiver Back Panel
1
2
11
3
4
5
6
13
12
14
15
16
7
9
10
17
18
1
POWER ON/OFF:
Main switch to switch off totally the receiver
2
AC IN:
Power cord 230VAC/50Hz.
3
IF IN 2:
Input of the second digital tuner
4
IF IN 1:
Input of the first digital tuner
5
ANT IN:
Antenna input for analogue signals, it must be connected to LOOP OUT 2
6
S/PDIF:
Coaxial output for digital audio (AC3)
7
VCR SCART:
SCART connector for video recorder, DVD recorder or DVD player
9
VIDEO:
Video output for external monitor, TFT or video beamer
10
Y, CB, CR:
Components video output for external monitor, TFT or video beamer
11
RS-232:
Serial port to update the firmware of the receiver
12
IF OUT 1:
Output from first digital tuner, please connect to IF IN 2 in case of using the
LOOPTHRUOUGH function with the supplied bridge.
13
IF OUT 2:
Output from second digital tuner.
14
TO TV:
Modulator output to connect one TV set. Audio signal is available in Mono.
15
S/PDIF:
Optical output for digital audio (AC3)
16
S-VIDEO:
S-Video output for external monitor, TFT or video beamer
17
TV SCART:
SCART output for connecting one TV set, mode RGB or CVBS selectable
18
AUDIO:
Audio output for home audio systems or a Hi-Fi device.
Reserved of technical modifications and/or errors
-5-
U5101
Version en_1.1
Univers by FTE
User’s Manual · U5101
0.4. Remote Control
1. POWER:
Switches receiver ON or in stand-by-mode.
2. 3-set LED:
Shines as function control,
showing the selected transmission code 1, 2 or 3
3. TEXT:
Opens and closes teletext.
1
4. MUTE:
Switches audio on and off.
5. CODE:
Changes transmission code of the remote control.
6. NUMERIC KEYS:
For direct typing values and names.
7. CH+ CH-:
Changes channel up and down.
8. VOL+ VOL-:
Adjusts audio volume up and down.
9. TV/R:
Switches between TV and Radio channels.
10.EXIT:
Exit menus or stop operations.
11.MENU:
Opens the main menu.
3
2
5
6
Watch the last viewed channel.
12.Back:
13.
:
15. OK :
Confirms selections or opens channel list.
16.Color Keys:
Controls menu options.
17. App:
Without function currently.
Shows the EPG information.
Opens channel list.
20.Fav:
Opens favourite channel list.
21.Audio:
Opens audio menu.
22.Sub:
Switches subtitle on and off.
23.INFO:
Shows channel information with signal bar.
24.Zoom:
Zoom function.
25.Pup Pdw:
Moves cursor in block steps
26.Fav+ Fav-:
Moves favourite channel up and down.
27. ►II :
Start / Stop button for recording and TimeShift.
28. ◄◄ :
Backward button for recording and TimeShift.
29. ►► :
Forward button for recording and TimeShift.
32
13
13
14
33
34
16
17
18
19
20
21
22
23
24
25
26
27
28
29
30
Stop button for recording and TimeShift.
31. PVR :
Opens PVR menu.
32.
Places marks within recording process.
:
12
15
19. List:
MARK
11
14
31
18.EPG:
:
8
Changes channels volume or controls the
cursor in menus..
10
■
9
7
Adjusts audio volume or controls the cursor in menus.
:
14.
30.
4
33. REC :
Quick start for recording.
34. PIP :
Starts Picture In Picture function.
Reserved of technical modifications and/or errors
-6-
Back: Battery box
U5101
Version en_1.1
Univers by FTE
User’s Manual · U5101
1. First installation
1.1 Complete Content
The following goods must be included in this package when you open it for the first time.
Remote Control
Installation Guide
Two batteries
Type AAA, Micro, 1,5V
Bridge for Loopthrough connection
Antenna connection cable
Reserved of technical modifications and/or errors
-7-
U5101
Version en_1.1
Univers by FTE
User’s Manual · U5101
1.2 Accessories
U4301
U4005
U4006
U4500
LOG3235F
LG 229
MF 103
LPS 1222
U0301
AO 100
Offset Dish 80cmØ
LNC universal single
LNC universal twin
Double DiSEqC Switch
DVB-T Compatible Antenna
DVB-T Mast Amplifier
Mixer Terr-SAT
Power Supply
3 connectors outlet
4 connectors outlet
Example 2
Example 1
Example 1:
It is the recommended installation with an LNC
Twin type. Through this combination, the
reception is the same in both tuners; therefore
there are no limits in the selection/viewing
channels. The terrestrial signals are mixed with
one of the SAT lines.
Example 2:
Installation using a Single LNC. In this case the
possibilities of recording/viewing or PIP are
limited to the signals of same band and
polarity. The Terrestrial signal is mixed with the
Satellite one.
Example 3:
Complete Reception of two satellites using
Twin LNCs and one double DiSEqC switch.
The Terrestrial signal in this case is distributed
separately.
Example 3
Reserved of technical modifications and/or errors
-8-
U5101
Version en_1.1
Univers by FTE
User’s Manual · U5101
1.3 Safety rules
Please read the manual carefully before using the receiver.
You will receive a lot of information to use this product correctly and you will prevent incidents.
Please keep the manual on a safe place.
CAUTIONR
RISK OF ELEKTRIC SHOCK
DO NOT OPEN
This sign warns you about
high voltages, with risk
of electric shock
Caution: Do not open the housing of
this receiver. Repairs can only be
made by professionals authorized. If
not, warranty will not be valid anymore.
This sign informs about
special information which is
important to know.
Caution: Keep this receiver far away from liquids. Do not place it on placements close to water like flowers
vases, wash basin, aquariums or pools. It exists a high risk of electric shock when water or high humidity
filters inside the receivers. Never place other devices on it; they can overheat the receiver as well as daring
fire risk. The receiver must be used only with original power cord to 230V main plug.
Please read carefully this manual and do not hesitate to contact to professional help if you have any doubt.
Opening the receiver housing as well as the Hard Disk case will mean a total lost of warranty.
Installation:
1.
Never work during a thunderstorm or staying near of the antenna systems.
2.
Before adjusting the receiver, make sure that your antenna is well aligned and works properly.
3.
Unplug the main connection (230V) every time you work with receiver connections. Do it also when you stay
away for a long time out of home like in holiday periods.
4.
The best placement for the receiver is close to the TV and your other equipment like DVD, VCR, CD, and game
stations. Select a stable place where you can make the necessary connections in a safety way.
The 230V main plug should be in a place easy to reach, that you can unplug it when it is necessary.
Cleaning: Before cleaning the receiver with a slightly damped cloth, please disconnect the main 230 V connection from
the receiver. Please use only mild cleaners.
Accessories: Please, do not use accessories which are not agreed by the manufacturer of the receiver.
Unsuitable accessories could increase the risk of getting on fire, an electrical impact or other damages.
Placement: Select a placement where the Receiver has air circulation enough, otherwise it may have overheating
accumulation. Do not cover the openings of the housing. Unsuitable placements are also places close to heaters or soft
locations like e.g. sofas and beds.
Power connection: Select a main plug with easy access, in case of unplugging necessity; it will be easier and faster.
Please, make sure that the cord as well as the plug is in perfect conditions. Do not pull the cable, use always the plug.
Housing: Please, make sure that no liquid will filter into the housing of the receiver. If so, disconnect immediately the
receiver from the main 230 V plug and bring the receiver to a professional.
Air humidity: When you take the Receiver from a cold to a warm place, please wait until the receiver gets the same
temperature as the new environment, in order to avoid problems of humidity condensation.
Maintenance / Repairing: Within the warranty time all the repairing processes should be done by authorized technical
staff. Otherwise, the warranty will be lost.
Reserved of technical modifications and/or errors
-9-
U5101
Version en_1.1
Univers by FTE
User’s Manual · U5101
1.4 Fast installation guide
Please, follow the instructions for a faster and simpler installation of the receiver.
Step 1: Connections
Connect the cable from the LNB and Dish:
There are two possibilities of connection, based in how is the antenna installation:
1
1.- One single satellite cable: in this case, this cable should be connected to IF
IN 1 connector, at back panel. The IF OUT 1 output should be connected to IF
IN 2 through the supplied bridge. This kind of connection limits the possibilities
of your receiver. See the Chapter 9 for further information about Installation.
2.- Two independent satellite cables: in this case, please connect the Cable 1
to the IF IN 1, and the second one to IF IN 2. In this way, it is possible to
dispose of independent signals in each tuner. Depending in how are these
signals, it may arise two situations:
2.1
2.1.- Both signals are exactly the same (for example with a Twin
LNC): In this case, no limitation will appear in the PiP and
Recording functions.
RECOMMENDED INSTALLATION
2.2.-. The two signals are different (for example, one from Astra
and the other one Hotbird satellites). In this case, during the
recording process of one channel of Input 1, it only will be
possible to view channels of the same frequency that the one is
being recorded, or from the other satellite. The same limitation is
applicable to PiP function.
In this case, in addition, you can dispose of more combinations
of some satellites with a DiSEqC switch for whatever of the
Antennas.
In the chapter 9 is explained with further details these connections, with the limitations that appear.
Reserved of technical modifications and/or errors
- 10 -
U5101
Version en_1.1
Univers by FTE
User’s Manual · U5101
Connecting the TV, LCD or video beamer
Your TV or other equipment can be connected in different ways:
SCART / RGB
In this connector you will find the best Picture quality in RGB and RGB-YUV modes.
This is the connector that you will use normally to connect the TV.
To do it, you should use a Standard SCART – SCART cable.
S-VHS
This connection gives a high quality, lightly higher than the SCART one (it doesn’t admit
the RGB mode).
To use it, you will need a S-VHS Cable.
Modulator
This output gives the worst Picture quality.
You only need to use it in case that your TV does not have another input tyoe. The
connection cable is included. Use the TO TV output and tune the receiver in the TV like
it was one channel more in the TV.
Take in account that the sound is, in this case, in mono mode.
Video / DVD
In regards to scart VCR-Scart connection, you can connect a VCR or a DVD.
The DVD signal can also be watched through the receiver if the TV is connected using
a Scart.
You will find more information in the chapter 7.4 – System adjustments.
You can find more detailed information in the chapter 0.3 Back Panel
This receiver has a main switch at the back panel.
If you see a message “shortcircuit in the antenna” in the screen, you have a shortcircuit
in the antenna. Please, verify it and restart the receiver.
When you configure the system for the first time, the current date will be stored in Menu > System Preferences >
Version as the warranty start time.
Second Step: Main settings on the receiver
When you start the first time the receiver or when you execute a “factory default” process, you will see this
installation guide in English language.
,
and the button
The selection of the menu options will be done with the arrow buttons
OK of the remote control.
Your remote control disposes of 3 different code tables for the communication with the receiver. By default,
the selected table is the number 1, which corresponds to the Satellite reception equipment. Normally it
should not be changed when the batteries are installed for the first time.
Please, verify that when you push whatever key, the lighted code is the 1. In other case, use the CODE
key to modify this selection.
Reserved of technical modifications and/or errors
- 11 -
U5101
Version en_1.1
Univers by FTE
User’s Manual · U5101
Menu Language:
Here you have to select the language for the Receiver menu and information.
and press the OK button.
Select the language with the arrow buttons
Connecting type:
Select the option based in your connections.
Use the arrow keys
to select and press OK.
Time Zone:
In order to the receiver is able to display the correct time and adjust the
timer recordings correctly, it is needed to fix the time zone to the place you live.
Select here the time delay according to your position comparing to
Greenwich Time.
In UK:
Summer time: +1 hours
Winter time:
GMT hour
Select with the arrow buttons
and press the OK button.
Geographical Location:
To adjust the positioners of the antenna, it is recommended to have the
Latitude and Length of your location.
It is not absolute needed to introduce these data.
You can look out the following map in order to know this data:
Reserved of technical modifications and/or errors
- 12 -
U5101
Version en_1.1
Univers by FTE
User’s Manual · U5101
Reserved of technical modifications and/or errors
- 13 -
U5101
Version en_1.1
Univers by FTE
User’s Manual · U5101
Selection of the Pre-Stored Channel List
This option allows loading the channel list stored in your receiver, and
you will not need to tune channels. The list includes Astra / Hot Bird /
Hispasat / Turksat channels, and it is supposed that the same input
signal is available in both inputs.
If you select Load Channel List, the installation assistant finishes at this
point and it begins the viewing of the channels.
In case of having a different configuration, please select Tune new
channels and continue with the installation assistant, configuring the antennas.
Antennas configuration:
In this menu, you should configure the connected signals in the IF
IN of your PVR.
By default, the equipment comes with the configuration that you
can see in the Picture, with four satellites.
The available options in this screen allow:
Red Button: Deletes the selected satellite. It asks for confirmation.
Green Button: Edits the selected satellite. The options appear at
the image below.
Yellow Button: Adds a satellite. The options appear at the below
image.
Antenna Options:
-
-
Name: Your PVR disposes of several pre-configured
satellites. You can find the one you want in the list or
add a new one. They are sorted by its orbital position.
Band: There are two available bands: C and Ku. The
differences basically are the frequencies in the
transmission. The Ku band has two possibilities; the
most common is the Universal Ku.
Low Band / High Band: It is used when the band
selection is the Ku, and it programmes the local
oscillators of the LNC.
DiSEqC 1.0 / 1.1 Port: To configure the use of switches.
Motor: Activates the motor option to direct the antenna.
22 KHz: tone of switching the band of the LNC.
LNB Power: LNB Feeding. By default the selection is for
an Universal LNB.
Signal: It shows if there is available signal in this
selected configuration.
LIST Button: Change the selection of the antenna to the Input 2. This function is only possible when it has
been selected the input 2. This function is only possible when it has been selected previously that there are
two LNB. In case of selecting only one or LOOPTHROUGH, the second input is not available. The system
to select the satellites to the antenna 2 is exactly the same to the input 1, using the Yellow Key to add
satellites.
Alter whatever change, it should be confirmed with the OK key when you exit the menu.
Reserved of technical modifications and/or errors
- 14 -
U5101
Version en_1.1
Univers by FTE
User’s Manual · U5101
Channel Search:
Once the antenna configuration is completed, you should proceed to
tune the satellite channels that you have selected. There are different
ways to tune the channels: through LNB, through Satellites and
through Transponders.
When you select the channel searching through LNB, you only can
select one LNB, which corresponds to the programmed tuner.
When you are searching by satellites, you are allowed to select a Wide
range of satellites, so you could programme the searching of all the
satellites that you have configured.
The searching through Transponder is the most selective. It allows selecting all the frequencies that you’re
going to tune and searching channels.
In whatever selection, you always will have available to search Free To Air channels (uncoded channels),
channels with Conditional Access or All the channels.
Please, choose the searching pressing the Green button. Once you have finished (the time will depend on
the number of transponders it will have to find) you will get a window like the following one:
Detected TV
Channels
Detected
Radio Channels
Level and Quality
Searching process
Meter
You can select the channel searching whenever pressing the Exit button.
Once the searching is finished, you must confirm the storing of a new Channel List.
Press the OK button.
The receiver will come back to the Channel Search menu.
You can search again if you want, or exit by pressing the Exit button.
Here it finishes the Fast Installation Guide.
Reserved of technical modifications and/or errors
- 15 -
U5101
Version en_1.1
Univers by FTE
User’s Manual · U5101
1.5 Menus
Main Menu
Channel Management
Parental control
Activate parental control.
Move, rename or delete channels,
Program and, create favourite list.
PVR Management
Administration for recordings,
Pictures and MP3 files as well as
connecting external USB devices.
Timers
Administration for recordings,
manual activation for timer events.
Reserved of technical modifications and/or errors
Tools
Calculator,
Calendar with date management.
Installation
Receiver and antenna settings
Search channels
Frequency manager
Backup
System Settings
Main settings for receiver
for OSD and adapt TV set
Factory default
Software upgrade
- 16 -
U5101
Version en_1.1
Univers by FTE
User’s Manual · U5101
Chapter 2 Standard Functions
2.0 Switch on the receiver
The receiver has a main switch at the back panel. To switch on, take the switch in position 1.
Now the receiver begins to run and show information on its display.
2.1 StandBy
To switch the receiver from Standby (sleep mode) to the working mode, press Orange Power button on the left corner
at the top of the remote control.
If the receiver had been working before and you did not switch on by main switch, the receiver show the last displayed
channel.
When you press it again, the receiver goes back to the stand by mode.
2.2 Teletexto
The button Text opens the teletext generator.
Automatically the receiver loads page 100 as standard.
Like in your TV set you can open the pages by pressing the buttons 0-9.
Para ver esta película, debe
disponer de QuickTime™ y de
un descompresor TIFF (sin comprimir).
If you want to open, for example, the page 140, you
have to press the buttons 1 – 4 – 0.
When you want close the page, press Exit.
2.3 MUTE
With this function, you will be able to shut down the audio completely.
To do it, press the button Mute and the warning symbol will be displayed.
By pressing again the button Mute the function will be disabled.
2.4. Numeric block on remote control
In regards to the numeric block in the remote control, you can select directly the channels when you know the stored
program place.
If you want for example place 23, you have to press the buttons 2 and 3 and after the button OK.
2.5. Switch channels
With the buttons CH+ / CH- or
you can change the channels also.
Press one button for getting one channel up or down.
2.6. Change between TV- and Radio channels
When you want change between TV and Radio channels, you have to press the button TV/R on the remote control.
2.7. Vol+/Vol- Volume
you can regulate the audio volume.
With the buttons Vol+ / Vol- or
To do it, you will see a graphic like the one at the left side.
For using this function properly, you need to make an alignment with you TV set.
Turn off the volume of the receiver. For this, press the button MUTE on remote control. Now turn up the volume on TV
until the moment you hear a noise. Now turn down the volume until the noise disappears. Normally this is around 5075% of the total volume of the TV set.
Reserved of technical modifications and/or errors
- 17 -
U5101
Version en_1.1
Univers by FTE
User’s Manual · U5101
2.8. Stop the functions
With the Exit button you can stop functions like channels search or close menus.
2.9. Open Main menu
To open the main menu, you have to press the button MENU .
The menu system is made in a tree structure.
2.10. Watch the last viewed channel
With the Back button, you can access to the channel viewed previously.
2.11. Channel list
When all the menus are closed, you can open a channel list by pressing
the button OK.
With the button TV/R you can switch between TV and Radio channels.
With the button FAV you can sort this list as follows:
POS, Position in channel list
Name, by alphabetic sort
FTA / CAS sort by free or coded channels
If the position or the name of the channel fits, you can carry out a searching.
Press the Green button to select the searching mode until the symbol (…)
appears in the row Pos or Name, and introduce the characters with the
alphanumeric keyboard.
The handling of the keyboard is like in a mobile phone.
When you press one button several times you will have different results.
Example: If you press button 2: a, b, c and 2
You will get a channel list with the information requested.
2.12. EPG Electronic Program Guide
By pressing the button EPG you will start the electronic program guide.
The receiver gets the information of the tuned channel. The information
only will be available in case the broadcaster transmits it.
With the buttons
you can select a channel and with
one
event. The Blue colour field highlights the current selected event and the
Red line shows the current time.
With the Yellow button you can mark one event. The receiver will switch to
this channel once the event has begun. If you select an event which has already
started, the receiver switches to this channel immediately.
Using the REC button (over and event) the receiver will record this event
into the internal hard disk.
Pressing the button INFO you will get more detailed information about the event.
With the arrow buttons
Reserved of technical modifications and/or errors
you can move along the text.
- 18 -
U5101
Version en_1.1
Univers by FTE
User’s Manual · U5101
2.13. Favourite channel list
If no menu is opened, you can get your favourite channels list by pressing
the button FAV .
With the buttons Pup / Pdw you can switch between 8 different lists, if you
have marked channels before. With the buttons
you can
select a channel from this list.
2.14. Menu Audio
If all menus are closed you can open the menu Audio by pressing
the Audio button.
You can change here the audio output in Stereo, Left and Right
audio format..
Testing the channels, you will be able to make the most suitable selection.
Standard selection is Stereo.
2.15. Signal and Channel information
Pressing the INFO button, with no menu activated,
you will see the channel information and the Signal Level Bar.
information is the same that appears when you change the channels.
In the signal bar we can see the following information:
Channel Number, Channel Name, current Time and Date,
Name of the current event and brief description given by EPG.
Start and Stop time of the event and the indication of the current time from the beginning in yelow color.
This menu disposes of 2 keys of advanced functions. Blue and Yelow
keys. Through Blue key, you cand get the technical information of the
shown channel at the top part of the window, as you can see in the
image:
Yellow key allows seeing which will be the next event indicated by
EPG, with its start and stop times.
2.16. Changing favourite channels
With the buttons FAV+ and FAV- you can switch the favourite channels
directly.
The Sequence for the channels is the established one before in main channel
list.
2.17. Zoom Function
With the Zoom button you can see more details of the image.
By pressing the button OK you can select the enlargement.
If you want to stop, please press Exit
2.18. Subtitles
When no menu is opened, you can start with Sub button the subtitle function.
Subtitles only can be displayed when the operator transmit them.
Reserved of technical modifications and/or errors
- 19 -
U5101
Version en_1.1
Univers by FTE
User’s Manual · U5101
2.19. Short-circuit protection
If you see one message like this, you have a short circuit or to high power
in the antenna system.
In this case switch off the receiver and check the system.
The displayed information stops automatically when the problem is solved.
2.20. Fast record
If you want to record one event immediately you must press only
the button REC on the remote control. You will see the event as usually
and you will see a red point for a while in screen.
If you press REC more that one time, you can select how long the
record will be.
Selection: 30min, 60min, 90min, 120min, 180min, 240min
If you press only one time the record time will be according your
selection, which will be done in:
Menu > System Settings > Recording settings
2.21. Time Shift
If you want to use time shift function to stop one event, you only need
to press only the button ►II one remote control.
The program stops and it will be stored on the hard disk until you restart to
watch it. The OSD shows you the information about the time delay from the
original event.
When you want continue you only press again ►II.
As the information you see now comes from the hard disk, you can also
use forward and backward functions.
If you press several times ►► you can adjust the speed for forward.
Selection: 2x, 4x, 8x speed .
You also have the option 5m, in this case the receiver moves in 5 minutes steps.
Through INFO Key, you can see the time difference between you playback and the realtime, in an horizontal bar which
appears in the top part of the picture.
The maximum time that the equipment allows recording meanwhile it is paused is for 4 hours.
The red bar is the recorded time, the yellow bar is the played time, the rest of time is the time in Time Shifting mode.
When you exit of the Time Shifting mode, the receiver will give you the
option of storing the Time Shifting in the Hard Disk like a recording.
Press OK to save the recording.
Reserved of technical modifications and/or errors
- 20 -
U5101
Version en_1.1
Univers by FTE
User’s Manual · U5101
Chapter 3 Channel Management
3.1. TV-Channel list
Here you will find an overview about all channels.
Channels can be administrated, moved, deleted or blocked.
The navigation is with the buttons
and
.
With the button TV/R you will switch between TV and Radio
channels.
With the button LIST you can sort this list as follows:
POS, Position in channel list
Name, alphabetically
FTA / CAS sort by free or coded channels
To see the PID information, you have to press the button TEXT.
This information will be read by the receiver automatically and it gives
the information where the program is in the data stream.
It is not necessary to change it, but it can be done by the numeric keys
of the remote control.
3.1.1 Skip channels
With this function it is possible to skip selected
.
with the buttons CH+ / CH- or
If you want mark channels for skipping, you have to select the channel and then press
the Blue Button Skip. Doing this, you will see that the channel has a symbol
like the one at the right side. Marked channels only will be opened by channel list.
3.1.2 Lock channels
If you want to lock channels with a password needed for opening them,
you can do it with this function.
If you want to mark channels, please select the channel by
buttons and than press the Yellow button Lock.
Doing this, you will see that the channel now has a symbol like the one at the right side.
In order the function works properly, you have to activate the password
function in menu Parental Control.
±
3.1.3 Delete channels
If you want to delete one channel, you have to select it and then press the
Red button Delete.
Doing this, you see now one symbol like one the right side.
You can mark more than one channel, the channels will be deleted when you close the
Channel Management.
Reserved of technical modifications and/or errors
- 21 -
U5101
Version en_1.1
Univers by FTE
User’s Manual · U5101
3.1.4 Delete channel groups or all channels
If you want to delete a channel group or all channels,
you have to select them and than press the Green button Del. Group.
In the following submenu you should choose all channels from one MUX or All
channels.
With the OK button the selection will be done
3.1.5 Edit channels
If you want to move channels in their position in channel list
or you want to change their name, you can do it in the submenu
Edit Channel.
To do it, press the button INFO.
In the line POS you can change the placement in channel list
In Operation, you can select the mode of changing the position of the
channel. You can choose between Move (it will shift the rest of
channels) and Exchange (it will exchange the position between 2
channels)
In the line Name you can modify the actual name of this channel.
The keyboard handling is like in a mobile phone.
When you press one button several times you will have different
results.
Example: If you press button 2: a, b, c and 2
With the arrow buttons you can move the cursor in its position.
In this menu, the Green button change between normal and
capital letters and the RED button delete the letters.
With the OK button the selection will be done.
The receiver stores the changes when you leave the menu.
OK the message.
Please confirm by selecting with
3.1.6 List of favourite channels
With the buttons 1 to 8 from the numeric block you can select channels of the
favourite channel list 1 to 8.
At the column Favourite of the Channel List, you will see which Favourite list
each channel is from.
If you want to give to a favourite channel list an own name,
you can do it by pressing the button FAV.
you have to select one list.
With the buttons
In the line you can move the cursor with the buttons
.
The RED button delete letters and the Green button change between
normal and capital letters.
The keyboard handling is like in a mobile phone.
When you press one button several times you will have different results.
Example: If you press button 2: a, b, c and 2
With the OK button the selection will be done.
Reserved of technical modifications and/or errors
- 22 -
U5101
Version en_1.1
Univers by FTE
User’s Manual · U5101
Chapter 4 PVR Management
The PVR Management is similar to a file viewer.
Internal or external data devices
With the button TV/R you can select between the internal hard disk or another one at the USB 2.0 HighSpeed
connected external device.
Ordering recorded files
options.
Pre-viewing window of
the selected file.
Stored files
And folders
Information of the
selected file.
4.1. Play record
If you want play one record, you can do it by pressing the button OK.
4.2. Lock record
With this function it is possible to lock one record and you need to give the
password before playing it.
If you want to mark a record for lock, please select the file and then press
the Yellow button Lock.
Behind this channel you will see now a symbol like the one at the right side.
In order to the function works properly, you have to activate the password
function in menu Parental Control.
±
4.3. Delete record
If you want to delete a recorded file, select it and press the Red (Delete) button.
Doing this, it will appear a menu requesting for confirmation to delete, press OK to delete or Exit to exit without deleting.
4.4. Movies, MP3, Photos
The file list contains the different file formats that can be played. You can differentiate them with the icon placed at the
left side of the file number.
You can select between:
Pictures in JPEG or PNG format
Music in MP3 format
Movies in JPEG, PNG format
Reserved of technical modifications and/or errors
- 23 -
U5101
Version en_1.1
Univers by FTE
User’s Manual · U5101
4.5. Sorting
In order to have a better view, you can sort the files.
Please press the button LIST.
With
Sort A to Z:
Sort Date:
Sort Size:
Sort None:
buttons you can select the following options:
Sort the files related to the first letter of the name in A,B,C….
Sort the files related to the file date.
Sort the files related to the file size.
No sorting
4.6. HDD Management
In the HDD management submenu you can see the capacity of the
hard disk. You also see the free space available.
To open this menu, you have to press the button PVR.
The indicated HDD capacity is lower than the one the manufacture writes.
This is due to the manufacturers often counts as follows.
1 GB = 1.000.000 bytes
More correctly is 1GB = 1.024.000 bytes.
The result for this is that a 160GB HDD indicated by the manufacturer
the storage have real 148GB. This receiver shows you the real space.
If you want to delete the hard disk totally, you can do it with
the Yellow Button Format and the hard disk will be completely erased.
Caution: This process will delete also saves you have made with Backup tools.
4.6.1 Folder management
To keep sorted your HDD, you can create own folders.
To do it, open the folder management by pressing the button Text (copy) and
then press the Yellow (Add) button to create a new folder.
In one folder you can create again other folders.
The navigation inside the folder management is made with the
.
buttons
4.6.2 Delete folder
If you want to delete one folder with all included files, you can
do it with the Red button Delete.
Doing this, it will appear requesting for confirmation to delete, press OK to delete or EXIT to exit without deleting.
4.6.3 Lock folder
With this function it is possible to lock one folder, you will need to give the
password before playing.
If you want to mark a folder for locking, please select the file and then press
the Yellow button Lock.
Behind this folder you see now a symbol like the one at the right side.
In order to this function works properly, you have to activate the password
function in menu Parental Control.
Reserved of technical modifications and/or errors
- 24 -
±
U5101
Version en_1.1
Univers by FTE
User’s Manual · U5101
4.6.4 Add folder
In the menu of Record Management, push the Text (Copy) button and you will
enter in a submenu.
With the Yellow (Add) button, you can add a new subfolder.
The keyboard handling is like in a mobile phone.
When you press one button several times you will have different results.
Example: If you press button 2: a, b, c and 2
With the arrow buttons you can move the cursor in its position.
In this menu, the Green button change between normal and
capital letters and the RED button delete letters.
With the OK button the folder will be created.
4.6.5 Move file
If you want to move one file to another folder, you can do it as follows:
If it is not opened, please open the PVR Management by pressing the
button PVR.
Press now the button TEXT to open the folder management.
It will appear two columns with the same files. The left column is the file
origin which will be copied or moved, the right column is the destination
where the file will be copied or moved.
Though the PVR key, you can change the order of the file, for passing to that
the origin will be the USB device. In the same way, the TV/R key modifies the
destination device, in order to select the USB or the internal HDD.
You can select the folder by pressing OK when it has been selected. To
change the window where the selections are being done, use the GREEN
key and you will see the yellow highlighted to the other window.
Once selected the file to copy in the left column and the destination where it
will be copied in the right one, press the BLUE key to proceed to the copy or
movement of the file. You should have selected the origin file in yellow, in the
left column.
The receiver stores all the events in the folder PVR .
Please select with the buttons ►► and ◄◄ the folder where the file
is stored currently and press the OK button.
The equipment copies when the origin and the destination have different devices, it means, from Hard Disk to external
USB. However, the equipment moves files when the origin and destination are in the same device.
ORIGIN Device
Change with PVR
DESTINATION Dev.
Change with TV/R
ORIGIN Files
Selection with
Reserved of technical modifications and/or errors
Destination folder
Selection with
- 25 -
U5101
Version en_1.1
Univers by FTE
User’s Manual · U5101
Chapter 5 Timers
In menu Timers you get one overview about all events which you have stored.
These events can be store over EPG or direct in this menu.
Menu options
List with all events including
channel name and name for the
event
Start and recording time
Frequency and PID information
for the selected event
Menu options
5.1. Sorting
For having a better view, you can sort the events.
Please press for this the button LIST.
With
buttons you can select the follow options:
Sort Channel: Sort the list related to the first letter of the program name in
A,B,C….
Sort Name:
Sort the events related to the name of event in A,B,C….
Sort Start:
Sort the files related to the start time.
Sort Pos:
Sort the files by date of creation.
5.2. Delete Timer
With the Red button Delete you can delete events.
buttons you can select one event and then press the
With
Red button Delete, then confirm the following message.
5.3. Edit / Add timer
With the Green button Edit you can modify one event,
This can be useful, when you want to record one event and
you do not know exactly its starting or ending time.
With the Yellow button Add you can add manual one event.
The using of Add and Edit is the same.
Channel
Here you can change the channel which will be recorded.
and select in the new menu the channel you want
Press the button
by the buttons
and press OK.
Reserved of technical modifications and/or errors
- 26 -
U5101
Version en_1.1
Univers by FTE
User’s Manual · U5101
Title
You can modify an existing title or create a new one.
buttons.
If you want to change it, select this line by
The keyboard handling is like in a mobile phone.
When you press one button several times you will have different results.
Example: If you press button 2: a, b, c and 2
you can move the cursor in its position.
With the arrow buttons
In this menu, the Green button changes between normal and
capital letters and the RED button deletes letters.
Start / Stop
If you want to modify start and stop times, select this line
buttons.
by
Press now
and select with
the entry you want to change.
The entry will be modified by the buttons
.
When you have finished, press OK.
Repeat
The standard value is 1x, for one time recording.
With the buttons
you can choose the following options also.
2x - 6x
T
W
Monday – Friday
This repeats the recording next day, at same time, same channel.
This repeat the recording every day at same time, same channel.
This repeat the recording every week at same time, same channel.
It will repeat the recording since Monday to Friday in the same channel and at the same time.
Record
Here you can select if you want to store this event to the internal hard disk , in an external device, or not.
If you select no, you can store one event through one DVD-Recorder over the connector VCR Scart.
Selection: yes – internal, yes- external or no
Reserved of technical modifications and/or errors
- 27 -
U5101
Version en_1.1
Univers by FTE
User’s Manual · U5101
Chapter 6 Tools
In this menu you can find two little helper tools.
The calculator is useful for fast calculations and with the calendar
you can mark dates for special events like birthdays.
6.1. Calculator
The using of the calculator is very easy.
With numeric block remote control, input the numbers.
For the calculations you use the colour buttons.
Red Button
Green Button
Yellow Button
Blue Button
Addition
Subtraction
Multiplication
Division
The button OK is used for = function.
With the buttons ◄ you restore the calculator.
6.2. Calendar
If you open the calendar, the yellow marked field shows the current date.
This will be shown in the line under the calendar.
With the buttons Fav- and Fav+ you can switch between the months.
With the buttons Pup and Pdown you can change the year.
In the first column it is marked the number of week in the year and one blue
marked field shows a stored event.
and
You can select the individual dates with the buttons
.
Add one event (Anniversary)
If you want to add an event, select the date and press the
Yellow button Add Anniversary.
You can type the name for the event like in a mobile phone.
When you press one button several times you will have different results.
Example: If you press button 2: a, b, c and 2
you can move the cursor in its position.
With the arrow buttons
In this menu, the Green button changes between normal and
capital letters and the RED button deletes letters.
If you select later a blue marked field you will see the name info the field.
Delete one event
If you want to delete an event, you have to select it and then press
the Red button delete Anniversary.
Change Alarm
Pushing the Green button, you can add an alarm to the event, you will see that this symbol (*) appears close to the
date. A visual alarm will appear in the screen the day of the event.
Reserved of technical modifications and/or errors
- 28 -
U5101
Version en_1.1
Univers by FTE
User’s Manual · U5101
Chapter 7 System Settings
In the menu System Settings you will find all basic adjustments
of the Receiver.
7.1. Menu Language
Here you can choose the language which will be shown in the receiver.
You can select:
English, German, French, Spanish, Italian, Portuguese
Please select with the buttons
and then press OK.
7.2. Audio Language
Here you can choose the audio language for the TV and Radio channels.
Example:
If you select English and the channel you want to see have one
audio carrier in English, you will get the audio in English.
If there is no audio carrier in English, you will get the first one which is
supported in this channel, for example German.
You can select:
English, German, French, Spanish, Italian, Portuguese
Please select with the buttons
and then press OK.
7.3. Time Zone
In order to the receiver shows the correct time as well as adjusting the records
properly, it is needed the adjustment of the Time Zone where you live.
For UK:
Summer time: +1 hour
Winter time:
GMT hour
Please select with the buttons
Reserved of technical modifications and/or errors
and then press OK.
- 29 -
U5101
Version en_1.1
Univers by FTE
User’s Manual · U5101
7.4. TV Settings
Here you can adapt your receiver to your TV set and you can select
the screen format.
TV-System
Select here which TV system your TV set support.
Selection: NTSC, PAL, Secam and AUTO
.
Please change with the buttons
TV-Format
Select here which TV format your TV set has available.
Selection: 4:3, 16:9 and AUTO, please change it with the buttons
.
RF Mode
If you connect your TV or Video set with one IEC coaxial connection at the
output TO TV, you will need to select which system is supported by this device.
Options: PAL M, B/G, I, D/K or NTSC , please change them with the buttons
.
RF Channel
Here you can select which channel the modulator has to use.
This is only needed if you connect your receiver with the IEC coaxial connection at the
output TO TV to your TV set.
Selection: Channel 21 to 69, please change with the buttons
.
Picture Format
This option is only available when you have not selected TV format in mode AUTO.
.
Options: Pan&Scan or Letter Box , please change with the buttons
In this option you can choose how the pictures in films with a big format will be adapted to your TV set.
If you select Pan&Scan you will see one part of the film and at the left and right sides it will be cut
In Letter Box, the picture will become smaller and you will see on top and bottom two black bars.
TV output
This option allows choosing how the receiver will send the colours to the TV set.
Selection: CVBS , RGB, SVIDEO or YUV , please change with the buttons
.
Loop VCR
Here you select the priority of an external video signal.
If you have selected Slave, the receiver shows every time the signal coming from the VCR Scart connector, when there
is signal available. It also can be a signal from DVD player or recorder.
If you have select Master , the signal from receiver has priority and you will see only the signal from connector VCR
scart when the receiver is in Standby mode.
INFO: This receiver has a special LPC mode for saving current. If you select Slave the LPC mode will be disabled.
Selection: Master or Slave , please change with the buttons
.
LPC Mode
This receiver has a special LPC mode for saving current. This reduces the consumption in Standby mode.
Please check your settings in menu Loop VCR . In the LPC mode, the antenna signal keeps cut at the output TO TV ,
so if you use the antenna signal to watch the TV through the receiver, you should disable it.
.
Selection: ON or Off , please change it with the buttons
The LPC function has 2 consequences. The first one is the time it delays to switch from Stand By to working mode, and
the second one is that in this mode, the signals which has to pass through the tuners or the modulator are attenuated
because off the unfeeding from the main board. If whatever of these 2 effects are disturbing you during the use of your
PVR, just disable this function.
Sleep
If you want shut down the receiver automatically, you can choose here the time for the sleep timer.
Selection: 15, 30, 45, 60, 75, 90, 105, 120 or Sleep Off
.
Please change it with the buttons
Reserved of technical modifications and/or errors
- 30 -
U5101
Version en_1.1
Univers by FTE
User’s Manual · U5101
7.5. Recording Settings
Impulsive Recording Limit
Select here how much time do you want to record when you
activate the function Fast Recording.
Selection: 1, 2 or 4 hours
HDD Manager
With this menu you can open the HDD manager, which is
described on chapter 4.6.
.
For opening, press button
USB
In this menu you will see the total space and the free space of your
USB device. You also can format this device.
Margin REC EPG (Before)
Here you can indicate if you want that the recording begins before the starting time of the EPG. You can select among
0, 5, 10, 15 or 30 minutes.
Margin REC EPG (After)
Here you can indicate if you want that the recording ends after the ending time of the EPG. You can select among 0, 5,
10, 15 or 30 minutes.
Disable HDD
Selecting On, the Hard Disk will switch off when nobody is accessing to it, saving energy.
Selecting Off, the Hard Disk will be always powered on.
7.6. OSD Settings
Remote control
Here you can change the transmission code for the remote control
if you have problems with other devices.
Please change it with the buttons
.
For saving the changes, please press OK .
Do not forget to change also the code on the remote control.
For this, press the button CODE on your remote control until the
correct LED is lighting.
Info bar delay
Here you can select how long the information of the OSD will be displayed
on the screen.
Selection: 1 to 10 sec.
Please change it with the buttons
.
Number of Sequential Channel
Selecting Yes in this option, the positions of the channels will be occupied continuously and sequentially. Although you
move the position of one channel, you will shift the positions to avoid leaving empty channels.
Selecting No, you can leave empty channels if we shift the position of one channel.
LCN
With this option you can select, how the receiver have to sort the channels after a new
search.
Please check if LCN is supported in your country.
.
Selection: ON or Off , please change it with the buttons
Reserved of technical modifications and/or errors
- 31 -
U5101
Version en_1.1
Univers by FTE
User’s Manual · U5101
7.7. Version
Here you get information about the hard and software from your receiver.
Manufacture
Model
Hardware
Loader
Software
FP
Software
CRC
Manufacture of the receiver.
Exact article name.
Revisions number from main PCB
Version for boot loader
Version for installed software
Version for VFD display
Beginning of the warranty time
Checksum of the EEprom
7.8. Factory Default
With this option you can restore the receiver totally to the status when
the receiver was used the first time.
Caution: Make this only if you are 100% sure, this step can is irreversible.
Recordings on the internal hard disk will not be damaged due to this action.
7.9. Software Upgrade
With this menu you can transfer data and install new software.
you can choose between the following
With the buttons
possibilities.
Serial port (Download)
Start data download via RS-232 connection.
Serial port (Upload-ALL)
Send all stored channels and main software to other receivers by using
RS-232 connection.
Serial port (Upload-Backup) Send the backup file (receiver database) and software to other receivers by using
RS-232 connection.
For this, the receiving receiver must have been executed a factory default before.
Serial port (Upload-UserDB) Send all stored channels to other receivers by using RS-232 connection.
Serial port (Upload-APP)
Send the receiver software to other receivers by using RS-232 connection.
USB (Download)
Start the data download via USB.
Caution, on USB Stick can be only one receiver file.
Upload-ALL or Upload Backup create two files.
usbupdate_userdb_V1_0_27.bin
Database
usbupdate_V1_0_27.bin
Software
Both can be used but one must be delete manually on PC.
USB (Upload-ALL)
Send all the stored channels and main software to USB-Stick.
This create two files.
USB (Upload-Backup)
Send the backup file (receiver database) and software to USB-Stick.
This create two files.
USB (Upload-UserDB)
Send all stored channels to USB-Stick.
USB (Upload-APP)
Send the receiver software to USB-Stick.
Reserved of technical modifications and/or errors
- 32 -
U5101
Version en_1.1
Univers by FTE
User’s Manual · U5101
Chapter 8 Parental Control
With this menu, you can activate the parental control where is necessary
to give one password before opening channels or making settings.
8.1. Set Lock
To activate the parental control, select with
and then press
.
button Set Lock
You have to give the standard code 0000 or your individual one with the
numeric block from the remote control. Then press OK button.
8.2. Channel lock
Here you can activate the parental control for channels if you have marked
it in
Channel Management for Lock.
For this, select with the buttons
the line Channel Lock
.
and than press
You have to give the standard code 0000 or your individual one with the
numeric block from remote control. Then press OK button.
8.3. Record Lock
Here you activate the parental control for recording events.
the line Record Lock
For this, select with the buttons
and than press
.
You have to give the standard code 0000 or your individual one with the
numeric block from remote control. Then press OK button.
8.4. Installation Lock
Here you cane activate the parental control for the menu Parental control,
System Settings and Installation.
For this, select with the buttons
the line Installation Lock
and then press
.
You have to give the standard code 0000 or your individual one with the
numeric block from remote control. Than press OK button.
8.5. Change Password
When you want to change the standard password, select for this with the
Change Password and press OK button.
buttons
Old Password
New Password
Retype Password
Input here the actual password
Input here the new password you want.
Password must have 4 digits.
Retype here the new password
and press OK button.
If you loose in any time the standard or your individual password
you can unlock it with master password 5100.
Reserved of technical modifications and/or errors
- 33 -
U5101
Version en_1.1
Univers by FTE
User’s Manual · U5101
Chapter 9 Installation
In this menu, you can make the complete installation of the channels,
configuring the antennas, Transponders, importing channel lists or making
backup copies (backup).
9.1. Connection Type
In this menu, you can configure the inputs to be viewed.
One LNB: In this case, you only will have channels in one tuner. This option
has some limitations in how woks the PVR:
-
-
Recording: During the recording process of one channel,
you only will be able to select channels which are located
in the same transponder, it is, a limited number of
channels will be available to be viewed.
PiP: When this function is being executed, the active
channel becomes the small window and in the main
window you only can see the channels of the active
transponder of the small window.
Two LNB: In this case, you will dispose of two active inputs. You should take in account the following
indications, based in how these signals are:
-
Both input signals are the same, it is, in both cables there are the same available signal.
This option is very usual when it is being used Twin LNB. This is the most
recommended installation.. In these cases, there is no limitation in how the PVR
works.
-
Both signals come from different satellites. In this case, the system is limited during the
recording or PiP functions, in a similar way to the example with one input, but in this
case, when a channel is being recorded it is possible to see the channels which are in
the same transponder or all the channels located in the other input.
Loopthrough: In this case it is an extension of the one input option. In this situation, you connect one
bridge between the IF OUT 1 output and the IF IN 2 input. This bridge allows the signal which arrives to
tuner 1, arriving also to tuner 2. It is important to know that the satellite signals vary depending the voltage
and tone supplied from the receiver, in this way different reception bands can be selected. When this
option in enabled, the available signals in both inputs are in the same satellite band, so during the
recording and PiP functions, the availability of viewing channels is reduced to the same transponder
channels which are being viewed or whatever channels located in the same satellite band which is being
viewed.
Select with buttons
Reserved of technical modifications and/or errors
the Type of Connection row and push OK.
- 34 -
U5101
Version en_1.1
Univers by FTE
User’s Manual · U5101
9.2. Antenna Configuration
In this menu you should configure the signals that are connected at the
inputs IF IN of your PVR.
By default, the equipment comes with the configuration that you can see in
the Picture with four satellites.
The available options in this screen allow:
Red button: Deletes the selected satellite. It requests for confirmation.
Green button: Edits the selected satellite. The option appears in the following
image.
Yellow button: Adds a satellite. The options appear in the below image.
Antenna Options:
-
-
-
-
Name: Your PVR is provided with
several satellites pre-stored. You can
find the one you want in the list or to
add a new one. They are sorted by
its orbital position. With the key
you can access to the available
satellite list.
Band: There are two available bands:
C and Ku. The difference is basically
the transmission frequency. The Ku
band has two possibilities, the most
common is the universal Ku.
Low Band / High Band: It is used
when the band selection is Ku one,
and it programmes the Local
Oscillators of the LNC.
DiSEqC 1.0 / 1.1 Ports: To configure the use of antenna switch. These switches allow the
reception of different satellites in a single input.
Motor: Enables the function of using a motor to direct the antenna.
22 KHz: Tone to switch the band of the LNC.
LNB Power: Feeding to the LNB. By default the selection is the one for an universal LNB.
Signal: It shows if there is an available signal in the selected configuration.
LIST button: It changes the selection of the antenna to input 2. This
function is only possible when it has been selected previously that there
are two LNB available. In case of selecting 1 or LOOPTHROUGH, the
second input is not available. The system to select the satellites to the
input 2 is exactly the same to the input 1, using the Yellow button to add
satellites.
Alter whatever change, you should confirm with the OK button when you
exit the menu.
Reserved of technical modifications and/or errors
- 35 -
U5101
Version en_1.1
Univers by FTE
User’s Manual · U5101
9.3. Channel Search
Once the antenna configuration is completed, you should proceed to
tune the channels from the selected satellites. There are different ways
to tune the channels: through LNB, through Satellites and through
Transponders.
Searching channels through LNB:
When you select to search channels through LNB, you only can select
one LNB, which corresponds to the programmed tuner, so if you have
more than one LNB installed and configured, you should proceed with
one and then the other to tune all the received channels. Close to the
LNC that you have selected, you will see where it will be carried out
the tuning.
Searching channels through Satellite:
When you search through satellite, you will have several satellite selections,
so you can programme the searching of all the satellites that you have
configured and in one single process you will find all the channels.
To select the satellites, use the Green key, to change the sort of the satellite
list, use the LIST key, confirm your multiple selection by pressing OK key.
Searching channels through Transponder:
Searching through Transponders is the most selective of all the options.
It allows you selecting the frequencies that you are going to tune and
search channels. By default your equipment shows All the transponders
and with the key you can change this option and make a selection of
the transponders that you want to tune. The selection is made with the
Green button and it is validated the multiple selection with the OK key.
In case of adding some new transponder (see point 9.5 transponders
management) you should tune it in this mode.
In whatever selection, you always will have available to find Free To Air
(Free channels), channels with Conditional Access, or All the
channels.
Begin searching pressing the Green button. Once the searching process
is finished (the time will depend on the number of transponders to be
found), you will get a window as the following one:
TV Channels
detected
Radio Channels
detected
Level and Quality
meter
Searching
process
Reserved of technical modifications and/or errors
- 36 -
U5101
Version en_1.1
Univers by FTE
User’s Manual · U5101
You can stop the channel searching whenever you want pressing the Exit key.
Once the search is finished, you should confirm the storage of the new channel list.
Press the OK button.
The receiver will come back to the Channel Searching menu.
You can search again if you want, or exit the menu with the Exit key.
9.4. Satellite Management
Your receiver are provided with a very important pre-stored satellite list, if
in addition you want to add some one more or to change the parameters of
some channels, these functions are made through this menu. The
available options are:
Delete Satellites
If you want to delete one satellite, you can do it with the Red (Delete) key.
Doing this, the receiver is requesting you the deleting confirmation, with
the OK button you will erase the satellite, with the Exit button you will
cancel.
Edit satellites
With the Green (Edit) button, you can modify the parameters of one satellite. The
editable parameters with its orbital position in degrees and direction, the name as
well as the transmission band (C, Ku or both).
Select with the buttons
and press OK to confirm.
the row and with
the values,
To edit the name of the satellite, the handling of the keyboard is the same than the
one of a cellular telephone: pressing one button some times, you will choose the
wished letter. Example: if you push the key 2: a, b, c and 2 will be shown. With the
arrow buttons you can place the cursor in the wanted button. In this menu, the Green key changes between capital and
normal letters, with the Red key, it erases the last character.
Add satellites
With the Yellow (Add) button, you can add a satellite. The process is exactly the same than the before one, with the
difference that the menu does not have data.
Skip Satellite
With this function it is possible to skip one satellite in the fast searching channels process.
The marked channels will be not selected where you search channels. Please, ensure that you mark the satellites
correctly. It will appear in the right column the icon:
and
To select the satellites, use the buttons
You can place marks in more than one satellite.
Reserved of technical modifications and/or errors
. Press the Blue (Skip) button to mark them.
- 37 -
U5101
Version en_1.1
Univers by FTE
User’s Manual · U5101
9.5. Transponders Management
In the transponders management, we will have a screen like the following one:
With the TV/R they are
shown the TP of the C, Ku
or both bands.
UIT the LIST key you can
change the sort which with
the TP are shown. You can
change the sort of the TP
List, you can sort them by
frequency or by polarity.
With the EPG they are
shown the different prestored satellites and when
you select whatever of
them, it is shown the TP of
this satellite.
Data block of TP where it is
shown the satellite frequency
of transmission, polarity,
symbol rate and FEC. Last
two columns are for the
selection of erasing and skip.
The options you have right with the list are the following ones:
Delete Transponder: The RED key allows you to make a multiple selection of transponders to be deleted. When you
select a TP, it will appear the icon in its column, when you exit of the menu, you will be requested to confirm the
changes.
Edit Transponder: This function with the GREEN key will allow you to vary the parameters of the transponder. You can
change the frequency, polarity, symbol rate and FEC. This last parameter can be changed to AUTO mode in case of
unknowing it.
Add Transponder: Like in the previous step, the YELLOW key, allow adding new TP to the list.
Skip Transponder: In this function, with the BLUE key, allows that one transponder will be keeped in the list but it will be
not tuned.
Whatever change made over the list of transponders will need to be confirmed with OK button when you exit the menu.
9.6. SatcoDX Update
SatcoDX is a standard created by TELE-SATELLITE to update and keep updated the list of channels and TP of your
receiver. You can find more details in the website: www.satcodx.com
Reserved of technical modifications and/or errors
- 38 -
U5101
Version en_1.1
Univers by FTE
User’s Manual · U5101
9.7. Backup
In this menu you can save your backups or preferences.
Load Backup
It loads a backup from the internal memory of the receiver.
Save Backup
It saves a backup copy in the internal memory of the receiver. It
overwrites whatever copy which was stored before.
Delete Backup
It deletes the backup of the internal memory of the receiver.
Load configuration
It loads the configuration from your Hard Disk.
the line
Select with the buttons
Load Configuration and then press OK.
In the submenu you can choose the configuration list that you want to
load.
Save configuration
It saves the configuration in the Hard Disk.
You can choose a customized name.
To modify the configuration name, the handling of the keyboard is the
same than the one of a cellular telephone: pressing one button some
times, you will choose the wished letter. Example: if you push the key
2: a, b, c and 2 will be shown.
With the arrow buttons you can place the cursor in the wanted button.
In this menu, the Green key changes between capital and normal
letters, with the Red key, it erases the last character.
Erase configuration
It erases a configuration from the Hard Disk.
Select in the submenu which configuration do you want to delete and press OK.
Reserved of technical modifications and/or errors
- 39 -
U5101
Version en_1.1
Univers by FTE
User’s Manual · U5101
Chapter 10 Equipment features
10.1. Technical Data
The features of the SAT depend only in its hardware and in its electronic.
The majority of the functions are executed by the software.
General
Model
Reception Range
Memories
OSD Languages
Codes of the remote control
HDD Capacity
Electronic Program Guide (EPG)
Function (PIP)
LPC Low Power Consumption
Time Shift
Easy Recording Function
Recording over EPG
MP3 Music
Pictures JPEG / PNG
Decoder teletext embedded
Memory teletext
Data connections
U5101
DVB-S
8000
English, German, French, Spanish, Italian,
Portuguese
3
160GB
Yes
Yes
Yes
Yes
Yes
Yes
Yes
Yes
Yes
800 pages
RS232, USB 2.0 HighSpeed
VIDEO
Format
Bit Rate
Output
Screen Format
Resolution
Connections
MPEG-2 & MPEG-1 compatible
Max 15Mbps
NTSC/ SECAM / PAL
4:3 / 16:9 / Auto
720X480 @ 30fps; 720X576 @ 25fps
S-VHS, Scart (RGB), YUV or RCA
AUDIO
Format
Frequency sampling
Connections
MPEG-2/MPEG-1 layer 1 & 2
32 / 44,1 / 48
RCA, AC3 coaxial, AC3 optical
DEMODULATION
Demodulation
FEC
Input data rate
QPSK
All supported by DVB-S
2-45 MS/s
SIGNAL INPUT
Frequency Range
Input Level
950 – 2150 MHz
-60dBm -30dBm
RF MODULATOR
Band
TV Standard
Output Channels
UHF C21-69
PAL BG / I / DK, NTSC
21~69(PAL), 14~83(NTSC)
MISC
Antenna Feeding x2
Voltage Input
Consumption with HDD working
Consumption in LPC mode
Dimensions
Weight
13/18 VDC – 0/22 Khz 400 mA max
90~260VAC 50Hz~60Hz
38,6 VA / 18 ,7 W max.
5,3 VA / 1,3 W
360×250×65mm
2,6 Kg
Reserved of technical modifications and/or errors
- 40 -
U5101
Version en_1.1
Univers by FTE