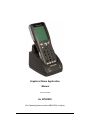
1
Graphical Demo Application
Manual
Version XFA30920
for OPH1000
(For Operating System versions XBAV0104 or higher)
GRAPHICAL DEMO APPLICATION FOR OPH1000
OPTICON
CAUTION: This user’s manual may be revised or withdrawn at any time without prior notice.
Version
User’s manual for Graphical demo application
Model: OPH1000
Version: XFA30920
Operating System (OS) version: XBAV0104 or higher
February 2007
Copyright 2007, Opticon Sensors Europe B.V.
All rights reserved.
Limited warranty and disclaimers
By opening the package of this product you agree to become bound by the liability and warranty
conditions as described below.
Under all circumstances this manual should be read attentively, before installing and or using the
product. In no event,
Opticon Sensors Europe will be liable for any direct, indirect, consequential or incidental damages
arising out of use or inability to use both the hardware and software, even if Opticon has been informed
about the possibility of such damages.
All Opticon products are warranted for a period of one year after purchase, covering defects in physical
media and physical documentation. The liability of Opticon is limited to replacement of defective media
or documentation.
Opticon will not be liable for modifications that are made by the customer. Opticon does not warrant that
the software is free of errors, or that it will meet any user’s particular standards, requirements, or needs.
Opticon will in no event be liable for any direct, indirect or incidental damages arising out of use of this
software.
Trademarks used are property of their respective owners.
GRAPHICAL DEMO APPLICATION FOR OPH1000
OPTICON
TABLE OF CONTENTS - 3
Table of contents
TABLE OF CONTENTS
3
1.
KEYS
4
2.
2.1
2.2
2.3
2.4
2.5
2.6
THE MENU STRUCTURE
Scan Labels
Scroll data
Transmit Data
Delete Database
System Menu
Version
5
6
7
8
9
10
16
3.
DATA FORMAT
17
GRAPHICAL DEMO APPLICATION FOR OPH1000
OPTICON
GRAPHICAL DEMO APPLICATION -
1.
PAGE 4
Keys
The OPH1000 has full alphanumeric keypad with some additional control keys
including the following:
The Q1 key (Up key) or left key (with shift)
The Trigger key.
The Q2 key (Down key) or right key (with shift)
While holding the shift key and pressing a
numeric key the alpha representative value is
displayed on the screen.
GRAPHICAL DEMO APPLICATION FOR OPH1000
OPTICON
GRAPHICAL DEMO APPLICATION -
2.
PAGE 5
The Menu Structure
The menu structure consists of several items. These items together form the
main and submenus. You may use the
(Q1) and
(Q2) keys to
navigate through the menu and items may be selected by pressing the ENT or
the
(Trigger) button. Direct selection of the menu is also possible by
pressing the numeric equivalent of the menu item.
Below is the schematic representation of the OPH1000 menu.
•
•
•
•
•
•
•
•
•
•
•
•
•
•
•
•
•
1
2
3
4
5
Scan Labels
Scroll Database
Transmit Data
Delete Database
System Menu
i.
Com Port
1. Port
2. Baudrate
3. Parity
4. Databits
5. Stopbits
ii. Protocol
iii. Display
iv. Barcodes
v.
Memory
vi. Drive
6 Version
GRAPHICAL DEMO APPLICATION FOR OPH1000
OPTICON
GRAPHICAL DEMO APPLICATION -
2.1
PAGE 6
Scan Labels
Scan Labels
By pressing the trigger button the laser line emits and
it is possible to scan a barcode.
Barcode can now be scanned be pressing the trigger
button. You may also use the keypad to enter code.
To enter alpha data, hold the
(Shift) button while
pressing any of the numeric keys. To enter the input
data press the
(ENT) or
(Trigger) keys.
To return to the main menu, press the
key.
(CLR)
The data entered now appears on the display.
Total indicates the current quantity in the database. If
the entered data does not exist in the database yet,
the total is 0.
By default, you are adding 1 to the total. You may
overwrite the default value with any number that is 4
digits or less.
To input a negative value, keep the
(Shift)
pressed and press the
(0). To make a negative
value positive, repeat the same process.
To enter the input press the
(Trigger) keys.
(ENT) or
If the Total + Add quantity is 0 (zero) the record is
deleted from the database.
GRAPHICAL DEMO APPLICATION FOR OPH1000
OPTICON
GRAPHICAL DEMO APPLICATION -
PAGE 7
If the total quantity in the database plus the newly
added quantity exceeds 999999 or
–999999, then an error message appears. The added
quantity is not stored in the database.
After pressing a key the scan barcode menu appears.
After entering the quantity the application returns to
the scan barcode screen.
2.2
Scroll data
This option allows you to scroll through the database
of stored codes.
To navigate through the inputted data use the
(Q1) and
GRAPHICAL DEMO APPLICATION FOR OPH1000
(Q2) keys.
OPTICON
GRAPHICAL DEMO APPLICATION -
2.3
PAGE 8
Transmit Data
By selecting the Transmit Data option, the database, if
present, can be transmitted to the PC. The system will
use the settings selected in the System Menu.
The communication parameters include:
Protocol: Default = NetO Protocol
Port:
Default = Cradle
Baudrate: Default = 115200
Parity:
Default = None
Databits: Default = 8
Stopbits: Default = 1
When the transmit data message appears on the
display put the OPH1000 in the cradle. You must run
an application to receive the data on the PC
Following a transmission, a message appears to
inform you whether is was successful or not.
If you receive an error message, check your settings,
ensure the PC application is running and ready to
receive, then try to transmit the database again.
GRAPHICAL DEMO APPLICATION FOR OPH1000
OPTICON
GRAPHICAL DEMO APPLICATION -
2.4
PAGE 9
Delete Database
You may select this menu item if you wish to delete
the entire database from the OPH1000
You are then asked to confirm your choice. You can
now press
(ENT) to delete the database or
(CLR) to cancel and return to the previous
screen.
When cancel is selected the database is not removed
from the RAM disk.
GRAPHICAL DEMO APPLICATION FOR OPH1000
OPTICON
GRAPHICAL DEMO APPLICATION -
2.5
PAGE 10
System Menu
The System menu contains a submenu where special terminal options can be
viewed or set. The navigation of this menu behaves the same as the main
menu.
The system menu consist of 6 items:
•
•
•
•
•
•
Com Port
Protocol
Display
Barcodes
Memory
Drive
(CLR) button is selected, the
When the
application returns to the main menu.
GRAPHICAL DEMO APPLICATION FOR OPH1000
OPTICON
GRAPHICAL DEMO APPLICATION -
PAGE 11
You may use the Com Port menu to change the
communication settings.
Your options include:
1.
2.
3.
4.
5.
Port
Baudrate
Parity
Databits
Stopbits
The Port setting controls how you connect your device
to the PC.
The OPH1000 supports two methods including IrDA
and Cradle.
The default setting is Cradle.
The Baudrate menu allows you to select a baudrate
from a set of standards.
These include:
1.
2.
3.
4.
5.
6.
7.
115200 (Default)
57600
38400
19200
9600
4800
2400
Checked = baudrate enabled
Unchecked = baudrate disabled
When selecting a new baudrate, the previous baudrate
is disabled.
GRAPHICAL DEMO APPLICATION FOR OPH1000
OPTICON
GRAPHICAL DEMO APPLICATION -
PAGE 12
The Parity menu allows you to select which type of
parity your code uses.
You can choose from:
1. None (Default)
2. Even
3. Odd
The Databits menu allows you to select the number of
databits used in your code.
You can choose from:
1. 7
2. 8 (Default)
The Stopbits menu allows you to select the number of
stopbits your code uses.
You may choose from:
1. 1 (Default)
2. 2
GRAPHICAL DEMO APPLICATION FOR OPH1000
OPTICON
GRAPHICAL DEMO APPLICATION -
PAGE 13
The Protocol menu allows you to select the method of
communication with the PC. The “No Protocol” setting
sends data from the database as flat ascii. The NetO
protocol sends data to the PC using the NetO protocol.
Checked = protocol enabled
Unchecked = protocol disabled
By selecting a new protocol the previous selected
protocol is disabled.
The Display menu allows you to change the contrast of
the OPH1000 display
You may use the
darker and the
GRAPHICAL DEMO APPLICATION FOR OPH1000
(Q1) key to make the screen
(Q2) to make the screen lighter.
OPTICON
GRAPHICAL DEMO APPLICATION -
PAGE 14
The barcode menu enables or disables the supported
barcode symbologies. Multiple barcodes can be
enabled at the same time.
Checked = enabling barcode
Unchecked = disabling barcode
Supported barcode types include:
• UPC
(Default)
• EAN
(Default)
• Code 39
(Default)
• Codebar
(Default)
• Industrial 2 of 5
(Default)
• Interleaved 2 of 5
(Default)
• S-Code
(Default)
• Matrix 2 of 5
• Chinese Post
• IATA Code
(Default)
• MSI
(Default)
• Telepen
(Default)
• UK/Plessey
(Default)
• Code 128
(Default)
• Code 93
(Default)
• Code 11
• Korean Post
• RSS-14
• RSS-Limited
• RSS-Expanded
• PDF417
(Default)
• MicroPDF417
(Default)
• All Add-Ons
By enabling all Add-Ons the add-ons for all
supported barcode types are enabled.
GRAPHICAL DEMO APPLICATION FOR OPH1000
OPTICON
GRAPHICAL DEMO APPLICATION -
PAGE 15
The Memory menu shows the amount of free memory
on the RAM disk.
When the RAM disk is (almost) full, a message
appears. The remaining memory is needed for data
communication from the Transmit Data menu.
RAM disk is almost full, data is stored.
RAM disk is full, data is not stored.
The Drive menu allows you to select the default drive
for file storage.
You may choose between the following:
1. Internal RAM (Default)
2. Memory Card
GRAPHICAL DEMO APPLICATION FOR OPH1000
OPTICON
GRAPHICAL DEMO APPLICATION -
2.6
PAGE 16
Version
The version menu allows you to view the current
software version.
The software version of this application.
GRAPHICAL DEMO APPLICATION FOR OPH1000
OPTICON
GRAPHICAL DEMO APPLICATION -
3.
PAGE 17
Data format
Each record is stored in a database file called DATA.FIL.
The fields in a record are:
<Barcode: 30 characters, right padded with spaces>
<Quantity: 7 characters, left padded with spaces, 6 numeric and 1 sign bit>
<Time stamp: 8 characters, format HH:MM:SS>
<Date stamp: 10 characters, format DD/MM/YYYY>
The record fields are separated by a comma and all records end with a
<CR><LF> character.
A complete record looks like this:
<Barcode>,<Quantity>,<Time>,<Date><CR><LF>
The maximum of 999999 records can be stored on this terminal.
GRAPHICAL DEMO APPLICATION FOR OPH1000
OPTICON
GRAPHICAL DEMO APPLICATION -
GRAPHICAL DEMO APPLICATION FOR OPH1000
PAGE 18
OPTICON