1
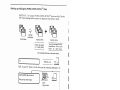
POEM
COM PU-STITCH
CS-I/Il
A
a
User’ S Manual
I
I
I
Version 1 .0
March, 1993
I
I
I
© Copyright 1993 AISIN WORLD CORP.OF AMERICA
© Copyright 1993 by AISIN WORLD CORP. OF AMERICA
All rights reserved.
No parts of this publication or the accompanying software may be copied or distributed,
transmitted, transcribed, stored in a retrieval system or translated into any human or
computer language, in any form or by any means, electronic, mechanical, magnetic,
manual, or otherwise, or disclosed to any third party without the express written
permission of
AISIN WORLD CORP. OF AMERICA
Portionsof this product are protected by the following patents:
: 4,821,662
9
USA Patent N
: EP022 1163
9
European Patent N
Other patenets pending.
I
I
I
I
I
I
I
I
I
I
I
I
I
I
Table of Contents
COMPU-STITCH
1. Introduction to POEM TM
COMPU-STITCH
What is POEM TM
COMPU-STITCH II
COMPU-STITCH I and POEM TM
POEM TM
COMPU-DESIGNS
POEM TM
I
1
2
COMPU-STITCH
2. Install POEM TM
COMPU-STITCH Disks
the Original POEM TM
up
Backing
Connectors and Cables
Connection Diagram
Connecting POEM to your Computer
Connecting MemoPlug (CS-lI only)
COMPU-STITCH Software
Installing the POEM TM
COMPU-STITCH Software
Start the POEM TM
COMPU-STITCH
Up-dating an Existing POEM TM
SIGNS
COMPU-DE
Installing POEM TM
Troubleshooting
Installation
Start the Program
5
6
3. Sew Existing Designs
Start the System
Open an Existing Design
Displaying the Design
Check the Frame
Display the Frame
Sew the Design
17
17
19
19
19
20
20
3
7
7
8
8
9
II
12
13
14
14
15
Prepare for Sewing
Start Sewing
Other Actions
Finish Sewing
esigns
M
Compu-D
Use POEM T
Sewing on Different Fabrics
Sewing in Different Colours
4. Create Lettering
Start a New Design
Set Satin Values
Enter Letters
Save Your Design
How to Create Multiple Lines
Add Lettering to Existing Designs
5. Sew Designs in Different Sizes
Undo
Tips and Limitations on Scaling Designs
Minimum and Maximum Stitch Length
Scaling the different stitch types
6. Change Existing Designs
Change the Colours of a Design
Change the Displayed Colours
Mix a New Colour
Change the Embroidery Colours
Go To the Desired Stitch
Insert Colour Change
7. Combine Designs
Viewing Your Design
Zoom
Pan
Full Screen
Measure
Combine Two Different Designs
Transform Selected Parts of a Design
Select Parts of a Design
Move Selected Parts
Cut Selected Parts
Copy Selected Parts
Paste Selected Parts
Rotate Selected Parts
Mirror Selected Parts
Delete Parts of a Design
Delete Selects
Delete Segment
Change Individual Stitches
Delete Stitch
Move Stitch
Manual Stitch
U
.20
21
22
23
23
25
25
26
26
30
30
32
33
35
35
35
36
37
37
37
38
41
41
42
F
43
43
43
44
44
44
45
45
45
46
47
47
47
48
49
51
51
51
52
52
52
52
I
Table of Contents
8. Create Your Own Custom Designs
Prepare the Pattern
Select Stitch Types
Draw Guide Lines on the Pattern
Plan the Stitching Sequence
Display the Pattern
Load the image
Set the Image Scale
Hide the Image
Clear the Image
Display the Frame
input the Design
Manual Stitch
Satin Columns
Fill Shapes
Centre
Save the Design
How to Improve Your Embroidery
Pull and Push Compensation
Tips for Entering Different Shapes
How to Applique
Edit your Designs
Add New Replacement Stitching
33
.
9. Back Up Your Design
Files
Copy Designs onto Floppy Disk
Delete Designs from the Hard Disk
Basic File Operations
File Name and Type
Disk Drives
Directory
List Files
Copy Files
Delete Files
Wildcards
Rename File
30
50
36
56
57
57
57
58
58
58
58
61
65
63
63
65
66
69
70
71
73
73
73
74
74
75
75
75
76
76
77
77
77
10. Quick Reference Guide
Keyboard Commands
Pull Down Menu Commands
File
Edit
Modify
Fills
Function
Display
image (CS-IT only)
79
79
80
80
80
8l
81
82
82
83
TITCH Alphabets
M
PU-S
T
Appendix POEM COM
85
Index
Table of Contents
1
UI
I
I
I
I
I
I
I
I
I
I
I
I
I
I
I
I
I
LV
Table of Contents
I
Introduction to
COMPU-STITCH
POEM TM
TM
What is POEM COMPU-STITCH
TM is a simple to use, graphic based computer software
POEM COMPU-STITCH
package, designed to allow hand embroiderers, sewing enthusiasts and hobbyists
of all walks to create machine stitched embroidery using a home computer and
the AISIN POEM embroidery machine.
This manual will guide you, step by step, through the operation of the software
and introduce you to the art and joys of computerized embroidery. Whether
you choose to edit and stitch out stock designs or take the plunge and create
your own embroidery designs from scratch, you will experience much pleasure
in the final stitched embroidery
1
POEM COMPU-ST
TM
TM
ITCH I and POEM COMPU-ST
ITCH II
cs_I
COMPU-STITCH (CS-I) software allows users of AISIN POEM
I
POEM TM
embroidery machines to:
• run the software on a suitably configured PC compatible computer
• stitch POEM format designs on a POEM embroidery machine
• create new automatic lettering for POEM machines in 3 letter styles,
block, serif and script alphabet
and vary letter height from 5mm to 50mm
• combine automatic lettering with new or existing POEM designs
• display POEM designs on the screen in actual size or with pan and zoom
• automatically centre the design for stitching
• set thread colours for display
• control machine functions such as make jump, colour change, set applique
• perform basic editing of designs or portions of designs
cut, copy, paste
delete
move, rotate, mirror image
• scale designs to different sizes (within practical limitations)
• save designs in POEM format on hard disk or floppy disk
• print designs by “print screen” to printers.
cs_li
POEM TM
CQMPU-STITCH (CS-Il) software allows users of AISIN POEM
II
embroidery machines to:
• take advantage of all CS-I features
• create their own unique designs by,
using a pixel image from a third party scanning/drawing program
as a guide or template
positioning stitch points around an on-screen template with a
mouse.
choosing where and when each stitch type is to be used within a
design. The three stitch types available are,
manual stitch
satin stitch automatic parallel or turning calculation
fill stitch automatic parallel calculation
-
-
I
2
Chapter 2
-
Introdl1ction to POEM COMP U-STITCH
TM
POEM COMPU-DE
TM
S1GNS
POEM T
COMPl.J-DE
SIGNS are sets of embroidery designs covering vanous
1
themes. They have been specifically designed for use with your POEM COMPL
TM System. Just load the additional software designs from the COMPU
STITCH
TM disk onto your computer and you are ready to stitch. Some
DESIGNS
standard design sets
Sports I
Sports II
Sports Mascots
Scary Things
Kids I
Kids II
Animals,
are available on disk for purchase. Contact your nearest POEM COMPU
STITCH dealer for more details.
TM
Chapter 1
-
Introduction to POEM COMPU-ST
1
ITCH
3
4
Chapter 1
-
Introduction to POEM COMP U-STITCH
TM
2
Install POEM CO
T
MPUM
STITCH
Before you can use POEM ,
COMPU-STI
T
M
TCH you must install the software on
your computer and connect the POEM machine.
o
Make backup copies of POEM COMP
TU-STI
M
TCH
Connect the POEM embroidery machine
€
Connect the MemoPlug (CS-Il only)
o
Install POEM COMP
TU-STI
M
TCH onto your hard disk
You will need:
—
—
-
—
I
1
3
3
POEM sewing machine, connecting cable and transformer.
MemoPlug (CS-Il only).
POEM T
COMPU-STI
M
TCH disks.
Blank, 3.5” High Density disks.
POEM T
COMPU-STI
M
TCH requires a 386 or 486 AT compatible computer with a
minimum of 4 Mb RAM, a 40Mb hard disk, a VGA colour monitor, a mouse
,
and DOS 5 to run. While a floating co-processor is not an absolute require
ment,
POEM T
COMPU-STI
M
TCH will work faster if one is installed.
These instructions assume that you are familiar with DOS terms and
basic
operations. If not, consult your computer’s reference manual.
Backing up the Original POEM COM
T
PU-S
M
TITCH Disks
IMPORTANT : The original POEM T
COMPU-STI
M
TCH disks are High Density
(HD). When making backup copies you must use High Density disks.
+
I>
original disks
backup
procedure
original disks
backup copies
Use the backups for the
installation then store
them in a safe place.
Store the disks
in a safe place.
Do not store both sets in the same place!
diskcopy a: a:
EJ
NOTE: If your 3.5” drive is the B: drive use the command diskco
py b: b:
Insert SOURCE disk in drive A:
Press any key when ready
insert
original disk
Insert TARGET disk in drive A:
I
[
[
I
-
-
Press any key when ready
remove
original disk
Enter
insert
backup disk
I
[
+—
You may be asked to swap the disks in and out of the drive
a few more times before the diskcopy is completed.
Copy another disk? (YIN)
n:=
iEnter
—
if diskcopy
is complete
[
6
Chapter 2
-
Install POEM COMP TM
U-STITCH
Connecting the POEM machine
Connectors and Cab’es
At the rear of your computer are a number of connectors, known as ports (See
diagram). The two ports you will use are COM1 (serial) and LPTI (parallel). Note
that this diagram shows a typical port set-up. The actual port set-up on your
computer may be different.
LTP (parallel / printer)
COMI (Serial)
The cable connecting POEM to your computer has two distinct ends. The small
end is an 8 pin, male DIN connector, and connects to the POEM machine. The
larger end is a female 9 pin connector, and connects to the COMI port on your
computer.
8 pin DIN male (to POEM)
9 pin female (to computer)
Connection Diagram
Chapter 2
-
Install POEM COMP U-STITCH
TM
7
_
I
I
Connecting POEM to your Computer
Note: Before you begin turn your computer OFF
o
€3
€3
Connect the small end of the
cable to the POEM port
marked LINE.
Connect the large end of the
cable to the COMI port at the
rear of the computer.
Connect the transformer to
the POEM port marked DC
12V.
Make sure that POEM is OFF
(power switch is on 0).
-fl
I
1
I
I
—
rLJ/a En
L_rJ
[
o
Connect the transformer to a
power outlet.
[
[
[
[
I
Connecting MemoPlug (CS-li only)
NOTE: CS-Il software will not
run
without
MemoPlug
attached. If MemoPlug is not
attached, only CS-I features will
be available.
--
.
.0,
Connect MemoPlug to the LPTI
(printer) port.
If you have a printer connected
to this port, disconnect the
printer, connect the MemoPlug,
then reconnect the printer to the
rear of the MemoPlug.
Chapter 2
-
Install POEM COM
T
PLJM
STITCH
LJ’Tl Memo Plug Printer
S
[
TM Software
Installing the POEM COMPU-STITCH
Before beginning this procedure, make sure that:
TM disks,
you have backed up the original POEM COMPU-STITCH
TM disks,
you have copies of all (3) POEM COMPU-ST1TCH
you have installed DOS 5 on your computer,
the POEM machine is OFF.
—
—
—
—
Insert the installation Disk #1 in drive A: (or B:)
Insert
Disk #1
a:install
[C:\>
Cs Software Installation
Checking PC system...
Installing CS Program files...
Configuring operating system settings...
The installation program will automatically place the system under the
directory C:\CS. Any sample designs installed by the system will be placed in
the directory C:\POEM.
Please load Disk #2
Press <Enter> when ready...
Remove
Disk #1
Insert
Disk #2
,J1
Enier
nstalling Disk #2 software files...
9
Chapter 2
-
TM
Install POEM COMP U-STITCH
Please load Disk #3
Press <Enter> when ready...
Remove
Disk #2
Insert
Disk #3
3
Ener.—
The system will now reboot.
Please remove the floppy disk from the drive.
Press <Enter> when ready
Remove
Disk #3
I
I
I
I
0
(:
I
I
I
F
F
F
F
F
10
Chapter 2
-
Install POEM COMP U-STITCH
TM
TM Software
Start the POEM COMPU-STITCH
Before attempting to start the software, make sure that:
the POEM machine is switched on
the DOS prompt is on screen (if not exit to DOS)
—
—
TM
We recommend that you make a habit of starting POEM COMPU-STITCH
from the POEM directory. This directory stores any sample designs available for
use in POEM COMPU.-STITCH
. It is also the directory where POEM COMPt.J
TM
TM are automatically placed duhng installation.
DESIGNS
(PoEM>
Cs
nte7]
To start the software
POEM Copu—Stitch I for PC
Ui .
19:4:53 Har 2 1993
Cc) Copyright Aisin World Corp. of Rrerica 1993
ll rights reserved
Portions of this product are protected by the following patents:
USR: 4.821.62
Europe: EPZ211G3
Other patents pending
Ox
Chapter 2
-
Nl
T
Install POEM COMPUSTITCH
I
11
______
I
TM
Up-dating an Existing POEM COMPU-ST[TCH
TM as updates over the
You can install new versions of POEM COMPL-STITCH
top of your existing system. If you install a new version of POEM COMPU
TM in the CS directory, the old system files will be overwritten. If you
STITCH
wish to keep the old system, install the new version in another directory, for
example, CSNEW.
Note: your embroidery designs can not be overwritten by this process because
they are stored in a different directory (\POEM) to the system files.
Insert the installation Disk #1 in dnve A (or B)
I
I
Insert
Disk #1
1
a:instali
1
1
CS Sofare installation
ChecKng PC system
(Files found in directory C:\CS
.9verwrite C:\ Cs? [YJ:
4
1
j
3
[Deietgoidfiles...
nstailing CS Program files...
operating system settings...
Configunng
I
1
J
Continue as described in Installing the POEM COMPU-ST1TCH
TM Software.
I
I
I
I
I
12
Chapter 2
-
TM
Install POEM COMPLJ-STITCH
Installing POEM COMPU-DESIGNS
Before beginning this procedure, make sure that:
TM disks,
you have backed up the original POEM COMPU-DESIGNS
the POEM machine is OFF.
—
—
Insert the POEM COMPU-DESIGNS Disk in drive A: (or B:)
Insert Disk
[C:\>
a:install
[Installing Compu-Designs files...
A sub-directory for the new designs is created under the C:\POEM directory
automatically. The name of the new sub-directory will correspond to theme
TM disk.
name on the POEM COMPU-DESIGNS
Installation complete.
Please remove the floppy disk from the drive.
Press <Enter> when ready
Remove
Disk
1
Enter—
Chapter 2
-
Install POEM COMP U-STITCH
TM
13
Troubleshooting
Installation
Below is a table listing possible causes of installation errors and how to
overcome them.
Action
Error
Not enough disk space.
14
Check available disk space.
CS-I/Il needs a total of 8
Megabytes of hard disk space to
function:
4 Megabytes to install
4 Megabytes to run
8 Megabytes Total
At the prompt type dir” then press
<ENTER>.
Check available disk space.
Delete unnecessary files to create 8 Mbytes or
more of hard disk space.
Not enough memory.
Check available memory.
CS-I/Il requires 4 Mbytes of
RAM to run.
Reboot the PC.
Check that 4 Mbytes or more is checked
correctly. Contact your supplier if not.
DOS 5 not installed.
Check which version of DOS is installed.
CS-I/Il requires DOS 5 or later
to run.
To see which version of DOS is installed,
type ‘ver’ at the DOS prompt then press
<ENTER>.
If an earlier version is displayed, (eg DOS
3.1), install DOS 5.
See the DOS Users Manual for installation
instructions. Install CS-I/Il Software again.
Unable to find the Mouse
driver.... (mouse.sys)
Which directory is it in?
(C:\DOS)
Locate mouse driver on computer, or
Stop CS-I/li installation and install a mouse
and driver.
CS-I/Il uses a mouse. It works
with a bus mouse, a serial mouse
or an on-board mouse (PS/2), and
uses the standard mouse driver
software distributed with the
mouse. If during installation CSI/Il cannot find a mouse driver,
the question above will be asked.
If you know, enter the directory where the
mouse.sys file is. The default is C:\DOS.
If you do not know or do not have a mouse
connected to your system, you must stop the
CS-I/Il installation process.
Press <Ctl> and <C> at the same time, to
exit the installation.
Turn your computer off.
Connect an appropriate mouse for your
computer.
Turn the computer on.
Install the mouse driver software.
(See the mouse and mouse driver installation
manual for instructions.)
Install CS-I/Il.
Chapter 2
-
TM
Install POEM COMP U-STITCH
I
I
I
I
I
I
I
I
I
I
I
I
I
I
I
I
I
Start the Program
At some time, you may have problems starting your software. Don’t panic. You
haven’t broken it. There are certain conditions under which POEM COMPU
TM will not operate. Take a little time to double check the computer and
STITCH
POEM machine setup and you will solve most problems quickly.
Chapter 2
-
Problem
Action
CS-I/Il won ‘t start.
Check POEM is connected to the
computer.
The POEM machine must be
connected to the computer before
POEM COMPU-STITCH
TM will
operate.
Are the connecting cables firmly in place?
Is the transformer connected to the POEM
Is the transformer plugged in and on?
Is the red light on top of the POEM on?
Is the POEM plugged in and turned on?
Is the POEM connected to the computer?
(Refer to A Note About Connectors And
Cables and Connecting POEM To Your
Computer for details)
POEM
COMPU
TM
STITCH runs but CS-I
appears in the title bar
instead of CS-Il.
Check that you have the MemoPlug.
CS-Il requires a MemoPlug to
operate. It is supplied with the
program at the time of purchase.
If the MemoPlug is not attached
to the computer the program will
run but only the features of CS-I
will be available.
Is it attached to the LPT1 (printer) port on
your computer?
Is the connection firmly in place?
(See Connecting POEM to your computer for
details)
Install POEM COMPU-STITCH
T1
15
-4
El
U)
0
n
0
rn
N)
N
n
..::
.
a
a
3
Sew Existing Designs
Now we are ready to start working with POEM COMPUSTITCHTM. First we
will see how to sew out a simple design such as you could easily produce for
yourself if you have CS-Il. A sample design has been included and we will show
you how to sew it.
Start the System
To enter POEM COMPUSTITCHTM you simply:
o turn on your PC
@ turn on your POEM machine
€ go to the POEM directory by entering cd\POEM
0 type cs then press <ENTER>.
A message will be presented, see over.
17
flboait CS—I
POEM CorpuStltch I for PC
VI. BA
19:40:53 Mar 2 1993
Cc) Copyright Aisin World Corp. of Arerica 1993
nil rights reserved
Portions of this product are protected b the following patents:
USA: 4.8Z1.62 Europe: EP0221163
Other patents pending
F
ox
Clear this message by moving the arrow shaped pointer move the mouse
until it points to the box marked “OK”. The shape of the pointer will change to a
hand. Then click the button. Alternatively you can press the <ENTER> key.
-
The next message will be presented.
POB Go,ipu-Stitcb for PC
4any standard designs are available For your POEM Conpu-Stitch Systen
Anjnajs, Birds, Children, Sports. Festive. etc.
Fox- an up to date list of Conpu-Designs
please contact your local dealer
Ox
I
Click on “OK” again then the POEM CS window will be presented.
I’OEN CS-I
Ih,tltled
Scale 1.I
JjJ4jjJ odifJ!jjJ Function I llisDlagJ
4.
Ertptt Design
18
-
I
I
I
I
I
[
[
[
[
[
[
.oour I
Chapter 3
-
Change Individual Stitches
E
Open an Existing Design
Using the Menus
The software is operated by giving it commands from lists called menus. To
view a menu move the pointer to the menu name listed across the top of the
screen
the menu bar. To open a design move to the File menu. Again the
pointer will change to a hand. Click on the box named File.
—
A list of commands will drop down below the menu bar. Move the pointer over
“Open...”. The command will be highlighted.
A dialog box is presented that lists files in the current directory that contain
designs. Across the top are boxes that allow you to choose the location of the
files you want to see listed. The design we are going to sew -BALLOONS.CSD- is
listed below.
Displaying the Design
To display BALLOONS.CSD click on the name on the list. The file listing will be
highlighted to show that it has been selected. Click on “OK”
Note that you cannot display a design by double clicking on the file.
Check the Frame
Now our design is displayed on the screen. The number of stitches in the design
is shown in the bottom left hand corner of the screen.
You can investigate the design now it is displayed on the screen.
Show Au
To see the design in the largest size that will still allow it to fit on the screen
choose “Show All” from the Display menu. The scale will be shown in the top
right hand corner of the screen.
Chapter 3
-
Change individual Stitches
19
1:1
To return your design to actual size click on 1:1 in the display menu. The design
is displayed the same size as the finished embroidery.
Disp’ay the Frame
Choose “Large Frame” from the Display menu. A representation of the frame
will be displayed on the screen. The menu item will be ticked to indicate that
the frame is displayed.
Notice that the design fits within the sewing boundary which is shown as a
dotted line.
Sew the Design
You are now ready to sew the design. Choose Sew from the File menu.
I
I
I
I
L
[
L
There will be a short delay then the Sewing Controls dialog box will be
presented. This dialog box shows instructions, the colour used in the screen
display for the currently sewing thread, the stitch number that the machine has
reached and a number of buttons to control the machine.
The instructions box inside the Sewing Controls dialog box gives instructions
and error messages as you sew.
Sewing Controls
ad thread for colour 1
ess Start to begin sewing.
Colour 1:
L
Backup
j
T
Stitch:
Stop
[
Start
Pull Up
Cancel
Prepare for Sewing
You have displayed a representation of the frame on the screen. Now you need
to prepare the actual frame filled with fabric. Select the same frame as you have
displayed, in this case the large frame.
Use a firm, woven fabric such as linen. See Sewing on Different Fabrics at the
end of this chapter for details of handling other fabrics.
Fit the fabric into the frame. The frame is used the same way as a hand
embroidery frame. The fabric should be stretched tightly across the bottom of the
frame. Tighten the screw so that the fabric is drum tight. The two parts of the
20
Chapter 3
-
Change Individual Stitches
E
[
[
[
[
[
L
frame should fit together neatly. Don’t let the inner hoop of the frame sit above
or below the outer hoop as this will interfere with sewing.
The dialog box which is displayed shows the colour used in the screen display
for the first thread and the instruction “Load thread for colour 1”. Thread the
machine as described in the POEM-500 Hardware Users Manual.
Check that you have sufficient bobbin thread to sew the design.
Attach the frame to the machine
Start Sewing
Click on the “Pull Up” button. This causes the machine to pull up the bobbin
thread.
Click on the “Start” button.
The machine sews a few stitches then stops. This is so that you can trim the
excess thread. You will see that the instruction box contains a message to that
effect.
Click on the “Start” button again.
The machine will sew colour 1.
When the machine reaches a colour change it stops again so that you can
rethread the machine. The dialog box shows colour 2 this time for the first
balloon coloured blue on the screen.
When you are ready click on “Start” again.
Other Actions
You can press “Stop” while sewing to stop the machine.
While stopped you can press “Back Up” to make the machine move back a
stitch. The instruction box will show “Backed up X stitches”. You can back up as
many stitches as you like. When you press Start again the machine will start
sewing from the new position. This is useful if the thread breaks.
You can stop and remove the frame from the machine at any time. Replace the
frame when you are ready to recommence sewing.
If you want to stop sewing entirely and return to working on the computer you
can click on “Cancel” at any time.
Finish Sewing
Continue sewing as above until the design is finished. You can tell how far you
are through the design by comparing the number of stitches shown in the dialog
box with the number of stitches in the design.
When the whole design has been stitched the instruction box will show. “The
design is finished. Press ‘Cancel’ to exit.”
Press “Cancel” and the dialog box will be removed from the screen.
Chapter 3
-
Change Individual Stitches
21
Use POEM COMPU-DE
TM
SIGNS
Your sample design BALLOONS.CSD is stored in the POEM directory. When
you load POEM COMPUDESIGNJSTM they are usually stored in sub-directories.
The name of the sub-directory is the same as the name of the theme the designs
belong to.
When you choose “Open’ and display the dialog box the files listed are those in
the directory shown in the box beside “Dir”. At present that is the POEM
directory but to list your POEM TM
COMPU-DESIGNS you will need to change it
to the appropriate sub-directory.
Click on the arrow on the side of the Dir box. A drop down list of directories will
be displayed. The name of the directory you are in will be shown with dotted
lines above and below it. Above the upper dotted line are the parent directories
at present C:\. Below the lower dotted line the subdirectories are listed. Click on
the sub-directory you want. The design files in that sub-directory will be listed.
[
r
[
When you want to use a different sub-directory click on the Dir box and select
the POEM directory. When you are back in the POEM directory select a new
sub-directory.
Open Desiqn
Disk IC:DOS
L!J
C:\CS\POEM
File,,ap,e
Dir POEM
!1 Files .CSD
No files selected
5345280 bjtes free
File Size
Date
Tine
BALLL3ONS.CSD
102
OX
j
09-Har-93
14:S:40
r
r
r
r
F
I
F
I
jaiT1
Scroll the Files List
There may be more files in the directory than can be displayed in the Open
dialog box. At the right of the files list is a “scroll bar”. You can use this to view
details of files below the last file on the list. At the top and bottom of the scroll
bar are boxes with arrows on them. Place the pointer on the box with the down
arrow and press the mouse button and keep it down. The list of files will scroll
upward adding new files to the bottom of the list. Use the box with the up arrow
to show the top of the list again.
r
r
I
Chapter 3
-
Change Individual Stitches
The bar at the side of the files list also contains a white box. This box indicates
where the group of files you have displayed are in the full ist represented by te
bar. You can also scroll the files list by moving the box. Place the pointer on the
box, press down the mouse button and move the mouse.
If you prefer you can copy your POEM T
COMPU-DES
M
IGNS into the POEM
directory. lse DOS command to cops’ from your floppy disk.
Listing Files on Different Disks
The first box in the Open dialog box is labelled “Disk”. This box shows the hard
disk C: DOS and the contents of the hard disk are listed below. If you want to list
the files on a floppy disk click on the arrow on the right of the box. A drop down
list of disks will be presented. When you want to change the disk click with the
pointer on the one you want e.g. B:DOS for a disk in the B: drive. At the
moment we want to sew designs from the hard disk so we will leave this box
showing C:DOS.
Sewing on Different Fabrics
Backing
Embroidery needs a firm foundation so firm fabrics are best to sew on. To assist
with this a firm non-woven backing can be used with other fabrics. This is
especially important with light or stretchy, knitted fabrics such as used in
T-shirts. The backing can be trimmed after you have sewn your embro
ider!.
Sewing in Different Colours
You do not need to stitch your designs in the same colours as the screen display.
You will need to know when to use each colour because the dialog box will
show the screen display colours. Make a list of the screen colours with the
corresponding thread colours that you want to use instead. Then when the
dialog box shows the screen display colour you will know what thread colour to
use.
Chapter 3
-
Change Individual Stitches
24
Chapter 3
-
Change Individual Stitches
4
Create Lettering
To give a touch of elegance to lingerie, table linen etc. you can easily create
designs consisting of lettering or add lettering to existing designs. Lettering can
be varied from the plain and functional to beautiful, flowing script. Three
different styles of alphabet are available (see illustrations in the Appendix) in
sizes from 5mm to 50mm. The alphabets can be varied by adjusting the width or
the slant of the letters.
EN
Start a New Design
Choose “New” from the File menu. This will close the currently open design
and replace it with an empty design. The top of the screen will show “Untitled”.
If you have just turned the system on an untitled design will already be
displayed.
Display the Frame
25
Set Satin Values
Before inputting your lettering you need to decide on the satin stitch spacing.
Choose ‘Satin Values” from the Fills menu. A default value will be displayed.
This value will be suitable for most purposes but you can change it if you wish.
Smaller stitch spacing is suitable with fabrics like towelling and for longer stitch
lengths used in large lettering as it covers better. Wider spacing is suitable for
short stitch lengths used in small lettering.
Click on “OK” when you are satisfied with the values.
This step can be skipped if you do not want to change the spacing.
Enter Letters
LetteTinq
Letters
Height
12.S
Width
lea
SI ant
I
Iii
deg
I
o
Jrii.i
Alphabet
FcRIPT
L!1
Spaci.g
ox
CanceI
I
1
I
1
I
I
[
Choose “Lettering from the Fills menu.
A dialog box will be presented in which you can define the lettering
@ Type in the letters you want to embroider.
r
Enter one line of up to 40 characters
To type in characters place the pointer over the box and it will change to an
I-beam. Click with the left mouse button and it will change to a vertical line
indicating that you can type in an entry. Use the <BACKSPACE> key to
delete characters.
I
F
F
I
26
Chapter 4
-
Create Lettering
€
Specify Letter Height.
The size of the lettering is determined by specifying the size of a capital letter
in the alphabet.
Enter the height you want the letters to be from 5mm to 50mm.
You can change the value shown in two ways. You can click on the up and
down arrows to increase or decrease the value shown. You can also type in
the value you want to set.
John Warner
CAPTAIN
The height of the capital letter affects
the total width of a monogram.
Joh n Warner
CAPTAIN
Reduce the height of the capital letter and
the width of the monogram decreases.
0 Specify Letter Width.
The standard width of letters depends on the shape of the letters and the
selected letter height. You can adjust the width of the letters to a percentage
of the original. How effective this is will depend on the letters and the
alphabet used. You will be able to judge by looking at the screen display of
the planned stitching. Too large a change will result in excessive distortion
of the shapes of the letters. In most cases a changeof up to ± 20% would be
the maximum likely to give a satisfactory result.
Chapter 4
-
Create Lettering
27
CA?ThIN
I
I’
Monogram is too wide for the stitching area.
Enter 80% in the width box.
I
(
JWrn
j
Monogram width has changed but the letter height
remains the same
I
Specify Slant Angle.
the
You can adjust the letters to be slanted from -30 to +30 degrees. Enter
Script
the
slant
not
do
you
angle in degrees. It is recommended that
alphabet.
I
28
Chapter 4
-
Create Lettering
Choose an Alphabet.
Click on the arrow to display the drop-down list then click on an option. Th
alphabets available are:
Block
Serif
Script
See the Appendix for an illustration of the alphabets.
€1
Specify Letter Spacing.
For the Script alphabet you should use a spacing of zero.
For Block and Serif alphabets enter the spacing between letters in mm. The
recommended value is one tenth the letter height.
0 Click OK if all items are correct.
Click on “OK” at the bottom of the Lettering dialog box when you are happy
with your entries. If you decide not to proceed, click on “Cancel”.
The screen will go black and display the message “Please wait” while the
stitches are calculated. Then the usual screen will be redrawn.
The calculated lettering will be displayed in the centre of the frame.
€
Check Frame
Check that the lettering fits within the frame. The dotted line indicates the
borders of the stitching area.
If you need you can move the frame. Click inside the frame. A rectangle will
be displayed to indicate the new frame position. Move the rectangle to
where you want to place the frame then click again.
Select Auto Centre from the Fills menu
Ensure that stitching starts and finishes at the centre of the frame. Stitches
will be inserted from the centre to the starting point of the lettering and
from the end of the lettering to the centre.
If you are dissatisfied with the result and wish to start again select “New” and
start again. If you want to scrap your work and finish working in CS select
“Exit”. When you make these selections a message will appear to check that you
do not want to save your work (see below). Click on the “No” button.
If you are happy with the result you can sew it as described in chapter 3.
Chapter 4
-
Create Lettering
29
Save Your Design
design if ‘ou intend to sew
You can save a permanent copy of your lettering
again.
it
[
[
Choose Sove from the File menu.
presented that asks you
The first time you save a new design a dialog box will be
for the filename
(see chapter 9).
Type in the unique filename you want to give your design
should save every five
If you continue working to amend your design you
no dialog box will be
minutes. When you save the design the second time
name.
presented. The design will be saved under the specified
How to Create Multiple Lines
[
r
r
I
0 Create the first line of lettering using steps one to eight.
@ Check Frame.
top of the frame to
You may want to position the first line of lettering at the
e Large Frame
ensure that you have plenty of space for the later lines. Choos
of the
ntation
represe
or Small Frame from the Display menu. Move the
of
lines
next
the
frame. Leave the frame displayed to help with positioning
stitching.
€3 Create the second line of lettering.
it fits in the frame
This time you will want to position the lettering so that
and is in the desired position relative to the other lettering.
extents of the
An extents box i.e. a box the sides of which are at the outer
s. This box is
stitches will be displayed on your screen to indicate the stitche
ready for moving to position the lettering
.
O Position the second line of lettering.
the pointer in a
The prompt line shows “Pick guide point”. Click with
to reposition the
position relative to the extents box that will enable you
stitches correctly e.g. a distinctive point.
30
Chapter 4
-
Create Lettering
[
and the extents box
The prompt line shows “Place selection”. Drag the mouse
e position. When the
will move with the pointer staging in the same relativ
n where you want the
pointer and the extents box are indicating the positio
will disappear and a
lettering to be, click on the mouse. The extents box
representation of the stitches will be displayed.
ever, if you are not
This should result in the arrangement you want; how
still be moved. See
can
satisfied with the result don’t despair the stitching
description of “Move” in chapter 7.
they will fit in your
You can add further lines of stitching if you wish and if
frame.
O Choose Auto Centre from the Fills menu.
you sew.
If you do not centre the design it will be done automatically when
Sew
joining the
After you have sewn the embroidery you can trim the threads
lines of lettering.
Chapter 4
-
Create Lettering
31
Add Lettering to Existing Designs
I
Existing designs can be individualized by the addition of captions. rnottos etc
o
1
Open the design.
9 Input lettering.
9 Position lettering.
o
Save the new design under a new name.
You may want to save the new design with lettering as well as keep the
original design. If you choose “Save’, you will save the new design in place
of the old design under the original filename.
To keep the original file as last saved and save a copy of the new combined
design choose “Save As” from the File menu. A dialog box which allows
‘iou to enter a new filename is presented.
The new design will be saved under the new filename and the original
design will be kept in the form it was in when you last saved it, under its
original filename and in the original disk and directory.
I
@ Sew
You can sew the design after you “Save As”. Once the design is saved you
can open it at any time and sew it. Trim the thread between the design and
the lettering.
The lettering will be added to the end of the design and will be sewn in the
same colour thread as the last colour in the design. To stop the machine to
change the thread before you sew the lettering see Add Colour Change in
chapter 6.
I
[
I
32
Chapter 4
-
Create Lettering
5
Sew Designs in Different Sizes
You can change the size of your design so that it fits on a garment or so that you
can use it for different applications.
0 Display the frame
@ Select all the stitches of the design.
The first thing you have to do is let the computer know that you will be
working with the design. This is known as “selecting” a part of the design.
Selecting is a basic process used with many commands.
To select the whole design for scaling choose “Select All” from the Modify
menu. The stitches will all be displayed in black to show they have been
selected for action. If you decide not to proceed you can deselect the stitches
return them to normal by choosing “Deselect All”.
—
—
€3 Choose “Scale” from the Modify menu.
An extents box is displayed around the design. You will change the size of
the extents box to indicate the way you want the design resized. The prompt
line will show the scale.
o Pick anchor point.
The prompt line shows “Pick anchor point”. The anchor point will stay in
the same position. Click on an appropriate point to help you resize the
design. See the diagrams below to see how the anchor point and guide point
operate.
33
[
[
anchor point
[
anchor point
ollit
£
[
[
gUaeV
i•r
anchor point
r
Pick guide point.
second point to
The prompt line next shows “Pick guide point”. Click on a
use to change the size of the extents box for scaling.
I
Resize the design.
mouse and the
The prompt line next shows “Scale selection”. Move the
.
extents box will change size. The prompt line shows “Scale xx.xx”
displayed at the
Click when the box is the desired size. The stitching will be
new size.
€1 Save the design under a new name.
to Save As
Save your new version of the design. You will probably want
have your
and
design
l
under a new filename so that you keep your origina
new version as well.
Sew the design.
like as described
You can sew the embroidery from the design any time you
in chapter 3.
34
Chapter 5
-
Sew Designs in Different Sizes
r
I
t
(
[
[
Undo
If you are unhappy with the result or change your mind about the resizing
when you see the displayed stitches, you can reverse the scaling. Choose “Undo
from the Edit menu.
You can “undo” several processes. Most transformations of the design
(described in later chapters) can be undone if you are not satisfied with the result
or otherwise change your mind.
Undo is a toggle command which means that ‘ou can switch between the before
and after states. If you choose undo the design will revert to its original state
then if you choose undo again it will return to its new state.
Tips and Limitations on Scaling Designs
To achieve the best results you need to have some understanding of the resizing
process. Your design is made up of stitches which have been planned with a
particular size of result intended. There are limitations to the extent to which
these can be converted into stitches that will make a good piece of embroidery of
a different size.
The greater the change in size, the less good the final result. In practice the limit
is a reduction to half the original size or an increase to twice the original size.
You can see that this still gives you a lot of scope for adjusting the size of a
design to fit your purposes.
Minimum and Maximum Stitch Length
The stitch length depends on frame movements. There are limitations to the
maximum and minimum frame movements the embroidery machine can
make and hence to the maximum and minimum stitch length. The maximum
stitch length depends on the angle of the stitch.
Jumps are frame movements without needle penetrations. When the stitch
length is expanded beyond the maximum stitch length the stitch is divided into
equal length jumps equal to or shorter than the specified jump length Where
there are jumps between needle penetrations the stitch is shown as a dotted
line. Maximum stitch length and jump length can be set by choosing “Stitch
Lengths” from the Function menu.
Maximum stitch length is measured along the X and Y axes not the distance
between needle penetration points.
Stitches shorter than minimum stitch length are automatically removed from
your design.
Click in the Use as Default box to insert a cross if you want the values you are
using to be used for all new designs. Click on “Reset” to return to the initial,
factory set values.
Chapter 5
-
Sew Designs in Different Sizes
35
Scaling The different stitch types
You will notice that your designs are made up of three types of stitching:
• manual for lines and outlines and to travel around your design;
• satin stitch for narrow areas e.g. lettering;
• fill stitch for larger and irregular shapes. The shape is filled with
parallel rows of stitching.
For more details of the different stitch types see chapter 8.
These different types of stitches are handled differently when resizing.
• Manual: the number of manual stitches remains the same but the
length of the stitches is changed. If you enlarge a pattern which has
small curve outlines stitched with manual, you may not have enough
stitches to follow the resized cun’e.
• Satin: stitches are decreased or increased in length when scaled but the
spacing between stitches remains the same. The number of stitches,
therefore, is reduced or increased to fit the new size. When satin stitch
is increased in length the spacing may not be appropriate. Make sure
that the enlarged satin stitches are no longer than 2 2.5cm otherwise
the stitches may gape and not cover the fabric adequately.
• Fill: the number of fill stitches is changed to fit the newly sized shape.
-
Manual stitch
example
•1
Enough stitches
to follow a curve
Same stitches enlarged. Now, not
enough stitches to follow a curve.
[
Holes
One problem that arises in increasing the size of a piece of embroidery is that
gaps also increase in size. What might be a quite acceptable gap in the original
may not stay so when the design is resized.
There are also problems in decreasing the size of the embroidery. There may be
gaps or holes that you want in the design and that may become too small.
36
Chapter 5
-
Sew Designs in D:fferent Sizes
[
[
6
Change Existing Designs
You can change designs in various ways.
• The simplest change is to change thread colours. You can add
or delete colour changes.
• You can combine two or more designs into one design using
Paste From.
• Parts of a design can be rearranged using Move, Cut, Copy,
Paste, Rotate and Mirror; and
• You can delete and move individual stitches and insert
manual stitches.
Change the Colours of a Design
Change the Dispoyed Colours
The displayed thread colours can be changed. You may want to display the
actual colours you intend to sew the design in to check the appearance or you
may want to display the design in bright, highly contrasting colours so the
design can be seen most clearly.
Choose “Thread Colours” from the Function menu. At the top of the dialog bo
which will be displayed are the colours that will be used to represent each oi
fourteen threads. Some or all of these threads have been used in the design. To
37
________
_________
__________
_____________
_________
__________
____
_____________
_________
____
_________
_____________
____
_________
____
________
_________
_________
__
__
__
___________________
________
________
has been
find out what threads have been used look at the colours. If a thread
ror that
used the stitches in the design will be displayed in the colour shown
colour.
same
thread. There may be more than one thread of the
At the bottom of the box are sixteen colours that can be used for the threads.
Most of these colours can be changed to change your range of choice.
Thread Ealours
Thread Nunber
44
Q5
hQ6
Q7
011
Qiz
013
Q14
----I-—
01
Q3
02
- -—
1
i
08
09
Qia
Co 1 or
Mix...
LZt I
_J
I
ox
Cancel
I
To alter the colour of a thread, click on the circle for that thread number so that
it becomes filled. The colour used for that thread number in the colours at the
bottom of the dialog box will be bordered.
To change to a different colour from the range of colours offered at the bottom
of the dialog box, click on the colour you want to use. The colour shown for the
thread will change to the new colour.
To change to the factory set colours click on ‘Reset”.
Click ‘OK” when you have finished changing colours.
When you return to the design the displayed colours will be those set for the
threads used.
Mix a New Colour
If you would like to mix a new colour, click on the “Mix...” button. (Some
colours cannot be mixed. If the bordered colour is one of these the “Mix...”
button will be greyed and the label shifted to the right hand side of the button.)
A dialog box will be displayed showing the thread number and the thread
description and the colour you have selected. You can modify this colour by
using the boxes below it to alter its composition. Two colour mixing methods
are offered. You can select either HLS (Hue, Lightness, Saturation) or RGB (Red,
Green, Blue).
38
Chapter 6
-
Change Existing Designs
The HLS system.
The HLS System works on the Albert H. Munsell Theory of Colour.
Hue is the advancement of colour increased by degrees. It is associated with a
particular colour from the spectrum for example blue, red and yellow. The
range for hue is from 0 to 360 degrees.
HUE (H)
BLUE
MAGENTA
CYAN
RED 120
2401
GREEN
YELLOW
Lightness is how bright or dim a colour appears. The range for lightness is from
0 to 100 percent. Zero is equal to black and one hundred is equal to white. At
lightness 0% or 100%, saturation and hue are irrelevant.
LIGHTNESS (L)
(ñO/
.J’_, /0
no’
J /0
7
SATURATION (S)
SATURATION (S)
The most colourful: L=50%, S=100%
Saturation specifies how vivid a colour is. A saturated colour is very intense,
while a less saturated colour appears greyed or muted. You specify saturation a
a percentage in the range 0 through 100. A saturation of 0% is simply a shade of
grey, while a saturation of 100% gives the most intense possible colour having
that hue and lightness.
Chapter 6
-
Change Existing Designs
39
The RGB system
The RGB system, also called the additive colour system defines colours as
red, green and blue. You
mixtures of the three additive colour primaries
specify colours in the range 0 through 100.
For example, you can define various shades of yellow by mixing equal amounts
of red and green with a smaller amount of (or no) blue. A yellow with the
proportions 90,90, 0. is much brighter than a 30, 30, 0 yellow, while a 100, 100, 20
yellow is a still brighter washed-out light yellow.
You control the overall brightness of the colour with the brightness of the
primaries you use.
Adding equal amounts of the three primaries results in a shade of grey. For
example 33, 33, 33 is a dark grey, while 67, 67, 67 is light grey. Black is 0, 0, 0 and
white is 100, 100, 100.
I
GREEN
BLUE
CYAN
(0,100,100)
(0,0,1(
WHITE
BLACK
(0,0,0)
“I
RED
-
‘YELLOW
(100,100,0)
(100,0,0)
I
40
Chapter 6
-
Change Existing Designs
You can visualize the RGB system as a cube. The three axes are the three
primaries while the origin is black. Each colour is a point within the colour
cube.
When you are happy with the colour you have mixed click on ‘OK’.
Select colours for each of the thread numbers you will be using. The colours are
for the screen display only and have nothing to do with the colours of the fina
stitching. You should choose colours that can be easily seen and which will
show up against each other on the screen.
Change the Embroidery Colours
The colours of the display do not affect the colours of the final embroidery.
When you sew the embroidery you can use any threads you wish. However,
you need to have colour changes to stop the embroidery machine so that you
can change threads. You may also wish to remove colour changes preventing
the embroidery machine from stopping if you do not wish to change threads.
Go To the Desired Stitch
First you must move the current needle position to the stitch where you want
the thread colour to change. To go to” the stitch you want, choose “Go To”
from the Modify menu. Click in the stitch position with the mouse using the
right mouse button to search backwards through the design and the left mouse
button to search forward through the design.
The current needle position is indicated by a white cross. Stitches before the
current needle position are displayed as solid lines in the chosen thread colours,
indicating that they have been stitched. Stitches after the the current needle
position are displayed as stitch points only indicating that they have not been
stitched yet.
If pointing does not place you at the exact stitch you want, you can travel
through the design using the arrow keys. The left and right arrows move you
through the design back and forward I stitch. The up and down arrows move
you through the design back and forward 10 stitches.
If you want to go to the stitch where a colour change has been inserted, for
example to delete a colour change, you can travel from one colour change tc
another by choosing Colour or Colourw
You can Go To the start or end of the design by choosing “Go to Start” or “Go to
End”.If you prefer you can press the Home key for Go to Start and the End key
for Go to End.
Chapter 6
-
Change Existing Designs
41
___
_______
___
_______
___
___
_______
_______
Insert Colour Change
Càlour tbaqe
Thread Nu,iber
iE
Q1
08
Q2
09
ox
03
[.
016
4
Q5
Q6
07
Cii
012
Q13
014
retup...
Cancel
]
To insert a colour change choose ‘Colour Change” from the Function menu.
A dialog box will be displayed showing fourteen colours for the screen display.
Click on the number for the desired colour.
If you want to change the colours offered you can access the thread colours
dialog box by clicking on the Setup button at the bottom of the dialog box. The
thread colours dialog box is used as described at the start of this chapter.
When the colours are set up as you wish and you have selected the colour you
want, click on “OK”.
The colour will be displayed up to the next colour change. If you want to
re-colour a section of the embroidery it may be necessary for you to insert two
colour changes one at the beginning and another at the end of the section.
Remove Colour Change
First you need to go to the stitch where the colour change was input. Use
to find the correct stitch. The status line will show
Colour and Colour
“Colour Change”. Choose “Clear” from the Function menu.
I
I
I
I
I
I
I
L
I
[
Go to The End of The Design
To finish, return to the end of the design. Choose “Go To End” from the Modify
menu.
[
You can also move to the start of the design when you need to by choosing “Go
To Start”.
[
Using Go To to Explore The Design
Investigate the way a design will be stitched by using Go To. Go To Start and the
design will be displayed as just needle penetration points, then travel to the end
or the arrow keys to move by stitches. The
of the design using Colour
stitching will be displayed a section at a time allowing you to see how it was
input, what underlays were used, how the colours were sequenced. This is a
powerful learning tool if you are going to create your own designs using CS-Il.
42
Chapter 6
-
Change Existing Designs
[
F
7
Combine Designs
As you get further into working with your designs and more adventurous you
can use the techniques described in this chapter.
•
view your design in greater detail,
•
measuring the dimensions of your design,
•
combining two designs,
•
manipulating parts of your design.
Viewing Your Design
Zoom
As well as viewing your designs as Show All and 1:1 scale as described in
chapter 3 you can zoom in to view chosen stitches in an enlarged scale. This
allows you to see the stitches in greater detail.
o
Choose “Zoom” from the Display menu.
@ Click at a corner of the area you want to enlarge.
A pointer will be displayed. Moving the pointer will reveal a rectangle with
your first selected point fixed in one corner and the pointer at the diagonally
opposite corner.
43
Move the pointer until the part of the design you want to see is framed then
click again.
The framed part of the design will be enlarged to fill the screen.
Pan
This command allows you to choose the part of the design centred on the
screen. It allows you to change the display to show parts of the design which
were off the screen.
(
0 Choose ttPantt from the Display menu.
A box will be displayed showing an outline indicating where the screen will
be positioned. You can move the outline by moving the pointer. The
pointer position is the point which will be the centre of the new screen
display.
@ Click the mouse when the outline is positioned as you require and the
pointer is at the point you want to be the centre of the screen display.
Full Screen
This command enlarges the dplav to fit the full screen without the menu bar
and status line. This allows you to view the full design at the largest possible
scale by selecting Show All first then Full Screen.
This display mode is also useful if you wish to print a copy of your design.
Display the design as you want to print it then choose Full Screen to display the
design without the surrounds then press Print Screen.
Press any key or click on a mouse button to return to the normal screen display.
[
[
[
Measure
[
You can measure between points on your design.
Choose “Measure” from the Display menu. Click on the first point then move
the pointer to the second point. A line will be displayed on the screen and its
dimensions will be shown in the prompt line in the bottom left hand corner of
the screen. e.g. X:44mm Y:213mm A[ngle]: 27 [degrees] L[engthl:49.3mm.
You can click on another starting point to measure another line or press <ESC>
to end.
44
Chapter 7
-
Combine Designs
Combine Two Different Designs
design into the
“Paste From...” allows you to paste the entire contents of another
the end of the
at
placed
design you are working on. The pasted stitches will be
current design.
Choose “Paste From...” from the Edit menu.
A file listing will be presented similar to the one used for “Open’. Select a
design and click “OK”.
The new design will be selected and an extents box will be displayed ready for
you to move the stitches in the same way as for “Move”. If you want the stitches
to stay in the original pasted position press <ESC>.
If you want to reverse the Paste, choose “Undo”.
Paste From... does not use the clipboard (see below).
Transform Selected Parts of a Design
The following commands give you the means to work with parts of your
design, to rearrange and rotate them.
Select Parts of a Design
You have already seen in chapter 6 how to select the whole design for scale.
Now we will look at how to select part of the design so we can carry out other
transformations.
o
Go To the first stitch of the section of the stitching you want to select for
changing.
See chapter 6 if you are not sure how to Go To.
@ Choose “Select” from the Modify menu to turn the select function on.
The menu item will show a tick to indicate that you are selecting stitches.
€
Go To the last stitch you want to change.
The stitches selected will be displayed in black.
o
Choose “Select” from the Modify menu to turn off the select function.
The tick will be removed from the menu item.
You will now be ready to carry out various transformations as described below.
After you have finished transforming choose “Deselect All” from the Modify
menu then go to the end of the design and redraw the screen. This is necessary
Chapter 7
-
Combine Designs
45