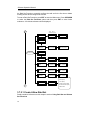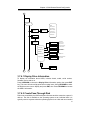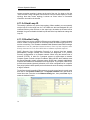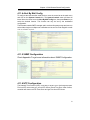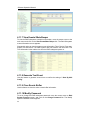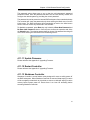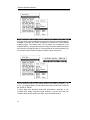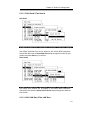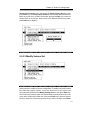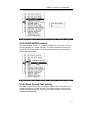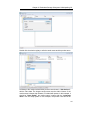
1
Software Operation Manual
10/10/2011
Copyright ©2011
This guide and any accompanying software and firmware are copyrighted. No
parts of this publication may be reproduced, stored on a retrieval system, or
transmitted, in any form or by any means, electronic, mechanical, photocopy,
recording, or otherwise, without prior written consent except for copies retained
by the purchaser for backup purposes.
All rights Reserved- Printed in Taiwan.
Notice
We make no warranties with respect to this documentation either express or
implied and provide it "as it". This includes but is not limited to any implied
warranties of merchantability and fitness for a particular purpose. The
information in this document is subject to change without notice. We assume no
responsibility for any errors that may appear in this document.
The manufacturer shall not be liable for any damage, or for the loss of
information resulting from the performance or use of the information contained
herein
Trademarks
Product names used herein are for identification purposes only and may be the
trademarks of their respective companies. All trademarks or registered
trademarks are properties of their respective owners.
ii
About This Software Operation Manual
This manual contains all the information you need to initially configuring and
monitoring the Sans Digital AccuRAID RAID Subsystem.
Task Map
1. Prepare
Refer to Software Operation Manual and Hardware Installation Guide, let
yourself know the features, capabilities of Sans Digital AccuRAID RAID
Subsystem and make sure you have everything on hand.
2. Install Hardware
Install the Sans Digital AccuRAID RAID Subsystem. Refer to: Hardware
Installation Guide
3. Configuration
To create a RAID set and define a volume set via LCD display front panel,
remote utility or 10/100 base-T Ethernet.
4. Make a Record
Be sure to clearly write down every items of the configuration, it will help
you to rescue the data back in case of RAID fail up.
Symbols in Text
These symbols may be found throughout this guide. They have the following
meanings.
Caution
This icons indicates that failure to follow directions could result in
personal injury, damage to your equipment or loss of information.
iii
Software Operation Manual
Note
This icon presents commentary, sidelights, or interesting points of
information. .
Important terms, commands and programs are put in Boldface font.
Screen text is given in screen font.
iv
Software Operation Manual
Contents
ABOUT THIS SOFTWARE OPERATION MANUAL ................................... III
TASK MAP ........................................................................................... III
1. PREPARE .......................................................................................... III
2. INSTALL HARDWARE ....................................................................... III
3. CONFIGURATION .............................................................................. III
4. MAKE A RECORD ............................................................................. III
SYMBOLS IN TEXT ............................................................................... III
CONTENTS .......................................................................................... IV
CHAPTER 1. INTRODUCTION .............................................................1
1.1 ARRAY DEFINITION..........................................................................1
1.1.1 Raid Set...................................................................................1
1.1.2 Volume Set ..............................................................................1
1.1.3 Instant Availability/Background Initialization .......................2
1.1.4 Array Roaming .......................................................................2
1.1.5 Online Capacity Expansion ....................................................2
1.1.6 Online RAID Level and Stripe Size Migration........................3
1.1.7 Hot Spares ..............................................................................3
1.1.8 Hot-Swap Disk Drive Support ................................................4
1.1.9 Hot-Swap Disk Rebuild ..........................................................4
1.2 RAID CONCEPT ...............................................................................4
1.2.1 RAID 0....................................................................................5
1.2.2 RAID 1....................................................................................5
1.2.3 RAID 1E .................................................................................6
1.2.4 RAID 3....................................................................................7
1.2.5 RAID 5....................................................................................8
1.2.6 RAID 6....................................................................................8
1.2.7 RAID X0 .................................................................................9
1.2.8 Summary of RAID Levels......................................................10
CHAPTER 2. ............................................................................................10
CONFIGURATION METHODS ...........................................................10
2.1 OVERVIEW .....................................................................................10
2.2 USING LOCAL FRONT PANEL TOUCH-CONTROL KEYPAD .................10
2.3 USING THE CONTROLLER’S SERIAL PORT ........................................12
2.3.1 Keyboard Navigation............................................................13
iv
2.3.2 Start-up VT100 Screen......................................................... 13
2.4 FIRMWARE-EMBEDDED TCP/IP & WEB BROWSER-BASED RAID
MANAGER (USING THE CONTROLLER’S 10/100 ETHERNET LAN PORT)
............................................................................................................ 18
2.5 CONFIGURATION MENU TREE ....................................................... 19
CHAPTER 3. ........................................................................................... 22
LCD PANEL CONFIGURATION ........................................................ 22
3.1 STARTING LCD CONFIGURATION UTILITY .................................... 22
3.2 LCD CONFIGURATION UTILITY MAIN MENU OPTIONS ................. 22
3.3 CONFIGURING RAID SETS AND VOLUME SETS............................... 23
3.4 DESIGNATING DRIVES AS HOT SPARES ......................................... 23
3.5 USING QUICK VOLUME AND RAID SET SETUP ............................... 24
3.6 USING RAID SET AND VOLUME SET FUNCTIONS ........................... 26
3.7 NAVIGATION MAP OF THE CONFIGURATION .................................. 28
3.7.1 Quick Volume/Raid Setup .................................................... 28
3.7.2 Raid Set Function................................................................. 29
3.7.3 Volume Set Function ............................................................ 32
3.7.4 Physical Drive...................................................................... 38
3.7.5 RAID System Function......................................................... 40
3.7.6 Fibre Channel Configuration............................................... 45
3.7.7 Ethernet Configuration ........................................................ 46
3.7.8 Show System Events ............................................................. 46
3.7.9 Clear all Event Buffers......................................................... 46
3.7.11 Show System Information................................................... 47
3.7.12 HDD Power Management.................................................. 47
CHAPTER 4. WEB BROWSER- BASED CONFIGURATION......... 49
4.1 FIRMWARE-EMBEDDED TCP/IP & WEB BROWSER-BASED RAID
MANAGER (USING THE CONTROLLER’S 10/100 ETHERNET LAN PORT)
............................................................................................................ 49
4.2 CONFIGURING RAID SETS AND VOLUME SETS............................... 50
4.3 DESIGNATING DRIVES AS HOT SPARES ......................................... 50
4.4 USING QUICK VOLUME /RAID SETUP CONFIGURATION ................. 51
4.5 USING RAID SET/VOLUME SET FUNCTION METHOD ..................... 53
4.6 CONFIGURING RAID SETS AND VOLUME SETS............................... 55
4.6.1 Main Menu........................................................................... 56
4.7 QUICK CREATE .............................................................................. 56
4.8 RAID SET FUNCTIONS .................................................................... 57
v
Software Operation Manual
4.8.1 Create Raid Set.....................................................................57
4.8.2 Delete Raid Set .....................................................................58
4.8.3 Expand Raid Set ...................................................................58
4.8.4 Activate Incomplete Raid Set ................................................59
4.8.5 Create Hot Spare..................................................................60
4.8.6 Delete Hot Spare ..................................................................60
4.8.8 Offline Raid Set.....................................................................61
4.9 VOLUME SET FUNCTION ................................................................61
4.9.1 Create Volume Set ................................................................61
4.9.2 Create Raid30/50/60 ............................................................65
4.9.3 Delete Volume Set.................................................................68
4.9.4 Modify Volume Set ................................................................69
4.9.5 Check Volume Set .................................................................70
4.9.6 Stop Volume Set Check .........................................................71
4.9.7 Scheduled Volume Checking ................................................71
4.10 PHYSICAL DRIVE..........................................................................72
4.10.1 Create Pass-Through Disk .................................................72
4.10.2 Modify Pass-Through Disk .................................................72
4.10.3 Delete Pass-Through Disk..................................................73
4.10.4 Identify Enclosure...............................................................73
4.10.5 Identify Selected Drive........................................................73
4.11 SYSTEM CONTROLS......................................................................74
4.11.1 System Configuration .........................................................74
4.11.2 Fibre Channel Config.........................................................77
4.11.3 EtherNet Config..................................................................78
4.11.4 Alert By Mail Config...........................................................79
4.11.5 SNMP Configuration ..........................................................79
4.11.6 NTP Configuration .............................................................79
4.11.7 View Events/ Mute Beeper ..................................................80
4.11.8 Generate Test Event............................................................80
4.11.9 Clear Events Buffer ............................................................80
4.11.10 Modify Password ..............................................................80
4.11.11 Update Firmware: ............................................................81
4.11.12 Restart Controller.............................................................81
4.11.13 Shutdown Controller.........................................................81
4.11.14 Hdd Power Management ..................................................82
4.12 INFORMATION MENU ...................................................................84
4.12.1 RaidSet Hierarchy ..............................................................84
vi
4.12.2 System Information ............................................................ 84
4.12.3 Hardware Monitor ............................................................. 84
CHAPTER 5. ........................................................................................... 86
SERIAL PORT CONFIGURATION .................................................... 86
5.1 CONFIGURING RAID SETS AND VOLUME SETS............................... 86
5.2 DESIGNATING DRIVES AS HOT SPARES ......................................... 87
5.3 USING QUICK VOLUME /RAID SETUP CONFIGURATION ................. 87
5.4 USING RAID SET/VOLUME SET FUNCTION METHOD ..................... 89
5.5 MAIN MENU .................................................................................. 92
5.5.1 Quick Volume/Raid Setup .................................................... 93
5.5.2 Raid Set Function................................................................. 95
5.5.3 Volume Set Function .......................................................... 102
5.5.4 Physical Drive.................................................................... 114
5.5.5 Raid System Function ........................................................ 116
5.5.6 Fibre Channel Config ........................................................ 125
5.5.7 Ethernet Configuration ...................................................... 126
5.5.8 View System Events............................................................ 128
5.5.9 Clear Events Buffer............................................................ 129
5.5.10 Hardware Monitor ........................................................... 129
5.5.11 System Information .......................................................... 131
5.5.12 Hdd Power Management ................................................. 131
CHAPTER 6 .......................................................................................... 135
REDUNDANT STORAGE SUBSYSTEM & MULTIPATHING I/O135
6.1 OVERVIEW .................................................................................. 135
6.1.1 Redundant raid subsystem ................................................. 136
6.1.2 Multipath I/O & No single point of failure ........................ 137
6.1.3 Configuration & connectivity............................................. 137
6.2 PHYSICAL CONNECTIONS WITH MPIO ......................................... 138
6.2.1 Single Host Server.............................................................. 138
6.2.2 Multiple Host Servers ........................................................ 138
6.2.3 Cluster Servers................................................................... 139
6.3 ENABLE MULTIPATHING I/O FOR WINDOWS VISTA & WINDOWS
SERVER 2008 .................................................................................... 140
6.3.1 Complete Volume Set configurations and hardware setup 140
6.3.2 Install Microsoft MPIO packages ...................................... 141
6.3.3 Register Microsoft MPIO devices ...................................... 144
6.3.4 Reboot the host server computer........................................ 146
vii
Software Operation Manual
6.4 ENABLE MULTIPATHING I/O FOR LINUX ......................................146
6.4.1 Complete Volume Set configurations and hardware setup.146
6.4.2 Install device-mapper-multipath option package ...............147
6.4.3 Edit the parameters of the storage subsystem ....................148
6.4.4 Activate multipathd service and partition the multipath
devices .........................................................................................148
6.5 ENABLE MULTIPATHING I/O FOR WINDOWS SERVER 2003 SP2 ..150
6.5.1 Complete Volume Set configurations and hardware setup.150
6.5.2 Modify msdsm.inf................................................................151
6.5.3 Install and uninstall MPIO driver under Windows Server
2003 SP2......................................................................................151
6.6 ENABLE MULTIPATHING I/O FOR VMWARE.................................152
6.6.1 Complete Volume Set configurations and hardware setup.152
6.6.2 Enable MPxIO service and partition the multipath devices152
6.7 ENABLE MULTIPATHING I/O FOR SOLARIS...................................160
6.7.1 Complete Volume Set configurations and hardware setup.160
6.7.2 Enable MPxIO service and partition the multipath devices161
APPENDIX A. ........................................................................................164
UPGRADING FIRMWARE .................................................................164
ESTABLISHING THE CONNECTION FOR THE RS-232 AND ETHERNET
PORT ..................................................................................................164
UPGRADING FIRMWARE THROUGH ANSI/VT-100 TERMINAL
EMULATION .......................................................................................165
UPGRADING FIRMWARE THROUGH WEB BROWSER MANAGEMENT ..169
APPENDIX B. ........................................................................................171
FIBRE OPERATION ............................................................................171
OVERVIEW .........................................................................................171
THREE WAYS TO CONNECT (FC TOPOLOGIES)....................................171
Point-to-point ..............................................................................172
Arbitrated Loop ...........................................................................172
Switched Fabric...........................................................................172
BASIC ELEMENTS ...............................................................................173
Cables and connectors ................................................................173
Fibre Channel Adapter................................................................173
Hubs ............................................................................................173
Switched Fabric...........................................................................173
viii
APPENDIX C ........................................................................................ 174
SNMP OPERATION & DEFINITION ............................................... 174
OVERVIEW ........................................................................................ 174
SNMP DEFINITION............................................................................ 174
SNMP INSTALLATION ....................................................................... 175
MIB COMPILATION AND DEFINITION FILE CREATION ....................... 175
LOCATION FOR MIB.......................................................................... 175
RAIDMIB OBJECT DEFINITION ........................................................ 175
APPENDIX D. ....................................................................................... 178
EVENT MESSAGES ............................................................................ 178
ix
Chapter 1. Introduction
Chapter 1. INTRODUCTION
This chapter provides a brief introduction of Array Definition and RAID concept.
1.1 Array Definition
1.1.1 Raid Set
A Raid Set is a group of disks containing one or more volume sets. It has the
following features in the RAID subsystem:
1. Up to sixteen Raid Sets are supported per RAID subsystem controller.
2. From one to twelve/sixteen/twenty four (depend on Model) drives can be
included in an individual Raid Set.
3. It is impossible to have multiple Raid Sets on the same disks.
A Volume Set must be created either on an existing raid set or on a group of
available individual disks (disks that are not yet a part of a raid set). If there are
pre-existing raid sets with available capacity and enough disks for specified
RAID level desired, then the volume set will be created in the existing raid set of
the user’s choice. If physical disks of different capacity are grouped together in a
raid set, then the capacity of the smallest disk will become the effective capacity
of all the disks in the raid set.
1.1.2 Volume Set
A Volume Set is seen by the host system as a single logical device. It is
organized in a RAID level with one or more physical disks. RAID level refers to
the level of data performance and protection of a Volume Set. A Volume Set
capacity can consume all or a portion of the disk capacity available in a Raid Set.
Multiple Volume Sets can exist on a group of disks in a Raid Set. Additional
Volume Sets created in a specified Raid Set will reside on all the physical disks
in the Raid Set. Thus each Volume Set on the Raid Set will have its data spread
evenly across all the disks in the Raid Set.
1. Volume Sets of different RAID levels may coexist on the same Raid Set.
2. The maximum addressable size of a single volume set can be exceeded than
2 TB (64-bit LBA, firmware define support up to 512TB, for Windows block
size set to 4KB can support up to 16TB).
3. Up to sixteen volume sets can be created in a raid set.
In the illustration below, Volume 1 can be assigned a RAID 5 level of
operation while Volume 0 might be assigned a RAID 0+1 level of operation.
1
Software Operation Manual
Raid Set 1 (3 Individual Disks)
Free Space
Volume 1 (RAID 5)
Volume 0 (RAID 0+1)
Disk0
Disk1
Disk2
1.1.3 Instant Availability/Background Initialization
RAID 0 and RAID 1 volume set can be used immediately after the creation. But
the RAID 3, 5, 6, and X0 volume sets must be initialized to generate the parity. In
the Normal Initialization, the initialization proceeds as a background task, the
volume set is fully accessible for system reads and writes. The operating
system can instantly access to the newly created arrays without requiring a
reboot and waiting the initialization complete. Furthermore, the RAID volume
set is also protected against a single disk failure while initializing. In Fast
initialization, the initialization process must be completed before the volume set
is ready for system accesses.
1.1.4 Array Roaming
The RAID subsystem stores configuration information both in NVRAM and on
the disk drives. This way it can protect the configuration settings in case of a
disk drive or controller failure. Array roaming allows the administrators the ability
to move a completely raid set to another system without losing RAID
configuration and data on that raid set. If a server fails to work, the raid set disk
drives can be moved to another server and inserted in any order.
1.1.5 Online Capacity Expansion
Online Capacity Expansion makes it possible to add one or more physical drives
to a volume set, while the server is in operation, eliminating the need to store
and restore after reconfiguring the raid set. When disks are added to a raid set,
unused capacity is added to the end of the raid set. Data on the existing volume
sets residing on that raid set is redistributed evenly across all the disks. A
contiguous block of unused capacity is made available on the raid set. The
unused capacity can create additional volume set. The expansion process is
illustrated in the following figure.
2
Chapter 1. Introduction
Before Array Expansion
Free Space = 40GB
Volume 1 = 40GB (D: )
Volume 0 = 40GB (C: )
Disk0 40GB
Disk1 40GB
Disk2 40GB
Array-A 120GB
The RAID subsystem controller redistributes the original volume set over the
original and newly added disks, using the same fault-tolerance configuration.
The unused capacity on the expanded raid set can then be used to create an
additional volume set, with a different fault tolerance setting if user needs to
change.
After Array Expansion (Adding One Disk)
Free Space = 80GB
Volume 1 = 40GB (D: )
Volume 0 = 40GB (C: )
Disk0 40GB
Disk1 40GB
Disk2 40GB
Disk3 40GB
Array-A 160GB
1.1.6 Online RAID Level and Stripe Size Migration
User can migrate both the RAID level and stripe size of an existing volume set,
while the server is online and the volume set is in use. Online RAID level/stripe
size migration can prove helpful during performance tuning activities as well as
in the event where those additional physical disks are added to the RAID
subsystem. Before the invention of RAID level and stripe size migration,
changing the RAID level and stripe size of a RAID system meant backing up all
data in the disk array, re-creating disk array configuration with new RAID level
and stripe size, and then restoring data back into RAID system. For example, in
a system using two drives in RAID level 1, you could add capacity and retain
fault tolerance by adding one drive. With the addition of third disk, you have the
option of adding this disk to your existing RAID logical drive and migrating from
RAID level 1 to 5. The result would be parity fault tolerance and double the
available capacity without taking the system off.
1.1.7 Hot Spares
A hot spare drive is an unused online available drive, which is prepared for
replacing the failure disk drive. In a RAID level 1, 1E, 3, 5, 6, X0 RAID set, any
3
Software Operation Manual
unused online available drive installed but not belonging to a RAID set can
define as a hot spare drive. Hot spares permit you to replace failed drives
without powering down the system. When RAID subsystem detects a SAS (or
SATA) drive failure, the system will automatically and transparently rebuild using
the hot spare drives. The raid set will be reconfigured and rebuilt in the
background, while the RAID subsystem continues to handle system request.
During the automatic rebuild process, system activity will continue as normal,
however, the system performance and fault tolerance will be affected.
The hot spare must have at least the same capacity as the
drive it replaces.
1.1.8 Hot-Swap Disk Drive Support
The RAID subsystem is built with the protection circuit to support the
replacement of SAS or SATA hard disk drives without having to shut down or
reboot the system. The removable hard drive tray can deliver “hot swappable”,
fault-tolerant RAID solutions at prices much less than the cost of conventional
SCSI hard disk RAID subsystems. We provide this feature for subsystems to
provide the advanced fault tolerant RAID protection and “online” drive
replacement.
1.1.9 Hot-Swap Disk Rebuild
A Hot-Swap function can be used to rebuild disk drives in arrays with data
redundancy such as RAID level 1, 1E, 3, 5, 6, and X0. If a hot spare is not
available, the failed disk drive must be replaced with a new disk drive so that the
data on the failed drive can be rebuilt. If a hot spare is available, the rebuild
starts automatically when a drive fails. The RAID subsystem automatically and
transparently rebuilds failed drives in the background with user-definable
rebuild rates. The RAID subsystem will automatically restart the system and the
rebuild if the system is shut down or powered off abnormally during a
reconstruction procedure condition. When a disk is Hot Swap, although the
system is functionally operational, the system may no longer be fault tolerant.
Fault tolerance will be lost until the removed drive is replaced and the rebuild
operation is completed.
1.2 RAID Concept
RAID is an acronym for Redundant Array of Independent Disks. It is an array of
4
Chapter 1. Introduction
multiple independent hard disk drives that provide high performance and fault
tolerance. The RAID subsystem controller implements several levels of the
Berkeley RAID technology. An appropriate RAID level is selected when the
volume sets are defined or created. This decision is based on disk capacity,
data availability (fault tolerance or redundancy), and disk performance. The
following are the RAID levels which are supported in the RAID subsystem.
The RAID subsystem controller makes the RAID implementation and the disks’
physical configuration transparent to the host operating system. This means
that the host operating system drivers and software utilities are not affected,
regardless of the RAID level selected. Correct installation of the disk array and
the controller requires a proper understanding of RAID technology and the
concepts.
1.2.1 RAID 0
RAID 0, also referred to as striping, writes stripping of data across multiple disk
drives instead of just one disk drive. RAID 0 does not provide any data
redundancy, but does offer the best high-speed data throughput. RAID 0 breaks
up data into smaller blocks and then writes a block to each drive in the array.
Disk striping enhances performance because multiple drives are accessed
simultaneously; but the reliability of RAID Level 0 is less than any of its member
disk drives due to its lack of redundancy.
1.2.2 RAID 1
RAID 1 also known as “disk mirroring”, data written to one disk drive is
5
Software Operation Manual
simultaneously written to another disk drive. Read performance may be
enhanced if the array controller can parallel accesses both members of a
mirrored pair. During writes, there will be a minor performance penalty when
compared to writing to a single disk. If one drive fails, all data (and software
applications) are preserved on the other drive. RAID 1 offers extremely high
data reliability, but at the cost is doubling the required data storage capacity.
1.2.3 RAID 1E
RAID 1E (available only on Sans Digital AccuRAID 8 Series) has been
traditionally implemented using an even number of disks; some hybrids can use
an odd number of disks as well. Illustration is an example of a hybrid RAID 1E
array comprised of five disks; A, B, C, D and E. In this configuration, each strip is
mirrored on an adjacent disk with wrap-around. In fact this scheme - or a slightly
modified version of it - is often referred to as RAID 1E and was originally proposed
by IBM. When the number of disks comprising a RAID 1E is even, the striping
pattern is identical to that of a traditional RAID 1E, with each disk being mirrored
by exactly one other unique disk. Therefore, all the characteristics for a traditional
RAID 1E apply to a RAID 1E when the latter has an even number of disks. RAID
1E offers a little more flexibility in choosing the number of disks that can be used
to constitute an array. The number can be even or odd.
6
Chapter 1. Introduction
1.2.4 RAID 3
RAID 3 provides disk striping and complete data redundancy through a
dedicated parity drive. RAID 3 breaks up data into smaller blocks, calculates
parity by performing an exclusive-or on the blocks, and then writes the blocks to
all but one drive in the array. The parity data created during the exclusive-or is
then written to the last drive in the array. If a single drive fails, data is still
available by computing the exclusive-or of the contents in the corresponding
strips of the surviving member disk. RAID-3 is best for applications that require
very fast data- transfer rates or long data blocks
7
Software Operation Manual
1.2.5 RAID 5
RAID 5 is sometimes called striping with parity at block level. In RAID 5, the
parity information is written to all of the drives in the subsystems rather than
concentrated on a dedicated parity disk. If one drive in the system fails, the
parity information can be used to reconstruct the data from that drive. All drives
in the array system can be used to seek operation at the same time, greatly
increasing the performance of the RAID system.
1.2.6 RAID 6
A RAID 6 array is essentially an extension of a RAID 5 array with a second
independent distributed parity scheme. Data and parity are striped on a block
level across multiple array members, just like in RAID 5, and a second set of
parity is calculated and written across all the drives. As larger disk arrays are
considered, it is desirable to use stronger codes that can tolerate multiple disk
failure. When a disk fails in a parity protected disk array, recovering the contents
of the failed disk requires successful reading on the contents of all no-failed
disks. RAID 6 provides an extremely high fault tolerance, and can sustain two
simultaneous drive failures without downtime or data loss. This is a perfect
solution when data is mission-critical.
8
Chapter 1. Introduction
1.2.7 RAID X0
RAID level-X0 (available only on Sans Digital AccuRAID 8 Series) refers to
RAID level- 10, 30, 50 and 60. RAID X0 is a combination of multiple RAID x
volume sets with RAID 0 (striping). Striping helps to increase capacity and
performance without adding disks to each RAID x array. The operating system
uses the spanned volume in the same way as a regular volume. Up to one drive
in each sub-volume (RAID 1, 3 or 5) may fail without loss of data. Up to two
drives in each sub-volume (RAID 6) may fail without loss of data.
The following illustration is an example of a RAID level-X0 logical drive.
RAID level-X0 allows more physical drives in an array. The benefits of doing so
9
Software Operation Manual
are larger volume sets, increased performance, and increased reliability.
RAID level-30 50 and 60 can support up to eight sub-Volumes.
If the volume is RAID level-30, 50, or 60, you cannot change
the volume to another RAID level. If the volume is RAID
level-0, 1, 1E, 3, 5, or 6, you cannot change the volume to
RAID level-30, 50, or 60.
1.2.8 Summary of RAID Levels
RAID subsystem supports RAID Levels 0, 1, 1E, 3, 5, 6, 30, 50 and 60. The
following table provides a summary of RAID levels.
RAID Description
Level
0
Also known as stripping.
Disks
requirement
(Cost)
Data Reliability
N
* No data
Protection.
Data distributed across multiple drives in the array. There is no
data protection
1
Also known as mirroring.
2
All data replicated on N Separated disks. N is almost always 2.
* Higher than
RAID 3, 5.
This is a high availability Solution, but due to the 100%
duplication, it is also a costly solution.
1E
Also known Block-Interleaved Parity.
N (N>2)
(0+1) Data and parity information is subdivided and distributed
across all disk. Parity must be the equal to the smallest disk
capacity in the array. Parity information normally stored on a
dedicated parity disk.
3
Also known Bit-Interleaved Parity.
6
10
Also known Block-Interleaved Distributed Parity.
* Lower than RAID 6.
* Higher than
RAID 3, 5.
N+1
Data and parity information is subdivided and distributed
across all disk. Parity must be the equal to the smallest disk
capacity in the array. Parity information normally stored on a
dedicated parity disk.
5
* Lower than RAID 6.
* Lower than RAID 1, 10, 6;
* Higher than a single drive.
N+1
* Lower than RAID 1, 10, and 6.
Data and parity information is subdivided and distributed
across all disk. Parity must be the equal to the smallest disk
capacity in the array. Parity information normally stored on a
dedicated parity disk.
* Higher than a single drive.
AS RAID level 5, but with additional independently computed N+2
redundant information
* Highest of all listed
alternatives.
Chapter 1. Introduction
30
RAID 30 is a combination multiple RAID 3 volume sets with
RAID 0 (striping)
(N+1) *2
Up to one disk failure in each
sub-volume
50
RAID 50 is a combination multiple RAID 5 volume sets with
RAID 0 (striping)
(N+1) *2
Up to one disk failure in each
sub-volume
60
RAID 60 is a combination multiple RAID 6 volume sets with
RAID 0 (striping)
(N+2) *2
Up to two disk failure in each
sub-volume
11
Software Operation Manual
Chapter 2.
Configuration Methods
2.1 Overview
After the hardware installation, the SAS or SATA disk drives installed to the
RAID must be configured and the volume set units initialized before they are
ready to use. This can be accomplished by one of the following methods:
•
Front panel touch-control keypad
•
Remote utility connected through the controller’s serial port (VT-100 or
Hyper terminal)
•
Using HTTP Proxy through the controller’s serial port to access web
browser-based RAID manager in Windows and Linux system.
•
Firmware-embedded TCP/IP & web browser-based RAID manager via the
controller’s 10/100 Ethernet LAN port.
Those user interfaces can access the built-in configuration and administration
utility that resides in the controller’s firmware. They provide complete control
and management of the controller and disk arrays, eliminating the need for
additional hardware or software.
Note
The RAID subsystem allows only one method to access menus at a
time.
2.2 Using local front panel touch-control
keypad
The front panel keypad and liquid crystal display (LCD) is the primary user
interface for the RAID subsystem. All configuration and management of the
RAID and its properly connected disk arrays can be performed from this
interface.
The front panel keypad and LCD are connected to the RAID subsystem to
access the built-in configuration and administration utility that resides in the
controller’s firmware. Complete control and management of the array’s physical
drives and logical units can be performed from the front panel, requiring no
additional hardware or software drivers for that purpose.
10
Chapter 2. Configuration Methods
This Chapter provides, in quick reference form, procedures that use the built-in
LCD panel to configure and operate the controller.
A touch-control keypad and a liquid crystal display (LCD) mounted on the front
panel of the RAID subsystem is the primary operational interface and monitor
display for the disk array controller. This user interface controls all configuration
and management functions for the RAID subsystem controller and for all SAS
(or SATA) disk array subsystems to which it is properly connected.
The LCD provides a system of screens with areas for information, status
indication, or menus. The LCD screen displays up to two lines at a time of menu
items or other information.
The Initial screen is as following:
Up Arrow Button
Down Arrow Button
ESC Button
Enter Button
LCD Display
Power Indicator (Blue)
Attention Indicator (Red)
Access Indicator (Blue)
2.2.1 Function Key Definitions
The four function keys at the button of the front panel perform the following
functions:
Key
Function
Up Arrow
Use to scroll the cursor Upward / Rightward
Down Arrow Use to scroll the cursor Downward / Leftward
ENT Key
Submit Select ion Function (Confirm a selected item)
ESC Key
Return to Previous Screen (Exit a selection configuration)
There are three LED indicators on the front panel. Following table provides a
11
Software Operation Manual
summary of the meanings of these LED indicators:
LED Indicator Normal Status
Power On
indicator
Bright Blue
Fail Indicator LED never light up
Data Access
Indicator
Problem Indication
This LED does not light up after
power switched on
LED light up as Red.
Blink blue during host computer LED never flickers
accessing the RAID subsystem.
For additional information on using the LCD panel and keypad to configure the
RAID see ”LCD Panel Configuration” on Chapter 3.
2.3 Using the controller’s serial port
The serial port on the RAID subsystem’s back panel can be used in Remote
manage mode. The provided interface cable converts the RS232 signal on the
RAID subsystem into a 9-pin D-Sub male connector. The firmware-based
terminal array management interface can access the array through this RS-232
port. You can attach a VT-100 compatible terminal or a PC running a “Hyper
terminal” program to the serial port for accessing the text-based Setup Menu.
RAID subsystem RS-232C Port Pin Assignment
To ensure proper communications between the RAID subsystem and the
VT-100 Terminal Emulation, please configure the VT100 terminal emulation
settings to the values shown below:
Terminal requirement
Connection
Null-modem cable
Baud Rate
115,200
Data bits
8
Stop
1
Flow Control
None
The RAID Subsystem’s RJ-11 connector’s pin assignments are defined as
below :
12
Chapter 2. Configuration Methods
RS-232C Pin Assignments
Pin
Description
Pin
Description
1
N/C
6
NC
2
GND
3
RX
4
TX
5
CTS
2.3.1 Keyboard Navigation
The following definition is the VT-100 RAID configuration utility keyboard
navigation.
Key
Function
Arrow Key
Move cursor
Enter Key
Submit selection function
ESC Key
Return to previous screen
L Key
Line draw
X Key
Redraw
2.3.2 Start-up VT100 Screen
By connecting a VT100 compatible terminal, or a PC operating in an equivalent
terminal emulation mode, all RAID subsystem monitoring, configuration and
administration functions can be exercised from the VT100 terminal.
There are a wide variety of Terminal Emulation packages, but for the most part
they should be very similar. The following setup procedure is an example Setup
of VT100 Terminal in Windows XP system using Hyper Terminal Version 5.1.
Step 1. From the Desktop open the Start menu. Pick All Programs, Accessories,
Communications and Hyper Terminal. Open Hyper Terminal (requires version
3.0 or higher)
13
Software Operation Manual
Step 2. Open HYPERTRM.EXE.
14
Chapter 2. Configuration Methods
Step 3. Enter a name for your Terminal. Click OK.
15
Software Operation Manual
Step 4. Select an appropriate connecting port in your Terminal. Click OK
Step 5. Configure the port parameter settings. Bits per second: “115200”, Data
bits: “8”, Parity: “None”, Stop bits: “1”, Flow control: “None”. Click OK
16
Chapter 2. Configuration Methods
Step 6. Open the File menu, and then open Properties.
Step 7. Open the Settings Tab.
Step 8. Open the Settings Tab. Function, arrow and ctrl keys act as: Terminal
Keys, Backspace key sends: Crtl+H, Emulation: VT100, Telnet terminal: VT100,
17
Software Operation Manual
Back scroll buffer lines: 500. Click OK.
Now, the VT100 is ready to use.
After you have finished the VT100 Terminal setup, you may press " X " key (in
your Terminal) to link the RAID subsystem and Terminal together.
Press “X’ key to display the disk array Monitor Utility screen on your VT100
Terminal.
2.4 Firmware-embedded TCP/IP & web
browser-based RAID manager (using the
controller’s 10/100 Ethernet LAN port)
To ensure proper communications between the RAID subsystem and Web
browser-based RAID management, Please connect the RAID system Ethernet
LAN port to any LAN switch port.
The controller has embedded the TCP/IP & Web Browser-based RAID manager
in the firmware. User can remotely manage the RAID system, without adding
any specific software (platform independent), via standard web browsers
directly connected to the 10/100 Ethernet RJ45 LAN port.
18
Chapter 2. Configuration Methods
To configure RAID subsystem on a local or remote machine, you need to know
its IP Address. The IP address will be default shown in the LCD screen. Launch
your firmware-embedded TCP/IP & Web Browser-based RAID manager by
entering http://[IP Address] in the web browser.
Note that you must be logged in as administrator with local admin rights on the
remote machine to remotely configure it. The RAID subsystem controller default
username is “admin” and the password is “0000”.
The RAID subsystem controller default User Name is
“admin” and the Password is “0000”. Please change the
Password when you first log-in.
2.5 Configuration Menu Tree
The following is an expansion of the menus in the configuration Utility that can
be accessed through the LCD panel, RS-232 serial port and Ethernet LAN port.
Main Menus
Quick Function
Quick Create
Raid Set Functions
Create Raid Set
Delete Raid Set
19
Software Operation Manual
Expand Raid Set
Activate Incomplete RAID Set
Create Hot Spare
Delete Hot Spare
Rescue Raid Set
Volume Set Functions
Create Volume Set
Create Raid30/50/60
Delete Volume Set
Modify Volume Set
Check Volume Set
Schedule Volume Check
Stop Volume Set Check
Volume Set Host Filters (only for FC)
Physical Drives
Create Pass-Through Disk
Modify a Pass-Through Disk
Delete Pass-Through Disk
Identify Enclosure
Identify Drive
System Controls
20
System Configuration
Chapter 2. Configuration Methods
Fibre Channel Configuration(only for FC)
EtherNet Configuration
Alert By Mail Configuration
SNMP Configuration
NTP Configuration
View Events/Mute Beeper
Generate Test Event
Clear Event Buffer
Modify Password
Upgrade Firmware
Shutdown Controller
Restart Controller
Information
RAID Set Hierarchy
System Information
Hardware Monitor
21
Software Operation Manual
Chapter 3.
LCD Panel Configuration
The Sans Digital AccuRAID RAID’s LCD configuration panel is character-based
which you can use after powering the unit. Use LCD Configuration panel to:
· Create raid set,
. Expand raid set,
· Define volume set,
· Add physical drive
· Modify volume set
· Modify RAID level/stripe size,
. Define pass-through disk drives,
. Modify system function and
· Designate drives as hot spares.
The LCD display front panel function keys are the primary user interface for the RAID
subsystem.
3.1 Starting LCD Configuration Utility
The main menu appears on the LCD screen, as shown below:
Use the up and down arrow buttons to move left and right to select a menu item.
Press ENT to select the item. Press the UP/DOWN to browse the selection. Press
ESC to return to the previous screen.
3.2 LCD Configuration Utility Main Menu Options
Select an option and the related information or submenu items displayed beneath it.
The submenus for each item are explained on the following sections. The
configuration utility main menu options are :
Option
Description
Quick Volume And Raid
Set Setup
Create a default configurations which are based
on the number of physical disk installed
Raid Set Functions
Create a customized raid set
Volume Set Functions
Create a customized volume set
22
Chapter 4. Web Browser-Based Configuration
Physical Drive Functions
View individual disk information
Raid System Functions
Setting the raid system configurations
Hdd Power Management
Setting disk power saving configurations
Fibre Channel Config
To set the Fibre channel config function
Ethernet Configuration
Setting local IP address
Show System Events
Record all system events in the buffer
Clear Event Buffer
Clear all event buffer information
Hardware Monitor
Show all system environment status
System Information
View the controller information
3.3 Configuring Raid Sets and Volume Sets
You can configure raid sets and volume sets either using “Quick Volume and Raid Set
Setup” automatically or “Raid Set Functions/Volume Set Functions” manually
configuration method. Each configuration method requires a different level of user
input. The general flow of operations for raid set and volume set configuration is:
Step 1
Step 2
Step 3
Step 4
Designate hot
spares/pass-throu
gh (optional).
Choose a
configuration
method.
Create raid set
using the
available
physical drives.
Define volume
set using the
space in the raid
set.
Step 5
Initialize the
volume set and
use volume set
in the HOST
OS.
3.4 Designating Drives as Hot Spares
To designate drives as hot spares, press ENT to enter the Main menu. Press
UP/DOWN to select the Raid Set Functions option and then press ENT. All raid set
functions will be displayed. Press UP/DOWN to select the Create Hot Spare Disk
option and then press ENT. The first unused physical device connected to the current
23
Software Operation Manual
controller appears: Press UP/DOWN to scroll the unused physical devices and select
the target disk to assign as a Hot Spare and press ENT to designate it as a hot spare.
Set the Hot Spare Type as Global, Dedicated Raid or Dedicated ENC and then press
ENT.
3.5 Using Quick Volume and Raid Set Setup
In Quick Volume and Raid Setup Configuration, it collects all drives and includes
them in a raid set. The raid set you create is associated with exactly one volume set,
and you can modify the RAID level, stripe size, and capacity. Designating drives as
Hot Spares will also combine with raid level in this setup.
The volume set default settings will be:
Parameter
Setting
Volume Name
Volume Set # 00
SAS Port#(Fibre Channel#)/LUN
0/0
Cache Mode
Write Back
Tag Queuing
Yes
The default setting values can be changed after configuration is complete.
Follow the steps below to create raid set using Quick Volume and Raid Setup
Configuration:
Choose Quick Volume And Raid Setup from the main menu. The available
Step1
RAID levels and associated Hot Spare for the current volume set drive are
displayed.
RAID Level Try to use drives of the same capacity in a specific array. If you use
Step2
drives with different capacities in an array, all the drives in the array is treated
as though they have the capacity of the smallest drive in the array.
The number of physical drives in a specific array determines the RAID levels
that can be implemented with the array.
RAID 0 requires one or more physical drives,
RAID 1 requires at least 2 physical drives,
RAID 1+ Spare requires more than 2 physical drives,
RAID 3 requires at least 3 physical drives,
RAID 5 requires at least 3 physical drives,
RAID 6 requires at least 4 physical drives,
24
Chapter 4. Web Browser-Based Configuration
RAID 3+ Spare requires at least 4 physical drives, and
RAID 5 + Spare requires at least 4 physical drives.
RAID 6 + Spare requires at least 5 physical drives.
RAID 30 requires at least 6 physical drives,
RAID 50 requires at least 6 physical drives,
RAID 60 requires at least 8 physical drives,
RAID 30+ Spare requires at least 7 physical drives, and
RAID 50+ Spare requires at least 7 physical drives.
RAID 60+ Spare require at least 9 physical drives.
Using the UP/DOWN key to select the RAID for the volume set and presses
ENT to confirm it.
Step3
Available Capacity Set the capacity size for the volume set. After select RAID
level and press ENT.
The selected capacity for the current volume set is displayed. Using the
UP/DOWN to create the current volume set capacity size and press ENT to
confirm it. The available stripe sizes for the current volume set are displayed.
Select Stripe size This parameter specifies the size of the stripes written to
Step4
each disk in a RAID 0, 1, 1E, 5, 6, 50 or 60 Volume Set. You can set the stripe
size to 4 KB, 8 KB, 16 KB, 32 KB, 64 KB, or 128 KB. A larger stripe size
provides better-read performance, especially if your computer does mostly
sequential reads. However, if you are sure that your computer does random
read requests more often, choose a small stripe size. Using the UP/DOWN to
select stripe size and press ENT to confirm it.
Step5
When you are finished defining the volume set, press ENT to confirm the Quick
Volume And Raid Set Setup function.
Fast Initialization Press ENT to define fast initialization and ESC to normal
Step6
initialization. In the Normal Initialization, the initialization proceeds as a
background task, the volume set is fully accessible for system reads and writes.
The operating system can instantly access to the newly created arrays without
requiring a reboot and waiting the initialization complete. In Fast Initialization,
the initialization proceeds must be completed before the volume set ready for
system accesses.
The controller will begin to Initialize the volume set you have just configured.
Step7
Step8
If you need to add additional volume set using main menu Create Raid Volume
Set function.
25
Software Operation Manual
3.6 Using Raid Set and Volume Set Functions
In Raid Set Function, you can use the Create Raid Set function to generate the new
raid set. In Volume Set Function, you can use the Create Volume Set function to
generate its associated volume set and parameters.
If the current controller has unused physical devices connected, you can choose the
Create Hot Spare option in the Raid Set Function to define a global hot spare.
Select this method to configure new raid sets and volume sets. This configuration
option allows you to associate volume set with partial and full raid set.
Step1
To setup the Hot Spare (option), choose Raid Set Functions from the main
menu. Select the Create Hot Spare Disk to set the Hot Spare.
Step2
Choose Raid Set Function from the main menu. Select the Create A New Raid
Set.
Step3
A Select Drive Channel in the next displayed showing the drive connected to
the current controller.
Step4
Press the UP/ DOWN to select specific physical drives. Press the ENT to
associate the selected physical drive with the current raid set.
Try to use drives of the same capacity in a specific raid set. If you use drives
with different capacities in an array, all the drives in the array is treated as
though they have the capacity of the smallest drive in the array.
The number of physical drives in a specific raid set determines the RAID levels
that can be implemented with the raid set.
RAID 0 requires one or more physical drives per raid set.
RAID 1 requires at least 2 physical drives per raid set.
RAID 1 + Spare requires at least 3 physical drives per raid set.
RAID 3 requires at least 3 physical drives per raid set.
RAID 5 requires at least 3 physical drives per raid set.
RAID 6 requires at least 4 physical drives per raid set.
RAID 3 + Spare requires at least 4 physical drives per raid set.
RAID 5 + Spare requires at least 4 physical drives per raid set.
RAID 6 + Spare requires at least 5 physical drives per raid set.
RAID 30 requires at least 6 physical drives,
RAID 50 requires at least 6 physical drives,
RAID 60 requires at least 8 physical drives,
26
Chapter 4. Web Browser-Based Configuration
RAID 30+ Spare requires at least 7 physical drives, and
RAID 50+ Spare requires at least 7 physical drives.
RAID 60+ Spare require at least 9 physical drives.
Step5
After adding physical drives to the current raid set as desired, press ESC to
confirm the Select Drive Channel function.
Press ENT when you are finished creating the current raid set. To continue
Step6
Step7
defining another raid set, repeat step 3. To begin volume set configuration, go
to step 7.
Choose Volume Set Functions from the main menu. Select the Create Raid
Volume Set and press ENT.
Choose one raid set from the Select Raid Set screen. Press ENT to confirm it.
Step8
The volume set attributes screen appears:
Step9
The volume set attributes screen shows the volume set default configuration
value that is currently being configured. The volume set attributes are:
The Raid Level,
The Capacity (Not supported via LCD Panel.)
The Stripe Size,
The SAS Port# (Fibre Channel#)/LUN,
The Cache Mode,
The Tagged Queuing,
The Volume Name (number).
All value can be changing by the user. Press the UP/ DOWN to select the
attributes. Press the ENT to modify each attribute of the default value. Using
the UP/DOWN to select attribute value and press the ENT to accept the default
value
Step10
After user completes modifying the attribute, press the ESC to enter the Select
Capacity for the volume set. Using the UP/DOWN to set the volume set
capacity and press ENT to confirm it.
27
Software Operation Manual
Step11
Step12
When you are finished defining the volume set, press ENT to confirm the
Create function.
Press ENT to define fast initialization and ESC to normal initialization. The
controller will begin to Initialize the volume set you have just configured. If
space remains in the raid set, the next volume set can be configured. Repeat
steps 7 to 12 to configure another volume set.
3.7 Navigation Map of the Configuration
The password option allows user to set or clear the raid subsystem’s password
protection feature. Once the password has been set, the user can only monitor and
configure the raid subsystem by providing the correct password. The password is
used to protect the internal RAID subsystem from unauthorized entry. The controller
will check the password only when entering the Main menu from the initial screen.
The RAID subsystem will automatically go back to the initial screen when it does not
receive any command in twenty seconds. The RAID subsystem password’s default
setting is 0000.
Invalid Password
Entered
Alnico AL-8XXXX
192.168.001.100*
No
If
Password
Is set
Verify
_
Password:
Password
Correct
Yes
Raid/Volume Set
Express Setup
3.7.1 Quick Volume/Raid Setup
Quick Volume and Raid Setup is the fastest way to prepare a raid set and volume set.
It only needs a few keystrokes to complete it. Although disk drives of different
capacity may be used in the raid set, it will use the smallest capacity of the disk drive
as the capacity of all disk drives in the raid set. The Quick Volume and Raid Setup
option creates a raid set with the following properties:
28
Chapter 4. Web Browser-Based Configuration
Power On
Total x Disks
Sans Digital
192.168.001.100*
Raid 0
> 2TB Support
* No
< No.
Use 64bit LBA
Use 4K Block>
Wraps Around
Total : xxxx GB
Select : xxxx GB
? ,? key to
select the size
Stripe Size
k Bytes
< 4k,8k,..128k>
Wraps Around
Raid 1+0
Raid 1 + 0+ Spare
Raid 3
Password
Raid 3 + Spare
Raid 5
Raid 5 + Spare
ENT : To Create
ESC : To Abort
Quick Volume
And
Raid Set Setup
ENT : FGrnd Init
ESC : BGrnd Initl
Raid Set Already
Existing
Volume Set #00
Initialize100.0%
B
1.
All of the physical disk drives are contained in a raid set.
2.
The raid levels associated with hot spare, capacity, and stripe size are selected
during the configuration process.
3.
A single volume set is created and consumes all or a portion of the disk capacity
available in this raid set.
4.
If you need to add additional volume set, use main menu Volume Set
functions.
Detail procedure references to this chapter’s section: Using Raid Set and Volume
Set Functions
3.7.2 Raid Set Function
User manual configuration can completely control the raid set setting, but it will take
longer time to complete than the Quick Volume and Raid Setup configuration. Select
29
Software Operation Manual
the Raid Set Function to manually configure the raid set for the first time or delete
existing raid set and reconfigure the raid set.
To enter a Raid Set Functions, press ENT to enter the Main menu. Press UP/DOWN
to select the Raid Set Functions option and then press ENT to enter further
submenus. All raid set submenus will be displayed.
B
“ENT” Key to
select drive group
Create A New
Raid Set
Select Drive
IDE Channel x
ENT : To Create
ESC : To Abort
ENT : To Delete
ESC : To Abort
Are You Sure ?
ENT :Yes, ESC:No
Select Raid Set
Raid Set # xx
Select Drive
IDE channel x
ENT : To Expand
ESC : To Abort
Active Incomplete
Raidset
Select RAID Set
RAID set # xx
ENT : To Active
ESC : To Abort
Create Hot
Spare Disk
Select Drive
IDE channel x
ENT : To Create
ESC : To Abort
Delete Hot
Spare Disk
Select Drive
IDE channel x
ENT : To Create
ESC : To Abort
Delete Existed
Raid Set
Select Raid Set
Raid Set # xx
Raid Set function
Expand Existed
Raid Set
Raid Set Name
Total Capacity
Display Raid Set
Information
C
Select Raid Set
Raid Set # xx
Free Capacity
Number of Member Disks
Min. Member Disk capacity
Raid Set State
3.7.2.1 Create A New Raid Set
Detail procedure references to this chapter’s section: Using Raid Set and Volume
Set Functions
30
Chapter 4. Web Browser-Based Configuration
3.7.2.2 Delete Existed Raid Set
Press UP/DOWN to choose the Delete Existed Raid Set option. Using UP/DOWN to
select the raid set number that user wants to delete and then press ENT to accept the
raid set number. The Confirmation screen appears, then press ENT to accept the
delete existed raid set function. The double confirmation screens appears, and then
press ENT to make sure to delete the existed raid set function
3.7.2.3 Expand Existed Raid Set
Instead of deleting a raid set and recreating it with additional disk drives, the Expand
Existed Raid Set function allows the user to add disk drives to the raid set that was
created.
To expand existed raid set, press UP/DOWN to choose the Expand Existed Raid
Set option. Using UP/DOWN to select the raid set number that user wants to expand
and then press ENT to accept the raid set number. If there is an available disk, then
the Select Drive Channel x appears. Using UP/DOWN to select the target disk and
then press ENT to select it. Press ENT to start expanding the existing raid set.
The new add capacity will define one or more volume sets. Follow the instruction
presented in the Volume Set Function to create the volume sets.
Once the Expand Raid Set process has started, user cannot
stop it. The process must be completed.
If a disk drive fails during raid set expansion and a hot spare is
available, an auto rebuild operation will occur after the raid set
expansion completes.
Migrating occurs when a disk is added to a raid set. Migration
status is displayed in the raid status area of the Raid Set
information when a disk is added to a raid set. Migrating status
is also displayed in the associated volume status area of the
volume set Information when a disk is added to a raid set.
3.7.2.4 Activate Incomplete Raid Set
When one of the disk drive is removed in power off state, the raid set state will change
to Incomplete State. If user wants to continue to work, when the RAID subsystem is
powered on, the Activate Incomplete Raid Set option can be used to active the raid
set. After user completes the function, the Raid State will change to Degraded Mode.
3.7.2.5 Create Hot Spare Disk
Please reference this chapter: Designating Drives as Hot Spares.
31
Software Operation Manual
3.7.2.6 Delete Hot Spare Disk
To delete hot spare, press UP/DOWN to choose the Delete Hot Spare Disk option.
Using UP/DOWN to select the hot spare number that user wants to delete and then
press ENT to select it. The confirmation screens appear and press ENT to delete the
hot spare.
3.7.2.7 RAID Set Information
Using UP/DOWN to choose the Display Raid Set Information option and press ENT.
Using UP/DOWN to select the raid set number that user wants to display. The raid set
information will be displayed.
Using UP/DOWN to scroll the raid set information; it shows Raid Set Name, Total
Capacity, Free Capacity, Number of Member Disks, Min. Member Disk Capacity and
Raid Set State.
3.7.2.8 Offline Raid Set
This function allows the user to move the whole created Raid Set to another Sans
Digital AccuRAID RAID subsystem without turning off power. “Active Raid Set” can
resume the offline-Raid Set to online status.
3.7.3 Volume Set Function
A volume set is seen by the host system as a single logical device. It is organized in a
RAID level with one or more physical disks. RAID level refers to the level of data
performance and protection of a Volume Set. A Volume Set capacity can consume all
or a portion of the disk capacity available in a Raid Set. Multiple Volume Sets can
exist on a group of disks in a Raid Set. Additional Volume Sets created in a specified
Raid Set will reside on all the physical disks in the Raid Set. Thus each Volume Set on
the Raid Set will have its data spread evenly across all the disks in the Raid Set.
To enter Volume Set Functions, press ENT to enter the main menu. Press UP/DOWN
to select the Volume Set Functions option and then press ENT to enter further
submenus. All volume set submenus will be displayed.
32
Chapter 4. Web Browser-Based Configuration
C
Volume Name
Chg. Volume Name
Volume Set # xx
Raid Level
Chg. Raid level
* Raid xx
Capacity
Chg. Volume Capacity
* xxxxx.x GB
<0, 1, 1E, 3, 5, 6,
30, 50, 60 >
Wraps Around
Stripe Size
Chg. Stripe Size
* xxx KBytes
<4k, 8k, 16k, …...128k>
Wraps Around
Chg. SAS Port#
* Port # xx
<0, 1, 0&1 for Cluster>
Wraps Around
SAS LUN
Chg. LUN Base
LUN # xxx
<0, 8, 16, 24, 32, 40, 48,
56, 64, 72, 80, 88, 96,
104, 112, 120>
Wraps Around
Cache Mode
Chg. SAS LUN
LUN xxx
Tagged Queuing
Chg. Cache mode
*Write-Back
SAS Port#
Select Raid Set
Raid Set # xx
LUN Base
<LUN Base + LUN,
LUN =0 ~ 7 >
Wraps Around
Chg. Tagged Queuing
* Enabled
<Write-Back; Write-Through>
Wraps Around
<Enabled, Disabled>
Wraps Around
ESC
Volume Set
Function
Total : xxxxGB
Select: xxxxGB
Create Raid
Volume Set
Delete Existed
Volume Set
ENT : To Create
ESC : To Abort
Starting Volume Set
initialization
Select Raid Set
Raid Set # xx
Select VolumeSet
Volume Set # xx
D
ENT : Fast Init
ESC : Normal
ENT : To Delete
ESC : To Abort
Are You Sure ?
ENT:Yes, ESC:No
1
3.7.3.1 Create Raid Volume Set
To create a volume set, Please reference to section 4.6: Using Raid Set and Volume
Set Functions. The volume set attributes screen shows the volume set default
configuration value that is currently being configured. The attributes are Raid Level,
Stripe Size, Cache Mode, SAS Port# (Fibre Channel#)/LUN, Tagged Queuing, and
Volume Name (number).
All value can be changed by the user. Press the UP/DOWN to select attribute. Press
the ENT to modify the default value. Using the UP/DOWN to select attribute value
and press the ENT to accept the default value. The following is the attributes
33
Software Operation Manual
descriptions. Please refer to section 4.6 Using Raid Set and Volume Set Functions to
complete the create volume set function.
3.7.3.1.1 Capacity
The maximum volume size is default in the first setting. Enter the appropriate volume
size to fit your application. The capacity can also increase or decrease by the UP and
DOWN arrow keys. Each volume set has a selected capacity which is less than or
equal to the total capacity of the raid set on which it resides.
3.7.3.1.2 Raid Level
RAID subsystem can support raid level 0, 1, 1E (0+1), 3, 5, 6, 30, 50, and 60.
3.7.3.1.3 Strip Size
This parameter sets the size of the segment written to each disk in a RAID 0, 1, 1E
(0+1), 5, 6, 50 or 60 logical drives. You can set the stripe size to 4 KB, 8 KB, 16 KB, 32
KB, 64 KB, or 128 KB.
A larger stripe size produces better-read performance, especially if your computer
does mostly sequential reads. However, if you are sure that your computer does
random reads more often, select a small stripe size.
3.7.3.1.4 Volume Name
The default volume name will always appear as Volume Set. #. You can rename the
volume set name as long as it does not exceed the 15 characters limit.
3.7.3.1.5 SAS Port# / SAS Port Mapping# (Fibre Host)
RAID subsystem supports dual 6Gb/s SAS wide Ports or quad 8Gb/s Fibre Channels.
SAS Port#: Two SAS wide port can be applied to the internal RAID subsystem.
Choose the SAS Port# option 0, 1 and 0&1 cluster.
SAS Port Mapping#: Two 8Gbps Fibre channel can be applied to the internal RAID
subsystem. Choose the Fibre Host# option 0, 1, 2, 3
3.7.3.1.6 SAS / Fibre LUN Base
SAS LUN Base: Each SAS device attached to the SAS card, a SAS wide port can
connect up to 128 (0 to 127) devices. The RAID subsystem is as a large SAS device.
We should assign a LUN base from a list of SAS LUNs.
Note : Sans Digital AccuRAID SAS RAID supports up to 122 devices down through
one channel (including the master system).
34
Chapter 4. Web Browser-Based Configuration
Fibre LUN Base: Each Fibre device attached to the Fibre card, as well as the card
itself, must be assigned a unique Fibre ID number. A Fibre channel can connect up to
128 (0 to 127) devices. The RAID subsystem is as a large Fibre device. We should
assign a LUN base from a list of Fibre LUNs.
3.7.3.1.7 SAS / Fibre LUN
SAS LUN: Each SAS LUN base can support up to 8 LUNs. Most SAS host adapter
treats each LUN like a SAS disk.
Fibre LUN: Each Fibre LUN base can support up to 8 LUNs. Most Fibre Channel host
adapter treats each LUN like a Fibre disk.
3.7.3.1.8 Cache Mode
User can set the cache mode as Write-Through Cache or Write-Back Cache.
3.7.3.1.9 Tag Queuing
The Enabled option is useful for enhancing overall system performance under
multi-tasking operating systems. The Command Tag (Drive Channel) function
controls the SAS command tag queuing support for each drive channel. This function
should normally remain enabled. Disable this function only when using older SAS
drives that do not support command tag queuing.
3.7.3.2 Delete Volume Set
Press UP/DOWN to choose the Delete Existed Volume Set option. Using
UP/DOWN to select the raid set number that user wants to delete and press ENT.
Scrolling the UP/DOWN to select the volume set number that user wants to delete
and press ENT. The Confirmation screen appears, and then press ENT to accept the
delete volume set function. The double confirmation screen appears, then press ENT
to make sure of the delete volume set function.
3.7.3.3 Modify Volume Set
Use this option to modify volume set configuration. To modify volume set attributes
from raid set system function, press UP/DOWN to choose the Modify Volume Set
Attribute option. Using UP/DOWN to select the raid set number that user wants to
modify and press ENT. Scrolling the UP/DOWN to select the volume set number that
user wants to modify and press ENT. Press ENT to select the existed volume set
attribute. The volume set attributes screen shows the volume set setting configuration
attributes that was currently being configured. The attributes are Volume Name
(number), Volume Capacity, Raid Level, Stripe Size, Cache Mode, Tagged Queuing,
SAS Port# (Fibre Channel#), SAS LUN (Fibre LUN), and Volume Name (number).
All value can be modified by the user. Press the UP/DOWN to select attribute. Press
the ENT to modify the default value. Using the UP/DOWN to select the attribute value
35
Software Operation Manual
and press the ENT to accept the selected value. Choose this option to display the
properties of the selected Volume Set; you can modify all values except the capacity.
36
Chapter 4. Web Browser-Based Configuration
1
Raid Level
Stripe Size
Cache Mode
Select VolumeSet
Volume Set # xx
SAS/Fibre Host
Chg. Raid level
* Raid x
<0, 1, 3, 5, 6>
Wraps Around
Chg. Stripe Size
* xxxx Bytes
<4k, 8k, 16k, …...128k>
Wraps Around
Chg. Cache mode
*Write-Back
<Write-Back; Write-Through>
Wraps Around
Chg. Fibre Ch.
* Channel x
Chg. Fibre LUN Base
* xxx
<Channel0 ; Channel
1;Ch0&1Cluster>
<0,8,16,32~12
0>
Wraps Around
Fibre LUN Base
Chg. Finre LUN
* Fibre LUN x
SAS/Fibre LUN
Select Raid Set
Raid Set # xx
Tagged Queuing
Volume Name
Chg. Tagged Queuing
* Enabled
<0-7>
Wraps Around
<Enabled, Disabled>
Wraps Around
Chg. Volume Name
Volume Set # xx
Modify Volume
Set Attribute
ESC
ENT : To Modify
ESC : To Abort
Check Volume Set
Consistency
Stop Volume Set
ConsistencyCheck
Select Raid Set
Raid Set # xx
Are You Sure ?
ENT :Yes, ESC :No
Select VolumeSet
Volume Set # xx
ENT : To Check
ESC : To Abort
ENT : To Stop
ESC : To Abort
Raid Set Name
Volume Capacity
Volume State
Fibre Attribute
Display Volume
Set Information
Select Raid Set
Raid Set # xx
Select VolumeSet
Volume Set # xx
Raid Level
Stripe Size
Member Disks
Cache Attribute
Tagged Queuing
Volume Name
37
Software Operation Manual
3.7.3.4 Check Volume Set Consistency
Use this option to check volume set consistency. To check volume set consistency
from volume set system function, press UP/DOWN to choose the Check Volume Set
Consistency option. Using UP/DOWN to select the raid set number that user wants
to check and press ENT. Scrolling the UP/DOWN to select the volume set number
that user wants to check and press ENT. The Confirmation screen appears, pressing
ENT will start the check volume set consistency.
3.7.3.5 Stop Volume Set Consistency Check
Use this option to stop volume set consistency check. To stop volume set consistency
check from volume set system function, press UP/DOWN to choose the Stop
Volume Set Consistency Check option and then press ENT to stop the check
volume set consistency.
3.7.3.6 Display Volume Set Information
Use this option to display volume set information. To display volume set information
from Volume set system function, press UP/DOWN to choose the Display Volume
Set Information option. Using UP/DOWN to select the raid set number that user
wants to show and press ENT. Scrolling the UP/DOWN to select the volume set
number that user want to display and press ENT. The volume set attributes screen
shows the volume set setting configuration value that was currently being configured.
The attributes are Raid Level, Stripe Size, Cache Mode, Fibre Attribute, Tagged
Queuing, and Volume Name (number). All value cannot be modifying by this option.
3.7.4 Physical Drive
Choose this option from the Main Menu to select a physical disk and to perform the
operations listed below. To enter a Physical Drive Functions, press ENT to enter the
main menu. Press UP/DOWN to select the Physical Drive Functions option and
then press ENT to enter further submenus. All physical drive submenus will be
displayed.
38
Chapter 4. Web Browser-Based Configuration
D
Physical Drive
Functions
Model
Serial Number
Firmware Rev.
Display Drive
Information
Select Drive
IDE Channel x
Device Capacity
Current SATA
Supported SATA
Device State
Create Pass
Through Disk
Select Drive
IDE Channel x
Chg. Cache mode
*Write-Back
Cache Model
SAS/Fibre Host
Chg. Fibre Ch.
* Channel x
<Write-Back;
Write-Through>
Wraps Around
<Channel 0;Channel1 ;
Ch0&1 Cluster>
Chg. Fibre LUNBase
* xx
Fibre LUN Base
< 0,8,16~120>
Chg. Fibre LUN
* Fibre LUNx
<0-7>
Wraps Around
LUN Base
SAS/Fibre LUN
Tagged Queuing
Chg. Tagged Queuing
* Enabled
<Enabled, Disabled>
Wrap Around
ESC
ENT : To Create
ESC : To Abort
E
2
3.7.4.1 Display Drive Information
To display all information about HDDs, includes brand, model, serial number,
firmware version and so on.
Press UP/DOWN to choose the Display Drive Information option, then press ENT
key. This menu will show all physical drive number items. Using UP/DOWN to select
the Disk that user want to display and press ENT, then Press UP/DOWN to browse
the HDD’s information.
3.7.4.2 Create Pass-Through Disk
Disk is not controlled by the RAID subsystem firmware and thus cannot be a part of a
raid set. The disk is available to the operating system as an individual disk. It is
typically used on a system where the operating system is on a disk and not controlled
39
Software Operation Manual
by the RAID subsystem firmware.
Using UP/DOWN to choose the Create Pass-Through Disk option and press ENT.
Using UP/DOWN to select the drive number those users want to create. The drive
attributes will be displayed. The drive attributes show the Cache Model, SAS Port#,
SAS LUN, and Tagged Queuing.
All values can be changed by the user. Press the UP/DOWN to select attribute and
then press the ENT to modify the default value. Using the UP/ DOWN to select
attribute value and press the ENT to accept the selected value.
3.7.4.3 Modify Pass-Through Disk
Use this option to modify the Pass-Through Disk attributes. To modify Pass-Through
Disk attributes from Pass-Through Disk pool, press UP/DOWN to choose the Modify
Pass-Through Drive option, and then press ENT key. The Select Drive Function
menu will show all Pass-Through Drive number items. Using UP/DOWN to select the
Pass-Through Disk that user wants to modify and press ENT. The attributes screen
shows the Pass-Through Disk setting value that was currently being configured. The
attributes are Cache Mode, SAS Port#, SAS LUN, and Tagged Queuing.
All value can be modified by the user. Press the UP/DOWN arrow keys to select the
attribute. Press the ENT to modify the default value. Using the UP/ DOWN key to
select attribute value and press the ENT to accept the selection value. After
completing the modification, press ESC to enter the confirmation screen and then
press ENT to accept the Modify Pass-Through Disk function.
3.7.4.4 Delete Pass-Through Disk
To delete pass-through drive from the pass-through drive pool, press UP/DOWN to
choose the Delete Pass-Through Drive option, and then press ENT. The Select
Drive Function menu will show all Pass-Through Drive number items. Using
UP/DOWN to select the Pass-Through Disk that user wants to delete and press ENT.
The Delete Pass-Through confirmation screen will appear press ENT to delete it.
3.7.4.5 Identify the Selected Drive
To prevent removing the wrong drive, the selected disk HDD LED Indicator will light
for physically locating the selected disk when the Identify Selected Drive function is
selected.
To identify selected drive from the physical drive pool, press UP/DOWN to choose the
Identify Drive option, then press ENT key. The Select Drive function menu will show
all physical drive number items. Using UP/DOWN to select the Disk that user wants to
identify and press ENT. The selected disk HDD LED indicator will flash.
3.7.5 RAID System Function
To enter a “System Control”, press ENT to enter the Main menu. Press UP/DOWN to
select the Raid System Function option and then press ENT to enter further
40
Chapter 4. Web Browser-Based Configuration
submenus. All raid system submenus will be displayed. Using UP/DOWN to select
the submenus option and then press ENT to enter the selection function.
41
Software Operation Manual
3.7.5.1 Mute the Alert Beeper
The Mute the Alert Beeper function item is used to control the RAID subsystem
Beeper. Select the “No” and press Enter key in the dialog box to turn the beeper off
temporarily. The beeper will still activate on the next event.
3.7.5.2 Alert Beeper Setting
The Alert Beeper function item is used to Disable or Enable the RAID subsystem
controller alarm tone generator. Using the UP/DOWN to select alert beeper and then
press the ENT to accept the selection. After completing the selection, the
confirmation screen will be displayed and then press ENT to accept the function
Select the Disabled and press Enter key in the dialog box to turn the beeper off
temporarily. The beeper will still activate on the next event.
3.7.5.3 Change Password
To set or change the RAID subsystem password, press the UP/DOWN to select
Change Password and then press the ENT to accept the selection. The New
Password: screen appears and enter new password that user wants to change.
Using the UP/DOWN keys you can set the password value. After completing the
modification, the confirmation screen will be displayed and then press ENT to accept
the function.
To disable the password, press ENT only in the New Password column. The existing
password will be cleared. No password checking will occur when entering the main
menu from the starting screen.
3.7.5.4 JBOD /RAID Mode Configuration
To set or change the RAID Mode of RAID subsystem, press the UP/ DOWN to select
JBOD/RAID Mode Configuration and then press the ENT to accept the selection.
The RAID mode selection screen appears and uses the UP/DOWN to set RAID mode.
After completing the modification, the confirmation screen will be displayed and then
press ENT to accept the function.
3.7.5.5 RAID Rebuild Priority
The “Raid Rebuild Priority’ is a relative indication of how much time the controller
devotes to a rebuild operation. The RAID subsystem allows user to choose the
rebuild priority (low, normal, high) to balance volume set access and rebuild tasks
appropriately.
To set or change the RAID subsystem RAID Rebuild Priority, press the UP/DOWN to
select RAID Rebuild Priority and press the ENT to accept the selection. The rebuild
priority selection screen appears and uses the UP/DOWN to set the rebuild value.
After completing the modification, the confirmation screen will be displayed and then
press ENT to accept the function.
42
Chapter 4. Web Browser-Based Configuration
3.7.5.6 SATA NCQ Support
To set or change the configuration, press the UP/ DOWN to select SATA-Mode and
then press the ENT to accept the selection.
3.7.5.7 HDD Read Ahead Cache
Sans Digital AccuRAID supports HDD Read Ahead Cache, allowing the users to
disable the cache in the HDD. To some HDD models, disabling the cache in the HDD
is necessary to prove the RAID subsystem functions. Press the UP/ DOWN to select
mode and then press the ENT to accept the selection.
3.7.5.8 Shutdown Controller
Shutdown Controller is a new feature mainly designed for users to safely power off
the RAID subsystem. When Shutdown Controller is executed, data staying in cache
will be completely written back to drive disks to ensure no data still staying in cache
memory before system power off.
Press the ENT to accept or ESC to cancel.
3.7.5.9 Disk Write Cache Mode
Disk cache can be turned off to prevent data lost, turned on to increase the
performance of the machine. The following is the reason why a user might want to
turn off the cache. In case of power failure, the data stored in the disk cache waiting
to be process might be lost. The disadvantage to turn off the disk cache is that
performance will decrease dramatically.
Auto: Disk cache's setting will accord the installation of battery backup. When battery
backup is installed, Disk cache is disabled. No battery backup installed, Disk cache is
enabled.
To set or change the configuration, press the UP/ DOWN to select “Disk Write
Cache Mode” and then press the ENT to accept the selection.
3.7.5.10 Disk Capacity Truncation Mode
This function is used for cutting down the reminder or decimal to allow the storage
space to be as a whole number.
For example:
It is rarely that the actual size of the Hard Drive is a whole number. Let’s take a 40GB
HDD for example, the actual size read by the controller maybe 40.55GB. This
function “capacity truncation” can be used to trim down the capacity to 40.00
GB. This function is useful because in the future the 40.55HDD might go bad, and
the user can’t locate another 40GB drive which contains 40.55GB in the actual
capacity, then that particular user will have to buy another drive with bigger capacity
to rebuild the raid volume.
To set or change the configuration, press the UP/ DOWN to select “Disk Capacity
43
Software Operation Manual
Truncation Mode” and then press the ENT
3.7.5.11HDD SMART Status Polling
This function is used for disabling / enabling HDD SMART. On Hardware Monitor the
temperature of each HDD can be monitored over there if the HDD SMART Status
Polling is enabled.
To set or change the configuration, press the UP/ DOWN to select “Disk Capacity
Truncation Mode” and then press the ENT
3.7.512 Terminal Port Configuration
Parity value is fixed at none.
Handshaking value is fixed at none.
Speed setting values are 1200, 2400, 4800, 9600, 19200, 38400, 57600, and 115200.
Stop Bits values are 1 bit and 2 bits.
To set or change the RAID subsystem Terminal Port configuration, press the UP/
DOWN to select Terminal Port Configuration and then press the ENT to accept the
selection. The baud rate setting or number of stop bit screen appears and uses the
UP/DOWN select the setting function. The respect selection screen appears and
uses the UP/DOWN arrow to set the value. After completing the modification, the
confirmation screen will be displayed and then press ENT to accept the function.
3.7.5.13 Restart Controller
Use the Restart Controller to reset the entire configuration from the RAID subsystem
controller non-volatile memory. To reset the RAID subsystem, press the UP/ DOWN
to select Restart Controller and then press the ENT to accept the selection. The
confirmation screen will be displayed and then press ENT to accept the function.
It can only work properly at Host and Drive without any
activity.
3.7.5.14 Volume Data Read Ahead
The uses are allowed to set volume data read ahead policies in order to get improved
performance. Depending on the different policies chosen, the amount of the
pre-fetched volume data to the hard drive’s cache memory will be different, too.
44
Chapter 4. Web Browser-Based Configuration
3.7.5.15 HDD Queue Depth
The users are allowed to increase the hard drive queue depth in order to allow more
commands being handled at a time. If the RAID subsystem reports hard drive failure
or hard drive timeout, please decrease the hard drive queue depth to 1.
3.7.6 Fibre Channel Configuration
3.7.6.1 Fibre Speed
Press the UP/ DOWN to select Ch0 Speed and then press the ENT to accept the
selection. Press UP/ DOWN to select speed (Auto, 2Gbps, 4Gbps, and 8Gbps)
then press ENT to accept the selection. The confirmation screen will be displayed and
then press ENT to accept the change.
3.7.6.2 Fibre topology
Press the UP/ DOWN to select Chg Ch0 Topology and then press the ENT to accept
the selection. Press UP/ DOWN to select speed (Auto, Loop, Point-Point, and
Fabric) then press ENT to accept the selection. The confirmation screen will be
displayed and then press ENT to accept the change.
3.7.6.3 Hard Loop
This setting is effective only under the setting is “Loop topology”. When enabled, you
can manually set the Loop ID in the range from 0 to 125. Press the UP/ DOWN to
select Hard Loop and then press the ENT to accept the selection. Then press UP/
DOWN to select Loop ID and then press the ENT to accept the selection.
45
Software Operation Manual
3.7.7 Ethernet Configuration
Use to configure the Ethernet port of RAID subsystem.
E
DHCP Function
DHCP Dis. /Enable
* Enabled
Confirm Change ?
ENT:Yes, ESC:No
Local IP Addr.
Modify Local IP
*xxx.xxx.xxx.xxx
Confirm Change ?
ENT:Yes, ESC:No
<Disabled, Enabled>
Wraps Around
HTTP Port Number
* 80
Ethernet
Configuration
Telnet Port Number
* 23
SMTP Port Number
* 25
Ethernet Addr.
* xx.xx.xx.xx.xx.xx
END
3.7.7.1 DHCP Function
Use to Enable or Disable the DHCP function.
Press the UP/ DOWN to select DHCP Function and then press the ENT to accept
the selection. The confirmation screen will be displayed and then press ENT to
accept the change.
3.7.7.2 Local IP Address
Use to Modify the Local IP Address.
Press the UP/ DOWN to select Local IP Address and then press the ENT to accept
the selection. Then enter the number of Local IP Address. The confirmation screen
will be displayed and then press ENT to accept the change.
3.7.8 Show System Events
To view the RAID subsystem events, press ENT to enter the Main menu. Press
UP/DOWN key to select the Show System Events option, and then press ENT. The
system events will be displayed. Press UP/DOWN to browse all the system events.
3.7.9 Clear all Event Buffers
Use this feature to clear the entire events buffer information.To clear all event buffers,
press ENT to enter the main menu. Press UP/DOWN to select the Clear all Event
Buffers option, and then press ENT. The confirmation message will be displayed
and press the ENT to clear all event buffers or ESC to abort the action.
46
Chapter 4. Web Browser-Based Configuration
3.7.10 Hardware Monitoring Information
To view the RAID subsystem controller’s hardware monitor information, press ENT to
enter the main menu. Press UP/DOWN to select the Hardware Information option,
and then press ENT. All hardware information will be displayed. Press UP/DOWN to
browse all the hardware information.
The Hardware Monitor Information provides the temperature, fan speed (chassis fan)
and voltage of the internal RAID subsystem. The temperature items list the current
states of the controller board and backplane. All items are also unchangeable. The
warning messages will indicate through the LCM, LED and alarm buzzer.
Item
Warning Condition
Controller Board Temperature > 85 Celsius
Backplane Temperature
> 55 Celsius
Controller Fan Speed
< 1700 RPM
Power Supply +12V
< 10.5V or > 13.5V
Power Supply +5V
< 4.7V or > 5.3V
Power Supply +3.3V
< 3.0V or > 3.6V
CPU Core Voltage +1.5V
< 1.35V or > 1.65V
3.7.11 Show System Information
Choose this option to display Main processor, CPU Instruction cache/ and data cache
size, firmware version, serial number, controller model name, and the cache memory
size. To check the system information, press ENT to enter the main menu. Press
UP/DOWN to select the Show System Information option, and then press ENT. All
major controller system information will be displayed. Press UP/DOWN to browse all
the system information.
3.7.12 HDD Power Management
Use this feature to configure drive disk power saving Press ENT to enter the main
menu. Then press UP/DOWN to select power saving options, and press ENT to enter
the selected option. Once into the selected option, press UP/DOWN to select the
wanted value. Finally press ENT to accept or ESC to abort the action.
3.7.12.1 Stagger Power On Control
To allow the power module to power up every hard disk one by one orderly in order to
ensure every hard disk in the system can be powered up with enough power. The lag
time range from the last hard drive power up to the next one power on can be
configured from 0.4 to 6.0.
To set or change the configuration, press the UP/ DOWN to select value and then
47
Software Operation Manual
press the ENT to accept the selection.
3.7.12.2 Time To Hdd Low Power Idle
Configure the time to launch HDD Low Power Idle (Send the heads to the ramp). For
more details, please visit at http://www.freepatentsonline.com/6819513.html. Be
noted this feature must couple with the hard disks supporting advanced power
management.
To set or change the configuration, press the UP/ DOWN to select value and then
press the ENT to accept the selection.
3.7.12.3 Time To Hdd Low RPM Mode
Configure the time to launch HDD Low RPM Mode. When longer periods of non-use
occur, additional power savings are possible. In this mode, the spindle motor can be
slowed to a lower spin rate. This action further reduces the power needed for the
drives. Be noted this feature must couple with the hard drives supporting advanced
power management.
To set or change the configuration, press the UP/ DOWN to select value and then
press the ENT to accept the selection.
3.7.12.4 Time To Spin Down Idle Hdd
Configure the time to launch Spin Down Idle HDD, mainly designed for saving the
power consumption consumed by the idle hard drives. When Spin Down is
invoked, the SMART status of each hard drive will be marked as "N/A” to signify the
hard drive has been into non-spin mode. As soon as data access is requested again,
all the idle hard drives will be automatically waken up by the RAID controller.
To set or change the configuration, press the UP/ DOWN to select value and then
press the ENT to accept the selection.
48
Chapter 4. Web Browser-Based Configuration
Chapter 4. Web Browser- Based
Configuration
The RAID subsystem web browser-based configuration utility is firmware-based and
uses to configure raid sets and volume sets. Use this utility to:
Create raid set,
Expand raid set,
Define volume set,
Add physical drive,
Modify volume set,
Modify RAID level/stripe size,
Define pass-through disk drives,
Update firmware,
Modify system function, and
Designate drives as hot spares.
If you need to boot the operating system from a RAID system, you must first create a
RAID volume by using front panel touch-control keypad, Web Browser through
Ethernet LAN, or VT-100 terminal.
4.1 Firmware-embedded TCP/IP & web
browser-based RAID manager (using the
controller’s 10/100 Ethernet LAN port)
To ensure proper communications between the RAID subsystem and Web
browser-based RAID management, Please connect the RAID system Ethernet LAN
port to any LAN switch port.
The controller has embedded the TCP/IP & Web Browser-based RAID manager in
the firmware. User can remote manage the RAID system without adding any user
specific software (platform independent) via standard web browsers directly
connected to the 10/100 Ethernet RJ45 LAN port.
To configure External RAID subsystem on a local or remote machine, you need to
know its IP Address. The IP address will default show in the LCD screen. Launch your
firmware-embedded TCP/IP & Web Browser-based RAID manager by entering
http://[IP Address] in the web browser.
Note that you must be logged in as administrator with local admin rights on the remote
machine to remotely configure it. The RAID subsystem controller default User Name
49
Software Operation Manual
is “admin” and the Password is “0000”.
The RAID subsystem controller default User Name is
“admin” and the Password is “0000”. Please change the
Password when you first log-in.
4.2 Configuring Raid Sets and Volume Sets
You can configure raid sets and volume sets with VT-100 terminal function using
Quick Volume/Raid Setup automatically, or Raid Set/Volume Set Function manually
configuration method. Each configuration method requires a different level of user
input. The general flow of operations for raid set and volume set configuration is:
Step 1
Step 2
Step 3
Step 4
Designate hot
spares/pass-throu
gh (optional).
Choose a
configuration
method.
Create raid set
using the
available
physical drives.
Define volume
set using the
space in the raid
set.
Step 5
Initialize the
volume set and
use volume set
in the HOST
OS.
4.3 Designating Drives as Hot Spares
All unused disk drive that is not part of a raid set can be created as a Hot Spare. The
Quick Volume/Raid Setup configuration will automatically add the spare disk drive
with the raid level for user to select. For the Raid Set Function configuration, user can
use the Create Hot Spare option to define the hot spare disk drive.
A Hot Spare disk drive can be created when you choose the Create Hot Spare option
in the Raid Set Function, all unused physical devices connected to the current
controller appears: Select the target disk by clicking on the appropriate check box.
50
Chapter 4. Web Browser-Based Configuration
Select the Hot Spare Type as Global, Dedicated Raid or Dedicated Enclosure. Tick on
the Confirm The Operation and click on the Submit button in the Create Hot Spare
to designate it as a Global, Dedicated Raid or Dedicated Enclosure hot spare.
4.4 Using Quick Volume /Raid Setup
Configuration
In Quick Volume /Raid Setup Configuration, it collects all drives in the tray and
includes them in a raid set. The raid set you create is associated with exactly one
volume set, and you can modify the default RAID level, stripe size, and capacity of the
volume set. Designating Drives as Hot Spares will also show in the raid level selection
option. The volume set default settings will be:
Parameter
Setting
Volume Name
Volume Set # 00
SAS Port# (Fibre Channel#)/LUN
0/0
Cache Mode
Write Back
Tag Queuing
Yes
The default setting values can be changed after configuration is complete.
Follow the steps below to create arrays using Quick Volume /Raid Setup
Configuration:
Step1
Choose Quick Volume And Raid Setup from the main menu. The available RAID
levels and associated Hot Spare for the current volume set drive are displayed.
RAID Level Try to use drives of the same capacity in a specific array. If you use
Step2
drives with different capacities in an array, all the drives in the array is treated as
though they have the capacity of the smallest drive in the array.
The number of physical drives in a specific array determines the RAID levels that
can be implemented with the array.
RAID 0 requires one or more physical drives,
RAID 1 requires at least 2 physical drives,
RAID 1+ Spare requires more than 2 physical drives,
RAID 3 requires at least 3 physical drives,
RAID 5 requires at least 3 physical drives,
RAID 6 requires at least 4 physical drives,
RAID 3+ Spare require at least 4 physical drives, and
51
Software Operation Manual
RAID 5 + Spare require at least 4 physical drives.
RAID 6 + Spare require at least 5 physical drives.
RAID 30 requires at least 6 physical drives,
RAID 50 requires at least 6 physical drives,
RAID 60 requires at least 8 physical drives,
RAID 30+ Spare require at least 7 physical drives, and
RAID 50 + Spare require at least 7 physical drives.
RAID 60 + Spare require at least 9 physical drives.
Using the UP/DOWN key to select the RAID for the volume set and presses ENT
to confirm it.
Step3
Available Capacity Set the capacity size for the volume set. After select RAID
level and press ENT.
The selected capacity for the current volume set is displayed. Using the
UP/DOWN to create the current volume set capacity size and press ENT to
confirm it. The available stripe sizes for the current volume set are displayed.
Select Stripe size This parameter specifies the size of the stripes written to each
Step4
disk in a RAID 0, 1, 1E(0+1), 5, 6, 50 or 60 Volume Set. You can set the stripe size
to 4 KB, 8 KB, 16 KB, 32 KB, 64 KB, or 128 KB. A larger stripe size provides
better-read performance, especially if your computer does mostly sequential
reads. However, if you are sure that your computer does random read requests
more often, choose a small stripe size. Using the UP/DOWN to select stripe size
and press ENT to confirm it.
Step5
When you are finished defining the volume set, press ENT to confirm the Quick
Volume And Raid Set Setup function.
Fast Initialization Press ENT to define fast initialization and ESC to normal
Step6
initialization. In the Normal Initialization, the initialization proceeds as a
background task, the volume set is fully accessible for system reads and writes.
The operating system can instantly access to the newly created arrays without
requiring a reboot and waiting the initialization complete. In Fast Initialization, the
initialization proceeds must be completed before the volume set ready for system
accesses.
The controller will begin to Initialize the volume set you have just configured.
Step7
Step8
52
If you need to add additional volume set using main menu Create Raid Volume
Set function.
Chapter 4. Web Browser-Based Configuration
4.5 Using Raid Set/Volume Set Function Method
In Raid Set Function, you can use the Create Raid Set function to generate the new
raid set. In Volume Set Function, you can use the Create Volume Set function to
generate its associated volume set and parameters.
If the current controller has unused physical devices connected, you can choose the
Create Hot Spare option in the Raid Set Function to define a global or dedicated hot
spare. Select this method to configure new raid sets and volume sets. The Raid
Set/Volume Set Function configuration option allows you to associate volume set
with partial and full raid set.
Step1
To setup the Hot Spare (option), choose Raid Set Functions from the main menu.
Select the Create Hot Spare Disk to set the Hot Spare.
Step2
Choose Raid Set Function from the main menu. Select the Create A New Raid
Set.
Step3
A Select Drive Channel in the next displayed showing the drive connected to the
current controller.
Step4
Press the UP/ DOWN to select specific physical drives. Press the ENT to
associate the selected physical drive with the current raid set.
Try to use drives of the same capacity in a specific raid set. If you use drives with
different capacities in an array, all the drives in the array is treated as though they
have the capacity of the smallest drive in the array.
The number of physical drives in a specific raid set determines the RAID levels
that can be implemented with the raid set.
RAID 0 requires one or more physical drives per raid set.
RAID 1 requires at least 2 physical drives per raid set.
RAID 1 + Spare requires at least 3 physical drives per raid set.
RAID 3 requires at least 3 physical drives per raid set.
RAID 5 requires at least 3 physical drives per raid set.
RAID 6 requires at least 4 physical drives per raid set.
RAID 3 + Spare requires at least 4 physical drives per raid set.
RAID 5 + Spare requires at least 4 physical drives per raid set.
RAID 6 + Spare requires at least 5 physical drives per raid set.
RAID 30 requires at least 6 physical drives per raid set.
RAID 50 requires at least 6 physical drives per raid set.
53
Software Operation Manual
RAID 60 requires at least 8 physical drives per raid set.
RAID 30 + Spare requires at least 7 physical drives per raid set.
RAID 50 + Spare requires at least 7 physical drives per raid set.
RAID 60 + Spare requires at least 9 physical drives per raid set
Step5
After adding physical drives to the current raid set as desired, press ESC to
confirm the Select Drive Channel function.
Press ENT when you are finished creating the current raid set. To continue
Step6
Step7
defining another raid set, repeat step 3. To begin volume set configuration, go to
step 7.
Choose Volume Set Functions from the main menu. Select the Create Raid
Volume Set and press ENT.
Choose one raid set from the Select Raid Set screen. Press ENT to confirm it.
Step8
The volume set attributes screen appears:
Step9
The volume set attributes screen shows the volume set default configuration
value that is currently being configured. The volume set attributes are:
The Raid Level,
The Capacity (Not supported via LCD Panel.)
The Stripe Size,
The SAS Port# (Fibre Channel#)/LUN,
The Cache Mode,
The Tagged Queuing,
The Volume Name (number).
All value can be changing by the user. Press the UP/ DOWN to select the
attributes. Press the ENT to modify each attribute of the default value. Using the
UP/DOWN to select attribute value and press the ENT to accept the default value
Step10
54
After user completes modifying the attribute, press the ESC to enter the Select
Capacity for the volume set. Using the UP/DOWN to set the volume set capacity
and press ENT to confirm it.
Chapter 4. Web Browser-Based Configuration
Step11
Step12
When you are finished defining the volume set, press ENT to confirm the Create
function.
Press ENT to define fast initialization and ESC to normal initialization. The
controller will begin to Initialize the volume set you have just configured. If space
remains in the raid set, the next volume set can be configured. Repeat steps 7 to
12 to configure another volume set.
User can use this method to examine the existing
configuration. Modify volume set configuration method
provides the same functions as create volume set
configuration method. In volume set function, you can use the
modify volume set function to modify the volume set
parameters except the capacity size.
4.6 Configuring Raid Sets and Volume Sets
The web browser start-up screen will display the current configuration of your RAID
subsystem. It displays the Raid Set List, Volume Set List and Physical Disk List. The
raid set information, volume set information and drive information can also be viewed
by clicking on the Raid Set Hierarchy screen. The current configuration can also be
viewed by clicking on Raid Set Hierarchy in the menu.
To display raid set information, move the mouse cursor to the desired raid set number,
then click it. The raid set Information will be shown in the screen.
To display volume set information, move the mouse cursor to the desired Volume Set
number, then click it. The volume set Information will be shown in the screen.
To display drive information, move the mouse cursor to the desired physical drive
number, then click it. The drive Information will be shown in the screen.
55
Software Operation Manual
4.6.1 Main Menu
The main menu shows all function that enables the customer to execute actions by
clicking on the appropriate link.
Individual Category
Description
Quick Function
Create a default configuration, which is based on the
number of physical disk installed; it can modify the
volume set Capacity, Raid Level, and Stripe Size.
Raid Set Functions
Create a customized raid set
Volume Set Functions
Create customized volume sets and modify the existed
volume sets parameter.
Physical Drives
Create pass through disks and modify the existed pass
through drives parameter. It also provides the function
to identify the respect disk drive.
System Controls
Setting the raid system configurations
Information
View the controller and hardware monitor information.
The Raid Set Hierarchy can also view through the
RaidSet Hierarchy item.
4.7 Quick Create
56
Chapter 4. Web Browser-Based Configuration
The number of physical drives in the raid subsystem determines the RAID levels that
can be implemented with the raid set. You can create a raid set associated with
exactly one volume set. The user can change the raid level, stripe size, and capacity.
A hot spare option is also created depending upon the existing configuration.
Tick on the Confirm The Operation and click on the Submit button in the Quick
Create screen, the raid set and volume set will start to initialize.
In Quick Create your volume set is automatically configured
based on the number of disks in your system. Use the Raid
Set Function and Volume Set Function if you prefer to
customize your system.
4.8 Raid Set Functions
Use the Raid Set Function and Volume Set Function if you prefer to customize your
system. User manual configuration can fully control the raid set setting, but it will take
longer to complete than the Quick Volume/Raid Setup configuration. Select the Raid
Set Function to manually configure the raid set for the first time or delete existing raid
set and reconfigure the raid set. A raid set is a group of disks containing one or more
volume sets.
4.8.1 Create Raid Set
57
Software Operation Manual
To create a raid set, click on the Create Raid Set link. A Select The SAS (SATA)
Drive For RAID Set screen will display showing the drives connected to the current
controller. Click on the selected physical drives with the current raid set. Enter 1 to 15
alphanumeric characters to define a unique identifier for a raid set. The default raid
set name will always appear as Raid Set. #.
Tick on the Confirm The Operation and click on the Submit button in the screen, the
raid set will start to initialize.
4.8.2 Delete Raid Set
To delete a raid set, click on the Delete Raid Set link. A Select The RAID SET To
Delete screen will display showing all raid set existing in the current controller. Click
the raid set number you wish to delete in the select column to delete screen.
Tick on the Confirm The Operation and click on the Submit button in the screen to
delete it.
4.8.3 Expand Raid Set
Use this option to expand a raid set, when a disk is added to your system. This
function is active when at least one drive is available.
58
Chapter 4. Web Browser-Based Configuration
To expand a raid set, click on the Expand Raid Set link. Select the target raid set,
which you want to expand it.
Tick on the available disk and Confirm The Operation, and then click on the Submit
button in the screen to add disks to the raid set.
4.8.4 Activate Incomplete Raid Set
When one of the disk drive is removed in power off state, the raid set state will change
to Incomplete State. If user wants to continue to work, when the RAID subsystem is
power on, the Activate Raid Set option to active the raid set can be used. After user
completes the function, the Raid State will change to Degraded Mode.
To activate the incomplete raid set, click on the Activate Raid Set link. A “Select The
RAID SET To Activate” screen will display showing all existing raid set in the current
controller. Click the raid set number you wish to activate in the select column.
Click on the Submit button in the screen to activate the raid set that has removed one
of the disk drives in the power off state. The RAID subsystem will continue to work in
degraded mode.
59
Software Operation Manual
4.8.5 Create Hot Spare
When you choose the Create Hot Spare option in the Raid Set Function, all unused
physical devices connected to the current controller appear: Select the target disk by
clicking on the appropriate check box. And Select the Hot Spare type as Global,
Dedicated Raid or Dedicated Enclosure. Tick on the Confirm The Operation, and
click on the Submit button in the screen to create the hot spares.
4.8.6 Delete Hot Spare
Select the target Hot Spare disk to delete by clicking on the appropriate check box.
Tick on the Confirm The Operation, and click on the Submit button in the screen to
delete the hot spares.
4.8.7 Rescue Raid Set
When the system is power off in the Raid set update period, it may disappear in this
abnormal condition. The “RESCUE” function can recover the missing Raid Set
information. The RAID controller uses the time as the Raid Set signature. The Raid
Set may have different time after the Raid Set is recovered.
The “SIGANT" function can regenerate the signature for the Raid Set.
60
Chapter 4. Web Browser-Based Configuration
4.8.8 Offline Raid Set
This function allows the user to move the whole created Raid Set to another Sans
Digital AccuRAID RAID subsystem without turning off power. “Active Raid Set” can
resume the offline-Raid Set to online status.
4.9 Volume Set Function
A volume set is seen by the host system as a single logical device. It is organized in a
RAID level with one or more physical disks. RAID level refers to the level of data
performance and protection of a volume set. A volume set capacity can consume all
or a portion of the disk capacity available in a raid set. Multiple volume sets can exist
on a group of disks in a raid set. Additional volume sets created in a specified raid set
will reside on all the physical disks in the raid set. Thus each volume set on the raid
set will have its data spread evenly across all the disks in the raid set.
4.9.1 Create Volume Set
The following is the volume set features for the Sans Digital AccuRAID SAS/SATA
RAID
1. Volume sets of different RAID levels may coexist on the same raid set.
2. Up to 16 volume sets can be created in a raid set.
3. The maximum addressable size of a single volume set can be exceeded than 2 TB
(64-bit LBA, firmware define support up to 512TB, for Windows block size set to
4KB can support up to 16TB).
To create volume set from raid set system, move the cursor bar to the main menu and
click on the Create Volume Set link. The Select the Raid Set to Create on It screen
will show all raid set number. Tick on a raid set number that you want to create and
then click on the Submit button.
The new create volume set allows user to select the Volume name, capacity, RAID
61
Software Operation Manual
level, strip size, SAS Port# (Fibre Channel#)/LUN, Cache mode, tag queuing.
4.9.1.1 Volume Name:
The default volume name will always appear as Volume Set. #. You can rename the
volume set name as long as it does not exceed the 15 characters limit.
4.9.1.2 Capacity:
The maximum volume size is default in the first setting. Enter the appropriate volume
size to fit your application.
4.9.1.3 Raid Level:
Set the RAID level for the Volume Set. Highlight Raid Level and press Enter.
The available RAID levels for the current Volume Set are displayed. Select a RAID
level and press Enter to confirm.
4.9.1.4 Strip Size:
This parameter sets the size of the stripe written to each disk in a RAID 0, 1, 1E (0+1),
5, 6, 50 or 60 logical drives. You can set the stripe size to 4 KB, 8 KB, 16 KB, 32 KB,
64 KB, or 128 KB.
A larger stripe size produces better-read performance, especially if your computer
does mostly sequential reads. However, if you are sure that your computer does
random reads more often, select a small stripe size.
62
Chapter 4. Web Browser-Based Configuration
RAID level 3 can’t modify strip size.
4.9.1.5 Greater Than Two TB Volume Support:
When the RAID set capacity of per volume is over 2TB, a special selection will appear
on the GUI, please make a choice according to your O.S.:
64bit LBA: for Linux, Unix Windows 2003 SP1 ( or later) and etc...
4K Block: Windows 2000, XP, enlarge block size from 512Byte to 4K.No. : Disable
greater than 2TB feature.
4.9.1.6 Volume initiation Mode
This parameter sets the initiation mode of selected volume set,
Foreground Initialization is the fast way to initial of the selected volume
set.
Background Initialization is the normal way to initial of the selected volume set.
No Init is special selection to rescue the volume. RAID system initiate the selected
volume set without writing any data and parity bit into the HDDs.
4.9.1.7 Cache Mode:
The RAID subsystem supports Write-Through Cache and Write-Back Cache.
4.9.1.8 Tag Queuing:
The Enabled option is useful for enhancing overall system performance under
multi-tasking operating systems. The Command Tag (Drive Channel) function
controls the SCSI command tag queuing support for each drive channel. This
function should normally remain enabled. Disable this function only when using older
drives that do not support command tag queuing
4.9.1.9 SAS Port#/LUN Base/LUN; Fibre Channel#/LUN
Base/LUN
4.9.1.9.1 SAS Port#/LUN Base/LUN
SAS Port#: The RAID subsystem supports Port 0, 1 and 0&1 cluster option.
63
Software Operation Manual
SAS LUN base: Each SAS wide port device is attached to the SAS card. A SAS wide
Port can connect up to 128(0 to 127) devices. The RAID subsystem is as a large SAS
device. We should assign a LUN base from a list of SAS LUNs.
Note : Sans Digital AccuRAID SAS RAID supports up to 122 devices down through
one channel (including the master system).
SAS LUN: Each SAS LUN base can support up to 8 LUNs. Most Fibre Channel host
adapter treats each LUN like a SAS disk.
4.9.1.9.2 SAS Port Mapping(Fibre Channel#)/LUN Base/LUN
SAS Port Mapping: The RAID subsystem supports port 0, 1, 2, 3.
64
Chapter 4. Web Browser-Based Configuration
Fibre LUN base: Each Fibre device attached to the Fibre card, as well as the card
itself, must be assigned a unique Fibre ID number. A Fibre channel can connect up to
128(0 to 127) devices. The RAID subsystem is as a large Fibre device. We should
assign a LUN base from a list of Fibre LUNs.
Fibre LUN: Each Fibre LUN base can support up to 8 LUNs. Most Fibre Channel
host adapter treats each LUN like a Fibre disk.
4.9.2 Create Raid30/50/60
Create Raid30, Raid50 or Raid60, procedure almost same as “4.9.1 create volume
set”, you need create two or more raid set first and follow create volume set
procedure to finish create Raidx0.
65
Software Operation Manual
The create Raid30/50/60 function allows user to select the RAID Set group, Volume
name, RAID level (R30/R50/R60), Volume capacity, Volume Initialization mode, strip
size, SAS Port# (Fibre Channel#)/LUN, Cache mode, tag queuing.
66
Chapter 4. Web Browser-Based Configuration
67
Software Operation Manual
4.9.3 Delete Volume Set
To delete Volume from raid set system function, move the cursor bar to the main
menu and click on the Delete Volume Set link. The Select The Raid Set To Delete
68
Chapter 4. Web Browser-Based Configuration
screen will show all raid set number. Tick on a raid set number and the Confirm the
Operation and then click on the Submit button to show all volume set item in the
selected raid set. Tick on a volume set number and the Confirm the Operation and
then click on the Submit button to delete the volume set.
4.9.4 Modify Volume Set
To modify a volume set from a raid set:
(1). Click on the Modify Volume Set link.
(2). Tick on the volume set from the list that you wish to modify. Click on the Submit
button.
The following screen appears.
Use this option to modify volume set configuration. To modify volume set attribute
values from raid set system function, move the cursor bar to the volume set attribute
menu and click on it. The modify value screen appears. Move the cursor bar to an
attribute item, and then click on the attribute to modify the value. After you complete
the modification, tick on the Confirm The Operation and click on the Submit button
to complete the action. User can modify all values except the capacity.
4.9.4.1 Volume Set Migration
Migrating occurs when a volume set is migrating from one RAID level to another, a
volume set stripe size changes, or when a disk is added to a raid set. Migration status
is displayed in the volume status area of the Raid Set Hierarchy screen when one
RAID level migrates to another, a Volume set stripe size changes or when a disk is
added to a raid set.
69
Software Operation Manual
4.9.5 Check Volume Set
To check a volume set from a raid set:
(1). Click on the Check Volume Set link.
(2). Tick on the volume set from the list that you wish to check. Tick on Confirm The
Operation and click on the Submit button.
Use this option to verify the correctness of the redundant data in a volume set. For
example, in a system with dedicated parity, volume set check means computing the
parity of the data disk drives and comparing the results to the contents of the
dedicated parity disk drive. The checking percentage can also be viewed by clicking
on Raid Set Hierarchy in the main menu.
Scrub Bad Block If Bad Block Is Found, Assume Parity Data Is Good option: the
check button will be shown when Data disk found bad blocks, and if selected, the
RAID controller will regenerate data from Parity disk to data disk, if check button not
yet selected RAID controller will report error only.
Re-compute Parity If Parity Error Is Found, Assume Data Is Good option: check
button will be shown when Parity Data disk found bad blocks, and if selected, RAID
controller will regenerate data from Data disk to Parity disk, if check button not yet
select RAID controller will report error only.
70
Chapter 4. Web Browser-Based Configuration
4.9.6 Stop Volume Set Check
Use this option to stop the Check Volume Set function.
4.9.7 Scheduled Volume Checking
Use this option to check volume set consistency at 1 ~12 weeks.
Scheduler option: set to 1 week ~ 12 weeks will start volume check after 1 week ~ 12
weeks,
Checking After System Idle option: set to 1 Minute ~ 30 Minutes, when RAID
system idle 1 Minute ~30 Minutes RAID system will start volume check, if host
accesses RAID system that will stop volume check. Next time, when RAID system is
idle for 1 Minute ~ 30 Minutes, RAID system will continue volume check.
Scrub Bad Block If Bad Block Is Found, Assume Parity Data Is Good option:
check button will be shown when Data disk found bad block, and if selected, RAID
controller will regenerate data from Parity disk to data disk, if check button not yet
selected RAID controller will report error only.
Re-compute Parity If Parity Error Is Found, Assume Data Is Good option: check
button will be shown when Parity Data disk found bad block, and if selected, RAID
controller will regenerate data from Data disk to Parity Data disk, if check button not
yet selected RAID controller will report error only.
71
Software Operation Manual
4.10 Physical Drive
Choose this option from the Main Menu to select a physical disk and to perform the
operations listed below.
4.10.1 Create Pass-Through Disk
To create pass-through disk, move the mouse cursor to the main menu and click on
the Create Pass-Through link. The relative setting function screen appears.
Disk is not controlled by the internal RAID subsystem firmware and thus cannot be a
part of a volume set. The disk is available to the operating system as an individual
disk. It is typically used on a system where the operating system is on a disk not
controlled by the RAID firmware. User can also select the cache mode, Tagged
Command Queuing, SAS Port# (Fibre Channel#)/LUN for this volume.
4.10.2 Modify Pass-Through Disk
Use this option to modify the Pass-Through Disk Attribute. User can modify the cache
mode, Tagged Command Queuing, SAS Port# (Fibre Channel#)/LUN on an existed
pass through disk.
To modify the pass-through drive attribute from the pass-through drive pool, move the
mouse cursor bar to click on Modify Pass-Through link. The Select The Pass
Through Disk For Modification screen appears tick on the Pass-Through Disk from
the pass-through drive pool and click on the Submit button to select drive.
The Enter Pass-Through Disk Attribute screen appears; modify the drive attribute
values, as you want.
72
Chapter 4. Web Browser-Based Configuration
After you complete the selection, tick on the Confirm The Operation and click on the
Submit button to complete the selection action.
4.10.3 Delete Pass-Through Disk
To delete pass-through drive from the pass-through drive pool, move the mouse
cursor bar to the main menus and click on Delete Pass Through link. After you
complete the selection, tick on the Confirm The Operation and click on the Submit
button to complete the delete action.
4.10.4 Identify Enclosure
When the Identify Enclose is selected, all HDD’s red LEDs will blink on the enclosure,
select any page will stop blink.
4.10.5 Identify Selected Drive
To prevent removing the wrong drive, the selected disk LED will light to physically
locate the selected disk when the Identify Selected Drive is selected.
To identify the selected drive from the drives pool, move the mouse cursor bar to click
on Identify Selected Drive link. When The Select the SATA Device For identification
screen appears, tick on the SATA device from the drives pool and Flash method. After
73
Software Operation Manual
completing the selection, click on the Submit button to identify selected drive.
4.11 System Controls
4.11.1 System Configuration
To set the raid system function, move the cursor bar to the main menu and click on
the System Configuration link. The System Configuration menu will show all items.
Move the cursor bar to an item, then press Enter key to select the desired function.
4.11.1.1 System Beeper Setting:
The Alert Beeper function item is used to Disable or Enable the RAID subsystem
controller alarm tone generator.
4.11.1.2 Back Ground Task priority:
The Back Ground Task priority is a relative indication of how much time the controller
devotes to a rebuild operation. The RAID subsystem allows user to choose the
rebuild priority (Low, Normal, High) to balance volume set access and rebuild tasks
appropriately. For high array performance, specify a Low value.
4.11.1.3 Terminal Port Configuration:
Speed setting values are 1200, 2400, 4800, 9600, 19200, 38400, 57600, and 115200.
Stop Bits values are 1 bit and 2 bits.
Parity value is fixed at None. Data Bits value is fixed at 8 bits.
74
Chapter 4. Web Browser-Based Configuration
4.11.1.4 JBOD /RAID Mode Configuration
To set or change the RAID Mode of RAID subsystem, press the UP/ DOWN to select
JBOD/RAID Mode Configuration and then press the ENT to accept the selection.
The RAID mode selection screen appears and uses the UP/DOWN to set RAID mode.
After completing the modification, the confirmation screen will be displayed and then
press ENT to accept the function.
4.11.1.5 SATA NCQ Support
To set or change the configuration, press the UP/ DOWN to select Enable / Disable
and then press the ENT to accept the selection.
4.11.1.6 Disk Write Cache Mode
Disk cache can be turned off to prevent data lost, turned on to increase the
performance of the machine. The following is the reason why a user might want to
turn off the cache. In case of power failure, the data stored in the disk cache waiting
to be process might be lost. The disadvantage to turn off the disk cache is that
performance will decrease dramatically.
Auto: Disk cache's setting will accord the installation of battery backup. When battery
backup is installed, Disk cache is disabled. No battery backup installed, Disk cache is
enabled.
To set or change the configuration, press the UP/ DOWN to select “Disk Write
Cache Mode” and then press the ENT to accept the selection.
4.11.1.7 HDD Read Ahead Cache
Sans Digital AccuRAID supports HDD Read Ahead Cache, allowing the users to
disable the cache in the HDD. To some HDD models, disabling the cache in the HDD
is necessary to prove the RAID subsystem functions. Press the UP/ DOWN to select
mode and then press the ENT to accept the selection.
4.11.1.8 HDD SMART Status Polling
This function is used for disabling / enabling HDD SMART. On Hardware Monitor the
temperature of each HDD can be monitored over there if the HDD SMART Status
Polling is enabled.
To set or change the configuration, press the UP/ DOWN to select “Disk Capacity
Truncation Mode” and then press the ENT
4.11.1.9 Disk Capacity Truncation Mode
This function is used for cutting down the reminder or decimal to allow the storage
space to be as a whole number.
For example:
It is rare that the actual size of the Hard Drive is a whole number. Let’s take a 40GB
75
Software Operation Manual
HDD for example, the actual size read by the controller maybe 40.55GB. This
function “capacity truncation” can be used to trim down the capacity to 40.00
GB. This function is useful because in the future the 40.55HDD might go bad, and
the user can’t locate another 40GB drive which contains 40.55GB in the actual
capacity, then that particular user will have to buy another drive with bigger capacity
to rebuild the raid volume.
To set or change the configuration, press the UP/ DOWN to select “Disk Capacity
Truncation Mode” and then press the ENT to accept the selection.
4.11.1.10 Volume Data Read Ahead
The uses are allowed to set volume data read ahead policies in order to get improved
performance. Depending on the different policies chosen, the amount of the
pre-fetched volume data to the hard drive’s cache memory will be different, too.
4.11.1.11 HDD Queue Depth
The users are allowed to increase the hard drive queue depth in order to allow more
commands being handled at a time. If the RAID subsystem reports hard drive failure
or hard drive timeout, please decrease the hard drive queue depth to 1.
76
Chapter 4. Web Browser-Based Configuration
4.11.2 Fibre Channel Config
4.11.2.1 Volume Set Selection
To configure Fibre Channel parameters, click "System Controls" -> "Fibre Channel
Config" from the Menu Frame of the RAID manager. Select the volume set number
that you want to configure the Fibre Channel parameter.
Make sure to check "Confirm The Operation" then click "Submit" button for change to
come into effect.
4.11.2.2 Channel Speed
Each FC Channel can be configured as 2Gbps, 4Gbps, 8Gbps or use "Auto" option
for auto speed negotiation between 2Gb / 4Gb / 8Gb. The controller default is "Auto",
which should be adequate under most conditions. The Channel Speed setting takes
effect for the next connection. That means a link down or bus reset should be applied
for the change to take effect. The current connection speed is shown at the end of the
row. You have to click the "Fibre Channel Config" link again from the Menu Frame to
refresh display of current speed.
4.11.2.3 Channel Topology
Each FC Channel can be configured as Auto, Loop, Point-to-Point, or Fabric
Topology. The controller default is "Auto" topology, which takes precedence of Loop
topology. Firmware restart is needed for any topology change to take effect. The
77
Software Operation Manual
current connection topology is shown at the end of the row. You have to click the
"Fibre Channel Config" link again from the Menu Frame to refresh display of current
topology. Note that current topology is shown as "None" when no successful
connection is made for the channel.
4.11.2.4 Hard Loop ID
This setting is effective only under Loop topology. When enabled, you can manually
set the Loop ID in the range from 0 to 125. Make sure this hard assigned ID is not
conflicted with any other devices on the same loop; otherwise the channel will be
disabled. It is good to disable the hard loop ID and let the loop itself auto arrange the
Loop ID.
4.11.3 EtherNet Config
Use this feature to set the controller’s Ethernet port configuration. Customer doesn’t
need to create a reserved space on the arrays before the Ethernet port and HTTP
service are working. The firmware-embedded Web Browser-based RAID manager
can access it from any standard internet browser or from any host computer either
directly connected or via a LAN or WAN with no software or patches required.
DHCP (Dynamic Host Configuration Protocol) is a protocol that lets network
administrators manage centrally and automate the assignment of IP (Internet
Protocol) configurations on a computer network. When using the Internet's set of
protocols (TCP/IP), in order for a computer system to communicate to another
computer system it needs a unique IP address. Without DHCP, the IP address must
be entered manually at each computer system. DHCP lets a network administrator
supervise and distribute IP addresses from a central point. The purpose of DHCP is to
provide the automatic (dynamic) allocation of IP client configurations for a specific
time period (called a lease period) and to eliminate the work necessary to administer
a large IP network.
To configure the raid controller’s Ethernet port, move the cursor bar to the main menu
and click on the System Controls link. The System Controls menu will show all
items. Move the cursor bar to the Ethernet Config item, then press Enter key to
select the desired function.
78
Chapter 4. Web Browser-Based Configuration
4.11.4 Alert By Mail Config
To configure the raid controller email function, move the cursor bar to the main menu
and click on the System Controls link. The System Controls menu will show all
items. Move the cursor bar to the Alert By Mail Config item, then press Enter key to
select the desired function. This function can only be set by the web-based
configuration.
The firmware contains SMTP manager and it monitors all system events and user can
select either single or multiple user notifications to be sent via ‘Plain English’ e-mails
with no software required.
4.11.5 SNMP Configuration
Check Appendix C to get more information about SNMP Configuration.
4.11.6 NTP Configuration
The Network Time Protocol (NTP) is one way to ensure your clock stays accurate.
Find out NTP server near you, set up NTP Server IP and Time Zone. After Confirm,
controller will connect to NTP Time server and get Time from NTP Server.
79
Software Operation Manual
4.11.7 View Events/ Mute Beeper
To view the RAID subsystem controller’s information, move the mouse cursor to the
main menu and click on the View Events/Mute Beeper link. The Raid Subsystem
events Information screen appears.
Choose this option to view the system events information: Timer, Device, Event type,
Elapse Time and Errors. The RAID system does not build the real time clock. The
Time information is the relative time from the RAID subsystem power on.
4.11.8 Generate Test Event
Use this feature to generate a test event to confirm the setting of “Alert By Mail
Config”.
4.11.9 Clear Events Buffer
Use this feature to clear the entire events buffer information.
4.11.10 Modify Password
To set or change the RAID subsystem password, move the mouse cursor to Raid
System Function screen, and click on the Change Password link. The Modify
System Password screen appears.
80
Chapter 4. Web Browser-Based Configuration
The password option allows user to set or clear the raid subsystem’s password
protection feature. Once the password has been set, the user can only monitor and
configure the raid subsystem by providing the correct password.
The password is used to protect the internal RAID subsystem from unauthorized entry.
The controller will check the password only when entering the Main menu from the
initial screen. The RAID subsystem will automatically go back to the initial screen
when it does not receive any command in ten seconds.
To disable the password, press Enter key only in both the Enter New Password and
Re-Enter New Password column. Once the user confirms the operation and clicks
the Submit button. The existing password will be cleared. No password checking will
occur when entering the main menu from the starting screen.
4.11.11 Update Firmware:
Please reference the Appendix A. Upgrading Firmware.
4.11.12 Restart Controller
Please reference the Appendix A. Upgrading Firmware.
4.11.13 Shutdown Controller
Shutdown Controller is a new feature mainly designed for users to safely power off
the RAID subsystem. When Shutdown Controller is executed, data staying in cache
will be completely written back to drive disks to ensure no data still staying in cache
memory before system power off. Ensure there is no loner I/O accessing before
executing Shutdown Controller
81
Software Operation Manual
4.11.14 Hdd Power Management
4.11.14.1 Stagger Power On Control
To allow the power module to power up every hard disk one by one orderly in order to
ensure every hard disk in the system can be powered up with enough power. The lag
time range from the last hard drive power up to the next one power on can be
configured from 0.4 to 6.0.
To set or change the configuration, press the UP/ DOWN to select value and then
press the ENT to accept the selection.
82
Chapter 4. Web Browser-Based Configuration
4.11.14.2 Time To Hdd Low Power Idle
Configure the time to launch HDD Low Power Idle (Send the heads to the ramp). For
more details, please visit at http://www.freepatentsonline.com/6819513.html. Be
noted this feature must couple with the hard disks supporting advanced power
management.
To set or change the configuration, press the UP/ DOWN to select value and then
press the ENT to accept the selection.
4.11.14.3 Time To Hdd Low RPM Mode
Configure the time to launch HDD Low RPM Mode. When longer periods of non-use
occur, additional power savings are possible. In this mode, the spindle motor can be
slowed to a lower spin rate. This action further reduces the power needed for the
drives. Be noted this feature must couple with the hard drives supporting advanced
power management.
To set or change the configuration, press the UP/ DOWN to select value and then
press the ENT to accept the selection.
4.11.14. 4 Time To Spin Down Idle Hdd
Configure the time to launch Spin Down Idle HDD, mainly designed for saving the
power consumption consumed by the idle hard drives. When Spin Down is
invoked, the SMART status of each hard drive will be marked as "N/A” to signify the
hard drive has been into non-spin mode. As soon as data access is requested again,
all the idle hard drives will be automatically waken up by the RAID controller.
To set or change the configuration, press the UP/ DOWN to select value and then
83
Software Operation Manual
press the ENT to accept the selection.
4.12 Information Menu
4.12.1 RaidSet Hierarchy
Use this feature to view the internal raid subsystem current raid set, current volume
set and physical disk configuration. Please reference this chapter “Configuring Raid
Sets and Volume Sets”.
4.12.2 System Information
To view the RAID subsystem controller’s information, move the mouse cursor to the
main menu and click on the System Information link. The Raid Subsystem
Information screen appears.
Use this feature to view the raid subsystem controller’s information. The controller
name, firmware version, serial number, main processor, CPU data/Instruction cache
size and system memory size/speed appear in this screen.
4.12.3 Hardware Monitor
To view the RAID subsystem controller’s hardware monitor information, move the
mouse cursor to the main menu and click the Hardware Monitor link. The Hardware
Information screen appears.
84
Chapter 4. Web Browser-Based Configuration
The Hardware Monitor Information provides the temperature, fan speed (chassis fan)
and voltage of the internal RAID subsystem. All items are also unchangeable. The
warning messages will indicate through the LCM, LED and alarm buzzer.
Item
Warning Condition
Controller Board
Temperature
> 85 Celsius
Backplane Temperature
> 55 Celsius
Controller Fan Speed
< 1700 RPM
Power Supply +12V
< 10.5V or > 13.5V
Power Supply +5V
< 4.7V or > 5.3V
Power Supply +3.3V
< 3.0V or > 3.6V
CPU Core Voltage +1.5V
< 1.35V or > 1.65V
85
Software Operation Manual
Chapter 5.
Serial Port Configuration
The RAID subsystem configuration utility is firmware-based and uses to
configure raid sets and volume sets. Because the utility resides in the RAID
controller firmware, its operation is independent of the operating systems on
your computer. Use this utility to:
· Create raid set
. Expand raid set
· Define volume set
· Add physical drive
· Modify volume set
· Modify RAID level/stripe size
. Define pass-through disk, drives
. Update firmware
. Hdd power management
. Modify system function
· Designate drives as hot spares.
5.1 Configuring Raid Sets and Volume Sets
You can configure raid sets and volume sets with VT-100 terminal function
using Quick Volume/Raid Setup automatically, or Raid Set/Volume Set Function
manually configuration method. Each configuration method requires a different
level of user input. The general flow of operations for raid set and volume set
configuration is:
Step 1
Step 2
Step 3
Step 4
Designate hot
spares/pass-throu
gh (optional).
Choose a
configuration
method.
Create raid set
using the
available
physical drives.
Define volume
set using the
space in the raid
set.
86
Chapter 5. Serial Port Configuration
Step 5
Initialize the
volume set and
use volume set
in the HOST
OS.
5.2 Designating Drives as Hot Spares
All unused disk drive that is not part of a raid set can be created as a Hot Spare.
The Quick Volume/Raid Setup configuration will automatically add the spare
disk drive with the raid level for user to select. For the Raid Set Function
configuration, user can use the Create Hot Spare option to define the hot spare
disk drive.
A Hot Spare disk drive can be created when you choose the Create Hot Spare
options in the Raid Set Function, all unused physical devices connected to the
current controller will appear: Select the target disk by clicking on the
appropriate check box.
Press the Enter key to select a disk drive, then select Hot Spare Type as a
Global, Dedicated To RaidSet or Dedicated To Enclosure and press Yes in the
Create Hot Spare to designate it as a Global, Dedicated To RaidSet or
Dedicated To Enclosure hot spare.
5.3 Using Quick Volume /Raid Setup
Configuration
In Quick Volume /Raid Setup Configuration, it collects all drives in the tray and
includes them in a raid set. The raid set you create is associated with exactly
one volume set, and you can modify the default RAID level, stripe size, and
capacity of the volume set. Designating Drives as Hot Spares will also show in
the raid level selection option. The volume set default settings will be:
Parameter
Setting
Volume Name
Volume Set # 00
SAS Port# (Fibre Channel#)/LUN
0/0
Cache Mode
Write Back
Tag Queuing
Yes
87
Software Operation Manual
The default setting values can be changed after configuration is complete.
Follow the steps below to create arrays using Quick Volume /Raid Setup
Configuration:
Choose Quick Volume And Raid Setup from the main menu. The available
Step1
RAID levels and associated Hot Spare for the current volume set drive are
displayed.
RAID Level Try to use drives of the same capacity in a specific array. If you use
Step2
drives with different capacities in an array, all the drives in the array is treated
as though they have the capacity of the smallest drive in the array.
The number of physical drives in a specific array determines the RAID levels
that can be implemented with the array.
RAID 0 requires one or more physical drives,
RAID 1 requires at least 2 physical drives,
RAID 1+ Spare requires more than 2 physical drives,
RAID 3 requires at least 3 physical drives,
RAID 5 requires at least 3 physical drives,
RAID 6 requires at least 4 physical drives,
RAID 3+ Spare requires at least 4 physical drives, and
RAID 5 + Spare requires at least 4 physical drives.
RAID 6 + Spare requires at least 5 physical drives.
RAID 30 requires at least 6 physical drives,
RAID 50 requires at least 6 physical drives,
RAID 60 requires at least 8 physical drives,
RAID 30+ Spare requires at least 8 physical drives, and
RAID 50 + Spare requires at least 8 physical drives.
RAID 60 + Spare requires at least 9 physical drives
Using the UP/DOWN key to select the RAID for the volume set and presses
ENT to confirm it.
Step3
Available Capacity Set the capacity size for the volume set. After select RAID
level and press ENT.
The selected capacity for the current volume set is displayed. Using the
UP/DOWN to create the current volume set capacity size and press ENT to
confirm it. The available stripe sizes for the current volume set are displayed.
88
Chapter 5. Serial Port Configuration
Select Stripe size This parameter specifies the size of the stripes written to
Step4
each disk in a RAID 0, 1, 1E (0+1), 5, 6, 50 or 60 Volume Set. You can set the
stripe size to 4 KB, 8 KB, 16 KB, 32 KB, 64 KB, or 128 KB. A larger stripe size
provides better-read performance, especially if your computer does mostly
sequential reads. However, if you are sure that your computer does random
read requests more often, choose a small stripe size. Using the UP/DOWN to
select stripe size and press ENT to confirm it.
Step5
When you are finished defining the volume set, press ENT to confirm the Quick
Volume And Raid Set Setup function.
Fast Initialization Press ENT to define fast initialization and ESC to normal
Step6
initialization. In the Normal Initialization, the initialization proceeds as a
background task, the volume set is fully accessible for system reads and writes.
The operating system can instantly access to the newly created arrays without
requiring a reboot and waiting the initialization complete. In Fast Initialization,
the initialization proceeds must be completed before the volume set ready for
system accesses.
The controller will begin to Initialize the volume set you have just configured.
Step7
Step8
If you need to add additional volume set using main menu Create Raid Volume
Set function.
5.4 Using Raid Set/Volume Set Function
Method
In Raid Set Function, you can use the Create Raid Set function to generate the
new raid set. In Volume Set Function, you can use the Create Volume Set
function to generate its associated volume set and parameters.
If the current controller has unused physical devices connected, you can
choose the Create Hot Spare option in the Raid Set Function to define a global
hot spare. Select this method to configure new raid sets and volume sets. The
Raid Set/Volume Set Function configuration option allows you to associate
volume set with partial and full raid set.
Step1
To setup the Hot Spare (option), choose Raid Set Functions from the main
menu. Select the Create Hot Spare Disk to set the Hot Spare.
89
Software Operation Manual
Step2
Choose Raid Set Function from the main menu. Select the Create A New Raid
Set.
Step3
A Select Drive Channel in the next displayed showing the drive connected to
the current controller.
Step4
Press the UP/ DOWN to select specific physical drives. Press the ENT to
associate the selected physical drive with the current raid set.
Try to use drives of the same capacity in a specific raid set. If you use drives
with different capacities in an array, all the drives in the array is treated as
though they have the capacity of the smallest drive in the array.
The number of physical drives in a specific raid set determines the RAID levels
that can be implemented with the raid set.
RAID 0 requires one or more physical drives per raid set.
RAID 1 requires at least 2 physical drives per raid set.
RAID 1 + Spare requires at least 3 physical drives per raid set.
RAID 3 requires at least 3 physical drives per raid set.
RAID 5 requires at least 3 physical drives per raid set.
RAID 6 requires at least 4 physical drives per raid set.
RAID 3 + Spare requires at least 4 physical drives per raid set.
RAID 5 + Spare requires at least 4 physical drives per raid set.
RAID 6 + Spare requires at least 5 physical drives per raid set.
RAID 30 requires at least 6 physical drives,
RAID 50 requires at least 6 physical drives,
RAID 60 requires at least 8 physical drives,
RAID 30+ Spare requires at least 8 physical drives, and
RAID 50 + Spare requires at least 8 physical drives.
RAID 60 + Spare requires at least 9 physical drives
Step5
After adding physical drives to the current raid set as desired, press ESC to
confirm the Select Drive Channel function.
Press ENT when you are finished creating the current raid set. To continue
Step6
90
defining another raid set, repeat step 3. To begin volume set configuration, go
to step 7.
Chapter 5. Serial Port Configuration
Step7
Choose Volume Set Functions from the main menu. Select the Create Raid
Volume Set and press ENT.
Choose one raid set from the Select Raid Set screen. Press ENT to confirm it.
Step8
The volume set attributes screen appears:
Step9
The volume set attributes screen shows the volume set default configuration
value that is currently being configured. The volume set attributes are:
The Raid Level,
The Capacity (Not supported via LCD Panel.)
The Stripe Size,
The SAS Port# (Fibre Channel#)/ LUN,
The Cache Mode,
The Tagged Queuing,
The Volume Name (number).
All value can be changing by the user. Press the UP/ DOWN to select the
attributes. Press the ENT to modify each attribute of the default value. Using
the UP/DOWN to select attribute value and press the ENT to accept the default
value
Step10
After user completes modifying the attribute, press the ESC to enter the Select
Capacity for the volume set. Using the UP/DOWN to set the volume set
capacity and press ENT to confirm it.
Step11
When you are finished defining the volume set, press ENT to confirm the
Create function.
Step12
Press ENT to define fast initialization and ESC to normal initialization. The
controller will begin to Initialize the volume set you have just configured. If
space remains in the raid set, the next volume set can be configured. Repeat
steps 7 to 12 to configure another volume set.
91
Software Operation Manual
User can use this method to examine the existing
configuration. Modify volume set configuration method
provides the same functions as create volume set
configuration method. In volume set function, you can use the
modify volume set function to modify the volume set
parameters except the capacity size.
5.5 Main Menu
The main menu shows all function that enables the customer to execute actions
by clicking on the appropriate link.
Option
Description
Quick Volume And Raid Create a default configurations which are
Setup
based on the number of physical disk installed
Raid Set Functions
Create a customized raid set
Volume Set Functions
Create a customized volume set
Physical Drive
Functions
View individual disk information
Raid System Function
Setting the raid system configurations
Hdd Power
Setting drive disk power saving modes
Management
92
Chapter 5. Serial Port Configuration
Fibre Channel Config
To set the Fibre channel config function
Ethernet Configuration Use to configure the Ethernet port of RAID
subsystem.
Views System Events
Record all system events in the buffer
Clear Event Buffer
Clear all event buffer information
Hardware Monitor
Show all system environment status
System Information
View the controller information
The password option allows user to set or clear the raid subsystem’s password
protection feature. Once the password has been set, the user can only monitor
and configure the raid subsystem by providing the correct password. The
password is used to protect the internal RAID subsystem from unauthorized
entry. The controller will check the password only when entering the Main menu
from the initial screen. The RAID subsystem will automatically go back to the
initial screen when it does not receive any command in twenty seconds. The
RAID subsystem password’s default setting is 0000.
5.5.1 Quick Volume/Raid Setup
Quick Volume/Raid Setup is the fastest way to prepare a raid set and volume
set. It only needs a few keystrokes to complete it. Although disk drives of
different capacity may be used in the raid set, it will use the smallest capacity of
the disk drive as the capacity of all disk drives in the raid set. The Quick
Volume/Raid Setup option creates a raid set with the following properties:
All of the physical disk drives are contained in a raid set.
The raid levels associated with hot spare, capacity, and stripe size are selected
during the configuration process.
A single volume set is created and consumed all or a portion of the disk capacity
available in this raid set.
If you need to add additional volume set, using main menu Create Volume Set
function
The total physical drives in a specific raid set determine the RAID levels that can
be implemented with the raid set. Press the Quick Volume/Raid Setup from
the main menu; all possible RAID levels screen will be displayed.
93
Software Operation Manual
A single volume set is created and consumes all or a portion of the disk capacity
available in this raid set. Define the capacity of volume set in the Available
Capacity popup. The default value for the volume set is displayed in the
selected capacity. Using the Arrow key to modify volume set capacity and press
the Enter key to accept this value. If it only uses part of the raid set capacity, you
can use the Create Volume Set option to define another volume set
This parameter sets the size of the stripe written to each disk in a RAID 0, 1, 1E
(0+1), 5, or 6 logical drives. You can set the stripe size to 4 KB, 8 KB, 16 KB, 32
KB, 64 KB, or 128 KB.
A larger stripe size produces better-read performance, especially if your
computer does mostly sequential reads. However, if you are sure that your
computer does random reads more often, select a small stripe size.
94
Chapter 5. Serial Port Configuration
Press the Yes key in the Create Volume/Raid Set dialog box, the raid set and
volume set will start to initialize it.
5.5.2 Raid Set Function
User manual configuration can completely control the raid set setting, but it will
take longer to complete than the Quick Volume/Raid Setup configuration. Select
the Raid Set Function to manually configure the raid set for the first time or
deletes existing raid set and reconfigures the raid set.
5.5.2.1 Create Raid Set
To define raid set, follow the procedure below:
1. Select Raid Set Function from the main menu.
2. Select Create Raid Set option from the Raid Set Function dialog box.
95
Software Operation Manual
3. A Select SAS (or SATA) Drive For Raid Set window is displayed showing
the SATA drive connected to the current controller. Press the UP and DOWN
arrow keys to select specific physical drives. Press the Enter key to associate
the selected physical drive with the current raid set. Repeat this step, as many
disk drives as user wants to add in a single raid set.
To finish selecting SATA drives For Raid Set, press Esc key. A Create Raid Set
confirmation screen appears, Press Yes key to confirm it.
1. An Edit The Raid Set Name dialog box appears. Enter 1 to 15 alphanumeric
characters to define a unique identifier for a raid set. The default raid set
name will always appear as Raid Set. #.
5.5.2.2 Delete Raid Set
To change a raid set, you should first delete it and recreate the raid set. To
96
Chapter 5. Serial Port Configuration
delete a raid set, select the raid set number that user wants to delete in the
Select Raid Set to Delete screen. The Delete Raid Set dialog box appears,
then press Yes key to delete it. The double confirmation screen appears, then
press Yes key to make sure of the function.
5.5.2.3 Expand Raid Set
Instead of deleting a raid set and recreating it with additional disk drives, the
Expand Raid Set function allows the users to add disk drive to the raid set that
was created.
To expand a raid set, follow the procedure below:
1. Click on Expand Raid Set option. If there is an available disk, then the Select
97
Software Operation Manual
SATA Drives for Raid Set Expansion screen appears.
2. Select the target Raid Set by clicking on the appropriate radial button. Select
the target disk by clicking on the appropriate check box.
3. The double confirmation screen appears, Press Yes key to start the function.
The new add capacity will define one or more volume sets. Follow the
instruction presented in the Volume Set Function to create the volume set s.
1. Once the Expand Raid Set process has started, user
cannot stop it. The process must be completed.
2. If a disk drive fails during raid set expansion and a hot spare
is available, an auto rebuild operation will occur after the
raid set expansion completes.
5.5.2.3.1 Migrating
Migrating occurs when a disk is added to a Raid Set. Migration status is
displayed in the raid status area of the Raid Set information when a disk is
added to a raid set. Migrating status is also displayed in the associated volume
status area of the Volume Set Information when a disk is added to a raid set.
5.5.2.4 Activate Incomplete Raid Set
The following screen is the Raid Set Information after one of its disk drive has
been removed in the power off state.
98
Chapter 5. Serial Port Configuration
When one of the disk drive is removed in power off state, the raid set state will
change to Incomplete State. If user wants to continue to work, when the RAID
subsystem is power on, the Activate Raid Set option to active the raid set can
be used. After user completes the function, the Raid State will change to
Degraded Mode.
99
Software Operation Manual
5.5.2.5 Create Hot Spare
When you choose the Create Hot Spare option in the Raid Set Function, all
unused physical devices connected to the current controller will appear: Select
the target disk by clicking on the appropriate check box.
And Select the Hot Spare type as Global, Dedicated Raid or Dedicated
Enclosure in the Select Hot Spare Type.
The created Hot Spare option gives you the ability to define a global or
dedicated hot spare.
5.5.2.6 Delete Hot Spare
Select the target Hot Spare disk to delete by clicking on the appropriate check
box.
Press the Enter keys to select a disk drive, and press Yes in the Delete Hot
Spare to delete the hot spare.
100
Chapter 5. Serial Port Configuration
5.5.2.7 Raid Set Information
To display Raid Set information, move the cursor bar to the desired Raid Set
number, then press Enter key. The Raid Set Information will show as below.
You can only view the information of this Raid Set.
5.5.2.8 Offline Raid Set
This function allows the user to move the whole created Raid Set to another
Sans Digital AccuRAID RAID subsystem without turning off power. “Active Raid
Set” can resume the offline-Raid Set to online status.
101
Software Operation Manual
5.5.3 Volume Set Function
A Volume Set is seen by the host system as a single logical device. It is
organized in a RAID level with one or more physical disks. RAID level refers to
the level of data performance and protection of a Volume Set. A Volume Set
capacity can consume all or a portion of the disk capacity available in a Raid Set.
Multiple Volume Sets can exist on a group of disks in a Raid Set. Additional
Volume Sets created in a specified Raid Set will reside on all the physical disks
in the Raid Set. Thus each Volume Set on the Raid Set will have its data spread
evenly across all the disks in the Raid Set.
5.5.3.1 Create Volume Set
The following is the volume set features for the Sans Digital AccuRAID
102
Chapter 5. Serial Port Configuration
SAS/SATA RAID
1. Volume sets of different RAID levels may coexist on the same raid set.
2. Up to 16 volume sets can be created in a raid set.
3. The maximum addressable size of a single volume set can be exceeded than
2 TB (64-bit LBA, firmware define support up to 512TB, for Windows block
size set to 4KB can support up to 16TB).
To create a volume set, follow the following steps:
1. Select the Volume Set Function from the Main menu.
2. Choose the Create Volume Set from Volume Set Functions dialog box
screen.
3. The Create Volume from Raid Set dialog box appears. This screen displays
the existing arranged raid sets. Select the raid set number and press Enter
key. The Volume Creation is displayed in the screen.
4. A window with a summary of the current volume set’s settings. The “Volume
Creation” option allows user to select the Volume name, capacity, RAID level,
stripe size, SAS Port# (Fibre Channel#)/LUN, Cache mode, tag queuing.
User can modify the default values in this screen; the modification procedures
are at “Modify Volume Set” section.
103
Software Operation Manual
5. After completing the modification of the volume set, press Esc key to confirm
it. A Fast Initialization screen is presented.
Select Yes key to start the Fast Initialization of the selected volume set.
Select No key to start the Normal Initialization of the selected volume set.
1. Repeat steps 3 to 5 to create additional volume sets.
2. The initialization percentage of volume set will be displayed at the button line.
5.5.3.1.1 Volume Name
104
Chapter 5. Serial Port Configuration
The default volume name will always appear as Volume Set. #. You can rename
the volume set name as long as it does not exceed the 15 characters limit.
5.5.3.1.2 Capacity
The maximum volume size is default in the first setting. The capacity can
increase or decrease by the UP and DOWN arrow key. Each volume set has a
selected capacity which is less than or equal to the total capacity of the raid set
on which it resides.
105
Software Operation Manual
5.5.3.1.3 Raid Level
Set the RAID level for the Volume Set. Highlight Raid Level and press Enter.
The available RAID levels for the current Volume Set are displayed. Select a
RAID level and press Enter key to confirm.
5.5.3.1.4 Strip Size
This parameter sets the size of the segment written to each disk in a RAID 0, 1,
1E (0+1), 5 or 6 logical drives. You can set the stripe size to 4 KB, 8 KB, 16 KB,
32 KB, 64 KB, or 128 KB.
106
Chapter 5. Serial Port Configuration
5.5.3.1.5 SAS Port# / Fibre Host #
SAS Port#
Two 6Gbps SAS Wide Port can be applied to the internal RAID subsystem.
Choose the SAS Port#. A Select SAS Port dialog box appears, select the port
number and press Enter key to confirm it.
Fibre Host#
Two 8Gbps Fibre channel can be applied to the internal RAID subsystem.
Choose the Fibre Host#. A Select Fibre Channel dialog box appears, select the
Port number.
5.5.3.1.6 SAS LUN Base /Fibre LUN Base
107
Software Operation Manual
SAS LUN Base: Each SAS device is attached to the SAS card, a SAS wide port
can connect up to 128(0 to 127) devices. The RAID subsystem is like a large
SAS device. We should assign an LUN base from a list of SAS LUNs.
Note : Sans Digital AccuRAID SAS RAID supports up to 122 devices down
through one channel (including the master system).
Fibre LUN base: Each Fibre device attached to the Fibre card, as well as the
card itself, must be assigned a unique Fibre ID number. A Fibre channel can
connect up to 128(0 to 127) devices. The RAID subsystem is like a large Fibre
device. We should assign a LUN base from a list of Fibre LUNs.
108
Chapter 5. Serial Port Configuration
5.5.3.1.7 SAS LUN /Fibre LUN
SAS LUN: Each SAS LUN base can support up to 8 LUNs. Most SAS host
adapter treats each LUN like a SAS disk.
Fibre LUN: Each Fibre LUN base can support up to 8 LUNs. Most Fibre
Channel host adapter treats each LUN like a Fibre disk.
5.5.3.1.8 Cache Mode
109
Software Operation Manual
User can set the cache mode to: Write-Through Cache or Write-Back Cache.
5.5.3.1.9 Tag Queuing
The Enabled option is useful for enhancing overall system performance under
multi-tasking operating systems. The Command Tag (Drive Channel) function
controls the SCSI command tag queuing support for each drive channel. This
function should normally remain enabled. Disable this function only when using
older SCSI drives that do not support command tag queuing
5.5.3.2 Delete Volume Set
To delete Volume set from raid set system function, move the cursor bar to the
110
Chapter 5. Serial Port Configuration
Volume Set Functions menu and select the Delete Volume Set item, then
press Enter key. The Volume Set Functions menu will show all Raid Set # item.
Move the cursor bar to a RAID Set number, then press Enter key to show all
Volume Set # in the raid set. Move cursor to the deleted Volume Set number,
press Enter key to delete it.
5.5.3.3 Modify Volume Set
Use this option to modify volume set configuration. To modify Volume Set values
from Raid Set system function, move the cursor bar to the Volume Set
Functions menu and select the Modify Volume Set item, then press Enter key.
The Volume Set Functions menu will show all Raid Set number items. Move the
cursor bar to a Raid Set number item, then press Enter key to show all Volume
Set item. Select the Volume Set from the list you wish to change, press Enter
111
Software Operation Manual
key to modify it.
Choose this option to display the properties of the selected Volume Set; you can
modify all values except the capacity.
5.5.3.3.1 Volume Set Migration
Migrating occurs when a volume set is migrating from one RAID level to another,
a Volume set stripe size changes, or when a disk is added to a Raid Set.
Migration status is displayed in the volume status area of the Volume Set
Information when one RAID level migrates to another, a Volume set stripe size
changes or when a disk is added to a raid set.
5.5.3.4 Check Volume Set
Use this option to verify the correctness of the redundant data in a volume set.
For example, in a system with dedicated parity, volume set check means
computing the parity of the data disk drives and comparing the results to the
contents of the dedicated parity disk drive. To check Volume Set from Raid Set
system function, move the cursor bar to the Volume Set Function menu and
select the Check Volume Set item, then press Enter key. The Volume Set
Functions menu will show all Raid Set number items. Move the cursor bar to a
Raid Set number item, then press Enter key to show all Volume Set item. Select
the Volume Set from the list you wish to check, press Enter key to select it.
After completing the selection, the confirmation screen appears, press Yes to
start check.
112
Chapter 5. Serial Port Configuration
5.5.3.5 Stop Volume Set Check
Use this option to stop all the Check Volume Set function.
5.5.3.6 Display Volume Set Info.
To display Volume Set information, move the cursor bar to the desired Volume
Set number, then press Enter key. The Volume Set Information will show as
following.
You can only view the information of this Volume Set.
113
Software Operation Manual
5.5.4 Physical Drive
Choose this option from the Main Menu to select a physical disk and to perform
the operations listed above.
5.5.4.1 View Drive Information
When you choose this option, the physical disks in the RAID subsystem are
listed. Move the cursor to the desired drive and press Enter. The following
appears:
114
Chapter 5. Serial Port Configuration
5.5.4.2 Create Pass-Through Disk
Disk is not controlled by the RAID subsystem firmware and thus cannot be a
part of a Volume Set. The disk is available to the operating system as an
individual disk. It is typically used on a system where the operating system is on
a disk not controlled by the RAID subsystem firmware. The SCSI Channel,
SCSI ID, SCSI LUN, Cache Mode, Tag Queuing, and Max Sync Rate items
detail description can reference the Create Volume Set section.
5.5.4.3 Modify Pass-Through Disk
Use this option to modify the Pass-Through Disk Attribute. To modify
Pass-Through Disk parameters values from Pass-Through Disk pool, move the
cursor bar to the Physical Drive Function menu and select the Modify
Pass-Through Drive option and then press Enter key. The Physical Drive
Function menu will show all Raid Pass-Through Drive number option. Move the
cursor bar to a desired item, then press Enter key to show all Pass-Through
Disk Attribute. Select the parameter from the list you wish to change, press
Enter key to modify it.
5.5.4.4 Delete Pass-Through Disk
To delete Pass-through drive from the Pass-through drive pool, move the cursor
bar to the Physical Drive Function menu and select the Delete pass-through
drive item, then press Enter key. The Delete Pass-Through confirmation screen
will appear and press Yes key to delete it.
115
Software Operation Manual
5.5.4.5 Identify Selected Drive
To prevent removing the wrong drive, the selected disk HDD LED Indicator will
light to physically locate the selected disk when the Identify Selected Device is
selected.
5.5.5 Raid System Function
To set the raid system function, move the cursor bar to the main menu and
select the Raid System Function item and then press Enter key. The Raid
System Function menu will show all items. Move the cursor bar to an item, then
press Enter key to select the desired function.
116
Chapter 5. Serial Port Configuration
5.5.5.1 Mute The Alert Beeper
The Mute The Alert Beeper function item is used to control the RAID subsystem
Beeper. Select the Yes and press Enter key in the dialog box to turn the beeper
off temporarily. The beeper will still activate on the next event.
117
Software Operation Manual
5.5.5.2 Alert Beeper Setting
The Alert Beeper function item is used to Disabled or Enable the RAID
subsystem controller alarm tone generator. Select the Disabled and press
Enter key in the dialog box to turn the beeper off.
5.5.5.3 Change Password
The password option allows user to set or clear the raid subsystem’s password
protection feature. Once the password has been set, the user can only monitor
and configure the raid subsystem by providing the correct password. The
password is used to protect the internal RAID subsystem from unauthorized
entry. The controller will check the password only when entering the Main menu
from the initial screen. The RAID subsystem will automatically go back to the
initial screen when it does not receive any command in twenty seconds.
To set or change the RAID subsystem password, move the cursor to Raid
System Function screen, press the Change Password item. The Enter New
Password screen appears.
To disable the password, press Enter only in both the Enter New Password
and Re-Enter New Password column. The existing password will be cleared.
No password checking will occur when entering the main menu from the starting
screen.
118
Chapter 5. Serial Port Configuration
5.5.5.4 RAID/JBOD Function
The “Raid Rebuild Priority’ is a relative indication of how much time the
controller devotes to a rebuild operation. The RAID subsystem allows user to
choose the rebuild priority (low, normal, high) to balance volume set access and
rebuild tasks appropriately.
5.5.5.5 Back Ground Task priority
The “Back Ground Task priority’ is a relative indication of how much time the
controller devotes to a rebuild operation. The RAID subsystem allows user to
choose the rebuild priority (low, normal, high) to balance volume set access and
rebuild tasks appropriately.
119
Software Operation Manual
5.5.5.6 SATA NCQ Support
To set or change the configuration, press the UP/ DOWN to select SATA-Mode
and then press the ENT to accept the selection.
5.5.5.7 Disk Write Cache Mode
Disk cache can be turned off to prevent data lost, turned on to increase the
performance of the machine. The following is the reason why a user might
wants to turn off the cache. In case of power failure, the data stored in the disk
cache waiting to be process might be lost. The disadvantage to turn off the disk
cache is that performance will decrease dramatically.
Auto: Disk cache's setting will accord to the installation of battery backup. When
battery backup is installed, Disk cache is disabled. No battery backup installed,
120
Chapter 5. Serial Port Configuration
Disk cache is enabled.
To set or change the configuration, press the UP/ DOWN to select “Disk Write
Cache Mode” and then press the ENT to accept the selection.
5.5.5.8 Disk Capacity Truncation Mode
This function is used for cutting down the reminder or decimal to allow the
storage space to be as a whole number.
For example:
It is rarely that the actual size of the Hard Drive is a whole number. Let’s take a
40GB HDD for example, the actual size read by the controller maybe
40.55GB. This function “capacity truncation” can be used to trim down the
capacity to 40.00 GB. This function is useful because in the future the
40.55HDD might go bad, and the user can’t locate another 40GB drive which
contains 40.55GB in the actual capacity, then that particular user will have to
buy another drive with bigger capacity to rebuild the raid volume.
To set or change the configuration, press the UP/ DOWN to select “Disk
Capacity Truncation Mode” and then press the ENT to accept the selection.
121
Software Operation Manual
5.5.5.9 HDD Read Ahead Cache Mode
Use to Enable or disable the “read ahead cache” in HDD. If you are using
Maxtor HDD, please be sure to disable “ Read Ahead Cach” or select the
“ Disabled Maxtor”. To set or change the configuration, press the UP/ DOWN to
select mode and then press the ENT to accept the selection
5.5.5.10 Update Firmware
Please reference the appendix B firmware utility for updating firmware.
122
Chapter 5. Serial Port Configuration
1. User can update the firmware through the VT100 terminal
or Web browser-based RAID management via HTTP Proxy
through the controller’s serial port.
2. User can update the firmware by the firmware-embedded
web browser-based RAID manager through the controller’s
10/100 Ethernet LAN port.
5.5.5.11 Restart Controller
Use the Restart Controller Function to reset the entire configuration from the
RAID subsystem controller non-volatile memory. To reset the controller, move
the cursor bar to the Main menu Raid System Function item and then press the
Enter key. The Raid System Function menu appears on the screen and press
Enter key to the Reset Controller item. The Reset Controller confirmation
screen appears. Select Yes key to reset entire RAID system.
It can only work properly at Host and Drive without any
activity.
5.5.5.12 Volume Data Read Ahead
The uses are allowed to set volume data read ahead policies in order to get
improved performance. Depending on the different policies chosen, the amount
123
Software Operation Manual
of the pre-fetched volume data to the hard drive’s cache memory will be different,
too.
5.5.5.13 HDD Queue Depth
The users are allowed to increase the hard drive queue depth in order to allow
more commands being handled at a time. If the RAID subsystem reports hard
drive failure or hard drive timeout, please decrease the hard drive queue depth
to 1.
5.5.5.14 Shutdown Controller
Shutdown Controller is a new feature mainly designed for users to safely power
off the RAID subsystem. When Shutdown Controller is executed, data staying in
cache will be completely written back to drive disks to ensure no data still
124
Chapter 5. Serial Port Configuration
staying in cache memory before system power off.
5.5.6 Fibre Channel Config
To set the Fibre channel config function, move the cursor bar to the main menu
and select the Fibre Channel Config item and then press Enter key. The Fibre
Channel Configuration menu will show all items. Move the cursor bar to an item,
then press Enter key to select the desired function.
5.5.6.1 Channel Speed
Each FC Channel can be configured as 2 Gbps / 4 Gbps / 8 Gbps or use
"Auto" option for auto speed negotiation between 1Gb / 2Gb / 4Gb. The
controller’s default setting is "Auto", which should be adequate under most
conditions. The Channel Speed setting takes effect for the next connection.
125
Software Operation Manual
That means a link down or bus reset should be applied for the change to take
effect. The current connection speed is shown at end of the row. You have to
click the "Fibre Channel Config" link again from the Menu Frame to refresh
display of current speed.
5.5.6.2 Channel Topology
Each FC Channel can be configured as Auto, Loop, Point-to-Point, or Fabric
Topology. The controller’s default setting is "Auto" topology, which takes
precedence of Loop topology. Firmware restart is needed for any topology
change to take effect. The current connection topology is shown at end of the
row. You have to click the "Fibre Channel Config" link again from the Menu
Frame to refresh display of current topology. Note that current topology is
shown as "None" when no successful connection is made for the channel.
5.5.6.3 Hard Loop ID
This setting is effective only under Loop topology. When enabled, you can
manually set the Loop ID in the range from 0 to 125. Make sure this hard
assigned ID is not conflicted with any other devices on the same loop; otherwise
the channel will be disabled. It is good to disable the hard loop ID and let the
loop itself auto arrange the Loop ID
5.5.7 Ethernet Configuration
Use this feature to set the controller Ethernet port configuration. Customer
doesn’t need to create a reserved space on the arrays before the Ethernet port
and HTTP service working.
5.5.7.1 DHCP Function
DHCP (Dynamic Host Configuration Protocol) is a protocol that lets network
administrators manage centrally and automate the assignment of IP (Internet
Protocol) configurations on a computer network. When using the Internet's set
of protocols (TCP/IP), in order for a computer system to communicate to
another computer system it needs a unique IP address. Without DHCP, the IP
address must be entered manually at each computer system. DHCP lets a
network administrator supervise and distribute IP addresses from a central point.
The purpose of DHCP is to provide the automatic (dynamic) allocation of IP
client configurations for a specific time period (called a lease period) and to
eliminate the work necessary to administer a large IP network.
To manually configure the IP address of the controller, move the cursor bar to
the Main menu Ethernet Configuration Function item and then press the Enter
key. The Ethernet Configuration menu appears on the screen. Move the cursor
bar to DHCP Function item, then press Enter key to show the DHCP setting.
Select the “Disabled’ or ‘Enabled” option to enable or disable the DHCP
function.
126
Chapter 5. Serial Port Configuration
5.5.7.2 Local IP address
If you intend to set up your client computers manually, make sure that the
assigned IP address is in the same range of your default router address and that
it is unique to your private network. However we would highly recommend that if
you have a network of computers and the option to assign your TCP/IP client
configurations automatically, please do. An IP address allocation scheme will
reduce the time it takes to set-up client computers and eliminate the possibilities
of administrative errors.
To manually configure the IP address of the controller, move the cursor bar to
the Main menu Ethernet Configuration Function item and then press the Enter
key. The Ethernet Configuration menu appears on the screen. Move the cursor
bar to Local IP Address item, then press Enter key to show the default address
setting in the RAID controller. You can reassign the IP address of the controller.
127
Software Operation Manual
5.5.7.3 Ethernet Address
A MAC address stands for Media Access Control address and is your
computer's unique hardware number. On an Ethernet LAN, it's the same as your
Ethernet address. When you're connected to the Internet from the RAID
controller Ethernet port, a correspondence table relates your IP address to the
RAID controller’s physical (MAC) address on the LAN.
5.5.8 View System Events
To view the RAID subsystem controller’s system event information, move the
cursor bar to the main menu and select the View System Events link, then
press the Enter key and the RAID subsystem events screen will appear.
128
Chapter 5. Serial Port Configuration
Choose this option to view the system events information: Time, Device, Event
type, Elapse Time and Errors. The RAID system does not built the real time
clock. The Time information is the relative time from the RAID subsystem power
on.
5.5.9 Clear Events Buffer
Use this feature to clear the entire events buffer information.
5.5.10 Hardware Monitor
The Hardware Monitor Information provides the temperature, fan speed
(chassis fan) and voltage of the internal RAID subsystem. The temperature
items list the current states of the controller board and backplane. All items are
also unchangeable. The warning messages will indicate through the LCM, LED
and alarm buzzer.
129
Software Operation Manual
Item
Warning Condition
Controller Board
Temperature
> 85 Celsius
Backplane Temperature
> 55 Celsius
Controller Fan Speed
< 1700 RPM
Power Supply +12V
< 10.5V or > 13.5V
Power Supply +5V
< 4.7V or > 5.3V
Power Supply +3.3V
< 3.0V or > 3.6V
130
Chapter 5. Serial Port Configuration
CPU Core Voltage +1.5V
< 1.35V or > 1.65V
5.5.11 System Information
Choose this option to display Main processor, CPU Instruction cache and data
cache size, firmware version, serial number, controller model name, and the
cache memory size. To check the system information, move the cursor bar to
System Information item, then press Enter key. All major controller system
inform.
5.5.12 Hdd Power Management
Use this feature to configure drive disk power saving
131
Software Operation Manual
5.5.12.1 Stagger Power On Control
To allow the power module to power up every hard disk one by one orderly in
order to ensure every hard disk in the system can be powered up with enough
power. The lag time range from the last hard drive power up to the next one
power on can be configured from 0.4 to 6.0.
5.5.12.2 Time To Hdd Low Power Idle
Configure the time to launch HDD Low Power Idle (Send the heads to the ramp).
For more details, please visit at http://www.freepatentsonline.com/6819513.html.
Be noted this feature must couple with the hard disks supporting advanced
power management.
132
Chapter 5. Serial Port Configuration
5.5.12.3 Time To Hdd Low RPM Mode
Configure the time to launch HDD Low RPM Mode. When longer periods of
non-use occur, additional power savings are possible. In this mode, the spindle
motor can be slowed to a lower spin rate. This action further reduces the power
needed for the drives. Be noted this feature must couple with the hard drives
supporting advanced power management.
5.5.12.4 Time To Spin Down Idle Hdd
Configure the time to launch Spin Down Idle HDD, mainly designed for saving
the power consumption consumed by the idle hard drives. When Spin Down is
invoked, the SMART status of each hard drive will be marked as "N/A” to signify
the hard drive has been into non-spin mode. As soon as data access is
requested again, all the idle hard drives will be automatically waken up by the
RAID controller.
133
Software Operation Manual
134
Chapter 6. Redundant Storage Subsystem & Multipathing I/O
Chapter 6
Redundant storage subsystem &
Multipathing I/O
6.1 Overview
The Sans Digital AccuRAID Redundant controller RAID subsystem contains
dual controller for redundancy. It requires native multi-path IO software built in
various operating systems to allow a host server to be able to access data over
multiple paths. The Sans Digital AccuRAID Fibre redundant controller RAID
subsystem provides the customers with four types of bay number to choose.
The details are as below:
AR212F8R : 2U/12bays Fibre to SAS RAID subsystem
AR316F8R : 3U/16bays Fibre to SAS RAID subsystem
AR424F8R : 4U/24bays Fibre to SAS RAID subsystem
AR212X6R : 2U/12bays SAS to SAS RAID subsystem
AR316X6R : 3U/16bays SAS to SAS RAID subsystem
AR424X6R : 4U/24bays SAS to SAS RAID subsystem
The redundant storage subsystem supports kinds of operating systems. The
details are as below:
Windows Server 2003 SP2
Windows Vista SP1
Windows Server 2008
Linux with 2.6.x kernel or above kernel versions
Solaris 10 Update 4
135
Software Operation Manual
Sans Digital highly recommend using SAS drives instead of
SATA drives. However, if using SATA drives is needed, an
optional bridge board is available for use with SATA drives. SAS
hard drives can be installed in the Sans Digital AccuRAID
redundant controller subsystem without additional modules.
6.1.1 Redundant raid subsystem
The Sans Digital AccuRAID redundant controller RAID subsystem supports
dual controllers to provide a high-availability storage subsystem. Both
controllers monitor each other, and if controller A fails, controller B will take over
all the I/O services.
6.1.1.1 Switch the message
redundant controller
of
LCM
between
Push three times “Down Arrow Button” that you can read the message and
configure your RAID through LCM between dual controller.
The default controller is shown as bellow :
RAID Subsystem
192.168.1.100
*
After push “Down arrow button” three times then you can read the message of
LCM from 2nd Controller :
RAID Subsystem
192.168.1.100
136
Chapter 6. Redundant Storage Subsystem & Multipathing I/O
6.1.2 Multipath I/O & No single point of failure
Multipath I/O is a I/O path fault tolerance and performance enhancement
technique, which requires more than one physical I/O path between the host
server and its corresponding storage devices. I/O path redundancy provides the
data protection with multiple I/O paths between the host server and the
corresponding storage subsystems.
6.1.3 Configuration & connectivity
Redundant RAID subsystem implements ALAU (Asymmetric Logical Unit
Access) algorithm which allows Volume Sets to be accessed by only one
controller when both controllers are on-line. The controller, which controls the
Volume Sets, is the preferred controller and another controller is for standby. For
example, Volume Set #000 is controlled by controller A, and the redundant
RAID subsystem allows host server access Volume Set #000 only through
controller A. Controller B would take over the data I/O if controller A fails. Figure
1 shows the standard connectivity for a single volume.
Figure 1
Redundant RAID subsystem default assigns even Volume Sets to controller A
and odd Volumes Sets to controller B. For example, controller A is the preferred
controller for Volume Set #000 and controller B is the preferred controller for
Volume Set #001 and so on.
137
Software Operation Manual
The method to configure RAID Sets is the same with the single controller
subsystem, such as creating RAID Sets, creating volume sets and etc. To
ensure the I/O redundancy, both two controllers must be connected to the host
server. Physical connectivity of redundant RAID subsystem is described at
chapter 6.2
6.2 Physical connections with MPIO
6.2.1 Single Host Server
Figure 2 shows how a single host server computer connects to the redundant
RAID subsystem. According to RaidSet Hierarchy, two volumes are mapped to
channel 0. As figure 2 shows, both channel 0 (controller A & controller B) are
connected to a dual port HBA. Volume Set #000 is preferred controlled by
controller A and Volume Set #001 is preferred controlled by controller B.
Figure 2
6.2.2 Multiple Host Servers
Figure 3 shows how multiple servers connect to the redundant RAID subsystem.
According to RaidSet Hierarchy, two volumes are mapped to channel 0 and
another two volumes are mapped to channel 1. As figure 2 shows, both channel
138
Chapter 6. Redundant Storage Subsystem & Multipathing I/O
0 (controller A & controller B) are connected to a dual port HBA on the host
server A. Both channel 1 (controller A & controller B) are connected to a dual
port HBA on the host server B. Volume Set #000 & Volume Set #002 are
preferred controlled by controller A .Volume Set #001 & Volume Set #003 are
preferred controlled by controller B.
Figure 3
6.2.3 Cluster Servers
Figure 4 shows how cluster servers connect to the redundant RAID subsystem.
According to RaidSet Hierarchy, two volumes are assigned to channel 0 &
channel 1 for cluster. As figure 2 shows, both channel 0 (controller A & controller
B) are connected to a dual port HBA on the host server A. Both channel 1
(controller A & controller B) are connected to a dual port HBA on the host server
B. Volume Set #000 is preferred controlled by controller A and Volume Set #001
is preferred controlled by controller B.
139
Software Operation Manual
Figure 4
6.3 Enable Multipathing I/O for Windows Vista
& Windows Server 2008
Below steps are required to enable multipathing I/O for Windows Vista &
Windows Server 2008:
6.3.1 Complete Volume Set configurations and
hardware setup
Create a single volumeset (eg. “model#-VOL#000”). Connect Fibre cables to
the host server machine.
Power on the host server, and run “Computer Management”. Double click
140
Chapter 6. Redundant Storage Subsystem & Multipathing I/O
System Tools > Device Manager > Disk drives. Two devices with same name
would show up. “Sans Digital” presents the vendor name and “AR316F8R”
presents the product name. All the above operations can be equally applied to
the Sans Digital AccuRAID SAS-to-SAS or Fibre redundant controller RAID
subsystem. The vendor name will be “Sans Digital” and the product name will
be “AR316F8R-VOL#000” for Fibre and “AR316X6R-VOL#000” for SAS.
6.3.2 Install Microsoft MPIO packages
Run “Computer Management” and double click System Tools > Device Manager.
At menu bar, click Action > Add legacy hardware to execute Add Hardware
Wizard. Click “Next”.
Select “Install the hardware that I manually select from a list (Advanced) then
click “Next”.
141
Software Operation Manual
Select “Storage controllers” and click “Next”.
Select “Microsoft” as the manufacturer then select “Microsoft Multi-Path Bus
Driver” and click “Next”.
142
Chapter 6. Redundant Storage Subsystem & Multipathing I/O
Follow the wizard to complete installing “Microsoft Multi-Path Bus Driver”.
Repeat the previous steps to add legacy hardware. Select “System devices”
and click “Next”.
Select “Microsoft” as the manufacturer then select “Microsoft Multi-Path Device
Specific Module” and click “Next”.
143
Software Operation Manual
Follow the wizard to complete installing “Microsoft Multi-Path Device Specific
Module”.
6.3.3 Register Microsoft MPIO devices
Run “regedit”. Click “Computer” then click Edit > Find. Enter “supporteddev”
then click “Find Next”.
144
Chapter 6. Redundant Storage Subsystem & Multipathing I/O
Double click the relative registry to edit the vendor name and the product name.
According to the vendor name and the product name shown in “disk devices”,
edit the value data. The longest vendor name must be within 8 letters. If the
vendor name is shorter than 8 letters, fill in blank with spaces. In this example, it
should be "Sans Digital"; the product name is same with the “volumeset
name” from the array system. In this example, the product name should be
145
Software Operation Manual
“AR316F8R-VOL#000”. Finally, click “OK” to complete editing. If the Sans
Digital AccuRAID SAS-to-SAS redundant controller RAID subsystem is used
here, the vendor name should be “Sans Digital” and the product name should
be “AR316X6R-VOL#000”
Press “F3” button to find next relative registry. Enter the same vendor name and
the product name as previous registry then click “OK”. Repeat pressing “F3”
until all relative registries are edited.
6.3.4 Reboot the host server computer
Restart the host server computer and you can find a new Multi-Path Disk
Device.
6.4 Enable Multipathing I/O for Linux
Below steps are required to enable multipathing I/O for Linux:
6.4.1 Complete Volume Set configurations and
hardware setup
Create a single volumeset (eg. “AR316F8R-VOL#000”). Connect Fibre cables
to the host server machine.
Power on the host server and check devices. Two disk devices would show up
and they actually present the same volumeset “AR316F8R-VOL#000”. All the
above operations can be equally applied to the Sans Digital AccuRAID
SAS-to-SAS redundant controller RAID subsystem, too. By doing so, same, two
disk devices would show up and they actually present the same volume
“AR316X6R-VOL#000”.
146
Chapter 6. Redundant Storage Subsystem & Multipathing I/O
6.4.2 Install device-mapper-multipath option package
147
Software Operation Manual
6.4.3 Edit the parameters of the storage subsystem
Overwrite “/etc/multipath.conf” with Sans Digital AccuRAID configuration file
“multipath.conf” which is found in CD. Open “/etc/multipath.conf” to modify the
proper vendor name and product name.
Modify the vendor name and product name. In this example, the vendor name
should be “Sans Digital” and the product name should be “AR316F8R-VOL#*”.
Save it then reboot the host server computer. If the Sans Digital AccuRAID
SAS-to-SAS redundant controller RAID subsystem is tested here, in this
example, the vendor should be as “Sans Digital” and the product name should
be “AR316X6R-VOL#*”.
6.4.4 Activate multipathd service and partition the
multipath devices
Run command “/etc/init.d/multipathd restart” to restart multipathd service.
148
Chapter 6. Redundant Storage Subsystem & Multipathing I/O
Run command “multipath –ll” to display multipath devices. [ prio = 50] [ active]
presents optimize mode and [ prio = 10] [ enabled ] presents un-optimize mode.
Partition the multipathing device “/dev/mapper/mpath0”.
149
Software Operation Manual
6.5 Enable Multipathing I/O for Windows
Server 2003 SP2
Below steps are required to enable multipathing I/O for Windows Server 2003:
6.5.1 Complete Volume Set configurations and
hardware setup
Create a single volumeset (eg. “AR316F8R-VOL#000”). Connect Fibre
cables to the host server machine.
Power on the host server and check devices. Two devices with same name
would show up and they actually present the same volumeset
“AR316F8R-VOL#000”.
All the above operations can be equally applied to the Sans Digital AccuRAID
SAS-to-SAS redundant controller RAID subsystem, too. By doing so, same, two
equal devices would show up and they actually present the same volume
“AR316X6R-VOL#000”.
150
Chapter 6. Redundant Storage Subsystem & Multipathing I/O
6.5.2 Modify msdsm.inf
Uncompress the file Dual Controller MPIO 2003. Then edit the three
red-circled places of the file msdsm.inf according to the names of the two new
equal disk devices mentioned at chapter 6.5.1,
The longest name of the vendor name is 8 letters. If the vendor name is shorter
than 8 letters, fill in blank with spaces. In this example, it should be "Sans
Digital". Then edit the product name. In this example, the product name should
be “AR316F8R-VOL#000”. If the Sans Digital AccuRAID SAS-to-SAS
redundant controller RAID subsystem is tested here, the vendor name should
be “Sans Digital” and the product name should be “AR316F8R-VOL#000”
6.5.3 Install and uninstall MPIO driver under Windows
Server 2003 SP2
Following chapter 6.5.2, install MPIO driver under Dos Mode (Command
Prompt Mode) by typing:
install -i . msdsm.inf "root\msdsm"
to un-install MPIO driver:
install -u . msdsm.inf "root\msdsm"
Finally, reboot the host server.
151
Software Operation Manual
6.6 Enable Multipathing I/O for VMware
Below steps are required to enable multipathing I/O for VMware 3.5:
6.6.1 Complete Volume Set configurations and
hardware setup
Step 1: Create one volume with Port number “0” selected
Step 2: Channel 0 of the first controller is connected to host 0 of the dual
channel Fibre HBA that is inserted inside of the ESX Server.
Step 3: Channel 0 of the second controller is connected to host 1 of the dual
channel Fibre HBA inserted inside of the ESX Server.
6.6.2 Enable MPxIO service and partition the multipath
devices
Step 4: Power on the ESX Server and login the VMware Infrastructure Client
152
Chapter 6. Redundant Storage Subsystem & Multipathing I/O
Step 5: Choose “Configuration” and then select “Storage”
Step 6: Select “Disk/LUN”
153
Software Operation Manual
Step 7: Device “vmhba33:0:1” is found. This device is the created volume
existing in the RAID subsystem. If no storage device is found at this
step, please go back to step 5, and select “Storage Adapters” to rescan in the
created volume.
154
Chapter 6. Redundant Storage Subsystem & Multipathing I/O
Step 8: Click “Next”
Step 9: Give “Datastore” a name
Step 10: Set maximum file size
155
Software Operation Manual
Step 11: Click “Finish”
Step 12: Now the storage device “vmhba33:0:1:1” is able to be used, and it has
two I/O paths. If only one path available, that means either “0&1 For Cluster” is
not pre-set on the RAID subsystem or one of the dual host ports on the Fibre
HBA or the RAID controller is linked down
156
Chapter 6. Redundant Storage Subsystem & Multipathing I/O
Step 13: Click “Properties….” of “vmhba33:0:1:1” to manage MPIO. In this case,
Vmhba33:0:1 is the first path; vmhba33:1:1 is the second path
Step 14: Click “Manage Paths” at Step 13 to call up MPIO settings page. Then
click the upper “Change” to change “MPIO Policy” or click lower “Change” to
change “Preferred” path
157
Software Operation Manual
Step 15: Preferred path “Enabled” or “Disabled.” When MPIO Policy “Fix” is
chosen, one path will be auto assigned as the preferred path (Active), and the
other path will be automatically assigned as “Standby.” “Fix” is the default MPIO
Policy.
Step 16: Change MPIO Policy. Before changing MPIO Policy, please read
158
Chapter 6. Redundant Storage Subsystem & Multipathing I/O
VMware ESX Server Multipath-related documents first to get your storage
device work at the right policy.
Step 17: Now, the data storage with dual path failover support setting is done;
the users could start installing new virtual machine into this data storage.
159
Software Operation Manual
1. How to re-define failback time : On the left menu, software
-> Advanced Settings -> Disk -> Disk.PathEvalTime. The
default is 300 sec(s).
2. VMware seems not yet including SAS host interface into
VMware Hardware Certification Program. Given that,
before this is clarified, MPIO for SAS Host SOP or guides
won’t be included in this instruction guide at the moment.
6.7 Enable Multipathing I/O for Solaris
Below steps are required to enable multipathing I/O for Solaris:
6.7.1 Complete Volume Set configurations and
hardware setup
Create a single volume (eg. “AR316F8R-VOL#000”). Connect Fibre cables
to the host server machine.
Power on the host server and check devices. Two devices would show up and
they actually present the same volume “AR316F8R-VOL#000”. All the above
operations can be equally applied to the Sans Digital AccuRAID SAS-to-SAS
redundant controller RAID subsystem, too. By doing so, same, two devices
would show up and they actually present the same volume
“AR316X6R-VOL#000”.
160
Chapter 6. Redundant Storage Subsystem & Multipathing I/O
6.7.2 Enable MPxIO service and partition the multipath
devices
Run command “stmsboot –e” to enable multipathing. Follow the procedure and
reboot the host server computer.
161
Software Operation Manual
Edit /kernel/drv/scsi_vhci.conf to enable MPxIO supporting multipathing devices.
Modify the vendor ID as “Sans Digital” and the product ID as
“AR316F8R-VOL#*”. If the Sans Digital AccuRAID SAS-to-SAS redundant
controller RAID subsystem is tested here, modify the vendor as “Sans Digital”
and the product name as “AR316X6R-VOL#*”. Then save it and reboot the host
server computer.
Run command “format” to partition the multipathing device.
162
Chapter 6. Redundant Storage Subsystem & Multipathing I/O
Please refer to
http://docs.sun.com/app/docs/doc/820-1931/gfpva?l=zh_tw&
a=view for more information.
163
Software Operation Manual
Appendix A.
Upgrading Firmware
Since the RAID controller features flash firmware, it is not necessary to change
the hardware flash chip in order to upgrade the RAID firmware. The user can
simply re-program the firmware through the RS-232 port or 10/100 Ethernet port.
New releases of firmware are available in the form of a DOS file. The file
available at the FTP site is usually a self-extracting file that contains the
following:
xxx0FIRM.BIN is Firmware Binary,
xxx0BOOT.BIN is Boot code,
xxx0MBR0.BIN is Main boot code
Firmware Release Notes.txt It contains the history information of the firmware
change. Read this file first before upgrading the firmware.
Establishing the Connection for the RS-232
and Ethernet port
The firmware can be downloaded to the RAID controller by using an
ANSI/VT-100 compatible terminal emulation program or HTTP web browser
manager. You must complete the appropriate installation procedure before
proceeding with this firmware upgrade. Please refer to Software Operation
Manual: Chapter 4.3, “VT100 terminal (Using the controller’s serial port)” for
details on establishing the connection. Whichever terminal emulation program
is used must support the ZMODEM file transfer protocol.
Web browser-based RAID manager can be used to update the firmware. You
must complete the appropriate installation procedure before proceeding with
this firmware upgrade. Please refer to Software Operation Manual: chapter 6.1,
“Web browser-based RAID manager (Using the controller’s Ethernet port)” for
details on establishing the connection.
164
Appendix A. Upgrading Firmware
Upgrading Firmware Through ANSI/VT-100
Terminal Emulation
Get the new version firmware for your RAID controller. For Example, download
the bin file from Sans Digital’s web site onto the c:
1. From the Main Menu, scroll down to "Raid System Function"
2. Choose the "Update Firmware"; then “Update The Raid Firmware” dialog
box appears.
3. Go to the tool bar and select Transfer. Open “Send File”.
165
Software Operation Manual
4. Select “ZMODEM modem” under Protocol. ZMODEM as the file transfer
protocol of your terminal emulation software.
5. Click Browse. Look in the location where the Firmware upgrade software is
located. Select the File name and click “open”.
166
Appendix A. Upgrading Firmware
6. Click “Send”. Send the Firmware Binary to the controller
7. When the Firmware completes downloading, the confirmation screen
appears. Press “Yes” to start program the flash ROM.
8. When the Flash programming starts, a bar indicator will show “Start Updating
167
Software Operation Manual
Firmware. Please Wait:”.
9. The Firmware upgrade will take approximately thirty seconds to complete.
After the Firmware upgrade is complete, a bar indicator will show “Firmware
Has Been Updated Successfully”.
168
Appendix A. Upgrading Firmware
10. After the new firmware completes download, user should find a chance to
restart the controller for the new firmware to take effect.
The user has to reconfigure all of the settings after the
firmware upgrade is complete, because all of the settings will
default to the original default values.
Upgrading Firmware Through Web Browser
Management
Get the new version firmware for your RAID subsystem controller. For Example,
download the bin file from Sans Digital’s web site onto the c:
To upgrade the RAID subsystem firmware, move the mouse cursor to
“Upgrade Firmware” link. The “Upgrade The Raid System Firmware”
screen appears.
Click Browse. Look in the location where the Firmware upgrade software is
located. Select the File name click “open”.
Click the “Confirm The Operation” and press the “Submit” button.
The Web Browser begins to download the firmware binary to the controller and
start to update the flash ROM.
After the firmware upgrade is complete, a bar indicator will show “Firmware Has
Been Updated Successfully”
After the new firmware completes download, user should find a chance to
restart the controller for the new firmware to take effect.
169
Software Operation Manual
The user has to reconfigure all of the settings after the
firmware upgrade is complete, because all of the settings will
default to the original default values.
170
Appendix B. Fibre Operation
Appendix B.
Fibre Operation
Overview
Fibre Channel is a set of standards under the auspices of ANSI (American
National Standards Institute). Fibre Channel combines the best features from
SCSI bus and IP protocols into a single standard interface, including
high-performance data transfer (up to 800 MB per second), low error rates,
multiple connection topologies, scalability, and more. It retains the SCSI
command-set functionality, but uses a Fibre Channel controller instead of a
SCSI controller to provide the network interface for data transmission. In today's
fast-moving computer environments, Fibre Channel is the serial data transfer
protocol choice for high-speed transportation of large volumes of information
between workstation, server, mass storage subsystems, and peripherals.
Physically, the Fibre Channel can be an interconnection of multiple
communication points, called N_Ports. The port itself only manages the
connection between itself and another such end-port which, which could either
be part of a switched network, referred to as a Fabric in FC terminology, or a
point-to-point link. The fundamental elements of a Fibre Channel Network are
Port and node. So a node can be a computer system, storage device, or
Hub/Switch.
This chapter describes the Fibre-specific functions available in the Fibre
channel RAID controller. Optional functions have been implemented for Fibre
channel operation only available in the Web browser-based RAID manager. The
LCD and VT-100 can’t configure the options available for Fibre channel RAID
controller.
Three ways to connect (FC Topologies)
A topology defines the interconnection scheme. It defines the number of devices
that can be connected. Fibre Channel supports three different logical or physical
arrangements (topologies) for connecting the devices into a network:
* Point-to-Point
* Arbitrated Loop (AL)
* Switched (Fabric)
The physical connection between devices varies from one topology to another.
In all of these topologies, a transmitter node in one device sends information to
a receiver node in another device. Fibre Channel networks can use any
171
Software Operation Manual
combination of point-to-point, arbitrated loop (FC_AL), and switched fabric
topologies to provide a variety of device sharing options.
Point-to-point
A point-to-point topology consists of two and only two devices connected by
N_ports of which are connected directly. In this topology, the transmit Fibre of
one device connects to the receiver Fibre of the other device and vice versa.
The connection is not shared with any other devices. Simplicity and use of the
full data transfer rate make this Point-to-point topology an ideal extension to the
standard SCSI bus interface. The point-to-point topology extends SCSI
connectivity from a server to a peripheral device over longer distances
Arbitrated Loop
The arbitrated loop (FC_AL) topology provides a relatively simple method of
connecting and sharing resources. This topology allows up to 126 devices or
nodes in a single, continuous loop or ring. The loop is constructed by
daisy-chaining the transmit and receive cables from one device to the next or by
using a hub or switch to create a virtual loop. The loop can be self-contained or
incorporated as an element in a larger network. Increasing the number of
devices on the loop can reduce the overall performance of the loop because the
amount of time each device can use the loop is reduced. The ports in an
arbitrated loop are referred as L-Ports.
Switched Fabric
A switched fabric a term is used in a Fibre channel to describe the generic
switching or routing structure that delivers a frame to a destination based on the
destination address in the frame header. It can be used to connect up to 16
million nodes, each of which is identified by a unique, world-wide name.
In a switched fabric, each data frame is transferred over a virtual point-to-point
connection. There can be any number of full-bandwidth transfers occurring
through the switch. Devices do not have to arbitrate for control of the network;
each device can use the full available bandwidth.
A fabric topology contains one or more switches connecting the ports in the FC
network. The benefit of this topology is that many devices (approximately 2-24)
can be connected. A port on a Fabric switch is called an F-Port (Fabric Port).
Fabric switches can function as an alias server, Multicast server, broadcast
server, quality of service facilitator and directory server as well.
172
Appendix B. Fibre Operation
Basic elements
The following elements are the connectivity of storages and Server components
using the Fibre channel technology.
Cables and connectors
There are different types of cables of varies lengths for use in a Fibre Channel
configuration. Two types of cables are supported: Copper and optical (fibre).
Copper cables are used for short distances and transfer data up to 30 meters
per link. Fibre cables come in two distinct types: Multi-Mode fibre (MMF) for
short distances (up to 2km), and Single-Mode Fibre (SMF) for longer distances
(up to 10 kilometers). The controller default supports two SFP connectors.
Fibre Channel Adapter
Fibre Channel Adapter is devices that connect to a workstation, or server and
control the electrical protocol for communications.
Hubs
Fibre Channel hubs are used to connect up to 126 nodes into a logical loop. All
connected nodes share the bandwidth of this one logical loop. Each port on a
hub contains a Port Bypass Circuit (PBC) to automatically open and close the
loop to support hot plug ability.
Switched Fabric
Switched fabric is the highest performing device available for interconnecting
large numbers of devices, increasing bandwidth, reducing congestion and
providing aggregate throughput. .
Each device connected to a port on the switch, enabling an on-demand
connection to every connected device. Each node on a Switched fabric uses an
aggregate throughput data path to send or receive data
173
Software Operation Manual
Appendix C
SNMP Operation & Definition
Overview
The Sans Digital AccuRAID SAS/SATA RAID subsystem firmware-embedded
Simple Network Management Protocol (SNMP) agent for the connect array. An
SNMP-based management application (also known as an SNMP manager) can
monitor the disk array. An example of An SNMP management application is
Hewlett-Packard’s Open View. The firmware-embedded SNMP agent can be
used to augment the RAID controller if you are already running an SNMP
management application at your site.
SNMP Definition
SNMP, an IP-based protocol, has a set of commands for getting the status of
target devices. The SNMP management platform is called the SNMP manager,
and the managed devices have the SNMP agent loaded. Management data is
organized in a hierarchical data structure called the management Information
Base (MIB). These MIBs are defined and sanctioned by various industry
associations. The objective is for all vendors to create products in compliance
with these MIBs so that inter-vendor interoperability can be achieved. If a
vendor wishes to include additional device information that is not specified in a
standard MIB, then that is usually done through MIB extensions.
174
Appendix C. SNMP Operation & Definition
SNMP Installation
z
The installation of the SNMP manager is accomplished in several phases:
z
Installing the Manager software on the client
z
Placing a copy of the management information base (MIB) in a directory
which is accessible to the management application
z
Compiling the MIB description file with the management application
MIB Compilation and Definition File creation
Before the manager application accesses the RAID controller, user needs to
integrate the MIB into the management application’s database of events and
status indicator codes. This process is known as compiling the MIB into the
application. This process is highly vendor-specific and should be well-covered
in the User’s Guide of your SNMP application. Ensure the compilation process
successfully integrates the contents of the XXXX.MIB file into the traps
database.
Location for MIB
Depending upon the SNMP management application used, the MIB must be
placed in a specific directory on the network management station running the
management application. The MIB file must be manually copied to this directory.
For example:
SNMP Management Application
MIB Location
HP OpenView
\OV\MIBS
Netware NMS
\NMS\SNMPMIBS\CURRENT
Your management application may have a different target directory. Consult the
management application’s user manual for the correct location.
RAIDMIB Object Definition
All traps are defined under this object according to the following table:
Trap
[Reserved]
Traps
Description
128-255 are RaidSet
Trap Number
1-127
Traps
175
Software Operation Manual
rsCreate
rsDelete
rsExpand
rsRebuild
rsDegraded
rsNoEvent
128
129
130
131
132
133
[Reserved]
134-255
Traps
256-383 are VolumeSet
vsInitializing
vsRebuilding
vsMigrating
vsChecking
vsCompleteInit
vsCompleteRebuild
vsCompleteMigrating
vsCompleteChecking
vsCreate
vsDelete
vsModify
vsDegraded
vsFailed
vsRevived
vsTotals
[Reserved]
Traps
256
257
258
259
260
261
262
263
264
265
266
267
268
269
270
271-383
Traps
384-511 are IDE Device
pdAdded
pdRemoved
pdReadError
pdWriteError
pdAtaEccError
pdAtaChangeMode
pdTimeOut
pdMarkFailed
pdPciError
pdSmartFailed
pdCreatePass
pdModifyPass
pdDeletePass
pdTotals
Traps
384
385
386
387
388
389
390
391
392
393
394
395
396
397
[Reserved]
398-511
Traps
scsiReset
scsiParity
176
512-639 are SCSI Bus
Traps
512
513
Appendix C. SNMP Operation & Definition
scsiModeChange
scsiTotals
514
515
[Reserved]
516-639
\
Traps
640—676 Hardware Monitor
hwSdram1BitEcc
hwSdramMultiBitEcc
hwTempController
hwTempBackplane
hwVoltage15
hwVoltage3
hwVoltage5
hwVoltage12
hwVoltage1_3
hwVoltage2_5
hwVoltage1_25
hwPower1Failed
hwFan1Failed
hwPower2Failed
hwFan2Failed
hwPower3Failed
hwFan3Failed
hwPower4Failed
hwFan4Failed
hwUpsPowerLoss
hwTempController_R
hwTempBackplane_R
hwVoltage15_R
hwVoltage3_R
hwVoltage5_R
hwVoltage12_R
hwVoltage1_3_R
hwVoltage2_5_R
hwVoltage1_25_R
hwPower1Failed_R
hwFan1Failed_R
hwPower2Failed_R
hwFan2Failed_R
hwPower3Failed_R
hwFan3Failed_R
hwPower4Failed_R
hwFan4Failed_R
Traps
640
641
642
643
644
645
646
647
648
649
650
651
652
653
654
655
656
657
658
659
660
661
662
663
664
665
666
667
668
669
670
671
672
673
674
675
676
177
Software Operation Manual
Appendix D.
Event Messages
Sans Digital AccuRAID RAID Event List
Event
Type
Meaning
Device Inserted
Warning
HDD inserted
Device Removed
Warning
HDD removed
Reading Error
Warning
HDD reading error
Keep Watching HDD status,
maybe it is caused by noise or
HDD unstable.
Writing Error
Warning
HDD writing error
Keep Watching HDD status,
maybe it is caused by noise or
HDD unstable.
ATA Ecc Error
Warning
HDD ECC error
Keep Watching HDD status,
maybe it is caused by noise or
HDD unstable.
Change ATA Mode
Warning
HDD change ATA mode Check HDD connection.
Time Out Error
Warning
HDD Time out
Keep Watching HDD status,
maybe it is caused by noise or
HDD unstable.
Device Failed
Urgent
HDD failure
Replace HDD
PCI Parity Error
Serious
PCI Parity error
If only happen once, it maybe
caused by noise. If always
happen, please check power
supply or contact to us.
Device
Failed(SMART)
Urgent
HDD SMART failure
Replace HDD
PassThrough Disk
Inform
Pass Through Disk
Created
PassThrough Disk
Inform
Pass Through Disk
Modified
PassThrough Disk
Inform
Pass Through Disk
Deleted
178
Action
Appendix D. Event Messages
Start Initialize
Warning
Volume initialization has
started
Start Rebuilding
Warning
Volume rebuilding has
started
Start Migrating
Warning
Volume migration has
started
Start Checking
Warning
Volume parity checking
has
Complete Init
Warning
Volume initialization
completed
Complete Rebuild
Warning
Volume rebuilding
completed
Complete Migrate
Warning
Volume migration
completed
Complete Check
Warning
Volume parity checking
Create Volume
Warning
New Volume Created
Delete Volume
Warning
Volume deleted
Modify Volume
Warning
Volume Modify
Volume Degraded
Urgent
Volume degraded
Volume Failed
Urgent
Volume failure
Failed Volume
Revived
Urgent
Failed Volume revived
Abort Initialization
Warning
Initialization been abort
Abort Rebuilding
Warning
Rebuilding been abort
Abort Migration
Warning
Migration been abort
Abort Checking
Warning
Parity Check been abort
Stop Initialization
Warning
Initialization been
stoped
Stop Rebuilding
Warning
Rebuilding been stoped
Stop Migration
Warning
Migration been stoped
Stop Checking
Warning
Parity Check been
stoped
Replace HDD
179
Software Operation Manual
Create RaidSet
Warning
New Raidset created
Delete RaidSet
Warning
Raidset deleted
Expand RaidSet
Warning
Raidset expand.
Rebuild RaidSet
Warning
Raidset rebuilding
RaidSet Degraded
Urgent
Raidset degraded
Replace HDD
SCSI Bus Reset
Inform
SCSI Bus got a Reset
command
Depend on system status, it could
be normal status(such as host
boot up) or abnormal status cause
by unstable SCSI cabling /
termination.
SCSI Bus Parity
Inform
SCSI Bus encounter
Parity Error
Check SCSI cabling / termination
SCSI Bus SE<>LVD Inform
SCSI Bus transfer
speed changed
Depend on system status, it could
be normal status(such as SE
device inserted) or abnormal
status cause by unstable SCSI
cabling / termination.
IDE Bus Reset
IDE Bus got a Reset
command
Depend on system status, it could
be normal status(such as host
boot up) or abnormal status cause
by compatibility problem.
Inform
IDE Bus UDMA CRC Inform
IDE Bus encounter
UDMA CRC Error
FC Link Up
Inform
Fibre Channel Link Up
FC Link Down
Inform
Fibre Channel Link
Down
In U160 Mode
Serious
SCSI Bus transfer
The SCSI Bus may noisy, check
speed changed to U160 the SCSI cabling and termination.
DRAM 1-Bit ECC
Urgent
DRAM 1-Bit ECC error
Check DRAM
DRAM Fatal Error
Urgent
DRAM fatal error
encountered
Check the DRAM module and
replace with new one if required.
Controller Over
Temperature
Urgent
Abnormally high
temperature detected
on controller (over
6degree)
Check air flow and cooling fan of
the enclosure, and contact us.
Backplane Over
Temperature
Urgent
Abnormally high
temperature detected
on backplane (over 55
degree)
Check air flow and cooling fan of
the enclosure, and contact us.
180
Appendix D. Event Messages
HDD Over
Temperature
Urgent
Abnormally high
temperature detected
on HDD (over 55)
Check air flow and cooling fan of
the enclosure.
#.#V Abnormal
Urgent
Abnormal voltage
detected. ( exceed 5%
tolerance, 12V is 10%)
If only happen once, it maybe
caused by noise. If always
happen, please check the voltage
output of the power
Power Failed
Urgent
Power # failure
Check the power supply, Replace
a new one if required.
Fan Failed
Urgent
Cooling Fan # failure or Check cooling fan of the
speed below 1700RPM enclosure, and replace with a new
one if
UPS AC Power Loss Urgent
UPS AC Power failure
detected
Controller Temp.
Recovered
Serious
Controller temperature
back to normal level.
Backplane Tempe.
Recovered
Serious
Backplane temperature
back to normal level.
#.#V Recovered
Serious
Voltage output back to
normal
Power # Recovered
Serious
Power # back to on-line
state.
Fan # Recovered
Serious
Fan # back to on-line
state.
UPS AC Power
Recovered
Serious
UPS AC power back to
on-line state.
Raid Powered On
Warning
Raid Power On
Test Event
Urgent
Test Event
Power On With
Battery Backup
Warning
Raid Power On with
battery backuped
Incomplete RAID
Discovered
Serious
Some raidset member
disks missing before
power on
HTTP Log In
Serious
a HTTP login detected
Telnet Log In
Serious
a Telnet login detected
Check AC power status or cabling
between UPS and RAID system.
Hdd Temp.
Recovered
Check disk information to find out
which channel missing.
181
Software Operation Manual
VT100 Log In
Serious
a VT100 login detected
API Log In
Serious
a API login detected
Lost
Urgent
Rebuilding/Migration
LBA
182
Some rebuilding/
migration raidset
member disks missing
before power on
Reinserted the missing member
disk back, controller will continued
the incompleted
rebuilding/migration