1
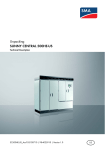
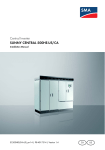
Central Inverter
SUNNY CENTRAL 250U and 500U
User Manual
SC250U_500U-BUS091711 | 98-4000611 | Version 1.1
US
SMA Solar Technology AG
Copyright © 2009 SMA America, Inc. All rights reserved.
No part of this document may be reproduced, stored in a retrieval system, or transmitted, in any
form or by any means, electronic, mechanical, photographic, magnetic or otherwise, without the
prior written permission of SMA America, Inc.
SMA America makes no representations, express or implied, with respect to this documentation or
any of the equipment and/or software it may describe, including (with no limitation) any implied
warranties of utility, merchantability, or fitness for any particular purpose. All such warranties are
expressly disclaimed. Neither SMA America nor its distributors or dealers shall be liable for any
indirect, incidental, or consequential damages under any circumstances.
(The exclusion of implied warranties may not apply in all cases under some statutes, and thus the
above exclusion may not apply.)
Specifications are subject to change without notice. Every attempt has been made to make this
document complete, accurate and up-to-date. Readers are cautioned, however, that SMA America
reserves the right to make changes without notice and shall not be responsible for any damages,
including indirect, incidental or consequential damages, caused by reliance on the material
presented, including, but not limited to, omissions, typographical errors, arithmetical errors or listing
errors in the content material.
SMA America, Incorporated
4031 Alvis Court
Rocklin, CA 95677-4011
Tel. +1 916 625 0870
Fax +1 916 625 0871
www.SMA-America.com
User Manual
SC250U_500U-BUS091711
3
SMA Solar Technology AG
IMPORTANT SAFETY INSTRUCTIONS
SAVE THESE INSTRUCTIONS
This manual contains important instructions for Models SC 250U / SC 500U SOLAR INVERTERS,
that shall be followed during installation and maintenance of the inverter.
The Sunny Central is designed and tested according to international safety requirements, but as with
all electrical and electronic equipment, certain precautions must be observed when installing and/
or operating the Sunny Central. To reduce the risk of personal injury and to ensure the safe
installation and operation of the Sunny Cetral, you must carefully read and follow all instructions,
cautions and warnings in this Installation Guide.
Warnings
A Warning describes a hazard to equipment or personnel. It calls attention to a procedure or
practice, which, if not correctly performed or adhered to, could result in damage to or destruction
of part or all of the SMA equipment and/or other equipment connected to the SMA equipment or
personal injury.
DANGER!
DANGER indicates a hazardous situation which, if not avoided, will result in death or
serious injury.
WARNING!
WARNING indicates a hazardous situation which, if not avoided, could result in death
or serious injury.
CAUTION!
CAUTION indicates a hazardous situation which, if not avoided, could result in minor or
moderate injury.
NOTICE!
NOTICE indicates a situation that can result in property damage if not avoided.
4
SC250U_500U-BUS091711
User Manual
SMA Solar Technology AG
Other Symbols
In addition to the safety and hazard symbols described on the previous pages, the following symbol
is also used in this Installation Guide:
Information
This symbol accompanies notes that call attention to supplementary information that you
should know and use to ensure optimal operation of the system.
General Warnings
General Warnings
All electrical installations must be done in accordance with the local and National
Electrical Code ANSI/NFPA 70.
The Sunny Central contains no user-serviceable parts. For all repair and maintenance
always contact an authorized SMA Service Center.
Before installing or using the Sunny Central, read all of the instructions, cautions, and
warnings on the Sunny Central, the PV array, in this Installation Guide and in the User
Manual.
Before connecting the Sunny Central to the electrical utility grid, contact the local utility
company. This connection must be made only by qualified personnel.
PV arrays produce electrical energy when exposed to light and thus can create an
electrical shock hazard. Wiring of the PV-arrays should only be performed by qualified
personnel.
Warranty
The currect guarantee conditions are available at www.sma-america.com and can be downloaded
or are available on paper from the usual sales channels if required. For warranty coverage, or if
you have questions about the Sunny Central warranty, contact SMA America at the address,
telephone number or Web site listed on page 3 (to send E-mail, see the Contact section of the SMA
America Web site).
User Manual
SC250U_500U-BUS091711
5
SMA Solar Technology AG
6
SC250U_500U-BUS091711
User Manual
SMA Solar Technology AG
Table of Contents
Table of Contents
1
1.1
1.2
Information on this Manual. . . . . . . . . . . . . . . . . . . . . . . . . 9
Target Group . . . . . . . . . . . . . . . . . . . . . . . . . . . . . . . . . . . . . . . 9
Validity . . . . . . . . . . . . . . . . . . . . . . . . . . . . . . . . . . . . . . . . . . . . 9
2
Safety Instructions . . . . . . . . . . . . . . . . . . . . . . . . . . . . . . . 10
3
3.1
3.2
3.3
3.4
3.5
Description of the Sunny Central . . . . . . . . . . . . . . . . . . . 12
Design of the Sunny Central . . . . . . . . . . . . . . . . . . . . . . . . . . 13
Location of the Safety Instructions . . . . . . . . . . . . . . . . . . . . . . 14
Identifying the Sunny Central. . . . . . . . . . . . . . . . . . . . . . . . . . 15
Firmware. . . . . . . . . . . . . . . . . . . . . . . . . . . . . . . . . . . . . . . . . . 15
Elements for Sunny Central Operation . . . . . . . . . . . . . . . . . . 16
3.5.1
Sunny Display. . . . . . . . . . . . . . . . . . . . . . . . . . . . . . . . . . . . . . . . . . . . . . . . 16
3.6
Optional Accessories . . . . . . . . . . . . . . . . . . . . . . . . . . . . . . . . 16
4
4.1
Operating the Sunny Display . . . . . . . . . . . . . . . . . . . . . . 17
Functions of the Buttons . . . . . . . . . . . . . . . . . . . . . . . . . . . . . . 17
4.2
4.3
4.4
4.5
Description of Display Symbols . . . . . . . . . . . . . . . . . . . . . . . . 18
Navigating through the Menu . . . . . . . . . . . . . . . . . . . . . . . . . 20
Switching the display . . . . . . . . . . . . . . . . . . . . . . . . . . . . . . . . 20
Menu Overview . . . . . . . . . . . . . . . . . . . . . . . . . . . . . . . . . . . . 22
4.5.1
Description of Menu Items . . . . . . . . . . . . . . . . . . . . . . . . . . . . . . . . . . . . . . 23
4.6
Changing the Date and Time . . . . . . . . . . . . . . . . . . . . . . . . . . 23
4.6.1
4.6.2
Changing the Time . . . . . . . . . . . . . . . . . . . . . . . . . . . . . . . . . . . . . . . . . . . . 23
Changing the Date . . . . . . . . . . . . . . . . . . . . . . . . . . . . . . . . . . . . . . . . . . . . 24
4.7
Display Firmware Version . . . . . . . . . . . . . . . . . . . . . . . . . . . . 25
5
5.1
5.2
Parameters . . . . . . . . . . . . . . . . . . . . . . . . . . . . . . . . . . . . . 26
Description of Parameters . . . . . . . . . . . . . . . . . . . . . . . . . . . . 26
Changing Parameters. . . . . . . . . . . . . . . . . . . . . . . . . . . . . . . . 28
User Manual
SC250U_500U-BUS091711
7
Table of Contents
SMA Solar Technology AG
6
6.1
Error Diagnosis. . . . . . . . . . . . . . . . . . . . . . . . . . . . . . . . . . 29
Diagnosis . . . . . . . . . . . . . . . . . . . . . . . . . . . . . . . . . . . . . . . . . 30
6.1.1
6.1.2
6.1.3
6.1.4
6.1.5
6.1.6
Solar Generator Fault. . . . . . . . . . . . . . . . . . . . . . . . . . . . . . . . . . . . . . . . . .
Sunny Central Fault . . . . . . . . . . . . . . . . . . . . . . . . . . . . . . . . . . . . . . . . . . .
Grid Fault . . . . . . . . . . . . . . . . . . . . . . . . . . . . . . . . . . . . . . . . . . . . . . . . . . .
Display Fault . . . . . . . . . . . . . . . . . . . . . . . . . . . . . . . . . . . . . . . . . . . . . . . . .
Acknowledge Error at the Sunny Display . . . . . . . . . . . . . . . . . . . . . . . . . .
Acknowledge the Error with the Sunny WebBox. . . . . . . . . . . . . . . . . . . . .
7
Contact . . . . . . . . . . . . . . . . . . . . . . . . . . . . . . . . . . . . . . . . 38
8
Appendix - Glossary . . . . . . . . . . . . . . . . . . . . . . . . . . . . . 39
8
SC250U_500U-BUS091711
30
31
34
36
36
36
User Manual
SMA Solar Technology AG
Information on this Manual
1 Information on this Manual
This document describes the operation, maintenance and failure correction of the Sunny Central
250U and Sunny Central 500U. This manual does not cover any details concerning solar modules.
Information concerning the solar modules is available from the manufacturer of the solar modules.
1.1 Target Group
This manual is for the installer, the maintenance personnel and the operator of a Sunny Central
250U and Sunny Central 500U. An installer is an electrician or technician who is trained in dealing
with the dangers and hazards that can occur when installing electric devices.
1.2 Validity
This manual applies for the Sunny Central 250U and Sunny Central 500U from the BFR firmware
version 1.010 and the DSP firmware version 1.010. In this manual the Sunny Central 250U and
Sunny Central 500U are referred to as "Sunny Central".
User Manual
SC250U_500U-BUS091711
9
SMA Solar Technology AG
Safety Instructions
2 Safety Instructions
DANGER!
High voltages are present in the live components of the medium voltage grid.
Death resulting from burning and electric shock.
•
Do not touch the live components of the medium voltage grid or the inverter.
•
Pay close attention to all safety precaution measures regarding the medium voltage
grid.
WARNING!
Failure to follow the manual, the operating instructions and the safety precautions may
lead to severe injury from electric shock.
•
All work on the Sunny Central may only be done as described in this manual.
•
Pay attention to all safety instructions.
•
Follow all operating instructions.
•
If problems occur when performing the work described here, contact SMA
America.
WARNING!
Operating a damaged Sunny Central may cause severe injury from electric shock.
10
•
The Sunny Central may only be used when it is technically faultless and safe to
operate.
•
Operate the Sunny Central only if there are no visible damages.
•
Regularly check the Sunny Central for visible damage.
•
Ensure that all external safety features are freely accessible at all times, and that
they are regularly tested for correct functionality.
SC250U_500U-BUS091711
User Manual
SMA Solar Technology AG
Safety Instructions
Storage of handbooks
This documentation must be kept in the immediate vicinity of the Sunny Central. It must be
accessible to service and maintenance personnel at any time.
Do not store this documentation or other papers in the Sunny Central.
User Manual
SC250U_500U-BUS091711
11
SMA Solar Technology AG
Description of the Sunny Central
3 Description of the Sunny Central
The Sunny Central is a solar inverter that converts the DC energy from solar modules to AC energy.
This energy is then fed to the public grid. The Sunny Central is designed for indoor and outdoor
installation.
Principle of a Solar Power System with a Sunny Central
A
B
C
D
Stop
Solar modules
B
DC distribution with DC fuses (e.g., Sunny Central String-Monitor)
C
DC disconnect
D
Sunny Central
E
AC fuse
F
AC disconnect
G
Public grid
SC250U_500U-BUS091711
F
G
Start
A
12
E
User Manual
SMA Solar Technology AG
Description of the Sunny Central
3.1 Design of the Sunny Central
The Sunny Central is divided into three sections.
Sunny Central 250U
Sunny Central 500U
A
B
C
A
Magnetics Cabinet:
The Sunny Central's transformer is contained in the Magnetics
Cabinet.
B
Control Cabinet:
The Control Cabinet contains the system control, the Sunny
Display, the stop/start switch and the stacks for converting direct
current to alternating current.
C
Interface Cabinet:
All AC, DC and data cables are connected in the Interface
Cabinet.
User Manual
SC250U_500U-BUS091711
13
SMA Solar Technology AG
Description of the Sunny Central
3.2 Location of the Safety Instructions
Sunny Central 250U
The figure to the right shows the location of the safety
instructions on the Sunny Central 250U.
A
Door of the Magnetics Cabinet
General warnings
B
Door of the Control Cabinet and Interface
Cabinet
Warning regarding high voltages in the Sunny
Central.
Sunny Central 500U
The figure to the right shows the location of the safety
instructions on the Sunny Central 500U.
A
A
B
B
Door of the Magnetics Cabinet
General warnings
B
Door of the Control Cabinet and Interface
Cabinet
Warning regarding high voltages in the Sunny
Central.
14
SC250U_500U-BUS091711
User Manual
SMA Solar Technology AG
Description of the Sunny Central
3.3 Identifying the Sunny Central
You can identify the Sunny Central using the type plate
(see figure at right, example for a typeplate of the Sunny
Central 500U). The type plate is located in the Interface
Cabinet.
A
Type description of the Sunny Central
SMA Solar Technology AG
www.sma-america.com
A
SUNNY CENTRAL
Model:
SC500U
Serial No.:
0180100000
Date of manufacture:
Max. Continuous output Power*
B
C
Serial number of the Sunny Central
Date of manufacture
250kWac
Operating voltage range (Vac 3-Phase)*
Min
Nominal
422
480
Max
522
Operating frequency range (Hz)*
Min
Nominal
59.3
Max
60.0
60.5
300.7Aac
Max. continuous output current*
0.99
Output power factor
Range of input operating voltage
3.4 Firmware
You can use the display to call up the firmware version
of the Sunny Central and of the display (see Section 4.7
"Display Firmware Version" (Page 25)).
290 - 600 Vdc
MPPT Range of operating DC voltage*
290 - 480 Vdc
Max. operating current*
800 Adc
The unit contains DC-Ground and Fault Detector
and Interruptor
ENCLOSURE
Type 3R (IP54)
*For more details and for tightening torque,
allowable wire size and type see the Operator’s
Manual
Utility Interactive 3-Phase Inverter
Utility interactive inverter
LISTED UL 1741 36AN
User Manual
B
C
11/2007
Tested To Comply
With FCC Standards
FOR HOME AND OFFICE USE
SC250U_500U-BUS091711
15
Description of the Sunny Central
SMA Solar Technology AG
3.5 Elements for Sunny Central Operation
3.5.1 Sunny Display
There is a display on the front side of the Sunny Central. The
display shows the current values of the solar power system.
See Section 4 "Operating the Sunny Display" (Page 17).
3.6 Optional Accessories
The Sunny Central can be equipped with various
communication and data acquisition devices.
Sunny WebBox
The Sunny WebBox collects the data from the Sunny Central continuously. To read the data, the
Sunny WebBox can be connected to a laptop or PC. The data can be processed with Sunny Portal,
for example.
Sunny SensorBox
The Sunny SensorBox and the sensors enable you to acquire environmental data of your solar
power system which are relevant for performance evaluation. For this purpose, the Sunny
SensorBox is equipped as standard with an integrated irradiation sensor and an external module
temperature sensor. The Sunny SensorBox delivers the sensor data via an RS485 interface to the
SMA communication devices (e.g. Sunny WebBox).
Power Metering
The Shark power meter and iLon device are a revenue grade metering system. They allow the output
generation of the inverter to be monitored and recorded. This information is sent via the internet to
a network that can process the data into a utility bill.
16
SC250U_500U-BUS091711
User Manual
SMA Solar Technology AG
Operating the Sunny Display
4 Operating the Sunny Display
4.1 Functions of the Buttons
A
Pushbutton
B
Knob
The display can be operated with a pushbutton and a knob.
Pushbutton
If an error occurs during operation, the pushbutton is backlit red. The display indicates the error with
a number and a description in the text line.
Knob
The knob can be pressed or turned to the left or the right.
•
•
Turn:
-
Moves up and down in the menu
-
Entering values (decrease, increase)
Press
-
Open/close menu
-
Select/cancel function
-
Select value
-
Confirm entry
-
Activation of the background illumination
User Manual
SC250U_500U-BUS091711
17
Operating the Sunny Display
SMA Solar Technology AG
4.2 Description of Display Symbols
A
Tapping
The background illumination is switched on by tapping on the housing cover.
B
Open switch: The Sunny Central is not feeding the grid (e.g., at night).
Closed switch: The Sunny Central is feeding the grid.
C
Power
This displays the power which the Sunny Central is feeding into the grid. The display is
updated every 5 seconds.
D
Day
The energy fed into the grid on this day is displayed here. This is the energy generated
from the moment the Sunny Central begins to operate to the moment of the reading. The
display is updated every 5 seconds.
E
Total
This displays the total energy which the Sunny Central has fed into the grid during its
operating time. The display is updated every 5 seconds.
F
Text line
The text line shows the menu and a plain text error description.
For example, if there is an error, the cause of the error is shown in the text line. In addition,
the display shows the respective error number in position G, I or K.
18
SC250U_500U-BUS091711
User Manual
SMA Solar Technology AG
G
Operating the Sunny Display
Event number grid
If there is a failure in the AC grid, an error number will be shown in this position. In
addition, a plain text message will be shown in the text line (position F). See Section 6
"Error Diagnosis" (Page 29).
H
Grid voltage, grid frequency, grid current
Changing display between:
•
Grid voltage
•
Grid frequency
•
Grid current (average over all three phases)
The display changes between the values every 2 seconds.
I
Event number Sunny Central
If there is an error in the Sunny Central, an error number will be shown in this position. In
addition, a plain text message will be shown in the text line (position F). See Section 6
"Error Diagnosis" (Page 29).
J
Solar voltage, solar current
This displays the solar voltage and solar current in alternation. The display changes
between the values every 2 seconds.
K
Event number PV generator
If there is a failure in the PV generator, an error number will be shown in this position. In
addition, a message in plain text will be shown in the text line (position F). See Section 6
"Error Diagnosis" (Page 29).
L
Errors
This symbol is illuminated if an error occurs. Contact the SMA Service Line, see Section 7
"Contact" (Page 38).
M
Errors
This symbol is illuminated if an error occurs. In Section 6 "Error Diagnosis" (Page 29) it is
described how this error can be rectified.
N
Graphic display of the output power of the Sunny Central
The output power of the Sunny Central is shown in a chart in the display. The daily graph
is displayed by default. Also see Section 4.4 "Switching the display" (Page 20).
The column for the current hour is adjusted every five seconds.
User Manual
SC250U_500U-BUS091711
19
SMA Solar Technology AG
Operating the Sunny Display
4.3 Navigating through the Menu
You can navigate through the menu using the knob and the pushbutton on the Sunny Display.
Action
Procedure
Change menu item
Turn knob.
Select menu
Press knob once.
Leave menu
Turn the knob until the text line reads "BACK".
Press the knob.
The Sunny Display changes to the outer menu.
Confirm entry
Press knob once.
Increase / decrease values.
Turn knob.
4.4 Switching the display
You can view the hourly graph or the daily graph in the display. The display shows the hourly graph
by default. The current hour or the current day is the right column of the chart. With every new hour
or new day, the chart moves further to the left, out of the screen. In total the display can show 16
hours or 16 days.
E-DAY
E-DAY charts the hours and indicates the maximum power
output of the day. When no energy is fed into the grid (at
night, for example) a gap is inserted in the chart. The gap is
the same width as a column.
A
No energy is fed into the grid
B
Current hour
20
SC250U_500U-BUS091711
User Manual
SMA Solar Technology AG
Operating the Sunny Display
E-HISTORY
E-HISTORY is the chart of the last 16 days. The daily chart
displays the energy which the Sunny Central fed into the grid
on the respective days.
A
Current day
Switching between E-DAY and E-HISTORY
You change the display by turning the knob.
Turn the knob to the left: E-HISTORY
Turn the knob to the right: E-DAY
User Manual
SC250U_500U-BUS091711
21
SMA Solar Technology AG
Operating the Sunny Display
4.5 Menu Overview
The menu of the Sunny Display is subdivided into two menu items. To access the menu, proceed as
follows:
1.
Turn the knob to the right until the text line "E-DAY" appears.
2.
Keep the knob and the pushbutton pressed for 5 seconds.
The Sunny Display changes to the main menu.
Menu 1st level
Menu 2nd level
SETTINGS
CURRENT TIME
TIME SETTINGS
Menu 3rd level
Menu 4th level
SET CURRENT TIME
HOUR
MIN
BACK
SET CURRENT DATE
YEAR
MONTH
DAY
BACK
BACK
BACK
INFO
VERSION BFR
VERSION DSP
VERSION DISPLAY
VERSION LCD
BACK
BACK
22
SC250U_500U-BUS091711
User Manual
SMA Solar Technology AG
Operating the Sunny Display
4.5.1 Description of Menu Items
SETTINGS
In the Settings menu you can adjust the settings on the display (e.g.
date and time settings) and display the current time.
•
CURRENT TIME
Displays the current time.
•
TIME SETTINGS
In this menu you can change the time and the date (see Section 4.6
"Changing the Date and Time" (Page 23)).
INFO
The Info menu displays the firmware numbers of the Sunny Display
and the Sunny Central.
•
VERSION BFR
Displays the firmware number of the Sunny Central operation control
unit (BFR).
•
VERSION DSP
Displays the firmware number of the Sunny Central Digital Signal
Processor (DSP).
•
VERSION DISPLAY
Displays the firmware version of the Sunny Display.
•
VERSION LCD
Displays the firmware number of the Sunny Display LCD.
4.6 Changing the Date and Time
If a Sunny WebBox is not built into the Sunny Central, you can change the date and time on the
Sunny Display. If you wish to change the date or the time (e.g. from summer to winter time), proceed
as follows:
4.6.1 Changing the Time
1.
Keep the knob and the pushbutton pressed for 2 seconds.
2.
Turn the knob until the text line displays "SETTINGS".
3.
Press the knob once.
4.
Turn the knob until the text line displays "TIME SETTINGS".
5.
Press the knob once.
The Sunny Display changes to the "SETTINGS" menu.
The Sunny Display changes to the "TIME SETTINGS" menu.
6.
Turn the knob until the text line displays "SET CURRENT TIME".
7.
Press the knob once.
The Sunny Display changes to the "SET CURRENT TIME" menu. You can set the hours and
minutes in this menu.
8.
-
HOUR: Current hour. The time is shown in 12-hour format.
-
MIN: Current minute.
Turn the knob until the text line displays "HOUR", for example.
User Manual
SC250U_500U-BUS091711
23
Operating the Sunny Display
9.
SMA Solar Technology AG
Press the knob once.
The Sunny Display changes to the "HOUR" menu item.
10. Turn the knob until the text line displays the desired hour.
11. Press the knob once to confirm and save the current value.
The Sunny Display springs back to the "SET CURRENT TIME" menu. The value (in this case the
hour) is set.
12. To set the minute, proceed as described in point 9. Select "MINUTE" instead of "HOUR".
4.6.2 Changing the Date
1.
Follow points 1 through 6 in chapter 4.6.1 "Changing the Time" (Page 23).
2.
Turn the knob until the text line displays "SET CURRENT DATE".
3.
Press the knob once.
The Sunny Display changes to the "SET CURRENT DATE" menu. You can set the year, month
and day in this menu.
-
YEAR: Current year.
-
MONTH: Current month.
-
DAY: Current day.
4.
Turn the knob until the text line displays "YEAR", for example.
5.
Press the knob once.
6.
Turn the knob until the text line displays the desired year.
7.
Press the knob once to confirm and save the desired value.
The Sunny Display changes to the "YEAR" menu item.
The Sunny Display springs back to the "SET CURRENT DATE" menu. The value (in this case
the year) is set.
8.
24
To set the month and day, proceed as described in point 4. Select "MONTH" or "DAY"
instead of YEAR.
SC250U_500U-BUS091711
User Manual
SMA Solar Technology AG
Operating the Sunny Display
4.7 Display Firmware Version
You can display the firmware versions of the Sunny Central and the Sunny Display as follows:
1.
Keep the knob and the pushbutton pressed for 2 seconds.
2.
Turn the knob until the text line displays "INFO".
3.
Press the knob once.
The Sunny Display changes to the "INFO" menu. In this menu you can select the firmware
versions and version numbers.
-
VERSION BFR: firmware version of the Sunny Central operation control unit (BFR).
-
VERSION DSP: firmware version of the Sunny Cetral Digital Signal Processor (DSP).
-
VERSION Display: firmware version of the Sunny Display.
-
VERSION LCD: firmware version of the Sunny Display LCD.
4.
Turn the knob until the text line of the event display reads "VERSION BFR", for example.
5.
Press the knob once.
The Sunny Display shows the version number of the operation control unit.
6.
Press the knob once to spring back one level.
User Manual
SC250U_500U-BUS091711
25
SMA Solar Technology AG
Parameters
5 Parameters
5.1 Description of Parameters
The following table shows the parameters that are visible to the user. The installation guide of the
Sunny Central also shows the parameters that are visible to the installer.
Parameter Name Range
Default
Parameter Description
Ackn
–––
Acknowledge an error manually
–––, Ackn,
NoAckn
Dt
You can acknowledge an error with the
optional Sunny WebBox. Refer to
Section 6.1.6 "Acknowledge the Error
with the Sunny WebBox." (Page 36).
yyyymmdd
Current Date.
Here you can set the current date.
Ofs_E-Total
Ofs_h_On
0 ... 214748364
kWh
0 kWh
0 ... 2147483 h
0h
The Sunny Central's total energy yield
Changing the Ofs_E_Total parameter
may be necessary if you exchange the
computer assembly (BFR) of the Sunny
Central and want to transfer the data
from the old device.
The Sunny Central's total number of
hours of operation
Changing the Ofs_h_On parameter
may be necessary if you exchange the
computer assembly (BFR) of the Sunny
Central and want to transfer the data
from the old device.
Ofs_h_Total
0 ... 2147483 h
0h
Total number of operational hours with
grid feeding
Changing the Ofs_h_Total parameter
may be necessary if you exchange the
computer assembly (BFR) of the Sunny
Central and want to transfer the data
from the old device.
Plimit
26
0 ... 1000 kW
SC250U_500U-BUS091711
250 kW
(SC250U)
500 kW
(SC500U)
Upper limit for AC output power
This parameter cannot be changed.
User Manual
SMA Solar Technology AG
Parameters
Parameter Name Range
Default
Parameter Description
Pmax
0 ... 250 kW
(SC250U)
250 kW
(SC250U)
Output limit of the Sunny Central
0 ... 500 kW
(SC500U)
500 kW
(SC500U)
PVPwrMinTr
0 ... 1200 kW
10 kW
MPP tracking
PVPwrMinTrT
1 ... 1800 s
600 s
If the output exceeds the value
PVPwrMinTr, the Sunny Central will wait
for the period of time set in PVPwrMinTrT
before it begins to seek the Maximum
Power Point.
PVStrT
1 ... 1800 s
90 s
Initial voltage of the Sunny Central
400 V
If the voltage increases over the value
set at PVVtgStr, the Sunny Central will
start after waiting for the period of time
set at PVStrT.
PVVtgStr
0 ... 1200 V
Serial Number
The output power of the Sunny Central
can be reduced with this parameter.
Serial number of the Sunny Central.
This parameter cannot be changed.
SpntRemEna
–––, Off, On
On
Switching off the Sunny Central
With this parameter you can switch off
the Sunny Central via the remote access.
Tm
hhmmss
Current Time.
Here you can set the current time.
User Manual
SC250U_500U-BUS091711
27
SMA Solar Technology AG
Parameters
5.2 Changing Parameters
DANGER!
Danger to life through changing the internal safety specifications of the Sunny Central.
•
Parameters may only be changed with the express authorization of the grid
operator and SMA America.
If a Sunny WebBox is installed in the Sunny Central, you can change the parameters of the Sunny
Central via remote access from a PC or laptop. If you want to change the parameters of a Sunny
Central without an inbuilt Sunny WebBox, contact SMA America.
Change the parameters as described in the following:
1.
Open Internet browser.
2.
Enter the Sunny WebBox IP address.
The Sunny WebBox interface appears in the browser.
3.
Enter the installer or user password. The parameters are displayed depending on the
password level.
4.
Select Sunny Central from the selection list to the left.
5.
Select the "Parameter" tab.
6.
Select and change the desired parameter.
7.
Go to the bottom of the parameter list and click on "Save".
The browser displays the parameter list of the Sunny Central.
The parameter changes after 2 seconds.
28
SC250U_500U-BUS091711
User Manual
SMA Solar Technology AG
Error Diagnosis
6 Error Diagnosis
If the Sunny Central detects a fault during operation, it shows the fault in the display. Faults are
indicated with a two-digit error code, a plain text message in the text line, a symbol in the display
and a glowing pushbutton. This section describes how to recognize the type of fault and how you
can rectify it. For the user of the Sunny Central this section should only be used for diagnosing a fault.
DANGER!
Even in the case of a fault the Sunny Central can still contain high voltages.
Risk of death from electric shock.
•
All procedures described in this section may only be carried out by qualified
personnel.
•
All the safety instructions in the installation guide and user manual must be observed
when working on the Sunny Central.
•
Contact SMA America if you cannot rectify the fault with the help of this manual.
Example of an Isolation Failure
A
The pushbutton glows to indicate a failure.
B
Symbol for a failure (in this case a wrench)
C
Error number (here: isolation failure)
D
Plain text message in the text line
User Manual
SC250U_500U-BUS091711
29
SMA Solar Technology AG
Error Diagnosis
6.1 Diagnosis
The displayed faults are divided into the three areas of the PV system:
•
Solar generator (see Section 6.1.1 "Solar Generator Fault" (Page 30))
•
Sunny Central (see Section 6.1.2 "Sunny Central Fault" (Page 31))
•
Grid (see Section 6.1.3 "Grid Fault" (Page 34))
6.1.1 Solar Generator Fault
If the fault is on the solar generator side, a two-digit error
code appears on the left side of the system display (see
figure to the right: A). With this error number you can narrow
down the type of malfunction. The table below describes the
type of fault, its cause and what you can do to rectify the
fault.
No.
Description
34
Error text:
DC-Overvoltage
Cause of fault:
The voltage of the solar generator is too high.
Corrective measures:
•
35
Immediately disconnect the solar generator from the Sunny Central! The
Sunny Central can be damaged by the high input voltage.
•
Check the input voltage.
•
Check module wiring and system design.
Error text:
Ground Fault
Cause of fault:
The solar generator has a connection to ground.
Corrective measure:
•
30
Check the solar generator for a ground fault.
SC250U_500U-BUS091711
User Manual
SMA Solar Technology AG
No.
Description
38
Error text:
Error Diagnosis
DC-Overcurrent
Cause of fault:
The current of the solar generator is too high.
Corrective measures:
•
Immediately disconnect the solar generator from the Sunny Central! The
Sunny Central can be damaged by the high input current.
•
Check the input current.
•
Check module wiring and system design.
6.1.2 Sunny Central Fault
If the fault is with the Sunny Central, a two-digit error code
appears in the middle of the system display (see figure to the
right: A). With this error number you can narrow down the
type of malfunction. The table below describes the type of
fault, its cause and what you can do to rectify the fault.
No.
Description
60
Error text:
Device Fault
Cause of fault:
•
Internal fault of the Sunny Central.
Corrective measures:
•
61
Contact the SMA Service Line.
Error text:
Device Fault
Cause of fault:
Internal fault of the Sunny Central.
Corrective measures:
•
User Manual
Contact the SMA Service Line.
SC250U_500U-BUS091711
31
SMA Solar Technology AG
Error Diagnosis
No.
Description
64
Error text:
Device Fault
Cause of fault:
Internal fault of the Sunny Central.
Corrective measures:
•
65
Contact the SMA Service Line.
Error text:
Overtemperature
Cause of fault:
The ambient temperature is too high.
Corrective measures:
70
•
Check functionality of fan.
•
Clean the fan.
•
Clean dirty fan inlets and the ventilation plate.
Error text:
Temperature sensor failure
Cause of fault:
•
Cable break
•
Short circuit
•
Internal fault of the Sunny Central.
Corrective measures:
75
•
Check the cabling of the temperature sensor.
•
Contact the SMA Service Line.
Error text:
Fan failure
Cause of fault:
The ambient temperature is too high.
Corrective measures:
32
•
Check functionality of fan.
•
Clean the fan.
•
Clean dirty fan inlets and the ventilation plate.
SC250U_500U-BUS091711
User Manual
SMA Solar Technology AG
No.
Description
76
Error text:
Error Diagnosis
Communication failure
Cause of fault:
Internal fault of the Sunny Central.
Corrective measures:
•
77
Contact the SMA Service Line.
Error text:
Device fault
Cause of fault:
Contactor defective.
Corrective measures:
•
79
Contact the SMA Service Line.
Error text:
Reverse current failure
Cause of fault:
Short circuit in the solar generator.
Corrective measures:
•
User Manual
Check the solar generator for short circuits.
SC250U_500U-BUS091711
33
SMA Solar Technology AG
Error Diagnosis
6.1.3 Grid Fault
If the fault is on the grid side, a two-digit error code appears
on the right side of the system display (see figure to the right:
A). With this error number you can narrow down the type of
malfunction. The table below describes the type of fault, its
cause and what you can do to rectify the fault.
No.
Description
01
Error text:
Grid failure
Cause of fault:
The grid voltage is too high.
Corrective measures:
02
•
Check the grid voltage.
•
If the grid voltage lies outside the acceptable range because of local grid conditions,
ask the grid operator if the voltages can be adjusted at the feed-in point.
Error text:
Grid failure
Cause of fault:
The grid voltage is too low.
Corrective measures:
05
•
Check the grid voltage.
•
If the grid voltage lies outside the acceptable range because of local grid conditions,
ask the grid operator if the voltages can be adjusted at the feed-in point.
•
Check that the external fuses are functional.
•
Check that the AC cable is securely connected.
Error text:
Grid failure
Cause of fault:
The grid frequency is outside the permitted range.
Corrective measures:
34
•
Check grid frequency.
•
If the grid frequency lies outside the acceptable range because of local grid
conditions, ask the grid operator if the frequency can be adjusted at the feed-in point.
•
Check that the external fuses are functional.
•
Check that the AC cable is securely connected.
SC250U_500U-BUS091711
User Manual
SMA Solar Technology AG
No.
Description
08
Error text:
Error Diagnosis
Grid failure
Cause of fault:
One phase of the grid has failed.
Corrective measures:
13
•
Check the grid voltage.
•
Check that the external fuses are functional.
•
Check that the AC cable is securely connected.
Error text:
Grid installation failure
Cause of fault:
Counterclockwise phase sequence
Corrective measures:
•
Check connection to the grid.
•
Check phase sequence.
User Manual
SC250U_500U-BUS091711
35
SMA Solar Technology AG
Error Diagnosis
6.1.4 Display Fault
If the fault is with the display, the cause of the fault appears in
text line (see example to the right). A display fault is shown
without a two-digit error code. The table below describes the
type of fault, its cause and what you can do to rectify the fault.
No.
Description
none
Error text:
NO COMMUNICATION
Cause of fault:
The display has received no data for 5 minutes.
Corrective measures:
•
Check communication cable.
•
Check supply voltage of the operation control unit (BFR).
•
Check operating mode of the Display (see the Sunny Central installation guide).
-
WEBBOX: For this operating mode a Sunny WebBox has to be installed.
-
NO WEBBOX: No Sunny WebBox installed.
•
For operation with Sunny WebBox: Check function of the Sunny WebBox.
•
Contact the SMA Service Line.
6.1.5 Acknowledge Error at the Sunny Display
Acknowledge the error as described in the following.
1.
Rectify the error at the Sunny Central as described in section 6 "Error Diagnosis" (Page 29).
2.
Press the glowing pushbutton once.
-
After 2 seconds the error is acknowledged.
6.1.6 Acknowledge the Error with the Sunny WebBox.
If a Sunny WebBox is installed in the Sunny Central, you acknowledge an error via a Sunny
WebBox from a PC or Laptop. You will find an extensive description of the operation of the Sunny
WebBox in the technical description of the Sunny WebBox.
The error can only be acknowledged in the installer mode. Proceed as follows:
1.
Rectify the error at the Sunny Central as described in section 6 "Error Diagnosis" (Page 29).
1.
Open Internet browser.
2.
Enter the Sunny WebBox IP address.
The Sunny WebBox interface appears in the browser.
3.
36
Enter the installer or user password. The parameters are displayed depending on the
password level.
SC250U_500U-BUS091711
User Manual
SMA Solar Technology AG
4.
Select Sunny Central from the selection list to the left.
5.
Select the "Parameter" tab.
-
Error Diagnosis
The browser displays the parameter list of the Sunny Central.
6.
Select the "Ackn" parameter.
7.
Select "Ackn" from the menu list.
8.
Go to the bottom of the parameter list and click on "Save".
-
The error is acknowledged.
User Manual
SC250U_500U-BUS091711
37
SMA Solar Technology AG
Contact
7 Contact
If you have technical problems concerning our products, contact the SMA Serviceline. We require
the following information in order to provide you with the necessary assistance:
•
Inverter type
•
Type and number of modules connected
•
Serial number of the Sunny Central
•
Error number of the Sunny Central
•
Display of the Sunny Central
SMA America, Incorporated
4031 Alvis Court
Rocklin, CA 95677
Tel. +1 916 625 0870
Fax +1 916 625 0871
[email protected]
www.SMA-America.com
38
SC250U_500U-BUS091711
User Manual
SMA Solar Technology AG
Appendix - Glossary
8 Appendix - Glossary
AC
Abbreviation for "Alternating Current"
ANSI
Abbreviation for American National Standards Institute
BFR
Abbreviation for operation control unit
CEC
Abbreviation for California Energy Commission
Crossover cable
A crossover cable is needed, for example, to connect two computers directly with one another. A
crossover cable is an 8-wire twisted pair cable with an RJ45 plug on each end. In one of the plugs
certain wires are interchanged.
DC
Abbreviation for "Direct Current"
Derating
A controlled reduction in performance, usually dependent on component temperatures. Compared
with the normal process of completely shutting down the device, the negative effect on the external
power network is reduced with derating.
DSP
Abbreviation for Digital Signal Processor
Energy
The energy is measured in Wh (watt hours), kWh (kilowatt hours) or MWh (megawatt hours). The
energy is the power calculated over time. If, for example, your Sunny Central operates at a constant
output of 150 kW for half an hour and then at a constant output of 250 kW for another half hour,
it has fed 200 kWh of energy into the gird within that hour.
Ethernet
Ethernet is a cable-based data network technology for local data networks. It allows data exchange
in the form of data frames between all devices connected to a local network (e.g. computer, printer).
Fast Ethernet
Fast Ethernet is a further development of Ethernet which works at 100 Mbit/s. Also see "Ethernet".
Maximum Power Point (MPP)
Operating point with the maximum output power. This operating point varies with the solar radiation
and temperature conditions of the modules.
User Manual
SC250U_500U-BUS091711
39
Appendix - Glossary
SMA Solar Technology AG
NEMA
Abbreviation for National Electrical Manufactures Association
NFPA
Abbreviation for National Fire Protection Association
Patch Cable
A patch cable is used, for example, to connect a computer to a switch or router. A patch cable is
an 8-wire twisted pair cable with an RJ45 plug on each end.
Power
The power is measured in W (watts), kW (kilowatts) or MW (megawatts). Power is a present value.
It displays the power the Sunny Central is currently feeding into the grid.
PV
Abbreviation for photovoltaic, designates the conversion of solar energy into electrical energy.
PWM
Abbreviation for Pulse Width Modulation
Router
A router connects several computer networks together.
RS485
RS485 is an interface standard for cable-bound data transmission. RS485 allows communication
with 50 inverters and communication devices over a distance of 4,000 ft.
Solar Cell
An electronic component which generates electrical energy when irradiated with sunlight. Since the
voltage produced by a solar cell is very small (approx. 0.5 V), several solar cells are combined to
form a solar module. The most common material presently used for solar cells is silicon, which is
manufactured in different forms (monocrystalline, polycrystalline, amorphous).
Solar Energy System
A solar power plant is a power plant in which a portion of the solar irradiation is converted to
electrical energy by means of solar cells. The DC voltage won this way is converted to AC voltage
by an inverter (for example, Sunny Central) and is fed into the electricity network.
Solar Inverter
A device for converting the direct current (DC) from the PV generator into alternating current (AC),
which is required by most normal household devices and especially for feeding energy into an
existing supply grid.
Solar Module
A collection of solar cells in a housing that protects the sensitive cells from mechanical stresses and
allows easy installation.
40
SC250U_500U-BUS091711
User Manual
SMA Solar Technology AG
Appendix - Glossary
String
Describes a group of solar modules connected in series.
Sunny Central
The Sunny Central is an inverter for large solar power systems. This inverter concept is one in which
all solar modules are connected to each other (in series and/or parallel) and a single inverter is
used for feeding energy into the grid.
Sunny Portal
Sunny Portal is a web-based service provided by SMA which offers the possibility of creating a
personal Sunny Portal website on which the data pertaining to a photovoltaic plant can be
displayed. Additionally, the Sunny Portal archives this data. The solar power system data is
available worldwide over the Internet.
Sunny SensorBox
The Sunny SensorBox and the sensors enable you to acquire environmental data of your solar
power system which are relevant for performance evaluation. For this purpose, the Sunny
SensorBox is equipped as standard with an integrated irradiation sensor and an external module
temperature sensor. The Sunny SensorBox delivers the sensor data via an RS485 interface to the
SMA communication devices (e.g. Sunny WebBox).
Sunny Central String-Monitor
The DC cables from the solar generators are collected in the Sunny Central String-Monitor. The
Sunny Central String-Monitor monitors the current of the PV modules and can detect failures, e.g.,
the failure of a module.
Sunny WebBox
The Sunny WebBox collects the data from the Sunny Central continuously. To read the data, the
Sunny WebBox can be connected to a laptop or PC. The data can be processed with Sunny Portal,
for example.
Switch
A switch is a network component which allows the connection of several computers or network
segments in a local network.
THD
Abreviation for Total Harmonic Distortion
User Manual
SC250U_500U-BUS091711
41
Appendix - Glossary
42
SC250U_500U-BUS091711
SMA Solar Technology AG
User Manual
SMA America, Incorporated
www.sma-america.com
4031 Alvis Court
Rocklin, CA 95677-4011
Tel 916-625-0870
Fax 916-625-0871
[email protected]