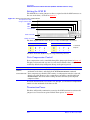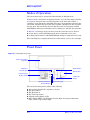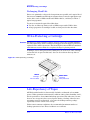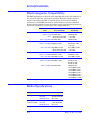
1
HP DDS Drives
HP
HP
HP
HP
HP
HP
HP
HP
HP
C1533A DDS-2 Drive (8 gigabyte)
C1534A DDS-1 Drive (2 gigabyte)
C1536A & HP C5737A DDS-DC Drive (4 gigabyte)
C1537A & HP C1554A DDS-3 Drive (24 gigabyte)
C1539A & HP C1599A DDS-2 Drive (8 gigabyte)
C1553A DDS-2 Autoloader (48 gigabyte)
C1557A & HP C5648A DDS-3 Autoloader (144 gigabyte)
C5683A DDS-4 Drive(40 gigabyte)
C5713A DDS-4 Autoloader (240 gigabyte)
User Manual
Part Number: C1534-90911
Edition 8, December 1999
Hewlett-Packard Ltd.
Computer Peripherals Bristol
Filton Road, Stoke Gifford
Bristol BS12 6QZ, U.K.
Notice
The information contained in this
document is subject to change
without notice.
Hewlett-Packard makes no
warranty of any kind with
regard to this material,
including, but not limited to,
the implied warranties of
merchantability and fitness
for a particular purpose.
Hewlett-Packard shall not be
liable for errors contained herein
or direct, indirect, special,
incidental or consequential
damages in connection with the
furnishing, performance, or use of
this document.
This document contains
proprietary information which is
protected by copyright. All rights
reserved. No part of this
document may be photocopied,
reproduced or translated to
another language without the
prior written consent of
Hewlett-Packard.
© Copyright 1999 by
Hewlett-Packard Limited
Printing History
Version
Date
Changed Pages
Edition 1
June 94
All
Edition 2
November 94
Minor updates
Edition 3
May 95
Cosmetic changes
Draft Edition 4 Nov 95
Addition of HP C1537A and HP C1553A
Draft Edition 5 July 1996
Addition of HP C1539A
Edition 6
September 1996 Addition of HP C1557A
Edition 6.1
March 1997
Changed MTBF for HP C1553A (p.9-2).
Changed duty cycle for HP C1557A. (p.9-2).
Tolerances and dimensions on Figure 2.8
changed slightly.
Inclusion of supported Mode and Log pages
(p.7-5).
Edition 6.2
October 1997
Small changes
Edition 6.3
May 1998
Small changes
Edition 7
May 1999
Addition of HP C5683A, HP C5713A and
HP C1536A
Edition 8
December 1999 Small changes
Note
As far as this manual is concerned:
n the HP C1554A is identical to the HP C1537A
n the HP C1599A is identical to the HP C1539A
n the HP C5648A is identical to the HP C1557A
n the HP C5737A is identical to the HP C1536A
The inclusion of a particular drive or autoloader in this
document does not imply that that drive or autoloader is
currently available.
The Purpose of this Manual
This manual provides a comprehensive introduction to HP DDS drives:
n HP C1534A DDS-1 Drive, with a capacity of 2 gigabytes
n HP C1536A (HP C5737A) DDS-1 Drive, with a capacity of 4 gigabytes using
2:1 data compression
n HP C1533A DDS-2 Drive, with a capacity of 8 gigabytes using 2:1 data
compression
n HP C1539A (HP C1599A) DDS-2 Drive, with a capacity of 8 gigabytes using
2:1 data compression
n HP C1553A DDS-2 Autoloader, with a capacity of 48 gigabytes using 2:1 data
compression
n HP C1537A (HP C1554A) DDS-3 Drive, with a capacity of 24 gigabytes using
2:1 data compression
n HP C1557A (HP C5648A) DDS-3 Autoloader, with a capacity of 144 gigabytes
using 2:1 data compression
n HP C5683A DDS-4 Drive, with a capacity of 40 gigabytes using 2:1 data
comprssion
n HP C5713A DDS-4 Autoloader, with a capacity of 240 gigabytes using 2:1 data
compression
It gives details of how to install and operate the drives, and contains full
specifications of all the drives.
Further information is available in volumes 2–5 of the HP DDS Technical
Manual:
n Volume 2: Integration Guide
n Volume 3: The SCSI Interface
n Volume 4: Background to DDS Products
n Volume 5: DDS UNIX Configuration Guide
See Chapter 1 for details of these and other documents.
Edition 8—December 1999
Intro-3
Intro-4
Edition 8—December 1999
Contents
1 Introduction
HP DDS Drives 1-2
DDS Formats and Compatibility 1-3
Related Documents 1-6
Ordering Supplies 1-7
SCSI Accessories 1-8
2 Installation
Power Connection 2-2
Grounding 2-3
SCSI Connection and Termination (DDS-1 drives only) 2-4
Setting the SCSI ID 2-4
Data Compression Control 2-5
Termination Power 2-5
SCSI Connection and Termination (DDS-2 and DSS-3 drives only)
Setting the SCSI ID 2-6
Data Compression Control 2-6
Termination Power 2-6
SCSI Connection and Termination (DDS-4 drives only) 2-7
Mixing SE and LVD, Ultra and Ultra2 SCSI Devices 2-7
Setting the SCSI ID 2-7
Data Compression Control 2-8
Termination Power 2-8
Configuration Switches 2-9
Data Compression (not HP C1534A) 2-9
Media Recognition System (MRS) 2-10
Switches 4 to 8 2-10
Autoloader Option Switches 2-10
Fixing Requirements 2-12
Airflow and Cooling Requirements 2-13
2-5
3 Operation—Drives
Front Panel 3-2
Media Caution Signal 3-2
Loading and Unloading 3-3
Inserting Cartridges 3-3
Removing Cartridges 3-4
Forcing the Ejection of a Cartridge 3-4
Taking Care of the Drive 3-5
Head Cleaning 3-5
Prolonging Head Life 3-5
Temperature and Condensation 3-6
Removing Power from the Drive 3-6
Upgrading Firmware from Tape 3-6
Edition 8—December 1999
Contents-1
4 Operation—Autoloaders
Modes of Operation 4-2
Front Panel 4-2
Front Panel Buttons 4-3
Front Panel Liquid Crystal Display (LCD) 4-3
Front Panel Lights 4-4
LCD Messages Categories 4-4
Loading the Magazine and Cartridges 4-6
Ejecting the Magazine and Cartridges 4-8
Forcing Ejection 4-9
Head Cleaning 4-9
Avoiding Condensation 4-11
LCD Messages 4-11
Number Codes (HP5713A only) 4-11
Localizing the Display (HP C5713A only) 4-15
Upgrading Firmware from Tape 4-16
Self-Test 4-17
Replaceable Parts 4-17
5 Cartridges
DDS Formats 5-2
Choosing Cartridges 5-2
Write-Protecting a Cartridge 5-4
Life-Expectancy of Tapes 5-4
Humidity 5-5
Using Labels 5-5
6 Troubleshooting
General Procedure 6-2
Emergency Removal of a Magazine or Cartridge (autoloaders only)
6-3
7 Interface Implementation
The SCSI Interface 7-2
Supported Messages 7-2
Supported Status Codes 7-3
Supported Commands 7-3
Supported Mode Pages 7-5
Supported Log Pages 7-5
8 Physical and Safety Specifications
Dimensions and Weight 8-2
Orientation (Autoloaders only) 8-2
Environmental 8-3
Electromagnetic Compatibility 8-4
Media Specifications 8-4
Power Requirements 8-5
Safety 8-7
Contents-2
Edition 8—December 1999
Conditions of Acceptability
8-7
9 Reliability
Summary 9-2
Mean-Time Between Failures (MTBF)
Drive Life 9-3
Data Interchange 9-3
Data Reliability 9-3
9-2
10 Performance Specification
Power-Fail Handling
10-3
A Product Comparisons
Physical A-2
Media-Related A-3
Mechanical A-4
Electrical A-5
Quality and Regulatory A-6
Interface and Performance A-6
Additional Differences A-7
Glossary
Index
Edition 8—December 1999
Contents-3
Contents-4
Edition 8—December 1999
1
Introduction
Edition 8—December 1999
1-1
Introduction
HP DDS Drives
HP DDS Drives
HP C1533A, HP C1534A, HP C1536A,
HP C1537A, HP C1539A, HP C5683A
drive mechanisms
HP C1553A, HP C1557A, HP C5713A
autoloader mechanisms
The family of DDS drives from HP is outlined in the following table.
HP C1534A
HP C1536A
(HP C5737A)
HP C1533A
HP C1537A HP C1539A
(HP C1554A) (HP C1599A)
HP C1553A
HP C1557A
(HP C5648A)
HP C5683A HP C5713A
Size
3½” HH
3½” HH
3½” HH
3½” HH
3½” HH
5¼” FH
5¼” FH
3½” HH
5¼” FH
Format
DDS-1
DDS-DC
DDS-2
DDS-3
DDS-2
DDS-2
DDS-3
DDS-4
DDS-4
No
Yes
Yes
Yes
Yes
Yes
Yes
Yes
Yes
2.6 GB
2.6 GB
15.6 GB
15.6 GB
n/s
n/s
DCLZ Data Compression
Capacity (with 2:1 data compression where supported)
DDS-1 60m:
1.3 GB
2.6 GB
DDS-1 90m:
2.6 GB
2.0 GB
4.0 GB
4.0 GB
4.0 GB
4.0 GB
24 GB
24.0 GB
4.0 GB*
24 GB*
DDS-2 120m:
n/s
n/s
8.0 GB
8.0 GB
8.0 GB
48 GB
48.0 GB
8.0 GB
48 GB
DDS-3 125m:
n/s
n/s
n/s
24.0 GB
n/s
n/s
144.0 GB
24.0 Gb
144 GB
DDS-4 150m
n/s
n/s
n/s
n/s
n/s
n/s
n/s
40.0 Gb
240 GB
no compression: 183 KB/s
2:1 compression:
n/s
183 KB/s
366 KB/s
510 KB/s
1.02 MB/s
1 MB/s
2 MB/s
510 KB/s
1.02 MB/s
510 KB/s
1.02 MB/s
1 MB/s
2 MB/s
3 MB/s
6 MB/s
3 MB/s
6 MB/s
Error Rate
<1 in 1015
<1 in 1015
<1 in 1015
<1 in 1015
<1 in 1015
<1 in 1015
<1 in 1015
<1 in 1015
<1 in 1015
Data Buffer
Maximum Sustained Transfer Rate
512 KB
512 KB
1 MB
2 MB
1 MB
1 MB
2 MB
8 MB
8 MB
Firmware upgrade via
SCSI or cartridge
Yes
Yes
Yes
Yes
Yes
Yes
Yes
Yes
Yes
Read-after-write (RAW)
Yes
Yes
Yes
Yes
Yes
Yes
Yes
Yes
Yes
Yes
Yes
Yes
Yes
Yes
Yes
Yes
Yes
Yes
No
No
No
No
No
No
No
No
No
200,000
5%
200,000
5%
200,000
12%
200,000
12%
300,000
12%
40,000
30%
55,000
30%
400,000
12%
100,000
30%
Interface
SE narrow SCSI-2:
Ultra-wide LVD and SE
multi-mode SCSI:
MTBF
Hours:
Duty cycle:
n/s = not supported
1-2
SE = Single-Ended
Edition 8—December 1999
Introduction
DDS Formats and Compatibility
DDS Formats and Compatibility
DDS formats have been developed by Hewlett-Packard for data storage drives
which use and build on DAT technology. DDS-format drives are produced by a
number of manufacturers.
HP C1534A
The HP C1534A implements the DDS-1 format. This incorporates the error
correction techniques used in audio DAT drives with additional techniques
specifically designed to provide the integrity of data necessary for computer use.
These extra methods of error detection and correction are as follows:
o
C3 ECC, a third level of Error Correction Code, providing correction across
frames within groups.
o Read-After-Write, where data is verified immediately after it is written and
re-written if there is any error.
o Data Randomizer, for recoding the data in order to provide a consistent
signal level. This enables read-after-write to be effective.
o Track checksums, for detecting and locating helical errors, and so
improving the performance of C3 ECC.
o N-Group Writing, where every group is repeated a set number of times. The
default setting for N is 1.
Each tape can be formatted as a single data space, or as two partitions which can
be written to independently.
Tapes are used as follows:
DDS-1 60m
DDS-1 90m
DDS-2
DDS-3
DDS-4
DDS-1
DDS-1
not supported
not supported
not supported
HP C1536A (HP C5737A)
The HP C1536A implements the DDS-DC format. This includes all of the features
of the DDS-1 format, plus an extension to include data compression as follows:
o
Compressed data can be stored in a way that maintains the full
functionality of the DDS format, and ensures backwards compatibility with
existing DDS drives.
o Any DDS-1 and DDS-DC cartridge can be read, whether data compression
is switched on or off.
o Data is automatically decompressed on reading even if data compression is
switched off.
o Mixing compressed and uncompressed data is supported. This means that
a cartridge can be written with uncompressed data and read in any DDS
drive.
Tapes are used as follows:
DDS-1 60m
DDS-1 90m
DDS-2
DDS-3
DDS-4
DDS-1
DDS-1
not supported
not supported
not supported
Edition 8—December 1999
1-3
Introduction
DDS Formats and Compatibility
HP C1533A and HP C1539A (HP C1599A)
The HP C1533A and HP C1539A implement the DDS-2 format. This includes all
of the features of the DDS-1 and DDS-DC formats, plus the ability to read and
write with much higher capacity when using DDS-2 cartridges. The drives read
and write using DDS-1 format when using DDS-1 media (60m and 90m).
The HP C1539A has a TapeAlert feature that allows software and operating
systems to warn users of problems which may occur, such as a cartridge nearing
the end of its useful life, and to recommend actions that the user can take to
recover from the situation. The drive also has an improved internal cleaning
sweeper that reduces the frequency of cleaning tape usage by a factor of eight.
Tapes are used as follows:
DDS-1 60m
DDS-1 90m
DDS-2
DDS-3
DDS-4
DDS-1
DDS-1
DDS-2
not supported
not supported
HP C1553A
The HP C1553A DDS-2 Autoloader combines a changer mechanism with an
HP C1533A DDS-2 tape drive mechanism. The autoloader houses up to six DDS
cartridges in a removable magazine, which enables you to back up 48 gigabytes
of data overnight (assuming a data compression ratio of 2:1). High-speed file
retrieval and tape swapping typically allows access to any file in an average of
ninety seconds.
The autoloader supports both sequential and random access mode, with
minimum interruption time between cartridges.
The embedded drive has the features listed for the HP C1533A above. The
autochanger adds the following:
o
A Liquid Crystal Display (LCD) giving clear and comprehensive indications
of the status of the autoloader
o A low-cost magazine carrying up to six DDS cartridges, giving a magazine
capacity of 48 gigabytes for DDS-2 cartridges and 2:1 data compression
o Compatibility with the SCSI-2 Medium Changer command set
o A common SCSI-2 interface for the drive and changer
o A standard 5¼-inch full-height form factor
Tapes are used as follows:
DDS-1 60m
DDS-1 90m
DDS-2
DDS-3
DDS-4
DDS-1
DDS-1
DDS-2
not supported
not supported
HP C1537A (HP C1554A)
The HP C1537A implements the DDS-3 format which allows storage of 24
gigabytes on a DDS-3 tape (assuming a data compression ratio of 2:1). The drive
includes most of the features of DDS-2 drives, with the following major
differences:
o
Any DDS-1, DDS-DC, DDS-2 or DDS-3 cartridge can be read or written to,
whether data compression is switched on or off.
o N-Group writing is no longer supported.
o The drive is capable of additional sophisticated techniques of errorcorrection for dealing with tapes which are not up to specification.
1-4
Edition 8—December 1999
Introduction
DDS Formats and Compatibility
o
When using DDS-3 media, the drive reads and writes the DDS-3 format
with much higher capacity.
o An improved internal cleaning sweeper reduces the frequency of cleaning
the heads by a factor of eight.
o HP’s TapeAlert feature allows software and operating systems to warn
users of problems which may occur, such as a cartridge nearing the end of
its useful life, and to recommend actions that the user can take to recover
from the situation.
Tapes are used as follows:
DDS-1 60m
DDS-1 90m
DDS-2
DDS-3
DDS-4
DDS-1
DDS-1
DDS-2
DDS-3
not supported
HP C1557A (HP C5648A)
The HP C1557A DDS-3 Autoloader combines a changer mechanism with an
HP C1537A DDS-3 tape drive mechanism. The autoloader houses up to six DDS
cartridges in a removable magazine, which enables you to back up 144 gigabytes
of data overnight (assuming a data compression ratio of 2:1). High-speed file
retrieval and tape swapping typically allows access to any file in an average of
ninety seconds.
The autoloader supports both sequential and random access mode, with
minimum interruption time between cartridges.
The embedded drive has the features listed for the HP C1537A above. The
autochanger adds the following:
o
A Liquid Crystal Display (LCD) giving clear and comprehensive indications
of the status of the autoloader
o A low-cost magazine carrying up to six DDS cartridges, giving a magazine
capacity of 144 gigabytes for DDS-3 cartridges and 2:1 data compression
o Compatibility with the SCSI-2 Medium Changer command set
o A common SCSI-2 interface for the drive and changer
o A standard 5¼-inch full-height form factor
Tapes are used as follows:
DDS-1 60m
DDS-1 90m
DDS-2
DDS-3
DDS-4
DDS-1
DDS-1
DDS-2
DDS-3
not supported
HP C5683A
The HP C5683A implements the DDS-4 format which allows storage of 40
gigabytes on a DDS-4 tape (assuming a data compression ratio of 2:1). The drive
includes most of the features of DDS-3 drives, with the following major
differences:
o
Any DDS-2, DDS-3 or DDS-4 cartridge can be read or written to, whether
data compression is switched on or off. 90m DDS-1 tapes can be read but
not written to.
o Wide Fast-20 LVD Ultra SCSI interface.
o New three-point mechanism mounting system.
Tapes are used as follows:
DDS-1 60m
DDS-1 90m
DDS-2
DDS-3
DDS-4
nor supported
DDS-1 read only
DDS-2
DDS-3
DDS-4
Edition 8—December 1999
1-5
Introduction
Related Documents
HP C5713A
The HP C5713A DDS-4 Autoloader combines a changer mechanism with an
HP C5683A DDS-4 tape drive mechanism. The autoloader houses up to six DDS
cartridges in a removable magazine, which enables you to back up 240 gigabytes
of data overnight (assuming a data compression ratio of 2:1). High-speed file
retrieval and tape swapping typically allows access to any file in an average of
ninety seconds.
The embedded drive has the features listed for the HP C5683A above. The
autochanger adds the following:
o
A Liquid Crystal Display (LCD) giving clear and comprehensive indications
of the status of the autoloader
o A low-cost magazine carrying up to six DDS cartridges, giving a magazine
capacity of 240 gigabytes for DDS-4 cartridges and 2:1 data compression
o Compatibility with the SCSI-2 Medium Changer command set
o A common SCSI-2 interface for the drive and changer
o A standard 5¼-inch full-height form factor
Tapes are used as follows:
DDS-1 60m
DDS-1 90m
DDS-2
DDS-3
DDS-4
nor supported
DDS-1 read only
DDS-2
DDS-3
DDS-4
Related Documents
The following documents provide additional information:
Documents Specific to HP DDS Drives
n
HP DDS Technical Manual, Vol.2 “Integration Guide”, part no. C1533-90906
n HP DDS Technical Manual, Vol.3 “The SCSI Interface”, part no. C1533-90907
n HP DDS Technical Manual, Vol.4 “Background to DDS Products”, part no.
C1533-90908
n HP DDS Technical Manual, Vol.5 “HP DDS Configuration Guide”, part no.
C1533-90915
Contact your HP supplier for copies.
General Documents and Standardization
n
Small Computer System Interface (SCSI-1), ANSI X3.131-1986. The ANSI
authorized standard for SCSI implementation, available through ANSI
n Enhanced Small Computer System Interface (SCSI-2)
ANSI X3T9.2-1993 Rev. 10L, available through ANSI
n DDS-1
o ECMA-170
o ISO/IEC 12247:1993
o ANSI X3.203 and X3.206
n DDS-DC
o ECMA-150, 2nd Edition
o ISO/IEC 11557:1992
1-6
Edition 8—December 1999
Introduction
Ordering Supplies
n
DCLZ
o ECMA-151, 2nd Edition
o ISO/IEC 11558:1992
o ANSI X3.223
n DDS-2
o ECMA-198, 2nd Edition
o ISO/IEC 13923:1995
n DDS-3
o ECMA-236, 1st Edition
n DDS-4
o ECMA-288, 1st Edition
Copies of General Documents can be obtained from:
ANSI 11 West 42nd Street
New York, NY 10036-8002
USA
ISO CP 56
CH-1211 Geneva 20
Switzerland
ECMA 114 Rue du Rhône
CH-1204 Geneva
Switzerland
Global Engineering 2805 McGaw
Documents Irvine, CA 92714
USA
Tel: +41 22 849 6000
Web URL: http://.www.ecma.ch
Tel: 800 854 7179 or 714 261 1455
Ordering Supplies
Part number for supplies are as follows:
C5718A
150m DDS-4 Media Recognition System cartridge
C5708A
125m DDS-3 Media Recognition System cartridge
C5707A
125m DDS-2 Media Recognition System cartridge
C5706A
90m DDS-1 Media Recognition System cartridge
C5705A
60m DDS-1 Media Recognition System cartridge
C5709A
Cleaning cartridge
92283L
Lockable storage box for 12 cartridges
C1571A
Magazine for the HP C1553A, HP C1557A and HP C5713A
autoloaders
C1572A
Autoloader magazine complete with five DDS-2 cartridges and one
cleaning cartridge
C15570
Autoloader magazine complete with five DDS-3 cartridges and one
cleaning cartridge
C7436A
Autoloader magazine complete with five DDS-4 cartridges and one
cleaning cartridge
Edition 8—December 1999
1-7
Introduction
Ordering Supplies
SCSI Accessories:
92222A
SCSI interface cable: low to low density connectors—0.5m
92222B
SCSI interface cable: low to low density connectors—1.0m
92222C
SCSI interface cable: low to low density connectors—2.0m
K2296
SCSI interface cable: high to low density connectors—0.9m
K2297
SCSI interface cable: high to low density connectors—1.5m
C5743A
SCSI interface cable: 68-pin high to 68-pin high density connectors,
LVD/SE Ultra2 quality conductors (for DDS-4 drives)—2.5m
C5742A
SCSI interface cable: 68-pin high to 68-pin high density connectors,
LVD/SE Ultra2 quality conductors (for DDS-4 drives)—1.5m
C5741A
SCSI interface cable: 68-pin high to 68-pin high density connectors,
LVD/SE Ultra2 quality conductors (for DDS-4 drives)—0.9m
C7424A
Internal SCSI cable: 4 connector, 68-way, terminated, LVD/SE
Ultra2 quality conductor (for DDS-4 drives)—1m (the connector
comes as part of the cable)
92222D
SCSI extender cable
1252-3251 SCSI bus passive terminator*
K2291
SCSI bus active terminator*
1252-5634 SCSI bus SLICK active terminator (for HP NetServers)
*You should use active termination on the SCSI bus for devices which support a
transfer rate of more than 5 MB/s, or when there is any such device on the bus. It
is possible to use HP DDS drives at 5 MB/s in which case passive termination is
a possibility. However, HP recommends that you use of active termination in all
cases.
1-8
Edition 8—December 1999
2
Installation
Edition 8—December 1999
2-1
Installation
Power Connection
Power Connection
The power connections are shown in figures 2.1 and 2.3 for drives and figures 2.2
and 2.4 for autoloaders.
Figure 2.1 Power connections (pre-DDS-4 drives)
Rear of Drive
+12V
+12V gnd
+5V
+5V gnd
Figure 2.2 Power connections (pre-DDS-4 autoloaders)
Autoloader option switches
+5V
+5V gnd
+12V gnd
+12V
Changer
power
Rear of the embedded drive
+12V
+12V gnd
+5V
Drive power +5V gnd
Figure 2.3 Power connections (DDS-4 drives)
Rear of Drive
+5V
+5V gnd
2-2
+12V
+12V gnd
Edition 8—December 1999
Installation
Grounding
Figure 2.4 Power connections (pre-DDS-4 autoloaders)
Autoloader option switches
+5V
+5V gnd
+12V gnd
+12V
Rear of the embedded drive
Changer
power
+5V
Drive power +5V gnd
+12V
+12V gnd
Figure 2.5 Y-cord connections
For autoloaders, connect power by using the
Y-Cord connector shown in figure 2.5, which is supplied
with the autoloader. Note that the two ground lines are
routed separately, and only connected together to a
common ground at the external power supply connector.
Grounding
The 5V and 12V grounds are both connected to the chassis.
The following are appropriate parts to make up a mating connector:
Housing
AMP part number 1-480424-0
Pins for 18 AWG cable AMP part number 60619-4 (quantity 4)
Edition 8—December 1999
2-3
Installation
SCSI Connection and Termination (DDS-1 drives only)
SCSI Connection and Termination (DDS-1
drives only)
Only a single-ended, narrow SCSI configuration is supported. The hardware and
termination specifications of this interface type can be found in Section 4,
Physical Characteristics, of the SCSI X3T9/89-042 Standard.
Only unshielded connectors can be used.
The HP C1534A and HP C1536A do not support termination on the drive itself.
Normally, drives such as these are not required to be at the end of a bus, but if
this is unavoidable, HP recommends the use of an additional short length of cable
with a terminator attached. There is not enough space for a feed-through
connector to be connected to the drive, unless you use a special short modified
power extender cable with one ear reduced.
The following are possible cable and terminator sources:
Cable: 28AWG Ribbon, Spectra Strip
132-2899-887 style 2697
Connector: 3M Connector
3425-7650
3M Strain Relief
3448-3050
Power Extender: 4-way Feed-Through Power Cable C1534-61001
Terminator: Methode Active SCSI Terminator
DM 1050-02-R
Methode Passive SCSI Terminator DM 1050-02-O
Setting the SCSI ID
The SCSI ID is set using jumpers on the set of pins beside the SCSI connector at
the rear of the drive, as shown in figure 2.6.
Figure 2.6 Rear panel of the HP C1534A/36A
Compression on/off,
using a control cable
Bit 0
Bit 1
Bit 2
SCSI connector
Power connector
The three significant bits in the ID give a range of 0 through 7 as follows:
SCSI ID
Bit 2
Bit 1
Bit 0
SCSI ID
Bit 2
Bit 1
Bit 0
0
1
2
3
0
0
0
0
0
0
1
1
0
1
0
1
4
5
6
7
1
1
1
1
0
0
1
1
0
1
0
1
1=shorted
0=open
The HP C1534A/36A reads the SCSI ID at power-up and during self-test.
2-4
Edition 8—December 1999
Installation
SCSI Connection and Termination (DDS-2 and DSS-3
Data Compression Control
For the HP C1536A, data compression can be controlled through the jumper pin
shown in figure 2.6. The HP C1534A does not support data compression.
The pin is only monitored at power-on, and controls whether data compression is
enabled by default. Any subsequent change to the pin is ignored.
Pin State
Unconnected
(default)
Effect
Data compression is only controlled by configuration switches 1 and 2 (on the
underside of the drive) and through MODE SELECT.
Connected to 0V Data compression is disabled. The setting of configuration switch 1 is ignored.
Switch 2 is valid. Data compression can still be controlled through MODE
SELECT . Note that when reading, the drive will decompress compressed data.
It follows, that if you are using this pin, you should set configuration switch 1 on
the underside of the drive to ON.
Termination Power
The HP C1534A and HP C1536A are permanently configured to provide
termination power.
SCSI Connection and Termination (DDS-2
and DSS-3 drives only)
Only a single-ended, narrow SCSI configuration is supported, with a maximum
sustained transfer rate of 8 MB/s. See Section 4, Physical Characteristics, of the
SCSI X3T9/89-042 Standard. Only use unshielded connectors.
The drive does not support termination on the device itself. Normally, drives such
as this are not required to be at the end of a bus, but if this is unavoidable, HP
recommends the use of the feed-through SCSI terminator listed below, which
plugs directly into the rear of the drive. Use active termination because the drive
is capable of a transfer rate greater than 5 MB/s.
The following are possible cable and terminator sources:
Cable: 28AWG Ribbon, Spectra Strip
Connector: 3M Connector
3M Strain Relief
132-2899-887 style 2697
3425-7650
3448-3050
Terminator: Methode Active SCSI Terminator
DM550-06-R
Amphenol Active SCSI Terminator 33770
Note When using feed-through termination, termination power must be supplied to
pin 26 of the SCSI Interface. Power can be supplied by any device on the bus. If
you want the drive to supply it, set a jumper across the two pins marked “Term
power” in figure 2.7.
Be careful when inserting and removing feed-through terminators, to avoid
damaging the end walls of the terminator and the drive.
Edition 8—December 1999
2-5
Installation
SCSI Connection and Termination (DDS-2 and DSS-3 drives only)
Setting the SCSI ID
The SCSI ID is set using jumpers on the set of pins beside the SCSI connector at
the rear of the drive, as shown in figure 2.7.
Figure 2.7 Rear panel of the HP C1533A/37A/39A
Compression on/off,
using a control cable
Bit 0
Bit 1
Bit 2
Term power
SCSI connector
Power connector
The three significant bits in the ID give a range of 0 through 7 as follows:
SCSI ID
Bit 2
Bit 1
Bit 0
SCSI ID
Bit 2
Bit 1
Bit 0
0
1
2
3
0
0
0
0
0
0
1
1
0
1
0
1
4
5
6
7
1
1
1
1
0
0
1
1
0
1
0
1
1=shorted
0=open
The drive reads the SCSI ID at power-up and during self-test.
Data Compression Control
Data compression can be controlled through the jumper pin shown in figure 2.7.
The pin is only monitored at power-on, and controls whether data compression is
enabled by default. Any subsequent change to the pin is ignored.
Pin State
Unconnected
(default)
Effect
Data compression is controlled by configuration switches 1 and 2 (on the
underside of the drive) and through the SCSI MODE SELECT command.
Connected to 0V Data compression is disabled. The setting of configuration switch 1 is ignored.
Switch 2 is valid. However, data compression can still be controlled through
MODE SELECT . Note that when reading, the drive will always decompress
compressed data.
It follows from this that if you want to use this pin, you should set configuration
switch 1 on the underside of the drive to ON.
Termination Power
The drive will provide termination power for the SCSI termination resistors if a
jumper is set across the two pins marked “Term power” in figure 2.7.
2-6
Edition 8—December 1999
Installation
SCSI Connection and Termination (DDS-4 drives only)
SCSI Connection and Termination (DDS-4
drives only)
For the HP C5683A and HP C5713A, ultra-wide LVD and single-ended multimode SCSI is supported. Only unshielded connectors can be used.
The drive does not support termination on the device itself. Normally, drives such
as this are not required to be at the end of a bus, but if this is unavoidable, HP
recommends the use of the feed-through SCSI terminator listed below, which
plugs directly into the rear of the drive. Use active termination because the drive
is capable of a transfer rate greater than 5 MB/s.
The following are possible cable and terminator sources:
Cable: Internal, 4 connectors, 68-way Ribbon Cable, LVD/SE
HP C7424A
Ultra 2 quality conductors—1m (the connector comes as
part of the cable)
Connector: 3M Connector
3M Strain Relief
Terminator: Methode Datamate SCSI Terminator
3425-7650
3448-3050
DM 2750-01-LVD-SE
Note When using feed-through termination, termination power must be supplied to
pin 26 of the SCSI Interface. Power can be supplied by any device on the bus. If
you want the drive to supply it, set a jumper across the two pins marked “Term
power” in figure 2.7.
Be careful when inserting and removing feed-through terminators, to avoid
damaging the end walls of the terminator and the drive.
Mixing SE and LVD, Ultra and Ultra2 SCSI Devices
If you combine SE and LVD devices on the same bus, the host bus adapter will
automatically switch to single-ended mode and optimum performance for any
device on the bus will be at Ultra speeds and cable length. This means that the
performance of any Ultra2 devices will drop to that of Ultra devices. All other
devices will operate at their optimum speed.
If you connect only LVD devices, the bus will operate in low voltage differential
mode and Ultra2 speeds will be enabled. You can use a combination of Ultra and
Ultra2 devices. Each device will operate at its optimum speed.
Setting the SCSI ID
The SCSI ID is set using jumpers on the set of pins beside the SCSI connector at
the rear of the drive, as shown in figure 2.8.
Edition 8—December 1999
2-7
Installation
SCSI Connection and Termination (DDS-4 drives only)
Figure 2.8 Rear panel of the HP C5683A/C5713A
SCSI connector
Term. power 3 2 1 0
Compression on/off, using a control cable bits
Power connector
The three significant bits in the ID give a range of 0 through 15 as follows:
SCSI ID Bit 3 Bit 2
0
1
2
3
4
5
6
7
0
0
0
0
0
0
0
0
0
0
0
0
1
1
1
1
Bit 1
Bit 0
SCSI ID
Bit 3
Bit 2
Bit 1
Bit 0
0
0
1
1
0
0
1
1
0
1
0
1
0
1
0
1
8
9
10
11
12
13
14
15
1
1
1
1
1
1
1
1
0
0
0
0
1
1
1
1
0
0
1
1
0
0
1
1
0
1
0
1
0
1
0
1
1=shorted
0=open
The drive reads the SCSI ID at power-up and during self-test.
Data Compression Control
Data compression can be controlled through the jumper pin shown in figure 2.8.
The pin is only monitored at power-on, and controls whether data compression is
enabled by default. Any subsequent change to the pin is ignored.
Pin State
Unconnected
(default)
Effect
Data compression is controlled by configuration switches 1 and 2 (on the
underside of the drive) and through the SCSI MODE SELECT command.
Connected to 0V Data compression is disabled. The setting of configuration switch 1 is ignored.
Switch 2 is valid. However, data compression can still be controlled through
MODE SELECT . Note that when reading, the drive will always decompress
compressed data.
It follows from this that if you want to use this pin, you should set configuration
switch 1 on the underside of the drive to ON.
Termination Power
The drive will provide termination power for the SCSI termination resistors if a
jumper is set across the two pins marked “Term. power” in figure 2.7.
2-8
Edition 8—December 1999
Installation
Configuration Switches
Configuration Switches
There is a set of configuration switches on the underside of the drive, as shown in
figure 2.9. These are read at power-on. With the drive switched off, use the
information below to select the correct configuration for your system.
Figure 2.9 Configuration switches (shown in default positions)
On On Off On On On On On
Note For the drive to operate correctly, appropriate drivers and application software
must be loaded on the host computer. It is beyond the scope of this manual to
cover this area. For further details consult the HP DDS Configuration Guide,
Volume 5 of the HP DDS Technical Manual, or contact your HP supplier. The
following table is provided as a general reference only.
The following table shows typical Configuration Switch Settings. They are only a
rough guideline; there are a great many different settings for different
configurations, for example, to enable and disable the Media Recognition System
(MRS). The HP DDS Configuration Guide, Volume 5 of the HP DDS Technical
Manual lists them all and offers configuration advice.
Default and most PC Applications
Hewlett-Packard Workstations
Series 300/400/700/800
SUN
IBM RS/6000
DEC
1
2
3
4
5
6
7
8
On
On
On
On
Off
Off
On
On
On
On
On
On
On
On
On
On
On
On
On
On
On
On
On
Off
Off
On
On
On
On
On
On
Off
Off
Off
Off
Off
On
On
On
Off
Data Compression (not HP C1534A)
(Switches 1 and 2 are disabled in the HP C1534A, because the drive does not
support data compression.)
Switches 1 and 2 are normally used to configure the way in which data
compression is set for the drive. The following table shows the available options:
Switch 1
Default:
Switch 2
Meaning
On
On
Compression enabled at power-on with host control
On
Off
Compression enabled at power-on no host control
Off
On
Compression disabled at power-on. The host is allowed
to control compression.
Off
Off
Compression disabled at power-on no host control
Note that with switch 1 on, data written to the tape will be compressed without
the knowledge of the host.
Edition 8—December 1999
2-9
Installation
Autoloader Option Switches
Media Recognition System (MRS)
Switch 3 is normally used to configure the drive to respond to DDS Media
Recognition System tapes. MRS is discussed more fully in Chapter 5.
Default:
Switch 3
Meaning
On
The Media Recognition System is disabled. All DDS tapes are treated
the same, whether they possess the Media Recognition stripes or not.
Off
MRS is active. Non-Media Recognition System tapes are treated as if
they are write-protected.
Note There is an exception in the case of drives integrated into SUN and IBM
systems, where switch 8 controls MRS.
Switches 4 to 8
Switches 4 to 8 are used to specify connectivity and functionality according to host
or customer requirements. The default setting is all switches on.
Autoloader Option Switches
The autoloader option switches are on the rear-panel (see figure 2.10). The
switches are read at power-on.
Figure 2.10 Autoloader option switches
When the autoloader is switched off, you can set the following configurations
(other settings are not used at this time). For more precise details, and settings
recommended for different systems, see the HP DDS Configuration Guide,
Volume 5 of the HP DDS Technical Manual.
Note LUN 0 is the drive mechanism, LUN 1 is the changer mechanism.
2-10
Edition 8—December 1999
Installation
Autoloader Option Switches
Switches
Allow
Resequencing
LUN 1 Magazine
Ready
LUN 0 Drive
Inquiry
off on on off 6h (HP Series 800)
Enabled
Enabled
Enabled
off on on on 7h (HP Series 700)
Enabled
Enabled
4
3
2
1
off off off on
on on on on
Auto-stack
Auto-eject
Enabled
Enabled
Value
1h
Fh (Default)
Auto-stack
The autoloader enters Stacker mode (see “Modes of Operation” on page 4-2) after
a magazine has been inserted.The first cartridge is loaded automatically.
Auto-eject
When the autoloader is in Stacker mode it will eject the magazine after the last
cartridge in the magazine is unloaded.
Allow
Resequencing
While the autoloader is in Stacker mode, you can select another cartridge to be
loaded into the drive by using the Select and Load buttons. When this option is
not enabled, the Load and Select buttons are ignored in Stacker mode.
LUN 1
Magazine
Ready
A TEST UNIT READY command to LUN 1 will receive a NOT READY status
message unless a magazine in present and magazine census data is available.
When this option is not enabled, a TEST UNIT READY command will receive a
GOOD status report whenever the autoloader has completed the power-on selftests. This provides a method of detecting whether a magazine is present.
LUN 0 Drive
Inquiry
The product ID sent in response to an INQUIRY command to LUN 1 will be that
of the embedded tape drive.
When this option is not enabled the ID sent is that of the entire autoloader.
Edition 8—December 1999
2-11
Installation
Fixing Requirements
Fixing Requirements
The position of fixing points is shown in figure 2.11 for drives and figure 2.12 for
autoloaders.
Note Screw threads must not penetrate more than 4 mm into the drive.
Figure 2.11 Drive fixing points
Figure 2.12 Autoloader fixing points
Tolerances
±0.6
mm
Tolerances
are ±0.6are
mm
except
unless otherwise
where marked
otherwise stated
2-12
Edition 8—December 1999
Installation
Airflow and Cooling Requirements
Airflow and Cooling Requirements
In order to keep temperature and humidity at acceptable levels, you are advised
to ensure that forced airflow is provided across the drive or autoloader.
Depending on the type of installation, the airflow may be as low as 0.03 m3/min
(1 ft3/min) through the drive, or 0.3 mm (0.01 in) of water pressure drop. This level
of airflow may be achieved by the use of a very small fan, say 40 mm (1½ in)
square. As a guideline, a typical 80mm (3 in) square fan in a system box produces
0.6 to 0.9 m3/min (20 to 30 ft3/min).
Note Make sure you do not have any unfilled peripheral slots in your system. These
may cause airflow to bypass the drive completely.
Monitoring Airflow
Note The relationship between airflow and pressure drop depends heavily on the
actual design of the cabinet in which the drive is placed. The important factor is
to ensure that the drive is within the specified temperature limits.
An appropriate method to establish whether you have adequate airflow over the
drive is to measure temperatures at two key sites. Each product must meet two
conditions:
Max Temp
Difference*
Location
The temperature of the biggest integrated circuit in the center of
the PCB:
HP 35470A
HP 35480A
HP C1533A
HP C1553A
U5
U5
U13
U13
HP
HP
HP
HP
C1534A
C1536A
C1539A
C1537A
U4
U4
U6
U7
39°C
HP C1557A U7
HP C5683A U6
HP C5713A U6
The temperature of the head/tape interface on the left-hand side,
looking from the front
12°C
* The maximum difference between the applied temperature and the measured
temperature. For example if the applied temperature is 25°C (in other words,
ambient) and the measured temperature is 40°C, the maximum difference will be
40°−25° = 15°C.
The same applies to the head/tape interface. For example if the applied
temperature is 25°C, you should provide sufficient air flow so that the
temperature of the head/tape interface does not exceed 37°C (37−25 = 12).
The test conditions should be as follows:
1 Power up the drive with a tape loaded but not performing any commands.
2 Allow a minimum of two hours for the temperature to stabilize.
Testing should be completed for the worst-case physical configuration for airflow.
Edition 8—December 1999
2-13
Installation
Airflow and Cooling Requirements
Alternative Method
A simpler but less accurate method is to monitor a single point on the “underside”
of the drive. Fix a thermocouple at the point and make sure that the measured
temperature does not exceed 52°C:
This point should be limited to a maximum of 12°C above the applied
temperature. For example, if the applied temperature is 40°C (surrounding), then
you need to ensure that there is sufficien air flow so that this point does not
exceed 52°C (40+12).
Drive
Location on the underside
From the front
HP 35470A 100 mm
HP 35480A
HP C1533A 70 mm
HP C1553A
HP C1534A 70 mm
HP C1536A
HP C1539A 50 mm
HP C1537A
HP C1557A
HP C5683A 55 mm
HP C5713A
2-14
From the side
50 mm
50 mm
40 mm from the left side looking from the
front
50 mm
35 mm from the right side looking from the
front
Edition 8—December 1999
3
Operation—Drives
Edition 8—December 1999
3-1
Operation—Drives
Front Panel
Front Panel
Figure 3.1 Front panel
Unload button
Activity light
Attention light
The lights on the front panel operate as follows:
Activity Light n Flashing green shows activity (loading, unloading, reading, or writing).
n
Steady green means a cartridge is loaded.
Attention Light n Flashing amber indicates that a cartridge is near the end of its life or that
n
the heads need cleaning (the Media Caution signal—see below).
Steady amber indicates a hard fault.
Figure 3.2 illustrates the meaning of different patterns of lights:
Figure 3.2 Front panel lights
Activity Attention
Meaning
Key
Activity—load or unload
Off
Activity—read or write
Green
Cartridge loaded
Amber
any
Media Caution signal
any
Fault
Power-on (starts with two
steady lights)
Flash Green
(½s on, ½s off)
Flash Amber
(½s on, ½s off)
Fast Flash Green
(¼s on, ¼s off)
Media Caution Signal
HP drives monitor the number of correctable errors that occur during reading and
writing. If the number or errors grows excessive, it can mean that the tape is
nearing the end of its useful life, or that the tape heads need cleaning.
If the Media Caution signal appears, clean the tape heads as described on page 3-5.
If the signal is still displayed after cleaning the heads, repeat the operation with
a different tape. If this clears the signal, the first tape is nearing the end of its life.
Copy the data onto a new tape and discard the old one.
The Media Caution signal is cleared when a new tape is loaded or when the drive
is power-cycled.
3-2
Edition 8—December 1999
Operation—Drives
Loading and Unloading
Loading and Unloading
CautionStick cartridge labels firmly to the recessed label area. To avoid a mechanism
jam, observe the following recommendations:
n
Labels must not be peeling off
Stick labels only within the label area
n Do not stick a label on top of another label
n
Only use cartridges labelled with a DDS logo in the drive—never use DAT
cartridges (see Chapter 4).
Inserting Cartridges
Figure 3.3 Inserting a cartridge
Insert a cartridge into the slot on the front panel. As the cartridge is inserted, the
drive takes it and performs a load sequence.
Note By default, the drive is configured to detect DDS Media Recognition System
cartridges. If you load a cartridge which is not DDS Media Recognition System,
the cartridge will be treated as write-protected; you will only be able to read it,
not write to it. See Chapter 4 for more details.
The load sequence is as follows:
1 The drive mechanism threads the tape and rewinds to BOM (Beginning of
Media). The drive then reads the first Reference area on the tape (Partition 1
on a 2-partition tape) to find the tape format (DDS, audio, and so on) and the
number of partitions.
2 If the tape is blank, the drive leaves the tape at BOP (Beginning of Partition)
for Partition 0 and awaits the next command.
3 If the error rate is high, the Media Caution signal is set on the front panel
lights (the Attention light flashes amber).
4 The System area on the tape is then accessed and the Tape log read into the
drive. (Note that the Tape log is not loaded for HP C1534A/36A drives with
firmware version T503.)
5 Finally the drive rewinds to BOP (Partition 0).
Edition 8—December 1999
3-3
Operation—Drives
Loading and Unloading
Removing Cartridges
A cartridge can be removed either in response to a SCSI LOAD/UNLOAD command
or if you press the Unload button.
For either of these methods the drive performs an Unload sequence:
1 The tape is rewound to BOP for Partition 0.
2 If the tape is write-enabled, the copy of the Tape log is written back to tape.
(This does not occur for HP C1534A/36A drives with firmware version T503.)
3 The tape is then rewound to BOM, unthreaded from the mechanism, and
ejected.
Note If the host has previously sent a PREVENT MEDIA REMOVAL command,
operation of the Unload button is disabled; pressing the button has no effect, and
does not initiate an Unload sequence. The Unload button returns to normal
operation when the drive receives an ENABLE MEDIA REMOVAL command or a
SCSI reset.
Forcing the Ejection of a Cartridge
Caution Only force ejection as a last resort to recover a cartridge. Never use it as a quick
way of ejecting the cartridge. You may lose data if you force ejection. The tape
can also end up invalidly formatted, because EOD may not have been written.
If you press the Unload button when the drive is busy, it may be a long time before
the drive will respond to the request, because it must first finish the task on
which it is engaged. This ensures that the task is terminated in a controlled
manner and no data is lost.
However, there may be occasions when you need to unload a cartridge urgently,
even at the risk of losing data. To do this, you must force ejection. There are two
ways of doing this:
n
Press the Unload button three times within a 5-minute period (or press the
Unload button twice in the 5 minutes following a SCSI UNLOAD command).
n Hold the Unload button down for at least 5 seconds.
Following either of these actions, the drive first waits for 35 seconds from the time
of the first press, in order to give the normal eject procedure a chance to be
followed. Once this period of grace has elapsed, it immediately unthreads the tape
and ejects the cartridge, regardless of what operation it was performing. The
drive is then reset as though the power had been switched off and then on again.
Because forced ejection may interrupt any operation, it is possible that the drive
will not write EOD before the cartridge is ejected. This will cause loss of data, and
result in a cartridge with an invalid format.
Note A forced ejection overrides any SCSI PREVENT MEDIA REMOVAL which may be
in effect, and can abort any SCSI operations which may be in progress on the
drive.
3-4
Edition 8—December 1999
Operation—Drives
Taking Care of the Drive
Taking Care of the Drive
DDS drives require little care and maintenance. The two main activities are to
clean the heads regularly, and to avoid condensation and temperature extremes.
Head Cleaning
Clean the tape heads regularly using the guidelines in the following tables. Tape
heads should also be cleaned if the Media Caution signal is displayed on the front
panel (the Attention light flashes amber) and continues to be displayed when you
repeat the operation with a new tape.
HP C1534A, HP C1536A, HP C1533A
Number of DDS cartridges used each day
Cleaning Interval
≤1
2–3
4+
Weekly
Twice a week
Daily
HP C1537A, HP C1539A, HP C5683A
Number of DDS cartridges used each day
Cleaning Interval
≤1
2
3
4+
8 weeks
4 weeks
3 weeks
Weekly
Clean the heads using a cleaning cartridge, HP 92283K, as follows:
1 Insert the cleaning cartridge into the drive. The drive automatically takes the
cartridge, loads it, and cleans the heads.
2 After about 30 seconds (20s for the HP C1537A), the drive ejects the cartridge.
3 Take the cleaning cartridge out of the drive, and write the date on the label on
the cartridge. This provides a record of how many times the cartridge has been
used. You need to know this, because a cleaning cartridge has a life of typically
50 cleaning cycles.
Note Cleaning cartridges can only be used about 50 times. For the HP C1537A,
HP C1539A and HP C5683A, software applications can warn you when the
cleaning cartridge has reached the end of its life and needs replacing by polling
the drive’s TapeAlert log. For other drives, the cartridge will be ejected after only
about 14 seconds when the cleaning cartridge has expired. (In the case of the
HP C1533A, the Media Caution signal may still be displayed.) If any of these
events occurs, discard the cleaning cartridge and repeat the cleaning operation
with a new one.
Prolonging Head Life
Drives are optimized to achieve the best performance possible and a typical head
life in excess of 6000 hours. This figure assumes that you use the appropriate tape
for the drive (such as DDS-4 media with DDS-4 drives), and that you follow a
typical usage pattern.
You may not attain the typical head life when:
n
You use an older tape format, such as DDS-2 tapes with a DDS-3 drive.
n A large proportion of cartridges loaded are being used for the first time.
Edition 8—December 1999
3-5
Operation—Drives
Upgrading Firmware from Tape
Temperature and Condensation
Condensation is bad for tape drives. To minimize the chance of condensation,
keep within the environmental limits given in the specifications (see page 8-3).
To avoid temperature problems, observe these guidelines:
o
Position the drive in a position where the temperature is relatively stable,
for example, away from open windows, fan heaters and doors.
o Do not leave cartridges in severe temperature conditions, for example in a
car standing in bright sunlight.
o Do not transfer data (reading from and writing to cartridges) when the
temperature is changing by more than 10°C (18°F) per hour.
o After either the drive or the cartridge have been subjected to extreme
temperature changes (>15°C, 27°F), do not use the drive for at least two
hours to allow the temperature of the drive and cartridge to stabilize.
Removing Power from the Drive
To ensure reliable operation, do not remove power from the drive during read,
write, fast-search, load and unload activities.
Upgrading Firmware from Tape
HP DDS drives allow you to upgrade firmware by inserting a Firmware Upgrade
cartridge.
Caution Do not disconnect power during the upgrade, particularly when the front panel
lights are flashing, or it may result in the drive having corrupt firmware or no
firmware at all. The drive will then have to be returned to the factory.
To upgrade firmware:
Note n If the firmware upgrade is incompatible with your hardware, no upgrade will
take place. The tape will be ejected after about 1 minute instead of the usual
3 minutes.
n The upgrade tape must not be write-protected.
n The upgrade tape can only be used a certain number of times. After that, a
drive will reformat it for normal data use, although given the amount of use
it will have had, it is not advisable to use it for data.
n You cannot convert a firmware upgrade tape for normal data use.
1 Ensure that the drive is not engaged in any SCSI activity (the Activity light is
off and the host is not going to be accessing the drive).
2 Insert the Firmware Upgrade cartridge into the drive.
3 The upgrade process automatically takes place. During the actual erasure and
reprogramming of the firmware, it is critically important that you do not power
down the drive. The front panel lights flash rapidly during this critical time.
4 After about three minutes, when the upgrade is complete, the cartridge will be
ejected. Remove it, and replace it in its box.
3-6
Edition 8—December 1999
Operation—Drives
Upgrading Firmware from Tape
Upgrade Tapes for Multiple Drives
From late 1995, drives began to be able to support tapes that contain upgrades
for more than one drive. When the upgrade tape is inserted, the drive reads
successive upgrades from the tape until it reaches one which matches its
hardware. It will then upgrade the firmware. The whole process will take about
15 seconds longer for each upgrade version which needs to be skipped.
If you insert a tape with multiple upgrade versions into a drive which does not
support tapes of this kind, the drive will only look at the first upgrade version on
the tape. If this matches its hardware, the drive will update the firmware. If it
does not match, the tape will be rejected.
Edition 8—December 1999
3-7
Operation—Drives
Upgrading Firmware from Tape
3-8
Edition 8—December 1999
4
This chapter gives details of the basic operation of the autoloaders
(HP C1553A, HP C1557A and HP C5713A), and the meaning of the
front panel displays.
No maintenance is necessary apart from regular cleaning of the
tape heads. See the section “Head Cleaning” on page 4-9.
Operation—Autoloaders
Edition 8—December 1999
4-1
Operation—Autoloaders
Modes of Operation
Modes of Operation
The autoloaders may be operated in either Stacker or Random mode.
In Stacker mode (also known as Sequential mode), you can select which cartridge
you want by using the Select and Load buttons on the front panel. When a
cartridge is ejected from the embedded drive after a host UNLOAD command, the
autoloader automatically moves the next available cartridge from the magazine
into the drive. The autoloader does not depend on the host computer sending
SCSI Medium Changer commands to move cartridges to and from the magazine.
In Random (or Changer) mode, the host views the autoloader as two devices:
n
n
A tape drive to which SCSI Sequential Access commands can be sent.
A changer mechanism to which SCSI Medium Changer commands can be sent.
The controlling host computer therefore has full random access to any cartridge.
Front Panel
Figure 4.1 Autoloader front panel
Door for inserting
magazine
Magazine
Present light
Select button
Eject button
Liquid Crystal
Display (LCD)
Load Tape
button
Operator Attention
Required light
Tape Activity light
The autoloader front panel consists of the following:
n
n
n
n
n
n
A door through which the magazine is loaded
The Select button
The Eject button
The Load Tape button
A liquid crystal display (LCD)
Three lights (LEDs)—the Magazine Present light, the Operator Attention
light, and the Tape Activity light
4-2
Edition 8—December 1999
Operation—Autoloaders
Front Panel
Front Panel Buttons
Select Button
The Select button allows you to select any of the cartridges in the magazine after
the magazine has been autoloaded into the unit. If you press the Select button
repeatedly, the display cycles through the cartridges available in the magazine.
You then press the Load Tape button to load the selected cartridge.
In Random mode, the Select button is disabled.
Load Tape Button
Use the Load Tape button to load the selected cartridge from the magazine into
the drive. This puts the drive into Stacker mode; when the selected cartridge is
ejected following a host UNLOAD command, the drive will automatically load the
next highest numbered cartridge.
In Random mode, the Load Tape button is disabled.
Eject Button
The Eject Button starts the unload process. The drive unloads any currently
loaded cartridge, and the changer mechanism returns the cartridge to the
magazine. The magazine is then ejected. The button can also be used to force
ejection in an emergency. See “Forcing Ejection” on page 4-9.
Note The host computer can disable the Eject Button by sending a SCSI PREVENT
MEDIA REMOVAL command.
Front Panel Liquid Crystal Display (LCD)
The five display regions of the LCD provides information about the autoloader.
Note that the exact display shown in figure 4.2 can never occur; all the sections
are showing at the same time so that you can see where they are.
Figure 4.2 Front panel LCD
1 The 10-character dot matrix display provides information on the autoloader’s
operating status and potential error conditions. See “LCD Messages
Categories” on page 4-4 for details of the kinds of messages that can be
displayed here.
2 The 7-segment display shows the number of the current cartridge loaded in the
drive, or the cartridge selected when you press the Select button repeatedly.
Edition 8—December 1999
4-3
Operation—Autoloaders
LCD Messages Categories
3 “DC” (Data Compression) and “WP” (Write-Protected) in the center of the LCD
indicate when data compression is being used for writing, and whether the
cartridge is write-protected.
4 The six numbered boxes on the right of the LCD are individually lit to show
which magazine slots contain a cartridge.
5 The display at the bottom of the LCD shows how much tape has been used in
the current partition. The more lines shown, the more tape has been used.
When all the lines show, the partition is full.
Front Panel Lights
The autoloader has three front panel lights (see figure 4.1):
Magazine Present (top light)—green
Steady green
A magazine is installed.
Flashing green
A magazine is being installed, checked or ejected. The light also
flashes during the autoloader’s self-test routine.
Tape Activity (middle light)—green
Steady green
A cartridge is present in the drive.
Flashing green
4 Hz
Data is being read or written, or activity other than the
cartridge being loaded or unloaded is occurring.
2 Hz
A cartridge is being loaded or unloaded. The light also
flashes during the autoloader’s self-test routine.
Operator Attention Required (lower light)—amber
Steady amber
A serious hardware error has occurred.
Flashing amber A user-recoverable error has occurred. The exact meaning
depends on the rate of flashing:
A firmware upgrade is taking place.
The tape is nearing the end of its useful life.
The heads need cleaning.
A hard fault condition has occurred that the drive cannot
easily clear.
1 Hz There is a tape in the autoloader but no magazine.
1 Hz The front panel door is open when it should not be.
4 Hz
2 Hz
2 Hz
1 Hz
To find which of these applies, read the message on the top line
of the LCD and then refer to “LCD Messages” on page 4-11. Take
corrective action if possible. If necessary, call for Service.
The light also flashes at 2 Hz during the autoloader’s self-test
routine.
LCD Messages Categories
The type of information displayed by the LCD can be divided into three
categories:
n
n
Normal autoloader operating status information
Error messages
4-4
Edition 8—December 1999
Operation—Autoloaders
LCD Messages Categories
n Information messages
These types are described below. All the messages are listed on page 4-11 in
alphabetical order. The type of message is indicated by the letter S (Status), E
(Error) or I (Informational).
Status Messages
The status messages that appear on the LCD cover five functional states or areas
of activity of the autoloader. When switched on, the autoloader moves through the
states in the following order:
Reset At power on, the autoloader is in Reset state until the self-test has been passed.
Firmware If a firmware upgrade tape is in the drive or an upgrade is taking place over the
Upgrade SCSI bus from the host, the autoloader moves into the Firmware Upgrade state
after passing the self-test.
Magazine Load If no upgrade is being performed, the autoloader moves into the Magazine Load
state, and remains there until a magazine has been loaded.
Cartridge Load After a magazine has been loaded, the autoloader moves into the Cartridge Load
state until a cartridge has been moved to the drive and loaded.
Tape Motion Once a tape has been loaded, the Tape Motion state covers activity involving the
tape, including reading and writing data.
The table below shows the messages that can be displayed in each functional
state. The messages in brackets are not displayed on the LCD, because the
autoloader will have already have moved to the next functional state.
State:
Messages:
Reset
Self Test
(Test OK)→
Firmware
Upgrade
FW Upgrade
FW Check
FW Program
New FW!!!!
(No Upgrade)→
Edition 8—December 1999
Magazine Load
Insert Mag
Mag Check
Mag Eject
(Mag Loaded)→
Cartridge Load
Mag Loaded
SemiLoaded
Loading
Unloading
Cleaning
FW Tape
(Tape Loaded)→
Tape
Motion
Ready xxm
Read
Write x.y
Search >>
Search <<
Rewind
Format
Erase
Locate
Partition
4-5
Operation—Autoloaders
Loading the Magazine and Cartridges
Error Messages
The LCD can display a range of error messages relating to the autoloader’s
operation. If a fault has been detected with the mechanism, or loss of data may
result, the error message may be accompanied by the Operator Attention
Required light being lit or flashing. This is indicated in the OAR column in the
alphabetical list of messages on page 4-11.
Where possible, actions that you can take to recover from the error are also given.
For further information on errors, see Chapter 6, “Troubleshooting.”
Information Messages
Informational messages are displayed when power is applied to the autoloader.
They indicate its identity, SCSI ID and configuration. They also tell you when you
have pressed the front panel buttons to confirm that the autoloader has
recognized the action.
Loading the Magazine and Cartridges
Caution Use the correct cartridges:
n
Only use cartridges labeled “DDS Media Recognition System” in the drive. To
exploit the full potential of the drive, make sure that they are DDS-2
cartridges for the HP C1553A, DDS-3 cartridges for the HP C1557A or DDS-4
cartridges for the HP 5713A.
n Never use DAT cartridges, because the media is not certified, and they can
have a different specification that can cause them to jam in the mechanism.
n Do not use DDS-3 or DDS-4 cartridges with the HP C1553A, or DDS-4
cartridges with the HP 1557A; the drives will simply eject them.
To avoid jams, insert cartridges in the magazine in their proper orientation and
fully pushed home.
To avoid mechanism jams, use labels properly:
Only stick labels in the label areas on cartridges and magazines (see
figure 4.3).
n Ensure that the corners of cartridge and magazine labels stick firmly to the
surface and do not curl at their edges.
n Never stick labels on top of other labels.
n
Note It is recommended that you store cartridges in their magazines, so that
cartridges belonging to a multi-volume backup are kept together and in the
correct order.
4-6
Edition 8—December 1999
Operation—Autoloaders
Loading the Magazine and Cartridges
Figure 4.3 Loading the magazine and cartridges
Loading cartridges
into the magazine
Do not fix labels here
Fix label here
Inserting the magazine
into the autoloader
1 Place as many cartridges as you need into the magazine, pointing towards the
center of the magazine (see figure 4.3). Make sure that the small arrows on the
magazine and cartridge line up.
You can use any number of cartridges from 1 to 6, and place them in any of the
magazine slots. However, for ease and speed of use, start by using slot 1.
During a sequential backup, by default the drive will attempt to load the first
cartridge from slot 1.
2 To install the magazine, insert it into the slot in the front of the autoloader
with the large arrow uppermost and pointing towards the autoloader (see
figure 4.3). Apply steady pressure until the mechanism takes the magazine
and pulls it into the autoloader.
3 The autoloader then performs a self-test routine. This also checks which
magazine slots contain cartridges.
4 When the self-test and magazine check is complete, if you are using the
autoloader in Stacker mode, select the cartridge with which you want the
sequence to start by pressing the Select button. When the correct number is
displayed, press the Load Tape button to load the cartridge.
In Random mode, the host computer selects and moves a cartridge from the
magazine into the drive mechanism.
Note The drive is configured to use DDS Media Recognition System cartridges. Any
cartridge that is not DDS Media Recognition System will be treated as writeprotected—you will only be able to read it, not write to it.
Edition 8—December 1999
4-7
Operation—Autoloaders
Ejecting the Magazine and Cartridges
5 The drive now performs a load sequence. This takes a maximum of 25 seconds
from the time the cartridge is inserted to the time the drive is ready to start
acting upon the next command from the host. The sequence is as follows:
a The drive mechanism threads the tape and rewinds it to Beginning of Media
(BOM). It checks the tape format (such as DDS-2 or audio) and the number
of partitions. If the tape is blank, the drive leaves the tape at Beginning of
Media (BOM) and awaits the next command.
b If the tape is in DDS format and is write-enabled, the drive performs write
and read tests. If the error rate is high, the Operator Attention Required
light flashes and “Clean Me” is displayed on the LCD.
c The drive copies the Tape log from the tape into RAM.
d The drive rewinds to BOP (Beginning of Partition) and goes online, awaiting
a command from the host.
6 Once the drive is online, it sends a CHECK CONDITION on receipt of the next
SCSI command from the host. The UNIT ATTENTION key is set in the returned
REQUEST SENSE data to indicate that the tape may have been changed.
Ejecting the Magazine and Cartridges
To eject a cartridge from the autoloader, press the Eject button. The following
sequence of events occurs:
1 The tape is rewound to BOP (Beginning of Partition).
2 If the tape is write-enabled, the copy of the Tape log held in RAM is written
back to tape.
3 The tape is then rewound to BOM (Beginning of Media) and unthreaded.
4 The changer mechanism replaces the cartridge in the magazine.
5 The magazine is ejected.
If the host sends an Unload command (LOAD/UNLOAD with the LOAD bit set to
0), the same procedure is followed but the magazine is not ejected at the end.
If you press the Eject button during the 30 seconds when the autoloader checks
magazine slots following insertion of a magazine, the magazine will be ejected
immediately, even if Medium Removal Prevention is in force.
Note If the host has previously sent a PREVENT MEDIA REMOVAL command, the
unloading action is different in two ways:
n The Eject button is disabled and has no effect. It does not initiate an unload
sequence.
n An Unload command puts the drive into the semi-loaded state. That is, it takes
the drive offline and unthreads the tape, but does not eject it.
The effects of PREVENT MEDIA REMOVAL continue until an ENABLE MEDIA
REMOVAL command is received, or the drive is reset.
4-8
Edition 8—December 1999
Operation—Autoloaders
Head Cleaning
Forcing Ejection
Caution You can lose data if you force ejection of a tape. The tape may also end up
invalidly formatted, because EOD (End of Data) may not have been written.
Only force ejection as a last resort to recover a cartridge. Never use it as a quick
way of ejecting the cartridge.
If you press the Eject button when the drive is busy, it may be a long time before
the drive will respond to the request, because it will finish the task it is
performing first. This ensures that the task is terminated in a controlled manner,
and no data is lost.
However, if you need to unload a cartridge urgently, even at the risk of losing
data, you must force ejection as follows:
1 Hold the Eject button down for at least 5 seconds until the LCD displays “Force
Eject”.
2 The autoloader waits 35 seconds to give the normal ejection procedure a chance.
3 Once this time has elapsed, if there is a tape loaded in the drive, it is
immediately unthreaded and the cartridge is ejected, regardless of what
operation the drive was performing. The cartridge is then returned to its slot
in the magazine, and the drive is reset as though the power had been cycled.
Because the forced ejection may interrupt any operation, it is possible that the
drive will not write EOD (End of Data) before the cartridge is ejected. This will
cause loss of data, and result in a cartridge with an invalid format. However, it
should still be possible to read such a cartridge up to the point where the
ejection interrupted the writing.
4 If no cartridge is loaded in the drive, the autoloader assumes that you want to
eject the magazine. Following the 35 seconds, it does this. The autoloader is
then reset as though power had been cycled.
Note Forced ejection overrides any SCSI PREVENT MEDIA REMOVAL that may be in
effect, and can abort any SCSI operations in which the autoloader is engaged.
Head Cleaning
Clean the tape heads at the following times:
n
After every 25 hours of use
When a “Clean Me” message is displayed in the front panel LCD and the
Operator Attention Required light is flashing amber.
As a rough guideline, the frequency of cleaning is likely to be as follows:
n
HP C1553A
Number of cartridges used each day:
Cleaning frequency:
≤1
2–3
≥4
Weekly
Twice a week
Daily
HP C1557A and HP C5713A
Number of cartridges used each day:
Cleaning frequency:
Edition 8—December 1999
≤1
2
8 weeks 4 weeks
3
≥4
3 weeks
Weekly
4-9
Operation—Autoloaders
Head Cleaning
Clean the heads using a cleaning cartridge, HP 92283K, as follows.
Note Cleaning cartridges can only be used about 50 times.
With the HP C1557A, software applications can warn you that a cleaning
cartridge has expired by polling the TapeAlert log.
With both autoloaders, an expired cleaning cartridge will be ejected in less than
20 seconds instead of the usual 30 seconds. With the HP C1553A, if the “Clean
Me” message was showing before the attempt to clean the heads, it will still be
showing afterwards.
Cleaning the Heads in Stacker Mode
1 Place the cleaning cartridge into one of the magazine slots (for example, slot 1)
and insert the magazine into the autoloader.
2 Use the Select button to select the magazine slot in which you placed the
cleaning cartridge.
3 Press the Load Tape button to load the cleaning cartridge into the drive. The
autoloader will then automatically perform a cleaning cycle.
4 At the end of the cleaning cycle, the drive automatically ejects the cartridge
and the changer mechanism replaces it in the magazine.
5 Note the date on the label on the cleaning cartridge, so that there is a record of
how many times it has been used. After 50 uses, discard the cartridge.
Note If you decide to leave a cleaning cartridge permanently in the magazine, it will
reduce the amount of data you can back up to the magazine, since you will only
have five slots available for data cartridges.
Cleaning the Heads in Random Mode
1 The host sends a MOVE MEDIUM command to move the cleaning cartridge
from the magazine to the drive. The autoloader will only recognize that the
cartridge is a cleaning cartridge once it is loaded into the drive.
2 The drive will then automatically carry out a cleaning cycle.
3 The drive automatically ejects the cartridge after the cleaning cycle is
complete. The changer returns the cartridge to its magazine slot without
further host involvement.
In Random mode, the host can program a routine cleaning cycle (say, once a
week). The cleaning cartridge remains in a set position, such as, slot 6, ready for
use at the designated time. Remember that this will reduce the amount of data
you can back up to the magazine, since you will only have five slots available for
data cartridges.
Note Using the SCSI MOVE MEDIUM command, a cleaning cartridge can only be
returned to its original source slot in the magazine.
Prolonging Head Life
Drives are optimized to achieve the best performance possible and a typical head
life in excess of 6000 hours. This figure assumes that you use the appropriate tape
4-10
Edition 8—December 1999
Operation—Autoloaders
Avoiding Condensation
for the drive (such as DDS-4 media with DDS-4 drives), and that you follow a
typical usage pattern.
You may not attain the typical head life when:
n
You use an older tape format, such as DDS-2 tapes with a DDS-3 drive.
n A large proportion of cartridges loaded are being used for the first time.
Avoiding Condensation
Condensation is bad for tape drives, where a thin tape is passing across a rapidly
spinning head. To minimize the risk of condensation, keep to the environmental
requirements on page 8-3.
To avoid temperature problems, follow these guidelines:
n
Position the autoloader in a position where the temperature is relatively stable,
for example, away from open windows, fan heaters and doors.
n Avoid leaving cartridges in severe temperature conditions, for example in a car
standing in bright sunlight.
n Avoid transferring data (reading from and writing to cartridges) when the
temperature is changing by more than 10°C (50°F) per hour.
n After either cartridge or autoloader has experienced an extreme change of
temperature (more than 15°C, 59°F), do not use the autoloader for at least two
hours to allow the temperature of the autoloader and cartridges to stabilize.
LCD Messages
The following list gives the messages that can be shown on the front panel LCD
in alphabetical order. See also “LCD Messages Categories” on page 4-4.
The Type column can show three letters:
E
I
S
Error messages
Informational messages
Status messages
The OAR column indicates the state of the Operator Attention Required light on
the front panel while the message is being displayed:
O
F
On
Flashing
Note The HP C5713A also displays the URL of the HP World Wide Web Support page
with certain messages.
Number Codes (HP5713A only)
The HP C5713A autoloader has a language selection feature, which allows you to
localize the display for French, German, Spanish, Portuguese or Japanese. If your
language is not supported, you can select a Numerical code instead and refer to
the list of messages below for an explanation of the code.
Edition 8—December 1999
4-11
Operation—Autoloaders
LCD Messages
#
LCD Message
Type OAR Meaning
1019 At BOD
E
O
A SPACE command encountered BOD unexpectedly.
The tape is now positioned at BOD.
1018 At EOD
E
O
A READ or SPACE command encountered the EOD area unexpectedly.
The tape is now positioned at EOD.
8014 Bad Media
E
F
A READ or SPACE command has failed because the tape is not in DDS
format.
Action: Unload the tape and use a DDS-certified (Media Recognition
System) tape.
8021 Cannot Write
E
F
A WRITE, WRITE FILEMARK or ERASE command has been attempted on
non-Media Recognition System tape.
Action: Remove the cartridge and replace with a Media Recognition
System cartridge.
E
F
Cleaning failed, possibly due to an expired tape.
Action: Use a new cleaning cartridge.
2001 Clean Me
E
F
A high error rate has been detected reading or writing.
Action: Insert a cleaning cartridge to clean the tape heads, ensuring that
the tape in the cleaning cartridge has not been used up. See “Head
Cleaning” on page 4-9.
1008 Cleaning
S
2006 Close Door
E
F
The front panel door is open. Any autoloader motion will be delayed.
Action: This is probably caused by a magazine that is partly inserted
through the door. Push the magazine fully home or remove it.
8002 Drive Comms
E
O
The drive has stopped communicating with the changer mechanism.
Action: Call for service.
Non-MRS Tape
8009 Clean fail:
Check Cleaning
Tape
A cleaning cartridge has been loaded into the drive mechanism.
Error
The drive has detected an internal error.
8001 Drive fault
E
8004 Eject Fail
E
2010 Eject Mag
I
This is displayed when you press the Eject button.
1015 Erase
S
The drive is erasing data from the tape.
8000 Error X
E
4003 ERROR: No tape
I
HP OBDR requires a cartridge in slot 1 from which it can boot.
I
The system cannot boot from the loaded tape.
1023 ForceEject
I
A forced ejection is in progress (see page 4-9).
1014 Format
S
A SCSI command for generating a one- or two-partition tape is being
executed, or the drive is changing the size of the partitions on an existing
two-partition tape.
3002 FW Check
S
Firmware upgrade data is being checked for compatibility.
8024 FW Data Err
E
F
F
An eject command has failed, either after you pressed the Eject button
or after a host command.
Action: Try forcing ejection (see page 4-9).
The mechanism has jammed. The number X gives the reason for the jam.
Action: Press the Eject button to attempt to recover the cartridge and
magazine. If the problem persists, note the value of X and call for service.
in slot 1
4001 ERROR: Unable to
boot from tape
4-12
F
The autoloader has failed to upgrade the drive firmware, because the
new firmware is corrupt.
Action: Obtain a good copy of the firmware upgrade.
Edition 8—December 1999
Operation—Autoloaders
LCD Messages
#
LCD Message
Type OAR Meaning
3003 FW Program
S
The drive is being upgraded with the new firmware.
3005 FW Tape
S
The cartridge loaded in the drive mechanism is a firmware upgrade tape
cartridge.
3001 FW Upgrade
S
Firmware upgrade data is being read from a tape.
8025 FW Read Fail
E
F
A firmware upgrade failed because of an error in reading data from the
tape.
Action: Try again. If it still fails, call for service.
8027 FW Tape Write
E
F
A firmware upgrade failed because the tape is write-protected.
Action: Change the write-protect switch on the tape and try again.
8026 FW Write Fail
E
F
A firmware upgrade failed because of an error in writing a modified
upgrade count to the tape.
Action: Try again. If it still fails, call for service.
2002 Insert Mag
S
8003 Load Fail: Try
E
F
A load command has failed, or a load or change partitions command has
failed to read the System area of the tape, whcih stores information
about tape usage.
Action: Use a new cartridge.
E
F
A load command has failed, or a load or change partitions command has
failed to read the System area of the tape, whcih stores information
about tape usage.
Action: Press the Eject button.
Protected
The autoloader is waiting for you to insert a magazine.
New Tape
8007 Load Fail: Press
Eject
1021 Load Lock
I
Manual loading is locked (PREVENT MEDIA REMOVAL is in operation)
2009 Load Tape
I
This is displayed when you press the Load Cartridge button.
1003 Loading
S
Either a cartridge is being moved from the magazine and placed into the
drive mechanism, or the drive is loading a cartridge.
1016 Locate
S
The drive is moving the tape to a point specified by the host.
1002 Mag Check
S
The autoloader is examining the magazine to determine which slots are
occupied.
1001 Mag Eject
S
The autoloader is ejecting the magazine.
1006 Mag Loaded
S
A magazine is present in the autoloader and the magazine check has
been carried out.
8005 Media Removal
E
O
Prevented
An eject command has been attempted after a SCSI PREVENT MEDIA
REMOVAL command has been sent by the host.
Action: Try again when the media removal prevention has been removed.
This can be achieved by the host sending a SCSI ALLOW MEDIUM
REMOVAL command, or by resetting or power-cycling the autoloader.
The firmware upgrade process has been successfully completed.
3004 New FW!!!!
S
8016 No EODmark
E
F
The drive is trying to read what appears to be a blank tape (one with no
DDS-format EOD pattern). This is probably a result of power failure
while writing.
4000 OBDR Mode
I/S
F
The drive has switched to HP One-Button Disaster Recovery mode and
is restoring the operating system.
1017 Partition
S
The drive is switching to the other partition on a two-partition tape.
Edition 8—December 1999
4-13
Operation—Autoloaders
LCD Messages
#
LCD Message
8017 Partition 1 too
Type OAR Meaning
E
O
large
A command to format the tape has failed because the requested size for
partition 1 is too large.
Action: Try again with a smaller partition 1, or, if possible, a longer tape.
2007 Press Eject
I
Press the Eject button.
1009 Read
S
The drive is reading data from the tape.
8012 Read Fail
E
1013 Rewind
S
8020 SCSI Error
E
1012 Search <<
I
The drive is searching for a record, filemark, setmark, or BOD
(Beginning of Data) towards the beginning of the tape (in SCSI terms, it
is responding to a SPACE command with a negative Count field).
1011 Search >>
S
The drive is searching for a record, filemark, setmark, or EOD (End of
Data) towards the end of the tape (in SCSI terms, it is responding to a
SPACE command with a positive Count field).
1022 Select Lock
I
Tape selection is locked (SCSI PREVENT MEDIUM REMOVAL is in
operation).
2008 Select Tape
I
This is displayed when you press the Select button and for a short time
after the button is released.
0000 Self Test
S
The autoloader is performing its power-on self-test.
1007 SemiLoaded
S
A cartridge is in the drive but not loaded (the tape has not been
threaded).
2003 Stray Tape:
I
There is a cartridge in the autoloader but there is no magazine present
to put it in.
Action: Insert an empty magazine to retrieve the cartridge.
F
A read has failed. The host should reposition and try again.
The drive is rewinding the tape to the beginning of partition.
O
Insert Empty Mag
A SCSI command error has been detected.
Action: Check the SCSI interface connection and try again.
8006 Tape Fault
E
F
The cartridge in the drive is faulty, possibly because the tape has
snapped, or the cartridge has an invalid pattern of identification holes.
Action: Use a new cartridge and ensure that it is Media Recognition
System.
1024 Tape Full
E
O
A READ, SPACE, WRITE or WRITE FILEMARKS command encountered
EOP unexpectedly. When reading, this may mean the required data is
on the next cartridge in the sequence.
8019 Tape has DC data
E
O
A READ command has encountered compressed data on the tape, and the
drive is not currently configured to decompress data. The host may have
disabled data compression, or configuration switch 2 (on the underside
of the autoloader) may be off so the host’s ability to control the drive’s
state is disabled.
Action: Check that the host has not disabled data compression. Make
sure that switch 2 is on by reconfiguring the drive using the
configuration switches on the underside of the autoloader.
8013 Tape Position
E
O
A WRITE, READ, SPACE or REWIND command has failed to complete.
The tape is positioned on the far side of the bad groups of data.
Action: Reposition and try again.
E
F
The cartridge is stuck in the drive.
Action: Try forcing ejection (see page 4-9). If this fails, call for service.
Lost
8008 Tape Stuck
4-14
Edition 8—December 1999
Operation—Autoloaders
Localizing the Display (HP C5713A only)
#
LCD Message
Type OAR Meaning
I
The system cannot boot from a cleaning cartridge.
1004 Unloading
S
Either the drive is unloading a cartridge, or a cartridge is being ejected
from the drive and replaced in the magazine.
8022 UpgradeErr
E
F
An error occurred while upgrading the firmware.
8015 Worn Media
E
F
A high error rate has been detected while writing, suggesting that the
tape is nearing the end of its useful life.
Action: Copy any data you wish to keep from the cartridge onto a new
cartridge and discard the old cartridge.
1010 Write x.y
S
8010 Write Fail
E
F
A WRITE, WRITE FILEMARK or ERASE command has failed.
Action: Use a new cartridge.
8003 Write Fail:
E
F
The drive could not write to the tape, which may be worn or damaged.
Action: Insert a cleaning cartridge to clean the tape heads, ensuring that
the tape in the cleaning cartridge has not been used up (see “Head
Cleaning” on page 4-9), or use a new cartridge.
E
F
A WRITE, WRITE FILEMARK or ERASE command has been attempted on
a write-protected cartridge.
Action: Remove the cartridge and change it to write-enabled.
E
F
The upgrade firmware is not compatible. The drive has not been
programmed.
4002 Unable to boot:
Cleaning tape
The drive is writing data to tape. “x.y:1” is the cumulative compression
ratio since power-on, or since the compression ratio was last cleared. For
example, “Write 2.1” means a compression ratio of 2.1:1. The
compression ratio is only be displayed after about 1 MB of data has been
written since power-on.
Clean or Use New
Tape
8018 Write Protected
Tape
8023 Wrong FW
Localizing the Display (HP C5713A only)
HP C5713A autoloaders allow you to localize the LCD display so that messages
are displayed in the desired language.
1 Switch on the autoloader and hold down the Select button on the front panel
for five seconds to access the Language? feature.
2 Press the Select button to scroll through the available languages. The selected
language is displayed in the LCD display.
If you select Numeric, messages will be displayed as numerical codes, which are
defined in “LCD Messages” on page 4-11.
3 Press the Load button to store the selected language and exit the language
selection utility.
To exit the language selection facility without selecting a language, press the
Enter button. If the Select button is not pressed for two minutes, the drive will
automatically exit the language selection facility without selecting a language.
Edition 8—December 1999
4-15
Operation—Autoloaders
Upgrading Firmware from Tape
Upgrading Firmware from Tape
The autoloader allows you to upgrade its firmware by inserting a Firmware
Upgrade tape. In order to do this, proceed as follows. The process will take at least
3 minutes to complete.
Caution Do not disconnect power at any time during the upgrade, or it may result in the
autoloader having corrupt firmware, or no firmware at all. The autoloader will
then have to be returned to the factory.
Note n If the firmware upgrade is incompatible with your hardware, no upgrade will
take place. The LCD will show the message “Wrong FW”, the upgrade cartridge
will be returned to the magazine, and the magazine ejected.
n The upgrade tape must not be write-protected.
n The upgrade tape can only be used a certain number of times. After that, an
autoloader or drive will reformat it for normal data use, although given the
amount of use it will have had, it is not advisable to use it for data.
n You cannot otherwise convert a firmware upgrade tape for normal data use.
1 Ensure that the drive is not engaged in any SCSI activity (the Tape Activity
light is off and the host is not going to be accessing the drive).
2 Place the Firmware Upgrade tape into magazine slot 1, and insert the
magazine into the autoloader.
3 Use the front panel Select button to select magazine slot 1.
4 Press the Load Tape button to load the upgrade tape into the drive. The
autoloader will then automatically upgrade the firmware. It is critically
important that you do not power down the drive during this.
5 When the LCD shows the message “New FW!!!”, the firmware has been
successfully upgraded and the upgrade tape has been returned to the
magazine. Press the Eject button to eject the magazine. Remove the Firmware
Upgrade tape, and replace it in its box.
Upgrade Tapes for Multiple Drives
From late 1995, autoloaders and drives will begin to be able to support tapes that
contain upgrades for more than one drive. When the upgrade tape is inserted, the
drive reads successive upgrades from the tape until it reaches one that matches
its hardware. It will then upgrade the firmware. The whole process will take
about 15 seconds longer for each upgrade version that needs to be skipped.
If you insert a tape with multiple upgrade versions into an autoloader or drive
that does not support tapes of this kind, the device will only look at the first
upgrade version on the tape. If this matches its hardware, the device will update
the firmware. If it does not match, the tape will be rejected.
4-16
Edition 8—December 1999
Operation—Autoloaders
Self-Test
Self-Test
During power-up, the autoloader executes a self-test diagnostic sequence to test
the electronics for functionality. This is shown by all three lights flashing at a rate
of 2 Hz (twice a second). If the self-test fails, the Operator Attention Required
light changes to steady amber and the other lights extinguish. The results of
these tests are reported to the host through the SCSI RECEIVE DIAGNOSTICS
command.
Replaceable Parts
The autoloader is a single field replaceable unit (FRU). In the event of a problem
with any of the sub-assemblies in the unit, the whole unit should be replaced.
Edition 8—December 1999
4-17
Operation—Autoloaders
Replaceable Parts
4-18
Edition 8—December 1999
5
Cartridges
Edition 8—December 1999
5-1
Cartridges
DDS Formats
DDS Formats
The DDS (Digital Data Storage) formats build on the DAT (Digital Audio Tape)
format to meet the more stringent needs of computer data storage. As the DDS
technology has developed, so new standards have been produced, each allowing
more data to be stored on a single cartridge.
Briefly, the development of the DDS formats to date has been as follows:
DDS-1
DDS-1 was originally called DDS. It uses 60m and 90m cartridges,
and does not allow hardware data compression.
DDS1-DC
DDS1-DC, or simply DDS-DC, extended DDS-1 to include hardware
data compression. This can typically double the capacity of a tape.
DDS-2
DDS-2 includes the features of DDS-1 and DDS-DC, but increases the
amount of data that can be written to a single cartridge in two ways:
n It uses longer, thinner tapes (120m).
n It writes data in narrower tracks
Together these features mean that a DDS-2 tape can hold twice the
data of a DDS-1 90m tape.
DDS-3
DDS-3 stores data at twice the density of DDS-1 and DDS-2, and also
allows more of the tape to be used for data. As a result, a DDS-3
(125m) tape holds three times the data of a DDS-2 tape.
DDS-4
DDS-4 tape, at 150m, is longer than DDS-3 (125m) tape. It holds
holds two-thirds again as much data as a DDS-3 tape.
These formats are described in much more detail in Chapter 3 of Background to
DDS Products (Volume 4 of the HP DDS Technical Manual).
Choosing Cartridges
To exploit the full potential of a DDS-format drive, you should use matching
cartridges—DDS-1 cartridges for DDS-1 drives, DDS-2 cartridges for DDS-2
drives and DDS-3 cartridges for DDS-3 drives. This will allow the drives to store
the maximum amount of data on a tape.
However, HP DDS drives are backward compatible. This means that, for
example, a DDS-2 drive can read and write DDS-1 tapes. Note that it will use
DDS-1 format, so the full advantage of DDS-2 will be lost.
Drives are not forward compatible, so, for example, a DDS-2 drive cannot read or
write a DDS-3 tape. It will simply eject it.
The following table summarizes which drive can write and read which tapes. The
capacities given are those that can typically be obtained using data compression
(DC) where possible. They assume a compression ration of 2:1. Capacities are for
a single cartridge.
5-2
Edition 8—December 1999
Cartridges
Choosing Cartridges
Cartridge Types
DDS-1 (60m)
DDS-1 (90m)
DDS-2 (120m)
DDS-3 (125m)
DDS-4 (150m)
HP C1534A Yes (not DC) 1.3 GB Yes (not DC) 2 GB
No
No
No
HP C1536A
Yes
2.6 GB
Yes
4 GB
No
No
No
HP C1533A
HP C1539A
HP C1553A
Yes
2.6 GB
Yes
4 GB
Yes
8 GB
No
No
HP C1537A
HP C1557A
Yes
2.6 GB
Yes
4 GB
Yes
8 GB
No
24 GB
No
HP C5683A
HP C5713A
No
Yes
4 GB
(read only)
Yes
8 GB
Yes
24 GB
Yes
40 GB
Yes = cartridge can be read and written to in the format of the tape, unless
stated otherwise
No = cartridge will be ejected, and so can neither be read nor written to
DDS-Logo Media
To identify computer-grade DDS media easily, look for the DDS logos. These
indicate that the media meets the DDS specifications laid down by the ECMA,
ISO/IEC and ANSI standards (see chapter 1).
The DDS-1, DDS-2 and DDS-3 logos are show in figure 5.1.
Figure 5.1 DDS logos
DDS/DDS-1 Logo
DDS-3 Logo
DDS-2 Logo
DDS-4 Logo
The Media Recognition System (MRS) enables drives to identify DDS-grade
media. DDS MRS cartridges have a series of stripes on the transparent leader at
the beginning of the tape. HP drives can be configured to treat non-MRS tapes as
write-protected. In other words, the drive will only be allowed to read non-MRS
cartridges, not write to them.
DDS-1 MRS tapes can be recognized by the logo in figure 5.2. MRS is used on all
DDS-2 and DDS-3 tapes with the logos shown in figure 5.1.
Figure 5.2 DDS Media Recognition System logo
Cartridges with the old DDS-1 logo (as shown in figure 5.1) are in no way inferior;
they simply do not carry the stripes on the leader tape, so the drive cannot
recognize them as DDS quality. All DDS cartridges produced from early 1993
should have the Media Recognition System stripes. HP cartridges have the same
part numbers as before. In order to configure the drive to write to the old DDS
cartridges (figure 5.1), see “Configuration Switches” on page 2-9.
Edition 8—December 1999
5-3
Cartridges
Write-Protecting a Cartridge
Prolonging Head Life
Drives are optimized to achieve the best performance possible and a typical head
life in excess of 6000 hours. This figure assumes that you use the appropriate tape
for the drive (such as DDS-4 media with DDS-4 drives), and that you follow a
typical usage pattern.
You may not attain the typical head life when:
n You use an older tape format, such as DDS-2 tapes with a DDS-3 drive.
n A large proportion of cartridges loaded are being used for the first time.
Write-Protecting a Cartridge
Caution The Tape log, which contains a history of usage of the tape, is updated during
the unload procedure. If the cartridge is write-protected, the Tape log will not be
updated, and so will be inaccurate. Note that HP C1534A and HP C1536A drives
with firmware revision T503 do not update the Tape log during unload.
Cartridges can be write-protected by sliding the tab on the rear of the cartridge
so that the hole is open. In this state, data can be read from the tape but not
written to it.
Figure 5.3 Write-protecting a cartridge
WRITE
Cartridge
write-enabled
READ-ONLY
Cartridge
write-protected
Life-Expectancy of Tapes
All DDS-certified media is electronically checked to withstand at least 2000
passes. Under optimum environmental conditions (50% relative humidity, 22°C),
this is equivalent to about 100–150 backup operations. This takes into account
that an area of tape may have several passes during a backup, either because
streaming cannot be maintained, or because the backup software package
repeatedly accesses certain areas of tape.
Under certain extreme conditions, the recommended maximum number of
backup operations is less. These conditions are as follows:
5-4
Edition 8—December 1999
Cartridges
Humidity
n
Environmental Conditions: Sustained use at the low end of the humidity
specification will reduce the tape life.
n Computer Performance: The lower the performance of the computer, the more
likely that streaming cannot be maintained and that an increase in the
number of passes over given areas of tape will occur.
n Backup Software Package: The backup package may access certain areas of
tape frequently, or there may be a high system overhead that may cause
streaming to stop. Both of these factors increase the number of tape passes in
a given area.
Because these parameters vary from system to system, it is difficult to give a
definitive statement of the number of backup operations achievable using a
particular tape.
As a guideline we recommend that you limit the use of a tape to around 75 backup
operations in worst-case conditions of the following:
n
Environment: sustained low humidity
Computer Performance: streaming failures
n Backup Software Package: accessing certain tape areas frequently, or causing
streaming failure
n
Humidity
To avoid condensation problems, allow a tape to stabilize after it has been moved
from one temperature and humidity to another for at least two hours before you
use it.
Using Labels
Cartridge and magazine labels must be firmly stuck to the recessed label area and
nowhere else. To avoid a mechanism jam, observe the following
recommendations:
n
Labels must be firmly stuck and not peeling off or curling at the corners.
n Labels must only be stuck within the label area.
n A label must not be stuck on top of another label.
n Only use the labels that are supplied with the cartridges or magazine.
Figure 5.4 Magazine label area
Only stick a label here
Edition 8—December 1999
5-5
Cartridges
Using Labels
5-6
Edition 8—December 1999
6
This chapter contains a few hints for approaching troubleshooting,
together with a detailed description of the emergency procedure
that a qualified service engineer can use to retrieve a magazine or
cartridge from an autoloader in the event of a jam.
For details of error messages displayed on the front panel LCD of an
autoloader, see “LCD Messages Categories” on page 4-4 and “LCD
Messages” on page 4-11.
Troubleshooting
Edition 8—December 1999
6-1
Troubleshooting
General Procedure
General Procedure
If a problem occurs, the first step is to try to establish whether the problem lies
with the cartridge, the drive, the host computer and connections, or the way the
system is being operated.
n
Has the system just been installed?
There could be an installation problem:
1
2
3
4
5
6
7
n
Check through the information in Chapter 2.
Check the power connectors and SCSI cabling.
Is the SCSI ID correctly set? Is there a SCSI system conflict?
Has the SCSI bus been correctly terminated?
Have the configuration switches been set correctly for your system?
Check the environmental conditions against the specified limits.
Are appropriate drivers and application software installed on the host?
Are you using new cartridges or a different brand of cartridge? Have you been
using the particular cartridge for a very long time?
The problem could lie with the cartridge:
1 Check through Chapter 5.
2 Check that you are using a DDS-labeled cartridge—not a DAT cartridge.
3 DDS-2 media will be ejected by DDS-1 and DDS-DC drives (HP C1534A and
HP C1536A).
4 DDS-3 and DDS-4 media will be ejected by DDS-1, DDS-DC and DDS-2 drives
(HP C1534A, HP C1536A, HP C1533A, HP C1539A and HP C1553A).
5 DDS-4 media will be ejected by DDS-3 drives (HP C1537A and HP C1557A).
6 Are you trying to write to non-MRS media? Check the configuration switches.
7 Has the cartridge been write-protected?
8 Clean the tape heads with the cleaning cartridge.
9 Try the operation again.
10 If the problem still occurs, try using a different cartridge.
11 If the problem is still there, the problem probably lies with the drive or the host
computer.
n
Has the drive been moved recently? Have any cables been disconnected and
reconnected? Has the environment changed—unusually hot, cold, damp or dry?
Has there been dust or dirt near the drive. Have reasonable precautions against
static been taken?
The problem could lie with the drive:
1 Check the cables and connectors.
2 Clean the tape heads with the cleaning cartridge.
3 If the problem persists, check the environmental conditions against the
specified limits. Perhaps move the drive to a more suitable site.
n
Has a new operating system been installed in the host computer? Has new backup
software been installed.
The problem could lie with the host or the software. Consult the computer’s
operating manuals, the software manual, or seek help from a service engineer.
6-2
Edition 8—December 1999
Troubleshooting
Emergency Removal of a Magazine or Cartridge (autoloaders only)
Emergency Removal of a Magazine or
Cartridge (autoloaders only)
Caution This procedure should only be performed by a qualified service engineer.
Considerable care is required and full anti-static precautions must be taken.
Warranty conditions may be violated.
In the event of a mechanical jam, the LCD will display “Error X”. If the actions
proposed on page 4-12 fail to clear the jam, and if you must remove the magazine
or cartridge, then use the following procedure.
1 Power down the system and remove the autoloader. Place it upside down on a
bench.
2 Unscrew the securing bracket at the rear of the autoloader that fixes the drive
mechanism in the autoloader (2 screws)—see figure 6.1.
Note You cannot remove the bracket fully until after step 3.
Figure 6.1 Rear view, removing the securing bracket and drive
3 Gently pull upwards on the drive mechanism by gripping the SCSI connector.
The drive will rotate up, pivoting from the front face—see figure 6.2. As the
drive starts to pivot, it reaches a position where you can remove the securing
bracket.
Figure 6.2 Rear view: lifting the drive and removing the magazine
front face
of drive
Edition 8—December 1999
6-3
Troubleshooting
Emergency Removal of a Magazine or Cartridge (autoloaders only)
4 After removing the bracket, rotate the drive fully forward, exposing the
magazine area. Remove the magazine by gently lifting it away from the spring
loaded pusher bar. This is located on the right side looking from the rear.
5 If a cartridge remains jammed in the drive, proceed as follows:
a Disconnect the red interface cable from the pivoted front face of the drive
(the DAI interface cable)—see figures 6.2 and 6.3.
b Remove the top lid of the drive mechanism (4 screws).
c Insert a 1.5 mm hexagonal key or a small crosspoint (Posidrive 0)
screwdriver into the aperture on the right side of the drive looking from rear.
This gives you access to the motor worm wheel, as shown in figure 6.3. Turn
the hexagonal key or small crosspoint screwdriver anticlockwise to release
the cartridge—this may take more than 1000 turns.
Figure 6.3 Turning the motor worm wheel to release the cartridge
Red interface cable
connects here
front face
of drive
4 To reassemble the autoloader, the steps are almost the reverse of the above
procedure:
a Place the lid correctly on the drive mechanism and attach it with the four
screws while pushing down gently.
b Fit the front of DAT drive under the pivot points.
c Connect the red interface cable.
d Rotate the drive back into position and, when you reach the point mentioned
in step 3, insert the securing bracket.
e Push the drive fully home.
f Insert the two screws into the securing bracket at the rear and tighten
them—see figure 6.1.
6-4
Edition 8—December 1999
7
Interface Implementation
Edition 8—December 1999
7-1
Interface Implementation
The SCSI Interface
The SCSI Interface
The drives use SCSI-2 as the interface to connect to the host system.
Note Throughout this chapter, the term SCSI implies SCSI-2.
The SCSI implementation provides the drives with a standard set of features and
functions. These include the following:
n
n
n
n
n
n
DDS-‘1, DDS-2, DDS-3 drives: Single-ended narrow SCSI connection
DDS-4 drives: LVD/single-ended multi-mode SCSI
Synchronous data transfers
Asynchronous data transfers
Implementation of all mandatory and most optional commands of the
Sequential Access command set
Autoloaders only: Full implementation of mandatory Medium Changer
commands
More detailed information on the SCSI interface can be found in the documents
listed in Chapter 1.
Supported Messages
The following messages are supported:
00h
01h
02h
03h
04h
05h
06h
07h
08h
09h
0Ah
0Bh
0Ch
8Xh
COMMAND COMPLETE
EXTENDED MESSAGE—SDTR and WDTR*
SAVE DATA POINTER
RESTORE POINTERS
DISCONNECT
INITIATOR DETECTED ERROR
ABORT
MESSAGE REJECT
NO-OP (NO OPERATION)
MESSAGE PARITY ERROR
LINKED COMMAND COMPLETE
LINKED COMMAND COMPLETE (with flag)
BUS DEVICE RESET
IDENTIFY**
* For DDS-1, DDS-2 and DDS-3 drives, EXTENDED MESSAGE (01h) is only
supported with the Extended Message Code of 01h, SYNCHRONOUS DATA
TRANSFER REQUEST. All drives support both synchronous and asynchronous
data transfer, and no vendor-unique codes are implemented.
** The IDENTIFY message (80h–FFh) is only supported for the values 80h and
C0h.
7-2
Edition 8—December 1999
Interface Implementation
Supported Status Codes
Supported Status Codes
The following status codes are supported:
00h
02h
08h
10h
18h
GOOD
CHECK CONDITION
BUSY
INTERMEDIATE GOOD
RESERVATION CONFLICT
Supported Commands
The following commands are supported. They include all Mandatory and
Extended commands and most Optional commands
Opcode Command
00h
TEST UNIT READY
Description
Checks if the drive is ready.
01h
REWIND
02h
REQUEST BLOCK
ADDRESS
03h
REQUEST SENSE
Tells the drive to position the tape at the beginning of the currently active
partition.
Not HP C1534A/36A: Returns a count representing the current logical block
address to the host. A block is of fixed or variable length depending on the
Fixed bit in the WRITE command. Blocks are numbered sequentially,
starting with 1 at BOM. Each block, filemark, or setmark adds one to the
count from BOM.
Tells the drive to transfer sense data to the host.
05h
READ BLOCK LIMITS
Instructs the drive to return its limits for record length.
07h
INITIALIZE ELEMENT
STATUS
08h
READ
0Ah
WRITE
0Ch
SEEK BLOCK
10h
WRITE FILEMARKS
11h
SPACE
12h
INQUIRY
Autoloaders only: ensures that the data about the status of internal elements
(magazine slots and the drive) is available for READ ELEMENT STATUS.
Transfers one or more data records to the host, starting with the next record
on the tape.
Transfers one or more records from the host to the current logical position on
the tape.
Not HP C1534A/36A: Positions the tape in a specified position in the current
partition. When there is no exception condition during command execution,
the tape is placed at the BOP side of the block specified in the Block Address
field.
Tells the drive to write a specified number of filemarks starting at the
current logical position on the tape.
Instructs the drive to perform a variety of positioning functions, spacing over
a specified number of records, filemarks, setmarks, or to EOD.
Tells the drive to return basic operating parameter information to the host.
13h
VERIFY
15H
MODE SELECT
Verifies one or more records beginning with the next record on the tape. The
verification only checks records on the tape. No data is transferred between
the host and the drive.
Allows the host to configure the drive, setting Immediate Mode, Read-afterWrite, C3 Error Correction, N-Group Writing, managing the number and
size of partitions, and changing the active partition. (N-Group writing is not
supported on the HP C1537A.)
Edition 8—December 1999
7-3
Interface Implementation
Supported Commands
Opcode Command
16h
RESERVE UNIT
Description
Reserves the drive for the exclusive use of the initiator or for another
specified SCSI device.
Releases the drive if it is currently reserved by the initiator. Third-party
release is supported.
Erases part or all of the remaining data within a partition, beginning at the
current logical position.
Allows the drive to report its current configuration.
17h
RELEASE UNIT
19h
ERASE
1Ah
MODE SENSE
1Bh
LOAD/UNLOAD
1Bh
Enhanced LOAD/
UNLOAD
1Ch
RECEIVE DIAG
RESULTS
1Dh
SEND DIAGNOSTIC
1Eh
PREVENT MEDIA
REMOVAL
Enhanced PREVENT
MEDIA REMOVAL
Tells the drive to load or unload a cartridge. Unload-at-EOD and
retensioning are not supported.
Autoloaders only: A vendor-unique version of LOAD/UNLOAD, which allows
hosts that do not support different LUNs and the Medium Changer command
set to operate with the autoloader. It allows the host to specify the magazine
slot to use.
Tells the drive to send analysis data to the host after completion of a SEND
DIAGNOSTIC command.
Requests the drive to perform diagnostic tests. If the tests fail, CHECK
CONDITION status indicates the results are available through the REQUEST
SENSE command.
Allows the host to control whether the drive can eject a tape cartridge.
1Fh
MEDIA CENSUS
2Bh
LOCATE
Autoloaders only: A vendor-unique version of PREVENT MEDIA REMOVAL,
which also allows the host to control whether the magazine can be removed.
Autoloaders only: A vendor-unique command returning information on which
magazine slots contain cartridges.
Moves the current logical position to a new position specified by the host.
1Eh
34h
READ POSITION
Returns the drive’s logical position to the host.
3Bh
WRITE BUFFER
3Ch
READ BUFFER
4Ch
LOG SELECT
Used in conjunction with the READ BUFFER to test the buffer and the SCSI
bus integrity.
Used after a WRITE BUFFER command to test the data buffer and the SCSI
bus integrity.
Allows the host to clear one or more log pages in the drive.
4Dh
LOG SENSE
Allows the host to retrieve information from the drive’s logs.
A5h
MOVE MEDIUM
B8h
READ ELEMENT
STATUS
Autoloaders only: Allows the host to request that a cartridge is moved from
the magazine to the drive, or from the drive to the magazine.
Autoloaders only: Allows the host to find the status of the internal elements
(magazine slots and the embedded tape drive).
7-4
Edition 8—December 1999
Interface Implementation
Supported Mode Pages
Supported Mode Pages
The following Mode pages are supported:
Mode Page
02h
Disconnect-Reconnect
0Fh
Data Compression Characteristics (not HP C1534A)
10h
Device Configuration
11h
Medium Partitions
1Ch
TapeAlert (HP C1539A, DDS-3 and DDS-4 drives only)
1Dh
Element Address Assignment (autoloaders only)
1Fh
Device Capabilities (autoloaders only)
Supported Log Pages
The following Log pages are supported:
Log Page
02h
Write Error Counters
03h
Read Error Counters
2Dh
Reserved (DDS-3 and DDS-4 drives only)
2Eh
TapeAlert log (HP C1539A, DDS-3 and DDS-4 drives only)
30h
Tape Log
31h
Tape Capacity Log
32h
Buffer Trace Log
33h
Device Trace Log
34h
Write Frames Error Counters
35h
Read Frames Error Counters
36h
Bad Group Log
37h
Drive Counters
38h
Mechanism Counters
39h
Data Compression Log (not HP C1534A)
3Ah
Data Compression Trace Log (not HP C1534A)
3Bh
Channel Trace Log
3Ch
Autoloader Trace Log (autoloaders only)
3Dh
Autoloader Retry Counters (autoloaders only)
3Eh
Read Retry Log (HP C1539A, DDS-3 and DDS-4 drives only)
Edition 8—December 1999
7-5
Interface Implementation
Supported Log Pages
7-6
Edition 8—December 1999
8
Physical and Safety
Specifications
Edition 8—December 1999
8-1
Physical and Safety Specifications
Dimensions and Weight
Dimensions and Weight
The overall dimensions of drives are as follows:
Height: 41.3 mm (1.6 in.)
Depth: 150 mm (5.9 in.)
Width: 101.6 mm (4.0 in.)
The overall dimensions of the autoloader without the front panel are as follows:
Height: 82.6 mm (3.25 in.)
Depth: 203.2 mm (8.0 in.)
Width: 146.1 mm (5.75 in.)
Weight
HP C1533A, HP C1537A: 1 kilogram (2.2 lb), without a cartridge.
HP C1534A, HP C1536A: 0.66 kilogram (1.5 lb), without a cartridge.
HP C1539A: 0.685 kilogram (1.5 lb), without a cartridge
HP C5683A: 0.716 kilogram (1.58 lb), without a cartridge
HP C1553A, HP C1557A 2.2 kilogram (4.8 lb), without a magazine
HP C5713A: 1.989 kilogram (4.38 lb), without a magazine
Orientation (Autoloaders only)
The autoloaders are designed to operate in two orientations as shown in
figure 8.1:
Figure 8.1 Operating orientations
As a special order, the HP C1553A can be supplied for use in the vertical
orientation with a different front panel that has the icons and LCD rotated.
8-2
Edition 8—December 1999
Physical and Safety Specifications
Environmental
Environmental
These specifications are for the drive or autoloader, not for any particular
DDS-format cartridge. If a cartridge is used which has more stringent
requirements than these specifications, the cartridge’s requirements should be
observed.
Parameter
Specification
Ambient
Temperature
Operating
5°C to 40°C (∆T<10°C/h)
Non-Operating
−40°C to 70°C (∆T<20°C/h)
Humidity
Operating
20 to 80% RH, non-condensing
Maximum wet bulb temperature = 26°C (∆RH<30%/h)
Non-Operating
5 to 95% RH (∆RH<30%/h)
Vibration
Operating (3 axes for
drives, 1 axis for
autoloaders)
Swept Sine: 0.3 g peak, 5–500 Hz @ 1 octave/min
Non-Operating (3 axes)
Swept Sine: 0.75 g peak, 5-500 Hz @ 1 octave/min
Random:
Random:
5–350 Hz @ 0.00053 g2/Hz
350–500 Hz @ −6 dB/octave
500 Hz@ 0.000271 g2/Hz (≈0.5 g rms)
5–100 Hz @ 0.020 g2/Hz
100–137 Hz @ −6 dB/octave
137–350 Hz @ 0.0107 g2/Hz
350–500 Hz @ −6 dB/octave
500 Hz @ 0.0052 g 2/Hz (≈2.41 g rms)
Operating (drives: 3 axes, 5.0 g peak for 3 ms: half sine
autoloader: 1 axis)
no performance change
Shock
Operating (drives: 2 axes, 8.0 g peak for 11 ms: half sine
3 faces, autoloader: 1
axis)
no data loss
Altitude
Transportatio
n
Non-Operating (6 faces)
no damage
90.0 g peak for 3 ms: half sine
30.0 g peak for 26 ms: trapezoidal
Operating
0 km to 4.6 km (0 to 15,000 ft)
Non-Operating
0 km to 15.2 km (0 to 50,000 ft)
Vibration
Type 1 package (3 axes)
Swept Sine: 0.5 g peak @ 5–200–5 Hz @ 1 octave/min
5 min dwell at peak resonance
Random:
5–100 Hz @ 0.015 g2/Hz
100–200 Hz @ −6 dB/octave
200 Hz @ 0.0038 g 2/Hz (≈1.47 g rms)
(30 min/axis)
Type 1: One
drive packaged
individually,
also ten drives
packaged
together
Impact
Type 1 package
10 vertical impacts (6 faces and 4 bottom package
corners from 910 mm height for a single drive, 760 mm
for ten packaged together)
Suspended
Particles
Operating and NonOperating
Suspended particle environment,
particles <200 microgram/cubic meter
Acoustic Noise Emissions
Edition 8—December 1999
<5.0 bel soundpower
8-3
Physical and Safety Specifications
Electromagnetic Compatibility
Electromagnetic Compatibility
The EMC performance of internal autoloaders depends on the characteristics of
the system in which the autoloader is installed. Hewlett-Packard has tested
internal autoloaders installed in network servers and in external desktop
enclosures to verify EMC performance against existing regulatory standards.
Hewlett-Packard will also ensure that internal autoloaders will comply with new
regulatory standards by or before their date of implementation.
Implementation
Date
European Economic
Area Standards
Radiated and Conducted Emissions
before 1 Aug EN 55022:1994
2001: + Amendment A1:1995
+ Amendment A2:1997
from 1 Aug 2001: EN 55022:1998
Harmonic Current Emissions
before 1 Jan 2001: EN 60555-2:1987
after 1 Jan 2001: EN 61000-3-2:1995
+ Amendment A1:1998
+ Amendment A2:1998
Voltage Fluctuations and Flicker
before 1 Jan 2001: EN 60555-3:1987
after 1 Jan 2001: EN 61000-3-3:1995
Immunities
before 1 Jul 2001: EN 50082-1:1992
after 1 Jul 2001: EN 55024:1998
International
Standards
CISPR 22:1993
+ /A1:1995
+ /A2:1996
CISPR 22:1997
IEC 60555-2:1982
+ A1:1985
IEC 61000-3-2:1995
+ /A1:1997
+ /A2:1998
IEC 60555-3:1982
IEC 61000-3-3:1994
IEC 801-2:1991
IEC 801-3:1984
IEC 801-4:1988
CISPR 24:1997
IEC 61000-4-2:1995
IEC 61000-4-3:1995
IEC 61000-4-4:1995
IEC 61000-4-5:1995
IEC 61000-4-6:1996
IEC 61000-4-8:1993
IEC 61000-4-11:1994
Media Specifications
Parameter
Specification
Storage
Temperature
Humidity
Wet Bulb Temp
5°C to 32°C
20%RH to 60%RH
26°C max
Transportation
(recommended)
Temperature
Humidity
Wet Bulb Temp
−40°C to 45°C
5%RH to 80%RH
26°C max
8-4
Edition 8—December 1999
Physical and Safety Specifications
Power Requirements
Power Requirements
The power requirements are as follows:
+5V: ±5%, Ripple <150 mV peak-peak (<100 mV peak-peak for the HP C1533A
and HP C1553A)
n +12V: ±10% (±5% for drives other than the HP C1537A when programming
EEPROM), Ripple <150 mV peak-peak
n
On powering up, both supplies should come up within 1 second of each other.
On powering down, the 12V supply should be maintained within ±10% limit until
the 5V supply drops below 4.5V.
The specified ratings are as follows:
+5V supply +12V supply Power
HP C1534/36A
HP C1533A
Typical Operation
0.6A
0.12A
< 5W
Worst Case Peaks (<1s)
0.8A
0.4A
8.8W
< 1.2A
< 0.2A
7.5W
Typical Operation
HP C1537A
Worst Case Peaks (<1s)
1.2A
0.8A
15.6W
Typical Operation
0.95A
< 0.06A
5.7W
Worst Case Peaks (<2s)
095A
0.51A
10.2W
<0.65A
0.03A
3.8W
HP C1539A
Typical Operation
Worst Case Peaks (<1s)
1.0A
0.3A
6.1W
HP C5683A
Typical Operation
0.5A
0.4A
7.3W
Worst Case Peaks (<1s)
0.85A
1.2A
20.3W
HP C1557A
(embedded drive)
Typical Operation
<1.2A
0.25A
9W
Worst Case Peaks (<1s)
1.2A
0.8A
15.6W
HP C5713A
(embedded drive)
Typical Operation
0.5A
0.4A
7.3W
Worst Case Peaks (<1s)
0.85A
1.2A
20.3W
For the HP C1553A, the ratings for the embedded drive are the same as for the
HP C1533A above.
The ratings for the changer mechanism in the autoloaders are as follows:
Changer
Mechanism
+5V supply
+12V supply
Power
Typical Operation
<0.75A
<0.25A
6.8W
Worst Case Peaks (<1s)
0.75A
2.0A
28W
Measured values of current for typical units are as follows:
HP C1534A/36A HP C1533A HP C1537A HP C1539A HP C5683A
5V
12V
5V
12V
Idle
0.6A
10 mA
1.1A
0.1A
Reading/Writing
0.6A
0.12A
1.16A 0.12A 0.85A 0.06A 0.65A 0.03A 0.5A
Load/Unload (peak, <0.5s)
0.7A
0.32A
1.12A 0.6A 0.66A 0.51A 0.48A 0.06A 0.36A 1.07A
Fast Forward/Reverse
0.6A
0.25A
1.1A
Edition 8—December 1999
5V
12V
5V
12V
5V
12V
0.6A 0.05A 0.47A 0.02A 0.18A 0.19A
0.4A
0.4A 0.74A 0.21A 0.64A 0.03A 0.85A 1.2A
8-5
Physical and Safety Specifications
Power Requirements
For the HP C1553A, measured values of overall current for typical units are as
follows:
n +5V: between 1300 mA and 1400 mA with no significant spikes.
n +12V: shown in figures 8.2 and 8.3.
The drives are protected by internal fuses.
Figure 8.2 HP C1553A autoloader: typical overall current
Figure 8.3 HP C5713A autoloader: typical overall current
1200 mA
800 mA
400 mA
Idle
8-6
Drive
Read/Write
Fast Forward
Rewind
Load/Unload
Autoloader
Activity
Edition 8—December 1999
Physical and Safety Specifications
Safety
Safety
All HP DDS drives conform to the following safety standards:
n
UL 1950—“Safety of Information Equipment, Including Electrical Business
Equipment” (Second Edition).
n CSA C22.2 Number 950, M1986—“Safety of Information Equipment, Including
Electrical Business Equipment”.
n TUV EN60 950: “Safety of Information Technology Equipment including
Electrical Business Equipment” (1992 + A1 + A2:1993)
n IEC 950—“Safety of Information Technology Equipment including Electrical
Business Equipment”
Conditions of Acceptability
Use the drives only in equipment where the suitability of the combination has
been determined by an appropriate certification organization (for example,
Underwriters Laboratories Inc. or the Canadian Standards Association in North
America, and the British Standards Institution or Verband Deutscher
Elektrotechniker in Europe).
Other considerations include the following:
n A drive must be installed in an enclosure to limit an operator’s access to live
parts, to provide system stability, and to give the drive the necessary
grounding integrity.
n A drive must only be supplied by a Safety-Extra-Low-Voltage (secondary)
circuit in accordance with DIN VDE 0805. During incorporation of the
equipment, all requirements of DIN VDE 0805 must be observed and obeyed
Note The drives are only fused to protect them from excessive currents.
Edition 8—December 1999
8-7
Physical and Safety Specifications
Conditions of Acceptability
8-8
Edition 8—December 1999
9
Reliability
Edition 8—December 1999
9-1
Reliability
Summary
Summary
HP C1533A
HP C1553A
HP C1537A
HP C1539A
HP C1557A
HP C5683A
HP C5713A
200,000
5%
2,000
200,000
12%
6,000
40,000
30%
6,000
300,000
12%
6,000
300,000
12%
6,000
55,000
30%
6,000
400,000
12%
6,000
100,000
30%
6,000
n/a
DDS
DDS-DC
n/a
DDS-1
DDS-DC
DDS-2
>100,000
DDS-1
DDS-DC
DDS-2
n/a
DDS-1
DDS-DC
DDS-2
DDS-3
n/a
DDS-1
DDS-DC
DDS-2
>100,000
DDS-1
DDS-DC
DDS-2
DDS-3
HP C1534A
HP C1536A
The following table summarizes the reliability specifications of the drives. Each
measure is described in the sections that follow.
Parameter
MTBF
Hours: 200,000
Duty cycle:
5%
Drive Life (tape2,000
pulling hours)
Cartridge Swaps
n/a
Interchange
DDS-1
Formats
Data Reliability
Error Rate
<1 in 1015 <1 in 1015 <1 in 1015 <1 in 1015 <1 in 1015 <1 in 1015 <1 in 1015
bits read bits read bits read bits read bits read bits read bits read
n/a
>100,000
DDS-1*
DDS-1*
DDS-DC DDS-DC
DDS-2
DDS-2
DDS-3
DDS-3
DDS-4
DDS-4
<1 in 1015 <1 in 1015
bits read bits read
* 90m DDS-1 tapes are read-only; 60m DDS-1 tapes are not supported
Note Hewlett-Packard Company does not warrant that these predicted values are
representative of any particular unit installed for customer use. Failure rates
are derived from a large database of test samples. The actual failure rate will
vary from unit to unit.
Mean-Time Between Failures (MTBF)
The specifications assume that the integration practices recommended by CPB
have been followed (see the list of related documents on page 1-6). Also refer to
the duty cycle given in the table above.
The method of calculation is as follows:
Cumulative hours of all drives shipped
MTBF = ---------------------------------------------------------------------------------------------------------------------------------------------Number of units returned due to end-user failures
MTBF for the Autoloaders
Changer Life
The expected life of the changer mechanism is >100,000 cartridge swaps. This is
based on a typical model of heavy usage as follows:
n The autoloader is used 5 days per week.
n There are 20 cartridge swaps per day.
n The drive performs 10 hours of tape pulling per day.
This gives 100 cartridge swaps per week and 50 hours pulling tape, which is
equivalent to a 30% duty cycle for the autoloader.
A
1
2
3
cartridge swap is defined as follows:
The drive rewinds the cartridge and unloads it.
The changer mechanism returns the cartridge to the magazine.
The changer selects another cartridge from the magazine and transfers it to
the drive.
4 The drive loads the new cartridge.
9-2
Edition 8—December 1999
Reliability
Summary
Calculating the MTBF
For HP C1553A autoloaders, the expected MTBF is based on a figure of 80,000
hours for the changer mechanism, with the usage model described in “Changer
Life” above.
The MTBF for the drive mechanism would be 200,000 power-on hours with the
typical duty cycle for DDS-format drives of 12%. With the heavier 30% duty cycle
within the autoloader, this reduces to 80,000 hours.
Combining these two gives an overall MTBF of 40,000 hours at a 30% duty cycle.
This is calculated as follows:
Drive:
MTBFD @ 12% = 200,000 hrs
Autochanger mechanism:MTBFA @ 30% = 80,000 hrs
For the drive embedded in an autoloader:
The factor for usage in the autoloader is 30%
------------- = 2.5
12%
so MTBF D
200000
@ 30% = --------------------- = 80000 hours
2.5
So we now have:
MTBFD @ 30% = 80,000hrs
MTBFA @ 30% = 80,000hrs
The FPMH (Failure Rate Mechanism Hours) for the whole autoloader is the sum
of the reciprocals of the individual MTBFs for drive and autochanger mechanism:
–5
1
1
1
1
FPMH = ------------------------ + ----------------------- = ----------------- + ----------------- = 2.5 × 10
MTBF D MTBF A
80000 80000
The MTBF for the whole autoloader is then the reciprocal of this FPMH:
1
1
MTBF = --------------------- = ----------------------------- = 40000 hours
–5
FPMH
2.5 × 10
Drive Life
The expected life of the HP C1534A/36A is equivalent to 2,000 hours of tape
pulling. For the other, higher-performance drives, the expected head life is
equivalent to 6,000 hours of tape pulling.
Note The drive is designed to operate in streaming and repositioning modes.
Sustained low data transfer rates may cause premature failure through an
excessive number of starts and stops.
Data Interchange
According to specification, cartridges can be interchanged between drives which
conform to the same DDS format.
Data Reliability
The unrecoverable error rate on read is specified as less than 1 in 1015 bits read.
For further details, refer to “Designing a Data Storage Format for Digital Audio
Tape (DAT)”, produced for the DDS Manufacturers Group, and available from
Hewlett-Packard (see Chapter 1).
Edition 8—December 1999
9-3
Reliability
Summary
9-4
Edition 8—December 1999
10
Performance Specification
Edition 8—December 1999
10-1
HP C1536A
HP C1533A
HP C1537A
HP C1539A
HP C1553A
HP C1557A
HP C5683A
1.3 GB*
2.6 GB
2.6 GB
2.6 GB
2.6 GB
15.6 GB
15.6 GB
n/s
HP C5713A
HP C1534A
Performance Specification
Capacity (2:1 compression)
DDS-1 60m cart.
n/s
†
DDS-1 90m cart.
2.0 GB*
4.0 GB
4.0 GB
4.0 GB
4.0 GB
24.0 GB
24.0 GB
4.0 GB
24.0 GB†
DDS-2 120m cart.
n/s
n/s
8.0 GB
8.0 GB
8.0 GB
48.0 GB
48.0 GB
8.0 GB
48.0 GB
DDS-3 125m cart.
n/s
n/s
n/s
24.0 GB
n/s
n/s
144.0 GB
24.0 GB
144.0 GB
DDS-4 150m cart.
n/s
n/s
n/s
n/s
n/s
n/s
n/s
40.0 GB
240.0 GB
510 KB/s
1 MB/s
3 MB/s
3 MB/s
3 MB/s
3 MB/s
6 MB/s
‡
6 MB/s‡
8 MB/s
10 MB/s
40 MB/s‡ 40 MB/s‡
Transfer Rate
Max. Sustained Native 183 KB/s 183 KB/s 510 KB/s 1 MB/s 510 KB/s
Max. Burst Asynch.
1.6 MB/s 1.6 MB/s 3 MB/s
Max. Burst Synch.
5 MB/s
5 MB/s
Average Cartridge Load
Time
<14s
<14s
Fast Search
(average file access
time)
52s
(90m)
52s
(90m)
3 MB/s
3 MB/s
8 MB/s 10 MB/s >10 MB/s
<14s
<14s
<13s
40s
40s
45s
(DDS-2) (DDS-3) (DDS-2)
swap time swap time
+ <14s
+ <14s
40s
(DDS-2)
40s
(DDS-2)
<15s
swap time
+ <15s
50s
(DDS-4)
50s
(DDS-4)
n/s not supported
* HP C1534A does not support data compression. These are uncompressed capacities.
† read-only
‡ wide SCSI
Assumptions:
n
Tapes conform to the DDS Media Specification.
Tape heads are cleaned regularly using the guidelines in Chapter 3.
n Drive and tapes are kept within environmental specifications.
n C3 ECC frames, read-after-write, and read retries use the default settings.
n Transfer rates are using the optimal tape type (DDS-2 tape in a DDS-2 drive,
DDS-3 in a DDS-3 drive, DDS-4 tapes in a DDS-4 drive).
n
Data Capacity
Using data compression on the drives (except the HP C1534A), the actual
capacity that can be achieved depends on the nature of the data.
Load and Unload Times
The load time is from when a cartridge is inserted to when the drive is ready to
start acting upon the next host command.
The time taken to unload and eject a cartridge depends heavily on the length of
tape, the number of partitions and the current position on the tape. The tape must
first be rewound, which could take up to 80s for a DDS-2 tape (60s for DDS-1 90m)
if EOD is near the end of the tape. The drive then updates the Tape log. Finally,
the drive performs the unloading procedure. As a result, the entire eject sequence
can take between 30 seconds and 2 minutes.
Note HP 1534A/36A drives with firmware version T503 do not load or save the Tape
log, so their load and unload times are less.
10-2
Edition 8—December 1999
Performance Specification
Autoloader Swap Times
The average cartridge swap time is 15 seconds, where a swap is defined as
follows:
1 The drive rewinds the cartridge and unloads it.
2 The changer mechanism returns the cartridge to the magazine.
3 The changer selects another cartridge from the magazine and transfers it to
the drive.
4 The drive loads the new cartridge.
The actual time will depend on the position in the magazine.
Retries Limits on Rewrites
For Read-After-Write rewrites, each frame can be rewritten up to a maximum of
127 times (giving 128 writes of the frame). In addition, the total number of frame
rewrites within one group is 128.
Power-Fail Handling
If there is a power-fail, the drive performs the following actions, and reverts to its
default configuration when power is restored:
1 The drive executes the Power-Up sequence of self-tests.
2 If a tape is present, it is threaded with the usual load sequence.
3 The drive fails the next host command and returns a CHECK CONDITION
status. The host should then send a REQUEST SENSE command. The drive
responds with the UNIT ATTENTION sense key, and sets the Additional Sense
bytes to indicate that the drive has been power-cycled.
Edition 8—December 1999
10-3
Performance Specification
10-4
Edition 8—December 1999
Appendix A
Product Comparisons
Edition 8—December 1999
Appendix A-1
Physical
Form-factor
HP
35470A
HP
35480A
HP
C1534A
HP
C1536A
HP
C1533A
HP
C1537A
HP
C1539A
HP
C1553A
HP
C1557A
HP
C5683A
HP
C5713A
3.5"
3.5"
3.5"
3.5"
3.5"
3.5"
3.5"
5.25"
5.25"
3.5"
5.25"
Appendix A-2
The following tables compare features of HP DDS drives:
Dimensions (in mm)
Weight (no cartridge
or magazine)
101.6 (4.0") 146.1 (5.75") 146.1 (5.75") 101.6 (4.0") 146.1 (5.75")
150 (5.9") 203.2 (8.0") 203.2 (8.0") 150 (5.9") 203.2 (8.0")
41.3 (1.6") 82.6 (3.25") 82.6 (3.25") 41.3 (1.6") 82.6 (3.25")
i kg
(2.2 lb)
1 kg
(2.2 lb)
0.66 kg
(1.5 lb)
0.66 kg
(1.5 lb)
1 kg
(2.2 lb)
1 kg
(2.2 lb)
0.685 kg
(1.5 lb)
2.2 kg
(4.8 lb)
2.2 kg
(4.8 lb)
0.716 kg
(1.58 lb)
1.989 kg
(4.38 lb)
Autochanger
No
No
No
No
No
No
No
Yes
Yes
No
Yes
Lights (LEDs)
2 bi-color
2 bi-color
2
2
2
2
2
3 + LCD
3 + LCD
2
3 + LCD
Yes
Yes
No
No
No
No
No
No
No
No
No
jumper
jumper
jumper
jumper
Yes
jumper
jumper
jumper
jumper
Yes
Yes
No
No
No
No
No
No
No
Termination
resistors
Termination power
Humidity sensor
permanent permanent
No
No
Edition 8—December 1999
Width: 101.6 (4.0") 101.6 (4.0") 101.6 (4.0") 101.6 (4.0") 101.6 (4.0") 101.6 (4.0")
150 (5.9")
Depth: 150 (5.9") 150 (5.9") 150 (5.9") 150 (5.9") 150 (5.9")
Height: 41.3 (1.6") 41.3 (1.6") 41.3 (1.6") 41.3 (1.6") 41.3 (1.6") 41.3 (1.6")
Supported media
MRS support
Hardware data
compression (DCLZ)
HP
35470A
HP
35480A
HP
C1534A
HP
C1536A
HP
C1533A
HP
C1537A
HP
C1539A
HP
C1553A
HP
C1557A
HP
C5683A
HP
C5713A
DDS-1
DDS-1
DDS-1
DDS-1
DDS-1,
DDS-2
DDS-1,
DDS-2,
DDS-3
DDS-1,
DDS-2
DDS-1,
DDS-2
DDS-1,
DDS-2,
DDS-3
DDS-1*,
DDS-2,
DDS-3
DDS-4
DDS-1*,
DDS-2,
DDS-3,
DDS-4
optional
optional
Yes
Yes
Yes
Yes
Yes
Yes
Yes
Yes
Yes
No
Yes
No
Yes
Yes
Yes
Yes
Yes
Yes
Yes
Yes
Yes
No
No
No
No
Yes
Yes
No
No
No
Yes
No
No
No
No
Yes
Yes
No
No
No
Yes
Yes
Yes
No
No
Yes
Yes
Yes
Yes
No
Yes
Yes
Yes
No
No
Yes
Yes
Yes
No
No
Yes
Yes
Yes
Yes
No
No
Yes*
Yes
Yes
Yes
No
Yes*
Yes
Yes
Yes
Appendix A-3
Media-Related
Format compatibility
DDS-1:
DDS1-DC:
DDS-2:
DDS-3:
DDS-4:
1.3 GB
2.0 GB
No
No
No
2.6 GB
4.0 GB
No
No
No
1.3 GB
2.0 GB
No
No
No
2.6 GB
4.0 GB
No
No
No
2.6 GB
4.0 GB
8.0 GB
No
No
2.6 GB
4.0 GB
8.0 GB
24.0 GB
No
2.6 GB
4.0 GB
8.0 GB
No
No
15.6 GB
24.0 GB
48.0 GB
No
No
15.6 GB
24.0 GB
48.0 GB
144 GB
No
n/s
4.0 GB*
8.0 GB
24.0 GB
40.0 GB
n/s
24.0 GB*
48.0 GB
144 GB
240 GB
Data encoding
8:10 NRZI
8:10 NRZI
8:10 NRZI
8:10 NRZI
8:10 NRZI
8:10 NRZI
8:10 NRZI
8:10 NRZI
8:10 NRZI
8:10 NRZI
8:10 NRZI
Data density on tape
61,000 bpi 61,000 bpi 61,000 bpi 61,000 bpi 61,000 bpi 122,000 bpi 61,000 bpi 61,000 bpi 122,000 bpi 122,000 bpi 122,000 bpi
60m DDS-1:
90m DDS1-DC:
120m DDS-2:
125m DDS-3:
150m DDS-4:
Track density
1869 tpi
1869 tpi
1869 tpi
1869 tpi
2793 tpi
2793 tpi
2793 tpi
2793 tpi
2793 tpi
* DDS-1 60m cartridges are not supported in DDS-4 drives. 90m cartridges are read-only.
3738 tpi
3738 tpi
Edition 8—December 1999
Capacity (typical, using 2:1 data compression where supported)
Load mechanism
Tension control
Independent reel
motor control
reels
raised
reels
raised
firmware firmware
HP
C1534A
HP
C1536A
HP
C1533A
HP
C1537A
HP
C1539A
HP
C1553A
HP
C1557A
HP
C5683A
HP
C5713A
cartridge
lowered
cartridge
lowered
reels raised
reels
raised
cartridge
lowered
reels raised
reels
raised
cartridge
lowered
cartridge
lowered
firmware
firmware
firmware/
mechanical
firmware
firmware
firmware
firmware
mechanimechanical tension cal tension
arm
arm
Yes
Yes
No
No
Yes
No
No
Yes
No
Yes
Yes
8
8
7
7
8
8
7
8
8
7
7
8 mm/s
(0.315
ips)
8 mm/s
(0.315
ips)
8 mm/s
(0.315 ips)
8 mm/s
(0.315 ips)
23.39
mm/s
(0.92 ips)
23.39
mm/s
(0.92 ips)
Fast-search tape
speed (multiple of
normal speed)
175x
175x
100x
100x
70x (DDS-1)
105x (DDS-2)
100x
(DDS-3)
68.4
68.4
Drum speed
(reading and writing)
2000
rpm
2000
rpm
2000 rpm
2000 rpm
5737 rpm
3825 rpm
(DDS-3)
Windowless drum
No
No
Yes
Yes
No
Forced-air cooling
recommended
No
No
No
No
Yes
Number of tape
guides
Normal tape speed
15.5 mm/s 10.4 mm/s
(0.61 ips)
(0.41 ips)
15.5 mm/s
(0.61 ips)
15.5 mm/s 10.4 mm/s
(0.61 ips)
(0.41 ips)
70x (DDS-1) 70x (DDS-1)
105x (DDS-2) 105x (DDS-2)
5737 rpm
5737 rpm
No
No
No
No
No
100x
(DDS-3)
3825 rpm 11479 rpm 11479 rpm
(DDS-3)
(DDS-4)
(DDS-4)
No
Yes
Yes
1 cu.ft./
min
1 cu.ft./
min
Appendix A-4
HP
HP
35470A 35480A
Edition 8—December 1999
Mechanical
Power requirements
HP
35480A
HP
C1534A
HP
C1536A
HP
HP
HP
C1533A C1537A C1539A
HP
C1553A
HP
C1557A
HP
C5683A
HP
C5713A
5V ±5%
5V ±5%
5V ±5%
5V ± 5%
5V ± 5% 5V ± 5% 5V ±5% 5V ± 5%
5V ± 5%
5V ± 5%
5V ± 5%
12V ±10% 12V ±10% 12V ± 10% 12V ± 10% 12V ± 5% 12V ±5% 12V ± 10% 12V ± 10% 12V ± 10%1 12V ±5% 12V ± 10%
5V current, typical
operation
0.6A
0.6A
0.6A
0.6A
<1.2A
0.95A
<0.65A
<1.2A2
<0.75A3
<1.2A2
<0.75A3
0.5A
0.5A2
<0.63A3
5V current, worst case
peaks (<1s)
0.6A
0.6A
0.8A
0.8A
1.2A
0.95A
1.0A
1.2A2
0.75A3
1.2A2
0.75A3
0.85A
0.85A2
0.75A3
5V power supply noise
& ripple, peak-to-peak
<0.15V
<0.15V
<0.15V
<0.15V
<0.1V
<0.1V
<0.15V
<0.1V
<0.1V
<0.15V
<0.15V
12V current, typical
operation
0.1A
0.1A
0.12A
0.12A
<0.2A
0.06A4
0.03A
<0.25A2
<0.25A3
<0.25A2
<0.25A3
0.4A
0.4A2
<1.12A 3
12V current, worst case
peaks (<2s)
0.6A
0.6A
0.4A
0.4A
0.8A
0.51A
0.3A
0.8A2
2.0A3
0.8A2
2.0A3
1.2A
1.2A2
2.0A3
12V power supply noise
& ripple, peak-to-peak
<0.15V
<0.15V
<0.15V
<0.15V
<0.15V
<0.15V
<0.15V
<0.15V
<0.15V
<0.15V
<0.15V
<5 W
<5 W
<5 W
<5 W
8.55 W
5.7W
3.8W
9W2
6.8W 3
9W 2
7.3W
7.3W2
16.6W3
8.8W
8.8W
15.6W
10.2W
6.1W
15.6W2
28W3
15.6W 2
28W3
20.3W
20.3W2
29.5W3
Power consumption,
typical operation
Power consumption,
worst case
±5% if programming the EEPROM
1
4
2
embedded drive
3
changer mechanism
During rewind, the typical 12V current is 0.2A for about 90 seconds
Appendix A-5
HP
35470A
Edition 8—December 1999
Electrical
HP
HP
HP
HP
35470A 35480A C1534A C1536A
HP
C1533A
HP
HP
HP
HP
HP
HP
C1537A C1539A C1553A C1557A C5683A C5713A
Specified MTBF
(hours at x% duty cycle)
50,000
(12%)
50,000
(12%)
200,000
(5%)
200,000
(5%)
200,000
(12%)
300,000
(12%)
300,000
(12%)
35,000
(30%)
55,000
(30%)
400,000
(12%)
100,000
(30%)
Drive life
(tape-pulling hours)
>6000
>6000
2,000
2,000
6,000
6,000
6,000
6000
6000
6000
6000
Changer life (cartridge swaps)
Uncorrectable error rate
UL, CSA & TUV approved
Environmental specs
ITE EMC specs
>100,000 >100,000
15
<1 in 10
<1 in 10
15
<1 in 10
15
15
<1 in 10
15
<1 1in 10
15
<1 in 10
<1 in 10
15
<1 in 10
15
15
<1 in 10
>100,000
<1 in 10
15
Edition 8—December 1999
Quality and Regulatory
<1 in 1015
Yes
Yes
Yes
Yes
Yes
Yes
Yes
Yes
Yes
Yes
Yes
HP B2
HP B2
HP B2
HP B2
HP B2
HP B2
HP B2
HP B2
HP B2
HP B2
HP B2
Yes
Yes
Yes
Yes
Yes
Yes
Yes
Yes
Yes
Yes
Yes
Interface and Performance
Buffer size
HP
35470A
HP
35480A
HP
C1534A
HP
C1536A
HP
C1533A
HP
C1537A
HP
C1539A
HP
C1553A
HP
C1557A
HP
C5683A
HP
C5713A
1 MB
1 MB
512 KB
512 KB
1 MB
2 MB
1 MB
1 MB
2 MB
8 MB
8 MB
183 KB/s
1.5 MB/s
≤5 MB/s
183 KB/s
1.5 MB/s
≤5 MB/s
183 KB/s
1.5 MB/s
≤5MB/s
510 KB/s
3 MB/s
≤8 MB/s
1 MB/s
3 MB/s
10 MB/s
510 KB/s
3 MB/s
<10 MB/s
510 KB/s
3 MB/s
≤8 MB/s
1 MB/s
3 MB/s
10 MB/s
3 MB/s
6 MB/s‡
40 MB/s‡
3 MB/s
6 MB/s‡
40 MB/s‡
<2.5s
<2.5s
<3.0s
<3.0s
<2.5s
<2.5s
<3s
<2.5s
<2.5s
<2.5s
<2.5s
≤30s
(DDS-1
90m)
≤30s
(DDS-1
90m)
52s
(DDS-1
90m)
52s
(DDS-1
90m)
40s
(DDS-2)
40s
(DDS-3)
40s
(DDS-2)
40s
(DDS-2)
40s
(DDS-3)
50s
(DDS-4)
50s
(DDS-4)
Power-on self-test time
<14s
<14s
<5s
<5s
<10s
<10s
<10s
<5s
<5s
Load time
<30s
<30s
<14s
<14s
<14s
<14s
<13s
<15s
<15s*
15s†
Sustained, native: 183 KB/s
Burst, asynchronous: 1.5 MB/s
Burst, synchronous: ≤5 MB/s
Mean reposition time
Mean time to fastsearch (on an xm
cartridge)
<14s*
15s†
<14s*
15s†
*loading a cartridge in the embedded drive
†
average time for the changer mechanism to swap a cartridge between the magazine and the drive
‡
wide SCSI
Appendix A-6
Transfer Rates (maxima using the optimal cartidge type for each drive, such as DDS-2 for DDS-2 drives)
Additional Differences
1 Minimum SCSI transfer size to guarantee streaming:
HP 35470/80A, HP C1534A/36A 5 KB
HP C1533/37/39A
6 KB
HP C5683/5713A
8 KB
The following notes concern SCSI commands:
2 INQUIRY, Standard Inquiry Data Format page, Product Revision Level:
The HP 35470A/80A uses a numeric format showing the basic firmware
revision and the drive variant, such as “10.9”. Here the basic revision level is
10, and the variant is 9. For the full firmware revision code, see the INQUIRY
Firmware Revisions page (code C0h), bytes 5–29. This might show the full
firmware revision as “10.7”, for example.
Other HP DDS drives use an alphanumeric format giving the firmware date
code. For the HP C1533A/53A, this is in the form “yymm”, where “yy” is the
year, and “mm” the month. For example, “9503” would mean March 1995.
The HP C1534A/36A use the same basic method, but the first digit of the year
is replaced by the letter “T”. For example, “T503” would indicate an
HP C1534A/36A with firmware of March 1995.
3 LOG SENSE: The HP C1534 and HP C1536A do not support the following Log
Pages:
o Read and Write Error Counters
o Write and Read Frames Error Counter Pages
o Bad Group Log Page Drive Counters
o Mechanism Counters.
For early versions of the firmware, the Tape log is not updated on unloading.
4 LOG SENSE: HP C1539A, DDS-3 and DDS-4 drives support the TapeAlert Log
page and the Read Retry Log page.
5 READ BUFFER: Drive Failure Codes in EEPROM:
The HP 35470/80A return information in 10-byte slots.
The HP C1534/36A use the same format as the DDS-2, DDS-3 and DDS-4
drives and return information in 3-byte slots.
6 REQUEST SENSE: The data length is 19 bytes for the HP 35470/80A and
22 bytes for the HP C1534/36A.
7 REQUEST SENSE: Some vendor-unique drive error codes in byte 17 have
different definitions for different drives.
8 MODE SELECT, Disconnect/Reconnect Page: The Bus Inactivity default value
is 39h for the HP 35470/80A and 38h for the HP C1534/36A.
Edition 8—December 1999
Appendix A-7
Appendix A-8
Edition 8—December 1999
Glossary
ANSI American National Standards Institute, which sets standards for SCSI and the
safety of electrical devices, amongst other things.
asynchronous see data transfer
autoload When a tape cartridge is inserted, a tape drive with autoload will automatically
load it without the host having to send a load command. If a drive does not have
autoload, the drive will take no action until it receives a load command from the
host computer.
autoloader A device embodying a tape drive and a cartridge changer mechanism, housed in
a single case.
block A logical unit of information. Called “record” in the DDS-format specification.
BOM Beginning Of Media. The first point on the tape that can be accessed by the drive.
BOP Beginning Of Partition. The position at the beginning of the permissible
recording region of a partition.
C3 ECC A third level of error correction code covered by the DDS format. C3 allows any
two tracks in a group to be corrected, and is used only when a raw data error is
too big to be corrected by C1 and C2. C3 code is stored in an extra frame at the
end of the twenty-two frames of data in each group.
changer A mechanism within an autoloader for moving tape cartridges from the magazine
into the tape drive, and back again. See also random mode, stacker mode
checksum The sum of a series of bytes written to the tape, which can be checked against the
sum of the same series of bytes when the tape is read.
compression A procedure in which data is transformed by the removal of redundant
information in order to reduce the number of bits required to represent the data.
This is done by representing strings of bytes with codewords.
DAT Digital Audio Tape
data randomizer see randomizing
data transfer phase On a SCSI bus, devices put in requests to be able to transfer information. Once a
device is granted its request, it and the target to which it wants to send
information can transfer the data using one of three protocols (assuming both
devices support them): asynchronous, synchronous, and wide.
In asynchronous transfers, the target controls the flow of data. The initiator can
only send data when the target has acknowledged receipt of the previous packet.
All SCSI devices must support asynchronous transfer.
In synchronous data transfer, the initiator and target work in synchronization,
allowing transmission of a packet of data to start before acknowledgment of the
previous transmission.
In wide data transfer, two bytes are transferred at the same time instead of a
single byte.
HP DDS drives support asynchronous, synchronous and 8-bit wide transfers.
Edition 8—December 1999
Glossary-1
DCLZ Data Compression Lempel-Ziv. A compression algorithm based on the Lempel-
Ziv LZ2/LZW algorithms, but with improved performance.
DDS Digital Data Storage is a recording format that builds on the DAT format to
support the storage of computer data. It was developed originally by HewlettPackard and Sony as an industry standard. The first generation standard was
DDS-1 (or simply DDS), to which was added data compression to produce the
DDS-DC standard.
Further enhancements, notably narrower tracks and thinner tape, led to DDS-2,
which can typically provide double the capacity of DDS-1.
DDS-3 uses a new magnetic coating on the tape that allows twice the recording
density. Together with the use of time-tracking, this gives a DDS-3 tape
approximately three times the capacity of a DDS-2 tape.
DDS-4 uses longer tapes (150m). HP’s DDS-4 drives, which are ultra-wide SCSI
devices, allow transfer rates from 3 to 4 times greater than DDS-3 and capacities
that are two-thirds as much again.
differential see SCSI
ECC Error Correction Code. See C3 ECC
ECMA European Computer Manufacturers Association
EOD End Of Data. The end of valid data in a partition on a tape.
fast-searching The process of reading just the Sub-Code areas to locate an item on the tape at a
speed significantly faster (90 to 175 times) than normal read speed.
filemark A mark written by the host. It does not necessarily separate files. It is up to the
host to assign a meaning to the mark.
forced ejection In an emergency, you can force the drive to eject a cartridge. In doing so, data will
probably be lost, and the tape may become unusable, so be very cautious about
using this emergency procedure. To force the ejection of a cartridge, press the
Unload button (the Eject button on the HP C1553A) three times within a
5-minute period, or hold it down for at least 5 seconds.
FRU Field Replaceable Unit, an assembly or group of components that is replaced in
its entirety by Service Engineers when it contains a fault.
host The host computer system acting as controller for the drive.
load The process in which the drive takes in an inserted cartridge and goes online.
LVD Low-Voltage Differential. See SCSI.
magazine A holder for up to six tape cartridges used in autoloaders.
Media Recognition A method by which a drive can recognize data-grade tape. The tape has a series
System (MRS) of stripes on its transparent leader tape that the drive can detect. By default, the
drive treats a non-Media Recognition System tape as read-only and will not write
data to it. However, it is possible to switch the recognition system off using the
Configuration switches on the underside of the drive. If this is done, the drive will
treat all DDS tapes the same.
Glossary-2
Edition 8—December 1999
N-group writing Sometimes called multiple group writing, N-group writing repeats each group of
data so that there are N consecutive copies of each group on the tape. This is a
simple way of improving data integrity, but speed and capacity are sacrificed
through writing all data several times. N-group writing is not implemented on
DDS-3 and DDS-4 drives.
offline The drive is offline if the tape is currently unloaded or not in the drive. The host
has limited access, and cannot perform any commands that would cause tape
motion. The host can, however, load a tape if one is inserted, and can execute any
diagnostic tests that do not require tape motion.
online The drive is online when a tape is loaded. The host has access to all command
operations, including those that access the tape, set configurations and run
diagnostic tests.
partition A part of a tape that can be treated as a complete and independent whole. A tape
can have one or two partitions.
PRML Partial Response Maximum Likelihood—a method of recovering data from a
signal that can cope with the higher density of data used by the DDS-3 format (a
linear density of 122,000 bits per inch, which is twice that of DDS-1 and DDS-2).
The technique not only identifies data bits more accurately, but by scanning the
bits surrounding a bit being read, it can deduce the correct value for dubious bits.
random mode Autoloaders only: In Random mode, cartridges are used in order dictated by the
host or the user, rather than sequentially, as in Stacker mode. For each cartridge
to be used, the host must issue a SCSI MOVE MEDIUM command to instruct the
autoloader to move the cartridge from the magazine to the drive. When the
cartridge is full, or when no further use is to be made of it, the host must again
use the MOVE MEDIUM command to load another.
Random mode is sometimes referred to as Changer mode.
randomizing A recoding of data symbols before they are written to tape in order to provide a
consistently high RF envelope level. An inconsistent RF envelope is one of the
criteria for rewriting a frame on read-after-write.
read-after-write (RAW) Read-after-write improves data integrity by reading data immediately after it is
written and writing the frame again if an error is found. The Audio DAT twohead drum is replaced by a four-head drum for this, with two read-only heads and
two write-only heads. Frames are only re-written as necessary, so speed and
capacity are affected minimally. RAW is included in the DDS format.
SCSI Small Computer System Interface—a standard command specification and
command set that enables computers and peripherals to communicate with each
other. HP’s current family of tape drives adhere to the SCSI-2 specification.
Single-Ended and Low Voltage Differential SCSI
These terms define how the signals are transmitted along the cable.
With single-ended (SE) SCSI, each signal travels over a single wire and each
signal's value is determined by comparing the signal to a paired ground wire.
Signal quality tends to decrease over longer cable lengths or at increased signal
speed.
Edition 8—December 1999
Glossary-3
With low voltage differential (LVD) signaling, signals travel along two wires and
the difference in voltage between the wire pairs determines the signal value.
This enables faster data rates and longer cabling with less susceptibility to noise
than SE signaling and reduced power consumption.
Narrow and Wide, Fast, Ultra and Ultra2 SCSI
o
o
o
o
o
Narrow SCSI devices can transfer data one byte at-a-time (and are
sometimes called “8-bit SCSI” devices). They can conform to either the SCSI2 or SCSI-3 protocols. They have a 50-pin connection to the SCSI bus.
Wide SCSI devices can transfer two bytes of data simultaneously (“16-bit
SCSI”). They usually have a single, 68-pin connection to the SCSI bus. (This
physical arrangement is part of the SCSI-3 specification.) They may support
either SCSI-2 or SCSI-3 protocols. Wide and narrow devices can
simultaneously be connected to the same bus without problem, provided
certain rules are followed.
Fast SCSI can transfer data at up to 10 MB/sec, using a cable of up to 6
meters total length.
Ultra SCSI can transfer data at up to 20 MB/sec, but the cable length cannot
exceed 3 meters (it is also known as “Fast20”).
Ultra2 SCSI can transfer data at up to 40 MB/sec, using a cable of up to 25
meters total length for a single device, or up to 12 meters for two or more
devices (it is also known as “Fast40”).
Ultra SCSI supports both SE and LVD interfaces. Ultra2 SCSI supports LVD
interfaces only.
In normal situations, slower devices can coexist with faster devices, and narrow
devices can be used on the same SCSI bus as wide devices using a suitable
adapter.
HP’s DDS-4 drives (HP C5683A and HP C5713A) are ultra-wide SCSI-2
compatible devices. They can be used with both LVD and SE host bus adapters.
sense data Data returned after the execution of a SCSI command, telling the host whether
the transaction was successful, and if not, what went wrong.
sequential access Sequential Access devices store data sequentially in the order in which it is
received. Tape devices are the most common sequential access devices. Devices
such as disk drives are Direct Access devices, where data is stored in blocks, not
necessarily sequentially. Direct Access allows for speed of retrieval, but at a
price.
setmark A special recorded element within a partition to which the drive can fast-search
without having to know the number of records or filemarks that precede the
setmark.
single-ended see SCSI
stabilizing Leaving a cartridge for a period of time in the room in which it is to be used in
order to avoid condensation problems caused by changes in humidity and
temperature. A period of two hours is recommended.
Glossary-4
Edition 8—December 1999
stacker mode Autoloaders only: In Stacker mode, cartridges are used sequentially from the
autoloader magazine. The cartridge selected by the user (by pressing the front
panel Select button, and then loaded by pressing the Load button) is used first.
When it is full, the changer mechanism automatically moves it back to the
magazine, and then moves the cartridge in the next highest numbered slot to the
drive. This continues until all the cartridges have been used. To load cartridges
under host control, the device must be in Random mode.
Stacker mode is sometimes referred to as Sequential mode.
synchronous see data transfer
system area A section in the Lead-in Area at the beginning of a partition used to store the tape
usage information.
Tape log The Tape log contains details of the history of a tape, the total number of groups
written, of RAW retries, of groups read, of C3 ECC retries, and of loads. The log
is copied into RAM when the tape is loaded into the drive, updated as the tape is
used, and loaded back into the System area on the tape when it is unloaded.
Note: For HP C1534A/36A drives firmware version T503, the Tape log is neither
loaded from tape nor copied back when the tape is unloaded.
Tape Alert The TapeAlert log holds a set of flags that indicate faults with the drive or tape.
For example, the Not Data Grade flag is set to indicate that the drive has
detected that a tape that is not Media Recognition System is loaded. By reading
this log, host software or the operating system can inform users of existing or
impending conditions and can give advice. For example, the software might
recommend that you use a new tape or clean the heads.
termination A SCSI bus (or cable) can have many devices plugged into it, but the end of the
cable furthest from the host computer must always be terminated to avoid signals
being reflected back and interfering with other signals. The terminator both
absorbs signals and provides power to the lines in the cable. For this reason, it
must itself be provided with power.
o The HP C1534A/36A are permanently configured to provide such power.
o The other drives can be configured to provide power by setting a jumper on the
rear panel—see Figure 2-6.
Terminators can be of two types, active and passive. Active termination is
recommended for a bus that has the tape drive on it, because although more
expensive, it ensures better and more secure performance.
time-tracking A technique of ensuring that the read head stays in the center of the track that
it is reading. The drive measures the time it takes to reach a particular point on
the track, and if this time is less than or greater than its expected value, the drive
adjusts the tape speed to compensate. In HP’s DDS-3 and DDS-4 drives, timetracking replaces the Automatic Track Following (ATF) used in DDS-1 and
DDS-2 drives, and allows more of each track to be available for data storage.
DDS-3 and DDS-4 drives still write ATF signals on DDS-1 and DDS-2 tapes to
ensure full backward compatibility.
transfer rate The rate at which data is transferred from one device to another, for example
from the host computer to the tape drive during backup.
vendor-unique The addition of commands to SCSI that are not included in the standard.
Edition 8—December 1999
Glossary-5
Glossary-6
Edition 8—December 1999
Index
A
background to DDS products
1-6
backup software problems
6-2
blocks
Glos-1
BOM
3-3, 4-8, Glos-1
BOP
3-3, 4-8, Glos-1
buffer, data
1-2, A-6
buttons
Eject
4-3, 4-9
Load Tape
4-3
Select
4-3
Unload
3-2, 3-4
cables
2-4
ordering
1-8
SCSI
2-5, 2-7
capacity
1-2, 10-2, A-3
cartridges
5-1
choosing
5-2
cleaning
3-5
compatibility
5-2
emergency removal
6-3
forcing ejection
3-4, 4-9
inserting
3-3
loading in magazine
4-6
ordering
1-7
problems
6-2
removing
3-4
stabilizing
Glos-4
types supported
5-3, A-3
changer mechanism
Glos-1
life expectancy
9-2
changer mode
4-2
checksum
1-3, Glos-1
cleaning cartridge
3-5, 4-9
cleaning heads
autoloader
4-9
drives
3-5
commands supported
7-3
compatibility
cartridges
5-2
electromagnetic
8-4
compression
see data compression
condensation
3-6, 4-11, 5-5
conditions of acceptability
8-7
Configuration Guide
1-6
configuration switches
2-9
connection
power
2-2
SCSI
HP C1533A/53A
2-5, 2-7
HP C1534A/36A
2-4
HP C1537A
2-6, 2-8
connectors, SCSI
2-4, 2-5, 2-7
cooling
2-13, A-4
CSA
8-7
C
D
acceptability
8-7
acoustic noise emissions
8-3
active termination
1-8
Activity light
3-2
airflow
2-13
monitoring
2-13
algorithms, Lempel-Ziv
Glos-2
allow resequencing
2-11
altitude
8-3
ANSI
1-6, Glos-1
application software
2-9
asynchronous data transfer
7-2, Glos-1
Attention light
3-2, 3-5
auto-eject
2-11
autoloader
1-4, Glos-1
connections
2-2
fixing points
2-12
front panel
4-2
grounding
2-3
operating
4-1
option switches
2-2, 2-3, 2-10
orientation
8-2
random mode
4-2
stacker mode
4-2
swap times
10-3
autoloading
Glos-1
auto-stack
2-11
B
C3 ECC
1-3, Glos-1
DAT
cartridges
Edition 8—December 1999
Glos-1
3-3, 4-6
data
buffer
1-2
capacity
10-2, A-3
density
A-3
randomizer
1-3
data compression 1-3, 2-9, A-3, Glos-1
cable control
HP C1533A/53A/37A 2-6, 2-8
HP C1536A
2-5
switches
2-9
data reliability
9-2
error rate
9-3
data transfer
Glos-1
asynchronous
7-2
synchronous
7-2
DC, on front panel LCD
4-4
DCLZ
A-3, Glos-2
DDS formats
1-3, 5-3, A-3, Glos-2
DEC
2-9
density of data on tape
A-3
differential SCSI
Glos-4
dimensions
2-12, 8-2
direct access
Glos-4
documents, related
3, 1-6
drive life expectancy
9-2
drivers
2-9
E
ECMA
Glos-2
Eject button
4-3, 4-9
ejecting the magazine
4-8
ejection, forcing
3-4, 4-9
electromagnetic compatibility
8-4
ENABLE MEDIA REMOVAL
3-4
enclosures
8-7
environmental specification 8-3, A-6
EOD
3-4, 4-9, Glos-2
error messages
4-6
error rate
9-3, A-6
extender cable
1-8
F
fast SCSI
fast-search
speed
faults
filemarks
Glos-4
Glos-2
A-4
6-1
Glos-2
Index-1
Index
firmware, upgrading
autoloader
4-16
drives
3-6
fixing points
2-12
flashing lights
3-2, 4-4
forcing ejection
3-4, 4-9
form factor
1-2
format
see DDS formats
format of tape, identifying
4-8
front panel
autoloader
4-2
drives
3-2
lights
4-4
localizing
4-15
number codes
4-11
FRU
Glos-2
fusing
8-7
G
grounding
autoloader
2-3, 8-7
2-3
H
head cleaning
autoloader
4-9
drives
3-5
head life, prolonging
3-5, 4-10, 5-4
Hewlett-Packard workstations
2-9
host
Glos-2
problems
6-2
HP C1533A
1-4
HP C1534A
1-3
HP C1536A
1-3
HP C1537A
1-4
HP C1539A
1-4
HP C1553A
1-4
HP C1557A
1-5, 1-6
humidity
2-13, 5-5, 8-3
humidity sensor
A-2
I
IBM RS/6000
inserting a magazine
inserting cartridges
installation
problems
Integration Guide
interchange format
interface cables, ordering
interface implementation
2-9
4-6
3-3
2-1
6-2
1-6
9-2, 9-3
1-8
7-1
Index-2
J
jams, avoiding
4-6
L
labels, where to stick them 3-3, 4-6,
5-5
languages on front panel
4-15
LCD
4-3
localizing
4-15
messages
4-4, 4-11
LEDs
see lights
Lempel-Ziv algorithm
Glos-2
life expectancy
of changer mechanism
9-2
of tapes
5-4
life of drive
9-3
lights
A-2
Activity
3-2
Attention
3-2, 3-5
Magazine Present
4-4
Operator Attention Required
4-4, 4-6, 4-8, 4-9, 4-11
Tape Activity
4-4
liquid crystal display
see LCD
Load Tape button
4-3
loading
Glos-2
cartridges
3-3, 4-6
magazine
4-6
sequence
3-3, 4-8
time taken during 4-8, 10-2, A-6
localizing the front panel display 4-15
log pages
7-5
logs
Tape
Glos-5
TapeAlert
1-4, Glos-5
logs, Tape
4-8
low voltage differential
see LVD
LUN 0 drive inquiry
2-11
LUN 1 magazine ready
2-11
LVD
Glos-4
combing with SE devices
2-7
M
magazine
ejecting
emergency removal
forcing ejection
inserting
loading cartridges in
ordering
Magazine Present light
maintenance
Glos-2
4-8
6-3
4-9
4-6
4-6
1-7
4-4
9-2
media
5-1
life expectancy
5-4
specifications
8-4
Media Caution signal
3-2, 3-5
Media Recognition System
2-10, 3-3, 4-6, 5-3, A-3, Glos-2
Medium Changer commands 1-4, 7-2
message
information
4-6
messages
error
4-6
SCSI, supported
7-2
shown on LCD
4-4, 4-11
status
4-5
types
4-11
mode pages
7-5
MOVE MEDIUM
4-10
MRS see Media Recognition System
MTBF
1-2, 9-2, A-6
N
narrow SCSI
Glos-4
N-Group writing
1-3, Glos-3
number codes on front panel
4-11
O
offline
Glos-3
online
3-3, Glos-3
operation
autoloader
4-1
drives
3-1
Operator Attention Required light
4-4, 4-6, 4-8, 4-9, 4-11
option switches, autoloader
2-2, 2-3, 2-10
ordering supplies
1-7
orientation of the autoloader
8-2
P
packaging
partitions
passive termination
PCM
performance specification
physical specification
power
connection
consumption
extender
requirements
power-fail handling
8-3
Glos-3
1-8
A-3
10-1
8-2
2-2
A-5
2-4
8-5, A-5
10-3
Edition 8—December 1999
Index
PREVENT MEDIA REMOVAL
3-4, 4-3, 4-8, 4-9
PRML
A-3, Glos-3
problems
6-1
prolongin head life
3-5, 4-10, 5-4
R
random mode
randomizing
RAW
retry limit
rear panel
autoloader
drives
records
related documents
reliability
replaceable parts
reposition time
retries, limits
rewrites, retry limit
4-2, Glos-3
1-3, Glos-3
1-3, Glos-3
10-3
2-2
2-2
Glos-1
1-6
9-1
4-17
A-6
10-3
10-3
S
safety
8-7
SCSI
1-6, 7-1, Glos-3, Glos-4
commands supported
7-3
connection and termination
HP C1533A/53A
2-5, 2-7
HP C1534A/36A
2-4
HP C1537A
2-6, 2-8
documents
1-6
ID
HP C1533A/53A/37A 2-6, 2-7
HP C1534A/36A
2-4
interface
7-2
Medium Changer commands
1-4, 7-2
messages supported
7-2
ordering accessories
1-8
termination
Glos-5
SE
see single-ended
search speed
A-6
Select button
4-3
self-test
4-17
time taken during
A-6
sequential access
Glos-4
Sequential Access command set 7-2
sequential mode
4-2
service
9-2
setmarks
Glos-4
shock
8-3
single-ended
Glos-3
combining with LVD devices 2-7
single-ended SCSI
Glos-4
specifications
EMC
8-4
environmental
8-3, A-6
media
8-4
performance
10-1
physical
8-2
speed
fast-search
A-4
search
A-6
tape
A-4
stabilizing
5-5, Glos-4
stacker mode
4-2, Glos-5
status codes
7-3
status messages
4-5
storage box
1-7
stuck cartridge or magazine
6-3
SUN
2-9
supplies
1-7
supported commands
7-3
suspended particles
8-3
switches
autoloader option
2-2, 2-3
configuration
2-9
synchronous data transfer 7-2, Glos-1
system area
Glos-5
time taken while
loading
repositioning
self-testing
swapping tapes
unloading
time-tracking
track checksum
transfer rate
transportation
troubleshooting
types of message
T
Vendor-Unique
vibration
tape
format, identifying
4-8
guides
A-4
life expentancy
5-4
speed
A-4
stabilizing
5-5
Tape Activity light
4-4
Tape log
4-8, 5-4, Glos-5
TapeAlert log
1-4, Glos-5
temperature
2-13, 3-6, 4-11, 8-3
tension control
A-4
termination
1-8, Glos-5
HP C1533A/53A
2-5, 2-7
HP C1534A/36A
2-4
HP C1537A
2-6, 2-8
resistors
A-2
termination power
A-2
HP C1533A/53A/37A
2-6, 2-8
HP C1534A/36A
2-5
terminators
2-4, 2-5, 2-7
Edition 8—December 1999
10-2, A-6
A-6
A-6
10-3
10-2
Glos-5
1-3
1-2, 10-2, Glos-5
8-3
6-1
4-11
U
ultra SCSI
Glos-4
ultra-wide
using with ultra2 devices
2-7
Unload button
3-2, 3-4
disabled
3-4
forcing ejection
3-4
unloading
cartridges
3-3
time taken during
10-2
upgrading firmware
autoloader
4-16
drives
3-6
V
Glos-5
8-3
W
wide data transfer
wide SCSI
WP, on front panel LCD
write-protecting
Glos-1
Glos-4
4-4
5-4
Y
Y-cord
2-2
Index-3
Index
Index-4
Edition 8—December 1999