1
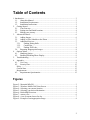
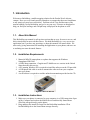
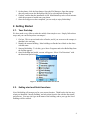
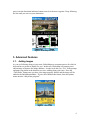
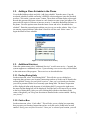
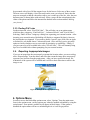
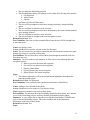
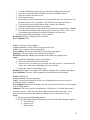
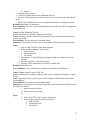
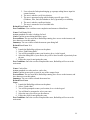
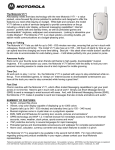
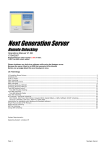
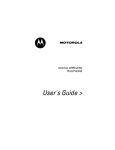
BoilerMap
CS307 Team B Spring 2006
User Manual – Draft 2
Table of Contents
1. Introduction..................................................................................................................... 3
1.1.
About this Manual............................................................................................... 3
1.2.
Installation Requirements ................................................................................... 3
1.3.
Installation Instructions....................................................................................... 3
2. Getting Started ............................................................................................................ 4
2.1.
Your first step ..................................................................................................... 4
2.2.
Setting start and finish locations ......................................................................... 4
2.3.
Making your journey........................................................................................... 5
3. Advanced Features...................................................................................................... 6
3.1.
Adding Images .................................................................................................... 6
3.2.
Adding a Class Schedule to the Phone ............................................................... 7
3.3.
Additional Services............................................................................................. 7
3.3.1.
Finding Dining Halls................................................................................... 7
3.3.2.
Catch a Bus ................................................................................................. 7
3.3.3.
Finding ITaP Labs....................................................................................... 8
3.4.
Reporting Inappropriate Images ......................................................................... 8
4. Options Menu.............................................................................................................. 8
4.1.
Handicap Option ................................................................................................. 9
4.2.
Enabling/Disabling Photo Display...................................................................... 9
5. Troubleshooting .......................................................................................................... 9
6. Appendix..................................................................................................................... 9
6.1.
Use Cases ............................................................................................................ 9
6.2.
Security Plan ..................................................................................................... 15
Policy ........................................................................................................................ 15
Current State ............................................................................................................. 15
Requirements ............................................................................................................ 15
6.3.
Requirements Questionnaire............................................................................. 15
Figures
Figure 2 - Motorola MPx220 .............................................................................................. 3
Figure 3 - Windows Mobile 2003 Start Screen .................................................................. 4
Figure 4 - Selecting your current location .......................................................................... 5
Figure 5 - Selecting your desired destination ..................................................................... 5
Figure 6 - BoilerMap Directions......................................................................................... 6
Figure 7 - camera view ....................................................................................................... 6
Figure 8 - view of current classes for day........................................................................... 7
Figure 9 - Example of an inappropriate image ................................................................... 8
2
1. Introduction
Welcome to BoilerMap, a mobile mapping solution for the Purdue West Lafayette
campus. Have you ever found yourself somewhere on campus that bears no resemblance
to any terrain you may have seen before? Problem solved! Just find the name of the
nearest building, fire up BoilerMap, and you’re on your way! Pictures are displayed to
help you find your bearings, and a helpful map is displayed on the phone as well.
1.1. About this Manual
This BoilerMap user manual is split up into sections that are easy for users to access, and
delves into details for more advanced users. We think BoilerMap is a very easy-to-use
application, but if you have any questions, we hope this manual will answer them. We
start out by giving instructions for installing the application on your phone, and move on
to outlining our more advanced features.
1.2. Installation Requirements
1. Motorola MPx220 smart phone or a phone that supports the Windows
Smartphone SDK 2003.
2. A GPRS data connection. Cingular and T-Mobile are two carriers in the United
States that offer this service.
3. A PC running Windows XP is required to install the software on the CD provided.
4. A USB phone link cable in order to transmit the software from your computer
onto your phone.
5. A web browser is required to read the online documentation provided on the CD.
Figure 1 - Motorola MPx220
1.3. Installation Instructions
1. Make sure your phone is connected to your computer via a USB connection. Open
up My Computer and explore the Mobile Device and then My Smart Phone.
Select the storage directory on the phone.
2. Drag and drop the install file located on the BoilerMap installation CD in
bin/BoilerMap.cab to the Smart Phone storage directory.
3
3. On the phone, click the Start button. Open the File Manager. Open the storage
directory and execute the BoilerMap.cab file by selecting and clicking OK.
4. If asked, confirm that the installation is OK. Installation may take several minutes
while the program is loaded onto your phone.
5. Once the setup process has completed, you are ready to enjoy BoilerMap!
2. Getting Started
2.1. Your first step
We have made every effort to make the mobile client simple to use. Simply follow these
steps, and you can find anywhere on campus!
1. Get lost. This is not too hard to do at Purdue, and if you are new to the campus, it
shouldn’t take too long.
2. Identify the nearest building. Most buildings on Purdue have labels on the doors
with the name.
3. Start up BoilerMap. To do this, go to Start->Programs and select BoilerMap from
the list that appears.
4. Once BoilerMap has loaded, a menu will appear. Select “Get Directions” with
the directional pad to begin.
Figure 2 - Windows Mobile 2003 Start Screen
2.2. Setting start and finish locations
Next, BoilerMap will prompt you for your current location. Think back to the last step
when you identified a nearby building, and select that from the list with the directional
pad selector. You may also type in the name of the building, and as you type the list of
buildings will be reduced.
4
Figure 3 - Selecting your current location
Next, you need to tell BoilerMap where it is you want to go. Do this the same way you
selected your current location, using the directional pad on your phone.
Figure 4 - Selecting your desired destination
2.3. Making your journey
BoilerMap will display a photo of the nearest building and a map showing where you
should go next on a partial map. Follow the little green line as it projects the direction
you should walk. Once you have reached the next waypoint (green dot on the map),
5
press in on the directional indicator button to travel to the next waypoint. Keep following
the line until you arrive at your destination.
Figure 5 - BoilerMap Directions
3. Advanced Features
3.1. Adding Images
As you are following along on your route, BoilerMap may encounter an area for which it
does not have a picture to display for you. In this case, BoilerMap will prompt you to
add an image to improve the image database. In order to do this, say “Yes” to the prompt
and point your phone in the direction you were walking along your route. Press the
“Take Photo” button once you have your image properly framed, and the image will be
added to the BoilerMap database. If you wish to disable this feature, from the options
menu unselect “add picture program.”
Figure 6 - camera view
6
3.2. Adding a Class Schedule to the Phone
Go to the BoilerMap website and click “add class schedule” from the menu. Copy the
text based schedule available on Purdue’s SSINFO website and paste it into the provided
text box. Click on the “generate routes” button. The website will then display a password.
Record this password and write it down in a safe location to enter it into your phone. The
password will expire in 24 hours to increase security. Launch the BoilerMap software on
the phone. Go to the options menu from the home screen and select “download class
schedule”. Enter the personal password that was given to you on the website. Note: if you
are entering a password that is older than 24 hours it will not work. Select “enter” to
begin download of class schedule.
Figure 7 - view of current classes for day
3.3. Additional Services
Under the options menu select “Additional Services” to add a new service. Currently the
system supports two additional services. Upon selecting a new service they will be added
to the main menu of the program. These services are described below.
3.3.1. Finding Dining Halls
On the main menu, select “Find Dining Halls”. This will take you to a dialog box
requesting that you enter your location. Instructions on how to do this can be found in the
section entitled “Setting start and finish locations”. Once you’ve selected your location,
you will be presented with a list of currently open dining halls. The hours of operation
will be displayed inline with the name of each dining hall. If you press the right arrow,
the menu for that dining hall will be displayed. Press the back or left arrow keys to return
to the list of dining halls. After you select a dining hall with the action button in the
center of the phone, you’ll be given directions as detailed in the section entitled “Making
your journey”.
3.3.2. Catch a Bus
On the main menu, select “Catch a Bus”. This will take you to a dialog box requesting
that you enter your location. Instructions on how to do this can be found in the section
entitled “Setting start and finish locations”. Once you’ve selected your location, you will
7
be presented with a list of all the campus loops for the busses. Select one of these routes.
The next screen will display a list of bus stops on the route you selected. Notice that the
stops are arranged so that the closest bus stop to you is at the top of the list. Also, the next
departure time is shown inline with each stop. Select a stop with the action button in the
center of the phone and follow the instructions detailed in the section entitled “Making
your journey”.
3.3.3. Finding ITaP Labs
On the main menu, select “Find ITaP Labs”. This will take you to an options menu
which has three categories: “Find Lab Now”, “Advanced Search”, and “List All Labs”.
Selecting “Find Lab Now” brings up a dialog box requesting your current location. After
inserting your current location, BoilerMap will display a computer lab that is closest to
the location that you inputted. If you need to choose a specific type of lab, like an Apple
or Solaris lab, you should choose “Advanced Search. Once selected, you are given the
option to choose whether or not to sort results by proximity or availability. Finally, if
you just want a list of all available labs, select “List All Labs”. This will instantly bring
up a list of available labs without prompting for your current location.
3.4. Reporting Inappropriate Images
If you see an image that does not properly represent the location where you are traveling,
select “Report Image” from the menu, and select the reason the image does not properly
represent your location from the popup menu. After you have reported an image, the
Administer of the system will be notified and it will be to their discretion to remove the
image or not.
Figure 8 - Example of an inappropriate image
4. Options Menu
In order to access the BoilerMap options menu, select “Options” from the main menu.
Once in the options menu, various options may either be enabled or disabled by using the
action button. If an option is enabled it will appear in black letters. If the option is
disabled the option name will have a strikethrough in it or it will be grayed out.
8
4.1. Handicap Option
The handicap option is provided for users who would like to know information about
handicap access to facilities. When you reach your destination, information such as the
location of a handicap entrance and building elevators will be displayed in a popup menu.
4.2. Enabling/Disabling Photo Display
If you do not like the picture display, or want the map to take up a larger portion of the
screen, it is possible to disable picture display in the Options menu.
5. Troubleshooting
For common troubleshooting questions and a FAQ, check the README.TXT file
included in the root directory of the CD-ROM.
6. Appendix
6.1. Use Cases
Name: Adding a picture to a current waypoint
Actors: Standard user (lost freshman)
Goals: Add a picture to the system(which may include both flickr and the database)
Preconditions: The user must be at a waypoint
Steps:
1. Select “menu” item at current waypoint
2. Select “add picture”
3. Select the picture on the phone
4. Add/Modify picture meta-data (such as picture name and direction)
5. Showed all values
a. Select “back”
b. Select “save”
6. Confirm picture addition to waypoint ( “your waypoint has been saved” )
Related User Cases: N/A
Post Condition: The new image will be added to the database and will be displayed upon
the next visit to the current waypoint. The image will also be added to a newly added list
that the Administrator of the system will be able to review to decide if it is an
inappropriate image.
Name: No image exists for waypoint
Actors: Users
Goals: Allow the user to add picture to waypoint
Preconditions: The user must be at a waypoint and a picture must not exist for the
waypoint.
9
Summary: Let the user associate a picture he has taken to a waypoint.
Steps:
1. Prompt user with “no image exists for this waypoint, do you wish to add one?”
2. Cut to camera program
3. Open “add picture” menu item
Related User Cases: Improper image for waypoint
Post Conditions: N/A
Name: Improper image for waypoint
Actors: Standard user (lost freshman)
Goals: Be able to identify improper images for current waypoint and notify
administrators
Preconditions: The user must be at a waypoint.
Steps:
1. Select “Menu” item at current waypoint
2. Select “Report image”
3. Select reason from drop down menu for reporting
4. Optionally select add comments button for additional comments
5. Select “Send”.
6. Pop-up confirmation of sent status.
Related User Case: No image exists for waypoint
Post conditions: The user will resume operation and the Administrator will be notified
that an improper image was reported.
Name: Using the handicap functionality
Actors: Standard user (lost freshman)
Goals: To use BoilerMap and be able to have handicap access information given on the
route.
Preconditions: Route must exist
Summary: Showing a handicapped accessible route to the user from a given source.
Steps:
1. Go to options menu, described in the Options Menu chapter, and enable Handicap
mode
2. When the route is finished, the screen will popup with additional handicap
information for the destination building.
Related User Cases: Get Directions
Post Conditions: Boilermap will return a route which ends in a handicapped accessible
area.
Name: Get Directions
Actors: Standard user (lost freshman)
Goals: To provide the capability for the user to find directions for walking on campus.
Preconditions: The user must know where they are at or starting from (building name).
Summary: The user enters their starting location and selects their destination, and then
our program maps out the directions step by step (approximately 10ft intervals).
Steps:
10
1. The user loads the BoilerMap program.
2. The first BoilerMap dialog will prompt to select from the following menu options:
a. Get Directions
b. Add a Picture
c. Options
3. And then will select Get Directions.
4. The user will be prompted to select their starting location by campus building
names.
5. The user will then be asked to verify selection.
6. The user will be prompted to select their destination by the same selection method
as the starting location.
7. The user will then be asked to verify selection.
8. The user will then be brought to the route navigation system.
Related User Cases: N/A
Post Conditions: Once the user has completed their route the user will be brought back
to the main menu.
Name: Navigating a route
Actors: Standard user who has selected a route for directions
Goals: The user needs to be provided a convenient and efficient menu system to navigate
through each step (or waypoint) of their path.
Preconditions: The user must have selected their route through the methods of the Get
Directions use case.
Summary: The user needs several options to be able to be accessed through the route
navigation system:
1. Back (to previous direction and waypoint)
2. Forward (to next direction and waypoint)
3. (Back to) Main Menu.
4. (Upload Picture) for current waypoint.
5. Report Picture) for current waypoint.
Steps:
1. The right navigation key will be the default button highlighted throughout the
route navigation system.
Related User Cases: Get Directions
Post Conditions: User confirms route completion and returns to Main Menu.
Name: Adding a class schedule to the phone
Actors: Standard user who wishes to view their next class
Goals: Integrate a student’s class route to their phone.
Preconditions: The user must have the BoilerMap installed on their phone, have internet
access to the BoilerMap website, and have the data-plan enabled on their phone.
Summary: A user will be able to copy their text schedule from Purdue’s SSINFO and
paste it into the BoilerMap website. They then would be able to download that
information with routes to their phone.
Related User Cases: N/A
Steps:
11
1.
2.
3.
4.
5.
Go to the BoilerMap website and click add class schedule from the menu.
Copy the text based schedule available on Purdue’s SSINFO website
Paste the schedule into the text box
Click generate routes
Record the personal password that was just generated and write it down in a safe
location to enter it into your phone. The password will expire in 24 hours.
6. Close web browser to prevent others from viewing class schedule.
7. Launch the BoilerMap software on the phone.
8. Go to the options menu from the home screen and select download class schedule
9. Enter the personal password that was given to you on the website. Note: if you
are entering a password that is older then 24 hours it will not work.
10. Select enter to begin download of class schedule
Related User Cases: Viewing the class schedule
Post Conditions: N/A
Name: Viewing the class schedule
Actors: standard user who wishes to view their next class
Goals: View a students classes on the phone
Preconditions: The user has added the class schedule to the phone.
Summary: The user wishes to view his/her class schedule
Related User Cases: Adding class schedule to the phone, navigating a route
Steps:
1. Launch the BoilerMap software on the phone
2. Select class schedule from the main menu.
3. Select the class you wish to go to from the class that you are in. Notice how the
class at the current time is highlighted for easy selection.
4. Follow the steps for Navigating a route
Related User Cases: Viewing the class schedule, Adding a class schedule to the phone
Post Conditions: The user will be prompted to return back to the main menu.
Name: Find Services
Actors: standard user (lost freshman)
Goals: To provide the capability for the user to find directions for services such as
restaurants, libraries, and labs.
Preconditions: Optional for directions: The user must know where they are at or starting
from (building name).
Summary: The user selects the second option, ‘Find Services’, from the start menu to
search for services. Then they enter their subject search or select from a list. Next
directions will be optional, and similar in method to the Get Directions use case.
Steps:
1. The user loads the BoilerMap program.
2. The first BoilerMap dialog will prompt to select from the following menu options:
a. Get Directions
b. Find Services
c. Add a Picture
12
d. Options
3. And then select Options.
4. Under the Options menu select Additional Services
5. The user will be prompted to search for their service or pick it from a drop down
menu.
6. Follow the Get Directions use case for added functionality of finding directions.
Related User Cases: Get Directions.
Post Conditions: Once the user has completed their search the user will be brought back
to the main menu.
Name: Quickly finding an ITaP lab
Actors: Standard user wishing to find closest ITaP lab
Goals: Showing a user the closest ITaP computer lab based on their current location as
quickly as possible.
Preconditions: The user must be in the Main Menu.
Summary: User needs to be able to access an available ITaP lab as quickly as possible
Steps:
1. Select “Find ITaP Labs” from the main menu.
2. There are three options to choose from:
a. Find Lab Now
b. Advanced Search
c. List all labs
3. Selecting the 1st option brings up a prompt asking user to input his current
location.
4. The user is asked to verify his selection.
5. The user will be returned a list of closest available labs.
Related User Cases: N/A
Post Conditions: User confirms route completion and returns to Main Menu.
Name: Finding a specific type of ITaP lab
Actors: Standard user wishing to find a specific kind of computer lab (Windows, Apple,
Solaris)
Goals: Showing the user a specific type of ITaP computer Lab based on their location
and availability.
Preconditions: The user must be in the Main Menu.
Summary: User needs more customized results that are not available in the quick search.
He needs to be able to:
1. Input his current location
2. Return results by proximity
33.
Steps:
1. Select “Find ITaP Labs” from the main menu.
2. There are three options to choose from here.
a. Find Lab Now
b. Advanced Search
c. List all labs
13
3. User selects the 2nd option bringing up a prompt asking him to input his
current location.
4. The user is asked to verify his selection.
5. The user is presented a page which displays specific type of lab
(Windows, Mac, Sun) and whether to sort by proximity or availability.
6. The user is asked to confirm selection
7. The user is returned a list of available labs.
Related User Cases: N/A
Post Conditions: User confirms route completion and returns to Main Menu.
Name: Find Dining Halls
Actors: standard user who is looking for food
Goals: Find the nearest dining hall that is open
Preconditions: The user must have BoilerMap running, have access to the internet, and
have data access on their phone.
Summary: The user wishes to find the nearest open dining hall
Related User Cases: N/A
Steps:
1. Launch the BoilerMap software on the phone
2. Select “Find Dining Halls”
3. You will be prompted to enter your location, do so via the keypad
4. Select the dining hall of your choice, they will be listed in order of proximity from
the user
5. Follow the steps for navigating the route
Post Conditions: Once the user has completed the route, BoilerMap will revert to the
main menu
Name: Catch a Bus
Actors: standard user who needs to catch a bus
Goals: Find the nearest pick-up spot for one of the campus loops
Preconditions: The user must have BoilerMap running, have access to the internet, and
have data access on their phone.
Summary: The user wishes to board the nearest bus
Related User Cases:
Steps:
1. Launch the BoilerMap software on the phone
2. Select “Catch a Bus”
3. You will be prompted to enter you location, do so via the keypad
4. You will then be prompted to select your route
5. Select the stop you wish to get directions to
6. Follow the steps for navigating the route
Post Conditions: Once the user has completed the route, BoilerMap will revert to the
main menu
14
6.2. Security Plan
Policy
The goals for BoilerMap are to not allow users information on the phone and computer to
be compromised by unauthorized parties. The application is to not crash or effect normal
usage of the phone or PC. If the application does crash it is the user’s responsibility to
notify the administrator, and the administrator’s responsibility to notify BoilerMap
software.
There will be two types of users, the administrator and a regular user. The administrator
will be responsible for publishing routes, filtering inappropriate images, and maintaining
the flickr.com and MySQL accounts. The user will be responsible for using the
BoilerMap application in addition to checking for updates to routes and synching to the
pc. The user will not have access to adding waypoints, however they will be able to
install their class schedule to the phone. One person may assume both roles, a user and
administrator.
Current State
A risk analysis is to be conducted on the existing system to determine if it meets all the
goals of the policy and the requirement document.
Requirements
Please refer to the project requirement document.
6.3. Requirements Questionnaire
1) Is interaction with the camera phone API possible with this phone?
2) Does this phone have an upgrade to the newer and better Windows Mobile 5.0?
3) Is it possible to run a J2ME application on this phone? We have found
conflicting information; motocoder.com does not list this phone, however, the
specs for the phone itself lists java.
4) What would be the expected amount of memory that the application should
take up on the phone while running?
These are the questions that we sent to our corporate partner. He is currently on vacation,
and will be getting back to us shortly with his answers.
15