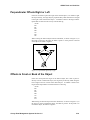
1
AASHTOWare SDMS Collector User’s Guide Release 3.5 American Association Of State Highway and Transportation Officials Acknowledgements Technical Writer Kit Carson, Arkansas Highway and Transportation Department (SDMS Task Force, Emeritus) Reviewed by Jay Tarwater, Texas Department of Transportation (Chairman, SDMS Task Force) Brian Casey, Maine Department of Transportation (SDMS Task Force) Dean Wilkerson, Arkansas Highway and Transportation Department (SDMS Task Force) Dennis O’Brien, Iowa Depart ment of Transportation (SDMS Task Force) Gene Hafermann, Wisconsin Department of Transportation (SDMS Task Force, Emeritus) Document Production University of Maine 348 Boardman Hall Orono, ME 04469 207 581 2189 www.AASHTOWare.org Trademarks AASHTOWare is a registered trademark and service mark of AASHTO. AASHTO and SDMS are registered trademarks of AASHTO. SDMS Collector and SDMS Processor are proprietary software products of AASHTO. Other product names are trademarks or registered trademarks of their respective owners. Copyright Published by the American Association of State Highway and Transportation Officials, Inc 444 North Capitol Street N.W., Suite 249 Washington, D.C. 20001, USA (202) 624-5800 © Copyright 2002 by the American Association of State Highway and Transportation Officials, Inc. All rights reserved. This book or parts thereof, may not be reproduced in any form without written permission of the publisher. Printed in the United States of America. CHAPTER 1 INTRODUCTION...................................................................................................................................... 1-1 W ELCOME TO SDMS................................................................................................................................................................1-1 A Complete Processing System ........................................................................................................................................ 1-2 What Is Needed to Use SDMS Collector ? ..................................................................................................................... 1-3 SDMS DOCUMENTATION ........................................................................................................................................................1-4 SDMS U SER M ANUAL OVERVIEW.........................................................................................................................................1-4 Chapter 1 Introduction...................................................................................................................................................... 1-4 Chapter 2 SDMS Collector System Basics..................................................................................................................... 1-4 Chapter 3 SDMS Tasks and Activities............................................................................................................................. 1-4 Chapter 4 Data Collection................................................................................................................................................ 1-4 Chapter 5 User Shot Sequences....................................................................................................................................... 1-5 Chapter 6 Computations.................................................................................................................................................... 1-5 Chapter 7 The Editor ......................................................................................................................................................... 1-5 Chapter 8 Disk Management and Communication....................................................................................................... 1-5 Chapter 9 Customizing SDMS Collector........................................................................................................................ 1-5 Chapter 10 Getting Help and Using Macros................................................................................................................. 1-5 Chapter 11 Examples......................................................................................................................................................... 1-5 Chapter 12 Appendix.......................................................................................................................................................... 1-5 HOW TO USE THIS M ANUAL....................................................................................................................................................1-6 CONVENTIONS USED IN THIS M ANUAL ..................................................................................................................................1-6 HOW TO INSTALL SDMS COLLECTOR ...................................................................................................................................1-6 HOW TO START AND EXIT SDMS COLLECTOR ....................................................................................................................1-6 GENERAL RULES OF SDMS TASKS AND A CTIVITIES...........................................................................................................1-7 CHAPTER 2 SDMS COLLECTOR SYSTEM BASICS ........................................................................................... 2-1 SDMS DATA STRUCTURE........................................................................................................................................................2-1 Projects and Tasks.............................................................................................................................................................. 2-1 Activity.................................................................................................................................................................................. 2-1 Data Item.............................................................................................................................................................................. 2-2 SDMS COLLECTOR FILE TYPES..............................................................................................................................................2-3 Project File .......................................................................................................................................................................... 2-3 Control File.......................................................................................................................................................................... 2-3 Horizontal Alignment File with PI Definition................................................................................................................ 2-5 Vertical Alignment File...................................................................................................................................................... 2-9 Superelevation Files.........................................................................................................................................................2-11 Configuration Files ..........................................................................................................................................................2-12 Help Files...........................................................................................................................................................................2-12 Sequence Files...................................................................................................................................................................2-12 Macro Files........................................................................................................................................................................2-13 Edit Files............................................................................................................................................................................2-13 Temporary Files................................................................................................................................................................2-13 SDMS FILE NAMING CONVENTIONS....................................................................................................................................2-13 THE SDMS COLLECTOR M ENUS ..........................................................................................................................................2-13 The Main Menu .................................................................................................................................................................2-14 The Project Mode Menus.................................................................................................................................................2-14 The Functions Menu.........................................................................................................................................................2-16 The 2D and 3D Stakeout Menu ......................................................................................................................................2-17 The Edit Menu...................................................................................................................................................................2-18 The I/O Menu.....................................................................................................................................................................2-19 The Disk Operations Menu.............................................................................................................................................2-20 The Configurations Menu................................................................................................................................................2-20 SELECTING FILES TO USE.......................................................................................................................................................2-21 The File name Prompt......................................................................................................................................................2-21 Viewing a Directory.........................................................................................................................................................2-21 Specifying File Subsets....................................................................................................................................................2-22 CHAPTER 3 SDMS TASKS AND ACTIVITIES ........................................................................................................ 3-1 HORIZONTAL TASKS .................................................................................................................................................................3-1 The Traverse Task (TK:TRA)............................................................................................................................................ 3-1 The Radial Topography Task (TK:RTO) ........................................................................................................................ 3-6 The Combined Task (TK:COM) ....................................................................................................................................... 3-7 The Control Network Task (TK:CON)............................................................................................................................ 3-7 The Photo Control Task (TK:PHO)................................................................................................................................. 3-7 The Terrain Model Task (TK:TMO) ................................................................................................................................ 3-7 VERTICAL TASKS ......................................................................................................................................................................3-8 The Three-Wire Level Task (TK:3WR) ........................................................................................................................... 3-8 The Level Run Task (TK:LEV)........................................................................................................................................3-11 The Cross Section Task....................................................................................................................................................3-11 The Profile Task (TK:PRO) ............................................................................................................................................3-14 SPECIAL SURVEY PROCEDURES ............................................................................................................................................3-15 Station Resections.............................................................................................................................................................3-15 Perpendicular Offsets Right or Left ...............................................................................................................................3-16 Offsets in Front or Back of the Object ..........................................................................................................................3-16 Utility Elevations..............................................................................................................................................................3-17 Remote Elevations............................................................................................................................................................3-18 Sets.......................................................................................................................................................................................3-19 Text Activity.......................................................................................................................................................................3-19 Check Activity....................................................................................................................................................................3-20 Figure Activity...................................................................................................................................................................3-20 Defining Connectivity in the SDMS Project File ........................................................................................................3-20 CHAPTER 4 DATA COLLECTION.............................................................................................................................. 4-1 OPEN A PROJECT ........................................................................................................................................................................4-1 Open a New Project ........................................................................................................................................................... 4-1 Open an Existing Project................................................................................................................................................... 4-3 U SING A TOTAL STATION.........................................................................................................................................................4-4 Naming a Total Station...................................................................................................................................................... 4-4 Getting Measurements from the Total Stations............................................................................................................. 4-5 PROMPTING DATA TAGS ..........................................................................................................................................................4-6 ENTERING DATA FIELDS..........................................................................................................................................................4-6 Manually Entering Data.................................................................................................................................................... 4-6 Entering Data from Total Stations................................................................................................................................... 4-7 Attribute and Information Data Items............................................................................................................................. 4-8 Entering Data from Control Files.................................................................................................................................... 4-8 TRACKING POINT AND FIGURE NUMBERS...........................................................................................................................4-11 Intelligent Point Numbering............................................................................................................................................4-11 CORRECTING ERRORS.............................................................................................................................................................4-11 Deleting a Shot or Station ...............................................................................................................................................4-12 Editing to Correct Data Entry Errors...........................................................................................................................4-12 Reentering Data to Correct Errors................................................................................................................................4-12 ENDING DATA COLLECTION..................................................................................................................................................4-13 Suspending a Project........................................................................................................................................................4-13 Closing a Project..............................................................................................................................................................4-13 CHAPTER 5 USER SHOT SEQUENCES .................................................................................................................... 5-1 A BOUT SHOT SEQUENCES........................................................................................................................................................5-1 Why Use a Sequence........................................................................................................................................................... 5-1 SEQUENCE FILES .......................................................................................................................................................................5-2 Required Data for Sequences........................................................................................................................................... 5-2 Tags Only Sequence........................................................................................................................................................... 5-2 Default New Project Sequence......................................................................................................................................... 5-2 BUILDING A SEQUENCE FILE ...................................................................................................................................................5-3 Inserting a Standard Shot When Building a Sequence................................................................................................. 5-3 Inserting Another Sequence in a Sequence.................................................................................................................... 5-4 Using the Help Data Tag in a Sequence File................................................................................................................. 5-4 Descriptive Items in a Sequence as Constants............................................................................................................... 5-5 U SING A SEQUENCE..................................................................................................................................................................5-5 Sequence Levels and Remaining Shots............................................................................................................................ 5-5 Skipping or Repeating Shots in a Sequence................................................................................................................... 5-6 Escaping from a Sequence................................................................................................................................................ 5-6 Escaping from an Activity in a Sequence........................................................................................................................ 5-6 Multiple Sequences............................................................................................................................................................. 5-6 Skipping or Repeating Shots in Multiple Sequences..................................................................................................... 5-7 Updating Constants............................................................................................................................................................ 5-8 Removing Constants........................................................................................................................................................... 5-8 Inserting a Standard Shot in a Sequence........................................................................................................................ 5-8 How to Quickly Repeat a Sequence................................................................................................................................. 5-9 Calling the Same Sequence............................................................................................................................................... 5-9 Deleting Shots or Stations from a Sequence.................................................................................................................. 5-9 Ending a Sequence with AC:CK....................................................................................................................................... 5-9 SEQUENCES AND POINT NUMBERING SCHEMES...................................................................................................................5-9 A Simple Point Numbering Scheme ................................................................................................................................. 5-9 Point Numbering Hierarchy............................................................................................................................................5-10 Using Point Numbering with Multiple Sequences.......................................................................................................5-10 CHAPTER 6 COMPUTATIONS ..................................................................................................................................... 6-1 TOLERANCES IN COMPUTATIONS............................................................................................................................................6-1 Three Wire Tolerance ........................................................................................................................................................ 6-1 Stadia Imbalance................................................................................................................................................................ 6-1 Resection Tolerance........................................................................................................................................................... 6-2 U SING CONTROL FILES WITH COMPUTATIONS.....................................................................................................................6-2 U SING COMBINATION FACTOR (CF:) WITH COMPUTATIONS..............................................................................................6-3 LIVE COMPUTATIONS ...............................................................................................................................................................6-3 THE 2D AND 3D COMPUTATIONS AND STAKE OUT FUNCTIONS........................................................................................6-5 Entering Stakeout Data...................................................................................................................................................... 6-6 The Orientation Screen...................................................................................................................................................... 6-8 Shot/Inverse Screen..........................................................................................................................................................6-10 Alignment/Control Stakeout Screen...............................................................................................................................6-12 Slope Stakeout and Slope Stake Shot Screens..............................................................................................................6-17 Summary of Slope Staking Situations............................................................................................................................6-21 Additional Computation Functions................................................................................................................................6-22 Vertical/Horizontal Ratio Computations Hierarchy...................................................................................................6-23 BATCH COMPUTATIONS .........................................................................................................................................................6-24 Starting Batch Computations..........................................................................................................................................6-24 Computation Results ........................................................................................................................................................6-25 The Finished Write Control File....................................................................................................................................6-26 Basic Rules of Batch Computations...............................................................................................................................6-27 CHAPTER 7 THE EDITOR.............................................................................................................................................. 7-1 START EDITING..........................................................................................................................................................................7-1 How to Select a File to Edit.............................................................................................................................................. 7-1 How to Create a New File................................................................................................................................................. 7-2 The Edit Screen................................................................................................................................................................... 7-3 EDITING FILES ...........................................................................................................................................................................7-3 Keys Used in Editing.......................................................................................................................................................... 7-3 Changing Data in a Line................................................................................................................................................... 7-4 Inserting a Line................................................................................................................................................................... 7-4 Clearing a Line.................................................................................................................................................................... 7-4 Deleting a Line.................................................................................................................................................................... 7-4 Inserting Characters .......................................................................................................................................................... 7-4 Deleting Characters........................................................................................................................................................... 7-5 Using <F6> Undo.............................................................................................................................................................. 7-5 Recording the Edit.............................................................................................................................................................. 7-5 The Recall Buffer ................................................................................................................................................................ 7-5 The Search Function.......................................................................................................................................................... 7-6 ENDING EDITING .......................................................................................................................................................................7-6 Overwrite Protection.......................................................................................................................................................... 7-7 Abandoning the Edits......................................................................................................................................................... 7-7 Combining Files.................................................................................................................................................................. 7-7 PRINTING A FILE WITHIN EDITING .........................................................................................................................................7-7 CHAPTER 8 DISK MANAGEMENT AND COMMUNICATION ....................................................................... 8-1 DISK M ANAGEMENT .................................................................................................................................................................8-1 The Disk Operations Menu............................................................................................................................................... 8-1 Selecting Files..................................................................................................................................................................... 8-1 The File Request Prompt................................................................................................................................................... 8-2 Viewing a Directory........................................................................................................................................................... 8-2 Specifying File Subsets...................................................................................................................................................... 8-3 Marking Files in the Directory......................................................................................................................................... 8-3 File Management Functions............................................................................................................................................. 8-3 Special Considerations Disk Operations........................................................................................................................ 8-5 COMMUNICATIONS....................................................................................................................................................................8-5 The Default PC Communication Parameters ................................................................................................................ 8-5 Sending a File to Another Computer............................................................................................................................... 8-6 Receiving a File from Another Computer....................................................................................................................... 8-6 CHAPTER 9 CUSTOMIZING SDMS COLLECTOR .............................................................................................. 9-1 THE LOCATION OF THE CONFIGURATION FUNCTIONS.........................................................................................................9-1 EDITING THE CONFIGURATION FILES.....................................................................................................................................9-2 The Order of Items in a Configuration File................................................................................................................... 9-2 Editing and Saving a Configuration................................................................................................................................ 9-2 THE I/O CONFIGURATION - IO.CFG......................................................................................................................................9-3 I/O Communication Devices............................................................................................................................................. 9-3 I/O Communication Parameters ...................................................................................................................................... 9-3 I/O Printing Controls......................................................................................................................................................... 9-3 THE PROJECT CONFIGURATION - PROJECT.CFG...............................................................................................................9-4 THE SYSTEM CONFIGURATION - SYS.CFG...........................................................................................................................9-5 THE CONTROL FILE CONFIGURATION - CNTL.CFG ...........................................................................................................9-6 TOLERANCE CONFIGURATION - TOL.CFG...........................................................................................................................9-7 THE TASK/A CTIVITY DEFINITION FILE - TASK.TGS ..........................................................................................................9-8 How to Change Task and Activity Definitions............................................................................................................... 9-9 CHAPTER 10 GETTING HELP AND USING MACROS ..................................................................................10-1 GETTING HELP .........................................................................................................................................................................10-1 The SDMS Collector Help Files.....................................................................................................................................10-1 How to Get Help ...............................................................................................................................................................10-4 KEYBOARD MACROS ..............................................................................................................................................................10-6 Building Macros................................................................................................................................................................10-7 Using Macros....................................................................................................................................................................10-9 Examples of Macros.........................................................................................................................................................10-9 CHAPTER 11 EXAMPLES ..........................................................................................................................................11-1 A SSUMPTIONS..........................................................................................................................................................................11-1 CONFIGURATION SETTINGS ...................................................................................................................................................11-1 RADIAL TOPOGRAPHY EXAMPLE..........................................................................................................................................11-2 Computed Radial Topography Example Saved As A Control (.CTL) File .............................................................11-7 TRAVERSE EXAMPLE ..............................................................................................................................................................11-8 The Traverse Example Project (.PRJ) File ................................................................................................................11-12 The Computed Traverse Example Saved As A Control (.CTL) File.......................................................................11-14 LEVEL RUN EXAMPLE ......................................................................................................................................................... 11-15 The Level Run Example Project (.PRJ) File ..............................................................................................................11-16 The Computed Level Run Saved As A Control (.CTL) File.....................................................................................11-16 THREE-W IRE LEVEL EXAMPLE.......................................................................................................................................... 11-17 The Three-Wire Level Example Project (.PRJ) File.................................................................................................11-18 The Computed Three-Wire Level Example Saved As A Control (.CTL) File.......................................................11-18 CROSS-SECTION EXAMPLE ................................................................................................................................................. 11-19 The Cross-Section Example Project (.PRJ) File.......................................................................................................11-24 The Computed Cross-Section Example Saved As A Control (.CTL) File .............................................................11-26 PROFILE EXAMPLE ............................................................................................................................................................... 11-27 The Profile Example Project (.PRJ) File....................................................................................................................11-29 Computed Profile Example Saved As A Control (.CTL) File..................................................................................11-30 CHAPTER 12 APPENDIX ............................................................................................................................................12-1 OVERVIEW................................................................................................................................................................................12-1 SET UP OF TOTAL STATIONS .................................................................................................................................................12-1 SDMS COLLECTOR FILE NAMING CONVENTIONS.............................................................................................................12-2 THE SDMS COLLECTOR PROGRAM FILES...........................................................................................................................12-2 TASKS........................................................................................................................................................................................12-3 A CTIVITIES...............................................................................................................................................................................12-3 DATA TAGS ..............................................................................................................................................................................12-5 TASKS DEFAULT PROMPT SEQUENCES ............................................................................................................................. 12-18 Traverse Task - TRA.......................................................................................................................................................12-18 Radial Topography Task - RTO ...................................................................................................................................12-18 Combined Task - COM ..................................................................................................................................................12-18 Control Network Task - CON .......................................................................................................................................12-19 Profile Task - PRO .........................................................................................................................................................12-19 Photo Control Task - PHO............................................................................................................................................12-20 Terrain Model Task - TMO...........................................................................................................................................12-20 Level Run Task - LEV.....................................................................................................................................................12-20 Three-Wire Level Task - 3WR .......................................................................................................................................12-21 Cross-Section Task - XSE..............................................................................................................................................12-21 THE DEFAULT CONFIGURATION AND HELP FILES........................................................................................................... 12-22 Control Configuration....................................................................................................................................................12-22 I/O Configuration...........................................................................................................................................................12-22 Project Configuration ....................................................................................................................................................12-24 System Configuration.....................................................................................................................................................12-25 Tolerance Definition......................................................................................................................................................12-25 Tags Help .........................................................................................................................................................................12-26 SAMPLE SDMS FILES.......................................................................................................................................................... 12-31 Combined Task (TK:COM) ...........................................................................................................................................12-31 Radial Topography Task (TK:RTO) ............................................................................................................................12-35 Computed Radial Topography Example Saved As A Control (.CTL) File ...........................................................12-36 Radial Cross Section Example Using The Radial Topography Task (TK:RTO) .................................................12-38 Traverse Task (TK:TRA) Example...............................................................................................................................12-42 Level Run Task (TK:LEV) .............................................................................................................................................12-45 Three-Wire Level Task (TK:3WR) ...............................................................................................................................12-46 Cross-Section Task (TK:XSE).......................................................................................................................................12-47 Profile Task (TK:PRO) ..................................................................................................................................................12-50 Sample Control File.......................................................................................................................................................12-52 Sample Horizontal Alignment File (.ALI) with Spirals and Equations - PI Definition ......................................12-53 Sample Horizontal Alignment File (.ALI) with Spirals and Equations - PI Definition in Report Format......12-54 Sample Vertical Alignment File (.PRO) - PI Definition...........................................................................................12-55 Sample Superelevation File (.SUP) - PI Definition..................................................................................................12-56 DEFINING CONNECTIVITY IN THE SDMS PROJECT FILE ................................................................................................ 12-57 DEFINING CONNECTIVITY IN THE SDMS CALCULATED FILE ....................................................................................... 12-57 CONNECTIVITY BY FIGURE CODE...................................................................................................................................... 12-58 CONNECTIVITY BY ORIGIN-DESTINATION........................................................................................................................ 12-60 CREATING CLOSED CHAINS................................................................................................................................................ 12-63 Closed Chains Using “FG:#,C”..................................................................................................................................12-63 Closed Chains Using OD: .............................................................................................................................................12-64 Closed Chains using the Chain Activity AC:CH.......................................................................................................12-65 CREATING GAPS IN CHAINS................................................................................................................................................ 12-65 CONNECTIVITY BY TAPING................................................................................................................................................. 12-68 Direction Options for the Taping Activity ..................................................................................................................12-70 Closing a Taped Object .................................................................................................................................................12-77 Ending in a Figure Using the Taping Activity...........................................................................................................12-83 CHAIN A CTIVITY AND CHAIN DATA ITEM........................................................................................................................ 12-87 Chain Activity..................................................................................................................................................................12-87 Chain (CH:) Data Item..................................................................................................................................................12-90 CONNECTIVITY BY FEATURE CODE ................................................................................................................................... 12-90 Unique Feature Codes For Each Chain.....................................................................................................................12-91 Beginning and Ending Chains Using Common Feature Codes and Shot Identification....................................12-94 GENERATING CHAINS AND POINTS PARALLEL TO A PREVIOUSLY DEFINED CHAIN.................................................. 12-97 How Points Are Created for a Parallel Chain........................................................................................................ 12-100 GENERAL RULES OF SDMS TASKS AND A CTIVITIES....................................................................................................12-104 OVERVIEW...........................................................................................................................................................................12-104 RULES ..................................................................................................................................................................................12-104 Introduction Chapter 1 Introduction This chapter contains: • An introduction to SDMS • A list of the documentation needed to use SDMS Collector • An overview of how this manual is organized • Suggestions on how to use the manual • System Requirements for SDMS Collector • How to install SDMS Collector Welcome to SDMS Welcome to the AASHTO Survey Data Management System, SDMS. This software is the basis of a comprehensive survey data processing and stake out system. It uses the AASHTO SDMS data structure that is defined, published, and maintained by AASHTO. SDMS Collector supports data collection for commonly used horizontal and vertical surveying tasks. It also collects a large variety of data types, making it well suited for GIS systems and long term archiving. Instructions can be recorded for line connectivity, figure and feature coding, and other CAD or drawing information. AASHTO SDMS is a detailed data structure which has been defined, documented, and adopted by the American Association of State Highway and Transportation Officials (AASHTO) for recording field survey information. This data structure is defined in the AASHTO SDMS Technical Data Guide 2000. This Technical Data Guide can be obtained in Adobe PDF format or HTML format for free by downloading it from the AASHTO SDMS web site at http://www.aashtoware.org/sdms/sdmsdown.nsf or in hard copy format for $40 by writing or calling AASHTO at: AASHTO 444 North Capitol Street, NW, Suite 249 Washington, DC 20001 (202) 624-5800 The goal of AASHTO in defining this data structure is to establish a national standard for recording, exchanging, and archiving survey data. With electronic measuring equipment and computers being applied to every facet of surveying, civil design, plans production, and construction, the need for such a defined standard has become critical. The current situation of each brand and model of data collector having a unique data format is a huge impediment to the automation of these processes. SDMS Collector is a “Year 2000” (Y2K) compliant survey data collection software that can be used for common surveying tasks and it complies with the SDMS technical data structure. It currently runs on DOS based desktop and laptop computers, and many of the DOS based hand-held computers. The software can communicate with a variety of total station instruments. It can also be used as a generic, alphanumeric Survey Data Management System Version 3.5 1-1 Introduction data collector when no measuring device is electronically interfaced. SDMS Collector is a menu driven system that is easy to learn and easy to use while being flexible and comprehensive at the same time. One of the hallmarks of SDMS Collector is that within the confines of the SDMS data structure, the software is almost completely user definable. A user can configure the system to prompt for a particular set of data items in any order that makes sense and is convenient for them. SDMS Collector allows the user to define lists of responses to many of the prompts and displays them as pick lists. This reduces the amount of hand entry of data required in the field. The SDMS Collector Release 3.4 software also provides 3D stakeout functionality using horizontal and vertical design alignments and control information. This makes SDMS Collector truly a field to office to field system. A Complete Processing System Field survey data can be collected, reviewed and edited in SDMS Collector. But the capabilities of the system do not stop there. SDMS Collector allows the user to compute coordinates in the field by using live computations. SDMS Collector also provides several 3D Stakeout functions, including stakeout based on points in a control file, stakeout of horizontal alignments and profiles; stakeout of cross slopes based on design sections and superelevation, and slope staking based on the vertical/horizontal ratio from a known point. SDMS Processor is a Windows based program that runs on a desktop or lap top computer. This program allows the user to post process the data collector project files using least squares computational routines. It also provides reports of the results including analysis of errors encountered, a robust full screen smart editor, a graphic display of the points and chains collected, an export option for several file formats including the SDMS calculated file (CAL) and points and chain file (PAC) that contains the points collected and the chains that connect some of them. Survey Data Management System Version 3.5 1-2 Introduction What Is Needed to Use SDMS Collector ? SDMS Collector is an MS-DOS based program that requires at least an 8 line by 40-column display. It is designed for use on hand-held PCs in the field but can also be used on desktop and laptop computers as well as other data recorders that support MS-DOS. To record information measured by total station instruments, there must be an RS232C serial connection between the total station and the data recorder. Specific data recorders that meet the SDMS criteria include: • Husky Hunter 16 (2Mb minimum) • Husky FS/2 (2Mb minimum) • Husky FS/3 (2Mb minimum) • Husky FSGS (2Mb minimum) • Husky MP2500 (2Mb minimum) • HP100LX (2Mb minimum) • HP200LX (2Mb minimum) • PC and Laptop Computers that support MS DOS. Total stations supported by SDMS Collector include: Driver GEODIMETER System (400/500/600) LIECA T1010 & 1610 LIECA TCR303 LEICA TCA1103 LIETZ SET (3 & 3B) NIKON DTM Series (400, 500,700, 800) PENTAX PTSIII SOKKIA SET Series (2, 2B, 3, 3B, XL, & 100 Series TOPCON (Coarse and Fine Modes) GTS Series (4 & 300/500/700) GTS AF Series (601-603 ,605) GPT Series (1001, 1002, 1003) TRIMBLE TTS (300 and 500) WILD T2000 & T2002 ZEISS Elta Series 3 & 4D For information on supporting other brands and models of total stations, review information on the SDMS web site or contact: AASHTO 444 North Capitol Street N.W., Suite 249 Washington, D.C. 20001 (202) 624-5800 SDMS Collector may be also be used as a survey data recording system without being connected to a measuring device. In every case where a measurement is called for, the user has the option of manually entering the values through the keyboard, or polling the connected total station for the measurement values. Survey Data Management System Version 3.5 1-3 Introduction Contact AASHTO Headquarters for information on the procedure to add support for other brands and models of total stations. SDMS Documentation Complete documentation available for the SDMS system consists of: • AASHTOWare SDMS Collector User Guide, which contains the rules of SDMS and instructions for data collection, editing, computing files, customizing,file management, stakout, and more. It also includes default listings of the configuration files, data tags, task and activity definitions as well as many examples of collected data files. • AASHTOWare SDMS Collector Getting Started Manual, which contains instructions for installing the software and for using the more common features of the software. • The AASHTO SDMS Technical Data Guide 2000, which provides detailed information on the SDMS data structure. This document is needed by anybody who wants to write translators to import and export SDMS data. • AASHTOWare SDMS Processor User Guide, is provided as an “on line help” within the SDMS Processor software Any of these documents can be obtained in Adobe PDF format or HTML format by downloading it for free from the AASHTO SDMS web site at http://www.aashtoware.org/sdms/sdmsdown.nsf. Hard copies can also be obtained for a fee from AASHTO headquarters. SDMS User Manual Overview Chapter 1 Introduction This chapter includes a general introduction to SDMS Collector software, describes the SDMS documentation that is available as well as how this User Guide is laid out, and describes how to install SDMS Collector software Chapter 2 SDMS Collector System Basics This chapter describes the basic SDMS data structure, file format definitions, and file naming conventions. It also provides an overview of the SDMS Collector menus Chapter 3 SDMS Tasks and Activities This chapter contains detailed definitions of SDMS tasks and activities, as well as several activities that are combined to complete a survey measurement. Chapter 4 Data Collection This chapter explains how to use SDMS Collector. It explains how to open a new or existing project, how to manually enter data and electronically transfer from a total station, how to access data in control files, how to delete shots or stations, and how to correct data entry Survey Data Management System Version 3.5 1-4 Introduction errors. It also discusses the intelligent point numbering feature, and provides instructions for using the on-line help system. Chapter 5 User Shot Sequences This chapter explains how to create and use user shot sequences. Chapter 6 Computations This chapter explains how to use computation functions of SDMS Collector during data collection. Computations include batch computations, live computations and 2D and 3D computations and stakeout functions. Chapter 7 The Editor This chapter explains how to edit files within SDMS Collector and its functions apply equally to configuration files and data files. Chapter 8 Disk Management and Communication This chapter talks about the disk operation functions of SDMS Collector. It explains how to use the built-in file manager to view a directory and do common operations such as selecting, copying, renaming or deleting files. Also included are instructions for sending and receiving files via an RS-232 interface. Chapter 9 Customizing SDMS Collector Configurations shape the personality of the system. This chapter explains how to edit the system, project, file, I/O, and tolerance configuration files, and how to change default task, activity and prompt definitions. Chapter 10 Getting Help and Using Macros This chapter details the structure of the SDMS Collector help files and provides guidelines for editing them with a generic ASCII editor. It also explains how to create and use keyboard macros to shorten keystroke-intensive commands to just a few keystrokes. Chapter 11 Examples This chapter has several sample projects to practice using SDMS Collector. Chapter 12 Appendix This appendix contains lists of SDMS Collector file naming conventions;, program files; task, activity and prompt default definitions; configuration and help file defaults; and, instrument driver configuration requirements. The SDMS Data Structure Technical Guide is also included. Survey Data Management System Version 3.5 1-5 Introduction How to Use This Manual This manual is not a tutorial. It explains features by grouping similar features into chapters. For example, while the editor is active at many different points in the program, editing procedures are explained only in Chapter 7, The Editor. For a more step by step approach to using SDMS Collector, the user is referred to the SDMS Collector Getting Started Manual. This user guide is designed to detail the SDMS data structure and rules and details the basic functions which have been implemented in SDMS Collector. Conventions Used in this Manual • • • • • Keys are bracketed, like this: <F1> Directory or <CTRL> File names and file name extensions are shown like this: NEWPR.SEQ or the file name extension PRJ Information to be typed is shown in bold italic letters, like this: Type an N to... Prompts and messages displayed by the computer are shown in smaller bold letters, like this: Choose a Command or MIOC Variables, such as a value or file name, are shown in italics, like this: path\file name.ext or XC:xxxxxx.xxx How to Install SDMS Collector 1. 2. 3. 4. 5. 6. Create an SDMS Collector directory. Use the DOS "make directory" command. At the DOS prompt in the root directory (C:\) type: MD SDMS Press <ENTER> to create the directory. To log into the new directory, use the DOS "change directory" command and give the new directory name. Type: CD SDMS Press <ENTER> to change to the new directory. To copy the SDMS Collector program files into the SDMS directory, follow the directions furnished with the data collector being used. When copying is complete, store the original program in a safe place. It may desirable to have a separate directory for the SDMS data files. Use the above steps to create other directories or subdirectories. Note: All of the configuration files (file name extension CFG), help files (file name extension HLP) and the TASK.TGS file must be located in the same directory as the executable program file (SDMS.EXE). How to Start and Exit SDMS Collector 1. 2. 3. 4. Log into the directory containing SDMS Collector Type SDMS and press <ENTER> When the Main Menu appears, press the appropriate function key to start (see Chapter 2). To exit SDMS, press <Esc> at the Main Menu and when asked if you want to Exit to DOS, press the Y key. Survey Data Management System Version 3.5 1-6 Introduction General Rules of SDMS Tasks and Activities There are a number of “Rules” that must be followed when using the SDMS Collector software. These rules pertain to how configuration and help files must be maintained, what data is required for data collection and processing, and how duplicate data items are processed. The basic rules that are emp loyed by SDMS Collector in data collection and processing are listed in the Appendix. Details regarding these rules can be found in the appropriate sections of this User Guide, including the Appendix. Survey Data Management System Version 3.5 1-7 SDMS Collector System Basics Chapter 2 SDMS Collector System Basics Chapter 2 contains: • SDMS data structure • SDMS file types and formats • SDMS file naming conventions • An overview of the SDMS Collector menus SDMS Data Structure The SDMS data structure forms the foundation of the SDMS system. It is defined in the AASHTO SDMS Technical Data Guide 2000. SDMS is defined specifically for Tasks, Activities, and Data Tags used in design and land surveys. Enhancements being considered by the AASHTO SDMS Product Task Force would expand SDMS to include tasks, activities, and data tags for other types of surveys done in support of transportation system development and maintenance. These might include construction, traffic, maintenance, inventory, soil exploration, etc. For design surveys, the Tasks supported are Traverse, Radial Topography, Single Wire Leveling, Three Wire Leveling, and Cross Sectioning. There are also subsets and combinations of some of these basic tasks such as Combined (which is a combination of Traverse and Radial Topography), and Profile and Line Topography (which are really subsets of Cross Sectioning). There are also ways of using a task for a specific structure of collection such as using Radial Topography to collect cross sections. Projects and Tasks In SDMS, a survey job is called a Project. Within a project there are different types of tasks that the surveyor carries out, such as traverse, radial topography, cross section, etc. For a given survey project, there may be multiple tasks done, but each SDMS electronic file may contain only one Task. Therefore, a survey project will mo st likely have multiple project (.PRJ) files with each containing one type of survey or Task. Activity During a survey task a surveyor typically sets up at a point, shoots other points to get the measurements of angles and distances, describes point attributes, then moves to the next setup point and repeats the same kind of activities. In SDMS, a Task consists of a sequence of Activities. There are certain SDMS rules that apply as to what activities are allowed and how they are sequenced. Each activity begins with the abbreviation AC: followed by a colon and the data field tag that defines the survey function being performed. These include activities such as: • AC:OS - Occupying a Station • AC:BS - Taking a Backsight • AC:FS - Taking a Foresight, Survey Data Management System Version 3.5 2-1 SDMS Collector System Basics • AC:CC- Ma king a Control Check, etc. An Activity is a group of data items that define the measurements, location, and/or descriptive attributes of a survey object. When the survey object is a point, the activity is called a shot. However, there are many other types of activities that detail information that is not specific to one point. One such non-shot activity is the project header activity that defines information about the particular survey project while other activities may define relationships between various survey points. Data Item In an activity, a single piece of data is represented as a data item. A data item consists of two parts: Data Tag and Data Field. A data tag is a two character alphanumeric code that describes the type of data in the data item. A data field is the value of the data in the data item. There are three types of data fields: • measured values; • computed values • descriptive values. The hierarchical data structure of SDMS (Figure 2-1) is: • Each survey project will have one or more project (PRJ) files with each one involving one type of Task. • Each Task consists of one or more Activities • Each Activity consists of a set of data items. • The type of data in each data item is designated by the Data Tag. • The data is stored in the Data Field. Task Activity Data Item Data Item Data Item Data Item Activity Activity Figure 2-1 SDMS data structure Different types of tasks, activities and data tags are defined for SDMS. Refer to the Appendix for the detailed definitions. Survey Data Management System Version 3.5 2-2 SDMS Collector System Basics SDMS Collector File Types Project File SDMS Collector data for a Task is stored in an ASCII text file, called a Project File. PRJ is used as the file extension for such project files. In a project file, each data item occupies one line. The line begins with the two-character data tag followed by a colon and then the data field. Each activity begins with the AC: data tag, followed by a colon and a two-character activity code. The first two lines of a project file always define the project name and task. A project file must contain, at minimum, the following main data items: Data Item Description PR: The PR: data item is the first data item encountered in the project file. It takes its value from the actual project filename. REQUIRED TK: The TK: data item is the second data item encountered in the project file. It defines the type of survey project contained in the file. This assures that, during processing, a cross-section project will not be confused with a traverse, for example. REQUIRED Presently, ten tasks are supported in the data structure. See Section 4, Task and Activity Definitions, for details. AC:PR The AC:PR is the first activity within a PRJ file. There are an unlimited number of data items related to the project that can be entered within this activity. This activity is optional for the user, however, even if the user does not include this activity manually, the data collector will add this activity and certain project settings when the PRJ file is suspended or closed for the first time. Project configuration items, such as, CR:, CF:, UL:, UA:, UT:, UP:, and VR: will be added automatically. In addition, the data tag and names of any active control and alignment files will also be added. AC:OS For computational purposes, survey shots before the first AC:OS in the project file are disregarded during processing. The AC:OS is followed by the data items for the occupied station (point number, coordinates, staff and instrument heights, etc.). AC:BS The backsight activity must immediately follow the occupied station activity if no station resection shots occur. The data items, in the order described above, are the "nuts and bolts" of a project file. In an actual project file there will be many data items appropriately inserted after each activity data item. See Chapter 11 for examples of a project file. Control File A control file contains the known or previously determined coordinates for points. These files are used to define horizontal control points, vertical benchmark points and calculated points to be staked out. CTL is used as the file extension for Control files. SDMS Collector allows up to five active control files at one time. Details on the allowed control file names can be found in Chapter 9, Customizing SDMS. The table below shows the minimum structure of the control file: Survey Data Management System Version 3.5 2-3 SDMS Collector System Basics Data Item Description AC:PR All data before the first activity, other than a project header activity, is ignored. The project header information is for documentation only. However, systems that read and write this file may need to know some of the information, such as the metadata items for units, datum, coordinate systems, combination factors, etc. Ultimately, such information should be checked against the similar settings in the system reading this data and provide warnings or conversions as needed. Any valid SDMS descriptive tags can be used under this activity. OPTIONAL AC:XX The AC:XX data item separates points in the control file. While most often this will be a sideshot activity data item (AC:SS), any activity data item may be used. REQUIRED PN: The point number data item immediately follows the activity data item. Each set of coordinates in the control file is located using the point number, so do not repeat point numbers in any one control file. REQUIRED YC: The numeric value of the Y coordinate (Northing) is entered into the control file using the YC: data tag. REQUIRED If this coordinate is unknown, the YC: data item must still be present in each entry. Either leave the data field blank or enter a -99999 to represent a missing coordinate. XC: The numeric value of the X coordinate (Easting) is entered into the control file using the XC: data tag. REQUIRED If this coordinate is unknown, the XC: data item must still be present in each entry. Either leave the data field blank or enter a -99999 to represent a missing coordinate. ZC: The numeric value of the Z coordinate (elevation) is entered into the control file using the ZC: data tag. REQUIRED If this coordinate is unknown, the ZC: data item must still be present in each entry. Either leave the data field blank or enter a -99999 to represent a missing coordinate. PD: The point description is entered using the PD: data tag. If the point description is unavailable or not applicable, the PD: data item must be present but its data field may be left blank. REQUIRED CM:, FE, etc. Any other descriptive data tag. A maximum number of 25 data tags are currently allowed in one activity. OPTIONAL SX: Error estimate in the X direction (easting) of the control point. OPTIONAL SY: Error estimate in the Y direction (northing) of the control point. OPTIONAL SZ: Error estimate in the Z direction (elevation) of the control point. OPTIONAL Note: The first data item of a control point must be the activity data item. Other data items can be in any order. See Appendix for an example of a control file. See the Technical Guide for all the options that are allowed in the control file format. Survey Data Management System Version 3.5 2-4 SDMS Collector System Basics Horizontal Alignment File with PI Definition A horizontal alignment file based on the PI definition can be used for all live computations and stakeout functions in SDMS Collector Release 3.4. Previous versions of SDMS Collector used alignments based on a PC/PT definition, but these alignments were restricted to simple tangents and circular curves. The PI defined alignments support angle points with no curve data, circular curves, spiral curves, compound curves and station equations. The first and last PI (basically POTs) listed in the alignment file must not have an associated circular or spiral curve . ALI is used as the file extension for alignment files. The 3D Stakeout functions REQUIRE the active alignment file to be based on the PI definition and an associated vertical alignment file and superelevation file must also be named. The older PC/PT defined horizontal alignments are not supported in this latest version of the SDMS Collector software. The PI definition for horizontal alignments defines the coordinates for POT’s and PIs, stationing for the first POT, and curvature elements for the key PI points. Then SDMS Collector software uses the coordinates of the PI points along with the key curve and/or spiral elements for each curve in the alignment for conversions between X, Y coordinates and station-offset values Note: The PI Definition requires the inclusion of “TY:PI” in the header of the alignment file. The TY:PI must appear after AC:PR, if present, and before the first point or equation activity. The first segment in an alignment file is shown in the following table: Data Item Description AC:PR All data before the first activity, other than a project header activity, is ignored. The project header information is for documentation only. However, systems that read and write this file may need to know some of the information, such as the metadata items for units, datum, coordinate systems, combination factors, etc. Ultimately, such information should be checked against the similar settings in the system reading this data and provide warnings or conversions as needed. Any valid SDMS descriptive tags can be used under this activity. OPTIONAL TY:PI Indicates the PI Definition is to be used. REQUIRED. AC:EQ The Station Equation Activity is required to define the location of station equation points if the alignment contains station equations. All equations must be listed in the order they appear in the alignment and cannot be located on a curve or spiral element. EQ:# Equation number is used to indicate the number of the equation in the alignment and can be used as the identifier of the station equation point as needed by other software interpreting the alignment. OPTIONAL SB:###+## Defines the station back of the equation. REQUIRED ST:###+## Defines the station ahead of the equation. REQUIRED PD:, CM:, FE: All other tags listed with the activity are ignored in computations, but may be included for documentation Survey Data Management System Version 3.5 2-5 SDMS Collector System Basics purposes. AC:xx The alignment description begins here. Use any activity data item except AC:PR or EQ:. REQUIRED NOTE: The alignment must start at a PI with no curve or spiral data. It must be a point on the tangent before the first curve or spiral point in that alignment. PN:nnn The point number correlates the PI point with the point in the project control file. OPTIONAL ST:##+## This is the stationing value at the beginning of the alignment. Enter the value in either stationing format or in decimal format. If omitted, the default beginning station will be zero. The UL: response listed in the PROJECT.CFG file will define units and stationing. OPTIONAL but RECOMMENDED XC:xxxxxx.xxx Defines the X coordinate of the starting point of the alignment. REQUIRED. YC:xxxxxx.xxx Defines the Y coordinate of the starting point of the alignment. REQUIRED ZC:xxxxxx.xxx The Z coordinate (elevation). OPTIONAL SI:PI SI:PI is the point where two tangent lines meet. It defines the circle arc segment. A shot identification should be entered for each segment. REQUIRED AC:xx Activity for the next segment in the alignment. Use any activity data item except AC:PR or EQ:. REQUIRED PN:nnn The point number correlates the PI point with the point in the project control file. OPTIONAL ST:##+## The stationing of each intermediate PI for the horizontal alignment being defined. OPTIONAL. NOTE: ST: can be included for informational purposes, but should be ignored in computations. All data is computed based on the first point station (ST:) value and any station equations defined by AC:EQ. XC:xxxxxx.xxx Defines the X coordinate of the intermediate point of the alignment. REQUIRED. YC:xxxxxx.xxx Defines the Y coordinate of the intermediate point of the alignment. REQUIRED ZC:xxxxxx.xxx The Z coordinate (elevation). OPTIONAL RA:nnn Defines the radius of a curve or curve/spiral combination. Based on the direction of the alignment being defined, a positive value indicates a curve to the right and a negative value indicates a curve to the left. REQUIRED. NOTE: A radius is not required for PIs with no curve defined (normally called an angle point). PD:, CM: All other tags listed with the activity are ignored in computations, but may be included for documentation purposes. * Any of the tags that follow can be used as attributes for a simple curve. These tags are not used in computations. TL:nnn The tangent length (distance from the PI to the PC or PT). Survey Data Management System Version 3.5 2-6 SDMS Collector System Basics EX:nnn The external (distance from the PI to the curve midpoint). MO:nnn The middle ordinate (distance from the curve midpoint to the long chord midpoint). LC:nnn The long chord (distance from the PC to the PT). DA: The delta angle on the direction of the alignment being defined, a positive value indicates a curve to the right and a negative value indicates a curve to the left. PD:, CM:, FE: All other tags in the shot are ignored, but may be include for documentation purposes. * The tags that follow are required to define the various curve/spiral combinations. Supported combinations are defined following the table. R1:nnn Defines the beginning radius for certain spiral curve combinations. R2:nnn Defines the ending radius for certain spiral curve combinations. S1:nnn The length of an entry spiral. S2:nnn The length of an exit spiral. S3:nnn The length of a connecting spiral. The subsequent segments (repeated as necessary) Data Item Description AC:xx As above. The activity is used to define each intermediate PI in the horizontal alignment. Use any activity data item except AC:PR or EQ:. PN:nnn As above. ST:##+##,n The stationing of each intermediate PI for the horizontal alignment being defined. As above. OPTIONAL XC:xxxxxx.xxx Defines the X coordinate of each intermediate PI in the alignment. REQUIRED YC:xxxxxx.xxx Defines the Y coordinate of each intermediate PI in the alignment. REQUIRED ZC:xxxxxx.xxx As above. SI:PI As above. RA:nnn As above, including additional tags required to define spiral/curve combinations. PD:, CM: As above. *** NOTE: The alignment must end at a PI with no curve or spiral data. It must be a point on the tangent after the last curve or spiral point in that alignment. The data that follows is needed for the Final Point in an alignment. AC:xx As above. REQUIRED PN:nnn As above. REQUIRED ST:##+##,n The stationing of the final PI for the horizontal alignment being defined. As above. OPTIONAL XC:xxxxxx.xxx Defines the X coordinate of the final point in the alignment. REQUIRED YC:xxxxxx.xxx Defines the Y coordinate of alignment. REQUIRED Survey Data Management System Version 3.5 the final point in the 2-7 SDMS Collector System Basics ZC:xxxxxx.xxx As above. SI:PI As above. PD:, CM: As above. See the Appendix for an example of an alignment file based on the PI definition. Defining Compound and Spiral Curves Combinations Compound and Reverse Curves Compound and reverse curves must be stored as a series on simple curves. Compound and Reverse Curves Compound and reverse curves must be stored as a series of simple curves. Spiral Curves Combinations All cases require the data tags AC:, SI:, XC:, and YC:. The SI: tag, must identify the point as a PI (SI:PI). The XC: and YC: tags define the PI coordinates. The additional tags and conditions needed for each combination case are described below. Any tags encountered other than those described are ignored for computational purposes. SCS (curve with an entry spiral and exit spiral) SRS (an entry spiral and exit spiral with no curve) The additional tags needed to define an SCS or SRS combination are S1: and S2:. Tags S1: and S2: define the lengths of the entry and exit spirals, respectively. RA defines the curve radius, which is also the ending radius of the entrance spiral and the beginning radius of the exit spiral. If the sum of the deflection angles for the two spirals that are computed from the given spiral lengths and radius equal the total PI deflection angle, a zero length curve between the spirals is assumed. SC (curve with an entry spiral only) SR (an entry spiral by itself) The additional tag needed to define an SC or SR combination is S1:, which defines the length of the entry spiral. RA: defines the spiral ending radius and the radius of the curve. If the computed spiral deflection angle is equal to the total PI deflection angle, a zero length curve is assumed. CS (curve with an exit spiral only) RS (an exit spiral by itself) The additional tag needed to define a CS or RS combination is S2:, which defines the length of the exit spiral. RA: defines the spiral beginning radius and the radius of the curve. If the computed spiral deflection angle is equal to the total PI deflection angle, a zero length curve is assumed. RSR (a partial or connecting spiral with different radii) The additional tags needed to define an RSR type are R1:, R2:, and S3:. R1: and R2 define the beginning and ending radius of the spiral, Survey Data Management System Version 3.5 2-8 SDMS Collector System Basics respectively. Neither R1: nor R2: will be infinity. S3: defines the length of the spiral. NOTE If an SCSCS (Entry spiral, curve, connecting spiral, curve, exit spiral) is not computed directly by the software being used, one of the following methods can be used to develop a horizontal alignment to accomplish this combination: SCS and CS; or, SC and SCS Vertical Alignment File A vertical alignment file defines the VPI points specified by station and elevation. This information is used to compute the profile grade line elevation at any station along the alignment. Symmetrical and asymmetrical vertical curves are specified by defining the lengths of the parabolic curves along the vertical alignment. The first and last VPI points listed in the file are beginning and ending point, respectively, and cannot have vertical curve lengths listed with them. PRO is used as the file extension for Vertical Alignment files. Note: The vertical alignment control points (VPT, VPI, VPT) do not have to correspond to control points in the associated horizontal alignment file. But, the stationing used for the vertical alignment control points must be within the stationing defined in the associated horizontal alignment file. The first segment in a vertical alignment file is shown in the following table: Data Item Description AC:PR All data before the first activity, other than a project header activity, is ignored. The project header information is for documentation only. However, systems that read and write this file may need to know some of the information, such as the metadata items for units, datum, coordinate systems, combination factors, etc. Ultimately, such information should be checked against the similar settings in the system reading this data and provide warnings or conversions as needed. Any valid SDMS descriptive tags can be used under this activity. OPTIONAL AC:EQ Station Equations are optional in the profile file. The equations define the location of a station equation point on the horizontal alignment. The equations cannot be related to the vertical alignment itself. All equations must be listed in the order they appear in the horizontal alignment and cannot be located on a curve or spiral element. EQ:# Equation number is used to indicate the number of the equation in the alignment and can be used as the ID of the station equation point as needed by other software interpreting the alignment. OPTIONAL. SB:###+## Defines the station back of the equation. REQUIRED ST:###+## Defines the station ahead of the equation. REQUIRED PD:, CM:, FE: All other tags in the shot are ignored, but may be include for documentation purposes. AC:xx The alignment description begins here. Use any activity data item except AC:PR or EQ:. Survey Data Management System Version 3.5 2-9 SDMS Collector System Basics PN:nnn The point number correlates the PI point with the point in the project control file. OPTIONAL ST:##+##,n This is the stationing value at the beginning of the vertical alignment (VPI). The value may be either stationing format or decimal format. If no station is defined the default value is zero. REQUIRED. NOTE: The vertical alignment control points (VPT, VPI, VPT) do not have to correspond to control points in the associated horizontal alignment file. But, the stationing used for the vertical alignment control points must be within the stationing limits defined in the associated horizontal alignment file. NOTE If the station value could occur at two or more locations, the format “###+##,n” is used. “n” is a positive integer value used to indicate the section of the alignment in which the equation is located (n=1, meaning between the beginning of the alignment and the first station equation; n=2, second section; etc.). If “n” is not given, the first section of the alignment is assumed. In other words, there are no station equations involved. XC:xxxxxx.xxx The X coordinate for the beginning point of the vertical alignment, based on the stationing of the horizontal alignment being used. REQUIRED. YC:xxxxxx.xxx The Y coordinate for the beginning point of the vertical alignment, based on the stationing of the horizontal alignment being used.. REQUIRED. ZC:xxxxxx.xxx The elevation of the beginning point of the vertical alignment. REQUIRED. SI:VPI VPI for the point at the beginning and end of the vertical alignment and where two vertical slope lines meet. REQUIRED. L1:xxxx Defines the length of vertical curve from the VPC to the VPI along the station axis. REQUIRED. L2:xxxx Defines the length of vertical curve from the VPI to the VPT along the station axis. This value will equal L1: for symmetrical curves, but must be listed. REQUIRED. AC:xx The description of the next segment begins here. Use any activity data item except AC:PR or EQ. REQUIRED. PN:nnn The point number correlates the PI point with the point in the project control file. OPTIONAL ST:##+##,n This is the stationing value of the second VPI of the vertical alignment. The value may be either stationing format or decimal format. REQUIRED NOTE: If the station value could occur at two or more locations, the format “###+##,n” is used. “n” is a positive integer value used to indicate the section of the alignment in which the equation is located (n=1, meaning between the beginning of the alignment and the first station equation; n=2, second section; etc.). If “n” is not given, the first section of the alignment is assumed. In other words, there are no station equations involved. XC:xxxxxx.xxx The X coordinate for the second VPI of the vertical alignment, based on the stationing of the associated horizontal alignment. OPTIONAL. YC:xxxxxx.xxx The Y coordinate for the second VPI of the vertical Survey Data Management System Version 3.5 2-10 SDMS Collector System Basics alignment, based on the stationing of the associated horizontal alignment. OPTIONAL. ZC:xxxxxx.xxx The elevation for the second VPI of the vertical alignment. REQUIRED SI:VPI As above L1:xxxx As above L2:xxxx As above AC: Repeat as above to define each VPI in the vertical alignment. Remember that the last VPI cannot contain vertical curve data. See the Appendix for an example of a vertical alignment file. Superelevation Files A superelevation file defines the vertical/horizontal slope ratio to be used at any given station along the roadway being defined. The file is structured to indicate the station number and slope ratio to the left and right of centerline. SUP is used as the file extension for Superelevation files. This information is used in stake out to determine the left and right side slopes of the roadway surface at any station along the alignment. Transition sections are computed based on interpolation between the stations listed in the file. Data Item Description AC:PR All data before the first activity, other than a project header activity, is ignored. The project header information is for documentation only. However, systems that read and write this file may need to know some of the information, such as the metadata items for units, datum, coordinate systems, combination factors, etc. Ultimately, such information should be checked against the similar settings in the system reading this data and provide warnings or conversions as needed. Any valid SDMS descriptive tags can be used under this activity. OPTIONAL AC:EQ Station Equations are optional in the superelevation file. Equations, if listed, must be the same equations listed in the horizontal alignment file. All equations must be listed in the order they appear in the alignment and cannot be located on a curve or spiral element.. EQ:# Equation number is used to indicate the number of the equation in the alignment and can be used as the ID of the station equation point as needed by other software interpreting the alignment. OPTIONAL. SB:###+## Defines the station back of the equation. REQUIRED ST:###+## Defines the station ahead of the equation. REQUIRED PD:, CM:, FE:, etc. All attribute tags in the shot are ignored in computations, but may be included for documentation purposes. AC:xx The alignment description begins here. Use any activity data item except AC:PR or EQ:. ST:nn+nn This is the beginning stationing value at the beginning or within the stationing defined by the horizontal alignment. The value may be either stationing format or decimal. Survey Data Management System Version 3.5 2-11 SDMS Collector System Basics E1:xxxx Defines the superelevation slope rate on the left side. Slopes are expressed in feet/feet or meter/meter (i.e. -0.02 is a 2% slope downwards) E2:xxxx Defines the superelevation slope rate on the right side. Slopes are expressed in feet/feet or meter/meter (i.e. -0.02 is a 2% slope downwards) PD:,CM: Can be used to tell what the transition is. For example, CM:End Normal Crown Section. AC:xx A new activity is used for each change in superelevation transition to be defined, whether on one side or both sides of the horizontal alignment. Use any activity data item except AC:PR or EQ:. ST:##+##,n This is the stationing value for the transition being defined. The value may be either stationing format or decimal format. REQUIRED NOTE If the station value could occur at two or more locations, the format “###+##,n” is used. “n” is a positive integer value used to indicate the section of the alignment in which the equation is located (n=1, meaning between the beginning of the alignment and the first station equation; n=2, second section; etc.). If “n” is not given, the first section of the alignment is assumed. In other words, there are no station equations involved. E1:xxxx Defines the superelevation slope rate on the left side. Slopes are expressed in feet/feet or meter/meter (i.e. -0.02 is a 2% slope downwards) E2:xxxx Defines the superelevation slope rate on the right side. Slopes are expressed in feet/feet or meter/meter (i.e. -0.02 is a 2% slope downwards) PD:,CM: Can be used to tell what the transition is. For example, CM:End Full Super Section. AC: Repeat activities, as required, to define superelevation transitions. See the Appendix for an example of a superelevation file. Configuration Files The configuration files contain configuration information used by SDMS Collector, such as the paths to find the files, the tolerances for multiple measurements and computations, the name of the control files, etc. See Appendix for the examples of the configuration files and see Chapter 8 for how to use configuration files to customize SDMS Collector for a specific project. CFG is used for the file extension for Configuration files. Help Files The help files describe the data tags, the size of the response data field, the type of response expected and, in some cases, lists of allowable responses. See Chapter 9 for the structure of the help files and how to use them to get help. HLP is used as the file extension for Help files. Sequence Files A sequence file stores a sequence of activities and data items. Sequence files are used during data collection to prompt the user with the Survey Data Management System Version 3.5 2-12 SDMS Collector System Basics activities and data items in the order defined in the sequence. Default responses to data items can be provided in the sequence file. SEQ is used as the file extension for Sequence files. Macro Files The macro files store a sequence of keystrokes. The stored keystrokes may include function keys, data item input, the ESC key, and so on. Executing a macro will read the keystrokes and enter them into SDMS Collector automatically. See Chapter 9 for how to use macro in SDMS. MAC is used as the file extension for Macro files. Edit Files Edit files are copies of the project file being edited with the SDMS Collector editor. These files can be saved with the extension .EDI so the raw project file is not changed. Temporary Files There are general purpose temporary files produced internally by SDMS Collector software and they are defined with a TMP file extension. SDMS File naming Conventions SDMS follows DOS file naming conventions and uses these file name extensions: Extension File Type ALI CAL CFG CTL EDI HLP MAC PRJ PRO SEQ SUP TMP Horizontal Alignment File Calculated File Configuration File Control File Edited File Help File Macro File Project File Vertical Alignment File User Shot Sequence File Superelevation File Temporary File Note Never change or alter program file names or extensions. The SDMS Collector Menus SDMS Collector uses a function key driven menu system. An SDMS Collector menu is a text display on the screen with some Special Function Keys (SFK) on the bottom line. Beginning at the left-most SFK, they are referred to as <F1> through <F8>. The user controls the program by using these function keys. Some SDMS Collector menus can be accessed from only one place in the program, while others are available in several places.. The Esc key is used to exit from the current menu to the previous menu. Survey Data Management System Version 3.5 2-13 SDMS Collector System Basics The Main Menu The main menu, shown in Figure 2-2, displays: • The Choose a Command prompt • The main menu keys • The SDMS Collector version number and release date • The system date, time, and available disk space Figure 2-2 The main menu Functions available from the main menu include: • <F1> Project to open a new or reopen an existing project • <F2> Edit to edit a data or sequence file • <F3> Computations to process data files in batch mode • <F4> I/O to send, receive, or print files via RS 232 port • <F5> Disk to copy, rename, or delete files, or to view a directory • <F7> Configurations to view and edit configuration files • <CTRL><F10> or <Alt><F10> to record a macro • <Esc> to return to DOS Note <Alt><F10> records a macro as it executes it. <CTRL> <F10> records the macro keystrokes, but does not execute it. For details, see Chapter 10, Getting Help and Using Macros. The Project Mode Menus The project mode is accessed from the main menu by pressing <F1> Project. Project mode has three menus: • Project mode in an activity • Project mode in a sequence Project mode at MIOC (MIOC is short for More Input or Command. Project Mode in an Activity The project mode menu displayed during an activity is shown in Figure 2-3. Survey Data Management System Version 3.5 2-14 SDMS Collector System Basics Figure 2-3 Project Mode in an Activity Functions available from the project mode menu in an activity include: • <F1> Measure 1 or <F2> Measure 2 to record data from a connected total station when prompted for information that the total station can measure. F1 is used to measure the horizontal angle, vertical angle and slope distance, F2 is used to measure the horizontal and vertical angles only. • <F4> Get to get a point from a control file and enter the data into the project file • Type a new data item to add to the project file • <CTRL><F10> or <Alt><F10> to record a macro Project Mode in a User Shot Sequence The project mode menu displayed when a sequence file is used during data collection is shown in Figure 2-4. Figure 2-4 Project Mode Menu in a User Shot Sequence The line above the function keys displays information related to a shot sequence. Details on this information can be found in Chapter 5, User Shot Sequence. Functions available from the project mode menu during a user shot sequence include: • <F1> Measure 1 or <F2> Measure 2, as defined, to record data from a connected total station when prompted for information that the total station can measure: • <F3> Save Sequence to update a constant in the sequence • <F4> Get to get a point from a control file and enter the data into the project file • Type a response to a data tag, or insert a new data item to add to the project file • <CTRL><F10> or <Alt><F10> to record a macro Survey Data Management System Version 3.5 2-15 SDMS Collector System Basics Project Mode at MIOC (More Input or Command) The project mode menu at MIOC is shown in Figure 2-5: Figure 2-5 Project Mode Menu at MIOC Functions available from the project mode menu at MIOC include : • <F1> Measure 1 or <F2> Measure 2, as defined, to take a quick shot (see Chapter 3, Data Collection Basics, for details on quick shots) • <F3> Sequence to call a user shot sequence • <F7> Functions to access editing, batch computations, I/O and disk operations, or configurations • <F8> Live computation functions, such as inverse and stake out information. • Change the displayed activity data field to select a new activity • Overwrite the AC: data tag to add a data item to the last activity • <CTRL><F10> or <Alt><F10> to record a macro • <Esc> to close or suspend the project The Functions Menu The functions menu is accessed from project mode at MIOC by pressing <F7> Functions. The functions menu (Figure 2-6) provides access to main menu functions in project mode. Figure 2-6 The Functions Menu. Functions available from the functions menu include: • <F2> Edit to edit a data or sequence file • <F3> Computations to process a data file in batch mode • <F4> I/O to access the I/O operations menu • <F5> Disk to access the disk operations menu • <F7> Configurations to access the configurations menu • <CTRL><F10> or <Alt><F10> to record a macro • <Esc> to return to data collection Survey Data Management System Version 3.5 2-16 SDMS Collector System Basics The 2D and 3D Stakeout Menu The 2D and 3D stakeout functions, are accessed from the project mode menu at MIOC by pressing <F8>Stak, which is shown in Figure 2-5. SDMS Collector has a number of 2D and 3D computation and stakeout functions available while in the project data collection mode. The computation functions provided are: • Calculate the azimuth, bearing, and horizontal distance between two points. • Locate a point at a given azimuth, bearing, distance, and elevation from a known point. • Calculate X, Y, and Z coordinates and station-offset values relative to the active horizontal alignment, vertical alignment, and specified superelevation. This can be done by using point numbers, station and offset, or station and feature from a control file, or, by manually entering the required data. • Set slope stakes based on a known or computed hinge point and catch point. • Set points based on a slope ratio. The stakeout functions enable the user to perform stakeout operations based on point data and roadway design information. Therefore, based on the files named in control configuration (CNTL.CFG), SDMS Collector will verify the information required to perform the stakeout functions is present. When SDMS Collector is started, the system will: • Check to make sure the control files that are named exist. • Read the geometric definition of the horizontal alignment, based on the PI definition from an alignment file (.ALI), provided by an external source (for example, information from a CADD system). The alignment file supports angle deflection points, simple curves, compound and reverse curves, spirals, and station equations. • Read the geometric definition of the profile (vertical alignment) from a profile file (.PRO) provided by an external source. The profile file definition supports profiles with symmetrical and asymmetrical vertical curves. • Read the superelevation transition specifications from a superelevation file (.SUP), provided by an external source. The superelevation file defines the left and right side slopes at each transition station. The stakeout functions are explained in detail in Chapter 6, Computations. The first screen that appears after pressing <F8> Stak is the orientation screen shown in Figure 2-7. Figure 2-7. The 2D/3D Stakeout Orientation Screen Survey Data Management System Version 3.5 2-17 SDMS Collector System Basics The Edit Menu The edit menu (Figure 2-8) is accessed from: • The main menu by pressing <F2> Edit • Project mode at MIOC by pressing <F7> Functions, then <F2> Edit. Editing is explained in detail in Chapter 7, The Editor. Figure 208 The Edit Menu • • • • • • • • Functions available from the edit menu include: Edit the selected file <F2> Search to work in search mode <F3> Recall to recall deleted lines <F4> Print to print the file being edited. <F5> File to access the various file save functions <F6> Undo to undo the current edit <CTRL><F10> or <Alt><F10> to record a macro <Esc> to lose edits and exit The Search Menu The search function (Figure 2-9) is accessed from the edit menu by pressing <F2>Search. The search feature is explained in detail in Chapter 7, The Editor Figure 2-9 The Search Menu Functions available from the search menu include: • Edit the selected file • <F2> New to specify a new search expression • <F3> Recall to recall deleted lines • <F5> File to access the various file save functions • <F6> Undo to undo the current edit • <F7> Previous for the previous occurrence of the search expression • <F8> Next for the next occurrence of the search expression • <CTRL><F10> or <Alt><F10> to record a macro • <Esc> to return to the edit menu Survey Data Management System Version 3.5 2-18 SDMS Collector System Basics The File Save Menu The file save menu (Figure 2-10) is accessed from: • The edit menu by pressing <F5> File • The search menu by pressing <F5> File. • The file save options are explained in detail in Chapter 7, The Editor Figure 2-10 The File Save Menu. Functions available from the file save menu include: • <F1> Read to insert a file into the edit file at the current cursor location • <F2> Write to write the edit file to a new file • <F3> Save to save the edit file and resume editing • <F4> Exit to save the edit file and exit • <F5> Quit to abandon edits and exit editing The I/O Menu The I/O menu (Figure 2-11) is accessed from: • The main menu by pressing <F4> I/O • Project mode at MIOC by pressing <F7> Functions, then <F4> I/O. • The I/O operations are explained in detail in Chapter 8, Disk Management and Communication Figure 2-11 The I/O Menu. Functions available from the I/O menu include: • <F1> Receive to receive a file through the serial port (not available from the functions menu) • <F3> Send to send a file through the serial port (not available from the functions menu) • <F5> Print to print a file • <CTRL><F10> or <Alt><F10> to record a macro • <Esc> to return to the original menu Survey Data Management System Version 3.5 2-19 SDMS Collector System Basics The Disk Operations Menu The disk operations menu (Figure 2-12),is accessed from: • The main menu by pressing <F5> Disk • Project mode at MIOC by pressing <F7> Functions, then <F5> Disk. • Disk operations are explained in detail in Chapter 8, Disk Management and Communication. Figure 2-12 The Disk Operations Menu Functions available from the disk operations menu include: • <F1> Directory to see a directory or sub-directory • <F2> Copy to copy files • <F3> Rename to rename files • <F4> Delete to delete files (not available if the removal protection toggle is turned on in the system configuration) • <CTRL><F10> or <Alt><F10> to record a macro • <Esc> to return to the original menu The Configurations Menu The configurations menu (Figure 2-14) is accessed from: • The main menu by pressing <F7> Configurations • Project mode at MIOC by pressing <F7>Functions, then <F7>Configurations. • Configurations are explained in detail in Chapter 9, Customizing SDMS Collector. Figure 2-14 The Configurations Menu Functions available from the configurations menu include: • <F2> System to edit the system configuration found in file SYS.CFG • <F3> Project to edit the project configuration found in file PROJECT.CFG (not available from the functions menu) • <F4> Control to edit the control file configuration found in file CNTL.CFG Survey Data Management System Version 3.5 2-20 SDMS Collector System Basics • • • • <F6> I/O to edit the I/O configuration found in file IO.CFG <F7> Tolerance to edit the tolerance definition found in file TOL.CFG <CTRL><F10> or <Alt><F10> to record a macro <Esc> to return to the original menu Selecting Files to Use Most operations require that a file be named on which to perform the operation. A file must be named to: • Open a project • Create or edit a sequence • Edit a file • Perform disk operations • Perform I/O operations • Compute a file The File name Prompt When SDMS Collector first prompts to name a file, it suggests the path named as the default data path. Set this path under the DP: (Data Path) tag in the I/O configuration. Each time SDMS Collector presents the file name prompt, it turns the insert toggle on, as indicated by Ins in the upper right corner of the screen. This toggle can be turned off (and on) by pressing <Ins>. The displayed path can be change when a file name is entered. Type in the directory path and the file name. Press <ENTER> to select the file, or press <Esc> to exit file selection. The <F1> Directory key may also be used to view a directory from which to pick a file. A typical SDMS Collector file name prompt is shown in Figure 2-15. Figure 2-15 The File name Prompt Viewing a Directory To pick a file from a directory, press <F1> Directory at the file name prompt. Change the path and use wildcards to narrow the list before pressing <F1> Directory. When SDMS Collector displays the correct path, press <ENTER>. When SDMS Collector displays a directory (Figure 2-16): Survey Data Management System Version 3.5 2-21 SDMS Collector System Basics • • • • • Select a file by moving the cursor to the file name and pressing <ENTER>. Use the < ↑ > or < ↓ > and Page Up or Page Down, to move the cursor to a file name or directory entry. View the parent directory by pressing <ENTER> or <DIR> View another directory by pressing <ENTER> on the directory name Name a new directory to view by pressing <F1> Directory and entering a new path specification (use wildcards in the path specification, if desired) Press <Esc> to exit without selecting a file Figure 2-16 Viewing a Directory Specifying File Subsets The user may enter a file specification for viewing a certain subset of files in a directory. Wild card characters, or specific characters or extensions, in addition to the path, may also be included. For example: Enter this To view C:\SDMS\*.* All files in the SDMS directory on drive C: C:\SDMSDATA\*.PRJ All files in the SDMSDATA directory on drive C: with the file name extension PRJ A:\PR8909*.* All files on the A: drive beginning with the letters PR8909, with any file name extension A:\??.S* All files on the A: drive with a two-letter file name, with a file name extension starting with an S, followed by any or no characters. Survey Data Management System Version 3.5 2-22 SDMS Tasks and Activities Chapter 3 SDMS Tasks and Activities This chapter contains detailed definitions of SDMS tasks and activities, as well as several activities that are combined to complete a survey measurement. Note that all SDMS Collector Project files must begin with PR: followed by TK: and their associated responses. Thereafter, the following descriptions define what is required and what is optional for each type of task. Horizontal Tasks The Traverse Task (TK:TRA) The traverse task is a horizontal task that allows control traversing and trigonometric leveling. A traverse task starts at an initial occupied station, followed by a backsight, then a foresight to another point. The foresight is then the next occupied station in the traverse. This pattern may be repeated as many times as desired throughout the traverse. Note The computations within SDMS Collector REQUIRE the last foresighted point from an occupied station be the next point used as an occupied station in a traverse. Most post processing software use the point numbers assigned and will automatically build the traverse links. The traverse task is comprised of set-ups. A set-up consists of the occupied point, a reference backsight or station resection, and a foresight. The set-up may contain any number of other allowed horizontal task activities. There are three types of set-ups: beginning, intermediate and ending. Each type of set-up has different activity and data item requirements. The Beginning Set-Up The activities used in the beginning set-up are listed in the following table: Activity Data Items The project header activity is defined for all tasks. It is not a shot. It is used to enter descriptive data about the project and initializes certain computational constants. It may be entered AC:PR anywhere in a project file, although is must Project Header commonly entered immediately after the task data item. The data items in the project header activity will be those tags listed in the NEWPR sequence being used. These tags normally are: barometric pressure (BP:); curvature and refraction (CR:); date (DT:); project identification (ID:); instrument type (IT:); name (NM:); observer (OB:); recorder (RE:); instrument serial number (SN:); temperature (TE:); time (TM:); weather (WE:). The saved project (PRJ) file will list the same data tags but will also include many of the configuration parameters listed in the configuration files. This includes: combination factor (CF:); first location control file (L1:); Survey Data Management System Version 3.5 3-1 SDMS Tasks and Activities Activity AC:OS Occupied Station AC:BS Backsight Survey Data Management System Version 3.5 Data Items second location control file (L2:); rod type (RT:); first staking file (S1:); second staking file (S2:); units of angles (UA:); units of length (UL:); units of pressure (UP:); units of temperature (UT:); and, the version of data collector software (VR:). The beginning occupied station is a required activity. It signals the beginning of computational data. All survey shots preceding this activity are ignored during computations. The data used in this activity are YC:, XC:, ZC:, and IH:. The YC, XC:, and ZC: for the first occupied station are needed for computations. If not entered, SDMS Collector assumes 0 as the default values for Live computations (for batch computations, SDMS Collector will look for these needed values first in the data file, then in an active CTL file, and finally prompt the user if not found). Station resection activities can also be used to solve the station coordinates. ZC: is required only for elevation computations. If elevations are not required, ZC: can be omitted from the activity sequence. Continue with project data until a point of known elevation can be observed from an occupied station. If this point is not the backsight, shoot this point with an elevation control activity (AC:EC) to update the missing elevations back to the beginning occupied station. The IH: initializes the instrument height value for the project. This data item is assumed to be 0 if not entered into the PRJ file.. The first backsight activity is used with the beginning occupied station activity to establish initial station orientation and the initial reference angle. The backsight activity is a required activity unless station location is to be calculated by station resection. The backsight azimuth is determined by entering XC: and YC: values, or AZ:. XC: and YC: data items are used to compute the backsight azimuth. If both the coordinates and an azimuth are entered, SDMS Collector uses only the azimuth. The azimuth direction is entered as if sighting from the Occupied Station: toward the Backsight. If neither coordinates nor an azimuth are entered in the backsight, an azimuth of zero is assumed. HZ:. VT:, and DS: data items use numeric values to represent the measurements from the occupied station to the backsight point. If the horizontal measurement data is not present, a horizontal reference angle of 0° is assumed. The SH: is the staff height for the backsight point and it initializes this value for other shots in the project. Whenever a new SH: item is entered, it is displayed in the lower-right corner of the screen. When SH: is not entered for a given shot, SDMS 3-2 SDMS Tasks and Activities Activity AC:SR Station Resection AC:FS Foresight Data Items Collector assumes it remains the same as the last time it was entered. The station resection activity is an optional activity and in the traverse task it is used exclusively with the beginning occupied station. It is used to compute occupied station coordinates if the user is unable to set up on a known station and needs to solve unknown station coordinates. This activity is used after the occupied station activity. SH:, YC:, XC:, ZC: and HZ: are required for three point resections. SH:, YC:, XC:, ZC:, HZ:, VT:, and DS: are required for two point resections. The foresight activity records SH:, HZ:, VT;, and DS: to the next point to be occupied. The Intermediate Set-Up The required activities in an intermediate set-up are listed in the following table: Activity Data Items AC:OS Occupied Station AC:BS Backsight Survey Data Management System Version 3.5 The intermediate occupied station receives coordinates from the foresight point established from the previous set up. These are computed values and should not be entered by the surveyor. Traverse computations in SDMS Collector always assume that the previous foresight is being occupied. In addition to the point number and point description data items, the data items in the intermediate occupied station should include the IH:, If the ZC: is known for the occupied point, it may be entered. This will reset the elevation and all subsequent elevations will be computed from this new known elevation. The error between the computed elevation and the entered elevation will be adjusted and spread over the previous set-ups. This adjustment will only be made back to the last known elevation. If this known elevation is the very first encountered in the project file, the elevations will be pushed back to the beginning of the file and no adjustment will be made. Note: If post processing software other than SDMS Collector will be used that allows occupation of subsequent foresight points in any order, the data may be collected in that manner. Basically, the rules implemented by the processing software determine how the data should be collected. SDMS Processor allows occupation of subsequent foresight points in any order The intermediate backsight activities are used to establish the initial reference angle. It is always assumed that the previously occupied point is being backsighted. The data items in the backsight activity include SH:, HZ:, VT: and DS:. Note: If post processing software other than SDMS Collector will be used that allows a 3-3 SDMS Tasks and Activities Activity Data Items Foresight AC:FS backsight on any previously established point by point number, the data may be collected in that manner. Basically, the rules implemented by the processing software determine how the data should be collected. SDMS Processor allows occupation of subsequent foresight points in any order The intermediate foresight activities are the same as for the beginning set-up. Note: The station resection activity should not be used in the intermediate setups in the traverse task. The Ending Set-Up The ending set-up closes the traverse loop. It is used to establish known ending coordinates for traverse closure and adjustment. SDMS Collector recognizes an ending station in one of four ways: 1. If the end of file sequence is encountered, the current occupied station is assumed to be the ending station. 2. If there are coordinates (XC:, YC:) in the last occupied station, it is assumed to be an ending station. 3. If a set-up does not contain a foresight, it is assumed to be an ending station. 4. If an occupied station contains either the ES:Y or ES:YES data item, it is assumed to be an ending station. A set-up following an ending set-up will be considered the beginning station of a new traverse. The activities used in the ending set-up are listed in the following table: Activities Data Items AC:OS Occupied Station AC:BS Backsight AC:FS Foresight Survey Data Management System Version 3.5 The ending occupied station is required for the ending set-up. The data items in the ending occupied station may include the IH:, XC:, YC: and, ZC: as well as point number and description items. The coordinates are needed for computations. They can be entered in the field or in the office. If not entered into the PRJ file, SDMS Collector will first look in the active Locate control file to find a match with the PN: value to get the coordinate values it needs. If there is no active control file or if the PN: value is not found, SDMS Collector will prompt the user for the needed coordinate values. The ending backsight activity is used to establish the initial reference angle.. The ending backsight activity usually contains SH:, HZ:, VT:, and DS: data items from the occupied station to the backsight point in addition to the point number and description items. The ending foresight activity establishes the closing azimuth for the traverse. The closing foresight may be any known point, including the beginning point. The ending foresight is required if an azimuth adjusted closure is desired for azimuth adjustment, XC: and YC: or. AZ: data items are required. The XC: and YC: data items are used to compute the closing azimuth. The azimuth takes precedence over 3-4 SDMS Tasks and Activities Activities Data Items the coordinates if an AZ:, XC:;, and YC: are entered. If neither coordinates nor an azimuth are entered, SDMS Collector will first look in the active Locate control file to find a match with the PN: value to get the coordinate values it needs. If there is no active control file or if the PN: value is not found, SDMS Collector will prompt the user for the needed coordinate values The station resection activity is not used with the ending set-up. The optional activities that can be used with the traverse task include elevation control, control check, sideshot intersect, tie sequence, and project header. Activity Data Items The elevation control activity records the elevation and the angle and distance measurements to a point of known elevation, such as a benchmark. It AC:EC is used to establish elevations on all activities back Elevation Control to the occupied station when the elevation of the station is unknown. If a valid ZC: data item has already been encountered, or if this is the second elevation control shot from this occupied station, the elevation control activity will be treated as control check activity. The default elevation control activity is made up of seven data items. The AC:EC data item is always the first entry of a elevation control activity, but the other items may be entered in any order. The data items are point number PN:, point description (PD:), elevation (ZC:), horizontal angle (HZ:), vertical angle (VT:), distance (DS:). The control check activity is actually a sideshot to a point with known coordinates. It is used to AC:CC check the accuracy of the survey by checking into Control Check a known point. This procedure can be used to verify that a set-up has not been disturbed. The default control; check activity is made up of nine data items. The AC:CC data item is always the first entry of a control check activity, but the other item s may be entered in any order. The data items are point number (PN:), point description (PD:), horizontal coordinate (XC:), Northing coordinate (YC:), elevation (ZC:), horizontal angle (HZ:), vertical angle (VT:), distance (DS:). The sideshot intersect activity is used to locate a point that is not accessible with a prism. The remote point is shot from two or more stations AC:SI with the sideshot intersect activity. Only the Sideshot Intersect horizontal angle, and optionally, the vertical angle are recorded. The same point number must be used each time the point is shot. The default sideshot intersect activity is made up of four data items. The AC:SI data item is always the first entry of a sideshot intersect activity, but the other items may be entered in any order. The data items Survey Data Management System Version 3.5 3-5 SDMS Tasks and Activities Activity AC:TS Tie Sequence Data Items are point number (PN:), point description (PD:), horizontal angle (HZ:), and optionally, the vertical angle (VT:) if elevation on the remote point are desired. When running a control survey, the tie sequence activity is used when there is a possibility that an existing occupied point may be removed or otherwise not available for future surveys. Tie sequence shots are taken collecting the azimuth and the distance to two or more tie points from the original occupied point. The azimuth is an approximate azimuth from the original point to the tie point. The taped distance is the actual taped distance from the original point to the tie point. The azimuths and distances of the tie points can be used to relocate the original occupied point in the future, if necessary. Three to four tie sequence shots should yield the strongest results, but only two are required. The default tie sequence activity is made up of five data items. The AC:TS data item is always the first entry of a tie sequence activity, but the other items may be entered in any order. The data items are point number (PN:), azimuth (AZ:), distance (DS:), point description (PD:). The Radial Topography Task (TK:RTO) A radial topography task allows one or more radial sideshots to be taken from one or more occupied stations. To establish orientation, a backsight or station resection must be taken for each occupied station. No foresight is collected so the surveyor may not “move up and occupy” a point shot in the field as in the traverse or combined tasks. The required activities include occupied station, backsight or station resection (if no backsight), and sideshot. The technical specifications for occupied stationed backsight, are the same as shown in the traverse task. The optional activities include elevation control, control check, sideshot intersect, utility elevation, and project header. The technical specifications for all but the sideshot and utility elevation are the same as shown in the traverse task. Activities Data Items Sideshot AC:SS Survey Data Management System Version 3.5 The data items that must me included in a sideshot are the SH:, HZ:, VT:, and DS: measurements. These define the relationship between this point and the associated OS: and BS:). Remember that if the SH: is not included, SDMS Collector will assume it is the same as the last time it was entered in the project file. Typically the next most important data item in a side shot activity is the PN: data item since it is used by the processing system to determine if there are 2 or more sideshots with the same point number. This creates a multi-stub SS. The rest of the descriptive data items further define the attributes of the side shot point (such as FE:, TY:, and PD:) or the 3-6 SDMS Tasks and Activities Activities Utility Elevation AC:UE Data Items relationship it has with other side shot points (such as OD: or FG: to define which points get connected on a plan drawing).. The utility elevation activity is used to determine the elevation of an underground utility. A sideshot is taken to a point directly above the underground utility. The utility elevation activity records the rod reading of a rod dropped down to the utility itself. The utility elevation activity must be entered after the leading sideshot before any other activities are started. There may be multiple utility elevations taken from the same leading sideshot. The Combined Task (TK:COM) The combined task is a comprehensive horizontal task that allows control traversing, trigonometric leveling and simultaneous collection of radial topography sideshots, as well as all other common SDMS horizontal project activities. Optional activities that can be included with the combined task include sideshot, foresight, elevation control, control check, sideshot intersect, utility elevation, tie sequence, and project header. Intermediate set-ups are optional to a combined task. The Control Network Task (TK:CON) The control network task is most closely related to a traverse, but the control network task assumes that multiple foresights will be taken to all visible points from each occupied station. Each foresight is then occupied and all visible points are shot form those stations. This results in a project file with many possible traverse routes running through it. The technical specifications for each defined activity in the control network task are contained in the information on the traverse task. The required activities include occupied station, backsight (or station resection if no backsight), and foresight. The optional activities include elevation control, control check, sideshot intersect, tie sequence, and project header. The Photo Control Task (TK:PHO) The photo control task is used to tie aerial survey control work into ground control work. The photo control task uses all of the activities of the combined task. The significant difference between the photo control and combined tasks is the functional use of the sideshot. The photo control task assumes that any sideshot activity is used only for picture points. All other activities are used as defined for the comb ined task. The advantage of having a separate Task for this type of survey is that the appropriate measurement and descriptive data elements can be predefined in the task definition file. The Terrain Model Task (TK:TMO) The terrain modeling task picks up break lines and surface points for terrain modeling. The terrain modeling task can use all of the activities of the combined task. Survey Data Management System Version 3.5 3-7 SDMS Tasks and Activities The significant difference between the terrain modeling and combined tasks is the functional use of the sideshot. The terrain modeling task assumes that any sideshot activity is used only for break lines and surface points. All other activities are used as defined for the combined task. The advantage of having a separate Task for this type of survey is that the appropriate measurement and descriptive data elements can be predefined in the task definition file. Vertical Tasks SDMS vertical tasks are differential leveling tasks. They always begin with an occupied station activity and a backsight activity to establish an elevation at the first instrument set-up. The tasks then may contain sideshot activities, elevation control activities and/or control check activities to compute or check elevations on other points visible from the set-up. To carry elevations forward, a shot is taken on a turning point, using either the turning point or foresight activity. The instrument is moved to a new set-up and a backsight is taken on the turning point. The Three-Wire Level Task (TK:3WR) The three-wire level task is a control differential leveling task. It collects threewire rod readings and carries elevation values through the survey. The threewire level task performs basically the same function as a level run task, but with a higher degree of precision by recording and averaging the top, middle and bottom stadia wire readings for each shot. The three-wire readings used in conjunction with the stadia constant of the leveling instrument also allow the software to compute the distances between the leveling instrument and the backsight, foresight, or turning point. Therefore, the summation of the distances between the backsight and foresight distances can be computed and displayed to help the survey crew to keep the summation close to zero or balanced, thus eliminating the effects of systematic instrument errors. The activities used in the three-wire level task are listed in the following table: Activities Data Items AC:PR Project Header Survey Data Management System Version 3.5 The project header activity is defined for all tasks. It is not a shot. It is used to enter descriptive data about the project and initializes certain computational constants. It may be entered anywhere in a project file, although is must commonly entered immediately after the task data item. The data items in the project header activity will be those tags listed in the NEWPR sequence being used. These tags normally are: barometric pressure (BP:); curvature and refraction (CR:); date (DT:); project identification (ID:); instrument type (IT:); name (NM:); observer (OB:); recorder (RE:); instrument serial number (SN:); temperature (TE:); time (TM:); weather (WE:). The calculated file (CAL) will list the same data tags but will also include many of the configuration parameters listed in the configuration files. This includes: combination factor (CF:); first location control file (L1:); second location control file (L2:); rod type (RT:); first staking file (S1:); second staking file (S2:); units of angles (UA:); units of length UL:); units of pressure (UP:); units of temperature (UT:); and, version of data 3-8 SDMS Tasks and Activities Activities AC:OS Occupied Station AC:BS Backsight AC:FS Foresight AC:CC Control Check AC:EC Elevation Control Survey Data Management System Version 3.5 Data Items collector software (VR:). The occupied station activity is a required activity. It is used with a backsight activity to establish the initial instrument set-up elevation. The bench mark is not normally physically occupied but the AC:OS signals the actual beginning of computational data The AC:OS signals the beginning of computational data. All preceding survey shots are ignored during computations. Subsequent AC:OS data items signal the end of the current level run and the beginning of another. The elevation of the initial backsight point can be entered in the occupied station or the backsight activity with the ZC: data item. It can contain either the known elevation or an assumed value. If the ZC: is an unknown elevation and the user does not want to use an assumed value, the default value is 0. Occupied station activities are not allowed for the intermediate set-ups. The backsight activity is used after an occupied station activity to establish the elevation of the first instrument set-up. Subsequent backsights are shot from each instrument set-up to the previous turning point or foresight point. The backsight contains the three-wire rod readings at the backsight point, i.e. the rod readings taken from the top (R1:), middle (R2:) and bottom (R3:) stadia wires in the telescope. The backsight activity can also contain the description of the backsight point. The first backsight in a level loop will actually be the description for the beginning Bench Mark. This description (including BM elevation) can also be coded into the preceding AC:OS. The foresight activity is used to carry elevations forward from the instrument set-up to a point used as a turning point, or to the closing point of the level run. The foresight activity contains the three-wire rod readings and can also include a known closing elevation. Generally the description of the turning points are coded the first time the point is measured to. An AC:CC is a control check which would involve the software doing a comparison of the AC:CC point elevation against the computation of that point from the current PRJ file. This would thus involve the SDMS Collector computations showing the delta Z (DZ:)at this point. The AC:CC will only compute and display the difference and will continue with the project values for elevation. AC:EC is a way to establish the correct elevation for the current setup. Thus, while it would do the same computation as the AC:CC to establish the difference in elevation at that point, it would then use the elevation value as established by the AC:EC to continue on with the level loop. The turning point rod reading is taken from an instrument set-up. The instrument is then moved to a new set-up and the turning point is again shot form the 3-9 SDMS Tasks and Activities Activities Data Items AC:TP Turning point new set-up as a backsight. It is processed as for the turning point activity in the cross-section task. The turning point activity contains the three-wire rod readings at the turning point. The basic difference between an AC:FS and an AC:TP is that the fore sight is typically a point for which a description is encoded and for which the elevation is desired for future use while an AC:TP is just an intermediate point that is used to move the elevations forward to points of interest and little or no description is coded and the elevation is not needed for future use. In the three-wire level task, whenever SDMS Collector will need a rod reading for comp utations, it automatically prompt the user for the top (R1:), middle (R2:) and bottom (R3:) wire readings. When rod readings are outside the tolerance error set, SDMS Collector prompts the user for the rod readings again. After each shot, SDMS Collector displays the accumulated imbalance. The user can use this information to balance the foresight and backsight distances to reduce the systematic instrument errors caused by instrument miss-adjustment. SDMS Collector uses the rod type (RT:) and stadia constant (W3:) to compute distances and elevations. For yard rods, distances and elevations are computed in feet, while the mean rod reading is shown in yards. For foot and meter rods, the distances and elevations are in the same units as the rod (either feet or meters, respectively). The Stadia Constant (W3:), which is located in PROJECT.CFG, has to do with the separation of the instrument stadia wires. The constant relates to the cross hairs on the level instrument being used. If it is a FULL STADIA instrument, then the difference between the top and bottom wire readings will be 1 foot at a distance of 100 feet when using a foot rod. If it is a ONE THIRD STADIA instrument, then the difference between the top and bottom wire readings will be 1 foot at a distance of 333 feet when using a foot rod. The same ratio rules apply when using YARD and METER RODS. When using a FULL Stadia instrument with a METER ROD the difference between the top and bottom wire readings will be 1 meter at a distance of 100 meters. See note in second paragraph of this section above. When defining prompt or user shot sequences for the three-wire level task, it is only necessary to enter the rod reading (RR:) data tag one time per shot. SDMS Collector automatically converts this data tag to R1:, R2: and R3: during data collection. Note: If there is no elevation (ZC:) provided with an occupied station (AC:OS), but elevations (ZC:) are provided on one or all the foresights that follow that AC:OS, the post processing software should compute the file from the point where the first ZC: is encountered to the end of the file or until another AC:OS is encountered. Note: Multiple loops can be collected in the same project file. Each loop should start with AC:OS. This tells the post processing software the intent is to start a new loop from that point to the end of the file, or, until another AC:OS is encountered that signifies the start of another loop. Survey Data Management System Version 3.5 3-10 SDMS Tasks and Activities The Level Run Task (TK:LEV) The level run task is a differential leveling task in which one the middle wire cross hair is used. It performs basically the same function as a three-wire level task, but with a lesser degree of precision. The level run task is processed by SDMS Collector much like the three-wire level task, except that the three rod readings are replaced by a single rod reading, represented by the rod reading (RR:) data tag. All of the notes related to beginning AC:OS, descriptive data, and AC:FS versus AC:TP made above for the Three Wire Level Task also apply to this single wire level task called TK:LEV. Note: If there is no elevation (ZC:) provided with an occupied station (AC:OS), but elevations (ZC:) are provided on one or all the foresights that follow that AC:OS, the post processing software should compute the file from the point where the first ZC: is encountered to the end of the file or until another AC:OS is encountered. Note: Multiple loops can be collected in the same project file. Each loop should start with AC:OS. This tells the post processing software the intent is to start a new loop from that point to the end of the file, or, until another AC:OS is encountered that signifies the start of another loop. The Cross Section Task The cross-section task collects station, offset and rod reading values for points located along an alignment. The task is processed by SDMS Collector to compute station, offset and elevation. The activities used in the cross-section task are listed in the following table: Activity Data Items The project header activity is defined for all tasks. It is not a shot. It is used to enter descriptive data about the project and initializes certain computational constants. It may be AC:PR entered anywhere in a project file, although is Project Header must commonly entered immediately after the task data item. The data items in the project header activity will be those tags listed in the NEWPR sequence being used. These tags normally are: barometric pressure (BP:); curvature and refraction (CR:); date (DT:); project identification (ID:); instrument type (IT:); name (NM:); observer (OB:); recorder (RE:); instrument serial number (SN:); temperature (TE:); time (TM:); weather (WE:). The saved project (PRJ) file will list the same data tags but will also include many of the configuration parameters lis ted in the configuration files. This includes: combination factor (CF:); first location control file (L1:); second location control file (L2:); rod type (RT:); first staking file (S1:); second staking file (S2:); units of angles (UA:); units of length UL:); units of pressure (UP:); units of temperature (UT:); and, version of data collector software (VR:). Survey Data Management System Version 3.5 3-11 SDMS Tasks and Activities Activity AC:OS Occupied Station AC:BS Backsight AC:ST Stationing Foresight AC:FS AC:SS Sideshot AC:CC Control Check Survey Data Management System Version 3.5 Data Items The occupied station activity is a required activity. It is explained in detail in the Three Wire Level Task. The backsight activity is used after an occupied station activity to establish the elevation of the first instrument set-up. Subsequent backsights are shot from each instrument set-up to the previous turning point or foresight activity point. The default data item in the backsight activity is RR:. It represents the rod reading when the rod is read while occupying the backsight point. The stationing activity establishes the stationing value for each cross-section taken from the setup. The stationing activity should be the first activity for each cross-section. This nominal stationing value becomes the default for each subsequent sideshot on the crosssection and need not be re-entered for each sideshot. The default data item in the stationing activity is ST:, which represents the station value along the alignment, in either stationing format (10+00) or decimal format (1000). When the plus sign is not used, SDMS Collector places it 2 places left of the decimal if the UL: is set to F or M2 in the PROJECT.CFG file. If UL: is set to M or M3, then SDMS Collector assumes the station plus sign is 3 places left of the decimal. The foresight activity is used to carry elevations forward from the instrument set-up to a point used as a turning point, or to the closing point of the level run. The turning point activity achieves the same effect, but is not included in the final results when the file is sent to other systems. In addition to PN: and PD: data items, the foresight activity contains the RR: data item to represent the rod reading when the rod is placed on the foresight point. If the foresight is closing on a known elevation, the ZC: data item is used. The sideshot activity is used to compute the offset and elevation of the sideshot point. The station of the point is taken from the previous stationing activity. The sideshot activity contains O:F and RR:. For the data field of the OF: data item, a positive offset value is entered for a shot to the right of the alignment, a negative offset value is entered for shots to the left of the alignment. An AC:CC is a control check which would involve the software doing a comparison of the AC:CC point elevation against the computation of that point from the current PRJ file. This would thus involve the SDMS Collector computations showing the delta Z (DZ:) at this point. 3-12 SDMS Tasks and Activities Activity AC:EC Elevation Control AC:UE Utility Elevation AC:TP Turning point Data Items The AC:EC is a way to establish the correct elevation for the current setup. Thus, while ti would do the same computation as the AC:CC to establish the difference in elevation at that point, it would then USE the elevation value as established by the AC:EC to continue on with the level loop. The AC:CC will only compute and display the difference and continue with the project values for elevation. The utility elevation activity is used to determine the elevation of an underground utility. A sideshot is taken on a point directly above the underground utility. The utility elevation activity records the rod reading of a rod dropped down to the utility itself. The utility elevation activity must be entered after the leading sideshot before any other activities are started. There may be multiple utility elevations taken from the same leading sideshot. The turning point rod reading is taken from the current set-up. The instrument is then moved to a new set-up and the turning point point is again shot from the new set-up as a backsight. The turning point activity achieves the same computational effect as the foresight, but it is considered an intermediate and non-critical point. Coordinates for turning point activities are not included in the results when the file is processed. Turning point activity contains the rod reading when the rod is placed on the turning point. Note: If there is no elevation (ZC:) provided with an occupied station (AC:OS), but elevations (ZC:) are provided on one or all the foresights that follow that AC:OS, the post processing software should compute the file from the point where the first ZC: is encountered to the end of the file or until another AC:OS is encountered. Note: Multiple loops can be collected in the same project file. Each loop should start with AC:OS. This tells the post processing software the intent is to start a new loop from that point to the end of the file, or, until another AC:OS is encountered that signifies the start of another loop. Hand Level Shots in a Cross Section Sideshots are often needed in a cross-section at locations which cannot be shot from the current instrument set-up. Survey crews often pick up the elevation of these shots with a hand level. The SDMS data structure provides a method of recording hand level shots as “LOC” shots. LOC shot mode is activated by a data item SI:BL (Shot ID, begin LOC shot) in a backsight activity. The backsight shot must be on the last sideshot. All shots after the activation of LOC shot mode are processed using elevations based on the backsight shot that began the LOC shot mode. This includes turning point shots and other backsight points. When the LOC shot mode is ended, the instrument set-up elevation is restored to the value it had at the beginning of the LOC shot mode. LOC shots are ended by entering an SI:EL (Shot ID, end LOC shot) data item in the last sideshot activity (AC:SS) in the LOC sequence. Survey Data Management System Version 3.5 3-13 SDMS Tasks and Activities The Profile Task (TK:PRO) The profile task is similar to the cross-section, except that each sideshot in a profile contains a stationing data item. The offset is assumed to be zero unless otherwise specified with the offset data item (OF:). The profile task is for picking up elevations along an alignment. The required activities in a profile task are occupied station, backsight and sideshot. The optional activities are foresight, turning point, control check, elevation control, utility elevation and project header. The sideshot activity is used to compute the elevation of the sideshot point along the alignment. Survey Data Management System Version 3.5 3-14 SDMS Tasks and Activities Special Survey Procedures Certain SDMS activities can be used to compute coordinates for specialized activities. These include: • Station resections • Perpendicular offsets to the right or left of an object • Offsets in front of or behind an object • Remote elevations • Utility elevations • Sideshot intersections • Control Checks • Connectivity using figure numbers, chains, taping, etc. Station Resections When it is impossible to set up on a station point, the station resection activity is used to establish coordinates for the occupied station. Field procedures are as follows: Note: Resections are easier to perform if the known coordinates are stored in a control file for entry in the current project file using GET POINT. 1. Occupy the station of unknown position in the usual manner. Do not enter any YC:, XC:, or ZC: coordinates. 2. Choose two known points to use as resection points, and shoot them as station resection activities. Sets of angles may be used. Northing (YC:) and Easting (XC:) coordinate values must be entered for each resection point. If ZC: is also available on these known points, SDMS Collector will compute a 3D resection. Note: Remember to take all angle measurements as horizontal angles right (HZ:) from the initial point. 3. Enter the station resection activity by typing SR: in the activity data item (AC:SR). Record available data on the resection points. 4. When SDMS Collector computes the file, the occupied station coordinates will be calculated using the data from the station resection activities. SDMS Collector will use the first AC:SR as the AC:BS from the AC:OS it computes to compute other points in the PRJ file. 5. When computing a resection occupied station, SDMS Collector will compare the range of the results with the Resection Tolerance value in the TOL.CFG file. If the measurement data is outside of tolerance, the user will be shown the computed RT: and the default RT: and allowed to accept or reject the resection. If acceptable, SDMS Collector will proceed as if the computation had been within the tolerance. If unacceptable, and SDMS Collector is in Live Computation mode, it will return to collection mode so the resection can then be repeated and recomputed. If unacceptable, and SDMS Collector is in Batch Computation mode, it will return missing values for the coordinates of the respected occupied station and continue. Note: In SDMS Collector, resection computations are based on a link traverse solution. Therefore, only the last two resection shots will be used. Note: In SDMS Processor, all resection points shot are used as part of the least squares adjustment. In all cases, the HZ: VT:. and DS: must be included in the activity. This information is used to compute the occupied station coordinates and establish orientation of the survey. Survey Data Management System Version 3.5 3-15 SDMS Tasks and Activities Perpendicular Offsets Right or Left If the user is unable to place the target on the desired object, or is unable to sight the object directly, the target may be perpendicularly offset from the line of sight to the right or left of the desired object. A sideshot is taken to the target and the taped offset is entered in the activity with the data tag. AC:SS PN: FE: PD: HZ: VT: DS: OF: When viewing the desired object from the instrument, as shown in Figure 3-1, if the target or prism is to the right, the offset is positive. If the prism is to the left of the object, the offset is negative. Figure 3-1 Perpendicular offsets left or right Offsets in Front or Back of the Object If the user cannot place the target on the desired object, but is able to place it directly in front or behind the object, the target may be directly offset along the line of sight in front or in back of the desired object. A sideshot is taken to the target and the taped offset is entered with the LO: data tag. AC:SS PN: FE: PD: HZ: VT: DS: LO: When facing the desired object from the instrument, as shown in Figure 3-2, if the target or prism is behind the object, the offset is positive. If the prism is in front of the object, the offset is negative. Survey Data Management System Version 3.5 3-16 SDMS Tasks and Activities Figure 3-2 Offsets Front or Back Utility Elevations The Utility elevation activity is used to determine the elevation of an object. This activity is normally associated with a utility object located directly above or below the level of the sideshot. Figure 3-3 Utility Elevation The field procedure is as follows: 1. Take a sideshot to the ground point directly above or below the utility, as shown in Figure 3-3. 2. AC:SS PN: FE: PD: HZ: VT: DS: Use AC:UE to start the utility elevation activity. Record the rod reading of a rod dropped or raised to the utility itself. A positive rod reading (RR:##) Survey Data Management System Version 3.5 3-17 SDMS Tasks and Activities indicates that the elevation of the utility is below that of the point sideshot. A negative reading (RR:-##) indicates that the elevation of the utility will be above that of the point sideshot. AC:UE RR: The X and Y coordinates of the utility will be the same as the sideshot immediately preceding the utility elevation activity. The elevation of the utility is computed by adding algebraically, based on the sign, the rod reading recorded in the AC:UE to the elevation value computed for the previous sideshot. All utility elevations must be entered after a leading sideshot and before any other activities. Multiple utility elevation activities can use the same leading sideshot activity. Remote Elevations The remote elevation is a special case of the utility elevation activity. It is used to determine the elevation of an object above or below the level of the sideshot using a vertical angle (VT:) to the point rather than using a rod reading to indicate depth or height. The field procedure is as follows: 1. Take a sideshot to a ground point immediately above or below the elevated object, as shown in Figure 3-4. AC:SS PN: FE: PD: HZ: VT: DS: Figure 3-4 Remote Elevation 2. Use utility elevation activity to record the vertical angle ot the desired object. AC:UE VT: Survey Data Management System Version 3.5 3-18 SDMS Tasks and Activities The Northing and Easting coordinates of the remote point will be those of the leading sideshot, but the elevation coordinate is adjusted using the vertical angle in the utility elevation activity. Sets During data collection, measurements of angles may be repeated two or more times to increase precision, eliminate certain instrumental errors, and prevent mistakes from going undetected. SDMS supports this activity with sets . A set consists of measuring the same point in two orientations of measuring instrument: • Face 1 - direct face of the instrument telescope • Face 2 - reverse (or inverted) face of the instrument telescope the The set is denoted by the data tag SE:. The face of the set is denoted by the data tag FC:. A shot can be either Face 1 (FC:1) or Face 2 (FC:2) of the telescope. Therefore, only one SE: tag and one FC: tag can be included in an activity. However, the Face 1 (FC:1) or Face 2 (FC:2) of the same set are not necessarily in consecutive activities. The user can shoot up to 99 sets on the same point. All descriptive data for a shot, including coordinates, staff height, or other required data, must always be given the first time the point is recorded. After that it is acceptable to simply enter SE:, FC:, PN: and measurement data items. Sets can be collected only related to a given occupied station. Any time the user occupies a new station, set values start over Text Activity The text activity (AC:TX) is used to define a text block which will allow multiple point description data items (PD:) or comment data items (CM:) within the activity. The difference between the text activity and other shot activities is that the text activity can be used to provide extensive additional detail to a point that was shot previously in the project file, or about the project file itself. No shot data (HZ:, VT, DS:) can be included. The advantage of using this activity is that the point does not have to be re-shot if additional descriptive information needs to be added related to that shot. The first method for using the text activity is to add descriptive information about a point shot previously in the project file. This method only requires that the point number of the point that the descriptive information is to be appended be included with the text activity. When the project file is processed, the descriptive information will be appended to the shot activity with that point number. No shot data (HZ:, VT, DS:) or feature code (FE:) is included. The second method for using the text activity is to record information about the project file itself. If the text activity is used for reference purposes about the project file, the point number (PN:) number is omitted. When the activity is used in this manner, SDMS Processor will record the data as the last entries in the header activity (AC:PR) in the calculated file and/or points and chain file as descriptive information about that file. The default text activity is made up of three data items. The AC:TX data item is always the first entry of a text activity, but the other items may be entered in any order. Data Tag Description of Data Tag AC:TX Survey Data Management System Version 3.5 Text Activity 3-19 SDMS Tasks and Activities PN: Point Number CM: Comment Check Activity The check activity is used in various situations to allow interaction by the user. Primarily, it is used to interrupt a sequence so that the user can work interactively with SDMS without having to exit from the sequence. The check activity is not saved to the project file. The default check activity uses only the AC:CK data item. Data Tag AC:CK Description of Data Tag Check Activity Figure Activity The figure activity is designed to store information needed to draw some standard figure, such as a drop inlet, based on certain critical points. The use of this activity and the critical points that are used, must be done in a way that is compatible with the software system used to process the SDMS data. The basic idea is to provide the description and measurement items needed to feed a post processing system the information required for a macro to draw standard items like curb and gutter sections, culverts, inlets. The default figure activity is made up of five data items. The AC:FG data item is always the first entry of a figure activity, but the other items may be entered in any order. Data Tag Description of Data Tag AC:FG FE: FG: PL: TY: Figure activity Feature Figure Code List of critical points Type (Macro name that will be used) Note SDMS Collector and SDMS Processor pass this as information only. The responses to the data items will depend on the CADD system used. To date, no CADD system has elected to use this activity. Therefore, the current definition of the figure activity is very general. Defining Connectivity in the SDMS Project File Defining connectivity refers to the method used to indicate which surveyed points should be connected together to form linear and curvilinear features such as centerlines, edges of pavements, break lines, fences, and so on. The word chains will be used to refer to the figures formed by connecting points. The definition of chains is vital to producing good maps and accurate digital terrain model surfaces. Obtaining accurate measurements is the first priority of a survey crew. But just knowing the positions of the points is not very helpful if there is no information related to what the points represent and how they are connected to one another. The decision on which connectivity method is used has an enormous impact on the procedures used by the field crew. SDMS Collector records data in the same order the measurements were taken in the field. It would be fairly easy to define point connectivity if the field crew was forced to collect points along a chain from one end to the other, and was Survey Data Management System Version 3.5 3-20 SDMS Tasks and Activities not allowed to take other shots that are not part of that chain. However, this is not always an efficient way to operate. A more efficient procedure is to move the instrument along a corridor or to different spots around a site and to take as many measurements from each set up position as possible. This method results in a file where the points on any given chain are scattered throughout the file, and in which several chains may be in progress simultaneously. Connecting the points to define chains is the job of the post-processing software that interprets the SDMS data. But the field data collection procedure needs to provide the post-processing system with the intelligence to do that correctly. SDMS has several different methods of tagging points for chain definition. Each method has its advantages and the selection is to some extent a matter of personal preference. These methods include: • Connectivity By Figure Code • Connectivity By Origin-Destination • Connectivity By Taping • Connectivity With The Chain Activity Other information may also be needed when defining chains. This can be accomplished by adding data tags to define attributes of the chain being defined. Tags can be used to designate such things as: • The chain feature code. • Whether the chain represents a surface break line or just a planimetric feature. • Which points in the chain are angle points and which are points on curves. • Graphical attributes such as level, color, and line style. The SDMS Collector software provides a wide variety of methods to define connectivity. Details on several of these methods are provided in the in the Appendix. Note: SDMS Collector passes this as information only. SDMS Processor uses this information to generate the chain list at the end of a calculated project file and is stored in the points and chain (PAC) file. Survey Data Management System Version 3.5 3-21 Data Collection Chapter 4 Data Collection As discussed in the last chapter, an SDMS project is made up of a series of activities, which, in turn, are made up of a series of data items. A data item consists of a data tag and a data field. Therefore, when using SDMS to do data collection, the user needs to determine the sequence of the activities that will be used in the current project, which data tag to use and what data to enter in the data field. This chapter covers data collection with SDMS. It includes information on: • Starting a new project or reopening an existing project • Naming the total station to use during data collection • Prompting data tags for the next data item. • Entering the data field manually, from the total station or from the control files • Measuring points in sets • Using intelligent point numbering • Correcting data entry errors during data collection • Ending data collection by suspending or closing a project Open a Project To open a project, press <F1> Project displayed in the main menu. SDMS Collector briefly displays the message Building Help Tables, then prompts to name the project desired, as shown in Figure 4-1. Figure 4-1 Open a project When the file name prompt appears, the cursor is sitting on the period ( . ), and the insert toggle is turned on (as indicated by “Ins” in the upper right corner of the screen). The path displayed will be the path stored in the I/O Configuration file as the PP:. The I/O Configuration file is described in Chapter 8. Type a project name (change the path, if necessary), and press <ENTER>. Open a New Project If a project name that does not exist is entered, SDMS Collector will start a new project. The first thing SDMS Collector does is to prompt the user for the task type of the new project, as shown in Figure 4-2. Survey Data Management System Version 3.5 4-1 Data Collection Figure 4-2 Open a new project SDMS defines the task by using three-letter task identifiers: Task Type Task Identifier Combined COM Control Network CON Cross-Section XSE Level Run LEV Photo Control PHO Profile PRO Radial Topography RTO Terrain Model TMO Three-Wire Level 3WR Traverse TRA After the user enters the task type, SDMS Collector will prompt the tags that form the project header. The Default Project Header SDMS Collector provides a default sequence in the file named NEWPR.SEQ for opening new projects. This sequence contains the following data tags: Data tag Description AC:PR Project header activity ID: Project Identification NM: Name DT: Date (taken from system date) WE: Weather TE: Temperature BP: Barometric pressure IT: Instrument type (names the total station device driver) SN: Instrument serial number OB:: Observer RE Recorder The user can add or delete tags to customize it as needed. If the user does not want to use NEWPR.SEQ when opening a new project, the data field of the NS: data tag in the Project Configuration File must be changed. See Chapter 9, Customizing SDMS Collector, for more information. Survey Data Management System Version 3.5 4-2 Data Collection Automatically Inserted Data Items SDMS Collector automatically inserts certain data items from the project configurations immediately after the first activity in the project file. This is transparent to the user and helps to document meta data items for the project. The current settings are extracted from the various Configuration files that are active during data collection. The data automatically inserted by SDMS Collector includes the following items: Data Tag CR: CF: UL: UA: UT: UP: VR: L1: L2: S1: S2: HA: RT: W3: Description Curvature and refraction toggle and the current setting Combination factor and the current setting Units of length and the current setting Unit of angles and the current setting Units of temperature and the current setting Units of pressure and the current setting SDMS Collector version number Primary location file name (if named) Secondary location file name (if named) Primary staking file name (if named) Secondary staking file name (if named) Horizontal alignment file name (if named) Rod type (vertical tasks only) Three-wire stadia constant (three-wire level task only) Open an Existing Project The user can reopen an existing project, whether suspended or closed, to continue data collection or do some computations or editing. This allows some preliminary work to be done before the surveyors arrive at the site. For example, before going to the field, the user might: • Name the control files to use in the control file configuration. • Open a new project and assign the Task. • Enter the project header data. • Close or suspend the project. When arriving at the site, since all preliminary data has been recorded, the user can reopen the project and immediately start data collection. How to Reopen an Existing Project From the main menu, press <F1> Project. When SDMS Collector asks for a project name, type the name of the file that is to be reopened and press <ENTER>. The user can use <F1> Directory to display a list of the project files and select the one to be worked on. See Chapter 2, SDMS Collector System Basics for detailed instructions on using <F1> Directory. Survey Data Management System Version 3.5 4-3 Data Collection An existing project can be either suspended or closed. If the project was suspended, SDMS Collector simply reopens the project. SDMS Collector displays the last six lines of the project file. The project is ready to accept new data. If the project was closed, SDMS displays the file name and the last five lines of the project file. SDMS Collector prompts “File Closed Reopen? Yes/No”, as shown. (Figure 4-3). To continue: • Type a Y to reopen the file. The user can continue the project. • Type an N to return to the file name prompt. • The user can select another project or go back to the main menu Figure 4-3 Open an existing project Default Sequence for Reopening Projects The user can specify a default start-up sequence for a reopened project, then continue data collection as usual. See chapter 9, Customizing SDMS Collector, for information on setting the Default Sequence - Old Job (OS) in the system configuration. Using a Total Station If the computer running SDMS Collector is connected properly with a total station, the user can get the measurements from the total station and SDMS Collector writes the data directly to the project file. SDMS Collector identifies the total stations using the driver names of instruments supported by SDMS. Naming a Total Station Before using a total station to do the data collection, the user needs to tell SDMS Collector which total station will be used. Each supported total station has a unique device driver name. The user specifies the selected total station by using the instrument type data tag IT:. How to Name the Total Station Use the instrument type data tag (IT:) to name the total station. Enter this data tag into the project file like any other data tag. The IT: data tag is in the default new project sequence, NEWPR.SEQ. When a new project is started, the user is prompted for the total station to be used. The user answers this prompt with one of the driver names in the table above. The instrument type can be accessed from the help file by pres sing ? when the cursor is located to the right of the colon of IT:. A list of the supported total stations will be displayed, as shown. (Figure 4-4). Move the cursor to the appropriate instrument using the arrow up or down keys. Press <ENTER> on the total Survey Data Management System Version 3.5 4-4 Data Collection station desired. The instrument type will be added automatically after the IT: tag. Figure 4-4 The list of valid total stations If the user does not use the opening sequence, or the sequence is edited so that the IT: data tag is removed, the IT: data item with the total station driver name must be entered manually, using the procedure explained above, before any attempt is made to collect data from the total station. If this is not done, the data collector will not communicate with the total station. If the data will be collected manually (enter data without connecting to a total station), enter IT:MANUAL How to Automatically Name the Total Station To automatically name the total station when a new project is created, the driver name needs to be put in the IT: data item in the opening sequence (NEWPR.SEQ). This data item (e.g., IT:GEODIMETER) is then entered automatically every time a new project file is opened. Changing Total Stations Mid-Project It may be necessary to change total station in the middle of a project (due to a malfunction or for some other reason). To do this, set up the instrument and attach it to the data collector in the usual manner. Then enter a new IT: data tag with the new driver name for the instrument to be used. Naming the Total Station on Reopening a Project When a Closed project is reopened, the user must enter a new IT: data tag to name the total station, even if the instrument data item may have been entered in the project file already. This is required to assure the crew has selected the correct instrument driver when reopening a project. When a Suspended project is reopened, the user does not have to rename the total station, unless the type of the instrument is going to be changed. When a project is suspended, SDMS Collector automatically stores the value of the IT: tag in a separate, project-specific file. Getting Measurements from the Total Stations SDMS Collector provides the user with two function keys to collect measurement data from the total station, <F1> and <F2>. The <F1> key is used to get the horizontal angle, vertical angle and distance measurements while the <F2> key is used to get the horizontal and vertical angles only. See the section of this chapter, Entering Data from Total Stations, to get more detailed instructions. Survey Data Management System Version 3.5 4-5 Data Collection Prompting Data Tags During data collection, SDMS Collector prompts the user using data tags one after another and lets the user enter responses in the data fields. The data tags and the order they will be presented to the user are determined by the prompt sequences. For many common surveying tasks and activities, SDMS Collector provides a default definition which specifies for each type of task which activities are can be used and for each activity which data tags will be used and in what order. This default definition is used by SDMS Collector as the default prompt sequence. The default prompt sequence is defined in the TASK.TGS file. The prompt sequences can be modified (or even deleted) by the user. See Appendix for the default TASK.TGS file. In addition to the default prompt sequences found in TASK.TGS, the users can create and use their own prompt sequences called user shot sequences. Such shot sequences are discussed in detail in Chapter 5, User Shot Sequences. While in a preset prompt sequence the user can also choose to insert any data tag they want by moving the cursor under the next data tag in the default sequence and overwriting the data tag with any other valid data tag.. For example, when SDMS Collector starts a new activity by prompting the activity tag AC: and a two character activity identifier, the user can overwrite the AC: data tag with another one and add the data to the previous activity. If the user overwrites the prompted data tag and data is entered,, SDMS Collector will next continue with the prompt that comes next in the default sequence. If the user is running a user shot sequence and wishes to insert a default sequence from the TASK.TGS file, when the cursor is on the Activity line to be started, the user can hit Insert instead of Enter. This will cause SDMS Collector to take the list of prompts for the current activity from the default sequence and then return to the user defined sequence. In addition, while in a user defined sequence, the user can repeat the previous Activity in the sequence or skip the next Activity in the sequence by using the Page Down and Page Up keys. Entering Data Fields There are several ways to answer a prompt and enter data into the data field. The user can • Manually enter the data by typing the requested data and pressing <ENTER • Skip a prompted data item, by pressing <ENTER> with the data field blank. (the user may have to clear the line first with the Ctrl L (CLEAR LINE) command or with the <space-bar>) • Get the measurements from the total station by pressing the appropriate measure key (either <F1> Measure 1 or <F2> Measure 2) • Get the data from the control files using GET POINT. Manually Entering Data For all the data tags, the user can manually enter the data by typing the response in the data field. The response is accepted when the user presses the <ENTER> key. For some of the data tags, the default entries are prompted together with the data tags. The user can accept the entry by pressing <ENTER> or change the entry Survey Data Management System Version 3.5 4-6 Data Collection by overwriting the response displayed. For example, the user can change to a different activity by changing the activity identifier prompted. However, if an activity that is not defined for the current task in the TASK.TGS file is chosen by the user, SDMS Collector displays an error message. Either select another activity, or edit the TASK.TGS file to include the desired activity. (If this happens a lot, the user may not be using the best task for the job.) For some of the data tags, the valid entries are predefined in the TAGS.HLP file. The user can bring up the entry list by pressing <?> when the cursor is at the first character of the data field and select an entry from the list. For example, the list of supported total stations is displayed when SDMS Collector prompts IT: and the user presses <?>: The user can use the arrow keys <↑> and <↓> to browse the list. The entry in the line of the cursor is highlighted. The highlighted entry is entered in the data field by pressing <ENTER>.If the user knows the first letter of the proper response, they can first type that letter and then the <?> key. This will cause SDMS Collector start the pop-up list for that data tag response at the first item that status with that letter in the TAGS.HLP file response list. Entering Data from Total Stations The data for the horizontal angle, vertical angle, and slope distance can be recorded from the total stations. SDMS Collector sets two function keys <F1> Measure 1 and <F2> Measure 2 to collect data from the total stations. Generally, <F1> is for getting the horizontal angle, vertical angle and distance, while <F2> is for getting horizontal and vertical angles only. There are presently two types of shots that use these function keys. They are normal shots and quick shots. Normal Shots When SDMS Collector prompts for the measurement data tags, HZ:, VT:, or DS:, and the user presses one of the measurement function keys, data measured by the instrument will be displayed and entered in the project file. If the sequence being used contains these measurement prompts in order, when the user presses the measure function on one of these lines, any subsequent measurement items that can be transferred will be. Therefore, if the prompt sequence in use has: HZ: VT: DS: and the user presses the measure key while on the HZ: line, the VT: and DS: values will also be transferred if they exist on the total station and SDMS will move to the first prompt after the DS: line in the sequence. If the prompt is on the VT: or DS: tags and the HZ: was missed accidentally, the user will need to move the cursor to the left of the colon and over type the tag displayed with HZ:. Pressing <F1> again will record the instrument value. Quick Shots When SDMS Collector prompts an activity data tag (AC:), if the user presses one of the measurement function keys, SDMS will take a quick shot. A quick shot automatically: • Increments the point number from the previous shot • Duplicates descriptive information from the previous shot Survey Data Management System Version 3.5 4-7 Data Collection • • Enters information that can be measured by the instrument Presents the activity data tag for the next shot “Once” Function for One-Time Data Entry Many times during data collection, a data item only needs to be changed for one shot. The ONCE Function allows the user to make a one shot change to a data item. This makes a one shot change to a constant entry, such as a staff height, easier by redisplaying the previous value for faster reentry. 1. During data collection, select a data item that carries values forward, like a point number, point description, instrument height, or staff height. 2. Type the data tag for one of these repeating items. Notice the previous or incremented value from the last time this item was used. 3. Type a new, one-time entry over the displayed information, but do not press <ENTER>. Instead, press <CTRL><ENTER>. The next time SDMS encounters this data item, it prompts for the default, not for the value of the one-time entry. 4. Note that constants, such as a staff or instrument height, must be reentered in the next shot taken. The one-time entry makes this easier by redisplaying the previous value for faster reentry. Attribute and Information Data Items The attribute and information data items keys, (A0: through A9: and I0: through I9:) are user-definable data tags. The attribute data tags create additional survey data items for which an existing data tag does not define. The information data items create additional project header project header data items. To select one of these tags, type the desired tag and press <ENTER>. These data items are used the same as any other data item and can be included in prompt and shot sequences. These data items have prompts in the TAGS.HLP file, but the user can create personalized prompts for them. Regardless of how the prompts are edited, the data tags stay as originally defined and listed in the Appendix. Entering Data from Control Files Control files store the coordinates and attributes of points. These may be lists of benchmarks and monuments; a listing of coordinates created with other software; or a project file that has been formatted to control file format. The user can have up to five control files active at any time. These files are named in the Control Configuration file (see Chapter 9, Customizing SDMS Collector). The control files are: Control Files Representing Data Tag Primary location control file L1 Secondary location control file L2 Primary staking control file S1 Secondary staking control file S2 Write control file WC • The primary and secondary location control files contain location control coordinates, such as adjusted traverse points and horizontal alignment points. Typically these would be points the user expects to occupy and/or sight to orient the instrument Survey Data Management System Version 3.5 4-8 Data Collection • • The primary and secondary staking control files typically contain coordinates for points the user plans to stake-out in the field. . The write control file is where coordinates are logged during batch computations and during the use of the SAVE function related to live computations. Control File Format The control files store the coordinates of points. Every point record in the control file is started by an activity data item (it does not matter which activity identifier is used), and identified by the point number. The coordinate data items are required. Other data items are optional. Data items can be listed in any order after the PN tag. So the default point record in a control file looks like: AC:OS PN: PD: XC: YC: ZC: PD:Get Coordinates from a Control File During data collection, the user can pull the coordinates of a point from a named control file and enter them into the current project file. When prompted for the point number (or any other data item in the control file), press the <F4> Get Point key. SDMS Collector prompts “Get PN:+” as shown. (Figure 4-5). Figure 4-5 Get a point Note It works best to use the <F4> Get Point key when SDMS Collector prompts for the point number so the user does not have to enter the PN twice. Select a Specific Point in the Location Control Files Type over the plus sign (+) with a specific point number to retrieve data for that control point. SDMS first looks in the named L1: control file for that point. If it does not find the point there, SDMS searches the L2: control file. If SDMS does not find the desired point in either the L1: or L2: files, it will display the message Point Not Found. SDMS Collector does not automatically search the other control files for the point. SDMS returns to the PN: prompt. The user can try again by pressing the <F4> Get Point key. Select a Specific Point in Other Control Files To have SDMS Collector search in one of the control files other than the first and second locate files, use a comma and the corresponding control file data tag after the point number. For example, to search for point number 352 (PN:352) in the write control file, type: Survey Data Management System Version 3.5 4-9 Data Collection Get PN:352,WC If SDMS does not find the point in the write control file, it will display the message Point Not Found and return to the PN: prompt. Automatically Select the Next or Previous Point in the File Pressing <ENTER> on the plus sign in the Get PN:+ prompt will let SDMS Collector automatically select the next point in the last-used control file. To use the previous point, type a minus sign ( - ) over the plus sign and press <ENTER>. If this is the first time the <F4> Get Point key is used in this project, SDMS automatically goes to the L1: file, otherwise SDMS searches the most recently used control file. When SDMS finds a point, it reads the control point information and automatically assigns the data fields to the data tags requested by the prompt sequence. In the following example, the sequence is not asking for the ZC:, so even though there is a ZC: value for the control point, it is not written to the project file: Prompt Control File Data Resulting Project File Sequence AC:OS AC:SS AC:OS PN: PN:1 PN:1 PD: YC:1000 PD:IRON PIN YC: XC:1500 YC:1000 XC: ZC:100 XC:1500 PD:IRON PIN Pulling Selected Data Items from a Control Point The user can pull a single data item from a control file point, such as the Z coordinate (ZC:). When SDMS Collector is at MIOC and prompting for a new activity, manually type the data tag for the single item wanted from the control file. For example, type ZC:. If the Z coordinate is available from a Get PN in this shot, SDMS Collector automatically inserts it. Switching Control Files Mid-Project The user can name new control files any time during a project. This lets the user switch between control files without leaving the project mode. However, remember that even if only one new control file is named during a project, SDMS Collector resets all control file "pointers" to the top of each named control file when data collection is resumed. This will effect the results of automatically getting the next and previous control points from a control file For example, assume the user has pulled four successive points from the L1: control file by pressing <ENTER> on the Get PN:+ prompt. Then the user stops to name a new S1: control file. Naming a new control file causes SDMS Collector to lose track of its position in all of the control files. When the user resumes data collection and presses <ENTER> on the Get PN:+ prompt for the L1: file, SDMS Collector goes back to the first point in that file; it does not pick up where it left off after the fourth point. Viewing a Control or Alignment File Survey Data Management System Version 3.5 4-10 Data Collection The user can look at the coordinates for any point in an active control or alignment file with the editor. Tracking Point and Figure Numbers The user can keep track of the point and figure numbers with the <F9> key. For example, the user has been jumping around in the point numbering, from 4 to 15 to 19 to 6. Now the user cannot remember the numbering scheme and needs the next highest number from those already used. Proceed as follows When SDMS Collector prompts and suggests a point number, press the <F9> key. SDMS displays the next largest number from the points the user has already used: Point#:20 SDMS Collector suggests 20, because the highest point number the user used so far was 19. Press <ENTER> on the suggested point number to accept and use it. Or, manually type over the suggestion with a different number and then press <ENTER>. The user can use this procedure for figure numbers (FG:) as well. Intelligent Point Numbering SDMS Collector prompts for default point numbers. Suggested point numbers are for convenience only, and may be overridden at any time. Activity Default Beginning Point Number Occupied Station 2 Backsight Shot 1 Foresight Shot 3 Sideshot 100 The pattern repeats for each set up: • The occupied station point number is that of the last foresight. • The backsight point number is that of the previous occupied station. • The foresight point number is one greater than the current occupied station point number (or is incremented by the data item coding set for point numbers). Intelligent point numbering also applied to OD: values. SDMS will automatically suggest the OD: value as the PN: value + the increment value for PN:. Correcting Errors There are three ways to correct data entry errors in the project mode • Delete the shot or occupied station that contains the error • Edit the file with the editor • Reenter the correct data before beginning the next activity Survey Data Management System Version 3.5 4-11 Data Collection Deleting a Shot or Station If the wrong activity is chosen or a serious data entry error is made for a shot or station, the user can use data tag DL: to delete the shot or station before beginning a new activity. • Enter DL:SH and press <ENTER> before beginning the next shot, the current activity is deleted and SDMS returns to MIOC. • Enter DL:ST and press <ENTER>, all the shots for the current occupied station, including the occupied station itself, are deleted and SDMS returns to MIOC. • Enter DL:SH to delete a shot, or DL:ST to delete an occupied station and its related shots. Data is not actually removed from the file. Instead, the DL: data tag marks the data to be disregarded during processing. Note Use the editor to insert the DL: data tag in a previous shot if a new activity has already been started. Editing to Correct Data Entry Errors Another way to correct data entry errors is with the editor. Access the editor from MIOC by pressing <F7> Functions, then <F2> Edit. (For specific instructions on using the editor, see Chapter 7, The Editor.) Note Turn on overwrite protection in the system configuration to prevent editing the current project file. In edit mode, find the shot that contains the incorrect data. Fix incorrect data items by: • Typing new information • Deleting the incorrect entries (CTRL D) • Inserting new entries (CTRL N opens a new line above the cursor line) • Inserting a duplicate data item with the correct information after the incorrect data item in the activity. Note Never try to correct a shot by re-entering a data item in the next shot. Use the editor to back up and make the change. Computations reflect the corrected or last-entered data item. When corrections are made to the project file using this method, SDMS Collector immediately records all edits in the project file. Reentering Data to Correct Errors Another way to correct a mistake is to call the data item again and enter the correct value before beginning the next activity. Computations always reflect the last-entered data item. This is called reentering data, and does not involve the editor. The last-entry of any data item in any one shot is always the one used in calculations. There are some exceptions to this rule including CM: ,PD:, AD:, and PL: data tags. These tags can be entered as many times as desired to add comments, descriptions, Angle/Distance lists, and Point Lists when these items will exceed the 25 character limit set for data tags. Survey Data Management System Version 3.5 4-12 Data Collection Ending Data Collection When data collection is completed , press <Esc> at MIOC. SDMS Collector asks “Close or Suspend”, as shown in Figure 4-6: Figure 4-6 Close or suspend a project • • Type a C to close the project and return to the main menu. Type an S to suspend the project and return to the main menu. Suspending a Project When the user suspends a project, SDMS Collector automatically stores projectspecific data in a separate file. This file is given the same file name as the project file with the extension SP:. It contains: • The status of intelligent point numbering • The maximum point number used in the project • The maximum figure number used in the project • The value of the IT: (instrument type) data tag, so it is not necessary to rename an instrument unless the instrument originally being used has been changed. Closing a Project When the project is closed, all the project specific data, such as instrument type (IT:), is lost. This data must be reentered when the project is reopened. Details for reopening an existing project can be found in this chapter. Survey Data Management System Version 3.5 4-13 User Shot Sequences Chapter 5 User Shot Sequences This chapter describes: • The purpose and benefits of sequences • Data required in sequences • The default project header sequence, NEWPR.SEQ • How to create and edit sequences, with tips and shortcuts: using sequences as building blocks; inserting standard shots; automatically jumping to another sequence; and, inserting user help messages • How to use a simple sequence in data collection, including skipping or repeating shots, and escaping from a sequence • How to use up to six levels of sequences • Special handling of constant descriptive items • How to insert a standard (default) shot in a sequence • Point numbering schemes • How to quickly repeat a sequence • How to cancel a sequence • How to delete stations or shots in a sequence About Shot Sequences A prompt sequence is list of one or more data items. It can form the "skeleton" for a shot, a series of shots, or even an entire project. The user prepares the outline ahead of time, and fills it in during data collection. SDMS Collector provides the user with a TASK.TGS file which contains the default task and activity definitions, also called standard prompt sequences The users can modify the standard prompt sequence or create a user shot sequence (or shot sequence). A user shot sequence has, at minimum, one activity. The user shot sequences are stored in the sequence files with the extension SEQ. Why Use a Sequence Sequences link data items together in a way that the user feels is most convenient to use. Most users tend to think in patterns of information, such as horizontal-vertical-distance. SDMS Collector is designed to make it convenient to be prompted for survey data in a pattern that matches the way the user thinks. This also allows several activities to be linked together to make a shot sequence. For instance, if data for a given task is collected in a predictable way, a sequence can be set up to automatically prompt for all of the data items and activities needed to repeat the predictable pattern. The Benefits of Using Sequences • • • • Fewer keystrokes are required, which means the user can enter data faster. Reduced coding means fewer errors or omissions in data collection. Less training is required when the user can plan a working schematic of the project ahead of time. The user can use multiple rod persons to complete projects more quickly. Survey Data Management System Version 3.5 5-1 User Shot Sequences Sequence Files Shot sequences are kept in individual files with the file name extension SEQ. The user may keep as many sequence files in the computer as space allows. Sequence files are in the ASCII file format and use the same file structure as SDMS project and control files. The user can create and edit sequence files with the SDMS Collector editor. Required Data for Sequences In order to process data files correctly, SDMS imposes a few rules about constructing a sequence. These rules center around which activities and data items must be in a project file, and the order in which a few of them must appear The task data tag (TK:) in the project file defines the type of task. This tells the post-processing software which rules to use to compute the file. The activities allowed in the specific task are defined in the TASK.TGS file. When a user shot sequence is built and used for a specific project, only the activities in the specific task can be used. The users can change the definitions in the TASK.TGS file for their needs. Note Although the user can customize the definitions of tasks and activities in TASK.TGS file, there can be no more than 20 activities in a task and no more than 20 data items in an activity. When creating user shot sequences, the user should first look up the required data items for the activities as they apply to the specific project. Make sure all required measurement and coordinate data items for each activity are included. As a rule of thumb, use the default task and activity definitions found in the Appendix. Data items can be added to or removed from the default definitions, provided they do not impact the computations. For more information about required data for computation, see Chapter 3, SDMS Tasks and Activities. An activity must contain, at minimum: • The activity data tag AC: • A point number • Required measurement or coordinate data Descriptive data is optional, and does not help or hinder the remaining information in the shot. Note Failure to enter required data, particularly measurement or coordinate information, can result in incorrect results or other processing inconsistencies. Tags Only Sequence A sequence file can have data tags only (without any activity tags). Usually this kind of sequence file is used to insert a series of data items in the current activity during the data collection. Default New Project Sequence The first sequence for a new project is named in the project configuration file under the NS: data tag (default sequence to begin new job). SDMS Collector Survey Data Management System Version 3.5 5-2 User Shot Sequences provides a default NS: sequence named NEWPR.SEQ. This sequence contains the following data items: Data tag Description AC:PR Project header activity ID: Project ID NM: Name DT: Date (taken from system date) WE: Weather TE: Temperature BP: Barometric pressure IT: Instrument type (names the total station device driver) SN: Instrument serial number OB: Observer RE: Recorder Users can use NEWPR.SEQ as provided, or modify it to suit their needs. The users could also create their own opening sequence, or choose not to use an opening sequence at all. Building a Sequence File The sequence files can be built by using any text editor as well as the SDMS Collector editor. Care should be taken when using an editor other than the SDMS Collector. Other editors would not provide the traps to make sure the data tags used are all valid and capitalized. New sequence file can be made from existing sequence files by: • editing an existing sequence and saving it under a new file name, or • appending another sequence to the existing sequence, then saving the results under a new file name. Inserting a Standard Shot When Building a Sequence Standard shots can be included in a sequence. Instead of typing each individual data item, place the --: (two hyphens) data tag after the sideshot activity tag. This directs SDMS Collector to use the data tags defined for the given activity as found in the active TASK.TGS file for the task being used.) This saves keystrokes when the sequence has many standard shots. When SDMS Collector encounters --:, it prompts for the standard activity sequence. When the standard shot is complete, SDMS Collector returns to the user shot sequence and prompts for the next activity in the sequence. For example, to include a standard sideshot, two standard utility elevations and a comment in a sequence can be done the "long way" or the "short way: REGULAR SHORT CUT METHOD AC:SS AC:SS PN: --: PD: AC:UE HZ: --: Survey Data Management System Version 3.5 5-3 User Shot Sequences REGULAR METHOD SHORT CUT VT: AC:UE DS: --: AC:UE CM: PN: PD: RR: AC:UE PN: PD: RR: CM: Inserting Another Sequence in a Sequence One sequence can include another sequence. Instead of typing in the entire sequence, insert the //: data tag and the sequence file name to signal an automatic sequence call. When SDMS Collector encounters //:file name in a sequence, it behaves as if the next sequence is called with <F3> Sequence function key. The following example shows the sequence UE.SEQ automatically called from another sequence: AC:SS PN: PD: HZ: VT: DS: //:UE (UE.SEQ called automatically. When finished, original sequence continues.) AC:SS PN: PD: HZ: VT: DS: Using the Help Data Tag in a Sequence File The help data tag (H1:) allows the user to enter a help message in a sequence, without writing the help message into the project file. When a sequence is created or edited, the H1: data tag can be included at a spot where it will help the crew on the upcoming shot or sequence. When the sequence is used, the help message appears at the spot it is inserted in the sequence file. After reading the message, the user press <ENTER>. The sequence continues normally but the message is not written into the project file. Survey Data Management System Version 3.5 5-4 User Shot Sequences Descriptive Items in a Sequence as Constants Descriptive items, such as point description, point number, comments, etc., may be entered in a sequence either as variables or constants. If the description is included along with the data tag in the sequence, the description remains constant. If only the data tag itself is entered, the last value entered for that data tag is displayed as the default. Using A Sequence A user shot sequence can be invoked by pressing the <F3> Sequence function key when SDMS Collector displays MIOC in the upper right corner of the screen and is going to start a new activity. SDMS Collector prompts the user for the name of the sequence to use, as shown in Figure 5-1. Figure 5-1 SDMS Collector asks for sequence file name The user can type the file name in the highlighted line or press <F1>Dir function key to browse the SEQ directory and pick up the sequence file to use. Sequence Levels and Remaining Shots When a sequence file is being used, SDMS Collector displays the sequence status on the line directly above the function key line. Figure 5-2 Sequence level and remaining shots For example, in Figure 5-2 the sequence message line reads that the ROADS sequence is active at level one, and that there are four shots(activities) remaining in the sequence. The level of a sequence will be discussed later in the chapter. When a sequence with tags only is used, the sequence message line reads: Level: x Tags Only Survey Data Management System Version 3.5 5-5 User Shot Sequences Skipping or Repeating Shots in a Sequence To skip over a shot in a sequence, press <PgDn> when SDMS Collector displays MIOC. This advances the user to the next shot in the sequence. Pressing <PgDn> on the last shot in the sequence produces a harmless No More Shots in File message. To repeat a shot in the current sequence, press <PgUp> when SDMS Collector displays MIOC. This lets the user repeat the most recently completed shot in the sequence. (It does not replace the first execution of that activity; it just lets the user repeat the series of prompts for the activity.) Pressing <PgUp> on the first shot in the sequence produces a harmless At Top of File message. Escaping from a Sequence Anytime SDMS Collector displays MIOC the user can exit sequences entirely. Simply press <Esc> to return to standard data collection If two or more levels of sequences are active, press <Esc> one time for each level to exit. Escaping from an Activity in a Sequence To escape from the middle of an activity in a sequence without canceling the entire sequence, just enter the delete shot (DL:SH) data item in the activity instead of answering the current prompt. SDMS Collector returns to MIOC at the next activity in the current sequence. Multiple Sequences A sequence can be interrupted to use a second sequence. The second sequence can be interrupted to use a third, and so on up to six levels deep. SDMS Collector keeps the place where the sequence is interrupted and lets the user execute subsequent sequences before returning to finish the interrupted sequence(s). The term Level 1 is given to the first sequence in progress at any given time. The term Level 2 is given to any sequence called before completing a Level 1 sequence. The term Level 3 is given to any sequence called before completing a Level 2 sequence. The term Level 4 is given to any sequence called before completing a Level 3 sequence. The term Level 5 is given to any sequence called before completing a Level 4 sequence. The term Level 6 is given to any sequence called before completing a Level 5 sequence. By itself, no sequence is defined as having any certain level. Levels merely define the order in which sequences were called into use. The following is an example where multiple sequences could be beneficial. Survey Data Management System Version 3.5 5-6 User Shot Sequences The job is to survey a city street from curb to curb. It must be done so that the shots may be linked later to produce cross-section results. Obviously, the user may want to shoot a series of sideshots in a predictable pattern. Each sequence contains sideshots for top-of-curb, bottom-of-curb, edge-ofpavement, center-of-road, etc. (Instructions on entering a point numbering scheme for this sequence appear later in this chapter.) There are also other things found in and around a street which can be material to any survey, such as utility manholes. If the user is in the middle of a Level 1 sequence and wants to step out and shoot the manhole, the user can simply interrupt the level 1 sequence and call out a Level 2 sequence. When the Level 2 sequence is complete the Level 1 sequence is continued. Suppose the sequence file EW.SEQ (East-to-West) is to take sideshots across the road from the east curb to the west curb. The data tags, and any descriptive constants listed in report form would be: AC:SS AC:SS AC:SS AC:SS AC:SS AC:SS AC:SS PN: PN: PN: PN: PN: PN: PN: PD:TOP OF CURB PD:BOTTOM OF CURB PD:EDGE OF PVMNT PD:CENTERLINE PD:EDGE OF PVMNT PD:BOTTOM OF CURB PD:TOP OF CURB HZ: HZ: HZ: HZ: HZ: HZ: HZ: VT: VT: VT: VT: VT: VT: VT: DS: DS: DS: DS: DS: DS: DS: Also suppose sequence file UTILMH.SEQ (Utility manhole) is to take utility elevation shots for a manhole: a sideshot of the top of manhole, and utility elevations for gas, electric, and phone lines. These data tags, and any fixed descriptions listed in report form, would be: AC:SS AC:UE AC:UE AC:UE PN: PN: PN: PN: PD:TOP OF MANHOLE HZ: PD: MINNEGASCO RR: PD:NO STATES POWER RR: PD:NWBELL TELE RR: VT: DS: At MIOC press <F3> Sequence and call EW.SEQ. Complete data entry for the first four sideshots (top of pavement through the centerline). When the fourth sideshot is complete the user is at MIOC and the sequence message line reads : Level: 1 Shot: 3 The user then is ready to shoot the utility manhole. The user temporarily interrupts EW.SEQ to use UTILMH.SEQ by pressing <F3> Sequence to call the Level 2 sequence UTILMH.SEQ. The sequence message line reads: Level: 2 Shot: 4 After the data for the Level 2 sideshot is entered the sequence message line reads: Level: 2 Shot: 3. The user may now pick up the Minnegasco pipeline. Drop the rod to the pipe and enter the data. The sequence message line reads : Level: 2 Shot: 2. When the Level 2 sequence is finished the sequence message line again reads : Level: 1 Shot: 3 Skipping or Repeating Shots in Multiple Sequences To skip over a shot in a sequence, press <PgDn> when SDMS Collector displays MIOC. SDMS Collector advances to the next shot in the sequence. Press <PgDn> once for each activity to be skipped. Pressing <PgDn> on the last shot in the last sequence produces a harmless No More Shots in File message. Survey Data Management System Version 3.5 5-7 User Shot Sequences If the user is in a Level 1 sequence, and the next activity is a Level 2 sequence to be automatically called using the //: data tag, pressing <PgDn> places the user at the first shot in the Level 2 sequence. To repeat a shot in the current sequence, press <PgUp> when SDMS Collector displays MIOC. This lets the user repeat the prompt sequence for the previous (most recently completed) shot in the sequence. It does not replace the first execution of that activity; it just allows repeating the series of prompts for the activity. Press <PgUp> once for each activity to back up. If the user is on the first shot in a Level 2 or deeper sequence, pressing <PgUp> places the user at the last executed shot in the previous sequence. SDMS Collector displays two messages: At Top of File; and, Moving Back to Previous Level. If the user is in any sequence and the previous "shot" is an automatic call for another sequence (a //:file name.seq entry), pressing <PgUp> places the user at the first shot in //:file name.SEQ sequence. SDMS Collector displays two messages: At Top of File; and, Moving Back to Previous Level. Updating Constants The user can change the constants in the sequence file during data collection without editing the sequence When SDMS Collector prompts the data item with the constant that needs to be changed, enter a new value in the data field and press <F3> Save Sequence instead of <ENTER>. This updates the constant in the sequence file. Removing Constants Constants can also be removed from a sequence with <F3> Save Sequence. When SDMS Collector displays the constant, clear the line with <Ctrl>L or <spacebar>. When the line is clear, press <F3> Save Sequence. The next time this data item is used, SDMS Collector presents a blank data field (if this data tag has not been used elsewhere in the project). If the data tag has been used somewhere in the project, SDMS Collector presents that value in place of the constant Inserting a Standard Shot in a Sequence At times the user may want to include a shot using the standard activity definition within a user shot sequence, but does not know ahead of time where this will be needed (e.g., take a topo shot in a cross-section task). Instead of interrupting or canceling the sequence to take a standard shot, follow these steps: 1. When prompted for the next activity in the user shot sequence at MIOC, type the activity for the shot to be inserted over the suggested activity, but do not press <ENTER>. 2. Press <Ins>. SDMS Collector prompts for each data item in the standard definition for the activity as defined in the TASK.TGS file. Answer each prompt normally. 3. When the standard shot is finished, SDMS Collector returns to the user shot sequence and prompts for next activity in the sequence. Survey Data Management System Version 3.5 5-8 User Shot Sequences How to Quickly Repeat a Sequence The user can quickly repeat the most recent sequence. When SDMS Collector displays MIOC, press <F3> Sequence, then press <ENTER>. SDMS Collector retains the name of the last used sequence file name in the file name prompt, so pressing <ENTER> automatically selects that sequence for use. Calling the Same Sequence While using a sequence, do not try to call the same sequence again as a next level sequence. Doing so results in the harmless error message file name.SEQ Already in Use. Try Another. Finish the original sequence, and then call it in again (or try another sequence). Deleting Shots or Stations from a Sequence To delete a shot in the sequence, enter the DL:SH data tag before beginning the next shot. This deletes all data back to the most recent AC: data tag. To delete a station in the sequence, enter the DL:ST data tag before beginning the next shot. This deletes all data back to the most recent AC:OS data tag. Ending a Sequence with AC:CK AC:CK allows the user to stop a sequence to make a decision without making an entry to the PRJ file. For example, the user can create a one activity (or shot sequence) and end it with AC:CK. When the user sees this, they can decide to call another sequence, go back and repeat the previous shot in the sequence (using PgUp), or exit the sequence by pressing <Enter>. Sequences and Point Numbering Schemes Developing point numbering schemes requires good management practices. Good systems for backing up data files, using file naming conventions, and planning out projects in advance must be in place for the user to get top value out of any automation system. Part of good management may involve a point numbering system that lets the user recognize a shot by its point number. With careful planning, the user can set up a general structure to apply to all of the surveying projects. This effectively promotes data collection standards even within the flexibility of SDMS. By combining point numbering schemes with sequences, the user can still collect data in completely customized series of sequences, and the point numbering will not get confused since SDMS Collector keeps track of it for the user. A Simple Point Numbering Scheme As an example for a point numbering scheme, the following sequence file for a utility elevation activity will be used. AC:SS PN:700 PD:SIDESHOT FOR UE Survey Data Management System Version 3.5 5-9 User Shot Sequences HZ: VT: DS: AC:UE PN:750 RR: The first time this sequence is used, and if the point number is coded to increment by a factor of 1 in TAGS>HLP, the point number for the sideshot activity increments from 700 to PN:701 The point number for the utility elevation activity increments from 750 to:PN:751 The next time this sequence is used, the sideshot point number increments to 702, and the utility elevation point number increments to 752. Note The user can override point numbering any time by typing a new point number over the displayed number. The next point number is incremented from the new number entered. Point Numbering Hierarchy Point numbering schemes raise some interesting possibilities not usually found in a data collector. Examine these sequence files (assume that all necessary measurement or coordinate items are present but not shown): SS. SEQ FS. SEQ BS. SEQ OS. SEQ AC:SS PN:100 AC:FS PN:500 AC:BS PN: 999 AC:OS PN:blank Notice that the first three sequences have a value entered in the point number field of the sequence (PN:100, PN:500 and PN:999, respectively). SDMS Collector automatically increments these numbers when the sequence is used. The fourth file, OS.SEQ, has no data entered in the point number field. When this sequence is called, SDMS Collector uses the next available point number from the main level of project mode. The point number is not impacted by numbering schemes from any other sequence. Suppose sequence OS.SEQ is called immediately after a new project is created. Intelligent point numbering suggests a default of 2 in the point number field because no numbering scheme was entered in this sequence. When sequence BS.SEQ is called, SDMS Collector suggests the point number 998 as the default. But, if a backsight is selected manually by typing in AC:BS (using the standard activity definition), the suggested default PN:1 is displayed in the point number field. It would not be 1000, because 1000 pertains only to backsights in the sequence BS.SEQ. Note While these discussions focus on point numbers, numbering schemes hold true for any incrementing data tag. Using Point Numbering with Multiple Sequences Assume the user is in data collection mode and in the middle of a sideshot sequence. There are four sideshots in the sequence which begin numbering at 10, 20, 30 and 40, respectively. Survey Data Management System Version 3.5 5-10 User Shot Sequences After the first sideshot (point number 11), SDMS Collector displays MIOC. Call a level 2 sequence with point numbers beginning at 100. When the level 2 sequence is completed and the level 1 sequence is resumed, SDMS Collector retains the integrity of point numbering in the level 1 sequence. This means that the point number for the second sideshot in the level 1 sequence is 21. Survey Data Management System Version 3.5 5-11 User Shot Sequences Survey Data Management System Version 3.5 5-12 Computations Chapter 6 Computations SDMS Collector provides various functions to let the user process and check their survey measurement data in the field. SDMS Collector automatically makes some tolerance checks during data collection tasks. Several functions provided allow the user to request tolerance checks, coordinate values, or station and offset values on the fly. SDMS Collector also provides the user with the capability to use batch computations to compute and adjust the coordinates for all points in a project file Tolerances in Computations SDMS Collector compares tolerances in the TOL.CFG file with results during computations. Each data tag in this file is described in TOL.HLP file. The user can access this file to define tolerances using the <F7> Tol key on the configurations menu. Some tolerances are checked as data is collected while others are checked during batch computations. In either case, if a result exceeds a tolerance, SDMS Collector displays a warning message, but usually allows the user to continue computing if they want to. Three Wire Tolerance During data collection using the three wire level task, SDMS Collector computes the differences between R1: and R2: and between R2: and R3: and then checks the difference in these differences against the default tolerance. If the difference is out of the tolerance, SDMS Collector displays a warning message, as shown in Figure 6-1. Figure 6-1 Warning Message for Out of Three Wire Tolerance This message is displayed for a few seconds and then SDMS Collector returns to the R1: prompt and the user must re-observe the three rod readings. Stadia Imbalance Another check provided by SDMS Collector during a three wire leveling task is referred to as the stadia imbalance. Using the R1: and R3: rod readings along with the stadia constant (defined as W3: in the PROJECT.CFG file), SDMS can compute the distances to the backsight and foresight (or turning points). SDMS Collector then displays a running total of the imbalance between these back and ahead distances. To nullify the affect of instrument miss-adjustment, the user Survey Data Management System Version 3.5 6-1 Computations should attempt to adjust their sight lengths such that this running imbalance stays close to zero. As discussed in a previous chapter, the W3: constant depends on the telescope of the level being used. If it is a full stadia telescope, then a difference of one unit between R1: and R3: translates to 100 times that unit for the distance the level is from the rod. In this case, W3: is set to 100 units. In other words, if R1:-R3: is 1 meter and the instrument has a full stadia telescope, then the distance to the rod is 100 meters. For a one-third height stadia instrument, W3 would be 333 units per unit of R1:-R3:. Resection Tolerance For two (2) point station resection, SDMS Collector first computes the results of the coordinates of the occupied station for each possible combination of the measurements (for a 2 point resection in which all distances and angles are measured, there would be 4 possible solutions), then computes the mean and standard deviation of these results. If the standard deviation is greater than the resection tolerance, SDMS Collector will display the information, as shown in Figure 6-2, and the user has the option to accept or reject the computation. If the standard deviation is less than the default tolerance, the computation will be completed without user interaction. Figure 6-2 Computed Resection Out of Tolerance Note: In some cases the geometry of the triangle formed by two station resections and an occupied station creates angles close to 0 degrees or close to 180 degrees. In these special situations, SDMS Collector will automatically eliminate the solutions that are too sensitive to these severe angles and base the solution on the measured distances. If only the horizontal angle is measured to one or more of the station resection points, SDMS Collector will compute the station resections as if only the horizontal angles were measured. SDMS computes the diameter of the circle through the three solutions to compare with the resection tolerance set. SDMS Collector does not compute resections for more than two successive station resections. In cases where more than three are recorded, SDMS Collector will use the last two for computations. Using Control Files with Computations All current SDMS tasks require coordinates for some known points in order to compute the coordinates for other points that have been tied in a project file. The coordinates can be combinations of: the X Coordinate (XC:) , Y Coordinate (YC:) , Elevation (ZC:); the X Coordinate (XC:) and Y Coordinate (YC:); or the Elevation (ZC:) only, depending on the results required.. The basic rule followed when computations are requested by the user is SDMS Collector will first look in the project file to see if known coordinates exist for Survey Data Management System Version 3.5 6-2 Computations key points. If so, SDMS Collector uses these values. If needed control coordinates are not found in the project file, SDMS Collector will check to see if the user has named any active control files in the CNTL.CFG file. If so, SDMS Collector will search first the L1: and then the L2: control file to find a match for the PN: it needs coordinates for. If SDMS cannot find the needed coordinates in the project or the active L1: or L2: control files, it will then prompt the user to key in the needed coordinates. If the user does not know the coordinates to key in, SDMS Collector will assign 0 for the needed values. Figure 6-3 shows the screen that will appear to prompt the user for needed coordinates when they are not found in the project file or active control files. Figure 6-3 Manual Entry Coordinates Screen Enter the missing values, then press <F1> Save to store the coordinates to a control file and continue computations. The Save function is explained further in the section on Live Computations below. Using Combination Factor (CF:) with Computations The user also needs to understand how SDMS Collector uses the combination factor when performing computations. The combination factor is the combination of the state plane coordinate scale factor and the elevation factor. It is a ratio that needs to be applied to distances to convert them from ground measured distances to state plane grid distances and visa-versa. Field measurements are always made at the ground surface, but the control coordinates being used may be based on the state plane grid. Therefore, to make the distance compatible with these coordinates, computations must adjust the distances by the combination factor. This means that when collecting measurements to compute grid coordinates, SDMS Collector must multiply any measured distance by the active CF: as part of the coordinate computations (Ground Distance x CF=Grid Distance). Likewise, when grid coordinates are used to determine a distance to be staked out, SDMS Collector must divide each computed distance by the CF: (Grid Distance ÷ CF = Ground Distance) before displaying the distance to be staked out. The default CF: is defined in the PROJECT.CFG file but the user can change that in the project file. SDMS Collector uses the CF: in the project header if it exists. SDMS Collector also displays the active CF: in the 2D/3D Stakeout screen when the user is using that for computing inverses or determining coordinates for station and offsets to an active horizontal alignment. Live Computations In addition to the live tolerance checks described earlier in this chapter, SDMS Collector enables the user to compute coordinates in the middle of data collection. Such computations do require that the project file contains the Survey Data Management System Version 3.5 6-3 Computations necessary measurements and known coordinates required to compute the specified point coordinates. The live computations can be accessed only when SDMS Collector is in Project Mode. To start live computations, press <F6> Comp whenever SDMS Collector is displaying the MIOC prompt. The screen shown in Figure 6-4 lists the options that are available. Figure 6-4 Live Computation Options The user chooses the point to compute by pressing the associated function key. If the user is on an Occupied Station activity and presses the <F1> key, the known or computed coordinates of that setup point will be displayed. Subsequently pressing <ESC> will return the user to the project file in collection mode. Suppose the user is doing an elevation control in the middle of a traverse. Pressing <F1> after taking the elevation control shot will compute the elevation of the current occupied station. Note: The coordinates displayed for the point are not adjusted. After the computations are completed, SDMS Collector will display the computed coordinates as shown in Figure 6-5. Figure 6-5 Live computation results The user can also save the computed coordinates from this screen into a control file by pressing <F5> Save. SDMS Collector uses the Write Control file as the default. If there is no write control file specified in the control configuration, SDMS Collector will create a file with the name of the project file and a CTL extension. When SDMS Collector saves a point to a control file, it first checks the file to see if the same point number is already in the control file. If the point number is found, SDMS Collector will display the screen shown in Figure 6-6. Survey Data Management System Version 3.5 6-4 Computations Figure 6-6 Append or Renumber the Point to Save If the user chooses Renumber (by pressing R), they will be prompted for another PN: to use and then SDMS Collector will repeat the process of searching the named control file for a conflict. If the user chooses Append (by pressing A), the point will be saved at the bottom of the write control file with the duplicate point number. It is then the responsibility of the user to edit the control file to remove any duplicate point numbers. The point can also be saved to a control file other than the active write control file by inserting a comma after the PN: and adding the control file tag (such as PN:,L1:). Note: If more than one point in a control file has the same PN:, SDMS Collector will always find the first one when accessing that control file. If the user presses the <F2> or <F3> to compute the last measured shot or another shot in the current project file, SDMS Collector will compute the required coordinates and present screens similar to shown above. If the selected point has known coordinates in the project file, the difference between the computed coordinates and the known coordinates are also reported as DX:, DY:, and DZ: values. The 2D and 3D Computations and Stake Out Functions SDMS Collector has a number of 2D and 3D computation and stake out functions available while in the project data collection mode. The computation functions provided are: • Calculate the azimuth, bearing, and horizontal distance between two points. • Locate a point at a given azimuth, bearing, distance, and elevation from a known point. • Calculate X, Y, and Z coordinates and station-offset values relative to the active horizontal alignment, vertical alignment, and specified superelevation. This can be done by using point numbers, station and offset, or station and feature from a control file, or, by hand entering the required data. • Set slope stakes based on a known or computed hinge point and catch point. • Set points based on a slope ratio. The stakeout functions enable the user to perform stakeout operations based on point data and roadway design information. Therefore, based on the files name in control configuration (CNTL.CFG), SDMS Collector will verify the information required to perform the stakeout functions is present. When SDMS is started, the system will: • Check for control files named. • Read the geometric definition of the horizontal alignment, based on the PI definition from an alignment file (.ALI), provided by an external source (for Survey Data Management System Version 3.5 6-5 Computations • • example, information from a CADD system). The alignment file supports angle deflection points, simple curves, compound and reverse curves, spirals, and station equations. Read the geometric definition of the profile (vertical alignment) from a profile file (.PRO) provided by an external source. The profile file definition supports profiles with symmetrical and asymmetrical vertical curves. Read the superelevation transition specifications from a superelevation file (.SUP), provided by an external source. The superelevation file defines the left and right side slopes at each transition station. If any of these files are missing SDMS Collector will display an error message stating which file is not found. The name of the file is only restricted to DOS naming conventions, the extension is what SDMS Collector is looking for. If only control point staking is desired, the horizontal alignment file name in the control configuration <F4> must be empty. SDMS Collector uses the control files, horizontal alignment, profile, and superelevation data provided in these files to compute and display radial stakeout information for any requested point number (PN:), station and offset (ST: and OF:), or station and feature (ST: and FE:) on the appropriate stakeout screens. The slope stake out function allows catch points to be set using point numbers, station and offset (ST: and OF:), or station and feature (ST: and FE:) from a control file or entered manually. The slope ratio (VH:) can also be changed to compute a new catch point. These functions can be accessed at any time MIOC is displayed in the project file by pressing F8 Stak (function key F8). Note: SDMS Collector does not perform a collimation check of the instrument to compensate for the telescope cross hairs being out of adjustment. Therefore, the user should use the collimation functions on the instrument to assure the points staked are correct as it relates to the line of sight. Entering Stakeout Data Coordinates and some other specific information can be entered on the stakeout screens using control file information or entered manually. There are three options/levels available when search for data. The options and order searched are: • Control Files • Control Files and Horizontal Alignment File • Control Files, Horizontal Alignment File, Vertical Alignment File, and, Superelevation File. Certain data is required to be included or excluded for particular files, based on the search option desired. The information required for each of these options and the order data searched is described in detail in the sections that follow. Data from a Control File SDMS Collector will automatically searches the control files first to find point coordinate data if the following data tags have a response entered on a stakeout screen: • PN: Survey Data Management System Version 3.5 6-6 Computations • • ST:/OF: ST:/FE: If any of these combinations of data have been stored in the control file, those coordinates will be used and all other data tags will be filled or computed based on that information for that particular screen. In this case the horizontal alignment, profile, and superelevation file will be ignored. Data for the Orientation screen is considered primary control information. Therefore, SDMS Collector first looks at the named L1: control file for the point to fill in the fields on this screen. If it does not find the point there, it looks in the named L2: control file. SDMS follows this hierarchy because the user would most likely keep location control data in one of these two files. Data for the other stake out screens is considered staking information. Therefore, SDMS Collector first looks at the named S1: control file. If it does not find the point there, it looks in the named S2: control file. SDMS Collector follows this hierarchy since the user would normally keep staking data in one of these two files. If SDMS Collector does not find the requested point, it returns to the point number field. Note: To facilitate stakeout, name the control file of the coordinates to be staked as the primary staking control file, S1:. If the user has both the known control points and the points to be staked in the same control file, it is okay to name the same file in the L1: and the S1: control files. SDMS Collector is not limited to searching the control files mentioned above. The user may pull data from any control file named in the CNTL.CFG file by simply typing the desired point number, a comma, and the control file data tag in which the point is located. For example: • Point number 103 in the write control file is represented as 103,WC • Point number 502 in the secondary staking control file is represented as 502,S2 Data based on Horizontal Alignment, Profile, and Superelevation The second level of computations is based on using a control file with no ST: or OF: stored in the file and the named horizontal alignment. In this case, all computations for station, offset, will be based on the horizontal alignment named. The elevation stored in the control file will be used in this case. A control file and horizontal alignment file must be named in the control configuration file (CNTL.CFG) for computations to function in this manner. It is important to remember the control file cannot contain ST: or OF:. The third level of computations is based again on using a control file with no ST: or OF: stored in the file, and the named horizontal alignment, vertical alignment, and superelevation file. In this case, all computations for station, offset, and elevations will be based on the horizontal alignment, vertical alignment, and superelevation file named. The elevation stored in the control file will be used in this case. All of the files must be named in the control configuration file (CNTL.CFG) for computations to function in this manner. It is important to remember the control file cannot contain ST: or OF: for this option to function. Alignments with Equations It is important to remember to enter the section number (n) to designate which segment of the alignment is being used if that alignment contains equations. For Survey Data Management System Version 3.5 6-7 Computations example, ST:##+##,2 indicates the station desired is ni the segment of the alignment immediately following the first equation. If a segment number (n) is not included SDMS Collector assumes the station is before the first equation. But, no data will be computed if the station entered is greater than the back station value of the equation listed. Be careful that the correct segment number is entered. If the wrong segment number is entered and the stationing exists in that section, data will be computed, but it will be in the wrong location. For example, the user intends to stake out a point at station 12+00 located between the first and second station equations and at an offset of 50 feet right. The correct entry is ST:12+00,2 and OF:50. The correct stakeout data would be computed. If ST:12+00,3 happened to be entered by mistake, and that station exists between the second and third equation, data would be computed but for the wrong location. It may be obvious by the horizontal angle (HZ:) and horizontal distance (DH:) displayed that the point is in error in most cases. But it may be difficult to detect if the control point being occupied happens to be in the vicinity of the equation which could make the error difficult to observe. Manually Entering Data Coordinate data can be entered manually if a control file is not available on the data collector. Use the <↑> and <↓> keys to move the cursor from field to field. Note that the cursor cannot be moved left or right. If the cursor is on the left side of the screen, it will have to be moved down through all of the items on the left to get to the top of the right side of the screen. Use the <ENTER> key to enter a value without leaving the field. When a value is typed in a field that impacts the results in another field, SDMS Collector will re-compute the entire screen when <ENTER> is pressed or when the cursor is moved up or down. Note: SDMS Collector does not transfer any measurement values up to the instrument. The Orientation Screen The first screen that appears for the stake out functions is the Orientation screen shown in Figure 6-7. This screen is used to: • Input the data necessary to orient the instrument for stake out. • Input point numbers or coordinates to compute the inverse horizontal distance and azimuth/bearing between two points. This screen also provides access to all the computation and stake out functions. This includes: • <F1>Shot – The shot and inverse computation screen. • <F2>Stak – 2D and 3D stakeout based on control points or horizontal and vertical alignments. • <F3>Slop – Slope staking functions. • <F5>Save – Saving point data to the Write Control File • <F6>Rec – Recording the screen data in the record file (.REC). • <F7>Func – Configuration files • <F8>Proj – Return to the project file. These functions will be described in detail in this section. Survey Data Management System Version 3.5 6-8 Computations Instrument Orientation Once the instrument has been set up, the orientation screen is used to input the coordinate data for the occupied station and the backsight point. The left side of the screen, labeled OS PN:, is used to input data for the point number of the occupied station. The right side, labeled BS PN:, is used to input data for the backsight point. The coordinate data can be entered manually or can be retrieved from the named control file. Type in the point number of the control point desired and press Enter. If the point number entered in these fields resides in one of the named Location Control Files, coordinate information will be displayed in the corresponding fields for that point. If the user wishes to stake points at the correct elevation, the instrument height (IH:) and staff height (SH:) should be entered on this screen. NOTE: If no value is entered for SH: and IH:, SDMS Collector will use the default values and display 5 with no tenths/hundredths (UL:F), or 1.5 with no millimeters (UL:M, M2, or M3). The response field will be blank on all the stakeout screens to indicate the user has not entered a true value. In this case, the computed values may only be valid for the azimuth/bearing and horizontal distance to the point. Figure 6-7. The Orientation Screen To complete the orientation of the instrument, press <F1>Shot. This will bring up the Shot/Inverse screen shown in Figure 6-8. The functions available from the Shot/Inverse screen are covered in that section. Once the instrument orientation is complete, the use has a number of options available. Pressing <F2>Stak will bring up the Alignment/Control Stakeout screen. Pressing <F3>Slop will bring up the Slope Stakeout screens. These screens allow the user numerous stakeout options that are described in detail in the sections related to those options. If no measurements are taken with the instrument or entered for HZ: and VT:, SDMS Collector will assume HZ:0 and VT:0. These values will be held for all staking until the user returns to this screen to change and re-orients to the backsight. Pressing <F5>Save will save the coordinate data for both the occupied station point and the backsight point to the named Write Control File. If the point already exists in the Write Control file, the user will be asked whether to append the point to the bottom of the control file with the same point number, or, to assign a new point number. Pressing <F6>Rec_ will record the information currently displayed on the screen in the Record (.REC) file. This is essentially a “screen dump” that can be used to check or verify what information was used during the orientation process. Survey Data Management System Version 3.5 6-9 Computations Pressing <F7>Func is used to access the control configuration (CNTL.CFG) file to review or change the filenames for the control files, the horizontal alignment and vertical alignment files, and superelevation file. All of the configuration files available during data collection are also available for review and edit. Pressing <F8> Proj will return the user to the data collection mode. Summary of Orientation Screen Functions and Displays The function keys on the Orientation screen (Figure 6-7) perform the following: <F1>Shot – Brings up the Shot/Inverse screen. <F2>Stak – Brings up the Stakeout Alignment/Control screen. <F3>Slop – Brings up the Slope Stakeout screen. <F5>Save – Saves the data displayed or entered for the BS (PN, FE, XC, YC, ZC) to the Write Control (WC) file. The data will be appended to the bottom of the file. Checks for duplicate point numbers will be made. <F6>Rec – Saves (records) the entire screen data, as displayed, to the Record (.REC) file. <F7>Func – Brings up the Project Function menu <F8>Proj – Return user to Project Mode Screen (MIOC) <Esc> – Backs up one screen. The data displayed on the orientation screen is as follows: PN: – Value from CNTL.CFG or input by user YC: – Value based on PN entered from CNTL.CFG or input by user XC: – Value based on PN entered from CNTL.CFG or input by user ZC: – Value based on PN entered from CNTL.CFG or input by user PD: – Value based on PN entered from CNTL.CFG or input by user IH: – Input by user or default (5 or 1.5 depending on UL:F or UL:M, M2, M3) SH: – Input by user, default (5 or 1.5 depending on UL:F or UL:M, M2, M3) Shot/Inverse Screen The Shot/Inverse screen shown in Figure 6-8 is used to complete the orientation of the instrument and to compute the horizontal distance and azimuth/bearing between the points listed on the Orientation Screen. This screen is accessed from the Orientation screen by pressing <F1>Shot. This screen will display the azimuth (AZ:) and bearing, and the computed horizontal distance (DD:) between the occupied station and the backsight listed on the Orientation screen. If the data collector is hooked to an instrument, pressing the <F1>Meas key will trigger the instrument to measure the horizontal distance (HD:) and horizontal angle (HZ:) between the occupied station and backsight. The computed elevation difference (DZ:) between the known elevation of the backsight and the computed elevation, based on the current measurement will also be displayed. Coordinates based on a state plane coordinate system can be used for staking out points. The combination adjustment factor (CF:) saved in the project configuration file (PROJECT.CFG) will be displayed and used for computations. At times the wrong value for CF: has been saved in the project configuration file. The user can change the combination adjustment factor to the correct value on the Shot/Inverse screen. Be sure to press Enter after making a Survey Data Management System Version 3.5 6-10 Computations change. The value entered will automatically be saved as the updated project combination adjustment factor in the project configuration file. Figure 6-8. The Shot/Inverse Screen The user can also enter the measurement information manually if an instrument is not hooked to the data collector. When no instrument is attached or activated, the user must set the data collector to IT:MANUAL. Pressing <F1>Meas will then bring up the Enter HVD Data screen, shown in Figure 6-9. This allows the manual entry of the necessary measurement data. Pressing <F1>Save on the Enter HVD Data screen will then return the user to the Shot/Inverse screen with the DH:, HZ, and DZ data tags updated based on the data that was entered on the HVD screen. Figure 6-9. The HVD (Manual Entry) Screen Note that some of the same functions that are displayed on the Orientation screen are also available from the Shot/Inverse screen. This eliminates the need to return to the Orientation screen to access those particular functions. Note: The user can have any angle on the EDM at the time the backsight measurement is made. Horizontal angles for the stakeout functions will be calculated based on that reading. Note: If no measurements are taken with the instrument or entered for HZ: and VT:, SDMS Collector will assume HZ:0 and VT:0. These values will be held for all staking until the user returns to this screen to change and re-orients to the backsight. Summary of Shot/Inverse Screen Functions and Displays The function following: <F1>Meas – <F2>Stak – <F3>Slop – <F6>Rec – keys on the Shot/Inverse screen (Figure 6-7) perform the Activates the instrument to measure HVD to the backsight. Brings up the Stakeout Alignment/Control screen. Brings up the Slope Stakeout screen. Saves (records) the entire screen data, as displayed, to the Record (.REC) file. Survey Data Management System Version 3.5 6-11 Computations <F7>Func – Brings up the Project Function menu <F8>OR_ – Return user to Orientation screen. <Esc> – Backs up one screen. The data displayed on the Shot/Inverse screen is as follows: AZ: – The computed value of the azimuth between the occupied station point and the backsight point. BR: – The computed value of the bearing between the occupied station point and the backsight point. DD: – The computed horizontal distance from inverse occupied station point and the backsight point. DZ: – The computed value of the elevation difference (algebraic) between the known elevation of the backsight point known minus the elevation based on the measurement. DH: – The horizontal distance based on the slope distance (DS:) and vertical angle (VT:) measured. HZ: – The horizontal angle measured from occupied station to the backsight, or input by user. CF: – The combination factor from Project Configuration file (Project.cfg) or input by user. Summary of the HVD Data Entry Screen The function keys on the HVD Data screen (Figure 6-9) perform the following: <F1>Save – Allows manual entered HZ:, VT:, and DS: to be used to computed measurement data for the current active stakeout screen. <Esc>– Backs up one screen and no displayed data a will be used. The data displayed on the HVD Data Entry screen is as follows: HZ: – Input by user VT: – Input by user DS: – Input by user Alignment/Control Stakeout Screen The Stakeout Alignment/Control screen shown in Figure 6-10 is accessed from the Orientation screen and the Shot/Inverse screen by pressing <F2>Stak. Based on the occupied station data entered on the Orientation screen and the files named in the project control configuration (CNTL.CFG), the user can use this screen to stake points using the options listed in the Entering Stakeout Data section above. Figure 6-10 The Alignment/Control Stakeout Screen Survey Data Management System Version 3.5 6-12 Computations The data for the point to be staked will normally come from primary or secondary staking control files (S1: or S2:). The user can use the point number (PN:), station and offset (ST: and OF:), or station and feature (ST: and FE:) to specify which point in the locate file is to be staked out. This data must be stored with the point number in the secondary stakeout control file to use this function. The XC: and YC: values can be displayed for the point by pressing <F3>X_Y_ as shown in Figure 6-11. The F3 menu key will then toggle to StOf. The XC: and YC: will be displayed for points until F3 is pressed again. Figure 6-11 Alignment/Control Stakeout Screen toggled to display XC: and YC: If there is an active horizontal alignment file , the manually entered station (ST:) and offset (OF:), and elevation (ZC:), if known, are are used to locate the point. If a vertical alignment file is active, the elevation (ZC:) will be computed based on that profile alignment. If a superelevation file is active, the elevation of offset points will be will be based on the superelevation data. If there is an active horizontal alignment file, and a point number (PN:) is entered from the active stake out control files (S1: and S2: in the control configuration), the ST: and OF: displayed with the point will be computed from the coordinates in the control file, based on the named horizontal alignment. If there is no vertical alignment file named or no elevation (ZC:) is entered, no vertical data will be computed for stake out. Note: Data from the L1:, L2:, or WC: control files can be used by entering a comma after the point number followed by the control file tag into which the point is stored (e.g. 1,L1, or 100,WC). The horizontal angle (HZ:), horizontal distance (DH:), and the Delta Z (DZ:) will also be computed and displayed based on the occupied station point data entered on the Orientation screen and the point data entered on the Stakeout Alignment/Control screen. The instrument is then turned until the horizontal angle reading on the instrument display equals the HZ: value. DH: is used to tell how far the desired point will be from the instrument location. The staff height (SH:) entered on the Orientation screen will also be displayed. This value can be changed, as needed, as shots are taken. If the staff height needs to be changed for a particular shot or shots, it can be done at this screen. These values will be used to compute the length offset (LO:), and the Delta Z (DZ:) for that particular point. When the prism is set in that direction, the user can use the <F1>Meas key to measure the actual values for the horizontal angle (HA:), slope distance (DS:), and vertical angle (VT:) to the prism. From this actual measurement information, the length offset (LO:), right angle offset (RO:), and the DZ: will be calculated. Survey Data Management System Version 3.5 6-13 Computations The length offset (LO:), shown in Figure 6-12, is based on the instrument as the reference. A negative length offset (LO:-) indicates the distance actually measured is short and the prism needs to move away from the instrument the distance displayed to reach the desired point. A positive length offset (LO:+, or no sign) indicates the distance actually measured is long and the prism needs to move toward the toward the instrument the distance displayed to reach the desired point. LO:0 will display if the measurement distance is equal to the inverse distance to the desired point. Prism in back of point LO:+ Point Location Desired Prism in front of point LO:- Figure 6-12 Length Offset (LO:) Direction - The right angle offset (RO:), shown in Figure 13, indicates whether the prism needs to be moved from the current measured position to get to the desired point position. The direction is always based on looking back at the instrument. A negative right angle offset (RO:-##) indicates the distance to the desired point is left of the current position. A positive right angle offset (RO:+##, or no sign) indicates the distance to the desired point is right of the current position the distance displayed. Point Location Desired RO:- Actual Shot RO:+ Actual Shot Figure 6-13 Right Angle Offset (RO:) Direction The Delta Z (DZ:) indicates the vertical distance the point shot is above (DZ:###) or below (DZ:-##) the elevation of the actual desired It is based on the algebraic difference between the known elevation of the desired point and the elevation of the current point shot. Many times the point to be set needs to be offset vertically, above or below the desired point elevation. This is done in stakeout by typing in a value for the vertical offset data item (VO:). The default is zero (0). Survey Data Management System Version 3.5 6-14 Computations Pressing <F4>Data brings up the HVD screen shown in Figure 6-14. This allows viewing of the azimuth and bearing to the point entered on the Alignment/Control Stakeout screen. Figure 6-14 The HVD Data Screen The HVD Data screen is also used to display information related to the actual point shot. The lower left side below the space displays the horizontal angle (HZ:), vertical angle (VT:) and slope distance (DS:) measured by the instrument or manually entered on the Enter HVD Data screen. The right side the screen displays the computed station (SS:) and computed offset (OO:) if a horizontal alignment is active. The computed elevation (ZZ:) and the Delta Z (DZ:) of the point shot and the horizontal distance (DH:) to that point is also displayed. The DZ: displayed is the same as shown on the Alignment/Control Stakeout screen. At times it may not be possible to actually stake the point desired, or the point shot may need to be saved for future use. Pressing <F4>Updt will compute the values for the current shot, then automatically return to the Stakeout Alignment/Control screen and change the values of the data items displayed, based on the measurement information. When the point is staked out, the user can use the <F5>Save key to save the coordinate data for that point in the write control file. The screen values for all the data items displayed can be saved to the record file (.REC) by pressing <F6>Rec. Once the user is satisfied or has completed the required functions for the current point, pressing <F2>NewP will clear all data fields so the data for the next point can be entered. When this key is pressed, all the fields in the current screen are cleared and their values are removed from the program memory. Therefore, be sure to save any desired data before using this function. The staff height (SH:) will redisplay the values from the Orientation screen. Summary of Alignment/Control Stakeout Screen Functions and Displays The function keys on the Alignment/Control Stakeout screen (Figure 6-10) perform the following: <F1>Meas – Activates the instrument to measure (If IT:MANUAL, then goes to HVD data entry screen for manual input of HZ/VT/DS values). <F2>NewP – This clears the screen values retains last SH set. <F3>X_Y_ – Toggle for Station/Offset (StOf) and coordinate display. <F4>Data – Brings up the HVD data screen. <F5>Save – Saves the data displayed or entered for the BS (PN, FE, XC, YC, ZC) to the Write Control (WC) file. The data will be appended to Survey Data Management System Version 3.5 6-15 Computations <F6>Rec – <F8>OR_ – <Esc> – the bottom of the file. Checks for duplicate point numbers will be made. Saves (records) the entire screen data, as displayed, to the Record (.REC) file. Return user to Orientation screen. Backs up one screen. The data displayed on the Alignment/Control Stakeout screen is as follows: PN: – Input by user ST: – Value from CNTL.cfg, based on PN, or input by user OF: – Value from CNTL.cfg, based on PN, or input by user FE: – Value from CNTL.cfg, based on PN, or input by user ZC: – Value from CNTL.cfg, based on PN, or input by user SH: – Value from Orientation screen, or input by user VO: – Input by user, default = 0. This value is (+) added to or (-) subtracted from SH: to compute for shot point elevation. LO: – Computed distance ahead or behind the current shot position to the desired position RO: – Computed distance left or right of the current shot position to the desired position. DZ: – The algebraic difference between the known elevation (ZC:) of the desired point and the computed elevation (ZZ:) of the point measured, plus the vertical offset (VO:). That is, DZ=(ZC + VO - ZZ). HZ: – Horizontal angle between the occupied station/backsight orientation and the point desired. DH: – Horizontal distance between the occupied station/backsight orientation and the point desired. Summary of the HVD Data Entry Screen The functions for the HVD data entry screen is the same as described in section for the Inverse/Shot screen. Refer to the Inverse/Shot section for details. Summary of the HVD Data Screen The function keys on the HVD Data screen (Figure 6-14) perform the following: <F2>Prev – Returns to the active stakeout screen. <F4>Updt – Indicates the computed information based on the measurement is to replace the data currently on the active stakeout screen. <F6>Rec – Saves (records) the entire screen data, as displayed, to the Record (.REC) file. <F8>OR_ – Return user to Orientation screen. <Esc> – Backs up one screen. The data displayed on the Alignment/Control Stakeout screen is as follows: AZ: – Azimuth of the point entered on the active stakeout screen. BR: – Bearing of the point entered on the active stakeout screen. HZ: – Displays instrument measurement or the input by user on data entry screen. VT: – Displays instrument measurement or the input by user on data entry screen. DS: – Displays instrument measurement or the input by user on data entry screen. Survey Data Management System Version 3.5 6-16 Computations SS: – OO: – ZZ: – DZ: – DH: – Computed station based on the current shot point. Computed offset based on the current shot point. Computed elevation of the current shot point. The algebraic difference between the known elevation (ZC:), the computed elevation (ZZ:) plus the vertical offset (VO:). That is, (ZC + VO - ZZ). Horizontal distance from occupied station point to the current shot point. Slope Stakeout and Slope Stake Shot Screens The slope stakeout screen shown in Figure 6-15 allows the user to stake points based on a known or computed slope ration between a hinge or beginning point and a catch or ending point. This screen is accessed from the Orientation screen and the Shot/Inverse screen by pressing <F3>Slop. Figure 6-15 The Slope Stakeout Screen The left side of the screen is for data input related to the hinge point. The user can enter a point number (PN:), to get the point from the active primary or secondary stake out control file (S1: or S2:). The station (ST:) and offset (OF:) will be computed based on the active horizontal alignment. The elevation (ZC:) will be the value in the named control file. Note: The preference of the combinations for searching the stake out files is: point number; station and offset; station and feature. Note: Data from the L1:, L2:, or WC: control files can be used by entering a comma after the point number followed by the control file tag into which the point is stored (e.g. 1,L1, or 100,WC). The right side of the screen is for the catch point. The user can enter a point number (PN:), to get the point from the active primary or secondary stake out control file (S1: or S2:). The station (ST:) and offset (OF:) will be computed based on the active horizontal alignment. The elevation (ZC:) will be the value in the named control file. The slope ratio (VH:) will be computed, based on the algebraic difference between the offsets and elevations displayed. Note: The station for the hinge point and catch point must be the same. Data can also be entered manually for the hinge point and catch point. In this case the data is not dependent on a particular control file. Therefore, the ST:, OF:, and ZC: must be entered for both. If the point to be set needs to be offset vertically, above or below the design point elevation, enter a value for the vertical offset data item (VO:). The default value is zero (0). Survey Data Management System Version 3.5 6-17 Computations After a combination of these values is entered, press the <F1>Shot key. This brings up the Slope Stake Shot screen shown in Figure 6-16. FIGURE 6-16 The Slope Stake Shot Screen The left side of the screen will display the same values for the catch point that are on the Slope Stakeout screen. The staff height (SH:) and vertical/horizontal slope ratio (VH:) will also be displayed from that screen. The lower right side of the screen displays the computed values for the data needed for stakeout based on the hinge point and catch point data. The horizontal angle (HZ:), horizontal distance (DH:), and the Delta Z (DZ:) will also be computed and displayed based on the occupied station point data entered on the Orientation screen and the point data entered on the Slope Stakeout screen. The instrument is then turned until the horizontal angle reading on the instrument display equals the HZ: value. The horizontal distance (DH:) is used to tell how far the desired point will be from the instrument location. The staff height (SH:) entered on the Orientation screen will also be displayed. This value can be changed, as needed, as shots are taken. If the staff height needs to be changed for a particular shot or shots, it can be done at this screen. These values will be used to compute the length offset (LO:), and the Delta Z (DZ:) for that particular point. When the prism is set in that direction, the user can use the <F1>Meas key to measure the actual values for the horizontal angle (HZ:), slope distance (DS:), and vertical angle (VT:) to the prism. This data can be entered manually when no instrument is active by using the HVD Data Entry screen (Figure 6-9). The data can be reviewed on the HDV data screen, as shown in Figure 6-17. The data on this screen is described in detail in the section discussing Alignment/Control Stakeout. Figure 6-17 HVD Data Screen for Slope Stake Shot Note: The AZ: and BR: displayed on the HVD data screen is based on the inverse from the occupied station to the catch point displayed on the Slope Stakeout screen. Survey Data Management System Version 3.5 6-18 Computations Pressing <F2>Prev will return the user to the Slope Stake Shot screen, as shown in Figure 6-18. The computed values for LO:, RO:, and DZ: will be displayed, based on the point actually measured. Figure 6-18 Slope Stake Shot Screen showing values for OO:, LO:, RO;, DZ:, computed from the shot. When the point is staked out, the user can use the <F5>Save key to save the coordinate data for that point in the write control file. The screen values for all the data items displayed can be saved to the record file (.REC) by pressing <F6>Rec. Note: VH: will only display a value during the measurement process when the computed data will equal the station displayed for the hinge point. At times it may not be possible to actually stake the point desired, or the point shot may need to be saved for future use. Pressing <F4>Updt on the HVD data screen shown in Figure 6-17, will compute the values for the current shot, then automatically return to the Stakeout Alignment/Control screen and change the values of the data items displayed, based on the measurement information. When the point is staked out, the user can use the <F5>Save key to save the coordinate data for that point in the write control file. The screen values for all the data items displayed can be saved to the record file (.REC) by pressing <F6> Rec. Once the user is satisfied or has completed the required functions for the current point, pressing <F2>NewP will clear all data fields so the data for the next point can be entered. When this key is pressed, all the fields in the current screen are cleared and their values are removed from the program memory. Therefore, be sure to save any desired data before using this function. The staff height (SH:) will redisplay the values from the Orientation screen. Summary of the Slope Stakeout Screen The function keys on the Slope Stakeout screen (Figure 6-15) perform the following: <F1>Shot – Brings up the Slope Stake Shot screen. <F2>NewP – Clear the current values to input new point data. <F5>Save – Saves the data displayed or entered for the BS (PN, FE, XC, YC, ZC) to the Write Control (WC) file. The data will be appended to the bottom of the file. Checks for duplicate point numbers will be made. <F6>Rec – Saves (records) the entire screen data, as displayed, to the Record (.REC) file. <F8>OR_ – Return user to Orientation screen. <Esc> – Backs up one screen. Survey Data Management System Version 3.5 6-19 Computations The data displayed on the Slope Stakeout screen is as follows: Hinge PN: – input by user ST: – from CNTL.cfg based on PN or input by user OF: – from CNTL.cfg based on PN or input by user FE: – from CNTL.cfg based on PN or input by user ZC: – from CNTL.cfg based on PN or input by user VH: – (design slope) calculated from hinge point to catch point, or input by user Catch PN: – input by user ST: – from CNTL.cfg based on PN or input by user OF: – from CNTL.cfg based on PN or input by user FE: – from CNTL.cfg based on PN or input by user ZC: – from CNTL.cfg based on PN or input by user VO: – input by user, default = 0. This value is (+) added to or (-) subtracted from to SH to compute for shot point elevation. Summary of the Slope Stake Shot Screen The function keys on the Slope Stake Shot screen (Figure 6-16) perform the following: <F1>Meas – This activates the instrument to measure. (If IT:MANUAL, then goes to the HVD screen for manual entry of HZ/VT/DS values). <F2> Prev – Returns to the Slope Stakeout screen to continue or enter a new point. <F4>Data – Brings up the HVD screen. This screen displays the AZ: and BR: of the point entered on the Alig/Cntl Stakeout screen. The HZ:, VT:, and DS: measured or input manually, and the SS:, OO:, ZZ:, DZ:, and DH: for the measured shot will also be displayed. <F6>Rec_ – Records the entire screen data, as displayed, to the Record (.REC) file. <F8>OR_ – Returns user to Orientation screen. <Esc> – Backs up one screen. The data displayed on the Slope Stake Shot screen is as follows: ST: – Value from the Slope Stakeout screen (Catch PN ST). OF: – Value from the Slope Stakeout screen (Catch PN OF). FE: – Value from the Slope Stakeout screen (Catch PN FE). ZC: – Value from the Slope Stakeout screen (Catch PN ZC). SH: – Value from the Orientation screen, or input by user. VH: – Value from the Slope Stakeout screen, or input by user. LO: – Computed distance ahead or behind the current shot position to the desired position RO: – Computed distance left or right of the current shot position to the desired position. DZ: – The algebraic difference between the known elevation (ZC:), the computed elevation (ZZ:) plus the vertical offset (VO:). That is, (ZC + VO - ZZ). HZ: – Horizontal angle between the occupied station/backsight orientation and the point shot or entered manually. DH: – Horizontal distance from occupied station point to the current shot point. Survey Data Management System Version 3.5 6-20 Computations Summary of the HVD Data Entry Screen for Slope Stakeout The functions for the HVD data entry screen are the same as described in section for the Inverse/Shot and Alignment/Control Stakeout screens and as shown in Figure 6-9. Refer to that Inverse/Shot section for details. Summary of the HVD Data Screen for Slope Stakeout The function keys on the HVD Data screen (Figure 6-17) perform the following: <F2>Prev – Returns to the active stakeout screen. <F4>Updt – Indicates the computed information based on the measurement is to replace the data currently on the active stakeout screen. <F6>Rec – Saves (records) the entire screen data, as displayed, to the Record (.REC) file. <F8>OR_ – Return user to Orientation screen. <Esc> – Backs up one screen. The data displayed on the Slope Stakeout HVD Data screen is as follows: AZ: – Azimuth of the catch point entered on the active stakeout screen. BR: – Bearing of the catch point entered on the active stakeout screen. HZ: – Displays instrument measurement or the input by user on data entry screen. VT: – Displays instrument measurement or the input by user on data entry screen. DS: – Displays instrument measurement or the input by user on data entry screen. SS: – Computed station based on the current shot point. OO: – Computed offset based on the current shot point. ZZ: – Computed elevation of the current shot point. DZ: – The algebraic difference between the known elevation (ZC:), the comp uted elevation (ZZ:) plus the vertical offset (VO:). That is, (ZC + VO - ZZ). DH: – Horizontal distance from occupied station point to the current shot point. Summary of Slope Staking Situations If any of the situations that follow occur, the prism can be moved toward or away from the instrument, and left of right of the current shot position, to attempt to reach the catch point. If the shot is still not within tolerance, the design slope ratio (VH:) can be changed on the slope stakeout screen to bring that point within tolerance. • The computed slope ratio (VH:) does not equal the design slope ratio. • The vertical cut/fill distance, Delta Z (DZ:) is not equal to zero. • The computed offset (OO:) is not equal to the design offset. • These values are not within the tolerance allowed. • If the user cannot use the data computed because of obstructions, etc., the prism can be moved, the instrument re-sighted, and a new measurement taken. • If the staff height (SH:) is changed, the vertical cut/fill distance, Delta Z (DZ:) and the horizontal distance (DH:) will be updated accordingly. • Changing the horizontal angle (HZ:) will change the right angle offset (RO:) accordingly. The Delta Z (DZ:) will be the difference between the known the Z coordinate (ZC:) computed from the hinge point Survey Data Management System Version 3.5 6-21 Computations • • • • • Vertical/Horizontal ratio (VH:). The length of offset (LO:) will show the distance, plus (+) or minus (-), from the instrument based on the stationing (ST:). If the measurement data displayed on the HVD Data screen are the values that will be used instead of that computed from the entered hinge point and catch point, the user presses <F4>Updt. The Slope Stakeout screen will display with the data changed based on the measured point. The measurement values will be displayed for both the hinge point and the catch point. The user can continually update screens manually or automatically. Computations work based on measurement data from an instrument or manual entry (<F1>Meas). The screens that utilize this function should update based on the HZ:, VT:, and DS: measured in the field (and if a VO: is entered). When the user is satisfied with the results of the measurement information, press <F4> Data. The catch point data is then updated based on the last information displayed on the Slope Stake Shot screen. This data can then be saved to the write control file by pressing <F5>Save. When the current catch point is completed, the user presses the <F2>NewP key to start staking out the next catch point. All the fields in the screen will be cleared and the values are removed from the program memory. Additional Computation Functions Azimuth/Bearing and Distance Between Points The Orientation and Shot/Inverse screens can also be used to compute the inverse horizontal distance, azimuth, and bearing for points other than the occupied station and backsight. This is done by entering the point numbers or coordinate values of the points desired on the left and right sides of the Orientation screen, as shown in Figure 6-7. Press <F1>Shot to view the computed information for the azimuth (AZ:), bearing (BR:) and the horizontal distance (DH:) between the two points on the Shot/Inverse screen as shown in Figure 6-8. Coordinates Computed from Azimuth and Distance Coordinates for points not included in the control file can be computed and saved by inserting the azimuth/bearing and distance measured to that point. This function is part of the Alignment/Control Stakeout screen shown in Figure 6-10. The azimuth or bearing and distance can be computed from the measurement information to the point shot or entered manually. SDMS Collector displays the YC:, XC:, and ZC: for the desired point. The coordinates computed will be based on the occupied station point, staff height, and instrument height entered on the Orientation screen. Press <F5> Save to record the point coordinate data to the Write Control file. If no point number has been entered, the user will be prompted to assign one. Creating Catch Points and Measuring Slopes The user can also create a catch point and measure slopes at any desired position, elevation, or vertical/horizontal ratio, based on a hinge point. This is done by using one of the following combinations on the Slope Stakeout screens: • Compute the Catch Point Offset – Enter the hinge point data (ST:, OF:, ZC:); a Vertical/Horizontal Ratio (VH:), and, catch point elevation (ZC:). Survey Data Management System Version 3.5 6-22 Computations • • Compute the Catch Point Elevation – Enter the hinge point data (ST:, OF:, ZC:), Vertical/Horizontal Ratio (VH:), and, catch point offset (OF:). Compute the Vertical/Horizontal Ratio – Enter the hinge point data (ST:, OF:, ZC:), and the catch point data (ST:, OF:, ZC:). Note: The VH: is held for computations until the value is deleted or the user presses <F2>NewP. This allows the user to change the offset of the catch point to compute the elevation, or to change the elevation of the catch point to compute an offset based on the elevation. The desired information will then be computed based on the data input. The position of the desired point can also be based on the measurement information for that point. The update function <F4>Uptd on the HVD data screen, as shown in Figure 6-17, is used in this case. Vertical/Horizontal Ratio Computations Hierarchy To compute the vertical horizontal ratio between the hinge point and catch point, or to compute an offset or elevation based on VH: requires data be entered in a specific manner. The tables that follow indicate the order data should be entered. E = Entered as known from CTL or Manual Entry C = Computed value based on entered information # IN BOX = Order data should be entered to compute values for other than VH:. 1 - Enter PN from CTL file. Hinge Point PN:E ST: From CTL OF: From CTL: ZC: From CTL VH:C 2 No control points, all manual entry based on an alignment.. Hinge Point PN: ST: E #1 OF: E: #3 ZC: E #4 VH: C Hinge Point PN:E ST: Equal Hinge Point OF: From CTL ZC: From CTL Hinge Point PN: ST: Equal Hinge Point (#2) OF: E #5 ZC: E #6 3 Manual Entry to get new OF based on VH: and ZC: (of Catch Point) Hinge Point PN: Hinge Point PN: ST: E #1 ST: Equal Hinge Point (#2) OF: E: #3 OF: C ZC: E #4 ZC: E #5 VH: E #6 Note: Numbers 1-5 can come from the CTL originally. 4 Manual Entry to get new ZC: based on VH: and OF: (of Catch Point) Hinge Point PN: Hinge Point PN: ST: E #1 ST: Equal Hinge Point (#2) OF: E: #3 OF: E #6 ZC: E #4 ZC: C VH: E #5 Survey Data Management System Version 3.5 6-23 Computations Note: This scenario (Number 4) would only work if the Hinge Point OF: and ZC: have been CLEARED by the user. Blank spaces ARE NOT =0. Then the desired Hinge Point OF: would be entered to compute the Hinge Point ZC:. Batch Computations SDMS Collector batch computations processes a project file by reducing the raw angular and measurement data to produce a coordinate control file. To prepare for computations: 1. Edit the project file, if necessary. 2. Name the appropriate control files in the CNTL.CFG file. 3. Check the tolerances set in the TOL.CFG file. Starting Batch Computations To start batch computations from the main menu, press <F3> Comp. To start batch computations from the project mode, at any MIOC prompt, press <F7>Func, then <F3>Comp. SDMS Collector asks the user to name the file to compute. If the user is accessing computations from the project mode, the current project file name is suggested. This file can be accepted by pressing <ENTER> or a different project file name can be entered and computed. SDMS Collector displays the selected project file and the named control files, as shown in Figure 6-18, and asks if the user wants to proceed. Before continuing, check the displayed file names for any errors. Figure 6-18 Batch Computation Set Up The Batch Computations screen displays: • The input file is the file to compute. • The read-control file is the L1: primary location control file named in the control configuration file. • The write control file is the WC: (write control file) named in the control configuration file and where SDMS Collector writes the computed coordinates for this project. If no write control file is specified, SDMS Collector uses the input file name to identify the write control file. It uses the same file name with the CTL extension. • SDMS Collector uses the horizontal alignment file during cross-section computations to produce XY coordinates. If the user types Y (Y must be pressed twice), the batch computations start. If the user types an N, SDMS Collector returns to where the user accessed the computation function to allow the user to make necessary changes to the control Survey Data Management System Version 3.5 6-24 Computations configuration file. above. The user then proceeds with computations as explained Computation Results Screen Reports SDMS Collector produces various screen reports for the computed project, depending on the type of survey task. SDMS Collector displays each screen and waits for the user to press a key to continue to the next screen. The first option that SDMS Collector offers the user is the opportunity to observe the reductions of any angle sets that are contained in the project file. SDMS Collector offers a Yes or No option to let the user choose to review or not to review the set reduction results. If the user selects Yes, the user is presented the screen shown in Figure 6-19 which shows the station name, the mean, standard deviation, the maximum value and the minimum value of each horizontal angle, vertical angle and distance measured for a particular set. Figure 6-19 Set Reduction Results The screen will also inform the user of the number of sets and if any were rejected because they did not meet the tolerance requirements. The user may scroll through each set by using the < ↑ > or the < ↓ > keys. If the user selects not to review the set reduction results, the set reduction is performed in the background and will not be displayed on the s creen. Note: If at any time there is a warning that a measurement is not within set tolerances, the user can hit the Esc key and this will terminate the computation. From there the user may then edit the project file for a later re-calculation. Survey Data Management System Version 3.5 6-25 Computations SDMS Collector computes the angular and linear miss-closure for traverse and combination tasks, if closing coordinates are recorded. The results, as shown in Figure 6-20, are displayed as the total number of set-ups in the traverse loop; the total traverse length; the angle closure; the angular error per turn; the latitude closure error; the longitude closure error; and, the ratio of precision. Figure 6-20 First Screen of Traverse Report Pressing <Enter> will bring up the next screen, as shown in Figure 6-21. that shows the adjusted azimuth closures; the latitude closure error; the longitude closure error; the elevation closure error; and, the ratio of precision. Figure 6-21 Second Screen of Traverse Report Report Files The information displayed in the set reduction screens is stored in file SET.TMP in the temporary directory specified in the I/O configuration file. The information displayed in the traverse adjustment screens is stored in file REPORT.TMP in the temporary directory. These files can be printed from DOS or Windows on a PC. The temporary files are overwritten with the most recent data each time batch computations are performed. Note SDMS Collector will report if any points are out of specified tolerances. The Finished Write Control File When SDMS Collector finishes the computations and reports, it writes the coordinates to the write control file. These results are written in control file format. If the named WC: file contains data, SDMS Collector overwrites the existing data. If there are missing values, SDMS Collector writes in 999999.000. Two points in an SDMS control file might look like: AC:OS PN:2 YC:14812.479 XC:553.715 Survey Data Management System Version 3.5 6-26 Computations ZC:83.771 PD:CNTRL PT AC:OS PN:3 YC:-999999.000 XC:-999999.000 ZC:83.771 PD:BENCH MARK Basic Rules of Batch Computations How batch computations function depends on the task being used. information that follows explains how the computations are performed. The Horizontal Tasks Traverse Task (TK:TRA) SDMS Collector will first reduce any set measurements in the project file. Then compute the raw error of position closure and the azimuth closure will be computed. It will also compute the azimuth adjusted position closure. If these closures are within tolerances, SDMS Collector will automatically adjusts the traverse using the Compass Rule. If the closures are not within tolerances, the user will be asked if they still want to proceed with the adjustment. If not, SDMS Collector will just put the unadjusted coordinates in the CTL file. Note: SDMS Collector will also compute trigonometric elevations, but it will not adjust them to intermediate known elevations and it will not use distance reductions to backsight shots for the closure or adjustment computations. Combined Task (TK:COM) SDMS Collector will first compute and adjust the traverse portion. It will then use the adjusted traverse points to compute all sideshots, multi-stub shots, intersects, etc. Any sideshots are computed from these adjusted shot elevations. If the traverse is not complete, SDMS Collector will proceed as if it were a Radial Topography task. Radial Topography Task (TK:RTO) SDMS Collector will first compute any resections. Then it will compute sideshots, multi-stub shots, intersects, etc. If there is an active horizontal alignment, then SDMS Collector will project the shot positions onto the alignment to compute the station and offset for each shot. Survey Data Management System Version 3.5 6-27 Computations Vertical Tasks Single Wire Level Task (TK:LEV) SDMS Collector will compute the error in vertical closure and if within tolerance, will then adjust the shot elevations by the error of closure divided by the number of turning points. As with horizontal tasks, if the closures do not meet tolerances, the user is asked if adjustment should continue or not. If not, the unadjusted values are put in the CTL file. Three Wire Level Task (TK:3WR) SDMS Collector will compute the error of vertical closure and the stadia imbalance. If closure is within tolerance, elevations are adjusted just like for single wire leveling (based on number of turns). SDMS Collector does NOT adjust three wire levels based on length of sights as some survey texts suggest. Cross Section Task (TK:XSE) SDMS Collector first computes the single wire level loop if one exists. It then computes the sideshot elevations. Finally, if there is an active horizontal alignment, SDMS Collector will merge the partially computed project file with this alignment to compute the XX: and YY: for each sideshot. The end result will be the similar to a radial topography computation having an active horizontal alignment in that every sideshot would contain an XX:, YY:, ZZ:. However, in this case the station and offset values would have been measured, so they would be labeled with ST: and OF: instead of SS: and OO:. The level closure is not adjusted even if there is a closed level loop in the project file. SDMS Collector also supports Hand Level Shots. These would be computed similar to regular sideshots after adjustment of the main level loop. Chapter 3 for the procedure used to enter hand level shots. Note: Computed values in an SDMS CAL file produced by SDMS Processor will always have a double character tag Note: All other SDMS tasks are basically subsets of those discussed above and would follow similar rules related to computations and adjustments. Survey Data Management System Version 3.5 6-28 The Editor Chapter 7 The Editor SDMS Collector provides the user with an ASCII file editor, so it is not necessary to exit SDMS Collector to edit most files. • The SDMS Collector editor edits these files: • Raw data files • Edited data files • Coordinate control files • Alignment files • User shot sequence files • The task/activity definitions file, TASK.TGS • Configuration files • Calculated files Note To maintain file integrity, the SDMS Collector help files can be edited only by using a generic ASCII editor. See Chapter 9 Customizing SDMS Collector for details Start Editing The editor works the same way on all SDMS Collector files, but how the user accesses each type of file varies with the file type. To Edit This Type of File Use This Main Menu Key Alignment files (extension ALI) <F2> Edit * Control files (extension CTL) <F2> Edit * Project files (extension PRJ) <F2> Edit * Edited project files (extension EDI) <F2> Edit* Task/activity definitions (TASK.TGS) <F2> Edit * Sequence Files (extension SEQ) <F2> Edit* Configuration files (extension CFG) <F7> Configurations ** *In project mode press <F7> Functions, then <F2> Edit **In project mode press <F7> Functions, then <F7> Configurations The edit function key can be accessed from two places in SDMS Collector: 1. From the main menu, press the <F2> Edit key to select edit mode. 2. In project mode at the MIOC prompt, press the <F7> Functions key, then the <F2> Edit key to select edit mode. How to Select a File to Edit When the user presses the Edit key, SDMS Collector prompts the user for the name of the file to edit. SDMS Collector suggests the default data path in the DP: data item in the I/O configuration., as shown in Figure 7-1. Survey Data Management System Version 3.5 7-1 The Editor Figure 7-1 File name prompt If SDMS Collector is in project mode, it suggests the active project file name. The cursor is at the beginning of the file name. The user can type in the name of the file to edit (change the path, if necessary) or press <F1>Dir key to browse the directory to pick up the file. If the user presses <F1> Dir, SDMS Collector prompts the default directory path with the file extension .PRJ, as shown in Figure 7-2. Figure 7-2 Default directory path 1. 2. Press <ENTER> to see the files in the default path. If the file is located in another directory, change the path before pressing <ENTER>. Move the cursor to the desired file and press <ENTER> to select it for editing. When a file is selected, SDMS Collector changes to edit mode. The cursor will be at the top of the file. If the current project file is edited from project mode, the edit screen contains the current project file and the cursor is at the bottom of the file. How to Create a New File If an edit file that does not exist is named, SDMS Collector responds “NOT FOUND OKAY TO CREATE? YES NO”, as shown in Figure 7-3: Figure 7-3 Create a new file Survey Data Management System Version 3.5 7-2 The Editor • • Type a Y to create the file and begin editing. Type an N to exit editing. The Edit Screen The edit screen, as shown in Figure 7-4, has three main parts: • The status line (line 1) • The data lines (lines 2 through 7) • The editing special function keys (line 8) Figure 7-4 The edit screen The first line of the edit screen line is the status line. It lists: • The name of the edit file • The editing mode, either Edit or Edit→Search • The line number of the edit file on which the cursor is sitting • The status of the insert toggle (when Ins appears, the insert toggle is turned on) The next six lines act as a window to edit the file. The bottom line of the edit screen labels the active special function keys for the current editing mode. Editing Files Keys Used in Editing The SDMS Collector editor has various shortcut editing keys available. These shortcut keys are listed below. Note: In the table that follows, the <Ctrl> key is represented by the ^ character. For example, ^D means press and hold <Ctrl> and then press D. Key ^T ^B <Home> <End> <PgUp> <PgDn> <↓ > <↑ > <→ > Survey Data Management System Version 3.5 Function Moves the cursor to the first line in the file (Top-ofFile) Moves the cursor to the last line in the file (Bottom-ofFile) Moves the cursor to the top line of the display window Moves the cursor to the bottom line of the display window Moves the cursor up one screen (6 lines) Moves the cursor down one screen Moves the cursor up one line Moves the cursor down one line Moves the cursor one space to the right 7-3 The Editor <← > <Tab> <Shift><Tab> <backspace> <Del> <Ins> ^D ^L ^N <?> <Esc> Moves the cursor one space to the left Moves the cursor from the left side of the colon (data tag) to the right side of the colon (data tag). Moves the cursor from the right side of the colon (data field) to the left side of the colon (data tag) Moves the cursor to the left one character at a time and deletes the character Deletes the character under the cursor Toggles insert mode on or off Deletes the line on which the cursor is sitting; place the line in the recall buffer Clears the line from where to cursor is sitting to the end of the line and does not place the line in the recall buffer Inserts a new line above the cursor Reviews the definition of a data tag or restricted response, if any Brings up prompt for user related to saving changes or not Changing Data in a Line 1. 2. Use the < ↓ > and < ↑ > keys to position the cursor on the line to be changed. This highlights the line. Type over the old data with new information. The user can change the data tag, the data field, or both. Inserting a Line 1. 2. 3. 4. Position the cursor on the line above which to insert a blank line. Use the <Ctrl>N NEW LINE command to create a blank line. Type the appropriate information on the blank line and press <ENTER>. This enters the new data and creates a new blank line for more additions. Enter more information, or press <ENTER> on the blank line to “close” it. Clearing a Line Note Clearing a line is not the same as deleting it. To delete the line and place it in the recall buffer, use the <Ctrl>D DELETE LINE command. 1. Position the cursor at the beginning of the line to be cleared. 2. Use the <Ctrl>L CLEAR LINE command to clear the line for new information. Cleared lines are not placed in the recall buffer. Deleting a Line 1. 2. 3. Place the cursor on the line to be deleted. Use the <Ctrl>D DELETE LINE command to delete the line. SDMS Collector puts the deleted line in the recall buffer. See The Recall Buffer section. Inserting Characters 1. 2. Move the cursor to the spot where the information is to be added with the <↓>, <↑ >, <←>, or <→> keys. When the insert toggle is on and the user types new characters, existing information is pushed ahead of the new input. Turn the insert toggle off by pressing <Ins>. Survey Data Management System Version 3.5 7-4 The Editor Deleting Characters There are several ways to delete characters: • Position the cursor on the character to be deleted and press <Del>. • Position the cursor one character to the right of the character to be deleted and press <backspace>. • Use the <Ctrl>L CLEAR LINE command to clear all characters from the cursor position to the end of the line. • When the Ins toggle is turned off, position the cursor on the character to be deleted and press the <spacebar> to type over the character with a space. Or, type over the character with another character. Using <F6> Undo If an edit has been made but it needs to be changed, press the <F6> Undo key before pressing <ENTER>, < ↑ > or < ↓ >. <F6> Undo restores the original information. Note The <F6> Undo key does not “undelete” a line. Deleted lines must be recalled from the recall buffer. Recording the Edit The user must move off an edited line with <ENTER>, < ↑ > or < ↓ > before saving the file for the edit to take effect, otherwise changes to that line are not recorded in the saved file. The Recall Buffer Each time a line is deleted with the <Ctrl>D DELETE LINE command, SDMS Collector puts the deleted line in the recall buffer. The recall buffer holds a maximum of 50 lines. The recall buffer fills with the most recently deleted line at the top. When the recall buffer becomes full, it makes room for new lines by deleting the oldest lines first. Suppose the user deleted the following lines in the order indicated: AC:SS PN:1003 PD:IRON PIN ←deleted 2nd PD:IRON PIN USGS 1477 HZ:176.003 VT:89.404 DS:848.76 CM:OBSERVED 8-88 ←deleted 3rd CM:NSP ←deleted 1st The recall buffer holds these deleted lines in this order: CM:OBSERVED8-88 ←last in, first out PD:IRONPIN ←recalled next CM:NSP ← first in, last out To Recall Deleted Lines: 1. Position the cursor where to insert the recalled line. 2. Press <F3> Recall to recall the line most recently placed in the recall buffer. Survey Data Management System Version 3.5 7-5 The Editor 3. One line is recalled each time <F3> Recall is pressed. Once a line is recalled, it is no longer in the recall buffer (unless it is deleted again). SDMS Collector clears the recall buffer when the current editing session is closed. The Search Function The user can search for information in many different ways. The wildcards “*” and “?” can be used to specify the search expression. Enter this To find this PN:100 Point number 100 PN:39? Point numbers beginning with 39 and ending in any single character PN:39* Point numbers beginning with 39 and ending with any one or more characters PN:* All point numbers **:IRON PIN Any data tag with the data IRON PIN To search in the file: 1. From edit mode, press <F2> Search. SDMS Collector prompts for a search expression. Enter an expression using the conventions listed above, and press <ENTER>. 2. The search menu appears and the function key line changes to show the search mode function keys. After the user enters the search expression SDMS Collector provides several choices: a. Press <F7> Previous to search backward for data matching the search expression. Press <F7> Previous as many times as necessary. b. Press <F8> Next to search forward for data matching the search expression. Press <F8> Next as many times as necessary. c. Press <F2> New to enter a new search expression. d. Press <F3> Recall to recall a deleted line. e. Press <F4>Print to print the file. f. Press <F5> File to select file operations. g. Press <F6> Undo to undo an edit. h. Perform normal editing functions. i. Press <Esc> to return to edit mode. Ending Editing Once editing is complete, the data can be saved by pressing <F5> File, SDMS Collector provides the following options: • <F1> Read: Insert a new file at the cursor • <F2> Write: Save the file to a new file name and resume editing • <F3> Save: Save the file to the same file name and resume editing • <F4> Exit: Save the file to the same file name and quit editing • <F5> Quit: Lose edits and quit editing The user may also exit editing by pressing <Esc>. SDMS Collector asks: “OK to Lose Edits? Yes No” • Type a Y to lose edits and return to the starting point (either the main menu or project mode). If the changes have already been saved, then answering Y to this question WILL NOT lose the edits. • Type an N or press <Esc> to continue editing. Survey Data Management System Version 3.5 7-6 The Editor Note: The <F3> Save and <F4> Exit file operations functions do not appear if overwrite protection is turned on (OP:Yes) in the system configuration file. Overwrite Protection The user cannot overwrite files if the overwrite protection toggle is turned on (OP:Yes) in the system configuration file. This means the user cannot save the edited file to the same file name. Instead, the edited file must be saved to a new file name using a file extension such as .EDI OP:Yes also prevents the user from editing the current project file during data collection (although the user may view it in the editor). This function makes sure the raw project file (.PRJ) remains as collected in the field, which may be important for legal reasons. Abandoning the Edits If the user wants to discard all of the changes to the file, press <Es c>. SDMS Collector prompts: OK to Lose Edits? Yes No • Type a Y to lose edits. SDMS Collector returns to starting point (either the main menu or project mode). • Type an N to continue editing. Combining Files 1. 2. 3. 4. 5. Position the cursor on the line below which to insert the new file. Press the <F5> File key. Next, press the <F1> Read key. SDMS Collector asks the name of the file to insert. Enter the file name, press <ENTER>. SDMS Collector inserts the new file into the edit file. Printing a File Within Editing 1. 2. 3. COM1 Device on the COM1 serial port COM2 Device on the COM2 serial port LPT1 Device on the 1st parallel port LPT2 Device on the 2nd parallel port CON Screen display (console) 4. • • Turn the printer ON LINE and set it to TOP OF PAGE before executing print commands. From edit mode, press <F4> Print. SDMS Collector prints the file from the cursor position to the end of the file. Printing occurs on the print device (PD:) in the I/O configuration file. The print device choices are: Press <Esc> to stop printing. SDMS Collector asks: “Are you sure? Yes No” Type a Y to stop printing. Type an N to resume printing. Survey Data Management System Version 3.5 7-7 Disk Management and Communication Chapter 8 Disk Management and Communication SDMS Collector lets the user manage files without leaving the program. This chapter explains how to use these SDMS Collector file handling and disk management functions: • Access the disk operations menu • Select files to use with disk operations • Use <F1> Directory to view files in any directory on the disk • Mark files in a directory for use in a disk operations function • Use the SDMS file naming conventions • Copy a file or batch of files • Delete a file or batch of files • Rename a file or batch of files • Print files • Send files to or receive files from other computers through the RS-232 (serial) port Disk Management The Disk Operations Menu The disk operations menu shown in the figure 8-1 can be accessed from • The main menu by pressing <F5> Disk • The Project mode by pressing <F7> Functions, then <F5> Disk Figure 8-1 The Disk Operations Menu From the disk operations menu the user can: • Press <F1> Directory to view a directory listing • Press <F2> Copy to copy files • Press <F3> Rename to rename files • Press <F4> Delete to delete files • Press <Esc> to return to starting point (either the main menu or data collection) Note The <F4> Delete key does not appear when file removal protection is turned on (RP:Yes) in the system configuration file. Selecting Files SDMS Collector offers a built -in file manager that can be used without exiting the program. A file must be named for most of these operations. This includes: Survey Data Management System Version 3.5 8-1 Disk Management and Communication • • • • Opening a project Editing a file Performing disk operations Performing I/O (send, receive, and print) operations The File Request Prompt When SDMS Collector asks the user to name a file, it uses the path set under the default path data tag (DP:) in the I/O configuration file. Notice that the insert toggle is on, as indicated by Ins in the upper right corner of the screen. It can be turned off and on by pressing <Ins>. The user may change the displayed path, then type in a file name and press <ENTER> to select the file, or press <Esc> to exit file selection. Figure 8-2 shows a typical SDMS Collector file request prompt: Figure 8-2 A File Request Prompt Viewing a Directory To see the files in a directory, press <F1> Dir when prompted for a file name. The user can change the default path and use DOS wild cards to narrow the list from which to choose when using <F1> Directory. When SDMS Collector displays the correct path, press <ENTER>to view the directory, as shown in Figure 8-3, or press <Esc> to exit. Figure 8-3 Viewing a directory To pick a file from a directory, press <F1> Dir at the file name prompt. Change the path and use wildcards to narrow the list before pressing <F1> Dir. When SDMS Collector displays the correct path, press <ENTER>. When SDMS Collector displays a directory: • Select a file by moving the cursor to the file name and pressing <ENTER>. Use the < ↑ > or < ↓ > and Page Up or Page Down, to move the cursor to a file name or directory entry. • View the parent directory by pressing <ENTER> on ..<DIR> Survey Data Management System Version 3.5 8-2 Disk Management and Communication • • • View another directory by pressing <ENTER> on the directory name Name a new directory to view by pressing <F1> Dir and entering a new path specification (use wildcards in the path specification, if desired) Press <Esc> to exit without selecting a file Specifying File Subsets The user can enter a file specification for viewing a certain subset of files in a directory. Wild card characters, or specific characters or extensions, in addition to the path can be included. For example: Enter this To view C:\SDMS\*.* All files in the SDMS directory on drive C: C:\SDMSDATA\*.P All files in the SDMSDATA directory on drive C: RJ with the file name extension PRJ A:\PR8909*.* All files on the A: drive beginning with the letters PR8909 with any file name extension A:\??.S* All files on the A: drive with a two letter file name with an extension of S followed by any or no characters Marking Files in the Directory It is possible to choose several files to copy, rename or delete. Sometimes wildcards are inefficient because the desired file names are so varied. In this case, use the file selection tools available on the directory display function keys: • <F2> Mark places a flag on files to be used in the selected operation. • <F2> Mark acts as a toggle. That is, the first time it is pressed it on a file name, it marks the file. The next time it is pressed, it removes the mark, and so on. • <F3> +All automatically marks all the files in the displayed directory for the selection made. This is faster than marking every file individually. • <F4> -All removes all file marks. • <Esc> returns to the disk operations menu with no files selected. File Management Functions How to Copy Files 1. 2. 3. 4. From the disk operations menu, press <F2> Copy. Enter the name of a file to copy. Use wildcards to specify more than one file. The user also may use <F1> Directory. At the directory select files with <F2> Mark, <F3> +All or <F4> -All. When all files are selected, press <ENTER>. SDMS Collector prompts the user to name the destination file(s). Enter a file name specification (change the path, if necessary), and press <ENTER>. Use different file name specifications, depending on the desired effect. For example: Source TRAV.PRJ Destination OLDTRAV.PRJ *.RAW *.PRJ *.SEQ ALL.SEQ Survey Data Management System Version 3.5 Effect Copies the file named TRAV.PRJ to a new file named OLDTRAV.PRJ. Copies all files with the extension RAW to files with the extension PRJ Copies all files with the extension SEQ to one new file named ALL.SEQ 8-3 Disk Management and Communication After SDMS Collector copies the files, it returns to the disk operations menu. How to Rename Files 1. 2. 3. 4. From the disk operations menu, press <F3> Rename. Enter the name of a file to rename. Use wildcards to specify more than one file. The user also may use <F1> Directory. All the directory select files with <F2> Mark, <F3> +All or <F4> -All When all desired files have been selected, press <ENTER>. SDMS Collector prompts the user for the new name of the selected file(s). Use different file name specifications, depending on the desired effect. For example: Source TRAV.PRJ Destination OLDTRAV.PRJ *.RAW *.PRJ Effect Renames the file TRAV.PRJ to a new file named OLDTRAV.PRJ Renames files with the file name extension RAW to new files with the file name extension PRJ After SDMS Collector renames the files, it returns to the disk operations menu. How to Delete Files Note The <F4> Delete key does not appear when file removal protection is turned on (RP:Yes) in the system configuration file. 1. From the disk operations menu, press <F4> Delete. 2. Enter the name of a file to delete. Use wildcards to specify more than one file. User also may use <F1> Directory. At the directory select files with <F2> Mark, <F3> +All or <F4> -All. 3. When files have been selected, press <ENTER>. SDMS Collector asks if the selected files are to be deleted. For example, if four files are selected to be deleted, SDMS Collector asks: Delete (4) Files Yes No • • Type a Y to delete the selected files. Type an N or press <Es c> to cancel the deletion process and return to the disk operations menu. How to Print Files SDMS Collector can print project, control, alignment, sequence, tag, and configuration files. Such files can be printed from several spots in the program: • From the main menu press <F4> I/O, then <F5> Print. • From project mode press <F7> Function, then <F4> I/O, and finally <F5> Print. SDMS Collector prompts the user to name a file to print. The user may use <F1> Directory to view a directory before entering a file name. The user may also select a file from the displayed directory. • From edit mode, position the cursor at the point in the file where printing is to begin. Press <F4> Print. SDMS Collector prints the file being edited from the cursor position to the end of the file, then returns to the edit mode. Always print default and original files before editing. Printed copies are useful for documentation, or may be used as an editing road map. Naming the Print Device User can name any of the following print devices under the PD: data tag in the system configuration: This name Identifies this port COM1 Survey Data Management System Version 3.5 Serial printer on the COM1 serial port 8-4 Disk Management and Communication This name Identifies this port COM2 Serial printer on the COM2 serial port LPT1 Parallel printer on the first parallel port LPT2 Parallel printer on the second parallel port CON Screen display (console) How to Print from Project Mode 1. 2. 3. 4. From the main menu, press <F4> I/O, and then <F5> Print. From project mode, press <F7> Functions, then <F4> I/O, then <F5> Print. SDMS Collector prompts the user to name a file to print. User may use <F1> Directory to view a directory before entering a file name. User also may select a file from the displayed directory. SDMS Collector prints the file and returns to the starting point. How to Print from Edit Mode 1. 2. 3. Position the cursor at the point in the file where to begin printing. Press <F4> Print. SDMS Collector prints the file being edited from the cursor to the end of the file, then returns to edit mode. Special Considerations Disk Operations • • • • The removal protection toggle must be turned off in the system configuration (RP:No) in order to delete files. See Chapter 9 Customizing SDMS Collector, for more information. When copying files by name, both the source file name and the destination file name must be specified. The user can keep the same file name for both the source and destination files. If the destination file exists and the overwrite protection toggle is turned on in the system configuration (OP:Yes), SDMS Collector warns that the destination file exists, and asks the user to verify the overwrite before copying over the existing file. When specifying destination file names, *.* can be used to keep the same name as the source file. Communications SDMS Collector provides RS-232 transfer communications for sending and receiving files to and from other computers. The I/O configuration defines these communications parameters. Specific instructions for editing the I/O configuration are found in Chapter 9, Customizing SDMS Collector. NOTE that these parameters are NOT currently used when communicating between an SDMS Collector hardware platform and a total station. Those communication parameters are hard coded into the SDMS Collector program based on the total station default parameters of the instrument manufacturer. SDMS Collector uses the instrument type (IT:) response to select the appropriate internal parameters for communicating with a total station. The Default PC Communication Parameters The default communications parameters for communicating with a standard IBM -PC are: Setting Explanation Survey Data Management System Version 3.5 8-5 Disk Management and Communication B1:9600 Baud rate: 9600 P1:NONE Parity: NONE D1:8 Data bits: 8 S1:1 Stop bits: 1 Sending a File to Another Computer Use these steps to send a file from SDMS Collector to another computer 1. Get the destination computer ready to receive the file. Make sure all cables are connected properly and that all devices are powered on. 2. Be sure the communication parameters are set correctly in SDMS Collector, on both the host and destination computers. The program must be running on both the host and the destination computer. 3. From the SDMS Collector main menu, press <F4> I/O. SDMS Collector automatically checks to see that the communication device is present. 4. On the destination computer, enter the SDMS Collector file name that is to receive the data and press <ENTER>. 5. Begin the transfer at the destination computer by pressing <F1> Recv. 6. To start the transfer, press <F3> Send on the host computer. 7. When file transfer is complete, SDMS Collector returns to the main menu. Note The file transfer must begin with the computer receiving the file (destination) being started first, then send the file from the host computer. Receiving a File from Another Computer Use these steps to receive a file in SDMS Collector from another computer 1. Get SDMS Collector ready to receive the file. Be sure all cables are connected properly and that all devices are powered on. 2. Be sure the communication parameters are set correctly in SDMS Collector on the source and destination computers. 3. From the main menu, press <F4> I/O. SDMS Collector automatically checks to see that the communication device is present. 4. Name the SDMS Collector file to receive the data and press <ENTER>. 5. Begin the transfer at the other computer. 6. When file transfer is complete, SDMS Collector returns to the main menu. Survey Data Management System Version 3.5 8-6 Customizing SDMS Collector Chapter 9 Customizing SDMS Collector SDMS Collector lets the user control the personality of the data collector. Since surveying methods vary by user, SDMS Collector is designed to be set up for different work needs. SDMS Collector supplies predefined configuration and task/activity settings (defaults), but also gives the user the tools to change them. Making modifications is fast and easy with the editing procedures described in Chapter 7, The Editor. For example, date and time can be stamped into the project at the start of the job, at each occupied station, or at each shot. If date/time stamping is not wanted at all, the user can turn it off by setting this toggle to AD:OFF. This chapter talks about the configuration files, and about the default task/activity definitions: • The I/O configuration file sets up data directory paths, controls communications between SDMS Collector and outside devices, and enters specific printer controls for reports (such as page length and width, print headers and footers, etc.) • The project configuration file sets controls for a project, such as the combination factor or three-wire stadia constant, documenting the units of measurement used in the project, etc. • The system configuration file defines other data collection conditions, such as activating the over write protection lock, or specifying automatic data logging to a printer, etc. • The control configuration file names the control files and the horizontal alignment file to use with the projects. • The tolerance configuration file lets the user set certain tolerances for checking data values during data collection and computations. • The task/activity definition file lets the user modify the sequence of prompts for normal data collection. • The tags help file can also be modified to include user specified responses for many of the descriptive data tags as well as to change the length of data field. HOWEVER, since SDMS Collector uses this file to check for valid data tags and field entries, the user must be careful not to add or delete any of the SDMS data tags and definitions. For this reason, editing this file is not allowed with the SDMS Collector editor. Instead, a separated ASCII editor must be used. The Location of the Configuration Functions Configuration functions can be changed by pressing <F7> Conf at the main menu or from project mode by pressing <F7> Func, then <F7> Conf. This will bring up the menu screen, as shown in Figure 9-1, that displays the configuration files that can be changed. Remember, project configuration cannot be changed from project mode. Survey Data Management System Version 3.5 9-1 Customizing SDMS Collector Figure 9-1 Configuration screen • • To edit a specific configuration, press the corresponding function key. To edit the task activity definition, press <F2> Edit from the main menu, then s elect the TASK.TGS file. Note The configuration files (all program files with the file name extension CFG and the TASK.TGS file) must be located in the same directory as the executable program file (SDMS.EXE). This is also true for all files with the HLP extension. Editing the Configuration Files All of the editing tools are available for editing a configuration file or the task/activity definition file. This chapter does not cover how to use the editor. Before editing files, the user should be familiar with the editing procedures in Chapter 7, The Editor. The Order of Items in a Configuration File The order in which data items appear in a configuration file is not important. Feel free to rearrange any configuration file. Remember if two of the same configuration data items are entered in a configuration file, SDMS Collector uses the last one it finds. (This is the same rule used in data collection and computations.) Editing and Saving a Configuration Use the rules outlined in Chapter 7, The Editor, when editing a configuration file. However, the save file options, as shown in Figure 9-2, are slightly different. Edits to Configuration files are saved by pressing <F1>. A configuration file can be exited without saving any edits that may have been made by pressing the ESC key. Figure 9-2 File save options for configuration files Survey Data Management System Version 3.5 9-2 Customizing SDMS Collector The I/O Configuration - IO.CFG The I/O configuration controls the flow of data and how SDMS Collector interacts with other devices. DP: - The data path tells SDMS Collector where to store and recall alignment, superelevation, and control files. The path entered here is used as a default only, and is suggested by SDMS Collector for a file location. This default may be overridden or changed anytime. PP: - The pro ject path tells SDMS Collector where to store and recall project files. The path entered here is used as a default only, and is suggested by SDMS Collector for file selection. This default may be overridden or changed anytime. QP: - The sequence path tells SDMS Collector where to store and recall sequence files. The path entered here is used as a default only, and is suggested by SDMS Collector for file selection. This default may be overridden or changed anytime. TP: - The temporary path tells SDMS Collector where to place temporary files during computations. On a data collector or laptop, this might be set to an available RAM disk. SP: - The screen pause controls how long the screen pauses when files or reports are printed to the screen. Enter the pause in 1/18 seconds (18 = 1 second). The default is 18. I/O Communication Devices CD: - The communication send/receive device names the port to use when communicating between SDMS Collector and total stations. The default is COM1 (RS-232 communications). I/O Communication Parameters The following I/O configuration data tags control communication parameters between SDMS Collector and other peripheral devices. Both the computer and the device must use the correct corresponding parameters for successful data transfer. The default communication parameters are for an IBM-PC. Note that all communication parameters related to the total station are hard coded with the instrument driver IT and do not utilize these settings. B1: - This tag sets the baud rate. Choose from 300, 1200, 2400, 4800 or 9600. The default is 9600. P1: - This tag sets the parity. Choose from ODD, EVEN or NONE. The default is NONE. PR: - This tag sets the data transfer protocol. Choose XON/XOFF or NONE. The default is NONE. D1: - This tag sets the data bits. Choose 7 or 8. The default is 8. S1: - This tag sets the stop bits. Choose 1 or 2. The default is 1. I/O Printing Controls The following I/O data tags control printing conditions: Survey Data Management System Version 3.5 9-3 Customizing SDMS Collector PD: - Print device names the printer connected to SDMS Collector. The default is LPT1. The possible choices are: Port Name The Port COM1 Serial printer on the COM1 serial port COM2 Serial printer on the COM2 serial port LPT1 Parallel printer on the first parallel port LPT2 Parallel printer on the second parallel port CON Screen display (console) PH: - The print header data tag lets the user enter a 37-character (or less) alphanumeric page header for reports. Leave this field blank if no header is needed on the reports. The default is blank (no header entered). PF: - The print footer data tag lets the user enter a 37-character (or less) alphanumeric page footer for reports. Leave this field blank if no footer is needed on the reports. The default is blank (no footer entered). PL: - The page length data tag controls the intervals at which the printer is to start a new page. Enter the number of lines per page (standard spacing is 6 lines per inch). The default is 60 lines. Set this field to 8 if the PC or data collector screen display (PD:CON) is used as the print device. PW: - The page width data tag tells SDMS Collector how wide to print the reports and files. Enter the number of characters per line. The default is 80 characters. Set this field between 10 and 40 if the data collector or PC screen display (PD:CON) is used as the “printer”. PG: - This data tag turns automatic page numbering on or off. Yes turns the toggle on; No turns it off. The default is No. TS: - This data tag turns automatic time stamping on or off for printed reports. Yes turns this toggle on; No turns it off. The default is No. DT: - This data tag turns automatic date stamping on or off for printed reports. Yes turns this toggle on; No turns it off. The default is No. The Project Configuration - PROJECT.CFG The project configuration can be edited only when the configurations are accessed from the main menu. That is, once in project mode (data collection), the user cannot change the project configuration until the project is ended and SDMS Collector returns to the main menu. Note SDMS Collector automatically inserts certain information from the project configuration file directly into the project file, see Chapter 4, Data Collection. CR: - The curvature and refraction indicates with a Yes or No whether the project data should be corrected for earth curvature and atmospheric refraction. The default is Yes. This tells the post processing software to apply a correction to the slope distance (DS) when computing the horizontal distance (DH). W3: - The three wire stadia constant is used to record the 3 wire stadia constant value. This value should be consistent with the selected instrument type. The default is 333.3333. CF: - The combination factor constant is used to reduce ground distances to grid distances, and vice versa. The default is 1.00 (no adjustment). Survey Data Management System Version 3.5 9-4 Customizing SDMS Collector UL: - The units of length data item documents in which units length data items are recorded. Choose F (feet) , M (meters), M2 for 100 meter stationing and M3 for kilometer stationing. The default is F. UA: - The units of angle data item documents in which units angular data items are recorded . Choose D (degrees), R (rads) or G (gons). The default is D. The FORMAT for angles in SDMS is DDD.MMSSS and this is not decimal degrees. This is what SDMS Collector is using in computations. UT: - The units of temperature data item documents in which units temperature data items are recorded. Choose F (Fahrenheit) or C (Celsius). The default is F. UP: - The units of pressure data item documents in which units barometric pressure data items are recorded. Choose B (millibars) or I (inches). The default is I. OS: - This is the old project - opening sequence file that SDMS Collector automatically calls when a suspended or closed project file is reopened. Any sequence file can be named here. The default is blank (no opening sequence for old projects). NS: - This is the new project - opening sequence file that SDMS Collector automatically calls when a new project is opened. Any sequence file can be used here. The default is NEWPR.SEQ (supplied with the program). The extension, “.SEQ”, is not required in the project configuration file. RT: - The rod type data item specifies the type of rod used during a threewire leveling task. If a yard rod is specified, readings are reduced to feet. If a foot or meter rod is specified, no conversion is made. Choose from F (foot), Y (yard) or M (meter). The default is F. MM: - The minimum memory data item specifies the value at which SDMS Collector will automatically notify the user at every AC:OS that the remaining available memory is getting low. This value is given in bytes (with each byte being approximately equal to one keystroke). The default is 1000 bytes. The System Configuration - SYS.CFG LP: - If the log to printer toggle is turned on, all entered data is automatically logged to the named, connected print device (the device named under the PD: data tag in the I/O configuration). If this toggle is turned off, no automatic printer logging occurs during data collection. Ye s turns this toggle on; No turns it off. The default is No. Note If the computer on which SDMS Collector is running is connected to a total station and the PD is COM1, logging to the printer cannot occur and is automatically turned off. • • • • AD: - This data item controls the automatic date and time stamping feature. The default is OFF. The choices are: PROJ The system date and time are stamped at the beginning of each project. STAT The system date and time are stamped at the beginning of each occupied station activity, immediately following the AC:OS data item. SHOT The system date and time are stamped at the beginning of each activity immediately following the AC:XX data item. OFF No automatic date/time entries are made. Survey Data Management System Version 3.5 9-5 Customizing SDMS Collector OP: - If the overwrite protection toggle is turned on, a source file cannot be overwritten with an edited file. Edits must be saved in a new file. If this toggle is turned off, a source file may be overwritten with an edited file. Yes turns this toggle on; No turns it off. The default is No. RP: - If the file removal protection lock is turned on, files cannot be deleted using the SDMS Collector file deletion feature. If this lock is turned off, files can be deleted within SDMS Collector. Yes turns this toggle on; No turns it off. The default is No. MP: - The macro pause setting determines the length of time, in seconds, that SDMS Collector pauses between steps in a macro before continuing to the next step. The default is 0 (no pause). AS: - The automatic save setting determines if each data item is saved as it is recorded. If this toggle is turned on, data is saved to the file automatically after each shot. If this toggle is turned off, the user is asked it the data should be saved. Yes turns this toggle on; No turns it off. The default is Yes. OA: - The overwrite data setting determines if control point data computed during batch processing is written to the control file, overwriting all existing information in the file, or if the new control point data is appended, or added to the existing data in the file. If this toggle is turned on by choosing A, the computed data is appended. If this toggle is turned off by choosing O, the existing data is overwritten. The default is O. The Control File Configuration - CNTL.CFG SDMS Collector inserts active control file names in the project file after the project configuration automatic entries. SDMS Collector can have up to five different control files active at a time. Each has an associated data tag, as described below. In addition to thes e, the horizontal and vertical alignment files and the superelevation file are necessary for the stake out functions to operate properly. L1: - This is the primary location control file. It is the first of two possible location coordinate files. This file normally contains the coordinates of known points (such as those established by NGS, or points established by high precision GPS or traversing) that have been adjusted using least squares or some other technique, and may be needed during a projcect. L2: - This is the secondary location control file. It is the second of two possible location coordinate files. S1: - This is the primary staking control file. It is the first of two possible staking coordinate files. This file will normally contain the coordinates of points computed during project design, such as alignment control points, right of way points, and structure stake out points. S2: - This is the secondary staking control file. It is the second of two possible staking coordinate files. WC: - This is the write control file. This is the file SDMS Collector save the computed coordinates. During the live computation, this is the default file SDMS Collector uses when the user saves the coordinates. After the batch computation, SDMS Collector will write all the computed coordinates to this file. If this file is not specified, SDMS Collector will use the file name of the current project file and extension CTL to create a write control file. Survey Data Management System Version 3.5 9-6 Customizing SDMS Collector HA: - This is the horizontal alignment file. This file contains the coordinates of key points along a horizontal alignment. It is used in computing cross-section data and for stake out based on station and offset. Horizontal alignment files based on the PC/PT definition are used for 2D stakeout and live computations available during data collection. This type of alignment file must be used with the cross section task (TK:XSE) if X,Y coordinates are to be calculated for the shots. A horizontal alignment file can also be used in other tasks to calculate X,Y coordinates from stationoffset values, and vice versa. The PI definition must be used in the 3D stakeout functions. VA: -The Vertical Alignment file. This file gives the vertical geometry, elevations, for the calculations used in stake out. SF: -The surperelevation file. This file gives the information relative to cross slopes for the sub-grade or pavement calculations used in 3D stake out. SUP is used as the file extension for surperelevation files. Note: Horizontal alignment files can be used by themselves for 2D stakeout. The vertical alignment and superelevation files must be named for 3D stakeout. Tolerance Configuration - TOL.CFG TOL.CFG defines settings for such things as minimum closures, instrument precision specifications, error radii, and standard deviations. SDMS Collector issues a warning if any of the default tolerance values are exceeded during computations. Most of the default values are based on values establish by NGS for third order surveys and are in units of feet. To be able to switch more easily between metric and English, the user may want to establish a TOLE.CFG for English projects and a TOLM.CFG for metric projects and then activate the appropriate one by copying it to TOL.CFG. VT:- This data tag is the maximum occupied station tolerance for vertical tasks. It specifies the maximum number of occupied stations allowed per loop during processing. The default is 25. W1: - This data tag is the single wire level closure tolerance. It specifies, for vertical tasks, the difference between the given elevation and the elevation as computed for the survey. The default is 0.05. ST: - This data tag is the three-wire stadia difference tolerance. It specifies the maximum difference between the upper and lower stadia intervals. The default value for this data tag is 0.011 feet. The tolerance is computed as: The value of the top (R1) rod reading, plus the value of the bottom (R3) rod reading, less twice the value of the middle (R2) rod reading, or R1: + R3: - (2 x R2:) = three-wire stadia difference. The default value is 0.011. W:3 - This data tag is the three-wire level closure tolerance. It specifies, for three-wire level tasks, the maximum the difference between the given elevation and the elevation as computed for the survey. The default value is 0.03. XC: - The profile/cross-section closure tolerance specifies, for vertical tasks, the difference between the given elevation of the closing point, and the elevation as computed through the survey. The default value is 0.1. Survey Data Management System Version 3.5 9-7 Customizing SDMS Collector SD: - The deviation from nominal stationing tolerance specifies, for crosssection tasks, the difference between nominal stationing and the stationing as computed through the survey. The default value is 5. RT: - The resection tolerance specifies, in feet, the maximum standard deviation of the computed coordinates. The default value is 0.3. ER: - The radial topography error radius tolerance specifies the radial distance of standard deviation of Northing and Easting for sideshot intersects located from three or more occupied stations e default value is 0.25. MS: - The double/multi stub tolerance specifies the maximum allowable radial difference between coordinates computed for a point from two or more occupied stations. The default value is 0.25. VI: - The vertical intersects tolerance specifies the standard deviation of elevations computed for sideshot intersects. The default value is 0.25. RP: - The ratio of precision tolerance specifies the ratio of closing error to the length of the traverse. The value entered is the whole number to the right of the colon when the precision is expressed as a ration of precision. 1:#####. For example, a ratio of 1:20000 would be recorded as RP:20000. The default value is 10000. TT: - Maximum number of occupied stations in a traverse task. It specifies the maximum number of occupied stations allowed per traverse. A warning will be given during processing that the number has been exceeded. The maximum and default value is 25. SDMS Collector will not process the file if it contains more than 25 Occupied Stations. TA: - The traverse horizontal angle closure tolerance specifies the difference between the given closing azimuth, and the azimuth computed through the traverse, divided by the number of occupied stations. The default value is 3. TE: - The traverse elevation closure tolerance specifies the maximum difference between the given elevation of the closing point, and the elevation as computed through the survey. The default value is 0.5. RA: - The reciprocal angle difference tolerance specifies how far a shot in the double reciprocal angle calculation may be out of tolerance. The default value is 0.1 When the tolerance is exceeded, SDMS Collector reports the error and disregards the shot that caused the error, and recalculates the double reciprocal angle. HA: - The set horizontal angle tolerance specifies the standard deviation of measured horizontal circle readings. The default value is 5. VA: - The set vertical angle tolerance specifies the standard deviation of measured vertical readings. The default value is 20. DS: - The set distances tolerance specifies the standard deviation of measured distance readings recorded in sets. The default value is 0.05. The Task/Activity Definition File - TASK.TGS The default tasks and activities conform to The AASHTO SDMS Data Structure Technical Guide 2000. Currently, SDMS Collector has ten tasks: Horizontal Tasks (TK:) Vertical Tasks (TK:) Combined (COM) Survey Data Management System Version 3.5 Cross-section (XSE) 9-8 Customizing SDMS Collector Horizontal Tasks (TK:) Vertical Tasks (TK:) Control network (CON) Level run (LEV) Photo control (PHO) Profile (PRO) Radial topography (RTO) Three-wire level (3WR) Terrain model (TMO) Traverse (TRA) Only the activities defined for the current task are available during data collection (this also applies to user shot sequences). For example, assume the default task and activity definitions for a traverse project. If the user attempts a sideshot, SDMS Collector warns “AC: not valid for this task”. Either select another activity, or modify the default definitions to include the activity. How to Change Task and Activity Definitions The default task/activity definition file is named TASK .TGS. Each task has a set of predefined activities and data tags (see the Appendix for a list of these defaults Note The TASK.TGS file must be stored in the program directory (the same directory as the SDMS.EXE file). From the main menu, press <F2> Edit. Or, during data collection, press <F7> Functions, then <F2> Edit. When asked for the file to edit, name the SDMS Collector program path and the file TASK.TGS, then press <RETURN>. Note If the task/activity changes are temporary, it may be preferable to create a user shot sequence instead of changing default definitions. SDMS Collector then displays the TASK.TGS file. available. All editing tools are The file is organized in the order shown in the Appendix. That is, the first task is traverse (TK:TRA) with its activities and data items. The second task is radial topography (TK:RTO), and so on. When a task or activity definition is changed, be sure to include all data items and activities that are needed for computations. Note The maximum number of activities in a task definition in TASK.TGS is 20. If there are more than 20 activities in a task definition, SDMS Collector will give a warning message when a project is started or reopened. Survey Data Management System Version 3.5 9-9 Getting Help and Using Macros Chapter 10 Getting Help and Using Macros SDMS Collector offers unique tools to make data collection fast and easy. This chapter discusses: • Getting help in SDMS Collector • Building and using keyboard macros Getting Help The SDMS Collector Help Files The help files give immediate, context -sensitive help while the user is working with SDMS Collector. Help files have several functions: • They give the full name of a displayed data tag. • They can give a list of suggested or allowed responses for each data tag. • They can include help comments for each data item. • They control what kind of data the data item accepts: alphanumeric, numeric only, or yes/no responses. • They control incrementing for data items such as point or figure numbers. Help File Filenames The SDMS Collector help files are: File Name File Content CNTL.HLP Control file configuration help IO.HLP I/O configuration help PROJECT.HLP Project configuration help SYS.HLP System configuration help TAGS.HLP Data tags help TOL.HLP Tolerance definition help Help File Structure Note Make sure to understand the help file structure before editing a help file. A help file contains: • The data tag information line, which contains the data tag, the data field length, the data type, and the prompt name. • A list of allowed or suggested responses, if applicable, following the data tag information line. • A list of help messages pertaining to the data tag, if applicable. Note No data tags can be added to or deleted from the list in a help file. Only responses to most data tags listed may be added or deleted. Responses to the data tags TK: and AC: cannot be changed. The Data Tag Information Line Using the ending station (ES:) data tag in the TAGS.HLP file as an example, the information line for the tag is: ES 3 2 Ending Station (Y/N)?,YES <ENTER>. An explanation of each entry on the information line can be found in the table that follows. Survey Data Management System Version 3.5 10-1 Getting Help and Using Macros Field ES 3 2 Ending Station (Y/N), YES <ENTER> Description The two character data tag, followed by a space The data field length, followed by a space; maximum value of 25, with a range of 1 to 25 The data type, followed by a space; maximum value of 3.999, with a range of 0 to 3.999 The prompt name, followed by a comma; maximum of 37 characters The area between the comma and the carriage return/line feed is reserved for the default response to the prompt; maximum of 25 characters A carriage return/line feed; must be present at the end of each line The Data Type Each data tag has its own coding scheme. This allows some data tags to accept alphanumeric data, while others accept only yes/no answers or numeric data. The coding scheme is set up like this This code Accepts this response 0 Data for this tag is alphanumeric data 1 Data for this tag is numeric data 2 Data for this tag must be YES or NO 3.xxx Numeric data for this tag increments each time the data item is used (.xxx represents the incrementing factor) The Data Type Incrementing Factor Currently, the data tags Chain Number (CH:) and Point Number (PN:) allow the user to set the incrementing factor desired for the point numbers assigned. The three digits to the right of the decimal for codes beginning with a 3 represent the incrementing factor. The incrementing factor can be set to any number from 001 to 999. For example: Incrementing factor Effect 3.001 Point number increments by one (1, 2, 3) 3.002 Point number increments by two (2, 4, 6) 3.010 Point number increments by 10 (10, 20, 30) 3.100 Point number increments by 100 (100, 200, 300) The Response List Help files also contain lists of responses, where applicable. This list can limit responses to only those in the list, or can include a wildcard entry so the data tag can accept responses other than those in the list. Accept Only Listed Responses A data tag can be set up to accept only the responses in the response list. If the user attempts any other response, or tries to leave the field blank, SDMS Collector refuses the entry. In this example, SDMS Collector accepts only the listed responses: Survey Data Management System Version 3.5 10-2 Getting Help and Using Macros GM 6 0 Geometry,<ENTER> ;CURVE=connect points with smooth curves <ENTER> ;POINT=connect points with straight lines <ENTER> Accept Only Listed Responses or a Blank If the user wants to make sure that the prompt is either answered with a listed response, or left blank, the help file wildcard must look like this: ; =<ENTER> The semi -colon, followed by a space, an equals sign, and carriage return/line feed, forces the user to either accept one of the suggested responses or leave the field blank. This wildcard can be placed anywhere in the response list. GM 6 0 Geometry,<ENTER> ;CURVE=connect points with smooth curves <ENTER> ;POINT=connect points with straight lines<ENTER> ; =<ENTER> Accept Any Response When the user wants a list of responses, but does not want to be limited to the list, enter this wildcard as the first line of the response list: ;<ENTER> The semi-colon followed by a carriage return/line feed must immediately follow the data tag information line and precede all suggested response lines. For example: GM 6 0 Geometry,<ENTER> ;<ENTER> ;CURVE=connect points with smooth curves <ENTER> ;POINT=connect points with straight lines<ENTER> Adding Help Comments To add help comments to the response list, make the entry like this: ;help comment<ENTER> A semi-colon, followed by a help comment and a carriage return/line feed is the help comment wildcard. This line appears when the user asks for help on a data field, but is not entered into the project file. This wildcard can be placed anywhere in the response list. For example: GM 6 0 Geometry,<ENTER> ;help comment added here <ENTER> ;another help comment added here <ENTER> ;another help comment added here <ENTER> ;CURVE=connect points with smooth curves <ENTER> ; a help comment could be added here <ENTER> ;POINT=connect points with lines<ENTER> ; =<ENTER> Add the situation where descriptive data tags can have items added if the item begins with a semi-colon and ends with an equal sign (followed by an optional description. For example, the PD: list might read: PD 25 0 Point Description,<ENTER> ;OAK =Oak Tree ;POPLAR=Poplar Tree ;= Survey Data Management System Version 3.5 10-3 Getting Help and Using Macros The items OAK and POPLAR have been added as optional valid responses for PD:. While the system will accept this, the proper use of these added responses depends on the software that processes the data files. In addition, certain tags such as AC:, have a set list of responses that will cause problems and should not be changed or added to by the user. For many descriptive tags, however, adding items to the list can save a lot of typing for the user in the field. How to Edit Help Files Help files cannot be edited within SDMS Collector. An ASCII editor must be used instead. Be sure to maintain the help file structure and format. Rules and guidelines for editing help files are as follows: • Before editing a help file, make a backup copy of the default help file. If a serious editing error is made, the default backup file can be copied back to the system. • Keep backup copies of any help files to edit. • Never delete or add data tags. • Never delete or add responses to the Activity (AC:) and Task (TK:) tags. • Never change the order of the data tags in the listing. Changing the order of the tags results in a system error and causes SDMS Collector to "get lost." • The user may change the order of the suggested responses in to the response list of a data tag. The only placement requirement is for the “any response”, which is a semicolon (;) with no response following it. The semicolon functions as the help file wildcard, and must appear as the first line of a response list added below a data tag. How to Get Help The user can use the on-line help key when the meaning of the displayed data tag, or what kind of information is allowed for the data tag is not known. The response will be displayed when the <SHIFT> and <?> (question mark) keys are pressed simultaneously. The <?> key works in either project or edit mode. The user can use the help function to: • Find the meaning of the currently displayed data tag • Find the allowed responses for the displayed data tag • Display an alphabetical list of available tags • Automatically select a data tag • Automatically select information to enter (certain tags only) How to Use Help on Data Tags When help is needed for a data tag that is displayed, put the cursor on the data tag, and press the question mark key (<SHIFT> <?>). SDMS Collector immediately displays the meaning of the data tag. For example, assume that SDMS Collector is displaying the DO: data tag. Move the cursor to the data tag (the left side of the colon) and press <?>. SDMS Collector displays an alphabetical list of available data tags, beginning with the displayed data tag, as shown in Figure 10-1. Survey Data Management System Version 3.5 10-4 Getting Help and Using Macros Figure 10-1 Help on data tags The user can start the display further down in the help list by typing one or two characters in the data tag field before pressing <?>. For example, if the user types an F in the data tag field and then presses <?>, SDMS Collector will start the display at the first data tag starting with the letter F, as shown in Figure 10-2. Figure 10-2 Data tags starting from “F” To begin at the top of the list, clear the data tag characters before pressing <?>. SDMS Collector will display the first allowed response in the help file, as shown in Figure 10-3: Figure 10-3 List of all data tags How to Use Help to Select a Data Tag When the user is not sure which data tag should be used, one can be selected from the help list by using the procedure that follows. 1. In project or edit mode, press <?> to display the data tag list. 2. Use <↓> and <↑> to move through the list. When the cursor is on the desired data tag, press <ENTER>. 3. To exit without selecting a data tag, press <Esc>. For example, if the user pressed <ENTER> on A1:Attribute 1 in the help list, SDMS Collector returns to the project file and displays A1:. Other data is then entered as usual. Survey Data Management System Version 3.5 10-5 Getting Help and Using Macros How to Use Help on Data Fields When the user is not sure what answer is acceptable for a data tag, the help function can be used. 1. Display the response list for the data field. 2. Use < ↓ > and < ↑ > to scroll the list. When the cursor is on the desired value for the data field, press <ENTER> to select it. 3. To exit without selecting a response, press <Esc>. For example, assume SDMS Collector is displaying DO: in the project file. Place the cursor on the blank field to the right of the colon. Press <?>. SDMS Collector displays the response list, as shown in Figure 10-4: Figure 10-4 Select an entry for DO If the user pressed <ENTER> on H=Horizontal in the help list, SDMS Collector returns to the project file and displays DO:H in the project file. Help is not available for all data tags. If the user presses <?> on a tag that help is not available, SDMS Collector will display the message shown in Figure 105: Figure 10-5 Message displayed when there is no help information for a data tag Many data tags, such as FE: (feature code), can have a vast number of allowed responses. To scroll through the list from the top looking for the correct response can be time consuming. To speed up the process, the user can enter the first letter of what the response may be. The help file will start at the corresponding letter of the alphabet. Keyboard Macros Keyboard macros are powerful tools that allow the user to set up commands or repeated entries using single keys instead of having to type in the entire field. For example, the user can create a macro to copy project files to another disk or directory, open projects, and configure the system. Note As with any powerful tool, use a macro with caution. A macro created at the main menu may produce quite unexpected results if accidentally used from Survey Data Management System Version 3.5 10-6 Getting Help and Using Macros another menu. SDMS Collector cannot determine which is the current menu when the macro is recorded. Macros record only keystrokes, not program levels. Building Macros There are two ways to create a macro: • Record and execute the macro simultaneously with <Alt><F10> • Record the macro without executing it with <CTRL><F10> Record and Execute a Macro Simultaneously 1. 2. Press <Alt><F10> to begin recording a macro. SDMS Collector briefly displays the message “Collecting Keys for Macro”, as shown in Figure 106. When using <Alt><F10> to define the macro, the user also executes the function of the macro for the first time. Figure 10-6 Start recording a macro Record a Macro without Executing It 1. 2. Press <CTRL><F10> to begin recording a macro. SDMS Collector briefly displays the message Collecting Keys for Macro. <CTRL><F10> defines the macro, but only records the keystrokes. This does not perform the functions of the macro at the same time. To use a macro defined with <CTRL><F10>, the user must deliberately call the macro into use (see Using Macros). Press the first keystroke for the macro. Notice that the computer gives a high-pitched beep when the user presses a key while recording a macro. Putting a Pause in a Macro 1. 2. To put a pause instruction in the macro, use the <CTRL>P (Pause) command. This temporarily stops the recording of macro keystrokes. The computer sounds a low-pitched tone to indicate that the user is typing during a macro pause. When typing is finished, press <CTRL>P (Pause) to resume recording the macro. The computer again gives high-pitched beeps for each macro keystroke. Naming a Macro When the user finishes recording the macro, press <Alt><F10>. SDMS Collector asks for a comment to describe the macro, as shown in Figure 10-7. Survey Data Management System Version 3.5 10-7 Getting Help and Using Macros Figure 10-7 Enter a comment for macro Type in a comment and press <ENTER>. SDMS Collector asks for a letter to name the macro, as shown in Figure 10-8. Figure 10-8 Choose letter for a macro The user can type any of the 26 alpha keys to associate with the macro. When a letter is typed, SDMS Collector returns to normal operating mode. If the character of an existing macro is typed SDMS Collector will display the message shown in Figure 10-9. Figure 10-9 Overwrite a macro? The user has the option to overwrite the macro already using the desired alpha key by responding Yes. If the response is No, SDMS Collector will return to the previous screen to allow entry of a new entry. Note The user can overwrite existing macros, even if overwrite protection is turned on in the system configuration. a. If the user types an N, SDMS Collector returns to the Choose letter for Macro prompt. Enter another letter or press <Esc> to exit macro definition. b. If the user types a Y, SDMS Collector overwrites the existing macro and returns to normal operating mode. Aborting a Macro Definition To abort a macro that has been defined without saving it, press <Alt><F10>. When SDMS Collector prompts to enter a comment, press <Esc>. Survey Data Management System Version 3.5 10-8 Getting Help and Using Macros Using Macros To execute a macro, press the <Alt> key and the letter key with which the macro is named. If the macro has a pause in it, the macro stops at the pause instruction so the user can manually type information before resuming the macro. The computer sounds a low-pitched tone on each keystroke to indicate that the user is typing during a macro pause. When the user finishes typing, enter the <CTRL>P (Pause) command again to resume the macro. SDMS Collector aborts the macro if it encounters an error. An error can be anything from a system error to simply having a keystroke in the macro that does not fit the keys available at that level of the macro. Display the Macro Comment The macro comment can be displayed while the user is executing the macro. Press <Alt> <=> during a pause instruction to display the comment The user can make SDMS Collector display the comment for any macro by first pressing <Alt> and <=> simultaneously, then press the <macro letter>. For example, to display the macro named K, simultaneously press <Alt> <=> then press <K>. Tips on Using Macros 1. 2. Be sure to keep information about the macro, such as its intent and at which point in the program it can be called, etc. The user can get a directory of the macros with the <F1> Directory key. Since all macros have the file name extension MAC, enter *.MAC as the file name specification when looking through the directory for macros Suggestions for Using Macros A macro can do anything that could also be done with manual keystrokes. The user may have up to 26 macros (one for each letter of the alphabet). The following are two examples for using macros in everyday activities • Opening a new project • Copying project files (for backup, duplicating, etc.) Controlling the Rate of Execution of a Macro The user can control the speed at which SDMS Collector executes the macro. Macro speed is controlled by the macro Pause tag, MP:, in the system configuration file. See Chapter 9, Customizing SDMS Collector, for information on setting this control. Examples of Macros A Macro to Open a New Project 1. 2. 3. Begin at the main menu. Press <Alt><F10> to begin recording the macro. Press the <F1> Project key. SDMS Collector displays a prompt to enter the project name. The user probably will not use the same project name for each project. Therefore, a pause instruction could be inserted at the file name prompt with <CTRL>P (Pause) to allow entering a project name. Enter a project file name (this can be a dummy file name, for now). When the user finishes, use <CTRL>P (Pause) again to resume defining the macro, then press <ENTER>. Survey Data Management System Version 3.5 10-9 Getting Help and Using Macros 4. 5. Press <ENTER> or type a response for each prompt in the opening sequence that will remain constant. Enter pause instructions for prompts that have varying responses from project to project. Press <Alt><F10> to finish the macro, then give it a comment and a name. A Macro to Copy Project Files 1. 2. 3. 4. 5. 6. Begin at the main menu. Press <Alt><F10> to begin recording the macro. Press the <F5> Disk key to display the disk operations menu. Press the <F2> Copy key from the disk operations menu. SDMS Collector prompts for a file name(s) to be copied. Enter the path for the project files and use *.PRJ as the file name specification and press <ENTER>. This targets all project files in the specified path for the copy process. The user could also enter a pause instruction, then use the <F1> Directory key to manually select the files to be copied before resuming the macro. Enter the drive letter (and path, if necessary) of the destination disk and press <ENTER>. Press <Alt><F10> to finish the macro, then give it a comment and a name. Survey Data Management System Version 3.5 10-10 Examples Chapter 11 Examples This chapter presents some sample projects so the user can practice using SDMS Collector. The examples include a graphic of the project, instructions for entering the data, and a printout of the project file. There is an example of each of these six tasks: • Radial topography • Traverse • Level run • Three-wire level • Cross-section • Profile Assumptions When doing the examples, please remember: • The examples are set up as new projects. 1. The examples do not use total stations. The user will enter horizontal angle, vertical angle and distance measurements through the keyboard. • When using a total station, the user would use either <F1> Measure 1 or <F2> Measure 2 to collect data from the instrument on the first prompt that asks for measurable information. The examples use the default task and activity definitions found in the Appendix. The examples do not use control files. The first example, radial topography, begins with opening a new project at the main men u. The rest of the examples assume that a project has been opened; a task has been selected; and, it is ready to enter the beginning occupied station data. Prompts or messages are shown in small, bold letters, like this: MIOC or Enter Task Keys pressed are shown in brackets, like this: <ENTER>, <F1> Project, or <Esc> Information to type is shown in bold, italic letters, like this: 2244.08 • • • • • • Configuration Settings The following are the configuration settings used in these examples: Project System Tolerance Definition Configuration Configuration CR:Yes LP:N VT:25 RP:10000 W3:333.3333 AD:OFF WI:.05 TT:25 CF:1.00 OP:No ST:.003 TA:3 UL:F RP:No W3:.03 TE:.5 UA:D MP:0 XC:.1 RA:.1 UT:F AS:Yes SD:5 HA:5 UP:I OA:O RT:30 VA:20 OS: ER:.25 DS:.05 NS:NEWPR.SEQ MS:.25 RT:F VI:25 Survey Data Management System Version 3.5 11-1 Examples MM:1000 Radial Topography Example Radial topography (TK:RTO) can be either a horizontal task to collect data with X and Y components, or a horizontal and vertical task for data with X, Y, and Z components. A radial topography task usually consists of an occupied station, a backsight, and sideshots. Backsight PN:216 PD:CTRL MON YC:2244.08 XC:473879.91 PN:1004 PD:N.E. COR BLDG PN:57 PD:TBM ZC:448.391 PN:1005 PD:N.E. COR ROOF PN:1004 PD:24”MAPLE PN:1003 PD:S.E. COR BLDG Occupied Station PN:215 PD:CTRL MON YC:1527.85 XC:473128.36 Displayed Choose a Command Project Name> *.PRJ C:\path\.prj New Project Enter Task TK: AC:PR AC:OS PN:2 PD: IH: Survey Data Management System Version 3.5 PN:1001 PD:SAN MH PN:1002 PD:8” VCP Instructions and Comments From the main menu, press <F1> Project to open a project. Type the project name RTOEXAM , <ENTER>. Type RTO ; <ENTER> to select the radial topography task. This is the first prompt of NEWPR.SEQ. Either press <Esc> to exit the sequence, or enter the project header information. When NEWPR.SEQ is complete, SDMS Collector automatically suggests an occupied station activity. Press <ENTER> to accept it. Type point number 215 over the suggested point number 2 and press <ENTER>. Type the point description CTRL MON and press <ENTER>. Type the instrument height 5.45 and press <ENTER>. 11-2 Examples Displayed SH: YC: XC: ZC: Instructions and Comments Type the staff height 6.0 and press <ENTER>. Type the Y coordinate value 1527.85 and press <ENTER>. Type the X coordinate value 473128.36 and press <ENTER>. Press <ENTER> to leave data field blank when the elevation of the occupied station is unknown. An elevation control activity, AC:EC, will be done later to update elevations. Note: If data is entered incorrectly, it is not necessary to edit the file to make corrections. Any data item within an activity, except CM: and PD:, can be corrected by simply reentering the data tag with the corrected information. SDMS Collector will use the data from the last entry found for a data tag for computations and assigning attributes. AC:BS Press <ENTER> to accept the suggested backsight activity AC:BS. PN:1 Type point number 216 over the suggested point number 1 and press <ENTER>. PD:CTRL MON Press <ENTER> to accept the suggested point description CTRL MON. YC: Type the Y coordinate value 2244.08 and press <ENTER>. XC: Type the X coordinate value 473879.91 and press <ENTER>. HZ: Type 0 to zero the backsight and press <ENTER>. VT: Type the measured vertical (zenith) angle 89.5930 and press <ENTER>. DS: Type the measured slope distance 1038.182 and press <ENTER>. AC:BS SDMS Collector again suggests a backsight activity, since it was the last activity used. Type EC over BS and press <ENTER> to select the elevation control activity. PN:100 Type point number 57 over the suggested point number 100 and press <ENTER>. (Don't forget to delete the leftover 0.) PD:CTRL MON Type point description TBM over the suggested description CTRL MON. Use the <spacebar> or <CTRL>L to clear any previous description not replaced by the new one. ZC: Type 448.391 to enter the known elevation and press <ENTER>. HZ: Type the measured horizontal angle 5.4530 and press <ENTER>. VT: Type the measured vertical (zenith) angle 89.2244 and press <ENTER>. DS: Type the measured slope distance 838.54 and press <ENTER>. AC:EC Type SS over the suggested EC and press <ENTER> to select the sideshot activity. Survey Data Management System Version 3.5 11-3 Examples Displayed Instructions and Comments Note: From here on, the user will not be told to press <ENTER> to enter values that have been typed into the data collector. But, be sure to do so for data to be entered in the project file. PN:58 Type point number 1000. PD:TBM Type 24” MAPLE. HZ: Type 16.3741. VT: Type 90.2550. DS: Type 565.855. AC:SS A length offset data item must be entered to correct the tree shot, which was taken on the near side of the tree, to the center of the tree. Back up to the “A” in AC and type LO, but don't press <ENTER> yet. LO: Type -1 (the staff was one foot nearer the instrument than the center of the tree). AC:SS Press <ENTER> to accept the suggested sideshot activity. PN:1001 Press <ENTER> to accept incremented point number 1001. PD:24 IN Type SAN MH <ENTER> (remember to clear MAPLE the rest of the line before pressing <ENTER>). HZ: Type 70.3524. VT: Type 91.1548. DS: Type 436.472. Note: Other information about the underground utility may be recorded with other data tags specified by the user. AC:SS Type UE over the displayed SS to select the utility elevation activity. PN:1002 Press <ENTER> to accept incremented point number 1002. PD:SAN MH Type 8“ VCP. RR: Type 10.3, which is the vertical offset from the last sideshot to the utility elevation point. AC:UE Type SS over the displayed UE to select the sideshot activity. PN:1003 Press <ENTER> to accept incremented point number 1003. PD:8 IN PVC Type SE COR BLDG HZ: Type 225.1422 VT: Type 88.3035 DS: Type 265.934 AC:SS Due to an obstruction, the staff height changes to 8.50 for this one shot. Move to the “A” in AC and type SH, but do not press <ENTER> yet. SH:6.0 Type 8.50. Since this is a one-time change, use the "once" function. Press <CTRL><ENTER> to enter the staff height value. AC:SS Press <ENTER> to accept the suggested sideshot activity. PN:1004 Press <ENTER> to accept incremented point number 1004. PD:SE COR Type NE over SE so that the description reads BLDG NE COR BLDG. Survey Data Management System Version 3.5 11-4 Examples Displayed HZ: VT: DS: AC:SS SH:6.0 AC:SS PN:1005 PD:NE COR BLDG RR: AC:UE VT: AC:UE Close or Suspend Choose a Command Instructions and Comments Type 251.5246 Type 88.2942 Type 271.581 A staff height must be selected again to return the staff height to its original value (before it is changed with the "once" function on point 1003). Move to the “A” in AC and type SH, but don't press <ENTER> yet. Press <ENTER> to accept 6.0 and restore the staff height. NOTE: The staff height tag, SH:, can be added to the TASK.TGS file under TK:RTO, AC:SS to eliminate the need to type in the tag each time. The user could accept the value displayed or change using the once shot, etc. Type UE over the displayed SS to select the utility elevation activity. Use a vertical (zenith) angle measurement in the utility elevation to measure the elevation of eaves on the building. Press <ENTER> to accept incremented point number 1005. Add ROOF to the displayed description. Press <ENTER> on the blank field to skip this prompt. Move to the “A” in AC and type VT to select the vertical angle data tag, but do not press <ENTER> yet. Type 61.4352 Press <Esc> to leave data collection. Type a C to close the project. SDMS Collector returns to the main menu. Note Most CADD systems need a feature code, FE, to plot points with the correct symbol. Since the feature code is user defined, based on the CADD system used, it is not included in the example files. Survey Data Management System Version 3.5 11-5 Examples The Radial Topography Example Project (.PRJ) File 1. 2. 3. 4. 5. 6. 7. 8. 9. 10. 11. 12. 13. 14. 15. 16. 17. 18. 19. 20. 21. 22. 23. 24. 25. 26. 27. 28. 29. 30. 31. 32. 33. 34. 35. 36. 37. 38. 39. 40. 41. 42. 43. 44. 45. 46. 47. 48. 49. 50. 51. 52. 53. 54. 55. 56. 57. 58. 59. 60. PR:RTOTEST.PRJ TK:RTO AC:OS PN:215 IH:5.45 SH:6.0 YC:1527.8 XC:473128.36 PD:CTRL MON AC:BS PN:216 PD:CTRL MON YC:2244.08 XC:473879.91 HZ:0 VT:89.5930 DS:1038.182 AC:EC PN:57 PD:TBM ZC:448.391 HZ:5.4530 VT:89.2244 DS:838.541 AC:SS PN:1000 PD:24” MAPLE HZ:16.3741 VT:90.2550 DS:565.855 LO:-1 AC:SS PN:1001 PD:SAN MH HZ:70.3524 VT:91.1548 DS:436.472 AC:UE PN:1002 PD:8” VCP RR:10.3 AC:SS PN:1003 PD:SE COR BLDG HZ:225.1422 VT:88.3035 DS:265.934 SH:8.50 AC:SS PN:1004 PD:NE COR BLDG HZ:251.5246 VT:88.2942 DS:271.581 SH:6.0 AC:UE PN:1005 PD:NE COR BLDG ROOF VT:61.4352 CP:06/14/95 11:19:43 Survey Data Management System Version 3.5 11-6 Examples Computed Radial Topography Example Saved As A Control (.CTL) File 1. 2. 3. 4. 5. 6. 7. 8. 9. 10. 11. 12. 13. 14. 15. 16. 17. 18. 19. 20. 21. 22. 23. 24. 25. 26. 27. 28. 29. 30. 31. 32. 33. 34. 35. 36. 37. 38. 39. 40. 41. 42. 43. 44. 45. 46. 47. 48. 49. 50. 51. 52. 53. 54. AC:OS PN:215 YC:1527.850 XC:473128.360 ZC:439.837 PD:CTRL MON AC:BS PN:216 YC:2244.080 XC:473879.910 ZC:439.460 PD:CTRL MON AC:EC PN:57 YC:2042.498 XC:473790.331 ZC:448.391 PD:TBM AC:SS PN:1000 YC:1785.132 XC:473633.447 ZC:435.041 PD:24” MAPLE AC:SS PN:1001 YC:1329.958 XC:473517.274 ZC:429.667 PD:SAN MH AC:UE PN:1002 YC:1329.958 XC:473517.274 ZC:419.367 PD:8” PVC AC:SS PN:1003 YC:1535.356 XC:472862.622 ZC:443.704 PD:SE COR BLDG AC:SS PN:1004 YC:1656.383 XC:472889.227 ZC:446.421 PD:NE COR BLDG AC:UE PN:1005 YC:1656.383 XC:472889.227 ZC:585.279 PD:NE COR BLDG ROOF Survey Data Management System Version 3.5 11-7 Examples Traverse Example Traverse (TK:TRA) can be either a horizontal task to collect data with X and Y components, or a horizontal and vertical task to collect data with X, Y, and Z components. A traverse is normally defined as a series of occupied stations, backsights, and foresights. Other types of activities can be included as well. See the Appendix for the default task and activity listing. A traverse can be balanced and adjusted in SDMS Collector. PN:26 CTRL PT (BS) PN:27 CTRL PT (BEG STA) PN:101 TRAV PT (OS) PN:27 PD:CTRL PT YC:80281.016 XC:853432.237 ZC:448.2285 PN:26 PD: CTRL PT YC:80101.427 XC:853960.738 PN:35 PD: CTRL PT YC:78484.989 XV:855651.863 PN:36 CTRL PT PD: CTRL PT AZ:91.3352 (AZM, PN:35 ->PN:#36) PN:102 TRAV PT (OS) PN:103 TRAV PT (OS) PN:35 CTRL PT (END STA) Displayed Choose a Command Project Name> *.PRJ New Project Enter Task TK: AC:OS PN:2 PD: IH: AC:BS YC: AC:BS XC: AC:BS Survey Data Management System Version 3.5 PN:36 CTRL PT AZM (FS) Instructions and Comments From the main menu, press <F1> Project to open a project. Type the project name TRAEXAM; <ENTER>. Type TRA and press <ENTER> to select the traverse task. Press <ENTER> to begin the suggested occupied station activity. Type point number 27 over the suggested point number 2; <ENTER>. Type the point description CTRL PT and press <ENTER>. Type the instrument height 5.2 and press <ENTER>. SDMS Collector suggests a backsight activity. But before taking the backsight, the coordinates of the occupied station must be entered. Back up to the “A” in AC and type YC to manually select the Northing coordinate data item, but do not press <ENTER> yet. Type the Northing coordinate 80281.016 and press <ENTER>. Back up to the “A” in AC and type XC to manually select the Easting coordinate data item, but don't press <ENTER> yet. Type in the Easting coordinate 853432.237 and press <ENTER>. Back up to the “A” in AC and type ZC to manually 11-8 Examples Displayed Instructions and Comments select the elevation/Z coordinate data item, but don't press <ENTER> yet. ZC: Type in the elevation/Z coordinate 448.225 and press <ENTER>. AC:BS Press <ENTER> to accept the suggested backsight activity AC:BS. PN:1 Type point number 26 over the suggested point number 1 and press <ENTER>. PD:CTRL PT Press <ENTER> to accept the suggested point description CTRL PT. SH: Type the staff height 5.7 and press <ENTER>. HZ: Type 0 to zero the backsight and press <ENTER> VT: Type the measured vertical (zenith) angle 91.0200 and press <ENTER>. DS: Type the measured slope distance 558.181 and press <ENTER>. AC:BS SDMS Collector again suggests a backsight activity. But before continuing, the coordinates of the backsight must be entered. Back up to the “A” in AC and type YC, but do not press <ENTER> yet. YC: Type the Northing coordinate 80101.427 and press <ENTER>. AC:BS Back up to the “A” in AC and type XC, but do not press <ENTER> yet. XC: Type in the Easting coordinate 853960.738 and press <ENTER>. AC:BS Type FS over the displayed BS to select the foresight activity and press <ENTER>. PN:3 Type point number 101over the suggested point number 3 and press <ENTER>. PD:CTRL PT Type TRAV over CTRL and press <ENTER>. Note: From here on, the user will not be told to press <ENTER> to enter values that have been typed into the data collector. But, be sure to do so for data to be entered in the project file. HZ: Type 54.4048 VT: Type 90.2550 DS: Type 610.061 AC:FS A new staff height value must be entered since the staff height changed. Move to the “A” in AC and type SH, but do not press <ENTER> yet. SH:5.7 Notice that SDMS Collector suggests the last-entered staff height. Change it to 4.9. At this point the coordinates of the foresight point can be checked. To do that, press <F6> to get the following options: • Press F1 for the last occupied station. • Press F2 for the last measured station. • Press F3 to enter the point number. Press <F2> to get the coordinates of the last foresight point. At this point if an error, is detected, the shots can be edited to rectify it. To do that, press Esc twice to return to the project. Press <F7> to choose the Func menu and press <F2> to edit the project shown. Move the cursor to the desired tag (for example move the cursor to the VT of the foresight shot and change it to 91.0200). Move the cursor one position down and press <F5> and then Survey Data Management System Version 3.5 11-9 Examples Displayed Instructions and Comments <F4> to save and exit the edit mode. Press Esc to return to the project. Now press <F6> and <F2> to check the coordinates again. This demonstrates the flexibility to collect and correct the data at the same time. AC:FS The instrument has moved to point 101. Type OS over FS to select the occupied station activity. PN:101 Press <ENTER> to accept incremented point number 101. PD:TRAV PT Press <ENTER> to accept the suggested point description TRAV PT. IH:5.2 Press <ENTER> to accept the suggested instrument height. 5.2. SH:4.9 Press <ENTER> to accept the suggested staff height 4.9. AC:BS Press <ENTER> to accept the backsight shot PN:27 Press <ENTER> to accept the point number 27 PD: TRAV PT Type CTRL over TRAV and press <ENTER> HZ: Type 0 to zero backsight VT: Type 89.3410 DS: Type 610.061 AC:BS Type FS over BS to select the foresight activity. PN:102 Press <ENTER> to accept incremented point number 102. PD:CTRL PT Type TRAV over CTRL. HZ: Type 173.3938 VT: Type 87.3846 DS: Type 698.496 AC:FS The staff height has changed again, a new SH value must be entered. Move to the “A” in AC and type SH, but do not press <ENTER> yet. SH:4.9 SDMS Collector suggests the last-entered staff height. Change it to 5.3. AC:FS The instrument has been moved to point 102. Type OS over FS to select the occupied station activity. PN:102 Press <ENTER> to accept incremented point number 102. PD:TRAV PT Press <ENTER> to accept the suggested point description TRAV PT. IH:5.2 Change the instrument height to 5.42. SH:5.3 Press <ENTER> to accept the suggested staff height 5.3. AC:BS Press <ENTER> to accept the backsight shot activity PN:101 Press <ENTER> to accept the suggested point number 101 PD:TRAV PT Press <ENTER> to accept the suggested point description HZ: Type 0 to zero the backsight VT: Type 91.2114 DS: Type 698.496 AC:BS SDMS Collector suggests the backsight activity. Type FS over BS to select the foresight activity. PN:103 Press <ENTER> to accept incremented point number 103. PD:TRAV PT Press <ENTER> to accept the suggested point Survey Data Management System Version 3.5 11-10 Examples Displayed HZ: VT: DS: AC:FS SH:5.3 AC:FS PN:103 PD:TRAV PT IH:5.42 SH:5.1 AC:BS PN:102 PD:TRAV PT HZ: VT: DS: AC:BS PN:104 PD:TRAV PT HZ: VT: DS: AC:FS SH:5.1 AC:FS PN:35 PD:CTRL PT IH:5.45 SH:4.84 AC:BS YC: Survey Data Management System Version 3.5 Instructions and Comments description TRAV PT. Type 159.2402 Type 90.5815 Type 793.877 The staff height has changed again so a new SH value must be entered. Move to the “A” in AC and type SH, but do not press <ENTER> yet. SDMS Collector suggests the last-entered staff height. Change it to 5.1. The instrument has moved to point 103. Type OS over FS to select the occupied station activity. Press <ENTER> to accept incremented point number 103. Press <ENTER> to accept the suggested point description TRAV PT. Change the instrument height to 5.45. Press <ENTER> to accept the suggested staff height 5.1. Press <ENTER> to accept the suggested backsight shot activity Press <ENTER> to accept the suggested point number 102 Press <ENTER> to accept the suggested point description Type 0 to zero the backsight Type 89.0145 Type 793.877 Type FS over BS to select the foresight activity. SDMS Collector suggests the incremented point number 104. Change it to 35 Type CTRL over TRAV. Type 133.0802 Type 91.1010 Type 1228.112 The staff height has changed again so a new SH value must be entered. Move to the “A” in AC and type SH, but do not press <ENTER> yet. SDMS Collector suggests the last-entered staff height. Change it to 4.84 The instrument has moved to point 35. Type OS over FS to select the occupied station activity. Press <ENTER> to accept point number 35. Press <ENTER> to accept the suggested point description CTRL PT. Change the instrument height to 4.9 Press <ENTER> to accept the suggested staff height 4.84. SDMS Collector suggests a backsight activity. But before taking the backsight, the closing Northing coordinate must be entered. Back up to the A in AC and type YC to manually select the Northing coordinate data item, but don't press <ENTER> yet. Type the closing Northing coordinate 78484.989 11-11 Examples Displayed AC:BS XC: AC:BS PN:103 PD:CTRL PT HZ: VT: DS: AC:BS PN:36 PD:CTRL PT HZ: VT: DS: AC:FS SH:4.84 AC:FS AZ: AC:FS Close or Suspend Choose a Command Instructions and Comments SDMS Collector again suggests a backsight activity. But before taking the backsight, the closing Easting coordinate must be entered. Back up to the A in AC and type XC to manually select the Easting coordinate data item, but don't press <ENTER> yet. Type the closing Easting coordinate 855651.863 Press <ENTER> to accept suggested backsight shot activity Press <ENTER> to accept the suggested point number 103 Press <ENTER> to accept the suggested point description Type 0 to zero the backsight Type 88.4950 Type 1228.112 Type FS over BS to select the foresight activity. Press <ENTER> to accept incremented point number 36. Press <ENTER> to accept the suggested point description CTRL PT. Type 181.5540 Type 90.3020 Type 835.533 The staff height has changed again so a new SH value must be entered. Move to the “A” in AC and type SH, but do not press <ENTER> yet. SDMS Collector suggests the last-entered staff height. Change it to 5.1 The azimuth data tag must be added manually to enter known closing azimuth. Move to the “A” in AC and type AZ, but do not press <ENTER> yet. Type 91.3352 Press <Esc> to leave data collection. Type a C to close the project. SDMS Collector returns to the main menu. Note Remember, sequences can be used to set up the prompts for all the tags used in an activity. This eliminates the need to overwrite the tags during data collection. The Traverse Example Project (.PRJ) File 1. 2. 3. 4. 5. 6. 7. 8. 9. 10. 11. 12. 13. 14. PR:TRAEXAM TK:TRA AC:OS PN:27 PD:CTRL PT IH:5.2 SH:5.7 YC:80281.016 XC:853432.237 ZC:448.225 AC:BS PN:26 PD:CTRL PT HZ:0 Survey Data Management System Version 3.5 11-12 Examples 15. 16. 17. 18. 19. 20. 21. 22. 23. 24. 25. 26. 27. 28. 29. 30. 31. 32. 33. 34. 35. 36. 37. 38. 39. 40. 41. 42. 43. 44. 45. 46. 47. 48. 49. 50. 51. 52. 53. 54. 55. 56. 57. 58. 59. 60. 61. 62. 63. 64. 65. 66. 67. 68. 69. 70. 71. 72. 73. 74. 75. 76. 77. 78. 79. 80. 81. 82. 83. 84. 85. VT:91.0200 DS:558.181 YC:80101.427 XC:853960.738 AC:FS PN:101 PD:TRAV PT HZ:54.4048 VT:90.2550 DS:610.061 SH:4.9 AC:OS PN:101 PD:TRAV PT IH:5.2 SH:4.9 AC:BS PN:27 PD:CTRL PT HZ:0 VT:87.3846 DS:610.061 AC:FS PN:102 PD:TRAV PT HZ:173.3938 VT:87.3846 DS:698.496 SH:5.3 AC:OS PN:102 PD:TRAV PT IH:5.42 SH:5.3 AC:BS PN:101 PD:TRAV PT HZ:0 VT:92.2114 DS:698.496 AC:FS PN:103 PD:TRAV PT HZ:159.2402 VT:90.5815 DS:793.877 SH:5.1 AC:OS PN:103 PD:TRAV PT IH:5.45 SH:5.1 AC:BS PN:102 PD:TRAV PT HZ:0 VT:89.0145 DS:793.877 AC:FS PN:35 PD:CTRL PT HZ:133.0802 VT:91.1010 DS:1228.112 SH:4.84 AC:OS PN:35 PD:CTRL PT IH:4.9 SH:4.84 YC:78484.989 Survey Data Management System Version 3.5 11-13 Examples 86. 87. 88. 89. 90. 91. 92. 93. 94. 95. 96. 97. 98. 99. 100. 101. XC:855651.663 AC:BS PN:103 PD:TRAV PT HZ:0 VT:88.4950 DS:1228.112 AC:FS PN:36 PD:CTRL PT HZ:181.5540 VT:90.3020 DS:835.533 SH:5.1 AZ:91.3352 CP:04/14/95 15:32:09 The Computed Traverse Example Saved As A Control (.CTL) File 1. 2. 3. 4. 5. 6. 7. 8. 9. 10. 11. 12. 13. 14. 15. 16. 17. 18. 19. 20. 21. 22. 23. 24. 25. 26. 27. 28. 29. 30. 31. 32. 33. 34. 35. 36. 37. 38. 39. 40. 41. 42. AC:OS PN:27 YC:80281.016 XC:853432.237 ZC:448.225 PD:CTRL PT AC:BS PN:26 YC:80101.427 XC:853960.738 ZC:438.652 PD:CTRL PT AC:OS PN:101 YC:79696.227 XC:853606.076 ZC:444.133 PD:TRAV PT AC:OS PN:102 YC:79053.258 XC:853877.605 ZC:472.511 PD:TRAV PT AC:OS PN:103 YC:78477.371 XC:854423.960 ZC:458.927 PD:TRAV PT AC:OS PN:35 YC:78484.989 XC:855651.863 ZC:433.482 PD:CTRL PT AC:FS PN:36 YC:78462.065 XC:856487.098 ZC: PD:CTRL PT Survey Data Management System Version 3.5 11-14 Examples Level Run Example The level run task (TK:LEV) is a vertical (differential leveling) task. The occupied station (AC:OS) enters the beginning elevation and signals the beginning of the task. The elevation control is carried through a series of backsights and turning points. The foresight activity (AC:FS), is used for sights on permanent and temporary benchmarks for which elevations are known or desired. AC:BS RR:6.29 AC:TP RR:1.36 840.54 TP#1 AC:BS RR:7.94 AC:FS RR:9.37 HI:848.48 HI:841.90 AC:OS PN:1 PD:USGS 31 D 1957 ZC:835.61 Displayed Choose a Command Project Name> *.PRJ New Project Enter Task TK: ZC: AC:BS RR: AC:BS RR: AC:TP RR: AC:BS PN:3 PD:USGS 31D 1957 RR: AC:FS Survey Data Management System Version 3.5 AC:FS PN:2 PD:USGS 31E 1957 ZC:839.123 Instructions and Comments From the main menu, press <F1> Project to open a project. Type the project name LEVEXAM; <ENTER>. Type LEV and press <ENTER> to select the traverse task. Type the elevation of 835.61 for the occupied station. Press <ENTER> to accept the suggested backsight activity AC:BS. Type 6.29 to enter the rod reading at the backsight on benchmark. Type TP over the displayed BS to select the turning point activity. Type 1.36 to enter the turning point rod reading. Type BS over the displayed TP to select the backsight activity. Type 7.94 to enter the observed rod reading at backsight on turning point. Type FS over the displayed BS to select the foresight activity. Type point number 2 over the suggested point number 3. Change the point description to read USGS 31E 1957. Type 9.37 to enter the rod reading at foresight. SDMS Collector suggests a foresight activity. But before 11-15 Examples Displayed ZC: AC:FS Close or Suspend Choose a Command Instructions and Comments continuing, the known closing elevation must be entered. Back up to the “A” in AC and type ZC, but do not press <ENTER> yet. Type 839.123 Press <Esc> to leave data collection. Type a C to close the project. SDMS Collector returns to the main menu. The Level Run Example Project (.PRJ) File 1. 2. 3. 4. 5. 6. 7. 8. 9. 10. 11. 12. 13. 14. 15. 16. 17. 18. PR:LEVEXAM.PRJ TK:LEV AC:OS PN:1 PD:USGS 31D 1957 ZC:835.61 AC:BS RR:6.29 AC:TP RR:1.36 AC:BS RR:7.94 AC:FS PN:2 PD:USGS 31E 1957 RR:9.37 ZC:839.123 CP: 09/21/95 0:02:27 The Computed Level Run Saved As A Control (.CTL) File 1. 2. 3. 4. 5. 6. 7. 8. AC:OS PN:1 ZC:835.610 PD:USGS 31D 1957 AC:FS PN:2 ZC:839.123 PD:USGS 31E 1957 Survey Data Management System Version 3.5 11-16 Examples Three-Wire Level Example Three-Wire Level (TK:3WR) is a vertical (differential leveling) task. PN:1 PD:USGS 3005A ZC:1016.723 PN:2 PD:USGS 3002B ZC:1015.986 1.722 1.603 1.485 2.228 2.115 2.003 2.928 2.815 2.702 2.675 2.550 2.425 AC:TP ZC:1018.536 Displayed Choose a Command Project Name> *.PRJ New Project Enter Task TK: ZC: AC:BS R1: R2: R3: AC:BS R1: R2: R3: AC:TP R1: R2: R3: AC:BS PN:3 PD:USCGS 3005A R1: R2: R3: AC:FS ZC: AC:FS Survey Data Management System Version 3.5 Instructions and Comments From the main menu, press <F1> Project to open a project. Type the project name 3WREXAM; <ENTER>. Type 3WR and press <ENTER> to select the traverse task. Type 1016.723 and press <ENTER>. Press <ENTER> to accept the suggested backsight activity. Type 2.928 Type 2.815 Type 2.702 Type TP over BS to select the turning point activity. Type 2.228 Type 2.115 Type 2.003 Type BS over TP to select the backsight activity. Type 1.722 Type 1.603 Type 1.485 Type FS over BS to select the foresight activity. Type 2 Type USCGS 3005B. Type 2.675 Type 2.550 Type 2.425 Manually select the elevation/Z coordinate data tag to enter the known closing elevation. Back up to the “A” in AC and type ZC, but do not press <ENTER>. Type 1015.986 Press <Esc> to leave data collection. 11-17 Examples Displayed Close or Suspend Choose a Command Instructions and Comments Type a C to close the project. SDMS Collector returns to the main menu. The Three-Wire Level Example Project (.PRJ) File 1. 2. 3. 4. 5. 6. 7. 8. 9. 10. 11. 12. 13. 14. 15. 16. 17. 18. 19. 20. 21. 22. 23. 24. 25. 26. PR:3WREXAM TK:3WR AC:OS PN:1 PD:USCGS 3005A ZC:1016.723 AC:BS R1:2.928 R2:2.815 R3:2.702 AC:TP R1:2.228 R2:2.115 R3:2.003 AC:BS R1:1.722 R2:1.603 R3:1.485 AC:FS PN:2 PD:USCGS 3005B R1:2.675 R2:2.550 R3:2.425 ZC:1015.986 CP:08/24/95 09:04:23 The Computed Three-Wire Level Example Saved As A Control (.CTL) File 1. 2. 3. 4. 5. 6. 7. 8. AC:OS PN:1 ZC:1016.723 PD:USCGS 3005A AC:FS PN:2 ZC:1015.986 PD:USCGS 3005B Survey Data Management System Version 3.5 11-18 Examples Cross-Section Example The cross-section task (TK:XSE) is a vertical (differential leveling) task. All sideshots are assumed to be ground shots unless a point description is entered. PN:2 FE:TBM PD:SPK IN PP RR:2.18(FS) ST:10+80 OF:-62 RR:6.87(BS) See hand level detail -100 -75 ST:10+00 -50 8.0 -25 7.3 -52 6.4 -50 -25 5.8 -15 5.4 0 5.1 ST:10+44 -25 7.0 5.0 -25 7.8 0 4.2 0 6.4 5.6 25 8.2 0 6.4 25 7.5 25 50 8.1 6.4 50 ST:10+80 Setup #1 HI:1300.73 AC:OS PN:1 FE:BM ZC:1292.316 PD:DOT 8241 RR:8.41 -50 PN:200 FE:SSMH PD:SAN SEWER MH ST:11+39 OF:-69 RR:-6.83 8.0 50 ST:11+00 PN:201 FE:SS PD:24” VCP NW RR:8.32 Setup #2 HI:1305.42 PN:202 FE:SS PD:FL 36” RCP RR:14.84 Hand Level Detail 2.5 6.3 1.5 -75 -100 7.2 3.6 Closing B.M. AC:FS PN:3 FE:BM ZC:1301.242 PD:DOT 8242 RR:4.15 ORIG. SETUP 2.5 -50 Displayed Choose a Command Project Name> *.PRJ New Project Enter Task TK: AC:OS PN:1 FE: PD: ZC: AC:BS RR: AC:BS ST: AC:ST Survey Data Management System Version 3.5 Instructions and Comments From the main menu, press <F1> Project to open a project. Type the project name XSEEXAM; <ENTER>. Type XSE and press <ENTER> to select the traverse task. Press <ENTER> to begin the suggested occupied station activity. Press <ENTER> to begin the suggested point number. Type BM and press <ENTER>. Type DOT 8241 and press <ENTER>. Type 1292.316 and press <ENTER>. Press <ENTER> to accept the suggested backsight activity. Type 8.41 and press <ENTER>. Type ST over the displayed BS to select the stationing activity for the first cross-section. Type 10+00. Type SS over the displayed ST to select the 11-19 Examples Displayed FE:BM PD:DOT 8241 OF: RR: AC:SS FE:XSE PD: OF:0 RR: AC:SS FE:XSE PD: OF:-25 RR: AC:SS FE:XSE PD: OF:-50 RR: AC:SS FE:XSE PD: OF:25 RR: AC:SS ST:10+00 AC:ST CM: AC:SS FE:XSE PD: OF:50 RR: AC:SS FE:XSE PD:C/L ENT OF:0 RR: AC:SS FE:XSE Survey Data Management System Version 3.5 Instructions and Comments sideshot activity. Type XSE (cross section feature) and press <ENTER> Press <Ctrl><L> to clear the line, then press <ENTER>. Type 0 for sideshot on centerline. Type 6.4 Press <ENTER> to accept the suggested sideshot activity. Press <ENTER> to accept the suggested feature Press <ENTER> to accept the blank line. Type -25 Type 7.3 Press <ENTER> to accept the suggested sideshot activity. Press <ENTER> to accept the suggested feature Press <ENTER> to accept the blank line. Type -50 Type 6.0 Press <ENTER> to accept the suggested sideshot activity. Press <ENTER> to accept the suggested feature Press <ENTER> to accept the blank line. Type 25 Type 7.5 Press <ENTER> to accept the suggested sideshot activity. Press <ENTER> to accept the suggested feature Press <ENTER> to accept the blank line. Type 50 Type 8.1 Type ST over SS to select the stationing activity. Type 10+41 Enter a comment for the special cross-section. Back up to the “A” in AC and type CM, but do not press <ENTER>. Type C/L 20 ENT LT. Press <ENTER> to accept the suggested activity Press <ENTER> to accept the suggested feature Type C\L ENT Type 0 Type 5.1 Press <ENTER> to accept the suggested sideshot activity. Press <ENTER> to accept the suggested feature Press <ENTER> to accept the suggested point description. Type -15 Type 5.4 Press <ENTER> to accept the suggested sideshot activity. Press <ENTER> to accept the suggested feature 11-20 Examples Displayed PD:C/L ENT OF:-15 RR: AC:SS FE:XSE PD:C/L ENT OF:-25 RR: AC:SS ST:10+41 AC:SS FE:XSE PD:C/L ENT OF:-52 RR: AC:SS FE:XSE PD: OF:0 RR: AC:SS FE:XSE PD: OF:-25 RR: AC:SS RR: AC:BS SI: AC:BS FE:XSE PD: OF:-50 RR: AC:SS RR: AC:TP RR: AC:BS FE:XSE PD: OF:-75 Survey Data Management System Version 3.5 Instructions and Comments Press <ENTER> Type -25 Type 5.8 Press <ENTER> to accept the suggested sideshot activity. Press <ENTER> to accept the suggested feature. Press <ENTER> to accept the suggested point description. Type -52 Type 6.4 Type ST over SS to select the stationing activity. Type 10+50 Press <ENTER> to accept the suggested activity Press <ENTER> to accept the suggested feature. Press <Ctrl><L> to clear the line, then press <ENTER> Type 0 Type 4.2 Press <ENTER> to accept the suggested sideshot activity. Press <ENTER> to accept the suggested feature. Press <ENTER> to accept the blank line. Type -25 Type 5.0 Press <ENTER> to accept the suggested sideshot activity. Press <ENTER> to accept the suggested feature. Press <ENTER> to accept the blank line. Type -50 Type 3.6 Type BS over SS to select the backsight activity. Type 7.2 Manually select the shot ID data tag to indicate the beginning of hand-level (LOCKE) shots. Back up to the “A” in AC and type SI, but do not press <ENTER>. Type BL Type SS over BS to select the sideshot activity. Press <ENTER> to accept the suggested feature. Press <ENTER> to accept the blank line. Type -75 Type 1.5 Type TP over SS to select the turning point activity (make a turn with the hand-level for one more shot). Type 1.5 Type BS over TP to select the backsight activity. Type 6.3 Type SS over BS to select the sideshot activity. Press <ENTER> to accept the suggested feature. Press <ENTER> to accept the blank line. Type -100 11-21 Examples Displayed RR: AC:SS SI:BL AC:SS FE:XSE PD: OF:-100 RR: AC:SS FE:XSE PD: OF:25 RR: AC:SS PN:2 FE: PD: RR: AC:FS ST:10+50 AC:FS OF:50 AC:FS RR: AC:BS ST:10+80 AC:ST FE:BM PD: OF:50 RR: AC:SS FE:XSE PD: OF:0 RR: AC:SS Survey Data Management System Version 3.5 Instructions and Comments Type 2.5 Manually select the shot ID data tag to indicate the end of hand-level (LOCKE) shots. Back up to the “A” in AC and type SI, but do not press <ENTER>. Type EL. (This restores the HI saved at the start of LOCKE shots.) Press <ENTER> to accept the suggested sideshot activity. Press <ENTER> to accept the suggested feature. Press <ENTER> to accept the blank line. Type 25 Type 5.8 Press <ENTER> to accept the suggested sideshot activity. Press <ENTER> to accept the suggested feature. Press <ENTER> to accept the blank line. Type 50 Type 6.4 Type FS over SS to select the foresight activity. Press <ENTER> to accept the suggested point number. Type BM and press <ENTER>. Type SPK IN PP Type 2.18 Manually select the stationing data tag to input the stationing of the foresight point. Back up to the “A” in AC and type ST, but do not press <ENTER>. Type 10+80 Manually select the offset data tag to input the offset of the foresight point. Back up to the “A” in AC and type OF, but do not press <ENTER>. Type -62 Type BS over FS to select the backsight activity. Type 6.87 Type ST over BS to select the stationing activity. Type 11+00 Type SS over ST to select the sideshot activity. Change the feature to XSE and press <ENTER> Press <Ctrl><L> to clear the line, then press <ENTER> Type in 0 Type 7.1 Press <ENTER> to accept the suggested sideshot activity. Press <ENTER> to accept the suggested feature. Press <ENTER> to accept the blank line. Type -25 Type 7.8 Press <ENTER> to accept the suggested sideshot activity. 11-22 Examples Displayed FE:XSE PD: OF:-25 RR: AC:SS FE:XSE PD: OF:-50 RR: AC:SS FE:XSE PD: OF:25 RR: AC:SS FE:XSE PD: OF:50 RR: AC:SS PN:100 AC:SS ST:11+00 AC:SS PN:201 FE: PD: SANITARY SEWER MANHOLE RR: AC:UE PN:202 FE:SS PD:24 “ VCP NW RR: AC:UE PN:3 Survey Data Management System Version 3.5 Instructions and Comments Press <ENTER> to accept the suggested feature. Press <ENTER> to accept the blank line. Type -50 Type 7.0 Press <ENTER> to accept the suggested sideshot activity. Press <ENTER> to accept the suggested feature. Press <ENTER> to accept the blank line. Type 25 Type 8.2 Press <ENTER> to accept the suggested sideshot activity. Press <ENTER> to accept the suggested feature. Press <ENTER> to accept the blank line. Type 50 Type 8.0 Press <ENTER> to accept the suggested sideshot activity to pick up a manhole. Change the feature to SSMH (sanitary sewer manhole) and press <ENTER>. Type SANITARY SEWER MANHOLE and press <ENTER>. Type -69 Type 6.83 Manually select the point number data tag. Back up to the “A” in AC and type PN, but do not press <ENTER>. Type 200 Manually select the stationing data tag. Back up to the “A” in AC and type ST, but do not press <ENTER>. Type 11+39, press <ENTER>. Type UE over SS to select the utility elevation activity. Press <ENTER> to accept the suggested point number 201. Type SS Type 24” VCP NW Type 8.32, the distance from the sideshot down to utility elevation. Press <ENTER> to accept the suggested utility elevation activity AC:UE to pick up a deeper pipe. Press <ENTER> to accept the suggested point number 202. Press <ENTER> to accept the suggested feature. Type 36” RCP Type 14.84 Type FS over UE to select the foresight AC:FS to close on known elevation. Press <ENTER> to accept the suggested point number. 11-23 Examples Displayed FE:SS PD:36 IN RCP RR: AC:FS ZC: AC:FS Close or Suspend Choose a Command Instructions and Comments Type BM Type DOT 8242 Type 4.15 Manually select the elevation/Z coordinate data tag to enter known closing elevation. Back up to the “A” in AC and type ZC, but do not press <ENTER>. Type 1301.242 Press <Esc> to leave data collection. Type a C to close the project. SDMS Collector returns to the main menu. The Cross-Section Example Project (.PRJ) File 1. 2. 3. 4. 5. 6. 7. 8. 9. 10. 11. 12. 13. 14. 15. 16. 17. 18. 19. 20. 21. 22. 23. 24. 25. 26. 27. 28. 29. 30. 31. 32. 33. 34. 35. 36. 37. 38. 39. 40. 41. 42. 43. 44. 45. 46. 47. 48. 49. 50. 51. PR:XSEEXAM.PRJ TK:XSE AC:OS PN:1 FE:BM PD:DOT 8241 ZC:1292.316 AC:BS RR:8.41 ST:10+00 AC:SS FE:XSE OF:0 RR:6.4 AC:SS FE:XSE OF:-25 RR:7.3 AC:SS FE:XSE OF:-50 RR:6.0 AC:SS FE:XSE OF:25 RR:7.5 AC:SS FE:XSE OF:50 RR:8.1 ST:10+41 CM:C\L 20 ENT LT AC:SS FE:XSE PD:C\L ENT OF:0 RR:5.1 AC:SS FE:XSE PD:C\L ENT OF:0 RR:5.1 AC:SS FE:XSE PD:C\L ENT OF:-15 RR:5.4 AC:SS FE:XSE PD:C\L ENT OF:-25 Survey Data Management System Version 3.5 11-24 Examples 52. 53. 54. 55. 56. 57. 58. 59. 60. 61. 62. 63. 64. 65. 66. 67. 68. 69. 70. 71. 72. 73. 74. 75. 76. 77. 78. 79. 80. 81. 82. 83. 84. 85. 86. 87. 88. 89. 90. 91. 92. 93. 94. 95. 96. 97. 98. 99. 100. 101. 102. 103. 104. 105. 106. 107. 108. 109. 110. 111. 112. 113. 114. 115. 116. 117. 118. 119. 120. 121. 122. RR:5.8 AC:SS FE:XSE PD:C\L ENT OF:-52 RR:6.4 ST:10+50 AC:SS FE:XSE OF:0 RR:4.2 AC:SS FE:XSE OF:-25 RR:5.0 AC:SS FE:XSE OF:-50 RR:3.6 AC:BS RR:7.2 SI:BL AC:SS FE:XSE OF:-75 RR:1.5 AC:TP RR:1.5 AC:BS RR:6.3 AC:SS FE:XSE OF:-100 RR:2.5 SI:EL AC:SS FE:XSE OF:25 RR:5.8 AC:SS FE:XSE OF:50 RR:6.4 AC:FS PN:2 FE:BM PD:SPK IN PP RR:2.18 ST:10+80 OF:-62 AC:BS RR:6.87 ST:11+00 AC:SS FE:XSE OF:0 RR:7.1 AC:SS FE:XSE OF:-25 RR:7.8 AC:SS FE:XSE OF:-50 RR:7.0 AC:SS FE:XSE OF:25 RR:8.2 AC:SS FE:XSE Survey Data Management System Version 3.5 11-25 Examples 123. 124. 125. 126. 127. 128. 129. 130. 131. 132. 133. 134. 135. 136. 137. 138. 139. 140. 141. 142. 143. 144. 145. 146. 147. 148. OF:50 RR:8.0 AC:SS FE:SSMH PD:SANITARY SEWERE MANHOLE OF:-69 RR:6.83 PN:200 ST:11+39 AC:UE PN:201 FE:SS PD:24" VCP NW RR:8.32 AC:UE PN:202 FE:SS PD:36" RCP RR:14.84 AC:FS PN:3 FE:BM PD:DOT 8242 RR:4.15 ZC:1301.242 CP:07/23/01 11:35:49 The Computed Cross-Section Example Saved As A Control (.CTL) File 1. 2. 3. 4. 5. 6. 7. 8. 9. 10. 11. 12. 13. 14. 15. 16. 17. 18. 19. 20. 21. 22. 23. 24. 25. 26. 27. 28. 29. 30. 31. 32. 33. 34. 35. 36. AC:OS PN:1 YC: XC: ZC:1292.316 PD:DOT 8241 AC:FS PN:2 YC: XC: ZC:1298.546 PD:SPK IN PP AC:SS PN:200 YC: XC: ZC:1298.586 PD:SANITARY SEWERE MANHOLE AC:UE PN:201 YC: XC: ZC:1290.266 PD:24" VCP NW AC:UE PN:202 YC: XC: ZC:1283.746 PD:36" RCP AC:FS PN:3 YC: XC: ZC:1301.242 PD:DOT 8242 Survey Data Management System Version 3.5 11-26 Examples Profile Example The profile task (TK:PRO) is a vertical (differential leveling) task. Foresight RR:6.27 PN:2 PD:SPK IN PP ST:12+60 OF:-.45 ZC:235.57 Setup #1 HI:241.843 ST:8+60 RR:1.35 ST:13+60 RR:5.49 ST:10+00 RR:4.26 ST:12+00 RR:6.90 ST:9+00 RR:2.15 ST:11+00 RR:7.40 B.M. Occupied Station PN:1 PD:USGS 81L 1964 ZC:236.413 Back Sight RR:5.43 Displayed Choose a Command Project Name> *.PRJ New Project Enter Task TK: ZC: AC:BS RR: AC:BS ST: OF: RR: AC:SS ST:8+60 OF:0 RR: AC:SS ST:9+00 OF:0 RR: AC:SS ST:10+00 Survey Data Management System Version 3.5 Backsight RR:5.19 ST:13+00 ST:12+20 RR:6.05 RR:6.9 ST:14+00 RR:5.83 ST:15+00 RR:6.01 ST:14+45 RR:6.10 ST:16+00 RR:5.75 B.M. Setup #2 HI:240.763 Foresight PN:3 RR:6.92 ZC:233.860 PD:USGS 81M 1964 Instructions and Comments From the main menu, press <F1> Project to open a project. Type the project name PROEXAM; <ENTER>. Type PRO and press <ENTER> to select the traverse task. Type 236.413 Press <ENTER> to accept the suggested backsight activity. Type 5.43 and press <ENTER>. Type SS over BS to select the sideshot activity. Type 8+60 Type 0 Type 1.35 Press <ENTER> to accept the suggested sideshot activity AC:SS. Type 9+00 Press <ENTER> to accept the offset of 0. Type 2.15 Press <ENTER> to accept the suggested sideshot activity AC:SS. Type 10+00 Press <ENTER> to accept the offset of 0. Type 4.26 Press <ENTER> to accept the suggested sideshot activity AC:SS. Type 11+00 11-27 Examples Displayed OF:0 RR: AC:SS ST:11+00 OF:0 RR: AC:SS ST:12+00 OF:0 RR: AC:SS PN:3 PD:USGS 81L 1964 RR: AC:FS ST:12+20 AC:FS OF:0 AC:FS RR: AC:BS ST:12+60 OF:-45 RR: AC:SS ST:13+00 OF:0 RR: AC:SS ST:13+60 OF:0 RR: AC:SS ST:14+00 OF:0 RR: AC:SS ST:14+45 OF:0 RR: AC:SS Survey Data Management System Version 3.5 Instructions and Comments Press <ENTER> to accept the offset of 0. Type 7.4 Press <ENTER> to accept the suggested sideshot activity AC:SS. Type 12+00 Press <ENTER> to accept the offset of 0. Type 7.0 Press <ENTER> to accept the suggested sideshot activity AC:SS. Type 12+20 Press <ENTER> to accept the offset of 0. Type 6.90 Type FS over SS to select the foresight activity. Type 2 Type SPK IN PP. Use <CTRL>L to remove remaining part of old description. Type 6.27 (foresight on spike turning point). Manually select the stationing data tag to input the stationing. Back up to the A in AC and type ST, but don't press <ENTER>. Type 12+60 Manually select the offset data tag to input the offset. Back up to the A in AC and type OF, but don't press <ENTER>. Type -45 (offset of turning point). Type BS over FS to select the backsight activity. Type 5.19 Type SS over BS to select the sideshot activity. Type 13+00 Type 0 Type 6.05 Press <ENTER> to accept the suggested sideshot activity AC:SS. Type 13+60 Press <ENTER> to accept the offset of 0. Type 5.49 Press <ENTER> to accept the suggested sideshot activity AC:SS. Type 14+00 Press <ENTER> to accept the offset of 0. Type 5.83 Press <ENTER> to accept the suggested sideshot activity AC:SS. Type 14+45 Press <ENTER> to accept the offset of 0. Type 6.10 Press <ENTER> to accept the suggested sideshot activity AC:SS. Type 15+00 Press <ENTER> to accept the offset of 0. Type 6.01 Press <ENTER> to accept the suggested sideshot activity 11-28 Examples Displayed ST:15+00 OF:0 RR: AC:SS PN:2 PD:SPK IN PP RR: AC:FS ZC: AC:FS Close or Suspend Choose a Command Instructions and Comments AC:SS. Type 16+00 Press <ENTER> to accept the offset of 0. Type 5.75 Type FS over SS to select the foresight activity, to check in to closing benchmark. Type 3 Type USGS 81M 1964 Type 6.92 Manually select the elevation/Z coordinate data tag to input the enter closing elevation. Back up to the A in AC and type ZC, but don't press <ENTER>. Type 233.860 Press <Esc> to end data collection. Type a C to close the project. SDMS Collector returns to the main menu. The Profile Example Project (.PRJ) File 1. 2. 3. 4. 5. 6. 7. 8. 9. 10. 11. 12. 13. 14. 15. 16. 17. 18. 19. 20. 21. 22. 23. 24. 25. 26. 27. 28. 29. 30. 31. 32. 33. 34. 35. 36. 37. 38. 39. 40. 41. 42. 43. PR:PROEXAM TK:PRO AC:OS PN:1 PD:USGS 81L 1964 ZC:236.413 AC:BS RR:5.43 AC:SS ST:8+60 OF:0 RR:1.35 AC:SS ST:9+00 OF:0 RR:2.15 AC:SS ST:10+00 OF:0 RR:4.26 AC:SS ST:11+00 OF:0 RR:7.4 AC:SS ST:12+00 OF:0 RR:7.0 AC:SS ST:12+20 OF:0 RR:6.9 AC:FS PN:2 PD:SPK IN PP RR:6.27 ST:12+60 OF:-45 AC:BS RR:5.19 AC:SS ST:13+00 OF:0 Survey Data Management System Version 3.5 11-29 Examples 44. 45. 46. 47. 48. 49. 50. 51. 52. 53. 54. 55. 56. 57. 58. 59. 60. 61. 62. 63. 64. 65. 66. 67. 68. 69. 70. RR:6.05 AC:SS ST:13+60 OF:0 RR:5.49 AC:SS ST:14+00 OF:0 RR:5.83 AC:SS ST:14+45 OF:0 RR:6.10 AC:SS ST:15+00 OF:0 RR:6.01 AC:SS ST:16+00 OF:0 RR:5.75 AC:FS PN:3 PD:WWALL USGS 81M 1964 RR:6.92 ZC:233.860 CP: 08/25/95 15:34:39 Computed Profile Example Saved As A Control (.CTL) File 1. 2. 3. 4. 5. 6. 7. 8. 9. 10. 11. 12. 13. 14. 15. 16. 17. 18. AC:OS PN:1 YC: XC: ZC:236.413 PD:USGS 81L 1964 AC:FS PN:2 YC: XC: ZC:235.573 PD:SPK IN PP AC:FS PN:3 YC: XC: ZC:233.860 PD:WWALL USGS 81M 1 Survey Data Management System Version 3.5 11-30 Appendix Chapter 12 Appendix Overview The Appendix gives quick reference to various parts of SDMS Collector: • Set up of total stations • The SDMS Collector file naming conventions • The SDMS Collector program files • Tasks • Activities • Data tags • Default task and activity definitions • Default help file listings • Default of configuration file listings • Sample Project Files • The file structure of control files • The file structure of alignment files • The file structure of the superelevation file • Defining Connectivity using SDMS • General Rules of SDMS Set Up of Total Stations The total station must be correctly set up to communicate with SDMS. These communication parameters are currently hard coded into the SDMS program based on manufacturer default settings when each model was first added to SDMS support. Since then, some manufactures have changed the defaults on newer instruments. The communication parameters for all the supported total stations are as follows: Driver Baud Data Parity Stop Bit Bit GEODIMETER System (400/500/600) 4800 7 Odd 1 LIECA T1010 & 1610 2400 7 Even 1 LIECA TCR303 9600 7 Even 1 LEICA TCA1103 9600 7 Even 1 LIETZ SET (3 & 3B) 1200 8 None 1 NIKON DTM Series (400, 500, 700, 800) 1200 8 None 1 PENTAX PTSIII 1200 8 None 1 SOKKIA SET Series (2, 2B, 3, 3B, XL, & 100 Series 1200 8 None 1 TOPCON (Coarse and Fine Modes) 1200 7 Even 1 GTS Series (4 & 300/500/700) GTS AF Series (601-603 ,605) GPT Series (1001, 1002, 1003) Survey Data Management System Version 3.5 12-1 Appendix Driver Baud Data Bit Parity Stop Bit TRIMBLE TTS (300 and 500) 38400 8 none 1 WILD T2000 & T2002 2400 7 Even 1 ZEISS Elta Series 3 & 4D 1200 7 Odd 2 SDMS Collector File Naming Conventions The name for SDMS files must observe DOS file naming conventions. The SDMS file name extensions conventions are listed below: File Extension File Description ALI Horizontal Alignment files CAL Calculated files CFG Configuration files CTL Control files EDI Edited files EXE Executable program files HLP Help files MAC Macro files PRJ Project files PRO Vertical Alignment files SEQ User shot sequence files SUP Superelevation files TGS Default prompt sequence TMP Temporary files The SDMS Collector Program Files SDMS Collector program files include the executable file, the configuration files, the help files and the default prompt sequence file TASK.TGS. All of these files must be located in the same directory named as the default (DP:) in the I/O configuration file. File Name Purpose Edit in SDMS CNTL.CFG Names control and alignment files Yes or use DOS editor CNTL.HLP Control file configuration help No use editor DOS HALIGN.TMP Temporary file used to compile current No use horizontal alignment file editor DOS IO.CFG Names I/O devices and default paths Yes or use DOS editor IO.HLP I/O configuration help No use editor NEWPR.SEQ Default sequence for opening new jobs Yes DOS PROJECT.CFG Sets controls in the project configuration Yes or use DOS editor PROJECT.HLP Project configuration help Survey Data Management System Version 3.5 No use DOS 12-2 Appendix File Name Purpose Edit in SDMS editor SYS.CFG Sets options in the system configuration Yes or use DOS editor SYS.HLP System configuration help No use editor SDMS.EXE Runs the SDMS program No TAGS.HLP Lists data tags and allowed responses No use editor TASK.TGS Defines activities and data items, by task Yes TOL.CFG Sets survey collection TOL.HLP Tolerance help tolerances for DOS DOS data Yes or use DOS editor No use editor DOS Tasks Tasks appear in the project file with the task data tag (TK:). Tasks are always three letter combinations. The following table shows the horizontal tasks with its data item. Horizontal Task Task ID Description Combined COM To combine one or more single thread traverses and radial topography measurements in one project Control network CON To establish a control network of traverses. This allows least squares adjustment of the traverses by the post processing software. Sideshots are not allowed Photo control PHO To establish photo control points Radial topography RTO To be used for radial topography measurements, both for data collection and stakeout. Terrain model TMO Terrain model measurements Traverse TRA One or more single thread traverses. Sideshots are not allowed. The following table shows the vertical tasks with its data item. Vertical Task Task ID Description Cross-section XSE Cross section measurements done with a level Level run LEV single wire level run Profile PRO To measure points along a profile Three-wire level 3WR Three wire leveling run Activities Activities appear in the project file with the activity data tag (AC:). The following table shows each activity with its data item: Survey Data Management System Version 3.5 12-3 Appendix Activity Activity ID Description Backsight BS Backsight shot to a defined point Control check CC Used to shoot from the current station to a point with known X,Y,Z coordinates as a check on the current position and elevation. Chain CH To define a chain by giving a list of previously defined points and chains, regardless of any connectivity methods used Check shot CK Used to suspend prompted operations to allow the user to work interactively with SDMS, then continue the operation. Elevation control EC Used with tasks that use an electronic total station instrument to shoot from the current occupied station to a point with known elevation to compute the elevation of that occupied station. Equation Point EQ Used to define a station equation in an alignment file. Figure FG Used to record critical points from which standard figures (such as an inlet) can be extrapolated. Foresight FS Used to make a foresight shot from the current station. Occupied station OS Used to set up the instrument on a known or previously measured point. Project header PR To define the project name, the task, and global settings for a project Sideshot intersect SI Used to measure a horizontal angle from the current station to a sideshot point. A sideshot intersect to the same point from at least two different stations will allow the sideshot point coordinates to be computed. Station resection SR Used to measure distances and angles from the current station to points with known coordinates. Resection measurements from an occupied station to two or more different known points will allow the occupied station coordinates to be computed. Sideshot SS Used to make a sideshot from the current station. Stationing ST Used to define a station on a baseline or alignment for cross sectioning. Taping TA Used to define a chain by collecting taped measurements along figures (such as a building perimeter). Tie sequence TS Used to reference a control point using azimuths and distances Turning point TP Used for a turning point (foresight) in the level or 3-wire level task Survey Data Management System Version 3.5 12-4 Appendix Activity Activity ID Description Text TX Used to define a text block which allows multi-line comments or point descriptions Utility elevation UE Used to measure an elevation on a utility point, above or below the level of the sideshot. Data Tags Data tags identify pieces of data. Data tags have two alphanumeric characters and a colon. The table below describes the SDMS data tags. The data tags are listed alphabetically and may not be in the same order as found in the TAGS.HLP file. Note: A number of the tags in the list are either used only in the various configuration files, or have a completely different definition in a configuration file than the same tag name does in an SDMS project file. In the latter case, the tag name is defined in the list twice; an example of this is the AD data tag. Tags that are used for configuration file data items are marked with the word (config) underneath. Data Tag Description --: Standard Shot - used in building sequences to indicate that you want to use the standard prompts for an activity. Place the -- data tag immediately following the activity data item. //: Nested Sequence - used to nest one user-defined sequence inside of another. If //:file name is found in a sequence, the sequence in the given file is invoked. Once the nested sequence is completed, the original sequence continues. A0 - A9: Attribute fields 0 through 9. Used to record special attribute data for which there is not already a data tag. For example, a street address may be recorded using these data items. AA: Area-Computed - used to record the computed area of a stored figure. No user response required. AC: Activity - begins a new activity. The activity name must be one of the two character codes listed in section 8.3. AD: Angle Distance List - used to record a list of angles and horizontal and vertical distances measured by tape in the taping activity (AC:TA). AD: (config) Auto Date/Time Stamp - when used in the SYS.CFG file, design ates when or if to automatically date and time stamp the project file. Responses include OFF, PROJ (in project header only), STAT (at each OS activity), and SHOT (at each activity). AH: Accuracy Horizontal - used in a project file to designate the horizontal precision of a point if recorded with that point, or for all the points in a file if recorded in the project header. Examples - AH:A (could be equivalent to NGS Order A of 0.1 PPM); AH:F (could be equivalent to NGS First Order of 10.0 PPM) Survey Data Management System Version 3.5 12-5 Appendix Data Tag Description AR: Area – defines the known or designed area of a closed chain or figure. AS: (config) Auto Save - when used in the SYS.CFG file, Yes indicates that files will be automatically saved. No indicates that the user will prompted whether or not to save files. AV: Accuracy Vertical - used in a project file to designate the vertical precision of a point if recorded with that point, or for all the points in a file if recorded in the project header. Examples - AV:F1 (could be equivalent to NGS First Order, Class 1); AV:T (could be equivalent to NGS Third Order) AZ: Azimuth - used to record an azimuth from the current station to either a backsight or foresight point. B1: (config) Baud Rate - when used in the IO.CFG file, designates the communications device baud rate (B1:9600 = 9600 baud). Does not apply to the measuring device. BG: Begin Group - Used in the SDMS points and chain (PAC) file to indicate the beginning of the list of chains generated by SDMS Processor from the shot attribute information listed in that file BP: Barometric Pressure - used to record the barometric pressure in the units designated by the UP: data item. BR: Bearing – used to record or display the bearing measured or computed between two points. The format is (N or S)DD.MMSSS(E or W). BS: Backsight Point Number - used with the Taping Activity (AC:TA) to list the point number to use as the back sight to initiate the taping routine. CD: Chain Description - used to record descriptive information for a survey or geometry chain (figure). This data item will normally be used with AC:SS and AC:CH CD:(config) Communication Device - when used in the IO.CFG file, designates the name of the serial communications device port (COM1, COM2 etc.) CE: Collimation Error - used to record the angular horizontal collimation error as determined by the surveyor when testing the collimation of the instrument. CF: Combination Factor - used to specify the combination factor used in converting between grid and ground distances. CH: Chain Number - used in the chain activity (AC:CH) to include a list of previously defined chains in the chain being defined. CI: City - used to record the city where the survey took place. CL: Class - used to record a classification code of some sort. Some post processing and CADD systems interpret this as a topography attribute tag, while other post-processing and CADD may interpret it as a soil classifications. CM: Comment - used to record a comment about a point or observation. CN: Condition - used to record the condition of surveyed objects, such as inlets, pipes, bridges, etc. This data item is Survey Data Management System Version 3.5 12-6 Appendix Data Tag Description often used in inspection surveys. CO: County - used to record the county where the survey took place. CP: Close Project - closes a project and indicates that it is finished. Any user response may be given. It is used to indicate the user’s intent that the project is complete and is not to be continued. CR: Curvature and Refraction - indicates with a Y or N whether the project data should be corrected for the Earth’s curvature and atmospheric refraction. CS: Coordinate System - used in a project or control file to indicate the coordinate system used as the basis of the point coordinates found in that file. Examples State Plane Coordinate systems; County Coordinate systems; local coordinate systems. D1: (config) Data Word Length - when used in the IO.CFG file, designates the serial communications word length in bits (7 or 8). DA: Deflection Angle - used to record deflection angles at PI points for computation of a horizontal alignment. The deflection angle is defined by extending the back tangent direction ahead of the PI and measuring the subtended angle and recording this angle in DDD.MMSSSS format. An angle left is indicated by preceding the angle with a negative (-) sign in front of the (-DDD.MMSSSS). An angle right is positive and no sign is required. NOTE: In the current release of SDMS Collector and SDMS Processor, DA: is used for information purposes only . DC: Degree of Curvature - used in the Horizontal Alignment file to define a curve’s degree of curvature. It may also be used in a project file to document a degree of curvature for a curve. DD: Distance-Computed - where multiple observations are made of a point from the same station, this data item records the averaged distance. DH: Distance Horizontal - used to record a measured horizontal distance. DI: Diameter - records the diameter of a surveyed object, such as a culvert pipe or a tree. DL: Delete Shot/Station - used to delete a single shot (DL:SH), or delete a station and all of its related shots (DL:ST). Deleted items are not actually removed from the project file, only marked as deleted. DO: Direction of Offset - used to record whether offsets to the prism in an activity are horizontal (DO:H) or vertical (DO:V). DP: Depth - used to record the depth of cover of a surveyed object. DP: (config) Data Path - when used in the IO.CFG file, it designates the default directory path for SDMS project files. DS: Distance Slope - used to record a slope distance measurement. Usually used in conjunction with a vertical Survey Data Management System Version 3.5 12-7 Appendix Data Tag Description angle (VT:) and horizontal angle (HZ:) data item DS: (config) Distance Tolerance Sets - When used in the TOL.CFG file to specify the standard deviation of a measured distance from the mean. DT: Date - records the date. DT: (config) Date Stamp - when used in the IO.CFG file, Yes or No indicates whether or not to stamp the date on each page of SDMS reports and printouts. DV: Distance Vertical – used to record or display the vertical distance between two known or computed points. DX: Delta X - used in live and batch computations to record the algebraic difference between the known X Coordinate (XC:) of a point and the computed X Coordinate (XX:) of a point based on the shots taken to that point in a project file. DY: Delta Y - used in live and batch computations to record the algebraic difference between the known Y Coordinate (YC:) of a point and the computed Y Coordinate (YY:) of a point based on the shots taken to that point in a project file. DZ: Delta Z - used in live and batch computations to record the algebraic difference between the known Z Coordinate (ZC:) of a point and the computed Z Coordinate (ZZ:) of a point based on the shots taken to that point in a project file. E1: Left Side Slope - used in the superelevation file (.SUP) for the stake out functions to define the left side slope rate at a transition station. This slope is expressed in feet/feet, meter/meter, or percent (E.g., 0.02). E2: Right Side Slope - used in the superelevation file (.SUP) for the stake out functions to define the tight side slope rate at a transition station. This slope is expressed in feet/feet, meter/meter, or percent (E.g., 0.02). ED: Error Distance - used to record the standard deviation in the mean of multiple distance measurements. EG: End Group (List) - Used in the SDMS points and chains (PAC) file to indicate the end of the list of chains generated by SDMS Processor from the shot attribute information listed in that file. EH: Error Horizontal Angle - used to record the standard deviation from the mean of multiple horizontal angle measurements. EQ: Equation Number - used to the point number of a station equation in an alignment. ER: (config) Error Radial Topography Radius - when used in the TOL.CFG file, defines the radial topography error radius tolerance value. ES: Ending Station - identifies the ending station of a survey loop. EV: Error Vertical Angle - used to record the standard deviation in the mean of multiple vertical angle measurements. EX: External Distance Horizontal Curve - used with a horizontal alignment (PI Definition) to record the distance Survey Data Management System Version 3.5 12-8 Appendix Data Tag Description from the PI to the midpoint of the arc defined between the PC and PT to the PI FC: Face Number - used to record which face of the instrument was used for each shot when recording a set of repeated shots to a point from the same station. FC:1 indicates direct; FC:2 indicates reverse. This must always be used in conjunction with the set (SE) data item. FE: Feature Code - used to record an alpha, numeric, or alpha-numeric feature code for a point or chain. FG: Figure Code - used to assign a common figure number to all points that are part of the same figure or chain. Points with the same figure number should be connected together by the post-processing software in the order recorded to form a chain. FP: (config) Format Path - when used in the IO.CFG file, designates the default directory path for predefined output formats. GM: Geometry Type - used to tag the geometric type of a point in a chain. For example, if GM:C (curve) is used, the chain should have a smooth curve going through the point. If GM:P (Point) is used, the chain should have a straight line between points. Verify how these data items are used by the post-processing software to define chains. GR: Group - used to group sets of surveyed object together in the post-processing software database. Items with the same group tag should be placed on the same level, layer, zone etc. H1: Help - displays on-line help text during data collection. Does not record any information to the project file. HA: Horizontal Alignment File Name - gives the name of the file that defines the geometry of the horizontal alignment. The alignment geometry is used for station-offset calculations. HA: (config) Horizontal Angle Set Difference - used in TOL.CFG to set the tolerance allowed between an individual horizontal angle measured in sets and the mean horizontal angle computed from the sets. Horizontal angles that exceed the difference will be omitted from final computations HD: Horizontal Datum - records the user-specified name of the horizontal datum, such as NAD27 or NAD83. This information can be used by the post-processing software for conversions between X,Y and Latitude, Longitude. SDMS will accept any response; be sure that the name you use is compatible with the post-processing software. HE: Height Ellipsoid –used to record the distance, measured along the normal to the ellipsoid, between a point on the ground and the surface of the ellipsoid as defined in geodesy and used with the Global Positioning System (GPS). Also known as ellipsoid height and height above the ellipsoid. HG: Height Geoid – used to record the distance between the geoid and ellipsoid at a given point as defined in geodesy and used with the Global Positioning System (GPS). The geoid can be above or below the ellipsoid defined. HH: Horizontal Angle-Computed - computes the average Survey Data Management System Version 3.5 12-9 Appendix Data Tag Description horizontal angle from repeated observations to a point from the same station. HT: Height - records the user-specified height of a surveyed object, such as a tree or fence. HY: Highway - used to record the name of a highway or road. HZ: Horizontal Angle - used to record a horizontal angle measurement. The format used is DDD.MMSSS. I0 - I9: Information Field 0 (through) Information Field 9 used to record user-defined information fields. These tags may have specific usage defined by the post-processing software. ID: Project Identification - records the name or identification number of the project in the project header. IH: Instrument Height - used to record the vertical distance from the occupied survey point to the vertical index of the instrument. IT: Instrument Type - used to record the type of instrument used. This information tells SDMS which device driver to use. IT:NONE indicates that all measurements will be entered manually. L1: (config) Location 1 Control File Name – used in CNTL.CFG to name the primary control point file. By default, referenced control points are searched for in this file first, and in the Location 2 file second. L1: Length First Curve - used with a vertical alignment (PRO) to record the length of vertical curve for symmetrical curves or the curve length from the VPC to VPI for unsymmetrical curves. L2: (config) Location 2 Control File Name – used in CNTL.CFG to name the secondary control point file. L2: Length Second Curve - used with a vertical alignment (PRO) to record the length of vertical curve from the VPI to VPT for unsymmetrical curves. LC: Long Chord - used with a horizontal align ment (PI Definition) to record the distance represented by a straight line between the PC and PT of a curve. LG: Longitude - used to record the longitude of a point. LN: Length - used to record the length of a surveyed object. Used with a horizontal alignment (PI Definition) to record the length of a circular curve. LO: Length Offset - used when the target can not be placed directly on the point being measured, but is placed in front or in back of the point. A negative value is used if the target is in front of the point. LP: (config) Log to Printer - when used in the SYS.CFG file, Yes or No indicates whether or not to log any screen reports to the printer automatically. LS: Length of Spiral - used to specify the length of a spiral in the PC/PT defined horizontal alignment file. LT: Latitude - records the latitude of a point. MM: (config) Memory Cache - when used in the PROJECT.CFG file, designates the amount of hard disk space below which the Survey Data Management System Version 3.5 12-10 Appendix Data Tag Description user is warned. MO: Mid Ordinate Circular Curve - used with a horizontal alignment (PI Definition) to record the distance from the center of a curve to the midpoint of the long chord for that curve. MP: (config) Macro Pause - when used in the SYS.CFG file, designates the step delay time for macro execution in 1/18th second increments (MP:2 designates 2/18th seconds pause time). MS: (config) Multi-Stub - when used in the TOL.CFG file, defines the error radius allowed on multi-stub intersections. NM: Name - used as a general purpose Name field. It could be used to record project names, point and chain names, name of a building, etc. NS: Number of Shots - can be used by the post-processing software to indicate the number of shots that have been taken on a point from the same station. NS: (config) New Project S equence - when used in the PROJECT.CFG file, designates the name of the sequence file to automatically execute when starting a new project. OA: (config) Overwrite/Append - when used in the SYS.CFG file, “O” indicates that current data overwrites existing files, and “A” indicates that current data is appended to existing files. OB: Observer - used to record the name or initials of the observer on the survey crew. OD: Origin/Destination Point Number - provides a method of defining chain connectivity. When shooting points on a chain, it defines the identification number of the next point to be connected to in that chain. OF: Offset - used when the target can not be placed directly on the point being measured, but is placed to the left or right of the point. A perpendicular offset to the left of the point (in the line of sight when facing the point from the instrument) is entered as a negative value. Used in the profile and cross section tasks and in stake out computations to define the distance right of left of the specified alignment a shot represents. OO: Offset-Computed - used to record the computed offset of a point relative to an alignment when the point was measured by radial setup. OP: (config) Overwrite Protection - when used in the SYS.CFG file, YES designates protection is on (files may not be overwritten). OS: Occupied Station Point Number - used with the Taping Activity (AC:TA) to list the point number to use as the occupied station to initiate the taping routine. OS: (config) Old Project Sequence - when used in the PROJECT.CFG file, designates the name of the sequence file to execute when starting SDMS to continue with an existing project. OW: Owner - used to record the name of an owner of some object defined by the survey. For example, it may be used to specify the owner of a parcel defined by a chain, or of a utility feature defined by a point. Survey Data Management System Version 3.5 12-11 Appendix Data Tag Description P1: (config) Parity - when used in the IO.CFG file, designates the type of parity used for serial communications (NONE, ODD, or EVEN). PC: Prism Correction - used to correct the measured slope distance for the difference between the optical center of the prism and the axis of the prism housing. Entered as a length value in the project units. PD: Point Description - used to record point description information. It may also be used to record descriptive information for a chain or other objects. PD: (config) Print Device - when used in the IO.CFG file, designates the name of the printer device port (LPT1, LPT2, COM1, COM2, or CON). PF: (config) Print Footer - when used in the IO.CFG file, defines a line of text to be used as a footer in SDMS reports and printouts. PG: (config) Page Numbering - when used in the IO.CFG file, Yes or No indicates whether or not to number pages in SDMS reports and print outs. PH: Physical Characteristic - used to record encoded physical characteristic information for a point. This is used by some post-processing software to assign graphical attributes such as level and cell/symbol name. PH: (config) Print Header - when used in the IO.CFG file, defines a line of text to be used as a header in SDMS reports and printouts. PL: Point List - used in the chain activity (AC:CH) to define a list of point numbers to be included in that chain. PL: (config) Page Length - when used in the IO.CFG file, designates the number of lines per page for SDMS reports and printouts. PM: PPM Factor - records a parts-per-million factor usually associated with total station measuring devices. PN: Point Number - identifies the point number for an activity. Depending on which activity it is used in, it may be referring to a previously defined point, or assigning a point number to a new point. For example, the backsight activity (AC:BS) must give the number of a previously defined point that is being observed. A sideshot activity (AC:SS) assigns a point number to a new point. PO: Prism Offset - used to record the distance from the desired point to a prism placed on the point. It is used in conjunction with the offset direction data item (DO:), which indicates if the prism is set in a horizontal or vertical offset orientation. If, when facing the point, the prism offset is to the right, enter a negative offset value. PP: (config) Project Path - when used in the IO.CFG file, it designates the default directory path for creating and editing projects files. PR: Project Name - identifies the file name of the file used to collect the survey. Only one PR data item may be used per project file. The project name may be up to 8 characters. It is ALWAYS the first data item in a project file. Survey Data Management System Version 3.5 12-12 Appendix Data Tag Description PR: (config) Protocol - when used in the IO.CFG file, designates the communications protocol (NONE or XON/XOFF). PW: (config) Page Width - when used in the IO.CFG file, designates the width of the page in characters for SDMS reports and printouts. Defaults to PW:40 for screen output, and PW:80 for printer output. SDMS assumes that a constant width character font is being used. QP: (config) Sequence Path - when used in the IO.CFG file, designates the default path for finding sequence files. R1: (TK:3WR) Rod Reading-Top Wire - for three wire leveling (3WR), used to record the upper wire reading. R1: Radius First Curve - used with a horizontal alignment (HA:) to record the radius of the first circular curve of a compound curve or compound reverse curve and also defines the beginning radius to use for a connecting spiral between compound curves. R2: (TK:3WR) Rod Reading-Middle Wire - for three wire leveling (3WR), used to record the middle wire reading. R2: Radius Second Curve - used with a horizontal alignment (HA:) to record the radius of the second circular curve of a compound curve or compound reverse curve and also defines the ending radius to use for a connecting spiral between compound curves. R3: (TK:3WR) Rod Reading-Bottom Wire - for three wire leveling (3WR), used to record the bottom wire reading. RA: Radius - records the radius of a curve. The radius for a curve to the left is entered as a negative value. RD: Ring Description - a special tag used in tunneling operations to describe the current ring. RE: Recorder - records the name or initials of the note taker or recorder on the survey crew. RN: Ring Number - a special tag used in tunneling operations to identify the current ring. RO: Right Angle Offset – used to record the angular offset left or right of the line of sight to an object. Not presently used in SDMS Collector live or batch computations. RP: (config) Removal Protection - when used in the SYS.CFG file, YES indicates the removal protection is on (files may not be deleted). RP: (config) Ratio of Precision - when used in the TOL.CFG file, defines the position closure tolerance in traverses. A warning is issued if the computed closure is worse. RR: Rod Reading - used to record the rod measurement in vertical tasks and in activities such as utility elevation (AC:UE) in horizontal tasks. In vertical tasks, all rod readings are positive unless the rod is inverted. In horizontal tasks, positive readings are used to record depth values. RS: Ring Style - special data tag for tunneling operations that indicates the type of ring being observed. RS:CIRC, RS:BOX, and RS:ARCH indicate circular, rectangular, or arched ring styles, respectively. Survey Data Management System Version 3.5 12-13 Appendix Data Tag Description RT: Rod Type - used to specify the units of graduation of the rod being used. Valid responses are YARD, FOOT, and METER. Yard measurements are automatically converted into feet. RT: (config) Resection Tolerance - when used in the TOL.CFG file, defines the resection tolerance value in UL. S1: (config) Stop Bit Length - when used in the IO.CFG file, designates the number of stop bits for serial communications (1 or 2). Staking 1 Control File Name – used in CNTL.CFG to name the primary staking point file. This file defines coordinates for points to be staked out in the field. S1: Entry Spiral Length - used with a horizontal alignment to record the spiral length to use at the beginning (TS) of a spiral curve. S2: (config) Staking 2 Control File Name – used in CNTL.CFG to name the secondary staking point file. S2: Exit Spiral Length - used with a horizontal alignment to record the spiral length to use at the end (SC) of a spiral curve. S3: Connecting Spiral Length - used with a horizontal alignment to record the spiral length to use between compound circular curves. SB: Station Back - used to indicate the stationing to be used for an alignment (HA & VA) from a specific SI back along the alignment. SD: Station Direction - used to indicate whether shots are currently being taken looking up-station (SD:UP; increasing stations) or down-station (SD:DOWN; decreasing stations). This is normally used only in tunneling operations. SD: (config) Nominal Station Deviation - when used in the TOL.CFG file, defines the station deviation tolerance value. SE: Set Number - used to identify a point as part of a set of repeated measurements to a point from the same station. Sets are used to calculate averaged distances and angles. Each shot in the set must contain both the SE: and FC: data items. SF: (config) Superelevation File Name - used to specify the name of the file where the cross slopes for the sub-grade or pavement based on the horizontal alignment specified are defined. SH: Staff Height - used to record the height of the staff, target, rod, or prism on a shot. SI: Shot Identification - identifies a point as being of certain type. Refer to section 5 of the SDMS Technical Data Guide 2000 for detailed information about allowable responses. SN: Serial Number - used to record the serial number of the instrument being used. SP: Suspend Project - used to suspend work on a project until a later time or day. Any response may be used and recorded. The SP data item is generated by SDMS, and Survey Data Management System Version 3.5 12-14 Appendix Data Tag Description does not affect computations. SP: (config) Screen Pause - when used in the IO.CFG file, designates the amount of time for pausing the screen display for scrolling screen reports in 1/18th second increments (SP:2 = 2/18th sec. pause). SS: Stationing-Computed - computes and records the station relative to an alignment of a point shot radially. ST: Stati oning - used to define the nominal station along an alignment or the stationing to use ahead at an equation. It is also used in the station activity (AC:ST), where it applies to all subsequent shots until a new station activity is begun. The format is based on the units of length (UL:) settings in the project configuration file. ST: (config) Three Wire Stadia Tolerance - when used in the TOL.CFG file, designates the 3 write stadia difference tolerance. SX: Standard Error Estimate X Coordinate – used with control points to define an error estimate in the X component (Easting) of the coordinate for that control point to be used during the least squares analysis process. The response represents the amount of freedom the user wishes to allow the control point to adjust during processing. The default value in SDMS Processor is 0.001feet (or meters) which is considered fixed. SY: Standard Error Estimate Y Coordinate – used with control points to define an error estimate in the Y component (Northing) of the coordinate for that control point to be used during the least squares analysis process. The response represents the amount of freedom the user wishes to allow the control point to adjust during processing. The default value in SDMS Processor is 0.001feet (or meters) which is considered fixed. SZ: Standard Error Estimate Z Coordinate – used with control points to define an error estimate in the Z component (Elevation) of the coordinate for that control point to be used during the least squares analysis process. The response represents the amount of freedom the user wishes to allow the control point to adjust during processing. The default value in SDMS Processor is 0.001feet (or meters) which is considered fixed. TA: (config) Traverse Horizontal Angl e Closure - when used in the TOL.CFG file, defines the angular closure error tolerance value. TD: Tunnel Direction - records the direction of a tunnel, such as INBOUND or OUTBOUND. TE: Temperature - used to record the current temperature in the units designated in the UT data item. TE: (config) Traverse Elevation Closure - when used in the TOL.CFG file, defines the traverse elevation closure tolerance value. TI: Tunnel Identification - records the name or number of a tunnel. TK: Task - used to define the type of survey task being conducted. There may be only one TK: data item per project file, and it is normally the second data item in the Survey Data Management System Version 3.5 12-15 Appendix Data Tag Description project. TL: Tangent Length - used with a horizontal alignment (PI Definition) to indicate the tangent length of a simple curve. TM: Time - used to record the time. TN: Traverse Number - used to tag which traverse a point belongs to when multiple traverses are in the same project. TP: (config) Temporary Path - when used in the IO.CFG file, designates the default directory path for temporary files. TS: Date/Time Stamp - records the date and time. TS: (config) Time Stamp - when used in the IO.CFG file, Yes or No indicates whether or not to time stamp each page for SDMS reports and printouts. TT: (config) Maximum S tations Traverse - when used in the TOL.CFG file, sets the maximum number of occupied stations allowed in a traverse. TY: Type - used to record a type code for an object. It is used by some post-processing software to assign graphical attributes such as level or color. UA: Units of Angles - specifies the units used in angle measurements. Most systems record degrees, minutes, and seconds (ddd.mmss). UL: Units of Length - specifies the units used in length and distance measurements, coordinates, station values, etc.. Allowable responses are F (feet) and M (meters with kilometer stationing ##+###.###), M2 (meters with 100 meter stationing ###+##.###), and M3 (same as M). UP: Units of Pressure - specifies the units used for recording barometric pressure with the BP data item. UT: Units of Temperature - specifies the units used for recording temperature. Allowable responses are F (Fahrenheit) and C (Celsius). VA: Vertical Alignment File Name - specifies the name of the file where the control vertical alignment geometry is defined. VA: (config) Vertical Angle Sets Difference - maximum deviation allowed between and individual vertical angle measured in sets and the mean vertical angle computed form sets. Vertical angles that exceed the difference will not be used in final computations VD: Vertical Datum - records the user-defined name of the vertical datum being used (VD:NGVD29 or VD: NAVD88 for example). VE: Vertical Index Error - used to record the angular vertical collimation error as determined by the surveyor when testing the collimation of the instrument. VH: Vertical/Horizontal Ratio - Used in stake out to specify the slope of a line between two points, expressed as decimal equivalent meter/meter, foot/foot or a percent (EG VH:0.02). VI: (config) Vertical Intersects Tolerance - when used in the TOL>CFG file, defines the tolerance allowed when Survey Data Management System Version 3.5 12-16 Appendix Data Tag Description comparing computed elevations for a point shot from various occupied stations during a sideshot intersection activity (AC:SI). VO: Vertical Offset - used in radial topography to record the vertical distance (+/-) from the point shot to a remote shot directly above or below it. VR: Version Number - used to record the version number of SDMS being used. VT: Vertical Angle - used to record a vertical angle measurement in the DDD.MMSS format. Vertical angles are measured from the zenith being equal to zero degrees. For example a vertical angle of 90.0000 degrees indicates horizontal line of sight. This angle is equivalent to a zenith angle. VT: (config) Maximum Vertical Stations - when used in the TOL.CFG file, defines the maximum number of occupied stations that can be recorded in a vertical task between two bench marks. VV: Vertical Angle-Computed - where multiple observations are made of a point from the same occupied station, this data item records the averaged vertical angle. W1: (config) Single Wire Level Closure - when used in the TOL.CFG file, defines the single wire leveling closure tolerance. W3: (config) Three Wire Stadia Constant - used in leveling to record the Three Wire stadia constant value. This value should be consistent with the selected rod type (RT). This data item is also used in the TOL.CFG file. WC: Write Control File Name - a user specified control file used to save point data that has been calculated but not checked for accuracy. Once these points have been verified, they can be moved to the L1:, L2:, S1:, or S2: files. WD: Width - used to record the width of a surveyed object, such as a box culvert. WE: Weather - used to record user-defined weather condition description. WI: Witness Description - used to record information about a witness or accessory points. XC: X Coordinate-Known - used to record a known X coordinate value for a point. XC: (config) Cross Section Closure Tolerance - when used in the TOL.CFG file, defines the profile and cross section closure tolerance value. XX: X Coordinate-Computed - used to record a computed X coordinate value for a point in a calculated project file. YC: Y Coordinate-Known - used to record a known Y coordinate value for a point. YY: Y Coordinate-Computed - used to record a computed Y coordinate for a point in a calculated project file. ZC: Z Coordinate-Known - used to record a known elevation for a point. ZN: Zone - used to record the projection or state plane zone for Survey Data Management System Version 3.5 12-17 Appendix Data Tag Description the project coordinate system. ZZ: Z Coordinate-Computed - used to record a computed elevation for a point in a calculated project file. Tasks Default Prompt Sequences The following tables list the default Activity and Data Items listed in the TASK.TGS file provided with SDMS Collector program. Traverse Task - TRA Activity Default Data Tags AC:OS PN: IH: FE: PD: AC:BS PN: SH: FE: PD: HZ: VT: DS: AC:FS PN: SH: FE: PD: HZ: VT: DS: AC:EC PN: SH: FE: PD: ZC: HZ: VT: DS:: AC:CC PN: SH: FE: PD: YC: XC: ZC: HZ: VT: DS: AC:SI PN: FE: PD: HZ: AC:TS PN: FE: HZ: VT: DS: PD: AC:PR AC:CK AC:TX PN: CM: Radial Topography Task - RTO Activity Default Data Tags AC:OS PN: IH: FE: PD: AC:BS PN: SH: FE: PD: HZ VT: DS: AC:SS PN: SH: FE: PD: HZ: VT: DS: AC:EC PN: SH: FE: PD: ZC: HZ: VT: DS: AC:CC PN: SH: FE: PD: YC: XC: ZC: HZ: VT: DS: AC:SR PN: SH: FE: PD: HZ: VT: DS: YC: XC: ZC: AC:SI PN: FE: PD: HZ: AC:UE PN: SH: FE: PD: RR: AC:ST ST:: AC:PR AC:CK AC:TX PN: CM: AC:CH FE: CD: FG: CH: PL: AC:FG FE: TY: AC:TA OS: BS: PN: FE: CD: FG: AD: PL: CM: Combined Task - COM Activity Survey Data Management System Version 3.5 Default Data Tags 12-18 Appendix AC:OS PN: IH: FE: PD: AC:BS PN: SH: FE: PD: HZ VT: DS: AC:FS PN: SH: FE: PD: HZ: VT: DS: AC:SS PN: SH: FE: PD: HZ: VT: DS: AC:EC PN: SH: FE: PD: ZC: HZ: VT: DS: AC:CC PN: SH: FE: PD: YC: XC: ZC: HZ: VT: DS: AC:SR PN: SH: FE: PD: HZ: VT: DS: YC: XC: ZC: AC:SI PN: FE: PD: HZ: AC:UE PN: SH: FE: PD: RR: AC:TS PN: HZ: VT: DS: FE: PD: AC:ST ST: AC:PR AC:CK AC:TX PN: CM: AC:CH FE: CD: FG: CH: PL: AC:FG FE: TY: AC:TA OS: BS: PN: FE: CD: FG: AD: PL: CM: Control Network Task - CON Activity Default Data Tags AC:OS PN: FE: PD: IH: SH: AC:BS PN: FE: PD: HZ: VT: DS:: AC:FS PN: FE: PD: HZ: VT: DS:: AC:EC PN: FE: PD: ZC: HZ: VT: DS: AC:SI PN: FE: PD: HZ: AC:TS PN: FE: HZ: VT: DS: PD: AC:PR AC:CK AC:TX PN: CM: Profile Task - PRO Activity Default Data Tags AC:OS PN: PD: ZC: AC:BS RR: AC:FS PN: PD: RR: AC:SS ST: OF: RR: AC:EC PN: PD: RR: ZC: AC:CC PN: PD: RR: ZC: AC:UE PN: PD: RR: AC:TP RR: AC:PR AC:CK Survey Data Management System Version 3.5 12-19 Appendix Activity AC:TX Default Data Tags PN: CM: Photo Control Task - PHO Activity Default Data Tags AC:OS PN: FE PD: IH: AC:BS PN: SH: FE: PD: HZ: VT: DS: AC:FS PN: SH: FE: PD: HZ: VT: DS: AC:SS PN: SH: FE: PD: HZ: VT: DS: AC:EC PN: SH: FE: PD: ZC: HZ: VT: DS: AC:CC PN: SH: FE: PD: YC: XC: ZC: HZ: VT: DS: AC:SR PN: SH: FE: PD: HZ: VT: DS: YC: XC: ZC: AC:SI PN: FE: PD: HZ: AC:UE PN: FE: PD: RR: AC:TS PN: HZ: VT: DS: FE: PD: AC:PR PN: FE PD: IH: AC:CK AC:TX PN: CM: Terrain Model Task - TMO Activity Default Data Tags AC:OS PN: FE: PD: IH: AC:BS PN: SH: FE: PD: HZ: VT: DS: AC:FS PN: SH: FE: PD: HZ: VT: DS: AC:SS PN: SH: FE: PD: HZ: VT: DS: AC:EC PN: SH: FE: PD: ZC: HZ: VT: DS: AC:CC PN: SH: FE: PD: YC: XC: ZC: HZ: VT: DS: AC:SR PN: SH: FE: PD: HZ: VT: DS: YC: XC: ZC: AC:SI PN: FE: PD: HZ: AC:UE PN: FE: PD: RR: AC:TS PN: HZ: VT: DS: FE: PD: AC:PR AC:CK AC:TX PN: CM: Level Run Task - LEV Activity Default Data Tags AC:OS PN: FE: PD: ZC: AC:BS RR: AC:FS PN: FE: PD: RR: AC:EC PN: FE: PD: RR: ZC: AC:CC PN: FE: PD: RR: ZC: Survey Data Management System Version 3.5 12-20 Appendix AC:TP RR: PD: AC:SS PN: FE: PD: RR: AC:PR AC:CK Three-Wire Level Task - 3WR Activity Default Data Tags AC:OS PN: FE: PD: ZC: AC:BS RR: AC:FS PN: FE: PD: RR: AC:EC PN: FE: PD: RR: ZC: AC:CC PN: FE: PD: RR: ZC: AC:TP RR: AC:PR AC:CK AC:TX PN: CM: Cross-Section Task - XSE Activity Default Data tags AC:OS PN: FE: PD: ZC: AC:BS RR: AC:FS PN: FE: PD: RR: AC:SS FE: PD: OF: RR: AC:ST ST: AC:EC PN: FE: PD: RR: ZC: AC:CC PN: FE: PD: RR: ZC: AC:UE PN: FE: PD: RR: AC:TP RR: AC:PR AC:CK AC:TX Survey Data Management System Version 3.5 PN: CM: 12-21 Appendix The Default Configuration and Help Files Control Configuration The Control Configuration File - CNTL.CFG 1. 2. 3. 4. 5. 6. 7. 8. L1: L2: S1: S2: WC: HA: VA: SF: The Control Configuration Help File - CNTL.HLP 1. 2. 3. 4. 5. 6. 7. 8. 9. 10. 11. 12. 13. 14. 15. 16. 17. 18. 19. 20. 21. 22. 23. 24. L1 12 0 Primary Location Control File, ; ;enter L1: control file name L2 12 0 Secondary Location Control File, ; ;enter L2: control file name S1 12 0 Primary Staking Control File, ; ;enter S1: control file name S2 12 0 Secondary Staking Control File, ; ;enter S2: control file name WC 12 0 Write Control File, ; ;enter WC: control file name HA 12 0 Horizontal Alignment File, ; ;enter HA: horizontal alignment file name HA 12 0 Horizontal Alignment File, ; ;enter VA: vertical alignment file name SF 12 0 Superelevation File, ; ;enter SF: superelevation file name I/O Configuration The I/O Configuration File - IO.CFG 1. 2. 3. 4. 5. 6. 7. 8. 9. 10. 11. 12. 13. 14. 15. 16. 17. 18. 19. DP:C:\SDMS\PRJ\ PP:C:\SDMS\PRJ\ QP:C:\SDMS\SEQ\ TP:C:\SDMS\TEMP\ SP:18 CD:COM1 B1:9600 P1:NONE PR:NONE D1:8 S1:1 PD:LPT1 PH:BEGIN PF:END PL:60 PW:80 PG:No TS:No DT:No Survey Data Management System Version 3.5 12-22 Appendix The I/O Configuration Help File - IO.HLP 1. 2. 3. 4. 5. 6. 7. 8. 9. 10. 11. 12. 13. 14. 15. 16. 17. 18. 19. 20. 21. 22. 23. 24. 25. 26. 27. 28. 29. 30. 31. 32. 33. 34. 35. 36. 37. 38. 39. 40. 41. 42. 43. 44. 45. 46. 47. 48. 49. 50. 51. 52. 53. 54. 55. 56. 57. 58. 59. 60. 61. 62. 63. 64. 65. 66. DP 37 0 Data Path, ; ;enter new default data path PP 37 0 Project Path, ; ;enter new default project path QP 37 0 Sequence Path, ; ;enter new default sequence path TP 37 0 Temp Path, ; ;enter new temporary work path SP 3 1 Screen Pause in 1/18 sec.,18 ; ;18=default screen pause/page (1 sec.) CD 5 0 Communication Send/Receive Device,COM1 ;COM1=COM1 device ;COM2=COM2 device B1 5 1 Baud Rate,9600 ;300=300 baud ;1200=1200 baud ;2400=2400 baud ;4800=4800 baud ;9600=9600 baud P1 4 0 Parity,NONE ;ODD=odd parity checking ;EVEN=even parity checking ;NONE=no parity checking PR 8 0 Protocol,NONE ;NONE=NO PROTOCOL ;XON/XOFF= XON/XOFF PROTOCOL D1 1 1 Data Bits,8 ;7=7 data bits ;8=8 data bits S1 1 1 Stop Bits,1 ;1=1 stop bit ;2=2 stop bits PD 4 0 Print Device,LPT1 ;LPT1=LPT1 device ;LPT2=LPT2 device ;COM1=COM1 port ;COM2=COM2 port ;CON=screen display PH 37 0 Print Header, ; ;enter desired page header PF 37 0 Print Footer, ; ;enter desired page footer PL 2 1 Page Length (in lines),60 ; ;60=default for printer ;8=default for screen PW 2 1 Page Width (in chars),80 ; ;80=default for printer ;40=default for screen PG 3 2 Page Numbering,No ;Yes=number each page ;No=no page numbering TS 3 2 Time Stamping,No ;Yes=put time stamp on each page ;No=no time stamping DT 3 2 Date Stamping,No ;Yes=put date stamp on each page ;No=no date stamping Survey Data Management System Version 3.5 12-23 Appendix Project Configuration The Project Configuration File - PROJECT.CFG English Unit Project 1. 2. 3. 4. 5. 6. 7. 8. 9. 10. 11. CR:Yes W3:333.3333 CF:1.00 UL:F UA:D UT:F UP:I OS: NS:NEWPR RT:F MM:1000 1. 2. 3. 4. 5. 6. 7. 8. 9. 10. 11. CR:Yes W3:333.3333 CF:1.00000000 UL:M UA:D UT:C UP:B OS: NS:NEWPR RT:M MM:10000 Metric Unit Project The Project Configuration Help File - PROJECT.HLP 1. 2. 3. 4. 5. 6. 7. 8. 9. 10. 11. 12. 13. 14. 15. 16. 17. 18. 19. 20. 21. 22. 23. 24. 25. 26. 27. 28. 29. 30. 31. 32. 33. 34. 35. CR 3 2 Curvature and Refraction,Yes ;Yes=CR adjustments applied during computations ;No=CR adjustments NOT applied during computations W3 8 1 3 Wire Stadia Constant,333.3333 ; ;333.3333=default stadia interval CF 8 1 Combination Factor,1.00 ; ;1.00=default (no adjustment) UL 1 0 Units - Length,F ;F=feet ;M=meters (Kilometer stationing) ;M2=meters (100 meter stationing) ;M3=meters (Kilometers stationing) UA 1 0 Units - Angles,D ;D=degrees ;R=rads ;G=gons UT 1 0 Units - Temperature,F ;F=Fahrenheit ;C=Celsius UP 1 0 Units - Pressure,I ;B=bars ;I=inches of Hg OS 37 0 Default Seq to Begin Old Job, ; ;default is no beginning seq ;to change, enter new path\file name NS 37 0 Default Seq to Begin New Job,NEWPR ; ;NEWPR=default ;to change, enter new path\file name RT 1 0 Rod Type,F ;F=foot ;Y=yard Survey Data Management System Version 3.5 12-24 Appendix 36. ;M=meter System Configuration The System Configuration File - SYS.CFG 1. 2. 3. 4. 5. 6. 7. LP:No AD:OFF OP:No RP:No MP:0 AS:YES OA:O The System Configuration Help File - SYS.HLP 1. 2. 3. 4. 5. 6. 7. 8. 9. 10. 11. 12. 13. 14. 15. 16. 17. 18. 19. 20. 21. 22. 23. LP 3 2 Log to Printer,No ;Yes=project data listed to printer ;No=project data NOT listed to printer AD 4 0 Auto Date/Time Stamp,Off ;PROJ=enter at start of project only ;STAT=enter at each occupied station ;SHOT=enter at each activity ;OFF=no date/time stamping OP 3 2 Overwrite Protection,No ;Yes=files may NOT be overwritten ;No=files may be overwritten RP 3 2 Removal Protection,No ;Yes=files may NOT be deleted ;No=files may be deleted MP 3 1 Macro Pause (in 1/18 sec.),0 ; ;0=default (no step delay for macros) AS 3 2 Automatic saving,Yes ;Yes=files will be saved automatically ;No=user will be prompted OA 1 2 Overwrite or Append,O ;O=data will be overwritten ;A=data will be appended Tolerance Definition The Tolerance Definition File - TOL.CFG English Unit Project 1. 2. 3. 4. 5. 6. 7. 8. 9. 10. 11. 12. 13. 14. 15. 16. 17. 18. VT:25 WI:.05 ST:.011 W3:.03 XC:.1 SD:5 RT:30 ER:.25 MS:.25 VI:.25 RP:10000 TT:25 TA:3 TE:.5 RA:.1 HA:5 VA:20 DS:.05 1. 2. VT:25 W1:.015 Metric Unit Project Survey Data Management System Version 3.5 12-25 Appendix 3. 4. 5. 6. 7. 8. 9. 10. 11. 12. 13. 14. 15. 16. 17. ST:.003 W3:.015 XC:.03 SD:1.5 RT:.1 ER:.2 MS:.10 VI:0.5 RP:10000 TT:25 TA:3 RA:.5 HA:5 VA:20 DS:.02 The Tolerance Definition Help File - TOL.HLP 1. 2. 3. 4. 5. 6. 7. 8. 9. 10. 11. 12. 13. 14. 15. 16. 17. 18. VT W1 ST W3 XC SD RT ER MS VI RP TT TA TE RA HA VA DS 6 6 6 6 6 6 6 6 6 6 6 6 6 6 6 6 6 6 1 1 1 1 1 1 1 1 1 1 1 1 1 1 1 1 1 1 Max # of OSs in a Vertical Task,25 Single Wire Level Closure,.05 3-Wire Stadia Difference,.011 3-Wire Level Closure,.03 Profile/X-section Closure,.1 Deviation from Nominal Stationing,5 Resection Tolerance (feet),0.30 Radial Topog Error Radius,.25 Double/Multi Stubs,.25 Vertical Intersects,.25 Ratio of Precision,10000 Max # of OSs in Traverse,25 Traverse Horizontal Angle Closure,3 Traverse Elevation Closure,.5 Reciprocal Angle Difference,.1 Set Horizontal Angle,5 Set Vertical Angle,20 Set Distances,.05 Tags Help The Default Tags Help File TAGS.HLP 1. 2. 3. 4. 5. 6. 7. 8. 9. 10. 11. 12. 13. 14. 15. 16. 17. 18. 19. 20. 21. 22. 23. 24. 25. 26. 27. 28. 29. A0 10 0 Attribute 0, A1 10 0 Attribute 1, A2 10 0 Attribute 2, A3 10 0 Attribute 3, A4 10 0 Attribute 4, A5 10 0 Attribute 5, A6 10 0 Attribute 6, A7 10 0 Attribute 7, A8 10 0 Attribute 8, A9 10 0 Attribute 9, AA 25 1 Area Computed, AC 2 0 Activity, ;BS=Backsight ;CC=Control Check ;CH=Chain ;CK=Check Shot ;EC=Elevation Control ;EQ=Equation ;FG=Figure ;FS=Foresight ;OS=Occupied Station ;PR=Project Header ;SI=Sideshot Intersect ;SR=Station Resection ;SS=Sideshot ;ST=Stationing ;TA=Taping ;TP=Turn Point ;TS=Tie Sequence Survey Data Management System Version 3.5 12-26 Appendix 30. 31. 32. 33. 34. 35. 36. 37. 38. 39. 40. 41. 42. 43. 44. 45. 46. 47. 48. 49. 50. 51. 52. 53. 54. 55. 56. 57. 58. 59. 60. 61. 62. 63. 64. 65. 66. 67. 68. 69. 70. 71. 72. 73. 74. 75. 76. 77. 78. 79. 80. 81. 82. 83. 84. 85. 86. 87. 88. 89. 90. 91. 92. 93. 94. 95. 96. 97. 98. 99. 100. ;TX=Text Block ;UE=Utility Elevation AD 25 0 Angle Distance List, AH 2 0 Accuracy Horizontal, AR 25 1 Area, AV 2 0 Accuracy Vertical, AZ 12 1 Azimuth, BG 25 0 Begin Group, BP 10 1 Barometric Pressure, BR 10 0 Bearing, BS 7 3.001 Back Sight Point Number, CD 25 0 Chain Description, CE 10 1 Collimation Error, CF 10 1 Combination Factor, ; ;1.0=Default CH 6 3.001 Chain Number, CI 25 0 City, CL 2 0 Class, ;F=Feature ;G=Ground CM 25 0 Comment, CN 25 0 Condition, CO 25 0 County, CP 25 0 Close Project, CR 3 2 Curvature & Refraction Adjust?, CS 10 0 Coordinate System, DA 8 1 Deflection Angle, DC 8 1 Degree of Curvature, DD 12 1 Distance Computed, DH 12 1 Distance Horizontal, DI 8 0 Diameter, DL 2 0 Delete Shot/Station, ;SH=shot ;ST=station DO 1 0 Direction of Offset, ;H=horizontal ;V=vertical DP 8 0 Depth, DS 12 1 Distance Slope, DT 10 0 Date, DV 12 1 Distance Vertical, DX 12 1 Delta X, DY 12 1 Delta Y, DZ 12 1 Delta Z, E1 6 0 Left Side Slope, E2 6 0 Right Side Slope, ED 8 1 Error Distance, EG 25 0 End Group, EH 8 1 Error Horizontal Angle, EQ 4 1 Equation Number, ES 3 2 Ending Station (Y/N)?,YES ;YES=current OS is ending station ;NO=current OS is NOT ending station EV 8 1 Error Vertical Angle, EX 10 1 External Distance Circular Curve, FC 1 1 Face Number, ;1=direct face ;2=reverse face FE 5 0 Feature Code, ; FG 4 0 Figure Code, GM 1 0 Geometry Type, ;C=Curve Point ;P=Point on Line GR 4 0 Group, H1 25 0 Help, HA 12 0 Horizontal Alignment File Name, HD 13 0 Horizontal Datum, HE 9 1 Height Ellipsoid, HG 9 1 Height Geoid, Survey Data Management System Version 3.5 12-27 Appendix 101. 102. 103. 104. 105. 106. 107. 108. 109. 110. 111. 112. 113. 114. 115. 116. 117. 118. 119. 120. 121. 122. 123. 124. 125. 126. 127. 128. 129. 130. 131. 132. 133. 134. 135. 136. 137. 138. 139. 140. 141. 142. 143. 144. 145. 146. 147. 148. 149. 150. 151. 152. 153. 154. 155. 156. 157. 158. 159. 160. 161. 162. 163. 164. 165. 166. 167. 168. 169. 170. 171. HH 9 0 Horizontal Angle Computed, HT 6 0 Height, HY 15 0 Highway, HZ 10 1 Horizontal Angle, I0 20 0 Information 0, I1 20 0 Information 1, I2 20 0 Information 2, I3 20 0 Information 3, I4 20 0 Information 4, I5 20 0 Information 5, I6 20 0 Information 6, I7 20 0 Information 7, I8 20 0 Information 8, I9 20 0 Information 9, ID 25 0 Project Identification, IH 6 1 Instrument Height, IT 25 0 Instrument Type, ;GEODIMETER=See Docs for Model #'s ;LEICA=See Docs for Model #'s ;MANUAL=data entered by hand ;NIKON_DTM=See Docs for Model #'s ;PENTAX_PTSIII=PTS III ;SOKKIA(LIETZ)=See Docs for Model #'s ;TOPCON_COARSE=See Docs for Model #'s ;TOPCON_FINE=See Docs for Model #'s ;TRIMBLE_TTS=See Docs for Model #'s ;WILDT2000=See Docs for Model #'s ;WILDT1010=See Docs for Model #'s ;ZEISS4D=See Docs for Model #'s L1 12 0 Loc 1 CTL File Name/Length Curve 1, L2 12 0 Loc 2 CTL File Name/Length Curve 2, LC 10 0 Long Chord, LG 13 0 Longitude, LN 6 0 Length, LO 8 1 Length Offset, LS 10 0 Length of Spiral, LT 12 0 Latitude, MO 10 1 Mid Ordinate Distance Circular Curve, NM 25 0 Name, NS 2 1 Number of Shots, OB 15 0 Observer, OD 7 3.001 Origin/Destination Point Number, OF 6 1 Offset, OO 6 1 Offset Computed , OS 7 3.001 Occupied Station Point Number, OW 25 0 Owner, PC 10 1 Prism Correction, PD 25 0 Point Description, PH 4 0 Physical Attribute, PL 25 0 Point List, PM 4 0 PPM Factor, PN 7 3.001 Point Number (Max 32576), PO 6 1 Prism Offset, PR 25 0 Project Name, R1 8 1 Rod Reading Top Wire/Radius 1, R2 8 1 Rod Reading Middle Wire/Radius 2, R3 8 1 Rod Reading Bottom Wire, RA 10 1 Radius, RD 25 0 Ring Description, RE 15 0 Recorder, RN 6 3.001 Ring Number, RO 8 1 Right Angle Offset, RR 6 1 Rod Reading, RS 4 0 Ring Style, RT 2 0 Rod Type, ;F=foot rod ;Y=yard rod ;M=meter rod S1 12 1 Stk 1 CTL File Name/Spiral Entry Length, S2 12 1 Stk 2 CTL File Name/Spiral Exit Length, S3 12 1 Spiral Connecting Length, Survey Data Management System Version 3.5 12-28 Appendix 172. 173. 174. 175. 176. 177. 178. 179. 180. 181. 182. 183. 184. 185. 186. 187. 188. 189. 190. 191. 192. 193. 194. 195. 196. 197. 198. 199. 200. 201. 202. 203. 204. 205. 206. 207. 208. 209. 210. 211. 212. 213. 214. 215. 216. 217. 218. 219. 220. 221. 222. 223. 224. 225. 226. 227. 228. 229. 230. 231. 232. 233. 234. 235. 236. 237. 238. 239. 240. 241. 242. SB 10 1 Station Back, SD 4 0 Station Direction, ;UP=shots taken up station ;DOWN=shots taken down station SE 2 1 Set Number, SF 12 0 Superelevation File Name, SH 6 1 Staff Height, SI 3 0 Shot ID, ;BL=begin LOC shots ;EL=end LOC shots ;PC=point of curve ;PI=point of intersection ;PT=point of tangent ;CS=curve to spiral ;SC=spiral to curve ;ST=spiral to tangent ;TA=taping shot ;TS=tangent to spiral ;RTO=radial topog shot ;XSE=cross-section shot SN 10 0 Serial Number, SP 25 0 Suspend Project, SS 10 0 Stationing Computed, ST 10 0 Stationing, SX 6 0 Standard Error Estimate X-Coordinate, SY 6 0 Standard Error Estimate Y-Coordinate, SZ 6 0 Standard Error Estimate Z-Coordinate, TD 8 0 Tunnel Direction, ;INBOUND= ;OUTBOUND= TE 3 1 Temperature, TI 18 0 Tunnel ID, TK 3 0 Task, ;COM=Combined ;CON=Control Network ;LEV=Level Run ;PHO=Photo Control ;PRO=Profiling ;RTO=Radial Topography ;3WR=Three-Wire Level ;TMO=Terrain Model ;TRA=Traverse ;XSE=Cross-Section TL 10 1 Tangent Length, TM 8 0 Time, TN 2 1 Traverse Number, TY 5 0 Type, UA 1 0 Units of Angles, UL 2 0 Units of Length, ;F=Feet or English ;M=Metric (Kilometer ST) ;M2=Metric (100 Meter ST) ;M3=Metric (Kilometer ST) UP 1 0 Units of Pressure, ;B=Millibars ;I=Inches of Mercury UT 1 0 Units of Temperature, ;F=Farenheit ;C=Celsius VA 12 0 Vertical Alignment File Name, VD 7 0 Vertical Datum, VE 10 1 Vertical Index Error, VH 6 0 Vertical to Horizontal Ratio, VO 12 1 Vertical Offset, VR 25 0 Version Number, VT 9 1 Vertical (Zenith) Angle, VV 8 1 Vertical Angle Computed, W3 8 1 Three-Wire Stadia Constant, WC 12 0 Write Control File Name, WD 6 0 Width, WE 10 0 Weather, Survey Data Management System Version 3.5 12-29 Appendix 243. 244. 245. 246. 247. 248. 249. 250. 251. 252. WI XC XX YC YY ZC ZN ZZ -// 25 0 Witness Description, 25 1 X Coordinate Known , 25 1 X Coordinate Computed, 25 1 Y Coordinate Known, 25 1 Y Coordinate Computed, 10 1 Z Coordinate/Elevation Known, 4 1 Datum Projection Zone, 10 1 Z Coordinate/Elevation Computed, 0 0 Wild Card (Insert a Standard Shot), 12 0 Nested Sequence (Insert a Sequence), Survey Data Management System Version 3.5 12-30 Appendix Sample SDMS Files Combined Task (TK:COM) Project (.PRJ) File 1. 2. 3. 4. 5. 6. 7. 8. 9. 10. 11. 12. 13. 14. 15. 16. 17. 18. 19. 20. 21. 22. 23. 24. 25. 26. 27. 28. 29. 30. 31. 32. 33. 34. 35. 36. 37. 38. 39. 40. 41. 42. 43. 44. 45. 46. 47. 48. 49. 50. 51. 52. 53. 54. 55. 56. 57. 58. 59. 60. 61. PR:P89123 TK:COM AC:PR ID:HWY 136 IT:GEO440 SN:76428 NM:PROJECT 89-123 TE:28 BP:29.3 OB:K ADAMS RE:K ADAMS DT:06/14/1999 WE:CLEAR CR:Y CF:1 UL:F UA:D UT:F UP:I VR:SDMS Collector 3.4.0 AC:OS PD:TRAV PT SAMSON PN:2 IH:5.25 SH:6 YC:5580.962 XC:5221.601 AC:BS PN:1 PD:TRAV POINT DAVID HZ:34.2514 VT:89.0501 DS:734.048 YC:6258.469 XC:4939.307 AC:SS PN:100 PD:R/W MON B-26 HZ:96.1640 VT:88.5242 DS:546.797 AC:SS PN:101 PD:R/W MON B-45 HZ:228.3749 VT:87.5846 DS:531.080 AC:SI PN:102 PD:WDGY TOWER HZ:82.1353 VT:86.5559 AC:FS PN:3 PD:TRAV PT HZ:134.5308 VT:90.5813 DS:1126.370 AC:OS PN:3 IH:5.40 Survey Data Management System Version 3.5 12-31 Appendix 62. 63. 64. 65. 66. 67. 68. 69. 70. 71. 72. 73. 74. 75. 76. 77. 78. 79. 80. 81. 82. 83. 84. 85. 86. 87. 88. 89. 90. 91. 92. 93. 94. 95. 96. 97. 98. 99. 100. 101. 102. 103. 104. 105. 106. 107. 108. 109. 110. 111. 112. 113. 114. 115. 116. 117. 118. 119. 120. 121. 122. 123. 124. 125. 126. 127. 128. 129. 130. 131. 132. SH:6 AC:BS PN:2 HZ:24.5604 VT:88.5748 DS:1126.370 AC:EC PN:103 PD:BM 2356-1 HZ:59.1705 VT:88.5333 DS:381.168 ZC:899.31 AC:SS PN:104 PD:IP SW COR LOT44 BLK12 HZ:134.0738 VT:87.2455 DS:230.603 AC:SS PN:105 PD:R/W MON B-27 HZ:171.2949 VT:86.2818 DS:676.971 CM:MULTI-STUB CM:TO PT 105 AC:SS PN:106 HZ:230.5505 VT:88.5542 DS:566.994 AC:SS PN:107 HZ:308.0349 VT:87.1111 DS:415.505 AC:FS PN:4 PD:TRAV PT JOSHUA HZ:198.2428 VT:89.3422 DS:1348.459 AC:OS PN:4 IH:5.30 SH:6 YC:6250.00 XC:7599.932 ZC:902.03 AC:BS PN:3 HZ:354.5026 VT:90.2230 DS:1348.459 AC:FS PN:5 PD:NGS PT JONES HZ:226.3004 VT:88.1906 DS:1136.218 YC:5631.775 XC:8552.676 AC:SS PN:108 PD:NE COR SEC 6 HZ:292.2006 VT:85.4946 DS:369.439 AC:SS PN:105 Survey Data Management System Version 3.5 12-32 Appendix 133. 134. 135. 136. 137. 138. 139. 140. 141. 142. 143. PD:R/W MON B-27 HZ:17.0809 VT:87.4228 DS:806.761 AC:SI PN:102 PD:WDGY TOWER HZ:53.2135 VT:86.2102 DS:1933.977 CP:06/14/1999 11:19:43 Computed Combined Task Example Saved As A Control (.CTL) File 1. 2. 3. 4. 5. 6. 7. 8. 9. 10. 11. 12. 13. 14. 15. 16. 17. 18. 19. 20. 21. 22. 23. 24. 25. 26. 27. 28. 29. 30. 31. 32. 33. 34. 35. 36. 37. 38. 39. 40. 41. 42. 43. 44. 45. 46. 47. 48. 49. 50. 51. 52. 53. 54. 55. 56. 57. AC:PR NM:JOB P89123 ID:STATE HWY 136 CM:CONTROL FILE DT:03/26/2000 HD:AHD (Any SDMS compliant data tag VD:AVD may follow the AC:PR) UL:F AC:OS PN:2 YC:5580.962 XC:5221.601 ZC:912.337 PD:TRAV PT SAMSON AC:BS PN:1 YC:6258.469 XC:4939.307 ZC:923.338 PD:TRAV POINT DAVID AC:SS PN:100 YC:6004.392 XC:5567.403 ZC:922.297 PD:R/W MON B-26 AC:SS PN:101 YC:5055.920 XC:5299.227 ZC:930.318 PD:R/W MON B-45 AC:SI PN:102 YC:7486.443 XC:6117.887 ZC:1030.508 PD:WDGY TOWER AC:OS PN:3 YC:5818.088 XC:6322.550 ZC:892.536 PD: AC:EC PN:103 YC:5962.054 XC:5969.693 ZC:899.310 PD:BM 2356-1 AC:SS PN:104 YC:6046.721 XC:6350.777 ZC:902.336 PD:IP SW COR LOT 44 BLK 12 AC:SS Survey Data Management System Version 3.5 12-33 Appendix 58. 59. 60. 61. 62. 63. 64. 65. 66. 67. 68. 69. 70. 71. 72. 73. 74. 75. 76. 77. 78. 79. 80. 81. 82. 83. 84. 85. 86. 87. 88. 89. 90. 91. 92. 93. 94. 95. 96. 97. 98. 99. 100. 101. 102. 103. 104. PN:105 YC:6300.797 XC:6795.394 ZC:933.609 PD:R/W MON B-27 AC:SS PN:106 YC:5682.589 XC:6873.013 ZC:902.547 PD: AC:SS PN:107 YC:5403.144 XC:6315.493 ZC:912.335 PD: AC:OS PN:4 YC:6250.000 XC:7599.932 ZC:902.030 PD: AC:SS PN:108 YC:5885.889 XC:7543.480 ZC:928.201 PD:NE COR SEC 6 AC:SS PN:105 YC:6300.797 XC:6795.394 ZC:933.609 PD:R/W MON B-27 AC:SI PN:102 YC:7486.443 XC:6117.887 ZC:1030.508 PD:WDGY TOWER AC:FS PN:5 YC:5631.775 XC:8552.676 ZC:934.701 PD:NGS PT JONES Survey Data Management System Version 3.5 12-34 Appendix Radial Topography Task (TK:RTO) Project (.PRJ) File 1. 2. 3. 4. 5. 6. 7. 8. 9. 10. 11. 12. 13. 14. 15. 16. 17. 18. 19. 20. 21. 22. 23. 24. 25. 26. 27. 28. 29. 30. 31. 32. 33. 34. 35. 36. 37. 38. 39. 40. 41. 42. 43. 44. 45. 46. 47. 48. 49. 50. 51. 52. 53. 54. 55. 56. 57. 58. 59. 60. 61. 62. 63. 64. 65. PR:RTOTEST.PRJ TK:RTO AC:PR ID:HWY 136 IT:GEO440 SN:76428 NM:PROJECT 89-123 TE:28 BP:29.3 OB:K ADAMS RE:K ADAMS DT:06/14/1999 WE:CLEAR CR:Y CF:1 UL:F UA:D UT:F UP:I VR:SDMS Collector 3.4.0 AC:OS PN:215 IH:5.45 SH:6.0 YC:1527.8 XC:473128.36 PD:CTRL MON FE:CTL AC:BS PN:216 PD:CTRL MON FE:CTL YC:2244.08 XC:473879.91 HZ:0 VT:89.5930 DS:1038.182 AC:EC PN:57 PD:TBM FE:CTL ZC:448.391 HZ:5.4530 VT:89.2244 DS:838.541 AC:SS PN:1000 PD:24” MAPLE FE:TR HZ:16.3741 VT:90.2550 DS:565.855 LO:-1 AC:SS PN:1001 PD:SAN MH FE:SSMH HZ:70.3524 VT:91.1548 DS:436.472 AC:UE PN:1002 PD:8” VCP FE:SS RR:10.3 Survey Data Management System Version 3.5 12-35 Appendix 66. 67. 68. 69. 70. 71. 72. 73. 74. 75. 76. 77. 78. 79. 80. 81. 82. 83. 84. 85. 86. 87. 88. 89. 90. 91. AC:SS PN:1003 PD:SE COR BLDG FE:BU FG:1 CD:BUILDING FRONT HZ:225.1422 VT:88.3035 DS:265.934 SH:8.50 AC:SS PN:1004 PD:NE COR BLDG FE:BU FG:1 HZ:251.5246 VT:88.2942 DS:271.581 SH:6.0 AC:UE PN:1005 PD:NE COR BLDG PD:ROOF FE:BU VT:61.4352 CP:06/14/1999 11:19:43 Computed Radial Topography Example Saved As A Control (.CTL) File 1. 2. 3. 4. 5. 6. 7. 8. 9. 10. 11. 12. 13. 14. 15. 16. 17. 18. 19. 20. 21. 22. 23. 24. 25. 26. 27. 28. 29. 30. 31. 32. 33. 34. 35. 36. 37. 38. 39. AC:PR NM:JOB RTOTEST ID:STATE HWY 136 CM:CONTROL FILE DT:03/26/2000 HD:NAD 83 (1996) VD:NAVD 88 ZN4802 UL:F AC:OS PN:215 YC:1527.850 XC:473128.360 ZC:439.837 PD:CTRL MON FE:CTL AC:BS PN:216 YC:2244.080 XC:473879.910 ZC:439.460 PD:CTRL MON FE:CTL AC:EC PN:57 YC:2042.498 XC:473790.331 ZC:448.391 PD:TBM FE:CTL AC:SS PN:1000 YC:1785.132 XC:473633.447 ZC:435.041 PD:24” MAPLE FE:TR AC:SS PN:1001 Survey Data Management System Version 3.5 (Any SDMS compliant data tags may follow the AC:PR) 12-36 Appendix 40. 41. 42. 43. 44. 45. 46. 47. 48. 49. 50. 51. 52. 53. 54. 55. 56. 57. 58. 59. 60. 61. 62. 63. 64. 65. 66. 67. 68. 69. 70. 71. 72. YC:1329.958 XC:473517.274 ZC:429.667 PD:SAN MH FE:SSMH AC:UE PN:1002 YC:1329.958 XC:473517.274 ZC:419.367 PD:8” PVC FE:SS AC:SS PN:1003 YC:1535.356 XC:472862.622 ZC:443.704 PD:SE COR BLDG FE:BU AC:SS PN:1004 YC:1656.383 XC:472889.227 ZC:446.421 PD:NE COR BLDG FE:BU AC:UE PN:1005 YC:1656.383 XC:472889.227 ZC:585.279 PD:NE COR BLDG ROOF FE:BU Survey Data Management System Version 3.5 12-37 Appendix Radial Cross Section Example Using The Radial Topography Task (TK:RTO) Project (.PRJ) File 1. 2. 3. 4. 5. 6. 7. 8. 9. 10. 11. 12. 13. 14. 15. 16. 17. 18. 19. 20. 21. 22. 23. 24. 25. 26. 27. 28. 29. 30. 31. 32. 33. 34. 35. 36. 37. 38. 39. 40. 41. 42. 43. 44. 45. 46. 47. 48. 49. 50. 51. 52. 53. 54. 55. 56. 57. 58. 59. 60. 61. 62. 63. PR:X3RIVER2 TK:RTO AC:PR ID:7200-04-00 HY:STH 35 ID:RF / STAGELINE RD CO:ST CROIX ID:GPS ID NM:SURVEY2 OB:S IVES OB:D HENKEL OB:G GOSNELL TE:76 BP:28.8 WE:PCLOUDY DT:08/14/1995 CR:Y CF:1.00 UL:F UA:D UT:F UP:I VR:SDMS Ver# 3.1 L1:CL101493 AC:OS PN:2125 PD:SR 2125 HUB FE:CP YC:402168.536 XC:1280328.492 IH:5.53 SH:5.25 AC:BS PN:212 PD:GPS 212 REBAR/RED YC:401692.521 XC:1280267.955 ZC:948.850 FE:CP SH:5.25 HZ:0 VT:91.2736 DS:480.05 AC:EC PN:212 PD:GPS 212 REBAR/RED ZC:948.850 HZ:0 VT:91.2744 DS:480.09 AC:ST ST:376+00 AC:SS SI:XSE PN:1294 HZ:12.2924 VT:93.165 DS:141.43 SH:8.9 AC:SS PN:1295 HZ:19.5012 VT:93.1058 Survey Data Management System Version 3.5 12-38 Appendix 64. 65. 66. 67. 68. 69. 70. 71. 72. 73. 74. 75. 76. 77. 78. 79. 80. 81. 82. 83. 84. 85. 86. 87. 88. 89. 90. 91. 92. 93. 94. 95. 96. 97. 98. 99. 100. 101. 102. 103. 104. 105. 106. 107. 108. 109. 110. 111. 112. 113. 114. 115. 116. 117. 118. 119. 120. 121. 122. 123. 124. 125. 126. 127. 128. 129. 130. 131. 132. 133. 134. DS:163.54 AC:SS PN:1296 HZ:24.1952 VT:93.1302 DS:183.83 FG:1 AC:SS PN:1297 HZ:27.2712 VT:93.072 DS:199.78 AC:SS PN:1298 HZ:31.0932 VT:92.482 DS:224.77 AC:SS PN:1299 HZ:33.4616 VT:92.2604 DS:247.94 AC:ST ST:376+30 AC:SS PN:1336 HZ:39.3548 VT:92.4502 DS:225.52 AC:SS PN:1337 HZ:38.2014 VT:93.014 DS:213.71 AC:SS PN:1338 HZ:36.1204 VT:93.1148 DS:193.66 AC:SS PN:1339 HZ:32.5414 VT:93.3038 DS:169.65 FG:1 AC:SS PN:1340 HZ:29.3154 VT:93.4456 DS:150.71 AC:SS PN:1341 HZ:25.1514 VT:93.4852 DS:132.18 AC:ST ST:376+50 AC:SS PN:1364 HZ:30.5242 VT:94.0808 DS:114.78 AC:SS PN:1365 HZ:36.0436 VT:94.0048 DS:139.38 AC:SS PN:1366 HZ:39.162 VT:93.4224 Survey Data Management System Version 3.5 12-39 Appendix 135. 136. 137. 138. 139. 140. 141. 142. 143. 144. 145. 146. 147. 148. 149. 150. 151. 152. 153. 154. 155. 156. 157. 158. 159. 160. 161. 162. 163. 164. 165. 166. 167. 168. 169. 170. 171. 172. 173. 174. 175. 176. 177. 178. 179. 180. 181. 182. 183. 184. 185. 186. 187. 188. 189. 190. 191. DS:161.87 FG:1 AC:SS PN:1367 HZ:41.3208 VT:93.2208 DS:184.54 AC:SS PN:1368 HZ:43.2018 VT:93.073 DS:206.37 AC:SS PN:1369 HZ:44.2818 VT:92.4752 DS:221.97 AC:ST ST:377+00 AC:SS PN:1404 HZ:57.4836 VT:92.4444 DS:223.9 SH:8.4 AC:SS PN:1405 HZ:57.4044 VT:93.0258 DS:214.8 AC:SS PN:1406 HZ:57.3424 VT:93.2744 DS:190.42 AC:SS PN:1407 HZ:57.2624 VT:93.4942 DS:167.98 AC:SS PN:1408 HZ:57.2156 VT:94.0448 DS:153.76 FG:1 AC:SS PN:1409 HZ:57.1238 VT:94.3428 DS:128.25 AC:SS PN:1410 HZ:57.124 VT:95.0118 DS:102.16 CP:08/14/1995 16:34:43 Horizontal Alignment (.ALI) for the Radial Cross Section Example 1. 2. 3. 4. 5. 6. 7. 8. 9. 10. 11. AC:PR TY:PI AC:OS ST:273+91.820 YC:395055.255546 XC:1287570.442257 AC:OS SI:PI YC:395655.611997 XC:1287221.448369 RA:-3819.718600 Survey Data Management System Version 3.5 12-40 Appendix 12. 13. 14. 15. 16. 17. 18. 19. 20. 21. 22. 23. 24. 25. 26. 27. 28. 29. 30. 31. 32. 33. 34. 35. 36. 37. 38. 39. 40. 41. 42. 43. 44. 45. 46. 47. 48. 49. 50. 51. 52. 53. 54. 55. 56. 57. 58. 59. 60. 61. 62. 63. 64. 65. 66. 67. AC:OS SI:PI YC:399699.523000 XC:1282267.595000 AC:OS SI:PI YC:400968.442332 XC:1280713.148696 RA:2864.789000 AC:OS SI:PI YC:401978.547000 XC:1280247.466000 AC:OS SI:PI YC:402939.008427 XC:1279804.669808 RA:-5729.578000 AC:OS SI:PI YC:405025.138463 XC:1277994.204798 RA:3819.718600 AC:OS SI:PI YC:406667.042806 XC:1277083.317397 RA:-5729.578000 AC:OS SI:PI YC:411116.692918 XC:1274103.039958 RA:-5729.578000 AC:OS SI:PI YC:411965.563000 XC:1273294.969000 AC:OS SI:PI YC:413853.236303 XC:1271498.021412 RA:5729.578000 AC:OS SI:PI YC:418302.515668 XC:1270939.849402 RA:2864.789000 AC:OS SI:PI YC:421062.045789 XC:1271206.875130 RA:-22918.311800 AC:OS SI:PI YC:421899.816000 XC:1271239.791000 Survey Data Management System Version 3.5 12-41 Appendix Traverse Task (TK:TRA) Example Project (.PRJ) File 1. 2. 3. 4. 5. 6. 7. 8. 9. 10. 11. 12. 13. 14. 15. 16. 17. 18. 19. 20. 21. 22. 23. 24. 25. 26. 27. 28. 29. 30. 31. 32. 33. 34. 35. 36. 37. 38. 39. 40. 41. 42. 43. 44. 45. 46. 47. 48. 49. 50. 51. 52. 53. 54. 55. 56. 57. 58. 59. 60. 61. 62. 63. 64. 65. PR:TRAEXAM TK:TRA AC:PR ID:HWY 136 IT:GEO440 SN:76428 NM:PROJECT 89-123 TE:28 BP:29.3 OB:K ADAMS RE:K ADAMS DT:89/11/35 09:23 WE:CLEAR CR:Y CF:1 UL:F UA:D UT:F UP:I VR:SDMS Collector 3.4.0 AC:OS PN:27 PD:CTRL PT IH:5.2 SH:5.7 YC:80281.016 XC:853432.237 ZC:448.225 AC:BS PN:26 PD:CTRL PT HZ:0 VT:91.0200 DS:558.181 YC:80101.427 XC:853960.738 AC:FS PN:101 PD:TRAV PT HZ:54.4048 VT:90.2550 DS:610.061 SH:4.9 AC:OS PN:101 PD:TRAV PT IH:5.2 SH:4.9 AC:BS PN:27 PD:CTRL PT HZ:0 VT:87.3846 DS:610.061 AC:FS PN:102 PD:TRAV PT HZ:173.3938 VT:87.3846 DS:698.496 SH:5.3 AC:OS PN:102 PD:TRAV PT IH:5.42 Survey Data Management System Version 3.5 12-42 Appendix 66. 67. 68. 69. 70. 71. 72. 73. 74. 75. 76. 77. 78. 79. 80. 81. 82. 83. 84. 85. 86. 87. 88. 89. 90. 91. 92. 93. 94. 95. 96. 97. 98. 99. 100. 101. 102. 103. 104. 105. 106. 107. 108. 109. 110. 111. 112. 113. 114. 115. 116. 117. 118. 119. SH:5.3 AC:BS PN:101 PD:TRAV PT HZ:0 VT:92.2114 DS:698.496 AC:FS PN:103 PD:TRAV PT HZ:159.2402 VT:90.5815 DS:793.877 SH:5.1 AC:OS PN:103 PD:TRAV PT IH:5.45 SH:5.1 AC:BS PN:102 PD:TRAV PT HZ:0 VT:89.0145 DS:793.877 AC:FS PN:35 PD:CTRL PT HZ:133.0802 VT:91.1010 DS:1228.112 SH:4.84 AC:OS PN:35 PD:CTRL PT IH:4.9 SH:4.84 YC:78484.989 XC:855651.663 AC:BS PN:103 PD:TRAV PT HZ:0 VT:88.4950 DS:1228.112 AC:FS PN:36 PD:CTRL PT HZ:181.5540 VT:90.3020 DS:835.533 SH:5.1 AZ:91.3352 CP:04/14/95 15:32:09 Computed Traverse Example Saved As A Control (.CTL) File 1. 2. 3. 4. 5. 6. 7. 8. 9. 10. 11. 12. 13. 14. AC:PR NM:JOB TRAVEXAM ID:STATE HWY 1136 CM:CONTROL FILE DT:03/26/1998 HD:NAD 83 (1996) VD:NAVD 88 UL:M3 ZN:4802 AC:OS PN:27 YC:80281.016 XC:853432.237 ZC:448.225 Survey Data Management System Version 3.5 (Any SDMS compliant data tags may follow the AC:PR) 12-43 Appendix 15. 16. 17. 18. 19. 20. 21. 22. 23. 24. 25. 26. 27. 28. 29. 30. 31. 32. 33. 34. 35. 36. 37. 38. 39. 40. 41. 42. 43. 44. 45. 46. 47. 48. 49. 50. 51. PD:CTRL PT AC:BS PN:26 YC:80101.427 XC:853960.738 ZC:438.652 PD:CTRL PT AC:OS PN:101 YC:79696.227 XC:853606.076 ZC:444.133 PD:TRAV PT AC:OS PN:102 YC:79053.258 XC:853877.605 ZC:472.511 PD:TRAV PT AC:OS PN:103 YC:78477.371 XC:854423.960 ZC:458.927 PD:TRAV PT AC:OS PN:35 YC:78484.989 XC:855651.863 ZC:433.482 PD:CTRL PT AC:FS PN:36 YC:78462.065 XC:856487.098 ZC: PD:CTRL PT Survey Data Management System Version 3.5 12-44 Appendix Level Run Task (TK:LEV) Project (.PRJ) File 1. 2. 3. 4. 5. 6. 7. 8. 9. 10. 11. 12. 13. 14. 15. 16. 17. 18. 19. 20. 21. 22. 23. 24. 25. 26. 27. 28. 29. 30. 31. 32. 33. 34. 35. 36. PR:LEVEXAM.PRJ TK:LEV AC:PR ID:HWY 136 IT:SOKKIA B1 SN:76428 NM:PROJECT 89-123 TE:28 BP:29.3 OB:K ADAMS RE:K ADAMS DT:89/11/35 09:23 WE:CLEAR CR:Y CF:1 UL:F UA:D UT:F UP:I VR:SDMS Collector 3.4.0 AC:OS PN:1 PD:USGS 31D 1957 ZC:835.61 AC:BS RR:6.29 AC:TP RR:1.36 AC:BS RR:7.94 AC:FS PN:2 PD:USGS 31E 1957 RR:9.37 ZC:839.123 CP: 09/21/95 0:02:27 Computed Level Run Saved As A Control (.CTL) File 1. 2. 3. 4. 5. 6. 7. 8. 9. 10. 11. 12. 13. 14. 15. 16. 17. AC:PR NM:JOB LEVEXAM ID:STATE HWY 1136 CM:CONTROL FILE DT:03/26/1998 HD:NAD 83 (199^) VD:NAVD 88 UL:F ZN:4802 AC:OS PN:1 ZC:835.610 PD:USGS 31D 1957 AC:FS PN:2 ZC:839.123 PD:USGS 31E 1957 Survey Data Management System Version 3.5 (Any SDMS compliant data tags may follow the AC:PR) 12-45 Appendix Three-Wire Level Task (TK:3WR) Project (.PRJ) File 1. 2. 3. 4. 5. 6. 7. 8. 9. 10. 11. 12. 13. 14. 15. 16. 17. 18. 19. 20. 21. 22. 23. 24. 25. 26. 27. 28. 29. 30. 31. 32. 33. 34. 35. 36. 37. 38. 39. 40. 41. 42. 43. 44. PR:3WREXAM TK:3WR AC:PR ID:HWY 136 IT:SOKKIA B1 SN:76428 NM:PROJECT 89-123 TE:28 BP:29.3 OB:K ADAMS RE:K ADAMS DT:89/11/35 09:23 WE:CLEAR CR:Y CF:1 UL:F UA:D UT:F UP:I VR:SDMS Collector 3.4.0 AC:OS PN:1 PD:USCGS 3005A ZC:1016.723 AC:BS R1:2.928 R2:2.815 R3:2.702 AC:TP R1:2.228 R2:2.115 R3:2.003 AC:BS R1:1.722 R2:1.603 R3:1.485 AC:FS PN:2 PD:USCGS 3005B R1:2.675 R2:2.550 R3:2.425 ZC:1015.986 CP:08/24/95 09:04:23 Computed Three-Wire Level Example Saved As A Control (.CTL) File 1. 2. 3. 4. 5. 6. 7. 8. 9. 10. 11. 12. 13. 14. 15. 16. AC:PR PR:JOB TRAVEXAM NM:STATE HWY 1136 CM:CONTROL FILE DT:03/26/1998 HD:NAD 83 (1996) VD:NAVD 88 UL:M3 ZN:4802 PN:1 ZC:1016.723 PD:USCGS 3005A AC:FS PN:2 ZC:1015.986 PD:USCGS 3005B Survey Data Management System Version 3.5 (Any SDMS compliant data tags may follow the AC:PR) 12-46 Appendix Cross-Section Task (TK:XSE) Project (.PRJ) File 1. 2. 3. 4. 5. 6. 7. 8. 9. 10. 11. 12. 13. 14. 15. 16. 17. 18. 19. 20. 21. 22. 23. 24. 25. 26. 27. 28. 29. 30. 31. 32. 33. 34. 35. 36. 37. 38. 39. 40. 41. 42. 43. 44. 45. 46. 47. 48. 49. 50. 51. 52. 53. 54. 55. 56. 57. 58. 59. 60. 61. 62. 63. 64. 65. PR:XSEEXAM TK:XSE AC:PR ID:HWY 136 IT:SOKKIA B1 SN:76428 NM:PROJECT 89-123 TE:28 BP:29.3 OB:K ADAMS RE:K ADAMS DT:89/11/35 09:23 WE:CLEAR CR:Y CF:1 UL:F UA:D UT:F UP:I VR:SDMS Collector 3.4.0 AC:OS PN:1 PD:DOT 8241 ZC:1292.316 AC:BS RR:8.41 AC:ST ST:10+00 AC:SS OF:0 RR:6.4 AC:SS OF:-25 RR:7.3 AC:SS OF:-50 RR:6.0 AC:SS OF:25 RR:7.5 AC:SS OF:50 RR:8.1 AC:ST ST:10+41 CM:C/L 20 ENT LT AC:SS OF:0 RR:5.1 PD:C/L AC:SS OF:-15 RR:5.4 PD:C/L ENT AC:SS OF:-25 RR:5.8 PD:C/L ENT AC:SS OF:-52 RR:6.4 PD:END ENT LT AC:ST ST:10+50 AC:SS Survey Data Management System Version 3.5 12-47 Appendix 66. 67. 68. 69. 70. 71. 72. 73. 74. 75. 76. 77. 78. 79. 80. 81. 82. 83. 84. 85. 86. 87. 88. 89. 90. 91. 92. 93. 94. 95. 96. 97. 98. 99. 100. 101. 102. 103. 104. 105. 106. 107. 108. 109. 110. 111. 112. 113. 114. 115. 116. 117. 118. 119. 120. 121. 122. 123. 124. 125. 126. 127. 128. 129. 130. 131. 132. 133. 134. 135. 136. OF:0 RR:4.2 AC:SS OF:-25 RR:5.0 AC:SS OF:-50 RR:3.6 AC:BS RR:7.2 SI:BL AC:SS OF:-75 RR:1.5 AC:TP RR:1.5 AC:BS RR:6.3 AC:SS OF:-100 RR:2.5 SI:EL AC:SS OF:25 RR:5.8 AC:SS OF:50 RR:6.4 AC:FS PN:2 PD:SPK IN PP RR:2.18 ST:10+80 OF:-62 AC:BS RR:6.87 AC:ST ST:11+00 AC:SS OF:0 RR:7.1 AC:SS OF:-25 RR:7.8 AC:SS OF:-50 RR:7.0 AC:SS OF:25 RR:8.2 AC:ST ST:11+39 AC:SS OF:-69 RR:6.83 PN:200 ST:11+39 AC:UE PN:201 PD:24” VCP NW RR:8.32 AC:UE PN:202 PD:36” RCP RR:14.84 AC:FS PN:3 PD:DOT 8242 RR:4.15 ZC:1301.242 CP:08/23/9516:43:37 Survey Data Management System Version 3.5 12-48 Appendix Computed Cross-Section Example Saved As A Control (.CTL) File 1. 2. 3. 4. 5. 6. 7. 8. 9. 10. 11. 12. 13. 14. 15. 16. 17. 18. 19. 20. 21. 22. 23. 24. 25. 26. 27. 28. 29. 30. 31. 32. 33. 34. 35. 36. 37. 38. 39. 40. 41. 42. 43. 44. 45. AC:PR NM:JOB TRAVEXAM ID:STATE HWY 1136 CM:CONTROL FILE DT:03/26/1998 HD:NAD 83 (1996) VD:NAVD 88 UL:F ZN:4802 AC:OS PN:1 YC: XC: ZC:1292.316 PD:DOT 8241 AC:FS PN:2 YC: XC: ZC:1298.534 PD:SPK IN PP AC:SS PN:200 YC: XC: ZC:1298.562 PD: AC:UE PN:201 YC: XC: ZC:1290.242 PD:24” VCP NW AC:UE PN:202 YC: XC: ZC:1283.722 PD:36” RCP AC:FS PN:3 YC: XC: ZC:1301.242 PD:DOT 8242 Survey Data Management System Version 3.5 (Any SDMS compliant data tags may follow the AC:PR) 12-49 Appendix Profile Task (TK:PRO) Project (.PRJ) File 1. 2. 3. 4. 5. 6. 7. 8. 9. 10. 11. 12. 13. 14. 15. 16. 17. 18. 19. 20. 21. 22. 23. 24. 25. 26. 27. 28. 29. 30. 31. 32. 33. 34. 35. 36. 37. 38. 39. 40. 41. 42. 43. 44. 45. 46. 47. 48. 49. 50. 51. 52. 53. 54. 55. 56. 57. 58. 59. 60. 61. 62. 63. 64. 65. PR:PROEXAM TK:PRO AC:PR ID:HWY 136 IT:SOKKIA B1 SN:76428 NM:PROJECT 89-123 TE:28 BP:29.3 OB:K ADAMS RE:K ADAMS DT:89/11/35 09:23 WE:CLEAR CR:Y CF:1 UL:F UA:D UT:F UP:I VR:SDMS Collector 3.4.0 AC:OS PN:1 PD:USGS 81L 1964 ZC:236.413 AC:BS RR:5.43 AC:SS ST:8+60 OF:0 RR:1.35 AC:SS ST:9+00 OF:0 RR:2.15 AC:SS ST:10+00 OF:0 RR:4.26 AC:SS ST:11+00 OF:0 RR:7.4 AC:SS ST:12+00 OF:0 RR:7.0 AC:SS ST:12+20 OF:0 RR:6.9 AC:FS PN:2 PD:SPK IN PP RR:6.27 ST:12+60 OF:-45 AC:BS RR:5.19 AC:SS ST:13+00 OF:0 RR:6.05 AC:SS ST:13+60 OF:0 Survey Data Management System Version 3.5 12-50 Appendix 66. 67. 68. 69. 70. 71. 72. 73. 74. 75. 76. 77. 78. 79. 80. 81. 82. 83. 84. 85. 86. 87. 88. 89. RR:5.49 AC:SS ST:14+00 OF:0 RR:5.83 AC:SS ST:14+45 OF:0 RR:6.10 AC:SS ST:15+00 OF:0 RR:6.01 AC:SS ST:16+00 OF:0 RR:5.75 AC:FS PN:3 PD:WWALL USGS PD:81M 1964 RR:6.92 ZC:233.860 CP: 08/25/95 15:34:39 Computed Profile Example Saved As A Control (.CTL) File 1. 2. 3. 4. 5. 6. 7. 8. 9. 10. 11. 12. 13. 14. 15. 16. 17. 18. 19. 20. 21. 22. 23. 24. 25. 26. 27. 28. AC:PR NM:JOB TRAVEXAM ID:STATE HWY 1136 CM:CONTROL FILE DT:03/26/1998 HD:NAD 83 (1996) VD:NAVD 88 UL:M3 ZN:4802 AC:OS PN:1 YC: XC: ZC:236.413 PD:USGS 81L 1964 AC:FS PN:2 YC: XC: ZC:235.573 PD:SPK IN PP AC:FS PN:3 YC: XC: ZC:233.860 PD:WWALL USGS PD:81M 1964 Survey Data Management System Version 3.5 (Any SDMS compliant data tags may follow the AC:PR) 12-51 Appendix Sample Control File 1. 2. 3. 4. 5. 6. 7. 8. 9. 10. 11. 12. 13. 14. 15. 16. 17. 18. 19. 20. 21. 22. 23. 24. 25. 26. 27. 28. 29. 30. 31. AC:PR PR:JOB 001234 NM:STATE HWY 1– HWY 71 CM:CONTROL FILE DT:03/26/1998 HD:NAD 83 (1996) VD:NAVD 88 UL:M3 ZN:4802 AC:OS PN:1 YC:207471.554 XC:759409.835 ZC:282.994 FE:CONTROL PD:5/8 REBAR SX:0.005 SY:0.005 SZ:0.02 AC:OS PN:2 YC:206635.500 XC:759717.549 ZC:307.162 FE:CONTROL PD:REBAR AND CAP ST:10+00 OF:50 SX:0.008 SY:0.008 SZ:0.01 Survey Data Management System Version 3.5 (Optional but recommended) (Any SDMS compliant data tags may follow the AC:PR) (Any SDMS descriptive data tags may added but none are required) 12-52 Appendix Sample Horizontal Alignment File (.ALI) with Spirals and Equations - PI Definition 1. 2. 3. 4. 5. 6. 7. 8. 9. 10. 11. 12. 13. 14. 15. 16. 17. 18. 19. 20. 21. 22. 23. 24. 25. 26. 27. 28. 29. 30. 31. 32. 33. 34. 35. 36. 37. 38. 39. 40. 41. 42. 43. 44. 45. 46. 47. 48. 49. 50. 51. 52. 53. 54. 55. 56. 57. 58. 59. 60. 61. 62. 63. 64. 65. AC:PR PR:STH67 NM:STATE HWY A – HWY B CM:DESIGN HORIZONTAL ALIGNMENT DT:03/26/1998 UL:M3 VD:NGVD 29 HD:NAD 83 (1991) ZN:4802 RE:GENO DT:03/26/1998 RE:GENO TY:PI AC:EQ (All equations listed immediately EQ:1 following AC:PR)** SB:11+374.836 ST:11+400.000 AC:EQ EQ:2 SB:12+172.297 ST:12+140.000 AC:OS ***(Beginning PI)*** ST:10+973.656 YC:206370.369000 XC:759735.757000 AC:OS SI:PI ***(Spiral Curve Spiral)*** YC:206655.052023 XC:759712.393480 S1:30.000000 S2:30.000000 RA:435.000000 AC:OS SI:PI ***(Spiral Curve Spiral)*** YC:206971.980072 XC:759516.707250 S1:50.000000 S2:50.000000 RA:592.379000 AC:OS SI:PI ***(Simple Curve)*** YC:207400.163795 XC:759447.697336 RA:-435.000000 AC:OS SI:PI ***(Simple Curve)*** YC:207594.266000 XC:759322.394000 RA:-582.126000 AC:OS SI:PI ***(Simple Curve)*** YC:207777.366789 XC:759158.093290 RA:480.000000 AC:OS SI:PI ***(RSR - Radius Spiral Radius)*** YC:208076.928466 XC:759174.304456 R1:300.000000 R2:400.000000 S3:150.000000 AC:OS SI:PI ***(Ending PI)*** YC:208605.886025 XC:759457.507387 Survey Data Management System Version 3.5 12-53 Appendix Sample Horizontal Alignment File (.ALI) with Spirals and Equations PI Definition in Report Format 1. 2. 3. 4. 5. 6. 7. 8. 9. 10. 11. 12. AC:PR PR:STH67 NM:STATE HWY A - HWY B CM:DESIGN HORIZONTAL ALIGNMENT DT:03/26/1998 UL:M3 VD:NGVD 29 HD:NAD 83 (1991) ZN:4802 RE:GENO DT:03/26/1998 RE:GENO TY:PI AC:EQ SB:11+374.836 ST:11+400.000 AC:EQ EQ:2 SB:12+172.297 ST:12+140.000 AC:OS ST:10+973.656 YC:206370.369000 XC:759735.757000 AC:OS SI:PI YC:206655.052023 XC:759712.393480 S1:30.000000 S2:30.000000 RA:435.000000 AC:OS SI:PI YC:206971.980072 XC:759516.707250 S1:50.000000 S2:50.000000 RA:592.379000 AC:OS SI:PI RA:-435.000000 YC:207400.163795 XC:759447.697336 AC:OS SI:PI RA:-582.126000 YC:207594.266000 XC:759322.394000 AC:OS SI:PI YC:207777.366789 XC:759158.093290 RA:480.000000 AC:OS SI:PI YC:208076.928466 XC:759174.304456 R1:300.000000 R2:400.000000 S3:150.000000 AC:OS SI:PI YC:208605.886025 XC:759457.507387 Survey Data Management System Version 3.5 12-54 Appendix Sample Vertical Alignment File (.PRO) - PI Definition 1. 2. 3. 4. 5. 6. 7. 8. 9. 10. 11. 12. 13. 14. 15. 16. 17. 18. 19. 20. 21. 22. 23. 24. 25. 26. 27. 28. 29. 30. 31. 32. 33. 34. 35. 36. 37. 38. 39. 40. 41. 42. 43. 44. 45. 46. 47. 48. 49. AC:PR PR:STH67.PRO NM:STATE HWY A – HWY B CM:DESIGN CENTERLINE PROFILE DT:03/26/1998 RE:GENO UL:M3 AC:OS SI:VPI ST:10+974.000 ZC:299.024000 L1:0.000000 L2:0.000000 AC:OS SI:VPI ST:11+240.000 ZC:307.998840 L1:225.000000 L2:225.000000 AC:OS SI:VPI ST:11+725.164,2 (Second Occurrence of the Station) ZC:284.000640 L1:125.000000 L2:125.000000 AC:OS SI:VPI ST:12+142.867,3 (Third Occurrence of the Station) ZC:284.000640 L1:100.000000 L2:100.000000 AC:OS SI:VPI ST:12+342.867,3 (Third Occurrence of the Station) ZC:275.500640 L1:100.000000 L2:100.000000 AC:OS SI:VPI ST:12+494.867,3 (Third Occurrence of the Station) ZC:275.500640 L1:0.000000 L2:0.000000 AC:OS SI:VPI ST:13+402.462,3 (Third Occurrence of the Station) ZC:279.999998 L1:0.000000 L2:0.000000 Survey Data Management System Version 3.5 12-55 Appendix Sample Superelevation File (.SUP) - PI Definition 1. 2. 3. 4. 5. 6. 7. 8. 9. 10. 11. 12. 13. 14. 15. 16. 17. 18. 19. 20. 21. 22. 23. 24. 25. 26. 27. 28. 29. 30. 31. 32. 33. 34. 35. 36. 37. 38. 39. AC:PR PR:STH67.SUP NM:STATE HWY A – HWY B CM:DESIGN SUPERELEVATION FILE THROUGH CM:THE FIRST CURVE DT:03/26/1998 UL:M3 VD:NGVD 29 HD:NAD 83 (1991) ZN:4802 RE:GENO AC:OS ST:10+973.656 E1:-0.020000 E2:-0.020000 AC:OS ST:11+129.667 E1:-0.020000 E2:-0.020000 AC:OS ST:11+139.836 E1:-0.020000 E2:0.000000 AC:OS ST:11+169.836 E1:-0.059000 E2:0.059000 AC:OS ST:11+344.836 E1:-0.059000 E2:0.059000 AC:OS ST:11+400.000 E1:-0.020000 E2:0.000000 AC:OS ST:11+410.169 E1:-0.020000 E2:-0.020000 Survey Data Management System Version 3.5 12-56 Appendix Defining Connectivity in the SDMS Project File Defining connectivity refers to the method used to indicate which surveyed points should be connected together to form linear and curvilinear features such as centerlines, edges of pavements, break lines, fences, and so on. The word chains will be used to refer to the figures formed by connecting points. The definition of chains is vital to producing good maps and accurate digital terrain model surfaces. Obtaining accurate measurements is the first priority of a survey crew. But just knowing the positions of the points is not very helpful if there is no information related to what the points represent and how they are connected to one another. The decision on which connectivity method is used has an enormous impact on the procedures used by the field crew. SDMS Collector records data in the same order the measurements were taken in the field. It would be fairly easy to define point connectivity if the field crew was forced to collect points along a chain from one end to the other, and was not allowed to take other shots that are not part of that chain. However, this is not always an efficient way to operate. A more efficient procedure is to move the instrument along a corridor or to different spots around a site and to take as many measurements from each set up position as possible. This method results in a file where the points on any given chain are scattered throughout the file, and in which several chains may be in progress simultaneously. Connecting the points to define chains is the job of the post-processing software that interprets the SDMS data. But the field data collection procedure needs to provide the post-processing system with the intelligence to do that correctly. SDMS has several different methods of tagging points for chain definition. Each method has its advantages and the selection is to some extent a matter of personal preference. These methods include: • Connectivity By Figure Code • Connectivity By Origin-Destination • Connectivity By Taping • Connectivity With The Chain Activity • Connectivity by Feature Code • Connectivity by creating parallel chains Other information may also be needed when defining chains. This can be accomplished by adding data tags to define attributes of the chain being defined. Tags can be used to designate such things as: • The chain feature code. • Whether the chain represents a surface break line or just a planimetric feature. • Which points in the chain are angle points and which are points on curves. • Graphical attributes such as level, color, and line style. The SDMS Collector software provides a wide variety of methods to define connectivity. Details on several of these methods are provided in the sections that follow. It is important to remember that the method used for defining connectivity and assigning attributes to chain figures must be compatible with the post-processing software that interprets the SDMS data file. Defining Connectivity in the SDMS Calculated File The Chain Activity (AC:CH) is used in the calculated file (.CAL) to define the point connectivity and other chain information. The post processing software interprets the connectivity information in the SDMS project file (.PRJ) to build Survey Data Management System Version 3.5 12-57 Appendix the various chains. This process produces a separate Chain Activity (AC:CH) for each chain defined in the project file. All of the Chain Activities that are generated by SDMS Processor will be shown at the bottom of the SDMS calculated file and will always follow the points in the calculated (CAL) file. The CAD software being used needs to be able to read and interpret the SDMS calculated file to display the points and chains. The user can also manually create additional chains during field data collection, as well as during the post-processing phase. An existing chain activity can be edited or a new chain activity can be manually entered into the project file. The user will have to reprocess the data in the project file for any edited information to be passed to the calculated (CAL) file. The chains listed at the bottom of the calculated file can also be edited or new chain activities can be added manually. No further checks will be made by the processing software to verify the information is correct. Therefore, the user must be sure the points being used in the manually created chain activities are in the calculated file. NOTE The chain list at the bottom of the file will always be preceded by the Close Project (CP:) data item. If the project file being processed has the Suspend Project (SP:) data item or no data item indicating the end of the project file, then the Close Project (CP:) data item must be added by the post processing software to separate the chain list generated from the field generated shot data. Connectivity by Figure Code The Figure data item (FG:) offers a simple way of defining connectivity. In this method, each chain is assigned a unique figure code, and every measured point that is part of a chain is tagged with the figure code of that chain. The survey of a roadway is an example. The left edge-of-pavement is designated as Figure 1 (FG:1) and the right edge-of-pavement as Figure 2 (FG:2). Every point measured on the left pavement edge must include the data item FG:1 and every point on the right edge must include FG:2. The post-processing software should then form a chain for the left edge by connecting all of the points tagged with FG:1. Depending on the algorithm used by the post processor system, connecting of points with common FG numbers can either be in shot order or by point number. Likewise, the post-processing software should form a chain for the right edge by connecting all points tagged with FG:2. Connectivity Using The Figure Code Method (Point number indicates the survey shot sequence) PN: 26 FG:1 PN: 21 FG:1 PN: 14 FG:1 PN: 10 FG:1 PN: 23 PN: 17 PN: 16 FG:2 FG:2 FG:2 PN: 12 FG:2 Figure 6.1 Connectivity by Figure Code Survey Data Management System Version 3.5 12-58 Appendix SDMS Processor connects points in shot order by default. Chains connected by point number can be generated using the Chain Activity (AC:CH) at any time during the data collection session. Project File for Connectivity by Figure Code The information shown in Figure 6.1 will be used to create a chain using Figure Codes (FG:). Each point is labeled with its point number (PN:) and Figure code (FG:). The point numbers correspond to the shot sequence used in the field. 1. 2. 3. 4. 5. 6. 7. 8. 9. 10. 11. 12. 13. 14. 15. 16. 17. 18. 19. 20. 21. 22. 23. 24. 25. 26. 27. AC:SS PN:10 FG:1 FE:EPL CD:LEFT PAVEMENT EDGE SH:5 HZ:45.2354 VT:90.3045 DS:100.44 AC:SS PN:14 FG:1 FE:EPL SH:5 HZ:55.2853 VT:90.3006 DS:180.94 AC:SS PN:21 FG:1 FE:EPL SH:5 HZ:55.2853 VT:90.3006 DS:180.94 ...., ETC. CP:09/18/1999 18:46:43 This data represents the first three points that make up the chain defined by Figure 1 (FG:1). The FG: data item tells the processing software to generate Figure 1, and to connect PN:10 to PN:14 to PN:21. The chain would continue based on all points found in the file with FG:1 as the assigned Figure Code. This method does impose the restriction that the points on a given chain must be measured in shot order working from one end of the chain towards the other, but not necessarily in sequential shots. It does allow any number of chains to be in progress simultaneously. The field crew must keep track of the Figure Codes used for each chain. The other chain attributes, such as the feature code, are usually defined as data items on the first point of each chain. The Calculated File for Connectivity by Figure Code The shot sequence used in the Project File for Connectivity by Figure Code section, would be listed in the SDMS calculated file (.CAL) as: 1. 2. 3. 4. 5. 6. 7. 8. 9. 10. 11. 12. 13. AC:SS PN:10 FG:1 FE:EPL CD:LEFT PAVEMENT SH:5 HZ:45.2354 VT:90.3045 DS:100.44 XX:#### YY:#### ZZ:#### AC:SS Survey Data Management System Version 3.5 EDGE (Calculated X coordinate) (Calculated Y coordinate) (Calculated Z coordinate) 12-59 Appendix 14. 15. 16. 17. 18. 19. 20. 21. 22. 23. 24. 25. 26. 27. 28. 29. 30. 31. 32. 33. 34. 35. 36. 37. 38. 39. 40. 41. 42. 43. 44. 45. PN:14 FG:1 FE:EPL SH:5 HZ:55.2853 VT:90.3006 DS:180.94 XX:#### YY:#### ZZ:##### AC:SS PN:21 FG:1 FE:EPL SH:5 HZ:55.2853 VT:90.3006 DS:180.94 XX:#### YY:#### ZZ:##### ...., ETC. CP:09/18/1999 18:46:43 BG:Begin Chain List AC:CH FG:1 FE:EPL CD:LEFT PAVEMENT EDGE PL:10,14,21 ….ETC. EG:End Chain List CP:09/27/1999 13:15:18 Connectivity by Origin-Destination Connectivity using origin-destination (OD:) is designed to let each point on a chain indicate the point number of the next point on that chain. This method does not require the FG: data item be included with each side shot activity (AC:SS) that will be part of the figure in the project file. A feature code data item (FE:) is recommended for each chain point, but it is not required. The feature code used does not have to be the same for every point. The points do not have to be sequential in the project data file, that is measured one after the other, but they must be within the project file for the chain being defined. The post processing software will use the feature code of the first point encountered with an OD: data item in the project file for a particular figure and assign that feature to the chain to be created. If no feature code (FE:) is recorded for that chain point in the project file, the processing software being used should assign a user defined or default feature code for the chain created. The post processing software will also assign a figure code number (FG:) to identify the figure. Normally, the value assigned will be in a range that would not be assigned in the field or is set by the user in the post processing software. Most post processing software will make a series of two point chains when this technique is used. The figure created will appear in the chain list at the bottom of the calculated file or points and chain file. Figure 6.2 shows a sample data set for which chains were defined with the Origin-Destination method. The labels on each point give the point number and Origin-Destination data item. The point number corresponds to the shot sequence. This method allows chain points to be collected out of sequence. This method can also be used along with the Figure Code method to designate that a certain point can be part of one chain based on the figure code (FG:) and part of another chain based on the origin/destination (OD:). Survey Data Management System Version 3.5 12-60 Appendix Connectivity Using The Origin-Destination Method (Point number indicates the survey shot sequence) PN: 26 PN: 21 PN: 14 OD:26 OD:21 PN: 23 PN: 10 OD:14 PN: 17 OD:23 PN: 16 OD:17 PN: 12 OD:16 Figure 6.2 Connectivity by origin/destination Project File for Connectivity by Origin-Destination An example of how this method works uses the information shown in Figure 6.2. If PN:10 is side shot from the current occupied station, and it is part of a chain for which the next point is PN:14, the following information might be recorded: 1. 2. 3. 4. 5. 6. 7. 8. 9. 10. 11. 12. 13. 14. 15. 16. 17. 18. 19. 20. 21. 22. 23. 24. 25. 26. 27. 28. 29. 30. 31. 32. 33. 34. 35. 36. 37. 38. 39. 40. AC:SS PN:10 FE:CURB CD:CURB LINE SH:5 HZ:45.2354 VT:90.3045 DS:100.44 OD:14 AC:SS PN:12 FE:FENCE SH:5 HZ:45.2354 VT:90.3045 DS:100.44 OD:16 AC:SS PN:14 FE:CURB SH:5 HZ:55.2853 VT:90.3006 DS:180.94 OD:21 AC:SS PN:16 FE:FENCE SH:5 HZ:45.2354 VT:90.3045 DS:100.44 OD:17 AC:SS PN:17 FE:FENCE SH:5 HZ:55.2853 VT:90.3006 DS:180.94 Survey Data Management System Version 3.5 (defines the feature code of the first chain as CURB) (points to PN: 14 as the next point in the CURB chain) (defines the feature code of the next chain as FENCE) (points to point number 16 as the next point in the FENCE chain.) 12-61 Appendix 41. 42. 43. OD:23 ...., ETC. CP:09/18/1999 18:46:43 The OD: data item under the shot activity for PN:10 tells the processing software to create a figure, using a Figure Code (FG:) assigned by the post processor, to connect PN:10 to PN:14 using the feature code CURB (FE:CURB). The OD: data item under the shot activity for PN:14 tells the postprocessing software to add PN:21 to the chain. The Calculated file for Connectivity by Origin-Destination The shot sequence used in the Project File for Connectivity by OriginDestination section, would be listed in the SDMS calculated file (.CAL) as: 1. 2. 3. 4. 5. 6. 7. 8. 9. 10. 11. 12. 13. 14. 15. 16. 17. 18. 19. 20. 21. 22. 23. 24. 25. 26. 27. 28. 29. 30. 31. 32. 33. 34. 35. 36. 37. 38. 39. 40. 41. 42. 43. 44. 45. 46. 47. 48. 49. 50. 51. 52. 53. 54. AC:SS PN:10 FE:CURB CD:CURB LINE SH:5 HZ:45.2354 VT:90.3045 DS:100.44 XX:#### (Calculated X coordinate) YY:#### (Calculated Y coordinate) ZZ:#### (Calculated Z coordinate) OD:14 AC:SS PN:14 FE:CURB SH:5 HZ:55.2853 VT:90.3006 DS:180.94 XX:#### YY:#### ZZ:##### OD:21 ...., ETC. CP:09/18/1999 18:46:43 BG:Begin Chain List AC:CH FG:1000 (Figure Code assigned by the post FE:CURB processing software since not given) CD:CURB LINE PL:10,14 AC:CH FG:1001 (Figure Code assigned by the post FE:CURB processing software since not given) CD:CURB LINE PL:14,21 AC:CH FG:1002 (Figure Code assigned by the post FE:FENCE processing software since not given) CD:6’ CHAIN LINK FENCE PL:12,16 AC:CH FG:1003 (Figure Code assigned by the post FE:FENCE processing software since not given) CD:6’ CHAIN LINK FENCE PL:16,17 AC:CH FG:1002 (Figure Code assigned by the post FE:FENCE processing software since not given) CD:6’ CHAIN LINK FENCE PL:17,23 ….ETC. EG:End Chain List CP:09/27/1999 13:15:18 Survey Data Management System Version 3.5 12-62 Appendix Creating Closed Chains There are three methods available to create a closed chain. The first method closes the chain by inserting “,C” after the Figure Code (FG:#,C). The second method creates a closed chain by using the Origin-Destination (OD:) data tag, as previously explained. The third method creates a closed chain by using Activity Chain (AC:CH). Closed Chains Using “FG:#,C” When FG:#,C is used within a shot activity, the post processing software interprets this to mean that the user wants to connect the current shot to the first shot in the file that contains the same FG:#. This effectively closes the chain that includes all the shots with FG:#. For example: 1. 2. 3. 4. 5. 6. 7. 8. 9. 10. 11. 12. 13. 14. 15. 16. 17. 18. 19. 20. 21. 22. 23. 24. 25. 26. AC:SS PN:10 FE:EPL CD:LEFT PAVEMENT EDGE FG:1 SH:5 HZ:45.2354 VT:90.3045 DS:100.44 AC:SS PN:14 FE:EPL FG:1 SH:5 HZ:55.2853 VT:90.3006 DS:180.94 AC:SS PN:21 FE:EPL FG:1,C (Close the chain created by FG:1 SH:5 on the first point in FG:1) HZ:55.2853 VT:90.3006 DS:180.94 CP:09/18/1999 18:46:43 The Calculated File for a Closed Chain using Figure Code The “FG:1,C” listed with the shot data for Point 21 tells the post processing software to close the chain (FG:1) on PN:10, which is the first point in the chain. The calculated file will have the computed point information and will show the chain created as: 1. 2. 3. 4. 5. 6. 7. 8. 9. 10. 11. 12. 13. 14. 15. 16. 17. AC:SS PN:10 FE:EPL CD:LEFT PAVEMENT EDGE SH:5 HZ:45.2354 VT:90.3045 DS:100.44 XX:#### (Calculated X coordinate) YY:#### (Calculated Y coordinate) ZZ:#### (Calculated Z coordinate) AC:SS PN:14 FE:EPL FG:1 SH:5 HZ:55.2853 Survey Data Management System Version 3.5 12-63 Appendix 18. 19. 20. 21. 22. 23. 24. 25. 26. 27. 28. 29. 30. 31. 32. 33. 34. 35. 36. 37. 38. 39. 40. 41. 42. 43. VT:90.3006 DS:180.94 XX:#### YY:#### ZZ:##### AC:SS PN:21 FE:EPL FG:1,C SH:5 HZ:55.2853 VT:90.3006 DS:180.94 XX:#### YY:#### ZZ:##### ...., ETC. CP:09/18/1999 18:46:43 BG:Begin Chain List AC:CH FG:1 FE:EPL CD:LEFT PAVEMENT EDGE PL:10, 14, 21,10 EG:End Chain List CP:09/27/1999 13:15:18 Closed Chains Using OD: The OD: data item can also be used to close a figure by inserting the point number that is to be closed upon as the response to the OD: data item for the last point shot to close that figure. Using the previous example, to close the figure from PN:21 back to PN:10, the field data in the project file would be as follows: 1. 2. 3. 4. 5. 6. 7. 8. 9. 10. 11. 12. 13. 14. 15. 16. 17. 18. 19. 20. 21. 22. 23. 24. 25. 26. 27. 28. AC:SS PN:10 FE:EPL CD:LEFT PAVEMENT EDGE FG:1 SH:5 HZ:45.2354 VT:90.3045 DS:100.44 AC:SS PN:14 FE:EPL FG:1 SH:5 HZ:55.2853 VT:90.3006 DS:180.94 AC:SS PN:21 FE:EPL FG:1 SH:5 HZ:55.2853 VT:90.3006 DS:180.94 OD:10 (Close the chain created by FG:1 on the CM: first point in FG:1, PN:10) CP:09/18/1999 18:46:43 Note that this method of closing a chain does not require the closing point to be the first point collected in a chain which would be required if the “,C” method were used. The disadvantage of the Origin–Destination method is the user has to remember the point number for the closing point. Survey Data Management System Version 3.5 12-64 Appendix The Calculated File for a Closed Chain using Origin Destination The OD:10 listed with the shot data for PN:21 tells the post processing software to close the chain (FG:1) on PN:10, which is the first point in the chain. The calculated file will have the computed point information and will show the chain created as: 1. 2. 3. 4. 5. 6. 7. 8. 9. 10. 11. 12. 13. 14. 15. 16. 17. 18. 19. 20. 21. 22. 23. 24. 25. 26. 27. 28. 29. 30. 31. 32. 33. 34. 35. 36. 37. 38. 39. 40. 41. 42. 43. 44. AC:SS PN:10 FE:EPL CD:LEFT PAVEMENT EDGE SH:5 HZ:45.2354 VT:90.3045 DS:100.44 XX:#### (Calculated X coordinate) YY:#### (Calculated Y coordinate) ZZ:#### (Calculated Z coordinate) AC:SS PN:14 FE:EPL FG:1 SH:5 HZ:55.2853 VT:90.3006 DS:180.94 XX:#### YY:#### ZZ:##### AC:SS PN:21 FE:EPL FG:1 SH:5 HZ:55.2853 VT:90.3006 DS:180.94 OD:10 XX:#### YY:#### ZZ:##### ...., ETC. CP:09/18/1999 18:46:43 BG:Begin Chain List AC:CH FG:1 FE:EPL CD:LEFT PAVEMENT EDGE PL:10, 14, 21,10 EG:End Chain List CP:09/27/1999 13:15:18 Closed Chains using the Chain Activity AC:CH Figures can also be closed using the Chain Activity. This method is explained in the discussion of the Chain Activity later in this section. Creating Gaps in Chains A gap can be created in a chain by adding “,G” after the Figure Code (FG:#,G). This tells the post processing software to create a chain with the Figure Code and feature assigned and to place a gap in the chain between the point where the “,G” appears and the next point in that chain. The gap created will be shown in the PL (Point List) field of a calculated file as two commas in a row between the points where the gap is to occur. A gap can also be created by manually Survey Data Management System Version 3.5 12-65 Appendix entering an extra comma between points in a PL field in an AC:CH as explained in the discussion of the Chain Activity later in this section. PN: 16 FG:1 PN: 15 FG:1 PN: 14 FG:1 PN: 10 FG:1 PN: 23 PN: 24 PN: 25 FG:1 FG:1 FG:1 PN: 26 FG:1 Figure 6.3 Creating a gap in a survey chain Project file for Creating a Gap In the project file, to create the gap between PN:16 and PN:23 shown in Figure 6.3, the shot at PN:16 would contain the line “FG:1,G” along with the feature code FE:EPL. This information tells SDMS Processor to break the connection between PN:16 and PN:23, which in this case is the next point with the same figure code. Then, the figure is to continue once past the break, based on the other points listed. The project file will have the point information and will indicate how the chain is to be created: 1. 2. 3. 4. 5. 6. 7. 8. 9. 10. 11. 12. 13. 14. 15. 16. 17. 18. 19. 20. 21. 22. 23. 24. 25. 26. 27. 28. 29. 30. 31. 32. AC:SS PN:10 FE:EPL CD:LEFT PAVEMENT EDGE FG:1 SH:5 HZ:45.2354 VT:90.3045 DS:100.44 AC:SS PN:14 FE:EPL FG:1 SH:5 HZ:55.2853 VT:90.3006 DS:150.94 AC:SS PN:15 FE:EPL FG:1 SH:5 HZ:56.2853 VT:90.3006 DS:180.94 AC:SS PN:16 FE:EPL FG:1,G (Place a gap in the chain starting at PN:16 SH:5 and ending at the next point shot.) HZ:57.2853 VT:90.3006 Survey Data Management System Version 3.5 12-66 Appendix 33. 34. 35. 36. 37. 38. 39. 40. 41. 42. 43. 44. 45. 46. 47. 48. 49. 50. 51. 52. 53. 54. 55. 56. 57. 58. 59. 60. 61. 62. 63. DS:195.94 AC:SS PN:23 (Gap ends at the next point shot, PN:23, FE:EPL the figure will then continue.) FG:1 SH:5 HZ:59.2927 VT:89.1642 DS:210.24 AC:SS PN:24 FE:EPL FG:1 HZ:55.3947 VT:90.1432 DS:190.28 AC:SS PN:25 FE:EPL FG:1 HZ:50.5917 VT:89.1642 DS:180.24 AC:SS PN:26 FE:EPL FG:1 HZ:41.2017 VT:89.1642 DS:155.24 CP:09/18/1999 18:46:43 The Calculated File for creating a gap. The “FG:1,G” listed with the shot data for PN:16 tells SDMS Processor to place a gap in the chain (FG:1) between PN:16 and PN:23, then continue the chain with the points shot having the same figure code. The calculated file will have the computed point information and will show the chain created as: 1. 2. 3. 4. 5. 6. 7. 8. 9. 10. 11. 12. 13. 14. 15. 16. 17. 18. 19. 20. 21. 22. 23. 24. 25. 26. 27. 28. 29. 30. 31. AC:SS PN:10 FE:EPL CD:LEFT PAVEMENT EDGE FG:1 SH:5 HZ:45.2354 VT:90.3045 DS:100.44 XX:#### YY:#### ZZ:##### AC:SS PN:14 FE:EPL FG:1 SH:5 HZ:55.2853 VT:90.3006 DS:150.94 XX:#### YY:#### ZZ:##### AC:SS PN:15 FE:EPL FG:1 SH:5 HZ:56.2853 VT:90.3006 DS:180.94 Survey Data Management System Version 3.5 12-67 Appendix 32. 33. 34. 35. 36. 37. 38. 39. 40. 41. 42. 43. 44. 45. 46. 47. 48. 49. 50. 51. 52. 53. 54. 55. 56. 57. 58. 59. 60. 61. 62. 63. 64. 65. 66. 67. 68. 69. 70. 71. 72. 73. 74. 75. 76. 77. 78. 79. 80. 81. 82. 83. 84. 85. 86. 87. 88. 89. 90. 91. 92. 93. 94. 95. XX:#### YY:#### ZZ:##### AC:SS PN:16 FE:EPL FG:1,G (Start the gap in the chain and end SH:5 the gap at the next point shot with HZ:57.2853 the same figure code.) VT:90.3006 DS:195.94 XX:#### YY:#### ZZ:##### AC:SS PN:23 (Gap ends at this point. The figure FE:EPL will then continue.) FG:1 SH:5 HZ:59.2927 VT:89.1642 DS:210.24 XX:#### YY:#### ZZ:##### AC:SS PN:24 FE:EPL FG:1 HZ:55.3947 VT:90.1432 DS:190.28 XX:#### YY:#### ZZ:##### AC:SS PN:25 FE:EPL FG:1 HZ:50.5917 VT:89.1642 DS:180.24 XX:#### YY:#### ZZ:##### AC:SS PN:26 FE:EPL FG:1 HZ:41.2017 VT:89.1642 DS:155.24 XX:#### YY:#### ZZ:##### CP:09/18/1999 18:46:43 BG:Begin Chain List AC:CH FG:1 FE:EPL CD:LEFT PAVEMENT EDGE PL:10,14,15,16,,23,24,25,26 EG:End Chain List CP:09/27/1999 13:15:18 Connectivity by Taping Taping is an activity specifically designed for defining chains around buildings or other figures when it may not be practical or desirable to use an electronic Survey Data Management System Version 3.5 12-68 Appendix instrument to collect all of the points that define that building or figure. This procedure allows the user to tape the horizontal distance along each side, to approximate the direction, and to indicate the approximate difference in elevation between two angle points. Before the taping activity can be used, two points must be recorded, using the sideshot activity, to establish a beginning reference line for the taped measurements. Typically, the total station is used to measure these two points immediately before beginning the taping activity, but this is not required. The points can be recorded at any time in the project file, but must be recorded before the taping activity in which they will be used. The backsight point number data item (BS:) and the occupied station point number data item (OS:) are used with the taping activity to specify the point numbers to be used for the backsight and occupied station respectively. Within the taping activity, taped measurements begin at the occupied station point number (OS:). The direction of the reference line is from the occupied station point number (OS:) to the backsight point number (BS:). The points assigned to the OS: and BS: are included as part of the taped figure. Note: The point number of the first point in the point list created by the taping activity will be the point number used with the BS: data item, followed by the point number of the OS: data item. The points created from the data with each AD: data item will follow in sequence. The default sequence for this activity is: 1. 2. AC:TA OS: 3. BS: (Point Number of the point to be used as the back sight. The first point of chain created within the taping activity.) 4. PN: (Beginning Point Number to be used for the points computed within the taping activity) 5. FE: (Feature Code to be used for the new chain) 6. CD: 7. FG: (Chain Description to be used for the new chain) (Figure Code to be used for the chain) 8. AD: (Angle, distance, and difference in elevation to the next point) 9. AD: (Angle, distance, and difference in elevation to all other points, as needed) 10. PL: (Point List to indicate previously shot points to include as the last points in the chain created) 11. CM: (Add at any time) (Point Number of the point to be use as the occupied station. The second point of chain created within the taping activity.) Two radial measurements establish the first segment of the chain within each taping activity. These points are used as the back sight (BS:) and occupied station (OS:) to start defining the figure to be taped. Note: The BS: and OS: data items are required for the post processing software to generate data for the taped points. Therefore, both data items must contain a response for each taping activity entered in a project file. Survey Data Management System Version 3.5 12-69 Appendix The Point Number (PN:) indicates the point number to be used for the first point taped. Subsequent point numbers will increment as defined in the TAGS.HLP file. The feature code data item (FE:) designates the feature of the chain being built by the taping activity. The figure code data item (FG:) designates the Figure Code of the chain being defined. The angle distance list defines the direction, horizontal distance, and difference in elevation from the preceding point to the point that follows. The format is: AD:Direction,Horizontal Distance,Vertical Distance Note: The AD: line must include at least the direction and horizontal distance (DH:). If there is no change in elevation, the vertical distance (DV:) can be shown as zero (0) or left blank. There is no comma required following the vertical distance (DV:). The direction to each point is indicated by looking from the “current“ occupied point” toward the “current“ back sight point and measuring the horizontal angle right to the next point to be taped. The direction of the line can be indicated by: F (Forward) = 180° B (Back) = 0° L (Left) = 270° R (Right) = 90° HZ (Horizontal Angle Right) = 0° - 360° The direction in the angle distance lists (AD:) can be listed as: • All alpha designated angles (F, B, R, L) • All numeric angles (Horizontal Angles Right, HZ:) • A combination of alpha designated angles (F, B, R, L) and numeric angles (Horizontal Angles Right, HZ:). The following sections give details on the various ways the taping activity information can be recorded in the project file. The post processing software uses this data to compute coordinates for these points. The points created are shown in the SDMS Calculated (CAL) file as a traverse around the taped object. Each point includes the shot identification data item with the response of TA (SI:TA) to indicate the points were created by taping. The chain (figure) created will be listed at the bottom of the file. The points created are shown in the SDMS Points and Chain (PAC) file as points (AC:PD) and also have the shot identification data item and response of TA (SI:TA). The chain (figure) created will be listed at the bottom of the file. Note: Taped objects with angles other than 90 degrees may not be supported by the post processing software being used. In that case, it will be necessary to collect the data as side shots and define their connectivity using the chain activity. Direction Options for the Taping Activity Currently, there are two options available to indicate the direction being taped. The first option uses the alpha characters F, B, L, R to define the direction. The second option uses the horizontal angle right (HZ:) to define the direction. Survey Data Management System Version 3.5 12-70 Appendix These options are defined in detail at the beginning of Section VI. The sections that follow will explain how these options are used in a project file. Connectivity Using The Taping Activity Point number indicates the survey shot sequence PN: 9 104 72 PN: 10 34 60 38 44 Figure 6.4 The Taping Activity Direction using alpha characters Most taping will consist of measuring around objects with 90° angles, and at time, forward and back. Therefore, the use of alpha characters to represent those angles provides a short hand method for data entry. For example, the sequence to tape around the building in Figure 6.4 is: 1. 2. 3. 4. 5. 6. 7. 8. 9. 10. 11. 12. 13. 14. 15. 16. AC:SS PN:9 FE:HOUSE SH:5 HZ:19.3538 VT:90.3045 DS:254.93 AC:SS PN:10 FE:HOUSE SH:5 HZ:0 VT:90.3006 DS:180.94 AC:TA OS:10 17. BS:9 (Point Number of the point to be used as the back sight. This is first point in the chain being defined within the taping activity.) 18. PN:100 (Beginning point number to be used for the points computed within the taping activity) 19. FE:HOUSE 20. FG:5 21. CD:OUR HOUSE (Feature to be used for the new chain) (Figure Code to be used for the chain) (Chain Description) Survey Data Management System Version 3.5 (Point Number of the point to be used as the occupied station. This is the second point in the chain being defined within the taping activity.) 12-71 Appendix 22. AD:R,34, (90° HZ Right 34 feet, use the same elevation as PN:10) 23. AD:R,60,3.2 (90° HZ Right 60 feet. Add 3.2 feet to the elevation of the preceding point) 24. AD:L,38,0 (90° HZ Left, 38 feet. Elevation the same as the preceding point.) 25. AD:R,44, (90° HZ Right 44 feet. Elevation the same as the preceding point.) 26. AD:R,72, -3.2 (90° HZ Right 71 feet. Subtract 3.2 feet from the elevation of the preceding point.) 27. AD:R,104 28. (90° HZ Right 104 feet. Elevation the same as the preceding point.) CP:09/18/1999 18:46:43 Direction using horizontal angles right (HZ) The user may need to tape around objects that have angles other than 90° involved. This can be done using a horizontal angles right (HZ:) to indicate the direction along each side of the object being measured. Using horizontal angles right, the preceding taping activity would be: 1. 2. 3. 4. 5. 6. 7. 8. 9. 10. 11. 12. 13. 14. 15. 16. AC:SS PN:9 FE:HOUSE SH:5 HZ:19.3538 VT:90.3045 DS:254.93 AC:SS PN:10 FE:HOUSE SH:5 HZ:0 VT:90.3006 DS:180.94 AC:TA OS:10 17. BS:9 (Point Number of the point to be used as the back sight. This is first point in the chain being defined within the taping activity.) 18. PN:100 19. FE:HOUSE 20. FG:5 21. 22. CD:OUR HOUSE AD:90,34, 23. AD:R,60,3.2 24. AD:L,38,0 25. AD:R,44, (Beginning point number to be used for the points computed within the taping activity) (Feature to be used for the new chain) (Figure Code to be used for the chain) (Chain Description) (90° Horizontal Right 34 feet, use the same elevation as PN:10) (90° HZ Right 60 feet. Add 3.2 feet to the elevation of the preceding point) (90° HZ Left, 38 feet. Elevation the same as the preceding point.) (90° HZ Right 44 feet. Elevation the same as the preceding point.) Survey Data Management System Version 3.5 (Point Number of the point to be used as the occupied station. This is the second point in the chain being defined within the taping activity.) 12-72 Appendix 26. 27. 28. AD:R,72, -3.2 (90° HZ Right 71 feet. Subtract 3.2 feet from the elevation of the preceding point.) AD:R,104 (90° HZ Right 104 feet. Elevation the same as the preceding point.) CP:09/18/1999 18:46:43 The Calculated (CAL) File The shot sequence used and the resulting chain list (AC:CH) would be listed in the SDMS calculated file (.CAL) as: 1. 2. 3. 4. 5. 6. 7. 8. 9. 10. 11. 12. 13. 14. 15. 16. 17. 18. 19. 20. 21. 22. 23. 24. 25. 26. 27. 28. 29. 30. 31. 32. 33. 34. 35. 36. 37. 38. 39. 40. 41. 42. 43. 44. 45. 46. 47. 48. 49. 50. 51. 52. 53. 54. 55. 56. 57. AC:SS PN:9 FE:BU XX:10085.4876 YY:10240.1582 ZZ:497.7211 SH:5.0000 HZ:19.3538 VT:90.3045 DS:254.9300 AC:SS PN:10 FE:SU XX:10000.0000 YY:10180.9330 ZZ:498.4164 SH:5.0000 HZ:.0000 VT:90.3006 DS:180.9400 AC:TA OS:10 BS:9 PN:100 CD:OUR HOUSE AD:R,34, AD:R,60,3.2 AD:L,38,0 AD:R,44, AD:R,72,-3.2 AD:R,104 AC:OS PN:10 FE:HOUSE XC:10000.0000 YC:10180.9330 ZC:-99999 XX:10000.0000 YY:10180.9330 ZZ:498.4164 SI:TA (Assigned to all taped points in the AC:TA by the post processing software.) IH:.0000 AC:BS PN:9 FE:HOUSE XX:10085.4876 YY:10240.1582 ZZ:497.7211 SI:TA SH:.0000 HZ:.0000 AC:SS PN:100 (PN: assigned to the first taped point by the post processing software.) FE:HOUSE XX:10019.3623 YY:10152.9848 ZZ:498.4165 Survey Data Management System Version 3.5 12-73 Appendix 58. 59. 60. 61. 62. 63. 64. 65. 66. 67. 68. 69. 70. 71. 72. 73. 74. 75. 76. 77. 78. 79. 80. 81. 82. 83. 84. 85. 86. 87. 88. 89. 90. 91. 92. 93. 94. 95. 96. 97. 98. 99. 100. 101. 102. 103. 104. 105. 106. 107. 108. 109. 110. 111. 112. 113. 114. 115. 116. 117. 118. 119. 120. 121. 122. 123. 124. 125. 126. SI:TA SH:.0000 HZ:90.0000 VT:90.0000 DS:34.0000 AC:OS PN:100 FE:HOUSE XX:10019.3623 YY:10152.9848 ZZ:498.4165 SI:TA IH:.0000 AC:BS PN:10 FE:HOUSE XC:10000.0000 YC:10180.9330 ZC:-99999 XX:10000.0000 YY:10180.9330 ZZ:498.4164 SI:TA SH:.0000 HZ:.0000 AC:SS PN:101 (PN: assigned to post processing FE:HOUSE XX:10068.6824 YY:10187.1534 ZZ:501.6167 SI:TA SH:.0000 HZ:90.0000 VT:86.5650 DS:60.0850 AC:OS PN:101 FE:HOUSE XX:10068.6824 YY:10187.1534 ZZ:501.6167 SI:TA IH:.0000 AC:BS PN:100 FE:HOUSE XX:10019.3623 YY:10152.9848 ZZ:498.4165 SI:TA SH:.0000 HZ:.0000 AC:SS PN:102 (PN: assigned to post processing FE:HOUSE XX:10090.3226 YY:10155.9172 ZZ:501.6167 SI:TA SH:.0000 HZ:270.0000 VT:90.0000 DS:38.0000 AC:OS PN:102 FE:HOUSE XX:10090.3226 YY:10155.9172 Survey Data Management System Version 3.5 the next taped point by the software) the next taped point by the software) 12-74 Appendix 127. 128. 129. 130. 131. 132. 133. 134. 135. 136. 137. 138. 139. 140. 141. 142. 143. 144. 145. 146. 147. 148. 149. 150. 151. 152. 153. 154. 155. 156. 157. 158. 159. 160. 161. 162. 163. 164. 165. 166. 167. 168. 169. 170. 171. 172. 173. 174. 175. 176. 177. 178. 179. 180. 181. 182. 183. 184. 185. 186. 187. 188. 189. 190. 191. 192. 193. 194. 195. ZZ:501.6167 SI:TA IH:.0000 AC:BS PN:101 FE:HOUSE XX:10068.6824 YY:10187.1534 ZZ:501.6167 SI:TA SH:.0000 HZ:.0000 AC:SS PN:103 (PN: assigned to post processing FE:HOUSE XX:10126.4909 YY:10180.9743 ZZ:501.6168 SI:TA SH:.0000 HZ:90.0000 VT:90.0000 DS:44.0000 AC:OS PN:103 FE:HOUSE XX:10126.4909 YY:10180.9743 ZZ:501.6168 SI:TA IH:.0000 AC:BS PN:102 FE:HOUSE XX:10090.3226 YY:10155.9172 ZZ:501.6167 SI:TA SH:.0000 HZ:.0000 AC:SS PN:104 (PN: assigned to post processing FE:HOUSE XX:10085.4884 YY:10240.1587 ZZ:498.4170 SI:TA SH:.0000 HZ:90.0000 VT:92.3241 DS:72.0710 AC:OS PN:104 FE:HOUSE XX:10085.4884 YY:10240.1587 ZZ:498.4170 SI:TA IH:.0000 AC:BS PN:103 FE:HOUSE XX:10126.4909 YY:10180.9743 ZZ:501.6168 SI:TA SH:.0000 HZ:.0000 AC:SS Survey Data Management System Version 3.5 the next taped point by the software) the next taped point by the software) 12-75 Appendix 196. PN:105 (PN: assigned to the last taped point by the post processing software) 197. 198. 199. 200. 201. 202. 203. 204. 205. 206. 207. FE:HOUSE XX:9999.9998 YY:10180.9328 ZZ:498.4172 BG:BEGIN CHAIN LIST AC:CH FE:HOUSE FG:5 PL:9,10,100,101,102,103,104,105 EG:END CHAIN LIST CP:06/08/2000 14:08:15 It should be noted that in this case, PN:104 will be at or near PN:9 and PN:105 will be at or near PN:10. This is due to the lower precision of the position of the point that normally results from taping. The Points and Chain (PAC) File The points created by the taping activity and the resulting chain list (AC:CH) would be listed in the SDMS Points and Chains (.PAC) file as: 1. 2. 3. 4. 5. 6. 7. 8. 9. 10. 11. 12. 13. 14. 15. 16. 17. 18. 19. 20. 21. 22. 23. 24. 25. 26. 27. 28. 29. 30. 31. 32. 33. 34. 35. 36. 37. 38. 39. 40. 41. 42. AC:PD PN:9 FE:BU XX:10085.4876 YY:10240.1582 ZZ:497.7211 AC:PD PN:10 FE:SU XX:10000.0000 YY:10180.9330 ZZ:498.4164 AC:PD PN:100 (PN: assigned to the first taped point by the post processing software) FE:HOUSE XX:10019.3623 YY:10152.9848 ZZ:498.4165 SI:TA (Assigned to all taped points in the AC:TA by the post processing software) AC:PD PN:101 (PN: assigned to the next taped point by the post processing software) FE:HOUSE XX:10068.6824 YY:10187.1534 ZZ:501.6167 SI:TA AC:PD PN:102 (PN: assigned to the next taped point by the post processing software) FE:HOUSE XX:10090.3226 YY:10155.9172 ZZ:501.6167 SI:TA AC:PD PN:103 (PN: assigned to the next taped point by the post processing software) FE:HOUSE XX:10126.4909 YY:10180.9743 ZZ:501.6168 SI:TA AC:PD PN:104 (PN: assigned to the next taped point by the Survey Data Management System Version 3.5 12-76 Appendix 43. 44. 45. 46. 47. 48. 49. 50. 51. 52. 53. 54. 55. 56. 57. 58. 59. post processing software) FE:HOUSE XX:10085.4884 YY:10240.1587 ZZ:498.4170 SI:TA AC:PD PN:105 (PN: assigned to the last taped point by the post processing software) FE:HOUSE XX:9999.9998 YY:10180.9328 ZZ:498.4172 BG:BEGIN CHAIN LIST AC:CH FE:HOUSE FG:5 PL:9,10,100,101,102,103,104,105 EG:END CHAIN LIST Note: The list of points in a Points and Chain (PAC) file, defined by the any of the taping activity scenarios supported by SDMS, will be similar to the sample shown above. Therefore, sample PAC files will not be listed for each of the sections that follow. Closing a Taped Object The procedures described above will create duplicate points of the occupied station (OS:) point and the back sight (BS:) point used at the beginning of a taping activity (PN:9 and PN:10). Since the taped measurements and vertical differences are not intended to be at the same precision as those shot with the total station, the closing points may miss the intended location desired. A better method would be to use either the Origin -Destination (OD:) data item, or add “,C” to the last angle distance list, to tell the post processing software to close the figure on a specified point. Project file Closing AC:TA with Origin-Destination (OD:) Using the same example shown in Figure 6.4, and the OD: tag to tell the post processing software to close the figure on a specified point, the data will be collected in the project file as: 1. 2. 3. 4. 5. 6. 7. 8. 9. 10. 11. 12. 13. 14. 15. 16. AC:SS PN:9 FE:HOUSE SH:5 HZ:19.3538 VT:90.3045 DS:254.93 AC:SS PN:10 FE:HOUSE SH:5 HZ:0 VT:90.3006 DS:180.94 AC:TA OS:10 (Point Number of the point to be used as the occupied station. This is the second point in the chain being defined within the taping activity.) 17. BS:9 Survey Data Management System Version 3.5 (Point Number of the point to be used as the back sight. This is first point in the chain being defined within the taping 12-77 Appendix activity.) (Beginning Point Number to be used for the points computed within the taping activity) 18. PN:100 19. FE:HOUSE (Feature to be used for the new chain) 20. FG:5 21. CD:OUR HOUSE (Chain Description) 22. AD:R,34, (Right 34 feet, use the same elevation as PN:10) 23. AD:R,60,3.2 (Right 60 feet. Add 3.2 feet to the elevation of the preceding point) 24. AD:L,38,0 (Left 38 feet. Elevation the same as the preceding point.) 25. AD:R,44, (Right 44 feet. Elevation the same as the preceding point.) 26. 27. OD:9 (Close the new chain on point number 9) CP:09/18/1999 18:46:43 (Figure Code to be used for the chain) Calculated File with OD: in the Taping Activity Using OD: to close the figure, the post processing software would display the calculated shot information and describe the chain in the SDMS calculated file (.CAL) as 1. 2. 3. 4. 5. 6. 7. 8. 9. 10. 11. 12. 13. 14. 15. 16. 17. 18. 19. 20. 21. 22. 23. 24. 25. 26. 27. 28. 29. 30. 31. 32. 33. 34. 35. 36. 37. 38. 39. AC:SS PN:9 FE:BU XX:10085.4876 YY:10240.1582 ZZ:497.7211 SH:5.0000 HZ:19.3538 VT:90.3045 DS:254.9300 AC:SS PN:10 FE:SU XX:10000.0000 YY:10180.9330 ZZ:498.4164 SH:5.0000 HZ:.0000 VT:90.3006 DS:180.9400 AC:TA OS:10 BS:9 PN:100 CD:OUR HOUSE AD:R,34, AD:R,60,3.2 AD:L,38,0 AD:R,44, OD:9 AC:OS PN:10 FE:HOUSE XC:10000.0000 YC:10180.9330 ZC:-99999 XX:10000.0000 YY:10180.9330 ZZ:498.4164 Survey Data Management System Version 3.5 12-78 Appendix 40. SI:TA 41. 42. 43. 44. 45. 46. 47. 48. 49. 50. 51. 52. IH:.0000 AC:BS PN:9 FE:HOUSE XX:10085.4876 YY:10240.1582 ZZ:497.7211 SI:TA SH:.0000 HZ:.0000 AC:SS PN:100 (PN: assigned to the first taped point by the post processing software) FE:HOUSE XX:10019.3623 YY:10152.9848 ZZ:498.4165 SI:TA SH:.0000 HZ:90.0000 VT:90.0000 DS:34.0000 AC:OS PN:100 FE:HOUSE XX:10019.3623 YY:10152.9848 ZZ:498.4165 SI:TA IH:.0000 AC:BS PN:10 FE:HOUSE XC:10000.0000 YC:10180.9330 ZC:-99999 XX:10000.0000 YY:10180.9330 ZZ:498.4164 SI:TA SH:.0000 HZ:.0000 AC:SS PN:101 (PN: assigned to the next taped point by the post processing software) FE:HOUSE XX:10068.6824 YY:10187.1534 ZZ:501.6167 SI:TA SH:.0000 HZ:90.0000 VT:86.5650 DS:60.0850 AC:OS PN:101 FE:HOUSE XX:10068.6824 YY:10187.1534 ZZ:501.6167 SI:TA IH:.0000 AC:BS PN:100 FE:HOUSE XX:10019.3623 YY:10152.9848 ZZ:498.4165 SI:TA 53. 54. 55. 56. 57. 58. 59. 60. 61. 62. 63. 64. 65. 66. 67. 68. 69. 70. 71. 72. 73. 74. 75. 76. 77. 78. 79. 80. 81. 82. 83. 84. 85. 86. 87. 88. 89. 90. 91. 92. 93. 94. 95. 96. 97. 98. 99. 100. 101. 102. 103. 104. 105. 106. 107. Survey Data Management System Version 3.5 (Assigned to all taped points in the AC:TA by the post processing software) 12-79 Appendix 108. 109. 110. 111. 112. 113. 114. 115. 116. 117. 118. 119. 120. 121. 122. 123. 124. 125. 126. 127. 128. 129. 130. 131. 132. 133. 134. 135. 136. 137. 138. 139. 140. 141. 142. 143. 144. 145. 146. 147. 148. 149. 150. 151. 152. 153. 154. 155. SH:.0000 HZ:.0000 AC:SS PN:102 (PN: assigned to post processing FE:HOUSE XX:10090.3226 YY:10155.9172 ZZ:501.6167 SI:TA SH:.0000 HZ:270.0000 VT:90.0000 DS:38.0000 AC:OS PN:102 FE:HOUSE XX:10090.3226 YY:10155.9172 ZZ:501.6167 SI:TA IH:.0000 AC:BS PN:101 FE:HOUSE XX:10068.6824 YY:10187.1534 ZZ:501.6167 SI:TA SH:.0000 HZ:.0000 AC:SS PN:103 (PN: assigned to post processing FE:HOUSE XX:10126.4909 YY:10180.9743 ZZ:501.6168 SI:TA SH:.0000 HZ:90.0000 VT:90.0000 DS:44.0000 BG:BEGIN CHAIN LIST AC:CH FE:HOUSE FG:5 PL:9,10,100,101,102,103,9 EG:END CHAIN LIST CP:06/08/2000 14:08:15 the next taped point by the software) the last taped point by the software) The Project file Closing AC:TA using “C” in the Angle Distance (AD) List Using the example shown in Figure 6.4, the building can also be closed by adding the letter C, preceded by a comma (,C), at the end of the last angle distance (AD:) list. Using this method tells SDMS Processor to close the figure on the back sight point that is listed with the particular taping activity. The data will be collected in the project file as: 1. 2. 3. 4. 5. 6. 7. 8. 9. AC:SS PN:9 FE:HOUSE SH:5 HZ:19.3538 VT:90.3045 DS:254.93 AC:SS PN:10 Survey Data Management System Version 3.5 12-80 Appendix 10. 11. 12. 13. 14. 15. 16. FE:HOUSE SH:5 HZ:0 VT:90.3006 DS:180.94 AC:TA OS:10 (Point Number of the point to be used as the occupied station. This is the second point in the chain being defined within the taping activity.) 17. BS:9 18. PN:100 19. 20. 21. 22. 23. 24. 25. 26. (Point Number of the point to be used as the back sight. This is the first point in the chain being defined within the taping activity.) (Beginning Point Number to be used for the points computed within the taping activity) FE:HOUSE (Feature to be used for the new chain) FG:5 (Figure Code to be used for the chain) CD:OUR HOUSE (Chain Description) AD:R,34, (Right 34 feet, use the same elevation as PN:10) AD:R,60,3.2 (Right 60 feet. Add 3.2 feet to the elevation of the preceding point.) AD:L,38,0 (Left 38 feet. Elevation the same as the preceding point.) AD:R,44,C (Right 44 feet. Elevation the same as the preceding point, Close on the back sight point) CP:09/18/1999 18:46:43 The Calculated File with “,C” in the Taping Activity Using “,C” to close the figure, the post processing software would display the calculated shot information and describe the chain in the SDMS calculated file (.CAL) as: 1. 2. 3. 4. 5. 6. 7. 8. 9. 10. 11. 12. 13. 14. 15. 16. 17. 18. 19. 20. 21. 22. 23. 24. 25. 26. 27. 28. 29. 30. 31. 32. AC:SS PN:9 FE:BU XX:10085.4876 YY:10240.1582 ZZ:497.7211 SH:5.0000 HZ:19.3538 VT:90.3045 DS:254.9300 AC:SS PN:10 FE:SU XX:10000.0000 YY:10180.9330 ZZ:498.4164 SH:5.0000 HZ:.0000 VT:90.3006 DS:180.9400 AC:TA OS:10 BS:9 PN:100 CD:OUR HOUSE AD:R,34, AD:R,60,3.2 AD:L,38,0 AD:R,44,C AC:OS PN:10 FE:HOUSE Survey Data Management System Version 3.5 12-81 Appendix 33. 34. 35. 36. 37. 38. 39. 40. 41. 42. 43. 44. 45. 46. 47. 48. 49. 50. 51. 52. 53. 54. 55. 56. 57. 58. 59. 60. 61. 62. 63. 64. 65. 66. 67. 68. 69. 70. 71. 72. 73. 74. 75. 76. 77. 78. 79. 80. 81. 82. 83. 84. 85. 86. 87. 88. 89. 90. 91. 92. 93. 94. 95. 96. 97. 98. 99. 100. XC:10000.0000 YC:10180.9330 ZC:-99999 XX:10000.0000 YY:10180.9330 ZZ:498.4164 SI:TA (Assigned to all taped points in the AC:TA by the post processing software) IH:.0000 AC:BS PN:9 FE:HOUSE XX:10085.4876 YY:10240.1582 ZZ:497.7211 SI:TA SH:.0000 HZ:.0000 AC:SS PN:100 (PN: assigned to the first taped point by the post processing software) FE:HOUSE XX:10019.3623 YY:10152.9848 ZZ:498.4165 SI:TA SH:.0000 HZ:90.0000 VT:90.0000 DS:34.0000 AC:OS PN:100 FE:HOUSE XX:10019.3623 YY:10152.9848 ZZ:498.4165 SI:TA IH:.0000 AC:BS PN:10 FE:HOUSE XC:10000.0000 YC:10180.9330 ZC:-99999 XX:10000.0000 YY:10180.9330 ZZ:498.4164 SI:TA SH:.0000 HZ:.0000 AC:SS PN:101 (PN: assigned to the next taped point by the post processing software) FE:HOUSE XX:10068.6824 YY:10187.1534 ZZ:501.6167 SI:TA SH:.0000 HZ:90.0000 VT:86.5650 DS:60.0850 AC:OS PN:101 FE:HOUSE XX:10068.6824 YY:10187.1534 ZZ:501.6167 SI:TA IH:.0000 AC:BS Survey Data Management System Version 3.5 12-82 Appendix 101. 102. 103. 104. 105. 106. 107. 108. 109. 110. 111. 112. 113. 114. 115. 116. 117. 118. 119. 120. 121. 122. 123. 124. 125. 126. 127. 128. 129. 130. 131. 132. 133. 134. 135. 136. 137. 138. 139. 140. 141. 142. 143. 144. 145. 146. 147. 148. 149. 150. 151. 152. 153. 154. PN:100 FE:HOUSE XX:10019.3623 YY:10152.9848 ZZ:498.4165 SI:TA SH:.0000 HZ:.0000 AC:SS PN:102 (PN: assigned to post processing FE:HOUSE XX:10090.3226 YY:10155.9172 ZZ:501.6167 SI:TA SH:.0000 HZ:270.0000 VT:90.0000 DS:38.0000 AC:OS PN:102 FE:HOUSE XX:10090.3226 YY:10155.9172 ZZ:501.6167 SI:TA IH:.0000 AC:BS PN:101 FE:HOUSE XX:10068.6824 YY:10187.1534 ZZ:501.6167 SI:TA SH:.0000 HZ:.0000 AC:SS PN:103 (PN: assigned to post processing FE:HOUSE XX:10126.4909 YY:10180.9743 ZZ:501.6168 SI:TA SH:.0000 HZ:90.0000 VT:90.0000 DS:44.0000 BG:BEGIN CHAIN LIST AC:CH FE:HOUSE FG:5 PL:9,10,100,101,102,103,9 EG:END CHAIN LIST CP:06/08/2000 14:08:15 the next taped point by the software) the last taped point by the software) Ending in a Figure Using the Taping Activity The taping activity can also be used to define a taped figure that ends and is not intended to create a closed object. A chain created by the taping activity can be stopped at any point by ending with an AD: in the project file. Survey Data Management System Version 3.5 12-83 Appendix Connectivity Using The Taping Activity Point number indicates the survey shot sequence PN: 9 104 PN: 10 34 60 38 44 Figure 6.5 Taping Activity - Ending a Figure Using the example in Figure 6.5 to end a chain, the taping activity will be: 1. 2. 3. 4. 5. 6. 7. 8. 9. 10. 11. 12. 13. 14. 15. 16. AC:SS PN:9 FE:HOUSE SH:5 HZ:19.3538 VT:90.3045 DS:254.93 AC:SS PN:10 FE:HOUSE SH:5 HZ:0 VT:90.3006 DS:180.94 AC:TA OS:10 (Point Number of the point to be used as the occupied station. This is the second point in the chain being defined within the taping activity.) 17. BS:9 (Point Number of the point to be used as the back sight. This is the first point in the chain being defined within the taping activity.) 18. PN:100 (Beginning Point Number to be used for the points computed within the taping activity) 19. 20. 21. 22. FE:HOUSE (Feature to be used for the new chain) FG:5 (Figure Code to be used for the chain) CD:PART OF OUR HOUSE (Chain Description) AD:R,34, (Right 34 feet, use the same elevation as PN:10) AD:R,60,3.2 (Right 60 feet. Add 3.2 feet to the elevation of the preceding point) AD:L,38,0 (Left 38 feet. Elevation the same as the preceding point.) AD:R,44, (Right 44 feet. Elevation the same as the preceding point, and the end of the chain.) CP:09/18/1999 18:46:43 23. 24. 25. 26. Survey Data Management System Version 3.5 12-84 Appendix The Calculated file Using the shot sequence listed, the post processing software would display the calculated shot information and describe the chain in the SDMS calculated file (.CAL) as: 1. 2. 3. 4. 5. 6. 7. 8. 9. 10. 11. 12. 13. 14. 15. 16. 17. 18. 19. 20. 21. 22. 23. 24. 25. 26. 27. 28. 29. 30. 31. 32. 33. 34. 35. 36. 37. 38. 39. 40. 41. 42. 43. 44. 45. 46. 47. 48. 49. 50. 51. 52. 53. 54. 55. 56. 57. 58. 59. 60. 61. 62. AC:SS PN:9 FE:BU XX:10085.4876 YY:10240.1582 ZZ:497.7211 SH:5.0000 HZ:19.3538 VT:90.3045 DS:254.9300 AC:SS PN:10 FE:SU XX:10000.0000 YY:10180.9330 ZZ:498.4164 SH:5.0000 HZ:.0000 VT:90.3006 DS:180.9400 AC:TA OS:10 BS:9 PN:100 CD:OUR HOUSE AD:R,34, AD:R,60,3.2 AD:L,38,0 AD:R,44, AC:OS PN:10 FE:HOUSE XC:10000.0000 YC:10180.9330 ZC:-99999 XX:10000.0000 YY:10180.9330 ZZ:498.4164 SI:TA (Assigned to all taped points in the AC:TA by the post processing software) IH:.0000 AC:BS PN:9 FE:HOUSE XX:10085.4876 YY:10240.1582 ZZ:497.7211 SI:TA SH:.0000 HZ:.0000 AC:SS PN:100 (PN: assigned to the first taped point by the post processing software) FE:HOUSE XX:10019.3623 YY:10152.9848 ZZ:498.4165 SI:TA SH:.0000 HZ:90.0000 VT:90.0000 DS:34.0000 AC:OS PN:100 Survey Data Management System Version 3.5 12-85 Appendix 63. 64. 65. 66. 67. 68. 69. 70. 71. 72. 73. 74. 75. 76. 77. 78. 79. 80. 81. 82. 83. 84. 85. 86. 87. 88. 89. 90. 91. 92. 93. 94. 95. 96. 97. 98. 99. 100. 101. 102. 103. 104. 105. 106. 107. 108. 109. 110. 111. 112. 113. 114. 115. 116. 117. 118. 119. 120. 121. 122. 123. 124. 125. 126. 127. 128. 129. 130. 131. FE:HOUSE XX:10019.3623 YY:10152.9848 ZZ:498.4165 SI:TA IH:.0000 AC:BS PN:10 FE:HOUSE XC:10000.0000 YC:10180.9330 ZC:-99999 XX:10000.0000 YY:10180.9330 ZZ:498.4164 SI:TA SH:.0000 HZ:.0000 AC:SS PN:101 (PN: assigned to the next taped point by the post processing software) FE:HOUSE XX:10068.6824 YY:10187.1534 ZZ:501.6167 SI:TA SH:.0000 HZ:90.0000 VT:86.5650 DS:60.0850 AC:OS PN:101 FE:HOUSE XX:10068.6824 YY:10187.1534 ZZ:501.6167 SI:TA IH:.0000 AC:BS PN:100 FE:HOUSE XX:10019.3623 YY:10152.9848 ZZ:498.4165 SI:TA SH:.0000 HZ:.0000 AC:SS PN:102 (PN: assigned to the next taped point by the post processing software) FE:HOUSE XX:10090.3226 YY:10155.9172 ZZ:501.6167 SI:TA SH:.0000 HZ:270.0000 VT:90.0000 DS:38.0000 AC:OS PN:102 FE:HOUSE XX:10090.3226 YY:10155.9172 ZZ:501.6167 SI:TA IH:.0000 AC:BS PN:101 FE:HOUSE XX:10068.6824 Survey Data Management System Version 3.5 12-86 Appendix 132. 133. 134. 135. 136. 137. 138. 139. 140. 141. 142. 143. 144. 145. 146. 147. 148. 149. 150. 151. 152. 153. 154. YY:10187.1534 ZZ:501.6167 SI:TA SH:.0000 HZ:.0000 AC:SS PN:103 (PN: assigned to the last taped point by the post processing software) FE:HOUSE XX:10126.4909 YY:10180.9743 ZZ:501.6168 SI:TA SH:.0000 HZ:90.0000 VT:90.0000 DS:44.0000 BG:BEGIN CHAIN LIST AC:CH FE:HOUSE FG:5 PL:9,10,100,101,102,103 EG:END CHAIN LIST CP:06/08/2000 14:08:15 Chain Activity and Chain Data Item Chain Activity The chain activity (AC:CH) can be used in the project file during data collection and in the resulting calculated file to define a chain manually. It can be used along with any of the other connectivity methods described. Shot order is not critical when using the chain activity in this manner, but the points listed must be in the project file in which the manually added chain activity appears. The point list (PL:) and chain list (CH:) data items are used to specify which points connect in what order. The PL: data item is an exception to the rule that only the last occurrence of a data item in an activity is significant. All PL: data items in the chain activity are used to create the list of points to be connected. The post processing software should interpret the last point of any PL line as connecting to the first point in the next PL line. This rule is followed for each PL: data item encountered within a specific chain activity (AC:CH). The primary advantage to this method is that points may be shot in any order. Another advantage is that it is easy to use the same measured point in more than one chain, so that chains join and intersect cleanly at the same common point. Survey Data Management System Version 3.5 12-87 Appendix Connectivity Using The Chain Activity Point number indicates the survey shot sequence PN: 8 PN: 15 PN:14 PN:7 PN:13 PN:6 PN: 21 PN: 22 PN:24 PN:23 Figure 6.6 The Chain Activity For example, the topography shown in Figure 6.6 could be listed in the project file as: 1. 2. 3. 4. 5. 6. AC:CH FE:FENCE CD:OUR FENCE LINE FG:10 PL:6-8,15-13 PL:21-24 The chain activity (AC:CH) defines a chain whose feature code is FENCE, and which connects points 6, 7, 8, 15, 14, 13, 21, 22, 23, and 24 in that order. Notice that the PL: data item is an exception to the rule that only the last occurrence of a data item in an activity is significant. All PL: data items in the chain activity are used to create the list of points to be connected. The calculated file would first list the shot information and computed coordinates for the points in the list. The chain created would be listed at the bottom of the calculated file as: 1. 2. 3. 4. 5. 6. 7. 8. BG:Begin Chain List AC:CH FE:FENCE CD:OUR FENCE LINE FG:10 PL:6-8,15-13,21-24 EG:End Chain List CP:09/27/1999 13:15:18 Creating A Gap With the Chain Activity A gap can be created in the chain by including two commas in a row. For example, 1. 2. 3. 4. 5. 6. AC:CH FE:FENCE CD:OUR FENCE LINE FG:10 PL:6-8,,15-13 PL:21-24 will create a gap between points 8 and 15, as shown in Figure 6.7. Survey Data Management System Version 3.5 12-88 Appendix Creating A Gap Using The Chain Activity Point number indicates the survey shot sequence PN: 8 PN: 15 PN:14 PN:7 PN:13 PN:6 PN: 21 PN: 22 PN:23 PN:24 Figure 6.7 Gap created in a chain The chain created will be listed at the bottom of the calculated file as: 1. 2. 3. 4. 5. 6. 7. 8. BG:Begin Chain List AC:CH FE:FENCE CD:OUR FENCE LINE FG:10 PL:6-8,,15-13,21-24 EG:End Chain List CP:09/27/1999 13:15:18 Creating A Closed Chain With Chain Activity The chain can be closed by adding the first point in the point list to the end of the point list. For example, 1. 2. 3. 4. 5. 6. AC:CH FE:FENCE CD:OUR FENCE LINE FG:10 PL:6-8,15-13 PL:21-24,6 will close the figure, as shown in Figure 6.8. Creating A Closed Chain Using The Chain Activity Point number indicates the survey shot sequence PN: 8 PN: 15 PN:14 PN:7 PN:13 PN:6 PN: 21 PN: 22 PN:23 PN:24 Figure 6.8 Creating A Closed Chain The chain created will be listed at the bottom of the calculated file as: 1. BG:Begin Chain List Survey Data Management System Version 3.5 12-89 Appendix 2. 3. 4. 5. 6. 7. 8. AC:CH FE:FENCE CD:OUR FENCE LINE FG:10 PL:6-8,15-13,21-24,6 EG:End Chain List CP:09/27/1999 13:15:18 Chain (CH:) Data Item The CH: data item (not to be confused with the Chain Activity, AC:CH) can be used to include the points in a previously defined chain. For example, the sequence 1. 2. 3. 4. 5. 6. 7. AC:CH FE:EPL CD:LEFT PAVEMENT EDGE ENTIRE PROJECT FG:11 PL:1-3 CH:10 PL:31,32 Defines a chain with feature code EPL that connects points 1, 2, and 3 to the points already listed for the chain stored as Figure 10 (FG:10), then connects to points 31 and 32. This chain is stored as Figure 11 (FG:11). Multiple CH: data items may also be used in the chain activity. The calculated file would list the shot information and computed coordinates for the points in the list. The chain will be listed at the bottom of the calculated file as: 1. 2. 3. 4. 5. 6. 7. 8. BG:Begin Chain List AC:CH FE:EPL CD:LEFT PAVEMENT EDGE ENTIRE PROJECT FG:11 PL:1-3,6-8,15-13,21-24,31,32 EG:End Chain List CP:09/27/1999 13:15:18 Connectivity by Feature Code The feature code methodology defines connectivity by using the same unique feature code for all of the points on a given chain. This method is similar to the figure code method, except that instead of giving the feature code and figure code as separate data items, the figure code is directly linked to the feature code. Project sites usually have more than one chain of the same type. Therefore, some procedure must be used to indicate when a specific chain begins and ends. One procedure is to assign a unique feature code (FE:) for each chain that will be encountered. The project header must indicate this procedure is being used by adding the the chain desciription data tag (CD:) with the response “FE” (CD:FE). The second procedure uses the same feature code for chains of the same type and designates where each individual chain begins and ends by using the shot identification (SI:) data tag. The project header must indicate this procedure is being used by adding the the chain desciription data tag (CD:) with the response “BE” (CD:BE). Connectivity by Feature Code normally does not require using the figure code (FG:) data tag to assign a figure number to the chain created. This is normally done by the post processing software. Some post processing software will also assign point numbers to the points shot, eliminating the need to add them in the data collection file. Be sure to determine the capabilities of the post processing Survey Data Management System Version 3.5 12-90 Appendix software being used before eliminating the figure codes and point numbers in the field generated data collection files. Each procedure will be defined in detail. But, the examples will display the results in only one format. The example for unique feature codes will show the results in the calculated file (CAL) format. The shot identification example will show the results in the Points and Chain (PAC file format. Point Numbers will be used in the examples. Unique Feature Codes For Each Chain Individual chains can be created by assigning unique alpha or alphanumeric feature codes to distinguish between each chain. For example, the points on one edge-of-pavement chain may be given feature code EP1 as shown in Figure 6.9. Points on some other edge of pavement may be assigned EP2, and so on. Connectivity Using The Feature Code Method (Point number indicates the survey shot sequence) PN: 14 FE:EP1 PN: 26 FE:EP1 PN: 21 FE:EP1 PN: 23 FE:EP2 PN: 10 FE:EP1 PN: 17 FE:EP2 PN: 16 FE:EP2 PN: 12 FE:EP2 Figure 6.9 Connectivity by Unique Feature Code The resulting project file is shown below. 1. 2. 3. 4. 5. 6. 7. 8. 9. 10. 11. 12. 13. 14. 15. 16. 17. 18. 19. 20. 21. 22. 23. 24. AC:SS PN:10 FE:EP1 HZ:256.0033 VT:87.2649 DS:109.090 AC:SS PN:12 FE:EP2 HZ:266.1432 VT:87.2312 DS:114.870 AC:SS PN:14 FE:EP1 HZ:252.3530 VT:87.4540 DS:192.990 AC:SS PN:16 FE:EP2 HZ:258.5637 VT:87.4154 DS:195.240 Survey Data Management System Version 3.5 12-91 Appendix 25. 26. 27. 28. 29. 30. 31. 32. 33. 34. 35. 36. 37. 38. 39. 40. 41. 42. 43. 44. 45. 46. 47. 48. 49. 50. AC:SS PN:17 FE:EP2 HZ:254.1241 VT:87.5102 DS:341.690 AC:SS PN:21 FE:EP1 HZ:250.2943 VT:87.5554 DS:338.430 AC:SS PN:23 FE:EP2 HZ:252.3759 VT:87.2757 DS:414.940 AC:SS PN:26 FE:EP1 HZ:249.1628 VT:88.0814 DS:400.230 ...,ETC CP:04/30/2001 21:13:26 Any number of chains may be in progress simultaneously. The points on any one chain must be measured in order (but not necessarily in a point number sequence) working from one end of the chain to the other. Side shots to single point features can be collected also. In this case, the post processing software has to recognize, by the feature code used, that the point being measured is not part of a chain. This may require some type of ”lookup” table to specify which feature code prefixes designate chains and which are used for individual points. For example, points with a feature code TREE (FE:TREE) would normally not be connected in a chain. The post processing software must finally generate the chain list using the chain activity (AC:CH) to be added at the end of the calculated file. The Calculated File For Connectivity By Unique Feature Codes For Each Chain The shot sequence using connectivity by feature code, would be listed in the SDMS calculated file (.CAL) as: 1. 2. 3. 4. 5. 6. 7. 8. 9. 10. 11. 12. 13. 14. 15. 16. 17. 18. 19. 20. 21. 22. AC:SS PN:10 FE:EP1 XX:9480.1798 YY:10561.1445 ZZ:504.8596 HZ:256.0033 VT:87.2649 DS:109.0900 AC:SS PN:12 FE:EP2 XX:9500.9082 YY:10562.3545 ZZ:505.2378 HZ:266.1432 VT:87.2312 DS:114.8700 AC:SS PN:14 FE:EP1 XX:9479.8421 Survey Data Management System Version 3.5 12-92 Appendix 23. 24. 25. 26. 27. 28. 29. 30. 31. 32. 33. 34. 35. 36. 37. 38. 39. 40. 41. 42. 43. 44. 45. 46. 47. 48. 49. 50. 51. 52. 53. 54. 55. 56. 57. 58. 59. 60. 61. 62. 63. 64. 65. 66. 67. 68. 69. 70. 71. 72. 73. 74. 75. 76. 77. 78. 79. 80. 81. 82. 83. YY:10645.4492 ZZ:507.5401 HZ:252.3530 VT:87.4540 DS:192.9900 AC:SS PN:16 FE:EP2 XX:9501.4436 YY:10644.9117 ZZ:507.8418 HZ:258.5637 VT:87.4154 DS:195.2400 AC:SS PN:17 FE:EP2 XX:9500.3157 YY:10792.8177 ZZ:512.8179 HZ:254.1241 VT:87.5102 DS:341.6900 AC:SS PN:21 FE:EP1 XX:9478.1080 YY:10791.1057 ZZ:512.2168 HZ:250.2943 VT:87.5554 DS:338.4300 AC:SS PN:23 FE:EP2 XX:9496.3387 YY:10866.5262 ZZ:518.3502 HZ:252.3759 VT:87.2757 DS:414.9400 AC:SS PN:26 FE:EP1 XX:9471.8457 YY:10853.0941 ZZ:513.0131 HZ:249.1628 VT:88.0814 DS:400.2300 BG:BEGIN CHAIN LIST AC:CH FE:EP1 FG:309 (Figure Number Assigned by post processing Software) PL:10,14,21,26 AC:CH FE:EP2 FG:310 (Figure Number Assigned by post processing Software) PL:12,16,17,23 EG:END CHAIN LIST CP:05/01/2001 09:05:35 Survey Data Management System Version 3.5 12-93 Appendix Beginning and Ending Chains Using Common Feature Codes and Shot Identification Individual chains can also be created using the same feature code for chains of the same type by indicating when each particular chain begins and ends. This is done by adding the shot identification tag with the begin chain (SI:BC) response to the shot where the chain begins and adding the shot identification tag with the end chain (SI:EC) response to the shot where the chain ends. For example, the points for the left and right edge of-pavement chain may be given feature code EP as shown in Figure 6.10. Connectivity Using The Feature Code Method (Point number indicates the survey shot sequence) PN: 11 FE:EP PN: 13 FE:EP PN:12 FE:EP PN: 17 FE:EP PN: 10 FE:EP PN: 16 FE:EP PN: 15 FE:EP PN: 14 FE:EP Figure 6.10 Connectivity by Feature Code and Shot Identification The project file using the shot identification to begin and end a chain would contain the data that follows. 1. 2. 3. 4. 5. 6. 7. 8. 9. 10. 11. 12. 13. 14. 15. 16. 17. 18. 19. 20. 21. 22. 23. 24. 25. 26. 27. AC:SS PN:10 FE:EP HZ:256.0033 VT:87.2649 DS:109.090 SI:BC AC:SS PN:11 FE:EP HZ:252.3530 VT:87.4540 DS:192.990 AC:SS PN:12 FE:EP HZ:250.2943 VT:87.5554 DS:338.430 AC:SS PN:13 FE:EP HZ:249.1628 VT:88.0814 DS:400.230 SI:EC AC:SS Survey Data Management System Version 3.5 (Begin Left Pavement Edge) (End Left Pavement Edge) 12-94 Appendix 28. 29. 30. 31. 32. 33. 34. 35. 36. 37. 38. 39. 40. 41. 42. 43. 44. 45. 46. 47. 48. 49. 50. 51. 52. 53. 54. PN:14 FE:EP HZ:266.1432 VT:87.2312 DS:114.870 SI:BC (Begin Right Pavement Edge) AC:SS PN:15 FE:EP HZ:258.5637 VT:87.4154 DS:195.240 AC:SS PN:16 FE:EP HZ:254.1241 VT:87.5102 DS:341.690 AC:SS PN:17 FE:EP HZ:252.3759 VT:87.2757 DS:414.940 SI:EC (End Right Pavement Edge) ...., ETC. CP:09/18/1999 18:46:43 Note: The point numbers may be left out of the data collection file if the post processing software will assign them during processing. This method requires that each chain be completed before another chain using the same feature code is started. The points on any one chain must be collected in sequential order (but not necessarily in point number sequence) working from one end of the chain to the other. The post processing software then generates the chain list using the chain activity (AC:CH) and adds the data to the end of the calculated file and/or PAC file. The PAC File For Connectivity By Feature Code Using Shot Identification To Begin and End A Chain The shot sequence using connectivity by feature code and the shot identification data tag to begin and end a chain would be listed in the SDMS Points and Chain file (.PAC) as: 1. 2. 3. 4. 5. 6. 7. 8. 9. 10. 11. 12. 13. 14. 15. 16. 17. 18. 19. 20. 21. 22. AC:SS PN:10 FE:EP XX:9480.1798 YY:10561.1445 ZZ:504.8596 HZ:256.0033 VT:87.2649 DS:109.0900 AC:SS PN:11 FE:EP XX:9479.8421 YY:10645.4492 ZZ:507.5401 HZ:252.3530 VT:87.4540 DS:192.9900 AC:SS PN:12 FE:EP XX:9478.1080 Survey Data Management System Version 3.5 12-95 Appendix 23. 24. 25. 26. 27. 28. 29. 30. 31. 32. 33. 34. 35. 36. 37. 38. 39. 40. 41. 42. 43. 44. 45. 46. 47. 48. 49. 50. 51. 52. 53. 54. 55. 56. 57. 58. 59. 60. 61. 62. 63. 64. 65. 66. 67. 68. 69. 70. 71. 72. 73. 74. 75. 76. 77. 78. 79. 80. 81. 82. 83. YY:10791.1057 ZZ:512.2168 HZ:250.2943 VT:87.5554 DS:338.4300 AC:SS PN:13 FE:EP XX:9471.8457 YY:10853.0941 ZZ:513.0131 HZ:249.1628 VT:88.0814 DS:400.2300 AC:SS PN:14 FE:EP XX:9500.9082 YY:10562.3545 ZZ:505.2378 HZ:266.1432 VT:87.2312 DS:114.8700 AC:SS PN:15 FE:EP XX:9501.4436 YY:10644.9117 ZZ:507.8418 HZ:258.5637 VT:87.4154 DS:195.2400 AC:SS PN:16 FE:EP XX:9500.3157 YY:10792.8177 ZZ:512.8179 HZ:254.1241 VT:87.5102 DS:341.6900 AC:SS PN:17 FE:EP XX:9496.3387 YY:10866.5262 ZZ:518.3502 HZ:252.3759 VT:87.2757 DS:414.9400 BG:BEGIN CHAIN LIST AC:CH FE:EP FG:309 (Figure Number Assigned by post processing Software) PL:10,11,12,13 AC:CH FE:EP FG:310 (Figure Number Assigned by post processing Software) PL:14,15,16,17 EG:END CHAIN LIST CP:05/01/2001 09:05:35 Survey Data Management System Version 3.5 12-96 Appendix Generating Chains and Points Parallel to a Previously Defined Chain A chain parallel to a list of points shot previously, or parallel to a chain (figure) defined previously in the same file, can also be generated by the post processing software. This is accomp lished by adding horizontal offsets (OF:) and/or vertical distances (DV:) to the Chain Activity (AC:CH). This process also generates the points that make up the new chain. 1. 2. 3. 4. 5. 6. 7. 8. 9. 10. 11. AC:CH FE:CURB FG:12 PN:50000 PL:1-3 CH:10 (CH:10 is made of PN’s 40-42 for this example) PL:31,32 OF:0.5 DV:0.5 ...., ETC. CP:09/18/1999 18:46:43. The example chain activity shown above indicates a chain with the feature “CURB” is to be generated 0.5 feet right and 0.5 feet above each point of the chain defined by the points list and chain list included. The Figure Code (FG:) is used as the identifier of the chain to be created. The point number for each point generated will be based on the point number that has been entered in that particular chain activity. For examp le, in the chain activity listed above, the first point generated parallel to PN:1 will be PN:50001. A new point will be generated for every point in the point list and for every point making up a chain in the chain list (CH). The chain that is created will be FG:12. The post processing software generates points to represent the new positions defined by the offsets. The chain generated will be listed at the bottom of the calculated file with any other chains that are defined in the project file. Note: PN: may or may not be required, depending on the post processing software used. Consult the user guide for that software to determine the actual requirements. The Calculated File Using this method, the post processing software would include the additional points generated by the offsets and would list the information in the SDMS calculated file as shown in the example that follows. 1. 2. 3. 4. 5. 6. 7. 8. 9. 10. 11. 12. 13. 14. 15. 16. 17. 18. AC:SS PN:1 FE:CURB SH:5 HZ:45.2354 VT:90.3045 DS:100.44 XX:### YY:### ZZ:#### AC:SS PN:2 FE:CURB SH:5 HZ:55.2853 VT:90.3006 DS:180.94 XX:### Survey Data Management System Version 3.5 12-97 Appendix 19. 20. 21. 22. 23. 24. 25. 26. 27. 28. 29. 30. 31. 32. 33. 34. 35. 36. 37. 38. 39. 40. 41. 42. 43. 44. 45. 46. 47. 48. 49. 50. 51. 52. 53. 54. 55. 56. 57. 58. 59. 60. 61. 62. 63. 64. 65. 66. 67. 68. 69. 70. 71. 72. 73. 74. 75. 76. 77. 78. 79. 80. 81. 82. 83. 84. 85. 86. 87. YY:### ZZ:#### AC:SS PN:31 FE:CURB SH:5 HZ:56.2853 VT:90.3006 DS:190.94 XX:### YY:### ZZ:#### AC:SS PN:32 FE:CURB SH:5 HZ:57.2853 VT:90.3006 DS:195.94 XX:### YY:### ZZ:#### AC:SS PN:40 FE:EPL SH:5 HZ:55.2853 VT:90.3006 DS:180.94 XX:### YY:### ZZ:#### AC:SS PN:41 FE:EPL SH:5 HZ:55.2853 VT:90.3006 DS:180.94 XX:### YY:### ZZ:#### AC:SS PN:42 FE:EPL SH:5 HZ:55.2853 VT:90.3006 DS:180.94 XX:### YY:### ZZ:#### AC:CH FE:CURB FG:12 BN:50000 PL:1-3 CH:10 (CH:10 is made of PN’s 40-42 for this example) PL:31,32 OF:0.5 DV:0.5 AC:SS PN:50001 (First point generated by the offsets being included in the chain activity at PN:1) FE:CURB XX:### YY:### ZZ:#### AC:SS PN:50002 (Second point generated by the offsets being included in the chain activity at PN:2) Survey Data Management System Version 3.5 12-98 Appendix 88. 89. 90. 91. 92. 93. FE:CURB XX:### YY:### ZZ:#### AC:SS PN:50003 94. 95. 96. 97. 98. 99. FE:CURB XX:### YY:### ZZ:#### AC:SS PN:50040 100. 101. 102. 103. 104. 105. FE:CURB XX:### YY:### ZZ:#### AC:SS PN:50041 106. 107. 108. 109. 110. 111. FE:CURB XX:### YY:### ZZ:#### AC:SS PN:50042 112. 113. 114. 115. 116. 117. FE:CURB XX:### YY:### ZZ:#### AC:SS PN:50031 118. 119. 120. 121. 122. 123. FE:CURB XX:### YY:### ZZ:#### AC:SS PN:50032 124. 125. 126. 127. 128. 129. 130. 131. 132. 133. 134. 135. 136. 137. 138. 139. 140. FE:CURB XX:### YY:### ZZ:#### ...., ETC. CP:09/18/1999 18:46:43 BG:Begin Chain List AC:CH FE:EPL FG:10 PL:40-42 (OR 40,41,42) AC:CH FE:CURB FG:12 PL:50000-50007 EG:End Chain List CP:09/27/1999 13:15:18 (Third point generated by the offsets being included in the chain activity at PN:3) (Fourth point generated by the offsets being included in the chain activity at PN:40) (Fifth point generated by the offsets being included in the chain activity at PN:41) Sixth point generated by the offsets being included in the chain activity at PN:42) (Seventh point generated by the offsets being included in the chain activity at PN:31) (Eighth point generated by the offsets being included in the chain activity at PN:32) The first chain listed in the calculated file would have been generated from the field shots on the points. The second chain would have been generated by the designated offsets. New points were also generated to represent the calculated positions. The user can edit the chains listed and also create additional chains during the post-processing phase. This can be done by manually editing an existing chain or by making a new chain list in the project file. If edits or new chains are introduced, the file must be reprocessed. The post processing software would Survey Data Management System Version 3.5 12-99 Appendix need to review the entire file to check for any edited or added chains. The points generated would then be listed in the required format. All of the chains created using the parallel chain function will be listed at the end of the calculated file in the AC:CH format along with the other chains created in the project file. How Points Are Created for a Parallel Chain The points that will need to be computed to create the parallel chain will depend on the configuration of the chain or points being paralleled. The examples that follow indicate what points need to be stored in the actual SDMS Calculated file (CAL) and/or Points and Chain file (PAC) for export to a CADD or for archive purposes. Chains Consisting of Two Points Points are created perpendicular and at the offset distance specified, to the right or left of the points in the points or chain being paralleled. Figure 6.11 shows the chain and two of the points that would be created using part of the information from the example above. 90o OF: 0.5 90o OF: 0.5 l Point collected in field r Point computed and stored in CAL or PAC file Field collected chain Parallel chain Figure 6.11 Points and chain computed parallel to a two-point figure Chains Consisting of More Than Two Points The majority of chains collected will consist of more than two points and will be an irregular shape with intersecting angles less than or greater than 180°. Therefore, the points that are created for the parallel figure and stored in the SDMS calculated file (CAL) and/or Points and Chain file (PAC) are not actually perpendicular to the points in the chain being paralleled. Since these points actually lie on the bisector of the angle, they will not be at the offset distance specified in the chain activity containing that data. This requires two temporary points be computed by the post processing software on each end of the line as is done for a two-point chain. For intersection angles greater than 180°, it is necessary to compute temporary points as shown in Figure 6.12. 90o OF:0.5 o 90o OF:0.5 90 OF: 0.5 90o OF: 0.5 l Point collected in field Temporary point at OF:# Field collected chain Figure 6.12 Points computed parallel to an irregular shaped figure with angles greater than 180°. The temporary points are then used to compute the intersect point that will actually be created and stored for defining the parallel figure. This point should be on the bisect of the angle between the two temporary points, as shown in Figure 6.13. Survey Data Management System Version 3.5 12-100 Appendix 90o 90o l Point collected in field Temporary point at OF: # r Point computed and stored in CAL or PAC file Field collected chain Parallel chain Figure 6.13 Location of the point to be stored The actual point and figure that will be stored is shown in Figure 6.14. l 90o OF:.5 90o OF:.5 Point collected in field r Point computed and stored in CAL or PAC file Field collected chain Parallel chain Figure 6.14 Actual points and chain computed parallel to an irregular shaped chain with angles greater than 180°. NOTE: The temporary points do not need to be stored in the CAL or PAC file. Another scenario to consider is parallel offsets to a figure formed with angles less than 180°. The temporary points are computed in the same manner as for a two-point chain. But in this case, the temporary points will fall beyond the actual point and parallel chain location, as shown in Figure 6.15 should be placed in the same way as the closed figure. o 90 OF:.5 o 90 OF:.5 90o OF:.5 90o OF:.5 l Point collected in field Temporary OF: # point at Field collected chain Parallel chain Figure 6.15 Points computed parallel to an irregular shaped figure with angles less than 180°. This point should be on the bisector of the angle between the two temporary points, as shown in Figure 6.16. The new point is generated at the intersection of the parallel chain if they were extended to the temporary points. l Point collected in field Temporary point at OF: # r Point computed and stored in CAL or PAC file Field collected chain Parallel chain Figure 6.16 Temporary points will overlap for angles less than 180° Survey Data Management System Version 3.5 12-101 Appendix The actual point and figure that will be stored is shown in Figure 6.17. l Point collected in field r Point computed and stored in CAL or PAC file Field collected chain Parallel chain Figure 6.17 Actual points and chain stored parallel to an irregular shaped figure with angles less than 180°. Creating Points and Chains Parallel to Closed Figures Points and chains can be computed parallel to the outside and inside of a closed figure. Temporary points must be computed to generate the required points for the parallel chain. A parallel chain outside the closed figure will generate the temporary points shown in Figure 6.18. PN:100 PN:105 Point collected in field PN:101 Temporary point computed at OF:# PN:102 Field collected figure PN:104 PN:103 Figure 6.18 Temporary points for a parallel chain outside the closed figure The actual points and chain to be stored in the calculated (CAL) file and/or points and chain (PAC) file is shown in Figure 6.19. PN:100 PN:105 Point collected in field Computed point stored in CAL or PAC file PN:101 PN:102 Field collected figure Parallel chain PN:103 PN:104 Figure 6.19 A parallel chain generated outside a closed figure Survey Data Management System Version 3.5 12-102 Appendix A parallel chain lying inside the closed figure will generate the temporary points shown in Figure 6-20. PN:100 PN:105 Point collected in field PN:101 Temporary point computed at OF:-# PN:102 Field collected figure PN:104 PN:103 Figure 6.20 Temporary points for a parallel figure within the closed figure The actual points and chain to be stored in the calculated (CAL) file and/or points and chain (PAC) file is shown in Figure 6.21. PN:100 PN:105 Point collected in field PN:101 Computed point stored in CAL or PAC file PN:102 Field collected figure PN:103 PN:104 Parallel chain Figure 6.21 A parallel figure generated within a closed figure Note: SDMS Processor reads connectivity by Origin-Destination (OD:) as a series of two (2) point chains. Therefore, if a parallel chain of more that two points is to be created, the OD: method cannot be used. A Figure Code is required for the parallel chain to be create that consists of more than two points. Note: The chain activity to create the parallel chain must be entered in the project file after the entire chain that is being paralleled has been collected. It does not have to follow immediately after that chain, but it is recommended. Survey Data Management System Version 3.5 12-103 Appendix General Rules of SDMS Tasks and Activities Overview There are a number of basic rules that should be used and followed in the development of data collection and processing software using SDMS. These rules have an effect on the actual field data collection procedures, as well as the way the processing software uses the field generated project file information. Rules The following lists contain some of the basic rules that should be followed in the data collection and processing software. 4. Only certain activities are allowed with a given task. These are somewhat definable by the user in the TASK.TGS file, but there are also some restrictions imposed by the processing routines. For example, an activity of stationing to define the nominal station is not valid when doing a traversing task and even if the user figured out a way to edit that tag into the TASK.TGS file, the processing software would not understand how to use it. 5. SDMS Collector does not change to the default sequence for the activity currently dis played until the user presses <ENTER> on that new AC. Therefore, nothing in the just completed Activity is stored to the project file until the new Activity is accepted. This feature allows the user to modify items in the just completed Activity without having to use the Edit command. This is done by moving the cursor over the currently displayed Activity and typing in any valid data tag. The data tag and response will be added to the bottom of the previous activity. SDMS will then redisplay the next Activity prompt. This procedure allows the user to either add an item to an activity that is not in the default prompts for an activity listed in the TASK.TGS file, or to change an already entered item in the activity by entering the same data tag and a new response. 6. Within any activity, only the last occurrence of a data tag is used by the processing software. The purpose of this rule relates to the rule in surveying of never erasing in a field book. For example, if a mistake was made by recording a feature as FE:CURB that should have been FE:EC, another line with FE:EC can be added following the incorrect entry and the processing software will assume this last line is the correct one. 7. There are a few exceptions to this rule for data that does not fit in the 25 characters allowed per data item. Presently, four data tags can be listed multiple times within an activity. The data tags are: comments (CM:): point lists (PL:); point descriptions (PD:); and, chain list (CH:). Each appearance of these data tags and the responses will be passed to the calculated file by the post processing software. Certain data tags are treated as toggles by the processing software. This means if these data items are defined in one activity, they will be used as defined in all subsequent activities and computations where they are needed as if they are the same as last defined. Two primary examples of this rule are staff height (SH:), and instrument height (IH:). If an AC:SS is done to measure a sideshot point and SH:5.5 is entered, then 5.5 feet will be used in computing all subsequent AC:SS coordinate values, even if the SH data tag does not appear within those Survey Data Management System Version 3.5 12-104 Appendix subsequent sideshot activities. If the user does not define the SH: or IH: in any activity in the data set, then the processing software uses a built-in default value. Sometimes this built-in value is user definable, and sometimes it is “hard coded” by the program developer. Other data tags that follow this rule are combination factor (CF:); all of the data tags used to define Header, Units, and Datum information; instrument type (IT:); and, other data tags related to instrument constants. There is also the SI data tag that defines the shot identification and once designated will apply to all succeeding shots until the response is changed. As an example, this is used to designate which shots in a PRJ are to be used for cross section purposes only and which are to be used for topography. 8. 9. Related to this rule is how the prompting schemes work in SDMS. If the user defines a certain activity to prompt for certain data tags every time that activity is used, then SDMS will present the prompt with the data field filled in with the entry made the last time that data tag was used. This rule is true for most descriptive data tags. A few exceptions are those related to Point Numbers (PN:); origin/Destination (OD:); Set (SE:); and, Face (FC:). The data fields can be defined to increment from the last entry for these data tags. If a data tag is being prompted for but no data entry is desired for that particular tag, the user can press <ENTER> with a blank data field and the software will eliminate that line from the data set as if the prompt had never been made. If the user never wants that prompt to appear, it can be remo ved from the definition of that activity within that Task in the TASK.TGS file. When the post process software encounters a normally required coordinate data tag response field that has no value available, -99999 shall be used to fill that field to indicate the value is missing. This includes XC:, YC:, ZC:, XX:, YY:, and ZZ:. SDMS files (PRJ, CAL, CTL) compiled with SDMS Release 3.2 and earlier may also have a null value for the PD: data tag. This value is not to be confused with the possibility of negative coordinates being encountered. The only exception is the DOS version of SDMS Collector (Release 3.4x and earlier). Those versions use -99999to indicate the NULL value. SDMS contains many tags that can be used by a survey crew to communicate how points are to be connected in a drawing, used in a DTM routine, etc. 10. The Geometry (GM:) data tag is used to define a point as a line point or a curve point. If the activity has a GM:C line, this can indicate to a CADD software that this point is on a Curved line. Various algorithms can also be written to evaluate how many points in succession are defined as C (curve points) to determine if the points are to be connected with straight line segments or curved line segments. If the user does not define this GM: data tag, the default value of line point is normally assumed and all connections would be made with straight line segments. The user would have to review their CADD processing software rules to know how GM: may be interpreted and what happens in various combinations of points with GM: values. 11. The Class (CL:) data tag can be used to define a point as a Feature point or a Ground point for DTM software. This allows the user to collect information on points for two dimensional (2D) presentation that do not have valid or accurate elevations or for use in three dimensional (3D) computations or presentations that do have valid or accurate elevations. The options are currently CL:F for a 2D feature point and CL:G for a 3D ground point. The default in this case would probably be GM:G, but the Survey Data Management System Version 3.5 12-105 Appendix various third party processing software systems may treat this differently and may employ other interpretation rules and responses to define various situations. Some processing software actually key the nature of a point off of the FE: data field. The reason for this is that 95% of the time if the Feature is known, it is also known whether the point should be 2D or 3D. If the surveyor needs to override this FE: related definition of a point, he may choose to use the CL: data field after the FE: data field to override the default for that FE:. 12. The FE: and CL: tags can also be used by processing software to define feature and class of other objects being measured and defined such as chains. 13. SDMS allows the developer of processing software to assign their own rules for how point identifications are assigned. One current processing tool merges the FE: and PN: data fields to form an alphanumeric point identification. Therefore, an AC:SS with a PN:498 and a FE:CULV would become CULV498 in the processing software. Currently, only numeric point numbers are supported in SDMS Collector. These are just a few examples of how SDMS tags can be used to communicate more information to a processing software system. Many similar rules can be established, but they would need to be defined in the documentation for that tool and then communicated to the surveyor collecting the field data. Survey Data Management System Version 3.5 12-106