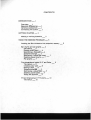
1
Howard D. Siebenrock
ENHANCEMENTS TO GRAPH IT™
Save plots and charts created by AT ARI GRAPH IT'"'
Diskette: 32K (APX-2007 4)
ENHANCEMENTS
TO
GRAPH
IT .
Howar d D. Siebenrock
PrograM and Manual Contents
©
1982 Howard D. Siebenrock
Copyright notice. On receipt of this c:cmputer program and associated documentation <the
software>t the author grants you a nonexdusive license to execute the endosed software. This
software is copyrighted. You are prohibited from reproducing, translating, or distributing
this software in any unauthorized manner.
Distributed By
The ATARI Program Exchange
P 0 . Box 3i05
·
Santa Clara. CA 95055
To request an APX Product Catalog, write to the address above. or call toll-free:
800/538-1862. (outside California)
800/672-1850 (within California)
· Or call our Sales number. 408/727-5603
Trademarks of Atari
The following are trademarks of Atari. Inc.
ATARI~
ATAAI
ATAAI
ATAAI
ATAAI
ATARI
ATARI
ATAAI
ATAAI
ATAAI
400.. Home Computer
800.. Home Computer
410.. Program Recorder
810"" Disk Drive
820.. 40-column Printer
822.. Thermal Printer
825.. so-column Printer
830.. Acoustic Modem
850.. Interface Module
Printed in U.S.A.
CONTENTS
INTRODUCTION
1
Overview
1
Required accessories _
Optional accessories _
Contacting the author _
GETTING STARTED
1'
1
1
2
Making a working diskette _
2
USING THE MERGED PROGRAMS
5
Loading the Work diskette into computer memory_ 5
Bar charts and pie graphs _
6
The menus
6
Storing a bar chart _
6
Specifying a filename _
6
Diskette storage _
6
Retrieving a saved bar chart _
Deleting saved charts _ 7
Pie graphs _ 7
7
Two-dimensional plots: X-Y and Polar _
The menus
8
Creating your plot _
8
Saving a plot _
8
Diskette storage _
9
Retrieving a saved plot _
9
Deleting saved plots _
9
Using the joystick_ 9
Three-dimensional X-Y-Z plots_ 10
The menus
10
8
INTRODUCTION
OVERVIEW
The ENHANCEMENTS TO GRAPH IT programs let you save the charts, graphs, and plots on a
diskette that you create using GRAPH IT. Then you can retrieve the saved charts, graphs,
and plots later and display them on your TV screen. You can change the plotting limits,
and you can use the joystick, as before, to display the values at any point plotted. You
can delete unwanted charts, graphs, or plots from within the program without going into
the Disk Operating System <DOS>. To plot the trigonometric functions in the two- or
three-dimensional plots, you now may choose between using radians or degrees. The
functions entered in the program display below the plots.
REQUIRED ACCESSORIES
32K RAM
ATARI 410 Program Recorder
ATARI 810 Disk Drive
ATARI BASIC Language Cartridge
GRAPH IT <CX4109>
OPTIONAL ACCESSORIES
One ATARI J'oystick Controller
CONTACTING THE AUTHOR
Users wishing to contact the author about ENHANCEMENTS TO GRAPH IT may write to him at:
9309 W. 98 Court
WestMinster, CO 80020
-1·-
GETTING STARTED
MAKING A WORKING DISKETTE
1. Insert the A TAR! BASIC Language Cartridge in the (Left Cartridge) slot of your
computer.
2. Turn on your disk drive.
3. When the BUSY light goes out, open the disk drive door and insert the ENHANCEMENTS
diskette with the label in the lower right-hand corner nearest to you. Close the door.
4. Turn on your computer and TV set.
5. DOS will load and then automatically display the Graph It menu program. The sc:reen
displays the A TAR! logo and a list of graphic programs. However, selecting a program from
the menu won't work, because only the Enhancements programs are on this diskette. You
must first load the Graph It programs from the cassette recordert enter the Enhancement
programs from the diskettet and then save the enhanced versions of the programs to a Work
diskette.
To c:reate this Work diskette, do the following:
a. Press the SYSTEM RESET key and type DOS.
b. After the DOS menu displayst remove the ENHANCEMENT diskette and insert a new
diskette.
c. Format the new diskette by selecting option I from the DOS menu. Then write the DOS
files by selecting option H from the menu. This is your Work diskette.
d. Remove the Work diskette and insert the ENHANCEMENT diskette. Select option 0
<Duplicate File), enter the filename AUTORUN.SYS t and press the RETURN key. Insert the
Work diskette when asked to insert the destination.
e. Remove the Work diskette and insert the ENHANCEMENT diskette. Select option 0 againt
enter the filename GRAPH, and press fhe RETURN key. Insert the Work diskette when asked
to insert the destination.
f. The Work diskette should now contain the following files: DOS.SYS, DUP.SYSt
AUTORUN.SYSt and GRAPH. Select option A on the menu and press the RETURN key to verify
that the diskette has all these files.
g. You're now ready to merge the Enhancements programs with the original Graph It
programs and save the enhanced programs to your Work diskette. Insert the ENHANCEMENT
diskette, select option B <Run Cartridge), and press the RETURN key.
h. Follow the instructions in the AT ARI GRAPH IT manualt PP• 2-3, to load the bar
charts and pie graphs from side 1 of cassette A.
·
-2-
i. After the program loads and the menu displays, press the SYSTEM RESET key.
j. Making sure the EN:HANCEMENT diskette is in the disk drive, type ENTER "D!BARPIE.CHG"
and press the RETURN key. The Enhancements program for bar charts and pie graphs will
enter and merge with the original program.
k. When the program has loaded, remove the ENHANCEMENT diskette and insert the Work
diskette. Save the enhanced version of the program onto the Work diskette by typing
SAVE "D:GRAPH.BPI" and pressing the RETURN key.
1. To merge the X-Y Enhancements program with the ATARI two-dimensional plots, insert
the ENHANCEMENT diskette and press the SYSTEM RESET key,
m. Follow the instructions in the ATARI GRAPH IT manual, PP• 2-3, to load the
two-dimensional X-Y plots from side 2 of cassette A EXCEPT in step 16 of the ATARI
GRAPH IT manual, P• 3t when the READY prompt appears on the screen again, type CLOAD
(instead of RUN) and press RETURN on the console keyboard.
n. After the program loads and the menu displays, press the SYSTEM RESET key.
o. Making sure the ENHANCEMENT diskette is in the disk drive, type ENTER "D:XY.CHG" and
press the RETURN key. The Enhancements program for two-dimensional X-Y plots will enter
and merge with the original program.
·
P• When the enhancements have loaded, remove the ENHANCEMENT diskette and insert the
Work diskette. Save the enhanced version of the program on the Work diskette by typing
SAVE "DtGRAPH.XY" and pressing the RETURN key.
q. To merge the polar Enhancements program with the ATARI two-dimensional polar plots,
insert the ENHANCEMENTS diskette and press the SYSTEM RESET key.
r. Follow the instructions in the ATARI GRAPH IT manual, PP• 2-3, to load the
two-dimensional polar plots from side 1 of cassette B.
s. After the program loads and the menu displays, press the SYSTEM RESET key.
t. Making sure the E:t-!HANCEME:t-tT diskette is in the disk drive, type ENTER "D!POLAR.CHG"
and press the RETURN key. The Enhancements program for the two-dimensional polar plots
will enter and merge with the original program.
u. When the Enhancement program loads, remove the ENHAl~CEMENT diskette and insert the
Work diskette. Save the enhanced version of the program by typing SAVE "DtGRAPH.POL"
and pressing the RETURN key.
v. To merge the three-dimensional Enhancements program with the ATARI three-dimensional
X-Y-Z plots, insert the ENHANCEMENT diskette and press the SYSTEM RESET key.
w. Follow the instructions in the ATARI GRAPH IT manual, PP• 2-3, to load the
three-dimensional X-Y-Z plots from side 2 of cassette :S,
x. After the program loads and the menu displays, press the SYSTEH P..ESET key.
,..,
-..:,-
Y• Maldng sure the ENHANCEMENT diskette is in the disk drive, type ENTER "D:THREE.CHG"
and press the RETURN key, The En han cements for the three-dimensional X- Y -z plots will
enter and merge with the original program.
z, When the Enhancements program has loaded, remove the ENHANCEMENT diskette and insert
the Work diskette. Save the enhanced version of the program by typing SAVE "D:GRAPH.3D"
and pressing the RETURN key.
5. The Work diskette now contains the enhanced graphic programs. Be sure the Work
diskette is in the disk drive, and then turn the computer off and back on again. After
DOS loads, select one of the graphic programs from the menu and refer to the user manual
section that follows.
-4-
USING THE MERGED PROGRAMS
LOADING THE WORK DISKETTE INTO COMPUTER MEMORY
1. Insert the ATARI BASIC Language Cartridge in the <Left Cartridge> slot of your
c:cmputer.
2. Turn on your TV screen.
3. Turn on the disk drive. When the busy light goes out, insert the Work diskette into
the disk drive and turn on the computer.
4. The screen displays the ATARI logo, the four graphic programs <~ar & Pie, X-Y,
.folar, and ~D>, and the prompt ENTER FIRST LETTER OF GRAPH? _ • Answer by typing
the first letter of your choice and pressing the RETURN key.
5. Refer to the appropriate description in the next section for instructions on using the
enhanced programs.
-5-
BAR CHARTS AND PIE GRAPHS
THE MENUS
The first screen display is the original menu with the choices of BAR CHARTS, PIE GRAPHS,
or EXIT. To plot bar charts, press B and the RETURN key. To plot pie graphs, press P and
the RETURN key. <To reload the main menu and select a different graph program, press E
and the RETURN key,)
.
If you press B or P, the next menu is new. It prompts you to choose PLOT, RETRIEVE, or
EXIT TO MENU. Use RETRIEVE to retrieve a previously saved chart or graph <press Rand the
RETURN key>. Use PLOT to plot a chart or graph <press P and the RETURN key). Use EXIT to
return to the first menu <press E and the RETURN key>.
No changes have been made to the parameter input or plotting routines. Follow the ATARI
GRAPH IT manual, page 4, to create a bar chart.
STORING A BAR CHART
When your chart is finished, press any key to display the menu below the chart. Notice
that after the EXIT <Y /N) prompt is the new option SAVE. Use SAVE to save the chart
displayed on the screen to a diskette file for permanent storage <press S and the RETURN
key>.
SPECIFYING A FILENAME
The bottom of the screen displays the filename prompt, FILE NAME n: __ .DAB, with
. the cursor positioned after the colon. Enter a name up to eight letters or numbers <the
name must start with a letter> and press the RETURN key. The filename extender, .DAB,
identifies this file as a DAta Bar file, and is automatically added to the end of the
filename. If you answer the filename prompt with an illegal name, the screen reprompts
you. If you respond by only pressing the RETURN key, the plot isn't saved, the prompt
disappears from the screen, and you return to the previous menu.
As the program saves the file to diskette, you'll notice a cursor passing through the
chart.
DISKETTE STORAGE
If your diskette doesn't have enough room to hold your plot, the message DISK FULLPLEASE CHANGE AND PRESS RETURN" displays. Insert another formatted diskette. It's a good
idea to keep some formatted diskettes on hand so you always have one available to store
your plots. Most bar charts require about 25 sectors.
-6-
RETRIEVING A SAVED BAR CHART
Press any key to display the menu and then press Y and the RETURN key to exit. The screen
then displays the menu BAR CHARTS, PIE GRAPHS, or EXIT, Press B and the RETURN key to
display the next menu, PLOT, RETRIEVE, or EXIT, Press R and the RETURN key to display a
list of bar charts on the diskette, along with a prompt for you to enter a filename. Type
in one of the names from the list and press the RETURN key. The saved bar chart will
display.
DELETING SAVED CHARTS
When retrieving plots, you have to option of deleting a plot from the diskette. Type a *
in response to the filename prompt, press the RETURN key, enter the filename to be
deleted, and press the RETURN key again. If you change your mind and don't want to delete
a file, press the RETURN key without entering a filename.
PIE GRAPHS
Pie graphs have the same menus and enhancements as the bar charts. Select Pin the first
menu and create a pie graph. The only difference is in the filename extender. The pie
graphs use .DAP for DAta fie graphs.
-7-
TWO-DIMENSIONAL PLOTS: X-Y & POLAR
THE MENUS
The first menu is new, with the choices of PLOT, RETRIEVE, or EXIT. Press P and the
RETURN key to plot.
The second menu is also new. You ma.y cheese between RADIANS or DEGREES to plot the
trigonometric functions. Press R or D, a.s you prefer, and the RETURN key.
CREATING YOUR PLOT
The screen new displays the first menu in the original ATARI GRAPH IT program. Refer to
the program manual, pages 8 or 10, to create a. plot. Notice that during the plotting, the
function you entered displays a.t the bottom of the screen.
When plotting in two dimensions, remember that a.utcscaling will scale theY-axis to fit
en the screen. If you're in degrees and plot one period of a. sine ware, the X-axis will
be entered from 0 to 360 degrees. If you also plot a. leg function, the a.utcscaling will
scale the Y-axis fer the leg of 360 (a. large number compared to the sine function). This
causes the sine function to be very close to the X-a.xis. If you don't a.utcscale and enter
the Y-a.xis limits based en the sine function <-1 to +1), the leg function will reach the
Y- scale limit of Y=+1 and continue· across the top of the screen. Even though the plot
reaches the limit of the screen, the joystick will calculate and display the proper
values.
SAVING A PLOT
After the plots a.re drawn, the screen scrolls up to display the word RADIANS or DEGREES,
depending en which you selected.
Press any key to display the menu of CHANGE LIMITS, RESTART, DO NOT EXIT, and a new
choice, SAVE.
CHANGE LIMITS returns you to the second menu, RADIANS or DEGREES.
REST ART returns you to the first menu, PLOT, RETRIEVE, or EXIT.
SAVE stores your plot on diskette. The screen displays the filename prompt:
FILE NAME D: _ _.DXY if you're doing X-Y plots or FILE NAME n:_.DPL if
you're doing POLAR plots. Type a. filename up to eight letters or numbers <the name must
start with a. letter> and press the RETURN key. If you answer the filename prompt with an
illegal name, the screen reprompts you. If you respond by only pressing the RETURN key,
the plot isn't saved, the prompt disappears from the screen, and you return to the
previous menu. After the program saves the plot, the functions display a.ga.in.
-8-
DISKETTE STORAGE
If your diskette doesn't have enough room to hold your plot, the message DISK FULL-
PLEASE CHANGE AND PRESS RETURN" displays. Insert another formatted diskette. It's a good
idea to keep some formatted diskettes on hand so you always have one available to store
your plots. Most plots require about 55 sectors.
RETRIEVING A SAVED PLOT
Press any key and then press R, for RETRIEVE, and the RETURN key. The screen displays a
list of two-dimensional plots on the diskette and a prompt for you to enter a filename.
Type in a name from the list and press the RETURN key. The plot you saved displays on the
screen along with the function used to plot it.
DELETING SAVED PLOTS
When retrieving plots, you have to option of deleting a plot from the diskette. Type a *
in response to the filename prompt, press the RETURN key, enter the filename to be
deleted, and press the RETURN key again. If you change your mind and don't want to delete
a file, press the RETURN key without entering a filename.
USING THE .JOYSTICK
The joystick works as explained in the ATARI GRAPH IT manual. However, in the X-Y plots,
if you plot more than one function, only the function the c:ursor is on displays. To
remove the c:ursor from the screen, press any key, then press D, for DO NOT EXIT, and then
press the RETURN key.
-9-
THREE-DIMENSIONAL X-Y-Z PLOTS
THE MENUS
The first two menus are the same as for the two-dimensional plots. Select P, for PLOT,
and R, for RADIANS. The screen displays the prompts to enter the function. Refer to the
ATARI GRAPH IT manual, page 12t to create a. three-dimensional X-Y-Z plot.
If you answer "No" to the prompt for Non-visual plottingt you'll see the plot in
progress. Displayed below is the message NUMBER OF LINES TO GO_ and the function you
entered. When the plot is finished, the screen scrolls up to remove the message, leaving
the function and adding the word RADIANS or DEGREES.
The rest of the enhancements to the three-dimension! plots is the same a.s for the
two-dimensional plots.
-10-
Limited Warranty on Media and Hardware Accessories. We. Atari. Inc., guarantee to you, the original
retail purchaser. that the medium on which the APX program is recorded and any hardware
accessories sold by APX are free from defects for thirty days from the date of purchase. Any applicable
implied warranties. including warranties of merchantability and fitness for a particular purpose. are
also limited to thirty days from the date of purchase. Some states don't allow limitations on a warranty's
period. so this limitation might not apply to you. If you discover such a defect within the thirty-day
period, call APX for a Return Authorization Number, and then return the product along with proof of
purchase date to APX. We will repair or replace the product at our option.
You void this warranty if the APX product: (1) has been misused or shows signs of excessive wear.
(2) has been damaged by use with non-ATARI Home Computer products; or (3) has been serviced or
modified by anyone other than an Authorized ATAR I Computer Service Center. Incidental and consequential damages are not covered by this warranty or by any implied warranty. Some states don't allow
exclusio.n of incidental or consequential damages. so this exclusion might not apply to you.
Disclaimer of Warranty and Liability on Computer Programs. Most APX programs have been written
by people not employed by Atari, Inc. The programs we select for APX offer something of value that we
want to make available to ATARI Home Computer owners. To offer these programs to the widest
number of people economically, we don't put APX products through rigorous testing. Therefore, APX
products are sold "as is," and we do not guarantee them in any way. In particular, we make no warranty.
express or implied, including warranties of merchantability and fitness for a particular purpose. We are
not liable for any losses or damages of any kind that result from use of an APX product.
For the complete list of current
APX programs, ask your ATARI retailer
for the APX Product Catalog
ATAAI"
PROGRAM
EXCHANGE
~.0. Bel 3705
Scnlo Oaa. CA 9S055
Review Form
we·re interested in your experiences witt1 APX programs
and documentation. both favorable and unfavorable.
Many of our autt'lors are eager to improvett'leir programs
if they know what you want. And. of course. we want to
know about any bugs that slipped by us. so that tne
autnor can fix them. We also want to know whether our
instructions are meeting your needS. You are our best
source for suggesting improvements! Please hefp us by
taking a moment to fill in this reYiew sheet. Fold the sheet
in thirdS and seaJ it so that tne address on the bottom of
the bade becomes the envetope front. Thank you tor
helping usf .
1. Name and APX number of program.
2. If you nave problems using the program. please describe them here.
3. What do you
~ly
like about this program?
4. What do you think the program's weaknesses are?
5. How can the catalog description be more accurate or comprehensive?
6. On a scale of 1 to 10. 1 being -poor" and 10 being Mexcellenf'. please rate the following aspects of this program:
- - - Easy to use
- - - User-oriented (e.g.• menus. prompts. clear language)
- - - enjoyable
---Self-instructive
- - - Useful (non-9ame programs)
- - - Imaginative graphics and sound
7. Describe any technical errors you found in the user instructions (please give page numbers).
8. What did you especially like about the user instructions?
9. What revisions or additions would improve these instructions?
10. On a scale of 1 to 10. 1 representing "poor'' and 10 representing "excellent". how would you rate the user
instructions and why?
·
11 . Other comments about the program or user instructions:
ATAAI Program Exchange
P.O. Sox 3705
. Santa Clara. CA 95055
[seat nerei