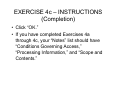
1
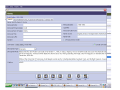
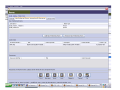
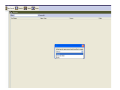
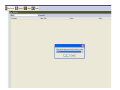
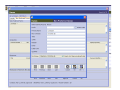
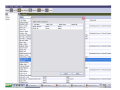
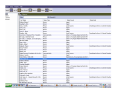
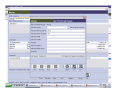
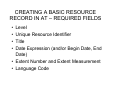
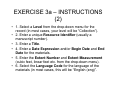
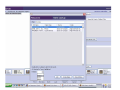
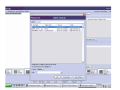
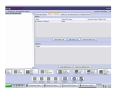
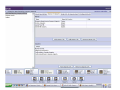
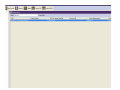
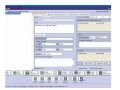
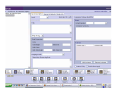
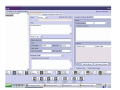
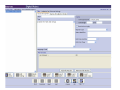
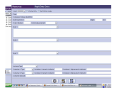
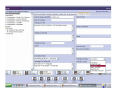
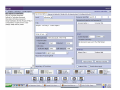
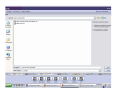
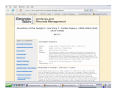
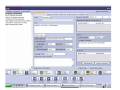
ARCHIVISTS’ TOOLKIT
WORKSHOP
March 13, 2008
Christine de Catanzaro
Jody Thompson
Agenda
•
•
•
•
•
•
Brief overview of Archivists’ Toolkit
Names and Subjects module & exercise
Accession module & exercise
Resources module & exercises
Exporting EAD/MARC
Questions
ARCHIVISTS’ TOOLKIT
WORKSHOP
Names and Subjects Modules
NAMES AND SUBJECTS –
Chapter 11 (AT MANUAL)
• The “NAMES” and “SUBJECTS” modules
provide:
– A tool for recording persons, families, and
corporate bodies associated with accessions
or collections
– A means to track the relationships between
archival materials and all above entities
– A way to manage name and subject
authorities
NAMES MODULE - STANDARDS
• Designed to conform with ISAAR(CPF)
• Designed to support the emerging
standard EAC (Encoded Archival Context)
• Allows formulation of names using
AACR2, DACS rules
TECH PRACTICES FOR NAMES
AND SUBJECTS
• Authorities in use:
– LC name authority file, subject headings
(LCNAF, LCSH)
– Art and Architecture Thesaurus (AAT)
– Digital Library of Georgia Name Authority
Database (DLG)
– Union List of Artists Names (ULAN)
– Local Sources (using DACS rules)
ELEMENTS REQUIRED FOR A
NAME RECORD IN AT
• Name type (person, corporate body,
family)
• Source or rules (at least one must be
present)
• Sort name (if create sort name
automatically is checked, this will be done)
• Primary name (for personal or corporate
names); Family name (for a family)
NAMES MODULE – View All
• Click on “Names” on left sign
of screen
• Click on “List All” icon at top of
screen
EXERCISE 1
Creating a Basic NAME Record
EXERCISE 1 –
INSTRUCTIONS (1)
• Enter the creator listed in your finding aid
OR
• Enter your own name
• Make sure the “Names” module is
highlighted (icons on the left)
• Click on “New Record” (top of screen)
EXERCISE 1 –
INSTRUCTIONS (2)
• Select the appropriate name: Person,
Corporate Body, or Family
• Click “OK”
EXERCISE 1 –
INSTRUCTIONS (3)
• Enter Primary name (for personal or corporate
names); Family name (for a family) and Rest of
Name (if needed)
• Enter Source (select from drop-down menu –
choose “Local Sources”)
• Enter Rules (optional)
• Make sure Create Sort Name Automatically is
checked
• Go to INSTRUCTIONS (OPTIONAL) or go
directly to COMPLETION
EXERCISE 1 –
INSTRUCTIONS (OPTIONAL)
• Click on “Non-Preferred Names” tab
• Click on “Add Non-Preferred Names”
• Enter another version of your
name/creator’s name that is not the
authorized version
• Click OK
EXERCISE 1 – INSTRUCTIONS
(OPTIONAL)
• Click on “Contact Info” tab
• Enter some minimal contact information
EXERCISE 1 - COMPLETION
• IF YOU USED A CREATOR’S NAME,
click “OK.” This action will save your data.
• IF YOU USED YOUR OWN NAME, click
“CANCEL.” Your data will not be saved.
CUSTOMIZATIONS – NAMES
MODULE (Chapter 15 of AT)
• Change the fields in the display screen
• Make additions/revisions to the drop-down
menu
– E.g., add a Name Source (Tech customized
by adding DLG)
• You can also merge records
– E.g., “Dodd, Jim” and “Dodd, James B.”
Accession Module
Introduction
Exercise 2
Creating a Basic
Accession Record
Exercise 2
•
•
•
•
Click on Accession module
Click on New Record
Work on Basic Information Tab first
Enter required fields:
– Accession number
– Accession date
Exercise 2
• Enter other fields on Basic Information Tab
– Title
– Extent
– Double check repository
– Date expression
– Locations
Exercise 2
• Enter fields on Accession Notes tab
– Acquisition type
– Description
– Disposition note
Exercise 2
• Enter fields on Names & Subjects tab
– Click on Add Name Link
– Use filter function to search for name on
Name Look up list
– Click on appropriate name
– Click on “OK” message and enter appropriate
function: creator, source or subject
– Double click on appropriate name
– Close window
Exercise 2
• Create donor contact information
– See Exercise 1-Creating a Basic Name
Record
Exercise 2
• Enter fields on Acknowledgements,
Restrictions & Processing Tasks tab
– Acknowledgements & Restrictions information
• Check boxes and enter dates for paperwork
• Note restrictions or access issues
Exercise 2
• Enter fields on Acknowledgements,
Restrictions & Processing Tasks tab
– Processing Task information
•
•
•
•
Mark processing priority and processor(s)
Enter information about processing plan
Enter processing start date and status
Click OK to save record
ARCHIVISTS’ TOOLKIT
WORKSHOP
Resources Module (1)
ADVANTAGES OF AT FOR
DESCRIBING ARCHIVAL MATERIALS
• A tool for writing finding aids (descriptions
of archival resources)
• A way to export valid EAD and MARC
records (in XML encoding)
• (See Chapter 9 of User Manual)
• A means to import existing EAD or MARC
records (in XML encoding) (Chapter 6)
RESOURCES MODULE STANDARDS
• Designed to conform to the new EAD
Schema
• Creates valid EAD documents (if you’re
using the EAD DTD)
• Allows and encourages compliance with
DACS rules
• Permits compliance with RLG BPGs
(mostly)
DESCRIBING ARCHIVAL
MATERIALS
Basic Description
CREATING A BASIC RESOURCE
RECORD IN AT – REQUIRED FIELDS
•
•
•
•
Level
Unique Resource Identifier
Title
Date Expression (and/or Begin Date, End
Date)
• Extent Number and Extent Measurement
• Language Code
EXERCISE 3a
Creating a Basic Resource
Record
EXERCISE 3a: INSTRUCTIONS
(1)
• From the Main Screen, select “Resources”
• Click on the “New Record” icon at the top
of the screen
• A blank Resource record should appear
EXERCISE 3a – INSTRUCTIONS
(2)
• 1. Select a Level from the drop-down menu for the
record (in most cases, your level will be “Collection”).
• 2. Enter a unique Resource Identifier (usually a
manuscript number).
• 3. Enter a Title.
• 4. Enter a Date Expression and/or Begin Date and End
Date for the materials.
• 5. Enter the Extent Number and Extent Measurement
(cubic feet, linear feet etc. from the drop-down menu).
• 6. Select the Language Code for the language of the
materials (in most cases, this will be “English (eng)”.
EXERCISE 3a – INSTRUCTIONS
(3)
• Click “OK”
EXERCISE 3a (completion)
• Click “OK” to save your work
• Your collection should now appear in the
List of Resources on your screen
• Double click on your record to open it back
up
DESCRIBING ARCHIVAL
MATERIALS – COLLECTION
LEVEL
Names and Subjects
EXERCISE 3b
Adding a Creator to Resources Names and Subjects
EXERCISE 3b – INSTRUCTIONS
(1)
• Make sure you are in the “Resources”
module, in the Resource record you’ve just
created
• Click on “Names and Subjects” tab
• Click on “Add Name Link” button on the
top half of your screen
• A “Name Lookup” list should appear
• Use the filter to type the first few letters of
the Primary Name of your creator
EXERCISE 3b – INSTRUCTIONS
(2)
• Select the name of the creator
• IMPORTANT: At the bottom left of your
screen, select the correct function from the
drop-down menu (function is Creator)
• When a function is selected, you may
OPTIONALLY assign a role to the Creator
EXERCISE 3b – INSTRUCTIONS
(3)
• Click on “Link” button
• Click “Close Window”
• You should see the Creator name appear
in the Names section (the top half) of the
screen
DESCRIBING ARCHIVAL
MATERIALS – COLLECTION
LEVEL
“Notes etc & Deaccessions” Tab
EXERCISE 4a – INSTRUCTIONS
• Select Conditions Governing Access from the
drop-down menu
• A new screen should appear with the note type
Conditions Governing Access note
• Enter your title for this note (many repositories
use Restrictions on Access)
• Enter any restrictions listed in your finding aid. If
there are none (or none are indicated in your
finding aid), type “No restrictions.”
• Click “OK.”
EXERCISE 4b - INSTRUCTIONS
• Select Processing Information from the
drop-down menu
• A new screen should appear with the note
type Processing Information note
• Enter your title for this note (many
repositories use Processing Information)
• Enter the processing information listed in
your finding aid (if any).
• Click “OK.”
EXERCISE 4c – INSTRUCTIONS
(1)
• Select Scope and Contents from the
drop-down menu
• A new screen should appear with the note
type Scope and Contents note
• In the check box at the top of your screen,
select Multi-part.
• In the “Add part” drop-down menu on the
bottom of the screen, select Text.
EXERCISE 4c – INSTRUCTIONS
(2)
• A new text screen will appear. Enter the
first paragraph of the “Scope and
Contents” text in your finding aid.
• Click “OK.”
• Select “Text” from the “Add part” dropdown menu and add a second paragraph.
• Click “OK.”
• Your paragraphs should be listed in order
on your screen.
EXERCISE 4c – INSTRUCTIONS
(Completion)
• Click “OK.”
• If you have completed Exercises 4a
through 4c, your “Notes” list should have
“Conditions Governing Access,”
“Processing Information,” and “Scope and
Contents.”
DESCRIBING ARCHIVAL
MATERIALS – COLLECTION
LEVEL
“Finding Aid Data” Tab
COLLECTION LEVEL - Completion
• Enter data in selected fields on the
“Finding Aids Data” screen.
• At the bottom right of your screen, click
“OK.”
ARCHIVISTS’ TOOLKIT
WORKSHOP
Resources Module (2)
WORKING AT THE COMPONENT
LEVEL
• Collections can be divided into series,
subseries, files, items etc.
• AT allows description of each of these
levels and offers the possibility of very
detailed description
• AT uses the “Child” and “Sibling”
metaphors to add components to a finding
aid
EXERCISE 5a
Adding Child/Sibling Components
EXERCISE 5a – INSTRUCTIONS
(1)
• Open the Collection Level description that
you created in Exercises 3 and 4
• On the left side of the screen, click on the
collection title
• NB: You are at the Collection level
• At the bottom left of your screen, click on
the “Add Child” icon
• A new screen will appear with 3 tabs at the
top
EXERCISE 5a – INSTRUCTIONS
(2)
• Select a Level from the drop-down menu
for the record. (Your level will probably be:
Series, File, or Item, depending on your
collection.)
• Enter a Title for the component (Series
Title/File Title, Item Title).
• Enter either a Date Expression or a
Begin Date and End Date.
EXERCISE 5a – INSTRUCTIONS
(3)
• Enter a second component (either a
second series, file, or item) at the same
level as the first component:
– On the left side of the screen, click on the title
of the first series, file, or item. Make sure it is
highlighted
– Click on the “Add Sibling” icon
EXERCISE 5a – INSTRUCTIONS
(4)
• For the second component level:
– Select a Level for the record
– Enter a Title
– Enter a Date Expression or a Begin Date
and End Date
EXERCISE 5a –
INSTRUCTIONS (5)
• Click “OK”
EXERCISE 5b –
INSTRUCTIONS (1)
• Add a Child record to one of the
components:
– On the left side of the screen, click on the
component you want to select
– Click on the “Add Child” button
– A new screen should appear for you to enter
the Level, Title, and Date Expression/Begin
and End Date
EXERCISE 5b –
INSTRUCTIONS (2)
• Adding an instance
– The file created on the previous slide is in a
folder numbered Box 1, folder 1
– To record this information click the “Add
Instance” button (at right of screen, toward the
bottom)
– A screen will appear asking what type of
instance you want to create
– For a folder, select “Mixed materials”
EXERCISE 5b –
INSTRUCTIONS (3)
• A new screen will appear
• Enter box/folder information on this screen
• Click “OK”
EXERCISE 5c –
INSTRUCTIONS (1)
• Adding a digital object
– Click the “Add Instance” button at the right
toward the bottom of the screen
– A screen will appear asking what type of
instance you want to create
– For a digital object, select “Digital object”
EXERCISE 5c –
INSTRUCTIONS (2)
• A new screen will appear on which you
can record the data you need for your
export
• Note that you can export METS and
MODS for digital object records
OTHER FEATURES OF AT
RESOURCE MODULE
• Rapid data entry is available to enter all
data, including Box/folder information, on
one screen
• A “Delete Component” button is available
• Managing locations is also available from
the Resource Module
ARCHIVISTS’ TOOLKIT
WORKSHOP
Exporting EAD and MARC
QUESTIONS?
Jody Thompson
([email protected])
Christine de Catanzaro
([email protected])
THANK YOU FOR COMING!
Jody Thompson
([email protected])
Christine de Catanzaro
([email protected])