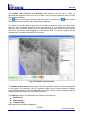
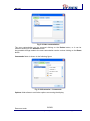
1
WR-10X User Manual Server Document code: OM-11242-10-01 The copyright in this document is the property of Eldes. The document is supplied by Eldes on the express understanding that it is to be treated as confidential and that it may not be copied, used or disclosed to others in whole or in part for any purpose except as authorized in writing by Eldes. Eldes s.r.l. Via Di Porto 2/b 50018 Scandicci (FI) ITALY WR-10X User Manual Server List of Acronyms Acronym Meaning CD Compact Disk DataAcq Data Acquisition and Signal Processing manager LAN Local Area Network MMI Man Machine Interface PC Personal Computer PPI Plan Position Indicator PRF Pulse Repetition Frequency RHI Range Height Indicator Rx Receiver SR Service Release StdDev Standard Deviation USB Universal Serial Bus Ver. Version Document code: OM-11242-10-01 ELDES Proprietary Information Page 1 of 118 WR-10X User Manual Server Summary 1. INTRODUCTION.............................................................................................................................. 7 2. SOFTWARE PACKAGE INSTALLATION ............................................................................................... 7 2.1 2.2 2.2.1 2.2.2 2.2.3 3. INTRODUCTION...................................................................................................................... 7 INSTALLATION PROCEDURE .................................................................................................... 7 WR-10X Installation ...................................................................................................................... 9 License Server Service Installation ............................................................................................ 14 Start applications ........................................................................................................................ 21 DATA ACQUISITION AND SIGNAL PROCESSING SETTING .................................................................. 22 3.1 SCAN.................................................................................................................................. 23 3.1.1 Radar/Scan List .......................................................................................................................... 23 3.1.2 Scan Mode ................................................................................................................................. 25 3.1.3 Scan Setting ............................................................................................................................... 29 3.1.3.1 Scan Setting left block ....................................................................................................... 29 3.1.3.2 Scan Setting right block ..................................................................................................... 30 3.1.4 Communication .......................................................................................................................... 34 3.1.5 Scheduler ................................................................................................................................... 36 3.1.6 Products ..................................................................................................................................... 40 3.1.7 Advanced work mode ................................................................................................................. 42 3.2 3.2.1 3.2.2 3.2.3 3.3 3.3.1 3.3.2 3.3.3 3.3.4 3.4 3.4.1 3.4.2 3.4.3 3.4.4 3.4.5 3.5 3.5.1 3.5.2 3.5.3 3.5.4 3.6 3.7 SIGNAL PROCESS ............................................................................................................... 43 Structure of RAW data................................................................................................................ 47 Structure of PPI integrated data ................................................................................................. 49 Structure of RHI integrated data ................................................................................................. 52 GENERAL............................................................................................................................ 55 SignalProcessing log .................................................................................................................. 56 DataAcqTsk log .......................................................................................................................... 58 SignalProcessingError log .......................................................................................................... 59 Decision Threshold Log file ........................................................................................................ 59 ARCHIVE ............................................................................................................................. 61 General configuration ................................................................................................................. 62 Log DataArchiveTsk ................................................................................................................... 62 Action ......................................................................................................................................... 63 Archive configuration .................................................................................................................. 64 Scheduler ................................................................................................................................... 65 REGISTRATION .................................................................................................................... 66 Registration section .................................................................................................................... 67 Manage registration section ....................................................................................................... 68 Registration parameters ............................................................................................................. 68 Tooltip Syntax and MACRO ....................................................................................................... 69 DATAACQ BUTTONS DESCRIPTION ........................................................................................ 72 COLOR SCALE ..................................................................................................................... 73 4. FOLDERS STRUCTURE ................................................................................................................. 74 5. DISPLAY ..................................................................................................................................... 77 5.1 5.2 5.2.1 W ORK MODE ....................................................................................................................... 79 MAP SETTINGS ................................................................................................................... 80 Layers management ................................................................................................................... 82 ELDES Page 2 of 118 Proprietary Information Document code: OM-11242-10-01 WR-10X User Manual Server 5.3 5.4 5.5 PRODUCTS FILTER .............................................................................................................. 85 COMMANDS ON DISPLAYED IMAGE ....................................................................................... 86 MENU BAR ......................................................................................................................... 88 5.5.1 File.............................................................................................................................................. 89 5.5.1.1 Image management ........................................................................................................... 89 5.5.2 View............................................................................................................................................ 97 5.5.3 Settings ...................................................................................................................................... 98 5.5.4 Utility........................................................................................................................................... 99 5.5.4.1 Map Creator ....................................................................................................................... 99 5.5.4.2 Mark Creator .................................................................................................................... 101 5.5.4.3 Layer Creator ................................................................................................................... 103 5.5.5 Tool .......................................................................................................................................... 109 6. CLUTTER AREAS DISPLAY .......................................................................................................... 110 7. CLUTTER MAP VERIFICATION .................................................................................................... 111 8. ADDITIONAL FEATURES ............................................................................................................. 112 8.1 8.1.1 8.1.2 8.1.3 8.1.4 8.1.5 SETTABLE FUNCTIONS IN THE FILE SIGNALPROCESSINGCONSTRUCTOR.XML ....................... 112 Interferent Rejection ................................................................................................................. 112 ClutterMapMedianFilter ............................................................................................................ 117 PPIMedianFilter ........................................................................................................................ 117 RHIMedianFilter........................................................................................................................ 117 NoiseDataCollection ................................................................................................................. 118 Document code: OM-11242-10-01 ELDES Proprietary Information Page 3 of 118 WR-10X User Manual Server List of Figures FIG. 2-1 INSTALLMANAGER FOLDER ....................................................................................................... 7 FIG. 2-2 INSTALL MANAGER ................................................................................................................... 8 FIG. 2-3 WR-10X INSTALLSHIELD W IZARD............................................................................................. 9 FIG. 2-4 WR-10X INSTALLSHIELD W IZARD - SERVER ........................................................................... 10 FIG. 2-5 INSTALLATION W IZARD - PATH ................................................................................................ 11 FIG. 2-6 WR-10X INSTALLSHIELD W IZARD - SUMMARY ........................................................................ 12 FIG. 2-7 WR-10X INSTALLSHIELD W IZARD - END ................................................................................. 13 FIG. 2-8 LICENSE SERVER INSTALLSHIELD W IZARD .............................................................................. 14 FIG. 2-9 LICENSE SERVER INSTALLSHIELD W IZARD - PATH ................................................................... 15 FIG. 2-10 LICENSE SERVER INSTALLSHIELD W IZARD - READY ............................................................... 16 FIG. 2-11 LICENSE SERVER INSTALLSHIELD W IZARD - QUESTION .......................................................... 16 FIG. 2-12 LICENSE SERVER INSTALLSHIELD W IZARD - END ................................................................... 17 FIG. 2-13 LICENSE SERVER INSTALLSHIELD W IZARD - COMPLETED ....................................................... 17 FIG. 2-14 W INDOWS APPLICATIONS BAR ............................................................................................... 18 FIG. 2-15 LICENSE SERVER CONTROL CENTER .................................................................................... 18 FIG. 2-16 LICENSE SERVE CLOSING APPLICATION ................................................................................ 19 FIG. 2-17 LICSRV.EXE FILE .................................................................................................................. 19 FIG. 2-18 LICSRVUI STARTING ............................................................................................................ 19 FIG. 2-19 LICENSE FILE SELECTION ..................................................................................................... 20 FIG. 2-20 LICSRVUI SAVING ................................................................................................................ 20 FIG. 2-21 ACCESS FROM START MENU ................................................................................................. 21 FIG. 3-1 DATAACQ – MAIN WINDOW ..................................................................................................... 22 FIG. 3-2 SCAN FOLDER ........................................................................................................................ 23 FIG. 3-3 RADAR SETTING ..................................................................................................................... 24 FIG. 3-4 RADAR NAME AND SCAN ......................................................................................................... 24 FIG. 3-5 ADD/REMOVE SCAN ................................................................................................................ 25 FIG. 3-6 SCANS .................................................................................................................................. 25 FIG. 3-7 SCAN MODE .......................................................................................................................... 26 FIG. 3-8 AZIMUTH AND ELEVATION STEPS ............................................................................................. 28 FIG. 3-9 SCAN SETTING ...................................................................................................................... 29 FIG. 3-10 CLUTTER FILTER– SETTINGS ................................................................................................ 33 FIG. 3-11 COMMUNICATION ................................................................................................................. 34 FIG. 3-12 ENABLE DATA TRANSMISSION................................................................................................ 35 FIG. 3-13 RAS CONNECTION ............................................................................................................... 35 FIG. 3-14 SCHEDULER ........................................................................................................................ 36 FIG. 3-15 TASK EXECUTION WINDOW.................................................................................................... 37 FIG. 3-16 ENTER PASSWORD .............................................................................................................. 37 FIG. 3-17 SCHEDULING ....................................................................................................................... 38 FIG. 3-18 SCHEDULING ADDITION ......................................................................................................... 38 FIG. 3-19 TASK SCHEDULING ............................................................................................................... 38 FIG. 3-20 ADVANCED SCHEDULING OPTIONS......................................................................................... 39 FIG. 3-21 SCHEDULED TASK SETTINGS ................................................................................................. 39 FIG. 3-22 SCHEDULING REMOVAL ........................................................................................................ 40 FIG. 3-23 PRODUCTS .......................................................................................................................... 41 FIG. 3-24 ADVANCED WORK MODE ....................................................................................................... 42 FIG. 3-25 SIGNAL PROCESS FOLDER .................................................................................................... 43 FIG. 3-26 ENABLE NOISE FILTER SECTION............................................................................................. 46 FIG. 3-27 RAW FILE STRUCTURE ......................................................................................................... 48 FIG. 3-28 GENERAL FOLDER ................................................................................................................ 55 FIG. 3-29 SIGNAL PROCESSING LOG ..................................................................................................... 57 FIG. 3-30 DATAACQTSK LOG .............................................................................................................. 58 FIG. 3-31 SIGNAL PROCESSING ERROR LOG ......................................................................................... 59 ELDES Page 4 of 118 Proprietary Information Document code: OM-11242-10-01 WR-10X User Manual Server FIG. 3-32 LOG DECISION THRESHOLD ................................................................................................. 59 FIG. 3-33 ARCHIVE FOLDER ................................................................................................................ 61 FIG. 3-34 GENERAL CONFIGURATION ................................................................................................... 62 FIG. 3-35 LOG DATAARCHIVETSK ....................................................................................................... 62 FIG. 3-36 ACTION ............................................................................................................................... 63 FIG. 3-37 ARCHIVE CONFIGURATION .................................................................................................... 64 FIG. 3-38 ARCHIVE-SCHEDULER ......................................................................................................... 65 FIG. 3-39 REGISTRATION FOLDER........................................................................................................ 66 FIG. 3-40 REGISTRATION SECTION ...................................................................................................... 67 FIG. 3-41 MANAGE REGISTRATION SECTION ......................................................................................... 68 FIG. 3-42 TOOLTIP.............................................................................................................................. 71 FIG. 3-43 DATAACQ BUTTONS ............................................................................................................. 72 FIG. 3-44 EXAMPLE OF COLOR MAP ..................................................................................................... 73 FIG. 4-1 FOLDERS STRUCTURE ............................................................................................................ 75 FIG. 4-2 FOLDERS STRUCTURE ............................................................................................................ 75 FIG. 4-3 FOLDERS STRUCTURE ............................................................................................................ 76 FIG. 5-1 DATAVIEW MAIN SCREEN ....................................................................................................... 77 FIG. 5-2 SECTIONS MANUAL RESIZE ..................................................................................................... 78 FIG. 5-3 AUTOMATIC SELECTION .......................................................................................................... 79 FIG. 5-4 LAST DATE SELECTION ........................................................................................................... 79 FIG. 5-5 INTERVAL DATE SELECTION .................................................................................................... 80 FIG. 5-6 MANUAL SELECTION............................................................................................................... 80 FIG. 5-7 MAP SETTINGS ...................................................................................................................... 81 FIG. 5-8 LAYERS MANAGEMENT ........................................................................................................... 82 FIG. 5-9 LAYER ADDITION/CHANGE ...................................................................................................... 83 FIG. 5-10 LAYER PREVIEW ................................................................................................................. 84 FIG. 5-11 PRODUCTS FILTER ............................................................................................................... 85 FIG. 5-12 CONTROL BAR ..................................................................................................................... 86 FIG. 5-13 COLOR MANAGEMENT BAR ................................................................................................... 86 FIG. 5-14 DISPLAY WITH TOOLTIP ........................................................................................................ 87 FIG. 5-15 DISPLAY WITH ZOOM ............................................................................................................ 87 FIG. 5-16 IMAGE MANAGEMENT ........................................................................................................... 89 FIG. 5-17 PREVIEW –FILE MENU .......................................................................................................... 90 FIG. 5-18 PREVIEW – EXPORT FORMAT ................................................................................................ 90 FIG. 5-19 E- MAIL FORMAT .................................................................................................................. 91 FIG. 5-20 PREVIEW –VIEW MENU......................................................................................................... 91 FIG. 5-21 CUSTOMIZE – TOOLBARS ..................................................................................................... 92 FIG. 5-22 NEW TOOLBAR .................................................................................................................... 92 FIG. 5-23 NEW CUSTOMIZATION .......................................................................................................... 93 FIG. 5-24 CUSTOMIZE – COMMANDS ................................................................................................... 93 FIG. 5-25 CUSTOMIZE – OPTIONS........................................................................................................ 94 FIG. 5-26 LARGE ICONS ...................................................................................................................... 94 FIG. 5-27 ICONS DESCRIPTION ............................................................................................................ 94 FIG. 5-28 MENU ANIMATIONS .............................................................................................................. 94 FIG. 5-29 BACKGROUND ..................................................................................................................... 95 FIG. 5-30 BACKGROUND TEXT ............................................................................................................. 95 FIG. 5-31 BACKGROUND IMAGE ........................................................................................................... 96 FIG. 5-32 TOOLBAR CUSTOMIZATION ................................................................................................... 96 FIG. 5-33 TOOLBAR ICONS .................................................................................................................. 97 FIG. 5-34 FIND ................................................................................................................................... 97 FIG. 5-35 RADAR SITE SETTINGS ......................................................................................................... 98 FIG. 5-36 PRODUCT VIEW SETTINGS .................................................................................................... 98 FIG. 5-37 MAP CREATOR - INTERFACE................................................................................................. 99 FIG. 5-38 MAP CREATOR - PREVIEW ................................................................................................. 100 FIG. 5-39 MAP CREATOR – GRAYSCALE MODE .................................................................................. 101 FIG. 5-40 MARK CREATOR – INTERFACE ............................................................................................ 102 Document code: OM-11242-10-01 ELDES Proprietary Information Page 5 of 118 WR-10X User Manual Server FIG. 5-41 MARK CREATOR – PREVIEW ............................................................................................... 102 FIG. 5-42 LAYER CREATOR – PREVIEW .............................................................................................. 103 FIG. 5-43 LAYER CREATOR – PREVIEW .............................................................................................. 105 FIG. 5-44 LAYER CREATOR – LAYER NAME SELECTION MASK............................................................... 106 FIG. 5-45 LAYER CREATOR – PREFERENCES WINDOW ................................................................... 107 FIG. 5-46 ZOOM IMAGE – EXAMPLE 1 ................................................................................................. 109 FIG. 5-47 ZOOM IMAGE – EXAMPLE 2 ................................................................................................. 110 FIG. 6-1 MODIFIED COLOR TABLE ...................................................................................................... 110 FIG. 7-1 CLUTTER MAP IMAGE EXAMPLE ............................................................................................. 111 FIG. 8-1 SPIKE NOISE EXAMPLE.......................................................................................................... 113 FIG. 8-2 “DIMFILTER” PARAMETER MEANING IN CASE OF MEDIANFILTER ............................................... 114 FIG. 8-3 RADAR-TO-RADAR NOISE SUPPRESSION ................................................................................ 115 FIG. 8-4 “LAG1-LAG1 AND LAG2 SPACEFILTER MEANING .................................................................... 116 List of Tables TAB. 2-1 THE LICENSE SERVER SERVICE ICONS ................................................................................... 18 TAB. 2-2 SOFTWARE APPLICATION ICONS ............................................................................................. 21 TAB. 3-1 RANGE / RANGE STEP ASSOCIATION ....................................................................................... 26 ELDES Page 6 of 118 Proprietary Information Document code: OM-11242-10-01 WR-10X User Manual Server 1. Introduction This manual is referred to Ver. 4.0.0 SR05. 2. Software package installation 2.1 Introduction In order to correctly install the software package, it is necessary to have previously installed a Windows 2000 operating system or higher Windows version. The following chapter describes step by step the installation procedure. 2.2 Installation procedure Insert the hardware key in the USB port. Insert the CD including the application in the proper driver. If the auto run is enabled the Fig. 2-2 will appears. Otherwise it’s necessary to manually start the installation by launching the InstallManager.exe file on the WR10X_Ver4_0_0_0Install folder (see Fig. 2-1). Fig. 2-1 InstallManager folder Document code: OM-11242-10-01 ELDES Proprietary Information Page 7 of 118 WR-10X User Manual Server Fig. 2-2 Install Manager On the Install Manager window select the WR-10X and the License Server Service check boxes (the License Server Service is required only for the first installation). Click Install to start the installation: the WR-10X installation starts first. ELDES Page 8 of 118 Proprietary Information Document code: OM-11242-10-01 WR-10X User Manual Server 2.2.1 WR-10X Installation If you have selected the WR-10X check box on the Install Manager window (Fig. 2-2) the Fig. 2-3 will appear. Fig. 2-3 WR-10X InstallShield Wizard Press Next > to continue. Document code: OM-11242-10-01 ELDES Proprietary Information Page 9 of 118 WR-10X User Manual Server Select Server on the Fig. 2-4 and press Next >. Fig. 2-4 WR-10X InstallShield Wizard - Server ELDES Page 10 of 118 Proprietary Information Document code: OM-11242-10-01 WR-10X User Manual Server On the Fig. 2-5 select the installation path and press Next >. Fig. 2-5 Installation Wizard - Path Document code: OM-11242-10-01 ELDES Proprietary Information Page 11 of 118 WR-10X User Manual Server The Fig. 2-6 shows a summary of the selected options for the installation: click on Next > button to start the installation. Fig. 2-6 WR-10X InstallShield Wizard - Summary ELDES Page 12 of 118 Proprietary Information Document code: OM-11242-10-01 WR-10X User Manual Server At the end of the installation the Fig. 2-7 is shown: press Finish to exit the WR-10X installation. Fig. 2-7 WR-10X InstallShield Wizard - End Document code: OM-11242-10-01 ELDES Proprietary Information Page 13 of 118 WR-10X User Manual Server 2.2.2 License Server Service Installation If you have selected the License Server Service check box on the Install Manager window (Fig. 2-2) the Fig. 2-8 will appear. Fig. 2-8 License Server InstallShield Wizard Press Next > to continue. ELDES Page 14 of 118 Proprietary Information Document code: OM-11242-10-01 WR-10X User Manual Server On the Fig. 2-9 select the installation path and press Next >. Fig. 2-9 License Server InstallShield Wizard - Path Document code: OM-11242-10-01 ELDES Proprietary Information Page 15 of 118 WR-10X User Manual Server On the Fig. 2-10 press Install. Fig. 2-10 License Server InstallShield Wizard - Ready The Fig. 2-11 asks for the License Server Service installation: press the Sì button to confirm. Fig. 2-11 License Server InstallShield Wizard - Question ELDES Page 16 of 118 Proprietary Information Document code: OM-11242-10-01 WR-10X User Manual Server At the end of the installation the Fig. 2-12 is shown: press Finish to exit the License Server service installation. Fig. 2-12 License Server InstallShield Wizard - End The Fig. 2-13 shows that the License Server service installation is completed. Fig. 2-13 License Server InstallShield Wizard - Completed Document code: OM-11242-10-01 ELDES Proprietary Information Page 17 of 118 WR-10X User Manual Server After the installation, check the status License Server service by verifying the relative icon on the Windows applications bar (see Fig. 2-14). Fig. 2-14 Windows applications bar The License Server Service icons are described in Tab. 2-1: Tab. 2-1 The License Server Service icons Icon Meaning License Server Service available License Server Service unavailable In case the service is not available, try to manually restart the service as follows: Insert the hardware key in the PC USB port; Double click on the service icon in order to open the License Server Control Center window, see Fig. 2-15; Fig. 2-15 License Server Control Center Click on the Close button , the Fig. 2-16 appears. ELDES Page 18 of 118 Proprietary Information Document code: OM-11242-10-01 WR-10X User Manual Server Fig. 2-16 License Serve Closing Application Click on the Close the Application and Stop the Service button. Manually start the service by launching the LicSrv.exe file on the .../Eldes/License Server path (see Fig. 2-17). Fig. 2-17 LicSrv.exe file Confirm the Start of the License Server service by clicking Sì on the Fig. 2-18. Fig. 2-18 LicSrvUI starting Document code: OM-11242-10-01 ELDES Proprietary Information Page 19 of 118 WR-10X User Manual Server The License Server Control Center window appears (see Fig. 2-15). Make sure that the license file provided by Eldes is present in the PC Server, otherwise copy it in a PC Server folder. Click on the Open button , the Fig. 2-19 appears. Fig. 2-19 License File selection Select the folder of the license file, select the .lic file and press Open. Confirm to save the license data by pressing Sì on the Fig. 2-20. Fig. 2-20 LicSrvUI saving The user will see the License Server Control Center window (Fig. 2-15) updated with the correct configuration. ELDES Page 20 of 118 Proprietary Information Document code: OM-11242-10-01 WR-10X User Manual Server 2.2.3 Start applications After completing the software installation, the PC desktop will be populated by the link icons to the three software applications. The icons are described in Tab. 2-2. Clicking on the link the related software will be launched. Tab. 2-2 Software application icons Icon Meaning DataAcq icon: it launches the DataAcq application in order to set up the radar configuration . DataView icon: it launches the DataView application in order to display radar data. RCU-TS icon: it launches the RCU-TS application in order to perform system debug for installation and maintenance procedures (not object of this manual) Similarly, it will be possible to launch the installed software from the menu Start → All Programs → WR-10X. Fig. 2-21 Access from Start menu Document code: OM-11242-10-01 ELDES Proprietary Information Page 21 of 118 WR-10X User Manual Server 3. Data acquisition processing setting and signal “DataAcq” (Data Acquisition and Signal Processing manager) software package allows to enter data in order to manage the radar configuration. To launch the software, click on DataAcq link icon from the menu Start → All Programs → WR-10X → DataAcq. created on the desktop, or select Once the program has been launched, the main window including the following subfolders will appear: Scan Signal process General Archive Registration Fig. 3-1 DataAcq – Main window The following paragraphs will describe parameters included in the folders. ELDES Page 22 of 118 Proprietary Information Document code: OM-11242-10-01 WR-10X User Manual Server 3.1 Scan The Scan folder is mainly composed of two sections: Radars list and Scans section, which include the list of all available radars and scans, and Configuration folders section, composed of a series of sub folders necessary to the configuration of each radar and related scans. It is important to specify that DataAcq Server version obviously see only one radar, that whose scans and scheduling it manages. On the contrary, DataAcq Client version can see different networks composed of several radars each. Fig. 3-2 Scan folder Note Only if (in the “General configuration” section) the “Advanced work mode” check box is flagged, the “Advanced work mode” tab is available in the “Configuration folders” section. 3.1.1 Radar/Scan List This section allows to manage radars and scans; the last ones have also available a series of columns which allow to monitor the status of the scheduled tasks related to the scan. On each column it is possible to carry out operations such as layout, resizing, position changes, enable its display or not; this is possible by holding the left mouse button on the column and dragging it or by clicking with the right mouse button choosing the related entry. By clicking on the name, a window called Radar Setting activates on the right section. Clicking on the Modify button it is possible to have access to this window, see Fig. 3-3. On this window it’s possible to set 2 parameters which are very important for the system architecture: the Radar Network and the Radar ID. The Radar Network specifies the NETWORK which includes the radar. At Client level it is possible to find several networks supervising different geographical regions as South Area, North Area etc.... each of which is composed of several radars. The Radar Network specifies the network in which the radar is included, in the example of Fig. 3-3 the network is called “A”. Document code: OM-11242-10-01 ELDES Proprietary Information Page 23 of 118 WR-10X User Manual Server This letter will be included as initial part of the name identifying each file generated during the scan operations and through this letter the DataAcq Client version will be able to identify the network related to each file it will manage. The Radar ID parameter follows the same logic except for the fact that it will identify each single radar inside the same network, specified by the Radar Network parameter. It is clear that these parameters can be set only by the DataAcq Servers, the DataAcq Client will only use them to manage files and generate products. Fig. 3-3 Radar setting Once Radar Network and Radar ID parameters have been set, activating the drop down menu available under the symbol +, it is possible to rename the radar (see Fig. 3-4), add a new scan (Add scan) or remove that currently selected (Delete scan) (see Fig. 3-5). Fig. 3-4 Radar name and scan ELDES Page 24 of 118 Proprietary Information Document code: OM-11242-10-01 WR-10X User Manual Server Fig. 3-5 Add/remove scan Selecting a radar or a scan, it will be possible to enter or modify the related configuration parameters, through the folders which will appear on the right side. The Fig. 3-6 shows an example in which in DataAcq Server, three different scan modes have been prepared. The scheduler has been activated only on one scan and it will run the scan at the specified day and hour. Fig. 3-6 Scans 3.1.2 Scan Mode In the Scan Mode folder (see Fig. 3-7) it is possible to select characteristic parameters of each scan. The main parameters which can be set are the scan type, PPI and/or RHI, through the relative check box. For each type it’s possible to select the operating Range which shows the radar range in distance and the Range step that allows to specify the scan range resolution. The Range step can be set in function of the specified Range, according to the Tab. 3-1. Document code: OM-11242-10-01 ELDES Proprietary Information Page 25 of 118 WR-10X User Manual Server Fig. 3-7 Scan Mode Tab. 3-1 Range / Range step association RES. 90 (m) RES. 150 (m) RES. 300 (m) RES. 450 (m) Range 21.6 (Km) Yes Yes Yes Yes Range 36 (Km) No Yes Yes Yes Range 72 (Km) No No Yes Yes Range 108 (Km) No No No Yes In the PPI section (see Fig. 3-8), it is possible to enable different Elevation Steps together with the related parameters and set the Azimuth Velocity (azimuth rotation speed) with which it is intended to carry out the procedure. The Azimuth resolution field determinates the antenna lobe width that allows to set the acquisition samples (azimuth oversampling). The Sector Blanking 1 and the Sector Blanking 2 check boxes allow choosing if to turn off the radar radiation in one or max two sectors. For each sector, after flagging the check box, it is necessary to set the start angle of the sector blanking and the end one, expressed in degrees; the difference between the two values is the sector width. The sector width value must result <180 degrees and, in case of both sectors flagged, these must be separated by at leas 10 degrees, otherwise an error message will appear. By means of the Max El. field (available for each sector) it is possible to insert the value, expressed in degrees, related to the elevation angle over which the blanking will be applied no more. In the RHI section (that is not enabled for WR10X-CE configuration) it is instead possible to enable different azimuth steps together with the related parameters and set the initial and ending elevation with which it is intended to carry out the procedure. Selecting the Automatic RHI check box, azimuth steps will be disabled and the system independently calculates the most appropriate azimuth value to carry out the RHI. Two search systems related to the azimuth direction along which the next RHI scan will be run can be set: Max intensity and Max water’s cells number on ray. ELDES Page 26 of 118 Proprietary Information Document code: OM-11242-10-01 WR-10X User Manual Server In both cases data related to the volumetric scan composed of n polar PPI are reproduced on the horizontal plane and put on the Cartesian axes before proceeding with the next processing. In the first case, the algorithm which controls this function will find the azimuth value for which the maximum reflectivity value has been found on the Cartesian reflectivity map; if the reflectivity value of the maximum group which has been found exceeds a specified threshold, the azimuth direction found is used to run the automatic RHI scan. In the second case the number of cells whose reflectivity exceeds a determined threshold is measured and stored for each ray of the Cartesian reflectivity map: the azimuth direction used for the next RHI scan is that of the ray in which the number of cells marked with “water” is the maximum. The integration algorithm of data related to the RHI scan uses a fictitious resolution amplified with a factor 6 if compared with the real resolution of the elevation cell corresponding to a radar beam width of -3dB. This system assures a higher definition on the involved phenomenon even maintaining an exact estimation of the reflectivity value and it is possible according to the high number of available samples for each real resolution cell. The Bright band detection allows to search, in the specified azimuth step and elevation range, the quote of the reflectivity peak, that is characteristic of the RHI product (see RHI Product Generator User Manual). Finally the Elevation resolution allows to perform the elevation oversampling in the same way of the Azimuth resolution. During the scan it is possible to set up to 10 steps which can be selected putting a flag on the related Elevation step n box, for the PPI, and to the Azimuth step n box for the RHI. Clicking on the elevation or azimuth value it is possible to modify it. This value is expressed in degrees. All steps can be enabled at any time together with the related values and, if it would not be necessary to manage any of them later, it will be sufficient to remove the flag without changing the configured value. Document code: OM-11242-10-01 ELDES Proprietary Information Page 27 of 118 WR-10X User Manual Server Fig. 3-8 Azimuth and elevation steps ELDES Page 28 of 118 Proprietary Information Document code: OM-11242-10-01 WR-10X User Manual Server 3.1.3 Scan Setting The Scan Setting folder is composed of a left and a right block. Fig. 3-9 Scan Setting 3.1.3.1 Scan Setting left block The left block contains the Settings section, the possible choices are: Do not radiate, the radar does not radiate power; Radiation off at end scan, at the end of the running scan the radar radiation is set to Off; Save raw data in .r file, “raw” data are saved in a binary file with .r extension. The file is saved in the following address C:\Programs\WR-10X\DataFiles\DATA\RAW; Save raw data in text file, “raw” data are saved in a text file. -The file is saved in the following address: C:\Programs\WR10X\DataFiles\DATA\RA Document code: OM-11242-10-01 ELDES Proprietary Information Page 29 of 118 WR-10X User Manual Server Tuning - After, at the end of each scan the radar tunes again; - Before, at the beginning of each scan the radar tunes again (recommended); - None, radar does not carry out tuning procedure. - Enable Pointing for Tune, this check box is automatically flagged if one (or both) Sector Blanking (in the “PPI” section of the “Scan mode” tab) is selected. - Azimuth direction, type the Azimuth angle value (0-360 degrees) related to the antenna desiderated direction to be kept during the tuning activity. Note The chosen Azimuth angle value must not be included inside any set sector blanking! Enable IR, for the first installation the check box must be not flagged. Only if a radar-to-radar interference is present, this option can be eventually used. Note The “Enable IR” check box flagged action is equivalent to set “IntReject” = 3 in the ..\WR-10X\Bin\SignalProcessingConstructor.xml file and, in this case, this part of .xml file is ignored. - IR threshold, after flagging the related check box, it is necessary to insert the “IR threshold” value (0-100 dB) in the proper field. Note The “Enable IR” check box flagged action is equivalent to set “IntReject” = 3 in the ..\WR-10X\Bin\SignalProcessingConstructor.xml file and, in this case, this part of .xml file is ignored The above mentioned choices are not mutually exclusive, more than one setting can be set, except for the Tuning parameters. 3.1.3.2 Scan Setting right block The right block (divided between PPI and RHI) contains the Clutter filters an Settings sections. The RHI section is not enabled for WR10X-CE configuration. On Clutter filters it’s possible to set parameters necessary for the clutter filter configuration as follows: Enable declutter (statistical filter): it enables the statistical declutter filter; Enable clutter map (PPI only): it allows to use the clutter maps (if present) for the declutter algorithm; Clutter map update (PPI only): during the radar operation, it allows to stop the generation of clutter maps in case of weather worsening (clutter maps must be acquired in clean weather condition) and resume it later; Low threshold: recommended values in the range 0÷15; ELDES Page 30 of 118 Proprietary Information Document code: OM-11242-10-01 WR-10X User Manual Server High threshold: recommended values in the range 6÷30; Recovery windows dimension: allowed in the range 0÷6; The Settings section is composed of the following columns: Decision Threshold: decision threshold for clutter acknowledgment, allowed values in the range 0÷100; Height Threshold: height threshold above which the declutter is not carried out, allowed values within 0÷180°; Range: it shows the available range (radar range in distance); Range Step: it shows the available range step for each range The meaning of the above mentioned parameters is described in the following paragraph. Statistical declutter filter The declutter filter is a statistical type and its operating principle is based on the different distribution of samples occurring between the radar echo due to the clutter and the radar echo due to the weather signal. The following paragraph gives a general explanation about the statistical declutter operation and the DataAcq setting parameters function. In order to describe its operation we will base our explanation on a matter of fact: each PPI cell related to the WR10X system is sampled with N values showing reflectivity, in which N depends on the constant rotation speed of the antenna. In the typical case of a 20°/S speed, N is equal to 120. The whole PPI is composed of 14400 cells, a matrix of 120x120, when the system is set on a range of 36Km, while when a range of 72Km is used the matrix will be 120x240 for a total of 28800 cells. Each cell, as above mentioned, is composed of 120 samples, so, each cell will have its own average value and standard deviation. In its turn, each PPI will be composed of a specific number of cells whose reflectivity will be due to the clutter, to the weather signal, or can be empty. The clutter standard deviation is usually about 5 while for the weather signal it is on the average approximately 13. According to what has been said above, it is clear that during observations in clear air (without rain) the PPI will be made almost exclusively of cells with StdDev about 5, due to clutter, while all other cells will be empty except for a small percentage of cells with different StdDev. If we remove from the calculation all empty cells, or those having a reflectivity lower than a threshold value, it follows that a high percentage of PPI is made of clutter (90% approx.). The situation changes considerably as a disturbance carrying rain enter inside the PPI. In this case there will be cells with StdDev due to clutter, other cells will have StdDev due to weather signal, and others will have a StdDev with an intermediate value. If we remove from the calculation all empty cells, or those having a reflectivity lower than a threshold value, it follows that the clutter effect in % in the PPI rapidly decreases with the arrival of cells having StdDev due to weather signal. So, it is easy to recognize the presence of rain inside the PPI and differently manage cells according to the fact that it is a PPI only including clutter or a PPI including weather signal. In case of a PPI only including clutter, it will be sufficient to remove the cells which contain it, in case of a PPI including weather signal, the cells will be filtered with a recovery mask in order to display only the weather signal, cleared of the clutter. Document code: OM-11242-10-01 ELDES Proprietary Information Page 31 of 118 WR-10X User Manual Server So, the necessary parameters to realize this kind of filter are basically three: The StdDev value only related to the clutter typical of the installation site; The percentage of incidence of the clutter in the PPI in clear air, typical of the installation site; The StdDev value typical of the weather signal. As regards the last parameter, it is possible to refer to typical values, while it is not possible to do the same with the first two parameters. The clutter standard deviation highly depends on the installation site. Ex. Mountain areas, wooded hills, urban environments, etc. The same can be said for the percentage of incidence in the PPI. This is the reason why these parameters are chosen only AFTER an observation period in clear air in which these areas are estimated. The DataAcq software includes some automatic calculation tools which allow to quantify these parameters in order to carry out a correct estimation. Declutter filter setting The following figure shows the window related to the declutter parameters setting. The declutter can be disabled removing the flag from Enable declutter. The Low Threshold field defines the typical StdDev value below which each cell will be defined as “clutter cell”. The High Threshold field defines the typical StdDev value above which each cell will be defined as “weather signal cell”. The Recovery windows dimension field defines the dimension (matrix of n. cells x n. cells) of the recovery mask used during the weather PPI processing for the filtering of cells with intermediate StdDev. ELDES Page 32 of 118 Proprietary Information Document code: OM-11242-10-01 WR-10X User Manual Server Fig. 3-10 Clutter filter– Settings The Decision Threshold field defines the percentage which usually the clutter takes in the PPI IN CLEAR AIR. If the percentage of cells with a StdDev lower than the Low Threshold is higher than the percentage shown in this field, the PPI is considered as a PPI of clutter and it is managed accordingly Decision Threshold. If the percentage is lower, the PPI will be considered as a weather PPI and it will be managed in a different manner. According to the used range, 36 or 72 Km, the percentage of clutter in the PPI changes, so, there are 2 threshold values depending on the range which is used. Furthermore, in the central column it is possible to define an elevation angle above which NO clutter signal is still visible and so, above this elevation angle, NO declutter algorithms will be applied. In order to limit the presence of possible distortion of the weather echo, the statistical filtering is applied in a selective way. Using the Decision Threshold, Low threshold, High threshold as initialization parameters, some clutter maps are dynamically updated. Clutter maps are status maps as they highlight cells in which in clear air there is clutter and they are as much as the elevations set in the schedule. The statistical declutter algorithm is only applied on cells for which the clutter map related to the specific elevation has a value equal to 1. Document code: OM-11242-10-01 ELDES Proprietary Information Page 33 of 118 WR-10X User Manual Server 3.1.4 Communication The Communication folder includes the fields which must be filled to set the FTP server address to which data have to be sent. Fig. 3-11 Communication In order to enable the fields included in the folder it is necessary to put a flag on the option Send data to FTP Server. ELDES Page 34 of 118 Proprietary Information Document code: OM-11242-10-01 WR-10X User Manual Server Fig. 3-12 Enable data transmission In this way it is possible to enter FTP Server name, the server name ( or IP address); FTP directory name, the name of the Server directory; User name; Password. It is possible to put a flag on the Use RAS connection to send data option if the connection to the FTP site has to be established via GSM or GPRS. Fig. 3-13 RAS connection In this case, it is necessary to enter in the Phonebook entry field the entry previously configured in the Windows phonebook which calls the GSM or GPRS modem, and which is necessary to establish the connection. It is also possible to put a flag on the Disconnect RAS at the end of transmission option to cut off the call at the end of data transmission. Document code: OM-11242-10-01 ELDES Proprietary Information Page 35 of 118 WR-10X User Manual Server 3.1.5 Scheduler In the Scheduler folder it is possible to schedule radar scans. Fig. 3-14 Scheduler Clicking on the Add/Modify schedule button, a window related to scheduled tasks typical of Windows will appear as shown in the Fig. 3-15: ELDES Page 36 of 118 Proprietary Information Document code: OM-11242-10-01 WR-10X User Manual Server Fig. 3-15 Task execution window In this screen it is possible to activate or not the scheduled task and decide the execution criteria. Putting a flag on the Activated option, the procedure will be run at the specified time. Selecting the option Run only after the access the choice is to run the procedure only when the user, who creates it, has completed the operating system login. Removing the flag the possibility to set the password through the Set password button will be enabled; in this way, the scheduled task will be run even if the login to the system is missing. Fig. 3-16 Enter Password Document code: OM-11242-10-01 ELDES Proprietary Information Page 37 of 118 WR-10X User Manual Server Clicking on Scheduling folder and holding the New button, the window shown in the following figure will appear: Fig. 3-17 Scheduling Clicking the New button an item will be added to the scheduling list. Fig. 3-18 Scheduling addition Clicking on the Remove button the selected scheduling will be removed. From the drop down menu which appears under the Schedule operation entry, it is possible to select the task recurrence and so the task starting time. Fig. 3-19 Task scheduling Clicking on the Advanced button, the options shown in the following figure will be displayed: ELDES Page 38 of 118 Proprietary Information Document code: OM-11242-10-01 WR-10X User Manual Server Fig. 3-20 Advanced scheduling options From here it is possible to set a series of parameters such as the dates range within the scheduling has to be applied, the task repetition recurrence, etc. Entering the Settings folder we will find a series of options which allow to customize the task scheduling. Fig. 3-21 Scheduled task settings Document code: OM-11242-10-01 ELDES Proprietary Information Page 39 of 118 WR-10X User Manual Server Note Do NOT change settings directly from the Windows scheduler in order to avoid misalignments and conflicts. Clicking on the Remove schedule button which is in the Scheduler folder, the selected scheduling is removed, after clicking on Yes in the window related to the operation acknowledgement request. Fig. 3-22 Scheduling removal 3.1.6 Products The Products folder includes all general configuration parameters, General Configuration, and parameters related to the different products registered in the system, Products. ELDES Page 40 of 118 Proprietary Information Document code: OM-11242-10-01 WR-10X User Manual Server Fig. 3-23 Products As regards the General Configuration, it is possible to put a flag on one or all of the following options: Show GestObjTsk video log, shows, in the window which is opened at any scheduled scan request, all messages related to the operations which the involved module is carrying out; Save GestObjTsk log on file GestObjTsk.log, saves the same information on a text file named GestObjTskyyyymm.log (yyyy=year, mm=month) in the \WR10X\Bin\LogFiles folder; Show GestObjTsk window, allows to show the GestObjTsk application window. If this is not displayed, the log display too will be missing; Show elaboration details, displays information related to the generation of each single product, controlled by the GestObjTsk father module. It is also possible to choose the format of the date to be displayed in the product which is going to be generated between: Local Time or UTC. Document code: OM-11242-10-01 ELDES Proprietary Information Page 41 of 118 WR-10X User Manual Server The Products section shows the list of all registered products included in the system together with the related characteristics. For WR10X-CE configuration the product RHI is not enabled. Putting a flag on the Enable column it will be possible to decide which products the system has to generate, while clicking on the Configure button it will be possible to have access to the configuration typical of each single product. Further details will be available in the specific manuals. 3.1.7 Advanced work mode Only if in the “General configuration” section the “Advanced work mode” check box is flagged, the “Advanced work mode” is available; this is a special configuration window (protected by Password) used only during the start-up procedure in order to determine the optimum thresholds for the declutter algorithm and to enable specific operating modes useful to the installer. The “Advanced work mode” window is shown in Fig. 3-24. Fig. 3-24 Advanced work mode ELDES Page 42 of 118 Proprietary Information Document code: OM-11242-10-01 WR-10X User Manual Server 3.2 Signal Process The Signal Process folder includes parameters related to the signal processing and it is divided into Radar calibration and Radar setting. Fig. 3-25 Signal Process folder Radar calibration is the section of the folder which includes parameters related to the radar calibration. Putting a flag on the K Radar calculation box, the radar constant at 1 Km range (Radar constant) is calculated using all other parameters, otherwise it is entered as input parameter together with Receiver slope parameters. In this second mode (to be used when all radar parameters are not available) the radar constant value, necessary for the reflectivity calculation in dBZ, is entered manually. The correct constant value is that which allows to extract measured reflectivity values related to the real situation and can be extrapolated only through another calibrated system covering the same observation area. If the constant is calculated (putting a flag on K radar calculation), the calculation procedure and the meaning of the parameters are described below. The WR10X weather radar measures a parameter called Reflectivity Z, representing it in a polar space on logarithmic scale (dBZ). Reflectivity is calculated from the average power received by the antenna according to the following relation: Document code: OM-11242-10-01 ELDES Proprietary Information Page 43 of 118 WR-10X User Manual Server Z c =2,9979x10⁸ K =0,93 1024 ln( 2) c 3 2 Pt G2 r 2 Pr K 2 is the speed of light in a vacuum expressed in [m/s] is the water scattering coefficient These two parameters are fixed and do not depend on the specific installation; other parameters are: c is the wavelength of the transmitted carrier expressed in [cm] ft ft (Transmitted Frequency) is the frequency of the transmitted carrier expressed in [MHz] (Pulse Time) is the transmitted pulse time expressed in [μs] G (Antenna Gain) is the antenna gain (measured twice, once during the transmission and once during the reception) expressed in [dB] (Azimuth Beamwidth) is the antenna lobe width (at -3dB) on azimuth axis (horizontal axis) expressed in [°] (Elevation Beamwidth) is the antenna lobe width (at -3db) on elevation axis (vertical axis) expressed in [°] Pt (Transmitted Power) is the peak power radiated by the radar expressed in [Kw] Note These parameters depend on the specific installation so, they must be configured according to experimental data obtained by laboratory measurements and possibly updated on site according to the periodic maintenance inspections to the instrument. r is the distance of the observed cell from the radar expressed in [Km] Pr is the average power received by the radar antenna coming from the involved cell located at a distance r from the radar and expressed in [dBm] These parameters can be obtained by the matrix of integrated data in log power (dBm) resulting from the processing previous to the radar constant calculation. Typically, the Z parameter is expressed in [mm6/m]; in the above mentioned relation it is necessary to apply a further correction factor for the conversion of the units of measure. In order to be better represented, Z is expressed in dBZ=10xLog(Z), so, isolating r and Pr variables related to the single cell in the radar equation, a constant C is introduced, depending on the system characteristics and reflection properties of water drops: ELDES Page 44 of 118 Proprietary Information Document code: OM-11242-10-01 WR-10X User Manual Server The constant C expressed in [dB] is obtained as 10xLog() of the constant part related to the radar equation expressed in linear form. In order to consider losses due to the radome effect (not perfectly transparent) and to the run on the sliding guide (insertion-loss of some microwave components), a further term, L, is included in the C radar constant; L element, depending on the radome attenuation, can be changed through the interface using the entry Radome attenuation. A further loss factor must be introduced to consider the attenuation due to atmospheric gases. Defining with LGAS the two-way attenuation expressed in [dB/Km], the above mentioned relation changes as follows: The value of the LGAS parameter is considered in the calculation of the reflectivity matrix but cannot be changed through the interface. Finally, it is important to add that data actually available at the software processing input is the matrix of the voltage levels at the LOG amplifier output encoded on 8 bits (256 levels). The levels A/D Pr (dBm) association is defined by the following parameters: Receiver slope and MDS which express, respectively, the slope and the offset of the radar receiver characteristic. The Reflectivity constant field allows to select Rain if it is necessary to represent reflectivity of a rain field or Snow if it is necessary to represent reflectivity in a snow field. In the first case the scattering coefficient used in the radar equation is that related to the water case ( K =0,93), while in the second case the scattering coefficient is that related to the snow case ( K =4,15). By means of the Short, Medium, Long radio-buttons, it is possible to choose the kind of pulse to transmit. The PRF (Hz), Pulse time (us) and Matched Filter Loss (dB) fields are automatically filled and once chosen the pulse kind, the related “Pulse time” and “Matched Filter Loss” proposed values can be modified by the user, while the “PRF” value can not be modified. Document code: OM-11242-10-01 ELDES Proprietary Information Page 45 of 118 WR-10X User Manual Server In the Radar setting section it is possible to set the radar offsets: Azimuth offset (degrees): increasing this value in a positive direction the map rotates of the same degrees clockwise. Elevation offset (decidegrees): this value sets the offset expressed in tenths of degrees for the correction of the antenna storing position (“HOME” position means 0° elevation). For WR10X-CE configuration this value is forced to 0 and it can’t be modified. In fact in this case the antenna elevation is manually performed. Gate offset: it is the number of gates (@ 90 m, the minimum range resolution) to set the range offset related to data acquisition. The 0 value means that no range offset is applied for the data acquisition. Note These values are set during the installation and setup procedures. It is recommended not to change them. Putting a flag on the Enable noise filter option, the noise filter is applied and it’s possible to choose between Automatic or Manual, as shown in Fig. 3-26: Manual: the Noise Level is the a static value measured in laboratory and it is multiplied with the Log threshold to get the noise threshold (logarithmic value); Automatic: in this case at the beginning of the schedule, the processor performs a noise estimation by getting Pulse number pulses and creates a Noise Mean Level in the log file; this value, that depends on the temperature, is used to calculate the real offset of the radar receiver characteristic; the Noise calculation indicates when the processor has to collect data for the noise estimation (At the end is suggested in order to not disturb the tuning phase). The Tune indicator threshold determinates the value for which it is done a complete or a fast tuning. Typical value is 100. Fig. 3-26 Enable noise filter section ELDES Page 46 of 118 Proprietary Information Document code: OM-11242-10-01 WR-10X User Manual Server 3.2.1 Structure of RAW data As it has already been said, it is possible to extract data related to scans which have not been processed in order to use them in next processing. It is also possible to obtain data which have not been processed directly in a text file readable by whatever editor. The purpose of this paragraph is to describe the structure of the RAW file also called raw data file (not processed). The file is shown in the following figure. The first column show the really acquired date for the specific pulse (year-month-day, aaaammdd format). The second column show the really acquired timestamp for the specific pulse (hours-minutes-seconds-milliseconds, hhmmssMMM format). The third column shows a simple progressive number necessary to mark the start and the end of cells in azimuth. The fourth column shows the azimuth value of the involved pulse. The value is expressed in encoder steps where 2047 is the maximum value corresponding to the round angle. Each full scan will include the point in which the azimuth meter crosses 0 (shown in the example figure). This point represents the so called north mark that is the referenced point from which the processing algorithm begins the reorganization of data matrix. In order to determine the Start and the End of each azimuth cell, a simple proportion is used: 2047 : 360 x : AZ resolution For example if the selected azimuth resolution is 3°, the value expressed in encoder steps is obtained for each cell of 3°, that is 17,0 steps. The fifth column shows the elevation value of the involved pulse expressed in number of stepper motor on the elevation axis. The antenna position of the elevation axis expressed in degrees is obtained by applying the following relationship: Columns from the 6th to the last will include AD converter values for all the radar cells. The number of cells on each row (range bin) depends on the setting of the range and range resolutions according to the Tab. 3-1. For example if the selected range is 72Km and the selected range resolution is 300m, the range bin number for each row is (72000/300)=240. Each row is related to ONLY ONE transmitted pulse. Document code: OM-11242-10-01 ELDES Proprietary Information Page 47 of 118 WR-10X User Manual Server It follows that the line number in the RAW file is related to the antenna speed in fact, with a PRF of 800 Hz and an antenna speed of 20°/s, the time necessary to complete a round will be of 18S. So 800 18 14400 It follows that if the antenna speed is constant at 20°/s to complete a round angle, the RAW data file will be composed of 14400. In short it is possible to say that if it is intended to integrate all values related to the first rang-bin for an antenna beam width of 3°, it will be necessary to take all samples included in the 6th column starting from the line progressive number of 2868 to number 2761 (see example). In the example it is instead clear that samples composing the first range-bin are not 120 but only 107 (2868-2761), the same can be said for all range-bins. This is due to the real antenna speed which is not, in this case, equal to 20°/S but to 22,43°/S. As the PRF is fixed to 800 Hz and the sampling is fixed, the file includes only 12940 lines against the theoretical 14400. This example has been made to highlight that the processing algorithm REMAPS the cells Start and End points according to the real antenna speed calculating the number of pulses actually integrated in each cell. Fig. 3-27 RAW file structure The RHI raw text file format is very similar to the PPI raw text file format described above. ELDES Page 48 of 118 Proprietary Information Document code: OM-11242-10-01 WR-10X User Manual Server The fourth column shows the fixed azimuth value of the involved pulse. The fifth column shows the elevation value of the involved pulse expressed in number of stepper motor on the elevation axis. The file name format for the raw text file is described below: PPI-XXX-AAAAMMGGHHMM-B-RRRR-rrrr-aaaa-EEEE-R.txt or RHI-XXX-AAAAMMGGHHMM-B-RRRR-rrrr-aaaa-EEEE-R.txt where: XXX = Network and radar number identifier. AAAAMMGGHHMM = Acquisition data (start time of the radar scheduler). B = Not used. RRRR = Range expressed in hundreds of meters. rrrr = Range resolution range expressed in meters. aaaa = Azimuth resolution expressed in decidegrees. EEEE = Elevation expressed in decidegrees. R = Not used. 3.2.2 Structure of PPI integrated data Processing algorithms applied to RAW data make integrated data available for the subsequent processing (possibly clutter-free). Integrated data are generated in binary format for the two elementary moments of PPI reflectivity and RHI reflectivity. Integrated data are identified by the .z extension and are used as input parameters by the product generators algorithms. In PPI scan, the integration elementary unit is the resolution cell on the azimuth plan determined by the antenna beam width selected from DataAcq interface and by the rangeresolution selected from DataAcq interface. As regards this radar system, the azimuth antenna beam width is equal to 3°, so, the whole scan on 360° will include 120 azimuth cells, but it is also possible to apply an oversampling in azimuth by selecting from DataAcq interface a beam width lower than the nominal. There are four range. For each range can be selected different range-resolution according to the Tab. 3-1. The file name contains all the information necessary to determine the size and number of cells contained in the integrated file .z: PPI-XXX-AAAAMMGGHHMM-B-RRRR-rrrr-aaaa-EEEE-C.z or PPI-XXX-AAAAMMGGHHMM-B-RRRR-rrrr-aaaa-EEEE-U.z where: Document code: OM-11242-10-01 ELDES Proprietary Information Page 49 of 118 WR-10X User Manual Server XXX = Network and radar number identifier. AAAAMMGGHHMM = Acquisition data (start time of the radar scheduler). B = Not used. RRRR = Range expressed in hundreds of meters. rrrr = Range resolution range expressed in meters. aaaa = Azimuth resolution expressed in decidegrees. EEEE = Elevation expressed in decidegrees. C or U = Data type, C for cluttered data, U for uncluttered data. For example the integrated data file with the file name PPI-A00-201112011256-B-03600150-0010-0010-U.z referred data acquired at 12:56 on 01 December 2011 from radar A00. The range is 36Km, the range resolution is 150m, the azimuth resolution is 1°(oversampling), the elevation selected is 1°. Overall the data divided into 36Km/150m=240 cells in range (columns) and 360°/1°=360 cells in azimuth (rows). Each row of the matrix is preceded by a header of 23 numeric fields. The fields contained in the header are as follows: HEADER = (HEADER_TYPE, HEADER_TIMESTAMP_Y, HEADER_TIMESTAMP_MG, HEADER_TIMESTAMP_HM, HEADER_TIMESTAMP_S, HEADER_TIMESTAMP_mS, HEADER_INDEX, HEADER_SCANTYPE, HEADER_AZIMUTH, HEADER_AZIMUTH_IN, HEADER_AZIMUTH_OUT, HEADER_ELEVATION, HEADER_ELEVATION_IN, HEADER_ELEVATION_OUT, HEADER_PULSEWIDTH, HEADER_PRF, HEADER_RANGE, HEADER_RANGESTEP, HEADER_AZIMUTHSTEP, HEADER_AZIMUTHSPEED, HEADER_NUMPULSES, HEADER_MEANNUMPULSES, HEADER_DATAFORMAT) where: HEADER_TYPE = Number of fields contained in the header. For PPI integrated data this field value is 23. HEADER_TIMESTAMP_Y = Field year of the timestamp corresponding to the time where you started the acquisition of the specific azimuth cell (4 digit for year). HEADER_TIMESTAMP_MG = Field month + day of the timestamp corresponding to the time where you started the acquisition of the specific azimuth cell (2 digit for month + 2 digit for day). HEADER_TIMESTAMP_HM = Field hours + minutes of the timestamp corresponding to the time where you started the acquisition of the specific azimuth cell (2 digit for hours + 2 digit for minutes). HEADER_TIMESTAMP_S = Field seconds of the timestamp corresponding to the time where you started the acquisition of the specific azimuth cell (2 digit for seconds). HEADER_TIMESTAMP_mS = Field milliseconds of the timestamp corresponding to the time where you started the acquisition of the specific azimuth cell (3 digit for milliseconds). HEADER_INDEX = Sequential index of the row (takes integer values from 1 to number of rows). HEADER_SCANTYPE = Scan type identifier (1 = PPI, 2 = RHI, 3 = SECTOR only predisposition). For PPI integrated data this field value is 1. ELDES Page 50 of 118 Proprietary Information Document code: OM-11242-10-01 WR-10X User Manual Server HEADER_AZIMUTH = Azimuth position at the end of the specified ray. This position is expressed in steps of 11-bit encoder (integer value between o and 2047). HEADER_AZIMUTH_IN = Only predisposition for future use in azimuth sector scan type. For PPI scan type this field is equal to HEADER_AZIMUTH. HEADER_AZIMUTH_OUT = Only predisposition for future use in azimuth sector scan type. For PPI scan type this field is equal to HEADER_AZIMUTH. HEADER_ELEVATION = Antenna angle elevation point for the PPI acquisition. This field is expressed in decidegrees (integer value between 0 and 1800). HEADER_ELEVATION_IN = For PPI scan type this field is equal to HEADER_ELEVATION. HEADER_ELEVATION_OUT = For PPI scan type this field is equal to HEADER_ELEVATION. HEADER_PULSEWIDTH = Transmitted pulsed width expressed in nanoseconds (integer value on 4 digit). HEADER_PRF = Transmission pulse repetition frequency expressed in Hz/10 (integer value on 4 digit with default value 8000 Hz/10). HEADER_RANGE = Acquisition selected range expressed in hundreds of meters (integer value on 4 digit). HEADER_RANGESTEP = Acquisition selected range step expressed in meters (integer on 4 digit). HEADER_AZIMUTHSTEP = Integrated selected azimuth step expressed in decidegrees (integer on 4 digit). HEADER_AZIMUTHSPEED = Average antenna azimuth speed measured on complete revolution. This field is expressed in decidegrees (integer on 4 digit). HEADER_NUMPULSES = Numbers of pulses integrated on specified ray (integer on 4 digit). HEADER_MEANNUMPULSES = Average numbers of pulses integrated on total ray (integer on 4 digit). HEADER_DATAFORMAT = Number of data bits (the same for header and data). On each row, the header of 23 integer field is followed by a data field consists of a number of records depends on the range and range-step parameters. Each data record is named cell and has a reflectivity average value appropriately coded in levels within 0÷2^HEADER_DATAFORMAT. From the coded reflectivity value, it is possible to obtain the reflectivity value through the following relation: In case of PPI scan, the elevation position of all rays does not change. Unlike what above described for RAW data, the azimuth and elevation positions are not involved by the offset. Document code: OM-11242-10-01 ELDES Proprietary Information Page 51 of 118 WR-10X User Manual Server In particular, the azimuth position of each ray, expressed in encoder steps, shows the angle to which the ray closes (for example, if the azimuth resolution selected is 3°, as regards the first cell, the azimuth position is 17 encoder steps corresponding to 3°). With reference to the example mentioned above, PPI-A00-201112011256-B-0360-01500010-0010-U.z, if we also consider the header presence on each ray, the integrated data matrix for the PPI scan has a size of 360X263. The .z binary file related to PPI integrated data is saved in a “ushort” format (Unsigned Integer, 16 bits). 3.2.3 Structure of RHI integrated data In RHI scan, the integration elementary unit is the resolution cell on the vertical plane determined by the antenna beam selected from DataAcq interface and by the rangeresolution selected from DataAcq interface. As regards this radar system, the beam antenna width on the vertical plane is equal to 3°, but it is also possible to apply an oversampling in azimuth by selecting from DataAcq interface a beam width lower than the nominal. If we consider the restricted speed of the elevation scan, the number of samples available for the integration inside each selected antenna elevation beam width, resolution cell is very high. The elevation-resolution for the RHI scan is selectable from DataAcq interface. For this kind of scan angles, the scan beginning and end can be configured by the interface, so, the cells number on the vertical plane depends on these settings: There are four range. For each range can be selected different range-resolution according to the Tab. 3-1. The file name contains some of the information necessary to determine the size and number of cells contained in the integrated file .z: RHI-XXX-AAAAMMGGHHMM-B-RRRR-rrrr-eeee-AAAA-C.z or RHI-XXX-AAAAMMGGHHMM-B-RRRR-rrrr-eeee-AAAA-U.z where: XXX = Network and radar number identifier. AAAAMMGGHHMM = Acquisition data (start time of the radar scheduler). B = Not used. RRRR = Range expressed in hundreds of meters. rrrr = Range resolution range expressed in meters. eeee = Elevation resolution expressed in decidegrees. AAAA = Azimuth expressed in decidegrees. C or U = Data type, C for cluttered data, U for uncluttered data. ELDES Page 52 of 118 Proprietary Information Document code: OM-11242-10-01 WR-10X User Manual Server For example the integrated data file with the file name RHI-A00-201112011256-B-03600150-0005-2800-U.z referred data acquired at 12:56 on 01 December 2011 from radar A00. The range is 36Km, the range resolution is 150m, the elevation resolution is 0.5°(oversampling), the azimuth selected is 280°. Overall the data divided into 36Km/150m=240 cells in range (columns) while the information extracted from the file name is not sufficient to determine the number of rows. The missing information concerning the initial and final elevations of the scanned sector on the elevation axis, however, are available in the header of each row. Each row of the matrix is preceded by a header of 24 numeric fields. The fields contained in the header are as follows: HEADER = (HEADER_TYPE, HEADER_TIMESTAMP_Y, HEADER_TIMESTAMP_MG, HEADER_TIMESTAMP_HM, HEADER_TIMESTAMP_S, HEADER_TIMESTAMP_mS, HEADER_INDEX, HEADER_SCANTYPE, HEADER_AZIMUTH, HEADER_AZIMUTH_IN, HEADER_AZIMUTH_OUT, HEADER_ELEVATION, HEADER_ELEVATION_IN, HEADER_ELEVATION_OUT, HEADER_PULSEWIDTH, HEADER_PRF, HEADER_RANGE, HEADER_RANGESTEP, HEADER_ELEVATIONSTEP, HEADER_ELEVATIONSPEED, HEADER_NUMPULSES, HEADER_MEANNUMPULSES, HEADER_BB, HEADER_DATAFORMAT) where: HEADER_TYPE = Number of fields contained in the header. For RHI integrated data this field value is 23. HEADER_TIMESTAMP_Y = Field year of the timestamp corresponding to the time where you started the acquisition of the specific azimuth cell (4 digit for year). HEADER_TIMESTAMP_MG = Field month + day of the timestamp corresponding to the time where you started the acquisition of the specific azimuth cell (2 digit for month + 2 digit for day). HEADER_TIMESTAMP_HM = Field hours + minutes of the timestamp corresponding to the time where you started the acquisition of the specific azimuth cell (2 digit for hours + 2 digit for minutes). HEADER_TIMESTAMP_S = Field seconds of the timestamp corresponding to the time where you started the acquisition of the specific azimuth cell (2 digit for seconds). HEADER_TIMESTAMP_mS = Field milliseconds of the timestamp corresponding to the time where you started the acquisition of the specific azimuth cell (3 digit for milliseconds). HEADER_INDEX = Sequential index of the row (takes integer values from 1 to number of rows). HEADER_SCANTYPE = Scan type identifier (1 = PPI, 2 = RHI, 3 = SECTOR only predisposition). For RHI integrated data this field value is 2. HEADER_AZIMUTH = Antenna angle azimuth point for the RHI acquisition. This field is expressed in decidegrees (integer value between 0 and 3600). HEADER_AZIMUTH_IN = Only predisposition for future use in azimuth sector scan type. For RHI scan type this field is equal to HEADER_AZIMUTH. HEADER_AZIMUTH_OUT = Only predisposition for future use in azimuth sector scan type. For RHI scan type this field is equal to HEADER_AZIMUTH. Document code: OM-11242-10-01 ELDES Proprietary Information Page 53 of 118 WR-10X User Manual Server HEADER_ELEVATION = Elevation position at the end of the specified ray. This position is expressed in decidegrees (integer value between 0 and 3600). HEADER_ELEVATION_IN = Angle elevation at the start of the elevation sector acquired. This field value is expressed in decidegrees. HEADER_ELEVATION_OUT = Angle elevation at the stop of the elevation sector acquired. This field value is expressed in decidegrees. HEADER_PULSEWIDTH = Transmitted pulsed width expressed in nanoseconds (integer value on 4 digit). HEADER_PRF = Transmission pulse repetition frequency expressed in Hz/10 (integer value on 4 digit with default value 8000 Hz/10). HEADER_RANGE = Acquisition selected range expressed in hundreds of meters (integer value on 4 digit). HEADER_RANGESTEP = Acquisition selected range step expressed in meters (integer on 4 digit). HEADER_ELEVATIONSTEP = Integrated selected elevation step expressed in decidegrees (integer on 4 digit). HEADER_AZIMUTHSPEED = Nominal antenna elevation speed for antenna sector movement during the RHI scan operation. This field is expressed in decidegrees (integer on 4 digit). HEADER_NUMPULSES = Numbers of pulses integrated on specified ray (integer on 4 digit). HEADER_MEANNUMPULSES = Average numbers of pulses integrated on total ray (integer on 4 digit). HEADER_BB = Estimated Bright Band quote expressed in meters. If the Brigth Band quote estimation algorithm is disabled (property selectable from DataAcq interface), or Bright Band non detection, this field value is 0. HEADER_DATAFORMAT = Number of data bits (the same for header and data). On each row, the header of 24 integer field is followed by a data field consists of a number of records depends on the range and range-step parameters. Each data record is named cell and has a reflectivity average value appropriately coded in levels within 0÷2^HEADER_DATAFORMAT. From the coded reflectivity value, it is possible to obtain the reflectivity value through the following relation: In case of RHI scan, the azimuth position of all rays does not change. Unlike what above described for RAW data, the azimuth and elevation positions are not involved by the offset. In particular, the elevation position of each ray, expressed in decidegrees, shows the angle to which the ray closes. ELDES Page 54 of 118 Proprietary Information Document code: OM-11242-10-01 WR-10X User Manual Server With reference to the example mentioned above, RHI-A00-201112011256-B-0360-01500005-2800-U.z, with RHI start elevation angle 0° and RHI stop elevation angle 30° if we also consider the header presence on each ray, the integrated data matrix for this RHI scan has a size of 60x263 (N=[30°-0°]/0.5°). The .z binary file related to RHI integrated data is saved in a “ushort” format (Unsigned Integer, 16 bits). The .z binary file related to RHI integrated data is available only for radar WR-10X full version. 3.3 General The General folder includes general configuration parameters. Fig. 3-28 General folder The General Configuration window includes the following options, which can be simultaneously selected: Show DataAcqTsk video log: putting a flag on this option, the application log messages are displayed. Save DataAcqTsk video log on file DataAcqTsk.log: putting a flag on this option the log messages are saved on the DataAcqTskyyyymm.log file (yyyy=year, mm=month) in the \WR-10X\Bin\LogFiles folder. Save advanced analysis log on file: selecting this option messages related to the log of the signal processing module will be stored in a file called Document code: OM-11242-10-01 ELDES Proprietary Information Page 55 of 118 WR-10X User Manual Server SignalProcessingyyyymm.txt (yyyy=year, mm=month) in the \WR-10X\Bin\LogFiles folder. Apart from the status of this option, in the same folder, a log file including synthesis information useful for the declutter parameters setting is continuously updated (DecisionThreshold.txt). Show signal process details: putting a flag on this option a log including additional information about the signal process execution will be displayed. Display window application: putting a flag on this option the display on screen of a shell, in which the flow of all tasks run by DataAcqTsk is shown, is enabled. Advanced work mode: selecting this option a special configuration window (protected by Password) is enabled. This is used only during the start-up procedure in order to determine the optimum thresholds for the declutter algorithm and to enable specific operating modes useful to the installer. This will not be described in this manual, while only the related Log file will be shown (see 3.3.4). In the RS232 radar command configuration box, parameters related to the radar serial connection are set: COM Port: selects the COM port necessary to the connection. Baudrate: selects the connection speed (values from 300 to 128000 baud) Parity: selects the parity control type (None, Odd, Even) Data bit: selects the data bit number. Stop bit: selects the stop bit number. It is practically possible to configure during the installation only the number of the COM port used for the commands serial channel of the radar. All other parameters, because of implementation needs, must have the following values: Baudrate = 9600, Parity = Odd, Data bit = 8, Stop bit = 1. 3.3.1 SignalProcessing log The log file called SignalProcessing is a file which is generated if enabled by the Save Advanced Analysis log on file flag (section 3.3). Each month a new file named according to the following logic is generated: SignalProcessing-YEAR-MONTH and it is stored in the C:\Programs\WR10X\Bin\LogFiles path. A typical example of this file is shown in the following figure: ELDES Page 56 of 118 Proprietary Information Document code: OM-11242-10-01 WR-10X User Manual Server Fig. 3-29 Signal processing log The purpose of this file is to provide a log of the software module carrying out the signal processing in order to value possible corrections to make to the declutter parameters. For further information refer to section 0. On the left of each line the specific data and time is reported. The file contains the NOISE PARAMETERS MEASUREMENT section that shows the outputs of the noise algorithm: in particular, the Noise Mean Level indicates the noise mean value expressed in a/d converter levels. The second section shows the processing outputs of the acquired data for each elevation In the first line, as the upper section, the date and hour of the scan is reported. The second line shows the scan range, 36 or 72 Km. The third line shows the elevation value at which the scan has been run. After these preliminary information, the main parameters through which the signal processing has processed the scan are provided. The number of cells which had a StdDev lower than the Low Threshold called “Ground Clutter”. The number of cells which had a StdDev higher than the High Threshold called “Weather signal” The number of cells which had an intermediate StdDev called “Mixed Signal”. It is also possible to detect speed errors in the antenna rotation. Document code: OM-11242-10-01 ELDES Proprietary Information Page 57 of 118 WR-10X User Manual Server 3.3.2 DataAcqTsk log The purpose of this log file is to save in a file all messages coming from the DataAcqTsk module. This function can be useful, in case of system fault, to analyze the scan process point in which the problem has occurred or occurs. The log is Monthly type. Fig. 3-30 DataAcqTsk Log ELDES Page 58 of 118 Proprietary Information Document code: OM-11242-10-01 WR-10X User Manual Server 3.3.3 SignalProcessingError log The purpose of this log file is to save in a file all ERROR messages coming from the Advanced Analysis module. This file is continuously updated. This function can be useful, in case of system fault, to analyze the scan process point in which the problem has occurred or occurs. This log is Monthly type. Fig. 3-31 Signal processing error log 3.3.4 Decision Threshold Log file The Decision Threshold.txt is a log file and it is related to the PPI scanning. The Decision Threshold.txt log file purpose is to save on a file a report which allows to observe the variability of the set parameters related to the declutter filter; so this function can be useful for a short and long period analysis. Fig. 3-32 Log Decision Threshold The first column shows year and month to which the data are referred. The second column shows the range for which the data are calculated. The third column shows the elevation value for which the data are calculated. The fourth column shows the range resolution, expressed in meter. The fifth column shows the azimuth resolution, expressed in degrees. Document code: OM-11242-10-01 ELDES Proprietary Information Page 59 of 118 WR-10X User Manual Server The sixth column shows the REAL “Decision Threshold” value of the last scan, calculated according to the “LOW Threshold” value currently set. The seventh column shows the REAL “Min extreme of the LOW Threshold range” value calculated measuring the StdDev of the last scan which has been run, classified as “Clutter”. The eighth column shows the REAL “Max extreme of the LOW Threshold range” value calculated measuring the StdDev of the last scan which has been run, classified as “Clutter”. The ninth column shows the number of times which a specified scan has been launched and it also shows the number of samples used in the calculations to obtain the average values. The tenth column shows the THEORETICAL “Decision Threshold” value calculated according to the “LOW Threshold” set, making an average between data of all scans which have been run. The eleventh column shows the THEORETICAL “Min extreme of the LOW Threshold range” value calculated making an average of the StdDev of all scans which have been run, classified as “Clutter”. The twelfth column shows the THEORETICAL “Max extreme of the LOW Threshold range” value calculated making an average of the StdDev of all scans which have been run, classified as “Clutter”. ELDES Page 60 of 118 Proprietary Information Document code: OM-11242-10-01 WR-10X User Manual Server 3.4 Archive The Archive folder includes all parameters related to data archiving or removal. The archive files can be found in the Archive sub-folder related to the software directory installation. Fig. 3-33 Archive folder The Archive folder is divided into the following sub-folders: General configuration, Action, Archive configuration, Scheduler, which will be detailed described in the following paragraphs. Document code: OM-11242-10-01 ELDES Proprietary Information Page 61 of 118 WR-10X User Manual Server 3.4.1 General configuration The General configuration folder includes the following options: Show DataArchiveTsk video log: putting a flag on this option, the log messages, related to the application which archives data, will be displayed on screen. Display window application: putting a flag on this option the display on screen of the DataArchiveTsk application window is enabled. This shows all tasks that are being carried out. Save DataArchiveTsk video log on file DataArchiveTsk.log: putting a flag on this option, log messages are saved on the DataArchiveTskyyyymm.log file (yyyy=year, mm=month) in the \WR-10X\Bin\LogFiles folder. Fig. 3-34 General configuration 3.4.2 Log DataArchiveTsk The purpose of this log file is to save all messages coming from the DataArchiveTsk module on a file. This function can be useful in case of system fault, to analyze the archive process point in which a possible problem has occurred or occurs. Fig. 3-35 Log DataArchiveTsk ELDES Page 62 of 118 Proprietary Information Document code: OM-11242-10-01 WR-10X User Manual Server 3.4.3 Action The Action folder includes all parameters related to actions that have to be carried out on data. Fig. 3-36 Action The Archive action box includes the following options: Archive: it archives data; Delete: it deletes data; No action: no action to be carried out. The Action on files plus “n” days old ones option allows to select the files on which the action, previously selected in the Archive action box, has to be carried out. For example, entering a value of 30 in the Action on files plus “n” days old ones field and putting a flag on the Delete button in Archive action option, data files older than 30 days will be removed, that is only those related to the last month will be stored. Document code: OM-11242-10-01 ELDES Proprietary Information Page 63 of 118 WR-10X User Manual Server 3.4.4 Archive configuration In the Archive configuration folder is available a list including all information related to the registered products on which the archiving rules have to be applied; in order to select the item on which the desired action has to be applied it will be necessary to put a flag on the Enable column. For WR10X-CE configuration the RHI line is not present. All items on which it is possible to apply the above mentioned rule are described below: Enable action rule on products files: applies the specified rule on all product files having the Enable column enabled. Enable action rule on text raw files: applies the specified rule on all RAW data files in text format. Enable action rule on Z files: applies the specified rule on all binary files, called Z, related to products having the Enable column enabled. Enable action rule on scan files: applies the specified rule on all Scan-type files including information about the scan through which the related product has been or will be generated. Enable action rule on raw files: applies the specified rule on all RAW files in binary format. Fig. 3-37 Archive configuration ELDES Page 64 of 118 Proprietary Information Document code: OM-11242-10-01 WR-10X User Manual Server All archived files are placed in the Archive sub-folder, belonging to the WR-10X installation directory, according to the following hierarchy: <archived data folder>, year, month, day. Ex. Archive->PPI->2008->12->01. It is also possible to apply the rules related to the specified action to a second folder, characterized by the Enable action rule on secondary directory parameter. Archived files, on this last folder, are placed according to the hierarchy listed above. 3.4.5 Scheduler In the Scheduler folder it is possible to schedule the data archiving activity. Clicking on the Add/Modify schedule button it is possible to open the window related to the archiving schedule. This window is similar to that related to scans scheduling, for further details see par. 3.1.5. Clicking on the Remove schedule button it is possible to remove the set scheduling after clicking on Yes at the acknowledgement request. Fig. 3-38 Archive-Scheduler Document code: OM-11242-10-01 ELDES Proprietary Information Page 65 of 118 WR-10X User Manual Server 3.5 Registration The Registration folder includes all parameters necessary to manage and display products integrated in the system. Fig. 3-39 Registration folder This folder is composed of two sections, Registration and Manage registration, which have the function to, respectively, add a new product to the system and modify an existing product. ELDES Page 66 of 118 Proprietary Information Document code: OM-11242-10-01 WR-10X User Manual Server 3.5.1 Registration section In the Registration section it is possible to enter data necessary to integrate a new product in the system. It is possible to manually carry out this operation, choosing the Manual registration option, or importing a registration file, identified by the rwx extension, clicking on the Import reg. file button and selecting the desired file. Once the file, including the necessary information, has been imported, all parameters will be filled with the information read. It will be possible at any time to manually edit the fields previously entered, putting a flag on Manual registration. Once all fields have been correctly filled, it is possible to add a new product clicking on the Register button; the application will automatically process the informative content entered and the list in the Manage registration section will enlarge with the product which has been now registered. On the contrary, clicking on the Clear button, all edited fields will be cleared of their values. Fig. 3-40 Registration section Document code: OM-11242-10-01 ELDES Proprietary Information Page 67 of 118 WR-10X User Manual Server 3.5.2 Manage registration section In the Manage registration section it is possible to display, modify or delete products included in the system. Fig. 3-41 Manage registration section Each of the above mentioned operations must be carried out after clicking the Modify button. It will be now possible to edit parameters included in the table and save the new values clicking on the Save button. Once clicked, buttons and values will be read-only again, except for the Modify button, which will allow to carry out a new changing, and the Restore button, which will restore values to the version previous to the change. If it is intended to remove an existing product, it will be sufficient to select its name or any of the fields below, click on the Delete button, always after clicking the Modify button, and acknowledge the related request. As in the previous case, if it is intended to undo the change, it will be sufficient to click on the Restore button. For WR10X-CE configuration the RHI section is not enabled. 3.5.3 Registration parameters A series of parameters, divided into two categories DataAcq and DataView, can be set in both sections described in par. 3.5.1 and 3.5.2. ELDES Page 68 of 118 Proprietary Information Document code: OM-11242-10-01 WR-10X User Manual Server Both categories are described in details below: DataAcq 1. Name: indicates the product name. 2. Description: indicates the complete product name. 3. Dll path: indicates the path which leads to the product dll, which will be integrated in the system. The specified file won’t be modified, on the contrary it will be copied in the WR-10X\Bin\Obj folder in which the system places all files related to the registered products. 4. Ctf path: indicates the path which leads to the product dll, with the ctf extension, which will be integrated in the system. The specified file won’t be modified, on the contrary it will be copied in the WR-10X\Bin\Obj folder in which the system places all files related to the registered products. 5. Acronym: is a text string composed of three letters which univocally identifies the product. 6. Config file: indicates the configuration file name managed by the product. 7. Level: indicates the level of the registered product. As regards the server application it is possible to register only “First Level” products. DataView 1. Color table path: indicates the path which leads to the file including the product colors specification. The specified file won’t be modified, on the contrary it will be copied in the WR-10X\Bin\Colortbl, in which the system places the color table of the registered products. 2. Manage layer: enables or disables the possibility to manage the Map settings section in the DataView application (see par.). 3. Manage clutter filter: enables or disables the possibility to manage the Products Filter section in the DataView application (see par. 5.5.3). 4. Variable label: indicates the description to be displayed in the drop down menu below the Range parameter in the Products Filter section related to DataView application. The value included in this field is the informative content of the product file portion, shown in the following example: ‘PPI-A01-200810271340-B-0360-0010-U.PNG’ In the specific case of a PPI product it represents the elevation expressed in tenths of degrees. 5. Tooltip: indicates the description to superimpose on the image, simultaneously with the left mouse button click. In this description it is possible to use letters, numbers, mathematical expressions and MACROS, which can be represented through a specific syntax. For a detailed description on syntax and MACROS use, refer to par. 3.5.4. 3.5.4 Tooltip Syntax and MACRO MACROS consist in key words corresponding to system variables, numbers or mathematical expressions, which can be used alone or in more complex formulae. The list of MACROS available in the system and a short description of their functions are shown below: SQRT[] Square root function SIN[] Sine function Document code: OM-11242-10-01 ELDES Proprietary Information Page 69 of 118 WR-10X User Manual Server COS[] Cosine function ASIN[] Arc sine function ACOS[] Arc cosine function ATAN[] Arc tangent function COTAN[] Cotangent function TAN[] Tangent function PI Pi constant AZIMUTH Macro returning the angle position of the cursor on the azimuth axis DISTANCE Macro returning the radial distance of the cursor from the radar site (according to the range) RANGE Macro returning the related parameter taken by the file name VARIABLE Macro returning the related parameter taken by the file name IMGINFO Macro returning non numerical information on the pixel value pointed by the cursor OFFSET Macro returning the elevation offset value corresponding to the radar site height and available in the application .xml configuration file for products display (this parameter can be configured by the Radar settings at the “radar heights” entry see para. 4.5.3) LAT Macro returning the radar site latitude available in the application .xml configuration file for products display (this parameter can be configured by the Radar settings at the “lat radar site” entry see para. 4.5.3) LON Macro returning the radar site longitude available in the application .xml configuration file for products display (this parameter can be configured by the Radar settings at the “lat radar site” entry see para. 4.5.3) ELDES Page 70 of 118 Proprietary Information Document code: OM-11242-10-01 WR-10X User Manual Server Trigonometric functions accept angles expressed in degrees. Macros including square brackets need an argument to put in them. The argument can be a number or a function. For example the following syntax: SQRT[SIN[45+AZIMUTH]+OFFSET] Where AZIMUTH = 30° and OFFSET = 0.4 Km, return the value: To explain the syntax to be used for the tooltip composition, the value included in the default field, together with the PPI product will be examined as follows: Distance: |DISTANCE| Km;Height: |DISTANCE * SIN[VARIABLE] + OFFSET| Km;Azimuth: |AZIMUTH|°;Elevation: |VARIABLE|°;Reflectivity: |IMGINFO| dBz Text highlighted in RED represents an arbitrary text intended to exhaustively describe the subsequent quantity; for the tooltip syntax this is an optional field. Text highlighted in YELLOW represents an arbitrary description, identifying the unit of measure of the quantity that comes first; for the tooltip syntax this is an optional field. All that is included between the symbol ‘|’ is considered by the system as a formula, which can be composed of MACROS, numbers and mathematical operators. Each expressed quantity must be separated by a semicolon (‘;’). The graphic representation resulting from this, displayed as tooltip of the product selected in the DataView application, is the following: Fig. 3-42 Tooltip Document code: OM-11242-10-01 ELDES Proprietary Information Page 71 of 118 WR-10X User Manual Server 3.6 DataAcq buttons description The following buttons appear under the DataAcq window: Save and Exit: saves the changing done and closes the application. Save: saves the changing done. Exit: closes the application. Save profile: saves the configuration profile displayed at that moment in a file having a wpf extension and whose name is specified by the user. Load profile: loads the profile from a wpf file specified by the user, replacing it to the configuration displayed at that moment. Start selected scan: immediately starts the running of the active scan. Fig. 3-43 DataAcq buttons Note Start selected scan appears only if the Scan window is selected. ELDES Page 72 of 118 Proprietary Information Document code: OM-11242-10-01 WR-10X User Manual Server 3.7 Color scale The color scale used by each product is specified through a proper configuration file, available in \WR-10X\Bin\Colortbl and called “colortbl_<product acronym>.txt”, in which <product acronym> is an abbreviation composed of three letters, indicating a specific type of product; ex. PPI. This file allows to specify a map of 225 colors max., each of which is defined by a RGB level. The following figure shows an example of a possible color table, which can be displayed by any kind of text editor. Fig. 3-44 Example of color map The first column is a sequential number, the second column specifies the limits of the size to be displayed (reflectivity limits (dBZ) for the PPI product) in which the color specified in the subsequent columns is used. Columns 3, 4, and 5 show, respectively, the R, G and B levels of the color specified for each reflectivity range. As regards to reflectivity values equal to 46 dBZ, in the example of the figure, the color used is 021 defined by the following levels: R=255, G=81, B=34. Each color is coded on 3 x 255 levels. In the Colortable composition the following conditions must be observed: Hold the black (R=0, G=0, B=0) on the first line. Do not use the reserved combination R=242, G=0, B=0 in the scale definition. The lines total number must be equal to (multiple of 8)+1 (9,17,25,33…). Document code: OM-11242-10-01 ELDES Proprietary Information Page 73 of 118 WR-10X User Manual Server 4. Folders structure A short description of the structure related to folders included in the software is given below. The syntax with which files are named and their function will also be described. ELDES application, in server version, creates a compressed .cab archive for each active scan execution. The file is temporarily put in a proper FTP space, external to the server, or if an external FTP area is not available, the file is written on the server machine in C:\inetpub\ftproot\WR10X or in a shared folder. The .cab file follows the nomenclature described below: rnn-yyyymmddhhmm.cab where: rnn, is an identifier univocal for the radar inside a possible network. In particular “r” is the letter within the A-Z range identifying the radar network, while “nn” is a number within the 00-99 range identifying the specific radar inside the network. yyyymmddhhmm, shows the reference date in UTC format of the .cab file. The format used in this case has the following order: year, month, day, hour, minute. The .cab file includes four types of files: rnn-yyyymmddhhmm.Scan DataAcq.xml PPI-rnn-yyyymmddhhmm -B-RRRR-rrrr-aaaa-EEEE-C.z PPI-rnn-yyyymmddhhmm -B-RRRR-rrrr-aaaa-EEEE-U.z RHI-rnn-yyyymmddhhmm -B-RRRR-rrrr-eeee-AAAA-C.z RHI-rnn-yyyymmddhhmm -B-RRRR-rrrr-eeee-AAAA-U.z The Scan file is a text file only including a string specifying the name of the active “scan”; information included in the file name is the same information for the .cab file described above. “Scan” means a series of settings configured and stored in ELDES control and management environment which can be called by the scheduling or instantaneous execution mode. The .xml file is the current configuration file annexed by the server application to the compressed data package transmitted to a FTP space or a shared folder and used by the client application to realign the local settings display with the remote settings. The .z files are binary and include information related to the scan, here described: RRRR: is the range expressed in hundreds of meters; rrrr: is the range resolution expressed in meters; aaaa: is the azimuth resolution expressed in tenths of degree; EEEE: is the elevation value expressed in tenths of degree; eeee: is the elevation resolution expressed in tenths of degree; AAAA: is the azimuth value expressed in tenths of degree. For example about PPI, the files indicate that the scan has been run at a “EEEE” elevation and “aaaa” azimuth resolution, with a “RRRR” range and “rrrr” range resolution, from the “rnn” radar at the “yyyymmddhhmm” scheduled date. ELDES Page 74 of 118 Proprietary Information Document code: OM-11242-10-01 WR-10X User Manual Server The PPI and RHI acronyms indicate the products with the same name. “C” or “U” sections show de-cluttered and non de-cluttered data respectively. The folder C:\Program Files\WR-10X here is shown: Fig. 4-1 Folders structure The DataFile folder includes 4 folders named DATA , PPI , RHI , RAW. In the SERVER version, .z and .scan files are archived in the DATA folder while the compressed version intended for the Client is momentarily put in the FTP space as above mentioned. It is important to specify that the .z binary file C type, decluttered , and U type files, non decluttered, are ALWAYS included in the .CAB file. The Client will choose which file to use for the display. The generated graphic products files are put in the PPI and RHI folders. These can be JPEG , TIF , BMP , GIF , PNG type according to the configuration chosen (see par. 3.1.6.) and if the products generation has been enabled. On the contrary, the so called “raw” files, that is to say not processed which can be saved in .r or .txt format, are put in the RAW folder. The name syntax for these files is similar to the above mentioned one. The SERVER version has an additional folder named ToSendFile in which .cab files (compressed) are stored when it has not been possible to establish a connection with the FTP site. Once the connection has been restored, all files stored in this folder are downloaded in the FTP space and ToSendFile folder is emptied. As regards the archives management, the system is structured as follows: according to the settings specified for the archiving function, the operation is automatically activated once a day, starting from the fixed hour up to the complete archiving of all products files older than N days from the current date. The product files are archived in the proper C:\Programs\WR-10X\Archive folder inside a structure of sub-folders with a three level hierarchy, year, month and day. Fig. 4-2 Folders structure Document code: OM-11242-10-01 ELDES Proprietary Information Page 75 of 118 WR-10X User Manual Server If, for example, the test schedules requests are launched for 3 days from February the 1st 2008, and with N=1, the folders structure included in C:\Programs\WR-10X\Archive\PPI at 00.00 of February the 3rd will appear as shown in the figure. According to the options which have been chosen, the archiving system will take files from the DataFile directory, the related sub-folders and it will archive them in the Archive folder, according to the above mentioned logic. Files which can be archived are: graphic product files, .Z files (binary type),.SCAN files, RAW files both .r and .txt. The BIN folder is structured as follows: Fig. 4-3 Folders structure Inside the LogFiles folder it is possible to display ALL the LOG files described in the previous chapters. ELDES Page 76 of 118 Proprietary Information Document code: OM-11242-10-01 WR-10X User Manual Server 5. Display The DataView software package allows to display data. To launch the software, click on DataView link icon select from the menu Start → WR-10X → →DataView. created on the desktop, or Once the program has been launched, the Fig. 5-1 will appear: Fig. 5-1 DataView Main screen Note The chapter describes the application for the WR-10X full configuration; for the WR10X-CE the RHI product is not displayed Document code: OM-11242-10-01 ELDES Proprietary Information Page 77 of 118 WR-10X User Manual Server The Radars and Products and Settings side sections can be set in order to automatically disappear when they are not used, or they can be blocked in order to have them always available. The button turned down indicates that the section is blocked, the left indicates that the section will automatically disappear. button turned The width of the side sections sizes can be modified putting the cursor over their edge; they can also be placed anywhere in the main window, or it is possible to leave them floating in any area of the screen; all this is possible holding the left mouse button on the title bar of the section and dragging it in the desired area. The whole window can be resized and if necessary expanded to full screen. Fig. 5-2 Sections manual resize The Radars and Products section shows the list of products which have been configured in the system only relating to the PC controlled radar (Server version allows to display only products related to the local radar while the Client version allows to display products related to different radars and composite products). The Settings section is composed of the following sub-sections: Work mode Map settings Products filter described in the following paragraphs. ELDES Page 78 of 118 Proprietary Information Document code: OM-11242-10-01 WR-10X User Manual Server 5.1 Work mode The Work mode section allows to select and set one of the four possible display mode related to radar images: Automatic selection allows to set a number of frames to be sequentially displayed, within 1 and 50. To set the number of frames, click with the mouse on the bar and drag it until the desired number is displayed in the related box. Frames are selected in order to show one after another a buffer of the last n images dynamically updated each time a new image is produced by the system and saved in the DataFiles folder. Fig. 5-3 Automatic selection Last date selection allows to select a date from which all images available in the DataFiles folder are displayed one after another. To select the date it is possible to manually enter it in the From field, or it is sufficient to click on the arrow; it will appear a calendar from which it will be possible to make the selection. Clicking on Today the current date will be automatically entered, while clicking on Clear the field will be removed. Fig. 5-4 Last date selection Document code: OM-11242-10-01 ELDES Proprietary Information Page 79 of 118 WR-10X User Manual Server Interval date selection allows to select a couple of Date/hour in which all images available in the DataFiles folder will be selected. The date choice is similar to that related to the Last date selection above mentioned. Hour must be manually entered. Fig. 5-5 Interval date selection Manual selection allows to specify a series of customized paths in which it will be possible to find the products images to display. The path of the Archive folder is set by default without the possibility to be removed or changed. From here it is possible to display all data which have been archived in the system. Clicking the right mouse button with the pointer inside the list including the paths, a menu will be displayed. This will allow the user to add or remove a path. To specify the path that must be considered for the images search, it is necessary to enable the related radio button. Fig. 5-6 Manual selection 5.2 Map Settings The Map settings sub-section allows to manage the layers which have to be integrated with the different products images. The Radar Image layer is the radar processing and cannot be changed or deselected. An empty background image (map .bmp located in \WR-10X\Maps) and a polar mark for each range managed by the system (36Km and 72Km) are provided by default. The last cannot be changed. If it is intended to use a mark different from that provided by default, it will be sufficient to create a new layer enabling it in place of the one already existing. ELDES Page 80 of 118 Proprietary Information Document code: OM-11242-10-01 WR-10X User Manual Server The Fig. 5-7 shows an example of a display with the default polar mark and a customized background image. One of the four available image format can be selected for the display: Note It is important to consider the format of the generated files when selecting this option. This format is defined during the product configuration, see par. 3.1.6. If no file has been generated with the specified format, no image will be displayed. Fig. 5-7 Map settings Document code: OM-11242-10-01 ELDES Proprietary Information Page 81 of 118 WR-10X User Manual Server 5.2.1 Layers management In the Map Settings section it is possible to manage layer in a dynamic and flexible manner. All functions necessary to make maximum use of the graphic support are described in the following paragraphs. Fig. 5-8 Layers management All configured layers are included in the list. Note Each product of each radar has specific layers. Through the and buttons it is possible to move the selected layer upwards or downwards. The lower layer is the layer which will be positioned over any other image, while the first will be the layer which will be under all subsequent images. The button allows to remove the selected layer. ELDES Page 82 of 118 Proprietary Information Document code: OM-11242-10-01 WR-10X User Manual Server To add a new layer it will be sufficient to push the button. A window in which it will be possible to enter all the necessary information will appear, as shown in the following figure: Fig. 5-9 Layer addition/change The necessary information list is the following: Layer Name: indicates the name of the layer which will be displayed in the list. This must be univocal inside the product. Transparence: indicates the transparence color which has to be linked to layer images. It is possible to manually choose it, writing the RGB color, separating values through a semicolon, or choosing it among one of the available colors of the drop down menu which will be displayed clicking on the arrow. It is also possible to click on the button with the symbol of a phial ; in this way, a window will appear (see Fig. 5-12) showing the image related to the Path previously selected. Moving the cursor on the image, the RGB color related to the pointed pixel will be specified. Clicking once with the left mouse button the window will close and the color chosen will be specified in the Transparence field. If it is not intended to apply any transparence it is sufficient to leave the field empty. Layer paths: in this table it is possible to specify the path in which the specific image for the selected range has to be placed. According to the range modification in the Products filter section, the image related to this range will be displayed. To create the link it is necessary to click on the button in the Path column and the files search screen will appear, with a filter set in order to detect only those files having compatible extensions to be managed in the system. Document code: OM-11242-10-01 ELDES Proprietary Information Page 83 of 118 WR-10X User Manual Server Fig. 5-10 Layer Preview Once all values have been entered in the related fields click on the Save button to save the new layer, adding it to the list. To modify an existing layer click on the mentioned for the layer adding. button and follow the same procedures ELDES Page 84 of 118 Proprietary Information Document code: OM-11242-10-01 WR-10X User Manual Server 5.3 Products filter The Products filter section allows to choose the display type between: Display of images generated through clutter filter application, putting a flag on the Without clutter option. Display of images generated without clutter filter application, putting a flag on the With clutter option. The Range drop down menu displays all range values related to the available radars in the system. After selecting one of these the related layer image is displayed. The drop down menu below the Range, whose name can be changed, and which can be configured in the Registration section related to the involved product, displays sizes and the related image; in the example shown in the following figure the size is expressed as elevation in tenths of degrees. If this control is disabled deselecting the proper check box, the images movie-loop will show a time sequence of the product apart from the content of the variable field. Fig. 5-11 Products filter Document code: OM-11242-10-01 ELDES Proprietary Information Page 85 of 118 WR-10X User Manual Server 5.4 Commands on displayed image During the images display, in the central window, it is possible to make some operations: Images play (movie-loop); Movie-loop reproduction stop; Movie-loop pause; Manually move to the following or previous image; Move to the first or the last available image. Controls which are below player commands allow to modify, respectively, the update speed of the movie-loop frames from 10ms min. to 1000ms max. and the time between the end of a loop and the beginning of the next one. Fig. 5-12 Control bar The progress bar which is below shows the movie-loop progress; the file name which is currently being processed is shown in the read-only text box next to it. The representation of colors used by the displayed product image is placed on the control bar side. Moving the bars the color related to its position in the displayed image is removed. The purpose is to highlight the centers or the end of the disturbance characterized by a lower reflectivity. Fig. 5-13 Color management bar Clicking with the left mouse button on the displayed image, information related to the image itself will be shown through a tooltip. The displayed descriptions can be configured in the Registration section related to DataAcq application at the Tooltip entry. It is also possible to carry out a recursive zoom on the displayed image enabling the related entry in the Tools menu, moving, holding the left mouse button, squaring the desired portion. Two example figures are shown in the following. ELDES Page 86 of 118 Proprietary Information Document code: OM-11242-10-01 WR-10X User Manual Server Fig. 5-14 Display with tooltip Fig. 5-15 Display with zoom Document code: OM-11242-10-01 ELDES Proprietary Information Page 87 of 118 WR-10X User Manual Server 5.5 Menu Bar The menu bar includes the following entries: File View Settings Utility Tools At first start-up of the display software it will be necessary to configure the controls reset. In order to accomplish this it will be necessary to click with the right mouse button on the menu bar at the right top side of the DataView window in order to make the Customize… control available. The Customize… control gives a proper configuration window in which also the Options tab is available and from which it is possible to have access to the Reset my usage data button. Clicking on this button, controls available in the menus included in the DataView control bar take the installation settings. This operation is absolutely necessary if during the installation a preexisting installation update has been configured. ELDES Page 88 of 118 Proprietary Information Document code: OM-11242-10-01 WR-10X User Manual Server 5.5.1 File Selecting File from the menu bar, two choices are available: Exit: to exit from the viewer; Image management: for the current image formatting in a proper print preview (or saving in a different graphic format), for further details refer to par. 5.5.1.1. 5.5.1.1 Image management Selecting File → Image management a window, as shown in the following figure, will appear: Fig. 5-16 Image management Document code: OM-11242-10-01 ELDES Proprietary Information Page 89 of 118 WR-10X User Manual Server File Menu Selecting File from the menu bar of the Preview window, the following options will be available: Fig. 5-17 Preview –File menu Page Setup… This opens a page setting window typical of Windows, in which it is possible to set format, alignment (horizontal – vertical), printer trays and the page layout. Print… This opens the print window typical of Windows, in which it is possible to select printer, pages and number of copies. Print Prints the document directly. Export Document… This allows to select the format in which image is intended to be exported, the possible choices are: PDF, HTML, Text, CSV, MHT, Excel, Rich Text, Graphic. Selecting each of this entries, a window allowing to set the related parameters before exporting will appear. Fig. 5-18 Preview – export format ELDES Page 90 of 118 Proprietary Information Document code: OM-11242-10-01 WR-10X User Manual Server Send via E-Mail… This allows to select the format in which the image is to be exported, in order to be able to send it via e-mail. Possible choices are PDF, Text, CSV, MHT, Excel, Rich Text, Graphic. Selecting each of this entries, a window allowing to set the related parameters will appear, then Outlook will automatically be opened together with a pre-set e-mail with the exported document attached. Fig. 5-19 E- mail format Exit Closes the Preview window. View Selecting View from the menu bar of the Preview window, options shown in the following figure will be available. These have different controls related to the page display settings for printing. Fig. 5-20 Preview –View menu Putting a flag on Toolbar and Status Bar entries, these will allow to display, respectively, the toolbar (at the top of the window below menus) and the status bar (at the bottom of the window below the image). Document code: OM-11242-10-01 ELDES Proprietary Information Page 91 of 118 WR-10X User Manual Server Customize… Selecting Customize the window that appears is the same window which is possible to display clicking with the right mouse button on DataView menu bar. This allows to customize the Preview window toolbar. The Customization window is divided into three sub-folders: Toolbars, Commands and Options. Toolbars allows to customize the toolbar, Toolbar and Status Bar options are equal to the same options in the View entry. Main Menu option is always enabled. Fig. 5-21 Customize – Toolbars Clicking on the New button, a window, related to the creation of a new customization whose name can be chosen, appears. Fig. 5-22 New Toolbar Once the customization window has been created, this will appear together with the above described entries. ELDES Page 92 of 118 Proprietary Information Document code: OM-11242-10-01 WR-10X User Manual Server Fig. 5-23 New customization The new customization can be removed clicking on the Delete button, or it can be renamed clicking on the Rename button. Any possible change made to the new customization can be undone clicking on the Reset button. Commands folder is shown in the following figure: Fig. 5-24 Customize – Commands Options folder allows to set further options concerning the display. Document code: OM-11242-10-01 ELDES Proprietary Information Page 93 of 118 WR-10X User Manual Server Fig. 5-25 Customize – Options Putting a flag on the Large icons option the menu bar icons will be displayed in a larger size. Fig. 5-26 Large icons If it has been put a flag on the Show Screen Tips on toolbar option, holding the mouse pointed on a menu bar icon a message showing the function related to the icon will appear. Fig. 5-27 Icons description Finally, clicking on Menu animations it is possible to choose how to animate drop down menus appearing in the Preview window. Possible choices are shown in the following figure: Fig. 5-28 Menu Animations ELDES Page 94 of 118 Proprietary Information Document code: OM-11242-10-01 WR-10X User Manual Server Background From the Background menu it is possible to select the image background color selecting Color… Fig. 5-29 Background It is possible to choose the color among three different groups: Custom, Web, System. Selecting Watermark… entry it is possible to make a writing (Text Watermark folder) and/or an image (Picture Watermark folder) appear on the background. Different options for the image/text customization are available for each folder. Fig. 5-30 Background text As regards the text (to be entered in the Text field) it is possible to choose: font, size, color, transparency, type of inclination. Document code: OM-11242-10-01 ELDES Proprietary Information Page 95 of 118 WR-10X User Manual Server Fig. 5-31 Background image As regards the image, which has to be inserted exploring the PC hard disk after clicking on Load image…, it is possible to choose: position in the page, alignment, transparency, etc. It is possible to choose, for both text and image, which pages the background text and/or image have to appear on (Page Range options). Toolbar Icons Icons displayed on the toolbar can be modified putting a flag on options related to the buttons which it is intended to display, as shown in the following figure: Fig. 5-32 Toolbar customization ELDES Page 96 of 118 Proprietary Information Document code: OM-11242-10-01 WR-10X User Manual Server The meaning of all icons which can be displayed are shortly described in the following figure: Fig. 5-33 Toolbar icons The Search icon allows to open the Find window in which it is possible to enter a text to be searched in the document. Fig. 5-34 Find The hand tool allows to move the document dragging and dropping it. For all other buttons refer to the above described menus. 5.5.2 View Selecting View from the menu bar the following entries will be available: Browser Radars and Products: shows or hides the Radars and Products section, exactly the same as clicking on the button. Off line Radars: shows in the Radars and Products section also those radars which, during the configuration alignment procedure between Server and Client, are not updated; in this way it is possible to go on seeing the products images generated by the involved radar. This option makes sense only in a Client system. Common Products View: enables or disables the common setting imposition for all products according to what is specified in the proper configuration window accessible from the Setting menu. Document code: OM-11242-10-01 ELDES Proprietary Information Page 97 of 118 WR-10X User Manual Server 5.5.3 Settings Selecting Settings from the menu bar the following entries are available: Radar site: opens a window in which it is possible to enter the radar site altitude, expressed in meters, latitude and longitude, expressed in degrees. Fig. 5-35 Radar site settings Product view: opens a window in which it is possible to configure two sections. The first section allows to choose if the settings related to a first level product (product) among those registered and so available in the proper drop down menu have to be applied to all other first level products. The second section allows to choose if the settings related to a second level product (derived product) among those registered and so available in the proper drop down menu have to be applied to all other second level products. The server type installation does not manage second level products so in this case the second section does not have any effect. Fig. 5-36 Product view settings ELDES Page 98 of 118 Proprietary Information Document code: OM-11242-10-01 WR-10X User Manual Server 5.5.4 Utility Selecting Utility from the menu bar the following choices will be available: Map Creator: starts the application allowing the background maps creation which can be used as layer. Mark Creator: starts the application allowing the polar marks creation which can be used as layer. Layer Creator: starts the application which allows georeferenced layer creation of different type. 5.5.4.1 Map Creator Map Creator is an application intended for layer creation of Background Mark. The following figure shows the configuration interface related to this application: Fig. 5-37 Map Creator - Interface The SET control allows to determine the name, the graphical format and the path of the Background Map file to generate. The GEOREF. CONTROL controls allow to find the path of the georeferentiation and data conversion files necessary for the Background Map files beginning from the not georeferenced cartographic database possibly included in the software package. Document code: OM-11242-10-01 ELDES Proprietary Information Page 99 of 118 WR-10X User Manual Server The default name related to the georeferentiation and data conversion files (possibly included in the software package) are automatically specified in the GEOREFERENTIATION FILE and GEOREF DATA CONVERSION FILE text boxes. The default search path for both files above mentioned is the following: ..\ Cartografia_Italia and can be specified through the FIND controls (the Cartografia_Italia folder is an example which marks the location of the not georeferenced cartographic database possibly included in the software package). The DEG MODE and DMS MODE controls, together with the related text boxes allow to edit the coordinates of the map centre (LAT LON coordinates of the radar site) respectively in the decimal degrees and degrees minutes and seconds formats. The RANGE control allows to specify, through the proper text box, the range of the Background Map to generate expressed in [Km]. The OFFSET CONTROL allows to correct possible georeferentiation errors in the Background Map preview to generate, applying to the map centre, the offsets specified in the proper text boxes along x and y axes (offset expressed in pixel). Only after having configured all the parameters necessary to the generation of the Background Map the interface makes available the DRAW button. Clicking on the DRAW button, a map preview generation algorithm is activated at the end of which the map will be displayed in the proper preview window. The following figure shows this situation: Fig. 5-38 Map Creator - Preview ELDES Page 100 of 118 Proprietary Information Document code: OM-11242-10-01 WR-10X User Manual Server At the end of the DRAW procedure, the IMAGE DIMENSION and IMAGE TYPE controls, besides the SAVE button, are made available on the interface. IMAGE DIMENSION allows to specify the size expressed in pixel of the image to generate (square image). IMAGE TYPE allows to specify if the image should be generated in Truecolor mode (that is to say, with all colors shown in the preview window) or in Grayscale mode (that is to say in a scale of grays). The following figure shows the image version displayed in the preview window generated in Grayscale. In this situation it is possible to change again the parameters of the map to generate and display a new preview of the Background Map clicking on the SAVE button. Fig. 5-39 Map Creator – Grayscale Mode The EXIT button allows to close the interface at any time provided that the routines related to the preview generation and the map generation in graphical format are not running. 5.5.4.2 Mark Creator Mark Creator is an application intended for the creation of marks necessary for the localization in polar coordinates of radar images. The following figure shows the application configuration interface. Document code: OM-11242-10-01 ELDES Proprietary Information Page 101 of 118 WR-10X User Manual Server Fig. 5-40 Mark Creator – Interface The SET control allows to specify name, format and path of the graphic file to generate. The RANGE control allows to specify through a proper text box the radial size of the polar mark to generate expressed in [Km]. The TICKS NUMBERS control allows to specify through a proper text box the number of concentric circles (and related labels) which must be displayed in the polar mark. Clicking on the DRAW button the generation routine of the preview will be activated. At the end of the generation routine the polar mark is represented in the proper window. The following figure shows the preview generated by the application for a range of 72 Km and for 12 Ticks. Fig. 5-41 Mark Creator – Preview ELDES Page 102 of 118 Proprietary Information Document code: OM-11242-10-01 WR-10X User Manual Server Only at the end of the preview generation routine the application make the SAVE button available on the graphic interface. Clicking on this button the graphic file will be actually generated. 5.5.4.3 Layer Creator Layer Creator is an application intended for the georeferenced layer creation of different type. A proper interface allows the application configuration before proceeding with the layer generation. The following figure shows the application configuration interface. Fig. 5-42 Layer Creator – Preview From the application configuration interface it is possible to generate georeferenced layers for the single radar or for the mosaic of several radars. Two proper sections allow to specify the necessary parameters in both cases. In case of mosaic of several radars it is necessary to specify four parameters related to the minimum latitudes and longitudes and to the maximum latitudes and longitudes of the geographical area covered by the mosaic. In case of single radar it is necessary to specify three parameters related to the latitude and longitude of the radar site and to the range expressed in Km for which the layers generation is required. Document code: OM-11242-10-01 ELDES Proprietary Information Page 103 of 118 WR-10X User Manual Server The LAYER SELECTION section allows to define the layers types to generate previews or images. The following choices are available: DEM Data: this layer represents, through a color scale which can be set by the user, the altimetry of the involved geographic area. Nations Bound: this layer represents the boundaries of nations included in the involved geographical area. Regions Bound: this layer represents the boundaries of regions included in the involved geographical area Provinces Bound: this layer represents the boundaries of provinces included in the involved geographical area. Municipalities Bound: this layer represents the boundaries of municipalities included in the involved geographical area. Cities: this layer represents the main cities included in the involved geographical area thresholded according to a configurable inhabitants number. Rivers: this layer represents the main rivers included in the involved geographical area. All Layer: this option disables all other options and imposes the generation in preview mode of all seven layers described above for the involved geographical area. Roads and Rails options cannot be selected and are pre-settings for future updates. The GEOREF. CONTROL section allows to specify the path including the archive of geographical information used by the application for layers generation. The default path is the following: .. D:\WR-10X\Bin\CARTOGRAPHY Once all controls, necessary for the layers generation, have been configured, the application makes the DRAW button available. ELDES Page 104 of 118 Proprietary Information Document code: OM-11242-10-01 WR-10X User Manual Server The following figure shows a map displayed in preview mode in the interface graphic window: Fig. 5-43 Layer Creator – Preview When the preview image is available in the interface graphic window, also the IMAGE TYPE and IMAGE DIMENSION controls as well as the SAVE button, are enabled. The IMAGE TYPE control allows to select the type of color of images which can be saved in the different layers from those displayed in the interface graphic window. The possible choices are TRUECOLOR and GRAYSCALE. The IMAGE DIMENSION allows to set sizes expressed in pixels of the layers images to save in graphic format. Possible choices are in this case 480x480, 640x640, 820x820, 1024x1024. Layers can be saved in GIF, TIFF, PNG, BMP graphic formats clicking on the SET button. The following figure shows the definition window of the path and the layer name: Document code: OM-11242-10-01 ELDES Proprietary Information Page 105 of 118 WR-10X User Manual Server Fig. 5-44 Layer Creator – Layer name selection mask Clicking again on the SAVE button, a graphic file will be generated for each selected layer and the name of the single layer is created attaching a layer-type description to the name specified by the user. Settings shown in the previous figure generate the following files: In the application menu bar two choices are available, VIEWER and UTILITY. VIEWER enables the preview window display, UTILITY allows to have access to the PREFERENCES window. The following figure shows the PREFERENCES window: ELDES Page 106 of 118 Proprietary Information Document code: OM-11242-10-01 WR-10X User Manual Server Fig. 5-45 Layer Creator – PREFERENCES window From the PREFERENCES window it is possible to define options for all types of layers managed by the application. Except for the DEM and CITIES layers, which have additional options available, for all other layers it is possible to select the line color and the line width. As regards the CITIES layer it is possible to select the character color (char. color) and the characters width (char. width) and the type of the city to display (cities type). The cities type control makes cities (capital of the province) and cities & town (main cities and towns) options available; the second choice enables a control intended for the setting of a threshold related to the number of inhabitance (town population). Below a specified number, cities will not be displayed. The Binary File Generation option is not used. Document code: OM-11242-10-01 ELDES Proprietary Information Page 107 of 118 WR-10X User Manual Server As regards the DEM layer it is possible to specify, in RGB format, edges of the chromatic scale used to represent altimetry on the ground (G_IN, G_OUT) and edges of the chromatic scale used to represent depths of the sea areas (S_IN, S_OUT). Usually it is preferred to use, as regards the sea representation, only one color; in this case S_IN = S_OUT must be imposed. Colors can be selected using the proper SETCOLOR controls: In particular, it is possible to select a color from the preset palette applying it clicking on the OK button or it is possible to have access to an advanced mode clicking on the DEFINE CUSTOMIZED COLORS button. In this case, it is possible to select with the mouse a color from the palette on the right side of the window, add it to the customized colors clicking on the ADD TO CUSTOMIZED COLORS button, select it among the customized colors and finally apply it clicking on the OK button. The GENERAL section allows to select from the proper control the referenced nation for which the boundaries .BND file will define the dataset of the neighboring nations possibly involved in case of generation of layers centered on geographical position close to the referenced nation boundaries. ELDES Page 108 of 118 Proprietary Information Document code: OM-11242-10-01 WR-10X User Manual Server 5.5.5 Tool Selecting Tool from the menu bar, it is only possible to choose Zoom. Expanding it, it will be possible to have access to other entries, such as Enable Zoom (or the shortcut CTRL+Z), which enables the Zoom function of the displayed image. Area to zoom is selected with a rectangle on the image and can be done in a recursive way. “Zoom In” (or the shortcut +) “Zoom Out” (or the shortcut -) controls allow to scale respectively, forward or back a zoom level. The image zoom can be done with both a steady image, and during the movie-loop. The following figures are an example of the zoom function. Fig. 5-46 Zoom image – example 1 Document code: OM-11242-10-01 ELDES Proprietary Information Page 109 of 118 WR-10X User Manual Server Fig. 5-47 Zoom image – example 2 6. Clutter areas display It is possible to display in the DataView also the cells which included clutters and that the signal processing removed during the images de-clutter. In order to accomplish this, it is necessary to modify the colortbl_PPI.txt file or the colortbl_RHI.txt file according to the product on which it is intended to activate the function. Both files can be found in the C:\Program Files\WR-10X\Bin\Colortbl path. A modified color table example is shown in the following figure: 000 001 002 003 004 -99.0 -31.5 -25.0 -20.0 -15.0 000 208 0 8 24 000 208 16 120 120 000 208 176 255 255 Fig. 6-1 Modified Color table It will be sufficient to modify the 001 line entering values as shown in the figure, the result will be that cells including clutters will be displayed in gray color, besides the usual display of cells including weather signals. ELDES Page 110 of 118 Proprietary Information Document code: OM-11242-10-01 WR-10X User Manual Server 7. Clutter Map Verification This chapter describes the software application tool for the Clutter map verification. This tool allows to generate images corresponding to the clutter map. To execute the tool, on the provided installation CD, select the ..\Tools folder and launch the GeneratoreMappeClutter.exe file. The application asks for the input folder: select the ..\WR-10X\Bin\CMap path on the folder installation software. The tool creates a graphic file image for each file binary file (clutter map) located in the CMap folder. The Fig. 7-1 shows an example of clutter map using the following acquisition data: Radar: A00 Range: 72 km Range resolution: 300 m Azimuth resolution: 3° Elevation: 1° Fig. 7-1 Clutter Map image example Document code: OM-11242-10-01 ELDES Proprietary Information Page 111 of 118 WR-10X User Manual Server 8. Additional Features For the Additional Features management it is not foreseen a software MMI. So, the Server operator has to carry out the related settings by means of the data entering in SignalProcessingConstructor.xml file. 8.1 Settable Functions in the SignalProcessingConstructor.xml file This group of functions can be set by the ..\WR10X\Bin\SignalProcessingConstructor.xml file modification; the default file configuration is reported in the following. <?xml version="1.0" ?> <InterferentRejection IntReject="0" DimFilter="3" LevelRejectThr="30"> </InterferentRejection> <ClutterMapMedianFilter CMAPMedFilt="0" CMAPDimFilter="3"> </ClutterMapMedianFilter> <PPIMedianFilter PPIMedFilt="0" PPIDimFilter="3"> </PPIMedianFilter> <RHIMedianFilter RHIMedFilt="0" RHIDimFilter="3"> </RHIMedianFilter> <NoiseDataCollection SaveNoiseData="0"> </ NoiseDataCollection > All the parameters meanings are explained in the following. 8.1.1 Interferent Rejection This section allows to enable and to set a filtering mode against interfering signals. Four modes are available by means of the “IntReject” parameter setting. IntReject=0; no one filter is applied. IntReject=1; one-dimensional MedianFilter applied on Azimuth axis related to RAW data. In this case, both the “DimFilter” and “LevelRejectThr” parameters are necessary in order to respectively define: dimension of the one-dimensional mask used in the filtering threshold (in levels) under which the filtering process will not apply The filter is locally applied only for range-gate for which the MedianFilter application introduces a level reduction greater or equal to “LevelRejectThr”. This kind of filtering is suitable for spikes suppression; an example of spike noise is shown in Fig. 8-1. ELDES Page 112 of 118 Proprietary Information Document code: OM-11242-10-01 WR-10X User Manual Server Fig. 8-1 Spike noise example It is recommended to set the “LevelRejectThr” value to 30 levels and decrease it until interfering signals are not present; in any case it is advisable to choose a “LevelRejectThr” value greater or equal to 20 levels in order to avoid weather signal suppression. Avoid to set the “DimFilter” parameter value = 5 in order to avoid to locally modify the intensity related to the observed weather phenomenon. The “DimFilter” parameter meaning, in case of Median Filter, is explained by the Fig. 8-2. Document code: OM-11242-10-01 ELDES Proprietary Information Page 113 of 118 WR-10X User Manual Server Fig. 8-2 “DimFilter” parameter meaning in case of MedianFilter IntReject=2; one-dimensional SpaceFilter applied on RAW data. In this case, only the “LevelRejectThr” parameter is used in order to define the threshold (in levels) under which the filtering process will not apply. The filter is locally applied only for range-gate for which the gap (in levels) between the azimuth current position and the adjacent one (lag1) is greater or equal to the “LevelRejectThr” value. This kind of filtering is suitable for suppression of radar-to-radar interfering signals if: the interfering signal PRF value is far from WR-10X PRF value; ELDES Page 114 of 118 Proprietary Information Document code: OM-11242-10-01 WR-10X User Manual Server the interfering signal PRF value is very quickly variable between two PRF near values. An example related to this filtering application is reported in Fig. 8-3 and the meaning of lag1 - lag1 and lag2 SpaceFilter is reported in Fig. 8-4. Fig. 8-3 Radar-to-radar noise suppression It is recommended to set the “LevelRejectThr” value to 30 levels and decrease it until interfering signals are not present; in any case it is advisable to choose a “LevelRejectThr” value greater or equal to 20 levels in order to avoid weather signal suppression. The “Lag1-Lag1 and Lag2 SpaceFilter meaning is explained in Fig. 8-4. Document code: OM-11242-10-01 ELDES Proprietary Information Page 115 of 118 WR-10X User Manual Server Fig. 8-4 “Lag1-Lag1 and Lag2 SpaceFilter meaning IntReject=3; one-dimensional SpaceFilter applied on RAW data. In this case, only the “LevelRejectThr” parameter is used in order to define the threshold (in levels) under which the filtering process will not apply. The filter is locally applied only for range-gate for which the gap (in levels) related the azimuth current position and the two adjacent ones (lag1 and lag2) is greater or equal to the “LevelRejectThr” value. This kind of filtering is suitable for suppression of radar-to-radar interfering signals having a very quickly variable PRF value among three PRF near values. ELDES Page 116 of 118 Proprietary Information Document code: OM-11242-10-01 WR-10X User Manual Server It is recommended to set the “LevelRejectThr” value to 30 levels and decrease it until interfering signals are not present; in any case it is advisable to choose a “LevelRejectThr” value greater or equal to 20 levels in order to avoid weather signal suppression. 8.1.2 ClutterMapMedianFilter This section allows to enable and to set a median filter on the clutter maps generated during the radar operation. By means of the “CMAPMedFilt” it is possible to select two modes: CMAPMedFilt=0; no one filter is applied. CMAPMedFilt=1; two-dimensional Median Filter applied on the clutter maps In this case, only the “CMAPDimFilter” parameter is used in order to define the dimension of the square mask that is used during the filtering. Generally, it is not necessary to activate this function; this function is dedicated to extreme cases where the various functions applied to remove the noise spikes don’t get the desiderated results or rather, the clutter maps (viewable by means of the sw application “GeneratoreMappeClutter.exe”) are still too noised. The “CMAPDimFilter” parameter is set to 3, for default; it is recommended to set the parameter not exceeding the value 5 in order to avoid to locally modify the intensity related to the observed weather phenomenon. 8.1.3 PPIMedianFilter This section allows to enable and to set a median filter to be applied to the matrix of integrated data (PPI-*.z) related to PPI acquisition. PPIMedFilt=0; no one filter is applied. PPIMedFilt=1; two-dimensional Median Filter applied on the matrix of integrated data (PPI-*.z). In this case, only the “PPIDimFilter” parameter is used in order to define the dimension of the square mask that is used during the filtering. Generally, it is advisable to activate this function in any case for the residual spikes suppression from the binary matrix that is used as input for the processing. The “PPIDimFilter” parameter is set to 3, for default; it is recommended to set the parameter not exceeding the value 5 in order to avoid to locally modify the intensity related to the observed weather phenomenon. 8.1.4 RHIMedianFilter This section allows to enable and to set a median filter to be applied to the matrix of integrated data (PPI-*.z) related to RHI acquisition. RHIMedFilt=0; no one filter is applied. RHIMedFilt=1; two-dimensional Median Filter applied on the matrix of integrated data (PPI-*.z). In this case, only the “RHIDimFilter” parameter is used in order to define the dimension of the square mask that is used during the filtering. Generally, in case of RHI acquisition it not necessary to apply this filter; it is recommended only in case of excessive residues on the image. Document code: OM-11242-10-01 ELDES Proprietary Information Page 117 of 118 WR-10X User Manual Server The “RHIDimFilter” parameter is set to 3, for default; it is recommended to set the parameter not exceeding the value 5 in order to avoid to locally modify the intensity related to the observed weather phenomenon. 8.1.5 NoiseDataCollection This section allows to enable the saving on disk of the noise data acquired during the schedule running. The files are saved in the folder ..\WR-10X\DataFiles\RAW; the data aren’t managed by the storing tool. Only for debug activity or for short time intervals it is recommended the use of this function. The stored file name format is: Noise_ggmmaaaahhmm_ss.mat For example the file “Noise_060220131457_53.mat”includes noise data of the day 06/02/2013 at time 14:57 and 53 seconds. The files are saved in .mat format importable without additional processing in Matlab software environment. For the format of the information related to the file, please refer to the RAW data description (see chapter 3.2.1); the format is the same. ELDES Page 118 of 118 Proprietary Information Document code: OM-11242-10-01