Download Guided Tour (Version 2) - Department of Electrical Engineering
Transcript
Guided Tour (Version 2)
By Steven Castellucci
This document was inspired by the Guided Tour written by Professor H. Roumani. His version of the tour can
be accessed at the following URL: http://www.cse.yorku.ca/~roumani/jbaYork/GuidedTour.pdf.
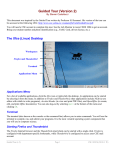
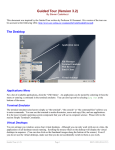
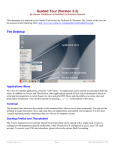
The Xfce (Linux) Desktop
Workspaces
Firefox and Thunderbird
Terminal
Applications Menu
Applications Menu
For a list of available applications, click the Xfce icon or right-click the desktop. An application can be started
by selecting it from the menu. In addition to Firefox and Thunderbird, other applications include NEdit (a text
editor with which to write programs), Acrobat Reader (to view and print PDF files), and OpenOffice (to create,
edit, and print Office documents). You can also log-out by selecting Quit at the bottom of the menu and
clicking OK.
Terminal
The terminal (also known as the console or the command-line) allows you to enter commands. You will use the
terminal to compile, run, and submit your programs. It is the most versatile operating system component that
you will use in computer science.
Starting Firefox and Thunderbird
The Firefox Internet browser and the Thunderbird email client can be started with a single click. Firefox is
configured with department-specific bookmarks, while Thunderbird is configured to access your CSE mail
account
Guided Tour (v.2)
Page 1
CSE 1020 M (2008-09 W)
Workspaces
The operating system’s desktop is where you can arrange your application windows. With Xfce, you can arrange
you windows across four (by default) virtual desktops (also known as workspaces). Although you can only
work with one at a time, the applications on all workspaces remain running.
To switch between workspaces, you can click on the thumbnail images. Alternatively, you can scroll the mouse
wheel on an empty portion of the desktop. Even if you do not use the extra workspaces, make sure that you do
not accidentally switch to them as you work.
Focusing with the Mouse
With Windows, you indicate the active window by clicking within it. The window remains active until you
minimize it or select another window. However, with Xfce, the active window is the one that contains the mouse
pointer. If you move your mouse pointer to another window, the new window becomes the active one.
For example, if you want to type a command in a terminal, you must first position your mouse within its
window. If, as you type, your mouse pointer moves outside of the terminal window, the terminal will not
receive your keystrokes.
Simple Commands
Command: pwd
Example: pwd
Description: Displays the current directory (a.k.a. working directory). The same output can be seen a terminal
window’s title bar.
Command: man command
Example: man submit
Description: Displays the user manual for the passed command. The user manual details the type and number
of arguments required by the command, and lists all the available command options. To scroll through the user
manual, press the spacebar. To exit the user manual, simply press the Q-key.
Command: mkdir dirName Example: mkdir eChecks
Description: Creates a subdirectory with the passed name in the current directory. The example creates a
subdirectory called “eChecks”.
Example 1: cd Example 2: cd ..
Example 3: cd mail
Command: cd dirName
Description: Without any argument (Example 1), this command changes the working directory to your home
directory (equivalent to the “My Documents” folder in Windows). With the argument “..” (Example 2), this
command changes the working directory to the parent directory. If you provide the name of a subdirectory as an
argument (Example 3), this command changes the working directory to be that subdirectory (e.g., the
subdirectory called “mail”).
Command: ls dirName
Example 1: ls Example 2: ls mail Example 3: ls *.txt
Description: Lists the contents of the directory specified by the argument. Without any arguments (Example 1),
this command lists the visible contents of the working directory. If the argument is a directory name
(Example 2), this command lists the visible contents of that directory (e.g., the subdirectory called “mail”).
Example 3 lists all files in the current directory that have a “.txt” extension. You can use the “*” wildcard to
search for files that match a pattern. There are many options for this command, such as “-a” to show hidden
files and “-l” to show file and directory details. Enter the command man ls for further details.
Guided Tour (v.2)
Page 2
CSE 1020 M (2008-09 W)
Command: rm fileOrDir Example 1: rm First.java
Example 2: rm –r eChecks
Description: Removes the file or directory indicated by the argument. The first example deletes the file
“First.java”. The second example (note the “-r” option) removes directory called “eChecks” and all of its
contents. Use this command with caution!
Command: cp orgnl cpy Example: cp First.java First_backup.java
Description: Copies the file orgnl to the location cpy. The example creates a copy of “First.java”, called
“First_backup.java”.
Command: mv old new
Example: mv First.java Second.java
Description: Moves the file old to the location new. This command can also be used to rename files. The
example renames “First.java” to “Second.java”.
Command: script log
Example: script A1_log.txt
Description: Records the commands and output generated at the terminal until exit is entered. The record is
written to a file, whose name is passed as an argument.
Auto-Completion and Command History
You do not have to type entire filenames or directory paths. Type the first couple of characters, followed by the
TAB key. The operating system will complete the rest of the name or path. If there are multiple matches, the
operating system will complete only the common portion. You will have to type additional characters to
identify the desired file or directory.
To repeat a command at a terminal, you can use the up- and down-arrow keys to cycle through commands you
previously entered. This can be very beneficial during labs and lab tests, as you will repeatedly compile and run
your program to test it.
Creating and Editing Text Files
To create and edit your programs in 1020, I recommend you use a text editor called NEdit. Other text editors are
installed on the system, such as Pico, Emacs, and Vim. However, NEdit is considered the most user-friendly. To
start NEdit, you can select it from the applications menu, or enter nedit & at a terminal. Optionally, you can
include a filename (e.g., nedit First.java &). If the file already exists, it will be opened automatically.
If not, the file will be created.
When testing a program, its content will be referenced by line number. Under the Preferences menu, click
on Default Settings, and then select Show Line Numbers. This will show the line numbers along
the left margin. Under the same Default Settings menu, select the option Show Matching (..) and
set it to ON. This will help you avoid putting too many or too few parenthesises in your code. Again under the
Preference menu, select Save Defaults and click OK. This will save your preferences.
Guided Tour (v.2)
Page 3
CSE 1020 M (2008-09 W)
Printing Files
Included in your course fee is a print quota of 500 pages. To display the number of pages remaining in your
quota, enter the command pquota at a terminal.
Typically, you can print an open file by selecting Print from the File menu. After you send the file to be
printed, go to any print station in room CSEB 1004 or 1006. Touch the screen to activate it. Enter your
username and password using the attached keyboard. Ensure that the files you want printed are selected, and
press the print icon in the bottom-left corner. To exit without printing, press the exit icon. If you experience any
printing problems, contact the lab monitor.
Creating a Java Program
Before you can run a Java program, you need to write its code, compile it, and correct any syntax errors. If you
have not yet done so, read the above section, “Creating and Editing Text Files”. Create a new text file named
First.java with the following content:
import java.util.Scanner;
import java.io.PrintStream;
public class First
{
public static void main(String[] args)
{
Scanner input = new Scanner(System.in);
PrintStream output = System.out;
output.println(“My name is ???”);
}
}
Replace “???” with your name. Save your program. Compile it by entering javac First.java at a
terminal (note the “c” in “javac”). The compiler will identify the type and location of any syntax errors.
Correct any errors in your code, save your changes, and recompile your code.
Enter java First at the terminal to run your program (do not type the “.java” extension). Your program
should output “My name is”, followed by your name.
Guided Tour (v.2)
Page 4
CSE 1020 M (2008-09 W)
Configuring eCheck
Your weekly lab assignments will take the form of “eChecks” – programs that are checked electronically. You
will learn more about eChecks in the textbook. However, you must first configure the eCheck program that
checks your code. Enter the command java Options at a terminal.
Uncheck “Work Offline”. Enter your username, password, and the following URL:
http://www.cse.yorku.ca/~roumani/type/ec/ec.cgi
Double-check that you entered the URL correctly. When you are finished, click Apply.
Submitting Assignments
I computer science courses, you will be required to submit assignments and lab tests. To do so, you will use the
submit command, which has the following structure:
submit course assignmentName yourFile1 yourFile2 ... yourFileN
For example:
submit 1020 A2 A2.java readme.txt
It is recommended that you submit your files early and often. Newer files overwrite those with the same name.
For more information, enter the command man submit at a terminal.
Assignment One
Your first assignment will test your ability to follow written instructions and to apply the information presented
in this document. This assignment assumes that you have configured eCheck, and created, compiled, and run
First.java as outline in the above sections “Configuring eCheck” and “Creating a Java Program”,
respectively. If you have not done so, please complete these tasks before proceeding.
Before you begin this assignment, ensure you can spend at least 20 minutes on it. This assignment is a relatively
short one, but it must be completed in one sitting. Before starting, read all the instructions and re-read this
document to address any questions you might have. Use only one terminal window. If you accidentally close
the terminal window, if your computer crashes, or if you would like to re-submit the assignment, see the section
below called “Starting Over”.
Guided Tour (v.2)
Page 5
CSE 1020 M (2008-09 W)
Follow these instructions in-order:
1. Log-in to a workstation in CSEB 1004 or 1006.
2. Open a terminal window.
3. Go to your home directory by entering the appropriate command at the terminal you just opened.
4. Enter the command script asgn1_log.txt (i.e., type the command, then press ENTER).
5. Enter the command pwd
6. Make a copy of the file First.java called Check01A.java
7. Make a subdirectory called asgn1 in your home directory.
8. Move the file Check01A.java (source) to the asgn1/ (destination) subdirectory.
9. Change the current directory to asgn1/
10. Open the file Check01A.java in a text editor.
11. Modify your program so that it only outputs one line: “My Account Number is ???”. Replace “???” with
your username. Remember to save your changes.
12. Compile the program Check01A.java at the terminal.
13. List the contents of your working directory. Check that there exists a file called Check01A.class
14. Run eCheck to test your program. Do so by entering java eCheck 01A at the terminal.
15. eCheck will indicate an error with your output. However, it will also tell you what your program
produced and what it expects as the correct answer. Make the appropriate modification to your code,
save the change, and run eCheck again with the previous command.
16. Repeat step 15 until eCheck states that your program “passed all tests”. Enter the command exit to
stop the script command.
17. Return to your home directory. List its contents. Check that you have a file called asgn1_log.txt
If you wish, you can view its contents by opening it in a text editor. However, do not make any
changes to the file.
18. Enter the following command to submit the file: submit 1020 A1 asgn1_log.txt
Congratulations, you have just finished your first 1020 assignment!
Starting Over
If your computer crashed, or you accidentally closed the terminal window, you might have to start Assignment
One from the beginning. If so, follow these instructions:
1. Enter cd at a terminal.
2. Then, enter rm –r asgn1 at the same terminal. For each file, enter y to confirm its deletion.
3. Repeat the section, “Assignment One”.
Guided Tour (v.2)
Page 6
CSE 1020 M (2008-09 W)


