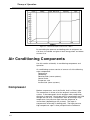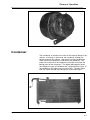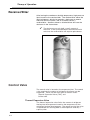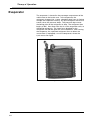
1
APPENDIX D
USER’S MANUAL
GENERAL
This appendix is for reference only. The (ZEEAC315A) version User’s Manuals are supplied for your
information or can be copied for the customer. Part numbers for the User’s Manual are as follows:
Snapon
ZEEAC315A
(Serial A) INCLUDED
Effective
01/2001
Page D-1
Safety Information
Safety Notice
For your safety, read this manual thoroughly before operating
KoolKare™ DiagnosTech™ system.
KoolKare™ DiagnosTech™ system is intended for use by
properly trained, skilled professional automotive technicians.
The safety messages presented below and throughout this
user's manual are reminders to the operator to exercise care
when using this unit.
There are many variations in procedures, techniques, tools, and
parts for servicing vehicles, as well as in the skill of the
individual doing the work. Because of the vast number of test
applications and variations in the products that can be tested
with this instrument, Snap-on® cannot possibly anticipate or
provide advice or safety messages to cover every situation. It is
the automotive technicians responsibility to be knowledgeable of
the system that is to be tested. It is essential to use proper
service methods and test procedures and to perform tests in an
appropriate and acceptable manner that does not endanger
your safety, the safety of others in the work area, or the vehicle
or equipment being tested.
It is assumed that the operator has a thorough understanding of
vehicle air conditioning systems before using KoolKare™
DiagnosTech™ system. This understanding of principles and
operating theories is necessary for competent, safe and
accurate use of this instrument.
Before using KoolKare™ DiagnosTech™ system, always refer
to and follow safety messages and applicable test procedures
provided by the manufacturer of the vehicle or equipment being
tested.
Read All Instructions
Read, understand and follow all safety messages and
instructions in this manual and on the test equipment. Safety
messages in this section of the manual contain a signal word
with a three-part message and, in some instances, an icon.
I
Safety Information
The signal word indicates the level of hazard in a situation.
• DANGER indicates an imminently hazardous situation which,
if not avoided, will result in death or serious injury to the
operator or bystanders.
• WARNING indicates a potentially hazardous situation which,
if not avoided, could result in death or serious injury to the
operator or bystanders.
• CAUTION indicates a potentially hazardous situation which, if
not avoided, may result in moderate or minor injury to the
operator or bystanders.
• IMPORTANT indicates a situation that may arise during
testing that could damage the vehicle or test equipment.
Safety messages in this section contain three different type
styles.
• Normal type states the hazard.
• Bold type states how to avoid the hazard.
• Italic type states the possible consequences of not avoiding
the hazard.
An icon, when present, gives a graphical description of the
potential hazard.
IMPORTANT SAFETY INSTRUCTIONS
Risk of suffocation.
— Vehicle exhaust gases contain carbon monoxide.
— Refrigerant gas can displace air in work area.
Use KoolKare™ DiagnosTech™ system in locations
with mechanical ventilation providing at least four
air changes per hour.
Suffocation will cause injury.
Power
Risk of electric shock and fire.
• To avoid electric shock the power cord protective
grounding conductor must be connected to a
properly grounded A.C. outlet.
• Use proper A.C. outlet for unit to operate correctly.
See unit ID plate on back of unit. Extension cords
are not recommended. If an extension cord is
necessary, then use:
— 16 AWG for cords up to 50', and
— 14 AWG for cords greater than 50' but less
than 100'.
• Connect power cord to properly grounded outlet.
Do not remove or bypass the grounding pin.
• Use only fuses with the rating specified near the
fuse holder.
Electric shock and fire can cause injury.
II
Safety Information
Refrigerant
Risk of expelling refrigerant under pressure.
• Wear safety goggles and protective gloves, user
and bystander. If any refrigerant gets into eyes,
flush with water and seek a doctor's aid
immediately, even though irritation may cease.
• Do not remove master filter while under pressure.
Perform maintenance procedure for removing
master filter in Chapter 4–Changing the Master
Filter.
• Prevent refrigerant from contacting the skin.
Expelled refrigerate can cause injury.
Risk of explosion.
• Do not use compressed shop air for leak detection
or to pressure test a system containing
refrigerant. Refrigerant can form combustible
mixtures at pressures above atmospheric and with
air concentrations greater than 60% by volume.
• Do not heat a container of refrigerant above 125°F
(52°C).
Explosion can cause injury.
Risk of fire.
• Do not use this equipment in the vicinity of spilled
or opened containers of gasoline.
• Do not use KoolKare™ DiagnosTech™ system or
leak detector equipment if R-12 substitutes are
suspected. R-12 refrigerant substitutes may be
flammable.
Fire can cause injury.
Risk of poison.
• Avoid breathing air conditioning refrigerant and
lubricant vapor or mist.
• Do not allow refrigerant to contact open flame or
be drawn into a running engine. This can cause
refrigerant to become poisonous phosgene gas.
• Use KoolKare™ DiagnosTech™ system to remove
refrigerant from air conditioning systems.
Exposure can irritate eyes, nose and throat.
Risk of irritation of mucous membranes.
• Avoid breathing A/C refrigerant and lubricant
vapor or mist. Exposure may irritate eyes, nose
and throat. To remove HFC-134a from the A/C
system, use service equipment certified to meet
the requirements of SAE J2210 (HFC-134a
Recycling Equipment). Additional health and
safety information may be obtained from
refrigerant and lubricant manufacturers.
Exposure can irritate eyes, nose and throat.
III
Safety Information
Oil (Lubricant)
Risk of expelling oil under pressure.
• Wear safety goggles and protective gloves, user
and bystander. If any oil gets into eyes, flush with
water and seek a doctor's aid immediately, even
though irritation may cease.
Expelled oil can cause injury.
General
Engine systems can malfunction expelling fuel, oil
vapors, hot steam, hot toxic exhaust gases, acid,
refrigerant and other debris.
Wear safety goggles and protective gloves, user and
bystander.
Engine systems that malfunction can cause injury.
Engine compartment contains electrical connections and
hot or moving parts.
• Keep yourself, test leads, clothing and other
objects clear of electrical connections and hot or
moving engine parts.
• Do not place test equipment or tools on fenders or
other places in the engine compartment.
Contact with electrical connections and hot or moving
parts can cause injury.
Service hoses can not withstand high temperatures or
severe mechanical stress.
Keep the service hoses away from moving or hot
engine parts.
Service hoses can split or burst causing injury.
Removing tubing assemblies from the compressor may
discharge refrigerant.
Wear safety goggles and protective gloves, user and
bystander.
Refrigerant may cause injury.
IV
Safety Information
A test vehicle may move if not properly prepared.
• Block the drive wheels before performing a test
with the engine running. Unless instructed
otherwise, set the parking brake and put the gear
selector in neutral (manual transmission) or park
(automatic transmission). If the vehicle has an
automatic parking brake release, disconnect the
release mechanism for testing and reconnect
when testing is completed.
• Do not leave a running engine unattended.
A moving vehicle can cause injury.
Risk of injury.
This equipment should be operated by qualified
personnel.
Operation of KoolKare™ DiagnosTech™ system by
anyone other than qualified personnel may result in
injury.
Risk of refrigerant leakage.
Always close the quick coupler valves before
disconnecting a hose coupling.
A loosened hose coupling can leak refrigerant into the
atmosphere.
Misdiagnosis may lead to incorrect or improper repair
and/or adjustment.
Do not rely on erratic, questionable, or obviously
erroneous test information or results. If test
information or results are erratic, questionable, or
obviously erroneous, make sure that all connections
and data entry information are correct and that the
test procedure was performed correctly. Refer also
to the Maintenance/Troubleshooting section and
perform tests and make repairs as required. If test
information or results are still suspicious, do not
use them for diagnosis. Contact Snap-on® customer
service.
Improper repair and/or adjustment may cause vehicle or
equipment damage or unsafe operation.
SAVE THESE INSTRUCTIONS
V
Safety Information
VI
Table of Contents
Safety ....................................................................................................................................................... I
Introduction .......................................................................................................................................... 1-1
Refrigerant Gases .................................................................................................................... 1-2
Refrigerant Handling .................................................................................................... 1-3
Refrigerant Safety ........................................................................................................ 1-3
Refrigerant Substitute Warning .................................................................................... 1-4
Refrigerant Oils .......................................................................................................................... 1-5
Refrigerant Oil Safety .................................................................................................. 1-5
Functional Description .............................................................................................................. 1-6
Front Panel .................................................................................................................. 1-6
Back Panel .................................................................................................................. 1-8
R-134a Accessories...................................................................................................... 1-9
Specifications .......................................................................................................................... 1-10
General ...................................................................................................................... 1-10
Operating.................................................................................................................... 1-10
Storage ...................................................................................................................... 1-11
Capacities .................................................................................................................. 1-11
Installation and Operation .......................................................................................................... 2-1
Component Identification .............................................................................................. 2-1
Installation ................................................................................................................................ 2-1
Adding Refrigerant to KoolKare™ DiagnosTech™ System.......................................... 2-1
Power Up..............................................................................................................................2-2
Auto Tank Fill Mode ............................................................................................................2-3
Operation .................................................................................................................................. 2-4
Preliminary Checks ...................................................................................................... 2-5
Display Data ................................................................................................................ 2-6
Recover ........................................................................................................................ 2-7
Vacuum ...................................................................................................................... 2-11
Charge ...................................................................................................................... 2-13
Tank Full/Empty ..........................................................................................................2-15
Manual Tank Refill ......................................................................................................2-15
Tank Discharge ............................................................................................................2-16
Displaying Refrigerant Amount.................................................................................... 2-16
Setup.......................................................................................................................... 2-17
Usage Report ............................................................................................................ 2-18
Theory of Operation and Diagnosis ............................................................................................3-1
Theory of Operation ....................................................................................................................3-1
Air Conditioning Components......................................................................................................3-2
Compressor ..................................................................................................................3-2
Condenser ....................................................................................................................3-3
Receiver/Drier................................................................................................................3-4
Control Valve ................................................................................................................3-4
Evaporator ....................................................................................................................3-6
Accumulator ..................................................................................................................3-7
Diagnostics ................................................................................................................................3-8
Mechanical Failures ......................................................................................................3-8
Electrical Failures ..........................................................................................................3-8
Loss of Refrigerant ........................................................................................................3-9
Component Failures ......................................................................................................3-9
Gauge Readings ..........................................................................................................3-10
i
Table of Contents
Maintenance ................................................................................................................................ 4-1
Equipment Tips ............................................................................................................ 4-1
Master Filter/Dryer .................................................................................................................... 4-1
Automatic Reminder Feature ........................................................................................ 4-1
Changing the Master Filter/Dryer .................................................................................. 4-2
Changing the Identifier Filter..........................................................................................4-3
Changing a Particle Filter ..............................................................................................4-4
Replacing Printer Paper ................................................................................................4-5
Replacing Print Cartridge ..............................................................................................4-5
Troubleshooting ........................................................................................................................ 4-6
Replacement Parts ...................................................................................................... 4-7
Optional Accessories .................................................................................................. 4-7
ii
Table of Illustrations
Introduction
Figure 1-1: Front Panel ............................................................................................................ 1-6
Figure 1-2: Back Panel ............................................................................................................ 1-8
Figure 1-3: R-134a Accessories .............................................................................................. 1-9
Theory of Operation and Diagnosis
Figure 3-1: Latent Heat Graph for One Pound of Water ............................................................3-2
Figure 3-2: Compressor ............................................................................................................3-3
Figure 3-3: Condenser ..............................................................................................................3-3
Figure 3-4: Receiver/Drier ..........................................................................................................3-4
Figure 3-5: Thermal Expansion Valve ........................................................................................3-5
Figure 3-6: Orifice Tube..............................................................................................................3-5
Figure 3-7: Evaporator ..............................................................................................................3-6
Figure 3-8: Accumulator ............................................................................................................3-7
Figure 3-9: Pressure/Temperature Chart..................................................................................3-11
Maintenance
Figure 4-1: Master Filter/Dryer.................................................................................................. 4-2
Figure 4-2: Identifier Filter ........................................................................................................ 4-3
Figure 4-3: Particle Filter .......................................................................................................... 4-4
iii
Trademark and Copyright Information
Trademark Acknowledgements
Snap-on® is a trademark of Snap-on® Technologies, Inc.
EquiServ® is a registered trademark of Snap-on® Tools Company.
KoolKare™ is a trademark of Snap-on® Tools Company.
DiagnosTech™ is a trademark of Snap-on® Technologies, Inc.
Copyright Information
KoolKare™ DiagnosTech™ User’s Manual ©2000 Snap-on® Incorporated.
The information, specifications and illustrations in this manual are based on the latest
information available at the time of printing. Snap-on® reserves the right to make
changes at any time without notice.
iv
Using This Manual
This manual contains instructions for use and setup of
KoolKare™ DiagnosTech™ system. A table of contents and
table of illustrations are provided to make this manual easy to
use.
Some of the information shown in text or illustrations includes
optional equipment.
Conventions
This section contains a list of conventions used in text.
Check Note
A check note provides additional information about the subject
in the preceding paragraph.
Example:
✓
Do not start vehicle if adequate ventilation is not
available.
Equipment Tips
Equipment tips provide information that applies to specific
equipment. Each tip is introduced by this icon ❐ for easy
identification.
Example:
❐ Always oil the seals before connection to any tank, filter or
fitting. A leaky connection or no-flow condition may result if
the seal is dry.
Equipment Damage
Situations arise during testing that could damage the vehicle or
the test equipment. The word IMPORTANT signals these
situations.
Example:
Failure to follow these instructions could damage
compressor.
v
Using This Manual
Safety Messages
Safety messages are provided to help prevent personal injury
and equipment damage. All safety messages are introduced by
a signal word indicating the hazard level. The types of safety
messages are:
Indicates an imminently hazardous situation which,
if not avoided, will result in death or serious injury
to the operator or to bystanders.
Indicates a potentially hazardous situation which, if
not avoided, could result in death or serious injury
to the operator or to bystanders.
Indicates a potentially hazardous situation which, if
not avoided, may result in moderate or minor injury
to the operator or to bystanders.
Some safety messages contain visual symbols with signal
words.
Example:
Engine systems can malfunction expelling fuel, oil
vapors, hot steam, hot toxic exhaust gases, acid,
refrigerant and other debris.
Wear safety goggles and protective gloves, user and
bystander.
Engine systems that malfunction can cause injury.
Terms
Use the following definitions as a foundation to help understand
KoolKare™ DiagnosTech™ system processes and/or
components.
Virgin Tank
A refrigerant tank, disposable or refillable, that contains new
refrigerant. Disposable virgin tank must be evacuated and
cannot be refilled. Dispose of evacuated tank in accordance
with local, state and federal regulations that apply in your area.
A refillable virgin tank should be returned to your supplier.
Recovery/Charging Tank
A refrigerant tank designed to store refrigerant removed from a
virgin tank or recovered from a vehicle. On KoolKare™
DiagnosTech™ system, refrigerant is filtered and dried before
reaching the recovery tank. Once in the recovery tank, it is
ready for reuse.
vi
Using This Manual
Recycle
The process of removing refrigerant from a system, filtering,
drying and storing it in the recovery tank. On KoolKare™
DiagnosTech™ system, this process is part of recovery mode.
Recover
The process of removing refrigerant from a system to prevent
release of refrigerant into the atmosphere.
✓ Recover is the only process that removes and recycles
refrigerant.
Vacuum
The process of drawing a vacuum on a refrigerant system to
remove air and possibly moisture.
Charge
The process of filling an air conditioning system with refrigerant.
Chargeable
Referred to as Chargeable Amount on KoolKare™
DiagnosTech™ system screens. Chargeable Amount is the
weight of refrigerant available in the unit for dispensing into the
air conditioning system.
Purging
The process of bleeding off non-condensable gases from the
recovery tank.
Stable Scale
Situation where the refrigerant weight measuring device reading
becomes steady. Moving the unit excessively may cause the
scale reading to become unsteady.
vii
Using This Manual
viii
1
Introduction
KoolKare™ DiagnosTech™ system recovers, recycles,
vacuums and charges refrigerant for automotive air conditioning
systems. Functions such as Tank Refill may be performed
automatically when conditions are met, or manually as needed.
Refer to Auto Tank Fill Mode page 2-3, or Manual Tank Refill
page 2-15.
When powered up, KoolKare™ DiagnosTech™ system
performs a self-test and displays the micro-controller software
version. KoolKare™ DiagnosTech™ system monitors error
conditions, and when an error is encountered, displays an error
message with accompanying beeps and blinks of an amber light
during all operating cycles.
KoolKare™ DiagnosTech™ system includes:
• A Liquid Crystal Display (LCD) and eight buttons to control
operation,
Continuously displayed status line including time and date,
• Integral gauge set and automatic, solenoid operated, control
valves with service hoses,
• A 25 pound capacity internal charging cylinder and electronic
scale to ensure maximum refrigerant storage and accurate
charging capabilities,
— Recovery tank is automatically refilled from the virgin
refrigerant tank if the internal charging cylinder amount
falls below 15 pounds of refrigerant and the KoolKare™
DiagnosTech™ system is powered up and idle for 5
minutes.
• Master filter/dryer with automatic replacement reminder,
• Integral refrigerant identifier with replaceable filter, and
• Integral printer that gives a hard copy “DISPLAY DATA ” of
probe temperature, percent of humidity, information about the
percentages of R-134a, R-12, R-22, HC(hydrocarbons), air,
and high- and low-side pressures.
This manual applies to the following model:
Model Number
EEAC315A
Refrigerant Type
R-134a
Voltage
120 VAC
1-1
Introduction
Refrigerant Gases
Halogens are any of the five elements (fluorine, chlorine,
bromine, iodine and astatine) that form part of group 7a of the
Periodic Table of Elements. The fluorine and chlorine elements
of this family are used to create a methane organic compound
used to form dichlorodifluoromethane (CCL2F2 ), a halogenated
hydrocarbon called CFC-12 (chlorofluorocarbon 12). This
refrigerant gas is commonly known as Refrigerant-12, or R-12,
and has been used as a refrigerant in mobile air conditioning
systems for many years.
The new refrigerant in the halogenated hydrocarbon family,
HFC-134a (CH2FCF3 ), or R-134a, is now being incorporated in
mobile air conditioning systems. HFC stands for
hydrofluorocarbon.
The environmental impact of mobile air conditioning refrigerant
containing chlorine (R-12) has caused regulatory action that will
eventually eliminate the use of such products. Regulatory
action is necessary because when the chlorine content in R-12
is exposed to the atmosphere:
• It depletes the protective ozone layer in the atmosphere,
• It has relatively high global warming potential, and
• Its long atmospheric lifetime is approximately 120 years.
R-134a has been developed for new vehicle production but does
not replace or directly substitute for R-12 in existing vehicles.
R-134a does not contain chlorine, does not deplete the ozone
layer in the atmosphere and has an atmospheric lifetime of
about 15.5 years.
Environmental Protection Agency (EPA) and state regulations
specify that:
• Provisions be made to certify all air conditioning service,
installation and repair personnel,
• Refrigerant be recovered, recycled or reclaimed from
automotive air conditioning systems, instead of allowing
vapors to be expelled, or vented, into the atmosphere, and
• Refrigerant be recycled and reused, or properly disposed of,
instead of allowing vapors to be expelled, or vented, into the
atmosphere.
Mobile air conditioning service, installation and repair
technicians must be qualified and certified.
1-2
Introduction
Refrigerant Handling
Mobile air conditioning systems contain chemical mixtures that
require special handling to avoid injury and to avoid venting
refrigerant into the atmosphere.
Do not discharge any refrigerant gas, vapor or liquid from a
refrigeration system into the atmosphere. If service is required
that involves opening the refrigerant system, use a certified
recovery system.
Refrigerant Safety
• Wear safety goggles and protective gloves, user
and bystander. If any refrigerant gets into eyes,
flush with water and seek a doctor's aid
immediately, even though irritation may cease.
• Do not remove master filter while under pressure.
Follow instructions for removing master filter. For
additional information refer to Chapter
4–Changing the Master Filter.
• Prevent refrigerant from contacting the skin.
• Read, understand and follow Safety Information in
the front of this manual.
• Use KoolKare™ DiagnosTech™ system in
locations with mechanical ventilation providing at
least four air changes per hour.
• Avoid breathing air conditioning refrigerant and
lubricant vapor or mist.
• Do not allow refrigerant to contact open flame or
be drawn into a running engine. This can cause
refrigerant to become poisonous phosgene gas.
• Use KoolKare™ DiagnosTech™ system to remove
refrigerant from air conditioning systems.
• Read, understand and follow Safety Information in
the front of this manual.
Tighten all tubing and hose connections properly.
Insufficient or excessive torque can result in loose
joints or deformed parts. Either condition can result
in refrigerant leakage.
1-3
Introduction
Refrigerant Substitute Warning
• Do not use KoolKare™ DiagnosTech™ system or
leak detection equipment if R-12 substitutes are
suspected. R-12 refrigerant substitutes may be
flammable.
• Read, understand and follow Safety Information in
the front of this manual.
Aftermarket R-12 refrigerant substitutes are being sold that are
dangerous or potentially flammable gases. These products
contain a blend of butane, isobutane and propane and have the
potential for explosion. Some of these products are:
• OZ-12,
• Refrigerant-176,
• Arctic Chill R-176, and
• GHG Refrigerant 12.
Some vehicles using OZ-12 can be identified by a label that
may be placed in the engine compartment, but many cannot be
identified. State agencies and the Environmental Protection
Agency (EPA) have banned flammable substitutes.
If it is suspected that a refrigerant system contains a product of
this type:
• Question customers about previous service,
• Be aware of any unfamiliar odor from the system,
• Do not use a leak detector, and
• Do not use recycling equipment.
1-4
Introduction
Refrigerant Oils
In mobile air conditioning units, the lubricant needed for the
compressor is blended with the refrigerant. Mineral (petroleum)
oils were used with R-12 systems. Mineral oils are not soluble
in R-134a and the industry had to substitute synthetic
lubricating fluids for the mineral oils. Polyalkylene glycol oils
(PAGs) were the first synthetics to meet the auto A/C
compressor manufacturers performance criteria, and most
automakers and compressor manufacturers devised their retrofit
specifications with PAGs in mind. Since then, polyol ester oils
(ESTERS or POEs) have been tested and also have been found
to meet the the performance criteria. Although POEs have not
been approved by the automakers or A/C compressor
manufacturers, POEs are frequently used in A/C retrofits in the
automotive aftermarket.
Refrigerant Oil Safety
Risk of irritation of mucous membranes.
• Wear safety goggles and protective gloves, user
and bystander. If any refrigerant gets into eyes,
flush with water and seek a doctor's aid
immediately, even though irritation may cease.
• Avoid breathing A/C refrigerant and lubricant
vapor or mist. Exposure may irritate eyes, nose
and throat. To remove HFC-134a from the A/C
system, use service equipment certified to meet
the requirements of SAE J2210 (HFC-134a
Recycling Equipment). Additional health and
safety information may be obtained from
refrigerant and lubricant manufacturers.
Exposure can irritate eyes, nose and throat.
1-5
Introduction
Functional Description
Front Panel
Figure 1-1: Front Panel
A — Integral Gauge Set
High and low pressure panel mounted gauges are for monitoring
vehicle air conditioning system pressures.
B — Control Panel
Houses display screen, control buttons, gauges, and optional
printer.
C — Liquid Crystal Display (LCD) Screen
Displays alpha-numeric information and key labels.
1-6
Introduction
D — Control Buttons
Eight buttons are used to enter information and control
KoolKare™ DiagnosTech™ system operation:
• The CANCEL key cancels any information entered and begins
the program selection sequence as if the tester were just
powered up.
• The pound key (#) displays refrigerant quantity in recovery
tank and amount chargeable.
• The star key (*) will be used for future updates.
• Five buttons with variable functions depending on the screen
display.
E — Integral Refrigerant Identifier (behind identifier filter)
Determines if an A/C system is contaminated with refrigerant
other than R-134a. Typical contaminant’s are R-12, R-22,
flammable gases, refrigerant blends, and non-condensable
gases (air).
F — Main Power Switch
Turns power on and off. Must be on (I) for unit operation.
Also a circuit breaker.
G — Oil Drain Bottle
Container for holding used oil.
H — Beeper
Beeps to indicate successful completion of programmed
sequence and other conditions.
I — Amber Light
Lights to indicate successful completion of programmed
sequence and blinks to indicate other conditions.
J — Tray
Use for tool and adapter storage.
K — Contrast Adjust Knob
Use to adjust LCD screen contrast.
L — Operators Manual Holder
For holding operators manual.
1-7
Introduction
Back Panel
Figure 1-2: Back Panel
A — Master Filter/Dryer
Consists of a 10 micron particulate filter and desiccant to
remove moisture. For additional information refer to Chapter
4–Changing the Master Filter.
B — Virgin Refrigerant Tank and Holding Bracket
C — Scale
Electronically measures the amount of refrigerant dispensed,
recovered, and remaining in the recovery tank.
D — Service Port, High-Side
For connecting to high pressure side of vehicle A/C system.
E — Service Port, Low-Side
For connecting to low pressure side of vehicle A/C system.
1-8
Introduction
F — Particle Filter
One near each pod to trap particles from A/C system being
serviced.
G — Oil Separator
Removes oil and other contaminant’s from the refrigerant being
recovered.
H — Recovery Tank
Holds refrigerant from an A/C service and supplies refrigerant
for charging.
I — Vacuum Pump
Removes air from A/C system being serviced.
Figure 1-3: R-134a Accessories
R-134a Accessories
A — Service Hoses and Pod Assemblies
Red and blue hoses for connecting KoolKare™ DiagnosTech™
system to vehicle. Pods contain automatic solenoid valves.
✓ Pods are delicate.
Do not drop, abuse or mishandle.
B — Shut-off Adapters (Couplers)
1 - Connects to high-side and low-side service ports of vehicle.
2 - Quick connect/disconnect valve actuation. Couplers contain
manual shutoff hand valves to control flow of refrigerant
while connected to service ports and prevent blow back
while connecting/disconnecting hoses.
1-9
Introduction
Specifications
General
Power
120 VAC, 1 PH, 60 Hz @ 12 amps
Shipping Weight
200 pounds (102.5 kg)
Dimensions
Depth 32"
Height 47.5"
Width 20"
Operating
Operating Temperature Range
50 to 120°F (10 to 49°C) ambient
Pressure Range
30 in. Hg. to 400 psi
Refrigerant Charge Amount
0–22 pounds (9.98 kg)
Recovery Amount
0–25 pounds (11.34 kg)
Compressor
1/3 hp hermetic reciprocating piston compressor
Vacuum Pump
1/3 hp oilless reciprocating piston pump
1-10
Introduction
Storage
Temperature
-4 to 158°F (-20 to 70°C)
Relative Humidity
Up to 80% non-condensing
Capacities
Charge
Up to 22 pounds (9.98 kg)
Recovery
Up to 25 pounds (11.34 kg) total
Vacuum Pump Displacement
4.8 cfm
1-11
Introduction
1-12
2
Installation
and Operation
Use this chapter to prepare KoolKare™ DiagnosTech™
system for initial use and perform routine recovery, vacuum and
charging procedures.
Component Identification
Unpack and locate all components shipped with KoolKare™
DiagnosTech™ system using the unpacking instructions.
Installation
Before using KoolKare™ DiagnosTech™ system for the first
time, add refrigerant.
Adding Refrigerant to
KoolKare™ DiagnosTech™ System
Recovery tank must contain enough refrigerant to charge the
vehicle. Before a complete charging operation can occur,
recovery tank must contain enough refrigerant for the charge
desired plus 3 pounds. If recovery tank does not contain an
adequate amount of refrigerant, the charge operation does not
function. To make this operation as simple as possible, the
KoolKare™ DiagnosTech™ system employs a unique “Auto
Tank Fill” mode.
Once a virgin refrigerant tank is properly installed, the
KoolKare™ DiagnosTech™ system will automatically refill the
recovery tank if tank falls below 15 pounds of refrigerant.
This mode will begin 5 minutes after initial power up and again
anytime KoolKare™ DiagnosTech™ system is idle (not
recovering, charging, nor pulling a vacuum) for 5 minutes.
KoolKare™ DiagnosTech™ system also employs a manual
refill option (refer to Manual Tank Refill page 2-15), which can
be used to charge the unit the first time it is filled.
2-1
Installation and Operation
Power Up
During power up, KoolKare™ DiagnosTech™ system will
perform numerous internal functions. These include a self
diagnostics routine, warm up of refrigerant identifier, and a
purity test of refrigerant in the recovery tank and the virgin tank.
✓
✓
KoolKare™ DiagnosTech™ system will not operate if
ambient temperature is outside the range of 50-120°F
(10-49°C).
Leave KoolKare™ DiagnosTech™ system powered up
throughout the day.
1. Plug power cord into a properly grounded supply line.
Refer to I.D. plate on back of unit for proper supply
voltage.
✓
Use properly rated extension cord to plug KoolKare™
DiagnosTech™ system into an electrical outlet if
needed. Use of an under rated extension cord will
create an excessive voltage drop and cause
KoolKare™ DiagnosTech™ system to see a low
voltage. A low voltage may cause KoolKare™
DiagnosTech™ system to operate erratically.
2. Turn on power switch. The KoolKare™ DiagnosTech™
system will power up. Two screens display in the
following order:
— KoolKare™ DiagnosTech™ system Welcome
screen,
— Software version screen, and Identifier version
screen.
If KoolKare™ DiagnosTech™ system indicates a
high or low voltage, turn KoolKare™ DiagnosTech™
system off and contact an electrician. This means
that the voltage supplied by the wall socket is
outside of national electric code limits.
3. KoolKare™ DiagnosTech™ system will display results
of recovery tank refrigerant identification.
Call service if KoolKare™ DiagnosTech™ system
displays improper refrigerant identification and/or
detection of HC’s.
4. Check refrigerant identification filter periodically for being
dirty.
A spotted or dirty identifier filter may damage
identifier if not changed. Refer to Maintenance for
replacement of identifier filter.
2-2
Installation and Operation
5. If elevation level is not preset at the factory, KoolKare™
DiagnosTech™ system will display upon first time power
up:
GO TO SETUP AND ENTER
ELEVATION LEVEL
✓
✓
KoolKare™ DiagnosTech™ system will prompt for this
on power up until elevation level is entered.
Set elevation level upon first time power up, so
KoolKare™ DiagnosTech™ system operates properly.
6. Press NEXT, KoolKare™ DiagnosTech™ system will
display main menu screen.
Auto Tank Fill Mode
✓
Use only a virgin tank from a reputable supplier of
refrigerant. KoolKare™ DiagnosTech™ system will
automatically identify contents of virgin tank each time
an auto tank fill operation is started.
— If KoolKare™ DiagnosTech™ system identifies virgin
tank as being contaminated, the following message
displays:
BAD VIRGIN TANK
REFILL ABORTED.
PRESS CONTINUE.
1. Connect yellow hose end to virgin refrigerant tank.
2. Open virgin refrigerant tank valve fully. Check for leaks.
3. Position virgin refrigerant tank on its holding bracket with
its valve facing down. Secure with velcro straps.
4. Power up KoolKare™ DiagnosTech™ system (refer to
Power Up page 2-2).
Auto Tank Fill mode will begin when these conditions
are met:
— 5 minutes have elapsed since last power up,
— Recovery tank contains less than 15 pounds of
refrigerant, and
— KoolKare™ DiagnosTech™ system is idle (not
recovering, charging, or pulling a vacuum).
2-3
Installation and Operation
✓
During Auto Tank Fill mode, no sequence is allowed to
operate until Auto Tank Fill mode is complete. If a
function key is pressed during Auto Tank Fill Mode the
following message could display:
REFILLING TANK
PLEASE WAIT
PRESS CANCEL TO RETURN
TO OPERATING MODES
To regain operating status, either let the tank fill process
finish or press CANCEL to abort automatic refill.
✓
If CANCEL is pressed, there will be a short delay while
any refrigerant trapped in the oil separator bowl is
being transferred into the recovery tank.
6. If virgin refrigerant tank empties during Auto Tank Fill
mode, the following message displays:
REFILL TANK IS EMPTY
REPLACE WITH NEW
TANK, PRESS CONTINUE
7. At this time, replace virgin refrigerant tank and press
CONTINUE. If no replacement virgin refrigerant tank is
available, press CONTINUE and change the tank at a
later time.
Operation
This section contains:
— Preliminary and visual inspection of a vehicle,
— Display data,
— Recovering vehicle refrigerant,
— Creating a vacuum in vehicle A/C system before charging,
— Charging vehicle A/C system with recovered/recycled
refrigerant,
— Manual tank refill,
— Tank discharge, and
— Displaying refrigerant amount.
After performing all installation procedures, follow these
recommended vehicle service procedures before using
KoolKare™ DiagnosTech™ system for A/C work.
2-4
Installation and Operation
Keep service hoses away from moving or hot engine
parts. Service hoses cannot withstand high
temperatures or severe mechanical stress.
Close virgin refrigerant tank valve when not in
use. Open tank valves may result in refrigerant
loss from tank.
KoolKare™ DiagnosTech™ system will not operate
outside of the following limits:
— Warmer than 120°F (55°C),
— Colder than 50°F (10°C), and/or
— Relative humidity greater than 80%.
Stabilize KoolKare™ DiagnosTech™ system to a
moderate temperature and inspect for
abnormalities.
Contact Customer Service at Snap-on® before
operating if unsure of condition.
Operating KoolKare™ DiagnosTech™ system with
the following conditions may reduce its
functionality:
— Visible evidence of damage,
— Has been subjected to prolonged storage
under unfavorable conditions, or
— Has been subjected to severe transportation
stresses.
Preliminary Checks
Visual Inspection
A visual inspection of the vehicle to be serviced is useful to help
diagnose and efficiently repair any problems.
— Inspect compressor drive belt for wear or slippage,
— Inspect A/C lines and switches for damage and/or broken or
corroded wires,
— Check for leaves and/or debris caught in front of condenser
or between condenser and radiator,
— Use a scan tool or multi-meter to check for operation of
electrical components,
— Check for clutch slippage or noise,
— Verify blower fan works on all speeds,
— Verify climate control works in all modes, and
— Check for adequate airflow coming out of A/C vents.
Precondition Vehicle
Warm up vehicle being serviced prior to a refrigerant recovery
operation to obtain the fastest and most complete refrigerant
recovery possible. Connect service hoses. Lower vehicle hood
as much as possible without damaging or crimping service
hoses. Run the vehicle with the A/C system off. Turn off engine
when normal operating temperature is reached.
2-5
Installation and Operation
Display Data
Display Data mode collects data from the vehicle to be serviced.
A refrigerant identification of the vehicle’s A/C system can be
performed by pressing ID CAR. If the refrigerant is not 98%
pure R134A, KoolKare™ DiagnosTech™ system will abort any
further vehicle servicing. KoolKare™ DiagnosTech™ system
will collect system pressure data and data from the A/C vents,
and store all of this information for later use.
✓
It is recommended that vehicle be at normal operating
temperature.
1. Have KoolKare™ DiagnosTech™ system powered up
(refer to Power Up page 2-2).
2. Empty waste oil bottle.
3. Reset follower needles on high and low side gauges.
4. Press DISPLAY DATA to begin data mode, the following
message displays:
CONNECT THE SERVICE HOSES.
CONNECT AND POSITION THE PROBES.
START THE VEHICLE AND TURN ON THE A/C.
PRESS NEXT WHEN DONE
5. Connect red, high-side service hose to high-side service
port on vehicle and open quick coupler valve.
6. Connect blue, low-side service hose to low-side service
port on vehicle and open quick coupler valve.
✓
If the vehicle has more than one low-side service port,
use service port closest to evaporator.
7. Connect duct temperature probe to the center most vent
on dash.
✓
If the vehicle has dual temperature control or rear unit,
connect second temperature probe to appropriate vent.
8. Start vehicle.
✓
Do not start vehicle if adequate ventilation is not
available.
9. Turn A/C on MAX with temperature to coldest setting.
10. Turn blower on to high speed.
2-6
Installation and Operation
11. Press NEXT to begin data collection.
12. KoolKare™ DiagnosTech™ system displays high- and
low-side system pressures, ambient temperature and
humidity, two duct temperatures, and pod status.
13. Press ID CAR to start a refrigerant identification of the
vehicle’s A/C system.
14. Press MIN/MAX RESET to reset pressure and
temperature probe MIN/MAX readings.
A. Check connections if external sensors display errant
information.
B. If abnormal pressure or temperature is indicated,
refer to manufacturer’s service manual for proper
diagnostic procedures and specifications.
15. Press PRINT to obtain a paper copy of data or press
CONTINUE to return to main menu and then press
RECOVER to recover A/C system.
16. Turn vehicle off.
✓
If refrigerant fails identification do not continue with
recovery operations.
— Close quick couplers and disconnect high- and lowside service hoses from vehicle.
— Connect service hoses to mating ports on back of
KoolKare™ DiagnosTech™ system to clear service
hose whips. Open valves and then close valves.
— Disconnect temperature and airflow probes from
vehicle.
Recover
During recovery, KoolKare™ DiagnosTech™ system will
recover vehicle A/C refrigerant from both service hoses as
quickly as possible. There are two ways to recover vehicle
refrigerant. One way is described as a PASSIVE RECOVERY,
where the vehicle is not running, and the other way is a RAPID
RECOVERY, where the vehicle is running with the A/C system
also running. KoolKare™ DiagnosTech™ system will not let
recovery tank be overfilled during any recovery process. Follow
these steps to recover refrigerant as desired.
2-7
Installation and Operation
PASSIVE RECOVERY
Perform a passive recovery on vehicles that do not/cannot be
started or the vehicle’s A/C system does not/cannot be
operated. This includes vehicles with seized compressors and
sensors, switches or clutches not operating properly. To perform
a passive recovery, follow the steps in Rapid Recovery
eliminating the steps to start the vehicle and turn the A/C ON.
RAPID RECOVERY
Before a rapid recovery is performed, make sure the Preliminary
Checks were verified first. A vehicle A/C system needs to
mechanically and electrically work correctly to prevent damage
to any parts or equipment during the recovery stage. Follow all
safety warnings during recovery.
✓
✓
System pressure and engine heat bring vehicle A/C
system up to higher pressures and help to rapidly force
the refrigerant out of vehicle A/C system and into
K o o l K a r e ™ D i a g n o s Te c h ™ system.
Drain oil collection bottle before starting on any vehicle.
1. Have KoolKare™ DiagnosTech™ system powered up
(refer to Power Up page 2-2).
2. Press RECOVER button to begin recovery mode and the
following message displays:
CONNECT HOSES AND
THEN PRESS CONTINUE.
3. Connect red, high-side service hose to high-side service
port on vehicle and open quick coupler valve.
4. Connect blue, low-side service hose to low-side service
port on vehicle and open quick coupler valve.
✓
If the vehicle has more than one low-side service port,
use service port closest to evaporator.
5. Press CONTINUE on the KoolKare™ DiagnosTech™
system control panel and the following message displays:
IDENTIFYING
REFRIGERANT..
PLEASE WAIT
2-8
Installation and Operation
✓
If refrigerant fails identification:
The KoolKare™ DiagnosTech™ system recovery
sequence will be aborted.
— Close quick couplers and disconnect high- and lowside service hoses from vehicle.
— Connect service hoses to mating ports on back of
KoolKare™ DiagnosTech™ system to clear service
hose whips and open valves.
— Disconnect temperature probe(s) from vehicle.
The following message displays:
WRONG TYPE OF
REFRIGERANT!!!!
CONNECT HOSES TO THE REAR
VENT PORTS AND OPEN
VALVES TO PURGE THE LINES
PRESS CONTINUE WHEN DONE
— Press NEXT.
✓
If there is no pressure detected in the vehicle A/C
system, the following message displays:
RECOVERY ABORTED
NO PRESSURE IN SYSTEM
PRESS CONTINUE
6. Start vehicle.
✓
Do not start vehicle if adequate ventilation is not
available.
7. Turn A/C on MAX with blower on high.
8. The following message displays:
WAITING FOR STABLE SCALE!
9. Once KoolKare™ DiagnosTech™ system starts to
recover refrigerant, the following message displays:
RECOVERING REFRIGERANT
FROM VEHICLE!
2-9
Installation and Operation
✓
✓
✓
Select PAUSE to hold the recovery sequence. Select
START to resume recovery.
When vehicle A/C system gets low enough, the low
pressure cut-off/pressure cycling switch should remove
power to the A/C clutch.
If KoolKare™ DiagnosTech™ system shuts down due
to a full recovery tank, offload recovery tank into a DOT
approved refrigerant tank or other recover/recycle unit
(refer to Tank Discharge page 2-18).
10. Allow KoolKare™ DiagnosTech™ system to finish
recovery mode. This may take several minutes
depending upon how much refrigerant is dissolved in the
vehicle A/C compressor oil and other conditions.
The following message displays:
DRAINING OIL,
PLEASE WAIT...
11. Turn off vehicle
— Once oil is done draining, the following message
displays:
RECORD THE AMOUNT
OF OIL DRAINED
THEN PRESS CONTINUE
12. Record amount of waste oil taken out of the A/C system.
✓
✓
✓
Refer to manufacturer’s specifications for oil
replacement.
Use caution, oil may be hot.
A pulsed gas escaping sound emits from KoolKare™
DiagnosTech™ system while purging non-condensible
gases when recovery is completed. Do not be alarmed
by this noise or defeat this process.
13. Press CONTINUE and the following message displays:
WOULD YOU LIKE TO
CONTINUE RECOVERY?
YES / NO
— To continue recovery would add any suspected
additional refrigerant to total accumulated. To exit
recovery and reenter the recovery mode would start
the accumulated refrigerant counter from zero.
2-10
Installation and Operation
— The procedure is complete when KoolKare™
DiagnosTech™ system beeps and energizes light.
VACUUM
The vacuum mode removes all air out of the vehicle A/C
system. It does not remove moisture from the system. The
vehicle A/C system desiccant removes the moisture. Refer to
manufacturer’s specifications for proper desiccant replacement.
1. Have KoolKare™ DiagnosTech™ system powered up
(refer to Power Up page 2-2).
2. Press VACUUM button to begin vacuum mode and the
following message displays:
CONNECT SERVICE HOSES TO VEHICLE.
ENTER VACUUM TIME.
PRESS START WHEN DONE.
3. Connect red, high-side service hose to high-side service
port on vehicle and open quick coupler valve.
4. Connect blue, low-side service hose to low-side service
port on vehicle and open quick coupler valve.
✓
If the vehicle has more than one low-side service port,
use service port closest to evaporator.
5. Enter vacuum time or KoolKare™ DiagnosTech™
system will default to a vacuum time of 3 minutes.
— Default vacuum time is 3 minutes, with a maximum
allowed time of 10 minutes for the first vacuum. The
“UP” button increases time by 1 minute increments.
The “DOWN” button decreases time by 1 minute
increments.
6. Press START on the KoolKare™ DiagnosTech™ system
control panel and the following message displays:
CHECKING FOR PRESSURE IN VEHICLE
BEFORE PULLING A VACUUM!
— If there is pressure in the vehicle A/C system, the
following message displays:
VACUUM ABORTED
PRESSURE DETECTED IN THE VEHICLE
RECOVER REFRIGERANT BEFORE PULLING
A VACUUM. PRESS NEXT.
2-11
Installation and Operation
7. If there is no pressure in vehicle A/C system, the vacuum
sequence will begin and the following message displays:
SETTING UP FOR VACUUM MODE
PLEASE WAIT
PULLING VACUUM ON VEHICLE
XX MIN. REMAINING
✓
Select PAUSE to hold the vacuum sequence. Select
START to resume sequence.
— KoolKare™ DiagnosTech™ system is programmed
to pull a vacuum of 28 in. Hg. at sea level.
— If 28 in. Hg. is not pulled in 3 minutes there is a leak
in the vehicle A/C system or at service hose
connections, and the following message displays:
I WAS UNABLE TO PULL AND HOLD VACUUM
CHECK CONNECTIONS TO VEHICLE
PRESS CANCEL TO CONTINUE
— The procedure is complete when KoolKare™
DiagnosTech™ system beeps, energizes light and
the following message displays:
VACUUM COMPLETED
IS MORE TIME REQUIRED?
YES / NO
— Additional vacuum time can be started at this point
with a maximum allowed time of 95 minutes.
8. If yes, enter desired vacuum time in minutes.
2-12
Installation and Operation
Charge
The charge sequence may be initiated for two reasons. One
reason is to add a nominal amount of refrigerant to the A/C
system for diagnostic purposes. The other reason is to fully
charge a vehicle A/C system after a successful vacuum
sequence.
Follow Vehicle Manufacturer’s A/C Service Procedures
When charging, a slow charge may occur due to pressure
equalization between KoolKare™ DiagnosTech™ system and
the vehicle A/C system. To signal a problem, KoolKare™
DiagnosTech™ system will beep, blink the light continuously
and display a slow charge message.
It is the responsibility of the technician to be familiar with
vehicle manufacturer’s recommended service procedures.
✓
✓
System will automatically test for a vacuum of 20 in.
Hg. before allowing a charge of six ounces or more.
If 20 in. Hg. of vacuum is not observed in vehicle A/C
system, KoolKare™ DiagnosTech™ system will not
enter a complete charge and the following message
displays:
NO VACUUM DETECTED IN VEHICLE
CONTINUE CHARGING OR
RETURN TO MAIN MENU
1. Have KoolKare™ DiagnosTech™ system powered up
(refer to Power Up page 2-2).
2. Press CHARGE button to begin charge mode. The
following message displays:
SELECT UNITS
1
2
3
4
POUNDS - OUNCES
DECIMAL POUNDS
OUNCES
KILOGRAMS
3. Enter desired charge weight by pressing up and/or down,
then press ENTER. The following message displays:
CONNECT HOSES TO THE VEHICLE
THEN PRESS CONTINUE
4. Connect red, high-side service hose to high-side service
port on vehicle and open quick coupler valve.
2-13
Installation and Operation
5. Connect blue, low-side service hose to low-side service
port on vehicle and open quick coupler valve.
✓
If the vehicle has more than one low-side service port,
use service port closest to evaporator.
6. Press CONTINUE on KoolKare™ DiagnosTech™
system control panel.
— KoolKare™ DiagnosTech™ system automatically
verifies adequate refrigerant amount in the recovery
tank.
✓
If recovery tank does not contain an adequate
refrigerant amount, the KoolKare™ DiagnosTech™
system beeps and the light blinks continuously. The
following message displays for 5 seconds.
CHARGE AMOUNT SELECTED IS GREATER THAN
‘CHARGEABLE’ AMOUNT IN TANK!
✓
For additional information refer to Adding Refrigerant to
KoolKare™ DiagnosTech™ System page 2-1.
7. If recovery tank contains an adequate refrigerant amount,
the following series of messages will display:
CHARGE SEQUENCE
WAITING FOR STABLE SCALE!
I AM CHARGING
✓
Select HOLD to pause the charging sequence. Select
NEXT to resume charging.
— If desired refrigerant charge is not entered into
vehicle A/C system within 4 minutes, the following
message displays:
SLOW CHARGE
DO YOU WANT TO
CHARGE FROM THE LOW SIDE
YES / NO
2-14
Installation and Operation
— If yes, the following message displays:
SLOW CHARGE...
COMPLETING CHARGE
ON THE LOW SIDE.
— The procedure is complete when KoolKare™
DiagnosTech™ system beeps, energizes light and
the following message displays:
CHARGE COMPLETED.
CLEARING HOSES
PLEASE WAIT
CHARGING IS COMPLETE
✓
Refer to manufacturer’s specifications for oil
replacement.
— The vehicle A/C system is now ready for system
operation verification (refer to manufacturer’s
specification).
Tank Full/Empty
Messages display when the recovery tank is full or empty.
✓
KoolKare™ DiagnosTech™ system may be used to
charge an A/C system when the recovery tank is full.
Manual Tank Refill
Use this procedure to manually refill recovery tank.
1. Have KoolKare™ DiagnosTech™ system powered up
(refer to Power Up page 2-2).
2. Press NEXT button on main menu screen.
3. Press OPTIONS button.
4. Press MANUAL REFILL button.
✓
KoolKare™ DiagnosTech™ system will refill recovery
tank to 15 pounds or until CANCEL is pressed.
2-15
Installation and Operation
Tank Discharge
Use this procedure to discharge recovery tank into an approved
DOT refrigerant tank.
1. Have KoolKare™ DiagnosTech™ system powered up
(refer to Power Up page 2-2).
2. Press NEXT button on main menu screen.
3. Press OPTIONS button.
4. Press TANK DISCHARGE button and the following
message displays:
CONNECT LOW SIDE HOSE TO DISCHARGE TANK
PRESS START TO DISCHARGE
PRESS STOP TO HALT DISCHARGE
PRESS EXIT TO RETURN TO MENU SCREEN
5. Connect low-side service hose to an approved DOT
refrigerant tank using tank adapter 1-15080 and open
quick coupler valve.
6. Press START to begin discharging.
— Press STOP to halt discharge.
— Press EXIT to return to menu screen.
✓
KoolKare™ DiagnosTech™ system will discharge
recovery tank until empty or until STOP or EXIT is
pressed.
Displaying Refrigerant Amount
Use this procedure to determine amount of refrigerant in the
recovery tank and amount able to be charged.
1. Press # (AMOUNT) button on control panel.
— Amount available to charge will also be displayed on
the main menu screen.
2-16
Installation and Operation
Setup
Use this procedure to access setup options (time, date,
language and elevation).
1. Press NEXT button on main menu screen.
2. Press SETUP button.
Once in the Setup screen, choose from the following:
Setup - Time/Date
1. Time and Date Setup: Press SELECT button to move
double arrows over item to be incremented. Press DONE
when finished.
Setup - Language (Alternate languages not available on all
models.)
1. Language Setup: Display language selections on
start-up YES/NO.
— If YES is selected, this screen would be the first
viewed screen upon power up of the KoolKare™
DiagnosTech™ system.
2. Select language: English/Francais/Espanol.
Setup - Elevation
1. Elevation Setup: Press SELECT button to adjust
elevation level and the following message displays:
CONNECT HOSES TO BACK
OF UNIT. OPEN VALVES.
PRESS ZERO AND THEN PRESS NEXT
2. Connect service hoses to the back of the unit and open
the valves.
3. Press ZERO.
4. Press NEXT.
5. Press UP or DOWN to enter elevation above sea level.
6. Press DONE when finished.
2-17
Installation and Operation
Usage Report
The usage report is data compiled from completed operation,
time, total charge weight, recovery weight, and filter dryer
weight used to monitor refrigerant usage of KoolKare™
DiagnosTech™ system. Use this procedure to access the
usage report.
1. Press NEXT button on main menu screen.
2. Press OPTIONS button.
3. Press USAGE REPORT button.
4. Press PRINT button to obtain a paper copy of usage
report, if desired.
`
2-18
Theory of
Operation and
Diagnosis
3
Use this section to:
Understand the theory of air conditioning systems,
Understand air conditioning component operation, and
Diagnosis of general air conditioning problems.
Theory of Operation
To effectively diagnose air conditioning systems the technician
should have an understanding of air conditioning concepts and
theories.
— Heat energy travels from a warmer to a cooler object.
— Pressure and temperature are related. The boiling and
condensing point of a substance will change, based on
pressure. Raising the pressure raises the boiling point.
Example:
The boiling point for water decreases as altitude
increases (pressure drops). At sea level (14.7 psi
atmospheric pressure) water boils at 212°F/100°C. At
10,00 feet, atmospheric pressure is only 10.25 psi and
water boils at 194°F/ 90°C.
— Substances absorb or give off large amounts of heat energy
when changing states (solid to liquid, liquid to gas, etc). For
a liquid to change to a gas it must take on heat. The
additional heat does not increase the temperature of the
substance. This “hidden” heat is called latent heat. The
latent heat is given off when the substance condenses back
to a liquid.
Heat is measured in BTUs (British Thermal Units). A BTU is the
amount of heat required to increase the temperature of one
pound of water by 1°F.
Starting with one pound of ice at 0°F/-9°C, it takes 32 BTUs to
raise the temperature to the melting point of 32°F/0°C. The ice
will begin to melt as additional BTUs are added. The additional
BTUs will not increase the temperature of the ice/water mixture.
It takes a total of 144 BTUs to completely melt the one pound of
ice. The 144 BTUs are latent heat. It then takes 180 BTUs to
raise the water temperature to the boiling point of 212°F/100°C.
It takes 970 BTUs to vaporize the water. Refer to Figure 3-1.
3 -1
Theory of Operation
Figure 3-1 : Latent Heat Graph for One Pound of Water
By controlling the pressure and boiling point of refrigerant we
can force it to absorb and give off heat energy when and where
we want it to.
Air Conditioning Components
Use this section to identify air conditioning components and
operation.
Air conditioning systems consist of some or all of the following
major components:
Compressor,
Condenser,
Receiver/Drier (some systems),
Control Valve,
Evaporator, and
Accumulator (some systems).
Compressor
Modern compressors are of the Radial, Axial, or Rotary type.
The compressor is driven off of the engine’s accessory drive
system. A electromagnetic clutch engages when compressor
operation is required. Clutch operation is controlled by the PCM
through the A/C relay. Compressors work by drawing in high
temperature, low pressure vapor from the evaporator or
accumulator (depending on the system). The vapor is
compressed, increasing it’s boiling point. The high pressure,
high temperature vapor is then pumped into the condenser.
3-2
Theory of Operation
Figure 3-2 : Compressor
Condenser
The condenser is located in the front of the vehicle ahead of the
radiator. Incoming air flows over the condenser cooling fins
before reaching the radiator. High pressure, high temperature
vapor leaves the compressor and enters the condenser. The
pressure increase that the compressor provides increases the
boiling point of the refrigerant. The higher boiling point forces
the refrigerant vapor to condense into a high pressure liquid. In
the condenser the vapor loses it’s latent heat. The heat flows
from the vapor through the cooling fins to the incoming air.
Figure 3-3: Condenser
3-3
Theory of Operation
Receiver/Drier
After leaving the condenser the high temperature, high pressure
liquid travels to the receiver/drier. The receiver/drier stores the
liquid refrigerant, which also contains a desiccant to remove
moisture from the system. Not all systems contain a
receiver/drier. Systems without a receiver/driver will have the
desiccant in the accumulator.
✓
The desiccant can only hold a small amount of
moisture. If the system becomes contaminated with
moisture, the receiver/drier will require replacement.
Figure 3-4: Receiver/Drier
Control Valve
The control valve is located at the evaporator inlet. The control
valve regulates the amount of refrigerant that flows into the
evaporator. There are two main types of control valves:
Thermal Expansion Valve (TXV), and
Orifice tube.
Thermal Expansion Valve
The thermal expansion valve limits the amount of refrigerant
flowing into the evaporator based on the temperature of the
refrigerant leaving the evaporator. The power head of the valve
is connected to a sensing bulb at the evaporator outlet by a
capillary tube.
3-4
Theory of Operation
As the temperature of the evaporator outlet increases, a special
gas in the sensing bulb begins to expand. The expanding gas
travels through the capillary tube and applies pressure on the
power head. The power head overcomes internal spring
pressure and forces the valve open, allowing more refrigerant to
flow into the evaporator. As the outlet temperature of the
evaporator begins to drop, the gas in the sensing bulb begins to
contract, reducing pressure on the power head. The internal
spring then closes the valve, reducing the flow of refrigerant.
Figure 3-5: Thermal Expansion Valve
Orifice Tube
An orifice tube allows a steady flow of refrigerant to flow into the
evaporator through a calibrated restriction. The restriction in the
orifice tube can be fixed or variable. Evaporator outlet
temperature is controlled by cycling the compressor clutch on
and off. All orifice tube systems use an accumulator. A few
systems will also use a receiver/drier in conjunction with the
accumulator.
Figure 3-6: Orifice Tube
3-5
Theory of Operation
Evaporator
The evaporator is located in the passenger compartment of the
vehicle next to the heater core. In the evaporator, the
refrigerant changes into a vapor, absorbing heat from air flowing
through the evaporator housing. As liquid refrigerant leaves the
control valve, the pressure drops. The pressure drop causes
the boiling point of the refrigerant to drop. The refrigerant then
begins to boil. Heat flows from the air to the evaporator coils, to
the boiling refrigerant. The latent heat absorbed by the
refrigerant will later be given off in the condenser. After leaving
the evaporator, the vaporized refrigerant flows to either the
accumulator (if equipped), or to the compressor, where the
cycle starts over again.
Figure 3-7: Evaporator
3-6
Theory of Operation
Accumulator
The accumulator is located in the engine compartment near the
evaporator outlet. The accumulator allows any liquid refrigerant
exiting the evaporator time to vaporize before entering the
compressor. If it did not vaporize, the liquid refrigerant would
damage the compressor. The accumulator also contains a
desiccant to remove moisture from the system. All orifice tube
systems use an accumulator. A small number of TXV systems
use an accumulator as additional compressor protection.
✓
The desiccant can only hold a small amount of
moisture. If the system becomes contaminated with
moisture, the accumulator will require replacement.
Figure 3-8: Accumulator
3-7
Theory of Operation
Diagnostics
Most Air Conditioning performance problems fit into the
following categories:
– Mechanical,
– Electrical,
– Loss of refrigerant, or
– Component failure.
Mechanical Failures
Mechanical failures can be easy to overlook. When diagnosing
air conditioning performance problems, keep the following in
mind:
Broken or slipping drive belts will reduce system performance.
Condenser fins can become clogged with debris. Clogged
condensers will be inefficient. High side pressures will
increase due to insufficient airflow.
Too low of an idle speed will effect A/C performance.
Defective blower motors or clogged evaporator housings will
decrease system performance. There will be little to no air
flow from the vents.
Improperly adjusted or broken blend doors can reduce
performance.
Electrical Failures
Electrical problems can be the source of many air conditioning
complaints, keep the following in mind:
Low system voltage will cause the compressor clutch to slip.
— Check available voltage at the clutch. No voltage
indicates a control circuit problem.
— Check voltage on the control and power side of the A/C
relay. No voltage indicates a circuit or wiring problem.
Check A/C fan operation. A damaged fan or no fan operation
can cause high side pressures to increase and reduce system
performance.
Check the PCM (Power Control Module) for codes. An A/C
system could trigger a manufacturer specific code that could
help with A/C system diagnosis. Or, there are several generic
OBDII codes that could help such as:
P0530
P0531
P0532
P0533
P0534
3-8
—
—
—
—
—
A/C Refrigerant Pressure Sensor Circuit,
A/C Refrigerant Sensor Circuit Range,
A/C Refrigerant Sensor Circuit Output Low,
A/C Refrigerant Sensor Circuit Output High, or
Air Conditioner Refrigerant Charge Loss.
Theory of Operation
Loss of Refrigerant
The most common reason for poor air conditioning performance
is loss of the refrigerant charge. Most leaks can be found with
either a visual inspection or use of a leak detector.
Damp and dirty lines can indicate leaks.
Check the compressor seals and pressure relief valve for any
wetness.
Condensers are vulnerable to damage from road debris.
Check the evaporator with a leak detector through the drain
port or through an air vent in the dash.
A system may have more than one leak. Check the entire
system before making repairs.
If additional refrigerant is added for a leak check, let the
system run for several minutes before conducting a leak
check.
Component Failures
Compressor
Compressor may be noisy.
A/C system will not work.
High- and low-side pressure will be equal.
Condenser and Receiver/Drier
High- and low-side pressures are low: check for leaks.
High-side pressure is high and low-side pressure is low or in
a vacuum: internal blockage.
High-side pressure is high: condenser is clogged with road
debris or fan is inoperative.
Thermal Expansion Valve
Stuck Closed
Low-side pressure is low.
High-side pressure is low.
Valve is covered in frost.
Stuck open
Low-side pressure is high.
High-side pressure is high.
Frost on a low-side hose.
Cooling performance is low. The refrigerant does not have
time to evaporate.
Orifice Tubes
Blockage is most common failure.
High-side pressure is high.
Low-side pressure is in a vacuum.
Tube is covered in frost.
3-9
Theory of Operation
Gauge Readings
✓
Gauge reading
High-side high
Low-side high
Possible cause
Repair
System overcharged
– Recover and recharge
Air in system
– Leak check
TXV stuck open
– Replace valve
System leak
– Leak check
Clutch slipping
– Check clutch
Moisture in system
– Leak check/replace
receiver/drier
Orifice tube blocked
– Replace tube
TXV stuck closed
– Replace valve
High-side low
Low-side is high
Compressor Failure
– Repair/replace
compressor
High-side high
Low-side low
Internal blockage
– Repair/replace
component with
blockage
High-side low
Low-side low
3-10
Gauge readings will vary depending on ambient
temperature.
Theory of Operation
°F
°C
R–134a
°F
°C
R–134a
-60
-55
-50
-45
-40
-51.1
-48.3
-45.5
-42.7
-39.9
-10.8
-10.1
-9.3
-8.3
-7.3
27
28
29
30
31
-2.7
-2.2
-1.8
-1.1
-.5
23.7
24.5
25.3
26.1
26.9
-35
-30
-25
-20
-18
-37.2
-34.4
-31.6
-28.8
-27.7
-6.1
-4.8
-3.4
-1.8
-1.1
32
33
34
35
36
0
.5
1.1
1.5
2.2
27.8
28.6
29.5
30.4
31.3
-16
-14
-12
-10
-8
-26.6
-25.5
-24.4
-23.3
-22.2
-0.3
0.4
1.2
2.0
2.8
37
38
39
40
41
2.7
3.3
3.8
4.4
4.9
32.2
33.1
34.1
35.0
36.0
-6
-4
-2
0
1
-21.1
-19.9
-18.8
-17.7
-17.2
3.7
4.6
5.5
6.5
7.0
42
43
44
45
46
5.5
6.1
6.6
7.2
7.7
37.0
38.0
39.0
40.0
41.1
2
3
4
5
6
-16.6
-16.1
-15.4
-14.9
-14.4
7.5
8.0
8.6
9.1
9.7
47
48
49
50
55
8.3
8.8
9.4
9.9
12.7
42.2
43.2
44.3
45.4
51.2
7
8
9
10
11
-13.8
-13.3
-12.7
-12.2
-11.6
10.2
10.8
11.4
12.0
12.6
60
65
70
75
80
15.5
18.3
21.1
23.8
26.6
57.4
64.0
71.1
78.7
86.7
12
13
14
15
16
-11.1
-10.5
-9.9
-9.4
-8.8
13.2
13.8
14.4
15.1
15.7
85
90
95
100
105
29.4
32.2
34.9
37.7
40.5
95.2
104.3
113.9
124.1
134.9
17
18
19
20
21
-8.3
-7.7
-7.2
-6.6
-6.1
16.4
17.1
17.7
18.4
19.2
110
115
120
125
130
43.3
46.1
48.8
51.6
54.4
146.4
158.4
171.1
184.5
198.7
22
23
24
25
26
-5.5
-4.9
-3.4
-3.8
-3.3
19.9
20.6
21.4
22.1
22.9
135
140
145
150
155
57.2
59.9
62.7
65.5
68.3
213.5
229.2
245.6
262.8
281.0
Figure 3-9: Pressure/Temperature Chart
3-11
Theory of Operation
3-12
4
Maintenance
Use this chapter to maintain the KoolKare™ DiagnosTech™
system’s:
Master filter/dryer,
Identifier filter,
Compressor,
Particle filter,
Printer paper, and
Print cartridge.
✓
Troubleshooting information and a list of parts and
accessories is also included.
Equipment Tips
❐ Always oil the seals before connection to any tank, filter or
fitting. A leaky connection or no-flow condition may result if
the seal is dry.
Master Filter/Dryer
Change the master filter/dryer when the meter has accumulated
150 recovery pounds since the last master filter change.
Automatic Reminder Feature
Refrigerant recovery volume is monitored as a measure of when
to change the master filter/dryer. After 150 pounds of
refrigerant has been recovered a message is displayed to
change the filter. Following that message, this question is
displayed “Did you change the filter, YES or NO?”. If the answer
is YES, then the meter is reset to zero. If the answer is NO,
then the unit will remind the user to change the filter each time
the unit is powered up.
4-1
Maintenance
Changing the Master Filter/Dryer
Use the procedure in this section to change the master
filter/dryer.
Wear safety goggles and protective gloves, user
and bystander. If any refrigerant gets into eyes,
flush with water and seek a doctor’s aid
immediately, even though irritation may cease.
Do not remove master filter while under pressure.
Perform maintenance procedure for removing
master filter in this section.
Prevent refrigerant from contacting the skin.
Read, understand and follow Safety Information in
the front of this manual.
1. Press NEXT button on main menu screen.
2. Press MAINTENANCE button.
3. Press REPLACE FILTER and the following message
displays:
DO YOU WANT TO CHANGE THE FILTER?
FILTER POUNDS XX
4. Press YES.
5. KoolKare™ DiagnosTech™ system will prompt to
change master filter/dryer.
Figure 4-1: Master Filter/Dryer
6. Unscrew two hose fittings from master filter/dryer.
7. Lift master filter/dryer out of holding bracket.
✓
4-2
Dispose of the filter according to local, state and
federal regulations that apply in your area.
Maintenance
8. Install new master filter/dryer, matching direction of flow
on filter with flow decal on cabinet.
9. Attach fittings hand tight.
10. Check for leaks.
Changing the Identifier Filter
Replace the refrigerant identifier filter when it starts to show
color changes.
Wear safety goggles and protective gloves, user
and bystander. If any refrigerant gets into eyes,
flush with water and seek a doctor’s aid
immediately, even though irritation may cease.
Do not remove identifier filter while under
pressure. Perform maintenance procedure for
removing identifier filter in this section.
Prevent refrigerant from contacting the skin.
Read, understand and follow Safety Information in
the front of this manual.
1. Turn off power to KoolKare™ DiagnosTech™ system.
Figure 4-2: Identifier Filter
2. Gently pull filter out of holding bracket.
3. Disconnect lines to filter.
✓
Dispose of the filter according to local, state and
federal regulations that apply in your area.
4. Connect lines to new filter, paying attention to flow
markings on filter.
5. Remount filter in holding bracket.
4-3
Maintenance
Changing a Particle Filter
Use the procedure in this section to clean or replace an in-line
particle filter screen.
Wear safety goggles and protective gloves, user
and bystander. If any refrigerant gets into eyes,
flush with water and seek a doctor’s aid
immediately, even though irritation may cease.
Do not remove particle filter while under pressure.
Perform maintenance procedure for removing
particle filter in this section.
Prevent refrigerant from contacting the skin.
Read, understand and follow Safety Information in
the front of this manual.
1. Verify there is no pressure in service hoses.
2. Turn off power to KoolKare™ DiagnosTech™ system.
3. Unscrew the two hex connectors for the particle filter
housing between pod assembly and service coupler.
Figure 4-3: Particle Filter
4. Pull particle filter screen out of housing.
5. Clean or replace filter as needed.
6. Reattach particle filter housing connection.
✓
Apply oil to particle filter housing o-ring before
reassembly to prevent damage to o-ring.
7. Check for leaks.
4-4
Maintenance
Replacing Printer Paper
Use this procedure to replace printer paper.
1. Have KoolKare™ DiagnosTech™ system powered up
(refer to Power Up page 2-2).
2. Press NEXT button on main menu screen.
3. Press MAINTENANCE button.
4. Remove attaching screws and cover plate from printer.
5. Replace printer paper roll and start to feed the paper into
the printer.
6. Hold PAPER FEED button until paper is fed through
printer.
7. Replace printer cover plate and attaching screws.
Replacing Print Cartridge
Use this procedure to replace print cartridge.
1. Remove attaching screws and cover plate from printer.
2. Gently lift print cartridge straight out with thumb and
forefinger.
3. Carefully align and replace new print cartridge and
ribbon.
4. Replace printer cover plate and attaching screws.
4-5
Maintenance
Troubleshooting
Symptom
Machine does not turn on
Remedy
Power cord not plugged in
– Plug in cord
No power from A.C. outlet
– Check power source
Circuit breaker on machine
tripped
– Reset 15 amp circuit
breaker by pushing
circuit breaker button
Service couplers not open
– Open service couplers
Particle filter dirty
– Open filter housing and
clean or replace screen
Fitting(s) not properly
connected to master filter/dryer
– Tighten fitting(s) finger
tight
Leaky service hose(s) or
adapter connection(s)
drawing in air
– Tighten fitting(s) or
replace seals in
finger tight fitting(s)
Loose oil separator bowl
– Call Service
Does not charge
Insufficient refrigerant in
internal charging cylinder
– Fill tank with refrigerant
– Open virgin tank valve
– Replace virgin tank
Machine does not draw
a vacuum
Loose hose connection(s)
– Tighten loose hose
connection(s)
Vacuum pump not running
– Call Service
Hissing noise from oil
separator during recover
and/or vacuum mode
Oil separator bowl loose
– Call Service
Refrigerant loss from
tank on scale over time
Leaky tank connection(s)
– Attempt to tighten
connection(s), if
unsuccessful, Call Service
Long recover times
System being recovered is
cold and has components that
hold a substantial amount of
liquid refrigerant
– Heat A/C system by
running engine and keep
hood closed as much as
practical to hold in heat
– Particle filter(s) dirty,
clean or replace
Particle filter dirty
– Open filter housing and
clean or replace screen
Refrigerant not being
removed from vehicle
Excessive purging of
non-condensable gases
4-6
Possible Cause
Maintenance
Replacement Parts
Part Number
Description
1-27280 ........................................Service Coupler, Low-Side
1-27180 ......................................Service Coupler, High-Side
EEAC300A1 ....................................................Identifier Filter
1-9881 ......................................................Master Filter/Dryer
5-8126 ..............................................................Printer Paper
2-20466 ......................................................Printer Cartridge
1-6181 ................................................Particle Filter Element
1-15080 ..........................................Low-Side Adapter Fitting
Optional Accessories
EAK0027C00AS ............Vehicle Adapter Repair Kit (O-rings)
EEAC1315ACV ............................................Protective Cover
For service or to order replacement parts or optional
accessories, contact EquiServ® or call 1-800-225-5786.
4-7
Maintenance
4-8