1
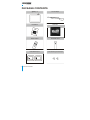
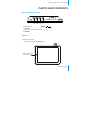
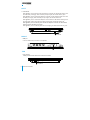
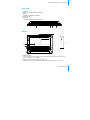
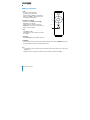
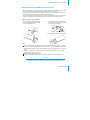
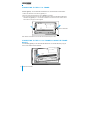
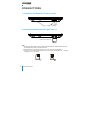
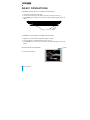
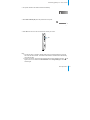
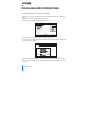
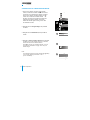
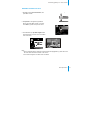
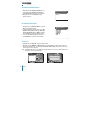
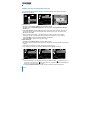
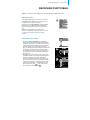
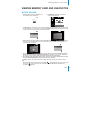
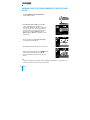
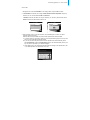
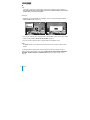
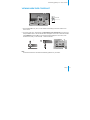
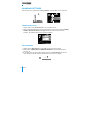
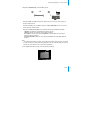
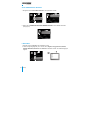
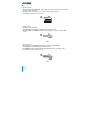
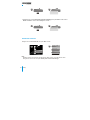
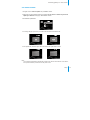
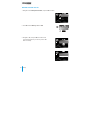
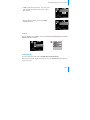
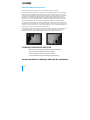
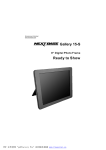
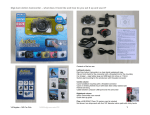
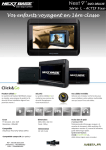
Entertainment Unlimited
www.next-base.com
@Gallery 15
8'' Wi-Fi Digital Photo Frame
Photos without Frontiers
,
Nextbase @Gallery 15 - User s Guide
CONTENTS
CONTENTS......................................................1
IMPORTANT SAFETY INSTRUCTIONS......... 2
GENERAL INTRODUCTION............................3
PACKAGE CONTENTS...................................4
PARTS AND CONTENTS.................................5
Button definitions.........................................5
Front............................................................ 5
Left...............................................................6
Right............................................................ 6
Top...............................................................6
Bottom......................................................... 7
Back............................................................ 7
Remote control........................................... 8
Notes on using the remote control unit....... 9
Replacing the battery.................................. 9
Connecting to the 8'' x 6'' frame.................10
Connecting to the 10'' x 8'' frame by using
the frame mount.........................................10
How to use the extendable stand support..11
CONNECTIONS.............................................12
Connecting the adapter to the DC socket..12
Inserting a memory card into
@Gallery 15...............................................12
Inserting a USB stick into @Gallery 15......13
BASIC OPERATIONS.....................................14
Turning on the unit by using the adapter....14
Turning on the unit by using the battery.....14
Select Wi-Fi network..................................14
PICASA RELATED OPERATIONS.................16
Getting a free account with Picasa............16
Logging into Picasa account......................17
Connecting to a wireless network..............18
Viewing Picasa photos...............................19
Send photos.......................................... 20
Begin slideshow.....................................21
Slideshow settings.................................21
Delay time..............................................21
Slideshow sequence............................. 22
Slideshow effect.....................................22
Copy to.................................................. 22
Zoom in................................................. 23
Rotate....................................................23
Properties.............................................. 23
Download and synchronize photos........24
RECEIVING PHOTO MAIL.............................25
Email account............................................25
Receiving photo mail................................. 25
VIEWING MEMORY CARD AND USB
PHOTOS.........................................................27
Batch upload..............................................27
Viewing photos from a memory card or
USB stick....................................................28
Upload................................................... 29
Delete.................................................... 30
Viewing Weather Forecast.........................31
Changing Settings..................................... 32
Resize resolution...................................32
Wi-Fi network.........................................3.2
Auto and manual receive.......................3
.4
Language...............................................34
Display settings......................................35
Date and time.........................................35
Slideshow settings.................................37
Reset .................................................... 37
Personal profile......................................38
Software update.....................................39
Backup Picasa photo.............................40
Status.....................................................41
Login Picasa..........................................41
OTHER...........................................................42
Dimension and parameter......................... 42
Trouble shooting........................................43
Smashed screen identification...................44
General Introduction
1
IMPORTANT SAFETY INSTRUCTIONS
1.
Read these instructions.
2.
Keep these instructions.
3.
Heed all warnings.
4.
Follow all instructions.
5.
Do not use this device near water.
6.
Clean only with a dry cloth.
7.
Do not block any ventilation openings. Install in accordance with the manufacturer's
instructions.
8.
Do not install near any source, such as radiator, heat register, stove, and any other device
(including amplifiers) that produces heat.
9.
Do not defeat the safety purpose of the polarized or grounding-type plug. A polarized plug
has two blades with one wider than the other. A grounding-type plug has three prongs. The
wide blade or the third prong are provided for your safety. If the provided plug does not fit into
your outlet, consult an electrician for replacement of the obsolete outlet.
10. Prevent the power cord from being walked on or pinched particularly near plugs, especially at
the point where they exit from the device.
11. Only use attachments/accessories specified by the manufacturer.
12. Unplug this device during lightning storms or when unused for long periods of time.
13. Refer all servicing to qualified service personnel. Servicing is required when the device has
been damaged in any way, such as power-supply cord or plug is damaged, liquid has been
spilt or objects have fallen onto the device, the device has been exposed to rain or moisture,
does not operate normally, or has been dropped.
14. To reduce the risk of fire or electric shock, do not expose this device to rain or moisture.
15. The device shall not be exposed to dripping or splashing and any object filled with liquids, shall
be placed on the device.
16.
WEEE statement: Please do not throw electronic devices into household waste. Separate
them for correct recycling.
2
General Introduction
,
Nextbase @Gallery 15 - User s Guide
GENERAL INTRODUCTION
Thank you for purchasing this Wi-Fi digital photo frame. Please read this manual carefully before
operating and keep it for future reference.
Nextbase @Gallery 15 is an 8'' Wi-Fi digital TFT photo frame with a 2GB internal memory which
enables you to store up to 5000 photos. It can upload and download photos via a Wi-Fi internet
connection. The built-in Lithium battery (3.7V, 1500 mAh) provides up to 2-hour use. It supports
SD/MMC/MS/MS-PRO/xD memory cards and USB sticks. Pictures can be uploaded to the Picasa
website and viewed from anywhere in the world. @Gallery 15 has been designed to fit all standard
8'' x 6'' photo frames, which enables it to be personalized to suit your photos or your room decor.
@Gallery 15 includes an extendable stand as well as wall fixing points which allow you to use it on
a table or hang it on a wall. On top of this @Gallery 15 has an inbuilt weather forecast function.
Now, open the box and enjoy your digital photos!
General Introduction
3
PACKAGE CONTENTS
@Gallery 15
AC-DC Adapter
User Manual
Quick Start
tosw utF
itho ronti
4
Remote Control
Extendable Stand
Frame Mount X 2pcs
Frame Retaining Screws X 2pcs
General Introduction
,
Nextbase @Gallery 15 - User s Guide
PARTS AND CONTENTS
BUTTON DEFINITIONS
1
1. ESC (Escape)
2
3
4
2. DIR/OK (
)
3. HOT-KEY
(Press to check the weather forecast)
4. STANDBY
FRONT
1. Remote control sensor
The remote control signals are received here.
Remote control sensor
(Do not cover this)
General Introduction
5
LEFT
1. LED indicator
When @Gallery 15 is powered and the DC adapter is connected, the LED indicator will be red to
show the battery is charging. When the battery is fully charged, the indicator will turn green.
When @Gallery 15 is off and the DC adapter is connected, the LED indicator will be red to show
the battery is charging. When the battery is fully charged, the indicator will turn off.
When @Gallery 15 is on and the DC adapter is not connected, the LED indicator will be green to
show the battery is being used. When the battery is discharged, the indicator will turn off.
When @Gallery 15 is in its standby mode and the DC adapter is connected, the LED indicator
will be red to show the battery is charging.
When @Gallery 15 is in its standby mode and is not charging, the LED indicator will turn green.
LED indicator
RIGHT
1. USB port
Connect a USB memory stick here to view pictures.
ES C
DIR/OK
HOT-K EY
STA ND BY
USB
TOP
1. Wi-Fi antenna
Please pull out the Wi-Fi antenna to connect to the internet.
Wi-Fi antenna
6
General Introduction
,
Nextbase @Gallery 15 - User s Guide
BOTTOM
1. DC IN 5V
Connect the included AC/DC adapter here.
2. Reset
Press it when @Gallery 15 crashes.
3. Power ON/ OFF
4. Card slot
Support SD /MMC /MS /MS Pro /xD cards.
4
3
2
1
BACK
2
3
2
1
1
1. Metal connectors
Pull out metal frame connectors that can be screwed into wooden frames by using screws
provided. (See page 10 for details)
2. Wall hanging mount (horizontal or vertical option)
3. Table top stand. Flip out, and adjust to either vertical or horizontal use. (See page 11)
General Introduction
7
REMOTE CONTROL
1. ESC
To exit the current operation.
Go back to the previous menu.
When operating a slideshow or full screen
display, press ESC to exit the mode, and
move back to the thumbnail.
2. Up /Down /Left /Right
Direction key for Up /Down /Left /Right.
Navigating in sub-directory.
When a picture is viewed in full screen,
Up/Down can be used to view the previous
picture or the next picture.
1
ESC
2
3
OK
4
HOT-KEY
5
STANDBY
3. OK
Press OK to confirm.
Press OK to enter the next menu or confirm
the selection.
4. HOT-KEY
Press HOT-KEY to get the weather forecast.
5. STANDBY
Press for about 3 seconds, then the unit will enter standby mode. Press STANDBY again, then
the unit will wake up and enter normal operation mode.
Note:
1. The buttons on the remote control have exactly the same functions as the ones on the unit of
@Gallery 15.
2. Standby function would not work if the unit is not powered by the AC-DC adapter.
8
General Introduction
,
Nextbase @Gallery 15 - User s Guide
NOTES ON USING THE REMOTE CONTROL UNIT
1. Do not drop or step on the remote control or subject it to shocks. Note that the remote control
may not work if there are obstacles between the remote sensor and itself.
2. Do not expose the remote sensor to strong light. Doing so may make operation impossible.
3. Use the remote control unit within the specified operating range.
4. Do not block the signal between @Gallery 15 sensor and the remote control. If the signal is
blocked, the remote control will not work. Remote control sensor is shown on page 5.
REPLACING THE BATTERY
1. Use your finger nail to press A and
pull out the battery holder according
to the indicated direction.
2. Remove the old battery, and put the
new battery on the battery holder with
the + side facing upwards.
Lithium
Battery (CR2025)
3. Fit the battery holder back to its place.
NOTE:
To prevent leakage of fluid from the lithium battery, remove the battery when not using the
remote control unit for long periods of time (one month or more). If the battery leaks fluid,
carefully take the battery out and wipe the battery holder, then replace with a new lithium
battery.
Caution: The battery may present a risk of fire if not handled properly. Do not recharge,
disassemble, or heat it above 100 oC.
Replace battery with the same type.
Dispose of used battery properly, keep away from children and do not dispose it in fire.
CAUTION
RISK OF EXPLOSION IF BATTERY IS REPLACED BY AN INCORRECT TYPE.
DISPOSE OF USED BATTERIES ACCORDING TO THE INSTRUCTIONS.
General Introduction
9
CONNECTING TO THE 8'' X 6'' FRAME
Nextbase @Gallery 15 can match with all standard 8'' X 6'' wooden frames as shown below:
1. Attach the standard 8" X 6" frame to @Gallery 15.
2. Move the frame locking latches to secure @Gallery 15 in place.
3. If the chosen frame does not have its own locking latches, then use the built-in metal frame
connectors on @Gallery 15. Pull out the metal frame connectors as shown below. Attach
to the frame by using the screws supplied.
Slide out both sides
Note: Remote controldoes not work if the sensor is blocked by the frame.
CONNECTING TO THE 10'' X 8'' FRAME BY USING THE FRAME
MOUNT
Your Nextbase @Gallery 15 can match with all standard 10'' X 8'' wooden frames by using the
frame mount included in the accessories:
10
General Introduction
,
Nextbase @Gallery 15 - User s Guide
Attach @Gallery 15 to the frame mount, and make sure that the remote control sensor is aligned
with the remote control window. Press down and click in to place securely.
Remote control sensor
Remote
control window
Frame mount
@Gallery 15
1. Choose your favorite 10'' X 8'' frame.
2. Slot @Gallery 15 into the supplied Nextbase frame mount.
3. Then mount the frame (with @Gallery 15) into the standard 10'' X 8'' wooden frames, and fix
securely.
HOW TO USE THE EXTENDABLE STAND SUPPORT
Nextbase @Gallery 15 can be placed on a table by using the extendable stand. It can be placed
horizontally or vertically as desired.
1. Select either horizontal or vertical modes as desired.
2. Pull up the stand on the back of @Gallery 15.
3. Adjust the length of the support by sliding the "Lock-Unlock" latch, and then pull the support
stand to the desired length.
4. Push the latch to Lock to fix the position.
5. Lean @Gallery 15 back to the desired position.
1
2
3
4
5
General Introduction
11
CONNECTIONS
1. CONNECTING THE ADAPTER TO THE DC SOCKET
2. INSERTING A MEMORY CARD INTO @GALLERY 15
Insert the card as shown
Note:
1. Because of various sizes of memory cards provided by different suppliers, please adjust the
angle slightly if the memory card cannot be read.
2. Mini SD adapter or dual voltage SD cards may not be recognized by @Gallery 15.
3. Please do not use the MS-PRO adapter with a surface whose paint has fallen off, or damage
to @Gallery 15 may be caused.
12
General Introduction
,
Nextbase @Gallery 15 - User s Guide
3. INSERTING A USB STICK INTO @GALLERY 15
Insert the USB stick as shown below.
Note:
1. Support USB 2.0.
2. Support USB host to read and write USB disk.
3. Support JPEG decoding.
ES C
DIR/OK
HOT-K EY
STA ND BY
General Introduction
13
BASIC OPERATIONS
TURNING ON THE UNIT BY USING THE ADAPTER
1. Plug the AC-DC adapter to a wall outlet.
2. Connect the DC output plug of the adapter to the DC input jack of the main unit.
3. Press ON/OFF for 3 seconds to turn on the power, and the Nextbase opening screen will
appear.
2
3
1
TURNING ON THE UNIT BY USING THE BATTERY
1. @Gallery 15 also works without adapter if the battery is charged.
2. The built-in battery (3.7V/1500mAh) allows up to 2-hour use.
3. Press ON/OFF for 3 seconds to turn on the power, and the Nextbase opening screen will
appear.
SELECTING WI-FI NETWORK
1. Pull out the Wi-Fi antenna.
14
Basic Operations
Lighting
,
Nextbase @Gallery 15 - User s Guide
2. The system will search for wireless network automatically.
Scan for wireless networks...
3. Select Wi-Fi network (AP). Enter the password if it is required.
Nextbase
Security enable wirless network
Kismet
Security enable wirless network
Xs Tsh
Security enable wirless network
WEP
WEP
WEP
4. Press OK on the unit or on the remote control to confirm your choice.
OK
Note:
1. For first time setup, or first time operation after reset, the network list will pop up to let the
user select the Wi-Fi network. The selected network will be remembered and automatically
connected next time.
2. For later connections, if the previously selected network cannot establish connection,
will
appear on the screen. Please enter Wi-Fi Network under Change Settings to search for
network again.
Basic Operations
15
PICASA RELATED OPERATIONS
GETTING A FREE ACCOUNT WITH PICASA
If you do not have an account with Picasa, go to http://picasaweb.google.com to create your
account.
Please follow the steps below to create a new account.
1. Visit the Picasa website at http://picasaweb.google.com
Http://picasaweb.google.com
Picasa
TM
Web Albums
Fast and easy photo sharing from Google
Just added! Try our new photo search.
Sign in to Picasa Web Albums with your
Search Photos
Google Account
Email:
Password:
Remember me on this
computer.
Sign in
I cannot access my account
Post photos and videos online in seconds
One-click web upload directly from Picasa, or add photos using a web browser or your Mac.
Share photos with friends and family
Share albums exclusive with friends and family, or make your albums pubic and share with the Picasa
community.
,
Dont have a Google Account?
Create a new
Google Account
,
View and save your friends
photos
,
Keep track of your favorite people and see when they add something new. Download friends albums too.
Enjoy photos at their best
See big photos, scroll though them quickly, rotate and zoom. Have fun with captions and comments.
Sign Up!
Learn More >>
C 2007 Google - Google Home - Privacy Policy - Help
2. Click ''Create a new Google account'' to create your new account.
3. Enter your current email address, select a password and user name, and enter other relative
information as shown below.
Http://picasaweb.google.com
Γοογλε
TM
Create a Google Account - Picasa Web Albums
Accounts
Create an Account
Your Google Account gives you access to Picasa Web Albums and other Google services. If you already have a Google
Account, you can sign in here.
Require information for Google account
Your current email address:
e.g. [email protected]. This will be used to sign-in to your account.
Password strength:
Choose a password:
Minimum of 8 charaters in length.
Re-enter password:
Remember me on this computer.
Creating a Google Account will enable Web History. Web History is a feature
that will provide you with a more personalized experience on Google that includes
more relevant seach results and recommendations. Learn More
Enable Web History.
Get started with Picasa Web Albums
Desired username:
4. After entering relevant information, read Google Terms of Service and accept if you agree.
5. Once you have created an account, upload your pictures by following the steps in the user
manual.
16
Basic Operations
,
Nextbase @Gallery 15 - User s Guide
LOGGING INTO PICASA ACCOUNT
Once Wi-Fi Network has been selected under Change Settings, the device will scan for wireless
networks automatically, and then display all available networks. Select the network you wish to
connect to by pressing OK.
Enter your Picasa email address.
Enter your password.
Press OK on the unit or on the remote control
to confirm the information you entered.
Picasa
T
M
Email:
Password:
Save
Not saved
Picasa is a trademark of Google Inc.
Press OK before entering the password. The key board
will appear on the screen.
Use the navigation keys Up/Down/Left/Right to enter letters
and numbers, then press OK to confirm.
Please enter the email address.
1
2
3
4
5
q
w
e
r
t
u
i
f
g
l
;
z
m
x
,
o
pa
h
j
k
c
.
v
b
7
y
8
-
=
n
/
Shift
Picasa
T
M
Email:
Password:
******
XXXXXXXXX
Save
Not saved
Note:
If Not Saved has been selected, you will need to re-enter
your email address and password when turning on the
power next time.
9
Enter
d
\
Space
@
Press Save to save email address and password
and enter the main menu.
6
s
2 00 8/1 /1 7
Receive Photo M ail
View M emory Card
and USB Photo
View Picasa Photos
Check Weather and
Latest News
Change Settings
Picasa is a trademark of Google Inc.
02: 4 5
0
Basic Operations
17
CONNECTING TO A WIRELESS NETWORK
1. If the icon for network connection ''
'' appears
in white, it means the wireless network has not been
connected, and re-searching the network is needed.
If the icon for network connection appears in ''
''
in blue color, it means the wireless network
has been connected. The quantity of the blue lines
represent the reception condition. 3 blue lines
indicate the network signal is strong, while 1 blue
line indicates it is weak.
2 00 8/1 /1 7
02: 4 5
Receive Photo M ail
View M emory Card
and USB Photo
View Picasa Photos
Check Weather and
Latest News
Change Settings
Picasa is a trademark of Google Inc.
2 00 8/1 /1 7
02: 4 5
Resize Resolution
Change Settings
Wi-Fi Network
2. Navigate down to Change Settings, and press OK
to confirm.
Auto and Manual Receive
Language
Display Settings
3. Navigate down to Wi-Fi Network, and press OK to
confirm.
Change Settings
Scan for wireless networks
Wi-Fi Network
IP address and DNS
4. Navigate to Scan for wireless network, and press OK
to confirm. The system will then search for a wireless
network and show the available networks.
Press OK to choose your preferred network. You can
now follow the instructions on page 18 to view your
Picasa images.
Note:
The wireless channel of the Wi-Fi module that @Gallery
15 is currently applying is between 1 and 11
(2.412~2.462GHz).
Change Settings
Wi-Fi Network
Scan for
wireless
networks
Scan for wireless networks...
2 00 8/1 /1 7
Change Settings
Wi-Fi Network
Scan for
wireless
networks
Nextbase
Security enable wirless network
Kismet
Security enable wirless network
Xs Tsh
Security enable wirless network
18
Basic Operations
02: 4 5
WEP
WEP
WEP
,
Nextbase @Gallery 15 - User s Guide
VIEWING PICASA PHOTOS
2 00 8/1 /1 7
1. Navigate down to View Picasa Photos, and
press OK to confirm.
02: 4 5
Receive Photo M ail
View M emory Card
and USB Photo
View Picasa Photos
Check Weather and
Latest News
Change Settings
Picasa is a trademark of Google Inc.
2. Hit Up /Down to navigate through different
albums, and press OK to confirm your choice.
Press ESC to go back to the previous menu.
2 00 8/1 /1 7
View Picasa photos
02: 4 5
Character (9)
Plant (5)
Animal (2)
3. Press Direction keys Up /Down /Right /Left to
select the photos you want to view. Press OK to
view in full screen.
2 00 8/1 /1 7
0 2: 4 5
2 00 8/1 /1 7
02: 4 5
View Picasa photos
Character (9)
Vitas-04.jpg
Note:
1. When a thumbnail photo is selected, it will be enlarged and highlighted by a yellow frame. The
file name will be shown at the bottom of the screen.
2. The maximum length for an album name is 99 letters.
Basic Operations
19
While viewing a photo in full screen, you can press OK to bring up a list of options.
Photo
Photo
Send
Begin Slideshow
Slideshow Settings
Copy To
Zoom in
Rotate
Properties
2 00 8/1 /1 7
0 2: 4 5
Send
Begin Slideshow
Slideshow Settings
Copy To
Zoom in
Rotate
Properties
SEND PHOTOS
1. Press OK to select Send, you can either select Add New Address or choose an existing email
address.
Address Book
Add New Address
2. Press OK to add a new address, use the navigation keys and press Enter to confirm the address
in the keyboard menu.
2 00 8/1 /1 7
Please enter the email address.
1
9
2
0
3
4
5
q
w
e
r
t
u
i
o
pa
f
g
h
j
k
l
;
z
x
c
v
b
Space
6
7
y
s
One mail has been sent!
8
Enter
d
n
Shift
m
@
,
.
\
/
-
=
02: 4 5
20
Setup
,
Nextbase @Gallery 15 - User s Guide
3. Navigate down to select the email address, press OK to confirm, and the selected photo will be
sent to the chosen email account. When the photo is being sent,
will appear in the top right
corner of the screen. The message "One mail has been sent!" will appear on the screen, once
the photo is successfully sent out.
4. If the message "One mail cannot be sent! " appears, it indicates the photo fails to be sent out.
Please repeat the steps above.
Note:
1. The maximum quantity of the address book is 50 email addresses. If a 51st email address
is entered, the 1st email address will be deleted automatically.
2. If an email address is entered more than once, the message "The email address already
exists." will pop up.
BEGIN SLIDESHOW
Navigate down to Begin Slideshow, and press OK to start slideshow.
SLIDESHOW SETTINGS
Navigate down to Slideshow Settings, and press OK.
A sub-menu will pop up, which includes the settings of
Delay Time, Slideshow Sequence, and
Slideshow Effect.
DELAY TIME
1. Navigate down to Delay Time, and press OK to
enter the sub-menu.
2. There are 10 optional delay time: 5 seconds,
10 seconds, 30 seconds, 1 minute, 5 minutes,
30 minutes, 1 hour, 4 hours, 12 hours and
24 hours. Navigate and press OK to confirm the
preferred delay time.
Photo
Delay Time
Slideshow Sequence
Slideshow Effect
Delay Time
5 seconds
10 seconds
30 seconds
1 minute
5 minutes
30 minutes
1 hour
4 hours
12 hours
24 hours
Setup
21
SLIDESHOW SEQUENCE
1. Navigate down to Slideshow Sequence, and
press OK to select Sequential or Random.
2. Select Sequential to play photos in sequence.
3. Navigate down to select Random to play
photos randomly.
Slideshow Sequence
Sequential
Random
SLIDESHOW EFFECT
1. Navigate down to Slideshow Effect, and press
OK to select different effects.
2. 8 optional slideshow effects are provided: Off,
Random, Scroll down, Scroll up, Scroll left,
Scroll right, Block flip and Morph. Navigate
and press OK to confirm the preferred effect.
3. You can select Off to disable the transition, or
select Random to enable random transition.
Slideshow Effect
Off
RandomScroll
downScrollup
ScrollleftScroll
rightBlockflip
Morph
COPY TO
1. Navigate down to COPY TO, and press OK to confirm.
2. Navigate to select USB Disk or Memory Card, and press Enter. Your photo will be copied to
the selected storage base. The message "One file has been copied" will appear on the screen
when the process is completed.
Note: The Copy To function is not available for the photos stored in memory card and USB due to
consistency with the Picasa website.
Copy To
USB
Memory Card
2 00 8/1 /1 7
02: 4 5
2 00 8/1 /1 7
One file has been copied!!!
22
Setup
02: 4 5
,
Nextbase @Gallery 15 - User s Guide
ZOOM IN
1. Navigate down to Zoom In, and press OK. Photo will be displayed in twice its original size.
2. Press OK again, and photo will be displayed respectively in 4, 8, 16 and 32 times its original
size.
3. Use the navigation keys Up/Down/Left/Right to view the enlarged photo.
2 00 8/1 /1 7
ROTATE
02: 4 5
90
1. Navigate down to select Rotate, and press
OK to rotate the picture by 90 degrees.
Press OK again to continue rotation to 180
degrees, 270 degrees and back to 0 degree.
PROPERTIES
Navigate down to select Properties, and press
OK to confirm. The file name, file size,
resolution and creation time of the photo will be
displayed.
Properties
File name:
vitas_02.jpg
File size:
72,994 Bytes
Resolution:
1024*768
Creation time:
2007-12-25 10:05:00
Setup
23
DOWNLOAD AND SYNCHRONIZE PHOTOS
You can download and synchronize photos from the Picasa website to the internal memory by
following the steps below.
2 00 8/1 /1 7
0 2: 4 5
2 00 8/1 /1 7
0 2: 4 5
Resize Resolution
Auto Receive
On
2 00 8/1 /1 7
02: 4 5
Off
Change Settings
Change Settings
Auto&Manual
Receive
Wi-Fi Network
Manual Receive
You have got 1 new photos.
View now
Auto&Manual Receive
View later
Language
Display Settings
A. Auto Receive
1. Navigate down to Change Settings, and press OK to confirm.
2. Navigate down to Auto and Manual Receive, and press OK to enter Auto Receive, Manual
Receive menu.
3. Select Auto Receive, and press OK to select On. The system will automatically download and
synchronize photos from the Picasa website to the internal memory every 15 minutes. Press
OK again to select Off.
4. When a new photo is received, a message will pop up to inform the user. The message
includes the number of Picasa photos and the number of email photos you have received.
Select View Now to begin new photos' slideshow automatically.
Select View Later to go back to the previous screen.
B: Manual Receive
1. Navigate down to Manual Receive, and press OK to confirm.
2. The system will start to download and synchronize photos from the Picasa website to the internal
memory.
3. If a new photo is received, a message will pop up to inform the user.
4. If no new photo is received, the message ''There are no new photos'' will pop up.
2 00 8/1 /1 7
0 2: 4 5
2 00 8/1 /1 7
0 2: 4 5
Auto Receive
Change Settings
Auto&Manual
Receive
Manual Receive
2 00 8/1 /1 7
02: 4 5
There is no new photo!
Begin to synchronize with the website.
On
Change Settings
Change Settings
Auto&Manual
Receive
Manual
Receive
Auto&Manual
Receive
Manual
Receive
Note:
1. When downloading or synchronizing photos from the Picasa website,
will appear in the top
right corner of the screen. E.g,
5/10 Means there are 10 photos in total for downloading and
the fifth one is currently being downloaded.
2. The Auto and Manual Receive function can also be used for receiving email photos.
24
Setup
,
Nextbase @Gallery 15 - User s Guide
RECEIVING PHOTO MAIL
@Gallery 15 can receive photo mails from PC and other @Gallery 15 digital photo frames.
EMAIL ACCOUNT
2 00 8/1 /1 7
A free built-in email account of your own is provided in
your @Gallery 15 by Nextbase. This account can send
and receive photo mails, but cannot edit.
Navigate down to Change Settings, and press OK to
enter the sub-menu. Navigate down to Personal
Profile, and press OK to confirm. Then you can see
your
@Gallery 15 email address on the top of the
screen. Once @Gallery 15 has been reset, the email
a ccount will be erased, and a new one will be
created.
02: 4 5
@Gallery Email Account
Change Settings
Personal Profile
[email protected]
Picasa Account
[email protected]
Picasa Profile Photo and Nickname
Nextbase
Picasa URL
Http://picasaweb.google.c om/Jack@ yahoo.com
2 00 8/1 /1 7
0 2: 4 5
Receive Photo Mail
RECEIVING PHOTO MAIL
1. Navigate to Receive Photo Mail, and press OK to
confirm. The email senders and their email addresses
will appear. On this page, every email account includes
3 sections of information sender's name, email address,
and email quantity. The email quantity consists of 2
parts the number of unread emails and the total number
of emails (e.g. 2/5 means there are 5 emails in total,
and 2 of them are unread.). If there is an unread email,
an unfolded envelop icon will also appear beside the
sender's name.
2. Navigate to the email account you want to check, and
press OK to confirm. Then all the photo mails sent from
this account will appear. The photo mails appear
according to their sent time, that is, the latest one will
be shown first. On this page, every photo mail includes
3 sections of information a Read/Unread icon, email
subject, and the sent date. If the photo mail has never
been read, the icon will be
. If the photo mail has
been read before, the icon will be
.
View Memory Card
and USB Photo
View Picasa Photos
Check Weather and
Latest News
Change Settings
Picasa is a trademark of Google Inc.
2 00 8/1 /1 7
0 2: 4 5
Receive Photo Mail
Jack
[email protected](0/1)
Lucy
[email protected](0/1)
2 00 8/1 /1 7
0 2: 4 5
Receive Photo Mail
Pj-photos(4)
2008/4/1 11:06:00
Pj-photos(4)
2008/3/29 10:55:00
Pj-photos(4)
2008/3/28 06:02:58
Pj-photos(4)
2008/3/28 05:27:09
Setup
25
3. Navigate to the photo mail you want to check, press
OK to confirm, and then the photos will be displayed.
If the mail is included with text, the text message will
be shown as a photo file as well, and listed at the
beginning.
2 00 8/1 /1 7
Receive Photo Mail
test(3)
02: 4 5
Test
Dear
Best rgds
Jack
Apollo W orldwide Limited
2008-04-01
112.jpg
Note:
The photo mail will be updated every 15 minutes to check for new emails when Auto Receive
is selected under the Auto and Manual Receive settings. (For detailed information of Auto
Receive, please refer to page 34.)
26
Setup
,
Nextbase @Gallery 15 - User s Guide
VIEWING MEMORY CARD AND USB PHOTOS
BATCH UPLOAD
1. Insert a memory card or a USB stick, and
the following image will appear.
2 00 8/1 /1 7
2. If View Now is selected, the thumbnail
screen will be displayed.
02: 4 5
2 00 8/1 /1 7
02: 4 5
M emory Card
Found new photos.
Photo (10)
View Now
Upload All
Vitas-04.jpg
3. If Upload All has been selected, the system will display the screen below. You can either select
an existing album or create a new one. After pressing OK, all photos will be initially stored in the
memory buffer and then uploaded to the Picasa website.
2 00 8/1 /1 7
0 2: 4 5
Album List
Create Album
test(Unlisted)
Sakura(Public)
may(Unlisted)
Poster(Public)
China(Public)
2 00 8/1 /1 7
02: 4 5
Photos have been successfully
saved in the temporary memory,
and will be uploaded to Picasa
website.
Memory Card
USB
Each online album can contain at most 500images.
4. During upload, if the photo quantity of the selected album exceeds 500, the message below will
be shown. Select another album or create a new album and press OK. The extra photos will
uploaded to the new album.
2 00 8/1 /1 7
The photo quantity of the selected
album has reached the maximum
500pcs. Please choose another
album or to create a new album to
continue the upload.
OK
02: 4 5
2 00 8/1 /1 7
02: 4 5
Album List
Create Album
test(Unlisted)
Sakura(Public)
may(Unlisted)
Poster(Public)
China(Public)
Esc
Each online album can contain at most 500images.
5. When the memory of your Picasa website account is full, the message "The memory space of
your Picasa account is full. X photos upload failed." will appear on the screen. The photos
saved in the memory buffer will be automatically deleted after the upload failure.
6. Photo Display Order: After batch upload is done, the user can view the uploaded photos through
the option View Picasa Photos. The photos can be shown randomly.
7. If Quit is selected, the system will exit the current menu and go back to the previous screen.
Note:
will appear in the top right corner of the
When uploading pictures from memory card /USB,
screen. E.g,
5/10 means there are 10 photos in total for uploading and the fifth one is
currently being uploaded.
Setup
27
VIEWING PHOTOS FROM A MEMORY CARD OR USB
STICK
1. Select View Memory Card and USB Photos,
and press OK to confirm.
2 00 8/1 /1 7
02: 4 5
Receive Photo Mail
View Memory Card
and USB Photo
View Picasa Photos
Check Weather and
Latest News
Change Settings
Picasa is a trademark of Google Inc.
2. Select Memory Card or USB, and press OK to
confirm. When Memory Card/USB is not
connected to @Gallery 15, the icon you navigate
to is grey and cannot be entered. When Memory
Card and USB are connected to @Gallery 15 at
the same time, navigate Up/Down to choose
Memory Card or USB stick. Press OK to view the
photos inside.
3. Use the navigation keys Up /Down /Left /Right
to navigate the thumbnail photos.
2 00 8/1 /1 7
02: 4 5
2 00 8/1 /1 7
02: 4 5
2 00 8/1 /1 7
02: 4 5
View Memory Card
and USB photos
Memory Card
USB
Memory Card
Photo (10)
Vitas-04.jpg
4. Press OK to display the selected photo in full screen.
Memory Card
Photo (10)
5. If a photo fails to be displayed, the icon
will appear
both at the thumbnail page and in full screen.
During the slideshow, the invalid photo will not be
shown.
Vitas-04.jpg
Note:
When a thumbnail photo is selected, it will be enlarged and highlighted by a yellow frame, and
the file name will be shown at the bottom of the screen.
28
Setup
,
Nextbase @Gallery 15 - User s Guide
UPLOAD
1. Navigate down to select Create Album or an existing album, and press OK to confirm.
2. If Create Album is selected, the message "Please Select the Album Properties" will pop up.
After that you can choose between Public and Unlisted.
If Unlisted is selected, the album can only be viewed by you, but not by other internet users. If
Public is selected, the album will be visible to all.
2 00 8/1 /1 7
Album List
USB Create Album
test(Unlisted)
Sakura(Public)
may(Unlisted)
Poster(Public)
China(Public)
2 00 8/1 /1 7
02: 4 5
02: 4 5
USB
Memory Card
Please Select The Album Properties!
Public
Unlisted
USB
3. Enter the album name by using the keyboard, and press OK again to confirm. The album
properties will then be shown.
Select the album and press OK. Your photos will be uploaded to the Picasa website.
A. To view the photos on the internet, simply log in to www.picasaweb.google.com and you will
see the newly created album listed as a folder.
B. If you want to view all the photos that have been uploaded to the Picasa website, please
select Auto Receive under the Change Settings option. This will automatically inform you if
any new photo is uploaded to your Picasa webpages.
C: Photo display order: The uploaded photos will be listed according to the uploaded time, that
is, the latest uploaded one will be listed on the front.
Please enter the album name.
1
q
2
w
3
e
4
9
r
u
i
o
pa
f
g
h
j
l
;
z
m
x
,
5
0
6
t
y
s
7
8
Enter
d
k
c
v
.
b
Shift
\
n
-
/
Space
=
@
Setup
29
Note:
If the number of photos in a selected album reaches 500, the following message will pop up:
The photo quantity of the selected album has reach the maximum 500pcs, please choose
another album or to create a new album.
DELETE
1. Navigate down to select Delete, and press OK to confirm. The message "Are you sure you
want to delete this file?" will pop up.
Photo
Begin Slideshow
Slideshow Settings
Zoom in
Rotate
Delete
Properties
2 0 08 / 1 /1 7
0 2: 4 5
2 0 08 / 1 /1 7
0 2: 4 5
Are you sure your want to delete this file?
Yes
No
2. If you want to delete the photo, navigate to Yes and press OK to confirm. Then the photo will be
deleted, and the message "Photo has been deleted!" will pop up.
3. If you do not want to delete the photo, navigate to No and press OK to confirm.
Note:
The Delete function is not available for the Picasa photos due to consistency with the Picasa
website.
For the information of sending photos, beginning slideshow, slideshow settings, zooming in,
rotating, deleting and properties, please refer to SEND PHOTOS, BEGIN SHOW, SLIDESHOW
SETTINGS, ZOOM IN, ROTATE and PROPERTIES respectively on page 20, page 21 and
page 22.
30
Setup
,
Nextbase @Gallery 15 - User s Guide
VIEWING WEATHER FORECAST
2 00 8/1 /1 7
0 2: 4 5
ESC
OK
HOT-KEY
HOT-KEY
STANDBY
6
16 / 8
Today
Guangzhou
18 / 11
Tomorrow
YAHOO!NEWS
1. Press the HOT-KEY at any time, and the weather forecast will appear from the bottom of the
current screen.
2. Or, from the main menu, navigate down to Check Weather and Lastest News in the main menu,
and press OK to confirm. Then several file folders will appear on the screen. Select the file folder
named @Weather and press OK. A 2-day weather forecast will appear on the screen, which
,
includes current, today,s and tomorrows
weather information.
2 00 8/1 /1 7
0 2: 4 5
Guangzhou
2 00 8/1 /1 7
0 2: 4 5
2 00 8/1 /1 7
02: 4 5
Receive Photo Mail
View Memory Card
and USB Photo
View Picasa Photos
Check Weather and
Latest News
News-Common(0)
Current
Today
Tomorrow
partly cloudy
sunny
dilbert (0)
Check Weather and
Latest News
weather (1)
Change Settings
News-Tech (0)
cloudy
6
16 / 8
Picasa is a trademark of Google Inc.
18 / 11
YAHOO!NEWS
Note:
The weather forecast and news will be automatically updated every 15 minutes.
Setup
31
CHANGING SETTINGS
From the main menu, navigate down to Change Settings, and press OK to go to the sub-menu.
2 00 8/1 /1 7
02: 4 5
2 00 8/1 /1 7
02: 4 5
Resize Resolution
Receive Photo Mail
Change Settings
View Memory Card
and USB Photo
Wi-Fi Network
View Picasa Photos
Auto and Manual Receive
Check Weather and
Latest News
Language
Change Settings
Display Settings
Picasa is a trademark of Google Inc.
RESIZE RESOLUTION
1. Navigate down to select Resize Resolution, and press OK to confirm.
2. When choosing Download/Synchronize on Picasa website, users can choose between 640X480,
800X600, 1024X768,1600X1200 and Original size. Photos will be stored in the chosen
resolution. The default resolution of storing photos is 800x600.
2 00 8/1 /1 7
0 2: 4 5
Photo download size
Change Settings
Resize
Resolution
640*480
800*600
1024*768
1600*1200
Original size
WI-FI NETWORK
1. Navigate down to Wi-Fi Network, and press OK to search for wireless networks.
2. Please refer to CONNECTING TO A WIRELESS NETWORK for more detailed information.
(See page 19)
3. If you wish to enter your Wi-Fi details manually please choose Enter Manually from the submenu. (Details for manually selecting a wireless network can be seen on page32)
2 00 8/1 /1 7
0 2: 4 5
Change Settings
networks
Wi-Fi Network
Scan for wireless
Enter Manually
32
Setup
,
Nextbase @Gallery 15 - User s Guide
3. Navigate to Enter Manually, and press OK to confirm.
2 00 8/1 /1 7
0 2: 4 5
2 00 8/1 /1 7
02: 4 5
SSID
Change Settings
Scan for wireless networks
Wi-Fi Network
Change Settings
Wi-Fi Network
None
Security
WEP
WPA
Enter Manually
IP address and DNS
Dynamic
Static
Enter Manually
IP Address
Subnet Mask
Gateway
Primary
DNS
Secondary DNS
Connect
Navigate to SSID, press OK to bring up the virtual keyboard, and enter the SSID address by
using the virtual keyboard.
Navigate to Security, and press OK to navigate from None, WEP, WPA. Select one to match
your Wi-Fi routers security method.
Navigate to IP address and DNS, and press OK to select between Dynamic and Static.
If Dynamic is selected, the information above will turn into grey.
If Static is selected, the information above will turn into white.
When Static is selected, scroll down to IP Address and press OK to pop up the virtual
keyboard to fill in the numbers.
After Secondary DNS is filled, the cursor will jump to Connect, and press OK to finish the
operation.
Note:
The IP address consists of 4 sections. The number range of each section is 0-255. If a number
over 255 is entered, it will be automatically changed to 255. Once the third digit of a section is
entered, the cursor will move to the next section automatically.
4. If the IP/DNS information is wrong, the message below will pop up.
2 00 8/1 /1 7
0 2: 4 5
Can not connect to Picasa,
please check the IP address
and DNS
Setup
33
AUTO AND MANUAL RECEIVE
1. Navigate down to Auto and Manual Receive, and press OK to confirm.
2 00 8/1 /1 7
2 00 8/1 /1 7
0 2: 4 5
Resize Resolution
Auto Receive
02: 4 5
On
Change Settings
Change Settings
Auto&Manual
Receive
Wi-Fi Network
Manual Receive
Auto and Manual Receive
Language
Display Settings
2. Please refer to DOWNLOAD AND SYNCHRONIZE PHOTOS for more detailed information.
(See page 24)
2 00 8/1 /1 7
0 2: 4 5
Begin to synchronize with the website.
Change Settings
Auto&Manual
Receive
Manual
Receive
LANGUAGE
1. Navigate down to Language, and press OK to confirm.
2. There are eight languages for you to choose, that is, English, Francais, Deutsch, Italiano,
Espanol, Nederlands, Nordmann and Svenska. Press OK to confirm. The default language is
English.
2 00 8/1 /1 7
2 00 8/1 /1 7
0 2: 4 5
Resize Resolution
Language
Change Settings
Change Settings
Wi-Fi Network
Language
English
Francaise
Deutsch
Italiano
Auto and Manual Receive
Espanola
Nederlands
Language
Nordmann
Svenska
Display Settings
34
Setup
02: 4 5
,
Nextbase @Gallery 15 - User s Guide
DISPLAY SETTINGS
1. Navigate down to Display Settings, and press OK to confirm.
2. Press OK to select Brightness, and use Up /Down to increase /decrease the brightness. A
yellow bar shows the effect on the screen.
3. Press OK again to exit brightness adjustment, and navigate down to Contrast.
4. Press OK again to highlight Contrast, and use Up /Down to increase /decrease the contrast.
A yellow bar shows the effect on the screen.
5. Press OK to exit contrast adjustment, and press ESC to go back to the previous menu.
2 00 8/1 /1 7
2 00 8/1 /1 7
0 2: 4 5
02: 4 5
Brightness
Resize Resolution
5
Change Settings
Change Settings
0
Display Settings
Wi-Fi Network
Contrast
5
Auto and Manual Receive
0
Language
Display Settings
DATE AND TIME
A. Set Date And Time
1. Navigate down to Set Date and Time, and press OK to confirm.
2. Use Left/Right to select Auto or Manual. If Auto is selected, the time is automatically matched
with the time zone the user has selected. The data on the auto Set Date and Time could be
affected by internet disconnection. If Manual is selected, users can set date and time by
themselves.
3. Navigate down to Date setting, use Left/Right to highlight year setting, and then use Up/Down
to adjust. Use Left/Right to enter month, and follow the same steps for date. Press OK again
to confirm.
4. Navigate down to Time setting, use Left/Right to highlight hour, and then use Up /Down to
adjust. Use Left/Right to enter minute setting, and follow the same steps for AM /PM setting.
Press OK again to confirm.
5. Navigate down to Display Date and Time. Use Left/Right to select On or Off.
6. Press OK to confirm.
2 00 8/1 /1 7
0 2: 4 5
2 00 8/1 /1 7
Set Date and T ime
Change Settings
Date nd Time
Set Date and T ime
Aut o
Date
2008
Time
4
02: 4 5
Manuall y
Change Settings
Select Time zone
Display Format
Date nd Time
Set Date
And Time
1
17
55
AM
Set Standby Ti me
Display Date & T ime
On
Off
OK
Setup
35
B. Select Time Zone
1. Navigate down to Select Time Zone, and press OK. A list of time zones will pop up. The default
time zone is GMT+01:00 Berlin.
2. Navigate down to select the time zone you prefer, and press OK to confirm.
3. Press ESC to go back to the previous menu.
2 00 8/1 /1 7
0 2: 4 5
Change Settings
Date nd Time
Time Auto
Adjust
Select Time Zone
GMT-01:00 Brantislava
GMT-01:00 Prague
GMT-01:00 Brussels
GMT-01:00 Belgrade
GMT-01:00 Berlin
GMT-01:00 Bern
GMT-01:00 Madria
GMT-01:00 Monaco
C. Display Format
1. Navigate down to select Time.
2. Use Left/Right to select 12-Hour or 24-Hour, and press OK to confirm.
3. Navigate to Date, use Left/Right to select the date display mode you prefer, and press OK to
confirm.
2 00 8/1 /1 7
0 2: 4 5
Change Settings
Time
12-Hour
Date
Y/M/D M/D/Y
24-Hour
Date nd Time
Set Date
And Time
D/M/Y
OK
D. Set Standby Time
1. Navigate down to select Set Standby Time, and press OK to highlight Enable.
2. Use Left/Right to select Enable, and press OK to confirm.
3. Use Left/Right to adjust Turn On Time and Turn Off Time, and then press OK to confirm.
4. Press ESC to go back to the previous menu.
2 00 8/1 /1 7
0 2: 4 5
Change Settings
Enable
Set Standby Ti me
Disable
Date nd Time
Set Standby
Time
Turn On T ime
0
0
Turn Off Time
0
0
OK
36
Setup
AM
AM
,
Nextbase @Gallery 15 - User s Guide
SLIDESHOW SETTINGS
1. Navigate down to Slideshow Settings, and press OK to confirm.
2. Select Delay Time, use the navigation keys Up/Down/Left/Right to adjust the delay time, and
press OK to confirm. There are several options for interval time: 5 seconds, 10 seconds, 30
seconds, 1 minute, 5 minutes, 30 minutes, 1 hour, 4 hours, 12 hours and 24 hours.
3. Navigate down to Slideshow Sequence, use Left/Right to select Sequential or Random, and
press OK to confirm.
4. Navigate down to Slideshow Effect, and press OK to enter the list. Use Up/Down to select the
effect you want, and press OK again to confirm.
5. Press ESC to go back to the previous menu.
2 00 8/1 /1 7
02: 4 5
2 00 8/1 /1 7
02: 4 5
Date & Time
Sec
Delay T ime
5
Change Settings
Change Settings
Slideshow
Settings
Slideshow Settings
Slidesho w S eque nce
Sequential
Random
Slidesho w Effect
Reset
Off
Random
Personal Profile
Scroll down
Scroll up
Software Update
Scroll left
RESET
1. Navigate down to Reset, and press OK to select Reset all settings to default or Erase photo
account and settings.
2. Select Reset all settings to default, and press OK to confirm. Select Reset or Cancel to
continue. Press OK again to confirm.
2 00 8/1 /1 7
0 2: 4 5
2 00 8/1 /1 7
02: 4 5
Date & Time
Reset all settings to default.
Change Settings
Slideshow Settings
Change Settings
Reset
Erase photo account and settings.
Reset
Personal Profile
Software Update
Setup
37
2 00 8/1 /1 7
0 2: 4 5
Change Settings
2 00 8/1 /1 7
02: 4 5
All setting s will be reset. T he picas a account
and picasa photo s will not be deleted.
Reset
Reset all
settings
All settings have been reset!
Reset
Cancel
3. Navigate down to select Erase photo account and settings, and press OK to confirm. Select
Reset or Cancel to continue. Press OK again to confirm.
2 00 8/1 /1 7
0 2: 4 5
Change Settings
2 00 8/1 /1 7
02: 4 5
2 00 8/1 /1 7
02: 4 5
All setting s will be reset. T he picas a account
and picasa photo s will be deleted as well!
Reset
Erase photo
account and
settings
All setting s will be reset, and the Picas a
Reset
accou nt an d photos hav e bee n deleted!
Cancel
PERSONAL PROFILE
Navigate down to Personal Profile, and press OK to confirm.
2 00 8/1 /1 7
0 2: 4 5
Email address
Date & Time
Change Settings
Change Settings
[email protected]
Personal Profile
Slideshow Settings
Profile Photo and Nickname
Reset
Personal Profile
Gallery URL
Software Update
http://picasaweb.goole.com/
Note:
@Gallery email account is built in and allocated by MWS. Hence, the email address will be
changed if the user choose the option "Erase photo account and settings."
38
Setup
,
Nextbase @Gallery 15 - User s Guide
SOFTWARE UPDATE
1. Navigate down to Software Update and press OK to confirm.
2. When there is a new software version, the message "A new version is found. Do you want to
update your software?" will pop up. Select Yes to continue.
3. Download the updated file.
2 00 8/1 /1 7
0 2: 4 5
Backup Picasa Photos
Change Settings
Status
Login Picasa
4. A message will pop up to inform you whether the download is successful or not.
2 00 8/1 /1 7
0 2: 4 5
2 00 8/1 /1 7
Download finished, Please restart the
photo frame.
Please go back to the "Change Settings" menu
and select "Software Update" again.
OK
OK
02: 4 5
5. If the update fails, restart the photo frame and wait for the update finished notice.
2 00 8/1 /1 7
0 2: 4 5
Software updating...
2 00 8/1 /1 7
02: 4 5
Update finised, Please restart
the photo frame again.
Note:
1. The software update will be automatically checked every time the user switches on the device.
2. The update should be processed under AC power mode.
Setup
39
BACKUP PICASA PHOTO
1. Navigate down to Backup Picasa Photo, and press OK to confirm.
2 00 8/1 /1 7
02: 4 5
Backup Picasa Photos
Change Settings
Status
Login Picasa
2. Press OK to select Memory Card or USB.
2 00 8/1 /1 7
02: 4 5
Backup Picasa Photos
Change Settings
Backup Picasa
Photos
Backup all picasa photos to
Status
Memory Card
Login Picasa
USB
3. Navigate to Yes, and press OK. This will save all
your Picasa photos into your memory card or USB
stick as a backup.
2 00 8/1 /1 7
Backup Picasa
Change Settings
Photo
02: 4 5
photos to memory card?
Are you sure want to save all picasa
Yes
No
2 00 8/1 /1 7
Change Settings
Backup Picasa
Photo
40
Setup
Backup finished.
02: 4 5
,
Nextbase @Gallery 15 - User s Guide
4. If ESC is pressed during the backup, this screen on the
right will appear. Press Yes to cancel backup, or press
No to continue.
2 00 8/1 /1 7
0 2: 4 5
Change Settings
Backup all picasa photosa to
Backup Picasa
Photo
Memory Card
USB
5. When the backup is finished, the message "Backup
finished" will appear.
2 00 8/1 /1 7
02: 4 5
Change Settings
Backup Picasa
Photo
Backup finised.
STATUS
Navigate to Status, and press OK to confirm. The Fireware version, MAC address and Internal
memory status will be displayed.
2 00 8/1 /1 7
2 00 8/1 /1 7
0 2: 4 5
02: 4 5
Firmware version
Backup Picasa Photos
Change Settings
Change Settings
Status
Status
PGallerySPSMPUI1.071NET1.07.2KER1.07.1
MAC Address
00:06:6e:00:4d:71
Internal memory status
Login Picasa
Space used:
10MB Space left:
1853 MB
LOGIN PICASA
For how to login Picasa, please refer to LOGGING INTO PICASA ACCOUNT.
When the user has already logged into the Picasa account, the Save/Not Save option will not be
shown on the screen.
Setup
41
OTHER
DIMENSIONS AND PARAMETERS
Product Name:
@Gallery 15
Power Supply:
Input
100-240V
AC Output 5V DC
2A
Resolution
800X600X3 Pixels
Battery
1500mAh
Screen Size
8''
Screen Ratio
4:3
Dimension:
200 X 100 X 23.3 mm
Net Weight:
500g
42
Other
,
Nextbase @Gallery 15 - User s Guide
TROUBLE SHOOTING
PROBLEM
SOLUTION
Cannot swith on
@Gallery 15
1. Check whether the battery has been charged, or
charge the battery.
2. Use the adapter to supply power.
Automatically turns off
1. Check whether the battery has been charged, or
charge the battery.
Wi-Fi connection fails
Blurred image
IR remote doesn't work
Blurred or no picture
Pixel failure
1. Make sure your router is Wi-Fi support (WLAN).
2. Check the security password, and make sure you
type in the correct password. If you forget the
password, you can either check the setup of access
point/router or call the manufacter for help.
3. Make sure your Wi-Fi network can be connected to
the internet. If not, please call your ISP (internet
service provider) for help.
1. Check the original size and quality of the pictures.
1. Change batteries in the remote control.
2. Ensure that the IR sensor is not covered by object or
the frame. Sensor location is shown on Page 5.
1. Broken screen - see page 44 for broken screen
identification.
2. Non warrantable damage.
1. The LCD screen contains 1,440,000 pixels. Pixels can
fail during normal product life. 1 pixel=0.00007%
failure rate. One pixel failure/per year of operation is
considered normal and not a cause for concern.
Other
43
BROKEN SCREEN IDENTIFICATION
A Liquid Crystal Display (LCD) screen is a multilayer complex component.
Under the tough outer plastic layer, the glass sandwich beneath holds the LCD crystals in
place, which are themselves suspended in fluid. In the unfortunate event of an accident,
particularly a sharp localized impact, the glass will break. The tough plastic outer sheet on
the surface of the glass keeps all the glass intact underneath, preventing shards from
falling out. This is a specific safety feature, particularly implemented for the younger user
and also for in-car use. The broken glass normally shows signs of the impact mark and
also cracks radiating away. The resultant fluid leakage renders the panel inoperable.
Symptoms are often a dark round mark, a white screen without picture and maybe some
multicolored lines. Depending on the individual break, an element of the TV picture may
remain for a while, but not for long, as the fluid leaks away. Some inky black staining may
also appear upon the crack lines, as the fluid escapes.
Unfortunately a break of this nature is not covered under the manufactures warranty, as it
is accidental damage to the product, rather than an original defect from manufacture.
Please see below for some sample images of broken LCD panels for reference.
DAMAGE REQUIRING SERVICE
Have the unit serviced by a qualified service technician if:
The unit has been exposed to rain or water.
The unit does not seem to operate normally.
The unit exhibits a marked change in performance.
DO NOT ATTEMPT TO SERVICE THE UNIT BY YOURSELF!
44
Other
NEXTBASE @Gallery 15
www.next-base.com
@Gallery 15 - ENG - MANUAL - NB - A1