1
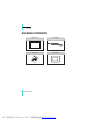
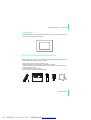
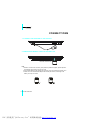
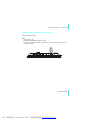
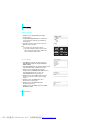
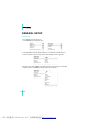
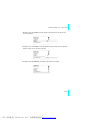
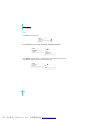
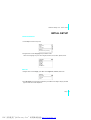
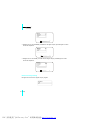
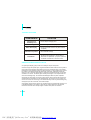
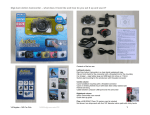
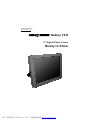
Entertainment Unlimited
www.next-base.com
Gallery 15-S
8 '' Digital Photo Frame
Ready to Show
PDF 文件使用 "pdfFactory Pro" 试用版本创建 www.fineprint.cn
,
Nextbase Gallery 15-S - User s Guide
CONTENTS
CONTENTS......................................................1
IMPORTANT SAFETY INSTRUCTIONS ..........2
GENERAL INTRODUCTION............................ 3
PACKING CONTENTS ....................................4
PARTS AND CONTENTS.................................5
Button definitions.........................................5
Right side.................................................... 5
Bottom side................................................. 5
Back side.....................................................6
Connect to the 8'' x 6'' frame....................... 6
Frame mount............................................... 7
GENERAL SETUP.......................................16
Slideshow...............................................16
Video......................................................18
INITIAL SETUP........................................... 19
Language setup..................................... 19
Display................................................... 19
Restore factory setting...........................20
OTHER....................................................... 21
Dimension and parameter..................... 21
Trouble shooting................................ .... 22
Smashed screen identification............... 22
How to use the integral stand support........ 7
CONNECTIONS.............................................. 8
Connect the adapter to the socket.............. 8
Inserting a memory card to Gallery 15-S.... 8
Inserting a USB stick to Gallery 15-S.......... 9
BASIC OPERATIONS.....................................10
Turning on the unit.....................................10
Turning off or sleep the unit....................... 11
Selecting the file storage location.............. 11
Enjoy photo............................................... 12
Photo menu............................................... 12
Mark operation...........................................13
Displaying effect........................................ 14
Enjoy video................................................15
Video effect................................................15
General Introduction
PDF 文件使用 "pdfFactory Pro" 试用版本创建 www.fineprint.cn
1
IMPORTANT SAFETY INSTRUCTIONS
1. Read these instructions.
2. Keep these instructions.
3. Heed all warnings.
4. Follow all instructions.
5. Do not use this apparatus near water.
6. Clean only with dry cloth.
7. Do not block any ventilation openings. Install in accordance with the manufacturer's
instructions.
8. Do not install near any heat sources such as radiators, heat registers, stoves, or other
apparatus (Including amplifiers) that produce heat.
9. Do not defeat the safety purpose of the polarized or grounding-type plug. A polarized plug
has two blades with one wider than the other. A grounding type plug has two blades and a
third grounding prong. The wide blade or the third prong are provided for your safety. If the
provided plug does not fit into your outlet, consult an electrician for replacement of the
obsolete outlet.
10. Protect the power cord from being walked on or pinched particularly at plugs, convenience
receptacles, and the point where they exit from the apparatus.
11. Only use attachments/accessories specified by the manufacturer.
12. Unplug this apparatus during lightning storms or when unused for long periods of time.
13. Refer all servicing to qualified service personnel. Servicing is required when the apparatus
has been damaged in any way, such as power-supply cord or plug is damaged, liquid has
been spilled or objects have fallen into the apparatus, the apparatus has been exposed to
rain or moisture, does not operate normally, or has been dropped.
14. To reduce the risk of fire or electric shock, do not expose this appliance to rain or moisture.
15. Apparatus shall not be exposed to dripping or splashing and no objects filled with liquids,
shall be placed on the apparatus.
16.
WEEE statement: Please do not throw electronic devices into household waste and
separate them for correct recycling.
2 General Introduction
PDF 文件使用 "pdfFactory Pro" 试用版本创建 www.fineprint.cn
,
Nextbase Gallery 15-S - User s Guide
GENERAL INTRODUCTION
Thank you for purchasing this digital photo frame. Please read this manual carefully before
operating and reserve it for future reference.
Nextbase Gallery 15-S digital photo frame can be placed either vertically or horizontally to fit the
photos on display. You can place it somewhere in a room for a continuous display by simply
connecting it to the mains power supply.
General Introduction
PDF 文件使用 "pdfFactory Pro" 试用版本创建 www.fineprint.cn
3
PACKING CONTENTS
Gallery 15-S
AC-DC Adapter
User Manual
Frame Mount
4 General Introduction
PDF 文件使用 "pdfFactory Pro" 试用版本创建 www.fineprint.cn
,
Nextbase Gallery 15-S - User s Guide
PARTS AND CONTENTS
BUTTON DEFINITIONS
E SC
D IR /O K
ME NU
P OWE R
1
2
3
4
1. ESC (Escape)
3. MENU
5. RESET
R ESE T
2. DIR /OK
4. POWER
RIGHT SIDE
1. USB port
Connect USB memory stick here.
E SC
DIR/O K
ME NU
P OWE R
R ES ET
USB
BOTTOM SIDE
1. DC IN 5V
Connect the included AC /DC adapter here.
2. Card Jack
Support SD /MMC /MS Pro /xD cards.
2
1
General Introduction
PDF 文件使用 "pdfFactory Pro" 试用版本创建 www.fineprint.cn
5
BACK SIDE
1
2
1
SD/MMC/MS/xD
DC IN 5V
1. Wall hanging mount (Horizontal or vertical option)
2. Table top stand. Flip out, adjust to either vertical or horizontal use (see page7).
CONNECT TO THE 8'' X 6'' FRAME
Nextbase Gallery 15-S can be fitted to match all standard 8'' X 6'' wooden frames as shown below:
1. Match the standard 8'' X 6'' frame with Gallery 15-S.
2. Move the locking latches upon the frame to secure the Gallery 15-S.
SD/M M C/M S/x D
DC IN 5V
6 General Introduction
PDF 文件使用 "pdfFactory Pro" 试用版本创建 www.fineprint.cn
,
Nextbase Gallery 15-S - User s Guide
FRAME MOUNT
Your Nextbase Gallery 15-S can be mounted with all standard 10" X 8" wooden frames by using
the frame mount contained in the accessories:
HOW TO USE THE INTEGRAL STAND SUPPORT
Nextbase Gallery 15-S can be placed on a table top using the integral support. The Gallery 15-S
can be positioned horizontally or vertically as desired.
1. Pull out the support from the back of the Gallery 15-S .
2. Rotate the support to either horizontal or vertical modes as required.
3. Adjust the length of the support by sliding the "Lock-Unlock" latch, and then pull the support
stand to the desired length.
4. Push the latch to lock to fix the position.
5. Lean the Gallery 15-S back to the desired position.
1
2
3
4
5
General Introduction
PDF 文件使用 "pdfFactory Pro" 试用版本创建 www.fineprint.cn
7
CONNECTIONS
1. CONNECT THE ADAPTER TO THE SOCKET
2. INSERTING A MEMORY CARD TO GALLERY 15-S
Insert the card as shown
Note:
1. Because of various size of memory card provided by different suppliers, please adjust the
,
angle slightly if the memory card can t be read.
2. The mini SD adapter or dual voltage SD cards may not be recognized by the Gallery 15-S.
3. Please do not use the MS-PRO adapter with a raised paint surface, or damage to the
Gallery 15-S may be caused.
8 General Introduction
PDF 文件使用 "pdfFactory Pro" 试用版本创建 www.fineprint.cn
,
Nextbase Gallery 15-S - User s Guide
3. INSERTING A USB STICK TO GALLERY 15-S
Insert the USB stick as shown.
Note:
1. Supply USB 1.1 only.
2. Support JPEG, BMP, Motion JPEG (AVI, MOV).
3. Connect the memory stick directly to the Gallery 15-S. Do not use an external cable or this
may cause problems.
E SC
DIR/OK
ME NU
P OWE R
RE SET
General Introduction
PDF 文件使用 "pdfFactory Pro" 试用版本创建 www.fineprint.cn
9
BASIC OPERATIONS
TURNING ON THE UNIT
1. Connect the AC-DC adapter to a socket.
2. Connect the DC output plug of t he adapter to the DC input jack of the main unit.
3. Press Power for two seconds to start the Gallery 15-S.
SD/MMD/MS /xD
1
1. Navigate to choose Photo or Video, press OK to enter, photo or video will be in grey if no
memory card or USB device is connected.
2. Navigate down to choose Setup , press OK to enter setup. Please refer to page 16 for details.
E SC
DIR/OK
ME NU
P OWE R
RE SET
Note:
If memory card is inserted or pictures contained in USB device, slideshow will automatically
start after turning on the power. Priority will be Memory Card, USB.
10 Basic Operations
PDF 文件使用 "pdfFactory Pro" 试用版本创建 www.fineprint.cn
,
Nextbase Gallery 15-S - User s Guide
TURNING OFF OR SLEEP THE UNIT
Sleep
Power Off
Exit
1. Press Power to go back Sleep, Power off, Exit menu. Navigate to select Sleep, press OK to
enter sleep status, press any key can restart the operation.
2. Navigate down to select Power off, press OK to turn off the unit.
3. Navigate down to select Exit, press OK to exit the menu.
SELECTING THE FILE STORAGE LOCATION
1. Press ESC to go back to Setup, Memory Card, USB menu.
Memory Card
Photo
Video
USB
Photo
Video
Setup
2. Highlight Setup, Memory card or USB, select your desired storage location.
3. Enter the storage location and start your desired show.
Note:
Please always select the storage location first.
Basic Operations
PDF 文件使用 "pdfFactory Pro" 试用版本创建 www.fineprint.cn
11
ENJOY PHOTO
1. Navigate down to highlight Photo, press OK to
enter Thumbnail.
2. Use Up /Down /Right /Left buttons on Gallery 15-S
to choose photos for displaying, press OK for full
screen display.
3. Press UP to go to the previous picture, and press
Down to go the next picture.
Memory Card
Photo
Video
USB
Photo
Video
Setup
Note:
1. It supports up to 1600 pieces of pictures.
2. The speed of displaying pictures will vary. More
time is required for larger file sizes. BMP is also
slower to load than JPEG formats.
PHOTO MENU
1. Press Menu in Thumbnail, choose the effect from
Play Slideshow, Copy one, Copy all, Delete one,
Delete all, Mark.
2. Select Play Slideshow to enter slideshow display. Please
refer to Slideshow setup for different effect setup.
3. Navigate down to select Copy one, select the
storage location from Memory Card, USB. Select one
and ''File copying'' appears on screen, and
''Files Copied'' indicates copying finished.
4. Navigate down to select Copy all, follow the same
steps to copy all pictures to your required storage
location.
5. Navigate down to select Delete one, select
Yes to delete one single picture.
6. Navigate down to select Delete All, select
Yes to delete all pictures.
7. Navigate down to select Mark. Please refer to Mark
Operation for details.
Play Slideshow
Copy One
Copy All
Delete One
Delete All
Mark
Copy To>
Memory Card
USB
Delete the file?
Yes
No
12 Basic Operations
PDF 文件使用 "pdfFactory Pro" 试用版本创建 www.fineprint.cn
,
Nextbase Gallery 15-S - User s Guide
Note:
Press Menu during the slideshow can stop the slideshow and enter relative menu for effect
choosing.
Press ESC to go back to Thumbnail, press OK to pause the photo slideshow.
MARK OPERATION
1. Navigate down to select Mark. Press OK , a tick box will appear next to each thumbnail
displayed. A tick mark will also be shown against the selected photo.
2. Use the navigating key to choose pictures you want to mark, press OK to set a mark in the
tick box, press OK again to unmark.
Basic Operations
PDF 文件使用 "pdfFactory Pro" 试用版本创建 www.fineprint.cn
13
3. Press Menu to enter the menu Slideshow Marked,
Slideshow Marked
Slideshow Unmarked, Copy Marked,
Slideshow Unmarked
Copy Unmarked, Delete Marked,
Copy Marked
Delete Unmarked, Cancel All Mark.
Copy Unmarked
4. Press OK to select Slideshow Marked. The marked
Delete Marked
Delete Unmarked
pictures will play a slideshow automatically.
Cancel All Mark
5. Navigate down to select Slidershow unmarked. The
unmarked pictures will play a slideshow automatically.
6. Navigate down to select Copy Marked. The marked
pictures will be copied automatically.
7. Navigate down to select Copy Unmarked. The unmarked
pictures will be copied automatically.
8. Navigate down to select Delete Marked. The marked pictures will be deleted automatically.
9. Navigate down to select Delete Unmarked. The unmarked pictures will be deleted
automatically.
10.Navigate Down to Cancel All Marked. All marks will be cancelled.
DISPLAYING EFFECT
1. Press Menu during full screen display, select from
Play Slideshow, Counter Clockwise Rotate,
Clockwise Rotate, Zoom in, Copy, Delete.
2. Navigate down to Play Slideshow to start the slideshow.
3. Navigate down to Counterclockwise Rotate, picture
Play Slideshow
Counterclockwise Rotate
Clockwise Rotate
Zoom In
Copy
Delete
can be counterclockwise rotated.
4. Navigate down to Clockwise Rotate , picture can be
clockwise rotated.
5. Navigate down to Zoom in, press OK to zoom
2x, 4x, 8x, 16x. Press ESC to cancel zoom.
6. Navigate down to Copy, OK to select storage
location, press OK again to confirm.
7. Navigate down to Delete, OK to select between
Copy to >
Memory Card
USB
Yes /No. Press OK again to confirm.
14 Basic Operations
PDF 文件使用 "pdfFactory Pro" 试用版本创建 www.fineprint.cn
,
Nextbase Gallery 15-S - User s Guide
ENJOY VIDEO
1. Navigate down to select Video , press OK to enter video list.
2. Use UP /DOWN buttons on Gallery 15-S to choose video file and press OK to play.
Memory Card > Video >
Memory Card
Photo
Video
USB
Photo
Video
Setup
01 - Don,t Cry ( Orig inal).mov
02 - ch ina roses. mo v
03 - ch ina roses. mo v
04 - Mo ment. mov
05 - Sta nd By Me.av i
3. When the video files are listed, press Menu to select Copy One, Copy All, Delete One,
Delete All, Mark.
VIDEO EFFECT
1. While the video is playing, press Menu to
enter Pause, Stop, Next, Previous menu.
2. Press Pause to pause the video.
3. Navigate down to stop the video.
4. Navigate down to select Next and press OK
to go to the next video.
5. Navigate down to select Previous and press
OK to go to the previous video.
6. Press ESC to go back to the video list.
Pause
Stop
Next
Previous
Note:
1. Only MOV or AVI files will be played on the Gallery 15-S, other file types will not be played.
Files must be recorded within the following parameters to play correctly. Only support Motion
JPEG up to VGA@30fps (640X480) in MOV or AVI format.
2. There will be no sound output when playing video file.
Basic Operations
PDF 文件使用 "pdfFactory Pro" 试用版本创建 www.fineprint.cn
15
GENERAL SETUP
SLIDESHOW
1. Choose Setup to enter the setup menu.
Press Slideshow to enter Slideshow setup.
Setup
Slideshow
Video
Language
Display
Restore Factory Setting
Slideshow
Delay Time
Transition
Repeat
Random
Play Slideshow
2. Press Delay Time to select the slideshow delay time, you will have the selected delay time
,
between two pictures. There ll be longer interval when displaying pictures of bigger size.
Slideshow
Delay Time
Transition
Repeat
Random
Play Slideshow
3 Sec
10 Sec
30 Sec
60 Sec
300 Sec
3. Navigate down to select Transition, select different effects of picture emergence. Select Off to
disable the transition, and Random to enable random effect of transition.
Slideshow
Delay Time
Transition
Repeat
Random
Play Slideshow
Off
Fade
Shutter
Cross Comb
Mask
Brick
Dissolve
Bar
Expansion
Silk
Random
16 Setup
PDF 文件使用 "pdfFactory Pro" 试用版本创建 www.fineprint.cn
,
Nextbase Gallery 15-S - User s Guide
4. Navigate down to select Repeat, select On, slideshow will repeat from the first picture to the
last one automatically.
Slideshow
Delay Time
Transition
Repeat
Random
Play Slideshow
On
Off
5. Navigate down to select Random, select On, slideshow will pick pictures randomly; select Off,
slideshow will play one by one following the order
Slideshow
Delay Time
Transition
Repeat
Random
Play Slideshow
On
Off
6. Navigate down to Play Slideshow, press OK to enter slideshow immediately.
Slideshow
Delay Time
Transition
Repeat
Random
Play Slideshow
Setup
PDF 文件使用 "pdfFactory Pro" 试用版本创建 www.fineprint.cn
17
VIDEO
1. Press Video to enter Video setup.
Video
Play Mode
Random
2. Press Play Mode to select from Play One, Play All, Single Repeat, Repeat All.
Video
Play Mode
Random
Play One
Play All
Single Repeat
Repeat All
3. Press Random, select On. Gallery 15-S system will pick video randomly from the video list,
select Off, video will be played one by one following the order.
Video
Play Mode
Random
On
Off
18 Setup
PDF 文件使用 "pdfFactory Pro" 试用版本创建 www.fineprint.cn
,
Nextbase Gallery 15-S - User s Guide
INITIAL SETUP
LANGUAGE SETUP
1. Press Setup to enter the setup menu.
Setup
Slideshow
Video
Language
Display
Restore Factory Setting
2. Navigate down to select Language and press OK to confirm.
There are six languages for you to select: English, German, French, Italian, Spanish, Dutch.
Language
English
Deutsch
Francais
Italiano
Espanol
Nederlands
DISPLAY
1. Navigate down to select Display, press OK to enter Brightness, Contrast, Color menu.
Display
Brightness
Contrast
Color
>
>
>
2. Press Brightness to enter brightness adjustment, press OK and Left /Right to adjust, press OK
again to confirm and exit the adjustment.
Setup
PDF 文件使用 "pdfFactory Pro" 试用版本创建 www.fineprint.cn
19
Displ ay
Brigh tness
Contrast
Color
>
>
>
_
+8
3. Navigate down to select Contrast, press OK and Left /Right to adjust, press OK again to confirm
and exit the adjustment.
Displ ay
Brigh tness
Contrast
Color
>
>
>
_
+8
4. Navigate down to select Color, press OK and Left /Right to adjust, press OK again to confirm
and exit the adjustment.
Disp lay
Brightness
Cont rast
Color
>
>
>
_
8
+
Restore Factory Setting
Navigate down to restore the original set-up by supplier.
Restore?
Yes
No
20 Setup
PDF 文件使用 "pdfFactory Pro" 试用版本创建 www.fineprint.cn
,
Nextbase Gallery 15-S - User s Guide
OTHER
DIMENSION AND PARAMETER
Product Name:
Gallery 15-S
Power Supply:
Input 100-240V AC
Output 5V DC 2Amp
Resolution
800X600X3 Pixels
Screen Size
8''
Screen Ratio
4:3
Dimension:
201 X 150 X 22.8 mm
Net Weight:
450g
Other
PDF 文件使用 "pdfFactory Pro" 试用版本创建 www.fineprint.cn
21
TROUBLE SHOOTING
PHENOMENON
SOLUTION
Cannot turn on
the Gallery 15-S
1. Use the adapter to supply power.
Blurred Image
1. Check the original size and quality of the pictures.
Video doesn't play
Blurred or no picture
Pixel failure
1. Check video format is MOV or AVI (other format not
compatible)
1.Smashed screen.
2. Non warrantable damage.
1. The LCD screen contains 1,440,000 pixels. Pixels can
fail during normal product life. 1 pixel=0.00007%
failure rate. One pixel failure / per year of operation is
considered normal and not a cause for concern.
SMASHED SCREEN IDENTIFICATION
A Liquid Crystal Display (LCD) screen is a multilayer complex component.
Under the tough outer plastic layer, the glass sandwich beneath holds the LCD crystals in
place, which are themselves suspended in fluid. In the unfortunate event of an accident,
particularly a sharp localized impact, the glass will break. The tough plastic outer sheet on
the surface of the glass keeps all the glass intact underneath, preventing shards from
falling out. This is a specific safety feature, particularly implemented for the younger user
and also for in-car use. The broken glass normally shows signs of the impact mark and
also cracks radiating away. The resultant fluid leakage renders the panel inoperable.
Symptoms are often a dark round mark, a white screen without picture and maybe some
multicolored lines. Depending on the individual break, an element of the TV picture may
remain for a while, but not for long, as the fluid leaks away. Some inky black staining may
also appear upon the crack lines, as the fluid escapes.
Unfortunately a break of this nature is not covered under the manufactures warranty, as it
is accidental damage to the product, rather than an original defect from manufacture.
Please see below for some sample images of broken LCD panels for reference.
22 Other
PDF 文件使用 "pdfFactory Pro" 试用版本创建 www.fineprint.cn
,
Nextbase Gallery 15-S - User s Guide
DAMAGE REQUIRING SERVICE
Have the unit serviced by a qualified service technician if:
The unit has been exposed to rain or water.
The unit does not seem to operate normally.
The unit exhibits a marked change in performance.
DO NOT ATTEMPT TO SERVICE THE UNIT BY YOURSELF!
Other
PDF 文件使用 "pdfFactory Pro" 试用版本创建 www.fineprint.cn
23
NEXTBASE Gallery 15-S
www.ne xt-base.com
Gallery 15-S - ENG - MANUAL - NB - A1
PDF 文件使用 "pdfFactory Pro" 试用版本创建 www.fineprint.cn