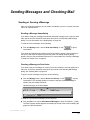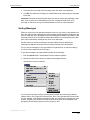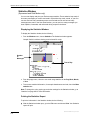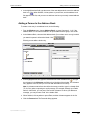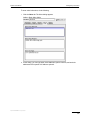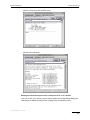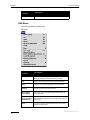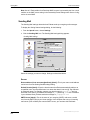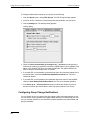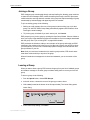
1
User Manual for Macintosh
Version 5.0
This document is designed for use online. The Contents and Index sections plus all crossreferences are “hot linked.” Just click the topic, and the topic information appears. In the
Index, click the page number. Also, if you click any cross-reference, you will display the
topic referenced.
This manual was written for use with version 5.0 of the Eudora ® software for Macintosh. This manual and the Eudora
software described in it are copyrighted, with all rights reserved. This manual and the Eudora software may not be
copied, except as otherwise provided in your software license or as expressly permitted in writing by QUALCOMM
Incorporated.
Copyright © 1992-2000 by QUALCOMM Incorporated. All rights reserved.
Copyright © 1988-1992 by the University of Illinois Board of Trustees.
Portions of the Eudora software were written by John Norstad, Copyright © 1988-1990 Northwestern University, and
David Johnson, Copyright © 1984 Brown University. All rights reserved.
The LDAP Library is Copyright © 1992-1996 by the Regents of the University of Michigan. All rights reserved.
Eudora, Eudora Pro, and Eudora Light are registered trademarks and the emailman graphic is a trademark of QUALCOMM Incorporated.
PureVoice, SmartRate, and MoodWatch are trademarks of QUALCOMM Incorporated.
WorldMail and Eudora Internet Mail Server (EIMS) are trademarks of QUALCOMM Incorporated.
QUALCOMM is a registered trademark and registered service mark of QUALCOMM Incorporated.
Apple, AppleTalk, Macintosh, and the Apple logo are registered trademarks and QuickTime,
AppleTalk, LocalTalk, Keychain, and MacTCP are trademarks of Apple Computer, Inc.
Adobe, Acrobat, and Acrobat Exchange™ are trademarks of Adobe Systems Incorporated.
Microsoft, Windows, Outlook Express, and Internet Explorer are registered trademarks of Microsoft Incorporated in
the United States and/or other countries.
MacSLIP is a trademark of Hyde Park Software, Inc.
All other trademarks and service marks are the property of their respective owners.
Use of the Eudora software and other software and fonts accompanying your license (the “Software”) and its documentation is at your sole risk. The Software and its documentation (including this manual), and QUALCOMM’s software maintenance and extended maintenance, if applicable, are provided “AS IS” and without warranty of any kind
and QUALCOMM and QUALCOMM’s Licensor(s), including but not limited to the University of Illinois and Apple
Computer, Inc. (collectively herein referred to as “QUALCOMM”), EXPRESSLY DISCLAIM ALL WARRANTIES,
EXPRESS OR IMPLIED, INCLUDING, BUT NOT LIMITED TO THE IMPLIED WARRANTIES OF MERCHANTABILITY AND FITNESS FOR A PARTICULAR PURPOSE AND AGAINST INFRINGEMENT. QUALCOMM DOES
NOT WARRANT THAT THE FUNCTIONS CONTAINED IN THE SOFTWARE WILL MEET YOUR REQUIREMENTS, OR THAT THE OPERATION OF THE SOFTWARE WILL BE UNINTERRUPTED OR ERROR-FREE, OR
THAT DEFECTS IN THE SOFTWARE WILL BE CORRECTED. FURTHERMORE, QUALCOMM DOES NOT
WARRANT OR MAKE ANY REPRESENTATIONS REGARDING THE USE OR THE RESULTS OF THE USE OF THE
SOFTWARE OR ITS DOCUMENTATION IN TERMS OF THEIR CORRECTNESS, ACCURACY, RELIABILITY, OR
OTHERWISE. NO ORAL OR WRITTEN INFORMATION OR ADVICE GIVEN BY QUALCOMM OR A QUALCOMM
AUTHORIZED REPRESENTATIVE SHALL CREATE A WARRANTY OR IN ANY WAY INCREASE THE SCOPE OF
THIS WARRANTY. SOME JURISDICTIONS DO NOT ALLOW THE EXCLUSION OF IMPLIED WARRANTIES, SO
THE ABOVE EXCLUSION MAY NOT APPLY.
UNDER NO CIRCUMSTANCES INCLUDING NEGLIGENCE, SHALL QUALCOMM AND ITS DIRECTORS,
OFFICERS, EMPLOYEES OR AGENTS BE LIABLE FOR ANY INCIDENTAL, SPECIAL OR CONSEQUENTIAL
DAMAGES (INCLUDING DAMAGES FOR LOSS OF PROFITS, LOSS OF BUSINESS, BUSINESS INTERRUPTION,
LOSS OF BUSINESS INFORMATION AND THE LIKE) ARISING OUT OF THE USE OR INABILITY TO USE THE
SOFTWARE OR ITS DOCUMENTATION, EVEN IF QUALCOMM OR A QUALCOMM AUTHORIZED REPRESENTATIVE HAS BEEN ADVISED OF THE POSSIBILITY OF SUCH DAMAGES. SOME JURISDICTIONS DO NOT
ALLOW THE LIMITATION OR EXCLUSION OF LIABILITY FOR INCIDENTAL OR CONSEQUENTIAL DAMAGES
SO THE ABOVE LIMITATION OR EXCLUSION MAY NOT APPLY.
In no event shall QUALCOMM’s total liability to you for all damages, losses, and causes of action (whether in
contract, tort [including negligence] or otherwise) exceed the amount paid for the Software and its documentation.
Acknowledgments
The Eudora software was designed and written by Steve Dorner, Pete Resnick, John Boyd, Alan Bird, Martin Naiman,
John Purlia, Clarence Wong, Christine Park, Forest Hill and Scott Gruby. Quality assurance performed by Matt
Dudziak and Gwen Huntley. This manual was written by Gigi Miller and Armand Rouleau. Icons were designed by
Arlo Rose.
Thanks to Tim Maroney for the folder-choosing code, John Norstad for the window placement code, John Bruner for
the Mishawaka font, Ray Davison for the Include Self code, David Johnson for the BinHex code, and Cal Simone of
Mainstay for help in redesigning Eudora’s AppleScript Dictionary.
Finally, thanks to all the users and testers of Eudora, whose suggestions have made it a much better program than it
otherwise would have been.
About the Name
Why the name Eudora?
When looking for a name for this new Post Office Protocol mail program, we thought immediately of the title of the
short story “Why I Live at the P.O.,” and named the program after the author of the story, Eudora Welty.
“Why I Live at the P.O.” can be found in a collection entitled A Curtain of Green and other stories (Harcourt Brace & Co.).
Ms. Welty’s stories are funny, sad, and fascinating; she’s surely one of the great American writers.
August 2000
PM80-48129-4
Contents
Introducing Eudora® Email
Introducing Eudora Email
What’s New in Eudora Email v5.0
System Requirements
Opening and Configuring Eudora
Open Eudora
Getting Started Settings
Auto. Configure Settings (Automatic Configuration)
Hosts Settings
Specifying POP or IMAP for the
Incoming Mail Server Protocol
Importing from Outlook Express
Using Eudora in One of Three Modes
Choosing an Operating Mode and Registering Eudora
Quitting Eudora
Getting Help
Technical Support
Creating Messages
Creating an Outgoing Message
Using the Composition Window
Title Bar
Icon Bar
Formatting Toolbar (Text Styles)
Message Header
Message Body
Saving a Message for Later Changes
Setting the Message Priority
Requesting a Return Receipt
(Sponsored and Paid modes only)
Formatting Text (Sponsored and Paid modes only)
Text Editing Menu Commands
Other Formatting Options
Inserting Objects in Message Text
(Sponsored and Paid modes only)
Attaching a File to a Message
Sending Attachments to Non-Eudora Users
Inserting the Contents of a Text File into a Message
17
17
17
18
18
18
19
20
21
23
24
25
25
27
27
28
31
31
31
31
32
33
35
36
36
37
38
39
39
41
42
43
45
45
QUALCOMM Incorporated
v
Contents
Including a URL in a Message
(Sponsored and Paid modes only)
Checking Your Spelling
(Sponsored and Paid modes only)
Checking Your Spelling Automatically
Checking Your Spelling Manually
Check Spelling on Send or Queue
Adding Custom User Dictionaries
Using MoodWatch
Using MoodWatch for Outgoing Messages
Using MoodWatch for Incoming Messages
45
46
46
47
48
49
49
50
51
Sending Messages and Checking Mail
Sending or Queuing a Message
Sending a Message Immediately
Queuing a Message to Send Later
Queuing a Message to Send at a Certain Time
Editing a Queued Message
Taking a Message Out of the Queue
Sending Queued Messages When Checking Mail
Sending Messages with Special Server Instructions
Using SMTP Authentication
Keeping Copies of Outgoing Messages
Checking for Incoming Mail
Checking for Mail Automatically
Checking for Mail Manually
Stopping a Mail Check
Using Your Password
Changing Your Password
53
53
53
53
54
55
55
55
56
56
57
57
58
58
59
59
60
Using Signatures and Stationery
Using a Signature
Signatures Window
Adding a New Signature
Modifying a Signature
Deleting a Signature
Including a Signature in Your Message
Using Stationery (Sponsored and Paid modes only)
Stationery Window
Creating New Stationery
Creating New Stationery Using the Save As Command
Modifying Stationery
Deleting Stationery
61
61
61
62
62
63
63
64
64
65
65
66
67
QUALCOMM Incorporated
vi
Contents
Sending or Replying to a Message
with a Particular Stationery
Using Multiple Personalities
(Sponsored and Paid modes only)
Using Alternate Email Accounts
Personalities Window
Creating a New Personality
Modifying a Personality
Deleting a Personality
Creating a New Message from the Personality Window
Changing the Personality of a New Message
Checking Mail for Your Personalities
Checking for Mail Automatically
Replying from a Personality
Replies and Personalities
Linking a Signature and Stationery to a Personality
Creating an IMAP Personality
Receiving Messages
Managing Your Mail on the POP Server
Creating a POP Account
Leaving Mail on the Server
Deleting a Message from the POP Server
Skipping Messages Over a Certain Size
Checking for Mail with Special Server Instructions
Checking for Mail from Your POP Account
Managing Your Mail on the IMAP Server
Creating an IMAP Account
Checking Mail from Your IMAP Account
First Mail-Check
Subsequent Mail-Checks
Incoming Message Window
Title Bar
Icon Bar
Message Body
Receiving Attachments
Viewing Graphics Attachments as
Pictures in the Message
Specifying an Attachment Folder
Editing Incoming Messages
Using Active URLs
Viewing HTML Text
Viewing HTML Graphics
67
69
69
70
71
73
73
73
74
75
75
75
75
76
78
81
81
81
83
84
84
85
86
87
88
90
90
90
91
92
92
93
93
94
95
96
97
97
98
QUALCOMM Incorporated
vii
Contents
Using the Speak Option to Read Your Messages
(Sponsored and Paid modes only)
Saving a Message to a File
Printing a Message
Viewing IMAP Messages
Responding to IMAP Messages
Transferring IMAP Messages
Retrieving Attachments
Minimal Headers Only
Full Message Except Attachments Over ? K
Full Message with Attachments
Actions That Retrieve IMAP Messages
Automatically Deleting IMAP Attachments
98
99
99
99
100
100
100
101
102
102
103
103
Replying to Messages
Replying to a Message
Using the Reply Options
Forwarding a Message
Redirecting a Message
Turbo Redirecting
Redirect and Signatures
Sending Rejected Messages Again
Replying with a Stationery File
(Sponsored and Paid modes only)
Replying to a Message with a Particular Stationery
(Sponsored and Paid modes only)
105
105
105
106
107
107
108
108
Working with Mailboxes
Opening a Mailbox
Opening Other Mailboxes
Understanding the Components of a Mailbox
Message Summaries
Status Column
Priority Column
Attachments Column
Label Column
Sender/Recipient Column
Date Column
Size Column
MoodWatch Column
Server Status Column
Subject Column
Displaying and Resizing Columns
Using the Mailbox Size Display
111
111
111
112
112
113
114
114
115
115
115
116
116
116
117
117
117
108
109
QUALCOMM Incorporated
viii
Contents
Message Preview Pane
Using the Title Bar Popup Menu
Creating Mailboxes and Folders
Creating a Mailbox or Folder
Using the Mailbox Menu
Creating a Mailbox Within a Folder
Using the Mailboxes Window
Creating a New Mailbox or Mail Folder
Renaming a Mailbox or Mail Folder
Moving a Mailbox or Mail
Folder into Another Folder
Moving Messages from One Mailbox to Another
Deleting a Mailbox or Mail Folder
Working with IMAP Mailboxes
Using the Mailboxes Window with
an IMAP Account
Using the Mailbox and Transfer Menus
with an IMAP Account
Creating New IMAP Mailboxes and Folders
Resynchronizing an IMAP Mailbox or Folder
Refreshing Your List of IMAP
Mailboxes and Folders
Creating and Using IMAP Trash Mailboxes
Organizing Your Messages
Deleting Messages
POP Procedure
IMAP Procedure
To Mark a Message for Deletion
To Unmark a Message for Deletion
To Remove All Messages Marked for Deletion
Automatically Deleting Attachments
Transferring Messages
Using the Transfer Menu
Dragging Messages
Creating a Mailbox or Folder During Transfer
Filtering Messages
Quick and Simple Filters with the
Make Filter Command
Match Conditions
Action Area
Make Filter dialog buttons
Detailed Filters with the Filters Window
Filter Criteria – The Match Area (Filters Window)
118
120
120
121
121
121
123
123
123
124
124
124
125
125
126
127
128
129
131
131
131
132
132
132
133
133
133
134
134
135
135
136
136
138
138
139
140
QUALCOMM Incorporated
ix
Contents
Filter Actions
Creating an Auto-Reply
(Sponsored and Paid modes only)
Sorting Messages
Saving a Message to a File
Choosing an Application for Saved Messages
Finding and Searching
Finding Text in the Current Window
Finding a Word or Text String
in the Current Window
Finding the Next Occurrence of Text (Find Again)
Changing the Find String to the
Selected Text (Enter Selection)
Stopping a Find
Text Considered in a Find Operation
Finding Messages in Mailboxes and Folders
Basic Search Procedure
Using the Search All Command
Using the Search Mailbox Command
Using the Search Mailfolder Command
Using the Enter Selection Command with Search
Setting Up the Search Conditions
Using the Target Popup
Using the Comparison Popup
Using the Value Fields
Using the Mailboxes Pane
Starting and Stopping the Search
Working with the Search Results
in the Results Pane
Performing an Additional Search
on the Search Results
Saving a Search Results Window
Regular Expressions
(Sponsored and Paid modes only)
Managing Windows in Eudora
Normal Windows
Tabbed Windows
Anatomy of a Tabbed Window
Default Tabbed Windows in Eudora
Reorganizing Tabbed Windows
Opening and Activating Tabbed Windows
Creating a New Tabbed Window
142
144
145
146
147
149
149
150
151
151
152
152
153
153
155
155
156
156
157
158
161
162
162
163
165
167
168
168
171
171
171
172
173
173
174
174
QUALCOMM Incorporated
x
Contents
Closing Tabbed Windows
Link History (Sponsored or Paid mode only)
Statistics Window (Sponsored and Paid Modes only)
Displaying the Statistics Window
Printing the Statistics Report
Task Progress Window
Using the Address Book
Printing Your Address Book
Creating an Address Book within
Eudora’s Address Book
(Sponsored and Paid modes only)
Adding a Person to the Address Book
Adding a Group to the Address Book
Adding Entry Information
Changing, Moving, Saving, and Updating Entries
Deleting Entries
Addressing a Message from the Address Book
Inserting Full Email Addresses rather than Nicknames
(Sponsored and Paid modes only)
Make Address Book Entry Command
Creating a Group from the Address Book
Finish Address Book Entry Command
(Sponsored and Paid modes only)
Using Automatic Nickname Completion
(Sponsored and Paid modes only)
Using the Recipient History List
(Sponsored and Paid modes only)
Using Nicknames that were Not Created by Eudora
Saving Your Entries to a File
Using the Recipient List
Including Nicknames on the Recipient List
Using Directory Services
What Are Directory Services?
Specifying Your Default Lookup Servers
Looking Someone Up
Keeping the Connection Open to
Your Lookup Server for “Live” Queries
Performing Turbo Lookups on Selected Text
Addressing a Message from Your Query Results
Making Address Book Entries
Making Entries from the Current Selection
175
175
176
176
176
177
181
182
182
183
185
186
190
191
191
192
192
194
195
195
197
198
198
198
199
201
201
202
203
205
206
206
207
208
QUALCOMM Incorporated
xi
Contents
Finding and Using Lookup Servers
from Around the World
Using Menu Commands
Apple Menu
File Menu
Edit Menu
Text Submenu
Spelling Submenu
(Sponsored and Paid modes only)
Mailbox Menu
Message Menu
Change Submenu
Server Options Submenu
Transfer Menu
Special Menu
Find Submenu
Window Menu
Help Menu
Scripts Menu (Sponsored and Paid Modes only)
208
211
211
212
214
216
218
219
220
224
225
226
227
230
231
234
235
Using Modifiers and Shortcuts
Modifiers
Modifiers Not Reflected in Eudora’s Menus
Modifiers That Show Up As New
Commands on Eudora’s Menus
Shortcuts
237
237
237
Setting Eudora Preferences
Introduction
Getting Started
Checking Mail
Sending Mail
Checking Mail
Account/Server Information (POP and IMAP)
Connection (POP and IMAP)
Mail Management (POP only)
Download Options (IMAP only)
Sending Mail
Server
Connection
Message
Composing Mail
Account Information
245
245
245
246
246
246
247
248
248
249
250
250
251
251
252
252
239
242
QUALCOMM Incorporated
xii
Contents
Nickname Expansion
Spell Checking (Sponsored and Paid modes only)
Check Spelling
Ignore words with
Suggest words that
Attachments
Sending Attachments
Receiving Attachments
Replying
Reply to all
Address Handling for Reply to All
Priority Handling
Fonts & Display
Mailbox Display
Columns
Drawing
Message Preview
Date Display
Date formats
Display timezone
Eudora Labels
Styled Text
Sending mail with styles
When receiving styles, pay attention to
Formatting Toolbar
Moving Around
After finishing a messages
More keystroke options
Toolbar
Getting Attention
When something exciting happens
More attention-getting behavior
Sounds
Hosts
Checking Mail
Sending Mail
Directory Services
All connections
Extra Warnings
Deleting
Queueing and Sending
Other
MoodWatch
252
253
254
254
255
255
256
256
257
257
258
258
258
261
262
262
262
263
263
264
264
265
265
266
266
266
267
267
267
268
269
269
270
270
271
271
271
271
272
272
273
273
274
QUALCOMM Incorporated
xiii
Contents
Internet Dialup
Miscellaneous
Personalities (Sponsored and Paid modes only)
Personality to Configure
Checking Mail
Sending Mail
Personality Extras (Sponsored and Paid modes only)
Personality to Configure (POP and IMAP)
More Checking Mail (POP)
More Checking Mail (IMAP)
More Sending Mail (POP and IMAP)
Auto. Configure (ACAP)
ACAP Server Configuration
Fetch Configuration
Statistics
Eudora Sharing Protocol
(Sponsored and Paid modes only)
Tips on Using ESP
Creating an ESP Group
Creating an ESP Group (Advanced Setup)
Inviting Members to Join Your Group
Configuring Shared Folder Settings
Configuring Group Change Notifications
Maintaining Group Members
Joining a Group
Leaving a Group
Working with the Shared Folder
Changing Group Information
Configuring Global ESP Settings
Using the ESP Mailbox and Folder
General Reference
Customizing the Main Toolbar
(Sponsored and Paid modes only)
Using Eudora Plug-ins
Plug-in Software That Comes with Eudora
Installing and Using Eudora Plug-ins
Word Services
Printing
Putting Multiple Users on One Macintosh
Eudora Folders
Attachments Folder
Cache Folder
275
276
278
278
279
280
280
281
281
282
283
284
284
285
285
287
288
289
292
294
295
296
299
301
301
302
302
303
303
305
305
306
307
308
309
310
310
311
311
311
QUALCOMM Incorporated
xiv
Contents
Delivery Folder
Eudora Filters
Eudora Items
Eudora Log and Old Log
Eudora Nicknames and Nicknames Folder
Eudora Settings and Eudora Settings.bkup
IMAP Folder
Mail Folder
In, Out, and Trash (in the Mail Folder)
Mailbox Aliases (in the Mail Folder)
Parts Folder
Signature Folder
Spool Folder
Stationery Folder
Eudora Application Folder
Eudora Stuff
Extra Plugins
Documentation
Sources
Anonymous ftp (ftp.eudora.com)
Eudora Web Site
Eudora Information
Obtaining an Internet Email Server
Ph Server Source Code
Password Change Server
Kerberos
Mail Transport
Outgoing Mail
Incoming Mail
More Information
Using UUCP
Settings Dialog for UUCP
Operation
Internals
Mail Drop Format
Working Files
D.mac0####
X.mac0####
Using MIME
MIME Encodings
MIME Labeling
Practical Issues
Turning Off Quoted-Printable
311
311
312
312
312
312
312
312
313
313
313
313
313
313
314
314
315
315
316
316
316
316
316
317
317
317
317
318
318
318
319
319
320
320
320
320
320
320
321
321
322
322
322
QUALCOMM Incorporated
xv
Contents
Mapping Between MIME Types and
Macintosh Types
Sending
Receiving
Troubleshooting
323
323
324
325
Glossary
329
Index
333
QUALCOMM Incorporated
xvi
Introducing Eudora Email
®
Introducing Eudora Email
Welcome to Eudora Email 5.0! Eudora Email, hereafter referred to as Eudora, is a
comprehensive electronic mail (email) software program that accesses your Internet
Service Provider (ISP) or network to receive and send your email messages. Eudora
manages these messages within your computer.
In Eudora, you can write messages and send them with custom stationery and signatures.
You can send files, both text and graphic, created in other programs and “attach” them to
your email messages. You can forward messages, redirect them, or reply to all recipients
of a message.
You can set up mailboxes and folders for your mail and build “filters” to sort messages,
alert you, and even send an automatic reply.
All your favorite addresses can be stored in your personal address book, or you can let
Eudora search for addresses for you. And if you use more than one ISP, Eudora allows
you to build “multiple personalities” to send and receive mail to multiple accounts.
There are many more features and functions described later in this manual.
What’s New in Eudora Email v5.0
The following new features and functions have been added to Eudora Email 5.0 for Macintosh.
■
Import from Outlook Express™.You may now import mail information and settings
from Microsoft® Outlook Express 5.0. See “Importing from Outlook Express” on page
24.
■
Eudora Sharing Protocol (ESP). ESP is a new Eudora plug-in that allows you to
share documents and discussion among of a group of Eudora users without the use of
a shared server. See “Eudora Sharing Protocol (Sponsored and Paid Modes only)” on
page 287.
■
MoodWatch™. MoodWatch is a new Eudora feature that can monitor offensive text in
both incoming and outgoing messages. You can display the new Mood Watch options
dialog to set Mood Watch settings. “Using MoodWatch” on page 49.
■
Statistics. You can now display and print statistics on your Eudora usage. See “Statistics Window (Sponsored and Paid Modes only)” on page 176.
■
New Script menu. A new Script menu appears on the menu bar if you move your
AppleScript™ folder to the Eudora Applications folder or to the Eudora Stuff folder. All
scripts in your folder and those included with Eudora appear on the menu. See “Scripts
Menu (Sponsored and Paid Modes only)” on page 235.
■
New Address Book. The Eudora address book has been improved for easier usage
and maintenance. See “Using the Address Book” on page 181.
QUALCOMM Incorporated
17
System Requirements
Eudora User Manual
System Requirements
To use the Eudora Email application, you must have at least the following:
■
Macintosh® PowerPC processor.
■
Macintosh OS 8.1 or later.
■
Network or Internet mail account that uses POP3 or IMAP4 protocol.
■
Access to your mail account via a TCP/IP (Internet) network connection or via PPP
dial-up networking through a modem.
Note. Some Eudora plug-ins, such as QUALCOMM’s PureVoice™ Player-Recorder
require more advanced configurations, such as a Power Macintosh and System 7.5 or
later. Be sure to check the README and other documentation before you use any Eudora
plug-in. Click the following topic for more information: “Using Eudora Plug-ins” on page
306.
Opening and Configuring Eudora
Note. Eudora’s installation procedure is in the Eudora Quick Start Guide included in the
product box. If you downloaded Eudora from the Internet, the Quick Start Guide is an electronic file located in the Documentation folder.
Open Eudora
After you have installed Eudora, to open Eudora, do the following:
■
Double-click on the application icon.
Eudora application icon
If you have installed Eudora Email 5.0 over an existing version of Eudora, your settings
are automatically used from your previous version of Eudora.
If you have installed Eudora for the first time, the Settings option appears displaying the
Getting Started settings dialog.
QUALCOMM Incorporated
18
Eudora User Manual
Opening and Configuring Eudora
Getting Started settings dialog
Getting Started Settings
If you are configuring Eudora for the first time, the Getting Started settings dialog appears
when you open Eudora after installation.
Note. Completing the settings requires information from your ISP or company email
administrator. If you don’t have the information required, you can click Cancel and
complete the settings later, but you won’t be able to send or receive email until you do.
To begin entering mail and address information, do the following:
1
Enter the following information into the text fields:
Username—Enter your user name, that is, the name you use to log into your primary
email account. This name is provided by your Internet Service Provider or your
company’s email administrator. For example, in the incoming mail account
[email protected], the user name is John.Davis.
Mail Server—Enter the name of your incoming mail server for your principal email
account. All incoming messages to your primary account are routed through this
server. Use the Hosts Settings dialog to specify whether this server uses POP (Post
Office Protocol) or IMAP (Internet Message Access Protocol). See “Hosts Settings” on
page 21. A sample server name might be worldmail.myfirm.com. Check with your
ISP or your company’s email administrator if you’re not sure what to enter here.
Real name—Enter the name assigned to your principal account, generally your first
and last name. The text you enter here is included in the From: field in all of your
outgoing messages from this account. It identifies you to your recipients.
SMTP Server (Simple Mail Transfer Protocol)—Enter the name of the outgoing mail
sever for your principal email account if it’s different from our incoming mail server
name, for example: smtp1.myfirm.com. All outgoing messages sent from your
primary account are routed through this server. If the computer that runs your primary
incoming mail account is the same as your outgoing mail server, you can leave this
field blank.
QUALCOMM Incorporated
19
Opening and Configuring Eudora
Eudora User Manual
Return address—Enter the return email address that has been assigned to you by
your ISP or your company’s email administrator. This is the address that other people
use to send you email. Also, the address you enter here is included in the From: field in
all of your outgoing messages from this account. When a recipient replies to a
messages from this account, the reply is sent to this address.
If you do not enter an enter an address in this field, Eudora uses your incoming mail
account as the return address. Incoming mail accounts are usually in the following
format: username@mailhost. For example, suppose your incoming mail account is
[email protected] but your return address is
[email protected]. You would then enter [email protected] in this
field.
Sample settings entered in the Getting Started settings dialog
2
To save your settings, click OK.
Auto. Configure Settings (Automatic Configuration)
If your ISP or company provides Application Configuration Access Protocol (ACAP)
settings, you can instruct Eudora to retrieve these settings.
Note. If you get your settings from an ACAP server, first make sure that you are
connected to the Internet.
To enter ACAP settings, do the following:
1
From the Special menu, choose Settings.
2
In Settings category list, scroll and choose Auto. Configure. The Auto. Configure
Settings dialog appears.
QUALCOMM Incorporated
20
Eudora User Manual
Opening and Configuring Eudora
Auto. Configure settings dialog
3
Enter the following information in the Auto. Configure settings dialog.
ACAP Username—Enter your user name for the ACAP server.
ACAP Server—Enter the name of the ACAP server that contains your settings.
ACAP Port—Enter the port number for the ACAP server. Port 674 is the default, and is
the usual port for ACAP servers.
4
To instruct Eudora to get your account settings from the ACAP server, click Fetch
Settings Now. A dialog appears asking you to enter your password. Enter the password and click Configure Automatically.
5
To save your settings, click OK.
Hosts Settings
Now that you have entered the name of your incoming server in the Mail Host field in the
Getting Started settings dialog, you may also need to enter the name of your outgoing mail
server if it’s different from your incoming server. Also in the Hosts settings dialog, you need
to enter the names of the directory servers you will use to look up people on the Internet.
To enter the name of your mail and directory servers, do the following:
1
From the Special menu, choose Settings.
2
In the Settings category list, scroll and choose Hosts. The Hosts Settings panel
appears.
QUALCOMM Incorporated
21
Opening and Configuring Eudora
Eudora User Manual
Sample settings entered in the Hosts settings dialog
3
Enter the following information in the Hosts settings dialog:
Mail Server—This field should contain the name you entered in the Mail Server field of
the Getting Started settings dialog. If not, enter the full name of the incoming mail
server. For example: incoming.myfirm.com.
SMTP Server—Enter the name of the outgoing mail sever for your principal email
account, for example: outgoing.myfirm.com. All outgoing messages sent from
your primary account are routed through this server. If the computer that runs your
primary incoming mail account is the same as your outgoing mail server, you can leave
this field blank.
Directory Services/Ph/LDAP Server—Should you decide to use directory services,
enter the name of your directory services server that allows you to look up people on
the Internet or your local intranet, for example ph.myfirm.com or
ldap.myfirm.com. Your ISP or your email administrator can provide you with the
server names to use for each type of directory service available to you, that is either Ph
or LDAP services.
Finger Server—Should you decide to use Finger directory services, enter the name of
the server that runs the Finger protocol for Internet and intranet searches. You can
obtain this server name from your ISP or from your email administrator. If you leave this
field blank, Eudora uses your SMTP server as your Finger server.
“Live” directory service queries—Check this box if you want your directory services
to act on search information automatically. This saves you time when you perform
Internet or intranet searching.
Note. For more information on the remaining fields, see “Hosts” on page 270.
QUALCOMM Incorporated
22
Eudora User Manual
Opening and Configuring Eudora
Specifying POP or IMAP for the Incoming Mail Server Protocol
As a final step, you need to specify whether your incoming mail server uses the POP or
IMAP protocol for receiving and managing your mail. For the correct protocol, check with
your email administrator or your ISP.
To enter POP or IMAP information, do the following:
1
From the Special menu, choose Settings.
2
From the Settings category list, scroll and choose Checking Mail. The Checking Mail
settings dialog appears.
Sample settings entered in the Checking Mail settings dialog (POP server)
3
In the Mail Protocol field, choose POP or IMAP, depending on which protocol your
incoming mail server uses (the default for this field is POP). Note that your Username
and Mail Server should be the same as in the Getting Started settings dialog.
Some of the fields will change depending on whether you choose POP or IMAP. Your
your ISP or email administrator will tell you if you need to enter any additional information in the POP-related or IMAP-related fields, such as an “IMAP Mailbox Location
Prefix” if you are using IMAP. If you have been instructed to enter that information, do
so now.
4
To save your settings, click OK.
If you’d like more information on the additional fields of the Checking Mail settings dialog,
see “Checking Mail” on page 246.
If you use POP and you want to learn how to manage your mail on the POP server, see
“Managing Your Mail on the POP Server” on page 81.
If you use IMAP and you want to learn all about IMAP and how Eudora lets you check,
receive, read, respond to, and otherwise manage your mail on the IMAP server, see
“Managing Your Mail on the IMAP Server” on page 87.
QUALCOMM Incorporated
23
Importing from Outlook Express
Eudora User Manual
Once you have configured Eudora, you are ready to begin sending and receiving
messages! However, you may want to change the Eudora operating mode and register
your copy of Eudora.
Importing from Outlook Express
To set up a newly migrated account from Microsoft Outlook Express 5.0 as a new account
in Eudora, do the following:
1
From the File menu, choose Import Mail. The Email Importer dialog appears.
Email Importer dialog
2
Choose the email account from the list and click Import Account. To choose a mail
folder to import via a standard file dialog, click Select Other. Once an account is
selected to import, the Import Mail dialog appears.
Import Mail dialog
3
Choose the items you wish to import into Eudora and click OK. Eudora transfers all the
items you checked to your new Eudora account.
Note. If you have not set up a Dominant personality in Eudora, Eudora will use the
default email account you previously set up in Outlook Express. If you do have a
dominant personality set up in Eudora, the account you choose will be an alternate
personality. You can choose more than one account.
Important. It may take a little bit of time for the migration to occur depending on how much
mail, the complexity of your settings, and the size of your address book that you are
importing into Eudora.
QUALCOMM Incorporated
24
Eudora User Manual
Using Eudora in One of Three Modes
Using Eudora in One of Three Modes
You can choose one of three operating modes on how you wish to use Eudora. They are
as follows:
Sponsored mode
This mode provides the full-featured Eudora desktop email client at no charge, supported
by sponsors' advertising. It includes all of the features that are in the Paid mode.
Paid mode
In this mode, Eudora leads you through the payment process, then activates the
full-featured desktop email client without advertising.
Light mode
This is an upgrade to the freeware version formerly known as Eudora Light. It includes
fewer features than the other modes and a sponsor image or logo, but no advertising.
Choosing an Operating Mode and Registering Eudora
If you bought Eudora from a retail store or from a web site, Eudora installs in Paid mode.
However, if you would like to change the operating mode, for example to Sponsored mode,
you can do so right in the Eudora program. (Remember to request a refund from QUALCOMM. See the Eudora Quick Start Guide for refund information.)
To change the Eudora operating mode after you install Eudora, do the following:
1
From the Help menu, choose Payment & Registration. The Payment and Registration
window appears.
Payment and Registration Window
QUALCOMM Incorporated
25
Choosing an Operating Mode and Registering Eudora
2
3
Eudora User Manual
In the Which Eudora is right for you? section:
■
To use Eudora in sponsored mode, click Sponsored Mode (free, with ads).
Eudora displays the ad window.
■
To use Eudora in paid mode, click Paid Mode (costs money, no ads). Eudora
displays the Eudora web site for you to purchase Eudora.
■
To use Eudora in light mode, click Light Mode (free, fewer features). Eudora
changes to Eudora in light mode by shutting down certain features.
In the Keeping Current section:
■
To register your copy of Eudora, click Register with Us. Eudora takes you to
Eudora’s registration web page. Enter your information, and an email will be sent to
you confirming your registration.
If you are using Eudora in either Sponsored or Paid mode, you need to register to be
eligible for technical support.
If you don’t register or use Eudora in Light mode, you are not eligible for technical
support.
4
■
To enter or change your profile, click Profile. Eudora displays a web site where you
can provide information about yourself to help in customizing ads that may be of
interest to you.
■
To find the most current version of Eudora, click Find the Latest Update to
Eudora. The Eudora web site displays for you to retrieve the latest version of
Eudora.
In the Your Registration Information section, click Enter your code to change your
registration when you change from one Eudora mode to another. The Registration
dialog appears.
Registration dialog
QUALCOMM Incorporated
26
Eudora User Manual
Quitting Eudora
Quitting Eudora
To quit Eudora, do the following:
■
From the File menu, choose Quit or press Command+Q.
If you have queued messages, or timed messages due to be sent in the next 12 hours, you
are given the option to send them. See the sections “Queuing a Message to Send Later”
on page 53 and “Queuing a Message to Send at a Certain Time” on page 54.
The Trash mailbox is emptied if the Empty Trash on Quit box is checked in the
Miscellaneous Settings. See “Miscellaneous” on page 276.
Getting Help
Eudora has an online help window that provides quick-reference instructions for accomplishing many of Eudora’s operations. To display an online help window, choose the topic
you want from the Eudora Help menu.
Eudora Help menu
Eudora also has extensive “Balloon Help.” To turn balloon help on, do the following:
1
From the Help menu, choose Show Balloons.
2
Move the mouse pointer to a Eudora menu selection or item on the screen to display a
brief description of that item.
QUALCOMM Incorporated
27
Technical Support
Eudora User Manual
Balloon Help
You can use Balloon Help even when a dialog appears.
To turn Balloon Help off, do the following:
■
From the Help menu, choose Hide Balloons.
Note. If you have an extended keyboard with a Help key, you can press the key to turn
Balloon Help on and off.
When sending a message to the Eudora Technical Support group to report a problem (if
you are eligible for technical support), or when you send us an email message to report a
bug, do the following:
1
After composing your message, place the cursor at the bottom of your message
composition window.
2
From the Help menu, choose Insert System Configuration.
Your computer’s configuration is inserted at the bottom of the message. This helps
Eudora engineers analyze the problem.
You can get specialized help from the Eudora website. Just access the following web
addresses.
■
Tutorial pages: www.eudora.com/techsupport/tutorials
■
Get immediate help: www.eudora.com/techsupport/mac
■
X-Eudora-Settings: www.eudora.com/techsupport/mac/xsettings.html
■
IMAP FAQ: www.eudora.com/techsupport/mac/imapfaq.html
Technical Support
If after reviewing all of the available materials—this user manual, the Quick Start Guide,
the README files, the Online Help, and the Balloon Help, and you still need help, contact
your ISP or email administrator or the Eudora Technical Support group.
If you register your copy of Eudora in Sponsored or Paid mode, you are entitled to the
following:
■
Paid mode—6 calls or email messages for 1 year
■
Sponsored mode—6 calls or email messages per year if you remain in Sponsored
mode
QUALCOMM Incorporated
28
Eudora User Manual
■
Technical Support
Light mode—no technical support
Be sure to register as soon as possible to avoid any delays in receiving technical support.
Also, refer to the Eudora family of products technical support Web site, which includes a
Frequently Asked Questions (FAQ) section, “how to” information and tutorials. Open the
following web site: http://www.eudora.com/techsupport/Mac
Eudora tech support reps are available Monday – Friday from 8 a.m. to 5 p.m. Pacific Time
using the following phone number and email address:
Phone: (858) 658-1292
Email: [email protected]
When contacting us via telephone or email, you will be required to provide the following:
■
Registration number
■
Eudora version, mode, and platform
■
System version
■
What you were doing when the problem occurred and any error messages (including
error codes) that you received.
QUALCOMM Incorporated
29
Technical Support
Eudora User Manual
QUALCOMM Incorporated
30
Creating Messages
Creating an Outgoing Message
An outgoing message is a message you send to someone else. The simplest way to
create an outgoing message is to do the following:
■
From the Message menu, choose New Message or press Command+N. Or on the
Eudora toolbar, click
.
The composition window appears.
Using the Composition Window
The composition window consists of the title bar, the icon bar, the formatting toolbar (for
text styles), the message header, and the message body.
Composition window including header fields
message header
message body
Title Bar
The title bar provides information about the message, including the name of the
addressee, the time and date the message was sent, and the message subject.
■
To open the mailbox in which the message resides, double-click the title bar.
■
To open a menu containing the mailbox and/or folder(s) in which the message resides,
hold down the Command key, and click the title in the title bar.
– Select the mailbox from that menu to open it.
– Select a folder to open the Mailboxes window with that folder highlighted.
QUALCOMM Incorporated
31
Using the Composition Window
Eudora User Manuall
Icon Bar
The icon bar is a row of icon buttons displayed just under the title bar. These icons let you
control the priority of your message, override some of your default settings for the current
message, apply text styles to the message, and send or queue the message.
When you click the leftmost icons, popup menus appear allowing you to make a selection.
When you click the middle buttons, you can turn functions on or off for the current
message. You may also see buttons to enable Eudora plug-ins when you click on them, for
example PureVoice. Finally, the Send/Queue button at the far right lets you send or queue
the current message. Following are the icon descriptions.
You can set some of the defaults for the icon bar in the Sending Mail settings, the Attachments settings, the Styled Text settings, and the Personality Extras settings. See “Setting
Eudora Preferences” on page 245.
Priority
This lets you indicate that your message is of higher or lower priority than
a normal message. For most messages, this is just an empty box (normal
priority). For details, see “Setting the Message Priority” on page 37.
Signature
This lets you automatically add one of your signatures to the end of the
message. For details, see “Using a Signature” on page 61.
Attachment Type
This lets you select the encoding format for attachments. For details, see
the section “Attaching a File to a Message” on page 43.
Text Styles Toolbar
Click this icon to show or hide the formatting toolbar, for changing the
style of your text. The cursor must be in the message area in order for you
to use the icons on the formatting toolbar. For details, see “Formatting
Toolbar (Text Styles)” on page 33.
Quoted-Printable Encoding
If this is on, quoted-printable encoding is used when sending messages
or plain-text attachments that contain either special characters or long
lines of text. It is recommended that you always leave this icon on.
Include Macintosh Information
If this is on, the Macintosh file type and resources are included in all but
Uuencode attachments. For details, see “Attaching a File to a Message”
on page 43.
Word Wrap
When the message is sent, the text is automatically “wrapped,” meaning
that carriage returns are inserted at the end of each line of text, with
roughly 76 characters per line.
QUALCOMM Incorporated
32
Eudora User Manual
Using the Composition Window
Keep Copy
If this is on, Eudora puts a copy of this message in your Out mailbox as
soon as you send the message. Eudora keeps this message copy in your
Out mailbox until you either delete it or transfer it to another mailbox.
Return Receipt (Sponsored and Paid modes only)
If this is on, your recipient’s email software returns a message to you notifying you when your recipient has opened your outgoing message.
However, for this feature to work, your recipient’s email system must
support return receipts. For details, see “Requesting a Return Receipt
(Sponsored and Paid modes only)” on page 38.
Plug-ins (Optional)
You may see additional icons that, when clicked, enable a Eudora plug-in,
if that plug-in is installed in your Eudora Stuff folder when you start
Eudora. For more details, see “Using Eudora Plug-ins” on page 306. The
example shown is the icon for QUALCOMM’s PureVoice Player-Recorder
plug-in.
MoodWatch
ice cube—There is no offensive language in the message.
1 chili—There may be a slight bit of offensive language in the message.
2 chilies—There may be offensive language in the message.
3 chills—There is offensive language in the message.
Send or Queue
Click Send to send this message immediately. Click Queue to put this
message in a queue (waiting line) in your Out box to be sent later. If the
Immediate send option is on in the Sending Mail settings, the button is
labeled Send. If this option is off, the button is labeled Queue. For details,
see “Sending or Queuing a Message” on page 53.
Formatting Toolbar (Text Styles)
The formatting toolbar, when displayed, appears just under the icon bar. It consists of a
series of popup menus and push-button icons that let you apply styles to the text in the
current message.
To show or hide the formatting toolbar in the current message only, click the text styles
toolbar icon on the icon bar (see the previous section). To show or hide the formatting
toolbar in all outgoing messages by default, do the following:
1
From the Special menu, choose Settings.
2
Scroll through the Settings category icons, and choose Styled Text.
3
In the Styled Text dialog, turn the Show formatting toolbar option on or off.
Note. You can’t apply text styles to text you type in the header fields.
QUALCOMM Incorporated
33
Using the Composition Window
Eudora User Manuall
Font-related popups and buttons generally apply styles to any text you have selected in
the message body or to text typed from the insertion point onward. Paragraph-related
buttons apply styles to the whole paragraph(s) containing the currently selected text or the
insertion point.
Click the popup menus to select the text font, size, and color. Click the other buttons to
apply their styles or remove the style. The Link button requires that text (or a graphic) be
selected.
The popup menus and buttons on this toolbar are described below.
Font
Makes the selected text a specific font (typeface)
Size
Makes the selected text a specific size
Color (Sponsored and Paid modes only)
Makes the selected text a specific color. Note that “No Color” is the default
for text on your computer (usually black)
Bold
Makes the selected text bold
Italics
Makes the selected text italic
Underline
Makes the selected text underlined
Unquote (Sponsored and Paid modes only)
Removes one level of quoting (excerpt bars) from the selected text or the
insertion point
Quote (Sponsored and Paid modes only)
Adds one level of quoting (excerpt bars) to the selected text or the insertion point
Align Left (Sponsored and Paid modes only)
Aligns the selected paragraph to the left margin
Align Center (Sponsored and Paid modes only)
Aligns the selected paragraph to the center of the page
QUALCOMM Incorporated
34
Eudora User Manual
Using the Composition Window
Align Right (Sponsored and Paid modes only)
Aligns the selected paragraph to the right of the page
Indent Out (Sponsored and Paid modes only)
Removes one level of indent from the selected paragraph
Indent In (Sponsored and Paid modes only)
Indents the selected paragraph indented once to the left
Completely Plain
Turn on to remove all formatting from the selected text. Note that this
button does not remove inserted objects such as horizontal rules,
graphics, and hyperlinks.
Bulleted List (Sponsored and Paid modes only)
Makes the selected text a bulleted list.
Insert Horizontal Rule (Sponsored and Paid modes only)
Turn on to insert a horizontal line at the position of the insertion point in
the message body. The rule may be placed above or below the current
line if the cursor shares the line with text. For more details, see “Inserting
Objects in Message Text (Sponsored and Paid modes only)” on page 42.
Link to URL (Sponsored and Paid modes only)
Turn on to convert the selected text or graphic into a highlighted, clickable
hyperlink to a URL that you specify. When your recipient clicks the hyperlink in the received message, he or she is immediately taken to the URL.
You must fully qualify the protocol before in enter the web site address,
http://, ph://, ftp://, for example: http://www.eudora.com. For more
details, see “Inserting Objects in Message Text (Sponsored and Paid
modes only)” on page 42.
For more information on text styles, see “Formatting Text (Sponsored and Paid modes
only)” on page 39.
Message Header
Outgoing message headers consist of six fields: To, From, Subject, Cc, Bcc, and X-Attachments. You can directly edit the To, Subject, Cc, and Bcc fields. To move the insertion point
between these fields, press the Tab key, or click in the desired field with the mouse, or
press Return.
To:—Recipients’ email addresses or nicknames you have defined. Multiple addresses and
nicknames must be separated by commas. For more information on nicknames, see
“Using the Address Book” on page 181.
QUALCOMM Incorporated
35
Saving a Message for Later Changes
Eudora User Manuall
From:—Sender’s email address. This is usually your incoming email account plus your
real name. You can use a return address other than your incoming mail account by
entering the address in the Return address field of the Getting Started options. See
“Getting Started” on page 245.
If you have multiple personalities set up, you can select the appropriate personality in the
From: field popup menu. See “Using Multiple Personalities (Sponsored and Paid modes
only)” on page 69.
Subject:—Brief text indicating the contents of the message. This field can be left blank
although it is considered a point of email etiquette to include a subject with each message.
Cc:—Email addresses or nicknames of people to whom a copy of the message is to be
sent. These recipients are displayed in the message header for all recipients to see.
Multiple addresses and nicknames must be separated by commas. This field can be left
blank. Cc means “carbon copy.”
Bcc:—Email addresses or nicknames of people you want to send a copy of this message
to in confidence. The Bcc field does not appear in the header of received messages, so
the recipients in the To and Cc fields will not know that a copy of this message was sent to
these addresses. Multiple addresses and nicknames must be separated by commas. This
field can be left blank. Bcc stands for “blind carbon copy.”
(Sponsored and Paid modes only) You can also use the Bcc field to keep a copy of this
message in one of your mailboxes. To do this, put the insertion point in the Bcc field and
select the mailbox from the Fcc menu (normally the Transfer menu). The name of the
mailbox is inserted into the Bcc field, preceded by “ƒ:” and the whole expression is placed
in quotes. After the message is sent, it is moved to that mailbox. Fcc stands for “folder
carbon copy.”
X-Attachments:—A list of documents being attached to and sent along with this
message. You’ll see an icon and name for each attachment. For instructions on how to add
attachments to a message, see “Attaching a File to a Message” on page 43. To delete an
attachment from an outgoing message, select it and press the Delete key. The attachment
is deleted in Eudora, but not in your computer.
Message Body
After filling in the header fields, move the insertion point to the space below the message
header. Type the body of the message here. For information about formatting your
message text, see the sections “Formatting Text (Sponsored and Paid modes only)” on
page 39 and “Formatting Toolbar (Text Styles)” on page 33.
You can insert pictures and horizontal lines into the message text. You can also create
clickable links to URLs for your recipients. For more details, see “Inserting Objects in
Message Text (Sponsored and Paid modes only)” on page 42.
Saving a Message for Later Changes
Sometimes it is convenient to save an outgoing message, either as a safeguard when
typing long messages, or so you can return to it later to make changes.
To save the current message, do the following:
QUALCOMM Incorporated
36
Eudora User Manual
■
Setting the Message Priority
— From the File menu, choose Save.
To save all of the outgoing messages that you currently have open, do the following:
■
— While holding down the Option key, choose Save All from the File menu.
Saved messages are put in the Out mailbox, and if at least one recipient is entered in
either the To: or the Bcc: field, the saved message is shown with a bullet (•) in the Status
column. If both the To: and the Bcc: fields are empty, the Status column is blank. The bullet
indicates that the message not only has been saved but is also ready to be sent or
queued.
Saved (and sendable) messages in the Out mailbox
You can continue making changes to the message or close it. If you try to close an
outgoing message without saving that version of the message, an alert appears asking if
your changes should be saved or discarded. If you choose Discard and the message has
never been saved, the message is deleted.
Setting the Message Priority
You can assign a priority to incoming and outgoing messages. The priority is only for you
and your recipients; it does not affect the way mail transport systems handle the
messages.
There are five priority levels available. Each is represented by a small symbol in the icon
bar of a message window and the Priority column of a message summary. Normal priority
is used for messages that have no assigned priorities and is shown as a blank. You can
also choose Raise or Lower to set the priority one level higher or lower, instead of setting
a particular priority level.
New messages are created with the Normal priority. To change the priority of the current
message, use the Priority popup on the icon bar of the composition window.
Changing the priority of a message using the Priority popup
QUALCOMM Incorporated
37
Requesting a Return Receipt (Sponsored and Paid modes only)
Eudora User Manuall
To set up Eudora to always use the sender’s priority on your replies, do the following:
1
From the Special menu, choose Settings.
2
Scroll through the Settings category icons, and choose Replying.
3
In the Replying settings dialog, turn on the Copy original’s priority to reply option.
You can always change the priority in the message window.
Requesting a Return Receipt (Sponsored and Paid modes only)
You can request that your recipients notify you when they have seen your message. To do
this, click
in the message window.
Your recipients receive a message with a request to notify you that they have seen the
message. If your recipient clicks the Notify Sender button, you receive a message that tells
you when that recipient opened your message.
Request for notification
If you sent yourself a copy of the message, you will or will not see the notification request
depending on whether the Prompt for receipts requested by self option is turned on or off
in the Miscellaneous settings. See “Miscellaneous” on page 276.
To determine how Eudora sends you a copy of the message, Eudora uses the “me” nickname. You can create the “me” nickname in the Address Book (see “Using the Address
Book” on page 181). If you do not have a “me” nickname, Eudora uses the contents of the
Username, Mail Host, and Return address fields from the Getting Started settings.
If you receive a message with a request for notification of receipt, you can click Notify
Sender to send the notification, or you can just ignore it. If you ignore it, nothing happens.
To remove the request without sending the notification, hold down the Option key and click
Notify Sender.
Note. Return Receipt options may or may not work as described. It all depends on your
recipients’ email software program.
QUALCOMM Incorporated
38
Eudora User Manual
Formatting Text (Sponsored and Paid modes only)
Formatting Text (Sponsored and Paid modes only)
You can use standard text editing options to format the text of your outgoing messages,
text files, and signature files. The formatting is sent to your recipients using Hypertext
Markup Language format (HTML).
HTML is the text formatting standard used by Web browsers and newer email applications.
Besides allowing you to use enriched text, HTML also lets you create bulleted lists and
embed pictures, horizontal lines, and links to URLs (hyperlinks) in your outgoing email
messages. Note that the formatting your recipient sees depends on how well their email
software supports these standards.
It’s important to know that you cannot completely control what happens on your recipients’
computer. Depending on the type of computer they are using, their email software, their
installed fonts, their settings or preferences, and other considerations, they could end up
viewing something slightly or even very different from what you had intended. Also, the
formatting changes you make are sent to your recipients, but your default text settings are
not. Any text you did not change appears using your recipients’ default text settings, which
may be different from yours.
In Eudora, you can select preferences for sending text in your messages as follows.
1
From the Special menu, choose Settings.
2
Scroll through the Settings category list and choose Styled Text.
3
In the Styled Text settings dialog, you can select whether you want Eudora to send your
messages with styled or plain text or both.
If the Ask me each time option is on, then every time you send or queue a message
that contains styled text, you are asked how you want to send the text: plain and styled
both, styled only, or plain only. This setting is identical to the Try to queue a message
with styled text option in the Extra Warnings settings (See “Extra Warnings” on page
272).
Text in outgoing messages, text files, and signature files can be formatted using the text
editing menu commands found on the Text submenu from the Edit menu. However, styles
in Signatures are sent only if there are styles in the body of the message. Otherwise, your
signature (whether it has styles or not) will be sent as plain text.
Text in outgoing messages can also be formatted using the formatting toolbar. The Text
submenu commands from the Edit menu are described below. See “Formatting Toolbar
(Text Styles)” on page 33 for information on using the formatting toolbar.
Text Editing Menu Commands
To format text, use the commands on Text submenu from the Edit menu. If text in the
message body is selected, the menu command applies the formatting to that text. If no text
is selected but the insertion point is in the message body, then the font-related commands
apply the formatting to the next text you type, and the margin-related commands apply the
formatting to the current paragraph (the paragraph containing the insertion point).
Following is a description of the formatting options.
QUALCOMM Incorporated
39
Formatting Text (Sponsored and Paid modes only)
Eudora User Manuall
Plain, Bold, Italic, Underline—Makes the text plain (the default), bold, italic, or underlined. The keyboard shortcuts are, in the same order as above, Command+T,
Command+B, Command+I, and Command+U.
Completely Plain—Clears all formatting and go back to the default settings. This
command is available only if you hold down the Option key while displaying the Text
submenu from the Edit menu. The Completely Plain command appears where the Plain
command normally would. The keyboard shortcut is Option+Command+T.
Quote, Unquote (Sponsored and Paid modes only)—Adds (Quote) or removes (Unquote)
one level of excerpt bars (|) to/from the selected or current text. Eudora uses excerpt bars
to indicate or “quote” the sender’s original text when you reply to a message. The keyboard
shortcuts are Command+’ for Quote and Option+Command+’ for Unquote.
Left, Center, Right (Sponsored and Paid modes only)—Aligns the selected or current
paragraph to the left, the center, or the right of the current indent.
Margins: Normal (Sponsored and Paid modes only)—Makes the selected or current
paragraph’s left and right margins normal or flush with the message window (the default).
Margins: Indent, Indent 2, Indent 3, Indent 4(Sponsored and Paid modes only)—Makes
the selected or current paragraph’s left and right margins indented one, two, three, or four
levels.
Margins: With Bullets (Sponsored and Paid modes only)—Converts the selected or
current paragraph(s) into a bulleted list, where each paragraph is indented and begins with
a bullet. Selecting this command again removes the bullets and returns the text to its prior
margin. A checkmark appearing next to this command indicates that the bulleted list
formatting is on.
Color (Sponsored and Paid modes only)—Makes the text black, indicated by No Color
(the default), or the indicated color. Default color options are red, green, blue, yellow, and
brown.
Font (Sponsored and Paid modes only)—Makes the text one of the fonts available on your
Macintosh by choosing the font from the submenu. Remember that your recipient may not
have the same fonts you do.
Size—Makes the text very small (Smallest) to very big (Biggest) and sizes in between.
The increase or decrease is based on the next or previous standard point size. The full list
of sizes is smallest, smaller, small, normal, big, bigger, and biggest.
Remember that you are viewing the text based on your default settings, but your recipient’s settings and fonts may be different. For example, if you have a default font size of 10,
and you edit your message text to be a bigger size, it would display as 18 points to you, but
would display as 24 points for a recipient with a default font size of 14.
Insert Horizontal Rule (Sponsored and Paid modes only)—Inserts a horizontal line in
your message text. A horizontal rule is inserted on the line containing the cursor (or on the
line immediately below if the cursor is interior to a line of text). This allows attractive
formatting of your messages using separators such as appears in web pages.
Insert Graphic (Sponsored and Paid modes only)—Inserts a graphic in your message. A
dialog appears for you to select the graphic that you want to include in your text. The
graphic is inserted into the message body at the insertion point position. You can continue
typing text. Once the graphic is inserted in your message, you can drag it to where you
QUALCOMM Incorporated
40
Eudora User Manual
Formatting Text (Sponsored and Paid modes only)
want it. When your recipient opens your message, he or she will see the picture right in the
message body, depending on whether or not the receiving computer and email software
supports the display of pictures embedded in message text.
Link to URL (Sponsored and Paid modes only)—Convert the selected piece of text, or the
selected graphic, to a clickable, underlined hyperlink to a Uniform Resource Locator (URL)
you specify. When your recipient clicks the link, he or she is immediately taken to the URL.
To create a text or graphic hyperlink, do the following:
1
Type the text or insert a graphic you want to link in your outgoing message, then select
the text or graphic you want to hyperlink. The text or graphic should be highlighted.
2
From the Edit menu, choose Text then Link to URL. The Link to URL dialog appears.
Link to URL dialog
3
Type the URL you wish to hyperlink the text or graphic to, then click Create Link.
To unlink, click Remove Link.
To cancel the linking function, click Cancel.
The text or graphic is now linked and is highlighted and underlined in the message. When
your recipient receives the message, opens it, and clicks the hyperlink, their default
browser or other application opens and goes directly to the URL you specified.
Note. Other protocols such as ftp:, mailto:, ph:, etc. may be linked in this manner.
Other Formatting Options
If you turn on the Word Wrap
in the composition window, you do not need to use
carriage returns in the body of your message. When you send the message, the text is
automatically “wrapped,” meaning that carriage returns are inserted at the end of each line
of text, with roughly 76 characters per line. This makes the message legible on the recipient’s computer.
Also, you can turn Word Wrap on for all messages by default by turning on the Word wrap
option in the Composing Mail settings (see “Composing Mail” on page 252). However, if
you’re using stationery, the word wrap setting saved with the stationery file will override the
Composing Mail setting. You can always turn on the Word Wrap icon in the composition
window, which will override all other settings.
To manually wrap text, do the following:
1
Select and highlight the text you want to wrap.
2
From the Edit menu, choose Wrap Selection.
QUALCOMM Incorporated
41
Inserting Objects in Message Text (Sponsored and Paid modes only)
Eudora User Manuall
■
To unwrap text, select the text you want, then hold down the Option key and from
the Edit menu, choose Unwrap Selection.
■
To copy wrapped text without taking the carriage returns, hold down the Option key
and from the Edit menu, choose Copy & Unwrap.
■
To copy wrapped and styled text without taking the carriage returns or styles, hold
down the Shift and Option keys and from the Edit menu, choose Copy Without
Styles & Unwrap.
■
To move text around in your messages or text files, or to move text from other application windows into your Eudora windows, use Copy and Paste or the Macintosh
standard Drag and Drop functions. Note that the Require control key for
text/message dragging option in the Miscellaneous settings lets you restrict
drag-and-drop operations to the use of the Control key. Also note that the
drag-and-drop options also apply to graphics inserted in messages by using the
Insert Graphic command from the Text submenu from the Edit menu.
Inserting Objects in Message Text (Sponsored and Paid modes only)
You can insert pictures and horizontal rules into messages, and you can create hyperlinks
to Uniform Resource Locators (URL) out of selected pieces of text or selected graphics.
URLs are addresses that display Internet locations such as web sites and home pages.
To insert a horizontal rule in an outgoing message, do the following:
1
In the message body, put the insertion point where you want the horizontal line to
appear.
2
From the Edit menu, choose Text then Insert Horizontal Rule or click the Insert Horizontal Rule
on the composition window formatting toolbar. A horizontal line is
inserted at the insertion point or on the line immediately below if the insertion point is in
a line of text.
To insert a picture in your message, do the following:
1
In the message body, put the insertion point where you want the picture to appear.
2
From the Edit menu, choose Text then Insert Graphic.
3
Choose a graphic file from the dialog.
The picture is inserted and your recipient will see it in the message body when the
message is opened. You can drag to move the picture, and you can type text around it.
You can also insert a picture into your message by dragging the graphics file from your
desktop into the message body.
With QuickTime version 4.0 or later installed on your Macintosh, you can insert a variety of
items into your outgoing messages using the Insert Graphic command (or drag-and-drop).
You can insert graphics files in any formats QuickTime accepts, for example, JFIF/JPEG,
GIF, TIFF, PNG, BMP (Windows Bitmap), MacPaint, Photoshop, QuickDraw Picture
(PICT), QuickDraw GX Picture, QuickTime Image File, Silicon Graphics Image File, Targa
QUALCOMM Incorporated
42
Eudora User Manual
Attaching a File to a Message
Image File and more. You can also insert sounds (e.g., QUALCOMM PureVoice files),
movies, and other multimedia content. Of course, what your recipient sees or hears will
depend on the receiving computer, email software, and any installed multimedia software.
To link a piece of text or a graphic to a URL, do the following:
1
Select and highlight the text or graphic.
2
From the Edit menu, choose Text then Link to URL or click the Link to URL
composition window formatting toolbar.
3
In the dialog that displays, type the URL and click Create Link. The text or graphic is
linked and underlined. Clicking on it takes you (or the recipient) immediately taken to
the URL.
on the
This command lets you link any piece of text or graphic to a URL. For example, your
message can contain the text “For more information on our products, Click here.”
To insert a URL in a message, see “Including a URL in a Message (Sponsored and Paid
modes only)” on page 45.
Attaching a File to a Message
Any Macintosh file can be attached and sent with a Eudora message. An attachment
accompanies the email message and does not appear within the message text. Instead,
the name of the document and its icon appear automatically in the X-Attachments: field of
the message header.
To attach a file to a current outgoing message, do the following:
1
From the Message menu, choose Attach Document or press Command+H. A standard file dialog appears.
2
Once the desired document is located, choose it and click
to the message.
to attach the document
You can add as many attachments as you want.
You can also drag one or more files from the desktop onto the message window to attach
them. To attach a graphic file, you must drag it above the header divider line, or else it will
be inserted in the message body.
Note. Use the Attach submenu from the Message menu to attach files created with
Eudora plug-ins. See “Using Eudora Plug-ins” on page 306 for details.
QUALCOMM Incorporated
43
Attaching a File to a Message
Eudora User Manuall
An outgoing message with an attached document
To detach an attachment before you send a message, do the following:
1
In the X-Attachments: field, choose the attachment.
2
Press the Delete key or from the Edit menu, choose Clear. The attachment is deleted.
When the message is sent, if the attachment is not a plain text file, it is encoded in the
selected attachment type. This allows you to send any kind of attachment, even Macintosh
applications.
The attachment types include the following:
AppleDouble
This is best for recipients with MIME-compliant email readers, regardless
of what operating system they are using. For more information on MIME,
see “Using MIME” on page 321.
AppleSingle
This works for recipients with MIME-compliant email readers on Macintoshes. Do not use this type if your recipient is not using a Macintosh.
BinHex
This is best for recipients on a Macintosh with an email reader that is not
MIME-compliant.
Uuencode Data Fork
This is best for recipients using non-Macintosh systems that are not
MIME-compliant.
You can select the default encoding method for all outgoing messages in the Attachments
settings (see “Attachments” on page 255). On a message-by-message basis, you can
select the encoding method from the Attachment Type popup
message composition window.
on the icon bar of the
QUALCOMM Incorporated
44
Eudora User Manual
Inserting the Contents of a Text File into a Message
If you want to include the Macintosh file-type and resources with an AppleDouble or
AppleSingle attachment, be sure you click the Macintosh Information icon
. This can
be important in maintaining the integrity of the file for another Macintosh, but can confuse
other operating systems. (You can turn this on by default for all outgoing messages by
turning on the “Always include Macintosh information” option in the Attachments settings.
See “Attachments” on page 255.)
If the attachment is a plain text file, it is not encoded in any special format before being
sent, but you can use the “Include Macintosh Information” icon to force the document to be
encoded with the desired encoding.
Sending Attachments to Non-Eudora Users
If you send an attachment to someone who does not use Eudora, the attached file may be
included at the end of the message in the chosen attachment format (AppleDouble,
AppleSingle, BinHex, or Uuencode). Your recipient should save the message as a file, then
decode the file using an application appropriate for the encoding method you used when
you sent the message.
Note. The recipient of the attachment must have the supporting application software to
open, view, and print the attachment file you send. For example, if you send a Word document, the recipient must have Word installed on their computer.
Inserting the Contents of a Text File into a Message
The contents of a text file can be inserted directly into a message (and then edited if
desired). To insert a text file into a message, take these steps:
1
Put the insertion point where you want the text inserted.
2
From the Message menu, choose Attach Document.
3
Select the text file you want.
4
Click Insert.
The text from the file is inserted into your message, and you can edit it as normal.
Including a URL in a Message (Sponsored and Paid modes only)
To include an automatically hotlinked URL in an outgoing message, enclose the URL with
less than and greater than signs (angle brackets) to ensure that your recipient’s email
application can identify the item as a URL. For example,
<http://www.qualcomm.com/eudora>. The URL is automatically highlighted as an
active URL in your message window. The default highlighting is blue underlined text.
Clicking on the URL immediately takes the recipient to that web site or other location.
QUALCOMM Incorporated
45
Checking Your Spelling (Sponsored and Paid modes only)
Eudora User Manuall
URL in an outgoing message
To insert a piece of text or a graphic in a message and link them to an URL, see “Inserting
Objects in Message Text (Sponsored and Paid modes only)” on page 42.
Checking Your Spelling (Sponsored and Paid modes only)
Eudora includes a built-in spelling checker. It can be used to check for misspellings in
outgoing messages, incoming messages, text files, and signature files.
The spelling checker includes a built-in dictionary and also lets you create a custom user
dictionary.
You can customize Eudora’s spelling checker to do the following:
■
Check your spelling automatically as you type, or only when you request it (manually).
■
Ignore words containing initial capitals, mixed capitals (uppercase and lowercase characters), numbers, and all capitals.
■
Suggest alternate spellings for misspelled words: that is, suggest words that look like
the word you typed, that sound like the word you typed, or that look or sound like the
word — or never make suggestions.
■
Check outgoing messages for spelling as they are sent or queued and alert you if the
message contains misspellings, so that you can correct them before you send or
queue the message.
Note. Changes to the spelling settings can be made in the Spell Checking settings dialog.
See “Spell Checking (Sponsored and Paid modes only)” on page 253.
Checking Your Spelling Automatically
Eudora’s automatic spell checking feature highlights spelling errors as you type. You can
correct the word now or later, or after you finish writing your message.
Before you can use the automatic speller, you need to make sure the Check spelling:
Automatically as you type is turned on in the Spell Checking settings dialog.
To turn the automatic speller on, do the following:
QUALCOMM Incorporated
46
Eudora User Manual
Checking Your Spelling (Sponsored and Paid modes
1
From the Special menu, choose Settings.
2
Scroll and select Spell Checking. The Spell Checking dialog appears.
Spell Checking dialog
3
Select Automatically as you type (if not already selected).
4
Click OK. Your automatic speller should be on.
Checking Your Spelling Manually
If you prefer not to use the automatic spell checker, Eudora has a manual method to check
your spelling. However, to check spelling manually, you must have Check spelling: Only
when requested turned on in the Check Spelling settings dialog. See “Spell Checking
(Sponsored and Paid modes only)” on page 253.
To check your spelling manually, do the following:
1
In an open message window, text file, or signature file in Eudora, from the Edit menu,
choose Spelling then Check Spelling, or press Command+6. Or, click
in the main
toolbar.
Eudora scans your entire message including the Subject line of outgoing messages, or
the selected text, and highlights all the misspelled words.
2
Double-click the highlighted word or place the insertion point anywhere in the word to
select it. Either display the Spelling submenu or hold down the Control key and click the
highlighted word to display the spelling context popup menu. The submenu and the
context popup menu each list Eudora’s suggestions for the correct spelling of the
misspelled or unknown word.
Note. The Control key works only if the Contextual Menu Manager is installed, which is
included in Mac OS 8.5 and later.
3
Choose your preferred spelling from the submenu or the context popup menu. Or
choose Add to Dictionary or press Shift+Option+Command+6 to add the new word to
your custom user dictionary.
QUALCOMM Incorporated
47
Checking Your Spelling (Sponsored and Paid modes only)
4
Eudora User Manuall
Correct each highlighted word until you are finished. To proceed through the message,
either double-click the next highlighted word or choose Find Next Misspelling from
the Spelling submenu or the context popup menu, or press Option+Command+6.
More Spell Checking Information
■
The spelling checker ignores any text that is preceded by a quote mark, which is
normally an excerpt bar, also called a sidebar (|), but which in older versions of Eudora
can also be an angle-bracket (>) for unstyled text. Eudora assumes that this quoted
text was originally from another message, and therefore does not need to be
spell-checked.
■
The spell error word highlighting is not a style. It is a visual cue for you only and is
removed from the message when you send it or close it. It will not affect any other
styles in your message.
■
To correct a word marked as misspelled, you can place the cursor anywhere inside the
word and then display the Spelling submenu or the context popup menu. You do not
have to double-click the word.
■
If Eudora has no suggestions for the correct spelling of a misspelled word in any of its
spelling dictionaries, then suggestions are not listed on the Spelling submenu or the
context popup menu. Suggestions are also not listed if the Never make suggestions
option is turned on in the Spell Checking settings dialog. See “Spell Checking (Sponsored and Paid modes only)” on page 253.
■
To add any new word or variant spelling to your custom user dictionary, double-click the
word to highlight it, and then choose Add to Dictionary from Spelling submenu or the
context popup menu, or press Shift+Option+Command+6.
■
To remove any word from your custom user dictionary, double-click the word and
choose Remove from Dictionary from either the Spelling submenu or the context
popup menu.
Note. You can remove a word from Eudora’s built-in spelling dictionary, but you must
spell-check a message or file containing the word first.
Check Spelling on Send or Queue
To set up Eudora to check the spelling in a message when you send or queue it, do the
following:
1
From the Special menu, choose Settings.
2
Scroll the Settings category list and choose Spell Checking.
3
In the Spell Checking settings dialog, turn on the Warn when sending/queuing
message with misspellings option.
4
To save your setting and close the Settings dialog, click OK.
If the Warn when sending/queuing message with misspellings option is on, the message is
checked for spelling errors when the message is sent or queued. If spelling errors are
found, they are highlighted and an alert appears, giving you a choice of either sending the
message with spelling errors or with corrections.
To send the message with spelling errors, do the following:
QUALCOMM Incorporated
48
Eudora User Manual
Using MoodWatch
■
In the alert, click Send Anyway.
To correct the spelling errors, do the following:
1
Click Cancel.
2
Fix the errors.
3
Send the message again. The alert displays until all spelling errors are corrected.
To customize Eudora’s built-in spelling checker, see “Spell Checking (Sponsored and Paid
modes only)” on page 253.
Adding Custom User Dictionaries
To add a custom user dictionary for use with Eudora’s built-in spelling checker, simply drop
it into one of your Spelling Dictionaries folders.
When you install Eudora, Eudora creates a Spelling Dictionaries folder in your Eudora
Stuff folder, under your Eudora Application Folder. Your custom user dictionaries are
normally kept in this folder when you create them. However, you can also create a Spelling
Dictionaries folder in your Eudora Folder, under your System (pre-OS9) or Documents
Folder. If you create such a folder, then Eudora will put your newly created customer user
dictionaries there. You can also add new dictionaries to that folder.
Note. If you do create a Spelling Dictionaries folder in your System or Documents folder,
be sure to move your User Dictionary into that folder. Always keep these two dictionaries
in the Spelling Dictionaries folder you are currently using.
A dictionary is just a list of words in a text file, one word per line. You can create such a
dictionary file yourself, using a text editor.
Eudora considers all of the dictionaries in your current Spelling Dictionaries folder —
including your User Dictionary and all of your custom dictionary files as one big dictionary.
Using MoodWatch
MoodWatch monitors incoming and outgoing messages for offensive text. A new settings
dialog has been added for MoodWatch so you can determine how you wish to use MoodWatch.
MoodWatch works similarly to a spell checker. MoodWatch scans and determines what
words or phrases in a message or a header may be offensive. One, two, or three red chili
peppers appear to indicate the severity of the offensive text. If you are sending or
queueing a message, a warning appears letting you know that text in your message may
be offensive to your recipient.
QUALCOMM Incorporated
49
Using MoodWatch for Outgoing Messages
Eudora User Manuall
Using MoodWatch for Outgoing Messages
When you open a new composition window to begin writing a new message, MoodWatch
scans each word and phrase you type and determines if it might be offensive to your recipient. The level of offensiveness is indicated by the appearance of one, two, or three red
chili peppers, with three red chilies being the most offensive and one the least. As you
write, chili peppers appear next to the Send or Queue button.
There is no offensive language in the message.
There may be a slight bit of offensive language in the message.
There may be offensive language in the message.
There is offensive language in the message.
After you click the Send or Queue button, a warning appears indicating there is offensive
text in your email message. Following is the warning you would get if three chili peppers
displayed.
MoodWatch warning
■
To send the message despite the offensive text, click Send Anyway. Your message is
sent. If you have Eudora set to Queue messages for later transmission, you can still
retrieve the message in the Out mailbox to edit or delete it. You can then send the
message or requeue it.
■
To return to the composition window without sending or queueing the message, click
Cancel.
QUALCOMM Incorporated
50
Eudora User Manual
Using MoodWatch for Incoming Messages
Using MoodWatch for Incoming Messages
By changing the options in the MoodWatch settings dialog, you can have MoodWatch
scan your incoming messages for offensive text as well. The indicators are one, two, or
three chili peppers appearing in the mailbox’s message summary column, as shown.
MoodWatch scanning incoming mail
Also, by turning on an option in the MoodWatch settings, you can have MoodWatch scan
and display chili peppers on all of your stored mail. See “MoodWatch” on page 274 for
more information.
QUALCOMM Incorporated
51
Using MoodWatch for Incoming Messages
Eudora User Manuall
QUALCOMM Incorporated
52
Sending Messages and Checking Mail
Sending or Queuing a Message
After you compose a message, you can send it immediately, or put it in a queue to be sent
later or at a specified time.
Sending a Message Immediately
If you want to send your messages immediately instead of putting them in a queue to send
later, then be sure the Immediate send option is turned on in the Sending Mail settings
dialog. For more information, see “Sending Mail” on page 250.
To send the current message, do the following.
■
From the Message menu, choose Send Immediately, or click
or press
Command+E.
If you have the Immediate send option turned on, but want to put the current message in
the queue, hold down the Option key and click Send. The Change Queuing dialog
appears, and you can set detailed instructions. For more details, see “Queuing a Message
to Send at a Certain Time” on page 54.
Queuing a Message to Send Later
If you want to put your messages in a queue (in the Out mailbox) to send all together at a
later time, be sure the Immediate send option is turned off in the Sending Mail settings
dialog. See “Sending Mail” on page 250.
To put the current message in the queue, do the following.
■
From the Message menu, choose Queue For Delivery or click
, or press
Command+E. The message window is closed (if it was open) and the message is
saved in the Out mailbox marked Q.
Queued messages in the Out mailbox
To send all of your queued messages, do the following.
■
From the File menu, choose Send Queued Messages or press Command + - (dash).
The Task Progress window appears momentarily at the top of the screen indicating the
progress of the transmission.
QUALCOMM Incorporated
53
Sending or Queuing a Message
Eudora User Manual
If you have the Immediate send option turned off, but want to send a message immediately, hold down the Option key and click Queue. The Change Queuing dialog appears,
and you can select the Send message Right Now option. However, if you select this
option, all messages that are queued in the Out box will be sent.
You can set up Eudora to warn you if you try to delete queued message or try to quit
Eudora with queued messages waiting to be sent. To do this, turn on those options in the
Extra Warnings settings dialog. See “Extra Warnings” on page 272.
Queuing a Message to Send at a Certain Time
You can specify that a message be sent at a certain time in the future. To do this for the
current outgoing message, do the following.
1
From the Message menu, choose Change.
2
From the Change submenu, choose Queueing. the Change Queueing dialog appears.
Change Queuing dialog
3
Choose one of the following options:
■
If you choose Right Now, the message is sent as soon as you click OK.
■
If you choose Next Time Queued Messages are Sent, the message is sent the
next time queued messages are sent, such as via the Send Queued Messages
command from the File menu.
■
If you choose On or after, you can use the Time and Date fields to fill in the time
and date you want the message to be sent. The message is saved in the Out
mailbox showing a clock icon
in the Status column, and is sent when the specified time arrives.
Note. For the message to be sent at the specified time, Eudora must be running at that
time. If not, then the message is sent the first time Eudora is started after the specified
time has passed.
QUALCOMM Incorporated
54
Eudora User Manual
Sending or Queuing a Message
■
If you choose Don’t Send for a messages that has never been queued, nothing
happens. the message is held in the Out mailbox until it is either deleted or
requeued and sent.
Editing a Queued Message
To edit a queued message, do the following.
1
Open the Out mailbox.
2
Double-click to choose the message summary.
3
Make the necessary edits and save it. The message is kept in the Out mailbox and
remains at the Queued status. If you close the changed message without saving it, an
alert appears asking you to save or discard your changes.
Taking a Message Out of the Queue
A message that is queued but not yet sent can be unqueued:
1
Open the Out mailbox.
2
Choose the desired message summary.
3
From the Message menu, choose Change then Queuing to display the Change
Queuing dialog.
4
Click Don’t Send, then click OK.
This changes the message status from queued (Q) to sendable (•). The message is held in
the Out mailbox until it is either deleted, requeued, or sent.
Sending Queued Messages When Checking Mail
If the Send on check option is turned on in the Sending Mail settings dialog, then every
time Eudora checks for mail (automatically or manually), all queued messages are automatically sent. See “Sending Mail” on page 250.
QUALCOMM Incorporated
55
Sending Messages with Special Server Instructions
Eudora User Manual
Sending Messages with Special Server Instructions
To send your queued messages with special instructions for the incoming server (POP
server only), do the following.
1
Hold down the Option key and from the File menu, choose Send Messages Specially.
The Mail Transfer Options dialog appears.
Mail Transfer Options dialog
2
Set the options you want and click OK. All the actions you have requested are
completed.
Using SMTP Authentication
SMTP authentication operates automatically in Eudora.
Eudora can log in to an SMTP server when sending mail, just like it does for receiving
mail. Not all SMTP servers require or allow such authentication. Eudora will attempt
authentication to servers that allow it. The preferred SMTP authentication method is
CRAM-MD5. If CRAM-MD5 is not available, LOGIN or PLAIN will automatically be used.
Once Eudora discovers that your SMTP server allows authentication when you send
messages, a dialog appears that prompts you to enter a password.
If for some reason you prefer that Eudora not attempt to login to your SMTP server, you
can tell it not to do so by doing the following.
1
From the Special menu, choose Settings, then Personalities. The Personalities
settings dialog appears.
2
Turn off the Allow Authentication setting and click OK.
Important. If you turn off the Allow Authentication option, you may not be able to send
mail. Please check with your email administrator or ISP for instructions. If Eudora detects
this situation, a warning dialog appears.
QUALCOMM Incorporated
56
Eudora User Manual
Keeping Copies of Outgoing Messages
■
Click Try Anyway—Eudora will try to send your mail without authentication even
though it will probably fail to send the mail.
■
Click Allow—Eudora will turn the “Allow Authentication” switch back on for that
personality.
■
Click Cancel—Messages will not be sent for that personality.
Check with your email administrator or ISP for instruction if you have difficulties.
Keeping Copies of Outgoing Messages
There are three ways to keep copies of your outgoing messages:
■
To keep a copy of every outgoing message in the Out mailbox, turn on the Keep copies
of outgoing mail option in the Sending Mail settings dialog. See “Sending Mail” on page
250.
■
To keep a copy of the current outgoing message in the Out mailbox, turn on the Keep
Copy icon
■
in the icon bar.
To keep a copy of the current outgoing message in a particular mailbox, put the insertion point in the Bcc: field of the message and select the mailbox from the Fcc: menu
(normally the Transfer menu).
In all of these cases, when the message is sent, a copy of the message is put in the specified mailbox with a checkmark ( ) in the Status column indicating that the message has
been sent.
If none of these options are used, a copy of the outgoing message is put into the Trash
mailbox after the message has been sent.
Note. You can also set up a filter to save copies of outgoing messages in particular mailboxes based on information contained in the message. See the Copy To action under
“Filter Actions” on page 142.
Checking for Incoming Mail
There are two ways to check your incoming server and transfer mail to your Macintosh:
automatically and manually. These are described later.
The “incoming server” is where your mail is received and stored until it is transferred by
Eudora to your Macintosh. You can use several different mail accounts with Eudora. Your
main account, or “dominant personality,” is specified in the Getting Started settings dialog.
Additional mail accounts, or “multiple personalities” are specified in the Personalities
settings dialog with additional options in the Personality Extras settings dialog.
For more information on the Personalities setting dialogs, see “Personalities (Sponsored
and Paid modes only)” on page 278 and “Personality Extras (Sponsored and Paid modes
only)” on page 280. To set up and manage personalities, see “Using Multiple Personalities
(Sponsored and Paid modes only)” on page 69.
QUALCOMM Incorporated
57
Checking for Incoming Mail
Eudora User Manual
Note. When you check mail, either automatically or manually, the progress window shows
the name of the personality for which mail is currently being checked.
You can also control how your mail is transferred from the server, and what happens to it
on the server. For details, see “Managing Your Mail on the POP Server” on page 81.
Note. If you are using IMAP, see “Managing Your Mail on the IMAP Server” on page 87 for
more details on how to check mail from an IMAP server.
Checking for Mail Automatically
To set up Eudora to automatically check your incoming account(s) and transfer new mail,
do the following.
1
From the Special menu, choose Settings.
2
Scroll the Settings category list and choose Checking Mail. The Checking Mail
settings dialog appears.
3
In the Checking Mail settings dialog, turn on the Check for mail every ? minutes
option, and enter the number of minutes that you want between mail checks. This
controls your dominant account.
If you are using multiple personalities, see “Checking for Mail Automatically” on page
75.
Note. Fifteen minutes is a good minimum interval because checking mail more often
puts an unnecessary load on your incoming mail server. If the text field is empty or is
set to 0, mail cannot be automatically checked.
If automatic checking is set, the Check Mail command from the File menu shows you
the next scheduled time for an automatic mail check.
Checking for Mail Manually
You can manually check for new mail at any time using any of these methods:
■
From the File menu, choose Check Mail.
■
Press Command+M.
■
Click the Check Mail button
on the main toolbar.
If you have not successfully entered your password since opening the Eudora program,
you are prompted for it.
The Task Progress window is momentarily displayed, indicating that an attempt to reach
your incoming account is being made and showing the personality name for each
incoming account being checked. At the end of the mail check, barring errors, the Task
Progress window is closed.
QUALCOMM Incorporated
58
Eudora User Manual
Using Your Password
Stopping a Mail Check
To stop a mail check, use one of these three methods:
■
Click the Stop button in the Task Progress window.
■
Press the Escape key (Esc).
■
Press Command+. (period).
Using Your Password
Each time you open Eudora and check mail for the first time, you need to enter a password
for each incoming account that you have. This password is required by the incoming
server before it transfers your mail, so that no one else can get your mail from the server.
However, if your are using OS9 or later, you can use Apple’s System Keychain to store
your Eudora password. See www.eudora.com/techsupport/mac for more information.
Note. This does not protect your mail once it is on your Macintosh. Unless a message has
been sent with some type of security, it is in plain-text format, which many applications can
read. If you are interested in securing your Eudora messages on your Macintosh, you may
want to consider a disk driver that can encrypt hard disk data.
If you need to enter a password, the Password dialog appears. Type in your password and
click OK. If you make a mistake before clicking OK, simply backspace and re-enter the
password correctly.
Entering your password
Note. Your incoming account password is case-sensitive, so the uppercase and lowercase characters must be typed in using the exact case. Be sure the Caps Lock key is off.
If your password is rejected, an error message appears indicating that you have entered
the wrong password. To redisplay the Password dialog, do the following.
■
From the Special menu, choose Change Password.
As long as Eudora is running, it remembers all of your passwords. If you do not want it to
remember (if, for example, you are away from your Macintosh), do the following.
■
From the Special menu, choose Forget Password.
The next time you check mail for any account, you are prompted for your password again.
QUALCOMM Incorporated
59
Using Your Password
Eudora User Manual
You can also make Eudora remember all of your passwords from one session to the next,
which means you never have to enter passwords again even if you quit and restart
Eudora. You want to do this only if your Macintosh is in a secure location, where there is no
possible chance of someone else having access to it. To save your password, do the
following.
1
From the Special menu, choose Settings.
2
Scroll the Settings category list and choose Checking Mail. The Checking Mail
settings dialog appear.
3
Check the Save Password box and click OK.
Changing Your Password
To change the password for your dominant account only, do the following.
■
From the Special menu, choose Change Password and follow the instructions below.
For both your dominant account and for each selected personality, you are prompted to
enter your old password once, and your new password twice. Depending on the server
you are using, the password can be up to 30 characters, but normally it is only 7 or 8.
Note. This works only if the incoming server is running a compatible password-change
server. For information about these servers, see “Sources” on page 316.
When you choose a new password, try not to use real words, names, dates, familiar acronyms, etc. Some servers require at least one number or symbol in your password, and it’s
a good idea to include such items even if they are not required.
QUALCOMM Incorporated
60
Using Signatures and Stationery
Using a Signature
A signature is a few lines of text that are automatically added to the end of an outgoing
message when it is sent. A signature can be whatever you want, but it is mostly used to
give contact information (telephone, address, etc.). You use only one signature at a time in
a message, but you can have as many different signatures as you want.
Note. Your signature is not displayed in the Eudora message window. It appears only to
your recipient.
Multiple signatures are available only if you are operating Eudora in either Sponsored or
Paid modes. However, if you are operating Eudora in Light mode, you are allowed only one
signature.
Signatures Window
Use this window to manage and apply signatures.
To open the Signatures window, do the following:
■
From the Window menu, choose Signatures. Or if the Signature window is in a visible
tabbed window, click its tab.
Sample Signatures window
The Signatures window displays a single column list of your signature files.
Note. You can select only one signature at a time in the list; you cannot select multiple
signatures.
QUALCOMM Incorporated
61
Adding a New Signature
Eudora User Manual
At the bottom of the Signatures window are icon buttons that you can use to add (New),
delete (Remove), or modify (Edit) a signature file.
■
New—Create a new signature. You enter the name of the new signature.
■
Remove—Delete the selected signature. Eudora asks you to confirm the deletion.
■
Edit—Open an editing window to add a new or edit an existing signature.
Eudora comes with a default signature called Standard. This is an empty signature file that
you fill with signature text.
Adding a New Signature
To create a signature, do the following:
1
From the Window menu, choose Signatures. The Signatures window appears.
2
At the bottom of the Signatures window, click the New button.
3
Type a name for the new signature icon that appears and press Return or click the Edit
button. The signature text window appears.
4
In the signature text window, type the text you want for your signature. When you are
finished, close the window. An alert asks if you want to save the changes to the
window.
5
Click Save. Or, to cancel and return to the text window, click Cancel. Or, to close the
text window without saving your changes, click Discard.
You can add as many signatures as you like.
Modifying a Signature
To modify a signature, do the following:
1
From the Window menu, choose Signatures. The Signatures window appears.
2
Click the signature icon you want to modify.
3
At the bottom of the Signatures window, click the Edit button. The signature text
window appears.
Note. You can also double-click on the signature icon to open the text window for that
signature.
4
Make your changes to the signature. When you are finished, close the window. An alert
asks if you want to save your changes.
5
To save the changes and close the window, click Save. Or, click Cancel to return to the
text window. Or, click Discard to close the window without saving your changes.
To change the name of a signature, do the following:
■
Click once on the signature name text in the Signatures window. After a brief pause,
the name is highlighted in the edit box. Type the new name and press Return.
QUALCOMM Incorporated
62
Eudora User Manual
Deleting a Signature
Deleting a Signature
To delete a signature, do the following:
Note. Eudora does not prompt you to confirm the removal of a signature.
1
From the Window menu, choose Signatures. The Signatures window appears.
2
Click the signature icon you want to delete.
3
At the bottom of the Signatures window, click the Remove button or press the Delete
key. The signature is deleted.
Including a Signature in Your Message
To include a signature in an outgoing message, do the following:
■
From the Signature popup on the icon bar in the composition window, choose the
desired signature.
Setting the signature for a particular message
To include a particular signature in all of your outgoing messages, do the following:
1
From the Special menu, choose Settings.
2
Scroll the Settings category icons and choose Composing Mail. The Composing Mail
settings dialog appears.
3
In the Signature: field, choose a signature from the popup. This signature is now
linked to your dominant personality. To link a signature to an alternate personality, see
“Linking a Signature and Stationery to a Personality” on page 76.
For either dominant or alternate personalities, you can change the signature for a particular message by selecting a different signature or None from the Signature popup on the
icon bar of the composition window.
If you want to be able to see your signature in the outgoing message before you send it, do
the following:
1
From the Window menu, choose Signatures. The Signatures window appears.
2
In the Signatures window, drag the signature item to the open composition window,
dropping it at your desired position in the message. The signature text appears at that
position.
QUALCOMM Incorporated
63
Using Stationery (Sponsored and Paid modes only)
Eudora User Manual
This is equivalent to cutting and pasting from the signature file. You can drag more than
one signature at a time. However, be sure to set the Signature popup on the composition window icon bar to “None” for that message, so that no other signatures are sent
with the message (these won’t be visible to you but they will be visible to your recipients).
Using Stationery (Sponsored and Paid modes only)
Stationery files are templates for outgoing messages. If you find yourself repeatedly
sending the same message, save the message as a stationery file and send it whenever
you need to by using the ”New Message With” or the ”Reply With” commands. This way
you don’t have to copy and paste text into a message; you can just open a pre-written
message and edit it as necessary.
Settings stored in stationery files override most other settings. For example, the signature
that was set when the stationery file was saved overrides any default signature you select
in the Settings dialog. You can, however, use the icons on the icon bar of the new
message composition window to override any settings stored with the stationery.
You must keep your stationery files in the Stationery Folder located in your Eudora Folder
found under the System or Documents Folder. Then you can gain access to these files
from the Stationery window, the “New Message With” and “Reply With” submenus, and the
Stationery popups in the Composing Mail and Personality Extras settings.
Stationery Window
Stationery files are created and managed from the Stationery window. You can also open
a new stationery message from the Stationery window.
To open the Stationery window, do the following:
■
From the Window menu, choose Stationery. Or, if the Stationery window is in a visible
tabbed window, click its tab.
Sample Stationery window
QUALCOMM Incorporated
64
Eudora User Manual
Creating New Stationery
The Stationery window displays a single column list of your stationery files.
Note. You can select only one stationery at a time in the list; you cannot select multiple
stationery.
At the bottom of the Stationery window are icon buttons that you can use to add (New),
delete (Remove), or modify (Edit) a stationery file.
■
New—Create a new stationery. You enter the name of the new stationery.
■
Remove—Delete the selected stationery. Eudora asks you to confirm the deletion.
■
Edit—Open a stationery messages to add a new or edit an existing stationery.
Creating New Stationery
To create a new stationery file from the Stationery window, do the following:
1
From the Window menu, choose Stationery. The Stationery window appears.
2
At the bottom of the Stationery window, click the New button.
3
Type a name for the new stationery icon that appears and press Return.
4
Click the Edit button. A new message window is opened for the stationery file.
5
Enter the header information and/or message body text you want for this stationery.
6
In the upper right corner (normally where the Send or Queue button appears in an
outgoing message), click the Save button. The stationery file is saved.
7
Close the stationery message window.
Note. After you have created the new stationery file, you can double-click on the stationery’s icon in the Stationery window, and a new composition message window appears for
you to send a message using this stationery.
Also, to change the stationery in a new outgoing message that’s already open, simply drag
the desired stationery icon from the Stationery window and drop it onto the open composition window.
Creating New Stationery Using the Save As Command
To create a stationery file using the Save As command, do the following
1
From the Message menu, choose New Message, or click the New Message icon on
the toolbar
.
2
Enter the text you want into the message body and fill in the headers as appropriate
(Subject, copies, etc.).
3
From the File menu, choose Save As. The Save As dialog appears.
QUALCOMM Incorporated
65
Modifying Stationery
Eudora User Manual
Saving a stationery file using Save As dialog
4
In the Save as: text field, enter a name for the file.
5
Check the Stationery option box.
6
Click the Go To Stationery Folder button (you must keep the file in the Stationery
Folder in your Eudora Folder, within your System or Documents Folder).
7
To create the stationery file, click Save.
You can also create stationery files from messages in your Out mailbox, no matter what
their message status (sent, unsent, queued, etc.). Just do the following:
1
Open the Out mailbox.
2
Open a message or select one or more message summaries.
3
From the File menu, choose Save As and follow the previous procedure. You may
need to edit the resulting stationery file to remove any extraneous headers or other
text, if you saved multiple Out box messages. See “Saving a Message to a File” on
page 146.
Modifying Stationery
To modify a stationery file, do the following:
1
From the Window menu, choose Stationery. The Stationery window appears.
2
Click the stationery icon you want to modify.
3
At the bottom of the Stationery window, click the Edit button. The stationery message
window appears.
Note. Instead of steps 2 and 3 above you can also hold down the Option key and
double-click the stationery icon.
4
Modify the stationery. You can make changes to the headers and/or message body as
you desire.
5
Click the Save button.
6
Close the stationery message window.
QUALCOMM Incorporated
66
Eudora User Manual
Deleting Stationery
Note. To rename a stationery file, click the name box for the stationery item (in the open
Stationery window). After a short pause, the name is highlighted for editing. Type the new
name and press Return.
Deleting Stationery
To remove a stationery file, do the following:
Note. Eudora does not prompt you to confirm the removal of a stationery file.
1
From the Window menu, choose Stationery. The Stationery window appears.
2
Click the icon for the stationery you want to delete.
3
At the bottom of the Stationery window, click the Remove button (or press the Delete
key). The stationery is removed.
4
Close the Stationery window.
Sending or Replying to a Message with a Particular Stationery
To send a message with a particular stationery, do the following:
1
From the Message menu, choose New Message With. The New Message With
submenu appears.
2
From the New Message With submenu, choose the desired stationery. A new
message composition window appears containing the header and body from the stationery file. You can edit and send this new message just as you would any other
message.
To reply to a message with a particular stationery, do the following:
1
From the Message menu, choose Reply With. The Reply With submenu appears.
2
From the Reply With submenu, choose the desired stationery. A new message composition window appears. The stationery header text is incorporated into the reply header
text. The stationery body text is inserted below the quoted body text from the original
message. You can edit and send this new message just as you would any other
message.
Note. Another way to reply using a particular stationery is to drag the message summary
from the mailbox window and drop it on an icon in the open Stationery window. A new
reply message is created using that stationery and is composed as described above.
To use a particular stationery file for all of your outgoing messages, do the following:
1
From the Special menu, choose Settings.
2
Scroll the Settings category icons and choose Composing Mail. The Composing Mail
settings dialog appears.
3
From the Stationery popup, choose the desired stationery. Most new messages use
this file, unless you create the message with the “Redirect” or “Send Again” command
or from the “New Message With” or “Reply With” submenu. If “None” is selected in the
QUALCOMM Incorporated
67
Sending or Replying to a Message with a Particular Stationery
Eudora User Manual
Stationery popup, no default stationery is used for the selected personality. To link a
particular stationery to an alternate personality, see “Linking a Signature and Stationery to a Personality” on page 76.
You can also set up a filter to reply with a stationery message. For more details, see the
“Reply With” filter action under “Filtering Messages” on page 135.
QUALCOMM Incorporated
68
Using Multiple Personalities
(Sponsored and Paid modes only)
Using Alternate Email Accounts
In Eudora, you can set up a different “personality” for each alternate email account you
have. For example, if you have work, home, and school email accounts, you can set up
Eudora to send and receive email for each of these accounts, all without having to quit and
restart Eudora. That is, you can check mail for all your personalities at once, or for
selected personalities, and you can do the same for sending mail. You can even stagger
your automatic mail checks.
To set up a personality, you enter information in the Personalities and Personality Extras
dialogs, which are found in Settings under the Special menu or in the Personalities window
under the Window menu.
For each new personality you create, you need the following information:
■
personality name
■
real name
■
username
■
mail host name (incoming server)
■
SMTP server name (outgoing server if different from the incoming server)
■
default domain
■
return address (if different from username@mailhost)
■
checking and sending mail settings
■
server configuration
■
authentication method
■
default stationery
■
default signature if you’re not using stationery.
Some of these settings are required, and some are optional. For more details, see
“Personalities (Sponsored and Paid modes only)” on page 278 and “Personality Extras
(Sponsored and Paid modes only)” on page 280.
All other settings in the Settings dialog (and elsewhere in Eudora) apply to all personalities. If you change any of those settings, the changes apply to all personalities as well.
Note. You can create multiple personalities for the same user account. Just use a different
personality name and some of the information from the first personality; that is, you “clone”
the personality and change a few items. However, make sure you don’t check mail for the
same account. If you do so, you’ll receive an error message.
QUALCOMM Incorporated
69
Using Alternate Email Accounts
Eudora User Manual
Personalities Window
You use the Personalities window to manage, gain access to, and apply your e-mail
accounts (personalities) when you use more than one account.
To open the Personalities window, do the following:
■
From the Window menu, choose Personalities. Or, if the Personalities window is in a
visible tabbed window, click its tab.
Sample Personalities window
The Personalities window displays the personality icon and name for each personality you
have set up. <<Dominant>> indicates your principal email account, which is the account
Eudora uses whenever you don’t specify a particular personality, and it’s the account
associated with all the mail stored before you began using personalities.
You can select multiple icons and names in the Personalties window to perform some of
the operations listed below. Press the Shift key to select a consecutive range of items and
press the Command key to make non-consecutive selections.
At the bottom of the Personalities window are icon buttons that you can use to manage
personalities.
■
New—Add a new personality. When you click this button, a new personality icon
appears in the personalities column. See the following section “Creating a New Personality.”
■
Remove—Delete the selected personality. Note, however, that you cannot delete the
<<Dominant>> personality. You are prompted to confirm the deletion for each personality you have selected to delete. Note that these deletions are permanent and cannot
be undone! When you delete a personality, any messages associated with that personality are reassigned to your Dominant personality. You can use the Delete key as a
shortcut for this command. See “Deleting a Personality” on page 73.
■
Check Mail—Checks mail for the selected personalities.
QUALCOMM Incorporated
70
Eudora User Manual
■
Creating a New Personality
Edit—Displays the Personalties settings dialog for you to add a new or modify an
existing personality’s information. You can modify only one personality at a time.
You can drag one or more received messages to a personality item in the personalities
window. Eudora will “Reply” as that personality to the message.
Creating a New Personality
To create a new personality, do the following:
1
From the Window menu, choose Personalities. The Personalities window appears.
2
Click the New button. An untitled personality item appears with the personality icon.
3
In the name box for the new item, type a name for the personality and press Return. (If
the name box is not already highlighted for editing, click it once. After a short pause,
the box is highlighted.)
4
With the personality item still highlighted (click once on the icon if it is not), click the
Edit button. The Personalities settings dialog appears.
Sample Personalities settings dialog
Note. Also, you can display the Personalities settings dialog by choosing Settings from
the Special menu. In the Personalities settings dialog, just click the New button to
enter a new personality.
5
Enter the appropriate information. Following are the field descriptions.
Personality Name—Enter the name of the personality being created, or example,
Business or School). <<Dominant>> indicates your dominant personality.
Note. The name shown here may be different from the Real name associated with the
personality.
QUALCOMM Incorporated
71
Creating a New Personality
Eudora User Manual
Username—Enter the name you use to login to this email account. For example, in the
incoming mail account [email protected], the login name is
rclark. The part after the at sign “@” is the name of the incoming mail server, that is
the mail host name.
Mail Server—Enter the name of the incoming mail server for this personality. All
incoming messages to this personality are routed through this server.
Check for mail every ? minutes—Enter a number in this option to specify the time
intervals between mail checks for this personality.
Check mail on manual check—Turn this option on so each time you check mail
manually, for example, by choosing the Check Mail command from the File menu, mail
is checked for this personality as well. When you create a personality, this option is
checked by default.
Real name—Enter the real name assigned to this personality, generally a first and last
name. The text you enter here is included in the From: field of all your outgoing
messages from this personality and identifies the source to your recipients. It appears
before your return address in the message header.
SMTP Server—Enter the name of the outgoing mail server for this personality.
Outgoing messages you send are routed through this server. If the mail host selected
by this personality’s incoming mail account also runs on an SMTP server, you can
leave this field blank.
Return Address—If this address is different from the personality’s incoming mail
account, enter the return email address used in outgoing messages and replies for this
personality. The address you enter here is included in the From: field of all your
outgoing messages from this personality. And when a recipient replies to a message
from this personality, the reply is sent to this address. If you do not enter an address in
this field, Eudora uses the personality’s incoming mail account as the return address.
Incoming mail accounts are usually of the form loginname@incomingmailserver.
For example, suppose your incoming mail account is
[email protected] but your return address is slightly different
[email protected]. You would then enter [email protected] in this field.
If you do enter an address in this field, first test the address to be sure that mail sent to
it is indeed delivered to you. If you use an invalid return address, no one will be able to
reply to mail sent from this personality.
Send mail whenever sends are done—Turn this option on so queued mail for this
personality is sent whenever Eudora sends queued mail.
Allow Authentication—If this setting is checked, Eudora can log in to an SMTP server
when sending mail, just like it does for receiving mail. Not all SMTP servers require or
allow such authentication. Eudora will attempt authentication to servers that allow it.
The preferred SMTP authentication method is CRAM-MD5. If CRAM-MD5 is not available, LOGIN or PLAIN will automatically be used.
6
In the Settings category list, click Personality Extras and enter additional information
if you wish for that personality. See “Personality Extras (Sponsored and Paid modes
only)” on page 280 for field descriptions.
7
When finished, click OK.
QUALCOMM Incorporated
72
Eudora User Manual
Modifying a Personality
Modifying a Personality
To modify a personality, do the following:
1
From the Window menu, choose Personalities. The Personalities window appears.
2
Click the personality icon to highlight the personality you wish to modify. You can modify
only one personality at a time.
3
Click the Edit button. The Personalities settings dialog for that personality appears.
4
Make any changes you want, then either click OK, or click the Personality Extras category in the Settings list, make additional changes for that personality, and click OK.
Note. If you want to change other settings, or use a separate set of mailboxes for a
personality, see “Putting Multiple Users on One Macintosh” on page 310.
To change the name of a personality, do the following:
1
Click the personality name text in the Personalities window. After a brief pause, the
name is highlighted in the edit box.
2
Type the new name and press Return.
Deleting a Personality
Note. You cannot delete or rename your Dominant personality.
To delete a personality, do the following:
1
From the Window menu, choose Personalities. The Personalities window appears.
2
Click the personality icon to highlight the personality you wish to delete. You can select
multiple personalities for deletion if desired.
3
Click Remove or press the Delete key.
A dialog appears asking you if you really want to delete the personality. A separate
dialog appears for each personality you chose to delete.
4
To delete the personality, click OK, or if you change your mind, click Cancel.
Important. Deletion of a personality cannot be undone! When you delete a personality, all
messages associated with that personality (both incoming and outgoing) are assigned to
your Dominant personality. However, if you recreate a personality with the identical
personality name, those messages will be reassigned to the new personality.
Creating a New Message from the Personality Window
Note. Your Dominant personality is your principal email personality. It is the personality
Eudora uses whenever you do not specify otherwise. Also, it is the personality that is associated with all mail stored before you began using multiple personalities.
One easy way to create a new outgoing message from any of your personalities, but
particularly your alternate (non-dominant) ones, is the following:
QUALCOMM Incorporated
73
Changing the Personality of a New Message
Eudora User Manual
1
From the Window menu, choose Personalities. The Personalities window appears.
2
Double-click the desired personality icon or click the personality icon and press
Return.
A new composition window is opened that is addressed from that personality.
Changing the Personality of a New Message
To change the personality of a new outgoing message once you have opened it, use one
of these methods:
■
Select the new personality from the Personality popup in the From: field of the
message header.
Personality popup in the From: field
■
Select the new personality from the Personality submenu found under Change in the
Message menu.
■
Open the Personalities window from the Window menu and drag the icon for the
desired personality onto the composition window.
In any of these methods, the information in the From: field of the composition window
changes to reflect the new personality. This generally consists of the real name and the
return email address for that personality.
These methods also provide a way to create a new outgoing message from any of your
non-dominant personalities. Simply open a new message for your Dominant personality
using one of the standard methods, for example, by clicking the New Message button on
the toolbar, then change the personality to your desired account using one of the personality-change methods above.
For information on how to change the personality associated with an incoming message,
see “Replying from a Personality” on page 75.
Note. The “Personality submenu” and the “From:” field Personality popup are available
only when you have multiple personalities set up.
QUALCOMM Incorporated
74
Eudora User Manual
Checking Mail for Your Personalities
Checking Mail for Your Personalities
To check mail for one or more of your personalities, do the following:
1
From the Window menu, choose Personalities. The Personalities Window appears.
2
Select the personalities for which you want to check mail.
3
Click the Check Mail button at the bottom of the Personalities window.
Eudora checks your mail for all of your selected personalities.
Checking for Mail Automatically
To set up Eudora to automatically check your incoming account(s) and transfer new mail
for a particular personality, do the following:
1
From the Special menu, choose Settings.
2
Scroll the Settings category list and choose Personalities. The Personalities settings
dialog appears.
3
In the Personalities settings dialog, choose the desired personality in the Personality
popup.
4
Turn on the Check for mail every ? minutes option and enter the number of minutes
that you want between mail checks for that personality.
Note. Fifteen minutes is a good minimum interval because checking mail more often
puts an unnecessary load on your incoming mail server. If the text field is empty or is
set to 0, mail is not automatically checked.
Replying from a Personality
To easily reply to a message from a particular personality, do the following:
1
From the Window menu, choose Personalities. The Personalities Window appears.
2
Select or open the message you wish to reply to.
3
Drag the selected message summary, or drag the open message by the Tow Truck icon
into the Personalities window and drop it on the desired personality item.
A new reply message is created with the address of the selected personality.
Replies and Personalities
When you respond to a message, Eudora assigns your response the same personality
under which it received the message. For example, if your Business personality receives a
message, your replies to that message are sent from your Business personality.
QUALCOMM Incorporated
75
Replying from a Personality
Eudora User Manual
There are two ways to change the personality of a response. The first is to use the method
in “Replying from a Personality,” or alternately, to initiate the response and then change the
personality, using one of the three methods described in “Changing the Personality of a
New Message” on page 74.
Another way is to change the personality associated with the original message to which
you are responding, do the following:
1
Open the message.
2
From the Message menu, choose Change then Personality. The Personality
submenu appears.
3
From the Personality submenu, choose the desired personality.
From then on, all of your replies to that message are sent from the newly assigned personality.
For example, suppose you have two additional email personalities (other than dominant),
One personality called “Business” that you use to respond to business matters, and an
other personality called “Legal” that you use to respond to legal matters. By chance your
Business personality receives a message that is better handled by your Legal personality.
If you initiate a normal reply, the personality in the reply is Business. Change it to Legal
using one of the standard personality change methods (e.g., Personality popup), and now
that response is sent from your Legal personality.
But if you go back to the original message you received as Business, open it and change
the associated personality to Legal from the Personality submenu just described. That
message is now associated with your Legal personality, and all of your replies to that
message from now on are sent from your Legal personality.
Note. You can also set up a filter to automatically assign a desired personality to incoming
messages that satisfy the filter criteria. See the “Make Personality” action under “Filter
Actions” on page 142.
Linking a Signature and Stationery to a Personality
In Eudora, you can link a signature and a stationery to an existing personality via the
Personalities Extra settings dialog. For example, if you have Business personality, you can
link your Business signature and stationery to this personality.
If you are using a default stationery file, or if you send or reply to a message with stationery, then the signature stored in the stationery file overrides the default signature for the
current personality. Also, stationery from the first personality is replaced with the stationery
from the new personality.
No matter what signature gets assigned to the new message or reply when you open or
initiate it, you can always override that signature by selecting a signature from the Signature popup in the composition window. For more details, see “Using a Signature” on page
61.
For more information on how to use stationery with multiple personalities, see the section
“Using Stationery (Sponsored and Paid modes only)” on page 64.
Important. Before you can link a signature or stationery to a personality, you need to
create them first.
QUALCOMM Incorporated
76
Eudora User Manual
Replying from a Personality
To link a signature and stationery to a personality, do the following:
1
From the Special menu, choose Settings.
2
Scroll through the Settings category icons and choose Personality Extras. The
Personality Extras settings dialog appears.
Personality Extras settings dialog
3
In the Personality popup, choose the personality whose signature or stationery you
want to change.
4
In the Stationery popup, choose the stationery you want to use with this personality.
5
In the or Signature popup, choose the signature you want to use with this personality.
Note. The Stationery selected here overrides the selected signature. It is advisable to
use either the signature or the stationery for this personality.
6
In the Domain to Add field, enter the domain name you want Eudora to automatically
add to an unqualified name addressed in messages sent from this personality. An
unqualified name is a name that doesn’t have an at sign “@” sign followed by a domain
name. This can be used to save time when addressing large numbers of messages to
users in the same domain. Also, different personalities can be used to send messages
to different domains. For example, you can use one personality to send work-related
messages to the domain myfirm.com, and another personality to send personal
messages to the domain in your home email address or to your school account (for
example, myschool.edu).
7
Click OK. This personality is now linked to the stationery and signature you chose from
the popup menus.
Caution. Be careful when using stationery with multiple personalities. Although stationery
settings override most other settings, there is one important exception: If you change the
personality of the current message, and that results in the default stationery file being
applied, then the personality stored in the stationery file is ignored. To avoid conflicts, be
sure that the personality saved with the stationery file matches the personality in the
Personality Extras settings. The personality saved with the stationery file can be identified
by the personality in the Personality popup in the “From:” field of the stationery file window.
QUALCOMM Incorporated
77
Creating an IMAP Personality
Eudora User Manual
Creating an IMAP Personality
Important. Before you create a personality for an IMAP account, make sure you know
how to set up an IMAP account, check for mail, etc. For more information on IMAP
accounts, see “Managing Your Mail on the IMAP Server” on page 87.
To create an IMAP personality as an alternate personality, do the following:
1
From the Special menu, choose Settings.
2
Scroll through the Settings category list and choose Personalities. The Personalities
settings dialog appears.
3
Click the New button and type a name for the new personality in the Personality Name
field (e.g., “My IMAP Mail”).
4
Fill in the remaining fields as required. For field descriptions, see “Creating a New
Personality” on page 71.
5
Scroll through the Settings category list and choose Personality Extras. The Personality Extras settings dialog appears.
Personality Extras settings dialog showing IMAP options
6
With the new personality selected in the Personality popup, choose IMAP in the Server
Configuration field.
7
Enter the information in the fields of this dialog as required. Following are the descriptions of the IMAP options.
Location Prefix—Enter a folder location representing the pathway to your mailboxes.This tells Eudora where to look for your mail on the incoming IMAP mail server.
An example mailbox location prefix is /usr/mail/. If you are not sure what to enter in
this field, ask your email administrator or your ISP.
Download Options— When you check mail for your IMAP account, these options (you
can only choose one) tell Eudora how much of each incoming message to retrieve from
the IMAP server to your Macintosh. You can retrieve just the essential headers, or,
alternately, the entire message and any attachments under a specified size.
QUALCOMM Incorporated
78
Eudora User Manual
Creating an IMAP Personality
Minimal headers only— Turn this option is on, and only a limited set of message
headers, and nothing else, is retrieved for each incoming IMAP message. The
remaining headers, the message body, and any attachments are not retrieved with the
message, but are left on the server for you to retrieve later. The headers tell you who
sent the message, the date and time it was sent, and the subject. Once you have this
information, you can decide whether you want to retrieve the full message and any
attachments, or just delete the message.
Full message except attachments over ? K— If this option is on and a number is
entered in the box, the full message (full set of message headers and the message
body) and any attachments smaller than the specified size are retrieved for each
incoming IMAP message. Any attachments larger than the specified size are not
retrieved with the message but are left on the server for you to retrieve later. If you want
Eudora to retrieve all of your IMAP attachments for this account, enter a large number
in this field. If you don’t want attachments retrieved when you check your mail, enter 0
in this field.
Full message with attachments—Turn this option on to retrieve the full message and
all attachments, regardless of size, for each incoming IMAP message for this personality.
Use a trash mailbox on the IMAP server—Turn this option on, and Eudora will try to
create a Trash mailbox on the IMAP server the first time you delete a message from
any mailbox store for this IMAP personality. The purpose of the Trash mailbox is let you
have a storage place for deleted mail as you would with a POP account. You can keep
all of your deleted mail in the Trash mailbox either to empty the mailbox at some point
or retrieve deleted messages from that mailbox before they are removed from the IMAP
server.
Stationery—Select a stationery from the popup for this IMAP personality.
or Signature—Select a signature from the popup for this IMAP personality. The stationery setting will override the signature. For more information, see “Linking a Signature
and Stationery to a Personality” on page 76.
Domain to Add—Enter the domain name you want Eudora to automatically add to an
unqualified name addressed in messages sent from this personality. An unqualified
name is a name that doesn’t have an at sign “@” sign followed by a domain name. This
can be used to save time when addressing large numbers of messages to users in the
same domain. Also, different personalities can be used to send messages to different
domains. For example, you can use one personality to send work-related messages to
the domain myfirm.com, and another personality to send personal messages to the
domain in your home email address or to your school account (for example,
myschool.edu).
8
To save your changes and close the Settings dialog, click OK.
In the Personalities window, you will now see the new personality listed. (Also, your dominant personality appears in this window by default, whether you selected POP or IMAP as
its server configuration.)
In the Mailboxes window, you will see the new IMAP personality listed as a root mail folder.
This IMAP folder’s name displays under the Mailbox and Transfer menus, with its own
submenu.
Note. You can also create an IMAP personality via the Personalities Window from the
Window menu.
QUALCOMM Incorporated
79
Creating an IMAP Personality
Eudora User Manual
QUALCOMM Incorporated
80
Receiving Messages
Managing Your Mail on the POP Server
During a mail check, your incoming messages are transferred from your POP account on
the incoming server to your computer, and then deleted from the incoming server.
There are several options that you can use to control your mail transfers and the storage
on the server. These options are available in the following three areas in Eudora:
■
Checking Mail settings for your dominant personality only. See “Checking Mail” on
page 246. For information on personalities, see “Using Multiple Personalities (Sponsored and Paid modes only)” on page 69.
■
Personality Extras settings for all of your personalities. See “Personality Extras
(Sponsored and Paid modes only)” on page 280. Also, you can display the Personalities Extras settings dialog by pressing the Edit button
that appears in the
Personalities Window for a selected personality icon. See “Checking Mail for Your
Personalities” on page 75.
■
Mail Transfer Options dialog you can display by pressing the Option key and choosing
“Check Mail Specially” or “Send Messages Specially” commands from the File menu.
Creating a POP Account
To gain access to your POP account to check mail, you must first create a POP account
for your dominant personality.
You can create a POP accounts for alternate personalities. To create an alternate personality, see “Creating a New Personality” on page 71.
To create a POP account as your dominant personality, do the following:
1
From the Special menu, choose Settings.
2
Scroll through the Settings category icons and choose Checking Mail. The Checking
Mail settings dialog appears.
QUALCOMM Incorporated
81
Managing Your Mail on the POP Server
Eudora User Manual
Checking Mail settings dialog showing POP options
3
In the Server Configuration: field, choose POP.
Fill in the rest of the fields of this dialog as required. Following are the descriptions of
the POP options.
Authentication. Specify which POP authentication technology to use with your email
account: Passwords, Kerberos, or APOP. Ask your email administrator which one to
specify.
Overlap commands. Turn this on to have Eudora send commands to your POP server
immediately, instead of waiting for a previous command to be completed. Using this
option is faster, but not all servers will comply.
Leave on server for ? days. Turn this option on and enter the number of days you
want Eudora to leave messages on the POP server. When this option is on, Eudora
copies incoming messages to your computer whenever you check for mail. If you leave
the text box blank, your mail is left on the server indefinitely. See the next section
“Leaving Mail on the Server” for more information.
Delete from server when emptied from trash. Turn this option on to delete
messages from the POP server when they are removed from your Trash mailbox.
Skip messages over ? K . Turn this option on and enter a file size (in Kilobytes) in the
text field, and Eudora will not retrieve the message in its entirety if it’s over the file size
you specified here. These messages are retrieved only in part, which include the first
few lines of the message along with a statement that says the message is not
complete. This option can be useful if you have a slow connection.
4
To save the information and close the Settings dialog, click OK. Your POP account is
now created.
QUALCOMM Incorporated
82
Eudora User Manual
Managing Your Mail on the POP Server
Leaving Mail on the Server
If you use the POP protocol for your incoming server to retrieve mail, your mail is normally
deleted from the server once it is delivered to Eudora. However, most POP incoming
servers allow you to keep your mail on the server so you can retrieve it from several
different computers at various times.
Facts you should know if you decide to leave your mail on the server:
■
Some mail servers won’t allow you to keep mail on them.
■
Your system administrator may not allow you to keep mail on the server even though
you have the option turned on. Usually administrators do not like to keep too much mail
on the server because of space concerns.
■
Keeping a lot of mail on the server may slow down the mail checking process.
■
If you check mail from several computers at different times, you can end up reading
your messages two or more times. However, if you delete mail from your Trash folder,
the message is deleted on the server (if the option to do so is on).
Eudora has an option that allows you to leave your email messages on the server for a
specified number of days.
To transfer all of your new messages from the incoming server to Eudora and also leave
copies of those messages on the server, do the following:
1
From the Special menu, choose Settings.
2
Scroll through the Settings categories and choose Checking Mail. The Checking Mail
settings dialog appears.
3
In the Checking Mail settings dialog, turn on the Leave on server for ? days option
and enter the maximum number of days that copies of your email messages should be
kept on the server. This number is determined by the time it takes for you to check mail
from all of your computers. If this number is too small, copies of your mail will not be
delivered to all of your computers.
Important. Make sure the settings in step 3 are identical on all of the computers from
which you will be receiving your mail. If you don’t, one computer will delete the mail
from the server before you can receive it at another computer.
4
Click OK.
At the next mail check from that computer, Eudora ignores the copies of those previously
read messages and looks for new ones. However, if you check mail from another
computer, those messages are treated as new and are transferred to that computer. For
more information, see “Checking Mail” on page 246.
The “Leave on server for ? days” option can also be set for each of your alternate personalities. To do this, display the Personality Extras settings dialog. See “Personality Extras
(Sponsored and Paid modes only)” on page 280.
Important. The Leave on server for ? days option should be used with care, since it can
result in a buildup of messages on the POP server.
QUALCOMM Incorporated
83
Managing Your Mail on the POP Server
Eudora User Manual
Deleting a Message from the POP Server
To delete a message that has been left on the server (without retrieving it again), do the
following:
■
Turn on the Trash icon
in the message’s icon bar.
■
Set the message summary’s server action to Delete, then check mail again.
■
In the Mail Transfer Options dialog, turn on the Delete all messages that have been
retrieved option. See “Checking for Mail with Special Server Instructions” on page 85.
For more information on deleting messages, see “Deleting Messages” on page 131.
Skipping Messages Over a Certain Size
To stop Eudora from transferring incoming messages that are too large, do the following:
■
For your dominant personality: turn on the Skip messages over ? K option in the
Checking Mail settings dialog and specify a size in the text box. See “Checking Mail” on
page 246.
■
For other personalities: choose a personality and turn on the Skip messages over ? K
option in the in the Personality Extras settings dialog. Specify a size in the text-entry
box for each personality. See “Personality Extras (Sponsored and Paid modes only)” on
page 280.
Only the first few lines of the messages that exceed that size are transferred with a note at
the bottom stating that the whole message has not been transferred.
If you decide you want to transfer the whole message, turn on the Fetch icon
in the
open message window’s icon bar or set the message summary’s server action to Fetch
from Server, then check mail again. You can also use the Trash icon
or the Fetch &
Delete server action so that the message is deleted from the server after it is transferred
to your computer.
If you decide you do not want the message and want to delete it from the server, turn on
the Trash icon in the open message window’s icon bar or set the message summary’s
server action to Delete from Server, then check mail again.
QUALCOMM Incorporated
84
Eudora User Manual
Managing Your Mail on the POP Server
Checking for Mail with Special Server Instructions
To check your mail and give special transfer and storage instructions to the server, do the
following:
1
While pressing the Option key, choose Check Mail Specially from the File menu. The
Mail Transfer Options dialog appears.
Mail Transfer Options dialog
2
Set the options you want and click OK to continue checking for mail.
A description of the mail transfer options in this dialog are as follows:
Retrieve new mail—Transfer your new mail from the incoming server to your computer.
Send queued messages—Send all the queued messages (marked “Q”) in your Out
mailbox.
Delete messages marked for deletion—Delete the messages on the POP server that
are marked “Delete” in Eudora, either via the Trash icon in the incoming message window
or the “Delete from Server” or “Fetch & Delete” server action in the message summary.
This is for messages that were left on the server, either with:
■
the Leave on server for ? days option or the Skip messages over ? K option in the
Checking Mail or the Personality Extras settings,
■
or with the Fetch all message headers to In mailbox option in the Mail Transfer
Options dialog.
Retrieve messages marked for retrieval
Retrieve the messages on the server that are marked “Fetch” (from Server) or “Fetch &
Delete” in Eudora (via the icons on the incoming message window or the server action
popup in the message summary). This is for messages that were retrieved only in part,
either with:
QUALCOMM Incorporated
85
Managing Your Mail on the POP Server
Eudora User Manual
■
the Leave on server for? days option or the Skip messages over? K option in the
Checking Mail or the Personality Extras settings,
■
or with the Fetch all message headers to In mailbox option in the Mail Transfer
Options dialog.
Note. To mark a message “Fetch” (from Server), “Delete” (from Server), or “Fetch &
Delete,” either click the icons in the incoming message window or select an option from
the server action popup of the message summary.
Delete all messages that have been retrieved—Delete all the messages on the server
that have already been transferred to the computer you are currently using.
Delete all messages on server (be sure)—Delete all of your messages on the server
even if Eudora has not fetched them. Caution: Be absolutely sure this is what you want to
do because there is no way to undo it!
Fetch all message headers to In mailbox—Retrieve the header and the first few lines of
every new message. If you select this option, the messages are filtered but any “Copy To”
or “Transfer To” filter action is not performed (the message neither is copied nor leaves the
In mailbox). To specify what you want to do with each message the next time you check
mail, either set the server action popup in the message summary or use the Fetch and
Trash icons in the open message window icon bar.
Important. If you delete the message header, and you have the Delete from server
when emptied from trash option turned on in the Checking Mail settings, the message
is gone completely from Eudora and the server the next time trash is emptied.
Transfer mail for the following personalities:—If you have multiple personalities, you
can check or send mail based on the following:
■
Options on the right side of this Mail Transfer Options dialog
■
Options in the Checking Mail settings for your dominant personality only
■
Options in the Personalities and the Personality Extras settings for any of your personalities.
You can also specify the personalities whose mail you want to check or send with this mail
transfer. Press the Shift key to select multiple personalities in sequence, or the Command
key to select them out of sequence.
Checking for Mail from Your POP Account
When Eudora does a mail check (automatic or manual), you can be notified of new mail in
any combination of the following ways:
■
An alert dialog
■
A flashing mail icon in the menu bar
■
The opening of the mailboxes into which new mail is delivered
■
A special “New Mail” sound.
These options are turned on or off in the Getting Attention settings dialog. For information,
see “Getting Attention” on page 268.
QUALCOMM Incorporated
86
Eudora User Manual
Managing Your Mail on the IMAP Server
When you receive notice that new mail has arrived, choose Eudora from the applications
menu on your computer. Mail usually arrives in the In mailbox (unless you are using filters
to transfer messages). If the In mailbox is not already open, open it using one of these
methods:
■
From the Mailbox menu, choose In.
■
Press Command+1.
■
Click the In (mailbox) button
on the main toolbar.
Messages are listed in the order they are received, with the most recent message listed
last. Unread messages are designated by a blue bullet ( ) in the Status column of the
message summary.
Unread messages in the In mailbox
To open a message, do any one of the following:
■
Double-click anywhere on the message summary.
■
Highlight the message summary and press Return.
■
Highlight the message summary and from the File menu, choose Open Selection.
Also, you can view the message in the message preview pane located at the bottom of the
mailbox window if the message summary is highlighted.
Incoming messages are saved indefinitely in the In mailbox, or the mailbox into which they
are filtered, until they are deleted or transferred to another mailbox.
Managing Your Mail on the IMAP Server
If your incoming mail server uses the Internet Message Access Protocol (IMAP), your
mail, mailboxes, and folders are stored on the server, not on your computer. When you
create mailboxes and folders, you create them on the server. However, you can see them
in the Mailboxes window in Eudora. When you launch Eudora, you retrieve your mailboxes
and folders from the server. When you check mail, the mail you retrieve is filtered on the
server although your filters are created in Eudora. This is beneficial if you have to retrieve
mail from different computers. Your mail remains on the server for you to retrieve at
anytime on any computer.
During mail checks, partial messages or full messages are transferred to your computer,
with or without attachments, depending on the options you specify in the Checking Mail
settings dialog your main account (see “Checking Mail” on page 246). This is beneficial if
you use a computer with limited disk space or a slow network connection. To specify
options for your personalities, display the Personality Extras settings dialog (see“Personality Extras (Sponsored and Paid modes only)” on page 280).
QUALCOMM Incorporated
87
Creating an IMAP Account
Eudora User Manual
When a message is transferred, either in part or in full, from the IMAP server to your
computer during a mail check, a copy of the message remains on the server until you
actively delete it.
You may want to check with your email administrator or ISP to see if they have any restrictions for limited mail storage and aging in your IMAP account.
Note. To manage IMAP mailboxes and folders, go to “Working with IMAP Mailboxes” on
page 124.
Creating an IMAP Account
To gain access to your IMAP account to check mail and manage your mailboxes, you must
first create an IMAP personality. The IMAP personality also serves as the “root folder” for
your hierarchy of mailboxes and mail folders in which you store your email on the IMAP
server.
You can create an IMAP personality as your dominant personality or as an alternate
personality. To create an alternate personality, see “Creating an IMAP Personality” on
page 78.
To create an IMAP personality as your dominant personality, do the following:
1
From the Special menu, choose Settings.
2
Scroll through the Settings category icons and choose Checking Mail. The Checking
Mail settings dialog appears.
Checking Mail settings dialog showing IMAP options
3
In the Server Configuration: field, choose IMAP.
4
Fill in the rest of the fields of this dialog as required. Following are the descriptions of
the IMAP options.
QUALCOMM Incorporated
88
Eudora User Manual
Creating an IMAP Account
Location Prefix. This tells Eudora where to look for your mail on the incoming IMAP
mail server. Normally you enter a folder location representing the pathway to your mailboxes. An example mailbox location prefix is /usr/mail/. If you are not sure what to
enter in this field, ask your email administrator or your ISP.
Save password. If this is on, your password is remembered even if you quit and restart
Eudora. You won’t be prompted to enter it.
Use background threading. If this is on, then when you check mail either or automatically or manually. Eudora checks your mail in the background, so that you can perform
other functions at the same time, such as composing messages. If this is off, then
when a mail check is initiated, you must wait until Eudora finishes checking your mail
before you can perform another function. See also the “Use separate thread for
sending” option in the Sending Mail settings dialog, which lets you perform other functions while Eudora sends mail in the background. See “Sending Mail” on page 250.
Send on check. If this is on, any messages queued in your Out mailbox (and marked
with a Q in the Status column of the message summary) are sent when you check for
mail, whether the mail-check is automatic or manual. (Timed-queue messages—those
marked with a clock icon in the Status column of the Out box—are sent only if their time
constraints are satisfied.)
Download options. When you check mail for your IMAP account, these options (you
can only choose one) tell Eudora how much of each incoming message to retrieve from
the IMAP server to your computer. You can retrieve just the essential headers, or, alternately, the entire message and any attachments under a specified size.
Minimal headers only. If this option is on, only a limited set of message headers, and
nothing else, is retrieved for each incoming IMAP message. The remaining headers,
the message body, and any attachments are not retrieved with the message, but are
left on the server for you to retrieve later. The headers tell you whom the message is
from, the date and time it was sent, and the subject. Once you have this information,
you can then decide whether you want to retrieve the full message and any attachments, or just delete the message.
Full message except attachments over ? K. If this option is on and a number is
entered in the box, the full message (full set of message headers and the message
body) and any attachments smaller than the specified size are retrieved for each
incoming IMAP message. Any attachments larger than the specified size are not
retrieved with the message but are left on the server for you to retrieve later. If you want
Eudora to retrieve all of your IMAP attachments for this account, enter a large number
in this field. If you don’t want attachments retrieved when you check your mail, enter 0
in this field.
Full message with attachments. If this option is on, the full message and all attachments, regardless of size, are retrieved for each incoming IMAP message for your
dominant personality.
Note. Use of a Trash mailbox for a Dominant IMAP account is governed by the “Use a
trash mailbox on the IMAP server” option in the Personality Extras settings when
Server Configuration is set to IMAP.
5
To save the information and close the Settings dialog, click OK. Your IMAP account is
now created.
QUALCOMM Incorporated
89
Creating an IMAP Account
Eudora User Manual
Checking Mail from Your IMAP Account
First Mail-Check
Now that you have set up an IMAP account, you can begin by checking your mail for the
account.
To check your mail in the account, do the following:
1
From the Window menu, choose Personalities. The Personalities window appears.
2
In the Personalities window, choose your IMAP personality by clicking the icon next to
it. The Mailboxes window appears.
3
At the bottom of the Mailboxes window, click the Check Mail button
4
Enter your password if prompted. Eudora checks for mail.
.
Subsequent Mail-Checks
After you do your first mail-check, you can retrieve your mail for your IMAP account(s)
using any of the following methods.
■
Single Mailbox
To check for new mail in a single IMAP mailbox:
1
Open the mailbox either by double-clicking on its icon in the Mailboxes window or by
selecting it from the appropriate IMAP submenu under the Mailbox menu. (Choose
This Mailbox under the submenu to open an IMAP folder as a mailbox or double-click
the folder’s icon in the current mailboxes window. IMAP folders can contain messages
as well as mailboxes and other folders.)
2
Enter your password if prompted.
Eudora checks your mail for that mailbox, resynchronizing the mailbox and updating it with
new message headers from the IMAP server.
■
Multiple Mailboxes
To check your mail in multiple mailboxes, even across IMAP accounts, do the following:
1
From the Window menu, choose Mailboxes. The Mailboxes window appears.
2
Choose the desired mailboxes. You can make selections from different IMAP accounts
if you want.
3
At the bottom of the Mailboxes window, click Resync.
4
Enter you password(s), if prompted.
Eudora opens all selected mailboxes and checks your mail for all of them, resynchronizing
them all and updating them with new message headers from the IMAP server(s).
■
One or More IMAP Accounts
To check for new mail in one or more IMAP accounts, do the following:
QUALCOMM Incorporated
90
Eudora User Manual
Incoming Message Window
1
From the Window menu, choose Personalities. The Personalities window appears.
2
Choose the IMAP personalities for which you want to check mail. Use the normal
selection methods in this window, that is, click a single item to select it, use the Shift
key for a consecutive group of mailboxes (or drag-select a group), and use the
Command key to make non-consecutive selections.
3
Click the Check Mail button
4
Enter your password(s) if prompted.
.
Eudora resynchronizes all mailboxes and folders in all of the selected IMAP accounts,
updating each mailbox and folder with new message headers from the corresponding
IMAP server.
To check your mail in all of your IMAP accounts, without having to select anything, do the
following:
1
Without selecting anything in the Personalities window, press the Option key and click
the Check Mail button
2
.
Enter your password(s) if prompted.
Mail is checked for all of your IMAP accounts.
Incoming Message Window
To open an incoming message for either POP or IMAP, do the following:
■
Double-click its message summary in a mailbox window, or if the message summary is
currently highlighted, from the File menu, choose Open Selection or press Return.
Incoming message window
Note. If you press the Command key and click the title area in the title bar, a popup menu
appears that lets you select the mailbox or mail folder containing the message. Selecting
the mailbox opens that mailbox; selecting a folder opens the Mailboxes window and highlights that folder.
QUALCOMM Incorporated
91
Incoming Message Window
Eudora User Manual
Title Bar
The title bar provides information about the message, including the name of the sender,
the time and date the message was sent, and the message subject.
Icon Bar
The icon bar is a row of objects displayed just under the title bar. Click an icon to turn it on
or off, or select an item from a popup icon’s menu.
Priority Popup
Click the Priority button to display a popup where you can indicate if a
message is of higher or lower priority than a normal message. Most
incoming messages have a normal priority (blank box). For details,
see “Setting the Message Priority” on page 37.
Pencil
Click the Pencil icon button to edit text in the body of a received
message.
BLAH BLAH BLAH
Click the BLAH BLAH BLAH icon button to see all message headers
including HTML marking tags.
Fixed Width
Click the Fixed Width icon button to convert the message text to the
fixed-width font selected in the Fixed-Width Font popup of your Fonts
& Display settings. See “Fonts & Display” on page 258. This lets you
view aligned text, such as columns and tables more easily.
The Fixed Width icon appears only if a proportional font is selected in
the Screen Font popup of the Fonts & Display settings. Note that the
change to the viewing font is for current message only. No other
message is affected, and the button is turned off when you close the
message.
Subject
This is the subject that was assigned by the sender, and is shown in
the message summary.
Fetch
Click the Fetch icon button to transfer the entire message to your
computer the next time you check mail. This icon is displayed only if
the message was originally transferred in part.
QUALCOMM Incorporated
92
Eudora User Manual
Incoming Message Window
Trash
Click the Trash icon button to delete the message from the server the
next time you check mail. This icon is displayed only if the original
message is still on the server.
Get HTML Graphics
Click the Get HTML Graphics icon button to transfer an HTML graphic
in an open message from the web to your computer. You must be
connected to the Internet when you click the icon for the graphic to be
transferred. This icon appears only if the message contains HTML
graphics, for example a web page is sent to you via a browser, and
the Automatically download HTML graphics option is turned off in
your Fonts & Display settings at the time you opened the message.
For more details, see “Viewing HTML Graphics” on page 98.
Tow Truck
Click the Tow Truck to drag any current message into a different
mailbox. Just hold the mouse button down on the tow truck and drag it
to an open mailbox window, to a mailbox button on the main toolbar,
or to a mailbox icon in the Mailboxes window.
Message Body
The message contains header information, text, any inserted graphics or audio files, and
any attachments sent with the message. Attachments can be opened from within the
message window, or the preview pane, by double-clicking on the attachment icon, name,
or picture, or by holding down the Command key and single-clicking on the item. For more
details on viewing and opening attachments, see “Receiving Attachments” on page 93.
You can specify what kind of text styles you want or don’t want displayed in incoming
messages. Under the When receiving styles, pay attention to option in the Styled Text
settings, just turn off the option for a style that you don’t want to receive, for example, bold
text. All of the possible styles are on by default. See “Styled Text” on page 265.
Receiving Attachments
Unless you have specified a particular folder for your incoming attachments (see “Specifying an Attachment Folder” on page 95), they are automatically decoded and saved in the
Attachments Folder in your Eudora Folder, located in your System or Documents Folder. If
you receive multiple attachments with the same name, a number is added to the end of
each duplicate name, in the order the files are received.
Attachments appear in the body of incoming messages and in the message preview pane.
■
You can open an attachment from an open message window or the message preview
pane, double-click the attachment name, icon, or picture, or press the Command key
and single-click the item. If you have the application that the attachment was created
in, that application launches and the attachment opens.
QUALCOMM Incorporated
93
Viewing Graphics Attachments as Pictures in the Message
Eudora User Manual
■
You can move an attachment into another folder on your desktop without leaving the
message window. To do so, drag the attachment from the message window or the
preview pane to the folder where you want to store it.
■
You can copy an attachment into another folder on your desktop without leaving the
message window. To do so, press the Option key and drag the attachment from the
message window or the preview pane to the folder where you want to store the copy.
The original attachment stays where it is.
Tip. If you hold down the control and option keys while double-clicking a received attachment icon within the body of a message, Eudora displays the attachment in the Finder.
Note. The Attachment column popup menu in the mailbox window message summaries
list provides an easy way to determine the attachments received. Select the message
summary and hold down the mouse button on the Attachment column of the summary.
The popup menu lists the file names of all attachments received with the message. Select
one of the attachments to open it. For more details, see the “Working with Mailboxes” on
page 111.
Viewing Graphics Attachments as Pictures in the Message
To view graphics attachments as pictures in the message rather than as name-and-icon
pairs, turn on the Display graphics in messages option in the Fonts & Display settings. See
“Fonts & Display” on page 258.
Displaying a graphics attachment as a picture in the message
Eudora lets you view any graphics attachment in PICT (QuickDraw Picture) format or, if
QuickTime version 3 or later is installed on your computer, any format QuickTime supports
can be displayed, for example, JFIF/JPEG, GIF, TIFF, PNG, BMP (Windows Bitmap),
MacPaint, Photoshop, QuickDraw GX Picture, QuickTime Image File, Silicon Graphics
Image File, and Targa Image File, as well as movies, sounds, other multimedia content
and more.
QUALCOMM Incorporated
94
Eudora User Manual
Specifying an Attachment Folder
If the criteria above are not met or if the attachment file is too large for the available
memory, the graphics attachment appears in the message as a name-and-icon pair.
Also, you can send and receive animated GIF images. However, to view the animation you
must turn on the feature in the Fonts and Display settings dialog. See “Fonts & Display” on
page 258.
Specifying an Attachment Folder
If you do not want to use the default Attachments folder to receive your attachments, you
need to specify a folder where your attachments go when you receive a message.
To specify an attachment folder, do the following:
1
From the Special menu, choose Settings.
2
Scroll through the Settings category icons and choose Attachments.
3
Under the Attachment Folder: option, click the long button. A standard file dialog
appears.
4
Double-click the name of the folder you want to use (its name should be displayed in
the menu above the list), then click the Use Folder button. The dialog closes leaving
the Settings dialog displayed. The name of the folder you just selected is now displayed
in the Attachment Folder button. See below.
5
If the name of the folder appears on the button, click OK.
An attachments folder is selected
Note. If at any time Eudora cannot find your selected folder, an alert appears at startup
informing you that the Attachment Folder is unavailable. Eudora uses the default “Attachments Folder” located in your Eudora Folder located in your System or Documents Folder
for attachments until you designate a new folder.
QUALCOMM Incorporated
95
Editing Incoming Messages
Eudora User Manual
Also, you can set up a filter to move incoming attachments automatically to a folder you
specify on your desktop, based on match criteria for the incoming messages carrying the
attachments. To do this, use the “Move Attachments” filter action, selecting the folder from
the folder selection dialog that displays. For details, see this action under “Filter Actions”
on page 142. This feature is useful for separating attachments by personality. For
example, you can create folders for each personality and have Eudora automatically place
each personality’s attachments into its dedicated attachment folder.
Editing Incoming Messages
You can edit the message body in an incoming message if you click the Pencil button on
the icon bar
. You can also edit the Subject in the icon bar at any time, even with the
Pencil button off (this is the subject shown in the message summary).
To edit an incoming message, do the following:
1
Click the Pencil icon button to turn it on.
2
Edit the message body.
3
When finished, from the File menu, choose Save or press Command+S to save it and
close the message.
If you close or transfer the message without saving, or if you click the Pencil again to
turn off editing, an alert asks if you want to Save or Discard your changes.
To edit the subject of an incoming message, do the following:
1
Open the message (you can leave the Pencil button off) and edit the subject in the icon
bar, not the subject in the message header.
2
When finished, click somewhere else in the message, or close it.
The new subject appears in the message summary. The contents of the Subject field of
the message header remain unchanged.
Note. If you reply to the message, the original subject is used for the reply, not your
changed subject. This lets you put information useful to you in the summary while transmitting the original subject to your sender.
QUALCOMM Incorporated
96
Eudora User Manual
Using Active URLs
Editing the subject of an incoming message
Using Active URLs
Any string of text that Eudora recognizes as a URL (Uniform Resource Locator) that
begins with http, ftp, gopher, Ph, Finger, etc. is active. Active URLs are normally highlighted in blue text and underlined.
To open a World Wide Web location, transfer a file, do a gopher search, use the Finger
tool, etc., do the following:
■
Press the Command key and click the URL (or just double-click the URL).
To specify what Internet application you want to use for a URL type, do the following:
1
Press the Option key and double-click the URL. A standard file dialog appears.
2
Select the application you want, then click Open. The application is opened and goes
to the selected URL. The next time you select a URL of that type, the same application
is automatically used.
Someone may send you a message containing a hot link that is poorly formatted, and
Eudora does not recognize it as a URL. Eudora will not highlight the text string, but you
can still use it as an active link by doing the following:
1
Select the entire string of text that you think is a hot link.
2
From the File menu, choose Open Selection, or press the Command key and click the
selection.
It’s better to enclose hot links in angle brackets, < >, for example,
<http://www.qualcomm.com/eudora/>. This helps Eudora and other software products to recognize the hot link.
Viewing HTML Text
Sometimes you may receive Web pages or other HTML-formatted text in email messages.
Eudora displays these messages as best it can, but if you want to display them in your
World Wide Web browser, you can do so right from Eudora by doing the following:
1
Open the message, or highlight its message summary in the mailbox window.
2
From the File menu, choose Open in Browser. Eudora uses the browser you have
selected for use with active HTML hot links (see “Using Active URLs” on page 97). If
you have not yet selected a browser for HTML, Eudora asks you to choose one.
QUALCOMM Incorporated
97
Viewing HTML Graphics
Eudora User Manual
Note. Eudora for Macintosh does not handle HTML frames. If you receive an HTML frame,
open it in your browser.
Viewing HTML Graphics
Before you can view an HTML graphic in a Eudora message, two conditions must be met.
■
Make sure the Automatically download HTML graphics option is turned on in the Fonts
& Display settings. If not turned on, each HTML graphic image displays as a
broken-graphic icon. See “Fonts & Display” on page 258.
Note. Turning off the Automatically download HTML graphics option does not affect
HTML graphic files already displayed on your computer.
■
Make sure you are connected to the Internet, so the graphic files can be retrieved from
the web to your computer.
If you want to view HTML graphics an open message, do the following:
1
Open the message
2
On the icon bar of the open message window, click the Get HTML Graphics button
(see “Icon Bar” on page 92 for more details).
Note. HTML graphic files that are retrieved to your computer either automatically, via the
Fonts & Display setting or manually via the icon bar button, are stored in your Cache
Folder, which is in the Eudora Folder contained in your System or Documents Folder. This
Cache Folder is managed the way cache folders are managed in web browser applications. Files continue to be added to the folder and when the folder reaches a certain size,
the oldest least-used image files are deleted to make room for new image files. For more
information on this folder, see “Eudora Folders” on page 311.
Using the Speak Option to Read Your Messages
(Sponsored and Paid modes only)
In Eudora, you can have a voice read your messages aloud. Basically, if a message
window is open, the voice can read the text of that message, including either the To: or
From: field as well as the Subject: field.
Also, in the message summaries list of a mailbox, you can select a range of message
summaries to be read aloud. When one message is read, the voice will say “Next
message” when switching messages.
Important. You must have PlainTalk installed and active to take advantage of Eudora’s
speech capabilities. If your version of Mac OS System Software does not include PlainTalk
built-in, you can retrieve an installer from <http://www.apple.com/>.
To have Eudora read your email message(s), do the following:
1
Highlight the message summary(ies) in the summaries list in a mailbox, or open a
message.
2
From the Edit menu, choose Speak.
QUALCOMM Incorporated
98
Eudora User Manual
Saving a Message to a File
Eudora will read the message(s) to you.
Note. Eudora can read a message in any mailbox including the Out and Trash mailboxes.
However, in the Out mailbox, the voice will read the To: and Subject: fields only.
If you have a message from someone else (not the sender) embedded in the message,
the voice will say “quote,” read that portion of the message in a higher pitch, and say
“unquote” when finished.
Saving a Message to a File
You can save one or more incoming messages to a separate text file on your computer by
doing the following:
1
In an opened message or a selected message summary, choose Save As from the
File menu. The Save As dialog appears.
2
Select the folder where you wish to file the messages and click Open.
Printing a Message
To print the current message, do the following:
■
In an opened message or a selected message summary, from the File menu, choose
Print to print one to several copies, or choose Print One Copy to print one copy only.
Eudora automatically prints headers and footers on each page, giving the message
title, page number, and your return address.
Viewing IMAP Messages
By default, when Eudora checks your mail for your IMAP account, it retrieves the “Minimal
headers” for any new incoming message. That means it does not retrieve the full message,
and it does not retrieve any attachments included with the message. However, the
messages and attachments not retrieved remain on the IMAP server.
To view a new incoming IMAP message, do one of the following:
■
Open the message from the mailbox window in which it arrived and double-click the
message summary.
■
Select the summary and press Return.
■
Select the message summary and view the message in the preview pane.
The message window opens but only with a short initial message indicating that the full
message will be retrieved. (Or, this notice appears in the preview pane if you are
previewing the message.)
Eudora then begins retrieving the message. Once the message has been fully retrieved,
Eudora displays the message content in the message window or the preview pane.
QUALCOMM Incorporated
99
Viewing IMAP Messages
Eudora User Manual
Note. If you are checking your mail while traveling, or if you want to avoid making a
network connection for some other reason, switch to “offline” mode or do not open
messages you haven’t yet retrieved.
You can distinguish fully retrieved messages from minimally retrieved messages (essential
headers only) by looking at the “Server Status” column in the open mailbox window. If the
column for a message summary contains a blank diamond, the message has not been
retrieved. If the column contains a half-filled diamond, the message is retrieved, but not its
attachments. If the column contains a totally filled diamond, the message and its attachment are retrieved.
Responding to IMAP Messages
When you use the Reply, Forward, Redirect, or Turbo Redirect command on an IMAP
message that has only been partially retrieved, the incoming IMAP message is then fully
retrieved and is excerpted as necessary in the response. Eudora notifies you that the
retrieval is occurring.
If the incoming message has attachments and you initiate a Forward, Redirect, or Turbo
Redirect command, the attachments will accompany the message automatically. For more
details, see “Retrieving Attachments” on page 100.
Transferring IMAP Messages
When transferring IMAP messages, consider the following:
■
You can perform transfers in the normal way, that is by using the Transfer menu, or
using drag and drop. You drag open messages by using the Tow Truck icon. You drag
message summaries by selecting them and dragging the selection.
■
You can transfer messages from an IMAP mailbox to another IMAP mailbox, even
across IMAP accounts. This action does not retrieve the messages to your computer.
■
You can transfer messages from an IMAP mailbox to a POP mailbox. This action
retrieves the IMAP messages to your destination POP mailbox on your computer.
■
You can also transfer messages from a local POP mailbox on your computer to an
IMAP mailbox. This moves the message from your POP mailbox on your computer to
your IMAP mailbox on the server.
■
When transferring IMAP messages (or when making a POP-to-IMAP transfer), you
may first need to make a network connection to complete the transfer.
■
The first time you transfer (or delete) a message from an IMAP mailbox, Eudora will try
to create a Trash mailbox if the Use a trash mailbox on the IMAP server option is turned
on for that IMAP account in the Personality Extras settings. See “Personality Extras
(Sponsored and Paid modes only)” on page 280.
Retrieving Attachments
Attachments for an incoming IMAP message can be retrieved at the following times:
■
When you check your IMAP mail and the message first comes in.
QUALCOMM Incorporated
100
Eudora User Manual
Viewing IMAP Messages
■
When you open the message or perform some other action that retrieves it.
■
When you manually retrieve the attachment.
Note. The factor that determines what happens during mail retrieval is your selection for
Download Options in the IMAP settings under the Checking Mail settings (for your dominant personality) and the Personality Extras settings (for any of your IMAP personalities).
The Download Options settings are available only when the Server Configuration field in
those dialogs is set to IMAP for the relevant personality.
The three choices for Download Options are the following:
■
Minimal headers only
■
Full message except attachments over ? K
■
Full message with attachments.
You can have only one of these options turned on at a time. Following is each Download
Options option is described.
Minimal Headers Only
If the Minimal Headers Only option is turned on in the Download Options field for your
IMAP personality, the following occurs when retrieving messages.
■
Eudora retrieves the full message, including all headers and the entire message body.
■
Eudora retrieves all of the message’s “inline” components, which include graphic files
displayed in the message, inserted hypertext links, inserted horizontal rules, and, for
example, any internal HTML components from a transmitted web page. (These components, or “parts,” when retrieved are stored in your Parts folder in the Eudora Folder.)
■
Eudora does not retrieve any attachment files included with the message. Instead,
Eudora displays each attachment in the message (or preview pane) by its icon and
name pair, with a small down arrow,
icon.
called the Fetch arrow displayed next to the
To retrieve an attachment that has a Fetch arrow, click the Fetch arrow. The attachment is
retrieved and stored in your Attachment Folder, or whatever folder you have designated to
receive attachments.
Once the attachment is retrieved, the Fetch arrow disappears for that attachment in the
message window or preview pane, and the attachment appears either as an icon and
name pair or as a picture in the message (if a graphics file and the proper settings are
turned on).
Also, once the attachment is retrieved, it is now on your computer, and you can treat it as
you would treat an attachment retrieved from a POP server. For more details on working
with incoming attachments, see “Receiving Attachments” on page 93.
QUALCOMM Incorporated
101
Viewing IMAP Messages
Eudora User Manual
Full Message Except Attachments Over ? K
If Full message except attachments over ? K is turned on in the Download Options field for
your IMAP personality, and if you have entered a number in the text entry field, the
following occurs when retrieving messages.
■
The full message is retrieved, including all headers and the entire message body.
■
Eudora retrieves all “inline” components including graphic files displayed in the
message, inserted hypertext links, inserted horizontal rules, and, for example, any
internal HTML components from a transmitted web page. (These components, or
“parts,” when retrieved, are stored in your Parts folder in the Eudora Folder.)
■
Any attachments within the specified size limit are retrieved and stored in your Attachment Folder, or whatever folder you have designated to receive attachments.
■
Any attachments above the specified size limit are not retrieved, but are left on the
server. You can manually retrieve these attachments later.
Any attachments that have been retrieved to your computer appear as normal in the
message window or the preview pane. They appear as an icon and name pair, or as a
picture in the message (if a graphics file and the proper settings are turned on).
Any attachments that have not been retrieved to your computer appear as an icon and
name pair with a small down arrow
called the Fetch arrow displayed next to the icon.
To retrieve an attachment that has a Fetch arrow, click the Fetch arrow. The attachment is
retrieved to your computer and stored in your Attachment Folder, or whatever folder you
have designated to receive attachments. When the retrieval is complete, the Fetch arrow
disappears, and the attachment appears either as an icon and name pair or as a picture in
the message.
You can manage these attachments as if you had retrieved them from a POP server. For
more details on managing incoming attachments, see “Receiving Attachments” on page
93.
Note. The number you enter in the text entry field for the Full message except attachments
over ? K option is a size limit that applies to the attachments only and not to the message
itself. Thus, if you specify an attachment size limit of 20K and the message itself is 100K,
then during a mail check the full 100K message will still be retrieved. In this case too, a
15K attachment would be retrieved during the mail check, but a 40K attachment would not,
and would be displayed with a Fetch arrow so you could manually retrieve it later.
Full Message with Attachments
If Full Message with Attachments is turned on in the Download Options field for your IMAP
personality, the following occurs when retrieving messages.
■
Entire messages with headers are retrieved.
■
All attachments regardless of size are retrieved.
QUALCOMM Incorporated
102
Eudora User Manual
Viewing IMAP Messages
Actions That Retrieve IMAP Messages
If the Minimal Headers Only option is turned on in the Download Options field for your
IMAP personality, the following actions can fully retrieve a partial message from the IMAP
server to your computer.
■
Open the message
■
Preview the message in the message preview pane
■
Reply to the message
■
Forward the message
■
Redirect the message
■
Send the message again (Send Again command)
■
Transfer the message from an IMAP mailbox to a POP mailbox (an IMAP-to-IMAP
transfer will not retrieve the message).
Automatically Deleting IMAP Attachments
For information on deleting messages, see “Deleting Messages” on page 131.
To have IMAP messages attachments automatically deleted, do the following:
1
From the Special menu, choose Settings.
2
Scroll through the Settings category list and choose Attachments.
3
In the Attachments settings dialog, turn on the Trash attachments with messages
option.
4
Make sure the attachments, if retrieved, are still in the Attachment Folder (or the
folder you have specified for attachments). For details, see “Attachments” on page 255.
If you have these options turned on and you want to delete an IMAP message but save its
attachment, move the attachment into another folder before deleting the message.
Important. If you delete a message from the IMAP server whose attachments have not
been retrieved, the attachments will be deleted from the server. Make sure you have
retrieved all wanted attachments before deleting the message.
QUALCOMM Incorporated
103
Viewing IMAP Messages
Eudora User Manual
QUALCOMM Incorporated
104
Replying to Messages
Replying to a Message
To reply to the current message, do the following:
■
From the Message menu, choose Reply or click
.
A new message window appears with the original sender’s address automatically placed
in the To: field of the header. All of the sender’s original text is quoted in the message body.
This text can be edited as needed. Additional text can be added to the reply just as to any
outgoing message, and the reply can then be sent or saved for further changes.
The sender’s text is quoted with a left sidebar, also called an excerpt bar.
Quoted text with excerpt bar
Messages that have been replied to are identified with a left arrow (
column of their message summary.
) in the Status
Eudora implements a new Internet standard for sending text, format=flowed. This new
standard lets you send text with returns only at the ends of paragraphs, which is more
convenient for reading on small or unconventional displays. However, unlike styled text,
format=flowed is not unpleasant for recipients with simple mailing programs. For more
information on format=flowed, see www.eudora.com/techsupport/mac.
Using the Reply Options
There are several options that you can use when replying to messages.
■
To quote only some of the sender’s text, select the text you want, then press the Shift
key and choose Reply Quoting Selection from the Message menu.
■
To include everyone who received the original message, press the Option key and
choose Reply To All from the Message menu. Or, turn on the Reply to all: By default
option in the Replying settings dialog (see “Replying” on page 257), and the Message
menu option changes to “Reply To All.” In this case, you must press the Option key to
create a reply to only the original sender.
■
To include yourself as a recipient, turn on the When replying to all Include yourself
option in the Replying settings. This applies only if you are using “Reply To All.”
QUALCOMM Incorporated
105
Forwarding a Message
Eudora User Manual
Note. To determine who you are for the Include yourself option, Eudora uses the “me”
nickname, if you have one. If you do not have a “me” nickname set up in your Address
Book, Eudora uses the contents of the Username, Mail Host, and Return address
fields from the Getting Started settings. (Incoming mail personalities are usually in the
form of username@mailhost.) The “me” nickname is particularly useful if you have
multiple addresses and do not want replies to go to any of those addresses.
■
To put the addresses of the other recipients of the original message in the Cc: field
(instead of the To: field), turn on the When replying to all: Put original To: recipients in
Cc: field, not To: field option in the Replying settings dialog. Only the original sender’s
address is put in the To: field. This works only if you are using “Reply To All.”
■
To ensure that your reply has the same message priority as the original message each
time you reply to a message, turn on the Copy original’s priority to reply option in the
Replying settings dialog.
Note. If you copy text from an incoming message to the clipboard, then paste it as a
quotation into your reply (choose Paste As Quotation from the Edit menu), an attribution line is included for the quoted text. Here’s a sample attribution line: “At 10:24 PM
-0600 1/20/99, Jane Doe wrote:”. If you copy, then paste as quotation, blocks of text
from different incoming messages into the same reply message, then an attribution line
will be included for each pasted block of text. In this way you can reply to multiple
people in one message.
Forwarding a Message
Any message can be forwarded to someone else. You forward a message to someone
who would consider the message as important as you do.
To forward the current message, do the following:
■
From the Message menu, choose Forward or click
.
A new message window appears with your address in the From: field and the original
subject preceded by “Fwd.” Also, a space appears in the Subject: field. The original
sender’s text is quoted in the message body, and any original attachments are in the
Attached: field. For details on how text is quoted in the message body, see “Replying to a
Message” on page 105. Make any changes or add any comments you want and enter the
recipient’s address in the To: field. The message can then be sent or saved for further
changes.
Note. If you forward an outgoing message (a message you sent), the attachments are not
automatically included.
Messages that have been forwarded are identified with a right arrow (
column of their message summary.
) in the Status
Another way to forward a message:
■
Set up a filter that uses the Forward To filter action. See “Filtering Messages” on page
135 and “Filter Actions” on page 142.
QUALCOMM Incorporated
106
Eudora User Manual
Redirecting a Message
Redirecting a Message
Incoming messages can be sent to a new recipient “by way of” you, maintaining the original sender’s address in the From: field. You redirect a message that should have been
sent to someone else.
To redirect the current message, do the following:
■
From the Message menu, choose Redirect or click
.
A new message window appears with the original sender’s email address in the From:
field with the statement “by way of ____,” followed by your real name and/or return
address. The original sender’s text is in the message body, and any original attachments
are in the Attached: field. Make any changes you want and enter the recipient’s address in
the To: field. The message can then be sent or saved for further changes.
Note. You may want to enclose any changes in brackets ([ ]) so that you don’t confuse the
recipient about who wrote what.
Redirected message
Messages that have been redirected are identified with a diagonal arrow (
column of their message summary.
) in the Status
Another way to redirect a message:
■
Set up a filter that uses the Redirect To filter action. See “Filtering Messages” on page
135 and “Filter Actions” on page 142.
Turbo Redirecting
You can redirect one or more messages to someone on your Quick Recipient List, queue
the new message (without displaying it), and delete the original message, all with one
command.
■
Press the Option key and choose the recipient from the Turbo Redirect To submenu
under the Message menu.
To Turbo Redirect a message without deleting the original, do the following:
QUALCOMM Incorporated
107
Redirecting a Message
■
Eudora User Manual
Press the Shift and Option keys and choose the recipient from the Turbo Redirect
Without Delete To submenu.
To make “Turbo Redirect To” appear as the default submenu on the Message menu, in
place of the “Redirect To” submenu, turn on the Turbo redirect by default option in the
Miscellaneous settings (see “Miscellaneous” on page 276). (Note that this option does not
affect the “Redirect” command on the Message menu, only the “Redirect To” submenu.
Redirect and Signatures
When you use “Redirect” (or the “Redirect To” filter action), your signature is not added to
the message when it is sent, unless you originally created the message. Eudora considers
the message to be originally from you if the address in the From: field exactly matches
either your return address or one of the addresses belonging to your nickname called
“me,” if you have one set up in your Address Book.
Sending Rejected Messages Again
If for some reason an email message cannot be delivered to a recipient, mail transport
agents return the message to the original sender (you). A message is typically rejected
because of an error in the recipient’s address, although many other reasons are possible.
The return message usually includes cryptic information that may let you determine the
reason the message was rejected. It also includes the text of the original message.
You can easily recover the original message, make any corrections, and resend it. To do
this for the current message, do the following:
■
From the Message menu, choose Send Again.
This eliminates the inserted extra text and reformats the message as it originally
appeared. You can then make changes or additions and send the message again.
The Send Again command is also useful for resending saved messages, such as those in
your Out box or those you’ve Cc’ed to yourself. You can send the same message to
another recipient to avoid having to retype the whole message, or you can send a different
message to the same recipients to avoid having to retype their addresses in the header
fields. In this sense, the Send Again command lets you treat any stored message (whether
incoming or outgoing) as a stationery file.
Replying with a Stationery File
(Sponsored and Paid modes only)
To reply to a message with stationery, do the following:
1
Open or highlight the message you are replying to.
2
From the Message menu, choose Reply With. The Reply With submenu appears.
3
Choose the desired stationery. The stationery file is opened as a reply message and is
addressed as appropriate (your Replying settings are used). For details about stationery, see “Using Stationery (Sponsored and Paid modes only)” on page 64.
QUALCOMM Incorporated
108
Eudora User Manual
Replying to a Message with a Particular Stationery (Sponsored and Paid modes only)
To reply to a message with a stationery file and only quote some of the sender’s original
text, do the following:
1
Highlight the text you want to quote
2
Press the Shift key, and from the Message menu, choose Reply Quoting Selection
With. The Reply Quoting Selection With submenu appears.
3
While still pressing the Shift key, choose the desired stationery. If no text is selected,
Eudora does not quote any text.
You may also reply to message with stationery in the following ways:
■
With the Stationery window open, drag an open message by its Tow Truck, or drag
selected message summaries in a mailbox window, onto a stationery item in the Stationery window. A reply is initiated using the selected stationery.
■
With the Personalities window open, drag an open message by its Tow Truck, or drag
selected message summaries in a mailbox window, onto a personality icon in the
Personalities window. A reply is initiated from that personality, and the stationery stored
with that personality is used in the reply.
■
Set up a filter that uses the “Reply With” filter action. For more details, see “Filtering
Messages” on page 135 and “Filter Actions” on page 142.
Replying to a Message with a Particular Stationery
(Sponsored and Paid modes only)
To reply to a message with a particular stationery, do the following:
1
From the Message menu, choose Reply With. The Reply With submenu appears.
2
From the Reply With submenu, choose the desired stationery. A new message composition window appears. The stationery header text is incorporated into the reply header
text. The stationery body text is inserted below the quoted body text from the original
message. You can edit and send this new message just as you would any other
message.
Note. Another way to reply using a particular stationery is to drag the message summary
from the mailbox window and drop it on an icon in the open Stationery window. A new
reply message is created using that stationery and is composed as described above.
QUALCOMM Incorporated
109
Replying to a Message with a Particular Stationery (Sponsored and Paid modes only)
Eudora User Manual
QUALCOMM Incorporated
110
Working with Mailboxes
Mailboxes are where your messages reside. Folders are where mailboxes and messages
reside, if you so choose.
This section describes mailboxes and folders that have been set up locally on your
computer for a POP account. If you have an IMAP account, please refer to “Working with
IMAP Mailboxes” on page 124.
Opening a Mailbox
■
To open a mailbox, choose it from the Mailbox menu.
■
To open a mailbox that is within a folder (referred to as a “nested” mailbox), choose the
folder from the Mailbox menu, then choose the mailbox from the submenu (or continue
selecting subfolders until the mailbox can be selected).
■
To open a mailbox from the Mailboxes window, choose Mailboxes from the Window
menu. The Mailboxes window displays all the mailboxes and folders in your Eudora
Folder.
■
To open a mailbox in the Finder, double-click the desired mailbox.
Mailbox menu and Mailboxes window
Opening Other Mailboxes
You can open a mailbox that is located outside the Eudora Folder (on a different network
volume, for example) by doing the following:
■
From the Mailbox menu, choose Other. A standard file dialog appears asking you to
select the mailbox.
QUALCOMM Incorporated
111
Understanding the Components of a Mailbox
Eudora User Manual
Once you have opened a mailbox using the Other command, the mailbox remains on the
Mailbox and Transfer menus until you quit Eudora. However, if you open the mailbox within
a folder or subfolder, it remains on the Mailbox and Transfer menus indefinitely, even if you
quit and restart Eudora.
Understanding the Components of a Mailbox
Mailboxes contain all of your incoming and outgoing message summaries. Additionally, if
the “Show message previews by default setting” is turned on in the Mailbox Display
settings dialog, mailboxes also show the message preview pane.
To open a mailbox, do the following:
■
From the Mailbox menu, choose the mailbox you want to open, or double-click its icon
or name in the Mailboxes window from the Window menu.
Mailbox showing message summaries
Message Summaries
Each line in a mailbox window represents a message and is called a message summary.
To select one or more message summaries, use one of the following methods:
■
To choose one summary, click it.
■
To choose a range of consecutive summaries, click the first summary in the range, hold
down the Shift key and click on the last summary in the range.
■
To choose non-consecutive summaries, hold down the Command key and click the
summaries one-by-one.
■
To choose all the summaries that are from or to the same person, hold down the
Option key and click the person’s name in a summary. The summaries are grouped as
well as selected. You can perform this same function for any column (except server
status) in the mailbox window, for example, size, priority, etc.
■
To choose a summary that best matches the letters you type, type the first few letters of
a sender or recipient’s name (or the Subject, if the mailbox is currently sorted by
Subject).
QUALCOMM Incorporated
112
Eudora User Manual
Understanding the Components of a Mailbox
Each message summary is divided into columns: Status, Priority, Attachments, Label,
Sender/Recipient, Date, Size, Server Status, and Subject. You can show or hide these
columns using the Mailbox Display settings found in Settings from the Window menu.
A message’s Status, Priority, Label, and Server Status can be changed directly in the
mailbox window. To do this, click the message summary column you want to change. The
pointer displays as the popup menu symbol
. Hold down the mouse button and select
an option from the popup menu.
The Attachment column also has a popup menu. If the message summary indicates that
the message contains attachments, click and hold down the mouse button on the Attachment column of the message summary. The popup menu displays all attachments associated with that message, by file name. Select one of the files to open that attachment.
You can copy the text in one or more message summaries by doing the following:
1
Choose the summaries.
2
From the Edit menu, choose Copy. The information in each selected summary is
copied. This information can be pasted into a new message or a text file for record
keeping or later use.
Status Column
The status column displays the message status. You can use the popup to change the
status to another available status, depending on whether the message is incoming or
outgoing.
Message has not been read (all mailboxes except Out), or
message is queued or sendable but has not been queued or sent
(Out mailbox).
<blank> Message has been read (all mailboxes except Out), or message
is not yet able to be queued or sent because it has no recipients
in the To: or Bcc: field (Out mailbox only).
Message has been replied to.
Message has been forwarded.
Message has been redirected.
Message needs to be rebuilt; it cannot be sent.
Message is queued to be sent (outgoing messages only).
Message is queued to be sent at a specified time (outgoing
messages only).
QUALCOMM Incorporated
113
Understanding the Components of a Mailbox
Eudora User Manual
Message has been sent (outgoing messages only).
Message was transferred from the Out mailbox before being sent.
Message cannot be sent because of an error. Usually the error is
in the recipient’s email address.
...
Message is currently being sent.
Priority Column
The priority column displays the message priority. You can use the popup to set a particular priority, or to raise or lower the priority.
Highest priority
High priority
<blank> Normal priority
Low priority
Lowest priority
Raise Raise the priority one level.
Lower Lower the priority one level.
For more information on message priorities, see “Setting the Message Priority” on page
37.
Attachments Column
The Attachments column displays the attachment icon (
documents.
) if a message has attached
If the message does have attached documents, use the Attachment column popup to see
the file names of the attached documents and also to open the attachments. Hold down
the mouse button on the Attachment column of the message summary and either view the
attachments on the popup or select one of the attachments to open.
QUALCOMM Incorporated
114
Eudora User Manual
Understanding the Components of a Mailbox
Label Column
This Label column displays the message label. You can assign labels to incoming
messages, either manually by selected the label from the popup or automatically using
filters. See “Filtering Messages” on page 135.
To assign a label to an existing message, do the following:
1
Choose the message or range of messages in the message summaries you want to
label.
2
From the Message menu, choose Change then Label. The Label submenu appears.
3
Choose the label you want for this message.
When a message summary is assigned a label, the entire summary (text only) changes
color to match the label color.
Note. There are two kinds of labels: Finder and Eudora. Finder label colors and titles are
assigned in the Macintosh Preferences dialog from the Edit menu in the Finder) or in the
Macintosh Label control panel. Eudora label colors and titles are assigned using the
Eudora Labels settings. See “Eudora Labels” on page 264.
Sender/Recipient Column
This Sender/Recipient column shows the sender of the message (for incoming messages)
or the intended recipients (for outgoing messages).
To select all the message summaries from a particular sender or recipient, do the
following:
■
Hold down the Option key and click the name of one of the message summaries from
that person.
The summaries are grouped as well as selected. To ungroup them, perform a sort operation (e.g., click the Date column heading).
Note. Bugs in some incoming servers/mail transport systems cause Eudora to display the
sender of incoming messages as ???@???. The reason is that the required “From:”
header is missing. If you encounter such a message, see your email administrator. Administrators can obtain a copy of qpopper from ftp.eudora.com that may correct the
problem (see “Sources” on page 316).
Date Column
The Date column displays the date and time the message was composed, or, for timed
outgoing messages, the date and time the message is scheduled to be sent.
Eudora uses two methods of displaying date information in mailbox windows:
■
Age-sensitive—Mail that arrives today has a time stamp; mail that arrived within the
last six calendar days is stamped with the day of the week, and mail that arrived prior to
the previous week is stamped with the date.
■
Fixed—All mail messages are stamped with the date and time, with the date formatted
according to the short date format in current use by your computer and the time
formatted according to the current time format.
QUALCOMM Incorporated
115
Understanding the Components of a Mailbox
Eudora User Manual
To set date information, do the following:
1
From the Special menu, choose Settings.
2
Scroll the Setting category icons and choose Date Display. The Date Display settings
dialog appears.
3
In the Date format field, choose either Age-sensitive or Fixed.
4
Click OK.
For more information, see “Date Display” on page 263.
Size Column
This column displays the size of the message in kilobytes, or K, where 1K = 1024 bytes.
MoodWatch Column
The MoodWatch column displays chili peppers to determine how offensive the text is in the
message.
One, two or three red chili peppers appear in this column
to determine how offensive the text is in this message.
One pepper indicates mild offense and three peppers the
most offensive. See “Using MoodWatch for Incoming
Messages” on page 51 for more information.
Server Status Column
The Server Status column displays the action that is to be done to the corresponding
message on the server. The next time you check mail, the server status you requested is
automatically completed. You can change the desired server status using the popup in this
column.
Do Nothing
Doesn’t do anything with the message on the
server.
Fetch from
Server
Retrieves the whole message from the server.
Delete from
Server
Deletes the message from the server.
Fetch &
Delete
Retrieves the whole message from the server,
then delete it from the server.
QUALCOMM Incorporated
116
Eudora User Manual
Understanding the Components of a Mailbox
Deleted on
IMAP Server
IMAP only: This message is marked for deletion.
Delete it from the IMAP server the next time you
choose Remove Deleted Messages or the Trash
mailbox is emptied on that IMAP server (if a
Trash mailbox exists).
Note. You can also use the Mail Transfer Options dialog to control the mail transfer (on the
POP server only). For details, see “Checking for Mail with Special Server Instructions” on
page 85.
Subject Column
The Subject column displays the subject of the message. The sender originally typed this
information into the message header, but you can modify it (see “Editing Incoming
Messages” on page 96).
Displaying and Resizing Columns
To specify which columns you want displayed in your mailbox windows, do the following:
1
From the Special menu, choose Settings.
2
Scroll through the Setting category icons and choose Mailbox Display. The Mailbox
Display settings dialog appears.
3
Check the boxes for the columns you want to display.
To resize a column in a mailbox window, move the mouse pointer until it is over the column
divider to the right of the column you want to resize. The pointer changes shape to the
column resize cursor ( ).
Hold down the mouse button, drag the divider to the position you desire, and release the
mouse button. The column divider moves to the new location, and the mailbox is redrawn.
You can shrink a column only as far as its left divider. If you do that, a double divider line
appears in place of the column, and the column’s contents are hidden. To redisplay the
column, drag the right divider line to the right. Remember that you can also hide and show
a column from the Mailbox Display settings. See “Mailbox Display” on page 261.
Note. You can also resize columns by dragging the divider lines in the headers. The
pointer does not change shape in this case.
Using the Mailbox Size Display
In the lower left corner of the summary list portion of each mailbox window, three numbers
show the size information for that mailbox.
■
First number (5) shows the number of messages in the mailbox.
■
Second number (3K) is the total amount of disk space those messages require;.
■
Third number (4K) is the amount of unused disk space associated with that mailbox.
QUALCOMM Incorporated
117
Message Preview Pane
Eudora User Manual
Mailbox showing mailbox size display
Unused space is created when messages are deleted from a mailbox. This unused space
is automatically removed when it becomes too large.
To manually clean up the wasted space in all mailboxes, do the following:
■
Click the mailbox’s size display (for that mailbox only) or, to compact all your mailboxes
(recycle all the unused space), hold down the Option key and click on any mailbox size
display.
Important. Try not to keep too many messages in your In, Out, or Trash mailboxes
because it slows down your system’s performance. If you wish to keep these messages,
it’s better to transfer them to other mailboxes.
Note. If you highlight to select more than one message, the number of selected messages
appears to the left of the mailbox’s message number, for example before the 5 in the
above example. To show the count, you must have the Show count of selected messages
turned on in the Mailbox Display settings dialog. See “Mailbox Display” on page 261.
Message Preview Pane
If the Show message previews by default setting is turned on in the Mailbox Display
settings, then at the bottom of every mailbox window, just below the message summary
list, a message preview pane appears.
The message preview pane shows the headers and body of the currently selected
message in the message summary list.
The default preview pane is 12 lines high, but this height can be resized up or down, as
described further below.
If the message currently being previewed is short enough, you will see the full message in
the preview pane: headers and body. If the full message will not fit in the preview pane,
Eudora normally scrolls the headers up and out of view so the preview begins with the first
line of the message body. Scroll bars appear so that you can scroll up to view the headers,
or down to view a long message body. Only one message can be previewed at a time: if
multiple message summaries are selected in the mailbox window, the preview pane is
blank.
To toggle the keyboard focus from the message summary list to the message preview
pane and back again, press the Tab key. Or, click in the preview pane to put the focus there
Note. If the Mark read if clicked in or tabbed to or scrolled setting is turned on in the
Mailbox Display settings, any of these actions will change the status of an unread
message (•) to read (blank).
When keyboard focus is in the preview pane, Eudora treats the preview pane like an open
incoming message window. Thus, you can do the following from the preview pane:
■
Press the spacebar to page down through the message.
QUALCOMM Incorporated
118
Eudora User Manual
Message Preview Pane
■
Use the arrow keys, as set in the Moving Around settings (unmodified, or modified with
Command, Option, etc.), to switch to the next or previous message in the mailbox.
■
Use standard commands that you would normally use in an open incoming message
window, whether via the menus, the main toolbar, or keyboard shortcuts and modifiers.
These include Reply, Forward, Redirect, Delete, Transfer, Save As, Print, and more.
■
Double-click an attachment name, icon, or picture to open the attachment.
■
Double-click a URL (hot link) to launch the application for that URL.
Every mailbox window has a triangle button at the bottom left of the mailbox summary list,
just to the left of the mailbox size display. Click this button to show or hide the preview
pane within the current mailbox only (this does not control whether the preview pane is
shown or hidden in other mailboxes).
Preview pane show/hide button (middle left)
If the preview pane is set to display in every mailbox window (Show message previews by
default is turned on), you can use the triangle button to hide preview panes in mailboxes in
which you don’t want to see them. If the preview pane is set to be hidden in every mailbox
window (Show message previews by default is turned off), you can use the triangle button
to show the preview pane in just those mailboxes you want.
You can change the height of the preview pane relative to the message summary list by
holding down the mouse button on the preview pane size button at the bottom right of the
message summary list and dragging this button up or down. This button, also called the
“splitter” button, is just to the right of the horizontal scroll bar.
Preview pane size button (middle right)
The preview pane size button is displayed only when the preview pane appears in that
mailbox window.
QUALCOMM Incorporated
119
Creating Mailboxes and Folders
Eudora User Manual
The following settings apply to any mailbox window in which the message preview pane is
currently visible. These settings, which appear in the Message preview section of the
Mailbox Display settings, are independent of whether the Show message previews by
default setting in that Settings dialog is turned on or off.
■
Mark read after ? seconds—(Default value is 5 seconds.) If this setting is on, then an
unread message currently being previewed in the preview pane is marked read (blank
in the Status column) after the number of seconds entered in the box.
■
Mark read if clicked in or tabbed to or scrolled—If this setting is on, then an unread
message currently being previewed in the preview pane is marked read if you move the
keyboard focus to the preview pane by either clicking in the preview pane, or Tabbing to
the pane, or operating its scroll bar, if available.
■
Mark read if “next message” used to move away—If this setting is on, then an
unread message currently being previewed in the preview pane is marked read if you
move to the next (or previous) message using the modified or unmodified arrow keys
as set in the Moving Around settings.
■
Mark read if deleted—If this setting is on, then an unread message currently being
previewed in the preview pane is marked read if you delete it. If this setting is off, then
the message is not marked read when deleted. Note that if this setting is on and you
delete the unread message currently being previewed, Eudora first marks the message
read, then deletes it.
Note. Eudora will not automatically mark as read the new unread messages that are
received following a mail check or filter action, until you take action on the first new unread
message in the new list in that mailbox.
Using the Title Bar Popup Menu
In an open message or mailbox window, hold down the Command key and click on the title
in the title bar. A popup menu appears showing the hierarchy of mailboxes and folders
containing that message or mailbox.
If you choose a mailbox from the menu, the mailbox window opens for that mailbox. If you
choose a folder, the Mailboxes window opens and the folder is highlighted in the window.
Creating Mailboxes and Folders
Eudora lets you create mailboxes to put messages in, and folders to put mailboxes or
more folders in.
There are three ways to create mailboxes and folders:
■
Using the New command from the Mailbox menu.
■
Pressing the New Mailbox or New Folder button in the Mailboxes window from the
Window menu. The Mailboxes window is especially useful if you want to create
multiple mailboxes quickly.
■
Using the New command from the Transfer menu.
QUALCOMM Incorporated
120
Eudora User Manual
Using the Mailboxes Window
Creating a Mailbox or Folder Using the Mailbox Menu
To create a new mailbox or mail folder, do the following:
1
From the Mailbox menu, choose New. The New Mailbox dialog appears.
New Mailbox dialog
2
To create a mailbox, type in the new mailbox name and click OK. The mailbox is
created and added to the Mailbox and Transfer menus and to the Mailboxes window.
3
To create a mail folder, type the name of the new mail folder and check the Make it a
folder option. Click OK to create the folder. The New Mailbox dialog appears again.
4
Type the name of a mailbox to create within the new folder, then click OK. The new
folder and its mailbox appear in the Mailbox and Transfer menus and in the Mailboxes
window.
Creating a Mailbox Within a Folder
To create a new mailbox within a particular folder, do the following:
1
From the Mailbox menu, choose the desired folder.
2
From the submenu that appears, choose New. The New Mailbox dialog appears.
3
Type in the new mailbox name and click OK.
The mailbox is created and added to the Mailbox and Transfer menus.
You can also create a subfolder by doing the following:
1
In the New Mailbox dialog, check the Make it a folder option.
2
Click OK.
3
When the dialog reappears, enter the name of a new mailbox to create in the subfolder
and click OK.
Using the Mailboxes Window
The Mailboxes window lets you manage your mailboxes and mail folders. Using this
window, you can create, rename, and remove mailboxes and mail folders, move mailboxes
and folders in and out of other folders, and move messages in and out of mailboxes.
QUALCOMM Incorporated
121
Using the Mailboxes Window
Eudora User Manual
Note. Mailboxes and folders that are underlined in the window have unread messages in
them.
To display the Mailboxes window, do the following:
■
From the Window menu, choose Mailboxes. The Mailboxes window appears.
Mailboxes window
To open a mailbox or folder within the window, double-click it, or click it once and press
Return. You can move among the folders and mailboxes using the up and down arrow
keys, or close or open folders by clicking on the triangle to the left.
You can start typing the name of the mailbox or folder you want, and it is highlighted when
you have typed enough unique characters to identify it (the item must be displayed, so a
mailbox that is in a closed folder cannot be selected this way).
Three buttons appear at the bottom of the window (left to right): New Mailbox, New
Folder, and Remove. If you have multiple personalities and at least one uses an IMAP
incoming mail server, a fourth button appears, Refresh. See “Managing Your Mail on the
IMAP Server” on page 87 for details. If the icons appear only on the buttons, resize the
window wider and the titles will appear.
Like other Eudora windows, the Mailboxes window can be placed anywhere on your
desktop and open. To move the Mailboxes window, drag it by the title bar, as you would
with any Macintosh window.
Select mailboxes and folders in the following ways:
■
Click the icon to select a single item; click on the name only when you want to rename
the item.
■
Hold down the Shift key and click to select a consecutive range of items.
■
Hold down the Command key and click to make non-consecutive selections, adding or
subtracting individual items from a group selection.
■
Hold down the mouse button and drag to select a group.
QUALCOMM Incorporated
122
Eudora User Manual
■
Using the Mailboxes Window
Press Command+A to select all items in the Mailboxes window (except the top-level
Eudora Folder).
Also, you can drag mailboxes (but not mail folders) from the Mailboxes window to the main
toolbar to add them as toolbar buttons.
Creating a New Mailbox or Mail Folder
To create a new mailbox or mail folder in the Mailboxes window, do the following:
1
At the bottom of the Mailboxes window, click the New Mailbox
or New
Folder
button. An untitled mailbox or mail folder is created and placed in
one of the following locations:
■
If a folder is selected, the item is placed in that folder.
■
If a mailbox is selected, the item is placed in the folder containing that mailbox.
■
If nothing is selected, the new folder or mailbox is created root level of the “mail
folder” within the Eudora Folder. See “Eudora Folders” on page 311 for details.
2
Type the new name into the name box.
3
Press Return or Enter or click outside the name box. If you like, drag the new mailbox
or folder into another folder.
The new mailbox or folder is added to the Mailbox and Transfer menus.
Renaming a Mailbox or Mail Folder
To rename a mailbox or mail folder, do the following:
1
Click the name for the item. After a short pause, the name is highlighted for editing.
2
Type in the new name and press Return or Enter or click outside the name box. Press
the Esc key (Escape) to cancel the rename.
Note. You cannot rename the Eudora Folder or the In, Out, or Trash mailboxes.
Moving a Mailbox or Mail Folder into Another Folder
To move a mailbox or mail folder into another folder, do the following:
■
Choose the item you want to move and drag it to where you want it. If you drag it over a
closed folder, the folder opens so you can see its contents. It closes when you drop the
item or you drag it above the folder or out of the window.
To move a mailbox or mail folder into the root folder, do the following:
■
Drag it to the Eudora Folder at the top of the list.
Note. You cannot move the Eudora Folder or the In, Out, or Trash mailboxes.
QUALCOMM Incorporated
123
Working with IMAP Mailboxes
Eudora User Manual
Moving Messages from One Mailbox to Another
To transfer an open message into a mailbox in the Mailboxes window, do the following:
■
Grab the open message by the Tow Truck icon
in the upper right corner of the
message window and drag it to the mailbox, dropping it when the mailbox is highlighted.
You can also drag one or more selected message summaries from an open mailbox
window to a mailbox in the Mailboxes window, dropping them when the mailbox is highlighted.
If you drag messages over a closed folder, the folder opens so you can see its contents. It
closes when you drop the messages or you drag them above the folder or out of the
window.
Deleting a Mailbox or Mail Folder
To delete a mailbox or mail folder, do the following:
1
Choose the mailbox you want to remove.
2
At the bottom of the Mailboxes window, click the Remove button
or press
the Delete key on your keyboard. A dialog appears asking you to confirm the deletion.
3
To delete the item, click Remove It.
If you selected more than one mailbox or mail folder, you are prompted to delete each
selected item. Click Remove It to delete the items one at a time or click Remove All to
remove all of them without further prompts.
If you choose to remove a mailbox in which messages are still stored or a folder in which
other mailboxes or folders are stored, all the messages, mailboxes, and folders contained
within the selected mailbox or folder are also removed.
Note. You cannot remove the Eudora Folder or the In, Out, or Trash mailboxes.
Items removed from the Mailboxes window are also removed from the Mailbox and
Transfer menus. They are moved to the Finder’s Trash and can be recovered before
emptying the Trash.
Working with IMAP Mailboxes
IMAP mailbox management is similar to POP mailbox management. The differences are
due mainly to the fact that all IMAP mailboxes and folders are stored on the IMAP server
rather than on your Macintosh. In other words, your IMAP mailboxes are managed
remotely rather than locally.
Note. You may find that some mailboxes on your IMAP server were created by others and
made accessible to you. You may have both “read and write” permission for some of these
mailboxes; that is, not only can you read the messages stored in them, but you can also
change or delete these messages. But for other such mailboxes you may only have “read”
QUALCOMM Incorporated
124
Eudora User Manual
Working with IMAP Mailboxes
permission; that is, you can read the messages in them, but you cannot change or delete
them. Find out from your email administrator or your ISP what particular permissions you
have for such mailboxes that you share with others.
Using the Mailboxes Window with an IMAP Account
Following are important IMAP-related items to keep in mind when working with IMAP mailboxes and folders in this window:
■
Each IMAP personality has its own top-level folder, also called a “root folder,” in the
Mailboxes window. The name of the folder is the personality name associated with the
personality. All POP personalities, on the other hand, are kept under one root folder,
called the “Eudora Folder” by default.
■
After your first mail-check for your IMAP account, you will see an In box under that
account’s root folder in this window. The In box is the assigned In mailbox for all new
messages coming into your IMAP account. Each IMAP account has its own In box.
■
IMAP folders may be given a unique icon to distinguish them from POP folders
because IMAP folders may contain not only mailboxes and other folders, but also
messages. (POP folders can contain mailboxes and other folders but not messages.)
■
To show or hide the contents of an IMAP folder in the Mailboxes window, click the
triangle button next to the folder icon, as you would with POP folders. However,
double-clicking on an IMAP folder opens the folder as a mailbox, so that you can view
the messages contained in the folder. (Double-clicking on a POP folder, by contrast,
shows or hides the folder contents in the window.)
■
If the incoming mail server for at least one of your personalities is an IMAP server, then
an additional button appears at the bottom of the Mailboxes window, the “Refresh”
button. This button is used to update the list of IMAP mailboxes and folders for one or
more of your IMAP accounts. See “Refreshing Your List of IMAP Mailboxes and
Folders” on page 128.
■
When moving mailboxes in the Mailboxes window via drag-and-drop, you cannot drag
a mailbox from one IMAP account to another. You can drag a mailbox to a different
folder within the same IMAP account.
Using the Mailbox and Transfer Menus with an IMAP Account
Use of the Mailbox and Transfer menus is generally the same in this case. Following are
important IMAP-related points to keep in mind.
■
The root folder for an IMAP account is listed at the bottom of the Mailbox and Transfer
menus after POP items. A separator separates the POP section from the IMAP
section. Remember that the name of a root IMAP folder is the personality name for that
account. If you have more than one IMAP personality, each one is represented at the
bottom of the menus. Each root folder menu item has its own submenu that lets you
access the remaining folders and mailboxes in that account.
■
After your first mail-check for an IMAP account, an In box mailbox item is added to that
IMAP submenu on the Mailbox and Transfer menus. The In mailbox is the assigned In
box for all new mail coming in to your IMAP account. Each IMAP account has its own In
box.
QUALCOMM Incorporated
125
Working with IMAP Mailboxes
Eudora User Manual
■
Each IMAP submenu under the Mailbox and Transfer menus contains a “New”
command for creating new mailboxes in the account. See “Creating New IMAP Mailboxes and Folders” on page 126.
■
IMAP submenus under the Mailbox and Transfer menus may have a command called
“This Mailbox.” Selecting this command opens the containing IMAP folder as a mailbox,
so you can view the messages contained in that folder. Unlike POP folders, IMAP
folders may contain not only mailboxes and other folders, but also messages.
Creating New IMAP Mailboxes and Folders
Creating an IMAP personality adds a root IMAP folder to your mailbox and folder structure.
The root folder carries the name of the personality and is available on the Mailbox and
Transfer menus and in the Mailboxes window. You can now create new mailboxes and
folders under that root IMAP folder.
To create new IMAP mailboxes and folders, use the same methods as you do with POP as
follows:
■
On the IMAP submenu under the Mailbox and Transfer menus, choose New. Or click
New Mailbox or New Folder buttons at the bottom of the Mailboxes window. The Mailboxes window is found under the Window menu.
When you create new IMAP mailboxes and folders, these items are added to the Mailbox
and Transfer menus and to the folder structure in the Mailboxes window. See the following
example of IMAP mailboxes and folders.
Example of IMAP Mailbox and Folder structure
For more information on these mailbox and folder creation methods, see “Working with
Mailboxes” on page 111. Following is information about IMAP mailbox and folder management.
■
If an IMAP folder is selected in the Mailboxes window when you click the New Mailbox
or New Folder button, Eudora creates the new mailbox or folder inside the selected
folder.
QUALCOMM Incorporated
126
Eudora User Manual
■
Working with IMAP Mailboxes
When you create a new IMAP mailbox or folder, the mailbox list is refreshed for that
IMAP account, and is updated in the Mailboxes window and on the Mailbox and
Transfer menus. (See “Refreshing Your List of IMAP Mailboxes and Folders” on page
128.)
Note. You can drag mailboxes and folders into other folders within the same IMAP
account, but you cannot drag IMAP mailboxes and folders into a folder in a different
IMAP account.
■
Renaming IMAP mailboxes and folders is the same as POP. See “Renaming a Mailbox
or Mail Folder” on page 123.
■
Moving an IMAP mailbox or folder into another folder is the same as POP. See “Moving
a Mailbox or Mail Folder into Another Folder” on page 123.
■
Removing IMAP mailboxes and folders is the same as the POP. See“Deleting a
Mailbox or Mail Folder” on page 124.
If you choose to remove a mailbox in which messages are still stored, or a folder in
which other mailboxes, folders, or messages are stored, then all the messages, mailboxes, and folders contained within the selected mailbox or folder are also removed.
Here’s what happens when you remove an IMAP mailbox or folder.
■
The item is deleted from the IMAP server.
■
The item is removed both from the Mailboxes window and from the Mailbox and
Transfer menus.
Note. Unlike with POP items, deleted IMAP items cannot be recovered. In particular,
they are not moved to the Finder’s Trash.
■
The mailbox list is refreshed for that IMAP account, and is updated in the Mailboxes
window and on the Mailbox and Transfer menus. (See “Refreshing Your List of
IMAP Mailboxes and Folders” on page 128.)
Important. You cannot delete a root IMAP folder for removing IMAP mailboxes and
folders because you will be deleting a personality.
Resynchronizing an IMAP Mailbox or Folder
If you have a computer at work, another at home, a third at school, and a laptop when you
travel and if you use IMAP for your incoming mail, your IMAP mailboxes and folders need
to be resynchronized. For example, you have just one mailbox in your IMAP account, an In
box, where you receive all your mail. You check for mail, which results in new messages
being transferred to the In box. Then you go to another computer and delete some of the
messages in your In box. Then you go to a third computer and change the status of some
of the messages in your In box. By performing different functions to your IMAP In box from
several computers, you now need to resynchronize the In box. Resynchronization updates
all operations performed on the mailbox from all computers that have access to the
mailbox. In fact, in some cases, other users might be able to access your mailboxes (or at
least some of them), which adds an additional variable of change to the equation.
Resynchronization is done on a mailbox-by-mailbox basis. You can also resynchronize an
IMAP folder as a mailbox if it contains messages.
To resynchronize an IMAP mailbox, do one of the following:
QUALCOMM Incorporated
127
Working with IMAP Mailboxes
Eudora User Manual
■
Open the IMAP mailbox, either by choosing it from the Mailbox menu, or by
double-clicking its icon in the open Mailboxes window (from the Window menu). To
open an IMAP folder as a mailbox, choose This Mailbox from the folder’s submenu on
the Mailbox menu, or double-click the folder icon in the open Mailboxes window.
■
Check mail for the IMAP personality, that is, open the Personalities window from the
Window menu, chick the IMAP personality icon, and click the Check Mail button
. Alternately, if the personality is configured in the Personalities settings
dialog to check mail during manual or automatic mail checks, choose Check Mail from
the File menu or simply wait for the next automatic mail check.
When you resynchronize a mailbox, its contents are completely updated according to all
operations that have been performed on the mailbox from all computers that have access
to it.
Refreshing Your List of IMAP Mailboxes and Folders
Resynchronization deals with changes at the message level, coordinating all changes
made to the messages in a particular mailbox from any number of different computers.
Refreshing deals with changes at the mailbox and folder level, coordinating all changes
made to the list of mailboxes and folders for that particular IMAP account, from any
number of computers, as mailboxes and folders are added, deleted, renamed, and otherwise changed.
Because the mailboxes and folders in your IMAP account are stored remotely, on the
IMAP server, you can change any of these from other computers, and other users who
have access to these items can change them as well.
The Mailboxes window does not reflect the “real-time” status of the mailbox and folder list
for your IMAP account(s), and between mail checks, a disparity can grow between what
appears in a particular IMAP list and what is actually on that IMAP server, as new mailboxes are added to the account and existing ones are changed or removed.
To refresh the list of mailboxes and folders for one or more of your IMAP accounts, so that
the Mailboxes window (and the Mailbox and Transfer menus) displays the latest update of
what is actually on each IMAP server.
To refresh the mailbox or folder list for one IMAP account, do the following:
1
From the Window menu, choose Mailboxes. The Mailboxes window opens.
2
Click the icon of the root IMAP folder whose list of items you want to refresh.
3
At the bottom of the Mailboxes window, click the Refresh button
list of mailboxes and folders for the selected IMAP account.
to refresh the
Note. The Refresh button appears only if you have IMAP mailboxes set up.
To refresh the mailbox and folder lists for all of your IMAP accounts at once, do the
following:
1
From the Window menu, choose Mailboxes. The Mailboxes window options.
2
Without making any selections, press the Option key and click the Refresh button
.
QUALCOMM Incorporated
128
Eudora User Manual
Working with IMAP Mailboxes
When you refresh the list for an IMAP account, the list of mailboxes and folders is updated
according to what actually appears on that account’s IMAP server at that time. The
Mailbox and Transfer menus are also updated to show the current IMAP mailbox and
folder hierarchy.
Creating and Using IMAP Trash Mailboxes
Eudora gives you the option to create a Trash mailbox on the remote IMAP server corresponding to your IMAP account. You can do this for each IMAP account you have. Keeping
a Trash mailbox on your IMAP server lets you manage your discarded IMAP messages
exactly the way you would manage messages in a local (POP) Trash mailbox. To do this,
you must turn on the Use a trash mailbox on the IMAP server option in the Personality
Extras settings dialog.
Without a Trash mailbox on the IMAP server, you must mark messages for deletion and
then remove them on a mailbox-by-mailbox basis. See the next section “Deleting
Messages from the IMAP Server.”
Usually, the Use a trash mailbox on the IMAP server option is already turned on by default.
However, to turn on this feature and use a Trash mailbox on the IMAP server for one of
your IMAP accounts, do the following:
1
From the Special menu, choose Settings.
2
Scroll through the Settings category list and choose Personality Extras. The Personality Extras settings dialog appears.
3
From the Personality popup, choose your desired IMAP personality.
4
Check the Use a trash mailbox on the IMAP server box to turn it on.
5
To save your changes and close the Settings dialog, click OK.
The first time you delete or transfer a message from a mailbox in that IMAP account,
Eudora will try to create a trash mailbox on that server. If it fails, Eudora will prompt you to
choose a trash mailbox manually. Just choose the New command under the IMAP
submenu of the mailbox selection menu to create a new mailbox to be used as the Trash
mailbox on that IMAP server.
You can empty the trash in one of three ways:
■
By choosing Empty Trash from the Special menu empties your local (POP) Trash
mailbox along with any remote (IMAP) Trash mailbox for any IMAP server you’ve
connected to recently.
■
By pressing the Option key and choosing Empty All Trash Mailboxes from the Special
menu empties both the local (POP) Trash mailbox and all IMAP Trash mailboxes you
have created on the IMAP servers for your IMAP accounts.
■
By pressing the Shift key and choosing Empty Local Trash Mailbox from the Special
menu empties the local (POP) Trash mailbox only.
When you empty an IMAP Trash mailbox, the messages in the mailbox are completely
removed from both your computer (the corresponding cache folder in the IMAP Folder)
and the IMAP server.
QUALCOMM Incorporated
129
Working with IMAP Mailboxes
Eudora User Manual
Note. If the Empty Trash on Quit option is turned on in your Miscellaneous settings (see
“Miscellaneous” on page 276), when you quit Eudora, your local (POP) Trash mailbox is
emptied, along with any remote (IMAP) Trash mailboxes for any IMAP account whose
server you have been recently connected to. That is, the Empty Trash on Quit option and
the Empty Trash command from the Special menu do the same thing.
QUALCOMM Incorporated
130
Organizing Your Messages
Deleting Messages
As a safeguard against inadvertent deletions, two steps are used to delete a message
from your Macintosh: first you put the message in the Trash, then you empty the Trash.
POP Procedure
To put a message in the Trash, do the following:
1
Select the message.
2
From the Message menu, choose Delete, or from the Transfer menu, choose Trash.
Also, you can just press the Delete key or click the Delete button on the main toolbar.
The message is transferred to the Trash mailbox.
To delete the messages in the Trash mailbox (removing them permanently from your
Macintosh), do the following:
■
From the Special menu, choose Empty Trash.
To delete a message permanently without sending it to the Trash first, do the following:
1
Select the message.
2
Hold down the Shift and Option keys, and from the Message menu, choose Nuke (or
use any of the delete options).
Warning: You cannot undo a Nuke operation!
If you delete or nuke a message that has an attachment, the attachment is moved to Trash
on your desktop. However, the Trash attachments with messages option must be checked
in the Attachments settings, found in Settings from the Special menu. The attachment
must be in your Attachment Folder (or the folder you’ve designated to receive attachments). For this to happen, see “Automatically Deleting Attachments” following this
section. For more information on the attachment settings, see “Attachments” on page 255.
You can set up Eudora to warn you if you try to delete unread, queued, or unsent
messages. To do this, turn on these options in the Extra Warnings settings found in
Settings under the Special menu. See “Extra Warnings” on page 272.
Quitting Eudora empties the contents of the Trash mailbox when the Empty Trash on Quit
option is turned on in the Miscellaneous settings, found in Settings from the Special menu.
See “Miscellaneous” on page 276.
Finally, if you want to delete just a few messages from the Trash mailbox, do the following:
1
Open the Trash mailbox.
2
Select the desired messages.
QUALCOMM Incorporated
131
Deleting Messages
Eudora User Manual
3
From the Message menu, choose Delete or press the Delete key. Deleting a message
from the Trash removes it completely from your computer.
IMAP Procedure
If you have the Use a trash mailbox on the IMAP server option turned off, all new
messages are delivered to your IMAP server and are kept there until you manually delete
them.
Also, whenever you retrieve a message, either in part or in full, from the IMAP server to
your computer, either during a mail check or through another activity that retrieves
messages, a copy of the message is kept on the IMAP server until you manually delete it.
Therefore to delete an IMAP message, you must delete it from the IMAP server. To delete
messages, you must perform two steps:
■
Mark the message for deletion.
■
Remove all messages marked for deletion from a mailbox.
To Mark a Message for Deletion
To mark a message for deletion, do the following:
1
Option the IMAP mailbox or folder containing the message.
2
Select the message summary in the mailbox or open the message.
3
From the Message menu, choose Delete or click the Delete toolbar button
.
Also, in an open message, from the Message menu, choose Change then Server
Options submenus, then choose Mark as Deleted.
Also, after selecting a message summary, press the Delete key or hold down the
mouse button on the Server Status column, and choose Mark as Deleted from the
popup menu.
The following indicates that an IMAP message has been marked for deletion.
■
A check mark appears next to the Mark as Deleted command when the message is
open or selected.
■
A hollow diamond appears next to the Mark as Deleted option on the Server Status
column popup for the selected message.
To Unmark a Message for Deletion
If you mark an IMAP message for deletion and then change your mind, you can unmark
the message so that it won’t be deleted from the IMAP server. You must unmark the
message before you perform an operation that removes all messages marked for deletion.
To unmark an IMAP message that is marked for deletion, first open the IMAP mailbox or
folder containing the message, then do one of the following:
■
Open the marked message and choose the Message menu, then choose Mark as
Deleted from the Change then Server Options submenus.
QUALCOMM Incorporated
132
Eudora User Manual
■
Automatically Deleting Attachments
Select the message summary for the marked message, hold down the mouse button
on the Server Status column and again choose Mark as Deleted from the popup
menu.
The check mark next to the Mark as Deleted command is removed for the open or
selected message, and the hollow diamond next to the Mark as Deleted option on the
Server Status column popup is also removed for the selected message.
To Remove All Messages Marked for Deletion
To remove all messages marked for deletion in a particular IMAP mailbox, open the
mailbox and then do one of the following:
■
In the message summary list, click the mailbox size display button
.
■
Press the Option key and from the Special menu, choose Remove Deleted Messages
(normally the Empty Trash command).
When you do either of the above actions, all messages marked for deletion in that mailbox
are permanently removed from the mailbox. They are completely removed both from the
IMAP server and from your computer.
Caution. Once you remove marked messages using the above methods, these messages
are completely gone and cannot be recovered.
Automatically Deleting Attachments
When you delete messages, you can have their attachments automatically deleted as
well. You need to turn an option on in the Attachments settings dialog.
1
From the Special menu, choose Settings.
2
Scroll through the category icons and choose Attachments.
3
In the Attachments settings dialog, turn on the Trash attachments with messages
option.
Be sure the attachments are still in the Attachment Folder (or the folder you have specified
for attachments). If you have this option on and you want to delete a message but save its
attachment, move the attachment into another folder before deleting the message.
Transferring Messages
You can transfer messages freely between mailboxes. There are several ways to do this.
■
Use the Transfer menu.
■
Drag a message summary to an open mailbox.
■
Drag an open message’s Tow Truck to an open mailbox.
■
Drag a message to a mailbox button on the main toolbar.
■
Drag a message to a mailbox icon in the Mailboxes window (see “Using the Mailboxes
Window” on page 121).
QUALCOMM Incorporated
133
Transferring Messages
Eudora User Manual
To put a copy of a message in another mailbox (instead of transferring the message), hold
down the Option key and use one of the transfer options above. This is useful if you want
to file a message in more than one mailbox.
If you try to transfer a message to the Out mailbox, an alert appears informing you that
some header information may be removed from the message during transfer. Click Yes to
transfer the message.
Important. Don’t forget to clean out your Out mailbox occasionally to increase your
system performance.
Note. You can undo mailbox transfers, one at time, using the Undo command from the Edit
menu.
Using the Transfer Menu
The Transfer menu is one way to transfer messages between mailboxes. With a current
message open, or message summaries selected, select a mailbox from the Transfer
menu. The messages are transferred from their previous mailbox to the mailbox you
selected.
Dragging Messages
You can drag messages from one mailbox to another using the message summaries or
the Tow Truck icon
in an open message window.
To drag a message summary to another mailbox, do the following:
1
Select the message summary (or summaries).
2
Place the cursor over the summary, and hold down the mouse button. The cross
pointer will change to an arrow.
3
Drag the summary into:
■
Any open mailbox window, or
■
Onto a main toolbar mailbox button you have created (see “Customizing the Main
Toolbar (Sponsored and Paid modes only)” on page 305), or
■
Onto a mailbox icon in the open Mailboxes window (see “Using the Mailboxes
Window” on page 121).
When you release the mouse button, the message is transferred.
Note. You can drag a message summary to the Finder to create a new mailbox. Do this if
you want to back up or transfer your mailboxes. Also, if you drag a message summary to a
composition window, the sender’s address will be inserted into the recipient field in which
you drop the summary.
To drag an open message to another mailbox, do the following:
1
Hold down the mouse button over the Tow Truck icon
2
Drag the message into:
.
QUALCOMM Incorporated
134
Eudora User Manual
Filtering Messages
■
Any open mailbox, or
■
Onto a main toolbar mailbox button you have created, or
■
Onto a mailbox icon in the open Mailboxes window.
When you release the mouse button, the message is transferred.
Creating a Mailbox or Folder During Transfer
To create a mailbox and transfer the current message into it at the same time, do the
following:
■
From the Transfer menu, choose New instead of the name of the mailbox. The New
Mailbox dialog appears.
New Mailbox dialog
You can create a new mailbox or mail folder (for details, see “Creating Mailboxes and
Folders” on page 120). When you are done, the current message is transferred into the
new mailbox.
Filtering Messages
Note. If you are using Eudora in Light mode, you have limited use of the Filters feature in
Eudora.
Many of the email management functions in Eudora can be done automatically using
filters. For example, you can automatically reply to a request for information, transfer all
the messages from your children into a Personal mailbox, and label all the messages from
your customers as “Hot.”
A filter can be thought of as a personal secretary that takes your mail and does certain
things to it that you specify. One kind of filter might watch for particular mail from a mailing
list and move it into a mailbox, open the message, and play a sound. Another might look
for other kinds of mail and give it a label color, a high priority, a new Subject line, or have a
voice speak the name and subject of the message.
You can create as many of these filters as you like and give each of them from one to five
instructions on what to do with your mail that fits a certain set of criteria, based on information in the header of the message and the message body.
QUALCOMM Incorporated
135
Filtering Messages
Eudora User Manual
Quick and Simple Filters with the Make Filter Command
The simplest filters are those that transfer incoming messages to a particular mailbox
based on the sender of the message or one or more of the recipients. For example, each
time you check your mail, you may want to have Eudora take all of the incoming messages
it receives from your friend Joe and automatically transfer them into a mailbox you have
called “Mail from Joe.” To get Eudora to do this, you set up a simple filter.
If you are not familiar with filters, the Make Filter command provides an easy way to learn
how to use filters. Once you get comfortable with the simple filters created this way, you
can go on to make more complex, powerful filters using the Filters window. Professional
filter creators will find that the Make Filter command provides a rapid, convenient method
for making a simple transfer filter.
Also, the Make Filter command is good to use when you want to eliminate unsolicited
email messages (SPAM). Just create a simple filter that will move all messages from this
person or address right into the trash mailbox.
To open the Make Filter dialog, do the following:
1
Open an incoming or outgoing message containing the information you want in your
filter, or choose one or more message summaries in a mailbox.
2
From the Special menu, choose Make Filter. The Make Filter dialog appears.
Make Filter dialog
3
Choose a Match condition (see the following topic).
4
Choose an Action (described later in this section).
5
When finished, click Create Filter.
Match Conditions
The Match condition area of the dialog helps you set up the criteria that will determine
whether or not a particular message will get acted on by this filter.
QUALCOMM Incorporated
136
Eudora User Manual
Filtering Messages
You can specify what type of messages you are interested in filtering, incoming or
outgoing. You can also specify a manual filter. You can combine any of the three types of
filters: Incoming, Outgoing, and Manual.
Note. If you create the filter using messages in your Out box, Eudora automatically checks
if the Outgoing and Manual checkboxes are selected. If you create the filter using
messages in any other mailbox besides Out, Eudora automatically checks if the Incoming
and Manual checkboxes are selected.
■
Incoming—Select Incoming for this filter to act on incoming messages only, matching
the content you previously entered. The Incoming filter functions only after your
messages are downloaded from the server.
■
Outgoing—Select Outgoing for this filter to act on messages after you send them
matching the content you previously entered. The Outgoing filter functions only after
your messages are sent.
■
Manual—Select Manual when you want the filter to be executed when you choose the
Filter Messages command from the Special menu. Manual is checked by default.
Note. If you check Incoming or Outgoing (or both), the filter is automatic; that is, Eudora
performs the filter operation in the background automatically when you send or check mail.
If you also check Manual, the filter becomes both automatic and manual; that is, you can
now manually perform the filter operation as well, by choosing “Filter Messages” from the
Special menu while message summaries are selected in a mailbox window—but Eudora
still filters the messages during mail sends and checks automatically. In short, checking
Manual does not “turn off” Eudora’s automatic filtering for that filter. It just provides you
another option.
Note. Making a filter manual also gives you a good way to test the filter to your needs as
soon as you set it up, rather than having to wait until the next time you send or check mail.
After creating a manual filter, check to see that it works the way you intended by selecting
“Filter Messages” from the Special menu. Your open message or selected message
summaries are immediately filtered according to the new filter.
You can choose one of three content matches: From contains, Any Recipient contains, or
Subject contains.
■
From contains (the default)—Select to match the message against the From: field—
the sender—of the messages you selected. If you selected multiple messages, and
they do not have a common sender, this field is left blank. In either case you can edit
the field. The From: field of a target message must contain the information in this box
but does not have to exactly equal it.
■
Any Recipient contains—Select to match the message against any of the recipients
in the messages you selected (recipients are contained in the To: and Cc: fields and, in
an outgoing message, the Bcc: field). Choose one recipient from the popup list
(accessed from the arrow button next to the field), or edit the text in the field. Note that
the information you enter here must be contained in any of the recipient fields of the
target message, but does not have to exactly equal the recipient field.
■
Subject contains—Select to match the message against the Subject field of the
messages you selected. If you have selected multiple messages and they do not have
a common Subject, this field is left blank. In either case, you can edit the field. The
Subject line of a target message must contain the information in this box but does not
have to exactly equal it.
QUALCOMM Incorporated
137
Filtering Messages
Eudora User Manual
Note. If you select multiple messages with no common Subject, sender, or recipient,
Eudora displays a message informing you so, and Make Filter command performs no
function.
Action Area
The Action area lets you determine the one action that will be performed on messages
that satisfy the Match conditions you have specified for this filter. The three action choices
are all message-transfer actions; they transfer the filtered message to a mailbox. For
messages that satisfy your match conditions, your simple filter will, depending on your
selection here, transfer the messages to either a new mailbox, an existing mailbox, or your
Trash mailbox.
■
Transfer to new mailbox—Select to transfer the filtered message to a new mailbox
that you will specify. The text field is filled in with a suggested new-mailbox name based
on your selected content match condition (From, Any Recipient, or Subject). You can
change this name if you like. The mailbox will be created in your Mail Folder (in your
Eudora Folder under your Documents Folder), and it can later be moved using drag
and drop in the open Mailboxes window from the Window menu. The new mailbox is
created in your Mail Folder as soon as you create this filter.
■
Transfer to existing—Select to transfer the filtered message into one of your existing
mailboxes. Choose the mailbox using the button next to the field. When you click the
button, you can select a mailbox from the Transfer menu.
■
Delete Message (transfer to Trash)—Select to delete the message that satisfies the
filter match conditions by transferring it to your Trash mailbox. This feature is useful for
deleting unsolicited email.
Tip. If you frequently transfer messages to a certain mailbox manually, you may want to
automate the process. First, open the mailbox, select a few representative messages, and
select the Make Filter command from the Special menu. The Make Filter function then
creates a filter that matches the messages and transfers them to the mailbox of your
choice.
Make Filter dialog buttons
After you have set up your match conditions and filter action, click:
■
Create Filter (the default button) to create the filter. The filter is added to the bottom of
your filters list in the Filters window. The filter is available immediately and will act on
messages that satisfy the conditions at the next mail check, mail send, or selection of
the “Filter Messages” command from the Special menu.
■
Add Details to create your filter and also open the Filters window. There, you can add
additional information to specialize your new filter. The filter is added to the bottom of
your filters list and is immediately available in the form in which it was set up in the
Make Filter dialog. Any changes you make in the Filters window must be saved before
they become effective. See the following section “Detailed Filters with the Filters
Window” for more information on the Filters window.
■
Cancel to cancel the filter if you change your mind. The filter is cancelled and your
changes are not saved.
QUALCOMM Incorporated
138
Eudora User Manual
Filtering Messages
Detailed Filters with the Filters Window
In the Make Filter dialog, discussed previously, you can create quick, simple filters that
perform one operation—a mail transfer—based on one match condition—a piece of
header information. The Filters window lets you create more complex, powerful filters that
use multiple match conditions and perform multiple filter actions. Also, you can use the
Filters window to create simple filters such as those created by the Make Filter command.
Note. Filters are executed in the order that they appear in the filters window. You can drag
and drop filters to reorder them.
To open the Filters window to create or modify a filter, do the following:
1
From the Window menu, choose Filters or click the Filters window’s tab if it is part of a
visible tabbed window group. The Filters window appears, and any filters you have
created are listed on the left. For more information on how to manipulate the Filters
window alone and as part of a tabbed window, see “Managing Windows in Eudora” on
page 171.
Filters window with an example filter
2
To add a new filter, click New or to modify a filter, click an existing filter to select it.
3
Select the options for how you want the filter to be used: as an automatic filter to be
invoked on any Incoming and/or Outgoing mail, and as a Manual filter that can be
invoked when you choose Filter Messages from the Special menu. Any combination
of these options works.
4
Define the criteria for the filter: use the header item popup lists and the text fields to
specify which header items should include a particular string of text. You can define two
related terms for the criteria so that your filter is as specific as possible. For detains,
see “Filter Criteria – The Match Area (Filters Window)” on page 140.
5
Define the action(s) to be taken on messages that fit the criteria. For details, see “Filter
Actions” on page 142.
QUALCOMM Incorporated
139
Filtering Messages
Eudora User Manual
6
To save the filter, from the File menu, choose Save or by closing the Filters window
and clicking the Save button in the alert.
Filters are automatically named based on the first term of the criteria for the filter. You can
reorder them by dragging a filter up or down in the list. You can reorder your filters to indicate in what order you want your messages filtered, and grouping your filters will make
them easier to find.
Important. When reordering filters, remember that filters function from top to bottom. The
message will obey the first filter it encounters that fulfills its criteria. If a filter is created for
other criteria in this message and is placed below the initial filter, the second filter will be
ignored. For example, lets say you set up the first filter to transfer messages from your
boss to a certain mailbox. You set up another filter to transfer any messages concerning
an important project (in the Subject field) to another mailbox. If you receive a message
from your boss with the project’s name in the Subject field, the message will go to the
mailbox that your boss’ messages reside instead of the project’s mailbox.
When the filters are invoked (automatically or manually), each message is matched
against each filter in order from top to bottom. If the message meets a filter’s criteria, the
actions are done as specified until there are no more actions, then the message is
matched against the next filter. If at any point a “Transfer” or “Skip Rest” action is done,
nothing else is done with that message, and the next message is filtered.
Important. Actions also function from top to bottom. If a message’s criteria does not
match the first action, the action is skipped and the next one is invoked. Only a “Transfer”
or a “Skip Rest” action completes the filter’s function. A “Transfer to” implies a “Skip Rest.”
You can change the width of the filters list to create more or less space for your list. To do
this, put the mouse pointer over the separator line to the right of the list until the pointer
changes to a splitter cursor, then press and hold down the mouse button and drag the line
to the left or right.
Eudora places a small icon to the left of the filter in the list for some action you have
selected for that filter. These icons may be of different shapes, and they represent certain
actions you selected for this filter. Icons appearing to the right include the bullet, indicating
a Skip Rest (don’t filter this message any further); the right arrow, indicating a Transfer
action; and the right double-arrow, indicating a Copy action. Icons appearing to the left
include the dinosaur, which indicates that the filter has not been active for 30 days and
may not be needed anymore. Also, if the filter name is shown in color, it means you have
chosen a “Make Label” action in that filter and have selected that label color for the action.
Filter Criteria – The Match Area (Filters Window)
Note. See the section the “Quick and Simple Filters with the Make Filter Command” on
page 136 for details on the use of the Incoming, Outgoing, and Manual checkboxes in the
Filters window Match area.
Each filter can use one or two “terms” as its criteria, connecting them as appropriate with
the conjunction popup.
Header—Use this field to specify which message header items you want the filter to
search. You can choose an option from the popup menu or enter one yourself (this is
helpful if you want to use a header item that does not appear on the menu, such as
X-Priority).
QUALCOMM Incorporated
140
Eudora User Manual
Filtering Messages
The selections are as follows:
■
To:
■
Cc:
■
From:
■
Subject:
■
Reply-To:
■
«Any Recipient»
■
«Any Header»
■
«Body»
■
«Personality»
The «Any Recipient» option searches all possible recipient items (To:, Cc:, Bcc:); the «Any
Header» option searches all message headers (including hidden headers that are shown
with the BLAH BLAH BLAH option); the «Body» option searches the message body; and
the «Personality» option searches the name of the personality associated with the
message.
Use the “Match Type” popup to control how the header item is matched with the text string
in the text field.
Note. It’s better that you keep the contents of all fields as specific and brief as possible.
The greater the complexity, the less the likelihood of a match.
Carefully check the header you’re looking at in the match area of the filter.
The match options are as follows:
contains or does not contain—If the specified header item contains or does not contain
the text string, filter the message. It allows other text to surround the text string. Using
“contains” makes it easier to make a filter match.
is or is not—If the specified header item is or is not a complete match of the text string,
filter the message.
starts with or ends with—If the specified header item starts with or ends with the text
string, filter the message. The starts with item refers to the first non-whitespace character
after the colon, so any spaces after the colon are ignored.
appears or does not appear—If the header item appears or does not appear in the
message, filter the message (the text field is ignored). This is useful for filtering messages
based only on the types of fields they contain.
intersects nickname—The header field is broken into addresses that are matched
against the addresses and nicknames in the specified nickname. The user name and mail
host name must exactly match one of the nickname addresses.
Type the text string that you want the filter to search for into the text fields.
QUALCOMM Incorporated
141
Filtering Messages
Eudora User Manual
Note. Be sure not to enter a header label in the text field as part of the text string (e.g., To:,
From:, Bcc:). For example, to filter all messages from Bob, do not enter “From: Bob” in the
text field. Rather, choose ”From:” in the Header field, and enter simply “Bob” in the text
field.
Use the conjunction popup to link the two terms. The conjunction options are as follows:
ignore—Ignore the second term; if the message matches the first term, filter the
message.
and—If the message matches both the first and second terms, filter it.
or—If the message matches either term, filter it.
unless—If the message matches the first term, filter it unless the message also matches
the second term, in which case do not filter it. (This lets you exclude certain variations of
the first term.)
Filter Actions
All messages that match the filter criteria are acted on as specified with the Actions
popups. Each filter can do up to five things to a message that matches the criteria. You can
use the same action twice if it does not directly affect the original message. For example,
“Copy To” can be used twice, but “Transfer To” cannot.
The Actions options are as follows:
None—No action.
Make Status—Assigns the selected status to messages.
Make Priority—Assigns the selected priority level to messages. If you select a specific
level, messages are set to that priority. If you select Raise or Lower, messages are raised
or lowered one priority level (if possible) based on their pre-filter level.
Make Label (Sponsored and Paid modes only)—Assigns the selected label to messages.
Label colors and names for Macintosh labels (1 through 7) are set in the Finder’s Preferences dialog from the Edit menu on Mac OS 8.x systems, or in the Macintosh Labels
control panel on System 7.x machines. Label colors and names for the Eudora labels (8
through 15) are set in the Eudora Labels settings in Settings from the Special menu. See
“Eudora Labels” on page 264.
Make Personality (Sponsored and Paid modes only)—Assigns the selected personality to
messages. This action is intended mainly for incoming messages. When you receive an
incoming message that is filtered with this action, then any response you initiate to this
message from then on will be from the assigned personality, until you either change the
personality associated with the incoming message, or change the personality associated
with the individual response. For more information, see “Using Alternate Email Accounts”
on page 69.
Note. You can use the Make Personality filter action on outgoing messages. But since
filters are run after the mail is sent, only the copies of your message are assigned the
new personality; the original message is sent under the unchanged personality.
QUALCOMM Incorporated
142
Eudora User Manual
Filtering Messages
Make Subject—Assigns the new subject to messages. If you choose this option, the
entire subject of the message is replaced with the new subject. Use the “&” symbol to
stand for the old subject if you want to add the new subject to the old subject. For example,
entering “New Subject [was &]” results in “New Subject [was Old Subject]”.
Play Sound (Sponsored and Paid modes only)—Plays the selected sound when
messages are received.
Speak (Sponsored and Paid modes only)—When a message is received that matches the
filter criteria, your Macintosh “speaks” in the selected voice the name of the message’s
sender (Who) and/or the Subject.
Note. You must have Speech Manager version 1.4 or higher installed in your system
Extensions folder and enabled in order for this filter action to be available and to work.
Open (Sponsored and Paid modes only)—Opens the mailbox and/or message when a
message is received. If you set a previous action to filter messages into a mailbox, then
that mailbox is opened.
Print (Sponsored and Paid modes only)—Prints one copy of each message.
Notify User—Notifies you “As normal” and/or “In report” when messages are received.
The “As normal” option notifies you based on the options you have selected in the Getting
Attention settings in Settings from the Special menu (see “Getting Attention” on page 268).
The “In report” option notifies you by displaying a filter report that details what filter actions
have been performed.
Forward To (Sponsored and Paid modes only)—Forwards messages to the specified
email address(es). Forwarded messages are placed in the queue in the Out mailbox, and
sent the next time you send queued messages.
Note. Eudora will not redirect/reply/forward if the received message is Precedence:bulk or Precedence:list header. This avoids a mail loop.
Redirect To (Sponsored and Paid modes only)—Redirects messages to the specified
email address(es). Redirected messages are placed in the queue in the Out mailbox, and
sent the next time you send queued messages.
Reply With—Replies to messages with the selected stationery message. Replies are
placed in the queue in the Out mailbox and sent the next time you send queued
messages.
Tip. You can use this action to reply to specific senders with stationery telling them that
you are on vacation: “I’m out till the 10th. I’ll reply to your message when I get back.”
For more details, see “Creating an Auto-Reply (Sponsored and Paid modes only)” on
page 144.
Server Options (Sponsored and Paid modes only)—Sets the message’s server action to
“Fetch” and/or “Delete.” See “Managing Your Mail on the POP Server” on page 81.
Copy To—Copies messages to the selected mailbox.
Transfer To—Transfers messages to the selected mailbox.
QUALCOMM Incorporated
143
Creating an Auto-Reply (Sponsored and Paid modes only)
Eudora User Manual
Move Attachments—When a message is received that matches the filter criteria, it
places any attachments received with that message into a folder you specify, rather than
placing them in the default Attachment Folder as set in the Attachments settings (see
“Attachments” on page 255). A standard folder dialog appears that lets you choose where
the attachment files are to reside for this filter.
Tip.You can use this action to separate incoming attachments by personality. You can
move different attachments into different folders based on the personality that receives
them.
Skip Rest—This means “skip the rest of the filters in the filters list, after this one.” Stops
filtering for the message (the message is not matched to the rest of the filters in the filters
list).
The Last used field displays the date the filter was last used on a message. This, along
with the dinosaur icon (not used for 30 days), helps you identify filters that are no longer
useful and can be safely deleted.
Creating an Auto-Reply (Sponsored and Paid modes only)
You can create an email message that can be sent to people automatically when you are
on vacation or away from your computer. This message is called an auto-reply. You create
an auto-reply by using Eudora’s stationery and filter functions.
Note. Eudora will not redirect/reply/forward if the received message is Precedence:bulk or
Precedence:list header. This avoids a mail loop. Also, Eudora must be left running, and the
Save Password function must be active.
Before you create the auto-reply, make sure that the “Check for mail every _ minutes” (the
value you enter must be greater than 0) and “Send on check options” are turned on in the
Checking Mail options dialog. See “Checking Mail” on page 246.
Also, make sure you have entered your incoming mail server’s password for your current
session or have Eudora save your password.
To create an auto-reply, do the following:
1
2
3
Write your auto-reply message using Eudora’s Stationery functions. Once the
auto-reply message is written, name and save it as stationery. See “Using Stationery
(Sponsored and Paid modes only)” on page 64.
From the Window menu, choose Filters. The Filters window appears.
In the Match section, choose a header from the Header popup. Select a header that
matches the header in the messages to whom you want to send your auto-reply. <<Any
Recipient>> is the most common for an auto-reply.
Important. If you choose <<Any Recipient>>, all recipients including mailing list you
subscribe to will receive your auto-reply.
For example, to set an auto-reply only to messages sent to your user name, just select
<<Any Recipient>> then choose contains. In the text box, enter your user name. You
can match others as well, but it may cause a large number of messages to be
auto-replied to.
4
In the Action section, choose Reply with in the first popup.
QUALCOMM Incorporated
144
Eudora User Manual
5
6
Sorting Messages
In the text box to the right of the first popup, enter the name of the stationery.
Click OK. The stationery message you created will be sent to the people you indicated
in this filter.
Important. Remember to delete this filter when you want your auto-reply message to stop.
Also, if you are gone for an extended period of time, it would be better to set up an
auto-reply on the server. Ask your email administrator or ISP for more information.
Sorting Messages
When you check your mail and new messages come in to your In box, or are filtered out of
the In box and into other mailboxes, the new messages are placed in their mailboxes in the
order in which they arrive. By default, these new messages are added to the bottom of the
message summary list in the mailbox window. Note that this is not necessarily strict date
order, since occasionally messages may arrive out of date order.
Similarly, when you transfer messages to another mailbox, then by default those
messages are added to the bottom of the message summary list in that mailbox.
You can sort the messages in any open mailbox to organize them in order according to
one of the column attributes (such as Date).
To sort the messages in an open mailbox window, do the following:
1
From the Special menu, choose Sort, The Sort submenu appears.
2
Choose the name of the column you want the messages sorted by.
Special menu and Sort submenu
You can perform complex sorting by holding down the Shift key and sorting by another
mailbox column. The original sort remains intact, but it is now grouped with the new selection. For example, if the mailbox is sorted by Sender with each group of messages in order
by Date, and then you hold down the Shift key and sort by Size, the messages are still
grouped by Sender but the groups are now in order by Size.
QUALCOMM Incorporated
145
Saving a Message to a File
Eudora User Manual
The normal sort order is ascending, which means from bottom to top. Ascending Date
order, for example, means that the newest messages are at the bottom and the oldest
messages are at the top. To sort in descending order—top to bottom—hold down the
Option key and select a sort option from the Sort Descending submenu under the Special
menu.
To keep messages with the same Subject together all the time, do the following:
1
From the Special menu, choose Sort. The Sort submenu appears.
2
From the Sort submenu, choose Group Subjects. If this is checked, messages with
the same Subject, for example, conversational “threads,” including replies, are kept
together in the mailbox regardless of whether you sort by Date, Sender, etc. A bullet
next to the Subject column heading tells you that the Group Subjects option is active.
Sorting by a column makes the column’s heading button look pressed. Incoming mail that
arrives in a mailbox with a (pressed in column heading button is automatically sorted by
that column, subject to the restrictions above. For example, if a mailbox is sorted by
Sender and a new message comes in from Bob, it will be grouped with other messages
from Bob.
Note. Click once on a column heading button to sort the messages in that mailbox by that
column and also turn on automatic sorting by that column for new messages that come
into the mailbox. Click the button twice to sort the column but turn off automatic sorting by
that column for new messages that come into the mailbox.
Saving a Message to a File
You can save one or more messages (incoming or outgoing) to a separate text file on your
computer.
To save a message to a file, do the following:
1
Open or select the messages(s) you want to save to text.
2
From the File menu, choose Save As. The Save As dialog appears, letting you choose
a name and location for the file.
Save As dialog (incoming messages)
QUALCOMM Incorporated
146
Eudora User Manual
Saving a Message to a File
Note. If you are saving messages from your Out box, the Stationery option and the Go
To Stationery Folder button also appear in this dialog.
3
4
Enter the name you want to give the text file, and select the appropriate options.
■
Guess Paragraphs— Removes extraneous carriage returns from each message
leaving returns only at the ends of paragraphs, and also converts multiple spaces
into tabs.
■
Include Headers— Retains each message’s header information in the saved document. If this is not checked, only the body of each message is saved.
■
Stationery— Saves the outgoing message(s) as a stationery file. Clicking Stationery deactivates the other two checkboxes (regardless of their settings) and activates the “Go To Stationery Folder” button. Click Go To Stationery Folder to save
the stationery file in your Stationery Folder, normally kept in your Eudora Folder
(under your System or Documents Folder). See “Using Stationery (Sponsored and
Paid modes only)” on page 64 for more details.
Once you have made all of your choices, click the Save button.
Note. If an Unread ( ) incoming message is saved to a file, its status changes to Read
(blank), regardless of whether the message was opened.
If you select multiple messages from a mailbox window and choose “Save As” from the
File menu, all of the messages are saved to a single file. (If you save multiple Out box
messages to a stationery file, you may need to edit the file by removing extraneous
headers and other text from the stationery template.)
Choosing an Application for Saved Messages
When you save a message to a file using the “Save As” command from the File menu, the
new text file is formatted as basic ASCII text in a Macintosh document. The document type
is determined by the program you select using the “TEXT files belong to” option in the
Attachments settings.
Note. Out box messages saved to a stationery file are saved in Eudora format and are not
affected by this setting.
To specify the application to use for saved messages, do the following:
1
From the Special menu, choose Settings.
2
Scroll through the Settings category icons and choose Attachments. The Attachments
settings dialog appears.
3
In the TEXT files belong to option near the bottom of the settings dialog, click the
button. A standard file dialog appears.
4
Using this dialog, search through your disk to locate the desired application (probably
your favorite word processing program).
5
Select the application and then click Open.
The selected application appears in the TEXT files belong to button, as shown in the
following figure.
QUALCOMM Incorporated
147
Saving a Message to a File
Eudora User Manual
Attachments settings dialog showing the selected application
QUALCOMM Incorporated
148
Finding and Searching
Note. If you are operating Eudora in Light mode, you will have limited functionality when
using Eudora’s Finding and Searching features.
In Eudora, performing a Find operation means searching for a word, a phrase, or any other
string of text in an open message window or other single window that is currently on top.
To perform a Find, you use the Find commands under the Find submenu from the Special
menu. You also optionally use the Find dialog.
Performing a Search operation means searching through some or all of your mailboxes
and mail folders for messages that satisfy a certain search criteria. The result is one or
more messages containing the information you are looking for, or having certain characteristics you are looking for (such as being sent later than a certain date). To perform a
Search, you use the Search commands under the Find submenu from the Special menu,
and you use a Search window.
Special menu displaying the Find submenu
Find
Search
Finding Text in the Current Window
Using the commands found under the Find submenu, you can find a word or a string of
text in any of the following windows, provided that window is currently open and on top:
■
Message window (incoming or outgoing)
■
Text document window
■
Signature file window
■
Stationery message window
■
Mailbox window (message summaries and preview pane)
■
Search window (Mailboxes pane, and Results pane following a successful search)
■
Tool windows (from the Window menu):
QUALCOMM Incorporated
149
Finding Text in the Current Window
Eudora User Manual
– Address Book
– Directory Services window
– Filters window
– Mailboxes window
– Personalities window
– Signatures window
– Stationery window
You can find additional occurrences of the same word or text string in the current window
by choosing the Find Again command in the Find submenu.
You can change the text to be found “on the fly,” using a selected word or text string, so
that you can continue looking for different text in the same window. Just choose Enter
Selection from the Find submenu.
You use the Find dialog and the Find submenu commands to perform these operations.
The Find commands each have keyboard shortcuts that make finding text in an active
window quick and convenient.
Finding a Word or Text String in the Current Window
To find a word or text string in the current window, do the following:
1
Open the window in which you want to find the text.
2
From the Special menu, choose Find or press Command+F. The Find submenu
appears.
3
From the Find submenu, choose Find. The Find dialog appears.
Find dialog with sample text
4
In the Find: field, type the text you want to find.
5
To find text as a complete word instead of part of another word, click Whole word. For
example, if you’re looking for the word “guard,” “guard” would be accepted but the word
“guardian” would be rejected.
6
If you want an exact match of uppercase and lowercase letters, click Match case. For
example, if you’re looking for the word “PureVoice,” the Match case option would reject
the word “purevoice.”
7
Once you’ve entered the text string and set your options, click Find in the dialog.
QUALCOMM Incorporated
150
Eudora User Manual
Finding Text in the Current Window
Eudora looks for the first (or next) instance of your specified text in the currently open
window, beginning at the current insertion point. If a match is found, the text is highlighted
and the window is scrolled to that text if necessary. If no match is found, the “not found”
alert appears.
Finding the Next Occurrence of Text (Find Again)
You can use the “Find Again” command to find the next occurrence of a word either in an
open message or in a message summary in an open mailbox.
To find the next occurrence of a word within an open message or mailbox, do the following:
1
Open the window or mailbox in which you want to find the text, or bring it to the front of
all windows.
2
From the Special menu, choose Find. The Find submenu appears.
3
To enter text, choose Find. The Find dialog appears.
4
To find the same text, choose Find Again from the Find submenu or press
Command+G.
Eudora looks for the next occurrence of the specified text in the currently open window. If a
match is found, the text is highlighted and the window is scrolled to that selection if necessary. If no match is found, the “not found” alert appears.
You can keep choosing Find Again or pressing Command+G to find additional occurrences of the text in the current window or mailbox. When Eudora reaches the end of the
window or mailbox, it will wrap to the beginning of the window to continue looking for the
text.
You can also keep looking for additional occurrences of the text in the current window by
repeatedly clicking the Find button in the open Find dialog.
Note. When you close the Find dialog, its contents are saved until you quit Eudora.
Changing the Find String to the Selected Text (Enter Selection)
You can change the text you’re looking for without opening the Find dialog or bringing it to
the front. Just do the following:
1
In any open Eudora window, select the text you want to use for your Find operation.
2
From the Special menu, choose Find then Enter Selection or press the Command+=
shortcut.
The selected text is entered into the Find field of the Find dialog replacing any text that
is already there. This operation is performed whether the Find dialog is currently closed
or open.
3
If the window in which you want to find the text is not already the on the top window,
bring it to the front now (or open it).
4
Click Find in the Find dialog if it’s open, or from the Special menu, choose Find then
Find Again (Command+G).
QUALCOMM Incorporated
151
Finding Text in the Current Window
Eudora User Manual
Eudora looks for the next occurrence of your new text in the currently open window. If a
match is found, the text is highlighted and the window is scrolled to that selection if necessary. If no match is found, the “not found” alert appears.
You can keep changing the text to be found so you can look for different items in the same
window without having to open the Find dialog or bring it to the front. The shortcuts prove
especially handy for rapid finding.
Note. The “Enter Selection” command does not change the “Whole word” and “Match
case” settings in the Find dialog. If you want to change those options for your next Find,
you must make those changes directly in the Find dialog.
Stopping a Find
Although Find operations are usually so fast that you likely won’t have time to stop it, if you
ever need to stop a Find, press the Escape key (Esc), or press Command+. (period).
Text Considered in a Find Operation
When you use the “Find” or “Find Again” command in a current window, Eudora will look
through the following text depending on what kind of window it is.
■
Message window — All visible header text and all body text in an incoming message.
All header and body text in an outgoing message. (To look for text in the normally
hidden headers of an incoming message, turn on the “Blah Blah Blah” icon on the icon
bar.)
■
Text document window — All text in the window
■
Signature file window — All text in the window (i.e., the contents of the signature file)
■
Stationery message window — All text in the headers and body of the stationery
message
■
Mailbox window — If the cursor is currently in the message summary list, then all text
in the Who and Subject columns of the message summaries. (Eudora highlights the
entire message summary if the Find is successful.) If the message preview pane is
visible, and a message is currently being previewed, and keyboard focus is currently in
the preview pane, then all text in the headers and body of the message being
previewed. (This discussion also applies to the results in the Results pane of the
Search window following a successful search.)
■
Tool windows (accessed from the Window menu):
– Address Book — All text in all text fields of the Address Book: Nickname, Name,
Postal Address, Phone, Fax, Address(es), Notes.
– Directory Services window — All text in the results of a query (query results area of
the window — but not the Enter query field).
– Filters window — All text in the filters list and the text entry fields of each filter.
– Mailboxes window — All text in the names of all items (mailboxes and folders) in the
window, including items in closed folders. Eudora will scroll down below the current
scroll area if necessary. (Note: This discussion also applies to the Mailboxes pane
in the Search window.)
QUALCOMM Incorporated
152
Eudora User Manual
Finding Messages in Mailboxes and Folders
– Personalities window — All text in all personality names in the window
– Signatures window — All text in all signature file names in the window
– Stationery window — All text in all stationery file names in the window
Note. In some tool windows or tool window fields, a successful Find results in the target
text being highlighted exactly. In other tool windows or fields, the entire name or line is
highlighted.
Finding Messages in Mailboxes and Folders
You can search through any combination of your mailboxes and folders for all messages
that contain a certain piece of information, either text or other items such as a particular
priority, label, message status, attachment count, and much more.
You can search for a specific piece of information in all your mail or just search for a particular item that matches the criteria you set. For example, you can find that one bibliographic
reference buried somewhere in tens of thousands of messages in hundreds of mailboxes
just by knowing a word in the title, or you can look to gather together all messages sent to
you since last Tuesday.
To search for a message, just set up the criteria by selecting options from the pop-up lists
and by entering text.
Note. The default shortcut setting for finding messages is Option + Command + F. If you
prefer to use Command + F (Find), from the Special menu, choose Settings then Moving
Around. Turn on the Exchange Find and Search menu command key setting.
Basic Search Procedure
To search through your mailboxes and mail folders for one or more messages that contain
the information you’re seeking, do the following:
QUALCOMM Incorporated
153
Finding Messages in Mailboxes and Folders
1
Eudora User Manual
From the Special menu, choose Find then Search, or press Option+Command+F. The
Search window appears.
Default Search window (sample mailboxes)
2
Set the match conditions for your search. Click More if you want to specify additional
conditions. Click Fewer to remove these additional conditions if you change your mind.
(See “Setting Up the Search Conditions” on page 157.)
3
Set the additional conditions if you have them, and then specify whether all of the
conditions must be matched or only one condition must be matched, by selecting
Match all or Match any from the popup. (This popup appears only if you have multiple
search conditions.)
4
In the Mailboxes tab, choose the mailboxes and folders in which you want to search.
(Depending on how you invoke the search, some or all of your mailboxes may already
be selected. If you use the Search All command, all of your mailboxes are automatically selected.) See “Using the Mailboxes Pane” on page 162 for more details.
5
After you finish setting up the criteria and choosing the mailboxes, click Search, or
press Return. (The Search button changes to Stop once the search is underway.)
Allow the search to continue to completion, or stop it at any time by clicking Stop, or by
pressing Escape (Esc) or Command+. (period) if the Search window is on top.
6
Examine the results in the Results pane, and work with the messages if desired. (For
more details, see “Working with the Search Results in the Results Pane” on page 165.)
7
If you want to perform an additional search on the messages found so far, click Search
results, change your search conditions to fit the new search, and click the Search
button. Eudora will search only those messages that appear in the Results pane.
8
Continue as before, working with the new results if desired, performing additional
searches on the results, or conducting new searches with new search conditions
and/or mailboxes.
9
When you are finished, close the Search window.
QUALCOMM Incorporated
154
Eudora User Manual
Finding Messages in Mailboxes and Folders
Note. You can perform multiple searches at once. To do this, open a new Search window
for each search operation from the Find submenu or press Command+Option+F. Each
search runs separately.
Also, the Search command opens the Search window and selects all of your mailboxes in
the Mailboxes pane. To perform this search, select some text in an open Eudora window
and choose Search All, Search Mailbox, or Search Mailfolder. You can save the
searches to review at a later time. See “Saving a Search Results Window” on page 168.)
Using the Search All Command
The Search All command gives you a quick way to search through all mailboxes using
selected text.
1
In an open Eudora window, select the text that you want to search for.
2
From the Special menu, choose Find then Search All. The Search window appears.
Eudora performs a search for the selected text through all mailboxes. The Search window
is opened, all of your mailboxes are selected in the Mailboxes pane, the selected text is
entered into the text field of the one search condition (Anywhere contains <selected text>),
and the search is performed. The results appear in the Results pane.
Note. If no text is selected when you choose Search All, the result is the same as with the
Search command; that is, the Search window is opened, all of your mailboxes are selected
in the Mailboxes pane, and Eudora waits for you to specify your search conditions.
Using the Search Mailbox Command
The Search Mailbox command gives you a quick way to search through a single mailbox.
1
With a message window or mailbox window open, from the Special menu, choose
Find then Search Mailbox, or press Option+Command+F.
2
Set your match conditions and conduct the search as described under “Basic Search
Procedure” on page 153.
When you choose Search Mailbox, the Search window is opened, and the current
mailbox, the one containing the current message or the one corresponding to the current
mailbox window, is selected in the Mailboxes pane. This lets you search through that
mailbox only.
If you choose Search Mailbox while text is selected in a current message window, Eudora
performs a search on that text, looking through that mailbox only. The Search window is
opened, the mailbox is selected in the Mailboxes pane, the selected text is entered into the
text field of the one search condition (“Anywhere” contains <selected text>), and the
search is performed. The results appear in the Results pane.
Note. If you choose Search Mailbox while no message window or mailbox window is
currently open, the Search window opens with all of your mailboxes selected in the Mailboxes pane.
QUALCOMM Incorporated
155
Finding Messages in Mailboxes and Folders
Eudora User Manual
Using the Search Mailfolder Command
The Search Mailfolder command gives you a quick way to search through a single mail
folder:
1
With a message window or mailbox window currently open, from the Special menu,
choose Find then Search Mailfolder, or press Option+Command+F.
2
Set your match conditions and conduct the search as described under “Basic Search
Procedure” on page 153.
When you select Search Mailfolder, the Search window is opened, and the current mail
folder, the one containing the current mailbox window, or the one containing the mailbox
that contains the current message, is selected in the Mailboxes pane, along with all mailboxes and folders contained in that folder. This lets you search through the entire mail
folder, and only that mail folder.
If you choose Search Mailfolder while text is currently selected in a current message
window, Eudora performs a search on that text, looking through the current mail folder
only. The Search window is opened, the mail folder is selected in the Mailboxes pane
(along with all mailboxes and folders in that folder), the selected text is entered into the text
field of the one search condition (“Anywhere” contains <selected text>), and the search is
performed. The results appear in the Results pane.
Note. If you choose Search Mailfolder while a top-level mailbox is open (a mailbox directly
under your Eudora Folder), or while a message from such a mailbox is open, then the
Search window opens with your Eudora Folder and all of its contents are selected in the
Mailboxes pane.
If you choose Search Mailfolder while no message window or mailbox window is open, the
Search window opens with all of your mailboxes and folders selected in the Mailboxes
pane.
Using the Enter Selection Command with Search
The Enter Selection command can also be used with the Search feature. You use it to
change the search text in the Search window, also behind the scenes.
To use this command
1
With the Search window closed, select any word or text string in an open window in
Eudora.
2
From the Special menu, choose Find then Enter Selection, or press the Command+=
shortcut.
The selected text is automatically inserted into the text field of the first search condition in
the Search window (“Anywhere” contains <selected text>). Now when you open the
Search window using any of the Search functions (Search, Search All, Search Mailbox, or
Search Mailfolder), the text will be available for performing your search.
Text you enter in the Search window using the Enter Selection command remains in the
Search window even after you close it. However, you can type over the text to change it.
QUALCOMM Incorporated
156
Eudora User Manual
Finding Messages in Mailboxes and Folders
The next time you perform a search (by choosing Search All, Search Mailbox, or Search
Mailfolder while text is selected in an open window), the text you entered with the Enter
Selection command is replaced with the text selected for the Turbo Search.
Note. When you choose Enter Selection, the selected text is automatically inserted into
both the Find dialog (Find field) and the Search window (text field of first search condition).
In this way, you can use the same text for both a Find and a Search.
Setting Up the Search Conditions
The following figure below shows a sample Search window set up to perform a search.
Search window with sample search setup
target popup
comparison popup
value field
A search condition is a single line in the Match area, and consists of selections you make
from a combination of popups along with text you enter in text fields.
You can add additional search conditions by clicking More. Each time you click More,
another condition is added to the bottom of your condition list.
When you have more than one search condition, the Fewer button appears next to the
More button. Click Fewer to remove search conditions from your list, from the bottom up.
QUALCOMM Incorporated
157
Finding Messages in Mailboxes and Folders
Eudora User Manual
When you have more than one search condition, the Match all/Match any popup appears
next to the More and Fewer buttons. Select Match all if you want the search to capture a
message only if that message satisfies all of your search conditions. Select Match any if
you want the search to capture a message if that message satisfies at least one of your
search conditions.
When using Match all, the more conditions you have, the finer your search; and you can
reach a point where the search returns nothing. A common error is to specify too many
conditions, too-specific search values, and Match all. If such a search returns nothing, try
backing off on your search by using fewer conditions, or less-specific search values, or
switch to Match any.
By contrast, a Match any search with multiple conditions can result in too many found
messages to make the search useful. Try working with fewer conditions in this case, or
making the search text (or other value) more specific, or switching to Match all.
Every search is different, and everyone’s mail collection is different, and you may need to
experiment based on the mailboxes you want to look through, the amount of mail in each
one, the kind of data you’re looking for, and the crudeness or specificity of your search
conditions.
Your selection in the first (leftmost) popup, target popup, determines which popups and
other fields will appear in the remainder of the search condition, as well as what contents
they contain. Typically the target popup is followed by another popup that we’ll call the
comparison popup, and that is usually followed by a text field that we’ll call the value field.
However, there are a number of variations of this scheme described later.
Using the Target Popup
The target popup specifies the area within a message where you want Eudora to look for
text or non-text attributes. The default target selection is Anywhere.
If you choose...
This will happen...
Anywhere
Eudora looks through all text in the headers and message body of a
message. This includes text in hidden headers that are normally only
exposed with the Blah Blah Blah icon on the icon bar. It also includes
the header labels themselves.
Headers
Eudora looks through all text in the headers of a message, including
header labels. This includes text in hidden headers that are normally
only exposed with the Blah Blah Blah icon on the icon bar.
Body
Eudora looks through all text in the body of a message (the area below
the headers).
Attachment
Name(s)
Eudora looks through all text in the file names of attachment files
included with a message.
Summary
Eudora looks through all text in the Who, Subject, and Date columns of
the message summary.
QUALCOMM Incorporated
158
Eudora User Manual
Finding Messages in Mailboxes and Folders
If you choose...
This will happen...
Status
Eudora compares the value of the status of the message. Note that the
comparison popup values change to is and is not, and you must
choose the status value from the Status popup that appears next to the
comparison popup.
Priority
Eudora compares the value of the priority of the message. Note that
the comparison popup values change to is, is not, is greater than, and
is less than, and you must choose the priority value from the Priority
popup that appears next to the comparison popup. Higher priorities
have higher values.
Attachment
Count
Eudora compares the number of attachments sent with the message
against the match value. A message with no attachments has an
attachment count of 0. Note that the comparison popup values change
to is, is not, is greater than, and is less than, and you must enter the
count value (a whole number) into the text field that appears next to the
comparison popup.
Label
Eudora compares the value of the message label. Note that the
comparison popup values change to is and is not. You must select one.
Date
Eudora compares the value in the message Date field, the date the
message was sent or composed for sent and queued messages. Note
that the comparison popup values change to is, is not, is after, and is
before, and you must choose the date value from the Date selection
field that appears next to the comparison popup. To change the value
in the Date field, click the month, day, or year (two-digit number), and
then click the up or down arrow, or enter the date values in the text
field.
Size (K)
Eudora compares the value of the size of the message, in kilobytes (K).
Note that the comparison popup values change to is, is not, is greater
than, and is less than, and you must enter a size value (whole number,
representing the number of K) in the text field.
QUALCOMM Incorporated
159
Finding Messages in Mailboxes and Folders
Eudora User Manual
If you choose...
This will happen...
Age
Eudora compares the value of the age of the message, measured from
the date and time it was sent (or composed) to the current system date
and time, but subject to the qualifications described below. Note that
the comparison popup values change to is, is not, is greater than, and
is less than, and you must enter a whole number value in the adjacent
text field and then choose one of the values: Minutes, Hours, Days,
Weeks, Months, or Years from the selection popup that appears next to
the text field. Following are descriptions of age values:
– Minutes—If the search is conducted during the 60 seconds
between minute 3 and minute 4 of this hour begun at 11:03:20
a.m., for example, then a message with a seconds value
anywhere between minute 2 and minute 3 just a moment ago
11:02:00 and 11:02:59 a.m. is considered one minute old.
– Hours— If the search is conducted at any time between
11:00:00 a.m. and 12:00:00 noon, for example, than any
message with a time between 10:00:00 and 11:00:00 o’clock of
that same half-day is considered one hour old.
– Days—No matter what time of day the search is conducted
(Tuesday, for example), any message dated the previous day
(Monday), no matter what time, is considered one day old. Thus,
if the search is conducted at 12:01:00 a.m. Tuesday, a message
dated 11:59:00 p.m. Monday is still considered one day old.
– Weeks—No matter what day of the week this is (Tuesday, for
example), a message dated the previous week (Monday through
Sunday) is considered one week old.
– Months—No matter what day of the month this is (February, for
example), a message from any day of the previous month
(January) is considered one month old. That holds true if you
conduct the search on February 29 and the message is from
January 1, or if you conduct the search on February 1 and the
message is from January 31.
– Years—No matter when in this year (e.g., 1999) you conduct the
search, a message from any day in the prior year (1998) is
considered one year old. A message from the current year
(1999) is considered less than a year old. If the search is
conducted on January 1, a message from yesterday, December
31 of the previous year, is still considered one year old.
Personality
Eudora compares the value of the personality name for the personality
associated with the message. Note that the comparison popup values
change to is and is not, and you must select the personality name
value from the Personality popup that appears next to the comparison
popup. The Personality popup lists all of your existing personalities.
To:
Eudora looks through all text in the To: field of the message header,
even if it extends beyond one line or includes hundreds of addresses.
QUALCOMM Incorporated
160
Eudora User Manual
Finding Messages in Mailboxes and Folders
If you choose...
This will happen...
From:
Eudora looks through all text in the From: field of the message header
(generally a real name and an email address).
Subject:
Eudora looks through all text in the Subject: field of the message
header, even if it extends to multiple lines. Note that because Eudora
lets you edit the Subject in the Summary of an incoming message
(here we mean the Subject that appears in the message summary, not
the internal Subject header, which is normally not editable), a search
on “Subject:” may yield a different result from a search on Summary for
a particular message. See the description of the Summary target
above for more information.
Cc:
Eudora looks through all text in the Cc: field of the message header,
even if it extends beyond one line or includes hundreds of addresses.
Bcc:
Eudora looks through all text in the Bcc: field of the message header
(works for outgoing messages only), even if it extends beyond one line
or includes hundreds of addresses. This includes Fcc: (folder carbon
copy) text, which is generated when you select a mailbox from the Fcc
menu (normally the Transfer menu) while the cursor is in the Bcc: field
of the open outgoing message composition window.
Any
Recipient
Eudora looks through all text in all of the recipient fields of the message
header: To, Cc, and Bcc, as described above.
Using the Comparison Popup
The values on the comparison popup may change depending on your selection in the
target popup. The following values on the default comparison popup (when the Anywhere
target is selected) are described. Where the values for this popup change for a particular
target, those values are described in the corresponding target description in the previous
section. The “is” and “is not” values, however, generally mean the same thing on those
popups as well. (The comparison popup changes for all targets in the middle section of the
target popup, except Summary.)
Comparison
Conditions to match...
contains
The target must contain some specified text in order to be a match.
contains
word
The target must contain the specified text as a separate word to be a
match. If the target contains the specified text as part of another word,
it is not considered a match. For example, the text “info” is a match if it
appears by itself, but not as part of the word “information.”
does not
contain
If the target does not contain the specified text (or attribute, if it’s a
non-attribute target), it is considered a match.
is
If the target exactly equals the specified text, it is considered a match.
is not
If the target does not exactly equal the specified text (or attribute, if it’s
a non-attribute target), it is considered a match.
QUALCOMM Incorporated
161
Finding Messages in Mailboxes and Folders
Eudora User Manual
Comparison
Conditions to match...
starts with
If the target begins with the specified text, it is considered a match.
ends with
If the target ends with the specified text, it is considered a match.
matches
regexp
This stands for “matches regular expression.”
Note. Regular expression is an advanced and complex method of
searching for text.
You can enter any expression in the text field that would be recognized
by regular expression commands. Regular expression is a search
string that uses special characters to match text characters. For
example, if you are searching for messages sent to you by two people,
choose “From” in the target popup, then choose “matches regexp.” Type
their usernames between brackets separated by a vertical pipe
symbol, such as (bobclark)|(janedoe) in the text box. Eudora
searches and displays all messages from these two people. Regular
expressions generally lets you use wildcard characters, such as the
asterisk (*) and question mark (?). For more information on how regular
expression commands are used, and how you may enter text in the text
field for this comparison value, point your web browser to
<http://sansecus.usc.es/unixpages/concepts_regrexp.h
tml>.
See “Regular Expressions (Sponsored and Paid modes only)” on page
168.
Using the Value Fields
For any selection from the target popup that presents a text-entry field, you may enter any
string of alphanumeric characters in the text field. Some targets, such as “Age,” will result
in a meaningful search only if you enter a numeric value in the text field.
When using the “matches regexp” value on the comparison popup, note that some characters may take on special meaning when you enter them in the text field. These include, for
example, the asterisk (*) and the question mark (?), which serve as wildcards. See the
description of the “matches regexp” comparison value in the previous section.
Using the Mailboxes Pane
Click the Mailboxes tab to bring the Mailboxes pane to the front of the Search window.
In the Mailboxes pane, select the mailboxes and folders you want to search through if your
desired mailboxes are not already selected automatically.
Standard selection methods apply in this pane. The pane is a replica of the Mailboxes
window from the Window menu. It duplicates your mailbox and folder structure and also
shows underlines for those mailboxes and folders in which there is unread mail. This can
be useful if you want to target your search based on the Read or Unread status of
messages.
QUALCOMM Incorporated
162
Eudora User Manual
Finding Messages in Mailboxes and Folders
Click an item in the Mailboxes pane to select it. Use the Shift key to select a contiguous
range of items (or drag-select), and use the Command key to make non-consecutive
selections, adding or removing items in a group selection. Press Command+A to select all
of your mailboxes and folders. To deselect an entire selection, click somewhere outside the
selection.
Important. When you click a folder to select it, all mailboxes and folders contained in that
folder are also selected. This is one difference from selection rules in your Mailboxes
window.
Your selection in the Mailboxes pane determines where Eudora will look when conducting
the search. Eudora will look at all messages contained in the selected mailboxes and
folders.
Starting and Stopping the Search
To start a search, do the following:
1
Set up your search conditions in the Match area.
2
Choose Match all or Match any for multiple conditions.
3
Choose your desired mailboxes and folders in the Mailboxes pane.
4
Click Search to start the search, or press Return.
Eudora begins searching through the selected mailboxes and matching messages against
your search conditions.
As soon as the search begins, the following occurs:
■
The Search button changes to Stop.
■
The Results pane is brought to the front of the Search window.
■
Mailboxes and Results tabs are temporarily hidden, and are replaced with the status
message “Searching: _______,” where the blank is filled in with the name of the
mailbox currently being searched. Eudora dynamically runs through these names as
the search progresses, and they can change rapidly.
Note. Eudora searches your selected folders and mailboxes in the order in which they
appear in the Mailboxes pane, and searches your messages in the order in which they
appear in the mailboxes.
When Eudora encounters a message that matches the conditions of the search, the
following occurs
■
Message appears in the Results pane.
■
Counter at the lower left of the message summary list (similar to a mailbox size display)
is increased by one.
■
Messages continue to be added to the bottom of the message list in the Results pane
(if they are successful matches), and the counter continues to roll upward, until the
search is complete.
QUALCOMM Incorporated
163
Finding Messages in Mailboxes and Folders
Eudora User Manual
When the search is finished, the following occurs:
■
The Stop button changes back to Search.
■
Mailboxes and Results tabs reappear.
■
Search results checkbox appears next to the More button (or, with multiple conditions,
next to the More and Fewer buttons and the “Match all/Match any” popup).
To stop a search at any time, do the following:
■
In the Search window, click Stop, or if the Search window is currently on top, press
Escape (Esc) or Command+. (period).
The search stops, and any results appear in the Results pane. The button behavior is the
same as described above (as if the search had completed).
You can also stop a search, using any of the above methods, when a desired result
appears in the Results pane.
Closing the Search window terminates the search without preserving your results.
Note. For optimum search speed, keep the Search window on top until the search is
completed. Searches run in the background tend to be a bit slower.
To perform multiple searches, do the following:
1
Begin one search.
2
From the Special menu, choose Find. The Find submenu appears.
3
From the Find submenu, choose Search or press Command+F. Another Search
window appears.
4
Set up the second search in the new Search window and begin the second search.
Continue with additional searches if you like. Eudora can perform all of these searches in
tandem. You can also start a search and then move to other tasks, and Eudora will perform
the search in the background.
QUALCOMM Incorporated
164
Eudora User Manual
Finding Messages in Mailboxes and Folders
Working with the Search Results in the Results Pane
The following shows a sample Results pane in a Search window after a simple search.
Search window showing sample search results
The Results pane can be thought of as a “cloned mailbox window,” with a few new features
that do not appear in regular mailbox windows, with some variations on the actions you
perform in regular mailbox windows.
The Results pane has all the columns of a regular mailbox window, with the addition of a
new column, Mailbox, that does not appear in mailbox windows. The Mailbox column lists
the mailbox that contains the message returned by the search.
The Mailbox column has an associated popup menu. To see this popup menu, do the
following:
1
Click to select a message summary in the Results pane.
2
Press and hold down the mouse button on the Mailbox column of that summary. A
popup menu appears, showing the list of containing folders for the named mailbox.
Selecting one of the folders opens the Mailboxes window and highlights that folder in
the window. It also includes the mailbox itself. By selecting it, you open the window for
that mailbox.
The message summary list is similar to the lists you see in regular mailbox windows,
except that in the Results pane, the list often contains messages from multiple mailboxes
rather than just one.
To sort the results list by Mailbox, just click the Mailbox column heading as you would
other headings. Eudora sorts the messages alphabetically.
QUALCOMM Incorporated
165
Finding Messages in Mailboxes and Folders
Eudora User Manual
Note. Keep in mind that any sorting you do in the results list will not sort the messages
back in their home mailboxes. The results list sort is independent of any current sort conditions in original mailboxes.
You can do just about anything in the Results pane message list that you can do in any
mailbox window summary list, with few exceptions, as noted later in this section.
The numeric display at the bottom left of the message summary list reflects the number of
messages that were returned by the search. It is a count of the number of message
summaries in the Results pane. When the search is complete, this number stays static.
You cannot remove messages from the Results pane, as you can in regular mailbox
windows.
The message count display is not the same as a mailbox size display. Clicking the counter
button will do nothing.
For more information on the normal operations performed in mailbox windows and the
message preview pane, many or most of which apply to the Search window, see “Working
with Mailboxes” on page 111. IMAP users: see “Managing Your Mail on the IMAP Server”
on page 87 for the rule variations in IMAP mailbox windows.
Here are the major operations you can perform in the Results pane and how they affect
the original messages and the mailboxes in which they are stored:
■
In the Results pane, if you change the Status, the Priority, the Label, or the Server
Action via the corresponding column popup, the changes are reflected back in the
message summary in the original mailbox as well as in the original message itself.
■
If you double-click a message summary in the results list to open that message, the
original message opens. Any changes you make to that message, for example,
changing the Priority or Label or editing the message, are also made to the original
message. The changes are reflected both in the results list summary and in the
message’s summary in the original mailbox.
■
You can delete messages in the Results pane summary list. To do so, select one or
more message summaries (use standard selection methods) and do one of the
following:
– Press Delete.
– Choose Delete from the Message menu.
– Choose Trash from the Transfer menu.
– Click Delete on the main toolbar.
– Drag the summaries to one of the following destinations: the Trash mailbox icon in
the open Mailboxes window; the Trash mailbox button on the main toolbar; the open
Trash mailbox window.
When you perform one of the above operations, the original message is deleted (transferred to the Trash). However, the message summary remains in the Results pane
summary list, but the Mailbox column for that summary is updated to show the new
mailbox — the Trash mailbox. If you then empty the Trash, the message summary for
the deleted message is removed from the Results pane.
Note. You can undo message deletions from the Results pane, in which case the
Mailbox column of the message summary is updated to show the message’s former
mailbox.
QUALCOMM Incorporated
166
Eudora User Manual
■
Finding Messages in Mailboxes and Folders
You can transfer messages via the Results pane summary list. To do so, select one or
more message summaries (use standard selection methods) and do one of the
following:
– Choose the new mailbox from the Transfer menu.
– Drag the summaries to one of the following destinations: a mailbox icon in the open
Mailboxes window, a mailbox button on the main toolbar, or an open mailbox
window.
When you perform one of these operations, the original message is transferred from its
original mailbox to the new mailbox. The message summary in the Results pane,
however, stays where it is: but the Mailbox column for that summary is updated to
reflect the new mailbox in which the message is stored. Note: You can undo transfers
from the Results pane, in which case the Mailbox column of the message summary is
updated to show the message’s former mailbox.
Note. IMAP users, see “Working with IMAP Mailboxes” on page 124 for more information.
Performing an Additional Search on the Search Results
Assume you’ve opened the Search window, set up your search, and clicked the Search
button.
The search is complete (or you’ve stopped it mid-way), and now the results appear in the
Results pane, and the Search results checkbox appears next to the More button (or, if you
have multiple search conditions, it appears next to the “Match all/Match any” popup).
You can now perform an additional search on your search results. You can use this feature,
for example, if you haven’t quite pinpointed what you want, and you know that it’s somewhere in the results list.
To perform an addition search on your search results, do the following:
1
Click the Search results checkbox to turn it on.
2
Change your search conditions. You must change your search conditions for the new
search, or you will merely return the same results you have now. This change can be
as simple as changing a single character in a specified text string.
Note. Because the search is performed only on the results in the Results pane,
changing your selected mailboxes in the Mailboxes pane will have no effect.
3
Perform the search by clicking the Search button (or press Return) and allow the
search to continue to completion or stop it at any time.
Your new results will likely be a subset of your first results, and may make it easier to find
the information you’re looking for.
You can perform additional searches on the results returned by each subsearch, by
keeping the Search results checkbox clicked (turned on), changing the search conditions
each time, and performing the search.
Note. The Search results checkbox is only displayed following a successful search; that is,
one that returns at least one message into the Results pane. This is true whether you
allow the search to run to completion or you stop it partway.
QUALCOMM Incorporated
167
Regular Expressions (Sponsored and Paid modes only)
Eudora User Manual
Saving a Search Results Window
Once you have performed a search, you can save the search results to display or to
conduct additional searches later.
To save a search results window, do the following:
1
Perform the search.
2
From the File menu, choose Save As. The Save As dialog appears showing Search
Folder as the folder the search results window is to be saved to.
3
In the Save As dialog, type the name of the search results window and click OK. The
search results window is saved in the Search folder.
To retrieve the saved search results window, do the following:
From the Special menu, choose Find, and the name of the search results window is
listed at the bottom of the Find submenu. Select it and the saved search window will
display.
■
Note. You can also sort messages in the Search window when the Results pane is active.
This sorts the messages resulting from a search. Use the Sort submenu from the Special
menu or click the column headings. The Sort by Mail option is available only in the Search
window Results pane. Just click the Mailbox column heading in that pane, and Eudora
sorts the messages resulting from a search. The Sort by Mailbox option is not available in
mailbox windows.)
Regular Expressions (Sponsored and Paid modes only)
When searching for messages in Eudora, an option you can use is regular expressions.
Following is a description of regular expressions and how they are used in Eudora.
You can find regular expressions in the Find Messages window located in the comparison
pop-up. The option "matches regexp" appears. In the Find Messages window, regexp is
not case sensitive.
Following are symbols that are supported in Eudora.
Symbol
Character representation
.
(period) represents any one character.
[]
(brackets) contain a set of characters from which a match can
be made. It corresponds to one character in the search string.
*
(asterisk) is a multiplier. It will match zero or more of the
previous character.
QUALCOMM Incorporated
168
Eudora User Manual
Regular Expressions (Sponsored and Paid modes only)
Symbol
Character representation
+
(plus) is a multiplier. It will match one or more of the previous
character.
^
(caret) is the start of the line.
\
(backslash) is an escape character which means that the next
character will not have a special meaning.
?
(question mark) is a multiplier. It will match zero or one of the
previous character.
[^]
(brackets containing caret and other characters) means any
characters except the character(s) after the caret symbol in the
brackets.
$
(dollar) is the end of the line.
|
(pipe) is OR. It requires that the joined expressions have
parentheses around them.
Here are a few examples:
Symbols
What they match
E.*a
matches Eudora, Etcetera, Ea
ho+p
matches hop, hoop, hoooop, but not hp
e.a
matches eta, eda, e1a; it only matches Eta if the matching is
case-insensitive
etc\.
matches etc. but not etc
[eE].a
matches eta and Eta
QUALCOMM Incorporated
169
Regular Expressions (Sponsored and Paid modes only)
Eudora User Manual
You can find further information on regular expressions on the web, for example the
following web site: www.robelle.com/library/smugbook/regexpr.html.
QUALCOMM Incorporated
170
Managing Windows in Eudora
Windows in Eudora for the Macintosh exist in one of two states:
■
Normal
■
Tabbed
Normal Windows
A normal window is a standalone window containing one function.
Examples of normal windows are message windows, mailbox windows, and any of the
windows accessible from the Window menu when they are in the single state (ungrouped),
without tabs.
Tabbed Windows
A tabbed window is a collection of windows containing several functions. The combined
windows form a single window in which each member window has its own tab for activating and dragging.
But only tool windows, that is, only those that are accessible from the Window menu can
be combined into a tabbed window in this way (or can stand alone with a single tab). Other
kinds of windows, such as message windows and mailbox windows, cannot be combined
into tabbed windows.
The tool windows, each of which can be tabbed, are as follows in order down the Window
menu:
■
Address Book
■
Directory Services
■
Filters
■
Mailboxes
■
Personalities
■
Signatures
■
Stationery
■
Task Progress
QUALCOMM Incorporated
171
Anatomy of a Tabbed Window
Eudora User Manual
Anatomy of a Tabbed Window
A tabbed window is a collection of tool windows combined into one window. Each tool
window in the tabbed window has its own window tab. Below is an example of a tabbed
window with the Signatures window active.
Sample tabbed window (tabs at top)
A window tab has two purposes:
■
Lets you bring the window to the front of the group to display it (by clicking on the tab).
■
Serves as a “drag handle” that lets you drag the tool window from one tabbed window
to another tabbed window so that you can reorganize your tabbed windows and create
new ones. You can also reorder your tabs within the same tabbed window by dragging
the tab to where you want it.
A tool window in the normal state (no tabs) can be converted to the tabbed state by doing
the following:
■
From the Window menu, choose Tabs while the window is open.
To convert the window back to the normal state, do the following:
■
From the Window menu, choose Tabs again.
A check mark next to the Tabs command indicates that the tool window is in the tabbed
state. No check mark indicates that the tool window is in the normal, or untabbed, state.
The Tabs command is active only when the currently active window is a tool window or a
tabbed window group.
The title displayed in the title bar of a tabbed window is the name of the active window in
the tabbed group.
QUALCOMM Incorporated
172
Eudora User Manual
Default Tabbed Windows in Eudora
Note. If there is room enough in a tabbed window, each window’s tab contains both the
icon and the text label associated with that tool window. If there is not enough room in the
tabbed window, only the icon appears on each tab.
Default Tabbed Windows in Eudora
Eudora comes with two default tabbed window groups, one containing four tool windows,
and the other containing three, for a total of seven tool windows.
The first default tabbed window contains the following four tool windows (to display this
window, choose one of the following member windows from the Window menu):
■
Mailboxes
■
Signatures
■
Stationery
■
Personalities
The second default tabbed window contains the following three tool windows (to display
this window, choose one of the following member windows from the Window menu):
■
Address Book
■
Filters
■
Directory Services
You can reorganize these default tabbed windows any way you like. Your new organization
will be preserved when you quit and restart Eudora.
Reorganizing Tabbed Windows
You are not restricted to the default tabbed window arrangements in Eudora. You can mix
and match tabbed windows any way you like.
At one extreme, you can have each of the seven tool windows in its own normal window
displaying one function. At the other extreme, you can have all seven tool windows
combined into one tabbed window displaying seven functions. In between, you can have
multiple tabbed windows open at once, mixed and matched to suit your purposes.
To have a tab showing in a single normal tool window, do the following:
■
From the Window menu, choose Tabs while that window is open.
To move a window from one tabbed group to another, do the following:
■
Drag the window tab from the first group and drop it onto the second group.
If you drop the window tab onto another tab in the second group, the new window tab is
inserted at that position and the other tabs are displaced to accommodate it. If you do not
drop the tab onto an existing tab, Eudora adds the new tab at the “end” of the group of
existing tabs.
QUALCOMM Incorporated
173
Opening and Activating Tabbed Windows
Eudora User Manual
To reorganize the left-to-right order of tabs within a tabbed window, do the following:
■
Drag the tabs left and right. The drop scheme is the same as that described previously.
If after reorganizing your tabbed windows you change your mind, you can revert to the
original default tabbed windows that came with Eudora by doing the following:
■
Press and hold the Option key and from the Window, choose Revert To Default Tabs.
Opening and Activating Tabbed Windows
To open a tabbed window group, open any of its member windows by selecting the appropriate command from the Window menu. The tabbed window opens with the selected
window as the active (frontmost) window.
If the tabbed window group is already open, and you wish to display one of its member
windows that is currently not active do one of the following:
■
Click the member window’s tab.
■
Choose the desired window from the Window menu. The desired window comes to the
front of the tabbed group.
If you deselect Tabs from the Window menu while a tabbed window group is open (check
mark next to Tabs disappears), the active window becomes normal, and the other windows
in the group disappear.
Creating a New Tabbed Window
To create a new tabbed window, do the following:
■
Drag one of the tabs from an existing tabbed window and drop it onto an exposed
portion of the desktop.
You now have a new tabbed window consisting of one tool window with a tab. You can drag
other tabbed windows into the window to add to the new group.
Alternately, to create a new tabbed window from a single normal tool window open on your
desktop, do the following:
■
Bring that window to the front of all Eudora windows and from the Window, choose
Tabs. The tool window is given a tab, and you can now add other tabbed windows to
this new window to expand the new group.
To convert a single tabbed window back to a normal tool window, do the following:
■
Make the window active and from the Window menu, deselect Tabs (check mark next
to Tabs disappears).
QUALCOMM Incorporated
174
Eudora User Manual
Closing Tabbed Windows
Closing Tabbed Windows
To close a tabbed window, do the following:
■
From the File menu, choose Close or click the close button at the left end of the title
bar.
When you close a tabbed window, Eudora remembers the contents of all member
windows and the state and position of the tabbed window. When you redisplay the tabbed
window, the active window shows its prior contents and the tabbed window appears in its
prior state and position.
However, if you attempt to close or hide a tabbed window in which the active window
contains unsaved changes, or you attempt to deactivate that active window by making
another window active in the group, Eudora asks you if you want to save your changes.
Link History (Sponsored or Paid mode only)
Link History displays Internet web site addresses, other links, and ads you clicked in
Eudora.
To display your link history window, do the following:
1
From the Window menu, choose Link History. The Link History window appears.
Link History menu option and window
2
To activate a link in the list, double-click to highlight and launch it, or click the item and
then View. To remove the link from the list, click Remove.
Note. Links expire and are removed from the list after 30 days.
QUALCOMM Incorporated
175
Statistics Window (Sponsored and Paid Modes only)
Eudora User Manual
Statistics Window
(Sponsored and Paid Modes only)
You can now display and print your Eudora usage statistics. These statistics keep track of
how many messages you receive and send in a particular day, week, month, or year. You
can also see how many attachments were received and sent as well as how many
messages were read. In the Sent Email section, you can see how many messages you
have replied to, forwarded, and redirected during a specific timeframe.
Displaying the Statistics Window
To display the Statistics window, do the following:
1
From the Window menu, choose Statistics. The Statistics window appears.
Sample Statistics window showing received email for a day
Number
of
Messages
Time of Day
2
From the popup menu, choose to see email usage statistics for the Day, Week, Month,
or Year.
3
To see more statistical information, for example Attachments received, check the More
statistics box.
Note. To change the color, graph type, and other settings for the Statistics window, go to
“Statistics” on page 285 for more information.
Printing the Statistics Report
To print the information in the Statistics window, do the following:
■
With the Statistics window open, go to the File menu and choose Print. Your Statistics
report will print.
QUALCOMM Incorporated
176
Eudora User Manual
Task Progress Window
Task Progress Window
The Task Progress window displays activity as it happens. For example, when you check
mail, the Task Progress window displays email transfer information as it occurs.
To open the Task Progress window, do the following:
■
From the Window menu, choose Task Progress.
To show the Task Progress window’s tab, do the following:
■
From the Window menu, choose Tabs while the window is open. To hide the tab, select
Tabs again.
Note. To cause the Task Progress window to open and close automatically during and
after network activity, turn on Show Task Progress during background activity option in the
Getting Attention settings dialog. This option is on by default. For more information, see
“Getting Attention” on page 268.
Following is a sample Task Progress window showing email being retrieved from the
incoming mail server.
Task Progress window showing mail being downloaded
The Task Progress window also displays error messages as the errors are encountered. In
the following example, the Task Progress window shows a password error, indicating that
the user entered an incorrect password during a mail check. To clear the error in this case,
the correct password must be entered.
Task Progress window displaying an error
QUALCOMM Incorporated
177
Task Progress Window
Eudora User Manual
You can set mail-checking options from the popup menu at the lower left corner of the Task
Progress window. The options on this menu are shortcuts to Eudora settings, normally
found in the Settings dialog, that specify the conditions under which automatic mail checks
occur.
Task Progress window popup menu
There are three mail-checking options on this menu.
■
Don’t check when not connected
If you use a modem to dial in to a server to check your mail, choose this option so
Eudora won’t try to check your mail (if automatic checking is set) when you are disconnected.
■
Don’t check when on batteries
If you use a laptop computer to dial in and check your mail, choose this option so
Eudora won’t try to check your mail (if automatic checking is set) when your laptop is
powered by batteries only. Eudora can distinguish whether your laptop is powered by
batteries or electricity. Mail checking can be a drain on computer batteries.
■
Offline (never check)
Choose this option if you do not want Eudora to attempt to make any connections. This
is useful if you check mail from a laptop and if you are not connected to any network.
Note. You can send, receive, and compose mail all at the same time, and you can perform
other operations simultaneously as well. Eudora will even send and check mail while you
work in other applications. To instruct Eudora to check mail in the background, turn on the
Use background threading option in the Checking Mail settings. To instruct Eudora to send
mail in the background, turn on the Use separate thread for sending option in the Sending
Mail settings. See “Checking Mail” on page 246 and “Sending Mail” on page 250.
QUALCOMM Incorporated
178
Using the Address Book
The Address Book is where you keep information about individuals or groups that you
correspond with. Each entry in the Address Book includes a name for a person or group,
their full email address (email addresses for groups), a full name, any contact information
including both home and work information, other email addresses and information, and
any notes. You can also use the Address Book to put names on the Recipient List, and to
address a new message. See “Using the Recipient List” on page 198.
To open your Address Book, do the following:
■
From the Window menu, choose Address Book, or press Command+L, or click the
Address Book icon
on the main toolbar.
Address Book with example entries
All of the names are kept in address books, so you can group your names by putting them
in different address books. Eudora Nicknames is the default address book, and the
example above shows an additional address book called Family.
■
To show or hide the names in an address book, click the blue triangle to the left of the
file name.
You can use the View By popup menu to display the names by different criteria, for
example by Last Name. If you want to view the entries by Last Name, choose Last Name
from the View By popup. If you view by a field that does not contain any data, the entry
appears as the nickname enclosed in brackets preceded by three periods: ...{Dad}.
QUALCOMM Incorporated
181
Printing Your Address Book
Eudora User Manual
You can do the following in the address book window:
■
You can find and select an entry by typing the first few letters of the entry. The list of
entries must be active (to make the list active, click somewhere in the list).
■
You can page up and down in the list of entries, use the arrow keys to move up and
down through the entries, or hold down the Command key and use the arrow keys to
move up and down through the files of entries.
Printing Your Address Book
To print your Address Book entries, do the following:
■
With the Address Book open, from the File menu, choose Print.
Creating an Address Book within Eudora’s Address Book
(Sponsored and Paid modes only)
To create an address book within the Eudora Address Book, do the following:
1
From the Window menu, choose Address Book, or press Command + L. Or, if the
Address Book is in an inactive window in an open tabbed window group, click its tab.
The Address Book window appears.
Entering a new address book in the Address Book
2
In the Address Book window, click
appears in the list.
. A new address book entry
QUALCOMM Incorporated
182
Eudora User Manual
3
Adding a Person to the Address Book
In the highlighted text field, type the name of the new address book next to the address
book icon
. When finished, click anywhere or press Enter, and the address book
file appears in the list, and you can now add new entries to your newly created address
book.
Adding a Person to the Address Book
To create a new entry in an address book, do the following:
1
From the Window menu, choose Address Book, or press Command + L. Or, if the
Address Book is in an inactive window in an open tabbed window group, click its tab.
2
In the Address Book, choose which address book (if more than one is set up) in which
you want this person’s information listed. Click
.
Entering a new address book entry
3
In the highlighted text field, type the nickname next to the nickname icon
OR type
the nickname in the Nickname text field on the right side of the window. The nickname
entry appears in the list, and you can now add information for this entry.
Note. A nickname entered here should be the name you wish to type in a header field
(To, Cc, Bcc) when composing an email message. For example, although your Dad’s
name is John Smith, you can enter “Dad” as the nickname. So when you address a
message, you can just enter “Dad” in the header field.
4
When finished, click anywhere or press Enter, and the nickname appears in the list.
5
Click the Personal tab. The Personal dialog appears.
QUALCOMM Incorporated
183
Adding a Person to the Address Book
Eudora User Manual
Address Books Personal dialog
6
In the Full Name field, type the real name or an informal name for the person. If there
is just one address for the entry, this name and the address are included in the “To:”
field for your recipient to see.
7
In the First Name and Last Name fields, type the first and last name of the person. You
can interchange the first and last names by clicking
8
.
In the This nickname will expand to the following address(es) text field, enter at
least one complete email address for this person.
Note. Make sure this field contains no other information except addresses and nicknames, or your messages will be addressed incorrectly.
9
If you want to put this name on your recipient list, check the Recipient List box.
Note. It is recommended that you have no more than 2,000 nicknames per nickname file.
If the files are too large, they may appear collapsed in the address book, but you can still
use all the nicknames when addressing messages. If you have a large number of entries,
you might want to consider using a Ph or LDAP server.
QUALCOMM Incorporated
184
Eudora User Manual
Adding a Group to the Address Book
Adding a Group to the Address Book
To create a new group in an address book, do the following:
1
From the Window menu, choose Address Book, or press Command + L. Or, if the
Address Book is in an inactive window in an open tabbed window group, click its tab.
2
In the Address Book, choose which address book (if more than one is set up) in which
you want this group’s information listed. Click
.
Entering a new address book entry (group)
3
In the highlighted text field, type the name, for example “My buddies” of the new group
next to the nickname icon
OR type the nickname in the Nickname text field on the
right side of the window. The nickname entry appears in the list, and you can now add
information for this entry.
4
When finished, click anywhere and the nickname appears in the list.
5
Click the Personal tab. The Personal dialog appears.
QUALCOMM Incorporated
185
Adding Entry Information
Eudora User Manual
Address Books Personal dialog (group)
6
In the Full Name field, type the a descriptive or an informal name for the group. This
name is included in the To field for your recipient to see.
7
In the This nickname will expand to the following address(es) text field, type the
complete email address for each person included in the group. Separate multiple
addresses with commas or carriage returns (this is the only place you can use a
carriage return to separate addresses). You can also use nicknames in this field, but be
sure that any nicknames you use are defined by their own entry. You can use a mixture
of nicknames and complete email addresses.
Note. Make sure this field contains no other information except addresses and nicknames, or your messages will be addressed incorrectly.
8
If you want to put this group on your recipient list, check the Recipient List box.
Adding Entry Information
In the Eudora Address Book, there are several dialogs in which you can add information
for a person or a group. These text fields may be used liberally when entering information.
Following is a description of each dialog. The Personal dialog is described in the “Adding a
Person to the Address Book” on page 183.
To enter Home information for this entry, do the following:
1
In the left side of the window, choose the entry for whom you want to enter information.
His or her nickname appears in the Nickname field.
2
Click the Home tab. The Home dialog appears.
QUALCOMM Incorporated
186
Eudora User Manual
Adding Entry Information
Address Book Home dialog
3
In this dialog, you can type postal information, phone numbers, and a web site address
for this person. All fields are optional.
4
If you’d like to swap the Home and Work dialog information, click Swap with Work.
5
If the information listed here is this person’s main information, check the
Primary Information box.
QUALCOMM Incorporated
187
Adding Entry Information
Eudora User Manual
To enter work information, do the following:
1
Click the Work tab. The Work dialog appears.
Address Book Work dialog
2
In this dialog, you can type the person’s work information, including title, company
name, postal address, phone numbers, and a web site address for this person’s
company. All fields are optional.
3
If you’d like to swap the Work and Home dialog information, click Swap with Home.
4
If the information listed here is this person’s main work information, check the
Primary Information box.
QUALCOMM Incorporated
188
Eudora User Manual
Adding Entry Information
To enter other information, do the following:
1
Click the Other tab. The Other dialog appears.
Address Book Other dialog
2
In this dialog, you can type other email addresses, phone numbers, and web site
addresses for this person. All fields are optional.
QUALCOMM Incorporated
189
Changing, Moving, Saving, and Updating Entries
Eudora User Manual
To enter more information on this person, do the following:
1
Click the Notes tab. The Notes dialog appears.
Address Book Notes dialog
2
In this dialog, you can type anything you want. This is good place to enter information
such as the person’s birthday and other important dates specific to this person.
To save your changes to the Address Book, do the following:
■
From the File menu, choose Save or press Command + S. Or if you close the Address
Book, click Save in the warning dialog.
Note. If your Address Book has duplicate entries, Eudora recognizes only the topmost
entry of the duplicates.
Changing, Moving, Saving, and Updating Entries
■
To modify an Address Book entry, choose the entry from the list and edit the fields as
appropriate.
Important. If you change a nickname, be sure to correct any entries that reference that
nickname.
■
To move an entry from one file to another, choose the entry and simply drag it to the
destination file.
■
To save your changes to the Address Book, choose Save or press Command + S. Or if
you close the Address Book, click Save in the warning dialog.
QUALCOMM Incorporated
190
Eudora User Manual
■
Deleting Entries
To refresh and update your recipient list and address book, hold down the option key
and open the address book (this rebuilds your address book’s table of contents).
Deleting Entries
■
To remove one or more Address Book entries, choose the address books from the list
and click
.
■
To undo the deletion, close the Address Book without saving and click Discard in the
alert. (For multiple selections, use the Shift key to select items in sequence and the
Command key to select items out of sequence.)
■
To remove one or more nickname files, choose the nicknames from the list (use standard selection methods) and click
.
Note. You cannot remove the Eudora Nicknames file.
Addressing a Message from the Address Book
You can open and address a new message from the Address Book using the To:, Cc:, and
Bcc: buttons.
To create a new message from the Address Book, do the following:
1
In the Address Book entry list, choose the entry you want to address the message to.
You can select multiple entries by holding down the Shift key to choose multiple entries
in sequence, or the Command key to make non-sequential selections.
2
Click To:, Cc:, or Bcc: at the bottom of the Address Book.
A new composition window appears with the selected nickname(s) inserted in the recipient field.
Note. A quick way to open a message in the Address Book is to double-click an entry. A
new message opens, and the selected nickname is inserted in the To: field.
Once the composition window appears, you can use any of the following methods to insert
additional nicknames into the recipient fields (To:, Cc:, and Bcc:):
■
Choose one or more entries in the Address Book entry list and click To:, Cc:, or Bcc:.
■
Choose one or more entries in the entry list and drag the selected entries to one of the
recipient fields.
■
Choose one or more entries and double-click anywhere on the selection to add the
nickname(s) to the To: field.
Note. Hold down the Shift key while clicking To:, Cc:, or Bcc: to keep the Address Book
topmost, so you can continue addressing the message or work in the Address Book.
QUALCOMM Incorporated
191
Inserting Full Email Addresses rather than Nicknames (Sponsored and Paid modes only)
Eudora User Manual
Inserting Full Email Addresses rather than Nicknames
(Sponsored and Paid modes only)
If the Expand nicknames immediately option is turned on in the Composing Mail settings
dialog, when you add a nickname to a recipient field using one of the above methods, the
nickname is automatically expanded into the full email address(es) it contains.
If the Expand nicknames immediately option is turned off, you can still cause inserted nicknames to be immediately expanded into their full email addresses by using one of the
following methods of addressing the message:
■
Hold down the Option key while clicking To:, Cc:, or Bcc:.
■
Drag one or more selected entries to the To:, Cc:, or Bcc: field.
■
Hold down the Option key while double-clicking one or more selected entries (To: field
only).
Make Address Book Entry Command
The Make Address Book Entry command is used to create entries in your Address Book
and is especially helpful for making group entries. You can use this command from
anywhere in Eudora, including open messages, open mailbox windows, the Address
Book, and the Directory Services window.
Also, you can create Address Book entries anywhere in Eudora including open messages
from the current selection by selecting the addresses you want, then holding down the
Shift key and choosing Make Address Book Entry From Selection command from the
Special menu.
To use the Make Address Book Entry command, do one of the following:
■
In an open window, go to step 1.
■
In an open mailbox window, first select the message summary or summaries you want
in the address book, then go to step 1.
1
From the Special menu, choose Make Address Book Entry.
Make Address Book Entry command
The Make Address Book Entry dialog appears.
QUALCOMM Incorporated
192
Make Address Book Entry dialog
2
In the Nickname text box, Eudora enters the name in the email address or the
message. You can change it if you like.
3
In the Full Name field, Eudora enters the full name as it appears in the email address
of the message. You can change it if you like.
4
In the First Name and Last Name fields, Eudora enters the first and last name of the
person as it appears in the email address or the message. You can change it if you like.
5
In the This nickname will expand to the following address field, Eudora enters the
email address as it appears in the message. You can change the email address if you
like.
If you choose multiple message summaries in the mailbox window, addresses are
taken from each message and all are put in the new entry.
If the open or selected message is an outgoing message, the new entry will include all
of the addresses in the To:, Cc:, and Bcc: fields.
If the open or selected message is an incoming message, the new entry will include the
address in the From: field.
6
If you have more than one address book, in the In the Address Book popup, choose
the address book in which you want to place this nickname. You cannot make a new
address book using the “Make Address Book Entry” command.
7
If you want to put the nickname on your Recipient List, check the
Quick Recipient box.
8
To open the Address Book to add more information, click Add Details.
9
When finished, click Create Nickname. The new entry is now in your address book.
Note. If your new nickname has the same name as an existing nickname, a prompt
appears asking if you want to add the address(es) to the existing nickname or replace the
existing nickname with the new address(es).
Creating a Group from the Address Book
Eudora User Manual
When you use the Make Address Book Entry command in an open message or mailbox
window, Eudora uses your current Replying settings. If the Reply to all By default setting is
turned on (or if it is not and you hold down the Option key when selecting Make Address
Book Entry), the new entry will include all of the recipients of the message plus the sender.
However, if the Include yourself setting is turned off and the current message is an
incoming message, your address is not included in the new entry.
Creating a Group from the Address Book
You can take several of your existing nicknames and group them together under one
composite nickname. For example, you can quickly combine your Family, Friends, and
School nicknames under a composite nickname called Everybody. The Everybody entry
contains the nicknames Family, Friends, and School, rather than their expanded email
addresses. However, if you address a new outgoing message to Everybody, it will be sent
to all of the email addresses contained in the Family, Friends, and School entries.
To make entries from the Address Book, do the following:
1
From the Window menu, choose Address Book. Or, if the Address Book is in a group
of tabbed windows, click its tab. The Address Book window appears.
2
Choose several different entries in the entry list (hold down the Shift key to select
multiple entries in sequence, or the Command key to make nonsequential selections).
3
From the Special menu, choose Make Address Book Entry. The Make Address Book
Entry dialog appears.
Make Address Book Entry
4
In the Nickname text box, type a nickname for the new entry.
5
In the Group Name field, type a descriptive name for this group.
QUALCOMM Incorporated
194
Eudora User Manual
Finish Address Book Entry Command (Sponsored and Paid modes only)
6
In the This nickname will expand to the following address field, Eudora displays the
nicknames you selected from the Address Book. You may add more nicknames and
email addresses if you’d like.
7
If you have more than one address book, in the In address book popup, choose the
address book in which you want to place this group.
8
If you want to put the group on your Recipient List, check the Quick Recipient box.
9
To open the Address Book to add more information, click Add Details.
10
When finished, click Create Nickname. The new group is now in your address book.
Note. If your new group has the same name as an existing group name, a prompt
appears asking if you want to add the address(es) to the existing name or replace the
existing name with the new address(es).
Finish Address Book Entry Command
(Sponsored and Paid modes only)
By using the Finish Address Book Entry command, Eudora will complete the nickname
entry you begin to enter in the To:, Cc:, or Bcc: field.
To use the Finish Address Book Entry command to complete a nickname in your
message, do the following:
1
In the To:, Cc:, or Bcc: field, type a unique portion of the nickname.
2
From the Edit menu, choose Finish Address Book Entry. The nickname popup list for
that letter appears.
3
Choose the desired nickname from the list.
To insert the real addresses for the entry instead of the nickname, do the following:
■
Hold down the Option key and from the Edit menu, choose Finish & Expand Address
Book Entry. (The nickname popup list appears if you have several nicknames beginning with the same letter.)
To set this auto-expansion to happen all the time (so that you don’t have to hold down
the Option key), check the Expand nicknames immediately box in the Composing Mail
settings.
For an alternate way to complete nicknames, see the next section, “Using Automatic Nickname Completion.”
Using Automatic Nickname Completion
(Sponsored and Paid modes only)
Similar to the Finish Address Book Entry command, nickname auto-completion lets you
enter a portion of an Address Book nickname in the To:, Cc:, or Bcc: field and has Eudora
automatically complete the nickname. Press Return or Enter, and the email address for
the nickname appears (provided the “Expand nicknames immediately” function is turned
on in the Composing Mail settings.
QUALCOMM Incorporated
195
Using Automatic Nickname Completion (Sponsored and Paid modes only)
Eudora User Manual
In the following example, you want to send a message to Margaret. You need to have
entered the nickname “margaret” and her email address in your Address Book. In the To:
field, type m (the feature is case-insensitive), and Eudora completes the name. If you have
more than one nickname beginning with M in your Address Book, you can select the
desired nickname using the nickname popup menu (press Command + , to display the
menu). You can go through the list using the up and down arrow keys. All nicknames in the
To:, Cc:, and Bcc: fields are shown in bold to indicate that they are nicknames previously
entered in the Address Book.
Nickname auto-completion in a new message
Note. If you have only a Margaret and a Mary as nicknames in your Address Book,
Eudora completes the first alphabetical name. So if you type m, Margaret appears first.
To complete the nickname, press Return or Enter. If you press comma (,), Eudora expands
the address and adds a comma at the end of the address so you can add another recipient’s nickname, as shown in the following example.
Nickname auto-completion after pressing the comma key
If you have several nicknames that begin with M, it may be better for you to display the
nickname popup menu and select the nickname you want. In the example below, suppose
you want to Cc Mike on your message. Type m and press Command + , (comma). The
nickname popup menu appears.
QUALCOMM Incorporated
196
Eudora User Manual
Using the Recipient History List (Sponsored and Paid modes only)
Nickname auto-completion popup menu
■
Select the nickname using the mouse pointer or arrow keys.
■
To cancel without selecting a nickname, click outside the popup or press Escape (Esc)
or Delete.
■
To complete the nickname’s address, press Return or Enter.
To turn the nickname auto-completion feature off, do the following:
1
From the Special menu, choose Settings.
2
Scroll down the Settings category icons and choose Composing Mail.
3
Deselect the Auto-complete Nicknames box. To turn the feature on, just check the
box.
4
When finished, click OK.
Using the Recipient History List (Sponsored and Paid modes only)
A history list of all recipients of your messages now resides in your address book as an
address book. The history file consists of names and email addresses of people you have
previously sent, forwarded, or replied to messages within Eudora. When you send
messages to these people again, their email names and addresses are included in the
automatic nickname completion list.
Sample History List in the Address book
QUALCOMM Incorporated
197
Using Nicknames that were Not Created by Eudora
Eudora User Manual
Auto-completion allows you to enter a portion of a name in the To:, Cc:, or Bcc: field, and
Eudora automatically completes the name for you. Just start typing and Eudora attempts
to complete the name. If multiple recipients match the text you’ve entered, press
Command + , (comma) to display a list of names from both your history file and address
book. Select the correct name, and the name and email address appear in the field.
Using Nicknames that were Not Created by Eudora
To use a nickname text file (.txt) that was not created in Eudora, place the file in the Nicknames Folder in your Eudora Folder (located in your System or Documents Folder) and be
sure the format is correct: one nickname on each line with the word “alias,” a space, the
nickname, a space, and the real address. For example:
alias joe [email protected]
If you show aliases, list them at the top of the file and list notes at the bottom of the file. You
cannot mix aliases and notes.
Here’s the general format:
alias nickname [email protected]
note nickname
<name:realName><address:postalAddressLine1 postalAddressLine2
postalAddressLine3><phone:phoneNumber><fax:faxNumber>noteField
And here’s an example, using “joe” above:
alias joe [email protected]
note joe
<name:Joe Doakes><address:Wow Inc. 1234 Main St. Anytown, CA><phone:(714)
555-1212><fax:(714) 555-1234>This is Joe D. at Wow, supplier for left-handed
widgets.
Quit and restart Eudora to see your new entries in the Address Book.
Saving Your Entries to a File
To save your Address Book entries as a text clipping with tab-delimited entries, do the
following:
■
Select the entries you want and hold down the Option key while dragging them to
Macintosh’s Finder.
To save them as a text clipping with the standard nickname format, use the same
process but do not hold down the Option key.
Using the Recipient List
The Recipient List contains the nicknames of recipients to whom you often send mail. A
nickname appears on this list if you have checked the “Recipient List” box in the Address
Book entry for that nickname.
QUALCOMM Incorporated
198
Eudora User Manual
Including Nicknames on the Recipient List
Recipient List checkbox in the Address Book
To open a new message and have it automatically addressed to someone on your Recipient List (the item is entered in the To: field), select the nickname from any of these three
submenus found in the Message menu:
■
New Message To — Opens a new message and addresses it to the selected nickname
■
Forward To — Forwards the current message(s) to the selected nickname
■
Redirect To — Redirects the current message(s) to the selected nickname
To insert a recipient’s nickname into a message that you have already opened, do the
following:
1
Move the cursor to where you want the nickname.
2
From the Edit menu, choose Insert Recipient. The Insert Recipient submenu
appears.
3
From the Insert Recipient submenu, choose the nickname.
To insert the real address(es) instead of the nickname, do the following:
1
2
Hold down the Option key and from the Edit menu, choose Insert & Expand Recipient. The Insert & Expand Recipient submenu appears.
From the Insert & Expand Recipient submenu, choose the nickname.
To set this to happen all the time (so that you don’t have to hold down the Option key), turn
on the Expand nicknames immediately option in the Composing Mail settings (see
“Composing Mail” on page 252 in the user manual).
You can add more than one nickname from the Recipient List to the To:, Cc:, and Bcc:
fields of any message. If you add the nicknames by selecting them from the Insert Recipient submenu (or Insert & Expand Recipient), Eudora automatically adds commas where
necessary.
Including Nicknames on the Recipient List
To include a nickname on the Recipient List, do the following:
1
From the Window menu, choose Address Book or press Command + L. Or, if the
Address Book is in a group of tabbed windows, click its tab.
2
Choose the appropriate Address Book entry from the list and check the Recipient List
box (next to the Nickname field).
QUALCOMM Incorporated
199
Including Nicknames on the Recipient List
Eudora User Manual
The nickname for the selected entry is added to the Recipient List. If you change a nickname or remove an entry, the Recipient List is updated as appropriate. For more details on
this list, see “Using the Recipient List” on page 198.
To add multiple nicknames to the Recipient List, do the following:
■
Choose the desired entries (using multiple selection methods) and check the
Recipient List box.
To remove one or more nicknames from the Recipient List, do the following:
■
Choose the appropriate Address Book entry or entries from the list and uncheck the
Recipient List box.
Note that checking and unchecking the “Recipient List” box performs the add/remove
operation to the Recipient List automatically, without requiring you to save the change in
the Address Book. However, if you make other changes to your Address Book during the
same session, you will need to save them.
Nicknames on the Recipient List are available from
■
■
The Insert Recipient submenu under the Edit menu
The New Message To, Forward To, and Redirect To submenus under the Message
menu
QUALCOMM Incorporated
200
Using Directory Services
What Are Directory Services?
Directory services are electronic white and yellow phone book-style services that lets you
search for people on the Internet or in your organization’s intranet.
Typically when you want to look someone up, you want to find out their email address, and
perhaps their city or county, state or province, country, phone number, organization, title,
and maybe their full name even if you only know part of it.
Eudora lets you search for people on the Internet and local intranets using three directory
service protocols:
■
Ph
■
LDAP (Lightweight Directory Access Protocol)
■
Finger
To use any of these directory service protocols, and thereby use the directory services
available to you on the Internet or within your organization, you must first enter the default
servers that will provide these services in your Hosts settings, which is shown in the next
section: “Specifying Your Default Lookup Servers” on page 202.
Note. The instructions in this chapter are the basic instructions for performing Internet and
intranet lookups in Eudora. For more details on how to use the Ph and Finger protocols
when performing lookups, see your email administrator or your Internet Service Provider
(ISP).
For detailed instructions on how to perform Internet and intranet lookups using LDAP in
Eudora, see the separate document “Using LDAP in Eudora.” This document is installed
as an online manual, in PDF format, in the Documentation Folder.
QUALCOMM Incorporated
201
Specifying Your Default Lookup Servers
Eudora User Manual
Specifying Your Default Lookup Servers
To specify your default lookup servers, do the following:
1
From the Special menu, choose Settings. Scroll through the list of icons and choose
Hosts. The Hosts Setting dialog appears.
Hosts settings with sample server entries
The Mail field should contain the name of your incoming mail server. This is the POP or
IMAP server that receives the mail that people send you.
The SMTP field should contain the name of your outgoing mail server, which is the
server that processes your mail when you send it out.
Note. If your email administrator or your ISP instructed you to leave this field blank, it’s
because your SMTP server resides on the same computer as your incoming mail
server. In that case, Eudora uses the server name in your Mail field as the location of
both your incoming (POP or IMAP) and outgoing (SMTP) servers.
2
In the Directory Services field, enter the name of a host computer that will be
providing you either the Ph or the LDAP service. In the example, an LDAP server name
has been entered. Many organizations have their own Ph and LDAP servers, and there
are a number of public Ph and LDAP servers out on the Internet that you can use to
look people up. You can enter either a Ph server name or an LDAP server name in this
field, and you can change the server name at any time while using Eudora.
3
(Optional) In the Finger field, you can enter the name of a host computer that will
provide your Finger service. However, if you leave this field blank, Eudora will use the
server you’ve entered in the SMTP field as the server that will provide your Finger
service. And if you’ve left the SMTP field blank as well, Eudora will use the server
named in the Mail field.
4
When you have finished entering your server names in the text fields, click OK to save
the changes and close the dialog.
QUALCOMM Incorporated
202
Eudora User Manual
Looking Someone Up
Note. Ask your email administrator or your ISP to provide you the server names for the
Directory Services and Finger fields. You can also use the Globe icon in the Directory
Services window to find other lookup servers, as discussed later in this section.
See “Hosts” on page 270 for more information.
If you are upgrading from an earlier version of Eudora, the servers you used for your Ph
(or LDAP) and Finger services are carried over into your new Hosts settings.
Looking Someone Up
Note. If you are using Eudora in Light mode, you cannot perform multiple or simultaneous
searches.
To look someone up on the Internet or your local intranet, do the following:
1
From the Window menu, choose Directory Services or press Command + Y. Or if the
Directory Services window is in a group of tabbed windows, click its tab. The Directory
Services window appears.
Directory Services window with sample entry
2
In the Enter query field, type the name of the person you are looking for, or associated
information in the format allowed by the current server’s protocol (the current server is
shown in parentheses after the Enter query label).
– Using Ph, you can enter the person’s first name, last name, first and last name,
email address, or any Ph command except login commands or commands that
require login. (Administrators: For information about the Ph server source code, see
“Sources” on page 316.)
QUALCOMM Incorporated
203
Looking Someone Up
Eudora User Manual
– Using LDAP, you can enter last name only, first and last names, and other information. For advanced instructions on using LDAP in Eudora, see the separate document “Using LDAP in Eudora,” installed as a PDF file in your Documentation Folder,
under your System or Documents Folder.
– Using Finger, enter your query in the form name@domain. If you leave out the
@domain part, Eudora supplies the “@” sign followed by the name of your Finger
server, as specified in the Finger field of the Hosts settings, or as specified in the
SMTP field if the Finger field is blank. So if your Finger server name is of the form
xxx and you enter a query of name, Eudora converts the query to name@xxx
3
For a Ph or LDAP lookup, click Lookup. For a Finger lookup, click Finger.
The query is sent to your Ph, LDAP, or Finger server, and the results returned by the
server appear in the lower section of the window, the large area under the Enter query
field. Scroll bars are provided to let you scroll through long results.
Note. To stop a query at any time, press the Escape key (Esc), or press Command+.
(period).
Results of an LDAP query from a public server
Note. Results may vary from server to server, even within the same protocol (e.g.,
LDAP). You can use the tab key to cycle through the entries that have email addresses.
4
Work with your query results if desired. See the following sections.
QUALCOMM Incorporated
204
Eudora User Manual
Looking Someone Up
Results of a Ph query from a public server
Results of a Finger query
Keeping the Connection Open to Your Lookup Server for “Live” Queries
If you turn on the “Live” directory service queries option in the Hosts settings dialog (see
“Specifying Your Default Lookup Servers” on page 202), the following occurs:
QUALCOMM Incorporated
205
Performing Turbo Lookups on Selected Text
■
Eudora User Manual
The connection with your current Ph or LDAP server (shown in parentheses after the
Enter query field label) is kept open. Your queries are automatically sent to the server
when you pause after typing the query text in the Enter query field. If you type some
text, pause, and then get too many matches, continue typing more characters in your
query string to narrow the search.
Note. The “live” query feature is not available for Finger queries.
Performing Turbo Lookups on Selected Text
To perform a rapid, automatic lookup on text selected anywhere in Eudora (including the
Directory Services window), do the following:
1
From anywhere in Eudora, select the text that you want to use as your directory
services query string.
Note. If you don’t select text in the current message, the turbo lookup occurs on the
message’s sender.
2
Hold down the Shift key and choose Directory Services from the Window menu or
press Shift+Command+Y. (You can also hold down Shift and click the Directory
Services toolbar button, or hold down Shift and click the window’s tab if it is an inactive
window in an open tabbed window group.)
The Directory Services window appears, and the selected text is entered in the Enter
query field. The query is sent to your default Ph or LDAP server, and the results are
returned in the results area of the Directory Services window.
Note. The server queried for turbo lookups is the Ph or LDAP server entered in the Directory Services field of your Hosts settings dialog. The Turbo Lookup feature is not available
for Finger queries. See “Hosts” on page 270 for more information.
Addressing a Message from Your Query Results
After you have performed a Ph or LDAP query and have obtained the results in the Directory Services window, you can now either open and address a new message to one of the
records in the results, or you can add the address(es) from one or more records to a new
composition message already open.
Note. After performing a Finger query, you can only address open messages with your
results, and only via drag and drop, as described later.
To open and address a new message based on your Ph or LDAP query results, do the
following:
1
Make sure there are no outgoing messages already open.
2
Perform the Ph or LDAP query in the Directory Services window.
3
Choose a record from the results returned by the server.
4
At the bottom of the Directory Services window, click the To:, Cc:, or Bcc: button.
QUALCOMM Incorporated
206
Eudora User Manual
Making Address Book Entries
A new outgoing message is opened, and the email address in the selected record is
entered in the recipient field corresponding to the button you clicked. The real name, if
there is one, is also entered. If the record contains multiple addresses, all of the addresses
(and their real names) are entered.
To add an address from your Ph or LDAP query results to a message that is already open,
do the following:
1
Make sure the message you want to address is active (on top).
2
From the Window menu, choose Directory Services, or press Command+Y. (Or click
the toolbar button or the window tab as discussed earlier.)
3
Perform the Ph or LDAP query.
4
Choose a record from the results returned by the server.
5
Click the To:, Cc:, or Bcc: button at the bottom of the window.
The email address in the selected record is added to the recipient field of the current
message corresponding to the button you clicked. The real name, if any, is also entered. If
the record contains multiple addresses, all of them (and their associated real names) are
entered in the recipient field.
Tip. You can also drag a selected address from your query results—Ph, LDAP, or Finger—
and drop it into any recipient field of an open new message window.
Note. You cannot use the To:, Cc:, and Bcc: buttons with Finger query results.
Making Address Book Entries
After you have performed a Ph or LDAP query and have obtained the results in the Directory Services window, you can make a new address book entry from your query results
(Ph or LDAP only).
To add a new address book entry based on your Ph or LDAP query results, do the
following:
1
Perform the Ph or LDAP query in the Directory Services window.
2
Choose a record from the results returned by the server.
3
From the Special menu, choose Make Address Book Entry. The New Nickname
dialog appears.
4
Enter a nickname and other information for this entry. For more information on entering
nicknames in the address book, see “Adding a Person to the Address Book” on page
183.
You can also highlight one or more addresses in the results. Just hold down the Shift key
and choose Make Address Book Entry from the Special menu.
Note. The Make Address Book Entry command is not available for use with Finger query
results.
QUALCOMM Incorporated
207
Finding and Using Lookup Servers from Around the World
Eudora User Manual
Making Entries from the Current Selection
To make entries from the current selection, do the following:
1
From anywhere in Eudora, including an open message, highlight the addresses you
want.
2
Hold down the Shift key and from the Special menu, choose Make Address Book
Entry From Selection. The New Nickname dialog appears.
3
Enter the nickname and other information for this entry.
The new entry’s Address(es) field will include all of the addresses that you selected.
Finding and Using Lookup Servers from Around the World
Although you have entered directory servers in your Host settings, you can also access
many servers on the Internet through Eudora. Some Ph and LDAP servers keep a list of
other Ph and LDAP servers available on the Internet. While this is not always a complete
list of every Ph and LDAP server on the Internet, you can gain access to the available
servers.
In the open Directory Services window, the current server, also called the active server, is
the server listed in parentheses to the right of the Enter query field label. This may or may
not be your default lookup server, depending on what server you have used for your most
recent lookup.
To get the list of Ph and LDAP servers from the current server, click the globe icon in the
open Directory Services window. As shown in the figure, this icon is located to the right of
the Enter query field, and under the Lookup button.
Directory Services window showing globe icon
Click the globe icon to get a
list of lookup servers from the
current server.
A list of Ph and LDAP servers appears in the results area.
To go to any one of the servers listed in order to perform a query on that server, do the
following:
■
Hold down the Command key and click the server URL or just double-click the URL.
Note. If you go from a Ph server to an LDAP server or vice versa, you will need to use the
rules of the new protocol when you submit queries.
Here are the items you will generally see in a server list returned when you click the Globe
icon:
QUALCOMM Incorporated
208
Eudora User Manual
Finding and Using Lookup Servers from Around the World
■
Configured server—This is your default Ph or LDAP lookup server in the Directory
Services field of your Hosts settings. See “Hosts” on page 270.
■
Servers used recently—This is a list of the Ph and LDAP lookup servers you have
used most recently to perform directory service lookups.
■
Ph servers (untitled)—This is a list of Ph servers on the Internet that you can use to
perform Ph queries.
■
LDAP servers—This is a list of public LDAP servers available to you on the Internet to
perform LDAP queries. For more information on LDAP servers, both public and private,
and how to use them, see the separate document “Using LDAP in Eudora”, installed as
a PDF file in your Documentation Folder.
The Ph server list can be long (200 items or so). To return everything in the server list
except the Ph servers, do the following:
■
Hold down the Shift key and click the Globe.
The resulting list will contain the Configured server, the Servers used recently, and the
LDAP servers, but not the Ph servers.
When you Command-click or double-click any of the server URLs in the server list, that
server becomes the current server (shown in parentheses after the Enter query label), and
remains current until you close the Directory Services window or go to a different server.
Note. When you click the Globe, the current server is queried for the server list. If you
change servers and click the Globe, the new server is queried for the list. For example, if
your current server is Cornell’s Ph server and you click the Globe icon, you will get one
server list. If you then make UC Berkeley’s Ph server your current server and click the
Globe icon, you may get a different server list.
To look up servers on ph.qualcomm.com, which contains a list of directory servers, do
the following:
■
Press the Option key and click the globe.
QUALCOMM Incorporated
209
Finding and Using Lookup Servers from Around the World
Eudora User Manual
QUALCOMM Incorporated
210
Using Menu Commands
This section describes Eudora’s menu commands. Each menu and submenu is illustrated,
and each command is described. Additional commands are available by pressing Option
and/or the Shift while opening a menu. These are called modifiers. See “Modifiers” on
page 237 for more information. The modifier keys are displayed in brackets [ ].
There are eight menu titles on the Eudora menu bar: File, Edit, Mailbox, Message,
Transfer, Special, Window, and Help. The Apple menu also has two Eudora-related
commands when Eudora is the active application.
Depending on what you are doing at a particular time, a given command may or may not
be available. This can also depend on the current state of Eudora’s settings. If a command
is unavailable for the current operation, it is “greyed out” (dimmed) on the menu. For
example, if the insertion point is currently in the header of a new open message, the Edit
menu’s Text submenu is dimmed; you cannot apply text styles to header text. Similarly, if
an incoming message is not currently open or selected, the Message menu’s Reply
command is dimmed; you cannot use the Reply command. (You also cannot reply to an
outgoing message.)
Apple Menu
The Apple menu lets you open items in your Apple Menu Items folder and view information
on the currently active application or program. The Apple Computer logo appears at the
top of the menu.
When Eudora is the currently active application, there are two Eudora-related commands
on the Apple menu.
Eudora commands on the Apple menu
QUALCOMM Incorporated
211
Eudora User Manual
Choose this
command
This happens...
About Eudora...
Displays the Eudora Email splash screen, which contains
information on this version of Eudora. Also, Registration
information (name and number) are included. Click Credits,
then More Credits, to view a full listing of the QUALCOMM
personnel who worked on the Eudora program. Click Visit
Web Site to open your default web browser and go to
QUALCOMM s Eudora web site. Click OK to close the
splash screen.
About Message
Plug-ins...
Displays a dialog that lists your installed message plug-ins,
by icon and name. Although you can select each item, you
cannot perform any operation on it from the dialog. Scroll
bars appear to let you scroll through a long list. Click OK to
close the dialog. For more information on message plug-ins,
see Using Eudora Plug-ins in the General Reference
chapter in the online user manual.
File Menu
This menu provides basic file and mail functions.
File menu
Choose this
command
New Text
Document
This happens...
Creates a new plain text document. The format in which the
document will be saved is determined by the text editing
application selected in the TEXT files belong to option of
the Attachments settings.
QUALCOMM Incorporated
212
Eudora User Manual
File Menu
Choose this
command
This happens...
Open...
Opens a plain text file, mailbox file, or Eudora Settings file.
Open Selection
Opens the selected (highlighted) item: a message summary,
a converted attachment, a URL, or, from the Mailboxes
window, a mailbox.
Open in Browser
Opens the selected (highlighted) message summary, or the
currently open message, in your World Wide Web browser.
Used for enhanced display of messages containing
HTML-formatted text (e.g., Web pages a correspondent has
sent you via email).
Close
Closes the currently open Eudora window.
Close All [Option]
Closes all open Eudora windows.
Save
Saves the changes to the currently open Eudora window.
Save All [Option]
Saves the changes to all open Eudora windows.
Save As...
Saves the currently open message, or selected message
summaries, to a plain text file. Or, saves the currently open
or selected outgoing message(s) to a stationery file. Or,
saves the currently open plain text file with a new name.
Import Mail...
Opens the Import Mail dialog box. You can import mail,
address book, and settings from Outlook Express.
Send Queued
Messages
Sends all messages that are queued for delivery in your Out
box (marked with a Q in the Status column of the message
summary).
Send Messages
Specially...
[Option]
Displays the Mail Transfer Options dialog so that you can
send messages from any or all of your personalities with
special transfer instructions for the server.
Check Mail
Retrieves new mail from the incoming mail server
associated with your Dominant personality (email account).
(Mail for alternate personalities is checked depending on
your settings in the Personalities settings for each
personality.)
Check Mail
Specially...
[Option]
Displays the Mail Transfer Options dialog so that you can
check mail for any or all of your personalities with special
storage and transfer instructions for the server.
Page Setup...
Sets your printing options, e.g., paper size and orientation.
Print...
Prints the currently open message or plain text file, the
currently selected message(s) in a mailbox window, or other
open windows in Eudora (such as the Address Book).
Print Selection...
[Shift]
Print the selected text only.
Print One Copy
Print one copy of the currently open message or selected
message summaries, bypassing the Print dialog.
QUALCOMM Incorporated
213
Edit Menu
Eudora User Manual
Choose this
command
This happens...
Quit
Quits (exits) the Eudora application.
Edit Menu
This menu provides text editing tools.
Edit menu
Choose this
command
This happens...
Undo/Redo
Undo: Reverses the last action taken.
Redo: Re-perform the action that has been undone.
Cut
Deletes the selected text and place it on the Clipboard.
Copy
Copies the selected text and place it on the Clipboard.
Copy & Unwrap
[Option]
Copies the selected text to the Clipboard but remove the
carriage returns at the end of each line.
Copy Without
Styles [Shift]
Copies the selected text to the Clipboard but remove all
style information.
Copy Without
Styles & Unwrap
[Shift+Option]
Copies the selected text to the Clipboard but remove all
style information and remove the carriage returns at the end
of each line.
Paste
Inserts the contents of the Clipboard at the current cursor
position (insertion point).
QUALCOMM Incorporated
214
Eudora User Manual
Edit Menu
Choose this
command
This happens...
Paste Without
Styles [Shift]
Inserts the contents of the Clipboard at the current cursor
position (insertion point), but inserts it as plain text only,
removing any style information.
Paste As
Quotation
Inserts the contents of the Clipboard at the current cursor
position (insertion point), but inserts it as quoted (excerpted)
text, with a continuous excerpt bar (sidebar) at the left.
Clear
Deletes the selected text, or detaches from the outgoing
message the attachment selected in the X-Attachments
field.
Text
Submenu. Applies text styles to the selected text or
paragraph or to the text beginning at the insertion point or
the paragraph containing the insertion point. See the figure
and table below for more details on the commands on this
submenu.
Text [Option]
Displays the Completely Plain command on the Text
submenu. This command removes all styles from the
current or selected text. See the following section for more
details.
Select All
Selects everything in the current message window, mailbox
window, or other window (e.g., Mailboxes window).
Wrap Selection
Inserts carriage returns at the end of each line of the
selected text, as appropriate. This results in approximately
76 characters per line.
Unwrap Selection
[Option]
Removes the carriage returns at the end of each line of the
selected text.
Finish Address
Book Entry
(Sponsored and Paid modes only) After you have typed the
first few letters of a nickname, Eudora finishes the nickname
for you.
Finish & Expand
Address Book
Entry [Option]
(Sponsored and Paid modes only) After you have typed the
first few letters of a nickname, Eudora finishes the nickname
for you and then replaces it with the real address(es)
associated with that nickname.
Insert Recipient
Submenu. Insert the quick recipient nickname selected from
this submenu, along with commas, if necessary, to separate
it from other addresses or nicknames. Note: If there are no
nicknames on your Quick Recipient List, this submenu
contains only the item No_Quick_Recipients_Defined.
See Using the Recipient List on page 198 for more details.
Insert & Expand
Recipient
[Option]
Submenu. Inserts the quick recipient nickname selected
from this submenu, and expands the nickname into its
associated real address(es), including commas where
necessary.
QUALCOMM Incorporated
215
Edit Menu
Eudora User Manual
Choose this
command
This happens...
Message
Plug-ins
Submenu. Selects one of the message plug-in operations
from this submenu to modify the text in an incoming or
outgoing message or to otherwise perform message-related
operations on the current message. You can also use the
About Message Plug-ins... command on the Apple menu
to see what message plug-ins you have installed. For more
details, see Using Eudora Plug-ins in the General
Reference chapter in the online user manual.
Speak
(Sponsored and Paid modes only) Allows highlighted
message(s) in a mailbox s message summary list or an
open message to be read to you aloud.
Spelling
(Sponsored and Paid modes only) Submenu. Uses the
commands on this submenu to instruct Eudora s built-in
spelling checker to check the spelling of a message, text file,
signature file, or stationery file, or the selected text. For
more details, see the last entry in this table, and also see
Checking Your Spelling (Sponsored and Paid modes only)
on page 46.
Add Word
Service...
Add AppleEvent-aware word processing functions to the
Edit menu.
Text Submenu
The Text submenu under the Edit menu lets you apply text styles to selected text and the
insertion point in composition messages, text files, signature files, and stationery files.
Text submenu
QUALCOMM Incorporated
216
Eudora User Manual
Edit Menu
Choose this
command
This happens...
Plain, Bold,
Italic,
Underline
Applies the selected style to the selected text or to text typed
beginning at the insertion point.
Completely
Plain [Option]
Removes all style information from the selected text (or the
insertion point) and returns it to plain text in the default font and
size.
Quote,
Unquote
(Sponsored and Paid modes only) Quote: Adds one level of
quoting (excerpt bars or sidebars) to the selected text or
paragraph or to the paragraph containing the insertion point.
Unquote: Removes one level of quoting.
Left, Center,
Right
(Sponsored and Paid modes only) Aligns the paragraph(s)
containing the selected text or the insertion point to the left
margin, the center, or the right margin.
Margins
(Sponsored and Paid modes only) Submenu. Applies the
specified margin or formatting to the paragraph(s) containing
the selected text or the insertion point. Normal applies the
normal margin, flush left with the left side of the message (if
alignment is also Left). Indent indents one level. Indent 2,
Indent 3, and Indent 4 indent the specified number of levels.
With Bullets converts the selected paragraphs or the current
paragraph to a bulleted list, but this option is only available if the
Send styled mail with option in the Styled Text settings is set to
HTML.
Color
(Sponsored and Paid modes only) Submenu. Applies the
specified color to the selected text or the insertion point. The
options are No Color (black by default), Red, Green, Blue,
Yellow, and Brown.
Font
Submenu. Applies the specified font to the selected text or the
insertion point. The options are all fonts installed and available
on your system.
Size
Submenu. Applies the specified size to the selected text or the
insertion point. Options are Smallest, Smaller, Small, Normal,
Big, Bigger, and Biggest. These settings do not correspond to
specific point sizes, and what your recipient sees may depend
on the default font size set in their email software. For example,
Normal may be 12 points on your system but 14 or 18 points on
your recipient s.
Insert
Horizontal
Rule
(Sponsored and Paid modes only) Inserts a horizontal separator
line at or above the current cursor position. This command is
only available if the Send styled mail with option in the Styled
Text settings is set to HTML.
Insert
Graphic...
(Sponsored and Paid modes only) Inserts a picture (graphic file)
in message text at the current cursor position. This command is
only available if the Send styled mail with option in the Styled
Text settings is set to HTML.
QUALCOMM Incorporated
217
Edit Menu
Eudora User Manual
Choose this
command
Link to URL...
This happens...
(Sponsored and Paid modes only) Converts the selected text to
a hyperlink to a URL. You specify the URL when prompted. This
command is only available if the Send styled mail with option
in the Styled Text settings is set to HTML and text in the
message is selected.
Spelling Submenu
(Sponsored and Paid modes only)
The Spelling submenu under the Edit menu lets you use Eudora’s built-in spelling checker
to check your spelling in composition messages, text files, signature files, and stationery
message files. For more details, see “Checking Your Spelling (Sponsored and Paid modes
only)” on page 46.
Spelling submenu
Choose this
command
This happens...
Check Spelling
Checks the spelling in the current message or the text,
signature, or stationery file. Misspellings are highlighted in
the window.
Find Next
Misspelling
Finds the next misspelling in the spell-checked message or
file. This command is only available following a spelling
check.
Add to Dictionary
Adds the selected word, which has been marked as a
misspelling, to your User Dictionary.
Remove from
Dictionary
Removes the selected word, which is not marked as a
misspelling, from your User Dictionary. (This action adds the
word to your User Anti-Dictionary.)
[Suggested
Corrections]
If you have displayed the Spelling submenu following a
spelling check and while a word marked as a misspelling is
selected, Eudora lists on this submenu, under the other
commands, its suggestions for the correct spelling of the
misspelled word. If Eudora has no suggestions in its
dictionary, however, no suggestions are listed on this
submenu.
QUALCOMM Incorporated
218
Eudora User Manual
Mailbox Menu
Mailbox Menu
This menu lets you open a mailbox, or bring an open mailbox to the front, and also create
new mailboxes.
Mailbox menu
Choose this
command
This happens...
In
Opens the mailbox where incoming messages are stored until
they are deleted or transferred to another mailbox.
Out
Opens the mailbox where messages you compose are stored,
where queued messages are held until actually sent, and where
copies of sent messages may initially be stored.
Trash
Opens the mailbox where deleted messages are stored.
New...
Displays the New Mailbox dialog to create a new mailbox. Note:
The New... command also appears on all folder submenus
(POP and IMAP), in which case the mailbox is created within
that folder (see below).
Other...
Opens a mailbox that is not stored in your Eudora Folder (within
your System Folder), and add an alias for that mailbox to the
Mailbox and Transfer menus. This alias is deleted when you quit
Eudora. Note: The Other... command also appears on all folder
submenus (POP only, not IMAP), in which case the mailbox
alias is stored in that folder and is not deleted when you quit
Eudora; it remains there until you actively delete it from the
Mailboxes window.
[Your
Mailboxes]
Opens the selected mailbox that you have created.
[Your Folders]
Selects a mailbox from any of the folders or subfolders you have
created to open that mailbox. Or, select New... or (POP only)
Other..., as described above.
QUALCOMM Incorporated
219
Message Menu
Eudora User Manual
Choose this
command
[IMAP Account
root folders]
This happens...
If your email account is stored on an IMAP server, or if you have
multiple personalities and the incoming mail server for one or
more of them uses IMAP (Server Configuration is set to IMAP
in the Personality Extras settings), your IMAP account root
folders are listed here after your POP account mailboxes and
folders (if you have a POP account). Eudora lists one IMAP root
folder for each IMAP personality you have set up. The folder
name is the personality name of that IMAP personality. Select a
mailbox from any of your IMAP folders or subfolders to open
that IMAP mailbox. Or, select New... to create a new mailbox
within the account, folder, or subfolder, as described above. For
more details, see Managing Your Mail on the IMAP Server on
page 87.
Message Menu
This menu lets you create, send, and delete messages, as well as add attachments and
also change certain properties of a message.
Message menu
QUALCOMM Incorporated
220
Eudora User Manual
Message Menu
Choose this
command
This happens...
New Message
Opens a new message composition window so that you can
create a new message and send it.
Reply
Replies to the sender of the currently open or selected
message. If Reply to all By default is turned on in the
Replying settings, then you must hold down the Option key to
display this command.
Reply To All
[Option]
Replies to the sender and all of the original recipients of the
currently open or selected message. If Reply to all By
default is turned on in the Replying settings, you do not need
to hold down the Option key.
Reply Quoting
Selection [Shift]
Replies to the sender only, and instead of quoting the entire
message, quote only the text you ve selected from the original
message. If Reply to all By default is turned on in the
Replying settings, then you must hold down both the Shift and
Option keys to display this command.
Reply Quoting
Selection To All
[Shift+Option]
Replies to the sender and all of the original recipients, and
instead of quoting the entire message, quotes only the text
you ve selected from the original message. If Reply to all By
default is turned on in the Replying settings, you only need
hold down the Shift key, not also the Option key.
Forward
Sends a copy of the currently open or selected message to
someone else. The entire message is quoted, including the
header.
Redirect
Sends a copy of the currently open or selected message to
someone else, but uses the original sender s address as the
return address. That way, if your recipient responds to the
message, the response goes to the original sender rather than
you. This is a message handoff. It says, I got this message
but it really should have gone to you. Here it is, and now I m
out of the loop. Note that the text is not quoted, and only the
message body is included.
Send Again
Resends a message that has been rejected by the mail
system. Eudora reformats the message for you to make it look
just as it did when you first sent it. You can also use this
command to resend any message and thereby save typing:
you can resend a long message to another recipient, or send
a different message to the same long list of recipients. In this
sense, Send Again lets you treat any message like a
stationery file.
New Message
To
Submenu. Sends a new message to someone on your Quick
Recipient List. This submenu lists all of the nicknames on your
Quick Recipient List. Selecting a nickname creates a new
message addressed to that nickname or the individual(s)
represented by it. For more details, see Using the Recipient
List on page 198.
Forward To
Submenu. Sends a copy of the currently open or selected
message to someone on your Quick Recipient List.
QUALCOMM Incorporated
221
Message Menu
Eudora User Manual
Choose this
command
This happens...
Redirect To
Submenu. Sends a copy of the currently open or selected
message to someone on your Quick Recipient List, but uses
the original sender s address as the return address. If Turbo
redirect by default is turned on in the Miscellaneous settings,
you need to hold down the Option key to display this
submenu title.
Turbo Redirect
To [Option]
Submenu. Performs a turbo redirect to someone on your
Quick Recipient List: redirect the currently open or selected
message to the selected nickname, queues the redirected
message in your Out box, and deletes the original message,
all in one step. If Turbo redirect by default is turned on in the
Miscellaneous settings, you do not need to hold down the
Option key.
Turbo Redirect
Without Delete
to [Shift+Option]
Submenu. Performs a turbo redirect (as above) to someone
on your Quick Recipient List, but does not delete the original
message. If Turbo redirect by default is turned on in the
Miscellaneous settings, hold down just the Shift key (without
the Option key).
New Message
With
(Sponsored and Paid modes only) Submenu. Creates a new
message that is formatted using the selected stationery file.
This submenu provides a handy way to use stationery.
Reply With
(Sponsored and Paid modes only) Submenu. Replies to the
sender of the currently open or selected message, and
formats the reply using the selected stationery. If Reply to all
By default is turned on in the Replying settings, you must
hold down the Option key to display this submenu title. This
submenu and its variants provide a handy way to create
replies that use stationery.
Reply To All
With [Option]
Submenu. Replies to the sender and all of the original
recipients of the currently open or selected message, and
formats the reply using the selected stationery. If Reply to all
By default is turned on in the Replying settings, you do not
need to hold down the Option key.
Reply Quoting
Selection With
[Shift]
Submenu. Replies to the sender of the currently open or
selected message, quote only the text you ve selected from
the original message, and formats the reply using the selected
stationery. If Reply to all By default is turned on in the
Replying settings, you must hold down both the Shift and
Option keys to display this submenu title.
Reply Quoting
Selection To All
With
[Shift+Option]
Submenu. Replies to the sender and all of the original
recipients of the currently open or selected message, quotes
only the text you ve selected from the original message, and
formats the reply using the selected stationery. If Reply to all
By default is turned on in the Replying settings, just hold
down the Shift key (without the Option key).
Attach
Document...
Displays a file selection dialog to select a Macintosh
document file or application file that will be attached to and
sent with the message you are composing. Also used to insert
the contents of a text file into the message you are
composing.
QUALCOMM Incorporated
222
Eudora User Manual
Message Menu
Choose this
command
This happens...
Attach
Submenu. The items on this submenu correspond to your
installed message plug-ins that create attachments. Select
one of the items to use that plug-in to create a special file that
will be attached to and sent with the message you are
composing. For example, the PureVoice plug-in lets you
create a voice recording that you can attach to and send with
your message. See Using Eudora Plug-ins in the General
Reference chapter in the online user manual.
Send
Immediately
Sends the currently open or selected composition message
right now. A selected message must have the Queued or
Sendable status. This command appears only if the
Immediate send option is turned on in the Sending Mail
settings.
Queue For
Delivery
Queues the currently open or selected composition message
in your Out box (marking it with a Q in the Status column), so
that it is ready for sending the next time queued messages are
sent. A selected message must have the Sendable status.
This command appears only if the Immediate send option is
turned off in the Sending Mail settings (it replaces Send
Immediately, above).
Change
Queueing...
[Option]
Displays the Change Queueing dialog so that you can change
the send or queue status of the currently open or selected
outgoing message. This command appears in place of Send
Immediately or Queue For Delivery, depending on whether
Immediate send is turned on or off in the Sending Mail
settings.
Change
Submenu. Changes any of the following properties of the
currently open or selected message: queueing, status, priority,
label, personality, or server options. See the separate section
below for more details. Note that the Status, Priority, Label,
and Server Options submenus under this submenu
correspond to the column popup menus for the corresponding
columns in an open mailbox window or a Search window with
the Results pane visible. For an outgoing message, the
Personality submenu corresponds to the Personality popup
in the From field of an outgoing message.
Delete
Transfers the currently open or selected message into the
Trash mailbox.
Nuke
[Shift+Option]
Permanently removes the currently open or selected message
from your Macintosh without first transferring it to the Trash
mailbox. If the message has attachments, these are moved
into the Finder Trash. Caution: Nuked messages cannot be
recovered! (You can recover their attachments, however,
before emptying the Finder Trash.)
QUALCOMM Incorporated
223
Message Menu
Eudora User Manual
Change Submenu
The Change submenu under the Message menu lets you change certain properties of the
currently open or selected message.
Change submenu
The Status, Priority, Label, and Server Options submenus under this submenu correspond
to the column popup menus for those columns in a mailbox window or Search window
(Results pane). The Personality submenu corresponds to the Personality popup in the
From field of an outgoing message only.
Choose this
command
This happens...
Queueing...
Displays the Change Queueing dialog in order to change the
send or queue status of the currently open or selected outgoing
message. Similar to Change Queueing... accessed directly
under the Message menu when you hold down the Option key
(see the previous table).
Status
Submenu. Changes the status of the currently open or selected
message (incoming or outgoing). Options are Unread, Read,
Replied, Forwarded, Redirected, Recovered, Unsendable,
Sendable, Queued, Timed Queue, Sent, Unsent, Transfer
Error, and Being Sent. (Some of these actions are not
selectable.) For more details on the various status values a
message can have, see Status Column on page 113.
Priority
Submenu. Changes the priority of the currently open or selected
message. Options are Highest, High, Normal, Low, Lowest,
Raise (raises the priority by one level), and Lower (lowers the
priority by one level). For more details on priority values, see
Priority Column on page 114 and also see Setting the
Message Priority on page 37. You can also change the priority
of an open message (incoming or outgoing) from the Priority
popup on the icon bar of the open message window.
Label
Submenu. Changes the label of the currently open or selected
message. Select one of the 15 defined labels, or select None for
no label. For more details on label values, see Label Column
on page 115, and also see Mailbox Display on page 261.
Personality
(Sponsored and Paid modes only) Submenu. Changes the
personality associated with the currently open or selected
message. Select ˙Dominant¨ or any of your alternate
personalities. Note: This submenu appears only if you have
more than one personality set up in Eudora.
QUALCOMM Incorporated
224
Eudora User Manual
Message Menu
Choose this
command
Server
Options
This happens...
Submenu. For the currently open or selected message,
changes the action that the POP or IMAP server will perform on
the server s copy of the message the next time mail is checked
from that server. The commands on this submenu differ
according to whether the message is stored on a POP or IMAP
server. See the separate sections below for more details.
Server Options Submenu
The commands on this submenu control what is done to the copy of the currently open or
selected message the next time mail is checked from that server. Different commands are
shown on this submenu depending on whether the server copy of the current message is
stored on a POP or IMAP server. Both variations of the submenu are shown below.
For more details on the POP versions of these commands, see “Server Status Column” on
page 116 and “Managing Your Mail on the POP Server” on page 81. IMAP users, see
“Managing Your Mail on the IMAP Server” on page 87 for details on the IMAP versions of
these commands.
Server Options submenu for POP (left) and IMAP servers
Choose this
command
This happens...
Do Nothing
The next time mail is checked, don t do anything with the
message on the POP server; don t fetch it, don t delete it.
Fetch from
Server
The next time mail is checked, download the entire message
from the POP server.
Delete from
Server
The next time mail is checked, delete the message from the
POP server.
Fetch & Delete
The next time mail is checked, download the entire message
from the POP server and delete the message from the POP
server.
Choose this
command
This happens...
Fetch
Message Text
Immediately download from the IMAP server the entire text of
the message, including the message header and the message
body.
Fetch
Attachments
Immediately download from the IMAP server all attachment files
that are attached to this message.
QUALCOMM Incorporated
225
Transfer Menu
Eudora User Manual
Choose this
command
This happens...
Mark as
Deleted
Immediately mark this message on the IMAP server as deleted.
Remove
Cached
Contents
Immediately remove the message from your local cache (in the
IMAP Folder), but leave the original message on the IMAP
server.
Transfer Menu
This menu lets you transfer the currently open message, or the currently selected
message summaries in a mailbox window, to another mailbox.
Note. If you hold down the Option key while transferring the message(s), a copy of the
message is placed in the destination mailbox, and the original message is left where it is.
Transfer menu
Choose this
command
This happens...
In
Transfers the current message(s) to the In mailbox.
Out
Transfers the current message(s) to the Out mailbox.
Trash
Transfers the current message(s) to the Trash mailbox.
New...
Displays the New Mailbox dialog to create a new mailbox, then
transfers the current message(s) into that mailbox. Note: If
New... is selected from a folder submenu, the new mailbox is
created in that folder.
QUALCOMM Incorporated
226
Eudora User Manual
Special Menu
Choose this
command
This happens...
Other...
Transfers the current message(s) to a mailbox that is not stored
in your Eudora Folder (within your System or Documents
Folder) and adds an alias for that mailbox to the Transfer and
Mailbox menus. This alias is deleted when you quit Eudora.
Note: If you select Other... from a folder submenu (POP only),
then the mailbox alias is stored in that folder and is not deleted
when you quit Eudora: it remains there until you actively delete
it.
[Your
Mailboxes]
Transfers the current message(s) to the selected mailbox that
you have created.
[Your Folders]
Transfers the current message(s) to the selected mailbox stored
in the folder or subfolder you have created. Or, select New... or
(POP only) Other..., as described above.
[IMAP
Mailboxes and
Folders]
Transfers the current message(s) to the selected IMAP mailbox,
or select New... as described above. See Mailbox Menu on
page 219 for more details, and see Managing Your Mail on the
IMAP Server on page 87 for the rules governing IMAP-to-IMAP
and POP-to-IMAP, as well as IMAP-to-POP, transfers.
Special Menu
This menu lets you perform a variety of maintenance and other special tasks in Eudora.
Special menu
QUALCOMM Incorporated
227
Special Menu
Eudora User Manual
Choose this
command
This happens...
Filter Messages
Filters the currently open message or selected message
summaries against all manual filters in your filters list. Manual
filters are those for which the Manual checkbox is checked in
the Match area of the Filters window for that filter, or in the
Match area of the Make Filter dialog when you created that
filter. See Filtering Messages on page 135 for more details.
Make Address
Book Entry...
Creates an entry in your Address Book (a nickname)
containing the address(es) in the open or selected
message(s) or other window where this command is available.
See the chapter Using the Address Book on page 181 for
more details.
Make Address
Book Entry
From
Selection...
[Shift]
Creates an entry in your Address Book (a nickname)
containing the selected address(es). See the above-cited
chapter for more details.
Make Filter...
Opens the Make Filter dialog to create a simple transfer filter
using the information in the currently open or selected
message(s). See Filtering Messages on page 135 for more
details.
Find
Submenu. The Find commands on this submenu let you look
for a text string in a currently open window (not just message
windows but other windows as well). The Search commands
open a Search window so you can perform more advanced
searching for specific information in messages across a wide
range of mailboxes and mail folders. For more details, see the
separate section below and Finding and Searching on page
149.
Sort
Submenu. Sorts the message summaries in an open mailbox
window, or in the Results pane of a Search window, in
ascending order by the selected column. You can also select
Group Subjects to turn on and off the grouping of messages
by subject to create conversational threads such as those
seen in Internet newsreaders. For more details, see Sorting
Messages on page 145. Note that the by Mailbox option is
available only in a Search window, with the Results pane
active.
Sort
Descending
[Option]
Submenu. Same as the item immediately above, but sort the
messages in reverse order by the selected column,
descending rather than ascending.
Settings...
Opens the Settings dialog so that you can modify your Eudora
settings. For complete descriptions of all Eudora settings, see
Setting Eudora Preferences on page 245.
QUALCOMM Incorporated
228
Eudora User Manual
Special Menu
Choose this
command
This happens...
Plug-in Settings
Submenu. This submenu lists your installed message plug-ins
that have settings you can configure. Selecting an item opens
a settings dialog for that plug-in. Modify the settings as
desired, then click OK to save your changes or Cancel to
discard them. For more details, see Using Eudora Plug-ins in
the General Reference chapter in the online user manual. To
see a listing of all your installed message plug-ins, select
About Message Plug-ins... from the Apple menu, but note
that this list may be a mixture of message plug-ins with
settings and those without.
Change
Password...
Changes the password of your email account on the incoming
mail server. Note that this requires a special password-change
server that is not available at all sites. Check with your ISP or
your email administrator to see if the password-changing
feature is available to you.
Change
Password for
Selected
Personalities...
Changes your password on the associated incoming mail
server for each of the personalities (email accounts and their
variations) currently selected in the open Personalities
window. This command appears on the Special menu only if
the Personalities window is open and one or more personality
items are selected in the list. Note that a password-change
server is required for each email account for which you want
to change your password. Check with your ISP or your email
administrator to determine whether you can use this feature
for a particular email account.
Forget
Password
Makes Eudora forget your password so that your mail cannot
be checked without re-entry of your password. That is, the
next time you or someone else attempts to check your mail,
you (or they) will be prompted for your account password. This
is useful if you should step away from your desk and are
concerned about others checking and reading your mail
without your knowledge or authorization.
Forget
Password for
Selected
Personalities
Makes Eudora forget your password for each of the
personalities currently selected in the open Personalities
window, so that mail cannot be checked for those
personalities without re-entry of the appropriate password.
This protects you from unauthorized checking and reading of
your mail by others who might have access to your computer.
This command appears only on the Special menu if the
Personalities window is open and one or more personality
items are selected in the list.
Empty Trash
Deletes all messages from the Trash mailbox. These
messages are permanently removed from your Macintosh.
Note: If you have one or more IMAP accounts, and at least
one of them has a Trash mailbox on its associated IMAP
server, Empty Trash empties your local (POP) Trash mailbox
(if you have one) along with any remote (IMAP) Trash mailbox
for any IMAP server you ve connected to recently. For more
details, see Managing Your Mail on the IMAP Server on
page 87.
ESP Groups
Opens the ESP window where you can create and maintain
ESP share groups.
QUALCOMM Incorporated
229
Special Menu
Eudora User Manual
Choose this
command
This happens...
Remove Deleted
Messages
[Option]
For all messages marked as deleted in the currently open
IMAP mailbox, removes those messages from the IMAP
server and from your computer. This command appears only if
the currently open mailbox resides on an IMAP server and if
the Use a trash mailbox on the IMAP server option is turned
off in the Personality Extras settings for the associated IMAP
personality. See Managing Your Mail on the IMAP Server on
page 87 for more details.
Empty All Trash
Mailboxes
[Option]
Empties all messages both your local (POP) Trash mailbox if
you have one, and all of the remote IMAP Trash mailboxes
that you have created on the IMAP servers for your IMAP
accounts. This command appears only if you have one or
more IMAP accounts and the Use a trash mailbox on the
IMAP server option is turned on in the Personality Extras
settings for at least one of these accounts (or a Trash mailbox
has been created on the IMAP server for one of these
accounts). See Managing Your Mail on the IMAP Server on
page 87 for more details.
Empty Local
Trash Mailbox
[Shift]
Empties of all messages the local (POP) Trash mailbox only.
This command only appears if you have one or more IMAP
accounts and at least one of them has an associated Trash
mailbox. This command gives you a way to restrict the taking
out the trash to the local Trash only, leaving the remote IMAP
Trash mailboxes untouched. See Managing Your Mail on the
IMAP Server on page 87 for more details.
[Plug-in Names]
Selects one of these items to use that installed plug-in. These
items are added to the bottom of the Special menu when
certain Eudora plug-ins are installed. See Using Eudora
Plug-ins in the General Reference chapter in the online user
manual for more details.
Find Submenu
The commands on the Find submenu let you find a text string in the currently open window
or search for more complicated information in messages throughout a wide range of your
mailboxes and mail folders, including all of them. For complete details, see “Finding and
Searching” on page 149.
Find submenu
QUALCOMM Incorporated
230
Eudora User Manual
Window Menu
Choose this
command
This happens...
Find...
Opens the Find dialog or make it active, so that you can enter
a text string and begin searching for that string in the currently
open message window, mailbox window, or other searchable
Eudora window.
Find Again
Finds the next occurrence of the specified text string in the
currently open searchable Eudora window. Eudora wraps to
the top of the window if it finds no occurrences in the
remainder of the window.
Enter Selection
Uses the selected text as the new Find string; place this text in
the Find field of the Find dialog, whether that dialog is open
(and inactive) or closed. Lets you change find strings in the
middle of a Find operation in the currently open window, so
that you can immediately look for new text without having to
make the Find dialog active (or even open it). Also uses the
selected text as the new default search string in currently
open and subsequently opened Search windows subject to
certain conditions.
Search
Opens a new Search window to prepare for the search. You
set your search conditions and click the Search button to
begin the search.
Search All
If a string of text is selected anywhere in Eudora, open a new
Search window and search through all of your mailboxes for
that text string. This lets you perform a Turbo Search on
selected text.
Search Mailbox
If a message window is open and text is selected in that
window, open a new Search window and search for the
selected text in the mailbox that contains the open message.
This lets you perform a Turbo Search on a selected text
string and restrict it to the current mailbox only.
Search
Mailfolder
If a message window is open and text is selected in that
window, open a new Search window and search for the
selected text in all mailboxes under the mail folder that
contains the open message. This lets you perform a Turbo
Search on a selected text string and restrict it to the
containing mail folder only.
Window Menu
This menu lets you work with windows in Eudora. You can bring them to the front of the
window stack, send them to the back of the stack, open special windows called “tool”
windows (or make them active), and apply and remove tabs to these tool windows and
tabbed window groups. (For more information on tabbed windows, see “Managing
Windows in Eudora” on page 171.)
Note. Tool windows are the windows named in the middle section of the Window menu,
beginning with the Address Book and ending with the Task Progress window.
QUALCOMM Incorporated
231
Window Menu
Eudora User Manual
Window menu
Choose this
command
This happens...
Send to Back
Sends the topmost (current) window to the back of all open
Eudora windows.
Tabs
This command is active only if the topmost (current) window is
either a single tool window (with or without a tab) or a tabbed
window group. In the case of a single window with a tab, Tabs is
checked (checkmark next to it), and selecting Tabs removes the
tab. In the case of a single window without a tab, Tabs is
unchecked, and selecting it adds a tab to the window. In the
case of a tabbed window group, Tabs is checked, and selecting
it removes all tabs from the member windows, and hides all
member windows except the currently active one in the group.
For more details, see Managing Windows in Eudora on page
171.
Revert to
Default Tabs
[Option]
Recombines all tool windows (except Task Progress) into their
default tabbed window group configurations. See Managing
Windows in Eudora on page 171 for more details.
Address Book
Opens the Address Book or bring it to the front for creating and
editing nickname entries. See Using the Address Book on
page 181 for complete details.
Directory
Services
Opens the Directory Services window or bring it to the front to
use online directories to look people up on the Internet or your
local Intranet. See Using Directory Services on page 201 for
complete details.
Filters
Opens the Filters window or bring it to the front to create and
edit filters that organize your messages. See Filtering
Messages on page 135 for complete details.
Mailboxes
Opens the Mailboxes window or bring it to the front to create,
rename, move, and remove your mailboxes and mail folders.
See the chapter Working with Mailboxes on page 111 for full
details, and IMAP users should also see Managing Your Mail
on the IMAP Server on page 87 for supplementary details.
QUALCOMM Incorporated
232
Eudora User Manual
Window Menu
Choose this
command
This happens...
Personalities
(Sponsored and Paid modes only) Opens the Personalities
window or bring it to the front to create, rename, edit, and
remove personalities (multiple email accounts or variations of
accounts). See Using Multiple Personalities (Sponsored and
Paid modes only) on page 69 for full details. IMAP users see
Managing Your Mail on the IMAP Server on page 87 for
additional information on setting up IMAP personalities.
Signatures
Opens the Signatures window or bring it to the front, to create,
rename, edit, and remove your custom signatures. See Using a
Signature on page 61 for full details.
Stationery
(Sponsored and Paid modes only) Opens the Stationery window
or bring it to the front to create, rename, edit, and remove
stationery message files. These are canned or template
messages that can be used to send the same information over
and over again. See Using Stationery (Sponsored and Paid
modes only) on page 64 for full details.
Statistics
(Sponsored and Paid modes only) Opens the Statistics window
to let you see your Eudora usage by day, week, month, or year.
Link History
(Sponsored and Paid modes only) Opens the Link History
window displaying all links (ads, URLS) you activated.
Task Progress
Opens the Task Progress window or bring it to the front to view
the progress of tasks being performed by Eudora in the
background, and to set automatic mail-checking options. See
Managing Windows in Eudora on page 171 for a description of
this window and its features.
[Your Open
Mailbox and
Message
Windows]
Brings the selected mailbox window or message window to the
front of all open Eudora windows.
QUALCOMM Incorporated
233
Help Menu
Eudora User Manual
Help Menu
Use this menu to access online help topics and to turn Balloon Help on and off.
Help menu
Command
Description
About Balloon
Help...
Displays a dialog giving you brief information on how to use
Balloon Help.
Show Balloons,
Hide Balloons
Selects Show Balloons to turn on Balloon Help, then point to
an item on your screen to display a help balloon containing
help information on that item. Select Hide Balloons to turn off
Balloon Help. If you have an extended keyboard with a Help
key, you can press that key to turn Balloon Help on and off.
About This
Release
This online help topic displays a description of the new
features in this latest release of Eudora and may also contain
descriptions of the newest features in the most recent major
release of Eudora.
[Online Help
Topics]
Selects one of these items to obtain help on that topic.
QUALCOMM Incorporated
234
Eudora User Manual
Scripts Menu (Sponsored and Paid Modes only)
Command
Description
PureVoice Help
Displays help information for using the QUALCOMM
PureVoice“ Player/Recorder plug-in (and application) for
recording, sending, receiving, and playing voice messages
with your email. This help topic only appears if, when you
installed this version of Eudora (or selected earlier versions),
you chose an installation option that also installed PureVoice.
If you installed PureVoice, it is available from the Attach
submenu from the Message menu when a new composition
message is open.
Payment and
Registration
Displays the Payment and Registration window where you
can change to another Eudora operating mode: Sponsored,
Paid, or Light. You can also register your copy of Eudora.
Insert System
Configuration
Inserts information about your computer at the insertion point
in the message body of an open composition message. This is
useful for including your system configuration when you
communicate with the Eudora Technical Support Group about
a problem you are having, or when you send us information on
a problem found in the software, so that in either case we can
determine what went wrong.
Scripts Menu
(Sponsored and Paid Modes only)
A Scripts menu can be displayed on Eudora’s menu bar if you have AppleScripts for
Eudora. You can add new AppleScripts to this menu. You can delete AppleScripts as well.
You can create toolbar icons for the Script menu options the same way you create icons in
Eudora.
To display Eudora’s Script menu, do the following:
1
In the Finder, create a new folder and name it Scripts.
2
Move the new folder in the Eudora Stuff folder found in Eudora Application Folder. If
you have any AppleScripts for Eudora, move them to this folder.
3
4
Quit and restart Eudora.
From the menu bar, choose Scripts. The Scripts menu appears showing the AppleScripts you have in the newly created Scripts folder.
Scripts menu
QUALCOMM Incorporated
235
Scripts Menu (Sponsored and Paid Modes only)
Eudora User Manual
To add or delete AppleScripts to the Scripts menu, do the following:
1
Choose Open Scripts Folder. The Scripts folder appears.
Scripts folder
2
To add a new AppleScript, drag and drop the new script into the Scripts folder. To
delete an AppleScript, drag and drop the script from the Scripts folder to another folder.
To add a Scripts option icon to the Eudora toolbar, do the following:
1
Move the pointer to the spot you want the new Script option icon to go. Press the
Command key. The Toolbar Button Creation dialog appears.
Toolbar Button Creation
2
From the Scripts menu, choose the option you want represented as an icon on the
toolbar. The icon is added to the toolbar.
3
Click the icon to perform the same task as the option in the Scripts menu.
QUALCOMM Incorporated
236
Using Modifiers and Shortcuts
Modifiers
Certain functions in Eudora can be implemented by holding down one or more “modifier”
keys while performing another action. Eudora uses the Shift, Option, Command, and
Control keys as modifier keys.
Eudora’s modifiers can be divided into two groups. The first consists of all those modifiers
that do not appear anywhere in Eudora’s menus. The second consists of all those modifiers that result in modified command names appearing on Eudora’s menus.
If you hold down the Shift key, the Option key, or both while you pull down a Eudora menu,
the menu shows the names of any modified commands that may be available.
For full descriptions of the names and functions of all of Eudora’s menu commands and
their modifications, see “Using Menu Commands” on page 211.
Modifiers Not Reflected in Eudora’s Menus
The following table lists all those modifiers that do not appear anywhere in Eudora’s
menus as renamed commands.
Press this key
and do this task.
This happens....
Shift + Open Eudora
Opens Eudora offline (does not check for mail, even if a mail checking
interval is set. You must first double-click the Eudora application icon
and then quickly press the Shift key until Eudora is fully started. You
may also open Eudora by selecting Eudora from the Apple menu).
Shift + Delete/Transfer
Does not open the next message after deleting or transferring the
current message.
Shift + Sort
Adds or removes the column as an extra sort criterion. This lets you
unsort or sort while preserving the previous sort(s). You can thus sort
by sender, then within sender by date, then within date by subject, then
unsorts by subject and preserve the sort by sender and the subsort by
date.
Shift + To:/Cc:/Bcc:
From the Address Book, does not bring the composition window to the
front after inserting the nickname.
Shift + Directory Services
Opens the Directory Services window with the selected text in the
Enter query field and perform the query.
Shift + click globe icon in
Directory Services
window
Lists all servers except the reference list of Ph servers. That is, lists the
Configured server, the Servers used recently, and the LDAP
servers, but does not list the Ph servers. (To list all servers, including
the Ph list, click the globe icon, without using the Shift key.)
Shift + drag selected text
Copies and pastes the selected text to the destination but without
including any style information.
QUALCOMM Incorporated
237
Modifiers
Eudora User Manual
Press this key
and do this task.
This happens....
Option + Transfer
Puts a copy of the current message in the selected mailbox and leave
the original (current) message where it is.
Option + Forward
Forwards the message without using quote characters.
Option + Queue/Send
Opens the Change Queueing dialog.
Option + Notify Sender
Removes the return receipt request but do not notify the sender.
Option + Double-click
URL
Displays a file dialog to select an Internet application (e.g., web
browser) to use for that URL type.
Option + Make Address
Book Entry...
Creates a nickname consisting of the sender of the message and all the
original recipients (or just the sender if the Reply to all By default
setting is turned on in the Replying settings).
Option + To:/Cc:/Bcc:
From the Address Book, inserts the full address instead of the
nickname (or don t, if the Expand nicknames immediately setting is
turned on in the Composing Mail settings).
Option + drag Attachment
from message window or
preview pane
Copies the attachment to another folder on your desktop.
Option + double-click a
stationery item in
Stationery window
Opens the stationery file for editing.
Option + click a mailbox
size display
Compacts all mailboxes. (To compact the current mailbox only, simply
click the mailbox size display, without using the Option key.)
Option + click a column in
a message summary in a
mailbox window
Selects and groups all messages sharing that message s value for that
column for example, all messages to or from that sender , or sent on
that date, or having the same subject (including replies), or the same
priority or label.
Option + drag Address
Book entries to the Finder
Saves the entries as a text clipping with tab-delimited entries. (To save
them in standard nickname format, just do the drag without the Option
key.)
Click a mailbox column
header (in a mailbox
window)
Sorts the messages in that mailbox by that column. Use Option + click
to sort in descending order, or Shift + click to add or remove the
column as an extra sort criterion (see Shift + Sort above).
Control + Command +
click Attachment
Opens the folder on your computer that holds the attachment, and
highlight the attachment.
Command + click
Attachment name, icon,
or picture
Opens or launches the attachment (same as a simple double-click).
Command + click URL
Opens your web browser or other appropriate application and go to the
URL (same as a simple double-click the URL).
Command + click server
URL in servers list in
Directory Services
window
Goes to that server to perform a query (same as a simple double-click).
QUALCOMM Incorporated
238
Eudora User Manual
Modifiers
Press this key
and do this task.
This happens....
Command + click the title
bar of an open message
or mailbox window
Opens or highlights the mailbox or folder containing that item.
Command + click
between two toolbar
buttons
Adds a new button to the main toolbar.
Command + drag a
toolbar button elsewhere
on the toolbar
Moves a button on the main toolbar. (Drops the button between two
other buttons or at either end of the toolbar.)
Command + drag a
toolbar button to the
Trash (on the Finder)
Removes the button from the main toolbar.
Command + click a
toolbar button
Changes the function of that main toolbar button.
Shift + click an item
In many Eudora windows, lets you select multiple items in sequence.
Click the first item in the sequence, then Shift + click the last item. The
whole group is selected.
Command + click an item
In many Eudora windows, lets you make nonconsecutive selections,
and add or subtract an item from a group selection, (selects or
deselects the item nonconsecutively).
Command + Control +
Option + Shift +
Settings...
Reverts all but your basic Eudora settings to their default values. (The
Settings... command is under the Special menu.)
Modifiers That Show Up As New Commands on Eudora’s Menus
The table below lists all those modifiers that result in new commands (modified command
names) appearing on Eudora’s menus.
The commands are organized by menu (going left to right across the menu bar) and are
listed top to bottom down each menu.
The left column shows the modifier key(s) and the name of the unmodified command. The
middle column shows the new name of the modified command as it appears on the menu.
The right column shows the resulting action of the modified command.
Press this key
and choose this
command
Displays this
modified command
Then this happens...
Option + Close
Close All
Closes all open Eudora windows.
Option + Save
Save All
Saves all currently open outgoing messages in
Eudora.
File Menu
QUALCOMM Incorporated
239
Modifiers
Eudora User Manual
Press this key
and choose this
command
Displays this
modified command
Then this happens...
Option + Send
Queued Messages
Send Messages
Specially...
Sends messages with special instructions for the
server.
Option + Check Mail
Check Mail
Specially...
Checks mail for any or all personalities with special
storage and transfer instructions for the server.
Shift + Print...
Print Selection...
Prints the current selection only.
Shift + Copy
Copy Without Styles
Copies the selected text but remove all style
information.
Option + Copy
Copy & Unwrap
Copies the selected text but removes all carriage
returns.
Shift + Option + Copy
Copy Without Styles
& Unwrap
Copies the selected text but removes all style
information and carriage returns.
Shift + Paste
Paste Without Styles
Pastes from the clipboard but first removes any
style information from the text to be pasted.
Option + Plain
Completely Plain
Removes all style information from the selected
text and returns it to the default settings. (This
command appears under the Text submenu from
the Edit menu.)
Option + Wrap
Selection
Unwrap Selection
Removes all carriage returns from the selected
text.
Option + Finish
Address Book Entry
Finish & Expand
Address Book Entry
Completes the nickname and expands it into its
associated address(es).
Option + Insert
Recipient
Insert & Expand
Recipient
Inserts the nickname and expands it into its
associated address(es).
Shift + Reply
Reply Quoting
Selection
Replies quoting the currently selected text only, not
the entire message.
Option + Reply
Reply To All
Replies to the sender and all recipients (or just the
sender, if the Reply to all By default setting is
turned on in the Replying settings).
Shift + Option +
Reply
Reply Quoting
Selection To All
Replies to the sender and all recipients, quoting
the selected text only (or just to the sender, if the
Reply to all By default setting is turned on).
Option + Redirect To
Turbo Redirect To
Performs a Turbo Redirect; that is, redirects to
the selected nickname on the Quick Recipient List,
queues the redirected message, and deletes the
original message, all in one step (or simply
Redirect, if the Turbo redirect by default setting
is turned on in the Miscellaneous settings).
Edit Menu
Messsage Menu
QUALCOMM Incorporated
240
Eudora User Manual
Modifiers
Press this key
and choose this
command
Displays this
modified command
Shift + Option +
Redirect To
Turbo Redirect
Without Delete To
Performs a Turbo Redirect, as above, but without
deleting the original message (performs a simple
Redirect if the Turbo redirect by default setting is
turned on in the Miscellaneous settings).
Shift + Reply With
Reply Quoting
Selection With
Replies with the selected stationery, quoting the
selected text only.
Option + Reply With
Reply To All With
Replies with the selected stationery, to the sender
and all recipients (or just the sender, if the Reply
to all By default setting is turned on in the
Replying settings).
Shift + Option +
Reply With
Reply Quoting
Selection To All With
Replies to the sender and all recipients using the
selected stationery and quoting the selected text
only (or just the sender, if the Reply to all By
default setting is turned on in the Replying
settings).
Option + Send
Immediately or
Option + Queue For
Delivery
Change Queueing...
Displays the Change Queueing dialog to change
the queueing status of the current message.
Shift + Option +
Delete
Nuke
Nukes the message; Removes it permanently from
your computer without first moving it to the Trash
mailbox. Caution: Nuked messages cannot be
recovered!
Shift + Make Address
Book Entry...
Make Address Book
Entry From
Selection...
Makes an Address Book entry (nickname) from the
current selection. (Note that something must be
selected for the modified name to appear on the
menu.)
Option + Sort
Sort Descending
Sorts in reverse order (descending rather than
ascending).
Revert To Default
Tabs
Reverts to the default configuration for tabbed
window groups.
Then this happens...
Special Menu
Window Menu
Option + Tabs
QUALCOMM Incorporated
241
Shortcuts
Eudora User Manual
Shortcuts
The keyboard shortcuts for Eudora commands and functions are shown in the table below.
The Command key, on most Macintosh keyboards, is marked with Apple Computer’s
“apple” logo and/or a cloverleaf.
If a shortcut corresponds to a menu command that can be modified with the Shift key or
Option key or both, you can similarly modify the shortcut. See the previous modifier tables.
Note that menu-command shortcuts execute the command without opening the menu.
Press these keys...
This happens...
Command + .
Stops the current action
Command + 0
Out (opens the Out mailbox)
Command + 1
In (opens the In mailbox)
Command + 6
Checks spelling (Eudora s built-in spelling checker)
Option + Command + 6
Finds next misspelling
Shift + Option +
Command + 6
Adds to dictionary (add unknown word to spelling dictionary)
Command + -
Sends queued messages
Command + =
Enters selection (into Find window)
Command + \
Sends to back (moves current window to the back of all Eudora
windows)
Command +
Adds levels of excerpt bars
Command + Option +
Removes levels of excerpt bars
Command + ,
Finishes address book entry (finishes nickname)
Command + [
Lowers priority
Command + ]
Raises priority
Command + A
Select All
Command + B
Make the selected text bold
Command + C
Copy
Command + D
Delete
Command + E
Send immediately, or queue for delivery
Command + F
Find... (opens the Find window to search for a text string in the
current message)
Option + Command + F
Searches for messages in mailboxes and folders
Command + G
Find Again (in the current message)
Command + H
Attach Document... (attach a file to a message)
QUALCOMM Incorporated
242
Eudora User Manual
Shortcuts
Press these keys...
This happens...
Command + I
Makes the selected text italic
Command + J
Filter Messages (execute manual filters on the selected messages)
Command + K
Make Address Book Entry... (make nickname)
Command + L
Address Book (open it)
Command + M
Check Mail
Command + N
New Message (open one)
Command + O
Open... (open file)
Command + P
Print...
Command + Q
Quit Eudora
Command + R
Reply
Command + S
Save
Command + T
Make the selected text plain
Command + U
Make the selected text underlined
Command + V
Paste
Command + W
Close (close the window or message)
Command + X
Cut
Command + Y
Directory Services (open the window)
Command + Z
Undo/Redo
Command + Option +
click Toolbar
Moves toolbar
Arrows
Moves from one message to another in a mailbox (depends on your
Moving Around settings)
Command+Arrows
Moves from one file to another in the Address Book.
Return or Enter
Selects the outlined button in any dialog, alert, or window, or open
the selected message(s)
Spacebar
Opens a selected message summary (or scroll its preview down
through the message preview pane), or close the current open
message. For long open messages, scroll the message down one
page.
Esc
Stops any operation currently in progress
Help
Turns Balloon Help on or off
F1
Undo/Redo, or main toolbar function. Note: Function keys can be
linked to main toolbar buttons by turning on the Map function keys
to buttons option in the Toolbar settings.
QUALCOMM Incorporated
243
Shortcuts
Eudora User Manual
Press these keys...
This happens...
F2
Cut
F3
Copy
F4
Paste
Home
Scrolls the window to the beginning
End
Scrolls the window to the end
Page Up, Page Down
Scrolls up or down through the window
QUALCOMM Incorporated
244
Setting Eudora Preferences
Introduction
To display settings dialogs where you can specify how you want to use Eudora are found
in the Settings option under the Special menu. By selecting or turning off options in these
dialogs, you can customize how you want Eudora to manage your mail.
When you first install Eudora, the Settings dialogs contain preset or default settings. You
can turn on new settings or change any of the default settings (brackets [ ] indicate the
default setting). Once finished, just click OK and your settings are changed.
Note. For your convenience, some settings appear in more than one category. For
example, your return address appears in both the Getting Started settings dialog and the
Sending Mail settings dialog. Changing an setting in one category changes the setting in
all categories in which it appears.
Getting Started
In the Getting Started settings dialog, you can determine the minimum information necessary for you to send and receive email. The information you enter here is for your dominant
personality, which is your primary email account.
To display the Getting Started settings dialog, do the following:
1
From the Special menu, choose Settings.
2
Click the Getting Started icon. The Getting Started settings dialog appears.
Getting Started settings
QUALCOMM Incorporated
245
Checking Mail
Eudora User Manual
Select the settings you want to change. Settings are described below.
Checking Mail
Username [blank]—(required entry) Enter your user name, that is, the name you use to
log into your primary email account. This name is provided by your Internet Service
Provider (ISP) or your company’s email administrator. For example, in the incoming mail
account
[email protected], the login name is John.Davis.
Mail Server [blank]—(required entry) Enter the name of your incoming mail server for
your principal email account. All incoming messages to your primary account are routed
through this server. Use the Hosts settings dialog to specify whether this server uses POP
(Post Office Protocol) or IMAP (Internet Message Access Protocol). A sample server
name might be worldmail.myfirm.com. Check with your ISP or your company’s email
administrator if you’re not sure what to enter here.
Sending Mail
Real name [blank]—(required entry) Enter the name assigned to your principal account,
generally your first and last name. The text you enter here is included in the From: field in
all of your outgoing messages from this account. It identifies you to your recipients.
SMTP Server—Enter the name of the outgoing mail sever for your principal email account
if different than the incoming mail server name, for example: smtp1.myfirm.com. All
outgoing messages sent from your primary account are routed through this server. If the
computer that runs your primary incoming mail account is the same as your outgoing mail
server, you can leave this field blank.
Return address [blank]—(if not username@mailhost) Enter the return email address
that has been assigned to you by your ISP or your company’s email administrator. This is
the address that other people use to send you email. Also, the address you enter here is
included in the From: field in all of your outgoing messages from this account. When a
recipient replies to a messages from this account, the reply is sent to this address.
If you do not enter an enter an address in this field, Eudora uses your incoming mail
account as the return address. Incoming mail accounts are usually in the following format:
username@mailhost. For example, suppose your incoming mail account is
[email protected] but your return address is
[email protected]. You would then enter [email protected] in this
field.
Checking Mail
The Checking Mail settings determine how Eudora checks for and receives your incoming
mail messages.
Note. The display of some of the fields in this settings dialog depends on what you choose
in the Server Configuration field: POP or IMAP. Following, the fields common to both
server configurations are listed, and then the fields particular to each server configuration,
POP and then IMAP.
QUALCOMM Incorporated
246
Eudora User Manual
Checking Mail
To display the Checking Mail settings dialog, do the following:
1
From the Special menu, choose Settings.
2
Click the Checking Mail icon. The Checking Mail settings dialog appears.
Checking Mail settings (POP server)
Select the settings you want to change. Settings are described below.
Account/Server Information (POP and IMAP)
Username—This is your email user name carried over from the Getting Started settings.
Mail Host—This is the name of your incoming mail server, carried over from the Getting
Started settings.
Mail Protocol [POP]—Choose either the POP or IMAP setting that corresponds to the
protocol used by your incoming mail server. If your incoming mail server uses the Post
Office Protocol (POP), choose POP. If your incoming mail server uses the Internet
Message Access Protocol (IMAP), choose IMAP.
If you are not sure which item to select, choose POP. But you should get the actual value
from your email administrator or your ISP. Tip: If all of your mailboxes are created and
stored on your local computer (your Macintosh), you are probably using POP. If all of your
mailboxes are created and stored remotely, on the incoming mail server itself (rather than
on your computer), you are probably using IMAP.
Authentication [Passwords]—Specify which POP authentication technology to use with
your email account: Passwords, Kerberos, or APOP. Ask your email administrator which
one to specify.
Save password [off]—Turn this setting on so your password is remembered even if you
quit and restart Eudora. You’ll never be prompted to enter it. You should use this setting
only if your computer is in a secure place.
QUALCOMM Incorporated
247
Checking Mail
Eudora User Manual
(POP only) Overlap commands [off]—Turn this setting on to have Eudora send
commands to your POP server immediately, instead of waiting for a previous command to
be completed. Using this setting is faster, but not all servers will comply.
Connection (POP and IMAP)
Check for mail every ? minutes [off, blank]—Enter the number of minutes for the time
interval you want Eudora to automatically check your POP server for new mail. This setting
works only when Eudora is running. Leaving the text box empty turns off automatic
checking even if you check the checkbox. Also, unchecking the setting turns off automatic
checking even if there is a number in the text box. Fifteen minutes or more is recommended for automatic mail checks.
Don’t auto-check when using battery [off]—Turn this setting on if you don’t want your
mail automatically checked when your computer is running on battery power (even if you
have the Check for mail every ? minutes setting turned on).
Use background threading [on]—Turn this setting on so Eudora can check your mail in
the background when an automatic or manual mail check is initiated. Also, you can
perform other functions at the same time such as composing messages. If this is off when
a mail check is initiated, you must wait until Eudora finishes checking your mail before you
can perform another function. See also the Use separate thread for sending setting in the
Sending Mail settings, which lets you perform other functions while Eudora sends mail in
the background.
Send on check [on]—Turn this setting on if any messages queued in your Out mailbox
(and marked with a Q in the Status column of the message summary) are sent when mail
is checked, whether the mail-check is automatic or manual. (Timed-queue messages—
those marked with a clock icon in the Status column of the Out box—are sent only if their
time constraints are satisfied.)
Mail Management (POP only)
Leave on server for ? days [off, blank]—Turn this setting on and enter the number of
days you want Eudora to leave messages on the POP server. When this setting is on,
Eudora copies incoming messages to your computer whenever you check for mail. If you
leave the text box blank, your mail is left on the server indefinitely. See “Leaving Mail on
the Server” on page 83 for more information.
Delete from server when emptied from trash [off]—Turn this setting on to delete
messages from your Trash mailbox and POP server.
Skip messages over ? K [off, 40]—Turn this setting on and enter a file size (in Kilobytes)
in the text field, and Eudora will not retrieve the message in it’s entirety if it’s over the file
size you specified here. These messages are retrieved only in part, which include the first
few lines of the message along with a statement that says the message is not complete.
This setting can be useful if you have a slow connection.
QUALCOMM Incorporated
248
Eudora User Manual
Checking Mail
Checking Mail settings (IMAP server)
(IMAP only) Location Prefix [blank]—This tells Eudora where to look for your mail on the
incoming IMAP mail server. Normally you enter a folder location representing the pathway
to your mailboxes. An example mailbox location prefix is /usr/mail/. If you are not sure
what to enter in this field, ask your email administrator or your ISP.
Download Options (IMAP only)
When you check mail for your IMAP account, these options (you can only choose one) tell
Eudora how much of each incoming message to retrieve from the IMAP server to your
computer. You can retrieve just the essential headers, or, alternately, the entire message
and any attachments under a specified size.
Minimal headers only [on]—If this setting is on, only a limited set of message headers,
and nothing else, is retrieved for each incoming IMAP message. The remaining headers,
the message body, and any attachments are not retrieved with the message, but are left
on the server for you to retrieve later. The headers tell you whom the message is from, the
date and time it was sent, and the subject. Once you have this information, you can then
decide whether you want to retrieve the full message and any attachments, or just delete
the message.
Full message except attachments over ? K [off, 40]—If this setting is on and a number
is entered in the box, the full message (full set of message headers and the message
body) and any attachments smaller than the specified size are retrieved for each incoming
IMAP message. Any attachments larger than the specified size are not retrieved with the
message but are left on the server for you to retrieve later. If you want Eudora to retrieve all
of your IMAP attachments for this account, enter a large number in this field. If you don’t
want attachments retrieved when you check your mail, enter 0 in this field.
Full message with attachments—If this setting is on, the full message and all attachments, regardless of size, are retrieved for each incoming IMAP message for your dominant personality.
QUALCOMM Incorporated
249
Sending Mail
Eudora User Manual
Note. Use of a Trash mailbox for a Dominant IMAP account is governed by the Use a trash
mailbox on the IMAP server setting in the Personality Extras settings when Server Configuration is set to IMAP.
Sending Mail
The Sending Mail settings determine how Eudora sends your outgoing mail messages.
To display the Getting Started settings dialog, do the following:
1
From the Special menu, choose Settings.
2
Click the Sending Mail icon. The Sending Mail settings dialog appears.
Sending Mail settings
Select the settings you want to change. Settings are described below.
Server
Return address (if not username@mailhost) [blank]—This is your return email address
carried over from the Getting Started settings dialog.
Default Domain [blank]—Enter the domain name that Eudora automatically adds to an
unqualified name. An unqualified name is a name that doesn’t have an “@” sign followed
by a domain name. For example, suppose your domain name is myfirm.com and you
enter that in this field. If you address a message to joe (assuming joe is not a nickname
in your Address Book), Eudora sends the message to [email protected].
SMTP Server [blank]—This is the name of your outgoing (SMTP) mail server, carried
over from the SMTP field of your Hosts settings. If the computer that runs your incoming
mail server (POP or IMAP) also runs an SMTP server, you can leave this field blank.
QUALCOMM Incorporated
250
Eudora User Manual
Sending Mail
Allow Authentication [on]—If this setting is checked, Eudora can log in to an SMTP
server when sending mail, just like it does for receiving mail. Not all SMTP servers require
or allow such authentication. Eudora will attempt authentication to servers that allow it.
The preferred SMTP authentication method is CRAM-MD5. If CRAM-MD5 is not available,
LOGIN or PLAIN will automatically be used.
Connection
Immediate send [on]—When this setting is on, the button at the far right of the icon bar in
an open new message composition window is labeled Send. Clicking the Send button
immediately sends the message to the SMTP server. If this setting is off, the same button
is labeled Queue and clicking it places the message in the Out mailbox marked ready for
delivery (Q).
Use separate thread for sending [on]—When this setting is on, the sending function
performs simultaneously with other Eudora functions. For example, if this setting and the
Use background threading setting in the Checking Mail settings are both turned on, you
can send, receive, and compose messages all at the same time.
Send on check [on]—When this setting is on, any messages that are queued in the Out
mailbox are sent when mail is checked, whether the mail-check is automatic or manual.
Message
Fix curly quotes [on]—When this setting is on, Eudora replaces all “curly” quotation
marks in message text or text attachments with “conventional” (straight) quotation marks
prior to sending the message. It also replaces bullets (•) and en/em dashes (–/—). These
marks are special characters, and this setting allows messages to be sent without using
quoted-printable encoding.
If your recipients have Multipurpose Internet Mail Extensions (MIME), there’s no reason to
use the above setting. Only turn it on if most of the people you correspond with don’t use
MIME.
Automatically Fcc to original mailbox [off] (Sponsored and Paid modes only)—If you
turn this setting on, replies are automatically copied to the same mailbox that contains the
original message. However, this feature does not apply to your In box. Fcc stands for folder
carbon copy.
Keep copies [on]—If you turn this setting on, a copy of each message you send is kept in
the Out mailbox. If this setting is off, a copy of each outgoing message is put in the Trash
mailbox after the message is sent.
QUALCOMM Incorporated
251
Composing Mail
Eudora User Manual
Composing Mail
The Composing Mail settings determine what Eudora features are available to you when
composing messages.
To display the Composing Mail settings dialog, do the following:
1
From the Special menu, choose Settings.
2
Scroll and click the Composing Mail icon. The Composing Mail settings dialog
appears.
Composing Mail Settings
Select the settings you want to change. Settings are described below.
Account Information
Return address (if not username@mailserver) [blank]—This field is carried over from
the Getting Started and Sending Mail settings dialogs.
Default Domain [blank]—This field is carried over from the Sending Mail settings dialog.
Nickname Expansion
Auto-complete nicknames [on] (Sponsored and Paid modes only)—When this setting is
on, a name you enter in the To:, Cc: or Bcc: field of a new message composition window
appears in boldface type if a nickname for this name exists in your Address Book. Eudora
completes the nickname and address for you.
Expand nicknames immediately [off] (Sponsored and Paid modes only)—If you turn
this setting on, nicknames you type in the recipient header fields (To:, Cc:, and Bcc:) are
replaced with the real addresses when you switch fields.
QUALCOMM Incorporated
252
Eudora User Manual
Spell Checking (Sponsored and Paid modes only)
Use these settings:
The values you choose for the following options apply only when you are not using stationery; that is, when the Stationery popup is set to None. If, on the other hand, you have
selected a stationery file in that popup, then the values below are ignored. Instead, Eudora
sets the icon bar of the new message according to how the stationery message was
saved. So, if you choose stationery that uses an Alternate signature, and you set the
Signature popup below to a Standard signature, your Alternate signature will be used in
the new message created from the stationery file.
Signature [Standard]—Select a signature from the popup, or select None for no signature. If you select a signature, Eudora automatically attaches that signature to the end of
outgoing messages from your Dominant account. You can override this setting with the
Signature popup in the composition window. See “Using a Signature” on page 61.
Word wrap [on]—When this setting is on, a carriage return is not required at the end of
each line of type in an outgoing message. Eudora automatically wraps text to the next line,
with line breaks at roughly 76 characters per line. This makes your mail more legible to
recipients using line-oriented mail systems. It is strongly recommended that you leave this
setting on.
May use Quoted-Printable [on]—If you turn this setting on, Eudora uses quoted-printable encoding when necessary, such as when sending messages that contain long lines
of text or special characters. If this setting is off, quoted-printable encoding is never used.
It is recommended that you leave this setting on.
Keep copies of outgoing mail [on]—This field is carried over from the Sending Mail
settings dialog.
Or, take settings and text from stationery
Stationery [None]—Select a stationery file from the popup, or select None for no stationery. If a stationery file is selected, that file is used when you open new messages (except
with the Redirect or Send Again commands under the Message menu). The icon bar in the
message window is set according to how the stationery message was saved, regardless
of the settings under Options when not using stationery in this dialog. However, you can
always change these settings from the icon bar after you open the new message.
Spell Checking (Sponsored and Paid modes only)
The Spell Checking settings control the behavior of Eudora’s built in spelling checker. You
can check the spelling in message composition windows, text files, and signature files. For
more information, see “Checking Your Spelling (Sponsored and Paid modes only)” on
page 46.
To display the Spell Checking settings dialog, do the following:
1
From the Special menu, choose Settings.
2
Scroll and click the Spell Checking icon. The Spell Checking settings dialog appears.
QUALCOMM Incorporated
253
Spell Checking (Sponsored and Paid modes only)
Eudora User Manual
Spell Checking settings
Select the settings you want to change. Settings are described below.
Check Spelling
Automatically as you type—If Automatically as you type is on, Eudora checks your
spelling as you are typing within a message, a text file, or a signature file. As you type,
spelling errors are highlighted and underlined. You can make corrections now or later.
Only when requested—If Only when requested is on, Eudora checks your spelling only
when you select Check Spelling from the Spelling submenu or its associated shortcut or
toolbar button.
Warn when sending/queueing message with misspellings [off]—If you turn this
setting on, the message is first checked for spelling errors. If no misspellings are found,
the message is sent or queued. But if misspellings are found, the errors are highlighted
and an alert appears, giving you the choice of either sending the message as is, with the
errors (Send Anyway), or correcting the errors before sending (Cancel). If this setting is
off, messages are not spell-checked when sent or queued.
If the warning alert appears and you click Cancel, every subsequent attempt to send or
queue the message will cause the alert to be displayed until there are no misspellings in
the message (or until you click Send Anyway).
Ignore
words with
These settings control whether Eudora’s spelling checker checks or ignores certain
common classes of words during a spelling check.
The spelling checker always ignores quoted text. Quoted text, also called excerpted text, is
normally preceded by continuous excerpt bars, one bar for each level of quote on the left
side of the text. Eudora assumes that this text was originally from another message and
does not need to be checked.
QUALCOMM Incorporated
254
Eudora User Manual
Attachments
Initial capitals (Nostromo) [off]—If you turn this setting on, the spelling checker ignores
any word that begins with a capital letter, such as a proper name. If this is off, the spelling
checker checks all such words against the spelling dictionaries.
Mixed capitals (noSTRomo) [off]—If you turn this setting on, the spelling checker
ignores any word that contains a mixture of uppercase and lowercase characters. If this is
off, the spelling checker checks all such words against the spelling dictionaries.
Numbers (n8str9m0) [off]—If you turn this setting on, the spelling checker ignores any
word that contains numbers. If this is off, the spelling checker checks all such words
against the spelling dictionaries.
All capitals (NOSTROMO) [off]—If you turn this setting on, the spelling checker ignores
any word that contains all capital letters, such as an acronym. If this is off, the spelling
checker checks all such words against the spelling dictionaries.
Suggest words that
These settings determine the kinds of suggestions offered by Eudora’s Spelling Dictionaries for the correct spelling of a word that is marked as misspelled during a spelling
check. The suggested words appear on both the Spelling submenu and (if available) the
Control key context popup menu. Only one of these settings can be selected at a time.
Look like the word you typed [on]—When this setting is on, then Eudora suggests
replacement words that are typographically similar to the word marked as misspelled.
Sound like the word you typed [off]—If you turn this setting on, then Eudora suggests
replacement words that are phonetically similar to the word marked as misspelled.
Look or sound like the word [off]—If you turn this setting on, then Eudora suggests both
look-alike and sound-alike replacement words for the word marked as misspelled.
Never make suggestions [off]—If you turn this setting on, then Eudora never suggests
replacement words for any word marked as misspelled by the spelling checker.
Attachments
The Attachments settings determine how Eudora sends and receives attachments.
To display the Spell Checking settings dialog, do the following:
1
From the Special menu, choose Settings.
2
Scroll and click the Attachments icon. The Attachments settings dialog appears.
QUALCOMM Incorporated
255
Attachments
Eudora User Manual
Attachments settings
Select the settings you want to change. Settings are described below.
Sending Attachments
Encoding method [BinHex]—This specifies what encoding method to use for attached
documents sent with outgoing mail. The options are AppleDouble, AppleSingle, BinHex,
and Uuencode. To change the method for just the current message, use the Attachment
Type popup in the outgoing message window. For more details, see “Attaching a File to a
Message” on page 43.
Always include Macintosh information [off]—If you turn this setting on, Macintosh
resources and types are included in attachments if they are basic MIME types. It may be
advisable to turn this off when sending attachments to non-Macintosh users.
Receiving Attachments
Attachment Folder [blank]—This setting lets you specify the folder in which Eudora
should place incoming attachments when they are received. To specify an attachment
folder, click the long button. A dialog appears prompting you to select a folder. If you do not
select an attachment folder, Eudora stores your incoming attachments in the Attachments
Folder in your Eudora Folder, contained in your Documents Folder.
TEXT files belong to [TeachText]—This specifies what application is used to open text
files. When you choose the Save As command from the File menu, Eudora creates a text
file that is saved for the application named in this field. You may want to set this setting to
your favorite word processing program. To change the application, click the application
name button. A dialog appears letting you select an application.
Trash attachments with messages [off]—If this setting is on, Eudora automatically
deletes an attachment received with a message when that message is deleted. The
attachment must still be in the folder defined as the Attachment Folder. If you want to save
an attachment but delete the message, move the attachment to another folder or turn this
setting off.
QUALCOMM Incorporated
256
Eudora User Manual
Replying
Receive MIME digests as attachments [on]—When this setting is on, MIME digests are
converted to Eudora mailboxes. If this is off, MIME digests will be displayed as a single
long message.
Replying
The Replying settings determine how replies are created.
To display the Replying settings dialog, do the following:
1
From the Special menu, choose Settings.
2
Scroll and click the Replying icon. The Replying settings dialog appears.
Replying settings
Select the settings you want to change. Settings are described below.
Reply to all
This setting specifies under what circumstances a reply goes to everyone in the original
message.
By default (use options key for sender only)—If this setting is turned on, the Reply To
All command appears under the Message menu, and a normal reply is addressed to all
the recipients of the original message. Hold down the Option key to create a reply to just
the sender.
When option key is down—If this setting is turned on, the Reply command appears
under the Message menu, and a normal reply is addressed only to the sender of the original message. In this case you can hold down the Option key to create a reply addressed
to the sender and all the recipients of the original message.
QUALCOMM Incorporated
257
Fonts & Display
Eudora User Manual
Address Handling for Reply to All
This setting specifies other particulars of addressing a reply-to-all message.
Include Yourself—If this setting is on, you receive a copy of your own reply when you
Reply to all. Your address is left in the address list of the new message. If this setting is off,
your address is removed from the reply message, and you do not receive a copy of the
reply.
Put original To: recipients in Cc: field, not To: field —If this setting is on, the addresses
of the original message recipients are moved from the To: field to the Cc: field of the
reply-to-all message. Only the address of the original sender is placed in the To: field. If
this setting is off, all of the addresses are placed in the To: field of the reply message.
To determine who you are for the Include yourself setting, Eudora uses the “me” nickname, You create the “me” nickname in your Address Book. If you do not have a “me” nickname, Eudora uses the contents of the Username, Mail Host, and Return address fields
from the Getting Started settings.
Treat lists specially—If this setting is on and if you Reply to all, mailing lists will be
included in your reply. However, this function does not work with all mailing lists.
Priority Handling
Copy original’s priority to reply [on]—When this setting is on, your replies use the same
priority as the original message.
Fonts & Display
The Fonts & Display settings determine how Eudora displays windows and text.
To display the Fonts & Display settings dialog, do the following:
1
From the Special menu, choose Settings.
2
Scroll and click the Fonts & Display icon. The Fonts & Display settings dialog appears.
QUALCOMM Incorporated
258
Eudora User Manual
Fonts & Display
Fonts & Display settings
Select the settings you want to change. Settings are described below.
Note. For each of the following three options, select the desired font from the popup and
type the point size in the text box.
Screen Font, Size [Mishawaka, 9]—These settings specify the font and point size to be
used for text displayed in message windows (incoming and outgoing), mailbox windows
(message summaries and the preview pane), and Search windows (message summaries
and the preview pane in the Results dialog).
Fixed-Width Font, Size [Monaco, blank]—These settings specify the font and point size
to be used for text displayed in open incoming messages when you click the Fixed Width
button on the icon bar of the open message window. Be sure to select a fixed-width
(monospaced) font from the popup, rather than a proportional font. For more details, see
“Incoming Message Window” on page 91.
Print Font, Size [Courier, blank]—These settings specify the font and point size to be
used for printed text in messages you print using the Print command from the File menu
and its variants (Print One Copy, Print Selection).
Colors—To change the colors for each of these settings, click the color area and select
the new color using the Macintosh color picker that appears. (If you are given the choice of
multiple color pickers, select the one you want.)
Text [black]—This specifies the color to be used for text displayed in Eudora
messages, mailbox windows, and Search windows.
Quotes [gray]—This specifies the color to be used for displaying quoted (excerpted)
text in replies. The Quotes color is an additional visual cue that helps you and your
correspondents distinguish quoted text from the new text you type.
Background [white]—This specifies the background color to be used in Eudora
messages, mailbox windows, and Search windows. Be sure that the color you select
here provides a sufficient contrast to the new and quoted text colors so that you can
read your text.
QUALCOMM Incorporated
259
Fonts & Display
Eudora User Manual
Dimensions of message windows:
Width [80]—This specifies the width in number of characters of new message
windows and received message windows when you open them. If you leave this field
blank, Eudora uses the default value of 80. This setting has no effect on what your mail
looks like when it is sent. When mail is sent, Eudora wraps at or before 76 columns if
the Word wrap setting is turned on in the Composing Mail settings or on the icon bar of
the outgoing message. If Word wrap is turned off, the message text flows to fit the width
of the recipient’s window.
If you use a proportional font for your Screen Font, Eudora sets the window width
based on the width of the “0” character.
Height [blank]—This specifies the height in number of lines of new message windows
and received message windows when you open them. If you leave this field blank,
Eudora uses a default value of 20.
If the Zoom windows when opening setting is turned on and you open a received
message, the window height is automatically adjusted to the height of the message
text.
Zoom windows when opening [on]—When this setting is on, mailbox windows and
message windows automatically open to their “zoomed” size. The zoomed size is
computed on a window-by-window basis. For mailbox windows, zoomed size is just wide
enough to display the widest summary and just long enough to display all the summaries,
or all the summaries and the message preview pane. (The default preview pane is 12 lines
high.) For message windows, zoomed size is just long enough to display all of the
message (but no longer than the Macintosh display screen), and as wide as the Width
setting in this dialog. Composition windows zoom to the height specified by the Height
setting (20 if blank).
Display graphics in messages [on]—This setting controls the way Eudora displays
graphics that are either inserted into the body of a message or attached to the message
as an attachment file. If this setting is on, Eudora displays both inserted graphics and
graphics attachments as pictures in the open incoming message window and in the
message preview pane in mailbox windows and Search windows. If this setting is off,
Eudora displays inserted graphics as icons and displays graphics attachments as name
and icon pairs. See the Automatically download HTML graphics setting description.
Show formatting toolbar [off]—If you turn this setting on, the formatting toolbar appears
by default in new message windows. This toolbar lets you easily format text styles in new
messages. If this is off, the formatting toolbar is hidden by default in new message
windows. You can turn this toolbar on and off in the current message by clicking the
formatting toolbar icon on the icon bar.
Use Live Scrollbars [off]—If you turn this setting on, the contents of the window scrolls
smoothly through the window as you drag the scroll slider in a Eudora window. If this is off,
the contents of the window do not move as you drag the scroll slider. When you release
the slider, the window is updated to show the contents at the new position.
Automatically download HTML graphics [on]—When this setting is on and you open an
incoming message containing HTML graphic images, you can see the pictures right in the
open message or in the preview pane. You must be connected to the Internet at the time
you open or preview the message. If this setting is off, HTML graphic files cannot be
retrieved when you open or preview the message. The HTML graphic image appears as a
broken-graphic icon. You can retrieve the graphics at any time (and online) by opening the
message and clicking the Get HTML Graphics button on the icon bar of the open message
QUALCOMM Incorporated
260
Eudora User Manual
Mailbox Display
window. Turning this setting off does not affect HTML graphic files already retrieved. That
is, even if you turn this setting off, HTML graphics that are already downloaded will still
appear as pictures in the open message or preview pane, rather than as broken-graphic
icons.
HTML graphic files that are downloaded to your computer via this setting are stored in
your Cache Folder, which is in the Eudora Folder contained in your Documents Folder.
This Cache Folder is managed the way cache folders are managed in web browser applications. Files continue to be added to the folder and when the folder reaches a certain
size, the oldest least-used image files are deleted to make room for new image files. For
more details, see “Eudora Folders” on page 311.
Animate animated GIF images[off]—Turn this feature on to display animated GIF
images embedded in HTML messages.
Mailbox Display
The Mailbox Display settings control the display of the contents of mailbox windows.
These settings determine which columns appear, whether separator lines appear, whether
the message preview pane appears by default in all mailbox windows, and the conditions
under which previewed messages that are marked “unread” (blue bullet in Status column)
are automatically marked “read” (blank Status column).
Note. Search window Results panes appear according to the settings in this dialog. For
more details, see “Finding and Searching” on page 149.
To display the Mailbox Display settings dialog, do the following:
1
From the Special menu, choose Settings.
2
Scroll and click the Mailbox Display icon. The Mailbox Display settings dialog appears.
Mailbox Display settings
Select the settings you want to change. Settings are described below.
QUALCOMM Incorporated
261
Mailbox Display
Eudora User Manual
Columns
Status, Priority, Attachments, Label, Who, Date, Size, Server, Mood]— Turning on any
of these settings (all are on by default) causes the corresponding column to be displayed
in mailbox windows. The Subject column is always displayed in mailbox windows. You can,
however, resize the Subject column in a mailbox window so that the column is hidden.
Drawing
Draw horizontal separator lines [on]—If you turn this setting on, horizontal separator
lines appear in mailbox windows separating message summaries.
Draw vertical separator lines [off]—If you turn this setting on, vertical separator lines
appear in mailbox windows separating columns.
Use Finder list color scheme [on]—If you turn this setting on, the background color of
the Mailbox window will be the same as the Finder’s color.
Show count of selected messages [off]—If you turn this setting on, the number of
messages you select appears to the left of the number of messages in a mailbox (located
on the left side of the bar between the mailbox and the preview pane).
Message Preview
These settings control whether the message preview pane is shown or hidden by default
in all mailbox windows, as well as the conditions under which unread messages being
previewed are automatically marked read. For more details, see “Message Preview Pane”
on page 118.
Show message previews by default [on]—If you turn this setting on, the message
preview pane appears by default in all mailbox windows. If this is off, the message preview
pane is hidden by default in all mailbox windows.
Whether this setting is on or off, you can always show or hide the message preview pane
in any open mailbox window by using the preview pane show/hide button (disclosure
triangle) at the bottom left of the message summary list in the mailbox window. The
show/hide button affects the display of the preview pane in the current mailbox window
only, and no other mailbox windows.
The following four settings apply to any open mailbox window in which the message
preview pane is visible, regardless of whether the Show message previews by default
setting (above) is on or off.
Mark read if clicked in or tabbed to or scrolled [on]—When this setting is on, an
unread message currently being previewed in the preview pane is marked read if you click
in the preview pane, tab to the preview pane, or operate the preview pane’s scroll bar.
(Each of these actions moves the keyboard focus to the preview pane.) If this is off,
clicking in, tabbing to, or scrolling the preview pane will not mark the message read.
Mark read if “next message” used to move away [on]—When this setting is on, an
unread message currently being previewed in the preview pane is marked read if you
move to the next (or previous) message when using the modified or unmodified arrow keys
as set in the Moving Around settings. If this is off, then performing such a message switch
will not mark the unread message as read.
QUALCOMM Incorporated
262
Eudora User Manual
Date Display
Mark read if deleted [on]—When this setting is on, an unread message currently being
previewed in the preview pane is marked read if you delete it or transfer it to the Trash
mailbox. If this setting is off, the message is not marked read when deleted. If this setting
is on and you delete the unread message currently being previewed, Eudora first marks
the message read, then deletes it. In this case, you will not get a warning if you have
Eudora set to warn you when you delete unread messages in the Extra Warnings settings
Mark read after ? seconds [on, 5]—When this setting is on, an unread message (bullet
in Status column) that is currently being previewed in the preview pane is marked read
(blank in Status column) after the number of seconds entered in the box. If this is off, an
unread message being previewed is not marked read after any length of time.
Date Display
The Date Display settings determine how the date appears in message summaries.
To display the Date Display settings dialog, do the following:
1
From the Special menu, choose Settings.
2
Scroll and click the Date Display icon. The Date Display settings dialog appears.
Date Display settings
Select the settings you want to change. Settings are described below.
Date formats
Age-sensitive—This specifies how to display the date. If Age-sensitive is selected,
messages dated today appear with the time, messages dated within the last six calendar
days appear with the day of the week, and messages dated seven calendar days or more
ago appear with the date.
Fixed—If Fixed is selected, all messages appear with the time and date.
QUALCOMM Incorporated
263
Eudora Labels
Eudora User Manual
Display timezone
This specifies what time zone to use.
Local timezone—If this timezone is selected, messages appear with your time and date.
Sender’s timezone—If this timezone is selected, messages appear with the sender’s time
and date.
Eudora Labels
The Eudora Labels settings let you determine the title and color of the 15 labels that can
be used to categorize messages.
The first seven labels are Macintosh labels. You can change the names and colors for
these labels in the Preferences dialog under the Edit menu displayed from the Finder.
To display the Eudora Labels settings dialog, do the following:
1
From the Special menu, choose Settings.
2
Scroll and click the Eudora Labels icon. The Eudora Labels settings dialog appears.
Eudora Labels settings
Labels 8 through 15 are the Eudora labels, and you can change the color and title text
for each one.
3
(Eudora labels only) Type the new title in the text field for that label.
4
To change a Eudora label color, click the color field next to the text field to display the
Macintosh color picker in the Apple Color dialog. If multiple color pickers appear,
choose one. Within a color picker, you can either choose from one of the pre-defined
colors or create your own custom color.
The default color for all Eudora labels (8 through 15) is black. The default title is Label
n, where n = 8 through 15.
QUALCOMM Incorporated
264
Eudora User Manual
Styled Text
You can change the label associated with a message to any of the 15 labels, or no label at
all by doing the following:
■
From the Message menu, choose Change then Label. The Label submenu appears.
Or choose the label from the Label column popup menu in mailbox windows and
Search windows or from the Make Label filter action in the Filters window.
See “Working with Mailboxes” on page 111 and “Organizing Your Messages” on page 131
for more details.
Styled Text
The Styled Text settings tell Eudora when to use style information in outgoing and
incoming messages.
To display the Styled Text settings dialog, do the following:
1
From the Special menu, choose Settings.
2
Scroll and click the Styled Text icon. The Styled Text settings dialog appears.
Styled Text settings
Select the settings you want to change. Settings are described below.
Sending mail with styles
When sending mail with applied fonts & styles [Send plain & styled both] (Sponsored and Paid modes only)—This specifies how to send a message that contains text
styles. Choose Send plain & styled both to send the message in both plain text form and
styled text (HTML) format. Recipients whose emailers cannot read styled mail will still be
able to read the message in plain text form. Choose Send styled mail only to send the
message with all styled text and not as a plain-text message. Choose Send plain text mail
only to send the message in plain text form only, with all style information removed. Turn
on the Ask me each time setting (default is off) if you want to be warned when you try to
QUALCOMM Incorporated
265
Moving Around
Eudora User Manual
send or queue a message with styled text. When the alert appears, you can choose Both
(the default) for plain and styled together, or Plain Only, or Styled Only. If you select Plain
Only, the style information is not sent with the message.
When receiving styles, pay attention to
Bold, Italic, Underline, Font, Size, Color, Left/right/center, Margins, Excerpts—If any
of these settings are on (all are on by default), that style appears in your incoming
messages and in the message preview pane (if the sender allows it). “Excerpts” refers to
excerpt bars included at the left of quoted text.
Formatting Toolbar
Show formatting toolbar [on]—If you turn this setting on, the formatting toolbar appears
in new message windows. This toolbar lets you easily format text styles in new messages.
If this is off, the formatting toolbar is hidden in new message windows. You can turn this
toolbar on and off in the current message by clicking the formatting toolbar icon on the
icon bar. This setting also appears in the Fonts & Display settings dialog.
Moving Around
The Moving Around settings determine how you open messages and switch fields in
Eudora.
To display the Moving Around settings dialog, do the following:
1
From the Special menu, choose Settings.
2
Scroll and click the Moving Around icon. The Moving Around settings dialog appears.
Moving Around settings
Select the settings you want to change. Settings are described below.
QUALCOMM Incorporated
266
Eudora User Manual
Toolbar
Arrow+these modifiers to switch messages [Command]—If any of these keyboard
keys are on, you can hold down the keys you have selected here and use the keyboard
arrows to close the current message and open the next or previous message in an open
message window or preview pane.The up and left arrow keys open the previous message,
and the down and right arrow keys open the next message. If any of these are on, you can
use the arrow keys by themselves to move the insertion point in messages and in the
preview pane. If all of these settings are off, you can use the arrow keys by themselves to
switch to the next or previous message, whether the cursor is in an open message window
or in the message preview pane.
After finishing a messages
This specifies whether to automatically open the next message after you delete or transfer
the current message or page past the end of it. Nothing means nothing is opened. Next
message means the next message in the mailbox is always opened. Next unread
message means the next unread message in the mailbox is always opened (could be way
down the list). Next message if unread means the very next message in the mailbox is
opened but only if it’s unread.
More keystroke options
Tab to switch fields, option-tab to insert tab [off]—If you turn this setting on and your
cursor is in the body of a message, pressing the Tab key moves the cursor to the To: field,
and pressing the Option and Tab keys together inserts a tab at the insertion point. If this
setting is off and your cursor is in the body of a message, pressing the Tab key inserts a
tab, and pressing the Option and Tab keys together moves the cursor to the To: field.
Return switches among header fields [on]—When this setting is on, pressing the
Return key moves the cursor to the next header field in outgoing messages. If this is off,
pressing the Return key inserts a carriage return into outgoing message headers.
Exchange Find and Search menu command keys [off]—Turn this setting on if you want
to switch the Find menu command key (Command+F) to the Search menu command key
(Option+Command+F).
Toolbar
The Toolbar settings determine how the main toolbar appears.
To display the Toolbar settings dialog, do the following:
1
From the Special menu, choose Settings.
2
Scroll and click the Toolbar icon. The Toolbar settings dialog appears.
QUALCOMM Incorporated
267
Getting Attention
Eudora User Manual
Toolbar settings
Select the settings you want to change. Settings are described below.
Show toolbar [on]—When this setting is on, the main toolbar appears on your desktop.
Orientation [Horizontal toolbar]—This specifies the orientation of the main toolbar, horizontal at the top of your screen or vertical along the left side.
Button type [Big icons only]—This specifies how the button names and icons appear.
Map function keys to buttons [off]—If you turn this setting on, the function (e.g., F5)
keys mimic the main toolbar buttons.
Function keys [off]—If you turn this setting on, the function key labels appear on the
main toolbar, under each button.
Getting Attention
The Getting Attention settings determine what Eudora does when it delivers you new mail
or when it is running in the background and wants your attention.
To display the Getting Attention settings dialog, do the following:
1
From the Special menu, choose Settings.
2
Scroll and click the Getting Attention icon. The Getting Attention settings dialog
appears.
QUALCOMM Incorporated
268
Eudora User Manual
Getting Attention
Getting Attention settings
Select the settings you want to change. Settings are described below.
When something exciting happens
put up an alert [on]—When this setting is on, an alert dialog notifies you when new mail
is received.
Flash an icon in the menu bar [on]—When this setting is on, an icon flashes in the menu
bar when Eudora needs attention. Eudora uses two different icons. They are a mail flag
when you have new mail and an envelope with an exclamation point in it for everything
else.
New mail and attention icons
Open mailbox (new mail only) [on]—When this setting is on, mailboxes are automatically opened when new mail arrives in them, and the first unread message of the last
unread batch of messages is selected.
Play a sound [on]—When this setting is on, a sound is played when Eudora needs attention. There are two different sounds, the New mail sound (played when new mail arrives)
and the Attention sound (played for everything else). Popup menus next to these titles let
you select the sound you want from the available sounds on your Macintosh.
More attention-getting behavior
Say OK to alerts after 2 minutes [on]—When this setting is on, any alerts that announce
a problem with sending and receiving mail automatically go away after two minutes. Many
network problems are temporary, so this allows Eudora to try communicating again. This is
useful if you have automatic mail checking turned on, and you are not at your computer.
QUALCOMM Incorporated
269
Hosts
Eudora User Manual
Show Task Progress during background activity [on]—When this setting is on, the
Task Progress window appears when Eudora is checking and sending mail. For more
details on this window, see “Managing Windows in Eudora” on page 171.
Open incoming message with error [off]—If you turn this setting on and any incoming
message with a transport error is opened, you will hear a short beep. Inside the message
you will see a red stop sign with an error message notifying you of the problem that
occurred during the retrieval of this message.
Sounds
New mail sound—From the popup menu, choose the sound you’d like to hear when new
mail arrives.
Attention sound—From the popup menu, choose the sound you’d like to hear when
Eudora needs attention.
Hosts
The Hosts settings tell Eudora what servers to use, and how to use them.
To display the Getting Started settings dialog, do the following:
1
From the Special menu, choose Settings.
2
Click the Hosts icon. The Hosts settings dialog appears.
Hosts settings
QUALCOMM Incorporated
270
Eudora User Manual
Hosts
Select the settings you want to change. Settings are described below.
Checking Mail
Mail Server [blank]—This field should contain the name you entered in the Mail Host field
of the Getting Started dialog. If not, enter the full name of the incoming mail server. For
example: curly.myfirm.com.
Overlap POP3 commands for better performance [off]—Check this box to send
commands to your POP server immediately, instead of waiting for a previous command to
be completed. This is faster, but your POP server may not be able to handle it. (POP3 is
Post Office Protocol version 3, the latest version.)
Sending Mail
SMTP Server [blank]—Enter the name of the outgoing mail sever for your principal email
account, for example: smtp1.myfirm.com. All outgoing messages sent from your
primary account are routed through this server. If the computer that runs your primary
incoming mail account is the same as your outgoing mail server, you can leave this field
blank.
Use mail-exchange records (SMTP Servers Only) [off]—Check this box so when
Eudora makes an SMTP connection, it asks your domain name server to tell it which host
would be best for accepting your mail. Ask your system administrator about this before
turning this setting on. The setting works only with Open Transport.
Directory Services
Ph/LDAP Server [blank]—Should you decide to use directory services, enter the name of
your directory services server that allows you to look up people on the Internet or your
local intranet, for example ph.myfirm.com or ldap.myfirm.com. Your ISP or your
email administrator can provide you with the server names to use for each type of directory service available to you, that is either Ph or LDAP services.
Finger Server [blank]—Should you decide to use Finger directory services, enter the
name of the server that runs the Finger protocol for Internet and intranet searches. You
can obtain this server name from your ISP or from your email administrator. If you leave
this field blank, Eudora uses your SMTP server as your Finger server.
“Live” directory service queries [off]—Check this box if you want your directory
services to act on search information automatically. This saves you time when you perform
Internet or intranet searching. The connection with your Directory Services server is kept
open in the open Directory Services window (when the window is on top and in use).
Directory service queries are automatically sent to the server when you pause after typing
query text in the Enter query field of the window.
All connections
DNS load balancing [off]—Check this box to spread the usage of several Eudora users
over many host computers. (Turn this setting on if your network administrator tells you to.)
QUALCOMM Incorporated
271
Extra Warnings
Eudora User Manual
System Administrators: DNS load balancing works by making Eudora choose a
random address from the list of addresses returned by the DNS (without DNS load
balancing, Eudora will always choose the first address from the list). If you have several
machines that can perform the exact same service, list all of their IP addresses under
one domain name, then instruct your users to use that domain name and to turn on the
DNS load balancing setting. Now the users are most likely to use any one of the
“balanced” machines for the service.
Extra Warnings
The Extra Warnings settings determine if you are warned before taking certain actions you
did not intend to take. Most of the warnings appear with an option to stop that warning
from being displayed again. If you choose that option, you can turn the warning back on
using the Extra Warnings settings.
To display the Extra Warnings settings dialog, do the following:
1
From the Special menu, choose Settings.
2
Scroll and click the Extra Warnings icon. The Extra Warnings settings dialog appears.
Extra Warnings settings
Select the settings you want to change. Settings are described below.
Deleting
Warn me when I—Eudora will warn you when you attempt to perform any of the checked
actions.
Try to delete unread mail [on]—When this setting is on, you are warned if you try to
delete any incoming messages marked with the Unread (•) status.
Try to delete queued mail [on]—When this setting is on, you are warned if you try to
delete any messages that are queued in your Out box with the Queued or Timed Queue
status.
QUALCOMM Incorporated
272
Eudora User Manual
Extra Warnings
Try to delete any unsent messages [on]—When this setting is on, you are warned if you
try to delete any messages in your Out box that are marked with the Send (•) status.
Queueing and Sending
Try to queue a message with no subject [off]—If you turn this setting on, you are
warned if you try to send or queue a message that has an empty Subject field.
Try to queue a message with styled text [off] (Sponsored or Paid mode only)—If you
turn this setting on, you are warned if you try to send or queue a message that contains
styled text. (You can also use the Styled Text settings to set several options related to
styled text.)
Try to quit with messages queued to be sent [on]—When this setting is on, you are
warned if you try to quit Eudora while you still have messages queued in your Out box with
the Queued or Timed Queue status.
Try to send a message whose size is more than ? K [900]—This setting is always on,
and its limited by the number you enter in the text-entry box. Enter a very large number to
avoid getting the warning. In any event, you are warned if you try to send a message
whose size is greater than the number you enter. You must enter a number between 0 and
1000000 (one million). If you try to make the text field blank, Eudora inserts the default of
900.
Other
Set a changed message back to read-only [on]—When this setting is on, you are
warned if, after editing an incoming message with the Pencil icon, you try to make the
message uneditable by either clicking the Pencil icon again or closing the message
without first saving your changes.
Empty the Trash mailbox [on]—when this setting is on, you are warned if you try to
empty the Trash mailbox via the Empty Trash command from the Special menu or its variants. Once messages are deleted from the Trash, they are completely gone.
If you turn on this setting, and you also turn on the Empty Trash on Quit setting in the
Miscellaneous settings, you will be warned every time you try to quit Eudora while
messages are in the Trash mailbox.
Try something that requires too much memory [on]—When this setting is on, you are
warned if you try to do something that might take more memory than you have available.
Try to follow an ad’s link while offline—When this setting is on, you are warned if you
try to display an ad’s web site when you are not connected to a server.
QUALCOMM Incorporated
273
MoodWatch
Eudora User Manual
MoodWatch
In the MoodWatch settings dialog, you can determine at what level you wish your
messages to be monitored before a warning appears telling you that, perhaps, your
message content may be offensive to your recipient. Also, you can set MoodWatch to
monitor incoming and stored messages for offensive content.
If you don’t want to use MoodWatch at all, you can turn it off in this dialog. Also, you can
choose if you want to use MoodWatch for incoming messages only, outgoing messages
only, or both.
To display the Extra Warnings settings dialog, do the following:
1
From the Special menu, choose Settings.
2
Scroll and click the MoodWatch icon. The MoodWatch settings dialog appears.
MoodWatch settings
Select the settings you want to change. Settings are described below.
Enable MoodWatch—If checked, MoodWatch is on. To turn MoodWatch off, just uncheck
the box.
Warn when queueing/sending
If the message seems like it might be offensive—Turn this setting on to set MoodWatch to its most sensitive level. If your message has some content that looks like it
might be offensive (one chili pepper appearing), you will be warned when you queue it.
If the message is probably offensive—Turn this setting on to set MoodWatch to a
medium sensitivity level. If your message has some content that looks like it is offensive (two chili peppers appearing), you will be warned when you queue it.
If the message is on fire—Turn this setting on to set MoodWatch to a low sensitivity
level. If your message has some content that is offensive (three chili peppers
appearing), you will be warned when you queue it.
QUALCOMM Incorporated
274
Eudora User Manual
Internet Dialup
Never—Turn this setting on to never display a warning in your outgoing messages,
despite offensive text in its content.
Scanning incoming mail
Scan new mail as it arrives—Turn this setting on to allow MoodWatch to scan all of
your incoming mail. MoodWatch determines the level of offensive text contained in the
message. MoodWatch then displays one, two, or three chili peppers in the MoodWatch
column of the mailbox where the message resides.
Scan stored mail in the background—Turn this setting on to allow MoodWatch to
scan all of your stored messages. MoodWatch determines the level of offensive text
contained in each message. MoodWatch then displays one, two, or three chili peppers
in the MoodWatch column of the mailbox where the message resides.
Internet Dialup
The Internet Dialup settings determine what Eudora does when you are connecting to
your ISP using MacSLIP from Hyde Park Software or Apple’s Open Transport PPP or
Apple’s Remote Access. Normally, when Eudora or any other application tries to make a
connection, your dialup software will automatically dial your ISP and establish a connection. This connection remains open until you close it or a timeout period elapses. The
settings below modify this behavior.
To display the Internet Dialup settings dialog, do the following:
1
From the Special menu, choose Settings.
2
Scroll and click the Internet Dialup icon. The Internet Dialup settings dialog appears.
Internet Dialup settings
Select the settings you want to change. Settings are described below.
QUALCOMM Incorporated
275
Miscellaneous
Eudora User Manual
Don’t check mail automatically if my Internet dialup software isn’t already
connected [off]—If you turn this setting on, Eudora does not check mail automatically
unless your Internet dialup software has already connected (this avoids unnecessary
connections to your ISP).
Disconnect my Internet dialup software after checking mail, If Eudora connected it
[on]—When this setting is on, your Internet dialup software disconnects at the end of a
mail check when it was connected by Eudora, but it does not disconnect at the end of a
mail check when it was connected by another application. If this setting is off, your Internet
dialup software will not automatically disconnect at the end of a mail check, even if it was
connected by Eudora. Use this setting to minimize the time you are connected to your
service provider.
Miscellaneous
The Miscellaneous settings control other assorted Eudora functions that are not otherwise
categorizable.
To display the Miscellaneous settings dialog, do the following:
1
From the Special menu, choose Settings.
2
Scroll and click the Miscellaneous icon. The Miscellaneous settings dialog appears.
Miscellaneous settings
Select the settings you want to change. Settings are described below.
Close messages with mailbox [off]—If you turn this setting on, closing any mailbox
window (except the Out mailbox) also closes all the open messages from that mailbox.
Empty Trash on Quit [on]—When this setting is on, the Trash mailbox is emptied when
you quit Eudora. If this is off, the Trash is emptied only when you choose the Empty Trash
command from the Special menu or one of its variants.
QUALCOMM Incorporated
276
Eudora User Manual
Miscellaneous
Turbo redirect by default [off]— If you turn this setting on, and you select a recipient
from the Turbo Redirect To submenu from the Message menu, a redirected message is
created with the specified recipient, the message is queued, and the original message is
deleted. Hold down the Option key to do a regular Redirect, or hold down the Shift key to
suppress the deletion of the original message.
Re-sort mailboxes less often [off]—If you turn this setting on, mailboxes are sorted only
when they are opened, or when messages is added to them.
Use old-style “.toc” files [off]—If you turn this setting on, each mailbox stores its table of
contents in a “mailbox.toc” file, instead of in its resource fork, the latter being the default in
3.0 and later versions of Eudora. If you have upgraded to version 3.0 or later, this is automatically on. You should turn this off at some point so that your mailboxes convert to using
resource forks.
Include outdated Return-Receipt-To: [off] (Sponsored and Paid modes only)—If this
setting is off, Eudora uses the “Disposition-Notification-To:” header in return receipt
requests to request that you be sent a notification when your message appears by the
recipient. If you turn this setting on, Eudora also sends the “Return-Receipt-To:” header in
return receipt requests. This header is understood by some older mail delivery systems
and may return you a receipt when your message is delivered to your recipient’s mailbox.
The “Return-Receipt-To:” header cannot give you any information about whether or not
your recipient displayed your mail, and is not supported by many newer mail delivery
systems.
Write to Internet Config [off]—If you turn this setting on, preferences are written to
Internet Config. If you do not intend to write to Internet Config, leave this setting off.
Read from Internet Config (not recommended) [off]—If you turn this setting on, preferences are read from Internet Config. If you do not intend to read to Internet Config, leave
this setting off.
Correct (but slow) international sorting [off]—If you turn this setting on, slower but
internationally correct string comparisons are used.
Generate filter reports [off]—If you turn this setting on, a filter report is generated when
messages are filtered from the In mailbox.
Prompt for receipts requested by self [on]—When this setting is on and if you request a
return receipt in an outgoing message including yourself as a recipient, you are asked to
respond to the request when you receive the incoming message. If this is off, you are not
asked to respond to the request. This setting does not affect whether your other recipients
get the request. They will always get the request in a return-receipt message provided
they have a compatible mailer.
Note. To determine who you are for the above setting, Eudora uses the “me” nickname if
previously set up in your Address Book. If you do not have a “me” nickname set up,
Eudora uses the contents of the Username, Mail Host, and Return address fields from
your Getting Started settings.
Use Navigation Services if they are available [on]—When this setting is on, Eudora will
use the newer Navigation Services dialogs for opening and saving files rather than the
older-style dialogs. To use this setting you must have Navigation Services version 1.1 or
later installed on your computer.
QUALCOMM Incorporated
277
Personalities (Sponsored and Paid modes only)
Eudora User Manual
Exchange Find and Search menu command keys [off]—Turn this setting on if you want
to switch the Find menu command key (Command+F) to the Search menu command key
(Option+Command+F).
Use system keychain to store passwords—Turn this setting on if you want to use
Apple’s keychain feature to store your Eudora passwords.
Personalities (Sponsored and Paid modes only)
The Personalities settings, along with the Personality Extras settings, are used to define
the necessary information for your multiple email personalities.
Note. For more details, see “Using Multiple Personalities (Sponsored and Paid modes
only)” on page 69.
To display the Personalities settings dialog, do the following:
1
From the Special menu, choose Settings.
2
Scroll and click the Personalities icon. The Personalities settings dialog appears.
Personalities settings
Select the settings you want to change. Settings are described below.
Personality to Configure
Personality [«Dominant»]—The popup menu in this field lists your alternate email
accounts, that is, your multiple personalities. Your Dominant personality is your primary
email account. It’s the one that’s associated with all mail stored before you began using
multiple personalities.
Click New to create a new personality. Click Remove to delete the personality currently
selected in the popup. You cannot delete your Dominant personality.
QUALCOMM Incorporated
278
Eudora User Manual
Personalities (Sponsored and Paid modes only)
To set the remaining settings in this dialog for a personality, just make sure that personality
is selected in the popup. Most of the settings for the Dominant personality are also
reflected in other Settings categories, such as Getting Started, Hosts, Checking Mail, and
Sending Mail. If you change those settings here, they are changed in all other Settings
categories in which they appear.
Personality Name [«Dominant»]—This is the personality name by which you choose to
refer to this personality. For your Dominant personality, this field is display-only and cannot
be changed. For an alternate (non Dominant) personality, this field is a text entry field.
Enter the name you wish to assign to the alternate personality, for example, Jim at Home.
This name appears in all places in Eudora where personality names are listed, such as on
the Personality submenu, in the Personalities window, on the From: field Personality
popup in a new message window, the Make Personality filter action, and the Search
window Personality search target.
Note. Eudora uses the Personality Name to mark your mail for that personality. If you
change the name of the personality, you break the link between the mail and that personality. As a result, mail that had been associated with the old personality name is now
assigned to the Dominant personality. If you reestablish the name for the personality, or
create a new personality with that name, the messages are reassigned to the personality.
For additional details on the remaining fields below, see “Getting Started” on page 245.
“Hosts” on page 270, “Checking Mail” on page 246, and “Sending Mail” on page 250.
Checking Mail
Username [blank]—Enter the email name for this personality’s account on the associated
incoming mail server (Mail Host, below).
Mail Server [blank]—Enter the name of the host computer that runs the incoming (POP
or IMAP) mail server that receives this personality’s incoming mail.
Check for mail every ? minutes [off, blank]—If you turn this setting on and you enter a
number in the box, mail is automatically checked for this personality at the specified
interval. If this is off, no automatic mail checking takes place for this personality (even if a
number is in the box). It is recommended that you enter a minimum interval of 15 minutes.
You can have different mail checking intervals for different personalities. However, if automatic mail checking is set for your Dominant personality, then the Check Mail command
reflects the time of the next check for the Dominant personality.
Check mail on manual checks [on]—If you turn this setting on and each time you do a
manual check for mail by selecting Check Mail fro the File menu, mail is checked for this
personality. If this is off, manual mail checks do not check mail for this personality. (You
can also perform manual mail checks for one or more selected personalities from the
Personalities window using the Check Mail button.)
Note. To turn off all mail checking settings for the selected personality, turn off both the
Check for mail every ? minutes setting and the Check mail on manual checks setting.
QUALCOMM Incorporated
279
Personality Extras (Sponsored and Paid modes only)
Eudora User Manual
Sending Mail
Real name [blank]—Enter the real name you wish to assign to this personality (generally
a first and last name). This name is used in the From: field of all outgoing mail for this
personality.
SMTP Server [blank]—Enter the name of the outgoing (SMTP) mail server for this
personality. If the Mail Host you enter above also runs an SMTP server, you can leave this
field blank.
Return address [blank]—The return email address used in outgoing messages and
recipients’ replies for this personality, if this address is different from the personality’s
incoming mail account (username@mailhost).
Send mail whenever sends are done [on]—If you turn this setting on, queued mail for
this personality is sent whenever Eudora sends queued mail. If this setting is off, queued
mail for this personality is not sent when Eudora sends queued messages, and you must
send such mail manually.
Allow Authentication [on]—If this setting is checked, Eudora can log in to an SMTP
server when sending mail, just like it does for receiving mail. Not all SMTP servers require
or allow such authentication. Eudora will attempt authentication to servers that allow it.
The preferred SMTP authentication method is CRAM-MD5. If CRAM-MD5 is not available,
LOGIN or PLAIN will automatically be used.
Personality Extras (Sponsored and Paid modes only)
The Personality Extras settings supplement the Personalities settings in defining your
alternate email accounts.
Note. The display of some of the fields in this settings dialog depends on what you choose
in the Server Configuration field: POP or IMAP. Below, we first list the fields common to
both server configurations, then list the fields particular to each server configuration, POP
and then IMAP.
To display the Personality Extras settings dialog, do the following:
1
From the Special menu, choose Settings.
2
Scroll and click the Personality Extras icon. The Personality Extras settings dialog
appears.
QUALCOMM Incorporated
280
Eudora User Manual
Personality Extras (Sponsored and Paid modes only)
Personality Extras settings (POP server)
Select the settings you want to change. Settings are described below.
Personality to Configure (POP and IMAP)
Personality [«Dominant»]—From the popup menu, choose the personality you want to
enter settings for.
To set the remaining settings in this dialog for a personality, just make sure that personality
is selected in the popup. Most of the settings for the Dominant personality are also
reflected in the Checking Mail and Composing Mail settings categories. If you change
those settings here, they are changed in the other Settings categories in which they
appear.
More Checking Mail (POP)
Mail Protocol [POP]—Your selection in this field determines whether some of the other
fields in this Settings dialog appear. You should select the setting that corresponds to the
protocol used by your incoming mail server for this personality. See “Checking Mail” on
page 246 for more details.
Authentication [Passwords]—Specify which POP authentication technology to use for
this personality: Passwords, Kerberos, or APOP. Ask your email administrator which one to
specify for this personality.
Skip messages over ? K [off, 40]—If you turn this setting on and a number is entered in
the field, incoming messages for this personality over the specified size are retrieved only
in part. These messages include the first few lines, along with a statement that says the
message is not complete. This can be useful if you have a slow connection.
Leave on server for ? days [off, blank]—If you turn this setting on and a number is
entered in the field, Eudora copies incoming messages for this personality to your
computer and leaves the message on the POP server for the specified number of days. If
you leave the box blank, your mail is left on the server indefinitely. If this setting is off, mail
for this personality is deleted from the POP server after it is transferred to your computer.
QUALCOMM Incorporated
281
Personality Extras (Sponsored and Paid modes only)
Eudora User Manual
More Checking Mail (IMAP)
Location Prefix [blank]—This tells Eudora where to look for your mail on the incoming
IMAP mail server for this personality. Normally you enter a folder location representing the
pathway to your mailboxes. An example mailbox location prefix is /usr/mail/. If you are
not sure what to enter in this field, ask your email administrator or your ISP.
Download options—When you check mail for your IMAP account for this personality,
these options (you can only choose one) tell Eudora how much of each incoming message
to retrieve from the IMAP server to your computer. You can retrieve just the essential
headers, or, alternately, the entire message and any attachments under a specified size.
Minimal headers only [on]—If this setting is on, only a limited set of message
headers, and nothing else, is retrieved for each incoming IMAP message for this
personality. The remaining headers, the message body, and any attachments are not
retrieved with the message, but are left on the server for you to retrieve later. The
headers tell you whom the message is from, the date and time it was sent, and the
subject. Once you have this information, you can then decide whether you want to
retrieve the full message and any attachments, or just delete the message.
Full message except attachments over ? K [off, 40]—If this setting is on and a
number is entered in the box, the full message (full set of message headers and the
message body) and any attachments smaller than the specified size are retrieved for
each incoming IMAP message for this personality. Any attachments larger than the
specified size are not retrieved with the message but are left on the server for you to
retrieve later. If you want Eudora to retrieve all of your IMAP attachments for this
account, enter a large number in this field. If you don’t want attachments retrieved
when you check your mail, enter 0 in this field.
Full message with attachments—If this setting is on, the full message and all attachments, regardless of size, are retrieved for each incoming IMAP message for this
personality.
Use a trash mailbox on the IMAP server [on]—If this setting is on and the first time you
transfer or delete a message from any mailbox stored in this IMAP account, Eudora will try
to create a Trash mailbox on the IMAP server for this personality. If it cannot create the
Trash mailbox, it will ask you to select an existing IMAP mailbox to use as the Trash
mailbox.To create a new IMAP mailbox to be used as the Trash mailbox on the 72IMAP
server, choose the New command under the appropriate submenu of the Mailbox or
Transfer menu.
The purpose of the Trash mailbox is to provide you a central location for storing your
deleted IMAP messages, similar to a POP Trash mailbox. You can regulate your deleted
mail in the Trash mailbox, either emptying the Trash or retrieving some of the deleted
messages before they are permanently removed from the IMAP server. If this setting is
deselected, you will have to mark each message for deletion and then delete the message
from the server. See “Deleting Messages” on page 131.
QUALCOMM Incorporated
282
Eudora User Manual
Personality Extras (Sponsored and Paid modes only)
Personality Extras settings (IMAP server)
More Sending Mail (POP and IMAP)
Stationery [None]—From the popup menu, choose a default stationery file to use for this
personality, or choose None for no default stationery. The selected stationery file is used
when you open new messages for this personality (except with the Redirect or Send Again
commands under the Message menu). The icon bar in the message window is set
according to how the stationery message was saved, regardless of any other settings in
the Settings dialog. However, you can always change these settings from the icon bar after
you open the new message. See “Composing Mail” on page 252 for more details.
or Signature [Standard]—From the popup menu, choose a default signature to use for
this personality or choose None for no default signature. If you choose a signature,
Eudora automatically attaches that signature to the end of outgoing messages for this
personality
Use this popup to set the default signature to use for this personality when the Stationery
popup is set to None. If you have selected a default stationery for this personality in the
Stationery, the signature that was saved with that stationery message file will override your
selection in this Signature popup.
Domain to Add [blank]—Enter the domain name you want Eudora to automatically add
to an unqualified name addressed in messages sent from this personality. An unqualified
name is a name that doesn’t have an “@” sign followed by a domain name. For example, if
you enter @myfirm.com in this field and address a message from this personality to jim
(assuming you do not have a jim nickname in your Address Book), Eudora addresses the
message to [email protected]. See “Sending Mail” on page 250 for more details.
QUALCOMM Incorporated
283
Auto. Configure (ACAP)
Eudora User Manual
Auto. Configure (ACAP)
The Auto. Configure settings instruct Eudora to retrieve settings previously configured
from an Application Configuration Access Protocol (ACAP) server.
ACAP was originally designed for use with IMAP accounts. If you keep your Eudora
settings stored on a remote ACAP server, then whenever you log in to your email account
from any computer or laptop, you can retrieve your Eudora settings from the ACAP server.
Therefore, you don’t have to set Eudora up with your settings on each computer from
which you check your mail.
To retrieve your Eudora settings from an ACAP server to any computer on which you are
running Eudora, make sure the computer is connected to the Internet.
Note. See your email administrator or your ISP for the information to enter in the fields of
this Settings dialog.
To display the Auto.Configure settings dialog, do the following:
1
From the Special menu, choose Settings.
2
Scroll and click the Auto. Configure icon. The Auto. Configure settings dialog appears.
Auto. Configure settings
Select the settings you want to change. Settings are described below.
ACAP Server Configuration
ACAP Username [blank]—Enter the user name by which you log in to the ACAP server,
if the server requires a user name.
ACAP Server [blank]—Enter the name of the ACAP server on which your Eudora
settings are stored.
ACAP Port [674]—Enter the communications port number to use for connecting to the
ACAP server. Port 674 is the usual port for ACAP servers and is entered for you as the
default.
QUALCOMM Incorporated
284
Eudora User Manual
Statistics
Fetch Configuration
Fetch Settings Now—Click this button to instruct Eudora to retrieve your email account
settings from the ACAP server. Once the settings have been retrieved, Eudora reconfigures itself to those settings.
Statistics
In the Statistics settings dialog, you can choose the color and graph type you prefer when
displaying and printing the Statistics window found in the Window menu. The Statistics
window displays your email usage, that is the statistics on received, sent, and general
Eudora usage. You can display this information for the current or previous day, week,
month, or year.
To display the Statistics settings dialog, do the following:
1
From the Special menu, choose Settings.
2
Scroll and click the Statistics icon. The Statistics settings dialog appears.
Statistics settings
Select the settings you want to change. Settings are described below.
Series—This column lists the different timeframes displayed in the Statistics window.
Current refers to the current day, week, month or year, as selected in the Statistics
window. Previous refers to the previous day, week, month or year, as selected in the
Statistics window. Average is the cumulative average that occurs on a day-to-day basis.
For example, if you choose to view your statistics for each day, the current graph would be
today, and the previous graph would be yesterday. The average graph would indicate the
cumulative average since you began keeping statistical information in Eudora.
Color—Choose the color you wish to represent the current, previous, and average criteria.
QUALCOMM Incorporated
285
Statistics
Eudora User Manual
Graph Type—Choose the graph type you prefer to display for the current, previous, and
average criteria. The graph type you choose will appear in the color you chose in the Color
column. The graph types you can choose are a line, a solid (filled) area, a graph bar, a
circle, diamond, or a square.
Count IMAP messages in all mailboxes, not just the Inbox—Turn this option on if you
want Eudora, for statistical purposes, to count all received IMAP messages regardless of
which mailbox they are received into. Turn this option off if you want Eudora to count only
the IMAP messages received in the Inbox.
Reset Statistics—Click Reset Statistics to erase all of your statistical information and
start anew. Once you click this button, usage information from now will begin to accumulate.
QUALCOMM Incorporated
286
Eudora Sharing Protocol
(Sponsored and Paid Modes only)
Eudora Sharing Protocol (ESP) is a Eudora feature that allows a group of people, called a
share group, to collaborate and share a common set of files. ESP automatically gives each
member of the share group a copy of those files, and when one of the members changes
a file, it brings all the other members' copies up to date automatically. ESP also makes it
easy for the members of a share group to send email messages to each other. Unlike
other collaboration tools, ESP uses only email to keep everyone in sync on the shared
files, so there's no need to maintain and administer a shared server.
ESP allows you to create and manage share groups within Eudora, on both Mac and
Windows platforms. If you send and receive email through Eudora, you can belong to an
ESP share group.
When you join an ESP Group, you designate a shared folder on your hard drive. Eudora
uses the shared folder to keep the most current copies of your group’s documents
together. You and each member of your group have copies of the shared documents.
When you or a member of your group adds, deletes, or updates a document, ESP automatically adds, deletes, or updates all copies of the document in all of the members’
shared folder.
You can use ESP for projects at work and for family members at home to help them stay in
touch. For example, you can create a share group by inviting members of your family to
share their most current photos with each other. When one member of the family adds a
digitized photo to his or her shared folder, all members of the family can see it. It’s like
maintaining a family album that can be shared with members of a family no matter where
they live.
When communicating between members of your group, email messages from the group
members are automatically routed to the mailbox of your choice. However, you can assign
only one mailbox per group.
You do ESP functions from the ESP Groups window found on the Tools menu. These are
the basic tasks in creating and maintaining a share group:
■
Create a share group.
■
Assign the share group a mailbox in Eudora and shared folder on your hard drive.
■
Invite members to join the share group.
■
Configure how ESP will update the shared folders.
■
Configure how your group members are notified of changes to the shared folder.
■
Maintain group membership by inviting or deleting members, or by synchronizing all
shared folders.
However, you may be asked to join a share group. If so, answer the invitation and you can
create a new shared folder and mailbox.
QUALCOMM Incorporated
287
Installing ESP
Eudora User Manuall
Important. You can only belong to a group on one computer. For example, you can use
your home computer to set up a group for family photos, and you can use your work
computer to set up a group for a work related project. However, you cannot use both your
home and work computer to view your family photos in your family group. If you try, one or
both computers will miss some of the photos.
However, if you have two different email addresses, you can belong to a share group on
more than one computer. If you check mail with one email address at work and a different
address at home, you just need to invite yourself to the share group twice, once for each
address. Once you’re in the group with one account, you can send an invitation to your
other account yourself. ESP will treat your two accounts as two different share group
members, and each will receive all the updates.
Installing ESP
ESP should install automatically into the Eudora Plug-ins folder. However, if you need to
install ESP yourself, do the following:
■
To install ESP on the Mac, copy the ESP plug-in file to the Eudora Stuff folder, which is
found in the Eudora Application folder.
Tips on Using ESP
Although ESP is a valuable tool for you and your group when working on the same document or file, there are some limitations. Here are a few tips on using ESP that will make
working on group files more efficient.
■
Do realize that the ESP folder is shared. If you take a file out of the shared folder, it will
be removed from each member’s shared folder.
■
Do invite people to be in your group. Some of them might have to become familiar with
ESP before becoming full members. As they are gaining experience, tell them how to
become full members.
■
Do use ESP to keep a shared list of current email addresses for group mailings. ESP
updates email addresses when you change the email address for a personality. When
saved in the ESP Groups window, ESP asks you if you want to update both your ESP’s
information and other members’ information or just update your ESP information. If you
choose both, an email message is sent to all group members and automatically
updates your changed email address.
■
Do use ESP as a mini-mailing list for, perhaps, a family, group of friends, coworkers
and so on. The list of email addresses stays current in all of the members’ lists when
the addresses are modified.
■
Don’t put large files in ESP. Other members of your group may have mail systems with
limits on file size.
■
Don’t put files in ESP where group members need to work on them at the same time.
ESP works best when one member works on one file at a time.
■
Don’t put files in ESP that need to be updated in realtime. There will be a few minute
delay in updated group files.
QUALCOMM Incorporated
288
Eudora User Manual
Creating an ESP Group
Creating an ESP Group
You can create a group and then invite members to join it. All members of a group are of
equal importance. Although you are creating the group, it does not mean that you are its
leader.
When you create a group, ESP assigns the group a unique identifier, which avoids any
naming conflicts.
To create a new group, do the following:
1
From the Special menu, choose ESP Groups. The ESP Groups window appears.
ESP Groups window
2
In the ESP Groups window, click New (located at the bottom of the window). The
Share Group dialog appears.
QUALCOMM Incorporated
289
Creating an ESP Group
Eudora User Manuall
Share Group dialog
3
Choose Create a brand new share group, then click Next. The Share Group Name
dialog appears.
Share Group Name dialog
4
In the Share Group Name text box, type the name of your group, then click Next. The
Share Group Description dialog appears.
QUALCOMM Incorporated
290
Eudora User Manual
Creating an ESP Group
Share Group Description dialog
5
In the Share Group Description text box, type a brief description of the group’s
purpose or file contents; then click Next. The Share Group Mailbox dialog appears.
Share Group Mailbox dialog
6
Do one of the following:
■
If you want to create a new mailbox for all group messages, choose Transfer to
New Mailbox and type the name of the mailbox in the text box.
■
If you want all group messages to go to an existing mailbox, choose Transfer to
Existing Mailbox, then click the long gray button. Choose a mailbox from the list,
then click OK.
Note. You can’t transfer messages to either the In mailbox or a mailbox already
assigned to another group.
7
Click Next. The Share Group Folder dialog appears.
QUALCOMM Incorporated
291
Creating an ESP Group (Advanced Setup)
Eudora User Manuall
Share Group Folder dialog
8
Do one of the following:
■
If you want to create a new folder to store all group files, choose Use New Folder
and type the name of the folder in the text box.
■
If you want to create a new folder in a location other than the one shown under
Use New Folder, go to the Finder and create a new folder. Click the long gray
button and choose a folder from the list. Click OK.
■
If you want to store all group files in an existing folder, choose Use Existing Folder
and click the long gray button. A list of your existing folders appears. Choose one of
the folders and click OK.
Note. If you want to create a new folder in a location other than the one shown under
Use New Folder, choose Use Existing Folder. Click the long gray button to the right of
Use Existing Folder and choose your new folder from the list. To create your new folder
either go to the Finder and create it or click New folder in the lower left-hand corner of
the Choose a Folder dialog.
You can’t use the same folder already assigned to another share group.
9
Click Next. The Success dialog appears.
10
Click Finish. Your new group is created.
The share group name appears in the list view attachment of the groups window.
Creating an ESP Group (Advanced Setup)
After you feel comfortable creating groups, you can bypass it and enter the group information directly in one dialog box.
To use the Advanced Share Group Setup function, do the following:
1
From the Special menu, choose ESP Groups. The ESP Groups window appears.
2
Click New (located at the bottom of the window). The Share Group dialog appears.
QUALCOMM Incorporated
292
Eudora User Manual
Creating an ESP Group (Advanced Setup)
Share Group dialog
3
Choose Skip directly to advanced share group setup. The Share Group dialog
appears.
Share Group dialog (same dialog as the Eudora tab)
4
Type the new group’s name in the Name text box.
5
Click the Shared Folder long gray button and choose a folder for this group. Click OK.
6
Click the Mailbox long gray button and choose a mailbox for this group’s messages.
Click OK.
7
Click the Personality long gray button and choose the Eudora personality you want
linked with this group. Click OK.
8
In the Description text box, type a brief description of the group’s function or contents
(optional).
9
Click OK.
QUALCOMM Incorporated
293
Inviting Members to Join Your Group
Eudora User Manuall
ESP adds the new group to your list of groups. The groups you create are listed in the
Groups window in the left column.
Inviting Members to Join Your Group
To be fully functional, your group must contain members in addition to yourself. Once you
invite someone, you can determine at what level a role they will play within the share
group. You can invite members to the group who can receive only the group messages.
To invite ESP users to join your group, do the following:
1
From the Special menu, choose ESP Groups. The ESP Groups window appears.
2
In the left column, choose the Share Group name to which you want to invite members.
3
Click the User tab. The User dialog appears.
4
Click Invite. The Share Group Role Settings dialog appears.
Note. To add a user to receive the group’s messages only, press the Option key while
clicking Invite. The Advanced Add dialog box appears where you can enter the
person’s name and email address. The user’s name and email address is stored in
your Users list, but ESP doesn’t send an invitation. This user receives only email
messages that have the group’s shared documents as attachments.
Share Group Role Settings dialog
5
You can determine which tasks each invitee to your group can do. In the Initial Role
area, choose of the following roles:
QUALCOMM Incorporated
294
Eudora User Manual
Configuring Shared Folder Settings
■
No Preference
■
Full Member (user sends and receives updates). This allows the person you invite
to receive and send files for the group either automatically or manually.
■
Broadcasting Member (user only sends updates, ignores any incoming updates).
This allows the person you invite to send files only to the group either automatically
or manually. Incoming files are ignored.
■
Receiving Member (user never sends updates, but processes incoming updates).
This allows the person you invite to receive files only from the group either automatically or manually. Any changes you make to the shared folder are ignored.
The system default is No Preference.
6
If you want ESP to notify the person you invite when updates are coming into your
shared folder, check the Ask before processing any updates INCOMING TO my
shared folder box. This box is checked by default.
7
If you want ESP to notify the person you invite when updates are going out of your
shared folder, check the Ask before processing any updates OUTGOING FROM my
shared folder box. This box is checked by default.
8
If you want ESP to warn the person you invite when the potential member attempts to
change role type, check the Prefer that user does not change role (displays
warning) box. If checked, the member can change role type but is discouraged to do
so.
9
Click OK. A message window opens that contains an invitation message for the
selected group. This message has a special attachment containing the group invitation.
10
In an open message window, enter the email addresses of the invitee(s) in the To
header. You can also enter text in the body of the message.
ESP Invitation message
When an invitee accepts the invitation, information contained in the attachment creates a
group entry in the invitee’s Groups window and prompts him or her to specify a share
group folder and mailbox. ESP sends an RSVP message back to the inviter. The inviter
then sends an updated copy of the membership list to all the members.
Configuring Shared Folder Settings
Every group member needs a shared folder on his or her hard drive to store documents,
schedules, messages, illustrations, images, or any other file the members deem necessary for sharing. ESP allows you and your group members to determine how often ESP
checks each member’s shared folder for updates, and how the information in the shared
folders is backed up.
QUALCOMM Incorporated
295
Configuring Group Change Notifications
Eudora User Manuall
To configure shared folder settings for your group, do the following:
1
From the Special menu, choose ESP Groups. The ESP Groups window appears.
2
In the left column, choose the Group name whose shared folders you want to set.
3
Click the Settings tab. The Settings dialog appears.
Settings dialog
4
Check the Check shared folder for changes every _ minutes box and specify the
time interval at which you want ESP to check the shared folder for group updates. If this
option is not checked, ESP won’t check the shared folder. The system default is for
ESP to check the shared folder every 10 minutes.
5
If you want ESP to automatically create a backup when other members update files in
the shared folder, check the Auto-Backup Updated Documents box. The box is
checked by default.
6
If you want ESP to automatically back up deleted documents from the shared folder,
check the Auto-Backup Deleted Documents box. The box is checked by default.
7
In the Store up to _ previous versions text box, indicate the number of previous
document versions you want Eudora to store.The system default is one version.
Configuring Group Change Notifications
You can specify the role you want to play in the group, which determines whether or not
you can send or receive updates to the shared folder. When you’ve determined your ESP
role, you can then decide how you want ESP to handle updates to the shared folder and
group membership.
QUALCOMM Incorporated
296
Eudora User Manual
Configuring Group Change Notifications
1
From the Special menu, choose ESP Groups. The ESP Groups window appears.
2
In the left column, choose the Group name whose change notifications you want to set
for your role.
3
Click the Notifications tab. The Notifications dialog appears.
Notifications dialog
4
Click one of the following in the Role area:
■
Full Member (user sends and receives updates). This allows you to receive and
send files for the group either automatically or manually.
■
Broadcasting Member (user only sends updates, ignores any incoming updates).
This allows you to send files only to the group either automatically or manually.
Incoming files are ignored.
■
Receiving Member (user never sends updates, but processes incoming updates).
This allows you to receive files only from the group either automatically or manually. Any changes you make to the shared folder are ignored.
■
Custom Member (use the settings in the Advanced tab). Go to step 6.
The Full Member role is the default.
QUALCOMM Incorporated
297
Configuring Group Change Notifications
5
In the Notifications area, do the following:
■
If you want ESP to notify you when updates are coming into your shared folder,
check the Ask before processing any updates INCOMING TO my shared folder
box. This box is checked by default.
■
If you want ESP to notify you when updates are going out of your shared folder,
check the Ask before processing any updates OUTGOING FROM my shared
folder box. This box is checked by default.
■
If you want Eudora to record all changes to group membership, check the Log any
membership updates box. The box is checked by default.
■
If you want ESP to notify you before the shared folder is updated, check the Ask
before processing any updates from my shared folder box. The box is checked
by default.
■
6
Eudora User Manuall
If you want ESP to monitor any of the group actions, check the Log any group
actions box. The box is checked by default. ESP logs all incoming and outgoing
shared folder changes in the a log file located in a subfolder of the Eudora folder.
If you chose Custom Member as your role, you must click the Advanced tab to display
the Advanced dialog to configure your role settings. In this dialog, you are required to
make various decisions about how you want ESP to handle modifications to the shared
folder. It also enables you to choose how ESP should track group membership.
Advanced dialog
7
In the Shared Folder Actions (Custom Member) area, do the following:
■
Determine which type of incoming or outgoing items—New Items, Updated Items,
or Deleted Items—you want ESP to handle.
■
From the popup lists, choose one of the following:
– To have ESP notify you before specific files in the shared folder are added, updated
or deleted, choose Ask first.
QUALCOMM Incorporated
298
Eudora User Manual
Maintaining Group Members
– To have ESP modify specific files in the share folder automatically, choose
Do file updates.
– To have Eudora ignore proposed updates to specific files in the shared folder automatically, choose Ignore file updates.
Note. The system default options from the pop-up menus for all incoming and outgoing
menus correspond to the last chosen options you selected in the Notifications dialog.
The Role buttons combined with the Ask before processing any updates INCOMING
TO my shared folder and Ask before processing any updates OUTGOING FROM my
shared folder are then equal to the choices in the pop-up menus. The Advanced tab
dialog allows you to add, update, and delete settings independently of each other.
Whereas in the Notifications dialog, while simpler, keeps the settings locked. For
example, you could use the Advanced tab dialog to specify that you want to be asked
when a delete occurs, but not when additions and updates occur.
8
To set a group password, click Set Shared Secret. The Shared Secret dialog appears.
Shared Secret dialog
9
In the text box, enter a secret word or phrase that will be known only to you and the
other members in your group. You will need to share the secret word or phrase with the
other group members. The secret word or phrase is used to make the transmission of
file changes more secure so that ESP can verify any incoming file changes were actually sent by a group member.
If your shared secret does not match the shared secret of other group members, you
will get a security error when you receive file changes from them. So if you choose to
use a shared secret word or phrase for improved security, be sure that all group
members set the exact same shared secret word or phrase. The secret word or phrase
is case-sensitive.
Maintaining Group Members
In the User dialog box in the Groups window, you can maintain your group members by
deleting them from the group, inviting new members, or by syncing the selected member’s
shared folder.
To maintain group members, do the following:
1
From the Special menu, choose ESP Groups. The ESP Groups window appears.
2
In the left column, choose the group whose users you wish to maintain.
QUALCOMM Incorporated
299
Maintaining Group Members
3
Eudora User Manuall
Choose the Users tab. The Users dialog appears, and a list of members of the
selected group appears.
User dialog showing group names and users
In this dialog, you can do all of the following:
■
Delete—To delete group members, select the member’s name and click Delete.
Generally, you use the Delete button to remove an invalid member, You can also
use it to avoid sending messages to someone.
Note. To preserve group participation and communication, use the Delete function
sparingly. In most situations, the departing group member uses the Leave function to
notify all group members of the departure from the group. The Delete function
bypasses this process.
■
Invite—To invite a new ESP member to join the group, click Invite. See “Inviting
Members to Join Your Group” on page 294.
■
Sync Folder—To send the entire contents of your shared folder to another group
member, choose the member’s name and click Sync Folder.
Note. ESP updates email addresses when you change the email address for a personality. When saved in the ESP Groups window, ESP asks you if you want to update both
your ESP’s information and other members’ information or just update your ESP information. If you choose both, an email message is sent to all group members and automatically updates your changed email address.
QUALCOMM Incorporated
300
Eudora User Manual
Joining a Group
Joining a Group
ESP manages group membership through a shared mailing list, allowing group members
to share files and messages. ESP creates the mailing list through a series of processes,
called invitations, ensuring that each member of the group has explicit knowledge of group
membership by acknowledging and approving each new member.
To join an existing group, do the following:
1
Wait for an email message from one of the group members inviting you to join their
group. The Join ESP Share Group dialog automatically appears after Eudora is done
receiving the email message.
2
To join the group, click Join. If you don’t want to join, click Cancel.
ESP prompts you to join the group by opening the New Group Wizard. Choose a folder to
store your copies of the shared documents and a mailbox to receive messages associated
with the group. See “Tips on Using ESP” on page 288 for details.
ESP processes the invitation, adds you as a member of the group, and sends an RSVP
message to the member who invited you to join. When the inviter's copy of ESP receives
your acceptance, you'll be sent a membership update message which will add the other
group members to your list.
Note. Until you receive an introduction from another group member, ESP doesn’t associate those members with you as part of the group.
When all introduction messages are received and answered, you are a member of the
group.
Leaving a Group
When you want to leave a group, ESP removes the group from your list of available groups
and sends a message to the other group members asking them to remove you from the
group.
To leave a group, do the following:
1
From the Special menu, choose ESP Groups.
2
In the left column, choose the name of the group you want to leave.
3
Click Leave (located at the bottom of the Groups window). The Leave dialog opens.
Leave dialog
4
In the Leave Group dialog, click Leave.
QUALCOMM Incorporated
301
Working with the Shared Folder
Eudora User Manuall
ESP creates a message to other group members announcing your departure from the
group. This message is attachment deletes you from other group members’ membership
lists.
Until you save changes to the ESP Groups window, you can cancel your departure from
the group. Just choose the share group that you had planned to leave and click Rejoin,
which is what the Leave button will be renamed when you chose this group.
If you're sure you want to leave the group, then save changes to the ESP Groups window
by either closing the window and choosing Save in the displayed dialog box or by
choosing Save from the File menu. ESP will send a message to other group members
announcing your departure from the group.
Working with the Shared Folder
Use the shared folder like any folder in the Finder by adding, modifying, or deleting files as
needed.
To open the shared folder, do the following:
1
From the Special menu, choose ESP Groups.
2
In the left column, choose the name of the group you want to open and click Open
Folder. The Save Changes dialog opens.
3
To save any changes before ESP opens the folder, you can click Save, Don’t Save, or
Cancel. The shared folder opens, allowing you to access its files.
ESP periodically scans the folder for changes, according to your settings, and sends the
updated files to other group members.
To update the shared folder of another group member manually, select the member from
the Users dialog and click Sync Folder. This sends the entire contents of the shared
folder to the selected member.
As ESP receives periodic changes to the shared folder from other users, it incorporates
the changes according to the settings you chose for the group (for example, with or without
notification, and with or without archiving). ESP alerts the user to potential conflicts if two
modified versions of a document arrive simultaneously.
Changing Group Information
ESP allows you to change the configuration of a group to meet the changing needs of its
members. The same tabs (User, Eudora, Settings, Notifications, and Advanced) you used
to create a group and configure its attributes can be used to change those of an existing
group.
To make changes to an existing group, do the following:
1
From the Special menu, choose ESP Groups. The Groups window appears.
2
In the left column, choose the group you wish to change.
3
Click any of the tabs and make your changes in their respective dialogs.
QUALCOMM Incorporated
302
Eudora User Manual
4
Configuring Global ESP Settings
When finished, click OK.
Configuring Global ESP Settings
You can control the type of messages received by the shared folder through the use of
filters and automatic processing actions.
Note. We recommend that you retain the default settings.
To configure your group settings, do the following:
1
From the Special menu, choose ESP Groups. The ESP Groups window appears.
2
Click Settings (located a the bottom of the Groups window). The Group Setting dialog
appears.
Group settings dialog
3
In the ESP Automatic Filters Precedence area, choose Run automatic filters before
user filters or the Run automatic filters after user filters. Depending on which
option you activate, ESP filters incoming messages into the shared folder either before
or after your own filters take effect. To run the automatic ESP filters before your
personal filters is the default.
4
In the Automatic Actions area, check the Allow automatic processing of incoming
attachments box if you want the shared folder updated automatically with email
message attachments as specified in the Settings dialog. The default is to automatically process incoming attachments.
5
If you want your shared folders scanned automatically at the frequency you specified in
the Settings dialog, check the Allow automatic scanning of shared folders box. The
system default is to allow automatic shared folder scanning.
Using the ESP Mailbox and Folder
When you create or choose a mailbox for the ESP Groups, the mailbox looks and functions similarly to other Eudora mailboxes, except you can perform ESP functions by
clicking the buttons just below the title bar.
QUALCOMM Incorporated
303
Using the ESP Mailbox and Folder
Eudora User Manuall
Following is an example of an ESP mailbox.
ESP mailbox showing ESP function buttons
Following are the descriptions of the functions when you click the ESP buttons:
■
■
■
New Message—Opens a new composition window addressed to the group for you to
type a message.
Open Folder—Opens your shared folder in a new window.
Invite—Invites a new member or members to join the group. See “Inviting Members to
Join Your Group” on page 294.
■
ESP Groups—Opens the ESP Groups window.
■
Update Others—Updates the files in other members’ shared folders.
QUALCOMM Incorporated
304
General Reference
Customizing the Main Toolbar (Sponsored and Paid modes only)
The Main Toolbar gives you easy access to your frequently used Eudora functions.
Main Toolbar
You can set the buttons to correspond to your function keys (the F keys on an extended
keyboard), and you can create new buttons for most Eudora commands.
Buttons on the main toolbar are context-sensitive; they are highlighted if they can be used
for the current task, and are dimmed if they cannot. For example, if an incoming message
is currently open or selected in a mailbox, the Reply toolbar button is highlighted because
you can reply to the message. If no incoming message is open or selected, the Reply
button is dimmed because there’s no message to reply to. For toolbar buttons that correspond to menu commands, the state of the button, highlighted or dimmed, matches the
state of its associated menu command.
For more information, go to the tutorial section on the Eudora website. See
www.eudora.com/techsupport/tutorials.
To add a new button to the main toolbar, do the following:
1
While pressing the Command key, move the cursor between two buttons or at either
end of the toolbar, depending on where you want the new button to go.
2
When the arrow changes to a splitter cursor (
dialog appears
), click it. The Toolbar Button Creation
Toolbar Button Creation dialog
3
Choose a menu item or enter a key combination. This can be almost anything you
would do with Eudora, including using modifier keys with the command.
When you are done, the button is added to the toolbar, and named appropriately. If you
change your mind before creating the button, click Remove Button or Cancel in the
dialog.
QUALCOMM Incorporated
305
Using Eudora Plug-ins
Eudora User Manual
You can also drag files from the Finder to the toolbar to add them as buttons, and you can
drag mailboxes from the Mailboxes window under the Window menu to the toolbar to add
them as mailbox buttons. (You cannot drag mail folders to the toolbar, at least from a POP
account; you can drag IMAP mail folders to the toolbar, because they are also mailboxes.)
To change what a button does, do the following:
■
While pressing the Command key, click the toolbar button, then choose the function as
you would when creating a button, or click Cancel if you change your mind.
To change the placement of a button on the toolbar, do the following:
■
While pressing the Command key, drag the button to where you want it.
To remove a button from the toolbar, do the following:
■
While pressing the Command key, drag the button to the Trash on your desktop. Or,
press the Command key and click the button, then click Remove Button in the dialog.
If you create a mailbox button in the toolbar, you can drag messages to that toolbar button
to transfer those messages to the associated mailbox. Drag an open incoming message
by its Tow Truck icon
, or drag selected message summaries from an open mailbox
window.
To set the options for displaying the main toolbar, do the following:
1
From the Special menu, choose Settings.
2
In the Settings category list, scroll and choose Toolbar Settings. The Toolbar Settings
dialog displays. There are options to show or hide the toolbar; to show it horizontally or
vertically; to show large or small icons, names, or combinations of icons and names; to
map the buttons to function keys; and to display the corresponding function key with
the buttons. For details, see “Toolbar” on page 267.
If you choose a display option that makes the toolbar long, arrow buttons are added to the
ends of the toolbar so that you can easily scroll through it and find the button you need.
Using Eudora Plug-ins
Plug-ins are special add-on pieces of software that can be “plugged in” to Eudora
(installed in Eudora) to add specialized features to Eudora. You can purchase Eudora
plug-ins developed by other companies. For information on plug-in software that’s available for use with Eudora, visit the Eudora web site <http://www.eudora.com>, or
send email to <[email protected]>.
Here are some examples of what these software helpers can do:
■
A language-conversion plug-in will let you translate a message into another language.
■
A security plug-in will let you secure or scramble a message automatically, so it can’t
be read by others.
■
A text-manipulation plug-in will let you change lowercase text to uppercase text.
QUALCOMM Incorporated
306
Eudora User Manual
Using Eudora Plug-ins
■
A data-compression plug-in will let you compact an attachment file so it’s much smaller
and therefore much easier for you to send and for your recipients to receive and download.
■
A virus-checking plug-in will let you automatically check any incoming attachments for
viruses.
■
QUALCOMM’s own PureVoice plug-in (installed automatically with Eudora) will let you
record, send, receive, and play voice attachments so you can talk to your recipients
over email and listen to their responses.
Plug-ins that are “plugged in” to Eudora communicate with Eudora across a common
boundary or “interface” called the Extended Messaging Services Application Programming
Interface (EMSAPI).
There are two kinds of Eudora plug-ins:
■
Message plug-ins are extension files whose icons often look like jigsaw puzzle pieces.
■
Resource plug-ins are preference files whose icons often look like a postal envelope
with a small jigsaw puzzle piece below it.
Sample message plug-in (left) and resource plug-in
The Eudora software comes with both message and resource plug-ins (see next section).
These are described later in this section. Several third-party plug-ins are included in
Eudora. Each third-party software’s documentation is included in Eudora’s Documentation
folder.
If you would like to write a Eudora message plug-in, you can obtain the Software Developer’s Kit (SDK) for the EMSAPI by anonymous ftp at ftp.eudora.com.
Plug-in Software That Comes with Eudora
When you install Eudora, the following message plug-ins are automatically installed in the
Eudora Stuff folder contained in your Eudora Folder (the folder containing your Eudora
application). These message plug-ins operate on text in open outgoing and incoming
messages:
■
Rot13 Text—Scrambles message text by rotating the letters 13 places through the
alphabet. Your recipient must apply Rot13 at the receiving end in order to unscramble
the text and read the message. That is, your recipient rotates each letter another 13
places through the alphabet, back to its original position in the alphabet (13 + 13 = 26).
■
Space & Tab Converter—Converts multiple spaces in message text to tabs, or vice
versa.
■
UPPERlower Text—Converts message text to either all upper case, all lower case,
initial word capitals, or initial sentence capitals.
QUALCOMM Incorporated
307
Using Eudora Plug-ins
Eudora User Manual
When you start Eudora, these conversion services appear on the Message Plug-ins
submenu under the submenu. To use one of the services, open an outgoing or incoming
message, then choose the service from the Message Plug-ins submenu. The conversion
is performed on the entire text in the message. If text is selected in the message when you
choose the service, the conversion is performed only on that text.
For more information on these message plug-ins, see their README files in the Eudora
Stuff folder.
Also when you install Eudora, a number of resource plug-ins are automatically placed in
the Extra Plugins folder in the Eudora Application Folder. These resource plug-ins,
however, are not yet installed or “plugged in.” To use them, you must install them (see the
installation instructions section).
For more information on these resource plug-ins, see “Eudora Folders” on page 311, and
also see the README file in the Extra Plugins folder itself.
Installing and Using Eudora Plug-ins
The installation procedure is the same whether you’re installing a message plug-in or a
resource plug-in.
1
Quit Eudora.
2
Drag the message or resource plug-in file into the Eudora Stuff folder contained in your
Eudora Folder (the folder that contains your Eudora application).
3
Restart Eudora.
The message or resource plug-in is now available.
Note. You can also install both message and resource plug-ins in the Eudora Folder itself
(the same folder containing your Eudora application), or in whatever folder you keep the
Eudora application. See “Eudora Folders” on page 311.
Message plug-ins, once installed, become available in one of the following places in
Eudora, depending on the kind of function they perform:
■
As commands on the Message Plug-ins submenu (under the Edit menu).
■
As icons on the icon bar of outgoing message windows or in the message body of
incoming message windows.
■
As commands on the Attach submenu (under the Message menu).
■
As commands at the bottom of the Special menu.
Some message plug-ins may not be available through the menus or in message windows
because they perform their function automatically, behind the scenes. Resource plug-ins,
once installed, can appear in a variety of places within Eudora, including in a dialog, a
menu, a string of text, or a picture. A resource plug-in may also operate behind the scenes
without your input.
To change the settings for those installed message plug-ins that have settings, do the
following:
QUALCOMM Incorporated
308
Eudora User Manual
Word Services
1
From the Special menu, choose Plug-in Settings. The Plug-in Settings submenu
appears.
2
From the Plug-in Settings submenu, choose the message plug-in.
To see which message plug-ins are currently installed, do the following:
1
From the Apple menu (Apple logo in the upper left corner of your screen), choose
About Message Plug-ins.
The dialog that displays shows all installed message plug-ins including those not
visible on menus or as icons. You can scroll through the dialog.
2
To close the dialog, click OK.
To “unplug” or uninstall a message or resource plug-in from Eudora, do the following:
1
Quit Eudora.
2
Drag the plug-in file out of your Eudora Stuff folder or the other folder in which you
installed it.
3
Start Eudora.
The Eudora plug-in will no longer appear in its former location in the menu system or in
windows or dialogs, or will no longer operate behind the scenes if it is not normally visible
in Eudora when installed.
Note. Make sure you do not put the removed message or resource plug-in into one of the
other allowable installation folders, such as the Eudora Application Folder. This will just
leave the plug-in installed from a different location the next time you start Eudora.
Word Services
Eudora lets you add word service applications to the Eudora editor for use with outgoing
messages. However, only applications that support the Word Services Suite can be used.
To add a word service to Eudora, do the following:
1
From the Edit menu, choose Add Word Service. The Choose a “Word Services” application dialog appears.
2
Browse through the dialog and find the desired application on your system and
double-click the application icon.
The word service is added to the Edit menu. To use this service for a current outgoing
message, choose it from the Edit menu.
To remove the word service from the Eudora editor and from the Edit menu, hold down the
Option key and choose the item from the Edit menu.
QUALCOMM Incorporated
309
Printing
Eudora User Manual
Printing
You can print the following items in Eudora:
■
Current open message
■
Selected message summaries (the messages inside)
■
Open text file window
■
Open signature file window
■
Open stationery file window
■
Selected text within an open message, text file window, signature file window, or stationery file window
■
Contents of the Directory Services window (results of a query, or the servers list)
■
Filters in the Filters window
■
Address Book entries
Eudora automatically prints headers and footers on each page, giving the window title,
page number, and your return address.
The Print options are found on the File menu.
■
To print the current message or item, choose Print.
■
To print just the selected text, hold down the Shift key and choose Print Selection.
■
To print one copy and bypass the standard Print dialog (quick print), choose
Print One Copy.
Putting Multiple Users on One Macintosh
If you have a multiple-user license for Eudora, you can set up Eudora
■
If you want more than one user on a single Macintosh
■
If you have multiple email accounts, but you don’t want to have alternate personalities
set up and use the same set of mailboxes
■
If you want to store your mail in a folder other than your System or Documents Folder
You need to quit and restart Eudora to switch users.
To have multiple users on one Macintosh, for each user make a copy of the Eudora Folder
that resides in the System or Documents Folder. The copies can be named whatever the
users want, and put anywhere they want, including on a floppy disk or network volume.
Each user can open Eudora by double-clicking the Eudora Settings file within their
assigned folder. They can make changes to the Settings, such as create new mailboxes,
nicknames, and filters, etc., and not affect other users on the Macintosh.
QUALCOMM Incorporated
310
Eudora User Manual
Eudora Folders
Note. To give users easy access to their mail, you can create aliases for their Eudora
Settings files and put them wherever you want on the Macintosh (the Apple Menu Items
folder is a good option).
Eudora Folders
The first time you start Eudora, it creates a Eudora Folder within your System (pre-OS9) or
Documents Folder. Even though you do not need to access the Eudora Folder during
normal operation, this section is provided to show you where Eudora stores your mailboxes, messages, nicknames, settings, and other data.
Attachments Folder
Incoming attachments are saved in the Attachments Folder until you specify another folder
via the Attachment Folder button in the Attachments Settings (see “Attachments” on page
255). The Attachments Folder is created when you first start Eudora after installation. See
“Receiving Attachments” on page 93 for more details on managing incoming attachments.
Cache Folder
HTML graphic files that are downloaded to your computer are stored in the Cache Folder.
These files are generally contained in web pages that a correspondent sends to you via
email from their web browser. These incoming graphic files are downloaded either automatically, if the Automatically download HTML graphics option is turned on in your Fonts &
Display Settings (see “Fonts & Display” on page 258), or manually when you click the Get
HTML Graphics icon of an open incoming message window.
The Cache Folder is managed the way cache folders are managed in web browser applications. That is, files continue to be added to the folder until the folder reaches a certain
size, at which point the oldest least-used image files are deleted to make room for new
image files. For more details on HTML graphic files, see “Viewing HTML Graphics” on
page 98.
Delivery Folder
When you check mail, your new incoming messages are downloaded and stored in the
Delivery Folder until they are filtered. This is only a temporary storage area and is usually
empty between mail checks.
Eudora Filters
Any filters you create are saved in the Eudora Filters file. See “Filtering Messages” on
page 135 for instructions on creating and using filters.
QUALCOMM Incorporated
311
Eudora Folders
Eudora User Manual
Eudora Items
The Eudora Items Folder contains special files and folders for use with Eudora. The
Plugins folder (different from the Extra Plugins folder in the Eudora Application Folder)
contains settings and information files for your installed Eudora plug-ins. The Eudora Items
folder is created when you first start Eudora after installation.
Eudora Log and Old Log
Mail transfers and errors are logged in the Eudora Log file. When the file reaches 100K in
size, it is saved as Old Log (replacing any existing Old Log file) and a new Eudora Log file
is created.
Eudora Nicknames and Nicknames Folder
Address Book entries are saved in the default Eudora Nicknames file. If you have created
additional files, those are kept in the Nicknames Folder. These files are in UNIX “.mailrc”
format. The Eudora Nicknames Folder is created when you first start Eudora after installation. See “Using the Address Book” on page 181 for more details on creating and using
Address Book entries and nickname files.
Eudora Settings and Eudora Settings.bkup
Settings information is saved in the Eudora Settings file. This file is created when you first
start Eudora after installation.
If you change your settings via the Settings dialog from the Special menu, Eudora saves
the old settings as Eudora Settings.bkup (replacing any existing Eudora Settings.bkup file)
and saves the new settings as Eudora Settings. See “Setting Eudora Preferences” on
page 245 for information on how to change your settings in the Settings dialog.
IMAP Folder
Mail downloaded from an IMAP account is stored in the IMAP Folder. This folder contains
one local cache folder for each of your IMAP personalities. The IMAP Folder is created the
first time you select IMAP in the Server Configuration field of the Checking Mail Settings
(see “Checking Mail” on page 246) for your Dominant personality, or the Personality Extras
Settings (see “Personality Extras (Sponsored and Paid modes only)” on page 280) for any
of your personalities. Deleting an IMAP personality or changing its Server Configuration
field from IMAP to POP deletes the local cache folder for that IMAP account from the
IMAP Folder. See “Managing Your Mail on the IMAP Server” on page 87 for more information.
Mail Folder
Mailbox files are kept in the Mail Folder. This folder is created when you first start Eudora
after installation.
Note. The Mail Folder contains mailbox files for all of your POP accounts. IMAP mail is
kept in the IMAP Folder.
QUALCOMM Incorporated
312
Eudora User Manual
Eudora Folders
In, Out, and Trash (in the Mail Folder)
Mail is saved in the In, Out, and Trash mailbox files and in mailboxes that you create.
These files are all in UNIX spool format.
Mailbox Aliases (in the Mail Folder)
Eudora supports the use of aliases for mailboxes that you have moved to a location
outside the Eudora Folder. This allows you to use these mailboxes from within Eudora.
Place the mailbox aliases in the Eudora Folder or a subfolder within the Eudora Folder.
Note. A mailbox alias is automatically created and placed in the Eudora Folder when you
open the mailbox by selecting the Other command from the Mailbox menu or one of its
submenus. If you open the mailbox by selecting Other, the mailbox alias is deleted when
you quit Eudora. However, if you open the mailbox by selecting Other from a submenu
under the Mailbox menu, the mailbox alias remains in the Eudora Folder indefinitely.
These arguments also apply when you transfer one or more messages to a mailbox by
selecting the Other command from the Transfer menu or one of its submenus.
Parts Folder
Multipurpose Internet Mail Extensions (MIME) are stored in the Parts Folder. This folder is
created when you first start Eudora after installation. This folder includes graphic files and
other objects that were inserted or embedded into the text of an incoming message. These
MIME parts are deleted from the Parts Folder when you delete the message.
Signature Folder
Signatures are kept in the Signature Folder. This folder is created when you first start
Eudora after installation. The two default signature files are Signature (corresponding to
the Standard selection in Eudora) and Alternate. Any additional signature files you create
in Eudora are kept in this folder. See “Using a Signature” on page 61 for more details on
how to create and use signatures.
Spool Folder
Attachments that are being forwarded or redirected are kept in the Spool Folder until the
corresponding message is deleted. The In.temp and Out.temp mailbox files in this folder
are used as temporary storage depots for incoming and outgoing mail received and sent
during mail checks and sends. This folder is created when you first start Eudora after
installation.
Stationery Folder
Stationery message files you create are kept in the Stationery Folder by default. See
“Using Stationery (Sponsored and Paid modes only)” on page 64 for more details on
creating and using stationery files.
QUALCOMM Incorporated
313
Eudora Application Folder
Eudora User Manual
Eudora Application Folder
During the installation, the Eudora Application Folder, also called the Eudora Folder, is
installed on your hard drive in the location you specify. This folder contains the following:
■
Eudora—the Eudora application
■
Eudora Stuff— the folder to use for installing message plug-ins and resource plug-ins
that you want available in Eudora; this folder also contains the Eudora Shared Libraries
(including the Eudora LDAP Library and the Eudora Internal Speller) and your Spelling
Dictionaries for use with the internal speller.
■
Extra Plugins—a folder containing additional plug-ins that are not yet installed (and
that you may want to install and use).
■
Documentation—the folder that contains the electronic (PDF) file versions of your
Eudora documentation, including this User Manual; these PDF files can be viewed with
Adobe Acrobat Reader, which is provided when you install Eudora.
■
README— A text file with important information and instructions, some of which may
not have been available for inclusion in this manual at press time.
Eudora Stuff
Install message plug-ins and resource plug-ins in the Eudora Stuff folder when you want to
use them with Eudora. For more information, including installation instructions, see “Using
Eudora Plug-ins” on page 306.
The Eudora Stuff folder also contains these subfolders:
■
Eudora Shared Libraries—contains the Eudora LDAP Library (for LDAP lookups via
the Directory Services window) and the Eudora Internal Speller (for built-in
spell-checking)
■
Spelling Dictionaries—contains your User Dictionary, your User Anti-Dictionary, and
the two dictionaries American-Common and American-Complete — all of which are
used with the built-in spelling-checker
The Eudora Stuff folder also contains Eudora plug-ins that were installed by default, along
with other items:
■
Eudora Help, the file containing all of Eudora’s Balloon Help
■
Rot13 Text plug-in and README
■
UPPERlower Text plug-in and README
■
Space & Tab Converter plug-in and README
■
QUALCOMM PureVoice™ application, Plug-in, Help, and README
■
Adobe Acrobat Reader™ Plug-in and README (optional)
QUALCOMM Incorporated
314
Eudora User Manual
Eudora Application Folder
Extra Plugins
Use the Extra Plugins folder to store uninstalled plug-ins that you may want to use at a
later time.
To use one of the Eudora plug-in files contained in this folder, do the following:
1
Quit Eudora
2
Drag the plug-in file into your Eudora Stuff folder.
3
Restart Eudora.
For further instructions, see “Using Eudora Plug-ins” on page 306.
The installed Extra Plugins folder contains the following files (all plug-in files are resource
plug-ins):
■
README— the text file that contains information on the plug-ins in this folder.
■
ESP—a plug-in file that allows you to use the Eudora Sharing Protocol where you can
create and maintain groups whose members share files.
■
Esoteric Settings—a plug-in file that adds extra settings dialogs to the Eudora
Settings. To gain access to these settings, choose Settings from the Special menu.
Scroll to the end of the icon categories to display the esoteric settings.
Important. Esoteric Settings should be used by advanced Eudora users only.
■
Forward934—a plug-in file that makes Eudora do RFC 934-style forwarding. In short,
when you forward a message with this plug-in installed, Eudora sets the forwarded
message off from the rest of your text by inserting lines at the beginning and end of the
forwarded message rather than quoting the individual lines of the message or adding
excerpt bars on the left. Without the plug-in installed, you can hold down the Option key
to suppress quotes in the forwarded message, but you have to insert the separation
lines yourself.
■
Kerberos Settings—a plug-in file that adds the settings necessary for using Kerberos
with Eudora. Consult your Kerberos administrator before using this file.
■
Synch I/O—a plug-in file that turns on synchronous I/O, which can improve compatibility with problem extensions and disk drivers.
■
Toshiba—a plug-in file for use with a certain model of Toshiba PowerBook hard drive,
to prevent the drive from corrupting Eudora mailboxes.
Documentation
The Documentation folder contains the following files.
Note. All PDF files can be viewed with Adobe Acrobat Reader, which can be installed as a
plug-in when you install Eudora.
■
This Eudora User Manual, in PDF format
■
The Eudora Quick Start Guide, in PDF format
■
The New Feature’s Manual, PDF format
QUALCOMM Incorporated
315
Sources
Eudora User Manual
■
The Using LDAP in Eudora, PDF format
■
The supplementary document Character Sets and Eudora, in PDF format
■
Additional documentation for plug-ins you can optionally install with Eudora (e.g.,
Adobe Acrobat Reader), but only if these plug-ins are installed
■
The release notes for this version of the Eudora software
Sources
Anonymous ftp (ftp.eudora.com)
QUALCOMM’s Eudora Division has an anonymous ftp server, ftp.eudora.com, that
has information and software related to Eudora. Included are POP3, Ph, and password
changing servers, the serialpop program, current product information, dialup files, and
more.
Eudora Web Site
Eudora has its own web site that you can access for general information, technical
support, services, and Eudora product information. Go to the following web site:
<http://www.eudora.com>.
Eudora Information
The information in this manual was correct at the time of release. However, some of this
information may already be out of date. For the latest information about Eudora, send
email to [email protected].
Obtaining an Internet Email Server
Post Office Protocol (POP) and Internet Message Access Protocol (IMAP) servers are
available for a variety of platforms. If you would like to run a POP or an IMAP server on
your own system, we suggest the following servers:
■
Macintosh—QUALCOMM’s Eudora Internet Mail Server™ (EIMS). EIMS supports
POP3 and IMAP4 as well as LDAP and Ph directory services. EIMS requires a Macintosh 68030 or higher (Mac IIx, IIcx, SE/30, or better) or a PowerPC.
■
Windows NT— QUALCOMM’s Eudora WorldMail™ Server. WorldMail supports POP3
and IMAP4 as well as LDAP and Ph directory services. A Microsoft Windows NT 4.0
server or workstation is required.
■
UNIX—QUALCOMM’s QPopper—QPopper is available via anonymous ftp from
ftp.eudora.com. QPopper versions are available for a number of UNIX systems.
■
VAX/VMS—VAX/VMS systems may try either the Multinet package from TGV or
IUPOP3 available via anonymous ftp from ftp.indiana.edu.
QUALCOMM Incorporated
316
Eudora User Manual
Mail Transport
For information on QUALCOMM’s family of Internet email servers, send email to
<[email protected]> or click to display the Eudora web site:
<http://www.qualcomm.com/eudora>.
Ph Server Source Code
A server for the Ph protocol is available via anonymous ftp from ftp.eudora.com.
Password Change Server
Three sample UNIX servers for Eudora’s Change Password command from the Special
menu are available via anonymous ftp from ftp.eudora.com.
Kerberos
To learn more about the Kerberos authentication system that is supported in this version
of Eudora, anonymous ftp to athena-dist.mit.edu and begin in the pub/kerberos
subdirectory.
Mail Transport
Eudora uses the Simple Mail Transfer Protocol (SMTP) to transfer your outgoing mail to
your SMTP server, which in turn uses SMTP to send your mail to your recipients. Mail from
your recipients arrives in your incoming Post Office Protocol (POP) or Internet Message
Access Protocol (IMAP) mail server, where it waits for Eudora to retrieve it. The mail
Eudora sends and receives is constructed in accordance with RFC 822 and RFC 2045
(MIME).
Eudora mail transport overview, POP (similar for IMAP)
POP
Check Mail
Your Macintosh
POP/SMTP
Server
SMTP
SM
TP
Send Queued Messages
The World at Large
QUALCOMM Incorporated
317
Mail Transport
Eudora User Manual
Outgoing Mail
When you send an email message to someone, Eudora uses SMTP to send the mail to
your local SMTP server computer. That computer then sends the mail to your addressee’s
computer, also (usually) by means of the SMTP protocol.
Why doesn’t Eudora talk directly to your addressee’s computer? First, it would take a lot
longer for your mail to leave your computer because your computer would have to call up
each addressee’s computer and deliver your mail. Secondly, some computers are “hard to
find”; it’s much better to let another computer “hunt” for your addressee than to make your
computer do it. Finally, sometimes your addressee’s computer won’t be available when
you want to send mail. The SMTP server handles this by holding your mail until the other
computer is ready to accept it, eliminating the inconvenience of having unsent messages
hanging around on your Macintosh.
Incoming Mail
When somebody sends you mail, other computers use the SMTP protocol to deliver the
mail to your POP or IMAP server. Your POP or IMAP server puts mail in your “mail drop,”
where it stays until the Eudoragram picks it up. When you check your mail, Eudora uses
POP version 3 or IMAP version 4 to pick up your mail and move it to your computer.
Why doesn’t Eudora use SMTP to receive your mail? SMTP works best when the
computers it knows about are always ready for mail. Unless you wanted to run Eudora and
your computer 24 hours per day, seven days a week, SMTP wouldn’t work well for you. It
also doesn’t work well in lab environments, where you might use any number of different
computers.
More Information
If you want to know more about the Internet in general, consult the book Internetworking
with TCP/IP, by Douglas Comer, 1988, Prentice-Hall, ISBN 0-13-470154-2 025.
If you want to know more about SMTP, RFC 822, POP version 3, and MIME, the official
standards are as follows:
■
RFC 821, “Simple Mail Transfer Protocol,” by Jonathan B. Postel
■
RFC 822, “Standard for the Format of Internet Text Messages,” by Dave Crocker
■
RFC 1939, “Post Office Protocol, Version 3,” by Marshall Rose
■
RFC 2045, “Multipurpose Internet Mail Extensions,” by Ned Freed and Nathaniel
Borenstein
You can find the RFCs by anonymous ftp to ds.internic.net, in the rfc directory. Or go
to <http://ds.internic.net/ds/dspg1intdoc.html> in your Web browser.
QUALCOMM Incorporated
318
Eudora User Manual
Using UUCP
Using UUCP
Eudora works with UNIX to UNIX Copy Protocol (UUCP) in almost exactly the same way
that it works with the POP (or IMAP) and SMTP servers. Attachments are supported, as is
regular mail checking and the other features. It is possible to mix methods; for example,
you can use UUCP for reading mail but SMTP for sending it.
Eudora does not come with UUCP. Three available Macintosh UUCP systems are “uupc
3.0” ([email protected]), “gnuucp” ([email protected]), and
“UUCP/Connect” (formerly “µAccess,” [email protected]). “UUCP/Connect” is
commercial; the other two are freeware. Eudora has been tested with all three packages; it
works well with uupc 3.0 and UUCP/Connect, but it does not work smoothly with gnuucp.
Settings Dialog for UUCP
To set up UUCP as your protocol, do the following:
1
From the Special menu, choose Settings.
2
In the icon category list, click the Getting Started icon. The Getting Started dialog
appears.
Getting Started Settings for UUCP
3
Enter the information in the following fields:
Real Name—Enter your real name as you wish to see it in the From: field of outgoing
messages.
Username—If you are going to receive mail via UUCP, you should put the full path
name of your “mail drop” (the file where UUCP leaves mail for you) in the Username
field. Precede the name with an exclamation point, for example:
!Doc;UUPC:maildrops:montgomery
QUALCOMM Incorporated
319
Using UUCP
Eudora User Manual
Operation
Almost all Eudora features work normally with UUCP. The one exception is the Leave on
server for ? days option in the Checking Mail Settings. When Eudora is used with POP and
this option is on, only unread mail is retrieved. With UUCP, however, Eudora does not
distinguish between read and unread mail; it retrieves all the mail at each check. This
results in duplicate messages, unless you use some other means to clean out your mail
drop between Eudora mail checks. It is suggested that this option remain off when using
UUCP.
Internals
Mail Drop Format
Eudora expects the mail drop to be in standard UNIX mailbox format, with UUCP envelopes (“From” lines) at the beginning of each message. The mail drop should use carriage
returns (not line feeds) for new lines.
Working Files
When sending mail, Eudora creates two files in the UUCP work directory. These files are
as follows:
D.mac0####
The message itself is put in this file. As distributed, Eudora uses returns for new lines in
this file. That can be changed by editing the last characters of STR# resource id 8000,
string 5; Eudora will use whatever nonprintable characters are at the end of the string. The
mail begins with a UUCP envelope. The “####” stands for the four-digit sequence number
mentioned above in the section “SMTP Server.” It increments as each message is sent.
X.mac0####
Commands for the UUCP system are put in this file. These commands are all editable via
ResEdit; they are distributed with returns at the ends.
U user mac
; identifies you (STR# id 8000, string 1)
F D.mac0####
; this file contains your message (8000,2)
I D.mac0####
; use your mail for input (8000,3)
C rmail recipient...
; all recipients of the mail are listed here (8000,4)
QUALCOMM Incorporated
320
Eudora User Manual
Using MIME
Using MIME
“MIME” stands for Multipurpose Internet Mail Extensions. MIME serves two major
purposes:
■
Allows mail applications to tell one another what sort of data is in mail.
■
Provides standard ways for mail applications to encode data so that it can be sent
through the Internet mail system.
MIME Encodings
The Internet uses SMTP (Simple Mail Transfer Protocol) to move mail around. SMTP is
limited to the US-ASCII character set. This is a problem for people who speak languages
other than American English and so need accented characters or non-American letters, or
for people who want to use special symbols like the section mark (§).
MIME provides a way around this restriction. It offers two encodings, “quoted-printable”
and “base64.” These encodings use US-ASCII character codes to represent any sort of
data you like, including special characters or even non-text data.
“Quoted-printable” is used for data that is mostly text but has special characters or very
long lines. It’s very simple. Quoted-printable looks just like regular text, except when a
special character is used. The special character is replaced with an “=” and two more characters that represent the character code of the special character. So, a section mark (§) in
quoted-printable looks like this: “=A8”.
However, there are some other things that quoted-printable does. For one, since it uses an
“=” to mean something special, equals signs must themselves be encoded (as “=3D”).
Second, no line in quoted-printable is allowed to be more than 76 characters long. If your
mail has a line longer than 76 characters, the quoted-printable encoding will break your
line in two and put an “=” at the end of the first line, to signal to the mail reader at the other
end that the two lines are really supposed to be all one line. Finally, a few mail systems
either add spaces to or remove them from the ends of lines. So, in quoted-printable, any
space at the end of a line gets encoded (as “=20”), to protect it from such mail systems.
Let’s try an example. Here’s a passage of text that you might type on your computer:
˙Il est d montr , disait-il, que les choses ne peuvent tre autrement;
car tout tant fait pour une fin, tout est n cessairement pour la
meilleure fin.¨
Without any encoding, this might show up on your recipient’s screen as:
+Il est dimontri, disait-il, que les choses ne peuvent btre autrement;
car tout itant fait pour une fin, tout est nicessairement pour la
meilleure fin.;
This corruption happens because SMTP cannot handle the special characters. However, if
you and your recipient both have MIME, quoted-printable encoding would be used, and
your text would show up properly:
˙Il est d montr , disait-il, que les choses ne peuvent tre autrement;
car tout tant fait pour une fin, tout est n cessairement pour la
meilleure fin.¨
QUALCOMM Incorporated
321
MIME Labeling
Eudora User Manual
While your mail was actually in transit, however, it would have looked like this:
=ABIl est d=E9montr=E9, disait-il, que les choses ne peuvent =EAtre =
autrement; car tout =E9tant fait pour une fin, tout est n=E9cessairement
=
pour la meilleure fin.=BB
Base64 encoding is another way to protect binary data from the SMTP mail system.
However, Base64 makes no attempt to be legible, and is most appropriate for non-text
data.
MIME Labeling
The other important part of MIME is that it lets mailers communicate what kind of data is in
a message (or part of a message). The primary mechanism used for this is the
Content-Type header:
Content-Type: text/plain; charset=iso-8859-1
A content-type header is divided into three parts: the content type, the content subtype,
and the parameters. In this case, the content type is “text,” meaning the message contains
mostly legible text. The content subtype is “plain,” which means there aren’t any formatting
commands or anything like that embedded in the text. Finally, “charset=iso-8859-1” is a
parameter; in this case it identifies the character set the message uses.
The major content types are as follows:
text
legible text
image
pictures and graphics
audio
sound
video
moving pictures
message
messages or pieces of messages
multipart
several different kinds of data in a single message
application
everything else
Practical Issues
There are really only two things you sometimes need to do with Eudora and MIME. One is
that it may occasionally be necessary to turn off quoted-printable encoding. Another is that
you may want to know how to define mappings between MIME types and Macintosh types.
Turning Off Quoted-Printable
Eudora automatically uses quoted-printable encoding if your mail or your plain text attachments contain special characters. If your recipients don’t have MIME, quoted-printable can
hurt more than it helps. If that’s the case, just turn off the QP icon in the outgoing message
icon bar when you are sending text files to those recipients.
QUALCOMM Incorporated
322
Eudora User Manual
Practical Issues
Mapping Between MIME Types and Macintosh Types
When you send attached files to other Eudora users, Eudora automatically knows what
kind of data is in the files because Eudora sends along special information with the file.
However, if you’re sending the file to a non-Macintosh user, or receiving files from a
non-Macintosh user, it’s important to get the right MIME type information on the file, or for
Eudora to understand what the MIME type information means.
Eudora knows about some MIME types. However, since new MIME types are being
defined all the time, it may be necessary to add to Eudora’s knowledge from time to time. If
you’re familiar with ResEdit, this isn’t too hard to do.
The way Eudora maps between MIME and Macintosh types is with EuIM and EuOM
resources. EuOM resources are used for sending attachments, EuIM for receiving. They
have the same basic structure.
EuOM and EuIM resources are lists of individual elements called “maps.” Each map
describes a Macintosh document type (or MIME data type) and then lists what MIME data
type (or Macintosh document type) it corresponds to. For any given type, Eudora looks
through all the maps in all the EuOM or EuIM resources, and uses the best match.
Note:EuOM and EuIM resources are also used when uuencoding and uudecoding files, so
that filename suffixes can be mapped to and from Macintosh types. A good set of EuIM
and EuOM resources can substantially improve document exchange with systems that
use uuencode.
Sending
When you create a map in an EuOM resource, you use the “Creator Code” and “Type”
fields to specify what documents the map applies to. These fields should be filled with the
four-byte creator code or Macintosh type of the documents you want to send. If you leave
the Creator Code blank, but fill in the type, the map is used for any document of that type,
regardless of creator. If you fill in both Creator Code and Type, a document has to match
both for the map to be used. Given the choice, Eudora uses the map that matches both
creator and type.
The other parts of the map are used to construct the MIME information. Content Type and
Content SubType are the MIME type and subtype to use for the document. Filename suffix
allows you to tell Eudora to add a suffix to the filename, as an extra hint to the receiving
system (for example, you might have Eudora add “.xls” to Excel files).
“Newline conversion?” tells Eudora whether or not to convert carriage returns in the file to
carriage return, linefeed. Usually, you should set this to 1 for text data, but to 0 for binary
files.
Finally, “May suppress resource fork?” is used in conjunction with Eudora’s Always include
Macintosh information option (in the Attachments Settings). If you set this to 1, and Always
include Macintosh information is off, Eudora won’t send Macintosh type and creator information with the file, and won’t send the resource fork. Instead, it will just send the data fork
with the MIME information attached to it.
QUALCOMM Incorporated
323
Practical Issues
Eudora User Manual
Example Map in an EuOM Resource
The map above says that all files of type “EPSF,” no matter what the creator, should be
sent as “application/postscript,” that “.eps” should be added to the filename, that carriage
returns should not be turned into carriage return/linefeed pairs, and that when the Always
include Macintosh information switch is off, the resource fork won’t be sent.
Receiving
EuIM resources are used for receiving files. They’re pretty much the same as EuOM
resources, except that the MIME type and subtype are used for matching, and the Macintosh creator code and type are applied to the file received.
As with EuOM resources, you can leave parts blank. If you want to match all files with an
“.eps” suffix, regardless of the MIME type or subtype, leave the type and subtype blank. If
you don’t care what the filename suffix is, leave that blank and match with the MIME type
and/or subtype only. Again, as with EuOM resources, Eudora will choose the map that
matches best.
With EuIM resources, it’s sometimes a good idea to use several maps to catch all important cases. For example, it might be a good idea to have three maps for dealing with PostScript files, as follows:
– Content Type: application
– Content SubType: postscript
– Filename suffix:
– Creator Code: mlpr
– Type: TEXT
This map will catch most MIME PostScript files, and set their creator to MacLPR.
– Content Type:
– Content SubType:
– Filename suffix: .eps
– Creator Code: dPro
QUALCOMM Incorporated
324
Eudora User Manual
Troubleshooting
– Type: EPSF
This map will match any incoming file with a suffix of “.eps,” regardless of the MIME type
info, and set its type to “EPSF” and creator to “dPro” (MacDraw Pro). But what if a file
comes in with a suffix of “.eps” and a MIME type/subtype of “application/postscript”?
Which map gets used? The first one gets used; when Eudora has a choice between
matching a suffix and matching MIME type information, MIME wins. A third map may be in
order:
– Content Type: application
– Content SubType: postscript
– Filename suffix: .eps
– Creator Code: dPro
– Type: EPSF
This makes application/postscript files with suffixes of “.eps” get type EPSF and creator
dPro.
Troubleshooting
Occasionally, you may encounter a problem or bug when using Eudora (as indicated by an
error message or some other type of symptom).
■
Make sure you have the current maintenance release of Eudora.
■
Locate the Eudora application in your Eudora Application Folder.
■
Click the application to highlight it, and choose Get Info from the Finder’s File menu.
■
Look for the Eudora version number in the dialog.
■
Next, using your World Wide Web browser, display the following web site,
<http://www.qualcomm.com/eudora>, and check to see what the latest version
of Eudora is. If that version is later than the one you have, see your Eudora administrator about obtaining the later version. This may solve the problem you’ve encountered.
If you do have the latest version of the Eudora software, read the current README file for
potential known conflicts. The README may also contain suggestions on how to resolve
some of these problems.
The following troubleshooting table provides the suggested corrective action for some of
the most common error messages or symptoms.
QUALCOMM Incorporated
325
Troubleshooting
Eudora User Manual
Symptom
Corrective Action
Eudora displays the following
error when you try to send or
queue mail:
Either the message you are trying to send, or the first
message queued in your Out mailbox, doesn’t have a
valid address. You need to enter a valid email address
in the To: or Bcc: field. An address in just the Cc: field
will not work.
“Sorry, can’t queue this
message; all messages
must have addresses in the
to: or bcc: fields.
Eudora displays the following
alert when you try to launch
the program:
“Memory is tight. You may
need to close some
windows, clean up your In,
Out, and Trash mailboxes,
or increase Eudora’s
memory size”
Eudora displays the following
alert when you try to launch
the program:
“Eudora cannot continue.
Error opening your settings
file.”
Eudora displays the following
error when you try to check
mail:
“-ERR Maildrop lock busy”
Mail stored in Eudora’s In, Out, Trash, and any open
mailboxes increases the amount of memory Eudora
needs to operate (mail stored in other mailboxes does
not). If you have a large amount of mail in these
mailboxes, try transferring them to other mailboxes to
decrease Eudora’s memory requirements. If that does
not stop the alert from appearing, increase Eudora’s
memory size from the Finder. First, quit Eudora. Then,
highlight the Eudora application icon, select Get Info
from the Finder’s File menu, and increase the
Preferred Size for the application.
Quit Eudora (click the Quit Now button in the alert)
and make sure you are not already running another
copy of Eudora. If you are already running another
copy, either quit that copy and relaunch the second
copy, or continue using the first copy. You cannot use
two different copies of Eudora simultaneously.
This usually happens after your Macintosh has “hung”
during a mail check and you are now attempting to
reconnect to the mail server. Try checking your mail
again in 1 minutes. If the problem persists, contact
your email administrator and tell them you have a
POPper process that needs to be disconnected.
System Administrators: You might also want to try the
QUALCOMM popper. It has a timeout that will reset
the mailbox if the connection closes abnormally. You
can ftp it anonymously from ftp.eudora.com in the
quest/unix/servers/popper directory.
QUALCOMM Incorporated
326
Eudora User Manual
Troubleshooting
Symptom
Corrective Action
Eudora displays the following
error when you try to check
mail:
First, verify the correct spelling of your entries in the
Username and Mail Host fields of the Getting Started
Settings found in Settings under the Special menu.
Make sure that each entry is complete and uses
proper lettercase throughout. Remember that these
entries are the respective components of your POP
account name that appear before and after the at “@”
sign; your POP account name is of the form
username@mailhost. Second, verify that you’re
entering your password correctly (the Caps Lock key
must be off). If the problem persists, see your email
administrator.
“There has been an error
transferring your mail. I
said: PASS and then the
POP server said: -ERR
Password supplied for
“<username>” is incorrect.”
Eudora displays the following
alert:
When the dialog appears after the alert message
appears, click Create New Table of Contents.
“Mailbox <mailboxname>
has a damaged table of
contents. Shall I build a
new one?”
Correspondents are
complaining that lines in the
messages you send are not
wrapping correctly (lines are
broken in funny places).
The best solution is to turn on the Word wrap option in
the Sending Mail Settings found in Settings under the
Special menu. When composing a message, press
Return only when you want to start a new paragraph.
Eudora will take care of breaking your paragraphs into
lines.
Your mail server complains
that you do not have a Date
header in your mail.
Eudora will not put a Date header on your mail if you
haven’t set the correct time zone information on your
Macintosh. You can set the time zone using the Map
control panel, or, if you have System 7 Pro or System
7.5, the Date & Time control panel. Remember to
change your time zone for Daylight Savings Time so
that Eudora can set the Date header correctly.
You have received a message
that contains columnar text,
and when you open the
message, the columns do not
line up properly.
Your screen font is probably a proportional font. This is
true if the Screen Font field of the Fonts & Display
Settings found in Settings under the Special menu is
set to a proportional font. In this case too, a Fixed
Width button appears on the icon bar of the open
incoming message. Click Fixed Width. The message
text is temporarily reformatted in the fixed-width font
specified in the Fixed-Width Font field of your Fonts &
Display Settings. Be sure that a fixed-width font, such
as Courier, is selected in this field. The message text
remains formatted in your fixed-width font until you
turn off the Fixed Width button or close the message.
QUALCOMM Incorporated
327
Troubleshooting
Eudora User Manual
Symptom
Corrective Action
You receive the following
message:
Your Mail Host (incoming server name) in the Getting
Started Settings found in Settings under the Special
menu is probably misspelled. Check with your ISP or
email administrator for the correct spelling.
Domain name does not
exist.
Any kind of TCP/IP errors
Check with your ISP or email administrator to make
sure your TCP/IP addresses are correct and entered in
the proper fields.
QUALCOMM Incorporated
328
Glossary
Alias. In Eudora, it’s another name or nickname for an existing user’s address. On a Mac,
it’s a file that is a link or pointer to some other file.
APOP. Authenticated Post Office Protocol is an MD5-based login command that does not
send passwords in clear text over the network.
Body. The part of an e-mail message that contains the main text of the message. The
body can contain text, graphics, sound, and video clips.
Browser. A World Wide Web client that uses HTTP to read and display HTML documents.
Client. A computer or software program that accesses resources over the Internet. It is
also an application that requests a server to perform a function. In the Internet mail environment, the term client indicates a mail user agent, for example, Eudora Pro.
Custom domain. An Internet Mail component that is configured with special routing information for SMTP mail settings. Multiple custom domains can be configured; messages
sent to a custom domain are handled and routed according to its specifications, that is,
through static routes or gateways.
Daemon. Daemons are generally server programs. They run continuously and are available when clients wish to initiate a session. However, an SMTP daemon periodically acts
as a client when it needs to forward messages that are not to be delivered locally.
Domain. In general, a group of computers and other devices under the management of a
single administrator or administrative entity. In the Internet, a domain identifies a range of
IP addresses and mail-forwarding information. See DNS.
DNS. Domain Name Service. The naming service used by Internet Mail to support
message routing. It maps domain addresses to IP addresses so Internet messages can
be delivered to a particular server.
Envelope. The envelope is the SMTP commands that enclose the e-mail message. The
SMTP envelope is the sequence of commands from the smtp-sender (a client) to the
smtp-receiver (a server) to forward a message to the next hop in the delivery.
Finger query. A directory service that queries a Finger server.
FTP. File Transfer Protocol
Gateway. In general, software that translates information between one protocol and
another.
Header. The part of an e-mail message that precedes the message. It contains information such as the originator, recipient, and subject of the message. Also, it is used as an
individual header field, such as the To: header.
QUALCOMM Incorporated
329
Glossary
HTML. Hyper-Text Marking Language used to create Web pages. A Web client interprets
HTML and displays documents and graphics accordingly. HTML also allows document
authors to establish hypertext links between documents in various locations on the
Internet and to create forms and image maps that enable users to interact with Web documents.
HTTP. Hyper-Text Transfer Protocol is the standard way of transferring information across
the World Wide Web. It supports a variety of media and file formats across a variety of
platforms.
IAB. Internet Activities Board. The organization (within the U.S. Department of Defense)
that is charged with administering the Internet.
IETF. Internet Engineering Task Force. The standards-setting body of the Internet.
Internet. A giant, global network made up of many smaller networks, all connected using
the TCP/IP protocol. The Internet is the network of networks which spans the globe.
TCP/IP is generally the network and transport protocol stack used to connect networks,
but protocol translating gateways enable non-TCP/IP networks to connect to the Internet,
as well.
Internet directory. A directory on the Internet that Eudora users can query. A directory
implementing Ph, LDAP, and Finger is an Internet directory.
Internet Message Access Protocol (IMAP). IMAP alows Eudora to access and manuipulate electronic mail messages on a server, and it permits manipulation of remote mailboxes so they function like local mailboxes. IMAP4 provides a richer and more complex set
of functionality than the POP3 protocol. IMAP is also called an incoming server.
IP address. The address that serves as a unique identifier of computers on the Internet. It
is a sequence of 4 small integers (each less than 256). When written the numbers are
separated by periods. For example: 210.170.2.45. The DNS converts IP addresses to the
more familiar domain names.
LDAP. Lightweight Directory Access Protocol is a protocol that provides an online, fully
indexed, fast access white-pages directory service developed and freely distributed by the
Regents of the University of Michigan.
Mailbox. In Eudora, a mailbox is a single collection of messages. Eudora allows the user
to create as many mailboxes as they wish to organize and store their messages.
A mailbox on a server is the location on the Internet where e-mail for a user is delivered.
Eudora collects messages from the server's mailbox and delivers it to mailboxes on the
user's computer.
Mailbox user. A user who sends and receive e-mail messages.
Mailing list. A group of recipients to whom users can refer by a common name (for
example, a mailing list called Marketing). When users address a message to a mailing list,
all members of the mailing list receive the message.
MIME. Multi-Purpose Internet Mail Extensions. A set of conversions to the Internet Mail
standards that supports the inclusion of multi-part and multimedia files, such as sound and
video, in e-mail messages.
Network. A group of connected computers that can communicate with one another.
Networks enable computers to share files and resources and exchange messages.
QUALCOMM Incorporated
330
Glossary
Ph. Ph (Phone book) is a protocol providing an online, fully indexed, fast access
white-pages directory service developed and freely distributed by the Computer and
Communications Services Office at the University of Illinois at Urbana.
POP3. Post Office Protocol 3. A protocol that provides a simple, standardized way for
users to access mailboxes and download messages to their computers. This is also called
the Incoming server.
Postmaster. A special type of user responsible for maintaining the mail delivery system
for a particular group of computers. A postmaster is responsible for following up on queries
from users and other postmasters. Internet standards require that the postmaster account
be valid at every domain.
RFC. Request For Comments. In the Internet community, RFCs are a numbered
sequence of documents generally describing protocols for Internet communication. An
Internet standard protocol is also give a STD number, in addition to an RFC number. Only
RFCs with a STD number are standards of the IETF. Some RFCs are historical or experimental, and are not standards. Others have not yet reached standard status. Still others
provide documentation about the Internet itself.
Server. An entity that provides a network service. A server can be hardware (such as a file
server), software (such as a mail server), or services (such as a transportation service). A
mail server is a program that accepts, relays, and delivers mail.
SMTP. Simple Mail Transfer Protocol. The protocol widely implemented on the Internet for
exchanging e-mail messages.
Static mail route. A mail route that an administrator explicitly specifies on a particular
domain. Static routes bypass domain name systems (DNS).
TCP/IP. Transmission Control Protocol/Internet Protocol. TCP/IP is a set of protocols for
computer network communication. The protocols provide conventions for connecting
networks and routing traffic between them. It supports local area networks, as well as
interconnections between local area networks. TCP/IP protocols are described in IETF
RFCs, as well as numerous reference works.
Username. A character string by which users are known (e.g., ldempster).
UUCP. UNIX to UNIX Copy Protocol is a UNIX e-mail protocol.
World Wide Web. Also known as the Web, the World Wide Web is a graphical interface to
Internet resources. Web refers to the set of hypermedia pages accessible via the Internet.
QUALCOMM Incorporated
331
Glossary
QUALCOMM Incorporated
332
Index
Index
Click page number to display topic.
Symbols
-, in the Status column 114
???@??? 115
•, in the Status column 37, 55, 113
µAccess 319
A
About Message Plug-ins command 309
ACAP Port option 284
ACAP Server option 284
ACAP settings 284, 285
ACAP Username option 284
Activating tabbed windows 174
Add to Dictionary command 47, 48
Address Book 181
adding a group 185
adding a person 183
adding an address book 182
adding email addresses 186
adding information 186
adding nicknames to the Quick Recipient List
199
Address(es) field in 184
changing entries in 190
creating a group from the address book 194
creating a message from 191
deleting entries 191
displaying entries in 181
dragging entries to another file in 190
Home tab 186
make address book entry from 192
maximum entries in 184
moving an entry 190
Name field in 188
Notes tab 190
Other tab 189
paging up and down in 182
Personal tab 183
printing 182
Recipient List option 199
removing entries from 190
saving changes to 190, 191
saving entries to a file 198
type to select entries in 182
using non-Eudora nicknames 198
View by popup menu 181
Work tab 188
Address(es) field 184
After transferring or deleting or paging past end of
current message, open option 267
Age-sensitive option 263
Aliases
mailboxes 313
Settings files 311
Align Center button 34
Align Center text option 40
Align Left button 34
Align Left text option 40
Align Right button 35
Align Right text option 40
All capitals option 255
Alternate personalities 57, 69
Always include Macintosh information option 45,
256
Any Header field
in Filters 141
Any Recipient field
in Filters 141
APOP option 82, 247, 248, 281
appears option 141
Apple Color dialog 264
AppleDouble 44
AppleDouble encoding 44
AppleDouble option 256
AppleSingle encoding 44
AppleSingle option 256
arrow in the Status column
diagonal (Redirected) 113
left (Replied) 113
right (Forwarded) 113
Arrow+these modifiers to switch messages option
267
As normal user notification 143
ASCII
MIME 321
Ask me each time option 39, 265
Attach Document command 43, 45
Attachment Folder 133
Attachment Folder option 95, 256
Attachment plug-ins 43
Attachment Type popup 44
Attachments
and UUCP 319
attaching files to outgoing mail 43
Attachment Folder
changing 95
Attachments Folder 93
automatically deleting 133
QUALCOMM Incorporated
333
Index
copying 94
decoding 45
detaching from a message 44
displaying graphics attachments inline 94
dragging to attach 43
encoding 44
moving 94
moving via filters 144
opening 93
receiving 93
Attachments column 114
Attachments Folder 93, 311
Attachments option 262
Attachments Settings 253
Attention sound option 86, 269
Authentication option 82, 247, 248, 281
Authentication, SMTP 56
Auto. Configure Settings 284, 285
Auto. Configure settings 284
Auto. Configure Settings (Automatic Configuration)
20
Automatically as you type option 254
Automatically download HTML graphics option 98,
260
Automatically Fcc to original mailbox option 251
Auto-reply 144
B
Background color option 259
background sending 251
background sending and receiving 89, 248
background threading 89, 248
Balloon Help 27
Base64 322
Bcc 36
Bcc button
in Directory Services 206
Bcc field 57
in outgoing mail 36
Big icons only option 268
Big icons with names option 268
BinHex encoding 44
BinHex option 256
BLAH BLAH BLAH icon 92
<blank>, in the Status column 113
Blind copy
with Bcc field 36
with Name field in Address Book 184
BMP file format 42, 94
Body field
in Filters 141
Bold button 34
Bold option 266
Bold text option 40
Bulleted List button 35
Button type option 268
By default (use option key for sender only) option
257
C
Cache Folder 311
Caps Lock (key) option 267
Cc 36
Cc button
in Directory Services 206
Cc field
in Filters 141
in outgoing mail 36
Change Queueing dialog 53, 54, 55
Changing your registration 26
Check for mail every ? minutes option 58, 75, 248,
279
Check mail
automatically 58, 75
Check for mail every ? minutes option 58, 75
entering password 59
Fetch & Delete server 84
Fetch icon 84
Fetch server action 84
manually check 58
minimum interval 58, 75
Save password option 60
Skip messages over ? K option 84
Trash icon 84
with special instructions 85
Check Mail command 58, 59
Check mail on manual checks option 279
Check Mail Specially command 81
Check Spelling
add custom user dictionaries 49
Add to Dictionary command 48
automatically as you type 46
command 47
dictionaries 46
Never make suggestions option 48
Remove from Dictionary command 48
spell-checking outgoing messages as they are
sent or queued 48
turn on manually 47
Check spelling option 254
checking mail
and sending queued messages 55
from multiple Macintoshes 81
Checking Mail Settings 246
Check for mail every ? minutes option 58, 75
checking your spelling 46
QUALCOMM Incorporated
334
Index
checkmark in the Status column (Sent) 57, 114
Chili pepper icons 50
Choose a “Word Services” application dialog 309
Choosing a mode 25
Clear command 44
clock icon in the Status column (Timed Queue) 54,
113
Close messages with mailbox option 276
Closing Eudora 27
Closing Tabbed Windows 175
Color option 266
Color popup 34
Color text options 40
Colors options 259
Command (key) option 267
Command-click on title bar 31
Compact
all mailboxes 118
one mailbox 118
Completely Plain button 35
Completely Plain option 40
Composing Mail Settings 252
Composition window 31
Configured server 209
Configuring Eudora 18
contains option
or does not contain option 141
Control (key) option 267
Control key, and drag and drop 42
copies of outgoing messages 57
Copy & Unwrap command 42
Copy blind
with Bcc field 36
with Name field in Address Book 184
Copy command 113
Copy original’s priority to reply option 38, 258
Copy To filter action 57, 86, 143
Copy Without Styles & Unwrap command 42
Copying a message to a mailbox 36, 134
Copying message summaries 113
copying messages via filters 143
Correct (but slow) international sorting option 277
CRAM-MD5, SMTP authentication 56
Create Link button 43
Creating a new mail folder 123
Creating a new mailbox 123
Creating a new personality 71
Creating a tabbed window 174
Creating a vacation message 144
Creating an auto-reply 144
Creating SMTP Authentication 56
Current maintenance release
how to determine 325
D
Date column 115
Date Display Settings 263
Date field in Change Queueing dialog 54
Date formats option 263
Date option 262
Delete all messages on server (be sure) option 86
Delete all messages that have been retrieved option 84, 86
Delete command 131
Delete from Server action 84, 116
Delete from server when emptied from trash option
82, 86, 248, 250
Delete key 124
Delete messages marked for deletion option 85
Delete server action 84, 143
Deleted on IMAP Server action 117
Deleting a personality 73
Delivery Folder 311
Detaching attachment 44
Dimensions of message windows options 260
dinosaur icon (Filters window) 140
Directory Services
addressing a message from 206
Bcc button 206, 207
Cc button 206, 207
finding Ph servers 208
To button 206, 207
Disconnect MacSLIP or OT/PPP if Eudora connected it option 276
Display dates using option 264
Display graphics in messages option 94, 260
DNS load balancing option 271
Do Nothing server action 116
does not appear option 141
Domain to Add option 283
Domain to add to unqualified names option 250,
252
Dominant personality 57, 73
Don’t check when not connected 178
Don’t check when on batteries 178
Don’t check when using battery option 248
Don’t make automatic checks when MacSLIP or
OT/PPP is not already connected option
276
Don’t Send option in Change Queueing dialog 55
Drag and Drop 42
Dragging text 42
Draw horizontal separator lines option 262
Draw vertical separator lines option 262
QUALCOMM Incorporated
335
Index
E
Edit
incoming mail 96
Edit menu
Add Word Service command 309
editing a queued message 55
EIMS 316
Email server
how to obtain 316
Empty the Trash mailbox option 273
Empty Trash on Quit option 131, 276
Enable MoodWatch option 274
Encoding method option 256
Encoding methods
AppleDouble 44
AppleSingle 44
BinHex 44
Uuencode Data Fork 44
Esoteric Settings 315
threading
Really Miscellaneous 178
ESP (Eudora Sharing Protocol) 287
advanced setup 292
changing group information 302
configuring global settings 303
creating a group 289
installing 288
inviting members to join 294
joining a group 301
leaving a group 301
maintaining group members 299
Notifications tab 297
Settings tab 296
Sync Folder command 302
tips 288
User tab 294
working with the shared folder 302
Eudora, how to open 18
Eudora Application Folder 314
Eudora Attention option 269
Eudora configuration 18
Eudora Email
Introduction 17
What’s new in this version? 17
Eudora Folder 314
Attachments Folder 311
Cache Folder 311
Delivery Folder 311
Documentation Folder 315
Eudora Filters file 311
Eudora Items folder 312
Eudora Log file 312
Eudora Nicknames file 312
Eudora Settings file 312
Extra Plugins Folder 315
IMAP Folder 312
In file 313
Mail Folder 312
Mailbox Aliases 313
Nicknames Folder 312
Old Log file 312
Out file 313
Signature Folder 313
Spool Folder 313
Stationery Folder 313
Trash file 313
README file 314
Eudora Information 316
Eudora Internet Mail Server (EIMS) 316
Eudora Items folder
Plugins folder 312
Eudora Labels Settings 264
Eudora Log file 312
Eudora New Mail option 269
Eudora Sharing Protocol (ESP) 287
Eudora Stuff folder 307, 308, 309
Eudora WorldMail Server 316
Excerpt bars 40
Excerpts option 266
Exiting Eudora 27
Expand nicknames immediately option 195, 199,
252
Extra Plugins Folder 315
Extra Plugins folder 308
Extra Warnings Settings 272
Try to delete any unsent mail option 131
Try to delete queued mail option 131
Try to delete unread mail option 131
F
Fcc menu 36, 57
Fetch & Delete server action 84, 116
Fetch all message headers to In mailbox option 86
Fetch from Server action 84, 116
Fetch icon 84, 92
Fetch server action 143
Fetch Settings Now option (button) 285
filter actions 142
Filter Messages command 139
filter reports, how to generate 277
Filtering Messages 135
Filters
and option 142
appears option 141
Conjunction field 142
contains option 141
QUALCOMM Incorporated
336
Index
does not appear option 141
does not contain option 141
ends with 141
header field 140
ignore option 142
Incoming option 139
intersects nickname option 141
invoked from top to bottom 140
is not option 141
is option 141
Manual option 139
Match Type field 141
Matching Text field 141
or option 142
Outgoing option 139
simple 136
starts with 141
unless option 142
Filters command 139
Filters window 139
Find Next Misspelling command 48
Finding messages in mailboxes folders 153
Finding text in the current window 149
Fix curly quotes option 251
Fixed option 263
Fixed-Width Font option 259
Flash an icon in the menu bar option 86, 269
Font option 266
Font popup 34
Font text options 40
Fonts & Display Settings 257
Formatting text
Bold 40
Center 40
Color 40
Completely Plain 40
Font 40
Insert graphic 40
Insert Horizontal Rule 40
Italic 40
Left 40
Link to URL 41
Plain 40
Right 40
Size 40
Underline 40
Formatting Toolbar
in outgoing mail 33
formatting toolbar
automatic on-off switch 260, 266
Forward To filter action 143
Forward To submenu 199
Forward934 315
forwarding
via filters 143
From field
in Filters 141
ftp.eudora.com 316
Full message except attachments over ? K option
79, 89, 249, 282
function keys
using with main toolbar 268
G
Generate filter reports option 277
Get HTML Graphics button 98, 260
Getting Attention Settings 268
Getting Help 27
Getting Started Settings 19, 245
Mail Host setting 57
Return address (if not username@mailhost)
option 36
GIF file format 42, 94
gnuucp 319
Go To Stationery Folder button 66
Guess Paragraphs 147
H
Height option 260
Help menu 27
Hide Balloons command 28
Insert System Configuration 28
Show Balloons command 27
Help, balloon 27
Hide Balloons command 28
Hide the recipient list
with Bcc field 36
with Name field in Address Book 184
History list 197
Horizontal toolbar option 268
Hosts Settings 21, 270
Mail option 22
Hot link
in incoming mail 97
in outgoing mail 45
how to
assign a label to a message 265
check your spelling 46, 47
generate filter reports 277
request a return receipt from yourself 277
set background color in messages and mailbox
windows 259
set quoted text color 259
set text color 259
QUALCOMM Incorporated
337
Index
spell-check outgoing messages as they are
sent or queued 48
stop a mail check 59
turn off all mail checking for a selected personality 279
HTML 39
HTML graphics
automatic download option 260
HTML text
how to view 97
Hypertext Markup Language format (HTML) 39
I
Icon bar
in incoming mail 92
in outgoing mail 32
ignore option 142
Ignore words with option 254
IMAP FAQ web site address 28
IMAP Folder 312
IMAP Mailbox Location Prefix option 78, 89, 249,
282
IMAP mailboxes and folders, deleting 127
IMAP mailboxes and folders, renaming 127
IMAP mailboxes, renaming 127
IMAP option 82, 247, 248, 281
IMAP or POP 23
IMAP server 57
how to obtain 316
Immediate send option 33, 53, 54, 251
Importing from Outlook Express 24
In mailbox 87
In report user notification 143
Include Macintosh Information icon 45
Include outdated Return-Receipt-To: option 277
Incoming mail server 57
incoming mail server (POP) 81
Incoming message window
icon bar 92
BLAH BLAH BLAH icon 92
Fetch icon 92
pencil icon 92
priority popup 92
Subject field 92
Tow Truck icon 93
message body 93
Incoming option 139
Indent In button 35
Indent Out button 35
Initial capitals option 255
Insert & Expand Recipient command 199
Insert Graphic command 42
Insert Graphic option 40
Insert Horizontal Rule button 42
Insert Horizontal Rule command 42
Insert Horizontal Rule option 40
Insert System Configuration 28
Inserting a file 45
Inserting objects in a message 42
Installing Eudora 18
Internet Dialup settings 275
Internet e-mail server
how to obtain 316
intersects nickname option 141
is not option 141
is option 141
Italic option 266
Italic text option 40
Italics button 34
J
JFIF file format 42, 94
JPEG file format 42, 94
K
Keep copies of outgoing mail option 57, 251, 253
Keep Copy icon 33, 57
keeping copies of outgoing messages 57
Kerberos 317
Kerberos option 82, 247, 248, 281
keyboard shortcuts 242
Keychain 278
L
Label column 115
Label column popup menu 265
Label option 262
Label submenu 265
labels
assigning via filters 142
changing the color and text 264
Eudora labels 264
how to assign to a message 265
Macintosh labels 264
Last used field 144
LDAP servers list 209
Leave on server for ? days option 82, 248, 281
and UUCP 320
Left, right, center option 266
Light mode 25, 26
Link History 175
Link to URL button 43
Link to URL command 43
Link to URL option 41
QUALCOMM Incorporated
338
Index
Local timezone option 264
LOGIN or PLAIN,SMTP authentication 56
Look like the word you typed option 255
Look or sound like the word option 255
M
Macintosh color picker 264
Macintosh server (POP or IMAP)
how to obtain 316
MacPaint file format 42, 94
MacSLIP (and OT/PPP) settings 276
Mail drop 319
Mail Folder 312
Mail Folders
creating during transfer 135
Make it a folder option 121
New command 121
Mail folders
creating in the Mailboxes window 123
creating using Mailbox menu 121
moving in the Mailboxes window 123
removing in the Mailboxes window 124
renaming in the Mailboxes window 123
Mail Host option 247, 279
Mail option 22, 271
Mail Protocol option 247, 281
Mail server 57
Mail Server in Settings 246
Mail Storage 311
Mail Transfer Options dialog 85, 117
Delete all messages on server (be sure) 86
Delete all messages that have been retrieved
86
Delete messages marked for deletion 85
Fetch all message headers to In mailbox 86
Retrieve messages marked for retrieval 86
Retrieve messages marked for retrieval option
85
Retrieve new mail 85
Send queued messages 85
Transfer mail for the following personalities 86
Mailbox Display Settings 261
Mailboxes
compacting all 118
compacting one 118
creating during transfer 135
creating in folders 121
creating in the Mailboxes window 123
creating using Mailbox menu 121
displaying columns 117
dragging to main toolbar to create buttons 123
Make it a folder option 121
message summaries 112
moving in the Mailboxes window 123
New command 121
opening 111
opening other 111
removing in the Mailboxes window 124
renaming in the Mailboxes window 123
resizing columns 117
size display 117
sorting messages in 145
space messages require 117
space wasted 117
transferring messages among 133
Mailboxes window 121
Main Toolbar 305
main toolbar
settings 261
Make Address Book Entry command 192
from a mailbox 192
from selection 208
from the Address Book 208
Make Address Book Entry From Selection command 192, 208
Make Filter Dialog 136
Make Filter dialog 136
Make Filter dialog buttons 138
Make it a Folder option 121
Make Label filter action 142, 265
Make Personality filter action 142
Make Priority filter action 142
Make Status filter action 142
Make Subject filter action 143
Managing mail on the server
Delete from Server action 116
Deleted on IMAP Server action 117
Do Nothing server action 116
Fetch & Delete server action 116
Fetch from Server action 116
Fetch icon 84
Fetch server action 84
Mail Transfer Options dialog 85
Skip messages over ? K option 84
Trash icon 84
managing your mail on the POP server 81
Manual option 139
Map function keys to buttons option 268
Mapping between MIME and Mac types 323
Margins
bullets 40
indents 40
normal 40
Margins option 266
Mark read after ? seconds option 263
Mark read if clicked in or tabbed to option 262
Mark read if deleted option 263
QUALCOMM Incorporated
339
Index
Mark read if “next message” used to move away option 262
May use Quoted-Printable option 253
“me” nickname, for personal identification 38, 258,
277
Message body
in incoming mail 93
in outgoing mail 36
Message header
Bcc field 36
Cc field 36
From field 36
in incoming mail 93
in outgoing mail 35
Subject field 36
To field 35
Message plug-ins 307
Message Plug-ins submenu 308
Message preview options 262
Message priority
how to set 37
Message summaries 112
Attachments column 114
changing the subject of 96
copying 113
Date column 115
Label column 115
MoodWatch column 116
Priority column 114
resizing columns 117
selecting 112
Sender/Recipient column 115
Server Action column 116
Size column 116
Status column 113
Subject column 117
message window height option 260
message window width option 260
Messages
transferring to a mailbox in the Mailboxes window 124
MIME 321
ASCII 321
mapping 323
Quoted-printable 321
MIME digests 257
MIME Labeling 322
Minimal headers only option 79, 89, 249, 282
Miscellaneous Settings 276
Empty Trash on Quit 131
Mixed capitals option 255
modifiers
not shown in Eudora’s menus 237
shown in Eudora’s menus 239
Modify a personality 73
Modify a signature 62
MoodWatch settings 274
MoodWatch 49
changing settings 274
enable 274
icons in an outgoing message 50
icons, in an outgoing message 33
in incoming messages 51
in outgoing messages 50
MoodWatch column 116
Move Attachments filter action 96, 144
Moving Around Settings 276
Multiple accounts in Eudora 69
Multiple accounts on one Macintosh 310
Multiple personalities 57, 69
Multipurpose Internet Mail Extension (MIME) 321
Multi-tasking 178
multi-threading 89, 248, 251
N
Name field 188
Names only option 268
Never make suggestions option 255
New command 121
New mail sound option 86, 269
New Mailbox dialog 121, 135
New Message To submenu 199
New Message With submenu 64
New Tabbed Window 174
Next message if unread option 267
Next message option 267
Next Time Queued Messages are Sent option in
Change Queueing dialog 54
Next unread message option 267
Nickname auto-completion option 252
Nicknames
“me” 38
adding to the Quick Recipient List 199
None filter action 142
Nothing option 267
Notify Sender button 38
return a receipt 38
Notify User filter action 143
Nuke command 131
Numbers option 255
O
Offline (never check) 178
Offline (no connections) option 246
Old Log file 312
On or after option in Change Queueing dialog 54
QUALCOMM Incorporated
340
Index
Only when requested option 254
Open Eudora 18
Open filter action 143
Open in Browser command 97
Open incoming message with error option 270
Open mailbox (new mail only) option 86, 269
Open Selection command 87
opening messages or mailboxes via filters 143
Opening tabbed windows 174
Option (key) option 267
or option 142
Orientation option 268
OT/PPP and MacSLIP Settings 276
Other... command (Mailbox and Transfer menus)
313
Out mailbox 134
outgoing message copies 57
Outgoing message window
Formatting Toolbar 33
Align Center button 34
Align Left button 34
Align Right button 35
Bold button 34
Color popup 34
Completely Plain button 35
Font popup 34
Indent In button 35
Indent Out button 35
Italics button 34
Size popup 34
Underline button 34
Unquote button 34
icon bar 32
keep copy icon 33
priority popup 32
quoted-printable icon 32
Return Receipt icon 33
signature popup 32
word wrap icon 32
message body 36
message header 35
Bcc field 36
Cc field 36
Subject field 36
X-Attachments field 36
title bar 31
Outgoing option 139
Outlook Express, importing 24
Overlap POP3 commands for better performance
option 82, 248, 271
P
Paid mode 25, 26
Password
changing
server source code for 317
entering 59
forgetting 59
remembering 59
Saving 60
Password dialog 59
Passwords
changing 60
Passwords option 82, 247, 248, 281
Pencil icon 92, 96
Pers. Name option 279
Personalities 69
create 71
deleting 73
modify 73
removing 73
personalities
and stationery (caution) 77
assigning via filters 142
Personalities Settings 69, 278
Personalities window 71
Personality Extras Settings 69, 280
Personality field
in Filters 141
Personality option 278, 281
Personality popup 74
Personality submenu 74
Ph
server source code 317
Ph servers list 209
Phone number for technical support 29
Photoshop file format 42, 94
PICT file format 42, 94
Plain text option 40
Play a sound option 86, 269
Play Sound filter action 143
Plug-in Settings submenu 309
Plug-ins 306
attachment 43
how to purchase third-party Eudora plug-in software 307
how to remove 309
included with Eudora 307
message 307
resource 307
Rot13 Text 307
Space & Tab Converter 307
UPPERlower Text 307
Plugins
Kerberos Settings 315
Synch I/O 315
Toshiba 315
QUALCOMM Incorporated
341
Index
Plugins folder (in Eudora Pro Folder), for extra
plug-ins 315
PNG file format 42, 94
POP option 82, 247, 248, 281
POP or IMAP 23
POP server 57, 81
how to obtain 316
Popup menu
title bar 120
preview pane
display control settings 262
Print
current item 310
selection only 310
Print filter action 143
Print Font option 259
printing
via filters 143
priority
assigning via filters 142
Priority button 32
Priority column 114
Priority option 262
Priority popup
default for replies 38
in composition window 37
in incoming mail 92
in outgoing mail 32
levels 37
Raise and Lower 37
Prompt for receipts requested by self option 38, 277
PureVoice sound files 43
Q
Q, in the Status column 53, 113
Queue button 53, 54
Queue For Delivery command 53
Queued (Q) status 53
queued messages
how to edit 55
sending on mail checks 55
taking them out of the queue 55
queueing a message to send at a certain time 54
Queueing mail to send later 53
Queueing... command 55
Quick Recipient List
Forward To submenu 199
Insert & Expand Recipient command 199
Insert Recipient command 199
New Message To submenu 199
putting nicknames on 199
Redirect To submenu 199
QuickDraw GX Picture file format 42, 94
QuickDraw Picture (PICT) file format 42, 94
QuickTime 42, 94
QuickTime Image File 42, 94
Quitting Eudora 27
Quote
add
remove 40
Quote command 40
Quoted-printable
MIME 321
turning off 322
Quoted-printable icon 32
Quotes color option 259
R
Read from Internet Config (not recommended) option 277
Real name 319
Real Name in Settings 246
Real Name option
and UUCP 319
Real name option 280
Receive MIME digests as attachments option 257
Recipient List option 199
Redirect To filter action 143
Redirect To submenu 199
redirecting
via filters 143
Registering Eudora 25
Registration, changing 26
Regular Expressions 168
Remove a signature 63
Remove All button 124
Remove Button 305
Remove from Dictionary command 48
Remove It button 124
Removing a personality 73
Removing IMAP mailboxes and folders 127
Renaming a mail folder 123
Renaming a mailbox 123
Renaming IMAP mailboxes and folders 127
Reorganizing Tabbed Windows 173
Reply to all option 257
Reply With filter action 68, 143
Reply With submenu 64
replying
with stationery via filters 68
with stationery, via filters 143
Replying Settings
Copy original’s priority to reply option 38
replying with stationery 67, 109
Reply-To field
in Filters 141
QUALCOMM Incorporated
342
Index
Require control key for text/message dragging
option 42
Requirements 18
Resize cursor 117
Re-sort mailboxes less often option 277
Resource plug-ins 307
Retrieve messages marked for retrieval option 85
Retrieve new mail option 85
Retrieve only message headers 86
Return address (if not username@mailhost) option
36, 250, 252
Return address option 280
Return Receipt 38
Return Receipt icon 33
Return switches among header fields option 267
Right Now option in Change Queueing dialog 54
Rot13 Text plug-in 307
S
Save As dialog 65
Save As... command 65
Save mail as text
as a single file 147
Guess Paragraphs option 147
Stationery option 147
TEXT files belong to option 147
Save password option 89, 247
Saving messages 36
Say OK to alerts after 2 minutes option 269
Screen Font option 259
Scripts menu 235
add or delete AppleScripts 235
Send Anyway button (spelling alert) 49, 254
Send mail whenever sends are done option 280
Send message Next Time Queued Messages are
Sent option 54
Send message On or after option 54
Send message Right Now option 54
Send message: Don’t Send option 55
Send Messages Specially command 81
Send on check option 55, 79, 89, 248, 251
Send plain & styled both option 265
Send plain text mail only option 265
Send Queued Messages command 53
Send queued messages option 85
Send styled mail only option 265
Sendable (•) status 37, 55
Sender/Recipient column 115
Sender’s timezone option 264
Sending Mail Settings 250
Immediate send option 33
sending queued messages when checking mail 55
sending with stationery 67
Sent status (checkmark) 57
Server
email, internet
how to obtain 316
Server Action column 116
Server action popup 84
Server Configuration option 82, 248
Server option 262
Server Options filter action 143
Servers used recently list 209
Set a changed message back to read-only option
273
Setting Up the Search Conditions 157
settings 245
Settings dialog 245
Sharing a Macintosh 310
Shift (key) option 267
shortcuts 242
Show Balloons command 27
Show columns option 262
Show formatting toolbar option 33, 260, 266
Show function key labels option 268
Show message previews by default option 262
Show Task Progress during background activity
option 270
Show toolbar option 268
Shutting down Eudora 27
Signature option 253
Signature popup 32
in composition window 63
Signature when not using stationery option 283
Signatures
creating an additional 62
creating or modifying the Alternate 61
including in a message 63
including in all messages 63, 77
modify 62
remove 63
Signatures command 61, 62
Silicon Graphics Image File 42, 94
Simple Filters 136
Size column 116
Size option 262, 266
Size options
Fixed-Width Font 259
Print Font 259
Screen Font 259
Size popup 34
Size text options 40
Skip messages over ? K option 82, 84, 248, 281
Skip Rest filter action 144
Small icons & names option 268
Small icons only option 268
SMTP Authentication 56
QUALCOMM Incorporated
343
Index
SMTP Server option 250, 280
Sorting 145
in descending order 146
sticky 145
with the shift key 145
Sound like the word you typed option 255
sounds
playing via filters 143
Sounds, in Getting Attention settings
Getting Attention settings, sounds 270
Space & Tab Converter plug-in 307
Speak filter action 143
speech
via filters 143
Spell Checking Settings 49
spelling
checking 46
checking manually 47
dictionaries 255
insertion point vs. double-click for correcting
misspelled words 48
quoted text ignored 48, 254
red-and-underline highlighting not a style 48
spell-checking outgoing messages as they are
sent or queued 254
Spelling submenu 47
Splitter cursor 305
Sponsored mode 25, 26
stationery 64
and multiple personalities (caution) 77
replying with 67, 109
replying with via filters 68
replying with, via filters 143
sending with 67
setting a default stationery file to use with all
outgoing messages 67, 68
stationery-dependent settings 64
Stationery Folder 66
Stationery messages
opening 66, 67
stationery messages
creating 65
Stationery option 66, 147, 253, 283
Statistics 176
changing color 285
changing graph type 286
changing settings 285
displaying window 176
printing report 176
Statistics settings 285
status
-, Unsent 114
•, Sendable 55
•, Sendable or Unread 37, 113
<blank>, Read or Unsendable 113
changing via filters 142
Forwarded (right arrow) 113
Q, Queued 53, 113
Redirected (diagonal arrow) 113
Replied (left arrow) 113
Sent (checkmark) 114
Timed Queue (clock icon) 54, 113
Status column 113
Status option 262
Sticky sort 145
stopping a mail check 59
Styled Text Settings 278
Subject
changing via filters 143
Subject column 117
Subject field 36
changing in message summaries 96
in Filters 141
in incoming mail 92
in outgoing mail 36
Suggest words that option 255
System requirements 18
T
Tab Contents and Auto-Activation 173
Tab key
switching fields with 35
Tab to switch fields, option-tab to insert tab option
267
Tabbed Windows 172
closing 175
default 173
new 174
opening
activating 174
reorganizing 173
Tabs
and the Save As command 147
tabs 147
taking a message out of the queue 55
Targa Image File 42, 94
Task Progress popup menu 178
Task Progress window 53, 177
background display setting 270
TCP/IP option
and UUCP 320
Technical support phone number 29
Text color option 259
TEXT files belong to option 147, 256
threading 89, 178, 248, 251
TIFF file format 42, 94
Time field in Change Queueing dialog 54
QUALCOMM Incorporated
344
Index
Timed Queue status (clock icon) 54
time-queued messages 54
Title bar
for outgoing mail 31
Title bar popup menu 120
To button
in Directory Services 206
To field
in Filters 141
Toolbar
formatting 33
main 305
adding a button 305
changing a button 306
displaying 306
dragging files to create buttons 306
mapping to function keys 306
moving a button 306
removing a button 306
scrolling arrows 306
transferring messages using 306
toolbar
main
settings 261
Toolbar Button Creation dialog 305
Toolbar Settings 261, 306
Tow Truck icon 93, 124
Transfer mail for the following personalities option
86
Transfer To filter action 86, 143
transferring
via filters 143
Transferring mail to another mailbox
and creating a mailbox or folder 135
by dragging it 134
by dragging the Tow Truck icon 134
using the option key 134
using the Transfer menu 134
Transferring mail to the Out mailbox 134
Trash attachments with messages option 133, 256
Trash icon 84
Trash mailbox 131
Troubleshooting 325
“Can’t queue this message” 326
“-ERR Maildrop lock busy” 326
“Error opening your settings file” 326
“Mailbox has a damaged table of contents” 327
“Memory is tight” 326
“Message columns don’t line up” 327
“Messages not wrapping correctly” 327
“No Date header in your mail” 327
“Password is incorrect” 327
and README file 325
Try something that requires too much memory op-
tion 273
Try to delete any unsent messages option 273
Try to delete queued mail option 272
Try to delete unread mail option 272
Try to queue a message with no subject option 273
Try to queue a message with styled text option 273
Try to quit with messages queued to be sent option
273
Try to send a message whose size is more than ? K
option 273
Turbo redirect by default option 277
Turning off Quoted-printable 322
Tutorial pages web site address 28
U
Underline button 34
Underline option 266
Underline text option 40
UNIX server (POP or IMAP)
how to obtain 316
unless option 142
unqueueing a message 55
Unquote 40
Unquote button 34
Unquote command 40
Unread (•) status 87
Unwrap Selection command 42
UPPERlower Text plug-in 307
URL
choosing an application 97
in incoming mail 97
in outgoing mail 45
Use a trash mailbox on the IMAP server option 282
Use an alert option 86, 269
Use background threading option 89, 248
Use Folder button 95
Use Live Scrollbars option 260
Use mail-exchange records (SMTP Servers Only)
option 271
Use Navigation Services if they are available option
277
Use old-style “.toc” files option 277
Use separate thread for sending option 251
user notification via filters 143
Username in Settings 246
Username option 279
UUCP 319
Mail drop format 320
Working files 320
D.mac0#### 320
X.mac0#### 320
UUCP/Connect 319
Uuencode Data Fork encoding 44
QUALCOMM Incorporated
345
Index
Uuencode data fork option 256
uupc 319
V
Vertical toolbar option 268
View By popup menu 181
W
Warn me when I options 272
Warn when sending/queueing message with misspellings option 48, 254
Warnings
Try to delete 131
Try to delete unread mail option 131
When option key is down option 257
When receiving styles, pay attention to option 93,
266
When sending mail with applied fonts & styles option 265
Who option 262
Width option 260
Windows Bitmap file format 42, 94
Windows NT server (POP or IMAP)
how to obtain 316
Word Service, adding 309
Word Wrap icon 32, 41
Word wrap option 41, 253
WorldMail Server 316
Wrap Selection command 41
Wrapped text 32, 41
Write to Internet Config option 277
X
X-Attachments field 43
in outgoing mail 36, 44
X-Eudora-Settings web site address 28
Z
Zoom windows when opening option 260
QUALCOMM Incorporated
346