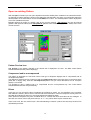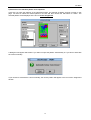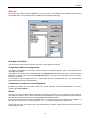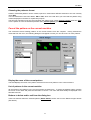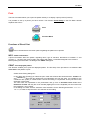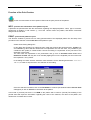
1
USER MANUAL
Click here to go
to the Table of
Contents
ENGLISH
LONATI spa – Via S. Polo, 11 – 25123 BRESCIA – Phone: 030-23901 – Fax: 030-2310024
Table of Contents
TABLE OF CONTENTS
Starting Microsoft Windows 3.1 _________________________________________________ 4
Starting Microsoft Windows 95 __________________________________________________ 5
PAINT Graphics Guide _________________________________________________________ 6
File Menu ____________________________________________________________________ 7
Select Machine Type ___________________________________________________________________ 7
New pattern __________________________________________________________________________ 8
Open an existing Pattern _______________________________________________________________ 10
Import Pattern _______________________________________________________________________ 12
Close (Close Pattern) _________________________________________________________________ 20
Save (Save Pattern) __________________________________________________________________ 21
Save as ____________________________________________________________________________ 24
Cancel the pattern on the current machine _________________________________________________ 25
Print Setup __________________________________________________________________________ 26
Print _______________________________________________________________________________ 27
File 1, 2, 3, 4 ________________________________________________________________________ 31
Exit________________________________________________________________________________ 31
View Menu __________________________________________________________________ 32
Toolbar ____________________________________________________________________________ 32
Status Bar __________________________________________________________________________ 34
Display the Colour Palette of the Current Machine ___________________________________________ 35
On/off Grid __________________________________________________________________________ 37
Display the colours configured in the pattern _______________________________________________ 38
Preview Window _____________________________________________________________________ 38
Window Menu _______________________________________________________________ 39
New Pattern Window __________________________________________________________________ 39
Open Pattern Windows Cascade ________________________________________________________ 39
Open Pattern Windows Tile_____________________________________________________________ 39
Arrange Pattern Icons _________________________________________________________________ 39
Change Menu________________________________________________________________ 40
Pattern or Weft Command _____________________________________________________________ 40
Change the Colour of the Grid___________________________________________________________ 41
Cancels the command that has just been carried out _________________________________________ 41
Description of the commands ___________________________________________________________ 42
Configuration Menu __________________________________________________________ 43
Pattern configuration management - OLD SYSTEM__________________________________________ 43
Display the feed setup table ____________________________________________________________ 45
Pattern configuration management - NEW SYSTEM _________________________________________ 46
Defines trace thickness (only for DIGRAPH3)_______________________________________________ 48
Help Menu __________________________________________________________________ 49
PAINT Help Index ____________________________________________________________________ 49
Using Help __________________________________________________________________________ 49
About PAINT ________________________________________________________________________ 49
Interactive PAINT Help ________________________________________________________________ 49
Geometric Tools _____________________________________________________________ 50
Dot ________________________________________________________________________________ 50
Dot ________________________________________________________________________________ 51
Line _______________________________________________________________________________ 51
Curves _____________________________________________________________________________ 51
Rectangle __________________________________________________________________________ 52
Square _____________________________________________________________________________ 52
Diamond ___________________________________________________________________________ 53
Circle ______________________________________________________________________________ 54
Ellipse _____________________________________________________________________________ 54
Conic Section _______________________________________________________________________ 55
2
Table of Contents
Text insert (only for DIGRAPH3) _________________________________________________________ 55
Use of the Tablet (only for DIGRAPH3) ___________________________________________________ 57
Polisplyne (only for DIGRAPH3) _________________________________________________________ 58
Modifying Area Tools _________________________________________________________ 59
Copy Rectangular Area ________________________________________________________________ 59
Copy a Pattern Area_________________________________________________________________ 60
Move a Pattern Area ________________________________________________________________ 60
Linear Multiple Copy ________________________________________________________________ 61
Rectangular Multiple Copy____________________________________________________________ 61
Copy Unshaped Area _________________________________________________________________ 62
Copy an Unshaped Area _____________________________________________________________ 62
Move an Unshaped Area _____________________________________________________________ 62
Modify Areas ________________________________________________________________________ 63
Symmetries _________________________________________________________________________ 64
Vertical Symmetry __________________________________________________________________ 64
Horizontal Symmetry ________________________________________________________________ 65
Oblique Symmetry with clockwise Rotation _______________________________________________ 65
Oblique Symmetry with anti-clockwise Rotation ___________________________________________ 66
Rotations ___________________________________________________________________________ 67
Pattern Rotation ____________________________________________________________________ 67
Horizontal Movement of the Pattern in a rectangular Area ___________________________________ 68
Vertical Movement of the Pattern in a rectangular Area _____________________________________ 68
Relative Origin _______________________________________________________________________ 69
Pattern Magnification - Zoom ___________________________________________________________ 69
Insert/Delete Needles/Courses __________________________________________________________ 70
Insert Needles on the left Side of the Pattern _____________________________________________ 70
Insert Needles on the right Side of the Pattern ____________________________________________ 71
Insert Courses on top________________________________________________________________ 71
Insert Courses below ________________________________________________________________ 72
Delete Needles ____________________________________________________________________ 72
Delete Courses ____________________________________________________________________ 73
Automatic scaling of the current pattern _________________________________________________ 73
Colour Tools ________________________________________________________________ 75
Replace Colours _____________________________________________________________________ 76
Replace colours in the whole pattern____________________________________________________ 76
Replace colours in a rectangle_________________________________________________________ 76
Fill with a Colour _____________________________________________________________________ 77
Flood ______________________________________________________________________________ 78
Select Colour ________________________________________________________________________ 78
Pattern OutLine ______________________________________________________________________ 79
Automatic selection of the whole pattern _________________________________________________ 79
Replace Colors in a Rectangle ________________________________________________________ 79
Replace a colour with a pattern __________________________________________________________ 80
Change a colour with an area of the pattern ______________________________________________ 80
Change a colour with a pattern ________________________________________________________ 80
Flash key (only for DIGRAPH3) _________________________________________________________ 81
Pattern coverage (only for DIGRAPH3)____________________________________________________ 81
Coverage throughout the pattern. ______________________________________________________ 81
Coverage only in a selected area_______________________________________________________ 81
Change colour on pattern panels (tool for Digraph3 system only) _______________________________ 82
Replace colours in the whole pattern____________________________________________________ 82
Replace colours in a rectangle_________________________________________________________ 82
Index_______________________________________________________________________ 84
3
Starting Microsoft Windows 3.1
Starting Microsoft Windows 3.1
User’s advices:
We recommend the new Windows 3.1 users to follow the instructions listed below:
) How to start Windows 3.1 :
•
•
•
•
Type Win in the command prompt (C:\>), and than press Enter ↵ .
Pressing the ALT button, the Manager Program is displayed.
Using the arrows keys, position on ?
Using the arrows keys, position on Windows Tutorial and press Enter ↵
• Now you are into WindowsTutorial: follow the desplayed instructions given by the system
The users that know already how to work with the Windows 3.1 system, must follow
the instructions listed below:
) How to start Windows 3.1 :
• Type Win in the command prompt (C:\>), and than press Enter ↵ .
• If the hardware has already been installed, you will find on the screen some standard work
groups and some other work groups as: Dinema - General Utilities - Lonati - Santoni
Into the Dinema work group you will find the following applications:
PAINT GRAPHIC
PAINT HELP
ICONS UPDATE
Into the General Utilities work group you will find all the utilities.
Into the LONATI work groups you will find the list of the machines:
NORMAL WOMAN
JAQUARD WOMAN
MAN SINGLE CYLINDER WITH PATTERN
MAN SINGLE CYLINDER WITHOUT PATTERN
DOUBLE CYLINDER
Into the SANTONI work group you will find the list of the machines:
DONNA TALLONE
DOPPIA FRONTURA
DOPPIA FRONTURA JACQUARD
MUTANDA
MONO DIREZIONALE
• To update or to install the hardware follow the instructions explained below:
a - Installation of programs in DOS system (machines - utilities)
b - Installation of programs in WINDOWS system (paint - grpbuild - bravo manual).
4
Starting Microsoft Windows 95
Starting Microsoft Windows 95
User’s advices:
We recommend the new Windows 95 users to follow the instructions listed below:
) How to start Windows 95 :
•
•
•
•
•
You just have to start the computer and the program will be automatically activated.
Press on the Start button which is in the start Bar on the left.
In the applications list of the start menu, select on Help.
In the windows concerning the Windows Help select: Tour: Ten minutes to using Windows
Now you are into Windows Help Tour: follow the desplayed instructions given by the
system
The users that know already how to work with the Windows 95 system, must follow the
instructions listed below:
) How to start Windows 95 :
• Type Win in the command prompt (C:\>), and than press Enter ↵ .
• If the hardware has already been installed, you will find on the screen some standard work
groups and some other work groups as: Dinema - Lonati - Santoni.
Into the Dinema work group you will find the following applications:
PAINT GRAPHIC
PAINT HELP
PATTERN UTILITY
PATTERN UTILITY HELP
Into the LONATI work groups you will find the list of the machines:
WOMAN 6809
WOMAN 80960
MAN 80960
BRAVO!
Into the SANTONI work group you will find the list of the machines:
INTIMO
WOMAN
MAN
• To update or to install the hardware follow the instructions explained below:
a - Installation of programs LONATI / SANTONI in WINDOWS 95 system.
5
PAINT Graphics Guide
PAINT Graphics Guide
Topics treated in the Help are divided into four categories represented by the following icons.
To choose a category by using the mouse, position the cursor underneath the icon and click. By using the
keyboard, press the Tab key to highlight the desired category and press Enter. To go back to this menu, click
on the Summary button of the Help window.
6
File Menu
File Menu
To get information about one item of the menu, first click on the menu and then on the desired item.
Select Machine Type
This command allows you to select a machine which you could display and/or modify patterns for. By
choosing it, the Working Machine Selection dialog box will appear, as represented here below.
To get information about the dialog box, position the mouse on the desired item and click.
Machine Name
The name of the current machine is displayed in this box.
7
File Menu
List of Machines
The list of machines you can use for graphics is displayed in this window.
Confim Selection
By the OK button you confirm the selection of the machine you will work for.
Cancel Machine Selection
The Cancel button allows you to quit the current window.
Drives
In this box you can choose the Drive containing the machines to select. It is a mechanism in the computer
that makes the memory device work to retrieve and store information. Personal Computers usually have one
hard disk drive labeled C and one or two floppy disk drives labeled A and B.
Some personal computers may have a network drive or a virtual disk drive where files can be managed. In
this case, the choice of drive may be a letter (D - E - F - etc.) which refers to part of a disk drive.
If this is the case, the user should have a full understanding of network systems and how they function from
specialised personnel.
New pattern
This command allows you to create a new file (pattern) for the current machine. The new pattern will use all
references you type in the dialog box Pattern Creation, shown here.
To get information about the dialog box, position the mouse on the desired item and click.
Insert Image Name; Number of Needles; Number of Courses
The user must enter the characteristics of the new pattern in these fields :
Pattern name area = enter the name of the pattern to be created.
Number of NEEDLES = enter the number of needles (x) in the pattern to be created.
Number of COURSES = enter the number of courses (y) in the pattern to be created.
Position the cursor inside the corresponding data rectangle and press the left button mouse for insert the
name of pattern and the number of the needles and courses.
8
File Menu
Drives
In this box you can choose the Drive containing the machines to select. It is a mechanism in the computer
that makes the memory device work to retrieve and store information. Personal Computers usually have one
hard disk drive labeled C and one or two floppy disk drives labeled A and B.
Some personal computers may have a network drive or a virtual disk drive where files can be managed. In
this case, the choice of drive may be a letter (D - E - F - etc.) which refers to part of a disk drive.
If this is the case, the user should have a full understanding of network systems and how they function from
specialised personnel.
Choosing the pattern’s format
LONATI / SANTONI patterns can be created, opened or saved with a different extension to the one normally
used (.DIS).
Two new extensions have been added, .SDI e .PAT, which are used when you know that the pattern being
created, displayed or saved is for a particular purpose.
The two new extensions must only be used when the pattern must contain special colours (extension .SDI)
or if the pattern is to be considered a particular weft [variable pattern] (extension .PAT).
Commands to confirm or cancel Operation
By these two buttons you can either confirm the current operation choosing the OK button or cancel it
choosing the Cancel button.
Shortcuts
To create a new pattern, press CTRL + N or click on icon
9
in the toolbar.
File Menu
Open an existing Pattern
With the Open command you can open all patterns that have already been created for the selected machine.
An example of pattern opening is shown in the dialog box represented in this page. You should first select the
desired pattern in the list and then choose the OK button to confirm. The selected pattern will be displayed in
a box with variable dimensions.
Besides opening an image of a pattern .DIS for the current machine, .SDI patterns can also be opened
(patterns with special colours) and .PAT patterns (patterns with variable designs) which always refer to the
current machine.
Pattern Preview Icon
The preview of the pattern selected in the window list is displayed in the box. The Icon control button
activates/disactivates the pattern displaying.
Compressed and/or uncompressed
The pattern is displayed as it has been saved. This type of Graphics displays both a compressed and an
uncompressed pattern.
The difference between the two systems is that the compressed pattern uses less space in the saving drive
(hard disk or floppy disk), while the uncompressed pattern has got normal dimensions as far as space
(bytes) is concerned.
It is possible to save a pattern both in a compressed and an uncompressed way. The control button
activates/disactivates the compressed way.
Drives
In this box you can choose the Drive containing the machines to select. It is a mechanism in the computer
that makes the memory device work to retrieve and store information. Personal Computers usually have one
hard disk drive labeled C and one or two floppy disk drives labeled A and B.
Some personal computers may have a network drive or a virtual disk drive where files can be managed. In
this case, the choice of drive may be a letter (D - E - F - etc.) which refers to part of a disk drive.
If this is the case, the user should have a full understanding of network systems and how they function from
specialised personnel.
10
File Menu
Choosing the pattern’s format
LONATI / SANTONI patterns can be created, opened or saved with a different extension to the one normally
used (.DIS).
Two new extensions have been added, .SDI e .PAT, which are used when you know that the pattern being
created, displayed or saved is for a particular purpose.
The two new extensions must only be used when the pattern must contain special colours (extension .SDI)
or if the pattern is to be considered a particular weft [variable pattern] (extension .PAT).
Shortcuts
To open the Open Pattern dialog box press the CTRL + A keys or click on the icon
11
in the toolbar.
File Menu
Import Pattern
The command import pattern is very useful whenever you wish to use a pattern with Bitmap - Windows
format (files .bmp - .dib) as a pattern to insert in a sock or whenever you wish to use a pattern made for
another machine LONATI or SANTONI (files .dis - .pat - .sdi), for the current machine.
Phases of importation of a pattern with Windows bmp - dib format
This type of image is exclusive to some graphics application programmes in Microsoft Windows. The most
well-known is Paintbrush, found in all Windows systems, in which patterns can be designed whose format is
easily converted to the LONATI/SANTONI program.
Pattern bitmap for windows importing goes through two phases:
1°
select image bmp
2°
colour machine assignment
1) Select Image
It is easy to carry out the procedure to import an image into the graphics.
First you should select a directory in the directory list, provided that it contains some Bmp patterns.
Once the directory has been selected, the names of the Bmp files contained in it will appear in the list on the
left, so that you may go on selecting the desired file.
You can use the edit box you find above the two lists of names when selecting both the directory and the file.
12
File Menu
'Format' box sets the type of image file format allowed by the extension (Bmp, Dib).
'Drive' box allows you to choose the current drive to display the list of directories.
You have to activate the 'Icon' command button, that enables displaying the pattern on a small scale
(preview), in order to see the content of the selected file.
Besides, the dimensions in needles and courses and the type of compression will be displayed on the right
side below.
Confirm your choice by choosing OK or cancel it by choosing Cancel.
A T T E N T I O N !!!
When you import a Bitmap - Windows pattern, whose format contains more than 256 colours, you have to
choose one of the 3 options of importation for the pattern colours mentioned in the above box. This phase
makes the colours assignment of the bmp pattern to those of the colour palette of the machine easier.
If you select one of these 3 options, the dialog box Colour assignment will be displayed.
2) Colour Assignment
Two images with the corresponding colour palettes, shown under them, are displayed.
The image on the left is the one to be imported, with its original colours, the image on the right is the one
resulting from the assignment of the machine colours.
13
File Menu
Colours are assigned as follows:
1°) Select the colour from the colour palette of the current machine (the one on the right) to attribute to the
colour or to the colours in the image to be imported. The chosen colour will be highlighted with a
rectangle. The description that refers to the colour’s machine movement will be displayed in the text bar.
2°) Select the colours that will substitute the colour currently selected in the machine colour palette from the
list of colours (the one on the left) in the pattern you wish to import.
While colours are being associated between the two lists, the resulting pattern appears in the box at the top
on the right. You can therefore check whether the pattern is satisfactory as you go along.
Once the original colours in the list on the left have been selected, they are highlighted with a rectangle and
automatically disappear from the list when you select a new machine colour to assign to the original colours.
To make the selected, original colours reappear, reselect the machine colour (palette on the right) which you
used in the assignment.
To cancel assignment of an original colour (colour list on the left), click on the colour itself and the selection
rectangle will disappear.
You can end the assignment when all the original colours in the image to be imported have been selected, or
when the machine pattern on the right is satisfactory.
To confirm the assignment, press OK . Press Cancel if you wish to cancel the entire operation.
N.B. Original colours not associated are automatically associated with colour 1 (normally black) in
the destination machine colour palette.
For machines with the software enabled it is possible to associate the colours of the two planes with the
colours of the source pattern. The colours on the first plane (drum colours) can then be attributed to the
destination pattern, after which the colours on the second plane (yarnfinger and stitch cam colours) can be
attributed by selecting the control of the second plane. Use the same system mentioned above to select the
colours, bearing in mind that the colours of the source pattern are all displayed for both the first and second
planes. It will be possible to associate a colour from both the first and second plane to a colour in the source
pattern.
14
File Menu
Phases of importation of a .dis pattern from a LONATI - SANTONI machine
The importation of a pattern .dis - .pat - .sdi (LONATI or SANTONI machine) follows also well-defined
operations.
selection of the original machine
1°
2°
selection of the pattern .dis - .pat - .sdi from the list of machines
3°
assignment of the machine colours
1) List of machines for the importation of the pattern Lonati/Santoni
When you want to import a pattern from a Lonati/Santoni machine, the first box to be displayed on the video
regards the list of available machines.
In this box, you have to select, from the list of machines, the original machine which contains the pattern to
be imported into the current machine. Once the machine has been selected, the list of patterns which are
available for the importation will be displayed.
15
File Menu
2) Selection of the machine pattern to be imported
In this box you open the patterns of the selected machine. An exemple of pattern opening is shown in this
page. You have to select the desired pattern in the list and then choose the OK button to confirm. The
selected pattern will be displayed in the box of colour assignment.
A dialog box will appear which asks if you want to import the pattern automatically or if you wish to associate
the colours manually.
If you choose to associate the colours manually, the chosen pattern will appear in the next colour assignment
window.
16
File Menu
3) Colour Assignment
Two images with the corresponding colour palettes, shown under them, are displayed.
The image on the left is the one to be imported, with its original colours, the image on the right is the one
resulting from the assignment of the machine colours.
Colours are assigned as follows:
1. Select the colour from the colour palette of the current machine (the one on the right) to attribute to the
colour or to the colours in the image to be imported. The chosen colour will be highlighted with a
rectangle. The description that refers to the colour’s machine movement will be displayed in the text bar.
2. Select the colours that will substitute the colour currently selected in the machine colour palette from the
list of colours (the one on the left) in the pattern you wish to import.
While colours are being associated between the two lists, the resulting pattern appears in the box at the top
on the right. You can therefore check whether the pattern is satisfactory as you go along.
Once the original colours in the list on the left have been selected, they are highlighted with a rectangle and
automatically disappear from the list when you select a new machine colour to assign to the original colours.
To make the selected, original colours reappear, reselect the machine colour (palette on the right) which you
used in the assignment.
To cancel assignment of an original colour (colour list on the left), click on the colour itself and the selection
rectangle will disappear.
You can end the assignment when all the original colours in the image to be imported have been selected, or
when the machine pattern on the right is satisfactory.
To confirm the assignment, press OK . Press Cancel if you wish to cancel the entire operation.
N.B. Original colours not associated are automatically associated with colour 1 (normally black) in the
destination machine colour palette.
For machines with the software enabled it is possible to associate the colours of the two planes with the
colours of the source pattern. The colours on the first plane (drum colours) can then be attributed to the
destination pattern, after which the colours on the second plane (yarnfinger and stitch cam colours) can be
attributed by selecting the control of the second plane. Use the same system mentioned above to select the
colours, bearing in mind that the colours of the source pattern are all displayed for both the first and second
planes. It will be possible to associate a colour from both the first and second plane to a colour in the source
pattern.
17
File Menu
Phases of importation of a pattern with Windows .pcx format
This type of image is exclusive to some graphics application programmes in Microsoft Windows. The most
well-known is Paintbrush, found in all Windows systems, in which patterns can be designed whose format is
easily converted to the LONATI/SANTONI program.
Pattern bitmap for windows importing goes through two phases:
1°
select image pcx
2°
colour machine assignment
N.B.: To facilitate understanding, the following example is based on the explanation given for
importation of the .BMP image, as the function uses the same procedure with the same lists and
colour palettes. Change the image filename extension from .bmp to .pcx.
1) Select Image
It is easy to carry out the procedure to import an image into the graphics.
First you should select a directory in the directory list, provided that it contains some Bmp patterns.
Once the directory has been selected, the names of the Pcx files contained in it will appear in the list on the
left, so that you may go on selecting the desired file.
You can use the edit box you find above the two lists of names when selecting both the directory and the file.
'Format' box sets the type of image file format allowed by the extension (Bmp, Dib).
'Drive' box allows you to choose the current drive to display the list of directories.
You have to activate the 'Icon' command button, that enables displaying the pattern on a small scale
(preview), in order to see the content of the selected file.
Besides, the dimensions in needles and courses and the type of compression will be displayed on the right
side below.
18
File Menu
Confirm your choice by choosing OK or cancel it by choosing Cancel.
A T T E N T I O N !!!
When you import a Bitmap - Windows pattern, whose format contains more than 256 colours, you have to
choose one of the 3 options of importation for the pattern colours mentioned in the above box. This phase
makes the colours assignment of the bmp pattern to those of the colour palette of the machine easier.
If you select one of these 3 options, the dialog box Colour assignment will be displayed.
2) Colour Assignment
Two images with the corresponding colour palettes, shown under them, are displayed.
The image on the left is the one to be imported, with its original colours, the image on the right is the one
resulting from the assignment of the machine colours.
Colours are assigned as follows:
1. Select the colour from the colour palette of the current machine (the one on the right) to attribute to the
colour or to the colours in the image to be imported. The chosen colour will be highlighted with a
rectangle. The description that refers to the colour’s machine movement will be displayed in the text bar.
2. Select the colours that will substitute the colour currently selected in the machine colour palette from the
list of colours (the one on the left) in the pattern you wish to import.
19
File Menu
While colours are being associated between the two lists, the resulting pattern appears in the box at the top
on the right. You can therefore check whether the pattern is satisfactory as you go along.
Once the original colours in the list on the left have been selected, they are highlighted with a rectangle and
automatically disappear from the list when you select a new machine colour to assign to the original colours.
To make the selected, original colours reappear, reselect the machine colour (palette on the right) which you
used in the assignment.
To cancel assignment of an original colour (colour list on the left), click on the colour itself and the selection
rectangle will disappear.
You can end the assignment when all the original colours in the image to be imported have been selected, or
when the machine pattern on the right is satisfactory.
To confirm the assignment, press OK . Press Cancel if you wish to cancel the entire operation.
N.B. Original colours not associated are automatically associated with colour 1 (normally black) in
the destination machine colour palette.
For machines with the software enabled it is possible to associate the colours of the two planes with the
colours of the source pattern. The colours on the first plane (drum colours) can then be attributed to the
destination pattern, after which the colours on the second plane (yarnfinger and stitch cam colours) can be
attributed by selecting the control of the second plane. Use the same system mentioned above to select the
colours, bearing in mind that the colours of the source pattern are all displayed for both the first and second
planes. It will be possible to associate a colour from both the first and second plane to a colour in the source
pattern.
Close (Close Pattern)
You use this command to close a pattern open on the screen.
When you select this command, if the pattern has been changed, a window will warn you and ask you, if you
want to save the changes you have made before closing it. If you close the document without saving, you will
delete all changes since you last saved.
You can close the open pattern by choosing the Close button of the pattern window, as shown later.
20
File Menu
Save (Save Pattern)
The Save command should be used when the pattern is open and you want to save the changes you have
made to it.
There is a new command in the Save function which is activated only when the current pattern includes
special colours.
The command enables association of a weft to special colours (.PAT patterns, variable patterns).
If the pattern contains special colours when you wish to save, the following dialog box will appear where you
choose whether to save the pattern only or to save the pattern associating it to some weft.
This window is only displayed when you want to save with
colours.
associate the pattern containing special
List of special colours to associate with the patterns
In this part of the association window, you can assign the desired pattern to each special colour. Assignation
of the pattern is carried out by pressing the left mouse key twice (double click) on the name of the .PAT
pattern displayed in the list of the association window.
Proceed as follows to assign special colours to a .PAT pattern:
1° select the special colour by clicking on the desired colour.
2° select the .PAT pattern from the list as described above.
21
File Menu
Preview the pattern
The .PAT pattern selected in the list can be displayed in this area of the window. To preview the .PAT
pattern, the small box beside the word ICON must be activated. Being a preview, the dimensions displayed
will not be actual.
Variable wefts or Patterns (.PAT patterns)
The possibility has been added of creating patterns with the .PAT extension and associating them with .SDI
patterns with special colours. Such patterns are called variable patterns and are created using normal
machine colours (not special colours) and having the same dimensions as when they are finally produced.
In the example below, two patterns are shown related to each other by the VARIABLE PATTERNS created
by the user to give the final .DIS pattern with the desired effect.
The example shows 4x4 patterns where wefts have been designed that, when associated with special
colours in the .SDI patterns, give the resulting .DIS pattern.
Preview the pattern
The .PAT pattern selected in the list to one side can be displayed in this area of the table. To preview the
selected .PAT pattern in the box, activate one of the options in the Display list to the left of the box.
As this is only a preview of the pattern, the dimensions shown in this box are not the actual dimensions.
Display method
In this part of the table the user chooses the method to display the .PAT pattern in the form of an icon. For
machines with the software enabled for plane knitting, the .PAT pattern can be displayed in different planes to
facilitate the choice for association of the special colour.
Naturally, the display of the planes is active if the .PAT pattern has been created with planes, otherwise the
basic method will be No Icon or First Plane.
Control for association of the second plane of the .PAT pattern
In this box, the user can decide if he wishes to associate the second plane of the .PAT pattern with the new
.DIS pattern. Therefore, if the box is not selected, the .DIS pattern will have no second plane from the .PAT
pattern. If the box is selected, the .DIS pattern created will have the second plane of the .PAT pattern as its
own second plane. In this case, if the .SDI pattern were already designed on the second plane, it will be lost
and replaced by the second plane of the .PAT pattern.
22
File Menu
Display the list of current patterns
The names of existing .PAT patterns are displayed in this area of the window. From this list you can select
the patterns (variable patterns) you wish to associate with special colours.
Display the dimensions of the selected pattern
The dimensions of the selected pattern are shown in NEEDLES (x) and COURSES (y).
Entry field for the name of the final pattern
Enter the name of the .DIS pattern which will result from associating the special colours with the .PAT
pattern. Normally the program keeps the same name of the .SDI pattern so if you wish to give the pattern a
different name, select the current name and type in a new one.
Button to cancel association between special colours and the pattern
Press this button when you wish to cancel the association between the pattern and a special colour. The
cancellation procedure is very simple; select the special colour you are interested in and then press the
cancel association button.
Button to temporarily save the association
Press this button to save the association between special colours and the pattern temporarily. The function is
useful if you wish to exit the pattern association window to return to the pattern without losing the choices
already made.
Exemple the risulting of the associated pattern.
Shortcuts
To save a pattern, press CTRL + S or click on the icon
in the toolbar.
In case you would like to change the name to the existing pattern, you should choose the command Save as
23
File Menu
Save as
By choosing this saving command, Save as, you can save the current pattern with a different name from the
one already used. This command opens the dialog box displayed in this page.
New Name of Pattern
You can type the new name you want to give to the current pattern in this box.
Compressed and/or uncompressed
The pattern is displayed as it has been saved. This type of Graphics displays both a compressed and an
uncompressed pattern.
The difference between the two systems is that the compressed pattern uses less space in the saving drive
(hard disk or floppy disk), while the uncompressed pattern has got normal dimensions as far as space
(bytes) is concerned.
It is possible to save a pattern both in a compressed and an uncompressed way. The control button
activates/disactivates the compressed way.
Commands to confirm or cancel Operation
By these two buttons you can either confirm the current operation choosing the OK button or cancel it
choosing the Cancel button.
Drives
In this box you can choose the Drive containing the machines to select. It is a mechanism in the computer
that makes the memory device work to retrieve and store information. Personal Computers usually have one
hard disk drive labeled C and one or two floppy disk drives labeled A and B.
Some personal computers may have a network drive or a virtual disk drive where files can be managed. In
this case, the choice of drive may be a letter (D - E - F - etc.) which refers to part of a disk drive.
If this is the case, the user should have a full understanding of network systems and how they function from
specialised personnel.
24
File Menu
Choosing the pattern’s format
LONATI / SANTONI patterns can be created, opened or saved with a different extension to the one normally
used (.DIS).
Two new extensions have been added, .SDI e .PAT, which are used when you know that the pattern being
created, displayed or saved is for a particular purpose.
The two new extensions must only be used when the pattern must contain special colours (extension .SDI)
or if the pattern is to be considered a particular weft [variable pattern] (extension .PAT).
Cancel the pattern on the current machine
This command cancels existing patterns in the current machine from the computer. Having selected the
command from the menu, the following dialog box will appear in which you can cancel one or more patterns.
Display the name of the current pattern
This field displays the name of the pattern selected from the list of patterns in the current machine.
List of patterns in the current machine
All the names of the patterns in the current machine are listed here. To select the desired pattern, position
the cursor on the name and press the left button to confirm. The name will automatically be displayed in the
field above the list.
Buttons to delete and/or exit from the dialog box
These two buttons delete the selected pattern (Delete button) and/or exit from the Delete Images window
(Exit button).
25
File Menu
Confirm deletion of the pattern
If you press the Delete button, a new dialog box will appear which asks you to confirm deletion of the pattern.
OK=Confirm deletion Cancel=Exit without deleting
Print Setup
The following options allow you to select the destination printer and its connection.
Printer
Select the printer you want to use. You could choose the Default printer or the Specific Printer option and
select one of the current installed printers shown in the box.
Now you could install printers and configure ports using the Windows Control Panel.
Orientation
Choose the print alignment of the paper, Portrait or Landscape.
Paper Size
Select the size of paper that the document is to be printed on.
Paper Source
Some printers offer multiple trays for different paper sources. Specify the tray here.
Options
Display a dialog box where users can make additional choices about printing, specific to the type of printer
you have selected.
Network
Choose this button to connect to a network location.
26
File Menu
Print
The Print command allows you to print the pattern directly or to display a print preview (Preview).
It is possible to set up a printer you have chosen. The function Printer Setup in the File Menu window
explains how to do it.
Print
Previous Menu
Functions of Direct Print
In this command there are three options regarding the pattern to be printed.
INFO - Pattern Information
It prints information about the pattern regarding name, type of machine, dimensions of needles “x” and
courses “y” , the list of the colours used in the pattern and relative commands assigned to the machine.
Before printing the information the dialogue box PRINT will appear.
PRINT - Print displayed pattern
This function enables you to print the displayed pattern. The first step of the procedure is to determine the
scale ratio of the pattern to print.
Pattern Print Scaling Dialog Box
In this dialog box (Scaling) you select the print scale ratio referred the two dimensions: needles “x”
and courses “y”.Since the two dimensions are indipendent one from the other, it is possible to give
a different ratio (scale) to needle and/or courses according to requirement of the print and to the
dimension of the sheet.
The size limits are expressed in the parenthesis and go from a minimum value of 0.0 to a
maximum of 100.9 and they are to be inserted (digiting them on the keyboard) into the boxes near
the respective x and y scales .
In the dialog box there are also automatic scale selections for the following dimensions: 2:1 * 1:1 *
1:2 * 1:4, in order to help the user in the selection of the scaling.
27
File Menu
Once the selection is finished, click on the OK button to continue (the window Pattern Preview Print
will appear) or click on Cancel to come back to the pattern.
There after the dialogue box PRINT will appear, and the procedure will start.
This method of pattern print is without GRID, so the pattern will be uniform(normal). The printed sheet will
report a heading with all the information regarding: type of machine, name of the pattern, dimensions of
needles and courses.
Shortcuts
To print a pattern, click on the icon
in the toolbar.
SQUARED - Squred Pattern Print
It prints the pattern inside a grid, highlighting the number of rows(courses) and columns (needles).
The first step of the procedure is the selection of the scale ratio of the grid.
Squared Pattern Print Scaling Dialog Box
In this dialog box (Squared Print) the user select the ratio of the two dimensions: X (needles) and Y (courses)
of the grid for the print of the squared pattern. The two dimensions refer to the grid and are expressed in
millimiters.Since they are indipendent one from the other, it is possible to give a different ratio (scale) to
needles and/or courses, according to the requirements of the print and the dimensions of the sheet.
Once the selection is finished, click on the OK button to continue (the window Pattern Preview Print will
appear) or click on Cancel to come back to the pattern.
The second, the operative one, will start the print, activating the dialogue box PRINT.
It is possible to set up a printer selected by the user. The function Printer Setup the File Menu window
explains you how to do it.
28
File Menu
Function of the Print Preview
In this command there are three options referred to the print preview of the pattern.
INFO - previews the information of the pattern to print
It previews the printed sheet with the information regarding the displayed pattern: name, type of machine,
dimensions of needles “x” and courses “y”, list of the colours used in the pattern, and relative commands
assigned to the machine.
PRINT - previews the pattern to print
This function enables to preview one ore many printed sheets of the displayed pattern.The first step of tha
procedure is the selection of the scale ratio of the pattern to print.
Pattern Print Scaling Dialog Box
In this dialog box (Scaling) you select the print scale ratio referred the two dimensions: needles “x”
and courses “y”.Since the two dimensions are indipendent one from the other, it is possible to give
a different ratio (scale) to needle and/or courses according to requirement of the print and to the
dimension of the sheet.
The size limits are expressed in the parenthesis and go from a minimum value of 0.0 to a
maximum of 100.9 and they are to be inserted (digiting them on the keyboard) into the boxes near
the respective x and y scales .
In the dialog box there are also automatic scale selections for the following dimensions: 2:1 * 1:1 *
1:2 * 1:4, in order to help the user in the selection of the scaling.
Once the selection is finished, click on the OK button to continue (the window Pattern Preview Print
will appear) or click on Cancel to come back to the pattern.
In this kind of preview print there is no GRID,so the pattern will be uniform (normal).The heading of the
printed sheet will report the information regarding the name of the machine, the name of the pattern, the
dimensions of needles and courses.
29
File Menu
SQUARED - previews the squared pattern to print
It previews a pattern inside a grid, highlighting the number of rows (courses) and coloumns (needles).
The scale ratio of the grid must be selected before the dialog box Pattern Preview Print
Squared Pattern Print Scaling Dialog Box
In this dialog box (Squared Print) the user select the ratio of the two dimensions: X (needles) and Y (courses)
of the grid for the print of the squared pattern. The two dimensions refer to the grid and are expressed in
millimiters.Since they are indipendent one from the other, it is possible to give a different ratio (scale) to
needles and/or courses, according to the requirements of the print and the dimensions of the sheet.
Once the selection is finished, click on the OK button to continue (the window Pattern Preview Print will
appear) or click on Cancel to come back to the pattern.
The second, the operative one, will start the print, activating the dialogue box PRINT.
It is possible to set up a printer selected by the user. The function Print Setup in the File Menu explains how
to do it.
Print Dialog Box
The following options allow you to specify how the document should to be printed:
Printer
The active printer and printer connection are displayed. If you want to change these specifications, choose
the Setup option.
Print Range
Specify the pages you want to print:
ALL = Prints the entire document
SELECTION = Prints the currently selected text
PAGES = Prints the range of pages you specify in the From and To boxes.
30
File Menu
Print Quality
Select the quality of printing. Generally, lower quality printing takes less time to produce.
Copies
Specify the number of copies you want to print for the selected page.
Collate Copies
Prints copies in page number order, instead of separated copies of each page.
File 1, 2, 3, 4
It opens one of the last four files you closed. Type the number next to the file to open or click on the file
name.
Exit
It ends the current working with PAINT. If you have made some changes since you last saved the pattern, the
program asks you to store them.
In case you have never saved the pattern, the program asks you to name it command save as.
Next time you will work with PAINT, the program will use same settings as during the last session.
31
View Menu
View Menu
To get information about one item of the menu, first click on the menu and then on the desired item.
Toolbar
Choose this command to display or to hide the Toolbar, that provides the most common PAINT activities.
If the toolbar is displayed, a “ V “-shaped check mark appears before the Toolbar function in the View
window.
Toolbar
The toolbar is displayed underneath the application menu. It provides a direct selection of some PAINT
commands.
To display or to hide the Toolbar, choose the corresponding command (ALT, V, T) in the View menu.
Create a new pattern.
Open an existing pattern. PAINT will open a dialog box to select the desired file.
Save the active pattern under its current name.
Display the palette for the colour assignment of the current machine.
Insert the grid into the pattern box.
Select a pattern weft.
Select the colour of the grid.
32
View Menu
Cancel the last command
Print the active pattern.
Help index.
Interactive Help.
Display the first pattern plane - drum colours
Display the second pattern plane - yarnfinger and stitch cam colours
Display the first and second planes at the same time
Defines trace thickness (only for DIGRAPH3)
Display the colours configured in the pattern
Display the feed setup table
33
View Menu
Status Bar
Choose this command to display or to hide the Status bar, that explains what you have to do after you have
selected a topic in the menu or in the tool palette.
Besides, the Status bar provides information about the application and the active pattern (active colour active pattern - Zoom level - absolute or relative position of the cursor).
If the Status bar is displayed, a “ V “-shaped check mark appears before the Status bar function in the View
window.
Statusbar
Command Description
A brief description of the command or activity you have just selected is diplayed in this area of the Status bar.
Display current Colour and Pattern
In the coloured rectangle on the left you can see which colour of the current machine palette is selected at
the moment.
In the rectangle on the right you can preview the pattern (weft) selected at the moment. If no pattern weft
has been selected, the rectangle is grey.
Current Thickness level
You can see which thickness is set.
Current Zoom Level
You can see which zoom level the pattern is displayed at in this area of the Status bar. The Zoom range
goes from x01 to x32.
. If
When you reach a x03 Zoom level, you can insert a gridinto the pattern by choosing the “grid” icon
this icon has already been chosen, the grid will automatically appear into the pattern, when the Zoom reaches
the x06 level.
Absolute Origin of Pattern
The abosolute positions in needles and courses of the insertion point are displayed in this rectangle.
Relative Origin of Pattern
The relative positions in needles and courses of the insertion point are displayed in this rectangle.
You could use these values in order to have a particular origin in the pattern as reference in case you need to
copy or create images at predefined distances.
By choosing the relative origin icon
you keep the function active, till you choose it once again.
34
View Menu
Display the Colour Palette of the Current Machine
By this command you can enter the colour card or palette of the current machine in order to select the colours
that you will be drawing with.
Besides choosing colours, in the palette you can select two options, combined to each colour, that allow you
to protect them and to make them transparent.
Choosing these two options could be very useful, if you need to copy some parts of the pattern in some other
areas, where you need to keep the already existing colours.
Protected Colour
This field provides a protection to each colour of the machine colour palette.
You need to protect a colour when, choosing the copy or transfer function, you want to put on top of the
original pattern a part of it or another image, keeping the colours of the original pattern unchanged while
superimposing.
This function allows you to protect the original pattern colours from any possible figures superimpositions.
Transparent Colour
This field provides transparence to each colour of the machine colour palette.
You need to make colours transparent when you want to copy or transfer only some images with established
colours to one area of the pattern. This command allows you to leave out the colours selected as transparent
from any pattern area you want to select.
Comment display area
This part of the colour palette displays the comment relative to the current colour. The comments can be
displayed automatically by passing the mouse cursor over the colours.
Display all colours in the table
This button displays all the colours in the colour palette of the machine. It is used when the USED button has
been activated to reset all the colours present in the colour palette.
35
View Menu
Display only the colours used in the current pattern
When activated, this button displays only the colours used in the current pattern. To reset all the palette
colours, press the ALL button or exit the colour palette (OK button).
Protection and transparence of all colours
These buttons will either protect all the table colours or make them transparent in a single operation. There
are two buttons for the protected colours and two buttons for transparent colours. They are very easy to use.
If the user wishes to protect all colours in the palette, press the p.On button. To deactivate the option, press
the p. Off button.
To make all colours transparent , press the t. On button. To deactivate the option, press the t. Off button.
Special Colours (.SDI pattern)
Several new colours have been added to the colour palette that are known as SPECIAL COLOURS (S1, S2,
S3, S4,…..).. They are not related to the traditional colours assigned to machine movements but can be
freely associated to variable patterns (.PAT patterns) that you create.
The advantage to the user of a pattern created with special colours is that of having an .SDI colour pattern to
which weft or pattern colours can be freely associated automatically creating the (.dis) pattern ready to be
encoded in the chain program and transferred to the machine.
This way, you can process more patterns using different wefts originating from a single colour pattern.
Plane patterns
Other colours (below the special colours) have also been included that can only be used if the software has
been enabled for the use of plane patterns.
NB: These last two functions are active only if they have been enabled in the software.
Shortcuts
To display the colour palette, press
F5 or click on the icon
36
in the toolbar.
View Menu
On/off Grid
This command allows you to display a grid in the pattern box as soon as the Zoom reaches the x03 level.
When this command is on, you can change the grid colour, in order to get a brighter contrast with the
pattern colours.
Shortcuts
In order to display the grid in the pattern box, press Ctrl + g or click on the icon
Change the Colour of the Grid
This command allows you to change the colour of the grid in the pattern box.
Shortcuts
To change the colour of the grid, press F7 or click on the icon
37
in the toolbar.
in the toolbar.
View Menu
Display the colours configured in the pattern
List of configured colours
This list contains the numeric codes of the colour palette for each colour and its description in the
configuration of the current machine. The text for each colour is the same as the text read when the machine
colour palette is activated (KEY F5).
Display the number, colour and description of the configured colour
In this part of the table of the configured colours, the user can see all references to the selected colour in full
(position number in the colour palette, colour and its description).
NB: These functions are only active if they have been enabled in the machine software.
Shortcuts
To display this table, press the
Display menu.
button on the tool bar or select the Configured colours option in the
Preview Window
How the selected weft looks like, when it is inserted into a pattern, is displayed in preview in this window.
38
Window Menu
Window Menu
To get information about one item of the menu, first click on the menu and then on the desired item.
New Pattern Window
You can display an additional pattern window concerning the current pattern by choosing the New window
command .
These two windows are useful both when you are creating and when you are modifying a pattern.
As the two windows display the same pattern, they are connected with each other. Therefore, making a
change in one of the them, you automatically have it displayed in the other one, too.
In short, we suggest you to display the entire pattern in one window and its magnified version (Zoom) in the
other one.
Open Pattern Windows Cascade
The Cascade command has to be used only after opening an additional window, in order to place the two
pattern windows one above the other.
Open Pattern Windows Tile
The Tile command has to be used only after opening an additional window, in order to place the two pattern
windows one on top of the other.
Arrange Pattern Icons
The Arrange Icons command places the pattern icons in order. You have to double-click on the icon, if you
want to open the pattern window again.
39
Change Menu
Change Menu
To get information about one item of the menu, first click on the menu and then on the desired item.
Pattern or Weft Command
The Pattern or weft command displays a Filling pattern dialog box, where you can either select an already
existing weft or create a new weft according to your needs.
In this box you can select, create and modify wefts to be inserted in the pattern.
List of Patterns
Available patterns or wefts with selected dimensions.
If you want to create a new pattern weft, first you have to choose where to place it in the list (red bordered
box), then you can start creating it in the window on the right, which has got the selected dimensions in
needles and courses.
Same procedure has to be followed, in case you want to modify an existing pattern weft. First you have to
select a pattern weft in the list, then you can start modifying it , when you have it displayed in the modify
window (on the right).
Modify Pattern Window
In this window you can create or modify a pattern selected in the list displayed in the window on the left. By
clicking on a blank square you draw a dot; by clicking on a full square you delete a dot.
40
Change Menu
Preview Window
How the selected weft looks like, when it is inserted into a pattern, is displayed in preview in this window.
Pattern Dimensions
It allows you to choose the dimensions of the pattern weft. The list displays a set of dimensions (4x4 - 5x5 6x6 - ......16x16) that correspond to the area, in needles and courses, of the wefts you could select.
Save Pattern
You can save in the list of the current dimension the pattern weft you have just created, by choosing the Save
button.
Shortcuts
To select or modify a pattern weft, press Ctrl + p or click on the icon
in the toolbar.
Change the Colour of the Grid
This command allows you to change the colour of the grid in the pattern box.
Shortcuts
To change the colour of the grid, press F7 or click on the icon
in the toolbar.
Cancels the command that has just been carried out
This button allows you to cancel the command that has just been carried out.
It is used to cancel the last modification made to the pattern and to put the pattern into the previous condition.
The button
is to be activated when you modify the pattern with any function.
41
Change Menu
Description of the commands
This function displays or disactivates the graphics program command descriptions. Normally the program is
set to display the descriptions to simplify use of the system.
Each time the mouse cursor stops over a command or function button, a small yellow bar will appear beside
the button with a short textual description of the command.
42
Configuration Menu
Configuration Menu
To get information about one item of the menu, first click on the menu and then on the desired item.
Pattern configuration management - OLD SYSTEM
The management command display the pattern configuration menu with the machine setup.
This programming system is only used for machines that have software enabled for this type management.
Having selected this function, the following windows appears in which, following a defined procedure, you
must set the configuration to be associated with the pattern during creation of the sock.
Configuration choice list
The window shows the current configurations available to you for association of the pattern to the machine
setup.
Configurations represented by a numeric code are called fixed configurations; they are entered in the
machine software. Configurations represented by letter codes (with characters) are called variable PAINT
configurations which you can create as you like.
43
Configuration Menu
To choose the type of configuration (fixed or variable), use the FIXED CFG option.
The configuration code chosen must be the same as the one which will be entered in the chain programming
page at the activation step of the pattern itself.
The number of variable PAINT configurations is defined by the software so you must bear in mind that the set
configurations are valid for all patterns attributed to the same machine. Variable configuration management
is exclusively the user’s responsibility. Any configuration can be associated to the pattern with the machine.
Create a new configuration
Pressing this key will create a new variable PAINT configuration to associate with the current pattern.
Numbering is carried out automatically by the program with letter codes (A B C D E .....).
Activation/disactivation of courses in the pattern
This part of the Courses window associates the setup of the courses in the pattern in order to define the
pattern’s repetition module in the machine. The setup of the pattern course is determined by the filled blue
box; if the blue box is displayed, the course is active, and if the box is not displayed, the course is inactive.
To select a course to associate, click on the course’s corresponding number and automatically a white box
will surround it. To activate the course, click on the box beside the number so turning it blue. Programming
is always referred to the configuration chosen in the Configuration List on the left of the window.
Associating the machine setup
Codes referring to the choice of setup attributed to the feed of the yarn-fingers, pattern drums and cams are
displayed in this part of the window. Feeds 1 to 4, which refer to the setup of the yarn-fingers, pattern drums
and cams, can be programmed on each course of the pattern module. Programming is always referred to
the configuration chosen in the Configuration List on the left of the window.
Type of machine setup
This part of the window allows you to choose the type of machine setup required for association of the pattern
courses with the feeds. The diagram shows that the choice only relates to Yarn-fingers, Pattern drums and
Cams.
List of setups
In this list you can choose the values or codes to associate to the courses for each feed of the machine
setup. The selection made will be displayed in the Machine setup list corresponding to the previously selected
course. Therefore, before selecting the codes, select the association course. Click twice on the desired
value from 1 to 4 to select the code.
Cancel the setup associated with the pattern course
Pressing this key cancels all associations which refer to the current course. The cancellation is only valid for
the type of setup (Yarn-fingers - Pattern drums - Cams) in use.
44
Configuration Menu
Cancel an association value
Pressing this key lets you cancel a code or value associated with the current course.
Exit the machine configuration window
Press this key to exit the machine configuration window and return to the pattern. If programming has been
completed correctly, the configuration table for the courses and feeds just associated will be displayed (see
“display feed”)
Configuring the machine using the PAINT graphics program
Use the FIXED CFG option to choose the configuration to use (fixed or variable). Activating the box allows
the fixed configurations (numeric code) to be used, while disactivating it allows the user-created variable
PAINT configurations (alphanumeric code) to be used instead.
Select the number of feeds to be used
This function is only valid for variable PAINT configurations; fixed configurations are excluded.
Display the feed setup table
This function activates or disactivates the table which displays the setup associated in the machine
configuration table for each course of the pattern.
The table shown in the diagram displays the configuration name and the three types of machine setup
(Yarnfingers - Pattern drums - Cams) and the values (feeds) for each pattern course. Display of the values is
determined by moving the mouse cursor over the pattern.
45
Configuration Menu
Pattern configuration management - NEW SYSTEM
The management command display the pattern configuration menu with the machine setup.
This programming system is only used for machines that have software enabled for this type management.
Having selected this function, the following windows appears in which, following a defined procedure, you
must set the configuration to be associated with the pattern during creation of the sock.
List of machine configurations
All existing configurations for the current machine are displayed in this list (including the Lonati configurations
nos.0-9, and the user configurations nos.??...) These configurations are created and managed using the
DMSC (Dinema Machine Software Configuration) software. This program is supplied exclusively with the
DIGRAPH3 station protection key.
The selected configuration will affect the colours of the current pattern but also all other patterns that the user
opens or modifies. If the user wishes to change the set configuration, return to this table and select another
configuration.
The chosen configuration code must be the same as the one entered in the activation step of the pattern’s
chain programming page
Enable the configuration description
The control activates or deactivates the description (comment) referring to the selected configuration. This
description is entered and modified using the DMSC program.
Display the configuration description
In this part of the table, the user can read the description associated with the selected configuration. It will
only be visible if the control that refers to the configuration description is active.
46
Configuration Menu
Display the feed setup table
This function activates or disactivates the table which displays the setup associated in the machine
configuration table for each course of the pattern.
This table (see the figure alongside) displays the
colour used in the pattern with the type of
machining attributed in the (CFG) configuration
associated with that pattern.
The comment
referring to the Yarnfingers - Drums - Stitch cams
and values (Feeds) for each course in the pattern
can be seen. Display of the values is determined
by moving the mouse cursor on the pattern. It is
also possible to display all machining methods for
that (CFG) configuration, course by course.
NB: These functions are only active if they have been enabled in the machine software.
Display the first pattern plane - drum colours
This button displays the first plane of the pattern where the user can only trace the pattern for the
drum movements on the basis of the colours enabled in the (.CFG) configuration. No other machine
movement is available as only the colours configured for the drums are available in the colour palette. Other
colours reserved for the drum plane may appear in the colour palette but, as they are not configured with the
new DMSC system, they are of no importance to the machine.
The pattern plane function in the Paint program is enabled for all three Lonati pattern formats (.DIS - .SDI .PAT). Naturally, all the tools supplied in the program can be used to design using this function.
NB: These functions are only active if they have been enabled in the machine software.
Display the second pattern plane - yarnfinger and stitch cam colours
This button displays the first plane of the pattern where the user can only trace the pattern for the
yarnfinger and stitch cam movements on the basis of the colours enabled in the (.CFG) configuration. No
other machine movement is available as only the colours configured for the yarnfingers and stitch cams are
available in the colour palette. Other colours reserved for the yarnfinger and stitch cam plane may appear in
the colour palette but, as they are not configured with the new DMSC system, they are of no importance to
the machine.
The pattern plane function in the Paint program is enabled for all three Lonati pattern formats (.DIS - .SDI .PAT). Naturally, all the tools supplied in the program can be used to design using this function.
NB: These functions are only active if they have been enabled in the machine software.
47
Configuration Menu
Display the first and second planes at the same time
This button displays the two knitting planes of the pattern at the same time. In this mode, it is possible
to see the yarnfinger movement colours and stitch cam colours over the drum colours. The user is also able
to trace or modify the pattern using this mode. In this case, it is possible to design with both the colours of
the first and second planes bearing in mind that the colours are associated with the movements on the basis
of the selected (.CFG) configuration. Other colours may appear in the colour palette but, as they are not
configured with the new DMSC system, they are of no importance to the machine.
The pattern plane function in the Paint program is enabled for all three Lonati pattern formats (.DIS - .SDI .PAT). Naturally, all the tools supplied in the program can be used to design using this function.
NB: These functions are only active if they have been enabled in the machine software.
Defines trace thickness (only for DIGRAPH3)
This function chooses the trace thickness of the instruments used to draw. To change the thickness, enter
the new number in the box "insert a number" and press OK to confirm. It will be displayed on the status bar
and can range from 1 to 100.
or
To increase or reduce the thickness, point to the
Alternatively, point to the circle
from 1 to 5.
keys and press the left mouse button.
and press the mouse left button. This will define the thickness
48
Help Menu
Help Menu
To get information about one item of the menu, first click on the menu and then on the desired item.
PAINT Help Index
The Index command allows you to dispaly the PAINT Help.
We kindly suggest you to go through this Help carefully, before you start using the PAINT Graphics program.
Using Help
Choose this command to get instructions on how to use the Help.
About PAINT
This command allows you to display information about the PAINT program.
Interactive PAINT Help
This command allows displaying explanations of functions and buttons you want to use.
When you choose this button, a “?” (the symbol that identifies the interactive Help), appears on top of the
arrow-shaped cursor.
Afterwards, you can position the mouse on the function or on the part of the program you would like to
achieve explanations of and, by clicking, the Help will be displayed.
Shortcuts
To choose the interactive Help, press Ctrl + F1 or click on the icon
49
in the toolbar.
Geometric Tools
Geometric Tools
The tool palette
contains a set of buttons to be used to draw the following geometric figures.
Draw a dot in the current colour.
Dot
Line
Draw a line in the current colour.
Rectangle
Draw a rectangle.
Square
Draw a square.
Diamond
Draw a diamond.
Curves
Draw a sequence of curves in the current colour.
Circle
Draw a circle.
Ellipse
Draw an ellipse.
Conic Section
Draw a conic section.
Text
Insert text. (Only for DIGRAPH3)
Tablet
Use the tablet. (Only for DIGRAPH3)
Curve
Polisplyne
Draw a curve joining the dots. (Only for DIGRAPH3)
50
Geometric Tools
Dot
Draws a dot in the current colour when the left or right mouse button is pressed. If you hold it pressed
down, you will operate as if free-hand drawing.
To do so, position the cursor on the pattern colour desired and press the left or right
mouse button.
You can select two colours, one colour assigned to the left button and one colour
assigned to the right button..
Line
Draws a line in the current colour when the left mouse button is pressed. You can modify the line by its
ends, which have both got control devices. These controls can be moved holding the left mouse button
pressed down and , at the same time, dragging it to get the desired movement.
To confirm your operation, press the right mouse button, when the cursor is positioned on one of the controls,
or create another figure.
Curves
Draws a sequence of Curves in the current colour when the left mouse button is pressed. You can
modify the curve by its ends, which have both got two control devices. These controls can be moved holding
the left mouse button pressed down and, at the same time, dragging it to get the desired movement.
To confirm your operation, press the right mouse button, when the cursor is positioned on one of the controls,
or create another figure.
51
Geometric Tools
Rectangle
Draws a Rectangle in the current colour when the left mouse button is pressed. You can modify the
rectangle by the controls placed in the centre of the figure, on the vertices and in the middle of the sides.
These controls can be moved holding the left mouse button pressed down and, at the same time, dragging it
to get the desired movement.
To confirm your operation, press the right mouse button, when the cursor is positioned on one of the controls,
or create another figure.
The rectangle button provides three different drawing shapes:
Perimeter
(only the border - perimeter of the rectangle).
Full
(the area of the rectangle filled with the current colour).
Filled with
a pattern
(the area of the rectangle filled with a previously selected pattern weft).
Square
Draws a square in the current colour when the left mouse button is pressed. You can modify the
rectangle by the controls placed in the centre of the figure, on the vertices and in the middle of the sides.
These controls can be moved holding the left mouse button pressed down and, at the same time, dragging it
to get the desired movement.
To confirm your operation, press the right mouse button, when the cursor is positioned on one of the controls,
or create another figure.
The rectangle button provides three different drawing shapes:
52
Geometric Tools
Perimeter
(only the border - perimeter of the square).
Full
(the area of the square filled with the current colour).
Filled with
a pattern
(the area of the square filled with a previously selected pattern weft).
Diamond
Draws a diamond in the current colour when the left mouse button is pressed. You can modify the
rectangle by the controls placed in the centre of the figure, on the vertices and in the middle of the sides.
These controls can be moved holding the left mouse button pressed down and, at the same time, dragging it
to get the desired movement.
To confirm your operation, press the right mouse button, when the cursor is positioned on one of the controls,
or create another figure.
The rectangle button provides three different drawing shapes:
Perimeter
(only the border - perimeter of the diamond).
Full
(the area of the diamond filled with the current colour).
Filled with
a pattern
(the area of the diamond filled with a previously selected pattern weft).
53
Geometric Tools
Circle
Draws a Circle in the current colour by pressing the left mouse button.You can modify the circle by
two controls, one placed in the centre, the other on the circumference. These controls can be moved holding
the left mouse button pressed down and, at the same time, dragging it to get the desired movement.
To confirm your operation, press the right mouse button, when the cursor is positioned on one of the controls,
or create another figure.
The circle button provides three different drawing shapes:
Circumference
(only the border - circumference of the circle).
Full
(the area of the circle filled with the current colour).
Filled with a pattern
(the area of the circle filled with a previously selected pattern weft)
Ellipse
Draws an Ellipse in the current colour when the left mouse button is pressed. You can modify the
ellipse by two controls, one placed in the centre, the other on the circumference. These controls can be
moved holding the left mouse button pressed down and, at the same time, dragging it to get the desired
movement.
To confirm your operation, press the right mouse button, when the cursor is positioned on one of the controls,
or create another figure.
The ellipse button provides three different drawing shapes:
Circumference
(only the border - circumference of the ellipse).
Full
(the area of the ellipse filled with the current colour).
Filled with a
pattern
(the area of the ellipse filled with a previously selected pattern weft).
54
Geometric Tools
Conic Section
Draws a Conic Section in the current colour by pressing the left mouse button. You can modify the
conic section by three controls, one placed in the centre and the other two on the circumference. These
controls can be moved holding the left mouse button pressed down and, at the same time, dragging it to get
the desired movement.
To confirm your operation, press the right mouse button, when the cursor is positioned on one of the controls,
or create another figure.
The conic section button provides three different drawing shapes:
Circumference
(only the border - circumference of the conic section).
Full
(the area of the conic section filled with the current colour).
Filled with
pattern
a
(the area of the conic section filled with a previously selected pattern
weft).
Text insert (only for DIGRAPH3)
To insert a new text, place the cursor over this icon and press the left mouse button.
Then place the cursor where you wish to insert text and press the left mouse button again.
The following window will appear:
55
Geometric Tools
Text insertion
Write directly in this box and press OK to confirm.
Text will be inserted in the position of the cursor on the current pattern.
To start a new paragraph press the CTRL and ENTER keys at the same time.
Insert rotation degree
Enter degree of text rotation and press OK to confirm. To increase or reduce the degree of rotation, point to
the
or
keys and press the left mouse button.
Vertical text
Select this box to arrange text vertically.
Upsidedown text
Select this box to arrange text upsidedown.
Choosing this option changes the degree of rotation to 180°.
Font configuration / Type of character
Character type
This box lists all the types of available characters. The types of available characters will be applied to the text
to be inserted. To select the desired character, press the up or down arrow keys on the “type of character”
box. Place cursor on the desired type of character and press OK to confirm.
Character style
This box allows the selected style to be applied to the character to be inserted.
To select the desired style, press the up or down arrow keys on the “style of character” box. Place the cursor
on the desired style of character and press OK to confirm.
Character dimension
This box lists the available sizes of the characters selected in the box "Type."
To select the desired dimension, press the up or down arrow keys on the character dimension box. Place the
cursor on the desired dimension or write it directly in the box and press OK to confirm.
Applied example
This displays an example of the test with the current formatting choices.
56
Geometric Tools
Use of the Tablet (only for DIGRAPH3)
1)
2)
The top left corner of the grid sheet with the source pattern must be placed in the top left corner
under the plastic sheet attached to the tablet. Both the mouse and the tablet can be attached to the
computer at the same time. To perform the copy using the tablet, put the mouse on one side and do
not move it, use the tablet only. Ensure the tablet has been turned on before the computer.
Select the tablet button to open the application window to full screen size.
3)
Select the " Dot In" button to confirm a dot that will represent the bottom left corner of the new motif to
be copied. The button can be selected as many times as required to modify the dot but only at this stage.
4)
Select the “123 dots” button using the tablet only to select three dots in this order: bottom right corner,
bottom left corner and top left corner of the area of the motif to be copied. The corner refers to the
outermost dot of the frame of the motif. The button can be selected as many times as required to modify
the corners but only at this stage.
5)
Select the “OK” button when the dots selected above are correct. Do not press OK without first
selecting the 4 dots in steps 3) and 4) or the program will take the maximum dimension of the pattern
and the tablet. Enter the dimensions of the motif on the tablet into the (Tablet Copy) window. The
permitted interval for these values in needles and courses ranges from 1 to 2000.
6)
Select the “Copy” button to start the actual copy: refer to the tablet only and press with the pen on
each dot of the sheet you wish to copy. To interrupt the copy, press the button on the pen closest to the
tablet. To see if the operation has been performed correctly, check the status of the button. It is now
possible to confirm the copy by pressing “OK” or abort the copy by pressing “KO”; alternatively, continue
the copy preparation and change the color by pressing the pen button again.
7)
Select the “OK” button to confirm the dots copied into the pattern.
8)
Select the “KO” button to cancel the changes made.
9)
The UNDO function is also active if you wish to cancel the confirmation made with the “OK”
button but only before the pattern is saved.
10)
The pattern must now be saved to maintain the changes definitively. Saving the pattern takes
the application window back to its original dimensions but for this tool to be used properly, select the
tool again so that the window fills the whole screen.
57
Geometric Tools
Polisplyne (only for DIGRAPH3)
This function traces a curve through a number of specified dots. This is used to create complex
pattern curves or design the leg hole of an article of clothing.
Add a dot to a Polisplyne curve
Adds a dot to a curve in the cursor position when the left mouse button is pressed.
Insert a dot in a Polisplyne curve (after)
Inserts a dot in the curve being traced. Press the left mouse button over a control dot to insert a new dot
after the one selected.
Insert a dot in a Polisplyne curve (before)
Inserts a dot in the curve being traced. Press the left mouse button over a control dot to insert a new dot
before the one selected.
Erase a dot from a Polisplyne curve
To erase a dot from the curve, press the left mouse button above the control dot to be erased.
Move a dot in a Polisplyne curve
To move a dot in the curve, hold down the left mouse button above a control dot, drag the dot to the new
position and release the mouse button.
Move a Polisplyne curve
To move the curve, hold down the left mouse button above a control dot, drag the curve to the new position
and release the button. The control dot and curve around it will be moved to the new position.
Confirm a Polisplyne curve
This function fixes the Polisplyne curve being traced onto the pattern.
58
Modifying Area Tools
Modifying Area Tools
The tool palette
contains a set of buttons to be used to modify areas, as listed here below.
Copy Rectangular
Area
Copy and move rectangular areas.
Copy Unshaped Area
Copy and move unshaped areas.
Modify Areas
Modify rectangular areas of the pattern.
Symmetries
Different symmetries of rectangular areas of the pattern.
Rotations
Rotations of rectangular areas.
Modify needles/ courses
Insert or delete needles or courses at any point of the pattern.
Relative Origins
Insert relative origins.
Magnification - ZOOM
Use of the magnification or Zoom
Copy Rectangular Area
This tool allows you to copy or move portions of the pattern.
Besides, it allows you to use other two options for the so-called multiple copy.
Button to copy a pattern area.
Button to move a pattern area.
Button for the linear multiple copy.
Button for the rectangular multiple copy.
It is necessary to choose the button corresponding to the desired function any time you want to carry out a
copy or a movement.
59
Modifying Area Tools
Copy a Pattern Area
To make a copy, you have to position the mouse on the pattern and define the
area to be modified by pressing the left mouse button and, at the same time,
dragging it.
NB.
The drawing area can be modified by pressing F8 or F9 which act
directly on the ‘X’ axis (F8) and the ‘Y’ axis (F9). This command type is
useful when you want to select to modify the whole area of the drawing.
Once the area has been defined, position the cursor inside the created box
and press the right mouse button to confirm the area.
You can move the area dragging it by holding the left mouse button pressed
down.
To confirm the copy, you only need to position the cursor inside the copied
image and quickly double-click the left mouse button. You can copy an image
as many times as you want, provided that you keep this button active.
You can also use this command to move an area of one pattern into
another one, provided they are both open and displayed.
Move a Pattern Area
To move a pattern area, you have to position the mouse on the pattern and
define the area to be moved by pressing the left mouse button and, at the
same time, dragging it.
NB.
The drawing area can be modified by pressing F8 or F9 which act
directly on the ‘X’ axis (F8) and the ‘Y’ axis (F9). This command type is
useful when you want to select to modify the whole area of the drawing.
Once the area has been defined, position the cursor inside the created box
and press the right mouse button to confirm the area.
You can move the area dragging it by holding the left key of the mouse
pressed down.
To confirm the movement, you only need to position the cursor inside the
moving image and quickly double-click the left mouse button.
The area that remains blank because of the movement will be filled up
with the current colour.
You can also use this command to move an area of one pattern into
another one, provided they are both open and displayed.
60
Modifying Area Tools
Linear Multiple Copy
To make a Linear multiple copy, you have to position the mouse on the
pattern and define the area to be moved by pressing the left mouse button
and, at the same time, dragging it.
NB.
The drawing area can be modified by pressing F8 or F9 which act
directly on the ‘X’ axis (F8) and the ‘Y’ axis (F9). This command type is
useful when you want to select to modify the whole area of the drawing.
Once the area has been defined, position the cursor inside the created box
and press the right mouse button to confirm the area.
You can move the area dragging it by holding the left mouse button pressed
down.
Evidently, the linear copy will move towards right, towards left, upwards,
downwards or diagonally starting always from the selected original area.
The selected area can be moved automatically without using the mouse. Use
function keys F3, F4, F6 and F7 to move the area as shown below, then
confirm the movement.
F3 =Move up
F4 =Move down
F6 =Move left
F7 =Move right
To confirm the movement, you only need to position the cursor on the last
repeated copy of the pattern and quickly double-click the left mouse button.
Rectangular Multiple Copy
To make a Rectangular multiple copy, you have to position the mouse on
the pattern and define the area to be moved by pressing the left mouse button
and, at the same time, dragging it.
NB.
The drawing area can be modified by pressing F8 or F9 which act
directly on the ‘X’ axis (F8) and the ‘Y’ axis (F9). This command type is
useful when you want to select to modify the whole area of the drawing.
Once the area has been defined, position the cursor inside the created box
and press the right mouse button to confirm the area.
You can move the area dragging it by holding the left mouse button pressed
down.
Evidently, the rectangle-shaped copy will move towards right, towards left,
upwards, downwards or diagonally starting always from the selected
original area.
To confirm the movement, you only need to position the cursor on the vertex of
the last repeated copy of the pattern and quickly double-click the left mouse
button.
61
Modifying Area Tools
Copy Unshaped Area
This tool allows you to copy or move a pattern area that you define by some dots.
Button to copy a defined area.
Button to move a defined
area.
It is necessary to choose the button corresponding to the desired function any time you want to carry out a
copy or a movement.
Copy an Unshaped Area
To make a copy, position the mouse on the pattern and define the area to be
modified by pressing the left mouse button and dragging it. Each time you
press the button, you fix a defining dot. If you had to delete the last
confirmed dot, you would only have to press the right mouse button.
Once the area has been defined, double-click the left mouse button to confirm.
The first dot will be linked to the last one automatically.
You can move the area dragging it by holding the left mouse button pressed
down.
To confirm the copy, you only need to position the cursor inside the copied
image and quickly double-click the left mouse button.
You can copy an image as many times as you want, provided that you keep
this button active.
You can also use this command to move an area of one pattern into
another one, provided they are both open and displayed.
Move an Unshaped Area
To move an area, position the mouse on the pattern and define the area to be
modified by pressing the left mouse button and dragging it. Each time you
press the button, you fix a defining dot. If you had to delete the last
confirmed dot, you would only have to press the right mouse button.
Once the area has been defined, double-click the left mouse button to confirm.
The first dot will be linked to the last one automatically.
You can move the area dragging it by holding the left mouse button pressed
down.
The area that remains blank because of the movement will be filled up
with the current colour.
To confirm the copy, you only need to position the cursor inside the copied
image and quickly double-click the left mouse button.
62
Modifying Area Tools
You can copy an image as many times as you want, provided that you keep
this button active.
You can also use this command to move an area of one pattern into
another one, provided they are both open and displayed.
Modify Areas
This command allows you to copy or modify the dimensions of a previously
selected rectangular area, making, therefore, a dimensional change.
to select the rectangle of the source area whose
First choose the button
dimensions you want to modify,
NB.
The drawing area can be modified by pressing F8 or F9 which act
directly on the ‘X’ axis (F8) and the ‘Y’ axis (F9). This command type is
useful when you want to select to modify the whole area of the drawing.
Then choose the destination
button and make changes by using the
controls positioned on the rectangle of the source area.
To confirm the operation, position the cursor inside the destination area and
quickly double-click the left mouse button.
To cancel the operation, press the right mouse button.
63
Modifying Area Tools
Symmetries
This tool allows you to copy with a symmetry a previously selected rectangular area.
You can choose the axis of rotation of the symmetry you want to carry out:
Button for vertical symmetry.
Button for horizontal symmetry.
Button for oblique symmetry towards Left.
Button for oblique symmetry towards Right.
It is necessary to choose the button corresponding to the desired function any time you want to make a
symmetrical copy of an image.
Vertical Symmetry
To make a copy with vertical symmetry, you have to position the mouse on
the pattern and define the area to be modified by pressing the left mouse
button and, at the same time, dragging it.
NB.
The drawing area can be modified by pressing F8 or F9 which act
directly on the ‘X’ axis (F8) and the ‘Y’ axis (F9). This command type is
useful when you want to select to modify the whole area of the drawing.
Once the area has been defined, position the cursor inside the created box
and press the right mouse button to confirm the area.
You can move the area dragging it by holding the left mouse button pressed
down.
To confirm the copy, you only need to position the cursor inside the copied
image and quickly double-click the left mouse button. You can copy an image
as many times as you want, provided that you keep this button active.
64
Modifying Area Tools
Horizontal Symmetry
To make a copy with horizontal symmetry, you have to position the mouse
on the pattern and define the area to be modified by pressing the left mouse
button and, at the same time, dragging it.
NB.
The drawing area can be modified by pressing F8 or F9 which act
directly on the ‘X’ axis (F8) and the ‘Y’ axis (F9). This command type is
useful when you want to select to modify the whole area of the drawing.
Once the area has been defined, position the cursor inside the created box
and press the right mouse button to confirm the area.
You can move the area dragging it by holding the left mouse button pressed
down.
To confirm the copy, you only need to position the cursor inside the copied
image and quickly double-click the left mouse button. You can copy an image
as many times as you want, provided that you keep this button active.
Oblique Symmetry with clockwise Rotation
To make a copy with oblique symmetry towards left (copy the pattern
with horizontal symmentry and rotate it 90 degrees towards left clockwise), you have to position the mouse on the pattern and define the area
to be modified by pressing the left mouse button and, at the same time,
dragging it.
NB.
The drawing area can be modified by pressing F8 or F9 which act
directly on the ‘X’ axis (F8) and the ‘Y’ axis (F9). This command type is
useful when you want to select to modify the whole area of the drawing.
Once the area has been defined, position the cursor inside the created box
and press the right mouse button to confirm the area.
You can move the area dragging it by holding the left mouse button pressed
down.
To confirm the copy, you only need to position the cursor inside the copied
image and quickly double-click the left mouse button. You can copy an image
as many times as you want, provided that you keep this button active.
65
Modifying Area Tools
Oblique Symmetry with anti-clockwise Rotation
To make a copy with oblique symmetry towards right (copy the pattern
with horizontal symmentry and rotate it 90 degrees towards right - anticlockwise), you have to position the mouse on the pattern and define the
area to be modified by pressing the left mouse button and, at the same time,
dragging it.
NB.
The drawing area can be modified by pressing F8 or F9 which act
directly on the ‘X’ axis (F8) and the ‘Y’ axis (F9). This command type
is useful when you want to select to modify the whole area of the
drawing.
Once the area has been defined, position the cursor inside the created box
and press the right mouse button to confirm the area.
You can move the area dragging it by holding the left mouse button pressed
down.
To confirm the copy, you only need to position the cursor inside the copied
image and quickly double-click the left mouse button. You can copy an image
as many times as you want, provided that you keep this button active.
66
Modifying Area Tools
Rotations
This tool allows you to rotate and horizontally and vertically move a previously selected rectangular
area or a portion of a pattern.
Choose the button corresponding to the operation you need an explanation of.
Pattern Rotation
Horizontal Movement of the pattern in a rectangular area
Vertical Movement of the pattern in a rectangular area
Pattern Rotation
To rotate a pattern, you have to position the mouse on the pattern and
define the area to be modified by pressing the left mouse button and, at the
same time, dragging it.
NB.
The drawing area can be modified by pressing F8 or F9 which act
directly on the ‘X’ axis (F8) and the ‘Y’ axis (F9). This command type
is useful when you want to select to modify the whole area of the
drawing.
Once the area has been defined, position the cursor inside the created box
and press the right mouse button to confirm the area.
You can move the area dragging it by holding the left mouse button pressed
down.
You rotate an image by positioning the mouse on the control placed on the
rectangle perimeter and, holding the left mouse button pressed down,
dragging it around.
To confirm the copy, you only need to position the cursor inside the copied
image and quickly double-click the left mouse button. You can copy and
rotate an image as many times as you want, provided that you keep this
button active.
67
Modifying Area Tools
Horizontal Movement of the Pattern in a rectangular Area
To carry out this command, you have to position the mouse on the pattern and define the area to be modified
by pressing the left mouse button and, at the same time, dragging it.
NB.
The drawing area can be modified by pressing F8 or F9 which act directly on the ‘X’ axis (F8) and the
‘Y’ axis (F9). This command type is useful when you want to select to modify the whole area of the
drawing.
Once the area has been defined, position the cursor inside the created box and press the right mouse button
to confirm the area.
You can move the area dragging it horizontally (towards left or right) by holding the left mouse
button pressed down.
To confirm the operation, you only need to position the cursor inside the copied image and quickly doubleclick the left mouse button.
Vertical Movement of the Pattern in a rectangular Area
To carry out this command, you have to position the mouse on the pattern and define the area to be
modified by pressing the left mouse button and, at the same time, dragging it.
NB.
The drawing area can be modified by pressing F8 or F9 which act directly on the ‘X’ axis (F8) and the
‘Y’ axis (F9). This command type is useful when you want to select to modify the whole area of the
drawing.
Once the area has been defined, position the cursor inside the created box and press the right mouse button
to confirm the area.
You can move the area dragging it vertically (upwards or downwards) by holding the left mouse
button pressed down.
To confirm the operation, you only need to position the cursor inside the copied image and quickly doubleclick the left mouse button.
68
Modifying Area Tools
Relative Origin
This tool allows you to select a relative origin, which the coordinates next to the absolute ones in the
Status Bar will refer to. To carry out this command, first you have to choose the corresponding button in the
tool palette, then position the cursor right in the point where you want the relative origin to be on the pattern,
and then press the left mouse button to set both the symbol and the relative origin.
Pattern Magnification - Zoom
This tool allows you to increase or decrease the ZOOM level by using the keys (directional arrows) or
the buttons
. You can carry out this command by positioning the mouse on the part you want to
magnify or minimize and then by confirming the operation any time you click the left mouse button.
You can carry out the same operation using the directional keys. By choosing the up arrow, down arrow keys
on the keyboard you encrease and decrease the zoom; by the left arrow key you bring the zoom back to level
1, by the right arrow key you increase the zoom of 10 levels.
The zoom level is displayed in the Status Bar.
69
Modifying Area Tools
Insert/Delete Needles/Courses
This tool allows you to delete or insert needles and courses anywhere in the previously selected
pattern box.
Choose the button corresponding to the operation you need an explanation of.
Insert needles on the left side of the pattern.
Insert needles on the right side of the pattern.
Insert courses on top
Insert courses below
Delete needles
Delete courses
Automatic scaling of the active pattern.
Insert Needles on the left Side of the Pattern
This command allows you to insert a certain number of needles from the predefined needle leftwards.
To insert it, do what follows: first select the corresponding button, then position the insertion point on the
needle where you want other needles to be added from in the pattern, and press the left mouse button. At this
moment, the insert needles window will be displayed: position the cursor inside the white rectangle to insert
the number of needles and press the left mouse button; type the number and confirm by choosing the OK
button or cancel by choosing the Cancel button.
WARNING !!! The inserted area will be displayed in the current colour.
70
Modifying Area Tools
Insert Needles on the right Side of the Pattern
This command allows you to insert a certain number of needles from the predefined needle
rightwards.
To insert it, do what follows: first select the corresponding button, then position the insertion point on the
needle where you want other needles to be added from in the pattern, and press the left mouse button. At this
moment, the insert needles window will be displayed: position the cursor inside the white rectangle to insert
the number of needles and press the left mouse button; type the number and confirm by choosing the OK
button or cancel by choosing the Cancel button.
WARNING !!! The inserted area will be displayed in the current colour.
Insert Courses on top
This command allows you to insert a certain number of courses from the predefined course upwards.
To insert it, do what follows: first select the corresponding button, then position the insertion point on the
course where you want other courses to be added from in the pattern, and press the left mouse button. At
this moment, the insert courses window will be displayed: position the cursor inside the white rectangle to
insert the number of courses and press the left mouse button; type the number and confirm by choosing the
OK button or cancel by choosing the Cancel button.
WARNING !!! The inserted area will be displayed in the current colour.
71
Modifying Area Tools
Insert Courses below
This command allows you to insert a certain number of courses from the predefined course
downwards.
To insert it, do what follows: first select the corresponding button, then position the insertion point on the
course where you want other courses to be added from in the pattern, and press the left mouse button. At
this moment, the insert courses window will be displayed: position the cursor inside the white rectangle to
insert the number of courses and press the left mouse button; type the number and confirm by choosing the
OK button or cancel by choosing the Cancel button.
WARNING !!! The inserted area will be displayed in the current colour.
Delete Needles
This command allows you to delete a certain number of needles from the predefined needle
rightwards.
To delete it, do what follows: first select the corresponding button, then position the insertion point on the
needle where you want some needles to be deleted from in the pattern, and press the left mouse button. At
this moment, the delete needles window will be displayed: position the cursor inside the white rectangle to
insert the number of needles and press the left mouse button; type the number and confirm by choosing the
OK button or cancel by choosing the Cancel button.
72
Modifying Area Tools
Delete Courses
This command allows you to delete a certain number of courses from the predefined course
downwards.
To delete it, do what follows: first select the corresponding button, then position the insertion point on the
needle where you want some needles to be deleted from in the pattern, and press the left mouse button. At
this moment, the delete needles window will be displayed: position the cursor inside the white rectangle to
insert the number of needles and press the left mouse button; type the number and confirm by choosing the
OK button or cancel by choosing the Cancel button.
Automatic scaling of the current pattern
This command allows you to enlarge or reduce the size of the active pattern gradually. The function is
valid for both the number of needles (‘X’ axis) and the number of courses (‘Y’ axis).
Do as follows: select the automatic scaling button and a window will open where you can set the values to
resize the pattern.
To modify or insert values in the window, position the cursor in the white field and press the left mouse
button.
73
Modifying Area Tools
Enter the desired number in each field, then confirm with the OK button or cancel the operation with the
Cancel button.
Original dimensions of the pattern
The window shows the dimensions of the ‘X’ axis (needles) and ‘Y’ axis (courses) in the current pattern.
These values cannot be modified and are only given as reference.
New pattern dimensions
The window shows the dimensions of the ‘X’ axis (needles) and ‘Y’ axis (courses) in the current pattern.
They are given as reference but it is in these fields that you enter the new dimensions to give the pattern.
The new values of the needles and courses are not in proportion so that any value can be entered.
Alternatively, enabling the Size option, the program automatically resizes the two dimensions in proportion.
There is no need to enter both dimensions if you only want one axis of the pattern resized.
Sizing options for the two dimensions
This function relates the new value set in one of the two fields (needles or courses) with the other.
For example, if the current pattern has the following dimensions, X = 100, Y = 50, and you want to increase
the dimensions of both axes proportionally, activate the proportional option and enter the new value of one of
the two axes. The other value will alter automatically, for example, setting the ‘X’ axis to 150 will alter the ‘Y’
axis to 75.
Dimensions of the scaling origins
The values ‘X = needle’ and ‘Y = course’, referring to the current pattern, can be entered in this part of the
window which will become the origins of the new dimensions set in the window.
If no value is entered, the program takes 0,0 as its origins.
74
Colour Tools
Colour Tools
Replace colours
Replace colours in one rectangle or in the whole pattern.
Fill with a colour
Fill an area with a colour.
Flood
Spread colour to all areas of your image not surrounded by a solid border.
Select colour
Select the colour to be used in the pattern box.
Outline colour
Select a different coloured Outline to the Pattern..
Replaces a
colour with a
pattern across
the whole
pattern
Replaces a colour across the whole pattern with a weft - pattern or with an
area of the pattern.
Flash key
This key usually makes the color flash.
(Only for DIGRAPH3).
Pattern
coverage
This tool changes one or two colors throughout a pattern positioned one
above the other in the pattern.
(Only for DIGRAPH3).
Change colours
on planes
Change colours in a rectangle or throughout the whole pattern. The colours
must be on different planes. The function is only enabled for machines
configured for more than one plane.
(Only for DIGRAPH3).
75
Colour Tools
Replace Colours
This tool allows you to change one or more colours in the whole pattern or in a previously selected
rectangle.
First you have to select the area, where you want the colours to be replaced, by choosing one of the two
following buttons:
Replace colours in the whole pattern
With this button you can replace the selected colors in the whole pattern.
Choose this button before you start selecting colors.
Replace colours in a rectangle
With this button you can replace the selected colors in a rectangular area of the pattern.
Therefore, if you choose this button, you have to select a rectangle before you start selecting colors.
NB.
The drawing area can be modified by pressing F8 or F9 which act directly on the ‘X’ axis (F8) and the
‘Y’ axis (F9). This command type is useful when you want to select to modify the whole area of the
drawing.
.
Then you have to confirm by choosing the OK button.
A combining colours palette, where you can see the colours you want to change in the pattern, will appear
in the Toolbar area.
This palette is composed of two rows of boxes called source (src) and destination (dst). The colours to be
changed will automatically be arranged in the src row, while the new colours, that will replace the original
ones, will be arranged in the dst row.
Confirm Colour Change
By this button you confirm the colour change procedure.
Cancel Colour Change
By this button you cancel the colour change procedure.
Command to initialize the Combining Colours Palette
By this button you can initialize (reset) the combining colours palette, restoring its default condition
to start a new combination.
Combining Colours Palette
This palette displays the source and destination colours you select for the colour change. Every time
you select a colour, the corresponding box will display it, while the next box will be highlighted by a
black square to show the next selection.
76
Colour Tools
You always have to follow the same procedure to select colours. First you have to choose the source colour,
that is the one you want to be replaced, then its respective substitute, that is the destination colour. You can
select colours choosing them either from the pattern itself or from the colours palette, using the cursor
position as reference for the choice.
Once the colours have been selected, you can proceed with the painting phase of the function. By choosing
the OK button, colours will be replaced in the pattern. If the colours have been replaced as you wished, you
have to choose the OK button to confirm the colour change, otherwise you can cancel the whole procedure
by choosing the KO button.
Fill with a Colour
This tool allows you to fill an area with the current colour.
To use this command, you only need to make two operations: first you have to choose between these two
buttons: fill with a colour or fill with a pattern (weft); then you can proceed with the painting phase of this
function. Position the cursor on the desired point of the pattern and, by pressing the left mouse button, you
will get the pattern or the outlined area filled with a previously selected colour or pattern.
To do so, position the cursor on the pattern colour desired and press the left or right
mouse button.
You can select two colours, one colour assigned to the left button and one colour
assigned to the right button..
The Fill with a colour command enables two buttons:
Fill an area with the current colour.
Fill an area with a previously selected pattern or weft.
77
Colour Tools
Flood
This tool allows you to spread colour to all areas of your image not surrounded by a solid border.
You always have to follow a fix procedure to carry out this command. First you have to choose one of these
two buttons:
to fiil with a colour
to fill with a pattern (weft)
Then you have to choose the button to select the colour you want to keep unchanged while filling
.
You select the colour simply by positioning the cursor on the pattern and by pressing the left mouse button on
the colour.
Finally, you have to choose the colour, which you want to draw with, in the colour palette.
Now you can proceed with the painting phase, with which you fill the pattern or the surrounding area with the
previously selected colour or pattern (weft), simply by positioning the cursor on the desired point of the
pattern and by pressing the left mouse button.
Select Colour
This tool allows you to select the current colour directly from the pattern rather than from
the colour chart dialog box or colour palette.
To do so, position the cursor on the pattern colour desired and press the left or right
mouse button.
You can select two colours, one colour assigned to the left button and one colour
assigned to the right button..
78
Colour Tools
Pattern OutLine
The tool Pattern Outline enables you to create an outline to the pattern, if the pattern has only one
colour. The Outline will have the thickness of one needle. With this function, the you have the possibility to
border the whole pattern or only a rectangular area previously selected.
First you must select the area to border, clicking on :
Automatic selection of the whole pattern
The function of this button is to select automatically the area of the whole pattern for the pattern
outline operation.
Choose this button before the selection of the colours.
Replace Colors in a Rectangle
With this button you can replace the selected colors in a rectangular area of the pattern.
Therefore, if you choose this button, you have to select a rectangle before you start selecting colors.
N.B.: The drawing area can be modified by pressing F8 or F9 which act directly on the ‘X’ axis (F8) and the
‘Y’ axis (F9). This command type is useful when you want to select to modify the whole area of the drawing.
Then you have to confirm the selection by choosing the OK button
.
In the tool bar, a combining colours palette will appear, where you can see the colours to select for the
outline.
This palette is composed of two rows of boxes called source(Col In) and destination (Col Out). In the box
named Col In you will select the colour of the pattern to border, whereas in the box named Col Out you will
select the colour of the outline.
The selection of the colour must follow a fixed procedure. First select the source colour, which is that of the
pattern to border(Col In), then select the destination colour, which is that of the outline(Col Out). It is possible
to select the colours directly from the displayed pattern, or from the colour tablet of the machine.
Once the colours have been selected, the operative step of the function will start. Choosing the OK button,
the program will insert the outline to the pattern.Click on the OK button to confirm the pattern outline
operation or click on KO button to cancel it.
79
Colour Tools
Replace a colour with a pattern
This tool allows you to replace a specific colour across the whole of the pattern with a mesh (weft or
pattern) or an area of the pattern itself.
The procedure is as follows:
first, select the button from the tool palette; then select the button relative to the type of replacement you want
to carry out (with a pattern or with an area of the pattern) using these two buttons:
Change a colour with an area of the pattern
This button lets you select an area of the pattern to replace the colour in the current pattern.
To select an area, press the left mouse button and position the cursor on the pattern; hold the left mouse
button down and drag the mouse to outline the area to be changed.
When you are happy with the area outlined, press OK to confirm the operation, otherwise press KO to
cancel it.
Change a colour with a pattern
This button displays the pattern chart from which you can select the type of mesh to replace the colour
in the current pattern.
Press this button to display a pattern choice dialog box from which you can select the weft desired. When
you have chosen, press OK to confirm the operation or KO to cancel it.
To assign the colour to the weft that will replace the colour in the pattern, press F5 or click on the colour in
the colour palette. If you do not assign a colour, the program will use the current colour.
Next, position the cursor over the colour to be replaced and press the left mouse button. The program
automatically replaces the colour with the weft or with the pattern selected in the area.
The function will remain active until the KO
button is pressed, so if you want to replace another colour in
the pattern, position the cursor on that colour and click the left mouse button.
80
Colour Tools
Flash key (only for DIGRAPH3)
This key usually makes the color flash.This function allow to distinguish two colors similar and near in
order to make the area of the flashing color visible.
Pattern coverage (only for DIGRAPH3)
This tool changes one or two colors throughout a pattern or in a previously selected area depending
on if the two colors are positioned one above the other in the pattern.
First, select the type of area the color change will be performed in. Do so with either of the following two
buttons:
Coverage throughout the pattern.
This button automatically selects all of the pattern for execution of a tool function. It must be pressed
before color selection.
Coverage only in a selected area
This button allows you to select an area of the pattern for execution of a tool function.
Pressing this button means you must then select a rectangular area before color selection.
NB.
The pattern area can be altered by pressing F8 or F9 which affect the “x” and “y” axes respectively.
This type of command is very useful when you wish to alter the area for the function to cover the whole
pattern.
Then, confirm with the OK button
A color association table will appear in the Command Bar where you can see the colors chosen for the
change to be performed in the pattern.
This table displays the 4 source and target colors in the color change. Each time a color is selected, the
corresponding box will be filled with that color and a black square will be positioned around the next box to
identify the next selection.
The colors must be selected in the correct order. First, the source color (top left) must be selected, then the
color that activates the coverage if it is found below the first color in the pattern (bottom left). Then the two
replacement colors (top right, then bottom right). Coverage is the replacement of the first color on the left with
the first color on the right and of the second color on the left with the second color on the right.
In the example above, if a green dot has a red dot below, the green will be replaced with a blue dot and the
red one with a yellow dot.
The colors can be selected from the pattern itself or from the color tablet; the cursor position is used as
reference. The colors in the four boxes need not all be different.
When the colors have been chosen, press OK and the program will activate the change of colors in the
pattern. If the change is satisfactory, press OK to confirm the change, or press KO to cancel the operation.
81
Colour Tools
Change colour on pattern panels (tool for Digraph3 system only)
This tool can only be activated for machines configured for more than one plane and with the
Digraph3 key connected. The tool allows colours on more than one plane to be changed throughout the
design or in a rectangular area selected beforehand. As soon as the tool has been selected, the pattern
display type will be automatically displayed for the first and second planes combined and will remain like that
until another tool is selected.
To check the operation has been correctly carried out, change the tool. For example, check execution on a
single plane using the pen.
Before carrying out the function, select the type of area the colours are to be changed in by using these two
buttons:
Replace colours in the whole pattern
With this button you can replace the selected colors in the whole pattern.
Choose this button before you start selecting colors.
Replace colours in a rectangle
With this button you can replace the selected colors in a rectangular area of the pattern.
Therefore, if you choose this button, you have to select a rectangle before you start selecting colors.
NB.
The drawing area can be modified by pressing F8 or F9 which act directly on the ‘X’ axis (F8) and the
‘Y’ axis (F9). This command type is useful when you want to select to modify the whole area of the
drawing.
.
Then you have to confirm by choosing the OK button.
A colour association table will appear in the command bar where the user will be able to see the colours
chosen for the pattern change.
The table has two rows of boxes called source (src) and destination (dst). The pattern colours to be
changed will appear in the src row and the new colours replacing the original ones will automatically appear
in the dst row.
Confirm Colour Change
By this button you confirm the colour change procedure.
Cancel Colour Change
By this button you cancel the colour change procedure.
Command to initialize the Combining Colours Palette
By this button you can initialize (reset) the combining colours palette, restoring its default condition
to start a new combination.
Combining Colours Palette
82
Colour Tools
This palette displays the source and destination colours you select for the colour change. Every time
you select a colour, the corresponding box will display it, while the next box will be highlighted by a
black square to show the next selection.
Colour selection must be carried out in the right sequence. First, select a source colour, i.e. the one to be
changed; then select the colour it will replace, i.e. the destination one. The colours can be selected either
from the pattern itself or from the colour palette. Use the cursor to select the colours.
Source and destination colours must be on different planes.
When the colours have been chosen, press OK. The program will activate the colour change in the pattern.
If the operation has been successful, press OK again to confirm the change of colours. If the operation is not
satisfactory, press KO to cancel the operation.
Once the operation has been confirmed, it is always advisable to change the tool to check the operation has
been correctly carried out on a single plane. If it has not, press the Cancel key.
A colour on the first plane replaced with a colour on the second plane will leave one black in its place. A
colour on the second plane replaced with a colour on the first plane will leave rubber in its place.
If a crossover colour change is required (i.e. a colour on the first plane is exchanged exactly with a colour on
the second plane), the new colours will prevail over the black and the rubber.
83
Index
Index
A
Absolute Origin of Pattern ________________________________________________________________________
Activation/disactivation of courses in the pattern ______________________________________________________
Add a dot to a Polisplyne curve____________________________________________________________________
Arrange Pattern Icons (Window Menu) ______________________________________________________________
Associating the machine setup ____________________________________________________________________
Automatic scaling of the current pattern _____________________________________________________________
34
44
58
39
44
73
B
Button to cancel association between special colours and the pattern ______________________________________ 23
Button to temporarily save the association ___________________________________________________________ 23
C
Cancel an association value ______________________________________________________________________ 45
Cancel Machine Selection_________________________________________________________________________ 8
Cancel the pattern on the current machine (Menu File)
Delete of pattern _____________________________________________________________________________ 25
Cancel the setup associated with the pattern course ___________________________________________________ 44
Change a colour with a pattern ____________________________________________________________________ 80
Change a colour with an area of the pattern __________________________________________________________ 80
Change colour on pattern palnes (Colour tools) (Tool for Digraph3 system only) _____________________________ 82
Change the Colour of the Grid (Modify Menu) ________________________________________________________ 41
Character dimension ____________________________________________________________________________ 56
Character style ________________________________________________________________________________ 56
Character type_________________________________________________________________________________ 56
Choosing the pattern’s format
Pattern format __________________________________________________________________________ 9; 11; 25
Circle (Geometric Tools) _________________________________________________________________________ 54
circle filled with a previously selected pattern weft)_____________________________________________________ 54
circle filled with the current colour __________________________________________________________________ 54
circumference of the circle _______________________________________________________________________ 54
circumference of the conic section _________________________________________________________________ 55
circumference of the ellipse_______________________________________________________________________ 54
Close - Close Pattern (File Menu)
Close the corrent pattern_______________________________________________________________________ 20
Colour Assignment for image .BMP -.DIB ____________________________________________________________ 13
Colour Assignment for image .PCX_________________________________________________________________ 19
Colour Assignment for LONATI / SANTONI pattern ____________________________________________________ 17
Colour machine Table
Display the Colour Palette of the Current Machine (View Menu) ________________________________________ 35
Colour Tools __________________________________________________________________________________ 75
Combining Colours Palette ____________________________________________________________________ 76; 82
Command Description___________________________________________________________________________ 34
Command to initialize the Combining Colours Palette _______________________________________________ 76; 82
Commands to confirm or cancel Operation_________________________________________________________ 9; 24
Comment display area to colour table_______________________________________________________________ 35
Compressed and/or uncompressed _____________________________________________________________ 10; 24
Configuration choice list _________________________________________________________________________ 43
Configuring the machine using the PAINT graphics program _____________________________________________ 45
Confim Selection machine_________________________________________________________________________ 8
Confirm a Polisplyne curve _______________________________________________________________________ 58
Confirm deletion of the pattern ____________________________________________________________________ 26
Conic Section (Geometric Tools) __________________________________________________________________ 55
conic section filled with a previously selected pattern weft). ______________________________________________ 55
conic section filled with the current colour____________________________________________________________ 55
Control for association of the second plane of the .PAT pattern ___________________________________________ 22
Copy a Pattern Area ____________________________________________________________________________ 60
84
Index
Copy an Unshaped Area _________________________________________________________________________
Copy Rectangular Area (Modifying Area Tools) _______________________________________________________
Copy Unshaped Area (Modifying Area Tools) _________________________________________________________
Create a new configuration _______________________________________________________________________
Current Thickness level__________________________________________________________________________
Current Zoom Level_____________________________________________________________________________
Curves (Geometric Tools) ________________________________________________________________________
62
59
62
44
34
34
51
D
Defines trace thickness (Menu Configuration) (only for DIGRAPH3) _______________________________________ 48
Delete Needles ________________________________________________________________________________ 72
Description of the commands (Modify Menu) _________________________________________________________ 42
Diamond (Geometric Tools) ______________________________________________________________________ 53
diamond filled with a previously selected pattern weft___________________________________________________ 53
diamond filled with the current colour _______________________________________________________________ 53
Dimensions of the scaling origins __________________________________________________________________ 74
Display all colours in the table_____________________________________________________________________ 35
Display current Colour and Pattern _________________________________________________________________ 34
Display method ________________________________________________________________________________ 22
Display only the colours used in the current pattern ____________________________________________________ 36
Display the configuration description________________________________________________________________ 46
Display the dimensions of the selected pattern .PAT ___________________________________________________ 23
Display the feed setup table (Menu Configuration) __________________________________________________ 45; 47
Display the first and second planes at the same time ___________________________________________________ 48
Display the first pattern plane - drum colours _________________________________________________________ 47
Display the list of current patterns for associate of special colors__________________________________________ 23
Display the number, colour and description of the configured colour _______________________________________ 38
Display the second pattern plane - yarnfinger and stitch cam colours ______________________________________ 47
DMSC (Dinema Machine Software Configuration) _____________________________________________________ 46
Dot (Geometric Tools) ___________________________________________________________________________ 51
Drives ________________________________________________________________________________ 8; 9; 10; 24
E
Ellipse (Geometric Tools) ________________________________________________________________________
ellipse filled with a previously selected pattern weft ____________________________________________________
ellipse filled with the current colour _________________________________________________________________
Enable the configuration description ________________________________________________________________
Entry field for the name of the final pattern associated __________________________________________________
Erase a dot from a Polisplyne curve ________________________________________________________________
Exit PAINT program(File Menu)____________________________________________________________________
Exit the machine configuration window ______________________________________________________________
54
54
54
46
23
58
31
45
F
File 1, 2, 3, 4 (File Menu) ________________________________________________________________________
Fill with a Colour (Colour Tools) ___________________________________________________________________
Flash key (Colour Tools) (Only for DIGRAPH3) ______________________________________________________
Flood (Colour Tools) ____________________________________________________________________________
Font configuration / Type of character_______________________________________________________________
31
77
81
78
56
G
Geometric Tools _______________________________________________________________________________ 50
H
Help Instructions (Menu Help) _____________________________________________________________________ 49
Horizontal Symmetry ____________________________________________________________________________ 65
85
Index
I
Import LONATI / SANTONI pattern .DIS - .SDI ________________________________________________________
Import LONATI / SANTONI pattern automatically ______________________________________________________
Import Pattern (File Menu)________________________________________________________________________
Import Windows image .BMP - .DIB ________________________________________________________________
Import Windows image .PCX _____________________________________________________________________
Information about PAINT Graphics (Menu Help)_______________________________________________________
Insert a dot in a Polisplyne curve (after) _____________________________________________________________
Insert a dot in a Polisplyne curve (before)____________________________________________________________
Insert Courses below____________________________________________________________________________
Insert Courses on top ___________________________________________________________________________
Insert Needles on the left Side of the Pattern _________________________________________________________
Insert Needles on the right Side of the Pattern ________________________________________________________
Interactive PAINT Help (Menu Help) ________________________________________________________________
15
16
12
12
18
49
58
58
72
71
70
71
49
L
Line (Geometric Tools) __________________________________________________________________________ 51
Linear Multiple Copy
Copy linear multiple___________________________________________________________________________ 61
List of configured colours ________________________________________________________________________ 38
List of machine configurations_____________________________________________________________________ 46
List of Machines ________________________________________________________________________________ 8
List of machines for the importation of the pattern Lonati/Santoni _________________________________________ 15
List of Patterns ________________________________________________________________________________ 40
List of setups __________________________________________________________________________________ 44
List of special colours to associate with the patterns ___________________________________________________ 21
M
Modify Areas (Modifying Area Tools)________________________________________________________________
Modify Pattern Window __________________________________________________________________________
Modifying Area Tools____________________________________________________________________________
Move a dot in a Polisplyne curve___________________________________________________________________
Move a Pattern Area ____________________________________________________________________________
Move a Polisplyne curve _________________________________________________________________________
Move an Unshaped Area_________________________________________________________________________
63
40
59
58
60
58
62
N
New Name of Pattern ___________________________________________________________________________ 24
New pattern
Insert Image Name; Number of Needles; Number of Courses ___________________________________________ 8
New pattern (File Menu) __________________________________________________________________________ 8
New Pattern Window (Window Menu)_______________________________________________________________ 39
O
Oblique Symmetry with anti-clockwise Rotation _______________________________________________________
Oblique Symmetry with clockwise Rotation___________________________________________________________
Open an existing Pattern (File Menu)
Open pattern ________________________________________________________________________________
Open Pattern Windows Cascade (Window Menu) _____________________________________________________
Open Pattern Windows Tile (Window Menu) _________________________________________________________
Options printing ________________________________________________________________________________
Orientation paper_______________________________________________________________________________
66
65
10
39
39
26
26
P
PAINT Help Summary (Menu Help)_________________________________________________________________ 49
Paper Size____________________________________________________________________________________ 26
86
Index
Paper Source _________________________________________________________________________________ 26
Pattern configuration management (Menu Configuration)_____________________________________________ 43; 46
Pattern coverage (Color tools) (Only for DIGRAPH3) ___________________________________________________ 81
Pattern Dimensions _____________________________________________________________________________ 41
Pattern GRID
Change the Colour of the Grid___________________________________________________________________ 37
On/off Grid (View Menu) _______________________________________________________________________ 37
Pattern Magnification - Zoom (Modifying Area Tools)
Zoom ______________________________________________________________________________________ 69
Pattern or Weft Command (Modify Menu)
Select the mesh pattern _______________________________________________________________________ 40
Pattern OutLine (Colour Tools)
Outline command ____________________________________________________________________________ 79
Pattern Preview Icon
Icon preview ________________________________________________________________________________ 10
Pattern Rotation _______________________________________________________________________________ 67
perimeter of the diamond ________________________________________________________________________ 53
perimeter of the rectangle ________________________________________________________________________ 52
perimeter of the square __________________________________________________________________________ 53
Polisplyne (Geometric tools) ______________________________________________________________________ 58
Preview the pattern _____________________________________________________________________________ 22
Preview the pattern for association _________________________________________________________________ 22
Preview Window _______________________________________________________________________________ 41
Preview Window (View Menu)_____________________________________________________________________ 38
Print (File Menu)
Print pattern_________________________________________________________________________________ 27
Print Dialog Box________________________________________________________________________________ 30
Print pattern
INFO - Pattern Information _____________________________________________________________________ 27
PRINT - Print displayed pattern__________________________________________________________________ 27
Print Pattern
SQUARED - Squred Pattern Print ________________________________________________________________ 28
Print preview pattern
INFO - previews the information of the pattern to print ________________________________________________ 29
PRINT - previews the pattern to print _____________________________________________________________ 29
SQUARED - previews the squared pattern to print __________________________________________________ 30
Print Setup (File Menu) __________________________________________________________________________ 26
Printer _______________________________________________________________________________________ 26
Protected Colour _______________________________________________________________________________ 35
Protection and transparence of all colours ___________________________________________________________ 36
R
Rectangle (Geometric Tools) _____________________________________________________________________
rectangle filled with a previously selected pattern weft __________________________________________________
rectangle filled with the current colour_______________________________________________________________
Rectangular Multiple Copy
Copy area rectangule multiple___________________________________________________________________
Relative Origin (Modifying Area Tools) ______________________________________________________________
Relative Origin of Pattern ________________________________________________________________________
Replace a colour with a pattern (Colour Tools) ________________________________________________________
Replace Colours (Colours Tools) __________________________________________________________________
Rotation - Horizontal Movement of the Pattern in a rectangular Area _______________________________________
Rotation - Vertical Movement of the Pattern in a rectangular Area _________________________________________
Rotations (Modifying Area Tools) __________________________________________________________________
52
52
52
61
69
34
80
76
68
68
67
S
Save - Save Pattern (File Menu)
Save pattern with associete special colors _________________________________________________________ 21
Save as (File Menu)
Save corrent pattern with another name ___________________________________________________________ 24
Select Colour (Colour Tools) _____________________________________________________________________ 78
Select Image .BMP _____________________________________________________________________________ 12
Select Machine Type (File Menu)
Type machine ________________________________________________________________________________ 7
Select the number of feeds to be used for the pattern configuration________________________________________ 45
Select Windows image .PCX______________________________________________________________________ 18
87
Index
Selection of the LONATI / SANTONI pattern to be imported______________________________________________
Special Colours (disegno .SDI) ____________________________________________________________________
Square (Geometric Tools) ________________________________________________________________________
square filled with a previously selected pattern weft ____________________________________________________
square filled with the current colour_________________________________________________________________
Status Bar (View Menu)__________________________________________________________________________
Symmetries (Modifying Area Tools) ________________________________________________________________
16
36
52
53
53
34
64
T
Text insert (only for DIGRAPH3) ___________________________________________________________________
Text Insert rotation degree _______________________________________________________________________
Text insertion __________________________________________________________________________________
Toolbar (View Menu) ____________________________________________________________________________
Transparent Colour _____________________________________________________________________________
Type of machine setup __________________________________________________________________________
55
56
56
32
35
44
U
Undelete command
Cancels the command that has just been carried out (Modify Menu) ____________________________________ 41
Upsidedown text _______________________________________________________________________________ 56
Use of the Tablet (only for DIGRAPH3) _____________________________________________________________ 57
V
VARIABLE PATTERNS __________________________________________________________________________
Variable wefts or Patterns (.PAT patterns)
Pattern with format .PAT _______________________________________________________________________
Vertical Symmetry ______________________________________________________________________________
Vertical text ___________________________________________________________________________________
88
22
22
64
56