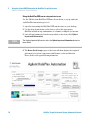
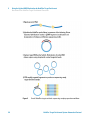
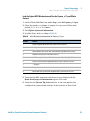
1
HaloPlex Target Enrichment System Automation Protocol For Illumina Sequencing Protocol Version D.4, May 2013 Research Use Only. Not for use in Diagnostic Procedures. Agilent Technologies Notices © Agilent Technologies, Inc. 2013 Warranty No part of this manual may be reproduced in any form or by any means (including electronic storage and retrieval or translation into a foreign language) without prior agreement and written consent from Agilent Technologies, Inc. as governed by United States and international copyright laws. The material contained in this document is provided “as is,” and is subject to being changed, without notice, in future editions. Further, to the maximum extent permitted by applicable law, Agilent disclaims all warranties, either express or implied, with regard to this manual and any information contained herein, including but not limited to the implied warranties of merchantability and fitness for a particular purpose. Agilent shall not be liable for errors or for incidental or consequential damages in connection with the furnishing, use, or performance of this document or of any information contained herein. Should Agilent and the user have a separate written agreement with warranty terms covering the material in this document that conflict with these terms, the warranty terms in the separate agreement shall control. Manual Part Number G9900-90020 Edition Version D.4, May 2013 Printed in USA Agilent Technologies, Inc. 5301 Stevens Creek Blvd Santa Clara, CA 95051 USA Technical Support For technical product support, contact your local Agilent Support Services representative. For US and Canada, call (800) 227-9770 (option 3,4,4). For other countries, find your support center telephone numbers at www.agilent.com/chem/contactus. Or send an e-mail to: [email protected] Notice to Purchaser Research Use Only. Not for use in diagnostic procedures. Safety Notices Technology Licenses The hardware and/or software described in this document are furnished under a license and may be used or copied only in accordance with the terms of such license. Restricted Rights Legend CAUTION A CAUTION notice denotes a hazard. It calls attention to an operating procedure, practice, or the like that, if not correctly performed or adhered to, could result in damage to the product or loss of important data. Do not proceed beyond a CAUTION notice until the indicated conditions are fully understood and met. WAR NING A WARNING notice denotes a hazard. It calls attention to an operating procedure, practice, or the like that, if not correctly performed or adhered to, could result in personal injury or death. Do not proceed beyond a WARNING notice until the indicated conditions are fully understood and met. U.S. Government Restricted Rights. Software and technical data rights granted to the federal government include only those rights customarily provided to end user customers. Agilent provides this customary commercial license in Software and technical data pursuant to FAR 12.211 (Technical Data) and 12.212 (Computer Software) and, for the Department of Defense, DFARS 252.227-7015 (Technical Data - Commercial Items) and DFARS 227.7202-3 (Rights in Commercial Computer Software or Computer Software Documentation). 2 HaloPlex Target Enrichment System Automation Protocol In this Guide... This guide describes an optimized automation protocol for using the HaloPlex target enrichment system to prepare sequencing library samples for Illumina paired-end multiplexed sequencing platforms. Sample processing steps are automated using the Agilent NGS Workstation. 1 Before You Begin This chapter contains information (such as procedural notes, safety information, required reagents and equipment) that you should read and understand before you start an experiment. 2 Using the Agilent NGS Workstation for HaloPlex Target Enrichment This chapter contains an orientation to the Agilent NGS Workstation, an overview of the HaloPlex target enrichment protocol, and considerations for designing HaloPlex experiments for automated processing using the Agilent NGS Workstation. 3 Sample Preparation This chapter describes the steps of the automated HaloPlex workflow to prepare target-enriched sequencing libraries for the Illumina platform. 4 Appendix: Provisional Adaptor-Dimer Removal Protocol This chapter describes a protocol used to remove adaptor-dimer (125 bp) molecules that may be observed for some designs. 5 Reference This chapter contains reference information, including component kit contents and index sequences. HaloPlex Target Enrichment System Automation Protocol 3 What’s New in Version D.4 • Support for HaloPlex Cardiomyopathy Research Panel designs (Table 2 on page 10, Table 18 on page 47, and Table 33 on page 82) What’s New in Version D.3 • Support for HaloPlex Cancer Research Panel designs (Table 2 on page 10, Table 18 on page 47, and Table 33 on page 82) • Updated Custom Kit ordering information (page 10) • Updated supplier information for NaOH and acetic acid (Table 1 on page 9) and updated preparation instructions for NaOH (page 48) • New Run Time Considerations section (page 26) • Support for FFPE-derived DNA samples (see Note on page 30) • Updated instructions for preparation of RE Master Mixes from the provided Enzyme Strips (page 32) • Instructions for obtaining Agilent’s SureCall analysis software (page 75) • Support for NGS Workstation error messages that may be encountered during run setup (page 20) What’s New in Version D.2 • Updated instructions for determination of hybridization time by referral to Box 1 Certificate of Analysis (page 47) • Updated instructions for use of Enzyme Strips 1 and 2 (page 30 and page 32) • Updated provisional purification protocol (step 9 on page 78) • Updated URL for design of HaloPlex probes (www.agilent.com/genomics/suredesign; see page 29) 4 HaloPlex Target Enrichment System Automation Protocol Content 1 Before You Begin Procedural Notes 8 Safety Notes 8 Required Reagents 9 Required Equipment 11 Optional Validation Reagents and Equipment 12 Required Accessories for Adaptation of NGS Workstation Option B for HaloPlex Automation 12 2 Using the Agilent NGS Workstation for HaloPlex Target Enrichment About the Agilent NGS Workstation 14 Overview of the HaloPlex Target Enrichment Procedure 23 Experimental Setup Considerations for Automated Runs 25 3 Sample Preparation Step 1. Digest genomic DNA with restriction enzymes 30 Step 2. Hybridize digested DNA to HaloPlex probes for target enrichment and sample indexing 42 Step 3. Capture and amplify the target DNA 48 Step 4. Purify the amplified target DNA 63 Step 5. Validate enrichment and quantify enriched target DNA 67 Step 6. Pool samples with different indexes for multiplexed sequencing 71 4 Appendix: Provisional Adaptor-Dimer Removal Protocol Purify the enriched library pool using AMPure XP beads 5 78 Reference Kit Contents 82 Nucleotide Sequences of HaloPlex Indexes 85 Qualitative analysis of enrichment by gel electrophoresis HaloPlex Target Enrichment System Automation Protocol 91 5 6 HaloPlex Target Enrichment System Automation Protocol HaloPlex Target Enrichment System Protocol 1 Before You Begin Procedural Notes 8 Safety Notes 8 Required Reagents 9 Required Equipment for HaloPlex Target Enrichment Automated Protocols 11 Optional Validation Reagents and Equipment 12 Required Accessories for Adaptation of NGS Workstation Option B for HaloPlex Automation 12 Make sure you read and understand the information in this chapter and have the necessary equipment and reagents listed before you start an experiment. Agilent Technologies 7 1 Before You Begin Procedural Notes Procedural Notes • The protocols in this manual are for use with Agilent’s G9901B, G9911B, G9921B and G9903B HaloPlex Target Enrichment System kits. The protocol is not compatible with earlier versions of HaloPlex reagent kits, including Agilent part numbers G9900A, G9900B, and G9900C. • The 96 reaction kit contains enough reagents to prepare master mixes for four runs of 3 columns of samples (24 samples) per run. When processing samples using runs with fewer than 24 samples, some reagents may be depleted before 96 samples are run. • The HaloPlex protocol is optimized for digestion of 200 ng of genomic DNA (split among 8 different restriction digestion reactions) plus 25 ng excess DNA, for a total of 225 ng genomic DNA. Using lower amounts of DNA in the enrichment protocol can adversely affect your results. Use a fluorometry-based DNA quantitation method, such as PicoGreen stain or Qubit fluorometry to quantify the DNA starting material. • Always keep pre-amplification and post-amplification DNA samples in separate work areas. Perform the enrichment procedure in the pre-amplification area. Open and store the amplified, enriched DNA samples only in the post-amplification area. • Possible stopping points, where DNA samples may be stored between steps, are marked in the protocol. Store the samples at –20°C, but do not subject the samples to multiple freeze/thaw cycles. • Ensure that master mixes are thoroughly mixed, by pipetting up-and-down or by gentle vortexing, before distributing to the samples. • In general, follow Biosafety Level 1 (BL1) safety rules. Safety Notes CA U T I O N 8 • Wear appropriate personal protective equipment (PPE) when working in the laboratory. HaloPlex Target Enrichment System Automation Protocol Before You Begin Required Reagents 1 Required Reagents Table 1 Required Reagents for HaloPlex Target Enrichment Description Vendor and part number HaloPlex Target Enrichment System Kit Select the appropriate kit for your probe design from Table 2 Herculase II Fusion Enzyme with dNTPs (100 mM; 25 mM for each nucleotide), 200 reactions Agilent p/n 600677 Nuclease-free Water (not DEPC-treated) Ambion Cat #AM9930 Agencourt AMPure XP Kit 5 mL 60 mL 450 mL Beckman Coulter Genomics p/n A63880 p/n A63881 p/n A63882 10 M NaOH, molecular biology grade Sigma, p/n 72068 2 M acetic acid Sigma, p/n A8976 10 mM Tris-HCl, pH 8.0 or 10 mM Tris-acetate, pH 8.0 General laboratory supplier 100% Ethanol, molecular biology grade Sigma-Aldrich p/n E7023 Quant-iT dsDNA BR Assay Kit, for use with the Qubit fluorometer 100 assays, 2-1000 ng 500 assays, 2-1000 ng HaloPlex Target Enrichment System Automation Protocol Life Technologies p/n Q32850 Life Technologies p/n Q32853 9 1 Before You Begin Required Reagents To select a HaloPlex Target Enrichment System Reagent Kit, use Agilent’s SureDesign tool at www.agilent.com/genomics/suredesign to design a custom panel or to select a pre-designed panel. Reagent kit ordering information is supplied as part of the SureDesign process and is summarized in Table 2 below. Table 2 HaloPlex Target Enrichment System Kits for Illumina Sequencing HaloPlex Probe Design Part Number Custom Panel Tier 1*, ILM, 96 reactions G9901B Custom Panel Tier 2†, ILM, 96 reactions G9911B Custom Panel Tier 3‡, ILM, 96 reactions G9921B Cancer Research Panel, ILM, 96 reactions G9903B Cardiomyopathy Research Panel, ILM, 96 reactions G9908B * Tier 1 designs are 1-500 kb and up to 20,000 probes. † Tier 2 designs are 0.5-2.5 Mb OR 1-500 kb with >20,000 probes. ‡ Tier 3 designs are 2.6 Mb-5 Mb. NOTE 10 Kits contain enough reagents for 96 reactions total, including one or more control reactions using Enrichment Control DNA (ECD) samples. Each run of up to 96 samples should include one ECD control enrichment reaction. HaloPlex Target Enrichment System Automation Protocol Before You Begin Required Equipment 1 Required Equipment Table 3 Required Equipment for HaloPlex Target Enrichment Automated Protocols Description Vendor and part number * with VWorks Agilent NGS Workstation Option A software version 11.0.1.1032 or later. Contact Agilent Automation Solutions for ordering information: [email protected] Robotic Pipetting Tips (Sterile, Filtered, 250 L) Agilent p/n 19477-022 Thermal Cycler Agilent SureCycler 8800, p/n G8800A 96 well plate module, p/n G8810A 384 well plate module, p/n G8820A or equivalent thermal cycler† and accessories Eppendorf twin.tec full-skirted 96-well PCR plates Eppendorf p/n 951020401 or 951020619 Eppendorf twin.tec full-skirted 384-well PCR plates* Eppendorf p/n 951020702 Eppendorf twin.tec half-skirted 96-well PCR plates‡ Eppendorf p/n 951020303 Thermo Scientific Reservoirs Thermo Scientific p/n 1064156 Nunc DeepWell Plates, sterile, 1.3-mL well volume Thermo Scientific p/n 260251 Axygen 96 Deep Well Plate, 2.2 mL, Square Well (waste reservoirs) Axygen p/n P-2ML-SQ-C E & K Scientific p/n EK-2440 Magnetic separator ** 1.5 mL tube-compatible separator or Conical vial-compatible separator Life Technologies DynaMag-2 magnet, p/n 12321D or equivalent DynaMag-15 magnet, p/n 12301D or equivalent Benchtop microcentrifuge VWR p/n 93000-196, or equivalent Benchtop plate centrifuge Labnet International MPS1000 Mini Plate Spinner p/n C1000, or equivalent P10, P20, P200 and P1000 pipettes Pipetman P10, P20, P200, P1000 or equivalent NucleoClean Decontamination Wipes Millipore p/n 3097 Qubit 2.0 Fluorometer Life Technologies p/n Q32866 Qubit assay tubes Life Technologies p/n Q32856 Vortex mixer General laboratory supplier * Protocols are also compatible with Agilent NGS Workstation Option B after purchase of accessories in Table 5. † Thermal cycler must have a maximum reaction volume specification of at least 100 L and must be compatible with 0.2 mL tubes. ‡ Compatible with Agilent SureCycler 8800. ** Select the appropriate device based on run size. See page 53 to determine magnetic bead volume to be used for your run size. HaloPlex Target Enrichment System Automation Protocol 11 1 Before You Begin Optional Validation Reagents and Equipment Optional Validation Reagents and Equipment Table 4 Reagents and Equipment for Optional Validation Methods Description Vendor and part number 2200 TapeStation Platform and Consumables 2200 TapeStation Agilent p/n G2964AA or G2965AA High Sensitivity D1K ScreenTape Agilent p/n 5067-5363 High Sensitivity D1K Reagents Agilent p/n 5067-5364 2100 Bioanalyzer Platform and Consumables 2100 Bioanalyzer Laptop Bundle Agilent p/n G2943CA 2100 Bioanalyzer Electrophoresis Set Agilent p/n G2947CA High Sensitivity DNA Kit Agilent p/n 5067-4626 Gel Electrophoresis Platform and Consumables XCell SureLock Mini-cell Life Technologies p/n EI0001 Novex 6% Polyacrylamide, TBE Pre-cast Gels Life Technologies p/n EC62655BOX Novex TBE Running Buffer, 5X Life Technologies p/n LC6675 Novex High-density TBE Sample Buffer, 5X Life Technologies p/n LC6678 GelRed Nucleic Acid Stain, 3X in water Biotium p/n 41001 DNA molecular weight markers General laboratory supplier UV-transilluminator General laboratory supplier Required Accessories for Adaptation of NGS Workstation Option B for HaloPlex Automation Table 5 12 Accessories Required for Adaptation of Agilent NGS Workstation Option B for HaloPlex Automation Protocols Description Vendor and part number Custom hardware, 384-well plate inserts, quantity of two required Agilent p/n G5420A 96-well PCR plate insert (red), quantity of one required Agilent p/n G5498B#13 HaloPlex Target Enrichment System Automation Protocol HaloPlex Target Enrichment System Protocol 2 Using the Agilent NGS Workstation for HaloPlex Target Enrichment About the Agilent NGS Workstation 14 Overview of the HaloPlex Target Enrichment Procedure 23 Experimental Setup Considerations for Automated Runs 25 This chapter contains an orientation to the Agilent NGS Workstation, an overview of the HaloPlex target enrichment protocol, and considerations for designing HaloPlex experiments for automated processing using the Agilent NGS Workstation. Agilent Technologies 13 2 Using the Agilent NGS Workstation for HaloPlex Target Enrichment About the Agilent NGS Workstation About the Agilent NGS Workstation About the Bravo Platform The Bravo platform is a versatile liquid handler with a nine plate-location platform deck, suitable for handling 96-well, 384-well, and 1536-well plates. The Bravo platform is controlled by the VWorks Automation Control software. Fitted with a choice of seven interchangeable fixed-tip or disposable-tip pipette heads, it accurately dispenses fluids from 0.1 µL to 250 µL. CA U T I O N Before you begin, make sure that you have read and understand operating, maintenance and safety instructions for using your Bravo platform. Refer to the Bravo Platform User Guide (G5409-90004) and the VWorks Software User Guide (G5415-90002). Bravo Platform Deck The protocols in the following sections include instructions for placing plates and reagent reservoirs on specific Bravo deck locations. Use Figure 1 to familiarize yourself with the location numbering convention on the Bravo platform deck. Figure 1 14 Bravo platform deck HaloPlex Target Enrichment System Automation Protocol Using the Agilent NGS Workstation for HaloPlex Target Enrichment About the Bravo Platform 2 Setting the Temperature of Bravo Deck Heat Blocks Bravo deck positions 4 and 6 are equipped with Inheco heat blocks, used to incubate sample plates at defined temperatures during the run. Runs that include low-temperature (4°C) or high-temperature (54°C) incubation steps may be expedited by pre-setting the temperature of the affected block before starting the run. Bravo deck heat block temperatures may be changed using the Inheco Multi TEC Control device touchscreen as described in the steps below. See Table 6 for designations of the heat block-containing Bravo deck positions on the Multi TEC control device. Table 6 Inheco Multi TEC Control touchscreen designations Bravo Deck Position Designation on Inheco Multi TEC Control Screen 4 CPAC 2 1 6 CPAC 2 2 1 Using the arrow buttons, select the appropriate block (CPAC 2 block 1 or CPAC 2 block 2). HaloPlex Target Enrichment System Automation Protocol 15 2 Using the Agilent NGS Workstation for HaloPlex Target Enrichment About the Bravo Platform 2 To set the temperature of the selected block, press the SET button. 3 Using the numeral pad, enter the desired temperature. The entered temperature appears in the top, left rectangle. Once the correct temperature is displayed, press the rectangle to enter the temperature. 4 Press the Temp button until the new temperature is displayed on the SET button and until the Temp button is darkened, indicating that the selected heat block is heating or cooling to the new temperature setting. The current temperature of the block is indicated in the center of the display. 16 HaloPlex Target Enrichment System Automation Protocol Using the Agilent NGS Workstation for HaloPlex Target Enrichment VWorks Automation Control Software 2 VWorks Automation Control Software VWorks software, included with your Agilent NGS Workstation, allows you to control the robot and integrated devices using a PC. The Agilent NGS Workstation is preloaded with VWorks software containing all of the necessary HaloPlex system liquid handling protocols. General instructions for starting up the VWorks software and the included protocols is provided below. Each time a specific VWorks protocol is used in the HaloPlex procedure, any settings required for that protocol are included in the relevant section of this manual. NOTE The instructions in this manual are compatible with VWorks software version 11.0.1.1032 or later. If you have questions about VWorks version compatibility, please contact [email protected]. Logging in to the VWorks software 1 Double-click the VWorks icon or the HaloPlex.VWForm shortcut on the Windows desktop to start the VWorks software. 2 If User Authentication dialog is not visible, click Log in on the VWorks window toolbar. 3 In the User Authentication dialog, type your VWorks user name and password, and click OK. (If no user account is set up, contact the administrator.) HaloPlex Target Enrichment System Automation Protocol 17 2 Using the Agilent NGS Workstation for HaloPlex Target Enrichment VWorks Automation Control Software Using the HaloPlex.VWForm to setup and start a run Use the VWorks form HaloPlex.VWForm, shown below, to set up and start each HaloPlex automation protocol. 1 Open the form using the HaloPlex.VWForm shortcut on your desktop. 2 Use the drop-down menus on the form to select the appropriate HaloPlex workflow step and number of columns of samples for the run. 3 Once all run parameters have been specified on the form, click Update layout and information. NOTE The displayed protocol will not run unless the Update layout and information button has been clicked. 4 The Bravo Deck Setup region of the form will then display the required placement of reaction components and labware on the workstation Bravo deck for the specified run parameters. 18 HaloPlex Target Enrichment System Automation Protocol Using the Agilent NGS Workstation for HaloPlex Target Enrichment VWorks Automation Control Software 2 5 Verify that the Current Tip State indicator on the form (shown below) matches the configuration of unused tips in the tip box at Bravo Deck position 2. For a fresh tip box, containing 12 columns of tips, all positions of the Current Tip State unused tip indicator (top portion, Box 2) should be selected, as shown below. Clicking Reset selects all columns for position 2. Also verify that the used tip indicator (bottom portion, Box 8) matches the configuration of used tips in the tip box at Bravo Deck position 8. For an empty tip box, all positions of the Current Tip State used tip indicator (bottom portion, Box 8) should be cleared, as shown above. Clicking Reset clears all columns for position 8. NOTE It is important that the Current Tip State indicator matches the configuration of tips present at Bravo Deck positions 2 and 8 when initiating the run. Tips that are inappropriately loaded onto the Bravo platform pipette head, or tips missing from the pipette head, will interfere with automated processing steps. You can use partial tip boxes for HaloPlex automation protocols, as long as positions of available tips are accurately indicated during run setup. 6 After verifying that the NGS Workstation has been set up correctly, click Start in the Controls section of the form to begin the run. Do not use the Start button on the VWorks Control Toolbar; runs must be initiated using the start button on the HaloPlex.VW Form, shown below. HaloPlex Target Enrichment System Automation Protocol 19 2 Using the Agilent NGS Workstation for HaloPlex Target Enrichment VWorks Automation Control Software Error messages encountered at start of run After starting the run, you may see the error messages displayed below. When encountered, make the indicated selections and proceed with the run. Encountering either or both of these error messages is not indicative of a problem with the NGS workstation or your run setup. 1 If you encounter the G-axis error message shown below, select Ignore and Continue, leaving device in current state. 20 HaloPlex Target Enrichment System Automation Protocol Using the Agilent NGS Workstation for HaloPlex Target Enrichment VWorks Automation Control Software 2 2 If you encounter the W-axis error message shown below, select Retry. HaloPlex Target Enrichment System Automation Protocol 21 2 Using the Agilent NGS Workstation for HaloPlex Target Enrichment VWorks Automation Control Software Verifying the Simulation setting VWorks software may be run in simulation mode, during which commands entered on screen are not completed by the NGS workstation. If workstation devices do not respond when you start a run, verify the simulation mode status in VWorks using the following steps. 1 Verify that Simulation is off is displayed on the status indicator (accessible by clicking View > Control Toolbar). 2 If the indicator displays Simulation is on, click the status indicator button to turn off the simulation mode. NOTE 22 If you cannot see the toolbar above the HaloPlex. VWorks form, click Screen in the Controls section of the form to exit full screen mode. If the toolbar is still not visible, right-click on the form and then select Control Toolbar from the menu. HaloPlex Target Enrichment System Automation Protocol Using the Agilent NGS Workstation for HaloPlex Target Enrichment Overview of the HaloPlex Target Enrichment Procedure 2 Overview of the HaloPlex Target Enrichment Procedure Figure 2 summarizes the HaloPlex target enrichment workflow. For each sample to be sequenced, individual HaloPlex-enriched, indexed libraries are prepared. Depending on the specific sequencing platform used, up to 96 samples can be pooled and sequenced in a single lane. Table 7 summarizes how the VWorks automation protocols are integrated into the HaloPlex workflow. See the Sample Preparation chapter for complete instructions for use of the VWorks protocols for sample processing. Table 7 Overview of VWorks protocols used during the workflow Workflow Step VWorks Protocol used for Automation Digest genomic DNA Digestion.pro Hybridize to HaloPlex probe and index samples Hybridization.pro Capture and amplify enriched DNA Capture_v1.1.pro Purify amplified libraries Purification_v1.1.pro HaloPlex Target Enrichment System Automation Protocol 23 2 Using the Agilent NGS Workstation for HaloPlex Target Enrichment Overview of the HaloPlex Target Enrichment Procedure Figure 2 24 Overall HaloPlex target-enriched sequencing sample preparation workflow. HaloPlex Target Enrichment System Automation Protocol Using the Agilent NGS Workstation for HaloPlex Target Enrichment Experimental Setup Considerations for Automated Runs 2 Experimental Setup Considerations for Automated Runs HaloPlex Automated Target Enrichment System runs may include 1, 2, 3, 4, 6, or 12 columns (equivalent to 8, 16, 24, 32, 48, or 96 wells) of gDNA samples to be enriched for sequencing on the Illumina platform. Plan your experiments using complete columns of samples. Table 8 Columns to Samples Equivalency Number of Columns Processed Total Number of Samples Processed 1 8 2 16 3 24 4 32 6 48 12 96 The number of columns or samples that may be processed using the supplied reagents (see page 82) will depend on the experimental design. For greatest efficiency of reagent use, plan experiments using at least 3 columns per run. Each 96-reaction kit contains sufficient reagents for 96 reactions configured as 4 runs of 3 columns of samples per run. HaloPlex Target Enrichment System Automation Protocol 25 2 Using the Agilent NGS Workstation for HaloPlex Target Enrichment Considerations for Placement of gDNA Samples in 96-well Plates for Automated Processing Considerations for Placement of gDNA Samples in 96-well Plates for Automated Processing • The Agilent NGS Workstation processes samples column-wise beginning at column 1. gDNA samples should be loaded into 96-well plates column-wise, in well order A1 to H1, then A2 to H2, ending with A12 to H12. When processing partial runs with <12 sample columns, do not leave empty columns between sample columns; always load the plate using the left-most column that is available. • For sample indexing during hybridization to the HaloPlex probe (see Figure 2), you will need to prepare a separate plate containing the HaloPlex Indexing Primer Cassettes. Assign the wells to be indexed with their respective indexing primers during experimental design. See “Nucleotide Sequences of HaloPlex Indexes” on page 85 for nucleotide sequences of the 96 indexes used in the HaloPlex Target Enrichment System. Considerations for Equipment Setup • Some workflow steps require the rapid transfer of sample plates between the Bravo deck and a thermal cycler. Locate your thermal cycler in close proximity to the Agilent NGS Workstation to allow rapid and efficient plate transfer. • Some workflow steps require that the sample plate be sealed using the PlateLoc thermal microplate sealer on the Agilent NGS Workstation, and then centrifuged to collect any dispersed liquid. To maximize efficiency, locate the centrifuge in close proximity to the Agilent NGS Workstation. Run Time Considerations Before you begin, refer to the Certificate of Analysis provided with Box 1 of your kit to determine the hybridization duration appropriate for your design. After reviewing the duration of this and other steps in the protocol, plan the start time for your experiment accordingly. 26 HaloPlex Target Enrichment System Automation Protocol Using the Agilent NGS Workstation for HaloPlex Target Enrichment Run Time Considerations 2 Designs containing <20,000 probes, including the Cancer Research and Cardiomyopathy Research Panels, use a 3-hour hybridization time. For these designs DNA digestion through PCR protocols (see Figure 2) are typically run on the same day with the DNA digestion protocol initiated early in the day. Designs containing >20,000 probes use a 16-hour hybridization time, which is typically completed overnight. Calculate the appropriate start time for the DNA digestion protocol, based on your run size and the run time estimates provided in the HaloPlex form in the VWorks software (HaloPlex.VWForm), to allow overnight hybridization. HaloPlex Target Enrichment System Automation Protocol 27 2 28 Using the Agilent NGS Workstation for HaloPlex Target Enrichment Run Time Considerations HaloPlex Target Enrichment System Automation Protocol HaloPlex Target Enrichment System Protocol 3 Sample Preparation Step 1. Digest genomic DNA with restriction enzymes 30 Step 2. Hybridize digested DNA to HaloPlex probes for target enrichment and sample indexing 42 Step 3. Capture and amplify the target DNA 48 Step 4. Purify the amplified target DNA 63 Step 5. Validate enrichment and quantify enriched target DNA 67 Step 6. Pool samples with different indexes for multiplexed sequencing 71 This section contains instructions for gDNA library target enrichment for sequence analysis using the Illumina platform. For each sample to be sequenced, an individual target-enriched, indexed library is prepared. The target region can vary from 1 kb to 5 Mb. Custom HaloPlex probes must be designed before purchasing the kit using Agilent’s SureDesign tool at www.agilent.com/genomics/suredesign. The HaloPlex Target Enrichment System amplifies thousands of targets in the same reaction, incorporating standard Illumina paired-end sequencing motifs in the process. During hybridization, each sample can be uniquely indexed, allowing for pooling of up to 96 samples per sequencing lane. Agilent Technologies 29 3 Sample Preparation Step 1. Digest genomic DNA with restriction enzymes Step 1. Digest genomic DNA with restriction enzymes In this step, gDNA samples are digested by 16 different restriction enzymes to create a library of gDNA restriction fragments. The gDNA is digested in eight different restriction reactions, each containing two restriction enzymes. The 16 restriction enzymes are provided in two 8-well strip tubes that are distinguished by red and green color markers. Enzymes are combined from corresponding wells of the red- and green-marked strip tubes to make eight different RE Master Mixes, which are then combined with each DNA sample in the run. NOTE Successful enrichment using the protocol in this guide requires high-quality DNA samples. Before you begin, verify that the genomic DNA samples have an OD 260/280 ratio ranging from 1.8 to 2.0. Verify the size distribution of DNA in each DNA preparation by gel electrophoresis. Any smearing below 2.5 kb indicates sample degradation. For HaloPlex target enrichment of FFPE-derived DNA samples, see Agilent publication no. G9900-90050, available at http://www.genomics.agilent.com. This publication provides a PCR-based protocol for assessment of DNA integrity and provides HaloPlex protocol modifications for improved performance from lower-quality DNA samples. Prepare the workstation 1 Gently wipe down the Bravo deck with a NucleoClean decontamination wipe. 2 Place red aluminum inserts on Bravo deck positions 4 and 9. 3 Turn on the chiller, set to 0°C, at position 9 of the Bravo deck. Be sure that the chiller reservoir contains at least 300 mL of 25% ethanol. 4 Place a 384-well adapter insert on Bravo deck position 6. 5 Pre-set the temperature of Bravo deck positions 4 and 6 to 4°C using the Inheco Multi TEC control touchscreen, as described in Setting the Temperature of Bravo Deck Heat Blocks. NOTE 30 To expedite thermal cycler warm-up for the restriction digest incubation on page 36, you can enter and initiate the digestion program on the thermal cycler now, and then pause the program until you are instructed to transfer the reaction plate. Be sure to pause the thermal cycler before the initiation of the 37°C incubation segment. Release the pause immediately after transferring the plate to the thermal cycler in step 14 on page 36. Be sure that the 384-well block is in the thermal cycler before initiating the program for warm-up. HaloPlex Target Enrichment System Automation Protocol Sample Preparation Step 1. Digest genomic DNA with restriction enzymes 3 Prepare the DNA Sample Source Plate NOTE In the protocol below, 200 ng genomic DNA is split among eight different restriction digests, with an additional 25 ng excess DNA included to allow for pipetting losses. Using <225 ng DNA in the enrichment protocol can result in low yield and can potentiate rare allele dropouts. Use a fluorometry-based DNA quantitation method, such as Qubit fluorometry or PicoGreen staining, to accurately quantify the DNA starting material. 1 Use the Qubit dsDNA BR Assay or PicoGreen staining kit to determine the concentration of your gDNA samples. Follow the manufacturers instructions for the kits and instruments. 2 Prepare the DNA sample plate for the run, containing up to 95 gDNA samples and the Enrichment Control DNA sample, using a full-skirted 96-well Eppendorf twin.tec plate. NOTE HaloPlex Automated Target Enrichment System runs may include 1, 2, 3, 4, 6, or 12 columns of the plate. Use full columns of DNA samples for each run. a In well A1 of a 96-well twin.tec plate, dispense 45 µL of the supplied Enrichment Control DNA (ECD). Store on ice. b In separate wells of the same 96-well twin.tec plate, dilute 225 ng of each gDNA sample in 45 µL nuclease-free water, for a final DNA concentration of 5 ng/µL. Continue to store on ice. For automated processing, fill plate wells column-wise in well order A1 to H1, then A2 to H2, ending with A12 to H12. Prepare the RE Master Mix Source Plate 1 Prepare the appropriate amount of RE Buffer +BSA mixture, according to the table below. Table 9 Preparation of RE Buffer + BSA mixture for Digestion.pro protocol Reagent Volume for 1 Library Volume for 1 Column Volume for 2 Columns Volume for 3 Columns Volume for 4 Columns Volume for 6 Columns Volume for 12 Columns RE Buffer 34 µL 408 µL 680 µL 952 µL 1224 µL 1768 µL 3536 µL BSA Solution 0.85 µL 10.2 µL 17 µL 23.8 µL 30.6 µL 44.2 µL 88.4 µL Total Volume 34.85 µL 418.2 µL 697 µL 975.8 µL 1254.6 µL 1812.2 µL 3624.4 µL HaloPlex Target Enrichment System Automation Protocol 31 3 Sample Preparation Step 1. Digest genomic DNA with restriction enzymes 2 Obtain the two provided green- and red-marked Enzyme Strips from Box 1. For each strip, label the color-marked tube with A, then continue labeling the remaining tubes with B through H, in order. Keep the strips on ice. CA U T I O N It is important to use the restriction enzyme tube strips in the proper orientation when preparing the RE Master Mixes as described below. The red or green color marker on the tube strip and cap strip are used to mark well A of each enzyme strip. 3 In eight individual tubes, prepare the eight Restriction Enzyme Master Mixes A, B, C, D, E, F, G, and H according to the table below. To prepare Master Mix A, combine RE Buffer + BSA from step 1 with the indicated volumes of enzyme solution from well A of the Green Enzyme Strip and from well A of the Red Enzyme Strip. Prepare Master Mixes B–H by repeating this process using enzyme solutions from the corresponding wells B-H of each provided Enzyme Strip. Table 10 Preparation of RE Master Mixes A–H for Digestion.pro protocol Reagent Volume for 1 Library Volume for 1 Column Volume for 2 Columns Volume for 3 Columns Volume for 4 Columns Volume for 6 Columns Volume for 12 Columns RE Buffer + BSA 4.0 51.0 µL 85.0 µL 119.0 µL 153.0 µL 221.0 µL 442.0 µL Green Enzyme Strip enzyme A–H 0.5 6.4 µL 10.6 µL 14.9 µL 19.1 µL 27.6 µL 55.25 µL Red Enzyme Strip enzyme A–H 0.5 6.4 µL 10.6 µL 14.9 µL 19.1 µL 27.6 µL 55.25 µL 63.8 µL 106.2 µL 148.8 µL 191.2 µL 276.2 µL 552.5 µL Total Volume for each 5 µL Master Mix A, B, C, D, E, F, G, or H NOTE For 1-4 column runs, RE master mixes A-H may be prepared in a 8 x 0.2-mL well strip tube, using a multichannel pipette to transfer volumes from Enzyme Strips 1 and 2 to the RE master mix strip. For 6- or 12-column runs, prepare the master mixes in 1.5-mL tubes. 4 Mix by gentle vortexing and then spin briefly. Keep on ice. 32 HaloPlex Target Enrichment System Automation Protocol Sample Preparation Step 1. Digest genomic DNA with restriction enzymes 3 Prepare the RE master mix source plate 1 Aliquot the Restriction Enzyme Master Mixes to a full-skirted 96-well Eppendorf twin.tec plate as shown in Figure 3. Add the volumes indicated in Table 11 of each master mix A–H to each well of the indicated column of the twin.tec plate. Keep the master mixes on ice during the aliquoting steps. Table 11 Preparation of the RE Master Mix Source Plate for Digestion.pro Master Mix Solution Position on Source Plate Volume of Master Mix added per Well of Source Plate 1-Column Runs 2-Column Runs 3-Column Runs 4-Column Runs 6-Column Runs 12-Column Runs RE Master Mix A Column 1 (A1-H1) 7.3 µL 12.7 µL 18.0 µL 23.3 µL 33.9 µL 68.4 µL RE Master Mix B Column 2 (A2-H2) 7.3 µL 12.7 µL 18.0 µL 23.3 µL 33.9 µL 68.4 µL RE Master Mix C Column 3 (A3-H3) 7.3 µL 12.7 µL 18.0 µL 23.3 µL 33.9 µL 68.4 µL RE Master Mix D Column 4 (A4-H4) 7.3 µL 12.7 µL 18.0 µL 23.3 µL 33.9 µL 68.4 µL RE Master Mix E Column 5 (A5-H5) 7.3 µL 12.7 µL 18.0 µL 23.3 µL 33.9 µL 68.4 µL RE Master Mix F Column 6 (A6-H6) 7.3 µL 12.7 µL 18.0 µL 23.3 µL 33.9 µL 68.4 µL RE Master Mix G Column 7 (A7-H7) 7.3 µL 12.7 µL 18.0 µL 23.3 µL 33.9 µL 68.4 µL RE Master Mix H Column 8 (A8-H8) 7.3 µL 12.7 µL 18.0 µL 23.3 µL 33.9 µL 68.4 µL Figure 3 Preparation of the RE Master Mix source plate for automation protocol Digestion.pro. HaloPlex Target Enrichment System Automation Protocol 33 3 Sample Preparation Step 1. Digest genomic DNA with restriction enzymes Load the NGS Workstation and Run the Digestion.pro VWorks Protocol 1 Open the HaloPlex setup form using the HaloPlex.VWForm shortcut on your desktop. 2 Log in to the VWorks software. 3 On the setup form, under Step, select 01 Digestion.pro. 4 Select the number of columns of samples to be processed. Runs must include 1, 2, 3, 4, 6, or 12 columns. 5 Click Update layout and information. 6 Load the Bravo deck according to Table 12. Table 12 Initial Bravo deck configuration for Digestion.pro Location Content 1 —(empty)— 2 New tip box 3 For 12-column runs only: Empty 384-well Eppendorf twin.tec plate (no 384-well insert required) For 1- to 6-column runs: empty 4 gDNA samples in full-skirted 96-well Eppendorf twin.tec plate seated on red insert 5 —(empty)— 6 Empty 384-well Eppendorf twin.tec plate seated on 384-well insert 7 —(empty)— 8 Empty tip box 9 RE Master Mix source plate (full-skirted 96-well Eppendorf twin.tec plate) seated on red insert 7 Verify that the NGS workstation has been set up as displayed in the Bravo Deck Setup and Information regions of the form. 34 HaloPlex Target Enrichment System Automation Protocol Sample Preparation Step 1. Digest genomic DNA with restriction enzymes 3 8 Verify that the Current Tip State indicator on the form matches the configuration of unused and used tips in the tip boxes at Bravo Deck positions 2 and 8, respectively. See page 19 for more information on using this segment of the form during the run. 9 When verification is complete, click Start to start the run. NOTE If workstation devices do not respond when you start the run, but activity is recorded in the Log, verify that VWorks is not running in Simulation mode. See page 22 for more information. 10 When prompted by VWorks as shown below, replace the tip box at position 2 with a new tip box and replace the used tip box at position 8 with an empty tip box. After both tip boxes are in place, click Reset under Current Tip State on the form. Verify that the tip state was updated and then click Continue on the prompt shown below. Depending on the run size, you may be prompted to change tip boxes multiple times during the run. The NGS Workstation combines each gDNA sample with each RE Master Mix in wells of a 384-well reaction plate. For 1- to 6-column runs, a single 384-well restriction digest plate is prepared; for 12 column runs, two 384-well restriction digest plates are prepared. HaloPlex Target Enrichment System Automation Protocol 35 3 Sample Preparation Step 1. Digest genomic DNA with restriction enzymes 11 When the workstation has finished preparing each 384-well restriction digest plate for the run, you will be prompted by VWorks as shown below. The final Bravo deck position of the prepared restriction digest plate varies for different run sizes. 12 Remove the 384-well plate from the Bravo deck position indicated in the prompt. 13 Seal the sample plate using the PlateLoc Thermal Microplate Sealer, with sealing settings of 165°C and 3.0 sec. Spin the plate briefly to release any bubbles trapped in the liquid. 14 Transfer the sealed plate to a thermal cycler and run the digestion program shown in Table 13, using a heated lid. After transferring the plate, click Continue on the prompt. Table 13 Thermal cycler program for HaloPlex restriction digestion Step Temperature Time Step 1 37°C 30 minutes Step 2 8°C Hold Preparation of each restriction digest reaction plate takes approximately 30-45 minutes. 36 HaloPlex Target Enrichment System Automation Protocol Sample Preparation Step 1. Digest genomic DNA with restriction enzymes 3 For 12 column-runs, the two 384-well plates are prepared sequentially, for a total run time of approximately 90 minutes. Run the thermal cycler digestion program for each plate as soon as prompted. During the 30-minute incubation of plate 1 in the thermal cycler, the workstation begins preparation of the digestion reactions in plate 2. Once the thermal cycler program is complete for plate 1, store the digested DNA in plate 1 on ice until the Digestion.pro protocol and thermal cycler program for plate 2 is finished. 15 Validate the restriction digestion reaction by electrophoretic analysis of the Enrichment Control DNA (ECD) reactions. a Transfer 4 µL of each ECD digestion reaction from the wells of the 384-well reaction plate indicated in Table 14 to fresh 0.2-mL PCR tubes. Note that for 12-column runs, four of the eight ECD digests are found on the first 384-well plate, and the remaining four digests are on the second 384-well plate. Table 14 Position of ECD digestion reactions for obtaining validation samples Restriction Enzyme Master Mix to be Validated Position of ECD Digestion Reaction in 384-Well Plates 1-6 Column Runs 12-Column Runs (two 384-well plates produced) RE Master Mix A A1 A1 (plate 1) RE Master Mix B A2 A2 (plate 1) RE Master Mix C B1 B1 (plate 1) RE Master Mix D B2 B2 (plate 1) RE Master Mix E A13 A1 (plate 2) RE Master Mix F A14 A2 (plate 2) RE Master Mix G B13 B1 (plate 2) RE Master Mix H B14 B2 (plate 2) b Incubate the removed 4-µL samples at 80°C for 5 minutes to inactivate the restriction enzymes. c Analyze the prepared samples using microfluidic electrophoresis on the 2100 Bioanalyzer (see page 39) or on the 2200 TapeStation (see page 40) or using gel electrophoresis (see page 41). HaloPlex Target Enrichment System Automation Protocol 37 3 Sample Preparation Step 1. Digest genomic DNA with restriction enzymes The ECD sample contains genomic DNA mixed with an 800-bp PCR product that contains restriction sites for all the enzymes used in the digestion protocol. When analyzing validation results, the undigested control should have gDNA bands at >2.5 kbp and a PCR product band at 800 bp. Each of the eight digested ECD samples should have a smear of gDNA restriction fragments between 100 and 2500 bp, overlaid with three predominant bands at approximately 125, 225 and 450 bp. These three bands correspond to the 800-bp PCR product-derived restriction fragments, and precise sizes will differ after digestion in each of the eight RE master mixes. NOTE In addition to the three predominant bands at approximately 125, 225 and 450 bp, you may detect additional, minor bands in the digested ECD sample lanes. Successful digestion is indicated by the appearance of the three predominant bands. The presence of additional minor bands, with relative abundance similar to the additional bands visible in Figure 4, Figure 5 and Figure 6, does not impact enrichment results. It is acceptable for band intensities in digestion reaction B to be slighltly reduced, compared to the other digestion reactions. 38 HaloPlex Target Enrichment System Automation Protocol Sample Preparation Step 1. Digest genomic DNA with restriction enzymes 3 Option 1: Validation by 2100 Bioanalyzer analysis Use a High Sensitivity DNA Kit (p/n 5067-4626) and the 2100 Bioanalyzer system with 2100 Expert Software (version B.02.07 or higher required to run the High Sensitivity Kit). See the reagent kit guide for general Bioanalyzer system setup instructions. • Prepare an undigested DNA gel control by combining 0.5 µL of the Enrichment Control DNA stock solution and 3.5 µL of nuclease-free water. • Prepare the chip, samples and ladder as instructed in the reagent kit guide, using 1 µL of each ECD sample and undigested DNA control for the analysis. • When loading samples on the chip, load the DNA ladder in the ladder sample well marked on the chip. Load the eight ECD digest samples (A to H) in sample wells 1 to 8, and load the undigested ECD sample in sample well 9. Do not run the undigested ECD control in sample well 1. • Place the prepared chip into the 2100 Bioanalyzer instrument and start the run within five minutes after preparation. See Figure 4 for sample Bioanalyzer electrophoresis results. Figure 4 Validation of restriction digestion by 2100 Bioanalyzer system analysis. Lane 1: 50-bp DNA ladder, Lanes 2-9: ECD digestion reactions A–H, Lane 10: Undigested Enrichment Control DNA. HaloPlex Target Enrichment System Automation Protocol 39 3 Sample Preparation Step 1. Digest genomic DNA with restriction enzymes Option 2: Validation by 2200 TapeStation analysis Use a High Sensitivity D1K ScreenTape (p/n 5067-5363) and reagent kit (p/n 5067-5364). For more information to do this step, see the 2200 TapeStation User Manual. • Prepare an undigested DNA gel control by combining 1 µL of the Enrichment Control DNA stock solution and 1 µL of nuclease-free water. • Prepare the TapeStation samples as instructed in the 2200 TapeStation User Manual. Use 2 µL of each ECD sample diluted with 2 µL of High Sensitivity D1K sample buffer in separate wells of a tube strip for the analysis. • Load the sample tube strip, the High Sensitivity D1K ScreenTape, and loading tips into the 2200 TapeStation as instructed in the 2200 TapeStation User Manual. Start the run. See Figure 5 for sample TapeStation electrophoresis results. Figure 5 40 Validation of restriction digestion by 2200 TapeStation analysis. Lane 1: TapeStation D1K High-Sensitivity Ladder, Lane 2: Undigested Enrichment Control DNA, Lanes 3–10: ECD digestion reactions A–H. HaloPlex Target Enrichment System Automation Protocol Sample Preparation Step 1. Digest genomic DNA with restriction enzymes 3 Option 3: Validation by gel electrophoresis Use a Novex 6% polyacrylamide TBE pre-cast gel and 1X Novex TBE Running Buffer. For more information to do this step, consult the manufacturer’s recommendations. • Prepare an undigested DNA gel control by combining 2 µL of the Enrichment Control DNA stock solution and 2 µL of nuclease-free water. • Add 1 µL of Novex Hi-Density TBE Sample Buffer (5X) to each 4-µL ECD sample. • Load 5 µL of each sample on the gel. In one or more adjacent lanes, load 200 ng of a 50-bp DNA ladder. • Run the gel at 210 V for approximately 15 minutes. • Stain the gel in 3X GelRed Nucleic Acid Stain for 10 minutes, and visualize bands under UV radiation. See Figure 6 for sample gel results. Figure 6 Stopping Point Validation of restriction digestion by gel electrophoresis. Lanes 1–8: ECD digestion reactions A–H, Lane 9: Undigested Enrichment Control DNA, Lane 10: 25-bp DNA ladder. If you do not continue to the next step, samples may be stored at –20°C for long term storage. There are no more long-term stopping points until after the PCR amplification step on page 62. HaloPlex Target Enrichment System Automation Protocol 41 3 Sample Preparation Step 2. Hybridize digested DNA to HaloPlex probes for target enrichment and sample indexing Step 2. Hybridize digested DNA to HaloPlex probes for target enrichment and sample indexing In this step, the collection of gDNA restriction fragments is hybridized to the HaloPlex probe capture library. HaloPlex probes are designed to hybridize selectively to fragments originating from target regions of the genome and to direct circularization of the targeted DNA fragments. During the hybridization process, Illumina sequencing motifs including index sequences are incorporated into the targeted fragments. For sample indexing primer assignments, see “Nucleotide Sequences of HaloPlex Indexes” on page 85 for nucleotide sequences of the 96 indexes used in the HaloPlex Target Enrichment System. The duration of the hybridization reaction is determined by the probe density of your design. Refer to the Certificate of Analysis provided with Box 1 of your kit to determine the hybridization conditions appropriate for your design. If the Certificate of Analysis provided with your custom probe does not include the hybridization time, please see the Note on page 47 for more information. Prepare the workstation 1 Gently wipe down the Bravo deck with a NucleoClean decontamination wipe. 2 Place a red instert on Bravo deck position 1. 3 Place a silver Nunc plate insert on Bravo deck position 9. 4 Turn on the chiller, set to 0°C, at position 9 of the Bravo deck. Be sure that the chiller reservoir contains at least 300 mL of 25% ethanol. 5 For all run sizes, place a 384-well adapter insert on Bravo deck position 4. Pre-set the temperature of Bravo deck position 4 to 4°C using the Inheco Multi TEC control touchscreen, as described in Setting the Temperature of Bravo Deck Heat Blocks. For 12-column runs only, place a second 384-well adapter insert on Bravo deck position 6 and pre-set the temperature of Bravo deck position 6 to 4°C. 42 HaloPlex Target Enrichment System Automation Protocol Sample Preparation Step 2. Hybridize digested DNA to HaloPlex probes for target enrichment and sample indexing NOTE 3 To expedite thermal cycler warm-up for the hybridization reaction on page 47, you can enter and initiate the hybridization program on the thermal cycler now, and then pause the program until you are instructed to transfer the reaction plate. Be sure to pause the thermal cycler before the initiation of the 95°C incubation segment. Release the pause immediately after transferring the plate to the thermal cycler in step 11 on page 47. Be sure that the 96-well block is in the thermal cycler before initiating the program for warm-up. Prepare the Master Mix Source Plate for Hybridization.pro 1 Prepare the appropriate amount of Hybridization Master Mix, according to the table below. Mix well by gentle vortexing, then spin the tube briefly. Table 15 Preparation of Hybridization Master Mix for Hybridization.pro Reagent Volume for 1 Library Volume for 1 Column Volume for 2 Columns Volume for 3 Columns Volume for 4 Columns Volume for 6 Columns Volume for 12 Columns HaloPlex Probe 20 µL 255 µL 425 µL 595 µL 765 µL 1105 µL 2210 µL Hybridization Solution 50 µL 637.5 µL 1062.5 µL 1487.5 µL 1912.5 µL 2762.5 µL 5525 µL Total Volume 70 µL 892.5 µL 1487.5 µL 2082.5 µL 2677.5 µL 3867.5 µL 7735 µL 2 In a Nunc DeepWell plate, prepare the Hybridization Master Mix source plate. Add the volumes indicated in Table 16 of the Hybridization Master Mix to all wells of the indicated column of the Nunc DeepWell plate. Table 16 Preparation of the Master Mix Source Plate for Hybridization.pro Master Mix Solution Position on Source Plate Volume of Master Mix added per Well of Nunc DeepWell Source Plate 1-Column Runs 2-Column Runs 3-Column Runs 4-Column Runs 6-Column Runs 12-Column Runs Hybridization Master Mix Column 1 102.8 µL 177.2 µL 251.6 µL 325.9 µL 474.7 µL 958.1 µL (A1-H1) HaloPlex Target Enrichment System Automation Protocol 43 3 Sample Preparation Step 2. Hybridize digested DNA to HaloPlex probes for target enrichment and sample indexing Prepare the Hybridization Reaction Plate with Indexing Primer Casettes 1 In a half-skirted 96-well Eppendorf twin.tec plate, aliquot 10 µL of the appropriate Indexing Primer Cassette to each intended sample indexing well position. Keep the plate on ice. Be sure to add only one specific Indexing Primer Cassette to each well, using different indexes for each sample to be multiplexed. Record the identity of the Indexing Primer Cassette assigned to each well for later sequence analysis. 2 If the run includes an ECD control sample that was analyzed as described on page 37, add 32 µL of nuclease-free water to well A1 of the hybridization reaction plate. (Well A1 should also contain 10 µL of indexing primer cassette from step 1 above.) The 32 µL of water added-back here compensates for the combined volume removed from the eight ECD digest wells during validation. Load the Agilent NGS Workstation and Run the Hybridization.pro VWorks Protocol 1 On the VWorks HaloPlex form, under Step, select 02 Hybridization.pro. 2 Select the number of columns of samples to be processed. Runs must include 1, 2, 3, 4, 6, or 12 columns. 3 Click Update layout and information. 44 HaloPlex Target Enrichment System Automation Protocol Sample Preparation Step 2. Hybridize digested DNA to HaloPlex probes for target enrichment and sample indexing 3 4 Load the Bravo deck according to Table 17. Table 17 Initial Bravo deck configuration for Hybridization.pro Location Content 1 Indexing Primer Cassette source plate (half-skirted 96-well Eppendorf twin.tec plate) seated on red insert 2 New tip box 3 —(empty)— 4 Digested DNA in 384-well plate, seated on 384-well insert 5 Empty full-skirted 96-well Eppendorf twin.tec plate 6 For 12-column runs only: Digested DNA in 384-well plate (digest plate 2), seated on 384-well insert For 1- to 6-column runs: empty 7 —(empty)— 8 Empty tip box 9 Hybridization Master Mix source plate (Nunc DeepWell plate) seated on silver insert 5 Verify that the NGS workstation has been set up as displayed in the Bravo Deck Setup and Information regions of the form. 6 Verify that the Current Tip State indicator on the form matches the configuration of unused and used tips in the tip boxes at Bravo Deck positions 2 and 8, respectively. See page 19 for more information on using this segment of the form during the run. 7 When verification is complete, click Start to start the run. The NGS Workstation combines all eight digestion reactions for each gDNA sample with Hybridization Master Mix and the appropriate Indexing Primer Cassette in wells of a 96-well plate. HaloPlex Target Enrichment System Automation Protocol 45 3 Sample Preparation Step 2. Hybridize digested DNA to HaloPlex probes for target enrichment and sample indexing 8 When the workstation has finished preparing the hybridization plate for the run, you will be prompted by VWorks as shown below. 9 Seal the sample plate using the PlateLoc Thermal Microplate Sealer, with sealing settings of 165°C and 3.0 sec. 10 Spin the plate briefly. 46 HaloPlex Target Enrichment System Automation Protocol Sample Preparation Step 2. Hybridize digested DNA to HaloPlex probes for target enrichment and sample indexing 3 11 Transfer the sealed plate to a thermal cycler and run the appropriate hybridization program in Table 18, using the hybridization duration listed on the Certificate of Analysis. After transferring the plate, click Continue on the VWorks prompt to finish the protocol. Use a heated lid. Do not include a low-temperature hold step in the thermal cycler program. Incubation at 54°C for more than the indicated time is not recommended. Table 18 Step Thermal cycler program* for HaloPlex probe hybridization Temperature Time (Duration of Step) Cancer Research Panel or Cardiomyopathy Research Panel Custom Designs with <20,000 probes (see Certificate of Analysis)† Custom Designs with >20,000 probes (see Certificate of Analysis)‡ Step 1 95°C 10 minutes 10 minutes 10 minutes Step 2 54°C 3 hours 3 hours 16 hours * Thermal cyclers that use calculated temperature methods cannot be set to 160 µL reaction volumes. In that case, enter the maximum possible volume. † Typical 1-500 kb designs contain <20,000 probes. Please refer to the Certificate of Analysis included with your probe to determine the appropriate hybridization time. ‡ Typical 501 kb-5 Mb designs and some 1-500 kb designs contain >20,000 probes. Please refer to the Certificate of Analysis included with your probe to determine the appropriate hybridization time. NOTE If the Certificate of Analysis provided with your custom probe does not include hybridization time information, use the following guidelines: For 1–500 kb designs, hybridize for 3 hours, unless you were notified by Agilent to use hybridization conditions for larger designs (16-hour hybridization). For 501 kb–2.5 Mb designs, hybridize for 16 hours. For 2.5–5 Mb designs, hybridize for 16 hours. CA U T I O N Make sure that the thermal cycler has a maximum reaction volume specification of at least 100 L. The 160-L HaloPlex hybridization reaction conditions have been optimized with the SureCycler thermal cycler (with volume specification of 10-100 L for PCR reactions). The performance of other thermal cyclers for this application should be verified before use. HaloPlex Target Enrichment System Automation Protocol 47 3 Sample Preparation Step 3. Capture and amplify the target DNA Step 3. Capture and amplify the target DNA In this step, the circularized target DNA-HaloPlex probe hybrids, containing biotin, are captured on streptavidin beads. After capture, DNA ligase is added to seal nicks, then target DNA is eluted and PCR-amplified. Assemble reagents for the run 1 Remove reagents to be used in upcoming protocol steps from cold storage and allow the solutions to reach room temperature: •From –20°C storage, remove the Capture Solution, Wash Solution, Ligation Solution and SSC Buffer. •From +4°C storage, remove the HaloPlex Magnetic Beads. 2 Prepare 30 µL per sample, plus excess, of fresh 50 mM NaOH for use in the DNA elution step on page 50. Prepare the 50 mM NaOH solution from a 10M NaOH stock solution. CA U T I O N Using high-quality NaOH is critical for optimal DNA elution and recovery. • Do not use stock NaOH solutions that were stored at concentrations below 10 M to prepare the 50 mM NaOH solution. • Keep the 50 mM NaOH solution container sealed when not in use, especially when processing large numbers of samples per run. Table 19 Amount of 50mM NaOH required per run size Volume for 1 Library Volume for 1 Column Volume for 2 Columns Volume for 3 Columns Volume for 4 Columns Volume for 6 Columns Volume for 12 Columns 30 µL 270 µL 510 µL 750 µL 990 µL 1470 µL 2940 µL 3 Obtain or prepare 0.5 µL per sample, plus excess, of 2 M acetic acid, for use in the PCR master mix on page 51. CA U T I O N It is critical to use high-quality acetic acid at 2 M concentration in this step to ensure neutralization of the NaOH used for elution. See Table 1 on page 9 for 2 M acetic acid supplier information, or prepare 2 M acetic acid from high-quality glacial acetic acid. 48 HaloPlex Target Enrichment System Automation Protocol Sample Preparation Step 3. Capture and amplify the target DNA 3 Prepare the workstation 1 Gently wipe down the Bravo deck with a NucleoClean decontamination wipe. 2 Place a red insert on Bravo deck position 4. 3 Pre-set the temperature of Bravo deck position 4 to 54°C using the Inheco Multi TEC control touchscreen, as described in Setting the Temperature of Bravo Deck Heat Blocks. 4 Place a second red insert on Bravo deck position 6. 5 Pre-set the temperature of Bravo deck position 6 to 4°C using the Inheco Multi TEC control touchscreen, as described in Setting the Temperature of Bravo Deck Heat Blocks. 6 Place the silver Nunc plate insert on Bravo deck position 9. 7 Turn on the chiller, set to 0°C, at position 9 of the Bravo deck. Be sure that the chiller reservoir contains at least 300 mL of 25% ethanol. Prepare the HaloPlex Magnetic Beads Source Plate 1 Vigorously resuspend the HaloPlex Magnetic Beads on a vortex mixer. The beads settle during storage. 2 Wash the magnetic beads. a Transfer 40 µL per sample of the HaloPlex Magnetic Beads suspension to a 1.5-mL tube or conical vial, using volumes provided in Table 20. Table 20 Volume of HaloPlex Magnetic Bead suspension for capture Reagent Volume for 1 Library Volume for 1 Column Volume for 2 Columns Volume for 3 Columns Volume for 4 Columns Volume for 6 Columns Volume for 12 Columns HaloPlex Magnetic Beads 0.04 mL 0.36 mL 0.68 mL 1.0 mL 1.32 mL 1.96 mL 3.92 mL HaloPlex Target Enrichment System Automation Protocol 49 3 Sample Preparation Step 3. Capture and amplify the target DNA b Put the vial into a compatible magnetic device for 5 minutes. c After verifying that the solution has cleared, carefully remove and discard the supernatant using a pipette. d Add an equivalent volume of Capture Solution (see Table 21) to the beads and resuspend by pipetting up and down. Table 21 Volume of Capture Solution used for bead resuspension Reagent Volume for 1 Library Volume for 1 Column Volume for 2 Columns Volume for 3 Columns Volume for 4 Columns Volume for 6 Columns Volume for 12 Columns Capture Solution 0.04 mL 0.36 mL 0.68 mL 1.0 mL 1.32 mL 1.96 mL 3.92 mL 3 Prepare a Nunc DeepWell source plate for the washed HaloPlex streptavidin bead suspension. Add 40 µL of the homogenous bead suspension to all wells of the Nunc DeepWell plate that correspond to sample-containing wells on the hybridization plate. 4 Place the streptavidin bead source plate at position 5 of the Bravo deck. Prepare wash and elution solution source plates Prepare a separate source plate for each of the solutions listed in Table 22. Use full-skirted 96-well Eppendorf twin.tec plates to prepare all three source plates. For all sample-containing wells of the hybridization plate, add the specified volume of solution to all corresponding wells of the solution source plate. Table 22 Preparation of solution source plates for Capture_v1.1.pro protocol Solution Volume to dispense per well of source plate Wash Solution 110 µL SSC Buffer 110 µL 50 mM NaOH 30 µL Seal the 50 mM NaOH source plate using the PlateLoc Thermal Microplate Sealer, with sealing settings of 165°C and 1.0 sec. Leave sealed until you are prompted to add the plate to the Bravo deck in step 15 on page 60. 50 HaloPlex Target Enrichment System Automation Protocol Sample Preparation Step 3. Capture and amplify the target DNA 3 Prepare the Master Mixes for Capture_v1.1.pro protocol 1 Prepare the appropriate amount of PCR Master Mix, according to the table below. Mix well by gentle vortexing, then spin the tube briefly. Table 23 Preparation of PCR Master Mix for Capture_v1.1.pro Reagent Volume for 1 Library Volume for 1 Column Volume for 2 Columns Volume for 3 Columns Volume for 4 Columns Volume for 6 Columns Volume for 12 Columns Nuclease-free water 16.1 µL 205.3 µL 342.1 µL 479 µL 615.8 µL 889.5 µL 1779 µL 5X Herculase II Reaction Buffer 10 µL 127.5 µL 212.5 µL 297.5 µL 382.5 µL 552.5 µL 1105 µL dNTPs (100 mM)* 0.4 µL 5.1 µL 8.5 µL 11.9 µL 15.3 µL 22.1 µL 44.2 µL Primer 1 1 µL 12.75 µL 21.3 µL 29.8 µL 38.3 µL 55.3 µL 110.5 µL Primer 2 1 µL 12.75 µL 21.3 µL 29.8 µL 38.3 µL 55.3 µL 110.5 µL 2 M Acetic acid 0.5 µL 6.4 µL 10.6 µL 14.9 µL 19.1 µL 27.6 µL 55.3 µL Herculase II Fusion DNA Polymerase 1 µL 12.75 µL 21.3 µL 29.8 µL 38.3 µL 55.3 µL 110.5 µL Total Volume 30 µL 382.5 µL 637.6 µL 892.7 µL 1147.6 µL 1657.6 µL 3315 µL * Be sure to use dNTPs at 100 mM concentration (25 mM for each nucleotide), like those provided with the Herculase II Fusion Enzyme with dNTPs (Agilent p/n 600677 or 600679). HaloPlex Target Enrichment System Automation Protocol 51 3 Sample Preparation Step 3. Capture and amplify the target DNA 2 Prepare the appropriate amount of Ligation Master Mix, according to the table below. Mix well by gentle vortexing, then spin the tube briefly. Store the master mix on ice until it is used on page 56. The Ligation Master Mix is added to the Master Mix Source Plate just before it is used in the Capture_v1.1.pro protocol. Do not add this master mix to the source plate before starting the run. Table 24 Preparation of Ligation Master Mix for Capture_v1.1.pro Reagent Volume for 1 Library Volume for 1 Column Volume for 2 Columns Volume for 3 Columns Volume for 4 Columns Volume for 6 Columns Volume for 12 Columns Ligation Solution 47.5 µL 605.6 µL 1009 µL 1413 µL 1817 µL 2624 µL 5249 µL DNA Ligase 2.5 µL 31.9 µL 53.1 µL 74.4 µL 95.6 µL 138.1 µL 276.3 µL Total Volume 50 µL 637.5 µL 1062.1 µL 1487.4 µL 1912.6 µL 2762.1 µL 5525.3 µL Prepare the Master Mix Source Plate for Capture_v1.1.pro Using the same Nunc DeepWell plate that was used for the Hybridization.pro run, prepare the Master Mix source plate for Capture_v1.1.pro. Add the volume indicated in Table 25 of PCR Master Mix to all wells of column 3 of the Nunc DeepWell plate. Table 25 Preparation of the Master Mix Source Plate for Capture_v1.1.pro Master Mix Solution Position on Source Plate Volume of Master Mix added per Well of Nunc Deep Well Source Plate 1-Column Runs 2-Column Runs 3-Column Runs 4-Column Runs 6-Column Runs 12-Column Runs PCR Master Mix Column 3 44.1 µL 75.9 µL 107.8 µL 139.7 µL 203.4 µL 410.6 µL (A3-H3) NOTE Column 2 of the Master Mix source plate must remain empty at this step. You will be prompted to add Ligation Master Mix to Column 2 at the appropriate time during the Capture_v1.1.pro protocol. Column 1 was used during the Hybridization.pro protocol. If you are using a new DeepWell plate for the Capture_v1.1.pro Master Mix source plate, be sure to leave columns 1 and 2 empty at this time, adding the PCR Master Mix to column 3 of the new plate. 52 HaloPlex Target Enrichment System Automation Protocol Sample Preparation Step 3. Capture and amplify the target DNA 3 Load the Agilent NGS Workstation and Run the Capture_v1.1.pro VWorks Protocol 1 On the VWorks HaloPlex form, under Step, select 03 Capture_v1.1.pro. 2 Select the number of columns of samples to be processed. Runs must include 1, 2, 3, 4, 6, or 12 columns. 3 Click Update layout and information. 4 Load the Bravo deck according to Table 26. Table 26 Initial Bravo deck configuration for Capture_v1.1.pro Location Content 1 Empty Axygen 96 Deep Well Plate (square wells) for waste 2 New tip box 3 Wash Solution source plate (full-skirted 96-well Eppendorf twin.tec plate) 4 Hybridized sample plate seated on red insert 5 HaloPlex magnetic streptavidin bead source plate (Nunc DeepWell plate) 6 Empty half-skirted 96-well Eppendorf twin.tec plate seated on red insert 7 —(empty)— 8 Empty tip box 9 Master Mix source plate (Nunc DeepWell plate) seated on silver insert 5 Verify that the NGS workstation has been set up as displayed in the Bravo Deck Setup and Information regions of the form. 6 Verify that the Current Tip State indicator on the form matches the configuration of unused and used tips in the tip boxes at Bravo Deck HaloPlex Target Enrichment System Automation Protocol 53 3 Sample Preparation Step 3. Capture and amplify the target DNA positions 2 and 8, respectively. See page 19 for more information on using this segment of the form during the run. 7 When verification is complete, click Start to start the run. The NGS Workstation completes the liquid-handling steps for capture of the target DNA-HaloPlex probe hybrids on the streptavidin beads. NOTE To expedite thermal cycler warm-up for the subsequent wash program on page 55, you can enter and initiate the wash program on the thermal cycler now, and then pause the program until you are instructed to transfer the reaction plate. Be sure to pause the thermal cycler before the initiation of the 46°C incubation segment. Release the pause immediately after transferring the plate to the thermal cycler in step 9. 8 When prompted by VWorks as shown below, remove and discard the hybridization plate from position 4 of the Bravo deck. Place a fresh half-skirted 96-well Eppendorf twin.tec plate at position 4 for use in the wash segment of the protocol. 54 HaloPlex Target Enrichment System Automation Protocol Sample Preparation Step 3. Capture and amplify the target DNA 3 9 When the workstation has finished preparing the capture wash plate, you will be prompted by VWorks as shown below. a Get the sample plate from position 4 and seal the plate using the PlateLoc Thermal Microplate Sealer, with sealing settings of 165°C and 3.0 sec. Transfer the sealed plate to a thermal cycler and run the wash program shown in Table 27, using a heated lid. Do not include a low-temperature hold step in the thermal cycler program following the 10-minute incubation. Table 27 Thermal cycler program for Capture_v1.1.pro wash step Step Temperature Time Step 1 46°C 10 minutes b Remove and discard the Wash Solution plate from position 3 of the Bravo deck. Place the SSC Buffer source plate at position 3 for use in the ligation segment of the protocol. c Remove and discard the bead source plate from position 5 of the Bravo deck. Place a fresh Nunc DeepWell plate at position 5. d After completing all steps, click Continue on the VWorks prompt to continue the automation protocol. Do not wait for the conclusion of the thermal cycler wash program to continue the protocol. HaloPlex Target Enrichment System Automation Protocol 55 3 Sample Preparation Step 3. Capture and amplify the target DNA 10 During the 10-minute incubation of the sample plate on the thermal cycler, you will be prompted to add the Ligation Master Mix to the Master Mix source plate as shown below. Add the volume of Ligation Master Mix indicated in Table 28 to all wells of column 2 of the Nunc DeepWell Master Mix source plate on Bravo deck position 9. Table 28 Addition of Ligation Master Mix to the Master Mix Source Plate for Capture_v1.1.pro Master Mix Solution Position on Source Plate Volume of Master Mix added per Well of Nunc Deep Well Source Plate 1-Column Runs 2-Column Runs 3-Column Runs 4-Column Runs 6-Column Runs 12-Column Runs Ligation Master Mix Column 2 73.4 µL 126.6 µL 179.7 µL 232.8 µL 339.1 µL 684.4 µL NOTE 56 (A2-H2) The Master Mix source plate at postition 9 should already contain the PCR Master Mix in Column 3 and the depleted Hybridization Master Mix from the Hybridization.pro protocol in Column 1. Be sure to add the Ligation Master Mix to Column 2 of the source plate at this step. HaloPlex Target Enrichment System Automation Protocol Sample Preparation Step 3. Capture and amplify the target DNA 3 11 Once the wash program in Table 27 has finished and you are prompted by VWorks, transfer the plate from the thermal cycler to Bravo deck position 4. Carefully unseal the plate, then click Continue on the VWorks prompt to resume the Capture_v1.1.pro protocol. The NGS Workstation completes the liquid-handling steps for ligation of the captured target DNA. NOTE To expedite thermal cycler warm-up for the subsequent ligation program on page 59, you can enter and initiate the wash program on the thermal cycler now, and then pause the program until you are instructed to transfer the reaction plate. Be sure to pause the thermal cycler before the initiation of the 55°C incubation segment. Release the pause immediately after transferring the plate to the thermal cycler in step 13. HaloPlex Target Enrichment System Automation Protocol 57 3 Sample Preparation Step 3. Capture and amplify the target DNA 12 When prompted by VWorks as shown below, remove and discard the plate from position 4. Click Continue on the prompt to resume the protocol. 58 HaloPlex Target Enrichment System Automation Protocol Sample Preparation Step 3. Capture and amplify the target DNA 3 13 When the workstation has finished preparing the ligation plate, you will be prompted by VWorks as shown below. a Get the sample plate from position 6 and seal the plate using the PlateLoc Thermal Microplate Sealer, with sealing settings of 165°C and 3.0 sec. b Transfer the sealed plate to a thermal cycler and run the ligation program shown in Table 29, using a heated lid. Table 29 Thermal cycler program for Capture_v1.1.pro ligation step Step Temperature Time Step 1 55°C 10 minutes Step 2 4°C Hold c Remove and discard the Nunc DeepWell plate from position 5 of the Bravo deck. Place a fresh Nunc DeepWell plate at position 5 for use in the ligation purification steps of the protocol. d Place a fresh half-skirted 96-well Eppendorf twin.tec plate at position 6 for use in the following PCR protocol steps. e After completing all steps, click Continue on the VWorks prompt to continue the automation protocol. Do not wait for the conclusion of the thermal cycler ligation program to continue the protocol. HaloPlex Target Enrichment System Automation Protocol 59 3 Sample Preparation Step 3. Capture and amplify the target DNA 14 Once the ligation program in Table 29 is finished and you are prompted by VWorks, transfer the plate from the thermal cycler to Bravo deck position 4. Carefully unseal the plate, then click Continue on the VWorks prompt to resume the Capture_v1.1.pro protocol. 15 When prompted by VWorks as shown below, remove and discard the SSC Buffer plate from position 3 of the Bravo deck. Place the 50 mM NaOH source plate at position 3 for use in the elution steps of the protocol. After carefully unsealing the source plate, click Continue on the prompt to resume the protocol. The NGS Workstation completes the liquid-handling steps for elution of the captured target DNA followed by preparation of PCR reactions for amplification. 60 HaloPlex Target Enrichment System Automation Protocol Sample Preparation Step 3. Capture and amplify the target DNA NOTE 3 To expedite thermal cycler warm-up for the subsequent PCR program on page 62, you can enter and initiate the PCR program on the thermal cycler now, and then pause the program until you are instructed to transfer the reaction plate. Be sure to pause the thermal cycler before the initiation of the 98°C denaturation segment. Release the pause immediately after transferring the plate to the thermal cycler in step 16. 16 When the workstation has finished preparing the PCR amplification reactions, you will be prompted by VWorks as shown below. a Get the sample plate from position 6 and seal the plate using the PlateLoc Thermal Microplate Sealer, with sealing settings of 165°C and 3.0 sec. b Transfer the sealed plate to a thermal cycler and run the PCR program in Table 30, using a heated lid. HaloPlex Target Enrichment System Automation Protocol 61 3 Sample Preparation Step 3. Capture and amplify the target DNA The optimal amplification cycle number varies for each HaloPlex Probe design. Consult the Certificate of Analysis (provided with HaloPlex Target Enrichment System Box 1) for the PCR cycling recommendation for your probe. Table 30 HaloPlex post-capture DNA amplification PCR program Segment Number of Cycles Temperature Time 1 1 98°C 2 minutes 2 Obtain cycle number from Certificate of Analysis 98°C 30 seconds 60°C 30 seconds 72°C 1 minute 3 1 72°C 10 minutes 4 1 8°C Hold c After initiating the PCR program in the thermal cycler, click Continue on the VWorks prompt to finish the automation protocol. d If you are continuing to the next step of PCR product purification, remove the Agencourt AMPure XP Beads from +4°C storage for use on page 63. Let the beads come to room temperature for the remainder of the amplification program. Stopping Point 62 If you do not continue to the next step, PCR products may be stored at –20°C for up to 72 hours or at 8°C overnight. For best results, however, purify PCR products as soon as possible. HaloPlex Target Enrichment System Automation Protocol Sample Preparation Step 4. Purify the amplified target DNA 3 Step 4. Purify the amplified target DNA In this step, the NGS Workstation does the liquid handling steps to purify the amplified target DNA sample using AMPure XP beads. Prepare the workstation and reagents 1 Gently wipe down the Bravo deck with a NucleoClean decontamination wipe. 2 Let the AMPure XP beads come to room temperature for at least 30 minutes. Do not freeze the AMPure XP beads at any time. 3 Mix the room-temperature bead suspension well so that the reagent appears homogeneous and consistent in color. 4 Prepare a Nunc DeepWell source plate containing AMPure XP beads. For each well to be processed, add 100 µL of homogenous AMPure XP beads per well to the Nunc DeepWell plate. 5 Place a red insert on Bravo deck position 6. 6 Pre-set the temperature of Bravo deck position 6 to 4°C using the Inheco Multi TEC control touchscreen, as described in Setting the Temperature of Bravo Deck Heat Blocks. 7 Prepare a Thermo Scientific reservoir containing 15 mL of nuclease-free water. 8 Prepare a Thermo Scientific reservoir containing 15 mL of the final sample elution buffer [nuclease-free 10 mM Tris-acetate or Tris-HCl buffer (pH 8.0)]. 9 Prepare a separate Thermo Scientific reservoir containing 45 mL of freshly-prepared 70% ethanol. Load the Agilent NGS Workstation and Run the Purification_v1.1.pro VWorks Protocol 1 On the VWorks HaloPlex form, under Step, select 04 Purification_v1.1.pro. 2 Select the number of columns of samples to be processed. Runs must include 1, 2, 3, 4, 6, or 12 columns. 3 Click Update layout and information. HaloPlex Target Enrichment System Automation Protocol 63 3 Sample Preparation Step 4. Purify the amplified target DNA 4 Load the Bravo deck according to Table 31. Table 31 Initial Bravo deck configuration for Purification_v1.1.pro Location Content 1 Empty Axygen 96 Deep Well Plate (square wells) for waste 2 New tip box 3 Empty full-skirted 96-well Eppendorf twin.tec plate 4 —(empty)— 5 AMPure XP beads in Nunc DeepWell source plate 6 Amplified DNA samples in half-skirted 96-well Eppendorf twin.tec plate seated on red insert 7 —(empty)— 8 Empty tip box 9 Nuclease-free water in Thermo Scientific reservoir 5 Verify that the NGS workstation has been set up as displayed in the Bravo Deck Setup region of the form. 6 Verify that the Current Tip State indicator on the form matches the configuration of unused and used tips in the tip boxes at Bravo Deck positions 2 and 8, respectively. See page 19 for more information on using this segment of the form during the run. 7 When verification is complete, click Start to start the run. 64 HaloPlex Target Enrichment System Automation Protocol Sample Preparation Step 4. Purify the amplified target DNA 3 8 When prompted by VWorks as shown below, remove the water reservoir from position 9 of the Bravo deck and replace it with the 70% ethanol reservoir. When finished, click Continue on the VWorks prompt. 9 When prompted by VWorks as shown below, remove the 70% ethanol reservoir from position 9 of the Bravo deck and replace it with the final sample elution buffer reservoir. When finished, click Continue on the VWorks prompt. HaloPlex Target Enrichment System Automation Protocol 65 3 Sample Preparation Step 4. Purify the amplified target DNA The NGS Workstation completes the liquid-handling steps for elution of the captured target DNA. 10 When the workstation has finished preparing the final eluted sample plate, you will be prompted by VWorks as shown below. Click Continue on the VWorks prompt to finish the protocol. Stopping Point 66 If you do not continue to the next step, samples may be stored at –20°C for long-term storage (up to one year). Avoid subjecting the stored DNA samples to multiple freeze-thaw cycles. HaloPlex Target Enrichment System Automation Protocol Sample Preparation Step 5. Validate enrichment and quantify enriched target DNA 3 Step 5. Validate enrichment and quantify enriched target DNA Prior to sample pooling and sequencing sample preparation, validate enrichment and quantify the enriched target DNA in each library sample by microfluidics analysis using the 2100 Bioanalyzer (see page 68) or the 2200 TapeStation (see page 69). Enriched library samples may also be qualitatively analyzed using gel electrophoresis. Sample gel electrophoresis results are provided in the Reference section on page 91. Expected Results Each amplicon in the prepared library contains one target insert surrounded by sequence motifs required for multiplexed sequencing using the Illumina platform. Amplicons include 50 to 500 bp of target DNA insert and 125 bp of sequencing motifs, as shown in Figure 7. Figure 7 Content of HaloPlex-enriched target amplicons. Each amplicon contains one target insert (blue) surrounded by the Illumina paired-end sequencing elements (black), the sample index (red) and the library bridge PCR primers (yellow). The amplicons should range from 175 to 625 bp in length, with the majority of products sized 225 to 525 bp. Amplicons in the 175 to 625 bp size range should be included for quantitation of the enriched target DNA in each sample. Any spurious DNA products outside of this size range in any sample should be excluded from the target DNA quantitation results. HaloPlex Target Enrichment System Automation Protocol 67 3 Sample Preparation Step 5. Validate enrichment and quantify enriched target DNA Option 1: Analysis using the 2100 Bioanalyzer System Use a Bioanalyzer High Sensitivity DNA Assay kit and the 2100 Bioanalyzer instrument with 2100 Expert Software (version B.02.07 or higher required to run the High Sensitivity Kit). See the reagent kit guide for general Bioanalyzer instrument and assay setup instructions. 1 Prepare the chip, samples and ladder as instructed in the reagent kit guide, using 1 µL of enriched library sample for the analysis. 2 Load the prepared chip into the 2100 Bioanalyzer instrument and start the run within five minutes after preparation. 3 Analyze the electropherogram for each sample according to the analysis guidelines on page 70. See Figure 8 for a sample Bioanalyzer electropherogram. NOTE If the concentration determined by Bioanalyzer analysis is > 10 ng/µL, repeat the analysis using a 1:10 dilution of the sample. Dilute 1 µL of the sample in 9 µL of 10 mM Tris, 1 mM EDTA and then mix well by vortexing at 2000 rpm on the IKA vortex supplied with the Bioanalyzer before analyzing the diluted sample. Figure 8 68 Validation of HaloPlex enrichment by 2100 Bioanalyzer system analysis. HaloPlex Target Enrichment System Automation Protocol Sample Preparation Step 5. Validate enrichment and quantify enriched target DNA 3 Option 2: Analysis using the 2200 TapeStation Use a High Sensitivity D1K ScreenTape (p/n 5067-5363) and reagent kit (p/n 5067-5364) to analyze the enriched library samples. For more information to do this step, see the 2200 TapeStation User Manual. 1 Prepare the TapeStation samples as instructed in the 2200 TapeStation User Manual. Use 2 µL of each enriched library sample diluted with 2 µL of High Sensitivity D1K sample buffer in separate wells of a tube strip for the analysis. 2 Load the sample tube strip, the High Sensitivity D1K ScreenTape, and loading tips into the 2200 TapeStation as instructed in the 2200 TapeStation User Manual. Start the run. 3 Analyze the electropherogram for each sample according to the analysis guidelines on page 70. See Figure 9 for a sample TapeStation electropherogram. Figure 9 Validation of HaloPlex enrichment by 2200 TapeStation analysis. HaloPlex Target Enrichment System Automation Protocol 69 3 Sample Preparation Step 5. Validate enrichment and quantify enriched target DNA Analysis of Electropherogram Results • Check that the electropherogram shows a peak fragment size between approximately 225 to 525 bp. • Determine the concentration of enriched target DNA in the sample by integration under the peak between 175 and 625 bp. Peaks at <150 bp may be observed, but should be excluded from quantitation. • Some designs may generate a peak at about 125 bp. This peak is associated with an adaptor-dimer product which will cluster and generate sequence that does not map to the genome. If the molar fraction of the 125 bp peak is greater than 10%, do another round of AMPure purification after pooling samples. First, pool equimolar amounts of libraries to be multiplexed, using concentrations determined for the 175–625 peak of each sample. Using 40 µL of the pooled libraries, purify the DNA using AMPure XP beads according to the protocol starting on page 77. 70 HaloPlex Target Enrichment System Automation Protocol Sample Preparation Step 6. Pool samples with different indexes for multiplexed sequencing 3 Step 6. Pool samples with different indexes for multiplexed sequencing Use the following guidelines to design your sample pooling strategy: • Use the Bioanalyzer- or TapeStation-measured concentration of 175-625 bp products in each sample to pool equimolar amounts of differentially indexed samples in order to optimize the use of sequencing capacity. • The final HaloPlex enrichment pool is ready for direct sequencing using standard Illumina paired-end primers and chemistry on the Illumina HiSeq, MiSeq, or GAIIx platform. See additional guidelines for the MiSeq platform (below) and HiSeq platform (page 75). • Use 100 + 100 bp or 150 + 150 bp paired-end sequencing, depending on the selection made during probe design. Since the read length affects maximum achievable coverage, check the design report to verify read length selected in probe design. • Sequencing runs must be set up to perform an 8-nt index read. For complete index sequence information, see tables starting on page 85. • Before aligning reads to the reference genome, trim the reads from Illumina adaptor sequences. MiSeq platform sequencing run setup guidelines Setting up a custom Sample Sheet: 1 In the IEM software, create a Sample Sheet for the MiSeq platform using the following Workflow selections. • Under Category, select Other. • Under Application, select FASTQ Only. HaloPlex Target Enrichment System Automation Protocol 71 3 Sample Preparation Step 6. Pool samples with different indexes for multiplexed sequencing 2 On the Workflow Parameters screen, enter the run information, making sure to specify the key parameters highlighted below: 72 HaloPlex Target Enrichment System Automation Protocol Sample Preparation Step 6. Pool samples with different indexes for multiplexed sequencing 3 3 Using the Sample Plate Wizard, set up a New Plate, entering the required information for each sample to be sequenced. In the Index 1(17) column of the TrueSeq LT Assay Plate table, assign each sample to any of the Illumina 17 indexes. The index will be corrected to a HaloPlex index at a later stage. 4 Finish the sample plate setup tasks and save the sample plate file. 5 Using the Sample Sheet Wizard, select the samples to include in the run and save the Sample Sheet file. HaloPlex Target Enrichment System Automation Protocol 73 3 Sample Preparation Step 6. Pool samples with different indexes for multiplexed sequencing Editing the Sample Sheet to Include HaloPlex indexes: 1 Open the Sample Sheet file in a text editor. For each sample, select the text for the 6-nucleotide index (highlighted below), and replace with the appropriate 8-nucleotide HaloPlex index sequence. 2 Save the edited Sample Sheet in an appropriate file location for use in the MiSeq platform run. 74 HaloPlex Target Enrichment System Automation Protocol Sample Preparation Step 6. Pool samples with different indexes for multiplexed sequencing 3 HiSeq platform sequencing run setup guidelines Set up sequencing runs to perform an 8-nt index read using the Cycles settings shown in Table 32. Cycle number settings can be specified on the Run Configuration screen of the instrument control software interface after choosing Custom from the index type selection buttons. Table 32 HiSeq platform Run Configuration screen Cycle Number settings* Run Segment Cycle Number Read 1 100 Index 1 (i7) 9 Index 2 (i5) 0 Read 2 100 * Settings apply to v3.0 SBS chemistry. Sequence analysis resources Agilent’s SureCall data analysis software is available to simplify the sequencing data analysis workflow after HaloPlex target enrichment. To learn more about this resource and download the SureCall software free of charge, visit www.agilent.com/genomics/surecall. HaloPlex Target Enrichment System Automation Protocol 75 3 76 Sample Preparation Step 6. Pool samples with different indexes for multiplexed sequencing HaloPlex Target Enrichment System Automation Protocol HaloPlex Target Enrichment System Protocol 4 Appendix: Provisional Adaptor-Dimer Removal Protocol Purify the enriched library pool using AMPure XP beads 78 This section contains a protocol for purification of the target-enriched library pool to remove adaptor-dimer molecules of approximately 125 bp size. Only do this protocol if electrophoretic analysis of the target-enriched library samples shows a peak at approximately 125 bp which represents a molar fraction of >10% of DNA in the sample (see page 68 to page 70.) Agilent Technologies 77 4 Appendix: Provisional Adaptor-Dimer Removal Protocol Purify the enriched library pool using AMPure XP beads Purify the enriched library pool using AMPure XP beads In this step, a 40-µL pool of target-enriched DNA libraries is purified using AMPure XP beads using manual sample processing. NOTE This protocol requires a 0.2 mL tube-compatible magnetic separation device, such as the Agencourt SPRIPlate Super Magnet Plate, Agencourt p/n A32782, or equivalent. 1 Let the AMPure XP beads come to room temperature for at least 30 minutes. 2 Prepare 400 µL of 70% ethanol per sample, plus excess, for use in step 10. 3 Transfer 40 µL of each target-enriched library pool to a fresh 0.2-mL tube. 4 Mix the AMPure XP bead suspension well, until the suspension appears homogeneous and consistent in color. 5 For each sample to be purified, prepare a bead mix by combining 40 µL of nuclease-free water and 100 µL of the homogenous AMPure XP bead suspension. Mix well, until the bead mix suspension appears homogeneous. 6 Add 140 µL of the homogenous bead suspension prepared in step 5 to each 40-µL DNA sample. Vortex thoroughly. Using this bead-to-sample volume ratio is imperative to ensure optimal purification results. 7 Incubate samples for 5 minutes at room temperature with continuous shaking. Make sure the samples are properly mixing in the wells during the 5-minute incubation. 8 Spin briefly to collect the liquid, then place the tubes in the magnetic separation device. Wait for the solution to clear (approximately 5 minutes). 9 Keep the tubes in the magnetic device. Carefully remove and discard the cleared solution from each tube using a 200-µL pipette set to 180 µL. Do not touch the beads while removing the solution. 10 Continue to keep the tubes in the magnetic device while you add 200 µL of 70% ethanol into the tubes. Use fresh 70% ethanol for optimal results. 78 HaloPlex Target Enrichment System Automation Protocol Appendix: Provisional Adaptor-Dimer Removal Protocol Purify the enriched library pool using AMPure XP beads 4 11 Wait for 30 seconds to allow any disturbed beads to settle, then remove the ethanol using a 200-µL pipette set to 200 µL. 12 Repeat step 10 and step 11 once for a total of two washes. 13 Remove any residual ethanol with a 20-µL volume pipette. 14 Air-dry the tubes with open lids at room temperature until the residual ethanol completely evaporates. Make sure all ethanol has evaporated before continuing. 15 Remove tubes from the magnetic device and add 40 µL of 10 mM Tris-acetate or Tris-HCl buffer (pH 8.0) to each sample. NOTE Use room-temperature Tris-acetate or Tris-HCl buffer for elution at this step. 16 Mix thoroughly by pipetting up and down 15 times using a 100-µL pipette set to 30 µL. 17 Incubate for 2 minutes at room temperature to allow elution of DNA. 18 Put the tube in the magnetic device and leave for 2 minutes or until the solution is clear. 19 Remove the cleared supernatant (approximately 40 µL) to a fresh tube. You can discard the beads at this time. Stopping Point If you do not continue to the next step, samples may be stored at –20°C for long-term storage (up to one year). Avoid subjecting the stored DNA samples to multiple freeze-thaw cycles. HaloPlex Target Enrichment System Automation Protocol 79 4 80 Appendix: Provisional Adaptor-Dimer Removal Protocol Purify the enriched library pool using AMPure XP beads HaloPlex Target Enrichment System Automation Protocol HaloPlex Target Enrichment System Protocol 5 Reference Kit Contents 82 Nucleotide Sequences of HaloPlex Indexes 85 Qualitative analysis of enrichment by gel electrophoresis 91 This chapter contains reference information, including component kit contents, index sequences, and optional gel validation instructions. Agilent Technologies 81 5 Reference Kit Contents Kit Contents The HaloPlex Target Enrichment System includes the following component kits: Table 33 HaloPlex Target Enrichment System Kit Contents Design Type HaloPlex Target Enrichment System-ILM, Box 1* HaloPlex Magnetic Beads Box 2 Store at –20°C Store at +4°C Custom 1-500 kb (up to 20,000 probes), ILMFST, 96 Reactions 5190-5385 OR 5190-5436† 5190-5386 Custom 0.5-2.5 Mb OR <0.5 Mb with >20,000 probes, ILM, 96 Reactions 5190-5534 OR 5190-5538† 5190-5386 Custom 2.6 Mb-5 Mb, ILM, 96 Reactions 5190-5536 OR 5190-5540† 5190-5386 Cancer Research Panel, ILM, 96 Reactions 5190-6236 5190-5386 Cardiomyopathy Research Panel, ILM, 96 Reactions 5190-6529 5190-5386 * See Table 34 for list of included reagents. † Part number 5190-5385, 5190-5534, or 5190-5536 is provided for the first order of a specific HaloPlex Probe design. Re-order kits, containing previously-purchased HaloPlex Probe designs, include Box 1 part number 5190-5436, 5190-5538, or 5190-5540. 82 HaloPlex Target Enrichment System Automation Protocol Reference Kit Contents 5 The contents of the HaloPlex Target Enrichement System Box #1 are detailed in the table below. Table 34 HaloPlex Target Enrichment System for Illumina Box 1 Contents Included Reagents Formal Hybridization Solution bottle Ligation Solution bottle Wash Solution bottle Capture Solution bottle SSC Buffer bottle RE Buffer bottle BSA Solution tube with clear cap DNA Ligase tube with red cap Enrichment Control DNA tube with orange cap Primer 1 tube with yellow cap Primer 2 tube with blue cap HaloPlex Indexing Primer Cassettes 96-well plate with Indexing Primer Cassettes 1-96* Enzyme Strip 1 8-well strip tube with green label Enzyme Strip 2 8-well strip tube with red label HaloPlex Probe tube with pink cap * See Table 35 for a plate map. HaloPlex Target Enrichment System Automation Protocol 83 5 Reference Kit Contents Placement of each HaloPlex Indexing Primer Cassette in the index cassette plate provided with p/n G9901B is shown in Table 35. Table 35 1 HaloPlex Indexing Primer Cassette plate map 2 3 4 5 6 7 8 9 10 11 12 A Index 1 Index 9 Index 17 Index 25 Index 33 Index 41 Index 49 Index 57 Index 65 Index 73 Index 81 Index 89 B Index 2 Index 10 Index 18 Index 26 Index 34 Index 42 Index 50 Index 58 Index 66 Index 74 Index 82 Index 90 C Index 3 Index 11 Index 19 Index 27 Index 35 Index 43 Index 51 Index 59 Index 67 Index 75 Index 83 Index 91 D Index 4 Index 12 Index 20 Index 28 Index 36 Index 44 Index 52 Index 60 Index 68 Index 76 Index 84 Index 92 E Index 5 Index 13 Index 21 Index 29 Index 37 Index 45 Index 53 Index 61 Index 69 Index 77 Index 85 Index 93 F Index 6 Index 14 Index 22 Index 30 Index 38 Index 46 Index 54 Index 62 Index 70 Index 78 Index 86 Index 94 G Index 7 Index 15 Index 23 Index 31 Index 39 Index 47 Index 55 Index 63 Index 71 Index 79 Index 87 Index 95 H Index 8 Index 16 Index 24 Index 32 Index 40 Index 48 Index 56 Index 64 Index 72 Index 80 Index 88 Index 96 84 HaloPlex Target Enrichment System Automation Protocol Reference Nucleotide Sequences of HaloPlex Indexes 5 Nucleotide Sequences of HaloPlex Indexes The nucleotide sequence of the 8-nucleotide index portion of each HaloPlex Indexing Primer Cassette is provided in the tables below. HaloPlex 96-reaction kits include plates containing the 96 indexes listed in Table 36 to Table 41. Table 36 HaloPlex Indexes 1-16 Index Number Sequence 1 AACGTGAT 2 AAACATCG 3 ATGCCTAA 4 AGTGGTCA 5 ACCACTGT 6 ACATTGGC 7 CAGATCTG 8 CATCAAGT 9 CGCTGATC 10 ACAAGCTA 11 CTGTAGCC 12 AGTACAAG 13 AACAACCA 14 AACCGAGA 15 AACGCTTA 16 AAGACGGA HaloPlex Target Enrichment System Automation Protocol 85 5 Reference Nucleotide Sequences of HaloPlex Indexes Table 37 86 HaloPlex Indexes 17-32 Index Number Sequence 17 AAGGTACA 18 ACACAGAA 19 ACAGCAGA 20 ACCTCCAA 21 ACGCTCGA 22 ACGTATCA 23 ACTATGCA 24 AGAGTCAA 25 AGATCGCA 26 AGCAGGAA 27 AGTCACTA 28 ATCCTGTA 29 ATTGAGGA 30 CAACCACA 31 CAAGACTA 32 CAATGGAA HaloPlex Target Enrichment System Automation Protocol Reference Nucleotide Sequences of HaloPlex Indexes Table 38 5 HaloPlex Indexes 33-48 Index Number Sequence 33 CACTTCGA 34 CAGCGTTA 35 CATACCAA 36 CCAGTTCA 37 CCGAAGTA 38 CCGTGAGA 39 CCTCCTGA 40 CGAACTTA 41 CGACTGGA 42 CGCATACA 43 CTCAATGA 44 CTGAGCCA 45 CTGGCATA 46 GAATCTGA 47 GACTAGTA 48 GAGCTGAA HaloPlex Target Enrichment System Automation Protocol 87 5 Reference Nucleotide Sequences of HaloPlex Indexes Table 39 88 HaloPlex Indexes 49-64 Index Number Sequence 49 GATAGACA 50 GCCACATA 51 GCGAGTAA 52 GCTAACGA 53 GCTCGGTA 54 GGAGAACA 55 GGTGCGAA 56 GTACGCAA 57 GTCGTAGA 58 GTCTGTCA 59 GTGTTCTA 60 TAGGATGA 61 TATCAGCA 62 TCCGTCTA 63 TCTTCACA 64 TGAAGAGA HaloPlex Target Enrichment System Automation Protocol Reference Nucleotide Sequences of HaloPlex Indexes Table 40 5 HaloPlex Indexes 65-80 Index Number Sequence 65 TGGAACAA 66 TGGCTTCA 67 TGGTGGTA 68 TTCACGCA 69 AACTCACC 70 AAGAGATC 71 AAGGACAC 72 AATCCGTC 73 AATGTTGC 74 ACACGACC 75 ACAGATTC 76 AGATGTAC 77 AGCACCTC 78 AGCCATGC 79 AGGCTAAC 80 ATAGCGAC HaloPlex Target Enrichment System Automation Protocol 89 5 Reference Nucleotide Sequences of HaloPlex Indexes Table 41 90 HaloPlex Indexes 81-96 Index Number Sequence 81 ATCATTCC 82 ATTGGCTC 83 CAAGGAGC 84 CACCTTAC 85 CCATCCTC 86 CCGACAAC 87 CCTAATCC 88 CCTCTATC 89 CGACACAC 90 CGGATTGC 91 CTAAGGTC 92 GAACAGGC 93 GACAGTGC 94 GAGTTAGC 95 GATGAATC 96 GCCAAGAC HaloPlex Target Enrichment System Automation Protocol Reference Qualitative analysis of enrichment by gel electrophoresis 5 Qualitative analysis of enrichment by gel electrophoresis Enrichment products may be qualitatively analyzed by gel electrophoresis. Analyze 5 µL of each enriched library sample (enriched ECD sample or experimental enriched libraries) by elecrophoresis on a Novex 6% polyacrylamide TBE pre-cast gel. See page 41 for additional gel analysis protocol recommendations. Successful enrichment is indicated by the presence of a smear of amplicons from approximately 225 to 525 bp in each enrichment library lane. For some probe designs, low molecular weight (<150 bp) bands may also be visible, but should not be included in enriched sample quantitation. See Figure 10 for a sample gel analysis image. Figure 10 Validation of HaloPlex enrichment process by gel electrophoresis. Lane 1: 25-bp DNA ladder, Lanes 2-7: enriched library samples. HaloPlex Target Enrichment System Automation Protocol 91 www.agilent.com In This Book This guide contains information to run the HaloPlex Target Enrichment System automation protocol. Agilent Technologies, Inc. 2013 Version D.4, May 2013 *G9900-90020* G9900-90020 Agilent Technologies