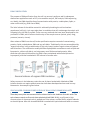
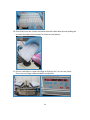
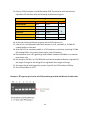
1
Introduction to Molecular Biology and Bioinformatics Training Workshop BecA-‐ILRI Hub, Nairobi, Kenya, May 5-‐16, 2014 Laboratory Manual Written and compiled by Rob Skilton, Martina Kyalo, Moses Njahira, Bramwel Wanjala, Francesca Stomeo, Solomon Maina, Eunice Machuka http://hpc.ilri.cgiar.org/beca/training/IMBB_2014/welcome.html 1 TABLE OF CONTENTS 1. Introduction to the Workshop .......................................................................................................... 6 Background .............................................................................................................................................. 6 Scope of the IMBB training workshop ...................................................................................................... 6 Workshop objectives ................................................................................................................................ 6 DNA barcoding ......................................................................................................................................... 7 Workshop plan ......................................................................................................................................... 8 2. Using a Micropipette ........................................................................................................................ 9 Introduction ............................................................................................................................................. 9 Pipette tips ...................................................................................................................................................... 9 Plunger positions ........................................................................................................................................... 10 Draw up liquid ............................................................................................................................................... 11 Dispense liquid .............................................................................................................................................. 12 Changing the volume ..................................................................................................................................... 13 Internet resources and further information ........................................................................................... 14 3. Lab Math ........................................................................................................................................ 15 Power Prefixes ............................................................................................................................................... 15 Conversion Factors ........................................................................................................................................ 16 Concentration ................................................................................................................................................ 16 The M words (Mole, Molar, Molarity) ........................................................................................................... 16 Molar solutions .............................................................................................................................................. 17 Percent (%) solutions ..................................................................................................................................... 17 Concentrated stock solutions -‐ using ‘X’ units ............................................................................................... 18 Preparation of working solutions from concentrated stock solutions .......................................................... 18 Simple Dilution .............................................................................................................................................. 20 Lab Math Cheat sheet ................................................................................................................................... 20 Online calculators .......................................................................................................................................... 21 Internet resources and further information ........................................................................................... 21 4. Genomic DNA extraction from animal tissues ................................................................................. 23 Introduction ........................................................................................................................................... 23 Collection and storage of tissue samples ...................................................................................................... 23 DNA purification ............................................................................................................................................ 24 Silica-‐based column purification of DNA: Using commercial kits .................................................................. 24 DNA extraction from muscle tissue using a spin column kit .................................................................. 25 Equipment and materials .............................................................................................................................. 26 Method .......................................................................................................................................................... 27 Agarose electrophoresis of genomic DNA ..................................................................................................... 29 NanoDrop spectrophotometry of genomic DNA ........................................................................................... 29 Internet resources and further information ........................................................................................... 30 5. Genomic DNA extraction from plant materials ............................................................................... 31 Introduction ........................................................................................................................................... 31 Plant sample collection and storage before isolation of genomic DNA: General considerations ................. 31 2 DNA purification METHODS from plant materials ......................................................................................... 31 Standard chemical method using CTAB .................................................................................................... 32 Plant Genomic DNA PURIFICATION using A kit ......................................................................................... 32 Genomic DNA extraction from plant materials using the ZR Plant/Seed DNA MiniPrep kit .................. 33 Introduction ................................................................................................................................................... 33 Equipment and materials required ............................................................................................................... 34 Method .......................................................................................................................................................... 34 SAMPLE COLLECTION ................................................................................................................................ 34 DNA EXTRACTION ...................................................................................................................................... 34 Internet resources and further information ........................................................................................... 36 6. Agarose gel electrophoresis ........................................................................................................... 38 Introduction ........................................................................................................................................... 38 Equipment and materials .............................................................................................................................. 39 Method .......................................................................................................................................................... 42 Preparing agarose gels (0.8%, 1.8%, 2%) .................................................................................................. 42 Casting the agarose gel ............................................................................................................................. 42 Loading the DNA samples onto the gel ..................................................................................................... 46 Running the gel (electrophoresis) ............................................................................................................. 47 Viewing and photographing the gel with the UV transilluminator Gel Doc system ................................. 48 Cleaning the gel equipment ...................................................................................................................... 48 Internet resources and further information ........................................................................................... 48 7. Polymerase Chain Reaction (PCR): An introduction ........................................................................ 50 8. PCR amplification of the cytochrome c oxidase subunit 1 (CO1) gene for DNA barcoding of animals .......................................................................................................................................................... 52 Introduction: DNA Barcoding ................................................................................................................. 52 Equipment and materials .............................................................................................................................. 53 CO1 PCR using Bioneer Accupower PCR PreMix Kit tubes ...................................................................... 55 Method .......................................................................................................................................................... 55 CO1 PCR using individual PCR reagents: titrating MgCl2 ....................................................................... 58 Method .......................................................................................................................................................... 58 9. PCR of the ribulose-‐1, 5-‐bisphosphate carboxylase oxygenase large subunit (rbcL) for DNA barcoding of plants ............................................................................................................................................ 62 Introduction: DNA Barcoding ................................................................................................................. 62 Equipment and materials .............................................................................................................................. 62 rbcL PCR using Bioneer Accupower PCR PreMix Kit tubes ..................................................................... 64 Method .......................................................................................................................................................... 64 rbcL PCR using individual PCR reagents: titrating MgCl2 ....................................................................... 67 Method .......................................................................................................................................................... 67 Internet resources and further information ........................................................................................... 71 10. Purification of PCR products ......................................................................................................... 73 Introduction ........................................................................................................................................... 73 GeneJET PCR Product Purification .......................................................................................................... 73 Equipment and materials .............................................................................................................................. 73 3 Method .......................................................................................................................................................... 74 GeneJET ..................................................................................................................................................... 74 Agarose gel analysis .................................................................................................................................. 75 NanoDrop Spectrophotometry ................................................................................................................. 75 DNA sequencing ........................................................................................................................................ 75 PCR Product Purification by ETHANOL Precipitation .............................................................................. 77 Equipment and materials .............................................................................................................................. 77 Method .......................................................................................................................................................... 77 Agarose gel analysis .................................................................................................................................. 77 NanoDrop Spectrophotometry ................................................................................................................. 78 DNA sequencing ........................................................................................................................................ 78 Internet resources and further information ........................................................................................... 79 11. DNA Sequencing: An introduction ................................................................................................ 81 Internet resources and further information ........................................................................................... 82 12. Restriction enzyme digestion of purified PCR products ................................................................. 83 Introduction ........................................................................................................................................... 83 Equipment and materials .............................................................................................................................. 84 Method .......................................................................................................................................................... 85 Internet resources and further information ........................................................................................... 89 13. NanoDrop spectrophotometry: Assessment of nucleic acid concentration and purity ................... 90 NanoDrop: Basic Use for measuring double stranded DNA .......................................................................... 90 Background information ................................................................................................................................ 92 Contaminant Identification ........................................................................................................................... 93 260/230 Ratios .......................................................................................................................................... 93 260/280 Ratios .......................................................................................................................................... 94 Internet resources and further reading .................................................................................................. 95 14. Genomic DNA extraction from plants: modified Dellaporta method ............................................. 97 Equipment and materials .............................................................................................................................. 97 Method .......................................................................................................................................................... 98 Tissue extraction ....................................................................................................................................... 98 Precipitation of Proteins and Polysaccharides .......................................................................................... 98 Solvent Extraction 1 .................................................................................................................................. 99 RNAse A treatment ................................................................................................................................... 99 Solvent Extraction 2 .................................................................................................................................. 99 Crude DNA pellet precipitation ............................................................................................................... 100 70% ethanol wash ................................................................................................................................... 100 Agarose gel electrophoresis of genomic DNA ............................................................................................. 100 NanoDrop spectrophotometry of genomic DNA ......................................................................................... 101 15. Recipes ....................................................................................................................................... 102 70 % Ethanol ........................................................................................................................................... 102 5 M NaCl .................................................................................................................................................. 102 5M potassium acetate ............................................................................................................................ 102 RNase A (20 mg/mL) ............................................................................................................................... 102 20 % SDS (sodium dodecyl sulphate) ...................................................................................................... 103 4 SDS/DTT Extraction Buffer ...................................................................................................................... 103 3 M Sodium acetate (pH 8.0) .................................................................................................................. 103 10X TBE Buffer (pH 8) .............................................................................................................................. 104 TE-‐1 buffer .............................................................................................................................................. 104 1 M Tris-‐HCl (pH 8) .................................................................................................................................. 104 Water ...................................................................................................................................................... 104 16. Cautions ..................................................................................................................................... 106 Chloroform .............................................................................................................................................. 106 SDS .......................................................................................................................................................... 106 UV transilluminator ................................................................................................................................. 106 Electrical equipment ............................................................................................................................... 107 17. Additional information ............................................................................................................... 108 18. Abbreviations ............................................................................................................................. 110 19. Acknowledgements .................................................................................................................... 111 20. Notes ......................................................................................................................................... 112 5 1. INTRODUCTION TO THE WORKSHOP BACKGROUND Biosciences have greatly enhanced our ability to quickly diagnose diseases, determine the genetic diversity of pest and pathogen populations, understand host-‐pathogen interactions, speed the development of new varieties of crops, combine genes from a wide array of organisms in transgenic technologies and develop strategies for their management. However, opportunities linking modern biosciences to agricultural improvement to solve some of Africa’s major agricultural problems remain largely untapped. A number of NARS in the east and central Africa region have basic equipment for conducting molecular biology techniques, and have access to the internet for bioinformatics analysis, but the skills to apply the technologies to agricultural research are largely lacking. This training workshop seeks to address the skills gap in basic molecular biology and bioinformatics, to increase the capacity of African scientists and institutions to conduct biosciences research, and to develop and deliver new technologies for agriculture. The main target group for this workshop is researchers at NARS in east and central Africa who are actively engaged in biosciences research, and who need the skills to address technology gaps in their own research programs. SCOPE OF THE IMBB TRAINING WORKSHOP IMBB is an intensive 2-‐week training workshop consisting of lectures and hands-‐on training in DNA purification, polymerase chain reaction (PCR), DNA sequencing and bioinformatics. Participants also experience the research discovery process whereby potentially novel DNA sequences acquired by each participant are analyzed during the bioinformatics sessions. Experts in molecular biology and bioinformatics from the BecA-‐ILRI Hub and regional partner research institutions will give training. WORKSHOP OBJECTIVES To give agricultural biosciences researchers from east and central Africa the working knowledge of basic molecular biology and bioinformatics that can be applied to address technology gaps in 6 their own agricultural research programmes, and that can be disseminated to other researchers at their home institutes. • • • • • Provide practical skills and concepts in basic molecular biology and bioinformatics Experience the discovery process as a team Provide skills to establish basic molecular biology and bioinformatics at NARs institutes Give researchers basic concepts of molecular biology and bioinformatics for understanding various contemporary areas of research and their applications and for communicating with other researchers in these fields Help establish links between researchers and with BecA DNA BARCODING The Workshop will be based on DNA barcoding to illustrate the power of basic molecular biology and bioinformatics techniques. DNA barcoding is a new diagnostic tool for rapid species recognition, identification, and discovery. As of February 2013, the Barcode of Life Datasystems database included almost 2,000,000 barcode sequences from over 160,000 species of animals, plants, and fungi (www.boldsystems.org/). DNA barcoding is based on a simple concept: it is a taxonomic method that uses a specific short genetic marker in an organism's DNA to identify the species. In 2003, Paul D.N. Hebert from the University of Guelph, Canada, proposed the creation of a public library of DNA barcodes that would be linked to named specimens and species. This library would "provide a new master key for identifying species, one whose power will rise with increased taxon coverage and with faster, cheaper sequencing". 7 WORKSHOP PLAN 8 2. USING A MICROPIPETTE This chapter was taken from the University of Queensland website: http://www.di.uq.edu.au/sparqmicropipette INTRODUCTION Molecular biologists frequently use very small volumes of liquids in their reserach, sometimes as small as 0.1 µL (that’s one ten thousandth of a millilitre, or one ten millionth of a litre!). For such small volumes, a micropipette is used. Micropipettes have a lot of different names, often based on the companies which manufacture the pipettes. For example, you might hear them called “Gilsons”, as this company makes a large range of these pipettes used in laboratories. (In the Workshop, you will use a range of Gilson Pipetman micropipettes). Regardless of the manufacturer, micropipettes operate on the same principle: the thumb depresses a plunger, and as it is released, liquid is drawn into a disposable plastic tip. When the plunger is pressed again, the liquid is dispensed. PIPETTE T IPS Disposable tips are an important part of the micropipette and allow the same device to be used for different samples (so long as you change your tip between samples) without washing. They come in a number of different sizes and colours, depending on the micropipette they are used with, and the volume to be dispensed. 9 The most commonly used tips are: D10 for use with P2 and P10 pipettes D20 for use with P20 pipette D100 for use with P100 pipette D200 for use with P200 pipette D1000 for use with P1000 pipette They are loaded into tip boxes for ease of use. Often the boxes of tips are sterilized to prevent contamination. For this reason tip boxes should be kept closed if they are not in use. Tips are loaded onto the end of the micropipette by pushing the end of the device into the tip and giving two sharp taps. Once used, tips are ejected into a waste beaker or flask using the tip eject button. (In the Workshop you must eject the tips into the flasks provided). Never touch the tip with your fingers, as this poses a contamination risk. Also available in the Workshop are pipette tips with aerosol resistant filters, which prevent contamination of the pipette barrel with sample, and prevents cross-‐contamination between samples, which is especially important with PCR. PLUNGER P OSITIONS For each pipette, the plunger can sit at any one of three positions: Position 1 is where Position 2 is reached by pushing Position 3 is reached by the pipette is at down on the plunger until pushing down from rest resistance is met position 2 Each of these positions plays an important part in the proper use of the pipette. 10 DRAW U P L IQUID Keeping the plunger at the second Steadily release pressure on the position, place the tip attached to plunger and allow it to return to the end of the micropipette Position 1. Do this carefully, beneath the surface of the liquid particularly with large volumes, as Push down with to be drawn up. Try not to push the liquid may shoot up into the tip the thumb until right to the bottom (especially if and the body of the micropipette. If Position 2 is you are removing supernatant bubbles appear in the tip, return the reached. from a centrifuged pellet), but liquid to the container by pushing ensure that the tip is far enough down to Position 3 and start again below the surface of the liquid (you may need to change to a dry that no air is drawn up. tip). 11 DISPENSE L IQUID Hold the micropipette so that the end of the tip is inside the vessel you want to deliver it to. When delivering smaller volumes into another liquid, you may need to put the end of the tip beneath the surface of the liquid (remember to change the tip afterwards if you do this to prevent contaminating the stock solution). For smaller volumes you may also need to hold the tip against the side of the container. Push the plunger down to Position 2. If you wish to mix two liquids together or resuspend a centrifuged pellet, release to Position 1 and push to Position 2 a few times to draw up and expel the mixed liquids To remove the last drop of liquid from the tip, push down to Position 3. If Release the plunger and allow delivering into a liquid, it to return to Position 1 remove the tip from the liquid before releasing the plunger 12 CHANGING T HE V OLUME Some micropipettes deliver fixed volumes, however the majority are adjustable. Each brand uses a slightly different method to do this. Gilsons have an adjustable wheel, others have a locking mechanism and turning the plunger adjusts the volume. All have a readout that tells you how much is being delivered and a range of volumes that can be dispensed. Trying to dispense less than the lower value of the range will result in inaccurate measurements. Trying to dispense over the upper range will completely fill the tip and allow liquid to enter the body of the pipette. Do not overwind the volume adjustment, as this affects the calibration of the micropipette. The way to interpret the readout depends on the micropipette used: In a 200-‐1000 µL micropipette (e.g. a Gilson P1000) the first red digit is thousands of µL (it should never go past 1), the middle digit is hundreds, while the third is tens. Therefore 1000 µL would read as 100, while 350 µL would read as 035. In a 20-‐200 µL micropipette (e.g. a Gilson P200) the first digit is hundreds of µL (it should never go past 2), the second is tens and the third is units. Therefore 200 µL would read as 200, while 95 µL would read as 095. In a 2-‐20 µL micropipette (e.g. a Gilson P20) the first digit is tens of µL (it should never go past 2), the second is units and the third red digit is tenths. Therefore 20µL would read as 200, while 2.5µL would read a 025 In a 0.2-‐2 µL micropipette (e.g. a Gilson P2) the first digit is units of µL (it should never go past 2), the second red digit is tenths and the third red digit is hundredths. Therefore, 2µL would read as 200, while 0.5 µL would read as 050 13 INTERNET RESOURCES AND FURTHER INFORMATION 1. Using a Micropipette -‐ University of Leicester training video http://www.youtube.com/watch?v=2UQIoYhOowM 2. Using a Micropipette http://www.di.uq.edu.au/sparqmicropipette 3. Pipetman maintenance http://oomyceteworld.net/protocols/RaininPipetmanGuide.pdf 4. Gilson Pipetman spare parts http://www.pipetman.com/ReplacementParts.aspx 14 3. LAB MATH Biosciences researchers need a good working knowledge of basic mathematical methods and formulae. In this chapter we have compiled the most common mathematical concepts and methods for use in the biosciences lab. Topics include scientific notation, molarity, and making solutions and dilutions. POWER P REFIXES It is essential that you learn the meaning of power prefixes. The most common ones used in the biology lab are kilo, milli, micro, nano and pico. In the laboratory you will encounter these when dealing with volumes (e.g. milliliters, ml or mL; microliters, µl or ul or µL), molarity (e.g. micomolar or µM), weights (e.g. kilograms, kg; nanograms, ng), molecular weights (e.g. kiloDaltons or kDa). You will also encounter kilo to describe 1000 nucleotide bases or base pairs (e.g. kb [kilo bases]; kbp [kilo base pairs]). In bioinformatics you will encounter the prefix ‘mega’ which is used to describe a million bases (megabases or Mb). Prefix Symbol Factor mega M 106 kilo hecto* deka* deci* centi milli micro nano pico k h da d c m µ (or u) n p 103 102 101 10-‐1 10-‐2 10-‐3 10-‐6 10-‐9 10-‐12 *not used in the biosciences laboratory 15 CONVERSION F ACTORS Conversion Factors (grams) 1x10³ g = 1 kg (kilogram) = 1x10-‐3 g = 1 mg (milligram) = 1x10-‐6 g = 1 *µg (microgram) = 1x10-‐9 g = 1 ng (nanogram) = 1x10-‐12g= 1 pg (picogram) = *Note: ‘µ’ is often written as ‘u’ Conversion Factors (Molarity) 1x10-‐3 M = 1 mM (millimolar) = 1x10-‐6 M = 1 µM (micromolar) = 1x10-‐9 M = 1 nM (nanomolar) = 1x10-‐12 M = 1 pM (picomolar) = 1000 g 0.001 g 0.000001 g 0.000000001 g 0.000000000001 g 0.001 M 0.000001 M 0.000000001 M 0.000000000001 M CONCENTRATION • • • • Concentration is the amount of a substance in a specific volume (or sometimes mass) of a solution or mixture. The substance that is dissolved is called the solute and the liquid is called the solvent. Remember ‘concentration’ and ‘amounts’ are NOT synonymous. ‘Amount’ is how much of a substance is present (e. g. 4 grams, 1 mole). ‘Concentration’ is a ratio with a numerator (amount) and a denominator (usually volume). e.g. 25 g NaCl per litre water, where the NaCl is the solute and water is the solvent. THE M W ORDS ( MOLE, M OLAR, M OLARITY) • • Mole: (symbol: mol) A name for 6.022 x 10²³ particles of something, e.g. a chemical. A mole of a chemical has a mass equal to the molecular weight (or formula weight) in grams. Molar: (symbol: M) The concentration, in moles per litre, of a solution. A one molar solution contains 1 mole of a substance in 1 litre (1 L). It is abbreviated M. For example one molar is written 1 M. 16 • Molarity: Molarity is the number of moles of a chemical in 1 L of solution and is thus a unit of concentration. A 1 Molar (1 M) solution is equivalent to one molecular weight (or formula weight) (MW or FW = g/mole) of a chemical dissolved in 1 L of solvent (usually water). MOLAR S OLUTIONS A one molar solution of a chemical is one in which 1 litre of solution contains the number of grams of chemical equal to its molecular weight. • Example 1 To make 1 litre of a 1 M NaCl solution, dissolve the molecular weight in grams of NaCl in a total volume of 1 litre of water: Formula: Grams required = (MW in g) x (desired molarity in moles) x (final volume in litres) 58.46 (MW of NaCl) g x 1 moles x 1 litre = 58.46 g Dissolve 58.46 g NaCl in water to a final volume of 1 litre • Example 2 To make 100 mL of a 0.3 M NaCl solution: Formula: Grams required = (MW in g) x (desired molarity in moles) x (final volume in litres) 58.46 (MW of NaCl) g x 0.3 moles x 0.1 litre = 1.75 g Dissolve 1.75 g of NaCl in water to a final volume of 100 mL PERCENT ( %) S OLUTIONS There are 2 types of percentage solutions: weight per volume (w/v) and volume per volume (v/v): Percentage (w/v) = weight (g) in 100 mL of solution Percentage (v/v) = volume (mL) in 100 mL of solution • Example 1 (w/v) To make a 3% solution of NaCl in water, weigh 3 g of NaCl and then make up the volume to 100 mL with water. • Example 2 (v/v) To make a 10% solution of glycerol in water, take 10 mL of glycerol and mix with 90 mL of water. 17 CONCENTRATED S TOCK S OLUTIONS -‐ U SING ‘ X’ U NITS Many enzyme buffers and electrophoresis buffers are prepared and stored as concentrated solutions. For example, a solution 20 times more concentrated would be denoted as 20X and would require a 1:20 dilution to attain the working concentration. • Example 1 Using 50X electrophoresis buffer: To prepare 1 litre of 1X electrophoresis buffer from a 50X stock, take 20 mL of stock (i.e. 1/50 of the final volume) and mix with 980 mL of water. • Example 2 Restriction enzyme digest using a 10X buffer: To set up a 25 µL restriction enzyme digestion, add 2.5 µL of a 10X buffer (i.e. 1/10 of the final volume), plus the other reaction components, and then water to a final volume of 25 µL. PREPARATION O F W ORKING S OLUTIONS F ROM C ONCENTRATED S TOCK SOLUTIONS Many buffers in molecular biology require the same components but often in varying concentrations. To avoid having to make every buffer from scratch, it can be useful to prepare several concentrated stock solutions and dilute as needed. The following formula is useful for calculating amounts of stock solution needed: Ci x Vi = Cf x Vf Where: Ci = initial concentration, or concentration of stock solution Vi = initial volume, or amount of stock solution needed Cf = final concentration, or concentration of desired solution Vf = final volume, or volume of desired solution You must first normalize the units, i.e. choose the same units for volumes and for concentrations: e.g. convert all volumes to mL and all molarities to mM. 18 • • • Example 1 How do you prepare 100 mL of TE buffer containing 10 mM Tris and 1 mM EDTA using stocks of 1 M Tris and 0.5 M EDTA ? Tris Ci x Vi = Cf x Vf 1000 x Vi = 10 x 100 so Vi = (10 x 100) / 1000 = 1 mL EDTA Ci x Vi = Cf x Vf 500 x Vi = 1 x 100 so Vi = (1 x 100) / 500 = 0.2 mL Therefore take 1 mL of 1 M Tris and 0.2 mL 0.5 M EDTA and mix with 98.8 mL water. Check your result. Does it make sense? Example 2 How do you prepare 250 mL of buffer containing 100 mM Tris and 10 mM NaCl using stocks of 0.5 M Tris and 0.1 M NaCl ? Tris Ci x Vi = Cf x Vf 500 x Vi = 100 x 250 so Vi = (100 x 250) / 500 = 50 mL NaCl Ci x Vi = Cf x Vf 100 x Vi = 10 x 250 so Vi = (10 x 250) / 100 = 25 mL Therefore, mix 50 mL of 0.5 M Tris, 25 mL 0.1 M NaCl and 175 mL water. Check your result. Does it make sense? Example 3 I have a 10% solution of NaCl in a tube and would like to make 65 mL of a 7% NaCl solution. What do I do? Ci x Vi = Cf x Vf 10 x Vi = 7 x 65 Vi = (7 x 65) /10 = 45.5 mL Therefore take 45.5 mL of 10% NaCl stock and mix with 19.5 mL of water. Check your result. Does it make sense? 19 SIMPLE D ILUTION A simple dilution is one in which a unit volume of a liquid material of interest is combined with an appropriate volume of a solvent liquid to achieve the desired concentration. The dilution factor is the total number of unit volumes in which your material will be dissolved. The diluted material must then be thoroughly mixed to achieve the true dilution. For example, for a 1:5 dilution combine 1 unit volume of stock solution (the material to be diluted) + 4 unit volumes of the solvent (the diluent). This is known as a 1+4 dilution, and has a dilution factor of 5. The dilution factor is frequently expressed using exponents: 1:5 would be 5-‐ 1 ; 1:100 would be 10-‐2, and so on. Dilutions can be written in different ways. For example, one part in ten dilution can be written in any of these ways: 1:10 1 in 10 1 part in 10 -‐1 1+9 10 Dilution factor of 10 LAB M ATH C HEAT S HEET 20 ONLINE C ALCULATORS There are plenty of online resources to help you with your calculations. Sigma Aldrich have a number of easy-‐to-‐use calculators. Links to three calculators, for solution dilution, mass molarity, and molarity for acids and bases, are given below: 1. Solution Dilution Calculator The solution dilution calculator tool calculates the volume of stock concentrate to add to achieve a specified volume and concentration. The calculator uses the formula M1V1 = M2V2 where "1" represents the concentrated conditions (i.e. stock solution Molarity and volume) and "2" represents the diluted conditions (i.e. desired volume and Molarity). http://www.sigmaaldrich.com/chemistry/stockroom-‐reagents/learning-‐center/technical-‐ library/solution-‐dilution-‐calculator.html 2. Mass Molarity Calculator The mass molarity calculator tool calculates the mass of compound required to achieve a specific molar concentration and volume. http://www.sigmaaldrich.com/chemistry/stockroom-‐ reagents/learning-‐center/technical-‐library/mass-‐molarity-‐calculator.html 3. Molarity calculator for an acid or base solution The molarity calculator tool provides lab-‐ready directions describing how to prepare an acid or base solution of specified Molarity (M) or Normality (N) from a concentrated acid or base solution. http://www.sigmaaldrich.com/chemistry/stockroom-‐reagents/learning-‐ center/technical-‐library/molarity-‐calculator.html INTERNET RESOURCES AND FURTHER INFORMATION 1. Molarity http://en.wikipedia.org/wiki/Concentration#Molarity http://www.youtube.com/watch?v=MH0pNcvfsm8 2. Scientific notation http://en.wikipedia.org/wiki/Scientific_notation 3. Lecture: David R. Caprette, Ph.D. Solutions and Dilutions http://www.bioedonline.org/presentations/index.cfm#presentation35 21 4. How to Make Simple Solutions and Dilutions http://abacus.bates.edu/~ganderso/biology/resources/dilutions.html 5. BioMath Calculators http://www.promega.com/biomath/default.htm 6. Introduction to lab math http://ocw.mit.edu/NR/rdonlyres/Biological-‐Engineering/20-‐109Spring-‐ 2006/4EF419A7-‐E30F-‐409E-‐9B12-‐E6C68E43D3D9/0/intro_to_labmath.pdf 7. Laboratory Math for Biologists http://www.rickhershberger.com/bioactivesite/lab/math/labmath.ppt#292 8. Notes on Basic Laboratory Mathematics, Laboratory Solutions & Some Practice Problems http://www.tracy.k12.ca.us/thsadvbio/pdfs/biotechmath.pdf 9. Chemistry Tutorial: Concentration, Molarity http://www.youtube.com/watch?v=JwV3F708ZrI 10. Maths for Science: Open University online course http://openlearn.open.ac.uk/mod/oucontent/view.php?id=398516&direct=1 11. Using numbers and handling data: Open University online course http://openlearn.open.ac.uk/mod/oucontent/view.php?id=398704 12. Mole and Avgadro’s Number: Khan Academy lecture http://www.khanacademy.org/science/chemistry/v/the-‐mole-‐and-‐avogadro-‐s-‐ number 22 4. GENOMIC DNA EXTRACTION FROM ANIMAL TISSUES INTRODUCTION Adapted from: • • Qiagen DNA Protocols & Applications http://www.qiagen.com/knowledge-‐and-‐ support/spotlight/protocols-‐and-‐applications-‐guide/dna/ Nishiguchi et al. (2001) DNA isolation procedures. In Techniques in Molecular Systematics and Evolution (2001) edited by Rob DeSalle, Gonzalo Giribet, Ward Wheeler. http://www.google.co.ke/search?tbo=p&tbm=bks&q=isbn:376436257X COLLECTION A ND S TORAGE O F T ISSUE S AMPLES The quality of the starting material affects the quality and yield of the isolated DNA. Optimal results are obtained with fresh material, or with material that has been immediately frozen (e.g. frozen in liquid nitrogen or dry ice) and stored at –80°C or liquid nitrogen. Repeated freezing and thawing of stored samples should be avoided, as this leads to reduced fragment size and precipitation of the DNA, and in diagnostic samples, to reduced yields of pathogen DNA (e.g. viral DNA). In general, genomic DNA yields will decrease if samples are stored at either 4°C (fridge temperature) or –20°C (general freezer temperature) without previous treatment. Animal tissues can also be stored in 70-‐90% ethanol at 4oC, often for many months without loss of DNA quality. Blood can be stored for many years at room temperature as dry blood spots on FTA cards. When obtaining tissue samples, regardless of the study or molecule of interest, the goal should be to acquire the freshest, or best-‐preserved, samples. Degraded nucleic acids can prevent successful molecular research. For example, PCR of DNA from old or badly preserved tissues can be unsuccessful because damage reduces the length of template molecules. Considerations for the correct storage of tissue is concisely summarised by Prendini, Hanner and DeSalle (https://research.amnh.org/amcc/pdfs/storage_collecting.pdf): “In an effort to minimise the processes of denaturation and degradation, preservation methods must aim to maintain the tissue samples at low temperature, exclude light and other forms of radiation, remove water and oxygen and sterilize against micro-‐organisms. These objectives are accomplished by freezing, desiccation or the addition of preservative fluids, and by storing samples in the dark, at constant, low temperature.” 23 DNA P URIFICATION The purpose of DNA purification from the cell is to ensure it performs well in subsequent downstream applications such as PCR, microsatellite analysis, SNP analysis, DNA sequencing etc. Ideally, the DNA should be free of contamination with protein, carbohydrate, lipids, or other nucleic acid (e.g. DNA free of RNA). The initial release of the cellular material is achieved by breaking the cell and nuclear membranes (cell lysis). Lysis must take place in conditions that will not damage the nucleic acid. Following lysis, the DNA is purified. There are many methods that have been developed for the purification of DNA, which reflects the diversity of the sample sources (animal, plant, fungi, protozoa, bacteria, viruses). After release of DNA from the cell, further purification requires removal of contaminating proteins, lipids, carbohydrates, RNA and any cell debris. Traditionally, this was accomplished by ‘organic extraction’ using a combination of high salt, low pH, and an organic mixture of phenol and chloroform. The combination readily dissolves hydrophobic contaminants such as lipids and lipoproteins, collects cell debris, and strips away most DNA-‐associated proteins. After extraction with phenol/chloroform the DNA is then precipitated with alcohol (ethanol or isopropanol), and then washed with 70% ethanol to remove salts. Safety concerns in the laboratory make the use of phenol undesirable. Methods of DNA isolation that do not require phenol extraction have been developed and are used in many laboratories. An example is given below. SILICA-‐BASED C OLUMN P URIFICATION O F D NA: U SING C OMMERCIAL K ITS These days many labs use commercial silica column kits for the isolation of nucleic acids. The spin columns contain a silica resin that selectively binds DNA. Briefly, a cell lysate in high concentrations of chaotropic salts is applied to a silica column, and the DNA in solution adsorbs to the solid phase. After the immobilized DNA is washed with optimized wash buffer to remove 24 cellular proteins and metabolites, the purified DNA is eluted in a specific volume of low salt buffer. No alcohol precipitation is required. This method is safer than methods where organic extraction is used. Silica-‐based column kits are available for purification of genomic DNA from animal, plant and microbial sources. Kits are also available for the purification of RNA, plasmids and PCR products. DNA EXTRACTION FROM MUSCLE TISSUE USING A SPIN COLUMN KIT In the workshop you will purify genomic DNA from animal muscle tissues using an Invitrogen PureLink Genomic DNA Kit. The DNA obtained will be very pure with high molecular weight, suitable for PCR. DNA will then be used to PCR amplify the CO1 gene, the target DNA Barcoding gene for animals. PureLink Genomic DNA Kit Overview 25 EQUIPMENT A ND M ATERIALS 1. Microfuge (Eppendorf tube centrifuge, microcentrifuge) 2. Vortexer 3. Gilson Pipetman pipettes and aerosol resistant filter pipette tips (D10, D20, D100, D200, D1000) 4. 5. Water bath set at 55oC. Eppendorf Snap-‐Cap Microcentrifuge Safe-‐Lock Tubes, 0.5 mL and 1.5 mL (Fisher Scientific # 05-‐402-‐18; 05-‐402-‐25). 26 6. 7. 8. 9. 10. PureLink Genomic DNA Kit (Invitrogen # K1820-‐01). Store at room temperature. Absolute (100%) ethanol. Store at room temperature. Sterile scalpel blades and clean microscope slides. Nitrile gloves Muscle tissue sample (stored in 80% ethanol at 4oC) METHOD • • • • • All centrifugations (spins) are done in a microfuge at room temperature. Ensure the centrifuge rotor is balanced before spinning. Make sure there is no precipitate visible in PureLink Genomic Digestion Buffer or PureLink Genomic Lysis/Binding Buffer. If any precipitate is visible in the buffers, warm the buffers at 37oC for 3-‐5 min and mix well to dissolve the precipitate before use. Add absolute ethanol to PureLink Genomic Wash Buffer 1 and PureLink Genomic Wash Buffer 2 according to instructions on each label. Mix well. Mark on the labels that ethanol is added. Store both wash buffers with ethanol at room temperature. Use filter tips throughout. PureLink Genomic Lysis/Binding Buffer and Wash Buffer 1 contain guanidine hydrochloride. Guanidine hydrochloride is extremely hazardous in case of ingestion. Harmful in case of skin contact (irritant), of eye contact (irritant). Redness, watering, and itching characterize inflammation of the eye. Skin inflammation is characterized by itching, scaling, reddening, or, occasionally, blistering. Contact of Guanidine hydrochloride with acids or bleach liberates toxic gases. DO NOT ADD acids or bleach to any liquid wastes containing this product. Wear gloves (e.g. nitrile gloves) and eye protection when handling these products. 1. You will each receive a small piece of muscle tissue (of unknown origin) in 75% ethanol in a 1.5 mL Eppendorf tube. Each muscle sample is about 25 mg. These samples are stored at 4oC. 2. Remove as much of the ethanol as possible using a 200 µL pipette tip. Dispose of the ethanol. 3. Using a sterile scalpel blade, chop the muscle sample as finely as possible on a clean glass microscope slide. Transfer the chopped tissue to a clean 1.5 mL Eppendorf tube. 4. Add 180 µL PureLink Genomic Digestion Buffer and 20 µL Proteinase K (supplied with the kit) to the tube. Ensure the tissue is completely immersed in the buffer mix. 5. Incubate at 55oC with occasional vortexing until lysis is complete (1-‐4 hours, although the lysis incubation can be left overnight if this is convenient). 6. To remove any particulate materials, centrifuge the lysate at 13,000 rpm in a microfuge for 3 min at room temperature. 27 7. Transfer supernatant to a new 1.5 mL Eppendorf tube. 8. Add 20 µL RNase A (supplied in the kit) to the lysate, mix well by brief vortexing, and incubate at room temperature for 2 min. Microfuge briefly. 9. Add 200 µL PureLink Genomic Lysis/Binding Buffer and mix well by vortexing for 5 sec. 10. Add 200 µL absolute ethanol to the lysate. Mix well by vortexing for 5 sec. Microfuge briefly. When processing multiple samples, you may prepare a master mix of the buffer and ethanol by mixing equal volumes of each relative to the number of samples. 11. Remove a PureLink Spin Column in a Collection Tube from the package. 12. Add the lysate (~640 µL) to the PureLink Spin Column. 13. Centrifuge the column at 13,000 rpm in a microfuge for 1 min at room temperature. 14. Discard the collection tube and place the spin column into a clean PureLink Collection Tube supplied with the kit. 15. Add 500 µL Wash Buffer 1 (already prepared with ethanol; see above) to the column. 16. Centrifuge column at room temperature at 13,000 rpm for 1 min at room temperature. 17. Discard the collection tube and place the spin column into a clean PureLink collection tube supplied with the kit. 18. Add 500 µL Wash Buffer 2 (already prepared with ethanol; see above) to the column. 19. Centrifuge the column at 13,000 rpm for 1 min at room temperature. 20. Discard collection tube. Place the spin column in a clean 1.5 mL Eppendorf tube (without lid). 21. Centrifuge the column at 13,000 rpm for 2 min at room temperature. This step is necessary to remove excess ethanol from the column. Any remnant ethanol will inhibit downstream DNA manipulations. 22. Discard collection tube. Place the spin column in a clean 1.5 mL Eppendorf tube (without a lid). 23. Add 25 µL of PureLink Genomic Elution Buffer to the column. Incubate at room temperature for 2 min. 24. Centrifuge the column at 13,000 rpm for 1 min at room temperature. 25. Leave the column in the tube. Add another 25 µL of PureLink Genomic Elution Buffer to the column. Incubate at room temperature for 2 min. 26. Centrifuge the column at 13,000 for 1 min at room temperature. The eluate in the tube contains purified genomic DNA. 27. Transfer the DNA to a clean, labeled 0.5 mL Eppendorf tube. 28. Store the purified DNA at -‐20oC. 28 AGAROSE E LECTROPHORESIS O F G ENOMIC D NA (See Chapter 6 for more information on agarose gel electrophoresis) 1. Transfer 3 µL of the purified genomic DNA to a clean 0.5 mL Eppendorf tube and mix with 3 µL 2X DNA Gel Loading Buffer. 2. Load sample onto a 0.8% agarose gel made with GelRed. 3. In three wells on the gel load 50 ng, 100 ng and 200 ng of Lambda DNA standards. These are provided at 10, 20 and 40 ng/µL in 1X DNA Gel Loading Buffer. Load 5 µL of each. 4. Also include a DNA Ladder in an outside well. 5. Run the gel at 50-‐80 V until the Bromophenol Blue dye has reached 2/3 the length of the gel or the Orange G dye has reached 3/4 the length of the gel. 6. Record an image of the gel using a gel documentation system. 7. Estimate the concentration of the genomic DNA by comparing with the Lambda Standards on the agarose gel. NANODROP S PECTROPHOTOMETRY O F G ENOMIC D NA (See Chapter 13 for instructions on using the NanoDrop). The NanoDrop is a cuvette-‐free spectrophotometer that uses only 1-‐2 µL to measure nucleic acid concentration and purity. 1. Blank the NanoDrop with 1.5 µL of diluent used for your genomic DNA sample. 2. Perform a spectral measurement with 1.5 µL of your sample. 3. Once you have determined the concentration of your sample, dilute an aliquot of the DNA with Nuclease Free Water in a labeled 0.5 mL Eppendorf tube to give 50 µL of 10 ng DNA/µL. 4. Store both the undiluted and diluted genomic DNA at -‐20oC. 29 Example: 0.8% agarose gel of high quality genomic DNA extracted from Cape Buffalo muscle using a PureLink kit. INTERNET RESOURCES AND FURTHER INFORMATION 1. Information on other methods of DNA purification http://www.promega.com/resources/product-‐guides-‐and-‐selectors/protocols-‐and-‐ applications-‐guide/dna-‐purification/ 2. Animal sample FTA protocols http://www.qiagen.com/hb/qiacardftaspots_en. 3. FTA general information http://www.whatman.com/References/51613%20FTA%20Cards%20Data%20Sheet%281 %29.pdf 4. How silica spin columns work http://bitesizebio.com/articles/how-‐silica-‐spin-‐column-‐ dna-‐and-‐rna-‐preps-‐work/ 5. Qiagen: Genomic DNA Purification Technical hints, applications, and protocols: Link 6. Promega: DNA Purification http://www.promega.com/~/media/Files/Resources/PAGuide/Letter/chap9.ashx 7. DNA Extraction procedures http://labs.medmicro.wisc.edu/mcfall-‐ ngai/papers/2002nish3.pdf 8. Walsh et al. (1991) Chelex 100 as a Medium for Simple Extraction of DNA for PCR-‐Based Typing from Forensic Material. http://www.biotechniques.com/multimedia/archive/00190/BTN_A_000114018_O_190 194a.pdf 30 5. GENOMIC DNA EXTRACTION FROM PLANT MATERIALS INTRODUCTION Adapted from: • • • CIMMYT (2005) Laboratory Protocols: CIMMYT Applied Molecular Genetics Laboratory. Third Edition. Mexico, D.F.: CIMMYT. Link Clarke (2009) Cetyltrimethyl Ammonium Bromide (CTAB) DNA Miniprep for Plant DNA Isolation, Cold Spring Harb Protoc; doi:10.1101/pdb.prot5177. http://cshprotocols.cshlp.org/content/2009/3/pdb.prot5177.abstract Centre for Integrative Legume Research (CILR) http://www.cilr.uq.edu.au/UserImages/File/Plant%20Genomic%20DNA%20Extraction% 20by%20CTAB%20_2__Fiona.pdf PLANT S AMPLE C OLLECTION A ND S TORAGE B EFORE I SOLATION O F G ENOMIC DNA: G ENERAL C ONSIDERATIONS Leaves can be harvested from tissue-‐cultured plants, the greenhouse or field-‐grown plants. It is preferable to use young leaves without necrotic areas or lesions, although older leaves that are not senescent may be used. If the midrib is thick and tough, remove it. Cut or fold leaves into 10-‐15 cm sections and place in a plastic screen mesh bag along with the tag identifying the sample. (Aluminium foil or paper bags may be substituted if holes are punched to allow good air-‐flow.) Place bags in an ice chest or other container with ice to keep samples cool but do not allow them to freeze. Make sure samples do not get wet. Leaf samples can be dried using silica gel, and dried leaf samples may be stored in sealed plastic bags at room temperature for a few days or, preferably, at -‐20°C where the leaf materials will be stable for several years. Fresh leaf samples may be frozen and stored at -‐80°C for up to one year. Fresh leaf samples yield the highest quality DNA, and in the Workshop you will use fresh young leaves from plants collected on the ILRI campus. DNA P URIFICATION M ETHODS F ROM P LANT M ATERIALS Plant materials are among the most difficult for high quality DNA extractions. DNA extraction from plant tissue can vary depending on the material used. The key is to properly prepare the 31 tissues for DNA extraction. Essentially any mechanical means of breaking down the cell wall and membranes to allow access to nuclear material, without its degradation, is required. STANDARD CHEMICAL METHOD USING CTAB For this, usually an initial grinding stage with liquid nitrogen in a mortar and pestle is employed to break down cell wall material and allow access to DNA while harmful cellular enzymes and chemicals remain inactivated. Once the tissue has been sufficiently ground, it can then be resuspended in a suitable buffer, containing reagents such as cetyltrimethyl ammonium bromide (CTAB) or SDS (sodium Dodecyl Sulphate). The presence of polysaccharides in a plant DNA preparation can inhibit techniques such as polymerase chain reaction (PCR). CTAB is a surfactant useful for isolation of DNA from tissues containing high amounts of polysaccharides. Under the high-‐salt conditions used in this protocol, the CTAB binds the polysaccharides, removing them from the solution. SDS is a strong anionic detergent useful for isolation of DNA from tissues containing high amounts of polysaccharides. The solubilized DNA is then extracted with chloroform to remove lipids and proteins. Finally, DNA must then be precipitated from the aqueous phase and washed to remove contaminating salts. Although we will not use the CTAB or SDS method in the Workshop, a detailed SDS protocol is available in Chapter 14. PLANT GENOMIC DNA PURIFICATION USING A KIT The advantages of using DNA isolation kits over crude CTAB method described above, is they are fast, simple, do not contain harmful chemicals such as phenol or chloroform and involves minimal handling. The technology makes use of spin columns, which contain a silica-‐gel-‐based membrane that binds the DNA. The DNA while bound to the membrane can be washed and cleaned from contaminants and then eluted from the column (membrane) using water. The DNA obtained is usually more pure and clean than DNA isolated from the crude CTAB method. One disadvantage of the kits is the cost, with kits ranging in price from $250 to $300+ for 50 preps. In the Workshop you will extract DNA from Plant tissues using the ZR Plant/Seed DNA MiniPrep kit. 32 GENOMIC DNA EXTRACTION FROM PLANT MATERIALS USING THE ZR PLANT/SEED DNA MINIPREP KIT INTRODUCTION The ZR Plant/Seed DNA MiniPrep is designed for the simple, rapid isolation of inhibitor-‐free, PCR-‐quality DNA from a variety of plant sample sources including leaves, stems, buds, flowers, fruit, seeds, etc. The procedure is easy and can be completed in as little as 15 minutes: plant samples (≤150 mg each) are added directly to a ZR Bashing Bead Lysis Tube and rapidly and efficiently lysed by bead beating without the use of organic denaturants or proteinases. The eluted DNA is ideal for downstream molecular-‐based applications including PCR, arrays, etc. (The DNA is high quality, inhibitor-‐free and is eluted with DNA Elution Buffer that is suitable for PCR amplification. A260/A280 > 1.8. Yields are typically 20-‐80 ng DNA/mg plant material.) A schematic of the ZR Plant/Seed DNA MiniPrep procedure is shown below. 33 EQUIPMENT A ND M ATERIALS R EQUIRED 1. ZR Plant/Seed DNA MiniPrep kit (50 preps), Catalog No. D6020. 2. Nitrile gloves 3. Microfuge (Eppendorf tube centrifuge, microcentrifuge) 4. Mixer-‐Eppendorf ThermoMixer C 5. Gilson Pipetman pipettes and aerosol resistant filter pipette tips 6. 1.5 mL Eppendorf tubes 7. Nuclease Free Water 8. 1M Dithiothreitol (DTT) (ready-‐made and stored at 4°C) 9. Aluminium foil 10. Clean scissors and forceps 11. Microtube micro-‐pestle 12. Scalpel blades METHOD SAMPLE COLLECTION 1. Collect a young fresh leaf from two different plants of your choice from the ILRI grounds. Take a photograph of the plants for your records. 2. Wrap the leaf in foil and take to the lab. 3. In the lab, cut the young leaf with clean scissors and weigh out 150 mg on a small piece of clean foil on the balance. Cut the tissue finely with a scalpel blade on a clean foil paper and transfer into a clean 1.5 mL Eppendorf tube using clean forceps. Keep on ice until you are ready for the next step. Rinse scissors and forceps in 10% bleach solution, tap water, then 70% ethanol (each in a beaker) and air dry after each sample. This will prevent cross-‐contamination between samples. DNA EXTRACTION For optimal performance, add 1M Dithiothreitol (DTT) on the material day to the Plant/Seed DNA Binding Buffer to a final dilution of 10 mM, i.e. 500 μL per 50 ml or 1 mL per 100 mL. Note: The Plant/Seed DNA Binding Buffer with DTT can be stored at 4°C for up to 1 week. 34 1. Grind the tissue using a microtube micro-‐pestle until a uniform fine pulp is produced. Leave pestle in tube after grinding. 2. Transfer the macerated plant tissue to a ZR Bashing Bead Lysis Tube and add 650 μL Lysis Solution to the tube. Use additional 100 μL Lysis Solution to rinse the 1.5 mL Eppendorf tube and microtube micro-‐pestle used in step 1 and collect the rinse into the ZR Bashing Bead Lysis Tube. Cap tube tightly to prevent leakage. 3. Secure the ZR Bashing Bead Lysis Tubes in the Eppendorf ThermoMixer and process at maximum speed (2000 rpm) for 10 min. 4. Centrifuge the ZR Bashing Bead Lysis Tube in a microfuge at 13,000 rpm for 5 min. 5. Snap off the base of the Zymo-‐Spin IV Spin Filter (orange top) prior to use and insert into a new Collection Tube. Transfer up to 400 μL supernatant from step 4 to the prepared Zymo-‐Spin IV Spin Filter Collection Tube and centrifuge at 7,000 rpm for 1 min in a microfuge. 6. Add 1,200 μL of Plant/Seed DNA Binding Buffer to the filtrate in the Collection Tube from Step 4 and mix thoroughly by pipetting up and down with a 1 mL pipette tip. 7. Transfer 800 μL of the mixture from Step 6 to a Zymo-‐Spin IIC Column in a Collection Tube and centrifuge at 10,000 rpm in a microfuge. (The Zymo-‐Spin IIC Column has a maximum capacity of 800 μL). 8. Discard the flow through from the Collection Tube and repeat Step 7. Add 200 μL DNA Pre-‐Wash Buffer to the Zymo-‐Spin IIC Column in a new Collection Tube and centrifuge at 10,000 rpm for 1 min in an Eppendorf microfuge. 9. Add 500 μL Plant/Seed DNA Wash Buffer to the Zymo-‐Spin IIC Column and centrifuge at 10,000 rpm for 1 min in a microfuge. 10. Discard the flow-‐through in the Collection Tube and centrifuge again the Zymo-‐Spin IIC Column at 10,000 rpm for 1 min in a microfuge to completely remove the residual buffer. 11. Transfer the Zymo-‐Spin IIC Column to a clean 1.5 mL Eppendorf tube and discard the Collection Tube with flow-‐through. 12. Add 50 μL nuclease-‐free water directly to the middle of the column matrix of the Zymo-‐ Spin IIC Column and centrifuge at 10,000 rpm for 30 sec in a microfuge to elute the genomic DNA. 13. Remove the column and cap the tube. The DNA is now suitable for PCR and other downstream applications. 14. Store the DNA at -‐20oC until required. 35 INTERNET RESOURCES AND FURTHER INFORMATION 1. 2. 3. 4. 5. 6. ZR Plant/Seed DNA MiniPrep https://www.zymoresearch.com/dna/genomic-‐dna/soil-‐fecal-‐plant-‐dna/zr-‐plant-‐ seed-‐dna-‐miniprep Dellaporta et al. (1983) Plant Molecular Biology Reporter 1, no 4, pp 19-‐21. http://link.springer.com/article/10.1007%2FBF02712670?LI=true#page-‐1 CIMMYT (2005) Laboratory Protocols: CIMMYT Applied Molecular Genetics Laboratory. Third Edition. Mexico, D.F.: CIMMYT. http://www.google.co.ke/search?q=CIMMYT.+2005.+Laboratory+Protocols%3A+CIM MYT+Applied+Molecular+Genetics+Laboratory.+Third+Edition.+Mexico%2C+D.F.%3A +CIMMYT&ie=utf-‐8&oe=utf-‐8&aq=t&rls=org.mozilla:en-‐US:official&client=firefox-‐a Plant DNA extraction method. http://www.protocol-‐ online.org/prot/Molecular_Biology/DNA/DNA_Extraction_Purification/DNA_Extractio n_from_Plants/index.html Plant genomic DNA extraction using CTAB http://www.cilr.uq.edu.au/UserImages/File/Plant%20Genomic%20DNA%20Extractio n%20by%20CTAB%20_2_Fiona.pdf FTA protocols for plant samples. http://www4.ncsu.edu/~rgfranks/research/protocols/FTA%20cards%20protocols/BD 36 7. 8. 05%20-‐ %20Applying%20and%20Preparing%20Plant%20Samples%20on%20FTA%20Cards.pdf DNA Extraction procedures. http://labs.medmicro.wisc.edu/mcfall-‐ ngai/papers/2002nish3.pdf Clarke (2009) Cetyltrimethyl Ammonium Bromide (CTAB) DNA Miniprep for Plant DNA Isolation, Cold Spring Harb Protoc; doi:10.1101/pdb.prot5177. http://cshprotocols.cshlp.org/content/2009/3/pdb.prot5177.abstract 37 6. AGAROSE GEL ELECTROPHORESIS INTRODUCTION Adapted from: • • • • http://www.docstoc.com/docs/23538647/Agarose-‐Gel-‐Electrophoresis http://www.biotium.com/product/product_info/Newproduct/GelRed_GelGreen.asp http://cibt.bio.cornell.edu/workshops_and_summer_programs/0708alum/4-‐Gel.pdf http://www.instrument.com.cn/show/Literature/C98928.pdf Gel electrophoresis is a widely used technique in molecular biology, used routinely for the analysis and preparation of DNA. Electrophoresis is the separation of charged molecules in an electric field. Agarose is a polysaccharide purified from seaweed. An agarose gel is created by suspending dry agarose in a buffer solution, boiling until the solution becomes clear, and then pouring it into a casting tray and allowing it to cool. The result is a flexible gelatine-‐like slab. DNA samples are loaded onto the gel in wells created by a sample comb during gel casting. For electrophoresis, the gel is submersed in a chamber containing a buffer solution and a positive and negative electrode. The DNA to be analyzed is forced through the pores of the gel by the electrical current. DNA will move towards the positive electrode and away from the negative electrode. Several factors influence how fast the DNA moves, including (i) the strength of the electrical field, (ii) the concentration of agarose in the gel and (iii) most importantly, the size of the DNA molecules. Smaller DNA molecules move through the agarose faster than larger molecules thereby giving separation of the DNA molecules in the sample by virtue of DNA size. DNA in the gel is visualized with a DNA stain, which can either be added to the gel before casting, or can be used to stain the DNA on the gel after electrophoresis. Ethidium bromide, because of its low price and good sensitivity, has been widely used for many decades as a dye for nucleic acid gel staining. However, ethidium bromide is a toxic and highly mutagenic material. The safety hazard and costs associated with decontamination and waste disposal can make the dye expensive to use. Alternative, safer gel stains, such as GelRed, have become commercially available in recent years. Like ethidium bromide, GelRed binds to DNA and illuminates when exposed to ultraviolet light, causing the DNA bands to fluoresce. GelRed will be used in the Workshop. 38 EQUIPMENT A ND M ATERIALS 1. 2. 3. 4. Nitrile gloves Safety goggles Heat resistant insulated gloves or Insulated Grippers. P10, P20, P100, P200, P1000 Gilson Pipetman pipettes and appropriate pipette tips (D20, D20, D100, D200, D1000). 5. 0.5 mL Eppendorf tubes 6. Glassware: 500 mL flasks, 1 L & 100 mL measuring cylinders, 1 litre Duran bottle and 200 mL Duran bottles. 7. Agarose, Molecular Biology Grade (Merck Millipore # 121853). Store at room temperature. 8. GelRed DNA stain (10,000X in water) (Biotium # 41003). Store at room temperature, or at 4oC for long-‐term storage. 9. Water bath set at 55oC. 10. DNA Gel Loading Buffers. Two 6X buffers are supplied. Select either for use in the workshop. i. 6X DNA Gel Loading Buffer (Merck Millipore # 69180-‐3). 6X Loading Buffer is for gel electrophoresis of DNA fragments or PCR products, and contains Orange G, Xylene Cyanol FF, and glycerol. In 1% agarose gels Orange G co-‐migrates with a ~50 bp DNA fragment and Xylene Cyanol with ~4000 bp DNA fragment. Store at 4oC. ii. 6x Orange Loading Dye Solution (Fermentas # R0631) contains 10mM Tris-‐HCl (pH 7.6) 0.15% Orange G, 0.03% Xylene Cyanol FF, 60% glycerol and 60mM EDTA. Store at room temperature, or at 4°C for up to 12 months. Prepare a 2X DNA Gel Loading buffer by mixing 0.5 mL 6X buffer and 1 mL sterile deionized water. Store at 4oC. 11. DNA ladders. Four DNA ladders are supplied. Select any for use in the workshop. i. Quick-‐Load 100 bp DNA Ladder (50 μg/mL) (NEB # N0467S). This DNA Ladder is a pre-‐mixed, ready-‐to-‐load molecular weight marker containing Bromophenol Blue as a tracking dye, which migrates with DNA of 500 bp in a 1% agarose gel. It contains 12 bands suitable for use as molecular weight standards for agarose gel electrophoresis. Use 10 µL per well (lane). The ladder includes fragments ranging from 100-‐1,517 base pairs. The 500 and 1,000 bp bands have increased intensity to serve as reference bands. Quick-‐Load 100 bp DNA Ladder is stable for at least 6 months at 25°C. For long-‐term storage, store at 4°C or -‐20°C. If stored at -‐20°C, mix well after thawing. ii. Low Molecular Weight DNA Ladder, 500 μg/mL (NEB # N3233S). This ladder includes fragments ranging from 25-‐766 bp. The 200 bp band has increased intensity to serve as a reference point. For long-‐term storage, store at -‐20°C; mix well after thawing. 39 iii. iv. Gel Loading Dye, Blue (6X) is supplied with the ladder, and contains Bromophenol Blue which migrates with DNA of 500 bp in a 1% agarose gel. To prepare a ready-‐to-‐ use solution of the ladder, mix 100 μL Low Molecular Weight DNA Ladder, 167 μL Gel Loading Dye, Blue (6X), and 733 μL TE buffer in a 1.5 mL Eppendorf tube. Mix well, microfuge briefly and prepare 200 μL aliquots in 0.2 mL Eppendorf tubes. For long term storage, store at -‐20°C; mix well after thawing. Keep an ‘in-‐use’ aliquot at 4oC. Use 10 μL per well (lane) on a gel. Perfect DNA 100 bp Ladder (Merck Millipore # 70539). The Perfect 100 bp DNA Ladder is supplied ready-‐to-‐use at 125 μg/ml in 10 mM Tris-‐HCl (pH 8.0), 1 mM EDTA. It contains 13 bands with fragments of the following sizes: 100, 200, 300, 400, 500, 600, 700, 800, 900, 1000, 1500, 2000 and 2500 bp. Bands at 500 and 1000 bp are brighter for easy reference on agarose gels. Use 5 μL per well (lane) on a gel. Storage: short-‐term, store at 4°C; long-‐term, store at -‐20°C. GeneRuler™ 1 kb Plus DNA Ladder (Fermentas #SM1331) is designed for sizing and quantification of DNA fragments in agarose gels. The ladder is composed of fifteen individual DNA fragments (in base pairs): 20000, 10000, 7000, 5000, 4000, 3000, 2000, 1500, 1000, 700, 500, 400, 300, 200, 75. It contains three reference bands (5000, 1500 and 500 bp) for easy orientation. The ladder is dissolved in TE buffer. The ladder is supplied with 6X DNA Loading Dye (10 mM Tris-‐HCl (pH 7.6), 0.03% Bromophenol Blue, 0.03% Xylene Cyanol FF, 60% glycerol and 60 mM EDTA). Before use, dilute the ladder to a 1X solution as follows: 25 μL Ladder, 25 μL 6X DNA Loading Dye, 150 μL sterile deionized water. Use 5 μL per well (lane) on a gel. Storage: short-‐term, store at 4°C; long-‐term, store at -‐20°C. 40 12. Lambda DNA Standards (10, 20 and 40 ng/µL in 1X DNA Gel Loading Buffer). Store at -‐20oC. Use 5 µL/well on a gel. 13. 10X TBE buffer (BecA-‐ILRI Hub Central Core) 14. Deionized water (BecA-‐ILRI Hub Central Core) 15. Microwave oven 16. Water bath at 55-‐60°C 17. Electrophoresis gel tank, power supply, gel casting tray, combs (Mupid-‐ex gel kit; Eurogentec #MU-‐0040) 18. Gel documentation system. Also known as a Gel Doc System. It is widely used in molecular biology laboratories for the imaging and documentation of nucleic acids on agarose gels stained with a fluorophore such as GelRed or ethidium bromide. Typically a gel doc system is composed of an ultraviolet (UV) light transilluminator, a hood to shield external light sources and a camera for image capturing. In the workshop we will use a Syngene Ingenius 3 UV light gel doc system (see image below), or a custom-‐made gel doc system. 41 METHOD PREPARING AGAROSE GELS (0.8%, 1.8%, 2%) 1. Measure out 50 mL 10X TBE buffer in a 100 mL cylinder. Transfer to a 1 litre cylinder. Add ~100 mL deionized water to the 100 mL cylinder and transfer the water to the 1 litre cylinder (this is to remove residual TBE in the 100 mL cylinder). Add deionized water to the 1 litre cylinder to 1 litre (this will give a 0.5X TBE solution). Transfer the 0.5X TBE to a 1-‐litre Duran bottle. Mix by inverting the bottle a few times. Label the bottle with contents, your name and date. 2. Make three different concentrations of agarose gels: • • • To make 250 mL of 0.8% agarose gel: Weigh out 2.0 g of agarose powder To make 250 mL of 1.8% gel: Weigh out 4.5 g of agarose powder To make 250 mL of 2% gel: Weigh out 5 g of agarose powder 0.8% gel will be used to analyze genomic DNA (gDNA); 1.8% gel will be used to analyze PCR products; 2% gel will be used to analyze PCR product restriction digests. 3. Transfer the required amount of agarose to a 500 mL flask. Add 250 mL 0.5X TBE Buffer to the flask, and swirl to get an even suspension of agarose. Put a loose fitting Duran cap or similar on the top of the flask to prevent excessive evaporation during boiling. 4. Dissolve the agarose by boiling in a microwave until the solution becomes clear: Put tissues under the flask when you microwave, which will make an accidental boil-‐over spill easier to clean! Heat the agarose/buffer for 10 sec, then remove from the microwave and swirl briefly to mix. Repeat until the solution starts to boil. Continue to boil, with very short intervals to prevent ‘boiling over’, until the solution becomes clear. Eye protection and heat resistant gloves must be worn when removing hot items from the microwave. Do not hold hot glassware with tissues! Beware of boiling over and spilling hot liquid! 5. Dispense the molten gel into two 125 mL aliquots in 200 mL Duran bottles. Use immediately (see below) or store at room temperature until required, but be sure to loosen the cap before microwaving again otherwise the bottle may explode! CASTING THE AGAROSE GEL 1. Set up the casting tray and combs according to the manufacturers’ instructions. In the Workshop we will use the Mupid-‐ex gel kit (see the Kit Instructions folder on the Workshop website for more information). 2. Place the casting stand on a level surface. 42 Place gel tray(s) into the casting stand. Two gels can be cast simultaneously with normal size trays. Put the 13-‐toothed comb into the casting stand: Or prepare gels using the alternative Mupid gel casting system (below): 3. Melt a 125 mL agarose aliquot in a microwave oven as described above. 4. Cool in a water bath at 55-‐60°C for 30 min, gently swirling every 10 min so it cools evenly. IMPORTANT! Failure to cool the solution sufficiently could deform the stand and gel tray. Cooling can be done more rapidly under a running cold-‐water tap, with continuous, gentle swirling so it cools evenly. The gel is at the correct temperature for pouring when the bottle can just be held comfortably. Note: excessive cooling will lead to the gel solidifying in the bottle; if this happens then you must re-‐melt by reheating in a microwave, and then cool again to 55-‐60oC. Avoid vigorous swirling to prevent introducing bubbles into the molten gel! 5. Add 3.75 µL GelRed to 125 mL agarose solution. Swirl gently to mix to give an even solution, but avoid introducing air bubbles. 6. Pour an appropriate volume of melted agarose into the casting tray fitted with a sample comb. The correct volume to use in a gel cast will be indicated in the manufacturers’ instructions. For the Mupid-‐ex gel kit, about 30 mL of solution is required to yield a gel 4 mm thick in small size trays (half gel), and about 60 mL of solution is required in large size trays (whole gel). 43 . For the alternative casting system (below), pour approximately 12.5 mL gel into the small gels, and 25 mL gel in the large gels. Bubbles on the surface of the gel can be removed by ‘pricking’ with a syringe needle or pipette tip. Alternatively they can be moved to the edge of the gel with a syringe needle or a pipette tip. Any unused gel in the Duran bottle can be stored at room temperature for later use. 7. Allow the gel to solidify. It will turn from clear to translucent as it solidifies, and will take about 30-‐40 min. 8. Remove the comb(s) with both hands by gently pulling upwards. 44 Note: for some gel kits the comb can be removed after the gel has been placed into the electrophoresis gel tank and overlaid with buffer. 9. Hold the gel tray on the both sides at the notches of the casting stand. Pull the tray upwards. Gel preparation is now complete. Gels can be stored in the gel tray at 4oC for up to a week: Wrap in cling film and store in a ‘moist box’ (a lunch box with tissues soaked in water or 0.5X TBE) to prevent the gels from drying out. Alternatively, store the gel in the gel tray and casting stand: saturate with a small quantity of 0.5X TBE buffer and cover the whole gel and tray with cling film to protect it from drying out and contamination, and store at 4oC. 10. Place the gel and gel tray on the gel bed of the Gel Tank Unit, without removing it from the tray. Be careful the gel does not slide from the tray. 45 Be sure the sample wells are nearest to the negative (black) electrode. DNA is negatively charged and will migrate towards the positive (red) electrode. 11. Add 0.5X TBE to the tank so the gel is covered by ~ 2 mm of buffer. The buffer volume required for the chamber will be indicated in the manufacturers’ instructions. For the Mupid-‐exU gel kit, the volume required is approximately 300 mL. Always use fresh buffer for each gel run. LOADING THE DNA SAMPLES ONTO THE GEL 1. To a 0.5 mL labeled Eppendorf tube, mix the required µL of your DNA sample with an equal volume of 2X DNA Gel Loading Buffer. Gently mix by gently pipetting up and down 3-‐4X, or by flicking the tube. 2. Carefully pipette each sample into separate wells in the gel. Make sure to record the order of the samples on the gel. Do not damage the wells with the pipette tip. Use a fresh tip for each sample, or wash the tip after each sample by pipetting multiple times in a beaker of sterile deionized water or in the buffer in the gel tank. Leave outside wells for the DNA size Ladder (1 well) or Lambda DNA Standards (3 wells). 46 3. Load the DNA size ladder or Lambda DNA Standards: a. When analyzing PCR products, pipette appropriate amount of DNA Ladder into one of the outside wells. b. When analyzing genomic DNA, pipette 5 µL of each of the Lambda DNA Standards (10, 20, 40 ng/µL in 1x DNA Gel Loading Buffer), into three outside wells. The Lambda DNA Standards, diluted to the appropriate concentration, are supplied. 4. Do not move the tank after the samples have been loaded, otherwise the samples may be washed out of the wells. RUNNING THE GEL (ELECTROPHORESIS) Caution: Electrical hazard! Never use electrical equipment with wet gloves on. Keep water and buffer away from all electrical connections. Do not use an electrical connection if it is wet. 1. Place the lid on the gel box (and where necessary connect the electrodes to the gel tank) and connect the power supply. Make sure the positive (red) and negative (black) electrodes are correctly connected to the power supply. DNA is negatively charged so will migrate towards the positive (red) electrode. 2. Turn on the power supply. 3. Set the voltage (usually between 50 and 100 V) 4. Set the time (usually between 30 and 60 min). 5. Start the run. 6. Ensure the current is running through the buffer by looking for bubbles forming on each electrode. Also ensure that the current is running in the correct direction by observing the movement of the dye in the sample buffer (it will take a minute or before you can see a movement). The dye should move towards the positive (red) electrode. The dye will run in the same direction as the DNA. 7. Run the gel until the Bromophenol Blue dye has reached 2/3 the length of the gel or the Orange G dye has run 3/4 the length of the gel. 8. Turn off the power on the power pack and at the socket (and where necessary disconnect the wires from the power supply and the tank). 9. Remove the lid of the gel tank. 10. Carefully remove the gel and the gel tray and transfer to a plastic box. 11. Rinse the gel in deionized water or tap water. 47 VIEWING AND PHOTOGRAPHING THE GEL WITH THE UV TRANSILLUMINATOR GEL DOC SYSTEM Caution: Radiation Hazard! UV transilluminators are powerful sources of UV radiation that will cause serious damage to unprotected eyes and skin. Wear a UV facemask and gloves for protection when using an open transilluminator. 1. 2. 3. 4. 5. 6. Place the gel on the UV transilluminator and turn on the UV light. Observe the DNA bands on the screen and record the gel image with the digital video camera. Turn off the UV light. Save the file. Dispose the gel in the appropriate bin. Clean the UV transilluminator with damp tissues. CLEANING THE GEL EQUIPMENT 1. 2. 3. Dispose the tank buffer in the sink. Rinse the tank with deionized water. Clean the casting tray, gel tray and combs with deionized water. Be sure the trays and combs are clean of residual agarose gel. INTERNET RESOURCES AND FURTHER INFORMATION 1. 2. 3. 4. 5. 6. 7. 8. Making an Agarose Gel -‐ University of Leicester http://www.youtube.com/watch?v=wXiiTW3pflM Running an Agarose Gel -‐ University of Leicester http://www.youtube.com/watch?v=U2-‐5ukpKg_Q&feature=relmfu Agarose Gel Electrophoresis http://www.youtube.com/watch?v=9f2VSyVhsGI How to Make and Run an Agarose Gel (DNA Electrophoresis) http://www.youtube.com/watch?v=2UQIoYhOowM Ask a biologist: agarose gel electrophoresis http://askabiologist.asu.edu/agarose-‐gel-‐ electroporesis Agarose gel electrophoresis (basic method) http://www.methodbook.net/dna/agarogel.html DNA ladders (Wikipedia) http://en.wikipedia.org/wiki/DNA_ladder Overview of DNA stains http://www.interchim.fr/ft/B/BQ041U.pdf 48 9. 10. 11. 12. 13. 14. 15. GelRed information http://www.biotium.com/product/product_info/flyer/GelRed%20&%20GelGreen%20F lyer.pdf Mupid-‐exU gel system http://www.helixxtec.com/e-‐com/Canadian/itm00092.htm Mupid ex gel system Manual http://www.instrument.com.cn/show/Literature/C98928.pdf How to Make and Run an Agarose Gel (DNA Electrophoresis) http://www.youtube.com/watch?v=2UQIoYhOowM Qiagen Benchguide http://www.qiagen.com/literature/benchguide/pdf/1017778_benchguide_chap_1.pdf Agarose Gel Electrophoresis http://en.wikipedia.org/wiki/Gel_electrophoresis Syngene Ingenius 3 manual http://www.gellex.jp/pdf/item/ingenius_3/InGenius_3_manual.pdf 49 7. POLYMERASE CHAIN REACTION (PCR): AN INTRODUCTION Adapted from the Promega website: • http://www.promega.com/resources/product-‐guides-‐and-‐selectors/protocols-‐and-‐ applications-‐guide/pcr-‐amplification/ The polymerase chain reaction (PCR) is a simple technique that amplifies a DNA template to produce multiple copies of a specific DNA fragment in vitro. Traditional methods of cloning a DNA sequence into a vector and replicating it in a living cell often require days or weeks of work, but amplification of DNA sequences by PCR requires only hours. A typical amplification reaction includes target DNA, a thermostable DNA polymerase, two oligonucleotide primers, deoxynucleotide triphosphates (dNTPs), reaction buffer and magnesium. Once assembled, the reaction is placed in a thermal cycler, an instrument that subjects the reaction to a series of different temperatures for set amounts of time. This series of temperatures and times is referred to as one cycle of amplification. Each PCR cycle theoretically doubles the amount of targeted sequence in the reaction. Ten cycles theoretically multiply the target by a factor of about one thousand; 20 cycles, by a factor of more than a million in a matter of 1-‐2 hours. Thirty to 35 cycles are most commonly used in PCR. Each cycle of PCR includes steps for template denaturation, primer annealing, and primer extension (new DNA strand synthesis). The initial step denatures the target DNA by heating it to 94-‐95°C for 15-‐120 seconds. In the denaturation process, the two strands of DNA separate from each other, producing the necessary single-‐stranded DNA template for replication by the thermostable DNA polymerase. In the next step of a cycle, the temperature is reduced to approximately 45-‐65°C for 15-‐60 seconds. At this temperature, the oligonucleotide primers can bind (anneal) with their specific complementary sequences on the denatured target DNA and act as primers for the DNA polymerase to synthesize a new DNA strand. The synthesis of new DNA begins as the reaction temperature is raised to the optimum for the DNA polymerase, which is about 72°C for most thermostable DNA polymerases, including Taq DNA polymerase. The extension step is usually 30-‐120 seconds. The next cycle begins with a return to 94-‐95°C for denaturation. The thermostable DNA polymerase most commonly used in PCR is Taq DNA polymerase, named after the thermophilic bacterium Thermus aquaticus from which it was originally isolated. It is often abbreviated to "Taq Pol" or simply "Taq". 50 PCR image from scienceblogs.com: http://scienceblogs.com/insolence/2007/06/the_autism_omnibus_the_difference_betwee.php 51 8. PCR AMPLIFICATION OF THE CYTOCHROME C OXIDASE SUBUNIT 1 (CO1) GENE FOR DNA BARCODING OF ANIMALS INTRODUCTION: DNA BARCODING Adapted from: • http://sciencetranslation.wordpress.com/2009/11/14/genetics-‐dna-‐barcoding/ • http://phe.rockefeller.edu/barcode/docs/TenReasonsBarcoding.pdf • http://en.wikipedia.org/wiki/DNA_barcoding A DNA barcode is a short DNA sequence taken from standardized portions of the genome, and is used to identify species. Barcodes can be obtained reasonably quickly and cheaply, especially through PCR. Since Linnaeus, biologists have used distinguishing features in taxonomic keys to apply binomial species names (e.g. Homo sapiens). From insects to birds, evidence now shows that short DNA sequences from a uniform locality on genomes can be a genetic distinguishing feature. Just as a Linnaean binomial species name is an abbreviated label for the morphology of a species, the short sequence is an abbreviated label for the genome of the species. Therefore, the barcode of life is a key, in addition to the binomial species name, to knowledge about a species. Compiling a public library of sequences linked to named specimens, plus faster and cheaper PCR and DNA sequencing, is making this new barcode key increasingly practical and useful. A portion of the cytochrome c oxidase subunit 1 mitochondrial gene (CO1) is the standard barcode region for higher animals. The barcode region is 658 nucleotide base pairs (bp) from the 5’ end of the CO1 gene, a very short sequence compared to the 3 billion base pairs in the human genome, for example. In the Workshop we will use DNA barcoding to illustrate the power of PCR, DNA sequencing and bioinformatics to identify animal species. We will use PCR of the CO1 gene, using primers with a broad target group including mammals, reptiles and fish. For PCR you will have the opportunity to (a) use the Bioneer Accupower PCR Premix Kit tubes, and (b) to make PCR mixes from individual components. 52 EQUIPMENT A ND M ATERIALS 1. 2. 3. 4. 5. 6. 7. 8. 9. Nitrile gloves Vortexer Plate centrifuge Microfuge Ice bucket and ice Pipettes and filtered pipette tips 0.5 mL and 1. 5 mL Eppendorf tubes 0.2 mL PCR tubes Tube racks 10. Bioneer Accupower PCR PreMix, 20 µL kit (Bioneer # K-‐2016). The Bioneer Accupower PCR PreMix kit contains 0.2 mL tubes, each containing lyophilised components of a PCR master mix (enzyme, buffer, Tween 20, MgCl2, dNTPs) and a gel tracking dye (Xylene Cyanol), plus a stabilizer (sorbitol) that maintains full activity for over one month at room temperature, and at least two years in a -‐20oC freezer. You simply add your primers, template DNA and Nuclease Free Water to a final volume of 20 µL, and then run the PCR. Note: the PreMix contains TOP DNA polymerase, not Taq DNA polymerase. Top DNA polymerase is a novel thermostable DNA polymerase that is more processive than TAQ DNA polymerase. The extension rate of TOP DNA polymerase is > 3X that of TAQ DNA Polymerase. TOP DNA polymerase can be used for a variety of PCR applications including TA cloning and is a robust enzyme for standard PCR. It contains no proofreading or 5’-‐3’ exonuclease activity. Store at -‐20oC. 11. Individual PCR reagents. Three Taq DNA polymerases are available in the workshop: • Crimson Taq DNA Polymerase (5u/µL) with 5X Mg-‐free PCR Reaction Buffer (NEB # M0325L). Crimson TAQ (Mg-‐free) Reaction Buffer contains a density reagent, which allows direct loading of PCR products onto a gel. In addition, Crimson TAQ (Mg-‐free) Reaction Buffer has a trace amount of a red dye, which serves as a colour aid in gel loading and a tracking dye, which migrates at about 10 bp on a 1% TBE agarose gel. Store at -‐20oC. • FastStart Taq DNA Polymerase (5u/µL) with 10X Mg-‐free PCR Reaction Buffer (Roche # 12032929001). This modified recombinant Taq DNA Polymerase is inactive at temperatures below 75°C, but is activated by a 2-‐ to 4-‐minute heat activation step at 95°C. This is known as ‘hot-‐start’ PCR. In hot-‐start PCR the polymerase is modified to ensure that it remains inactive at lower temperatures and only becomes active at the high temperatures at which primers specifically bind. This prevents the 53 amplification of nonspecific products and increases the yield, or sensitivity, of the desired PCR product. Store at -‐20oC. • DreamTaq DNA Polymerase (5u/ µL) (Thermo Scientific #EP0701). This enzyme is supplied with a 10X reaction buffer that includes MgCl2 at a concentration of 20 mM. For the purposes of this workshop, which you will determine the effect of MgCl2 concentration on the PCR, do not use the DreamTaq 10X buffer. Instead use one of the Mg-‐free buffers supplied with the other Taq polymerases supplied in the workshop. Store at -‐20oC. 12. 25 mM MgCl2 supplied with Taq DNA polymerases. Store at -‐20oC 13. dNTP Mix (Fermentas # R0191). Contains an aqueous solution of dATP, dCTP, dGTP and dTTP, each at a final concentration of 10 mM. Store in aliquots at -‐20oC. 14. CO1 PCR primers (2 µM each in Nuclease Free Water). Store at -‐20oC. a) VF1d_t1 TCTCAACCAACCACAARGAYATYGG b) VR1d_t1 TAGACTTCTGGGTGGCCRAARAAYCA Degenerate bases R= A/G; Y= C/T These primers have a broad target group including mammals, reptiles and fishes. Primers were obtained from Bioneer. 15. Nuclease Free Water. Store at room temperature. 16. Your purified genomic DNA (gDNA) samples from muscle tissues diluted to 10 ng/µL. Store at -‐20oC. 17. Positive (+ve) control gDNA (10 ng/µL). Store at -‐20oC. 18. ABI GeneAmp 9700 PCR thermocycler or equivalent. 54 CO1 PCR USING BIONEER ACCUPOWER PCR PREMIX KIT TUBES • • • • PCR is very sensitive and prone to cross-‐contamination. Work as cleanly as possible. Use filtered pipette tips throughout. Always wear disposable gloves (e.g. nitrile gloves). Change gloves frequently. METHOD Thaw CO1 primers VF1d_t1 and VR1d_t1 (2 µM each) and DNA samples on ice. Flick the tubes to mix, then microfuge briefly. Return to ice. Prepare a water/primer mix: To a 0.5 mL Eppendorf tube on ice add the following: Reagent Nuclease Free Water Primer VF1d_t1 (2 µM) Primer VR1d_t1 (2 µM) Total This is sufficient for 20 reactions. 1. 2. 3. 4. 5. 6. 7. 8. 9. Volume 280 µL 40 µL 40 µL 360 µL Cap the tube, mix by flicking a few times, then microfuge briefly. Store on ice. Take two strips of 8 Bioneer Premix tubes from the freezer. Label the strips of tubes using a fine black marker pen with numbers 1 to 16. Add 18 µL water/primer mix to each of the 16 tubes. Cap tubes and put in a rack at room temperature. To tubes 1, 2, 9, 10 add 2 µL Nuclease Free Water. Cap tubes and return to ice. These are your negative controls. To each of tubes 3, 4, 5, 6, 7 add 2 µL (20 ng) purified gDNA from muscle tissue sample 1. Cap tubes and return to ice. To each of tubes 11, 12, 13, 14, 15 add 2 µL (20 ng) purified gDNA from muscle tissue sample 2. Cap tubes and return to ice. To each of tubes 8, 16 add 2 µL (20 ng) +ve control gDNA. Cap tubes and return to ice. These are your positive controls. Place your tubes in the rack provided (below), along with all PCR tubes from your group. 55 Final conc. in the PCR -‐ 0.20 µM 0.20 µM 10. Place a lid on the rack. Vortex to dissolve the dried PreMix blue pellet by holding the rack with the tubes on the vortexer for a few seconds (below). 11. Spin the rack/tubes in a plate centrifuge at 2500 rpm for 2 min at room temp. Ensure the centrifuge is balanced before use (below): 56 12. Perform PCR of samples in an ABI GeneAmp 9700 Thermocycler with heated lid option (or equivalent PCR machine) with the following amplification program: Amplification Program Step Temp Time Cycles Denaturation 95°C 3 min 1 Denaturation 94°C 30 sec 35 Annealing 45°C 45 sec Extension 72°C 1 min Final extension 72°C 7 min 1 o Soak 20 C soak 1 13. At the end of the amplification program put the PCR tubes on ice. 14. Label 16 x 0.5 mL Eppendorf tubes with numbers 1 to 16, and add 3 µL 2X DNA Gel Loading Buffer to each tube. 15. Add 3 µL of PCR products to tubes containing 2X DNA Gel Loading Buffer. Use a clean pipette tip for each PCR product. 16. Electrophorese on a 1.8% agarose gel prepared with GelRed. Include a DNA ladder in an outside lane of each row of wells. Run the gel at 50-‐100 V in 0.5X TBE buffer until the Bromophenol Blue has migrated 2/3 the length of the gel or the Orange G has migrated 3/4 the length of the gel. 17. Document the gel with the gel doc system. The specific CO1 PCR product is 709 bp. 18. Store PCR products at -‐20oC. Example: Agarose gel of CO1 PCR products (1.8% gel run in 0.5X TBE buffer at 100 V for 35 min) 1. Kamba Zebu; 2. Goat; 3. Pig; 4. Impala; 5. Eland; 6. Wildebeest; 7. Buffalo; 8. Dik dik; 9. Ovine; 10. Burchell’s zebra; 11. Grevy’s zebra; 12. Grant’s gazelle; 13. Thompson’s gazelle; 14. Sheep; 15. Beef; 16. Crocodile; 17. Goat; 18. Goat; 19-‐20. Negative controls; M. 1Kb Plus DNA Ladder. The size of the CO1 PCR product is 709 bp. 57 CO1 PCR USING INDIVIDUAL PCR REAGENTS: TITRATING MGCL 2 • • • • PCR is very sensitive and prone to cross-‐contamination. Work as cleanly as possible. Use filtered pipette tips throughout. Always wear disposable gloves (e.g. nitrile gloves). Change gloves frequently. METHOD 1. On ice, thaw the following reagents: primers VF1d_t1 and VR1d_t1 (2 µM each), 10X (or 5X) Taq Buffer, 25 mM MgCl2, 10 mM dNTP. Once thawed, flick the tubes to mix contents, then microfuge briefly. 2. Remove the DNA polymerase from the freezer and microfuge briefly to settle the contents, and then keep on ice. 3. Label eight 0.5 mL Eppendorf tubes: M1-‐M8. Put in a rack at room temperature. Add the following to the tubes: Reagent M1 M2 M3 M4 M5 M6 M7 M8 Nuclease Free 18 16 14 12 10 8 6 4 Water (µL) 25 mM MgCl2 (µL) 2 4 6 8 10 12 14 16 Final Mg conc. in the PCR (mM) 0.5 1 1.5 2 2.5 3 3.5 4 Cap the tubes. Mix by flicking and then microfuge briefly. Then leave in a rack at room temperature. 58 4. Prepare a PCR Master Mix: to a labeled 0.5 mL Eppendorf tube on ice add the following: (This is sufficient for 10 reactions of 25 µL. Note: some groups of trainees will use 10X buffer and others will use 5X buffer. Adjust volumes of buffer and water according to this table.) Reagent Volume Final concentration Nuclease Free Water 92.5 µL (67.5 µL) -‐ *10X *(5X) Taq Buffer 25 µL (50 µL) 1X 10 mM dNTP Mix 5 µL 200 µM Primer VF1d_t1 (2 µM) 25 µL 0.20 µM Primer VR1d_t1 (2 µM) 25 µL 0.20 µM **Taq DNA Polymerase (5u/µL) 2.5 µL 1.25u/20µL Genomic DNA (10 ng/µL) 25 µL 1 ng/µL Total 200 µL *FastStart TAQ DNA Polymerase is supplied with 10X Mg-‐free buffer *Crimson TAQ DNA Polymerase is supplied with 5X Mg-‐free buffer **Use either buffer with DreamTaq 5. Cap the tube and mix by flicking the tube. Microfuge briefly. Return the tube to ice. 6. Return the PCR reagent stock solutions to the -‐20oC freezer. 7. Label eight 0.2 mL PCR tubes: 1 to 8. 8. Add 20 µL Master Mix to each tube. Cap the tubes and leave on ice. 9. Transfer 5 µL of MgCl2 from M1 to PCR tube 1 Transfer 5 µL of MgCl2 from M2 to PCR tube 2 Transfer 5 µL of MgCl2 from M3 to PCR tube 3 …and so on. 10. Cap the PCR tubes and mix each by gently flicking. Microfuge briefly. 59 11. Perform PCR of samples in an ABI GeneAmp 9700 Thermocycler with heated lid (or equivalent PCR machine) with the following amplification program: Amplification Program Step Temp Time Cycles Denaturation 94°C 3 min 1 Denaturation 94°C 30 sec 35 Annealing 45°C 45 sec Extension 72°C 1 min Final extension 72°C 7 min 1 o Soak 20 C soak 1 12. At the end of the amplification program put the PCR tubes on ice. 13. Label 5 x 0.5 mL Eppendorf tubes 1 to 5, and add 3 µL 2X DNA Gel Loading Buffer to each tube. 14. After the PCR has completed, add 3 µL of PCR products to tubes containing 2X DNA Gel Loading Buffer. Use a clean pipette tip for each PCR product. 15. Electrophorese on a 1.8% agarose gel prepared with GelRed. Include a DNA ladder in an outside lane. 16. Run the gel at 50-‐100 V in 0.5X TBE buffer until the Bromophenol Blue has migrated 2/3 the length of the gel, or the Orange G has migrated 3/4 the length of the gel. 17. Document the gel with the gel doc system. A specific CO1 PCR product is 709 bp. 18. Store the remaining PCR products at -‐20oC. Example: CO1 PCR products from PCR with a range of MgCl2 concentrations (0.5 – 4.0 mM MgCl2). Gel: 1.8% agarose. DNA ladder: 1Kb Plus. 60 EXAMPLE: CO1 DNA SEQUENCE SHOWING POSITIONS OF PCR PRIMERS AND THE CO1 BARCODE REGION >HIMANTOPUS MEXICANUS (BLACK-‐NECKED STILT) VOUCHER JGS1761 CYTOCHROME OXIDASE SUBUNIT I (COI) GENE, COMPLETE CDS; MITOCHONDRIAL. GENBANK: DQ385166.1 GTGACTTTCATCAACCGATGATTATTCTCAACCAACCACAAAGACATCGGTACCTTATACCTAA TCTTCGGCGCATGAGCCGGTATAGTTGGTACCGCCCTTAGCTTACTCATCCGTGCAGAACTAGG CCAACCAGGGACCCTACTAGGAGATGACCAAATCTACAATGTAATCGTCATTGCCCATGCCTTC GTAATGATCTTCTTCATGGTCATACCAATTATGATCGGCGGATTCGGAAACTGACTAGTACCAC TCATAATTGGCGCTCCCGACATAGCATTCCCCCGCATAAACAACATAAGCTTCTGACTACTACC ACCATCATTCCTACTCCTCCTCGCCTCCTCTACAGTAGAAGCAGGAGCAGGAACAGGATGAACT GTATATCCCCCCTTAGCTGGTAATTTAGCCCATGCCGGAGCTTCAGTAGACCTAGCCATCTTCT CCCTCCACTTAGCAGGTGTATCCTCTATCCTAGGCGCAATCAACTTCATCACAACTGCTATCAA CATAAAACCACCCGCCCTTTCACAATACCAAACCCCTCTATTCGTCTGATCTGTCCTCATCACC GCCGTCTTATTACTCCTATCACTCCCAGTCCTAGCCGCTGGCATTACCATGCTACTAACAGACC GAAACCTAAACACCACATTCTTTGACCCCGCTGGAGGAGGTGACCCAGTCCTATACCAACACCT CTTCTGATTCTTCGGCCACCCAGAAGTATACATCTTAATCCTACCCGGCTTCGGAATCATCTCC CACGTAGTAACATACTACGCGGGCAAAAAAGAACCCTTCGGCTACATAGGAATGGTATGAGCCA TACTATCAATTGGATTCCTAGGCTTCATTGTTTGAGCCCACCACATATTTACAGTAGGGATAGA CGTAGACACCCGAGCATACTTCACATCCGCTACCATAATCATCGCCATCCCCACCGGCATTAAA GTATTCAGCTGACTAGCAACACTGCACGGAGGGACAATTAAATGAGACCCCCCAATATTATGAG CCCTAGGATTTATCTTCCTCTTCACAATCGGAGGCCTAACAGGCATTGTCCTAGCAAACTCCTC CCTAGACATTGCCCTACACGATACCTACTACGTGGTAGCCCACTTCCACTACGTCCTCTCAATA GGTGCCGTCTTCGCTATCCTAGCAGGATTCACTCACTGATTCCCCCTATTTACAGGCTACACCC TGCACCCCACATGAGCCAAAGCACACTTCGGAGTCATATTCACAGGAGTGAACCTAACCTTCTT CCCCCAACACTTCCTAGGCCTAGCTGGTATACCACGACGATACTCCGACTACCCAGATACATAC ACCCTATGAAATACCATATCCTCCATCGGCTCCCTAATCTCCATAACTGCCGTAATCATACTAA TATTTATTATCTGAGAAGCCTTCGCATCAAAACGAAAGGCCCTACAACCAGAACTAACCGCCAC CAACATTGAATGAATCCACGGCTGCCCACCCCCATACCACACCTTCGAAGAACCAGCCTTCGTC CAAGTACAAGAAAGG Key: Primer VF1d_t1 TCTCAACCAACCACAARGAYATYGG Primer VR1d_t1 TAGACTTCTGGGTGGCCRAARAAYCA R= A/G; Y= C/T The size of a PCR product with primers VF1d_t1 and VR1d_t1 is 709 bp. The size of the barcoding region (in blue) is 658 bp. 61 9. PCR OF THE RIBULOSE-‐1, 5-‐BISPHOSPHATE CARBOXYLASE OXYGENASE LARGE SUBUNIT (RBCL) FOR DNA BARCODING OF PLANTS INTRODUCTION: DNA BARCODING DNA barcoding is the use of short DNA sequences of standard segment(s) of the genome for species identification. These DNA barcode sequences can be obtained reasonably quickly and cheaply, especially through PCR. The ribulose-‐1, 5-‐bisphosphate carboxylase oxygenase large subunit gene (rbcL) and the Maturase K gene (matK) from the plastid genome are recommended as the standard barcode regions for higher (land) plants based on assessments of sequence quality and levels of species discrimination (CBOL Plant Working Group, 2009; Burgess et al., 2011). In the Workshop we will use DNA barcoding of the rbcL gene to illustrate the power of PCR, DNA sequencing and bioinformatics. EQUIPMENT A ND M ATERIALS rbcL primers (2 µM each in Nuclease Free Water) a. rbcLa-‐forM13 TGTAAAACGACGGCCAGTATGTCACCACAAACAGAGACTAAAGC b. rbcLa-‐revM13 CAGGAAACAGCTATGACGTAAAATCAAGTCCACCRCG Primers were obtained from Bioneer. Underlined sequences are M13 tails that are included in the primers to facilitate DNA sequencing of the rbcL PCR products. 2. Your plant gDNA sample (20 ng/µL) 3. +ve control gDNA (20 ng/µL) 4. Vortexer 5. Nitrile gloves 6. Plate centrifuge 7. Microfuge 8. Ice bucket and ice 9. Pipettes and filtered tips 10. 0.5 mL and 1. 5 mL Eppendorf tubes 11. 0.2 mL PCR tubes 12. Tube racks 1. 62 13. Bioneer Accupower PCR PreMix, 20 µL kit (Bioneer # K-‐2016). See above for details. Store at -‐20oC. 14. Individual PCR reagents a) Three Taq DNA polymerases are available in the workshop: (I) Crimson TAQ DNA Polymerase (5u/µL) with 5X Mg-‐free PCR Reaction Buffer (NEB # M0325L). Crimson TAQ (Mg-‐free) Reaction Buffer contains a density reagent, which allows direct loading of PCR products onto a gel. In addition, Crimson TAQ (Mg-‐free) Reaction Buffer has a trace amount of a red dye, which serves as a colour aid in gel loading and a tracking dye which migrates at about 10 bp on a 1% TBE agarose gel. STORE AT -‐20OC. (II) FastStartTaq DNA Polymerase (5u/µL) with 10X Mg-‐free PCR Reaction Buffer (Roche # 12032929001). This modified recombinant Taq DNA Polymerase is inactive at temperatures below 75°C, but is activated by a 2-‐ to 4-‐minute heat activation step at 95°C. This is known as ‘hot-‐start’ PCR. In hot-‐start PCR the polymerase is modified to ensure that it remains inactive at lower temperatures and only becomes active at the high temperatures at which primers specifically bind. This prevents the amplification of nonspecific products and increases the yield, or sensitivity, of the desired PCR product. STORE AT -‐20OC. (III) DreamTaq DNA Polymerase (5u/ µL) (Thermo Scientific #EP0701). This enzyme is supplied with a 10X reaction buffer that includes MgCl2 at a concentration of 20 mM. For the purposes of this workshop, which you will determine the effect of MgCl2 concentration on the PCR, do not use the DreamTaq 10X buffer. Instead use one of the Mg-‐free buffers supplied with the other Taq polymerases supplied in the workshop. 15. 16. 17. 18. b) 25 mM MgCl2 supplied with Taq DNA polymerases. Store at -‐20oC. c) dNTP Mix (Fermentas # R0191). Contains an aqueous solution of dATP, dCTP, dGTP and dTTP, each at a final concentration of 10 mM. Store as aliquots at -‐20oC. Nuclease Free Water. Store at room temperature. ABI GeneAmp 9700 PCR thermocycler or similar, with 96 well block. 2X DNA Gel Loading Buffer. 1.8% agarose gel with GelRed. 63 RBCL PCR USING BIONEER ACCUPOWER PCR PREMIX KIT TUBES • • • • PCR is very sensitive and prone to cross-‐contamination. Work as cleanly as possible. Use filtered pipette tips throughout. Always wear disposable gloves (e.g. nitrile gloves). Change gloves frequently. METHOD 1. 2. 3. Remove the primer stocks, Nuclease Free Water from the -‐20oC freezer. Thaw the primer stocks on ice. Flick the tube a few times to mix. Microfuge briefly. Return the tubes to ice. Prepare a water/primer mix: To a 0.5 mL Eppendorf tube on ice add the following: Reagent Nuclease Free Water Primer rbcLa-‐fM13 (2 µM) Primer rbcLa-‐revM13 (2 µM) Total This is sufficient for 20 reactions. Volume 280 µL 40 µL 40 µL 360 µL 4. 5. 6. 7. Final conc. in PCR -‐ 0.20 µM 0.20 µM Cap the tube, mix by flicking the tube a few times, then microfuge briefly. Keep on ice. Take two strips of 8 Bioneer Premix tubes from the freezer. Label the strips of tubes using a fine black marker pen with numbers 1 to 16. Add 18 µL water/primer mix to each of the 16 tubes. Cap tubes and put in a rack at room temperature. 8. To tubes 1, 2, 9, 10 add 2 µL Nuclease Free Water. Cap tubes and return to ice. These are your negative controls. 9. To each of tubes 3, 4, 5, 6, 7 add 2 µL (40 ng) purified gDNA from plant sample 1. Cap tubes and return to ice. 10. To each of tubes 11, 12, 13, 14, 15 add 2 µL (40 ng) purified gDNA from plant sample 2. Cap tubes and return to ice. 11. To each of tubes 8, 16 add 2 µL (40 ng) +ve control gDNA. Cap tubes and return to ice. These are your positive controls. 12. Place your tubes in the rack provided (below), along with all PCR tubes from your group. 64 13. Place a lid on the rack. Vortex to dissolve the dried PreMix blue pellet by holding the rack with the tubes on the vortexer for a few seconds (below). 14. Spin the rack/tubes in a plate centrifuge at 2500 rpm for 2 min at room temp. Ensure the centrifuge is balanced before use (below): 65 15. Perform PCR of samples in an ABI GeneAmp 9700 Thermocycler with heated lid (or equivalent PCR machine) with the following amplification program: Step Denaturation Denaturation Annealing Extension Final extension Soak Amplification Program Temp Time 94°C 3 min 94°C 30 sec 55°C 1 min 72°C 1 min 72°C 7 min o 20 C soak Cycles 1 30 1 1 16. At the end of the amplification program put the PCR tubes on ice. 17. Label 16 x 0.5 mL Eppendorf tubes with numbers 1 to 16, and add 3 µL 2X DNA Gel Loading Buffer to each tube. 18. After the PCR has completed, add 3 µL of PCR products to the tubes containing 2X DNA Gel Loading Buffer. Use a clean pipette tip for each PCR product. 19. Electrophorese on a 1.8% agarose gel with GelRed. Include a DNA ladder in an outside lane of each row. 20. Run the gel at 50-‐100 V in 0.5X TBE buffer until the Bromophenol Blue has migrated 2/3 the length of the gel or the Orange G has migrated 3/4 the length of the gel. 21. Document the gel with the gel doc system. A specific rbcL PCR product is 634 bp. 22. Store PCR products at -‐20oC. Example: 1.8% agarose gel of maize rbcL PCR products generated with Bioneer PreMix tubes 66 RBCL PCR USING INDIVIDUAL PCR REAGENTS: TITRATING MGCL2 • • • • PCR is very sensitive and prone to cross-‐contamination. Work as cleanly as possible. Use filtered pipette tips throughout. Always wear disposable gloves (e.g. nitrile gloves). Change gloves frequently. METHOD 1. On ice, thaw primers rbcLa-‐fM13 and rbcLa-‐revM13 (2 µM each), 10X (or 5X) Taq Buffer, 10 mM dNTP Mix and 25mM MgCl2. Once thawed, flick the tubes to mix contents then microfuge briefly. Keep on ice. 2. Remove the DNA polymerase from the freezer and microfuge briefly to settle the contents, and then keep on ice. 3. Label eight 0.5 mL Eppendorf tubes: M1-‐M8. Put in a rack at room temperature. Add the following to the tubes: Reagent Nuclease Free Water (µL) M1 M2 M3 M4 M5 M6 M7 M8 18 16 14 12 10 8 6 4 25 mM MgCl2 (µL) 2 4 6 8 10 12 14 16 Final Mg conc. in the PCR (mM) 0.5 1 1.5 2 2.5 3 3.5 4 4. Cap the tubes. Mix by flicking and microfuge briefly. Then leave at room temperature. 67 5. To a labeled 0.5 mL Eppendorf tube on ice add the following to prepare a PCR Master Mix. This is sufficient for 10 reactions, each with a final volume of 25 µL. Note: some groups will use 10X buffer and others will use 5X buffer. Adjust volumes of buffer and water according to this table. Reagent Nuclease Free Water *10X *(5X) Taq Buffer 10 mM dNTP Mix Primer rbcLa-‐FM13 (2 µM) Primer rbcLa-‐RevM13 (2 µM) **Taq DNA Polymerase (5u/µL) Genomic DNA (20 ng/µL) Total Volume 92.5 µL (67.5 µL) 25 µL (50 µL) 5 µL 25 µL 25 µL 2.5 µL 25 µL 200 µL Final concentration -‐ 1X 200 µM 0.25 µM 0.25 µM 1.25u/20µL 2 ng/µL * FastStart TAQ DNA Polymerase is supplied with 10X buffer *Crimson TAQ DNA Polymerase is supplied with 5X buffer **Use either buffer with DreamTaq 6. Cap the Master Mix tube and mix by flicking the tube. Microfuge briefly. Return the tube to ice. 7. Return your PCR stock solutions to the -‐20oC freezer. 8. Label eight 0.2 mL PCR tubes: 1 to 8. 9. Add 20 µL Master Mix to each tube. Cap the tubes and leave on ice. 10. Transfer 5 µL of MgCl2 from tube M1 to PCR tube 1 Transfer 5 µL of MgCl2 from tube M2 to PCR tube 2 Transfer 5 µL of MgCl2 from tube M3 to PCR tube 3 …and so on. 11. Cap the PCR tubes and mix each by flicking. Microfuge briefly. 68 12. Perform PCR of samples in an ABI GeneAmp 9700 Thermocycler with heated lid (or equivalent PCR machine) using the following amplification program: Step Denaturation Denaturation Annealing Extension Final extension Soak Amplification Program Temp Time 94°C 3 min 94°C 30 sec 55°C 1 min 72°C 1 min 72°C 7 min o 20 C soak Cycles 1 30 1 1 13. At the end of the amplification programme put the PCR tubes on ice. 14. Label eight 0.5 mL Eppendorf tubes: 1 to 8, and add 3 µL 2X DNA Gel Loading Buffer to each tube. 15. After the PCR has completed, add 3 µL of PCR products to the tubes containing 2X DNA Gel Loading Buffer. Use a clean pipette tip for each PCR product. 16. Run on a 1.8% agarose gel with GelRed. Run at 50-‐100 V in 0.5X TBE buffer until the Bromophenol Blue dye has run 2/3 the length of the gel or the Orange G dye has run 3/4 the length of the gel. 17. Document the gel with the gel doc system. 18. A predicted rbcL PCR product for Zea mays is 634 bp (using primers with M13 tails). Sizes of rbcL PCR products from other plant species may vary slightly. 19. Store the remaining PCR products at -‐20oC. Example: rbcL PCR with titrated MgCl2. 1.8% agarose gel. 69 Example: Zea mays rbcL gene sequence and positions of the PCR primers >gi|18035|emb|Z11973.1| Zea mays chloroplast rbcL gene for ribulose bisphosphate carboxylase ATGTCACCACAAACAGAAACTAAAGCAAGTGTTGGATTTAAAGCTGGTGTTAAGGATTATAAAT TGACTTACTACACCCCGGAGTACGAAACCAAGGATACTGATATCTTGGCAGCATTCCGAGTAAC TCCTCAGCTCGGGGTTCCGCCTGAAGAAGCAGGAGCTGCAGTAGCTGCGGAATCTTCTACTGGT ACATGGACAACTGTTTGGACTGATGGACTTACCAGTCTTGATCGTTACAAAGGACGATGCTATC ACATCGAGCCCGTTCCTGGGGACCCAGATCAATATATCTGTTATGTAGCTTATCCATTAGACCT ATTTGAAGAGGGTTCTGTTACTAACATGTTTACTTCCATTGTGGGTAACGTATTTGGTTTCAAA GCCTTACGCGCTCTACGTTTGGAGGATCTACGAATTCCCCCTGCTTATTCAAAAACTTTCCAAG GTCCGCCTCACGGTATCCAAGTTGAAAGGGATAAGTTGAACAAGTACGGTCGTCCTTTATTGGG ATGTACTATTAAACCAAAATTGGGATTATCCGCAAAAAATTACGGTAGAGCGTGTTATGAGTGT CTACGCGGTGGACTTGATTTTACCAAAGATGATGAAAACGTAAACTCACAACCATTTATGCGCT GGAGAGACCGTTTCGTCTTTTGTGCCGAAGCAATTTATAAAGCACAAGCCGAAACTGGTGAAAT CAAGGGGCATTACTTGAATGCGACTGCAGGTACATGCGAAGAAATGATTAAGAGAGCTGTATTT GCAAGGGAATTAGGGGTTCCTATTGTAATGCATGACTACTTAACAGGAGGATTCACCGCAAATA CTACTTTGTCTCATTATTGCCGCGACAACGGCCTACTTCTTCACATTCACCGAGCAATGCATGC AGTTATTGATAGACAGAAAAATCATGGTATGCATTTCCGTGTATTAGCTAAAGCATTGCGTATG TCGGGGGGAGATCATATCCACTCCGGTACAGTAGTAGGTAAGTTAGAAGGGGAACGCGAAATAA CTTTAGGTTTTGTTGATTTATTGCGCGATGATTTTATTGAAAAAGATCGTTCTCGCGGTATCTT TTTCACTCAGGACTGGGTATCCATGCCAGGTGTTATACCGGTGGCTTCTGGGGGTATTCATGTT TGGCATATGCCAGCTCTGACCGAAATCTTTGGAGATGATTCCGTATTACAATTTGGTGGAGGAA CTTTAGGACATCCTTGGGGAAATGCACCTGGTGCAGCAGCTAATCGTGTGGCTTTAGAAGCCTG TGTACAAGCTCGTAACGAAGGGCGCGATCTTGCTCGTGAAGGTAATGAAATTATCAAAGCAGCT TGCAAATGGAGTGCTGAACTAGCCGCAGCTTGTGAAATATGGAAGGAGATCAAATTTGATGGTT TCAAAGCGATGGATACCATATAA KEY Primers rbcLa-‐fM13 TGTAAAACGACGGCCAGTATGTCACCACAAACAGAGACTAAAGC rbcLa-‐revM13 CAGGAAACAGCTATGACGTAAAATCAAGTCCACCRCG Degenerate position R = A or G Sequence in RED is the M13 tail For maize the size of a rbcL PCR product, generated using primers with M13 tails, is 634 bp. The size of the rbcL barcode region (yellow) is 553 bp. 70 INTERNET RESOURCES AND FURTHER INFORMATION 1. PCR (Wikipedia) http://en.wikipedia.org/wiki/Polymerase_chain_reaction 2. PCR Primer: Widely used manual from Cold Spring Harbor Press: http://books.google.co.ke/books?id=IbAcGxyD06MC&dq=PCR+manual&printsec=frontc over&source=in&hl=en&ei=pzHATfKsFsLXrQf70Z32Aw&sa=X&oi=book_result&ct=result &resnum=11&ved=0CF4Q6AEwCg#v=onepage&q&f=false 3. PCR video http://www.youtube.com/watch?v=eEcy9k_KsDI&feature=related 4. Bioneer Accupower PCR PreMix instructions http://us.bioneer.com/Protocol/AccuPower%C2%AE%20PCR%20PreMix.pdf 5. Bioneer AccuPower 2010 Brochure http://us.bioneer.com/pdf/2010/AccuPower%202010%20Brochure.pdf 6. Standard PCR protocols http://www.protocol-‐online.org/prot/Molecular_Biology/PCR/Standard_PCR/index.htm l 7. PCR Amplification-‐Promega overview of different PCR applications http://www.promega.com/resources/product-‐guides-‐and-‐selectors/protocols-‐and-‐ applications-‐guide/pcr-‐amplification/ 8. Roux (2009) Optimization and Troubleshooting in PCR http://cshprotocols.cshlp.org/content/2009/4/pdb.ip66.full.pdf+html 9. CO1: The ideal barcoding gene http://www.biotechlearn.org.nz/themes/barcoding_life/the_ideal_barcoding_gene 10. DNA barcoding (Wikipedia) http://en.wikipedia.org/wiki/DNA_barcoding 11. What is DNA barcoding? http://www.barcodeoflife.org/content/about/what-‐dna-‐ barcoding 12. Barcode of Life -‐ Outreach Materials http://www.barcodeoflife.org/content/resources/outreach-‐materials 13. Barcoding animal life: cytochrome c oxidase subunit 1 divergences among closely related species http://rspb.royalsocietypublishing.org/content/270/Suppl_1/S96.full.pdf 14. CBOL Plant Working Group (2009) A DNA barcode for land plants. Proc Natl Acad Sci USA 106: 12794-‐12797. http://www.pnas.org/content/106/31/12794.full 15. Bafeel et al. (2012). Ribulose-‐1, 5-‐biphosphate carboxylase (rbcL) gene sequence and random amplification of polymorphic DNA (RAPD) profile of regionally endangered tree species Coptosperma graveolens subsp. arabicum (S. Moore) Degreef. Plant Omics, 5(3), 285-‐290. http://www.pomics.com/bakir_5_3_2012_285_290.pdf 71 16. De Groot GA, During HJ, Maas JW, Schneider H, Vogel JC, Erkens RH. (2011) Use of rbcL and trnL-‐F as a two-‐locus DNA barcode for identification of NW-‐European ferns: an ecological perspective. PLoS One. 2011 Jan 26; 6(1):e16371. http://www.plosone.org/article/info%3Adoi%2F10.1371%2Fjournal.pone.0016371 17. Muturi et al. (2011) Tracking the feeding patterns of tsetse flies (Glossina Genus) by analysis of bloodmeals using mitochondrial cytochromes genes. PloS One. Volume 6, Issue 2, e17284. http://www.ploscollections.org/article/info%3Adoi%2F10.1371%2Fjournal.pone.001728 4;jsessionid=5D15A043BB293D0FF4ECD628F4A83405.ambra01 18. Kevin S. Burgess et al. (2011) Discriminating plant species in a local temperate flora using the rbcL+matK DNA barcode. Methods in Ecology and Evolution 2(4):333. http://onlinelibrary.wiley.com/store/10.1111/j.2041-‐210X.2011.00092.x/asset/j.2041-‐ 210X.2011.00092.x.pdf;jsessionid=17CC5829E793CDC240655F68223C78F1.f01t01?v=1& t=hujtpg2r&s=3c58d1d9ed965ed8985716783f9dfdc67a6fe73a 19. Cold Spring Harbor. DNA Barcoding 101. http://www.dnabarcoding101.org/ 72 10. PURIFICATION OF PCR PRODUCTS INTRODUCTION Adapted from http://www.fermentas.com/templates/files/tiny_mce/coa_pdf/coa_k0701.pdf PCR products must be purified or processed before they can be used in downstream applications such as DNA sequencing, ligation and cloning. There are many suitable methods available, including PEG precipitation, filtration, organic extraction, alcohol precipitation, Exonuclease I -‐ Shrimp Alkaline Phosphatase (Exo-‐SAP) treatment, and suing commercial DNA purification kits. In the Workshop we will use two methods: a commercial kit (GeneJET) method, and an ethanol precipitation method. GENEJET PCR PRODUCT PURIFICATION The GeneJET PCR Purification Kit is designed for rapid and efficient purification of DNA from PCR and other enzymatic reaction mixtures. The kit utilizes silica-‐based membrane technology in the form of a convenient spin column, eliminating the need for toxic phenol-‐chloroform extractions. The GeneJET PCR Purification Kit effectively removes primers, dNTPs, enzymes and salts from PCR and other reaction mixtures. The kit can be used for purification of DNA fragments from 25 bp to 20 kbp. The recovery rates are 90-‐100% in a 100 bp – 10 kb DNA fragment size range. Each GeneJET purification column has a total binding capacity of up to 25 µg of DNA and the entire procedure takes just 5 min. The purified DNA can be used in common downstream applications such as sequencing, restriction digestion, ligation and cloning. EQUIPMENT A ND M ATERIALS 1. 2. 3. 4. 5. 6. 7. Nitrile gloves Absolute ethanol. Store at room temperature. Nuclease Free Water Microfuge 1.5 mL and 0.5 mL Eppendorf tubes GeneJET PCR Purification Kit (Fermentas # K0701). Store at room temperature. Pipettes and filter pipette tips 73 METHOD GENEJET • • 1. 2. 3. 4. 5. 6. NOTE: Prior to the initial use of the GeneJET PCR Purification Kit, dilute the concentrated Wash Buffer with ethanol (96-‐100%): To 9 mL of concentrated Wash Buffer add 45 mL of ethanol. Mix thoroughly. Store at room temperature. Binding Buffer in the GeneJET PCR Purification Kit contains guanidinium thiocyanate. Wear gloves (e.g. nitrile gloves) and eye protection when handling the Binding Buffer. It is harmful by inhalation, in contact with skin, eyes or if swallowed. Contact of guanidinium thiocyanate with acids or bleach liberates toxic gases. DO NOT ADD acids or bleach to any liquid wastes containing this product. Combine PCR products to be purified in a 1.5 mL Eppendorf tube. Measure the volume of your combined PCR products using a P200 pipette and the appropriate tip. Add an equal volume of Binding Buffer to the PCR products (e.g. for 100 µL of PCR product, add 100 µL of Binding Buffer). Mix thoroughly by flicking and inverting the tube several times. Microfuge briefly. Transfer the mixture to the GeneJET purification column. Microfuge for 1 min at 13,000 rpm. Discard the flow-‐through. Add 700 µL of Wash Buffer (previously diluted with the ethanol as described above) to the GeneJET purification column. Let it stand for 1 min. Microfuge for 1 min at 13,000 rpm at room temperature. Discard the flow-‐through and place the purification column back into the collection tube. Centrifuge the empty GeneJET purification column for an additional 1 min at maximum speed to completely remove any residual wash buffer. Note. This step is essential as the presence of residual ethanol in the DNA sample may inhibit subsequent reactions. 7. 8. 9. Transfer the GeneJET purification column to a clean 1.5 mL Eppendorf tube (without a lid). Add 30 µL of Nuclease Free Water to the centre of the GeneJET purification column membrane and microfuge for 1 min at 13,000 rpm at room temperature. Discard the GeneJET purification column. Transfer the purified PCR product to a clean, labeled 0.5 mL Eppendorf tube. 74 AGAROSE GEL ANALYSIS (See Chapter 6 for more information on agarose gel electrophoresis). 1. Remove 3 µL of purified PCR product and mix with 3 µL 2X DNA Gel Loading Buffer in a 0.5 mL Eppendorf tube. 2. Load onto a 1.8% agarose gel prepared with 0.5X TBE and GelRed. 3. Also load a DNA ladder into one of the outside wells. 4. Run at 100 V for ~30-‐40 min. 5. Record the gel image. 6. Determine the size and integrity of your product. 7. For plants the size of a rbcL PCR product, generated using primers with M13 tails, is approx. 634 bp. For animals the size of a CO1 PCR product is approx. 709 bp. NANODROP SPECTROPHOTOMETRY If the yield and integrity of the purified PCR product looks acceptable from the gel (i.e. a good strong single band of the expected size, without any evidence of degradation), then proceed to NanoDrop Spectrophotometry. The NanoDrop is a cuvette-‐free spectrophotometer that uses just 1-‐2 µL to measure nucleic acid concentration and purity. See Chapter 13 for detailed instructions on using the NanoDrop. 1. Blank the NanoDrop with 1.5 µL of diluent used for your genomic DNA sample (Nuclease Free Water). 2. Perform a spectral measurement with 1.5 µL of your samples. 3. A pure sample of DNA has a 260/280 ratio of 1.8 (1.8-‐1.9 is acceptable). 4. An ideal concentration is at least 25 ng/µL. 5. Store the purified PCR product at -‐20oC. DNA SEQUENCING 1. For sequencing, your purified PCR product should be at least 25 ng/µL with a 260/280 ratio of 1.8-‐1.9. 2. Submit an aliquot (10 µL in a labeled 0.5 mL Eppendorf tube) to the SegoliP Unit for direct DNA sequencing. Aliquots of the PCR primers (5 µM) have already been given to the SegoliP Unit for sequencing. 3. The PCR product will be directly sequenced using forwards and reverse sequencing primers 75 a. The PCR primers will be used for sequencing of the CO1 PCR products b. M13 primers will be used for sequencing the rbcL PCR products. 13. Store the remaining purified PCR product at -‐20oC. Example: 1.8% agarose gel showing GeneJET purified rbcL PCR products (634 bp) 76 PCR PRODUCT PURIFICATION BY ETHANOL PRECIPITATION EQUIPMENT A ND M ATERIALS 1. 2. 3. 4. 5. 6. 7. Nitrile gloves Microfuge and refrigerated microfuge Pipettes and tips 0.5 mL Eppendorf tubes 3M Sodium Acetate, pH 5.2. Store at room temperature. Absolute ethanol. Store at room temperature. 70% ethanol. Store at room temperature. METHOD 1. Combine the PCR products for purification in a 0.5 mL Eppendorf tube. 2. Add 1/10th volume of 3 M sodium acetate pH 5.2 and 2.5 volumes of absolute ethanol to the PCR product. For example, if your PCR product volume is 100 µL then add 10 µL sodium acetate and 250 µL absolute ethanol. If you are purifying a large number of samples then you can prepare a “mastermix” of the two solutions according to the number of samples for purification. 3. Mix thoroughly by inverting the tube several times. 4. Incubate the tube at -‐20oC for 1 hr. 5. Centrifuge at 14,000 rpm for 20 min at 4oC. 6. Carefully discard the supernatant and add 300 µL of 70% ethanol to the pellet. 7. Mix thoroughly by inverting the tube several times. 8. Centrifuge at 14000 rpm for 15 min at 4oC. 9. Carefully discard the supernatant and air-‐dry the pellet. 10. Dissolve the pellet with 20 µL of Nuclease Free Water. AGAROSE GEL ANALYSIS (See Chapter 6 for more information on agarose gel electrophoresis). 1. Remove 3 µL of purified PCR product and mix with 3 µL 2X DNA Gel Loading Buffer in a 0.5 mL Eppendorf tube. 2. Load onto a 1.8% agarose gel prepared with 0.5X TBE and GelRed. 77 3. 4. 5. 6. 7. Also load a DNA ladder into one of the outside wells. Run at 100 V for ~30-‐40 min. Record the gel image. Determine the size and integrity of your product. For plants the size of a rbcL PCR product, generated using primers with M13 tails, is approx. 634 bp. For animals the size of a CO1 PCR product is approx. 709 bp. NANODROP SPECTROPHOTOMETRY If the yield and integrity of the purified PCR product looks acceptable from the gel (i.e. a good strong single band of the expected size, without any evidence of degradation), then proceed to NanoDrop Spectrophotometry. The NanoDrop is a cuvette-‐free spectrophotometer that uses just 1-‐2 µL to measure nucleic acid concentration and purity. See Chapter 13 for detailed instructions on using the NanoDrop. 1. Blank the NanoDrop with 1.5 µL of diluent used for your genomic DNA sample (Nuclease Free Water). 2. Perform a spectral measurement with 1.5 µL of your samples. 3. A pure sample of DNA has a 260/280 ratio of 1.8 (1.8-‐1.9 is acceptable). 4. An ideal concentration is at least 25 ng/µL. 5. Store the purified PCR product at -‐20oC. DNA SEQUENCING 1. For sequencing, your purified PCR product should be at least 25 ng/µL with a 260/280 ratio of 1.8-‐1.9. 2. Submit an aliquot (10 µL in a labeled 0.5 mL Eppendorf tube) to the SegoliP Unit for direct DNA sequencing. Aliquots of the PCR primers (5 µM) have already been given to the SegoliP Unit for sequencing. 3. The PCR product will be directly sequenced using forwards and reverse sequencing primers a. The PCR primers will be used for sequencing of the CO1 PCR products b. M13 primers will be used for sequencing the rbcL PCR products. 4. Store the remaining purified PCR product at -‐20oC. 78 Example: 1.8% agarose gel showing PCR products purified by precipitation M: GeneRuler™ 1 kb Plus DNA Ladder; 1-‐4: Purified PCR products Example NanoDrop readout showing concentrations in ng/µL of the PCR primers and purified PCR products based on the A260 reading, and purity based on the A260/A280 ratio. INTERNET RESOURCES AND FURTHER INFORMATION 1. GeneJET™ PCR Purification Kit Instructions http://www.fermentas.com/templates/files/tiny_mce/coa_pdf/coa_k0701.pdf 79 2. 3. 4. 5. 6. 7. Purification of PCR products for Sequencing http://www.biology.ualberta.ca/facilities/mbsu/uploads/sop_pdf//Purification_of_P CR_Products_for_Sequencing.pdf Protocol Online: PCR Product Purification http://www.protocol-‐ online.org/prot/Molecular_Biology/PCR/PCR_Product_Purification/index.html Combination PEG precipitation and gel purification of PCR products for LiCor Sequencing http://www.auburn.edu/~santosr/protocols/PEGTAEProtocol.pdf Exonuclease I -‐ Shrimp Alkaline Phosphatase clean up of PCR products http://www.nucleics.com/DNA_sequencing_support/exonucleaseI-‐SAP-‐PCR-‐ protocol.html Ethanol precipitation of DNA http://en.wikipedia.org/wiki/Ethanol_precipitation Ethanol precipitation of DNA http://www.lifetechnologies.com/content/dam/LifeTech/migration/en/filelibrary/pdf /focus.par.56415.file.dat/focus%20volume%207%20issue%204.pdf 80 11. DNA SEQUENCING: AN INTRODUCTION The Sequencing Genotyping and Oligonucleotide (SegoliP) Unit of the BecA-‐ILRI Hub will sequence your PCR products by Sanger Sequencing, using an ABI DNA Analyzer. Sanger Sequencing (adapted from http://en.wikipedia.org/wiki/Sanger_sequencing#cite_note-‐ Sanger1977-‐2 and http://www.giga.ulg.ac.be/jcms/c_6176/sanger-‐sequencing-‐big-‐dye) Sanger sequencing is a method of DNA sequencing based on the selective incorporation of chain-‐terminating dideoxynucleotides by DNA polymerase during in vitro DNA replication. Developed by Frederick Sanger and colleagues in 1977, it was the most widely used sequencing method for approximately 25 years. More recently, Sanger sequencing has been succeeded by "Next-‐Gen" sequencing methods, especially for large-‐scale, automated genome analysis. However, the Sanger method remains in wide use, primarily for smaller-‐scale sequencing projects. The classical chain-‐termination method requires a single-‐stranded DNA template, a DNA primer, a DNA polymerase (thermostable DNA polymerases are most commonly used), normal deoxynucleosidetriphosphates (dNTPs), and modified di-‐deoxynucleosidetriphosphates (ddNTPs), the latter of which terminate DNA strand elongation. These chain-‐terminating nucleotides lack a 3'-‐OH group required for the formation of a phosphodiester bond between two nucleotides, causing DNA polymerase to cease extension of DNA when a modified ddNTP is incorporated. The ddNTPs are each labeled with a separate dye that fluoresces at a different wavelength for detection in automated sequencing machines (DNA sequencers). This form of Sanger sequencing is known as ‘dye terminator sequencing’. DNA sequencers, such as ABI DNA Analyzers, can sequence 16 to 384 DNA samples in a single batch (run) in up to 24 runs a day. DNA sequencers carry out capillary electrophoresis for size separation of the DNA fragments produced during the sequencing reaction, followed by detection and recording of dye fluorescence, and data output as fluorescent peak trace chromatograms (also known as a sequence trace file). Sequencing reactions by thermocycling, cleanup and re-‐suspension in a buffer solution before loading onto the DNA sequencer are performed separately. The SegoliP Unit uses the BigDye Terminator v3.1 Cycle Sequencing Kit for sequencing reactions (https://www.lifetechnologies.com/order/catalog/product/4337455). 81 The 48-‐capillary 3730 DNA Analyzer is one of the DNA sequencers used by the SegoliP Unit. It is the ‘Gold Standard’ in low-‐to-‐medium throughput genetic analysis. The 3730 DNA Analyzer is used for DNA fragment analysis applications such as microsatellites, AFLP, and traditional Sanger DNA sequencing. This is a sequence trace file (this example was generated by one of the participants at the 2011 IMBB Training Workshop). The four bases are detected using the different fluorescent labels. These are detected by the DNA sequencer and represented as ‘peaks’ of different colours that can then be interpreted to determine the base sequence. INTERNET RESOURCES AND FURTHER INFORMATION 1. 2. 3. 4. 5. Sanger sequencing http://en.wikipedia.org/wiki/Sanger_sequencing DNA Sequencing by Capillary Electrophoresis http://tools.invitrogen.com/content/sfs/manuals/cms_041003.pdf DNA sequencing http://en.wikipedia.org/wiki/DNA_sequencing Introduction to sequencing http://en.wikipedia.org/wiki/Sequencing#Sanger_sequencing BigDye Terminator v3.1 Cycle Sequencing Kit (https://www.lifetechnologies.com/order/catalog/product/4337455). 82 12. RESTRICTION ENZYME DIGESTION OF PURIFIED PCR PRODUCTS INTRODUCTION Adapted from: • • • http://en.wikipedia.org/wiki/Restriction_enzyme#Examples http://en.wikipedia.org/wiki/Restriction_digest http://www.vivo.colostate.edu/hbooks/genetics/biotech/enzymes/renzymes.html A restriction enzyme (or restriction endonuclease [RE]) is an enzyme that cuts DNA at specific recognition nucleotide sequences known as restriction sites. Such enzymes, found in bacteria and archaea, are thought to have evolved to provide a defense mechanism against invading viruses. Inside a bacterial host, the REs selectively cleave foreign DNA in a process called restriction. Host DNA is methylated by a modification enzyme (a methylase) to protect it from the RE activity. Together, these two processes form the restriction modification system. To cut the DNA, a RE makes two incisions, once through each sugar-‐phosphate backbone (i.e. each strand) of the DNA double helix. Restriction sites are typically four, six, eight, ten, or twelve nucleotides long. Because there are only so many ways to arrange the four nucleotides that compose DNA (Adenine, Thymine, Guanine and Cytosine) into a four-‐ to twelve-‐nucleotide sequence, recognition sequences tend to occur by chance in any long sequence. Over 3000 REs have been studied in detail, and more than 600 of these are available commercially and are routinely used for DNA modification and manipulation in laboratories. Because of the huge variety of REs available, potential "restriction sites" appear in almost any gene or locus of interest on any chromosome. The length of restriction recognition sites varies: e.g. the enzymes EcoRI, SacI and SstI each recognize a 6 base-‐pair (bp) sequence of DNA, whereas NotI recognizes a sequence 8 bp in length, and the recognition site for Sau3AI is only 4 bp in length. Length of the recognition sequence dictates how frequently the RE will cut in a random sequence of DNA. REs with a 6 bp recognition site will cut, on average, every 46 or 4096 bp; a 4 bp recognition site will occur on average every 256 bp. REs have many uses in molecular biology. For example, they are used to assist insertion of genes into plasmid vectors during gene cloning. REs can also be used to distinguish gene alleles 83 or differences between homologous genes between species by specifically recognizing single base changes in DNA known as single nucleotide polymorphisms (SNPs). This is only possible if a SNP alters the restriction site present in the allele or homologous gene. In this method, the restriction enzyme can be used to genotype a DNA sample without the need for expensive gene sequencing. The sample is first digested with the RE to generate DNA fragments, and then the different sized fragments separated by gel electrophoresis. In general, alleles with correct restriction sites will generate two visible bands of DNA on the gel, and those with altered restriction sites will not be cut and will generate only a single band. The number and sizes of bands reveals the sample subject's genotype. When combined with PCR, restriction analysis is called PCR-‐ restriction fragment length polymorphism, or PCR-‐RFLP. In the workshop we will use PCR-‐RFLP to analyze the CO1 and rbcL gene. Several REs are available for you to try. All are ‘frequent cutters’, in that they each have a four base recognition sequence. The products of digestion will be electrophoresed on a 2% agarose gel, and the relative sizes of the restriction fragments will be determined. The restriction pattern on the gel will be compared with in silico (using Bioinformatics software) restriction analysis, which you will do during the Bioinformatics part of the workshop in the second week. In the Workshop, we will use Thermo Scientific FastDigest REs for rapid DNA digestion. All FastDigest enzymes are 100% active in a universal FastDigest Green buffer and are able to digest DNA in a few minutes. FastDigest Green Buffer includes a density reagent along with blue and yellow tracking dyes that allow for direct loading of the reaction mixtures on a gel. (The blue dye of the FastDigest Green Buffer migrates with 3-‐5 kbp DNA fragments in a 1% agarose gel. The yellow dye of the FastDigest Green Buffer migrates with ~10 bp DNA fragments in a 1% agarose gel.) EQUIPMENT A ND M ATERIALS 1. Nitrile gloves 2. Water bath at 37oC 3. Benchtop cooler 4. Ice bucket and ice 5. Pipettes and tips 6. 0.5 mL Eppendorf tubes 7. Nuclease Free Water 8. Purified PCR products 9. 10X FastDigest Green Buffer. Store at -‐20oC. 10. FastDigest restriction enzymes. Store at -‐20oC. 84 11. 2% agarose midi gels (gel length 10-‐12 cm). This gel size will give good resolution of the digestion products. 12. 0.5X TBE 13. DNA ladder Restriction enzyme AluI HaeIII HhaI HpaII MseI Sau3AI Recognition sequence AG^CT GG^CC GCG^C C^CGG T^TAA ^GATC Thermo Scientific # # FD0014 #FD0154 #FD1854 # FD0514 #FD2174 #FD0784 METHOD • Work as group to prepare digestion Master Mixes. • Through consultation with your Tutor, select appropriate restriction enzymes to test. 1. Remove the 10X FastDigest Green Buffer from the freezer and thaw. Mix by briefly vortexing. Microfuge briefly. Put on ice. 2. Remove the restriction enzymes from the freezer, and keep in a bench top cooler. Microfuge briefly before use. 3. For a enzyme, prepare a Digestion Master Mix in a labeled 0.5 mL Eppendorf tube: Reagent Nuclease Free Water 10X FastDigest Green Buffer FastDigest restriction endonuclease Purified PCR product Total 4. 5. 6. 7. Volume (1 reaction) 13.5 µL 2 µL 0.5 µL Master Mix (10 reactions) 135 µL 20 µL 5 µL Master Mix (20 reactions) 270 µL 40 µL 10 µL 4 µL 20 µL -‐ 160 µL -‐ 320 µL Aliquot 16 µL of Digestion Master Mix into 0.5 mL Eppendorf tubes. Add 4 µL of purified PCR product. Mix by flicking the tubes a few times. Microfuge briefly. Incubate the tubes in a water bath at 37oC for 30 min. 85 8. Load 10 µL of each directly onto a 2% agarose midi gel (gel length 10-‐12 cm). This gel size will give good resolution of the digestion products, some of which may be very small, and some may have very similar sizes. 9. Also load a DNA ladder in the 2 outside wells. 10. Run the gel at 50-‐100 V until the yellow dye has run 3/4 length of the gel. 11. Document the gel with the gel doc system. 12. Determine the sizes of the bands and interpret the results. 13. Store the remaining digest at -‐20oC. 86 Example: CO1 DNA sequence showing positions of PCR primers and restriction enzyme sites >gi|363409135|gb|JN543256.1| Birdstrike environmental sample clone BS09 cytochrome oxidase subunit I (CO1) gene, partial cds; mitochondrial VF1d_t1 TCTCAACCAACCACAAAGACATCGGCACCCTATACTTAATCTTTGGCGCATGAGCCGGTATAGT TGGTACCGCCCTCAGCTTACTTATTCGTGCAGAACTAGGCCAACCAGGAACCCTCCTAGGCGAC GACCAAATCTACAATGTAATTGTCACCGCCCATGCTTTCGTAATAATCTTCTTCATAGTTATGC CAATCATAATCGGTGGTTTCGGAAACTGACTAGTACCACTTATAATTGGTGCACCAGACATAGC ATTCCCACGCATAAATAACATAAGCTTCTGACTACTACCCCCATCATTCCTTCTCCTCCTTGCA TCATCCACAGTAGAAGCCGGAGCAGGTACAGGATGAACCGTGTACCCACCCCTGGCTGGTAATT TAGCCCACGCCGGAGCTTCAGTAGACCTGGCCATCTTCTCTCTTCACCTAGCAGGTGTGTCATC CATCCTAGGTGCAATCAACTTCATCACAACAGCCATTAACATAAAACCGCCCGCCCTTTCACAA TACCAAACTCCCCTCTTCGTATGATCCGTACTTATTACAGCTGTTCTACTCCTCCTCTCACTCC CAGTCCTTGCTGCTGGCATCACCATGCTACTAACAGATCGAAACCTAAACACCACATTCTTCGA CCCCGCCGGAGGAGGTGACCCAGTCCTATACCAACACCTCTTCTGATTCTTCGGCCACCCAGAA GTCTA VR1d_t1 KEY: Primers VF1d_t1 TCTCAACCAACCACAARGAYATYGG VR1d_t1 TAGACTTCTGGGTGGCCRAARAAYCA Degenerate positions: R= A or G; Y= C or T Predicted restriction endonuclease sites in ‘Bird strike’ CO1 PCR product: Enzyme Recognition Length Overhang Number of Positions in site (bases) sites sequence AluI AGCT 4 Blunt 4 79, 280, 399, 552 HaeIII GGCC 4 Blunt 3 103, 414, 696 HhaI GCGC 4 3' 1 48 HpaII CCGG 4 5’ 4 55, 337, 394, 646 MseI TTAA 4 5' 2 36, 484 Sau3AI GATC 4 5' 2 534, 611 87 Example: Zea mays rbcL PCR product sequence showing positions of the primers with M13 tails rbcLa-‐fM13 TGTAAAACGACGGCCAGTATGTCACCACAAACAGAAACTAAAGCAAGTGTTGGATTTAAAGCTG GTGTTAAGGATTATAAATTGACTTACTACACCCCGGAGTACGAAACCAAGGATACTGATATCTT GGCAGCATTCCGAGTAACTCCTCAGCTCGGGGTTCCGCCTGAAGAAGCAGGAGCTGCAGTAGCT GCGGAATCTTCTACTGGTACATGGACAACTGTTTGGACTGATGGACTTACCAGTCTTGATCGTT ACAAAGGACGATGCTATCACATCGAGCCCGTTCCTGGGGACCCAGATCAATATATCTGTTATGT AGCTTATCCATTAGACCTATTTGAAGAGGGTTCTGTTACTAACATGTTTACTTCCATTGTGGGT AACGTATTTGGTTTCAAAGCCTTACGCGCTCTACGTTTGGAGGATCTACGAATTCCCCCTGCTT ATTCAAAAACTTTCCAAGGTCCGCCTCACGGTATCCAAGTTGAAAGGGATAAGTTGAACAAGTA CGGTCGTCCTTTATTGGGATGTACTATTAAACCAAAATTGGGATTATCCGCAAAAAATTACGGT AGAGCGTGTTATGAGTGTCTACGCGGTGGACTTGATTTTACGTCATAGCTGTTTCCTG rbcLa-‐revM13 KEY Primers rbcLa-‐fM13 TGTAAAACGACGGCCAGTATGTCACCACAAACAGAGACTAAAGC rbcLa-‐revM13 CAGGAAACAGCTATGACGTAAAATCAAGTCCACCRCG Degenerate positions: R = A or G Sequence in RED is the M13 tail Predicted restriction endonuclease sites in Zea mays rbcL PCR product: Enzyme Recognition Length Overhang Number of Positions in sequence site (bases) sites AluI agct 4 Blunt 6 61, 153, 181, 190, 322, 624 HaeIII ggcc 4 Blunt 1 13 HhaI gcgc 4 3' 1 412 HpaII ccgg 4 5’ 1 97 MseI ttaa 4 5' 3 56, 68, 539 Sau3A gatc 4 5' 3 249, 300, 426 88 Example: 2% agarose gel electrophoresis of digested CO1 PCR products CO1 PCR products from unknown animals (1A-‐5A) digested with HpaII and HaeIII. UC: uncut CO1 PCR product. M: 1Kb Plus DNA ladder. Note that HpaII gives different restriction patterns with each sample, indicating that the sequence of CO1 is different for each of the samples. This can be confirmed with sequence analysis (bioinformatics) of the CO1 DNA sequences. INTERNET RESOURCES AND FURTHER INFORMATION 1. Thermo Scientific Fermentas FastDigest Restriction Enzymes http://www.fermentas.com/templates/files/tiny_mce/media_pdf/FastDigest_6p_broch ure.pdf 2. Restriction enzymes http://en.wikipedia.org/wiki/Restriction_enzyme#Examples 3. Restriction fragment length polymorphism http://en.wikipedia.org/wiki/Restriction_fragment_length_polymorphism 4. NEB Restriction endonucleases Technical Guide https://www.neb.com/~/media/NebUs/Files/Brochures/RE.pdf 5. NEBcutter V2.0: DNA sequence analysis to find restriction enzymes sites http://tools.neb.com/NEBcutter2/ 89 13. NANODROP SPECTROPHOTOMETRY: ASSESSMENT OF NUCLEIC ACID CONCENTRATION AND PURITY This information was adapted from: • • T042-‐TECHNICAL BULLETIN NanoDrop Spectrophotometers Assessment of Nucleic Acid Purity. Thermo Fisher Scientific – NanoDrop Products Wilmington, Delaware USA Technical support: [email protected] 302-‐479-‐7707 www.NanoDrop.com http://www.NanoDrop.com/Library/T042-‐NanoDrop-‐Spectrophotometers-‐Nucleic-‐Acid-‐ Purity-‐Ratios.pdf Using a spectrophotometer to quantitate DNA and RNA. http://www.mc.vanderbilt.edu/root/pdfs/mclaughlin_lab/dna_and_rna_with_a_spectr ophotometer.pdf NANODROP: B ASIC U SE F OR M EASURING D OUBLE S TRANDED D NA 1. Select ‘DNA-‐50’ for dsDNA on the screen. 2. To perform a blanking cycle, perform the following: a. Load a blank sample (the buffer, solvent, or carrier liquid used with your samples) onto the lower measurement pedestal and lower the sampling arm into the ‘down’ position. b. Click on the ‘Blank’ (F3) button. c. Open the arm and wipe the blanking buffer from both pedestals using a soft paper tissue. 3. Analyze an aliquot of water as though it were a sample. This is done using the ‘Measure’ button (F1). The result should be a spectrum with a relatively flat baseline. Wipe the blank from both measurement pedestal surfaces and repeat the process until the spectrum is flat. 4. Then measure your samples. a. Absorbances of the samples are represented as if measured with a conventional 10 mm path. b. A 260/280 nm ratio of ~1.8 is generally accepted as “pure” for DNA. c. The sample concentration will be calculated in ng/µL based on absorbance at 260 nm and the selected analysis constant (1 O.D. at 260 nm for double-‐stranded DNA = 50 ng/ µL of dsDNA) 90 d. The reading at 280 nm gives the amount of protein in the sample. Pure preparations of DNA and RNA have OD 260/OD280 values of 1.8 to 2.0, respectively. If there is contamination with protein or phenol, this ratio will be significantly less than the values given above, and accurate quantitation of the amount of nucleic acid will not be possible. 5. When the measurement is complete, open the sampling arm and wipe the sample from both the upper and lower pedestals using a soft laboratory wipe. Simple wiping prevents sample carryover in successive measurements 6. Cleaning the Pedestals: Wiping the sample from both the upper and lower pedestals (as shown below) upon completion of each sample measurement is usually sufficient to prevent sample carryover and avoid residue build-‐up. Although generally not necessary, 2 µL water aliquots can be used to clean the measurement surfaces after measuring particularly high concentration samples to ensure no residual sample is retained on either pedestal. After measuring a large number of samples, however, it is recommended that the areas around the upper and lower pedestals be cleaned thoroughly. This will prevent the wiping after each measurement from carrying previous samples onto the measurement pedestals and affecting low-‐level measurements. A final cleaning of all surfaces with de-‐ionized water is also recommended after the user’s last measurement. 91 BACKGROUND I NFORMATION Nucleic acids and proteins have absorbance maxima at 260 and 280 nm, respectively. Historically, the ratio of absorbances at these wavelengths has been used as a measure of purity in both nucleic acid and protein extractions. A ratio of ~1.8 is generally accepted as “pure” for DNA; a ratio of ~2.0 is generally accepted as “pure” for RNA. Similarly, absorbance at 230 nm is accepted as being the result of other contamination; therefore the ratio of A260/A230 is frequently also calculated. The 260/230 values for “pure” nucleic acid are often higher than the respective 260/280 values. Expected 260/230 values are commonly in the range of 2.0-‐2.2. Residual chemical contamination from nucleic acids extraction procedures may result an overestimation of the nucleic acid concentration and/or negatively influence downstream analysis. Shown below (Fig. 1) are example spectra for 4 common extraction reagents, which, if not properly cleaned up, will affect sample purity. 92 FIGURE 1. Spectra of reagents used in the isolation of nucleic acids. (A) TriZol; (B) Phenol; (C) Guanidine HCL; (D) Guanidinium Isocyanate. CONTAMINANT I DENTIFICATION Examination of sample spectra may be useful in identifying that a problem with sample purity exists. It is recommended that the following be reviewed after each sample measurement: • • • • 260/230 ratio – a low ratio may be the result of a contaminant absorbing at 230 nm or less. 260/280 ratio – a low ratio may be the result of a contaminant absorbing at 280 nm or less. Wavelength of the trough in sample spectrum– this should be at ~230 nm. Absorbance by a contaminant at a low wavelength will typically shift the wavelength of the trough. Refer to Figure 2. Wavelength of the peak in sample spectrum– this should be at 260 nm. Absorbance by a contaminant may shift the peak absorbance wavelength. Refer to Figure 2. 260/230 RATIOS Some contaminants have characteristic profiles, e.g. phenol, however many contaminants present similar characteristics: absorbance at 230 nm or less. Abnormal 260/230 values may indicate a problem with the sample or with the extraction procedure, so it is important to consider both. 93 A low A260/A230 ratio may be the result of: • • • • Carbohydrate carryover (often a problem with plants). Residual phenol from nucleic acid extraction. Residual guanidine (often used in column based kits). Glycogen used for precipitation. A high A260/A230 ratio may be the result of: • • Making a blank measurement on a dirty pedestal Using an inappropriate solution for the Blank measurement. The blank solution should be the same pH and of a similar ionic strength as the sample solution. Example: Using water for the Blank measurement for samples dissolved in TE may result in low 260/230 ratios. 260/280 RATIOS Abnormal 260/280 ratios usually indicate that the sample is either contaminated by protein or a reagent such as phenol or that there was an issue with the measurement. A low A260/A280 ratio may be caused by: • • Residual phenol or other reagent associated with the extraction protocol A very low concentration (< 10 ng/µL) of nucleic acid High 260/280 purity ratios are not indicative of an issue. Although purity ratios and spectral profiles are important indicators of sample quality, the best indicator of DNA or RNA quality is functionality in the downstream application of interest. If the purity ratio is significantly higher than expected, it is best to review the spectral profile as a primary means of troubleshooting. It is important to note that there are occasions when the purity ratios are within expected limits, yet there is a problem with the sample. 94 SHIFTS IN SPECTRAL PROFILE FIGURE 2. Spectra of purified DNA without contamination (A), and of the same DNA sample contaminated with guanidine (B) and phenol (C). • • Change in sample acidity: Small changes in the pH of the solution will cause the 260/280 to vary (1). Acidic solutions will under-‐represent the 260/280 ratio by 0.2-‐0.3, while a basic solution will over-‐represent the ratio by 0.2-‐0.3. Wavelength Accuracy of the Spectrophotometers: Although the absorbance of a nucleic acid at 260 nm is generally on a plateau, the absorbance curve at 280 nm is quite steeply sloped. A slight shift in wavelength accuracy will have a large effect on 260/280 ratios. The micro volume capability of NanoDrop spectrophotometers allow the researcher to quickly and easily run quality control checks of nucleic acid and protein samples. In addition, the instrument’s short measurement cycle and general ease of use greatly increases the rate at which samples can be processed, making it possible to implement multiple quality control checks throughout a procedure or process. INTERNET RESOURCES AND FURTHER READING 1. William W. Wilfinger, Karol Mackey, and Piotr Chomczynski. (1997) Effect of pH and Ionic Strength on the Spectrophotometric Assessment of Nucleic Acid Purity: BioTechniques 22:474-‐481. http://www.biotechniques.com/multimedia/archive/00010/97223st01_10678a.pdf 2. NanoDrop homepage www.NanoDrop.com 95 3. NanoDrop User’s Manual http://www.icmb.utexas.edu/core/DNA/Information_Sheets/NanoDrop/nd-‐1000-‐v3_2-‐ users-‐manual.pdf 4. NanoDrop 1000 Spectrophotometer: User’s manual http://www.NanoDrop.com/Library/nd-‐1000-‐v3.7-‐users-‐manual-‐8.5x11.pdf 5. T042-‐TECHNICAL BULLETIN NanoDrop Spectrophotometers Assessment of Nucleic Acid Purity http://www.NanoDrop.com/Library/T042-‐NanoDrop-‐Spectrophotometers-‐ Nucleic-‐Acid-‐Purity-‐Ratios.pdf 6. Using a spectrophotometer to quantitate DNA and RNA http://www.mc.vanderbilt.edu/root/pdfs/mclaughlin_lab/dna_and_rna_with_a_spectr ophotometer.pdf 7. NanoDrop Microvolume Quantitation of Nucleic Acids (movie) http://www.jove.com/index/Details.stp?ID=2565 96 14. GENOMIC DNA EXTRACTION FROM PLANTS: MODIFIED DELLAPORTA METHOD This method was adapted from Dellaporta SL, Wood J and Hicks JB (1983). A plant minipreparation: version II. Plant Mol. Biol. Rep. 1: 19-‐20. EQUIPMENT A ND M ATERIALS 1. 2. 3. 4. Nitrile gloves Refrigerated and non-‐refrigerated microcentrifuges 0.5 mL and 1.5 mL Eppendorf tubes Eppendorf tube micro pestles 5. Scissors and forceps 6. Household bleach (10%) diluted in tap water 7. Shaking water bath at 65oC 8. Water bath at 37oC 9. SDS/DTT Extraction Buffer. Store at room temperature. Pre-‐warm to 65oC before use. 10. Chloroform: isoamyl alcohol (24:1). Store at room temperature in a Duran glass bottle covered in foil, or in an amber Duran bottle. 11. Isopropanol. Store at -‐20oC in a 100 mL Duran bottle. 12. 70% ethanol and 100% (absolute) ethanol. Store both in 100 mL Duran bottles at -‐20oC. 13. Low salt TE buffer. Store at room temperature. 14. RNAse A (Merck Millipore # 70856). Supplied at 10 mg/ml in 10 mM Tris-‐HCl, 1 mM EDTA, 50% glycerol, pH 7.5. Store at -‐20oC 15. 3 M sodium acetate (pH 8.0). Store at room temperature. 16. 5M potassium acetate (pH 8.0). Store at room temperature. 97 17. Lambda DNA standards. These are provided at 10, 20 and 40 ng/µL in 1X DNA Gel Loading Buffer. Load 5 µL of each. Store at -‐20oC. 18. Nuclease Free Water (PCR Grade Water; Roche # 3315932001). Store at room temperature. METHOD TISSUE EXTRACTION 1. Collect a young fresh leaf from two different plants of your choice from the ILRI grounds. Take a photograph of the plants for your records. 2. Wrap the leaf in foil and take to the lab. 3. In the lab, cut ~200 mg of young leaf using clean scissors. Using clean forceps transfer the sample to a labeled 1.5 mL Eppendorf tube. Keep on ice until you are ready for the next step. Rinse scissors and forceps in 10% bleach solution, tap water, then 70% ethanol (each in a beaker) and air dry after each sample. This will prevent cross-‐contamination between samples. 4. When ready, remove tubes from ice and add 50 µL SDS/DTT Extraction Buffer (pre-‐ warmed to 65oC) to each sample tube. 5. Grind the tissue using an Eppendorf microtube micro-‐pestle until a uniform fine pulp is produced. Leave pestle in tube after grinding. 6. Add 550 µL SDS/DTT Extraction Buffer (pre warmed to 65oC) while rinsing off the micro pestle. Remove the pestle, and then cap the tube. 7. Put the tube into a shaking water bath at 65oC for 30-‐60 min. Flick regularly to mix. 8. Centrifuge the tube at 14,000 rpm in a microfuge for 5 min at room temperature to pellet plant debris. 9. Transfer upper, greenish phase to a clean 1.5 mL Eppendorf tube. Note: Be sure NOT to pipette up any of the pellet or floating debris. PRECIPITATION OF PROTEINS AND POLYSACCHARIDES 10. 11. 12. 13. Add 250 µL of ice-‐cold 5M potassium acetate. Mix by gently inverting 5-‐6 times. Incubate on ice for 5 min. Centrifuge in a microfuge at 14,000 rpm for 10 min at 4oC in a refrigerated microfuge. Transfer 450 µL of supernatant to a new 1.5 mL Eppendorf tube. 98 SOLVENT EXTRACTION 1 14. In a fume hood, add an equal volume (i.e. 450 μL) of chloroform:isoamyl alcohol (CIA-‐ 24:1) to each tube. 15. Cap the tube well. Then gently invert the tube gently for 3-‐5 min to extract thoroughly. Note: Do not shake the tubes otherwise the DNA will shear. During the extraction the solution will turn cloudy yellow/green. If you have many samples, then this step can be done with the tubes in a rack. Caution: Chloroform is a hazardous chemical, and must be handled in a fume hood. Please dispose of all used chloroform in the designated waste bottle in the fume hood. 16. Centrifuge the tube at 14,000 rpm for 10 min at 4oC in a refrigerated microfuge. Note: This produces two phases, an upper aqueous phase, which contains the DNA, and a lower chloroform phase, which contains some degraded proteins, lipids, and many secondary compounds. The interface between these two phases contains most of the "junk" cell debris, degraded proteins, etc. 17. Transfer 450 µL of the upper phase (which will be greenish in colour) taking care not to pipette up any CIA or interface material, to a new, labeled 1.5 mL Eppendorf tube. Keep the tubes on ice. RNASE A TREATMENT 18. Remove RNAse A (10 mg/mL) from the freezer and keep on ice. 19. Add 3 µL RNAse A to each sample and mix by flicking the tube several times. Incubate in a water bath at 37°C for 30 min. SOLVENT EXTRACTION 2 20. In a fume hood, add an equal volume of chloroform:isoamyl alcohol (CIA-‐24:1) to each tube, i.e. if your sample is 450 µL then add 450 µL CIA. 21. Cap the tube well. Then gently invert the tube gently for 5 min to extract thoroughly. If you have many samples, then this step can be done with the tubes in a rack. Note: Do not shake the tubes otherwise the DNA will shear. 22. Centrifuge the tube at 14,000 rpm for 10 min at 4°C in a refrigerated microfuge. This produces two phases, a clear upper aqueous phase, which contains the DNA, and a clear lower chloroform phase, which contains some degraded proteins, lipids, and many secondary compounds. The interface between these two phases contains most of the "junk" -‐cell debris, degraded proteins, etc. 99 Note: If the aqueous layer appears cloudy, repeat the step until the solution is clear. 23. Transfer 400 µL to a new, labeled 1.5 mL Eppendorf tube. Note: Make sure you do not disturb the interface layer, as this is where proteins, polyphenols and polysaccharides are concentrated! CRUDE DNA PELLET PRECIPITATION 24. 25. 26. 27. 28. Add an equal volume (400 µL) of isopropanol and mix by inverting gently 8-‐10 times Incubate at -‐20°C for 1 hr. Note: An overnight incubation at -‐20°C is preferred. Centrifuge at 14,000 rpm for 15 min at 4oC. Pipette off as much of the supernatant as possible without disturbing the pellet. Dry the pellet by placing the open tube in a water bath at 80oC for 5 min. 70% ETHANOL WASH 29. Add 200 µL 70% ethanol and invert the tube several times to wash the pellet. 30. Centrifuge tubes at 14,000 rpm for 10 min at 4oC. If the pellet is dirty (e.g. a brown colour) then repeat the wash-‐step with 70% ethanol. 31. Decant supernatant from each sample. Be very careful not to pour off the pellet. 32. Air-‐dry the DNA pellet for 30-‐60 min by leaving the open tube on its side on the bench or in a fume hood with the fan running. Put the open tube on a piece of clean aluminium foil or Parafilm to prevent the tube from getting dirty. Once dried, the pellet should be clear. Note: Do not over-‐dry the pellet otherwise it may be difficult to re dissolve in the next step. 33. Add 50 µL of sterile low salt TE buffer to the pellet. Dissolve the pellet by incubating in a waterbath at 55°C with frequent mixing by flicking the tube. Or you can leave the tube at room temperature overnight to dissolve, and afterwards flick the tube to ensure complete dissolution. Note: Do not vortex to mix as this will shear the DNA. 34. Store DNA at -‐20°C. AGAROSE G EL E LECTROPHORESIS O F G ENOMIC D NA 1. 2. Remove 3 µL of the purified genomic DNA and add to a clean 0.5 mL Eppendorf tube. Mix with 3 µL 2X DNA Gel Loading Buffer. Load on to a 0.8% mini agarose gel with GelRed. 100 3. 4. 5. 6. 7. In three wells on the gel load 50 ng, 100 ng and 200 ng of Lambda DNA standards. These are provided at 10, 20 and 40 ng/µL in 1X DNA Gel Loading Buffer. Load 5 µL of each. Also include a DNA Ladder in an outside well. Run the gel at 60-‐80 V for 1 hr. Record an image of the gel using a gel documentation system. Estimate the concentration of the genomic DNA by comparing with the Lambda Standards on the agarose gel. NANODROP S PECTROPHOTOMETRY O F G ENOMIC D NA 1. 2. 3. 4. The NanoDrop is a cuvette-‐free spectrophotometer that uses just 1-‐2 µL to measure nucleic acid concentration and purity. See Chapter 13 for detailed instructions on using the NanoDrop. Blank the NanoDrop with 1.5 µL of diluent used for your genomic DNA sample. Perform a spectral measurement with 1.5 µL of your sample. Once you have determined the concentration of your sample, dilute an aliquot of the DNA with Nuclease Free Water in a labeled 0.5 mL Eppendorf tube to give 50 µL of 10 ng DNA/µL. Store both the undiluted and diluted genomic DNA at -‐20oC. Example: 0.8% agarose gel of high quality genomic DNA extracted from various plants using the modified Dellaporta method. 101 15. RECIPES CHLOROFORM: ISOAMYL ALCOHOL (25:1) To a 100 mL Duran bottle, add 96 mL chloroform and 4 mL isoamyl alcohol. Mix by gently swirling the bottle. Cover the bottle with foil and label. Store at room temperature in a flammables store. 0.5 M EDTA, PH 8.0 To prepare 1 litre of EDTA at 0.5 M (pH 8.0), add 186.1 g of disodium EDTA.2H2O to 800 mL of sterile deionized water. Stir vigorously on a magnetic stirrer. Adjust the pH to 8.0 with NaOH (approx. 20 g of NaOH pellets). Adjust the volume to 1 litre with water. Dispense into 200 mL aliquots in Duran bottles and sterilize by autoclaving. The disodium salt of EDTA will not go into solution until the pH of the solution is adjusted to approx. 8.0 by the addition of NaOH. 70 % ETHANOL Mix 70 mL ethanol and 30 mL sterile deionized water. Store in a 100 mL Duran bottle at room temperature. 5 M NACL To prepare a 5 M NaCl solution: Dissolve 292 g of NaCl in 800 mL of sterile deionized water. Adjust the volume to 1 liter with water. Dispense into 200 mL aliquots in Duran bottles and sterilize by autoclaving. Store at room temperature. 5M POTASSIUM ACETATE Dissolve 49.07 g potassium acetate in 70 mL sterile deionized water then bring up to volume to 100 mL with sterile deionized water. Sterilize by autoclaving for 15 min. RNASE A (20 MG/ML) Dissolve 200 mg of RNAse (Sigma # R4875) in 10 mL of 10 mM Tris-‐HCl pH 7.5, 15 mM NaCl in a 15 mL Falcon polypropylene tube. Heat in a boiling water bath for 15 min, then remove from the water bath and allow to cool to room temperature. Mix by inverting the tube a few times, 102 then centrifuge briefly. Dispense into 1 mL aliquots in labeled 1.5 mL Eppendorf tubes and store at -‐20°C. Alternatively, purchase RNase solution (10 mg/mL; DNase and protease-‐free) from a biotech company. Store at -‐20°C. 20 % SDS (SODIUM DODECYL SULPHATE) Dissolve 50 g of electrophoresis-‐grade SDS in 200 mL of sterile deionized water. Heat to 68°C in a water bath and then stir with a magnetic stirrer to dissolve. If necessary, adjust the pH to 7.2 by adding a few drops of 1 N HCl. Adjust the volume to 250 mL with sterile deionized water. Store at room temperature. Sterilization is not necessary. Do not autoclave. SDS/DTT EXTRACTION BUFFER This recipe is for 50 mL buffer, which is sufficient for 100 samples. Reagent 1M Tris-‐HCl, pH 8.0 0.5M EDTA, pH 8.0 5M NaCl 20% SDS volume 5 ml 5 ml 5 ml 2.5 ml final conc. 100 mM 50 mM 500 mM 1% In a 100 mL Duran bottle mix together the reagents above, make up to 47.5 mL with sterile de-‐ ionized water and adjust to pH 8.0 using concentrated HCl. This can be stored at room temperature for up to 1 month. On the day of use, add 1 g PVP (40,000 MW) and 500 µL of 1M Dithiothreitol (DTT)* in fume hood. Mix using a sterile magnetic bar. Then make up to 50 mL with sterile de-‐ionized water. *Obtained from Sigma. Store at 4oC. 3 M SODIUM ACETATE (PH 8.0) Dissolve 204.12 g of sodium acetate.3H2O in 400 mL of sterile deionized water. Adjust the pH to 8 with glacial acetic acid. Adjust the volume to 500 mL with sterile deionized water. Dispense into 100 mL aliquots in 100 mL Duran bottles and sterilize by autoclaving. 103 10X TBE BUFFER (PH 8) Prepare 1 litre of a 10X stock solution: In 800 mL of sterile deionized water, dissolve 108 g of Tris base, 55 g of boric acid, and 9.3 g EDTA. Stir with a magnetic stirrer to dissolve. Make up the volume to 1 litre with sterile deionized water and mix. Transfer to a sterile 1-‐litre Duran bottle. Store at room temperature. The pH of the concentrated stock buffer should be approx. 8.3. Dilute the concentrated stock buffer to 0.5X with deionized water before use. TE-‐1 BUFFER Low salt Tris-‐EDTA buffer: 10 mM Tris-‐HCl pH 8.0, 0.1 mM EDTA. To make 100 mL of TE-‐1, mix 1 mL of 1 M Tris-‐HCl pH 8.0 and 20 µL of 0.5 M EDTA pH 8.0 and sterile deionized water to 100 mL. Sterilise by autoclaving. Dispense 10 mL aliquots in labeled universal tubes1 and store at room temperature. 1 Universal tubes e.g. 30 mL polystyrene tube from Sterilin (# 128B): 1 M TRIS-‐HCL (PH 8) Dissolve 121.1 g of Tris base in 800 mL of deionized water. Adjust the pH to 8.0 by adding approximately 42 mL of concentrated HCl. Allow the solution to cool to room temperature before making final adjustments to the pH. Adjust the volume of the solution to 1 liter with deionized water. Dispense into 4 x 250 mL aliquots in clean 250 mL Duran bottles and sterilize by autoclaving. If the 1 M solution has a yellow colour, discard it and obtain Tris of better quality. Note: the pH of Tris solutions is temperature-‐dependent and decreases approx. 0.03 pH units for each 1°C increase in temperature. For example, a 0.05 M solution has pH values of 9.5, 8.9, and 8.6 at 5°C, 25°C, and 37°C, respectively. WATER There are different grades of water used in the Workshop: • • Tap water Deionized Water: water deionized on a Milli-‐Q system (see http://en.wikipedia.org/wiki/Milli-‐Q) 104 • • Sterile deionized water: water deionized on a Milli-‐Q system, then autoclaved to sterilize. Nuclease Free Water (ultrapure DNase⁄RNase-‐Free water). This is supplied in many molecular biology kits, or can be purchased separately. 105 16. CAUTIONS CHLOROFORM Chloroform (CHCl3) is irritating to the skin, eyes, mucous membranes, and respiratory tract. It is a carcinogen and may damage the liver and kidneys. It is also volatile. Avoid breathing the vapours. Wear appropriate gloves (e.g. nitrile gloves) and safety glasses, and always use in a chemical fume hood. SDS SDS (sodium dodecyl sulphate) is toxic, an irritant, and poses a risk of severe damage to the eyes. It may be harmful by inhalation, ingestion, or skin absorption. Wear appropriate gloves (e.g. nitrile gloves) and safety goggles. Do not breathe in the dust. PURELINK GENOMIC LYSIS/BINDING BUFFER AND WASH BUFFER 1 contains guanidine hydrochloride. Guanidine hydrochloride is extremely hazardous in case of ingestion. Harmful in case of skin contact (irritant), and eye contact (irritant). Redness, watering, and itching characterize inflammation of the eye. Skin inflammation is characterized by itching, scaling, reddening, or, occasionally, blistering. Contact with acids or bleach to any liquid wastes containing these products is hazardous because it will liberate toxic gases. DO NOT ADD acids or bleach to any liquid wastes containing this product. Wear gloves and eye protection when handling these products. BINDING BUFFER IN THE GENEJET PCR PURIFICATION KIT contains guanidinium thiocyanate. Wear gloves and eye protection when handling the Binding Buffer. It is harmful by inhalation, in contact with skin, eyes or if swallowed. Contact with acids or bleach to any liquid wastes containing this product is hazardous because this will liberate toxic gases. DO NOT ADD acids or bleach to any liquid wastes containing this product. Wear gloves (e.g. nitrile gloves) and eye protection when handling these products. UV TRANSILLUMINATOR Radiation Hazard. UV Transilluminators are powerful sources of UV radiation that will cause serious damage to unprotected eyes and skin. Wear a UV facemask and gloves for protection. 106 ELECTRICAL EQUIPMENT Never use electrical equipment while wearing wet gloves. Keep water and buffer away from all electrical connections. Do not use an electrical connection if it is wet. 107 17. ADDITIONAL INFORMATION 1. Introduction to Molecular Biology http://learn.genetics.utah.edu/ http://learn.genetics.utah.edu/content/begin/dna/ 2. Molecular Biology web book http://www.web-‐books.com/MoBio/ 3. Free Video lectures: Molecular Biology http://freevideolectures.com/Course/2305/Introductory-‐Biology/9# 4. MIT OpenCourseWare: Molecular Biology http://ocw.mit.edu/courses/biology/7-‐28-‐ molecular-‐biology-‐spring-‐2005/ 5. Course: Molecular and Cell Biology C148, 001 -‐ Spring 2011 http://www.dnatube.com/courses/berkeleymolcellb 6. Sumanas (2006). The Polymerase Chain Reaction. http://www.sumanasinc.com/webcontent/anisamples/molecularbiology/pcr.html 7. Dolan Learning Center (2006a). Gel Electrophoresis. http://www.dnalc.org/ddnalc/rurces/electrophoresis.html 8. Dolan Learning Center (2006b). Polymerase Chain Reaction. http://www.dnalc.org/ddnalc/rurces/pcr.html 9. Generation Challenge Programme (GCP) –Capacity building corner http://www.generationcp.org/sp5/ 10. Guide to pH Measurement: http://www.alliancets.com/site/files/408/29497/109873/159912/Guide_to_pH_Mea surement.pdf 11. Qiagen Benchguide http://www.qiagen.com/literature/benchguide/default.aspx 12. Jean-‐Michel Claverie, Cedric Notredame: Bioinformatics For Dummies, 2nd Edition. http://www.dummies.com/store/product/Bioinformatics-‐For-‐Dummies-‐2nd-‐ Edition.productCd-‐0470089857.html http://www.amazon.co.uk/Bioinformatics-‐Dummies-‐Jean-‐Michel-‐ Claverie/dp/0470089857 Bioinformatics for Dummies Downloads: http://www.dummies.com/store/product/Bioinformatics-‐For-‐Dummies-‐2nd-‐ Edition.productCd-‐0470089857,navId-‐322494,descCd-‐DOWNLOAD.html 108 13. 14. 15. 16. 17. BecA-‐ILRI Hub http://hub.africabiosciences.org/ Inqaba Biotec www.inqababiotec.co.za F&S Scientific www.fnscientific.com Merck Millipore www.merckmillipore.com Roche www.roche-‐applied-‐science.com 109 18. ABBREVIATIONS bp BPB CTAB DNA dNTPs DTT EDTA gDNA kbp PCR PVP40 RNase SDS Taq pol TBE Tris base pair Bromophenol Blue cetyltrimethyl ammonium bromide deoxyribonucleic acid deoxynucleotide triphosphates dithiothreitol ethylenediaminetetraacetic acid genomic DNA kilobase pair polymerase chain reaction polyvinylpyrrolidone, molecular weight 40,000 ribonuclease sodium dodecyl sulphate Thermus aquaticus DNA polymerase tris borate-‐EDTA buffer tris(hydroxymethyl)aminomethane 110 19. ACKNOWLEDGEMENTS The BecA-‐ILRI Hub gratefully acknowledges the support of Australian Aid through a partnership between Australia's Commonwealth Scientific and Industrial Research Organisation (CSIRO) and the BecA-‐ILRI Hub; and the support of Syngenta Foundation for Sustainable Agriculture (SFSA), the Bill & Melinda Gates Foundation (BMGF), and the Swedish Ministry for Foreign Affairs through Sida, the Swedish International Development Cooperation Agency. We also gratefully acknowledge the following companies who provided high quality reagents for the workshop: • • • • • • Inqaba Biotec (www.inqababiotec.co.za) F&S Scientific (www.fnscientific.com) Merck Millipore (www.merckmillipore.com) Roche (www.roche-‐applied-‐science.com) Kentros Biosciences Unlimited ([email protected]). 111 20. NOTES 112