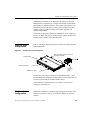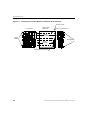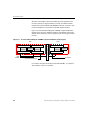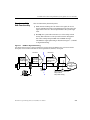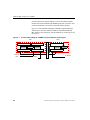
1
Verilink Red Zone Encryption Management System (REMS) User Manual October 1999 P/N 880-502423-001-B1 Copyright Notice Copyright 1999 Verilink Corporation. All rights reserved. This document does not create any express or implied warranty about Verilink or about its products or services. Verilink’s sole warranty is contained in its product warranty. The end-user documentation is shipped with Verilink’s products and constitutes the sole specifications referred to in the product warranty. Verilink has made reasonable efforts to verify that the information contained herein is accurate, but Verilink assumes no responsibility for its use or for any infringement of patents or other rights of third parties that may result. The customer is solely responsible for verifying the suitability of Verilink’s products for its use. Specifications are subject to change without notice. Trademarks Verilink is a registered trademark of Verilink Corporation. Access System 2000, WANscope, VeriStats, and FrameStart are trademarks of Verilink Corporation. Any named products herein are trademarks of their respective companies. FCC Requirements This equipment has been tested and found to comply within the limits for a Class A digital device pursuant to Part 15 of the Federal Communications Commission (FCC) rules. These limits are designed to provide protection against harmful interference in a commercial environment. This equipment generates, uses, and can radiate radio frequency energy and, if not installed and used in accordance with the user manual, can cause harmful interference to radio communications. There is no guarantee that interference will not occur in a particular installation. If this equipment causes harmful interference to radio or television reception—which can be determined by turning the equipment off and on—try to correct the interference by one or more of the following measures: • Reorient or relocate the receiving antenna. • Increase the separation between the equipment and receiver. • Connect the equipment into an outlet on a circuit different from that to which the receiver is connected. • Consult the dealer or an experienced radio/TV technician for help. This equipment complies with Part 68 of the FCC Rules. On the rear, side or bottom of the unit is a label that contains the FCC registration number and other information. If requested, provide this information to the telephone company. • All direct connections to the network lines must be made using standard plugs and jacks (compliant with Part 68). The following tables list the applicable registration jack universal order codes (USOCs), facility interface codes (FICs), and service order codes (SOCs). These are required to order service from the telco. For T1 interfaces: Port ID 1.544 1.544 1.544 1.544 Mbit/s Mbit/s Mbit/s Mbit/s SF SF, B8ZS ANSI ESF ANSI ESF, B8ZS REN/SOC 6.0N FIC 04DU9 04DU9 04DU9 04DU9 -BN -DN -1KN -1SN USOC RJ-48C jack • If the unit appears to be malfunctioning, inform the telco and disconnect it from the network lines until the source of trouble is determined to be your equipment or the telephone line . If your equipment needs repair, it should not be reconnected until it is repaired. • The unit has been designed to prevent harm to the network. If the telephone company finds that the equipment is exceeding tolerable parameters, it can temporarily disconnect service. In this case, the telephone company will provide you advance notice if possible. • If the telephone company alters its equipment in a manner that can affect the use of this device, it must give you warning so that you have the opportunity to maintain uninterrupted service. You will be advised of your right to file a complaint with the FCC. ii Verilink REMS User Manual • No customer is authorized to repair this equipment, regardless of warranty status. All repairs must be performed by Verilink or an authorized agent. It is the responsibility of users requiring service to report the need for service to Verilink or to one of our authorized agents. Lithium Battery English The lithium battery referred to in the following notices is contained inside the clock chip. DANGER! The battery can explode if incorrectly replaced! Replace only with the same or equivalent type recommended by the manufacturer. Dispose of used batteries according to the manufacturer’s instructions. DANGER! To avoid electrical shock in case of failure, the power supply must be installed by a professional installer. The terminal labeled with the ground symbol ( ) on the power supply must be connected to a permanent earth ground. CAUTION! Interconnecting circuits must comply with the requirements of EN60950:1992/A4:1997 Section 6.2 for telecommunications network voltages (TNV) circuits. Français ATTENTION! Une explosion peut se produire si la batterie est remplacée d’ une façon incorrecte! Remplacez-la seulement avec le même modêle de batterie ou un modèle équivalent selon les recommendations de manufacture. Disposez de les batteries usées selon les instructions de manufacture. ATTENTION! Pour éviter choc électrique en cas de insuccès, la provision de pouvoir doit êtré installé par un installeur professionnel. Le terminal de la provision de pouvoir, marqué du symbol de terre, ( ) doit connecté à un circuit de terre permanent. PRUDENT! Les circuits doivent êtré interconnectés de manière à ce que l’ équipement continue a êtré en agrément avec “EN60950:1992/A4:1997, Section 6.2, pour les circuits de voltage de liaisons d’ échanges (réseau) par les télécommunications (TNV),” après les connections de circuits. Españole ATTENCION! La bateria puede explotar si se reemplaza incorrectamente. Reemplace la bateria con el mismo tipo de bateria ó una equivalente recomendada por el manufacturero. Disponga de las baterias de acuerdo con las instrucciones del manufacturero. ATTENCION! Para evitar contacto con circuitos que electrocutan, la fuente de alimentación debe ser instalada por un técnico profesional. La terminal de la fuente de alimentación marcada con el símbolo de tierra ( ) debe ser conectada a un circuito de vuelta por tierra permanente. PELIGRO! Circuitos que se interconectan a la red de telecomunicaciones deben hacerse de tal manera que cumplan con los requisitos estipulados en las especificaciones “EN60950:1992/A4:1997, Sección 6.2, para los voltages de circuitos interconnectados a la Red de Telecomunicaciones (TNV),” despues de terminar las connecciones entre los circuitos. Deutsch VORSICHT! Explosionsgefahr bei unsachgemäßem Ersetzen der Batterie! Batterie gleichen Typs und gleicher Qualität benutzen, wie vom Hersteller empfohlen. Entsorgung der Batterie nach Anweisung des Herstellers! Verilink REMS User Manual iii VORSICHT, GEFAHR! Um keinen Schlag zu erhalten beim Versagen der electrischen Anlage, muss der Stromanschluss von einem Elektriker vorgenommen werden. Der elektrische Pol, versehen mit dem Erdsymbol ( ) muss am Stromanschluss permanent geerdet sein. VORSICHT! Schaltungen, die in den Geräten zusammengeschaltet sind, müssen weiterhin den Vorschriften EN60950:1992/A4:1997, Absatz 6.2 für Telecommunications Netz Spannung (TNV) Schaltkreize entsprechen. Canadian Requirements This digital apparatus does not exceed the Class A limits for radio noise emissions from digital apparatus set out in the Radio Interference Regulations of the Canadian Department of Communications. Le présent appareil numérique n’émet pas de bruits radioélectriques dépassant les limites applicables aux appareils numériques (de la class A) prescrites dans le Règlement sur le brouillage radioélectrique édicté par le ministère des Communications du Canada. The Industry Canada label indentifies CS-03 certified equipment. This certification means that the equipment meets certain telecommunications network protective, operational and safety requirements. Industry Canada does not guarantee the equipment will operate to the user’s satisfaction. Before installing this equipment, users should ensure that it is permissible to be connected to the facilities of the local telecommunications company. The equipment must also be installed using an acceptable method of connection. In some cases, the company’s inside wiring associated with a single line individual service may be extended by means of a certified connector assembly (telephone extension cord). The customer should be aware that compliance with the above conditions may not prevent degradation of service in some situations. Repairs to certified equipment should be made by an authorized Canadian maintenance facility designated by the supplier. Any repairs or alterations made by the user to this equipment, or equipment malfunctions, may give the telecommunications company cause to request the user to disconnect the equipment. Users should ensure for their own protection that the electrical ground connections of the power utility, telephone lines and internal metallic water pipe system, if present, are connected together. This precaution may be particularly important in rural areas. Caution: Users should not attempt to make such connections themselves, but should contact the appropriate electric inspection authority, or electrician, as appropriate. Safety Precautions This equipment is intended to be installed only in a Restricted Access Location that meets the following criteria: • Access can only be gained by service personnel or users who have been instructed about the reasons for the restrictions applied to the location and about any precautions that must be taken. • Access can only be gained through the use of a lock and key or other means of security, and is controlled by the authority responsible for the location. When handling this equipment, follow these basic safety precautions to reduce the risk of electric shock and injury: • Follow all warnings and instructions marked on the product and in the manual. • Unplug the hardware from the wall outlet before cleaning. Do not use liquid cleaners or aerosol cleaners. Use a cloth slightly dampened with water. • Do not place this product on an unstable cart, stand, or table. It may fall, causing serious damage to the product. • Slots and openings in the shelves are provided for ventilation to protect them from overheating. These openings must not be blocked or covered. Never place this product near a radiator or heat register. • This product should be operated only from the type of power source indicated on the marking label and manual. If you are unsure of the type of power supply you are using, consult your dealer or local power company. • Do not allow anything to rest on the power cord. Do not locate this product where the cord will interfere with the free movement of people. iv Verilink REMS User Manual • Do not overload wall outlets and extension cords, as this can result in fire or electric shock. • Never push objects of any kind into the shelves. They may touch dangerous voltage points or short out parts that could result in fire or electric shock. Never spill liquid of any kind on this equipment. • Unplug the equipment from the wall outlet and refer servicing to qualified service personnel under the following conditions: • When the power supply cord or plug is damaged or frayed. • If liquid has been spilled into the product. • If the product has been exposed to rain or water. • If the product has been dropped or if the cabinet has been damaged. Product Warranty Verilink’s product warranty covers repair or replacement of all equipment under normal use for a five-year period from date of shipment. Replacement products may be new or reconditioned. Any replaced or repaired product or part has a ninety (90) day warranty or the remainder of the initial warranty period, whichever is longer. Our in-house Repair Center services returns within ten working days. Customer Service Verilink offers the following services: • System Engineers at regional sales offices for network design and planning assistance (800) 837-4546 • Technical Assistance Center for free 24x7 telephone support during installation, maintenance, and troubleshooting (800) 285-2755 and [email protected] • To return a product, it must be assigned a Return Materials Authorization (RMA) number before sending it to Verilink for repair (800) 926-0085, ext. 2282 • Maintenance contracts and leasing plans (800) 837-4546 • Technical Training on network concepts and Verilink products (800) 282-2755 and [email protected] • Web site (www.verilink.com) Verilink REMS User Manual v vi Verilink REMS User Manual Table of Contents 1 Introduction ........................................................................................................................ 1-1 Overview .......................................................................................................................... 1-1 Features ............................................................................................................................. 1-2 Full T1 bandwidth without DSU/CSUs ................................................................ 1-3 Other key advantages of REMS ............................................................................ 1-3 REMS system hardware configuration ................................................................. 1-4 Diagnostics and performance monitoring ........................................................................ 1-6 Network performance parameters ......................................................................... 1-6 Alarms ................................................................................................................... 1-6 Registers database ................................................................................................. 1-7 Standards and compliance ................................................................................................ 1-8 AS2000 compatibility ....................................................................................................... 1-9 2 System Overview ................................................................................................................ 2-1 AS2000 rack-mountable shelf system .............................................................................. 2-1 Plug-in modules .................................................................................................... 2-1 Dual-line and multiline shelves ............................................................................ 2-2 Dual-line shelf configuration ................................................................................ 2-3 Multiline shelf configuration ................................................................................ 2-3 Overview of FBR and BRC Hardware ............................................................................. 2-5 Overview of the REMS component connections .................................................. 2-5 3 Theory of operation ............................................................................................................ 3-1 Verilink solves historical problems of encryption over T1 networks .............................. 3-1 Framing Encrypted T1 signals .............................................................................. 3-1 Accessing performance data ................................................................................. 3-2 Verilink’s REMS solution to encrypted T1 transmission ..................................... 3-2 Keystones of the New Functionality ..................................................................... 3-3 System operation .............................................................................................................. 3-5 How the REMS aligns itself ................................................................................. 3-5 BRC frame synchronization .................................................................................. 3-5 Encryptor synchronization .................................................................................... 3-6 FBR alignment and framing .................................................................................. 3-6 Alignment sequence .............................................................................................. 3-7 DTE alignment ...................................................................................................... 3-9 Red Zone Encryption Management System User Manual vii How performance data is distributed ............................................................................. 3-10 How the BRC communicates with the FBR ................................................................... 3-12 viii 4 FBR and BRC components of REMS .................................................................................. Overview ............................................................................................................... Frame Bit Repositioner (FBR) ......................................................................................... FBR NCC 2020 ..................................................................................................... FBR DIU 2130 ...................................................................................................... Black to Red Communicator (BRC) ................................................................................ Functions of the BRC ........................................................................................... Components of the BRC ....................................................................................... BRC NCC 2020 .................................................................................................... CDM 2249 ............................................................................................................ 5 Connecting REMS components .......................................................................................... 5-1 Procedure for connecting REMS components ................................................................. 5-3 Near-end of circuit ................................................................................................ 5-3 Connecting the far end equipment ........................................................................ 5-3 Signal acronyms in alphabetical order .................................................................. 5-5 Powering up REMS .......................................................................................................... 5-6 Configuring and starting REMS ........................................................................... 5-6 Setting up REMS to provide re-sync to the encryptor ..................................................... 5-7 Setting up external timing ................................................................................................ 5-8 6 Configuring and starting REMS .......................................................................................... 6-1 Configuring REMS using the thumbwheel switch ........................................................... 6-1 Using the thumbwheel switches (overview) ......................................................... 6-2 Accessing the NCC 2020 using the thumbwheel switches ................................... 6-3 Procedure for configuring the FBR ...................................................................... 6-4 Procedure for configuring the BRC ...................................................................... 6-5 Interpreting the LED indicators ........................................................................................ 6-7 General AS2000 NCC 2020 LEDs ....................................................................... 6-7 REMS master FBR NCC 2020 front panel LEDs ................................................ 6-9 Master FBR DIU 2130 front panel LEDs ........................................................... 6-10 Remote FBR DIU front panel LEDs ................................................................... 6-10 7 Performance monitoring ..................................................................................................... 7-1 Overview ............................................................................................................... 7-1 System communication of performance messages ............................................... 7-2 Calling up AM2000 performance displays ...................................................................... 7-4 Interpreting AM2000 reports in REMS ........................................................................... 7-6 Near-end User Statistics ........................................................................................ 7-6 Red Zone Encryption Management System User Manual 4-1 4-1 4-3 4-4 4-7 4-8 4-8 4-8 4-9 4-9 Near-end Equipment Statistics (PRMs from far end) ........................................... 7-6 8 Troubleshooting ................................................................................................................. 8-1 Overview .......................................................................................................................... 8-1 Basic troubleshooting ....................................................................................................... 8-2 Verifying REMS equipment using the encryptor bypass cable ........................................ 8-3 Troubleshooting using a test set and loopback ................................................................. 8-4 Sending framed all-ones to verify BRC connections to the T1 line ..................... 8-5 9 Installing and Configuring AS2000 Shelves ........................................................................ 9-1 Overview .......................................................................................................................... 9-1 Multiple shelf rack-mount systems .................................................................................. 9-2 Rack mounting dual-line shelves and heat baffles ................................................ 9-2 Using heat baffles ................................................................................................. 9-3 Instructions for mounting a dual-line shelf or heat baffle ..................................... 9-3 Using shelf rear panel functions ....................................................................................... 9-5 Connecting the signal and chassis ground ............................................................ 9-5 Setting the shelf address switch ............................................................................ 9-7 10 Installing and Replacing Plug-in Modules ......................................................................... 10-1 Installing a rear connector module into a shelf .............................................................. 10-1 Installing a front module into a shelf .............................................................................. 10-4 Removing and replacing plug-in modules ...................................................................... 10-5 Removing and replacing a front module ............................................................. 10-5 Removing and replacing a CIM or DIM module ................................................ 10-5 Red Zone Encryption Management System User Manual ix x Red Zone Encryption Management System User Manual Chapter 1 Introduction Overview The Verilink Access System 2000 Red Zone Encryption Management System (REMS) is a T1-compatible system for communicating KG-XX encrypted data1 between two Red Zones across a Black Zone public or private network while monitoring network management parameters from the Red Zone. KEY DEFINITION Figure 1-1 The secure area from a DTE to an encryptor is called the Red Zone. The non-secure public media between encryptors is called the Black Zone. Simplified Block Diagram of a REMS Network AM2000 DTE User-supplied compute running Access Manager 2000 AS2000 D4 or ESF REMS with full 1.544 MHz KG-XX RS-442/449 Red Zone LEC/ Common Carrier T1 Black Zone Near End T1 AS200 REMS with KG-xx D4 or ESF full 1.544 MHz RS-442/449 DTE Red Zone Far End 1. The purpose of encryption is to alter intelligent data, producing an unintelligent bit stream for transport across the non-secure public media. Inversely, the encryption process is reversed at the destination, reproducing the original intelligent data. Red Zone Encryption Management System (REMS) User Manual 1-1 Introduction Features The Red Zone Encryption Management System offers the following features: ■ Full 1.544 MHz T1 via RS-442/449 interfaces (1.536 Mbps plus 8 Kbps framing) No longer is there any need to give up bandwidth to provide framing functionality as there was with historical methods. (Patented technique requires no “wrap around” or other means that generate payload overhead.) ■ Data access port selectable between ESF or D42 • Supports AMI or B8ZS lines codes • Line level: DSX-1 ■ Single access port and network port per system unit ■ Complies with carrier T1 standards Requires no additional DSU/CSU modules ■ Plug-to-plug compatible with KG-81 and -94 encryptors REMS operates with Government and Military Encryptors such as the KG-81 and KG-94, including RS-422/449 interface signal levels and timing conventions at 1.544 Mbps ■ ■ Maintains integrity of fully framed T1 signals across KG-XX encryptors to Extended Super Frame (ESF) carrier network interface Dual modular components consisting of Frame Bit Repositioner (FBR) and Black to Red Communicator (BRC) These modules are installed on the Red Zone side and the Black Zone side of the encryptor, respectively. Another pair is installed similarly at the far-end circuit. ■ Windows-based Access Manager (AM2000) monitors Black Zones network parameters from Red Zones: • ESF performance data • alarms 2. Selectable as a user-configurable option. 1-2 Red Zone Encryption Management System (REMS) User Manual Features • fault isolation ■ ■ ■ Easy thumbwheel interface configuration Provides front panel Craft interface for performance monitoring via the ASCII Terminal Interface Transmit clocks supported (network side) • Loop mode (from network received data) • External mode (supplied by user) • Internal mode (1.544 Mbps) • DTE mode (from DTE received data) Full T1 bandwidth without DSU/CSUs ■ Easy hardware installation and troubleshooting ■ Installs in standard AS2000 multiline or dual-line shelves ■ Modules based on proven AS2000 standard products ■ Supports Verilink Advanced Programmable Architecture (APA) REMS uses the full 1.544 Mbps bandwidth at all points(1.536 Mbps plus 8 Kbps framing). DSU/CSU devices, which add framing and which bitstuff to the DTE signal to achieve T1 transmission rates are not necessary. REMS contains an integral T1 ESF Channel Service Unit (CSU), permitting direct connection to public or private T1 media. REMS can also be connected to an existing CSU. REMS supports B8ZS line coding for network clear channel operation. Other key advantages of REMS The key advantages of Verilink’s patented REMS are: ■ Enhanced security When compared with the “wraparound” technique, REMS is more secure for two reasons. First, the frame bit is sent through the encryptor, not wrapped around. Second, the frame bit is no longer coincident with DS0 channels. It is randomly aligned with the payload. ■ Network Management from the Red Zone Red Zone Encryption Management System (REMS) User Manual 1-3 Introduction Black Zone performance monitoring of both the near-end and far end can be done from the Red Zone. ■ Increased bandwidth REMS uses the full 1.544 Mbps bandwidth at all points. A 14% increase in bandwidth is realized when you compare the uncompromised 1.536 M bps provided by the REMS with the 1.34 4Mbps limit of the “slow down” technique. REMS system hardware configuration Each AS2000 REMS termination consists of two parts: ■ ■ a Black to Red Communicator (BRC/CSU), located in the Black Zone, and a Frame Bit Repositioner (FBR), located in the Red Zone. Both the BRC and the FBR are designed to function within either the Access System 2000 dual line-shelf (DLS 2000) or the “High Density” multi-line shelf (MLS 2200). See Figur e1-2, REMS System Equipment and Network Interfaces. Figure 1-2 REMS System Equipment and Network Interfaces T1 or RS-422 DTE RS-422 RS-422 T1 Far end REMS M U X D4/ESF 1.544Mbps F B R Encryptor 1.544Mbps 1.544Mbps KG81/ KG94 Common Carrier B D4/ESF or R Local Exchange 1.544Mbps C Networ B R C Access Manager 2000 Red Zone 1-4 Black Zone Red Zone Encryption Management System (REMS) User Manual Features Flexible DTE interfaces The REMS provides all needed interfaces for direct connection to public or private T1 media and to T1 or RS-422 Data Terminal Equipment (DTE). The REMS access port is selectable between standard Superframe (SF) framed signal (D4) or Extended Super Frame (ESF). Some of the current DTE multiplexers and terminals provide ESF capability only. REMS is selectable between ESF or D4 framing on the DTE access port. If ESF is selected, data can be extracted from the ESF framing information. FDL and CRC6 do not pass end-to-end.3 However, their functionality is provided via other REMS features. (For more information, see Chapter 3, Theory of operation.) Example DTE devices include: ■ T1 ATM switches ■ Public Branch Exchange (PBX) equipment ■ T1 framed multiplexers ■ Local Area Network (LAN) bridges and routers ■ Video conferencing equipment Because DTE signal formatting is standard, specialized interfaces and signal conditioning is not required. Electrical interface is RS-442/449 via female DB-25 connectors. This allows a variety of devices to be connected to the encrypted link (see BRC, below). 3. Internally, REMS uses ESF for synchronization only and does not pass FDL and CRC6 to the network. Red Zone Encryption Management System (REMS) User Manual 1-5 Introduction Diagnostics and performance monitoring The BRC provides near-end network and far-end performance information, which is displayed in the Access Manager 2000 (AM2000). BRC functionality includes test signals and loopbacks. The BRC deciphers the incoming T1.403 PRMs from the far-end, combines the data with near-end network data, and broadcasts the report data across the encryptor to the FBR located in the Red Zone. The FBR supports AM2000 alarm monitoring and logging, daily performance data retrieval, Red Zone daisy chaining, and FBR configuration. The FBR also supports the ASCII Terminal Interface for near-end performance displays (only). Network performance parameters The BRC supports all AM2000 capabilities such as network management, daisy chaining, performance monitoring, and storage of performance data and alarms. (Paragraph numbers refer to the T1M1.3/92-005R3 specification.) ■ Near-end registers: • Errored Seconds (6.3.2.3) • Errored Seconds Type B (6.3.2.4) • Severely Errored Seconds (6.3.2.5) • Unavailable Seconds (6.3.2.9) ■ Far-end registers: • Errored Seconds • Unavailable Seconds Alarms 1-6 Performance degrading alerts are included with each near and far end register set. Each thresholding point is user-selectable from 0 to 900. alerts pertain to Path Registers only. DS1 threshold and alerting criteria are described in T1M1.3/92-005R3, 4.2.2.4 and 9.2.1.3. For example, a typical alarm scenario would be: The FBR Errored Seconds performance Red Zone Encryption Management System (REMS) User Manual Diagnostics and performance monitoring register alarm threshold is set to 45. An accumulation of 45 error seconds within a 15-minute time interval at the far end causes the local FBR to initiate an alarm to AM2000. Registers database Data is logged in six AM2000 database registers. Register processing criteria are described in T1M1.3/92-005R3. Data storage is described in T1M1.3/92-005R3, 9.2.1.2 (DS1 Performance Data Storage). FBR registers can be reset independently or globally from the FBR ASCII Craft interface or the AM2000. Red Zone Encryption Management System (REMS) User Manual 1-7 Introduction Standards and complianc The network interface is compatible with AT&T 54016, ANSI T1.403, and provides clear channel capability. Consequently, the system supports an uncompromised 1.536 Mbps of payload. In addition, the BRC complies with the following standards and publications: ■ AT&T 62411 ■ AT&T 54016 Issue 2 ■ ANSI T1.403 1989 ■ Bellcore TR-194 ■ MCI ESF Standards ■ Sprint ESF Standards ■ GT&E ESF Standards AS2000 components have obtained the following approvals: 1-8 ■ Underwriters Laboratories 1459 ■ FCC Part 68 ■ FCC Part 15 Red Zone Encryption Management System (REMS) User Manual AS2000 compatibility AS2000 compatibility REMS is a standalone system and cannot be integrated with AS2000 modules. However, it installs in standard AS2000 shelves and uses standard power supplies. User interfaces REMS is configured with a thumbwheel interface. Access Manager (AM2000) an the ASCII Terminal Interface (ATI) are used in performance monitoring and troubleshooting. (The Verilink’s Graphical Network Manager (GNM) currently does not support REMS.) Advanced Programmable Architecture (APA) ADM 2170 incorporates Verilink Advanced Programmable Architecture (APA). APA provides the capability of downloading via AM2000 some portions of the upgraded firmware into an AS2000 module’s onboard RAM. The firmware EPROMs can also be field-replaced with upgraded chips. APA provides for system expansion, modular firmware upgradability, and a flexible technology migration path, thereby protecting the customer’s investment against obsolescence. (No downloads are currently applicable to REMS.) Red Zone Encryption Management System (REMS) User Manual 1-9 Introduction 1-10 Red Zone Encryption Management System (REMS) User Manual Chapter 2 System Overview This chapter presents a summary description of REMS, including the standard AS2000 modular shelf platform which houses REMS modules. AS2000 rack-mountable shelf system The AS2000 rack-mountable shelf system is a modular platform that accommodates a wide varietyof Verilink plug-in modules. Plug-in modules Individual plug-in modules provide specific functionality in a the AS2000 modular shelf platform. They also provide additional capacity and ease of replacement. Figur e2-1, Front Module Mating with Rear Connector Module in a Dualline Shelf Configuration, illustrates how a front module is plugged into a back module and into the backplane connector of the dual-line shelf. (The shelf is not shown.) Red Zone Encryption Management System (REMS) User Manual 2-1 System Overview Figure 2-1 Front Module Mating with Rear Connector Module in a Dual-line Shelf Configuration 128-pin mating Connectors Rear Connector Module 96-pin for mating with shelf backplane connector Front module Backplane connector is offset toward the front of the shelf relative to the plane of the rear connector module. Notes: Modules are shown without dual-line shelf but in the horizontal plane necessary for a dual-line configuration. Rear connector module is installed into the shelf first. Then, the front module is plugged in from the front. First, the rear connector modules are installed from the back the shelf into the individual slots. Then the front modules are plugged in from the front. In doing so, the rear-facing connectors of the front module plugs into the mating connectors of the shelf backplane and the rear connector module. The backplane connector and the rear connector module mating connectors are offset from each other. Dual-line and multiline shelves DCE TRUNKLOCA SYS PHY 2171 DS3 SYS SAR 2172 Front Panel View Concept Drawing, Dual-line and Multiline Shelf Rack Configurations 1 Figure 2-2 The REMS plug-in front/back module assembly is installed in a standard AS2000 dual-line or multiline shelf. Both the dual-line and multiline shelves are mountable in a standard 19-inch rack. See Figur e2-2, Front Panel View Concept Drawing, Dual-line and Multiline Shelf Rack Configurations. SNMP Dual-line shelf with split module assembly installed. Concept of multiline shelf 2-2 Red Zone Encryption Management System (REMS) User Manual AS2000 rack-mountable shelf system AS2000 plug-in modules can be added up to the capacity of the shelf. Multiline shelves can hold up to 13 single-wide modules in individually addressable slots. Additional shelves, with separate shelf addresses, can be added to increase node capacity. Rear connector modules and other modular system components usually can be added, upgraded, and replaced independently. The shelves are powered by optionally redundant DC power supplies in the form of double-wide plug-in modules for the multiline shelf and freestanding “brick” modules for the dual-line shelf. Dual-line shelf configuration Figure 2-3 Figur e2-3, Example Dual-line Shelf System shows an example dual-line shelf configuration. Example Dual-line Shelf System Rear connector module is visible fro the rear of the shelf. Dual-line shelf module front panel module front panel Universal power suppl In a dual-line shelf, plug-in modules are mounted horizontally. A dualline shelf holds only two plug-in modules. Shelves can be stacked and can be used in systems that also include multiline shelves. For information on installed shelves, see Chapter 9, Installing and Configuring AS2000 Shelves. Multiline shelf configuration Modules are installed into a multiline shelf configuration using the same method as for dual-line shelves, except that the modules are vertically oriented. Red Zone Encryption Management System (REMS) User Manual 2-3 System Overview Figure 2-4 Installing Front and Rear Modules in a Multiline Shelf, Side View Shelf rear panel Front module Multiline shelf (side view) Rear connector module 128-pin connectors Ejector handles Thumbscrews 96-pin connectors Shelf backplane connector 2-4 Red Zone Encryption Management System (REMS) User Manual Overview of FBR and BRC Hardware Overview of FBR and BRC Hardware The Red Zone Encryption Management System consists of two major components: Frame Bit Repositioner (FBR) and Black to Red Communicator (BRC). The FBR is installed on the Red Zone side and communicates between the DTE equipment and the encryptor. The FBR also connects to the PC running Access Manager. The BRC is installed on the Black Zone side of the encryptor and communicates with the network. On the far-end, another REMS is also installed. See Fig ure2-5, Block Diagram of REMS showing Functional Components. Figure 2-5 Block Diagram of REMS showing Functional Components REMS components go on both sides of the encryptor. Black Zone Red Zon Near-End M U X F B R Encryptor KG81 KG94 B R C Common Carrier or Local Exchange Networ Red Zon Far-End B R C Encryptor KG81 KG94 F B R M U X Access Manager 2000 The dashed lines on the left show the REMS broken into its two main functional components, the FBR and the BRC. In addition to their specific functions, both the Frame Bit Repositioner (FBR) and the Black-to-Red Communicator (BRC) provide full CSU functionality, including transcoding and performance data registers. Overview of the REMS component connections Both the FBR and the BRC are composed of front and back modules. Back modules are called Rear Connector Modules. The front modules contain the microprocessor-based engines that perform the essential Red Zone Encryption Management System (REMS) User Manual 2-5 System Overview functions of the modules. The back modules provided equipment and network connectivity. Engine modules are based on standard AS2000 modules but contain modified Flash EPROMs and other electronics. Rear Connector Modules are also based on standard AS2000 modules. Figur e2-6, Functional Block Diagram of REMS Component Modules and Encryptor shows the modular breakdown of the REMS components and their interconnectivity with the equipment side, the encryptor, and the network. Figure 2-6 Functional Block Diagram of REMS Component Modules and Encryptor BRC FBR NCC 2020 128-pin connector Shelf backplane DIM 253 128-pin connector CIM 2020 Encryptor —> MUX D4/ESF KG-XX Encryptor DIU 2130 NCC 2020 128-pin connector Shelf backplane CDM 2049 To network To PC/Access Manage For a further descriptive breakdown of the FBR and BRC, see Chapter 4, FBR and BRC components of REMS 2-6 Red Zone Encryption Management System (REMS) User Manual Chapter 3 Theory of operation This section provides technical background on problems with encryption over service carrier networks and the REMS solution to these problems. In depth material is presented on how REMS functions are allocated to and performed by its dual components, the FBR and the BRC. Subjects covered are framing, alignment, and system communication. Verilink solves historical problems of encryption over T1 networks When using the public telecommunications network to transport a full bandwidth encrypted signal, two areas have been problematic: ■ ■ Framing Encrypted T1 signals positioning the framing bit having access to Black Zone information about performance data, network alarms, and fault isolation from the Red Zone Transmission of encrypted, full bandwidth T1 signals across the public switched network has always been a challenge to the communication engineer. In the past, the carrier furnished a custom T1 facility to transport encrypted T1 data in an unframed format. In today’s world, custom T1 facilities are nonexistent or, at best, very expensive. The challenge to the user is how to economically hand off a framed, full bandwidth encrypted signal from the secure Red Zone to the carrier in the non-secure Black Zone. The previously accepted method has been to reposition the DTE frame bit into the payload before encryption and insert the network framing sequence into the bit stream after encryption. This process requires payload bandwidth to transport the DTE framing sequence to the far end. Transport of the framing information is necessary to ensure that at the far end, DTE framing is positioned correctly with respect to the payload. Red Zone Encryption Management System (REMS) User Manual User Manual 3-1 Theory of operation Accessing performance data Historically, network performance monitoring, network alarms, and fault isolation of an encrypted ESF-framed T1 signal were only accessible from the network connected ESF CSU in the Black Zone. Network performance information could not be passed through the encryptor because either: ■ ■ The framing and performance information was removed prior to encryption, or all information was encrypted, rendering the network framing and performance information unidentifiable and useless at the secured communication center (Red Zone). In this situation, the secured communication center in the Red Zone has no means of rapidly identifying whether T1 service in the Black Zone is deteriorating or failing. Isolating local hardware problems from network service problems is difficult without ESF CSU access. Resolution has required dispatching a technician to the ESF CSU site to evaluate the performance data. Often the site is unattended and located miles from the communication center, causing logistics problems for the operations staff. Typically, resolution requires considerable communications center downtime. Verilink’s REMS solution to encrypted T1 transmission Verilink’s Access System 2000 Red Zone Encryption Management System provides very useful solution for full bandwidth operation and network performance monitoring from the secured Red Zone. Using a proprietary, patented Verilink technique, the REMS allows fully framed T1 signals to be transmitted through an encryption system while maintaining a standard Extended Superframe (ESF) framed signal at the carrier network interface. The Access System 2000 REMS also allows critical network management information (such as ESF performance data and alarms) collected from the near- and far-end REMS Black systems to be delivered through the encryptor to Verilink’s Access Manager 2000, located in the Red Zone side of the encryptor. This technique is accomplished without “wrap around” or other means requiring payload overhead. 3-2 Red Zone Encryption Management System (REMS) User Manual Verilink solves historical problems of encryption over T1 networks Keystones of the New Functionality This new functionality has two keystones. ■ ■ First, instead of making the CSU frame to the signal, the Access System 2000 Red Zone Encryption Management System makes the signal frame to the CSU. This is implemented as the system aligns itself. Secondly, the system makes innovative use of the 4 Kbps of ESF Facility Data Link bits to securely transfer network management data. These 4 Kbps transport FBR code and PRM messages. The REMS T1 signal partitioning is illustrated in Figure 3 -1, REMS T1 Signal Partitioning. Figure 3-1 REMS T1 Signal Partitioning This diagram shows how the T1 signal is partitioned as it passes through the REMS system. The CRC-6 and ESF framing bits, which are added at the BRC are network-generated and, therefore, unencrypted. Red Zone 1.536 Mbps PAYLOAD 8 Kbps D4/ESF framing M U X Black Zone 1.536 Mbps PAYLOAD 8 Kbps FBR code F B R 1.536 Mbps encrypted payload 8 Kbps encrypte FBR code B R C Encryptor KG81 KG94 Common Carrier or Local Exchange Networ 1.536 Mbps encrypted PAYLOAD 4 Kbps encrypted FBR code 2 Kbps CRC-6 2 Kbps ESF framing Access Manager 2000 Red Zone Encryption Management System (REMS) User Manual 3-3 Theory of operation Figur e3-2, Signal Content Across Circuit illustrates the T1 signal content at each segment of the path from DTE to DTE. The figure shows transmission from the near end to the far end. Figure 3-2 Signal Content Across Circuit Black Zone direction of transmission Red Zone Near-End D4/ESF-framed FBR-framed plain text plain text M U X cipher text (encrypted FBR data) F B R B R C Red Zone Far End ESF-framed cipher text Common Carrie or Local Exchange Networ Encryptor KG81 KG94 FBR-framed D4-framed plain text plain text F B R B R C M U X Encryptor KG81 KG94 frame bit is offset frame bit is restored to original position Access Manager 2000 3-4 Red Zone Encryption Management System (REMS) User Manual System operation System operation The Red Zone Encryption Management System (REMS) consists of two of each of the following components: ■ DTE equipment, operating at 1.544 Mbps (such as IDN multiplexers) ■ Frame Bit Repositioners (FBR) ■ Encryptors (such as the KG81 or KG94), and ■ Black-to-Red Communicators (BRC) When the system starts up, each piece of equipment tries to “get into sync” with its counterpart at the other end of the network. To accomplish this, the entire system goes through an ordered procedure to align itself. How the REMS aligns itself The system alignment process involves four sequential steps: 1. BRC-to-BRC framing 2. Encryptor-to-encryptor synchronization 3. FBR-to-FBR alignment and framing, and 4. DTE-to-DTE framing In this example, we consider the near-end REMS termination to be the transmitting side. BRC frame synchronization The BRCs frame to each other, using ESF framing across the public network. Each BRC arbitrarily assigns a bit position in the cipher text signal and overwrites the original cipher text bit with standard ESF frame bits and CRC-6 bits. Although this would appear to create errors within the cipher text data, the following sequences eliminate any errors. Red Zone Encryption Management System (REMS) User Manual 3-5 Theory of operation After the BRCs are frame synchronized, a 1.544 Mbps path is provided though the aligned BRCs from the near- to the far-end encryptor. Encryptor synchronization Encryptor synchronization is initiated by the FBR encryptor re-sync lead and occurs in spite of the BRC frame bit insertion discussed above. After the encryptors synchronize, a 1.544 Mbps path is provided through the framed BRCs and synchronized encryptors from the near- to the far-end FBR. FBR alignment and framing The following steps provide an abbreviated description of the FBR alignment process. It is this alignment process that eliminates the errors mentioned above in the BRC sync process. Assume that the position of the D4/ESF frame bit entering the near-end FBR from its DTE is not initially aligned with the arbitrarily overwritten ESF frame bit generated by the near-end BRC. The decrypted plain text signal delivered to the far end FBR then would contain the original, unerrored FBR code, which replaces the D4/ESF frame pattern in its original position and random errors every 386 bits in some other (as yet undetermined) bit position. Receipt of unerrored FBR code signals the far end FBR that the near-end FBR is not properly aligned. This initiates the FBR alignment process. The end result of this alignment process is that the near-end DTE D4/ESF bit position will be shifted in time to correspond to the arbitrarily generated ESF bit position in the Black Zone. Any errors caused by the overwriting process in the Black Zone are then limited to the FBR code (instead of the payload) and are then simple to correct because the FBR code is redundant. The net result is 3-6 ■ no errors on any payload bits ■ no errors in the network ESF framing and CRC-6 bits, and ■ corrected errors in the FBR code Red Zone Encryption Management System (REMS) User Manual System operation Alignment sequence The alignment sequence is as follows: 1. The near-end FBR sends all ones (no framing bit) to the encryptor. The all-ones stream is encrypted, and this cipher text is passed to the BRC. 2. The near-end BRC inserts an initial ESF framing bit onto the cipher text by overwriting a bit at a random location. Additional ESF framing bits are inserted in every subsequent 386th bit. Time BRC I I I = BRC inserted bit 3. This ESF-framed cipher text is passed through the network to the farend BRC. This signal passes through the BRC unchanged and goes to the far-end encryptor, where it is decrypted to restore the original allones signal. Some of the bits which were inserted (overwritten) show up as errors —zeros where all ones were expected. The position of the errors is noted. Without further processing, the payload data would be errored sporadically in the inserted bit position. 4. Using this information, the far-end FBR identifies the near-end framing sequence generated by the near-end BRC and synchronizes to it. 5. By sending FBR code, the far-end FBR signals the near-end FBR that it has synchronized to the framing sequence of the near-end (transmitting) BRC. Red Zone Encryption Management System (REMS) User Manual 3-7 Theory of operation 6. As the near-end DTE transmits its D4/ESF framed signal, the nearend FBR extracts information about the location of the D4/ESF framing bit. Time BRC I F DTE I = BRC inserted bit F = D4 framing bit 7. The near-end FBR sends an FBR code that is aligned with the DTE framing. This means, actually, that the FBR code is inserted into the DTE framing bit position. The far-end FBR identifies the FBR and BRC frame bit positions and calculates an offset count. Time BRC I F DTE FBR code FBR offset = x I = BRC inserted bit F = D4 framing bit FBR = FBR code 8. The near-end FBR repositions the DTE framing bit, which contains the FBR code, by an amount equal to the offset count. Only the framing bit itself is repositioned, and the end-to-end (encode/decode) delay of the entire signal is a maximum of one bit. The FBR code and BRC framing bits now correspond to the same time slot. F 0 1 2 3 191 2 F 3 191 offset = x 0 3-8 1 Red Zone Encryption Management System (REMS) User Manual System operation Or, to summarize, the DTE frame bit, carrying FBR code, is shifted in time to correspond with the position of the BRC inserted bit. The far-end FBR reframes on the offset framing bit (FBR code). After the FBR code is aligned to the BRC frame bit position, the FBR allows the DTE payload onto the network. As a result of the offset and alignment, no payload bits are errored. 9. The far-end FBR moves the offset framing bit and restores it to its original location. 0 1 2 F 3 192 2 3 192 offset removed F DTE alignment 0 1 Once the FBRs are aligned and a 1.544 Mbps path is provided to the DTE, the DTEs frame to each other. Red Zone Encryption Management System (REMS) User Manual 3-9 Theory of operation How performance data is distributed The following four figures show how information from Black Zone performance registers is transferred to the Red Zone. Figure 3-3 Network performance data is collected in the Black Zone Red Zone Near-End To detect errors, each BRC creates a CRC-6 for the data it transmits and verifies the CRC-6 for the data it receives. This Black Zone error information is collected in performance registers. To exchange performance register information, BRCs send standard PRMs across the ESF Facility Data Link. The ESF Facility Data Link is concurrently carrying ESF framing bits and encrypted FBR code. Black Zone Far End Performance Registers PRM Near-End Performance Registers Near-End Performance Registers CRC-6 inserted Common Carrier or Local Exchange Networ B R C B R C CRC-6 verified Figure 3-4 The BRC encodes and transmits the performance data Red Zone Black Zone Near-End Far-End Performance Registers Near-End Performance Registers F B R B R C Encryptor KG81 KG94 Combined encrypted FBR code and BRC performance message Now, the Black Zone performance registers need to be transmitted to and rebuilt at the FBR. To do this, the BRC creates a BRC performance message and transmits it by using an algorithm to force errors on the encrypted FBR code. 3-10 Red Zone Encryption Management System (REMS) User Manual How performance data is distributed Figure 3-5 The FBR receives the information Red Zone Black Zone Near-End Far End Performance Registers Near-End Performance Registers Encryptor F B R KG81 KG94 B R C Decrypted FBR code (with BRC performance message At the encryptor, the FBR code containing the BRC performance message is decrypted. The FBR does know what FBR code it was expecting from the other end and can compare the received code with the expected code. Figure 3-6 The FBR decodes information and rebuilds registers Far End Performance Register Red Zone Black Zone Near-End Near-End Performance Registers F B R Far End Performance Registers Near-End Performance Registers Encryptor KG81 KG94 B R C Using an algorithm, the FBR extracts the BRC performance message from the received code. It then uses these extracted BRC performance messages to reconstruct the Black Zone performance registers. Red Zone Encryption Management System (REMS) User Manual 3-11 Theory of operation How the BRC communicates with the FBR As shown earlier in Figure 3 -1, REMS T1 Signal Partitioning, the network 2 Kbps framing and 2 Kbps CRC-6 codes are inserted at the BRC. The FBR code (originating at each FBR) is carried through to the far-end FBR and is used to maintain REMS synchronization. The encrypted FBR code is periodically interrupted across the network to support the ANSI T1.403 PRM andAT&T 54016 message exchanges. The BRC collects network performance data and provides a one-way communication channel through the encryptor to the FBR. Far-end BRC performance data is conveyed to the near-end BRC by means of a ANSI T1.403 Performance Report Message (PRM), which is inserted into the FBR code. Table 3-1, Decoding the 4-bit Message Field, shows what happens to the FBR code as it travels through the system from the far end to the near end. For the purposes of this discussion, only one 4-bit data byte is analyzed. The alpha references in the table correlate the FBR code with a specific location on the network diagram, shown in Figure 3 -3, Network performance data is collected in the Black Zone. 3-12 Red Zone Encryption Management System (REMS) User Manual How the BRC communicates with the FBR Table 3-1 Decoding the 4-bit Message Field Message bit # 1 2 3 4 Site Code or Message State FBR Code 1 0 1 1 A 0 1 1 0 B 1 1 0 1 The FBR code, placed in the offset frame bit positions, is sent from the far-end FBR. Encrypted FBR Code ⇓ ⇓ ⇓ ⇓ As it passes through the encryptor, the FBR code is encrypted. Originating BRC performance message C Network performance data is coded as a BRC performance message, ready to be inserted and sent to the near-end Access Manager 2000. Combined encrypted FBR code and BRC performance message The encrypted FBR code and the BRC performance message are combined into one message using a 2-input exclusive-OR function. Simply, for each bit position, if the bit values which are being combined are: • different, the resulting value is “1 1 0 1 1 D • the same, the resulting value is “0” Decrypted FBR code (with inserted BRC performance message 0 1 1 0 1 0 1 1 ⇓ ⇓ ⇓ ⇓ E As the exclusive-OR’ed text passes through the encryptor, it is decrypted to produce this result. Remember that the decryption key has now been applied to a message which was created from encrypted FBR code and a plain text BRC performance message, so the result will differ from original exclusive-OR’ed text. Local FBR reference code F The local FBR refers to the FBR code it was expecting. Resulting BRC performance message The FBR extracts the BRC message by using a second exclusive-OR function to compare the received code with the FBR reference code. Simply, each bit position is compared to the expected value. If the result of the comparison is: • different, the output is a “1” • the same, the output is a “0” 1 1 0 1 G The resulting message is the same as the original BRC performance message created in C . Red Zone Encryption Management System (REMS) User Manual 3-13 Theory of operation Figure 3-7 Where the FBR code is processed Black Zone Red Zone Near End Red Zone Far End E decrypted FBR code (with inserted BRC performance message) F local FBR reference code G resulting BRC performance message M U X F B R D combined encrypted FBR code and BRC performance message KG81 KG94 B R C Common Carrier or Local Exchange Networ Encryptor B encrypted FBR code B R C A FBR code KG81 KG94 F B R M U X Encryptor C originating BRC performance message Access Manager 2000 The communication from the BRC to its FBR is one-way because the near-end FBR uses the exclusive-OR function to extract the performance data from the decrypted FBR code (with an inserted BRC performance message). 3-14 Red Zone Encryption Management System (REMS) User Manual Chapter 4 FBR and BRC components of REMS The sections in this chapter break down the REMS FBR and BRC into their components and describe them in detail. The purpose of this chapter is to familiarize you with the REMS major components, the FBR and the BRC. There are no installation or operating instructions in this chapter. For REMS setup and component connection instructions, see Chapter 5, Connecting REMS components. These sections of this chapter describe: ■ purpose and operation of the FBR and BRC ■ front panel connectors, controls, and indicators. ■ “front” and “back” module connectivity ■ Rear Connector Module rear panel connectors ■ system interconnections CAUTION ! Overview REMS plug-in modules look similar to standard AS2000 modules. However, REMS components contain specially modified hardware and firmware and should be labeled on the front panel with their REMs model numbers. Do not attempt to replace a REMS module with a standard AS2000 module. Both the FBR and the BRC are composed of front and back modules. Back modules are called Rear Connector Modules. The front modules contain the microprocessor-based engines that perform the essential functions of the modules. The back modules provided equipment and Red Zone Encryption Management System (REMS) User Manual 4-1 FBR and BRC components of REMS network connectivity. Engine modules are based on standard AS2000 modules but contain modified Flash EPROMs and other electronics. Rear Connector Modules are also based on standard AS2000 modules. Figur e4-1, Functional Block Diagram of REMS Component Modules and Encryptor shows the modular breakdown of the REMS FBR and BRC and their interconnectivity with the multiplexers, the Encryptor, and the network. Figure 4-1 Functional Block Diagram of REMS Component Modules and Encryptor BRC FBR NCC 2020 128-pin connector Shelf backplane DIM 253 128-pin connector CIM 2020 Encryptor —> MUX D4/ ESF 4-2 KG-XX Encryptor DIU 2130 NCC 2020 128-pin connector Shelf backplane CDM 2049 To network To PC/Access Manage Red Zone Encryption Management System (REMS) User Manual Frame Bit Repositioner (FBR) Frame Bit Repositioner (FBR) The Frame Bit Repositioner (FBR) provides two interfaces which operate at 1.544 Mbps: ■ a T1 or RS-422 DTE interface ■ an RS-422 interface to the KG bulk encryption device The Frame Bit Repositioner (FBR) is a dual module assembly, made up of a paired CSU and DSU. These functions are implemented by one NCC 2020-based front module and one DIU 2130-based front module. Both modules contain special Flash EPROMs. See Figur e4-2, Functional Block Diagram of FBR Component Modules. Figure 4-2 Functional Block Diagram of FBR Component Modules FBR 128-pin connecto NCC 202 Shelf backplane DIM 2530 128-pin connecto CIM 2020 Encryptor —> MUX D4/ ESF KG-XX Encryptor DIU 2130 BRC To network To PC/Access Manage The NCC 2020 connects to the Red Zone DTE equipment via its CIM 2 0 20 rear connector module. The DIU 2130 connects to the encryptor via its DIM 2530 rear connector module. The FBR generates its own proprietary code and performs the following functions: ■ Receives and decodes performance data originating at the BRC This information is processed and stored in real time performance registers, duplicating the near-end and far-end “Black Zone” registers. The information can be viewed by the network management system in the Red Zone, the Verilink’s PC/Windowsbased Access Manager 2000 (AM2000). Red Zone Encryption Management System (REMS) User Manual 4-3 FBR and BRC components of REMS ■ ■ FBR NCC 2020 Repositions the framing bit provided by the DTE to correspond with the BRC inserted framing bit. This proprietary alignment technique is the key to full bandwidth operation. (For more information, see Chapter 3, Theory of operation.) The FBR NCC 2020 connects to the MUX via its Rear Connector Module, the CIM 2020. Figure4- 3, NCC 2020 Front Panel shows the NCC 2020 front panel controls and indicators. EQPT NET MON NET 0 STAT 0 EQPT NCC 2020 Front Panel EXE NCC 2020 Figure 4-3 Provides “Red Zone” alarm notification in the event that the register count exceeds the preset threshold REV IN OUT IN OUT NET EQPT CRAFT FUNCTION Thumbwheel Interface Thumbwheel Switches and Command Execution Push button Signal Access Jacks (Bantam) LED ASCII Indicators Interface Equipment, CSU Modular Jack for Status, and Network LEDs ASCII Terminal Connection Ejector handle Figur e4-4, FBR CIM 2020 Rear Panel (Back Module for NCC 2020), shows the rear connector panel of the NCC 2020’s mating back-module. Figure 4-4 FBR CIM 2020 Rear Panel (Back Module for NCC 2020) This CIM mates with NCC 2020 front module. Thumb screws EQPT To MUX ESF/D4 1.544 MHz in MANAGEMENT EXTENSION Not used CIM 2025 RELAY ALARM NO COM NC EXT TIMING MANAGEMENT PORT IN Not used To PC COM port NETWORK Not used The front panel of the FBR NCC 2020 contains: ■ 4-4 a momentary push-button switch (labeled EXE) Red Zone Encryption Management System (REMS) User Manual Frame Bit Repositioner (FBR) ■ a two-position thumbwheel switch The thumbwheel is used to configure the REMS. For thumbwheel switch interface operating instructions, see Chapter 6, Configuring and starting REMS. ■ LED function indicators ■ a Craft port connector (a 6-pin modular jack) ■ bantam signal access connectors Ejector handles facilitates removal and installation of the module.1 ASCII terminal jack The front panel CRAFT jack of the master NCC 2020 is used for a local ASCII terminal connection. This 6-pin miniature modular jack provides a direct RS-232 connection without flow control to the local terminal. This jack is equipped with an auto-baud feature, which is activated upon power-up. When the master NCC receives a carriage return (CR or 0DH) at a rate of 300, 600, 1200, 2400, 4800, 9600, or 19,200 baud, this port is programmed to operate at the ASCII terminal’s rate. Pressing the BREA key on the terminal for one second resets the baud rate, or disconnecting the cable from the terminal to the CRAFT jack also resets the baud rate. Refer to the Access System 2000 ASCII Terminal Operation manual for instructions on connecting the ASCII terminal to an Access System 2000 node. For information on using the ASCII Terminal Interface (ATI) with REMS, see Chapter 7, Performance monitoring. Signal access jacks The NCC 2020 front panel also has three pairs of bantam jacks for signal access by an external T1 test set. Fi gure4-5, NCC Signal Access Jacks shows the wiring of these jacks. 1. Later models are equipped with dual ejectors. Red Zone Encryption Management System (REMS) User Manual 4-5 FBR and BRC components of REMS Figure 4-5 NCC Signal Access Jacks D4/ESF Equipment NCC EQPT MON EQPT OUT NET IN CSU Signal Processing EQPT IN To/From shelf backplane NET OUT NET MON 4-6 EQPT IN The EQPT IN jack breaks the transmission path toward the DS-1 equipment. This allows an operator to apply an external test signal to the equipment receiver. EQPT OUT The EQPT OUT jack breaks the transmission path toward the network and looks toward the DS-1 equipment transmitter. This jack can be patched to the test set receiver for signal measurement. NET IN The NET IN jack looks toward the network when accessed. It can be patched to the test set transmitter for test signal application to the network. NET OUT The NET OUT jack permits external measurement of the incoming signal from the network. MON The MON jacks are non-intrusive. When accessed, each jack permits signal monitoring by an external test set without interrupting normal transmission. Red Zone Encryption Management System (REMS) User Manual Frame Bit Repositioner (FBR) FBR DIU 2130 Figure 4-6 The FBR DIU 2130 connects to the encryptor. The front panel of the FBR DIU 2130 is shown in Figur e4-6, FBR DIU 2130 Front Panel. FBR DIU 2130 Front Panel Loopback and Status LEDs STAT LOOP FAR END LOOP END NEAR DATA PORT 2 STAT LOOP Ejector handle Data Port 2 FAR END LOOP NEAR END DATA PORT 1 DIU 2130 Data Port 1 Information on interpreting the LED indicators is given in Chapter 6, Configuring and starting REMS. Figur e4-7, FBR DIM 2530 Rear Panel (Back Module for DIU 2130) shows the rear connector panel of the back-module that pairs with the FBR DIU 2130. Figure 4-7 FBR DIM 2530 Rear Panel (Back Module for DIU 2130) This DIM mates with DIU 2130 front module. 2530 DIM EIA-530DATA PORT 1 EIA-530DATA PORT EIA 530 DB-19 female connectors Red Zone Encryption Management System (REMS) User Manual 4-7 FBR and BRC components of REMS Black to Red Communicator (BRC) The Black to Red Communicator (BRC) is a single front-back module located in the Black Zone. It functions as a “super CSU.” Functions of the BRC The BRC performs the following functions: ■ ■ Provides positioning for the ESF framing bit Collects network performance data and transparently passes it through the decrypting direction of the active encryptor to the FBR for further processing and transmission to Access Manager 2000 By coordinating with the FBR, the BRC provides a one-way communication channel through the encryptor to the FBR. The BRC provides two interfaces which operate at 1.544 Mbps: ■ ■ Components of the BRC 4-8 An ESF-compliant T1 network interface which includes performance monitoring and data collection as defined by AT&T Pub. 54016 Rev. 2 and ANSI T1.403 An RS-422 interface to the KG bulk encryption devices (KG-81 and KG-94) The Black to Red Communicator (BRC) is made of two components based on standard AS2000 plug-in modules. The front module is the NCC 2020. The back module is the CDM 2249. See Figur e4-8, Functional Block Diagram of BRC Component Modules. Red Zone Encryption Management System (REMS) User Manual Black to Red Communicator (BRC) Figure 4-8 Functional Block Diagram of BRC Component Modules To PC/Access Manager BRC KG-XX Encryptor NCC 2020 FBR 128-pin connector Shelf backplane CDM 2249 To equipment To network BRC NCC 2020 The front module is based on the Node Controller Unit (NCC) 2020. The NCC contains the Channel Service Unit (CSU). The CSU performs the major T1 functions, such as signal framing and encoding. This is the same module that is a component of the FBR. See Figure 4 -3, NCC 2020 Front Panel. CDM 2249 The “back” module of the BRC NCC 2020 is based on the Channel Service Unit Interface Module (CDM) 2249. It receives the encrypted signal at its Data port. Its network port connects to the T1 carrier network. Figure 4-9 CDM 2249 Rear Panel EXT TIMING RS449/EIA530 MANAGEMENT MANAGEMENT NO COM NC EXTENSION PORT-IN Node Management Extension Port Node Management In Port CDM 2249 ALARM RELAY NETWORK Network Port To T1 Networ RJ-48 connector INPUT External Timing Port DATA Data Port Alarm Relay Jacks To back I/O port (input) of encryptor Not used Red Zone Encryption Management System (REMS) User Manual To PC COM port 4-9 FBR and BRC components of REMS 4-10 Red Zone Encryption Management System (REMS) User Manual Chapter 5 Connecting REMS components This chapter provides instructions for setting up a REM circuit. It also provides the following setup procedures: IMPORTANT ! ■ Setting up REMS to provide re-sync to the encryptor ■ Setting up external timing Before setting up a circuit, be sure you have read the preface and the three preceding chapters of this manual: ■ Preface ■ Chapter 1, Introduction ■ Chapter 3, Theory of operation ■ Chapter 4, FBR and BRC components of REMS Red Zone Encryption Management System (REMS) User Manual 5-1 Connecting REMS components CAUTION When connecting the FBR and BRC to the encryptor, be sure to maintain the correct polarity of the driver and receiver signals of these devices. That is, always connect the plus (+) output of a driver to the plus (+) input of the receiver it is connected to. Likewise, always connect the minus (-) output of a driver to the minus (-) input of the receiver it is connected to. See F igure5-2, Simplified System Cabling Diagram. Figure 5-1 Maintaining Driver Signal Wire Polarity, Example NOTE: The pin numbers are notated in the order <Plus, Minus>. For example, 3,16 means: + output 3, - output 16 3 (+) + Driver O 16 (- + Receiver O- Figur e5-3, Pin-to-Pin System Cabling Diagram shows a the signal-level connections for REMs on the near end. 5-2 Red Zone Encryption Management System (REMS) User Manual Procedure for connecting REMS components Procedure for connecting REMS components For intermodule connections, refer to Fi gure5-2, Simplified System Cabling Diagram. For signal level, pin-to-pin cabling details, refer to Figur e5-3, Pin-to-Pin System Cabling Diagram. Near-end of circuit Start by connecting the equipment at the near end. 1. Connect T1 MUX to FBR CIM 2020 rear panel, Equipment port. 2. Connect FBR, rear panel of FBR DIM 2530, Port 2 of FBR to Encryptor input port. 3. Connect PC to Management In port on FBR CIM 2020 rear panel. 4. Connect Encryptor output port to EIA 530 adapter cable (P/N 458502045-001 Rev A or higher). 5. Connector BRC end of adapter cable to minisub Management Extension port on rear panel of BRC CDM 2249. 6. Connect BRC Network port on rear panel of BRC CDM 2249 to T1 ESF network. Connecting the far end equipment Make similar connections (as above) on far end. Red Zone Encryption Management System (REMS) User Manual 5-3 Connecting REMS components Figure 5-2 Simplified System Cabling Diagram MUX FBR Encryptor DIM 2530 rear panel T1 ESF/D4 to network EIA-530 data port 2 To back I/O port of encrypto BRC CDM 2249 rear panel CIM 2020 rear panel Adapter cable ESF/D4 1.544 Equipment Port MHz MUX to FBR EIA 530 Black Zone Red Zone User-supplied computer running Access Manager 2000 Figure 5-3 Optional PC Pin-to-Pin System Cabling Diagram MUX FBR RD EIA 530 Port 2 on DIM 2530 3,16* Encryptor TPT EIA 530 Data Port on CDM 2249 TCT TCTC D4/ESF 1.544 MHz RS SD 4,19 2,14 24,11 TT RSC BSC RPT RCT RTC RPTC 2,14 24,11 15,12 3,16 17,9 BRC SD TT to T1 ESF or D4 network ST RD RT T1 ESF/ D4 from network ST 15, 12 Re-sync leads (64 kHz reference Red Zone synchronized with RSC) Black Zone NOTE: *The pin numbers are notated in the order <Plus, Minus>. 5-4 Red Zone Encryption Management System (REMS) User Manual Procedure for connecting REMS components Signal acronyms in alphabetical order BSC Black Station Clock RCT Receive Ciphered Text RD Read Data RPT Receive Plain Text RPTC Receive Plain Text Clock RS Red Station RSC Red Station Clock RTC Receive Ciphered Text Clock SD Send Data ST Send Timing (or Synchronized Timing) TCT Transmit Ciphered Text TCTC Transmit Ciphered Text Clock TPT Transmit Plain Text TT Terminal Timing Red Zone Encryption Management System (REMS) User Manual 5-5 Connecting REMS components Powering up REMS 1. Be sure you have connected the system components at both ends of the circuit. 2. Power up the shelves housing the modules in the circuit. (If necessary, see the appropriate AS2000 manuals referred to in the preface of this book.) Configuring and starting REMS 5-6 When you have connected the components on both sides of the circuit, configure and start REMS as described in the next chapter. Red Zone Encryption Management System (REMS) User Manual Setting up REMS to provide re-sync to the encryptor Setting up REMS to provide re-sync to the encryptor Provide re-sync leads to the encryptor as follows: 1. Connect the encryptor re-sync leads to the relay alarm contacts on the back of the FBR CIM 2020. (Use the COM and NC terminals.) Make the re-sync connections from the FBR to the KG at both ends of the circuit. (See Fig ure5-4, Providing Re-sync Leads to the Encryptor.) Figure 5-4 Providing Re-sync Leads to the Encryptor Test Set EIA 530 T1 F B R Loop Timing EIA 530 KG Encryptor Alarm relays BB R R C C T1 To far end Common Carrier or Local Exchange Networ Re-sync leads 2. Put the testset in loop-timing mode. 3. Using the thumbwheel interface, set the re-sync timing on the FBR. See Chapter 6, Configuring and starting REMS. Start with 6 seconds (command 71). Timing may vary depending on the encryptor and the type of transmission facility used. 4. If the circuit is not working as indicated by the REMS LEDs, the problem maybe in the network. Verify the T1 line by plugging an ASCII terminal into the Craft interface on the near-end BRC NCC 2020 front panel. (For details, see AS2000 ASCII Terminal Interface Manual.) Red Zone Encryption Management System (REMS) User Manual 5-7 Connecting REMS components Setting up external timing This section describes how to provide external timing to the external input of the BRC. The timing source must be the same one that provides CLK to the rest of the equipment in the circuit. See Figur e5-5, External Timing Block Diagram of Near-end and Table5- 1, REMS External Timing Configuration. NOTE “Master and Remote” configuration refer to the FBR only Internal/external timing refer to the BRC only. 1. Set the Multiplexers to loop timing. If loop timing is not possible, you can set the end Multiplexers for external timing and use the same external timing source provided to BRC EXT input or the RSC from the encryptor Or, 2. Set the Multiplexers’ timing to external timing and connect the FBR 64 KHz reference, which is synchronized with RSC. (See Figur e5-5, External Timing Block Diagram of Near-end.) 5-8 Red Zone Encryption Management System (REMS) User Manual Setting up external timing Figure 5-5 External Timing Block Diagram of Near-end Red Zone MUX FBR Black Zone Encryptor RD 3,16 TPT BR TCTC Loop or Ext. timing 2,14 TCT 24,11 SD to T1 ESF TT network RS SD 4,19 2,14 24,11 TT EXT CLK RSC BSC RPT RCT RPTC RTC 15,12 3,16 17,9 ST Internal or External timing RD T1 ESF from network RT ST 15, 12 Re-sync leads (64 kHz reference synchronized with RSC) EXT CLK In Table 5-1, REMS External Timing Configuration, two valid alternative timing configurations are given, one in each row Table 5-1 REMS External Timing Configuration Near-end MUX Near-end BRC Far-end BRC Far-end MUX Loop Internal Loop Loop Loop or Externala External Loop or External b Loop or External a. Must be from same clock source as EXT input to near-end BRC, or RSC from the encryptor, or 64 KHz REF (RSC) from FBR. b. Must be from same clock source as EXT input to near-end BRC. Red Zone Encryption Management System (REMS) User Manual 5-9 Connecting REMS components 5-10 Red Zone Encryption Management System (REMS) User Manual Chapter 6 Configuring and starting REMS This chapter describes: ■ Configuring REMS using the thumbwheel switch interface ■ Interpreting the LED indicators Configuring REMS using the thumbwheel switch The operator uses the EXE (execute) and FUNCTION thumbwheel switches on the NCC 2020 modules to configure REMS. There are thumbwheel switches in both the FBR and the BRC. You must configure the FBR and the BRC separately, as if they were two separate AS2000 nodes. Figur e6-1, NCC Thumbwheel Switches shows the top section of the master NCC 2020 front panel. Red Zone Encryption Management System (REMS) User Manual 6-1 Configuring and starting REMS CAUTION ! Figure 6-1 Do not attempt to use AM2000 or ASCII Terminal Interface (ATI) to configure REMS. (There are some exceptions, which are noted.) Use only the thumbwheel interface. If you accidentally change configuration using the AM2000 or the ATI, reconfigure the system using the thumbwheel interface. Do not use other thumbwheel commands that you may find in AS2000 manuals. Unspecified results may ensue. NCC Thumbwheel Switches NCC 2020 First digit o command. (TENs Value) EXE Second digit of command. (ONEs Value) X Using the thumbwheel switches (overview) X FUNCTION Push the buttons on this side to increment the digit values. Press this button twice within 1 second to execute the command. Push the buttons on this side to decrement the digit values. The system must be powered up before you use the thumbwheel switch interface. The thumbwheel switch interface is enabled by default. You can log into Access Manager 2000 (AM2000) to verify that the thumbwheel switches are enabled. Before entering thumbwheel commands, you must address the appropriate FBR or BRC NCC 2020 by entering its slot address number into the thumbwheel switches. Slot addresses numbers are two-digit numbers that range from 01 to 30. The NCC is typically in slot 01. Configuring the system using the thumbwheel switches is a two-step process. The operator enters a command by setting the FUNCTION thumbwheel switches to the corresponding command number (address). The operator then presses the EXE button twice (in one second). 6-2 Red Zone Encryption Management System (REMS) User Manual Configuring REMS using the thumbwheel switch Each command consists of two digits. The switch nearest to the EXE push-button sets the first digit of each command and has a TENs arithmetic value. The other switch sets the second digit of the command and has a ONEs value. Accessing the NCC 2020 using the thumbwheel switches Plug-in module slot addresses range from 01 to 30. Slot numbers are assigned to dual-line and multi-lined shelves from left to right, continuing from one shelf to another. See Figure 2-2 in the Red Zone Encryption Management System User Manual. The figure is titled, “Front Panel View Concept Drawing, Dual-line and Multiline Shelf Rack Configurations.” (For more information, see the AS2000 manuals referred to in the preface of the REMS user manual.) Every module in an Access System 2000 node has a unique two-digit location number, or address. In a node with two multiline and two dualline shelves, the module addresses for thumbwheel switch access are 01 to 13 in the first multiline shelf and 14 to 26 in the second multiline shelf. The module addresses in the dual-line shelves are 27 and 28 in the first shelf, and 29 and 30 in the second shelf. If the node has only dual-line shelves, the module addresses are 01 and 02 in the first shelf, and 03 and 04 in the second shelf. NOTE You must configure the FBR and the BRC separately, as if they were two separate AS2000 nodes. Accessing modules To access the desired NCC, enter its address in the thumbwheel switches and press the EXE button twice within one second. See Figure6- 1, NCC Thumbwheel Switches. The STAT LED of the module flashes green, indicating that it is accessed and waiting for your next command. Once an NCC has been accessed, you have 60 seconds to enter another thumbwheel switch command. If no command is entered within this time period, the accessed module returns to the idle state and its STAT LED goes out. Red Zone Encryption Management System (REMS) User Manual 6-3 Configuring and starting REMS Clearing an incorrect address entry If you accidentally access the wrong module, enter command 00 and rapidly press the EXE button twice. This releases the currently accessed module. If you enter command 00 while a QRSS test signal is applied to an NCC, or while a loopback is in progress, nothing happens. The loopbacks must be deactivated first. Procedure for configuring the FBR Use the following procedure for configuring the FBR NCC 2020. (For list of commands, see the subsection, FBR Thumbwheel Configuration Commands, below.) 1. Access the FBR by entering its location address into its the thumbwheel switches (located on the front panel of the FBR NCC 2020). The STATUS light on the front panel of the NCC begins flashing Green. (You have 60 seconds to perform the next step.) 2. Using the FBR thumbwheels (located on the front panel of the FBR NCC 2020), set the FBR to 40. This is the “canned” (preconfigured) FBR option. The NCC STATUS light stops flashing. 3. As appropriate, configure one of the FBRs in the circuit to be Master (64) and the other end, Remote (65). 4. As, appropriate, configure the access port to D4 or ESF framing. (You can also use the ASCII Terminal Interface (ATI) to set these parameters.) 5. Select the line code.(You can also use the ATI to set these parameters.) IMPORTANT ! 6-4 If you reset the thumbwheel switches to 40 at any time after performing the above procedure, all settings are reset to the defaults. You must then reenter the commands that make the configuration unique Red Zone Encryption Management System (REMS) User Manual Configuring REMS using the thumbwheel switch FBR Thumbwheel Configuration Commands Procedure for configuring the BRC 40 Canned FBR Option 1 (Remote REMS is the default.) 64 FBR is Master 65 FBR is Remote 68 Disable Re-sync (Default) 69 Re-sync= 2 seconds 70 Re-sync= 4 seconds 71 Re-sync= 6 seconds 72 Re-sync= 8 seconds 73 Re-sync= 10 seconds 80 D4 81 ESF 82 AMI 83 B8ZS Using the BRC thumbwheels (located on the front panel of the BRC NCC 2020), select the BRC timing mode for each BRC in the circuit. Refer to the subsection, BRC Timing Options, below. 1. Access the BRC by entering its location address into its the thumbwheel switches (located on the front panel of the BRC NCC 2020). The STATUS light on the front panel of the NCC begins flashing Green. (You have 60 seconds to perform the next step.) 2. Using the FBR thumbwheels (located on the front panel of the FBR NCC 2020), set the FBR to 40. This is the “canned” (preconfigured) FBR option. The NCC STATUS light stops flashing. 3. Select the BRC timing mode for each BRC in the circuit. Refer to the subsection, BRC Timing Options, below. Red Zone Encryption Management System (REMS) User Manual 6-5 Configuring and starting REMS BRC Timing Options Select one of the settings 40 through 43, which are canned programs. Then select from 50 through 63 as appropriate. 6-6 40 (Canned program) Internal timing, generate PRMs (Performance Report Messages) 41 (Canned program) Network loop timing, generate PRMs 42 (Canned program) Internal timing, no PRMs 43 (Canned program) Network loop timing, no PRMs 50 Internal timing 51 Network loop timing 52 Equipment timing 53 External timing RS442 54 External timing TTL 62 Disable transmit of BRC message 63 Enable transmit of BRC message Red Zone Encryption Management System (REMS) User Manual Interpreting the LED indicators Interpreting the LED indicators In some instances, REMS uses its front panel LED indicators differently from a standard AS2000. This section explains how to interpret the REMS LED indicators. (Some indications do coincide with those of a standard AS2000.) EQPT NET 0 STAT 0 EQPT NCC 2020 Front Panel Showing LED Indicators EXE NCC 2020 Figure 6-2 NET MON REV IN OUT IN OUT NET EQPT CRAFT FUNCTION • Equipment LED Indicators: • CSU Status • Networ General AS2000 NCC 2020 LEDs Decoding the NCC 2020 EQPT front panel LED indicator The EQPT (equipment) LED is a tri-color indicator with six states, as follows: Solid Green Equipment is OK (regardless of network connection). Solid Yellow NCC is looped toward the equipment via a repeater or equipment loopback (RLB or ELB) and no errors are being received. Solid Red Any continuous error condition (for example, LOS, LOF, AIS) Flashing Red Bipolar Violation or CRC-6 Error, low density indicator. LED is updated every 50 to 100 milliseconds. Flashing Red/Yellow NCC is looped toward the equipment (RLB, ELB) and errors are received from the equipment. Not Lit NCC is not powered up, or has lost power or Self Test failure. Red Zone Encryption Management System (REMS) User Manual 6-7 Configuring and starting REMS NOTE “Solid Red” events take priority over “Flashing Red” events, except when a loopback is enabled. Decoding the NCC 2020 CSU Status (STAT) LED Indicator The STAT (CSU status) LED is a three-color indicator with six possible states. This will be the only LED lit when the power-up self test fails. Solid Green All OK Flashing Green The NCC is being accessed by a thumbwheel switch operator at the master NCC. Solid Yellow An operator test is in progress (that is, a test signal is currently being applied to the circuit by the CSU). Solid Red Any alarm. Flashing Yellow and Red Errors received during user initiated test. NOTE Flashing Red Power-up self test failure. Not Lit No power, blown fuse. If an alarm state is caused by exceeding the performance monitoring threshold, the alarm does not clear until the error in the selected intervals falls below the threshold. This will be equal to one or more 15 minute intervals. Decoding the NCC 2020 Network (NET) LED Indicator LED The NET (network) LED is a tri-state indicator with six states, as follows: 6-8 Solid Green A normal signal is being received from the network (all OK). Solid Yellow NCC is looped toward network via a line loopback (LLB) or payload loopback (PLB) and no errors received from the network. Solid Red Continuous errors on the network (for example, LOS, LOF, RAI, AIS). Red Zone Encryption Management System (REMS) User Manual Interpreting the LED indicators Bipolar Violation or CRC-6 indicator. Flashing Red Flashing Red and Yellow CSU is looped toward the network and errors are being received (BPV or CRC-6). NCC is not powered up, power loss, or self test failure. Not Lit REMS master FBR NCC 2020 front panel LEDs EQPT NET 0 STAT 0 EQPT FBR NCC 2020 Front Panel Showing LED Indicators EXE NCC 2020 Figure 6-3 There are two NCC 2020 modules in each REMS, one in the FBR and one in the BRC. The NCC 2020 module LEDs referred to in this subsection are those of the master FBR (set to 64). NET MON REV <x> IN OUT IN OUT NET EQPT CRAFT FUNCTION • Equipment LED Indicators: • CSU Status • Networ Decoded FBR NCC 2020 LED indicators EQPT DTE input from terminal equipment. NET Signal information from BRC RCV signal in Black Zone. STAT (on BRC) Each Green flash indicates a message received from the Black Zone. (LEDs on the FBR actually flash twice very quickly, the first flash is the “decrypted” unencrypted PRM, the second flash is the BRC message, which contains the intelligible PRM.) Red Zone Encryption Management System (REMS) User Manual 6-9 Configuring and starting REMS Master FBR DIU 2130 front panel LEDs STAT LOOP FAR END LOOP END NEAR DATA PORT 2 STAT LOOP FAR END NEAR END LOOP FBR DIU 2130 Front Panel Showing LED Indicators DATA PORT 1 DIU 2130 Figure 6-4 The FBR DIU 2130 front panel LED assignments below refer to the DIU 2130 in the master REMS (set to 64). Near-end FBR DIU Front Panel LEDs STAT (Port 1) Flashing Red means Remote-to-Master signal path is out of alignment; alignment is in progress. Steady Red means loss of REMS framing. Flashing Green means remote to master is aligned and in receipt of PRMs or BRC messages. STAT (Port 2) Off means loss of REMS framing. Flashing Red means Master-to-Remote signal path is out of alignment; alignment is in progress. Green means Master-to-Remote signal path is aligned. Remote FBR DIU front panel LEDs The remote FBR is set to configuration 65. STAT (Port 2) Steady Red means loss of REMS framing. Flashing Red means Master to Remote is out of alignment; alignment is in progress. Flashing Green means in receipt of PRM or BRC messages. STAT (Port 1) 6-10 Off means loss of REMS framing. Steady Green means master to remote is aligned. Red Zone Encryption Management System (REMS) User Manual Chapter 7 Performance monitoring This chapter describes using AM2000 and/or the ASCII Terminal Interface(ATI) with REMS to monitor a REMS circuit performance. Overview It is possible to install and use REMS without Access Manager (AM2000). However using AM2000 is the best way to monitor REMS performance. AM2000 is a distinct Verilink product. AM2000 is a menudriven ASCII graphical display application that runs in Windows. It provides ASCII displays of various performance registers. NOTE You can also use the ASCII Terminal Interface (ATI) to display near-end performance data. No far-end reports are available via the ATI.Verilink recommends that you use AM2000 for monitoring REMS. Figur e7-1, Management of performance data, briefly summarizes how the BRC and FBR work together to manage performance data. Figure 7-1 Management of performance data Black Zone Red Zone Red Zone Near End Far End BRC collects network performance data and sends to the FBR in a BRC performance message. Each FBR provides Red Zone alarm notification. FBR receives and processes the BRC performance messages which carry the network performance data. Access Manager 2000 M U X F B R Encryptor KG81 KG94 B R C Common Carrier or Local Exchange Network Red Zone Encryption Management System (REMS) User Manual B R C Encryptor KG81 KG94 F B R M U X 7-1 Performance monitoring (For detailed general information on using AM2000, see Access Manager 2000 User Manual. AS2000 New Features Manual contains updated information on Access Manager (AM2000). See this manual as a supplement to Access Manager 2000 User Manual.) IMPORTANT CAUTION REM uses AM2000 displays and registers differently from standard AS2000 products. This chapter describes the REMS usage. ! System communication of performance messages In REMS, both the FBR and the BRC incorporate NCC 2020 modules. The NCC 2020 provides a management port that connects to the COM port of a PC. (The management port is located on the rear panel of the FBR CIM 2020 and BRC CDM 2249.) See Figur e7-2, Origination and Flow of Performance Data in a REMS Network. Figure 7-2 Origination and Flow of Performance Data in a REMS Network Black Zone Red Zone Near End Red Zone Far End PRMs carry far-end network performance data back to near-end BRC. A F B R Access Manager 2000 Encryptor KG81 KG94 B R C B B R C Encryptor KG81 KG94 F B R BRC relays PRMs and BRC messages to FBR. User performance registers in Red Zone gather information from point A in Black Zone. Equipment performance registers in Red Zone gather information from point B in Black Zone. 7-2 Red Zone Encryption Management System (REMS) User Manual In a typical operational scenario using AM2000, a near-end operator in the Red Zone can monitor the quality of the line as it is received by the near-end BRC and also receive reports from the far-end BRC. A certain subset of performance data from the far end is sent back to the near-end BRC in the form of Performance Report Messages (PRMs). The PRMs are combined with the near-end performance data and sent back to the FBR where they can be displayed by AM2000. A full set of reports can be also obtained from an AM2000 installed on the far end. Red Zone Encryption Management System (REMS) User Manual 7-3 Performance monitoring Calling up AM2000 performance displays This subsection assumes you have correctly installed AM2000 and configured your near-end node in accordance with the AM2000 manual. 1. Start the AM2000 and call up the Main Menu: Figure 7-3 Access Manager 2000 Main Menu 2. From the Main Menu, select Configuration to revise the system configuration tables. This step assures that AM2000 is properly modeling your existing REMS circuit. 3. To display the performance data, select Online access. You are presented with an element selection menu. 4. Select the element NCC 2020. The Retrieve CSU performance data menu appears: 7-4 Red Zone Encryption Management System (REMS) User Manual Calling up AM2000 performance displays Figure 7-4 Retrieve Performance Data Menu 5. Select the type of report you wish to see. The following reports are available in REMS: • USER data reports: selections A and E. In REMS, USER data maps to the RCV signal at the near-end BRC (point A). (See Figure 7 -2, Origination and Flow of Performance Data in a REMS Network.) • TELCO is the same as USER except that it is usually accessed only by the Telco. • EQP (Equipment) reports: C and G. In REMS, EQP data maps to far-end network performance, relayed via PRMs from far-end BRC. In response to your selection, the Node Selection Menu appears. 6. Select the near-end REMS node. The network performance display appears for the type of report you have selected. (For further details and illustrations of report display screens, see Access Manager 2000 User Manual.) Red Zone Encryption Management System (REMS) User Manual 7-5 Performance monitoring Interpreting AM2000 reports in REMS A subset of AM2000 reports and parameters are valid in a REMS environment. These include several parameters displayed in 1- and 24hour table reports and bar charts. Near-end User Statistics When monitoring User Statistics from an AM2000 attached to the near end, ignore the far-end User stats. PRMs from the far-end can be seen only in Equipment reports. In the AS2000 1-Hour USER Performance Data report display, the following parameters are measured: ES UAS BES SES LOFC ES-L SEFS CSU Test Status BPVs OOFS LOFS The same parameters are available in the 24-hour report. Near-end Equipment Statistics (PRMs from far end) When monitoring Equipment Statistics from an AM2000 attached to the near end, the following 1-hour and 24-hour parameters are displayed: ES UAS 7-6 Red Zone Encryption Management System (REMS) User Manual Chapter 8 Troubleshooting Overview REMS troubleshooting is divided into different phases of problem isolation as described in the following subsections. TIP Before starting the troubleshooting procedures in this section, recheck the system cabling according to Fi gure5-3, Pin-to-Pin System Cabling Diagram. Red Zone Encryption Management System (REMS) User Manual 8-1 Troubleshooting Basic troubleshooting In normal operating mode, all LEDs on the front panels should be green. Flashing green LEDs on the FBR DIU front panel indicate the receipt of BRC performance monitoring messages from the BRC to the FBR. (See Chapter 6, Configuring and starting REMS.) 1. If the system does not appear operational, start troubleshooting with the EQ LED on the FBR front panel. This LED must be green before any other part of the system can come up. A green EQ LED indicates that the EQ input of the FBR is receiving a good D4/ESF signal. 2. Next, verify that the encryptor and the BRC are properly connected. If the EQ LED is red, an LOS condition exists. This condition must be rectified before proceeding further. Recheck the setups described in Chapter 5, Connecting REMS components. 3. At the encryptor, verify the clock and data phase relationship. If the Clock does not have the proper phase relationship to the data from the FBR, correct the phase relationship by optioning the “phase select” strap in the encryptor. Encryptor re-sync connections are usually made to the Relay Alarm contacts on the back of the FBR. (Use the COM and NC terminals.) See Chapter 5, Connecting REMS components. 4. Verify that the signal from the network to the BRC input is good. The NET LED should be green. 8-2 Red Zone Encryption Management System (REMS) User Manual Verifying REMS equipment using the encryptor bypass cable Verifying REMS equipment using the encryptor bypass cable If REMS still does not come up, use the Encryptor Bypass cable to verify the operation of REMS without the encryptors. See Figur e8-1, Encryptor Bypass Cable Wiring Diagram. Figure 8-1 Encryptor Bypass Cable Wiring Diagram FBR Port 2 RD BRC Data port 2,14 3,16 SD 24,11 4,19 RS • 15,12 24,11 17,9 2,14 3,16 TT SD ST RT RD 15, 12 (64 kHz reference) ST GND TT 7 7 GND Red Zone Encryption Management System (REMS) User Manual (Rev. B, preliminary) 8-3 Troubleshooting Troubleshooting using a test set and loopback If the LED indicators show that REMs is not operating, use a testset (such as the FIREBERD, T-BERD, or Verilink’s TS2000). NOTE If a testset is not available, you can apply a known good T1 D4/ESF signal to the DTE input of the FBR. Put the near-end side of a REMS circuit into loopback in a setup described in Figure 8 -2, REMS Troubleshooting Using a Testset Loopback Setup. Figure 8-2 REMS Troubleshooting Using a Testset Loopback Setup Test Set EIA 530 T1 F DTE B R Loop Timing EIA 530 KG Encryptor 40 64 (Master) BB R R C C T1 loopback 40 The testset takes the place of the MUX. The encryptor (KG) is in the setup. The near-end BRC is looped back. 1. Configure the near-end side of a REMS circuit as the master node. (Set the FBR to 40, 64 and the BRC to 40.) 2. Put the testset on loop timing. 3. Disconnect the re-sync connection from the FBR to the encryptor, if it was previously connected. 4. Manually re-sync the KG. Encryptor re-sync connections are usually made to the Relay Alarm contacts on the back of the FBR. See Chapter 5, Connecting REMS components, for procedure to provide re-sync to the encryptor. The results of this procedure should be: a. The EQ LED on the FBR NCC 2020 should go Green. 8-4 Red Zone Encryption Management System (REMS) User Manual Troubleshooting using a test set and loopback b. The EQ LED BRC NCC 2020 should go Green. c. The KG should stay up and running. 5. Look for the following final indicators: a. Steady flashing of the Port 1 and Port 2 LEDs on the FBR DIU front panel indicate the FBR is receiving good REMS code and is trying to align. 6. If the above indications are not present, check the polarity of the EIA 530 signal wires. Crossed wires can cause a data inversion. (See Figur e5-3, Pin-to-Pin System Cabling Diagram.) 7. At the encryptor, re-verify the clock and data phase relationship. If the Clock does not have the proper phase relationship to the data from the FBR, correct the phase relationship by optioning the “phase select” strap in the encryptor. 8. Repeat the above steps for the far end. Sending framed all-ones to verify BRC connections to the T1 line After confirming that the T1 line is good, and the NET LED (on one or both BRCs) is still Red, perform the following steps: (Refer to Figure8- 3, Example of Typical REMS Circuit Configuration in Troubleshooting Mode.) 1. Plug an ASCII terminal into the Craft interface on the near-end BRC NCC 2020 front panel. (Alternatively, you can attach a PC running AM2000 to the BRC CDM 2049 Management In port.) 2. Using the ASCII terminal interface or the AM2000, change the keepalive signal at both BRCs to FAIS (framed all-ones). The NET LEDs should go Green. NOTE This keep-alive signal provided by the BRC allows the BRC to frame up even though the encryptor may not be sending signal toward the BRC and the T1 line. Red Zone Encryption Management System (REMS) User Manual (Rev. B, preliminary) 8-5 Troubleshooting Figure 8-3 Example of Typical REMS Circuit Configuration in Troubleshooting Mode Test Set Encryptor T1 Loop Timing Internal timing F B R B B R R C C 40 64 40 MASTER NODE Loop timin T1 T1 Networ Encryptor FBR Test Set T1 B R C 41 REMOTE NODE 40 65 Loop Timing In Figur e8-3, Example of Typical REMS Circuit Configuration in Troubleshooting Mode, two-digit numbers under the devices are configuration commands. See Chapter 6, Configuring and starting REMS. 8-6 Red Zone Encryption Management System (REMS) User Manual Chapter 9 Installing and Configuring AS2000 Shelves This chapter provides information and instructions on: ■ installing dual-line and multi-line shelves ■ configuring their shelf positions in a system ■ configuring and connecting shelves in a multi-shelf system Overview As described in Chapter 2, System Overview, AS2000 plug-in modules can be installed in rack-mountable shelves. Shelves are either a dual-line or a multiline shelf. The dual-line shelf is designed for installing modules horizontally. The multiline shelf is designed for installing modules vertically. (See Figur e2-2, Front Panel View Concept Drawing, Dual-line and Multiline Shelf Rack Configurations.) NOTE These instructions primarily pertain to dual-line shelves. For more details on installing a multiline shelf, see the AS2000 manuals referred to in the front of this document. Red Zone Encryption Management System (REMS) User Manual 9-1 Installing and Configuring AS2000 Shelves Multiple shelf rack-mount systems One or more dual-line shelves can be rack mounted horizontally or placed on a flat surface, stacked no more than two shelves high. Multiline shelves are usually rack mounted. IMPORTANT ! CAUTION Do not stack multiline shelves loose and unmounted on a flat surface. In multiple shelf rack-mount systems, heat baffles can be placed between shelves to prevent the equipment from overheating (maximum temperature is +50° C). By allowing air to circulate freely through the shelves mounted in a rack, a heat baffle provides ventilation and avoids most heat conduction from one rack to another. Figure 9-1 Heat Baffle Rack mounting dual-line shelves and heat baffles 9-2 The dual-line shelf requires one 1.75-inch (44.5 mm) high mounting space. It can be mounted in a 19-inch (482 .6mm) rack. Figure 9-2, System Mounting Dimensions, shows the shelf mounting dimensions for dual-line shelves and heat baffles. Red Zone Encryption Management System (REMS) User Manual Multiple shelf rack-mount systems Figure 9-2 System Mounting Dimensions 1 Mounting 1.75" Space HEAT BAFFLE Access System 2000 DUAL-LINE SHELF Access System 2000 DUAL-LINE SHELF DLS 2100 1.75" Slot 1 DLS 2100 Slot 1 HEAT BAFFLE (if required) 1.75" 1.75" Each dual-line shelf and heat baffle also occupies one vertical mounting space. Using heat baffles Heat baffles are mounted the same as dual-line shelves as shown in Figur e9-2, System Mounting Dimensions. Use the same mounting instructions described for the dual-line shelf, above. For a rack consisting entirely of dual-line shelves, one heat baffle must be placed between every two shelves, as shown in Figur e9-2, System Mounting Dimensions. If any equipment is to be mounted above two consecutively mounted dual-line shelves, place a heat baffle between the equipment and the dualline shelf. Instructions for mounting a dualline shelf or heat baffle The dual-line has mounting ears attached to the middle of the shelf for mid-mounting in a 19-inch (482.6 mm) rack. (See Figur e2-3, Example Dual-line Shelf System.) The ears are detachable for front-mounting the module. To mount the dual-line shelf to the equipment rack: 1. Place the dual-line shelf in an upright horizontal position. 2. Hold the shelf from underneath and align the mounting screw holes on the 19-inch (482.6 mm) mounting brackets. Red Zone Encryption Management System (REMS) User Manual 9-3 Installing and Configuring AS2000 Shelves 3. Line up the shelf holes with the holes in the rack. 4. Mount the top screws first and then the bottom screws. Hold the rack securely until all the screws are secured. 9-4 Red Zone Encryption Management System (REMS) User Manual Using shelf rear panel functions Using shelf rear panel functions A shelf rear panel allows for rear connector modules to be installed and secured. It also provides the following components: ■ connectors for the power supplies cables ■ connectors for ground connections and the expansion buses ■ shelf address switch See Figur e9-3, Rear Panel View of Dual-line Shelf with Callouts. Figure 9-3 Rear Panel View of Dual-line Shelf with Callouts TB Signal and Chassis Ground Connectors Dual Power Supply Connectors Shelf Address Switc Control Bus In Control Bus Out B C D E 2 7 8 9 A F 0 1 3 4 5 6 J3 J4 12 Mounting brackets for rear connector module thumb screws Connecting the signal and chassis ground Expansion bus connectors P3 and P4 The signal and chassis ground connector (TB1) on the dual-line shelf backplane connects the shelf to a proper grounding point. The signal and chassis ground connector has two sockets: ■ ■ The signal ground (SGND) conductor connects to the socket on the left-hand side of the connector. The chassis ground (CGND) conductor connects to the socket on the right-hand side of the connector. See Figur e9-4, Signal and Chassis Ground Connector on Rear Panel of Dual-line Shelf. Red Zone Encryption Management System (REMS) User Manual 9-5 Installing and Configuring AS2000 Shelves Figure 9-4 Signal and Chassis Ground Connector on Rear Panel of Dual-line Shelf Back view of dual line shelf B C D E 2 7 8 9 F 0 1 A 3 4 5 6 S G N D C G N D 1 2 TB1 NOTE A single shelf does not need to use the grounding connector. If more than one dual-line shelf is used in a node, use the TB1 grounding connectors on the back of the shelves. Both shelves should be grounded to the same grounding point. (Ground wires are user-supplied.) Connecting the signal ground The first socket on the left-hand side of the shelf backplane is labeled TB1-1. It connects the signal ground (SGND) conductor. Connecting the chassis ground The second socket on the right-hand side of the dual-line shelf backplane is labeled TB1-2. It connects the chassis ground (CGND) conductor. The point should be connected to the equipment rack ground bus and then the common station earth ground. Interconnecting the signal and chassis grounds If the customer site requires interconnecting the signal and ground, you can jumper the grounds together at the signal and chassis ground connector (TB1). 9-6 Red Zone Encryption Management System (REMS) User Manual Using shelf rear panel functions NOTE Setting the shelf address switch Figure 9-5 If more than one shelf is installed, all system shelves must be within 12 cabling feet (3.657 m) of each other. The address switch (SW1), located on the back of a dual-line shelf, sets the shelf identity within a node. The address switch on the first shelf in your node should be set to 0. If you have two shelves in your node, the address switch on the second shelf should be set to 1. (See the diagram below:) Dual-line Shelves and Slot Identification Diagram Front view schematic of double dual-line shelf Slot 1 NCC - Slot 2 - Shelf 0 Shelf 1 NCC Module is always on the left. On a multiline shelf, the shelf address switch is located on the power supply circuit board and is also labeled SW1. The circuit board is accessible from the rear of the shelf. See Figure9-6, Rear Panel View of Dual-line Shelf Showing Shelf Address Switch. Figure 9-6 Rear Panel View of Dual-line Shelf Showing Shelf Address Switch Shelf Address Switch (SW 1) B C D E 2 7 8 9 A F 0 1 3 4 5 6 J3 J4 12 Red Zone Encryption Management System (REMS) User Manual 9-7 Installing and Configuring AS2000 Shelves 1. Using a small flat-blade screwdriver, set the shelf address at the shelf address switch (SW1) located at the back of the shelf to the number of the shelf in your node. 2. If you have more than one shelf in your node, set the shelf address switch of each additional shelf as described above. 9-8 Red Zone Encryption Management System (REMS) User Manual Chapter 10 Installing and Replacing Plug-in Modules This chapter provides instructions for installing, removing, and replacing AS2000 modules in their shelves. CAUTION Before plugging in modules, be sure shelves are properly installed and grounded as described in the previous chapter. Installing a rear connector module into a shelf To install a rear connector module into a dual-line shelf, use the following procedure. TIP Verilink recommends you insert and secure each rear connector module into its multiline shelf before inserting its mating front modules. 1. Be sure the power supply cable is unplugged from the rear panel of the dual-line shelf, or that the power supply is unplugged from the AC or DC power source. 2. Select the appropriate shelf and slot position for the rear connector module/front module 2150 combination. The NCC module goes in Shelf 0, Slot 1. The DIU module goes in Slot 2. 3. Orient the rear connector module at the real panel of the dual-line shelf as shown in Figure 10-1, Front Module and Rear Connector Module Installation in a Dual-line Shelf, Top View. Red Zone Encryption Management System (REMS) User Manual 10-1 Installing and Replacing Plug-in Modules Figure 10-1 Front Module and Rear Connector Module Installation in a Dual-line Shelf, Top View Front module Front module Shelf 0, slot1 position Mating backplane connecto Dual-line shelf Front Panel Dual-line shelf (Top View) Slot 2 position Shelf Backplane CIM Module Thumbscrews The 128-pin female connector J1 side of the rear connector module should be facing to the interior of the shelf. Its rear connector panel should be facing to the outside rear of the shelf. 4. Insert the rear connector module into the slot 1 position of the dualline shelf so that the rear connector module seated with rear panel is flush with the rear panel of the shelf. Make sure it is squarely aligned. Seat it by gently pushing it all the way in until it stops and you can hand start the thumbscrews. 5. Secure the rear connector module by tightening the two thumbscrews on the rear panel as shown in Figure 1 0 -2, Securing a Rear Connector Module into a Dual-line Shelf Using the Thumbscrews. 10-2 Red Zone Encryption Management System (REMS) User Manual Installing a rear connector module into a shelf Figure 10-2 Securing a Rear Connector Module into a Dual-line Shelf Using the Thumbscrews Secure In place using the two thumbscrews. RX TX INPUT NO COM NC Cut-away rear view of dual-line shelf Red Zone Encryption Management System (REMS) User Manual PORT 2 V.35 DATA PORT 2 CEPT PORT 1 PORT 1 V.35 RX TX RX TX CIM 2001 TX EXT ALARM TIMING RELAY PORT 1 CIM 2001 RX CEPT 311-101256-001 PORT 2 rear connector module installed in slot 1 10-3 Installing and Replacing Plug-in Modules Installing a front module into a shelf To install a front module(s) into a shelf: TIP Verilink recommends you insert and secure each rear connector module into the dual-line shelf before inserting its mating “back” module. Install the rear connector module as described in the previous section. 1. Be sure the shelf is powered down and the rear connector module is already installed in the designated shelf and slot position, as described above. 2. Facing from the front of the shelf, slide the module(s) into the designated shelf slot position, aligning it with the shelf backplane connector and the rear connector module mating connector. 3. Using the dual ejector handles (if any) on the front panel of the module, plug the module firmly into the mating shelf backplane and the mating rear connector module connector. 4. Power up the dual-line shelf while watching the module front panel. Check for the following: a. The module’s front panel LEDs all briefly illuminate red. b. The front panel LEDs briefly illuminate green. c. The front panel LEDs then extinguish... d. ...except for the System LED which remains green. These events indicate a successful self-test of the rear connector module/front module installation. The above routine applies only if the front module is being installed initially or if all ports are out of service. If the front module has been previously configured and the ports are in service, the LEDs will reflect the current state of the configuration and the alarm status. NOTE 10-4 If the LEDs begin regularly flashing red instead of going out, the front module has failed the self-test. Repeat the installation and replace the module with a new module if necessary. Red Zone Encryption Management System (REMS) User Manual Removing and replacing plug-in modules Removing and replacing plug-in module When you replace a module, follow the standard good practices of an experienced technician, such as powering down equipment and using the proper tools. When you replace a rear connector module in a multiline shelf, first remove the front module. This is the opposite from the sequence you use to install the modules. See the previous section. Removing and replacing a front module PROCEDURE 1. ✓ 2. ✓ 3. ✓ To remove a front module from a multiline shelf, use the following procedure: 1. Power down the dual-line shelf. 2. Remove the primary management cable and other cables (if any) from the front module front panel. 3. To unseat the card, pull the handles of the ejectors outward from the front panel of the front module. 4. Slide the front module out of the dual-line shelf and place it in an ESD-protective bag or box. 5. Install the replacement module following the instructions in the previous section. Removing and replacing a CIM or DIM module PROCEDURE 1. ✓ 2. ✓ 3. ✓ To remove a rear connector module from a dual-line or multiline shelf: 1. Power down the dual-line shelf. 2. Before detaching the cables attached to the module, label them for future reference. 3. Disconnect the cables attached to the module. Red Zone Encryption Management System (REMS) User Manual 10-5 Installing and Replacing Plug-in Modules 4. Loosen the thumbscrews at each outer edge of the module. (See instructions in the previous section.) 5. Remove the front module. Follow the instructions as described in Removing and replacing and plug-in modules, above. 6. Slide the module out of the dual-line shelf and put it in an ESDprotective bag or box. 7. Install the replacement module following the instructions in the previous section. 10-6 Red Zone Encryption Management System (REMS) User Manual October 1999 P/N 880-502423-001 B1 VERILINK CORPORATION 127 JETPLEX CIRCLE, MADISON, ALABAMA 35758 TEL: (800) 837-4546