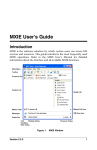
1
MXIE
User’s Manual
Manual Part Number 90-18002
Zultys Technologies
771 Vaqueros Avenue
Sunnyvale CA 94085-5327
USA
+1-408-328-0450
http://www.zultys.com
Notice
The information contained in this document is subject to change without notice.
Zultys Technologies makes no warranty of any kind with regard to this material, including, but
not limited to, the implied warranties of merchantability and fitness for a particular purpose.
Zultys Technologies shall not be liable for errors contained herein or for incidental or
consequential damages in connection with the furnishing, performance, or use of this material.
Zultys Technologies assumes no responsibility for the use or reliability of interconnected
equipment that is not furnished by Zultys Technologies.
This document contains proprietary information which is protected by copyright. The contents of
this manual and the associated software are the property of Zultys Technologies, and all rights are
reserved. No part of this document may be photocopied, reproduced, stored in any computer
format, translated to another language, or publicly displayed without the prior written consent of
Zultys Technologies.
The information contained herein has been prepared by Zultys Technologies solely for use by
Zultys’s employees, agents, and customers. Dissemination or use of the information or concepts
contained herein to or by other parties is prohibited without prior written consent from Zultys
Technologies.
Zultys, the Zultys logo, the Zultys mark, and Zultys product names are trademarks of Zultys
Technologies. All other names may be trademarks or registered trademarks of their respective
owners.
Revision History
Release
Release Date
0.1.1
14 December 2002
1.0.4
23 April 2003
1.1.1
12 July 2003
1.2.0
12 November 2003
2.0.2
21 June 2004
2.2.0
06 November 2004
2.2.1
18 January 2005
2.4.1
25 May 2005
2.4.2
22 November 2005
3.0.0
25 July 2006
Contents
Chapter 1
Introduction
1
1.1 MXIE Features . . . . . . . . . . . . . . . . . . . . . . . . . . . . . . . . . . . . . . . . . 1
1.1.1 Text Messages . . . . . . . . . . . . . . . . . . . . . . . . . . . . . . . . . . . . . . . . . . . . 1
1.1.2 Session Management . . . . . . . . . . . . . . . . . . . . . . . . . . . . . . . . . . . . . . . 1
1.1.3 Presence . . . . . . . . . . . . . . . . . . . . . . . . . . . . . . . . . . . . . . . . . . . . . . . . . 2
1.1.4 Address Book . . . . . . . . . . . . . . . . . . . . . . . . . . . . . . . . . . . . . . . . . . . . 2
1.1.5 Message Window . . . . . . . . . . . . . . . . . . . . . . . . . . . . . . . . . . . . . . . . . 2
1.2 MX Accounts. . . . . . . . . . . . . . . . . . . . . . . . . . . . . . . . . . . . . . . . . . . 2
1.2.1 Users . . . . . . . . . . . . . . . . . . . . . . . . . . . . . . . . . . . . . . . . . . . . . . . . . . . 2
1.2.2 Operators . . . . . . . . . . . . . . . . . . . . . . . . . . . . . . . . . . . . . . . . . . . . . . . . 3
1.2.3 ACD Agents . . . . . . . . . . . . . . . . . . . . . . . . . . . . . . . . . . . . . . . . . . . . . 3
1.2.4 Inbound Call Center Agents and Supervisors . . . . . . . . . . . . . . . . . . . . 3
1.2.5 Hunt Group Agents . . . . . . . . . . . . . . . . . . . . . . . . . . . . . . . . . . . . . . . . 3
1.2.6 Administrators . . . . . . . . . . . . . . . . . . . . . . . . . . . . . . . . . . . . . . . . . . . . 3
1.3 System Requirements . . . . . . . . . . . . . . . . . . . . . . . . . . . . . . . . . . . 3
Chapter 2
Getting Started
5
2.1 Introduction . . . . . . . . . . . . . . . . . . . . . . . . . . . . . . . . . . . . . . . . . . . 5
2.2 Installation . . . . . . . . . . . . . . . . . . . . . . . . . . . . . . . . . . . . . . . . . . . . 5
2.2.1 Installation Software Sources . . . . . . . . . . . . . . . . . . . . . . . . . . . . . . . . 5
2.2.2 Running the Installation Software . . . . . . . . . . . . . . . . . . . . . . . . . . . . . 6
2.3 Logging onto MXIE. . . . . . . . . . . . . . . . . . . . . . . . . . . . . . . . . . . . . . 6
2.3.1 User Login panel . . . . . . . . . . . . . . . . . . . . . . . . . . . . . . . . . . . . . . . . . . 6
2.3.2 Role panel . . . . . . . . . . . . . . . . . . . . . . . . . . . . . . . . . . . . . . . . . . . . . . . 7
2.4 Languages . . . . . . . . . . . . . . . . . . . . . . . . . . . . . . . . . . . . . . . . . . . . 8
2.5 Passwords . . . . . . . . . . . . . . . . . . . . . . . . . . . . . . . . . . . . . . . . . . . . 9
2.6 Application Preferences . . . . . . . . . . . . . . . . . . . . . . . . . . . . . . . . . 9
2.6.1 Application . . . . . . . . . . . . . . . . . . . . . . . . . . . . . . . . . . . . . . . . . . . . . . 9
2.6.2 Pop up Notifications . . . . . . . . . . . . . . . . . . . . . . . . . . . . . . . . . . . . . . 10
2.6.3 Saving Changes to the Application Preferences panel . . . . . . . . . . . . 10
Chapter 3
MXIE Window
11
i
MXIE User’s Manual
3.1 Components . . . . . . . . . . . . . . . . . . . . . . . . . . . . . . . . . . . . . . . . . . 11
3.1.1 Main Menu . . . . . . . . . . . . . . . . . . . . . . . . . . . . . . . . . . . . . . . . . . . . . 12
3.1.2 Toolbar . . . . . . . . . . . . . . . . . . . . . . . . . . . . . . . . . . . . . . . . . . . . . . . . 12
3.1.3 Presence Bar . . . . . . . . . . . . . . . . . . . . . . . . . . . . . . . . . . . . . . . . . . . . 13
3.1.4 Session List . . . . . . . . . . . . . . . . . . . . . . . . . . . . . . . . . . . . . . . . . . . . . 13
3.1.5 Buddy List . . . . . . . . . . . . . . . . . . . . . . . . . . . . . . . . . . . . . . . . . . . . . . 17
3.1.6 Missed Call Indication . . . . . . . . . . . . . . . . . . . . . . . . . . . . . . . . . . . . . 20
3.1.7 Message Indication . . . . . . . . . . . . . . . . . . . . . . . . . . . . . . . . . . . . . . . 20
3.1.8 Status Bar . . . . . . . . . . . . . . . . . . . . . . . . . . . . . . . . . . . . . . . . . . . . . . . 21
3.2 Appearance Preferences . . . . . . . . . . . . . . . . . . . . . . . . . . . . . . . . 22
3.3 Calls Preferences. . . . . . . . . . . . . . . . . . . . . . . . . . . . . . . . . . . . . . 23
3.3.1 Appearance . . . . . . . . . . . . . . . . . . . . . . . . . . . . . . . . . . . . . . . . . . . . . 23
3.3.2 Calls . . . . . . . . . . . . . . . . . . . . . . . . . . . . . . . . . . . . . . . . . . . . . . . . . . . 24
3.3.3 Call Attached Data . . . . . . . . . . . . . . . . . . . . . . . . . . . . . . . . . . . . . . . 24
3.3.4 ZIP4x5 . . . . . . . . . . . . . . . . . . . . . . . . . . . . . . . . . . . . . . . . . . . . . . . . . 25
3.4 Sounds Preferences. . . . . . . . . . . . . . . . . . . . . . . . . . . . . . . . . . . . 25
3.5 Audio Output Preferences . . . . . . . . . . . . . . . . . . . . . . . . . . . . . . . 26
Chapter 4
Text Messaging
27
4.1 Introduction . . . . . . . . . . . . . . . . . . . . . . . . . . . . . . . . . . . . . . . . . . 27
4.2 Configuring Text Messaging . . . . . . . . . . . . . . . . . . . . . . . . . . . . . 27
4.2.1 Authorizing Text Messaging . . . . . . . . . . . . . . . . . . . . . . . . . . . . . . . . 28
4.2.2 Configuring MXIE for External Messaging . . . . . . . . . . . . . . . . . . . . 28
4.3 Text Message Window . . . . . . . . . . . . . . . . . . . . . . . . . . . . . . . . . . 31
4.3.1 Message Window Components . . . . . . . . . . . . . . . . . . . . . . . . . . . . . . 31
4.3.2 Using the Message Window . . . . . . . . . . . . . . . . . . . . . . . . . . . . . . . . 32
4.3.3 Docking Message Windows . . . . . . . . . . . . . . . . . . . . . . . . . . . . . . . . 33
4.4 Sending and Receiving Text Messages . . . . . . . . . . . . . . . . . . . . 34
4.4.1 Sending a Text Message . . . . . . . . . . . . . . . . . . . . . . . . . . . . . . . . . . . 34
4.4.2 Receiving a Text Message . . . . . . . . . . . . . . . . . . . . . . . . . . . . . . . . . . 35
4.4.3 View the Text Message History . . . . . . . . . . . . . . . . . . . . . . . . . . . . . 35
4.5 Messaging Preferences . . . . . . . . . . . . . . . . . . . . . . . . . . . . . . . . . 36
4.5.1 Instant Messaging Preferences . . . . . . . . . . . . . . . . . . . . . . . . . . . . . . 36
4.5.2 Messages Preferences . . . . . . . . . . . . . . . . . . . . . . . . . . . . . . . . . . . . . 38
Chapter 5
Voice Calls
41
5.1 Introduction . . . . . . . . . . . . . . . . . . . . . . . . . . . . . . . . . . . . . . . . . . 41
ii
Contents
5.2 Voice Call Devices . . . . . . . . . . . . . . . . . . . . . . . . . . . . . . . . . . . . . 41
5.2.1 Device Management . . . . . . . . . . . . . . . . . . . . . . . . . . . . . . . . . . . . . . 42
5.2.2 Bind a Phone . . . . . . . . . . . . . . . . . . . . . . . . . . . . . . . . . . . . . . . . . . . . 43
5.2.3 Cancel a Device Binding . . . . . . . . . . . . . . . . . . . . . . . . . . . . . . . . . . . 45
5.2.4 Device Monitor . . . . . . . . . . . . . . . . . . . . . . . . . . . . . . . . . . . . . . . . . . 45
5.2.5 Device Access Policy Preferences . . . . . . . . . . . . . . . . . . . . . . . . . . . . 46
5.3 Voice Call Sessions . . . . . . . . . . . . . . . . . . . . . . . . . . . . . . . . . . . . 47
5.3.1 Contact Information Formats . . . . . . . . . . . . . . . . . . . . . . . . . . . . . . . 47
5.3.2 Initiating a Voice Call . . . . . . . . . . . . . . . . . . . . . . . . . . . . . . . . . . . . . 48
5.3.3 Receiving a Voice Call . . . . . . . . . . . . . . . . . . . . . . . . . . . . . . . . . . . . 49
5.3.4 Handling Simultaneous Voice Call Sessions . . . . . . . . . . . . . . . . . . . 51
5.3.5 Conference Calls . . . . . . . . . . . . . . . . . . . . . . . . . . . . . . . . . . . . . . . . . 52
5.3.6 During the Call . . . . . . . . . . . . . . . . . . . . . . . . . . . . . . . . . . . . . . . . . . 53
5.3.7 Terminating the Connection . . . . . . . . . . . . . . . . . . . . . . . . . . . . . . . . 58
5.4 Softphone . . . . . . . . . . . . . . . . . . . . . . . . . . . . . . . . . . . . . . . . . . . . 58
5.4.1 Features . . . . . . . . . . . . . . . . . . . . . . . . . . . . . . . . . . . . . . . . . . . . . . . . 58
5.4.2 System Requirements . . . . . . . . . . . . . . . . . . . . . . . . . . . . . . . . . . . . . 59
5.4.3 Binding MXIE to the Softphone . . . . . . . . . . . . . . . . . . . . . . . . . . . . . 59
5.4.4 The Softphone Keypad . . . . . . . . . . . . . . . . . . . . . . . . . . . . . . . . . . . . 60
5.4.5 Using the Softphone . . . . . . . . . . . . . . . . . . . . . . . . . . . . . . . . . . . . . . 60
5.4.6 Encryption . . . . . . . . . . . . . . . . . . . . . . . . . . . . . . . . . . . . . . . . . . . . . . 60
5.4.7 Softphone Preferences . . . . . . . . . . . . . . . . . . . . . . . . . . . . . . . . . . . . . 61
5.5 Handling Incoming Calls . . . . . . . . . . . . . . . . . . . . . . . . . . . . . . . . 63
5.5.1 Introduction . . . . . . . . . . . . . . . . . . . . . . . . . . . . . . . . . . . . . . . . . . . . . 63
5.5.2 Call Handling Rules . . . . . . . . . . . . . . . . . . . . . . . . . . . . . . . . . . . . . . 63
5.5.3 Call Handling Plan . . . . . . . . . . . . . . . . . . . . . . . . . . . . . . . . . . . . . . . 66
5.6 Emergency Calls . . . . . . . . . . . . . . . . . . . . . . . . . . . . . . . . . . . . . . 68
Chapter 6
Video Calls
69
6.1 Video Call . . . . . . . . . . . . . . . . . . . . . . . . . . . . . . . . . . . . . . . . . . . . 69
Chapter 7
Operators and ACDs
71
7.1 Introduction . . . . . . . . . . . . . . . . . . . . . . . . . . . . . . . . . . . . . . . . . . 71
7.2 Operator and ACD Features . . . . . . . . . . . . . . . . . . . . . . . . . . . . . 71
7.2.1 Buddy List . . . . . . . . . . . . . . . . . . . . . . . . . . . . . . . . . . . . . . . . . . . . . . 71
7.2.2 Presence State . . . . . . . . . . . . . . . . . . . . . . . . . . . . . . . . . . . . . . . . . . . 71
7.2.3 Call Recording . . . . . . . . . . . . . . . . . . . . . . . . . . . . . . . . . . . . . . . . . . . 72
7.2.4 Callback . . . . . . . . . . . . . . . . . . . . . . . . . . . . . . . . . . . . . . . . . . . . . . . . 72
iii
MXIE User’s Manual
7.3 Inbound Call Center Groups . . . . . . . . . . . . . . . . . . . . . . . . . . . . . 74
7.3.1 Call Queues . . . . . . . . . . . . . . . . . . . . . . . . . . . . . . . . . . . . . . . . . . . . . 75
7.3.2 Supervisor Functions . . . . . . . . . . . . . . . . . . . . . . . . . . . . . . . . . . . . . . 76
7.3.3 Monitors . . . . . . . . . . . . . . . . . . . . . . . . . . . . . . . . . . . . . . . . . . . . . . . 77
7.3.4 Inbound Call Center Call Recording . . . . . . . . . . . . . . . . . . . . . . . . . . 85
7.3.5 Wallboard . . . . . . . . . . . . . . . . . . . . . . . . . . . . . . . . . . . . . . . . . . . . . . 86
Chapter 8
Presence
89
8.1 Introduction . . . . . . . . . . . . . . . . . . . . . . . . . . . . . . . . . . . . . . . . . . 89
8.2 MXIE Presence Implementation . . . . . . . . . . . . . . . . . . . . . . . . . . 89
8.2.1 Presence States . . . . . . . . . . . . . . . . . . . . . . . . . . . . . . . . . . . . . . . . . . 89
8.2.2 Presence Rules . . . . . . . . . . . . . . . . . . . . . . . . . . . . . . . . . . . . . . . . . . . 92
8.3 Displaying Presence . . . . . . . . . . . . . . . . . . . . . . . . . . . . . . . . . . . 95
8.3.1 Presence Bar . . . . . . . . . . . . . . . . . . . . . . . . . . . . . . . . . . . . . . . . . . . . 95
8.3.2 Status Bar . . . . . . . . . . . . . . . . . . . . . . . . . . . . . . . . . . . . . . . . . . . . . . . 95
8.3.3 Buddy List . . . . . . . . . . . . . . . . . . . . . . . . . . . . . . . . . . . . . . . . . . . . . . 95
8.3.4 Address Book . . . . . . . . . . . . . . . . . . . . . . . . . . . . . . . . . . . . . . . . . . . 95
8.4 Presence Alert . . . . . . . . . . . . . . . . . . . . . . . . . . . . . . . . . . . . . . . . 95
8.4.1 Notify Me When . . . . . . . . . . . . . . . . . . . . . . . . . . . . . . . . . . . . . . . . . 96
8.4.2 Notification Methods . . . . . . . . . . . . . . . . . . . . . . . . . . . . . . . . . . . . . . 96
8.4.3 Save This Alert . . . . . . . . . . . . . . . . . . . . . . . . . . . . . . . . . . . . . . . . . . 97
8.5 Configuring Presence . . . . . . . . . . . . . . . . . . . . . . . . . . . . . . . . . . 97
8.5.1 Presence Preferences . . . . . . . . . . . . . . . . . . . . . . . . . . . . . . . . . . . . . . 97
8.5.2 ACD and Operator Preferences . . . . . . . . . . . . . . . . . . . . . . . . . . . . . . 99
8.5.3 Presence Toolbar Preferences . . . . . . . . . . . . . . . . . . . . . . . . . . . . . . 100
Chapter 9
Address Book
103
9.1 Components . . . . . . . . . . . . . . . . . . . . . . . . . . . . . . . . . . . . . . . . . 103
9.1.1 Toolbar . . . . . . . . . . . . . . . . . . . . . . . . . . . . . . . . . . . . . . . . . . . . . . . 103
9.1.2 Book Tree . . . . . . . . . . . . . . . . . . . . . . . . . . . . . . . . . . . . . . . . . . . . . 104
9.1.3 Contact List . . . . . . . . . . . . . . . . . . . . . . . . . . . . . . . . . . . . . . . . . . . . 104
9.2 Address Book Preferences . . . . . . . . . . . . . . . . . . . . . . . . . . . . . 106
9.2.1 Address Book Preference panel . . . . . . . . . . . . . . . . . . . . . . . . . . . . . 106
9.2.2 Default Action panel . . . . . . . . . . . . . . . . . . . . . . . . . . . . . . . . . . . . . 108
9.2.3 Shown Properties panel . . . . . . . . . . . . . . . . . . . . . . . . . . . . . . . . . . . 108
9.2.4 Sort Order panel . . . . . . . . . . . . . . . . . . . . . . . . . . . . . . . . . . . . . . . . 109
9.3 Entry Information . . . . . . . . . . . . . . . . . . . . . . . . . . . . . . . . . . . . . 110
iv
Contents
9.4 Address Book Import . . . . . . . . . . . . . . . . . . . . . . . . . . . . . . . . . . 111
9.4.1 Select Source File . . . . . . . . . . . . . . . . . . . . . . . . . . . . . . . . . . . . . . . 111
9.4.2 Map MX User Properties to Source Fields . . . . . . . . . . . . . . . . . . . . 112
9.4.3 Import is About to Be Started . . . . . . . . . . . . . . . . . . . . . . . . . . . . . . 113
9.4.4 Panel 4: Import in Progress . . . . . . . . . . . . . . . . . . . . . . . . . . . . . . . . 113
9.4.5 Panel 5: Success . . . . . . . . . . . . . . . . . . . . . . . . . . . . . . . . . . . . . . . . 114
Chapter 10 Voice Mail, Faxes, and Call Recordings
115
10.1 Introduction . . . . . . . . . . . . . . . . . . . . . . . . . . . . . . . . . . . . . . . . . 115
10.2 Mail Boxes . . . . . . . . . . . . . . . . . . . . . . . . . . . . . . . . . . . . . . . . . . 115
10.2.1 User Boxes . . . . . . . . . . . . . . . . . . . . . . . . . . . . . . . . . . . . . . . . . . . . . 116
10.2.2 Group Boxes . . . . . . . . . . . . . . . . . . . . . . . . . . . . . . . . . . . . . . . . . . . 116
10.3 Message Types . . . . . . . . . . . . . . . . . . . . . . . . . . . . . . . . . . . . . . 117
10.3.1 Voice Messages . . . . . . . . . . . . . . . . . . . . . . . . . . . . . . . . . . . . . . . . . 117
10.3.2 Fax Messages . . . . . . . . . . . . . . . . . . . . . . . . . . . . . . . . . . . . . . . . . . . 118
10.3.3 Call Recordings . . . . . . . . . . . . . . . . . . . . . . . . . . . . . . . . . . . . . . . . . 118
10.4 Voice Mail Window . . . . . . . . . . . . . . . . . . . . . . . . . . . . . . . . . . . . 120
10.4.1 Accessing the Voice Mail Window . . . . . . . . . . . . . . . . . . . . . . . . . . 120
10.4.2 Voice Mail Window Description . . . . . . . . . . . . . . . . . . . . . . . . . . . . 121
10.4.3 Mail Box Directory . . . . . . . . . . . . . . . . . . . . . . . . . . . . . . . . . . . . . . 121
10.4.4 Message List . . . . . . . . . . . . . . . . . . . . . . . . . . . . . . . . . . . . . . . . . . . 123
10.4.5 Voice Mail Settings . . . . . . . . . . . . . . . . . . . . . . . . . . . . . . . . . . . . . . 126
10.5 Automatic Call Recording Window . . . . . . . . . . . . . . . . . . . . . . . 128
10.5.1 Automatic Call Recording Window Description . . . . . . . . . . . . . . . 129
10.6 Sending Messages. . . . . . . . . . . . . . . . . . . . . . . . . . . . . . . . . . . . 131
10.6.1 Voice Message Recorder . . . . . . . . . . . . . . . . . . . . . . . . . . . . . . . . . . 131
10.6.2 Sending Faxes with the Fax Wizard . . . . . . . . . . . . . . . . . . . . . . . . . 132
10.6.3 Using the Fax Printers . . . . . . . . . . . . . . . . . . . . . . . . . . . . . . . . . . . . 135
10.7 Message Notifications . . . . . . . . . . . . . . . . . . . . . . . . . . . . . . . . . 136
10.7.1 Notification Plan . . . . . . . . . . . . . . . . . . . . . . . . . . . . . . . . . . . . . . . . 136
10.7.2 Notification Rules . . . . . . . . . . . . . . . . . . . . . . . . . . . . . . . . . . . . . . . 138
10.8 Messages Preferences . . . . . . . . . . . . . . . . . . . . . . . . . . . . . . . . 141
10.8.1 Local Voice Mail Storage File Location . . . . . . . . . . . . . . . . . . . . . . 141
10.8.2 Delete Policy . . . . . . . . . . . . . . . . . . . . . . . . . . . . . . . . . . . . . . . . . . . 142
10.8.3 Message Confirmation Preferences . . . . . . . . . . . . . . . . . . . . . . . . . . 142
Chapter 11 Logs
143
v
MXIE User’s Manual
11.1 Log Features. . . . . . . . . . . . . . . . . . . . . . . . . . . . . . . . . . . . . . . . . 143
11.1.1 Record Parameters . . . . . . . . . . . . . . . . . . . . . . . . . . . . . . . . . . . . . . . 143
11.1.2 Log Functions . . . . . . . . . . . . . . . . . . . . . . . . . . . . . . . . . . . . . . . . . . 144
11.2 Call Log Preferences . . . . . . . . . . . . . . . . . . . . . . . . . . . . . . . . . . 145
Chapter 12 TAPI
147
12.1 Introduction . . . . . . . . . . . . . . . . . . . . . . . . . . . . . . . . . . . . . . . . . 147
12.1.1 TAPI Architecture . . . . . . . . . . . . . . . . . . . . . . . . . . . . . . . . . . . . . . . 147
12.1.2 CRM Applications . . . . . . . . . . . . . . . . . . . . . . . . . . . . . . . . . . . . . . . 148
12.1.3 TAPI and MX Integration . . . . . . . . . . . . . . . . . . . . . . . . . . . . . . . . . 148
12.1.4 TAPI and MXIE Integration . . . . . . . . . . . . . . . . . . . . . . . . . . . . . . . 149
12.2 Configuration . . . . . . . . . . . . . . . . . . . . . . . . . . . . . . . . . . . . . . . . 149
12.2.1 Application Installation . . . . . . . . . . . . . . . . . . . . . . . . . . . . . . . . . . . 149
12.2.2 PC Configuration . . . . . . . . . . . . . . . . . . . . . . . . . . . . . . . . . . . . . . . . 149
12.2.3 TAPI Application Configuration . . . . . . . . . . . . . . . . . . . . . . . . . . . . 151
12.3 Establishing Calls . . . . . . . . . . . . . . . . . . . . . . . . . . . . . . . . . . . . 155
12.3.1 Placing calls . . . . . . . . . . . . . . . . . . . . . . . . . . . . . . . . . . . . . . . . . . . . 155
12.3.2 Receiving Incoming Calls . . . . . . . . . . . . . . . . . . . . . . . . . . . . . . . . . 164
Appendix A User Preferences
167
A.1 Introduction . . . . . . . . . . . . . . . . . . . . . . . . . . . . . . . . . . . . . . . . . 167
A.2 Panel Directory. . . . . . . . . . . . . . . . . . . . . . . . . . . . . . . . . . . . . . . 167
A.3 Preference Panels . . . . . . . . . . . . . . . . . . . . . . . . . . . . . . . . . . . . 168
Appendix B System Files
171
B.1 Introduction . . . . . . . . . . . . . . . . . . . . . . . . . . . . . . . . . . . . . . . . . 171
B.2 File Descriptions . . . . . . . . . . . . . . . . . . . . . . . . . . . . . . . . . . . . . 171
B.2.1 Initialization and Settings . . . . . . . . . . . . . . . . . . . . . . . . . . . . . . . . . 171
B.2.2 Address Book File . . . . . . . . . . . . . . . . . . . . . . . . . . . . . . . . . . . . . . . 171
B.2.3 Voice Mail File . . . . . . . . . . . . . . . . . . . . . . . . . . . . . . . . . . . . . . . . . 172
B.2.4 Chat Text Files . . . . . . . . . . . . . . . . . . . . . . . . . . . . . . . . . . . . . . . . . 172
B.2.5 Instant Message Files . . . . . . . . . . . . . . . . . . . . . . . . . . . . . . . . . . . . 172
Appendix C User Lookup Panels
vi
173
Contents
C.1 User Lookup: Contacts . . . . . . . . . . . . . . . . . . . . . . . . . . . . . . . . 173
C.2 User Lookup: Recipient . . . . . . . . . . . . . . . . . . . . . . . . . . . . . . . . 174
Appendix D Glossary
177
Index
181
vii
MXIE User’s Manual
viii
Chapter 1
Introduction
1.1
MXIE Features
MXIE (Media Exchange Interface for End Users, pronounced mix-ee) is the software interface that
provides access to MX250 and MX301 services and resources by system users. MXIE is a single
interface that is used regardless whether you are logging in as an individual or an operator, ACD,
hunt group, or Inbound Call Center agent. MXIE’s graphical user interface allows you to
efficiently manage your voice call sessions, send and receive instant messages, inform other users
about your presence status, utilize address books to maintain your communication database, send
and receive voice and fax messages, and manage your voice mail box greetings.
Although MX users can make and receive voice calls without MXIE, most users find that MXIE
improves their efficiency and productivity. The MX requires that operators use MXIE when
routing calls and servicing requests for information. ACD agents will also find their jobs easier
through using MXIE.
1.1.1
Text Messages
MXIE supports two types of text messages.
•
Instant messages are exchanged with other users of the MX system to which you are logged
on. All MXIE users are authorized to use instant messaging.
•
External messages are exchanged with contacts external to your system through a supported
messaging system. Your MXIE account must be authorized for external messaging to use this
feature.
Chapter 4, starting on page 27, provides instructions on sending and receiving text messages.
1.1.2
Session Management
A session is a communication transaction between two or more endpoints. One endpoint requests
a connection with one or more other endpoints and the session is established when one or more
of the addressed endpoints agrees to the connection. The session finishes when the connection is
terminated. While the session is established, the endpoints can communicate with voice, text, or
video, depending on the type of session.
1. Within this user’s manual, MX refers to the MX250 and the MX30.
1
MXIE User’s Manual
MXIE displays a session block for each active communication session and provides single-button
access to session control functions, such as call transfer, conferencing, hold, and disconnect. MXIE
allows you to efficiently manage multiple voice calls.
Voice calls are supported by MXIE sessions. Video calls will be supported in later versions. Text
messages do not require the establishment of a session
1.1.3
Presence
Presence is the MX service that uses and distributes the availability of each system user. MXIE
displays your presence state and the state of other system users. You can configure presence rules
to automatically change your state when certain conditions are met and program MXIE to accept
or reject calls based on your presence state. You can also authorize or deny viewing access of your
presence state to other MX users. When your account is authorized for external messaging, you
can also exchange presence status information with users external to your MX system through a
supported messaging application
Chapter 8, starting on page 89, describes the MXIE presence implementation.
1.1.4
Address Book
The MXIE Address Book provides access to the MX user directory. You can also create, edit, and
access your personal address books. Address book tools allow you to view the presence status of
other MX users and initiate communication sessions with a single point and click operation.
Chapter 9, starting on page 103, describes the MXIE address book.
1.1.5
Message Window
The MXIE Message window displays a list of the voice and fax messages received by your MX
user account. You can play your voice messages, view your faxes, and organize all of your
messages through the message window.
Chapter 10, starting on page 115, describes the MXIE Message window.
1.2
MX Accounts
An MX User Account uniquely identifies a user to the MX and defines the access rights to system
resources for that user. Access rights are granted through the assignment of roles.
The MX user account determines the roles that the user is authorized to accept. The user
determines which roles will be active during a MXIE session when logging onto MXIE, as
explained in section 2.3 on page 6. The MX defines six role types: Users, Operators, ACD Agents,
Inbound Call Center agents, Hunt Group agents, and Administrators.
1.2.1
Users
The User role provides access to basic MX resources, including voice mail. When an account
owner logs onto MXIE, the User role for that account is always available.
2
1. Introduction
The system administrator assigns a user profile to each MX account. User profiles enable voice
mail usage, permit the registration of unmanaged devices, provide access to MXIE, and set the
minimum length of the user’s password. Many MXIE functions and preferences allow viewing
rights to other users on the basis of the user profile assignments.
1.2.2
Operators
Operators answer external calls that are not made to a specific user, or internal calls that are made
to request assistance. An account owner may have access to multiple operator or ACD agent roles.
The administrator assigns operator rights from the Administrator UI.
1.2.3
ACD Agents
ACD agents accept incoming calls that are made to a specific group, such as marketing or sales.
The administrator assigns ACD agent rights from the Administrator UI. An account owner may
have access to multiple ACD agent roles. Agents can accept calls to their ACD group only through
the MXIE interface or through special phones that support ACD group functions.
1.2.4
Inbound Call Center Agents and Supervisors
Inbound Call Center groups differ from ACD groups in that they provide more call and agent
management tools, including a call queue and call recording capabilities. The administrator can
assign supervisor rights to an ACD group member. Supervisors assign calls to specific agents,
monitor agent performance, and access performance statistics. The administrator assigns
Inbound Call Center agent and supervisor rights from the Administrator UI.
1.2.5
Hunt Group Agents
Hunt groups are similar to ACDs, except that hunt group agents can accept incoming calls from
their phones without accessing MXIE. The administrator assigns hunt group agent rights from
the Administrator UI.
1.2.6
Administrators
Administrators allocate MX resources and rights to other system users through the MX
Administrator User Interface. MXIE does not provide access to panels that perform administrator
functions.
1.3
System Requirements
Figure 1-1 lists the minimum and recommended PC requirements for running MXIE.
Item
Minimum Requirement
Recommended
Processor
Pentium III 900 MHz
Pentium III 900 MHz
Memory
256 MB
512 MB
Hard disc space
10 MB
80 MB
Figure 1-1
PC Requirements for running MXIE
3
MXIE User’s Manual
Item
Minimum Requirement
Recommended
Operation System
PC: Windows 2000 or XP
Linux: SUSE 9.0 or equivalent
Mac: OS X 10.2
Windows 2000 or XP
Linux: SUSE 9.0 or equivalent
Mac: OS X 10.2
Web Browser
HTML Browser
Windows Internet Explorer 6.0 or
Netscape 7.0
Monitor
19” diagonal, 1024 x 768 pixels
21” diagonal, 1400 x 1050 pixels
Connection
one 10 Mb/s Ethernet circuit
one 10/100 Mb/s Ethernet circuit
Pointing device
2-button mouse
2-button mouse with scroll wheel
Figure 1-1
PC Requirements for running MXIE (Continued)
Zultys does not regularly test program features with operating systems other than those listed in
figure 1-1 and therefore cannot guarantee program behavior when running MXIE under them.
Zultys does not recommend using any other operating system because, even if a version of MXIE
does run on these operating systems, a future version may not.
The web browser is used only for accessing the software required for installing MXIE and the fax
printer driver. Running MXIE does not require the web browser.
4
Chapter 2
Getting Started
2.1
Introduction
This chapter describes the MXIE installation process, logging onto MXIE, passwords, and MXIE
initiation preferences.
2.2
Installation
To use the MXIE client software, the computer upon which MXIE is installed must be able to
access the MX for which MXIE is providing resources.
2.2.1
Installation Software Sources
You can access the installation software from the MX home page, shown in figure 2-1, by opening
an internet browser (such as Internet Explorer or Netscape) and entering the network address of
the MX in the address entry box.
Figure 2-1
MX Home Page
5
MXIE User’s Manual
The MX Home Page provides options for downloading three different versions of MXIE – one for
each operating system upon which MXIE can run. Select the desired version by clicking on the
corresponding icon. Follow the instructions on the succeeding panels to either store the
installation software on your local drive or installing directly from the home page.
2.2.2
Running the Installation Software
Run the executable file client_setup.exe, or perform the installation directly from the MX home
page to install the MXIE software on your computer. After a successful installation, the software
displays the MXIE Login panel, as described in section 2.3.1.
Contact your system administrator if you are unable to install MXIE on your computer.
2.3
Logging onto MXIE
Before you can use MXIE, you must receive authorization to access MX resources by logging on
as a system user. This section describes the panels required to logon to MXIE.
2.3.1
User Login panel
The MX User Login panel, shown in figure 2-2, authorizes users to access system resources
through the MXIE User Interface. To log into the User Interface, enter the following:
•
•
•
your User Name
•
the language in which the user interface will display all panel text
the password of your MX user account (Passwords are always displayed as asterisks.)
the URL of MX, expressed as a domain name (such as MX_Sunnyvale) or in dotted decimal
notation, as shown in figure 2-2
You can change the language setting anytime during your MXIE session. Section 2.4 describes
the language capabilities of MXIE.
User names and passwords are initially configured by the Administrator UI. All parameter values
are case dependent. Section 2.5 describes passwords used by the MX.
After you successfully logged in, MXIE displays the Role panel that specifies your active roles and
location, as described in section 2.3.2 if any of the following criteria are true:
•
•
the MX has defined more than one location,
•
your account is authorized for external messaging
if your user account has authorization to act as an operator, ACD agent, hunt group agent, or
Inbound Call Center agent
After completing the Role panel, MXIE opens the User Interface window described in Chapter 3,
starting on page 11. If none of the Role panel criteria are met, MXIE immediately opens the User
Interface window without opening the Role panel.
Contact your system administrator if you are unable to log into MXIE.
6
2. Getting Started
Figure 2-2
2.3.1.1
MXIE User Login panel
Opening a New Instance
After logging into MXIE, you can open another MXIE instance by selecting File | New Instance
from the main menu. Opening additional MXIE instances permits one computer to access more
than one MX user account. A user that is temporarily away from his or her computer can log on
from a guest computer without terminating the MXIE sessions running on the guest computer.
2.3.1.2
Accessing a MXIE Instance from another Computer
The MX allows a user to run only one active MXIE instance at a time. If you attempt to log on to
MXIE from a second computer without closing your MXIE session on the first computer, the
system notifies you that it must close the first session to complete the login from the second
computer.
2.3.2
Role panel
Your MX user account defines the roles for which you have authorization. After you log into
MXIE, the Role panel, shown in figure 2-3, lists the roles that the MX has authorized for your
account. To indicate the roles that you intend to serve during your MXIE session, select the
appropriate options, confirm the location, and press the OK button.
Figure 2-3
Role Selection panel
The check box options list the roles that are available for your user account.
•
The first option (grey) lists your user name. Since your role as a user is active whenever you
log onto MXIE, this option is always selected.
7
MXIE User’s Manual
•
The next set of options, if available, list the names of the operator groups, ACD groups, and
Inbound Call Center groups assigned to your account. To log in as an agent of a group, place
a mark in the checkbox of the corresponding group. You can simultaneously log in to any or
all groups to which you are assigned.
Group names that are displayed in grey indicate hunt groups. MX users that are members of
hunt groups automatically log into their hunt groups whenever they log into MXIE.
•
If your account is authorized for external messaging, that option appears below the group
options.
You determine the roles that will be active each time you logon to MXIE. You can also change roles
during an MXIE session by selecting File | Change Role from the main menu.
The Location parameter specifies the location of your workstation. Location options are defined
by the Administrator UI. The location selection is important because it specifies how the system
supports your emergency services. If you call an external emergency service, the MX dials the
appropriate number, based on this setting, to access the service.
After selecting the desired checkboxes, press the OK button to close this panel and open the MXIE
user window, as described in chapter 3, starting on page 11.
2.4
Languages
MXIE can display window text in one of the many languages that it supports. When you log into
MXIE, you select the language that MXIE uses when displaying the user interface windows and
panels. When using a language other than the default for your computer, verify that the proper
language files are installed in order to properly display all language characters. Refer to your
operating system documentation for language file installation and support information.
The Select Language menu, shown in figure 2-4, lists the languages supported by MXIE.
Figure 2-4
Language Selection panel
To change the language that MXIE uses for displaying window text:
1.
8
Open the Select Language panel by selecting File | Language from the main menu.
2. Getting Started
2.
Select the desired language from the Select Language panel shown in figure 2-4.
3.
Press the OK button to enable the change.
Press Cancel to return to the MXIE window without changing the display language.
2.5
Passwords
The password required by the user login panel is the MX password that is assigned to your user
account. This password is also required for accessing voice mail and, for users that have
administrator rights, the Administrator UI. All passwords are case sensitive.
After logging into MXIE, you can change your password from the Change Password panel by
selecting File | Change Password from the main menu. This panel, shown in figure 2-5, displays
all entered data as asterisks. The Administrator UI defines the minimum size and other password
restrictions.
Figure 2-5
Change Password panel
To change your password:
1.
Type your password in the Current password entry box.
2.
Enter the proposed new password in the New password entry box.
3.
Re-enter the proposed new password in the Confirm new password entry box.
4.
Press the OK button to activate the password change and close this window.
MXIE will notify you with an error condition if the contents of the New password and
Confirm new password fields are not identical, if the proposed password is shorter than the
minimum password length or violates other password restrictions. Contact your system
administrator if you have problems changing your password or if you forget your password.
Press the Cancel button to keep your current password and exit this window.
2.6
Application Preferences
The Application Preferences panel, shown in figure 2-6, controls startup, termination, and display
aspects of the MXIE window. To open the Application Preferences panel, open the User
Preferences window by selecting File | Preferences from the main menu, then select Application
in the panel directory. Appendix A, starting on page 167, describes all user preference panels.
2.6.1
Application
This section controls the manner that your operating system interacts with the MXIE window.
9
MXIE User’s Manual
Figure 2-6
2.6.2
Application Preferences panel
•
Stay in System Tray: When this option is set, the MXIE instance is closed but not terminated
when you press the Close (X) icon on the right side of the title bar (upper right corner of
window). This allows you to re-access MXIE by right clicking on the MXIE icon in the
windows system tray in the bottom right corner of the Windows user interface. You exit MXIE
while in this mode by selecting File | Exit from the main menu.
•
Launch at Windows Startup: This option instructs the operating system to start MXIE
whenever the Windows program is initiated.
•
Stay on Top: This option forces the MXIE window to remain visible on the desktop whenever
it is open and not minimized.
Pop up Notifications
This section controls the appearance and removal of pop ups from the MXIE window. Pop ups
appear in the bottom right corner of your monitor to notify you of incoming voice calls, service
disruptions, and other status changes.
2.6.3
•
Select Display until I click on the pop up to close it to retain pop ups on the MXIE window until
you click the pop up close button.
•
Select Display for, seconds to retain pop ups on the MXIE window for a specified period. Enter
the specified period in the data entry area.
Saving Changes to the Application Preferences panel
Press the OK button to enable the changes to all User Preference panels and exit the window.
Press the Apply button to enable the changes to all User Preference panels without exiting the
window.
Press the Cancel button to discard changes to all User Preference panels and exit the window.
10
Chapter 3
MXIE Window
3.1
Components
The MXIE user window is the primary window for accessing MX services. In addition to initiating
and managing communication sessions, you can adjust your presence, view the presence of other
system users, bind a device for making voice calls, and access your address book, calling log,
incoming faxes, and voice mail from this window.
Figure 3-1 displays the components of the MXIE user window. The appearance of this window is
customized in the Appearance User Preferences panel, as explained in section 3.2 on page 22.
Figure 3-1
MXIE Window
11
MXIE User’s Manual
3.1.1
Main Menu
The main menu is located below the title bar and above the toolbar on the MXIE User Interface,
as shown in figure 3-1. Each word on the main menu accesses a drop down panel, through which
you can access MXIE panels or perform MXIE commands.
All MXIE users can access File, Actions, View, and Help menus from the main menu. MXIE users
that are logged in as a supervisor to an Inbound Call Center group can also access a Supervisor
menu from the main menu.
3.1.2
Toolbar
The toolbar is located between the main menu bar and the presence bar (or the session list if the
presence bar is not displayed) on the MXIE User Interface as shown in figure 3-1. Toolbar buttons
start, finish, and manage communication sessions in addition to accessing system resources, such
as your voice mail and address book.
The Toolbar provides immediate access to eleven MXIE functions. Icons that appear in only
shades as grey indicate unavailable functions. As shown in figure 3-2, each icon represents the
following MXIE functions.
Figure 3-2
12
Toolbar
•
Conference Call (1): This button starts a Conference Call, as described in section 5.3.5 on page
52. This function is available only if your MXIE instance is bound to a SIP device, as explained
in section 5.2.2 on page 43.
•
Voice Call (2): This button starts a Voice Call, as described in section 5.3.2 on page 48. This
function is available only if your MXIE instance is bound to a SIP device, as explained in
section 5.2.2 on page 43.
•
Text Message (3): This button opens an Text Message window, as described in section 4.4.1 on
page 34. The message window sends instant messages to other system users or external
messages to external contacts.
•
Disconnect (4): This button disconnects or ends the session highlighted in the session list. This
function is active whenever the Session List displays a session.
•
Hold (5): This button places the voice call highlighted in the session list on hold or retrieves a
call on hold, as described in section 5.3.6.1 on page 53. This function is inactive whenever the
Session List does not display a voice call session or if the current session is not a voice call, as
described in section 3.1.4.2
•
Transfer (6): This button initiates the transfer of an active voice call, as described in section
5.3.6.3 on page 55. This function is in inactive whenever the Session List does not display a
voice call session or if the current session is not a voice call, as described in section 3.1.4.2.
•
Message window (7): This button opens the message window that accesses your voice
messages, faxes, and recorded calls. The message window is described in section 10.4 on page
120.
3. MXIE Window
3.1.3
•
Address Book (8): This button opens the MXIE address book, described in Chapter 9, starting
on page 103.
•
Log (9): This button opens the MXIE log. The MXIE Log is described in Chapter 11, starting on
page 143.
•
Pickup (10): This button opens the voice call pickup panel, as described in section 5.3.6.5 on
page 56.
Presence Bar
The Presence bar is the MXIE window component that lists some or all of the available presence
states for the active role, as designated in the session list. You can change your presence state by
pressing a presence icon. The Presence bar also indicates your presence state with a depressed
icon if that icon is displayed on the bar. The list of available presence states depends on the active
role, as described in section 3.1.4.1.
Chapter 8, starting on page 89 describes the MX implementation of presence, including a
definition of presence states, the availability of the different states to each user role, and
instructions for customizing the presence bar.
3.1.4
Session List
The Session List is the MXIE user interface area that displays your open communication sessions,
as shown in figure 3-1. Each session list is separated into role partitions which, in turn, list the
session blocks that represent open communication sessions. In addition to using the mouse to
perform drag and drop operations, you can perform session control operations through keyboard
shortcuts (hot keys) or session control buttons.
3.1.4.1
Role Partitions
The number of role partitions in the session list depends on the role options selected when
logging into MXIE, as described in section 2.3.2 on page 7. If you login only as an individual user,
as shown in figure 3-3, the session list appears as a single partition without a partition header.
If you select the any of the group roles (listed below Janie.Newsome in this example) when
logging into MXIE, as shown in figure 3-4, the session list is divided into partitions and each role
selected in the panel is assigned a partition. MXIE uses the following types of role partitions to
identify the role type:
•
User Partition: This partition displays the name of the user. In figure 3-4, Janie.Newsome is listed
in the partition header of the user partition. This partition is equivalent to the solid block
partition that is created when none of the groups are selected when you log into MXIE.
•
Operator Partition: This partition displays the text Operator on the left side of the header,
followed by the name of the Operator group. In figure 3-4, Operator: Front_Desk is listed in the
partition header of the operator partition.
•
Agent Partition: This partition displays the text Agent on the left side of the header., followed
by the name of the ACD group. For Inbound Call Center groups, an arrow icon appears left of
the Agent text. In figure 3-4, Agent: TechSupport is listed in the partition header of an Inbound
Call Center partition.
Partition headers for hunt groups are identical to partition headers for ACD groups. In
partition headers for Inbound Call Centers, a square icon appears left of the Agent text.
13
MXIE User’s Manual
Figure 3-3
•
MXIE Window and Role Selection panel – user role selected
Supervisor Partition: This partition displays a square icon on the left side of the partition
header, followed by the text Supervisor on the left side of the header.
Operator and agent role partitions may display a Callback icon, which appears as a small arrow
button on the right side of the partition header. Callback icons indicate that a caller has left a
callback number with the group. See section 7.2.4 on page 72 for details.
Figure 3-4
14
MXIE Window and Role Selection panels – group roles selected
3. MXIE Window
To add or remove an operator or agent role from your session list, select File | Change Role from
the main menu. This opens the Role panel. Current calls being serviced by an operator or agent
role that is removed from the window will appear under the user role in the new configuration.
Removing the operator and agent roles from your session list prevents you from accepting calls
as an operator or an agent. You cannot log out of a hunt group without logging out of MXIE.
One role is designated as the active role; the session bar of the active role is blue. In figure 3-4,
Janie.Newsome is the active role.
3.1.4.2
•
To activate a role: click the mouse in the work area of the role partition directly below the
session bar of the role.
•
To change the size of the work area of a role partition: click and hold on the title bar of the
role, then move the mouse to adjust the title bar placement.
•
To maximize the size of the work area of a role partition: double-click the header of the
partition.
Session Blocks
Each session block in the session list represents an open MX session. A session block displays the
name of the other session participant, the session type, and the duration of the session. In figure
3-4, the Janie.Newsome user role partition contains a session block for a voice call with Charlie
Smith. Voice call session blocks appear in the partition of the role that is servicing the call.
Figure 3-5 displays four session block examples:
•
•
Session block 1 represents a voice call to a phone that is external to the MX.
Session block 2 represents a voice call to an internal user that is on hold. Session blocks with
a blue background are denoted as current sessions. In this example, block 2 is not current,
indicating that although the voice call is still active, the user is performing a MXIE function
with another session. MXIE always designates one session block as active. To activate a session
block, click the mouse within the block.
Figure 3-5
•
Session Block examples
Session blocks 3 and 4 represent the same chat session that has been active for 42 seconds.
Session control block 3 uses large icons on the left side of the block and session control buttons
on the right side of the block. You configure the icon type and the use of session control
buttons in the preferences window, as described in section 3.3 on page 23.
Double-clicking a session block performs one of the default actions upon the session it represents:
•
Active Call: places the call on hold
15
MXIE User’s Manual
•
•
•
•
3.1.4.3
Call on hold: activates the call
Chat Invitation: accepts the chat
Active chat: activates the message window
Disconnected chat: clears the session block from the list
Session Control Buttons
Session control buttons, when enabled, are located on the right side of each session block. The
session blocks display only the Session control buttons that can be used appropriately at a given
time. Section 3.3 on page 23 describes the configuration method for displaying and hiding session
control buttons.
MXIE defines the following six session control buttons shown in figure 3-6:
•
•
•
•
Transfer (1): Press this button during a voice call to transfer the call to another user.
•
•
•
•
Retrieve (5): Press this button to retrieve a call that was previously placed on hold.
Hold (2): Press this button during a voice call to put the call on hold.
Disconnect (3): Press this button to disconnect a voice call.
Answer (4): Press this button to accept a voice call when MXIE is configured to manage
multiple voice calls (see section 5.2.5.2 on page 47) and is handling at least one voice call.
Voice Mail (6): Press this button to send a call directly to voice mail.
Call Recording On Demand (7): Press this button to record the voice call.
Inhibit Call Recording On Demand (8): Press this button to turn off call recording for the
specified voice call.
Figure 3-6
3.1.4.4
Session Control Buttons
Keyboard Shortcuts
MXIE provides hot key assignments for performing common operations on the current session.
Figure 3-7 lists the available keyboard shortcuts.
Key
Operation
Reference
A or a
answer an inbound voice call
Section 5.3.3 on page 49
D or d
disconnect a voice call
Section 5.3.7 on page 58
H or h
place an active voice call on hold or retrieve a call on hold.
Section 5.3.6.1 on page 53
P or p
park an active call
Section 5.3.6.5 on page 56
R or r
reject an inbound voice call
Section 5.3.3 on page 49
T or t
transfer (unattended) a voice call
Section 5.3.6.3 on page 55
V or v
send an incoming voice call to voice mail
Section 5.3.3 on page 49
Figure 3-7
16
Hot Key assignments for Session block operations
3. MXIE Window
3.1.5
Buddy List
The Buddy List provides immediate and constant access to address entries of people with whom
you are in regular contact. You can quickly initiate Text Messages and Voice Calls with members
of your Buddy List, and many session control operations can be quickly performed with a drag
and drop of Buddy List icons. The Buddy List also may display the presence state for each internal
buddy who has configured MXIE to permit you to view their presence and each external buddy
that provides status information through the external messaging application program.
3.1.5.1
Buddy List Contents
The contents of the buddy list depend upon the type of Session List role that is active, as described
in section 3.1.4.1.
•
When the User role is active, the buddy list contains system users and external contacts that
you previously selected from your MX address books. A user role buddy list may contain a
maximum of 32 buddies.
To add an MX user to the buddy list, open the address book and display the contact list as
described in section 9.1.3 on page 104. Highlight the name of the contact that you wish to add,
press the right mouse button, and select Buddy. You can also drag and drop contacts from the
address book into your buddy list or into the Buddies directory of your address book, as
explained in section 9.1.3 on page 104.
To add an external contact to the buddy list, drag and drop the contact from the address book
into your buddy list or into the Buddies directory of you address book, as explained in section
9.1.3 on page 104.
To remove a buddy from the buddy list, highlight the buddy in the buddy list, right click your
mouse, and select Delete.
•
When an Operator role is active, the buddy list contains the name of every system user,
allowing an operator to quickly access any member of the enterprise. The names of all other
members of the operator group appear in boldface.
This buddy list displays all address book fields for each group and user defined in the system.
The list provides two columns for reporting the presence of each user within their roles as a
user, operator, ACD agent, and hunt group agent. The MXIE window in figure 3-8 displays a
buddy list for an active operator role.
To change the display order of buddy list columns, drag and drop the column header into the
desired location.
To add or remove a column from the list, right click on the column header.
Users cannot be added or deleted from the operator role buddy list.
•
When an agent or supervisor role is active, the buddy list contains all of the agents of the
group. Agents that are logged into the group are listed at the top of the buddy list and their
names appear in normal typeface. Agents that are logged into MXIE but are not logged into
the group appear toward the bottom of the list; their names appear in grey and the presence
icons indicates the presence state of the agent within their roles as users.
Agent buddy list contents cannot be edited. Agents cannot block their presence state from
other agents of the group. The agent group buddy list is similar in appearance to the user role
buddy list.
To select a buddy, highlight the buddy list entry by clicking your mouse on the buddy.
17
MXIE User’s Manual
Figure 3-8
Buddy List – Operator role
To select more than one buddy, press the Ctrl or Shift button while selecting buddies.
3.1.5.2
Buddy Groups
Buddy groups are sublists of buddies within your user buddy list. Using buddy groups can
organize your buddy list by separating your buddies into functional groups and displaying only
a subset of your buddy list at a time. You can place a contacts into more than one buddy group.
The buddy list in figure 3-9 contains two buddy groups: Sales and Technical Support. The Technical
Support buddy group contains three buddies. The Sales buddy group is collapsed; to view the
buddies in the group, click the plus sign (+) located left of the group name.
Figure 3-9
18
Buddy list with buddy groups
3. MXIE Window
3.1.5.3
•
To add a buddy group, right click in the buddy list and select Create a Group. Enter a name in
the buddy group banner and press enter.
•
To add a buddy to a buddy group, drag and drop a buddy into the group banner or into the
group list.
•
To remove a buddy group, right click on a group and select Delete Group.
Performing Session Operations
The buddy list supports the following methods of performing session operations with individual
buddies:
•
•
•
To initiate a voice call or text message, drag and drop a buddy list icon into a toolbar icon.
To initiate a voice call, drag and drop a buddy list icon into the session list to start a voice call.
To access a popup operation menu, select a buddy list icon and press the right mouse button.
The popup menu provides access to the following operations:
— initiate a voice call
— send a text message, e-mail, voice message, or fax to the buddy
— review your text message history with that buddy
— open the address book entry for the buddy
— create or change the alert for the buddy
— remove the contact from the buddy list
•
To transfer an active call to a buddy, drag and drop the voice call session block into a buddy
list icon.
•
To transfer the call to a buddy’s specific contact number or to the buddy’s voice mail, drag
and drop, while pressing the Ctrl key, the voice session block into a buddy list icon. Pressing
the Ctrl key during a drag and drop generates a contact option list for the buddy, as shown in
figure 3-10.
You can also perform session operations on buddy groups by right clicking your mouse on a
buddy group banner.
•
To initiate voice calls with each contact in a buddy group, drag and drop the buddy group
entry into the session list.
•
To access a popup operation menu for a buddy group, select a buddy group list entry and
press the right mouse button. The popup menu provides access to the following operations:
— sending text messaging, email, voice messages, or faxes to each contact in the list
— initiating conference calls
— remove the group from the buddy list
Double Clicking on a Buddy or Buddy Group performs the operation specified in the Address
Book Default Action panel, as described in section 9.2.2 on page 108.
19
MXIE User’s Manual
Figure 3-10
3.1.6
Buddy contact options for transferring a call with Drag and Drop
Missed Call Indication
The Missed Call Indication text is located below the session list, as shown in figure 3-1 on page 11.
This text is present only when you receive a voice call that was not answered (either by yourself
or through voice mail) before the caller terminated the call. Clicking on the text accesses your call
log that displays the source of the missed call. This indicator does not count calls that were
forwarded or rejected by a call handling rule.
•
3.1.7
To remove the Missed Call Indication text from the window, either click the Missed Call Icon
on the right side of the window, as shown in figure 3-1 on page 11, or access your call log. You
access the call log by clicking the Missed Call Indication text or selecting View | Log from the
main menu. Chapter 11, starting on page 143 describes call logs.
Message Indication
The Message Indication text is located at the bottom of the session list, as shown in figure 3-11.
This text is present only if you have at least one new voice or fax message in your voice mail box.
20
•
To display the sender and receipt time of your most recently received new message, press the
Message View icon located right of the indication text. Figure 3-11 displays the MXIE user
window after the Message View icon has been pressed. The sender and receipt time of the
message appears directly below the indication text. If the message is a fax, a fax icon appears
to the left of the senders name. No icon is displayed if the message is a voice message.
•
To display the recipient and receipt time of other new messages, press the Rewind or Forward
button. Pressing the forward button scrolls through your new messages. Pressing the reverse
button scrolls through your new voice messages in reverse order.
•
To play (voice message) or to view (fax) the displayed message, press the play button directly
below the Message View icon as shown in figure 3-11.
•
To save the displayed message, click on the text and select Save (“Charlie Smith, 6/28/2006,
9:37:53 AM” in figure 3-11).
3. MXIE Window
Figure 3-11
MXIE Window Displaying Voice Mail
•
To access the voice mail window, click the new message text (“You have 5 new messages” in
figure 3-11) or select View | Messages from the main menu.
•
To hide the messages, press the VM View icon again
Chapter 10, starting on page 115 describes the MXIE voice mail features.
3.1.8
Status Bar
The Status bar is located at the bottom of the MXIE user window, as shown in figure 3-1 on
page 11. The left side of the status bar displays the call handling rule status, external messaging
status, and the binding status. The right side of the status bar displays the presence status. Figure
3-12 displays the Status bar when displaying all available icons.
3.1.8.1
Call Handling Rule Status
The status bar displays the Call Handling Rule Status icon on the left side of the status bar if you
have defined at least one call handling rule. The cog next to the phone is yellow if at least one Call
Handling Rule is active; the cog is grey if no call handling rules are active.
Figure 3-12
Status Bar
To access the Call Handling Rule panel, either click on the Call Handling Rule Status icon or select
File | Preferences from the main menu and select Call Handling. Section 5.5 on page 63 describes
call handling rules and call handling plans.
21
MXIE User’s Manual
3.1.8.2
External Messaging Status
The status bar displays the External Messaging Status icon on the left side of the status bar if you
enabled External Messaging from the role panel, as described in section 2.3.2 on page 7. The
External Messaging icon appears as a yellow light bulb if External Messaging is active. The icon
appears as a grey light bulb if External Messaging is inactive.
External Messaging is activated from the External Messaging Preferences panel, as described in
section 4.2.2 on page 28. To open the External Messaging Preferences panel, click on the External
Messaging icon or select File | Preferences from the main menu and select External Messaging.
3.1.8.3
Binding Status
The binding status text reports the name of the device to which the MXIE instance is bound. If the
MXIE is not bound to any device, Bind to… appears in this location. To change the device binding
status or to bind to a different device, click on this text. Grey text denotes an inactive device.
Section 5.2.2 on page 43 describes each binding option.
3.1.8.4
Presence Status
The presence status text indicates the presence state of the active role as displayed in the session
list. To change the presence state for the active role, click on the presence text or icon on the right
side of the status bar, as shown in figure 3-12. Refer to chapter 8, starting on page 89, for
information concerning presence and presence states and section 8.2.2.5 on page 93 for details
about changing your presence state.
3.2
Appearance Preferences
The Appearance Preferences panel, shown in figure 3-13, controls the appearance of MXIE
window components. This panel is available to only users that log into MXIE as an operator, hunt
group agent, ACD agent, or Inbound Call Center agent.
Figure 3-13
22
Appearance Preferences panel
3. MXIE Window
To access the Appearance Preferences panel, open the User Preferences window by selecting
File | Preferences from the main menu, then select Appearance in the panel directory.
3.3
•
Use Windows font: Select this radio button to use the Microsoft Windows desktop font for all
MXIE text, including the session control blocks and the buddy list. You can change this font
from Window’s Display Properties panel by right clicking the mouse on an unused region of
the windows user interface and selecting Properties from the menu. Font settings are located
on the Appearance tab of this panel.
•
Use this font: Select this radio button to choose a font different from the Microsoft Windows
desktop font for displaying MXIE text. The default font type provided by this setting is
Microsoft Sans Serif; the default font size is 8.
•
Use color scheme: Configure the appearance of your MXIE window by selecting either the
default MXIE color scheme or the Windows scheme that is active on your computer.
Calls Preferences
The Calls Preferences panel, shown in figure 3-14, controls the appearance of session blocks and
the behavior of the MXIE window when receiving an incoming call. To open the Calls Preferences
panel, open the User Preferences window by selecting File | Preferences from the main menu,
then select Calls in the panel directory.
Figure 3-14
3.3.1
Call Preferences panel
Appearance
Session appearance options determine the format of session blocks. The session blocks in figure
3-15 display the icon and session button display options.
•
Show Session Control buttons: Select this option to display the session control buttons, as
shown on the right side of session block #1 in figure 3-15. When this option is not selected, the
session blocks resemble the right side of the session block #2.
23
MXIE User’s Manual
•
Large Session Icons: Selecting this option displays large icons in your session blocks, as shown
on the left side of block #1 in figure 3-15. When this option is not selected, the left side of your
session blocks resemble block #2.
Figure 3-15
3.3.2
Session Block Appearance options
Calls
Calls options specify the manner in which your computer displays an inactive MXIE User
Interface window if you receive a call while working within another program.
3.3.3
•
Show MXIE and change focus: When this option is selected, your computer displays the
MXIE User Interface and makes it the active window whenever you receive a call.
•
Show MXIE but do not change focus: When this option is selected, your computer displays
the MXIE User Interface whenever you receive a call, but your current active window remains
active.
•
Do not show MXIE: When this option is selected, your computer does not automatically
display the MXIE User Interface whenever you receive a call. You can view the user interface
by selecting that window on your desktop.
Call Attached Data
Automated attendants that handle calls have the capability to associate specific data fields with a
call. These data fields are filled by querying the caller, then passed to an agent who then uses that
information to service the caller’s request.
The Call Attached Data option specifies your MXIE instances response to receiving call attached
data. When Display Attached Data is enabled, MXIE displays any call attached data received
from the system.
Figure 3-16
24
Call Attached Data panel
3. MXIE Window
3.3.4
ZIP4x5
The ZIP4x5 phone provides four ethernet call appearances for voice calls. Three of the call
appearances carry calls from the ethernet circuit. The fourth call appearance can carry calls over
the ethernet circuit or over an analog circuit. This section of the panel determines the default
method when you initiate calls through a ZIP4x5 that is bound to your MXIE instance.
3.4
•
Use Digital Line by Default: Selecting this option programs MXIE to use a ZIP4x5 Digital Call
appearance, if one is available, when placing a voice call.
•
Use Analog Line by Default: Selecting this option programs MXIE to use the ZIP4x5 Analog
line, if available, when placing a voice call.
Sounds Preferences
The Sounds Preferences panel, shown in figure 3-17, determines the tones that MXIE plays to
alert you of incoming messages, session requests, and failed communication attempts. To open
the Sounds Preferences panel, open the User Preferences window by selecting File | Preferences
from the main menu, then select Sounds in the panel directory.
Figure 3-17
Sounds Preferences panel
The Volume Bar at the top of the panel adjusts the volume level of the sounds played by the PC.
Moving the vertical bar left to decrease the volume or right to increase the volume.
Each row in the table below the represents a MXIE event. The cells within a row determines the
characteristics of the sounds triggered by the MXIE event.
•
First column (untitled): A checkmark (tick) in this cell indicates the event listed in this row will
trigger the playing of a sound file. Click inside of this cell to place or remove the checkmark.
•
Event: This cell defines the event represented by the row of cells. If the first row is not selected
for an event, the event name will appear in grey text and the event will not trigger the playing
of a WAV file.
25
MXIE User’s Manual
•
Sound File Name: This cell determines the WAV file that MXIE plays when the listed event
occurs. To enter a file name either click inside of the cell and type the path and file name in the
data entry field or press the button on the right side of the cell to browse your system files.
Consult the documentation for your operating system for the default location of WAV files
provided with your operating system.
•
Repeat: The time selected in this cell indicates the frequency that an event will generate the
tone configured for the event. MXIE will repeat the tone until the event is acknowledged.
Select No to play the sound file only once for an event.
•
Play (arrow button): Press the Play button to listen to the WAV file for the selected event.
Press the Default button to select the default enable status and sound file for each event.
Press the OK button to save the changes to all User Preference panels and exit this window.
Press the Apply button to save changes to all User Preference panels without exiting this window.
Press the Cancel button to discard changes to all User Preference panels and exit this panel.
3.5
Audio Output Preferences
The Audio Output Preferences panel, shown in figure 3-18, determines the Audio Driver that
MXIE uses to play your voice messages and audio notifications. The available options depend on
the audio boards and sound drivers installed on your computer.
Figure 3-18
26
Audio Output Preferences
•
Select Use Windows Default or Primary Sound Driver to select the sound driver that is specified
as the Default Device in the Audio panel of the Sounds and Audio Devices Properties window
(Windows XP) or the Preferred Device in the Audio panel of the Sounds and Multimedia
Properties window (Windows 2000).
•
Select any other option to specify a driver that is installed on your computer.
Chapter 4
Text Messaging
4.1
Introduction
Text Messaging services allow MX users to exchange text messages with MX users logged into the
same system, as well as other people that can be access across the internet. MXIE text messaging
is categorized as follows:
•
Instant Messaging (IM) exchanges text messages between MX users that are logged onto the
system.
•
External Messaging exchanged text messages between MX users and anyone using one of the
following messaging applications:
— AIM (America Online)
— MSN (Microsoft Network)
— Yahoo
— ICQ
Text message exchanges sent over MXIE use a message window that provides areas for typing
new messages and viewing received messages. Text messages do not require the establishment of
a session and are sent regardless of the response of the intended recipient. As such, text
messaging is similar to sending e-mail.
This chapter presents the following topics:
•
•
•
•
4.2
configuring external messaging
a description of the message window that sends and receives text messages
sending and receiving text messages
setting up preferences for text messages
Configuring Text Messaging
Text messages can be sent and received through a MXIE account only if that account is authorized
for instant or external messages. Sending external messages through MXIE requires an initial
configuration process to like a MXIE account to a specific external messaging application. Instant
messaging requires no MXIE configuration process after an account has been granted
authorization.
This section describes the system requirements for external messaging and the procedure for
configuring external messaging from a MXIE account.
27
MXIE User’s Manual
4.2.1
Authorizing Text Messaging
Text messaging is authorized for MX accounts from the Administrator User Interface. Instant
messaging is authorized separately from external messaging. An account can be authorized for
either messaging service or for both services. If an account is not authorized for either instant or
external messaging, all MXIE text messaging icons are inactive (greyed out) and messaging is not
provided as an option of the various popup menus.
The MX Administrators User Interface Manual describes the process for authorizing instant
messaging and external messaging for an MX account. MXIE users that cannot access text
messaging services should contact their MX administrator.
4.2.2
Configuring MXIE for External Messaging
A users can send and receive external messages through MXIE only if external messaging is
enabled and activated on the MXIE instance and the user has registered at least one transport
account.
4.2.2.1
Enabling External Messaging
External messaging is enabled for a MXIE instance when specifying the user roles for the instance.
As described in section 2.3.2 on page 7, this is performed from the Role panel, which is accessed
when you log into MXIE or by selecting File | Change Role from the main menu.
To enable external messaging in your MXIE instance, place a check (tick) mark in the External
messaging checkbox. Although you must enable External Messaging each time you log into MXIE
to send and receive external messages, activation and transport registration information is
maintained with your account regardless of whether external messaging is enabled.
Figure 4-1
4.2.2.2
Role Panel – External Messaging enabled
Activating External Messaging
Activating external messaging connects your MXIE instance to the MX jabber server. The
activation status of an account persists regardless of whether you are logged into MXIE or if
external messaging is enabled your account. Once external messaging is activated for a MXIE
account, it does not have to be reactivated even after closing and reopening MXIE or disabling
then enabling external messaging.
To activate External Messaging:
1.
28
Open the External Messaging Preferences panel by clicking on the External Messaging icon
on the Status Bar (see section 3.1.8 on page 21) or selecting File | Preferences from the main
menu, then selecting External Messaging in the panel directory.
4. Text Messaging
If External Messaging has not been activated, MXIE displays the preference panel shown in
figure 4-2. If the panel is not empty, External Messaging was previously activated. If External
Messaging is not available in the panel directory, External Messaging was not enabled as
described in section 4.2.2.1.
Figure 4-2
External Messaging Preference panel – External Messaging is Inactive
2.
Access the connection popup panel by pressing the Disconnect icon located in the bottom
left corner of the preference panel and right of the panel directory.
3.
Select Connect in the popup panel
The indicates that it is connecting your instance to the jabber server by replacing the
Disconnected text with Connecting, then Connected.
When the MX has completed the connection to the jabber server, the External Messaging
Preferences panel displays External IM transport icons, as shown in figure 4-3. The center
icon for the Jabber server should be active (blue) and all other icons are inactive (grey) until
a transport account is registered.
To de-activate External Messaging, press the active icon located in the bottom left corner of
Preferences panel and select Disconnect in the popup menu.
4.2.2.3
Registering a Transport Account
Registering a transport account connects your MXIE instance through the Jabber server to an
messaging service account that you established through an external messaging application
provider. MX external messaging can communicate with external contacts though any of the
following messaging applications: AIM (America Online), MSN (Microsoft Network), Yahoo, and
ICQ.
Prior to registering a transport account, you must set up an account through one of the supported
applications.
29
MXIE User’s Manual
Figure 4-3
External Messaging Preference panel – External Messaging is Active
To register a transport account to your MXIE instance:
1.
Open the External Messaging Preferences panel and verify that External Messaging has
been activated for your account.
Figure 4-3 displays the External Messaging Preference panel when External Messaging is
active with no registered transports.
2.
Open the Transport Registration panel by double clicking the icon bar of the desired
transport application, or by single clicking the icon bar of the desired application and then
pressing the Register button located on the bottom right corner of the preference panel.
MXIE displays the Transport Registration panel appropriate for the selected transport.
Figure 4-4 displays the Transport Registration panel for ICQ.
Figure 4-4
3.
30
Transport Registration panel – ICQ
Enter the User Name and Password for your external messaging account in the specified
data entry field, then press Submit.
4. Text Messaging
The External Messaging Preference panel indicates the successful registration attempt by
displaying an active (blue) transport icon that corresponds to the transport program of your
external messaging account, as shown in figure 4.5.
Figure 4-5
External Messaging Preference panel – ICQ account is registered
To unregister a transport account to your MXIE instance, double click the icon that corresponds
to the transport account you wish to unregister. You can also select the icon by clicking it once,
then press the Unregister button located in the bottom right corner of the preference panel.
4.3
Text Message Window
The text exchange message window, shown in figure 4-6, sends and receives messages from other
MXIE users and external contacts through the Instant and External Message functions. MXIE
displays this window when you initiate or receive a text message.:
4.3.1
Message Window Components
This window comprises five components, as identified in figure 4-6:
•
The address bar displays the names of the users with whom you are communicating. The title
bar may also include the message application program when sending or receiving external
messages.
•
The text panel, which is directly below the address bar, displays the messages that have been
exchanged. Each message is immediately preceded a header that lists the user that sent the
message and the time that the message was sent. Header text for messages sent by the other
user is displayed in bold typeface. The right mouse button accesses a menu from where you
can copy, clear, and select all panel text.
You can adjust the format of the time and date markers in the Instant Messaging user
preference panel, as described in section 4.5.1.
31
MXIE User’s Manual
Figure 4-6
•
Message window
The toolbar provides immediate access to common tasks that you can perform with the
contact specified in the title bar (single window) or the active panel (docked windows). The
list of available tasks depends on the available information for the contact in your address and
may include voice call initiation, reviewing text history, and the sending of voice messages or
faxes.
To access the available functions, click on one of the two icons located on the right side of the
toolbar.
4.3.2
•
The input panel displays text that you are preparing to send to the other user. The Text panel
and the Input panel are divided by a Splitter bar. You can move the splitter bar up or down to
adjust the size of the Text and Input panels.
•
The send button transmits Input panel contents to the other user. After you press the Send
button, the input panel contents are also transferred to the text panel.
Using the Message Window
To send a message, place the cursor in the input panel, type the desired text, and press the Send
button. The maximum message size is 2730 characters. You can also program the Enter key to act
as the Send button in the Instant Messaging preferences panel, as explained in section 4.5.1 on
page 36.
To copy text in the text panel, block the desired text with your mouse, right click the mouse and
select Copy.
To clear the text panel, right click while the cursor is in the text panel and select Clear All.
To select all of the text in the text panel, right click while the cursor is in the text panel and choose
Select All.
32
4. Text Messaging
4.3.3
Docking Message Windows
Multiple message windows can be docked, or combined into a single window. The new window
contains one tab for each component message window. Figure 4-7 displays a docked instant
message window that contains four message panels. The address bar lists the order in which the
message panels were added to the docked window. Instant message windows can be docked to
External Message windows.
Figure 4-7
Docked Message window
Docking a message window requires a drag and drop operation. The upper left corner of figure
4-8 displays two message windows just before they are docked. The size and relative location of
the component message windows being docked has no effect on the docking process.
To dock two message windows:
1.
Click and hold the left mouse button while pointing the curser on the address bar of the
window that will be moved into the docked window.
2.
While holding the left mouse button, move the message window until the address bar is
located within the address window of the docked window.
A light brown outline, as shown on the panel in upper right corner of figure 4-8, displays the
new position of the window that you are moving.
3.
Release the left mouse button to complete the dock. The bottom window in figure 4-8 depicts
the docked message window with the two component panels.
To remove a panel from a message window, perform one of the following:
•
•
Double click on the name plate of the panel that you wish to remove from the docked window.
Drag the name plate of the panel that you wish to remove and drop it outside of the window.
To automatically dock new text message windows to existing text message windows, open the
Instant Messaging Preferences panel and select Always dock instant message windows. section
4.5.1 on page 36 describe the Instant Messaging Preferences panel.
33
MXIE User’s Manual
Figure 4-8
4.4
Docking a Message Window
Sending and Receiving Text Messages
Text messages are sent from and received by the message window described in section 4.3. The
method of sending and receiving Instant Messages is identical to method for External Messages.
For the initial communication with a contact, MXIE opens a message window, as shown in figure
4-6. or adds a panel to your message window if you have configured your preferences to
automatically dock all message windows. Subsequent messages sent to or received from the
contact are displayed on the same message window. Text messages to or from other contacts
require separate message windows or separate panels within a docked message window.
4.4.1
Sending a Text Message
You can send an instant message to any MX user or an external message to external contacts for
whom you have a valid messaging address.
To send a text message, perform one of the following actions:
•
34
Toolbar: press the text message icon and type the extension, user name, or text address of the
recipient in the resulting dialog box
4. Text Messaging
•
Main Menu: select Actions | Instant Message and type the extension or user name of the
recipient in the resulting dialog box
•
•
Buddy List: drag the recipient’s icon onto the instant message icon in the toolbar
•
Buddy List: double click on the recipient’s icon
Buddy List: right click on the recipient’s name or icon and select Instant Message from the
popup menu.
This action requires that the address book is configured to initiate a text message when you
double click on a contact. See section 9.2.2 on page 108 for more information.
•
•
Address Book: drag the recipient’s address book entry onto the text message icon in the toolbar
Address Book or Buddy List: click the right mouse button over the recipients name and select
Send an instant message
Type your message in the input panel and press the Send button. The text panel displays the text
that you have sent. Subsequent text messages sent to or received from the same contact appear in
the text panel of the same window in the order that they are sent or received.
The Enter key can insert line breaks in your messages or transmit messages to the other user.
Section 4.5.2.1 on page 38 describes the process of programming the Enter key for Text Messages.
Instant Messages that you send to users that are not logged into MXIE are delivered the next time
they log in.
4.4.2
Receiving a Text Message
Text messages received from contacts are displayed in the Text panel of the Text Message window.
A message window containing received text persists until you close the window.
You can respond to the text message by sending a text message: type your reply in the input panel
and press the Send button.
Instant Messages that are sent to you while you are not logged into MXIE appear the next time
you log in. The resolution method for External Messages sent to your account while you are not
logged into MXIE depends on the application transport through which the message was sent.
4.4.3
View the Text Message History
The Instant Messages Preferences panel provides an option to store all of your sent and received.
When this option is enabled, all messages sent and received are added to the specified file. Section
4.5.1.4 on page 38 describes the Save Messages in this folder command.
You can conveniently review these message from the Text Message History panel, shown in
figure 4-9, by selecting View | Text Message History from the main menu.
The toolbar of the Text Message History panel provides options that specify the messages
displayed in the text area.
•
The drop down menu in the upper left corner filters the displayed messages by the day they
were sent or received.
•
The filter button accesses a panel that filters the messages by the contact that sent or received
the message. One or more users are selected from the panel that is generated by pressing the
filter button.
35
MXIE User’s Manual
Figure 4-9
•
Text Message History panel
The buttons on the right side of the toolbar scroll through the daily list of messages. Pressing
the left arrow displays the message sent and received on the day previous to the date shown
in the drop down menu. Pressing the right arrow displays the message sent and received on
the day after the date shown in the drop down menu.
You can also select part or all of the exchange of instant messages to your operating systems
clipboard by using the mouse to highlight the text. Press Ctrl-C to copy the text.
4.5
Messaging Preferences
Text Message Preferences configure the message appearance within the text window, MXIE
window behavior when a message is received, the storage location for messages, and keystroke
actions when sending text messages. Preferences are configured on two preference panels:
Instant Messages and Messages.
The External Messaging Preferences panel is used to configure External Messaging and is
described in section 4.2.2 on page 28.
4.5.1
Instant Messaging Preferences
The Instant Messaging Preferences panel, shown in figure 4-10, configures the format of the date
and time headers in the message window, controls the behavior of your computer when you
receive a message, and controls the saving of text message sessions. To open the Instant
Messaging Preferences panel, open the User Preferences window by selecting File | Preferences
from the main menu bar, then select Instant Messaging in the panel directory.
36
4. Text Messaging
Figure 4-10
4.5.1.1
Instant Messaging Preferences panel
Show Date and Show Time
The text panel of the message window displays all previously sent messages. Each message is
preceded by a header line that indicates the sender of that message. When Show Date and Show
Time are enabled, the Message Header displays the time and date that the message was sent. The
messages shown in figure 4-6 were transmitted while Show Date and Show Time were enabled.
The Preferences panel provides Long format and Short format options for displaying the date in
each message header; these display options use the Long Date and Short Date formats defined in
the Regional Options panel of the Windows Control Panel.
4.5.1.2
Pop up Notification When Message is Received
MXIE displays a popup message in the bottom right corner of your monitor when you receive a
text message if this option is enabled.
4.5.1.3
Bring Message Window to the Front but do not Change Focus
When this option is enabled, the message window moves to the front of the desktop whenever
you receive a message; this window does not become active until you select it through a windows
operation.
If the option is not enabled, the message window will remain in its present location when it
receives a message. You can detect a new message by observing the Windows taskbar at the
bottom of the window; the taskbar button that represents the text message window will blink
when the window has a message to which you have not responded.
37
MXIE User’s Manual
4.5.1.4
Save Sessions in this Folder
Enabling this option saves your instant messages as text files in the directory specified in the data
entry box. Folders are created in the directory for separating the text files by the month they were
generated. The folder name format is YYYY-MM specifies the year and MM specified the month
that the files were generated.
The file name format is YYYYMMDD.xml, where YYYY is the year, MM is the month, and DD is
the date when the messages were received. One file is used to store all instant messages received
during a single day. For example, 20060725.xml contains the text of messages sent and received on
25 July 2006.
Example: Assume that C:\IM_History is listed in the Save Messages in this folder data
entry field. Within that folder, the subfolder named 2006-04 contains all text messages
sent and received during April 2006. Within that subfolder, the file named 20060423
contains all text messages sent and received on 23 April 2006. The folder named 2006-04
will contain one file for each day that you either sent or received an instant message.
Press the Browse button to select a storage directory from a drive in your local network.
Files are automatically removed after a specified time by entering a value in the Delete after, days
entry box.
4.5.1.5
Always Dock Instant Message Windows
Select this option to dock instant message windows that you are initiating or receiving to any
instant message window that already exists.
4.5.2
Messages Preferences
The Messages Preference panel, shown in figure 4-11, defines the behavior of the enter key when
sending messages and controls the receipt of instant messages by your phone. To open the
Messages Preferences panel, open the User Preferences window by selecting File | Preferences
from the main menu bar, then select Messages option directly below the Instant Messaging option
in the panel directory.
4.5.2.1
Message Sending Options
The input panel of the message window is used for typing and sending messages. In addition to
using the Send button, the Enter key can also transmit messages. The send options define the
MXIE response when you press the Enter key.
4.5.2.2
•
Enter sends text, Ctrl-Enter gives new line – when this option is selected, typing the Enter key
is equivalent to pressing the Send button; typing Ctrl-Enter adds a line to the message.
•
Ctrl-Enter sends text, Enter gives new line – when this option is selected, typing Ctrl-Enter is
equivalent to pressing the Send button; typing the Enter key adds a line to the message.
Instant Messages to Phone
Many SIP phones, including most Zultys ZIP and WIP phones, are capable of receiving and
transmitting instant messages. The Instant Messages to Phone section programs the MX to send
your instant messages to your phone. The selected option remains in force even when you are
logged out of MXIE.
38
4. Text Messaging
Figure 4-11
•
•
•
Messages (Instant Messaging) Preferences panel
Never: This option programs the MX to never send instant messages to your phone.
Always: This option programs the MX to send instant messages to your phone in addition to
sending them to your MXIE instance.
Only when MXIE is not running: This option programs the MX to send instant messages to
your phone only when you are logged out of MXIE.
39
MXIE User’s Manual
40
Chapter 5
Voice Calls
5.1
Introduction
You can use MXIE to initiate and control the voice calls that you make through the MX. Using
MXIE to control your voice calls provides access to the following tools:
•
•
sixteen MX call appearances for handling simultaneous voice calls
•
•
•
•
the MXIE Softphone that performs voice calls from your computer
•
the address book and buddy list for organizing your contact numbers and automating the
dialling process
•
•
Call Logs that track your incoming, outgoing, and missed calls.
the MXIE User Interface that, in addition to displaying the name of the other party and time
elapsed information, provides one button access to most call control features
Call Handling Plans that manage your incoming calls
Call Recording tools
Presence tools that define call handling methods based upon your availability and the
availability of other system users
the voice mail manager for listening to, sorting, and organizing your voice mail.
This chapter describes the use of MXIE for performing voice call and includes discussions on SIP
device management, call handling rules, voice mail management, and managing your call
sessions.
5.2
Voice Call Devices
Users can send and receive voice calls through any SIP device connected to and registered with
the MX that supports voice communications. This section discusses MX voice device management
and the binding process that allows MXIE to use a SIP device to initiate a voice call over the MX.1
1. The term device is used rather than phone. Devices can be, for example, PCs, video equipment, and PDAs. In most instances, the device is a phone, but throughout this chapter, the term device is used for generality.
41
MXIE User’s Manual
5.2.1
Device Management
A SIP device must be connected to and registered with the MX to access system resources. Users
can connect any SIP based product to the network and register it with the MX without action on
the part of the administrator. Communication sessions can be initiated from any device that is
registered with the MX.
Devices are categorized as Managed or Unmanaged based on their method of registration with
the system.
5.2.1.1
Managed Devices
The MX maintains a database for tracking individual SIP devices. A Managed Device is a SIP device
that is defined within the MX device database. The MX assigns a unique device ID to each
managed device. Contact your system administrator to add a SIP device to the device database,
assign a device ID to the device, and to obtain a list of managed devices that you can access.
After a managed device is defined, the system administrator can assign that device to any MX
user. You can restrict access to devices assigned to you through the preference window, as
described in section 5.2.5.
5.2.1.2
Unmanaged Devices
An unmanaged device is a device that is connected to the MX but is not defined in the MX device
database and is not assigned a unique device ID. Unmanaged devices can perform voice calls
using system resources.
To use a device as an MX unmanaged device, the address of record for the device must be
configured in one of the following formats:
•
the address of record must reference a valid MX user ID and the domain name of the MX, such
as [email protected].
•
the address of record must reference a valid MX extension number and the domain name of
the MX, such as [email protected].
The configuration of the address of record within a device is typically done through an HTML
form accessed from a browser or by entering the data directly into the device with the keys of a
hardware device or the software of a softphone.
5.2.1.3
Registered Contact
A registered contact is either:
— a managed device that the MX administrator has assigned to your user account.
— an unmanaged device that has an address of record that is constructed with either your
user name or extension and with the domain name of your MX system.
42
5. Voice Calls
5.2.2
Bind a Phone
A MXIE instance can manipulate voice calls through a registered contact regardless of its binding
status. A MXIE instance can initiate voice calls and handle multiple voice calls only through SIP
devices to which it is bound. The Bind a Phone window, shown in figure 5-1, binds your MXIE
instance to a SIP device. To access this window, select File | Bind To from the main menu bar or
select the binding status text in the Status Bar, as described in section 3.1.8.3 on page 22.
Figure 5-1
Bind A Phone window
MXIE instances can be bound to only one device at a time. Binding a MXIE instance to a SIP device
cancels any previous device binding to that instance.
ZIP4x5 devices provides access to an ethernet circuit and an analog circuit for voice calls. To select
the default circuit for voice calls initiated from a MXIE through a bound ZIP4x5, open the Calls
Preferences panel by selecting File | Preferences | Calls from the main menu. Section 3.3 on page
23 describes the commands that specify the default circuit for a ZIP4x5 bound to a MXIE instance.
5.2.2.1
Binding Status
The text in the top panel indicates the binding status of the MXIE instance and to which device,
if any, the instance is bound. This panel refers to a SIP device as a device or as a contact, which are
defined as follows:
5.2.2.2
•
Device: This term indicates that the instance is bound to a managed device. You can bind to
any managed device that has not been restricted by another user through a Device Access
Policy preference assignment, as described in section 5.2.5 on page 46.
•
Contact: This term indicates that the instance is bound to a registered contact. The Device
Access Policy preferences window, described in section 5.2.5 on page 46, controls user access
to your registered contacts.
Bind Device by ID
This option binds your MXIE instance to an MX managed device. To bind MXIE to a managed
device:
1.
Select this option and press the Next button.
43
MXIE User’s Manual
5.2.2.3
2.
Enter the device ID of the managed device to which you want to bind your MXIE instance.
The device ID, which is case sensitive, must be entered exactly as defined in the MX device
database. Contact your system administrator if you have problems entering the device ID.
3.
Press the Next button. If the binding operation is not successful, this panel will describe the
problem that MXIE encountered.
Bind Registered Contact
This option binds your MXIE instance to an MX registered contact. To bind MXIE to a registered
contact:
5.2.2.4
1.
Select this option and press the Next button.
2.
Select the contact name from the list that identifies the unmanaged device to which you
want to bind your MXIE instance. An empty contact list implies that there are no devices
registered with the system that can serve as your registered device.
3.
Press the Next button. If the binding operation is not successful, this panel will describe the
problem that MXIE encountered.
Bind by a Call from the Device
This option binds your MXIE instance to an MX managed device that you designate by making a
voice call. To bind MXIE to a device through a call:
5.2.2.5
1.
Select this option and press the Next button.
2.
The MXIE panel will display a phone number and a timer. Dial that number from the device
that you want to bind to your MXIE instance before the timer expires.
3.
Press the Next button. If the binding operation is not successful, this panel will describe the
problem that MXIE encountered. MXIE cannot bind unmanaged devices to your instance
through this option.
Bind to Internal Softphone
This option binds your MXIE instance to the MXIE internal Softphone. You can bind only one
instance to the Softphone. To bind MXIE to the Softphone, select this option and press the Next
button. If the binding operation is not successful, this panel will describe the problem that MXIE
encountered.
5.2.2.6
Bind Recent
This option allows you to select from a menu of devices and registered contacts to which your
MXIE was recently bound. This menu may include devices that are removed from the system or
names that are no longer valid. To bind MXIE to a recently bound device:
44
1.
Select this option and press the Next button.
2.
Select the device or contact name from the list that identifies the SIP device to which you
want to bind your MXIE instance.
3.
Press the Next button. If the binding operation is not successful, this panel will describe the
problem that MXIE encountered.
5. Voice Calls
5.2.3
Cancel a Device Binding
The following actions cancels a device binding:
5.2.4
•
•
Select File | Cancel Bind from the main menu bar.
•
•
Bind your MXIE instance to another device. This cancels the binding of the initial device.
Click on the binding status text on the left side of the Status Bar and select Cancel Bind from
the drop down menu.
Physically remove the device from being registered with the MX.
Device Monitor
The MXIE device monitor, shown in figure 5-2, displays the managed devices that are assigned
to your user account. To access the device monitor, select View | Devices from the main menu.
Figure 5-2
Device Monitor window
The Device Monitor displays one device block for each device to which your account is either
bound, assigned, or logged, and each unmanaged device that is a registered contact for your
account. Blue device blocks are displayed for managed devices to which you are assigned or
registered contacts for your account. Gray device blocks are displayed for devices that are not
assigned to you and are not registered contacts for your account
The top line of the device block displays:
•
•
•
•
the Device ID number if the device is a managed device
the registration address if the device is an unmanaged device
your binding or logged in status with that device
a phone icon that displays the status of the device:
45
MXIE User’s Manual
— A blue icon indicates that the device is active.
— A gray icon indicates that the device is not active.
— An absent icon indicates that the device is an analog phone; analog phones are always
active.
Text that is below the Device ID presents the device status information in the following order:
•
•
•
other user accounts that are assigned to the device (these lines are in bold typeface)
users that are bound to the device
users that are logged in to the device
Blue device blocks display a disconnect (X) icon to the right of each user that is bound to or logged
into a device. Press this icon to remove the user from your device.
Figure 5-2 displays device blocks for three devices. The user is assigned to the top two devices (IDs
0001E102C8B4 and 000BEA80000F); the third device (sip:[email protected]:15010) is a
registered contact for the user’s account. The user is bound to the top device. Evan Wayne is
assigned to the second device and is also bound to it. The user can remove Evan Wayne from this
binding by clicking the disconnect icon that is right of his name.
5.2.5
Device Access Policy Preferences
Device Access Policy preference window, shown in figure 5-3, performs the following services:
•
controls binding access by other users to devices that are configured as your registered
contacts
•
determines the method of controlling multiple phone calls
To open the Device Access Policy Preferences panel, open the User Preferences window by
selecting File | Preferences from the main window, then select Device Access Policy in the panel
directory.
Figure 5-3
46
Device Access Policy Preference panel
5. Voice Calls
5.2.5.1
Binding to My Devices
This section defines access rights that other users have to your registered contacts. You can select
one of the following options:
5.2.5.2
•
Allow all users to bind to my devices: This option allows all other MX users to bind to your
registered contacts.
•
Do not allow any users to bind to my devices: This option denies all other users binding
access to your registered contacts.
•
Allow only users matching my profile to bind to my devices: This option allows only users
with an identical user profile assignment to your own (refer to section 1.2.1 on page 2) to bind
to your registered contact.1 Contact your system administrator to determine the profile
assignment of any user.
For Multiple Incoming Calls
Using MXIE to control your voice calls provides another option for handling calls to your
extensions. You can either handle calls from the phone panel or from the MXIE window.
•
Manage using MXIE for my bound device: Select this option when managing your voice calls
from the MXIE control buttons and options instead of the front panel of your SIP device.
When you select this option, MXIE provides sixteen call appearances to handle multiple calls
while using only one call appearance on the device.
Important MXIE must be bound to a SIP device to manage multiple voice calls. The SIP
device handles multiple calls if MXIE is not bound to a device.
•
5.3
Manage using the phone: Select this option to manage your voice calls from the control panel
of the SIP device instead of the MXIE control buttons. Multiple calls are handled through call
appearances on the phone; the number of calls that you can simultaneously handle is limited
by the number of call appearances provided by your phone.
Voice Call Sessions
The MXIE User Interface can control most aspects of voice calls conducted from a device that is
connected to the MX and is either bound to MXIE or is a registered contact. Using MXIE to control
your calls gives you access to sixteen MXIE call appearances. This section describes MXIE voice
call management capabilities.
Important A MXIE instance cannot properly originate a call if it is bound to a SIP device that
has call forwarding or DND (do not disturb) enabled.
5.3.1
Contact Information Formats
When entering contact information for a voice call to a device that is connected to the same MX
system, the following formats are permitted:
1. Typically, these users belong to the same department, such as sales or technical support.
47
MXIE User’s Manual
•
•
•
•
user_name
extension
[email protected]
[email protected]
When entering contact information for all other devices that can be accessed by the MX, the
following formats are permitted:
•
•
5.3.2
any valid telephone number recognized by the PSTN and permitted by the MX dial plan
any valid SIP address that connects to a voice call device
Initiating a Voice Call
You can dial a call either through the MXIE interface or directly from the SIP device. After binding
the device to MXIE, you can dial a voice call from MXIE with one of the following methods:
•
Main Menu: Select Actions | Voice Call. Enter the contact information in the entry box, as
shown in figure 5-4, and press the Call button.
Figure 5-4
Voice Call Entry Box
•
Toolbar: Select the Voice Call icon. Enter the contact information in the entry box and press
the Call button.
•
•
•
Buddy List: Drag and drop a recipient’s icon into the Voice Call icon in the toolbar.
•
•
•
Address Book: Drag and drop a contact name into the session list.
Buddy List: Drag and drop the recipient’s icon into the session list.
Buddy List: Select a user, click the right mouse button, then select the Make a Call option,
specifying the number or address that you wish to call.
Address book: Click the right mouse button over a contact and select the Make a Call option.
Call Log: Click the right mouse button over a contact and select Call Back from the menu.
To place the voice call, take the SIP device off hook after performing one of the listed dialling
actions.
After entering the contact information, the user interface displays a session block on the MXIE
User Interface similar to the blocks in figure 5-5. The top block is displayed after dialling the
contact and before taking the SIP device off hook. The second block is displayed after taking the
device off hook and before the call is answered. The bottom block is displayed during the phone
conversation.
48
5. Voice Calls
Figure 5-5
5.3.3
Voice Call Session Blocks
Receiving a Voice Call
You can receive a voice call through any of the following devices:
•
•
•
5.3.3.1
a managed device bound to your MXIE instance
a managed device assigned to your user account through the MX administrator
a registered contact
Receiving a Voice Call as a User
When a caller dials your extension or user ID, all devices that fit these descriptions are alerted and
a session block is displayed on MXIE indicating the incoming phone number and, if available, the
name of the caller. Ringing voice calls appear in your session list as session blocks, as shown in
figure 5-6.
Figure 5-6
Ringing Phone Session block
The Call Handling Plan defines the method of handling incoming calls on the basis of your call
handling status, the presence state, call source, time of day, day of week, and date of call. The
rules that make up the Call Handling Plan can reject or route calls that you do not answer.
To answer a voice call:
•
•
•
SIP Device: take one of your ringing devices off hook
Session List: click the right mouse button over the ringing session block and select Answer
Session List: if visible, click on the answer button in the ringing session block, as shown in
figure 5-6
When you answer a voice call, the remaining devices become inactive and the MXIE session block
displays the name or number of the caller, the elapsed time of the call, and (if enabled) session
control icons.
49
MXIE User’s Manual
To reject a call, perform one of the following actions:
•
•
Session List: click the right mouse button over the ringing session block and select Disconnect
Keyboard: type ‘D’ or ‘d’
To send a call directly to voice mail, perform one of the following actions:
•
•
•
•
Toolbar: Click the Disconnect icon.
Session List: click the right mouse button over the ringing session block and select Send to
Voice Mail
Keyboard: type ‘V’ or ‘v’
Session List: if visible, click on the voice mail button in the ringing session block, as shown in
figure 5-6
To send a call directly to another user ’s voice mail box, drag and drop the voice call session block,
while pressing the Ctrl key, to the address book or buddy list contact that is to receive the
message.
5.3.3.2
Receiving a Voice Call as an Agent
When a caller dials the extension of your ACD, operator, or hunt group, the MX alerts members
of the group as defined by the system administrator. When a group call is routed to your
extension, all of your devices are alerted and MXIE displays session block under the group role
partition, indicating the incoming phone number and, if available, the name of the caller. Ringing
voice calls appear in your session list as session blocks, as shown in figure 5-6.
Your Call Handling Plan has no effect on incoming group calls. The administrator determines the
call distribution method, call timeout, voice timeout, and the method for handling unanswered
calls.
To answer a call, take one of your devices off hook; the remaining devices become inactive and
the MXIE session block displays the name or number of the caller, the elapsed time of the call, and
(if enabled) session control icons.
When you reject a call as an agent, the call is either sent to another agent or sent to voice mail,
depending on the type of group that receives the call, the MX call distribution method and the
number of agents that are logged into MXIE. Rejecting a call sent to a hunt group or an operator
groups sends the call to voice mail. Rejecting a call as a basic ACD or Inbound Call Center agent
either sends the call to the next agent or to voice mail.
To reject a call, perform one of the following actions:
•
•
•
Toolbar: click the Disconnect icon
Session List: click the right mouse button over the ringing session block and select Disconnect
Keyboard: type ‘D’ or ‘d’
To send a call directly to voice mail, perform one of the following actions:
50
•
Session List: click the right mouse button over the ringing session block and select Send to
Voice Mail
•
Keyboard: type ‘V’ or ‘v’
5. Voice Calls
To send a call directly to another user ’s voice mail box, drag and drop the voice call session block,
while pressing the Ctrl key, to the address book or buddy list contact that is to receive the
message.
5.3.4
Handling Simultaneous Voice Call Sessions
MXIE supports two methods of managing multiple simultaneous voice calls:
•
•
using MXIE call appearances and control buttons
using the SIP device call appearances and control buttons
You must use the same method to handle all simultaneous calls at any one time. You configure
the multiple call handling method from the Device Access Policy preferences window, described
in section 5.2.5.2.
5.3.4.1
MXIE Control of Multiple Calls
Controlling voice calls through MXIE provides sixteen call appearances for handling
simultaneous voice calls. Regardless of the number of calls that are simultaneously active, only
one call appearance on your SIP device is utilized when controlling your call through MXIE.
To configure MXIE to handle simultaneous calls, set the For multiple incoming calls parameter to
Manage using MXIE for my bound device on the Device Access Policy preferences window shown
in figure 5-3. Verify that MXIE is bound to your SIP voice call device; MXIE can control multiple
calls only when it is bound to a device.
To initiate a voice call while engaged in at least one active voice call sessions, perform one of the
MXIE call initiating methods listed in section 5.3.2. MXIE automatically places all calls not
previously suspended on hold and dials the new contact.
Incoming voice calls, when one or more previous calls are active, generate a MXIE session block
similar to the one shown for Evan Wayne in figure 5-7. To answer the call, press the Answer
session control button located in the bottom right corner of the block or double click the session
block that indicates the incoming call.
Figure 5-7
Receiving a second voice call while MXIE manages multiple calls
MXIE places all calls not previously suspended on hold and answers the incoming call. Figure 5-8
displays the session blocks shortly after the call is answered.
Figure 5-8
Simultaneous voice calls – MXIE manages multiple calls
51
MXIE User’s Manual
Important You must always use MXIE to control multiple calls when For multiple incoming
calls is set to Manage using MXIE for my bound device. Attempting to directly
use the phone to change your call appearance or to place a call on hold will
usually result in disconnected phone calls.
5.3.4.2
Controlling Multiple Calls From Your Phone
You can also manage multiple voice calls from the control panel of your SIP device. This mode
utilizes the call appearances on the device.
To configure MXIE to allow your phone to handle multiple calls, set the For multiple incoming calls
parameter to Manage using the phone on the Device Access Policy preferences window shown in
figure 5-3.
To initiate a voice call while engaged in one or more active voice call sessions, place all calls not
previously suspended on hold by using the hold button on the device, select an unused call
appearance on the device, and dial the new contact. MXIE displays a session control block for the
new session and updates its status as you manage the call from the device. You can also initiate
the new call from MXIE as described in section 5.3.2.
Incoming voice calls, when one or more previous calls are active, generate a MXIE session block
similar to the one shown for David Messenger in figure 5-9. To answer the call, press the Hold
button on your phone, then press the appropriate call appearance button.
Figure 5-9
Receiving a second voice call while the device manages multiple calls
Figure 5-10 displays the session blocks shortly after the call is answered.
Figure 5-10
5.3.5
Simultaneous voice calls – the device manages multiple calls
Conference Calls
A conference call is a simultaneous telephone conversation with more than one person. MXIE
supports conference calls with any device that can handle multiple call appearances. You can
have only one active conference call at a time.
After stating the conference call on MXIE, you manage all other conference call aspects from your
phone.
52
5. Voice Calls
5.3.5.1
Initiating a Conference Call
To perform a conference call on MXIE:
1.
Initiate the Conference call by performing one of the following actions:
•
•
•
2.
Toolbar: Press the Conference icon
Main Menu: Select Actions | Conference
Buddy List: Drag a Buddy Group into the Session List or onto the Conference icon in the
toolbar, then skip to step 3.
Select the conference participants from the User Lookup panel, as described in section C.2
on page 174.
When you press the OK button, MXIE initiates the conference action by lighting one call
appearance on your phone for each participant that you request, then rings your phone to
initiate the calling sequence.
3.
Take your phone off hook. MXIE then calls the first person in your conference list.
4.
After the first person answers your call, press the Conference button on your phone.
MXIE then calls the remaining people on your conference list and begins the conference call.
5.3.6
During the Call
MXIE can perform call control functions on calls that arrive on any device that you can access
regardless of whether it is bound to the MXIE instance. The following are a list of operations that
you can perform during an active call.
5.3.6.1
Hold
The Hold function allows you maintain the state of a call but suspend the conversation. When
you place a call on hold, the other person hears music; you and the other person cannot hear each
other. To resume the conversation, you must retrieve the call from the same phone that you used
to place the call on hold. If you want to retrieve the conversation from a different phone, use the
Park function instead1. Figure 5-11 displays session blocks for a normal call and for a call on hold.
Figure 5-11
Call Hold Session Blocks
To place a conversation on hold from MXIE, perform one of the following actions:
•
•
Session List: press the Hold session control button
Session List: right-click the mouse while the pointer is in the session block of the call and select
hold
1. Park is described in section 5.3.6.5.
53
MXIE User’s Manual
•
•
•
Toolbar: press the Hold icon in the toolbar
Keyboard: type ‘H’ or ‘h’
Other: retrieve or answer another voice call session as described in section 5.3.4.
After you place a call on hold, the phone is silent. Although you still have the phone off hook, the
phone does not provide you with a dial tone and does not automatically reserve a call
appearance.
Important If you place a call on hold from the MXIE, you should not perform any operations
from the phone until you retrieve the call from MXIE. Pressing any phone
buttons during this time (such as a new call appearance button) will disconnect
the first call.
To retrieve a conversation that is on hold from MXIE, perform one of the following actions:
5.3.6.2
•
•
Session List: press the retrieve session control button
•
•
•
Session List: double click on the session block
Session List: right-click the mouse while the pointer is in the session block of the call and select
retrieve
Toolbar: press the Hold icon
Keyboard: type ‘H’ or ‘h’
Call Recording On Demand
Call recording is an MX service that is available to users if the system has an active Call Recording
license and the User is assigned to a profile that permits call recording. Users that are permitted
to record phone calls are also allowed to record calls within their role as an operator. Users cannot
record phone calls in their roles as basic ACD or Hunt Group agents, regardless of the software
licenses installed in your system.
Inbound Call Center agents can record phone calls within their role as an Inbound Call Center
agent, as permitted by the system administrator. Recorded calls are stored in the agent’s user mail
box and is counted against the user’s voice mail capacity allotment. The Call Recording software
license is not required for an Inbound Call Center agent to record calls.
To record a voice call, the RTP stream that carries the conversation must be handled by the MX
system. Calls between two devices that are both on the same MX system may be set up by the
system such that the audio stream flows directly between the devices and bypasses the MX. These
calls cannot be recorded by the MX.
Calls are only recorded in their entirety. Partial calls cannot be recorded.
MXIE roles that are permitted to record calls will display a recording icon on the right side of voice
call session blocks for calls that can be recorded, as shown in figure 5-12.
To record a call, perform one of the following actions:
•
•
54
Session List: press the Call Recording Button
Session List: right-click the mouse while the pointer is in the session block of the call and select
Record and Save Call
5. Voice Calls
Figure 5-12
Session Block with Call Recording Icon
The session block displays an active Call Recording Icon for call recordings that are scheduled
to be saved, as shown in figure 5-19. A call recording is saved to your voice mailbox only if
session block displays the Active Call Recording Icon when the call is terminated.
Figure 5-13
Call Recording Session Block
To prevent the recording of a call, perform one of the following actions:
•
•
Session List: press the Inhibit Call Recording Button
Session List: right-click the mouse while the pointer is in the session block of the call and select
Do Not Record and Save Call
The session block displays the normal call recording icon shown in figure 5-12. When the
session block displays the normal call recording icon at the time the call is terminated, the call
recording will not be saved to your voice mailbox.
To access On Demand Call Recording, see section 10.4.1 on page 120.
Section 10.3.3 on page 118 describes Call Recording functions available through MXIE.
5.3.6.3
Blind Transfer
Transfer operations send your active call to another user or phone number. When performing a
Blind Transfer, you do not speak with the party to whom you are transferring the call.
To perform a blind transfer, perform one of the following actions:
•
•
•
•
•
Session List: right-click the mouse while pointing in the call’s session block and select Transfer
Session List: press the Transfer session control button
Toolbar: press the Transfer icon in the toolbar
Keyboard: type ‘T’ or ‘t’ from your keyboard
Session List: drag and drop the session block of the call to the address book or buddy list
contact that is to receive the transferred call
The first four options generate a Transfer data entry box for specifying the recipient of the
transferred call. The last option specifies the call recipient and does not require the data entry box.
55
MXIE User’s Manual
5.3.6.4
Attended Transfer
An attended transfer differs from a blind transfer in that you speak to the party to whom you are
transferring the call prior to the transfer. Attended transfers are also called merged calls.
To perform an attended transfer:
1.
Call the first party.
2.
Place the first party on hold, using one of the MXIE hold options described in section 5.3.4.1.
3.
Call the second party.
4.
While the cursor points in the session block of the second party, either right-click the mouse
and press the Transfer session control button, or drag and drop the session block to the
desired contact in the buddy list or address book
Right-clicking the mouse provides two transfer options, as shown in figure 5-14. One option
is Transfer, which generates a transfer entry block for specifying the blind transfer recipient
of the Bonnie Hopkins call. The second option is Transfer to user name (user name refers to the
second party), which performs the attended transfer.
In figure 5-14, Bonnie Hopkins was placed on hold while David Messenger was called, then
David Messenger was placed on hold while Adam Pierce was called. The right mouse button was
pressed to generate the options panel. Pressing the Transfer icon (T) or selecting Transfer on the
option panel transfers the Bonnie Hopkins call to David Messenger.
Figure 5-14
5.3.6.5
Attended Transfer session blocks
Park
The Park function allows you maintain the state of a call but suspend the conversation. Park
differs from Hold in that you can retrieve a parked call from any phone on the system.
To park a call, perform one of the following actions:
•
•
•
Session List: right click within the session block and select Park
Session List: drag and drop the voice call session block into the Park Pickup icon in the toolbar
Keyboard: type ‘P’ or ‘p’ from your keyboard
MXIE issues a two-digit call code and a multi-digit parking number in a popup similar to the one
shown in figure 5-15.
The parking number in this figure is 25918. The first three digits, 259, denote the MX park server
extension. This number is configured by the system administrator and may contain a maximum
of eight digits. All parking numbers generated by the MX begin with the park server extension.
56
5. Voice Calls
Figure 5-15
Parking Number Notification
The two-digit call code is identical to the last two digits of the parking number. This code
identifies the individual parked call.
If the parked call is not retrieved within a specified period, the MX will return the call to you. This
specified period is configured by the system administrator.
5.3.6.6
Pickup
To pickup a parked call, perform one of the following actions:
•
Toolbar: Press the Pickup icon to display the Parking panel. MXIE accounts authorized to
view all parked calls displays the panel shown in figure 5-16; otherwise, the Parking panel
displays only the Enter Park ID to pickup call data entry field. To pickup the parked call that
generated the panel in figure 5-15, enter 18 in the Pickup entry box, as shown in figure 5-16.
Figure 5-16
•
Toolbar: Press the Voice Call icon and enter the park number for the call, as shown in figure
5-17.
Figure 5-17
•
Parking Pickup Panel
Picking Up a Parked Call from the Voice Call Entry Box
Main Menu: Select Actions | Voice Call. Enter the multi-digit phone number in the entry box
and press the Call button.
57
MXIE User’s Manual
5.3.6.7
Adding a Contact to the Address Book
To add the person on the other end of your call to the MXIE phone book:
•
Session List: Right click the session block and select Add to Address Book.
You can use this method to add contacts to your buddy list. MXIE cannot display the presence of
any contact that you add through this method, even if the added contact is a user on your system.
5.3.7
Terminating the Connection
MXIE provides the following methods of terminating a voice call:
•
•
•
•
•
5.4
Session List: right-click the session block and select Disconnect
Session List: Press the Disconnect button in the session block.
Toolbar: Select the Disconnect icon.
SIP Device: Place the device on hook.
Keyboard: type ‘D’ or ‘d’ from your keyboard
Softphone
The MXIE Softphone allows you to perform voice calls through MXIE without using a hardware
device. The Softphone utilizes MXIE call appearances for handling individual calls and provides
the full set of telephone features offered through MXIE. Figure 5-18 displays the MXIE window
with Softphone active.
5.4.1
Features
The Basic MXIE Softphone provides the following features:
•
•
•
•
G.711 µ-law and G.711 A-law codecs
DTMF keypad interface
Mute button
Most MXIE calling functions including call transfer, hold, and park
An Advanced MXIE License is required to run the Advanced MXIE Softphone. The Advanced
MXIE Softphone includes all basic features plus the following:
•
•
•
•
G.729A and G.729AB codecs
Voice Encryption
Do Not Disturb (DND)
Call Conferencing
The Softphone Preferences panel (described in section 5.4.7) describes the method of selecting a
preferred codec for your calls.
58
5. Voice Calls
Figure 5-18
5.4.2
Softphone on the MXIE
System Requirements
The minimum PC requirements for running MXIE, shown in figure 1-1 on page 3, also describes
the minimum Softphone requirements for the PC components that are listed. In addition to these
components, using the Softphone requires that your PC is equipped with the following
hardware:
•
•
•
Sound card with Windows 2000 or XP drivers
Multimedia headset or multimedia PC speakers
PC microphone (may be included on multimedia headset)
MS Windows provides a Sound Recorder utility for recording through your microphone and
playing back sound through the speakers. You can verify the quality of sound recordings made
through your computer, independent of the Softphone, through this utility. On most computers,
you access the Sound Recorder utility by selecting Programs | Accessories | Entertainment |
Sound Recorder from the Start Button.
5.4.3
Binding MXIE to the Softphone
To initiate and receive calls on the Softphone, you must bind the Softphone to your MXIE
instance. Regardless of the number of MXIE instances that are open on your computer, you can
bind the Softphone to only one MXIE instance at a time.
59
MXIE User’s Manual
To bind MXIE to your Softphone, access the Bind a Phone window by selecting File | Bind To
from the main menu, then select the Bind to internal Softphone radio button. The internal
Softphone, when bound to MXIE, acts as a managed device with the device ID set to your user
ID. When a MXIE instance is bound to the Softphone, MXIE displays the Softphone keypad
directly below the Presence bar, as shown in figure 5-18. All of your registered contacts will
continue to ring normally when you have incoming calls while you are bound to the Softphone.
When using the Softphone for making multiple calls, MXIE handles all multiple incoming call
options regardless of the Device Access Policy preference setting. Refer to section 5.2.5.2 on page
47 for details on how MXIE handles multiple calls.
5.4.4
The Softphone Keypad
The keypad has twelve keys and three function buttons. The keys, labelled 0 to 9, *, and #, are
used to send DTMF tones to the other party of your voice session. These keys are inactive until
you establish a voice call and cannot be used to dial another party. The three function buttons
perform the following operations:
5.4.5
•
Conference: Press this button to initiate a conference call. Section 5.3.4 describes the process
of establishing a conference call on MXIE.
•
DND: Press this button to place the Softphone in Do Not Disturb mode. Calls received by the
Softphone while in Do Not Disturb mode are managed with call handling rules that are
triggered by the any incoming call or no answer events. Section 5.5.2 on page 63 for a description
of call handling rules.
•
Mute: Pressing this button disconnects the microphone input, preventing the person on the
other side of the conversation from hearing you. When Mute is active, you can still listen to
the other person.
Using the Softphone
All Softphone functions are performed through the MXIE interface. Refer to section 5.3 on page
47 for instructions on initiating, receiving, and handling voice call sessions through MXIE.
5.4.6
Encryption
The Softphone supports encryption for voice calls sent over the LAN. Encryption allows you to
transmit conversations without being monitored by unauthorized personnel. You can encrypt a
Softphone call if the MX is configured to allow encryption and if all devices in the conversation
support encryption.
60
•
To enable encryption on your voice call, right click the session block for the call and select
Encrypt. If your attempt to encrypt the call is successful, the session block for the call will
display the first three bytes of the encryption key. If the encryption attempt is not successful,
a popup message appears in the bottom right corner of your monitor.
•
To disable encryption on your voice call, right click the session block and select Encrypt. The
three byte encryption key will disappear from the session block.
5. Voice Calls
5.4.7
Softphone Preferences
Softphone Preferences panel, shown in figure 5-19, designates a codec that the MXIE Softphone
initially uses when negotiating communication settings prior to a voice call session. You can also
set a software switch to eliminate acoustic echo and program the software to use separate audio
devices when performing different functions.
To open the Softphone Preferences panel, open the User Preferences window by selecting
File | Preferences from the main menu, then select Softphone in the panel directory.
5.4.7.1
Preferred Codecs
This section specifies the codec that your system utilizes when speaking on the internal
softphone. Codec setting changes take effect only when the Softphone is on hook.
Figure 5-19
•
Softphone Preferences panel
G.711 µ-law and G.711 A-law: G.711 is the standard for encoding telephone audio on an 64
kbps channel. These settings provide toll grade voice and are the preferred settings when the
Softphone is connected to another LAN user.
G.711 µ-law is normally used in the United States, Canada, and Japan.
G.711 A-law is the standard for international circuits.
•
G.729A and G.729AB: G.729 is the standard for encoding speech signals at 8 kbits/sec. G.729
produces quality voice sound in most situations while conserving bandwidth. These codecs
are preferred when connected to parties on the WAN or internet where limiting bandwidth
may be a concern.
G.729A is the reduced complexity version of G.729.
G.729AB utilizes Voice Activity Detection / Comfort Noise Generation.
61
MXIE User’s Manual
5.4.7.2
Acoustic Echo Cancellation
Select this option to activate a software switch within the phone that reduces or eliminates any
echo that you hear. Under normal conditions, when you cannot detect an audio echo, this option
should not be enabled because the additional required processing may cause jitter or data loss.
5.4.7.3
Audio Devices
The Audio Devices section determines which audio hardware the Softphone will use during its
operation. If your PC has multiple audio cards, this panel allows you to program the phone to use
a different card for each function.
Figure 5-20
Softphone Audio Parameters Preference panel
This option allows you conduct a conversation through a headset connected to one audio card
while playing the ring tone through external speakers connected to another audio card. This
configuration allows you to listen for a ring tone without wearing the headset.
5.4.7.4
Button Bar
Press the OK button to enable the changes to all User Preference panels and exit the window.
Press the Apply button to enable the changes to all User Preference panels without exiting the
window.
Press the Cancel button to discard changes to all User Preference panels and exit the window.
62
5. Voice Calls
5.5
Handling Incoming Calls
5.5.1
Introduction
MXIE uses a call handling plan to manage incoming calls that you do not answer. The call
handling plan comprises rules that determine the MX response to busy and unanswered calls on
the basis of your call handling status, presence state, the call source, and the time, day, and date
of the call.
This first part of this section describes the structure and creation of call handling rules, followed
by a discussion of combining these rules to create a call handling plan.
5.5.2
Call Handling Rules
Call handling rules evaluate an incoming call and determine the MX reaction on the basis of the
call characteristics. Each Call Handling Rule comprises three elements: an event trigger, a set of
filtering conditions, and a call handling action. When the call matches the event trigger and
filtering conditions, the call handling action determines the call disposition.
Call Handling Rules are created and edited in the Call Rule Editor window, shown in figure 5-21.
To access the Call Rule Editor, select File | Preferences from the main menu, select Call Handling,
then press the New or Modify button in the Call Handling preferences window.
The Call Rule Editor comprises the four following sections:
•
•
•
•
5.5.2.1
Rule: This section configures the rule name.
Check Events Triggering the Rule: This section specifies the rule triggers.
Check Conditions you want to apply to this rule: This section specifies the rule filters.
Rule Description: This section specifies the rule action and parameters of selected filters and
triggers. All underlined text in this section links to dialog panels that configure the trigger,
filter, or action referenced by the text.
Rule Name
The rule name is the label that identifies the rule within its call handling plan. To configure the
name of a call handling rule, enter text in the Rule data entry box at the top of the Call Rule Editor
window, as shown in figure 5-21.
5.5.2.2
Event Triggers
The event trigger determines the type of call that activates a call handling rule. MX rules use these
triggers:
•
When I am using the phone: triggered by receiving an incoming call when you are in a voice
call.
•
•
No Answer: triggered by an incoming call that is not accepted within a specified time.
Any Incoming Call: triggered by any incoming call.
Rule triggers are selected from the Check events triggering the rule section of the Call Rule Editor.
63
MXIE User’s Manual
Figure 5-21
Call Rule Editor
A call rule may simultaneously select the when I am using the phone and the no answer condition
to block a call that is either received while you are in a voice call or is not answered. This
combination allows you to answer a call within a specified time, whereas the Any Incoming Call
condition is immediately triggered by an incoming call.
To select an event trigger, mark the corresponding box with a check mark (tick) in the Call Rule
Editor. When you enable the No Answer trigger, the Rule Description panel states “Apply this rule
when no answer After (please, specify) seconds”, as shown in figure 5-22. To indicate the time that
MXIE should wait before using this event to trigger the rule, click anywhere in the underlined
area and enter the time in the dialog panel.
Figure 5-22
Call Rule Editor – Event Triggers
Figure 5-22 displays the Call Rule Editor when the when I am using the phone and the no answer
conditions are selected. If Any incoming call is selected, the other two trigger options are greyed
out (not available) and the Rule Description states “Apply this rule for any incoming call”.
64
5. Voice Calls
5.5.2.3
Filtering Conditions
Filtering conditions specify additional criteria under which a triggered call is managed by the
rule. The MX applies a call handling rule to a call only if all selected triggering and filtering
conditions apply to the call. The MX defines the following filtering conditions:
•
My Presence: this condition filters a call if, at the time the call is received, your presence
matches the presence specified by this parameter.
•
Call From: this condition filters a call if it matches the phone number or user ID of the calling
party.
•
•
•
Date Range: this condition filters a call if it matches the date that the call is received.
Time of Day: this condition filters a call if it matches the time of day that the call is received.
On Days of Week: this condition filters a call if it matches the day of the week that the call is
received.
•
Holidays: this condition filters a call if the call is received on a day that was defined as a
holiday by the system administrator.
•
My Location is: this condition specifies the MX Group system to which you must be logged
into in order for the call handling rule to be valid. This option is available only if your system
is a member of an MX Group.
A call rule may use more than one filtering condition; in this case, a call rule matches the call only
if the call satisfies each filtering condition.
To select an event filter, mark the corresponding box with a check mark in the Call Rule Editor.
All filters except Holidays require the configuration of supporting parameters in the Rule
Description panel. Figure 5-23 displays the bottom half of the Call Rule Editor when all of the
filtering conditions are selected. The Rule Description section of this window lists the condition
value specifiers for each condition; click on the underlined text to access the dialog panels that
sets these values. The Call Rule Editor will not save the rule until you have assigned a value to
each underlined parameter in the Rule description section.
Figure 5-23
5.5.2.4
Call Rule Editor – Filtering Conditions
Call Handling Action
The call handling action defines the method that the rule uses to dispose of a call that matches the
trigger and filtering conditions. Call handling actions include:
65
MXIE User’s Manual
•
Forward to: this action routes the call to a specified extension, user ID, or telephone number.
Calls that are forwarded to another number are not counted by the Missed Call Indicator text
(see section 3.1.6 on page 20).
Important Do not configure the Forward to action to route calls to emergency phone
numbers. MXIE and the MX do not verify that Forward to numbers do not
improperly contact emergency service providers.
•
Forward to Voice Mail: this action routes the call immediately to voice mail.
Calls that are sent to voice mail are counted by the Message Indicator text (see section 3.1.7 on
page 20).
•
Reject: this action rejects the incoming call; the caller hears the fast busy signal when this
action is enabled. Calls that are rejected are not counted by the Miss Call Indicator text.
To select a call handling action, click on the text that states Select specific action, as shown in
figure 5-23. This accesses the Call Handling Action dialog panel shown in figure 5-24. Selecting
Forward to requires the entry of an extension, address, or telephone number in the
corresponding data entry box. Selecting Reject generates the following warning: “You are setting
up a call handling rule which will reject calls. All calls matching this rule will be dropped by the system
without notification”.
Figure 5-24
Call Handling Action dialog panel
5.5.3
Call Handling Plan
5.5.3.1
Description
Call handling plans manage incoming calls that you do not answer. Each call handling plan
comprises Call Handling Rules that determine the MX reaction to unanswered calls.
Figure 5-25 displays a list of call handling rules that make up a call handling plan. Each rule is
assigned a precedence rank. The MX begins to evaluate the Call Handling Plan with the highest
ranking call rule. If the conditions defined by the call handling rule match the incoming call, the
call rule action determines the disposition of the call. If the conditions defined by the call rule do
not match the incoming call, the Call Handling Plan evaluates the call against its next highest
ranking call rule.
The Call Handling Plan continues evaluation process until the incoming call matches a call rule
or until the call is evaluated against all of the call rules. If the call does not match any call rules, or
if there are no active call rules, the call is routed to voice mail as designated by the Administrator
UI.
66
5. Voice Calls
5.5.3.2
Call Handling Preference window
The Call Handling Plan for a MXIE instance is configured in the Call Handling Preference
window, as shown in figure 5-25. To access this window, select File | Preferences from the main
menu and select Call Handling in the panel directory. This window comprises three sections: Call
handling rules available, Show rules for location, and Rule description.
Figure 5-25
Call Handling Preferences panel
The Call handling rules available section lists all of the call handling rules configured within the
MXIE instance. Rules are listed in order of their precedence rank. Components of this panel that
support the creation of call handling rules and plans include:
•
Selection box: A selection box is located to the left of each call handling rule. The Call
Handling Plan only includes Call Handling Rules that have marked selection boxes. Rules that
are not marked are disregarded when the Call Handling Plan evaluates an incoming call. Click
this box to enable or disable the rule.
•
Precedence rank: The precedence rank appears next to a rule’s selection box and determines
the order that a rule is evaluated against incoming calls. Rules are listed in order of their
precedence rating, with the highest ranking rules at the top. The Up and Down buttons edit
the precedence rank of the highlighted rule.
An icon next to the precedence rank indicates that the rule is valid for only one MX location.
In figure 5-25, rule #3 is valid only for the Sunnyvale: Vaqueros location.
•
Edit Buttons: Located to the right of the call handling rules, the button bar accesses the Call
Rule Editor and modifies the precedence ranking of the available call handling rules.
— New: This button opens the Call Rule Editor to create a new rule.
— Modify: This button opens the Call Rule Editor to edit the highlighted call handling rule.
— Delete: This button removes the highlighted call handling rule from the list.
— Up: This button moves the highlighted rule higher in the list, increasing its precedence
ranking.
67
MXIE User’s Manual
— Down: This button moves the highlighted rule lower in the availability list, decreasing its
precedence ranking.
The Show Rules for Location displays the MX Group location for which the listed call rules are
valid. Each call handling rule can specify an MX system from where the rule is valid. For instance,
if you log into MXIE from the Sunnyvale system, the only valid call handling rules are those that
specify a From Location condition value of Sunnyvale, and those that do not specify any From
Location value.
To display the call handling rules that are valid for a specific system, select that system in this data
entry box. Select all locations to view all of your call handling rules.
The Rule Description section displays the components of the highlighted Call Handling Rule. You
can edit call rule trigger, filter, and action settings that are underlined in this section. This section
is identical in appearance and function to the Rule Description section of the Call Rule Editor
described in section 5.5.2 on page 63.
To add new filtering conditions or to change the event trigger, access the Call Rule Editor by
pressing the Modify button.
5.6
Emergency Calls
When a user dials a number that is recognized by the MX dial plan as an emergency call, MXIE
displays the Emergency Calls panel, as shown in figure 5-26, to all active operators.
Figure 5-26
68
Emergency Calls panel
Chapter 6
Video Calls
6.1
Video Call
Video Calling is not currently supported.
69
MXIE User’s Manual
70
Chapter 7
Operators and ACDs
7.1
Introduction
In addition to logging into MXIE through your user role, you can also log into MXIE as an agent
of any ACD, Hunt, Inbound Call Center, and Operator Group to which you are assigned. MXIE
opens a role partition for each group to which you login, as described in section 3.1.4.1 on page
13. MXIE provides features for ACD agents and operators that either differ to those available to
users or are not available to users. This chapter describes some of the features that are available to
members of Operators, ACD agents, Hunt Group agents, and Inbound Call Center agents.
Section 1.2 on page 2 defines the different types of MX roles available through MXIE. Section 2.3.2
on page 7 describes the User Role panel, which displays the groups to which you are assigned and
provides access to those group resources.
7.2
Operator and ACD Features
The availability and appearance of standard MXIE features differ for the various roles. This
section summarizes these differences and refers to manual sections that describe these features in
detail.
7.2.1
Buddy List
Buddy lists for operators contain the name of every system user, allowing an operator to quickly
access any member of the enterprise. Users cannot be added or deleted from the operator role
buddy list.
Buddy lists for ACD, Inbound Call Center, and Hunt Group agents contain all agents of the group.
Agent buddy lists cannot be edited and agents cannot block their presence state from other agents
of the group.
Section 3.1.5.1 on page 17 describes the buddy list contents for each MX role.
7.2.2
Presence State
The MX defines a different set of presence states for each role type. Available presence states for
each operator and agent role include:
•
•
•
Operators: Available, Not Available, On the Phone, Logged Off
ACD and Inbound Call Center agents: Available, Not Available, Active, Wrap Up, Logged Off
Hunt group agents: Available, Active, Logged Off
71
MXIE User’s Manual
Section 8.2 on page 89 describes the presence states and the rules that control the transitions into
these states for each role type.
7.2.3
Call Recording
Call recording is an MX service that is available to individual users and Inbound Call Center
agents. On Demand Call Recording is initiated by a user, agent, or Inbound Call Center
supervisor to save a recording of a current call. Automatic Call Recording is configured by a
system administrator to save all recordings of specific agents.
Section 10.3.3 on page 118 describes MXIE Call Recording.
7.2.4
Callback
The MX Voice Mail system provides an option that allows callers who are unable to reach an
operator, ACD agent, or hunt group agent to leave a phone number. This callback number is
inserted into a panel that is accessible by members of the group that received the call.
When a caller is unable to connect to a member of any group, the voice mail system allows the
caller to leave either a voice mail message or a callback number. After the caller leaves a callback
number, a callback icon appears in the partition header of each member of the group that is
logged onto MXIE. The callback icon remains on the partition header until one member of the
group accesses the Callback panel. In figure 7-1, a callback icon appears on the right side of the
Front_Desk operator partition.
Figure 7-1
72
Operator Role Partition Header with Callback Icon
7. Operators and ACDs
To access the Callback panel, press the Callback icon. When any group member presses the icon,
it is removed from the partition header of all members of the group.
Figure 7-2
7.2.4.1
Callback panel
Callback Number
The callback number is located at the top of the panel, as shown in figure 7-2. Press the Dial
button to execute the call.
7.2.4.2
Callback Result
The callback result table is located below the callback number. CDR reports that provide callback
activity are based on the options selected by agents as they attempt callbacks. Select the radio
button that describes the result of the call. The final resolution of the callback procedure depends
upon the result of the callback:
•
OK: Select this button if the callback was successfully completed. When you press the Done
button, the panel is removed permanently for this callback instance.
•
Busy: Select this button if the callback resulted in a busy signal. When you press the Done
button, the panel is removed for five minutes, after which the Callback icon for this call
reappears on the partition header of all logged in group members.
•
No answer: Select this button if the callback was not answered. When you press the Done
button, the panel is removed if there are no other callback requests.
The Callback icon for this call reappears on the partition header of all logged in group
members if the callback is not answered within the time period specified by the Redial
parameter.
•
Wrong number: Select this button if you were unable to reach the callback party because the
wrong number was entered into the callback panel. When you press the Done button, the
panel is removed permanently for this callback instance.
73
MXIE User’s Manual
7.2.4.3
•
Number does not exist: Select this button if you were unable to reach the callback party
because the callback panel lists a number that is not in service. When you press the Done
button, the panel is removed permanently for this callback instance.
•
Fax machine: Select this button if the callback number was answered by a fax machine. When
you press the Done button, the panel is removed permanently for this callback instance.
•
Answering machine: Select this button if the callback was answered by an answering
machine. Enter the redial period in the entry boxes below the Callback Result table. When you
press the Done button, the panel is removed for the period of time specified by the redial
parameter, after which the Callback icon for this call reappears on the partition header of all
logged in group members.
•
Wrong person: Select this button if the callback reached the right phone number but the
person that left the callback message is unavailable. When you press the Done button, the
panel is removed for the period of time specified by the redial parameters, after which the
Callback icon for this call reappears on the partition header of all logged in group members.
Redial
The Redial parameter specifies the period between the unsuccessful resolution of callback and the
reappearance of the Callback icon on the MXIE window of all agents logged into the group.
Unsuccessful results for which the Callback will reappear includes Busy, No Answer, Answering
Machine, and Wrong Person.
7.2.4.4
Done button
Pushing an active Done button removes the Callback panel. Pushing an inactive Done button has
no effect on the panel, which forces the agent to actively resolve the callback request.
The Done button is activated by one of the following:
•
•
•
7.3
selecting Wrong number
selecting Number does not exist
pressing the Dial button
Inbound Call Center Groups
Inbound Call Center groups provide features that are not available to ACD, Operator, or Hunt
groups. These features include:
•
Call queues advanced features: Inbound Call Center queues can be configured to control the
queue length, overflow routing, and play message to callers upon entering the queue and
while waiting in the queue. Callers to ACD groups, hunt groups, and operators are sent to
queues that provide none of these advanced features.
Call queue features are configured from the MX Admin User Interface.
•
•
74
Supervisors: Supervisors have the ability to monitor calls and maintain the call queue.
Monitors: Monitors are MXIE panels that display queue contents, callback requests, calling
statistics, and ACD agent summaries.
7. Operators and ACDs
•
Call Recording: Inbound Call Center calls can be recorded automatically, at the request of the
agent on the call, or at the request of the supervisor. ICC Call recording is discussed in section
7.3.4 on page 85.
Figure 7-3 displays the MXIE window for a user that belongs to two ACD groups. The session
block is active for the Sales basic ACD group. The session block is inactive for the Tech_Support
Inbound Call Center group. The arrow icon on the left side of the session control block indicates
that Tech_Support is an Inbound Call Center group. The Supervisor text that is right of the arrow
icon indicates that Bonnie Hopkins has supervisor rights for the group.
Figure 7-3
7.3.1
MXIE Window for a User assigned to Multiple ACD Groups
Call Queues
Inbound Call Center groups provide a queue for callers when there are no available agents within
the group. Callers are typically routed to agents that become available in the order that they
entered the queue; supervisors can move a caller’s position within the queue or assign the caller
to a specific agent. The MX call queue can handle a maximum of sixty callers, regardless of the
number of Inbound Call Center groups configured on your system. Calls that are received by an
Inbound Call Center group when the queue is full are handled as specified by the system
administrator. Queue characteristics are configured by the system administrator through the MX
Admin User Interface. Features that are available to an Inbound Call Center queue include:
•
•
•
music on hold for waiting callers
•
call handling rules based on criteria such as queue length, average wait time, and overflow
options
custom audio recordings for callers as they enter, leave and wait in the queue
caller options for leaving the queue; callers can dial “0” to re-route their call or “#” to leave a
voice mail
75
MXIE User’s Manual
•
7.3.2
queue monitor functions, as described in section 7.3.3.
Supervisor Functions
One or more agents of an Inbound Call Center group can be assigned as supervisors by the
system administrator. The following sections describe supervisor capabilities that are not
available to other agents of the group.
7.3.2.1
Monitoring Agent Activity
The Agent Monitor, described in section 7.3.3.1, allows a supervisor to quickly observe the
presence status of each agent in the group and the details of calls that busy agents are handling.
The Agent Statistics panel (section 7.3.3.5) provides cumulative agent activity, including the
number of calls handled by the agent, talk time, callbacks, and login statistics. The Group Statistics
Monitor (section 7.3.3.4) lists the cumulative activity of all group agents.
In addition to monitoring agent activity, supervisors can log individual agents out of an Inbound
Call Center group, record agent phone conversations, and assign specific calls to an agent from
the Agent Monitor panel.
7.3.2.2
Agent Call Intervention
Call intervention tools allow supervisors to assist agents as they handle calls to the queue. The
following options are provided from the Agent Monitor panel:
7.3.2.3
•
Silent Monitor: This tool allows the supervisor to listen to both sides of an agent’s call without
either party being aware of the supervisor’s presence.
•
Whisper: This tool allows the supervisor to listen to both sides of an agent’s call and to speak
to the agent during the call. The other party in the conversation is not aware of the
supervisor’s intervention. This feature is not supported in version 3.0.
•
Barge-In: This tool allows the supervisor to speak to both parties of an agents call, similar to a
three way conference. The call between the agent and the other party is normally resumed
when the supervisor leaves the conversation.
Supervisor Preferences
The Supervisor Preferences panel, shown in figure 7-4, configures the content of the Supervisor
menu on the main menu and the appearance of agent presence status icons on the supervisor
monitor panels. To open the Supervisor Preferences panel, open the User Preferences window by
selecting File | Preferences from the main menu, then select Supervisor in the panel directory. This
option is only available if you are logged into an agent role as a Supervisor.
76
•
Agents Status: This option controls the display of agent presence states on all supervisor
panels. Access the drop down menu to select Picture only, Picture and Text, or Text only.
•
Wallboard: This option specifies the Excel file that MXIE uses to prepare and display the
presentation of Inbound Call Center statistical information. Section 7.3.5 on page 86 describes
the MXIE wallboard function.
7. Operators and ACDs
Figure 7-4
7.3.3
Supervisor Preferences panel
Monitors
Monitors are MXIE panels that display queue contents, callback requests, calling statistics, and
agent summaries for Inbound Call Center groups. The Queue Monitor and Callback Monitor is
available to all agents and supervisors of a group. The Agent Monitor, Agent Statistics panel, and
Group Statistics panel are available only to the supervisors of a group.
7.3.3.1
Agent Monitor
The Agent Monitor is an Inbound Call Center feature that displays the members of the ACD
group and their current activity. All supervisors of an Inbound Call Center group can access the
Agent Monitor. To access this panel, as shown in figure 7-5, select Supervisor | Agent Monitor
from the main menu or press the arrow located left of the Supervisor text on the partition header.
Agent Presence Summary. The top section of the panel displays a presence summary of the
agents of the Inbound Call Center group. The load indicator bar, located on the right side of this
section, is a graphic presence summary:
•
•
•
The green bar represents the percentage of agents that are available.
The yellow bar represents the percentage of agents that are busy or in wrap up state.
The grey bar represents the percentage of agents that are logged out.
This section also displays the number of callers waiting in the Inbound Call Center queue.
Show Only Agents Logged In. This parameter determines the agents that are displayed in the
agent monitor. Select this option to display only agents that are logged into MXIE. When this
option is not selected, the Agent Monitor displays all agents of the group.
77
MXIE User’s Manual
Figure 7-5
Agent Monitor panel
Agent List. The Agent List is located below the Show Only Agents Logged In option. Each row in
the table lists one agent. You can sort the list by clicking on the column header of the desired sort
key. The following columns list the agent properties:
•
•
•
•
Presence (untitled column): This column displays the agent’s presence state.
Extension: This column displays the agent’s user extension.
Name: This column displays the user names of the agents.
Caller ID: This column displays the Caller ID of the caller to whom the agent is
communicating.
•
Type: This column displays an icon for each agent session. This icon displays the type of
session (voice call, chat, or fax) and the initiation direction of the session.
•
•
Length: This column displays the duration of the current sessions.
State: This column displays the call state. Parameter values include ringing, active, hold,
connected, or conference.
Supervisor Queue Menu. The supervisor queue menu, located on the left side of the panel next
to the agent list, displays icons that access tools for monitoring the agents. The queue icons, as
shown in figure 7-6, perform the following functions:
Figure 7-6
78
Agent Queue Menu
•
Silent Monitor: Press this icon to listen to the call involving the selected agent. During the
silent monitor, the supervisor’s microphone is muted; the agent and the call are not aware that
the supervisor is listening to the call.
•
Barge In: Press this icon to join the conversation between the agent and the caller. All parties
are aware of the supervisor’s presence in the conversation.
7. Operators and ACDs
7.3.3.2
•
Call Recording: Press this icon to record the conversation between the selected agent and the
caller.
•
Forced Logout: Press this icon to log out the selected agent.
Queue Monitor
The Queue Monitor is an Inbound Call Center feature that displays the list of callers that are
waiting in the ACD queue to speak to an agent. All agents and supervisors of an Inbound Call
Center group can access the Queue Monitor that displays the caller list. The queue monitor that
is available to supervisors displays, in addition to the caller list, group presence statistics and
supervisor icons to maintain the caller queue.
Queue Monitor Parameters – Agent panel. The Queue Monitor panel that is available to agents,
shown in figure 7-7, displays the queue of waiting callers. To access this panel, press the arrow
located left of the Agent text on the partition header.
Figure 7-7
Queue Monitor – Agent panel
Each row in the table lists one caller. The table lists the callers in the order when they are
scheduled to talk with an agent. The following columns list the properties of the callers:
•
Priority: This number specifies the order in which calls in the queue will be routed to available
agents. Priority numbers range from 0 (lowest priority) to 10 (highest priority) and are
assigned by a supervisor of the group.
•
Wait Time: This column displays the time that the caller has been waiting to speak with an
agent.
•
•
Caller ID: This column lists caller ID of the waiting caller.
Assigned To: This column specifies the time of the agent that is assigned to speak with the
caller. The group supervisor makes these assignments.
Queue Monitor Parameters – Supervisor panel. The Supervisor Queue Monitor, shown in figure
7-8, displays the queue of waiting callers (as shown to ACD agents), a summary of ACD agent
presence status, and an icon menu for performing maintenance tasks on the list. To access this
panel, select Supervisor | Queue Monitor from the main menu or press the arrow located left of
the Supervisor text on the partition header.
The Agent Presence Summary at the top section of the panel displays a presence summary of the
agents of the Inbound Call Center group. The load indicator bar, located on the right side of this
section, is a graphic presence summary:
•
The green bar represents the percentage of agents that are available.
79
MXIE User’s Manual
Figure 7-8
•
•
Queue Monitor – Supervisor panel
The yellow bar represents the percentage of agents that are busy or not available.
The grey bar represents the percentage of agents that are logged out.
This section also displays the number of callers waiting in the Inbound Call Center queue.
The supervisor queue menu, located on the left side of the panel next to the caller queue, displays
icons that access tools for managing the caller queue. The queue icons, as shown in figure 7-9,
perform the following functions:
Figure 7-9
•
•
•
•
•
7.3.3.3
Queue Monitor Menu
Priority: Press this icon to increment the priority number of the highlighted call.
Pick up: Press this icon to talk directly with selected caller.
Assignment: Press this icon to assign the selected caller to a specific agent.
Voice Mail: Press this icon to send the selected caller directly to group voice mail.
Transfer: Press this icon to send the selected caller to another party.
Callback Monitor
The Callback Monitor is an Inbound Call Center feature that displays the list of pending callback
requests. All agents and supervisors of an Inbound Call Center group can access the Callback
Monitor that displays the requests and a status summary of the callback requests. The callback
monitor that is available to supervisors displays, in addition to the callback requests and the status
summary, group presence statistics, and supervisor icons to maintain the callback queue.
Callback Monitor Parameters – Agent panel. The Callback Monitor panel that is available to
agents, shown in figure 7-10, displays the callback request queue. To access this panel, press the
arrow located left of the Agent text on the partition header.
The top section in the panel summarizes the content of the callback monitor list.
80
7. Operators and ACDs
Figure 7-10
Callback Monitor – Agent panel
•
Pending Callback Requests: This parameter lists the number of callback requests that are
ready to be attempted now. The Next Dial Attempt for these callbacks is blank.
•
Scheduled Callback Requests: This parameter lists the number of callback requests that are
scheduled to be attempted at a future time. The Next Dial Attempt parameter specifies the
scheduled time.
•
Callback Requests – Total: This parameter lists the total of all callback requests; this total is the
sum of Pending Callback Requests and Scheduled Callback Requests.
Each row in the table lists one callback request. The table lists the callback requests in the order in
which they are scheduled to be attempted. The following columns list the properties of that
callback requests:
•
•
•
Call To: This column identifies the caller ID of the individual that requested the callback.
Request Time: This column lists the time that the caller requested the callback.
Next Dial Attempt: This column specifies the time that the system will alert agents to perform
the next callback attempt. Callback requests remain in this list until an agent performs an
attempt.
This parameter is blank for pending callback requests; a pending callback request is presented
to all available agents when it reaches the top of the list. See Callback for more information. At
that time, the Next Dial Attempt parameter is blanked and the Callback Attempt is pending.
•
Last Dial Attempt: This column specifies the time of the most recent callback attempt to the
caller.
•
Last Result: The agent that performs a callback attempt logs the result of that attempt in the
Callback panel. This column displays that result.
•
Made By: This column lists the name of the agent that performed the most recent callback
attempt.
Callback Monitor Parameters – Supervisor panel. The Supervisor Callback Monitor, shown in
figure 7-11, displays the callback request queue (as shown to ACD agents), a summary of ACD
agent presence status, and an icon menu for performing maintenance tasks on the list. To access
this panel, select Supervisor | Callback Monitor from the main menu or press the arrow located
left of the Supervisor text on the partition header.
The Agent Presence Summary at the top section of the panel displays a presence summary of the
agents of the Inbound Call Center group. The load indicator bar, located on the right side of this
section, is a graphic presence summary:
•
The green bar represents the percentage of agents that are available.
81
MXIE User’s Manual
Figure 7-11
•
•
Callback Monitor – Supervisor panel
The yellow bar represents the percentage of agents that are busy or not available.
The grey bar represents the percentage of agents that are logged out.
This section also displays the number of callers waiting in the Inbound Call Center queue.
The supervisor callback menu, located on the left side of the panel next to the callback request
queue, displays icons that access tools for managing the callback request queue. The callback
icons, as shown in figure 7-12, perform the following functions.
Figure 7-12
7.3.3.4
Callback Monitor Menu
•
•
Priority: Press this icon to move the selected callback request one position higher in the queue.
•
•
Schedule: Press this icon to reschedule the selected callback request.
Callback: Press this icon to attempt the selected callback request. MXIE displays the Callback
panel; press Dial to attempt the callback.
Delete: Press this icon to remove the selected callback request from the callback request queue.
Group Statistics
The Group Statistics panel is an Inbound Call Center feature that displays the current and
cumulative activity level of agents in the ACD group. All supervisors of an Inbound Call Center
group can access the Group Statistics panel. To access this panel, as shown in figure 7-13, select
Supervisor | Group Statistics from the main menu or press the arrow located left of the
Supervisor text on the partition header.
Agent Presence Summary. The top section of the panel displays a presence summary of the
agents of the Inbound Call Center group. The load indicator bar, located on the right side of this
section, is a graphic presence summary:
•
•
82
The green bar represents the percentage of agents that are available.
The yellow bar represents the percentage of agents that are busy or not available.
7. Operators and ACDs
Figure 7-13
•
Group Statistics panel
The grey bar represents the percentage of agents that are logged out.
This section also displays the number of callers waiting in the Inbound Call Center queue.
Statistics Table. The bottom section of the panel lists the current and cumulative activity level of
agents in the group. All cumulative statistics are reset daily, as configured from the MX Admin
User Interface.
•
Total Number of calls in queue: This parameter displays the number of callers sent to the
queue since the daily reset.
•
Maximum number of calls in queue (at one time): This parameter displays largest number of
callers that were waiting in the group queue at one time. This parameter is reset daily.
•
Outbound calls (connected): This parameter displays the number of calls that were initiated
by ACD agents since the daily reset.
•
Call answered: This parameter displays the number of calls that have been answered by ACD
agents since the daily reset.
•
Calls transferred to voice mail: This parameter displays the number of calls that have been
transferred to voice mail since the daily reset.
•
•
•
Calls transferred to external number:
•
Calls sent to queue overflow: This parameter lists the number of calls that were received by
the ACD group when the queue was full. These calls were either forwarded, sent to voice mail,
or disconnect, as specified by the system administrator.
Disconnected Calls
Calls abandoned from queue: This parameter lists the number of callers that have abandoned
their calls while waiting in the queue since the daily reset.
83
MXIE User’s Manual
7.3.3.5
•
Total talk time: This parameter lists the cumulative talk time of all ACD agents since the daily
reset.
•
•
Average talk time: This parameter lists the average time per call since the daily reset.
•
Average wait time for answered calls: This parameter lists the average time, for all calls
answered by an ACD agent, that a caller had to wait before talking to that agent.
•
Average wait time for abandoned calls: This parameter lists the average time, for all
abandoned calls, that a caller waited for an agent before terminating the call.
•
•
Average Wait Time for all calls:
•
•
•
•
•
Successful callback requests made by agents:
Maximum wait time: This parameter lists the maximum time that a caller waited to talk to an
ACD agent before the call was either answered by the agent or terminated by the caller.
Inbound callback requests from customers: This parameter lists the number of callers that
have requested callbacks since the daily reset.
Unsuccessful callback requests made by agents:
Average hold time
Maximum hold time
Total hold time:
Agent Statistics
The Agent Statistics panel is an Inbound Call Center feature that displays the current and
cumulative activity level of each agent in the ACD group. All supervisors of an Inbound Call
Center group can access the Agent Statistics panel. To access this panel, as shown in figure 7-14,
select Supervisor | Agent Statistics from the main menu or press the arrow located left of the
Supervisor text on the partition header.
Figure 7-14
Agent Statistics panel
Agent Presence Summary. The top section of the panel displays a presence summary of the
agents of the Inbound Call Center group. The load indicator bar, located on the right side of this
section, is a graphic presence summary:
•
•
•
The green bar represents the percentage of agents that are available.
The yellow bar represents the percentage of agents that are busy or not available.
The grey bar represents the percentage of agents that are logged out.
This section also displays the number of callers waiting in the Inbound Call Center queue.
84
7. Operators and ACDs
Show Only Agents Logged In. This parameter determines the agents that are displayed in the
Agent Statistics panel. Select this option to display only agents that are logged into MXIE. When
this option is not selected, the panel displays all agents of the ACD group.
Agent List. The Agent List is located below the Show Only Agents Logged In option. Each row in
the table lists one agent. You can sort the list by clicking on the column header of the desired sort
key.
All cumulative statistics are reset daily, as configured from the MX Admin User Interface.The
following columns list the agent properties:
7.3.4
•
•
•
Extension: This column displays the user extensions of the agents.
•
Average Talk Time: This column displays the average time that the agent spent on each ACD
call since the daily reset.
•
Total Talk Time: This column displays the total time that the agent spent on ACD calls since
the daily reset.
•
•
Average Wrapup Time:
•
•
•
•
Average Hold Time
•
•
Last Logout:
Name: This column displays the user names of the agents.
Calls: This column displays the number of calls that the agent has answered since the daily
reset.
Total Wrapup Time: This column displays the total time that the agent spent in the wrap up
state since the daily reset.
Total Hold Time
Callback Total
Last Login: This column displays the time when the agent most recently logged into the ACD
group.
Total Time: This column displays the amount of time that the agent has been logged into the
ACD group.
Inbound Call Center Call Recording
The Inbound Call Center license provides On Demand Call Recording and Automatic Call
Recording capabilities. On Demand Call Recording is activated by MX users and agents during
a voice call to save a recording of the call. Supervisors can also use On Demand Call Recording to
selectively record calls of agents within their Inbound Call Center group, as described in section
7.3.3.1 on page 77.
Section 10.3.3 on page 118 describes MXIE call recording capabilities.
85
MXIE User’s Manual
7.3.5
Wallboard
7.3.5.1
Description
The MX250 supports a wallboard presentation of Inbound Call Center statistical data that can be
displayed through an overhead projector through MXIE. The Wallboard is constructed through
an Excel spreadsheet and referenced by MXIE. Data accumulated by the MX is sent to the Excel
spreadsheet, which this then placed in the wallboard sheet that is displayed on the monitor and
presented through an overhead projector.
•
•
7.3.5.2
To display the Wallboard on your monitor, select Supervisor | Monitor from the main menu.
To select the Excel file that receives and presents the statistical data, select File | Preferences
from the main menu, select Supervisor in the panel directory, then press the Select button in
the Wallboard section of the panel.
Constructing the Excel File
An Excel file that is used for displaying Wallboards require two types of sheets: data sheets and
worksheets.
Data Sheets receive ACD information from the MX when MXIE properly references the Excel file.
Each data sheet must have the same name as an Inbound Call Center group. Figure 7-15 displays
an Excel file with two data sheets: Marketing and Tech_Support; these names correspond to
Inbound Call Center groups named Sales and Tech_Support. The Excel file must contain one data
sheet for each Inbound Call Center group that is represented in the Wallboard.
Each data sheet is formatted as follows:
•
•
Column A receives the data from Excel and uses General number format.
Column B contains the name of the parameter for the data received in the corresponding row
in column A. Rows in this column must list the parameters in the following order:
Total number of calls in queue
Maximum number of calls in queue (at one time)
Outbound calls (connected)
Calls answered
Calls transferred to voice mail
Total callback requests
Calls abandoned from queue
Calls sent to queue overflow
Total talk time
Average talk time
Maximum wait time
Average wait time for answered calls
Average wait time for abandoned calls
Average wait time for all calls
86
7. Operators and ACDs
Figure 7-15
Wallboard Data Sheet implemented in Excel
Available
Not Available
Busy
Logged Out
Total
Calls currently in queue
Calls transferred to external number
Disconnected calls
Worksheets reference the information received by the data sheets and are used to create the
Wallboard. Excel documentation describes the creation of charts and the formatting of Excel
sheets. Figure 7-16 displays a sample Excel wallboard sheet.
87
MXIE User’s Manual
Figure 7-16
88
Wallboard worksheet
Chapter 8
Presence
8.1
Introduction
Presence is the MX service that uses and distributes the availability of each system user. Presence
information allows you to verify the availability of system users before attempting to contact
them. You can also choose when to receive calls by defining call handling rules based on your
presence status. Presence improves overall enterprise productivity by reducing calls to
unavailable parties and by providing the enhanced ability to instantly schedule meetings, events,
and communication sessions based on the availability of desired participants.
MXIE can also report and use the presence status of contacts that are external to the MX if your
MXIE instance is configured for external messaging. Unless otherwise stated, all parameters and
operations described in this chapter apply to the Presence of system users and external contacts.
Section 4.2.2 on page 28 describes the process of enabling and configuring external messaging on
your MXIE instance.
MXIE uses the buddy list and the address book to publish presence information to system users.
In addition to programming MXIE to automatically adjust your presence status when you are
using MX resources, you can manually adjust your status at any time.
MXIE implements presence through Presence states and Presence rules. Presence states define the
status of individual users. Presence rules define the conditions that trigger transitions between
presence states.
This chapter describes the MXIE implementation of presence, including a description of presence
states, presence rules, methods of configuring and displaying your presence, and monitoring the
presence of other enterprise users through the buddy list and address book.
8.2
MXIE Presence Implementation
The MXIE presence implementation is based on presence states and presence rules. Presence
states define the online and availability status of individual users within each of their roles.
Presence rules define the transition methods between the presence states.
8.2.1
Presence States
The MX defines a set of presence states for users, operators, and ACD agents. You cannot add or
delete states from each set. Presence states for individuals, operators, and agents are separate and
distinct from one another.
89
MXIE User’s Manual
Each user is assigned a presence state based on his or her communication availability. Users
logged into MXIE as an operator or an agent are assigned another presence state.
The set of presence states is different for each entity type. The following sections define the
presence states for users, operators, and agents.
8.2.1.1
Users
Presence states displays the availability status of a user to other system entities and are used by
call handling rules for routing incoming calls. Users can assign presence states for themselves;
presence rules also define the transition between presence states based on the user’s activity.
The following list describes the defined set of user presence states. MXIE provides three sets of
icons that represent these states. Your MXIE window displays the icon style configured in the
General panel of the User Preferences window, as explained in section 8.5.3 on page 100. Figure
8-1 displays the three sets of MXIE icons that represent presence states; you select the icon set that
MXIE displays from the General Preferences panel, as described in section 8.5.3 on page 100.
Figure 8-1
90
Presence Icons – Users
•
•
Available: This state indicates that the user is online and can accept calls.
•
•
Busy: This state indicates that the user is working.
•
In a Meeting: This state indicates that the user has left the workstation for a meeting and is
unavailable for an extended period.
•
Be Right Back: This state indicates that the user has left the workstation for a brief period –
typically 5 to 15 minutes.
Not Available: This state indicates that the user is either working or has temporarily left the
workstation. This state is typically used when the user has left the workstation for a specified
period.
At Lunch: This state indicates that the user has left the workstation for a meal break and is
unavailable.
8. Presence
•
Appear Offline: Users in this state appear logged off to all other users. The user continues to
receive session requests from other users. If the user does not respond to the request, the
sender receives notification that the user is logged off of the system and is not available.
•
•
Logged Out: This state indicates that the user is logged off of MXIE and is not available.
On the Phone: This state indicates that the user is making or receiving a voice call. A user
cannot manually enter this state.
After completing a call, a user enters the Busy state for a specified period before moving to the
Available state; this period is called the Wrap Up time. The Wrap Up time is configured from
the Presence Preferences window, as described in section 8.5.1.1 on page 97.
•
8.2.1.2
No Access: MXIE displays this state to users that do not have access rights to view your
presence status. This state may indicate a new user that has never logged into the MX. Call
handling rules cannot reference this state.
Operators
Presence states for operators display the availability of the user within this role as an operator.
These states are referenced by preset call handling rules for operators. MXIE displays one
presence state for all operator roles assumed by a user. Operators can assign presence states for
themselves; presence rules also assign presence states based on the activity of the operator.
The following is a list of operator presence states. Figure 8-2 displays the three sets of MXIE icons
that represent these states.
Figure 8-2
Presence Icons – Operators
•
Available: This state indicates that the user is logged in as an operator and can accept calls for
the operator groups as assigned by the system administrator.
•
Not Available: This state indicates that the operator is either working or has temporarily left
the workstation.
•
On the Phone: This state indicates that the operator is handling a phone call and should not
be bothered.
•
Logged Off: This state indicates that the user is not logged in as an operator and is not
available to accept calls.
91
MXIE User’s Manual
8.2.1.3
Agents
Presence states for ACD, Inbound Call Center, and Hunt group agents display the availability of
the user within these roles. These states are referenced by preset call handling rules for ACD and
hunt group agents. MXIE displays one presence state for all agent roles (operator, ACD, and hunt
group) assumed by a user. Agents can assign presence states for themselves; presence rules also
assign presence states based on the activity of the agent.
The following is a list of ACD and hunt group agent presence states. Figure 8-3 displays the three
sets of MXIE icons that represent these states.
Figure 8-3
•
Available: This state indicates that the user is logged in as an ACD or hunt group agent and
can accept calls for ACD or hunt groups as assigned by the system administrator.
•
Not Available: This state indicates that the agent is either working or has temporarily left the
workstation. The Not Available state is not defined for Hunt group agents.
•
•
Active: This state indicates that the agent is handling a phone call and should not be bothered.
•
8.2.2
Presence Icons – ACD and Hunt Group Agents
Wrap up: An agent enters wrap up state for a specified period after completing a phone call.
The wrap up state gives the agent time to document a call before continuing to the next phone
call. Select File | Preferences | ACD and Operator from the main menu to configure the Wrap
up time. The Wrap Up state is not defined for Hunt group agents.
Logged Off: This state indicates that the user is not logged in as an ACD or hunt group agent
and is not available to accept calls.
Presence Rules
Presence rules define the conditions that trigger automatic transitions between presence states.
You can also manually change presence states from the MXIE user window. MXIE defines the
following presence rule options.
8.2.2.1
Users
The following rules define conditions that trigger a transition between user presence states.
92
•
Available to Not Available: This transition is triggered when the user’s computer is inactive
for a specified period. This rule is enabled and configured in the User Preferences | Presences
window.
•
Available to On the Phone: This transition is triggered when the user makes or receives a call.
8. Presence
8.2.2.2
•
On the Phone to Busy (wrap up time): This transition is triggered when the user terminates a
call.
•
Busy (wrap up time) to Available: This transition is triggered after remaining in the Busy
(wrap up time) condition for a specified period if the Busy state was automatically entered
from the On the Phone state when a call was terminated. The Busy period is configured in the
Presences Preferences window.
•
Available to Busy: This transition is triggered if the user also has a role as an operator or ACD
agent and is engaged in a call within that role. This rule is enabled in the ACD and Operator
Preferences window.
Operators
The following rules define conditions that trigger a transition between Operator presence states.
8.2.2.3
•
Available to On the Phone: This transition is triggered when an operator initiates or accepts
a call. This rule cannot be removed or changed.
•
•
On the Phone to Available: This transition is triggered when an operator terminates a call.
Available to Not Available: This transition is triggered when the operator changes to a
specified state within the role as a user. This rule is configured in the ACD and Operator
preferences window.
Inbound Call Center and ACD Group Agents
The following rules define conditions that trigger a transition between ACD group and Inbound
Call Center agent presence states.
•
Available to Active: This transition is triggered when an agent initiates or accepts a call. This
rule cannot be removed or changed.
•
•
Active to Wrap up: This transition is triggered when an agent terminates a call.
•
8.2.2.4
Wrap up to Available: This transition is triggered after remaining in the wrap up state for a
specified period. Wrap up time is configured in the ACD and Operator Preferences window.
Available to Not Available: This transition is triggered when the agent changes to a specified
state within the role as a user. This rule is configured in the ACD and Operator Preferences
window.
Hunt Group Agents
The following rules define conditions that trigger a transition between Hunt Group agent
presence states.
8.2.2.5
•
Available to Active: This transition is triggered when an agent initiates or accepts a call. This
rule cannot be removed or changed.
•
Active to Available: This transition is triggered when an agent terminates a call.
Manual State Transitions
You can also perform many manual state transitions from the MXIE window. As shown in figure
8-4, the MXIE window defines two areas for manually changing your presence state.
93
MXIE User’s Manual
Figure 8-4
MXIE window – Presence Regions
•
The Presence bar optionally lists all states that are available for the active role. You can change
the presence state of your active role by pressing an icon in this bar. You can choose to display
the presence bar, the presence states that are displayed in this bar, and the display format
(icons or text), from the General Preferences window, as described in section 8.5.3 on page 100.
•
The Presence Status text in the bottom right corner can access a menu that lists the states that
are available for the active role. Click on this text to access the menu.
When an operator, ACD agent, or hunt group agent role is available in MXIE, this menu offers
a global option, as displayed in figure 8-5. Global options set the presence state for all roles
displayed on the MXIE window.
Figure 8-5
Presence status menu
Manually entering any state except Available disables any presence transition rule that defines
an automatic method of leaving the state.
94
8. Presence
8.3
Displaying Presence
MXIE displays presence in four window regions; the MXIE window, as shown in figure 8-4
displays three regions and the address book displays the fourth region. Two MXIE regions – the
presence bar and the status bar, displays your presence state while the other regions – the buddy
list and the address book, display the presence state of other system users.
8.3.1
Presence Bar
The Presence bar, located near the top of the MXIE window, displays a set of icons for some or all
of the available presence states for the active role. The active presence state is denoted within this
bar by the depressed icon; in figure 8-4, Available is the active state. You can change the presence
state by pressing one of the icons within this bar.
8.3.2
Status Bar
The presence status text is located on the right side of the status bar, as shown in figure 8-4, and
indicates the presence state of the active role. To change the presence state for the active role, click
on the presence text or icon
8.3.3
Buddy List
Buddy List contents depend on the active session role partition. When an individual role is active,
the list may display the presence state for each buddy who has configured MXIE to permit you to
view his or her presence. When an operator role is active, the Buddy List displays each user
account in the MX. When an ACD or hunt group agent role is active, the Buddy List displays all
members of the group.
The presence status displayed by the buddy list is updated in real time, with a two second delay
period between a change in presence and the distribution of that change among all system users.
Section 3.1.5 on page 17 describes the MXIE buddy list.
8.3.4
Address Book
The address book displays the presence state for each user. To access the address book, press the
address book icon on the toolbar or select View | Address Book from the main menu.
See chapter 9, starting on page 103, for more information about the MXIE Address Book.
8.4
Presence Alert
The Presence Alert panel programs MXIE to notify you when a buddy’s presence status changes
to a specified state. To access this panel, right click your mouse on a buddy in the buddy list and
select Change Alert, as shown in figure 8-6.
95
MXIE User’s Manual
Figure 8-6
8.4.1
MXIE Window with Alert Option menu
Notify Me When
The top section of the Presence Alert panel determines the presence state changes that trigger an
alert. Select one or more presence states by clicking on the text or icon in this section. The Presence
Alert panel shown in figure 8-7 is programmed to notify you when Evan Wayne changes his
presence to either Busy or In a Meeting.
Figure 8-7
8.4.2
Presence Alert panel
Notification Methods
The Presence Alert panel provides two methods of notifying you when a buddy changes presence
status to a state that triggers an alert.
96
8. Presence
•
Popup box: MXIE displays a popup box in the bottom right corner of your monitor when a
buddy triggers a presence alert. Figure 8-8 displays a sample popup box.
Figure 8-8
•
8.4.3
Presence Alert popup box
Audio Alert: MXIE is programmed to play a specified WAV file from the Sounds Preference
panel, as described in section 3.4 on page 25, by selecting File | Preferences from the main
menu.
Save This Alert
Presence alert settings are normally reset after the alert has been triggered once. To save an alert
setting, which programs MXIE to notify you each time the alert is triggered, select the Save This
Alert checkbox in the bottom left corner of the panel. The buddy list in figure 8-6 displays a saved
alert for Charlie Smith.
To remove a buddy alert, right click on the buddy and select Cancel Alert.
8.5
Configuring Presence
Presence settings are configured on three panels of the User Preferences window: the Presence
panel, the ACD and Operator panel, and the Toolbar panel. To access the User Preferences
window, select File | Preferences from the main menu.
8.5.1
Presence Preferences
The Presence Preferences panel, shown in figure 8-9, configures user role presence rules and
controls the display of your presence to other system users. To open the Presence Preferences
panel, open the User Preferences window by selecting File | Preferences from the main menu,
then select Presence in the panel directory.
8.5.1.1
Automatic Presence Change
Automatic presence change parameters determine the situations that enable the following User
role presence rules:
•
After __ minutes of no activity, show me as “Be Right Back” when my current presence is
“Available”: When this checkbox is selected, MXIE changes your Presence state to Be Right Back
if your current presence state is Available and there has been no activity on your computer for
the period specified by the data entry box.
97
MXIE User’s Manual
Figure 8-9
8.5.1.2
Presence Preferences panel
•
After __ minutes of no activity, show me as “Not Available” when my current presence is “Be
Right Back”: When this checkbox is selected, MXIE changes your Presence state to Not
Available if your current presence state is Be Right Back and there has been no activity on your
computer for the period specified by the data entry box.
•
Wrap up time: Wrap up time is the period after the end of a voice call that MXIE waits before
changing the presence state from Busy to Available. MXIE changes your presence state from On
the Phone to Busy immediately after you complete a call.
People who can view my presence
This panel section determines which MX users are allowed to view your user presence state.
These parameters do not affect your ability to view the presence of other users. Operators can
continue to view your user presence status regardless of this parameter setting.
Select any of the following checkboxes to allow users to view your presence:
98
•
All: This option allows all MX users to view your presence state. When this checkbox is
selected, all other checkboxes are unavailable for selection.
•
Those matching my profile: This option allows all other MX users that have the same User
Profile assignment as yours to view your presence; see section 1.2.1 on page 2 for a description
of user profiles. Contact your system administrator to determine which users have the same
profile assignment as yours.
•
•
Buddies: This option allows anyone in your buddy list to view your presence state.
List: This option allows everyone in the list at the bottom of the panel to view your presence
state. To add users to this list, drag and drop contact entries from the address book. To delete
a user from this list, highlight the user’s name and type the delete button on your keyboard.
8. Presence
8.5.2
ACD and Operator Preferences
The ACD and Operator Preferences panel, shown in figure 8-10, configures presence rules for
MXIE users when acting within their roles as operators, ACD agents, and hunt group agents. To
open the ACD and Operator Preferences panel, open the User Preferences window by selecting
File | Preferences from the main menu, then select ACD and Operators in the panel directory.
Figure 8-10
8.5.2.1
ACD and Operator Preferences panel
When Active on a call as an ACD agent or operator, become busy as user
MXIE declares a presence state for your role as a User and a presence state for your role as an
operator, ACD agent, or hunt group agent. When you select this checkbox, your user role
presence changes to Busy whenever you accept a call in your role as an agent or operator. The
user role returns to the Available presence state after the completion of the call or, in the case of
an ACD or hunt group agent, the completion of the wrap up state.
8.5.2.2
When Active on a call as a user, become NA as an ACD agent or operator
MXIE declares a presence state for your role as a User and a presence state for your role as an
operator, ACD agent, or hunt group agent. When you select this checkbox, your agent or operator
presence changes to Not Available whenever you accept a call in your role as a user. The Agent
or Operator role returns to the Available presence state after the completion of the call.
8.5.2.3
Make my presence as an operator or member of an ACD Group “Not Available”
This option automates your operator, ACD agent, or hunt group agent presence response when
you manually change your user role state. A presence rule changes the state of your operator or
agent presence to Not Available whenever you manually change your user role state to one of the
states selected within this option. The operator or agent returns to the available state when you
manually change the user role presence to a state not selected within this option.
99
MXIE User’s Manual
•
Select the All radio button to select all presence states. Each presence state icon is depressed
by selecting the All button.
•
Select the Selected radio button, then use your mouse to depress desired presence state icons,
to select a portion of the presence states.
Example: In figure 8-10, the Selected option is enabled; the presence rule will change the
operator or agent presence state to Not Available when the user manually changes the user role
to At Lunch, In a Meeting, or Be Right Back.
The icon style and display format of the icons on this panel are determined in the General
Preferences window, as described in section 8.5.3 on page 100.
8.5.2.4
Wrap up time
Wrap up time is the period following a phone call that allows an agent to finish any notes or data
entry tasks before taking the next call. After completing a call, an agent progresses from the Busy
state to the Wrap Up state. The MX does not route calls to agents that are in the Wrap Up state. This
parameter configures your wrap up time period for all groups to which you are assigned as an
agent. At the expiry of the Wrap Up time, the agent presence returns to the Available state
8.5.3
Presence Toolbar Preferences
The Toolbar Preferences panel, shown in figure 8-11, controls the appearance of the presence
toolbar. To access the Toolbar Preferences panel, open the User Preferences window by selecting
File | Preferences from the main menu, then select Toolbar in the panel directory.
Figure 8-11
Presence Toolbar Preferences panel
Select Show toolbar to display the Presence bar on the MXIE User Interface. All other presence
toolbar options are selectable only if the Show Toolbar option is selected.
100
8. Presence
•
Dancers, Head & Shoulders, and Objects determines the style of the icons that represent
presence states in the Presence bar. Figure 8-1 displays the three available icon formats.
•
Picture Only, Picture and Text, and Text Only determines the display format of the Presence
bar on the MXIE User Interface. Figure 8-12 displays the three presence toolbar display styles.
Figure 8-12
Presence Toolbar styles
The sample presence bar displayed below the Show Toolbar option indicates the icon style and
display format of the presence bar and the presence states that the presence bar displays. Buttons
that are pressed in this bar correspond to the states that are available in the presence bar. In figure
8-12, buttons that represent the Available, Not Available, Busy, At Lunch, In a Meeting, and Be
Right Back states are pressed; those states will appear in the Presence bar. Buttons that represent
Appear Offline and Wrap up are not pressed; those states will not appear in the presence bar. The
Available and Not Available state selections are valid for User, Operator, and Agent roles. The
Wrap up state is valid for only the Agent role. All other selections are valid only for the User role.
Select the Show All button to display all valid states in the Presence bar. Select the Selected button
and then press the icons on the panel for those states that you choose to display in the presence
bar; if none of the buttons are depressed, MXIE does not display the presence bar.
Icon Style is the only presence toolbar setting that affects the manner that the Status Bar displays
your presence or how the Buddy List displays the presence of others.
101
MXIE User’s Manual
102
Chapter 9
Address Book
9.1
Components
The Address Book window, shown in figure 9-1, provides access to the MX user directory and
supports the creation of personal address books. This window comprises three sections: the
Toolbar, Book Tree, and Contact List.
Figure 9-1
9.1.1
Address Book window
Toolbar
The toolbar, shown in figure 9-2, is located in the upper left corner of the Address Book window,
directly below the Title bar. The following is a description of Toolbar buttons:
Figure 9-2
Address Book toolbar
103
MXIE User’s Manual
9.1.2
•
•
Show or Hide Book Tree button (1): This button toggles the display status of the Book Tree.
•
Import Book button (3): Press the icon to import data file contents into the current address
book.
•
Delete button (4): Press this button to delete the selected entity – either a book from the book
tree or an entry from the contact list.
•
Options button (5): Press this button to access the User Preferences window. Address Book
Preference panels can be accessed from this window.
•
Search box (6): Search for a user in the contact list by entering the user’s first or last name in
this box, then press Enter. Press the arrow on the right side of the box to access searches that
you previously performed.
•
Item Width (7): Move the vertical bar across the slide area to adjust the width of the address
book entries.
New Entry button (2): Press the icon to add an entry to the contact list. Click on the arrow to
access a menu that adds a New Address Book to the Book Tree.
Book Tree
The book tree, located on the left side of the window, displays your address book library and
determines the current book. You display the book tree by pressing the Show or Hide Book Tree
Button until it is depressed. To hide the Book Tree, press the same icon until it is not depressed.
The book tree always lists these address books, each of which cannot be deleted or moved:
•
•
•
•
•
the MX Directory is derived from the MX user list
the Buddies Directory displays your buddies and the contents of your buddy lists.
the Speed Dial directory displays the contacts configured by the MX as system speed dial
contacts.
the Local Address Book is stored on your computer
the External IM book contains the contacts listed in the address books that you access through
your external messaging application accounts. The Address Book displays this directory only
if External Messaging is enabled on for your MXIE instance.
To add new books to the book tree, press the New Entry arrow on the toolbar. To delete books
from the book tree, press the delete button on the toolbar. After creating new address books, you
can move them within the book tree by using drag and drop operations.
9.1.3
Contact List
The Contact List is located on the right side of window or directly under the toolbar if the book
tree is not displayed. This list displays the contact names and information stored in the current
address book, as designated by the book tree.
9.1.3.1
Editing the Contact List
You can modify contacts within this list as follows:
•
104
To edit an entry, double-click the entry to access the Entry Information dialog panel, as shown
in figure 9-8 on page 110.
9. Address Book
•
To delete an entry, select the entry and press the delete button in the toolbar. Contacts cannot
be deleted from the MX Directory.
•
To add an entry, press the New Entry icon in the toolbar to access the Entry Information dialog
box. Contacts cannot be added to the MX Directory.
•
To import contents of a data file to the selected address book, press the Import Book arrow,
select Import Book, and follow the instructions in the dialog boxes. You cannot import entries
into the MX Directory.
Other search and display options include:
9.1.3.2
•
To search for a user within the current address book, type the first or last name of the user in
the toolbar search box and press the enter key. Search box contents are case sensitive. Continue
pressing the enter key to find the next entry with the first or last name listed in the search box.
•
To select the data fields that are displayed for each entry, access the Shown Entry Properties
of the Address Book Settings window by pressing the Options button in the toolbar.
•
To add an entry into your buddy list from the MX directory, drag and drop a contact that
directory into the Buddies directory.
•
To add an entry into your buddy list from a personal address book, press the Ctrl button
while you drag and drop a contact from one of your books into the Buddies directory. MXIE
will not display a presence icon for these buddies.
•
To move an entry into your buddy list from a personal address book, drag an drop a contact
from one of your books into the Buddies directory. MXIE will not display a presence icon for
these buddies.
MXIE Operations
To perform MXIE operations from the Contact List, select (highlight) a contact and press the right
mouse button to access an operations panel, as shown in figure 9-3. The list of available options
depend on the contact type and the information available in the Entry Information panel for the
contact. Section 9.3 on page 110 describes the Entry Information panel.
Figure 9-3
Contact Operations panels
105
MXIE User’s Manual
•
Select Make a Call to initiate a voice call with the contact. Selecting this option generates a
subpanel that lists the available contact methods for the contact – in this example, a business
number, a home number, and a SIP address.
This option is available if one of the following Entry Information data fields is filled for the
contact: Business Phone, Mobile Phone, or Home Phone fields.
•
Select Send an Instant Message to send an Instant Message to internal contact or an external
message to an external contact. Select Text Message History to review the messages sent to or
received from the contact.
These options are available for all internal users and for external contacts for which an
application account is specified on the contact’s Entry Information panel. If an application
account is specified for an internal user, selecting Send an Instant Message generates a
subpanel that allows you to select the account to which the message will be sent.
•
Select Send an E-Mail, Send a Voice Mail, or Send a Fax to send the specified message to the
contact.
These options are available for all internal users and for external contacts if the address book
lists an address to which the message can be delivered.
•
Select Buddy to add (or remove) this user to your MXIE buddy list. This option is available
only for contacts in the MX Directory or the Buddies directory.
You can drag and drop contacts from any address book to your buddy list.
— To move the contact, drag and drop an entry to the buddy list.
— To copy the contact, press the control button while dragging the entry.
•
•
•
•
9.2
Select Change Alert to modify or add a Presence Alert signal for this user.
Select Open to access a form for editing address book contents for this a user.
Click on Select All to highlight all users in the address book.
Click on Delete to remove this contact from the address book. You can delete contacts only
from your personal address books.
Address Book Preferences
The Address Book Preference panels control the User Interface reaction to Address Book edit
requests, controls the permanent placement option of the Address Book on top of the MXIE,
specifies a storage location for your personal address books, determines the data fields that are
displayed for each Address Book entry, determines the contact sort order in the address book, and
specifies the MXIE reaction when you double click on an address book entry. To access the
Address Book Preference panels, press the options button in the Address Book toolbar, as shown
in figure 9-2, or select File | Preferences from the main menu.
9.2.1
Address Book Preference panel
The Address Book Preference panel, shown in figure 9-4, determines the Address Book
operations that require confirmations, controls the display of the address book, and specifies the
local storage location of address book information. To access this panel, select Address Book from
the User Preferences panel.
106
9. Address Book
Figure 9-4
9.2.1.1
Address Book Settings – General panel
Confirmations
The five options refer to Address Book window deletion and move operations. If you attempt to
perform an operation in the Address Book window that is selected in this section, MXIE will
perform that operation only after a confirmation window offers the chance to discontinue the
procedure. Options that are not selected in this panel do not require final confirmation before
MXIE performs the operation.
9.2.1.2
Always on Top
When this option is selected, MXIE always displays the Address Book, whenever it is open and
not minimized, on top of the MXIE window.
9.2.1.3
Storage
This entry box specifies the file that contains your personal Address Books on your network or
local drive. The Select button loads an Address Book file from a local drive or network. The Save
as button opens a Save As window for creating and storing a file that contains the Local Address
Book and all personal address books.
The default location for MXIE personal address books, as configured when MXIE is installed, is
C:\Documents and Settings\<username>\Application Data\Zultys\MX Settings\address_book.xml
where <username> denotes the owner of the local computer. Appendix B, starting on page 171,
lists the default MXIE system file locations and describes their properties.
107
MXIE User’s Manual
9.2.2
Default Action panel
The Default Action panel, shown in figure 9-5, determines the action performed when you double
click on an address book entry. To access this panel, select Default Action from the User
Preferences window.
Figure 9-5
Address Book Settings – Default Action panel
The Default Action panel provides three action options. The selected option specifies the action
performed when you double click on a contact in any of your address book directories, including
the Buddy List. Options available on this panel include:
9.2.3
•
Open For Edit: Selecting this option opens the Entry Information panel to edit the contact
information.
•
Send IM: Selecting this option opens a Message Window to send a Instant Message to the
contact.
•
Place Phone Call: Selecting this option dials the extension number of the contact to initiate a
voice call.
Shown Properties panel
The Shown Properties panel, shown in figure 9-6, determines the properties that are displayed
for Address Book contacts. Property fields are only modified from the from the Entry Information
panel, as described in section 9.3. To access this panel, select Shown Properties from the User
Preferences window.
This Shown Properties panel lists all Address Book user properties. You select the properties that
are displayed for the contacts in your address books by placing check marks in the desired boxes.
108
9. Address Book
Figure 9-6
9.2.4
Address Book Settings – Shown Entry Properties panel
Sort Order panel
The Sort Order panel, shown in figure 9-7, the order that Address Book contact records are
displayed. To access this panel, select Sort Order from the User Preferences window.
This panel determines the order that Address Book contact records are displayed. Each address
book user property, as displayed in the Shown Entry Properties panel (including properties not
selected for display in the Address Book), can be a sort key.
Figure 9-7
Address Book Settings – Sort Order panel
109
MXIE User’s Manual
9.3
•
Sort By: The Sort By entry box specifies the first sort key. The radio buttons located right of the
selection box determine the sorting order.
•
Then Sort: Then Sort entry boxes specify the second and third sort keys from top to bottom,
respectively.
Entry Information
The Entry Information data entry form is accessed from the Address Book Contact List when
editing an existing record or creating a new record. Figure 9-8 displays the data entry form of an
MX user contact. To access the Entry Information panel, right click on a contact in the address
book and select Open.
Figure 9-8
Address Book Contact Entry Form
Grey data entry boxes indicate parameters that you cannot edit. In figure 9-8, the Full Name,
Business Phone, and SIP Address parameters cannot be edited. These parameters are always read
only in the MX Directory address book. You can usually edit all fields within the data entry form
for a personal address book.
•
The Address Bar lists the name of the address book on the left side and the record number
within the book on the right side. Records are listed in alphabetic order by last name.
•
The Data Entry area provides data entry boxes for address book user properties. Grey fields
(Full Name, Business Phone, and SIP Address in figure 9-8) are write-protected.
•
The Text Messaging area specifies external message application addresses for the user. In
addition to the MX address (specified by the MXIE icon at the top of the list), you can define
eight different external addresses for each contact.
Figure 9-9 identifies the icons located in the Text Messaging area. The Default Icon indicates
the address to which messages are sent when a specific address is not requested. To add an
external messaging address to the list, press the Add Address icon at the bottom of the area.
•
The Button Bar provides buttons for maneuvering through the address book, creating or
deleting entries, and closing the panel.
— Previous Entry (1) button moves the data entry form to the previous record (record 10 is the
previous record to the one shown in the figure) in the address book.
110
9. Address Book
Figure 9-9
Text Messaging icons
— Next Entry (2) button moves the data entry form to the next record (record 12 is the next
record to the one shown in the figure) in the address book.
— New Entry (3) button creates a user record in the address book.
— Delete Entry (4) button deletes a user record from the address book.
(You can add or delete records from only your local address books.)
— Search by Name (5) data box searches the address book for a first or last name. To perform
the search, type the name in the entry box and press the enter key.
— Save and Close (6) button saves changes to the address book and closes this window.
— Cancel (7) button discards all changes and closes the address book.
9.4
Address Book Import
Address Book Import merges the contents of a data file into the address book that is selected in
the book tree. To start the import operation, press the Import Book button on the Address Book
toolbar or right click the mouse while pointing at an address book in the Book Tree and select
Import Book. MXIE does not support merging the MX Directory with contents from another file.
The title bar of the Address Book Import windows lists the name of the Address Book that will
receive the imported records.
To set up an import operation, complete the following panels.
9.4.1
Select Source File
Figure 9-10 displays the Select source file panel. Specify the import file by pressing the Browse
button and selecting a file from your local drive or network. You can also specify a file by typing
its full path name in the File Name entry box.
After specifying the source file, select one of the following radio buttons to determine the method
of handling records that duplicate contact entries that exist in the address book:
•
Replace duplicates with items imported: Records from the source file that have the same
name as an address book contact will replace the contents of the address book contact.
•
Allow duplicates to be created: Records from the source file that have the same name as an
address book contact are used to create a new address book contact.
•
Do not import duplicate items: Records from the source file that have the same name as an
address book contact are discarded.
111
MXIE User’s Manual
Figure 9-10
Address Book Import – Select Source File
Press Next to enter the next panel.
9.4.2
Map MX User Properties to Source Fields
This panel defines the source and content of the Address List contact properties for the imported
contacts. Figure 9-11 displays the panel that configures these properties.
Figure 9-11
Address Book Import – User Property selection
The MX User Property column identifies the contact list property. The Property Source column
identifies the source for filling that property in all imported records:
112
•
Entries surrounded by brackets indicate that the User Property will be provided by a data field
from the source file. In figure 9-11, the User Property Business Phone is filled for each
imported contact by the Phone field from the source file.
•
Entries not surrounded by brackets indicate that the User Property will be filled by the entry
text. In figure 9-11, the User Property Fax Number will be filled by the text 398 768-1551 for
each imported contact.
9. Address Book
•
Entries may contain a mixture of bracketed and unbracketed entries. In figure 9-11, the SIP
Address entry contains this combination to form valid SIP addresses for each contact.
The Source Fields column on the right side of the window lists the data file field headings. You can
fill Property Source cells either by typing information directly into the cell, or by dragging and
dropping names from the Source Fields column.
To examine a sample record from the input file, right click while pointing in the MX User Property
or Property Source columns, then select Sample Data. The Property Source column displays the
input file data as it will be imported into the address book. Right click again and choose one of
the other options to examine other records, or select Sample Data again to exit this mode.
Press Next to enter the next panel.
9.4.3
Import is About to Be Started
MXIE displays the final confirmation panel shown in figure 9-12 before starting the import. Verify
that the desired manner of handling duplicate records is specified. Press Next to begin the import.
Figure 9-12
9.4.4
Address Book Import – Import is About to be Started
Panel 4: Import in Progress
Figure 9-13 displays the Import in Progress panel. This progress bar indicates the status of the
import procedure. Press Next after the import is completed.
Figure 9-13
Address Book Import – Import in Progress (Panel 4)
113
MXIE User’s Manual
9.4.5
Panel 5: Success
Figure 9-14 displays the Success panel. This panel indicates that the import procedure finished
successfully. Press Finish to exit this window and return to the Address Book.
Figure 9-14
114
Address Book Import – Success (Panel 5)
Chapter 10
Voice Mail, Faxes, and Call Recordings
10.1
Introduction
The MXIE Messages utility displays voice and fax messages received by your MX user account. It
also allows you to play your voice messages, display your faxes, and organize all of your
messages.
Topics described in this chapter include:
•
•
•
•
•
•
•
•
mail box types and properties
•
the Voice Mail Preferences panel that specifies the storage paramerters area for your voice
mail files
voice messages
fax messages
on demand call recordings
the Voice Mail window
the Automatic Call Recording window
the Voice Mail settings panel that selects your active greeting and lists your storage capacity
the Message Notification Preferences that specifies the method for alerting you of selected
incoming voice and fax messages
The MX voice mail server provides an alternate method for configuring and accessing your voice
mail. Although MXIE’s graphical user interface allows you to more efficiently manage your voice
mail, a limited set of configuration options are available only through the voice mail server. Refer
to the MX Voice Mail Server User’s Manual for more information.
10.2
Mail Boxes
MX voice mail boxes store messages to system users, operators, and ACD groups. Mail box
attributes and access authorization rights are either assigned through the Administrator User
Interface or configured through the voice mail server.
The MX defines two types of voice mail boxes: User boxes and Group boxes.
115
MXIE User’s Manual
10.2.1
User Boxes
User voice mail boxes store messages for MX users. Each user may be assigned one mail box by
the system administrator; each user mail box is assigned to one user. User box properties include:
•
Mail Box Number: The mail box number is the access code for the user mail box through the
voice mail server. This number is the same as the user extension and is set by the system
administrator.
•
Password: The password authenticates a user’s right to access a user box. The mail box
password is provided when you log onto MXIE.
•
Capacity: The system administrator sets the following mail box capacity limits:
— total number of messages
— maximum length of mail box messages
— total length of all mail box messages
Capacity limits cannot be altered through MXIE.
10.2.2
•
Recorded Name: The Recorded Name is an audio recording of the name of the mail box user.
The system introduces messages that the user sends to other mail boxes with this recording.
•
Greeting Content: A greeting is the message that the system plays for your callers when you
are not available to accept their calls. Each user voice mail box can store up to four greetings.
•
Active Greeting Designation: The active greeting designation determines the greeting that
the system plays for callers that are routed to your voice mail. This parameter is an integer
between one and four and cannot be set to a greeting that is not recorded.
•
Auto Attendant Greeting: The MX auto attendant routes calls to system users. Prior to routing
a call to your phone, the auto attendant can play your greeting, recorded name, or extension
to the caller. The auto attendant greeting is the greeting played by the auto attendant to a
caller prior to routing the caller to your extension.
Group Boxes
Group voice mail boxes store messages for operator, ACD, and hunt groups. Each group is
assigned one group mail box. A group box can be accessed by each member of the group assigned
to the box. Group assignments are made by the system administrator and cannot be modified
from the voice mail server. Group box properties include:
•
Number: The mail box number is the access code for the group mail box through the voice
mail server. This number is the same as the operator, ACD, or hunt group extension and is set
by the system administrator.
•
Password: Group mail boxes do not have passwords. You access a group mail box by logging
onto your group roles and entering your MXIE password.
•
Capacity: The system administrator sets the following mail box capacity limits:
— total number of messages
— maximum length of mail box messages
— total length of all mail box messages
Group mail box capacity limits cannot be edited through MXIE.
116
10. Voice Mail, Faxes, and Call Recordings
•
Recorded Name: The Recorded Name is an audio recording of the group name. The system
introduces messages that the group sends to other mail boxes with this recording. The
recorded name for a group box can be configured only through the voice mail server.
•
Greeting Content: A greeting is the message that callers hear when a group member is not
available to accept their calls. Each group voice mail account can store up to four greetings.
Greetings for group mail boxes can be recorded only through the voice mail server.
•
Active Greeting Designation: The active greeting designation determines the greeting that
the system plays for callers that are routed to the group voice mail. This parameter is an integer
between one and four and cannot be set to a greeting that is not recorded. The active greeting
designation for group mail boxes can be altered only through the voice mail server.
•
Auto Attendant Greeting: The MX auto attendant routes calls to system users, operators, and
ACD groups. Prior to routing a call, the auto attendant can play a group’s custom greeting,
name, or extension. The auto attendant greeting is the greeting played by the auto attendant
to a caller prior to routing the caller to the group extension. The auto attendant greeting for
group mail boxes can be recorded only through the voice mail server.
10.3
Message Types
10.3.1
Voice Messages
This section describes the properties and contents of MX voice mail messages. To select the audio
driver used for playing and recording messages, open the Audio Output Preferences panel by
selecting File | Preferences from the main menu, then selecting Audio Output from the panel
directory. Section 3.5 on page 26 describes this panel.
10.3.1.1
Message Status
Message status indicates the amount of processing that you have performed on the message.
MXIE utilizes two status levels: New and Saved.
10.3.1.2
•
New Messages: A voice mail message is designated as a New Message when it enters a mail box.
New messages are typically unread or have not been processed by the mail box owner.
•
Saved Messages: Saved messages are marked as such by the user or group member. Saved
messages have typically been read and are stored for future processing or reference.
Caller Mark
When leaving a message in your mail box, a caller may designate a call as urgent or private. In
addition to informing you concerning the importance and relevance of a call, the caller mark also
affects the playback and processing options available for a message.
•
Urgent: This mark indicates the high importance or time relevance of the message. Message
review and scan sessions play urgent new messages before private or normal messages.
•
Private: The private mark indicates that a message should not be distributed to other users or
groups.
•
Normal: The private and urgent marks are optional; normal messages do not have these
marks and are processed normally.
117
MXIE User’s Manual
10.3.1.3
Caller Source
Voice Mail processing and playback options depend on the message source.
10.3.1.4
•
Internal Device: A message sent from a device that is connected to the MX is accompanied
with the name of the caller (or the caller’s extension if the name is not available) that sent the
message. During playback sessions, messages from internal devices are introduced with the
name of the caller. You can use all available processing options on messages sent from internal
devices.
•
External Phone: A message sent from a phone that is not directly connected to the MX is either
introduced by the phone number of the calling device or by the time and date for calls coming
from an unknown source. You cannot send MXIE replies to messages sent by external phones.
Voice Message Content
Each voice mail message comprises two components. The header stores the properties of the
message and the body contains the recorded message.
10.3.2
•
Header: The header is played prior to the message. It contains the source of the call, the
message status, the caller mark, the date the call was received, and the time that the call was
received.
•
Message Body: The message body is the recording of the message as created by the sender.
Fax Messages
This section describes the properties and contents of MX fax messages.
10.3.2.1
Fax Message Status
Message status indicates the amount of processing that you have performed on the message.
MXIE utilizes two status levels: New and Saved.
10.3.2.2
•
New Messages: A fax message is designated as New when it enters a mail box. New messages
are typically unread or have not been processed by the mail box owner. The title name for new
faxes is displayed in boldtype in the mail box.
•
Saved Messages: Saved messages are marked as such by the user or group member. Saved
messages have typically been read and are stored for future processing or reference.
Fax Message Content
When a user, ACD group, or operator group receives a fax, it is stored in TIFF-F format in the mail
box. All MXIE accounts can receive faxes from internal sources groups through their MX
extensions and from external sources through a Fax DID number as assigned by the system
administrator. ACD groups and operators can also receive faxes through analog trunk groups.
10.3.3
Call Recordings
The MX defines three Call Recording classes: On Demand Call Recording, Automatic Call
Recording, and Emergency Call Recording.
•
118
On Demand Call Recording is initiated by an MX user or agent engaged in a voice call.
10. Voice Mail, Faxes, and Call Recordings
•
Automatic Call Recording is configured by an administrator, to retain recordings of all calls
involving a specified group of agents or users.
•
Emergency Call Recording automatically saves a recording of all calls made to an emergency
number, as defined through the Admin UI. No call recording license is required to record
emergency calls
Although the characteristics of all call recording wav files are identical, the classes differ in the
manner that calls are selected for recording, the manner that recordings are accessed, and the
manner that users are authorized to generate and access recordings.
The MX provides call recording resources through Call Recording and Inbound Call Center
software licenses. Although each license provides On Demand and Automatic Call Recording,
capabilities, they provide authorization to a different set of users. Inbound Call Center licenses
provide call recording capabilities to agents and supervisors of Inbound Call Centers. Call
Recording licenses provide call recording capabilities to any MX user, as authorized through the
MX Administrator User Interface. Refer to the Media Exchange Administrator’s Manual for more
information. Call Recording and Inbound Call Center licenses provide call recording resources
independently of each other.
Call Recording is available on the MX250. The MX30 does not support call recording.
10.3.3.1
On Demand Call Recording
On Demand Call Recording is activated by MX users and agents during a voice call to save a
recording of the call. On Demand recordings are available to the user that requested the recording
through the voice mailbox.
10.3.3.2
•
To activate On Demand Call Recording for an active voice call, refer to section 5.3.6.2 on page
54.
•
To access call recordings generated through On Demand Call Recording, refer to section
10.4.3.2.
Automatic Call Recording
Automatic Call Recording parameters, including the calls to be recorded and access rights to the
call recordings, are configured by a system administrator through the Administrator User
Interface. Calls cannot be designated to be automatically recorded from MXIE. Similarly,
authorization to view or manage calls cannot be granted through MXIE. While MXIE does not
display any notification that a call is being automatically recorded, the MX can be configured to
play an audio beep at the start of a call being recorded.
Automatic Call Recordings are accessed through the Automatic Call Recording panel. Automatic
Call Recording access rights are assigned to users independently of the assignment of users
whose calls are automatically recorded. Automatic call recordings may or may not be accessed by
users whose calls were recorded. Similarly, authorization to delete call recordings is granted
independently from authorization to delete recordings.
To access the Automatic Call Recordings panel, select View | Auto Call Recordings from the main
menu. The Automatic Call Recordings panel is described in section 10.5.1 on page 129.
119
MXIE User’s Manual
10.3.3.3
Emergency Call Recording
The MX records all voice calls to emergency numbers specified by the Admin UI, regardless of the
existence of any Inbound Call Center or Call Recording Licenses. Emergency call recordings are
accessed through the Automatic Call Recordings panel, as described in section 10.5.1 on page 129.
10.4
Voice Mail Window
The MXIE voice mail window displays your messages in folders that are arranged in a hierarchical
structure. You can listen to, display, forward, move, copy, send, and delete messages from this
window.
10.4.1
Accessing the Voice Mail Window
To access the Voice Mail window:
•
•
•
Toolbar: press the Voice Mail icon
Main Menu: select View | Messages
Session List: if you have new voice messages or faxes, click the You have new messages text on
the MXIE user window, as shown in figure 10-1
This text indicates the message type if your messages are either all faxes or all voice messages.
Figure 10-1
MXIE User Window with new voice mail
Section 3.1.7 on page 20 describes the process of accessing messages directly from the MXIE
window.
120
10. Voice Mail, Faxes, and Call Recordings
10.4.2
Voice Mail Window Description
The Voice Mail window, shown in figure 10-2, comprises two sections:
•
The Mail Box Directory, located on the left side of the window, displays the folders that store
your messages.
•
The Message List, located on the right side of the window, displays the messages that are
stored in the highlighted folder in the Mail box directory.
Figure 10-2
10.4.3
Voice Mail window
Mail Box Directory
Mail folders organize and store your messages. MXIE implements a hierarchical structure to
organize your messages and folders.
10.4.3.1
Hierarchical Levels
The left panel displays the available message folders in a hierarchical tree diagram. Each Message
directory has a minimum of two hierarchical levels.
The first directory lists the mail folders that are accessible to your active MXIE roles, as described
in section 2.3.2 on page 7. The Mail folder directory displays one first level directory entry for each
active user, operator, and agent role. Figure 10-2 displays an example of a directory that has four
first level directory entries:
— Messages contains messages received by the MXIE owner within the role as User.
— Operator: Front_Desk contains unanswered messages received by the Front_Desk
operator.
— Supervisor: Sales contains all unanswered messages received by the Sales Inbound Call
Center group.
121
MXIE User’s Manual
— Agent: Public_Relations contains unanswered messages received by the Public Relations
ACD group.
If a role is active, the corresponding folder displays a expand-collapse icon. In figure 10-2, Agent:
Public_Relations is the only first level directory entry that does not display the expand-collapse
icon. This indicates that the user is not logged in as a Public Relations agent and does not have
access to the Public_Relations voice mail folders.
The second directory level lists the mail folders that are accessible to each MXIE role. In figure
10-2, the User role (Messages) has direct access to five mail folders: Call Recording, Deleted, Fax,
Inbox, and Sales. All operator and agent roles each have access to an inbox and a fax box.
Other directory levels (third and lower) list mail folders that are subdirectories to higher level mail
folders. In figure 10-2, Inbox, Outgoing Fax, and Sent Fax are mail folders that are subdirectories to
the Fax mail folder.
10.4.3.2
Mail Folder Types
MXIE provides two types of mail folders:
•
System folders are the initial repository for messages that you receive or mark for deletion.
MXIE defines the following system voice mail folders:
— Call Recording files store your on demand voice call conversation recordings. Messages is
the only folder that contains a Call Recording folder.
— Deleted is a temporary folder for voice messages and folders that you deleted from the voice
mail window. You can restore messages and folders that are in this folder to their original
location. Deleting messages and folders from the Deleted folder permanently removes
them from the system. Messages is the only folder that contains a Deleted folder. Messages
in the Deleted box are stored on your local drive or network and do not count as part of
your allocated voice mail space.
— Fax | Inbox is a temporary storage area for the fax messages that are received by you, as a
user, or by the group.
— Fax | Outgoing Fax lists the outgoing fax messages that are waiting to be transmitted.
— Fax | Sent Fax lists the outgoing fax messages that were previously sent.
— Inbox is a temporary storage area for your voice mail as you process, delete, and organize
individual messages.
Messages in the Inboxes and the Call Recording folder are stored in the MX system; your voice
mail capacity defines the maximum size of the message Inboxes (voice and fax) and the Call
Recording folder while the group capacity settings define the maximum size of the operator
and agent mail boxes. Messages in the Deleted box are stored on your local drive or network
and do not count against your allocated voice mail space.
•
Personal folders are created by you to organize messages that you save for future reference.
The mail folder directory panel lists all personal mail folders among the hierarchical tree
structure. Personal folders can be renamed, deleted, and moved within the Mail Box Directory
panel.
Personal folder messages are stored on your local drive, as specified in the Messages
Preferences window. All files in a mail box are stored in a .vmi file. Section 10.4.4.6 on page 126
describes the process of storing voice messages (.wav files) and faxes (.tif files) as files that you
can access from other Windows programs.
122
10. Voice Mail, Faxes, and Call Recordings
MXIE distinguishes mail folders that have unread messages by displaying their names in bold
typeface and showing the number of unread messages in parenthesis. If your inbox has unread
mail, MXIE signals your phone which, if it supports this feature, alerts you to the new messages.
10.4.3.3
Mail Folder Services
Voice mail folder services, as shown in figure 10-3, are accessed by right clicking the mouse while
the cursor points in the Mail Folder Directory. Service options can copy, move, delete, and
compact the currently highlighted mail folder and can create a new mail folder as a subdirectory
of the current mail folder.
Figure 10-3
Mail Folder Services options
The availability of mail folder service options depends upon the properties of the current mail
folder. System folders cannot be moved or deleted; these options are greyed out and unavailable
if a system folder (Inbox or Deleted) is selected.
10.4.4
Message List
The right panel displays all messages and call recordings that are stored in the mail box selected
in the Mail Folder Directory panel. Voice message and call recording duration is specified by time;
fax length is specified by page count. In figure 10-3, the voice mail from Bonnie Hopkins is 26
seconds; the fax from Lindy Baker is one page.
You can listen to your voice messages and view your faxes from this panel, as well as perform
message management tasks. You can store voice messages and faxes in the same mail box.
123
MXIE User’s Manual
Message titles in this list are displayed in bold or regular typeface. MXIE marks unread messages
in Bold and saved messages in regular typeface. To alter the unread-saved status of a message,
select the message in this panel and click the right mouse button to access the message services
panel, as shown in figure 10-4. To change an unread message to a saved message, press Save; to
return a message back to unread status, press Mark as Unread.
Figure 10-4
Message Services options
You can drag and drop messages from this list into the folders displayed by the Mail Box
Directory. To copy a message into another mail box, press the Ctrl key while performing the drag
and drop operation. You can also right-click the mouse to move and delete messages highlighted
by the blue window cursor.
Other message service options allow you to forward a voice message or send a reply to the
originator of a voice message and all other interested users. You can also call back the sender if the
sender is a user on the MX system or called from a device that has caller ID.
10.4.4.1
Adding a Comment to a Message or Recording
The folder icon at the bottom of the panel provides a space to save a short text notation about the
message. Click in the field that is right of the icon and type a text message. This text is saved with
the voice mail. In figure 10-2, “Resume contact on 10/1” is the text message that will be saved with
the highlighted message from 398 427-8660
You can enter a maximum of 255 characters in the comment field.
10.4.4.2
Listening to Voice Messages and Recorded Calls
The Play panel, shown in figure 10-5, is located at the bottom of the Message list and controls the
audio playback of the selected Voice Message or On Demand Call Recordings. Play panel buttons
include:
124
10. Voice Mail, Faxes, and Call Recordings
•
•
Voice Mail Settings (1): Opens the Voice Mail Settings window described in section 10.4.5.
•
Stop (3): Stops playback of the audio message and resets the playback pointer to the beginning
of the message.
•
Progress bar (4): Displays the message playback progress. The vertical bar moves across the
horizontal track during playback. You can move the bar with the mouse to replay or skip
portions of the message.
•
Volume (5): Adjusts the volume of the message playback.
Play / Pause(2): Begins playback of the selected voice mail message. When MXIE is playing a
message, this area displays the Pause button. Pressing the pause button temporarily stops
playback of the selected message. To resume playback, press the pause button again.
Figure 10-5
10.4.4.3
Play panel buttons
Replying to a Voice Message
To reply to a voice message from another system user, right click on a message title in the voice
mail window and select Reply. MXIE displays the voice recording panel for recording the
message. Section 10.6.1 on page 131 describes the use of this panel.
10.4.4.4
Forwarding Messages
To forward a voice message, fax message, or call recording to another user, perform one of the
following actions:
•
drag and drop the message title line in the voice mail window to an address book entry or
buddy list contact
•
right click on a message title in the voice mail window and select Forward
Each action generates a voice recording panel (for voice messages) or the Fax Wizard (for faxes)
for creating an introduction to the forwarded message. Section 10.6.1 on page 131 describes the
process of creating a voice message and section 10.6.2 on page 132 describes the fax wizard.
10.4.4.5
Viewing a Fax Message
When a fax message is selected on the Message List, the Play panel, as shown in figure 10-5, does
not display a Progress bar or Volume section.
To view a fax, press the play icon on the play panel or double click on the fax name in the Message
list.
125
MXIE User’s Manual
10.4.4.6
Saving a Message to File
This option saves your messages to a file on your local hard drive or network. To save a voice
message as a wav file, or a fax message as a tif file, right click on the message title in the voice mail
window and select Save to File(s).
10.4.5
Voice Mail Settings
The Voice Mail Settings window shown in figure 10-6, changes your recorded user name, active
greeting and displays your voice mail storage capacity. This window comprises three panels: User
Name, Greetings, and Limitations. To access the Voice Mail Settings panel, press the icon in the
bottom left corner of the messages section of the voice mail window.
Figure 10-6
10.4.5.1
Voice Mail Settings – User Name Recording panel
User Name
The top section of the Greetings panel, shown in figure 10-6, displays the status of your recorded
user name. The system introduces messages that you send to other mail boxes with this recording.
To record or change your recorded user name using MXIE with a microphone and speaker
headset, perform the following procedure:
126
1.
Press the Change User Name button.
2.
Record your name, then press the Stop Record button when you are finished.
3.
Press the Play button to review your recording
4.
Press the Apply button to save the recording to the database. To discard the recording, press
the Cancel button.
10. Voice Mail, Faxes, and Call Recordings
10.4.5.2
User Greetings
The User Greeting list, located in the middle of the Greetings panel, displays the status of your
greeting messages and determines which greeting message is played to your callers when you are
not available to accept their calls. The MX allows each user to store a maximum of four greetings.
•
•
•
•
Greetings with an (Empty) indication are not recorded.
Greetings that are grey are not yet saved to the MX database.
Greetings that are in regular typeface are recorded but are not selected as the active greeting.
The greeting that is in bold typeface is the active greeting that callers hear when you are not
available to answer their calls.
In figure 10-6, Greetings 1 and 2 have been recorded, and Greeting 1 is the active greeting.
Greetings 3 and 4 are not yet recorded.
To record a greeting using MXIE with a microphone and speaker headset, perform the following
procedure:
1.
Click on the greeting you wish to record in the User Greeting list.
2.
Press the Change greeting button.
The panel changes to indicate the recording status, as shown in figure 10-7.
3.
Record your greeting, then press the Stop Record button when you are finished.
4.
Press the Play button to review your recording
5.
Press the Apply button to save the new greeting to the database. To discard the new
greeting, press the Cancel button.
Figure 10-7
Recording a User Greeting
127
MXIE User’s Manual
To change the active greeting, perform one of the following actions:
•
•
10.4.5.3
double click a recorded greeting, then press the Apply button
highlight one of the recorded greetings that is not active, press the Mark as Active button,
then press the Apply button
Auto Attendant Greeting
The MX auto attendant may route calls to your user extension. Prior to routing a call to your
phone, the auto attendant can play your greeting, recorded name, or extension to the caller. The
auto attendant greeting is the greeting played by the auto attendant to a caller prior to routing a
call to your extension. The bottom section of the Greetings panel displays the status of your auto
attendant greeting.
To record your auto attendant greeting using a MXIE with a microphone and speaker headset,
perform the following procedure:
10.4.5.4
1.
Press the Change greeting button.
2.
Record your greeting, then press the Stop Record button when you are finished.
3.
Press the Play button to review your recording
4.
Press the Apply button to save the new greeting to the database. To discard the new
greeting, press the Cancel button.
Limitations
The Limitations panel, shown in figure 10-8, lists the capacity of your voice mail box as configured
by the system administrator. You cannot alter these settings from MXIE.
•
•
Maximum mail box size lists the capacity of your voice mail inbox.
•
Maximum greeting length limits the duration of your user greeting.
Maximum message length limits the duration of each message that you receive. Callers are
alerted with an audio signal when they are about to exceed this limit.
Contact your system administrator to adjust these settings.
10.5
Automatic Call Recording Window
The Automatic Call Recording window, as shown in figure 10-9, displays the calls that were
automatically saved to which you have authorization to manage or play. To access the Automatic
Call Recording window, select View | Auto Call Recordings from the main menu.
Rights to view this window are granted by an administrator through the MX Administrator User
Interface as follows:
•
Users assigned to a Call Recording profile that allows access to all user calls that are
automatically recorded are authorized to manage or play any or all of the following:
— Personal (User) recordings
— Operator and ACD Group recordings
— Emergency recordings
128
10. Voice Mail, Faxes, and Call Recordings
Figure 10-8
•
Voice Mail Limitations
Individual ICC group members, including supervisors, are granted or denied access to group
automatic recordings from the Admin User Interface.
Each member can be authorized to view only their recordings or all group recordings.
Figure 10-9
10.5.1
Automatic Call Recording window
Automatic Call Recording Window Description
The Automatic Call Recording Window comprises three sections:
129
MXIE User’s Manual
10.5.1.1
•
The Filter Bar, located at the top of the window, specifies the call recordings that the window
displays
•
•
The Call Table displays a list of the available call recordings
The Playback Bar, located at the bottom of the window, controls the playback of the
highlighted call recording.
Filter Bar
The Filter Bar specifies the list of call recordings displayed by the window. Criteria used to select
calls include:
•
From: The From data fields specify the beginning time for the range of the listed call
recordings. To select a start time, place a mark in the From selection box and enter a date and
time in the corresponding data entry fields. If the From selection box is unselected, the earliest
call recording in the database that meets all other criteria is listed.
•
From: The To data fields specify the ending time for the range of the listed call recordings. To
select a end time, place a mark in the To selection box and enter a date and time in the
corresponding data entry fields. If the To selection box is unselected, the latest call recording
in the database that meets all other criteria is listed.
•
User: The User selection box and menu specifies the user whose calls are automatically
recorded. The User menu only displays users whose call recordings you are authorized to
view.
— To select a user, place a mark in the User selection box, then select the user in the User
menu.
— When the User selection box is unmarked, the table lists all calls for all call recordings that
meet other filter criteria.
•
Call Center: The Call Center selection box and menu specifies the ICC group whose calls are
automatically recorded. The Call Center menu only displays groups whose call recordings you
are authorized to view.
— To display all calls for a specific ICC group, place a mark in the Call Center selection box,
then select the group in the Call Center menu.
— To display all automatically recorded user calls, place a mark in the Call Center selection
box, then leave the drop-down menu located below the Call Center selection box blank.
— To display automatically recorded call for all groups for which you are authorized, leave the
Call Center selection box blank.
10.5.1.2
Playing and Managing Recorded Calls
The Call list displays the call information for all recorded calls stored in the MX that satisfy the
Filter Bar settings. Call information for Emergency calls is displayed in red type. You can also
listen to the recordings, copy recordings to files on your local system, and delete recordings from
this list.
To access the highlighted call recording, right click the mouse and select one of the following
options from the drop down menu. Grey text indicates an option for which you are not
authorized.
•
130
Play: Select this option to playback the recording.
10. Voice Mail, Faxes, and Call Recordings
10.5.1.3
•
Copy Description: Select this option to copy the recording information displayed in the list to
your computer clipboard. You can then paste the clipboard contents to other applications.
•
Delete: Select this option to remove the call recording from MX storage. Deleted recordings
cannot be restored.
•
Save to File: Select this option to copy the call recording to a wav file on your local computer
or network.
Playback Bar
The playback bar controls the playback of the highlighted call recording. Playback bar
components operate identically to the play panel described in section 10.4.4.2 on page 124.
10.6
Sending Messages
This section describes the process of composing and sending voice messages and faxes from
MXIE.
10.6.1
Voice Message Recorder
The Voice Message Recorder dialog box, shown in figure 10-10, controls the recording and
transmission of voice messages to other MX users. The following operations use the Voice
Recorder dialog box:
Figure 10-10 Voice Message Recording panel
•
Introductory remark recording: This function is accessed by forwarding a voice mail to
another MX user. The dialog box records an introductory remark that is attached to the
forwarded voice mail.
•
Send a Voice Mail: This function is accessed by right clicking a contact in the buddy list or
address book and selecting Send a Voice Mail. The dialog box records the message that is sent
to the buddy.
The operation type is stated on the left side of the panel’s title bar. The panel in figure 10-10 is
performing a Send Voice Mail operation.
To record and send a voice message, perform the following actions:
1.
Select the message recipients.
131
MXIE User’s Manual
When you enter the Voice Message recorder, the address area right of the To button usually
lists one message recipient. To designate other recipients, press the To button and follow the
instructions in the User Lookup: Recipient panel. After you finish entering recipients, their
names will appear next to the To button.
2.
Start the recording by pressing the circular red button located below the To button.
3.
Speak your message in the microphone, then press the square button that replaced the red
button, as shown in figure 10-11.
Figure 10-11 Recording a Voice Message
4.
Mark your message to give it the appropriate emphasis:
To mark the message private, press the button with the keys icon located left of the Send
button.
To mark the message urgent, press the button with the light bulb icon located above the
private button. This icon is depressed in figure 10-11.
10.6.2
5.
Review your recording by pressing the triangular button located below the To button.
6.
Send the message by pressing the Send button located in the bottom right corner of the
panel.
Sending Faxes with the Fax Wizard
The MXIE Fax Wizard controls the transmission of fax messages from your MX account through
the MX fax server. You can send most TIFF, bmp, jpeg, or png files as a fax to any MX role or any
phone number that is accessible from your MX system. Regardless of the file type of the selected
file, MXIE converts it to TIFF before sending it as a fax.
To access the MXIE Fax Wizard, perform one of the following:
•
•
Main Menu: select Actions | Send a Fax
Buddy List: right click on the recipient’s icon
The MXIE Fax Wizard comprises four component panels. You access these panels sequentially to
specify the file that you are faxing, the recipients of the fax, and the time when the MX will send
the fax. The name of the component panel is listed in the upper left corner of the panel, directly
below the title banner. To cancel the fax transmission, press the Cancel button from any of the
component panels.
132
10. Voice Mail, Faxes, and Call Recordings
10.6.2.1
File Selection
The File Selection panel specifies the name of the file that you intend to fax. The MX file server
supports the transmission of TIFF files; Fax Messages describes the MXIE tool that converts your
text documents and other files into TIFF format. MXIE displays the File Selection panel, as shown
in figure 10-12, when you open the MXIE Fax Wizard.
Figure 10-12 MXIE Fax Wizard – File Selection
To specify the file to be faxed, either enter the name in the Fax File Name data entry box or press
the Browse button to select the file from your local drive or network. You may also enter the name
of the document in the Document name data entry box; this parameter is optional and does not
affect the transmission of the fax.
After entering the file name, press the Next button to enter the Recipients panel.
10.6.2.2
Recipients
The Recipients panel, as shown in figure 10-13, specifies the phone numbers and addresses that
will receive the fax message.
Figure 10-13 MXIE Fax Wizard – Recipients
133
MXIE User’s Manual
To select an MX user recipient, enter an extension or user name in the Fax Number data entry
field. To select a recipient on the PSTN, enter the phone number in the Fax Number data entry
field. You may also enter the name of the recipient in the To data entry field; this parameter is
optional and does not affect the transmission of the fax. To select a recipient from your address
book, press the Address Book button.
To select multiple recipients, press the Add button after you enter a recipient’s contact
information in the Fax Number field, then specify another recipient in the Fax Number field.
After completing the Recipient list, press the Next button to enter the Schedule panel.
10.6.2.3
Schedule
The Schedule panel, as shown in figure 10-14, selects when the MX will deliver your fax message.
Figure 10-14 MXIE Fax Wizard – Schedule
•
•
Select Now to send the fax upon the completion of the MXIE Fax Wizard.
Select Schedule to send the fax at a future time and date. Specify the Date and Time in the
respective Date and Time data entry fields.
After completing the Schedule, press the Next button to enter the Fax Summary Information
panel.
10.6.2.4
Fax Summary Information
The Fax Summary Information panel, as shown in figure 10-15, displays the fax recipients and the
time when the fax will be sent. If you are logged into MXIE under multiple roles (as a user and an
ACD or operator agent), you can specify the role under which your fax will be sent; in this case,
the From field provides a drop down menu that lists your active role.
Verify the recipient and schedule information, then press the Next button to send the fax and exit
the MXIE Fax Wizard.
134
10. Voice Mail, Faxes, and Call Recordings
Figure 10-15 MXIE Fax Wizard – Fax Summary Information
10.6.3
Using the Fax Printers
The Fax Printer is a driver that is installed as a windows printer. You can fax any file that can be
normally printed through windows.
10.6.3.1
Installing MX Fax Printer Device Driver
Installing the MX Fax Device driver requires a printer port on your computer. The following
procedure installs a printer port on a computer that runs the Microsoft XP operating system. The
steps for installing a printer port in a computer running Windows 2000 are similar.
1.
Open the Control Panel by pressing the Start button on the Taskbar and selecting Settings |
Control Panel on the Start menu.
2.
Open the Printer and Faxes panel by right clicking on the Printer and Faxes icon and
selecting Open on the pop up menu.
3.
Open the Print Server Properties window by selecting File | Server Properties from the main
menu of the Printer and Faxes window.
4.
In the Print Server Properties window, click on the Ports tab and scroll down through the
list of installed ports. If a port named MXFax is present, proceed directly to step 1. If the
MXFax port is not present, open the Printer Ports window by pressing the Add Port button.
5.
In the Printer Ports window, chose Local Port from the Available port types section and press
the New Port button. When prompted to enter a port name, enter MXFax and press the OK
button.
You must be logged in as a Local Administrator to create a Local Port. If you are not logged
in as a Local Administrator you will receive a Specified port cannot be added. Operation could not
be completed error when attempting to add the MXFax port. If you receive this error, log in as
the Local Administrator, then return to step 4.
An MXFax Local Port should now be present on the system.
135
MXIE User’s Manual
After verifying that an MXFax Local Port exists on your system, perform the following steps to
install the MX Fax Printer Device Driver:
1.
Open the Add Printer Wizard by double clicking the Add Printer icon in the Printers and
Faxes window.
2.
In the Add Printer Wizard, select Local printer attached to this computer for the type of
printer to install and press the Next button to continue.
The Select a Printer Port dialog appears.
3.
In the Select a Printer Port dialog, select MXFax (Local Port) and press the Next button to
continue.
The Install Printer Software dialog will appear.
4.
In the Install Printer Software dialog panel, press the Have Disk button and enter the name
of the directory containing the device drivers for the MX Fax Printer, such as C:\Program
Files\Zultys\MXIE\drivers. Press OK.
5.
The Zultys MX Fax Printer device driver should now be listed as the printer device driver to
install. Click on Next to install the device driver.
The Zultys MX Fax Printer device driver is not digitally signed. If you receive a warning
about the digital signature during installation, ignore it and click on the Continue Anyway
button to proceed.
6.
10.6.3.2
Continue to press Next in each of the remaining dialogs until finished.
Sending Faxes with the Fax Printer
The Fax Printer is a driver that is installed as a windows printer when you install MXIE. You can
fax any file that can be normally printed through windows.
To send a fax through the fax printer, a MXIE instance must be active on your PC. Open a file
through a windows application (such Word or PDF Reader). Select the print option, then select
MX Fax Printer as the printer. Press the OK button to initiate the print. MXIE will then display
panels for selecting the destination phone numbers and the time that the fax will be sent.
10.7
Message Notifications
MXIE uses a notification plan to inform you of incoming voice messages and faxes. The
notification plan comprises rules that determine the MX delivery method and content of
messages sent to your e-mail account when your mail box receives a voice message or fax.
This first part of this section describes the structure and creation of notification rules, followed by
a discussion of combining these rules to create a notification plan.
10.7.1
Notification Plan
10.7.1.1
Description
Notification plans determine the method that you are informed when your mail box receives a
message. Each notification plan comprises a set of Notification Rules.
136
10. Voice Mail, Faxes, and Call Recordings
Figure 10-16 displays a list of notification rules that make up a notification plan. Each rule is
assigned a precedence rank. The MX begins to evaluate the Notification Plan with the highest
ranking rule. If the conditions defined by this notification rule match the incoming call, MXIE
sends the notification by specified by the rule. If the conditions defined by the rule do not match
the incoming message, the Notification Plan evaluates the call against its next highest ranking
rule.
Figure 10-16 Notification Preferences panel
The Notification Plan continues the evaluation process until the incoming message matches a rule
or until the message is evaluated against all of the rules. If the message does not match any rule,
or if there are no active rules, a message is not sent.
10.7.1.2
Notification Preference window
A Notification Plan is a list of active notification rules that determine the MX delivery method and
content of messages sent to your e-mail account when your voice mailbox receives a voice
message or fax. The notification rules for a MXIE instance are configured in the Notification Rule
Preference panel, as shown in figure 10-16. To open this panel, open the User Preferences
window by selecting File | Preferences from the main menu, then selecting Notification in the
panel directory.
This window comprises two sections: Available Notification Rules and Rule description.
The Available Notification Rules section lists all of the notification rules configured within the
MXIE instance. Rules are listed in order of their precedence rank. Components of this panel that
support the creation of notification rules include:
•
Selection box: A selection box is located to the left of each notification rule. The Notification
Plan only includes Notification Rules that have marked selection boxes. Rules that are not
marked are disregarded when the Notification Plan evaluates an incoming call. Click this box
to enable or disable the rule.
137
MXIE User’s Manual
•
Precedence rank: The precedence rank appears next to a rule’s selection box and determines
the order that a rule is evaluated against incoming faxes and voice messages. Rules are listed
in order of their precedence rating, with the highest ranking rules at the top. The Up and
Down buttons edit the precedence rank of the highlighted rule.
•
Edit Buttons: Located to the right of the call handling rules, the button bar accesses the
Notification Rule Editor and modifies the precedence ranking of the available call handling
rules.
— New: This button opens the Notification Rule Editor to create a new rule.
— Modify: This button opens the Notification Rule Editor to edit the highlighted rule.
— Delete: This button removes the highlighted notification rule from the list.
— Up: This button moves the highlighted rule higher in the list, increasing its precedence
ranking.
— Down: This button moves the highlighted rule lower in the availability list, decreasing its
precedence ranking.
The Rule Description section displays the components of the highlighted notification rule. You
can edit the rule notification period, method, and condition settings that are underlined in this
section. This section is identical in appearance and function to the Rule Description section of the
Notification Rule Editor.
To add new filtering conditions or to change other notification parameters, access the Notification
Rule Editor by pressing the Modify button.
10.7.2
Notification Rules
Notification rules determine the MX delivery method and content of messages sent to your e-mail
account when your mail receives a voice message or fax. Notification rules are created and edited
in the Notification Rule Editor window, shown in figure 10-17.
To access the Notification Rule Editor, select File | Preferences from the main menu, select
Notification in the panel directory, then either press the New button to create a new rule or press
the Modify button to edit the highlighted rule.
The Notification Rule Editor comprises the following sections:
138
•
•
•
•
Rule: This section defines the rule name.
•
•
Check Conditions: This section specifies the rule filters.
Notify Me: This section specifies the times when rule triggers a notification message.
Send Notification by: This section specifies the type of message that the rule triggers.
Attach Message: This section permits the sending of the voice message or fax as an attachment
to the notification message.
Rule Description: This section specifies the rule action and parameters of selected filters and
triggers. All underlined text in this section links to dialog panels that configure the trigger,
filter, or action referenced by the text.
10. Voice Mail, Faxes, and Call Recordings
Figure 10-17 Notification Rule Editor
10.7.2.1
Rule Name
The rule name is the label that identifies the rule within its notification plan. To configure the
name of a notification rule, enter text in the Rule data entry box at the top of the Notification
Editor window, as shown in figure 10-17.
10.7.2.2
Notify Me
The Notify Me section determines when the MX sends a notification message:
10.7.2.3
•
Each Time I receive a new message: Select this option to send a notification message if you do
not save or delete a new voice message or fax within a specified period after you receive it. You
specify the period by selecting the Message is Older Than option in the Check Conditions
section of the panel; if you do not configure this period, the MX sends a notification message
immediately after you receive a voice message or fax that triggers the rule.
•
With an aggregated notification at a regular interval: Select this option to send notification
messages at a specified interval if you have one or more new messages in your voice mailbox.
You specify the period by selecting the Notification Interval option in the Check Conditions
section of the panel.
Send Notification By
This section determines the method that the MX uses to send the notification message to you.
MXIE supports only e-mail for notification messages at this time. When you select this option, the
Rule Description section prompts you for an e-mail address.
139
MXIE User’s Manual
10.7.2.4
Attach Message
When this option is selected, notification messages sent to the specified e-mail address will
include the voice message or fax as an attachment.
10.7.2.5
Filtering Conditions
Filtering conditions specify additional criteria under which a triggered message is managed by
the rule. The MX applies a notification rule to a call only if all selected triggering and filtering
conditions apply to the call.
Figure 10-18 displays the Notify Me, Check Conditions and Rule Description sections of the
Notification Rule Editor when all available filtering conditions are selected; the availability of
certain conditions depends on the selected Notify Me option. To select an event filter, mark the
corresponding box with a check mark in the Check Conditions section. All selected filters require
the configuration of supporting parameters in the Rule Description panel; click on the underlined
text to access the dialog panels that sets these values.
The Notification Rule Editor will not save the rule until you assign a value to each underlined
parameter in the Rule description section.
Figure 10-18 Notification Rule Editor – Event Triggers
The MX defines the following filtering conditions:
140
•
Message Media: This condition specifies the type of message that filters a notification.
Parameter options are voice and fax.
•
Message Class: This condition specifies which messages will filter a notification by caller
mark.
•
Message From: This condition filters a message if it originates from the specified phone
number or user ID.
•
Message is Older Than: This condition sends a notification when the specified period has
elapsed after receiving the voice message or fax. This period allows you to save or delete a
message before the MX sends the notification message. This option is available only when Each
Time I Receive a New Message is selected in the Notify section.
10. Voice Mail, Faxes, and Call Recordings
•
Message Interval: This condition specifies the time period between notification messages.
This option is available only when With an aggregated notification at a regular interval is selected
in the Notify section.
•
Time of Day: This condition filters a message if the specified time of day matches the time that
the message is received.
•
On Days of Week: This condition filters a call if one of the specified weekdays match the day
of the week that the call is received.
A notification rule may use more than one filtering condition; in this case, a notification rule
matches the call only if the call satisfies each filtering condition.
10.8
Messages Preferences
The Messages Preferences panel, shown in figure 10-19, specifies the local storage location for
your saved messages and configures the destination of messages and mailboxes that you delete.
To open the Messages Preferences panel, open the User Preferences window by selecting File |
Preferences from the main menu, then select Messages in the panel directory.
Figure 10-19 Messages Preferences panel
10.8.1
Local Voice Mail Storage File Location
You can change the location of your voice mail files from this panel. The example displayed in
figure 10-19 is configured with the name of the default storage location, which overflows the text
box. The full default voice mail box location in this example is:
C:\Documents and Settings\janie.newsome\Local Settings\Application Data
\Zultys\MXSettings\janie.newsome.vm
Appendix B on page 171 lists the default MXIE system file locations and describes their properties.
•
•
Press the Select button to choose a storage location for your voice mail messages.
Press the Save as button to copy the current voice mail file into a new file.
141
MXIE User’s Manual
10.8.2
Delete Policy
Deletion options determine the method of removing messages and mail boxes from the voice mail
window. If you select Delete box to “Deleted” box, mail boxes that you delete are moved to the
Delete system mail box; boxes are permanently removed from your system by deleting them from
the Delete box. When Delete message to “Deleted” box is selected, voice mail messages are deleted
in the same manner. These options provide a method of recovering a message or mail box that
was deleted by mistake.
If these options are not selected, messages and boxes deleted from the voice mail window are
immediately removed from the system and cannot be recovered.
10.8.3
Message Confirmation Preferences
The Message Confirmation Preferences panel, shown in figure 10-20, configures the
confirmation options for copying, moving, and deleting your mailboxes and messages. To open
the Confirmation Preferences panel, open the User Preferences window by selecting File |
Preferences from the main menu, then select Confirmations in the panel directory.
Figure 10-20 Voice Mail Confirmation Preferences panel
The seven confirmation options control Message component copy, move, and deletion
operations. If you attempt to perform an operation in the Voice Mail window that is selected in
this panel, MXIE will perform that operation only after a confirmation window offers the chance
to discontinue the procedure. Options that are not selected in this panel do not require final
confirmation before MXIE performs the operation.
142
Chapter 11
Logs
11.1
Log Features
The MXIE Log, shown in figure 11-1, displays each voice call that generated a MXIE session block
over a specified period. Each record within the log refers to one voice call. To access the call log,
select View | Log from the main menu bar.
Figure 11-1
Call Log
Log records are obrained from the system Call Detail Records database and cannot be moverd or
deleted. The number of records displayed in the log is configured in the Call Log Preferences
panel. The maximum number of records displayed is based on the number of days specified on
the Call Preferences panel. When you reduce the size of the call log display by altering preference
panel settings, the call records are only removed from the Call Log panel and can be restored to
the display by resetting the Preferences parameter setting.
11.1.1
Record Parameters
Each record displays the following information about the voice call or chat session to which it
refers:
•
•
#: This column lists the record number within the log.
Icon (blank column heading): The icon in this column specifies the type and direction of the
session.
Figure 11-2 lists the icons taht are displayed in this column.
•
Date: This column specifies the date and time that the session began.
143
MXIE User’s Manual
Figure 11-2
11.1.2
Log Icons
•
Service: This column lists the operator, ACD, or hunt group role from which the session was
initiated.
•
•
•
Address: This column lists the SIP address of the other party.
Number: This column lists the extension or phone number of the other party.
Duration: This column lists the duration of the session.
Log Functions
You can access log functions by right-clicking the mouse while the cursor points in the log, as
shown in figure 11-3. Functions accessible in this manner include:
Figure 11-3
144
Log Functions
•
Call or Call Back: This option calls the address or number listed under the Number heading
in the selected Log entry. If the call entry is an inbound voice call, this option is Call Back.
•
Call to: This option lists all of the contact methods that are listed in the address book for the
contact that the log entry references. Click on one of the contact methods to place a call to the
contact.
•
Copy: This option copies all selected log records to the windows clipboard. You can select
records using standard Window edit procedures with your mouse and keyboard.
•
Select All: This option selects all of the call log records.
11. Logs
•
11.2
Add to Address Book: Select this option to add the contact to the address book. This option
appears if the contact in the highlighted entry is not in the address book.
Call Log Preferences
The Call Log Preference panel, shown in figure 11-4, instructs MXIE to display log entries and
configures the maximum size of your log. To open the Call Log Preference panel, open the User
Preferences window by selecting File | Preferences from the main menu, then select Call Log in
the panel directory.
Changes to call log parameters do not take effect until you exit and reenter MXIE.
Figure 11-4
Call Log Preferences panel
The maximum log size is based on the number of days that records are stored. Log entries are
retrieved directly from the MX. Reducing the size of the MXIE call log by altering preference
panel settings does not delete call log records.
•
Show Call Log: When you select this option, the Log window displays the contents of your
log. If this option is not selected, the log displays a blank panel.
•
Days: This parameter sets the maximum number of days for which calling records are stored.
145
MXIE User’s Manual
146
Chapter 12
TAPI
12.1
Introduction
TAPI is a set of functions and methods that allow Windows applications to share telephony
devices with each other. It provides a common means of handling different media (voice, data,
fax, and so on) on a wide range of hardware platforms.
12.1.1
TAPI Architecture
TAPI applications communicate directly with Windows to request services. Windows will pass
this information, such as the dial string, to the Telephony Service Provider (TSP). The TSP has a
“line” which is a virtual device used to communicate with external applications or devices.
Zultys provides a TSP called MX Telephony Service Provider that needs to be added to the PC,
and a line Zultys MX Line that needs to be configured on the TAPI application. A logical
representation of the TAPI architecture is shown in figure 12-1.
Figure 12-1
TAPI Architecture
147
MXIE User’s Manual
When you install MXIE, the program automatically installs the TSP and makes the Zultys MX
Line available.
To use the TAPI interface, you must run the MXIE first so that the Zultys MX Line can interface
with the MX1200 or MX250.
12.1.2
CRM Applications
Most CRM applications support TAPI for calling contacts from the application without having to
manually enter the phone number using a telephone keypad. There are additional features such
as tracking calls, creating journal entries, and logging all calls.
Some CRM applications also support the presentation of calling party information:
•
•
popup screen
activating contact information
The following CRM applications have been tested with the MX:
•
•
•
•
Microsoft Outlook 2002
Maximizer version 7.0
ACT! version 6.0
Goldmine version 6.01
The MX can operate with any CRM application that supports TAPI version 2.1 or above.
12.1.3
TAPI and MX Integration
TAPI fully integrates with the MX as a standard device would. Calls can be made to the following
devices and services:
•
•
•
•
•
SIP devices
softphones
automated attendant
voice mail
PSTN devices
All TAPI calls are reported as sessions and are recorded in the system CDR database2.
12.1.3.1
Maximum TAPI Sessions
The MX supports one TAPI session per device. The number of devices is limited by the number
of users configured on the MX.
1. Goldmine requires Cynergy CTI link to be TAPI compliant.
2. For more information on CDR refer to the Administrators User’s Manual.
148
12. TAPI
12.1.4
TAPI and MXIE Integration
TAPI interacts directly with MXIE. MXIE and a bound device are required for TAPI to function
with the MX.
MXIE handles all the messaging between Microsoft Windows and the SIP device. This
information is passed to the MX.
12.2
Configuration
12.2.1
Application Installation
Install the TAPI application you want to use with MXIE in accordance with the software
supplier’s documentation.
12.2.2
PC Configuration
Before you can use TAPI for making calls, the MX Telephony Service Provider needs to be added
to the PC that has the TAPI enabled application installed.
1.
Ensure MXIE software is installed on your computer.
2.
Open the Phone and Modem Options section of Windows Control Panel.
3.
Click the Advanced tab.
The Phone and Modem Options window will open as shown in figure 12-2.
Figure 12-2
4.
Phone and Modem Options – Advanced Tab
Click the Add button.
149
MXIE User’s Manual
The MX Telephony Service Provider will be a choice of available Telephony Providers as
shown in figure 12-3.
Figure 12-3
5.
MX Telephony Service Provider
Select the MX Telephony Service Provider and click the Add button.
The MX Telephony Service Provider will now be added to the system as shown in figure
12-4.
Figure 12-4
6.
150
MX Telephony Service Provider Added to PC
After adding the MX Telephony Service Provider, you can close the Phone and Modem
Options and Control Panel windows.
12. TAPI
12.2.3
12.2.3.1
TAPI Application Configuration
Microsoft Outlook
Outlook does not display calling party information for incoming calls from configured contacts.
To add TAPI support to Outlook:
The following Outlook configuration is similar to initiating a phone call.
1.
Right click on a Contact and choose the “Call Contact...” menu item as shown in figure 12-5.
Figure 12-5
Outlook – Call Contact
The New Call window will open as shown in figure 12-6.
Figure 12-6
2.
Outlook – New Call
Click the “Dialling Options...”
The Dialing Options window will open as shown in figure 12-7.
The Zultys Line does not require any additional configuration. If you press the Line
Properties button, there will be an error message as shown in figure 12-8. To resolve this
error message, click the OK button.
151
MXIE User’s Manual
12.2.3.2
Figure 12-7
Outlook – Dialing Options
Figure 12-8
Outlook – Line Properties Error Message
3.
Select Zultys MX Line from the Connect using line combo box.
4.
Click the OK button.
Maximizer
Maximizer provides a popup message with the calling party information when a contact makes
an incoming call.
To add TAPI support to Maximizer:
1.
Click the File | Preferences menu item.
The Preferences window will open as shown in figure 12-9.
152
2.
Click the Dialing tab.
3.
Select TAPI from the Method frame.
12. TAPI
Figure 12-9
4.
Maximizer – Preferences Window
Click the Device button.
The Device widow will open as shown in figure 12-10.
Figure 12-10 Maximizer – Adding Zultys MX Line
5.
Select Zultys MX Line from the Connect using line combobox.
6.
Click the OK button.
To add popup message support with calling party information:
1.
Check the Detect incoming calls checkbox from the Preferences | Dialling tab as shown in
figure 12-9.
2.
Open the Windows Registry Configuration by typing “regedit” from the Windows Run
command.
3.
Select the following registry path.
153
MXIE User’s Manual
HKEY_LOCAL_MACHINE\Software\Multiactive Software\Maximizer\Modules\AMGR\Cur
rentVersion\Tapi
4.
Double click the Show CID entry and change the value from 0 to 1.
If the Show CID setting is not there, you need to create the entry by accessing the Edit | New
| DWORD Value in the Tapi folder.
5.
Click OK and close the registry window.
The correct configuration of the registry is shown in figure 12-11.
Figure 12-11 Registry Settings that Enable Popup Messages for Incoming Calls
12.2.3.3
ACT!
ACT! supports calling party information by activating the contact for incoming calls of configured
contacts.
To add TAPI support to ACT!:
1.
Click the File | Preferences menu item.
The Preferences window will open as shown in figure 12-12.
2.
Click the Dialer tab.
Figure 12-12 displays the Preferences window with the Dialer tab selected.
3.
Select Zultys MX Line from the Modem or line combobox.
The Zultys Line does not require any additional configuration. If you press the Setup button,
there will be an error message as shown in figure 12-13. To resolve this error message, click
the OK button.
4.
Click the OK button.
To add activating contact support for incoming calls:
154
1.
Check the Lookup contact using caller ID checkbox in the Preferences | Dialer tab.
2.
Click the OK button.
12. TAPI
Figure 12-12 ACT! – Preferences Window
Figure 12-13 ACT! – Setup Error Message
12.3
Establishing Calls
12.3.1
Placing calls
12.3.1.1
Outlook
There are three ways to initiate a call using Outlook:
•
Select Actions | Call Contact from the main menu.
Figure 12-14 displays the Outlook Action menu when Call Contact is specified.
•
Right click on an Outlook contact and select Call Contact from the popup menu.
Figure 12-15 displays the popup menu when Call Contact is selected.
•
Pressing the Dial button in the toolbar
Figure 12-16 displays the Outlook toolbar with the Dial button selected.
Outlook displays call status for various call status. The list of call status is described in figure 12-17.
155
MXIE User’s Manual
Figure 12-14 Making a call using the menu system on Outlook
Figure 12-15 Making a call by right clicking a contact with Outlook
Figure 12-16 Making a call using the dial button on Outlook
To place a TAPI call using Outlook:
1.
156
Ensure MXIE is logged into MX and bound to a device.
12. TAPI
Call Status
Definition
On hook
TAPI line is in the IDLE state. No calls are being initiated or terminated
Dialing
A call is being dialled, or in the DIALING state
Connected
A TAPI line is actively connected
Hanging Up
A TAPI call is being torn down and resources are being released
Figure 12-17 Outlook – Call status definitions
If MXIE is not logged into the MX an error message as shown in figure 12-19 will appear
when you try to initiate a call. To resolve this error message, click the OK button and login
with MXIE to the MX.
MXIE screen prompts work properly only if you open MXIE and bind it to a device prior to
opening Outlook.
2.
Verify that DND or call forwarding is not enabled on the bound device.
If DND or call forwarding is set MXIE will generate a message as shown in figure 12-18. To
resolve this message, remove DND or call forwarding on the bound device. Outlook will
need to be restarted before any calls can be placed.
3.
Initiate a call by any of the three methods.
The New Call window will appear as shown in figure 12-6. The call status is On Hook
TAPI cannot establish a call if letters or special characters (such as * or #) are used in the
number.
4.
For international calls, Outlook has a problem if the number is in the following format:
+61 (0)2 8818 3266 (this example dials a number in Australia from the US)
If dialling from a US location, Outlook will send the (0) as part of the number string. The (0)
should not be sent if dialling from the US. The (0) should be sent only if dialling from
Australia.
To ensure that the proper number is dialled from all locations omit the (0) from the Outlook
entry as following:
+61 2 8818 3266
From a US location Outlook will dial:
011 61 2 8818 3266
Within Australia, with area code (02) Outlook will dial:
8818 3266
Within Australia, with area code (04) Outlook will dial:
0 2 8818 3266
Figure 12-18 MXIE – Message when DND or call forwarding is set
157
MXIE User’s Manual
Figure 12-19 Outlook – MXIE not logged into MX error message
5.
Press the Start call button.
If you do not wish to call the contact, click the Close button.
6.
Take the SIP device off hook.
After pressing the Start call button, the SIP device will ring.
To complete the sending of the number, take the SIP device off hook.
The call status will change to Connected and the device plays the ringback, while the call is
being established.1
The Connected state is set since there is a connection between TAPI and the MX. This
Connected state does not indicate a connection with the calling party.2
7.
Terminating the call.
A call can be terminated by the following actions:
•
•
place the SIP device on hook
press the End Call button
If the SIP device is placed on hook, the call status will immediately change to On hook.
If the End Call button is pressed, the call status will transition to the Hanging up state then to the
On hook call status.
Hold and transfer is not directly supported by Outlook. With MXIE, these features can be used
with Outlook.
12.3.1.2
Maximizer
There are three ways to initiate a call using Maximizer:
•
•
•
from the main menu, by selecting Actions | Make a Call... as described in figure 12-20.
right click a contact and selecting the Make Call menu item as shown in, figure 12-21
pressing the Phone button in the toolbar, shown in figure 12-22.
To place a TAPI call with Maximizer:
1.
Ensure MXIE is logged into MX and bound to a device.
1. Ringback may not be heard if the system connects immediately, such as connecting to MX or internal phone. Ringback
is usually heard when making calls through the PSTN.
2. When connected with the calling party, the state will still be in the connected state.
158
12. TAPI
Figure 12-20 Making a call using the menu on Maximizer
Figure 12-21 Making a call by right clicking on a contact with Maximizer
Figure 12-22 Making a call using the phone button on Maximizer
If MXIE is not logged into the MX an error message as shown in figure 12-23 will appear
when you try to initiate a call. To resolve this error message, click the OK button and login
with MXIE to the MX.
159
MXIE User’s Manual
Figure 12-23 Maximizer – MXIE not Logged Into MX Error Message
MXIE screen prompts work properly only if you open MXIE and bind it to a device prior to
opening Maximizer.
2.
Verify that DND or call forwarding is not enabled on the bound device.
If DND or call forwarding is set MXIE will generate a message as shown in figure 12-18. To
resolve this message, remove DND or call forwarding on the bound device.
3.
Initiate a call by any of the three methods.
TAPI cannot establish a call if special characters (such as * or #) are used in the number.
There are two different windows that appear when initiating a call depending on the
method to initiate the call.
If the call is initiated by the menu systems; Actions | Make Call or Right Click | Make Call a
window as shown in figure 12-24 will appear.
If the Phone button is pressed, a window as shown in figure 12-25 will appear.
If the call is initiated by the menu system, the number will be automatically sent. If the call
is initiated by the Phone button, you have to press the Dial button to send the number.
If you do not wish to call the contact, press the Cancel button for figure 12-24, or the Close
button for figure 12-25.
The definition of buttons shown in figure 12-24
Answered. Opens figure 12-26
Message. Disconnects the call and creates a log indicating a message was left for the contact
No Answer. Disconnects the call and creates a log indicating the party did not answer
Busy. Disconnects the call and creates a log indicating the party was busy
Re-dial. Disconnects the call and dials the contact number again
Figure 12-24 Maximizer – Phone Call
4.
160
For international calls, Maximizer does not exhibit the issue as described in step 4 from
section 12.3.1.1 on page 155 with Outlook.
12. TAPI
Figure 12-25 Maximizer – Phone
5.
Take the SIP device off hook.
The Phone window will appear as shown in figure 12-26.
Figure 12-26 Maximizer – Active Call
6.
Terminating the call.
A call can be terminated by the following actions:
•
•
place the SIP device on hook
press the Hang up button
161
MXIE User’s Manual
Hold and Transfer is not directly supported by Maximizer. With MXIE, these features can be used
with Maximizer.
12.3.1.3
ACT!
There are three ways to initiate a call using ACT!:
•
from the main menu by selecting Contact | Call Contact as described in figure 12-27
Figure 12-27 Making a call using the menu on ACT!
•
•
right click a contact and selecting the Phone Contact menu item as shown in figure 12-28
pressing the Dial Phone button in the toolbar shown in figure 12-29
To place a TAPI call with ACT!:
1.
Ensure MXIE is logged into MX and bound to a device.
If MXIE is not logged into the MX an error message as shown in figure 12-30 will appear
when you try to initiate a call. To resolve this error message, click the OK button and login
with MXIE to the MX.
MXIE screen prompts work properly only if you open MXIE and bind it to a device prior to
opening ACT!
2.
162
Verify that DND or call forwarding is not enabled on the bound device.
12. TAPI
Figure 12-28 Making a call by right clicking on a contact using ACT!
Figure 12-29 Making a call using the dial phone button on ACT!
Figure 12-30 ACT! – MXIE not Logged Into MX Error Message
If DND or call forwarding is set MXIE will generate a message as shown in figure 12-18. To
resolve this message, remove DND or call forwarding on the bound device. Outlook needs
to be closed and re-opened before more calls can be placed.
3.
Initiate a call by any of the three methods.
The Dialer widow will appear as shown in figure 12-31.
Select the number you wish to call by pressing the Dial1 button. TAPI cannot establish a call
if special characters (such as * or #) are used in the number.
If you do not wish to call the contact, click the Close button.
4.
For international calls, ACT! does not exhibit the issue described in step 4 from section
12.3.1.1 on page 155 with Outlook.
5.
Take the SIP Device off hook.
1. A contact can have more that one number associated with it. This sample only displays a single number for the contact.
163
MXIE User’s Manual
Figure 12-31 ACT! – Dialer
After taking the SIP device off hook a timer window as shown in figure 12-32 will appear.
Figure 12-32 ACT! – Call Timer
6.
Terminating the call.
ACT! does not support terminating calls. You terminate calls by placing the SIP device on
hook.
Hold and Transfer is not directly supported by ACT!. With MXIE, these features can be used with
ACT!
12.3.2
Receiving Incoming Calls
12.3.2.1
Outlook
Outlook does not support the use of TAPI for receiving calls.
12.3.2.2
Maximizer
Maximizer supports a popup message for incoming calls of configured contacts if you open MXIE
and bind it to a device prior to opening Maximizer. See section 12.2.3.2 on page 152 for
configuring Maximizer for incoming calls. When an incoming call is received from a configured
contact, a pop window as shown in figure 12-33 will be displayed.
You cannot answer the call using Maximizer. You have to take the bound device off hook.
164
12. TAPI
Figure 12-33 Maximizer – Incoming Call
12.3.2.3
ACT!
ACT! supports incoming calls by activating the contact info for the incoming contact. See section
12.2.3.3 on page 154 for configuring ACT! for incoming calls.
When an incoming call is received from a configured contact, ACT! will activate the incoming
contact. There is no popup message.
165
MXIE User’s Manual
166
Appendix A
User Preferences
A.1
Introduction
The User Preferences window, as shown in figure A-1, configures MXIE appearance settings and
other background parameters. To access the User Preferences panel, select File | Preferences from
the main menu.
Figure A-1
A.2
User Preferences window
Panel Directory
The Panel Directory, located on the left side of the window, lists the available User Preference
Panels. Twelve preference panels are accessible to all MXIE users. In addition to these panels, the
Softphone Preference panel is available with Advanced MXIE, and the ACD and Operator panel is
available for Users that are logged into MXIE as an operator, hunt group agent, or ACD agent.
To open a user preference panel, select it from panel directory.
167
MXIE User’s Manual
A.3
Preference Panels
The Preference Panels, located on the right side of the window, displays the options that are
provided on the specified User Preference panel. You select a panel in the panel directory. User
Preference settings take effect after you press the OK button at the bottom of the window.
The User Preference window provides the following panels:
•
The ACD and Operator panel configures presence rules for MXIE users that are logged into
the system under multiple roles. This panel is available to only users that log into MXIE as an
operator, hunt group agent, ACD agent, or Inbound Call Center agent. See section 8.5.2 on
page 99 for details.
•
The Address Book panel
— The Default Action subpanel
— The Shown Properties subpanel
— The Sort Order subpanel
•
The Appearance panel controls the appearance of MXIE window components. See section 3.2
on page 22 for details.
•
The Application panel controls startup, termination, and display aspects of the MXIE
window. See section 2.6 on page 9 for details.
•
The Audio Output panel determines the Audio Driver that MXIE uses to play your voice
messages and audio notifications. See section 3.5 on page 26 for details.
•
The Call Handling panel defines your call handling plan and configures your call handling
rules. See section 5.5.3.2 on page 67 for details.
•
The Call Log panel instructs MXIE to display log entries and configures the maximum size of
your log. See section 11.2 on page 145 for details.
•
The Calls panel controls the appearance of session blocks and the behavior of the MXIE
window when receiving an incoming call. See section 3.3 on page 23 for details.
•
The Device Access Policy panel controls binding access by other users to devices that are
configured as your registered contacts and determines the method of controlling multiple
phone calls. See section 5.2.5 on page 46 for details.
•
•
The External Messaging panel
The Instant Messaging panel configures the format of the date and time headers in the
message window, controls the behavior of your computer when you receive a message, and
controls the saving of text message sessions. See section 4.5.1 on page 36 for details.
— The Messages subpanel defines the behavior of the enter key when sending messages and
controls the receipt of instant messages by your phone. See section 4.5.2 on page 38 for
details.
•
The Messages panel specifies the local storage location for your saved messages and
configures the destination of messages and mailboxes that you delete. See section 10.8 on page
141 for details.
— The Confirmations subpanel configures the confirmation options for copying, moving, and
deleting your mail boxes and messages. See section 10.8.3 on page 142 for details.
•
168
The Notification panel defines your notification plan that informs you of new voice messages
and faxes in your mail box. See section 10.7.1.2 on page 137 for details.
A. User Preferences
•
The Presence panel configures user role presence rules and controls the display of your
presence to other system users. See section 8.5.1 on page 97 for details.
— The Toolbar subpanel controls the appearance of the presence toolbar. See section 8.5.3 on
page 100 for details.
•
The Softphone panel selects a codec that the MXIE softphone will initially use when
negotiating voice call session communication settings. See section 5.4.7 on page 61 for details.
— The Audio Parameters panel
•
The Sounds panel determines the tones that MXIE plays to alert you of incoming messages,
session requests, and failed communication attempts. See section 3.4 on page 25 for details.
•
The Supervisor subpanel configures the content of the Supervisor menu on the main menu
and the appearance of agent presence status icons on the supervisor monitor panels. See
section 7.3.2.3 on page 76 for details.
Press the OK button to enable the User Preference changes made in all panels and exit this
window.
Press the Apply button to enable the User Preference changes without exiting this window.
Press the Cancel button to discard all User Preference changes and exit this window.
169
MXIE User’s Manual
170
Appendix B
System Files
B.1
Introduction
MXIE stores several files on your local hard drive that are used by MX utilities to record your data,
store your settings, and log your activity. This appendix describes these files, including
information on their content, default location, and the method of customizing their location.
Important Always use the listed MXIE panel to move system files to a different location.
Moving these files by any other method (such as the windows file management
utility) may result in a loss of data.
B.2
File Descriptions
B.2.1
Initialization and Settings
The MXUser.Ini file stores login history, MXIE window appearance settings, and other
configuration settings. The location of this file is not configurable. If you delete or move this file,
MXIE creates a new file in the default location and all of the settings in the original file will be lost.
Default Directory Location:
C:\Document and Settings\user.name\Application Data\Zultys\MXSettings
File Name: MXUser.ini
Configuration Panel: None
B.2.2
Address Book File
The address book file stores the contact information for each of your address books.
Default Directory Location:
C:\Document and Settings\user.name\Application Data\Zultys\MXSettings
File Name: Address_book.xml
Configuration Panel: Address Book Settings. To access this panel, press the options button in the
address book.
171
MXIE User’s Manual
B.2.3
Voice Mail File
MXIE requires one voice mail file to store all of the voice mail that you have saved from the inbox
to another location. This file describes the structure of your voice mail directory and stores your
voice mail boxes, including each voice mail message in the boxes.
Default Directory Location:
C:\Document and Settings\user.name\Local Settings\Application Data\Zultys\MXSettings
File Name: user.account.vm, where user.account is the user ID of the account.
Configuration Panel: Voice Mail Users Preferences. To access this panel, select File | Preferences
| Voice Mail from the main menu.
B.2.4
Chat Text Files
Each chat text file saves the contents of one chat session. Chat files are stored in text format and
contain the conversation as recorded in the message window.
Default Directory Location:
C:\Document and Settings\user.name\Local Settings\Application Data\Zultys\MXSettings
File Name: YYMMDDTTTTTT.txt, which denotes the time and date the chat session began:
•
•
•
•
YY: year
MM: month
DD: date
TTTTTT: time in hours, minutes and seconds
For example, 030517123456.txt stores a chat that began at 12:34:56 on 17 May 2003.
Configuration Panel: Chat and IM Preferences. To access this panel, select File | Preferences |
Chat and IM Preferences from the main menu.
B.2.5
Instant Message Files
Each Instant Message text file save all Instant Messages that you send and receive for one day.
Instant Message files are stored in text format and contain the conversation as recorded in the
message window.
Default Directory Location:
C:\Document and Settings\user.name\Local Settings\Application Data\Zultys\MXSettings
File Name: YYMMDD_IM.txt, which denotes the day when the Instant Messages were recorded:
•
•
•
YY: year
MM: month
DD: date
For example, 030625_IM.txt saves messages received on 25 June 2003.
Configuration Panel: Chat and IM Preferences. To access this panel, select File | Preferences |
Chat and IM Preferences from the main menu.
172
Appendix C
User Lookup Panels
The User Lookup panel performs the following functions:
•
•
Specifies individual users for the Call From condition used by many Call Handling Rules.
Selects recipients for voice mail messages that you send.
To access specific information on each User Lookup panel function, click on the links located in
this topic.
C.1
User Lookup: Contacts
The User Lookup: Contacts panel specifies contact information for the Call From call handling
condition and the Forward to phone number or user ID call handling action that is used by many
Call Handling Rules. The Call From condition specifies the extension, address, or phone number
from which a call must originate in order for the defined condition to trigger an action. The
Forward to phone number or user ID action specifies the recipient of a handled call. To access this
panel, press the address book icon located on the right side of the Call Received From panel or
Call Handling Action panel.
The User Lookup: Contacts panel comprises two sections, as shown in figure C-1. The left section
displays the list of contacts contained in the address book specified by the Group parameter
located above the list. The right section displays contact information for the highlighted user in
the left section.
•
To select a user as the Call From criteria, double-click on a user name in the left section of the
panel.
•
To select contact information as the Call From criteria, left-click on an underlined field in the
right section of the panel.
•
•
To search for a user, enter the first or last name of the user in the Search for entry box.
To specify an address book, press the data entry button on the right side of the Group data
entry box.
Press the OK button to enter the specified information into the Call Received From panel and exit
this panel.
Press the Cancel button to discard the specified information and exit this panel.
173
MXIE User’s Manual
Figure C-1
C.2
User Lookup: Contacts panel
User Lookup: Recipient
The User Lookup panel designates a list of system users to receive a voice mail message. To access
this panel, press the To button on a send message panel or the Address Book button on a Transfer
panel.
The User Lookup panel comprises two sections, as shown in figure C-2. The left section displays
the list of Users configured in the MX system. The right section display the list of users that will
receive you voice mail message.
•
To select a user as a recipient, double-click one of the users on the list section. Repeat for each
user that is to receive the message.
•
To remove a user from the recipient list, highlight the user to be removed and either type the
Delete key, or right-click on the name and select Remove Contact from the list.
Press the OK button to enter the information into the Send Message panel and exit this panel.
Press the Cancel button to discard the specified information and exit this panel.
174
C. User Lookup Panels
Figure C-2
User Lookup: Recipient panel
175
MXIE User’s Manual
176
Appendix D
Glossary
ACD Agent. A member of an ACD Group.
ACD Group. A set of users, or agents, that answers calls to the same dialled number. An ACD
Group is usually defined to handle a specific type of call, such as technical support or inside sales.
See Automatic Call Distribution
Active Role. The MX role, as designated by the session list, for which the presence setting and the
buddy list contents are based on the MXIE user window.
Address Book. The MXIE utility that stores contact information, such as names, phone number,
and SIP addresses. The MX Directory address book provides read only access to the system user
directory and another method of initiating many MXIE features.
Administrator Profile. An MX data type that defines a user ’s authority to allocate system
resources.
Administrator UI. Software that allows the system administrator to configure MX system settings.
Automatic Call Distribution (ACD). A telephony service that routes incoming telephone calls to
one or more agents. The incoming calls are directed into the service through the same dialed
number.
Binding. The process of associating a MXIE instance with a SIP device. A MXIE instance can
initiate voice calls only through devices to which it is bound.
Buddy Group. Buddy groups are sublists of buddies within your user buddy list. Using buddy
groups can organize your buddy list by separating your buddies into functional groups and
displaying only a subset of your buddy list at a given time.
Buddy List. The MXIE User Window region that displays the presence of system contacts that are
configured as your buddies.
Call Handling Plan. A list of active call handling rules that determines the MX reaction to calls
that you do not answer.
Call Handling Rule. An instruction that evaluates the properties of an incoming call and
determines the MX reaction to that call.
Call Log. A MXIE window that contains a history of the each voice call and chat in which the
individual user participated.
CSV File. An ASCII comma delimited text file. Each record requires a separate line, with quotation
marks at the beginning and end of each field and with commas separating the fields.
Current Session. A session represented by a session block with a blue background.
177
MXIE User’s Manual
Device Assignment. The process of associating a Managed Device to an MX User ID. Device
assignments are performed only by a system administrator.
Device, SIP. Any type of IP Network computing device that is optimized for SIP-based IP
communications. Instruments capable of serving as SIP devices include SIP phones, softphones,
PDAs, and application programs.
Disconnect. Disconnecting a session terminates the communication between two endpoints.
Do Not Disturb (DND). An MX service that either routes calls directly to voice mail or, if a user is
not authorized to use voice mail, discards the calls.
Group Profile. An MX data type that defines a list of ACD Groups and Operator Groups. A user’s
Group Profile setting defines the ACD and Operator Group to which that user is assigned. Group
profiles are defined and assigned in the Administrator User Interface.
Hunt Group. A set of users, or agents, that answers calls to the same dialled number. Hunt groups
differ from ACD Groups in that calls to a hunt group in that you can answer calls to a hunt group
on a normal phone without using MXIE.
Hunt Group Agent. A member of a Hunt Group
Hold. The telephony function that suspends a conversation without disrupting the state of the
call. A call on hold can be retrieved only from the phone that was used to place it on hold.
Instant Message. The transmission of a single text message between two system users.
Managed Device. A SIP device that is defined within the MX device database and is identified by
the MX with a Device ID.
Main Menu. The MXIE user window region at the top of the window that uses drop down menus
to provide access to file control functions and basic MXIE operations.
Message Window. The MXIE utility that supports the transmission and receipt of instant
messages and chats.
MX. An Enterprise Media Exchange system. The term MX refers to the the MX250 and the MX30.
MXIE (Media Exchange Interface for End Users). The software interface that provides access to
MX1200 and MX250 services and resources by system users. MXIE is pronounced mix-ee.
Operator. A user that is responsible for answering incoming calls and either routing them to the
appropriate party or providing the requested information.
Operator Group. A collection of operators that answer incoming calls directed at a single phone
number.
Park. The telephony function that suspends a conversation without disrupting the state of the call
and allows the retrieval of the call from any phone.
Pickup. The action of retrieving a parked call.
Presence. The MX service that uses and distributes the availability of each system user.
Presence Bar. The MXIE window region, optionally located directly below the toolbar, that
displays the presence state of the active role and provides one touch access to presence state
transition buttons.
Presence Rule. MX operations that trigger a transition between presence states.
Presence State. A MX data type that indicate the online and availability status of an individual
user within an authorized MX role.
178
D. Glossary
Profile. An MX data construct that, when assigned to a user, authorizes the access of system
resources and defines the user’s authority to answer calls and modify system resources. Profile
types defined by the MX include Users, Group, and Administrator.
Registered Contact. A SIP device that is either a managed device that the MX administrator has
assigned to your user account, or an unmanaged device that has an address of record that is
constructed with either your user name or extension and with the domain of your MX system.
Role. An MX data type that defines the functions that an account owner can assume when
logging into MXIE. Role types defined by the MX include Users, Operators, ACD Agents, and
Administrators.
Role Partitions. A subsection of the session list that contains the session blocks for a specific role.
Session. A communication transaction between two or more endpoints. One endpoint requests a
connection with one or more other endpoints and is established when one or more of the
addressed endpoints agrees to the connection.
Session Blocks. A session list component that represents an open MX session. A session block
displays the name of the other session participants, the session type, and the duration of the
session.
Session Control Buttons. Session control buttons are optional components of a session block that
provide single button access to functions that control the session.
Session List. A MXIE window region that displays blocks that represent all open sessions of which
the MXIE instance is controlling.
Softphone. The Softphone is a MXIE tool that allows you to perform voice calls through MXIE
without using a hardware device.
Status Bar. The MXIE window region located at the bottom of the window that displays the
user’s binding status and presence status.
TAPI (Telephony Application Program Interface). TAPI is a standard program interface that
supports communications between a computer and phones, SIP voice call devices, and other
phone connected resources such as faxes and data modems.
Toolbar, Address Book. The Address Book window region that provides single button access to
address book display and edit function.
Toolbar, MXIE. The MXIE window region, located directly below the main menu, that provides
single button access to many MXIE functions.
Transfer. An operation where you send an active voice call to another user or phone number.
MXIE supports attended and blind transfers.
Transfer, Attended. A transfer operation where you speak with the person receiving the
transferred call.
Transfer, Blind. An transfer operation where you do not speak with the person receiving the call.
TSP (Telephony Service Provider). A TSP is a dynamic-link library that supports control of a
communications device through a set of exported service functions. MXIE provides a TSP to
support TAPI.
Unmanaged Device. A SIP device that is connected to the MX but is not defined in the MX device
database and is not assigned a unique device ID.
Voice Call. A Voice Call is the real time exchange of audio messages between two system users.
179
MXIE User’s Manual
Voice Mail. A telephone audio message mail box and the messages within that box.
Wrap Up State. An ACD agent presence state. An agent is moved to the Wrap Up state after
completing a voice call, then moves to the available state after a specified period.
Wrap Up Time. The period that an individual user waits after completing a voice call until the
system transfers the user ’s presence state from busy to available. Wrap Up time also defines the
period that an ACD agent remains in the Wrap Up state.
180
Index
A
access number
mail box, group . . . . . . . . . . . . . . . . . . 116
mail box, user . . . . . . . . . . . . . . . . . . . 116
accessing current instance . . . . . . . . . . . . . 7
accounts, MX . . . . . . . . . . . . . . . . . . . . . . . . 2
ACD agent
buddy list . . . . . . . . . . . . . . . . . . . . . . . . 17
definition . . . . . . . . . . . . . . . . . . . . . . . 177
presence configuration . . . . . . . . . . . . 99
presence rules . . . . . . . . . . . . . . . . . . . . 93
presence states . . . . . . . . . . . . . . . . . . . 92
role . . . . . . . . . . . . . . . . . . . . . . . . . . . . 3, 8
role partition . . . . . . . . . . . . . . . . . . . . . 13
ACD and Operator preferences . . . . . . . . 99
ACD group, definition . . . . . . . . . . . . . . 177
acoustic echo cancellation, Softphone . . 62
ACT!
initiating voice calls . . . . . . . . . . 162–164
TAPI support . . . . . . . . . . . . . . . . . . . . 154
version supported . . . . . . . . . . . . . . . 148
actions, call handling rules . . . . . . . . . . . . 65
active greeting
mail box, group . . . . . . . . . . . . . . . . . . 117
mail box, user . . . . . . . . . . . . . . . . . . . 116
active state
ACD agent . . . . . . . . . . . . . . . . . . . . . . . 92
hunt group agent . . . . . . . . . . . . . . . . . 92
Inbound Call Center agent . . . . . . . . . 92
adding a buddy . . . . . . . . . . . . . . . . . . . . . 19
address bar, message window . . . . . . . . . 31
address book
always on top . . . . . . . . . . . . . . . . . . . 107
book tree . . . . . . . . . . . . . . . . . . . . . . . 104
confirmation settings . . . . . . . . . . . . . 107
contact list . . . . . . . . . . . . . . . . . . . . . . 104
data entry . . . . . . . . . . . . . . . . . . . . . . . 110
definition . . . . . . . . . . . . . . . . . . . . . 2, 177
entry information . . . . . . . . . . . . . . . . 110
icon . . . . . . . . . . . . . . . . . . . . . . . . . . . . . 13
import . . . . . . . . . . . . . . . . . . . . . . 111–114
local file location . . . . . . . . . . . . . . . . . 107
MXIE panel . . . . . . . . . . . . . . . . . . . . . 103
preference panel . . . . . . . . . . . . . . . . . 106
preferences . . . . . . . . . . . . . . . . . 106–110
presence . . . . . . . . . . . . . . . . . . . . . . . . . 95
storage . . . . . . . . . . . . . . . . . . . . . . . . . 107
text messaging information . . . . . . . 110
toolbar . . . . . . . . . . . . . . . . . . . . . . . . . 103
address of record . . . . . . . . . . . . . . . . . . . . 42
administrator profile . . . . . . . . . . . . . . . . 177
administrator, Administrator UI . . . . 3, 177
Advanced ACD, see Inbound Call Center
agent . . . . . . . . . . . . . . . . . . . . . . . . . . . . . . 71
agent call intervention . . . . . . . . . . . . . . . 76
agent monitor . . . . . . . . . . . . . . . . . . . . . . . 76
agent presence summary . . . . . . . . . . . . . 77
AIM external messaging . . . . . . . . . . . . . . 29
always on top, address book . . . . . . . . . 107
analog line, ZIP4x5 . . . . . . . . . . . . . . . . . . 25
answer
hot key . . . . . . . . . . . . . . . . . . . . . . . . . . 16
icon . . . . . . . . . . . . . . . . . . . . . . . . . . . . . 16
appear offline state . . . . . . . . . . . . . . . . . . 91
appearance preferences . . . . . . . . . . . . . . 22
Apple operating system . . . . . . . . . . . . . . . 4
application preferences . . . . . . . . . . . . . . . . 9
at lunch state . . . . . . . . . . . . . . . . . . . . . . . 90
attended transfer . . . . . . . . . . . . . . . . 56, 179
audio drivers
MXIE settings . . . . . . . . . . . . . . . . . . . . 26
Softphone . . . . . . . . . . . . . . . . . . . . . . . 62
audio output preferences . . . . . . . . . . . . . 26
auto attendant greeting
mail box, group . . . . . . . . . . . . . . . . . . 117
mail box, user . . . . . . . . . . . . . . . . . . . 116
recording . . . . . . . . . . . . . . . . . . . . . . . 128
automatic call distribution . . . . . . . . . . . 177
Automatic Call Recording window 128–131
automatic call recordings . . . . . . . . . . . . 119
available state
ACD agent . . . . . . . . . . . . . . . . . . . . . . . 92
Hunt group agent . . . . . . . . . . . . . . . . 92
Inbound Call Center agent . . . . . . . . . 92
operator . . . . . . . . . . . . . . . . . . . . . . . . . 91
user . . . . . . . . . . . . . . . . . . . . . . . . . . . . . 90
B
be right back state . . . . . . . . . . . . . . . . . . . 90
bind a phone, MXIE panel . . . . . . . . . . . . 43
binding a device
by a call from the device . . . . . . . . . . . 44
by ID . . . . . . . . . . . . . . . . . . . . . . . . . . . . 43
by registered contact . . . . . . . . . . . . . . 44
cancelling a bind . . . . . . . . . . . . . . . . . . 45
definition . . . . . . . . . . . . . . . . . . . . . . . 177
preferences . . . . . . . . . . . . . . . . . . . . . . 47
recently bound devices . . . . . . . . . . . . 44
softphone . . . . . . . . . . . . . . . . . . . . . . . . 44
binding status
location on MXIE window . . . . . . . . . 22
MXIE panel . . . . . . . . . . . . . . . . . . . . . . 43
blind transfer . . . . . . . . . . . . . . . . . . . 55, 179
book tree . . . . . . . . . . . . . . . . . . . . . . . . . . 104
browser requirements . . . . . . . . . . . . . . . . . 3
Buddies directory . . . . . . . . . . . . . . . . . . 104
buddy group
initiate voice calls . . . . . . . . . . . . . . . . . 19
initiating conference call . . . . . . . . . . . 19
removing . . . . . . . . . . . . . . . . . . . . . . . . 19
send e-mail . . . . . . . . . . . . . . . . . . . . . . 19
send fax . . . . . . . . . . . . . . . . . . . . . . . . . 19
send text message . . . . . . . . . . . . . . . . . 19
send voice message . . . . . . . . . . . . . . . 19
buddy groups
description . . . . . . . . . . . . . . . . . . . . . . . 18
glossary . . . . . . . . . . . . . . . . . . . . . . . . 177
starting a session . . . . . . . . . . . . . . . . . 19
buddy list
adding a contact . . . . . . . . . . . . . . . . . 106
adding contacts . . . . . . . . . . . . . . . . . . 19
change presence alert . . . . . . . . . . . . . 19
disconnect . . . . . . . . . . . . . . . . . . . . . . . 19
glossary . . . . . . . . . . . . . . . . . . . . . . . . 177
initiate a voice call . . . . . . . . . . . . . . . . 19
MXIE location . . . . . . . . . . . . . . . . . . . . 17
operator . . . . . . . . . . . . . . . . . . . . . . . . . 17
removing contacts . . . . . . . . . . . . . . . . 19
roles . . . . . . . . . . . . . . . . . . . . . . . . . 17, 95
send e-mail . . . . . . . . . . . . . . . . . . . . . . 19
send fax . . . . . . . . . . . . . . . . . . . . . . . . . 19
send text message . . . . . . . . . . . . . . . . . 19
send voice message . . . . . . . . . . . . . . . 19
session control . . . . . . . . . . . . . . . . . . . 19
starting a session . . . . . . . . . . . . . . . . . 19
busy state . . . . . . . . . . . . . . . . . . . . . . . . . . 90
C
call attached data . . . . . . . . . . . . . . . . . . . . 24
call forwarding warning . . . . . . . . . . . . . . 47
call handling action, MXIE panel . . . . . . 66
call handling plan . . . . . . . . . . . . . . . 66, 177
call handling rules
action . . . . . . . . . . . . . . . . . . . . . . . . . . . 65
definition . . . . . . . . . . . . . . . . . . . . . . . 177
elements . . . . . . . . . . . . . . . . . . . . . . . . . 63
event trigger . . . . . . . . . . . . . . . . . . . . . 63
filtering conditions . . . . . . . . . . . . . . . . 65
name . . . . . . . . . . . . . . . . . . . . . . . . . . . . 63
precedence rank . . . . . . . . . . . . . . . . . . 67
rule description . . . . . . . . . . . . . . . . . . 68
selection box . . . . . . . . . . . . . . . . . . . . . 67
status on MXIE window . . . . . . . . . . . 21
user location . . . . . . . . . . . . . . . . . . . . . 68
call handling, MXIE panel . . . . . . . . . . . . 67
call log see log, call
call log preferences, MXIE panel . . . . . . 145
call queues . . . . . . . . . . . . . . . . . . . . . . . . . 75
call recording
icon . . . . . . . . . . . . . . . . . . . . . . . . . . . . . 16
playback (automatic) . . . . . . . . . . . . . 131
call recording folder . . . . . . . . . . . . . . . . 122
call recordings
automatic . . . . . . . . . . . . . . . . . . . . . . . 119
description . . . . . . . . . . . . . . . . . . 118–120
emergency . . . . . . . . . . . . . . . . . . . . . . 120
on demand . . . . . . . . . . . . . . . . . . . . . 119
operators and ACD groups . . . . . . . . . 72
playback (on demand) . . . . . . . . . . . 124
call rule editor, MXIE panel . . . . . . . . . . . 63
callback . . . . . . . . . . . . . . . . . . . . . . . . . 72–74
callback icon . . . . . . . . . . . . . . . . . . . . . . . . 14
callback panel . . . . . . . . . . . . . . . . . . . . . . . 73
calls preferences . . . . . . . . . . . . . . . . . . . . . 23
cancel a device binding . . . . . . . . . . . . . . . 45
181
MXIE User’s Manual
capacity
mail box, group . . . . . . . . . . . . . . . . . . 116
mail box, user . . . . . . . . . . . . . . . . . . . 116
Change password panel . . . . . . . . . . . . . . . 9
changing roles . . . . . . . . . . . . . . . . . . . . . . . 8
codecs, Softphone . . . . . . . . . . . . . . . . . . . 61
color scheme preference . . . . . . . . . . . . . . 22
comments, message files . . . . . . . . . . . . . 124
conference call
icon . . . . . . . . . . . . . . . . . . . . . . . . . . . . . 12
initiating from buddy group . . . . . . . 19
conference calls . . . . . . . . . . . . . . . . . . . . . 52
confirmation settings . . . . . . . . . . . . . . . 107
connection requirements . . . . . . . . . . . . . . 3
contact formats . . . . . . . . . . . . . . . . . . . . . . 47
contact list . . . . . . . . . . . . . . . . . . . . . . . . . 104
contact, registered . . . . . . . . . . . . . . . . . . . 42
copying text, text messages . . . . . . . . . . . 36
current session . . . . . . . . . . . . . . . . . . . . . . 15
D
days, maximum in call log . . . . . . . . . . . 145
deleted messages folder . . . . . . . . . . . . . 122
device access policy, MXIE panel . . . . . . 46
devices
binding preferences . . . . . . . . . . . . . . . 47
binding status . . . . . . . . . . . . . . . . . . . . 22
managed . . . . . . . . . . . . . . . . . . . . 42, 178
monitor . . . . . . . . . . . . . . . . . . . . . . . . . . 45
SIP . . . . . . . . . . . . . . . . . . . . . . . . . . 41, 178
unmanaged . . . . . . . . . . . . . . . . . . 42, 179
disconnect
hot key . . . . . . . . . . . . . . . . . . . . . . . . . . 16
icon . . . . . . . . . . . . . . . . . . . . . . . . . . 12, 16
voice call . . . . . . . . . . . . . . . . . . . . . . . . . 58
DND . . . . . . . . . . . . . . . . . . . . . . . . . . . . . . 178
DND warning . . . . . . . . . . . . . . . . . . . . . . . 47
do not disturb . . . . . . . . . . . . . . . . . . . . . . 178
docking text message windows . . . . . 33, 38
E
e-mail
send from buddy group . . . . . . . . . . . 19
send from buddy list . . . . . . . . . . . . . . 19
emergency call panel . . . . . . . . . . . . . . . . . 68
emergency call recordings . . . . . . . . . . . 120
emergency services . . . . . . . . . . . . . . . . . . . 8
encryption, Softphone . . . . . . . . . . . . . . . 60
ending a voice call . . . . . . . . . . . . . . . . . . . 58
enter key, message configuration . . . . . . 38
entry information, MXIE panel . . . . . . . 110
event trigger . . . . . . . . . . . . . . . . . . . . . . . . 63
Excel . . . . . . . . . . . . . . . . . . . . . . . . . . . . . . . 86
External IM Book directory . . . . . . . . . . 104
external message
activating . . . . . . . . . . . . . . . . . . . . . . . . 28
definition . . . . . . . . . . . . . . . . . . . . . . 1, 27
enabling . . . . . . . . . . . . . . . . . . . . . . . 8, 28
preferences . . . . . . . . . . . . . . . . . . . 36–39
registering transport account . . . . . . . 29
see also text message
182
external messaging address entry . . . . . 110
external messaging status . . . . . . . . . . . . . 22
external presence . . . . . . . . . . . . . . . . . . . . 89
F
fax
message content . . . . . . . . . . . . . . . . . 118
MXIE window indicator . . . . . . . . . . . 20
send from buddy group . . . . . . . . . . . 19
send from buddy list . . . . . . . . . . . . . . 19
sending with fax printer . . . . . . . . . . 136
sending with fax wizard . . . . . . 132–134
see also messages
fax messages
description . . . . . . . . . . . . . . . . . . . . . . 118
message folder . . . . . . . . . . . . . . . . . . 122
new status . . . . . . . . . . . . . . . . . . . . . . 118
saved status . . . . . . . . . . . . . . . . . . . . . 118
saving . . . . . . . . . . . . . . . . . . . . . . . . . . 126
viewing . . . . . . . . . . . . . . . . . . . . . . . . 125
fax printer
description . . . . . . . . . . . . . . . . . . 135–136
installing printer driver . . . . . . . . . . . 135
fax, sending
file selection . . . . . . . . . . . . . . . . . . . . . 133
recipient selection . . . . . . . . . . . . . . . 133
scheduling . . . . . . . . . . . . . . . . . . . . . . 134
summary information . . . . . . . . . . . . 134
filename format, text message . . . . . . . . . 38
filter button, Text Message History . . . . . 35
filtering conditions . . . . . . . . . . . . . . . . . . 65
focus, preference . . . . . . . . . . . . . . . . . . . . 24
font preference . . . . . . . . . . . . . . . . . . . . . . 22
format, contacts . . . . . . . . . . . . . . . . . . . . . 47
forwarding voice messages
introductory comments . . . . . . . . . . 131
procedure . . . . . . . . . . . . . . . . . . . . . . 125
G
global presence . . . . . . . . . . . . . . . . . . . . . . 94
Goldmine, TAPI support . . . . . . . . . . . . 148
greeting recording
mail box, group . . . . . . . . . . . . . . . . . . 117
mail box, user . . . . . . . . . . . . . . . . . . . 116
greetings
auto attendant . . . . . . . . . . . . . . . . . . 128
user . . . . . . . . . . . . . . . . . . . . . . . . . . . . 127
group profile . . . . . . . . . . . . . . . . . . . . . 8, 178
H
hold
definition . . . . . . . . . . . . . . . . . . . . . . . 178
hot key . . . . . . . . . . . . . . . . . . . . . . . . . . 16
icon . . . . . . . . . . . . . . . . . . . . . . . . . . 12, 16
tone . . . . . . . . . . . . . . . . . . . . . . . . . . . . . 25
voice call . . . . . . . . . . . . . . . . . . . . . . . . . 53
hot keys . . . . . . . . . . . . . . . . . . . . . . . . . . . . 16
hunt group agent
buddy list . . . . . . . . . . . . . . . . . . . . . . . . 17
definition . . . . . . . . . . . . . . . . . . . . . . . 178
presence configuration . . . . . . . . . . . . 99
presence rules . . . . . . . . . . . . . . . . . . . . 93
presence states . . . . . . . . . . . . . . . . . . . 92
role . . . . . . . . . . . . . . . . . . . . . . . . . . . . 3, 8
role partition . . . . . . . . . . . . . . . . . . . . . 13
hunt group, definition . . . . . . . . . . . . . . 178
I
icons
address book . . . . . . . . . . . . . . . . . . . . . 13
answer . . . . . . . . . . . . . . . . . . . . . . . . . . 16
call recording on demand . . . . . . . . . . 16
callback . . . . . . . . . . . . . . . . . . . . . . . . . . 14
conference call . . . . . . . . . . . . . . . . . . . 12
disconnect . . . . . . . . . . . . . . . . . . . . 12, 16
hold . . . . . . . . . . . . . . . . . . . . . . . . . . 12, 16
inhibit call recording on demand . . . 16
large . . . . . . . . . . . . . . . . . . . . . . . . . . . . 15
log . . . . . . . . . . . . . . . . . . . . . . . . . . . . . . 13
log panel . . . . . . . . . . . . . . . . . . . . . . . 143
message window . . . . . . . . . . . . . . . . . 12
MXIE toolbar . . . . . . . . . . . . . . . . . . . . . 12
pickup . . . . . . . . . . . . . . . . . . . . . . . . . . 13
retrieve . . . . . . . . . . . . . . . . . . . . . . . . . . 16
small . . . . . . . . . . . . . . . . . . . . . . . . . . . . 15
text message . . . . . . . . . . . . . . . . . . . . . 12
transfer . . . . . . . . . . . . . . . . . . . . . . . 12, 16
voice call . . . . . . . . . . . . . . . . . . . . . . . . 12
voice mail . . . . . . . . . . . . . . . . . . . . . . . . 16
ICQ external messaging . . . . . . . . . . . . . . 29
import address book . . . . . . . . . . . . 111–114
in a meeting state . . . . . . . . . . . . . . . . . . . . 90
Inbound Call Center
agent call intervention . . . . . . . . . . . . 76
agent monitor . . . . . . . . . . . . . . . . . . . . 76
agent presence summary . . . . . . . . . . 77
agent statistics . . . . . . . . . . . . . . . . . 84–85
call queues . . . . . . . . . . . . . . . . . . . . . . . 75
group statistics . . . . . . . . . . . . . . . . 82–84
monitors . . . . . . . . . . . . . . . . . . . . . . 77–82
presence configuration . . . . . . . . . . . . 99
supervisor functions . . . . . . . . . . . 76–87
supervisor preferences . . . . . . . . . . . . 76
Inbound Call Center agent . . . . . . . . . . . 93
buddy list . . . . . . . . . . . . . . . . . . . . . . . . 17
role . . . . . . . . . . . . . . . . . . . . . . . . . . . . . . 8
role partition . . . . . . . . . . . . . . . . . . . . . 13
Inbox message folder . . . . . . . . . . . . . . . 122
inhibit call recording, icon . . . . . . . . . . . . 16
initiating voice calls
ACT! . . . . . . . . . . . . . . . . . . . . . . . 162–164
Maximizer . . . . . . . . . . . . . . . . . . 158–162
MXIE . . . . . . . . . . . . . . . . . . . . . . . . . . . . 48
Outlook . . . . . . . . . . . . . . . . . . . . 155–158
input panel, message window . . . . . . . . 32
installation software
running . . . . . . . . . . . . . . . . . . . . . . . . . . 6
sources . . . . . . . . . . . . . . . . . . . . . . . . . . . 5
installing fax printer driver . . . . . . . . . . 135
Index
instance
accessing current . . . . . . . . . . . . . . . . . . 7
opening new . . . . . . . . . . . . . . . . . . . . . . 7
instant message
buddy list . . . . . . . . . . . . . . . . . . . . . . . . 19
definition . . . . . . . . . . . . . . . . . . 1, 27, 178
preferences . . . . . . . . . . . . . . . . . . . 36–39
tone . . . . . . . . . . . . . . . . . . . . . . . . . . . . . 25
see also text message
Instant Messaging preferences . . . . . . . . 36
introductory remarks, recording . . . . . . 131
J
jabber external messaging . . . . . . . . . . . . 29
K
keyboard shortcuts . . . . . . . . . . . . . . . . . . 16
keyboard, Softphone . . . . . . . . . . . . . . . . . 60
L
language
changing . . . . . . . . . . . . . . . . . . . . . . . . . 8
selecting . . . . . . . . . . . . . . . . . . . . . . . . . . 6
large session icons . . . . . . . . . . . . . . . . . . . 24
launch at startup preference . . . . . . . . . . 10
limitations
message length . . . . . . . . . . . . . . . . . . 128
MXIE panel . . . . . . . . . . . . . . . . . . . . . 128
voice mail box size . . . . . . . . . . . . . . . 128
Linux operating system . . . . . . . . . . . . . . . 4
listening to call recordings . . . . . . . . . . . 131
listening to voice messages . . . . . . . . . . 124
Local Address Book directory . . . . . . . . 104
location . . . . . . . . . . . . . . . . . . . . . . . . . . . . . 8
log, call
description . . . . . . . . . . . . . . . . . . . . . . 143
functions . . . . . . . . . . . . . . . . . . . . . . . 144
glossary . . . . . . . . . . . . . . . . . . . . . . . . 177
icon . . . . . . . . . . . . . . . . . . . . . . . . . . . . . 13
MXIE panel . . . . . . . . . . . . . . . . . . . . . 143
panel icons . . . . . . . . . . . . . . . . . . . . . . 143
parameters . . . . . . . . . . . . . . . . . . . . . . 143
user preferences . . . . . . . . . . . . . . . . . 145
logged off state
ACD agent . . . . . . . . . . . . . . . . . . . . . . . 92
hunt group agent . . . . . . . . . . . . . . . . . 92
Inbound Call Center agent . . . . . . . . . 92
operator . . . . . . . . . . . . . . . . . . . . . . . . . 91
user . . . . . . . . . . . . . . . . . . . . . . . . . . . . . 91
login panel . . . . . . . . . . . . . . . . . . . . . . . . . . 6
M
Macintosh operating system . . . . . . . . . . . 4
mail box, see voice mail box
mail folder, see voice mail folder
main menu
definition . . . . . . . . . . . . . . . . . . . . . . . 178
MXIE user window . . . . . . . . . . . . . . . 12
picture . . . . . . . . . . . . . . . . . . . . . . . . . . 11
managed devices . . . . . . . . . . . . . . . . 42, 178
manual presence state transitions . . . . . . 93
Maximizer
initiating voice calls . . . . . . . . . . 158–162
TAPI support . . . . . . . . . . . . . . . . 152–154
version supported . . . . . . . . . . . . . . . 148
maximum call log size . . . . . . . . . . . . . . . 145
maximum text message size . . . . . . . . . . . 32
memory requirements . . . . . . . . . . . . . . . . 3
message file
comments . . . . . . . . . . . . . . . . . . . . . . 124
fax viewing . . . . . . . . . . . . . . . . . . . . . 125
forwarding voice messages . . . . . . . 125
replying to voice message . . . . . . . . . 125
saving messages . . . . . . . . . . . . . . . . . 126
typeface . . . . . . . . . . . . . . . . . . . . . . . . 123
voice playback . . . . . . . . . . . . . . . . . . . 124
message list . . . . . . . . . . . . . . . . . . . . . . . . 123
message window
address bar . . . . . . . . . . . . . . . . . . . . . . 31
definition . . . . . . . . . . . . . . . . . . . . . 2, 178
icon . . . . . . . . . . . . . . . . . . . . . . . . . . . . . 12
input panel . . . . . . . . . . . . . . . . . . . . . . 32
send button . . . . . . . . . . . . . . . . . . . . . . 32
text panel . . . . . . . . . . . . . . . . . . . . . . . . 31
toolbar . . . . . . . . . . . . . . . . . . . . . . . . . . 32
message window, see text message window
messages
confirmation preferences . . . . . . . . . 142
preferences . . . . . . . . . . . . . . . . . . . . . 141
storage location . . . . . . . . . . . . . . . . . . 141
Messages (text) user preferences . . . . . . . 38
Microsoft Outlook, see Outlook
missed call, MXIE window indicator . . . 20
monitor requirements . . . . . . . . . . . . . . . . . 3
monitor, devices . . . . . . . . . . . . . . . . . . . . . 45
monitors
agent presence summary . . . . . . . . . . 77
agent queue . . . . . . . . . . . . . . . . . . . . . . 79
agent statistics . . . . . . . . . . . . . . . . . 84–85
callback . . . . . . . . . . . . . . . . . . . . . . . 80–82
group statistics . . . . . . . . . . . . . . . . 82–84
Inbound Call Center . . . . . . . . . . . 77–82
queue description . . . . . . . . . . . . . . . . . 79
supervisor queue . . . . . . . . . . . 78, 79, 80
MSN external messaging . . . . . . . . . . . . . 29
multiple voice calls
MXIE control . . . . . . . . . . . . . . . . . . . . . 51
phone control . . . . . . . . . . . . . . . . . . . . 52
preferences . . . . . . . . . . . . . . . . . . . . . . 47
MX . . . . . . . . . . . . . . . . . . . . . . . . . . . . . . . 178
MX Directory . . . . . . . . . . . . . . . . . . . . . . 104
MX250 . . . . . . . . . . . . . . . . . . . . . . . . . . . . 178
MX30 . . . . . . . . . . . . . . . . . . . . . . . . . . . . . 178
MXIE panels
address book . . . . . . . . . . . . . . . . . . . . 103
automatic call recording . . . . . . 128–131
bind a phone . . . . . . . . . . . . . . . . . . . . . 43
call handling action . . . . . . . . . . . . . . . 66
call log . . . . . . . . . . . . . . . . . . . . . . . . . 143
call rule editor . . . . . . . . . . . . . . . . . . . . 63
Change password . . . . . . . . . . . . . . . . . 9
entry information . . . . . . . . . . . . . . . . 110
limitations (voice mail) . . . . . . . . . . . 128
notification rule editor . . . . . . . 138–141
Select Language . . . . . . . . . . . . . . . . . . . 8
shown entry properties . . . . . . . . . . . 108
shown properties . . . . . . . . . . . . . . . . 108
sort order . . . . . . . . . . . . . . . . . . . . . . . 109
text message window . . . . . . . . . . . . . 31
user preferences . . . . . . . . . . . . . . . . . 168
Voice Mail Settings . . . . . . . . . . . . . . . 126
see also user preferences panels
MXIE user window
buddy list . . . . . . . . . . . . . . . . . . . . . . . . 17
definition . . . . . . . . . . . . . . . . . . . . . . . . 11
display when receiving call . . . . . . . . 24
main menu . . . . . . . . . . . . . . . . . . . . . . 12
message indicator . . . . . . . . . . . . . . . . . 20
missed call indicator . . . . . . . . . . . . . . 20
presence bar . . . . . . . . . . . . . . . . . . 13, 95
session list . . . . . . . . . . . . . . . . . . . . . . . 13
status bar . . . . . . . . . . . . . . . . . . . . . . . . 21
toolbar . . . . . . . . . . . . . . . . . . . . . . . . . . 12
MXIE, definition . . . . . . . . . . . . . . . . . . . . . 1
N
name recording . . . . . . . . . . . . . . . . . . . . 126
mail box, group . . . . . . . . . . . . . . . . . . 117
mail box, user . . . . . . . . . . . . . . . . . . . 116
new fax messages . . . . . . . . . . . . . . . . . . 118
new MXIE instance . . . . . . . . . . . . . . . . . . . 7
new voice messages . . . . . . . . . . . . . . . . 117
no access state . . . . . . . . . . . . . . . . . . . . . . 91
normal voice messages . . . . . . . . . . . . . . 117
not available state
ACD agent . . . . . . . . . . . . . . . . . . . . . . . 92
Inbound Call Center agent . . . . . . . . . 92
operator . . . . . . . . . . . . . . . . . . . . . . . . . 91
user . . . . . . . . . . . . . . . . . . . . . . . . . . . . . 90
notification, message
description . . . . . . . . . . . . . . . . . . 136–141
filtering conditions . . . . . . . . . . . . . . . 140
MXIE panel . . . . . . . . . . . . . . . . . . . . . 137
plan . . . . . . . . . . . . . . . . . . . . . . . . . . . . 136
rules . . . . . . . . . . . . . . . . . . . . . . . 136, 138
O
on demand call recordings . . . . . . . . . . . 119
on the phone state
operator . . . . . . . . . . . . . . . . . . . . . . . . . 91
user . . . . . . . . . . . . . . . . . . . . . . . . . . . . . 91
opening new MXIE instance . . . . . . . . . . . 7
operating system requirements . . . . . . . . . 3
183
MXIE User’s Manual
operator
buddy list . . . . . . . . . . . . . . . . . . . . . . . . 17
definition . . . . . . . . . . . . . . . . . . . . . . . 178
presence configuration . . . . . . . . . . . . 99
presence rules . . . . . . . . . . . . . . . . . . . . 93
presence states . . . . . . . . . . . . . . . . . . . 91
role . . . . . . . . . . . . . . . . . . . . . . . . . . . . 3, 8
role partition . . . . . . . . . . . . . . . . . . . . . 13
operator group, definition . . . . . . . . . . . 178
Outlook
initiating voice calls . . . . . . . . . . 155–158
TAPI support . . . . . . . . . . . . . . . . 151–152
version supported . . . . . . . . . . . . . . . 148
P
panels, see MXIE panels
park
definition . . . . . . . . . . . . . . . . . . . . . . . 178
hot key . . . . . . . . . . . . . . . . . . . . . . . . . . 16
voice call . . . . . . . . . . . . . . . . . . . . . . . . . 56
password
changing . . . . . . . . . . . . . . . . . . . . . . . . . 9
definition . . . . . . . . . . . . . . . . . . . . . . . . . 9
mail box, group . . . . . . . . . . . . . . . . . . 116
mail box, user . . . . . . . . . . . . . . . . . . . 116
PC requirements . . . . . . . . . . . . . . . . . . . . . 3
personal mail folder . . . . . . . . . . . . . . . . . 122
phone numbers . . . . . . . . . . . . . . . . . . . . . 47
pickup
definition . . . . . . . . . . . . . . . . . . . . . . . 178
icon . . . . . . . . . . . . . . . . . . . . . . . . . . . . . 13
picking up a call . . . . . . . . . . . . . . . . . . 57
play panel . . . . . . . . . . . . . . . . . . . . . . . . . 124
pointing device requirements . . . . . . . . . . 3
pop up notifications . . . . . . . . . . . . . . . . . 10
popup, screen . . . . . . . . . . . . . . . . . . . . . . 148
precedence rank . . . . . . . . . . . . . . . . . . . . . 67
preferences, see user preferences
presence
address book . . . . . . . . . . . . . . . . . . . . . 95
configuring . . . . . . . . . . . . . . . . . . . . . . 97
definition . . . . . . . . . . . . . . . . . . . . . . . . . 2
displaying . . . . . . . . . . . . . . . . . . . . . . . 95
external contacts . . . . . . . . . . . . . . . . . . 89
global . . . . . . . . . . . . . . . . . . . . . . . . . . . 94
glossary . . . . . . . . . . . . . . . . . . . . . . . . 178
icons . . . . . . . . . . . . . . . . . . . . . . . . . . . 101
implementation . . . . . . . . . . . . . . 89–101
preferences . . . . . . . . . . . . . . . . . . . . . . 97
viewing . . . . . . . . . . . . . . . . . . . . . . . . . 98
presence alert
change from buddy list . . . . . . . . . . . . 19
description . . . . . . . . . . . . . . . . . . . . 95–97
presence bar
definition . . . . . . . . . . . . . . . . . . . . . . . 178
load indicator . . . . . . . . . . . . . . . . . . . . 77
MXIE location . . . . . . . . . . . . . . . . . 13, 95
184
presence rules . . . . . . . . . . . . . . . . . . . . . . . 93
ACD agents . . . . . . . . . . . . . . . . . . . . . . 93
configuring . . . . . . . . . . . . . . . . . . . . . . 97
definition . . . . . . . . . . . . . . . . . . . . . . . 178
hunt group agents . . . . . . . . . . . . . . . . 93
Inbound Call Center agents . . . . . . . . 93
manual state transitions . . . . . . . . . . . 93
operators . . . . . . . . . . . . . . . . . . . . . . . . 93
users . . . . . . . . . . . . . . . . . . . . . . . . . . . . 92
presence states
ACD agent . . . . . . . . . . . . . . . . . . . . . . . 92
definition . . . . . . . . . . . . . . . . . . . . 89, 178
hunt group agent . . . . . . . . . . . . . . . . . 92
operators . . . . . . . . . . . . . . . . . . . . . . . . 91
users . . . . . . . . . . . . . . . . . . . . . . . . . . . . 90
presence status
location on MXIE window . . . . . . . . . 22
menu . . . . . . . . . . . . . . . . . . . . . . . . . . . 94
status bar . . . . . . . . . . . . . . . . . . . . . . . . 95
presence toolbar preferences . . . . . . . . . 100
private voice messages . . . . . . . . . . . . . . 117
processor requirements . . . . . . . . . . . . . . . 3
profile, definition . . . . . . . . . . . . . . . . . . . 179
Q
queues, call . . . . . . . . . . . . . . . . . . . . . . . . . 75
R
rank . . . . . . . . . . . . . . . . . . . . . . . . . . . . . . . 67
receiving a text message . . . . . . . . . . . . . . 35
receiving a voice call . . . . . . . . . . . . . . . . . 49
recording auto attendant greeting . . . . 128
recording user greeting . . . . . . . . . . . . . 127
registered contact . . . . . . . . . . . . . . . . 42, 179
reject call, hot key . . . . . . . . . . . . . . . . . . . 16
removing a buddy . . . . . . . . . . . . . . . . . . . 19
removing a buddy group . . . . . . . . . . . . . 19
replying to voice messages . . . . . . . . . . . 125
requirements, PC . . . . . . . . . . . . . . . . . . . . . 3
retrieve, icon . . . . . . . . . . . . . . . . . . . . . . . . 16
role
ACD agent . . . . . . . . . . . . . . . . . . . . . . 3, 8
buddy list contents . . . . . . . . . . . . . . . . 95
changing . . . . . . . . . . . . . . . . . . . . . . . . . 8
definition . . . . . . . . . . . . . . . . . . . . . . . 179
group . . . . . . . . . . . . . . . . . . . . . . . . . . . . 8
hunt group agent . . . . . . . . . . . . . . . . 3, 8
Inbound Call Center agent . . . . . . . . 3, 8
MXIE panel . . . . . . . . . . . . . . . . . . . . . . . 7
operator . . . . . . . . . . . . . . . . . . . . . . . . 3, 8
user . . . . . . . . . . . . . . . . . . . . . . . . . . . . 2, 7
role partitions . . . . . . . . . . . . . . . . . . . 13, 179
S
saved fax messages . . . . . . . . . . . . . . . . . 118
saved voice messages . . . . . . . . . . . . . . . 117
saving fax messages . . . . . . . . . . . . . . . . . 126
saving voice messages . . . . . . . . . . . . . . . 126
screen popup . . . . . . . . . . . . . . . . . . . . . . 148
Select Language, panel . . . . . . . . . . . . . . . . 8
selection box . . . . . . . . . . . . . . . . . . . . . . . . 67
send button, message window . . . . . . . . 32
sending a text message . . . . . . . . . . . . . . . 34
sending voice calls . . . . . . . . . . . . . . . . . . . 48
sending voice mail . . . . . . . . . . . . . . . . . . 131
session
current . . . . . . . . . . . . . . . . . . . . . . . . . . 15
definition . . . . . . . . . . . . . . . . . . . . . . . 179
session blocks
default actions . . . . . . . . . . . . . . . . . . . . 15
definition . . . . . . . . . . . . . . . . . . . . . . . 179
session control buttons
definition . . . . . . . . . . . . . . . . . . . . . . . 179
display . . . . . . . . . . . . . . . . . . . . . . . . . . 23
preferences . . . . . . . . . . . . . . . . . . . . . . 23
types . . . . . . . . . . . . . . . . . . . . . . . . . . . . 16
session icon preferences . . . . . . . . . . . . . . 23
session list
definition . . . . . . . . . . . . . . . . . . . . . . . 179
MXIE location . . . . . . . . . . . . . . . . . . . . 13
role partitions . . . . . . . . . . . . . . . . . . . . 13
session blocks . . . . . . . . . . . . . . . . . . . . 15
session management . . . . . . . . . . . . . . . . . . 1
shown entries panel, address book . . . 108
shown properties panel, address book 108
SIP address . . . . . . . . . . . . . . . . . . . . . . . . . 47
SIP device . . . . . . . . . . . . . . . . . . . . . . . . . . 41
small session icons . . . . . . . . . . . . . . . . . . . 24
Softphone
acoustic echo cancellation . . . . . . . . . . 62
audio drivers . . . . . . . . . . . . . . . . . . . . . 62
binding to MXIE . . . . . . . . . . . . . . . 44, 59
codecs . . . . . . . . . . . . . . . . . . . . . . . . . . . 61
description . . . . . . . . . . . . . . . . . . . . 58–60
encryption . . . . . . . . . . . . . . . . . . . . . . . 60
glossary . . . . . . . . . . . . . . . . . . . . . . . . 179
keyboard . . . . . . . . . . . . . . . . . . . . . . . . 60
system requirements . . . . . . . . . . . . . . 59
Softphone preferences . . . . . . . . . . . . . . . 61
software, see installation software
sort order panel, address book . . . . . . . 109
sounds preferences . . . . . . . . . . . . . . . . . . 25
Speed Dial directory . . . . . . . . . . . . . . . . 104
status bar
binding status . . . . . . . . . . . . . . . . . . . . 22
call handling rule status . . . . . . . . . . . 21
definition . . . . . . . . . . . . . . . . . . . . . . . 179
external messaging status . . . . . . . . . . 22
MXIE location . . . . . . . . . . . . . . . . . . . . 21
presence status . . . . . . . . . . . . . . . . 22, 95
stay on top preference . . . . . . . . . . . . . . . 10
supervisor
role partition . . . . . . . . . . . . . . . . . . . . . 14
supervisor, see Inbound Call Center
system mail folder . . . . . . . . . . . . . . . . . . 122
system tray preference . . . . . . . . . . . . . . . 10
T
TAPI . . . . . . . . . . . . . . . . . . . . . . . . . . 147–165
Index
TAPI support
ACT! . . . . . . . . . . . . . . . . . . . . . . . . . . . 154
Maximizer . . . . . . . . . . . . . . . . . . 152–154
Outlook . . . . . . . . . . . . . . . . . . . . 151–152
telephone numbers . . . . . . . . . . . . . . . . . . 47
telephony service provider . . . . . . . . . . 147
text message
authorizing . . . . . . . . . . . . . . . . . . . . . . 28
configuring . . . . . . . . . . . . . . . . . . . . . . 27
copying to clipboard . . . . . . . . . . . . . . 36
definition . . . . . . . . . . . . . . . . . . . . . . 1, 27
enter key, configure for . . . . . . . . . . . . 38
filename format . . . . . . . . . . . . . . . . . . 38
icon . . . . . . . . . . . . . . . . . . . . . . . . . . . . . 12
maximum message size . . . . . . . . . . . . 32
preferences . . . . . . . . . . . . . . . . . . . 36–39
receiving . . . . . . . . . . . . . . . . . . . . . . . . . 35
send from buddy list . . . . . . . . . . . . . . 19
send multiple messages from buddy
group . . . . . . . . . . . . . . . . . . . . . . . . . . . 19
sending . . . . . . . . . . . . . . . . . . . . . . . . . . 34
sending to phone . . . . . . . . . . . . . . . . . 38
see also instant message, external message
Text Message History window . . . . . . . . . 35
text message window
date format . . . . . . . . . . . . . . . . . . . . . . 37
docking . . . . . . . . . . . . . . . . . . . . . . . . . 33
docking default . . . . . . . . . . . . . . . . . . . 38
focus . . . . . . . . . . . . . . . . . . . . . . . . . . . . 37
function . . . . . . . . . . . . . . . . . . . . . . . . . 31
time format . . . . . . . . . . . . . . . . . . . . . . 37
tray popup . . . . . . . . . . . . . . . . . . . . . . . 37
using . . . . . . . . . . . . . . . . . . . . . . . . . . . . 32
text messaging entry . . . . . . . . . . . . . . . . 110
text panel, message window . . . . . . . . . . 31
tones . . . . . . . . . . . . . . . . . . . . . . . . . . . . . . . 25
toolbar
address book . . . . . . . . . . . . . . . . . . . . 103
message window . . . . . . . . . . . . . . . . . 32
MXIE user window . . . . . . . . . . . 12, 179
transfer
attended . . . . . . . . . . . . . . . . . . . . . 56, 179
blind . . . . . . . . . . . . . . . . . . . . . . . . 55, 179
hot key . . . . . . . . . . . . . . . . . . . . . . . . . . 16
icon . . . . . . . . . . . . . . . . . . . . . . . . . . 12, 16
transfer voice call . . . . . . . . . . . . . . . . 55, 179
transport account, registering . . . . . . . . . 29
TSP . . . . . . . . . . . . . . . . . . . . . . . . . . . . . . . 147
typeface, message files . . . . . . . . . . . . . . 123
U
unattended transfer . . . . . . . . . . . . . . . . . . 55
unmanaged device . . . . . . . . . . . . . . 42, 179
urgent voice messages . . . . . . . . . . . . . . 117
user
buddy list . . . . . . . . . . . . . . . . . . . . . . . . 17
greetings . . . . . . . . . . . . . . . . . . . . . . . 127
login . . . . . . . . . . . . . . . . . . . . . . . . . . . . . 6
presence configuration . . . . . . . . . . . . 97
presence rules . . . . . . . . . . . . . . . . . . . . 92
presence states . . . . . . . . . . . . . . . . . . . 90
role . . . . . . . . . . . . . . . . . . . . . . . . . . . . 2, 7
role partition . . . . . . . . . . . . . . . . . . . . . 13
user preference panels
Address Book panel . . . . . . . . . . . . . . 106
supervisor . . . . . . . . . . . . . . . . . . . . . . . 76
user preferences
calls panel . . . . . . . . . . . . . . . . . . . . . . . 23
color scheme . . . . . . . . . . . . . . . . . . . . . 22
device access policy . . . . . . . . . . . . . . . 46
device binding . . . . . . . . . . . . . . . . . . . 47
external message . . . . . . . . . . . . . . 36–39
fonts . . . . . . . . . . . . . . . . . . . . . . . . . . . . 22
instant message . . . . . . . . . . . . . . . 36–39
launch at startup . . . . . . . . . . . . . . . . . 10
messages . . . . . . . . . . . . . . . . . . . . . . . 141
notifications . . . . . . . . . . . . . . . . . 136–141
presence icons . . . . . . . . . . . . . . . . . . . 101
presence toolbar . . . . . . . . . . . . . . . . . 100
session control buttons . . . . . . . . . . . . 23
session icons . . . . . . . . . . . . . . . . . . . . . 23
stay on top . . . . . . . . . . . . . . . . . . . . . . . 10
summary . . . . . . . . . . . . . . . . . . . . . . . 168
system tray . . . . . . . . . . . . . . . . . . . . . . 10
text message . . . . . . . . . . . . . . . . . . 36–39
user preferences panels
ACD and Operator . . . . . . . . . . . . . . . . 99
appearance panel . . . . . . . . . . . . . . . . . 22
application . . . . . . . . . . . . . . . . . . . . . . . . 9
audio output panel . . . . . . . . . . . . . . . 26
call handling . . . . . . . . . . . . . . . . . . . . . 67
call log . . . . . . . . . . . . . . . . . . . . . . . . . 145
device access policy . . . . . . . . . . . . . . . 46
Instant Messaging . . . . . . . . . . . . . . . . 36
message confirmation . . . . . . . . . . . . 142
Messages (Text) . . . . . . . . . . . . . . . . . . . 38
Messages (voice mail) . . . . . . . . . . . . 141
notifications . . . . . . . . . . . . . . . . . . . . . 137
presence . . . . . . . . . . . . . . . . . . . . . . . . . 97
Softphone . . . . . . . . . . . . . . . . . . . . . . . 61
sounds panel . . . . . . . . . . . . . . . . . . . . . 25
user window . . . . . . . . . . . . . . . . . . . . . . . . 11
V
voice call . . . . . . . . . . . . . . . . . . . . . . . . . . . 57
attended transfer . . . . . . . . . . . . . . . . . 56
blind transfer . . . . . . . . . . . . . . . . . . . . . 55
buddy list . . . . . . . . . . . . . . . . . . . . . . . . 19
callback . . . . . . . . . . . . . . . . . . . . . . . . . . 72
emergency panel . . . . . . . . . . . . . . . . . 68
ending . . . . . . . . . . . . . . . . . . . . . . . . . . 58
hold . . . . . . . . . . . . . . . . . . . . . . . . . . . . . 53
icon . . . . . . . . . . . . . . . . . . . . . . . . . . . . . 12
initiate from buddy list . . . . . . . . . . . . 19
initiate multiple calls with buddy group
19
initiating . . . . . . . . . . . . . . . . . . . . . . . . . 48
multiple calls . . . . . . . . . . . . . . . . . . . . . 47
park . . . . . . . . . . . . . . . . . . . . . . . . . . . . . 56
pickup . . . . . . . . . . . . . . . . . . . . . . . . . . 57
receiving . . . . . . . . . . . . . . . . . . . . . . . . 49
simultaneous sessions . . . . . . . . . . . . . 51
tone . . . . . . . . . . . . . . . . . . . . . . . . . . . . . 25
voice mail
definition . . . . . . . . . . . . . . . . . . . . . . . 180
hot key . . . . . . . . . . . . . . . . . . . . . . . . . . 16
icon . . . . . . . . . . . . . . . . . . . . . . . . . . . . . 16
message length limitation . . . . . . . . . 128
MXIE window indicator . . . . . . . . . . . 20
play panel . . . . . . . . . . . . . . . . . . . . . . 124
settings window . . . . . . . . . . . . . . . . . 126
tone . . . . . . . . . . . . . . . . . . . . . . . . . . . . . 25
see also messages
voice mail box
group box properties . . . . . . . . . 116–117
messages . . . . . . . . . . . . . . . . . . . . . . . 123
size limitation . . . . . . . . . . . . . . . . . . . 128
user box properties . . . . . . . . . . . . . . 116
voice mail directory, description . . 121–123
voice mail folder
directory structure . . . . . . . . . . . . . . . 121
file management . . . . . . . . . . . . . . . . . 123
personal . . . . . . . . . . . . . . . . . . . . . . . . 122
personal folders . . . . . . . . . . . . . . . . . 122
system . . . . . . . . . . . . . . . . . . . . . . . . . 122
system folders . . . . . . . . . . . . . . . . . . . 122
typeface definition . . . . . . . . . . . . . . . 123
voice mail window, description . . 120–128
voice mail, sending
procedure . . . . . . . . . . . . . . . . . . . . . . 131
voice message, sending
from address book . . . . . . . . . . . . . . . 106
from buddy group . . . . . . . . . . . . . . . . 19
from buddy list . . . . . . . . . . . . . . . . . . . 19
video call, availability . . . . . . . . . . . . . . . . 69
viewing fax messages . . . . . . . . . . . . . . . 125
185
MXIE User’s Manual
voice messages
body . . . . . . . . . . . . . . . . . . . . . . . . . . . 118
caller mark . . . . . . . . . . . . . . . . . . . . . . 117
description . . . . . . . . . . . . . . . . . . 117–118
external phone, from . . . . . . . . . . . . . 118
forwarding . . . . . . . . . . . . . . . . . . . . . . 125
header . . . . . . . . . . . . . . . . . . . . . . . . . 118
internal device, from . . . . . . . . . . . . . 118
new status . . . . . . . . . . . . . . . . . . . . . . 117
normal . . . . . . . . . . . . . . . . . . . . . . . . . 117
playback . . . . . . . . . . . . . . . . . . . . 124, 131
private . . . . . . . . . . . . . . . . . . . . . . . . . 117
replying to . . . . . . . . . . . . . . . . . . . . . . 125
saved status . . . . . . . . . . . . . . . . . . . . . 117
saving . . . . . . . . . . . . . . . . . . . . . . . . . . 126
urgent . . . . . . . . . . . . . . . . . . . . . . . . . . 117
voice recorder . . . . . . . . . . . . . . . . . . 131–132
W
wallboard . . . . . . . . . . . . . . . . . . . . . . . . . . 86
WAV file location . . . . . . . . . . . . . . . . . . . . 26
Windows operating system . . . . . . . . . . . . 4
workstation location . . . . . . . . . . . . . . . . . . 8
wrap up state . . . . . . . . . . . . . . . . . . . . . . 100
ACD agent . . . . . . . . . . . . . . . . . . . . . . . 92
Inbound Call Center agent . . . . . . . . . 92
wrap up time . . . . . . . . . . . . . . . . . . . . 91, 98
Y
Yahoo external messaging . . . . . . . . . . . . 29
Z
ZIP4x5 analog line . . . . . . . . . . . . . . . . . . . 25
186