1
Ultimate Survey Enterprise
VERSION 3.0 USER MANUAL
© 2005 PREZZA TECHNOLOGIES, INC
http://www.prezzatech.com
Table of Contents
1.
Installation .................................................................................................................................................................... 1
Welcome to Ultimate Survey Enterprise .NET................................................................................................................... 1
System Requirements ....................................................................................................................................................... 2
Ultimate Survey Enterprise .NET 3.0 Installation Instructions ........................................................................................... 2
Upgrade Instructions for Ultimate Survey Enterprise .NET 3.0 ......................................................................................... 4
2.
Settings......................................................................................................................................................................... 9
Settings.............................................................................................................................................................................. 9
Appearance Settings ......................................................................................................................................................... 9
Application Settings ........................................................................................................................................................... 9
Application Settings ....................................................................................................................................................... 9
Folder/Path Settings ...................................................................................................................................................... 9
Email Settings.............................................................................................................................................................. 10
Security Settings.......................................................................................................................................................... 10
Image Options ............................................................................................................................................................. 11
Advanced Options ....................................................................................................................................................... 12
User Settings ................................................................................................................................................................... 12
Top Menu......................................................................................................................................................................... 13
Preferences ..................................................................................................................................................................... 13
Navigation........................................................................................................................................................................ 15
Encrypt User Passwords ................................................................................................................................................. 15
Monitoring Tools .............................................................................................................................................................. 15
Network User Settings ..................................................................................................................................................... 16
3.
Surveys ....................................................................................................................................................................... 19
Overview of Survey Administration.................................................................................................................................. 19
Overview of Taking a Survey........................................................................................................................................... 19
Survey Manager .............................................................................................................................................................. 20
Survey Editor ................................................................................................................................................................... 23
Create A New Survey ...................................................................................................................................................... 26
Survey Items.................................................................................................................................................................... 26
Creating A New Item (Adding A New Item) ..................................................................................................................... 27
Add Item to Survey .......................................................................................................................................................... 28
Item Types ....................................................................................................................................................................... 28
Checkbox..................................................................................................................................................................... 28
Date Item ..................................................................................................................................................................... 31
Dropdown List.............................................................................................................................................................. 33
Matrix ........................................................................................................................................................................... 35
Sum Total Matrix Set ................................................................................................................................................... 37
Multi-Language Survey Module ................................................................................................................................... 38
Multi-line Text Field...................................................................................................................................................... 39
Radio Buttons .............................................................................................................................................................. 41
Single-line Text Field ................................................................................................................................................... 43
True/False Question .................................................................................................................................................... 45
Yes/No Question.......................................................................................................................................................... 46
HTML Item ................................................................................................................................................................... 48
Horizontal Line............................................................................................................................................................. 48
Image Item................................................................................................................................................................... 49
Dropdown .................................................................................................................................................................... 49
Message Item .............................................................................................................................................................. 50
Survey Completion Events .............................................................................................................................................. 52
Survey Permissions ......................................................................................................................................................... 53
Survey Permissions ..................................................................................................................................................... 53
Survey Security............................................................................................................................................................ 54
iii
Ultimate Survey Enterprise User Guide
Response Options ....................................................................................................................................................... 55
Report Security ............................................................................................................................................................ 55
Survey Owner .............................................................................................................................................................. 56
Advanced Options ....................................................................................................................................................... 57
Respondents and Report Creators List ....................................................................................................................... 57
Survey Properties ............................................................................................................................................................ 57
Survey Search ................................................................................................................................................................. 58
Survey Style..................................................................................................................................................................... 59
Advanced Features.......................................................................................................................................................... 60
Branching..................................................................................................................................................................... 60
Completion Events....................................................................................................................................................... 62
Conditions.................................................................................................................................................................... 63
Hidden Items................................................................................................................................................................ 64
Piping........................................................................................................................................................................... 65
4.
Styles .......................................................................................................................................................................... 67
Additional Styles .............................................................................................................................................................. 67
Additional Styles .............................................................................................................................................................. 67
Properties ........................................................................................................................................................................ 68
HTML Header & Footer ................................................................................................................................................... 68
Matrix Styles .................................................................................................................................................................... 68
Page Base Styles ............................................................................................................................................................ 69
Include Standard Menus.................................................................................................................................................. 70
Style Export ..................................................................................................................................................................... 70
Style Template Overview................................................................................................................................................. 70
Survey Item Fonts............................................................................................................................................................ 71
5.
Libraries...................................................................................................................................................................... 73
Library Manager............................................................................................................................................................... 73
Add a New Item to Library ............................................................................................................................................... 74
Copy an Item From an Existing Library ........................................................................................................................... 75
Copy an Item From an Existing Survey ........................................................................................................................... 77
Create A New Library ...................................................................................................................................................... 78
6.
Reports ....................................................................................................................................................................... 81
Analysis Item Types......................................................................................................................................................... 81
Analysis Manager ............................................................................................................................................................ 81
Details Report .................................................................................................................................................................. 82
Edit Analysis .................................................................................................................................................................... 82
Edit Analysis Item ............................................................................................................................................................ 83
Export Results ................................................................................................................................................................. 83
Response Filters.............................................................................................................................................................. 84
Report Manager............................................................................................................................................................... 85
Response Details............................................................................................................................................................. 85
Summary Report.............................................................................................................................................................. 85
7.
Users........................................................................................................................................................................... 87
Users ............................................................................................................................................................................... 87
Add/Edit a User................................................................................................................................................................ 87
Email Lists ....................................................................................................................................................................... 88
Import Users .................................................................................................................................................................... 90
Logging in as a User........................................................................................................................................................ 91
Lookup Your Login Information ....................................................................................................................................... 92
User Groups .................................................................................................................................................................... 92
User Manager .................................................................................................................................................................. 94
Ultimate Survey User Types ............................................................................................................................................ 95
iv
Table Of Contents
User Management ........................................................................................................................................................... 96
Access Control Lists ........................................................................................................................................................ 96
Introduction to Access Control..................................................................................................................................... 96
Advanced Access Control............................................................................................................................................ 98
8.
Invitations ................................................................................................................................................................. 101
Invitations Overview....................................................................................................................................................... 101
Invitation Manager ......................................................................................................................................................... 101
9.
Miscellaneous .......................................................................................................................................................... 103
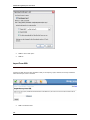
Commands .................................................................................................................................................................... 103
Deleting...................................................................................................................................................................... 103
/ Export in XML .......................................................................................................................................................... 103
Import From XML....................................................................................................................................................... 104
Email Troubleshooting ................................................................................................................................................... 105
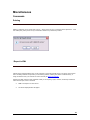
Web-based HTML Editor ............................................................................................................................................... 105
Examples ....................................................................................................................................................................... 106
Piping a response into another question item............................................................................................................ 106
10. Glossary ................................................................................................................................................................... 109
v
Installation
Welcome to Ultimate Survey Enterprise .NET
Ultimate Survey Enterprise .NET is a flexible web-based application for creating surveys and forms. With only a standard
web browser, Ultimate Survey enables you to build and deploy powerful web-based surveys and forms.
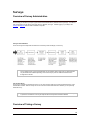
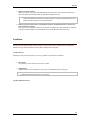
The application is divided into the following logical areas:
Survey
Manager
Style
Manager
Libraries
Reports
Manager
This is where you will spend the majority of the time. The Survey Manager is
responsible for the creation and editing of the survey, the process after the survey is
complete, who is able to see it, and whether the survey is activated or not. The
Survey Manger is the heart of the survey and while the other features are
supplemental.
The Style Manager provides a re-usable way to modify the appearance of your
surveys, by allowing you to create templates. The template can then be applied to
your survey. This is particularly useful if you want to import different style templates
via XML from our website.
Libraries are used to store re-usable survey questions and items you may want
to use in recurring surveys. This is particularly useful when you have multiple
surveys that have a long list of choices (such as States). The Libraries Manager
allows you to save the States choices saving you the time to recreate that
response.
The Reports Manager responsible for analyzing the results from your survey.
Ultimate Survey was designed for a general graphical interpretation, where you
get to choose how your results are displayed with what type of graph. Results
can be an overall view, or set to be as specific as to what each individual
responded to each questions
1
Ultimate Survey Enterprise User Guide
Invitations
Manager
The Invitations Manager allows you to set up invitations to participate in the
survey. This includes invitations via email (both addresses and lists), users,
and users groups. This is a very efficient way to conduct a survey to specific
audience without having unwanted participants contaminating the results.
Administrators Only. The Users Manager allows the Administrator to create new
Users or User Groups, set their privileges to accessing reports and creating
reports, and general account managing. You can also create email lists here for
generating hundreds or even thousands of invitations to participate in the survey.
For more information on the Users Manager, click here.
Users
Settings
Administrators Only. The Settings Manager allows the Administrator to configure
the installation figuration, change the application's appearance, user configuration,
and other miscellaneous application settings. For more information regarding
Settings Manager, click here.
Login
Logs you into the Ultimate Survey System
Logout
Logs you off the Ultimate Survey System by clicking on the icon.
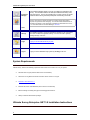
System Requirements
Ultimate Survey .NET has the following requirements that must be met in order to run it on your system:
•
Windows 2000 or higher (Windows 2003 Server recommended)
•
Web server running Microsoft Internet Information Server version 5.0 or higher
•
Microsoft's .Net Framework 1.1
•
Microsoft SQL Server 2000 Database (Service Pack 3 recommended)
•
Basic knowledge of installing web pages and managing Microsoft's IIS.
•
Ability to install with administrator privileges.
Ultimate Survey Enterprise .NET 3.0 Installation Instructions
2
Installation
Before installing Ultimate Survey Enterprise .NET survey software, it is imperative that you follow these
guidelines.
1. Check to see if your web and database servers meet the specifications outlined in the Requirements section of the
Prezza Technologies web site.
2. If you encounter any problems during the installation process, please check the Prezza Technologies KnowledgeBase.
3. If the KnowledgeBase cannot provide you with the information you need to install Ultimate Survey, please contact
Prezza Support at http://www.prezzatech.com/support/
FOR UPGRADE INSTALLATIONS: Please see the file called "UpgradeInstructions.htm" also included in this folder.
Here are the steps to installing Ultimate Survey Enterprise:
1. If you have not already done so, uncompress the .zip files or copy the files from the CD to a
temporary directory.
2. Copy these files from the temporary directory to the web server.
Note: The files should be placed in a directory under the directory root of Microsoft IIS server.
3. Set file permissions on Config directory
There is a directory named Config. Make sure that the entire directory is writable and that the
anonymous IIS user has rights to edit the files in it.
4. Place your license file (UltimateSurvey.lic) in the /bin directory under the root folder you just
created
Note: To obtain your license file: visit the Prezza support customer area
(http://www.prezzatech.com/support/members) to download your license file. You will need a
separate license file for each additional server license you may have purchased.
5. Set file permissions on your license file
Ensure that the anonymous IIS user and the ASP.NET process user both have rights to edit the
file.
Note: You will only need to give these users write permission on this file to complete the license
activation process. Once the activation process has been completed (see below) you may remove
the write permission from this file.
6. Create an IIS Application using the directory on the server containing your Ultimate Survey
files.
Note: To create an IIS Application:
Step 1: Open the IIS Manager utility on the web server.
Start menu -> Control Panel -> (Switch to Classic View) Administrative Tools -> Internet
Information Services
Step 2: Browse to the Ultimate Survey folder under 'Web Sites'.
Step 3: Right-click on the folder containing your Ultimate Survey files.
Step 4: Select Properties.
Step 5: On the first tab of the properties screen labeled 'Directories', click on the "Create"
button.
Step 6: Click "OK" Button.
7. Setup SQL Server Database:
Note: Microsoft SQL Server does not need to be installed on the same server as the Ultimate
Survey web files.
Option 1: Create a New Database:
Note: For more information on creating a new database, please consult SQL Server Help Files
or http://msdn.microsoft.com
Option 2: Use an Existing Database:
Note: No action required. All table names in Ultimate Survey are prefixed with "rz_" and all
stored procedures are prefixed with "rsp_" so that they can easily be distinguished from other tables
in the database.
8. Go to the following URL in your web browser:
http://yourserver/UltimateSurveyfolder/install/Default.aspx.
Note: This web page will provide a web-based interface that guides you through the rest of the
installation process. This will create all necessary tables and stored procedures. This will also
configure your web.config file with settings necessary to run Ultimate Survey software.
3
Ultimate Survey Enterprise User Guide
9. Request activation of your installation of Ultimate Survey
When you have completed application setup, you will be shown the activation wizard. The wizard
will walk you through the steps required to activate your installation of Ultimate Survey. Generally,
activation is a two step process. If the server you are installing Ultimate Survey on is connected to
the internet, the first time the wizard is run, choose the “Request activation” button. This will send
your installation information to Prezza, where your request will be processed. No personally
identifiable information is transmitted. When you have completed your request, the activation wizard
will close, and you may continue with step 11. You will have 30 days to use the application before
you must complete the activation
10. Complete activation of your installation of Ultimate Survey
When you receive your reply from Prezza with your activation code (either via email if you used the
automated activation request in step 9, or directly over the phone if you called). Return to the
activation wizard by navigating to Settings -> Application Settings, and clicking the “Activate” link in
the License Information panel. When the wizard starts, enter your activation code in the provided text
box and click Continue. If activation is successful, you will see a message to that affect, and you will
be logged out of Ultimate Survey, as the application must restart.
11. Log into Ultimate Survey and configure system settings
Note: Once you have logged into the application using a user with administrator privileges, go to the
Settings section to configure the application. At this point, it is most important to verify and update the
Application Settings.
Upgrade Instructions for Ultimate Survey Enterprise .NET 3.0
This document is for upgrading your installation of Ultimate Survey Enterprise .NET Version 2.1 to Ultimate Survey
Enterprise .NET Version 3.0 Beta. If you are not upgrading from a previous installation of Ultimate Survey, please see the
Install Instructions file (called "InstallInstructions.htm").
Here are the steps to upgrading Ultimate Survey Enterprise:
Option 1: Simple Database Setup (Recommended):
1. Make a full backup of your database. This is extremely important. If you do not back up
your database, Prezza Technologies may not be able to help you with any support issues that
arise.
2. Unzip the installation files.
3. Stop your IIS web site, if necessary
It is recommended that you stop your web server to stop any users from logging in while you copy the
new files to the server. Otherwise certain files may not be able to be overwritten.
4. Copy files to the web server
Copy all of the Ultimate Survey source files to your web server. These files should be copied over
your previous installation, allowing files to be overwritten.
Note: It is recommended that you use an FTP client to move
the files rather than a client such as Front Page. Using Front
Page may result in some of the included files to be modified
in the process.
5. Place your license file (UltimateSurvey.lic) in the /bin directory under the root folder you just
created
Note: To obtain your license file: visit the Prezza support customer area
(http://www.prezzatech.com/support/members) to download your license file. You will need a
separate license file for each additional server license you may have purchased.
4
Installation
6. Set file permissions on your license file
Ensure that the anonymous IIS user and the ASP.NET process user both have rights to edit the
file.
Note: You will only need to give these users write permission on this file to complete the license
activation process. Once the activation process has been completed (see below) you may remove
the write permission from this file.
7. Set file permissions on Config directory
There is a new directory named Config. Make sure that the entire directory is writable and that the
anonymous IIS user has rights to edit the files in it.
8. Start your IIS web site
IIf you stopped your site in step 2, you will need to start it up at this point.
9. Upgrade the Database
Point your web browser to http://yourserver/UltimateSurveyfolder/install/upgrade.aspx. This provides
a web-based interface for the rest of the setup.
10. Connect to Application
Once the database setup is complete, you can use a web browser to connect to:
http://yourserver/UltimateSurveyfolder.
11. Request activation of your installation of Ultimate Survey
Your installation of Ultimate Survey must be activated to work properly. You will have 30 days to
use the application before you must complete the activation, during this time a banner will be
displayed at the top all pages reminding you to activate. Generally, activation is a two step process
using the activation wizard, which is accessed by navigating to Settings -> Application Settings, and
clicking the “Activate” link in the License Information panel. If the server you are installing Ultimate
Survey on is connected to the internet, the first time the wizard is run, choose the “Request activation”
button. This will send your installation information to Prezza, where your request will be processed.
No personally identifiable information is transmitted. When you have completed your request, the
activation wizard will close, and you may continue using the application normally.
12. Complete activation of your installation of Ultimate Survey
When you receive your reply from Prezza with your activation code (either via email if you used the
automated activation request in step 11, or directly over the phone if you called). Return to the
activation wizard by navigating to Settings -> Application Settings, and clicking the “Activate” link in
the License Information panel. When the wizard starts, enter your activation code in the provided text
box and click Continue. If activation is successful, you will see a message to that affect, and you will
be logged out of Ultimate Survey, as the application must restart.
UPGRADE COMPLETE
Option 2: Manual Database Setup:
1. Make a full backup of your database. This is extremely important.
2. Unzip the installation files
3. Stop your IIS web site, if necessary
It is recommended that you stop your web server to stop any users from logging in while you copy the
new files to the server. Otherwise certain files may not be able to be overwritten.
4. Copy files to the web server
Copy all of the Ultimate Survey source files to your web server. These files should be copied over
your previous installation, allowing files to be overwritten.
Note: It is recommended that you use an FTP client to move
the files rather than a client such as Front Page. Using Front
Page may result in some of the included files to be modified
in the process.
5
Ultimate Survey Enterprise User Guide
5. Place your license file (UltimateSurvey.lic) in the /bin directory under the root folder you
just created
Note: To obtain your license file: visit the Prezza support customer area
(http://www.prezzatech.com/support/members) to download your license file. You will need a
separate license file for each additional server license you may have purchased.
6. Set file permissions on your license file
Ensure that the anonymous IIS user and the ASP.NET process user both have rights to edit the
file.
Note: You will only need to give these users write permission on this file to complete the license
activation process. Once the activation process has been completed (see below) you may remove
the write permission
7. Set file permissions on Config directory
There is a new directory named Config. Make sure that the entire directory is writable and that the
anonymous IIS user has rights to edit the files in it.
8. Start your IIS web site
If you stopped your site in step 2, you will need to start it up at this point.
9. Upgrade the Database
You will need to manually run the .SQL files to create the database. You will need Microsoft's SQL
Server Query Analyzer tool (or other compatible tool) to run these scripts against your SQL Server
Database.
Note: It is imperative that you run the scripts with the same
SQL user account that will be used to run the application.
a) Update the database schema
You will find the SQL update scripts inside the
UltimateSurvey/install/updatescripts folder.
If upgrading from a previous version of Ultimate Survey .NET Enterprise:
Start with the script that references your current version and continue to run the
subsequent SQL scripts until you have updated to the highest version. For
example, if you are currently running version 2.0 and the current release is
version 3.0, you should first run the script "Upgrade-2.0-to-2.1.sql", then run
"Upgrade-2.1-3.0". Always continue until all newer scripts are run.
If upgrading from a version of Ultimate Survey Professional Edition:
1. If you do not have version 7.1 of the Professional Edition, update the
database to version 7.1. You can upgrade from version 7.0.x to 7.1 by running
the script "Adv-Upgrade-7.0.x-7.1.sql". Next run the script "Adv-Convert-7.1-to3.0.sql".
b) Update the stored procedures
Run the SQL script "UltimateSurveyNetStoredProcs.sql" found in
UltimateSurvey/install folder.
Important Note: When running the scripts manually, several warning messages may
appear. As long as the message does not say "ERROR" the process is running
correctly.
10. Connect to Application
Once the database setup is complete, you can use a web browser to connect to:
http://yourserver/UltimateSurveyfolder.
6
Installation
11. Request activation of your installation of Ultimate Survey
Your installation of Ultimate Survey must be activated to work properly. You will have 30 days to
use the application before you must complete the activation, during this time a banner will be
displayed at the top all pages reminding you to activate. Generally, activation is a two step process
using the activation wizard, which is accessed by navigating to Settings -> Application Settings, and
clicking the “Activate” link in the License Information panel. If the server you are installing Ultimate
Survey on is connected to the internet, the first time the wizard is run, choose the “Request activation”
button. This will send your installation information to Prezza, where your request will be processed.
No personally identifiable information is transmitted. When you have completed your request, the
activation wizard will close, and you may continue using the application normally.
12. Complete activation of your installation of Ultimate Survey
When you receive your reply from Prezza with your activation code (either via email if you used the
automated activation request in step 11, or directly over the phone if you called). Return to the
activation wizard by navigating to Settings -> Application Settings, and clicking the “Activate” link in
the License Information panel. When the wizard starts, enter your activation code in the provided text
box and click Continue. If activation is successful, you will see a message to that affect, and you will
be logged out of Ultimate Survey, as the application must restart.
7
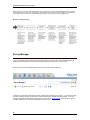
Settings
Settings
This section is accessible by clicking the "Settings" icon in the main navigation bar. Settings contains pages to edit system
wide configuration settings as well as preferences that impact how the application behaves.
Appearance Settings
The appearance settings section is used to customize the look and feel of the administration section.
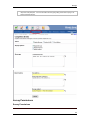
Application Settings
Application Settings
The application settings section configures many of the properties/components which are required to run Ultimate Survey
.NET.
Note: It is recommended that you make sure that no one is using the Ultimate Survey system when
modifying application settings.
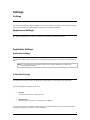
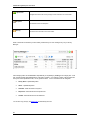
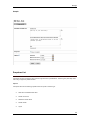
Folder/Path Settings
The Folder & Path settings are used to tell Ultimate Survey .NET where it is running and how users will access it.
The following settings are configured on this screen:
•
•
Host URL
The URL of your web server, including the http://
Application Root
This should be the virtual path to your Ultimate Survey installation.
If you are not sure of any of these settings, please consult your system administrator. Failure to configure these folders
and permissions properly may result in errors in the application.
9
Ultimate Survey Enterprise User Guide
Email Settings
Ultimate Survey uses Email for several reasons including survey invitations, password reset requests, and administrator
notifications. If you select to disable email, these features will not function.
Having trouble sending email? View our Email Troubleshooting Guide
If "Email Enabled" is set to "Yes", the following options will be available:
System Email
Address
The email address that Ultimate Survey will send from when sending administrator
notification email and password reset email.
Default
Invitation
Sender Address
The email address that will be used for the from address on email invitations if one is
not supplied.
Default
Invitation
Sender Name
The name that will be used (along with the default invitation sender address) when
sending email invitations. This value may or may not be recognized by the recipient's
email client.
SMTP Mail Host
This is the server that Ultimate Survey will use to send email. This can be any valid
server that is currently accepting SMTP email requests.
If you are not sure of any of these settings, please consult your system administrator. Failure to configure these folders
and permissions properly may result in errors occurring.
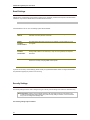
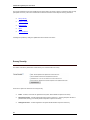
Security Settings
The security settings section is used to configure the type of security used to manage user sessions for Ultimate Survey.
Important Note: Changing security settings will result in all users being logged out of the system. This
includes the administrative session that is being used to modify settings. Therefore, it is recommended
that you do not change these settings often.
The following settings may be modified:
10
Settings
•
Concurrent Login Mode
This setting allows you to configure how Ultimate Survey reacts when more than one person attempts to login
using the same username. The available settings are:
•
•
•
•
•
•
Allowed
Every username may be used for an unlimited number of concurrent logins.
Not Allowed
Each username can only be logged in from only one location. Further attempts to login will be blocked
until the user signs off.
Logout User
This setting stops a username from being logged in for more than one concurrent session. However,
further attempts to login will logout the other sessions that are currently active.
Session Type
Sets whether to use "Cookies" or built in IIS session management ("Cookieless"). It is recommended that the
"Cookieless" session type is used for maximum security and compatibility.
Session Timeout
This value (in minutes) sets the amount of time to elapse before a session will expire. The time is only
measured during periods of inactivity.
Cookie Name
Specify the name of the cookie that is used by the application. This allows for multiple installations of Ultimate
Survey to exist on the same server.
Image Options
Image Options contains settings pertaining to the way that Ultimate Survey Enterprise stores and retrieves images.
The following settings are currently available:
•
•
Store Images in Database - This option stores images in the database rather than on the web server's hard
disk. This is useful in several situations, such as when dealing with a server farm/cluster. The downside to this
is the additional load that is placed on the database server and the storage requirements for the database
server will be higher.
Uploaded Images URL (available when the above option is disabled)
The full URL that corresponds to the Uploaded Images Folder.
11
Ultimate Survey Enterprise User Guide
•
•
•
Uploaded Images Folder (available when the above option is disabled)
The local system path where you would like to store uploaded images. This path must be accessible to IIS
(either by placing it under the wwwroot folder or by creating a virtual directory to it. This folder needs write
permission for the IIS User.
Preview Images File Path
Specifies the physical path on the server's disk that will be used to store temporary files for previewing uploaded
images. If this setting is not set, the previewing will be disaled.
Preview Images URL
URL to the path that will be used for previewing images. This must be the URL to the path specified in the
"Preview Images File Path" setting.
Advanced Options
The advanced options allow you to configure the way in which Ultimate Survey handles any exceptions that occur.
The available options are:
•
•
•
Display Exception Information - Enables or disables display of exception information on the users web
browser when an error occurs. Selecting this option enables the following two options.
Show Exception Stack Trace - Enables or disables display of the stack of application function calls when an
error occurs
Show Server Parameters in Error Display - Enables or disables display of the current server variables (e.g.
HTTP parameters) at the time when an error occurs
Note: It is strongly recommended that you do NOT enable any of these options except at the direction of a
Prezza support professional. The resulting error information may expose sensitive data to external users.
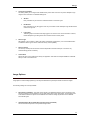
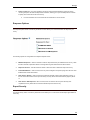
User Settings
The User Settings section allows you to customize the way that Registration for Ultimate Survey works.
The following options are available:
12
Settings
•
•
•
•
Allow Public Registration
Clicking this box will enable self-service registration on your installation of Ultimate Survey. If this box is not
checked, only administrators can register users through the administration interface.
Email Required
If checked, users will be required to enter their email address when registering for the system. This option
requires "Allow Public Registration" to be checked in order to properly function.
Encrypt User Passwords
Specifies whether passwords are encrypted in the database. Read more about Encryption details.
Default User Type
If public registration is enabled, this option sets the security level that users will have when they register.
It is strongly recommended that you do NOT set the default level to Administrator. This poses a huge security
risk and will allow any user to cripple the system.
•
Custom User Fields
Custom user fields are additional attributes that will be captured for each user. Each custom user field will hold
a text value.
Top Menu
A subset of the Appearance Settings.
The following settings are available:
•
Header Type
The "header type" refers to the application name that is displayed on the screen. This can be either:
•
•
•
Logo
Uses either a .jpg or .gif logo. This can be uploaded directly through the application.
Text
Uses the text of the Site Name specified in the Navigation section.
Menu Text Color
Specifies the color of the text on the application menu.
Preferences
The preferences section is used for modifying additional system wide preferences.
13
Ultimate Survey Enterprise User Guide
The following options are available:
System-wide
•
•
•
•
Results Per Page
Sets the number of items that display in data grids. Affected pages include: Manage Surveys, Manage Users,
and Reports.
Use HTML Editor
Enables or disables the web-based HTML editor. This applies to HTML items and parts of the Style Templates.
Use Date Picker
Enables or disables the popup date picker.
Show Available Survey List
Determines whether the "Surveys" icon is displayed to non-logged in users. This does not impact permissions
granted to individual surveys.
Survey Preferences
•
•
•
•
•
Default Edit Survey View
Sets the default view used to edit surveys. Regardless of the setting chosen, the user can always switch
between the two modes while editing a survey. The "All Pages" view shows the user all of the questions on one
screen while the "Individual Pages" defaults to show each page on a separate screen.
Default Drop Down Text
Sets the text that appears in the first line of drop down questions. Typically, this is text that will alert the user to
the fact that they must make a selection from the drop down box.
Default Other Text
Sets the default text label text that is used when "Allow Other" is enabled on a question.
Default Option Input Mode
Sets the default method used to input survey item options.
Default Survey Style
Specifies the default style template to be used on new surveys. Styles can be configured by pressing the
"Styles" icon.
Report Preferences
•
•
14
Default Export Type
Sets the default to CSV or SPSS formats. This can be changed when the Export is being run.
Report Incomplete Responses
Checking this box will include responses that have not been completed. This applies to Reports, Analysis, and
Export features.
Settings
•
•
Default to Aliases in Reports
Sets whether to use aliases or the full item text in reports. This value can be changed at report run time.
Show Preview in Analysis Editor
Specifies to show a preview of the analysis while it is being created.
Navigation
A subset of the Appearance Settings.
The following settings are available:
•
•
Site Name
Specifies the name of the site which appears in the title bar of the application.
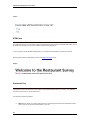
Home Page Body
HTML body which is displayed on the administrator welcome page. This page is displayed after a user logs into
the administration section. There is a built in WYSIWYG HTML editor which also allows you to enter raw HTML.
HTML Editor Guide
Encrypt User Passwords
This option encrypts user passwords using a one way hash algorithm. The encrypted password is stored in the database
rather than the plain text version.
Important Note: Changing this option will render all existing passwords useless. Therefore, it is not
recommended that you change this option after the initial system setup.
Monitoring Tools
Ultimate Survey comes with two monitoring tools that can be used to better understand your installation of Ultimate
Survey:
15
Ultimate Survey Enterprise User Guide
•
•
Logged in users
Displays all the registered users currently logged into the server hosting Ultimate Survey
Exception log
Displays all Ultimate Survey errors logged on the current web server
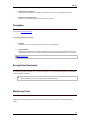
Logged in users
On this screen you can see all the registered users who are currently logged in to the active web server. You may log out
a specific user by clicking the Logout User button.
Note: The logged in users screen only displays the users logged into the current web server. In a multiple
server installation of Ultimate Survey, use the provided Refresh button to re-load the logged in users
screen until you have seen all servers. When you log out a user, they will only be logged out of the
current server.
Exception log
The exception log displays all errors logged by Ultimate Survey on the current server. This tool is provided to help you
diagnose and troubleshoot errors with the assistance of Prezza support professionals; the error information may be
encrypted and unreadable.
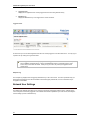
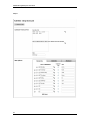
Network User Settings
The Network User Settings page allows you to configure how network users interact with the system. Ultimate Survey
can be configured so that it can piggyback on the network authentication capabilities of your web server, eliminating the
need for setting up users in Ultimate Survey.
16
Settings
The following options can be configured on the Network User Settings screen:
•
•
•
Allow network login - Checking this box configures Ultimate Survey to use the web server's authentication
process to authenticate users with the application. For this setting to work properly, your web server must be
properly configured to gather user authentication information.
Don't require registration - When this box is checked, networked users can be authenticated and granted
access to Ultimate Survey without having been registered as users in the system. When this box is checked,
the Select Roles accumulator box becomes active
Select network user roles - When network users are not required to be registered in Ultimate Survey, you
must specify what role(s) these users will have when they are authenticated by Ultimate Survey. Select the
role(s) you want unregistered network users to have in the left hand pane and click the > button to move them
to the right hand pane.
Click the Update button to save all changes made to network user settings.
17
Surveys
Overview of Survey Administration
The first thing you see when you open up your browser to the Ultimate Survey Software is the Login Page. You will find
that you see three icons at the top of the page, Surveys, Reports, and Login. Without logging in, you always view
Surveys and Reports that are made accessible to the public.
Survey Creation Workflow
These are the high level steps that are followed to successfully create and deploy a new survey:
Important Note about Active Surveys: While Ultimate Survey does not prohibit you from making changes to
surveys that are Active, it is recommended that you use extreme caution when doing so. Response data
may be tainted and/or deleted depending on the action that you perform. Additional notes are found
throughout this manual.
Post Creation Steps
Once a survey has been successfully launched, you can view real time results by accessing the Reports section of the
administration interface. After the survey has run its course and all the results have been collected, you can optionally
delete the survey.
Important Note: Deleting any element of a survey will delete the response data that goes with it. For example, if
a question is removed from a survey all response data for that question will also be deleted.
Overview of Taking a Survey
19
Ultimate Survey Enterprise User Guide
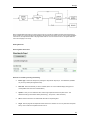
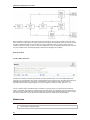
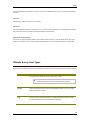
Many operations occur when a respondent takes a survey. Various sets of rules are evaluated throughout this process
including the survey's security type, visual settings, and the display of the items in the survey. Below is a visual diagram
which explains this from end to end. Understanding this process is a critical part of creating quality surveys.
Workflow of Taking a Survey:
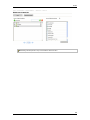
Survey Manager
The survey manager is where almost all of the work in producing a survey is done. The Survey Manager is the
starting point for creating the survey and the ending point where you activate the survey to go live.
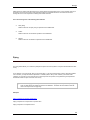
When you first enter the Survey Manager you will be given a screen that looks like this:
If there are any surveys that have been previously created, they will appear on this screen. To load a survey that
has been previously created, simply click on the survey that has been created and resume editing. If you have
several hundred surveys that exist from other users, you may use the Survey Search, located on the top right of
the page. Otherwise, you have the following options on this screen:
20
Surveys
New Survey
Create a New Survey
Import from XML
Import from XML
New Folder
Create a new folder
Page next
Go to the next page of Surveys
Page Last
Skip to the last page of Surveys
Go to the previous Page
Page Previous
Skip to the First Page
Page First
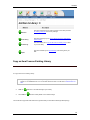
When you click a folder name from the survey list, its contents will be displayed. When the survey manager is
displaying the contents of a folder, some additional controls are available:
In addition to controls above, three additional controls are available:
21
Ultimate Survey Enterprise User Guide
Up one level
Navigates back to the main survey manager screen from within the current folder
Properties
Edit the folder name and description
Security
Edit the access control list for the current folder
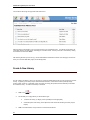
Other controls will be included if you have already created surveys or have existing surveys in your Survey
Manager:
All the Category titles can be sorted either alphabetically or sequentially by clicking on the Category title. It will
then organize the data first alphabetically or from least to greatest. If it is clicked on again, it will reorganize the
Surveys in reverse alphabetical order, or from greatest to least. Here is a breakdown of the categories:
•
Survey Name - alphabetically listed
•
Owner - alphabetically listed
•
Activated - listed with active surveys first
•
Responses - listed with the most responses first
•
Created - listed with the most recent dates first
You can also copy surveys, and delete them as indicated by the icons.
22
Surveys
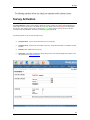
Survey Editor
Ultimate Survey has made the progress of building the survey a series of progressive steps that you will take until the
completion of the survey. These steps are in white text underneath the icons and are shown here circled in red:
They are as follows:
1.
Survey Editor
2.
Completion Events
3.
Properties
4.
Style
5.
Permissions
6.
Activation
7.
Test Survey
Located on the left, there is a "View" Drop-down menu, which allows you to specify which pages you would like to
see, if you have an extensive survey with multiple pages. It also allows you to jump directly to the Completion
Events Page.
The following icons you will see are organized into three sets:
1) Survey Icons - controls that allow you to edit/manipulate the survey in its entirety
2) Page Icons - controls that will only affect that particular page
23
Ultimate Survey Enterprise User Guide
3) Item Icons - controls items effect only the item
On the same level as the View Dropdown menu is a selection of icons that allow you to edit the survey on a
general level, rather than at the page or question level. The list is as follows:
Survey Icons
Hidden
Item
New Page
Preview
Hidden Items are used to pass data into the survey system without the respondent's input.
This is generally useful if you are linking to the survey from another web page which
already has information about the user. Other users include tracking the source of the
respondent or tracking their intranet username.
This creates a new page for the survey editor to create items on. Upon being clicked on,
it will take you to Creating a New Item page, since you cannot have a new page without
anything on it.
Preview allows you (the creator/editor of the survey) to view the Survey while in editing
mode, so you can have an idea of what the survey may look like when it is active. Style
templates (if selected), will have been added to the survey. During the editing of survey,
all items and pages will remain black and white by default, so this is a ideal way to view
the effect of the style during the editing process. See Fig 1.
This prints a copy of your survey.
Print
Export
Note: While the print icon is in 'Survey Edit', it will print out a copy of the
Survey, as it will appear in its completed form. This is useful for people
who are participants of the survey, but cannot take the survey online, and
need to take the survey in paper format.
This will export your survey into XML.
Page Icons
Add Item
By clicking this icon will add a new Item to the survey. An item is defined as the
statement or question that the user responds to which includes the options that are
provided. Items can be in several formats and types, and is up to the discretion of the
creator of the survey to decide which type and format is best suited for what is being
asked to the participant.
This enables a conditional rule to be set. Conditional statements are rules that are
applied to an item or page in a survey. These rules are evaluated (when the respondent
24
Surveys
Conditions
takes the survey) to determine whether the item or page is displayed to the respondent.
Branching
Similarly to the Conditions option, this enables a conditional rule to be set. This allows
you to skip to page(s) or jump directly to the end of the survey based upon the response
to a question.
This allows you to copy a page of items to a new page. This is particularly useful if you
are going to have pages that will follow another page's format and style. Click on the
icon and all copies of pages will be appended to the end of the survey
Copy Page
Note: Copying an item will carry over pipes as these are just tokens in a string,
and it will carry over scores, but it will not carry over conditionals
Move Page
Allows you to move the page within the survey.
Delete Page
This deletes the page. This will also delete any response data to the items on the page,
any conditions or branches that use items on the page, and any pipes which use items
on the page. Please use caution when deleting pages.
Item Icons
This will edit the item you have already created. If you have already created an item, and
wish to change it in some fashion, simply click this icon.
Edit Item
This allows you to copy an item to the same page. Simply click on the icon and a copy of
the item will appear at the end of the page.
Copy
Item
Insert
Item
Export
Item
Note: Copying an item will carry over pipes as these are just tokens in a string,
and it will carry over scores, but it will not carry over conditionals
This allows you to insert an item above the item this icon appears with. This is a useful
feature when you have a page with more than 10 items and you need to insert an item in
the middle.
This allows you to export an item via XML.
25
Ultimate Survey Enterprise User Guide
Delete
Item
This deletes the item.
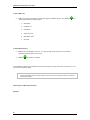
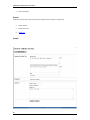
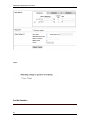
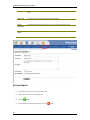
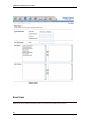
Create A New Survey
•
Click on the "New Survey" icon, that should be a 'plus sign'
•
This will bring you to the 'Create Survey' Page. This page will be identical to the Properties Page.
•
.
In the Survey Name text box, type the name of the Survey you wish to create. This will appear on the title bar
of the window your Survey will generate.
•
In the Survey Title, give your Survey a title. Often the name and the title will be the same.
•
In the Description Box, type in a brief description of the survey.
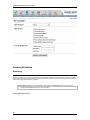
•
•
•
Under the Basic Options, check the box if you want your survey to be scored. This enabling you to give a score
for each option, allowing for further tabulation after the survey was completed. Also known as conjoint
methodology. Please refer to the section Scored Survey for more details.
Under the Add-On Modules, check the box if you want your survey to be in a different language. Once this
clicked, you will have the option to choose the languages you with the survey to be available in. Please note
that all language packs should be installed for both the participant's workstation and the administrator's servers
for this to be enabled. For more on this please see the Multi-Language Module.
Assuming you do not check the Multi-Language Module, click the "Submit" button and it will take you directly to
the Survey Editor Page.
Survey Items
Each survey is made up of one or more Survey Items. A Survey Item is any item created from one of the reusable Item
Types. The Item Type determines how the Survey Item behaves when it is displayed to the user. For example, the Survey
Item may be of a type that accepts an answer (such as a set of checkboxes) or it may be something that is for display
purposes (such as an image).
To add an Item to the Survey:
Every Survey Item must be one of the following Item Types:
26
Surveys
Item Type
Description
Multi-line Text
Field
Display a question with a multi-line freeform text entry box
Date
Asks the respondent to enter a valid date with optional maximum and minimum
values
Single-line Text
Field
Freeform text field with optional formatting rules, including minimum and
maximum values
Upload File
Allow user to upload a file. File types can be restricted.
Checkboxes
Lists of answers from which the respondent can select one or more answers
Radio Buttons
Lists of answers from which only one answer can be selected
Dropdown
Menu Lists of answers in a drop down menu from which the user can select
one or more answers
Matrix Question
Rank multiple items or answer multiple questions on the scale or set of scales.
Yes/No Question
Based on a Radio Button question, this item helps you quickly create a
question that accepts a yes or no answer.
True False
Question
Based on a Radio Button question, this item helps you quickly create a
question that accepts a true or false answer.
Display Item
Description
Message
Displays a message text in configurable font size and color
Image
Displays an image (configured at design time) to the respondent
Horizontal Line
Displays a plain horizontal line across the screen using an HTML horizontal rule
tag
HTML
Displays freeform HTML. Includes a web-based WYSIWYG HTML editor to make
input and formatting easy.
Creating A New Item (Adding A New Item)
This is a focal point in the survey creation.
27
Ultimate Survey Enterprise User Guide
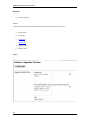
Add Item to Survey
You can add an Item to the survey with several options: The Add Item screen is used to add an item to the survey. By
clicking on the , you can add an item by the following options:
•
•
Creating a new item.
•
Click on the
•
Choose one of the Items on the Survey Items Page.
Adding an item from a Library
•
Click on the
•
Click on the
•
Click on the Library Title you wish to import your Items from.
•
•
'Add Item' button
'Add Item' button
'Add from Library'.
Check the appropriate Items you wish to import. You may select all, by checking the 'Select All'
button at the top of the page.
Importing an item from an XML file
•
Click on the
•
Click the 'Browse' button to choose the XML file you wish to import
•
Click the 'Import' button once you have selected the file.
'Import from XML' button
Item Types
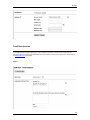
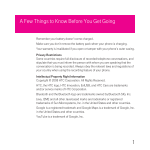
Checkbox
A Checkbox Item prompts the respondent to select one or more answers from a predefined list of answers.
28
Surveys
The following fields are provided for the creator/administrator to fill out:
Items Text / Sub Text
•
Question Text Box
•
Sub Text Box
•
Alias
Options
A Checkbox Item has the following properties which are specific to this item type:
•
Allow Other and Default Other Value
•
Layout
•
Number of Columns
•
Randomize Answer Order
•
Number Labels
•
Minimum to Choose
•
Maximum to Choose
Sample:
29
Ultimate Survey Enterprise User Guide
30
Surveys
Output:
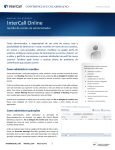
Date Item
which can be used to navigate to
A Date Item prompts the respondent to enter a valid date. A small calendar
determine a date. Upon clicking on the icon, a calendar will each day being a link which will subsequently fill in the text
box. Or, simply type the date in mm/dd/yyyy format.
31
Ultimate Survey Enterprise User Guide
The following fields are provided for the creator/administrator to fill out:
Items Text / Sub Text
•
Question Text Box
•
Sub Text Box
•
Alias
Required
•
Answer is Required
Options
A Date Item has the following properties which are specific to this item type:
32
•
Default Date
•
Minimum Date
•
Maximum Date
Surveys
Sample:
Dropdown List
A Dropdown List Item prompts the user to select a single value from a predefined list. This item type is particularly useful
when using a large list of possible answers.
Options:
A Dropdown Item has the following properties which are specific to this item type:
•
Allow Other and Default Other Value
•
Number of Columns
•
Randomize Answer Order
•
Number Labels
•
Layout
33
Ultimate Survey Enterprise User Guide
Sample:
34
Surveys
Output:
Matrix
A Matrix item is a type of question that offers you the ability to collect multiple answers from the respondent. The left
column of the grid displays the categories which is the topical item the respondent is responding to. The other columns
labeled at the top, are the matrix sets, which are the criteria that the respondent is using to respond to the categories.
Example 1:
35
Ultimate Survey Enterprise User Guide
To Add A Matrix Set:
•
Click on the category you would like to choose with regards to the Matrix Set type. Then Click the
The Dropdown list has the following options:
•
Radio Button
•
DropDown List
•
CheckBoxes
•
Single Line Inputs
•
Radio Button Scale
•
Sum Total
icon.
To Add a Matrix Category:
•
•
Enter text into the field labeled "Text:" and . You may optionally specify an Alias, which is used when
generating reports and exports on this survey.
Click the
icon to add it to the Matrix
To add a Matrix Set, select the type of Matrix set that you wish to add from the drop down menu. Then press the "+" icon
to proceed to the Matrix Set Editor.
Important Note: Changes to the matrix question are not saved until either the "Submit" or "Return to Edit"
buttons are pressed. Clicking any of the other icons on the screen may result in the loss of any changes
that have been made.
Other Examples of Matrix Style Questions:
Example 2
36
Surveys
Example 3
Sum Total Matrix Set
A Sum Total Matrix set allows you create a Matrix Item column that allows you to validate numerical data that the
respondent enters into the Sum Total matrix column.
The data is evaluated based on the sum of all numbers entered into the Sum Total column using one of the following
operators:
37
Ultimate Survey Enterprise User Guide
•
•
•
Equal To - The values entered into the column must sum to the Sum Total value specified at design time.
Less Than - The values entered into the column must be less than the Sum Total value specified at design
time.
Greater Than - The values entered into the column must br greater than the Sum Total value specified at
design time.
Multi-Language Survey Module
Note: Multi-Language Surveys require the purchase of the Multi-Language Survey Module.
Creating Surveys With Multi Language Support
Multi-Language support in Ultimate Survey allows users to create surveys that can be displayed in different languages
depending on the language choice of the respondent taking the survey.
Enabling Multi-Language Support
To enable multi-language support for a particular survey, in the Survey Properties pages, check the box labeled “Enable
Multi-Language”. The multi-language options form will appear.
Select one or more languages from the available list and set the default language in the drop-down list. The default
language you select will be the language that is displayed during editing of the survey. Next, select the method of
determining the language preference of the respondent. You can choose from the following options:
•
38
Prompt – Before taking the survey, the respondent is presented with a list of supported languages from which
to choose.
•
QueryString – The respondent’s language preference is retrieved from the query string.
•
Session – The respondent’s language preference is retrieved from the session object.
•
User - The respondent’s language preference is retrieved from the properties associated with a User.
Surveys
Technical Note
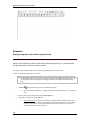
If you choose QueryString, Session, or User, you must specify a key for the language value. For example, if using
query string:
http://ultimatesurveyurl/surveys/takesurvey.aspx?surveyid=xxx&languagePreference=English
You see that “languagePreference” is the chosen key. This variable must be passed into Ultimate Survey.
Editing a Multi-Language Survey
When editing a multi-language survey, you will note some small differences when editing a particular survey item.
Specifically, there is a language selector at the top of the screen, which selects which language to edit. When you open
an Item to edit, it will show a view of the default language. All elements of the Item are available for editing. The chosen
default language serves as the primary key on which the other language choices depend.
Important Note: You must ensure that each text value found in your default language, a corresponding value
appears in the other supported languages. When you switch the language view, the editor will disallow
fields that do not have values in the default view. If you need a new option, switch back to the default
view and enter text in that field. When you return to the alternate language views, the box will now be
available for use. Be aware that you if you neglect to enter a value in an alternate language field for which
a value exists in the default language field, a required field error will show.
<screenshot ItemEditor>
Alias fields are shared by all languages. This provides a key for the purposes of reporting and export so that the answers
from each language are analyzed together.
Multi-line Text Field
A Multi-line Text Field Item allows you to ask the respondent an open-ended question that accepts multiple lines of text
input.
The following fields are provided for the creator/administrator to fill out:
Items Text / Sub Text
•
Question Text Box
•
Sub Text Box
•
Alias
Required
39
Ultimate Survey Enterprise User Guide
•
Answer is Required
Options
A Multi-line Text Field Survey Item has the following properties which are specific to this item type:
•
Number of Rows
•
Number of Columns
•
Default Text
Sample:
40
Surveys
Radio Buttons
A Radio Button item is a type of item that asks the respondent to select a single answer from a list of predefined answers.
The following fields are provided for the creator/administrator to fill out:
Items Text / Sub Text
•
Question Text Box
•
Sub Text Box
•
Alias
Required
•
Answer is Required
Options
A Radio Button Item has the following properties which are specific to this item type:
•
Allow Other and Default Other Value
•
Number of Columns
•
Randomize Answer Order
•
Number Labels
•
Layout
Sample:
41
Ultimate Survey Enterprise User Guide
42
Surveys
Output:
Single-line Text Field
A Single-line Text Field item prompts the respondent to enter a text value (with optional format constraints).
The following fields are provided for the creator/administrator to fill out:
Items Text / Sub Text
•
Question Text Box
•
Sub Text Box
•
Alias
43
Ultimate Survey Enterprise User Guide
Required
•
Answer is Required
Options
A Single-line Text Field Survey Item has the following properties which are specific to this item type:
•
Answer Format
•
Max Length
•
TextBox Size
•
Default Value
•
Minimum Value
•
Maximum Value
Sample:
44
Surveys
True/False Question
A True/False Question provides a quick way to make a question that accepts an answer of true or false from the
respondent. This item is based on the Radio Button item and, therefore, has many of the same options. Please refer to
the Radio Button Item for full details.
Sample:
45
Ultimate Survey Enterprise User Guide
Output:
Yes/No Question
46
Surveys
A Yes/No Question provides a quick way to make a question that accepts an answer of yes or no from the respondent.
This item is based on the Radio Button item and, therefore, has many of the same options. Please see the Radio Button
Item for full options.
Sample:
47
Ultimate Survey Enterprise User Guide
Output:
HTML Item
The HTML Item allows you to enter freeform HTML or formatted HTML (using the built-in web-based HTML editor). This is
an efficient way to quickly give your survey a flexible and eye-catching appearance.
If you do not wish to use the WYSIWYG HTML Editor, you may also edit the raw HTML by pressing the "Text" link.
More information about the HTML Editor is found in the HTML Editor Guide section.
Sample
Horizontal Line
A Horizontal Line item is an item that is used to create a visual separator between items in your survey. The Horizontal
Line item uses an HTML <hr> tag to create the line.
This item has the following properties:
•
48
Width as a % - Allows you to set the width of the line as a percentage of the width of the respondent's browser
window. This can be any whole number between 1 and 100.
Surveys
•
Size - This property sets the height of the horizontal line.
Sample:
Image Item
An Image Item is used to display an image to the survey respondent. This can be useful for displaying a logo or even a
reference image which helps the respondent answer the question.
Under the "Source" section of the Image Item's properties, you can select from the following:
•
•
Upload an Image - Allows you upload an image with your web browser. The image is saved in the Ultimate
Survey installation and a link is placed into the survey.
Specify an Image URL - Allows you to specify any valid URL to an image file.
In addition, you may also specify the alignment of the image, which can be set to align it to the Left, Center, or Right side
of the screen.
Dropdown
Allow Other and Default Other Value Options
The Allow Other option allows you to specify whether the item contains a choice for "Other". This applies to
multiple item types, including Checkboxes, Radio Buttons, and Drop Down item types. The other option prompts
the respondent to specify that their answer was not contained in the predefined list of answers and then they can
enter their own answer in a box provided next to the Other Option.
The Default Other Value lets you specify the text that appears next to the Other Option.
Layout
The Layout option allows you to specify whether the items are displayed Horizontally or Vertically. In the
Horizontal Layout, the answer options for the selected item flow from left to right. In the Vertical Layout, the
answer options for the selected item flow from top to bottom.
49
Ultimate Survey Enterprise User Guide
Number Labels
When enabled, the Number Labels option will number the answer options for the selected survey item.
Specifically, the numbering will appear in the format "1." and continues consecutively.
When used with the Randomize Answer Order option, the numbering will not be randomized.
Number of Columns
The Number of Columns property determines the number of columns that will be used for the purposes of laying
out the answers to the checkbox item. The Layout option determines whether the items are laid out going across
the columns or up and down them.
Randomize Answer Order
The Randomize Answer Order option tells the system to randomize the display of the answers to the item when
the respondent is taking the survey. This allows you to prevent order bias where respondents may tend to check
the middle or first/last answers to an item.
Message Item
A Message Item is a type of item that allows you to display text to the respondent at any part of the survey. This can be
useful for the purposes of adding instructional text or other information that will help guide the respondent through your
survey or form.
There are two optional properties which can be set for a Message Item:
•
Font Color - Allows you to specify the color of the message text.
•
Font Size - Allows you to specify the size (in pixels) of the message text.
Note: If these properties are not set, the survey will use the default text styles from the Style Template that is
currently applied to the survey.
Sample:
50
Surveys
Survey Activation
The Survey Activation screen is used to activate / deactivate a survey as well as to configure certain parameters that
specify when the survey can be taken. By default, the survey upon creation will be set as Inactive which will display in
the color red. Upon activation of the survey, by clicking the Activate link (whose link is green), the survey will start
recording the data to the Database, which then can be turned to generating reports.
The following options can be set on the Activation screen:
•
•
•
•
Activation Status - A survey can be either Active (on) or Inactive (off).
Activation Period - Sets the start and end date of the survey. These dates take effect on 12:00AM on the date
specified.
Summary - Basic statistics about the survey.
Survey URL- The full URL that should be used to take the survey. The URL that displays here is based on the
URL specified in the Application Settings.
51
Ultimate Survey Enterprise User Guide
Survey Completion Events
Once you have completed or edited a survey and are satisfied with your items, you need to determine what happens
once the respondent completes the survey and hits the "Submit" button.
Options and features concerning the completion of the survey have been separated into 4 sub-categories. They are as
follows:
Action - This is the main control of the Completion Events. The survey creator/editor has the option to
•
•
•
•
Display a message - This will display a message that will be displayed in the web browser window
Redirect to URL - This will redirect the participant to a specified URL. This is particularly useful if you wish to
have an elaborate Thank You Message
Close Window - This will close the web browser window.
Restart Survey - This will take the user back to the first page of the survey. Please note that on non-public
surveys this functionality requires "Max Responses Per User" setting to be greater than 1 or not set at all.
Display Options - This option allows the participant to view his responses, and/or view a summary of the responses thus
far. The Display Message checkbox is checked by default.
•
•
•
Display Message- If this box is checked, a message will be displayed on the subsequent page after the
participant filled out and completed the survey. The message can be entered in the text box below the Display
Options.
Display Response - On message page that is displayed after the completion of the survey, the participant will
have the option to view his/her responses by way of a button.
Display Analysis - On message page that is displayed after the completion of the survey, the participant will
have the option to view a summary response of the survey thus far by way of a button.
Email Options - If you wish to have a copy of the survey responses sent to the respondents, you can add their names
here. The first column allows you to specify the email address sender. The second box specifies the email address you
wish to send the individual response to. Finally, you have the ability to edit the Subject Line to your discretion.
52
Surveys
Important Tip: All information that can be entered on the Completion Page has the ability to be piped from the
responses of the participant. For more information about the piping ability, please refer to Piping in the
Advanced Features Section.
Survey Permissions
Survey Permissions
53
Ultimate Survey Enterprise User Guide
The Survey Permissions screen is accessible from the Survey Editor. This screen is used to configure the users who may
participate in the survey. The screen is divided into five sections that control various aspects of survey permissions:
•
Survey Security
•
Response Options
•
Report Security
•
Owner
•
Advanced Options
All settings are updated by clicking the Update button at the bottom of the screen.
Survey Security
This section of the Survey Permissions screen allows you to control access to the survey.
There are four options to choose from for survey security:
•
•
•
54
Public - All users, even those not registered in the system, will be allowed to respond to this survey
Password Protected - A single password will control access to this survey. Choosing this option will show a
password field, allowing you to set the password required to respond to this survey
All Registered Users - All users registered in the system will be allowed to respond to this survey
Surveys
•
Access Control List - Only users specified in the access control list will be allowed to access this survey.
Choosing this option will show the Respondents List button, allowing you to open the Respondent List screen
to specify which users have access to this survey
•
For more information on access control lists see Introduction to Access Control
Response Options
The response options section of the Survey Permissions screen allows you to control how users can respond to your
survey.
The following options are configurable in the Response Options section:
•
•
•
•
•
Maximum Responses - Sets the maximum number of responses that may be submitted for this survey. When
the limit is reached, respondents will see a message informing them that the limit has been reached
Responses Per User - Sets the maximum number of times each user is allowed to respond to a survey
Prohibit Back Buttton - When checked, the survey will not navigate to the previous page when the user clicks
the Back button in their web browser
Allow Users to Resume - When checked, the system will remember a user's place while taking a survey. If
the user closes their browser and re-opens the survey link, they will be returned to whatever page they left off
on
Allow Users to Edit Responses - When checked, users who return to the survey link after they have
completed the survey will be able to review and edit their responses to the survey
Report Security
The Report security section of the Survey Permission screen allows you to control access to data reports generated from
this survey.
55
Ultimate Survey Enterprise User Guide
The following options may be set in the Report security section:
•
Report Creation Permission - There are four options to choose from that let you control who may generate
reports based on the data from this survey:
•
•
•
•
•
Survey Owners & System Administrators - Only the users listed as owners of this survey, along
with users in the System Administrator role may generate reports based on this survey
Use Access Control List - Only users specified in the access control list may generate reports
based on this survey. Choosing this option reveals the Report Creators List button that opens the
Edit Access Control List screen for thus survey. For more information see Introduction to access
control
Registered Users Only - All users registered in the system may generate reports based on this
survey
Everyone - All users, including those not registered in the system, may create reports based on this
survey
Response Options - There are two options to choose from that allow you to specify the level of detail that
users who may generate reports are allowed to see
•
•
Only allow access to summary results - Users who are allowed to generate reports for this survey
will only be able to view the aggregate survey data, not individual responses
Allow access to summary and detailed results - Users who are allowed to generate reports for
this survey will be able to view individual responses
Note: The options on this screen allow you to specify the users that will be allowed to generate new reports
based on this survey. To configure access to existing reports, use the access control list for each report in
the Report Manager
Survey Owner
This section of the Survey Permission screen allows you to change the user who "owns" this survey.
56
Surveys
To change the owner of the survey, click the button next to the username; this will pop open a dialog box containing a list
of available users. Click a new username to re-assign ownership of this survey.
Advanced Options
The Advanced Options section of the Survey Permission screen allows you to use the advanced access control editor to
exercise finer control over access to this survey.
There are two controls available in the Advanced Options section:
•
•
Advanced ACL Editor - Clicking this button will open the advanced access control list editor for this survey.
For more information see Advanced access control
Do not automatically change access lists to match Survey and Report security types - When this option is
selected, changes made to the Survey Security and Report Security radio buttons in the other sections of the
Survey Permission screen will not affect the access control list for the survey. For example, if the survey
security was set to "Access Control List" and then changed to "All Registered Users" the ACL would not be
updated to reflect the addition of these new users.
Respondents and Report Creators List
The Respondents List and Report Creators List offer a simplified view of the access control list for survey control and
report creation, respectively. Both screens allow you to simply add users to the access control list, setting the appropriate
permission policies automatically.
For more information on access control see Introduction to Access Control
Survey Properties
Identical to the Survey Creator page, this option is available from the Survey Editor page. It is a good idea after you
complete or edit a survey to go over the Properties page to ensure the information continues to be accurate.
The following options can be set on this screen:
57
Ultimate Survey Enterprise User Guide
Survey Name
The administrative name for the survey. This is not displayed to respondents taking the
survey.
Survey Title
The title of the survey which will be displayed to respondents.
Survey
Description
The administrative description of the survey. Used on the Manage Surveys screen.
Scored
Survey
(Not implemented in this version) Enables scoring for the survey.
Survey Search
58
•
Type in the name of the survey or user you wish to find
•
Set the pull down menu to the appropriate field
•
Click the
•
If the results are not what you are looking for, click the
Button.
Button.
Surveys
Survey Style
The Survey Style screen configures options that impact the way the survey looks when a respondent is taking it.
The following style options can be configured on this page:
•
•
Style Template - Select the Style Template that should be applied to this survey. On the Survey Editor page
you can preview your survey with the applied style by using the Preview feature.
Style Options
•
•
•
Show Progress Bar - Displays a visual progress bar at the top of the page which tracks the
respondent's progress.
Show Question Numbers - When the respondent is taking the survey, this option displays item
numbers next to each question. The numbering starts with 1 on the first item on the first page and
continues consecutively until the end of the survey.
•
Show Survey Title - Displays the title of the survey at the top of every page in the survey.
•
Randomize Items in Pages - Randomizes the items on each page.
•
•
•
Show Page Numbers - When the respondent is taking the survey, this displays the total number of
pages as well as the current page they are on (e.g. "Page 2 of 5")
Show Validation/Required Fields Message - Enables or disables validation messages displayed on
the survey form
Show Validation/Required Fields Alert - Enables or disables validation messages displayed in a
modal dialog box
Override Button Text
Allows you to set the text of several buttons that are used when the respondent is taking the survey.
•
Continue Button
•
Finish Button
•
Back Button
59
Ultimate Survey Enterprise User Guide
Advanced Features
Branching
Branching evaluates one or more rules to determine which page the respondent will be directed to. This can accomplish
many of the same things as Page Conditions, but is also particularly useful if you need to skip a large number of questions
based on the respondent's answer to a question.
Important Note: Conditions can only be based on items that are on a PREVIOUS page. You cannot have a
condition that evaluates a question on the current page.
Branching Evaluation Process:
60
Surveys
When evaluating Branching Rules, the system goes through the a process of evaluating the branches. Each Branching
Group contains one or more rules which are evaluated in the order they were entered. As soon as the system evaluates a
rule to be true, the respondent is taken to the page listed in that rule. If no rule is found to be true, the system takes the
user to the next page in the survey.
Building Branches:
Branching Editor Screenshot:
Branches are created by selecting the following:
•
•
•
•
•
Branch Type - Select from "Response" (meaning the respondent's response) or "User Attributes" (available
only on surveys that require registered users).
Filter Item - Select the Item that you wish to evaluate. (Note: You cannot evaluate Display Item types and
currently Matrix Items cannot be evaluated either.)
Operator - Once you have selected an item, select a logical operator from the drop down menu. This
determines what type of evaluation will be performed (e.g. "Is Equal To", "Was Answered").
Value - Sets the value which the selected filter item will be compared against.
Target - Sets the page that the respondent will be sent to if the criteria is met. You may also select "Complete
Survey" which causes the Completion Events to be run.
61
Ultimate Survey Enterprise User Guide
You may continue to add an unlimited number of branching rules to a page.
Completion Events
Completion Events determine what is the last page that is executed when a respondent takes a survey. This specifies the
action that is taken when the survey is completed.
There are three main types of Completion Events:
1.
Display a Message
2.
Redirect to a URL
3.
Close Window
Type 1: Display a Message
This type of completion message displays a message to the respondent. Any combination of the following can be
selected:
•
•
•
•
Completion Message
Displays a message of your choice to the user. This field can also use Piping to further customize the message.
Response Details
Displays a summary of the respondent's response to the survey.
Results Summary
Displays the summary of results for the survey, including other respondent's response data.
Scoring Messages (applies to Scored Surveys only)
Optionally displays a custom message to the respondent based on their compiled score. This function allows
you to specify score ranges for each of the scoring messages.
Type 2: Redirect to a URL
Redirects the user to a URL of your choice.
Type 3: Close Window
Closes the browser window that was used to take the survey. This is extremely useful if the user is taking the survey in a
popup window.
Additional Options (apply to all types)
62
Surveys
•
Email a copy of the response
Allows you to specify one or more email addresses that will be sent a copy of the respondent's response via
email. This email is sent immediately after the respondent completes the survey.
Note: It is possible to pipe email addresses into this field to send a copy of the survey response to an
email address that was entered by the respondent. However, it is highly recommended that you also
make the question required if you are using this feature.
•
Email a copy of the response to the user [Available only when "All Registered Users" or "Access List"
is the selected security type]
When your survey is configured to require the respondent to be registered, this option will email the respondent
a copy of the response based on the email address that is currently attached to their user account.
Conditions
Conditions are rules that are applied to an item or page in a survey. These rules are evaluated (when the respondent
takes the survey) to determine whether the item or page is displayed to the respondent.
Condition Sources
Depending on the type of security used by your survey, conditions can be based on the following:
•
•
Survey Items
Any question type can be used as the source of a condition.
User Attributes
Available when the survey uses either the "Access List" or "All Registered Users" security type.
Important Note: Conditions can only be based on items that are on a PREVIOUS page. You cannot have a
condition that evaluates a question on the current page.
Condition Evaluation Process
63
Ultimate Survey Enterprise User Guide
When evaluating a condition, the system goes through the process above. Each condition contains one or more groups
which contain one or more criteria. The system goes through each group and evaluates the criteria one at a time. As soon
as it finds a criteria that is false, the group is false. If the group is evaluated to false, the system checks to see if the
condition contains more groups. If it does, it continues to evaluate each group of criteria as it did the first group. If at least
one group evaluates to true, the item/page displays. Otherwise, the item/page does not display.
Building Conditions
Condition Editor Screenshot:
Conditions are created by first selecting the Item that you wish to evaluate. (Note: You cannot evaluate Display Item
types) Once you have selected an item, select a logical operator from the drop down menu. This determines what type of
evaluation will be performed (e.g. "Is Equal To", "Was Answered"). The next step is to select a value which the
respondent's answer will be compared against. Once you have selected or entered the value, press the "+" icon.
You may continue to add an unlimited number of conditions to a group. However, you should not enter contradictory
criteria -- for example, if two criteria in a condition group were "How old are you is greater than 30" and "How old are you
is less than 30" the condition will never evaluate as true as the respondent cannot possible be older than 30 and younger
than 30 at the same time. You may also select conditions that have been created for prior questions/pages.
Hidden Items
Note: This feature is recommended for advanced or web savvy users only as it requires technical knowledge
and the ability to modify web pages.
64
Surveys
Hidden Items are used to pass data into the survey system without the respondent's input. This is generally useful if you
are linking to the survey from another web page which already has information about the user. Other users include
tracking the source of the respondent or tracking their intranet username.
This is done through one of the following three methods:
•
•
•
Query String
Reads a value from the query string as specified in the Variable field.
Cookie
Reads a value from the Cookie as specified in the Variable field.
Session
Reads a value from the Session as specified in the Variable field.
Piping
The piping feature allows you to redirect a participant's response to a future question or response located within the same
survey.
So, for example, if you were to ask "Who is your favorite actor?" in an open-ended question, and the respondent submits
"John Travolta", you may later ask the respondent in a related question.."Why is John Travolta" your favorite actor?
Similarly, you may also put "John Travolta" as one of the responses to a question, thus guaranteeing the respondents
favorite actor will be an option in the rest of the survey.
Important Note: The piping functionality cannot be utilized on the first page of the survey in 'Survey Editing'
mode, as data needs to be written and stored to the database. Therefore, the piping feature cannot be
used on surveys that are one page long.
Examples:
Piping a response into another question item.
Piping a response into a response of an question item.
Piping a response to a Completion Event.
65
Styles
Additional Styles
The Additional Styles screen allows you to set additional style properties which control the appearance of a style when the
user takes the survey.
Tip: It is highly recommended that you test any style edits prior to applying them to any live surveys. This
will ensure that your style has been properly configured and that no conflicting settings have been
entered.
The following styles may be configured on the Additional Styles screen:
•
Progress Bar
•
Button Style
•
Item Spacing
•
Completion Message Font
•
Scoring Message Font
Additional Styles
This section is for additional survey items that allow for a customized appearance.
Progress Bar:
If the progress bar is enabled for a survey, this specifies the appearance of it.
Button Style
The style of the continue and finish buttons that a user sees when taking a survey.
Important Note About Fonts: Fonts must be present on the respondent's computer in order to display.
Therefore we recommend using only standard fonts (e.g. "Arial") or font types (e.g. "Sans-Serif").
Otherwise the respondent's web browser will use a default font and ignore the font that you have entered.
In addition, you may enter alternate fonts by separating them with a comma. For example, if you enter
"Arial, Helvetica, Sans-Serif" the respondent's web browser will first try and use Arial. If Arial is not present
it will try and use Helvetica. If Helvetica is not present, it will use the default Sans-Serif type font.
67
Ultimate Survey Enterprise User Guide
Properties
You must specify a unique Name for the template as this will be used to identify the template when applying it to a survey.
In addition, you may set whether this Style Template is public. Checking this box specifies that other users may edit this
style template and/or use it in their surveys.
HTML Header & Footer
Each Style Template may contain an HTML header and footer. These two fields allow free form HTML to be entered.
When the survey is taken, the header will display at the top of the page above the survey and the footer will display at the
very bottom of the page after the survey is complete.
Note: HTML headers and footers are not validated for properly formatted HTML. Therefore, be sure to check
the HTML prior to inputting it into the Header and Footer fields. Failure to do so may have adverse effects
on the survey and/or cause the survey to become unusable.
Matrix Styles
This section creates styles that apply to Matrix item types only. If you do not have Matrix items in your survey, you need
not customize this section.
Background Colors:
68
Header Row
Sets the background color of the top row of the matrix table.
Default Row
Sets the background color for all of the odd numbered rows in the matrix table.
Alternating
Row
Sets the background color for all of the even numbered rows in the matrix table.
Styles
Fonts:
Header Font
The font style for the top row of the matrix table.
Default Row
Font
The font style for all of the odd numbered rows in the matrix table.
Alternating
Row Font
The font style for all of the even numbered rows in the matrix table.
Important Note About Fonts: Fonts must be present on the respondent's computer in order to display.
Therefore we recommend using only standard fonts (e.g. "Arial") or font types (e.g. "Sans-Serif").
Otherwise the respondent's web browser will use a default font and ignore the font that you have entered.
In addition, you may enter alternate fonts by separating them with a comma. For example, if you enter
"Arial, Helvetica, Sans-Serif" the respondent's web browser will first try and use Arial. If Arial is not present
it will try and use Helvetica. If Helvetica is not present, it will use the default Sans-Serif type font.
Page Base Styles
This section creates styles that apply to the entire page of the survey. This is accomplished by making modifications to the
styles that are applied to the "body" tag of the page.
In addition, these styles will be applied if none of the other style elements have been customized.
The following properties may be customized:
Body
Background
Color
This style sets the background color for the entire survey.
Body Top
Margin
This style sets the top margin of the pages (in pixels). This setting is especially useful if you
have created a header (in the Basic Properties) and wish to have it display at the very top of the
page.
Body Left
Margin
This style sets the left margin of the pages (in pixels). This setting is especially useful if you
have created a header (in the Basic Properties) and wish to have it display at the left of the
page.
Base Font
This style allows you to set the font name, size, style, and color of the text in the survey.
Error Message
This style is used for error, warning, and validation messages that are displayed while the
respondent is taking the survey.
69
Ultimate Survey Enterprise User Guide
Important Note About Fonts: Fonts must be present on the respondent's computer in order to display.
Therefore we recommend using only standard fonts (e.g. "Arial") or font types (e.g. "Sans-Serif").
Otherwise the respondent's web browser will use a default font and ignore the font that you have entered.
In addition, you may enter alternate fonts by separating them with a comma. For example, if you enter
"Arial, Helvetica, Sans-Serif" the respondent's web browser will first try and use Arial. If Arial is not present
it will try and use Helvetica. If Helvetica is not present, it will use the default Sans-Serif type font.
Include Standard Menus
Checking this box will display the built in header, footer, and menu (as they are displayed right now) while the user is
taking a survey.
Note: This feature is not yet implemented.
Style Export
Style Export (accessible from the Style Manager) allows you to export your style template to an XML file which is
downloaded to your computer. This can be used to save your style template or to share it with another installation of
Ultimate Survey Enterprise 2.0 or greater.
In addition, Style Templates are available for download at http://www.prezzatech.com
Style Template Overview
Overview
Style templates allow you to create a reusable "template" to control the style of your survey when a respondent is taking it.
This feature makes it very easy to quickly deploy similar looking surveys, while maintaining control over almost every
visual aspect of the survey.
Each Style Template uses Cascading Style Sheet (commonly known as CSS) code which is saved to the database.
In addition, once a Style Template has been created and applied to a survey, you may modify the appearance in real-time
and all of the surveys using the template will be immediately updated.
There is no limit to the number of Style Templates that can be created in the system.
Note: Currently a Style Template cannot be deleted if it is being used by a survey. If you wish to delete a
Style Template, you must first remove it from any survey that is using it.
70
Styles
Survey Item Fonts
This section creates styles that apply to the items which make up the survey. These styles do not apply to Message,
Image, Matrix, Horizontal Line, and HTML item types.
The following properties may be customized in the Survey Base Fonts section:
Question
Font
The question font style is applied to the question text that is part of an item.
Description
Font
The description font style applies to the description text (if entered/applicable) that is part
of an item.
Answer Font
The answer font style applies to the list of answers that go with a given item. Please note
that this does not apply to the answers listed in a drop down item.
Important Note About Fonts: Fonts must be present on the respondent's computer in order to display. Therefore we
recommend using only standard fonts (e.g. "Arial") or font types (e.g. "Sans-Serif"). Otherwise the respondent's web
browser will use a default font and ignore the font that you have entered. In addition, you may enter alternate fonts by
separating them with a comma. For example, if you enter "Arial, Helvetica, Sans-Serif" the respondent's web browser
will first try and use Arial. If Arial is not present it will try and use Helvetica. If Helvetica is not present, it will use the
default Sans-Serif type font.
71
Libraries
Library Manager
The Library Manager allows you to have a repository of questions and static items that you may wish to reuse in other
surveys. This is especially useful when you need to create many surveys that require the participants general information
(such as gender, birth date, location, etc). In addition, questions can be grouped by category, giving you the option to
import sets of questions, as well as finding the exact question you need more quickly.
When creating a survey, you may choose to add as many items as you please from these libraries. When you do so, a
copy of the item in the library is added to the survey. Within the survey, you may choose to edit the item/question in
whatever way you wish. The original item from the Library will not be touched, and will remain in it's original format.
The Library Manager screen is accessible from the main application navigation. This is where the creation, editing, export,
and deletion of item libraries takes place.
Several options are available in the Library Manager. They are as follows:
Adding a New Library
This will create a new Library for a list of Items you wish to keep for
future reference. The Library includes a name you wish to refer the
items as well as a brief description of the items.
Importing from XML
You can import different libraries via XML format. This is a particularly
good feature to have as you can import template Libraries from our
Prezza Tech's own extensive library collection.
View/Editng
Once a Library has been created, you can View or Edit the Items as you
see fit by clicking it.
Export
Export the Library Item into XML format so you can transfer to a different
system.
73
Ultimate Survey Enterprise User Guide
Delete
To delete a Library
Add a New Item to Library
Assuming you have already created a Library, or working with an existing Library, you will have a page that looks similar
to this:
This is the main Edit Library Page. Do not worry about the red text stating "No items found". This simply
means that there are no items added to the Library. To add items simply:
•
Click on the
Add Item button
You will now see a page that looks like this:
74
Libraries
New Item
This button will prompt you to create a new item in the same procedure
as creating a new item in the Survey Manager.
From Library
This button will prompt you to copy an item from a survey that exists in
another Library.
From Survey
This button allows you to copy an item from an existing survey to store
in your new Library.
Import
This button will allow you to import items(s) of an existing Survey via
XML.
Copy an Item From an Existing Library
To copy an item from an existing Library:
Note: If you are copying an Item from an existing Library, you should have at least one Library currently
existing on your database server. If it is on another network or server, you will have to import the Item via
XML.
•
Click the
•
Then Click the
"Add Item" on the main Edit Page of your Library.
Add From Library' Button on the Add Items Page.
You should have a page that looks similar to this (provided that you have added a meaningful description(!)):
75
Ultimate Survey Enterprise User Guide
Upon clicking the name of the Library you would like to copy the item from, you will be brought to a screen that looks
similar to this:
Select the items you would like to copy by checking the box to the corresponding item. You will also see the Item Type
conveniently placed in the third column, reminding you of the item format. You may choose ALL of the Items by clicking
the checkbox next to the text 'Select'.
After selecting the items you wish to copy, click the 'Submit' Button located at the bottom of the web page, and it should
return you to the main Edit Library Page, with the item(s) listed.
76
Libraries
Copy an Item From an Existing Survey
To copy an item from an existing Survey:
Note: If you are copying an Item from an existing Survey, you should have at least one Survey currently
existing on your database server. If the survey is on another network or server, you will have to import the
Item via XML.
•
Click the
•
Then Click the
"Add Item" on the main Edit Page of your Library.
Add From Survey' Button on the Add Items Page.
You should have a page that looks similar to this (provided that you have added a meaningful description(!)):
•
Click on the Survey Name that you want to copy the item from.
77
Ultimate Survey Enterprise User Guide
You should then be brought to a page that looks similar to this:
Select the items you would like to copy by checking the box to the corresponding item. You will also see the Item Type
conveniently placed in the third column, reminding you of the item format. You may choose ALL of the Items by clicking
the checkbox next to the text 'Select'.
After selecting the items you wish to copy, click the 'Submit' Button located at the bottom of the web page, and it should
return you to the main Edit Library Page, with the item(s) listed.
Create A New Library
This will create a new library in which you can store any number of related questions that you may find recurring in future
surveys. A popular type of Library may be called "Personal Information", where items surround a participants age,
gender, location, email, etc, is particularly useful. The library can simply be imported and then edited at your discretion
once inside the survey. To create a new Library is as follows:
•
Click on the
•
This will take you to a page where you will be asked to give:
•
•
•
78
icon.
a name to the Library. (A category name is probably the most appropriate)
a brief description of the Library (this is optional but a few sentences describing the Library may be
helpful)
Click on the Submit button and you will see a screen that looks like this
Libraries
After hitting the 'Submit' button, you will have successfully created a new Library. At this point you will want to add items
to your Library.
79
Reports
Analysis Item Types
Every Analysis Item must use one of the supported Analysis Item types. The Analysis type determines the type of
calculation that is performed on the response data. This also determines many of the options that will be available to you
when creating the Analysis Item.
The following Analysis Item types currently exist:
•
Summary Item - Used to show summary data for survey items.
•
Details Item - This is most useful for open-ended data. This item type shows the full text of the response data.
•
•
•
•
Matrix Summary Item - Similar to a Summary Item, but specifically designed for Matrix Items. Shows
summary data for Matrix Items.
Simple Cross Tabulation Item - Used to create a cross tabulation between two items.
Open Ended Matrix Item - Used to display the full set of answers entered into a single line text set of a matrix
item. This item cannot be used on any other item types.
Average Score Item - Requires scoring to be enabled. Calculates the average score for selected items.
Analysis Manager
The Analysis Manager is used to manage all of the Analysis reports for the survey selected on the Reports Manager
screen.
An "Analysis" is simply a collection of report objects (eg. bar graphs, cross tabs, and summary tables) for selected items
in the survey. Each Analysis can also have an unlimited set of filters on the survey response data. This gives you the
flexibility to easily build multiple reports for each survey.
The following options are available on the Analysis Manager screen:
•
•
New Analysis - Create a new Analysis from scratch for the selected survey.
Auto Generate - Auto generates a template Analysis report for the selected survey. This will create an analysis
item for every question in your survey.
81
Ultimate Survey Enterprise User Guide
•
Response Filters - This is used to setup the list of available filters for the current survey. Filters are used to
determine which survey response data is included in the Analysis item. Response Filters can then be applied to
each analysis object.
•
Run - Runs the selected Analysis. This is how you view the Analysis report's output.
•
Edit - Opens the Analysis Editor for the selected Analysis.
•
Copy - Creates a duplicate of the selected analysis
•
Delete - Deletes the selected Analysis.
Details Report
The Details Report shows a listing of each individual response to the survey. Any response in the survey may be viewed
or edited.
The layout of the Details Report essentially mimics the layout of your survey. It will also include additional data about the
response, including start time, end time, elapsed time, and the respondent's user name (if applicable) and IP address of
the respondent.
Edit Analysis
The Edit Analysis screen is accessed from the Analysis Manager screen by selecting the Edit option for one of the listed
Analyses.
This screen is used to edit the layout of the Analysis report. Specifically, you can add/remove items, apply filters, and edit
existing items that make up the Analysis.
For each Analysis item in the Analysis report, the following information is displayed:
•
•
82
Item type - Displays the Analysis Item's type.
Associated renderer - This is the term used to describe the type of output that is used for the selected
Analysis item. Examples are Summary Table, Column Graph and Line Chart.
Reports
•
Associated survey items - Shows which survey items are being analyzed in the selected Analysis item.
•
Use aliases - Sets whether or not to show the survey item's aliases in place of the question / option text.
•
Associated filters - Lists any filters that have been applied to the selected survey item.
•
Preview - Displays a preview of the Analysis Item.
Also on this screen is the option to add a new Analysis Item to the selected Analysis. This will add the item to the end of
the Analysis.
For more information:
Analysis Item Types
Edit Analysis Item
The Edit Analysis Item Screen is used to construct an analysis item for use with the current Analysis report.
These are the main components to an analysis item:
1.
Associated Items
This sets which Survey Items are used in the current Analysis Item.
2.
Renderer
Specifies the renderer that will be used to display the item on the screen at runtime. Each renderer has a
unique way of displaying the item on the screen.
3.
Behavior
Specifies how the analysis item will deal with answers entered into the "Other" field for the associated survey
items, if one exists.
4.
Aliases
Specifies whether to use the actual item/option text or to use the aliases that were entered at design time.
Export Results
The Export feature allows you to export the results of a survey to a comma separated file (.CSV). A comma separated file
can be used in a variety of 3rd party reporting applications, including Microsoft Excel, Crystal Reports, Microsoft Access,
and SPSS.
•
Detailed Response Info
Exports the user's IP address, the time started, the time ended, and the time elapsed.
83
Ultimate Survey Enterprise User Guide
•
•
•
•
•
Detailed User Info
Exports all of the attributes for each user that responded to the survey. This option only applies to surveys
which are using the "Access List" or "All Registered Users" security setting.
Merge Checkbox Results
This option places the results to a checkbox question into one column, separating each answer with a semi
colon. For example, a checkbox question which has three possible answers will normally generate three
columns in the export file. Checking this option will only generate one column (eg "red; blue; green").
Export Open Ended Results
Exports the answers to multi-line and single-line text field item types. Otherwise answers to these questions are
omitted from the export.
Export With Aliases
Uses the aliases in place of the item and answer text. This option requires that you specify Aliases for each of
the items and the answers for each item. This option is useful for the purposes of creating an export file that is
easier to read and/or importing the CSV file into a third party reporting program.
Export Hidden Items
Exports the Hidden Items that are part of the current survey. This option will not do anything if you do not have
Hidden Items in your survey.
.
Response Filters
The Response Filters option is accessible from within the Analysis section of the Report Manager.
Using the Response Filters, you can create a custom filter (or set of filters) which will be used to determine which data is
included in the Analysis Item. These filters are based on the respondents answer to a specific question and can use the
following operators:
•
Is Equal to
•
Is Not Equal to
•
Is Greater Than
•
Is Less Than
•
Contains
•
Does Not Contain
•
Was Answered
•
Was Not Answered
In addition, there is an Auto Generate option which will generate one filter for every question and answer pair. For open
ended questions, this will generate a single filter with a "Was Answered" operator.
84
Reports
Report Manager
You may view reports for any survey that you have access to or any survey that has public results/summary.
The following options are available from within the Reports section of Ultimate Survey Enterprise:
•
•
•
Analysis
Analysis is used to build a report on the survey. Each survey can have an unlimited number of Analysis reports.
Selecting this option will take you into the Analysis Manager.
Details
Option to view the full detail of each response. In addition, you can edit the details of each response.
Export
Use this option to export the survey results to a CSV (comma separated) file. This can be used in Microsoft
Excel, Access, or most 3rd party reporting applications.
Response Details
The Response Details screen shows the full details of the selected response.
Summary Report
The Summary Report shows a real time summary of all of the response data for the selected survey. This screen also has
several graph and table options that can be used to format the data to your liking.
Paging
The paging controls on the Summary Report screen allow you to select the pages which are currently visible in the report.
These pages correspond to the page numbers that were used when creating the survey.
Filtering
Pressing the report filtering icon takes you to the Report Filters selection screen.
Chart & Graph Options
Here is a key to all of the chart/graph options available on this screen.
Pie Chart - A pie chart is a useful way to see a percentage breakdown of how many times each
answer to a question was selected.
85
Ultimate Survey Enterprise User Guide
Donut Chart - A donut chart is an alternate representation of a pie chart.
Line Graph - A line graph plots the responses to a given question along a line. This makes it easy to
compare the number of responses to each answer.
Bar Graph - A bar graph draws a vertical line for the answer to each question.
Table View - A table view is a more text focused way to view the results. This is particularly useful for
viewing the results to matrix questions.
Print - This option will print the summary for the selected question, page, or group of pages.
Options
There are two other options which are also available on the Summary Report screen:
•
•
86
Show Aliases instead of full text - This option uses the Aliases that were specified when designing the survey.
Show open-ended questions - This option (on by default) shows/hides Single-line Text and Multi-line Text
questions.
Users
Users
Ultimate Survey's user management system allows you to manage registered users, user groups and email lists.
The "Users Home" screen (accessible by clicking the "Users" icon in the main navigation bar) is the starting point for
managing users, groups and email lists. On this screen, the following options are available:
•
•
•
•
User Manager
Allows you to add/edit/delete users that are currently registered on the system.
Import Users
A tool for importing users from other systems using a comma separated file.
User Groups
Manage groups of users.
Email Lists
Manage lists of email addresses.
Add/Edit a User
The Add/Edit a user screen allows you to create a new user in the system or edit an existing one. The only visual
difference between the two screens is that the New User screen's username field is titled "Desired Username" while the
Edit User screen's username field is simply titled "Username."
The Add/Edit user screen is divided into four sections:
•
•
•
•
Login Information - This section is mandatory and allows you to enter the basic information needed to
authenticate a user with Ultimate Survey
User Information - This section contains user-defined fields to gather and store additional user information.
To set which fields are available, use the Settings -> User Settings screen
User Roles - Use the accumulator box in this section to assign the user to, or remove the user from, various
system roles
User Groups - Use the accumulator box in this section to assign the user to, or remove the user from, various
user groups
87
Ultimate Survey Enterprise User Guide
Email Lists
Email lists are used to create lists of addresses that can be used to invite respondents to take a survey.
88
Users
Use of Email Lists and Invitations requires your survey system to have a properly configured Email Object in the
Application Settings.
On the Email Lists screen, the following functions are available:
•
New Email List - Click the plus sign button to create a new email list
•
View/Edit - Edit the list of email addresses in the email list
•
Properties - Edit the list name and description
•
Copy - Duplicate the selected list
•
Delete - Delete the selected list
Creating a new email list
To create a new email list click the plus sign button, which will open the List Properties screen. Enter a name and
optionally, a description for your email list and click Submit. You will then be shown the Edit Email List screen, where you
may add addresses to the list.
Editing an email list
To edit an email list, click the View/Edit button corresponding to the list you wish to edit. Alternatively this screen may be
reached as the second step of creating a new email list.
89
Ultimate Survey Enterprise User Guide
The following actions may be performed on the Edit Email List screen:
•
Add Addresses - Click the plus sign button to add email addresses to the list
•
Edit Security - Allows you to edit the access control list for this email list
•
Remove Address - Check the checkbox next to the address(es) that you wish to remove from the list and click
the Update button
Adding addresses to the list
To add addresses to the list, click the plus sign button on the Edit Email List screen. This will show the Enter Email
Addresses screen. Enter all the email addresses you wish to add, one per line, into the text box. Click Submit to add the
addresses to the list. Only valid email addresses will be added to the list, invalid entries will be skipped.
Import Users
Bulk User Registration allows you to quickly register users on the survey system. This is very useful for importing users
from another database.
Note: While there is no technical limit to the number of users that you can upload at a time, registering large
numbers of users will cause the registration process to take a long time. In our tests, approximately 1,000
users can be registered every 30 seconds on an idle server.
There are four steps to importing users, separated over two screens. The first screen contains the first three steps, which
relate to how the system will process the imported users, and the second screen allows you to specify how you will import
the users into the system.
Step 1: Select roles for imported users
In this step you will select the role or roles that the imported users will be assigned to. Select a role in the left hand pane
and click the >> button to move it to the right pane.
90
Users
Step 2: Select Fields
In this step, you will select the fields that you will use in your import and the order in which they will appear. You can
select from all user attributes (including username/password and custom fields).
First, select the fields that you wish to move from the left side and then press the right arrow to move them to the selected
column. You may use the up and down arrows to reorder the fields.
•
•
User Roles
Configures the roles that the user will have.
Columns
First, select the fields that you wish to move from the left side and then press the right arrow to move them to
the selected column. You may use the up and down arrows to reorder the fields.
Note: Setting the order of the fields is important as the file/data must include fields in the same order that you
choose on this screen. If a given user does not have a value for one of the attributes, a space should be
entered in place of a value.
Step 3: Select groups
In this step you may choose to add all imported users to a group. As above, to add imported users to a group, select the
desired group in the left pane and click >> to move it to the right pane. This step is optional
Step 4: Upload Data
After clicking Continue on the first screen, you can select one of the following options on the second screen:
1.
Upload a File
This file should be a comma separated file (CSV) which has one user record per line. Data must be specified for
all of the fields selected on the previous screen, in the order they were specified.
2.
Enter Data
Using this option, you can either paste data into the text box or manually enter data. One user may be specified
per line and the data must be entered in the order it was specified on the previous screen.
Once all steps have been completed, a final confirmation will display all of the users that have been found in the file or
data field. Pressing the import button will create these users.
Logging in as a User
The first thing you see when you open up your browser to the Ultimate Survey Software is the Login Page. You
will find that you see three icons at the top of the page, Surveys, Reports, and Login. Without logging in, you
always view Surveys and Reports that are made accessible to the public. This does not mean that you can edit or
change permissions however.
91
Ultimate Survey Enterprise User Guide
If you have an existing account fill out the appropriate boxes and click the 'Login' button. For users who have not
created an account, but wish to so, click here.
The following types of information can be modified for a user:
Login
Information
Login information allows the password to be modified. At this time the username cannot be changed
after the user is created.
User
Information
The detailed properties for the user, including name, email, and user type (Description of User
Types)
User
Groups
The user groups which the user belongs to. A user can belong to any number of user groups.
Lookup Your Login Information
Enter the email address that you used to create your account for this system. Pressing the "Reset Password" button will
send a link to your email that will allow you to reset your password.
If you do not have a login on this system or you do not remember the email address that was used to create your account,
please contact your system administrator.
User Groups
User Groups are used to create groups of users which have similar attributes or access permissions. Once users have
been added to a group, this facilitates the process of adding users to a survey access list and the sending of invitations.
92
Users
Control over user groups is controlled via access control list.
The following functions can be performed on the User Groups screen:
•
Add Group - Create a new empty user group
•
View/Edit - View and edit the users assigned to this group
•
Properties - Edit the name and description of a user group
•
Copy - Create a duplicate of the selected group
•
Delete - Delete the selected group
Note: The "Everyone" group is a system defined group containing all users in the system and cannot be
copied, deleted, or edited.
Creating a new user group [Editing group properties]
To create a new group, click the plus sign button. You will be shown the group properties screen below. To create a new
group, enter a group name and optionally, a description of your group and click the "Submit" button. This screen is also
used to edit the name and description of an existing group and can be reached by clicking the "Properties" button for the
desired group, or clicking the "Properties" menu item while editing a group.
Editing a group
93
Ultimate Survey Enterprise User Guide
To edit a group, click the "View/Edit" button corresponding to the group you wish to edit.
The following functions can be performed on the View/Edit User Group screen:
•
Add Users - Click the plus sign button to add users to this group
•
Edit Security - Edit the access control list for this group
•
Remove Users - Check the Remove check box corresponding to the user(s) you wish to remove, then click the
Delete button
Adding users to a group
To add a user to a group, click the plus sign button, which will display the Select Users screen shown below. Check the
checkbox next to the user(s) you would like to add to the group and click the Submit button.
User Manager
94
Users
The User Manager is the central point of control for user access to Ultimate Survey. Here you can perform the following
functions:
Add a user
Click the plus sign button to add a user to the system
View Users
This is the Manage Users screen's core function. You can view a list of all users that are currently registered for access to
this system. Each user may be edited by clicking the selected user's username.
Delete Users and/or Responses
Also on the user grid is the ability to delete a user or delete a user's responses. In order to perform this function, simply
check the box next to the user (or users) and press the update button, which is located at the bottom of the user table.
Ultimate Survey User Types
There are three pre-defined user types in the Ultimate Survey system. Every user must be set to one of these three types.
Administrator
The highest level user in the system. This type of user has full unrestricted access to
the system and may delete any Survey, Style, Library, or User.
Warning: Given the unrestricted nature of an Administrator user, we
recommend limiting the number of users that are set to this level.
Create and Take
Surveys
This user has the ability to take surveys and create new surveys. This user has
access to the Manage Surveys section and the Reporting section, but can only modify
surveys that they have created.
Take Surveys
Only
This type of user only has the ability to take surveys. However, in order to take a
survey, the survey must be set to "Public" or "All Register Registered Users" OR this
user must be granted access in the Access List for the survey.
95
Ultimate Survey Enterprise User Guide
User Management
The user management section contains tools used to configure user settings, user groups and email lists.
Ultimate Survey Enterprise has a sophisticated and powerful set of tools to control user access to all aspects of the
application. Ultimate Survey Enterprise automates the most common user management tasks, while allowing fine-grained
control for sophisticated users.
Introduction to access control
Advanced access control
Access Control Lists
Introduction to Access Control
Ultimate Survey Enterprise allows you to control access to surveys, email lists, reports, folders, and user groups using
several complementary tools. Permissions in Ultimate Survey are defined by two basic concepts: role and access control
list (ACL).
Understanding Roles
Roles form the basis of access control in Ultimate Survey Enterprise. A role is a set of permissions that may be assigned
to a user or group of users. An example of a role is "Survey Administrator." A user must be assigned to at least one role
and may only perform actions in the application that their role(s) allow them to perform. Users are assigned to or removed
from roles using the Edit User screen.
Note: Roles are the basic level of permission in Ultimate Survey Enterprise and will override conflicting
permissions granted in an access control list
Understanding access control lists
An access control list relates a user or user group to a controllable object. Access to the following objects is controlled
using ACLs:
96
•
Surveys
•
Email lists
•
Reports
•
User groups
Users
For each object that can be controlled, its access control list will specify what users and groups have access to that item,
and what actions they are allowed to perform on the object. This second function of the access control list is referred to
as a "policy." In the following picture you can see the access control list for a survey. The left hand box lists the users
and groups that are in the ACL for this survey. The right hand box details the policy that relates each user or group to the
object. In this picture, you can see that the user "peter" is selected, and that this user has permission to Edit and Take
this survey.
Understanding default policies
Each object that may be controlled with an access control list also has a default policy that is used to determine how to
handle users or groups who are not in the ACL. To set the default policy on an object, click the "Edit Default Policy"
button while on the access control screen for that object. In the image below, you an see that "View Analysis" permission
has been granted as part of the selected survey's default policy. This means that a user who is not in the ACL for this
survey will still be able to view reports.
97
Ultimate Survey Enterprise User Guide
Also see Advanced access control
Advanced Access Control
For most situations the basic user management and access control functions provided by Ultimate Survey are more than
adequate. However, certain situations may require you to exercise finer control over the users and objects in your survey
system.
Controlling policies directly
In the default view of an access control list, the right hand box shows the names of what are called permission masks.
Permission masks are groupings of individual polices that work in concert to give a user or group a logical level of access
to an object. In Ultimate Survey, permission masks have "friendly" names and individual polices follow the naming
convention Category.Action or Category.Subcategory.Action. As an example, the ACL permission "Administer Survey" is
a permission mask for the system policies Form.Fill, Form.Create, Form.Delete, Form.Edit, and Form.Fill.
Individual policies can be edited for any access control list by clicking the gear icon above the permission box on the ACL
editor screen. An ACL editor screen in advanced mode is shown below:
98
Users
Note: Editing individual policies is only recommended for advanced users
99
Invitations
Invitations Overview
The Ultimate Survey Invitations feature is used to send out email invitations to potential respondents to your survey. This
provides you with an easy way to request that users come and take your survey. In addition to providing the user with a
direct link to the survey, you can also "pipe" in the data from user accounts to make the email message have a
personalized feeling to it.
Please Note: There is no limit the number of email invitations that you can send with Ultimate Survey. However,
it is highly recommended that you first check with your system administrator and/or ISP to check if there
are any bulk mail policies in place.
To send an invitation, there are a few steps which must be followed:
1. Message
The first step of the process is to select the survey that you wish to create the invitation for and then compose the
message that you would like to send.
Please Note: If you are using an "Access List" or "All Registered Users" survey you will have the ability to use
the "Mail Merge" function to import user attributes into the body of the email. This feature is not available
for Public and Password restricted surveys.
2. Recipients
The recipient list specifies who you are sending the email invitation to. This is driven by the security type of the survey.
Specifically, Registered User and Access List surveys do not have the ability to send to email addresses and email lists -they are restricted to sending to users and user groups as these are the only type of recipients that can actually take the
survey.
3. Review and Send
This is the final step before sending the invitations off. Please proofread the invitation carefully as it cannot be revoked
once it has been sent out.
Please Note: Your web browser must remain open while invitations are being sent. However, if your browser is
closed and the send process is started again at a later date, it will continue processing from the point that
it previously left off.
Invitation Manager
Invitations are used to send email messages to users that you would like to invite to take a specific survey. This function
requires either the creation of Email Lists or registered Users that have valid email addresses.
Tip: An Invitation can be sent in either plain text or HTML format. While an HTML email offers formatting
options not found with plain text, it also requires the end user to have an HTML enabled email client.
In addition, sending invitations requires a properly configured email object, a valid SMTP host, and valid from address.
Most of these items can be configured in the Application Settings section.
101
Ultimate Survey Enterprise User Guide
The following options are available from this screen
1. Details
This screen shows the status of all email invitations that have been sent for the selected Invitation. This screen allows you
to see who has and has not responded to the survey.
2. Remind
This function sends out reminder email messages to all users who have not yet replied to the survey invitation.
3. Invite
Invite allows you to send out invitations to additional users who were previously not invited.
4. Delete
Deletes the invitation and all records associated with it. Cannot be undone.
102
Miscellaneous
Commands
Deleting
Deleting is made easy by way of this Trash Can icon. Simply click on this icon on whichever item is adjacent to it. It will
then subsequently ask if you are sure if you would like to delete it as a precautionary measure.
/ Export in XML
Ultimate Survey Enterprise Edition gives you the opportunity to export files into XML format. This saves you the tedious
task of recreating elaborate surveys when you are switching networks, installing new editions of Ultimate Survey, or
simply would like to share your work with the online community at Prezza Technologies.
Exporting from XML will be the same regardless of what you are importing. Styles, Libraries, and Surveys all follow the
same format to export, which is as follows:
•
Click on the Export icon shown above.
•
The window displayed below will appear:
103
Ultimate Survey Enterprise User Guide
•
Click the 'Save to Disk' option
•
Click OK
Import From XML
Importing from XML will be the same regardless of what you are importing. Styles, Libraries, and Surveys all follow the
same format to import, which is as follows:
•
104
Click on the Browse button
Miscellaneous
•
Select the file you wish to import (XML)
•
Click on the Import button
Note: You cannot import an XML file unless it has been initially saved as an XML file. For example, in order to
import a survey, you must first export it in XML first.
Email Troubleshooting
If email is not properly sending from the Ultimate Survey application, please check the following:
•
That you have specified a valid SMTP server in the Application Settings.
•
That you are sending from a valid email address.
•
That you are sending to a valid email address.
If you believe that the above items are correct OR if you receive an error about the CDO.MESSAGE Object, then please
follow these steps to check if your SMTP server is properly configured for relaying:
•
•
If using Microsoft's SMTP Server, open the properties on your SMTP Server and go the the "Access" tab. Press
the "Relay" button, change the option to "All except the list below" and clear any options in the list. Then press
OK. If this remedies the problem, this means that your normal settings do not allow the "From Address" that
was specified to send emails through the server.
While you do not want to leave your server completely open for SMTP relay, you can safely add the IP address
of your web server and set it to use the "Only the list below" option.
If the above steps do not solve your problem, please contact Prezza Technologies Technical Support.
Web-based HTML Editor
Ultimate Survey features a built in web-based HTML editor. This editor allows you to very easily create HTML formatted
text for a variety of different purposes through the application. In addition, you can import your own HTML and even edit
the HTML by hand.
105
Ultimate Survey Enterprise User Guide
Examples
Piping a response into another question item
Example: In this example we will create a question that prompts the participant why "x" is their favorite actor
after they specified who "X" was from a previous question.
This page provides a simple example of how to redirect a participants response or selection and
place it in a question item located later in the survey.
Note: This assumes you've already built a survey with a page that includes a question that asks the participant
who their favorite actor is. You may use the all types of question items EXCEPT the matrix question. As
you may recall from the 'Piping' Help page, the piping functionality cannot be implemented on the first
page.
1.
Click the
1.
A Pop-Up window should appear. It will give you two options, "Select Existing Pipe" or "Create New
Pipe".
2.
Assuming this is your first time creating a Pipe, Choose Option 2.
3.
At this point, you have three requirements to fill:
1.
106
image located at the right corner of the Question Text box
Choose Pipe Source: This pull down item allows you to redirect different information other than the
participants response. For instance, if you wanted the participants IP address to appear in a future
question, you may do so by choosing the 'Response' option in the pull down menu. But for this
example let's stick to the default of "Answer".
Miscellaneous
2.
Choose an Item: This is where you specify the item in which you are piping the participants response
from. Please note that they are number in the corresponding format x.x. The first number indicates
the page, and the second represents the number on which it appears on the page. So for example,
"4.2" means that this question appears on the fourth page and it is the second question on that page.
3.
Pipe Name: You must specify the pipe name for this pipe. Usually it is good policy to keep it the
same as the alias assigned to it. We'll call the pipe "actor_name".
1.
4.
Note: You cannot put a space between in the name of the pipe. The pipe's name is
stored as a variable, and must not have any spaces between letters to function properly.
If you need to use more than one word, be sure to use an "_" between words.
Once you have decided the name, click the
button.
You should now see the name of the pipe appended to the end of your question text. it will be denoted by two '@"
prefacing the variable name you assigned. So, in this case, you should see "@@actor_name" at the end of the text. You
should be able to place it inside the structure of the sentence. So, in conclusion the full question text should read as:
"Why is @@actor_name your favorite actor?
Upon activating or testing the survey, @@actor_name will be replaced with whatever the partcipant entered or selected
as a response.
107
Glossary
An Alias is a more concise or shorthand description of the item. This is a particularly useful feature when
generating reports, as the Alias will be used as the default label rather than the Question Text.
The Allow Other option allows you to specify whether the item contains a choice for "Other". This applies to
multiple item types, including Checkboxes, Radio Buttons, and Drop Down item types. The other option
prompts the respondent to specify that their answer was not contained in the predefined list of answers
and then they can enter their own answer in a box provided next to the Other Option.
The Default Other Value lets you specify the text that appears next to the Other Option.
The Answer Format option allows you to specify the type of input which the respondent is required to enter
when taking the survey. This option applies only to Single-line Text Fields.
Here is a list of the currently supported Answer Formats:
•
•
None - No validation of the respondent's entry.
Alpha Numeric String - The respondent may only enter letters and numbers into the field. Spaces
and special characters are not allowed.
•
Decimal - The respondent may enter any valid decimal (floating point) number.
•
Email Address - The respondent may only enter a properly formatted email address.
•
•
•
•
•
•
•
Integer - The respondent may only enter a properly formatted integer. An integer may be any
positive or negative number (as well as zero) with no decimal places. Note: Upon choosing this
format, you will then have the option of choosing the Minimum and Maximum value range for this
format.
Money - The respondent may enter any positive or negative money value with our without a dollar
sign. British pound and Japanese Yen symbols are also accepted.
Number - The respondent may enter any valid positive or negative number with any level of
decimal places.
Numeric Characters Only - The respondent may enter any string of numbers. This varies from
other formats in that it does not check for leading zero's.
Postal Code - The respondent may enter any properly formatted US ZIP or Canadian Postal Code.
Phone Number - The respondent may enter any properly formatted USA (or its territories) or
Canadian phone number in the format XXX-XXX-XXXX or (XXX) XXX-XXXX.
Social Security Number - The respondent may enter any properly formatted USA Social Security
Number in the format XXX-XX-XXXX.
109
Ultimate Survey Enterprise User Guide
•
String - Uppercase Letters Only - The respondent may only enter uppercase letters with no spaces.
•
String - Lowercase Letters Only - The respondent may only enter lowercase letters with no spaces.
•
URL- Requires the respondent to enter a properly formatted Internet URL using http:// or https://
If the Answer Required Checkbox is checked, then the survey will not continue unless this section of the
survey has been completed. This is particularly useful when certain user information is absolutely critical
to your reports and analysis.
Default Date
The Default Date option allows you to specify the default date value which will appear when the current item is
displayed to the respondent.
The Default Text option allows you to specify the default value/text which will appear when the current item is
displayed to the respondent.
The Default Value option allows you to specify the default value/text which will appear when the current item is
displayed to the respondent.
The Layout option allows you to specify whether the items are displayed Horizontally or Vertically. In the
Horizontal Layout, the answer options for the selected item flow from left to right. In the Vertical Layout,
the answer options for the selected item flow from top to bottom.
The Max Length option allows you to specify the maximum number of characters that can be entered by the
user. This is an optional setting.
The Maximum Date option allows you to specify the greatest date value that the respondent can enter for the
item.
The Maximum to Choose applies to checkbox items. This option specifies the maximum number of options that
the respondent may check. This must be a number greater than 0 or it can be left blank, which will not
restrict the respondent's answer. Entering a value greater than the number of available options will have
no effect on the respondent's answer to the question.
The Maximum Value allows the Survey Editor to select a minimum value the participant may enter as a
response.
110
Glossary
The Minimum Date option allows you specify the earliest date that the respondent may enter into the item when
taking the survey.
The Minimum to Choose applies to checkbox items. This option specifies the minimum number of options that
the respondent may check. This must be a number greater than 0 or it can be left blank, which will not
restrict the respondent's answer.
The Minimum Value allows the Survey Editor to select a minimum value the participant may enter as a
response.
When enabled, the Number Labels option will number the answer options for the selected survey item.
Specifically, the numbering will appear in the format "1." and continues consecutively.
When used with the Randomize Answer Order option, the numbering will not be randomized.
The Number of Columns property determines the number of columns that will be used for the purposes of
laying out the answers to the item. The Layout option determines whether the items are laid out going
across the columns or up and down them.
The Number of Columns property applies to Multi-line Text Field item. This specifies the number of columns
(measured in number of characters) that the multi-line text field (HTML Textarea) will have when the
respondent is taking the survey. The default number of columns = 90.
The Number of Rows property applies to a Multi-line Text Field item. This specifies the number of rows that the
multi-line text field (HTML Textarea) will have when the respondent is taking the survey. The default
number of columns = 8.
A Question Text Box is box in which the creator/editor of the survey may enter the question they wish the
participant to answer.
The Randomize Answer Order option tells the system to randomize the display of the answers to the item
when the respondent is taking the survey. This allows you to prevent order bias where respondents may
tend to check the middle or first/last answers to an item.
The Report Security sets the security type that will be used for this surveys data.
111
Ultimate Survey Enterprise User Guide
The following types are available:
•
Results Private - Only survey creators or administrators may view the results.
•
Summary Public - Summary results are available to the public.
•
Results Public - All results public. Non-logged in users may view the report by clicking the Reports link from
the navigation.
The Response Options are set on the Permissions page of the Survey Editor section.
The following options are available in this section:
Maximum
Resp
onse
s
Sets the total number of responses that can be collected for this survey.
Automatically stops additional users from responding.
Responses
per
User
Sets the total number of responses an individual respondent can submit
to this survey.
Prohibit
Back
Butto
n
If this option is checked, the respondent is not able to edit pages that
they have already answered. If the user presses the browser back
button, the current page is loaded up. Any responses that are resubmitted are ignored.
Allow
Checking this box allows respondents to start taking the survey and
continue where they left off at a later point. There are several
scenarios that exist for this option, depending on the survey
security type and the Session Type (set in the application settings
of the survey system):
User
s to
Resu
me
Registered users taking the survey: Any logged in user can stop taking
the survey and continue later from their computer (or another one)
and continue, provided that they login with their same username
and password.
Public or password protected survey with Session Type set to
"cookies": The user's web browser is given a Cookie, which
allows them to return at a later date to complete the survey.
Public or password protected survey with Session Type set to
"session": Resume functionality is not fully supported. Once the
user leaves the survey site or closes their web browser, they
cannot resume the survey.
Allow
User
s to
112
Checking this box allows users to edit their response to the survey after
they have completed it.
Glossary
Edit
Resp
onse
s
The editing can happen either from the completion page of the survey
(assuming the Completion Options do not include a redirect) or
from the Take Surveys page of the administration console (which
requires the user to have knowledge of the administration
console). If you are using a redirect and the user does not have
access to the administration console, this feature will not work.
The Security Types sets the security type that will be used for this survey.
The following types are available:
Survey Security Type - this sets the type of security for the particular survey. They are as follows:
•
•
•
•
Public - This type of survey allows anyone to take your survey. Access to the survey is public and
anonymous. You can, however, invite specific registered users to take the survey.
Password Protected - Very similar to a Public survey, but the users are required to enter the specified
password to take the survey.
Access List - This survey type denotes that access to the survey is restricted to users specifically given
permission for the survey. You can specify group or user access.
All Registered Users - This survey type allows any registered users to take the survey. This security option
allows you to send all registered users an email invitation to your survey.
A Sub Text Box allows the creator/editor of the survey to provide guidelines or instructions for the user to follow
when responding to the Item.
113