1
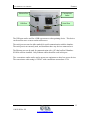
Real Chambers Test Chambers Overview REAL CHAMBERS CORPORATION CHAMBER USER’S MANUAL 11001199 REV. M Overview Real Chambers Test Chambers Overview o Service The Real Chambers Test Chambers have been designed for years of safe and dependable operation. In the event service is required, contact the nearest Real Chambers authorized service center or contact Real Chambers at: Real Chambers Corporation 10392 E. 48th Avenue Denver, CO 80238 USA Phone: 1-888-292-1552 www.realchambers.com o Design Modification DO NOT use this product in any manner not consistent with the instructions outlined in this manual! NEVER alter the design, or perform service that is not consistent with the instructions outlined in this manual, without the prior written approval of Real Chambers! Any service done without the approval of Real Chambers will result in termination of product warranty. o Additional Copies Additional copies of this manual are available by contacting Real Chambers at the address listed above. No part of this document may be reproduced or copied in any form, or by any means, without the prior written permission of Real Chambers Corporation Copyright 2013 Real Chambers Corporation ii 11001199 Rev. M www.realchambers.com Overview Real Chambers Test Chambers The staff and employees of Real Chambers thank you for choosing our product. Please don’t hesitate to call us with any questions or comments that you may have. If after reading through this manual, you are not confident in carrying out any task, please call Real Chambers Technical Service team at 1-888-292-1552. This manual is intended for use by Real Chambers Corporation Test Chamber customers. It is important to read and understand the information in this manual before installing or operating the chamber system. This will result in safer operation, longer equipment life, and more effective testing. This manual pertains to the REAL model chambers. Other component manufacturers which provide their own manuals are sent along with the chamber. The Environmental Chamber system offers you the ability to expose your new product to extreme temperatures at very rapid rates of change. This has proven to be an extremely effective means of identifying failure-prone components and assemblies in the shortest possible time. The unique characteristics of Real Chambers Test Chamber systems are of key importance in achieving this effectiveness. SAFETY FIRST! Liquid Nitrogen is not harmful if handled properly. However, without proper handling, severe frostbite and cryogenic burning can result. o During this process, you will need: Safety glasses with side shields Cryogenic insulated gloves Hearing protection Leather working gloves Steel toed shoes o Symbols and statements throughout this text and their meaning: Text following this symbol needs extra attention. NOTE: Text in this format is extra information helpful to the situation. CAUTION: Text in this format is information to help avoid personal injury and/or property damage. WARNING!: Text in this format is information to help avoid serious personal injury or death, and property damage. Table of Contents iii 11001199 Rev. M www.realchambers.com Table of Contents Real Chambers Test Chambers OVERVIEW ..................................................................................................................... II O O O O O SERVICE ..................................................................................................................... II DESIGN MODIFICATION.............................................................................................. II ADDITIONAL COPIES .................................................................................................. II DURING THIS PROCESS, YOU WILL NEED:................................................................... III SYMBOLS AND STATEMENTS THROUGHOUT THIS TEXT AND THEIR MEANING: ........... III DESCRIPTION OF SAFETY FEATURES ....................................................................2 O O O O O MAIN DISCONNECT SWITCH .......................................................................................2 EMERGENCY-STOP BUTTON........................................................................................2 EMERGENCY DOOR OPEN BUTTON (ONLY AVAILABLE ON 9 AND 16 SQ. FT. MODELS)3 DOOR INTERLOCK SWITCHES ......................................................................................4 TEMPERATURE HIGH/LOW LIMIT CONTROLLER .........................................................4 SPECIFICATIONS AND UTILITY REQUIREMENTS ..............................................5 PERFORMANCE ..................................................................................................................5 SYSTEM DETAILS...............................................................................................................6 DIMENSIONS AND UTILITIES ..............................................................................................7 FEATURES ........................................................................................................................8 O O O O O O TEMPERATURE CONTROL SYSTEM ..............................................................................8 AIR CIRCULATION FAN ...............................................................................................9 INSTRUMENTS .............................................................................................................9 OPTIONAL VIBRATION TABLE AND HAMMERS (REAL, TVC LINE) ...........................9 OPERATOR CONTROL SWITCHES .................................................................................9 CTI CONTROLLER .....................................................................................................11 SYSTEM INSTALLATION ...........................................................................................13 O O O O O O O O LOCATION .................................................................................................................13 ELECTRICAL POWER HOOK-UP .................................................................................13 COMPRESSED AIR CONNECTION ...............................................................................13 LIQUID NITROGEN PLUMBING ...................................................................................14 EXHAUST GAS PLUMBING .........................................................................................14 INSTALLING CHAMBER LIGHTS .................................................................................14 LOCATION OF UTILITY CONNECTIONS ......................................................................15 START-UP PROCEDURE .............................................................................................15 OPERATION ...................................................................................................................18 O O AIR SAFETY CONTROLLER OPERATION .....................................................................18 CHAMBER PLC CONTROLLER OPERATION................................................................19 OPTIONAL VIBRATION SYSTEM OPERATION ...................................................19 iii 11001199 Rev. M www.realchambers.com Table of Contents Real Chambers Test Chambers O O O O MOUNTING OF PRODUCT ...........................................................................................19 MANUAL MODE ........................................................................................................19 AUTOMATIC MODE ...................................................................................................19 ACCELEROMETER LIMITS..........................................................................................20 SYSTEM MAINTENANCE ...........................................................................................21 O O O O MAINTENANCE TASKS TO BE PERFORMED ON A DAILY BASIS ..................................21 MAINTENANCE TASKS TO BE PERFORMED ON A MONTHLY BASIS ............................21 MAINTENANCE TASKS TO BE PERFORMED EVERY THREE MONTHS ..........................23 MAINTENANCE TASKS TO BE PERFORMED ON AN ANNUAL BASIS ............................23 REPLACEMENT PARTS ..............................................................................................24 O O O O VALVES ....................................................................................................................24 SENSORS ...................................................................................................................26 ELECTRICAL ..............................................................................................................27 VIBRATION (TVC AND REAL MODELS ONLY) ..........................................................29 TROUBLESHOOTING ..................................................................................................31 o COMPONENT IDENTIFICATION/LOCATION .................................................................33 DRAWINGS APPENDIX ...............................................................................................35 iv 11001199 Rev. M www.realchambers.com Table of Figures Real Chambers Test Chambers Table of Figures FIGURE 1 - LIGHT BULB RETENTION ....................................................................................15 FIGURE 2 - FAN ROTATION DIRECTION ................................................................................16 List of Tables TABLE 1 - CHAMBER PERFORMANCE SPECIFICATIONS ..........................................................5 TABLE 2 - SYSTEM DETAILS..................................................................................................6 TABLE 3 – DIMENSIONS AND UTILITIES ................................................................................7 TABLE 4 - I/P VALVES.........................................................................................................24 TABLE 5 - LIQUID NITROGEN COOLING SOLENOID VALVE (REAL-20/REAL-20T) ...........24 TABLE 6 - COOLING SAFETY VALVES .................................................................................25 TABLE 7 - VIBRATION SAFETY SOLENOID ...........................................................................25 TABLE 8 - AIR PURGE SOLENOID ........................................................................................25 TABLE 9 - PROPORTIONAL LIQUID NITROGEN VALVE .........................................................26 TABLE 10 - REPLACEMENT THERMOCOUPLE ......................................................................26 TABLE 11 - REPLACEMENT RTD .........................................................................................27 TABLE 12 – REPLACEMENT DOOR GUARD SWITCH ............................................................27 TABLE 13 - REPLACEMENT LIGHT BULB .............................................................................27 TABLE 14 - SOLID STATE RELAY ........................................................................................27 TABLE 15 - REPLACEMENT HAMMERS ................................................................................29 TABLE 16 - REPLACEMENT ACCELEROMETER AND CABLE .................................................29 TABLE 17 - REPLACEMENT VOLUME BOOSTER ...................................................................29 TABLE 18 - REPLACEMENT AIR LUBRICATOR .....................................................................30 TABLE 19 - HAMMER AIR FITTINGS ....................................................................................30 TABLE 20 - TROUBLESHOOTING TABLE ..............................................................................31 v 11001199 Rev. M www.realchambers.com Safety Information Real Chambers Test Chambers Safety Information Your Real Chambers equipment is provided with several safety systems designed to help prevent accidental damage to product and equipment, and avoid injury to personnel. Always operate this equipment in accordance with the procedures set forth in the OPERATION section of this manual. The safety systems described below should be checked at least once every 30 days, and any inoperative or questionable conditions must be corrected before resuming operation. Servicing of this equipment and its associated utility service must be done only by properly trained personnel! Equipment servicing should be done only after shutting off the Main Disconnect Switch and closing all air and nitrogen supply valves, and then only in accordance with safe practices. (See MAINTENANCE, section of this manual for more information). Compressed air, liquid nitrogen, and high voltages can all cause severe injury or death if not properly handled. WARNING! - EXTREME TEMPERATURES AND PRESSURES: This equipment produces extreme temperatures and uses pressurized fluids. Failure to follow instructions and use proper safety precautions can cause injury or death. WARNING! - ASPHYXIATION HAZARD: This equipment uses LIQUID NITROGEN (LN2) which can displace oxygen and cause severe injury or death due to lack of oxygen. ALWAYS allow adequate time for ventilation after opening chamber doors before entering workspace! NEVER operate this equipment unless all exhaust ports are securely ducted to outside of building. Real Chambers recommends utilizing an oxygen monitor in the vicinity of the chamber to help protect personnel from potentially dangerous conditions. CAUTION - HIGH SOUND LEVELS: The vibration hammers may produce extreme sound levels which may cause temporary or permanent hearing damage, particularly after prolonged exposure. Do not attempt to operate vibration equipment with chamber or port doors open, unless adequate hearing protection is worn by all effected personnel! 1 11001199 Rev. M www.realchambers.com Specs and Utility Requirements Real Chambers Test Chambers Description of Safety Features On each unit, there are a number of features that help to ensure safe operation. These features include: o Main Disconnect Switch Located on the door of the operator control console, this large black pistol grip switch removes all electrical power to the equipment when placed in the OFF position. Note that any power provided directly to product under test inside the equipment may not be disconnected by this switch. This switch should be in the OFF position whenever the control console door is open for servicing. Note that turning this switch off does not remove the live voltage from the incoming power lines, but removes any live voltages after the disconnect switch. If maintenance work is to be done inside the control box, or on the chamber itself, it is recommended to lock-out the power to the chamber. The disconnect handle has a tab that can be retracted for lock-out purposes. If the control box door is closed properly, a padlock can be placed through the tab, which will prohibit personnel from accidentally turning the chamber’s power on while a service technician is working in the chamber. o Emergency-Stop Button The E-Stop button is a red mushroom button on the front of the control panel. The normal position for this button is pulled out. When the button is pushed in, all chamber functions will stop. When the button is pushed in, the alarm horn will sound and the silence button will blink until the alarm is acknowledged. The alarm event will be logged in the alarm history screen of the PLC controller. This button should only be used for emergency purposes. If the button is used, the event causing the shut-down should be confirmed ok, then the E-Stop button should be turned clockwise to resume normal chamber operation. If the E-Stop button was activated in the middle of a profile, that profile will have to be started over from the beginning. 2 11001199 Rev. M www.realchambers.com Specs and Utility Requirements Real Chambers Test Chambers o Emergency Door Open Button (Only available on REAL-48 models) The emergency door open button stops all chamber systems (fans, heat, cooling and vibration) and opens automated doors. It is 2 ½” in diameter, stainless steel, and mounted on the inside of the chamber opposite the plenum. If the emergency door open button has been activated, the following procedure should be used to return the chamber to operating condition: 1. Acknowledge the alarm by pressing the “Alarm Silence” button. 2. Open chamber doors completely open. 3. Turn Door Switch to the OPEN position. The door switch is located on the control box below the touch-screen. 4. Pull the Emergency door open button out, away from the chamber wall to disengage it. 5. Push the chamber doors closed as far as possible. 6. Be sure all personnel are clear of doors. 7. Turn the door switch to the CLOSE position. Emergency door open button Do not use the Emergency door open button as a service tool. This is only a STOP button - power is still live to the chamber. It is provided as a quick shutdown in the event of an operational emergency. This button must be pulled back out for chamber to run. 3 11001199 Rev. M www.realchambers.com Specs and Utility Requirements Real Chambers Test Chambers o Door Interlock Switches Each door is equipped with a sensor, which will interrupt the circulation fans, heat, cool, and optional vibration operation when the doors are open. These sensors are located on top of each door. Don’t operate the equipment unless all door interlocks are functioning properly. Proper status should be checked during scheduled maintenance. NOTE: Access ports and plugs are not protected by door interlocks. Since they are provided for cables and hoses supporting product under test, it will often be necessary to operate the equipment with one or more of these ports open. Packing the port with foam or other material rated for anticipated temperature ranges will greatly reduce heat leak and noise levels. CAUTION: Be certain that no one is directly in front of an open access port before switching on the optional vibration system! o Temperature High/Low Limit Controller A temperature limit controller is provided as an independent measure of safety against thermal runaway (hot or cold) which could occur from, but not limited to, the following: Programming error Primary controller failure Thermocouple breakage LN2 control valve sticking open SSR failure Blower failure The limit control is wired into the redundant safety devices (redundant heat contactor, LN2 safety) via the touch-screen controller. An independent RTD is provided for the limit control and located inside the air plenum. To adjust the high temperature set point of this controller, use the following procedure: 1. Press the “D” button on the front of the controller (it will now flash SP). 2. Use the up and down arrows to select the high temperature alarm limit desired. 3. Press the “P” button on the front of the controller. To adjust the low temperature set point of this controller, use the following procedure: 1. Press the “D” button on the front of the controller three times until AL-2 flashes. 2. Use the up and down arrows to select the low temperature alarm limit desired. 3. Press the “P” button on the front of the controller. 4 11001199 Rev. M www.realchambers.com Specs and Utility Requirements Real Chambers Test Chambers Specifications and Utility Requirements Real Chambers builds multiple chamber sizes, with various optional features available. Information shown is for standard models. Your chamber may vary if special requests were made at time of purchase concerning workspace dimensions, product temperature ramp rates, non-standard line voltages, or any other modifications. Real Chambers systems are designed for use in typical laboratory or manufacturing environments. Real Chambers systems are designed for use in temperatures from 50F to 100F (10C to 38C) and humidity levels below 30%. Table 1 - Chamber Performance Specifications P e r f o r m a n c e Temperature All Models Change Rate Up to 60C/min over range of Range -100 to +200C* High Speed Blower Range -100 to + 150°C* Temperature Control 1C on Stabilization Tri-Axial Vibration1 All Vibration Models Level Up to 60 gRMS on unloaded table Range 5 to 5000 Hz Control 1 gRMS within 1 min of settling 1 Tri-Axial vibration is only available on REAL model chambers. * This range is consistent with the use of the chamber in HALT and HASS applications which include fast thermal transitions and short periodic dwells only. 5 11001199 Rev. M www.realchambers.com Specs and Utility Requirements Real Chambers Test Chambers Table 2 - System Details S y s t e m REAL-20T/ REAL-20 D e t a i l s REAL-30T REAL-30 REAL-36T/ REAL-36 REAL-48T/ REAL-48 Cooling LN2 On/Off Control Direct Atomization in Plenum LN2 Linear Valve Control Direct Atomization in Plenum LN2 Linear Valve Control Direct Atomization in Plenum LN2 Linear Valve Control Direct Atomization in Plenum Heating2 20kW Solid State Time Proportional control, zero firing crossover 48kW Solid State Time Proportional control, zero firing crossover 66kW Solid State Time Proportional control, zero firing crossover 99kW Solid State Time Proportional control, zero firing crossover Doors One Full Opening Door, 12”x12” Window 10”x10” view area Two Full Opening Doors, 24”x24” window/ea (22”x22” view area) Two Full Opening Doors, 24”x24” window/ea (22”x22” view area) Bi-parting Front and Back 14”x24” window/ea (12”x22” view area) Vibration Table Support One set of four (4) springs rated at 70lbs/31.8kgs ea Total static load of 280 lbs/127 kg One set of four (4) springs rated at 250lbs/113.4kgs ea Total static load of 1000 lbs/453.6 kg One set of four (4) springs rated at 250lbs/113.4 kgs ea Total static load of 1000 lbs/453.6 kg One set of four (4) springs rated at 250lbs/113.4kgs ea Total static load of 1000 lbs/453.6 kg Vibration Table Size 20x20”/50.8x50.8 cm mounting surface. 30x30”/96.2x91.2 cm mounting surface. 36x36”/91.4x91.4 cm mounting surface. 48x48”/121.9x121.9 cm mounting surface. 3/8-16 s/s inserts on 4” centers. ThermobondSM insulated surface. 3/8-16 s/s inserts on 4” centers. ThermobondSM insulated surface. 3/8-16 s/s inserts on 4” centers. ThermobondSM insulated surface. 2 3/8-16 s/s inserts on 3” centers. ThermobondSM insulated surface. Heating specifications based on power supply voltage of 480 VAC, three phase. 6 11001199 Rev. M www.realchambers.com Specs and Utility Requirements Real Chambers Test Chambers Table 3 – Dimensions and Utilities D i m e n s i o n s a n d U t i l i t i e s REAL20T/ REAL-20 REAL-30T REAL-30 REAL-36T/ REAL-36 REAL-48T REAL-48 Int. Bare Chamber 24”w x 24”d x 36”h (61.0x61.0x58.4c m) 36”w x 36”d x 55”h (91.5x 91.5x 140. cm) 42”w x 42”d x 59”h (107 x107x 150 cm) 50”w x 54”d x 64”h (127x137.2x 162.2cm) Vibe in Position 24”w x 24”d x 24”h (61.0x61.0x58.4c m) 36”w x 36”d x 38”h (91.5x 91.5x 96.5cm) 42”w x 42”d x 44”h (107x107x112 cm) 50”w x 54”d x 32”h (127x137x91.5cm) Exterior Chamber 47”w x 34.5”d x 81”h (119 x 87.75 x 206 cm) 77”w x 53.5”d x 95.5”h (195.5 x 136 x 242.5 cm) 82”w x 55”d x98.5”h (209 x 140 x 251 cm) 98.75”w x 71”dx 107”h (249 x 180.5 x 272 cm) Weight 900lbs/408kg 2,250lbs/1022kg 3,500lbs/1,497kg 4,500lbs/2,041 kg Electrical 460 VAC 3 PH 460 VAC 3 PH 460 VAC 3 PH 460 VAC 3 PH 30 A 65 A 100 A 140 A Liquid Nitrogen 3/8” Supply 40 to 50 PSIG 2.1 to 3.4 barg 1/2” Supply 40 to 50 PSIG 2.1 to 3.4 barg 1” Supply 40 to 50 PSIG 2.1 to 3.4 barg 1” Supply 40 to 50 PSIG 2.1 to 3.4 barg Comp Air (REAL30T &48T) 3/8” supply 3/8” supply 3/8” supply 3/8” supply 80 PSIG, 15 CFM 5.5 barg, 0.4 m3/min 80 PSIG, 15 CFM 5.5 barg, 0.4 m3/min 90 PSIG, 15 CFM 5.5 barg, 0.4 m3/min 90 PSIG, 15 CFM 5.5 barg, 0.4 m3/min Comp Air ½” supply ¾” supply ¾” supply ¾” supply 90 PSIG, 50 SCFM 6.2 barg, 1.4 m3/min 100 PSIG, 70 SCFM 6.8 barg, 2.0 m3/min 120 PSIG, 80 SCFM 8.3 barg, 2.3 m3/min 120 PSIG One (1) 4”/10.2cm port, no fans or restrictions One (1) Two (2) 6”/15.2cm ports, no fans or restrictions. Can combine to 9”/22.9cm port Two (2) 6”/15.2cm ports, no fans or restrictions. Can combine to 9”/22.9cm port Exhaust 6”/15.2cm port, no fans or restrictions 140SCFM 8.3 barg, 3.9 m3/min 7 11001199 Rev. M www.realchambers.com Features Real Chambers Test Chambers Features o Temperature Control System The control of temperature is done by the CTI chamber controller. The controller manages various events and thermal PID coefficients to give the thermal response desired in the chamber. For specific information pertaining to the controller, refer to the controller manual, which was supplied with the chamber. Heating is accomplished with resistive electric elements, while cooling is accomplished by direct injection of liquid nitrogen (LN2). Electric heaters are carefully selected and arranged to provide extremely rapid rates of temperature change without exceeding the safe design limits of heat elements. Liquid nitrogen is injected using nozzles to quickly vaporize the liquid, providing maximum cooling without exposing product under test to liquid nitrogen droplets. On the REAL-20 chambers, the liquid nitrogen is injected through on/off control of solenoid valves. Additionally, there is a cooling safety valve. This solenoid closes if various safety features have tripped. This safety valve is up-stream of the cooling control valve. On the Real Chambers systems, the liquid nitrogen controls consist of two valves. The first valve is a cooling safety valve. The cooling safety valve closes if various safety conditions occur. The valve is open under normal chamber cooling operations. The second valve is a proportional control valve used for controlling the amount of liquid nitrogen let into the chamber’s plenum. The cooling control valve receives variable signals from the chamber’s controller, which instructs the valve to open the required amount. Both of these valves are vacuum insulated to minimize any condensation/frost build-up on the outside of the valves. The following is a picture of one of these valve assemblies: 8 11001199 Rev. M www.realchambers.com Features Real Chambers Test Chambers Vacuum insulated, pneumatically actuated cooling control valve. Vacuum insulated pneumatically actuated cooling safety valve. Vacuum insulated female bayonet liquid nitrogen connection. o Air Circulation Fan The chamber is equipped with non-corrosive air circulation fan(s), which provide air circulation to distribute temperature controlled air and minimize chamber temperature gradients. Baffles provide output air openings to direct the airflow in the chamber. o Instruments Product temperature and air temperature are controlled by a unique, temperature controller/programmer. The inputs to the temperature controller/programmer are type T thermocouples. One of the thermocouples is mounted in the airflow plenum and is not directly visible. The second thermocouple is designed to monitor the temperature of the device under test. A temperature Hi/Lo limit control protects product and equipment against thermal runaway due to a primary controller fault or control device failure. The input to the Hi/Lo limit control is a three-wire resistance temperature device (RTD). The RTD is mounted in the air-flow plenum and is not directly visible. o Optional Vibration Table and Hammers Vibration simulation is achieved using multiple pneumatically actuated pistons. These pistons are oriented to act in conjunction with a carefully engineered vibration table. This transmits broad frequency vibration patterns to the device under test as it experiences six degrees of freedom at controlled intensity. o Operator Control Switches 9 11001199 Rev. M www.realchambers.com Features Real Chambers Test Chambers The control console has several selector switches and buttons. These switches/buttons provide the following control: 1. Control Power (off, on) Turns control power on and off. Note this does not remove power from the rest of the chamber. 2. Alarm Silence (illuminated push-button) Pushing this button will silence the alarm horn and signal the controller that the alarm has been acknowledged at that time. To clear an alarm, push and hold the alarm silence button for 2 seconds3. 3. Door Latch4 (Toggle) Turing this switch pneumatically opens and closes the front and rear bi-parting doors. 3 4 The alarm condition must no longer be present. REAL-36/36T & REAL-48/48T models only. 10 11001199 Rev. M www.realchambers.com Features Real Chambers Test Chambers 4. Emergency Stop (push/turn) Pushing this red mushroom head button will stop all chamber functions and log the alarm in the controller’s alarm history. All output functions will stop and any profile will stop as chamber returns to an idle state. If a profile was running, it will need to be re-started from the beginning if an E-Stop had been issued. To reset the E-Stop, turn the button clockwise as indicated on the button. o CTI Controller The control system uses a process controller to facilitate numerous standard and optional control functions. Inputs to the controller include: Thermocouples Operator function selector switches Door-closed proximity switches Temperature controller event status Remote start status. Auxiliaries from motor and heater contactors. The controller processes the input information and directly controls outputs to: Fan starters Proportional LN2 valve Redundant electric heat contactors Redundant LN2 safety valve Door operators (REAL-36/REAL-48) Optional vibration control solenoids Optional vibration I/P valve This control system enhances the safety and reliability of the equipment by interlocking critical functions with safe-to-run input status signals as well as operator function switches. For complete documentation on the operation of the CTI controller, please refer to the controller manual, which was supplied with the chamber. o I/O Panel The control panel comes equipped with an I/O panel that includes a connection point for USB, serial, Ethernet, and a convenience outlet. 11 11001199 Rev. M www.realchambers.com Features Real Chambers Test Chambers Ethernet Port Convenience Outlet. USB Port Serial Port The USB port can be used for a USB type mouse or other pointing device. This device can be used to move a cursor on the touchscreen. The serial port was used on older models for serial communication with the chamber. The serial port is not currently used, and should not have any devices connected to it. The Ethernet port can be used for communication with a PC that has Real Chambers SCADA software installed. Only Ethernet cables should be used in this port. The convenience outlet can be used to power test equipment or other low power devices. The convenience outlet rating is 120VAC with a maximum current draw of 3A. 12 11001199 Rev. M www.realchambers.com System Installation Real Chambers Test Chambers System Installation NOTE: Refer to the Real Chambers Site Preparation Manual for more information regarding the system installation. The Site Preparation Manual is intended to be read in its entirety well before the delivery of the chamber. o Location When deciding on a location to install the chamber, it is important to note which side or sides of the unit will be against the wall, and the amount of clearance necessary for safe operation and accessibility. Keep in mind how much space will be necessary to open the doors, walk to and access/service the control panels, perform service, etc. The floor should be level. If perfectly level floor space is not available, use a sturdy metal plate at each leg necessary to shim the legs making the chamber level and secure. More information and hints on chamber location is included in the Site Preparation Manual. o Electrical Power Hook-Up The electrical power needs to be hooked up from above and into the top of the control box. A large hole is provided in the top of the control console for the entrance of the power wires. The power specs are given in the Specifications section of this manual. It is extremely important to run a properly sized ground wire. It is often beneficial to provide a ground wire that is actually larger than conventional standards. Doing so may aid in reducing any electrical noise problems. When running power there should be at least one to two feet of flexible conduit before the chamber to leave room for expansion and contraction of the floor as well as allow for slight variances in chamber placement. More information and hints on the electrical installation are included in the Site Preparation Manual. Recommended external fault disconnect device should be rated to 110% of the amperage rating of your chamber. Please contact Real Chambers directly to determine your chambers amperage rating. WARNING!: Control box contains high voltage. Any work done on the chamber with the control box door open should be done by trained personnel only. Serious injury or death may result. o Compressed Air Connection For size and pressure/flow requirements, refer to the Specifications section of this manual. Before final connection, be sure to purge the line to get unwanted debris out of 13 11001199 Rev. M www.realchambers.com System Installation Real Chambers Test Chambers the system5. Refer to the Outline & Dimension (O&D) drawings at the end of this manual for location of utility hook-ups. More information and hints on the compressed air connection are included in the Site Preparation Manual. o Liquid Nitrogen Plumbing Along with the electrical power, the LN2 service should come from above for easy access around the chamber. Refer to the Specifications section for size and pressure/flow information. The location is shown on the Outline and Dimension (O&D) drawing at the end of this manual. We recommend vacuum insulated piping for optimum performance of the chamber’s cooling system. The cooling rates specified for the chamber are only guaranteed if the LN2 supply is vacuum insulated and properly sized. If properly sized and insulated lines are not used, the cooling specifications will not be met. A line relief valve must be installed between the LN2 safety valve and the manual shutoff valve immediately before the chamber. This relief valve should be rated at a pressure which is the lesser of 150 psig and the pressure rating of the LN2 supply piping. This relief valve is not included with the chamber and should be taken care of at installation. o Exhaust Gas Plumbing For each unit, check the table labeled Dimensions and Utilities in the Specifications and Utilities section. With this information, route the exhaust to the outside of the building. No fans or restrictions should be placed in this line. Any fans or restrictions will decrease chamber performance. It is important to vent the chamber to the outside of the building for safety reasons. If the chamber is not vented to the outside of the building, there is a risk of oxygen depleted atmosphere. The exhaust plumbing should be straight up through the roof of the building for optimal performance. Any bends and horizontal rooms will reduce the performance of the chamber. In order to prevent any water/snow/debris from entering the chamber from the outside into the chamber, make sure proper check valves are installed at the exit of the exhaust gas plumbing. o Installing Chamber Lights The chambers are fully tested at the manufacture’s facility before they ship. This testing includes testing the chamber lights. However, to minimize risk of the lights being damaged in shipment, they are removed and shipped in the control box. The lights are installed by aligning the two pins of the bulb with the holes in the fixture and simply pushing the lights into the fixtures. It is recommended to use a small piece of wire6 to secure the light bulb to the fixture. This piece of wire will protect from the bulb vibrating out of the fixture during normal use of the chamber. The following figure shows a lamp 5 6 Any damage to equipment due to debris in the compressed air line is not covered under warranty. The wire should have insulation which can withstand the full temperature range of the chamber. 14 11001199 Rev. M www.realchambers.com System Installation Real Chambers Test Chambers held into the fixture with the thin wires. The figure has highlighted the wires to make them more visible. Thin pieces of wire to hold lamp in fixture. Figure 1 - Light bulb retention o Location of Utility Connections The Appendix of this manual contains outline and dimension (O&D) drawings of the standard chambers. Refer to these drawings for the most current utility connection dimensions. Although the dimensions on these drawings are most current and accurate, it is always a good idea to finish each utility connection in a flexible form to ease installation. o Start-Up Procedure WARNING!: Control box contains high voltage. Any work done on the chamber with the control box door open should be done by trained personnel only. Serious injury or death may result. When starting to apply power, it should be done in steps for ultimate safety and to ensure no damage was done in shipping. A copy of the manufacturing traveler is sent with the chamber. The traveler is provided to compare measured values at installation with those measured during manufacturing test-out. The following items should be measured, one at a time in the following order. If any measurements do not closely match the factory, call for technical support before starting the chamber. CAUTION: It is very important to follow this procedure to ensure components are working properly. Although all are important, special attention should be paid to items #1, 2, 9, 10, 14, 15, 18, 20, 21 and Vibration #2 and 6. 1. Measure and record the resistances of all heaters, phase to phase. 15 11001199 Rev. M www.realchambers.com System Installation Real Chambers Test Chambers 2. 3. 4. 5. 6. 7. 8. 9. If these readings do not closely match factory measurements, STOP and call for technical support. Do not start the chamber. Measure the resistances of each heater leg to ground. If any of these readings are not infinite in resistance, STOP and call for technical support. Do not start the chamber. Measure and record the main line (460/575 VAC) voltage. Measure and record the 120 vac voltage. Measure and record voltage at all DC power supplies. Turn Control Power ON. Close doors and check that all proximity switches engage. Turn on fan motor circuit breakers. Put the controller in Manual Mode and turn on the Fans Event. Ensure fans are rotating in the correct direction. With chamber doors closed, fan event on, control power on and motor circuit breakers on, the fans should come on. Then, open the chamber doors and look up at the fans to determine rotational direction. If the fans are not rotating in the proper direction, the heaters will not get sufficient air flow and cause premature burn-out and failure of the heater elements. If the fans are not rotating in the proper direction, disconnect all power and switch two of the power leads to the chamber, this should change the rotational direction. Both fans should be either spinning correctly or incorrectly. You should not find that one is correct and the other is not. The following diagram shows a view of the blower as looking up from the bottom and the correct fan rotational direction: ROTATION DIRECTION ROTATION DIRECTION Figure 2 - Fan rotation direction 10. After the fan rotational direction has been determined to be correct, measure and record current draw of each fan motor. 16 11001199 Rev. M www.realchambers.com System Installation Real Chambers Test Chambers 11. Install light bulbs and verify their operation. 12. Adjust the high and low Site Air Temperature Alarm Limits7 to 60°C for high and 0°C for low. 13. Turn on the Heat and Cool Events. 14. Set chamber set point to 70°C and verify high temperature safety works. 15. Set chamber set point to -10°C and verify low temperature safety works. 16. Repeat steps 14-17 for Product Temperature Alarm Limits. 17. Properly set the Site Temperature Alarm limits. 18. Run multiple thermal ramps and measure and record the current draw of each heater. 19. Set chamber to ramp from –50°C to +100°C and measure and record full chamber current draw while heating. Note that the controller must be giving 100% heating output to make an accurate measurement. 20. File these values and production traveler in a safe place for future reference. 21. If any of the above measured and recorded values appears to not closely match that previously recorded at the factory, call the factory for assistance. If the chamber has vibration, complete the following: 1. Ensure the accelerometer is secure to the vibration table. Tighten the accelerometer-mounting block to the table. Tighten the accelerometer to the mounting block. 2. Ensure the accelerometer cable is attached at both ends. 3. Turn the Vibration Event on. 4. Enter a 5Grms set point in Manual Mode. 5. See that the controller controls to that level. If the system’s vibration continues to get louder without settling on 5 Grms, push the red E-Stop button and examine all connections again. 6. Check the oil injection rate (if so equipped). It should inject a drop of oil at a rate no faster than one drop per 45 seconds. If it is injecting faster than that, slow it down by turning the little red adjustment dial on the top of the oiling unit so that it injects one drop per 45 seconds. 7 Refer to CTI manual for detailed information on operating the controller. 17 11001199 Rev. M www.realchambers.com Optional Vibration System Operation Real Chamber Corporation Test Chambers Operation Check chamber functions and your understanding of the system by following these steps with an empty chamber before installing the product to be tested. 1. Verify that all utilities are on-line before operating equipment. Compressed air is required to operate control valves, cooling system, vibration system and safety solenoids. Liquid nitrogen is required for proper cooling. (Empty or low LN2 tanks produce a mixture of liquid and vapor, which will not properly cool the chamber.) Proper voltage and phase electrical supply are necessary for full heating capability. These are listed in the Specifications section. 2. Verify that all Emergency Stop palm buttons are pulled out (normal Position). 3. Open compressed air service valve and liquid nitrogen supply valve. 4. With all function switches in OFF position, turn on main disconnect switch if not already on. 5. Turn the control power switch to the ON position. 6. Be sure all doors are closed securely. For REAL-36T/REAL-36 and REAL48T/REAL-48 models, close doors by manually pushing closed as far as possible. The doors will close when power is turned on and door close switch activated. 7. Program or set-up profiles and test conditions as required, or operate the chamber in Manual Mode. o Air Safety Controller Operation The air safety temperature controller is an independent temperature safety device. It is designed to provide an added level of safety to ensure products under test are not destroyed as a result of excessive heating or cooling. This controller monitors a three wire RTD installed in the air plenum. The controller provides two alarms, one when the temperature is above the high limit and one when the temperature is below the low limit. If the temperature is above the high limit, the controller will disable the heating function of the chamber by sending a signal to the input of the CTI controller. The alarm will be identified in the CTI controller and will be visually evident by the “SP” no longer being illuminated on the air safety controller. If the temperature goes below the low limit, the controller will disable the cooling function of the chamber. The alarm will be identified in the CTI controller and will be visually evident by the “A2” no longer being illuminated on the air safety controller. If the temperature is between the high limit and the low limit, the controller will display both “SP” and “A2.” 18 11001199 Rev. M www.realchambers.com Real Chamber Corporation Test Chambers Optional Vibration System Operation o Chamber CTI Controller Operation Complete documentation of the CTI touch-screen controller and its operation is contained in a separate manual, which is supplied with the chamber. Optional Vibration System Operation o Mounting of Product The vibration table has mounting points located in a grid pattern. These mounting points are 3/8-16 threaded inserts in the table. The device to be tested should be securely attached to the vibration table directly, or by use of a properly designed fixture. Any holes that are not used for mounting the product must retain the mounting bolt and hold down washer as supplied from the factory. The vibration system should not be run without the mounting bolts and hold down washers securely in place. Running the vibration system without the mounting washers and bolts in place will void the warranty of the table. o Manual Mode Vibration can be run in Manual mode with the CTI controller with the following procedure: 1. Put the controller in Manual Mode. 2. Turn on the Vibration Event. 3. Enter a vibration setpoint. 4. Turn the vibration section Run button to ON. o Automatic Mode The chamber’s vibration can also be controlled while in Automatic Mode. To do this, enter vibration setpoints in the profile as it is being defined on the CTI. For each step that has a vibration setpoint, be sure to turn the Vibration Event on. Vibration can be controlled during a thermal ramp step, a thermal dwell step, or a step with no thermal control at all (a “vibration only” step). A step will not control to a temperature setpoint if the “NOT A #” button is turned to ON for that particular step. By doing this, the technician can create a step that only controls vibration. 19 11001199 Rev. M www.realchambers.com Real Chamber Corporation Test Chambers Optional Vibration System Operation o Accelerometer Limits The standard accelerometer supplied with the chamber is capable of operating at temperatures below +121°C. If the chamber is going to operate at temperatures greater than +121°C, the accelerometer should be removed. An optional accelerometer is available that has an extended high temperature range. Consult the factory for details on the optional high temperature accelerometer. The low temperature limit of the accelerometer is -100°C, which is the same as the low temperature design limit of the chamber. 20 11001199 Rev. M www.realchambers.com Replacement Parts Real Chambers Test Chambers System Maintenance Maintenance of this equipment should be done by a qualified technician. High voltage electrical systems, cryogenic plumbing, high pressure gas and mechanical systems all represent a potential for injury or death. The main power must be turned off at the main disconnect and all gas supplies should be turned off prior to servicing this equipment It is a good practice to keep a maintenance log for the chamber. The log should contain the tasks that must be accomplished and when they were performed. Real Chambers Corporation does offer a service contract in which we will send a technician out to do routine maintenance items. Different plans are available. If interested, please call 1-888-292-1552 for details. o Maintenance Tasks to be Performed on a Daily Basis 1. Check the high and low temperature settings of the Site Alarm Limits and Profile Alarm Limits to insure that they are set to the appropriate settings for the product that is being tested. The high temperature set point should never be any higher than 200C8. The low temperature set point should never be any lower than -100°C. Entering set-points that exceed either of these limits will void the chamber warranty. 2. Make sure that the LN2 supply is on and that there is sufficient LN2 to perform your test. The pressure of the LN2 should also be verified and maintained near 50 psig. 3. Make sure that the compressed air to the chamber is turned on. o Maintenance Tasks to be Performed on a Monthly Basis 1. The proper function of the safety control devices should be checked on a regular basis. Replace any items that may be damaged or worn. 2. Check the operation of the Site Alarm Limits and the Profile Alarm Limits. To test the high temperature alarm limits, enter a temperature set point that is 10°C greater than the Alarm point. To test the low temperature alarm limits, enter a temperature set point that is 10°C less than the Alarm point. The Air alarm limits and the Product alarm limits should all be tested. 3. The electrical compartment should be kept clean and vacuumed if necessary. 8 Units with the high speed blower option must limit upper temperatures to below +150°C. 21 11001199 Rev. M www.realchambers.com Replacement Parts Real Chambers Test Chambers 4. The current draws of the heaters and blower motors should be checked and recorded for future reference to determine if there is any irregularity. Extreme caution must be taken whenever working with high voltage components. Increased current draws may be an early sign of heater problems. It is also recommended to record the heaters’ phase-to-phase resistances. WARNING!: Control box contains high voltage. Any work done on the chamber with the control box door open should be done by trained personnel only. Serious injury or death may result. 5. The chamber lights should be checked and replaced if burned out. 6. Check the door proximity switches by leaving the left hand door (for REAL48T/REAL-48) of the front of the chamber open and turning the door switch to the closed position. Try starting chamber. If proximity switch is working properly, the fans should not come on and an Alarm should sound. For single door models (REAL-20, TVC-4 & REAL-30 & REAL-36) turn system on with the doors closed and listen for the fan motor, open the door and listen for the fan to stop. If the fan does not stop, then replace the proximity switch. Repeat the procedure on the rear door. 7. The seals and gaskets on the doors and ports should be inspected for adequate sealing. Remove any foreign materials that may be embedded in the gasket. Worn or damaged gasket should be replaced. 8. Check all the fasteners on the chamber and tighten if necessary. Note that adjustment should only be done when metal is at ambient temperatures (~+20°C). 9. For the vibration system, check lubricator (if so equipped) and add oil if necessary. The oil level can be checked via the sight glass on the lubricator housing. If oil is required, Marvel Mystery Oil (Real Chambers part number 11008462) should be used. 10. Check lubricator (if so equipped) for proper oil injection rate. Lubricator should drop one drop of oil every 90 seconds when vibration is running. Do NOT inject more oil than one drop per 90 seconds. 11. Check operation of emergency door open button (applies to REAL-48T/REAL-48). To do this, simply press in the button (on the inside of the chamber), close the doors and attempt to start up the system. If it starts up, have the safety button valve serviced and/or replaced. The system should not start up with the emergency door open button pushed in. 22 11001199 Rev. M www.realchambers.com Replacement Parts Real Chambers Test Chambers 12. Check function of the E-stop mushroom button. Chamber should shutdown its functions when this is pushed in. o Maintenance Tasks to be Performed Every Three Months 1. Heater banks should be removed and visually inspected for signs of excess droop in the coiled heater wire. If heater wires have excess droop, they should be replaced immediately. Failure to replace drooping wires may result in a short circuit and damage to many other components. 2. Check and tighten set-screws and bottom retention bolt that hold the blower wheel onto the motor shaft. o Maintenance Tasks to be Performed on an Annual Basis 1. Calibrate the controller. Refer to controller manual for details on calibrating. 2. Calibrate I/P valves. Refer to the supplied I/P valve manual for details on calibrating. 3. The vibration hammers should be removed and cleaned. 4. The vibration hammer mounting bolts should be removed and anti-seize compound should be re-applied. Not doing this can lead to premature failure of the spacers in the vibration table. Bolts for large hammers should be torqued to 125 ft-lbs. Bolts for medium hammers should be torqued to 50 ft-lbs. 23 11001199 Rev. M www.realchambers.com Replacement Parts Real Chambers Test Chambers REPLACEMENT PARTS If any parts are required, please call 1-888-292-1552 for pricing and availability. The following information provides Real Chambers part numbers to assist in finding the correct part. o Valves I/P Valves These devices convert a 4-20mA control loop electrical signal into a regulated gas pressure. There are two (2) different I/P9 valves on the chamber. One of the valves is used for the control of the liquid nitrogen10. This valve is built into the positioner and converts the 4-20mA control loop to regulate the gas pressure to the actuator from 3-15 psig. Replacing this valve will require replacement of the proportional valve (see Table 9). Chambers that have the optional vibration table use an I/P valve to control the vibration. This valve converts the 4-20mA control loop and regulates the gas pressure from 0-120 psig. The following table identifies these valves. Table 4 - I/P Valves I/P Valve Liquid Nitrogen Vibration Pressure Span 3 -15 psig 0-120 psig Real Chambers P/N See Table 9 11809243 Liquid Nitrogen Cooling Solenoid Valve (REAL-20/REAL-20T only) This valve allows liquid nitrogen to flow into the REAL-20/REAL-20T chamber when it is calling for cooling. The valve provides on/off control of the liquid nitrogen flow. Table 5 - Liquid Nitrogen Cooling Solenoid Valve (REAL-20/REAL-20T) Item LN2 Cooling Solenoid Valve Real Chambers P/N 10973287 Cooling Safety Solenoid (REAL-20/REAL-20T only) The REAL-20/REAL20T has a solenoid valve that acts as a liquid nitrogen safety. The valve operates when the doors of the chamber are open. The valve will stop liquid nitrogen from entering the chamber while the doors are open. The following table identifies these valves. Table 6 - Liquid Nitrogen Cooling Safety Solenoid Valve (REAL-20/REAL-20T) 9 I stands for electrical current, P stands for gas pressure. An I/P valve is not used for liquid nitrogen control on the TC/TVC-1. 10 24 11001199 Rev. M www.realchambers.com Replacement Parts Real Chambers Test Chambers Item Real Chambers P/N LN2 Cooling Solenoid Valve 10973287 Cooling Safety Valve (REAL 30/36/48 & REAL-30T/36T/48T) The chambers have cooling safety valves that acts as a liquid nitrogen safety. The valve operates when the doors of the chamber are open. The valve will stop liquid nitrogen from entering the chamber while the doors are open. The following table identifies these valves. Table 6 - Cooling Safety Valves Item REAL-36/36T, REAL-48/48T LN2 Safety Valve (complete valve) REAL-30/30T LN2 Safety Valve (complete valve) Real Chambers P/N 88-2548-01001 11531739 Vibration Safety Solenoid This valve operates when the vibration event on the controller is turned on. When the valve is energized, it allows gas pressure to flow to the volume booster. The valve is a three-way valve with one branch open to atmosphere. When the valve is not energized, the air line to the volume booster is routed to atmosphere. Table 7 - Vibration Safety Solenoid Item Vibration Safety Solenoid Real Chambers P/N 23001021 Air Purge Solenoid When this valve is energized, it allows oxygenated airflow into the chamber. The valve is a three-way valve with one branch open to atmosphere. It is used to help oxygenate the air in the chamber before the chamber doors are opened. Table 8 - Air Purge Solenoid Item Air Purge Solenoid Real Chambers P/N 23001021 25 11001199 Rev. M www.realchambers.com Replacement Parts Real Chambers Test Chambers Proportional Liquid Nitrogen Cooling Valve (not on REAL-20/REAL-20T) This valve controls the flow of liquid nitrogen into the chamber based on the pressure input to the top of the valve. If there is less than 3 psig pressure applied to the top of the valve, the valve should not allow any liquid nitrogen flow into the chamber. If 15 psig is applied to the top of the valve, the valve should be completely open. At pressures between 3 and 15 psig, the valve will be somewhere between closed and wide open. Table 9 - Proportional Liquid Nitrogen Valve Item REAL-36/36T, REAL-48/48T LN2 Proportional Valve (complete valve) REAL-30/30T LN2 Proportional Valve (complete valve) Real Chambers P/N 88-2548-01229 11531721 o Sensors Product Temperature Thermocouple This type T thermocouple is designed to be placed directly on the product under test. The chamber will control such that this thermocouple measures the same temperature as the set-point. The thermocouple runs from the product under test into the control box. If a replacement thermocouple is installed, it is important to ensure that the sheathing is good over a temperature range of -200°C to +300°C. Table 10 - Replacement Thermocouple Item Replacement Thermocouple Type T Real Chambers P/N 10987443 Air Temperature Thermocouple This type T thermocouple is used as a second input to the controller. It helps control the product under test temperature such that it achieves the set-point as quickly as possible while minimizing any over-shoot. This second temperature input allows utilization of cascade temperature control. This thermocouple is not directly visible as it is mounted in the air-flow plenum and wired into the control box. If the thermocouple is replaced, it is important to ensure that the sheathing is good over a temperature range of -200°C to +300°C. Refer to the above table for a replacement thermocouple RTD The RTD monitors the air temperature as a backup safety device. The RTD is not directly visible as it is mounted in the air-flow plenum area and wired to the air safety device in the control box. When this device measures a temperature greater than the high temperature set-point or less than the low temperature set-point, the air safety device interrupts the heating/cooling of the chamber until the chamber is reset. 26 11001199 Rev. M www.realchambers.com Replacement Parts Real Chambers Test Chambers Table 11 - Replacement RTD Item Replacement RTD Type 3-wire Real Chambers P/N 14812624 Door Guard Switch The door guard switch monitors the status of the doors and inputs into the controller. The switches tell the controller if the chamber doors are open or closed. If the chamber doors are open, the controller will shut down various controller outputs. Table 12 – Replacement Door Guard Switch Item Door Guard Switch Real Chambers P/N 11354921 o Electrical Light Bulb The chambers have halogen lamps inside to allow viewing of the product under test while the test is in process. These lights are easily replaced should they burn out. Table 13 - Replacement Light Bulb Item Halogen Bulb Properties 12 Volt, 20 Watt Real Chambers P/N 10959063 Heater Solid State Relay (SSR) The chamber uses time-proportional solid state relays to control the heating of the chamber. The chamber has one SSR for each heater bank. The heater banks are in the air-flow plenum while the SSR is mounted in the control box. Table 14 - Solid State Relay Item Time Proportional Solid State Relay (REAL-20/20T, REAL30/30T) Time Proportional Solid State Relay (REAL-36/36T, REAL48/48T) Properties 480 VAC, 30 Amp Real Chambers P/N 11042767 480 VAC, 50 Amp 11035786 27 11001199 Rev. M www.realchambers.com Replacement Parts Real Chambers Test Chambers Replacement Fuses The chamber uses a variety of fuses to help protect the electrical components. The substitution of fuses, not approved for the application by Real Chambers, is extremely dangerous and can cause significant damage to equipment. Contact Real Chambers, for exact information on replacement parts. 28 11001199 Rev. M www.realchambers.com Replacement Parts Real Chambers Test Chambers o Vibration (TVC and REAL models only) Vibration Hammers The chambers utilize a pneumatic hammer that strikes the bottom of the vibration table to produce the random vibration of the table and product under test. There are two different size hammers used across the different chamber sizes. The following table gives part numbers for the different sizes. Table 15 - Replacement Hammers Item Medium Hammer Large Hammer Chamber Used On REAL-20, REAL-36, REAL-30, 48 REAL--30, REAL-36, 48 Real Chambers P/N 10954262 10954246 Accelerometer and Cable The accelerometer measures the acceleration level on the vibration table. It sends its signal through the accelerometer cable to the control box for controlling the vibration level of the Device Under Test. Table 16 - Replacement Accelerometer and Cable Item Connector Accelerometer (standard temp) Accelerometer (high temp) Accelerometer Cable (10 Feet Long) with Viton protective boot Accelerometer Cable (15 Feet Long) with Viton protective boot Accelerometer Cable (25 Feet Long) with Viton protective boot 10-32 10-32 10-32 to BNC Real Chambers P/N 10954300 11083198 11065141 10-32 to BNC 11042433 10-32 to BNC 11039082 Volume Booster The volume booster allows larger quantities of air to flow at elevated pressures by supplying it with a small quantity of air at the desired pressure. The volume booster acts as a dome-loaded pressure regulator. The control air to the volume booster comes from the vibration I/P valve. The higher quantity of air is passed to the pneumatic hammers, which create the vibration. Table 17 - Replacement Volume Booster 29 11001199 Rev. M www.realchambers.com Replacement Parts Real Chambers Test Chambers Item Real Chambers P/N REAL-20 Volume Booster 10963759 REAL-30, 36, 48 Volume Booster 10958360 Air Lubricator This device supplies a controlled amount of oil to the compressed air line that is feeding the pneumatic hammers of the vibration system. There is an adjusting dial on the top of the unit that allows adjustment of the quantity of oil that is delivered to the system. This should be set at no more than one drop of oil per 45 seconds of air flow. Table 18 - Replacement Air Lubricator Item REAL-20 Compressed Air Lubricator REAL-30, 36, 48 Compressed Air Lubricator Real Chambers P/N 10963812 10957754 Air Fittings for Hammers Each vibrator has two air fittings, which connect to the air supply and air exhaust hoses. These fittings have a standard pipe thread on one side and a flare fitting on the other side. The following table lists the vibrator size and the part numbers for the fittings required: Table 19 - Hammer Air Fittings Hammer Size Medium Large Inlet Air Fitting P/N 11786029 11394893 Exhaust Air Fitting P/N 11786029 11394893 30 11001199 Rev. M www.realchambers.com Drawings Appendix Real Chambers Test Chambers Troubleshooting Before doing any troubleshooting, the following items should be verified. The problem may be found by checking these items first: 1. Ensure 460VAC (or 575VAC for Canada) power is supplied to chamber and main disconnect is turned on. 2. Ensure compressed air supply is connected and there is pressure at the connection point. 3. Verify liquid nitrogen supply is connected and working at the chamber. WARNING!: The chamber control system contains high voltage devices. Extreme caution should be used when doing any service or maintenance. Service or repair should be done only by trained, qualified professionals. Failure to follow instructions and use proper safety precautions can cause injury or death. The following table should be used to help troubleshoot the test chamber. For more technical assistance, please call the factory 1-888-292-1552. Table 20 - Troubleshooting Table PROBLEM Chamber controller doesn’t power up POSSIBLE CAUSE Main disconnect not on Ground fault interrupt tripped Controller circuit breaker tripped Doors won’t open/close (applies Doors not closed far enough prior to turning switch to REAL-48/48T) Palm button pushed in Control power not on 24VDC control power fuse blown Door solenoid valve not operating No air pressure to chamber Lights don’t turn on Switch not turned on Bulbs burned out Light fuse blown 12VDC power supply failed 31 11001199 Rev. M www.realchambers.com Drawings Appendix Real Chambers Test Chambers Fans don’t turn on Chamber cools but doesn’t heat Chamber heats but doesn’t cool Chamber doesn’t heat or cool Doors not closed Control power not on Fan Event on controller not on Door guard switch(s) not engaged Motor starter circuit breaker tripped Control relay(s) not closed Reset button not pressed (not illuminated) Heat Event on controller not on Air temperature high safety limit exceeded Heater circuit breakers tripped Controller not calling for heat Controller internal limit exceeded Controller not configured properly Controller not giving output Heater contactors not pulled in SSR failed Reset button not pressed (not illuminated) Cooling Event on controller not turned on Air temperature cold safety limit exceeded Controller not calling for cool Controller internal limit exceeded Controller not configured properly Controller not giving output No air pressure Cooling safety solenoid not open Cooling I/P valve failed or needs calibration Cooling control valve failed Control power not on Door(s) not closed Fans not on Reset button not pressed Heat and Cool Events on controller not on Controller has alarm error Controller not configured properly Timer relay not engaging Air temperature limits exceeded Air temperature safety controller not configured properly 32 11001199 Rev. M www.realchambers.com Drawings Appendix Real Chambers Test Chambers No vibration in Manual mode Control power not on Vibration Mode switch not in “Manual” position No air supply to chamber Individual hammer air valves turned off Vibration safety solenoid not open Vibration I/P valve failed or needs calibration Volume booster failed o Component Identification/Location Door Guard Switch The door guard switch is located at the top of the chamber door. The REAL-20/20T has only one proximity switch while all other chambers have two. This switch is wired into the control system and is used for safety measures. If the doors open, the controller gets notified via the switch and disables various chamber functions. The following picture shows the door guard switch: Cable goes to control box Sensing part of switch Switch actuator 33 11001199 Rev. M www.realchambers.com Drawings Appendix Real Chambers Test Chambers Emergency Palm Button The emergency palm button is used on the REAL-48/48T. This button is an emergency safety device. If the button is pushed in, the doors will automatically open and the chamber will stop operation. To reset the chamber, the button needs to be pulled out towards the center of the chamber. The following picture identifies the palm button on the inside of the chamber: Chamber access port Emergency palm button Cooling and Vibration I/P Valves The cooling and vibration I/P valves convert the controller’s linear 4-20mA signal into a proportional pressure signal. In the case of the cooling I/P valve, the 4-20mA signal is converted to a pressure of 3-15 psig. For the vibration I/P valve, the 4-20mA signal is converted to a pressure of 0-120 psig. Both of these valves should be calibrated at least once a year. Note the REAL-20/20T does not have a cooling I/P valve as it uses time proportional control of the cooling valve. Both I/P valves are located inside the control box. 34 11001199 Rev. M www.realchambers.com Drawings Appendix Real Chambers Test Chambers DRAWINGS APPENDIX ITEM DRAWING NUMBER Outline and Dimension Drawing REAL-20 ...................................B-10998281 Outline and Dimension Drawing REAL-30 ...................................B-11739901 Outline and Dimension Drawing REAL-36 ...................................B-10998290 Outline and Dimension Drawing REAL-48 ...................................B-10998302 Pneumatic Schematic REAL-20 .....................................................B-14136540 Pneumatic Schematic REAL-30 .....................................................B-14136558 Pneumatic Schematic REAL-36 .....................................................B-14136566 Pneumatic Schematic REAL-48 .....................................................B-14136574 Liquid Nitrogen Schematic REAL-20 ............................................A-11001586 Liquid Nitrogen Schematic REAL-30 ............................................C-14090431 Liquid Nitrogen Schematic REAL-36 ............................................C-14170836 Liquid Nitrogen Schematic REAL-48 ............................................C-14210447 Electrical Schematic 35 11001199 Rev. M www.realchambers.com