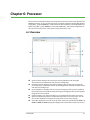
1
chenomx
5.0
Chenomx NMR Suite 5.0
Copyright © 2003-2008 Chenomx Inc.
CHENOMX NMR SUITE: USER MANUAL
Table of Contents
Notices and Trademarks ....................................................................................... vii
1. Introduction ...................................................................................................... 1
1.1. Installation ............................................................................................. 1
Windows .............................................................................................. 1
Linux (32-bit) ....................................................................................... 1
Linux (64-bit) ....................................................................................... 1
1.2. Activation and Licensing ........................................................................... 1
1.3. Setting the Compound Library Folder ......................................................... 2
1.4. Importing the Chenomx Compound Packs ................................................... 3
2. Changes Since Chenomx NMR Suite 4.6 ................................................................. 4
2.1. Signature Builder ..................................................................................... 4
2.2. Spin Simulator ......................................................................................... 4
2.3. Compound Builder ................................................................................... 4
2.4. Compound Library Folder ......................................................................... 4
2.5. Compound Packs ..................................................................................... 5
2.6. Peak Shapes ............................................................................................ 5
2.7. Embedded Libraries ................................................................................. 5
2.8. Editing Compounds in Your Library ........................................................... 6
2.9. Quick Searches ........................................................................................ 6
2.10. Versioned Compounds ............................................................................ 6
2.11. J-Modifiers ............................................................................................ 6
2.12. Automatic Cluster Generation .................................................................. 6
2.13. New pH Indicator ................................................................................... 7
2.14. Universally Unique Identifiers (UUID) ...................................................... 7
3. Handling Samples and Spectra ............................................................................. 8
3.1. Sample Preparation ................................................................................. 8
Internal Standard Solution ...................................................................... 8
3.2. Spectral Data Acquisition .......................................................................... 8
Pulse Sequences .................................................................................... 8
Required NMR Parameters ..................................................................... 9
3.3. Spectral Data Processing ........................................................................... 9
Data Processed with Other Software ........................................................ 9
4. Common Tasks ................................................................................................. 11
4.1. Processing a Spectrum ............................................................................ 11
4.2. Fitting a Spectrum .................................................................................. 12
4.3. Identifying Compounds .......................................................................... 12
4.4. Fitting Overlapped Regions in a Spectrum ................................................. 14
4.5. Determining Compound Concentrations ................................................... 15
5. The Basics ....................................................................................................... 16
5.1. Opening a File ....................................................................................... 16
5.2. Importing Spectra .................................................................................. 16
5.3. Saving a File .......................................................................................... 17
5.4. Closing a File ......................................................................................... 18
5.5. Exiting a Module .................................................................................... 18
5.6. Undo and Redo ...................................................................................... 19
5.7. Change Columns .................................................................................... 19
5.8. Overlaying a Spectrum ........................................................................... 19
5.9. Spectrum View Tools .............................................................................. 20
Show Entire Spectrum .......................................................................... 20
Set Zoom ............................................................................................ 20
Undo/Redo Zoom ................................................................................ 21
iii
CHENOMX NMR SUITE: USER MANUAL
Auto Zoom ..........................................................................................
Increase/Decrease Vertical Zoom ..........................................................
Spectrum View ....................................................................................
Spectrum Thumbnail ............................................................................
Select Region .......................................................................................
Tape Measure ......................................................................................
5.10. Display Options ...................................................................................
5.11. Preferences .........................................................................................
6. Processor ........................................................................................................
6.1. Overview ..............................................................................................
6.2. Quick Reference Guide ............................................................................
6.3. Information Tools ..................................................................................
CSI Editor ...........................................................................................
pH Editor ............................................................................................
Processing History ...............................................................................
Spectrum Details .................................................................................
6.4. Processing Tools ....................................................................................
Phasing ..............................................................................................
Baseline Correction ..............................................................................
Line Broadening ..................................................................................
Reference Deconvolution ......................................................................
Water Deletion ....................................................................................
Reverse Spectrum ................................................................................
6.5. Importing and Exporting Data .................................................................
Convert Spectra ...................................................................................
Send to Profiler ...................................................................................
7. Profiler ...........................................................................................................
7.1. Overview ..............................................................................................
7.2. Quick Reference Guide ............................................................................
7.3. Profiling Tools .......................................................................................
Compound Table .................................................................................
Custom Colors .....................................................................................
Highlighted Compounds .......................................................................
Starred Compounds .............................................................................
Quick Searches ....................................................................................
Concentrations ....................................................................................
Transforms .........................................................................................
Potential Concentrations ......................................................................
Scale Concentrations ............................................................................
Cluster Navigator .................................................................................
7.4. Compound Set Tools ..............................................................................
Compound Set Panel ............................................................................
Update Profiled Version (One Compound) ..............................................
Update Profiled Versions (Several Compounds) .......................................
Open Library Manager ..........................................................................
7.5. Importing and Exporting Data .................................................................
Export Profiled Concentrations .............................................................
Export Profiled Compounds ..................................................................
Import Profile .....................................................................................
Spectral Binning ..................................................................................
Export Spectrum Graphic ......................................................................
Copy Spectrum Image to Clipboard ........................................................
Send to Processor ................................................................................
21
21
21
22
22
22
23
24
27
27
28
29
29
30
32
33
34
34
35
36
37
38
39
39
39
40
41
41
42
44
44
46
46
47
48
49
50
51
52
53
53
53
54
54
55
56
56
57
57
58
59
60
60
iv
CHENOMX NMR SUITE: USER MANUAL
7.6. Information Tools ..................................................................................
Reference Panel ...................................................................................
Spectrum Details .................................................................................
Concentration Units .............................................................................
8. Spin Simulator .................................................................................................
8.1. Overview ..............................................................................................
8.2. Quick Reference Guide ............................................................................
8.3. Fitting Tools ..........................................................................................
New Simulation ...................................................................................
Spin Systems .......................................................................................
Spin Definitions ...................................................................................
Spin Navigator ....................................................................................
Spin Definition Tab ..............................................................................
J-Modifiers ..........................................................................................
Simulation Details ................................................................................
9. Compound Builder ...........................................................................................
9.1. Overview ..............................................................................................
9.2. Quick Reference Guide ............................................................................
9.3. Fitting Tools ..........................................................................................
New Compound ...................................................................................
Import ................................................................................................
Add Peak ............................................................................................
Selecting Peaks and Clusters .................................................................
Remove Selected Peaks ........................................................................
Adjusting Peaks ...................................................................................
Grouping Peaks as a Cluster ..................................................................
Optimize Selected Peak Shapes ..............................................................
Generate Cluster for Region ..................................................................
Transform Windows ............................................................................
Cluster Navigator .................................................................................
9.4. Information Tools ..................................................................................
Reference Panel ...................................................................................
Compound Details ...............................................................................
Information Panel ................................................................................
10. Library Manager .............................................................................................
10.1. Overview ............................................................................................
10.2. Quick Reference Guide ..........................................................................
10.3. Library Tools .......................................................................................
Compound Table .................................................................................
Quick Searches ....................................................................................
Import Compounds ..............................................................................
Export as Compound Pack ....................................................................
Send to Compound Builder ...................................................................
Show Archived Compounds ..................................................................
Remove Selected Compounds from Library .............................................
Rescan Compound Library ....................................................................
10.4. Compound Set Tools .............................................................................
Compound Set Panel ............................................................................
Compound Sets ...................................................................................
Smart Compound Sets ..........................................................................
Update Compound Versions ..................................................................
Rename Compound Sets .......................................................................
Delete Compound Sets ..........................................................................
61
61
61
62
63
63
64
66
66
66
67
68
69
69
71
72
72
73
75
75
75
76
77
78
78
79
79
80
81
82
83
83
84
85
86
86
87
88
88
89
89
90
91
91
92
92
93
93
94
95
96
97
97
v
CHENOMX NMR SUITE: USER MANUAL
11. Tutorials ....................................................................................................... 99
11.1. File Location Note ................................................................................ 99
11.2. Tutorial - Processor .............................................................................. 99
Introduction ........................................................................................ 99
Processing a Spectrum ......................................................................... 99
11.3. Tutorial - Profiler ............................................................................... 102
Introduction ...................................................................................... 102
Part I - Basic Profiling Techniques ........................................................ 102
Part II - Advanced Profiling Techniques ................................................ 104
11.4. Tutorial - Targeted Profiling ................................................................ 108
Identifying Compounds ...................................................................... 108
Fitting Clusters .................................................................................. 110
11.5. Tutorial - Spin Simulator ..................................................................... 115
Introduction ...................................................................................... 115
Part I - Simple Simulation ................................................................... 115
Part II - Complex Simulation ................................................................ 117
11.6. Tutorial - Compound Builder ............................................................... 121
Introduction ...................................................................................... 121
Part I - Simple Compound ................................................................... 121
Part II - Complex Compound ................................................................ 124
11.7. Tutorial - Library Manager .................................................................. 126
Introduction ...................................................................................... 126
Importing Compounds ........................................................................ 126
Glossary ........................................................................................................... 128
Index ................................................................................................................ 142
vi
CHENOMX NMR SUITE: USER MANUAL
Notices and Trademarks
Developed by Chenomx Inc.
© 2003-2008 Chenomx Inc. All rights reserved. No copying or reproduction allowed without
express written permission.
Technical Support
If you have any questions or concerns, please contact Chenomx Technical Support at:
Phone:
Fax:
E-mail:
+1 780 432 0033
+1 780 432 3388
<[email protected]>
When you contact Chenomx Technical Support, you may be asked to provide an application
log. The application log contains data that can help us track down issues that you may have
experienced while using Chenomx NMR Suite.
To save an application log file
Menu Location
Icon(s)
Help > Save Application Log...
1.
Open the Save Application Log dialog.
2.
Locate the folder in which you would like to save the application log file.
3.
In the File Name field, type a name for the application log file. If you do not specify
a different name, the file is saved as application.log.
4.
Click Save.
Chenomx is located at:
800 - 10050 112 Street NW
Edmonton, Alberta T5K 2J1
Canada
Disclaimer of Warranties and Liabilities
The software described in this document is furnished under a License Agreement. The
software may be used or copied only in accordance with the terms of such agreement. No
part of this publication may be reproduced, stored in a retrieval system, or transmitted in
any form or any means electronic or mechanical including photocopying and recording,
except as permitted in the License Agreement.
The information contained in this document is subject to change without notice. Chenomx
Inc. assumes no responsibility for any errors, omissions, or inaccuracies whatsoever.
Chenomx Inc. shall not be held liable for any damages, including special or consequential
damages, arising out of the use of the information contained in this document and the
software described herein, even if Chenomx Inc. has been advised in advance of the possibility
of such damages. Chenomx Inc. makes no warranties with regard to this material including,
but not limited to, the implied warranties of merchantability and fitness for a particular
purpose.
Trademarks
Chenomx NMR Suite is a trademark of Chenomx Inc.
vii
CHENOMX NMR SUITE: USER MANUAL
Windows, Windows NT, Windows XP, Windows 2000 and Windows Vista are either
trademarks or registered trademarks of Microsoft Corporation in the United States and/or
other countries.
Mac and Mac OS are trademarks of Apple Computer, Inc., registered in the U.S. and other
countries.
Solaris, Java, and JavaHelp are trademarks of Sun Microsystems, Inc in the United States
and other countries. Copyright © 1992 - 2008 Sun Microsystems, Inc.
Linux is a registered trademark of Linus Torvalds.
Other brand and product names are trademarks or registered trademarks of their
representative holders and should be noted as such.
viii
Chapter 1: Introduction
Welcome to Chenomx NMR Suite! This manual will help you to use Chenomx NMR Suite
software to process and profile NMR spectroscopic data.
Before you begin analyzing samples with Chenomx NMR Suite, you need to install and
activate the software. Also, accurate analysis of your NMR spectra with Chenomx NMR Suite
requires good sample preparation and the acquisition of high-quality spectra.
1.1 Installation
Chenomx NMR Suite requires a Java Runtime Environment. Please download and install
the latest version of Java from Sun Microsystems [http://java.com/].
After installing the software, you need to activate it. Please see “Activation and
Licensing” on page 1 for more details.
Windows
1.
Run the installer, named ChenomxNmrSuite[Edition]-5.0-windows-setup.exe.
2.
Follow the instructions displayed on screen.
3.
You have now installed Chenomx NMR Suite!
Linux (32-bit)
1.
Copy the installer script, named ChenomxNmrSuite[Edition]-5.0-linux-x86.sh,
to your desired installation folder.
2.
Run ChenomxNmrSuite[Edition]-5.0-linux-x86.sh.
3.
The install script creates a new folder named ChenomxNmrSuite[Edition]; you
can run Chenomx NMR Suite by running the ChenomxNmrSuite.sh script located
in this folder.
4.
You have now installed Chenomx NMR Suite!
Linux (64-bit)
1.
Copy the installer script, named
ChenomxNmrSuite[Edition]-5.0-linux-x86_64.sh, to your desired installation
folder.
2.
Run ChenomxNmrSuite[Edition]-5.0-linux-x86_64.sh.
3.
A new folder named ChenomxNmrSuite[Edition] is created; you can run Chenomx
NMR Suite by running the ChenomxNmrSuite.sh script located in this folder.
4.
You have now installed Chenomx NMR Suite!
1.2 Activation and Licensing
Chenomx NMR Suite uses an activation system. Activation is an anti-piracy technology
designed to verify that Chenomx software products are legitimately licensed. After you
1.1 Installation
1
CHENOMX NMR SUITE: USER MANUAL
install the Chenomx NMR Suite software, you need to activate it to ensure that you can use
all of the modules and libraries that you purchased, and that you can open, edit and save
changes to files other than Chenomx demo files.
To activate Chenomx NMR Suite
Menu Location
Help > Activation Details...
1.
Open any module of Chenomx NMR Suite. If you have not previously activated, or
if your license has expired, the Chenomx License Activation dialog appears.
Otherwise, on the Help menu, click Activation Details....
2.
E-mail the activation key listed in the dialog to Chenomx Technical Support at
<[email protected]>. If you do not have access to e-mail, call Chenomx
Technical Support at +1 780 432 0033.
Icon(s)
The activation key is unique to the computer used to generate it, and you cannot
use it to activate the software on other computers. If you are installing Chenomx
NMR Suite on multiple computers, you need to send activation keys for each to
Chenomx Technical Support.
3.
You will receive a license file (.cnxlic) from a support staff member. Save the
license file to a folder on your computer.
4.
Open any module of Chenomx NMR Suite. The Chenomx License Activation dialog
appears again.
5.
Click the Select License File button.
6.
Browse to the folder in which you saved the license file, select the file, and click the
Open button.
7.
You have now activated Chenomx NMR Suite. Click the Proceed button to run the
module that you selected.
You can view your activation details at any time by clicking Help > Activation Details in
any module.
Tips and Tricks
• Chenomx NMR Suite is licensed per seat, meaning that one license can be used on
one computer.
• Multiple users can use a one-seat license, but each user will need to activate separately
with the same license file.
• New major releases (for example, version 4.x to 5.x) require reactivation, while minor
releases (for example, version 4.5 to 4.6) do not.
1.3 Setting the Compound Library Folder
The default location of the compound library on your computer will vary depending on your
operating system:
• Windows XP:
\Documents and Settings\[username]\My Documents\Chenomx Compounds
1.3 Setting the Compound Library Folder
2
CHENOMX NMR SUITE: USER MANUAL
• Windows Vista:
\Users\[username]\Documents\Chenomx Compounds
• Linux:
/home/[username]/Chenomx Compounds
If you prefer to have your compound library stored in a different folder, you should change
the compound library folder before you install your compound packs. Changing your
compound library folder will not move any compounds that you have already imported.
How do I specify the compound library folder?
1.
Open the Preferences module.
2.
Switch to the Library Manager preferences.
3.
Under Compound Library Folder, click the Browse button (...).
4.
Locate the desired folder.
5.
Click Select to select the specified folder.
Related Topics
• “Preferences” on page 24
1.4 Importing the Chenomx Compound Packs
Due to the variety of compound packs available, Chenomx does not distribute compound
packs as part of the Chenomx NMR Suite installer. Your compound packs should be included
on your installation CD in the Libraries folder; if not, you will receive the compound packs
that you have licensed separately (either on CD, via e-mail, or via a web download).
If you have not received the compound packs that you have licensed, please contact Chenomx
Technical Support at +1 780 432 0033 or <[email protected]>.
To import Chenomx Compound Packs
1.
Save your Chenomx compound packs (.pack) to a folder accessible to the computer
on which you have installed Chenomx NMR Suite.
2.
Open the Library Manager module of Chenomx NMR Suite.
3.
On the Compounds menu, click Import...
4.
Click the Browse button (...), and navigate to the folder in which you saved your
Chenomx compound packs (.pack).
5.
Select the compound packs that you would like to install, and click Choose Files.
6.
Click Next.
7.
If you would like Library Manager to automatically create compound sets for the
imported compounds, select Create associated compound sets. Creating compound
sets is strongly recommended.
If you prefer to simply import the compounds, clear the Create associated
compound sets check box. You will need to create compound sets later to use the
imported compounds in Profiler.
8.
Click Finish.
1.4 Importing the Chenomx Compound Packs
3
Chapter 2: Changes Since Chenomx NMR Suite 4.6
Chenomx NMR Suite 5.0 has been rewritten in almost every area compared to previous
releases. Many new features have been added, some old features behave a little differently,
while others have been removed or replaced entirely. To help you move to the new release
more smoothly, here are some of the changes that may affect how you use Chenomx NMR
Suite the most.
2.1 Signature Builder
The capabilities formerly found in Signature Builder have been divided into two modules:
Spin Simulator and Compound Builder. Spin Simulator allows you to build theoretical models
of compounds using coupling relationships, while Compound Builder includes free-form
fitting tools and automation algorithms to fit overall cluster shapes without direct reference
to the theoretical underpinnings of a compound's spectrum.
2.2 Spin Simulator
Spin Simulator is a new module that inherited the theoretical basis of creating compound
signatures from Signature Builder. The simple first-order simulation performed by Signature
Builder has been replaced with full quantum mechanical spin simulation, which models
higher-order effects using spin definitions and spin-spin coupling, allowing more accurate
simulations.
To create compound signatures that are applicable outside a very narrow range of spectrum
conditions, you will need to simulate the compound in Spin Simulator, then open the
simulation in Compound Builder for refinement. You can then save the refined fit as a
compound file (.xcpd) and add it to your library.
2.3 Compound Builder
Compound Builder is a new module that inherited the free-form and automated Lorentzian
fitting tools from Signature Builder. Compound Builder focuses on making it easy to add
new compounds to your compound library. Modeling a compound is a simple, fast process
that no longer requires fully assigning a compound and deciphering all of its coupling
relationships before you start creating a new compound.
You can create approximate compound signatures starting with Compound Builder, but
creating signatures that will be useful in analyzing more than a narrow range of spectrum
conditions will require creating a simulation in Spin Simulator first.
You can save compound signatures that you generate using Compound Builder as compound
files (.xcpd). Compound files can be added directly to your library, either by saving or
copying them directly to your library folder, or importing them through Library Manager
(see “Compound Library Folder” on page 4 for more details).
2.4 Compound Library Folder
Earlier releases of Chenomx NMR Suite revolved around multiple compound libraries. For
example, you might have a pair of Chenomx compound libraries at 800 MHz: One for pH
6-8 and one for pH 4-9. In addition, you could have any number of custom libraries that you
2.1 Signature Builder
4
CHENOMX NMR SUITE: USER MANUAL
had created, which could include compounds from Chenomx libraries as well as compounds
that you had created yourself. As a result, you could easily end up with multiple copies of
a compound in different libraries, and you could not necessarily tell whether you were using
an up-to-date copy of the compound or an old (or just different) copy.
In Chenomx NMR Suite 5.0, you have only one library, which is actually a folder stored on
your computer's hard drive, containing Chenomx compound files (.xcpd) corresponding
to each of the compounds available for fitting spectra. Each compound has properties like
magnet frequency (MHz) and valid pH range telling you what sorts of spectra and samples
it is best suited for. You can then create lists called compound sets, based either on arbitrary
compounds that you have selected (see “Compound Sets” on page 94) or on selection rules
that you have defined (see “Smart Compound Sets” on page 95).
When you profile spectra in Profiler, you have access to all of the compound sets that you
have created all the time. You can even change the contents of a compound set in Library
Manager, and the new contents will appear immediately in Profiler, without the need to
restart either module. In any case, no matter how many compound sets you create, they are
all still based on the same pool of compounds in your library, with no duplicated signatures.
You can rename, relocate or otherwise reorganize compound files (.xcpd) within your
compound library folder as you like. The next time you use the software (close all modules,
then open a new one), the library folder will be rescanned and reindexed. Once the scan is
complete, any changes will be visible immediately in Profiler and Library Manager.
2.5 Compound Packs
Sharing compound signatures with other users of Chenomx NMR Suite is easy with compound
packs (.pack). You can create compound packs based on profiled compounds in Profiler,
or based on any compound set in Library Manager. The resulting files can be imported into
any other Chenomx NMR Suite 5.0 library, and are compact enough to be attached to e-mails,
sent through instant messaging clients, or shared using any other method you may have
available to share files with your colleagues.
2.6 Peak Shapes
The shapes of individual peaks, clusters and compounds are now represented as filled-in
regions, instead of simple lines, with adjustment handles on each peak. You can click and
drag anywhere in the filled regions to interact with the associated items, including peaks,
clusters, compounds and sum lines.
2.7 Embedded Libraries
Profiled spectra (.cnx) no longer contain embedded copies of the libraries used to profile
them. Instead, they store pointers to the relevant compounds in your library, along with
the actual profiled concentrations and transforms. If you would like to update the profile,
you will need the signatures for the profiled compounds to be present in your library.
When you open spectrum files (.cnx) from previous versions that contain embedded
libraries, the embedded data will be imported to your library folder. Importing embedded
compounds will not affect the fit of the spectrum file that you are opening, as the original
compound signatures will be used until you explicitly update them to the latest version.
Embedded compounds that are newer than their equivalents in your library will replace
the older verson, while those that are older will be added to the Archived Compounds list.
Embedded compounds with no equivalent in your library will simply be imported. Any new
compounds will then be available to be added to Compound Sets for use in Profiler.
2.5 Compound Packs
5
CHENOMX NMR SUITE: USER MANUAL
2.8 Editing Compounds in Your Library
You can directly edit compounds in your library. Double-click on any compound in the
Compound Table in Library Manager to send it to Compound Builder for revision. Alternately,
double-click any compound file (.xcpd) in your compound library folder to open it in
Compound Builder. When you save the compound, save it over the original file to replace
the original in your library. See “Universally Unique Identifiers (UUID)” on page 7 for more
details.
2.9 Quick Searches
Filtering the contents of your Compound Tables is easier and more powerful than ever.
Quick Searches allow you to type in text searches ("acetate"), frequency searches ("@2.30")
and even frequency range searches ("@2.30 to 4.19"), helping you find your favorite
compounds quickly and easily.
2.10 Versioned Compounds
Compounds in your library are now versioned using a combination of a universally unique
identifier (see “Universally Unique Identifiers (UUID)” on page 7 for more details) and a
modification date. The combined information allow Chenomx NMR Suite to track and update
individual compounds, rather than updating entire libraries when only a couple compounds
may have changed.
2.11 J-Modifiers
The concept of J-coupling as it appeared in Signature Builder has been replaced in Spin
Simulator by J-modifiers, which come in two varieties, coupled and uncoupled.
Uncoupled J-modifiers or uncoupled splits affect only one spin definition, splitting it as
though it was coupled to another spin definition, but without actually coupling it to anything.
Uncoupled splits allow you to start simulating a cluster in the spectrum without necessarily
defining all of its coupling relationships first. You should consider the uncoupled state of a
J-modifier to be a temporary one; in most cases, all uncoupled splits should be converted
to coupled splits before the simulation is considered complete.
Coupled J-modifiers or coupled splits are equivalent to J-couplings in Signature Builder, in
that they connect two spin definitions through a common J-value (formerly J-coupling value)
and split count (formerly splitting factor; see below for details).
The split count found in Spin Simulator is slightly different from the splitting factor in
Signature Builder. The splitting factor defined the number of peaks that would result from
the split, and was independent of the cluster that you were coupling to. Split count, on the
other hand, defines the number of protons causing the split, which for a simple split with
a split count of n will result in n+1 peaks (the familiar n+1 rule of NMR spectroscopy). For
uncoupled splits, the split count is a theoretical number that you must specify, since the
spin definition is not actually coupled to anything yet. For coupled splits, the split count for
a J-modifier on the current spin definition is the number of protons on the spin definition
to which the J-modifier is coupled.
2.12 Automatic Cluster Generation
Compound Builder can automatically generate a cluster that fits a specified region of an
overlaid spectrum, up to 100 peaks. However, signatures based on this automated cluster
2.8 Editing Compounds in Your Library
6
CHENOMX NMR SUITE: USER MANUAL
fitting are only useful in profiling spectra with characteristics similar to the source spectrum
on which they are based. Similar, in this case, refers to spectra having the same magnet
frequency (MHz), acquired using the same pulse sequence, under the same experimental
conditions, and with similar peak widths.
Using automatically generated signatures to profile spectra that differ significantly from
the source spectrum will yield results that are imprecise at best, if not outright inaccurate
or misleading.
2.13 New pH Indicator
In addition to imidazole and creatinine, Processor now supports the use of
[difluoro(trimethylsilyl)methyl]phosphonate (DFTMP) as a pH indicator. DFTMP has a
single peak in a 1H spectrum, appearing between 0.19 and 0.22 ppm.
2.14 Universally Unique Identifiers (UUID)
Compound signatures in your library are identified by a UUID, while the compounds
themselves (that is, the physical entities, as opposed to the their signatures) are identified
by the Chenomx compound ID. The use of UUIDs has a number of implications that may not
necessarily be obvious when you are creating new compounds for your library.
Changing the name of a compound in Compound Builder and saving it over the old file does
not create a new compound, but a new version of the same compound, with a new name.
To ensure that it appears as a new compound in your library, simply save it as a new file in
the compound library folder. To save it over the old file but still have it appear as a new
compound, open Compound Details, go to the Advanced tab, select the manual UUID
option and click Generate. When you save the file with the new UUID, it will appear as a
new compound in your library.
Saving a compound as a new file creates a new UUID in the file, so it will be treated as a
different compound in your library, but potentially with the same name.
Chenomx compound IDs are not required in compound signatures that you may create, but
adding them allows Chenomx NMR Suite to display accurate compound information in the
Reference Panel.
2.13 New pH Indicator
7
Chapter 3: Handling Samples and Spectra
Accurate analysis of your NMR spectra with Chenomx NMR Suite requires good sample
preparation and the acquisition of high-quality spectra.
3.1 Sample Preparation
Preparing your samples properly helps you get the best possible results from your analyses
with Chenomx NMR Suite.
Internal Standard Solution
Your samples must contain an internal standard to allow accurate quantification using
Chenomx NMR Suite. The internal standard solution recommended for use with Chenomx
NMR Suite contains the following components:
DSS is hygroscopic in the solid
form. For accurate
concentrations from a Chenomx
NMR Suite analysis, you must
determine the final DSS
concentration accurately.
• 99.9% D2O as a solvent, to allow locking during spectral acquisition.
• 5 mM 2,2-Dimethyl-2-silapentane-5-sulfonate (DSS) as a chemical shape indicator
(CSI)
• 0.2% w/v sodium azide (NaN3) to inhibit bacterial growth.
• (Optional) 100 mM imidazole as a pH indicator.
• (Optional) 100 mM creatinine as a pH indicator.
• (Optional) 100 mM DFTMP as a pH indicator.
You should adjust the pH of the above mixture to about 6.5, and add it as a 1 in 10 (10%
v/v) spike to each of your samples, to yield 10% D2O, 0.5 mM DSS, 0.02% w/v NaN3 and
10 mM imidazole, creatinine or DFTMP (if present).
For accurate sample analysis
with Chenomx NMR Suite, the
pH of your samples should be
between 4 and 9, and ideally
close to 7 for manual analysis.
Instead of DSS, 3-trimethylsilylpropionate (TSP or TMSP) or formate may be used as a CSI.
However, TSP and formate are not recommended, as their chemical shifts are sensitive to
pH.
If you choose not to add any pH indicators to your samples, you need to supply a pH value
measured to an accuracy of 0.01 for proper analysis with Chenomx NMR Suite.
Spectra that are poorly
collected, or collected from
samples that are poorly
prepared, may be difficult or
even impossible to convert and
analyze accurately.
3.2 Spectral Data Acquisition
For the best results from your analysis with Chenomx NMR Suite, you must acquire
high-quality spectra. You should pay particular attention to proper shimming, phasing and
baseline correction to produce spectra that you can accurately analyze and interpret using
Chenomx NMR Suite.
Pulse Sequences
Using Chenomx NMR Suite, you can quantitatively analyze spectra produced by NOESY (100
ms tmix). You can use other pulse sequences for identification purposes, but quantification
based on these pulse sequences may be unreliable.
3.1 Sample Preparation
8
CHENOMX NMR SUITE: USER MANUAL
Required NMR Parameters
For the best results from Chenomx NMR Suite when analyzing your data, you should use
the following parameters for NMR data collection:
• Temperature = 25 °C
• Acquisition time = 4 s
• Relaxation delay = 1 s
• Spectral width = 12 ppm
3.3 Spectral Data Processing
Chenomx NMR Suite can import raw data from a number of common sources. Supported
raw file formats include:
• Varian (fid files)
• Bruker (fid files)
• JEOL (.jdf files)
• NMRPipe (.fid files)
In order to analyze a spectrum with Chenomx NMR Suite, you must first process your raw
spectrum file using either the included Processor module or one of the following software
packages.
• VNMR and VNMRj (Varian phasefile files)
• XWIN-NMR (Bruker 1r files)
• Delta (JEOL .jdf files)
• NMRPipe (.ft2 files)
• ACD/Labs software package. Export your spectra to the JCAMP-DX format (.jdx
files).
To ensure maximum compatibility with the Chenomx Metabolite Library, you should zero-fill
your data, and process all spectra using an appropriate combination of reference
deconvolution and line broadening to yield a maximum linewidth of 1.0 to 1.3 Hz.
When zero-filling, you should use the nearest power of 2 that is at least twice as large as
the number of points acquired in the original spectrum (e.g., for 16000 points in the original
spectrum, use zero-filling of 32K points). When you import spectra using Processor, you
can do this by selecting the "Automatic" option for zero-filling.
You should not apply any other transform to the data, such as sine bell or Gaussian functions.
For the best results in analyzing your spectra with Chenomx NMR Suite, you must properly
phase and baseline correct all of your spectra.
Data Processed with Other Software
If you would like to process your spectra using software packages other than the Processor
module, you need to ensure that the Fourier-transformed (frequency domain) data from
your processed spectra are available for Chenomx NMR Suite to import.
3.3 Spectral Data Processing
9
CHENOMX NMR SUITE: USER MANUAL
Spectra processed from most third-party processing software require no additional
preparation, including XWIN-NMR from Bruker, Delta from JEOL, and NMRPipe. Spectra
processed elsewhere and converted to JCAMP-DX format also require no additional
preparation
To allow Chenomx NMR Suite to read spectra processed using the Varian VNMR software
package, you should save the datdir folder for the spectrum using the svfph macro or
copy it manually as described below. The svfph macro is available on the Chenomx website
at http://www.chenomx.com/support/macros; for instructions on how to install macros
please consult your Varian documentation.
To manually copy the Varian phasefile into the fid folder
1.
Open the spectrum in VNMR and process the spectrum.
2.
Change experiments or quit VNMR, making note of the experiment number in which
you have opened the spectrum (e.g., exp2).
3.
In a Solaris terminal window, copy the datdir folder into the mydata.fid folder
where mydata.fid is your Varian spectrum. mydata.fid is the folder that you
need to access to open the spectrum using Chenomx NMR Suite.
Use the following commands:
cd ~/vnmrsys/data/mydata.fid
cp -r ~/vnmrsys/expn/datdir .
where expn is the experiment number noted previously, and mydata.fid is the
fid folder you want to access with Chenomx NMR Suite. In this example, expn would
be exp2.
3.3 Spectral Data Processing
10
Chapter 4: Common Tasks
Chenomx NMR Suite can help you to perform many useful tasks. You can find overviews of
some common tasks in this chapter. Detailed descriptions of each function mentioned here
appear in later chapters.
4.1 Processing a Spectrum
Before you analyze a spectrum in Chenomx NMR Suite, whether in Profiler or in Compound
Builder, you need to process the spectrum.
To process a spectrum in Processor
1.
Open the spectrum (see “Opening a File” on page 16 and “Importing
Spectra” on page 16). If necessary, reverse the spectrum plot.
Reverse Spectrum flips the spectrum in the frequency domain. This function is only
necessary for some Bruker spectra.
2.
Adjust the phasing (see “Phasing” on page 34).
3.
Apply baseline correction (see “Baseline Correction” on page 35) as needed.
4.
Define the CSI parameters (see “CSI Editor” on page 29).
5.
Apply reference deconvolution to correct lineshape distortions (see “Reference
Deconvolution” on page 37), or apply line broadening to improve the signal-to-noise
ratio (see “Line Broadening” on page 36).
If you would like to apply line broadening in addition to reference deconvolution,
you should apply reference deconvolution first. You can add line broadening as a
separate effect, or during reference deconvolution; in the second case, add the
desired value (in Hz) to the target linewidth in the reference deconvolution panel.
After applying reference deconvolution or line broadening, you should readjust the
CSI parameters to take into account any newly-introduced changes in lineshape. If
you are using DSS or TSP as a CSI, you can usually readjust the CSI using the "Find
CSI Automatically" button in the CSI Editor (see “CSI Editor” on page 29).
6.
Determine the sample pH using imidazole, creatinine or DFTMP (see “pH
Editor” on page 30).
Calculating sample pH in Processor requires the presence of at least one pH indicator.
For sample pH above 6, imidazole provides the best results, while creatinine works
best for sample pH 5 and lower. For sample pH between 5 and 6, or for more general
pH determination, you should have multiple indicators in your samples. Please note
that you should not normally need to add creatinine to urine samples, as it is
naturally present in urine.
7.
If desired, delete the water peak from the spectrum (see “Water
Deletion” on page 38).
Water deletion is optional, and may not be necessary or desirable for all samples.
8.
Save the spectrum (see “Saving a File” on page 17), or jump to Profiler (see Chapter
7, Profiler on page 41) to continue with your analysis.
4.1 Processing a Spectrum
11
CHENOMX NMR SUITE: USER MANUAL
4.2 Fitting a Spectrum
Fitting a spectrum using targeted profiling is a very flexible task. You can vary the number
of compounds fit to a particular spectrum to suit a variety of timeframes, research goals, or
other requirements. One of the most important aspects of your approach to fitting a spectrum
should be maintaining a consistent fitting strategy, as this gives you more consistent and
more easily-interpreted results.
For more details on specific fitting techniques and how to apply them to your spectra, please
see “Tutorial - Targeted Profiling” on page 108.
To fit a spectrum using targeted profiling
1.
Process the spectrum (see “Processing a Spectrum” on page 11).
2.
(Optional) Create a Smart Compound Set or Compound Set containing the
compounds that you would like to analyze (see Chapter 10, Library
Manager on page 86).
3.
Open the spectrum in Profiler (see “Opening a File” on page 16).
4.
Select a Compound Set containing compounds appropriate for the sample. If you
created a Compound Set or Smart Compound Set above, select the Compound Set
that you created.
5.
Identify and fit prominent signals in the spectrum (see “Identifying
Compounds” on page 12).
Some compounds in the spectrum are very easy to pick out, including CSI compounds
like DSS or TSP and pH indicators like imidazole, creatinine or DFTMP. Depending
on the type of sample that you are analyzing, there may be other compounds that
also stand out.
6.
Systematically review the remaining signals in the spectrum; identify and fit as
needed.
You can use information and external links from the Reference Panel (see “Reference
Panel” on page 61) to help establish the presence of particular compounds in the
samples that you are analyzing.
4.3 Identifying Compounds
Chenomx NMR Suite provides computer-assisted methods to fit spectra. To identify
compounds in a sample, you need to match the compound signatures from your Library
with patterns in the sample spectrum. There are several ways that you can identify
compounds in a sample.
Show Selection Line must be
enabled in order to view
individual compound signatures.
It is enabled by default.
To identify specific compounds
1.
Select at least one Compound Set in the Compound Set Panel (see “Compound Set
Panel” on page 53).
2.
Locate a compound in the Compound Table that you believe is present in the sample
and select it (see “Compound Table” on page 44).
3.
Use the Cluster Navigator, located in the top left corner of the Spectrum View, to
navigate among the clusters for the displayed compound (see “Cluster
Navigator” on page 53).
4.2 Fitting a Spectrum
12
CHENOMX NMR SUITE: USER MANUAL
4.
Set a concentration for the compound so that you can see the clusters clearly (see
“Concentrations” on page 49).
5.
For each cluster, compare the shape of the selection line (blue) and the spectrum
line (black) and decide whether it is reasonable that the selection line could be
contributing to the spectrum line in the displayed region.
6.
If the fit appears reasonable, proceed to determine appropriate heights and
transforms for the clusters of the compound (see “Concentrations” on page 49 and
“Transforms” on page 50).
7.
If the fit does not appear reasonable, reset the concentration of the compound to
unknown (see “Concentrations” on page 49).
8.
Continue with any other specific compounds you would like to investigate.
To identify possible compounds causing a specific peak
1.
Select at least one Compound Set in the Compound Set Panel (see “Compound Set
Panel” on page 53).
2.
Right-click on the peak, and click Filter for Compounds Near x.xx ppm.
3.
In the Compound Table, select one of the listed compounds to display the selection
line and Cluster Navigator for the compound (see “Cluster Navigator” on page 53).
4.
Set a concentration for the compound so that you can see the clusters clearly (see
“Concentrations” on page 49).
5.
Compare the shape of the selection line (blue) and the spectrum line (black) and
decide whether or not it is reasonable that the selection line could be contributing
to the spectrum line in the displayed region.
6.
If the fit appears reasonable in the region near the peak that you are investigating,
use the Cluster Navigator to verify that the other clusters for the compound also
appear to fit reasonably well, then proceed to determine appropriate heights and
transforms for the clusters of the compound (see “Cluster Navigator” on page 53,
“Concentrations” on page 49 and “Transforms” on page 50).
7.
If the fit does not appear reasonable, return the concentration of the compound to
unknown (see “Concentrations” on page 49).
8.
Continue evaluating the remainder of the compounds in the list.
9.
When you have finished with the filtered list, clear the frequency filter to continue
your analysis with the full compound list (see “Quick Searches” on page 48).
10. If none of the compounds in the list of potential candidates provides a reasonable
fit near the peak that you are investigating, you should consider the possibility that
the compound causing the peaks is not in your compound library.
To identify all compounds contributing to a particular region
1.
Select at least one Compound Set in the Compound Set Panel (see “Compound Set
Panel” on page 53).
2.
Select a region in the Spectrum View (see “Select Region” on page 22).
3.
Right-click inside the selected region (highlighted in grey) and click Filter for
Compounds in Selected Region.
4.
In the Compound Table, select one of the listed compounds.
4.3 Identifying Compounds
13
CHENOMX NMR SUITE: USER MANUAL
5.
Set a concentration for the compound so that you can see the clusters clearly (see
“Concentrations” on page 49).
6.
Compare the shape of the selection line (blue) and the spectrum line (black) and
decide whether or not it is reasonable that the selection line could be contributing
to the spectrum line in the displayed region.
7.
If the fit appears reasonable in the region near the peak that you are investigating,
use the Cluster Navigator to verify that the other clusters for the compound also
appear to fit reasonably well, then proceed to determine an appropriate height
and/or appropriate transforms for the clusters of the compound (see “Cluster
Navigator” on page 53, “Concentrations” on page 49 and “Transforms” on page 50).
8.
If the fit does not appear reasonable, reset the concentration of the compound to
unknown (see “Concentrations” on page 49).
9.
Continue evaluating the remainder of the compounds in the list.
10. When you have finished with the filtered list, clear the frequency filter to continue
your analysis with the full compound list (see “Quick Searches” on page 48).
4.4 Fitting Overlapped Regions in a Spectrum
For all but the simplest spectra, you need to fit compounds whose signatures overlap.
Approaches to fitting these overlap regions are as varied as are the number of people fitting
them, but the general guidelines below may help you to develop your own strategy. As with
your more general approach to fitting spectra, a consistent strategy for fitting overlap
regions gives you more consistent results.
For more details on this and other fitting strategies, see “Tutorial - Targeted
Profiling” on page 108.
To fit compounds in an overlapped region of the spectrum
1.
Identify likely compounds contributing to an overlapped region (see “Identifying
Compounds” on page 12).
2.
Evaluate each compound for the presence of additional, non-overlapped peaks
elsewhere in the spectrum (see “Cluster Navigator” on page 53).
a.
If they are present:
i.
Fit the non-overlapped peaks to help establish a concentration range for
the compound (see “Concentrations” on page 49).
ii.
Look for clusters of peaks in the overlapped region with some clearly
visible peaks. Such clusters occur mostly at the edges of the overlap region,
but remember to look throughout the region, as some peaks stand out
nicely between the peaks of another cluster.
iii. Use these partially-exposed peaks to establish an optimal frequency for
the cluster, using transforms (see “Transforms” on page 50).
b.
If they are not present:
i.
Look for clusters of peaks in the overlapped region with some clearly
visible peaks.
ii.
Use these partially-exposed peaks to establish an optimal frequency for
the cluster, using transforms (see “Transforms” on page 50).
4.4 Fitting Overlapped Regions in a Spectrum
14
CHENOMX NMR SUITE: USER MANUAL
3.
Once you have approximately fit most of the groups in the overlap region, fine-tune
the heights and frequencies of each cluster in the region to obtain an optimal fit.
You can use the subtraction line to guide your fit, as a well-fit cluster will leave a
subtraction line that resembles a normal spectrum with the effects of the cluster
removed.
4.
In overlap regions, fit multi-peak clusters before single-peak clusters. Also, if urea
is present, you may want to fit it last, to minimize its interference with other fits in
the spectrum.
4.5 Determining Compound Concentrations
Once you have identified compounds present in a sample, you need to determine their
concentrations based on the data in the spectrum.
For more details on techniques for determining optimal fits of compounds in experimental
spectra, see “Tutorial - Targeted Profiling” on page 108.
To determine the concentration of a compound
1.
If the subtraction line (green) is not currently visible, turn it on via the View menu.
2.
Set a concentration for the compound so that you can see the clusters clearly (see
“Concentrations” on page 49).
3.
Use the Cluster Navigator to locate a cluster that you can use to approximate the
compound concentration (see “Cluster Navigator” on page 53).
When choosing a cluster with which to establish a compound's concentration, you
should use a cluster that overlaps others clusters as little as possible.
4.
Click and drag the height control for the compound and observe the subtraction
line. Adjust the height of the compound until the subtraction line under the cluster
approximates a normal spectrum. You may need to move (transform) the cluster
side to side somewhat to properly adjust the subtraction line (see “Subtraction
Line” on page 110).
Profiler applies any adjustments that you make to the height of one cluster
proportionately to all of the clusters for the compound. For example, if you reduce
the height of one cluster by 50%, Profiler reduces the heights of all of the other
clusters for the compound by 50%.
5.
If any of the clusters for the current compound overlap with compounds that you
have already fit, you may need to readjust those compounds.
4.5 Determining Compound Concentrations
15
Chapter 5: The Basics
Chenomx NMR Suite includes many advanced features that help you process and analyze
spectra, create custom compound signatures, and manage compound signatures and
compound sets in your library. Underlying all of these advanced features is a set of more
basic ones that are fundamental to the proper use of Chenomx NMR Suite. These include
basic file operations, navigation, display options and preferences that directly affect your
day-to-day use of Chenomx NMR Suite.
5.1 Opening a File
You can open Chenomx NMR Suite spectra (.cnx) in Processor and Profiler, and overlay
them in Compound Builder and Spin Simulator. You can open Chenomx compound files
(.xcpd) in Compound Builder, and you can open Chenomx spin simulation files (.xss) in
Spin Simulator and import them in Compound Builder.
How do I open a file?
Menu Location
File > Open
Icon(s)
Hotkey(s)
Ctrl-O
Cmd-O
1.
Open a module.
2.
Open the file selection dialog.
3.
Locate the folder containing the spectrum.
4.
Select the file and click Open.
5.
If the file you are opening requires importing, select import options as necessary.
Tips and Tricks
• If you are opening a Varian spectrum named Example.fid, the raw data is stored in
the file named Example.fid\fid, while the processed data is stored in the file named
Example.fid\datdir\phasefile.
• If you are opening a Bruker spectrum named Example\1, the raw data is stored in
the file named Example\1\fid, while the processed data is stored in the file named
Example\1\pdata\1\1r.
5.2 Importing Spectra
When you open a spectrum in a supported non-Chenomx format in Processor or Profiler,
you need to select import options for conversion into the Chenomx spectrum format (.cnx).
You can import raw spectrum data in Varian (fid), Bruker (fid), JEOL (.jdf) or NMRPipe
(.fid) file formats, and processed spectra in Varian (phasefile), Bruker (1r), JEOL (.jdf),
NMRPipe (.ft2) or JCAMP-DX (.jdx) file formats.
When you import processed spectra, your import options are somewhat limited, since most
of the processing that you may want to apply is assumed to have already taken place.
5.1 Opening a File
16
CHENOMX NMR SUITE: USER MANUAL
Table 5.1. Import NMR Data Options
CSI
Specify the Chemical Shape Indicator (CSI) used in the
sample. You can choose DSS, TSP or formate.
Concentration (mM)
Enter the concentration of the specified CSI in millimoles
per litre.
pH: Auto
Attempt to automatically detect the pH of the sample
using signals from imidazole, creatinine and DFTMP.
You must have at least one of these pH indicators present
in the sample to attempt automatic pH detection. If the
pH cannot be detected, you are asked to supply a value
manually after the spectrum is imported.
pH
Specify a pH value manually. Useful if your sample does
not contain either of the pH indicators.
Advanced Details
Access advanced import options.
Defaults
Restore all import settings for the current file type to
their default values.
Advanced Options
Line Broadening (Hz)
Apply an exponential FID weighting (line broadening)
function to your data. You can enter any value between
0 and 1000 Hz.
Zero Fill To
Enable zero-filling. Automatic zero-fills to the nearest
power of two that is at least twice as large as the number
of points acquired in your spectrum. You can also choose
a specific number of data points, if you prefer.
Phasing (Varian only)
Automatically apply phase adjustments to your
spectrum. Auto applies automatically-determined phase
angles, while Import VNMR Phasing imports the phase
angles found in the Varian procpar file. Only available
when you import Varian raw data (fid).
Auto Phasing
Apply automatically-determined phase angles to your
spectrum. Only available when you import non-Varian
raw data
Auto Baseline Correction
Automatically apply baseline correction to your
spectrum. Linear (Drift) applies a simple two-point
linear baseline correction, while Spline applies a cubic
spline baseline correction based on
automatically-determined breakpoints.
Delete Water Region
Remove the water region from the spectrum during the
import process.
Reverse Spectrum (Bruker only) Reverse your spectrum horizontally. You generally need
to reverse all spectra acquired with a particular
experimental setup on a particular instrument. Only
available when you import Bruker spectrum files (fid).
5.3 Saving a File
Saving a file ensures that any changes you have made are preserved for future reference.
When you are working on a complex task, you should save often.
5.3 Saving a File
17
CHENOMX NMR SUITE: USER MANUAL
How do I save a file?
Menu Location
File > Save/Save As...
Icon(s)
Hotkey(s)
1.
Click Save.
2.
If you have not previously specified a location and filename, do so now.
Ctrl-S
Cmd-S
How do I save a file with a different file name?
1.
Click Save As.
2.
Locate the folder in which you would like to save the spectrum.
3.
In the File Name field, type the new name of the spectrum file.
4.
Click Save.
Tips and Tricks
• Saving compound files in Compound Builder or simulation files in Spin Simulator
preserves only the mathematical peak descriptions created during the fitting process.
Compound Builder and Spin Simulator do not retain overlaid spectra in the saved
files.
5.4 Closing a File
When you finish working with a file, you can close it and open a new one without exiting
the program.
How do I close a file?
Menu Location
File > Close
Icon(s)
Hotkey(s)
1.
Click Close.
2.
If you have made changes to the file and they are not saved, choose whether you
would like to save the changes.
3.
If necessary, choose a location and filename for the file.
Ctrl-W
Cmd-W
Tips and Tricks
• You cannot close a file that has unsaved changes without having the option of saving
the changes. If there are no unsaved changes, the file is simply closed without further
interaction.
5.5 Exiting a Module
When you are finished working with a module, you can exit the module.
How do I exit a module?
Menu Location
Icon(s)
File > Exit
1.
Click Exit.
2.
If you have made changes to the currently open file and they are not saved, choose
whether you would like to save the changes.
3.
If necessary, choose a location and filename for the file.
Tips and Tricks
• You cannot exit a module with a file open that has unsaved changes without having
the option of saving the changes. If there are no unsaved changes, the module exits
without any further interaction.
5.4 Closing a File
18
CHENOMX NMR SUITE: USER MANUAL
5.6 Undo and Redo
You can undo recent changes to the currently open file, and redo recently undone changes.
How do I undo a recent change?
Menu Location
Edit > Undo/Redo
1.
Click Undo.
Icon(s)
Hotkey(s)
Ctrl-Z / Ctrl-Y
Cmd-Z / Cmd-Y
How do I redo a recently undone change?
1.
Click Redo.
Tips and Tricks
• Only the last 100 changes are available to be undone. If the change that you want to
undo is more than 100 steps back, you cannot undo the change.
• You can only redo changes that you have just undone. If you undo a change, then
make other changes, you can no longer redo the change that was undone.
5.7 Change Columns
In modules that have Compound Tables (Profiler and Library Manager), you can specify
which of the available columns are visible in the Compound Table.
How do I change the visible columns in the Compound Table?
Menu Location
View > Change Columns...
Icon(s)
1.
Open the Change Columns dialog.
2.
Select the check boxes for the columns you would like to display, and clear the check
boxes for the columns you would like to hide.
3.
Click OK.
Tips and Tricks
• You can quickly display or hide a particular column by right-clicking in the header
row of the Compound Table and clicking the column that you would like to display
or hide.
• The Concentration, Potential, Color, Highlights, Stars and Transformed columns are
only available in Profiler.
5.8 Overlaying a Spectrum
You can overlay Chenomx spectra (.cnx) in Compound Builder and Spin Simulator to aid
the fitting process.
How do I overlay a spectrum?
Menu Location
Icon(s)
View > Overlay Spectrum
1.
Click Overlay Spectrum.
2.
Locate the folder containing the spectrum that you would like to overlay, and select
the spectrum.
3.
Click Overlay.
5.6 Undo and Redo
19
CHENOMX NMR SUITE: USER MANUAL
How do I remove an overlaid spectrum?
Menu Location
View > Remove Overlaid
Spectrum
1.
Click Remove Overlaid Spectrum.
Tips and Tricks
Icon(s)
• You can only overlay spectra in the Chenomx NMR Suite format (.cnx). If the spectrum
you would like to use is in a different, supported format, you need to import and save
it in Processor before using it as an overlay.
• In Compound Builder, if you overlay a spectrum whose frequency does not match the
magnet frequency specified in the Compound Details, you are notified of the mismatch,
and given the chance to update the Compound Details to match the overlaid spectrum.
5.9 Spectrum View Tools
The Spectrum View contains the spectrum as a graph of intensity vs. frequency. In addition
to the simple zoom and scroll that you may be familiar with in other software, Chenomx
NMR Suite includes a number of specialized tools for manipulating the Spectrum View.
Menu Location
View > Zoom > Show Entire
Spectrum
Icon(s)
Hotkey(s)
Ctrl-(-) (minus)
Cmd-(-) (minus)
Show Entire Spectrum
Show Entire Spectrum allows you to quickly expand the current view, setting both the
vertical and horizontal scales to their largest possible values.
Tips and Tricks
• Show Entire Spectrum is not available when the full spectrum is already visible.
• Show Entire Spectrum is applied by default when you first open any spectrum, unless
you have set specific zoom settings in the Preferences.
Related Topics
• “Preferences” on page 24
Set Zoom
Menu Location
View > Zoom > Set Zoom
Icon(s)
Hotkey(s)
Ctrl-M
Cmd-M
You can set the Spectrum View to display specific frequency (horizontal) and height (vertical)
ranges. Displaying specific ranges can be useful for preparing illustrations or focusing on a
particular area of the spectrum.
How do I zoom to specific frequency and height ranges?
1.
Open the Set Zoom dialog.
2.
Enter the horizontal range (X-Axis) in ppm that you would like to display, or select
Entire Axis to zoom out to the full spectrum width.
3.
Enter the vertical range (Y-Axis) in standard intensity (si) that you would like to
display, or select Entire Axis to zoom out to the full spectrum height.
4.
Click OK.
Tips and Tricks
• When you open the Set Zoom dialog, the values that appear initially correspond to
your current view. If you change the values in only one dimension, your current
settings in the other dimension remain intact.
5.9 Spectrum View Tools
20
CHENOMX NMR SUITE: USER MANUAL
Undo/Redo Zoom
Menu Location
View > Zoom > Undo/Redo
Zoom
Just as Undo and Redo allow you to recall recent actions, Undo Zoom and Redo Zoom allow
you to recall recent views of the spectrum.
Icon(s)
Hotkey(s)
Tips and Tricks
[ or ]
• You can access up to 20 recent views through Undo Zoom.
• Redo Zoom is not available until you have used Undo Zoom at least once.
Auto Zoom
Menu Location
View > Zoom > Auto Zoom
Auto Zoom allows you to quickly adjust the vertical scale of the current view so that the
tallest peak in the currently displayed frequency range fits in the viewing pane, without
changing the displayed frequency range.
Icon(s)
Hotkey(s)
Ctrl-F
Cmd-F
Tips and Tricks
• You can apply Auto Zoom to the Spectrum View at any time by clicking anywhere on
the spectrum with the middle mouse button.
Increase/Decrease Vertical Zoom
Menu Location
View > Zoom >
Increase/Decrease Vertical Zoom
Icon(s)
Hotkey(s)
+ (plus) or - (minus)
Increase/Decrease Vertical Zoom allows you to incrementally adjust the vertical scale of
the current view, without changing the displayed frequency range.
Tips and Tricks
• Decrease Vertical Zoom is not available when the full spectrum is displayed.
Spectrum View
Processor offers a number of useful ways to change the current view by interacting directly
with the Spectrum View.
How do I scroll in the Spectrum View?
• Use the horizontal and vertical scroll bars appearing at the bottom and right sides of
the Spectrum View.
• Place the mouse cursor anywhere in the Spectrum View, then hold down the Shift
key and use the scroll wheel on your mouse to scroll horizontally.
How do I zoom in the Spectrum View?
• Click and drag directly on the spectrum. A red zoom box appears to show you the
region you are about to zoom in on.
• Select a region using the Select Region tool, and double-click in the region, or right-click
in the region and select Expand Region. The region expands horizontally to fill the
Spectrum View.
• Select a region using the Select Region tool, and middle-click in the region, or right-click
in the region and select Auto Zoom Region. The region expands horizontally to fill
the Spectrum View, and an Auto Zoom is applied.
• Place the mouse cursor anywhere in the Spectrum View, and use the mouse scroll
wheel to adjust the Vertical Zoom.
• Middle-click anywhere in the Spectrum View to apply an Auto Zoom.
5.9 Spectrum View Tools
21
CHENOMX NMR SUITE: USER MANUAL
Spectrum Thumbnail
The Spectrum Thumbnail appears in the bottom right corner of the Processor window, and
displays a miniature version of the Spectrum View. You can interact with the Spectrum
Thumbnail to change the view appearing in the Spectrum View.
How do I use the Spectrum Thumbnail?
• Click and drag in the Spectrum Thumbnail. A red zoom box appears to show you the
region you are about to zoom in on, and remains to indicate the region currently
displayed in the Spectrum View.
• Click and drag inside the zoom box to move it. The Spectrum View updates to show
the new region.
• Click and drag one of the solid borders of the zoom box to move that border, or click
and drag one of the corners to move the size and shape of the displayed region.
• Click anywhere in the Spectrum Thumbnail outside the zoom box to show the entire
spectrum in the Spectrum View. This is the same as using the Show Entire Spectrum
zoom tool.
• Double-click anywhere in the Spectrum Thumbnail to show the entire spectrum in
the Spectrum View. This is the same as using the Show Entire Spectrum tool.
Select Region
You can use the Select Region tool as an alternate zoom function, as well as to specify areas
with which to filter the Compound Table.
How do I select a region?
Menu Location
View > Select Region
Icon(s)
Hotkey(s)
Ctrl-T
Cmd-T
1.
Activate Select Region.
2.
Click and drag across a region of the Spectrum View to define a selected region.
3.
Double-click in the selected region to expand the region horizontally to fill the
Spectrum View.
Or
Middle-click in the selected region to expand the region horizontally to fill the
Spectrum View and apply an Auto Zoom.
Tips and Tricks
• You can also activate Select Region by double-clicking anywhere in the Spectrum
View.
Tape Measure
All modules include a simple tape measure that you can use to measure differences between
two points in the Spectrum View, displayed in both Hz and ppm.
How do I measure frequency differences in the Spectrum View?
1.
Press and hold down the Shift key.
2.
Click in the Spectrum View where you would like to start a measurement, then drag
to the end point.
5.9 Spectrum View Tools
22
CHENOMX NMR SUITE: USER MANUAL
Tips and Tricks
• You must have a spectrum, simulation or compound currently displayed in order to
use the tape measure.
• The tape measure remains in the Spectrum View until you change the current view
by scrolling, zooming or selecting a new region using the Select Region tool.
5.10 Display Options
There are a number of ways in which you can customize modules in Chenomx NMR Suite
to display information as you would like to see it. You can toggle the display of graph elements
in the Spectrum View, and you can change scales. You can find all of the following options
in the View menu.
Table 5.2. View Menu Options
X Scale
Changes the units represented on the horizontal scale in
the Spectrum View. Available units are ppm and Hz.
Y Scale
Changes the units represented on the vertical scale in the
Spectrum View. Available units are si (standardized
intensity) and ni (normalized intensity).
Show Spectrum Line
Toggles the display of the spectrum line in Processor and
Profiler. The spectrum line represents data from the
reference spectrum and appears black by default.
Show Overlay Line
Toggles the display of the overlay line in Compound
Builder and Spin Simulator. The overlay line represents
data from the reference spectrum that you can use to
build a compound or simulation, and appears black by
default.
Show Subtraction Line
Toggles the display of the subtraction line in Profiler,
Compound Builder and Spin Simulator. The subtraction
line represents a subtraction of the current fit from the
spectrum or overlay line, and appears green by default.
Show Sum Line
Toggles the display of the sum line in Profiler. The sum
line represents the total shape of all of the profiled
compounds in the current spectrum, and appears red by
default.
Show Compound Line
Toggles the display of the compound line in Compound
Builder. The compound line represents the total shape
of all of the clusters in the current compound, and appears
red by default.
Show Simulation Line
Toggles the display of the simulation line in Spin
Simulator. The simulation line represents the total shape
of all of the spin definitions in the current simulation,
and appears red by default.
Show Selection Line
Toggles the display of the selection line in Profiler,
Compound Builder and Spin Simulator. The selection line
represents the shape of the currently selected compound,
peak, cluster or spin definition, and appears blue by
default.
5.10 Display Options
23
CHENOMX NMR SUITE: USER MANUAL
Tips and Tricks
• You can change the colors of the various graph elements noted above, as well as that
of the background and zoom box, in the Preferences for the appropriate module.
Related Topics
• “Preferences” on page 24
5.11 Preferences
In Preferences, you can specify default folders, default settings for the Spectrum View, colors
of various graph elements and some module-specific settings.
How do I change preferences?
Menu Location
Icon(s)
File > Preferences
1.
Open the Preferences module.
2.
Select the module for which you would like to change preferences.
3.
Make your desired changes.
4.
Click OK.
How do I use a proxy server with Chenomx NMR Suite?
1.
Switch to the General module in Preferences.
2.
In the Internet Preferences section, select Manual proxy configuration.
3.
Enter the IP address of your HTTP proxy server, and the associated port that
Chenomx NMR Suite should use to access it.
How do I turn off animated zooming?
1.
Switch to the General module in Preferences.
2.
Clear the check box labeled Enable Zoom Animation.
How do I change the line colors?
1.
Click the swatch box corresponding to the type of line whose color you would like
to change.
2.
Click a new color on the color palette.
3.
Click OK to accept the selected color.
How do I set the default zoom?
1.
Select the Default Zoom check box.
2.
In the Default Zoom fields, enter the default values (in ppm) for the range of the
spectrum to display.
How do I specify the default file folder?
1.
Click the Always use this folder button.
2.
Click the default folder browse button (...).
3.
Locate the desired folder.
4.
Click Select to select the specified folder.
5.11 Preferences
24
CHENOMX NMR SUITE: USER MANUAL
How do I specify the compound library folder?
1.
Click the Browse button (...).
2.
Locate the desired folder.
3.
Click Select to select the specified folder.
Tips and Tricks
• You should avoid light line colors with a light (or white) background, as they are
difficult to see on the screen or in a printout.
• The low and high values for the default zoom must be at least 1 ppm apart.
• You can maintain multiple separate compound library folders and switch among them
using the Library Manager preferences. You should close any open files before
switching to a different compound library folder.
• If you plan to modify any of the Chenomx compounds, you may find it helpful to
maintain one compound library folder in which to experiment (a "play" folder) and
one that you will use for serious analysis (a "work" folder). In this case, copy your
current compound library folder to another location and rename it to indicate that
it is your "play" folder. When you want to experiment with the provided signatures,
change your compound library folder to the "play" folder, otherwise, change it to the
"work" folder.
Table 5.3. Preferences Overview
General Preferences
Internet Preferences
Allows you to configure Chenomx NMR Suite to access
the Internet through a proxy server, if needed, or to
disable connecting to the Internet entirely.
Enable Zoom Animation
Toggles the zooming animations used when you change
zoom settings in the Spectrum View.
Graph Preferences
Background Color
Changes the color of the background in the Spectrum
View.
Spectrum Line Color
Changes the color of the spectrum line in the Spectrum
View in Processor and Profiler. The default color is black.
Overlay Line Color
Changes the color of the spectrum overlay line in the
Spectrum View in Compound Builder and Spin Simulator.
The default color is black.
Sum Line Color
Changes the color of the sum line in the Spectrum View
in Profiler. The default color is red.
Compound Line Color
Changes the color of the compound line in the Spectrum
View in Compound Builder. The default color is red.
Simulation Line Color
Changes the color of the simulation line in the Spectrum
View in Spin Simulator. The default color is red.
Subtraction Line Color
Changes the color of the subtraction line in the Spectrum
View. The default color is green.
CSI Line Color
Changes the color of the CSI in the CSI Editor Spectrum
View in Processor. The default color is red.
5.11 Preferences
25
CHENOMX NMR SUITE: USER MANUAL
Zoom Box Color
Changes the color of the selected area in the Spectrum
View and the Spectrum Thumbnail. The default color is
red.
Selection Line Color
Changes the color of the selection line in the Spectrum
View in Profiler, Compound Builder and Spin Simulator.
The default color is blue.
Default Zoom (ppm)
Sets the frequency range of the Spectrum View that
initially appears when you open a file.
File Preferences
Display Recent Files
Sets the number of files displayed when you click File,
then Open Recent.
Default File Folder
Sets the default folder for saving and opening files.
Options are to use the last selected folder, or always use
the specified folder.
Compound Library Folder
Sets the folder used by Library Manager to store the
compound files (.xcpd) that make up your library.
5.11 Preferences
26
Chapter 6: Processor
The Processor module allows basic processing and conversion of spectra into the Chenomx
NMR Suite format (.cnx). Currently, Processor can import raw data in Varian (fid), Bruker
(fid), JEOL (.jdf) and NMRPipe (.fid) formats and processed data in Varian (phasefile),
Bruker (1r), JEOL (.jdf), NMRPipe (.ft2) and JCAMP-DX (.jdx) formats. Regardless of
the source format, Processor saves spectra as spectrum files (.cnx).
6.1 Overview
❶
❷
❸
❹
❺
❻
Spectrum View. Displays the spectrum as well as guidelines used during pH
determination, CSI adjustments and other processing steps.
Information Panel. Displays information relating to the current stage of spectrum
processing. Also, contains the controls used during pH determination, CSI adjustments
and other processing steps.
Processing History. Displays a list of every processing layer that you have applied to
the current spectrum, and allows removal of any processing layer that you have applied
using the Processor module.
Spectrum View Tools. These tools allow you to navigate the spectrum more easily.
Spectrum Thumbnail. Displays a thumbnail image of the current spectrum. You can
also use the thumbnail to navigate the spectrum at various zoom settings.
Status Bar. Displays the current cursor position in the units specified by the View > X
Scale and View > Y Scale settings. Also displays information about recent user actions.
6.1 Overview
27
CHENOMX NMR SUITE: USER MANUAL
6.2 Quick Reference Guide
Linux, Windows
Mac OS X
Ctrl-O
Cmd-O
---
---
Close
Ctrl-W
Cmd-W
Save
Ctrl-S
Cmd-S
---
---
Ctrl-J
Cmd-J
Spectrum Details...
---
---
Preferences...
---
---
Exit
---
---
Undo
Ctrl-Z
Cmd-Z
Redo
Ctrl-Y
Cmd-Y
X Scale
---
---
Y Scale
---
---
Zoom > Show Entire Spectrum
Ctrl-(-)
Cmd-(-)
Zoom > Set Zoom...
Ctrl-M
Cmd-M
Zoom > Undo Zoom
[
[
Zoom > Redo Zoom
]
]
Zoom > Auto Zoom
Ctrl-F
Cmd-F
Zoom > Increase Vertical Zoom
+
+
Zoom > Decrease Vertical Zoom
-
-
Edit Mode > CSI
---
---
Edit Mode > pH
---
---
Show Processing History
Ctrl-Shift-H
Cmd-Shift-H
Show Spectrum Line
Ctrl-Shift-1
Cmd-Shift-1
File Menu
Open...
Open Recent
Save As...
Send to Profiler
Edit Menu
View Menu
6.2 Quick Reference Guide
28
CHENOMX NMR SUITE: USER MANUAL
Linux, Windows
Mac OS X
Ctrl-T
Cmd-T
Phasing...
Ctrl-Alt-1
Cmd-Alt-1
Baseline Correction
Ctrl-Alt-2
Cmd-Alt-2
Line Broadening...
Ctrl-Alt-3
Cmd-Alt-3
Advanced > Reference Deconvolution...
Ctrl-Alt-4
Cmd-Alt-4
Advanced > Water Deletion
Ctrl-Alt-5
Cmd-Alt-5
Advanced > Reverse Spectrum
Ctrl-Alt-6
Cmd-Alt-6
Find CSI Automatically
---
---
Find pH Automatically
---
---
Convert Spectra...
---
---
Contents
F1
F1
Search
---
---
Save Application Log...
---
---
Activation Details...
---
---
About Chenomx NMR Suite...
---
---
Select Region
Processing Menu
Tools Menu
Help Menu
6.3 Information Tools
In addition to processing the spectrum itself, you can add extra information to a spectrum
that allows you to analyze the spectrum in Profiler or create compound signatures and
simulations in Compound Builder and Spin Simulator. You can also review processing layers
that you have added, and remove them if necessary.
CSI Editor
The chemical shape indicator (CSI) settings form the basis for all fits performed in Profiler
and Compound Builder. The accuracy of these settings also have a direct impact on the
accuracy of profiled spectra (.cnx), exported concentrations (.txt), compound files (.xcpd)
and spin simulations (.xss). The CSI editor allows you to view, define and change these
settings for the current spectrum.
When you import a spectrum, Processor attempts to automatically locate the CSI, and
determine its width and height. You can change these automatically determined parameters
using the CSI editor if necessary.
6.3 Information Tools
29
CHENOMX NMR SUITE: USER MANUAL
How do I modify the CSI settings?
Menu Location
View > Edit Mode > CSI
1.
Switch to the CSI Editor.
Menu Location
Tools > Find CSI Automatically
2.
Select the CSI present in your sample using the Chemical Shape Indicator
drop-down box. Valid CSIs for use in Chenomx NMR Suite include DSS, TSP and
formate.
3.
Type the concentration of the CSI in your sample in the Concentration (mM) text
entry box.
4.
Automatic: Click the Find Automatically button.
Icon(s)
Due to potential overlap with other compounds, Processor cannot automatically
find formate as a CSI. If Processor cannot find the CSI automatically when you use
DSS or TSP, check the phasing and baseline correction of your spectrum and try
again. If Processor cannot find your CSI, you need to use the manual tools to locate
it instead.
5.
Manual: Click and drag the CSI peak to match it with the spectrum line (black).
Adjust the width by dragging the width control (red triangles to either side of the
peak) or typing a number directly into the Width (Hz) text entry box.
Tips and Tricks
• In order to adjust the CSI settings for your spectrum, Processor must be in the CSI
Edit Mode.
• If you have selected DSS as the CSI, then the indicated center position always reads
0 ppm. If you use TSP or formate instead, the center position varies based on the
current pH value for the spectrum.
• If you are using formate as a CSI, finding the CSI automatically does not work. If the
automatic method does not work, you need to define the CSI manually.
• If you would like to adjust the height or width of the CSI peak while keeping its total
area constant, check the Preserve CSI Area box.
• You should usually define CSI parameters in the CSI Editor only after you have finished
applying all necessary processing layers. In particular, if you change the line
broadening or add reference deconvolution, you need to establish new CSI parameters
to ensure accurate quantification and generally good fits.
Related Topics
• “Importing Spectra” on page 16
• “pH Editor” on page 30
• “Spectrum Details” on page 33
• “Processing Tools” on page 34
pH Editor
The position and shape of signals for a compound in aqueous solutions can be very sensitive
to pH. The accuracy of the pH that you set for a spectrum may have an impact on the quality
and accuracy of fits that you may perform in Profiler, Compound Builder or Spin Simulator
based on the spectrum. The pH editor allows you to calculate or set the pH for the current
spectrum.
6.3 Information Tools
30
CHENOMX NMR SUITE: USER MANUAL
If your sample contains any combination of creatinine, imidazole or DFTMP, you may be
able to calculate the spectrum pH. If your sample does not contain these compounds, or if
you prefer to use an externally measured pH, you may enter a pH value manually.
While importing a spectrum, Processor attempts to calculate the pH of the sample
automatically using the frequencies of the imidazole, creatinine and DFTMP peaks. You can
refine or change this calculated pH in the pH Editor. If Processor cannot calculate the pH of
your sample, you need to set it manually. For manual entry, you should specify the pH to
an accuracy of ±0.01.
Figure 6.1. Equation to calculate spectrum pH from the position of a single peak. pKa is the acid dissociation
constant of the indicator, δ is the chemical shift of the peak, and δmax and δmin are the upper and lower
bounds on the chemical shift.
Processor calculates the spectrum pH as a function of the peak positions of the indicator
compounds. The formula used for DFTMP calculates spectrum pH based on the observed
position of a single peak (see Figure 6.1 on page 31), while the formula used for both
imidazole and creatinine uses the distance between the two observed peaks (see Figure
6.2 on page 31).
Figure 6.2. Equation to calculate spectrum pH from the positions of two peaks. pKa is the acid dissociation
constant of the indicator, mI is a correction for ionic strength, Δδ is the chemical shift difference between
the peaks, and Δmax and Δmin are the upper and lower bounds on the chemical shift difference.
The single peak equation for DFTMP is derived from a similar equation published recently
(see citation below). The two peak equation was developed internally by Chenomx.
MD Reily, LC Robosky, ML Manning, A Butler, JD Baker, and RT Winters. 2006. DFTMP,
an NMR Reagent for Assessing the Near-Neutral pH of Biological Samples. J Am Chem
Soc. 128(38): 12360-12361
The predicted frequencies of the imidazole, creatinine and DFTMP peaks, based on the pH
value that you currently have set, appear in the Spectrum View as a pair of blue lines at high
frequency (imidazole) and a pair of green lines at mid frequency (creatinine) and an orange
line at low frequency (DFTMP). You can use these lines during manual pH determination
by aligning them with the corresponding peaks for creatinine, imidazole and DFTMP, when
these compounds are present.
How do I set the spectrum pH?
Menu Location
View > Edit Mode > pH
1.
Switch to the pH Editor.
Menu Location
Tools > Find pH Automatically
2.
Set the desired pH using any one of the following methods:
Icon(s)
• Click the Find Automatically button.
• On the Tools menu, click Find pH Automatically.
• Click and drag the pH slider bar to set the determined frequencies of imidazole,
creatinine and DFTMP to the actual frequencies of the peaks in the spectrum (if
known). The resulting pH appears in the text box beside the slider bar.
• Select the pH slider control, and use the arrow keys to make fine adjustments to
the pH in increments of 0.01.
6.3 Information Tools
31
CHENOMX NMR SUITE: USER MANUAL
• Type the desired numeric pH into the text entry box to the right of the slider bar.
Tips and Tricks
• Once you have made coarse adjustments to the pH, you can zoom in to particular
indicator lines to make finer adjustments. Select the Fine Tune check box to allow
more detailed adjustments over a smaller pH range.
• If you have selected TSP or formate as the CSI, then changing the pH alters the scale,
since the frequencies of the TSP and formate peaks are pH-sensitive.
• Processor must be in the pH Edit Mode to adjust the pH for your spectrum.
• You must save your spectrum to retain the changes that you have made to the spectrum
pH.
Related Topics
• “Importing Spectra” on page 16
• “CSI Editor” on page 29
• “Spectrum Details” on page 33
Processing History
Processing spectra in Processor does not alter your original spectral data. Every processing
effect that you add to a spectrum behaves as a layer that modifies the display of your original
data. All of these effects are completely reversible, and are tracked in the Processing History
panel.
While processing a spectrum, you may want to review the processing layers that you have
already applied, or you may need to reverse the effects of one or more of the layers that
you have already applied. The Processing History maintains a list of every processing layer
that you have applied to the current spectrum using Processor. You can review this list to
find out the parameters used in each layer, like phase angles or reference deconvolution
parameters, and step back through past layers to reverse their effects.
When you import a processed spectrum, Processor imports phasing, baseline correction
and other processing that you may have applied in other processing software. The imported
processing effects appear in the Processing History as a layer called Preprocessing. The
details for the Preprocessing layer, appearing at the bottom of the panel, indicate the format
from which you imported the spectrum. The Preprocessing layer is not reversible; you
cannot remove it.
How do I review and remove processing layers?
Menu Location
View > Show Processing History
Icon(s)
Hotkey(s)
1.
Open the Processing History panel, if it is not already open.
2.
Click the name of a processing layer to review its associated parameters; they appear
in the Details box below the list.
3.
Click the Clear Last button to remove the most recent processing layer. Click the
button again to remove the next most recent layer, and so on.
Ctrl-H
Cmd-Shift-H
Or
Click the Clear All button to remove all of the processing layers listed in the
Processing History.
6.3 Information Tools
32
CHENOMX NMR SUITE: USER MANUAL
Tips and Tricks
• The Processing History only tracks processing effects, including phasing, baseline
correction, reference deconvolution, water deletion and line broadening. Changes to
spectrum metadata, such as the spectrum details or CSI and pH settings, are not
tracked in this panel.
• If you have just accidentally removed a layer in the Processing History, you can use
the Undo button to restore it.
Related Topics
• “Importing Spectra” on page 16
• “Processing Tools” on page 34
• “Convert Spectra” on page 39
Spectrum Details
Spectrum details describe the acquisition parameters used in acquiring the spectrum. Your
selected CSI and its concentration, along with the spectrum pH that you set, also appear in
the Spectrum Details. Since most of these parameters come directly from the imported
spectrum, you cannot modify most of the spectrum details, except for the Frequency Domain
Size and Comment fields.
The Frequency Domain Size field displays the number of points in the Chenomx spectrum
(.cnx) in the frequency domain, after spectrum data has been imported and zero-filling
applied. You can contrast this with the Time Domain Size, which displays the number of
point originally present in the imported spectrum, in the time domain.
The Comment field initially consists of the contents of any text descriptor file associated
with the original spectrum, but you can replace or expand it as desired.
How do I view and edit details of the current spectrum?
Menu Location
Icon(s)
File > Spectrum Details
1.
Open Spectrum Details.
2.
Click anywhere in the Comment field to place a text cursor in the field.
3.
Make any desired changes.
4.
Click the Accept button to apply your changes or click the Cancel button to discard
them.
Tips and Tricks
• You must save the spectrum in order to retain changes that you have made to the
spectrum comments.
• You can only change the CSI settings and spectrum pH using the CSI and pH editors.
• The value of the Frequency Domain Size field is set by the amount of zero-filling
that you select when you convert a spectrum. If you selected "Automatic," the
frequency domain size will be the nearest power of two that is at least twice the time
domain size.
Related Topics
• “Importing Spectra” on page 16
• “CSI Editor” on page 29
6.3 Information Tools
33
CHENOMX NMR SUITE: USER MANUAL
• “pH Editor” on page 30
6.4 Processing Tools
Processor applies each processing step as a layer, altering the way that you see and interact
with your spectrum, but leaving the original raw data untouched. The Processing History
records each layer along with its associated parameters, like phase angles, baseline
breakpoints and linewidth adjustments. You can review the layers, and even remove them
if necessary, restoring your spectrum to earlier state(s).
When you import a processed spectrum, processing that you have performed in other
software appear in the Processing History as a layer called Preprocessing; the details of the
Preprocessing layer indicate the format from which the processed data was imported. The
Preprocessing layer is not reversible, and cannot be removed. If you need to work with the
spectrum as it appeared before processing in other software, you need to import the raw
data (fid, .jdf, .fid) directly.
Phasing
Phase correction, or phasing, allows you to correct for phase shifts that may have occurred
during data acquisition. You can recognize phase shifts in a spectrum as an asymmetric
baseline on either side of peaks and peak clusters in the spectrum. In some cases, you may
see whole peaks inverted, pointing down from the baseline instead of up, while extreme
phase shifts may also add a periodic oscillation or "rolling" to the baseline.
Most spectra require some degree of phase correction. You should adjust phasing before
applying any other processing layers to your spectrum, like baseline correction or reference
deconvolution.
While importing a spectrum, you may choose to have Processor automatically apply phasing
adjustments. Otherwise, you can apply automatic or manual phase correction after you have
imported the spectrum. In either case, a Phasing layer appears in the Processing History;
you can remove the layer if necessary.
How do I apply phase correction to my spectrum?
Menu Location
Processing > Phasing
Icon(s)
Hotkey(s)
1.
Switch to Phasing mode.
2.
Automatic: Click the Auto button to have Processor automatically calculate phase
angles. You should review the spectrum after automatic phasing to ensure that the
results are acceptable. If necessary, you can use the manual controls to adjust the
phase angles before accepting them.
3.
Manual: Click and drag the Zero-order Phase and First-order Phase sliders, or
type angles in the boxes beside each slider. Use the Normal, Fine or Very Fine
modes to select the scale of changes made with the sliders.
4.
Click the Accept button to apply your changes, or click the Cancel button to discard
them.
Ctrl-Alt-1
Cmd-Alt-1
Tips and Tricks
• Select one of the phase angle controls, and use the arrow keys to make fine adjustments
to the phase angle. The arrow keys allow increments of 1° in Normal mode, 0.1° in
Fine mode, and 0.01° in Very Fine mode.
• Proper phasing of your spectrum is essential to obtaining accurate analysis of your
data with Chenomx NMR Suite.
6.4 Processing Tools
34
CHENOMX NMR SUITE: USER MANUAL
• A properly-phased spectrum has a baseline that describes a smooth curve across the
entire width of the spectrum.
• In spectra of aqueous samples, the water peak may be distorted relative to the rest
of the spectrum; do not use the water peak to determine phasing. Instead, try to obtain
smooth baseline curves to either side of the water peak.
• You should usually adjust the zero-order phase angle more than the first-order phase
angle, but remember that the requirements of a specific spectrum may vary.
• During a phasing session, you can clear your current adjustments by clicking the
Reset button. After you have accepted your changes, you can clear previous
adjustments through the Processing History panel.
Related Topics
• “Importing Spectra” on page 16
• “Processing History” on page 32
• “Baseline Correction” on page 35
• “Reference Deconvolution” on page 37
• “Convert Spectra” on page 39
Baseline Correction
Baseline correction allows you to remove distortions in the baseline of the spectrum. You
can recognize distorted baselines as a net curvature or slant of the regions of your spectrum
that contain no signal ("noise" regions). Common forms of baseline distortions include
"smiles" (outer regions of the spectrum turned up), "frowns" (outer regions of the spectrum
turned down), "wings" (left and right edges of the spectrum turned up or down, with the
middle region flat). If you notice a periodic oscillation or "rolling" of the baseline, you should
check the phasing of your spectrum before proceeding with baseline correction.
Most spectra require some degree of baseline correction, particularly if you need accurate
quantification in Profiler. You should apply baseline correction after phasing, but before
any other processing layers, like reference deconvolution.
While importing a spectrum, you may choose to have Processor automatically apply either
simple linear baseline correction (drift correction) or a cubic spline baseline correction
based on automatically-determined breakpoints. Otherwise, you can apply automatic or
manual baseline correction after you have imported the spectrum. In either case, a Baseline
Correction layer appears in the Processing History panel; you can remove this layer if
necessary.
For more direct control over the baseline correction applied to your spectrum, you can
specify endpoints (linear fit) or breakpoints (cubic spline fit) manually.
How do I apply baseline correction to my spectrum?
Menu Location
Processing > Baseline Correction
Icon(s)
Hotkey(s)
Ctrl-Alt-2
Cmd-Alt-2
1.
Switch to Baseline Correction mode.
2.
Automatic (Linear): Click the Auto Linear button to automatically determine a
linear baseline adjustment.
Or
Automatic (Spline): Click the Auto Spline button to automatically determine a set
of breakpoints for a cubic-spline-based baseline adjustment.
6.4 Processing Tools
35
CHENOMX NMR SUITE: USER MANUAL
3.
Manual: Click on the spectrum to set breakpoints for a cubic spline fit. Click and
drag existing breakpoints (including the endpoints) to move them. Hold down
Control or Command to place breakpoints anywhere in the spectrum, instead of
directly on the spectrum line itself. Hold down Shift while clicking on an existing
breakpoint to delete it.
4.
Click the Accept button to apply your changes, or click the Cancel button to discard
them.
Tips and Tricks
• Even if you intend to manually adjust baseline correction, you may find it helpful to
use the Auto Linear function first. Auto Linear allows Processor to first locate the
"natural" endpoints of the spectrum, giving you a useful starting point for any more
complex baseline fit.
• When setting breakpoints, you should be aware of the amount of curvature in the
area you are trying to fit. You need to set more breakpoints to fit regions with very
strong curvature, such as the areas near the water peak, than you would for a relatively
flat region.
Related Topics
• “Importing Spectra” on page 16
• “Processing History” on page 32
• “Phasing” on page 34
• “Reference Deconvolution” on page 37
• “Convert Spectra” on page 39
Line Broadening
Line broadening is a mathematical operation that multiplies your fid by an exponential
function before the fid is Fourier transformed. This effectively increases the linewidth in
your spectrum while averaging out instrument noise.
You may not need to apply line broadening to every spectrum. If you choose to use line
broadening, you should do so after phasing and baseline correction.
While importing a spectrum, you may choose to have Processor automatically apply line
broadening of 0 to 1000 Hz. Otherwise, you can apply line broadening manually after you
have imported the spectrum. In either case, a Line Broadening layer appears in the Processing
History; you can remove the layer if necessary.
How do I apply line broadening to my spectrum?
Menu Location
Processing > Line Broadening...
Icon(s)
Hotkey(s)
Ctrl-Alt-3
Cmd-Alt-3
1.
Switch to Line Broadening mode.
2.
Enter a value between 0 and 1000 Hz.
3.
Click the Accept button.
Tips and Tricks
• If you intend to apply reference deconvolution to your spectrum, you can add line
broadening at the same time. See “Reference Deconvolution” on page 37 for details.
6.4 Processing Tools
36
CHENOMX NMR SUITE: USER MANUAL
Related Topics
• “Importing Spectra” on page 16
• “Processing History” on page 32
• “Phasing” on page 34
• “Baseline Correction” on page 35
• “Reference Deconvolution” on page 37
• “Convert Spectra” on page 39
Reference Deconvolution
Reference deconvolution is a method of reconstructing an ideal spectrum by removing
lineshape distortions based on the shape of a reference peak. To successfully apply reference
deconvolution to a spectrum, you need to find a single, isolated peak, well-separated from
the signals in the rest of the spectrum. If you have added DSS or TSP to your sample, the
methyl signal from either of these is an ideal choice.
Reference deconvolution is a linear process, using direct and inverse Fourier transforms,
so quantitative relationships among compounds in the spectrum remain intact. Applying
reference deconvolution to a spectrum assumes that all lineshapes in the spectrum are
affected by systematic distortions in the same way.
Many spectra can benefit from the use of reference deconvolution, but it is not required. It
is particularly useful in reducing the effects of varying shimming techniques, or when you
need accurate quantification from regions with strong overlap of signals.
You need to apply reference deconvolution manually after you have imported your spectrum.
After you have applied reference deconvolution, a Reference Deconvolution layer appears
in the Processing History panel; you can remove this layer if necessary.
How do I apply reference deconvolution to my spectrum?
Menu Location
Processing > Advanced >
Reference Deconvolution
Icon(s)
Hotkey(s)
1.
In the CSI editor, fit the red CSI peak to your spectrum. See “CSI Editor” on page 29
for details.
2.
Switch to Reference Deconvolution mode.
3.
Zoom in to the highlighted peak in the Spectrum View.
4.
If you are using DSS or TSP as a CSI, select the Use DSS/TSP Satellites check box.
Otherwise, clear the check box.
5.
Enter the desired target linewidth.
6.
Click the Accept button to apply your changes, or click the Cancel button to discard
them.
7.
In CSI Edit mode, refit the red CSI peak to your spectrum to account for changes
introduced by reference deconvolution. See “CSI Editor” on page 29 for details.
Ctrl-Alt-4
Cmd-Alt-4
Tips and Tricks
• Successfully applying reference deconvolution to your spectrum requires good phasing
and baseline correction. You should not apply reference deconvolution to a spectrum
that is poorly phased or has a poor baseline.
• The target linewidth text box initially contains the native linewidth of your spectrum,
based on your CSI definition.
6.4 Processing Tools
37
CHENOMX NMR SUITE: USER MANUAL
• Choosing a target linewidth larger than the native linewidth in your spectrum is
equivalent to applying line broadening. Choosing a value smaller than the native
linewidth may provide some resolution enhancement, at the expense of a reduced
signal-to-noise ratio and possible spectral artifacts.
Related Topics
• “Importing Spectra” on page 16
• “Processing History” on page 32
• “Phasing” on page 34
• “Baseline Correction” on page 35
• “Line Broadening” on page 36
• “Convert Spectra” on page 39
Water Deletion
Menu Location
Processing > Advanced > Water
Deletion
Icon(s)
Hotkey(s)
In many spectra of biofluids or cell extracts, the water peak may be very large. In some
cases, it is so large that seeing any other peaks while completely zoomed out is difficult.
Water deletion is a simple processing layer that masks data points in the frequency domain
across a range associated with water. It is designed to prevent the height of the water peak
from dominating the vertical range of the spectrum display.
Ctrl-Alt-5
Cmd-Alt-5
Using water deletion is optional. You should ensure that no peaks of interest occur close to
the water peak before you apply water deletion, as such peaks may be masked by the water
deletion layer. You should apply water deletion after any other processing layers, including
phasing, baseline correction and reference deconvolution.
While importing a spectrum, you may choose to have Processor apply water deletion
automatically. Otherwise, you can apply water deletion manually after you have imported
the spectrum. In either case, a Water Deletion layer appears in the Processing History panel;
you can remove this layer if necessary.
Tips and Tricks
• Water deletion will not work if you have not defined the CSI for the spectrum, as the
location of the water peak is determined relative to your CSI.
• If your spectrum needs to be reversed, but has not yet been reversed, water deletion
may not work as intended. If necessary, you should reverse the spectrum before
applying water deletion.
Related Topics
• “Importing Spectra” on page 16
• “Processing History” on page 32
• “Reverse Spectrum” on page 39
• “Convert Spectra” on page 39
6.4 Processing Tools
38
CHENOMX NMR SUITE: USER MANUAL
Reverse Spectrum
Menu Location
Processing > Advanced > Reverse
Spectrum
Icon(s)
Hotkey(s)
Ctrl-Alt-6
Cmd-Alt-6
Reverse spectrum reverses the order of the data points in your spectrum in the frequency
domain, effectively flipping the spectrum horizontally.
You only need to use reverse spectrum with certain types of spectra from Bruker
spectrometers. If you have trouble locating the CSI peak (when you have a CSI in the sample),
or even making any sense of your spectrum after importing it, you may need to reverse the
spectrum.
While importing a spectrum, you may choose to have Processor reverse the spectrum
automatically. Otherwise, you can reverse the spectrum manually after you have imported
it. In either case, a Reverse Spectrum layer appears in the Processing History panel; you
can remove this layer if necessary.
Tips and Tricks
• If you notice that a spectrum from a particular spectrometer must be reversed, it is
likely that all spectra from that instrument, especially those acquired with the same
parameters, need to be reversed.
• If it is necessary, Reverse Spectrum should be the first layer in your Processing History,
as other processing layers may be difficult to apply correctly with the spectrum
backwards.
Related Topics
• “Importing Spectra” on page 16
• “Processing History” on page 32
• “Convert Spectra” on page 39
6.5 Importing and Exporting Data
Processor can help you to efficiently import raw spectral data from various sources, convert
them into Chenomx spectra (.cnx) and begin working with them.
Convert Spectra
For larger projects, you may want to convert groups of spectra into Chenomx spectra (.cnx),
processing them with a consistent set of parameters to ensure consistent analysis results.
How do I convert a group of spectra?
Menu Location
Icon(s)
Tools > Convert Spectra...
1.
Start the Convert Spectra wizard.
2.
Choose the source spectra to convert. The source spectra must be in one of the
supported file formats (“Spectral Data Processing” on page 9)
3.
If the source spectra include multiple file types, select the type that you would like
to convert.
4.
Click Conversion Settings to choose processing options to apply to each spectrum.
5.
Specify a target folder for the converted spectra.
Tips and Tricks
• If the source folder contains more than one type of spectrum file, you need to select
one type to convert in the current session, since different conversion options may
6.5 Importing and Exporting Data
39
CHENOMX NMR SUITE: USER MANUAL
apply to each available file type. You can do additional sessions to convert other file
types.
• The Conversion Settings available through the Convert Spectra wizard are the same
as those available when you import individual spectra (“Importing
Spectra” on page 16).
• Storing the converted spectra next to the source files means that each new spectrum
file appears in the same folder as the spectrum file from which it was created. You
may find it more useful to have Processor place the converted spectra in a different
folder.
• If you specify a folder other than the source folder for converted spectra, you get a
folder containing all of the converted spectra, with no subfolders created. Select
Mirror source folder structure to create a folder structure in the target folder that
is the same as that in the source folder, and store the resulting converted spectra
within the new folder structure.
Related Topics
• “Importing Spectra” on page 16
• “Processing History” on page 32
• “Processing Tools” on page 34
Send to Profiler
Menu Location
File > Send to Profiler
Icon(s)
Hotkey(s)
Ctrl-J
Cmd-J
When you finish processing a spectrum in Processor, your next task is often to start profiling
the spectrum in Profiler. Send to Profiler closes the current spectrum in Processor, and
opens it in Profiler, retaining any changes you have made in Processor.
Tips and Tricks
• Any changes that you have made to the spectrum in Processor are retained when you
send the spectrum to Profiler, and are visible if you bring the spectrum back into
Processor. However, you still need to save the spectrum, either in Processor or Profiler,
to permanently save those changes to the spectrum file.
Related Topics
• Chapter 7, Profiler on page 41
6.5 Importing and Exporting Data
40
Chapter 7: Profiler
The Profiler module helps you to identify and quantify compounds in a sample spectrum,
as well as apply spectral analysis techniques like spectral binning. You can fit any available
compound to the current spectrum, and you can modify the compounds displayed using
compound sets and filters.
7.1 Overview
The following illustration shows the default Profiler display after analyzing a sample. In
this example, the sum line of the Chenomx NMR Suite analysis appears in red, and the
original spectrum appears in black.
❶
❷
❸
❹
❺
Compound Set Panel. Allows you to control which compounds appear in the Compound
Table by selecting or deselecting compound sets. You can create or edit compound
sets using Library Manager.
Cluster Navigator. Allows you to navigate among the clusters of the currently selected
compound. You can enable or disable the Cluster Navigator using the View menu.
Spectrum View. Displays the spectrum as well as the sum line. You can modify the
display by focusing in on a particular area or displaying and modifying compound
signatures.
Quick Search. Allows you to filter the Compound Table to focus on a particular
compound or group of compounds.
Compound Table. Displays compounds, their calculated concentrations, and their
fitting status. You can access signatures of these compounds in the Spectrum View by
selecting them. As well, you can view additional compound information in the Reference
7.1 Overview
41
CHENOMX NMR SUITE: USER MANUAL
❻
❼
❽
❾
Panel by double-clicking on a compound name in this table. You can change the default
concentration units displayed in the Compound Table using the View menu.
Spectrum View Tools. These tools allow you to navigate the spectrum more easily.
Reference Panel. Displays additional information for the compound currently selected
in the Compound Table, including structure, molecular weight, CAS-RN and so on.
Spectrum Thumbnail. Displays a thumbnail image of the current spectrum. You can
also use the thumbnail to navigate the Spectrum View at various zoom settings.
Status Bar. Displays the current cursor position in the units specified by the View > X
Scale and View > Y Scale settings. Also displays information about recent user actions.
7.2 Quick Reference Guide
Linux, Windows
Mac OS X
Ctrl-O
Cmd-O
---
---
Close
Ctrl-W
Cmd-W
Save
Ctrl-S
Cmd-S
---
---
Send to Processor
Ctrl-J
Cmd-J
Open Library Manager
Ctrl-B
Cmd-B
Import Profile...
---
---
Export > Profiled Compounds (.pack)...
---
---
Export > Profiled Concentrations (.txt)...
---
---
Export > Spectrum Graphic...
---
---
Spectrum Details...
---
---
Preferences...
---
---
Exit
---
---
Undo
Ctrl-Z
Cmd-Z
Redo
Ctrl-Y
Cmd-Y
---
---
---
---
File Menu
Open...
Open Recent
Save As...
Edit Menu
Copy Spectrum Image to Clipboard
View Menu
Concentration Units
7.2 Quick Reference Guide
42
CHENOMX NMR SUITE: USER MANUAL
Linux, Windows
Mac OS X
X Scale
---
---
Y Scale
---
---
Zoom > Show Entire Spectrum
Ctrl-(-)
Cmd-(-)
Zoom > Set Zoom...
Ctrl-M
Cmd-M
Zoom > Undo Zoom
[
[
Zoom > Redo Zoom
]
]
Zoom > Auto Zoom
Ctrl-F
Cmd-F
Zoom > Increase Vertical Zoom
+
+
Zoom > Decrease Vertical Zoom
-
-
Show Reference Panel
Ctrl-Shift-R
Cmd-Shift-R
Show Compound Set Panel
Ctrl-Shift-K
Cmd-Shift-K
Show Cluster Navigator
Ctrl-Shift-N
Cmd-Shift-N
Show Spectrum Line
Ctrl-Shift-1
Cmd-Shift-1
Show Subtraction Line
Ctrl-Shift-2
Cmd-Shift-2
Show Sum Line
Ctrl-Shift-3
Cmd-Shift-3
Show Selection Line
Ctrl-Shift-4
Cmd-Shift-4
---
---
Ctrl-T
Cmd-T
Clear > Concentration
---
---
Clear > Transforms
---
---
Clear > Custom Color
---
---
Clear > Highlight
---
---
Clear > Star
---
---
Clear > Everything
---
---
Assign Custom Color...
---
---
Ctrl-U
Cmd-U
Change Columns...
Select Region
Compounds Menu
Selected Compound Submenu
Update Profiled Version...
7.2 Quick Reference Guide
43
CHENOMX NMR SUITE: USER MANUAL
Linux, Windows
Mac OS X
Ctrl-P
Cmd-P
Previous Cluster
Ctrl-Shift-,
Cmd-Shift-,
Next Cluster
Ctrl-Shift-.
Cmd-Shift-.
Clear > Concentrations
---
---
Clear > Transforms
---
---
Clear > Custom Colors
---
---
Clear > Highlights
---
---
Clear > Stars
---
---
Clear > Everything
---
---
Update Profiled Versions...
---
---
Set to Potential Concentrations
---
---
Scale Concentrations...
---
---
---
---
Contents
F1
F1
Search
---
---
Save Application Log...
---
---
Activation Details...
---
---
About Chenomx NMR Suite...
---
---
Set to Potential Concentration
Starred Compounds and All Compounds Submenus
Tools Menu
Spectral Binning...
Help Menu
7.3 Profiling Tools
Profiler provides you with a variety of tools to help you extract compound data from your
spectra. The data extraction process, called profiling, includes selecting compounds from
your Library, setting concentrations, determining transforms, and finding and using extended
information about compounds that you would like to fit.
Compound Table
The Compound Table summarizes the results of your profiling work with the current
spectrum. It contains entries for compounds that are available to fit to your spectrum, as
well as those that you have already fit, along with their potential and profiled concentrations.
7.3 Profiling Tools
44
CHENOMX NMR SUITE: USER MANUAL
You can modify the display of the Compound Table to show as much or as little information
as you like, to better suit your preferred approach to profiling.
The currently selected compound in the Compound Table is the active compound in the
Spectrum View, allowing you to manipulate its concentration and transforms.
You can filter the current contents of the Compound Table using Quick Searches. This can
help you quickly find the exact compound that you would like to profile. You can filter the
table based on text search, regions of the spectrum, or specific locations in the spectrum.
Using the Compound Table, you can assign custom display colors to compounds, highlight
compounds so that they are visible even when you are not working on them and toggle
stars on compounds to generally mark them for future reference.
There are twenty columns available for display in the Compound Table. You can choose to
display any number of the available columns, with a minimum of one visible at any time,
and you can drag the column headers to position the columns in any order that you like.
You can sort the Compound Table on any column by clicking its column header. Click the
header again to reverse the sort order.
Tips and Tricks
• You must have at least one Compound Set selected in the Compound Set Panel in
order to see any compounds in the Compound Table.
• You can set compound concentrations directly in the Compound Table, by
double-clicking on a compound's concentration column and typing in a value.
• You can perform many common compound operations through the context menu,
available by right-clicking on a compound's row in the table. Operations accessible
through the context menu include setting the compound to its potential concentration,
updating the profiled version of the compound to the latest version in your library,
assigning a custom color, and clearing concentrations, transforms, custom colors,
stars and highlights.
• Compounds that have been modified in some way from their default state (including
concentrations, transforms, custom colors, highlights and stars) will appear in the
Profiled Compounds set, and will appear in bold in the Compound Table.
• You can copy the contents of a cell to the Clipboard by right-clicking on the cell and
selecting Copy [cell name] to Clipboard. You can then paste the contents as text to
any other program.
Related Topics
• “Custom Colors” on page 46
• “Highlighted Compounds” on page 46
• “Starred Compounds” on page 47
• “Quick Searches” on page 48
• “Concentrations” on page 49
• “Potential Concentrations” on page 51
• “Compound Set Tools” on page 53
• “Export Profiled Concentrations” on page 56
• “Concentration Units” on page 62
7.3 Profiling Tools
45
CHENOMX NMR SUITE: USER MANUAL
Custom Colors
When working with multiple compounds, it can become difficult to distinguish which
compounds are contributing which parts to an overlapped region. You can set specific
compounds to appear in colors of your choice whenever they are visible in the Spectrum
View.
How do I assign a custom color to a compound?
Menu Location
Compounds > Selected
Compound > Assign Custom
Color...
Icon(s)
1.
Select the compound in the Compound Table.
2.
Open the Assign Custom Color dialog
3.
Choose a color to assign to the compound using the displayed color palette.
4.
Click OK.
How do I clear a custom color from a compound?
Menu Location
Compounds > Selected
Compound > Clear > Custom
Color
1.
Select the compound in the Compound Table.
2.
Click Clear Custom Color.
Icon(s)
Tips and Tricks
• Setting a custom color for a compound adds it to the Profiled Compounds set, even
if you have not set concentrations or transforms for the compound.
• Custom colors are stored with the spectrum when you save it as a .cnx file. The colors
you select are still associated with the compounds when you next open the file, until
you clear them.
Related Topics
• “Compound Table” on page 44
• “Highlighted Compounds” on page 46
• “Starred Compounds” on page 47
Highlighted Compounds
It is often useful to display several different compounds at the same time while fitting,
especially when you are working in heavily overlapped area. Highlighting a compound
allows you to "pin" it to the graph, so that it remains visible regardless of which compound
you have selected in the Compound Table. In combination with custom colors and exporting
spectrum graphics, highlighting can also help you to prepare snapshots of your fit that are
suitable for publication.
How do I highlight a compound?
1.
Click the check box for the compound in the Highlighted column ( ) of the
Compound Table.
How do I clear a highlighted compound?
Menu Location
Icon(s)
Compounds > Selected
Compound > Clear > Highlight
1.
Select the compound in the Compound Table.
2.
In the Compounds menu, click Selected Compound > Clear > Highlight, or clear
the check box for the compound in the Highlighted column.
7.3 Profiling Tools
46
CHENOMX NMR SUITE: USER MANUAL
Tips and Tricks
• Highlighting a compound adds it to the Profiled Compounds set, even if you have not
set concentrations or transforms for the compound.
• Highlight settings are stored with the spectrum when you save it as a .cnx file. The
compound that you highlight remains highlighted when you next open the file, until
you clear the highlights.
Related Topics
• “Compound Table” on page 44
• “Custom Colors” on page 46
• “Starred Compounds” on page 47
Starred Compounds
Starring compounds allow you to mark them for future reference, or to perform group
operations on them, including setting them to potential concentrations, scaling
concentrations, and clearing concentrations, transforms, custom colors, highlights or stars.
Stars are saved in the spectrum file, and remain visible when you next open the file, or until
you clear them.
How do I star a compound?
1.
Click the grey star for the compound in the Starred column ( ) of the Compound
Table.
How do I clear a starred compound?
Menu Location
Icon(s)
Compounds > Selected
Compound > Clear > Star
1.
Select the compound in the Compound Table.
2.
In the Compounds menu, click Selected Compound > Clear > Star, or click the
yellow star for the compound in the Starred column.
Tips and Tricks
• Starring a compound adds it to the Profiled Compounds set, even if you have not set
concentrations or transforms for the compound.
• Stars are stored with the spectrum when you save it as a .cnx file. The compound
that you star remains starred when you next open the file, until you clear the stars.
Related Topics
• “Compound Table” on page 44
• “Custom Colors” on page 46
• “Highlighted Compounds” on page 46
• “Concentrations” on page 49
• “Transforms” on page 50
• “Potential Concentrations” on page 51
• “Scale Concentrations” on page 52
• “Update Profiled Versions (Several Compounds)” on page 54
7.3 Profiling Tools
47
CHENOMX NMR SUITE: USER MANUAL
Quick Searches
When you are profiling a spectrum, you may have several Compound Sets active. The number
of compounds appearing in the Compound Table can make it difficult to locate a particular
compound to fit. Quick Searches allow you to temporarily limit the number of compounds
appearing in the Compound Table based on search criteria. The search criteria can include
text searches based on compound name, location, compound IDs, compound comments or
all of these. You can also search by frequency, listing all compounds appearing at a specific
frequency, or within a range of frequencies.
How do I limit the compounds visible in the Compound Table?
Icon(s)
Hotkey(s)
1.
Click the binoculars icon at the left edge of the search box to choose the type of
search to use (Compound Name, Compound Comment, Compound ID, Location or
All). If you do not specify something here, the default search type is All.
2.
Type your search terms in the Quick Search box at the top left of the Compound
Table. The contents of the Compound Table update to show all matches to your
current entry.
3.
Click the clear button at the right edge of the search box to cancel the search and
restore the full list of compounds. Clearing the search field also resets the search
type to All.
Ctrl-L
Cmd-L
How do I search for compounds near a single frequency?
1.
Right-click on the spectrum, and click Filter for Compounds Near x.xx ppm.
2.
Click the clear button at the right edge of the search box to cancel the search and
restore the full list of compounds.
How do I search for compounds in a frequency range?
1.
Use the Select Region tool to select a region of the spectrum.
2.
Right-click on the selected region, and click Filter for Compounds in Selected
Region.
3.
Click the clear button at the right edge of the search box to cancel the search and
restore the full list of compounds.
Tips and Tricks
• Use Quick Searches to temporarily limit the number of compounds displayed. Use
Compound Sets to define a more permanent working set of compounds for profiling
a particular spectrum.
• You can click repeatedly anywhere under the sum line (red) in the Spectrum View to
cycle through the compounds contributing to the sum line at the frequency that you
clicked.
• When you right-click anywhere under the sum line (red) in the Spectrum View, the
resulting context menu shows a list of compounds contributing to the sum line at the
frequency that you clicked. Select a compound from the list to make it the active
compound.
• You can perform frequency and frequency range searches directly from the Quick
Search box. For example, type @2.89 to find compounds appearing at 2.89 ppm, or
type @3.0 to 7.0 to find compounds appearing between 3.0 and 7.0 ppm.
7.3 Profiling Tools
48
CHENOMX NMR SUITE: USER MANUAL
Related Topics
• “Spectrum View Tools” on page 20
• “Preferences” on page 24
• “Compound Table” on page 44
• “Compound Set Tools” on page 53
Concentrations
While profiling a spectrum, you measure compound concentrations by determining heights
of compounds signatures that best fit peak heights in the current spectrum. You can only
adjust the concentration of a compound that you have selected in the Compound Table.
Profiler determines the concentration of a compound using the standardized intensities
(si) and standardized widths (sw) of its component peaks. When you adjust the height of a
compound, the heights of all other peaks and clusters corresponding to the compound scale
proportionately.
When you have set a compound concentration to 0.00 mM or greater, Profiler adds it to the
Profiled Compounds set at the top of the Compound Set Panel. If you set a profiled
compound's concentration to unknown (--), Profiler removes the compound from the
Profiled Compounds set.
How do I set compound concentrations?
1.
Select a compound in the Compound Table. If you do not see any compounds in the
Compound Table, select additional Compound Sets or use Quick Searches to find
one.
2.
Click and drag the blue triangle at the far right of the Spectrum View upward until
the compound signature reaches the desired height. If the compound already has
a concentration set, you can click and drag any peak or cluster vertically to change
the concentration.
How do I clear a concentration?
1.
Select a compound with a concentration in the Compound Table. If you do not see
any compounds with concentrations in the Compound Table, make sure the Profiled
Compounds set is selected. If you still do not see any compounds with concentrations,
then the current file has no concentrations set.
2.
In the Compounds menu, click Selected Compound > Clear Concentration, or
right-click on the compound in the Spectrum View or the Compound Table and click
Clear Concentration. The compound's concentration in the Compound Table
appears as unknown (--).
Tips and Tricks
• You can double-click on a compound's concentration in the Compound Table and
type a value directly to set the concentration. Type a number from 0 to 5000 mM or
equivalent, or type "--" to set the concentration to unknown.
• Once you have set a concentration for a compound, it appears in the Profiled
Compounds set. Selecting that set shows only compounds that you have profiled in
the Compound Table.
• You can hover the mouse cursor over any cluster, or its transform adjustment triangle
on the horizontal axis, or the compound's concentration adjustment triangle on the
7.3 Profiling Tools
49
CHENOMX NMR SUITE: USER MANUAL
vertical axis, to see the concentration for the current compound, even when the
Concentration column is not visible in the Compound Table. The concentration appears
in the top right corner of the Spectrum View.
• To clear all of the concentrations for the current spectrum, select Compounds > All
Compounds > Clear Concentrations.
• To clear concentrations only for starred compounds, select Compounds > Starred
Compounds > Clear Concentrations.
• All compound concentrations start out as unknown (--).
• If a compound's concentration is unknown (--) and you drag it up and then back down
to the baseline, the concentration is set to 0.00 mM. To return the concentration to
unknown, you must clear it.
• When you Export Profiled Concentrations, compounds with unknown concentrations
(--) are not exported unless other spectra in the exported set have those compounds
profiled.
Related Topics
• “Spectrum View Tools” on page 20
• “Compound Table” on page 44
• “Starred Compounds” on page 47
• “Quick Searches” on page 48
• “Transforms” on page 50
• “Potential Concentrations” on page 51
• “Scale Concentrations” on page 52
• “Compound Set Tools” on page 53
• “Export Profiled Concentrations” on page 56
• “Reference Panel” on page 61
• “Concentration Units” on page 62
Transforms
The frequencies of clusters in a compound signature that you are using may be different
from those in the actual spectrum. Such differences can occur due to changes in solution
pH, ion concentrations, and other matrix effects. Transforms allow you to move the clusters
from their starting locations to compensate for these effects and better fit the spectrum.
Transforms are limited to regions called transform windows. Profiler displays the transform
window for a particular cluster as triangles on the spectrum baseline when the cluster is
selected.
How do I set transforms?
1.
Select a compound in the Compound Table. If you do not see any compounds in the
Compound Table, select additional Compound Sets or use Quick Searches to find
one.
2.
Click and drag the blue triangle for a cluster along the horizontal axis in the Spectrum
View. If the compound already has a concentration set, you can click and drag any
cluster horizontally to change its transform.
7.3 Profiling Tools
50
CHENOMX NMR SUITE: USER MANUAL
How do I clear transforms for a compound?
1.
Select a transformed compound in the Compound Table. If you do not see any
transformed compounds in the Compound Table, make sure the Profiled Compounds
set is selected. If you still do not see any transformed compounds, then the current
file may not contain any transformed compounds.
2.
In the Compounds menu, click Selected > Clear Transform, or right-click on the
compound in the Spectrum View or the Compound Table and click Clear Transform.
The compound's clusters return to their default locations.
Tips and Tricks
• You can hover the mouse cursor over any cluster, or its transform adjustment triangle
on the horizontal axis to see the transform applied to the cluster. The information
appears in the top right corner of the Spectrum View. If the cluster is not transformed,
the display reads "Cluster is unchanged."
• To clear all of the transforms for the current spectrum, select Compounds > All
Compounds > Clear Transforms.
• To clear transforms only for starred compounds, select Compounds > Starred
Compounds > Clear Transforms.
• You can see which compounds have been transformed by turning on the Transformed
column in the Compound Table
Related Topics
• “Spectrum View Tools” on page 20
• “Compound Table” on page 44
• “Starred Compounds” on page 47
• “Quick Searches” on page 48
• “Concentrations” on page 49
• “Compound Set Tools” on page 53
• “Transform Windows” on page 81
Potential Concentrations
The potential concentration of a compound in Profiler is an estimate of the upper limit of
the compound's concentration. Profiler calculates a compound's potential concentration as
the maximum concentration for the compound that does not result in any peak in the
compound's signature exceeding the height of the spectrum line, taking into account all
possible transform values that can apply to each cluster. The value is intended to act as a
guideline only.
How do I set a compound to its potential concentration?
Menu Location
Compounds > Selected
Compound > Set to Potential
Concentration
1.
Select the compound in the Compound Table. If you do not see the compound in
the Compound Table, select additional Compound Sets or use Quick Searches to
find it.
2.
On the Compounds menu, click Selected Compound > Set to Potential
Concentration, or right-click on the compound and select Set to Potential
Concentration from the context menu.
Icon(s)
Hotkey(s)
Ctrl-P
Cmd-P
7.3 Profiling Tools
51
CHENOMX NMR SUITE: USER MANUAL
How do I set a compound to its potential concentration?
Menu Location
Compounds > Starred
Compounds > Set to Potential
Concentration
1.
Star at least one compound.
2.
On the Compounds menu, click Starred Compounds > Set to Potential
Concentration.
Icon(s)
How do I set all compounds to their potential concentrations?
1.
Menu Location
Compounds > All Compounds >
Set to Potential Concentration
Icon(s)
On the Compounds menu, click All Compounds > Set to Potential Concentration.
Tips and Tricks
• Potential concentrations in Profiler refer to estimates that are subject to error, based
on assumptions that may not coincide with your interpretation of the spectrum. You
should verify any results that you obtain based on potential concentrations.
• You can set all of the compounds in the Compound Table to their potential
concentrations. On the Compounds menu, select Set to Potential Concentrations.
Related Topics
• “Compound Table” on page 44
• “Starred Compounds” on page 47
• “Quick Searches” on page 48
• “Concentrations” on page 49
• “Compound Set Tools” on page 93
Scale Concentrations
Scale Concentrations allows you to modify the concentrations of all profiled compounds in
the current spectrum by a common multiplication factor. You can use this to compensate
for dilution effects, errors in CSI concentration or other systematic influences on compound
concentrations.
How do I scale the concentrations of all compounds by a common factor?
Menu Location
Compounds > All Compounds >
Scale Concentrations...
Icon(s)
1.
On the Compounds menu, click All Compounds > Scale Concentrations...
2.
Enter the multiplication factor you would like to use. To increase concentrations,
use a factor greater than one. To decrease them, use a factor less than one.
3.
Click OK.
How do I scale the concentrations of starred compounds by a common factor?
Menu Location
Icon(s)
Compounds > Starred
Compounds > Scale
Concentrations...
1.
Star at least one compound.
2.
On the Compounds menu, click Starred Compounds > Scale Concentrations....
3.
Enter the multiplication factor you would like to use. To increase concentrations,
use a factor greater than one. To decrease them, use a factor less than one.
4.
Click OK.
Tips and Tricks
• If you enter a multiplication factor that would result in a concentration higher than
5000 mM for any compounds, those compounds are set to 5000 mM. All other
compounds scale with the exact factor entered.
7.3 Profiling Tools
52
CHENOMX NMR SUITE: USER MANUAL
• If you set the multiplication factor to zero, all of the profiled compounds are set to 0
mM.
• Scale Concentrations does not affect compounds with unknown concentrations (--).
Related Topics
• “Starred Compounds” on page 47
• “Concentrations” on page 49
Cluster Navigator
The Cluster Navigator allows you to move quickly among the clusters of the currently
displayed compound. It appears in the top left corner of the Spectrum View as an ordered
list of the approximate positions of all the clusters of the compound in ppm. When you click
on a cluster position, the view zooms to provide an optimal view of the cluster. This includes
the larger of the full transform range of the cluster or the full width of the cluster, and the
full vertical extent of any peaks within the horizontal range. You can also use the Cluster
Navigator to move sequentially through the list of clusters in either direction.
How do I display the clusters of a compound in the Spectrum View?
Menu Location
Hotkey(s)
View > Show Cluster Navigator
1.
Make sure that the Cluster Navigator is visible, and select a compound in the
Compound Table.
2.
Click a cluster position to zoom directly to that cluster. Click the left or right arrow
to move sequentially through the list of clusters.
Ctrl-Shift-N
Cmd-Shift-N
Tips and Tricks
• Click on a cluster and drag along the Cluster Navigator to include adjacent clusters
in the Spectrum View.
Related Topics
• “Spectrum View Tools” on page 20
• “Compound Table” on page 44
• “Concentrations” on page 49
• “Transforms” on page 50
7.4 Compound Set Tools
Compound Sets are groups containing compounds found in your Library. You can use
Compound Sets that you have created in Library Manager to make the task of profiling your
spectra easier, by placing compounds that interest you the most at your fingertips.
Compound Set Panel
Menu Location
View > Show Compound Set
Panel
Icon(s)
Hotkey(s)
Ctrl-Shift-K
Cmd-Shift-K
The Compound Set Panel allows you to modify the contents of the Compound Table to
include any combination of the Compound Sets that you have created in Library Manager.
The panel contains a list of every Compound Set that is currently defined. Contents of the
checked Compound Sets appear in the Compound Table.
Tips and Tricks
• A Compound Set called Profiled Compounds always appears at the top of the
Compound Set Panel. This set includes all compounds in the current spectrum that
7.4 Compound Set Tools
53
CHENOMX NMR SUITE: USER MANUAL
have been modified, based on concentrations, transforms, custom colors, highlights
and stars.
• The Profiled Compounds set updates continuously, so if you clear the concentration
of a compound, it immediately disappears from Profiled Compounds. In this case, you
can still select the compound from its original Compound Set.
• If you change the contents of a Compound Set in Library Manager, your changes
immediately appear in Profiler. This includes modifying selection rules for Smart
Compound Sets, manually changing Compound Sets by adding or removing compounds,
and creating or deleting Compound Sets.
Related Topics
• “Profiling Tools” on page 44
• “Update Profiled Version (One Compound)” on page 54
• “Update Profiled Versions (Several Compounds)” on page 54
• “Open Library Manager” on page 55
Update Profiled Version (One Compound)
You can easily make changes to compounds in your library, add new compounds, or remove
outdated ones using Compound Builder and Library Manager. You will encounter spectra
that you profiled with different versions of the same compounds, or with compounds that
no longer exist. These discrepancies between your current library and the fit in a spectrum
file are marked with status icons like for changed compounds or for missing compounds.
You can update a particular profiled compound to reflect the latest version present in your
library. This allows you to update compounds in a controlled fashion, revising your fit one
compound at a time, as needed.
How do I update a single profiled compound?
Menu Location
Compounds > Selected
Compound > Update Version...
1.
Select the profiled compound that you would like to update in the Compound Table.
If you do not see any profiled compounds in the Compound Table, select the Profiled
Compound set in the Compound Set Table.
Ctrl-U
2.
Click Compound > Selected Compound > Update Version...
Icon(s)
Hotkey(s)
Cmd-U
Tips and Tricks
• This operation only updates the compound that you have selected in the Compound
Table.
• You can also update a single profiled compound via a context menu. Right-click on
the compound in the Compound Table, and click Update Version...
Related Topics
• “Compound Table” on page 44
• “Update Profiled Versions (Several Compounds)” on page 54
Update Profiled Versions (Several Compounds)
If you prefer, you can update many compounds at once instead of updating one at a time.
You can update all profiled compounds in one operation, or update only profiled compounds
that you have starred.
7.4 Compound Set Tools
54
CHENOMX NMR SUITE: USER MANUAL
How do I update all profiled compounds?
Menu Location
Compounds > All Compounds >
Update Versions...
Icon(s)
1.
Open the Update Versions dialog. If no compounds need updating, you cannot access
the dialog.
2.
Review the information in the dialog, and select the categories of compounds you
would like to update.
3.
Click OK.
How do I update starred profiled compounds?
Menu Location
Compounds > Starred
Compounds > Update Versions...
Icon(s)
1.
Star ( ) at least one compound in the Compound Table.
2.
Open the Update Profiled Versions dialog for starred compounds. If no starred
compounds need updating, you cannot access the dialog.
3.
Review the information in the dialog, and select the categories of compounds you
would like to update. You can update out-of-date compounds, missing compounds
or both.
4.
Click OK.
Tips and Tricks
• To determine why a compound needs updating, select it in the Compound Table. A
message appears in the space immediately above the Compound Table describing
the status of the compound in greater detail.
Related Topics
• “Compound Table” on page 44
• “Starred Compounds” on page 47
• “Import Profile” on page 57
• Chapter 9, Compound Builder on page 72
• Chapter 10, Library Manager on page 86
Open Library Manager
Menu Location
File > Open Library Manager
Icon(s)
Hotkey(s)
Ctrl-L
Cmd-L
While profiling a spectrum, you may want to define a new Compound Set that contains a
smaller list of compounds, or modify an existing Compound Set to focus more directly on
your current project. To access and edit Compound Sets, you can open the Library Manager
module from Profiler.
Tips and Tricks
• Compound Sets that you change in Library Manager update immediately in Profiler.
• Profiler does not close when you open Library Manager. Also, you can leave Library
Manager open for future reference while you continue your work in Profiler.
Related Topics
• “Compound Set Tools” on page 53
• Chapter 10, Library Manager on page 86
7.4 Compound Set Tools
55
CHENOMX NMR SUITE: USER MANUAL
7.5 Importing and Exporting Data
You can export concentrations from your profiled spectra for further analysis, bin the spectra
for analysis by more traditional techniques, or create images of the spectra for use in
publications and presentations.
Export Profiled Concentrations
When you have finished profiling a spectrum or set of spectra, you often need the resulting
concentration data in a spreadsheet or statistical analysis package. Export Profiled
Concentrations allows you to create a text file containing all of the relevant details from
profiled spectra, in a format that you can easily open in software like Microsoft Excel or
Umetrics SIMCA-P.
How do I export concentrations from one or more spectra?
Menu Location
Icon(s)
File > Export > Profiled
Concentrations (.txt)...
1.
Start the Export Profiled Concentrations wizard.
2.
Choose the source spectra to export, and specify a target folder and filename for
the exported text file. You can specify the currently open spectrum, other individual
spectrum files or one or more folders containing spectrum files as the source.
3.
Choose the compounds for which you would like to export concentration data. You
can use custom compound sets that you have created in Library Manager to filter
the output to specific compounds, or you can export all profiled compounds in all
of the spectra.
4.
Choose additional data that you would like to include in the exported file. Additional
data can include spectrum pH values, Chenomx compound IDs for the exported
compounds, or InChI or SMILES strings for the exported compounds.
5.
Choose the default layout (files in rows and compounds in columns) or transposed
layout (compounds in rows, files in columns) for the output file, depending on how
you intend to use the file.
Tips and Tricks
• If you do not explicitly specify a target file and folder, a file called
concentrations.txt is created in the folder containing your source spectra.
• To filter the exported compounds without modifying the source spectra, create a
Compound Set or Smart Compound Set in Library Manager, and only export
compounds in your custom Compound Set.
• To set spectrum pH values, open the spectrum in Processor, and use the pH editor.
The value that you set in the pH editor appears in the exported file when you choose
spectrum pH values as extra data to export.
• Use the default layout to export files that you intend to open with statistical analysis
packages. Use the transposed layout to export files that you intend to open in a
spreadsheet program, or if you prefer the transposed layout.
• If you intend to open the exported file in Microsoft Excel 2003 or earlier, you should
limit the number of compounds to less than 253 for the Default layout, or the number
of files to less than 253 for the Transposed layout, since these versions of Excel do
not support large numbers of columns.
Related Topics
• “Profiling Tools” on page 44
7.5 Importing and Exporting Data
56
CHENOMX NMR SUITE: USER MANUAL
• “Compound Set Tools” on page 53
• “Concentration Units” on page 62
Export Profiled Compounds
When you are collaborating with other people on a project, you may have different versions
of compounds in your library than your collaborator has in theirs. Exporting profiled
compounds creates a compound pack (.pack) containing the set of actual compound
signatures that you used to fit spectra for the project. Compound packs may be exchanged
with other users of Chenomx NMR Suite, and imported via Library Manager into a new
compound set. You can then be certain that you and your collaborator are always fitting
spectra for that project using the same collection of compound signatures.
How do I export a compound pack from the current spectrum?
Menu Location
Icon(s)
File > Export > Profiled
Compounds (.pack)...
1.
Open the Export Profiled Compounds dialog.
2.
Enter a name for the exported compound pack. The name you enter is used to label
the associated compound set when the compound pack is imported into another
library via Library Manager.
3.
Click OK.
4.
In the resulting file chooser, locate the folder in which you would like to save the
compound pack.
5.
In the File Name field, type the new name for the compound pack file. This can be
different from the name of the compound pack itself, but you may prefer to keep
them the same.
6.
Click Save.
Tips and Tricks
• You and your collaborator each need a valid licensed copy of Chenomx NMR Suite
installed in order to make use of compound packs.
• If you want to export all of the compounds in a compound set, regardless of whether
they have been fit in a particular spectrum, use Export as Compound Pack in Library
Manager.
Related Topics
• “Profiling Tools” on page 44
• “Import Compounds” on page 89
• “Export as Compound Pack” on page 90
• “Compound Sets” on page 94
Import Profile
When you are fitting a series of spectra from the same study, the spectra are often quite
similar to one another. While it is possible to fit each spectrum from scratch, it can be much
more efficient to copy a fit from an earlier spectrum in the series and then adjust it to match
the current spectrum. Importing profiles is an important technique for fitting large series
of similar spectra efficiently.
7.5 Importing and Exporting Data
57
CHENOMX NMR SUITE: USER MANUAL
How do I import a profile from another spectrum?
Menu Location
File > Import Profile...
Icon(s)
1.
Open the Import Profile dialog.
2.
Select a profiled spectrum (.cnx) from which you would like to import the profile.
3.
Click Import.
Tips and Tricks
• When you import a profile, the imported data completely replaces any fits of the
current spectrum that you may have done before you imported the profile.
Related Topics
• “Profiling Tools” on page 44
Spectral Binning
Statistical approaches to analyzing large numbers of spectra often involve data reduction
methods like spectral binning to reduce the number of variables that must be considered.
Spectral binning divides spectra into a series of regions, or bins, allowing analysis of the
integrated area of these bins instead of the raw spectral data. Profiler allows you to perform
spectral binning on collections of spectra, exporting the results to a text file format that is
easily read by spreadsheet programs and statistical analysis software packages.
How do I bin spectra?
Menu Location
Icon(s)
Tools > Spectral Binning...
1.
Start the Spectral Binning wizard.
2.
Choose the source spectra for binning, and specify a target folder for the resulting
binned data. You can specify a series of spectrum files or one or more folders
containing spectrum files as the source.
3.
Choose a binning method to apply to the specified spectra. You can use a defined
number of bins or a defined bin size in ppm across a range of the spectrum in ppm,
or create one bin per frequency-domain data point (full resolution binning). You
can also use bins based on the transform windows of compounds in a selected
Compound Set ("targeted binning").
4.
Choose a binning target. You can bin spectra based on the sum line (standard
binning) or the subtraction line (residual binning).
5.
Choose regions of the spectrum to exclude from binning, if desired. You can specify
any regions of the spectrum using start and end values in ppm.
6.
Choose a normalization method. You can normalize the bins relative to the total
area under the spectrum line or to units of standardized area (sa), where 1 sa is the
area under a theoretical DSS methyl peak at 0.50 mM.
7.
Choose output options for the binning results. You can label bins based on their
mid-points, their start points, or the range covered by each bin. Also, you can have
bins ordered from high to low frequency (10.0 to 0.0 ppm) or low to high frequency
(0.0 to 10.0 ppm). Finally, you can choose to use the full path in file labels, rather
than just the file name.
Tips and Tricks
• Binning can take a long time, especially on older computers or particularly large
datasets. If you have never tried binning before, try a small dataset of five or ten
spectra first, before moving on to larger datasets. The time needed for the smaller
7.5 Importing and Exporting Data
58
CHENOMX NMR SUITE: USER MANUAL
dataset will help you to more accurately estimate the time needed to complete a
binning session.
• If you choose one or more folders as the source, binning only includes spectra both
directly in the specified folders and in subfolders of the specified folders.
• If you do not explicitly specify a target folder, output files are created in the folder
containing your source spectra.
• Binning based on number of bins divides the spectrum into the specified number of
bins after excluding the regions that you have defined, if any.
• In order to do residual binning, each of the source spectra must have been analyzed
in Profiler and must contain at least one compound with a defined concentration.
• Excluding regions from a binning dataset can help you to remove the influence of
interfering or confounding signals.
• Normalization based on total area gives the area of a particular bin as a fraction of
the total area of all bins, except area in any of the excluded regions that you may have
defined.
• Spectral binning is subject to several numerical limits:
• Each binning session can include a maximum of 5000 spectra.
• The range that you define when using number of bins or size of bins as a binning
method must be at least 1 ppm wide, and can be as large as 2000 ppm (-1000 to
1000 ppm).
• You can specify a maximum of 1000000 (one million) bins or a minimum of 1.
• You can specify a minimum bin width of 0.00007 ppm and a maximum bin width
equal to the width of the range that you have chosen. For example, if you are binning
across a range of 2 to 10 ppm, your maximum bin width is 8 ppm.
Related Topics
• “Profiling Tools” on page 44
• “Compound Set Tools” on page 53
Export Spectrum Graphic
When you prepare publications or presentations based on your work in Profiler, you may
need to include images illustrating the fitting process or particular regions of the spectrum.
You can export spectrum graphics at various resolutions and into a variety of formats,
including both bitmap and vector formats.
How do I export an image of the current spectrum?
Menu Location
Icon(s)
File > Export > Spectrum
Graphic...
1.
Start the Export Spectrum Graphic wizard.
2.
Choose a file format. You can specify bitmap (.png) or vector formats (.svg, .svgz,
.pdf, .ps, .eps).
3.
Choose the image size (for bitmap formats) or quality (for vector formats), based
on your intended use of the image.
4.
Choose a folder and filename for the exported image.
7.5 Importing and Exporting Data
59
CHENOMX NMR SUITE: USER MANUAL
Tips and Tricks
• If you plan to distribute the image via e-mail or post it to a Web page, use Portable
Network Graphics (.png), Scalable Vector Graphics (.svg) or Compressed Scalable
Vector Graphics (.svgz).
• If you need an image that others can view or print on multiple computers, use Portable
Document Format (.pdf).
• If you are preparing images for professional typesetting or publication, use PostScript
(.ps) or Encapsulated PostScript (.eps).
• In the .png format, larger sizes result in more visible detail. In the other formats,
higher qualities result in more visible detail when printed at the same physical size.
• In the image options step, choose Do not shade area under lines to ensure that none
of the peak shading effects are retained in the exported image. This can be useful if
you are exporting an image of an area containing many clusters, as shading can create
a very heavy look.
Related Topics
• “Spectrum View Tools” on page 20
Copy Spectrum Image to Clipboard
Menu Location
Edit > Copy Spectrum Image to
Clipboard
Icon(s)
You can use Copy Spectrum Image to Clipboard to quickly make an image of the current
spectrum available to paste directly into another application, without creating an
intermediary file.
Tips and Tricks
• The resolution of the spectrum image copied to the clipboard varies based on the size
of the window on your screen in pixels. If adjusting combinations of your window
size and screen resolution do not allow you to produce images of a high enough
quality, you should consider using Export Spectrum Graphic.
Related Topics
• “Spectrum View Tools” on page 20
• “Export Spectrum Graphic” on page 59
Send to Processor
Menu Location
File > Send to Processor
Icon(s)
Hotkey(s)
Ctrl-J
Cmd-J
As you are working with a spectrum in Profiler, you may notice that the phasing, baseline
correction or other aspects of the spectrum's lineshapes are not properly adjusted. Similarly,
you may import a spectrum directly into Profiler, only to realize that it requires phasing,
baseline or other correction. Send to Processor closes the current spectrum in Profiler, and
opens it in Processor, retaining any changes you have made in Profiler.
Tips and Tricks
• Any changes that you have made to the spectrum in Profiler are retained when you
send the spectrum to Processor, and are visible when you bring the spectrum back
into Profiler. However, you still need to save the spectrum, either in Processor or
Profiler, to permanently save those changes to the spectrum file.
Related Topics
• Chapter 6, Processor on page 27
7.5 Importing and Exporting Data
60
CHENOMX NMR SUITE: USER MANUAL
7.6 Information Tools
While profiling spectra, you can access extended information about the compounds in your
Library, as well as acquisition and sample information connected to the current spectrum.
You can also change the concentration units that appear in the Compound Table and any
exported profiles.
Reference Panel
Menu Location
View > Show Reference Panel
Icon(s)
Hotkey(s)
Ctrl-Shift-R
Cmd-Shift-R
The Reference Panel displays information specific to the compound that you have selected
in the Compound Table. This includes a structure image, molecular formula and weight,
alternate names and links to external reference sites. You can use this information to verify
the identity of the compound that you are fitting and better understand the signature and
behaviour of the compound in your spectra.
Tips and Tricks
• Some sections in the Reference Panel are collapsed by default, including Alternate
Names and Alternate CAS Registry. To expand them, click the + symbol next to the
section name. Click the - symbol to collapse the section again.
• Each of the External Database References are links to the indicated database. Click a
link to open the associated database entry for the current compound in your system's
web browser.
• You can open the Reference Panel for a specific compound by double-clicking the
compound in the Compound Table. Double-click again to close the Reference Panel.
• Chenomx NMR Suite retrieves all Reference Panel information from a Chenomx server
named reference.chenomx.com, to ensure that you always have the most accurate
information. If you access the internet through an HTTP proxy server, or have no
internet access, you may want to change the internet preferences for Chenomx NMR
Suite.
Related Topics
• “Preferences” on page 24
• “Profiling Tools” on page 44
Spectrum Details
Menu Location
Icon(s)
File > Spectrum Details...
Spectrum Details allows you to view basic properties of the current spectrum, including
sweep width, magnet frequency, pulse sequence and so on, as well as user-defined properties
such as sample pH and comments that have been added in Processor.
Tips and Tricks
• All of the information in Spectrum Details is read-only in Profiler. To change sample
pH or add or modify comments for the spectrum, send the spectrum to Processor.
Related Topics
• Chapter 6, Processor on page 27
7.6 Information Tools
61
CHENOMX NMR SUITE: USER MANUAL
Concentration Units
Menu Location
View > Concentration Units
You can change the units of concentration used in the Compound Table. Available units
include millimoles per litre (mM), micromoles per litre (μM) and milligrams per decilitre
(mg/dL).
Tips and Tricks
• The concentration units setting affects both how concentrations appear in the
Compound Table and how they are exported. You should ensure that the concentration
units are set appropriately before you export concentrations.
• The maximum allowed concentration for any compound is 5000 mM (5 M). When
you have selected mg/dL as the concentration units, the maximum value varies per
compound, since the units incorporate the molecular weight of the compound.
However, the maximum value is always equivalent to 5000 mM.
• Concentrations in mg/dL are only available for compounds whose molecular weight
has been specified, and the accuracy of such concentrations depends on the accuracy
of the molecular weight provided. To change the molecular weight associated with a
compound, open it in Compound Builder and edit the Compound Details.
Related Topics
• “Profiling Tools” on page 44
• “Open Library Manager” on page 55
• “Export Profiled Concentrations” on page 56
• “Compound Details” on page 84
• “Send to Compound Builder” on page 91
7.6 Information Tools
62
Chapter 8: Spin Simulator
Spin Simulator is a simple yet powerful tool for creating simulations of NMR spectra, based
on user-defined spin systems and reference spectra. You can use these simulations as starting
points for creating your own compound signatures, especially if you need to create signatures
at multiple magnet frequencies, or you want to create robust signatures with a strong
theoretical backing.
To use Spin Simulator effectively, you must have a basic understanding of NMR theory. You
should also know how to interpret NMR spectra, especially J-coupling. Fitting complex
compounds requires at least this basic theoretical knowledge. Chenomx experts can provide
compound fitting services and develop specialized compound libraries for you. For more
information about customizing compound libraries and related services, please contact
Chenomx Contract Services.
You can only use Spin Simulator
if you have purchased the
Professional edition of Chenomx
NMR Suite, or if you are using a
time-limited trial version of
Chenomx NMR Suite.
8.1 Overview
❶
❷
❸
Spin Definition Panel. Displays the Spin Definition Tab for the currently selected spin
definition, including its center, number of protons represented, and width. Also allows
you to select other spin systems (via a drop-down menu) and spin definitions (via the
tabs).
J-Value Editor. Allows you to vary the J-value for the currently selected J-modifier.
J-Modifier List. Allows you to add, select, edit or remove J-modifiers associated with
the currently selected spin definition.
8.1 Overview
63
CHENOMX NMR SUITE: USER MANUAL
❹
❺
❻
❼
❽
Simulation Details. Display information about the current simulation, including the
simulation frequency and numbers of spin systems, transitions, and J-modifiers
represented in the simulation.
Spin Navigator. Allows you to navigate among the spin definitions of the currently
open simulation. You can enable or disable the Spin Navigator using the View menu.
Spectrum View Tools. These tools allow you to navigate the spectrum more easily.
Spectrum Thumbnail. Displays a thumbnail image of the current spectrum. You can
also use the thumbnail to navigate the Spectrum View at various zoom settings.
Status Bar. Displays the current cursor position in the units specified by the View > X
Scale and View > Y Scale settings. Also displays information about recent user actions.
8.2 Quick Reference Guide
Linux, Windows
Mac OS X
New Simulation...
Ctrl-N
Cmd-N
Open...
Ctrl-O
Cmd-O
---
---
Close
Ctrl-W
Cmd-W
Save
Ctrl-S
Cmd-S
Save As...
---
---
Preferences...
---
---
Exit
---
---
Undo
Ctrl-Z
Cmd-Z
Redo
Ctrl-Y
Cmd-Y
Select All Spin Definitions
Ctrl-A
Cmd-A
X Scale
---
---
Y Scale
---
---
Zoom > Show Entire Spectrum
Ctrl-(-)
Cmd-(-)
Zoom > Set Zoom...
Ctrl-M
Cmd-M
Zoom > Undo Zoom
[
[
Zoom > Redo Zoom
]
]
Zoom > Auto Zoom
Ctrl-F
Cmd-F
File Menu
Open Recent
Edit Menu
View Menu
8.2 Quick Reference Guide
64
CHENOMX NMR SUITE: USER MANUAL
Linux, Windows
Mac OS X
Zoom > Increase Vertical Zoom
+
+
Zoom > Decrease Vertical Zoom
-
-
Show Spin Navigator
Ctrl-Shift-N
Cmd-Shift-N
Show J-Value Editor
Ctrl-Shift-J
Cmd-Shift-J
Show Overlay Line
Ctrl-Shift-1
Cmd-Shift-1
Show Subtraction Line
Ctrl-Shift-2
Cmd-Shift-2
Show Simulation Line
Ctrl-Shift-3
Cmd-Shift-3
Show Selection Line
Ctrl-Shift-4
Cmd-Shift-4
Overlay Spectrum...
---
---
Ctrl-T
Cmd-T
Add Spin System
---
---
Remove Spin System
---
---
Add Spin Definition...
---
---
Remove Spin Definition
---
---
Add J-Modifier...
---
---
Edit J-Modifier...
---
---
Remove J-Modifier(s)
---
---
Uncouple Split
---
---
Group/Ungroup Uncoupled Splits
---
---
Select Region
Simulation Menu
Previous Spin Definition
Ctrl-Shift-Comma Cmd-Shift-Comma
Next Spin Definition
Ctrl-Shift-Period Cmd-Shift-Period
Help Menu
Contents
F1
F1
Search
---
---
Save Application Log...
---
---
Activation Details...
---
---
About Chenomx NMR Suite...
---
---
8.2 Quick Reference Guide
65
CHENOMX NMR SUITE: USER MANUAL
8.3 Fitting Tools
Spin Simulator provides you with a variety of tools to help you create accurate spin
simulations, by adding, manipulating and removing spin definitions and coupling constants,
grouping spin definitions into spin systems, selecting simulation algorithms, and viewing
summary details about your current simulation.
Spin simulation is a computationally intensive process, and takes more time as the simulation
you are creating becomes more complex. Generally, the amount of time required to
recalculate a simulation increases more or less linearly with the number of spin definitions
(protons) in the simulation, and exponentially with the number of distinct J-couplings. Spin
Simulator monitors the overall complexity of your simulation as you work, and if you attempt
to take an action that would result in unusable simulation times, the action will be cancelled,
and you will see a warning dialog indicating that the resulting simulation would be too
complex.
New Simulation
Menu Location
New Simulation creates a new simulation file (.xss). The new simulation file has the default
simulation frequency of 800 MHz.
File > New Simulation...
Tips and Tricks
Icon(s)
Hotkey(s)
• The new simulation file does not have an overlaid spectrum. You should overlay a
spectrum before you continue creating a simulation.
Ctrl-N
Cmd-N
• You need to save the new file in order to retain changes that you have made.
Related Topics
• “Overlaying a Spectrum” on page 19
• “Simulation Details” on page 71
Spin Systems
If you need to model many protons with a simulation, you may want to use spin systems to
organize them. A spin system in Spin Simulator is a set of spin definitions that you have
defined as only interacting with other spin definitions within the set. Chemically, this may
be loosely interpreted as a set of protons that couple only to each other.
How do I add a new spin system?
Menu Location
Icon(s)
Simulation > Add Spin System...
1.
Click Add Spin System.
2.
If this is the first spin system you are adding, a new dropdown list appears in the
Spin Definition Panel, above the Spin Definition Tabs, listing the available spin
systems. Additional spin systems also appear in this dropdown list.
How do I select a different spin system?
1.
In the Spin Definition Panel, select the spin system to which you would like to switch
from the drop-down list.
Alternately, select a spin definition belonging to the other spin system in the
Spectrum View.
8.3 Fitting Tools
66
CHENOMX NMR SUITE: USER MANUAL
How do I remove a spin system?
Menu Location
Simulation > Remove Spin
System...
Icon(s)
1.
Select a spin system from the drop-down list above the Spin Definition Tabs.
2.
Click Remove Spin System.
Tips and Tricks
• When you remove a spin system, all spin definitions and J-modifiers associated with
the spin system are removed as well.
Related Topics
• “Spin Definitions” on page 67
• “Spin Navigator” on page 68
• “Spin Definition Tab” on page 69
• “Simulation Details” on page 71
Spin Definitions
Spin Simulator creates computer models of the interactions among the members of a spin
system. Within Spin Simulator, a member of a spin system may be considered equivalent
to a single proton, or a group of protons that are both chemical shift equivalent and
magnetic-equivalent. These members of spin systems are described by spin definitions, and
are the basic building blocks of the models created by Spin Simulator.
A spin definition consists of three basic pieces of information: A number of protons
represented by the spin definition, the center of the spin definition in ppm (equivalent to
a chemical shift in an NMR spectrum), and a width in sw (analogous to a linewidth at
half-height in an NMR spectrum).
You can organize spin definitions into spin systems, as described elsewhere in this chapter
(see “Spin Systems” on page 66).
How do I add a new spin definition?
Menu Location
Icon(s)
Simulation > Add Spin
Definition...
1.
Open the Add Spin Definition dialog.
2.
Enter a number of protons, starting center in ppm, and starting width in sw. These
values can be changed later.
3.
Click OK.
How do I edit a spin definition?
1.
Select the spin definition by clicking on it in the Spectrum View, or selecting its Spin
Definition Tab in the Spin Definition Pane.
2.
Do one or more of the following:
• Click and drag the blue triangle on the horizontal axis to change the center of
the spin definition.
• Click and drag the blue triangle on the vertical axis to change the height of the
simulation.
• Click and drag the spin definition directly in the Spectrum View to change its
center and the simulation height simultaneously.
8.3 Fitting Tools
67
CHENOMX NMR SUITE: USER MANUAL
• Click and drag the blue triangles on either edge of the spin definition (at around
half the height of the tallest peak) to change the width of the spin definition.
How do I remove a spin definition?
Menu Location
Simulation > Remove Spin
Definition...
Icon(s)
1.
Select a spin definition using the Spin Definition Tabs or the Spin Navigator.
2.
Click Remove Spin Definition.
Tips and Tricks
• A spin definition can describe no more than ten protons. However, given that a spin
definition typically describes chemically and magnetically equivalent protons, you
may find that a value greater than three (a methyl group) is not often required.
• A spin system can contain any number of protons and spin definitions, as long as the
total number of transitions is less than 2000. If you need to create a simulation
requiring more than 2000 transitions, you will need to use multiple spin systems.
The total number of transitions in the current simulation appears in the simulation
details (see “Simulation Details” on page 71).
• Height adjustments always affects the whole simulation, not just the currently selected
spin definition. If you need to adjust the heights more than is possible in Spin
Simulator, save the simulation and open it in Compound Builder, then make your
adjustments there.
• Removing a spin definition also removes any J-modifiers that you have associated
with that spin definition.
Related Topics
• “Spin Systems” on page 66
• “Spin Navigator” on page 68
• “Spin Definition Tab” on page 69
• “J-Modifiers” on page 69
• “Simulation Details” on page 71
Spin Navigator
The Spin Navigator allows you to quickly move among the spin definitions that you have
created in the current simulation. It appears in the top left corner of the Spectrum View as
a ordered list of the approximate positions of all the spin definitions of the simulation in
ppm. When you click on a spin definition's position, the view zooms to provide an optimal
view of the spin definition. The optimal view includes the full width of the cluster and the
full vertical extent of any peaks within the horizontal range. You can also use the Spin
Navigator to move sequentially through the list of spin definitions in either direction.
How do I display the spin definitions of a simulation in the Spectrum View?
Menu Location
Hotkey(s)
View > Show Spin Navigator
1.
Make sure that the Spin Navigator is visible.
2.
Click a spin definition's position to zoom directly to that spin definition. Click the
left or right arrow to move sequentially through the list of spin definitions.
Ctrl-Shift-N
Cmd-Shift-N
8.3 Fitting Tools
68
CHENOMX NMR SUITE: USER MANUAL
Tips and Tricks
• Click on a spin definition and drag along the Spin Navigator to include adjacent spin
definitions in the Spectrum View.
Related Topics
• “Spin Systems” on page 66
• “Spin Definitions” on page 67
• “Spin Definition Tab” on page 69
• “Simulation Details” on page 71
Spin Definition Tab
The Spin Definition Tabs, found in the Spin Definition Panel, allow you to view and edit the
properties of a spin definition, and create, edit or remove J-modifiers.
How do I edit spin definitions and J-modifiers using the spin definition tab?
1.
Select a spin definition by clicking it in the Spectrum View, or by selecting its tab
in the Spin Definition Panel.
2.
Click in any of the text fields and enter a new value to edit the number of protons,
center or width of the spin definition.
3.
Edit J-modifiers by doing any of the following:
• Click Add... to add a new J-modifier to the current spin definition.
• Click Edit... to edit the selected J-modifier in the current spin definition.
• Click Remove to remove the selected J-modifier in the current spin definition.
Tips and Tricks
• Double-click on a J-modifier to change its coupling constant and coupling status,
including which spin definition the current one is coupled to, if any.
• Only the Spin Definition Tabs for the current spin system are visible at any given time.
• The tabs for spin definitions that are coupled to the one that you are currently viewing
appear highlighted in bold in the Spin Definition Panel.
Related Topics
• “Spin Systems” on page 66
• “Spin Definitions” on page 67
J-Modifiers
When you create a new spin definition, it appears as a single, unsplit peak. J-modifiers allow
you to split a spin definition into more complex shapes, to better fit real spectra. J-modifiers
can be uncoupled, affecting only one spin definition, or coupled, linking the spin definition
to another one via its coupling constant. Coupled J-modifiers allow more accurate simulations,
as Spin Simulator can use them to calculate higher-order coupling effects, accounting for
tenting and other complex behaviour.
8.3 Fitting Tools
69
CHENOMX NMR SUITE: USER MANUAL
How do I add an uncoupled J-modifier to a spin definition?
Menu Location
Compound > Add J-Modifier...
Icon(s)
1.
Select the spin definition to which you would like to add a J-modifier.
2.
Open the Add J-Modifier... dialog.
3.
Enter a J-value for the new J-modifier, in Hz.
4.
Select Uncoupled Split, and specify a split count for the new J-modifier.
5.
Click OK.
How do I add a coupled J-modifier to a spin definition?
1.
Select one of the two spin definitions that you would like to link with a coupled
J-modifier.
2.
Open the Add J-Modifier... dialog.
3.
Enter a J-value for the new J-modifier, in Hz.
4.
Select Coupled, and select the spin definition to which you would like to link.
5.
Click OK.
How do I edit an existing J-modifier?
Menu Location
Compound > Edit J-Modifier...
Icon(s)
1.
Select a spin definition.
2.
Select a J-modifier that you would like to edit.
3.
Open the Edit J-Modifier... dialog.
4.
Make your desired changes.
5.
Click OK.
How do I couple two spin definitions using splits that I have already defined?
1.
Select one of the two spin definitions that you would like to link, and select the
uncoupled split that will link it to the other spin definition.
2.
Open the Edit J-Modifier... dialog.
3.
Select Coupled, and select the spin definition to which you would like to link.
4.
Select the uncoupled split from the second spin definition that you would like to
link to.
5.
Click OK.
How do I remove a J-modifier?
Menu Location
Compound > Remove J-Modifier
Icon(s)
1.
Select a spin definition.
2.
Select a J-modifier that you would like to remove.
3.
Click Remove J-Modifier.
How do I uncouple a J-modifier?
Menu Location
Icon(s)
Compound > Uncouple
1.
Select a spin definition.
2.
Select a J-modifier that you would like to uncouple.
3.
Click Uncouple.
8.3 Fitting Tools
70
CHENOMX NMR SUITE: USER MANUAL
How do I ungroup uncoupled J-modifiers?
Menu Location
Compound > Ungroup
Uncoupled Splits
Icon(s)
Menu Location
Icon(s)
Compound > Group Uncoupled
Splits
1.
Select a spin definition.
2.
Select an uncoupled split with a split count greater than 1.
3.
Click Ungroup Uncoupled Splits..
How do I group several uncoupled J-modifiers?
1.
Select a spin definition.
2.
Select several uncoupled splits that you would like to combine. Hold down Ctrl to
multi-select J-modifiers.
3.
Click Group Uncoupled Splits..
Tips and Tricks
• J-Modifiers can only link two spin definitions that are in the same spin system.
• When you remove a coupled J-modifier, you will remove it from both spin definitions
to which it applied. If you only want to remove the J-modifier from one spin definition,
you will have to uncouple it first.
• Uncoupling a coupled J-modifier will result in an uncoupled split on each of the two
previously coupled spin definitions, each split having the same J-value as the original
coupled J-value.
• Most operations involving J-modifiers are available by right-clicking on a particular
J-modifier in the Spin Definition Tab.
Related Topics
• “Spin Systems” on page 66
• “Spin Definitions” on page 67
Simulation Details
The bottom center pane in the Spin Simulator window displays Simulation Details,
information about the current simulation. Simulation Details include the simulation
frequency, numbers of spin systems and spin definitions (spins), and numbers of transitions
present in the current simulation.
Tips and Tricks
• When you do not have a spectrum overlaid, you can change the simulation frequency
in the Simulation Details to explore the effects of spectrometer frequency on your
simulated compound.
• When you overlay a spectrum, the simulation frequency is set to match that of the
overlaid spectrum.
Related Topics
• “Overlaying a Spectrum” on page 19
• “Spin Systems” on page 66
• “Spin Definitions” on page 67
8.3 Fitting Tools
71
Chapter 9: Compound Builder
The Compound Builder module allows you to create compound library entries so that you
can identify and quantify user-defined compounds using Chenomx NMR Suite. You can
integrate the compound signatures that you create with Compound Builder into a
user-defined compound library using Library Manager.
You can only use Compound
Builder if you have purchased
the Professional edition of
Chenomx NMR Suite, or if you
are using a time-limited trial
version of Chenomx NMR Suite.
9.1 Overview
❶
❷
❸
❹
❺
❻
❼
Cluster Navigator. Allows you to navigate among the clusters of the currently open
compound. You can enable or disable the Cluster Navigator using the View menu.
Spectrum View. Displays the spectrum as well as the sum line and the currently selected
cluster(s) or peak(s).
Cluster and Peak Lists. Allow you to edit, select or remove clusters or peaks in the
currently open compound. Also allows you to define new clusters based on the currently
selected peaks or clusters.
Information Panel. Displays information relating to the currently selected cluster(s)
and peak(s).
Spectrum View Tools. These tools allow you to navigate the spectrum more easily.
Reference Panel. Displays additional information for the compound indicated by the
Chenomx Compound ID in the Compound Details, including structure, molecular weight,
CAS-RN and so on.
Spectrum Thumbnail. Displays a thumbnail image of the Spectrum View. The thumbnail
can also be used to navigate the spectrum at various zoom settings.
9.1 Overview
72
CHENOMX NMR SUITE: USER MANUAL
❽
Status Bar. Displays the current cursor position in the units specified by the View > X
Scale and View > Y Scale settings. Also displays information about recent user actions.
9.2 Quick Reference Guide
Linux, Windows
Mac OS X
New Compound...
Ctrl-N
Cmd-N
Open...
Ctrl-O
Cmd-O
---
---
Close
Ctrl-W
Cmd-W
Save
Ctrl-S
Cmd-S
Save As...
---
---
Import...
---
---
Compound Details...
---
---
Preferences...
---
---
Exit
---
---
Undo
Ctrl-Z
Cmd-Z
Redo
Ctrl-Y
Cmd-Y
Select All Clusters
Ctrl-A
Cmd-A
Select by Cluster
Ctrl-B
Cmd-B
X Scale
---
---
Y Scale
---
---
Zoom > Show Entire Spectrum
Ctrl-(-)
Cmd-(-)
Zoom > Set Zoom...
Ctrl-M
Cmd-M
Zoom > Undo Zoom
[
[
Zoom > Redo Zoom
]
]
Zoom > Auto Zoom
Ctrl-F
Cmd-F
+
+
File Menu
Open Recent
Edit Menu
View Menu
Zoom > Increase Vertical Zoom
9.2 Quick Reference Guide
73
CHENOMX NMR SUITE: USER MANUAL
Linux, Windows
Mac OS X
-
-
Show Reference Panel
Ctrl-Shift-R
Cmd-Shift-R
Show Cluster Navigator
Ctrl-Shift-N
Cmd-Shift-N
Show Overlay Line
Ctrl-Shift-1
Cmd-Shift-1
Show Subtraction Line
Ctrl-Shift-2
Cmd-Shift-2
Show Compound Line
Ctrl-Shift-3
Cmd-Shift-3
Show Selection Line
Ctrl-Shift-4
Cmd-Shift-4
Overlay Spectrum...
---
---
Ctrl-T
Cmd-T
Add Peak
Ctrl-K
Cmd-K
Edit Selected Peaks...
Ctrl-E
Cmd-E
Remove Selected Peaks
Delete
Delete
Group Selected Peaks as Cluster
Ctrl-G
Cmd-G
Transform Window > Edit for Selected
Cluster...
---
---
Transform Window > Set Default on
Selected Clusters
---
---
Transform Window > Clear for Selected
Clusters
---
---
Transform Window > Set Default on All
Clusters
---
---
Transform Window > Clear for All Clusters
---
---
Zoom > Decrease Vertical Zoom
Select Region
Compound Menu
Previous Cluster
Ctrl-Shift-Comma Cmd-Shift-Comma
Next Cluster
Ctrl-Shift-Period Cmd-Shift-Period
Tools Menu
Optimize Selected Peak Shapes
Ctrl-I
Cmd-I
Ctrl-Shift-I
Cmd-Shift-I
Contents
F1
F1
Search
---
---
Generate Cluster for Region
Help Menu
9.2 Quick Reference Guide
74
CHENOMX NMR SUITE: USER MANUAL
Linux, Windows
Mac OS X
Save Application Log...
---
---
Activation Details...
---
---
About Chenomx NMR Suite...
---
---
9.3 Fitting Tools
Compound Builder provides you with a variety of tools to help you create accurate compound
signatures, by adding, manipulating and removing peaks, grouping peaks into clusters and
defining ranges within which clusters are allowed to move. You can also generate arbitrary
clusters to fit the overall lineshape of a region, or optimize peaks to better fit the spectrum.
New Compound
Menu Location
File > New Compound...
Icon(s)
Hotkey(s)
Ctrl-N
Cmd-N
New Compound creates a new compound file (.xcpd). The new compound file has the
default Compound Details, including a magnet frequency of 800 MHz and a sample
concentration of 5 mM.
Tips and Tricks
• The new compound file does not have an overlaid spectrum. You should overlay a
spectrum before you continue creating a compound signature.
• You need to save the new file in order to retain changes that you have made.
Related Topics
• “Overlaying a Spectrum” on page 19
• “Compound Details” on page 84
Import
Importing allows you to use an existing spin simulation (.xss) or legacy compound album
(.cca) to guide creating a new compound file.
How do I import a spin simulation or compound album?
Menu Location
Icon(s)
File > Import...
1.
Open the Import Compound dialog.
2.
Locate the folder containing the simulation or album file that you would like to
import.
3.
Select the simulation or album file and click Open.
4.
Choose a calibration method.
If you are calibrating to a spectrum file (.cnx), click the Browse button (...) and
locate the spectrum file you would like to use.
The spectrum that you choose is overlaid in the Spectrum View.
5.
Click OK.
9.3 Fitting Tools
75
CHENOMX NMR SUITE: USER MANUAL
Tips and Tricks
• Calibrating to the Default Environment instead of a spectrum file will set a magnet
frequency of 800 MHz, a pH of 7.00, and CSI settings corresponding to DSS at 0.500
mM.
• You should calibrate a signature to a real spectrum for more accurate results when
using the signature in an analysis.
Related Topics
• “Overlaying a Spectrum” on page 19
• Chapter 8, Spin Simulator on page 63
• “Compound Details” on page 84
Add Peak
Add Peak allows you to add a new peak to the current compound signature. The mouse
cursor changes to a large crosshair, and the next point that you click in the Spectrum View
defines the position and height for the new peak. The new peak appears in the peaks list,
is added to the currently selected cluster and becomes the currently selected peak in that
cluster.
How do I add a peak to the current signature?
Menu Location
Compound > Add Peak
Icon(s)
Hotkey(s)
Ctrl-K
1.
Switch to Add Peak mode. The mouse cursor changes to a large crosshair.
2.
Click somewhere on the spectrum to add a new peak. The point that you click defines
both the position and the height of the new peak.
Cmd-K
Tips and Tricks
• To create a new cluster, you can deselect all clusters in the cluster list, then create a
new peak. The new peak appears in its own new cluster.
• The new peak appears in the peak list in numerical order with the currently displayed
peaks, not necessarily at the beginning or end of the list.
• Although the position that you click on the spectrum sets the position and height of
the new peak, you are free to change both after you have added the peak.
• Right-click anywhere in the Spectrum View that does not already contain a peak and
select Add a New Peak to Cluster or Add a New Peak to New Cluster to add a new
peak to a specific cluster or to a new one, respectively.
• When you right-click in the Spectrum View to add a new peak, the specific cluster to
which you can add a peak is the currently selected cluster if only one is selected, or
the closest cluster to the point that you clicked if multiple clusters are selected.
Related Topics
• “Selecting Peaks and Clusters” on page 77
• “Remove Selected Peaks” on page 78
• “Adjusting Peaks” on page 78
• “Grouping Peaks as a Cluster” on page 79
• “Optimize Selected Peak Shapes” on page 79
9.3 Fitting Tools
76
CHENOMX NMR SUITE: USER MANUAL
• “Generate Cluster for Region” on page 80
• “Transform Windows” on page 81
• “Cluster Navigator” on page 82
Selecting Peaks and Clusters
Many actions that you may perform in Compound Builder require you to select a peak or
cluster to act on. There are several ways to select peaks, unassociated groups of peaks or
clusters.
Clicking on the graph selects either peaks or clusters. You can toggle between selecting
peaks or clusters via the graph itself, but the Information Panel always allows you to select
either.
How do I select a cluster?
Menu Location
Hotkey(s)
Select by Cluster
1.
Turn on selection by cluster, if it is not currently on.
2.
Click on the cluster in the Spectrum View. Alternately, click on the cluster's position
in the Information Panel.
Ctrl-B
Cmd-B
How do I select a peak?
1.
Turn off selection by cluster, if it is currently on.
2.
Click on the peak in the Spectrum View. Alternately, click on the peak's position in
the Information Panel.
How do I select multiple peaks or clusters?
1.
Turn selection by cluster on or off, as needed.
2.
Hold down the Ctrl or Cmd key.
3.
Click each of the peaks or clusters that you would like to select, either in the
Spectrum View, the Information Panel, or both.
Tips and Tricks
• When you have a cluster currently selected, only the peaks associated with that cluster
are available to select via the Information Panel.
• When you have no clusters currently selected, no peaks are visible or available to
select via the Information Panel.
• If the peak that you would like to select is not visible in the Information Panel, you
may need to select a different cluster.
Related Topics
• “Add Peak” on page 76
• “Remove Selected Peaks” on page 78
• “Adjusting Peaks” on page 78
• “Grouping Peaks as a Cluster” on page 79
• “Optimize Selected Peak Shapes” on page 79
• “Generate Cluster for Region” on page 80
• “Transform Windows” on page 81
9.3 Fitting Tools
77
CHENOMX NMR SUITE: USER MANUAL
• “Cluster Navigator” on page 82
Remove Selected Peaks
As you develop a compound signature, you may need to remove one or more peaks from
the signature to refine or simplify the signature. You can remove one or more selected peaks
from the current signature, including peaks in different clusters, whole clusters or multiple
clusters.
How do I remove peaks?
Menu Location
Compound > Remove Selected
Peaks
Icon(s)
Hotkey(s)
Delete
Delete
1.
Select the peaks or clusters that you would like to remove.
2.
Click Remove Selected Peaks.
Tips and Tricks
• You can remove multiple peaks or clusters by selecting them via the Spectrum View
or the Information Panel.
• Right-click on a selection in the Spectrum View or Information Pane and select Remove
Peaks to remove the selected peaks.
Related Topics
• “Add Peak” on page 76
• “Selecting Peaks and Clusters” on page 77
Adjusting Peaks
In most cases, your initial placement of a peak does not allow a sufficiently accurate fit of
the overlaid spectrum. You need to modify the height or frequency of one or more peaks to
arrive at a fit that satisfies your requirements.
How do I set peak properties to specific values?
Menu Location
Compound > Edit Selected
Peaks...
Icon(s)
Hotkey(s)
Ctrl-E
1.
Select the peaks or clusters that you would like to adjust.
2.
Open the Edit Selected Peaks dialog.
3.
Enter the desired center (position in ppm), amplitude (height in si) and width (in
sw) to apply to all selected peaks or clusters.
4.
Click OK.
Cmd-E
How do I adjust peak properties with the mouse?
1.
Select the peaks or clusters that you would like to adjust.
2.
Click and drag the selected peaks or clusters in the Spectrum View to adjust their
positions and heights. Use the blue triangles on the horizontal and vertical axes for
fine control over position and height, respectively.
3.
Click and drag the blue triangles on either side of the selected peaks and clusters,
at approximately half-height, to adjust their widths.
Tips and Tricks
• When you enter specific values in the Edit Selected Peaks dialog, the values that you
enter are applied to all of the selected peaks, regardless of which clusters they are
associated with.
9.3 Fitting Tools
78
CHENOMX NMR SUITE: USER MANUAL
• Double-click on a peak or cluster in the Information Panel to open the Edit Selected
Peaks dialog for the double-clicked item.
• Right-click on a selection in the Spectrum View or Information Pane and select Edit
Selected Peaks to edit properties for the selection.
Related Topics
• “Add Peak” on page 76
• “Selecting Peaks and Clusters” on page 77
• “Grouping Peaks as a Cluster” on page 79
• “Optimize Selected Peak Shapes” on page 79
• “Generate Cluster for Region” on page 80
• “Transform Windows” on page 81
• “Cluster Navigator” on page 82
Grouping Peaks as a Cluster
During the fitting process, and especially when you are fitting more complex compounds,
you may need to group peaks from one or more clusters into a cluster of their own. This
ensures that all of the selected peaks move together when you use the compound signature
for profiling, and that they obey the same transform window settings.
How do I group peaks as a cluster?
Menu Location
Compound > Group Selected
Peaks as Cluster
Icon(s)
Hotkey(s)
Ctrl-G
Cmd-G
1.
Select the peaks and clusters that you would like to group as a new cluster.
2.
Click Group Selected Peaks as Cluster.
Tips and Tricks
• Right-click on a selection in the Spectrum View or Information Pane and select Group
Selected Peaks as Cluster to group the selected peaks directly.
• After grouping peaks into a new cluster, you may want to use the Edit Selected Peaks
dialog to set them all to a common width.
Related Topics
• “Add Peak” on page 76
• “Selecting Peaks and Clusters” on page 77
• “Adjusting Peaks” on page 78
• “Transform Windows” on page 81
• “Cluster Navigator” on page 82
Optimize Selected Peak Shapes
Adding peaks to a signature and adjusting them to approximately model a particular region
of the spectrum is fairly simple. However, the task of fine-tuning those peaks to accurately
fit the lineshape in that region can be tedious. Once you have approximated the fit of a region
of the spectrum, you can use Compound Builder's optimization algorithms to rapidly obtain
a more refined fit of the region.
9.3 Fitting Tools
79
CHENOMX NMR SUITE: USER MANUAL
How do I optimize the fit of peaks in my compound signature?
Menu Location
Tools > Optimize Selected Peak
Shapes
Icon(s)
Hotkey(s)
Ctrl-I
Cmd-I
1.
Select the peaks and clusters that you would like to optimize.
2.
Click Optimize Selected Peak Shapes.
Tips and Tricks
• You must select fewer than 100 peaks to optimize.
• Optimization will generally give better results if your starting fit is reasonably close
to the actual shape of the spectrum. Simulating the compound in Spin Simulator can
often give you a very good starting fit.
Related Topics
• “Add Peak” on page 76
• “Selecting Peaks and Clusters” on page 77
• “Adjusting Peaks” on page 78
• “Generate Cluster for Region” on page 80
Generate Cluster for Region
You may need to quickly create a compound signature that will allow you to verify that the
compound is present in a spectrum, without necessarily allowing the full range of flexibility
that a chemically accurate fit affords. You can create these limited-use signatures using
automatically generated clusters. Generated clusters lack the chemical accuracy of fits that
are backed by spin simulations, but provide a quick model of the general lineshape of a
compound.
How do I generate a cluster to fit a region of the spectrum?
Menu Location
Tools > Generate Cluster for
Region
Icon(s)
Hotkey(s)
Ctrl-Shift-I
Cmd-Shift-I
1.
Select the region of the spectrum that you would like to fit with a generated cluster.
2.
Click Generate Cluster for Region.
Tips and Tricks
• Generated clusters have no basis in theoretical NMR. They simply add a number of
Lorentzian peaks that approximates the overall shape of the spectrum in the selected
region. As a result, they will not allow you to accurately account for significant changes
in the spectrum based on magnet frequency, pH or other systematic variations.
• Signatures based on generated clusters will usually only give accurate results when
profiling spectra acquired under conditions very similar to the source spectrum.
• Generated clusters are already optimized. Further optimizations will not generally
give any better results.
• When you generate a cluster, Compound Builder will only use up to 100 peaks to fit
the selected region. If the region you are trying to fit cannot be accurately modeled
using 100 peaks, you can try selecting a smaller region, adding more peaks manually,
or simulating the compound in Spin Simulator and importing the simulation.
Related Topics
• “Select Region” on page 22
• “Add Peak” on page 76
9.3 Fitting Tools
80
CHENOMX NMR SUITE: USER MANUAL
• “Selecting Peaks and Clusters” on page 77
• “Adjusting Peaks” on page 78
• “Optimize Selected Peak Shapes” on page 79
Transform Windows
You can set limits on the amounts that you can transform (or move) individual clusters in
a compound signature in Profiler. These limits are called transform windows. Establishing
transform windows for your own compounds improves the quality of fits that you perform
with your custom compound signatures.
When you set transform windows, you should ensure that they are wide enough to account
for the degree of variability in cluster position that you expect to see in your samples. For
example, if you routinely analyze spectra with widely varying pH, you generally need larger
transform windows than if your sample spectra are always close to neutral.
The most common influences on the position of a cluster in a compound are pH and ion
concentrations. In order to set accurate transform windows for a compound, you should
consider acquiring spectra of the pure compound at the outer limits of the conditions you
expect to encounter when fitting the compounds in experimental mixtures. This allows you
to map the maximum extent of these effects on the cluster positions in your compounds.
In the absence of specific information about the behaviour of a cluster, you can set a default
transform window for the cluster. This sets a transform window 0.006 ppm wide, centered
on the current cluster center. For a cluster appearing at 1.000 ppm, the default transform
window sets lower and upper limits of 0.997 and 1.003 ppm, respectively.
How do I set the transform window for a cluster?
Menu Location
Compound > Transform Window
> Edit for Selected Cluster...
Icon(s)
1.
Select the cluster for which you would like to set a transform window.
2.
Open the Edit Transform Window dialog.
3.
Select Limit transforms to, and enter the new lower and upper limits for the
selected cluster.
4.
Click OK.
How do I change the transform window for a cluster?
1.
Select the cluster whose transform window you would like to change.
2.
Open the Edit Transform Window dialog.
3.
Enter the new lower and upper limits for the selected cluster.
4.
Click OK.
How do I set the default transform window for a cluster?
Menu Location
Compound > Transform Window
> Set Default on Selected
Clusters
1.
Select the cluster for which you would like to set the transform window.
2.
On the Compound menu, select Transform Window > Set Default on Selected
Cluster.
Icon(s)
Menu Location
Compound > Transform Window
> Set Default on All Clusters
How do I set the default transform window for all clusters?
1.
On the Compound menu, select Transform Window > Set Default on All Clusters.
Icon(s)
9.3 Fitting Tools
81
CHENOMX NMR SUITE: USER MANUAL
How do I clear the transform window for a cluster?
Menu Location
Compound > Transform Window
> Clear for Selected Clusters
Icon(s)
Menu Location
Compound > Transform Window
> Clear for All Clusters
Icon(s)
1.
Select the cluster for which you would like to clear the transform window.
2.
On the Compound menu, select Transform Window > Clear for Selected Clusters.
How do I clear the transform windows for all clusters?
1.
On the Compound menu, select Transform Window > Clear for All Clusters.
Tips and Tricks
• A transform window applies to the center of a cluster, and not the positions of its
outermost peaks. As a result, you should consider only cluster centers when you
decide on transform windows for your compounds.
• When you set a transform window for a cluster, the cluster center must lie within the
selected limits.
• After you have set a transform window for a cluster, if you try to move the cluster
beyond either limit of the transform window, the limit moves to accommodate the
new position of the cluster.
• You may need to acquire multiple spectra to determine appropriate transform
windows for a compound. Remember that some compounds, and some clusters within
a compound, are more sensitive than others to pH changes and other matrix effects.
• Setting default transform windows and clearing transform windows, described above
for single clusters, can also apply to multiple selected clusters.
Related Topics
• “Add Peak” on page 76
• “Selecting Peaks and Clusters” on page 77
• “Adjusting Peaks” on page 78
• “Grouping Peaks as a Cluster” on page 79
• “Cluster Navigator” on page 82
Cluster Navigator
The Cluster Navigator allows you to quickly move among the clusters that you have created
in the current compound signature. It appears in the top left corner of the Spectrum View
as a ordered list of the approximate positions of all the clusters of the compound in ppm.
When you click on a cluster position, the view zooms to provide an optimal view of the
cluster. The optimal view includes the larger of the full transform range of the cluster or
the full width of the cluster, and the full vertical extent of any peaks within the horizontal
range. You can also use the Cluster Navigator to move sequentially through the list of clusters
in either direction.
How do I display the clusters of a compound in the Spectrum View?
Menu Location
Hotkey(s)
View > Show Cluster Navigator
1.
Make sure that the Cluster Navigator is visible.
2.
Click a cluster position to zoom directly to that cluster. Click the left or right arrow
to move sequentially through the list of clusters.
Ctrl-Shift-N
Cmd-Shift-N
9.3 Fitting Tools
82
CHENOMX NMR SUITE: USER MANUAL
Tips and Tricks
• Click on a cluster and drag along the Cluster Navigator to include adjacent clusters
in the Spectrum View.
Related Topics
• “Add Peak” on page 76
• “Selecting Peaks and Clusters” on page 77
• “Adjusting Peaks” on page 78
• “Grouping Peaks as a Cluster” on page 79
• “Transform Windows” on page 81
9.4 Information Tools
While creating compound signatures, you can access extended information about compounds
known to Chenomx, view and update details associated with the current compound, and
more precisely manage peaks and clusters in complex compounds.
Reference Panel
Menu Location
View > Show Reference Panel
Icon(s)
Hotkey(s)
Ctrl-R
Cmd-R
The Reference Panel displays information specific to the compound match the Chenomx
Compound ID that you have specified in the Compound Details. This includes a structure
image, molecular formula and weight, alternate names and links to external reference sites.
You can use this information to better understand the structure and behaviour of the
compound as you prepare its signature.
Tips and Tricks
• Some sections in the Reference Panel are collapsed by default, including Alternate
Names and Alternate CAS Registry. To expand them, click the + symbol next to the
section name. Click the - symbol to collapse the section again.
• Each of the External Database References are links to the indicated database. Click a
link to open the associated database entry for the current compound in your system's
web browser.
• Chenomx NMR Suite retrieves all Reference Panel information from a Chenomx server
named reference.chenomx.com, to ensure that you always have the most accurate
information. If you access the internet through an HTTP proxy server, or have no
internet access, you may want to change the internet preferences for Chenomx NMR
Suite.
Related Topics
• “Preferences” on page 24
• “Fitting Tools” on page 75
• “Compound Details” on page 84
9.4 Information Tools
83
CHENOMX NMR SUITE: USER MANUAL
Compound Details
Menu Location
Icon(s)
File > Compound Details...
Using Compound Details, you can associate information with compound signatures that
you create. The information that you enter allows you to use the signature with appropriate
spectra, display correct information in the Reference Panel, calculate accurate concentrations,
and manage the contents of your compound library effectively.
Table 9.1. Compound Details
Required
Compound Name
Name of the compound, as you would like it to appear in the
Compound Table in Profiler
Compound Author
Author of the compound signature, as you would like it to
appear in the Compound Table in Profiler
Magnet Frequency (MHz)
Frequency of the acquired NMR spectrum, in megahertz
(MHz)
Sample Concentration
(mM)
Concentration of the compound in the sample spectrum, in
millimoles per litre (mM)
Reference
Chenomx Compound ID
Chenomx compound ID associated with the compound
InChI Code
IUPAC International Chemical Identifier (InChI) associated
with the compound (http://www.iupac.org/inchi/)
SMILES Code
Simplified Molecular Input Line Entry Specification (SMILES)
associated with the compound
Advanced
Molecular Weight (u)
Molecular weight of the compound in atomic mass units, not
including counter-ions
Valid pH Range
pH range over which you expect the compound signature,
and specifically the transform windows, to be valid
Pulse Sequence
Pulse sequence used to acquire the sample spectrum that
you would like to use as an reference (overlay) for the
compound signature
UUID
Universally Unique Identifier used to uniquely identify a
particular signature in your compound library.
Comment
Comment
Text comments associated with the compound signature;
you can use this to record any additional information that
you consider relevant
Tips and Tricks
• For accurate quantification results, you should consider verifying the sample
concentration that you enter using multiple independent techniques.
• Entering the correct Chenomx Compound ID ensures that information appropriate
to the compound appears in the Reference Panel.
• If you intend to use concentration units of milligrams per decilitre (mg/dL) in Profiler,
you should enter a molecular weight.
9.4 Information Tools
84
CHENOMX NMR SUITE: USER MANUAL
• Chenomx calculates molecular weights based on IUPAC atomic weights
[http://www.chem.qmul.ac.uk/iupac/AtWt/], and rounds the result to four decimal
places.
• You need to save the compound file in order to retain new or changed Compound
Details.
Related Topics
• “Fitting Tools” on page 75
• “Reference Panel” on page 83
• Chapter 10, Library Manager on page 86
Information Panel
The Information Panel is always visible at the bottom of the Compound Builder window. It
contains current information about the compound signature as you work on it, listing
clusters and peaks that you have created, describing the elements that you have currently
selected and the environment on which your compound is based, and allowing you to access
the edit dialog for any clusters or peaks you may have selected. You can also select peaks
and clusters directly in the Information Panel, allowing more precision than selecting them
from the Spectrum View directly.
Tips and Tricks
• You can select multiple peaks and clusters in the lists in the Information Panel. Hold
down the Ctrl or Cmd keys while clicking on the desired peaks and clusters.
• If you do not have a spectrum overlaid, the Information Panel indicates that your
compound signature is in the default environment. When you overlay a spectrum,
the environment changes to match the overlay.
• The Information Panel displays a warning if your overlaid spectrum does not match
the information that you provided in the Compound Details. You need to update the
Compound Details to match the overlay or choose a new overlay spectrum to remove
the warning.
Related Topics
• “Overlaying a Spectrum” on page 19
• “Fitting Tools” on page 75
• “Compound Details” on page 84
9.4 Information Tools
85
Chapter 10: Library Manager
The Library Manager module allows you to create Compound Sets based on compounds in
your library, as well as compounds that you have created in Compound Builder. You can
use Compound Sets in Profiler to focus your profiling efforts on specific compounds, based
on dynamic filters or predefined lists of compounds.
10.1 Overview
❶
❷
❸
❹
Compound Set Panel. Allows you to control which compound set appears in the
Compound Table.
Compound Table. Displays information about compounds and their status in the library.
You can send the signature of a compound to Compound Builder for editing by clicking
File > Send to Compound Builder or by double-clicking on the compound.
Quick Search. Allows you to filter the Compound Table to focus on a particular
compound or group of compounds.
Status Bar. Displays information about recent user actions.
10.1 Overview
86
CHENOMX NMR SUITE: USER MANUAL
10.2 Quick Reference Guide
Linux, Windows
Mac OS X
Ctrl-N
Cmd-N
Ctrl-Shift-N
Cmd-Shift-N
Update Compound Versions
Ctrl-U
Cmd-U
Edit Smart Compound Set...
Ctrl-E
Cmd-E
Rename Compound Set
Ctrl-R
Cmd-R
---
---
Ctrl-J
Cmd-J
Preferences...
---
---
Exit
---
---
Undo
Ctrl-Z
Cmd-Z
Redo
Ctrl-Y
Cmd-Y
Show Archived Compounds
---
---
Change Columns...
---
---
---
---
Remove Selected Compounds from >
Compound Set
Delete
Delete
Remove Selected Compounds from >
Library
Ctrl-Delete
Cmd-Delete
Import...
---
---
Rescan Compound Library
---
---
Contents
F1
F1
Search
---
---
Save Application Log...
---
---
Activation Details...
---
---
File Menu
New Compound Set...
New Smart Compound Set
Delete Compound Set
Send to Compound Builder
Edit Menu
View Menu
Compounds Menu
Add Selected Compounds to
Help Menu
10.2 Quick Reference Guide
87
CHENOMX NMR SUITE: USER MANUAL
About Chenomx NMR Suite...
Linux, Windows
Mac OS X
---
---
10.3 Library Tools
Library Manager allows you to browse and manage the contents of your library. Your library
contains all of the compounds that you can fit to a spectrum, including all magnet frequencies,
pH ranges, pulse sequences and so on.
Compound Table
The Compound Table in Library Manager serves a different purpose from the one in Profiler.
The most obvious difference is that concentrations (potential or otherwise) are not available
in Library Manager, since you are not profiling spectra. More generally, the Compound Table
displays compounds in your library and allows you to modify them.
When you first open Library Manager, the Compound Table displays the most recent versions
of all of the compounds in your library (see “Show Archived Compounds” on page 91 for
more information on viewing older versions of compounds). As you select Compound Sets,
the Compound Table updates to reflect the contents of the currently-selected set. You can
use the Compound Table to help you build Compound Sets, via drag-and-drop and context
menus. You can also use text-based Quick Searches to filter any list currently visible in the
Compound Table.
There are fourteen columns available for display in the Compound Table. You can choose
to display any number of the available columns, with a minimum of one visible at any time,
and you can drag the column headers to position the columns in any order that you like.
You can sort the Compound Table on any column by clicking its column header. Click the
header again to reverse the sort order.
Tips and Tricks
• You can add more compounds to a Compound Set by dragging them from the
Compound Table onto the name of the Compound Set, or by right-clicking on the
compound and selecting Add to New Compound Set or Add to. You cannot add
compounds to Smart Compound Sets directly.
• You can edit a compound in the Compound Table by right-clicking on its entry and
selecting Send to Compound Builder. As soon as you save your changes in Compound
Builder, they are available in all Compound Sets containing the compound.
• You can also double-click a compound in the Compound Table to send it to Compound
Builder.
Related Topics
• “Quick Searches” on page 89
• “Send to Compound Builder” on page 91
• “Show Archived Compounds” on page 91
• “Remove Selected Compounds from Library” on page 92
• “Rescan Compound Library” on page 92
• “Compound Set Tools” on page 93
10.3 Library Tools
88
CHENOMX NMR SUITE: USER MANUAL
Quick Searches
The number of compounds appearing in the Compound Table can make it difficult to locate
a particular compound. Quick Searches allow you to temporarily limit the number of
compounds appearing in the Compound Table based on search criteria. The search criteria
can include text searches based on name, compound IDs, comments or all of these.
How do I limit the compounds visible in the Compound Table?
Icon(s)
Hotkey(s)
1.
Click the binoculars icon at the left edge of the search box to choose the type of
search to use (Compound Name, Compound Comment, Chenomx Compound ID or
All). If you do not select something here, the default search type is All.
2.
Type your search terms in the Quick Search box at the top left of the Compound
Table. The contents of the Compound Table updates to show all compounds matching
your current entry.
3.
Click the clear button at the right edge of the search box to cancel the search and
restore the full list of compounds. This also resets the search type to All.
Ctrl-L
Cmd-L
Tips and Tricks
• Use Quick Searches to temporarily limit the number of compounds displayed. Use
Compound Sets to define a more permanent working set of compounds for profiling
a particular spectrum.
Related Topics
• “Compound Table” on page 88
• “Show Archived Compounds” on page 91
• “Remove Selected Compounds from Library” on page 92
• “Compound Set Tools” on page 93
Import Compounds
You can add compounds to your library from a variety of sources, including compound files,
compound packs, Chenomx spectra, old Chenomx library files and ZIP (compressed) archives.
Import Compounds helps you consolidate these sources, collecting the embedded compound
signatures for use in Profiler.
How do I import compounds into my library?
Menu Location
Compounds > Import...
Icon(s)
Hotkey(s)
1.
Open the Import Compounds wizard.
2.
Select any combination of compound files (.xcpd), compound packs (.pack),
spectrum files (.cnx), old Chenomx library files (.cnxlib), ZIP files (.zip) or
folders containing any of these file types.
3.
If necessary, choose the desired method of handling compounds that already exist
in your library.
4.
Click Finish to import the selected compounds.
Ctrl-I
Cmd-I
Tips and Tricks
• Archiving compounds that already exist in your library places the archived compounds
in a separate view in Library Manager. Archived compounds may be added to
10.3 Library Tools
89
CHENOMX NMR SUITE: USER MANUAL
Compound Sets (when they are not automatically updating), but not to Smart
Compound Sets.
• Library Manager searches through up to twenty levels of subfolders in each folder
that you select. If the compound sources that you expect to see do not appear, try
starting Import Compounds deeper in the folder structure.
Related Topics
• “Compound Table” on page 88
• “Show Archived Compounds” on page 91
• “Rescan Compound Library” on page 92
• “Compound Set Tools” on page 93
Export as Compound Pack
When you are collaborating with other people on a project, you may have different versions
of compounds in your library than your collaborator has in theirs. Exporting a compound
set creates a compound pack (.pack) containing the set of actual compound signatures
represented by the compound set. Compound packs may be exchanged with other users of
Chenomx NMR Suite, and imported via Library Manager into a new compound set. You can
then be certain that you and your collaborator are always fitting spectra for that project
using the same collection of compound signatures.
How do I export a compound set to a Compound Pack?
Menu Location
Icon(s)
Compounds > Export as
Compound Pack...
1.
Open the Export as Compound Pack... dialog.
2.
Select the compound set that you would like to export.
3.
Enter a name for the exported compound pack. This name is used to label the
associated compound set when the compound pack is imported into another library
via Library Manager.
4.
Click OK.
5.
In the resulting file chooser, locate the folder in which you would like to save the
compound pack.
6.
In the File Name field, type the new name for the compound pack file. This can be
different from the name of the compound pack itself, but you may prefer to keep
them the same.
7.
Click Save.
Tips and Tricks
• You and your collaborator each need a valid licensed copy of Chenomx NMR Suite
installed in order to make use of compound packs.
• If you only want to export compounds that are actually fit in a particular spectrum,
load the spectrum in Profiler and use Export Profiled Compounds.
Related Topics
• “Import Compounds” on page 89
• “Compound Set Panel” on page 93
• “Compound Sets” on page 94
10.3 Library Tools
90
CHENOMX NMR SUITE: USER MANUAL
• “Smart Compound Sets” on page 95
Send to Compound Builder
Library Manager can help you to manage fitting and maintenance of your custom compound
signatures. You can send any compound visible in the Compound Table to Compound Builder
for modifications. When you save your changes in your compound library folder and return
to Library Manager, the updated compound is available immediately throughout Chenomx
NMR Suite.
How do I use Send to Compound Builder?
Menu Location
File > Send to Compound Builder
Icon(s)
Hotkey(s)
Ctrl-J
Cmd-J
1.
Select a compound in the Compound Table.
2.
Click Send to Compound Builder.
3.
Make any desired changes to the compound signature in Compound Builder.
4.
Save the changes in Compound Builder.
5.
Close Compound Builder, or close the file.
Tips and Tricks
• Make sure that you have the Date Modified column turned on in the Compound Table.
This allows you to see which compounds you have modified recently.
• You can send multiple compounds to Compound Builder by selecting them in the
Compound Table, right-clicking on your selection, and selecting Send to Compound
Builder.
• You can only open five Compound Builder windows at the same time. If you try to
send more than five compounds to Compound Builder, only five of them open, and
an error message appears indicating that the remaining compounds could not be
opened.
• Changes that you make to a compound will only be immediately visible in Chenomx
NMR Suite if you save it in the compound library folder specified in the Library
Manager preferences.
Related Topics
• Chapter 9, Compound Builder on page 72
• “Compound Table” on page 88
• “Quick Searches” on page 89
• “Compound Set Tools” on page 93
Show Archived Compounds
Menu Location
View > Show Archived
Compounds
When you import a different version of a compound that already exists in your library, you
can archive the existing version. Show Archived Compounds allows you to review a list of
these archived compounds, from which you can open the archived compounds in Compound
Builder or remove them from your library permanently.
Turning on Show Archived Compounds adds a Compound Set called Archived Compounds
to the list on the far left of the Library Manager window. Select the newly-added Compound
Set to display the Archived Compounds list.
10.3 Library Tools
91
CHENOMX NMR SUITE: USER MANUAL
Tips and Tricks
• You can use an archived compound to replace a current version. Open the archived
compound in Compound Builder, and use Save As to save the .xcpd file on top of
itself in your Compounds folder (specified in Library Manager Preferences), making
it the new latest version of that compound.
• Archived compounds can be added to Compound Sets (when they are not automatically
updating), but not to Smart Compound Sets.
Related Topics
• “Compound Table” on page 88
• “Quick Searches” on page 89
• “Compound Set Tools” on page 93
• “Update Compound Versions” on page 96
Remove Selected Compounds from Library
If you are certain that you no longer want a compound accessible in Chenomx NMR Suite,
you can remove it from your library. This operation physically removes the compound from
your computer's file system. Do not confuse this with removing a compound from a
Compound Set.
How do I remove compounds from my library?
Menu Location
Compounds > Remove Selected
Compounds from > Library
Icon(s)
Hotkey(s)
1.
Select the compound that you would like to remove in the Compund Table.
2.
Click Remove Selected Compounds from > Library.
Tips and Tricks
Ctrl-Shift-Delete
Cmd-Shift-Delete
• When you have removed compounds from the library, you cannot recover them
through Undo. On systems with an active Recycle Bin or Trash folder, you may be
able to recover the deleted files via your operating system's restore function.
Related Topics
• “Compound Table” on page 88
• “Quick Searches” on page 89
• “Show Archived Compounds” on page 91
• “Rescan Compound Library” on page 92
• “Compound Set Tools” on page 93
Rescan Compound Library
Menu Location
Icon(s)
Compounds > Rescan Compound
Library
If you have made changes to your Compounds folder (specified in the Library Manager
Preferences) directly through your operating system's file manager, the changes normally
are visible only when you next run Chenomx NMR Suite (after shutting down all modules).
You can rescan the library on demand to make the changes visible without reloading a
module.
Tips and Tricks
• If you restored files from your operating system's Recycle Bin or Trash folder back
into your compound library folder, to recover compounds that you inadvertently
10.3 Library Tools
92
CHENOMX NMR SUITE: USER MANUAL
removed from the library, you may need to rescan the library to make the compounds
visible again.
• Changes that you make to the library from within any module of Chenomx NMR Suite
(including Compound Builder and Library Manager) appear immediately in any other
modules that may be open. You do not need to rescan the library to detect these types
of changes.
Related Topics
• “Compound Table” on page 88
• “Import Compounds” on page 89
• “Show Archived Compounds” on page 91
• “Remove Selected Compounds from Library” on page 92
10.4 Compound Set Tools
Compound Sets are groups containing compounds from your library that you can use in
Profiler. You can create them either by selecting specific compounds (Compound Sets) or
by defining rules for selecting compounds (Smart Compound Sets). Library Manager includes
a number of tools to help you browse and manage Compound Sets.
Compound Set Panel
The Compound Set Panel contains a list of the currently defined Compounds Sets and allows
you to interact with them by displaying the contents of Compound Sets, adding compounds
to them or editing filters for Smart Compound Sets. The Compound Set Panel also contains
the Compounds set and the Archived Compounds set (when enabled), allowing you to review
the complete contents of your library as well as earlier versions of compounds that you
have updated.
How do I display the contents of a Compound Set?
1.
Select the set in the Compound Set Panel. The contents of the set appear in the
Compound Table.
Tips and Tricks
• You can drag compounds onto a Compound Set in the Compound Set Panel to add
them to the set. This does not apply to Smart Compound Sets.
• You can rename Compound Sets and Smart Compound Sets directly in the Compound
Set Panel. Click on the name of a selected set, type the new name, and press Enter to
accept the new name.
• Several operations involving Compound Sets are available by right-clicking on them
in the Compound Set Panel.
Related Topics
• “Library Tools” on page 88
• “Export as Compound Pack” on page 90
• “Compound Sets” on page 94
• “Smart Compound Sets” on page 95
10.4 Compound Set Tools
93
CHENOMX NMR SUITE: USER MANUAL
• “Rename Compound Sets” on page 97
• “Delete Compound Sets” on page 97
Compound Sets
You may need to create a Compound Set that does not change as you add new compounds
to your library. For example, analysis of an extended dataset may require profiling a fixed
set of compounds to help ensure a consistent analysis, or you may want to profile only
specific compounds, and cannot easily define rules that select the compounds you want.
Compound Sets allow you to include arbitrary compounds on a per-compound basis,
hand-picking the members of the set to suit your needs.
Although Compound Sets do not automatically include new compounds that you add to
your library, some changes to the library still affect Compound Sets. If you remove a
compound from the library, or replace a compound with a new version, the removal or
update affects both Compound Sets and Smart Compound Sets. Compound Sets that you
have set to auto-update will always update themselves to contain the latest version of each
compound in the set. Compound Sets that are not auto-updating show you status indicators
marking the compounds that have been updated or removed.
How do I create an empty new Compound Set?
Menu Location
File > New Compound Set...
Icon(s)
Hotkey(s)
Ctrl-N
Cmd-N
1.
Click New Compound Set.
2.
Enter a name for the new Compound Set.
3.
Start adding compounds from your library or other Compound Sets.
How do I create a new Compound Set containing specific compounds?
1.
Select a compound or group of compounds in the Compound Table.
2.
Click New Compound Set.
3.
Enter a name for the new Compound Set.
How do I add compounds to an existing Compound Set?
Menu Location
Compounds > Add Selected
Compounds to [Compound Set]
1.
Select a compound or group of compounds in the Compound Table.
2.
Click Add to My Compound Set to add the compounds to an existing set called "My
Compound Set."
Alternately, drag the selected compounds onto the name of the Compound Set in
the Compound Set Panel.
How do I remove compounds from a Compound Set?
Menu Location
Hotkey(s)
Compounds > Remove Selected
Compounds from > Compound
Set
1.
Select the Compound Set from which you would like to remove compounds in the
Compound Set Panel.
Delete
2.
Select the compounds that you would like to remove in the Compound Table.
3.
Click Remove Selected Compounds from Compound Set.
Tips and Tricks
• You must manually add compounds to a Compound Set. Library Manager never
automatically adds any compounds to a Compound Set.
10.4 Compound Set Tools
94
CHENOMX NMR SUITE: USER MANUAL
• Right-click on a selected compound or group of compounds in the Compound Table,
and click Add to New Compound Set to create a new set containing the selected
compounds.
• You can only remove compounds from Compound Sets, and not Smart Compound
Sets.
Related Topics
• “Library Tools” on page 88
• “Export as Compound Pack” on page 90
• “Compound Set Panel” on page 93
• “Smart Compound Sets” on page 95
• “Update Compound Versions” on page 96
• “Rename Compound Sets” on page 97
• “Delete Compound Sets” on page 97
Smart Compound Sets
In Library Manager, you can create Compound Sets based on sets of rules that select
compounds from your library. These Smart Compound Sets automatically update to reflect
changes in your library. If you add new compounds to your library, they immediately appear
in any Smart Compound Sets with rules that match the new compounds.
Simple rules might be "all compounds that I can use to profile 800 MHz spectra" or "all
compounds with 'acetate' in their names." However, you can also use Smart Compound Sets
to select "all compounds useful for profiling 600 MHz spectra, with a valid pH range from 6
to 8, added to the library after January 1, 2008, with a molecular weight less than 300 g/mol
and whose name starts with the letter 'a'." You can be as specific or as general as you like.
You can also quickly merge results from existing Compound Sets, selecting "compounds that
are in Set A, but not in Set D."
Smart Compound Sets can help you focus on just the compounds that you are interested in,
without having to worry about updating the sets as you add new compounds to your library
or update existing compounds.
How do I create a new Smart Compound Set?
Menu Location
File > New Smart Compound
Set...
1.
Open the New Smart Compound Set dialog.
2.
Enter a name for the new Smart Compound Set.
Ctrl-Shift-N
3.
Enter the desired magnet frequency for the Smart Compound Set.
Cmd-Shift-N
4.
Use the drop-down menus to define any additional search filters that you would
like to apply to the Smart Compound Set. Use the + buttons to add new filters.
5.
Click OK.
Icon(s)
Hotkey(s)
10.4 Compound Set Tools
95
CHENOMX NMR SUITE: USER MANUAL
How do I edit a Smart Compound Set?
Menu Location
File > Edit Smart Compound
Set...
Icon(s)
Hotkey(s)
Ctrl-E
1.
Select a Smart Compound Set in the Compound Set Panel.
2.
Click Edit Smart Compound Set.
3.
Make any desired changes to the name of the set, magnet frequency restriction, or
filters.
4.
Click OK.
Cmd-E
Tips and Tricks
• You cannot manually add compounds to a Smart Compound Set. Only compounds in
your library that match the filters that you define in the Smart Compound Set appear
in the set. Use Edit Smart Compound Set to modify the compounds appearing in a
Smart Compound Set.
• Smart Compound Sets update automatically as the contents of your library change.
When you add a new compound to your library, it appears in any Smart Compound
Set whose filters it matches, even if you created the Smart Compound Set before you
added the new compound.
• Editing the filters of a Smart Compound Set is the only way that you can modify the
contents of a Smart Compound Set. You cannot directly add compounds to or delete
compounds from a Smart Compound Set.
Related Topics
• “Library Tools” on page 88
• “Compound Set Panel” on page 93
• “Compound Sets” on page 94
• “Rename Compound Sets” on page 97
• “Delete Compound Sets” on page 97
Update Compound Versions
When you create a compound set, the compound signatures included in the set are based
on the contents of your library at the moment you create the set. If you create new, updated
versions of compounds in that set using Compound Builder, those changes are not
automatically included in pre-existing compound sets. This means that you can use that
compound set to analyze spectra throughout a long-term project with consistent results,
independently of any library updates that you may need to make for other projects.
Update Compound Versions allows you to update the compound signatures in a particular
compound set to match the most recent versions of those compounds in your library.
How do I update compound versions in a compound set?
Menu Location
File > Update Compound
Versions
Icon(s)
Hotkey(s)
Ctrl-U
Cmd-U
1.
Select the compound set that you would like to update in the Compound Set Panel.
2.
Click File > Update Compound Versions.
Tips and Tricks
• You can choose to have compound sets automatically update their contents to match
the latest versions in your library by right-clicking on a set in the Compound Set Panel
and clicking Auto Update Compound Versions. The icon used for the set in the
10.4 Compound Set Tools
96
CHENOMX NMR SUITE: USER MANUAL
Compound Set Panel changes from the normal type ( ) to the auto-updating type
( ).
• You cannot use Update Compound Versions on Smart Compound Sets ( ). By
definition, these always update to contain the latest versions of compounds in your
library.
• Updating compound versions in Library Manager does not directly alter any fits you
did with previous versions of the updated compound set. When you load a spectrum
in Profiler that you fit with an earlier compound set, the compounds with new versions
available are marked in the Status column of the Compound Table. You then have the
option of updating them, or retaining the original signatures.
Related Topics
• “Update Profiled Version (One Compound)” on page 54
• “Update Profiled Versions (Several Compounds)” on page 54
• “Compound Sets” on page 94
• “Smart Compound Sets” on page 95
Rename Compound Sets
You can rename both Compound Sets and Smart Compound Sets after you have created
them.
How do I rename a Compound Set or Smart Compound Set?
Menu Location
File > Rename Compound Set...
Icon(s)
Hotkey(s)
Ctrl-R
Cmd-R
1.
Select a Compound Set or Smart Compound Set in the Compound Set Panel.
2.
Click Rename Compound Set.
3.
Enter a new name for the set.
4.
Press Enter.
Tips and Tricks
• Right-click on the name of a Compound Set or Smart Compound Set and select Rename
to rename the set.
• You can also rename a Compound Set or Smart Compound Set by clicking again on
the name of a selected set in the Compound Set Panel.
• You can rename a Smart Compound Set via the Edit Smart Compound Set dialog.
Related Topics
• “Compound Set Panel” on page 93
• “Compound Sets” on page 94
• “Smart Compound Sets” on page 95
Delete Compound Sets
You can delete both Compound Sets and Smart Compound Sets when you no longer have
need for them.
10.4 Compound Set Tools
97
CHENOMX NMR SUITE: USER MANUAL
How do I delete a Compound Set or Smart Compound Set?
Menu Location
Icon(s)
File > Delete Compound Set...
1.
Select a Compound Set or Smart Compound Set in the Compound Set Panel.
2.
Click Delete Compound Set.
Tips and Tricks
• Right-click on the name of a Compound Set or Smart Compound Set and select Delete
to delete the set.
Related Topics
• “Compound Set Panel” on page 93
• “Compound Sets” on page 94
• “Smart Compound Sets” on page 95
10.4 Compound Set Tools
98
Chapter 11: Tutorials
Whether you are a brand new user of Chenomx NMR Suite or you have just upgraded from
an earlier version, the tutorials in this chapter can help you use any of the available modules
more effectively.
11.1 File Location Note
Linux, Windows: You can find all files mentioned in these tutorials in the Samples\ folder
in your Chenomx NMR Suite install folder
Mac: You can find all files mentioned in these tutorials in the Samples/ folder in your
Chenomx NMR Suite DMG image.
11.2 Tutorial - Processor
Introduction
You can use the Processor module to process your spectra in preparation for using them
in Profiler, Spin Simulator or Compound Builder. Before processing your spectra, you should
add spectrum metadata. The most important metadata you should add is a CSI definition.
Processor adds some spectrum metadata based on the CSI type and concentration that you
specify in the Import NMR Data dialog when you import the spectrum. However, Profiler,
Spin Simulator and Compound Builder use the CSI to determine lineshapes for any fit or
simulation that you do, so it is very important to define the CSI shape properly.
Once you have added spectrum metadata, you can begin processing spectra. There are a
variety of processing effects available, and it is possible to apply them in any order that you
prefer. However, for the best results in any module, we recommend the following processing
order:
You should not apply reference
deconvolution to a spectrum
that is poorly phased or has a
poor baseline.
1.
Phasing
2.
Baseline Correction (2-point linear or cubic splines)
3.
Reference Deconvolution
4.
Line Broadening (0 to 1000 Hz; if necessary)
5.
Water Deletion
Processing a Spectrum
Getting Started
All files mentioned in this
tutorial are in the folder
specified at the beginning of the
tutorial.
When you import your own
spectra, use a CSI concentration
appropriate to your samples.
1.
Open Processor.
2.
Open the spectrum Sample.fid\fid.
3.
In the Import Varian Raw FID Dialog:
• Select DSS as the Chemical Shape Indicator, and set its concentration to 0.484
mM.
• Expand the Advanced Details section.
11.1 File Location Note
99
CHENOMX NMR SUITE: USER MANUAL
• Clear the Line Broadening check box.
• Set Zero Fill to to Automatic, if it is not set already.
• Clear the Phasing check box.
• Clear the Auto Baseline Correction check box.
• Clear the Delete Water Region check box.
A warning appears stating that
Processor could not determine
the pH automatically. Click the
OK button to proceed.
• Click the OK button.
Adjusting the Spectrum Phasing
4.
Switch to Phasing mode.
Automatic phasing often
provides reasonable results. For
the best results, visually inspect
the automatic results and refine
them as needed.
5.
Click the Auto button.
6.
Click on Very Fine to make small adjustments to the phasing. Drag the sliders for
zero-order and first-order phase angles until the peaks in the spectrum appear
symmetrical.
The water peak often does not
phase properly with the rest of
the spectrum, so you should
focus on other signals in the
spectrum instead. Phase angles
for the sample spectrum are
near 54° (zero-order) and -2°
(first-order).
7.
Click the Accept button to apply the changes to the spectrum and exit Phasing mode.
Applying Baseline Correction
8.
Switch to Baseline Correction mode.
9.
Click the Auto Linear button to have Processor locate the spectrum endpoints
automatically.
10. Automatic: Click the Auto Spline button to have Processor place a set of breakpoints
on the spectrum for you.
Breakpoints are normally placed
directly on the spectrum line.
Hold down the Control or
Command key while clicking to
place breakpoints at arbitrary
positions.
11. Manual: Click in the spectrum viewing pane to add breakpoints for a cubic spline
baseline fit. Use more points where the baseline is strongly curved, and fewer points
where it is basically linear.
12. Continue placing breakpoints until the blue line follows the spectrum baseline as
closely as possible.
13. When you are satisfied with your fit of the spectrum baseline, click the Accept
button to apply your changes to the spectrum.
Adjusting the CSI Settings
14. Switch to the CSI Editor.
15. Zoom in on the single DSS peak at the far right side of the spectrum. Use the
Automatic Vertical Zoom button to ensure the best view of the single peak.
If your spectrum has poor
phasing or baseline correction,
finding the CSI automatically will
not work; you should readjust
the phasing and baseline
correction before proceeding.
16. Automatic: Click the Find Automatically button to have Processor attempt to match
the peak automatically.
17. Manual: Use the Adjustment Handle and width controls to adjust the shape of the
red overlaid peak to match the black spectrum line as closely as possible.
18. Click the Show Entire Spectrum button to restore a view of the whole spectrum.
Applying Reference Deconvolution
19. Zoom in on the DSS peak at 0 ppm.
20. Switch to Reference Deconvolution mode.
11.2 Tutorial - Processor
100
CHENOMX NMR SUITE: USER MANUAL
21. Leave the Target Linewidth at its initial value of around 0.6 Hz.
22. Select the Use DSS/TSP Satellites check box.
23. Click the Accept button to apply your changes to the spectrum.
The CSI definition needs
adjustment following reference
deconvolution, as peak shapes
have changed throughout the
spectrum.
24. Switch to the CSI Editor.
25. Click the Find Automatically button.
Applying Line Broadening
26. Switch to Line Broadening mode.
For best results analyzing
spectra using the Chenomx
library, choose a value that
yields a total linewidth between
1.0 and 1.5 Hz.
27. Enter a value of 0.4 Hz.
The CSI definition needs
adjustment following line
broadening, as peak shapes have
changed throughout the
spectrum.
30. Click the Find Automatically button.
The calculated pH is 8.37. For
practice, try reproducing this
result using the manual tools.
32. Automatic: Click the Find Automatically button to have Processor attempt to
determine the spectrum pH automatically.
28. Click the Accept button to apply your changes to the spectrum.
29. Switch to the CSI Editor.
Determining the Spectrum pH
31. Switch to the pH Editor.
33. Manual: Click and drag the pH slider bar to adjust the pH, or manually enter a pH
value in the pH text entry box.
The blue, green and yellow lines, indicating the positions of the imidazole, creatinine
and DFTMP peaks respectively, move as you adjust the pH. You can determine a
coarse pH simply by adjusting these lines as close as possible to the five actual peaks
in your spectrum.
If the coarse pH is near the
transition between creatinine
and imidazole (around 5.5), then
both indicators are useful in
refining the pH value.
The range of pH available on the
slider bar changes as you zoom
in to yield a finer-grained control
over your pH adjustments. To
make the entire range of 0-14
available, clear the Fine Tune
check box.
34. Using the coarse pH, and the information box to the left of the pH slider bar, note
which pH indicator is most active in the pH range of the spectrum. In this case, it is
imidazole.
35. Zoom in on the two peaks for imidazole. Click the Automatic Vertical Zoom button
to ensure the best view of the two peaks.
36. Click and drag the pH slider bar to adjust the pH, or manually enter a pH value in
the pH text entry box.
As before, the indicator lines move as you adjust the pH. To obtain a refined pH
value, ensure that each line is as close as possible to its associated peak, keeping in
mind that every change in pH can move both peaks.
37. Click the Show Entire Spectrum button to restore a view of the whole spectrum.
Once you have finished adjusting your spectrum in Processor, you can:
• Move the spectrum directly to Profiler for further analysis (using the Jump to Profiler
button)
• Save the spectrum for later analysis in Profiler, for creating a simulation in Spin
Simulator, or for creating a compound signature in Compound Builder.
11.2 Tutorial - Processor
101
CHENOMX NMR SUITE: USER MANUAL
11.3 Tutorial - Profiler
Introduction
The Profiler module is the primary tool in Chenomx NMR Suite for profiling sample solutions.
You can profile samples by matching peak frequencies and heights contained in a compound
library with frequencies and heights in the sample spectrum. To help you become familiar
with the profiling process, the first part of the following tutorial provides a step-by-step
guide to fitting a sample spectrum containing only twelve compounds, none of which have
overlapping signatures. The second part provides some techniques for fitting spectra in
which some compound signatures overlap.
A custom compound pack has been included with the sample files to provide you with the
same compound signature that were used to prepare the tutorial. You need to install the
compound pack before you continue with this tutorial.
Install the custom compound pack
1.
Open Library Manager.
2.
Click Compounds > Import...
3.
Click the Browse button (...).
4.
In the Samples\Library Manager folder, select Sample.pack.
5.
Click Choose Files.
6.
Click Next.
7.
Click Finish.
8.
Verify that a compound set called "Tutorial Sample Compounds" now appears in
the Compound Set Panel.
Part I - Basic Profiling Techniques
Frequently, the simplest way to start analyzing a spectrum is to fit compounds that are
easily identifiable first. These compounds often have additional peaks in the busier regions
of the spectrum, so fitting them first can help rule out other compounds later in the fitting
process. In this simple spectrum, all of the compounds are quite well separated from each
other, and should be relatively simple to fit.
Basic Fit - Acetate
1.
Open Profiler.
2.
Open the sample file called Samples\Profiler\Basic Start.cnx.
3.
In the Compound Set Panel, select the compound set called Tutorial Sample
Compounds, which you just installed (see above).
4.
Zoom in on the single peak near 1.90 ppm.
5.
Right-click on the peak, and click Filter for Compounds Near 1.91 ppm.
6.
In the Compound Table, select acetate.
7.
Click the location of the peak (1.9 ppm) in the Cluster Navigator to include the peak's
full range of motion in the Spectrum View.
11.3 Tutorial - Profiler
102
CHENOMX NMR SUITE: USER MANUAL
8.
Set acetate to its potential concentration (see “Potential Concentrations” on page
51 for more information).
9.
Click and drag the acetate signature (blue) to match it as closely as possible to the
corresponding peak in the spectrum (black). You may need to zoom in more to
allow more accurate adjustments.
You can also click and drag the controls on the horizontal and vertical axes to move
the peak along only one axis at a time.
10. Clear the quick search box above the Compound Table by clicking the red "X".
11. Click Show Entire Spectrum.
Basic Fit - Pyruvate
12. Zoom in on the single peak near 2.40 ppm.
13. Right-click on the peak, and click Filter for Compounds Near 2.36 ppm.
14. In the Compound Table, select pyruvate.
15. Click the location of the peak (2.4 ppm) in the Cluster Navigator to include the peak's
full range of motion in the Spectrum View.
16. Set pyruvate to its potential concentration.
17. Click and drag the pyruvate signature (blue) to match it as closely as possible to
the corresponding peak in the spectrum (black).
18. Clear the quick search box above the Compound Table by clicking the red "X".
19. Click Show Entire Spectrum.
Compensating for Water Suppression Effects - Alanine
20. Zoom in on the doublet near 1.50 ppm.
21. Right-click on the doublet, and click Filter for Compounds Near 1.47 ppm.
22. In the Compound Table, select alanine.
23. Click the location of the doublet (1.5 ppm) in the Cluster Navigator to include the
doublet's full range of motion in the Spectrum View.
24. Set alanine to its potential concentration.
25. Click and drag the alanine doublet (blue) to match it as closely as possible to the
corresponding doublet in the spectrum (black).
You should not normally increase the height of a signature above the black line, so
use the right-most peak to determine the appropriate height.
26. Click the location of the second cluster of alanine (3.8 ppm) in the Cluster Navigator
to zoom to it in the Spectrum View.
27. Use the frequency control on the horizontal axis to better position the second cluster
over the corresponding signal in the spectrum. The frequency control allows you
to restrict the movement of the cluster to only one direction.
Since the second cluster is closer to water than the first one, it is more subject to
side effects of the water suppression pulse used to acquire the spectrum. Thus, the
cluster at 1.5 ppm is a good choice for determining the concentration of alanine,
while the cluster at 3.8 ppm must be fit using only horizontal adjustments.
11.3 Tutorial - Profiler
103
CHENOMX NMR SUITE: USER MANUAL
For more details on handling water suppression effects, see “Water
Suppression” on page 112.
28. Clear the quick search box above the Compound Table by clicking the red "X".
29. Click Show Entire Spectrum.
Profiling the Remaining Compounds
30. Using the techniques discussed above, you should be able to profile the remaining
nine compounds in the spectrum. You can check your results for all of the compounds
with the following list of concentrations. If you are unsure what the finished profile
should look like, open the file Basic End.cnx to view this spectrum with profiling
completed.
Some clusters are more reliable than others when determining concentrations of compounds
that have multiple clusters. You should use clusters meeting as many of the following criteria
as possible to set the concentration for such compounds:
• Minimal overlap. Ideally, the cluster should have no other clusters overlapping.
• More protons. If a cluster corresponds to three protons (such as a methyl group), the
signal for that cluster is stronger than the signal for a cluster corresponding to only
one proton.
• Unobscured. If a cluster appears near water (around 4.73 ppm), its signal may be
obscured by the presence of the water peak. Baseline correction or solvent suppression
during processing may further affect quantification. You should use these clusters
only when no alternative is available, and recognize that concentrations based solely
on these clusters may be unreliable.
Table 11.1. Expected Concentrations for Basic Start.cnx
Compound
Conc (mM)
Compound
Conc (mM)
3-Indoxylsulfate
0.3692
Formate
0.2474
4-Hydroxy-3-methoxymandelate
0.0425
Fumarate
0.1236
Acetate
0.4899
Niacinamide
0.4641
Alanine
0.5208
Pantothenate
0.0791
Citrate
0.4007
Pyruvate
0.4789
DSS (Chemical Shape Indicator)
0.4830
Urea
147.1484
Part II - Advanced Profiling Techniques
Real samples are rarely as simple as the previous example, and usually contain compounds
whose signatures overlap. Although profiling becomes more challenging in these cases, the
strategy remains the same; profile easily identifiable compounds first, and use the
contributions of those compounds to refine your efforts at profiling the overlapped regions.
There is a certain artistry to efficiently fitting a complex spectrum. The best method for
learning many of the techniques that you can use to fit such a spectrum is probably practice,
fitting progressively more complex spectra until you develop a level of proficiency. More
detailed discussions of profiling strategies are available elsewhere in this manual (see
“Tutorial - Targeted Profiling” on page 108, “Fitting a Spectrum” on page 12 and “Fitting
Overlapped Regions in a Spectrum” on page 14).
11.3 Tutorial - Profiler
104
CHENOMX NMR SUITE: USER MANUAL
Getting Started
1.
Open Profiler.
2.
Open the file called Samples\Profiler\Advanced Start.cnx.
3.
Select the Tutorial Sample Compounds set in the Compound Set Table.
Although completely non-overlapping compounds are easy to fit, they cannot give any
further insight into the fit of other compounds in the spectrum. You should generally profile
these compounds first, so that you can focus on the more challenging regions of the spectrum.
Since we covered the relevant techniques in Part I, they will not be covered in detail here.
Fitting Compounds with No Overlap
4.
Using the basic techniques discussed in Part I, fit the following twelve compounds.
• 3-Indoxylsulfate
• 4-Hydroxy-3-methoxymandelate
• Acetate
• Citrate
• Dimethylamine
• DSS (Chemical Shape Indicator)
• Formate
• Fumarate
• Niacinamide
• Pyruvate
• Threonine
• Trimethylamine
Once the non-overlapped compounds have been fit, a more systematic approach can be
very helpful. For this tutorial, start at the right-most edge of the spectrum, and move to the
left.
Fitting Compounds with Overlap
5.
In the Compound Table, select pantothenate, and set it to its potential concentration.
6.
Zoom in on the two single peaks for pantothenate near 0.90 ppm.
These peaks correspond to methyl groups in the structure of pantothenate. Methyl
groups can be very useful in setting an appropriate concentration for a compound,
as they are usually easy to locate.
7.
Click and drag the two peaks (0.88 and 0.92 ppm) to best fit the corresponding
peaks in the spectrum. You can use the frequency and height controls on the axes
to restrict the movement of a peak to only one dimension.
8.
Click the location of the next pantothenate cluster (2.4 ppm) in the Cluster Navigator.
9.
Use the frequency control on the horizontal axis to match the signature (blue) to
the spectrum (black). Although the left-most peak of this cluster overlaps with
2-oxoglutarate, the remaining two peaks provide enough information to establish
an appropriate location for the cluster.
11.3 Tutorial - Profiler
105
CHENOMX NMR SUITE: USER MANUAL
It is good practice to completely finish fitting an overlap region before moving on
to the next one. Since the only other compound in this region is 2-oxoglutarate, it
is the next logical compound to consider.
10. In the Compound Table, select 2-oxoglutarate, and set it to its potential
concentration.
11. Adjust the 2-oxoglutarate cluster near 2.43 ppm to best fit the spectrum.
Notice that the sum line (red) at 2.417 ppm now fits the spectrum more closely
than it did with only pantothenate adjusted.
Since 2-oxoglutarate is quite simple, you can finish fitting it before continuing with
pantothenate.
12. Click the location of the remaining 2-oxoglutarate cluster (3.0 ppm) in the Cluster
Navigator, and adjust the cluster there to best fit the spectrum. Use the frequency
control to prevent further changes to the concentration.
13. Select pantothenate again.
You can simply click on the sum line (red) to select the nearest compound. Click
repeatedly to cycle through the contributing compounds in an overlap region.
14. Click the location of the next pantothenate cluster (3.4 ppm) in the Cluster Navigator,
and adjust the cluster at 3.39 ppm using the frequency control.
15. In the Compound Table, set fucose and taurine each to their potential concentration,
and then select taurine.
16. Use the Cluster Navigator to display the taurine cluster near 3.3 ppm, and adjust it
to fit the spectrum.
Setting the concentration for taurine here will make it easier to fit the other cluster
near 3.4 ppm.
17. Return to the taurine cluster near 3.4 ppm, and use the frequency control to match
it to the spectrum.
In overlapped regions like this, the sum line (red) becomes a better indicator of the
quality of your fit in the region, so check the match of the sum line to the spectrum
before proceeding.
18. Select fucose, and use the Cluster Navigator to display the clusters near 1.2 ppm.
Click and drag across the series of clusters in the Cluster Navigator to view the
entire group.
19. Adjust the fucose clusters near 1.2 ppm to fit the spectrum. Use the cluster at 1.24
ppm to establish the concentration for fucose.
20. Return to the fucose cluster near 3.4 ppm, and use the frequency control to match
it to the spectrum, using the sum line to evaluate your progress.
21. Select pantothenate again, and use the Cluster Navigator to view the cluster near
3.5 ppm.
22. Adjust the pantothenate cluster at 3.51 ppm to fit the spectrum. Use the frequency
control.
23. Move on to the pantothenate cluster near 4.0 ppm, and use the frequency control
to fit the cluster to the nearest peak in the spectrum.
11.3 Tutorial - Profiler
106
CHENOMX NMR SUITE: USER MANUAL
The fitted peak for pantothenate in this region does not completely fit the area
available, due to overlap with serine. Once you have fit serine, this peak will fit
better.
24. In the Compound Table, set glycolate and serine each to their potential concentration,
and then select serine.
25. Use the Cluster Navigator to display the serine cluster near 3.8 ppm, and adjust it
to fit the spectrum, using the sum line to evaluate your progress.
26. Use the Cluster Navigator to display the serine clusters at 4.0 and 3.9 ppm.
Remember that you can click and drag across several clusters to display all of them.
27. Adjust the remaining two serine clusters using the frequency controls.
Notice that the sum line over the pantothenate cluster in this region now yields a
much better match to the spectrum.
28. Select glycolate, and adjust the single glycolate peak so that the sum line fits the
spectrum.
Since the multi-peak compounds in the region are already well fit, setting an
appropriate height for glycolate should now be quite simple.
29. Select fucose, display the cluster near 3.7 ppm, and adjust it using the frequency
control.
30. In the Compound Table, select alanine, and set it to its potential concentration
31. Display the alanine cluster near 1.5 ppm, and adjust it to fit the spectrum.
Use the right-most peak to set the height for the cluster, much like you did for the
basic spectrum.
32. Return to the alanine cluster near 3.8 ppm, and use the frequency control to match
it to the spectrum, using the sum line to evaluate your progress.
33. Adjust each of the fucose clusters near 3.8 ppm using the frequency controls. Try
finding individual peaks in each cluster that match peaks in the spectrum, and lining
them up.
34. Adjust each of the remaining fucose clusters using the frequency controls. If there
is not enough of a pattern visible in the spectrum to match a cluster to, leave the
cluster in its original position.
35. In the Compound Table, select urea, and set it to its potential concentration.
36. Adjust the urea cluster near 5.8 ppm to match it to the spectrum.
37. Check the overall fit of the spectrum to verify that the sum line lies generally along
the spectrum line.
You can check your results for all of the compounds with the following list of
concentrations. If you are unsure what the finished profile should look like, open
the file Advanced End.cnx to view this spectrum with profiling completed.
Table 11.2. Expected Concentrations for Advanced Start.cnx
Compound
Conc (mM)
Compound
Conc (mM)
2-Oxoglutarate
0.5047
Fumarate
0.1242
3-Indoxylsulfate
0.3683
Glycolate
0.6904
4-Hydroxy-3-methoxymandelate
0.0429
Niacinamide
0.4704
11.3 Tutorial - Profiler
107
CHENOMX NMR SUITE: USER MANUAL
Compound
Conc (mM)
Compound
Conc (mM)
Acetate
0.4928
Pantothenate
0.0824
Alanine
0.5314
Pyruvate
0.4730
Citrate
0.4370
Serine
0.9652
DSS (Chemical Shape Indicator)
0.4853
Taurine
0.9906
Dimethylamine
0.5299
Threonine
0.3484
Formate
0.2529
Trimethylamine
0.4976
Fucose
0.5009
Urea
332.2911
Bonus fit: There are at least two additional compounds present in trace quantities in this
spectrum. Identify and fit these compounds and check their concentrations here:
Compound 1 (0.0498 mM)
Compound 2 (0.0109 mM)
11.4 Tutorial - Targeted Profiling
Targeted profiling involves fitting a series of compounds to an experimental spectrum.
Practically, targeted profiling includes the two tasks of identifying a compound or compounds
that you would like to fit, and fitting the individual clusters of each compound to their
respective regions of the spectrum. Identifying a compound to fit is simply a matter of
displaying the compound and visually comparing its signature with visible patterns in the
spectrum, remembering that you can adjust both height (concentration) and position
(frequency) during the fitting process. There are several methods of filtering and sorting
the compound list to include compounds that are most likely to appear in a given region of
the spectrum.
Fitting individual clusters in a region of the spectrum requires some care and attention; the
most important facet of any fitting technique is applying it consistently to all spectra in a
dataset. Fitting can involve a variety of methods, depending on the intensity of the peaks,
the presence of other peaks in the region, the degree of overlap with other peaks, and the
presence of other clusters from the same compound elsewhere in the spectrum. Some of
these methods are described below; you may discover other methods as you analyze more
spectra.
Identifying Compounds
There are a variety of methods that you can use to help you identify compounds that are
present in any given spectrum. Some are implemented directly in the Profiler module, while
others may involve some literature review or external reference.
Each of the following techniques is essentially a method of limiting the list of potential
compounds for a given region of the spectrum. You must make the final decision as to
whether or not a particular compound is represented in the spectrum by visually comparing
the signature for the compound to the patterns visible in the spectrum. Remember that
each cluster can be moved somewhat to either side of its starting position (inside its
transform window), and the overall height of the compound can be adjusted.
Frequency Filters
You can filter the Compound Table to include only compounds that can appear at a certain
frequency, or in a certain range of frequencies. Right-click on the spectrum, and click Filter
11.4 Tutorial - Targeted Profiling
108
CHENOMX NMR SUITE: USER MANUAL
for Compounds Near x.xx ppm to select a single frequency. Alternately, select a region by
double-clicking on the spectrum and click-dragging across a range, then right-click inside
the selected region and click Filter for Compounds in Selected Region.
The frequency filters display all compounds that have transform windows overlapping the
selected frequency or frequency range. As a result, the number of compounds displayed
using the frequency filters varies with your library selection. For example, the pH 4-9 version
of a given compound set (e.g., at 800 MHz) displays more compounds than the pH 6-8 version
of the same compound set, since its transform windows are wider.
Text Filters
You can filter the Compound Table based on a simple text search, by typing the text to search
for in the empty text box at the top right corner of the Compound Table. This can help you
look for a particular compound, or a group of compounds with similar names, like all
compounds containing "acetate".
You can also use text filters to type in frequency searches (see “Frequency
Filters” on page 108). To search for compounds near 1.90 ppm, type "@1.90" in the text box
(without the quotes). To search for compounds from 2.75 to 4.30 ppm, type "@2.75 to 4.30"
(without the quotes).
Compound Lists
A list of compounds known to occur in samples of the type that you are analyzing can be an
invaluable tool to guide your fit of a spectrum. In many cases, the number of compounds
that could be contributing to a specific region of the spectrum can be large, so it can be
helpful to know some compounds that are more likely to be present. If you do not have such
a list, and are expecting to analyze samples of a particular type on a regular basis, you may
find it helpful to develop a list of your own based on representative samples.
For the Profiler sample files, the following compound list guided the fitting process:
2-Oxoglutarate
DSS (Chemical Shape Indicator)
Pyruvate
3-Indoxylsulfate
Formate
Serine
4-Hydroxy-3-methoxymandelate
Fucose
Taurine
Acetate
Fumarate
Threonine
Alanine
Glycolate
Trimethylamine
Citrate
Niacinamide
Urea
Dimethylamine
Pantothenate
If you have a list of compounds common to a sample type, you may want to create a
compound set in Library Manager and use it to perform initial fits of the spectra in your
dataset.
Test Mixtures
As you fit a series of spectra in a larger dataset, you will notice that the fit of some mixtures
of compounds is difficult to determine. You may want to try running controlled test mixtures
of the compounds in question to establish their behaviour under your experimental
conditions, and use information from the test mixtures to guide your fits of the larger dataset.
Test mixtures will help increase confidence and consistency in your fitting results.
11.4 Tutorial - Targeted Profiling
109
CHENOMX NMR SUITE: USER MANUAL
Fitting Clusters
Once you have selected a compound to fit, you need to fit the individual clusters of the
compound to their respective regions of the spectrum. There are several common approaches
to fitting clusters, and in a typical spectrum, more than one method will be necessary. You
should try to maintain a consistent approach to fitting spectra in a dataset, as this will help
you obtain accurate and consistent results from your analysis.
Basic Fits (Compound Line)
The simplest fit for a cluster is to adjust the cluster so that the compound line (blue by
default, unless you have assigned custom colors) matches the spectrum line (black). This
is most useful for isolated, low-intensity clusters. If you fit all of the clusters for a compound
using only basic fits, the quantity of the compound may be unreliable, particularly if other
clusters are nearby; the identity can still be considered accurate if the cluster shapes are
clearly discernible. Basic fits of tall, isolated clusters generally give accurate identity and
quantity.
Figure 11.1. Apart from these clusters in the aromatic region, none of the other peaks for tyrosine are clearly
visible. Although it is clear that tyrosine is present, the quantity of 19 μM should be considered approximate.
Subtraction Line
For more refined fits, use the subtraction line to determine an optimal fit for the cluster,
where possible. Adjust the cluster height and position to remove the influence of the adjusted
cluster while approximating a normal spectrum with the subtraction line. This is an advanced
technique offering some of the most accurate fits available, but requires more time than
other, simpler techniques.
11.4 Tutorial - Targeted Profiling
110
CHENOMX NMR SUITE: USER MANUAL
Figure 11.2. The overfit subtraction line (top center) shows a negative residual peak, and results in a
concentration of 25 μM. The underfit subtraction line (bottom center) leaves a positive residual peak, and
results in a concentration of 12 μM. The accurate fit (far right) results in a subtraction line that approximates
a smooth baseline through the area, indicating that the signal has been effectively subtracted from the
spectrum.
Figure 11.3. Inaccurate positions result in a combination of over- and underfits: A negative residual peak on
the right suggests the cluster should be moved left, or downfield (top center). A negative residual peak on
the left suggests the cluster should be moved right, or upfield (bottom center). Both identity and quantity
can be considered reliable in the accurate fit (far right).
Overlapped Regions (Sum Line)
You will encounter situations in which the cluster you need to fit overlaps one or more
clusters from other compounds; regions fitting this description are often called "busy
regions". You often need to fit compounds that have overlapped clusters in groups, ensuring
that the combined fit (sum line) matches the spectrum line.
First, identify likely compounds contributing to the overlapped region. Where available,
use non-overlapped peaks, including those in other regions of the spectrum, to establish
concentration ranges for the identified compounds. Use partially-exposed peaks to establish
positions for each of the overlapped clusters. Starting with the approximate fit thus obtained,
fine-tune the position and height of each of the overlapped clusters to optimize the overall
fit in the region.
Generally, fit multiplets before singlets in overlap regions, as they are easier to position
accurately. If all of the clusters for a compound are in overlap regions, the fit may be
unreliable, especially if most or all of the clusters are low-intensity singlets.
11.4 Tutorial - Targeted Profiling
111
CHENOMX NMR SUITE: USER MANUAL
Figure 11.4. Using frequency filters and sorting by potential concentration allow identifying serine, glycolate
and pantothenate as candidate compounds. Visual comparison of the signatures to the spectrum line confirms
the identifications.
Figure 11.5. Fitting each compound individually using the basic method (simple match to spectrum line)
yields reasonable concentrations, but the sum line doesn't quite match.
Figure 11.6. Considering all the compounds together, along with confirmation using other clusters of serine
and pantothenate, gives a better fit. Also, note the more than 20% change in pantothenate concentration!
Water Suppression
Spectra of aqueous samples are often acquired using a water suppressing pulse sequence,
since the water signal would otherwise drown out many useful signals. The water
suppression pulse can also partially suppress other resonances occurring near the frequency
of the water signal. When you fit compounds with multiple clusters, use clusters well away
from the water signal to determine compound quantities. This may result in a slight "overfit"
(sum line higher than spectrum line) of the clusters closer to water, but gives you more
consistent and accurate concentrations.
11.4 Tutorial - Targeted Profiling
112
CHENOMX NMR SUITE: USER MANUAL
Figure 11.7. Since cluster 0 (right) is quite far from the water peak, it experiences little suppression. Fitting
lactate based on cluster 0 results in a slight but acceptable overfit of cluster 1 (left).
Figure 11.8. Fitting lactate based on cluster 1 (left) incorrectly reduces the reported concentration by almost
11%.
Best Guess
When you fit a compound with multiple clusters, you may encounter a cluster that is difficult
to fit accurately, due to a lack of prominent peaks in the signature or in the spectrum, or
both. In this case, use minor adjustments to approximately fit the sum line to the spectrum
line; the goal here is mostly aesthetic, since very little information is available to guide an
accurate fit. If all of the clusters for a compound must be fit using this technique, the fit of
the compound (both identity and quantity) should be considered unreliable.
11.4 Tutorial - Targeted Profiling
113
CHENOMX NMR SUITE: USER MANUAL
Figure 11.9. The large cluster near 3.2 ppm was sufficient to establish the identity and quantity of
O-phosphocholine. Although there are no obvious peaks that can be used to align clusters 3 and 4 (top), it
seems reasonable to move them over to fit more neatly under the nearby "hump" in the spectrum (bottom).
No Fit
When fitting some compounds, you may find that a cluster is not visible in the signature or
the spectrum, or both, at concentrations consistent with the spectrum. Since no information
is available to guide a fit of the cluster, the best course is to leave the cluster at its starting
position. If all of the clusters for a compound fall into this category, the compound should
be considered not detected in the sample.
Figure 11.10. The doublet near 1 ppm provides enough information to set a concentration for isoleucine,
and the triplet near 0.92 ppm allows some confirmation of the identity. It is reasonable that isoleucine is
present, at or near 9 μM.
11.4 Tutorial - Targeted Profiling
114
CHENOMX NMR SUITE: USER MANUAL
Figure 11.11. There is no clear information elsewhere in the spectrum to guide the placement of the remaining
clusters, so they are left at their default positions. The initial assessment of isoleucine at 9 μM is still consistent
with the spectrum.
11.5 Tutorial - Spin Simulator
Introduction
You can only complete the Spin
Simulator tutorial if you have
purchased the Professional
edition of Chenomx NMR Suite,
or if you are using a time-limited
trial version of Chenomx NMR
Suite.
You can use the Spin Simulator module to create spin simulations of compounds that you
would like to add to your library. These simulations can be imported into Compound Builder
to create compound signatures that you can then add to your library.
It can be very helpful to have the molecular structure of the compound you are simulating
available for reference purposes.
Part I - Simple Simulation
In order to become familiar with the various tools available in Spin Simulator, as well as
with the basic process involved in creating a simulation, you will simulate a simple
compound, valine.
Aside from exchangeable protons, like the carboxylic acid and amine protons, there are four
types of protons expected to have visible signals for this compound, marked as 1 through
4 in the structure above. The two methyl groups (1 and 2) and one of the methine groups
(3) will each couple to the remaining methine group (4). Thus, in the spectrum for valine,
you would expect to see three doublets, each coupled to one complex cluster (rigorously,
a quartet of quartets of doublets, or qqd).
Simulating Valine
1.
Assign the spectrum, matching protons in the structure of the compound with
signals in the spectrum. For valine, the assignments are as follows:
a.
Methyl signals (1 and 2) appear at 0.978 and 1.031, each coupled to one of the
the methine signals (4).
11.5 Tutorial - Spin Simulator
115
CHENOMX NMR SUITE: USER MANUAL
b.
Methine signal (3) appears at 3.604 ppm, and is coupled to the other methine
(4).
c.
Methine signal (4) appears at 2.264 ppm, and is coupled to each of the other
three signals.
2.
Open Spin Simulator.
3.
Overlay the valine spectrum, called Samples\Spin Simulator\Valine.cnx.
4.
Add spin definitions for each of the signals from the assignment above, starting
from the right-hand side of the spectrum (low numbers) and moving left (to higher
numbers).
You now have SD0 and SD1 for the methyl groups (3 protons each, at 0.978 and
1.031 ppm), and SD2 and SD3 for the methine groups (1 proton each, at 2.264 and
3.604 ppm), with a tab for each spin definition in the Spin Definition Panel at the
far left edge of the Spin Simulator window.
5.
Zoom in to the two methyl signals near 1.0 ppm.
You can click and drag across the two corresponding entries in the Spin Navigator
to provide a useful zoom level.
6.
Measure the distance between the pairs of peaks in each doublet using the tape
measure.
The right-hand doublet measures about 7.02 Hz, while the left-hand one measures
about 7.07 Hz.
7.
Select SD0 (0.978 ppm) by clicking on it in the graph, or clicking on its tab in the
Spin Definition Panel.
8.
Right-click on SD0 (blue) and click Add J-Modifier...
9.
Enter a J-value of 7.02 Hz, select Uncoupled Split with a split count of 1, and click
OK.
10. Use the height and frequency controls on the vertical and horizontal axes to match
the first spin definition (blue) to the spectrum (black).
11. Adjust the width of the doublet using the controls to either side of the spin definition,
so that it better matches the spectrum.
A width of about 1.2 to 1.3 Hz is sufficient.
12. Select SD1 (1.031 ppm).
13. Add a J-modifier to SD1.
Use a J-value of 7.07 Hz, and select Uncoupled Split with a split count of 1.
14. Adjust SD1 to fit the spectrum.
Once again, a width of 1.2 to 1.3 Hz is sufficient.
15. Zoom to SD3 (3.604 ppm) using the Spin Navigator or the Spin Definition pane.
16. Measure the distance between peaks in the doublet.
This doublet measures about 4.36 Hz.
17. Add a J-modifier to SD3.
Use a J-value of 4.36 Hz and select Uncoupled Split with a split count of 1.
11.5 Tutorial - Spin Simulator
116
CHENOMX NMR SUITE: USER MANUAL
18. Adjust SD3 to fit the spectrum.
This doublet has a width of around 1.1 Hz.
19. Zoom to SD2 (2.264 ppm) using the Spin Navigator or the Spin Definition pane.
The resulting view does not reveal much of the actual spectrum, so adjust it to get
a better view.
20. Click View > Zoom > Set Zoom, and enter 2.23 to 2.30 ppm for the X Axis, and -0.05
to 0.87 si for the Y Axis.
21. Add a J-modifier to SD2. Select Coupled, to Spin Definition 0, using the uncoupled
split of 7.02 Hz.
The spin definition is now linked to one of the methyl groups; notice that it has split
to a quartet (n=3).
22. Add two more J-modifiers, one coupled to SD1 using the uncoupled split of 7.07 Hz,
and the other coupled to Spin Definition 3 using the uncoupled split of 4.36 Hz.
Notice that with each added J-modifier, the spin definition becomes more complex,
and matches more closely with the spectrum.
23. Adjust SD2 to better match the spectrum, using the height, frequency and width
controls.
This spin definition has a width of about 1.5 Hz.
24. Notice that changing the height of either spin definition changes the height of the
whole simulation; you cannot obtain a perfect height match with all four spin
definitions at the same time. The discrepancy is normal, and can be corrected in
Compound Builder prior to adding the compound to your library.
For now, simply choose one of the spin definitions with which to fit the simulation
height.
25. Save the simulation file.
If you would like to review the sample simulation of valine, you should not replace
the file called Samples\Spin Simulator\Valine.xss.
Part II - Complex Simulation
Now that you have developed a basic familiarity with some of the tools available in Spin
Simulator, you are ready to use them to simulate a more complex compound, proline.
The spectrum of proline will be much more complex than the spectrum of valine. The protons
at each position couple to all of the protons at adjacent positions. Also, the protons at each
position are diastereotopic, meaning that they can couple with each other (geminal coupling),
11.5 Tutorial - Spin Simulator
117
CHENOMX NMR SUITE: USER MANUAL
as well as coupling individually to the adjacent protons. While this does mean that splitting
patterns will be based exclusively on doublets (n=1), it also means that there will be a lot
more coupling interactions to keep track of.
Simulating Proline
1.
Assign the spectrum, matching protons in the structure of the compound with
signals in the spectrum. Note that this is often one of the largest tasks in fitting a
new compound. For proline, the assignments are as follows (protons labelled 'a'
project above the plane of the page, while those labelled 'b' project below the plane):
a.
The signal for proton 4b appears at 1.979 ppm, and couples to protons 3a, 3b,
4a, 5a and 5b (Spin Definition 0, or SD0).
b.
The signal for proton 4a appears at 2.012 ppm, and couples to protons 3a, 3b,
4b, 5a and 5b (Spin Definition 1, or SD1).
c.
The signal for proton 3b appears at 2.058 ppm, and couples to protons 2, 3a,
4a and 4b (Spin Definition 2, or SD2).
d.
The signal for proton 3a appears at 2.339 ppm, and couples to protons 2, 3b,
4a and 4b (Spin Definition 3, or SD3).
e.
The signal for proton 5a appears at 3.328 ppm, and couples to protons 4a, 4b
and 5b (Spin Definition 4, or SD4).
f.
The signal for proton 5b appears at 3.413 ppm, and couples to protons 4a, 4b
and 5a (Spin Definition 5, or SD5).
g.
The signal for proton 2 appears at 4.121 ppm, and couples to protons 3a and
3b (Spin Definition 6, or SD6).
2.
Open Spin Simulator.
3.
Overlay the proline spectrum, called Samples\Spin Simulator\Proline.cnx.
4.
Add spin definitions for each of the protons listed in the assignment above, making
sure that the number of protons for each is set to one. Although you do not need to
add the spin definitions in the indicated order to complete the tutorial, doing so
will make the tutorial easier to understand, since the Spin Definition (SD) notation
is used throughout the tutorial for clarity.
5.
Zoom in to SD6 (4.121 ppm).
6.
Measure the two coupling constants represented in this region of the spectrum,
using the spectrum line (black) as your reference. Specifically, find the distances
from an outermost peak to the adjacent peak and from an outermost peak to the
second peak in. The distances in this spectrum are 8.79 Hz and 6.52 Hz.
7.
Add one J-modifier to SD6 for each of the measured distances. Use uncoupled splits,
with split counts of 1 and J-values of 8.79 and 6.52 Hz.
You know that each of these couplings will link to single protons, so you can use a split count
of 1 for each of them.
8.
Use the frequency, width and height controls to match SD6 as closely as possible
to the spectrum line.
9.
If you need to adjust the J-values for SD6, select the J-modifier in the Spin Definition
Panel, and use the J-Value Editor appearing under the Spin Navigator to fine-tune
the J-value.
11.5 Tutorial - Spin Simulator
118
CHENOMX NMR SUITE: USER MANUAL
10. Zoom in to SD4 and SD5.
Based on the assignment above, there are three coupling constants associated with each of
these spin definitions. One can be easily measured as the distance between an outermost
peak and the second peak in; this measurement yields around 11.58 Hz for both spin
definitions, suggesting that this is the coupling constant linking these two spin definitions.
In addition, the value itself (11.58 Hz) is consistent with the geminal coupling relationship
between the protons responsible for these signals.
11. Add a J-modifier to SD5, and couple it to SD4 using a New Split, with a J-value of
11.58 Hz.
The remaining two coupling constants for SD5 are both near 7 Hz (the distance from an
outermost peak to the adjacent one), but it is not clear what the precise values should be.
You can set them to 7 Hz to approximate the correct value, and use the J-Value Editors to
refine the values visually.
12. Add two J-modifiers to SD5 as uncoupled splits, each with a J-value of 7 Hz, and a
split count of 1.
13. Use the J-Value Editor to fine-tune the J-modifiers that you just added. Aim for values
that center each of the peaks in the spin definition (blue) on the corresponding
peaks in the spectrum (black). The resulting values are 7.40 Hz and 6.67 Hz.
14. Use the frequency, width and height controls to match SD5 as closely as possible
to the spectrum line.
You can determine the remaining two coupling constants for SD4 using similar techniques.
The approximate distances are 7.2 Hz.
15. Add two J-modifiers to SD4 as uncoupled splits, with J-values of 7.2 Hz each, and
split counts of 1.
16. Use the J-Value Editor to fine-tune the J-modifiers. The resulting values are 7.44
and 6.88 Hz.
17. Use the frequency, width and height controls to match SD4 as closely as possible
to the spectrum line.
The remaining spin definitions are quite complicated. There is a lot of coupling among them,
including some to spin definitions that you have already fit. Some of these links to solved
spin definitions can help reduce the complexity of modeling the spin definitions that remain.
Start with SD3, since it is the last one that is well-isolated from other signals.
Due to the complexity of this signal, it is not immediately clear which measurements you
can use to extract coupling constants. However, one clue exists in the geminal relationship
between the protons responsible for this signal and SD2. You observed a coupling constant
of 11.58 Hz previously between geminal protons, so start by looking for a measurement of
similar magnitude. Measuring from an outermost peak to a peak near 11.58 Hz gives about
8.7 or 13.7 Hz. The former value does not appear quite large enough for a geminal coupling,
so use the latter to couple SD3 to SD2.
18. Add a J-modifier to SD3, and couple it to SD2 using a New Split with a J-value of 13.7
Hz.
SD3 should also be coupled to SD6, based on the original assignments. There are two
J-modifiers available to create this link, with J-values of 8.79 and 6.52 Hz. However, based
on the structure, you can estimate the dihedral angle between these two protons as larger
11.5 Tutorial - Spin Simulator
119
CHENOMX NMR SUITE: USER MANUAL
than that between SD2 and SD6. A larger dihedral angle implies a larger coupling constant,
according to the vicinal Karplus correlation, so use the larger of the two here.
19. Add a J-modifier to SD3, and couple it to SD6 using the larger of the two available
uncoupled splits (8.79 Hz).
Finally, you know that this signal should be coupled to SD0 and SD1, but the magnitude of
the coupling constants is not clear. You do have information from some of the other couplings
in the molecule that suggest the coupling constants should be near 7 Hz, so use this as a
starting point, and fine-tune using the J-Value Editor. Similarly, based on the dihedral angles
among the protons, you can speculate that the coupling constant to SD1 will be larger than
the coupling to SD0, and bias your adjustments accordingly.
20. Add two J-modifiers to SD3, one coupled to SD0, and the other to SD1, each with a
J-value of 7 Hz.
21. Use the J-Value Editor to fine-tune the two new J-modifiers. Ensure that the J-value
for the coupling to SD1 is larger than the J-value for the coupling to SD0.
Unfortunately, there is no entirely satisfactory combination of these two coupling constants
that allows a good fit of the cluster. However, the coupling constant to SD2 is still speculative,
so try adjusting that, as well.
22. Continue adjusting the J-modifiers, this time including the coupling to SD2 in your
adjustments. As before, aim for values that center each of the peaks in the spin
definition (blue) on the corresponding peaks in the spectrum (black). The resulting
values are 12.99 Hz (to SD2), 7.38 Hz (to SD1) and 6.65 Hz (to SD0).
23. Use the frequency, width and height controls to match SD3 as closely as possible
to the spectrum line.
SD2 has a coupling pattern similar to SD3. You have already coupled it to SD3, and there is
only one remaining J-modifier on SD6 to which you can couple. Also, the coupling constants
to SD0 and SD1 should be of similar magnitude to those you just established for SD3, so
again, start them at 7 Hz. Note that the Karplus correlation suggests that this time, the
coupling constant to SD0 should be larger than the coupling to SD1.
24. Add a J-modifier to SD2, and couple it to SD6 using the only remaining uncoupled
split (6.52 Hz).
25. Add two J-modifiers to SD2, one coupled to SD0, and the other to SD1, each with a
J-value of 7 Hz.
26. Use the J-Value Editor to fine-tune the J-modifiers. Ensure that the J-value for the
coupling to SD0 is larger than the J-value for the coupling to SD1. The resulting
values are 7.57 Hz (to SD0) and 6.87 Hz (to SD1).
27. Use the frequency, width and height controls to match SD3 as closely as possible
to the spectrum line. Since the spin definition overlaps with other on the right-hand
side, use the peaks on the left-hand side to guide your adjustments.
Most of the coupling constants relevant to the last two spin definitions (SD0 and SD1) have
already been defined. There is yet another geminal relationship between the associated
protons, so couple them using a J-value comparable to the other geminal couplings you have
seen (about 13 Hz).
28. Add a J-modifier to SD1, and couple it to SD0 using a J-value of 13 Hz.
11.5 Tutorial - Spin Simulator
120
CHENOMX NMR SUITE: USER MANUAL
Since the signals for SD0 and SD1 in the spectrum both appear simpler than you might
expect given that they are coupled to five other signals, it seems reasonable that the
remaining two coupling constants for each spin definition will be similar. The uncoupled
splits that are available are associated with SD4 (7.44 Hz and 6.88 Hz) and SD5 (7.40 Hz
and 6.67 Hz). Thus, the two larger coupling constants must be associated with SD0 and the
two smaller with SD1, or vice versa. A quick test of each alternative indicates that the former
option yields a better approximation of the spectrum.
29. Add a J-modifier to SD1, and couple it to SD4 using the smaller of the available
uncoupled splits (6.88 Hz).
30. Add a J-modifier to SD1, and couple it to SD5 using the smaller of the available
uncoupled splits (6.67 Hz).
31. Add a J-modifier to SD0, and couple it to SD4 using the remaining uncoupled split
(7.44 Hz).
32. Add a J-modifier to SD0, and couple it to SD5 using the remaining uncoupled split
(7.40 Hz).
33. Use the J-Value Editor to fine-tune the J-modifier coupling SD0 to SD1. The resulting
value is 13.23 Hz.
34. Use the frequency, width and height controls to match SD1 and SD0 as closely as
possible to the spectrum line.
35. Save the simulation file. If you would like to review the sample simulation of proline,
you should not replace the file called Samples\Spin Simulator\Proline.xss.
11.6 Tutorial - Compound Builder
Introduction
You can only complete the
Compound Builder tutorial if you
have purchased the Professional
edition of Chenomx NMR Suite,
or if you are using a time-limited
trial version of Chenomx NMR
Suite.
You can use the Compound Builder module to create compound signatures that you can
add to your library. Although you can create compound signature from scratch directly in
Compound Builder, you can model complex compounds more accurately if you simulate
them in Spin Simulator first. The simulation gives you a good starting point from which to
prepare a high-quality compound signature.
Part I - Simple Compound
In order to become familiar with the various tools available in Compound Builder, you will
create a compound signature for a simple compound, valine. You can use the simulation
that you created during the Spin Simulator tutorial, or just use the Spin Simulator sample
files provided. If you have not yet completed the Spin Simulator tutorial, you may find it
helpful to do so before proceeding with Compound Builder.
11.6 Tutorial - Compound Builder
121
CHENOMX NMR SUITE: USER MANUAL
The simulation of valine is a model representation of the expected spectrum for valine.
Compound Builder helps you to turn this model spectrum into a more accurate
representation of an experimental spectrum. For this purpose, the four main areas you need
to consider are refining the model, simplifying the model and defining transform windows
(and the associated valid pH range). For the best results when you integrate the compound
into your library, you also need to add some descriptive metadata about the compound.
Creating a Compound Signature for Valine
1.
Open Compound Builder.
2.
Import the valine simulation.
If you have already completed the Spin Simulator tutorial, import the simulation
that you created. Otherwise, import the sample simulation, called Samples\Spin
Simulator\Valine.xss.
3.
When prompted to calibrate the simulation environment, select Spectrum (.cnx),
and click the Browse button (...). Select the valine spectrum, called
Samples\Compound Builder\Valine.cnx.
The compound signature that you create will become part of your compound library. To
ensure that the new compound is properly represented in your library, you need to add
some basic information about the compound itself. Some information has been filled in
automatically based on the calibration spectrum that you selected.
4.
Open the Compound Details dialog.
5.
In the General tab, enter your name as the Compound Author, and enter a Sample
Concentration of 10 mM.
For better integration with compounds based on data from multiple spectrometers,
including the Chenomx library, you may want to replace the specific magnet
frequency obtained directly from the spectrum (799.81 MHz) with the more general
800 MHz.
6.
In the Reference tab, enter the Chenomx Compound ID for valine, 215. If you have
access to the InChI or SMILES codes for valine, you can enter them here as well.
7.
In the Advanced tab, enter the molecular weight of valine to three decimal places,
117.146. Also, enter a valid pH range of either 4.00 to 9.00 or 6.00 to 8.00. Enter
'noesy' as the pulse sequence.
8.
Click OK.
You will need to set appropriate transform windows before adding the signature to your
library. However, setting the default (0.006 ppm) transform windows for all clusters provides
an easy way to ensure useful zoom levels when using the Cluster Navigator to move around
the spectrum. Also, turning on the subtraction line can give you valuable insight into how
well the compound fits the experimental spectrum.
9.
Click Compound > Transform Window > Set Default on All Clusters to set a
default transform window (0.006 ppm wide, centered on the cluster center) for
every cluster in the compound.
10. Click View > Show Subtraction Line to display the subtraction line (green).
Several of the clusters in the imported simulation are quite simple. Focus on refining the
fits of simple clusters to the spectrum, and then deal with the more complex cluster.
11. Zoom to the cluster near 3.6 ppm using the Cluster Navigator and select it.
11.6 Tutorial - Compound Builder
122
CHENOMX NMR SUITE: USER MANUAL
12. Use the frequency and height controls to adjust the cluster (blue) to fit the spectrum
(black). To further refine your fit, adjust the cluster so that the subtraction line is
as flat as possible.
When you are adjusting simple clusters, you can get a very good approximate fit of the
cluster automatically, using optimization.
13. Zoom to the clusters near 1.0 ppm using the Cluster Navigator.
14. Select the cluster near 0.98 ppm and click Optimize Selected Peak Shapes.
15. Review the optimized fit, and refine the fit as needed.
To obtain accurate quantification when you use this compound to analyze spectra in Profiler,
it is helpful to recognize that peak heights have a larger effect on the quantification results
than peak width or peak area. Thus, when you refine the fit of a cluster, it is important to
ensure that the heights of the peaks match the experimental spectrum particularly well.
16. Select the cluster near 1.03 ppm, optimize it, and refine the fit as needed.
17. Zoom to the cluster near 2.3 ppm using the Cluster Navigator, select it, and optimize
the fit.
In this case, optimization cannot provide a better solution than the one you started with.
However, when you review the list of peaks in the cluster (click on each to view its
contribution to the cluster), you may notice that there appears to be more peaks present
than are strictly necessary. Simulation can produce peaks that do not contribute much to
the compound at the current frequency. Part of creating a good compound signature is
recognizing these extraneous peaks and removing them.
18. Select the first peak in the peak list for the cluster. Using the up and down arrow
keys, flip through the list and observe the contributions of each peak.
The first two peaks (2.234 and 2.240 ppm) appear normal, but the next two peaks (both
very near 2.243 ppm) appear almost identical, but offset slightly. These are excellent
candidates for pruning, as the two peaks could be replaced with one without any significant
decrease in the quality of the fit.
19. Find all of the near-identical pairs of peaks in the cluster, and remove one peak
from each pair (6 peaks removed).
Further review reveals that some of the taller peaks in the spectrum are represented by
groups of three peaks; one tall central peak flanked by two much shorter peaks. These
groups can also be replaced by single peaks with little effect on the quality of the fit.
20. Find all of the groups of three peaks as described above, and remove the two flanking
peaks from each group (6 groups, 12 peaks removed).
21. Optimize the fit of the cluster again.
The results of the second optimization are much better, and require only minimal refinement.
In addition, you have now reduced the complexity of the model (from 38 peaks to 20), while
improving the overall quality of the fit.
Now that the fit of the compound to the spectrum is satisfactory, you can add proper
transform windows to the clusters.
22. If you entered a valid pH range of 6.00 to 8.00 in the Compound Details, set the
following transform windows:
11.6 Tutorial - Compound Builder
123
CHENOMX NMR SUITE: USER MANUAL
a.
Cluster at 0.978 ppm: 0.95 to 1.00 ppm
b.
Cluster at 1.031 ppm: 1.00 to 1.05 ppm
c.
Cluster at 2.263 ppm: 2.21 to 2.31 ppm
d.
Cluster at 3.605 ppm: 3.57 to 3.62 ppm
23. If you entered a valid pH range of 4.00 to 9.00 in the Compound Details, set the
following transform windows:
a.
Cluster at 0.978 ppm: 0.92 to 1.00 ppm
b.
Cluster at 1.031 ppm: 0.99 to 1.05 ppm
c.
Cluster at 2.263 ppm: 2.16 to 2.31 ppm
d.
Cluster at 3.605 ppm: 3.50 to 3.64 ppm
24. Save the compound file. If you would like to review the sample fit for valine, you
should not replace the file called Samples\Compound Builder\Valine.xcpd.
If you want to create a compound for each valid pH range, change the transform windows
to match the range that you did not enter previously, update the Compound Details to match
the new range, and save the compound file to a different filename.
Part II - Complex Compound
Now that you have developed a basic familiarity with the tools available in Compound
Builder, you are ready to use them to create a compound signature for a more complex
compound, proline.
Creating a Compound Signature for Proline
1.
Open Compound Builder.
2.
Import the proline simulation.
If you have already completed the Spin Simulator tutorial, import the simulation
that you created. Otherwise, import the sample simulation, called Samples\Spin
Simulator\Proline.xss.
3.
When prompted to calibrate the simulation environment, select Spectrum (.cnx),
and click the Browse button (...). Select the proline spectrum, called
Samples\Compound Builder\Proline.cnx.
4.
Open the Compound Details dialog.
5.
In the General tab, enter your name as the Compound Author, and enter a Sample
Concentration of 10 mM.
11.6 Tutorial - Compound Builder
124
CHENOMX NMR SUITE: USER MANUAL
For better integration with compounds based on data from multiple spectrometers,
including the Chenomx library, you may want to replace the specific magnet
frequency obtained directly from the spectrum (799.81 MHz) with the more general
800 MHz.
6.
In the Reference tab, enter the Chenomx Compound ID for proline, 230. If you have
access to the InChI or SMILES codes for proline, you can enter them here as well.
7.
In the Advanced tab, enter the molecular weight of proline to three decimal places,
115.130. Also, enter a valid pH range of either 4.00 to 9.00 or 6.00 to 8.00. Enter
'noesy' as the pulse sequence.
8.
Click OK.
9.
Set default transform windows on all clusters, and make sure that the subtraction
line (green) is visible.
Several clusters are quite easy to adjust, and do not overlap with any other clusters, so
refine these ones first.
10. Optimize each of the clusters near 4.1, 3.4, 3.3 and 2.3 ppm, respectively, and refine
the fits as needed.
The cluster near 2.1 ppm overlaps slightly with the cluster near 2.0 ppm, but the overlap
should not cause any particular difficulty. However, the cluster does include some extraneous
peaks, which you should remove before proceeding.
11. Zoom to the cluster near 2.1 ppm, select it, and optimize the fit.
12. Review the contributions of each of the peaks to the overall cluster shape. Remove
peaks that appear particularly small relative to the peaks immediately adjacent (6
peaks removed).
13. Optimize the cluster, and refine the fit as needed.
The remaining two clusters are heavily overlapped, and optimizing them at this point yields
unsatisfactory results. You will need to simplify both of these clusters before refining the
fits.
14. Review the contributions of each peak in the cluster at 1.979 ppm to the overall
shape of the cluster.
a.
For pairs of near-identical peaks, remove one peak from each pair (8 peaks
removed).
b.
For groups containing peaks much smaller than the immediately adjacent
peaks, remove the small peaks (13 more peaks removed, 21 in total).
c.
To evaluate the effectiveness of removing a particular peak from the cluster,
remove it, and then select all the peaks contributing to the apparent peak in
the spectrum. Optimize the subset of peaks, and review the results. If all of the
remaining peaks contribute significantly to the optimized fit, then move on.
Otherwise, undo the optimization, and remove another peak from the subset.
15. Review the contributions of each peak in the cluster at 2.011 ppm in the same way
as described for the previous cluster (22 peaks removed).
16. Select both clusters, and optimize them together.
17. Refine the fits of both clusters as needed.
11.6 Tutorial - Compound Builder
125
CHENOMX NMR SUITE: USER MANUAL
Now that the fit of the compound to the spectrum is satisfactory, you can add proper
transform windows to the clusters.
18. If you entered a valid pH range of 6.00 to 8.00 in the Compound Details, set the
following transform windows:
a.
Cluster at 1.978 ppm: 1.93 to 2.02 ppm
b.
Cluster at 2.011 ppm: 1.96 to 2.05 ppm
c.
Cluster at 2.058 ppm: 2.01 to 2.09 ppm
d.
Cluster at 2.339 ppm: 2.30 to 2.37 ppm
e.
Cluster at 3.328 ppm: 3.30 to 3.36 ppm
f.
Cluster at 3.412 ppm: 3.38 to 3.44 ppm
g.
Cluster at 4.121 ppm: 4.10 to 4.14 ppm
19. If you entered a valid pH range of 4.00 to 9.00 in the Compound Details, set the
following transform windows:
a.
Cluster at 1.978 ppm: 1.92 to 2.04 ppm
b.
Cluster at 2.011 ppm: 1.93 to 2.07 ppm
c.
Cluster at 2.058 ppm: 2.00 to 2.12 ppm
d.
Cluster at 2.339 ppm: 2.27 to 2.39 ppm
e.
Cluster at 3.328 ppm: 3.25 to 3.39 ppm
f.
Cluster at 3.412 ppm: 3.36 to 3.48 ppm
g.
Cluster at 4.121 ppm: 4.05 to 4.18 ppm
20. Save the compound file. If you would like to review the sample fit for proline, you
should not replace the file called Samples\Compound Builder\Proline.xcpd.
11.7 Tutorial - Library Manager
Introduction
You can use the Library Manager module to add new compound to your library, remove
existing compounds, and create and edit compound sets using the compounds in your
library. Sources of compounds that you can add to your library include compound files
(.xcpd) created in Compound Builder, compound packs (.pack) from Chenomx or from
other users of Chenomx NMR Suite, embedded libraries in legacy spectrum files (.cnx) and
legacy Chenomx library files (.cnxlib).
Importing Compounds
To make use of compound signatures that you create using Compound Builder, you need
to add them to your library. Importing compound files (.xcpd) makes the compounds
available in your library, allowing you to use them in Profiler, add them to compound sets,
and generally use them alongside the Chenomx library.
Adding Valine and Proline to Your Library
1.
Open Library Manager.
2.
Click Compounds > Import...
11.7 Tutorial - Library Manager
126
CHENOMX NMR SUITE: USER MANUAL
3.
Click the Browse button (...) and navigate to the folder in which you saved the
compound files that you created during the Compound Builder tutorial.
If you have not completed the Compound Builder tutorial, you can use the provided
sample files, in the Samples\Compound Builder folder.
4.
Select your compound files and click Choose Files.
If you are using the sample files, select Valine.xcpd and Proline.xcpd and click
Choose Files.
5.
Click Next.
6.
Click the Create associated compound set: check box, and enter a name for the
new compound set that you would like the compound to appear in.
If you would not like to automatically add the compound to a new compound set,
clear the check box.
7.
Click Finish, and click OK in the resulting information dialog.
If you entered a compound set, it appears in the Compound Set Table. Otherwise,
you can find your newly add compounds in the Compounds set at the top of the
Compound Set Table.
You can use the same technique to add compound packs that you may receive from other
Chenomx NMR Suite users to your library. Simply select one or more compound pack files
(.pack) instead of selecting individual compound files. You can even select a folder
containing a mixture of compound files (.xcpd), compound packs (.pack) and legacy files
containing library information (.cnx and .cnxlib) to import from a variety of sources at
the same time.
11.7 Tutorial - Library Manager
127
Glossary
#
1r
See Bruker processed spectrum data.
acquisition time
Refers to the period of active data collection in an NMR pulse
sequence. The recommended acquisition time for spectra intended
for use with Chenomx NMR Suite is 4 s.
activation
The process of licensing Chenomx NMR Suite for legitimate use,
involving the installation of a Chenomx license file (.cnxlic).
animated zooming
Smooth transitions between zoom settings in the Spectrum View
of Processor, Profiler, Compound Builder or Spin Simulator.
application log
Text file generated by Chenomx NMR Suite for troubleshooting
purposes.
archived compounds
Old versions of a compounds currently present in your Library.
Only visible in Library Manager, when Show Archived Compounds
is turned on.
auto baseline
correction
Option available on importing spectra into Processor or Profiler
to automatically determine placement of breakpoints for
spline-based baseline correction. Equivalent to selecting Auto
Spline during baseline correction in Processor.
auto phasing
Option available on importing spectra into Processor or Profiler
to automatically determine phase angles. Equivalent to selecting
Auto during phasing in Processor.
auto zoom
Adjusts the vertical scale of the Spectrum View in Processor,
Profiler, Compound Builder and Spin Simulator to include all
visible data from available lines, including the spectrum, spectrum
overlay, sum, compound, simulation, subtraction, CSI and highlight
lines (where applicable).
baseline correction
Processing layer available in Processor. Also, the process of
compensating for distortions in the non-signal (noise) regions of
a spectrum.
basic fit
Simple profiling technique involving matching the selection line
(blue) to the spectrum line (black).
best guess fit
Simple profiling technique involving small transforms of indistinct
clusters to yield an aesthetic improvement in the profile, in the
absence of concrete information on which to base a more accurate
approach.
A
B
128
CHENOMX NMR SUITE: USER MANUAL
bin
In spectral binning, a region of the source spectrum that has been
reduced to a single value representing the area under the curve
in that region.
Bruker processed
spectrum data
Processed (Fourier-transformed) data from spectra acquired using
Bruker spectrometers and processed using the XWIN-NMR
software package developed by Bruker.
chemical shift and
shape indicator
Refers to a signal in the spectrum used to calibrate the chemical
shifts, lineshapes and concentrations of compounds in your
Library. Also refers to the compound responsible for the signal.
chemical shift
equivalent
Describes a relationship within a molecule between nuclei that
are interchangeable by symmetry operations or by a rapid process.
Chenomx compound
ID
Arbitrary positive integer assigned to a compound by Chenomx
staff, and used to uniquely identify the compound in the Chenomx
compound library.
cluster
Group of peaks that can be moved or otherwise adjusted as a unit
in Compound Builder and Profiler. Clusters can correspond to the
multiplets familiar to NMR spectroscopists, or to arbitrary
groupings created in Compound Builder.
Cluster Navigator
Graphical tool used in Compound Builder and Profiler to adjust
the Spectrum View to include specific clusters present in the
current compound.
.cnx
See spectrum file.
.cnxlic
See license file.
Compound Builder
Module in Chenomx NMR Suite used to prepare and modify
compound signatures (.xcpd) in your Library.
compound details
Information about a compound signature created in Compound
Builder. Some of the information is displayed directly in the
reference panel, some is used to access other information for
display in the reference panel, and some is used to index the
compound within a library.
compound file
Chenomx file format (.xcpd) designed to store the mathematical
descriptions of compound signatures created with Compound
Builder. The compound library of Chenomx NMR Suite consists
of a pool of compound files stored in a folder designated via
Library Manager preferences.
compound library
A pool of compound files (.xcpd) stored in a common folder and
indexed by Library Manager, used to profile spectra in Profiler.
compound line
In Compound Builder, the line in the Spectrum View indicating
the overall shape of the compound signature, colored red by
default.
compound pack
Chenomx file format (.pack) designed to store a collection of
compound files (.xcpd) for exchange among users of Chenomx
NMR Suite.
C
129
CHENOMX NMR SUITE: USER MANUAL
compound set
List of compounds defined in Library Manager that appears in
Profiler for use during profiling. Can refer to any set appearing in
the Compound Set Panel in Profiler, or to fixed lists of compounds
specifically as opposed to the automatically-updating lists known
as smart compound sets.
Compound Set Panel
List of available compound sets appearing in Profiler, based on
the current compound library. Allows modifying the displayed
contents of the Compound Table to aid in profiling spectra.
Compound Table
Table appearing in Profiler and Library Manager. Contains
information on compounds in your Library, including names,
compound IDs, valid magnet frequencies and pH ranges, InChI
and SMILES strings, and so on. Also contains potential and
measured concentrations when available in Profiler.
compressed scalable
vector graphics
Scalable vector graphics compressed with gzip compression
resulting in files that are up to ten times smaller. Suitable for image
distribution on the internet when storage space is an issue.
coupled split
In Spin Simulator, a J-modifier that links two spin definitions via
a common split count and J-value, allowing more accurate
calculation of complex coupling interactions. Equivalent to
J-couplings in previous versions of Chenomx NMR Suite.
creatinine
pH indicator supported by Chenomx NMR Suite. Most accurate
for pH 3.75 to 5.50.
CSI
See chemical shift and shape indicator.
CSI editor
Mode used in Processor to define the properties of the CSI for a
spectrum, including the experimental concentration (in mM), peak
center (in ppm), height (in si) and width (in Hz).
default selection line
In Profiler, the line used to indicate the currently selected
compound when no custom color has been assigned to it, colored
blue by default.
default transform
window
In Compound Builder, the limits applied to a cluster when such
limits are activated but not specified (e.g., through the menu item
Compound > Transform Window > Set Default on Selected
Clusters). Equivalent to a range of 0.006 ppm centered on the
position of the cluster when the default is applied, or 0.003 ppm
in either direction.
Delta
NMR software package developed by JEOL to run their
spectrometers and process the resulting data.
DFTMP
Abbreviation of [difluoro(trimethylsilyl)methyl]phosphonate, a
pH indicator supported by Chenomx NMR Suite. Most accurate
for pH 5.00 to 7.50.
DSS
Abbreviation of 2,2-dimethyl-2-silapentane-5-sulfonate, the CSI
recommended by Chenomx for most samples. All other CSIs in
Chenomx NMR Suite are defined relative to DSS.
D
130
CHENOMX NMR SUITE: USER MANUAL
E
.eps
See encapsulated PostScript file.
encapsulated
PostScript file
PostScript® file which contains image size and layout information
according to Adobe's Document Structuring Convention. Used
primarily for electronic and professional desktop publishing.
exporting spectrum
graphic
In Profiler, refers to creating an image file showing the current
Spectrum View. Used to generate images in various formats for
use in presentations or publications.
exporting profiled
compounds
In Profiler, refers to creating a compound pack file (.pack)
containing compounds from the currently open file that have been
modified, including concentrations, transforms, custom colors,
highlights and stars.
exporting profiled
concentrations
In Profiler, refers to creating a tab-delimited text file describing
the concentrations stored in one or more profiled Chenomx
spectrum files (.cnx). The resulting file is suitable for use in a
variety of statistical analysis and spreadsheet software.
.fid
See NMRPipe spectrum data.
fid
See spectrum data.
frequency domain size
The number of data points in a Chenomx spectrum, after data has
been imported and zero-filling applied.
frequency filter
In Profiler, a quick search based on the position of peaks in the
spectrum, in ppm. Can be used to specify a single frequency or a
range of frequencies, resulting in a list of all compounds having
at least one transform window that overlaps the specified
frequency or range. A more limited variety of a text filter.
.ft2
See NMRPipe processed spectrum data.
generate cluster for
region
In Compound Builder, an operation that automatically creates a
series of peaks to fit the selected region, based on minimizing the
average intensity of the subtraction line.
grouping J-modifiers
In Spin Simulator, combines multiple uncoupled J-modifiers into
a single one with the same total split count, and the average J-value
for the group. For example, grouping three uncoupled splits, with
split counts of 1, 2 and 3 and J-values of 4, 6 and 7 Hz, will give a
single uncoupled split with a split count of 6 (1+2+3) and a J-value
of 5.67 Hz (average of 4, 6 and 7 Hz).
group peaks as cluster
In Compound Builder, defines a collection of peaks as belonging
to the same cluster, so that they will transform together, appear
under the same entry in the Cluster Navigator and obey the same
transform windows.
F
G
131
CHENOMX NMR SUITE: USER MANUAL
H
highlight lines
In Profiler, the lines used to indicate highlighted compounds.
Colored to match the default selection line (blue by default), or
the custom color for each compound, if one has been assigned.
highlighted compound
In Profiler, a compound with a check in the Highlighted column
of the Compound Table. The signatures of highlighted compounds
always appear in the Spectrum View, regardless of what is selected
in the Compound Table.
imidazole
pH indicator supported by Chenomx NMR Suite. Most accurate
for pH 5.50 to 8.80.
importing compounds
Refers to expanding the compound library by adding signatures
from one or more compound sources, including compound packs
(.pack), compound files (.xcpd), and legacy Chenomx NMR Suite
files (.cnx and .cnxlib).
InChI
See IUPAC international chemical identifier.
IUPAC international
chemical identifier
A string of characters that uniquely represents a chemical
compound based on its structure. Developed and approved by the
International Union of Pure and Applied Chemists (IUPAC) and
the National Institute of Standards and Technology (NIST).
Java runtime
environment
Software based on a specification by Sun Microsystems that allows
a computer to run a Java application. Chenomx NMR Suite is a Java
application.
JCAMP-DX spectrum
data
Spectrum data (unprocessed or processed) stored in the JCAMP-DX
data interchange format.
.jdf
See JEOL Delta spectrum data.
.jdx
See JCAMP-DX spectrum data.
JEOL Delta spectrum
data
Data from spectra acquired using JEOL spectrometers and
processed (where applicable) using the Delta software package
developed by JEOL.
J-modifier
In Spin Simulator, parameters that modify a spin definition by
splitting it to form more complex shapes. Composed of a J-value
and a split count, and include both coupled and uncoupled splits.
J-value
In Spin Simulator, defines the magnitude of the split defined by a
J-modifier. Equivalent to a coupling constant for coupled splits.
J-value editor
In Spin Simulator, a graphical control used to vary the J-value for
the currently selected J-modifier.
I
J
132
CHENOMX NMR SUITE: USER MANUAL
L
library
Pool of compound signatures (.xcpd) available for use in Chenomx
NMR Suite. The Library replaces the Chenomx Compound Libraries
available in previous versions of Chenomx NMR Suite.
Library Manager
Module in Chenomx NMR Suite used to manage your Library by
adding or removing compounds, updating existing compounds
with new versions, and creating, updating and deleting compound
sets.
license file
Chenomx file format (.cnxlic) used to activate Chenomx NMR
Suite.
line broadening
Processing layer available in Processor. A mathematical operation
that multiplies a fid by an exponential function in the time domain,
averaging out instrumental noise at the expense of increasing
linewidths. The exponential function is represented by a value
measured in Hz, approximately corresponding to the increase in
linewidth that will result from the operation.
M
magnetic-equivalent
Describes a relationship within a molecule between nuclei that
couple equally to any nucleus in the same spin system. Nuclei that
are magnetic-equivalent are chemical shift equivalent by definition.
ni
See normalized intensity.
NMRPipe
A free software package designed to process NMR spectra.
NMRPipe processed
spectrum data
Data from spectra processed using the NMRPipe software package.
NMRPipe spectrum
data
Data from spectra stored using the NMRPipe software package.
no fit
Simple profiling technique applied to clusters for which no
information is available to guide a fit. The cluster is simply not
modified.
normalization
In Profiler, refers to dividing the area of each bin in a spectral
binning session by a common denominator, allowing binning
results to be compared across multiple spectra. Bins can be
normalized relative to the total area under the spectrum line or
to units of standardized area (sa).
normalized intensity
Refers to an intensity relative to that of the tallest peak in the
spectrum, that is, the point with the largest intensity. Using this
scale, if the tallest peak in the spectrum is the creatinine methyl
signal, and the urea signal is half as tall as the creatinine signal,
then the intensity of the urea signal is 0.5 ni.
N
133
CHENOMX NMR SUITE: USER MANUAL
O
optimize selected
peak shapes
In Compound Builder, an operation that automatically adjusts the
centers, heights and widths of the selected peaks to fit the overlaid
spectrum, based on minimizing the average intensity of the
subtraction line.
.pack
See compound pack.
.pdf
See portable document format.
peak
Mathematical model of a signal appearing in a spectrum. Chenomx
NMR Suite models all peaks as pure Lorentzian curves.
pH editor
Mode used in Processor to determine the sample pH for a
spectrum, based on the peaks positions of one or more pH
indicators.
pH indicator
Compound added to a sample to allow determination of the sample
pH. Indicators supported by Chenomx NMR Suite, like creatinine,
imidazole and DFTMP, have signals whose chemical shifts change
with the pH of the sample. Sample pH can thus be determined by
measuring the signals' chemical shifts.
phase correction
See phasing.
phasefile
Data from spectra processed using the VNMR or VNMRj software
packages developed by Varian.
phasing
Processing layer available in Processor. Also, the process of
choosing coefficients for the parts of a linear combination of real
and imaginary spectra, derived from the source spectrum and
varying linearly with frequency, to optimize the appearance of
the source spectrum.
.png
See portable network graphics.
portable document
format
Open file format created by Adobe Systems Incorporated. Vector
graphic format that stores document information in a device
independent and resolution independent way. Suitable for
multiplatform viewing and printing.
portable network
graphics
Raster graphic format with lossless compression, 48-bit true-color
depth, variable transparency and gamma correction. Suitable for
image distribution on the internet.
PostScript
Page description language introduced by Adobe Systems
Incorporated for describing images in a device independent way.
Used primarily for electronic and professional desktop publishing.
potential
concentration
Estimated upper limit of a compound's concentration, calculated
automatically by Profiler. Potential concentrations can be used to
guide profiling of a spectrum.
preprocessing
In Processor, an entry that appears in the Processing History to
indicate prior processing in third-party software packages.
P
134
CHENOMX NMR SUITE: USER MANUAL
Appears when processed data is imported (1r, phasefile, .ft2,
.jdf, .jdx).
Processing History
In Processor, a panel showing the processing layers that have been
applied to the currently open spectrum. Also allows reviewing the
details of each layer and removing layers as needed.
processing layer
In Processor, one of several modifications that can be made to
imported spectrum data to refine the appearance of the spectrum
and compensate for defects in acquisition. Includes phasing,
baseline correction, line broadening, reference deconvolution,
water deletion and reverse spectrum.
Processor
Module in Chenomx NMR Suite used to import NMR data from
various sources, add various processing effects like phasing,
baseline correction, line broadening and reference deconvolution,
and save the results as a spectrum file (.cnx).
profile
Part of a spectrum file (.cnx) describing the results of analyzing
the spectrum in Profiler. Includes the list of identified compounds,
along with their determined concentrations and transforms.
Represented in Profiler as the Compound Table.
profiled compounds
In Profiler, compounds that have been modified in some way from
their original state, including concentrations, transforms, custom
colors, highlights and stars. Also, compounds that appear in the
Profiled Compounds set in the Compound Set Panel.
Profiler
Module in Chenomx NMR Suite used to analyze spectra by
comparison with compound signatures from your Library, creating
a profile of the spectrum in a process called targeted profiling.
proxy server
Used to mediate communication between a computer on one
network and computers on other networks. Sometimes used to
improve network operations by caching frequently-accessed data,
or to improve network security by acting as a secured gateway
through which other computers access other networks (like the
Internet).
.ps
See PostScript.
pulse sequence
Specific series of radiofrequency bursts and pauses in an NMR
experiment, designed to excite nuclei in a particular way before
beginning to detect the resulting magnetization signal (during the
acquisition time).
quick search
Filter for the current view of the Compound Table based on
entered text. Results can be shown for matches to any or all of
compound name, compound comment, compound ID or location
in the spectrum (in ppm).
Q
135
CHENOMX NMR SUITE: USER MANUAL
R
reference
deconvolution
Processing layer available in Processor. Used to reconstruct an
ideal spectrum by removing lineshape distortions caused by
systematic variations in the magnetic field of the spectrometer.
Reference Panel
Displays additional data for the compound currently selected in
the Compound Table in Profiler, or for the compound ID specified
in the compound details in Compound Builder (if any).
relaxation delay
Refers to a pause preceding active data collection in an NMR pulse
sequence, to ensure that residual signal from the radiofrequency
pulse used to excite the sample is not visible in the spectrum. The
recommended relaxation delay for spectra intended for use with
Chenomx NMR Suite is 1 s.
rescan compound
library
In Library Manager, allows a user-initiated rescan of the folder in
which compound signatures are stored, usually to ensure that
changes made to the folder directly via the file system are properly
reflected in the library. Alternative to restarting Library Manager
(which rescans the library folder on startup).
residual binning
Variation of spectral binning in which the subtraction line is binned
instead of the spectrum line.
reverse spectrum
Processing layer available in Processor. Inverts the order of the
data points in a spectrum in the frequency domain, effectively
flipping the spectrum horizontally. Only necessary for spectra
from certain Bruker spectrometers.
sa
See standardized area.
scalable vector
graphics
Open standard created by the World Wide Web Consortium.
XML-based format for describing two-dimensional vector graphics.
Suitable for image distribution on the internet.
select region
Tool used to mark a specific region of the spectrum in the
Spectrum View. Used to provide more precise zooming, to define
frequency ranges for quick searches, to mark clusters, peaks or
spin definitions for selection, to mark a region in which to generate
a new cluster, and so on.
selection line
Line in the Spectrum View in Compound Builder and Spin
Simulator corresponding to the currently selected peak, cluster
or spin definition, colored blue by default.
send to Compound
Builder
In Library Manager, opens the compound file (.xcpd) of the
selected compound in Compound Builder for modification or
review.
send to Processor
In Profiler, opens the current spectrum in Processor to allow
modification of the processing layers, CSI settings, spectrum pH
or spectrum details. The details of the current profile
(concentrations, transforms, etc.) are retained, even if the
spectrum is then saved from Processor and closed.
S
136
CHENOMX NMR SUITE: USER MANUAL
send to Profiler
In Processor, opens the current spectrum in Profiler to start (or
continue) profiling. Any changes to the processing layers, CSI
setting, spectrum pH, or spectrum details are retained, even if the
spectrum is then saved from Profiler and closed.
si
See standardized intensity.
simplified molecular
input line entry
specification
A string of characters that uniquely represents a chemical
compound based on its structure. Developed by David Weininger
and extended by Daylight Chemical Information Systems, Inc.
simulation details
In Spin Simulator, information about the current simulation,
including simulation frequency in MHz, number of spin systems,
number of transitions modeled and number of J-modifiers defined,
including coupled and uncoupled splits.
simulation file
Chenomx file format (.xss) designed to store the parameters of
simulations created with Spin Simulator.
simulation line
Line in the Spectrum View in Spin Simulator corresponding to the
overall lineshape of the current spin simulation, colored red by
default.
smart compound set
Compound set defined in Library Manager as a set of rules for
dynamically selecting compounds from your Library.
SMILES
See simplified molecular input line entry specification.
spectral binning
Data reduction method widely used to prepare spectra for
statistical analysis. Spectra are divided into pieces or bins, and
the integrated area in each bin is considered for further analysis.
spectral width
The full range of frequencies represented in the current spectrum,
in ppm.
spectrum details
Information about the currently open spectrum in Processor and
Profiler. Includes acquisition parameters stored by the
spectrometer, CSI concentration and spectrum pH determined in
Processor, and text comments associated with the spectrum.
spectrum file
Chenomx file format (.cnx) designed to store raw spectrum data
(fid), processing layers added using Processor and profiles created
using Profiler. Can be used as overlays in Compound Builder and
Spin Simulator.
spectrum line
Line in the Spectrum View in Processor and Profiler corresponding
to the experimental data of the currently open spectrum, colored
black by default.
spectrum overlay
Spectrum files (.cnx) displayed in the Spectrum View in Spin
Simulator and Compound Builder to guide the construction of
accurate simulations and compound signatures.
spectrum overlay line
Line in the Spectrum View in Compound Builder and Spin
Simulator corresponding to the overlaid spectrum, colored black
by default.
spectrum thumbnail
Miniature version of the Spectrum View that can be used to quickly
navigate or zoom to different regions of the spectrum, regardless
of the currently viewed region or zoom level.
137
CHENOMX NMR SUITE: USER MANUAL
Spectrum View
Main display area in Processor, Profiler, Compound Builder and
Spin Simulator. Contains the spectrum graph and several tools for
manipulating the displayed information, including the Cluster
Navigator or Spin Navigator, and controls for adjusting the heights
and frequencies of displayed peaks, clusters or spin definitions.
spin definition
Basic element of a simulation created in Spin Simulator. Each spin
definition consists of a number of protons, a center in ppm and a
width in sw.
Spin Navigator
Adjusts the Spectrum View in Spin Simulator to include specific
spin definitions in the current simulation. Analogous to the Cluster
Navigator.
Spin Simulator
Module in Chenomx NMR Suite used to prepare and modify spin
simulations (.xss).
spin system
Grouping of spin definitions in Spin Simulator that are uncoupled
to any other spin definitions. Chemically, a spin system
corresponds to a group of protons in a compound that do not
interact with any other protons in the compound in a manner
detectable by NMR.
spline
A curved line formed by two or more vertices or breakpoints and
a mathematical formula that describes the curves between them.
split count
One of the two parameters that define a J-modifier. For coupled
splits, the split count is predefined as the number of protons
associated with the spin definition to which the current spin
definition is coupled. For uncoupled splits, the split count may be
considered the number of virtual protons to which the spin
definition would need to be coupled in order to show the desired
splitting pattern.
standardized area
Refers to an area relative to that of a theoretical DSS methyl peak
at a concentration of 0.50 millimoles per litre (mM).
standardized intensity
Refers to an intensity relative to that of a theoretical DSS methyl
peak at a concentration of 0.50 millimoles per litre (mM). Using
this scale, if you select DSS as your CSI, and indicate a DSS
concentration of 1.00 mM, then the intensity of the DSS methyl
signal in that spectrum is 2 si, since 1.00 mM is twice the standard
concentration of 0.50 mM.
standardized width
Refers to a linewidth relative to that of a theoretical DSS methyl
peak at a concentration of 0.50 millimoles per litre (mM).
starred compound
In Profiler, a compound for which the Star column has been toggled
on (yellow).
subtraction line
Line in the Spectrum View in Profiler, Compound Builder and Spin
Simulator showing the difference between the black line (spectrum
or overlay line) and the red line (sum, compound or simulation
line), colored green by default.
subtraction line fit
Advanced profiling technique giving very accurate results.
Concentrations and transforms for a compound are manipulated
so that the subtraction line (green) approximates a normal
138
CHENOMX NMR SUITE: USER MANUAL
spectrum, indicating the influence of the compound has been
efficiently subtracted from the original spectrum.
sum line
Line in the Spectrum View in Profiler representing the sum of all
of the compound lines in the profile of the currently open
spectrum, colored red by default.
sum line fit
Profiling technique needed for fitting overlapped regions. Clusters
overlapping in a particular region are manipulated so that the
sum line (red) in that region best approximates the spectrum line
(black). Other clusters for the same compounds that occur in other,
potentially less overlapped regions will often contribute to this
technique.
svfph
Macro available for VNMR and VNMRj that saves the phasefile
for a spectrum alongside its raw data (fid), in a subfolder called
datdir.
.svg
See scalable vector graphics.
.svgz
See compressed scalable vector graphics.
sw
See standardized width.
targeted binning
Variation of spectral binning in which the bins are defined as the
transform windows of each cluster of each compound in a
compound set.
targeted profiling
Data reduction method embodied in the Profiler module, involving
comparison of a spectrum to compound signatures in your Library,
reducing spectral data to a list of quantified compounds.
text filter
A quick search based on entered text. Filters the Compound Table
by matching compound name, compound comment, compound
ID or location in the spectrum (Profiler only, in ppm).
time domain size
The number of data points originally acquired for a spectrum, if
it originated from a raw fid, or the number of points originally
saved in a spectrum, if it was pre-processed using a third-party
software package.
TMSP
See TSP.
transform
Translation of a cluster in a compound signature along the
frequency axis during profiling. Transforms are necessary to
compensate for variation in cluster frequency due to pH, ionic
strength and other matrix effects.
transform window
Limit placed on the extent of transforms possible on a particular
cluster.
transitions
Lorentzian peaks corresponding to energy transfer among spins
in a spin system. The result of a simulation in Spin Simulator is a
series of transitions, the sum of which is the simulation line (red).
TSP
Abbreviation of 3-trimethylsilylpropionate, a CSI supported by
Chenomx NMR Suite as an alternative to DSS. The chemical shift
of TSP is sensitive to pH.
T
139
CHENOMX NMR SUITE: USER MANUAL
U
uncoupled split
In Spin Simulator, a J-modifier that splits a spin definition as
though it were coupled to a number of protons equivalent to the
spin count, by an amount equal to the specified J-value (in Hz).
universally unique
identifier
Standard identifier commonly used in software to ensure that a
piece of information (like a compound signature) can be identified
in such a way that the same identifier will never be used for
another piece of information.
unprocessed spectrum
data
Raw data from spectra acquired using Bruker or Varian
spectrometers that.
UUID
See universally unique identifier.
valid pH range
Optional parameter that describes the pH over which a compound
signature is expected to accurately reflect an experimental
spectrum. Often correlated with the pH range used to determine
transform windows.
vertical zoom
Adjusts the scale of the Spectrum View in the vertical direction,
without changing the displayed frequency range.
VNMR
Older NMR software package developed by Varian to run their
spectrometers and process the resulting data.
VNMRj
NMR software package developed by Varian to run their
spectrometers and process the resulting data.
V
W
water deletion
Processing layer that masks data points in a spectrum in the
frequency domain across a range associated with water. This
should not be confused with water subtraction methods operating
in the time domain to remove the water signal itself.
water suppression
Technique used to reduce the contribution of the water signal to
1
H NMR spectra of aqueous solutions via a special pulse sequences.
.xcpd
See compound file.
.xss
See simulation file.
XWIN-NMR
NMR software package developed by Bruker to run their
spectrometers and process the resulting data.
zero-filling
Refers to adding zeros to a fid prior to Fourier-transforming it.
Used by modern spectrometers to ensure that all spectra have a
X
Z
140
CHENOMX NMR SUITE: USER MANUAL
number of points that is a power of 2, enabling the use of fast
Fourier-transform algorithms. Can also be used to increase the
digital resolution of a spectrum, to a certain extent.
141
Index
A
ACD/Labs, 9
acquisition time, 9
activation, 1
key, 1
license, 1
license file (.cnxlic), 1
add
J-modifier, 69
peak, 76
selected compounds to [Compound
Set], 94
spin definition, 67
spin system, 66
animated zoom, 24
annotations
custom color, 44, 46
highlight, 44, 46
star, 44, 47
application log, vii
archived compound, 91
auto zoom, 21
automatic baseline correction, 35
automatic phasing, 34
automatically update compound set, 96
B
baseline correction, 35
automatic, 35
breakpoint, 35
'frowns', 35
'rolling', 35
'smiles', 35
'wings', 35
basic fit, 110
best guess fit, 113
bin
label, 58
size, 58
width, 58
binning target, 58
breakpoint, 35
Bruker
processed data (1r), 16
spectrum file (fid), 16
C
change columns, 19
Chenomx file types
compound album file (.cca), 75
compound file (.xcpd), 16, 75
compound pack (.pack), 3, 5, 57
license file (.cnxlic), 1
simulation file (.xss), 16, 66, 75
spectrum file (.cnx), 16, 39
Chenomx Technical Support, vii
clear
concentration, 49
transform, 50
transform window, 81
cluster
generate for region, 80
group peaks as, 79
list, 85
navigator, 53, 82
select, 77
comment, 33
compound
add to [Compound Set], 94
album file (.cca), 75
archived, 91
author, 84
details, 84
file (.xcpd), 16, 75
filter in selected region, 48
filter near x.xx ppm, 48
ID, 84
line, 23
name, 84
new, 75
pack (.pack), 3, 5, 57
remove from compound set, 94
remove from library, 92
set, 53, 88, 93, 94, 95, 97
table, 44, 88
compound details
author, 84
ID, 84
magnet frequency, 84
name, 84
sample concentration, 84
UUID, 7, 84
compound library
folder, 2, 24
remove compound from, 92
rescan, 92
compound set
automatically update, 96
delete, 97
export as compound pack (.pack), 90
new, 94
panel, 53, 93
remove compound from, 94
rename, 97
smart, 93, 95, 97
compressed SVG (.svgz), 59
concentration, 49
clear, 49
export profiled concentrations, 56
exported concentrations (.txt), 29
potential, 51
scale, 52
set to potential, 51
units, 62
convert
conversion settings, 39
spectra, 16, 39
copy spectrum image to clipboard, 60
coupled split, 6, 69
creatinine, 8, 11, 30
CSI, 8, 29
editor, 29
find automatically, 29
internal standard, 8
preserve area, 29
custom color, 44, 46
D
data acquisition, 8
datdir, 9
decrease vertical zoom, 21
default
file folder, 24
layout, 56
selection line, 23
transform window, 81
zoom, 24
delete compound set, 97
Delta, 9
DFTMP, 7, 8, 11, 30
display options
compound line, 23
default selection line, 23
overlay line, 23
selection line, 23
simulation line, 23
spectrum line, 23
subtraction line, 23, 110
sum line, 23, 111
DSS/TSP satellites, 37
E
edit
J-modifier, 69
peak, 78
142
CHENOMX NMR SUITE: USER MANUAL
smart compound set, 95
spin definition, 67
transform window, 81
embedded libraries, 5
encapsulated PostScript (.eps), 59
exclude region, 58
export
compound pack (.pack), 90
concentrations, 29
profiled compounds, 57
profiled concentrations, 56
spectrum graphic, 59
export concentrations
default layout, 56
transposed layout, 56
export spectrum graphic
image options, 59
exported concentrations (.txt), 29
F
filter
for compounds in selected region, 48
for compounds near x.xx ppm, 48
find CSI automatically, 29
find pH automatically, 30
first-order phase, 34
folder
compound library, 2, 24
default, 24
frequency domain size, 33
'frowns', 35
G
compounds (to library), 89
profile, 57
simulation file (.xss), 75
spectrum, 16
import to library
compound file (.xcpd), 89
compound pack (.pack), 89
old library file (.cnxlib), 89
spectrum file (.cnx), 89
ZIP-compressed file (.zip), 89
increase vertical zoom, 21
information panel, 77, 78
internal standard, 8
NMRPipe
processed data (.ft2), 16
spectrum file (.fid), 16
no fit, 114
normalization, 58
J
peak
add, 76
edit, 78
group as cluster, 79
list, 85
optimize selected, 79
remove, 78
select, 77
pH
editor, 30
find automatically, 30
indicator, 8
internal standard, 8
spectrum, 30
pH indicator
creatinine, 8, 11, 30
DFTMP, 7, 8, 11, 30
imidazole, 8, 11, 30
phasing, 34
automatic, 34
first-order phase, 34
zero-order phase, 34
portable document format (.pdf), 59
portable network graphic (.png), 59
PostScript (.ps), 59
potential concentration, 51
preprocessing, 32, 34
ACD/Labs, 9
Bruker processed data (1r), 16
Delta, 9
JCAMP-DX spectrum file (.jdx), 16
JEOL Delta spectrum file (.jdf), 16
NMRPipe processed data (.ft2), 16
Varian processed data (phasefile), 9,
16
VNMR, 9
VNMRj, 9
XWIN-NMR, 9
preserve CSI area, 29
processing
J-coupling, 69
J-modifier, 6, 69
add, 69
coupled split, 6, 69
edit, 69
group uncoupled, 69
J-value, 6, 69
J-value editor, 69
list, 69
remove, 69
split count, 6, 69
uncoupled split, 6, 69
ungroup uncoupled, 69
J-value, 6, 69
J-value editor, 69
JCAMP-DX spectrum file (.jdx), 16
JEOL Delta spectrum file (.jdf), 16
generate cluster for region, 80
group
peaks as cluster, 79
uncoupled splits, 69
L
H
M
highlight, 44, 46
magnet frequency, 84
I
N
image file types
compressed SVG (.svgz), 59
encapsulated PostScript (.eps), 59
portable document format (.pdf), 59
portable network graphic (.png), 59
PostScript (.ps), 59
scalable vector graphic (.svg), 59
imidazole, 8, 11, 30
import
compound album file (.cca), 75
new
compound, 75
compound set, 94
simulation, 66
smart compound set, 95
NMR parameters
acquisition time, 9
relaxation delay, 9
spectral width, 9
temperature, 9
license file (.cnxlic), 1
line broadening, 36
line color, 24
O
optimize selected peak shapes, 79
output options, 58
overlay line, 23
overlay spectrum, 19
P
143
CHENOMX NMR SUITE: USER MANUAL
baseline correction, 35
history, 32
line broadening, 36
phasing, 34
preprocessing, 32, 34
reference deconvolution, 37
reverse spectrum, 39
water deletion, 38
profiled compounds, 44, 46, 47, 49, 50,
52, 56, 57
profiling techniques
basic fit, 110
best guess fit, 113
no fit, 114
subtraction line fit, 110
sum line fit, 111
water suppression, 112
proline, 117, 124, 126
Q
quick search, 48, 89
R
redo zoom, 21
reference deconvolution, 37
DSS/TSP satellites, 37
target linewidth, 37
reference panel, 61, 83
relaxation delay, 9
remove
compound from compound set, 94
compound from library, 92
J-modifier, 69
overlaid spectrum, 19
peak, 78
spin definition, 67
spin system, 66
rename compound set, 97
rescan compound library, 92
reverse spectrum, 39
'rolling', 35
S
sample concentration, 84
sample preparation, 8
scalable vector graphic (.svg), 59
scale concentrations, 52
select
cluster, 77
peak, 77
region, 22
selection line, 23
send to
Compound Builder, 91
Processor, 60
Profiler, 40
set
to potential concentration, 51
zoom, 20
show entire spectrum, 20
Signature Builder, 4
simulation, 66
details, 71
file (.xss), 16, 66, 75
frequency, 71
line, 23
new, 66
spin definition, 67
spin system, 66, 67
smart compound set, 93, 95, 97
edit, 95
new, 95
'smiles', 35
spectral binning, 58
bin label, 58
bin size, 58
bin width, 58
binning target, 58
exclude region, 58
normalization, 58
output options, 58
total area, 58
spectral width, 9
spectrum
Bruker spectrum file (fid), 16
file (.cnx), 16, 39
JCAMP-DX spectrum file (.jdx), 16
JEOL Delta spectrum file (.jdf), 16
line, 23
NMRPipe spectrum file (.fid), 16
overlay, 19
pH, 30
remove overlaid, 19
reverse, 39
thumbnail, 22
Varian spectrum file (fid), 16
Spectrum View, 20, 21, 53, 68, 82
spin
definition, 67
navigator, 68
system, 66, 67
spin definition
add, 67
edit, 67
panel, 66, 69
remove, 67
spin system
add, 66
remove, 66
split count, 6, 69
splitting factor, 6
star, 44, 47
statistical analysis, 56, 58
export profiled concentrations, 56
spectral binning, 58
subtraction line, 23, 110
fit, 110
sum line, 23, 111
fit, 111
supported file types
Bruker processed data (1r), 16
Bruker spectrum file (fid), 16
JCAMP-DX spectrum file (.jdx), 16
JEOL Delta spectrum file (.jdf), 16
NMRPipe processed data (.ft2), 16
NMRPipe spectrum file (.fid), 16
Varian processed data (phasefile), 9,
16
Varian spectrum file (fid), 16
svfph macro, 9
T
tape measure, 22
target linewidth, 37
temperature, 9
time domain size, 33
total area, 29, 58
transform, 50
clear, 50
window, 50, 81
transform window
clear, 81
default, 81
edit, 81
transposed layout, 56
tutorial compounds
proline, 117, 124, 126
valine, 115, 121, 126
U
uncoupled split, 6, 69
undo zoom, 21
ungroup uncoupled splits, 69
update
compound versions, 96
profiled versions, 54
update profiled versions
all compounds, 54
144
CHENOMX NMR SUITE: USER MANUAL
selected compound, 54
starred compounds, 54
UUID, 7, 84
V
valine, 115, 121, 126
Varian
processed data (phasefile), 9, 16
spectrum file (fid), 16
VNMR, 9
VNMRj, 9
W
water
deletion, 38
suppression, 112
'wings', 35
X
XWIN-NMR, 9
Z
zero-order phase, 34
zoom
animated, 24
auto, 21
box, 21, 22
decrease vertical, 21
default, 24
increase vertical, 21
redo, 21
set, 20
show entire spectrum, 20
undo, 21
145