1
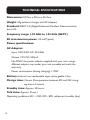
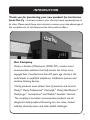
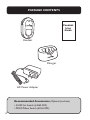
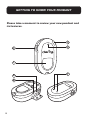
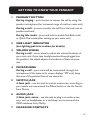
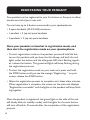
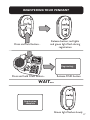
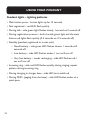
User Guide
Pendant
Remote Controller
for Fortissimo and Sempre
ClarityProducts.com
TABLE OF CONTENTS
Safety Instructions............................................................................................4
Battery Instructions.........................................................................................7
Care and Maintenance.....................................................................................8
Technical Specifications..................................................................................10
About Clarity....................................................................................................11
Package Contents . .........................................................................................12
Installation..........................................................................................................13
Getting to Know your Pendant...................................................................14
Registering your Pendant...............................................................................16
Using your pendant.........................................................................................18
Troubleshooting.............................................................................................. 23
FCC Requirements and Regulations.......................................................... 24
Warranty and Service.................................................................................... 27
IMPORTANT SAFETY INSTRUCTIONS
To prevent severe injury and loss of life/property, read this
section carefully before using the product to ensure proper
and safe operation of your product.
WARNINGS
Power connection
• Use only the power source marked on the product.
•Do not overload power outlets and extension cords. This can result
in the risk of fire or electric shock.
•Completely insert the AC adapter/power plug into the power outlet.
Failure to do so may cause electric shock and/or excessive hear
resulting in a fire.
•Regularly remove any dust, etc. from the AD adapter/power plug
by pulling it from the power outlet, then wiping with a dry cloth.
Accumulated dust may cause an insulation defect from moisture, etc.
resulting in a fire.
•Unplug the product from power outlets if it emits smoke, and abnormal smell, or makes an unusual noise. These conditions can cause fire
or electric shock.
Confirm that smoke has stopped emitting and contact the Clarity
Customer Service at 800-426-3738.
•Unplug from power outlets and never touch the inside of the product if its casing has been broken open.
•Never touch the plug with wet hands. Danger of electric shock exists.
SAVE THESE INSTRUCTIONS
4
IMPORTANT SAFETY INSTRUCTIONS
Installation
•To prevent the risk of fire or electrical shock, do not expose the
product to rain or any type of moisture.
•Do not place or use this product near automatically controlled devices such as automatic doors and fire alarms. Radio waves emitted
from this product may cause such devices to malfunction resulting in
an accident.
•Do not allow the AC adaptor to be excessively pulled, bent or placed
under heavy objects.
Operating safeguards
•Unplug the product from power outlets before cleaning. Do not use
liquid or aerosol cleaners.
• Do not disassemble the product.
Medical
•Consult the manufacturer of any personal medical devices, such
as pacemakers or hearing aids, to determine if they are adequately
shielded from external RF (radio frequency) energy. (The product
operates in the frequency range of 1.92 GHz to 1.93 GHz, and the
RF transmission power is 115 mW (max.).)Do not disassemble the
product.
•Do not use the product in health care facilities if any regulations
posted in the area instruct you not to do so. Hospitals or health care
facilities may be using equipment that could be sensitive to external
RF energy.
SAVE THESE INSTRUCTIONS
5
IMPORTANT SAFETY INSTRUCTIONS
Installation and location
•The AC adaptor is used as the main disconnect device. Ensure that
the AC outlet is installed near the product and is easily accessible.
When using your product, basic safety precautions
should always be followed to reduce the risk of fire, electric shock, and injury to persons, including the following:
•Do not use this product near water for example, near a bathtub,
washbowl, kitchen sink, or laundry tub, in a wet basement or near a
swimming pool.
•Avoid using a telephone (other than a cordless type) during an
electrical storm. There may be a remote risk of electric shock from
lightning.
•Do not use the telephone to report a gas leak in the vicinity of the
leak.
• Use only the power cord and batteries indicated in this manual.
•Exercise care when handling the batteries. Do not allow conductive
materials such as rings, bracelets, or keys to touch the batteries, otherwise a short circuit may cause the batteries and/or the conductive
material to overheat and cause burns.
SAVE THESE INSTRUCTIONS
6
IMPORTANT BATTERY SAFETY INSTRUCTIONS
WARNING: Dispose of used batteries according to the
instructions.
•Do not dispose of the battery in a fire as it may explode. Check with
local codes for possible special disposal instructions.
•Do not open or mutilate the battery. Released electrolyte is corrosive and may cause damage to the eyes and skin. It may be toxic if
swallowed.
•Your product has an embedded, non-replaceable battery, it is designed to last the lifetime of the product. Do not attempt to open
the product or remove the battery as this may cause injury and damage the product. Please contact the local recycling facility for removal
of the battery.
•Do not allow any battery or its holder to contact metal objects such
as keys or coins.
•Keep batteries out of the reach of children.
SAVE THESE INSTRUCTIONS
7
CARE AND MAINTENANCE
FOR BEST PERFORMANCE
Base unit location/avoiding noise
The base unit and other compatible Clarity units use radio waves to
communicate with each other.
•For maximum coverage and noise-free communications, place your
base unit at a convenient, high, and central location with no obstructions between the handset and base unit in an indoor environment.
a.away from electronic appliances such as TVs, radios, personal
computers, wireless devices, or other phones.
b.facing away from radio frequency transmitters, such as external
antennas of mobile phone cell stations. (Avoid putting the base
unit on a bay window or near a window.)
•Coverage and voice quality depends on the local environmental conditions.
•If the reception for a base unit location is not satisfactory, move the
base unit to another location for better reception.
Environment
•Keep the product away from electrical noise generating devices, such
as fluorescent lamps and motors.
•The product should be kept free from excessive smoke, dust, high
temperature, and vibration.
• The product should not be exposed to direct sunlight.
• Do not place heavy objects on top of the product.
SAVE THESE INSTRUCTIONS
8
CARE AND MAINTENANCE
•When you leave the product unused for along period of time, unplug
the product from the power outlet.
•The product should be kept away from heat sources such as heaters,
kitchen stoves, etc. It should not be placed in rooms where the temperature is less than 0 C (32 F) or greater than 40 C (104F). Damp
basements should also be avoided.
•The maximum calling distance may be shortened when the product
is used in the following places: Near obstacles such shills, tunnels,
underground, near metal objects such as wire fences, etc.
•Operating the product near electrical appliances may cause interference. Move away from the electrical appliances.
Routine care
• Wipe the outer surface of the product with a soft moist cloth.
• Do not use benzene, thinner, or any abrasive powder.
SAVE THESE INSTRUCTIONS
9
TECHNICAL SPECIFICATIONS
Dimensions: 57.7mm x 90mm x 26.7mm
Weight: 60g (without charger and AC adapter)
Standard: DECT 6.0 (Digital Enhanced Cordless Telecommunications 6.0)
Frequency range: 1.92 GHz to 1.93 GHz (DECT)
RF transmission power: 110 mW (peak)
Power specifications:
AC Adapter:
Input: 100V-240V AC, 50-60Hz
Output: 7.5V DC, 500mA
Use ONLY the power adapter supplied with your unit; using a
different adapter may render your unit unusable and voids the
warranty.
Power consumption (during charging): 1.35W
Battery: internal, non replaceable; type: rechargeable, LiIon
Charge time: 3 hours (if temperature between 32F and 50F, charging time is 6 hours)
Standby time: Approx. 24 hours.
Talk time: Approx. 4 hours
Operating conditions: 32F – 104F, 20% - 80% relative air humidity (dry)
10
INTRODUCTION
Thank you for purchasing your new pendant for Fortissimo
from Clarity – the best accessory for the top home speakerphone in
its class. Please read these instructions to ensure you take advantage of
the complete set of rich features that this product offers.
Our Company
Clarity, a division of Plantronics (NYSE: PLT), creates smart
communication solutions that help seniors live richer, more
engaged lives. Founded more than 40 years ago, Clarity is the
world leader in amplified telephones, notification systems and
assistive listening devices.
Clarity produces seven distinct lines of products and services:
Clarity,® Clarity Professional,® ClarityLife,™ Clarity AlertMaster,®
ClarityLogic,™ Ameriphone,® and Walker ® handset / test sets.
The company’s innovative communication products are all
designed to help people with hearing loss, low vision, limited
mobility, dexterity issues and other health challenges.
11
PACKAGE CONTENTS
Pendant
User
Guide
Pendant
Charger
AC Power Adapter
Recommended Accessories (Optional purchase)
• AS100 Air Switch (61563.000)
•PS500 Pillow Switch (61561.000)
12
INSTALLATION
Your product comes assembled as you take it out of the box.
Step 1: Locate an electrical outlet; pull the ends of the power cord to
untangle the cord; plug the power supply in the electrical outlet.
Step 2: Place pendant in charger; the side red light turns on to indicate
charging.
1
2
1
13
GETTING TO KNOW YOUR PENDANT
Please take a moment to review your new pendant and
its features.
2
3
4
1
5
6
14
7
GETTING TO KNOW YOUR PENDANT
1 PENDANT BUTTON
During ringing – press button to answer the call by using the
pendant microphone (for increased range of use from main unit)
D
uring a call – press to transfer the call from the main unit to
pendant and back.
During idle mode – press and hold to enable Sick Bell mode
or Quick Dial mode (after setting up your main unit)
2 SIDE LIGHT INDICATOR
(see lighting patterns section for details)
3 VOLUME WHEEL
During a call – move wheel to adjust the volume/loudness of
your main unit; if you have headphones/neckloop plugged into
the pendant, the wheel adjusts the loudness of these accessories.
4 MICROPHONE
During a call – your voice will be transmitted through this
microphone (if the main unit’s screen displays “PD”unit); keep
this area of the pendant free of any obstacles.
5 SWITCH JACK
3.5mm jack – use this jack for switch accessories, according to
your needs; we recommend the Pillow Switch or the Air Switch
from Clarity.
6 AUDIO JACK
3.5mm jack, mono – use this jack to plug in an audio accessory, such as headphones or a neckloop; we recommend the
CE30 neckloop from Clarity
7 CHARGING CONTACTS
15
REGISTERING YOUR PENDANT
Your pendant can be registered to your Fortissimo or Sempre, to allow
remote control of your main unit.
You can have up to 4 devices connected to your speakerphone:
• 4 spare handsets (XLC3.5HS) maximum
• 1 pendant + 3 (up to) spare handsets
• 2 pendants + 2 (up to) spare handsets
Place your pendant or handset in registration mode, and
then start the registration mode on your speakerphone.
•To start registration mode on the pendant, press and hold the button on the pendant until you hear the third beep, and both the red
lights under the button and the side green LED start flashing together; release the button. The green/red lights will keep flashing during
the registration process.
•To start the registration mode on your main unit, press and hold
the FIND button until you see the messge “Registering...” on your
screen; release the FIND button.
•Allow the registration process to complete, as it takes a few minutes.
When registration is complete, the screen on the main unit displays
“Registration successful” and the lights on the pendant will stop flashing together.
Once the pendant is registered, the green light on the side of the unit
will slowly blink (in standby mode), and the lights for the main button
will turn off within 15 seconds after the completion of the registration
process.
16
REGISTERING YOUR PENDANT
Press and hold button...
Release button; red lights
and green light flash during
registration
Registering...
Press and hold FIND button...
Release FIND button
WAIT...
Registration
complete
Green light flashes slowly
17
USING YOUR PENDANT
You can use your pendant to access additional features for your speakerphone.
NOTE: Every time the main button is pressed, the red lights under
the button turn on for 15 seconds.
During a call - using the pendant
You can use your pendant during a call, which allows you to be as far
away from the unit as you need to be (while still being able to hear the
incoming voice).
To use a pendant with your unit during a call – allowing you to use it at
maximum volume while being farther away from Fortissimo:
1. Start a call from Fortissimo (by dialing out or by answering a call
from the main unit) – OR – dial from your phonebook – see section Pendant mode. Note: If you are using your pendant to dial out
from the Phonebook (in pendant mode), the default active microphone is on the pendant.
2. Press the button on the pendant to enable the pendant’s microphone; you will see the text PD displayed on the screen; this
means that the microphone on the pendant is active, which allows
you to be farther away from the unit. If the active microphone is
on the pendant, your pendant’s green light will be solid.
3. To transfer the call back to Fortissimo, press the TALK button; the
text PD will be removed from your screen.
4. To transfer the call again to the pendant, press the button on the
pendant again.
5. The call is terminated from the device with the active microphone;
if the active microphone is on the pendant, press the button on
the pendant to end the call; if the active microphone is on Fortis18
USING YOUR PENDANT
simo, press the TALK button to end the call.
You can remotely adjust the volume of your unit using the wheel on the
pendant.
End a call
To end a call while using the pendant, press the pendant button.
Pendant features
Your pendant has several unique features that enhance the functionality
of your speakerphone. You can have two pendants registered to your
speakerphone; however, only one pendant will be active at one time
(while the other is charging in its charger).
To switch to the other (already registered) pendant, press the button
on the pendant you want to use; now the new pendant has control of
the unit. Pressing the button on the previous pendant will give control
back to that pendant.
Pendant mode
Works with your Phonebook (for better performance, set your Phonebook to Priority mode).
•Press pendant button
•Screen displays your phonebook records (in priority mode – if set);
each record is displayed for 3 seconds, accompanied by a “beep”.
When the record that you wish to call is displayed, press the pendant
button again; the phone dials out the phone number for that record.
•To end the call, press the pendant button again.
19
USING YOUR PENDANT
Additional features:
1.Your pendant is equipped with a headphone/neckloop jack; use headphones/neckloop to add privacy for your call; when headphones are
used, the speakerphone speaker is disabled.
a.We recommend the Clarity neckloop model CE30.
2.Your pendant is equipped with a local microphone, to ensure your
voice is transmitted properly during a call.
3.Your pendant is equipped with a volume control that controls the
volume of the speakerphone audio.
4.Your pendant is equipped with a switch jack – use an external switch
(3.5mm plug, purchased separately) to replace the button on your
pendant.
5.Your pendant has additional modes that can be enabled from your
main unit (Fortissimo or Sempre), after your pendant is registered to
your unit (to be activated by press-and-hold the pendant button for 3
seconds); you can only choose one option at a time. (Both cannot be
active at the same time.)
Sick bell mode
Default setting is OFF.
This enables your pendant to transmit a message towards the speakerphone. (In case it is in a different location)
•Press and hold the button on your pendant for 3 seconds, then say “I
need help” (or any type of voice messages) to transmit this message
to the speakerphone. Anyone in the vicinity of the speakerphone can
hear your message and provide the help you need.
Note: This mode does NOT enable a two-way conversation; it is for
the wearer of the pendant to transmit a message towards the person
20
USING YOUR PENDANT
near the speakerphone.
Note: You cannot use the “Sick Bell” or “Quick Dial” modes if you
have a switch plugged into your pendant.
Quick Dial mode
Default setting is OFF.
If a pendant is registered to your speakerphone, one of the Phonebook
records can be set as your “Quick Access” contact. (This is part of the
Additional Features associated with your phonebook records – accessible during Edit or Add modes for your phonebook records).
•Press and hold the pendant button for 3 seconds to activate this
mode.
The speakerphone dials out the phonebook record associated with
the “Quick Dial” feature; upon answering the call, you can start a
conversation with the contact in your phonebook that is associated
with this feature; press the button again to end the conversation.
•In case you are unable to end the call, the person contacted via this
feature can end the conversation by pressing twice the “5” key on
their phone.
21
USING YOUR PENDANT
Pendant lights – lighting patterns
• Main button press – button lights up for 15 seconds
• Not registered – red LED, flash quickly
• During talk – side green light flashes slowly, 1 second on/1 second off
•During registration process – both the side green light and the main
button red lights flash quickly (0.5 seconds on, 0.5 seconds off)
• Standby (pendant registered to a main unit)
•Good battery – side green LED flashes slower, 1 second on/5
seconds off
•Low battery – side LED flashes amber, 1 sec on/5 sec off
•Very low battery – needs recharging – side LED flashes red, 1
sec on/5 sec off
•Incoming ring – side red LED flashes quickly during ringing; repeat
pattern during incoming ring
• During charging in charger base – side LED turns solid red
•During FIND (paging from the base) – side LED flashes amber at a
quick pace
22
TROUBLESHOOTING
•When I use a pendant, my phonebook records are shown
in alphabetical order, but I assigned priority levels to
each record.
Your phonebook is shown in alphabetical by default; go to Menu/
Advanced Menu/Phonebook order and change to Priority.
•I turned both the Sick Bell feature and the Quick Dial
feature to on, but one of them doesn’t work.
You can’t have both features active at the same time. You need to
pick one to be active, and make sure that the other is set to off.
•I have Sick Bell (or Quick Dial) feature enabled, but I
cannot enable them using the switch plugged into the
pendant.
If you have a switch plugged into your pendant, the pendant and
the switch only work in pendant mode. Unplug the switch from
the pendant to access the Sick Bell (or Quick Dial) mode.
•I press the button on the pendant, but nothing happens.
Make sure your pendant is registered to the main unit (Fortissimo
or Sempre). If you have two pendants registered to your main unit,
only one can control your main unit at any given time.
•I do not know why the light(s) on my pendant blink in
this particular pattern
Please review the section describing the lighting patterns for your
pendant.
23
FCC REQUIREMENTS AND REGULATIONS
PART 15 OF FCC RULES INFORMATION
This device complies with Part 15 of the FCC Rules. Operation is
subject to the following two conditions:(1) This device may not cause
harmful interference, and (2) this device must accept any interference
received, including interference that may cause undesired operation.
Privacy of communications may not be ensured when using this phone.
CAUTION: Any changes or modifications not expressly approved by
the party responsible for compliance could void the user’s authority to
operate this device.
NOTE: This equipment has been tested and found to comply with the
limits for a Class B digital device, pursuant to Part 15 of the FCC Rules.
These limits are designed to provide reasonable protection against
harmful interference in a residential installation. This equipment generates, uses, and can radiate radio frequency energy and, if not installed
and used in accordance with the instructions, may cause harmful
interference to radio communications. However, there is no guarantee
that interference will not occur in a particular installation. If this equipment does cause harmful interference to radio or television reception,
which can be determined by turning the equipment off and on, the user
is encouraged to try to correct the interference by one or more of the
following measures:
- Reorient or relocate the receiving antenna.
- Increase the separation between the equipment and receiver.
- Connect the equipment into an outlet on a circuit different from that
to which the receiver is connected.
- Consult the dealer or an experienced radio/TV technician for help.
Some cordless telephones operate at frequencies that may cause interference to nearby TVs and VCRs. To minimize or prevent such inter24
FCC REQUIREMENTS AND REGULATIONS
ference, the base of the cordless telephone should not be placed near
or on top of a TV or VCR. If interference is experienced, move the
cordless telephone further away from the TV or VCR. This will often
reduce or eliminate interference.
FCC RF Exposure Warning:
This product complies with FCC radiation exposure limits set forth for
an uncontrolled environment.
To comply with FCC RF exposure requirements, the base unit must be
installed and operated 20 cm (8 inches) or more between the product
and all person’s body (excluding extremities of hands, wrist and feet).
This product may not be collocated or operated in conjunction with
any other antenna or transmitter.
For body worn operation, this pendant has been tested and meets the
FCC RF exposure guidelines when used with the Clarity and Plantronics accessories supplied or designed for this product. Use of other
accessories may not ensure compliance with FCC RF exposure guidelines.
Warning
Changes or modifications to this equipment not expressly approved by
the party responsible for compliance could void the user’s authority to
operate the equipment.
Notice
FCC ID can be found inside the battery compartment or on the bottom of the units.
25
FCC REQUIREMENTS AND REGULATIONS
This product meets the applicable Industry Canada
technical specifications
Before installing this equipment, users should ensure that it is permissible to be connected to the facilities of the local telecommunications
company. The equipment must also be installed using an acceptable
method of connection. In some cases, the company’s inside wiring associated with a single line individual service may be extended by means
of a certified connector assembly (telephone extension cord).
The customer should be aware that compliance with the above conditions may not prevent degradation of service in some situations.
Users should ensure for their own protection that the electrical ground
connections of the power utility, telephone lines and internal metallic
water pipe system, if present, are connected together. This precaution
may be particularly important in rural areas.
WARNING: Users should not attempt to make such connections
themselves, but should contact the appropriate electric inspection
authority, or electrician, as appropriate.
This Class B digital apparatus complies with Canadian ICES-003.[The
term “IC:” before the certification/registration number only signifies
that the Industry Canada technical specifications were met.]
The party responsible for regulatory compliance:
Clarity, a Division of Plantronics, Inc.
6131 Preservation Drive
Chattanooga, Tennessee 37416
Tel: 423-629-3500 or 800-426-3738
26
WARRANTY AND SERVICE
Incidental or Consequential Damages:
Neither Clarity nor your retailer dealer or selling distributors has
any responsibility for any incidental or consequential damages including without limitation, commercial loss or profit, or for any incidental
expenses, expenses, loss of time, or inconvenience. Some states do not
allow exclusion or limitation of incidental or consequential damage, so
the above limitation or exclusion may not apply to you.
Other Legal Rights: This warranty gives you specific legal rights and you
may also have other rights which vary from state to state.
To obtain warranty service, please prepay shipment and return the unit
to the appropriate facility listed below.
Clarity Service Center
6131 Preservation Drive
Chattanooga, Tennessee 37416
Tel: 423-629-3500 or 800-426-3738
Fax: 423-622-7646 or 800-325-8871
Plantronics Service Centre
151 Hymus
Point Claire, Quebec H9R 1E9
Tel: 800-540-8363 or 514-956-8363
Fax: 514-956-1825
27
Clarity, a Division of Plantronics, Inc.
6131 Preservation Drive
Chattanooga,TN 37416
Tel: 800-426-3738 Fax: 800-325-8871
E-mail: [email protected]
Website: www.clarityproducts.com
©2012 Clarity, a Division of Plantronics, Inc.All rights reserved. Clarity, Clarity Logic,
Smart for Seniors, and Fortissimo are trademarks or registered trademarks of
Plantronics, Inc.
Rev. A (11-12)
Printed in USA