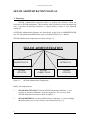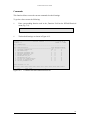
1
SEZAM
ADMINISTRATION MANUAL
SEZAM Administration Manual
Manual Order Number: SEZ312-00A312E
This document is applicable to SEZAM Version 3.1.2 and to all subsequent releases, unless
otherwise indicated in new editions or technical newsletters.
Specifications contained herein are subject to change and these changes will be reported in
subsequent revisions or editions.
Readers’ comments are welcome. Comments may be directed to:
E-mail: [email protected]
www.sezdata.com
© November 2011, Konstantin Soumm
All rights reserved
Use permissible by license only
Printed in the Federal Republic of Germany
The name SEZAM is either trademark or registered trademark of Konstantin Soumm and/or
his licensors. Other company and product names mentioned herein may be trademarks of their
respective owners.
The SEZAM documentation often refers to numerous hardware and software products by their
trade names. In most, if not all cases, these designations are claimed as trademarks or
registered trademarks by their respective companies.
2
SEZAM Administration Manual
TABLE OF CONTENTS
1. Summary ............................................................................................. 6
2. SEZAM Basic Principles ................................................................... 9
JCL Generation Process ........................................................................... 9
Break Points .......................................................................................... 12
System Variables .................................................................................... 14
Environment System Variables ..................................................................... 14
Date and Time System Variables .................................................................. 15
Access Control ....................................................................................... 16
3. How to Process Administration .......................................................... 19
Screens .................................................................................................. 22
Entering Commands ................................................................................. 23
Program Function Keys ............................................................................ 24
Getting Help ........................................................................................... 24
4. User Maintenance ............................................................................... 25
Create User ............................................................................................. 25
Browse User .......................................................................................... 28
Modify User ........................................................................................... 30
Copy User ............................................................................................. 31
Delete User ............................................................................................ 32
5. Environment Maintenance ................................................................. 33
Create Environment ................................................................................. 34
Modify Environment ............................................................................... 36
Create Record ........................................................................................ 38
Browse Record ...................................................................................... 40
Modify Record ....................................................................................... 42
Rename Record ...................................................................................... 43
Delete Record ........................................................................................ 44
Copy Environment .................................................................................. 45
Verify Environment ................................................................................. 46
Delete Environment ................................................................................. 48
Rename Environment .............................................................................. 49
Mass Update Environment ....................................................................... 50
Job Name Rule Processing ....................................................................... 52
Create Rule ........................................................................................... 55
Delete Rule ........................................................................................... 58
3
SEZAM Administration Manual
Description Processing ............................................................................. 59
................................................................................... 59
Delete Description ................................................................................... 60
Create Description
6. History Maintenance .......................................................................... 61
List Records ........................................................................................... 64
Delete Records ....................................................................................... 66
Browse Single Record ............................................................................. 68
Delete Single Record ............................................................................... 69
Job Processing ........................................................................................ 70
7. Parameter’s List Maintenance ............................................................ 71
Copy Parameter's Lists By User ................................................................. 73
Delete Parameter's Lists By User ............................................................... 74
Modify Parameter's Lists By User .............................................................. 75
Copy Parameter's Lists By Name ............................................................... 76
Delete Parameter's Lists By Name ............................................................. 77
Rename Parameter's Lists By Name ........................................................... 78
8. Saved Job Maintenance ...................................................................... 79
Create Saved Job .................................................................................... 81
Browse Saved Job ................................................................................... 84
Display System Information ..................................................................... 87
Modify Saved Job Inplace ......................................................................... 89
Put Saved Job ......................................................................................... 91
Get Saved Job ........................................................................................ 93
Copy Saved Job ...................................................................................... 95
Rename Saved Job .................................................................................. 96
Submit Saved Job ................................................................................... 97
Export Saved Job .................................................................................... 98
Delete Saved Job .................................................................................... 100
Mass Update Saved Jobs .......................................................................... 101
9. Translation Table Maintenance .......................................................... 102
Create Translation Table .......................................................................... 104
Delete Translation Tables ......................................................................... 105
Mass Update Translation Tables ................................................................ 106
Browse Translation Table ........................................................................ 107
4
SEZAM Administration Manual
Modify Translation Table ......................................................................... 108
Delete Translation Table .......................................................................... 109
Copy Translation Table ........................................................................... 110
10. Retrieval Functions .......................................................................... 111
Utilities ................................................................................................. 111
Commands ............................................................................................ 113
Environments ......................................................................................... 115
11. SEZAM Utilities ............................................................................... 117
12. SEZAM Corrections ......................................................................... 121
13. SEZAM Options ............................................................................... 122
APPENDIX A - Examples of Environment Definition ......................... 123
BS2000/OSD ......................................................................................... 123
z/OS ..................................................................................................... 126
z/VM .................................................................................................... 128
z/VSE ................................................................................................... 132
APPENDIX B - #PROGNAME Values ................................................. 133
APPENDIX C - Direct Commands......................................................... 136
APPENDIX D – Example of the Job’s Name Rule User Exit ............... 139
5
SEZAM Administration Manual
SEZAM ADMINISTRATION MANUAL
1. Summary
SEZAM Administration subsystem allows to perform the functions which are
necessary for SEZAM maintenance. These functions make it possible to create and modify the
users, to produce environment definitions, to support history records, to view threshold
settings etc.
All SEZAM Administration functions are allowed only on the level of ADMINISTRATOR
user. For information about SEZAM user types, consult the SEZAM User’s Manual.
SEZAM Administration components are shown in Figure 1-1.
SEZAM ADMINISTRATION
SEZAM
MAINTENANCE
SEZAM
UTILITIES
Figure 1-1:
SEZAM
RETRIEVAL
SEZAM
CORRECTIONS
SEZAM
OPTIONS
SEZAM Administration Components
Briefly, the components are:
*
SEZAM MAINTENANCE: Performs SEZAM maintenance functions, i.e. user
creation, environment definitions, saved jobs support etc. The overview of the
SEZAM maintenance functions is shown in Figure 1-2.
*
SEZAM RETRIEVAL: Performs SEZAM retrieval functions, i.e. browse through
threshold setting, view of cross reference user information (Fig. 1-3).
6
SEZAM Administration Manual
*
SEZAM UTILITIES: Performs SEZAM batch utilities (Fig. 1-4).
For more information consult the SEZAM Utilities Manual.
*
SEZAM CORRECTIONS: Provides an overview of the applied SEZAM corrections
For more information consult the SEZAM Installation Manual.
*
SEZAM OPTIONS: Provides an overview of the SEZAM settings. For more
information consult the SEZAM Installation Manual.
SEZAM MAINTENANCE
USER
MAINTENANCE
HISTORY
MAINTENANCE
ENVIRONMENT
MAINTENANCE
PARAMETER’S LIST
MAINTENANCE
SAVED JOB
MAINTENANCE
Figure 1-2:
TRANSLATION TABLE
MAINTENANCE
Overview of SEZAM Maintenance functions
7
SEZAM Administration Manual
SEZAM RETRIEVAL
UTILITIES
COMMANDS
ENVIRONMENTS
Figure 1-3:
Overview of SEZAM Retrieval functions
SEZAM UTILITIES
SEZUNLD
SEZLOAD
SEZDEL
Figure 1-4:
8
Overview of SEZAM Utilities
SEZLIST
SEZAM Administration Manual
2. SEZAM Basic Principles
JCL Generation Process
The main goal of SEZAM is to ensure the possibility of the job's dynamically generation and
execution for the ADABAS utilities, NATURAL utilities, NATURAL system commands and
NATURAL user programs. Jobs can be generated in the different format depending on the
operating system (z/OS, z/VSE, z/VM, BS2000/OSD). To provide this feature SEZAM must
be able to recognise the type of the operating system, or to generate the job stream based on
the user pre-defined job's description.
SEZAM provides the second way. To ensure the correct processing, SEZAM
ADMINISTRATOR has to describe the job generation stream. It must be done in the correct
syntax terms of the correspondent operating system. This description is kept in the SEZAM
environment.
An environment contains records which are organised in two sections: General Record
Section (GRS) and Sample Record Section (SRS). The structure of the SEZAM environment
is shown in Figure 2-1.
SEZAM Environment
GENERAL
RECORD
SECTION
SAMPLE
RECORD
SECTION
Record-1
Record-2
Record-3
. . . . .
Record-N
Figure 2-1:
Record-1
Record-2
Record-3
. . . . .
Record-M
SEZAM Environment Structure
9
SEZAM Administration Manual
The difference between the General (GRS) and the Sample Record Section (SRS) is the
following:
#
Each GRS record can have up to two priority entries:
PA
- priority in the ADABAS utilities job stream.
PN
- priority in the NATURAL utilities, NATURAL system commands
and NATURAL user programs job stream.
#
The records from GRS participate in the generation process in the sequence of their
priority values (PA, or PN). The SRS records don’t take a part in the job generation.
#
The SRS records are optional. There are no influence of SRS records on the job
generation process. The SRS records ensure the usage of the pre-defined default
datasets allocations by the JCL / REXX generation and execution.
SEZAM provides separate control of the job generation stream for the ADABAS utilities and
for all the other functions (i.e. NATURAL utilities, NATURAL system commands etc.). It is
achieved by the separating of the priorities for the ADABAS job stream (PA) from the
priorities for the NATURAL (PN).
Each JCL / REXX (Fig. 2-2) consists of two parts:
#
Independent part which is the same in all jobs.
#
Dependent part which is utility specific.
//KSMFASAV JOB (,,,999),'KSM',CLASS=W,MSGCLASS=X
//* SEZ312:F177-ADASAV(Save files)-FILE(18)
//* SEZENV=F177
/*ROUTE XEQ DAEF
/*JOBPARM SYSAFF=DAEF
/*ROUTE PRINT DAEF
//STEP01 EXEC PGM=ADARUN,REGION=8000K,TIME=1440
//STEPLIB DD DSN=RZDBA.DB177.NEWLOAD,DISP=SHR
//
DD DSN=RZDBA.DB177.LOAD,DISP=SHR
//DDASSOR1 DD DSN=DB177.SYSF.ASSOR1,DISP=SHR
//DDDATAR1 DD DSN=DB177.SYSF.DATAR1,DISP=SHR
//DDWORKR1 DD DSN=DB177.SYSF.WORKR1,DISP=SHR
//DDSAVE1 DD DSN=ADASAV.DAEF.DB177.F018,DISP=(,KEEP),
//
UNIT=3480,LABEL=(1,SL,EXPDT=98000),
//
VOL=(,RETAIN,,,SER=(KSM001)),TRTCH=COMP
//DDDRUCK DD SYSOUT=*
//DDPRINT DD SYSOUT=*
//DDCARD
DD *
ADARUN PROG=ADASAV
ADARUN SVC=249
ADARUN DEVICE=3390
ADARUN MODE=MULTI
ADARUN DBID=177
//DDKARTE DD *
ADASAV SAVE FILES=18
ADASAV UTYPE=EXU
ADASAV NOUSERABEND
//* END GENERATION
Figure 2-2:
10
Example of JCL
SEZAM Administration Manual
For the shown above example the independent and dependent parts are represented in Figures
2-3, 2-4.
//KSMFASAV JOB (,,,999),'KSM',CLASS=W,MSGCLASS=X
//* SEZ312:F177-ADASAV(Save files)-FILE(18)
//* SEZENV=F177
/*ROUTE XEQ DAEF
/*JOBPARM SYSAFF=DAEF
/*ROUTE PRINT DAEF
//STEP01 EXEC PGM=ADARUN,REGION=8000K,TIME=1440
//STEPLIB DD DSN=RZDBA.DB177.NEWLOAD,DISP=SHR
//
DD DSN=RZDBA.DB177.LOAD,DISP=SHR
//DDASSOR1 DD DSN=DB177.SYSF.ASSOR1,DISP=SHR
//DDDATAR1 DD DSN=DB177.SYSF.DATAR1,DISP=SHR
//DDWORKR1 DD DSN=DB177.SYSF.WORKR1,DISP=SHR
D E P E N D E N T
P A R T
//DDDRUCK DD SYSOUT=*
//DDPRINT DD SYSOUT=*
//DDCARD
DD *
ADARUN PROG=ADASAV
ADARUN SVC=249
ADARUN DEVICE=3390
ADARUN MODE=MULTI
ADARUN DBID=177
//DDKARTE DD *
D E P E N D E N T
P A R T
//* END GENERATION
Figure 2-3:
Independent JCL part
I N D E P E N D E N T
P A R T
//DDSAVE1 DD DSN=ADASAV.DAEF.DB177.F018,DISP=(,KEEP),
//
UNIT=3480,LABEL=(1,SL,EXPDT=98000),
//
VOL=(,RETAIN,,,SER=(KSM001)),TRTCH=COMP
I N D E P E N D E N T
P A R T
ADASAV SAVE FILES=18
ADASAV UTYPE=EXU
ADASAV NOUSERABEND
Figure 2-4:
Dependent JCL part
11
SEZAM Administration Manual
The dependent part has always two components:
#
Utility specific dataset component:
#
//DDSAVE1 DD DSN=ADASAV.DAEF.DB177.F018,
//
DISP=(,KEEP),
//
UNIT=3480,LABEL=(1,SL,EXPDT=98000),
//
VOL=(,RETAIN,,,SER=(KSM001)),TRTCH=COMP
Utility specific parameter’s component:
ADASAV SAVE FILES=18
ADASAV UTYPE=EXU
ADASAV NOUSERABEND
The independent part can and must be defined in the description of the job stream. As to
dependent part, it is impossible to provide it’s definition, because it receives the real values
dynamically during the JCL / REXX generation. The possible solution is to use the break
points which ensure the possibility of dynamic values substitution and make the generation
process extremely flexible.
Break Points
Here are the SEZAM break points in the alphabetical order:
Break Point
Function
Required/Optional
USERCB/E
Processing of ADABAS CLOGR datasets
Required
USERDB/E
Processing of ADABAS DSIMR dataset
Required
USERDD
Processing of utility specific datasets: DDSAVE1 etc.
Required
USERFB/FE
Processing of ADABAS FORMAT utility
Required
USERNB/E
Processing of NATURAL profile parameters
Required
USERN2B/E
Processing of NATURAL INPL system command
Required
USEROS
VM/ESA system indicator
Optional
USERPA
Processing of utility specific parameter’s
Required
USERPB/E
Processing of ADABAS PLOGR datasets
Required
USERRB/E
Processing of ADABAS RLOGR and RLOGM datasets
Required
USEROS
VM/ESA system indicator
Optional
USERSB/E
Processing of ADABAS single mode parameters
Required
USERTB/E
Processing of ADABAS SORT and TEMP datasets
Required
12
SEZAM Administration Manual
The actions take place by the processing of the break points are the following:
# USERCB/E
all records between USERCB and USERCE are included by the
execution of utilities which require CLOGR1/CLOGR2 datasets
# USERDB/E
all records between USERDB and USERDE are included by the
execution of utilities which require DSIMR dataset
# USERDD
place where the utility's datasets are to be substituted, for example:
DDSAVE1 (Fig. 2-4).
# USERFB/E
all records between USERFB and USERFE are excluded by the
formatting of the new datasets
# USERNB/E
all records between USERNB and USERNE are excluded by the
execution of NATURAL batch with user specific parameters
# USERN2B/E
all records between USERN2B and USERN2E are included by the
execution of NATURAL INPL
# USEROS
(only for VM/ESA) the VM/ESA operating system indicator, must be
set to 'VM'
# USERPA
place where the utility's parameters are to be substituted (Fig. 2-4).
# USERPB/E
all records between USERPB and USERPE are included by the
execution of utilities which require PLOGR1/PLOGR2 datasets
# USERRB/E
all records between USERRB and USERRE are included by the
execution of utilities which require RLOGR1/RLOGM1 datasets
# USERR2B/E
all records between USERR2B and USERR2E are included by the
execution of ADARAI RECOVER
# USERSB/E
all records between USERSB and USERSE are included by the
execution in ADABAS SINGLE mode
# USERTB/E
all records between USERTB and USERTE are included by the
execution of utilities which require SORT and TEMP datasets
13
SEZAM Administration Manual
System Variables
Environment System Variables
Some parameters of the independent part (Fig. 2-3) can not be premeditated because they get
their values dynamically. For example, ADARUN MODE (mode of operation) which can be
MULTI or SINGLE. To provide this possibility SEZAM uses a concept of environment
system variables which must/can be defined in the environment:
Variable
Description
Required/Optional
#COMMENTS
JCL commentary, is generated dynamically
Optional
#JOBNAME
Job name, is defined in accordance with
site-specific rules in environment maintenance
Optional
#PROG
ADARUN PROGRAM parameter, is generated
dynamically
Required
#MODE
ADARUN MODE parameter, is generated
dynamically
Required
#USERNAME
User name, is replaced with the NATURAL
system variable *USER
Optional
#USERINFO
User specific JCL information, is defined
in user maintenance
Optional
SEZAM functions can not be performed properly if the required breakpoints or the system
variables are missing or invalid. To check the environment definition against possible errors
use the environment verification facility.
The usage of dynamic substituted statements increases the flexibility of the environments and
reduces the storage required for the SEZAM system file. This feature allows definition of one
or more blocks of statements within GRS records. These statements could be dynamically
modified during the JCL/REXX execution, or generation.
For more information about the usage of dynamic substituted statements please refer to
SEZAM Users Manual.
Appendix A contains the examples of the break points and system variables in a different
operating system syntax.
14
SEZAM Administration Manual
Date and Time System Variables
SEZAM date and time system variables contain information about the current date and time.
They may be referenced at any point within an environment or JCL/REXX.
Variable
Date Format
#DATJ
YYDDD (Julian date)
#DAT4J
YYYYDDD (Julian date)
#DATN
YYYYMMDD
#DATI
YYMMDD
#DATE
DDMMYY
#TIMN7
HHMMSST
#TIMN6
HHMMSS
#TIMN4
HHMM
#TIMN2
HH
15
SEZAM Administration Manual
Access Control
SEZAM has a comprehensive system for control the access to ADABAS database resources
and to the various SEZAM functions. SEZAM enables protection mechanism against an
unauthorised access and improper use of the ADABAS databases in terms of environments. It
is possible to define exactly who is allowed to do what, by restricting the use of environments,
ADABAS files and SEZAM functions (i.e. ADABAS utilities, NATURAL utilities,
NATURAL system commands etc.).
This is accomplished by defining the objects and the relations between them. There are the
following main object types within SEZAM:
*
USERS
*
UTILITIES, SYSTEM COMMANDS etc.
*
ENVIRONMENTS
*
ADABAS FILES
The relationship between these objects is shown in Figure 2-5.
USERS
execute
UTILITIES
access
ENVIRONMENTS
use
ADABAS FILES
Figure 2-5:
16
SEZAM Objects and Relations
SEZAM Administration Manual
Each NATURAL user who intends to operate with SEZAM should be registered in SEZAM,
i.e. user must be defined with one of the following user type authority classification:
*
A(Administrator)
*
M(Manager)
*
E(Expert)
*
P(Person)
This classification pre-determines the user’s authorities of using the SEZAM objects.
ADMINISTRATOR may execute all utilities in all environments against all files. Only
ADMINISTRATOR with extra administration authority may execute the SEZAM
administration functions, i.e. create and modify users, environments etc. This user type is
determined only for the SEZAM system administrators. The ADMINISTRATOR without
such authority may only browse through the various SEZAM objects.
MANAGER may use a great part of functions with the all files but only in the predefined
environments. This user type can be assigned to the people responsible for the ADABAS
system maintenance only in the certain databases.
EXPERT may use a lot of functions with up to 50 predefined ADABAS files in the predefined environments. This user type is designed for the experienced ADABAS/NATURAL
developers.
PERSON may use a small part of functions with up to 50 predefined ADABAS files in the
predefined environments. Normally, this is the standard user type which will apply to most
potential users.
Each user type has the strictly defined set of allowed SEZAM functions which organisation is
represented in Figure 2-6.
PERSON
EXPERT
MANAGER
ADMINISTRATOR
Figure 2-6:
User’s Authorities to use the SEZAM functions
17
SEZAM Administration Manual
User must be defined in each environment where he is going to operate. The type of the user
in each environment can be different. The only exception is ADMINISTRATOR, who is
defined only once.
The usage of environments and ADABAS files can be restricted for each individual user. At
the same point SEZAM does not permit the individual definition of the set of available
utilities, it can only be done pro user type. It is realised on the basis of thresholds, which are
assigned to every SEZAM function, and should be achieved or exceeded by the user when
attempting to execute the utility. The balance between the user type and the threshold value
makes it possible to ensure the high level of protection.
SEZAM provides direct commands for performing the most functions. Each direct command
corresponds to a function on SEZAM menus and can be executed only by users with
correspondent type. The system reaction on the direct command depends on the balance
between the user's type and the function's threshold.
The relationship between thresholds and user types is shown in Figure 2-7.
USER
TYPE
A
M
E
P
A
FUNCTION
ALLOWED
FUNCTION
NOT
ALLOWED
FUNCTION
NOT
ALLOWED
FUNCTION
NOT
ALLOWED
M
FUNCTION
ALLOWED
FUNCTION
ALLOWED
FUNCTION
NOT
ALLOWED
FUNCTION
NOT
ALLOWED
E
FUNCTION
ALLOWED
FUNCTION
ALLOWED
FUNCTION
ALLOWED
FUNCTION
NOT
ALLOWED
P
FUNCTION
ALLOWED
FUNCTION
ALLOWED
FUNCTION
ALLOWED
FUNCTION
ALLOWED
THRESHOLD
Figure 2-7:
Relationship between thresholds and user types
The current function and command threshold settings can be viewed by SEZAM Retrieval
functions (see section Retrieval Functions).
18
SEZAM Administration Manual
3. How to Process Administration
SEZAM administration contains menus of the functions available on the level of the
user type ADMINISTRATOR.
To invoke the SEZAM administration subsystem, enter on the Administrator start-up menu in
the „Function“ field the corresponding number of the „SEZAM Administration“ function.
The example of start-up menu is shown in Figure 3-1.
When SEZAM Administration menu appears (Fig. 3-2), select the desired component of the
SEZAM Administration (Fig. 1-1) by entering the appropriate function code.
Processing of SEZAM maintenance and retrieval functions should be done from the
corresponding menus (Fig. 3-3, 3-4).
SEZAM Administration issues a message confirming each completed function. If an error
occurs, a message appears describing the error. Before doing any error analysis, try reviewing
the help information („?“ or PF1) for the last step you performed to see if any requirements
were overlooked; then retry the operation. For information about SEZAM Messages refer to
SEZAM Messages Manual.
Subsequent sections in this manual describe the major SEZAM Administration functions and
menu/screen structures in the order they appear.
SEZAM Utilities Manual describes the various SEZAM batch utilities.
19
SEZAM Administration Manual
09:50:22 ----------------- Administrator Startup Menu ------------- 2006-07-14
Function ===> 1
_
_
_
_
_
_
_
1
2
3
4
5
6
7
SEZAM administration
ADABAS maintenance
ADABAS EVENT REPLICATOR maintenance
NATURAL maintenance
Finished objects
Special functions
Authorities
Enter-PF1---PF2---PF3---PF4---PF5---PF6---PF7---PF8---PF9---PF10--PF11--PF12Help
Exit
Figure 3-1:
Administrator Start-up menu
13:33:10 ------------------ Sezam administration ------------------ 2003-08-1
Function ===>
_
_
_
_
_
1
2
3
4
5
Maintenance
Retrieval
Utilities
Corrections
Options
Enter-PF1---PF2---PF3---PF4---PF5---PF6---PF7---PF8---PF9---PF10--PF11--PF12-Help
Exit
Figure 3-2:
20
SEZAM Administration menu
SEZAM Administration Manual
13:37:23 ------------------- Sezam maintenance -------------------- 2003-08-11
Function ===>
_
_
_
_
_
_
1
2
3
4
5
6
User
Environment
History records
Parameter's list
Saved job
Translation table
Enter-PF1---PF2---PF3---PF4---PF5---PF6---PF7---PF8---PF9---PF10--PF11--PF12-Help
Exit
Figure 3-3:
SEZAM Maintenance menu
13:39:59 ------------------- Sezam retrieval ---------------------- 2003-08-11
Function ===>
_
_
_
_
1
2
3
4
Utilities
Commands
Environments
Resources
Enter-PF1---PF2---PF3---PF4---PF5---PF6---PF7---PF8---PF9---PF10--PF11--PF12-Help
Exit
Figure 3-4:
SEZAM Retrieval menu
21
SEZAM Administration Manual
Screens
The SEZAM Administration screens can be represented in one of the following formats:
*
MENU SCREENS have a selection list of possible functions. The user selects the
function using cursor, or entering an appropriate number in the „Function“ field at the
top of the screen. Example of menu is shown in Figure 3-2.
*
FUNCTIONAL SCREENS serve for the performing of the various SEZAM
administration functions. The direct command can be entered in the „Command“ field.
Example of functional screen is shown in Figure 3-5.
*
HELP SCREENS contain the help information. Example of help screen is shown in
Figure 3-6.
13:43:02 --------------------- Record list ------------------------ 2003-08-11
Command ===>
SCROLL ===> PAGE
CM - Command help
...............................................................................
Environment ===> MVS
Section
===> GRS
Co
-__
__
__
__
__
__
__
__
Record
---------#ADARUN-DB
#DDASSOR1
#NODE
ADARUN-P
ADARUN-PLG
ADARUN-RAI
CMPRINT
CMSYNIN
Pa
-54
10
3
53
56
59
Pn
-54
30
3
53
50
55
Value
---------------------------------------------------ADARUN DBID=333
//DDASSOR1 DD DSN=DB333.ASSOR1,DISP=SHR
/*ROUTE XEQ MVS
ADARUN PROG=#PROG
ADARUN PLOGRQ=NO
ADARUN UEX2=ADAEX2
//CMPRINT DD SYSOUT=*
//CMSYNIN DD *
Total records ===> 55
Enter-PF1---PF2---PF3---PF4---PF5---PF6---PF7---PF8---PF9---PF10--PF11--PF12-Help
Exit Refr
+
SrtR SrtA SrtN
Figure 3-5:
22
Record List Functional Screen
SEZAM Administration Manual
13:43:55 ---------------------- Record list ----------------------- 2003-08-11
Command
- direct command's field
SCROLL
- scroll PAGE / LINE / TOP / BOT can be used by PF7/PF8 keys
Co
- line command's field
Env/Section - current database environment/section of database environment
Record
- record's name, the next names are reserved break points and
and must be included in GRS:
USERFB/E - the section which is to be excluded by the
formatting of the new datasets
USERDD
- the place where the utility's datasets is to be
substituted; for example: DDOUT1
USERPA
- the place where the utility's parameters is to be
substituted (DDKARTE)
USERNB/E - the section which is to be excluded by the Natural
batch execution with user specific parameters
USERTB/E - the section which is to be included by the executing
of utilities which require SORT/TEMP datasets
USERSB/E - the section which is to be included by the executing
only in SINGLE mode
USERPB/E - the section which is to be included by the executing
of utilities which require PLOGR1/PLOGR2 datasets
Enter-PF1---PF2---PF3---PF4---PF5---PF6---PF7---PF8---PF9---PF10--PF11--PF12Exit
Next
Entering Commands
SEZAM commands can be entered on the menus, or on the functional screens. To receive the
information about the commands available on the corresponding screen, use the following
commands:
# CD
- available direct commands.
# CM
- available commands on the functional screens (Fig. 3-7).
13:46:16 ----------- Environment maintenance / Commands ----------- 2003-08-11
Direct commands:
BR/CR/DE/ED/RE
- browse/create/edit/rename record
SC
- scan and replace all records
CD
- available global direct command's list
VE
- verify database environment
SRS - Sample Record Section processing
Line commands:
BR/ED/DE/RE - browse/edit/delete/rename record
Filter functions:
Record - show records starting with specified record's name
Pa/Pn - show records starting with specified pa/pn
PF-Keys:
PF1 - help
PF4 - refresh; is recommended after filter processing
PF7/PF8 - scroll forwards / backwards
PF10/PF11/PF12 - show the list sorted by record SrtR / prta SrtA / prtn SrtN
Enter-PF1---PF2---PF3---PF4---PF5---PF6---PF7---PF8---PF9---PF10--PF11--PF12Exit
Figure 3-8:
Available Commands Screen (CM-command)
23
SEZAM Administration Manual
Once you are familiar with the SEZAM Administration and know how to find your way from
menu to menu, from function to function, you may also be interested in a faster and more
flexible way of handling SEZAM: instead of having to fastidiously „walk“ from one menu to
another, you may also „jump“ directly to the function you want. This is done by using of
direct commands.
You may enter a direct command on every SEZAM Administration screen which provides a
command or function line:
Command ===>
Function ===>
If you enter a direct command which is invalid, you will receive an error message. For the list
of all available direct commands, enter CD(SHOW DIRECT COMMAND’S LIST) in the
command line.
The direct commands equivalent to each function together with threshold settings are shown
in the Appendix C.
Program Function Keys
The following program function (PF) keys appear on all SEZAM Administration screens:
Key
Function
PF1
Help
PF3
Exit to previous screen
Other keys appear on some screens. Available PF keys and their functions are listed at the
bottom of each SEZAM screen. The extended information about PF keys assignments is
provided on the functional screens with the „CM“ (Command Help) Command (Fig. 3-7).
Getting Help
SEZAM Administration provides the possibility of getting help on every screen.
When entered “?“ (PF1 can also be used) SEZAM displays a brief information describing the
screen. This „on-line help“ gives information about the individual functions; on-line help is
the very best choice when questions occur while operating SEZAM.
24
SEZAM Administration Manual
4. User Maintenance
The user maintenance is the facility which provides definition, modification, browse,
copy and delete of SEZAM users.
To invoke the SEZAM user maintenance, enter on the SEZAM Maintenance menu (Fig. 3-3)
in the „Function“ field the corresponding number of the „User maintenance“ function:
1 - User maintenance
All user maintenance functions can be processed from the screen with the list of all SEZAM
users, which is shown in Figure 4-1.
13:53:36 -------------- User maintenance / User list -------------- 2003-08-11
Command ===>
SCROLL ===> PAGE
CM - Command help
..............................................................................
Co User
User User Env.
Env. File
Date of
name
type auth. name
stat. list
creation
-- -------- ---- ----- ---------- ----- --------------------- -------------__ JNM
A
N
1999-04-13
__ JPI
P
N
A016
A
1999-10-26
__ JTE
M
N
A018
A
2000-04-25
__ JWO
M
N
F009
A
2000-12-06
__ KOM
A
N
1999-12-01
__ KSM
A
Y
1999-04-13
__ KSM1
P
N
F044
A
2002-12-11
__ LFD
M
N
BS2000-1
A
2003-01-21
__ LFD
M
N
BS2000-2
A
2003-01-21
__ LFD
M
N
MVS
A
1999-09-21
Total records ===> 40
Enter-PF1---PF2---PF3---PF4---PF5---PF6---PF7---PF8---PF9---PF10--PF11--PF12-Help
Exit Refr
+
Figure 4-1:
User List Screen
25
SEZAM Administration Manual
Create User
To create the user definition perform the following steps:
#
Enter CR(CREATE USER) command in the „Command“ field on the user list screen
(Fig. 4-1).
#
Enter parameters of the user who has to be created (Fig. 4-2):
Parameter
Description
Required/Optional
USER NAME
Name of user to be created
Required
ENVIRONMENT
Name of environment, where
user have to be defined
Required for types: M/E/P
Don’t enter for type: A
USER INFO
User specific job information,
Optional
corresponds to the #USERINFO
system variable in the environment
description
USER TYPE
Type of user to be created
Required
#
If creating a user of type A specify an extra administrative authorisation.
#
If creating a user of type E, or P enter up to 50 ADABAS files with which the user can
operate in the current environment (Fig. 4-3).
After successfully processing the created user appears in the list of SEZAM users
(Fig. 4-1) and the following message is displayed:
SEZ0010: User created successfully
26
SEZAM Administration Manual
13:59:54 -------------- User maintenance / Create user ------------ 2003-08-11
Command ===>
? - Help
.............................................................................
Enter user to be created:
User name
===> USR001
Environment ===> DB001
User info
===> (USR001),'DB001-USR001'
User type
===> P <A/M/E/P>
Enter-PF1---PF2---PF3---PF4---PF5---PF6---PF7---PF8---PF9---PF10--PF11--PF12-Help
Exit
Figure 4-2:
Create User Screen
14:03:35 -------- Create expert(person) / Enter file list --------- 2003-08-11
Command ===>
? - Help
..............................................................................
Enter the file list for the following user:
User name
===> USR001
Environment ===> DB001
File list:
1____ _____
3____ _____
13___ _____
17___ _____
_____ _____
_____ _____
_____ _____
_____ _____
_____ _____
_____ _____
_____
_____
_____
_____
_____
_____
_____
_____
_____
_____
_____
_____
_____
_____
_____
_____
_____
_____
_____
_____
_____
_____
_____
_____
_____
_____
_____
_____
_____
_____
_____
_____
_____
_____
_____
_____
_____
_____
_____
_____
_____
_____
_____
_____
_____
_____
_____
_____
_____
_____
_____
_____
_____
_____
_____
_____
_____
_____
_____
_____
_____
_____
_____
_____
_____
_____
_____
_____
_____
_____
_____
_____
_____
_____
_____
_____
_____
_____
_____
_____
_____
_____
_____
_____
_____
_____
_____
_____
_____
_____
_____
_____
_____
_____
_____
_____
_____
_____
_____
_____
_____
_____
_____
_____
_____
_____
_____
_____
_____
_____
Enter-PF1---PF2---PF3---PF4---PF5---PF6---PF7---PF8---PF9---PF10--PF11--PF12-Help
Exit
Figure 4-3:
Create Expert(Person) Screen
27
SEZAM Administration Manual
Browse User
To view the user definition perform the following steps:
#
Enter BR(BROWSE USER) as direct command in the „Command“ field on the user
list screen (Fig. 4-1), or as line command in the „Co“ field against the appropriate
user.
#
If the command was entered as direct command enter parameters of the user who has
to be browsed (Fig. 4-4):
#
Parameter
Description
Required/Optional
USER NAME
Name of user to be browsed
Required
ENVIRONMENT
Name of environment, where
user is defined
Required for types: M/E/P
Don’t enter for type: A
The user definition is represented in Figure 4-5.
After successfully processing the following message is displayed:
SEZ0014: User browsed successfully
14:07:35 ---------------- User maintenance / Enter user ----------- 2003-08-11
Command ===>
? - Help
.............................................................................
Enter user to be browsed:
User name
===> USR001__
Environment ===> DB001
Enter-PF1---PF2---PF3---PF4---PF5---PF6---PF7---PF8---PF9---PF10--PF11--PF12-Help
Exit
Figure 4-4:
28
Example of Enter User Screen
SEZAM Administration Manual
15:45:06 --------- User maintenance / Browse expert(person) -------- 2003-08-11
Command ===>
? - Help
..............................................................................
User name
===> USR001
User info
===> (USR001),'DB001-USR001'
User type
===> P
Environment ===> DB001
Date of creation ===> 2003-08-11
Created by ===> KSM
File list:
1
3
13
17
Enter-PF1---PF2---PF3---PF4---PF5---PF6---PF7---PF8---PF9---PF10--PF11--PF12-Help
Exit
Figure 4-5:
Browse Expert(Person) Screen
29
SEZAM Administration Manual
Modify User
To change the user definition perform the following steps:
#
Enter ED(EDIT USER) as direct command in the „Command“ field on the user list
screen (Fig. 4-1), or as line command in the „Co“ field against the appropriate user.
#
If the command was entered as direct command enter parameters of the user which
definition has to be modified (Fig. 4-4):
#
Parameter
Description
Required/Optional
USER NAME
Name of user to be modified
Required
ENVIRONMENT
Name of environment, where
user is defined
Required for types: M/E/P
Don’t enter for type: A
Modify the desired user definition (Fig. 4-6).
After successfully processing the following message is displayed:
SEZ0022: User modified successfully
14:55:54 ---------- User maintenance / Edit expert/person --------- 2003-08-11
Command ===>
? - Help
..............................................................................
Enter the file list for the following user:
User name
===> USR001
Environment ===> DB001
User info
===> (USR001),'DB001-USR001'
User type
===> P
Date of creation ===> 2003-08-11
Created by
===> KSM
File list:
3____ _____ _____ _____ _____ _____ _____ _____ _____ _____ _____ _____ _____
17___ _____ _____ _____ _____ _____ _____ _____ _____ _____ _____ _____ _____
133__ _____ _____ _____ _____ _____ _____ _____ _____ _____ _____ _____ _____
251__ _____ _____ _____ _____ _____ _____ _____ _____ _____ _____ _____ _____
_____ _____ _____ _____ _____ _____ _____ _____ _____ _____ _____ _____ _____
_____ _____ _____ _____ _____ _____ _____ _____ _____ _____ _____ _____ _____
_____ _____ _____ _____ _____ _____ _____ _____ _____ _____ _____ _____ _____
_____ _____ _____ _____ _____ _____ _____ _____ _____ _____ _____ _____ _____
_____ _____ _____ _____ _____ _____ _____ _____ _____ _____ _____ _____ _____
_____ _____ _____ _____ _____ _____ _____ _____ _____ _____ _____ _____ _____
Enter-PF1---PF2---PF3---PF4---PF5---PF6---PF7---PF8---PF9---PF10--PF11--PF12-Help
Exit
Figure 4-6:
30
Edit Expert(Person) Screen
SEZAM Administration Manual
Copy User
To copy the user definition from one user to another perform the following steps:
#
Enter CO(COPY USER) as direct command in the „Command“ field on the user list
screen (Fig. 4-1), or as line command in the „Co“ field against the appropriate user.
#
Enter parameters of the source and target users (Fig. 4-7):
Parameter
Description
Required/Optional
SOURCE
USER NAME
Name of user to be copied
Required
SOURCE
ENVIRONMENT
Name of environment, where
source user is defined
Required for types: M/E/P
Don’t enter for type: A
TARGET
USER NAME
Name of target user
If blank, is equal to the source
name
Optional
TARGET
ENVIRONMENT
Name of target environment
If blank, is equal to the source
environment
Optional
After successfully processing the new user appears in the list of SEZAM users (Fig. 4-1) and
the following message is displayed:
SEZ0017: User copied successfully
16:11:06 ---------------- User maintenance / Copy user ------------- 2003-08-11
Command ===>
? - Help
..............................................................................
Enter user to be copied (source user):
User name
===> USR001__
Environment ===> DB001
Enter target user:
User name
===> ________
Environment ===> DB002
Enter-PF1---PF2---PF3---PF4---PF5---PF6---PF7---PF8---PF9---PF10--PF11--PF12-Help
Exit
Figure 4-7:
Enter User Screen
31
SEZAM Administration Manual
Delete User
To delete the user definition perform the following steps:
#
Enter DE(DELETE USER) as direct command in the „Command“ field on the user
list screen (Fig. 4-1), or as line command in the „Co“ field against the appropriate
user.
#
If the command was entered as direct command enter parameters of the user who has
to be deleted (Fig. 4-4):
#
Parameter
Description
Required/Optional
USER NAME
Name of user to be deleted
Required
ENVIRONMENT
Name of environment, where
user is defined
Required for types: M/E/P
Don’t enter for type: A
Confirm delete with the name of the user and the name of the environment where user
is defined (only for user type M/E/P). The example of confirmation screen is shown
in Figure 4-8.
After successfully processing the deleted user disappears from the list of SEZAM users
(Fig. 4-1) and the following message is displayed:
SEZ0005: User deleted successfully
16:32:33 -------------- User maintenance / Delete user ------------- 2003-08-11
Command ===>
? - Help
..............................................................................
Please confirm delete with the name USR002
/ DB001
===> USR002____ / DB001
Enter-PF1---PF2---PF3---PF4---PF5---PF6---PF7---PF8---PF9---PF10--PF11--PF12-Help
Exit
Figure 4-8:
32
Delete User Screen
SEZAM Administration Manual
5. Environment Maintenance
The environment maintenance is the facility which provides definition, modification,
browse and delete of SEZAM environments.
To invoke the SEZAM environment maintenance, enter on the SEZAM Maintenance menu
(Fig. 3-3) in the „Function“ field the corresponding number of the „Environment
maintenance“ function:
2 - Environment maintenance
All environment maintenance commands can be processed from the screen with the list of all
environments (Fig. 5-1). The following commands can be executed:
Command
Description
CR/DE/CO/RE
Create/Delete/Copy/Rename environment
SC/VE
Mass update/Verify environment
GRS/SRS
Process GRS/SRS section records
CRU/DRU
Create/Delete job name rule
CDE/DDE
Create(modify)/Delete description records
16:22:41 ------- Environment maintenance / Environment list -------- 2003-08-11
Command ===>
SCROLL ===> PAGE
CM - Command help
..............................................................................
Co
Env.
Description
General Sample Jobname Date of
Created
Record Record Rule
creation
by
Section Section
--- ---------- ----------------- ------- ------- ------- ---------- -------___ A001
daea Application Yes
Yes
Yes
2001-11-15 KSM
___ A012
daea Application Yes
Yes
Yes
2000-02-09 KSMFSLOD
___ A014
daea Application Yes
Yes
Yes
2000-02-09 KSMFSLOD
___ A015
daea Application Yes
Yes
Yes
2000-02-09 KSMFSLOD
___ A016
daea Application Yes
Yes
Yes
2000-02-09 KSMFSLOD
___ A017
daea Application Yes
Yes
Yes
2000-02-09 KSMFSLOD
___ A018
daea Application Yes
Yes
Yes
2000-02-09 KSMFSLOD
___ A019
daea Application Yes
Yes
Yes
2000-02-09 KSMFSLOD
___ A020
daea Application Yes
Yes
Yes
2000-02-16 KSM
___ A026
daea Application Yes
Yes
Yes
2000-12-22 KSM
Total records ===> 10
Enter-PF1---PF2---PF3---PF4---PF5---PF6---PF7---PF8---PF9---PF10--PF11--PF12-Help
Exit Refresh
+
Figure 5-1:
Environment List Screen
The value „Yes“ in the General or Sample Record Section means that the corresponding
section is not empty, i.e. there are records in it.
The value „Yes“ in the Jobname Rule field means that the rule has been defined for the
corresponding environment.
33
SEZAM Administration Manual
Create Environment
To create the environment you have to create the first record in any section of it: GRS or SRS
(Fig. 2-1). To do it take the following steps:
#
Enter CR(CREATE ENVIRONMENT) command in the „Command“ field on the
environment list screen (Fig. 5-1).
#
Enter parameters of the environment which has to be created (Fig. 5-2):
Parameter
Description
Required/Optional
ENVIRONMENT
Name of environment, which
has to be defined
Required
SECTION NAME
Name of the section (GRS/SRS), Required
where the first record has to be
placed
RECORD NAME
Name of the first record
being created
Required
RECORD PRTA
Record priority in ADABAS
JCL stream
Optional, only for GRS
records
RECORD PRTN
Record priority in NATURAL
JCL stream
Optional, only for GRS
records
If the priority values (PRTA/PRTN) are not entered, this record will not participate
in the generation process for the ADABAS and/or NATURAL jobs.
#
Enter the value of the record (Fig. 5-3).
After successfully processing the created environment appears in the list of SEZAM
environments (Fig. 5-1) and the following message is displayed:
SEZ0026: Environment created successfully
34
SEZAM Administration Manual
16:27:35 ------- Environment maintenance / Create environment ----- 2003-08-11
Command ===>
? - Help
..............................................................................
Enter environment to be created:
Environment
===> DB002
Enter section and record name:
Section name ===> GRS__
Record name
Record prta
Record prtn
===> JCH-A_____
===> 1_
===> __
Enter-PF1---PF2---PF3---PF4---PF5---PF6---PF7---PF8---PF9---PF10--PF11--PF12-Help
Exit
Figure 5-2:
Create Environment Screen
16:30:52 --------- Environment maintenance / Create record -------- 2003-08-11
Command ===>
? - Help
..............................................................................
Environment ===> DB002
Section
===> GRS
Record name ===> JCH-A
Record prta ===> 1
Record prtn ===>
Enter the record value:
//#JOBNAME JOB #USERINFO,CLASS=A,MSGCLASS=X,REGION=3M,__________________
//
NOTIFY=&SYSUID_____________________________________________________
//* #COMMENTS___________________________________________________________
________________________________________________________________________
________________________________________________________________________
________________________________________________________________________
________________________________________________________________________
________________________________________________________________________
----+---010---+---020---+---030---+---040---+---050---+---060---+---070-Enter-PF1---PF2---PF3---PF4---PF5---PF6---PF7---PF8---PF9---PF10--PF11--PF12-Help
Exit
Figure 5-3:
Create Record Screen
35
SEZAM Administration Manual
Modify Environment
The environment modification makes it possible to perform modification operations over the
records which are defined in the environment. The following commands can be processed:
Command
Description
BR/CR
Browse/Create record
ED/RE
Edit/Rename record
SC/VE
Mass update/Verify environment
DE
Delete record
GRS/SRS
Switch to GRS/SRS section
All listed above commands must be entered on the screen with the list of all records in the
appropriate section (GRS/SRS) of the corresponding environment. The example of this screen
is shown in Figure 5-4. To obtain it perform the following:
#
Specify the section (GRS/SRS) the records of which have to be processed.
To do it enter on the environment list screen (Fig. 5-1) as direct command in the
„Command“ field or as line command in the „Co“ field the following:
- GRS for General Record Section
- SRS for Sample Record Section
#
If the GRS/SRS command was entered as direct command enter the name of the
environment which contains the section being processed (Fig. 5-5).
The following program function (PF) keys appear additionally on the screen (Fig. 5-4) :
Key
Function
Description
PF4
Refresh
Refresh the screen contents
PF10
Sort by record name
Show the screen contents
in the sequence of record name
PF11
Sort by priority in ADABAS
JCL stream
Show the screen contents
in the sequence of priority
in ADABAS JCL stream (PA)
PF12
Sort by priority in NATURAL
JCL stream
Show the screen contents
in the sequence of priority
in NATURAL JCL stream (PN)
36
SEZAM Administration Manual
16:34:31 --------------------- Record list ------------------------- 2003-08-11
Command ===>
SCROLL ===> PAGE
CM - Command help
...............................................................................
Environment ===> DB002
Section
===> GRS
Co
-__
Record
---------JCH-A
Pa
-1
Pn
--
Value
---------------------------------------------------//#JOBNAME JOB #USERINFO,CLASS=A,MSGCLASS=X,REGION=3
Total records ===> 1
Enter-PF1---PF2---PF3---PF4---PF5---PF6---PF7---PF8---PF9---PF10--PF11--PF12-Help
Exit Refr
SrtR SrtA SrtN
Figure 5-4:
Record List Screen
16:16:43 ------ Environment maintenance / Enter environment -------- 2001-06-11
Command ===>
? - Help
..............................................................................
Section ===> GRS
Enter environment the section of which have to be processed:
Environment ===> DB002
Enter-PF1---PF2---PF3---PF4---PF5---PF6---PF7---PF8---PF9---PF10--PF11--PF12-Help
Exit
Figure 5-5:
Enter Environment Screen
37
SEZAM Administration Manual
Create Record
To add a new record to the section execute the next steps:
#
Enter CR(CREATE RECORD) as direct command in the „Command“ field on the
screen with all records (Fig. 5-4).
#
Enter parameters of the record which being created (Fig. 5-6):
Parameter
Description
Required/Optional
RECORD NAME
Name of the record to be
created
Required
RECORD PRTA
Record priority in the
ADABAS JCL stream
Optional for GRS
RECORD PRTN
Record priority in the
NATURAL JCL stream
Optional for GRS
The names of the GRS records are not informative and have no influence on the JCL
generation process. The exceptions are:
- break points, which must have the predefined names: USERDD, USERPA etc. For
more information about break points consult SEZAM Basic Principles.
- system records: the records with the names starting with '#' are the environment
identification records, or i-records. The usage of the i-records together with
SEZENV statement accelerates the job generation process and makes it possible to
specify more than one environment with the same DBID. The SEZENV parameter
should be set to the environment's name.
The SRS records are used in accordance with JCL / REXX requirements for the
ADABAS/ NATURAL utilities, for example: AUSBA, BACK, PLOGR1, OUT1 etc.
For example, ADABAS utility UNLOAD requires the allocation of OUT1 dataset. To
provide the possibility of default allocation, the corresponding SRS record with the
name OUT1 must be defined in the environment. For information about dataset
allocation consult SEZAM User’s Manual.
If the priority values (PRTA/PRTN) are not entered, the corresponding GRS record
does not participate in the generation process for the ADABAS/NATURAL.
#
Enter the value of record (Fig. 5-7).
After successfully processing the created record appears in the list of the records (Fig. 5-8)
and the following message is displayed:
SEZ0033: Record created successfully
38
SEZAM Administration Manual
16:38:39 --------------- Create record / Enter record ------------- 2003-08-11
Command ===>
? - Help
..............................................................................
Environment ===> DB002
Section
===> GRS
Enter record to be created:
Record name ===> EX ADARUN_
Record prta ===> 2_
Record prtn ===> __
Enter-PF1---PF2---PF3---PF4---PF5---PF6---PF7---PF8---PF9---PF10--PF11--PF12-Help
Exit
Figure 5-6:
Create Record / Enter Record Screen
16:38:41 --------------- Create record / Enter record ------------- 2003-08-11
Command ===>
? - Help
..............................................................................
Environment ===> DB002
Section
===> GRS
Record name ===> EX ADARUN
Record prta ===> 2
Record prtn ===>
Enter the record value:
//STEP01 EXEC PGM=ADARUN________________________________________________
________________________________________________________________________
________________________________________________________________________
________________________________________________________________________
________________________________________________________________________
________________________________________________________________________
________________________________________________________________________
________________________________________________________________________
----+---010---+---020---+---030---+---040---+---050---+---060---+---070-Enter-PF1---PF2---PF3---PF4---PF5---PF6---PF7---PF8---PF9---PF10--PF11--PF12-Help
Exit
Figure 5-7:
Create Record Screen
39
SEZAM Administration Manual
16:44:01 --------------------- Record list ------------------------ 2003-08-11
Command ===>
SCROLL ===> PAGE
CM - Command help
...............................................................................
Environment ===> DB002
Section
===> GRS
Co
-__
__
Record
---------EX ADARUN
JCH-A
Pa
-2
1
Pn
--
Value
---------------------------------------------------//STEP01 EXEC PGM=ADARUN
//#JOBNAME JOB #USERINFO,CLASS=A,MSGCLASS=X,REGION=3
Total records ===> 2
Enter-PF1---PF2---PF3---PF4---PF5---PF6---PF7---PF8---PF9---PF10--PF11--PF12-Help
Exit Refr
SrtR SrtA SrtN
SEZ0033: Record created successfully
Figure 5-8:
Record List Screen after execution of „Create Record“ command
Browse Record
To view the contents of the record take the next steps:
#
Enter BR(BROWSE RECORD) as direct command in the „Command“ field on the
screen with all records (Fig. 5-4), or as line command in the „Co“ field against the
appropriate record.
#
If the command was entered as direct command enter the name of the record which
contents have to be browsed (Fig. 5-9).
#
The contents of the record is shown in Figure 5-10.
After successfully processing the following message is displayed:
SEZ0043: Record browsed successfully
40
SEZAM Administration Manual
13:51:17 --------------- Browse record / Enter record -------------- 2003-08-11
Command ===>
? - Help
..............................................................................
Environment ===> DB002
Section
===> GRS
Enter record to be browsed:
Record name ===> JCH-A_____
Enter-PF1---PF2---PF3---PF4---PF5---PF6---PF7---PF8---PF9---PF10--PF11--PF12-Help
Exit
Figure 5-9:
Example of Enter Record Screen
13:54:34 --------- Environment maintenance / Browse record --------- 2003-08-11
Command ===>
? - Help
..............................................................................
Environment ===> DB002
Section
===> GRS
Record name ===> JCH-A
Record prta ===> 1
Record prtn ===>
Record value:
//#JOBNAME JOB #USERINFO,CLASS=A,MSGCLASS=X,REGION=3M,
//
NOTIFY=&SYSUID
//* #COMMENTS
----+---010---+---020---+---030---+---040---+---050---+---060---+---070-Enter-PF1---PF2---PF3---PF4---PF5---PF6---PF7---PF8---PF9---PF10--PF11--PF12-Help
Exit
Figure 5-10:
Browse Record Screen
41
SEZAM Administration Manual
Modify Record
To change the contents of the record execute the next steps:
#
Enter ED(EDIT RECORD) as direct command in the „Command“ field on the
screen with all records (Fig. 5-4), or as line command in the „Co“ field against the
appropriate record.
#
If the command was entered as direct command enter the name of the record which
contents have to be changed (Fig. 5-9).
#
Change the contents of the selected record on the screen (Fig. 5-11).
After successfully processing the following message is displayed:
SEZ0046: Record modified successfully
14:01:34 --------- Environment maintenance / Edit record ----------- 2003-08-11
Command ===>
? - Help
..............................................................................
Environment ===> DB002
Section
===> GRS
Record name ===> JCH-A
Record prta ===> 1
Record prtn ===>
Enter the record value:
//#JOBNAME JOB #USERINFO,CLASS=A,MSGCLASS=X,REGION=3M,__________________
//
NOTIFY=&SYSUID_____________________________________________________
//* #COMMENTS___________________________________________________________
________________________________________________________________________
________________________________________________________________________
________________________________________________________________________
________________________________________________________________________
________________________________________________________________________
----+---010---+---020---+---030---+---040---+---050---+---060---+---070-Enter-PF1---PF2---PF3---PF4---PF5---PF6---PF7---PF8---PF9---PF10--PF11--PF12-Help
Exit
Figure 5-11:
42
Edit Record Screen
SEZAM Administration Manual
Rename Record
To change the name of the record and/or the priorities in the ADABAS/NATURAL job
streams do the following:
#
Enter RE(RENAME RECORD) as direct command in the „Command“ field on the
screen with all records (Fig. 5-4), or as line command in the „Co“ field against the
appropriate record.
#
If the command was entered as direct command enter the name of the record being
renamed (Fig. 5-9).
#
Enter the new parameters of the record (Fig. 5-12):
Parameter
Description
Required/Optional
RECORD NAME
USER NAME
New record name
Optional; if not entered
is equal to the old name
RECORD PRTA
New priority in ADABAS JCL
stream
Optional; if not entered
is reset to zero
RECORD PRTN
New priority in NATURAL JCL
stream
Optional; if not entered
is reset to zero
After successfully processing the new record appears in the list of the records (Fig. 5-8)
instead of the old one and the following message is displayed:
SEZ0052: Record renamed successfully
14:39:24 --------- Environment maintenance / Rename record --------- 2003-08-11
Command ===>
? - Help
..............................................................................
Environment ===> DB002
Section
===> GRS
Old record/prta/prtn values:
Record name ===> JCH-A
Record prta ===> 1
Record prtn ===>
New record/prta/prtn values:
Record name ===> JCL HEADER
Record prta ===> 1_
Record prtn ===> 1_
Enter-PF1---PF2---PF3---PF4---PF5---PF6---PF7---PF8---PF9---PF10--PF11--PF12-Help
Exit
Figure 5-12:
Rename Record Screen
43
SEZAM Administration Manual
Delete Record
To delete the record take the next steps:
#
Enter DE(DELETE RECORD) as direct command in the „Command“ field on the
screen with all records (Fig. 5-4), or as line command in the „Co“ field against the
appropriate record.
#
If the command was entered as direct command enter the name of the record to be
deleted (Fig. 5-9).
#
To confirm delete enter the name of the record (Fig. 5-13).
After successfully processing the deleted record disappears from the list of the records
(Fig. 5-8) and the following message is displayed:
SEZ0039: Record deleted successfully
16:51:12 ----------- Environment maintenance / Delete record ------ 2003-08-11
Command ===>
? - Help
.............................................................................
Environment ===> DB002
Section
===> GRS
Please confirm delete with the name EX ADARUN
===> EX ADARUN_
Enter-PF1---PF2---PF3---PF4---PF5---PF6---PF7---PF8---PF9---PF10--PF11--PF12-Help
Exit
Figure 5-13:
44
Delete Record Screen
SEZAM Administration Manual
Copy Environment
To copy all the records from one environment (source) to another (target) perform the
following:
#
Enter CO(COPY ENVIRONMENT) as direct command in the „Command“ field on
the environment list screen (Fig. 5-1), or as line command in the „Co“ field against
the appropriate environment.
#
Enter parameters of the source and target environments (Fig. 5-14):
Parameter
Description
Required/Optional
SOURCE
ENVIRONMENT
Name of environment, which
records are to be copied
Required
SOURCE
SECTION
Name of section in source
Optional
environment, all records of which
are to be copied:
GRS - records from GRS
SRS - records from SRS
ALL - records from GRS and SRS
blank - sections are not copied
RULE
‘Y’ applies the existing in the
Required
source environment job name rule
to the target environment
DESCRIPTION
‘Y’ applies the existing in the
source environment description
to the target environment
Required
TARGET
ENVIRONMENT
Name of environment, to which
records have to be copied.
Required
After successfully processing the target environment appears in the list of environments
(Fig. 5-1) and the following message is displayed:
SEZ0075: Environment copied successfully
45
SEZAM Administration Manual
11:24:21 -------- Environment maintenance / Copy environment ------- 2003-08-11
Command ===>
? - Help
..............................................................................
Enter source environment/section to be copied:
Environment ===> DB001
Section
===> ALL__
Rule
===> Y
Description ===> Y
Enter target environment:
Environment ===> DB003
Enter-PF1---PF2---PF3---PF4---PF5---PF6---PF7---PF8---PF9---PF10--PF11--PF12-Help
Exit
Figure 5-14:
Copy Environment Screen
Verify Environment
To check if the environment has been set up properly do the following:
#
Enter VE(VERIFICATION ENVIRONMENT) as direct command in the „Command“
field on the environment list screen (Fig. 5-1), or as line command in the „Co“ field
against the appropriate environment.
#
If the command was entered as direct command enter the name of environment being
verified (Fig. 5-15).
If no errors was detected in the environment definition, the following message is displayed:
SEZ0147: Environment verified successfully
Otherwise the screen with verification protocol appears (Fig. 5-16) and the corresponding
message is displayed:
SEZ0144: Environment verified with errors/warnings
46
SEZAM Administration Manual
15:48:46 ---- Environment maintenance / Environment verification --- 2003-08-11
Command ===>
? - Help
..............................................................................
Enter environment to be verified:
Environment ===> DB002
Enter-PF1---PF2---PF3---PF4---PF5---PF6---PF7---PF8---PF9---PF10--PF11--PF12-Help
Exit
Figure 5-15:
Example of Enter Environment Screen
16:06:17 ---- Environment maintenance / Environment verification --- 2003-08-11
Command ===>
SCROLL ===> PAGE
? - Help
..............................................................................
Environment ===> DB002
Index
----1
2
3
4
5
6
7
Type
-----------Error
Error
Error
Error
Warning
Warning
Error
Message
---------------------------------------Statement PROG=#PROG is missing
Statement MODE=#MODE is missing
Break point USERDD is missing
Break point USERPA is missing
Break point USERNB is missing
Break point USERNE is missing
More than one different DBID
Total records ===> 7
Enter-PF1---PF2---PF3---PF4---PF5---PF6---PF7---PF8---PF9---PF10--PF11--PF12-Help
Exit
Figure 5-16:
Environment Verification Screen (Error Protocol)
47
SEZAM Administration Manual
Delete Environment
To delete the environment definition and all records associated with it take the following
steps:
#
Enter DE(DELETE ENVIRONMENT) as direct command in the „Command“
field on the environment list screen (Fig. 5-1), or as line command in the „Co“ field
against the appropriate environment.
#
If the command was entered as direct command enter the name of environment being
deleted (Fig. 5-15).
#
Enter the name of environment (Fig. 5-17) together with the section (GRS/SRS/ALL)
and job name rule being deleted. Confirm the delete on the confirmation screen.
After successfully processing the deleted environment disappears from the list of all
environments (Fig. 5-1) and one of the following messages is displayed:
SEZ0029: Environment deleted successfully
SEZ0218: Environment and all it's components deleted successfully
10:35:48 ------- Environment maintenance / Delete environment ----- 2003-08-11
Command ===>
? - Help
..............................................................................
Enter environment to be deleted:
Environment
Section
Rule
Description
===>
===>
===>
===>
DB003
ALL
Y
Y
Enter-PF1---PF2---PF3---PF4---PF5---PF6---PF7---PF8---PF9---PF10--PF11--PF12-Help
Exit
Figure 5-17:
48
Delete Environment Screen
SEZAM Administration Manual
Rename Environment
To rename the environment (source) to another (target) perform the following:
#
Enter RE(RENAME ENVIRONMENT) as direct command in the „Command“ field
on the environment list screen (Fig. 5-1), or as line command in the „Co“ field against
the appropriate environment.
#
Enter parameters of the source and target environments (Fig. 5-18):
Parameter
Description
Required/Optional
SOURCE
ENVIRONMENT
Name of environment, which
records are to be copied
Required
TARGET
ENVIRONMENT
Name of environment, to which
records have to be copied.
Required
After successfully processing the target environment appears in the list of environments
(Fig. 5-1) and the following message is displayed:
SEZ0357: Environment renamed successfully
17:06:49 ------ Environment maintenance / Rename environment ------ 2003-08-11
Command ===>
? - Help
..............................................................................
Enter source environment to be renamed:
Environment ===> DB001_____
Enter target environment:
Environment ===> __________
Enter-PF1---PF2---PF3---PF4---PF5---PF6---PF7---PF8---PF9---PF10--PF11--PF12-Help
Exit
Figure 5-18:
Rename Environment Screen
49
SEZAM Administration Manual
Mass Update Environment
To process scan/replace against the environment components do the following:
#
Enter SC(MASS UPDATE ENVIRONMENT) as direct command in the „Command“
field on the environment list screen (Fig. 5-1), or as line command in the „Co“ field
against the appropriate environment.
#
Enter parameters of the source and target environments (Fig. 5-19):
Parameter
Description
Required/Optional
SECTION
Name of section, records of
Optional
which are to be processed:
GRS - records from GRS
SRS - records from SRS
ALL - records from GRS and SRS
blank - sections are not copied
DESCRIPTION
‘Y’ includes the environment
Required
description records into processing
USEREXIT
‘Y’ includes the job name’s rule Required
user exit programs into processing
LIST RECORDS
‘Y’ creates the list of the scanned/ Required
replaced records
RECORD LENGTH Maximum record length can be
Required
reached after replace is completed
UPPERCASE
'Y' converts the replace value for
environment's description into
upper case
Required
After successfully processing the target environment appears in the list of environments
(Fig. 5-1) and one of the following message is displayed:
SEZ0313: Environment searched. 1 record(s) found
SEZ0312: Environment changed successfully. 1 record(s) replaced
50
SEZAM Administration Manual
17:20:05 ------- Environment maintenance / Scan environment ------- 2008-01-28
Command ===>
? - Help
..............................................................................
Please confirm modification of the environment DB001
===> __________
Enter the environment's values:
Section
Description
Userexit
List records
Record length
Upper case
===>
===>
===>
===>
===>
===>
ALL
N
N
N
70
Y
Scan value
===> SVC_____________________________________________________________________
Replace value
===> ________________________________________________________________________
Enter-PF1---PF2---PF3---PF4---PF5---PF6---PF7---PF8---PF9---PF10--PF11--PF12-Help
Exit
Figure 5-19:
Scan Environment Screen
51
SEZAM Administration Manual
Job Name Rule Processing
The job name rule is the site-specific rule in accordance with which the name of the
generated/executed job is dynamically created and substituted in the system variable
#JOBNAME (see Appendix A).
Each rule consists of :
*
Up to 10 source fields together with relative byte positions (Start/End);
Each source field can accept predefined or free entered value.
The following predefined SEZAM system variable can be used:
#ENVIRONMENT
-
name of the database environment
#USERNAME
-
name of the user
#PROGNAME
-
name of the current executed ADABAS/NATURAL
program
Appendix B shows all possible values of the #PROGNAME system variable.
*
Any number of #PROGNAME exceptions from the rule. The sense of the exceptions
could be explained on the following example:
°
The name of the job has to be generated as:
- #USERNAME + Last three letters of the executed ADABAS utility.
For example: IVULD, VNSAV, KSMORD, etc.
- #USERNAME + „NAT“ for all the NATURAL programs.
For example: IVNAT, VNSAV, KSMNAT, etc.
°
Defined rule includes two pre-defined fields: #USERNAME and #PROGNAME:
Nr Source field Start End
-- ------------ ----- --1
#USERNAME___ 1_
5_
2
#PROGNAME___ 4_
6_
3
____________ __
__
4
____________ __
__
5
____________ __
__
6
____________ __
__
7
____________ __
__
8
____________ __
__
9
____________ __
__
10 ____________ __
__
52
SEZAM Administration Manual
°
In accordance with the defined rule and depending on the executed program (see
Appendix B) the following job names will be generated:
#USERNAME
#PROGNAME
#EXCEPTION
#JOBNAME
KSM
ADAULD
no
KSMULD
KSM
SELECT
no
KSMECT
KSM
NATLOAD
no
KSMLOA
The first result (KSMULD) is correct, but the last two jobs are wrong. The solution to
this problem is to use at the moment of the job name's generation and substitution not
the „original“ but the „exceptional“ value of the #PROGNAME variable.
°
Define the exceptions as following:
Utility/function
-----------------------------ADAVAL
SELECT
NATUNLD
NATLOAD
ERRULDUS
ERRLODUS
SYSMAIN
SCAN
CATALL
ADARUN PROG=USER
°
Exception
-----------------------------______________________________
ADASEL________________________
XXXNAT________________________
XXXNAT________________________
XXXNAT________________________
XXXNAT________________________
XXXNAT________________________
XXXNAT________________________
XXXNAT________________________
XXXNAT________________________
In accordance with the defined exceptions and depending on the executed program
(see Appendix B) the job names are now generated properly:
#USERNAME
#PROGNAME
#EXCEPTION
#JOBNAME
KSM
ADAULD
no
KSMULD
KSM
SELECT
ADASEL
KSMSEL
KSM
NATLOAD
XXXNAT
KSMNAT
53
SEZAM Administration Manual
*
The user exit program which can be used alone or in combination with ‘standard’ rule
definition. The user exit program must be coded as a Natural sub-program with the
following parameters:
01 #RESPONSE-CODE
(P002)
01 #ENVIRONMENT
01 #USERNAME
01 #PROGNAME
(A010)
(A008)
(A030)
01 #OUTPUT
(A008)
/*
/*
/*
/*
/*
/*
/*
/*
/*
/*
/*
Response code:
0 - output contains user name
which is used in jobname
rule instead of #USERNAME
4 - output contains jobname;
jobname rule is not used
Environment name
User name
Program name; for example:
ADAREP, SYSTRANS etc.
Output
The user exit returns the #RESPONSE-CODE and the #OUTPUT.
The system reaction depends on the #RESPONSE-CODE:
- #RESPONSE-CODE = 0
The variable #OUTPUT must contain the modified value for the user’s
name which will be used in the standard job name’s rule processing
instead of the variable #USERNAME
- #RESPONSE-CODE = 4
The variable #OUTPUT must contain the value for the job’s name
which will be substituted into the system variable #JOBNAME. The
standard job name’s rule processing does not take place
The example of the user exit program can be found in the subprograms UEXRUL* and in the
Appendix D.
54
SEZAM Administration Manual
Create Rule
To create/modify the job name rule do the following:
#
Enter CRU(CREATE RULE) as direct command in the „Command“ field on the
environment list screen (Fig. 5-1), or as line command in the „Co“ field against the
appropriate environment.
#
If the command was entered as direct command enter the name of environment which
rule have to be processed (Fig. 5-15).
#
Specify the rule (Fig. 5-20). Mark „X“ to select the pre-defined SEZAM system
variable, or enter the every other value directly.
To define the exceptions:
- press PF10 to get the rule exception screen (Fig. 5-21).
- enter the exceptions and press PF6 to accept it.
- press PF3 to return to the create rule screen.
After successfully processing the following message is displayed:
SEZ0207: Exceptions accepted successfully
To test the rule execute the following steps:
- press PF12 to get the test rule screen (Fig. 5-22).
- mark „X“ to select the value of the #PROGNAME variable
- press PF12 to test it. The generated job name will be shown in the „Jobname“
field.
- press PF3 to return to the create rule screen.
After successfully processing the following message is displayed:
SEZ0188: Job name rule tested successfully
#
On the create rule screen (Fig. 5-20) press PF6 to accept the rule together with the
exceptions (if exist).
55
SEZAM Administration Manual
10:13:19 --------- Environment maintenance / Create rule ----------- 2008-01-28
Command ===>
SCROLL ===> PAGE
+-----------------------------+
? - Help
! Select source field name:
................................................!
Env A016
Exceptions 15
! Co Source field Length
Userexit
UEXRUL01
! -- ------------ -----! __ #ENVIRONMENT 10
Nr Source field Start End
! __ #USERNAME
8
-- ------------ ----- --! __ #PROGNAME
30
1
#USERNAME___ 1_
3_
!
2
A___________ 1_
1_
!
3
#PROGNAME___ 3_
6_
!
4
____________ __
__
!
5
____________ __
__
!
6
____________ __
__
!
7
____________ __
__
!
8
____________ __
__
+-----------------------------+
9
____________ __
__
10 ____________ __
__
Enter-PF1---PF2---PF3---PF4---PF5---PF6---PF7---PF8---PF9---PF10--PF11--PF12-Help
Exit Reset
Accept
Except
Test
Figure 5-20:
Create Rule Screen
13:20:38 ------- Environment maintenance / Rule exceptions --------- 2003-08-11
Command ===>
SCROLL ===> PAGE
? - Help
..............................................................................
Environment ===> DB001
Index
Utility/function
Exception
--------------------------------------------------------------86
ADAVAL
______________________________
87
SELECT
ADASEL________________________
88
NATUNLD
XXXNAT________________________
89
NATLOAD
XXXNAT________________________
90
ERRULDUS
XXXNAT________________________
91
ERRLODUS
XXXNAT________________________
92
SYSMAIN
XXXNAT________________________
93
SCAN
XXXNAT________________________
94
CATALL
XXXNAT________________________
95
ADARUN PROG=USER
XXXNAT________________________
Total records
===> 124
Total exceptions ===> 15
Enter-PF1---PF2---PF3---PF4---PF5---PF6---PF7---PF8---PF9---PF10--PF11--PF12-Help
Exit Refr
Accept -
Figure 5-21:
56
Rule Exceptions Screen
SEZAM Administration Manual
10:14:40 ---------- Environment maintenance / Test rule ------------ 2008-01-28
Command ===>
SCROLL ===> PAGE
+-----------------------------------------------+
? - Help
! Select test values:
..............................! Env ===> A016
Jobname ===>
! User ===> KSM_____
! Prog ===> ADACMP COMPRESS
Nr Source field Start End ! Excp ===>
-- ------------ ----- --- ! Exit ===> UEXRUL01 / -1
1
#USERNAME
1
3
!
2
A
1
1
! Co Utility/Function
Exception
3
#PROGNAME
3
6
! -- ------------------------------ --------4
! __ ADACMP COMPRESS
no
5
! __ ADACMP DECOMPRESS
no
6
! __ ADADBS ADD
no
7
! __ ADADBS NEWALTS
no
8
! __ ADADBS INCREASE
no
9
! __ ADADBS DECREASE
no
10
! __ ADADBS ALLOCATE
no
!
+-----------------------------------------------+
Enter-PF1---PF2---PF3---PF4---PF5---PF6---PF7---PF8---PF9---PF10--PF11--PF12--Help
Exit
+
Test
Figure 5-22:
Test Rule Screen
57
SEZAM Administration Manual
Delete Rule
To delete the job name rule take the following steps:
#
Enter DRU(DELETE RULE) as direct command in the „Command“ field on the
environment list screen (Fig. 5-1), or as line command in the „Co“ field against the
appropriate environment.
#
If the command was entered as direct command enter the name of environment being
deleted (Fig. 5-15).
#
Enter the name of environment to confirm the delete of the rule (Fig. 5-23).
After successfully processing the following message is displayed:
SEZ0212: Job name rules deleted successfully
13:27:54 --------- Environment maintenance / Delete rule ----------- 2003-08-11
Command ===>
? - Help
..............................................................................
Please confirm delete with the name DB001
===> DB001
Enter-PF1---PF2---PF3---PF4---PF5---PF6---PF7---PF8---PF9---PF10--PF11--PF12-Help
Exit
Figure 5-23:
58
Delete Rule Screen
SEZAM Administration Manual
Description Processing
The description records comprise the notes on the environment in the free form.
Create Description
To create/modify the environment description do the following:
#
Enter CDE(CREATE DESCRIPTION) as direct command in the „Command“ field on
the environment list screen (Fig. 5-1), or as line command in the „Co“ field against the
appropriate environment.
#
If the command was entered as direct command enter the name of environment which
rule have to be processed (Fig. 5-15).
#
Specify the description (Fig. 5-24).
After successfully processing the following message is displayed:
SEZ0362: Description accepted successfully
17:49:24 ------ Environment maintenance / Create description ------ 2003-08-11
Command ===>
? - Help
...............................................................................
Environment ===> DB001
Enter description record:
Hdr daea Application Development____________________________________________
0001 Contact persons: KSM/VN_________________________________________________
0002 Comments:_______________________________________________________________
0003 Bookkeeping project_____________________________________________________
0004 ________________________________________________________________________
0005 ________________________________________________________________________
0006 ________________________________________________________________________
0007 ________________________________________________________________________
0008 ________________________________________________________________________
0009 ________________________________________________________________________
0010 ________________________________________________________________________
0011 ________________________________________________________________________
Enter-PF1---PF2---PF3---PF4---PF5---PF6---PF7---PF8---PF9---PF10--PF11--PF12-Help
Exit Refr
Accept
Figure 5-24:
Create Description Screen
59
SEZAM Administration Manual
Delete Description
To delete the environment description take the following steps:
#
Enter DDE(DELETE DESCRIPTION) as direct command in the „Command“ field on
the environment list screen (Fig. 5-1), or as line command in the „Co“ field against the
appropriate environment.
#
If the command was entered as direct command enter the name of environment being
deleted (Fig. 5-15).
#
Enter the name of environment to confirm the delete of the description (Fig. 5-25).
After successfully processing the following message is displayed:
SEZ0366: Description deleted successfully
17:52:24 ------ Environment maintenance / Delete description ----- 2003-08-11
Command ===>
? - Help
..............................................................................
Please confirm delete with the name DB001
===> __________
Enter-PF1---PF2---PF3---PF4---PF5---PF6---PF7---PF8---PF9---PF10--PF11--PF12-Help
Exit
Figure 5-25:
60
Delete Description Screen
SEZAM Administration Manual
6. History Maintenance
The history maintenance is the facility which monitoring and accounting of the certain
events within SEZAM. This data is accumulated in the history records and can be to retrieve
information about the flow of modification of the various SEZAM system objects together
with the successfully execution of the following commands:
#
EX(EXECUTE JCL)
#
GN(GENERATE JCL)
#
SU(SUBMIT JCL)
For information about SEZAM commands consult SEZAM User’s Manual.
The next table shows in the alphabetical order the information which is kept in the history
records for the different SEZAM commands:
COMMAND
EX
GN
SU
SYSTEM
COMMAND
YES
YES
YES
YES
DATE
YES
YES
YES
YES
ENVIRONMENT
YES
YES
YES
NO
EXTENDED INFORMATION
YES
YES
YES
YES
FILES
YES
YES
YES
NO
JCL
YES
NO
YES
NO
JOB LOCATION
NO
YES
YES
NO
TIME
YES
YES
YES
YES
USER
YES
YES
YES
YES
INFORMATION
Figure 6-1:
History information
61
SEZAM Administration Manual
Detailed description of the information being recorded is shown below:
Information
Description
Example
___
COMMAND
Name of SEZAM command which was
executed
EX
DATE
Date when the event took place in the
DD/MM/YYYY format
2003-08-08
ENVIRONMENT
Name of environment where the current
event took place
DB001
EXTENDED
INFORMATION
Detailed information about the function / utility
ADAORD REORFASSO,
being processed:
ADAREP, ERRLODUS
- the executed Adabas/Natural program
- the modified Sezam system object:
<type-of-modification> source-object <target-object>
- the executed Sezam utility with the number of
modified system objects
FILES
List of ADABAS files, which were accessed in
the current event:
<file_number> - real file number
99999 - logical file number, indicates that the total
number of files is more than 50
133, 177
JCL
Up to 300 lines of JCL / REXX which was
involved in the corresponding event
//KSMFAREP JOB . . .
JOB LOCATION
Location of the job being processed within
the current event:
Object - NATURAL object
Area - NATURAL source area
Saved - SEZAM saved area
H.... - SEZAM history record:
<user><YYYYMMDD><HH:MM:SS>
Exec - directly executed with 'EX' command
Area(KSM/SJDUMMY)
TIME
Time when the event took place in the
HH:MM:SS.0 format
17:04:41.9
USER
Name of SEZAM user who has initiated
the current event
KSM
The information provided by the history facility allows DBA to control and regenerate the
events and their sequence within SEZAM. The use of history facility simplifies the database
administration and makes it possible to find out who, when and what has done.
SEZAM allows dynamically customizing of the history facility including it's activation and
deactivation. For more information about this service consult SEZAM Installation Manual.
62
SEZAM Administration Manual
To invoke the SEZAM history maintenance, enter on SEZAM Maintenance menu (Fig. 3-3) in
the „Function“ field the corresponding number of the „History records maintenance“
function:
3 - History records maintenance
All history maintenance functions can be processed from the screen, which is shown in
Figure 6-2.
15:50:56 ------------------ History maintenance ------------------- 2003-08-12
Command ===>
CM - Command help
..............................................................................
Enter the history processing parameters:
Function
Record type
Search limit
===> L
===> A
===> 0____
Starting from date ===> 2003-08-12
Ending at date
===> 2003-08-12
Enter-PF1---PF2---PF3---PF4---PF5---PF6---PF7---PF8---PF9---PF10--PF11--PF12-Help
Exit Defaults
Figure 6-2:
History Maintenance Screen
63
SEZAM Administration Manual
List Records
To list the history records for a given period of time do the following:
#
Enter L(LIST RECORDS) on the history maintenance screen (Fig. 6-2):
Function
#
===> L
Specify type of the history records (Fig. 6-2):
Record type
===> A
S - system records
U - user records
A - all records
#
Specify maximum number of records found before the list function is terminated.
(Fig. 6-2):
Search limit
===> 0
If 'zero' is specified the search is unlimited. The parameter is ignored unless the
extended processing routine is specified
#
Enter on the history maintenance screen (Fig. 6-2) the time period:
Starting from date ===> 2003-08-11
Ending at date
===> 2003-08-12
#
All the records for the given criteria are shown in Figure 6-3.
After successfully processing the following message is displayed:
SEZ0136: History records listed successfully
64
SEZAM Administration Manual
16:03:08 ----------- History maintenance / Record list ------------ 2003-08-12
Command ===>
SCROLL ===> PAGE
CM - Command help
..............................................................................
Co Env.
CM User
Extended
Files Jcl Date
Time
Information
-- ---------- --- -------- -------------------- ----- UNDF ---------- ------__ SYSTEM EN GRS KSM
ED(F13000,EX NATURAL
No
2003-08-11 08:45
__ SYSTEM EN GRS KSM
ED(F13000,NATPARM)
No
2003-08-11 08:46
__ SYSTEM EN GRS KSM
ED(F13000,NATPARM)
No
2003-08-11 08:46
__ F13000
SU KSM
ADARUN PROG=USER
Yes 2003-08-11 08:47
__ SYSTEM EN GRS KSM
ED(F13000,INPL)
No
2003-08-11 08:50
__ SYSTEM EN GRS KSM
ED(F13000,INPL)
No
2003-08-11 08:50
__ F13000
SU KSM
ADARUN PROG=USER
Yes 2003-08-11 08:51
__ F13000
SU KSM
ADARUN PROG=USER
Yes 2003-08-11 08:52
__ F13000
EX KSM
ADASAV SAVE FILES
812
Yes 2003-08-11 08:56
__ F13000
EX KSM
ADASAV RESTORE FMOVE 812
Yes 2003-08-11 08:57
Search limit ===> 0____
Total records ===> 10
Starting from ===> 2003-08-11
Record type
===> All
Ending at ===> 2003-08-12
Enter-PF1---PF2---PF3---PF4---PF5---PF6---PF7---PF8---PF9---PF10--PF11--PF12-Help
Exit Refr JclF
+
Figure 6-3:
Record List Screen
To be able to seek in the JCL / REXX lines of code, use the PF5 function key on the Record
List Screen (Fig. 6-3).
65
SEZAM Administration Manual
Delete Records
To delete the history records for a given time period perform the following steps:
#
Enter D(DELETE RECORDS) on the history maintenance screen (Fig. 6-2):
Function
#
===> D
Specify type of the history records being deleted (Fig. 6-2):
Record type
===> A
S - system records
U - user records
A - all records
#
Enter on the history maintenance screen (Fig. 6-2) the time period:
Starting from date ===> 2003-08-11
Ending at date
===> 2003-08-12
#
Confirm delete of the records with „DELETE ALL“ (Fig. 6-4).
After successfully processing the following message is displayed:
SEZ0138: History records deleted successfully
66
SEZAM Administration Manual
16:06:26 ----- History maintenance / Delete number of records ----- 2003-08-12
Command ===>
? - Help
..............................................................................
Please confirm delete of the 27
records with DELETE ALL
===> DELETE ALL
Enter-PF1---PF2---PF3---PF4---PF5---PF6---PF7---PF8---PF9---PF10--PF11--PF12-Help
Exit
Figure 6-4:
Delete Number of Records Screen
67
SEZAM Administration Manual
Browse Single Record
To view the detailed information contained in the history record execute the following:
#
Enter BR(BROWSE RECORD) as line command in the „Co“ field against the
appropriate history record on the screen shown in Figure 6-3.
#
The history information contained in the selected record is shown in Figure 6-5.
After successfully processing the following message is displayed:
SEZ0135: History record browsed successfully
16:12:37 ----------- History maintenance / Browse record ---------- 2003-08-12
Command ===>
CM - Command help
..............................................................................
Environment
===> F13000
User ===> KSM
Sezam command
===> EX
Date ===> 2003-08-11
Jcl
===> Yes
Time ===> 08:57:35.7
Extended info. ===> ADASAV RESTORE FMOVE
Job location
Natural info.
File list
===> Exec
===>
===> 812
902
Enter-PF1---PF2---PF3---PF4---PF5---PF6---PF7---PF8---PF9---PF10--PF11--PF12-Help
Exit
Jcl
Figure 6-5:
Browse Record Screen
To browse, or modify the JCL / REXX lines of code, press the PF5 function key. For more
information refer to the section History Job Processing.
68
SEZAM Administration Manual
Delete Single Record
To delete the history records one by one, execute the following:
#
Enter DE(DELETE RECORD) as line command in the „Co“ field against the
appropriate history record on the screen shown in Figure 6-3.
#
Confirm delete of the record with „DELETE“ (Fig. 6-6).
After successfully processing the removed record disappears from the list of history records
(Fig. 6-3) and the following message is displayed:
SEZ0134: History single record deleted successfully
16:20:11 ----------- History maintenance / Delete record ---------- 2003-08-12
Command ===>
? - Help
..............................................................................
The following record will be deleted:
Environment
===> F13000
User ===> KSM
Command
===> EX
Date ===> 2003-08-11
Jcl
===> Yes
Time ===> 08:57:35.7
Extended info. ===> ADASAV RESTORE FMOVE
Job location
===> Exec
Natural info.
===>
File list ===> 812
902
Please confirm delete with the word DELETE
===> DELETE
Enter-PF1---PF2---PF3---PF4---PF5---PF6---PF7---PF8---PF9---PF10--PF11--PF12-Help
Exit
Jcl
Figure 6-6:
Delete Record Screen
The record can also be deleted with the direct command 'DE' (Delete Record) issued on the
JCL Browse Screen (Fig. 6-7), or the JCL Modify Screen (Fig. 6-8). For more information
refer to the section History Job Processing.
69
SEZAM Administration Manual
Job Processing
To browse, modify, re-submit or export the job stored in the history records, execute the
following:
#
Enter JC(PROCESS JOB) as line command in the „Co“ field against the
corresponding history record on the screen shown in Figure 6-3.
#
The JCL / REXX contained in the selected record is shown in Figure 6-7.
#
To invoke the built-in editor and process the job modification, press the PF5 function
key.
Successfully processing is indicated by one of the following messages:
SEZ0347: History JCL browsed successfully
SEZ0348: History JCL browsed partially
16:38:04 ----------- History maintenance / Browse JCL ------------- 2003-08-12
Command ===>
SCROLL ===> PAGE
CM - Command help
..............................................................................
User ===> KSM
Date ===> 2003-08-11
Total ===> 25 / 25
Time ===> 08:56:09.8
0001
0002
0003
0004
0005
0006
0007
0008
0009
0010
0011
0012
//KSMFASAV JOB (,,,999),'KSM',CLASS=W,MSGCLASS=X
//* SEZ312:F13000-ADASAV(Save files)-FILE(812)
//* SEZENV=F13000
/*ROUTE XEQ DAEF
/*JOBPARM SYSAFF=DAEF
/*ROUTE PRINT DAEF
//SEZADA EXEC PGM=ADARUN,REGION=8000K,TIME=1440
//STEPLIB DD DSN=RZDBA.DB13000.NEWLOAD,DISP=SHR
//
DD DSN=RZDBA.DB13000.LOAD,DISP=SHR
//DDASSOR1 DD DSN=DB13000.ASSOR1,DISP=SHR
//DDDATAR1 DD DSN=DB13000.DATAR1,DISP=SHR
//DDWORKR1 DD DSN=DB13000.WORKR1,DISP=SHR
----+---010---+---020---+---030---+---040---+---050---+---060---+---070-Enter-PF1---PF2---PF3---PF4---PF5---PF6---PF7---PF8---PF9---PF10--PF11--PF12-Help
Exit
Modify
+
Figure 6-7:
Browse JCL Screen
To re-submit the job directly from the history facility, enter the SU(SUBMIT JOB) direct
command on the screen Fig. 6-7.
To export the job stored in the history records to the NATURAL text object, enter the direct
XP(EXPORT) command on the screen Fig. 6-7.
70
SEZAM Administration Manual
7. Parameter’s List Maintenance
This facility makes possible to show the user’s activity in the parameter’s list area and
to perform the maintenance commands. For more information about parameter’s lists consult
SEZAM User’s Manual.
To invoke the SEZAM parameter’s list maintenance, enter on the SEZAM Maintenance menu
(Fig. 3-3) in the „Function“ field the corresponding number of the „Parameter’s list
maintenance“ function:
4 - Parameter's list maintenance
The list of parameter’s list owners will be shown in the short format (Fig. 7-1).
16:46:25 --------- Parameter's list maintenance / List ------------ 2003-08-12
Command ===>
SCROLL ===> PAGE
CM - Command help
..............................................................................
Co
User
User
User
Quantity
Name
Type
Status
--------------------------__
FHI
M
A
1
__
HEB
M
A
2
__
JNM
A
A
726
__
KSM
A
A
1754
__
KSM1
M
A
12
__
MEN
M
A
1
__
MTA
P
A
1
__
SAC
A
A
5
__
SAGHWS
M
A
4
__
SAL
A
A
725
Total records ===> 10
Enter-PF1---PF2---PF3---PF4---PF5---PF6---PF7---PF8---PF9---PF10--PF11--PF12-Help
Exit Refresh
+
Full
Figure 7-1:
Parameter’s List Screen / Short Format
The information shown in Figure 7-1 includes the following:
Information
Description
QUANTITY
Number of parameter’s lists for a current user
USER NAME
User name
USER TYPE
User's type:
A/M/E/P
- administrator/manager/expert/person
- user not exist
USER STATUS
Current user status:
A
- user exists in SEZAM (is active)
N
- user does not exist
71
SEZAM Administration Manual
The following commands can be processed from this screen (Fig. 7-1):
Command
Description
CH
Update parameter's lists by user
DE
Delete parameter's lists by user
Pressing PF11 on the screen (Fig. 7-1) causes switch to the full format (Fig. 7-2).
16:50:08 ------- Parameter's list maintenance / List names -------- 2003-08-12
Command ===>
SCROLL ===> PAGE
CM - Command help
..............................................................................
User name ===> KSM
Co
-__
__
__
__
__
__
__
__
__
__
Parmlist name
------------------------A...
AERXXX AERLOD
AERXXX AERULD
ATM-SYSFILE
A001
A001(INCREASE)
A012
A014
A014-FUSER-2
A016
Quantity
--------1
1
1
1
12
2
5
11
1
3
Total records ===> 10
Enter-PF1---PF2---PF3---PF4---PF5---PF6---PF7---PF8---PF9---PF10--PF11--PF12-Help
Exit Refresh
+
Short
Figure 7-2:
Parameter’s List Screen / Full Format
The information shown in Figure 7-1 includes the following:
Information
Description
PARMLIST NAME
Parameter's list name
QUANTITY
Number of parameter’s lists with the given name
USER NAME
User name
The following commands can be processed from this screen (Fig. 7-2):
Command
Description
CO
Copy parameter's lists by name
DE
Delete parameter's lists by name
RE
Rename of parameter's lists by name
72
SEZAM Administration Manual
Copy Parameter's Lists By User
This command is used to copy all owner's parameter's lists to the other user. The owner of the
parameter’s lists and the target user must be defined with the same user’s type. To perform
copy execute the following:
#
Enter CO(COPY PARMLIST) as line command in the „Co“ field against the
selected parameter’s list's name (Fig. 7-1).
#
Enter source and target parameter's list owner's names and specify the Replace option
(Fig. 7-3).
After successfully processing the following message is displayed:
SEZ0299: Parameter list(s) copied successfully
16:58:17 --------- Parameter's list maintenance / Copy ------------ 2003-08-12
Command ===>
? - Help
..............................................................................
Enter source and target parameter's list names:
Source parmlist name ===> A001_____________________
Target parmlist name ===> X001_____________________
Replace ===> N
Enter-PF1---PF2---PF3---PF4---PF5---PF6---PF7---PF8---PF9---PF10--PF11--PF12-Help
Exit
Figure 7-3:
Copy Parameter’s Lists By User Screen
73
SEZAM Administration Manual
Delete Parameter's List By User
This command can be applied against the parameter's lists of the not existed users, or of the
owner's parameter's lists. To delete all parameter’s list of the given user execute the following:
#
Enter DE(DELETE PARMLIST) as line command in the „Co“ field against the
corresponding user on the parameter’s list screen (Fig. 7-1).
#
Confirm delete of all the parameter’s lists for selected user with the user’s name
(Fig. 7-4).
After successfully processing the removed entry disappears from the list shown in
Fig. 7-1 and the following message is displayed:
SEZ0123: Parameter list(s) deleted successfully
16:52:56 --------- Parameter's list maintenance / Delete ---------- 2003-08-12
Command ===>
? - Help
..............................................................................
Please confirm delete of the 2984 parameter's lists with the name KSM
===> ________
Enter-PF1---PF2---PF3---PF4---PF5---PF6---PF7---PF8---PF9---PF10--PF11--PF12-Help
Exit
Figure 7-4:
74
Delete Parameter’s Lists By User Screen
SEZAM Administration Manual
Modify Parameter's List By User
This command is used to perform mass update (scan and replace) of the all parameter's lists of
the given user. To perform update execute the following:
#
Enter SC(MASS UPDATE PARMLIST) as line command in the „Co“ field against the
corresponding user on the parameter’s list screen (Fig. 7-1).
#
Enter the scan/replace criteria and confirm mass update with owner’s name (Fig. 7-5).
After successfully processing the one of the following messages is displayed:
SEZ0288: Parmlist searched. 1 record(s) found
SEZ0282: Parmlist changed successfully. 1 record(s) replaced
13:15:52 --------- Parameter's list maintenance / Change ---------- 2003-08-12
Command ===>
? - Help
..............................................................................
Please confirm modification of the 12
parameter's lists
with the name KSM1
===> KSM1____
Enter the parameter's list values:
Scan value
===> F177____________________________________________________________________
Replace value
===> Q177____________________________________________________________________
Enter-PF1---PF2---PF3---PF4---PF5---PF6---PF7---PF8---PF9---PF10--PF11--PF12-Help
Exit
Figure 7-5:
Mass Update Parameter’s Lists Screen
75
SEZAM Administration Manual
Copy Parameter's Lists By Name
This command is used to copy the owner's parameter's lists with the given name to the other
user. The owner of the parameter’s lists and the target user must be defined with the following
user’s types:
Owner
A
M
E
P
Target user
A
A, M
A, M, E
A, M, E, P
To perform copy execute the following:
#
Enter CO(COPY PARMLIST) as line command in the „Co“ field against the
selected parameter’s list's name (Fig. 7-2).
#
Enter source and target parameter's list names and specify the target user name
(Fig. 7-6).
After successfully processing the following message is displayed:
SEZ0299: Parameter list(s) copied successfully
17:06:21 --------- Parameter's list maintenance / Rename ---------- 2003-08-12
Command ===>
? - Help
..............................................................................
Enter source parameter's list to be copied:
User name
===> KSM
Parmlist name ===> A..._____________________
Enter target parameter's list:
User name
===> KSM1____
Parmlist name ===> _________________________
Enter-PF1---PF2---PF3---PF4---PF5---PF6---PF7---PF8---PF9---PF10--PF11--PF12-Help
Exit
Figure 7-6:
76
Copy Parameter’s Lists By Name Screen
SEZAM Administration Manual
Delete Parameter's Lists By Name
This command is used to delete all owner's parameter's lists with the given name. To perform
delete execute the following:
#
Enter DE(DELETE PARMLIST) as line command in the „Co“ field against the
selected parameter’s list's name (Fig. 7-2).
#
Confirm delete of the parameter’s lists with parameter's list's name (Fig. 7-7).
After successfully processing the removed entry disappears from the list shown in
Fig. 7-2 and the following message is displayed:
SEZ0123: Parameter list(s) deleted successfully
17:08:24 --------- Parameter's list maintenance / Delete ---------- 2003-08-12
Command ===>
? - Help
..............................................................................
Please confirm delete of the 2
parameter's lists of user KSM
with the name A...
===> _________________________
Enter-PF1---PF2---PF3---PF4---PF5---PF6---PF7---PF8---PF9---PF10--PF11--PF12-Help
Exit
Figure 7-7:
Delete Parameter’s Lists By Name Screen
77
SEZAM Administration Manual
Rename Parameter's Lists By Name
This command is used to rename all owner's parameter's lists with the given name or with the
names starting with the given name (prefix) to the different name. To perform rename execute
the following:
#
Enter RE(RENAME PARMLIST) as line command in the „Co“ field against the
selected parameter’s list's name (Fig. 7-2).
#
Enter source and target parameter's list names (Fig. 7-8).
#
Enter operation mode (Fig. 7-8):
- STD - standard mode. Parameter’s lists with the specified name are processed
- PRE - prefix mode. Parameter’s lists with the specified prefix are processed
After successfully processing the removed entry disappears from the list shown in
Fig. 7-2 and the following message is displayed:
SEZ0339: Parameter list(s) renamed successfully
17:49:42 --------- Parameter's list maintenance / Rename ---------- 2004-10-04
Command ===>
? - Help
..............................................................................
Enter old and new parameter's list names:
Old parmlist name ===>
D/INST___________________
New parmlist name ===>
D/INS____________________
Mode ===>
PRE
Enter-PF1---PF2---PF3---PF4---PF5---PF6---PF7---PF8---PF9---PF10--PF11--PF12-Help
Exit
Figure 7-8:
78
Rename Parameter’s Lists By Name Screen
SEZAM Administration Manual
8. Saved Job Maintenance
This facility makes possible to store the jobs of common use in the separate area of
SEZAM. It allows to increase the performance by reducing the total number of execution of
GN(GENERATE JCL) command.
Every saved job can be executed directly from the Saved Area of SEZAM. The use of the
saved job can be restricted by the data/time of execution and/or by people. It can be very
convenient to grant, as an exception, the execution of some ADABAS/NATURAL utility to
the user who is normally not authorised for it.
Regardless of the restrictions every saved job can be processed by Administrator.
To invoke the SEZAM saved job maintenance, enter on the SEZAM Maintenance menu (Fig.
3-3) in the „Function“ field the corresponding number of the „Saved job maintenance“
function:
5 - Saved job maintenance
The list of all already created saved jobs will be shown (Fig. 8-1).
17:13:48 ----------- Saved job maintenance / Jobs list ------------ 2003-08-12
Command ===>
SCROLL ===> PAGE
CM - Command help
Library ===> KSM
Object ===> DUMMY_
...............................................................................
Co
-__
__
__
__
__
__
__
__
__
__
Job name
Owner
---------------- -------$A-BS2000/1
$A-BS2000/2
$A-VM
KSM
$A-VSE
$AER-AERULD
$AER-LOAD
$CST431-CSFLOAD
$CST431-CSHLOAD
$CST431-CSMLOAD
$CST431-CVHELP
Job description
User
A D
--------------------- ------ - A D
A D
A D
A D
ENTIRE DB AERULD...
A K
ENTIRE DB AERLOD...
A K
LOAD UPDATED CODE...
A K
LOAD UPDATED HELP...
A K
LOAD UPDATED MODELS
A K
CONVERT EXISTING H...
A K
L
U
U
U
U
U
U
U
U
U
U
R
R
R
N
R
R
R
R
R
R
R
S
O
O
O
O
O
O
O
O
O
O
Date
---------2003-03-20
2002-12-11
2003-07-10
2002-12-11
2001-02-26
2001-02-26
2001-02-26
2002-12-11
2001-02-26
2001-02-26
Total records ===> 10
Enter-PF1---PF2---PF3---PF4---PF5---PF6---PF7---PF8---PF9---PF10--PF11--PF12-Help
Exit Refr
+
Figure 8-1:
Saved Jobs List Screen
79
SEZAM Administration Manual
The information shown in Figure 8-1 includes the following:
Information
Description
ALLOWED USER
List of the users who are authorised to execute the job
(up to 8 bytes)
DATE
Date of the last modification
JOB NAME
Name of saved job
JOB DESCRIPTION
Description of saved job
OWNER
Name of the job's owner. If the dynamic translation takes place,
the translation table of the owner is activated
STATUS-A
Active Status:
A - job can be submitted
E - job can not be submitted, date/time restrictions are
expired
STATUS-D
Disposition:
D - job will be deleted after submit
K - job will be kept
STATUS-L
Lock Status:
L - job is locked and can not be submitted
U - job is unlocked
STATUS-R
Restriction Status:
R - job is time/people restricted. Job can be processed only
by authorised persons and/or only within the defined
date/time
N - job is unrestricted
STATUS-S
Submit Status:
O - job is open, i.e. has not been submitted
S - job was submitted
TOTAL RECORDS
Total number of the saved jobs
80
SEZAM Administration Manual
Create Saved Job
To create the saved job generate the JCL with GN(GENERATE JCL) command from the
ADABAS/NATURAL functional screen and perform the following steps:
#
Enter CR(CREATE JOB) as direct command in the „Command“ field (Fig. 8-1).
#
Enter parameters of the job being created (Fig. 8-2):
#
Parameter
Description
SOURCE JOB NAME
Name of the NATURAL object which contains
the correct JCL
TARGET JOB NAME
Name of the saved job
DESCRIPTION
Description of the saved job
DISPOSITION
Disposition of the saved job:
D - delete after submit
K - keep
RESTRICTION
Restriction of the saved job:
R - job is restricted
N - job is unrestricted
For restricted jobs press PF5 and make the following:
°
enter restriction values of the job being created (Fig. 8-3):
Parameter
Description
DATE FROM/TO
Date after/before which the job can be submitted:
YYYY-MM-DD - date
blank - not defined
TIME FROM/TO
Time after/before which the job can be submitted:
HH:MM - time
blank - not defined
DATE/TIME EXCEPT
Sequence of date/time restrictions processing:
Y - rejects the jobs which satisfy the restrictions
N - accepts the jobs which satisfy the restrictions
EXCLUSIVE/BROWSE
Exclusive rights of job’s submitting/browse:
Y - only administrators can submit/view the job
USER LIST
Names of the users (up to 10) who are authorised to
submit the current job, blank - all the users
81
SEZAM Administration Manual
°
on the restrictions screen (Fig. 8-3) press PF6 to accept the restrictions
After successfully processing the following message is displayed:
SEZ0191: Restrictions accepted successfully
°
#
press PF3 to return to the create job screen
On the create job screen (Fig. 8-2) press ENTER to create the job and confirm job
creation (Fig. 8-4).
After successfully processing the created job appears in the list of the saved jobs (Fig. 8-1)
and following message is displayed:
SEZ0193: Job created successfully
15:25:03 ---------- Saved jobs maintenance / Create job ------------ 2003-08-12
Command ===>
? - Help
..............................................................................
Enter job to be captured (source):
Job name
===> JCL001
Enter parameters of the saved job (target):
Job name
===> SYSMAIN_________
Description ===> COPY PROGRAMS MUB22 TO MUB22_
Disposition ===> D
Restriction ===> R
Enter-PF1---PF2---PF3---PF4---PF5---PF6---PF7---PF8---PF9---PF10--PF11--PF12-Help
Exit
Restrict
Figure 8-2:
82
Create Job Screen
SEZAM Administration Manual
13:56:43 ------- Saved jobs maintenance / Enter restrictions ------ 2003-08-12
Command ===>
? - Help
..............................................................................
Job name
===> DAEF-00009-ASAV
Job description ===> DAEF-00009 ADASAV
Enter restriction values:
Date
Except ===> _
From
===> __________
To
===> __________
Exclusive
Browse
Time
Except ===> _
From
===> 08:00
To
===> 09:00
===> Y
===> _
User list: ===> ________ / ________ / ________ / ________ / ________
________ / ________ / ________ / ________ / ________
Enter-PF1---PF2---PF3---PF4---PF5---PF6---PF7---PF8---PF9---PF10--PF11--PF12-Help
Exit
Accept
Figure 8-3:
Enter Restrictions Screen
13:58:57 ---------------- Create job confirmation ----------------- 2003-08-12
Command ===>
? - Help
..............................................................................
Environment F177
Program ADASAV SAVE
The job processed successfully and saved job will be created
Please confirm creating with Y
===> Y
Enter-PF1---PF2---PF3---PF4---PF5---PF6---PF7---PF8---PF9---PF10--PF11--PF12Help
Exit
Figure 8-4:
Create Job Confirmation Screen
83
SEZAM Administration Manual
Browse Saved Job
To browse the saved job perform the following steps:
#
Enter BR(BROWSE JOB) as direct command in the „Command“ field on the
screen with all jobs (Fig. 8-1), or as line command in the „Co“ field against the
appropriate job.
#
If the command was entered as direct command enter the name of the job which
contents have to be browsed (Fig. 8-5).
#
The contents of the saved job together with some additional information will be shown
(Fig. 8-6):
#
Information
Description
Job
Name of saved job
Desc
Description of the current saved job
Rest
Restriction status of the current saved job
Disp
Disposition of the current saved job
Total
Total number of the strings in the current job
For restricted jobs press PF5 to browse through restrictions of the current saved job
(Fig. 8-7).
After successfully processing the following message is displayed:
SEZ0175: Job browsed successfully
84
SEZAM Administration Manual
16:01:09 ---------- Saved jobs maintenance / Browse job ------------ 2003-08-12
Command ===>
? - Help
..............................................................................
Enter job to be browsed:
Job name
===> SYSMAIN_________
Enter-PF1---PF2---PF3---PF4---PF5---PF6---PF7---PF8---PF9---PF10--PF11--PF12-Help
Exit
Figure 8-5:
Example of Enter Job Name Screen
16:05:15 ----------- Saved job maintenance / Browse job ------------ 2003-08-12
Command ===>
SCROLL ===> PAGE
? - Help
..............................................................................
Job SYSMAIN
Desc COPY PROGRAMS MUB22 TO MUB22
Rest R Disp D
Total 29
Owner
1
* $$ JOB JNM=NSMAE1,CLASS=Z,SYSID=6,DISP=D
2
* $$ LST CLASS=Q,FNO=A03U
3
// JOB NSMAE1 (SOK),'DB-ADMINISTRATOR'
4
* SEZAM 1.0:EW1-USER(SYSMAIN/CO programs)-FromTo(MUB22,MUB22)
5
// ASSGN
SYS000,READER
6
// EXEC
PGM=NAT22XBA,SIZE=NAT22XBA,PARM='SYSRDR'
7
IM=D,MADIO=0,MAXCL=0,MT=0,OBJIN=R,AUTO=OFF,DC='.',DTFORM=I
8
ID=',',USIZE=64,ESIZE=100,MCG=OFF,DBID=241,ETID=1
9
/*
10
ADARUN PROG=USER
11
ADARUN MODE=MULTI
12
ADARUN DBID=241
13
ADARUN SVC=45
----+---010---+---020---+---030---+---040---+---050---+---060---+---070Enter-PF1---PF2---PF3---PF4---PF5---PF6---PF7---PF8---PF9---PF10--PF11--PF12-Help
Exit
Restrict
+
Figure 8-6:
Browse Saved Job Screen
85
SEZAM Administration Manual
14:18:31 ------- Saved jobs maintenance / Browse restrictions ------ 2003-08-12
Command ===>
? - Help
..............................................................................
Job name
===> SYSMAIN
Job description ===> COPY PROGRAMS MUB22 TO MUB22
Restriction values:
Date
Except ===>
From
===>
To
===>
Exclusive
Time
Except ===> N
From
===> 08:00
To
===> 09:00
===>
User list: ===> BRB
/
/
/
/
/
/
/
/
Enter-PF1---PF2---PF3---PF4---PF5---PF6---PF7---PF8---PF9---PF10--PF11--PF12-Help
Exit
Figure 8-7:
86
Browse Restrictions Screen
SEZAM Administration Manual
Display System Information
To browse the system information of the saved job execute the next steps:
#
Enter SY(DISPLAY SYSTEM INFORMATION) as direct command in the
„Command“ field on the screen with all jobs (Fig. 8-1), or as line command in the
„Co“ field against the appropriate job. The SY direct command can also be issued on
the Browse Saved Job Screen (Fig. 8-6) , or on the Modify Saved Job Screen
(Fig. 8-9).
#
If the command was entered as direct command enter the name of the job system
information of which have to be browsed (Fig. 8-5).
#
The following system information will be displayed (Fig. 8-8):
Information
Description
Job
Name of saved job
Description
Description of the current saved job
Owner
Job's owner's name
Status
Current status of the saved job
Created
Date of creation together with the name of the user who
has created the current saved job
Modified
Date of last modification together with the name of the user
who has modified the job
Locked
Submitted
Date of putting the job in the lock status together with the name
of the user who has locked the current saved job
Date of last submit together with the name of the user who has
submitted the job
After successfully execution the following message is displayed:
SEZ0201: Job's sysinfo browsed successfully
87
SEZAM Administration Manual
14:03:06 -------- Saved job maintenance / System information ------ 2003-08-12
Command ===>
? - Help
..............................................................................
Job
===> $ADA-ADASAV
Created:
Description ===> ADASAV TWOCOPIES TO VTS1
Date ===> 2000-08-24
Owner
===>
User ===> KSM
Status:
Acive
Disposition
Locked
Restriction
Submit
===>
===>
===>
===>
===>
Active
Keep
Unlocked
Restricted
Open
Modified:
Date ===> 2000-11-18
User ===> KSM
Locked:
Date ===>
User ===>
Submitted:
Date ===>
User ===>
Enter-PF1---PF2---PF3---PF4---PF5---PF6---PF7---PF8---PF9---PF10--PF11--PF12-Help
Exit
Figure 8-8:
88
System Information Screen
SEZAM Administration Manual
Modify Saved Job
To modify the saved job take the following steps:
#
Enter ED(EDIT JOB) as direct command in the „Command“ field on the screen with
all jobs (Fig. 8-1), or as line command in the „Co“ field against the appropriate job.
The ED direct command can also be issued on the Browse Saved Job Screen
(Fig. 8-6).
#
If the command was entered as direct command enter the name of the job which
contents have to be modified (Fig. 8-5).
#
Change the contents of the job together with job’s description and disposition
(Fig. 8-9). The following information is shown:
#
Information
Description
Job
Name of saved job
Desc
Description of the current saved job
Rest
Restriction status of the current saved job
Disp
Disposition of the current saved job
Total
Total number of the strings in the current job
To modify the restrictions press PF5 and make the following:
°
enter restriction values of the job being created (Fig. 8-3):
Parameter
Description
DATE FROM/TO
Date after/before which the job can be submitted
in the following format:
YYYY-MM-DD - date
blank - not defined
TIME FROM/TO
Time after/before which the job can be
submitted in the following format:
HH:MM - time
blank - not defined
DATE/TIME EXCEPT
Sequence of date/time restrictions processing:
Y - rejects the jobs which satisfy restrictions
N - accepts the jobs which satisfy restrictions
USER LIST
°
Names of users (up to 10) who are authorised to
submit the current job, blank - all the users
on the restrictions screen (Fig. 8-3) press PF6 to accept the restrictions
89
SEZAM Administration Manual
After successfully processing the following message is displayed:
SEZ0191: Restrictions accepted successfully
°
#
press PF3 to return to the modify job screen
On the modify job screen (Fig. 8-9) press ENTER to accept the job’s modifications.
After successfully processing the following message is displayed:
SEZ0179: Job modified successfully
16:01:44 ----------- Saved job maintenance / Edit job -------------- 2003-08-12
Command ===>
SCROLL ===> PAGE
? - Help
..............................................................................
Job SYSMAIN
Desc COPY PROGRAMS MUB22 TO MUB22__ Rest N Disp D
Total 29
Owner ________
1
* $$ JOB JNM=NSMAE1,CLASS=Z,SYSID=6,DISP=D______________________________
2
* $$ LST CLASS=Z,FNO=A03U_______________________________________________
3
// JOB NSMAE1 (SOK),'DB-ADMINISTRATOR'__________________________________
4
* SEZAM 2.0:EW1-USER(SYSMAIN/CO programs)-FromTo(MUB22,MUB22)___________
5
// ASSGN
SYS000,READER________________________________________________
6
// EXEC
PGM=NAT22XBA,SIZE=NAT22XBA,PARM='SYSRDR'_____________________
7
IM=D,MADIO=0,MAXCL=0,MT=0,OBJIN=R,AUTO=OFF,DC='.',DTFORM=I______________
8
ID=',',USIZE=64,ESIZE=100,MCG=OFF,DBID=241______________________________
9
/*______________________________________________________________________
10
ADARUN PROG=USER________________________________________________________
11
ADARUN MODE=MULTI_______________________________________________________
12
ADARUN DBID=241_________________________________________________________
13
ADARUN SVC=45___________________________________________________________
----+---010---+---020---+---030---+---040---+---050---+---060---+---070-Enter-PF1---PF2---PF3---PF4---PF5---PF6---PF7---PF8---PF9---PF10--PF11--PF12-Help
Exit
Restrict
+
Figure 8-9:
90
Modify Saved Job Screen
SEZAM Administration Manual
Put Saved Job
With combination of PUT/GET commands it is possible to modify the saved jobs not only inplace. To realise this possibility it is necessary to put the saved job from the SEZAM Saved
Area into the NATURAL text object, modify its contents with the NATURAL editor and get
the job to the Saved Area back.
After putting the job into the NATURAL object the saved job remains in the locked status. It
is not possible to modify or submit the locked job. Successfully processing of the GET
command unlocks the saved job automatically.
To put the saved job into the NATURAL object execute the followings:
#
Enter PU(PUT JOB) as direct command in the „Command“ field on the screen with
all jobs (Fig. 8-1), or as line command in the „Co“ field against the appropriate job.
#
Enter the name of the job which have to be put into the NATURAL object together
with the name of the corresponding NATURAL object (Fig. 8-10):
#
Parameter
Description
SOURCE JOB NAME
Name of the saved job
TARGET JOB NAME
Name of the NATURAL object where the saved
job must be put
Confirm processing (Fig. 8-11)
After successfully processing the saved job will be placed in the locked status.
91
SEZAM Administration Manual
14:05:52 ---------- Saved jobs maintenance / Put job -------------- 2003-08-12
Command ===>
? - Help
..............................................................................
Enter saved job to be put (source):
Job name
===> $ADA-ADASAV_____
Enter the target job:
Job name
===> JCL003
Enter-PF1---PF2---PF3---PF4---PF5---PF6---PF7---PF8---PF9---PF10--PF11--PF12-Help
Exit
Figure 8-10:
Put Saved Job Screen
14:04:54 ------------------- Put job confirmation ----------------- 2003-08-12
Command ===>
? - Help
.............................................................................
Environment F164
Program ADASAV SAVE
The job processed successfully and job will be overwritten
Please confirm putting with Y
===> Y
Enter-PF1---PF2---PF3---PF4---PF5---PF6---PF7---PF8---PF9---PF10--PF11--PF12Help
Exit
Figure 8-11:
92
Put Saved Job Confirmation Screen
SEZAM Administration Manual
Get Saved Job
To get the saved job from the NATURAL text object execute the followings:
#
Enter GE(GET JOB) as direct command in the „Command“ field on the screen with
all jobs (Fig. 8-1), or as line command in the „Co“ field against the corresponding
locked job, i.e. against the job previously processed with the PU(PUT JOB) command.
#
Enter the name of the job which have to be got from the NATURAL objects together
with the name of the corresponding NATURAL object (Fig. 8-12):
#
Parameter
Description
SOURCE JOB NAME
Name of the NATURAL object from where the
saved job must be got
TARGET JOB NAME
Name of the saved job in the locked status
Confirm processing (Fig. 8-13)
After successfully processing the saved job is be unlocked and the following message is
displayed:
SEZ0338: Job captured successfully
93
SEZAM Administration Manual
14:07:26 ---------- Saved jobs maintenance / Get job -------------- 2003-08-12
Command ===>
? - Help
..............................................................................
Enter job to be captured (source):
Job name
===> JCL003
Enter parameters of the saved job (target):
Job name
===> $ADA-ADASAV_____
Enter-PF1---PF2---PF3---PF4---PF5---PF6---PF7---PF8---PF9---PF10--PF11--PF12-Help
Exit
Figure 8-12:
Get Saved Job Screen
14:08:16 ------------------- Get job confirmation ----------------- 2003-08-12
Command ===>
? - Help
..............................................................................
Environment F164
Program ADASAV SAVE
The job processed successfully and saved job will be overwritten
Please confirm getting with Y
===> Y
Enter-PF1---PF2---PF3---PF4---PF5---PF6---PF7---PF8---PF9---PF10--PF11--PF12Help
Exit
Figure 8-13:
94
Get Saved Job Confirmation Screen
SEZAM Administration Manual
Copy Saved Job
To copy the contents of the saved job together with its restrictions (if any) from one saved job
to another execute the followings:
#
Enter CO(COPY JOB) as direct command in the „Command“ field on the screen with
all jobs (Fig. 8-1), or as line command in the „Co“ field against the appropriate job.
The CO direct command can also be issued on the Browse Saved Job Screen
(Fig. 8-6) , or on the Modify Saved Job Screen (Fig. 8-9).
#
Enter the source and target job names (Fig. 8-14):
Parameter
Description
SOURCE JOB NAME
Name of the saved job to be copied
TARGET JOB NAME
Name of the saved job, where the saved job must
be copied
After successfully processing the new job appears in the list of all saved jobs (Fig. 8-1) and
the following message is displayed:
SEZ0230: Job copied successfully
14:09:19 ---------- Saved jobs maintenance / Copy job -------------- 2003-08-12
Command ===>
? - Help
..............................................................................
Enter saved job to be copied (source):
Job name
===> SYSMAIN_________
Enter target saved job:
Job name
===> SYSMAIN-2_______
Enter-PF1---PF2---PF3---PF4---PF5---PF6---PF7---PF8---PF9---PF10--PF11--PF12-Help
Exit
Figure 8-14:
Copy Saved Job Screen
95
SEZAM Administration Manual
Rename Saved Job
To change the name of the saved job execute the followings:
#
Enter RE(RENAME JOB) as direct command in the „Command“ field on the screen
with all jobs (Fig. 8-1), or as line command in the „Co“ field against the appropriate
job.
#
Enter the old and new job names (Fig. 8-15):
Parameter
Description
OLD JOB NAME
Name of the saved job being renamed
NEW JOB NAME
New name of the saved job
After successfully processing the new job appears in the list of the all jobs (Fig. 8-1) instead
of the old one and the following message is displayed:
SEZ0235: Job renamed successfully
14:26:07 ---------- Saved jobs maintenance / Rename job ------------ 2003-08-12
Command ===>
? - Help
..............................................................................
Enter saved job values:
Old job name ===> SYSMAIN_________
New job name ===> SYSMAIN-NEW_____
Enter-PF1---PF2---PF3---PF4---PF5---PF6---PF7---PF8---PF9---PF10--PF11--PF12-Help
Exit
Figure 8-15:
96
Rename Saved Job Screen
SEZAM Administration Manual
Submit Saved Job
To submit the saved job to the operating system for execution perform the following:
#
Enter SU(SUBMIT JOB) as direct command in the „Command“ field on the screen
with all jobs (Fig. 8-1), or as line command in the „Co“ field against the appropriate
job. The SU direct command can also be issued on the Browse Saved Job Screen
(Fig. 8-6), or on the Modify Saved Job Screen (Fig. 8-9).
#
If the command was entered as direct command enter the name of the job being
submitted (Fig. 8-5).
#
Confirm submitting of the saved job to the operating system (Fig. 8-16).
After successfully execution the following message is displayed:
SEZ0073: JCL cards submitted to operating system successfully
14:09:44 ---------------- Processing confirmation ----------------- 2003-08-12
Command ===>
? - Help
..............................................................................
Environment F164
Program ADASAV SAVE
The JCL generation completed successfully
Please confirm submitting with Y
===> Y
Enter-PF1---PF2---PF3---PF4---PF5---PF6---PF7---PF8---PF9---PF10--PF11--PF12Help
Exit
Figure 8-16:
Processing Confirmation Screen
97
SEZAM Administration Manual
Export Saved Job
To copy (i.e. export) the saved job from the SEZAM Saved Area into the NATURAL object
without placing the saved job into the locked status execute the following steps:
#
Enter XP(EXPORT JOB) as direct command in the „Command“ field on the screen
with all jobs (Fig. 8-1), or as line command in the „Co“ field against the appropriate
job.
#
Enter the name of the job which have to be exported into the NATURAL object
together with the name of the corresponding NATURAL object (Fig. 8-17):
#
Parameter
Description
SOURCE JOB NAME
Name of the saved job
TARGET JOB NAME
Name of the NATURAL object where the saved
job must be exported
Confirm processing (Fig. 8-18)
16:50:26 ---------- Saved jobs maintenance / Export job ------------ 2003-08-12
Command ===>
? - Help
..............................................................................
Enter saved job to be exported (source):
Job name
===> SYSMAIN_________
Enter the target job:
Job name
===> JCL003
Enter-PF1---PF2---PF3---PF4---PF5---PF6---PF7---PF8---PF9---PF10--PF11--PF12-Help
Exit
Figure 8-16:
98
Export Saved Job Screen
SEZAM Administration Manual
14:11:06 ---------------- Export job confirmation ----------------- 2003-08-12
Command ===>
? - Help
..............................................................................
Environment F164
Program ADASAV SAVE
The job processed successfully and job will be overwritten
Please confirm exporting with Y
===> Y
Enter-PF1---PF2---PF3---PF4---PF5---PF6---PF7---PF8---PF9---PF10--PF11--PF12Help
Exit
Figure 8-18:
Export Saved Job Confirmation Screen
99
SEZAM Administration Manual
Delete Saved Job
To delete the saved job from the SEZAM Saved Area execute the following steps:
#
Enter DE(DELETE JOB) as direct command in the „Command“ field on the screen
with all jobs (Fig. 8-1), or as line command in the „Co“ field against the appropriate
job.
#
Confirm processing (Fig. 8-18)
After successfully execution the following message is displayed:
SEZ0171: Job deleted successfully
14:16:27 ---------------- Delete job confirmation ----------------- 2003-08-12
Command ===>
?- Help
..............................................................................
Please confirm delete of the job with the name JCL001
===> JCL001__________
Enter-PF1---PF2---PF3---PF4---PF5---PF6---PF7---PF8---PF9---PF10--PF11--PF12Help
Exit
Figure 8-18:
100
Delete Saved Job Screen
SEZAM Administration Manual
Mass Update Saved Jobs
To process scan and replace of the jobs in the SEZAM Saved Area execute the following
steps:
#
Enter SC(MASS UPDATE JOBS) as direct command in the „Command“ field on the
screen with all jobs (Fig. 8-1), or as line command in the „Co“ field against the
selected job.
#
Enter scan and/or replace values and confirm processing with the name of the user
(Fig. 8-19)
After successfully execution the following message is displayed:
SEZ0289: Jobs changed successfully. 5 occurrence(s) replaced
14:21:24 ---------- Saved jobs maintenance / Change jobs ---------- 2003-08-12
Command ===>
? - Help
..............................................................................
Please confirm modification of the 63 saved jobs with the name KSM
===> KSM_____
Enter the saved jobs values:
List records ===> Y
Record length ===> 70
Upper case
===> Y
Scan value
===> SVC=249_________________________________________________________________
Replace value
===> SVC=254_________________________________________________________________
Enter-PF1---PF2---PF3---PF4---PF5---PF6---PF7---PF8---PF9---PF10--PF11--PF12-Help
Exit
Figure 8-19:
Mass Update Saved Jobs Screen
101
SEZAM Administration Manual
9. Translation Table Maintenance
This facility ensures the possibility to create the list of the 'Translate From' magic
words which are dynamically searched and replaced to 'Translate To' words. The pairs of
'Translate From'/'Translate To' values are stored in the translation tables (t-tables). The facility
can be activated for user security passwords which must not by displayed in the plain job text.
Every user can have a single global Translation table and number of local Translation tables
defined one per SEZAM environment. By the submitting of the JCL / REXX in the current
environment, will be searched for the local Translation table defined for this environment, and
then for the global one. The entries defined in the global table will be activated only if the
local table is missing.
To invoke the SEZAM Translation table maintenance, enter on the SEZAM Maintenance
menu (Fig. 3-3) in the „Function“ field the corresponding number of the „Saved job
maintenance“ function:
6 - Translation table
The list of all defined Translation tables will be shown in the short format (Fig. 9-1).
09:48:34 ------- Translation table maintenance / List short ------- 2003-08-13
Command ===>
SCROLL ===> PAGE
CM - Command help
..............................................................................
Co
User
User
Quantity
name
Status
--------------------__
KSM
A
2
__
KSM1
A
1
__
PEMA
A
2
__
TSR
A
1
Total records ===> 4
Enter-PF1---PF2---PF3---PF4---PF5---PF6---PF7---PF8---PF9---PF10--PF11--PF12-Help
Exit Refr
Full
Figure 9-1:
102
Translation Table List Screen / Short Format
SEZAM Administration Manual
The information shown in Figure 9-1 includes the following:
Information
Description
USER NAME
Name of the table's owner
USER STATUS
Status of the table's owner:
A - owner exists in SEZAM (is active)
N - owner does not exist
QUANTITY
Number of the tables of the owner
TOTAL RECORDS
Number of processed records
The following commands can be processed on the screen shown in Figure 9-1:
Information
Description
CR
Create Translation table
DE
Delete Translation table by user
SC
Mass Update Translation tables by user
By pressing on PF11 you can switch to the list of all defined Translation tables of the current
use, i.e. owner in the full format (Fig. 9-2).
09:50:50 ------- Translation table maintenance / List full -------- 2003-08-13
Command ===>
SCROLL ===> PAGE
CM - Command help
..............................................................................
Co
User
User
Env.
Env.
T-table
name
Status
Status
Type
------------------------------------__
KSM
A
Global
__
KSM
A
Z103
A
Local
__
KSM1
A
Global
__
PEMA
A
Global
__
PEMA
A
A187
A
Local
__
TSR
A
Z103
A
Local
Total records ===> 6
Enter-PF1---PF2---PF3---PF4---PF5---PF6---PF7---PF8---PF9---PF10--PF11--PF12-Help
Exit Refr
Short
Figure 9-2:
Translation Table List Screen / Full Format
103
SEZAM Administration Manual
Create Translation Table
To create the Translation table perform the following steps:
#
Enter CR(CREATE TABLE) as direct command in the „Command“ field
(Fig. 9-1, Fig. 9-2).
#
Enter parameters of the t-table being created (Fig. 9-3):
Parameter
Description
ENVIRONMENT
Name of the environment where the t-table is to
define (only for local t-tables). To select the
environment from the list of the environments with no
t-tables defined issue the SE(SELECT) command
(Fig. 9-3)
TRANSLATE FROM/TO
entries which are searched and converted to the
correspondent 'Translate to' entries by the execution of
EX/SU/SB commands
After successfully processing the quantity of the created t-table for the given user increases
(Fig. 9-1) and following message is displayed:
SEZ0405: T-table created successfully
14:53:34 ------ Translation table maintenance / Create table ------ 2003-08-13
Command ===>
? - Help
..............................................................................
Enter owner of the table being created:
User name
===> KSM
Environment ===> F010______
Translate
from
--------SECRET__
________
________
________
________
to
-------------------------------------------------PUBLIC____________________________________________
__________________________________________________
__________________________________________________
__________________________________________________
__________________________________________________
Enter-PF1---PF2---PF3---PF4---PF5---PF6---PF7---PF8---PF9---PF10--PF11--PF12-Help
Exit Reset
Figure 9-3:
104
Create Translation Table
SEZAM Administration Manual
Delete Translation Tables
To delete all Translation tables of the t-tables owner, or of the user not more defined in the
SEZAM perform the following:
#
Enter DE(DELETE T-TABLE) as direct, or line command (Fig. 9-1).
#
Confirm processing with owner's name (Fig. 9-4):
After successfully processing the removed entry disappears from the list shown in Fig. 9-1 and
following message is displayed:
SEZ0410: T-table deleted successfully
15:03:44 --- Translation table maintenance / Delete all tables ---- 2003-08-13
Command ===>
? - Help
..............................................................................
Please confirm delete of
3 t-tables with the name KSM
/ ALL
===> KSM_____ / ALL
Enter-PF1---PF2---PF3---PF4---PF5---PF6---PF7---PF8---PF9---PF10--PF11--PF12-Help
Exit
Figure 9-4:
Delete Translation Tables
105
SEZAM Administration Manual
Mass Update Translation Tables
To scan and replace all Translation tables of the given owner take the following steps:
#
Enter SC(MASS UPDATE T-TABLES) as direct, or line command
(Fig. 9-1, Fig. 9-2).
#
Confirm processing with owner's name (Fig. 9-5):
After successfully processing the removed entry disappears from the list shown in Fig. 9-1 and
one of the following message is displayed:
SEZ0416: T-tables searched. 1 occurrence(s) found
SEZ0415: T-tables changed successfully. 1 occurrence(s) replaced
15:19:17 ------ Translation table maintenance / Change tables ----- 2003-08-13
Command ===>
? - Help
..............................................................................
Please confirm modification of the 3
t-tables with the name KSM
===> KSM_____
Enter the saved jobs values:
List records
===> Y
Scan value
===> PUBLIC__
Replace value
===> PRIVATE_
Enter-PF1---PF2---PF3---PF4---PF5---PF6---PF7---PF8---PF9---PF10--PF11--PF12-Help
Exit
Figure 9-5:
106
Mass Update Translation Tables
SEZAM Administration Manual
Browse Translation Table
To browse the single Translation table perform the following:
#
Enter BR(BROWSE T-TABLE) as direct, or line command (Fig. 9-2).
#
Enter the environment name, or leave it empty for the global t-table (Fig. 9-6).
After successfully processing the t-table will be displayed on the screen and the following
message is displayed:
SEZ0424: T-tables browsed successfully
15:24:22 ------ Translation table maintenance / Browse table ------ 2003-08-13
Command ===>
? - Help
..............................................................................
Enter owner of the table being browsed:
User name
===> KSM
Environment ===> __________
Enter-PF1---PF2---PF3---PF4---PF5---PF6---PF7---PF8---PF9---PF10--PF11--PF12-Help
Exit
Figure 9-6:
Browse Translation Table
107
SEZAM Administration Manual
Modify Translation Table
To modify the single Translation table do the following:
#
Enter ED(EDIT T-TABLE) as direct, or line command (Fig. 9-2).
#
Enter the environment name, or leave it empty for the global t-table (Fig. 9-7).
After successfully processing the t-table will be displayed on the screen and the following
message is displayed:
SEZ0428: T-table modified successfully
15:27:28 ------- Translation table maintenance / Edit table ------- 2003-08-13
Command ===>
? - Help
..............................................................................
Enter owner of the table being modified:
User name
===> KSM
Environment ===> __________
Enter-PF1---PF2---PF3---PF4---PF5---PF6---PF7---PF8---PF9---PF10--PF11--PF12-Help
Exit
Figure 9-7:
108
Modify Translation Table
SEZAM Administration Manual
Delete Translation Table
To delete the single Translation table of the t-tables owner, or of the user not more defined in
the SEZAM perform the following:
#
Enter DE(DELETE T-TABLE) as direct, or line command (Fig. 9-2).
#
Enter user name together with the environment name, or leave the environment name
empty for the global t-table (Fig. 9-8). Confirm processing with the user name and the
environment name (only for the local t-tables).
After successfully processing the t-table with the given name will disappear from the list
shown in Fig. 9-2 and the following message is displayed:
SEZ0410: T-table deleted successfully
15:34:11 -- Translation table maintenance / Delete single table --- 2003-08-13
Command ===>
? - Help
..............................................................................
Enter owner of the table being deleted:
User name
===> KSM_____
Environment ===> __________
Enter-PF1---PF2---PF3---PF4---PF5---PF6---PF7---PF8---PF9---PF10--PF11--PF12-Help
Exit
Figure 9-8:
Delete Translation Table
109
SEZAM Administration Manual
Copy Translation Table By Name
To copy the single Translation table with the given name of the t-tables owner to the different
name perform the following steps:
#
Enter CO(COPY T-TABLE) as direct, or line command (Fig. 9-2).
#
Enter the source and target environment's names, or leave one of the names empty if
the global t-table is processed (Fig. 9-9).
After successfully processing the t-table with the given name will disappear from the list
shown in Fig. 9-2 and the following message is displayed:
SEZ0432: T-table copied successfully
15:41:21 ------- Translation table maintenance / Copy table ------- 2003-08-13
Command ===>
? - Help
..............................................................................
Enter owner of the table being copied:
User name
===> KSM
Environment:
Source
===> F010________
Target
===> F044________
Enter-PF1---PF2---PF3---PF4---PF5---PF6---PF7---PF8---PF9---PF10--PF11--PF12-Help
Exit
Figure 9-9:
110
Copy Translation Tables By Name
SEZAM Administration Manual
10. Retrieval Functions
The retrieval facility may be used to get the information about the objects defined to
SEZAM and the existing relationships between them. With the Retrieval, you can not do any
SEZAM maintenance, you may only look at things.
To invoke the SEZAM retrieval, enter on the SEZAM Administration menu (Fig. 3-2) in the
„Function“ field the corresponding number of the „Retrieval“ function:
2 - Retrieval
Utilities
To get the actual settings of function thresholds execute the following:
#
Enter corresponding function code in the „Function“ field on the SEZAM Retrieval
menu (Fig. 3-4):
1 - Utilities
#
The actual threshold settings are shown in Figure 10-1.
10:24:47 ------------------- Retrieve utilities ------------------- 2003-08-13
Command ===>
SCROLL ===> PAGE
CM - Command help
..............................................................................
Index Utility/function
Threshold Authorization
----- ------------------------------ --------- ------------1
ADACMP COMPRESS
P
N
2
ADACMP DECOMPRESS
P
N
3
ADADBS ADD
A
N
4
ADADBS NEWALTS
M
N
5
ADADBS INCREASE
A
N
6
ADADBS DECREASE
A
N
7
ADADBS ALLOCATE
E
N
8
ADADBS CHANGE
E
N
9
ADADBS DEALLOCATE
E
N
10
ADADBS DELETE
E
N
Total records ===> 124
Enter-PF1---PF2---PF3---PF4---PF5---PF6---PF7---PF8---PF9---PF10--PF11--PF12-Help
Exit Refr
+
Figure 10-1:
Utility Threshold Information Screen
111
SEZAM Administration Manual
The information shown in Figure 10-1 includes the following:
Information
Description
UTILITY/FUNCTION
Name of utility/function
THRESHOLD
Threshold value of the utility/function.
For more information about thresholds consult
SEZAM Basic Principles section.
AUTHORIZATION
Authorisation of the utility/function:
Y - is defined, i.e. only the SEZAM Administrators granted
to maintain SEZAM are authorised for the corresponding
utility/function
N - is undefined
TOTAL RECORDS
Total number of records
112
SEZAM Administration Manual
Commands
This function allows to trace the current commands threshold settings.
To get the values execute the following:
#
Enter corresponding function code in the „Function“ field on the SEZAM Retrieval
menu (Fig. 3-4):
2 - Commands
#
The threshold settings are shown in Figure 10-2.
10:35:08 ------------------- Retrieve commands -------------------- 2003-08-13
Command ===>
SCROLL ===> PAGE
CM - Command help
...............................................................................
Ind Name/Description
Type Threshold Author.
--- -------------------------------------------------- ---- --------- ------1 CL Browse command list
SE
P
N
2 CM Command help
S
P
N
3 BR Browse parameter list
S
P
N
4 DE Delete parameter list
S
P
N
5 ED Edit generated job
S
P
N
6 EX Execute the job
S
P
N
7 GN Generate the job
S
P
N
8 ID Show user identification
S
P
N
9 LI List of generated jobs
S
P
N
10 SA Save parameter list
S
P
N
Total records ===> 118
Enter-PF1---PF2---PF3---PF4---PF5---PF6---PF7---PF8---PF9---PF10--PF11--PF12-Help
Exit Refr
+
Figure 10-2:
Command Threshold Information Screen
113
SEZAM Administration Manual
The information shown in Figure 10-2 includes the following:
Information
Description
NAME/DESCRIPTION
Name of the command
TYPE
Type of the command:
S - system command
D - global direct command
E - site independent external command
U - user defined external command
* - only visual part must be identical
For more information about the commands of type U and *
refer to SEZAM Installation Manual section.
THRESHOLD
Threshold value of the command.
For more information about thresholds consult
SEZAM Basic Principles section.
AUTHORIZATION
Authorisation of SEZAM command:
Y - is defined, i.e. commands of type S are available only for the
SEZAM Administrators granted with SEZAM administrative
authority; the commands of type U can be processed only if the
authorisation routine defined in the user exit SN00UEX1
terminates with the zero response code. For more information
refer to SEZAM Installation Manual section.
N - is undefined
TOTAL RECORDS
Total number of records
114
SEZAM Administration Manual
Environments
To get the list of all users who are authorised to operate with the specified ADABAS files
within the specified SEZAM environment, perform the following:
#
Enter corresponding function code in the „Function“ field on the SEZAM Retrieval
menu (Fig. 3-4):
3 - Environments
#
Enter environment and ADABAS file number for which the cross-reference
information should be displayed (Fig. 10-3).
#
The list of all users who may operate with selected ADABAS files within selected
environment are shown in Figure 10-4.
#
To get the detailed information about user’s definition enter BR(BROWSE USER) as
direct command in „Command“ field or as line command in the „Co“ field.
If command was issued as direct command enter the user’s parameters (Fig. 4-4):
#
The example of detailed user’s definition is shown in Figure 4-5.
11:00:15 ------------------ Retrieve environments ----------------- 2003-08-13
Command ===>
CM - Command help
..............................................................................
Enter cross-reference information:
Environment ===> F177_______
File
===> _____
Enter-PF1---PF2---PF3---PF4---PF5---PF6---PF7---PF8---PF9---PF10--PF11--PF12-Help
Exit
Figure 10-3:
Environment Cross Reference Screen
115
SEZAM Administration Manual
11:01:26 ------------- Cross-reference user / User list ----------- 2003-08-13
Command ===>
SCROLL ===> PAGE
CM - Command help
Environment ===> F177
File ===>
..............................................................................
Co User
User Env.
File
Date of Created
name
type
list
creation by
-- -------- ---- ---------- --------------------- -------- ----------------__ AXBE
A
20011212 KSM
__ BEKU
A
20011212 KSM
__ CNE
M
F177
20020702 KSM
__ DNI
A
20011212 KSM
__ GOZ
M
F177
20020702 KSM
__ JBE
A
19990506 KSM
__ JKS
M
F177
20020702 KSM
__ JNM
A
19990413 KSM
__ KOM
A
19991201 KSM
__ KSM
A
19990413 KSM
Total records ===> 10
Enter-PF1---PF2---PF3---PF4---PF5---PF6---PF7---PF8---PF9---PF10--PF11--PF12-Help
Exit Refr
+
Figure 10-4:
116
Environment Cross Reference List Screen
SEZAM Administration Manual
11. SEZAM Utilities
SEZAM utilities are the part of the SEZAM Administration Subsystem (Fig 1-1) and
are used for the maintenance of the SEZAM objects in batch.
The following objects can be processed with SEZAM utilities:
- Users
- Environments
- History Records
- Parameter Lists
- Saved Jobs
- Translation Tables
The SEZAM Utilities Manual describes the various SEZAM utilities. These are:
Utility
Function
SEZUNLD
Unloading of SEZAM objects from the SEZAM system file
SEZLOAD
Loading of SEZAM objects to the SEZAM system file
SEZDEL
Delete of SEZAM objects from the SEZAM system file
SEZLIST
Display a range of SEZAM objects within the SEZAM system file
An overview of SEZAM Utilities is shown in Fig. 1-4.
To invoke the SEZAM utilities, enter on the SEZAM Administration menu (Fig. 3-2) in the
„Function“ field the corresponding number of the „Utilities“ function:
3 - Utilities
Any of SEZAM utilities can be selected for further execution from SEZAM Utilities menu
(Fig. 11-1).
117
SEZAM Administration Manual
16:01:01 --------------------- SEZAM utilities -------------------- 2003-08-13
Function ===>
_
_
_
_
1
2
3
4
SEZUNLD
SEZLOAD
SEZDEL
SEZLIST
-
unload SEZAM objects
load SEZAM objects
delete SEZAM objects
list SEZAM objects
Enter-PF1---PF2---PF3---PF4---PF5---PF6---PF7---PF8---PF9---PF10--PF11--PF12-Help
Exit
Figure 11-1:
SEZAM Utilities menu
16:01:41 ------------- Unload SEZAM objects / SEZUNLD ------------- 2003-08-13
Function ===> 1
_
_
_
_
_
_
1
2
3
4
5
6
Users
Environments
History records
Parameter's list
Saved job
Translation tables
Enter-PF1---PF2---PF3---PF4---PF5---PF6---PF7---PF8---PF9---PF10--PF11--PF12-Help
Exit
Figure 11-2:
118
SEZULD menu
SEZAM Administration Manual
The following program function (PF) keys can be available on SEZAM Utility functional
screens:
Key
Function
PF1
Help
PF3
Exit to previous screen
PF4
Set default values of SEZAM Utility parameters
PF12
Allocate required datasets for the SEZAM Utility
To execute any of SEZAM Utilities perform the following steps:
#
Select the SEZAM Utility by entering the corresponding number in the „Function“
field, or using the cursor on the SEZAM Utilities menu (Fig. 11-1); for example
SEZUNLD Utility.
#
Enter the type of SEZAM object for the processing with the selected SEZAM Utility;
for example USERS (Fig. 11-2).
#
Enter required and optional SEZAM Utility parameters on the functional screen
(Fig. 11-3). The step can be processed with the help of parameter’s list commands
(SA/BR/DE). For information about parameter’s list commands consult the section
SEZAM Command in SEZAM User’s Manual.
#
Out of necessity allocate the datasets which are required for some of SEZAM Utilities.
For example, the SEZUNLD can require the CMWKF01, CMWKF02 and
CMWKF03. For information about the dataset allocation consult the section ADABAS
Maintenance in SEZAM User’s Manual.
#
Enter the job processing command for the JCL / REXX execution (EX) or generation
(GN). For information about job processing commands consult the section SEZAM
Commands in SEZAM User’s Manual.
119
SEZAM Administration Manual
11:09:32 ------------- Unload SEZAM users / SEZUNLD --------------- 2003-08-13
Command ===>
CM - Command help
..............................................................................
Parmlist destination:
Job destination:
Parmlist name ===> SEZAM312_________________
Job name ===> DUMMY_
..............................................................................
Utility parameters:
Environment/AdarunMode ===> SEZAM312__ / MULTI_
Library/User/Password ===> W312-011 / KSM_____ /
*
User name
User environment
User type
User authorization
Input delimiter
Terminal commands
===>
===>
===>
===>
===>
===>
K*______
*_________
*
*
,
%
Enter-PF1---PF2---PF3---PF4---PF5---PF6---PF7---PF8---PF9---PF10--PF11--PF12-Help
Exit Defaults
Alloc
Figure 11-3:
120
SEZULD (SEZAM Users) screen
SEZAM Administration Manual
12. SEZAM Corrections
SEZAM Corrections can be used for tracing the currently applied corrections, which
can be the first point by investigating of the different problems by SEZAM technical support.
The SEZAM corrections are described in SEZAM Installation Manual.
To invoke the SEZAM corrections, enter on the SEZAM Administration menu (Fig. 3-2) in
the „Function“ field the corresponding number of the „Utilities“ function:
4 - Corrections
The example of SEZAM correction screen is shown in Fig. 12-1.
16:38:13 ---------------- Applied source corrections -------------- 2009-03-12
Command ===>
CM - Command help
.............................................................................
312001
312011
312021
312031
312041
312051
312061
312071
312081
312091
312002
312012
312022
312032
312042
312052
312062
312072
312082
312092
312003
312013
312023
312033
312043
312053
312063
312073
312083
312093
312004
312014
312024
312034
312044
312054
312064
312074
312084
312094
312005
312015
312025
312035
312045
312055
312065
312075
312085
312095
312006
312016
312026
312036
312046
312056
312066
312076
312086
312096
312007
312017
312027
312037
312047
312057
312067
312077
312087
312097
312008
312018
312028
312038
312048
312058
312068
312078
312088
312098
312009
312019
312029
312039
312049
312059
312069
312079
312089
312099
312010
312020
312030
312040
312050
312060
312070
312080
312090
Enter-PF1---PF2---PF3---PF4---PF5---PF6---PF7---PF8---PF9---PF10--PF11--PF12Help
Exit
Figure 12-1:
SEZAM Corrections
121
SEZAM Administration Manual
13. SEZAM Options
The feature is designed for displaying SEZAM installation options together with the
current system settings. The product code is always to pass to SEZAM technical support by
the reporting of the problems of any kind.
The SEZAM options are described in SEZAM Installation Manual.
To invoke the SEZAM options, enter on the SEZAM Administration menu (Fig. 3-2) in the
„Function“ field the corresponding number of the „Utilities“ function:
5 - Options
The example of SEZAM options screen is shown in Fig. 13-1.
16:36:55 ------------------ Installation options ------------------ 2009-11-11
Command ===> GN
CM - Command help
..............................................................................
Report destination:
Report name ===> REP01_
..............................................................................
Product information:
Product code
: SEZ312 - 20091111 / R312106 / W312098
Customer
: Software AG
License
: Full
System settings:
_ Natural editor
_ History facility
_ Default names
_ Scroll processing
_ Generate processing
_ Dataset allocation
_ Confirmation processing
Enter-PF1---PF2---PF3---PF4---PF5---PF6---PF7---PF8---PF9---PF10--PF11--PF12Help
Exit
Figure 13-1:
SEZAM Options
The system settings are divided into groups (Natural editor, History facility etc.).
To display the group settings select the corresponding group with non blank character or with
cursor.
To generate the summary system report into Natural text object specify report name and
execute GN(Generate report) command.
122
SEZAM Administration Manual
APPENDIX A - Examples of Environment Definition
BS2000/OSD
GRS records for ADABAS JCL stream.
Prty
---1
Record
---------LOGON-A
2
3
SEZENV
SYSFILE-A
4
5
10
11
12
20
21
22
23
24
25
26
27
28
31
32
35
36
38
60
64
65
66
67
68
DDLIB-A
USERFB
#DDASSOR1
DDDATAR1
DDWORKR1
USERTB
DDSORTR1
DDTEMPR1
USERTE
USERPB
DDPLOGR1
DDPLOGR2
USERPE
USERCB
USERCE
USERRB
USERRE
USERDB
USERDE
USERFE
USERDD
DDDRUCK
DDPRINT
EX-ADARUN
ADARUN-PA
70
71
72
73
74
75
78
80
99
USERSB
ADARUN-PLG
USERSE
USERR2B
ADARUN-RAI
USERR2E
/EOF
USERPA
LOGOFF
Value
------------------------------------------------------------/.#JOBNAME LOGON
/REMARK #COMMENTS
/REMARK SEZENV=BS2000-1
/ASSIGN-SYSDTA *SYSCMD
/ASSIGN-SYSLST LI.#JOBNAME.DB069.#PROG.SYSLST
/FILE $RZ.ADA621.MOD
,LINK=DDLIB
/FILE $RZ.ADA69.ASSO
/FILE $RZ.ADA69.DATA
/FILE $RZ.ADA69.WORK
,LINK=DDASSOR1,SHARUPD=YES
,LINK=DDDATAR1,SHARUPD=YES
,LINK=DDWORKR1,SHARUPD=YES
/FILE $RZ.ADA69.SORT
/FILE $RZ.ADA69.TEMP
,LINK=DDSORTR1,SHARUPD=YES
,LINK=DDTEMPR1,SHARUPD=YES
/FILE $RZ.ADA69.PLOG1
/FILE $RZ.ADA69.PLOG2
,LINK=DDPLOGR1,SHARUPD=YES
,LINK=DDPLOGR2,SHARUPD=YES
/FILE LI.#JOBNAME.DB069.#PROG.DRUCK
/FILE LI.#JOBNAME.DB069.#PROG.PRINT
/EXEC (ADARUN,$RZ.ADA621.MOD)
ADARUN PROG=#PROG
ADARUN IDTNAME=ADABAGK1
ADARUN DEVICE=2000
ADARUN MODE=#MODE
ADARUN DBID=069
,LINK=DDDRUCK
,LINK=DDPRINT
ADARUN PLOGRQ=NO
ADARUN UEX2=ADAEX2
/EOF
/ASS-SYSOUT *PRIMARY
/ASS-SYSLST *PRIMARY
/LOGOFF
123
SEZAM Administration Manual
GRS records for NATURAL JCL stream (syntax 1).
Prty
---1
2
3
124
Record
---------LOGON-N
SEZENV
SYSFILE-N
4
10
11
12
20
21
DDLIB-N
#DDASSOR1
DDDATAR1
DDWORKR1
USERDD
PROC-EDT-B
22
ADARUN-PN
23
PROC-EDT-E
24
25
26
27
28
29
30
31
32
80
99
MOD-J-SW
EX-NATURAL
USERNB
NATPARM
USERNE
USERN2B
INPL
USERN2E
EOF
USERPA
LOGOFF
Value
------------------------------------------------------------/.#JOBNAME LOGON
/REMARK * #COMMENTS
/REMARK SEZENV=BS2000-1
/DEL-FILE LI.#USERNAME.#PROG.SYSOUT.NAT069
/DEL-FILE LI.#USERNAME.#PROG.SYSLST.NAT069
/SET-JOB-STEP
/ASS-SYSOUT LI.#USERNAME.#PROG.SYSOUT.NAT069
/ASS-SYSLST LI.#USERNAME.#PROG.SYSLST.NAT069
/FILE $RZ.ADA621.MOD
,LINK=DDLIB
/FILE $RZ.ADA69.ASSO
,LINK=DDASSOR1,SHARUPD=YES
/FILE $RZ.ADA69.DATA
,LINK=DDDATAR1,SHARUPD=YES
/FILE $RZ.ADA69.WORK
,LINK=DDWORKR1,SHARUPD=YES
/SET-FILE-LINK DDLNKPAR ,#DDLNKPAR
/MOD-J-SW ON=(4,5)
/ASS-SYSDTA *SYSCMD
/START-PROG EDT
§CR 1 : 'ADALNK IDTNAME=ADABAGK1'
§CR 2 : 'ADALNK DBID=069'
§W '#DDLNKPAR' O
§H
/MOD-J-SW OFF=(4,5)
/SET-JOB-STEP
/ASS-SYSDTA *PRIMARY
/MOD-J-SW ON=(2)
/START-PROG DEMO.NATPHSE
IM=D,AUTO=OFF,DBID=069,INTENS=1,LFILE=(133,69,3),PS=250,LS=069
STACK=INPL,IM=D,AUTO=OFF,DBID=069,INTENS=1
/EOF
/ASS-SYSOUT *PRIMARY
/ASS-SYSLST *PRIMARY
/LOGOFF
SEZAM Administration Manual
GRS records for NATURAL JCL stream (syntax 1).
Prty
---1
2
3
Record
---------LOGON-N
SEZENV
SYSFILE-N
4
10
11
12
20
21
DDLIB-N
#DDASSOR1
DDDATAR1
DDWORKR1
USERDD
PROC-ADA-B
22
ADARUN-PN
23
PROC-ADA-E
24
25
USERNB
PROC-NAT-B
26
27
NATPARM
PROC-NAT-E
28
29
30
USERNE
USERN2B
PROC-INP-B
31
32
INPL
PROC-INP-E
33
64
65
80
99
USERN2E
MOD-J-SW
EX-NATURAL
USERPA
LOGOFF
Value
------------------------------------------------------------/.#JOBNAME LOGON RZDB,1
/
SKIP-COMMANDS
TO-LABEL=BEGIN
/#COMMENTS
/JOB #JOBNAME RUN FOR #USERINFO
/.BEGIN
REMARK
/REMARK SEZENV=BS2000-2
/DEL-FILE LI.#USERNAME.#PROG.SYSOUT.NAT2001
/DEL-FILE LI.#USERNAME.#PROG.SYSLST.NAT2001
/SET-JOB-STEP
/ASS-SYSOUT LI.#USERNAME.#PROG.SYSOUT.NAT2001
/ASS-SYSLST LI.#USERNAME.#PROG.SYSLST.NAT2001
/FILE $RZDB.DEMO.ADA712.MOD ,LINK=DDLIB
/FILE $RZDB.ADA2001.ASSO
,LINK=DDASSOR1,SHARUPD=YES
/FILE $RZDB.ADA2001.DATA
,LINK=DDDATAR1,SHARUPD=YES
/FILE $RZDB.ADA2001.WORK
,LINK=DDWORKR1,SHARUPD=YES
/SET-FILE-LINK DDLNKPAR ,#DDLNKPAR
/MOD-J-SW ON=(4,5)
/ASS-SYSDTA *SYSCMD
/START-PROG EDT
§CR 1 : 'ADALNK IDTNAME=ADABASSN'
§CR 2 : 'ADALNK DBID=2001'
§W '#DDLNKPAR' O
§H
/SET-JOB-STEP
**** REMOVE DYNAMIC PARAMETERS WITH EOF ****
/SET-FILE-LINK CMPRMIN ,#CMPRMIN
/START-PROG EDT
§CR 1 : 'IM=D,AUTO=OFF,DBID=2001,INTENS=1'
§W '#CMPRMIN ' O
§H
/MOD-J-SW OFF=(4,5)
/SET-JOB-STEP
/ASS-SYSDTA *PRIMARY
**** REMOVE DYNAMIC PARAMETERS WITH EOF ****
/SET-FILE-LINK CMPRMIN ,#CMPRMIN
/MOD-J-SW ON=(4,5)
/ASS-SYSDTA *SYSCMD
/START-PROG EDT
§CR 1 : 'IM=D,AUTO=OFF,DBID=2001,INTENS=1,STACK=INPL'
§W '#CMPRMIN ' O
§H
/MOD-J-SW OFF=(4,5)
/SET-JOB-STEP
/ASS-SYSDTA *PRIMARY
/MOD-J-SW ON=(2)
/START-PROG DEMO.NATPHSE
/ASS-SYSOUT *PRIMARY
/ASS-SYSLST *PRIMARY
/LOGOFF
125
SEZAM Administration Manual
z/OS
GRS records for ADABAS JCL stream.
Prty
---1
2
3
126
Record
---------JCH-A
SEZENV
#NODE
4
5
6
10
11
12
13
14
15
16
17
18
19
20
22
23
24
25
26
27
28
29
30
31
32
45
49
50
51
52
53
EX ADARUN
STEPLIB-A
USERFB
#DDASSOR1
DDDATAR1
DDWORKR1
USERPB
DDPLOGR1
DDPLOGR2
USERPE
USERRB
DDRLOGM1
DDRLOGR1
USERRE
USERTB
DDSORTR1
DDTEMPR1
USERTE
USERCB
DDCLOGR1
DDCLOGR2
USERCE
USERDB
DDDSIMR1
USERDE
USERFE
USERDD
DDDRUCK
DDPRINT
DDCARD
ADARUN-P
54
55
56
57
58
59
60
88
90
99
#ADARUN-DB
USERSB
ADARUN-PLG
USERSE
USERR2B
ADARUN-RAI
USERR2E
DDKARTE
USERPA
JCT
Value
------------------------------------------------------------//#JOBNAME JOB (,,,999),#USERINFO,CLASS=W,MSGCLASS=X
//* #COMMENTS
//* SEZENV=MVS
/*ROUTE XEQ MVS
/*JOBPARM SYSAFF=MVS
/*ROUTE PRINT MVS
//SEZADA EXEC PGM=ADARUN,REGION=8000K,TIME=1440
//STEPLIB DD DSN=ADABAS.VXXX.MVSLOAD,DISP=SHR
//DDASSOR1 DD DSN=DB333.ASSOR1,DISP=SHR
//DDDATAR1 DD DSN=DB333.DATAR1,DISP=SHR
//DDWORKR1 DD DSN=DB333.WORKR1,DISP=SHR
//DDPLOGR1 DD DSN=DB333.PLOGR1,DISP=SHR
//DDPLOGR2 DD DSN=DB333.PLOGR2,DISP=SHR
//DDRLOGM1 DD DSN=DB333.RLOGM1,DISP=SHR
//DDRLOGR1 DD DSN=DB333.RLOGR1,DISP=SHR
//DDSORTR1 DD DSN=DB333.SORTR1,DISP=OLD
//DDTEMPR1 DD DSN=DB333.TEMPR1,DISP=OLD
//DDCLOGR1 DD DSN=DB333.CLOGR1,DISP=SHR
//DDCLOGR2 DD DSN=DB333.CLOGR2,DISP=SHR
//DDDSIMR1 DD DSN=DB333.DSIMR1,DISP=SHR
//DDDRUCK DD SYSOUT=*
//DDPRINT DD SYSOUT=*
//DDCARD
DD *
ADARUN PROG=#PROG
ADARUN SVC=249
ADARUN DEVICE=3390
ADARUN MODE=#MODE
ADARUN DSF=YES
ADARUN DBID=333
ADARUN PLOGRQ=NO
ADARUN UEX2=ADAEX2
//DDKARTE
DD *
//* END GENERATION
SEZAM Administration Manual
GRS records for NATURAL JCL stream.
Prty
---1
Record
---------JCH-N
2
3
SEZENV
#NODE
4
EX NATURAL
5
6
7
8
9
10
20
30
31
49
50
51
52
53
USERNB
NATPARM
USERNE
USERN2B
INPL
USERN2E
STEPLIB-N
#DDASSOR1
DDDATAR1
USERDD
CMPRINT
DDPRINT
DDCARD
ADARUN-P
54
55
90
99
#ADARUN-DB
CMSYNIN
USERPA
JCT
Value
------------------------------------------------------------//#JOBNAME JOB (,,,999),#USERINFO,CLASS=W,MSGCLASS=X,REGION=3M,
//
NOTIFY=&SYSUID
//* #COMMENTS
//* SEZENV=MVS
/*ROUTE XEQ MVS
/*JOBPARM SYSAFF=MVS
/*ROUTE PRINT MVS
SEZDO=Enter the Natural version
//SEZNAT EXEC PGM=NATBAT31,REGION=3M,
SEZEND
// PARM='IM=D,INTENS=1'
// PARM='STACK=INPL,AUTO=OFF,IM=D,INTENS=1'
//STEPLIB DD DSN=NATURAL.VXXX.MVSLOAD,DISP=SHR
//DDASSOR1 DD DSN=DB333.ASSOR1,DISP=SHR
//DDDATAR1 DD DSN=DB333.DATAR1,DISP=SHR
//CMPRINT DD SYSOUT=*
//DDPRINT DD SYSOUT=*
//DDCARD
DD *
ADARUN PROG=#PROG
ADARUN SVC=249
ADARUN DEVICE=3390
ADARUN MODE=#MODE
ADARUN DSF=YES
ADARUN DBID=333
//CMSYNIN DD *
//* END GENERATION
127
SEZAM Administration Manual
z/VM
GRS records for ADABAS REXX stream.
Prty
---1
2
3
4
USEROS
CMSSET
5
SET-ADA1
6
SET-ADA2
7
ADALINK
8
ADALINK2
9
10
11
12
13
16
17
20
22
23
24
25
26
29
30
32
45
49
50
51
52
53
54
55
56
57
60
61
62
128
Record
---------JCH-A
SEZENV
USERFB
#DDASSOR1
DDDATAR1
DDWORKR1
USERPB
USERPE
USERRB
USERRE
USERTB
DDSORTR1
DDTEMPR1
USERTE
USERCB
USERCE
USERDB
USERDE
USERFE
USERDD
DDDRUCK
Value
------------------------------------------------------------/* #COMMENTS
SEZENV=VM
*/
SAY '#COMMENTS'
VM
TRACE OFF
SET CMSTYPE HT
'CP SET IMSG OFF'
'CP SET EMSG OFF'
/* COMMON SETTINGS */
'SET FILEPOOL DAEXUSR:'
ADADIR
= 'DB33333A.ADA712.LOAD'
ADADIRDB = 'DB33333A.ADA712.DBA.DB33333'
ADDRESS CMS 'VMLINK .DIR' ADADIRDB '<= A-Z/A> (PUSH NOTYPE'
ADDRESS CMS 'VMLINK .DIR' ADADIR '<= A-Z/A> (PUSH NOTYPE'
'SET STORECLR ENDCMD'
'SET LDRTBLS 20'
'SET LOADAREA 20000'
'SETTXTLB'
'NUCXDROP *'
'NUCXTNTS'
'RELDD'
/* LINK DATABASE */
DO I = 200 TO 225
VAR = DIAG(8,'CP DETACH 0'!!I)
END
'CP LINK DB33333 200 200 MW NOT_USED'
/* ASSO */
'CP LINK DB33333 300 201 MW NOT_USED'
/* DATA */
'CP LINK DB33333 400 202 MW NOT_USED'
/* WORK */
'CP LINK DB33333 410 203 MW NOT_USED'
/* SORT */
'CP LINK DB33333 420 204 MW NOT_USED'
/* TEMP */
'DATADEF DDASSOR1,DSN=DB33333.ASSO,VOL=ASS200,UNIT=200'
'DATADEF DDDATAR1,DSN=DB33333.DATA,VOL=DAT300,UNIT=201'
'DATADEF DDWORKR1,DSN=DB33333.WORK,VOL=WOR400,UNIT=202'
'DATADEF DDSORTR1,DSN=DB33333.SORT,VOL=SOR420,UNIT=203'
'DATADEF DDTEMPR1,DSN=DB33333.TEMP,VOL=TEM410,UNIT=204'
/* DDDRUCK
*/
'STATE #JOBNAME DDDRUCK T1'
IF RC = 0 THEN 'ERASE #JOBNAME DDDRUCK T1'
DRUCK = 'DSN=#JOBNAME.DDDRUCK,MODE=T'
ADDRESS CMS 'DATADEF DDDRUCK,'!!DRUCK
DDPRINT
/* DDPRINT
*/
'STATE #JOBNAME DDPRINT T1'
IF RC = 0 THEN 'ERASE #JOBNAME DDPRINT T1'
PRINT = 'DSN=#JOBNAME.DDPRINT,MODE=T'
ADDRESS CMS 'DATADEF DDPRINT,'!!PRINT
REM001
/* DDCARD
*/
ARUN. = 'NDEF'
ADARUN-P
ARUN.1 = 'ADARUN PROG=#PROG'
ARUN.2 = 'ADARUN DEVICE=3390'
ARUN.3 = 'ADARUN MODE=#MODE'
#ADARUN-DB ARUN.4 = 'ADARUN DBID=33333'
USERSB
ADARUN-PLG ARUN.5 = 'ADARUN PLOGRQ=NO'
USERSE
USERR2B
ADARUN-RAI ARUN.6 = 'ADARUN UEX2=ADAEX2'
USERR2E
SEZAM Administration Manual
63
DDCARD-WR1
64
DDCARD-WR2
65
DDCARD
88
REM002
90
91
USERPA
DDKART-WR1
92
DDKART-WR2
93
DDKARTE
94
95
EX ADARUN
REST-ADA1
96
REST-ADA2
99
JCT
'STATE #JOBNAME DDCARD T1'
IF RC = 0 THEN 'ERASE #JOBNAME DDCARD T1'
DO I = 1 TO 99
IF ARUN.I <> 'NDEF' THEN DO
IF I = 1 THEN
'EXECIO 1 DISKW #JOBNAME DDCARD T1 0 F 80 (FINIS STRING 'ARUN.I
ELSE
'EXECIO 1 DISKW #JOBNAME DDCARD T1 (FINIS STRING 'ARUN.I
END
END
CARD = 'DSN=#JOBNAME.DDCARD,MODE=T'
'DATADEF DDCARD,'!!CARD
/* DDKARTE
*/
AKAR. = 'NDEF'
'STATE #JOBNAME DDKARTE T1'
IF RC = 0 THEN 'ERASE #JOBNAME DDKARTE T1'
DO I = 1 TO 99
IF AKAR.I <> 'NDEF' THEN DO
IF I = 1 THEN
'EXECIO 1 DISKW #JOBNAME DDKARTE T1 0 F 80 (FINIS STRING 'AKAR.I
ELSE
'EXECIO 1 DISKW #JOBNAME DDKARTE T1 (FINIS STRING 'AKAR.I
END
END
KARTE = 'DSN=#JOBNAME.DDKARTE,MODE=T'
'DATADEF DDKARTE,'!!KARTE
ADARUN
/* RESTORE ENVIRONMENT */
'NUCXDROP *'
ADDRESS CMS 'VMLINK .DIR' ADADIR '(POP DETACH'
ADDRESS CMS 'VMLINK .DIR' ADADIRDB '(POP DETACH'
ADDRESS CMS 'RELDD'
DO I = 200 TO 225
VAR = DIAG(8,'CP DETACH 0'!!I)
END
CP SET IMSG ON
CP SET EMSG ON
/* END GENERATION */
129
SEZAM Administration Manual
GRS records for NATURAL REXX stream.
Prty
130
Record
Value
---- ---------- ------------------------------------------------------------1
JCH-N
/* #COMMENTS
2
SEZENV
SEZENV=VM
*/
SAY '#COMMENTS'
3
USEROS
VM
4
CMSSET
TRACE OFF
SET CMSTYPE HT
'CP SET IMSG OFF'
'CP SET EMSG OFF'
5
SET-NAT1
/* COMMON SETTINGS */
'SET FILEPOOL DAEXUSR:'
NATDIR
= 'DB33333A.NAT314.LOAD'
NATDIRDB = 'DB33333A.NAT314.DBA.DB33333'
ADDRESS CMS 'VMLINK .DIR' NATDIRDB '<= A-Z/A> (PUSH NOTYPE'
ADDRESS CMS 'VMLINK .DIR' NATDIR '<= A-Z/A> (PUSH NOTYPE'
6
SET-NAT2
'SET STORECLR ENDCMD'
'SET LDRTBLS 20'
'SET LOADAREA 20000'
'SETTXTLB'
'NUCXDROP *'
'NUCXTNTS'
'RELDD'
'FILEDEF * CLEAR'
7
ADALINK
/* LINK DATABASE */
DO I = 200 TO 225
VAR = DIAG(8,'CP DETACH 0'!!I)
END
'CP LINK DB33333 200 200 MW NOT_USED'
/* ASSO */
'CP LINK DB33333 300 201 MW NOT_USED'
/* DATA */
8
ADALINK2
'CP LINK DB33333 400 202 MW NOT_USED'
/* WORK */
'CP LINK DB33333 410 203 MW NOT_USED'
/* SORT */
'CP LINK DB33333 420 204 MW NOT_USED'
/* TEMP */
30
#DDASSOR1
'DATADEF DDASSOR1,DSN=DB33333.ASSO,VOL=ASS200,UNIT=200'
31
DDDATAR1
'DATADEF DDDATAR1,DSN=DB33333.DATA,VOL=DAT300,UNIT=201'
49
USERDD
50
CMPRINT
/* CMPRINT
*/
'STATE #JOBNAME CMPRINT T1'
IF RC = 0 THEN 'ERASE #JOBNAME CMPRINT T1'
CMPRINT = ' #JOBNAME CMPRINT T1'
'FILEDEF CMPRINT DISK '!!CMPRINT
52
REM001
/* DDCARD
*/
ARUN. = 'NDEF'
53
ADARUN-P
ARUN.1 = 'ADARUN PROG=#PROG'
ARUN.2 = 'ADARUN DEVICE=3390'
ARUN.3 = 'ADARUN MODE=#MODE'
54
#ADARUN-DB ARUN.4 = 'ADARUN DBID=33333'
63
DDCARD-WR1 'STATE #JOBNAME DDCARD T1'
IF RC = 0 THEN 'ERASE #JOBNAME DDCARD T1'
64
DDCARD-WR2 DO I = 1 TO 99
IF ARUN.I <> 'NDEF' THEN DO
IF I = 1 THEN
'EXECIO 1 DISKW #JOBNAME DDCARD T1 0 F 80 (FINIS STRING 'ARUN.I
ELSE
'EXECIO 1 DISKW #JOBNAME DDCARD T1 (FINIS STRING 'ARUN.I
END
END
65
DDCARD
CARD = 'DSN=#JOBNAME.DDCARD,MODE=T'
'DATADEF DDCARD,'!!CARD
69
REM003
/* CMSYNIN
*/
ASYN. = 'NDEF'
70
USERPA
72
CMSYNI-WR1 'STATE #JOBNAME CMSYNIN T1'
IF RC = 0 THEN 'ERASE #JOBNAME CMSYNIN T1'
73
CMSYNI-WR2 DO I = 1 TO 99
IF ASYN.I <> 'NDEF' THEN DO
IF I = 1 THEN
'EXECIO 1 DISKW #JOBNAME CMSYNIN T1 0 F 80 (FINIS STRING 'ASYN.I
ELSE
'EXECIO 1 DISKW #JOBNAME CMSYNIN T1 (FINIS STRING 'ASYN.I
END
END
74
CMSYNIN
CMSYNIN = ' #JOBNAME CMSYNIN T1'
'FILEDEF CMSYNIN DISK '!!CMSYNIN
78
REM004
/* NATPARM
*/
SEZAM Administration Manual
79
NATPRM-WR1
80
81
USERNB
NATPARM
84
85
86
USERNE
USERN2B
INPL
88
89
USERN2E
NATPRM-WR2
94
95
EX NATURAL
REST-NAT1
96
REST-NAT2
99
JCT
NATPRM = ''
APRM. = 'NDEF'
APRM.1
APRM.2
APRM.3
APRM.4
APRM.5
=
=
=
=
=
'INTENS=1'
'MT=0'
'IM=D'
'AUTO=OFF'
'WORK=((1-2),AM=STD'
APRM.1
APRM.2
APRM.3
APRM.4
APRM.5
APRM.6
=
=
=
=
=
=
'STACK=INPL'
'INTENS=1'
'MT=0'
'IM=D'
'AUTO=OFF'
'WORK=((1),AM=STD)'
DO I = 1 TO 99
IF APRM.I <> 'NDEF' THEN DO
IF I = 1 THEN NATPRM = NATPRM !! APRM.I
IF I > 1 THEN NATPRM = NATPRM !! ',' !! APRM.I
END
END
"NAT31 BATCH" NATPRM
/* RESTORE ENVIRONMENT */
'NUCXDROP *'
ADDRESS CMS 'VMLINK .DIR' NATDIR '(POP DETACH'
ADDRESS CMS 'VMLINK .DIR' NATDIRDB '(POP DETACH'
ADDRESS CMS 'RELDD'
ADDRESS CMS 'FILEDEF * CLEAR'
DO I = 200 TO 225
VAR = DIAG(8,'CP DETACH 0'!!I)
END
CP SET IMSG ON
CP SET EMSG ON
/* END GENERATION */
131
SEZAM Administration Manual
z/VSE
GRS records for ADABAS JCL stream.
Prty
---1
Record
---------JCH-A
2
4
5
6
7
10
11
14
15
18
19
22
23
25
40
50
55
SEZENV
USERFB
#ADAFILE1
LIBDEF-A
USERTB
USERTE
USERPB
USERPE
USERCB
USERCE
USERRB
USERRE
USERDB
USERDE
USERFE
USERDD
ADARUN
60
ADARUN-P
61
68
69
70
71
72
73
75
80
99
#ADARUN-P
USERSB
ADARUN-PLG
USERSE
USERR2B
ADARUN-RAI
USERR2E
/*
USERPA
JCT
Value
------------------------------------------------------------* $$ JOB JNM=#JOBNAME,CLASS=0,DISP=D
* $$ LST CLASS=A,DISP=D,DEST=(,#USERINFO)
// JOB #JOBNAME #USERINFO
/* #COMMENTS
// OPTION LOG
/* SEZENV=VSE
// EXEC
PROC=ADAFIL
// LIBDEF PHASE,SEARCH=SAGLIB.ADA713
// ASSGN
SYS009,SYSLST
// EXEC
PGM=ADARUN,SIZE=ADARUN
ADARUN PROG=#PROG
ADARUN MODE=#MODE
ADARUN SVC=47
ADARUN DEVICE=3390
ADARUN DBID=241
ADARUN PLOGRQ=NO
ADARUN UEX2=ADAEX2
/*
/*
/&
* $$ EOJ
GRS records for NATURAL JCL stream.
132
Prty
---1
Record
---------JCH-N
2
5
6
9
10
SEZENV
#ADAFILE1
LIBDEF-N
USERDD
EX NATURAL
14
15
16
17
18
19
59
60
USERNB
NATPARM
USERNE
USERN2B
INPL
USERN2E
/
ADARUN-P
61
75
80
99
#ADARUN-P
/*
USERPA
JCT
Value
------------------------------------------------------------* $$ JOB JNM=#JOBNAME,CLASS=4,DISP=D
* $$ LST CLASS=A,DISP=D,DEST=(,#USERINFO)
// JOB #JOBNAME #USERINFO
/* #COMMENTS
/* SEZENV=VSE
// EXEC
PROC=ADAFIL
// LIBDEF *,SEARCH=(SAGLIB.ADA713,SAGLIB.USR315),TEMP
// ASSGN
// EXEC
SYS000,READER
PGM=NAT315BA,SIZE=NAT315BA,PARM='SYSRDR'
AUTO=OFF,IM=D,MT=0,INTENS=1,DBID=241
STACK=INPL,AUTO=OFF,IM=D,MT=0,INTENS=1,DBID=241
/*
ADARUN
ADARUN
ADARUN
ADARUN
ADARUN
/*
PROG=#PROG
MODE=#MODE
SVC=47
DEVICE=3390
DBID=241
/*
/&
* $$ EOJ
SEZAM Administration Manual
APPENDIX B - #PROGNAME Values
NR. #PROGNAME
1 ADAACK
2 ADACDC
3 ADACMP COMPRESS
4 ADACMP DECOMPRESS
5 ADACNV CONVERT
6 ADACNV REVERT
7 ADADBS ADD
8 ADADBS ALLOCATE
9 ADADBS CHANGE
10 ADADBS CVOLSER
11 ADADBS DEALLOCATE
12 ADADBS DECREASE
13 ADADBS DELCP
14 ADADBS DELETE
15 ADADBS DSREUSE
16 ADADBS ENCODEF
17 ADADBS INCREASE
18 ADADBS ISNREUSE
19 ADADBS MODFCB
20 ADADBS NEWALTS
21 ADADBS NEWFIELD
22 ADADBS ONLINVERT
23 ADADBS ONLREORFASSO
24 ADADBS ONLREORFDATA
25 ADADBS ONLREORFILE
26 ADADBS OPERCOM
27 ADADBS PRIORITY
28 ADADBS RECOVER
29 ADADBS REFRESH
30 ADADBS REFRESHSTATS
31 ADADBS RELEASE
32 ADADBS RENAME
33 ADADBS RENUMBER
34 ADADBS RESETDIB
35 ADADBS TRANSACTIONS
36 ADADBS UNCOUPLE
37 ADADCK
38 ADADEF DEFINE
39 ADADEF MODIFY
40 ADADEF NEWWORK
41 ADAFRM ASSOFRM
42 ADAFRM ASSORESET
43 ADAFRM CLOGFRM
44 ADAFRM DATAFRM
45 ADAFRM DATARESET
46 ADAFRM DSIMFRM
133
SEZAM Administration Manual
47 ADAFRM
48 ADAFRM
49 ADAFRM
50 ADAFRM
51 ADAFRM
52 ADAFRM
53 ADAFRM
54 ADAICK
55 ADAINV
56 ADAINV
57 ADALOD
58 ADALOD
59 ADAMER
60 ADAORD
61 ADAORD
62 ADAORD
63 ADAORD
64 ADAORD
65 ADAORD
66 ADAORD
67 ADAORD
68 ADAORD
69 ADAORD
70 ADAORD
71 ADAPLP
72 ADAPRI
73 ADARAI
74 ADARAI
75 ADARAI
76 ADARAI
77 ADARAI
78 ADARAI
79 ADAREF
80 ADAREF
81 ADAREF
82 ADAREF
83 ADAREF
84 ADAREF
85 ADAREP
86 ADARES
87 ADARES
88 ADARES
89 ADARES
90 ADARES
91 ADARES
92 ADARUN
93 ADASAV
94 ADASAV
95 ADASAV
134
DSIMRESET
PLOGFRM
RLOGFRM
SORTFRM
TEMPFRM
WORKFRM
WORKRESET
COUPLE
INVERT
LOAD
UPDATE
REDB
REF
REORASSO
REORDATA
REORDB
REORFASSO
REORFDATA
REORFILE
RESTRUCTUREDB
RESTRUCTUREF
STORE
CHKDB
DISABLE
LIST
PREPARE
RECOVER
REMOVE
AMIRROR
DMIRROR
DUPLICATE
FILE
NOMIRROR
WMIRROR
BACKOUT
CLCOPY
COPY
PLCOPY
REGENERATE
REPAIR
PROG=USER
MERGE
RESTONL
RESTORE
SEZAM Administration Manual
96 ADASAV RESTPLOG
97 ADASAV SAVE
98 ADASCR CHANGE
99 ADASCR DELETE
100 ADASCR INSERT
101 ADASCR PFIELDS
102 ADASCR PFILES
103 ADASCR PPW
104 ADASCR PROTECT
105 ADASCR REMOVE
106 ADASCR SBYVALUE
107 ADAULD
108 ADAVAL
109 ADAZAP
110 CATALL
111 ERRLODUS
112 ERRULDUS
113 INPL
114 NATLOAD
115 NATUNLD
116 SCAN
117 SELECT
118 SEZDEL
119 SEZLIST
120 SEZLOAD
121 SEZUNLD
122 SYSMAIN
123 SYSOBJH
124 SYSTRANS
135
SEZAM Administration Manual
APPENDIX C - Direct commands
DIRECT
COMMAND
ADA
ADAACK
ADACDC
ADACMP
ADACNV
ADADBS
ADADCK
ADADEF
ADAFRM
ADAICK
ADAINV
ADALOD
ADAMER
ADAMTS
ADAORD
ADAPLP
ADAPRI
ADARAI
ADAREF
ADAREP
ADARES
ADARPL
ADARPP
ADASAV
ADASCR
ADASEL
ADAULD
ADAVAL
ADAZAP
ARF
BR
CD
CL
CM
DE
ED
EX
EXIT
GN
ID
JOB
JOB GN
JOB SA
LI
MENU
136
DESCRIPTION
THRESHOLD
ADABAS maintenance menu
ADAACK Check address converter
ADACDC Changed data capture
ADACMP Compress/Decompress
ADACNV Database conversion
ADADBS Database services
ADADCK Check data storage
ADADEF Database definition
ADAFRM Format
ADAICK Check index/AC
ADAINV Invert
ADALOD Loader
ADAMER ADAM estimation
ADAMTS Message test send
ADAORD Reorder
ADAPLP Protection log/WORK print
ADAPRI Print selected blocks
ADARAI Recovery aid
ADAREF Reflective database
ADAREP Report
ADARES Restart
ADARPL PLOG replication replay
ADARPP Print TLOG records
ADASAV Save/Restore
ADASCR Security
ADASEL Select protection data
ADAULD Unload
ADAVAL Validate database
ADAZAP Modify datasets
ADABAS EVENT REPLICATOR menu
Browse parameter list
Browse global direct command list
Browse command list
Command help
Delete parameter list
Edit generated job
Execute the job
Terminate SEZAM session
Generate the job
Show user identification
Finished Jobs maintenance menu
Finished generated JOBs
Finished saved JOBs
List of generated jobs
SEZAM main menu
P
M
M
P
A
P
M
A
M
M
E
E
E
M
M
M
M
M
A
P
M
M
M
M
M
M
P
M
A
M
P
P
P
P
P
P
P
P
P
P
P
P
P
P
P
SEZAM Administration Manual
NAT
NCAT
NERR
NINP
NLOD
NOBJ
NSCN
NSMA
NSYS
NTRS
NULD
NUSR
NUTL
SA
SADM
SAOS
SCMP
SCHK
SDEL
SDEL EN
SDEL HI
SDEL PA
SDEL SA
SDEL TR
SDEL US
SDEV
SEZDBID
SEZDDM
SEZFDT
SEZFILE
SFUN
SLIB
SLOD
SLOD EN
SLOD HI
SLOD PA
SLOD SA
SLOD TR
SLOD US
SLST
SLST EN
SLST HI
SLST PA
SLST SA
SLST TR
SLST US
SMAN
SMAN EN
NATURAL maintenance menu
NATURAL Catall command
NATURAL error messages maintenance
NATURAL INPL Utility
Load NATURAL programming objects
NATURAL Object Handler
NATURAL Scan command
NATURAL object maintenance
NATURAL system commands processing
NATURAL SYSTRANS Utility
Unload NATURAL programming objects
NATURAL user program processing
NATURAL utilities processing
Save parameter list
SEZAM Administration
SEZAM Online ADABAS Services
SEZAM Compare of Natural objects
SEZAM ADABAS Checkpoint Information
SEZAM Delete Utility
SEZAM Environment Delete Utility
SEZAM History Delete Utility
SEZAM Parmlist Delete Utility
SEZAM Saved Jobs Delete Utility
SEZAM Table Delete Utility
SEZAM User Delete Utility
SEZAM ADABAS Device Type Calculator
Display active databases
Display view control information
Display field description table (FDT)
Display loaded files
SEZAM Special functions
SEZAM Library Information
SEZAM Load Utility
SEZAM Environment Load Utility
SEZAM History Load Utility
SEZAM Parmlist Load Utility
SEZAM Saved Jobs Load Utility
SEZAM Table Load Utility
SEZAM User Load Utility
SEZAM List Utility
SEZAM Environment List Utility
SEZAM History List Utility
SEZAM Parmlist List Utility
SEZAM Saved Jobs List Utility
SEZAM Table List Utility
SEZAM User List Utility
SEZAM Maintenance
SEZAM Environment Maintenance
P
P
P
M
P
P
P
P
P
P
P
P
P
P
A
P
P
P
A
A
A
A
A
A
A
P
P
P
P
P
P
M
A
A
A
A
A
A
A
A
A
A
A
A
A
A
P
A
137
SEZAM Administration Manual
SMAN
SMAN
SMAN
SMAN
SMAN
SOPT
SRET
SRET
SRET
SRET
SRET
SU
SULD
SULD
SULD
SULD
SULD
SULD
SULD
SUTL
SZAP
138
HI
PA
SA
TR
US
CO
FU
XR
RE
EN
HI
PA
SA
TR
US
SEZAM History Maintenance
SEZAM Parmlist Maintenance
SEZAM Saved Job Maintenance
SEZAM Translation Table Maintenance
SEZAM User Maintenance
SEZAM Installation options
SEZAM Retrieval menu
SEZAM Command Retrieval
SEZAM Function Retrieval
SEZAM Cross Reference
SEZAM Resource Utilization
Submit generated job
SEZAM Unload Utility
SEZAM Environment Unload Utility
SEZAM History Unload Utility
SEZAM Parmlist Unload Utility
SEZAM Saved Jobs Unload Utility
SEZAM Table Unload Utility
SEZAM User Unload Utility
SEZAM Utilities
SEZAM Applied source corrections
A
A
A
A
A
P
A
A
A
A
A
P
A
A
A
A
A
A
A
A
A
SEZAM Administration Manual
APPENDIX D – Example of the Job Name’s Rule User Exit
***********************************************************************
* Example of jobname rule userexit
*
* NAME: UEXRUL02
* TYPE: N / SUBPROGRAM
* AUTHOR: KONSTANTIN SOUMM
* DATE: 16.01.08 - 16.01.08
*
* HISTORY:
* 16.01.08 - W312-089 created
*
* #RESPONSE CODE:
* 0 - use the jobname rule specified in the environment,
*
the #OUTPUT contains the username
* 4 - do not use the jobname rule specified in the environment,
*
the #OUTPUT contains the jobname
*
***********************************************************************
DEFINE DATA
PARAMETER
01 #RESPONSE-CODE
(P002)
/* Response code:
/* 0 - output contains user name
/*
which is used in jobname
/*
rule instead of #USERNAME
/* 4 - output contains jobname;
/*
jobname rule is not used
01 #ENVIRONMENT
(A010)
/* Environment name
01 #USERNAME
(A008)
/* User name
01 #PROGNAME
(A030)
/* Program name; for example:
/* ADAREP, SYSTRANS etc.
01 #OUTPUT
(A008)
/* Output
LOCAL
01 #LENGTH
(P002)
/* User variables
END-DEFINE
/* ==========================================================
/*
/* Put your code here
/*
/* ==========================================================
MOVE #USERNAME TO #OUTPUT
/* Exceptions
DECIDE ON FIRST #PROGNAME
VALUE 'SELECT'
#PROGNAME := 'ADASEL'
VALUE 'NATUNLD'
#PROGNAME := 'XXNULD'
VALUE 'NATLOAD'
#PROGNAME := 'XXNLOD'
VALUE 'ERRULDUS'
#PROGNAME := 'XXNERU'
VALUE 'ERRLODUS'
#PROGNAME := 'XXNERL'
VALUE 'SYSMAIN'
#PROGNAME := 'XXNSMA'
VALUE 'SCAN'
#PROGNAME := 'XXNSCN'
VALUE 'CATALL'
#PROGNAME := 'XXNCAT'
VALUE 'ADARUN PROG=USER'
#PROGNAME := 'XXNUSR'
VALUE 'SEZUNLD'
#PROGNAME := 'XXSULD'
VALUE 'SEZLOAD'
139
SEZAM Administration Manual
#PROGNAME := 'XXSLOD'
VALUE 'SEZDEL'
#PROGNAME := 'XXSDEL'
VALUE 'SEZLIST'
#PROGNAME := 'XXSLST'
VALUE 'INPL'
#PROGNAME := 'XXNINP'
VALUE 'SYSTRANS'
#PROGNAME := 'XXNTRS'
VALUE 'SYSOBJH'
#PROGNAME := 'XXNOBJ'
NONE IGNORE
END-DECIDE
EXAMINE #USERNAME FOR ' ' GIVING LENGTH #LENGTH
* check username length
IF #LENGTH LE 3 THEN
COMPRESS #USERNAME
'M'
SUBSTRING(#PROGNAME,3,4)
INTO #OUTPUT
LEAVING NO
ELSE
MOVE #USERNAME TO #OUTPUT
END-IF
#RESPONSE-CODE := 4
ESCAPE ROUTINE
END
140
SEZAM Administration Manual
Notes
141
SEZAM Administration Manual
Notes
142