1
Sketch 3
Professional digital design for Mac
User Manual
Table of Contents
Canvas
Inspector
Layer List
Toolbar
Layer Basics
Shapes
Text
Images
Symbols
Styling
Grouping
Canvas
Exporting
Importing
Preferences
Performance
Shortcuts
Introduction
Sketch is a vector drawing app intended for designers of all sorts. Vector-based drawing
is by far the the best way to design websites, icons or interfaces. On top of this vector
editing we have added support for basic bitmap styles, such as blur and color
corrections.
We’ve made Sketch both powerful and easy to understand. Experienced designers can
easily transfer their existing skills in a matter of hours, and replace Adobe Photoshop,
Illustrator or Fireworks for most digital design tasks.
Why use Sketch
Sketch has a great UI and was built for the kind of things you want to do when you
design icons or interfaces. It’s a one-window app, and what you need is always in reach.
We support Multiple Fills per layer and we have the best text rendering & text styles out
there. The canvas is infinite and we have some great asset exporting tools we’re sure
you will love.
You can view the canvas both in a resolution-independent view where you have infinite
precision, or you can turn on Pixel Preview and you will know exactly how every pixel will
look on export - if you care about such a thing.
What Sketch is not
Sketch is not a bitmap editor. This means that if you want to do photo correction or draw
with brushes, this is not the app for you.
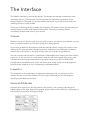
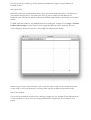
The Interface
The Sketch interface is minimal by design. The toolbar on the top contains the most
important actions. The inspector on the right lets you adjust the properties of the
selected layer(s). The pane on your left lists all the layers in your document, and your
working canvas is in the middle.
There are no floating panels. Instead, the inspector will adapt to show you the tools you
need at every moment, and hide everything else. That way you always have a
completely unobscured view of your canvas.
Canvas
Sketch’s canvas is infinite in size; you can scroll as far as you want in any direction, so you
have complete freedom on how you set up your drawing area.
If you’d like to define a fixed frame inside the infinite canvas, simply insert one or more
artboards. For example when designing mobile interfaces, many designers create an
artboard for each screen in the app and lay them out in order of appearance.
You can view the canvas both in a resolution-independent view where you have infinite
precision, or you can turn on pixel preview and you will know exactly how every pixel
will look when it’s being exported to a bitmap format (such as JPG or PNG). Note
though that some effects such as blur will force parts of the canvas to be displayed in
pixel preview mode as a blur is inherently a pixel-based effect.
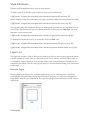
Inspector
The Inspector on the right lets you adjust the settings for the current layer, or the
options for the current tool. When you have a layer selected you will see that the
inspector is divided into sections.
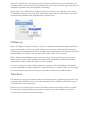
General Attributes
General layer styles are in the top section; the position, size, opacity, blending and
(depending on the layer type) a few special options, like corner radius for a rectangle or
the number of points for a polygon shape.
Style Attributes
Border and Fill attributes each have its own section.
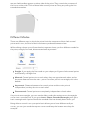
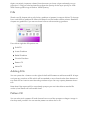
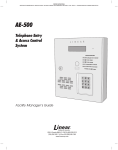
To add a new Fill or Border, just click the + icon in the section title:
![][]({% static ‘images/documentation/the-interface/inspector-fill-add.png’ %})
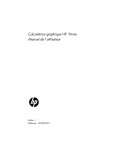
When adding a new Fill or Border, you’ll get a popover where you can choose the color:
![][]({% static ‘images/documentation/the-interface/inspector-fill-color.png’ %})
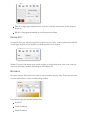
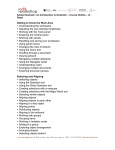
You can turn each Fill or Border off by unchecking the checkbox on its left. When one or
more Fills / Borders are off, you can delete them by clicking on the Trash Can icon that
appears on the section title:
![][]({% static ‘images/documentation/the-interface/inspector-fill-remove.png’ %})
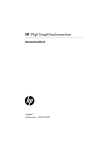
To change the options for a Fill or a Border, click the Gear icon:
![][]({% static ‘images/documentation/the-interface/inspector-fill-options.png’ %})
![][]({% static ‘images/documentation/the-interface/inspector-border-options.png’ %})
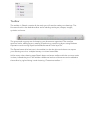
Layer List
The layer list contains a list of all layers (including slices) on the current page and shows
a small preview for each. You can also see which one is locked, invisible, has a mask, or
is marked for export. Here you can reorder layers and choose Boolean Operations for
subpaths of a shape. You can also group layers or rename them to keep your document
organised.
Multiple Pages
Sketch does have support for multiple pages and you can add/remove or switch to
other pages using the little popup above the layer list (you can also use the Page Up /
Page Down keys on your keyboard). The layer list always shows the layers of the current
page only.
Artboards
Artboards are displayed with a white background in the layer list. You can consider them
the top-level objects in your design and as such one artboard cannot be inserted into
another artboard.
Masks
Layers that have a mask applied to them will show a little dot in the layer list before their
name and preview. The layer that is casting the mask is the first layer below it without a
dot. More about masks.
Boolean Operations
Shapes can contain multiple subpaths. If so, they’re displayed as a group in the layer list,
with a disclosure arrow to show the sub-paths. Each sub-path can have a boolean
operation applied to it which dictates how it is combined with the path below it, which is
then fed to the path above it. The layer list is a convenient place to get an overview of
how the subpaths work together to achieve the final result and they’re an easy place to
change the operations if you want to do so. More about Boolean Operations.
Symbols and Shared Styles
Symbols are a special kind of group, which can exist in your document in multiple
places. They’re easily identifed by the purple folder icon the layer list uses to display
them - as opposed to a blue one for normal folders. More about Symbols.
Shared Styles are used to keep styling consistent between multiple objects and they can
be applied to shapes and text layers. To indicate that a shape or text layer is using a
shared style, their preview is displayed in a purple color instead of the standard dark
shade of gray. More about shared styles.
Toolbar
The toolbar in Sketch contains all the tools you will need to make your drawings. The
first set of tools in the default toolbar are for adding new layers; shapes, images,
symbols and more.
The group and ungroup are for keeping your document organised. The next few
sections are for editing layers; rotating, transforming, combining layers using Boolean
Operations and moving layers backwards/forwards in the layer list.
The Export button (the last icon in the toolbar) is also the slice tool where can export
your drawing to one or multiple bitmap- or vector-based files.
Unlike many other drawing apps Sketch does not have a toolbox with the common tools
in there, instead they are in the toolbar. Additional tools and shortcuts can be added to
the toolbar by right-clicking it and choosing “Customize toolbar…”.
Layers
Layers are the basic building blocks of content Sketch. Unlike in other applicatons
where the distinction between layers and objects is blurred; each object is always on its
own layer. We’ll be using the terms object and layer interchangeably throughout this
manual for that reason.
Groups and Artboards are used in Sketch keep your content organised and they are
also treated as layers in their own right. To start adding new layers to your document,
click the Insert icon the toolbar or go to the Insert menu in the application’s global
menu.
Adding Layers
The easiest way to add a layer is to pick one of the standard ones from the toolbar. Click
on the rectangle shape and you will see the cursor change to a cross-hair cursor with a
little square in the top-right.
Now click on the canvas and drag you insert your shape. When you let go of the mouse
the shape will be inserted and you can start to manipulate it in other ways.
Advanced Options
As you can see, the process of inserting is easy, but there are a few hidden shortcuts that
give you some additional control. For example, you can hold down the shift (⇧) key to
make your new shape square.
Similarly, you can hold the option ( ⌥ ) key to put the new shape’s center at the point of
your mouse (instead of the top-left).
If you decide that you placed the origin of your new shape slightly wrong, you hold
down the spacebar. While the spacebar is down you’ll be dragging the shape’s origin
instead of changing its size.
Selecting Layers
Selecting layers in Sketch is easy; you just click on the layer. Once the layer is selected,
you should see 8 little handles; one in each corner and one on each edge.
Note: If you don’t see these handles but are sure you selected the layer, you may have
accidentally hidden the Selection Handles. To toggle them, go to View › Show Selection
in the menu.
Selecting Multiple layers
You can select multiple layers by holding down the shift (⇧) key on the keyboard. If you
then click another layer it will preserve your original selection as well. If you hold ⇧ and
click an already selected layer, it will be deselected.
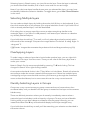
Click+drag from an empty area of the canvas to select everything that fits in the
rectangle. Again, if you have ⇧ or ⌘ pressed, it will extend your selection or deselect
any already selected objects.
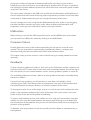
If you hold down the alt-key (⌥) as well, it will only select layers that lie entirely within
the bounds of the rectangle. Compare the images below. On the left: ⇧+drag. Right: ⇧
+drag with ⌥.
![][]({% static ‘images/documentation/layer-basics/click-and-drag-to-select.png’ %})
Overlapping Layers
To make it easy to select a layer that is buried under another layer, you can right-click
and choose ‘Pick Layer’ from the menu. There you will a list of with every layer that is
under your mouse.
Note: In Sketch 2.x this was accomplished by pressing ⌥+⌘ and clicking. This has
changed in Sketch 3.0 to right-clicking instead.
A convenient shorthand for this is the ⌥-key. When it is hold down, Sketch will select the
second layer under the mouse instead of the topmost one. If there are multiple layers
overlapping and you want the third one then you’ll have to go through the contextual
menu as described above, but in some cases this can be a very convenient trick.
Quickly Selecting Layers in Groups
Groups are a very convenient way to group content and sort-of prevent them from
accidental edits; until you double-click the group is treated as one layer and its contents
hidden away.
There are definitely situations where you do actually immediately want to select a
particular layer buried deep inside a hierarchy of groups. To save you lots of doubleclicking while you go down deeper and deeper into the group hierarchy, you can
instead hold down the ⌘-key and select that deeply buried layer straight away.
If you hold down the shift key as well you’ll be extending your selection as described in
the section above.
Moving Layers
You can move a selected layer by grabbing and moving it around with the mouse. To
restrict movement to a particular axis, hold down ⇧ when you drag.
As you move (or resize) your layer, Sketch should automatically align your layers to
adjacent layers. If this doesn’t happen, you might have accidentally switched off the
Layer Guides. To turn them in, go to View › Show Layer Guides in the menu. Rulers,
guides and grids are quite a big topic so they have a chapter of their own.
If you hold down the ⌥ key before you start dragging, you will instead drag a copy of
the layer, leaving the original layer in its place. (If you then after that immediately press
cmd+D (duplicate) again Sketch will insert another duplicated layer at exactly the same
offset as your first duplicate.)
Moving an Obscured Layer
Another complication of overlapping layers is moving an obscured layer. Normally
when you click+drag a shape it will immediately be selected - if it wasn’t selected yet and moved to its new location.
Very often this is a convenience, but it can be hindrance as well if you’ve got a selected
that is completely obscured by another layer. Clicking on the layer would instead select
the layer on top and move that one.
To get around this, you can hold hold down the ⌥+⌘-key and then clicking and
dragging will not change your selection. You can even click+drag somewhere
completely different on the canvas and Sketch will still preserve your selection.
Note: In Sketch 2.x this behaviour was using the ‘A’-key instead but in Sketch 3, the ‘A’key has been remapped to insert artboards instead.
Resizing Layers
The 8 handles don’t just indicate selection; you can also use them to resize a layer. Grab
any of the handles and drag them to resize layer. If you also hold down the shift key (⇧)
it will resize the layer proportionally; keeping width and height in the same ratio.
To resize just the width or height of a layer grab the resize handles on the sides of the
layer, to resize in both dimensions, use the corners.
If you hold down alt (⌥) it will resize from the middle out instead of from the opposite
corner.
Keyboard
You can also resize layer via the keyboard. For very pixel-precise adjustments this is
usually easier than using the mouse. To do so, hold down the ⌘-key and use the arrow
keys on the keyboard. ⌘→ will increase the width of the layer by 1px just as ⌘← will
decrease it by one. Similarly, ⌘↓ and ⌘↑ will increase and decrease the height by 1px
respectively. Holding down the shift key changes the 1px increment to 10px instead.
Scaling
When you resize a layer, it’s stylistic elements will not scale up or down accordingly; a
1px stroke on a 10x10 shape will stay a 1px stroke when the layer is resized to 50x50. To
resize a layer and its properties all in one go, use Edit › Scale instead from the menu
instead.
Editing Layers
To edit a layer, double-click it on the canvas or click the Edit button in the toolbar.
Whatever happens next depends on the kind of layer you’re trying to edit, so please
refer to the appropriate section below.
Note that you can at all times exit layer editing by clicking outside the layer or by
pressing Return or Escape.
Shapes
Images
Shapes
The most common type of layers in your document will be shapes. There is a large
variety of default shapes provided with Sketch such as circles, rectangles, stars and
more. Some of these shapes have extra options, such as (rounded) rectangles and the
star shape.
To add a new shape to your document, simply click Insert › Shape in the toolbar and
choose one of the available alternatives. Click and drag anywhere in the canvas to insert
the shape. While you’re dragging the mouse to insert the shape Sketch will indicate how
large the inserted shape will become. Let go of the mouse and the final shape is
inserted. You will see the inspector update and maybe display some extra options for
your shape.
Extra Options
Some of the default shapes in Sketch come with some interesting extra options. The star
and rounded rectangle shapes being the most notable. For the star shape the radius
and the number of points and the radius can be adjusted and for the rounded
rectangle, the corner radius.
Shape Terminology
The basic building block of a shape is a point. These are connected by straight or
bended lines into a path. A shape can have one or multiple paths. If there is more than
one, they are combined together using Boolean Operations into one path. Think for
example of two circular paths; one big, and one small, where the small one is used to
‘punch’ a hole in the bigger one. This concept of combining simple paths into complex
shapes is discussed in detail in our section on Boolean Operations.
Editing Shapes
Whenever you draw a new shape or edit an existing one, you are essentially interacting
with the points directly, and the lines that Sketch draw between those points are what
you see on screen. Sometimes the lines between the points are straight lines (a line) and
at other times they are bent (a curve).
Insert a rectangle from the toolbar by going to Insert › Shape › Rectangle. Draw it on the
canvas and when done, double-click it to start editing.
You will see a round point in each of the corners. You can click on these points and drag
them around to change their position. You will see that the rest of the shape changes
accordingly. You can click anywhere on a line between two points to insert a point on
there which you can then move around independently as well. To delete a point, click on
it and press backspace/return on your keyboard.
If you want curved lines instead of straight ones, you can double-click a point. You will
see two little handles appear on either side of the point. They control the curvature of
the line on either side. Think of these little control points as if they are pulling the line
towards themselves.
Different Modes
There are different ways in which the points limit the movement of their little control
points and in turn, the kind of the lines that are produced between them.
While editing a shape you will see that the inspector shows you four different modes for
the point; straight, mirrored, disconnected and asymmetric.
Straight: If you apply the first mode on your shape you’ll get no little control points
and basically a straight line.
Mirrored: Control points mirror each other; they are opposite each other and at
the same distance from the main - point. If a vector point is not straight, this is the
default.
Asymmetric: Distance between the control points and the main point is
independent, but they do mirror each other.
Disconnected: Control points are completely independent of each other.
If a point is set to straight, you can use the slider under this section to turn the straight
corner into a rounded one. If you go to Insert › Shape › Rounded Rectangle you’ll get a
basic rectangle with 4 points where the rounded-ness has already been set for you.
Being able to control is on a per-point basis allows you to have different radii per
corner; you can just round the top two corners and keep the bottom two sharp for
example.
Drawing versus Editing
Instead of starting with a predefined shape, you can also draw a shape from scratch by
using the Vector Tool. Click Insert › Vector from the toolbar and click anywhere on the
canvas to add your first point. Click somewhere else to add the second.
You will see that a line now connects both. Now click somewhere but hold down the
mouse while you drag away to draw a curve. You can draw a few more lines like that and
when you click again on the first line you’ll close shape and finish editing.
Selecting other points, inserting points on lines, and anything else is exactly the same,
whether you’re editing an existing shape or drawing a new one.
Closed vs Open
A path can be either closed or open. When it is closed, the last line in the path connects
back to the first. When a path is open, it leaves a gap between the last point and the
first. You can turn a closed path to an open one and vice versa by going to Layer › Paths ›
Close Path in the menu.
Whenever you are in shape-editing mode you can add new points to a path as long as
the shape is open.
Note that whenever you’ve applied a fill-style to your shape, the fill will draw as if the
path was closed - even if the border is drawn with a gap.
Shortcuts
If you hold down ⇧ before inserting in a new point at the end of a vector it will instead
align it at 45º angles to the previous point, ideal for drawing straight lines. If instead
you’re about to insert a point between two existing points it will insert the point exactly
between the existing points.
If you hold down the ⌘-key and click on a line between two points Sketch will insert the
point exactly in the middle of the line for you.
Multiple Selection
Something that not be immediately obvious is that you can select multiple points and
move them all at once. To select multiple points, hold down ⇧ while you click on points.
You’ll see that the selected point has a white centre while deselected ones are grey.
Another way to select multiple points is to hold down ⇧ and then click and drag from
an empty area in the view to make a rectangular selection. If you are still holding down
⇧ when you let go it will extend the selection you had before dragging with the newly
selected points. If not, it will deselect the old points and just select the newly selected
points.
Boolean Operations
When a shape you need is not among the standard shapes you will have to create it
yourself. The first impulse might be to to use vector tool and draw the shape from
scratch. However you will find that many times, acomplex shape is easy to break down
into the basic shapes. With boolean operation you can do exactly that; combine basic
shapes to create more complex ones.
Subpaths
Sketch has dynamic boolean operations and before we can discuss those in more detail
we have quickly revisit vector shapes. Most vector shapes in Sketch will consist of only
one series of points; one path so to speak. However a shape can have as many subpaths
as you want and the how the resulting shape will look depends on how these are
combined.
When you do a boolean operation in Sketch it will add the topmost shape as a subpath
of the second shape and use the particular boolean operation. Because boolean
operations in Sketch are dynamic you can always adjust the subpaths and if one of your
shapes is a rectangle, you can adjust the corner radius for this single subpath.
Operations
There are four different boolean operations and you will choose one depending on the
situaton.
Union The result of a union operation is a vector that is the sum of both vectors’
areas.
Subtract The result of a subtract operation is a vector where the area of the top
shape is removed from the one under it.
Intersect: The result of a intersect operation is a vector consisting of the parts
where the original shapes overlapped.
Difference The result of a difference operation is a vector that is exactly the part
where they didn’t overlap. It’s the inverse of an intersect operation.
Layer List
When you have a shape with multiple subpaths in your canvas take a look at it in the
layer list. Just like with normal groups you will see a disclosure arrow on the left and if
you expand that you will see a list of subpaths for your shape. On the right side you pick
a boolean operation for each subpath individually.
As the layer list is ordered from bottom to top; the order of the subpaths is the same.
The boolean operation you pick will combine the layer with the layer below. The result
of that will be passed to the subpath above if there is any.
Flattening
When you flatten a shape in Sketch, it will try to represent the multiple paths inside the
shape as one path; it will, so to speak, ‘flatten’ the hierarchy. However there are many
paths that can’t be flattened into one. A shape with a hole inside it will always have to be
represented as two paths; one for outer path, and one for the inner path.
When Sketch cannot flatten a path it will warn when you try to do so. If you persist in
flattening all the same, the subpaths you had will be replaced by different subpaths,
maybe fewer paths, maybe the same number of paths.
If you’re coming from other design apps you might be inclined to flatten a path after
you have applied a boolean operation. In Sketch there’s no need for that; you can apply
as many boolean operations on top of one-another without the need to flatten.
Transform
The transform tool can be used to distort an existing vector by skewing the points or by
creating a fake 3D effect. You can use the transform tool in Sketch to transform one or
multiple layers at the same time.
Select one or more layers and click the Transform button the toolbar. Grab one of the
four corners to freely transform the shape or grab a dot in the middle to move two
corners at the same time to skew the layer.
When you transform a shape from a corner you will notice that the opposite corner
always moves in the opposite direction as well. This makes it easy to apply perspective
effects for example. However if you do want to adjust in only one direction, hold down
the ⌘ key while dragging.
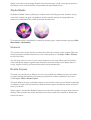
Masking
Masks in Sketch are used to selectively show parts of other layers. For example putting a
circular mask on an image will only show the part in the circle.
Any shape can be turned into a mask. To do so, select the shape and go to Edit › Use as
Mask in the menu. Any layers above the mask are clipped to its contents.
Restricting Masks
If you don’t want all subsequent drawing to be clipped, the best way to restrict the
‘influence’ of the mask is to put the mask and the layers you want clipped inside their
own group. Anything above the group will not be clipped if the mask is inside the
group.
Sometimes grouping is not an option. Another way to stop a mask is to do the
following:
1. Select a shape that is currently masked but that you don’t want masked
2. In menu go to Edit › Ignore Underlying Mask
This layer and any layers above it won’t be masked anymore. Take care when you
reorder layers as suddenly more or fewer layers can get masked.
Mask with Shape
If this all seems like a lot of work for masking an image, we have good news: Select a
shape and an image on the canvas and go to Edit › Mask with Selected Shape to use the
shape as a mask on the image. Sketch will put both layers inside a new group and turn
the shape into a mask. Basically it automates the steps listed above.
Alpha Masks
By default a Mask works by taking its surface area and hiding the rest. Another way to
work with a mask is to give it a gradient, and to use the opacity of that gradient to
determine what should be visible and what shouldn’t be.
This second mode is available for masks by selecting your mask and then going to Edit ›
Mask Mode › Alpha Mask.
Scissors
The scissors tool can be used to cut away lines from an existing vector shape. Select an
existing shape and select the scissors icon in the toolbar or use Layer › Paths › Scissors
for the menu bar.
You can then click on a line in your vector shape to cut it away. When you’re finished,
click outside the shape or press enter/escape to exit the scissors tool. When there is
only a single line left, you’ll leave the scissors tool automatically.
Rotate Copies
This tool is a special one in Sketch. It’s not in the toolbar by default, but you can add it
by right-clicking the toolbar and choosing Customize. It’s also available in the menu
under Layer › Paths › Rotate Copies.
This tool takes one layer and rotate copies of it around a certain point. Take the example
of a flower; create just one leaf, then rotate a dozen copies around the center and you’ll
have your flower
Select a layer, activate the Rotate Copies tool, enter the number of copies and close the
dialog. Then position the center-dot where you want it and click outside or deactivate
the tool to exit it.
Splitting
All shapes will be added as subpaths to the original shape. If you’d rather have them as
completely separate layers, go to Edit › Paths › Split in the menu to turn them into
separate layers.
Pencil
The pencil tool allows you to draw freely. After you let go of the mouse Sketch will try to
smoothen the curves and simplify the path.
You can find the Pencil too in the Insert icon in the toolbar or in the menu bar under
Insert as well. A quick shortcut for the Pencil tool is the ‘P’ key.
Stroke Width
The Stroke Width Tool allows you to set variable widths to your borders. Select a vector
and apply a border using the inspector. Then activate the stroke width tool using *Layer
› Paths › Stroke Width in the menu bar. Now click on the border in the canvas to set a
width point. You can drag this point out from the border to make the width larger or
smaller.
Text Layers
Sketch uses the native font rendering of the operating system and because of that, text
looks excellent. The benefit of native font rendering is that when you’re doing a website
design you’re sure that text looks accurate. Sketch also supports text styles so you can
have multiple text layers share the same font, size, kerning etc.
Adding Text
You can add text by clicking the text icon in the toolbar. The cursor changes to a text
cursor and then you can click anywhere in the canvas to insert your text layer at that
point. You will see text being added and selected so you can start typing immediately.
You can also click+drag to create a text box of a fixed size. When the text gets too big to
fit inside the box, it will resize downwards, as opposed to a normal text box which
increases its width to fit the content.
Resizing Text
When you resize a text box in the canvas its text size will not change, except when you
resize auto-width text using the resizing handle at the bottom.
Text Inspector
When you have a text layer selected you will notice that the inspector has changed to
show you all the properties that apply to text.
Below the standard layer proprties there’s the area for Shared Text Styles.
Below that you can pick the font and weight. And you can use the little T-button to
access lists and decorations such as underline and strikethrough. A little bit below there
there’s spacing; Character (kerning), Line (spaces between lines) and Paragraph (the
space between hard returns).
Text Color
When you’re editing text, you can apply specific colors to subrange of the the text. You
can do so using the little Color box between the font size and the T-options.
You can also apply a general fill style to the text layer, such as a gradient. However, any
fill applied here will apply to the entire text layer and it will override anything you set in
the color box above it.
Note that to render gradients on text, we have to convert it to a vector shape under the
hood and this will cause it to lose its subpixel-antialiasing.
Auto vs Fixed
The Width property (under the alignment) can be set to either auto or fixed. When it is
set to auto, the text box’s width will expand as wide as possible to fit the text you
entered. When it is set to fixed, it’ll wrap the text to its current width and instead expand
below instead.
Rendering
Sketch uses the native font rendering of the operating system and because of that, text
looks excellent. The benefit of native font rendering is that when you’re doing a website
design you’re sure that text looks accurate.
The system uses a technique called subpixel-antialiasing to improve text rendering and
Sketch will render its text using this technique as well. However there are a few caveats
to this, and to understand why, we need to explain something about the underlying
technology first.
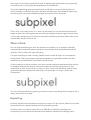
Subpixel-antialiasing
A computer screen is made up of a grid of pixels. The problem that text rendering faces
is that on regular screens there are not enough pixels on the screen to accurate draw
the curves. So anti-aliasing has to be used; it slightly lights pixels that only are partially
covered by the curves to give the appearance of smoothness.
Sub-pixel antialiasing goes one step further by taking into account that a pixel on a
screen actually consists of red, green and blue vertical strips. So instead of lighting up
the entire pixel, sub-pixel antialiasing lights up only the red or blue part.
That is why if you really zoom in on text in pixel mode you can see blue and brownish
edges to your text. Viewing the text at actual size though produces a good result. Users
coming from Windows are not used to sub-pixel antialiasing and they often refer to the
way the Mac renders fonts as ‘fat’.
When it Fails
For sub-pixel antialiasing to work, the text has to be drawn on an opaque (colored)
background because the system needs to know what the final composited result will
look like. This conflicts with layer blending.
For layer-blending to work correctly, Sketch has to render all layers on a transparent
background. That way the layers can blend together as expected and then the final
result can be rendered back into Sketch’s white canvas.
So this presents us with a problem; we cannot render subpixel-antialiased fonts without
an opaque background, and we cannot accurately render blending with one. This
means that as soon as you have one layer on your canvas with blending, Sketch has to
go the transparent-background-route and your text might no longer render with
transparent:
You can work around this by putting your text on top of something that is opaque, like a
shape with a fill or an image.
Exporting
Another problem with transparent happens on export. On the canvas, Sketch can render
the text behind an opaque background, so everything works.
However when you export a text layer to a PNG file and keep the background
transparent you will notice that the text looks different; because the background is
transparent we were unable to render it with subpixel-antialiasing.
Like with blending above, you can work around this by putting your text on top of
something that is opaque, like a shape with a fill or an image. However the area behind
the text has to be transparent, there is just no way around this unfortunately, so keep it in
mind when you are exporting.
Designing for iOS
When Apple introduced the iPhone they decided to not render any text on the device
with subpixel-antialiasing. The reason for this goes back to way red, green and blue
lights make up one pixel.
As you know, the iPhone can be rotated and this means that the vertical red/green/blue
pixels are suddenly stacked horizontally. And with that the entire subpixel-technique
falls apart. Apple could still render it in portrait mode and disable it in landscape, but
wisely decided to keep the experience consistent between portrait and landscape.
Whenever you are designing an interface for iPhone or iPad you have to take this into
account; on the canvas Sketch renders with subpixel-antialiasing, however on the device
it will not be rendered that way. You need to tell Sketch to not render with subpixelantialiasing, and you can do so in the Preferences. Go to Sketch › Preferences… in the
menu, and in the General tab, disable the Sub-pixel Antialias Fonts option.
Text to Outlines
When you convert Text to Outlines you will notice that the text renders slightly different
as well. Once again, this is due to subpixel-antialiasing. The system only does this
technique for Text, not for shapes. Read more about Text to Outlines here.
Shared Styles
You will often want to keep the style of multiple text layers the same. To do so, you can
define any number Text Styles in your document and layers that conform to this style are
always kept in sync.
Note that Text Styles exist on a per-document basis. You cannot share them between
documents but they are avaialble among all pages and artboards in your document.
Creating Style
To create a text style, select a text layer, and go to Layer › Create Shared Style in the
menu. You will see that the inspector updates to show you the new text style applied to
the layer. Here you can also give it a proper name.
Any attribute you change on the text (except the raw text string itself) is automatically
synced across to the other text layers with that style.
New Layers
You add a second text layer like you do usually and then go to the inspector and apply
the previously created Style to that layer as well. A faster way to insert a text layer with a
certain text style is to go to Insert › Styled Text and pick your style. You can then insert
this text layer the same way as usual.
Note: In Sketch 2.x we had a Text Styles as well, but they’ve been upgraded in version 3.
The biggest change since version 2 is that gradient fills, shadows and inner shadows are
now also part of the style of the text.
Text on Path
Sketch supports can render text on path, such as the example below:
There are two things we need for this to work; a vector shape and a text layer. When you
go to the Edit menu and enable ‘Text on Path’, Sketch will put the text layer on the line of
the vector shape underneath it. Note that it only works if the vector shape is below the
text layer; the order of the layers has to be such that the text layer sits on top of the
vector shape.
Placing the text layer on the vector is as easy as dragging it horizontally across the
shape. It may be hard to describe in writing, but you will see that it works very intuitively.
Convert To Outlines
Text can be converted to shapes using Type › Convert Text to Outlines from the menu.
This will turn each character in your text into a shape. You can then edit the the
individual paths and points as you could any other shape.
Warning
However, do take care with this approach. Do not vectorize long strings of text as it will
significantly slow down your document.
Converting a simple string of text into outlines results in many small subpaths and
calculating boolean operations on this is really, really expensive. If you have to, split the
text into as many text layers as possible, and convert those one by one.
And because you can apply gradients and everything else to text already, often there’s
no need to convert them in the first place.
Images
Sketch has good support for handling image in your document. Sketch is however not a
bitmap editor and our image editing tools are limited for that reason. However, Sketch 3
has improved in that area.
Note that you can turn any number of layers into a flattened bitmap by going to Layer ›
Flatten Selection to Bitmap.
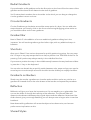
title; Color Adjust
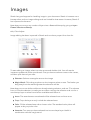
Image editing has been improved in Sketch and now has a proper UI to show for.
To start editing an image, select it on the canvas and double-click. You will see the
inspector update with a few special tools. First you have to select an area on the canvas,
and then pick the tool you want:
Selection: Select a rectangular area on the image
Magic Wand: Click+drag anywhere on the image to select an area. The further you
drag away from the start the greater the tolerance will be.
Note that you can use shift to add to an already-existing selection, and use ⌥ to subtract
from it. Once the selection is made you can either cut/copy the selection and us it for a
new bitmap layer or select from the four available tools below it:
Invert: The area that was not selected will be selected now and vice versa
Crop: Crops the layer to only include the selected area.
Color: Fill the selected area with a chosen color. The standard color picker will
appear to let you pick a color
Vectorize: Turn area you have selected into its own shape layer. Useful in
combination with the magic-wand.
Once you are done editing, click anywhere outside the image, or press Return or
Escape to exit.
title; Nine-slice
Normally when you resize bitmap layers they will resize proportionally in all directions.
Sometimes though, this is not what you want. If you’re making a web design for
example, you may have a blank screenshot of Safari.app that you resize as your content
grows.
To deal with this situation, we added Nine-slice scaling for images. Go to Layer › Convert
to Nine-slice Image and you’ll you’ll your image divided up into 9 sections. You can
click+drag any of the four points in the middle to adjust these boxes.
Next time you resize a this bitmap it will move the areas in the corner, stretch the areas
on the side in only one direction, and only scale up the middle part proportionally.
title; Color Adjust
If you wish the tweak the colors of an existing image you can use the Color Adjust panel
in the inspector to do so. You can change Saturation, Brightness, an Contrast in this
panel.
Note that this is a non-destructive effect so you can always change your values later.
Symbols
Symbols are a new feature in Sketch 3 and let you reuse groups of context easily across
pages and artboards. They are local to your document though and cannot be shared
between documents.
A symbol is in fact nothing more than a special kind of group. It is also displayed as a
group the layer list, but with a purple instead of a blue icon.
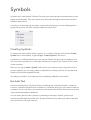
Creating Symbols
To create your first symbol, select a group, or a number of layers and click the Create
Symbol icon in the toolbar, or go to Layer › Create Symbol in the menu.
If whatever you had selected wasn’t yet a group, Sketch will group them together first.
You now have a purple icon in the layer list and you can give your Symbol a new name
in the inspector.
Now you can go to Insert › Symbol, and insert a new instance of your Symbol into the
canvas. Likewise you can copy-paste or duplicate an existing instance of a symbol and
Sketch will link them together as well.
Any edits you make in one instance are immediately reflected in the others.
Exclude Text
A common example of a Symbol will be something like a website header, or footer or
common interface elements such as buttons. In all these cases you may want to make an
exception for some of text in the symbols; each button should look the same, but its text
value should probably be different.
You can easily do this with symbols, by selecting a text layer inside a symbol and
checking the Exclude Text Value from Symbol checkbox. Any edits you make to the text
are now local to only that instance.
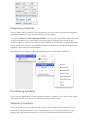
Organising Symbols
If you create a lot of symbols in your document you may want to group them together
somehow, because a long list of symbols isn’t that helpful.
If you go to Insert › Symbol › Manage Symbols, you will get a dropdown sheet with a list
of all the symbols in your document. You can rename or delete them there. If you
include a slash (/) in the name of the Symbol, Sketch will treat these as group separators.
For example, two symbols named Button/Normal and Button/Pressed will be grouped
together into a submenu called Button.
Note that they are always sorted alphabetically, not in their order of creation.
Duplicating Symbols
If you want to duplicate an existing symbol, select an instance of it in the canvas, and in
the inspector click on the symbol and choose ‘Duplicate Symbol’.
Swapping Symbols
In the same way you can apply another symbol to currently selected instance. In the
example of a pressed button and a normal button, you can swap between the two,
leaving their text value the same if you’ve set up both symbols to work that way!
Styling
The inspector panel holds all styling options for the selected layers.
Starting with the shared styles, we move down to general opacity and general blending,
followed by Fills, Borders, Shadows, Blur and Reflection. Each of these has been given
its own section in this manual, so click through to read more about each.
There are however a few generally applicable tips and tricks and we’ll discuss those
here.
Text Fields
The text fields in the inspector aren’t ordinary text fields. If you hover your mouse over
them you will see little up and down arrows appear on the right-hand size of the text
field. You can click those tho quickly increment or decrement the value. If you press
Shift, Sketch will instead increment or decrement the value by 10 times as much. And, if
applicable, holding down ⌥ will increase/decrease it by a tent of that size.
Up and Down
Once you are editing the text fields directly, the up and down arrows will have
disappeared, but their functionality is still available. You can use the Up an Down arrow
keys in combination with shit or ⌥ to achieve the increment/decrement feature as
above
Math
Another great feature in our text fields is that you can perform math on them. This works
for simple math as such as adding +5 or /2, but almost any expression is supported.
Scrubbing Values
For quickly adjusting text field values you can click and drag on the little label under any
text field to quickly increase or decrease its value. If you’re sure about the exact value
you want but just want to see its effect on the canvas, this is great way for quick
expirimentation.
Back on Canvas
You will be going back an forth between the canvas and the inspector a lot. Select an
object on the canvas, change some text values and go back to the canvas. However
normally the applications’s focus would remain on the inspector, so if you’d press the ‘R’
shortcut to insert a rectangle, you’d be typing that ‘R’ into the text field instead.
Most of the time that’s not exactly what you want. To confirm any edits you made in the
text fields, press Return. If you then press the Return key again, Sketch will move the
focus from the text field back on the canvas to allow you to use any shortcut and canvasspecific feature again.
Drag Drop
A border, fill, or shadow can be dragged around. To do so, grab it in an empty space
betwen the buttons and text fields and start dragging.
You reorder fills this way and even drag them out of the inspector to remove them
straight away.
Cleaning up unused Styles
An effective way to try multiple variations of some style is to have a number of borders
or shadows, and selectively turn some on or off. Or whatever the reason may be, we
noticed that many designers had a lot of disabled styles in their inspector.
To make it easy to remove disabled styles, as soon as you have a disabled fill or border,
the section will show a little trashcan icon. Click that, and all disabled styles will be
removed.
Copy Paste Styles
This is not necessarily inspector-related, but you can Copy-Paste styles between layers
using the Edit menu. If you don’t want layers to be permanently linked but do want to
share some style elements, this is a perfect solution.
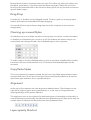
Alignment
At the top of the inspector are a few alignment-related buttons. The 6 buttons on the
right are for aligning layers among themselves, or, in the case of a single selection,
aligning that layer to the parent artboard.
The alignment icons on the right are for distributing layers horizontally and vertically. In
case of distributing horizontally, the leftmost and rightmost layer will stay where they are
and the layers in between will be spaced out evenly between them.
Layer-opacity Shortcut
Again not strictly inspector related, but whenever you have a layer selected you can
press the 1–9 keys on the keyboard to adjust the opacity of the layer quickly to 10%–
90%. Pressing 0% brings it back to 100% Opacity.
Fills
Sketch can fill shapes with a solid color, gradient or (pattern) image or Noise. To change
from a solid fill to gradient fill follow the steps from the border section above. Read the
chapter on gradients if you want to know how to edit an existing gradient.
From left to right the fill options are:
Solid Fill
Linear Gradient
Radial Gradient
Circular Gradient
Pattern Fill
Noise Fill
Adding Fills
You can press the + button on the right of the first fill button to add a second fill. A layer
can have any number of fills which will be stacked on top of each other from bottom to
top. Each fill can have its own blending mode and you can vary opacity between them
too.
Note that if the topmost fill is completely opaque you won’t be able to see the fills
under it, but Sketch will still render them.
Pattern Fill
You can also pick a pattern fill and choose from one of the presets or drag an image in
the drop area yourself. You can set the pattern to either tile or fill.
Tile: An image gets repeated over and over until the entire area of the shape is
filled up
Fill: An image gets stretched up to fill the entire shape
Noise Fill
A noise fill lets you add varying levels of grain to your layer, making otherwise dull fills
and shapes slightly more realistic by adding some minor texture.
Sketch 3 comes with three more noise images, a white, black an a color one, and you
can now also apply custom blending to each Noise fill.
Borders
All layers except Text layers can have as many borders as you want. These can all have
various thicknesses, colors and blending modes.
From left to right the border options are:
Solid Fill
Linear Gradient
Radial Gradient
Circular Gradient
Border Position
A border can be drawn on center, inside or outside of path. If you have a closed shape,
an inside border will draw the border on the inside of the shape’s contour, and outside
border on the outside.
A center border draws it straight on top of the outline, and it’s also the only option if the
shape is not closed, such as in case of a line. After all, the concept of ‘inside’ or ‘outside’
doesn’t exist on a line.
Color or Gradient
A border can be either a solid color or a gradient. You can switch between the two types
using the color box on each fill, and switching from a flat color to one of the tree
available gradient types.
Editing a border gradient works in exactly the same way as a fill gradient, so read the
chapter on gradients if you want to know how to edit them.
Dashed Lines
Shapes have a few more advanced options for their borders; dashed lines and changing
the ends and joins of a path. Look in the Inspector’s Border section and click the small
gear icon. A popover will display with additional options, including four fields at the
bottom for configuring dashed lines.
For example, a dash pattern of 4–2 will draw the stroke for four pixels, put a two pixel
gap, draw four more pixels and then so on. A dashed pattern of 5–4–3–2 will draw a
stroke of 5 pixels, a gap of 4, then a stroke of 3 pixels, a gap of two, and then start all
over again.
Shadows
Shadow and Inner shadow have the same settings and work in the same way except that
one is inside and the other is outside the shape.
Each Shadow can have its own blending as well, and this can be configured in the color
popover.
Spread
Each shadow also has a spread value which can be used to to in-effect grow the object
that is casting the shadow. The difference between blur and spread will clear with a little
illustration:
Note: an inner shadow on a text layer looks best if the blur radius is set to zero. Spread
is also unavailable for text layers.
Blur
There are four ways in which Sketch can blur your layers and you can pick between
these modes in the header of the blur section.
Gaussian Blur: This will blur the layer evenly across
Motion Blur: Blur only in one direction, giving the illusion of motion
Zoom Blur: Blur from one particular point out.
Background Blur: Blurring the content behind the layer
Background Blur
The other kinds of blur are kind of self-explanatory, but Background Blur might need a
little explanation
Background Blur was added after Apple introduced iOS7 so give designers an easy way
to reproduce this effect. To get the right effect, make sure you have a (semi-) transparent
fill on the layer, otherwise the blur effect won’t be seen.
Performance
Note that blur is a very expensive effect to render - especially background blur - and the
bigger the layer and the blur, the more memory & processing power it will take up.
Disable blurs if you can, and if you have the choice between using background blur and
regular blur, take the latter
Color
In Sketch we built the color picker directly into the inspector. To see it, select a shape,
enable the fill or border and click on the color button in either of them.
A popover window will appear and attach itself to the color box you just clicked.
Depending on the kind of color you’re adjusting (A shadow color, fill color or gradient),
the inspector will show different options, but most of the time most of the space is taken
up by the Color Picker.
The color picker is based on the HSB color model with the Saturation and Brightness on
the horizontal and vertical axis of the big square respectively, and then hue on the slider
underneath it. Underneath there you can change the opacity of the color.
You can change your color using the text fields below the color picker or by dragging
the little indicators around in the color picker. When adjusting the saturation and
brightness, notice you can hold shift to restrict moving to one axis.
HSB colors
Below there you can see the HEX value of the color and the RGBA color values. Note
you can switch to HSBA color values by clicking on the RGB labels.
Common Colors
Directly below the color picker and the text fields you will see one row with color
presets. This row of presets is automatically populated by Sketch; it analyses your
document and picks the most often used colors and puts them there.
This makes it easy to reuse common colors without having to create presets from them
manually.
Gradients
To give a shape a gradient fill, select it, then click on the Fill button and the inspector will
show the color tool. To learn how to work with colors read that chapter first. At the top of
the color panel you can choose between a color, various gradients, pattern or noise fill.
The available gradients are linear, radial or circular gradients but each works effectively
the same in Sketch.
If you pick a linear gradient, you will see two or more dots connected by a line
overlaying your layer. Each dot on the line represents a color stop of the gradient and
the space between the stops is drawn in a smooth transition of the colors.
To change the color of one of the stops, click on it in the canvas. You’ll see that the color
picker in the inspector updates to the color of that stop. Pick a new value in this color
picker and you’ll see the result update immediately.
To insert a stop between points, click halfway on a line and you’ll see another stop gets
added. You can move the stops between the starting and finishing point to determine
the smoothness of the gradient and you can move the first and last point to change the
direction of the gradient.
To delete a color stop, select it in the canvas and press the delete or backspace key on
the keyboard.
Radial Gradients
If you selected a radial gradient earlier the first point on the line will be the center of the
gradient and the last one will determine the size of gradient.
You’ll notice there’s another dot on the wider circle which you can drag to change the
circular gradient into an oval one.
Circular Gradients
Circular Gradients go clockwise around the center point of a layer. You can add color
stops wherever you want by click on the line and removing/dragging points works as
you would the same as for linear gradients.
Gradient Bar
New in Sketch 3 is the addition of a more traditional gradient-editing bar in the
inspector. You will see the gradient go from left to right, with any additional stops in
between.
Shortcuts
Also new in Sketch 3 are various shortcuts for quickly positioning points. You can press
the 1–9 keys on any stop except the first or last, to position it at 10%–90% of the line. So
pressing 5 will put the stop always exactly in the middle of the line.
If you want to position the stop in the middle exactly between the stop before and after
it, press the ‘=’-key on the keyboard.
You can also use the tab-key to quickly switch between color stops and you can use the
arrow keys to move the stops around on the left. Use the shift key to amplify the effect.
Gradients on Borders
Sketch can also render a gradient on a border stroke and this works very similar to a
gradient fill. Instead click on the color button of the border and repeat the procedure.
Reflection
Reflection will give your layer the impression as if it was standing on a glass table. You
can use the slider to change the intensity of the reflection. The second slider will
determine the distance between the original object and the reflection. Note that if the
slider doesn’t give you enough flexibility you can always enter a larger value in text box
besides it.
Note that enabling reflection will cause the object to be drawn twice, so there are
performance implications to this.
Shared Styles
Shared Styles already existed in Sketch 2, but they have been given a significant
overhaul in version 3. Shared Styles are now located in the the white box between the
general layer options an the style options.
You can create a new style by selecting a shape and creating a new style from the dropdown menu there. You can create as many styles as you want and you can switch
between existing styles using this panel as well.
A change you make to one Shared Style is immediately reflected on all the others.
Note that they work effectively the same now as Text Styles and Symbols. The same
sorting and editing options apply as there.
Grouping Content
Apart from basic layer such as shapes, images and text, Sketch has a few special kinds of
layers which are really useful in organising and presenting your export. Lastly, proper
organisation of layers can aid Exporting as well.
Groups
Layers in your document can be grouped so that they appear as one layer. You can
move and resize them as one and yet you can still go into the group and change the
individual layers inside.
Groups in Sketch are a very powerful tool. Because are just layers themselves, groups
can be grouped, moved and resized as well. If the group contains a text layer it will scale
up the fonts too.
You create a group by selecting one or more layers. Then click the group icon in the
toolbar and Sketch will create a new group with those items. You can also drag objects
between groups in the layer list as you would expect.
Editing Groups
Once you have created a group, you can double-click on it to view and edit its contents.
You can move the layers inside the group around and even add more layers. Whenever
you click on an object outside the group, Sketch will take you ‘out of’ the group so that
you can select other layers in your document again.
If you now click on a layer in the group it will select the entire group instead. In a way
this works exactly the same way as shapes with subpaths do.
Click-Through
By default a layer inside a group cannot be selected directly, without first doubleclicking the group. If you hold down the ⌘-key however, Sketch will let you select layers
nested deeply inside groups directly.
If you only use groups as an organisational component in the layer list and you don’t
want to have to double-click all the time, you can also mark a group as being clickthrough enabled in the inspector And there’s even a setting in the global preferences
where you can define this behaviour for new groups.
Artboards
Artboards allow you to create fixed frames on Sketch’s infinite canvas, but they’re
completely optional. When you have artboards in your document, the area outside each
artboard will be dimmed so you an clearly see what falls inside and what does not.
If you’re doing a web design you may want to design for different screen sizes and you
could turn each screen size into an artboard. If you’re making icons you may want to
limit yourself to any of the default icon sizes; you can create an artboard for each.
Artboards are a bit like a special kind of group. They’re always ‘open’; you never have to
double-click to view their contents, and they don’t resize to fit the contents inside. If you
give an artboard a certain frame, it’ll keep that frame until you resize it again.
Adding Artboards
To create an artboard, select Insert › Artboard from toolbar or menu. The inspector will
show you some common artboard sizes such a iOS-sized screens, common web design
widths and icon sizes.
Click on a preset to insert it into the canvas, or click on the header of a group of
artboard presets to insert them all at once. You can also add your own presets at the
bottom of the inspector.
If after you’ve inserted one artboard, you want to insert more artboards of that kind, you
can immediately press cmd+D (duplicate) until you have as many artboards as you
need.
Moving Artboards
Sketch will not let you select Artboards on canvas if they have content inside them. This
behaviour makes it easier to drag-select multiple layers in them for example, but
sometimes moving them is desirable.
You can always select an artboard in the layer list and then you can drag it around on
the canvas, or change its position or size in the inspector.
You can also click and drag on the name of the artboard in the canvas and drag it
around like that.
Grids and Rulers
Since Artboards act as their own canvas with the infinite canvas, each artboard has its
own rulers and optional grids, which is especially useful if you’re combining multipe
sized artboards in one canvas; one for breakpoint in a responsive web design for
example.
Read more about rulers, guides and grids here.
Templates
A good example use of Artboards can be seen in the Templates we ship by default. Go
to File › New From Template in the menu. If you pick the “Mac App Icon” template you’ll
see we created an artboard for each of the common sizes.
Pages
A document in Sketch can have any number of pages. Instead of having each page in its
own document, putting them all together in one document has a number of benefits.
For example, Symbols and Shared Styles work across pages, but not cross-document.
Another reason for using multiple pages has to do with performance. Sketch can easily
handle a dozen artboards on page, but depending on their content, size and the
number of them, you may find it beneficial to split the work up into multiple pages.
Canvas
Sketch’s canvas is infinite in size. You can view the canvas both in a resolutionindependent view where you have infinite precision, or you can turn on pixel preview
and you will know exactly how every pixel will look on export.
If you’d like to define a fixed frame inside the infinite canvas, simply create an artboard
using the artboard tool.
Navigating
Navigating around the canvas is easy. You can use the scroll-wheel on your mouse or
the tracked on your laptop to scroll in either direction. You can also hold down the
spacebar and click+drag to pan around as well.
Lastly, if no object is selected you can use the arrow keys to pan the canvas as well.
Note that Page Up/Page Down switches between Pages.
Zooming
Apart from that there are various shortcuts in the View menu for zooming in and out to
specific content. You can also hold down the ⌘-key an use the scroll wheel on your
mouse to zoom in and out as well.
Lastly, you can use the ‘Z’ key to quickly zoom into a particular area. Click+drag
anywhere on the canvas to zoom the viewport into that area..
Pixel Zoom
You can view your drawing in Sketch in two ways. Which way you prefer will depend on
the kind of work you do. These modes can be toggled in the View menu by clicking on
Show/Hide Pixel Grid. Note that when you’re at 100% zoom (actual size) there’s no
difference between either mode, but you’ll see it when you zoom in.
If you care how every individual pixel in your document looks then this mode is for you.
What you see is basically the equivalent of first exporting it to PNG and then zooming in
Preview.app.
If you don’t care about this then the default view is best for you; when you zoom in you’ll
see everything still with smooth curves.
Forced Pixel Preview
Sometimes though you’ll find that you cannot disable pixel preview even though you
may want to.
This is because the Blur effect has to work on raw pixel data. This means that the only
way Sketch can display these effects is by rasterizing your vectors an then applying
these filters. This does mean however that a vector-preview is no longer avaialble, so
we’re forced to show pixel preview.
When you try to disable pixel zoom and it can’t, it’ll offer to show you which layers are
preventing pixel zoom. On large documents this can be quite a timesaver.
Rulers, Guides, Grids
These features in Sketch will help position layers exactly how you want them; either on a
grid, lines or between layers themselves.
Guides
By default, automatic guides are turned on in Sketch. Note that they can be toggled with
the control (⌃) +’L’ key. When you’re resizing or moving layers Sketch will try to help you
align them with others layers automatically. When Sketch snaps your layer to another
you’ll see a red line appear that shows what exactly it is snapping to.
Rulers
Sketch has Rulers, which are hidden by default. As we’ve said before, Sketch has an
infinite canvas and because of this the Rulers are not fixed; you can grab and drag the
ruler around to define your own zero origin.
You can double-click anywhere on the ruler to add manual guides, and they’ll stay
visible as long as the Ruler is visible. To move the Ruler, grab it inside the Ruler and
move it around. To move a guide, you have to grab it inside the ruler, and then you can
drag it around. To remove the guide, drag it out of the view and you’ll see it’ll disappear
with a poof.
Regular Grid
You go to View › Grid to turn on the Grid, and Grid Settings can be found there too.
Sketch supports two kinds of Grids; a normal/standard grid and a Layout-grid.
Depending on the kind work you do in Sketch you may want to use one or the other.
The difference is easy to see:
The basic grid has settings for the size of the squares and how often you want a thicker
line to appear. The default grid size is 20px and thick lines every 10 squares.
Layout Grid
In the layout grid you can change the total width of your ‘page’ and the number of
columns. Also you can set the height of the ‘rows’ and the size of the columns. There are
additional settings for padding.
Sketch will do its best to place the Layout Grid in the middle of your artboard, but after
resizing the artboard, this may no longer hold true, so in that case you can press the
‘Center’ button to center the Grid in the Artboard easily.
Measuring
Sketch has excellent tools built-in for making sure your content is lined up correctly. It
can also be a real blessing to a developer who has received a Sketch document from a
designer and needs to get exact pixel measurements done.
Distance
When you hold down the option/alt (⌥) key on the keyboard, Sketch will calculate the
distance between the layer you’ve selected and the layer you’re hovering. A simple
illustration will clarify this:
![][]({% static ‘images/documentation/canvas/measurements.png’ %})
Also, when moving an object Sketch will show you the distance to other objects when
it’s equal to other existing distances:
![][]({% static ‘images/documentation/canvas/distances.png’ %})
Size
In the same way, if you resize a layer, Sketch will help you by indicating other layers that
have the same width or height.
![][]({% static ‘images/documentation/canvas/resize.png’ %})
Exporting
To export your work, either choose File › Export… from the menu, or click the Export
button in the toolbar. Sketch’s canvas is infinite in size. This means that when you want to
export your drawing you have to tell Sketch which part(s) you’re interested in.
In Sketch 3 we’ve greatly improved the exporting workflow. Read more about this in
Exporting Layers.
When you click the Export button in the toolbar, Sketch will pop down a sheet listing all
exportable layers in the canvas; artboards, slices and regular layers. You can export
some or all of these from there. Note that if you have some exportable layers selected
before you go to Export, Sketch will by default only export those.
Exporting Layers
New in Sketch 3 is the ability to export layers directly without creating slices.
Layers or Slices
Exporting a layer by itself means that no other elements on the canvas will be exported
with it. If there’s a layer on top or a background below it, none of those are included in
the export.
This method is very useful for exporting icons or similar objects out of a grand design,
but less useful for exporting your entire artwork. For that, use normal Slices or
Artboards.
Exporting Layers
If you have decided that you just need to export a single layer, you can do so in the
inspector. Select the layer (or group) that you want to export and click ‘Make Exportable’
in the bottom-left of the inspector.
You will see that the inspector has update to show you that you will be exporting one
image, at original size, with no prefix, and by default in PNG format.
You can click the little + icon to add another export size. By default this will export at
double-size with an @2x suffix, but you can change all of that to whatever you want. If
you are for example designing at @2x already, you can give your 1x export size a ‘@2x’
prefix and create a second export size at 0.5x without a prefix.
Note that we now also support exporting to arbitrary sizes, so if you’re designing for
android and you need 1.5x export, that is now possible too.
Layer List
You will also note that the icon for the layer in the list has been given a little knife-icon.
This is to indicate that this layer is exportable. Next time you click Export from the
toolbar this new exportable layer will show up there as well, amongst your regular slice
layers.
Note that you can also directly export layers from the layer list, without having to make
layers exportable or define slices. If you drag any layer out of the list on to the Finder or
any other app, Sketch will quickly export it for you in PNG format. If you hold down the
option key, it’ll write it to the pasteboard as PDF data instead.
Slices
Slices in Sketch allow you to export a defined area on the canvas to single file. A Sketch
document can have as many slices as you want and each will exporting to a different file.
Slices as Layers
Slices in Sketch 3 are now treated as normal layers. The benefits of this new approach
are plenty. You can now for example group a slice togehter with the content that its
supposed to export, and when you move the group around, the slice moves with it.
If you temporarily don’t want to be bothered by slices in your canvas, you can turn them
off at the bottom of the layer list using the little Knife-button.
Adding Slices
You can add a Slice by going to Insert › Slice in the toolbar and then click+drag
anywhere in the Canvas to define the area. When inside the slice tool, you can also just
click on a layer and Sketch will create a new slice exactly around that layer.
Naming
You can give each of your slices their own name, and this is the name that will be used
when you save your slice to disk.
A neat trick is that you if you include a slash (a ‘/’) it will create subfolders for your first.
For example, if you named your slice foo/bar.png, it would first create a folder named
‘foo’ and then create a image named ‘bar.png’ in there.
Multiple Sizes
New in Sketch 3 is that you can export multiple images out of a single slices. If you’re
doing iOS designs for example you will often want to export a single and doubleresolution for each icon. With Slices in Sketch, this is easy. Just click the + icon in the
inspector to add a second size.
Each size can have its own custom scale, format and suffix. The suffix is required
because normally the filename is derived from the name of the slice, but with two
exportable sizes, you need to suffix one of them. By default the second size you add be
a 2x size with a @2x suffix according to iOS’s convention.
You are however not restrictued to just 2x export; you can export to any resolution or
size with any prefix you want. If you design at double resolution alreay for example, you
can give your 1x size a @2x prefix and have your second size be at 0.5x
Group Contents Only
Sketch 2 had a way to export only certain layers for each slice. And while this concept
was easy to understand, it quickly turned into a messy process if you wanted to change
things or started replacing elements in your design.
Instead in Sketch 3, each slice now just has one checkbox; Export Group Contents Only.
When this is checked instead of exporting everything on the canvas, the slice will now
only export the layers inside its own group, discarding any overlapping layers outside it,
or any background layer behind it.
Trim
The last option available on every slice is Trim. With this turned on every slice that will be
exported will have transparent pixels trimmed away from its edges.
For example: You defined a slice somewhere in your document of 30 by 40 pixels, but it
contains a single oval which is just 15x15 pixels. Instead of resizing your slice to fit
exactly around this oval you turn on Trim and Sketch will trim away the transparent pixels
in your 30x40 slice until a small 15x15 image is left.
File Formats
Supported file formats for exporting
JPG: A commonly used format for photos but it does not support transparency
PNG: If your drawing contains transparent pixels this will be the best choice
TIFF: Supports transparency but its file size is bigger.
PDF or EPS: Preserve vector objects. Note that transparent gradients are not
supported in the PDF standard.
SVG: SVG support is quite good on shapes and text support, however, shadows
are not supported.
Non-supported file formats for exporting:
PSD: Photoshop’s file format is closed and not supported for export. If you have
access to Adobe Creative Suite, you can export your work as .PDF and import to
Illustrator. From there, export the project as a .PSD file.
AI: Illustrator files are not supported, but Illustrator can open .PDF or .SVG files
exported from Sketch.
Artboards
Artboards in Sketch 3 can also directly be exported, forgoing the need to add extra slice
layers to the document. Just add an export size to artboard and next time you click
Export, Sketch will include the artboards as well.
When you click on Export for the first time, and you have some artboards in your canvas,
Sketch will assume you want to export those and will make them exportable
automatically.
CSS Attributes
Sketch has a nice little feature to help web designers in getting their designs from a
static mockup in Sketch to real HTML.
If you select any number of elements in the canvas, you can then go to Edit › Copy CSS
Attributes in the menu. Sketch will then create CSS declarations for the borders, fills,
gradients, shadows and text styles used in the selected objects.
Sketch transfers its gradients to CSS gradients too. As the syntax for gradients is kinda
hairy, this is a real time-saver. Transferring designs from Sketch to CSS is now very easy
indeed.
Printing
Artboards and Slices in Sketch can be printed. Go to File › Print, and you’ll get a list of
your artboards, or slices if you have no artboards. The standard printing dialog will
appear and you will be able to print.
Note that we have default artboard sizes for A4 A5, and A6 paper formats.
Importing
Sketch supports a several file formats for importing. You can simply drag and drop files
onto the Sketch icon in the dock, or directly into an open document.
Supported File Formats
JPG: A commonly used format for photos but it does not support transparency
PNG: If your drawing contains transparent pixels this will be the best choice
TIFF: Supports transparency but its file size is bigger.
SVG: Sketch supports importing SVG files, but note that the coverage may not be
100%, as SVG has some concepts that Sketch does not support
PDF and EPS: Sketch supports importing PDF and EPS files, but as with SVG files, it
has some concepts that Sketch does not support and so they won’t be displayed.
If you have an EPS, PDF or SVG file that we Sketch does not import correctly, please
contact support and we will try to get it to work properly for the next update.
Non-supported Formats
The list below covers file formats commonly used for graphic design, but not currently
supported in Sketch.
PSD: Sketch can only import .psd files as flattened bitmaps.
AI: Sketch can only import .ai files as flattened bitmaps.
Preferences
Sketch’s preferences are divided up into General, Canvas and Layer-specific sections.
Consult the relevant chapter to find out more about the settings in each tab.
General
Canvas
Layers
General
At Launch
When no document is open yet when Sketch launches, create a new document or not.
Undo
Sketch will attempt to group multiple similar actions within the span of a second into a
single undo step. One example is moving a layer around using the arrow keys.
Font Rendering
Enable or disable subpixel anti-aliasing. When designing for the Mac or the Web you
will want to leave this one, when designing for iOS you’ll want to turn this off.
Read more about subpixel anti-aliasing in here.
Vector Import
Should PDF and EPS files by imported as flat ‘images’, or should Sketch try to interpret
the path data inside them and make the shapes editable.
Sketch Mirror
Should Sketch Mirror always update to show whatever artboard you have selected on
the Mac or should it operate independently?
Canvas
Retina
Retina screens for Mac and iOS use four physical pixels to represent one ‘traditional’
pixel. New Retina MacBook Pro’s have four times as many pixels as the older models but
display everything at the same size. They just use these extra pixels to provide more
detail to fonts, images etc.
By default Sketch does the same; the extra pixels are used to provide more detail, but
the physical size of the drawing stays the same. If you dont want this behaviour and
really want every physical pixel to be counted as one pixel in sketch, turn off the Retina
Canvas.
Zoom In on Selection
When you tell sketch to zoom in via the View › Zoom In / Zoom Out commands, Sketch
will by default zoom into the center of the canvas. By turning on this checkbox it will
instead focus in on the selected layers
Zoom back to Previous Canvas Position
Using this option, Sketch will zoom out to the position you had on the canvas before you
started zooming in. By default when you zoom out, Sketch zooms back straight from the
center point currently on canvas, but if you scroll around a lot while zoomed in and you
expect to return to the previous position on zoom out, use this checkbox.
Layout Grid
The Layout Grid’s columns can be either filled up with a color (Fill Grid), or Sketch can
draw the edges of the columns (Stroke Outline). This setting controls that behavior.
Layers
Resize Proportionally
Should the proportions (width/height) of new groups be automatically locked or not? If
locked, Sketch will keep the width and height proportionally the same. If not, you’re free
to resize your groups to any size.
Enable Click-through for New Groups
By default, click-through is off for new layers, but it can be turned on. From then on, any
group you create has it enabled. Read more about Click-through here
Offset duplicated Objects
By default Sketch offset duplicated object by 10px from the original. If you turn this off it
will be pasted straight on top of the original.
Fit to Pixel Bounds
When turned on, Sketch will attempt to keep your layers and shape points as much on
pixel edges as possible. As soon as you add decimal points to layer positioning yourself
though, Skech will let you and not put it back on pixel values again.
Also, pixel bounds are ignored when rotating layers as its often mathematically not
possible to accurately rotate and keep values on pixel bounds.
Strip Text Style
When turned on, Sketch removes all font, paragraph and color information from the text
layer you paste in. Often when copying text out of either a web browser or a text editor,
a bit of style info comes attached as well. Turning on this setting will ignore that.
Performance
Sketch can easily deal with reasonably complex drawings, but if you end up with a big
document you may want to know a few things about what is impacting Sketch’s
performance.
Blurs
Blurring layers is expensive. Sketch has to render the layer first into an offscreen bitmap
(which is expensive), and then applying a blur on that (which is really expensive). The
larger the blur radius the more expensive it gets.
For a 1px blur radius, Sketch needs to examine each pixel around each pixel; that makes
for 9 pixels to be examined per pixel to calculate the new average value. Increase the
blur radius to 2 pixels and so on and it increases expontentially
Note that Background blur is even more expensive than normal blurring is so keep that
into account. If all you’re trying to do is blur an image, blur that, an don’t use
background blur.
Shadows
The same goes for shadows. Rendering (big) shadows on (large) layers is expensive,
and more shadows mean more more delays. Inner shadows with spread’s are especially
expensive.
Multiple Pages
Sketch can easily handle a dozen artboards on a page, but if that is combined with big
shadows and blurs or even more artboards, things will slow down. One easy fix is to put
some artboards on another page.
Text to Outlines
Boolean operations are incredibly complex mathematical calculations to perform if you
want to get it right. If you have a shadow with a few dozen subpaths, each with boolean
operations, you’ll run into trouble.
This is why you should take care with vectorizing text. You can apply gradients directly
on text without the need to vectorize them first, so keep that in mind. Other than that, if
you can, put each character into its own text layer before vectorizing.
Shortcuts
Sketch has quite a few handy shortcuts available which will be good to know when you
spend a lot of time in it.
General Shortcuts
⌃+H: Toggle selection handles
⌃+L: Toggle alignment guides
⌃+G: Toggle Grid
Space: Hand Tool
Enter: Edit currently selected layer
⌘+3: Scroll to selected layers
⌘+2: Zoom into the selected layers
Z: Zoom Tool. Hold down and click or drag an area with the mouse. Reverse zoom
using Z + alt + click.
Escape: Exit the current tool, deselect all layers or go back in the inspector
Tab/Shift-tab: Cycle through layers in the current group
Inserting Layers
R: Insert a rectangle
O: Insert an oval
L: Insert a line
U: Insert a Rounded Rectangle
T: Insert a Text Layer
V: Vector layer
P: Pencil tool
Moving and Resizing Layers
⌥+Drag: duplicate a layer
⌥+Hover: display distance between other layers
⌥+Resize: resize from both ends
Shift+Resize: preserve aspect ratio These are the somewhat hidden shortcuts, but
many more are listed in the menu of course. Mastering keyboard shortcuts will
really help you increase the speed at which you work.
If you find that a certain action could benefit from a better shortcut, please do let us
know.
Hidden Commands
Sketch has a few hidden preferences that will be useful for certain advanced usages. To
use these commands, go to Terminal.app and type the commands. A restart of Sketch
will be required for these to take effect. To disable any of these settings, change YES to
NO and vice versa.
defaults write com.bohemiancoding.sketch3 svgExportSkipAssignIdToLayerName -bool YES
When this is set to YES, Sketch will not use the name of the layer for the id field of the
layer in SVG export.
For users who want Sketch to do something that is really only useful to a very small
subset of users, we can build in special settings like these. If you have an idea for one,
please contact us.