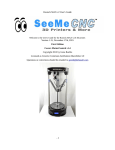
1
USER MANUAL
WELCOME TO THE REVOLUTION
Congratulations on your purchase of the INFINITY 3D. We’re excited that you’re part of the 3D
printing revolution! 3D printing is evolving at a pace we’ve never seen before and we want to make
sure you are able to incorporate these developments into your printer. The modular design of the
INFINITY 3D makes it easy for you to keep up with what’s new and incorporate it right into your
printer. Onwards and upwards!
This user manual is designed in a way to make it easy to operate and maintain your INFINITY 3D
printer. Please let us know if you are in need of any other documentation.
SPECIFICATIONS
Model
Manufacturer Part Number
Printing Method
Extruder
Extruder Drive
Extruder Mount
Nozzle Type
Nozzle Diameter
Filament Diameter
INFINITY 3D
INF3D-AF1
Fused Filament Fabrication
All-Metal Professional Extruder
Planetary Gearbox Drive
Precision Machined Aluminum Mount
Quick-Change nozzle
0.35 mm, optional: 0.4 or 0.5 mm
1.75 mm
Maximum Hot End Temp
Maximum Heated Bed Temp
Maximum Print Speed
Minimum Layer Height
Print Precision
Build Volume
315 C (600 F)
120 C (230 F)
30 grams/hour
50 Microns
+/- 0.07 mm
215 mm x 215 mm x 215 mm
Compatibility
Included Software
Input File Formats
Connectivity
Display Panel
Printer Dimensions
Frame Material
Weight
Ambient Operating Temp
Power Requirements
Windows, OSX, Linux
MatterControl
.stl, .amf, .gcode
USB 2.0
Full Graphic Display Panel
450 mm x 450 mm x 420 mm
Aluminum
11 kg (24.25 lbs)
15 - 32 C
110 - 220 VAC
2
SAFETY INFORMATION
CAUTION
Do not reach inside the printer frame while it is operating and always allow for
the heated parts to be fully cooled after operation. The INFINITY 3D printer
generates high temperates and has moving parts that may cause injury.
WARNING : BURN HAZARD
HOT SURFACE - ALLOW COMPONENTS AND FILAMENT TO FULLY COOL BEFORE
HANDLING
WARNING : VAPOURS / FUMES
VAPOURS/FUMES MAY CAUSE IRRITATION AT HIGH OPERATING TEMPERATURES.
OPERATE IN A WELL VENTILATED AREA. NEVER PLACE FLAMMABLE MATERIALS
OR LIQUIDS ON OR NEAR THE PRINTER WHEN POWERED ON IN OPERATION
WARNING : MOVING PARTS CAN CRUSH/CUT
ALWAYS KEEP HANDS CLEAR WHILE OPERATING. TIE BACK LONG HAIR OR
CLOTHING THAT CAN GET CAUGHT IN THE MOVING PARTS OF THE PRINTER.
WARNING : DO NOT OPERATE UNATTENDED
DO NOT LEAVE INFINITY 3D PRINTER UNATTENDED DURING OPERATION
WARNING : ELECTRIC SHOCK HAZARD
NEVER OPEN ELECTRONICS CASE WHEN PRINTER IS POWERED ON. TURN OFF
AND UNPLUG THE POWER SUPPLY.
INFINITY 3D User Guide by Revolution 3D Printers
Copyright © 2015 Revolution 3D Printers
Permission is granted to copy, distribute and/or modify this document under the the terms of the Creative Commons
Attribution - Share Alike 3.0 Unported licence (CC BY-SA 3.0).
Published by Revolution 3D Printers, Victoria, BC, Canada.
For more information, call +1-877-269-5510 or visit www.revolution3Dprinters.com
3
TABLE OF CONTENTS
WELCOME TO THE REVOLUTION
SPECIFICATIONS
SAFETY INFORMATION
UNBOXING
Whats in the box?
THE INFINITY 3D ILLUSTRATED PARTS CATALOGUE
INSTALLING PRINTER COMPONENTS
2
2
3
5
5
6
7
Universal Filament Spool Holders
7
Universal Spool Holder Adaptors
8
Inserting Filament into Extruder
10
Glass Build Plate 11
Power and USB cords
11
INSTALL AND SETUP OF MatterControl SOFTWARE
12
Connecting your Printer to MatterControl
12
Inputting your Printer’s Unique Calibration Settings
13
3D PRINT SETTINGS
STARTING A PRINT WITH MatterControl
14
15
How to Get a File
15
Printing
16
Viewing and Editing your Print
18
Control while Printing
18
Cloud Notifications
19
Export to SD Card
20
Graphic Display Panel
21
DESIGNING FOR 3D PRINTING
MATERIAL GUIDELINES
BASIC MAINTENANCE
22
23
24
Changing Filament 24
Filament Gear
24
Quick Change Nozzle
25
Oiling
25
Cleaning the Glass Build Plate
25
NOZZLE CLEARANCE SETTING
BELT TENSIONING
APPENDIX A
APPENDIX B
26
26
27
29
4
UNBOXING
1. Place the shipping box upright on an even floor
surface.
2. Open the box. 3. Remove the first layer of cardboard. 4. Grab the front and back of the printer frame from the
bottom of the box as shown and pull upward with
the pink side padding sliding out as well. 5. Remove the wrapping and blue tape from the frame.
6. Place the printer on an even and sturdy surface and
remove the side padding.
7. Remove the zap strap holding the extruder in place.
8. Remove the two zap straps on the x-axis.
Whats in the box?
The INFINITY 3D User Guide is also available as a PDF download from our website at
www.revolution3dprinters.com/support/downloads. Accessories Package #1
1. Spool Holder Arms (4 pieces)
2. Universal Spool Holder Adapters (4 pieces)
3. M4-12 bolt (1 piece)
4. Tool Kit ‣ 5.5 mm - 7 mm box end wrench (1 piece)
‣ 3, 2.5, 2, and 1.5 mm hex keys (4 pieces)
‣ Tweezers
‣ Ceramic screw driver
Accessories Package #2
1. Power Cord
2. USB Cord
3. SD Card
‣
‣
‣
‣
Precision oiler
Print removing blade
Quick Change nozzle Scraper
Inside the INFINITY 3D Printer
1. All printer components (assembled)
2. Glass Build Plate
5
THE INFINITY 3D ILLUSTRATED PARTS CATALOGUE
6
INSTALLING PRINTER COMPONENTS
Universal Filament Spool Holders
To assemble the Filament Spool
Holders, you will need the
following items from your
Accessories Package:
1. Spool Holder Arms (4 pieces) with M4-12mm bolts
and washers
2. Universal Spool Holder Adaptors (4 pieces)
3. M4-10 mm bolt
4. 3mm Hex Key
5. Combination 7mm wrench
Facing the front of the printer, you will see how each Spool Holder Arm is numbered. 1
2
3
4
You will notice that each of the Spool Holder Arms is labeled on each piece corresponding to
where it should go on the printer frame. Each Spool Holder Arm also has the correct bolts,
nuts and washers already included with each piece. Just unscrew them from the piece and
assemble them onto the printer frame using your 3mm hex key.
7
Installing the Universal Spool Holders
1. Position the Spool Holder Arm in its correct position corresponding the labels on the spool holder to the labels on the
printer frame). 2. Insert the 3Mx12mm screws and washers into the hole. 3. Using your 3mm hex key, screw in clockwise. Use a 20-25 in-lb
torque for each screw. 4. Repeat for Spool Holder Arms #1, 2, and 4. Note that Spool Holder Arm #3 attaches to the back panel of the printer. It requires a shorter
10mm screw, washer and bolt which is included with the spool arm.
1. Hold Spool Holder Arm #3 in position and insert
the 12 mm screw and washer on the top surface
to hold the arm in place.
2. Position the arm over the hole on the back panel
and insert the 10 mm screw and washer into the
hole and secure with a 3mm hex key.
3. Secure the top screw by attaching a nut and
washer on the underside of the top panel of the
printer. 4. Using the 7mm side of the combination wrench,
hold the bolt and secure the screw using the 3mm
hex key. Universal Spool Holder Adaptors
We created the Universal Spool Holder Adaptors so that your spool of filament, heavy or
light, can easily rotate as the printer is printing by reducing the stress caused by pulling of
the filament by the filament drive teeth. They can fit most filament spools and can easily be adapted to other spools on the market.
They use the preload of the spool arms to hold the spool in place which makes it that much
faster and easier to exchange filament spools. Adjust the drag of the spool feed by adjusting
the torque of the universal spool holder adaptor bolt. 8
Installing the Universal Spool Holder Adaptors
1. Insert one Universal Spool Holder
Adaptor into your filament spool and
insert the Adaptor into one of the Spool
Holder Arms. Note that the Spool Holder Arms are quite
flexible and will bend to allow for easy
installation.
2. Hold the filament spool in place and
insert the second Spool Holder Adaptor
into the other Spool Holder Arm with the
bearing and bolt sliding through the slot
on the inside of the arm. 3. Push the adapter down until you hear a
click. If you find that if your spool is not compatible with our Universal Spool Holder Adaptors.
Send us the measurements of your spool and we can send back a modified .stl file which you
can print and use for your spool.
9
Inserting Filament into Extruder
Once you have installed the Spool Holder Arms and Adaptors, you are now ready to insert
your filament into the extruder.
1. Squeeze the drive lock door to the
extruder and turn the drive door lock
knob counterclockwise to open the
filament drive door. From here you can
also view the filament gear teeth. 2. Trim your filament tip to make sure its
straight. Preheat the extruder to the
extrusion temperature of your filament.
3. Make sure your extruder is heated to the
extrusion temperature of the filament you
are using. Insert your filament through
the top of the extruder while holding the
filament drive door open. You should be
able to feed the filament through the
extruder and see filament being extruded
from the heated nozzle. 4. Close the filament drive door and turn
the drive door lock knob clockwise until
tight.
10
Glass Build Plate
The glass build plate is magnetized and completely removable by using the tape tab on the
side of the glass build plate. We recommend you use hairspray as the bed adhesive when
printing as it makes it easier to clean by simply washing with warm water and cleaning with
glass cleaner.
Power and USB cords
The power cord and the USB cords both come in the Accessories Package #2. Plug the
power cord in first and then the USB cord if you are using the MatterControl software on
your computer to run the printer.
11
INSTALL AND SETUP OF MatterControl SOFTWARE
Connecting your Printer to MatterControl
1. Select and download the MatterControl software for your platform from
www.revolution3dprinters.com/pages/downloads.
2. In the status dashboard, select “Add a Printer”. 3. Give your printer a name in the “Printer Name” field.
4. In the “Select Model” field, select the model by referring to the Delivery & Manufacture
Information form to load the configurations specific to your printer. Select “Save and
Continue”.
5. Follow the instructions in the “Connect to Printer” window as MatterControl will start to
create a connection to the printer. 6. Once the connection has been established, select “Done” to close the window.
If you unable to connect to your printer after following the above steps, continue with the
following troubleshooting steps:
1. Turn off the print while still connected to your computer.
2. Select the created printer name in the status bar at the top left hand side where you first
set up the printer. 3. In the “Connect to Printer” pop-up window, select “edit”.
4. In the “Serial Port” selection, you will notice a “refresh” button. Turn on your printer,
unplug from the computer and select “refresh”. You will notice that the serial port where
the printer was connected has become unavailable by turning grey.
5. While your printer is turned on, plug the USB back in and select “refresh”. The correct
serial port that the printer is connected to will appear highlighted. Select this serial port.
6. Under the “Baud Rate” selection, select 250000.
7. Save the settings by selecting “Save”. Note that it may take some time for your computer to recognize and download the driver for
the printer. If you are having trouble with installing the driver, refer to Appendix B.
12
Inputting your Printer’s Unique Calibration Settings
Every printer we send out goes through several calibration procedures to make sure
your selected extruder is perfectly tuned to your printer. The following printer settings are
optimized to each printer: Dual Extruder Offset, Z-Height Offset, and Print Centre. These
calibrations are found on the Delivery & Manufacture Information form and need to be
entered into the MatterControl slice settings under the Settings>Printer>Extruder and
Settings>Printer>General section when Advanced settings is selected as shown.
Note - The Z-Offset setting is used when there is a change to the height of the Glass Build
Plate - such as adding blue painters tape or any other surface which may change the height
of the build area. Refer to the instructions in the Nozzle Clearance Settings section if
changing the bed height.
13
3D PRINT SETTINGS
Your MatterControl software comes with preset quality settings specific to the
INFINITY 3D printer. In the Advance Controls>Settings options, the Quality selection has
three options: High, Medium and Low. Select to quickly start your print. In Settings, you will
also find the Materials selection. These presets can be customized and refined as you become more accustomed to working
with the printer and find settings specific for different prints and materials. Here is a quick
guide to better understand which quality slice setting might be best for your print:
Preset
Layer Height
Quality
Time of Print
High
0.1 mm
Highest
Slower
Medium
0.2 mm
Medium
-
Low
0.3 mm
Draft
Faster
To adjust these settings or create your own, select the editing button and select Add to
create new settings or Edit beside each setting. Note that the default Quality setting is Medium and the default Materials setting is PLA.
14
STARTING A PRINT WITH MatterControl
How to Get a File
There are several ways of creating a 3D print file or .gcode:
1. Develop a CAD design, export as a .stl file and drag-and-drop into MatterControl to
slice and print.
2. Download a .stl, or .gcode file to print.
3. 3D scan an existing object.
You are able to either drag and drop files directly into the Queue or select the Add button in
the print status window to browse for a print file.
4. Select the Create button at the bottom of the Print Queue to print basic text or
convert a .jpg image into a print file. The Image Converter is currently an add-on.
15
Printing
The MatterControl slice engine has Simple, Intermediate and Advanced settings, which
can be selected in the Settings window under the Quality and Material presets. These
settings filter the amount of control and print settings you have when starting your print. The Simple setting has one menu and allows for changing the layer height and the fill density
of your print, as well as generating support material and a raft.
The Intermediate setting allows your to have more control in your Print, Filament, and
Printer settings. In your Print settings, you can now control the type of infill, number of
perimeters, add a skirt and control your support material generated. In your Filament
settings, you can manually change the diameter of your filament, extrusion and bed
temperatures. In your Printer settings, you can change the parameters of the build plate and
manage your dual extruder settings. When using the Advanced
settings, you have full control of
your print with changing print and
fan speeds, repairing bad edges,
creating a wipe tower for your dual
extruders, refine filament retraction,
and change nozzle diameter to
name a few.
We recommend that every user start with the Simple mode and progress from there. The MatterControl website has an excellent library of each slice settings in MatterControl.
Visit the MatterControl website for a more in depth definition of each slice setting at:
www.mattercontrol.com/articles/mattercontrol-slice-settings-explained.
16
You are also able import and export your slice settings from another program in the Options
menu beside your slicing preferences. Each slicing option has a help option to help you
better understand how each setting affects your print. This help feature can be toggled on
and off by selecting Show Help beside the slicing preferences and options menu.
As you can see, the Show Help feature is toggled on and the Diameter and Extrusion
Multiplier has boxes underneath the slicing options to explain what they are and what
values should be entered to optimize your print and filament extrusion. 17
Viewing and Editing your Print
In the Queue and Library, you are able to view your print by selecting the print file
and selecting View. In the 2D or 3D view, you are able to view your print in the build plate
and area. You are also able to Edit your print by rotating, moving, copying, scaling, mirroring,
etc. This is where you are also able to add other files to print on the print bed by selecting
Insert. MatterControl also has an Auto-Arrange option which can rearrange your prints to fit
the bed and stagger multiple parts on the same bed. Once you’ve made your edits, select
Save or Save-As to save any changes you’ve made.
Control while Printing
While printing, you are able to control the print speed and extrusion rate of your print using
the Tuning Adjustment in the Control settings panel. It is based on a percentage of your
printing speeds with 1 being 100% of your print speed. Eg. If you are printing at 50 mm/sec
and you increase your Extrusion Multiplier to 1.2, you are now printing at 60 mm/sec.
18
Cloud Notifications
By using Cloud Notifications in MatterControl, you are able to be notified when your print is
finished by sending yourself a text, e-mail or a sound to be played on your computer. You
can also monitor the progress of your print by sending a link to yourself or your colleague.
You can change the Cloud Notification settings in the Configuration panel.
19
Export to SD Card
You are also able print without tethering your printer to a computer by using the Graphic
Display Panel and are able to control print speed, temperature and extrusion rate while
printing just like in MatterControl.
In the MatterControl Software, you are able to slice and export any file to a .gcode file format
which is transferred to the SD card ready to print from the printer directly. Select the file you
would like to print and select Option>Export to Folder which will generate a .gcode which
can be put on to any SD card. Another way to generate a .gcode file is to select
Options>Load Files while your printer is connected to your computer and the SD card
inserted in the printer. The program recognizes the flash storage device in the printer and can
transfer several files directly. After transferring the .gcode files to the SD card, select Eject
SD Card, disconnect your computer from the printer and you are able to start the print using
the Graphic Display Panel. 20
Graphic Display Panel
You are also able print without tethering your printer to a computer by using the Graphic
Display Panel and are able to control print speed, temperature and extrusion rate while
printing. Rotate the control button to scroll through the menu and select by pressing the
control button. View the full menu of the Graphic Display Panel in Appendix A.
1. Turn on the printer using the power switch
located on the right hand front of the
machine. The graphic display panel will
display several logos, and then the home
status screen. Push down on the control
knob located below the display panel to
select the main menu.
2. Rotate the control knob clockwise to
highlight Prepare and select the control
knob again to select it.
3. Rotate the control knob to highlight
Preheat PLA or Preheat ABS depending
on the material you are using, and select it.
4. Select Preheat PLA 1 or Preheat ABS 1
and click to select it. You will be returned to
the status screen to start heating your bed
and extruder. You can select materials for
your dual extruder as well by selecting
Preheat PLA 2 or Preheat ABS 2. Wait for
the actual (bottom) temperatures of the bed
and extruder to reach their desired (top)
temperatures, which should take
approximately 3 minutes. 5. Navigate to the main menu and select Print
from SD and select the .gcode file you
would like to print. Once the axes home,
your file will start printing.
21
DESIGNING FOR 3D PRINTING
There are many CAD and modelling softwares that can be used to do create your own
designs and prototypes. However, there are some tips that can help you in printing your
design just how you have designed it in CAD:
1. Modify your CAD design to make it easier to remove your 3D print from the printing
plate by adding a notch.
2. Avoid printing support material by orienting your print through the Edit feature in
MatterControl.
3. Use cooling towers or extra prints to get optimal print time and cool time per layer.
For very intricate and small prints, it is optimal that each layer has enough time to cool
before another layer is added on top. With the hot end extruder so close to each layer in
a small printing space, the layers are likely to start warping because they have not had
the chance to cool properly. If you place another print or a column printing away from
your print, it has enough time to cool and you should not experience as much warping.
4. Optimize the quality of your CAD file to match your printer resolution. Your 3D model is
essentially a mesh with many faces that gets sliced into many layers - if you would like a
completely smooth print, make sure that your mesh is fine enough in your CAD file.
5. Pick the appropriate infill. In MatterControl, you are able to pick many different infills
and a range of 0-100% infill. For prototyping or your first draft print, we suggest a lower
10-20% infill to reduce the amount of plastic you use and the time it takes to print. For a
strong, usable part, we suggest 60% and higher. Note that the smaller your infill
percentage, the more top solid layers are needed to achieve a solid top layer.
6. Adjust tolerances. If you are using nuts and bolts in your finished print, you have to
make sure that they fit properly once printed. Eg. for a 3 mm bolt to slide through the
printed part, size your hole to 3.5 mm in your CAD software. For a tap out, undersize to
2.7 mm (and a minimum of 3 perimeters when slicing) for a 3 mm bolt.
7. Plan for multi-materials printing with your dual extruder. In the Edit settings in
MatterControl, you are able to select which parts you would like to print with which
extruder by selecting Ungroup where the software will recognize different solid parts in
your print that can be selected and printed on its own or with your second extruder.
8. Interlocking designs - allow for enough tolerance. Although the printer is highly
accurate, the tolerance can depend on your filament and the printing temperature.
Measure your filament using calipers in several places and input the “corrected” filament
diameter in the Filament slicing settings. You can also change the Extrusion Multiplier
values to make sure your hinged parts have enough clearance and are able to print with
the negative space in between the hinges in order to print a working part.
22
MATERIAL GUIDELINES
Our extruder is specifically designed so that it can be used with any 1.75mm filament on the
market. With a maximum extruder temperature of 320C and a heated bed temperature of
120C, you are able to print with a large variety of materials. Here are some guidelines on
printing with the most popular filaments:
1. PLA (polylactic acid) has a range of temperatures depending on the purity and colour of
the PLA filament. A natural PLA can print at 180C while a white or highly pigmented PLA
can print as high as 220C. We recommend a bed temperature of 50C which can be
turned off after a few layers of printing. Using a hairspray as the bed adhesive can help it
stay on the bed while printing.
2. ABS (acrylonitrile butadiene styrene) has a printing temperature range of 210-250C with
a higher bed temperature of 100C. ABS can warp and shrink with temperature changes
so it needs a constant bed temperature and a bed with lots of adhesive. 3. Nylon (Taulman 645 and 618) has a very specific printing temperature of 245C with little
or no bed temperature, but requires many layers of adhesive on the bed as nylon needs
a printing surface with texture in order to avoid warping. Using several layers of hairspray
and adding a brim to your print can help the first layer of the print from warping and
peeling off the bed. Printing at a lower speed can also help in proper layer adhesion.
4. PETT (Taulman T-Glase) is a high strength filament which can print at a lower
temperature range of 210C-230C in comparison to nylon and can print on a heated bed
with hairspray on the glass bed. Note that we are constantly testing new materials and posting our results on our website and
online version of this User Guide. Check our website for any new materials and feel free to
reach out to us for printing guidelines on new materials.
23
BASIC MAINTENANCE
Changing Filament
Changing filament from one material to another is as easy as inserting filament as seen
above in the Inserting Filament into Extruder section. 1. Make sure your extruder is heated to the
extruding temperature when changing
filaments. 2. Once your new filament is inserted into the
extruder, manually push the filament through
the extruder to observe filament being
extruded from the heated nozzle. 3. Close the Filament Drive Door and turn the
Drive Door Lock Knob clockwise until its
tight. Filament Gear
The filament drive gear teeth is what feeds the extruder while printing. You may find that
using a low quality filament or through rigorous retractions and extractions, your filament can
get degraded by the gear teeth and will stop extruding. If you find this is the cause of your
print failure, follow the following steps:
Open the filament drive door to get to the filament gear. Remove the top filament portion (coming from the filament spool).
Make sure your nozzle is heated to the extrusion temperature of your filament.
Using tweezers from your tool kit, gently wiggle out the filament upwards and through
the open filament drive door. 5. Clean out the filament drive gear teeth with pressurized air or simply by blowing out the
ground filament.
1.
2.
3.
4.
The gear itself needs very little maintenance other than regularly removing any filament
particles that can gum up the gear teeth.
24
Quick Change Nozzle
If you find that your filament jam cannot be solved by manually pushing filament through the
heated nozzle, it is very fast and easy to switch out the clogged nozzle.
1. Make sure your nozzle has completely
cooled before going near the hot end. 2. Using a 3mm hex key, loosen the bolt on
the side of the hot end.
3. The nozzle can be removed using the
tweezers or by letting it slide out once
the bolt is loose enough. 4. Insert the new nozzle included with your
tool kit and tighten the bolt back again. For a dual extruder, use the two screws
beside the fan to change out the hot end
nozzle as they are more easily accessible. Oiling
The XYZ linear rods and Z-Axis threaded rods need to be oiled regularly (approx. every 30
hours of printing) to make sure there is no excess wear and minimal friction while printing.
The oiler provided has synthetic mineral oil which can be found in any store. We have provided a holder for the oiler, scraper and tweezers inside the printer frame to
make sure you don’t forget to oil the rods and any other moving parts on the printer.
Cleaning the Glass Build Plate
The glass build plate is easily cleaned with warm water and glass cleaner if using hairspray.
Make sure that your glass build plate doesn't build up dust as it won’t be able produce an
optimal first layer. 25
NOZZLE CLEARANCE SETTING
Once the printer leaves our workshop, the bed springs should not have to be adjusted
manually. If you were to change the bed height by adding tape to your glass or removing
tape, the bed height should be changed in the MatterControl software under Z-Offset as
shown in the section of Installing MatterControl Software.
The correct bed height is achieved by changing the Z-Offset in the MatterControl
software and being able to slide a piece of paper underneath the extruder nozzle with very
little pressure at each corner of the print bed.
BELT TENSIONING
Our machines are tuned and calibrated before leaving our workshop, but in the case
that you suspect the belt under the heated bed has been compromised or the prints are
starting to look shifted. Belt tensioning is something that you will rarely have to do with our
machine - however, the tension can depend on ambient operating temperature or just
constant use over several years. There is a very fast and quick way to increase the tension:
1. Locate the belt tension plug with the brass insert inside the y-axis belt clamp mount.
There is a 50 mm screw going through the y-axis belt clamp mount and the belt
tension plug as seen in the figure below.
2. Using a 2.5 mm hex key, slowly turn the screw in a clockwise direction and notice the
belt tensioning. You will reach the perfect tension when the top belt will vibrate 5-6 times
when strung. If you can hear the vibration, the belt is too tight. If you can hold both the
top and bottom of the belt together with little pressure, it is too loose. 26
APPENDIX A
The Graphic Display Panel full menu is as follows:
Main Start Up Screen Info Screen
Prepare
Disable steppers
Auto home Preheat PLA
Preheat PLA 1 Preheat PLA 2 Preheat PLA 3 Preheat PLA ALL Preheat PLA Bed
Preheat ABS
Preheat ABS 1
Preheat ABS 2
Preheat ABS 3 Preheat ABS ALL Preheat ABS Bed
Cool down Switch power off Move axis
Move 10mm Move 1mm Move 0.1mm
Control
Temperature
Nozzle: Nozzle2: Nozzle3: Bed:
Fan Speed: Autotemp:
Min: Max: Fact:
PID-P:
27
PID-I:
PID-D:
PID-C:
Preheat PLA conf:
Fan Speed: Nozzle: Bed:
Preheat ABS conf: Fan Speed:
Nozzle: Bed:
Motion
Accel:
Vxy-jerk: Vz-jerk: Ve-jerk Vmax x: Vmax-y: Vmax-z: Vmax-e: Vmin:
Vtrav min: Amax z: Amax y: Amax x: Amax e: A-retract: Xsteps/mm: Ysteps/mm: Zsteps/mm: Esteps/mm:
LCD contrast
LCD contrast:
Restore failsafe Print from SD
<list of the .gcode files on the SD card>
Note that the settings changed in the Graphic Display Panel are not transferrable to
MatterControl and are erased when the printer is powered off.
28
APPENDIX B
DRIVER INSTALL TROUBLESHOOTING
When first connecting your printer to your computer, Windows users will need to
download the driver required to communicate with the motherboard. For OS X users, the
driver is downloaded with the MatterControl software and is ready to use on first plug in. For
Windows users, follow the following steps to download the driver:
1.
2.
3.
4.
5.
6.
7.
8.
Run the MatterControl software installation wizard.
Run the Windows Device Manager.
Plug in the printer USB cable to the computer.
In the Windows Device Manager, you will find the driver “TAURINO - Arduino Mega2560”
under “Other Devices”.
Right-click on the driver and select “Update Driver Software”.
Select “Browse my computer for driver software” and “Browse”.
Navigate to “C:\Program Files (x86)\MatterControl\Static Data\Drivers” and select “OK”.
Select “Next”. Your driver should now be installed.
Note - For Windows 8 users, visit the MatterControl website at
www.mattercontrol.com/articles/installing-rambo-driver for detailed, step-by-step
information on setting up the Taurino driver.
29