1
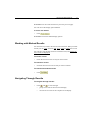
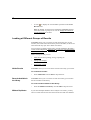
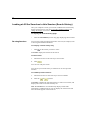
ERL WebSPIRS User’s Guide WebSPIRS 5.1 Ovid Technologies WebSPIRS User’s Guide Copyright © 2005 Ovid Technologies All rights reserved. SilverPlatter, ERL, and SilverLinker are registered trademarks of SilverPlatter International N.V. licensed to Ovid Technologies, Inc. Microsoft, MS-DOS, Windows, Windows 95, Windows 98, Windows NT , Windows 2000 and Windows XP are registered trademarks of Microsoft Corporation. Solaris is a trademark of Sun Microsystems, Inc. UNIX is a registered trademark of The Open Group. Ovid Technologies Ovid Technologies, Ltd. 9350 S. 150 E. Suite 300 250 Waterloo Road Sandy, Utah, 84070, USA London, SE1 8RD, England TEL: 801-304-3000 TEL: +44 (0) 20-7981-0600 FAX: 801-304-3001 FAX: +44 (0) 20-7981-0601 Web site: www.ovid.com i Table of Contents Chapter 3 About WebSPIRS 5.1 . . . . . . . . . . . . . . . . . . . . . . . . . . . . . . . . . . . . . . . . 3 Using WebSPIRS Help . . . . . . . . . . . . . . . . . . . . . . . . . . . . . . . . . . . . . . . 4 How do I? Help . . . . . . . . . . . . . . . . . . . . . . . . . . . . . . . . . . . . . . . . . . 4 WebSPIRS 5 Help . . . . . . . . . . . . . . . . . . . . . . . . . . . . . . . . . . . . . . . . 5 WebSPIRS Basics . . . . . . . . . . . . . . . . . . . . . . . . . . . . . . . . . . . . . . . . . . 6 Logging in . . . . . . . . . . . . . . . . . . . . . . . . . . . . . . . . . . . . . . . . . . . . . . 6 Choosing Databases . . . . . . . . . . . . . . . . . . . . . . . . . . . . . . . . . . . . . . 7 Finding Which Databases to Search . . . . . . . . . . . . . . . . . . . . . . . . . . 7 Logging Out . . . . . . . . . . . . . . . . . . . . . . . . . . . . . . . . . . . . . . . . . . . . . 8 Getting Help with Databases . . . . . . . . . . . . . . . . . . . . . . . . . . . . . . . . 8 Searching with WebSPIRS . . . . . . . . . . . . . . . . . . . . . . . . . . . . . . . . . . 10 Basic Searching . . . . . . . . . . . . . . . . . . . . . . . . . . . . . . . . . . . . . . . . . 10 Getting Suggested Search Terms . . . . . . . . . . . . . . . . . . . . . . . . . . . 11 Focusing Your Search . . . . . . . . . . . . . . . . . . . . . . . . . . . . . . . . . . . . 11 Using Search Results . . . . . . . . . . . . . . . . . . . . . . . . . . . . . . . . . . . . . . 15 Changing the Results Display . . . . . . . . . . . . . . . . . . . . . . . . . . . . . . 15 Working with Marked Results . . . . . . . . . . . . . . . . . . . . . . . . . . . . . . 17 Navigating Through Results . . . . . . . . . . . . . . . . . . . . . . . . . . . . . . . 17 Looking at Different Groups of Results . . . . . . . . . . . . . . . . . . . . . . . 18 Looking at All the Searches in this Session (Search History) . . . . . . 20 Printing Records . . . . . . . . . . . . . . . . . . . . . . . . . . . . . . . . . . . . . . . . 22 Saving and Exporting Records . . . . . . . . . . . . . . . . . . . . . . . . . . . . . 23 Emailing Records . . . . . . . . . . . . . . . . . . . . . . . . . . . . . . . . . . . . . . . . 25 Saving a Search History to Use Again . . . . . . . . . . . . . . . . . . . . . . . . 27 Saving Your Search History . . . . . . . . . . . . . . . . . . . . . . . . . . . . . . . . 28 Using Saved Search Histories . . . . . . . . . . . . . . . . . . . . . . . . . . . . . . 29 Changing Saved Search History Settings . . . . . . . . . . . . . . . . . . . . . 30 Checking for Library Holdings . . . . . . . . . . . . . . . . . . . . . . . . . . . . . . 30 Linking to Full-Text Documents on the Web . . . . . . . . . . . . . . . . . . . 31 Re-running Searches Automatically . . . . . . . . . . . . . . . . . . . . . . . . . 31 Setting Up an SDI . . . . . . . . . . . . . . . . . . . . . . . . . . . . . . . . . . . . . . . 32 Subscribing to an Alert . . . . . . . . . . . . . . . . . . . . . . . . . . . . . . . . . . . . 36 Database Thesaurus . . . . . . . . . . . . . . . . . . . . . . . . . . . . . . . . . . . . . . . 37 Searching from a Database Thesaurus . . . . . . . . . . . . . . . . . . . . . . . 37 Looking at Subheadings . . . . . . . . . . . . . . . . . . . . . . . . . . . . . . . . . . 38 Looking at Term Details . . . . . . . . . . . . . . . . . . . . . . . . . . . . . . . . . . . 38 ii Database Index . . . . . . . . . . . . . . . . . . . . . . . . . . . . . . . . . . . . . . . . . . . . Searching from a Database Index . . . . . . . . . . . . . . . . . . . . . . . . . . . Database Table of Contents . . . . . . . . . . . . . . . . . . . . . . . . . . . . . . . . . Searching from a Database Table of Contents . . . . . . . . . . . . . . . . . Using the Record TOC . . . . . . . . . . . . . . . . . . . . . . . . . . . . . . . . . . . Find Citation . . . . . . . . . . . . . . . . . . . . . . . . . . . . . . . . . . . . . . . . . . . . . . Searching Using Find Citation . . . . . . . . . . . . . . . . . . . . . . . . . . . . . . Searching Tips . . . . . . . . . . . . . . . . . . . . . . . . . . . . . . . . . . . . . . . . . . . . 39 39 41 41 41 43 43 44 3 About WebSPIRS 5.1 WebSPIRS (SilverPlatter's Information Retrieval System for the World Wide Web) lets you use a web browser to search SilverPlatter databases. Introduction WebSPIRS can be configured in a number of ways. Whether you can use a feature depends on the way WebSPIRS is set up in your organization, but you might be able to use WebSPIRS to: • Print, export, save, or email the records you retrieve . • Save your search history to use again in future sessions. • See library holdings information for cited documents. • Link directly to full content electronic journals. • Have documents delivered to you. • Use the SDI (Selective Dissemination of Information) feature, to set up searches to run automatically so you can receive email notifications of new records. • Subscribe to Alerts (SDIs created by your librarian to run automatically and send you email notifications of new records). 4 Using WebSPIRS Help WebSPIRS provides contextual How do I? Help for page specific tasks and WebSPIRS 5 Help covering the WebSPIRS features, and how to use them. How do I? Help How do I? help provides contextual help for performing page specific tasks. To access How do I? help: • Select the task you want to perform from the How do I? drop-down list. WebSPIRS opens a new window, which displays the relevant How do I? help topic. To close How do I? help: • Click on the How do I? help toolbar. To print a help topic: • Click on the How do I? help toolbar. WebSPIRS 5 Help 5 WebSPIRS 5 Help WebSPIRS 5 help covers WebSPIRS features and describes how to use them. To access WebSPIRS 5 help: • To access WebSPIRS 5 help, click Help on the WebSPIRS toolbar, or click Help on the How do I? Help toolbar. WebSPIRS opens a new window, which displays the WebSPIRS 5 help To close WebSPIRS 5 help: Click Close on the WebSPIRS 5 help toolbar. To print a help topic: • Click on the WebSPIRS 5 help toolbar. Introduction • 6 WebSPIRS Basics Logging in The Login page appears when you connect to WebSPIRS with your web browser. (The WebSPIRS URL address is provided by your librarian or system administrator.) Note: If the Select Databases page appears when you connect to WebSPIRS, you do not need to log in to WebSPIRS. To log in to WebSPIRS: 1. Type your user name and password (31 characters or less) in the appropriate fields. (See your librarian or system administrator if you don't have this information.) 2. Click WebSPIRS displays a list of databases that you can search or the Search page if your librarian or system administrator has specified the databases that you can search. To log in to multiple servers: Note: You can only log in to multiple ERL servers, with a separate user name and password for each server, if your librarian or system administrator has enabled this feature. By default, WebSPIRS logs in to multiple ERL servers with the same user name and password. 1. Type your user name and password (31 characters or less) in the appropriate fields for each server. (See your librarian or system administrator if you don't have this information.) 2. Click Choosing Databases 7 WebSPIRS displays a list of databases that you can search or the Search page if your librarian or system administrator has specified the databases that you can search. Choosing Databases The Available Databases page lists all the SilverPlatter databases currently available to you. It lets you do the following: Select and open databases you want to search. • Get database descriptions. • Find all the databases that contain the terms you plan to search for. Introduction • Note: If you see next to the server name, you have the right to use SilverLinker-enabled databases. This means you may be able to link to electronic journals to get the full content of cited documents. To Select and Open Databases: You can select and open the databases to search on the Available Databases page. 1. Check the box next to each database you want to search or check the box next to a database heading to search all the databases under that heading. 2. Click WebSPIRS opens the selected databases and displays the Search page. To Get a Database Description: • Click next to the database name for a description of that database. Finding Which Databases to Search The Suggest Databases page lets you find the most appropriate databases to search. 8 To find relevant databases: 1. Click 2. Type a word or phrase. 3. Click WebSPIRS searches all available databases and displays how many records match your term or phrase in each database. See Also: To Select and Open Databases: To Get a Database Description: Logging Out When you are finished searching, you must logout of WebSPIRS to end your search session completely. Once you are logged out, you can start a new WebSPIRS session or leave WebSPIRS ready for the next user. To log out of WebSPIRS: • Click Logout on the WebSPIRS toolbar. WebSPIRS displays the Login page confirming that your session is closed. Closing individual WebSPIRS windows will not log you out of WebSPIRS. You must click Logout to close WebSPIRS properly and make it ready for the next user. Getting Help with Databases Each SilverPlatter database has a unique online guide that includes a list of fields with descriptions and sample searches. It also includes explanations of any special features of the database. Getting Help with Databases 9 To display the database guides: • Click Database Guide. WebSPIRS opens the Database Guide pop-up window where you can see the online guides for any of the databases you are searching. By default WebSPIRS displays the online guide for the first database in the list of databases you are searching. To view the guide for a different database: • Select a database from the drop-down list in the Database Guide pop-up window. Introduction The Database Guide pop-up window displays the database guide for the database you selected. 10 Searching with WebSPIRS Basic Searching To perform a basic search: • Log in to WebSPIRS • Select one or more databases to search To search for records 1. Type a term or phrase you want to search for in the database you are currently using. Note: If you enter more than one term, WebSPIRS treats the terms as a phrase. 2. Click WebSPIRS searches the database for your term and displays any retrieved records. See Also: Change Databases Searching Tips To change databases to search: Click the Search Tabs. next to the list of databases being searched above WebSPIRS displays the list of databases that you can select and open. Getting Suggested Search Terms 11 To view the databases you are searching: Rest your mouse cursor on next to the list of databases that are currently being searched above the Search Tabs. Getting Suggested Search Terms To obtain suggested search terms: You can get suggestions for alternative search terms related to your subject term. As these terms are taken directly from database descriptor terms, they may give more precise search results. Introduction Note: Not available for all SilverPlatter databases, or if you selected multiple databases that do not share the same thesaurus. To get alternative search terms 1. Type a term or phrase. 2. Click WebSPIRS displays a list of suggested terms. Focusing Your Search If you enter a broad search term, you may get more records than you can handle. To make sure that all the records you get are really relevant to your search interests, you can focus your search using one of the following methods: Using Fields to Limit Your Results • Using Fields to Limit Your Results • Setting Search Limits Limit the number of records you see by specifying that you only want to see a record if it contains a specific term within one of its database fields, such as the TITLE field. 12 You enter the search term, and the field you want to find it in, into the text entry box, like this: pencil in TI Tip: Look at the database guide to check the fields in the database you are using. Most databases contain an author field, usually abbreviated AU, and a journal field, usually abbreviated JN. You can search for author or journal information directly in these fields. To find an author or journal on the Advanced Search page 1. Enter the name of the author or journal in the Term: field. orwell-george 2. 3. Select the appropriate field to search in from the drop-down list. • Select AUTHOR(AU) to search for an author. • Select JOURNAL NAME(JN) to search for a journal. Click WebSPIRS searches for the author or journal in the specified fields and displays the results. Setting Search Limits The limits you set are effective for all searches until you clear them, change them, change databases, or logout. To find fewer records: You can focus your search by applying various limits to your search statements. Limit fields are specially indexed fields that contain relatively few possible values. They let you limit your search results to records with common characteristics, such as language or publication year. WebSPIRS displays the Limit Search To box on appropriate Search Tabs. This box provides a convenient way to see, set and clear the limits that are being applied to your search. Focusing Your Search 13 To set or clear individual search limits: • Click the check box to the left of the limit that you wish to set/clear. To clear all search limits: Click To add new search limits: Some database fields are limit fields, which let you limit your searches to records with common characteristics, such as publication year or language. To change quick limits 1. Click 2. Select the 3. Select the limits you want to set. 4. Set the values of the limits. 5. Click tab. Introduction You can set quick limits in your open databases so that your search retrieves only records that contain the fields and values that you specify. WebSPIRS adds your chosen limits to the Limit Search To box and reruns your last search using the changed limits. You can set other limits in your open databases so that your search retrieves only records that contain the fields and values that you specify. To change other limits 1. Click 2. Select the 3. Select the limit you want to set by clicking on its name or list of Other Limits. tab. in the WebSPIRS displays possible values for the limit (if there are any). 14 4. Select the value of the limit (if there are any). 5. Click WebSPIRS reruns your last search using the changed limits. To clear limits: • Click Changing the Results Display 15 Using Search Results Changing the Results Display To get to the Change Display page: • Click Introduction The Change Display page lets you specify how and when you want WebSPIRS to display retrieved records. on any page displaying search results. To set the way to display results 1. Specify the maximum number of records you want to see on screen at one time and the Field Label Format you want to use. 2. Specify whether or not to display duplicate records and which records to give priority to. 3. • Select Full Text if you want to give priority to records with the $FT_LINK or $FULT metadata elements. • Select Descriptors if you want to give priority to records with the $SUBJECTS_CONTROLLED metadata element. • Select Abstract if you want to give priority to records with the $ABSTRACT metadata element. Select the fields you want to display within retrieved records. WebSPIRS displays some default field types. If you want to display other field types, select Specific Fields then click WebSPIRS opens the Change Fields page, where you can choose the fields you want to display. 16 4. Specify how you want WebSPIRS to sort your search results. 5. Specify how and when you want WebSPIRS to show your search results. 6. Click WebSPIRS returns you to the previous page. The Change Fields page lists the fields in the databases you are currently searching, allowing you to select the ones you want to display. To select the fields you want to display 1. Check the box next to each field you want to display. 2. Click WebSPIRS returns you to the previous page and displays the fields you selected in the Currently Selected Fields: field. You can sort the results you retrieve by a particular field and order by specifying the Results Sort Order options. To sort the results 1. Select Sort: to sort the results. 2. Enter the maximum number of records to sort. Note: If the number of records you retrieve exceeds this number, your results will not be sorted 3. Select the field to sort on in the Sort by: field. 4. Select the order in which you want to sort the records: • Select Ascending if you want to sort records in ascending order (e.g., 0 - 9; A - Z). • Select Descending if you want to sort records in descending order (e.g., 9 - 0; Z - A). 5. If necessary, change any of the other display options on this page. 6. Click Working with Marked Results 17 WebSPIRS sorts the results and returns you to the previous page. You can restore the display option defaults. To restore the defaults • Click WebSPIRS restores the default display options. Working with Marked Results Introduction You can mark any record in the list of retrieved records. When you mark records you can: view, unmark, print, save, export,or email the records. You can also view the full content of a marked record, and change the way records are displayed. To mark a record: • Check the box next to the record you want to mark. To unmark a record: • Uncheck the box next to the record you want to unmark. To unmark all marked records: • Click Navigating Through Results To navigate through results: • Click and to scroll through: • groups of records for the brief record display • records one at a time for the complete record display 18 • or click to display the record number specified in the Go To Record: field. Note: By default, for the brief record display WebSPIRS displays retrieved records in groups of 10. You can change the number of records displayed at one time. Looking at Different Groups of Results WebSPIRS allows you to view the records retrieved by any of your searches, the records associated with any term in the Index, or the record associated with any topic in the Table of Contents. You can choose to display all the results, records available in the library, records without duplicates, marked results, and a list of all the searches in the current session. While viewing records you can: All the Results • Mark them for later printing, saving, exporting etc. • Change their display. • Find similar records. WebSPIRS allows you to view all the records retrieved by your search. To view all the results: • Records Available in the Library Select All Results from the Show: drop-down list. WebSPIRS allows you to view the records retrieved by your searches that are available in the library. To view records available in the library: • Without Duplicates Select Available from Library from the Show: drop-down list. If you select multiple databases whose subjects are similar, you may retrieve records that cite the same article from more than one database. Looking at Different Groups of Results 19 When this occurs multiple instances of the article are called duplicates. WebSPIRS allows you to view the records retrieved by your searches without duplicates. To view results without duplicates: • Records Available in the Library Without Duplicates WebSPIRS allows you to view the records retrieved by your searches that are available in the library and without duplicates. To view records available in the library without duplicates: • Select Avail. w/o Duplicates from the Show: drop-down list. Introduction Marked Results Select Without Duplicates from the Show: drop-down list. WebSPIRS allows you to view only the records that you marked. To view marked results: • Select Marked Results from the Show: drop-down list. Note: This option is not available if you have not marked any records. List of All the Searches in this Session (Search History) WebSPIRS allows you to view all your previous searches in a session. To view a list of all previous searches: • Select Search History from the Show: drop-down list. See also: Looking at All the Searches in this Session (Search History) Find Similar Results WebSPIRS enables you to search for results that are similar to one of your current results. To find similar results: • Click below your chosen result. 20 Looking at All the Searches in this Session (Search History) After you complete a search, your search is added to the search history for the current session. You can re-use, edit, combine, remove, and change the display of searches. To display the Search History page: • Re-using Searches Click the Search History tab on any page displaying search results. You can reuse a search in the list of searches. You can, for example, rerun a search against different databases. To redisplay a search history entry • Click for the search you want to reuse. WebSPIRS displays the results for the search. To edit a search 1. Check the box next to the search you want to edit. 2. Click You can now edit your search. You can use your search history to combine two or more previous searches. To combine previous searches 1. Check the box next to each search you want to combine. 2. Click the or operator. WebSPIRS combines the selected searches to create a new search, and displays the results in the search history list. Note: WebSPIRS does not automatically display records after performing a combined search. You can display the retrieved records once the results appear in the search list. Looking at All the Searches in this Session (Search History) 21 To create an SDI from a search You can only create an SDI if you are an authorized user. You will only see for a search if you are an authorized user • Click for the search you want to create an SDI for. To remove a search 1. Check the box next to each search you want to delete. 2. Click WebSPIRS deletes the selected searches from the search history. Introduction Change the Display You can change the way your search results are displayed. To change the search results display 1. Click 2. Specify the number of records you want to see on screen at one time and the kind of field labels you want to use. 3. Specify the fields you want to display within retrieved records. WebSPIRS displays some default fields. If you want to display other fields, select Specific Fields then click WebSPIRS opens the Change Fields page, where you can choose the fields you want to display. 4. Specify how you want WebSPIRS to sort your search results. 5. Specify how and when you want WebSPIRS to show your search results. 6. Click WebSPIRS returns you to the previous page. To see the full text that is indexed in a record • Click Full Text Options 22 WebSPIRS opens a pop-up window displaying information about where the full text is available. Printing Records WebSPIRS allows you to print the records retrieved by any of your searches, the records associated with any term in the Index, or the record associated with any topic in the Table of Contents. To get to the Print Options page: • Click on any page displaying search results. To print records 1. Select the records you want to print. • Select All Records to print all the records. • Select Record Number and enter the start and end record numbers to print a range of records. • Select Marked Records Only to print only the marked records. 2. If necessary, select the fields in the records and other information to print. 3. Click WebSPIRS opens the browser print dialog box. To specify the records 1. 2. Select the records you want to print. • Select All records (if available) to specify all records. • Select Record number (if available) and enter the starting and ending record numbers for a specific range of records. • Select Marked records for marked records. (If you want to clear marked records after printing, select the Clear marked records checkbox.) If necessary, select the fields in the records and other items to print. Saving and Exporting Records 3. 23 Click WebSPIRS opens the browser print dialog box. To change the format 1. Check the Print one record per page box to print each record on a separate page. 2. If necessary, select the fields in the records and other items to print. 3. Click WebSPIRS opens the browser print dialog box. Introduction To preview the print 1. If necessary, select the fields in the records and other items to print. 2. Click WebSPIRS displays a print preview, which shows the information that will be printed. Saving and Exporting Records WebSPIRS allows you to save or export the records retrieved by any of your searches, the records associated with any term in the Index, or the record associated with any topic in the Table of Contents. You can save the records to a floppy or hard disk. To get to the Save or Export Records page: • Click on any page displaying search results. To export records 1. Select the required Export to application. 2. Specify which records to export. 3. Click 24 To save records to a disk 1. Specify which records to save. 2. If necessary, specify which fields in the records and other items to save. 3. Click 4. In the browser save page, specify the location and filename for your records. WebSPIRS saves the specified records. To specify the records 1. Specify the records you want to save. • Select All records (if available) to specify all records. • Select Record number (if available) and enter the starting and ending record numbers for a specific range of records. • Select Marked records for marked records. (If you want to clear marked records after saving, check the Clear marked records box.) 2. If necessary, specify which fields in the records and other items to save. 3. Click 4. In the browser save page, specify the location and filename for your records. WebSPIRS saves the specified records and displays the previous page. To change the fields to save 1. Specify the fields you want to save within retrieved records: • Select Title only to save the title only. • Select Citation only to save the citation only. • Select Citation and Abstract to save the citation and abstract. • Select Citation and Descriptors to save the citation and Emailing Records 25 descriptors. • Select Complete Record to save the complete record. 2. If necessary, change any of the other save options on this page. 3. Click 4. In the browser save page, specify the location and filename for your records. WebSPIRS saves the specified fields and returns you to the previous page. To set other items to save Introduction 1. Select the items you want to include with the saved records. • Select Search History to include your entire search history. • Select Record number and database name to include record numbers and the database name. • Select Field names with: to include field names, then choose the label type from the drop-down list. • Select With word wrapping to automatically wrap lines. 2. If necessary, select the records and fields you want to include. 3. Click 4. In the browser save page, specify the location and filename for your records. WebSPIRS saves the specified records and displays the previous page. Emailing Records WebSPIRS allows you to email the records retrieved by any of your searches, the records associated with any term in the Index, or the record associated with any topic in the Table of Contents. 26 To get to the Send Mail page: • Click on any page displaying search results. To send records 1. Enter the email address (e.g., [email protected]) you want to send the records from in the From: field. 2. Enter the email address (e.g., [email protected]) you want to send the records to in the Send records to: field. 3. Type a descriptive subject in the Subject: field. 4. If necessary, select the records, fields, and other information you want to include. 5. Click WebSPIRS emails the records and displays the previous page. To specify the records 1. Select the records you want to send. • Select All records (if available) to specify all records. • Select Record number (if available) and enter the starting and ending record numbers for a specific range of records. • Select Marked records for marked records. (If you want to clear marked records after sending, select the Clear marked records checkbox.) 2. If necessary, specify which fields in the records and other items to send. 3. Click WebSPIRS emails the specified records and displays the previous page. To change the fields to send 1. Select the fields you want to send within retrieved records: • Select Title only to send the title only. Saving a Search History to Use Again 27 • Select Citation only to send the citation only. • Select Citation and Abstract to send the citation and abstract. • Select Citation and Descriptors to send the citation and descriptors. • Select Complete Record to send the complete record. 2. If necessary, change any of the other send options on this page. 3. Click WebSPIRS sends the specified fields and displays the previous page. To set other items to send Introduction 1. Select the items you want to include with the records. • Select Search History to include your entire search history. • Select Record number and database name to include record numbers and the database name. • Select Field names with: to include field names, then choose the label type from the drop-down list. • Select With word wrapping to automatically wrap lines. 2. If necessary, select the records and fields you want to include. 3. Click WebSPIRS sends the specified records and displays the previous page. Saving a Search History to Use Again After you complete a search, your search is added to the search history for the current session. The search history lets you: • Display the records retrieved by a previous search • Rerun searches against new databases • Combine multiple searches 28 • Delete searches you no longer want • Save your searches for future use • Load search histories you have already saved To display the Search History: • Select Search History from the Show: drop-down list. To display previous search results: • Click next to the search whose results you want to view. To remove a search: 1. Check the box next to the search you want to delete. 2. Click To rerun a search against a new database: 1. Change Databases. 2. Click Search History to display the Search History page. 3. Click Rerun for the search you want to rerun. WebSPIRS reruns the search against the database you selected and displays the results. Saving Your Search History When you finish searching, you can save your search requests and run them again during future work sessions. Saving your search history is especially helpful for complex searches or those you perform regularly. To save a search history 1. Click WebSPIRS displays the Save Search History page. Using Saved Search Histories 2. 29 Enter your email address (64 characters or less) in the Email address: field. The address you type will serve as your “password” for accessing your stored search histories. 3. Enter a description for the search history in the Search History name: field. 4. Specify the expiry date for the search history by selecting the Month, Day, and Year. 5. Click WebSPIRS saves your search history. Introduction Using Saved Search Histories The Load Search History page allows you to load and use previously saved search histories. To load a search history 1. Click WebSPIRS displays the Personal Login page. 2. Enter your personal username and password. Ask your administrator if you do not have a personal username and password. 3. Click WebSPIRS displays the Load Search History page. 4. Select the search history you want to load. 5. Click WebSPIRS runs the saved search history against the currently selected database. 30 Changing Saved Search History Settings The Load Search History page allows you to edit the description and expiry date of any of your saved searches. To change search history details 1. Select the search history whose details you want to change. 2. Click WebSPIRS displays the Change Name/Date page. 3. Enter a new name for the search history. 4. If necessary, enter a new date when the search history expires. 5. Click WebSPIRS displays the saved search history with its modified details, on the Load Search History page. All the search histories on the Load Search History page are associated with an email address. Checking for Library Holdings If your library is set up to provide holdings information about documents cited in SilverPlatter databases, the records you retrieve may include: • a holdings message from your librarian or system administrator about document availability, and / or • a text link that lets you check the library’s online catalog for current holdings information. Linking to Full-Text Documents on the Web 31 Linking to Full-Text Documents on the Web If you see on the Available Databases page, your library subscribes to the SilverLinker database. When you search SilverLinkerenabled databases, you can link directly to full-text documents available from publishers' web sites. • If the document cited in a bibliographic record is in the SilverLinker database, you see a Full text available at the following web sites... drop-down list in the FTXT field or the service name. Select a publisher from the drop-down list to access the full text document. Note: The list of services is always shown on the complete record display page. Introduction • Note: If you do not see the FTXT field within the bibliographic record, see Changing the Results Display and make sure the field is selected. Note: Certain publishers may require you to login to their web sites. See your librarian or system administrator if you need more information.) Downloading time varies depending on the speed of your Internet connection and the size of the document. • Many full-text documents are published online in Adobe Acrobat (PDF) format. To read these documents, you will need the freely distributed Acrobat Reader available from Adobe's web site (http://www.adobe.com). Re-running Searches Automatically You can re-run particular searches automatically using the SDI (Selective Dissemination of Information) feature. IMPORTANT: You can only use the SDI feature if your system administrator or librarian gives you authorization. 32 Setting Up an SDI The WebSPIRS SDI (Selective Dissemination of Information) feature lets an authorized user save a search and have it rerun automatically when databases are updated, with the results emailed to a defined set of users. (The WebSPIRS administrator must authorize users to use SDIs.) If you are an authorized user you can create, edit, and delete SDIs. You can also subscribe to Alerts to receive regular search results for SDI searches created by your administrator or librarian. How WebSPIRS handles SDIs: 1. You use WebSPIRS to To Select and Open Databases:select and search databases. 2. You select a search statement (from your Search History) to make into an SDI. 3. If you do not have the full database set open currently, or the current database contains segments that are not suitable for SDI generation, the Create New SDI page is still shown but an alert box appears with an appropriate error. 4. If the SDI Database Conflict page appears, the database set you selected cannot be used to create an SDI, and a description of the conflict(s) is displayed. IMPORTANT: WebSPIRS must create an SDI baseline from the search in order to create an SDI. WebSPIRS runs the SDI against each database group (also referred to as a "family") rather than against individual databases. For example, against all MEDLINE databases mounted on the server, not just against the one you have searched. WebSPIRS suggests that you rerun the original search with all databases in the group opened so that you can see the results that will make up the SDI baseline. Note: There is a maximum number of records that you can include in an SDI baseline. The maximum is usually 1000 records, but your WebSPIRS administrator might have changed this setting. If your search exceeds the maximum, you will see a warning pop-up window, and you must refine your search. Setting Up an SDI 33 If you do not need to see the entire baseline before completing the SDI (for instance if unopened databases cover only earlier research and you are only interested in the most current research), you can click to open the Create New SDI page. Or you can return to the Search page by clicking change databases. and then If all selected databases are not supported for SDIs, you must click to return to the Search page. On the Create New SDI page, you set up the SDI, which includes an email notification address, and initiates the SDI. 6. WebSPIRS processes the SDI baseline and saves the SDI, alerting you by email when the SDI is in the system. (On the SDI Account page, the SDI is listed as "PROCESSING" until the baseline finishes.) To create an SDI from a search Introduction Creating SDIs 5. You can only create an SDI if you are an authorized user. You will only see for a search if you are an authorized user. 1. Go to the Search History page. 2. Click for the search you want to create an SDI for. WebSPIRS displays the Create SDI page. To set SDI details 1. Enter a name for the SDI in the SDI Name: field. The name must consist of alphanumeric characters only (no spaces) and must be unique to you. 2. Specify the expiry date for the SDI in the Expiry date: field. To set email details 1. Enter the email addresses to receive the SDI results. You can enter up to 25 addresses, each on a separate line. 34 2. Check the Only send email if new results box if you only want the mail sent when there are new results. 3. Enter the email address that you want to receive the administrative email. 4. Enter any comment you want to include for the SDI, and check the Use comments as mail Subject box if you want the comments to appear as the subject of the email. To view the Alerts page • Click Alerts on the WebSPIRS top bar. To specify what to include 1. Check the Record number and database name box to include this information in the email. 2. Specify the record details to include. 3. If necessary, specify the fields to include. 4. Specify whether to include labels, and the type of labels to include. To create an alert from an SDI IMPORTANT: You can only create Alerts if your system administrator or librarian gives you authorization. • Editing SDIs Check the Create as an Alert box. To view SDIs 1. Click SDI on the WebSPIRS top bar. 2. Enter your Personal User Name and Password. 3. Click Display SDIs. WebSPIRS displays the SDIs that you created. Setting Up an SDI To edit SDI details 1. Click SDI on the WebSPIRS top bar. 2. Click the Edit icon of the SDI you want to edit. 3. Specify the SDI details. 4. Click WebSPIRS modifies the SDI details. To edit email details Click SDI on the WebSPIRS top bar. 2. Click the Edit icon of the SDI you want to edit. 3. Specify the email details. 4. Click Introduction 1. WebSPIRS modifies the email details. To delete an SDI 1. Click SDI on the WebSPIRS top bar. 2. Check the box next to each SDI you want to delete. 3. Click WebSPIRS deletes the selected SDIs. Checking SDI Details The SDI Details page displays all the details for an SDI. To view subscriber details You can only perform this task if you are logged in as the local administrator. • Click the number in the Subscribers field. WebSPIRS displays the SDI subscribers list. 35 36 Subscribing to an Alert Alerts are a type of SDI. They are searches created by your librarian or WebSPIRS administrator, and scheduled to run automatically. You can only use this feature if your WebSPIRS administrator has authorized you. If you are an authorized user, you can subscribe to an Alert. Then the latest search results are emailed to you each time the Alert is run. You subscribe to, or unsubscribe from, Alerts using the Alerts page. To view alerts 1. Enter your email address. 2. Click WebSPIRS displays the alerts to which you can subscribe. To view alert details • Click on the name of the alert. WebSPIRS displays the details for the alert. To subscribe to an alert 1. Check the box next to each alert to which you want to subscribe. 2. Click WebSPIRS subscribes you to the alerts. To unsubscribe from an alert 1. Uncheck the box next to each alert to which you do not want to subscribe. 2. Click WebSPIRS unsubscribes you from the alerts. Searching from a Database Thesaurus 37 Database Thesaurus Searching from a Database Thesaurus Introduction Many SilverPlatter databases include a Thesaurus, which is a standardized list of terms that describe the records within a database. This enables you to select and search for synonyms, related terms, and preferred terms, and also to see descriptions of the terms. Note: The Thesaurus is available only if you are searching a single database, database family, or multiple databases that share the same thesaurus. To view the Thesaurus page: • Click the Thesaurus tab. To find a term in the Thesaurus: 1. Type the term you want to find in the Term: field. 2. Click WebSPIRS displays your term (or its closest match) at the top of the list. You can use and to “page” through the list. To see broader and narrower terms • Click on a Subject Heading. WebSPIRS displays any narrower terms and broader terms. You can click on one of these terms to see even broader and narrower terms. 38 Looking at Subheadings Subheadings are qualifiers used in some thesauri to describe specific aspects of a database. You can use them to focus your search on a specialized area of interest, such as epidemiology or psychology. If the database you are using includes subheadings, they appear automatically before you search for a Thesaurus term, allowing you to select the subheadings you want to apply. To search using subheadings 1. Check the box next to the subject items you want to search. 2. Select the subheadings you want to use for each subject term: 3. • Click ALL TOPICAL SUBHEADINGS if you want to apply all the listed subheadings to your search. • Click Use selected subheadings if you want to select individual subheadings from a list. Click or the marked subject terms. (whichever is available) to search for Note: Exploding searches for the marked terms along with narrower limits. WebSPIRS searches for the marked terms and displays your results. Looking at Term Details Term details typically provide information such as how an index or thesaurus term is used in the database. To use the term details • Click on any linked term in the list of permuted Thesaurus terms. WebSPIRS opens the Thesaurus Term Information page and displays a term definition and any related terms. Searching from a Database Index 39 Database Index Searching from a Database Index To view the Index page: • Click the Index tab. To find an index term 1. Type the term you want to find in the Term: field. 2. Select a different index if necessary. 3. Click Introduction Each SilverPlatter database has an Index of searchable terms. In addition to the General (Free Text) Index, some databases have separate indexes for certain fields such as Title or Author. WebSPIRS displays your term (or its closest match) at the top of the index term list. To pick an index • Select General Index from the drop-down list if you want to search the combined free text index for all open databases. • Select any of the field indexes (if available) if you want to find field specific terms such as author names. Note: Some field indexes may be unique to a particular database. To display records for an index term • Click the term you want to search for. WebSPIRS searches for your term and displays the results. 40 To display the records for several terms 1. Check the box next to each term you want to search for. 2. Click WebSPIRS searches for records containing at least one of your terms and displays the results. Searching from a Database Table of Contents 41 Database Table of Contents Searching from a Database Table of Contents Introduction Databases that provide full text documents are organized hierarchically and include a browsable Table of Contents (TOC). Just like the TOC in a book, it provides an outline of the database organized by subject, publication, or some other means. To navigate through the TOC • Click to expand individual topics. • Click to collapse all levels of the Table of Contents and just show the top level. You can use the Table of contents to display full text records. To view the full text 1. Navigate through the TOC until you reach the document level. The document level is identified by the 2. icon. Click a topic to display its full text. WebSPIRS displays the Full Record Display page in a new window, allowing you to view the entire record. Using the Record TOC The record TOC allows you to: • navigate and display sections of a record • access print, save, and email options. 42 To navigate and display sections of a record • Click an item in the left hand TOC. WebSPIRS displays the content of the selected item. To access print, save, and email options • Click the appropriate icon to access options. • Click to access print options. • Click to access save options. • Click to access email options. Searching Using Find Citation 43 Find Citation Searching Using Find Citation To find a citation 1. 2. Introduction The Find Citation Tab enables you to search for articles that match citation information. The more citation information you enter, the more precise the search will be. Complete one or more of the fields as described below: • Article Title: One or more words from the title. • Author’s Last Name: The last name of the author or one of the authors if there is more than one. • Initial: One or more initials. • Publication Year: Four digits. • Journal Name: One or more words from the journal name. • ISSN: Format can be either XXXX-XXXX or XXXXXXXX. Press the Enter Key or Click 44 Searching Tips • Before You Start Your Search... • Before selecting databases, you can use the Suggest Databases feature to find the ones that are most relevant to your search. • When typing your search requests: • Searching for a simple term searches all the fields. • Search in specific fields for more precise results. • Use truncation or wildcards to retrieve variations of a search term. • Use parentheses to avoid ambiguity in complex search statements. • Use hyphens when searching for hyphenated search terms. • Use operators to combine terms within a single request. • Search examples • Set limits on your search to narrow down your results. • If you need help developing or focusing your search, use the Advanced search. • Use the Index to locate specific terms within a database • If available with the databases you are searching: • Use the Suggest feature to get suggested alternatives to your search terms. • Use the Thesaurus to look up and search for synonyms, related terms, and preferred terms. • Use the Database Table of Contents to look up and display full text records. Searching Using Find Citation Before you start your search Using Truncation and Wildcards 45 • If you perform a complex search, or the same search on a regular basis, save your search history so you can use it in future sessions. • List the ideas and concepts that describe your search topic. • Narrow your topic. Remember, your goal is to get a manageable number of useful records. • Think of as many search terms describing your topic as you can. You might find what you want right away, but results can improve as you become more familiar with the database. Use truncation or wildcards to retrieve variations of your search term. The truncation symbol (*) substitutes for a string of zero or more characters. For example, cat* retrieves cat, catatonic, catatonia, category, etc. • The wildcard symbol (?) substitutes for one character or none. For example, the search m?cdonald retrieves both mcdonald and macdonald. Introduction • You can use truncation or wildcards anywhere in your search term, except as the first character. Using Parentheses Use parentheses to avoid ambiguity in complex search requests. For example, suppose you want to retrieve records that discuss rabies in dogs or rabies in cats. • If you search for rabies and (dogs or cats), you will retrieve records that discuss rabies and either dogs or cats, which is what you intended. • If you search for rabies and dogs or cats, you will retrieve records that discuss rabies and dogs, and records that discuss cats, but not necessarily records that discuss rabies and cats. If you omit parentheses from a complex search request, WebSPIRS inserts them automatically. Always check your search results to see if WebSPIRS interpreted your search request correctly. Using Hyphens If the fields you are searching use hyphens, you can hyphenate your search terms. • For example, marine-aquaculture in de retrieves only occurrences of marine-aquaculture in the DE field. If you omit hyphens, you can retrieve variations of your search term. 46 • Combining Terms with Operators For example, marine in de retrieves records containing occurrences of marine, marine-aquaculture, marine-crustaceans, marineenvironments, etc. You can use the operators adj, and, near, not, or, with to combine multiple search terms into a single, more focused search request. • adj retrieves records with search terms next to each other in a specified order. For example, dyslexia adj treatments retrieves records in which the term dyslexia immediately precedes the term treatments. Note: The adj operator does not work with bound terms. For example, searching for collaborative adj learning does not return records that contain the bound term collaborative-learning. • and retrieves records with both search terms. For example, dyslexia and child retrieves records with both dyslexia and child. • near retrieves records with both search terms in the same sentence. For example, dyslexia near treatment retrieves records where dyslexia and treatment appear in the same sentence (in any order). Add a number to near to specify exactly how close the terms must be. For example, language near2 computer retrieves records with language within two words of computer (in any order). • not retrieves records with first of two search terms, but not the second. For example, truman not capote retrieves records with Truman, excluding Capote. Use the not operator carefully as it can eliminate useful records. For example, dog not puppy misses records that contain both dog and puppy. • or retrieves records with either or both search terms. For example, dyslexia or learning disabilities retrieves records with either dyslexia, learning disabilities, or both. • with retrieves records with both search terms in the same field. For example, dyslexia with research retrieves records with both dyslexia and research in a single field. Search Examples • Single term: dyslexia • Term or phrase in a specific field: smith in au Searching Using Find Citation 47 Term or phrase in a limit field: py>1995 or la=german • Term with truncation or wildcards: comput*, colo?r • Previous search request number: #3 • Number (in quotes if equal to previous search number): 22 "#5" • Letters and numbers combined: 3m • Phrase: new york city • Phrase with hyphens: drug-abuse • Phrase with operator in quotes: "near" death experience • Multiple terms combined with operators: dog or puppy or canine • Any of the above, grouped with parentheses for clarity: (dog or 1) near puppy Introduction • 48 49 Index A Abstract 15 alerts subscribing 36 unsubscribing 36 available records 18 D database index searching from 39 database table of contents searching from 41 database thesaurus searching from 37 databases choosing 7 getting a description 7 guide 8 opening 7 selecting 7 Descriptors 15 display changing 15 duplicate records 15 duplicates records 18 E emailing records 25 exporting records 23 F find citation using 43 Introduction C change display 15 choosing databases 7 citation search using 43 50 full-text 31 H holdings 30 I index choosing 39 searching from index term 39 39 L library holdings 30 limit fields 11 limits clearing 14 logging out 8 M marking records 17 P printing records 22 Q quick limits changing 13 R records available 18 duplicates 18 emailing 25 exporting 23 marking 17 printing 22 saving 23 searching for 10 unmarking 17 results navigating 17 sorting 16 S saving records 23 51 T table of contents navigating 41 searching from 41 term details 38 thesaurus finding a term 37 searching from 37 subheadings 38 term details 38 U unmarking records 17 Introduction scope note, see term details 38 SDIs creating 21, 33 editing 34 setting up 32 search history 20 saving 28 search limits 12 changing 13 clear all 13 set or clear individual 13 searches combining 20 removing 21 re-running automatically 31 re-using 20 searching using a citation 43 subheadings 38 suggest databases 7