1
Temprecord User's Manual
Copyright 1992..2010 Temprecord International Ltd.
User's Manual for Temprecord Software.
Temprecord User's Manual
Version 5.21
This is the User's Manual for the
Temprecord for Windows software and
associated temperature and humidity
loggers. The contents of this manual
mirror the online help provided with the
application, but the format of this PDF
file is better suited to printing.
Temprecord User's Manual
Copyright 1992..2010 Temprecord International Ltd.
All rights reserved. No parts of this work may be reproduced in any form or by any means - graphic, electronic, or
mechanical, including photocopying, recording, taping, or information storage and retrieval systems - without the
written permission of the publisher.
Products that are referred to in this document may be either trademarks and/or registered trademarks of the
respective owners. The publisher and the author make no claim to these trademarks.
While every precaution has been taken in the preparation of this document, the publisher and the author assume no
responsibility for errors or omissions, or for damages resulting from the use of information contained in this document
or from the use of programs that may accompany it. In no event shall the publisher and the author be liable for any
loss of profit or any other commercial damage caused or alleged to have been caused directly or indirectly by this
document.
Produced November 2010
4
Temprecord Help
Contents
Foreword
Part I Contents
0
12
1 License Information
................................................................................................................................... 12
2 Help Menu ................................................................................................................................... 12
3 Getting Started
...................................................................................................................................
with Temprecord
13
4 How To Use...................................................................................................................................
Help
14
5 Pop-Up Menus
................................................................................................................................... 14
6 Toolbars and
...................................................................................................................................
Speed Buttons
15
7 Command-Line
...................................................................................................................................
Parameters
20
8 Where do I plug
...................................................................................................................................
my reader in ?
25
9 Temprecord...................................................................................................................................
Humidity Loggers
25
10 How Do I... ................................................................................................................................... 27
11 View Help As
...................................................................................................................................
PDF
27
12 About Temprecord
................................................................................................................................... 27
Part II Installation of Temprecord
27
1 Installing Temprecord
...................................................................................................................................
on Networks
30
2 Installing Temprecord
...................................................................................................................................
Reader USB Drivers
31
3 Installing the...................................................................................................................................
USB Drivers Manually
33
4 Notes for System
...................................................................................................................................
Administrators
38
Part III Common Problems
43
1 Temprecord...................................................................................................................................
will not start
44
2 Temprecord...................................................................................................................................
won't recognize my logger
44
3 The arrow keys
...................................................................................................................................
don't move the cursor on the graph
44
4 The trace isn't
...................................................................................................................................
visible on the graph
44
5 I can't alter some
...................................................................................................................................
of the parameters
44
6 I get an error...................................................................................................................................
when I try to update the parameters
45
7 I can't print with
...................................................................................................................................
Temprecord
45
8 I get a 'SPOOL32
...................................................................................................................................
Error' when I print
45
9 When I open...................................................................................................................................
a menu, some of the items are grayed
46
10 When I click...................................................................................................................................
on a button, nothing happens apart from a beep
46
11 My logger says
...................................................................................................................................
it exceeded the limits, but I can't see where
48
12 The start time
...................................................................................................................................
displayed changes every time I insert a marker
48
13 I have set different colors for display of values above the upper
limit and below the lower limit but my values still display and
print in one ...................................................................................................................................
color only
48
Copyright 1992..2010 Temprecord International Ltd
Contents
5
14 I can't get the TTV statistics to display or print, or export them to
a file
................................................................................................................................... 48
15 I can't get the PHI statistics to display or print, or export them to
a file
................................................................................................................................... 49
16 I cant print my
...................................................................................................................................
data as a list of values
49
17 COM Port Issues
................................................................................................................................... 49
18 I cant select the Humidity options when I program the logger
parameters ................................................................................................................................... 56
19 The temperature exceeded the limits but the summary does not
show this ................................................................................................................................... 56
20 My filenames
...................................................................................................................................
are all garbled
57
21 Why doesn't my printed graph look the same as the one I see on
screen?
................................................................................................................................... 57
22 The format of the displayed date format doesn't match my
Control Panel
...................................................................................................................................
regional settings
58
Part IV File Menu
58
1 Checking for...................................................................................................................................
a Logger
58
2 Reading a Logger
................................................................................................................................... 58
3 Accessing Temprecord
...................................................................................................................................
...
59
4 Saving a File................................................................................................................................... 59
5 Save File Dialog
................................................................................................................................... 60
6 Saving Web ...................................................................................................................................
Files
60
7 Opening a File
................................................................................................................................... 61
8 Opening Web
...................................................................................................................................
Files
62
9 Open File Dialog
................................................................................................................................... 62
10 Deleting a File
................................................................................................................................... 63
11 Delete File Dialog
................................................................................................................................... 63
12 Renaming a ...................................................................................................................................
File
64
13 Emailing Files
................................................................................................................................... 64
14 Closing a File
................................................................................................................................... 65
15 Editing the Comment
...................................................................................................................................
Fields
66
16 Edit File Comments
...................................................................................................................................
Dialog
66
17 Using the Comment
...................................................................................................................................
Fields
67
18 Exporting Data
................................................................................................................................... 68
19 Print Dialog ................................................................................................................................... 68
20 Printing Data
................................................................................................................................... 69
21 Saving to a PDF
...................................................................................................................................
File
69
22 Opening recent
...................................................................................................................................
files
69
23 Exiting Temprecord
................................................................................................................................... 70
Part V Program Menu
71
10 Temprecord International Ltd.
5
6
Temprecord Help
1 Programming
...................................................................................................................................
a Logger's Parameters
71
2 Program Parameters
...................................................................................................................................
Dialog
72
3 Logging Temperature,
...................................................................................................................................
Humidity, or Both
73
4 Setting Up Humidity
...................................................................................................................................
Loggers
73
5 User Data
................................................................................................................................... 74
6 Sample Period
................................................................................................................................... 74
7 Logging Duration
................................................................................................................................... 75
8 Start Delay ................................................................................................................................... 75
9 Start Time and
...................................................................................................................................
Date
76
10 Password ................................................................................................................................... 77
11 Password Required
................................................................................................................................... 78
12 Enable Safe ...................................................................................................................................
Range
78
13 Lower and Upper
...................................................................................................................................
Limits
79
14 Limit Delay ................................................................................................................................... 80
15 Loop Overwrite
................................................................................................................................... 80
16 Start and Stop
...................................................................................................................................
with Button
81
17 Start and Stop
...................................................................................................................................
with Switcher
81
18 Allow Markers
................................................................................................................................... 81
19 Mon-T Temperature
...................................................................................................................................
Logging Range Parameters
82
20 Setting up several
...................................................................................................................................
loggers
83
21 Setting up a...................................................................................................................................
default set of parameters
84
22 Starting a Logger
................................................................................................................................... 85
23 Stopping a Logger
................................................................................................................................... 86
24 Reusing a Logger
................................................................................................................................... 87
25 What the LEDs
...................................................................................................................................
on the logger tell you
87
26 Using the button
...................................................................................................................................
on the logger to mark an event
88
27 Using the button
...................................................................................................................................
on the logger to start and stop logging
89
28 Changing Logger
...................................................................................................................................
Parameters
90
29 Accuracy and
...................................................................................................................................
Resolution
90
30 Sample Rate...................................................................................................................................
Issues
91
31 Auto Mode Operation
................................................................................................................................... 91
32 Kiosk Mode ...................................................................................................................................
Operation
92
Part VI View Menu
1 Toolbars
92
................................................................................................................................... 93
2 Summary View
................................................................................................................................... 93
3 Statistics View
................................................................................................................................... 94
Total Temperature
..........................................................................................................................................................
Value (TTV)
97
Mean Kinetic ..........................................................................................................................................................
Temperature (MKT)
97
Product Integrity
..........................................................................................................................................................
Profile (PIP)
98
Process Hygiene
..........................................................................................................................................................
Index
100
Copyright 1992..2010 Temprecord International Ltd
Contents
7
Refrigeration..........................................................................................................................................................
Index
Rate of Cooling
..........................................................................................................................................................
104
105
4 Values View
................................................................................................................................... 105
5 Units
................................................................................................................................... 106
6 Graph View................................................................................................................................... 106
The Sample ..........................................................................................................................................................
Cursor
Setting the date
..........................................................................................................................................................
and time format on graph view
Changing the
..........................................................................................................................................................
view mode
How the limits
..........................................................................................................................................................
are used when Temprecord displays data
Viewing Temperature,
..........................................................................................................................................................
Humidity, or Both
Displaying the
..........................................................................................................................................................
same file in 2 or more windows
Displaying data
..........................................................................................................................................................
read from a logger in 2 or more windows
Go to Functions
..........................................................................................................................................................
Find Trace
.........................................................................................................................................................
Go to Sample
.........................................................................................................................................................
Go to First,
.........................................................................................................................................................
Go to Last Sample
Go to Start,
.........................................................................................................................................................
Go to End
Go to Next,
.........................................................................................................................................................
Go to Previous Marker
Go to Min,
.........................................................................................................................................................
Go to Max Sample
Select all samples
..........................................................................................................................................................
Copy to Clipboard
..........................................................................................................................................................
Copy to Excel
..........................................................................................................................................................
Set as Start,..........................................................................................................................................................
End Markers
Using the
.........................................................................................................................................................
Start and End Markers
Using the
.........................................................................................................................................................
Min and Max Markers
Using the
.........................................................................................................................................................
User Markers
Zoom Functions
..........................................................................................................................................................
How zooming
.........................................................................................................................................................
works
The Sample
.........................................................................................................................................................
Cursor and Mouse Cursor
Zooming.........................................................................................................................................................
with the mouse
Zooming.........................................................................................................................................................
with the mousewheel
Horizontal
.........................................................................................................................................................
Zoom
Vertical .........................................................................................................................................................
Zoom
Zoom Between
.........................................................................................................................................................
Start and End markers
Zoom All.........................................................................................................................................................
Zooming.........................................................................................................................................................
with the Mouse
Zoom Window
.........................................................................................................................................................
to Presets
Zoom all.........................................................................................................................................................
Windows to Presets
Zoom All.........................................................................................................................................................
Windows To This One
Assign Presets
.........................................................................................................................................................
from Window
Using the
.........................................................................................................................................................
Zoom Presets
Set as Start Sample
..........................................................................................................................................................
Set as End Sample
..........................................................................................................................................................
Tile Vertically
..........................................................................................................................................................
Tile Horizontally
..........................................................................................................................................................
Cascade
..........................................................................................................................................................
Close
..........................................................................................................................................................
View Info ..........................................................................................................................................................
Refrigeration..........................................................................................................................................................
Index Graph View
Part VII Options Menu
108
110
110
111
111
112
112
113
114
114
114
115
116
116
117
117
120
123
123
123
124
124
124
125
125
126
127
127
128
128
129
130
130
131
131
131
132
133
133
134
134
134
134
135
135
1 How the Options
...................................................................................................................................
work
136
10 Temprecord International Ltd.
7
8
Temprecord Help
2 Font Dialog................................................................................................................................... 136
3 General Options
................................................................................................................................... 137
4 COM Port Options
................................................................................................................................... 138
5 File Saving...................................................................................................................................
Options
139
File Saving Options
..........................................................................................................................................................
- Web Files
File Saving Options
..........................................................................................................................................................
- Encryption
File Saving Options
..........................................................................................................................................................
- Date Formatting
Using the File
..........................................................................................................................................................
and Folder Templates
When are default
..........................................................................................................................................................
filename and folders used?
Default TR Filename
..........................................................................................................................................................
Folder for .TR
..........................................................................................................................................................
Files
Default PDF ..........................................................................................................................................................
Filename
Folder for .PDF
..........................................................................................................................................................
Files
139
140
140
141
144
145
146
147
147
6 Summary View
...................................................................................................................................
Options
148
7 Show Mon-T
...................................................................................................................................
- specific settings
150
8 Values View
...................................................................................................................................
Options
150
9 Statistics View
...................................................................................................................................
Options
152
10 Graph View...................................................................................................................................
Options
154
Zoom and presets
..........................................................................................................................................................
options
155
11 View Options
................................................................................................................................... 156
12 Export Options
................................................................................................................................... 158
Copy to Clipboard,
..........................................................................................................................................................
Excel Options
161
13 Printing Options
................................................................................................................................... 163
14 Set Print Colors
................................................................................................................................... 166
15 Header and...................................................................................................................................
Footers, Paper Size
166
16 Parameter ...................................................................................................................................
Defaults
168
Mon-T Parameter
..........................................................................................................................................................
Defaults
168
17 Email Options
................................................................................................................................... 168
SMTP Email ..........................................................................................................................................................
Options
Emailing Files
..........................................................................................................................................................
from Temprecord using GMail
170
171
18 Language Options
................................................................................................................................... 171
19 Temprecord
...................................................................................................................................
Foreign-language Translation
171
20 Comment Labels
...................................................................................................................................
Options
172
21 Web Options
................................................................................................................................... 172
Tracking Options
..........................................................................................................................................................
Proxy Settings
..........................................................................................................................................................
Options
Web Load and
..........................................................................................................................................................
Save Options
173
173
174
22 Auto Mode...................................................................................................................................
Options
175
23 Date Formatting
...................................................................................................................................
Options
176
24 System Options
................................................................................................................................... 177
25 Diagnostics
...................................................................................................................................
Reports
177
Part VIII Error and Warning Messages
177
1 Bad address
................................................................................................................................... 179
Copyright 1992..2010 Temprecord International Ltd
Contents
9
2 Bad CRC ................................................................................................................................... 180
3 Bad verify ................................................................................................................................... 180
4 Battery is exhausted
................................................................................................................................... 180
5 Battery is nearly
...................................................................................................................................
exhausted
180
6 Confirm password
...................................................................................................................................
is invalid
181
7 Data is corrupted
................................................................................................................................... 181
8 Data read from
...................................................................................................................................
logger has not yet been saved. Save first ?
181
9 Datafile format
...................................................................................................................................
error - probably not a Temprecord data file
182
10 Datafile format
...................................................................................................................................
incorrect
182
11 Datafile format
...................................................................................................................................
version error
182
12 Do you wish
...................................................................................................................................
to exit Temprecord ?
182
13 Do you wish
...................................................................................................................................
to re-use the Temprecord logger ?
182
14 Do you wish
...................................................................................................................................
to start the Temprecord logger ?
183
15 Do you wish
...................................................................................................................................
to stop the Temprecord logger ?
183
16 Encryption...................................................................................................................................
key and confirm are different
184
17 Error carrying
...................................................................................................................................
out command line functions
184
18 Error opening
...................................................................................................................................
<filename>
184
19 Error loading
...................................................................................................................................
web file
185
20 Error opening
...................................................................................................................................
web file
185
21 Error printing
...................................................................................................................................
to PDF file
185
22 Error previewing
...................................................................................................................................
PDF file
185
23 Error viewing
...................................................................................................................................
PDF File
186
24 Error reading
...................................................................................................................................
file
186
25 Error sending
...................................................................................................................................
email
186
26 Error writing
...................................................................................................................................
file <filename>
187
27 Incorrect firmware
................................................................................................................................... 187
28 Invalid limit...................................................................................................................................
delay count
187
29 Invalid lower
...................................................................................................................................
temperature limit
187
30 Invalid password
...................................................................................................................................
submitted
187
31 Invalid sample
...................................................................................................................................
period
188
32 Invalid start...................................................................................................................................
date
188
33 Invalid start...................................................................................................................................
delay
188
34 Invalid start...................................................................................................................................
time
188
35 Invalid preset
...................................................................................................................................
date or time
188
36 Invalid upper
...................................................................................................................................
temperature limit
189
37 No wakeup...................................................................................................................................
from logger
189
38 No response
...................................................................................................................................
from logger
189
39 Logger Firmware
...................................................................................................................................
Revision 2.14
189
40 Password and
...................................................................................................................................
confirm are different
190
10 Temprecord International Ltd.
9
10
Temprecord Help
41 Password is
...................................................................................................................................
invalid
190
42 Password is
...................................................................................................................................
not verified
190
43 Password Specification
...................................................................................................................................
Errors
190
44 Start time and
...................................................................................................................................
date has already passed
191
45 Temprecord
...................................................................................................................................
cannot be stopped until start delay expires
191
46 Temprecord
...................................................................................................................................
failed to re-use
191
47 Temprecord
...................................................................................................................................
failed to start
192
48 Temprecord
...................................................................................................................................
failed to stop
192
49 Temprecord
...................................................................................................................................
has already been re-used
192
50 Temprecord
...................................................................................................................................
has not yet been started
192
51 Temprecord
...................................................................................................................................
is already running
192
52 Temprecord
...................................................................................................................................
is already started
193
53 Temprecord
...................................................................................................................................
is already stopped
193
54 Temprecord
...................................................................................................................................
must be re-used before starting
193
55 Temprecord
...................................................................................................................................
must be stopped before re-use
193
56 Temprecord
...................................................................................................................................
was unable to create your TRW.INI file
194
57 Temprecord
...................................................................................................................................
was unable to find your TRW.INI file
194
58 Temprecord
...................................................................................................................................
was unable to write to your TRW.INI file
194
59 The Auto Mode
...................................................................................................................................
option to reuse the logger is set
194
60 The comment fields for file <filename> have been edited but the
changes have
...................................................................................................................................
not yet been saved. Save file ?
195
61 The comment fields for logger <serial number> have been edited
but the data
...................................................................................................................................
has not yet been saved. Save logger data to file ?
195
62 The data from this logger has not yet been read. Do you wish to
read the data
...................................................................................................................................
and save it before re-using the logger ?
195
63 The factory calibration applied to this logger at manufacture can
no longer be
...................................................................................................................................
guaranteed
196
64 The recalibration
...................................................................................................................................
period on this logger will expire in N weeks
196
65 The Temprecord help file for the selected language <filename>
was not found.
...................................................................................................................................
English language help will be used instead
197
66 This logger''s
...................................................................................................................................
recalibration is due in N weeks
197
67 This model...................................................................................................................................
Temprecord cannot be re-used
198
68 This Temprecord
...................................................................................................................................
can only be started by snapping off a tab
198
69 This Temprecord
...................................................................................................................................
can only be stopped by snapping off a tab
198
70 TX timeout................................................................................................................................... 198
71 Unable access
...................................................................................................................................
parameters. Temprecord is probably faulty
198
72 Unable to access
...................................................................................................................................
parameters. Temprecord has been started
198
73 Unable to access
...................................................................................................................................
parameters. Temprecord has finished logging
199
74 Unable to access
...................................................................................................................................
parameters. Temprecord must be re-used first
199
75 Unable to access
...................................................................................................................................
Temprecord after re-use
199
76 Unable to access
...................................................................................................................................
Temprecord after starting
199
Copyright 1992..2010 Temprecord International Ltd
Contents
11
77 Unable to access
...................................................................................................................................
Temprecord after stopping
199
78 Unable to access
...................................................................................................................................
Temprecord logger
200
79 Unable to delete
...................................................................................................................................
file <filename>
200
80 Unable to access
...................................................................................................................................
Temprecord. Password is incorrect
201
81 Unable to load
...................................................................................................................................
file - insufficient memory
201
82 Unable to open
...................................................................................................................................
COMx
201
83 Unable to open
...................................................................................................................................
form
201
84 Unable to open
...................................................................................................................................
PDF help file
202
85 Unable to print
................................................................................................................................... 202
86 Unable to read.
...................................................................................................................................
Temprecord has not yet been started
202
87 Unable to read.
...................................................................................................................................
Temprecord is probably faulty
203
88 Unable to read.
...................................................................................................................................
Temprecord start delay has not expired
203
89 Unable to reuse
...................................................................................................................................
Temprecord. Unit is probably faulty
203
90 Unable to save
...................................................................................................................................
file <filename>
203
91 Unable to save
...................................................................................................................................
Temprecord parameters
203
92 Unable to start
...................................................................................................................................
Temprecord. Unit is probably faulty
204
93 Unable to stop
...................................................................................................................................
Temprecord. Unit is probably faulty
204
94 Unable to update parameters as Temprecord is not in ''ready''
state
................................................................................................................................... 204
95 Unable to update
...................................................................................................................................
parameters as Temprecord is of a different type
204
96 Unable to update
...................................................................................................................................
parameters as Temprecord is of older type
204
97 Unable to update
...................................................................................................................................
parameters as Temprecord is of newer type
205
98 Unable to update parameters as Temprecord protected with
password ................................................................................................................................... 205
99 Unable to create
...................................................................................................................................
spreadsheet
205
100 Unable to create
...................................................................................................................................
folder
205
101 Unable to open
...................................................................................................................................
spreadsheet
206
102 Unable to open
...................................................................................................................................
dialog
206
103 Unable to save
...................................................................................................................................
file for emailing
206
104 Unexpected
...................................................................................................................................
end-of-file
206
105 Unexpected
...................................................................................................................................
errors
206
106 Unknown command
...................................................................................................................................
option
207
107 Unknown logger
...................................................................................................................................
response
208
108 WARNING ...................................................................................................................................
- File damaged. Data may not be correct
208
109 Web file not
...................................................................................................................................
found
208
Index
209
10 Temprecord International Ltd.
11
12
1
Temprecord Help
Contents
Welcome to Temprecord for Windows on-line Help. This screen lists the major help topics. You can
jump to other topics by clicking on text that is displayed like this. For more information on how to use
the Temprecord help system, see How to Use Help.
License Information
File Menu
Program Menu
View Menu
Options Menu
Help Menu
Pop-up Menus
Toolbars and Speed Buttons
Installation
How to Use Help
Getting Started with Temprecord
How do I...
Common Problems
Error and Warning Messages
Command-Line Parameters
1.1
License Information
The Temprecord program is supplied free by Temprecord International Limited ("TIL"). You may not charge for
the software. You are free to distribute the software installation package to any other person or organization. It
must be supplied in it's unmodified complete form (generally a compressed file named trw-setup.zip).
You may not disassemble or reverse-engineer the Temprecord software or hardware.
The software is provided on an "as-is" basis. TIL does not warranty the software nor guarantee it's operation in
all environments. TIL accepts no claim for damages incidental to the use of their software.
1.2
Help Menu
While you can access Temprecord on-line help at most times by pressing F1, the Help menu provides
a quick way of jumping to frequently accessed topic groups, such as common problems that might be
experienced and how to deal with them, or a list of the error and warning messages.
Contents
How Do I...
Common Problems
Error and Warning Messages
View Help as PDF
Copyright 1992..2010 Temprecord International Ltd.
Contents
13
About Temprecord
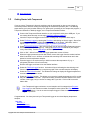
1.3
Getting Started with Temprecord
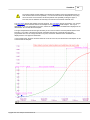
If you are new to Temprecord, this topic provides a step by step tutorial on how to use a logger to
record temperature and then reading and displaying the recorded temperature data. The following
steps assume you have just taken delivery of a ‘starter pack’ consisting of the Temprecord program, a
Temprecord Scientific or Multi-trip logger, and a Temprecord Reader Interface.
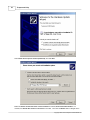
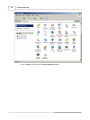
Connect the Temprecord Reader Interface to your computer’s serial port or USB port. If you
are unsure about this step, see the topic Where do I plug my reader in?
Insert the Temprecord logger into the Reader, making sure it is pushed all the way in.
Select File/Query Logger by opening the File Menu and clicking on Query Logger. After a few
seconds, a window should display showing a summary of the logger. Otherwise, see the
topics Unable to Access Temprecord Logger or Unable to open COMx.
Select Program/Parameters. After a few seconds you will see the Logger Parameters screen,
which allows you to set the logger up. Change the sample period to 00:00:10 (one sample
every 10 seconds). Set the start delay to 00:00:20 (20 seconds).
Click on ‘OK’. After a few seconds the logger parameters screen will close.
When the logger parameters screen has closed, remove the logger from the reader interface.
After 20 seconds or so, it will flash to indicate the start delay has counted down and it has
started to record temperature samples.
Place the logger in an environment you wish to measure the temperature of (e.g. a
refrigerator) and leave it for a few minutes.
Retrieve the logger, and insert it into the Reader Interface.
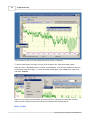
Select the File/Read Logger function. A window will open indicating the data is being read
from the logger. When this step is complete a graph of the recorded samples will display.
Select the View/Values function. The Window will change to display the logged temperatures
as a series of temperature values.
Select the File/Save function. This allows you to save the logged temperatures to a file so that
they can be read from disk later. Temprecord initially chooses a filename based on the serial
number of the logger, but you are free to change this if you wish. Click on OK to save the
data to disk.
Your Temprecord logger continues to record samples until it is stopped (see Program/
Stop Logger) or the maximum number of samples is taken (unless the Loop Overwrite
Option is turned on). You do not need to stop the logger in order to read and display the
logged temperature.
Congratulations! You have just used your Temprecord logger to record and display temperature
samples.
See also:
How Do I...?
Common Problems
Error and Warning Messages
Copyright 1992..2010 Temprecord International Ltd.
14
1.4
Temprecord Help
How To Use Help
There are several ways to find information about a particular help topic.
If you are new to Temprecord and want to find out how to use the product, try Getting Started
with Temprecord.
To search for help on a particular topic, click on the button marked 'Search' near the top of
this Help window.
To find out more about an item on a Temprecord menu, open the menu, move the mouse
over the menu entry, and press F1.
To find out more information about an error message that is displaying, press F1 while the
error message window is displayed, or click on the button marked 'Help'. You can also refer
to the Help topic Error and Warning Messages.
For a brief summary of the steps involved in the more common Temprecord operations, such
as programming a logger, starting a logger, reading a logger's data, etc., see the topic How
Do I....
If you are having a particular problem, try looking at the Help topic Common Problems.
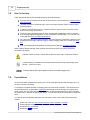
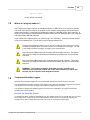
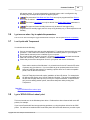
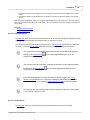
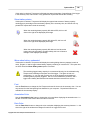
When viewing Temprecord help, these symbols are used as an aid to your quickly finding the
information you require:
indicates a note of caution - where care needs to be taken with a Temprecord function.
is used to bring your attention to text that describes a quicker way of performing some
function - a short-cut or hint.
indicates that the description applies to the Mk II and Mk III loggers only.
1.5
Pop-Up Menus
At most times when Temprecord is running, you can click the right mouse button and get a menu of
the most common commands.
For example, a frequent operation is changing from one view mode to another. This can be done in
the conventional way, by opening the View Menu and clicking on the view mode you require, but a
much quicker way is to place the mouse cursor in the Temprecord data window you want to change
the view mode in, and click the right mouse button. You can then select the view mode you want from
there.
You can perform the following operations from the pop-up menu in the current Temprecord data
window:
Select one of the four view modes (summary, values, statistics, or graph).
Select between viewing Temperature data, Humidity data, or both.
Access the Go To functions.
Access the Zoom functions.
Copyright 1992..2010 Temprecord International Ltd.
Contents
15
Set the current sample as the start sample.
Set the current sample as the end sample.
Read data from a logger.
Print from the current Temprecord data window.
Save the data in the current window to a file.
Edit the comment fields for the current window.
Access the display options. This menu entry will access the options page for any one of the
four view modes, i.e. summary, values, statistics or graph, depending on the current view
mode.
Close the current data window.
Some of these functions may not be available and the pop-up menu entries are displayed in gray in
that case. For example, the Zoom entry will be grayed unless the view mode of the current window is
graph view.
You can also perform the following operations from the pop-up menu that displays when the right
mouse button is clicked when there are no Temprecord data windows open, or the mouse is not
positioned over a data window:
Query a logger -i.e. check for the presence of a logger and display the summary data from
that logger in a new window.
Read data from a logger.
Open an existing Temprecord data file.
Exit Temprecord
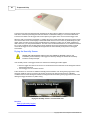
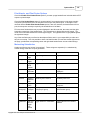
1.6
Toolbars and Speed Buttons
Many of the common operations you will need to perform with Temprecord can be accessed by the
row of buttons (called 'speed buttons') along the top of the Temprecord window. These buttons are
arranged as four groups. Each group of buttons is on its own toolbar. These toolbars can be
repositioned and "docked" in any of the top, left, bottom, or right edges of the Temprecord main
window. They can also be "undocked", that is, dragged outside the Temprecord main window and
floated above the desktop in any position.
Copyright 1992..2010 Temprecord International Ltd.
16
Temprecord Help
The main menu is also on it's own toolbar and can be moved or undocked.
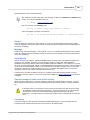
To dock a toolbar again, just drag it over any of the 4 edges of the Temprecord main window.
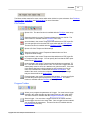
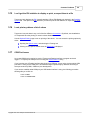
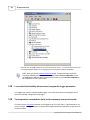
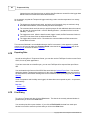
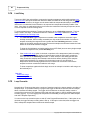
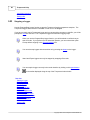
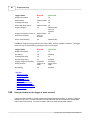
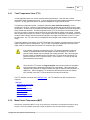
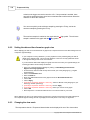
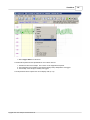
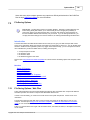
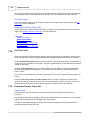
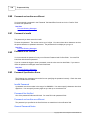
When you click on the close button of a toolbar, it will disappear. It will remain invisible even after you
exit and start Temprecord again. To make the toolbar visible again, click on View in the main menu
and select Toolbars:
When you exit Temprecord, the position and state (docked or undocked) of each toolbar is saved.
When you start Temprecord next, the toolbars are restored to their saved positions.
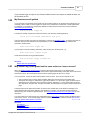
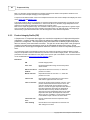
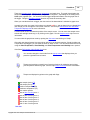
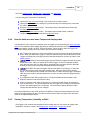
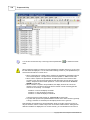
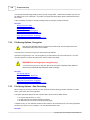
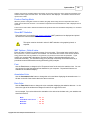
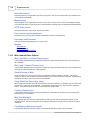
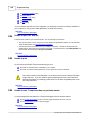
Menu Toolbar
Copyright 1992..2010 Temprecord International Ltd.
Contents
17
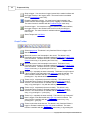
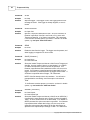
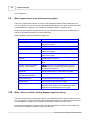
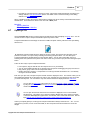
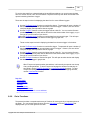
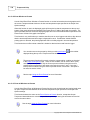
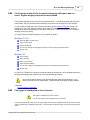
The Menu toolbar contains five menu entries which when clicked on open submenus. See File Menu,
Program Menu, View Menu, and Options Menu for more information.
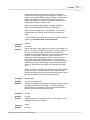
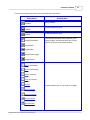
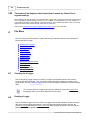
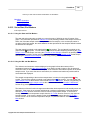
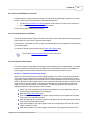
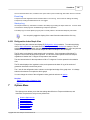
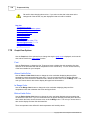
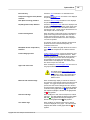
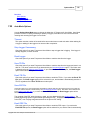
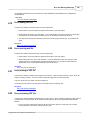
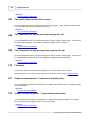
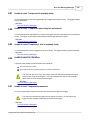
File Toolbar
Opens a file. The same function is available with the File/Open menu entry.
Saves the data in the current Temprecord data window to a disk file. The
same function is available with the File/Save menu entry
Saves the data in the current Temprecord data window as a PDF report file.
You can specify the form that the PDF report takes with the PDF options.
The same function is available with the File/Save to PDF menu entry.
Opens a file from Temprecord Web storage
Saves the data in the current Temprecord data window to a file to
Temprecord Web storage.
Saves the data in the current Temprecord data window as a PDF report file
to Temprecord Web storage. You can specify the form that the PDF report
takes with the PDF options.
Emails the data in the current Temprecord data window as an attached .TR
file. If the data in the window is from a file, or it was from a logger and was
subsequently saved to a file, the attachment is given that name. If the data
in the window has been read from logger but not yet saved to a file, the
name of the attachment is created from the default TR filename. The
details of the email, such as the recipients and accompanying message
body are determined be the email options.
Prints the data in the current Temprecord data window. You can specify the
form that the printed report takes with the printing options. The same
function is available with the File/Print menu entry.
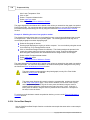
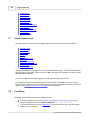
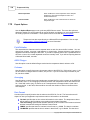
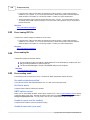
Program Toolbar
Allows you to program the parameters of a logger. You must have a logger
inserted in the reader interface and the logger must be in the 'ready' state.
The same function is available with the Program/Parameters menu entry
Starts a logger. You must have a logger inserted in the reader interface
and the logger must be in the 'ready' state. Once a logger has been started,
you cannot alter the parameters. The same function is available with the
Program/Start menu entry.
Copyright 1992..2010 Temprecord International Ltd.
18
Temprecord Help
Stops a logger. You must have a logger inserted in the reader interface and
the logger must be in the 'logging' state. The same function is available
with the Program/Stop menu entry.
Reads the data from a logger. You must have a logger inserted in the
reader interface and the logger must be in the 'logging' or 'finished' states.
The same function is available with the File/Read Logger menu entry
Reuses a logger. You must have a logger inserted in the reader interface,
the logger must be in the 'finished' state, and it must be a multi-trip or
scientific type. The same function is available with the Program/Reuse
menu entry.
Starts Temprecord Auto Mode.
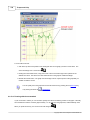
Graph Toolbar
Selects graph view. This button is only functional if there is logger or file
data loaded.
Moves the cursor to the first sample in the record. This button is only
functional if there is logger or file data loaded and graph view or values view
mode is selected. The same function is available with the View/Goto/First
Sample menu entry, or by pressing the 'Home' key.
Moves the cursor to the last sample in the record. This button is only
functional if there is logger or file data loaded and graph view or values view
mode is selected. The same function is available with the View/Goto/Last
Sample menu entry, or by pressing the 'End' key.
Zooms in (i.e. expands) the trace horizontally. This button is only functional
if there is logger or file data loaded and graph view mode is selected. The
same function is available with the View/Zoom/X+ menu entry, or by
pressing the '+' key with the shift key held down.
Zooms out (i.e. compresses) the trace horizontally. This button is only
functional if there is logger or file data loaded and graph view mode is
selected. The same function is available with the View/Zoom/X- menu
entry, or by pressing the '-' key with the shift key held down.
Zooms out (i.e. compresses) the trace vertically. This button is only
functional if there is logger or file data loaded and graph view mode is
selected. The same function is available with the View/Zoom/Y- menu
entry, or by pressing the '-' (minus) key.
Zooms in (i.e. expands) the trace vertically. This button is only functional if
there is logger or file data loaded and graph view mode is selected. The
same function is available with the View/Zoom/Y+ menu entry, or by
pressing the '+' (plus) key.
Zooms to show the whole data set. This button is only functional if there is
logger or file data loaded and graph view mode is selected. The same
function is available with the View/Zoom/All menu entry, or by pressing the
Copyright 1992..2010 Temprecord International Ltd.
Contents
19
F4 key.
Moves the graph sample cursor to the minimum values sample. This
button is only functional if there is logger or file data loaded and graph view
mode is selected. The same function is available with the View/Goto/
Minimum menu entry, or by pressing the F5 key. Note that only the
samples between the start and end samples are considered when
Temprecord searches for the minimum value.
Moves the graph sample cursor to the maximum values sample. This
button is only functional if there is logger or file data loaded and graph view
mode is selected. The same function is available with the View/Goto/
Maximum menu entry, or by pressing the F6 key. Note that only the
samples between the start and end samples are considered when
Temprecord searches for the maximum value
Zooms to the preset values for the time and temperature axes specified in
the graph view options page. See the topic Using the Zoom Presets for
more information
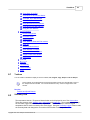
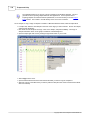
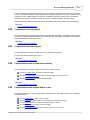
Go to Sample Toolbar
This toolbar is used when positioning the graph view or values view at a particular sample. If the toolbar is
docked or visible, just click in the entry field and type a sample number, followed either by the Enter key, or by
clicking the
button just to the right of the field. If the toolbar is not visible, using the View/Goto/Sample
menu function, or the shortcut key ^G will cause the toolbar to be made visible.
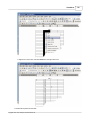
Copy Toolbar
Selects all the samples. This is equivalent to clicking on the first sample,
pressing F7 to set the start sample to the first sample, then clicking on the
last sample, pressing F8 to set the end sample to the last sample. Any
Copy operation will then copy all of the samples to the clipboard. The select
all samples operation can also be carried out by pressing Ctrl-A while in the
graph view, or selecting Select All from the right-click menu in graph view.
This button is only functional if there is logger or file data loaded and graph
view mode is selected
Sets the start sample to the graph sample cursor, i.e. the position on the
graph of the cursor. This is equivalent to pressing F7. This button is only
functional if there is logger or file data loaded and graph view mode is
selected.
Sets the end sample to the graph sample cursor, i.e. the position on the
graph of the cursor. This is equivalent to pressing F8. This button is only
functional if there is logger or file data loaded and graph view mode is
selected.
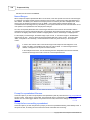
Copies the samples between (and including) the start and end samples to
the clipboard. From the clipboard the samples can then be pasted into a
spreadsheet such as Microsoft Excel or a word processing document. See
Copyright 1992..2010 Temprecord International Ltd.
20
Temprecord Help
copying samples to the clipboard for more information. This button is only
functional if there is logger or file data loaded and graph view mode is
selected
Copies the samples between (and including) the start and end samples to
an Excel spreadsheet file. By default, an XLS file with the same filename
as the .TR file is created. See copying samples to Excel for more
information. This button is only functional if there is logger or file data
loaded and graph view mode is selected
All of the functions accessible from these speed buttons are also available as menu
entries, and some are also available through the keyboard function keys.
1.7
Command-Line Parameters
When starting Temprecord from the command line (from a “DOS Prompt”, there are numerous
command-line options that can be used. Some of these enable you to perform repetitive tasks from a
batch file and are useful when setting up or reading a large number of loggers.
Temprecord already implements the ability to specify TR files to load on the command-line. These
existing command-line parameters are unaffected.
All settings (such as COM port, parameter defaults, export settings, etc) that are currently in use are
also used for any operations specified through command-line options.
As an example of the use of the added command-line options, the command:
trw
/stop /read /save fred /reuse /start /exit
will stop the logger, read the data, save it as a file FRED.TR, reuse the logger, start the logger again,
and TRW will then exit. If any errors occur, all processing of commands stops and a message
describing the problem is displayed.
The command:
trw /read
will start TRW, read the logger data, and remain open with the logged data displayed.
These command-line parameters are useful for performing a series of operations on one logger. If
you have a batch of loggers to read and reconfigure, auto mode operation is probably preferable.
Using the Command-Line Options
Commands can be carried out by any of the following methods:
From a DOS Command Prompt:
·
·
·
·
Click on Start
Click on Programs
Click on MS-DOS Prompt
At the C:> prompt, type the Temprecord command, i.e. “trw”, followed by a space, followed by
Copyright 1992..2010 Temprecord International Ltd.
Contents
21
the command-line options, followed by the “Enter” key.
From a Batch File:
·
·
·
·
·
·
Click on Start
Click On Programs
Click on Accessories
Click on NotePad
In NotePad, enter the commands you wish to execute, one per line.
Click on Save, and enter the folder and name of the file. Be sure to give it an extension .BAT,
e.g. “doit.bat”.
To execute the batch file, type its name at a DOS command prompt, or create a shortcut to it.
From A Shortcut:
·
·
·
·
·
·
·
·
·
Open the folder you want to create the shortcut in, unless you want the shortcut to be on your
desktop.
Right-click in the folder (or on the desktop).
Click on “New”
Click on “Shortcut”
Enter the TRW command-line, including the path, e.g.:
C:\trw\trw.exe /read
Don’t forget to add the “.EXE” to the TRW program name.
Click on Next
Enter a name for the shortcut.
Click on Finish.
To use the shortcut, double click it.
WARNING The TRW program contains many prompts and safeguards when dealing
with Temprecord data. As an example, TRW will prompt you before reusing a logger if it
believes you have not yet read and saved the data, as reusing a logger makes any data
in it inaccessible. These prompts are NOT issued when using the command-line
functions of TRW. It is the user’s responsibility to make sure that data has been saved
before reusing a logger with the /REUSE command line option.
Command-Line Reference
The command-line options are described in the order you would normally carry out the commands if
you were using them from TRW. Note however that the command-line options can be specified in any
order on the command line.
The order of execution of the commands is NOT necessarily the order in which you specify them, but
is instead the order that would make the most sense. As an example, if you specify the command:
trw /export /read
the logger would be read first, then the data would be exported.
Some combinations of command-line options are not sensible and in this case an error message will
be displayed and no commands will be executed.
Copyright 1992..2010 Temprecord International Ltd.
22
Temprecord Help
Command
/STOP
Example
trw /stop
Function
Stops the logger. If the logger is not in the logging state an error
message is issued. If the logger is already stopped, no error is
issued.
Command
/OPEN <filename>
Example
trw /open fred
Function
Opens a Temprecord data file from disk. An error is raised if no
filename is specified, if the file is not found or if it is not a valid
Temprecord data file. If no filetype is specified, .TR is assumed.
If the filename contains spaces, you need to enclose it in double
quotes, e.g. trw /open "data from fred.tr".
Command
/READ
Example
trw /read
Function
Reads the data from the logger. The logger must be present, and
either logging or stopped or an error results.
Command
/SAVE [<filename>]
Example
trw /read /save
trw /read /save fred
Function
Saves the loaded Temprecord data to a disk file as a Temprecord
data file. An error results if there is no data loaded, i.e. a /READ
or /OPEN command line option must also be specified. If no
filename is specified and the loaded data is from a file, an error is
issued. If no filename is specified and the loaded data is from a
logger, a filename is constructed from the logger serial number. If
a filename is specified and no filetype, .TR is assumed.
NOTE: If the file already exists it is overwritten. You will not be
prompted before overwriting, even if that option is checked in
TRW.
If the filename contains spaces, you need to enclose it in double
quotes, e.g. trw /read /save "data from fred.tr".
Command
/EXPORT [<filename>]
Example
trw /read /export
trw /read /export fred
Function
Saves the loaded Temprecord data to a disk file as an ASCII file (i.
e. performs the same function as the ‘Export’ function from within
TRW). An error results if there is no data loaded, i.e. a /READ or /
OPEN command line option must also be specified. If no filename
is specified and the loaded data is from a file, the name of the
export file is the name of the loaded TR file, but with filetype as
specified in the Options/Export settings of TRW. If no filename is
Copyright 1992..2010 Temprecord International Ltd.
Contents
specified and the loaded data is from a logger, a filename is
constructed from the logger serial number, and the filetype is as
specified in the Options/Export settings of TRW. If a filename and
filetype is specified, it is used as the exported filename. If no
filetype is specified but no filetype, the filetype as specified in the
Options/Export settings of TRW is used.
When exporting data with this option, the export settings as
specified in the Options/Export settings of TRW apply.
NOTE: If the file already exists it is overwritten. You will not be
prompted before overwriting, even if that option is checked in
TRW.
If the filename contains spaces, you need to enclose it in double
quotes, e.g. trw /read /export "data from fred.txt".
Command
/REUSE
Example
trw /reuse
Function
Reuses the logger. If the logger is not present, not a multiple use
type, or it is not in the stopped state an error message is issued. If
the logger is protected with a password and no password is
supplied with the /PASSWORD option, or the password supplied is
incorrect, an error results. When the logger is reused, all
parameters are left unchanged (except in the case of the older
Mk1 to Mk3 loggers, where the start delay is set to the value
specified in the parameter default options). If you require different
parameters to be used, specify them using the Options/Defaults
settings in TRW and use the /DEFAULTS command-line option
also.
NOTE: No warning is issued if the data in the logger has not been
read and/or saved. This option should not be used unless the
data from the logger has been successfully read and saved, either
by previous operations, or on the same command line.
Command
/PASSWORD
Example
trw /reuse /password 1234
Function
Supplies a password to be used when reusing the logger or setting
the logger parameters to the defaults. This option is required
when the logger is protected by a password and the /REUSE or /
DEFAULTS command-line options are used.
Command
/START
Example
trw /start
Function
Starts the logger. If no logger is present, or if the logger is not in
the READY state, an error results.
Command
/AUTO
Example
trw /auto
Copyright 1992..2010 Temprecord International Ltd.
23
24
Temprecord Help
Function
Starts Auto Mode when TRW starts. This option would normally
be used on it's own, or only with the /KIOSK option below.
Command
/KIOSK
Example
trw /kiosk
Function
Starts TRW in "Kiosk mode", with a reduced set of functions and
capabilities.
Command
/EXIT
Example
trw /open fred /export /exit
Function
Exits TRW when all command have been successfully carried out.
If any command resulted in a error, a message will be displayed,
and TRW will exit after this message has been cleared.
Examples
Some examples of common functions follow:
Example
trw /stop
Function
Stops the logger and leaves TRW running.
Example
trw /stop /save /reuse /exit
Function
Stops the logger, saves the data to a filename based on the logger
serial number (overwriting any file of the same name), reuses the
logger, and then exits TRW.
Example
trw /open sample1 /export /exit
Function
Reads the file SAMPLE1.TR from disk, exports it as SAMPLE1.
PRN (or whatever the current export filetype is set to) and then
exits TRW.
Example
trw /stop /read /save sample2 /export sample2 /exit
Function
Stops the logger, reads it, saves the data to SAMPLE2.TR,
exports it to SAMPLE2.PRN (or whatever the current export
filetype is set to) and then exits TRW. Note that in this example if
no filetype is specified after the /EXPORT option, the export
filename will be based on the logger serial number, even though a
filename was supplied with the /SAVE option.
If you enter the above command line into a batch file, and replace
the filename with “%1”, i.e. create a file called exportit.bat with the
following line in it:.
trw /stop /read /save %1 /export %1 /exit
you will be able to type the command:
Copyright 1992..2010 Temprecord International Ltd.
Contents
25
exportit sample2
to carry out the commands.
1.8
Where do I plug my reader in ?
The Temprecord program requires an available serial port or USB port on your computer to operate.
The serial connector for this will be on the back of your computer, along with the connectors for the
display and keyboard. It will be either a DB-9M (9-pin male) or a DB-25M (25-pin male) connector. A
25 pin-to-9 pin converter is supplied with the Reader Interface and you should use this if your computer
is only fitted with a DB-25M connector.
If your reader has a USB connector, you need to plug it into a SUB port. These are normally located
on the rear of desktop PCs, or on the side or rear of laptop/notebook PC's.
Unplugging the USB reader interface from the computer's USB port while Temprecord is running
can have unpredictable effects and result in the loss of communication with the logger. It is best
to exit Temprecord before unplugging or plugging in the reader interface.
Don’t confuse the DB9-M serial port connector with the display connector. The display
connector is normally the same size as a DB-9M connector but will be a 15-pin female
connector
Don’t confuse the DB25-M serial port connector with the printer connector. The printer
connector is normally the same size as a DB-25M connector but will be a 25-pin female
connector.
WARNING – The Temprecord Reader model SR2 is a Class A product. In a
domestic environment this product may cause radio interference in which case
the user may be required to take adequate measures.
1.9
Temprecord Humidity Loggers
Data from Temprecord RH loggers can only be viewed with Temprecord software version 3.28 or later.
The principal difference between Temprecord RH loggers and Temprecord temperature loggers is the presence
of an aperture in the front of the RH logger case where the humidity sensor is located.
The operation of Temprecord Humidity loggers is the same as for Temperature only loggers as described
elsewhere in this documentation
Dust on the Humidity Sensor
To minimize the effects of airborne dust building up on the Humidity sensor use an optional dust cover to protect
the Humidity sensor. Tests have proven that the proprietary dust cover that is shown below protecting the
Humidity sensor does not affect the performance or accuracy of the Temprecord RH logger.
Copyright 1992..2010 Temprecord International Ltd.
26
Temprecord Help
The dust covers have been designed and manufactured to allow maximum airflow to reach the humidity sensor
while at the same time preventing dust and other airborne contaminants settling on or around the RH sensor.
The dust cover slides over the logger and is held in place by the tight fit of the cover around the logger case.
When the dust cover becomes congested, try washing the cover in warm water after removing it from the logger,
then rinse the dust cover out thoroughly in clean water. Make sure the cover is 100% dry before fitting it to your
logger again. If the dust cover becomes unusable because of damage or soiling you can obtain replacement
dust covers from your Temprecord distributor. The dust covers are manufactured from a non-absorbent material.
Do not use a substitute such as filter paper as other materials can become saturated with moisture. This will
cause the RH logger to record humidity values higher than the actual humidity level present in the logged
environment.
Drying the Humidity Sensor
NEVER USE A MICROWAVE OVEN TO DRY THE HUMIDITY SENSOR! Doing so will
immediately void the warranty of the logger and seriously damage the electronics and battery
inside the unit beyond repair.
If the humidity sensor in the logger needs to be dried out the following procedure applies:
· Place the logger face down for six hours in a conventional oven that has been set to 50 degrees Celsius /
122 degrees Fahrenheit.
· Turn the logger over for a further 18 hours.
There should be no more than 5% Relative Humidity present inside the oven during the drying process. Leave
the logger inside the oven for a minimum drying time of 24 hours to return the RH sensor to calibration
conditions. Never exceed 60 degrees Celsius / 140 degrees Fahrenheit during the drying process as this could
damage the logger electronics or plastic casing.
Drying the Humidity sensor in a conventional oven.
See also:
Setting Up Humidity Loggers
Copyright 1992..2010 Temprecord International Ltd.
Contents
1.10
27
How Do I...
How do I install Temprecord on another computer ?
How do I set up a logger to record temperatures ?
How do I see the temperature values as numbers, instead of as a graph ?
How do I save my data after I have read it from the logger ?
How do the upper and lower limits work when Temprecord displays data ?
How do I see my data as a graph and as a set of values at the same time ?.
How do I use the comment fields ?.
What are 'Presets' and how do I use them ?
See also:
Common Problems
Error and Warning Messages
1.11
View Help As PDF
Use this menu item to see the help file as a PDF file. The PDF format help can be more convenient as it is
organized more like a book. It is also possible to print all or some of the help file, whereas Windows help only
allows you to print one topic at a time.
See Also
Unable to open PDF file
1.12
About Temprecord
Temprecord for Windows 2000/NT/XP/Vista
English-Language HTML Help
© Temprecord International Ltd 1992-2010
P.O. Box 58-430
Auckland, NEW ZEALAND
http://www.temprecord.com
[email protected]
Portions Copyright Indy and IndySSL
http://www.indyproject.org
Produced November 2010
Generated 2:32:26 p.m. Thursday, 11 November 2010
2
Installation of Temprecord
The Temprecord program can be installed on as many computers as you wish. Just take the original
installation disk that you installed this copy of Temprecord with, place it in the drive of the computer
you wish to install it on, and run TRW-SETUP.EXE from the drive.
Copyright 1992..2010 Temprecord International Ltd.
28
Temprecord Help
IMPORTANT! Don't plug in your reader interface before installing the Temprecord
software.
Of course you will require another reader interface unit if you wish to program and start loggers on the
second computer.
In order to use the reader interface unit, your computer must have a spare USB port. As part of the
installation process, the necessary USB driver files are normally copied to your computer and installed.
This part of installation normally proceeds without problems, but you might need to manually install
these drivers with some computers or versions of Windows. See the topic Installing Temprecord
Reader USB Drivers for more information.
.
When you first start to install Temprecord, you may see this warning:
Click on "Continue Anyway". You may need to repeat this step as the installation involves copying two
distinct sets of driver files.
When the installation has completed, plug in the reader interface. You may see the following warning:
Copyright 1992..2010 Temprecord International Ltd.
Installation of Temprecord
Select "No, not this time" and click the "Next" button. You will see the following screen:
Copyright 1992..2010 Temprecord International Ltd.
29
30
Temprecord Help
Select "Install the software automatically" and click the "Next" button.
Once again, the same procedure will likely repeat as there are two separate sets of driver files that
need to be installed for the Temprecord Reader.
To install Temprecord on another workstation on a network, see the topic Installing Temprecord on
Networks
See Also
Installing Temprecord on Networks
Installing Temprecord Reader USB Drivers
Notes for System Administrators
2.1
Installing Temprecord on Networks
This topic will mainly be of interest to network administrators.
Like most modern Windows applications, Temprecord has been designed to be installed on each
workstation it is required on. Once installed, the default data file and reports folders are set to the
current users profile, and also shared documents folders are created for the PC and have modify
permissions set for all users. The installer creates all folder required with the appropriate permissions
set. The installer will not run unless an administrator account is logged in.
Installing TRW on a common shared network drive is not recommended. The installation process
creates file associations between the Temprecord program and .TR data files which will not be present
if the program is not installed on the workstation. It also pre-installs USB driver files for the
Temprecord Reader. These files are not provided for in the Windows driver set, so users running from
a shared network copy of TRW.EXE will not be able to access loggers with a Temprecord Reader
interface.
Changes in the way Windows Help is implemented mean that it is more difficult to install
the help files on a shared drive. Windows help files (CHM files) will not function
properly unless they are located on the same machine as the user, i.e. they cannot be
on a network drive. The simplest way to circumvent this problem is to install
Temprecord on every machine that will be running it.
Windows XP/Vista
Windows XP and Windows Vista have additional security measures which prevent a user opening a
help file on a remote (network) drive. If you receive the message "Navigation Canceled" displayed in a
help window this is the reason. To prevent this, make sure that Temprecord is installed on every
machine that needs to run it -i.e. "locally".
We have provided a batch installer to enable rapid deployment of Temprecord software across
multiple machines. See the file Install.txt in the distribution package, and also the topic Notes for
System Administrators
See Also
Installation of Temprecord
Installing Temprecord Reader USB Drivers
Notes for System Administrators
Copyright 1992..2010 Temprecord International Ltd.
Installation of Temprecord
2.2
31
Installing Temprecord Reader USB Drivers
Normally installation of the USB drivers required for the Temprecord Reader Interface will happen automatically
as part of the software installation. If you experience difficulty with the automatic installation of the USB drivers
required for the reader interface, follow the instructions given here.
IMPORTANT! Don't plug in your reader interface before installing the Temprecord
software.
If the instructions given below do not work for you, you can always install the USB drivers manually
IMPORTANT NOTE. If you are running Windows 2000 or Windows XP prior to Service pack 2
("XP SP2"), you must ensure that your computer is not connected to the Internet when you install
the USB drivers. Otherwise Windows will load an incorrect driver file from the Internet. If you are
running Windows XP SP2 or above the installer will ask if it can check the Internet for the driver.
You must answer "No" to this question.
If the installation of the drivers is incomplete, you may see this dialog when you plug in the reader for the first
time:
Select Install from a specific location (Advanced), and click Next.
Copyright 1992..2010 Temprecord International Ltd.
32
Temprecord Help
Make sure Search for the best driver in these locations is selected, Search removable media is not
checked, and Include this location in the search is checked. Then click the Browse button. Navigate to the
folder C:\Program Files\TRW\Drivers (If you installed to a folder other than TRW, select that folder instead).
When you have selected the folder, close the Browse dialog and click Next.
After some time (up to a minute) you may see a warning that the drivers are not Microsoft-certified and asking
you to confirm that you wish to install them anyway:
Click on the Continue Anyway button. After a short time you should receive a dialog announcing the successful
Copyright 1992..2010 Temprecord International Ltd.
Installation of Temprecord
33
completion of the installation.
At this point, the whole process will repeat for the driver named "USB Serial Port". After this has completed
(make the same selections as detailed above for installation of the Temprecord USB Reader) your reader should
be ready for use. If you encounter difficulties, you can try to install the USB drivers manually
See Also
install the USB drivers manually
Installation of Temprecord
Installing Temprecord on Networks
Notes for System Administrators
2.3
Installing the USB Drivers Manually
If things go wrong with the USB installation, you can try installing the USB drivers manually.
IMPORTANT! Don't plug in your reader interface before installing the Temprecord
software.
IMPORTANT NOTE. If you are running Windows 2000 or Windows XP prior to Service pack 2
("XP SP2"), you must ensure that your computer is not connected to the Internet when you install
the USB drivers. Otherwise Windows will load an incorrect driver file from the Internet. If you are
running Windows XP SP2 or above the installer will ask if it can check the Internet for the driver.
You must answer "No" to this question.
First, plug the reader in to an available USB port.
To check if the drivers are installed, check the Device Manager (in Windows XP, click Start, Control Panel, and
Copyright 1992..2010 Temprecord International Ltd.
34
Temprecord Help
double-click System. Click on the Hardware tab from the System Properties page:
Click the Device Manager button.
Copyright 1992..2010 Temprecord International Ltd.
Installation of Temprecord
35
If the driver for the Temprecord Reader Interface is missing or incorrectly installed, and the a yellow exclamation
mark will show beside the USB symbol in the hardware list. Right-click the Temprecord USB Reader entry and
select Update Driver. The following dialog will display:
Copyright 1992..2010 Temprecord International Ltd.
36
Temprecord Help
Select Install from a specific location (Advanced), and click Next.
Make sure Search for the best driver in these locations is selected, Search removable media is not
checked, and Include this location in the search is checked. Then click the Browse button. Navigate to the
Copyright 1992..2010 Temprecord International Ltd.
Installation of Temprecord
37
folder C:\Program Files\TRW\Drivers (If you installed to a folder other than TRW, select that folder instead).
When you have selected the folder, close the Browse dialog and click Next. You will probably receive a warning
that the driver is not certified:
Click the Continue Anyway button, and you should see the following screen.
Copyright 1992..2010 Temprecord International Ltd.
38
Temprecord Help
.
At this point the whole process will repeat to install a second set of drivers that are required. Follow the same
procedure as outlined above.
See Also
Installation of Temprecord
Installing Temprecord on Networks
Installing Temprecord Reader USB Drivers
Notes for System Administrators
2.4
Notes for System Administrators
These notes will serve as a guide to administrators, IT support personnel and other installers of Temprecord.
Installation
Temprecord requires the user to have administrator rights for installation. After installation, Temprecord will be
available to all users of the computer, whether administrators or limited users.
Batch installation (see below) carried out on computers with an installation of Temprecord (TRW) prior to 5.25
can automatically import those settings, but you will need to edit the batch file to enable that group of
statements..
Installation of newer versions of Temprecord on computers with versions of Temprecord 5.26 Build 1038 and
above should retain the current settings.
Manual installation is just a matter of running the executable trw-setup.exe.
Installation Logs
Temprecord installation produces two log files with names that reflect the release version and date. These files
are written to a subfolder of the folder the TRW.EXE is installed into (normally C:\Program Files\Temprecord
Copyright 1992..2010 Temprecord International Ltd.
Installation of Temprecord
39
\TRW\). For example:
C:\Program Files\Temprecord\TRW\Installation Logs\Temprecord 5.27.0.1575 06 Jul
C:\Program Files\Temprecord\TRW\Installation Logs\Temprecord 5.27.0.1575 06 Jul
These files can be used to troubleshoot installation issues and should be included if you report an installation
problem.
Folder Use and Permissions
Installation of Temprecord creates the following folders off the root folder C:\Documents and Settings
\<User name>\:
..My Documents\Temprecord\
Defa
ult
folde
r for
Tem
prec
ord
(.TR)
files
..My Documents\Temprecord\Reports\
Defa
ult
folde
r for
PDF
repo
rt
files
..Local Settings\Application Data\Temprecord\TRW\
Fold
er
for
TR
W.
INI
setti
ngs
file
and
emai
l
queu
e file
..Local Settings\Application Data\Temprecord\TRW\Email Files\
Fold
er
for
temp
orar
y
attac
hme
nt
files
for
emai
ls.
Files
rem
ain
in
Copyright 1992..2010 Temprecord International Ltd.
40
Temprecord Help
here
until
the
emai
l
with
attac
hme
nts
is
succ
essf
ully
sent,
whe
n
thes
e
files
are
delet
ed.
..Local Settings\Application Data\Temprecord\TRW\Event Log\
Fold
er
for
the
even
t log
..Local Settings\Temp\Temprecord\TRW\Preview\
Fold
er
for
temp
orar
y
PDF
files
creat
ed
whe
n
PDF
previ
ew
is
used
.
It is assumed that these folders are all created with modify permissions for the current user, so that a limited user
can still run Temprecord, create and save files and email attachments, etc. Temporary PDF preview files are
created in the logged-in user's TEMP folder
Distribution
The Temprecord program is generally distributed as a ZIP file named trw-setup.zip. Within the ZIP archive are
three files:
· trw-setup.exe
The setup executable. Run this file to install Temprecord.
· readme.txt
Late-breaking news and version history
Copyright 1992..2010 Temprecord International Ltd.
Installation of Temprecord
41
· Install.txt
These notes
· TRW Batch Installation
Template.bat
A sample batch file to illustrate unattended batch installation
The installation ZIP archive file contains EXE and BAT files. These file types are often blocked
by system administrators because of the fear they might harbor viruses. You may need to find
alternate ways of distributing the installable other than email attachments.
Batch Installation
The file TRW Batch Installation Template.bat is provided as an example of how Temprecord can be
installed without user intervention in situations where the installation destination folder is known in
advance. System administrators should examine this file and edit it to suit their environment is
necessary, although using it in its current form will generally install Temprecord satisfactorily.
To prepare the batch installation template to install Temprecord, the following steps are required:
· Unzip the TRW setup files into a temporary folder
· Copy the file TRW Batch Installation Template.bat to a new name.
· Edit the new batch file and change the items shown in red on the following lines if required:
set InstallLogFilename=TRW Installation Log.txt
set InstallFolder=C:\Program Files\Temprecord\TRW\
set InstallGroup=Temprecord
You will find the batch installation template in the folder C:\Documents and Settings\All Users
\Documents\Temprecord Files\Samples.
A note about INI files
The INI file (usually called TRW.INI) is responsible for remembering all the settings of TRW when the
application exits.. From TRW version 5.26 onwards, the INI file is handled differently to previous TRW
versions:
· When TRW starts it first checks the folder the EXE file is located in for the INI file. If one is
found it is read. This folder is usually called something like:
C:\Program Files\Temprecord\TRW\
If Temprecord has been installed and is running from a network drive for shared use, an INI file
will be checked for in that folder instead.
· If the INI file is not found the common application data folder of the PC is checked. If TRW.INI
is found there it is read. This folder is normally called something like:
C:\Documents and Settings\All Users\Documents\Temprecord\Application
Data\TRW\
· If TRW.INI is not found in the common application folder, the local settings application folder is
checked. If TRW.INI is found there it is read. This folder is normally called something like:
C:\Documents and Settings\<User name>\Local Settings\Application Data
\Temprecord\TRW\
· If TRW.INI is not found in any of these three locations, a new default one is created in the local settings
Copyright 1992..2010 Temprecord International Ltd.
42
Temprecord Help
application data folder,
· When TRW exits, the INI file is written back to the folder it was read from. If the user does not
have write access to that folder, or the file is marked as read-only, no error message is issued.
The above behaviour enables various configurations to be accommodated. The installation default is
for each user to have their own INI file. Alternatively the INI file can be copied to the common
application data folder and it will be used by all users on that workstation. Finally, the INI file can be
copied to a network server folder containing a shared copy of TRW.INI and all users on the network
will share the INI settings.
The installer creates a new TRW.INI file unless it finds an existing one from a previous installation, so
existing settings should be preserved on re-installation of versions 5.26 onwards.
If you require a custom configuration for your users you can create this by installing TRW on your local
machine, setting up the desired options, then copying the TRW.INI file to your installation image such
that the file is available in the same folder as TRW-SETUP.EXE when this file is run. If the installer
finds this custom copy of TRW.INI in the same folder TRW-SETUP.EXE is running in, and there is no
local TRW.INI file there already, the custom one is copied
Previous versions of TRW kept the TRW.INI file in the folder:
C:\Program Files\TRW
If you have a previous version of TRW installed and wish to keep those settings, there
are statements in the batch file which copy the file TRW.INI from an existing installation
of TRW to the application data folder of the new installation. This means the new
installation will inherit most of the settings the user had with the previous installation of
TRW. These statements are commented out by default. You need to modify and
enable these statements if you require this. A backup of any existing TRW.INI file is
made first.
You need to deploy your edited batch file and the file trw-setup.exe. The other files readme.txt and
Install.txt are already present in the setup EXE file.
To carry out the batch installation:
· Copy the deployment files (edited batch file and setup executable) to a temporary folder on the
target installation machine.
· Change to that folder.
· Execute the batch file.
If you encounter problems with batch installation, the file TRW Installation Log.txt created as part of
installation can be inspected for clues as to what might be wrong. This file should be included in any
request for technical support.
Customizing Installation
If you require your installation to have customized settings, these are the steps required:
·
·
·
·
·
unzip all the files in trw-setup.zip to a temporary folder
install Temprecord on your computer.
open the Options dialog.
set any custom options you require.
exit Temprecord.
Copyright 1992..2010 Temprecord International Ltd.
Installation of Temprecord
43
· open Explorer and navigate to C:\Documents and Settings\<User name>\Local Settings
\Application Data\Temprecord\TRW
· copy the file TRW.INI into the temporary folder
The contents of the temporary folder are what you need to distribute as an installation image.
See Also
Installation of Temprecord
Installing Temprecord on Networks
Installing Temprecord Reader USB Drivers
3
Common Problems
Listed here are some of the more common problems users of Temprecord experience. To see an
explanation of the problem and its remedy, click on one of the topics below.
Temprecord will not start
Temprecord won't recognize my logger
The arrow keys don't move the cursor on the graph
The trace isn't visible on the graph
I can't alter some of the parameters
I get an error when I try to update the parameters
I can’t print anything with Temprecord
I can’t print my data as a list of values
I get a 'SPOOL32 Error' when I print
When I open a menu, some of the items are grayed
When I click on a button, nothing happens apart from a beep
My logger says it exceeded the limits, but I can't see where
I have set different colors for display of values above the upper limit and below the lower limit
but my values still display and print in one color only.
The start time displayed changes every time I insert a marker.
I can't get the TTV statistics to display or print, or export them to a file.
I can't get the PHI (growth) statistics to display or print, or export them to a file.
I can’t select the Humidity options when I program the logger parameters
The temperature exceeded the limits but the summary does not show this
My filenames are all garbled
Why doesn't my printed graph look the same as the one I see on screen?
The format of the displayed date format doesn't match my Control Panel regional settings
Copyright 1992..2010 Temprecord International Ltd.
44
3.1
Temprecord Help
Temprecord will not start
If Temprecord does not start at all, - i.e. when you click on the Temprecord icon, or Click on Start/All Programs/
Temprecord, nothing happens - the most likely reason is anti-virus software. Try disabling the anti-virus software
and start Temprecord again.
Temprecord only allows one instance of the application to be running at once. If you try to start Temprecord
when it already running an error message will display.
3.2
Temprecord won't recognize my logger
The most common reason for this is confusion over COM Ports. If you receive the error message
Unable to open COMx. the port selected is either in use by another device or program, or the port
doesn’t exist.
If you receive the message Unable to Access Temprecord Logger it means that Temprecord has
found the COM Port but was unable to communicate with the logger.
3.3
The arrow keys don't move the cursor on the graph
In Graph View mode the left and right arrow keys move the sample cursor one sample to the left or
right. If the current zoom factor is such that there are more samples across the screen than there are
pixels across the screen (a pixel is the smallest screen element your computer’s screen can display),
the displayed cursor will not necessarily move on screen when the cursor is moved with the arrow
keys.
Use the View/Zoom In Horizontally function to change the zoom factor so that the samples are
displayed more widely apart.
3.4
The trace isn't visible on the graph
In Graph View mode at higher Zoom levels it is possible to scroll the displayed area to a point in the
graph where the trace is not visible. If this occurs, you can use the View/Go To/Find Trace function to
position the trace near the centre of the window. The zoom factor and horizontal position are not
altered.
If you are viewing data from a Humidity logger, you can select whether Temperature, Humidity, or both
are displayed by right-clicking on the graph.
3.5
I can't alter some of the parameters
When using the Program/Parameters function to set up a logger, you may notice some of the
parameters are displayed in gray and you cannot alter them.
The parameters Lower and Upper Temperature Limits, Start at Date Option, Limits
Delay Option, and the group of enables (Loop Overwrite, Start and Stop with Button, Start and
Stop with Switcher and Allow Markers) are only possible with the newer Mk II and Mk III
Temprecord Loggers. If you are programming an older Temprecord logger, these parameters
Copyright 1992..2010 Temprecord International Ltd.
Common Problems
45
will appear grayed. If you are programming a humidity logger, and it is configured to log
Humidity only, the temperature options will appear grayed.
The parameters Start Date and Start Time can only be programmed if the Start on
Date option is enabled.
The function Limit Delay can only be altered if the Enable Safe Range parameter is
checked.
The upper and lower humidity limits can only be altered if the logger being
programmed is a humidity logger, and it is set up to log humidity only, or both temperature and
humidity.
3.6
I get an error when I try to update the parameters
This can occur when accessing the logger with Bluetooth serial ports. Set the option Bluetooth Compatibility
3.7
I can't print with Temprecord
You should check the following:
Can you successfully print with any other application? Try printing a document with your word
processor. If this is also unsuccessful, the problem lies with the printer or your computer.
Check that the selected printer is available to your computer.
Do you get a blank sheet when you print? Check the printing options and make sure that at
least one of summary, values, statistics, or view is selected.
Check that you have the latest printer driver for your printer and version of Windows.
Some earlier versions of the Windows 3.11 printer drivers for the HP LaserJet 5P series
of printers may give this error. If you are unable to get an updated printer driver for the
LaserJet 5 that fixes the problem, try installing a printer driver for an earlier compatible
printer, such as the HP LaserJet III.
Some HP DeskJet printers will require installation of other HP drivers. For example the
HP 820 and 870 require use of the HP DeskJet 310 driver. This driver is available from
the HP web site (http://www.hp.com) or from your Temprecord dealer. Install the driver
as if you were adding another printer, then select that printer when printing from
Temprecord.
See Also
I get a 'SPOOL32 Error' when I print
3.8
I get a 'SPOOL32 Error' when I print
This is an internal error in the Windows printer driver. Problems have been observed with some HP
printers, for example.
If you have a DeskJet 400 and are experiencing problems, try using the printer drivers for the 550C
printer. You will need to install the 550C as another printer and select this whenever you wish to print
Copyright 1992..2010 Temprecord International Ltd.
46
Temprecord Help
from Temprecord.
3.9
When I open a menu, some of the items are grayed
There are occasions when an item on a menu is not applicable because certain conditions are not
met. For example, if you do not have any data windows open (because you have not opened any files,
or loaded data from a logger), it is not sensible to save data, as there is no data to save..
Under these circumstances Temprecord will 'gray' the File/Save menu entry, as a reminder that you
need to do something else before you can use that entry.
Other examples of menu entries that are 'grayed' are:
Menu Entry
Disabled When
File/Save File
No data Windows are open or only summary data
loaded from a logger.
File/Close File
No data windows are open
File/Edit Comments
No data windows are open or only summary data
loaded from a logger.
File/Export
No data windows are open or only summary data
loaded from a logger.
File/Print
No data windows are open
View/Go To
No data windows open or view mode is not graph or
values.
View/Go To/Previous Marker
View/Go To Next Marker
These are only enabled when there is data
loaded from a Mk II or Mk III logger (Mk I loggers do
not support user markers).
View/Zoom
No data windows open or view mode is not graph.
View/Set as Start Sample
View/Set as End Sample
No data windows open or view mode is not graph.
View/Temperature
Only humidity data has been logged
View/Humidity
Only temperature data has been logged
View/Temperature and Humidity Only humidity data or only temperature data has been
logged (this menu option is only available when both
temperature and Humidity have been logged).
3.10
When I click on a button, nothing happens apart from a beep
There are occasions when a speed button action is not applicable because certain conditions are not
met. For example, if you do not have any data windows open (because you have not opened any files,
or loaded data from a logger), it is not sensible to print data, as there is no data to print.
Under these circumstances Temprecord will 'beep' when the button is clicked on, as a reminder that
you need to do something else before you can use that entry.
Copyright 1992..2010 Temprecord International Ltd.
Common Problems
The following describes when each of the speed buttons is inoperative:
Speed Button
Disabled When
Always enabled.
File/Open
No data windows are open
File/Save
No data windows are open
File/Print
Program/Parameters
Those buttons associated with programming and
reading a logger are always enabled, but a logger
needs to be present in the reader interface.
Program/Start
Program/Stop
Program/Read Logger
Program/Reuse
Zoom in horizontally
Zoom out horizontally
Zoom in vertically
Zoom out vertically
Zoom all
Zoom to presets
Select all samples
Set start sample
Set end sample
Copyright 1992..2010 Temprecord International Ltd.
No data windows open or view mode is not graph
47
48
Temprecord Help
Copy to clipboard
Copy to Excel
Go to minimum sample
No data windows open or view mode is not graph or
values.
Go to maximum sample
3.11
My logger says it exceeded the limits, but I can't see where
The red LED on Mk II and Mk III loggers will flash if the logged temperature has gone above the upper
limit or below the lower limit since the logger was started. If loop overwrite is on however the sample
record contained in the logger will not necessarily have any samples that are outside the limits, as
these may have been overwritten.
3.12
The start time displayed changes every time I insert a marker
Temprecord calculates the time of the first sample by taking the current time and counting backwards,
using the number of samples taken and the sample period. If the sample record contains markers as
well as temperature values, the start time will be earlier by the number of markers multiplied by the
sample period if the data has not been read from the logger.
If the data has been read from the logger the displayed time of first sample should be correct. If the
data has not been read then the summary time of first sample will be earlier than the true value if the
sample record contains markers.
3.13
I have set different colors for display of values above the upper limit and
below the lower limit but my values still display and print in one color only
The display option Show upper and lower limits needs to be checked for Temprecord to show values above the
upper limit or below the lower limit in different colors.
3.14
I can't get the TTV statistics to display or print, or export them to a file
Temprecord only displays the Total Temperature Value (TTV) statistics if Show TTV Statistics is
checked in the Statistics Options tab. This option must be checked if you want to print the TTV
statistics or export then to a file also.
Copyright 1992..2010 Temprecord International Ltd.
Common Problems
3.15
49
I can't get the PHI statistics to display or print, or export them to a file
Temprecord only displays the PHI (growth) statistics if Show PHI Statistics is checked in the Statistics
Options tab. This option must be checked if you want to print the PHI statistics or export then to a file
also.
3.16
I cant print my data as a list of values
Temprecord can print data in any or all of the four different view modes. By default, new installations
of Temprecord have the printing of numeric values disabled.
Use the Options/Printing page to turn on printing of the values. You can access the printing options by
either:
Opening the Options menu, and selecting the 'Printing' tab.
Clicking on the 'Options' button when the Print dialog is displayed.
3.17
COM Port Issues
An unused COM port is required to use the Temprecord Reader Interface to program and read
loggers. You specify the COM port to use using the Options/COM Port dialog.
If you have the type of Reader Interface that plugs into a USB port, it may not be obvious which COM
port that it is using, as the COM port is sometimes assigned dynamically by Windows according to
what port numbers (COM1, COM2 etc) are already taken.
If you need to establish what COM port your USB reader interface is using, the following procedure
should guide you to find out.
· Click on Start
· Click on Control Panel:
Copyright 1992..2010 Temprecord International Ltd.
50
Temprecord Help
· If your control panel window shows the "category" view (as shown above), click on Performance and
Maintenance.
Copyright 1992..2010 Temprecord International Ltd.
Common Problems
51
· Now, Click on See basic information about your computer. This will open the System Properties
window.
· If instead, your control panel window shows the "classic" view (as shown below):
Copyright 1992..2010 Temprecord International Ltd.
52
Temprecord Help
· Click on System. This will open the System Properties window.
Copyright 1992..2010 Temprecord International Ltd.
Common Problems
· Click on the Hardware tab.
Copyright 1992..2010 Temprecord International Ltd.
53
54
Temprecord Help
· Click on the Device Manager button.
Copyright 1992..2010 Temprecord International Ltd.
Common Problems
· Click on the plus (+) sign to the left of the Ports (COM & LPT) line to expand the line:
Copyright 1992..2010 Temprecord International Ltd.
55
56
Temprecord Help
· This will show the COM numbers of any ports connected to your PC. You can find out which one the
Temprecord Reader Interface is by unplugging it and seeing which COM port disappears.
HINT When you open the Options/COM Port dialog, Temprecord tries to select the
most likely USB-based COM Port. You can either select Look for USB reader to use
the USB-based COM port that Temprecord has located, or select Use this COM Port to
tell Temprecord to use a specific port.
3.18
I cant select the Humidity options when I program the logger parameters
Your logger may not be a Humidity-capable logger. If the case does not have a small grille at one
corner it is probably a temperature-only logger.
3.19
The temperature exceeded the limits but the summary does not show this
You may have the limit delay parameter on the logger set to a non-zero value. If the limit delay is set
to 5 for example, the logger will allow 5 consecutive samples outside the limits before it reports an outof-limits condition.
Copyright 1992..2010 Temprecord International Ltd.
Common Problems
57
If you want the logger to report an out-of-limits condition as soon as a sample is outside the limits, set
the limit delay to zero.
3.20
My filenames are all garbled
If you notice that your filenames are unusually long and contain all manner of characters and underscores, the
most likely reason is that you have forgotten to "quote" some characters in the filename or folder specification.
For example, if you wanted your Temprecord data files to always have the same name, and you entered a
default filename specification of:
Data from Green Logger.TR
The filename actually used when the data was saved to a file would be something like this!:
1a4_20 p.m.a fro11r0920 S0001234o9r.4_20 p.m.r
This is because Temprecord is using the characters you entered as formatting codes. To achieve the result you
intended, make sure the characters in the specification you don't want used as formatting characters are
enclosed in double-quotes:
"Data from Green Logger.TR"
If you do want to include formatting characters, make sure they are outside quotes, e.g.:
"Data from Green Logger" L".TR"
would cause a filename to be generated similar to:
Data from Green Logger S1234567.TR
See also:
Default filename specification
3.21
Why doesn't my printed graph look the same as the one I see on screen?
When the 'Visible Samples' printing option is selected, the sample range shown on the printed graph
corresponds to that shown on screen. This means that the temperature/humidity values span in the vertical axis
and the time span in the horizontal axis are the same for printed graph and the one on screen.
You may however, not see the same axis annotation values for each. There are two reasons for this.
· The font used for the on-screen graph annotation differs from the font used in the printed report.
· The aspect ratio (height vs. width) of the graph will be different. For the screen graph, the aspect ratio is
determined by the dimensions of the window the graph is displayed in. For the printed graph the aspect
ratio depends on the paper size, the paper orientation, and the height of the graph as a percentage of the
page.
Temprecord spaces the graticule annotation so that the time and date text can be written comfortably in the
space allocated without becoming difficult to read because of crowding. The format of the date and time is
determined by your computer's regional settings. See setting the date and time format on graph view for more
information.
The colors used for the printed report are configurable (see the Print Colors options) and may be different to the
ones used on screen. If you want the graph colors to match the screen color, make sure that the Use screen
colors on printer output option is checked.
See also:
Print Options
Print Colors options
Setting the date and time format on graph view
Copyright 1992..2010 Temprecord International Ltd.
58
3.22
Temprecord Help
The format of the displayed date format doesn't match my Control Panel
regional settings
When displaying the date and time on the horizontal axis of graph view, Temprecord uses the short date settings
from the computer's regional settings. However, if your computer is running Windows 7 you may experience
some problems getting the date to display in the desired format. This is because Windows 7 does not correctly
update this format in the regional settings under some circumstances
See the topic setting the date and time display format in graph view for more information.
4
File Menu
The File menu provides functions for loading and saving Temprecord data files, and reading and
printing data from a logger.
Checking for a Logger
Reading a Logger
Saving a File
Opening a File
Renaming a File
Deleting a File
Emailing a File
Closing a File
Editing the Comment Fields
Exporting Data
Printing Data
Opening recent files
Exiting Temprecord
4.1
Checking for a Logger
Use the File/Query Logger function to check for a logger in the Reader Interface and read the
summary data from the logger. This only reads enough information to display a summary of the
logger status. Use the File/Read Logger function to read the logged temperature values and display
them.
You can also check for a logger by pressing the spacebar, or from the pop-up menu
that displays when you press the right-hand mouse button.
4.2
Reading a Logger
Use the File/Read Logger function to check for a logger in the Reader Interface, read the summary
data, then read the logged temperatures. Once the logged temperatures have been read, the
window view mode will change to Graph View mode and the logged temperature values are shown
plotted as temperature against time.
Copyright 1992..2010 Temprecord International Ltd.
File Menu
59
You can also read the data from a logger by clicking on this speed button
on the
toolbar displayed along the top of the Temprecord main window, or from the pop-up
menu that displays when you press the right-hand mouse button.
When a Mon-T logger is read, the display units are set to the Mon-T programmed
logger units. I.e. if you program a logger in Fahrenheit units and read the logger with
Temprecord set to display temperatures in Celsius, the display units will change to
Fahrenheit after you read the logger's temperature data.
4.3
Accessing Temprecord ...
Temprecord is accessing your logger. If you decide you do not wish to continue, click the 'Cancel'
button and the operation will aborted.
4.4
Saving a File
Use the File/Save File function to save the contents of the currently selected window to a disk file.
The data can be that loaded previously from another file or from a logger.
If the data in the currently selected window is from a logger, Temprecord will suggest a filename
based on the serial number of the logger. You can type in a new name here if you wish.
If the data in the currently selected window is from a file, Temprecord will suggest the same filename
be used to save the data. You can type in a new name here if you wish. If you leave the name, or
use the name of an existing file, you will be prompted whether you wish to overwrite that file.
Unless you explicitly specify it, the file type of Temprecord data files is always set to ‘.TR’. You can
change this if you wish, but it is not recommended, as other Temprecord functions assume the use of
this filetype.
The File/Save File function creates files in Temprecord format. You cannot view these
files with a word processor or Notepad/Wordpad. To save the temperature data in text
form, or in a form suitable for importing into a spreadsheet, use the File/Export function
You must have read the temperature data from the logger before you can save it to disk.
If you have only read the summary data by using the File/Query Logger function, you
will not be able to save the temperature values to disk until you also read the logged
temperature data using the File/Read Logger function.
Copyright 1992..2010 Temprecord International Ltd.
60
Temprecord Help
You can save the data in the current window by clicking on this speed button
on the
toolbar displayed along the top of the Temprecord main window, or from the pop-up
menu that displays when you press the right-hand mouse button.
4.5
Save File Dialog
Enter the name of the file you wish to save and click the ‘OK’ button. If the file exists you will be asked
if you want to overwrite the existing file.
If you do not want to save the Temprecord data as a file, click the ‘Cancel’ button.
If you do not specify a filetype in the save file or export file dialog, Temprecord will
choose one for you.
If you do not specify a filetype in the 'Save Temprecord Data File' dialog,
Temprecord assumes a filetype of '.TR'. Unless you have good reason to
change, we recommend that you stay with this convention.
If you do not specify a filetype in the 'Export Temprecord Data' dialog,
Temprecord assumes the filetype specified in the export options ASCII filetype
field. You should set this option to correspond to the requirements of the
application you are exporting the data to.
If you specify no filetype after the filename, but you do specify the period,
Temprecord saves or exports the file without a filetype
You can also determine whether Temprecord prompts you before overwriting existing files of the
same name (see General Options.).
See also
Saving a file
Exporting data
Export options
4.6
Saving Web Files
You can save Temprecord data files and PDF report files on the Web. In order to use this service you must
have arranged the facility with Temprecord. Contact Temprecord for further details.
To save a Temprecord data file to the web, click on the
file to the web, click on the
speed button. To save a Temprecord PDF report
speed button.
When Temprecord saves a file to the web, the filename is generated automatically and any folders that are
required are also created for you, according to the following rules.
· If the data in a window has been read from a local disk file, Temprecord assigns the web file the same
name. The folder name is created according to the setting defined in the web save folders option.
Copyright 1992..2010 Temprecord International Ltd.
File Menu
61
· If the data in a window has been read from a logger, Temprecord creates the filename according to the
settings defined in web save filenames options. The folder name is created according to the setting
defined in the web save folders option.
When a datafile is saved to the web, the web filename is added to the list of recently accessed files that show in
the File menu. These entries are shown in the menu with a Web: prefix.
See also:
Opening Web files
File saving options - Web files
4.7
Opening a File
Use the File/Open File function to load a Temprecord data file from disk and display it in graph form. You can
use this function to inspect Temprecord data files previously saved on disk.
Temprecord data files have the filetype or extension of .TR. In Explorer and they will show in the Open Dialog
with this icon:
By default the Temprecord data file open dialog only shows .TR files, even though other file types may be
present in the folder. You open a file by selecting it and clicking the Open button. You can also open a
Temprecord data file by double-clicking it in the File Open dialog. You can open several files at once by
selecting them each (hold the Ctrl key down and click on each one you want to open) and then clicking the Open
button.
There are other ways to open Temprecord data files:
·
·
·
·
From explorer, drag the data file onto the Temprecord icon on your desktop.
You can open multiple files this way by selecting them in explorer and dragging the group onto the icon.
Drag a file or group of files onto the Temprecord window.
Double click a file in explorer. If Temprecord is not running it will start and load the file. If it is already
running the file will be loaded.
Each time you open a file, Temprecord opens another window to display the file in. The number of files you can
have displayed is limited only by the amount of memory your computer has, but in practice is many more than
you would normally want. You can alter the way each of these windows is displayed with the View menu.
You can alter the view mode of the window to any one of summary, values, statistics, or graph
by using the View menu, or from the pop-up menu that displays when you press the rightmouse button
You can open the same file more than once and have it displayed in two or more windows
simultaneously. This allows you to view and compare different parts of the graph for example,
or have the data displayed in graph view in one window, and in values view in another. See the
topic How do I see my data as a graph and as a set of values at the same time ?.
Unless you explicitly specify it, the file type of Temprecord data files is always assumed to be ‘.TR’. You can
change this if you wish, but it is not recommended, as other Temprecord functions assume the use of this
filetype.
Copyright 1992..2010 Temprecord International Ltd.
62
Temprecord Help
You can also open a file by clicking on this speed button
on the toolbar displayed along the
top of the Temprecord main window, or from the pop-up menu that displays when you press the
right-hand mouse button.
The File/Open File function only reads files in Temprecord format. You cannot load an ASCII
file or a file that was created with the File/Export function. If you try to load a file that is not a
Temprecord data file, an error message will be displayed.
See also:
Opening Web Files
Reading a Logger
Saving a File
Renaming a File
Closing a File
Changing the View Mode
Pop-up Menus
4.8
Opening Web Files
You can open Temprecord data files and PDF report files that you previously stored on the Web. In order to use
this service you must have arranged the facility with Temprecord. Contact Temprecord for further details.
Folders are created automatically when you save files to the web. See Saving Web Files for
more information.
To open a web file, click on the
any folders that are present.
speed button. A dialog will open showing the files stored on the web, and
Select the file you wish to open and click the Open button. Alternatively you can double-click the filename.
There will be a brief delay while the file is retrieved from the Web before the file loads.
+When a datafile is loaded from to the web, the web filename is added to the list of recently accessed files that
show in the File menu. These entries are shown in the menu with a Web: prefix.
See also:
Saving web files
File saving options - Web files
4.9
Open File Dialog
Displayed is a dialog that allows you to specify a file or files to be loaded into the Temprecord program.
Select the file you wish to open from the list, and click the ‘OK’ button.
If you do not wish to open a file, click the ‘Cancel’ button.
Copyright 1992..2010 Temprecord International Ltd.
File Menu
63
You can open two or more files at once by selecting those files from the list. If you hold
the Ctrl key down while you click in the scrolling list of files, you can selectively mark
files. You can also 'unmark' them by clicking on them when they are already marked. If
you hold the Shift key down when you click, all files between the last marked file and
where you clicked are marked. When you click on OK, all marked files are loaded.
By default, the list of files is made up from those matching the 'wild-card' of *.TR in the
current subdirectory. You can narrow down your search by typing in another wild-card
mask and clicking on 'OK'. For example, if you type
M*.TR
into the File Name field, and click on 'OK', only those files that start with 'M" and end with
'.TR' will be displayed.
See also:
Opening a File
Reading a Logger
4.10
Deleting a File
Use the File/Delete File function to remove any Temprecord data files you no longer have a use for.
Do not delete files unless you are absolutely certain you have no further use for them, or
the files are also backed up safely. Once a file has been deleted, the data contained in
it is no longer available.
4.11
Delete File Dialog
Displayed is a dialog that allows you to specify a file or files to be deleted from your computer system's
disk.
Select the file or files you wish to delete from the list, and click the ‘OK’ button.
If you do not wish to delete any files, click the ‘Cancel’ button.
You can delete two or more files at once by selecting those files from the list. If you hold
the Ctrl key down while you click in the scrolling list of files, you can selectively mark
files. You can also 'unmark' them by clicking on them when they are already marked. If
you hold the Shift key down when you click, all files between the last marked file and
where you clicked are marked. When you click on OK, all marked files are deleted.
Copyright 1992..2010 Temprecord International Ltd.
64
Temprecord Help
By default, the list of files is made up from those matching the 'wild-card' of *.TR in the
current subdirectory. You can narrow down your search by typing in another wild-card
mask and clicking on 'OK'. For example, if you type
M*.TR
into the File Name field, and click on 'OK', only those files that start with 'M" and end with
'.TR' will be displayed
See also:
Deleting a File
Renaming a file
4.12
Renaming a File
You can change the name of a Temprecord data file by opening it and then savingit under a different
name:
Click on the File/Open File function to load the file you want to rename.
Click on File/Save File.
Type in the new name.
Click on ‘OK’. If you have chosen the name of an existing file, you will be asked if you want to
overwrite that file.
This procedure creates an identical copy of a file with a different name. If you do not
want the file with the original name you can delete it.
See also:
Opening a File
Saving a File
Deleting a File
Closing a File
4.13
Emailing Files
Temprecord provides many flexible options for emailing data files or PDF reports. Clicking on File/Email will
display a submenu with six options:
You will probably need to configure the email options before you can send emails.
Email TR File
Sends the data from the current Temprecord data window as a .TR file by email. The recipient(s) of the email,
and the subject and body of the message are determined by the email options. The file is sent as an attachment
Copyright 1992..2010 Temprecord International Ltd.
File Menu
65
to the email. If your email options are configured to send emails by MAPI, the email will be send via your default
email client (Outlook, Outlook Express, Eudora etc.) and will probably be found in the outbox. Whether the email
is sent immediately or not depends on how the email client is configured. If the email options are configured for
SMTP you will also need to configure these options.
If the data in the current Temprecord data window is from a file, the name of the attached file will be the same as
the name of the file you have open. If the data is from a logger it will be saved to a file first. The name of the file
will be determined by the default TR filename option and the folder by the folder for TR files option.
Email PDF File
Sends the data from the current Temprecord data window as a report in PDF format.
If the data in the current Temprecord data window is from a file, the name of the attached file will be the same as
the name of the file you have open, but with an extension of .PDF. If the data is from a logger it will be saved to
a TR file first and then the PDF file will be created. The name of the PDF file will be determined by the default
PDF filename option and the folder by the folder for PDF files option.
Email TR and PDF Files
This option is the same as the above two, but both the TR and the PDF file are attached to the email.
Email All TR Files
The behaviour of this function is as for emailing a single TR file, except that TR files from all open Temprecord
data windows are attached to the email and sent.
Email All PDF Files
The behaviour of this function is as for emailing a single PDF file, except that PDF reports are generated for
each of the open Temprecord data windows and attached to the email and sent.
Email All TR and PDF Files
This function attaches a TR file and a PDF report from all open Temprecord data windows.
The Email TR File, Email PDF File, and Email both TR and PDF Files functions are also
available by clicking the right mouse button in a Temprecord data window.
See Also
Default TR Filename
Folder for TR files
Default PDF Filename
Folder for PDF files
Email Options
SMTP Options
4.14
Closing a File
Use the File/Close File function to close a window that is currently displaying logger data for data
from a Temprecord file.
If you have read the data from a logger and not yet saved it, you will be asked if you wish to do so.
If you have edited the comment fields for the window you are closing and not yet saved the file, you
will be asked if you wish to do so.
Copyright 1992..2010 Temprecord International Ltd.
66
Temprecord Help
You can also close the current Temprecord data window from the pop-up menu that
displays when you press the right-hand mouse button
4.15
Editing the Comment Fields
The File/Edit Comments function allows you to alter the 64-character comment fields that are stored
along with the Temprecord data file. These comment fields can contain anything you wish.
If you edit the comment fields for a file you have loaded, you must save the file again for the changes
to be effective. You will be prompted to do this if you try to close the window or exit Temprecord
without saving the changes.
If the comment fields are from a file that was created with an earlier version of
Temprecord, you may only alter the first field of the comment fields.
Don't get the comment fields confused with the user data. The comment fields are
stored with the file - they are not stored in the logger itself. They are provided as a
means of annotating the data files after they have been read from the logger, or for
providing additional data when files are exported to other applications such as
spreadsheets.
You can also edit the comment fields from the pop-up menu that displays when you
press the right-hand mouse button.
You can change the labels that appear to the left of the comment fields. Use the
Options/Comment Labels function to do this. These labels are also stored in the
Temprecord data file. You cannot change the labels in the file, only the data in the
fields themselves. See the topic Using the comment fields for more information.
4.16
Edit File Comments Dialog
Displayed are the comment fields for the currently loaded Temprecord data file or the comment fields
for the data from the logger, if you have just read one.
You can type up to 10 lines of descriptive information here. Only the first 64 characters of each line
are recorded. Click the ‘OK’ button to exit the dialog and save your changes. The changes will be
saved with the data when you use the save file function.
If you do not want to change the comment fields, click the ‘Cancel’ button.
Copyright 1992..2010 Temprecord International Ltd.
File Menu
67
If the comment fields are from a file that was created with an earlier version of
Temprecord, or the data loaded is from an earlier model Temprecord logger, you may
only alter the first field of the comment fields.
Don't get the comment fields confused with the user data. The comment fields are
stored with the file - they are not stored in the logger itself. They are provided as a
means of annotating the data files after they have been read from the logger, or for
providing additional data when files are exported to other applications such as
spreadsheets.
You can also edit the comment fields from the pop-up menu that displays when you
press the right-hand mouse button.
You can change the labels that appear to the left of the comment fields. Use the
Options/Comment Labels function to do this. These labels are also stored in the
Temprecord data file. You cannot change the labels in the file, only the data in the
fields themselves. See the topic Using the comment fields for more information.
See also:
Editing a comment
Saving a file
4.17
Using the Comment Fields
Temprecord provides a powerful means of attaching additional information to temperature data files.
When a Temprecord data set is created (i.e. when data is read from a logger and displayed in a
window), a set of comment fields is created, along with associated comment labels.
There are 10 comment fields, each with an associated label. Each comment field can be up
to 64 characters. The label can be up to 16 characters
The comment labels are assigned from the setting in the Options/Comment Labels page
when a logger’s data is read. The labels are associated with the file that is created from the
logged data and cannot be changed in that file. The comment labels are normally created by
the person who is organizing the data collection associated with the temperature loggers.
They give you the opportunity to create a labeled ‘form’ that the person who reads the logger
can fill in.
The contents of the comment fields are all set to empty when a Temprecord logger is read.
You can edit the contents of these fields at any time. You can enter any text you wish into the
comment fields. The comment fields are normally filled in by the person who reads the
logger.
The comment fields, and their associated labels, are saved when the Temprecord data file is
saved. You can edit the comment fields later by loading the file and using the Edit Comments
function.
You can change the default comment labels using the Options/Comment Labels page. Any
Copyright 1992..2010 Temprecord International Ltd.
68
Temprecord Help
loggers that are read from that time on and the data files that are created from the logger data
will have those comment labels associated with them.
As an example, say that the Temprecord logger was being used to monitor temperature in a nursery
for chickens:
The loggers are deployed each week, and at the end of that week, they are retrieved, along
with other data collected, such as mortality and feed consumption.
The comment labels would be set up to provide prompts for this additional data to be entered,
e.g. the label for comment field 1 could be 'Building Number :', the label for field 2 could be
'Mortality :', and so on.
The loggers are read. After the data from each logger is read, the Edit Comments function is
used to fill in the three fields we defined labels for above.
The logger data is saved to a file. Remember the comment labels and field contents are
saved with the file also.
This comment field data is now available whenever the file is accessed. It also appears on printed
reports (you will need to make sure Comment Fields is checked in the Printing Options tab), in the
summary view, and when the data is exported
4.18
Exporting Data
As well as saving files in Temprecord format, you can also use the File/Export function to save files in
ASCII, for use by other applications.
If you have more than one data file open, you can use File/Export All to export all the open files to
disk.
You can determine the format of the ASCII files saved with the Options/Export form. You can also
determine whether Temprecord prompts you for the export filenames first or chooses one based on
the data filename, and whether existing files can be overwritten without prompting first (see General
Options),
If both Temperature and Humidity were logged, the data values are exported as pairs – temperature,
then humidity.
See also
Saving a File
Export Options
4.19
Print Dialog
To print your Temprecord data, click the Print button. The data in the currently selected window is
printed when you click on the Print button.
You can also print all the open windows. If you click on File/Print All, the data from each open
window in turn will be sent to the printer when you click on the Print button.
Copyright 1992..2010 Temprecord International Ltd.
File Menu
69
To exit this dialog without printing anything, click the Cancel button.
The format of the printed report is determined by the printing options. You can change these before
you print by clicking the ‘Options’ button. For example, you can specify whether any or all of the four
reports (summary, statistics, values, or graph), are printed and change the fonts used.
If you want to change your printer setup, click the ‘Setup’ button. The functions available from the
Printer Setup dialog will depend on your installed printer, but you will generally (for example) be able to
change the printer orientation from portrait to landscape, or specify a different printer, if you have more
than one available.
4.20
Printing Data
Use the File/Print function to generate a printed report. When the Print dialog is opened you can
specify whether any or all of the summary, values, statistics, or graph are printed. The data printed is
taken from the currently selected window.
Use the File/Print All function to generate a printed report for all open windows. When the Print
dialog is opened you can specify whether any or all of the summary, values, statistics, or graph are
printed as for printing a single report. The data printed is taken from each of the displayed windows.
You can also open the Print dialog by clicking on this speed button
on the toolbar
displayed along the top of the Temprecord main window, or from the pop-up menu that
displays when you press the right-hand mouse button
.
See also:
Print dialog
Exporting data
4.21
Saving to a PDF File
Saving data to a PDF file is just like printing, but the report that would have been printed is sent instead to a PDF
file. The contents of the report are determined by the same options that determine the printed output.
If you want to alter the PDF options before you save the PDF file, click on the Print/PDF Options button.
Clicking on the Save to PDF button will open a dialog which allows you to specify the path and filename. If the
data currently loaded is from a TR file, the default name for the PDF file will be set to the same name as the TR
file, but with an extension of .PDF. If the data currently loaded is from a logge, the default name for the PDF file
will be generated from the default PDF filename.
4.22
Opening recent files
When the File Menu is opened, Temprecord includes the recently opened files as menu entries, so
that you can quickly return to files you have been working on. Files that you load from the web are
Copyright 1992..2010 Temprecord International Ltd.
70
Temprecord Help
also shown in the recent file entries. These are prefixed with "Web:".
A filename is added to this recent files list whenever you open or save a file to disk, and whenever
you open or save a file to the Web. Filenames are also added whenever these operations occur
from Auto Mode.
If you click on a file name corresponding to a file that is already open in a Temprecord data window,
that window is selected as the current data window.
If you click on a file name corresponding to a file that is not open in a Temprecord data window, a
new window is opened and that file loaded into it.
Whenever you access a file from the recent files list, the entry for that file is moved to the top of the
list.
You can also open the same file in two different windows. This is useful if you want to see the graph
and values simultaneously. See the topic How do I see my data as a graph and as a set of values at
the same time ?.
The maximum number of files shown in the recent files list is limited to 20. You can clear the list at
any time by selecting the File/Clear recent files list menu entry. Note that this only removes the
entries from the list. The Temprecord data files themselves are not affected.
See also
Opening files
Saving files
Opening Web files
Saving Web files
Auto Mode
4.23
Exiting Temprecord
Use the File/Exit Temprecord function to close the Temprecord program. You do not need to close
the data windows that you might have opened within Temprecord first.
When you exit Temprecord, it remembers the window size and position.
If you have read the data from a logger and not yet saved it, or you have edited the comment fields
for a data window and not yet saved the data to a file, you will be asked if you wish to do this before
exiting.
When you exit Temprecord, you will be asked to confirm that you want to do this. If
you prefer not to be asked this question, you can uncheck the option 'Prompt before
exiting Temprecord in the Options/General form.
Copyright 1992..2010 Temprecord International Ltd.
Program Menu
5
71
Program Menu
Use the program menu to set the logger parameters, and start, stop and re-use the logger.
Programming a Logger's Parameters
Logging Temperature, Humidity, or Both
Setting Up Humidity Loggers
User Data
Sample Period
Start Delay
Start Time and Date
Password
Lower and Upper Limits
Enable Safe Range
Limit Delay
Loop Overwrite
Start and Stop with Button
Start and Stop with Switcher
Allow Markers
Setting up several loggers
Setting up a default set of parameters
Starting a Logger
Stopping a Logger
Re-Using a Logger
Starting Auto Mode Operation
Registering Loggers
What the LEDs on the logger tell you
Using the button on the logger to mark an event
Using the button on the logger to start and stop logging
5.1
Programming a Logger's Parameters
Before a Temprecord logger is used to record temperature, it is usually programmed first. This is not
necessary, but unless the default parameter settings suit your application, you will generally want to
change them.
In the case of the multi-trip and scientific loggers, which can be used more than once, you may wish to
change the parameters after the logger has been re-used.
The following parameters can be programmed:
Copyright 1992..2010 Temprecord International Ltd.
72
Temprecord Help
Logging Temperature, Humidity, or Both
User Data
Sample Period
Start Delay
Start Time and Date
Password
Lower and Upper Limits
Enable Safe Range
Limit Delay
Loop Overwrite
Start and Stop with Button
Start and Stop with Switcher
Allow Markers
You can program the parameters for the logger currently in the reader interface by
clicking on this speed button
Temprecord main window.
5.2
on the toolbar displayed along the top of the
Program Parameters Dialog
This dialog allows you to set up the Temprecord logger before it is started.
When you have finished changing the parameters, click the ‘OK’ button to save the
parameters to the logger and exit this dialog.
If you have more than one logger to set up with the same or similar parameters, click the
‘Apply’ button to save the parameters to the logger and leave this dialog open.
Click the ‘Cancel’ button to exit this dialog without changing the logger parameters.
Click the ‘Defaults’ button to set all the parameters (except for the ‘Password’ and ‘Confirm’
fields) from the default options.
You can change the following parameters:
Logging Temperature, Humidity, or Both
user data
sample period
start delay
password.
Copyright 1992..2010 Temprecord International Ltd.
Program Menu
73
lower and upper limits
start time and date
enable safe range
limit delay
loop overwrite
start and stop with button
start and stop with switcher
allow markers
5.3
Logging Temperature, Humidity, or Both
If your logger is capable of logging Humidity, you can choose whether it logs temperature, Humidity, or
both. For more information see the topic Setting Up Humidity Loggers
If you select Temperature and Humidity, the number of samples available is halved, as one each of
both temperature and humidity values are logged each sample period. The display of logging duration
will change to reflect this.
See also:
Setting Up Humidity Loggers
5.4
Setting Up Humidity Loggers
Logging Humidity
If your logger is capable of logging Humidity, you can choose whether it logs temperature, humidity, or
both in the Program Parameters dialog.
If you select Temperature and Humidity, the number of samples available is halved, as one each of
both temperature and humidity values are logged each sample period. The display of logging duration
will change to reflect this.
Humidity Lower and Upper Limits
Temprecord Humidity loggers have the ability to compare the logged humidity against lower and upper limits,
and report whether the limits have been exceeded via the red and green LED’s on the logger.
The Program/Parameters form allows you to specify these limits. When Temprecord reads the data from a
humidity logger and displays it in graph view mode, the limits that were programmed in the logger are shown on
the graph. These limits are also used in the values view to change the displayed color of the values, and in
statistics view when calculating the time spend outside the limits.
When displaying the data from a humidity logger in graph view or values view, you can alter the
upper and lower limit and the displayed data and it's statistics will alter accordingly. The limits
programmed into the logger are not changed however.
See also:
Temprecord Humidity Loggers
Copyright 1992..2010 Temprecord International Ltd.
74
5.5
Temprecord Help
User Data
The user data consists of up to five lines of 40 characters each.. The user data is stored in the logger
and cannot be altered once the logger has been started.
Don't confuse the user data with the comment fields. The comment fields are stored in
the data files that Temprecord saves on disk and can be edited after the data has been
read and saved. The user data cannot be changed after the logger data has been read.
Earlier Temprecord loggers provided for six lines of 40 characters each. The sixth line
has been removed to allow for information to be stored at manufacture.
5.6
Sample Period
The sample period determines the time between samples. You can set the sample period in multiples
of 2 seconds.
Enter the time you wish to elapse between each Temprecord sample. This is normally set at
manufacture to the following values:
2.5 minutes for the inland model
5 minutes for the export model
2.5 minutes for the multi-trip model
5 minutes for the scientific model
2.5 minutes for the Mon-T logger
You can enter any value between 2 seconds and the upper limit of 24 hours.
If you enter a sample period greater than these values, it will be limited to these values within the
logger. The screen also calculates the logging duration, being the time to fill the logger based on the
current sample rate.
Temprecord has an internal time resolution of 2 seconds. This means that whatever value you enter
must be a multiple of 2 seconds. The time is specified in hours, minutes, and seconds.
When you have entered all the data you wish to alter, click on 'OK' to update the parameters and exit
the form.
Click on 'Apply' instead if you want to update the data in the logger, but not exit the form. This can be
useful where you have several loggers to set up, each with the same or similar parameters.
Once the logger has been started, you cannot alter the user data, password, sample
period or start delay. Check that these are correct before you start the logger.
Copyright 1992..2010 Temprecord International Ltd.
Program Menu
75
The sample period also affects the behaviour of the limit delay and Safe range. These
parameters both use units of the number of samples taken, so the time delay before
they act is dependent on the sample period.
When a MultiTrip or Scientific Temprecord logger is re-used, the sample period that was in effect for
the previous use is retained. If you require a different sample period, this should be programmed after
the logger has been re-used.
If the logger is a humidity logger, and both humidity and temperature are enabled, the sample period
applies to both, i.e. if you set a sample period of one minute, a temperature and humidity sample pair
will be taken every minute. In this case the logging duration will be halved.
See also:
Sample rate issues
Logging duration
Start delay
Start time and date
Start and stop with switcher
Start and stop with button
Limit Delay
Enable safe range
User data
Password
Re-using a logger
5.7
Logging Duration
This is the time that will elapse before the logger is full, based on the current sample period. This time
will change as you enter a new sample period, so you can adjust the sample period rate so that the
logger fills over a specific time interval if you desire.
If you are logging both Temperature and Humidity, the logging duration will be halved.
See also:
Sample period
Sample rate issues
Start delay
Start time and date
Start and stop with switcher
Start and stop with button
Enable safe range
User data
Password
Re-using a logger
5.8
Start Delay
The start delay determines how long after the logger is started before the first sample is actually taken.
The primary reason for the start delay is to allow for situations where the logger is started at room
temperature, and then later placed in a controlled environment.
Copyright 1992..2010 Temprecord International Ltd.
76
Temprecord Help
Enter the time you wish to elapse between starting of the Temprecord and the taking of the first
sample. This is normally set at manufacture to one minute, but you can alter it to any value between
10 seconds and 24 hours.
Temprecord has an internal time resolution of 2 seconds. This means that whatever value you enter
will be rounded to the nearest multiple of 2 seconds. The time is specified in hours, minutes, and
seconds.
When you have entered all the data you wish to alter, click on 'OK' to update the parameters and exit
the form.
Click on 'Apply' instead if you want to update the data in the logger, but not exit the form. This can be
useful where you have several loggers to set up, each with the same or similar parameters.
Once the logger has been started, you cannot alter the user data, password, sample
period or start delay. Check that these are correct before you start the logger.
The start delay is set from the options default value whenever a logger is reused. You
can still alter the start delay before starting the logger however
.
When a MultiTrip or Scientific Temprecord logger is re-used, the sample period that was in effect for
the previous use is retained. If you require a different sample period, this should be programmed after
the logger has been re-used.
See also:
Sample rate issues
Logging duration
Start time and date
Start and stop with switcher
Start and stop with button
Enable safe range
Sample period
User data
Password
Re-using a logger
5.9
Start Time and Date
Instead of using the start delay to determine how long after starting before the logger starts recording
samples, you can program Temprecord to start at a particular time and date.
In the Program/Parameters form, you must check the box 'Enable Start on Date Option'
before you can enter a time and date to start logging from.
The logger will start recording samples from within a few seconds of the time and date
specified. The time and date you specify must be in the future or an error will result
.
Copyright 1992..2010 Temprecord International Ltd.
Program Menu
77
It is still possible to start the logger by any of the other means, i.e. with the switcher, the
buttons, or by using the Program/Start Logger function of Temprecord. It is possible to
program the logger so that it cannot be started with the switcher and/or the button (see
the topics start and stop with switcher, and start and stop with button for more
information).
If the logger is started by any of these means, the start time and date is ignored.
See also:
Sample rate issues
Logging duration
Start delay
Start and stop with switcher
Start and stop with button
Enable safe range
Sample period
User data
Password
Re-using a logger
5.10
Password
Temprecord loggers can be protected with a password (actually a number). If the password is set, it is
not possible to alter the parameters or re-use the logger.
If you wish to protect the user data, you can enter a number into this field. This will prevent anyone
altering the user data or the sample period and start delay (unless they know the password also).
The password can be a number up to 8 digits. If you specify zero as the password, this is equivalent to
no password, and anyone will be able to alter the user data, start delay or sample period.
The password will not display as you type it. You must enter the password twice, once in the
'Password' field, and again in the 'Confirm' field. These two passwords must match. You do not need
to specify 8 digits. We recommend at least 4 digits as sufficient. If you leave these fields blank, the
current password will not be changed.
WARNING! Do not forget your password key!
If you do, you will be unable to alter the user data, start delay or sample period, and in
the case of the Multi-trip and Scientific models, you will be unable to re-use them. In
the case of Mon-T loggers, you will also need to know the password to start or stop the
logger using the Temprecord program. You can still start or stop these loggers using
the button if start with button or stop with button respectively have been enabled.
Temprecord are unable to reset passwords or determine what they have been set to. A
logger with an unknown password can still be read.
When you have entered all the data you wish to alter in the Program/Parameters form, click on 'OK' to
update the user data and exit the form.
Copyright 1992..2010 Temprecord International Ltd.
78
Temprecord Help
Click on 'Apply' instead if you want to update the user data in the logger, and not exit the form. This
can be useful where you have several loggers to set up, each with the same or similar user data.
Once the logger has been started, you cannot alter the user data, password, start delay
or sample period. Check that these are correct before you start the logger.
Removing a Password
To remove or clear a password, i.e. to allow anyone to access the logger without a password, edit the
parameters, then enter a value of 0 (zero) into the password and confirm fields. Then save the
parameters to the logger.
See also:
Password specification errors
User data
Sample period
Start delay
5.11
Password Required
The logger you are attempting to program or reuse is protected with a password. The password will be
number of up to 8 digits.
To access the logger, enter the logger password and click the ‘OK’ button. If you do not want to
access the logger, or you cannot because you do not know the password, click the ‘Cancel’ button.
See also:
Password Specification Errors
5.12
Enable Safe Range
Temprecord Mk III has a the ability to compare the logged temperatures and humidity against upper
and lower limits, and report whether the limits have been exceeded via the red and green LED on the
logger. In some situations, the logger must be started while the temperature/humidity is outside the
limits and it is undesirable for this situation to be reported as a temperature/humidity outside of the
limits. Also, there are applications where a brief excursion outside the limits may be expected, and is
not to be reported as an out-of-range error.
To accommodate these situations, Temprecord allows you to set a safe range enable, and an
associated limit delay.
If the enable safe range option is not checked, logger samples are checked against the limits from the
time when the logger is started. If the option is checked, the temperature/humidity must enter the 'safe
range' (i.e. it must be less than the upper limit and greater than the lower limit) before it will be checked
against the limits.
If humidity only is being logged, then the above comments apply to humidity instead of temperature.
If both temperature and humidity are being logged, then both the temperature and humidity must be
within their respective safe ranges
Copyright 1992..2010 Temprecord International Ltd.
Program Menu
79
If the enable safe range option is checked, comparison of the temperature (and/or humidity) values
starts as soon as the number of samples taken inside the safe range exceeds the value specified in
the limit delay parameter. For example, if the limit delay is set to 5, the checking of temperatures and/
or humidity against limits will not start until more than five successive samples have been recorded as
inside the safe range.
To have comparison against the limits begin as soon as a sample is inside the safe range, set the limit
delay to 0.
Enabling the safe range entry option does NOT mean that the logger does not start
taking samples until the conditions for safe range entry are met. Enabling safe range
entry means that the samples taken are not COMPARED against the limits until the
conditions for safe range entry are met. The logger still takes samples from the time the
start delay expires (or from the start time and date, if this is enabled).
See also:
Limit delay
Lower and upper limits
5.13
Lower and Upper Limits
Temprecord Mk III has a the ability to compare the logged temperature and humidity values against
lower and upper limits, and report whether the limits have been exceeded via the red and green LED
on the logger.
The Program/Parameters form allows you to specify these limits. Enter the limits in the same units as
the current setting of the units option (°C or °F). In the case of the humidity the units are % RH.
When Temprecord reads the data from a Mk III logger and displays it in
graph view mode, the limits that were programmed in the logger are shown on the
graph. These limits are also used in the values view and statistics view. See the topic
how the limits are used when Temprecord displays data for more information
.
In some situations, the logger must be started while the temperature and/or humidity are
outside the limits and it is undesirable for this situation to be reported as such. Also,
there are applications where a brief excursion outside the limits may be expected, and is
not to be reported as an out-of-range error. See the parameters enable safe range and
limit delay for more information.
See also:
Limit delay
Enable safe range
Copyright 1992..2010 Temprecord International Ltd.
80
5.14
Temprecord Help
Limit Delay
Temprecord Mk III has a the ability to compare the logged temperatures and humidity against upper
and lower limits, and report whether the limits have been exceeded via the red and green LED on the
logger. In some situations, the logger must be started while the temperature/humidity is outside the
limits and it is undesirable for this situation to be reported as a temperature/humidity outside of the
limits. Also, there are applications where a brief excursion outside the limits may be expected, and is
not to be reported as an out-of-range error.
To accommodate these situations, Temprecord allows you to set a limit delay parameter. The limit
delay is used in two ways - it affects the behaviour of both the safe range, and also the lower and
upper temperature and humidity limits.
·
The limit indicators (upper temperature exceeded, lower temperature exceeded, upper
humidity exceeded, lower humidity exceeded) are only set when the number of continuous
samples exceeding the respective limit is greater then the limit delay parameter. In other
words, the limit delay specifies how many consecutive samples are tolerated outside the limits
before an out-of-limits condition is flagged.
To have the limit indicators set (and therefore the red LED flash) as soon as any single sample
exceeds the respective limit, set the limit delay to 0.
·
If the enable safe range option is checked, comparison of the temperature (and/or humidity)
values starts as soon as the number of samples taken inside the safe range exceeds the
value specified in the limit delay parameter. In other words, the limit delay specifies how
many consecutive samples are tolerated inside the limits before checking of the samples
against the limits begins. For example, if the limit delay is set to 5, the checking of
temperatures and/or humidity against limits will not start until more than five successive
samples have been recorded as inside the safe range.
To have comparison against the limits begin as soon as a sample is inside the safe range, set
the limit delay to 0.
See also:
Enable safe range
Lower and upper limits
5.15
Loop Overwrite
Normally when Temprecord has taken a number of samples equal to the logger capacity, recording of
samples stops. It is possible however to program the logger so that when it is filled, the next sample
taken overwrites the oldest sample. The logger will from that time on therefore always contain a
record of the most recent 7937 samples (inland and multi-trip loggers) or 32513 samples (export and
scientific loggers). If you are logging both temperature and humidity, these figures are 3969 samples
and 16257 samples respectively
You can turn the loop overwrite option on and off in the Program/Parameters form. If this option is not
checked, the logger will stop recording when it fills up. If this option is checked, after the logger has
filled, subsequent samples taken overwrite the oldest sample.
Copyright 1992..2010 Temprecord International Ltd.
Program Menu
5.16
81
Start and Stop with Button
You can determine whether the logger can be started and/or stopped with the button in the Program/
Parameters form. If you want to be able to start the logger with the button, check the option marked
'Start with Button'. If you want to be able to stop the logger with the button, check the option marked
'Stop with Button'.
The button on the logger is used for both starting and stopping the logger, and also for
recording markers in the sample record. See the topics using the button on the logger
to mark an event and using the button on the logger to start and stop logging for more
information.
See also:
Starting a logger
Stopping a logger
Start and Stop with switcher
Allow markers
5.17
Start and Stop with Switcher
You can determine whether the logger can be started and/or stopped with the switcher in the Program/
Parameters form. If you want to be able to start the logger with the switcher, check the option marked
'Start with Switcher'. If you want to be able to stop the logger with the switcher, check the option
marked 'Stop with Switcher'.
You cannot prevent starting and stopping with the switcher of the older Temprecord
loggers.
the button on the logger is used for both starting and stopping the logger, and also for
recording markers in the sample record. See the topics using the button on the logger
to mark an event and using the button on the logger to start and stop logging for more
information
.
See also:
Starting a logger
Stopping a logger
Start and Stop with button
Allow markers
5.18
Allow Markers
You can determine whether pressing the button can be used to insert markers into the temperature
record in the Program/Parameters form. If you want to be able to insert markers by pressing the
button, check the option marked 'Allow Markers'.
Copyright 1992..2010 Temprecord International Ltd.
82
Temprecord Help
the button on the logger is used for both starting and stopping the logger, and also for
recording markers in the sample record. See the topics using the button on the logger
to mark an event and using the button on the logger to start and stop logging for more
information.
See also:
Starting a logger
Stopping a logger
Start and Stop with switcher
Allow markers
5.19
Mon-T Temperature Logging Range Parameters
The parameters discussed here are only present in the Temprecord Mon-T logger. When the
parameters for Temprecord Mk1 through Mk3a loggers are edited, these parameters do not
apply and will not show in the parameters dialog.
The Mon-T logger allows the user to trade off temperature resolution against temperature range. This is
achieved by allowing the user to specify the minimum temperature logged and the resolution. If a small value of
resolution is specified, e.g. 0.05C, the logger will only record over a smaller range. The table below shows the
temperature logging range that results from various settings of these controls
Minimum
Temperature
Resolution
Range
-40
-20
-15
-5
0.50
0.20
0.10
0.05
-40.00 to +86.50
-20.00 to +30.60
-15.00 to +10.30
- 5.00 to +7.65
Minimum Temperature
This is the lowest temperature the Mon-T logger can record. It can be set to any value within the specified
temperature range of the logger. It serves as the starting point for the logging temperature range.
Resolution
The size of the steps between one temperature and the next. The higher the resolution, the smaller the logged
temperature range. The resolutions available depend on the logger temperature units:
Resolution
Range (Celsius)
Range
(Fahrenheit)
1.00
0.50
0.20
0.10
0.05
not available
126.50 C
50.60 C
25.30 C
12.65 C
253.00 F
126.50 F
50.60 F
12.30 F
not available
Maximum Temperature
This is the highest temperature the Mon-T logger can record. It is calculated from the Minimum Temperature
and the Resolution. It is calculated using the formula:
Copyright 1992..2010 Temprecord International Ltd.
Program Menu
83
Tmax = TMin + (SampleIntervalsLogged * 253)
As you change the minimum temperature, resolution , or logger units, the maximum temperature is calculated
and displayed.
Logger Units
This parameter determines the units (Celsius or Fahrenheit) used to set the Minimum Temperature and
Resolution parameters.
Don't confuse the display units with the Mon-T Logger Units. The Mon-T Logger Units determine
what units are used when programming the Mon-T - specific parameters (Minimum Temperature,
and Resolution). The display units determine how temperatures are displayed in the Temprecord
program
When a Mon--T logger is read, the display units are set to the Mon-T programmed
logger units. I.e. if you program a logger in Fahrenheit units and read the logger with
Temprecord set to display temperatures in Celsius, the display units will change to
Fahrenheit after you read the logger's temperature data.
Warnings
Temprecord will warn you if you attempt to set the upper or lower limits outside the Minimum and Maximum
Temperatures as defined above.
When the Mon-T logger is recording temperatures outside the logging range, the temperature
actually recorded will be limited to the minimum or maximum temperature specified. This has
implications for calculated statistics. It is important to make sure the range between the
Minimum and Maximum Temperatures is greater than the expected temperature range.
These settings can only be adjusted if the option Show Mon-T - specific settings is enabled. If
this option is not enabled, the fields for Minimum Temperature, resolution, and Logger Units do
not appear and the logger temperature range and resolution are displayed in their place.
5.20
Setting up several loggers
If you have several Temprecord loggers to set up in a single session, Temprecord makes it easy for
you. The button marked 'Apply'' in the Program/Parameters form updates the information in the form
to the logger, but leaves the form open.
To set up several loggers with the same or similar programmed data:
1. Place the first logger into the reader interface.
2. Select the Program/Parameters menu item. After a few seconds the Program/Parameters
form will open with the parameters for that logger.
3. Make any changes you want to the user data, sample rate, etc.
4. Click on 'Apply'. A window will open while the Temprecord parameters are updated and after
this is done you will be returned to the Program/Parameters form.
5. Remove the logger and insert the next one.
Copyright 1992..2010 Temprecord International Ltd.
84
Temprecord Help
Repeat steps 3, 4 and 5 as many times as necessary to set up your loggers, then click on 'OK' to
update the last logger and close the Program/Parameters form
Temprecord will not allow you to set up a logger that is protected with a passwordunless
the passwords on all subsequent loggers matches the original logger, or the password
on the subsequent loggers is zero.
Temprecord will only allow you to set up loggers of all the same type in this way. You
cannot set up (for example) an inland logger, then a scientific logger
.
See also:
Setting up a default set of parameters
Auto Mode Operation
5.21
Setting up a default set of parameters
If you have a particular set of parameters that are frequently programmed into your loggers, you can
create a 'default' set of parameters, which you can load into the Program/Parameters form simply by
clicking on the 'Defaults' button.
To set up and use a set of default parameters:
Select the Options/Defaults menu item. This will open the default options form, which looks
very similar to the Program/Parameters form, except that there is no 'password' field.'
Enter the parameters. You might for example have a particular set of user data, which
remains the same for all loggers apart from one line, being the destination of produce being
shipped. You would leave that line blank here.
Click on OK.
To use the default set of parameters:
Place a logger into the reader interface.
Select the Program/Parameters menu item. After a few seconds the Program/Parameters
form will open with the parameters for that logger.
Click on the 'Defaults' button. This will load the user data with the defaults you programmed
previously.
Make any changes you want to the user data, sample rate, etc. In the example mentioned
above, you would key the destination into the line left blank.
Click on 'Apply' or 'OK'.
Remove the logger.
See also:
Setting up several loggers
Options Menu
Default options
Auto Mode Operation
Copyright 1992..2010 Temprecord International Ltd.
Program Menu
5.22
85
Starting a Logger
Use the Program/Start Logger function to start the Temprecord logger. Before starting, you should
configure the logger if you wish to set the user data, alter the sample period or start delay, or change
any of the other parameters
The Temprecord logger status must be READY in order for it to be started. Once started, the start
delay begins timing. After this start delay period has elapsed, the Temprecord unit will begin to log
temperature. The Temprecord logger will flash when started, and again when the start delay has
expired and logging begins. If you have recently read a Temprecord logger and not yet saved the
contents to a disk file, you will be prompted to save the data first.
Inland and Export loggers can only be started by snapping off the tabs.
Starting a logger does not necessarily mean it will begin taking temperature readings.
Logging of temperatures will not start until the start delay has counted down.
When you use the Program/Start Logger function, you will be asked to confirm that you
want to do this. If you prefer not to be asked this question, you can uncheck the option
'Prompt before starting' in the General Options form.
You can also set up a logger so that it can be started by the button on
the logger, or by the switcher or by a programmed start time and date
You can start the logger currently in the reader interface by clicking on this speed button
on the toolbar displayed along the top of the Temprecord main window.
See also:
Stopping a logger
Reusing a logger
Sample period
Start delay
Start time and date
Limit Delay
Lower and Upper limits
Loop Overwrite
Start and stop with button
Start and stop with switcher
Allow markers
Copyright 1992..2010 Temprecord International Ltd.
86
Temprecord Help
Auto Mode Operation
Saving a file
5.23
Stopping a Logger
Use the Program/Stop Logger function to stop the Temprecord logging temperature samples. The
Temprecord logger status must be LOGGING in order for it to be stopped.
If you have recently read a Temprecord logger and not yet saved the contents to a disk file, you will be
prompted to save the data first. The Temprecord logger will flash when logging stops.
When you use the Program/Stop Logger function, you will be asked to confirm that you
want to do this. If you prefer not to be asked this question, you can uncheck the option
'Prompt before stopping' in the General Options form.
You can also stop loggers with the switcher or by pressing the button on the logger.
Inland and Export loggers can only be stopped by snapping off the tabs.
You can stop the logger currently in the reader interface by clicking on this speed button
on the toolbar displayed along the top of the Temprecord main window
.
See also:
Starting a logger
Reusing a logger
Sample period
Start delay
Start time and date
Limit Delay
Lower and Upper limits
Loop Overwrite
Start and stop with button
Start and stop with switcher
Allow markers
Auto Mode Operation
Saving a file
Copyright 1992..2010 Temprecord International Ltd.
Program Menu
5.24
87
Reusing a Logger
The Program/Reuse Logger function allows Multi-trip or Scientific Temprecord loggers to be reused.
The Temprecord logger must be in the 'stopped' state. If the Temprecord unit has been passwordprotected, you will be asked to enter the password before the unit can be restarted. If you wish to
change the password, use the Program/Parameters function after you have re-used the logger . If you
have recently read a Temprecord logger and not yet saved the contents to a disk file, you will be
prompted to save the data first.
When a Temprecord is re-used, the current sample period is retained. If you want to set a different
sample period, use the Program/Parameters function after you have re-used the Temprecord logger.
When you use the Program/Reuse Logger function, you will be asked to confirm that
you want to do this. If you prefer not to be asked this question, you can uncheck the
option 'Prompt before reusing' in the General Options form.
The start delay is always set to the value specified in the default parameters when a
Temprecord is re-used. You can also change this with the Program/Parameters function
if desired.
You can reuse the logger currently in the reader interface by clicking on this speed
button
on the toolbar displayed along the top of the Temprecord main window
.
See also:
Starting a logger
Stopping a logger
Sample period
Start delay
Start time and date
Limit Delay
Lower and Upper limits
Loop Overwrite
Start and stop with button
Start and stop with switcher
Allow markers
Auto Mode Operation
Saving a file
5.25
What the LEDs on the logger tell you
The Mk III Temprecord logger has two visible LED's (light-emitting diodes). These are used to both to
provide a confirmation of operation of the logger, and to provide information about the temperature
limits stored in the logger.
Copyright 1992..2010 Temprecord International Ltd.
88
Temprecord Help
Logger Status
Red LED
Green LED
Ready to be started
off
off
When started
flashes 4 times off
Counting start delay
off
When start delay expires
flashes 4 times off
Logging, stopped
off
flashes briefly
every 10
seconds
Logging or stopped, if lower or
upper limit exceeded
flashes briefly
every 10
seconds
off
When communicating
off
flashes briefly
off
The Mon-T Temprecord logger also has two visible LED's, but their operation is different. The logger
status can only be determined by pressing the button on the logger.
Logger Status
Red LED
Green LED
Ready to be started
off
off
On starting
off
6 flashes
Counting start delay
off
off
On start delay expiry
off
6 flashes
Logging, stopped (only when
button pressed)
3 flashes if
logger out of
limits
3 flashes if
logger inside
limits
On stopping
off
6 flashes
See also:
Starting a logger
Stopping a logger
Start delay
Start time and date
Limit Delay
Lower and Upper limits
Start and stop with button
Start and stop with switcher
Allow markers
5.26
Using the button on the logger to mark an event
Temprecord has the ability to record markers along with the temperature data. A marker is simply an
indication of an event - no other information is stored other than the fact that the button was pushed,
and the time it was pushed. The time recorded is that of the most recently taken sample.
Copyright 1992..2010 Temprecord International Ltd.
Program Menu
89
To insert a marker, you must hold the button down for at least 2 seconds. The red LED
on the logger will flash twice to confirm that a marker has been recorded.
This feature must be enabled by checking the allow markers option in the Program/
Parameters form. If this option is not checked, pressing the button has no effect,
unless stop with button is also checked, in which case pressing the button (for at least
10 seconds) will stop the logger taking samples.
Once the marker has been recorded (i.e. when the LED flashes), be sure to release the
button immediately. Remember that the logger can also be stopped by holding the
button down for at least 10 seconds!
You can enter as many markers into the logger as you wish, but the Temprecord
program only displays the first 100 markers recorded.
Each marker occupies a sample position - i.e. for every marker you insert, the sample
capacity of the logger is reduced by one for that use.
See also:
Stopping a logger
Start and stop with button
Allow markers
Using the button on the logger to start and stop logging
5.27
Using the button on the logger to start and stop logging
You can use the button on the logger to start and stop logging. This feature must be enabled by
checking the start and stop with button options in the Program/Parameters form.
If this option is not checked, pressing the button has no effect, unless allow markersis
also checked, in which case pressing the button (for at least 2 seconds) will insert a
marker if the logger is taking samples
.
See also:
Starting a logger
Stopping a logger
Start and stop with button
Allow markers
Using the button on the logger to mark an event
Copyright 1992..2010 Temprecord International Ltd.
90
5.28
Temprecord Help
Changing Logger Parameters
Make any changes you want to the logger parameters. When you have finished, click on 'OK' and the
logger will be updated and the Program/Parameters form will close.
If you have several loggers to program, clicking on 'apply' will update the logger, but leave the form
open. You can then insert another logger and program that.
If you click on 'Default', the Program/Parameters form will be filled in with the parameters specified in
the Options/Defaults form.
See also:
User Data
Sample Period
Start Delay
Start Time and Date
Password
Lower and Upper Limits
Enable Safe Range
Limit Delay
Loop Overwrite
Start and Stop with Button
Start and Stop with Switcher
Allow Markers
Auto Mode Operation
5.29
Accuracy and Resolution
There is often confusion over the difference between the accuracy of monitoring devices, and the
resolution of monitoring devices.
'Accuracy' refers to the range of uncertainty that applies to a given temperature measurement, i.e. the
temperature value logged by the device as compared to the true temperature. The accuracy of the
Temprecord logger is around 0.6°C (1.0°F) over the measurement range.
'Resolution' refers to the number of decimal places to which the temperature values are recorded, and
also displayed. The resolution of the logger varies with temperature, but at 0C it is around 0.01°C (1
one-hundredth of a degree). The displayed resolution in Temprecord is usually 0.01°C. While it may
not seem sensible to record and display the temperature values to a greater resolution than the
accuracy of the logger, it can be in fact quite useful. Temprecord is able to record and display very
small fluctuations in temperature - changes that would be much smaller than the resolution of other
loggers, which often have a resolution of as much as 2.0°C.
The humidity values are normally displayed to a resolution to 0.01 %RH. The accuracy of the humidity
measurements is dependent on the grade of logger. Please see the specification sheet for more
details.
See also
Sample period
Sample rate issues
Copyright 1992..2010 Temprecord International Ltd.
Program Menu
5.30
91
Sample Rate Issues
The sample rate determines how often the Temprecord logger measures and stores the temperature.
With Temprecord, this is specified by the sample period, which is the time that elapses between
samples. Bear in mind that while a longer sample period will increase the length of time the logger will
run before the memory is filled, you need to consider the effects of undersampling. This situation
arises when the sample period is too long to pick up changes in the temperature. As an example, if
the sample period is set to 1 hour, you cannot guarantee to pick up instances where the temperature
exceeds a maximum value for a period of only ten minutes.
This discussion also applies to humidity, if humidity is being logged instead of temperature, or if both
are being logged
See also:
Sample period
Accuracy and resolution
5.31
Auto Mode Operation
Auto mode operation allows you to carry out a sequence of operations on a batch of loggers. For
example, you can stop, read, save, reuse, program the parameters, and start a logger in sequence by
doing nothing more than placing the logger in a reader. Temprecord detects when the logger has
been inserted, programs it, then waits for it to be removed before waiting for the next logger.
You can determine what operations are carried out by changing the Auto Mode Options
To start Auto Mode, select Auto Mode from the Program menu. Once the Auto Mode window is
displayed, you can click on the Start button and Temprecord will wait for a logger. When one is
inserted into the reader it will be detected and the sequence of operations defined by the Auto Mode
Options will be carried out. When the operations are complete Temprecord waits for the logger to be
removed.
To end logging mode click the Stop button. Click the Exit button to close the Auto Mode window.
Never remove the logger from the reader while Auto Mode operations are underway.
Wait until operations have finished and REMOVE LOGGER is displayed. If you need to
remove a logger while processing is underway, click on the Stop button first and wait
until Auto Mode has stopped.
You can also start Auto Mode operation by clicking on this speed button
toolbar displayed along the top of the Temprecord main window.
See also:
Auto Mode Options
Copyright 1992..2010 Temprecord International Ltd.
on the
92
5.32
Temprecord Help
Kiosk Mode Operation
The "Kiosk" mode operation of Temprecord is intended for environments where the sender of a shipment
monitored by Temprecord loggers wants to impose limits on the range of operations that can be performed on
the logger.
An example is where the Temprecord user programs loggers which are dispatched to a remote location and the
condition of the shipment is then assessed by examining the LED indicators. If a problem is indicated, the
receiver would read the logger and email the data file back to the sender. Kiosk mode (often in conjunction with
auto mode operation) allows the shipper to restrict the receiver to carrying out a certain subset of operations.
In kiosk mode the user is only able to perform the following operations:
· start the logger.
· stop the logger.
· read the logger.
· save the logger data.
· save a PDF report.
· email the TR data file.
· email a PDF report file.
· exit the Temprecord program.
·
The user cannot:
· select values or graph views.
· reuse the logger.
· alter any of the options.
Temprecord Kiosk Mode can only be started by providing a command line option at startup.
6
View Menu
Use the View menu to display the logged temperature data and change the format in which it is
displayed.
Toolbars
Summary View
Statistics View
Values View
Graph View
The Sample Cursor
Changing the view mode
Viewing Temperature, Humidity, or Both
Getting the same file displaying in 2 or more windows
Getting data read from the logger displaying in 2 or more windows
Viewing Temperature, Humidity, or Both
Units
Go to Functions
Find Trace
Go to First, Go to Last Sample
Copyright 1992..2010 Temprecord International Ltd.
View Menu
93
Go to Start, Go to End
Go to Next, Go to Previous Marker
Go to Min, Go to Max Sample
Set as Start, End Markers
Using the Start and End Markers
Using the Min and Max Markers
Using the User Markers
Zoom Functions
How zooming works
Horizontal Zoom
Vertical Zoom
Zoom Between Start and End markers
Zoom All
Zooming with the Mouse
Zoom Window to Presets
Zoom all Windows to Presets
Assign Presets from Window
Edit Presets
View Info
Cascade
Tile Vertically
Tile Horizontally
Close
6.1
Toolbars
You can enable or disable the display of the five toolbars, File, Program, Copy, Graph and Go to Sample.
These toolbars can be dragged from their docking position and sit as a small window in front of
the Temprecord main window. You can also dock them to any of the four edges of the main
window.
See also
Toolbars and Speed Buttons
6.2
Summary View
The temperature data in a Temprecord data window can be displayed in one of four view modes.
These are summary view, statistics view, values view and graph view. The summary view displays
the user data, logger serial number, sample period, etc. You do not need to read the logged
temperature data to see the summary view of the logger. Using the File/Query Logger function reads
the summary data and changes the view mode of the window to summary view.
Copyright 1992..2010 Temprecord International Ltd.
94
Temprecord Help
You can select the summary view mode by opening the View menu and clicking on 'Summary'.
You can also change the view mode from the pop-up menu that displays when you
press the right-hand mouse button.
See also:
Changing the view mode
Statistics view
Values view
Graph view
6.3
Statistics View
The temperature data in a Temprecord data window can be displayed in one of four view modes.
These are summary view, statistics view, values view and graph view. The statistics view displays an
analysis of the temperature data in relation to the lower and upper limits, and the start and end
samples. You need to read the logged temperature data to see the statistics view of the logger.
Using the File/Query Logger function only reads the summary data.
You can select the statistics view mode by opening the View menu and clicking on 'Statistics'.
(Mon-T logger only) When the Mon-T logger is recording temperatures outside the logging
range, the temperature actually recorded will be limited to the minimum or maximum temperature
specified. This has implications for calculated statistics, as the values used in the calculations
do not reflect the actual temperatures the logger was subjected to.
Take care when interpreting statistics from Mon-T loggers that have
exceeded the programmed Minimum or Maximum temperature range
The Statistics for all Samples
The statistical information displayed consists of:
the mean temperature (i.e. the average temperature)
the standard deviation
the maximum temperature reached
the minimum temperature reached
the number and percentage of samples that were above the upper limit.
the number and percentage of samples that were below the lower limit.
the number and percentage of samples that were both above the upper limit and below the
lower limit.
If Humidity was logged instead, these statistics are available for the logged humidity samples. If both
Humidity and Temperature were logged, these statistics are available for both. You can select
Copyright 1992..2010 Temprecord International Ltd.
View Menu
95
between them by using the View/Temperature, View/Humidity, and View/Temperature and
Humidity menu options.
Statistics for Samples Between Start and End Markers
The above parameters are calculated for all of the samples read from the logger. If you have set start
and end samples that are different from the first and last samples in the logger, the above parameters
are calculated again using only those samples between the start and end samples. This is useful
when you want to exclude a portion of the data record, e.g. the time when the logger was not in a
controlled environment.
TTV (Total Temperature Value) Statistics
Temprecord can also calculate and display TTV (Total Temperature Value) statistics. To enable this
facility, click on Options/Statistics, and make sure Show TTV Statistics is checked. The TTV statistics
are displayed after the statistics for all samples and statistics for samples between the start and
samples are displayed. The TTV statistics are calculated for one or more periods starting from the
start sample. The temperature limits, duration and number of TTV periods are set using the statistics
view options
For more information on the derivation and application of TTV statistics, see the topic Total
Temperature Value. There are also options that control whether the TTV statistical data is shown,
printed or exported. See Graph View Options, Printing Options, and Export Options for more details.
PHI Statistics
Temprecord can also calculate and display PHI (Process Hygiene Index) statistics. To enable this
facility, click on Options/Statistics, and make sure Show Growth Statistics is checked. The PHI
statistics are displayed after the statistics for all samples and statistics for samples between the start
and samples are displayed. The PHI statistics are calculated between the start and end samples only.
The PHI statistics are presented as a guide only. They do not represent any actual
measured growth of organisms present in the monitored environment. The statistics
calculated are based on information and techniques developed by the Meat Research
Institute of New Zealand.
For more information on the derivation and application of PHI statistics, see the topic Process Hygiene
Index.
Mean Kinetic Temperature (MKT)
Mean Kinetic Temperature (MKT) is a way of expressing the overall effect of temperature fluctuations during
storage or transit of perishable goods with a single temperature value, the Mean Kinetic Temperature.
MKT is a calculated, single temperature that is better represents the effects of temperature variations over a
period of time then a simple averaging of the temperatures.
Temprecord calculates the MKT value for the samples between the start and end samples and displays the value
on the graph view and Statistics view.
For more information on MKT, see the topic Mean Kinetic Temperature.
Refrigeration Index (RI) Statistics
Temprecord can also calculate and display RI (Refrigeration Index) statistics. To enable this facility,
click on Options/Statistics, and make sure Show Refrigeration Index Statistics is checked. The RI
statistics are displayed after the PHI statistics. The RI statistics are calculated between the start and
Copyright 1992..2010 Temprecord International Ltd.
96
Temprecord Help
end samples only. Remember that if a file has just been loaded the start sample is set to the first
sample and the end sample to the last sample.
The RI value is calculated for each sample and is cumulative. If the temperature falls below 7.0
degrees C the RI value at this point is reported. The RI value is also reported at the end sample,
regardless of whether the 7.0 degree C temperature was reached.
The time interval taken for the temperature to fall to 7.0 degrees C is also reported.
The RI value displayed is a logarithmic value, and represents the base 10 log of the number of
generation increases over the time period.
If the Show Refrigeration Index Statistics option is checked the refrigeration index is also plotted on
graph view. See Refrigeration Index Graph View for more information.
The RI statistics are presented as a guide only. They do not represent any actual
measured growth of organisms present in the monitored environment. The statistics
calculated are based on information and techniques developed by Meat and Livestock
Australia.
For more information on the derivation and application of RI statistics, see the topic Refrigeration Index
.
The settings of the lower and upper limits affect how the statistical data is displayed. See the topic
how the limits are used when Temprecord displays data for more information.
You can also change the view mode from the pop-up menu that displays when you
press the right-hand mouse button.
See also:
Changing the view mode
Summary view
Values View
Graph view
Total Temperature Value
Mean Kinetic Temperature
Graph View Options
Statistics View Options
Printing Options
Export Options
Process Hygiene Index
Refrigeration Index
Copyright 1992..2010 Temprecord International Ltd.
View Menu
6.3.1
97
Total Temperature Value (TTV)
In many applications the is a need to evaluate thermal performance - how well was a certain
temperature band maintained over time. In some applications the ideal ambient temperature changes
over time. At any given time there is an optimum temperature range for best results.
This optimum temperature profile - sometimes called the zone of thermal neutrality - can be
modeled as a single or a series of equal length time periods, where each period has a lower an upper
temperature. An index can be calculated for that period based on the distance the actual temperature
strays outside the two limits. The total temperature value (TTV) for that period is calculated as the
sum of the number of degrees outside the limits for each temperature sample in the period. Samples
that are within the limits are not counted - only samples where the temperature is outside the limits are
counted, and the further outside the limits the sample is, the higher its contribution for the TTV value
for that period. The TTV value is thus a temperature-time integral of the deviation from the ideal
range.
Temprecord allows you to specify up to 20 TTV periods of any duration, and then specify a lower and
upper temperature limit for each period. The TTV value is calculated separately for the lower and
upper limits for each time period, and total TTV results are also calculated.
If the number of samples corresponding to the TTV periods specified exceeds the
number of samples between the start sample and the last sample, the number of
periods actually shown may be less than the number specified. Also, this may mean
that the number of samples used to calculate the TTV value for the last shown TTV
period is less than a full TTV period’s worth. In this case the TTV value for the final
period will have less relevance.
The units of the TTV values are degree-samples, because the method of calculation
involves summing the temperature deviation for each sample. This means that the
displayed value depends on both the sample rate and the selected units (degrees F or
degrees C). When comparing TTV values from different data records, the sample
rate, selected units, and TTV period should be the same for both files.
The TTV statistics are shown in the statistics view. The TTV statistics can also be printed and
exported.
See also:
Changing the view mode
Statistics view
Statistics View Options
Printing Options
Export Options
Process Hygiene Index
6.3.2
Mean Kinetic Temperature (MKT)
Mean Kinetic Temperature (MKT) is a way of expressing the overall effect of temperature fluctuations during
storage or transit of perishable goods with a single temperature value, the Mean Kinetic Temperature.
Copyright 1992..2010 Temprecord International Ltd.
98
Temprecord Help
MKT is a calculated, single temperature that is better represents the effects of temperature variations over a
period of time than a simple averaging of the temperatures.
Temprecord calculates the MKT value for the samples between the start and end samples and displays the value
on the graph view and Statistics view.
Technically speaking, MKT is an expression of cumulative thermal stress experienced by a product at varying
temperatures during storage and distribution. In other words, MKT is a calculated, single temperature that is
analogous to the effects of temperature variations over a period of time.
MKT is not a simple weighted average. The calculation of MKT gives the higher temperatures a greater weight
when computing the average than would a simple numerical average or an arithmetic mean. This weighting is
determined by a geometric transformation--the natural logarithm of the absolute temperature.
6.3.3
Product Integrity Profile (PIP)
A frequent use of Temprecord data loggers is to monitor the temperature of a shipment with passive
refrigeration, i.e where cooling of the product is achieved by adding refrigerated ballast such as ice
packs to the consignment. The temperature profile thus starts off at a relatively higher temperature,
falls to a minimum, then warms back to ambient. The goal is to ensure the product cools quickly and
remains in the safe storage temperature zone for the anticipated duration of the journey. Blood
products tend to use this type of refrigeration where the container is made from expanded polystyrene
foam.
If a Temprecord logger is included with the shipment, the Temprecord program provides the ability to quickly
analyse a temperature record and determine key indicators via the Product Integrity Profile. The information is
presented in the form of annotations on the graph, and a report as part of the statistics. Both of these functions
can be enabled with the Show Product Integrity Statistics option.
Definitions
PIP
Product Integrity Profile
Cool zone
the desired temperature range in which the product
should remain
Above cool zone or
ambient
temperatures above the cool zone, i.e. where the
product is too warm
Below cool zone
temperatures below the cool zone - i.e. where the
product is too cold
Time to cool
the time taken for the temperature to cool from the
start until the upper limit of the cool zone
Time in cool zone
the time the product spent inside the cool zone. If the
product cooled below the lower limit, the time in the
cool zone will be shown as two sections: the time
taken to cool from the upper temperature limit down to
the lower temperature limit (when the temperature
enters the blow cool zone), and the time taken to
warm from the lower temperature limit up to the upper
temperature limit (when the temperature enters the
above cool zone or ambient). The time when reported
in the statistics report is the sum of these values.
Time below cool
zone
the time spend below the lower temperature of the
cool zone
Time warming
the time taken for the temperature to reach the end
after exiting the cool zone
Copyright 1992..2010 Temprecord International Ltd.
View Menu
99
The Product Integrity Profile statistics are intended for situations where the temperature does not
enter and leave the cool zone repeatedly. In an environment where the temperature was cycling
due to the action of a thermostat, and the temperature was repeatedly crossing the upper or
lower limit, the PIP statistics are less likely to be relevant and should be used with care..
The start sample sets the start position of the PIP analysis. The end sample sets the end position. For a logger
or file that has just been read the start and end samples are set to the first and last samples. This may be
appropriate or you can change them at any time, and the PIP statistics will be recalculated and displayed for the
data between the new start and end samples.
The upper temperature limit sets the upper boundary of the cool zone and the lower temperature limit the lower
boundary. For a logger or file that has just been read these limits are set to the limits the logger was
programmed with. You can change the limits at any time, and the PIP statistics will be recalculated and
displayed for the new upper and lower limits.
In the example below, the upper and lower limits are set to 10C and 2.3C, and the start and end samples are set
to the first and last samples.
Copyright 1992..2010 Temprecord International Ltd.
100
Temprecord Help
To avoid small temperature variations near the limits causing confusing results, the average of
the last three temperature samples is used when determining if the temperature has progressed
from one zone to the next. For this reason, there can be a delay of several samples before the
temperature progresses to another zone.
You should bear this in mind when comparing the temperature limits with the reported times.
6.3.4
Process Hygiene Index
Introduction
The following text is based on a document supplied by The Meat Research Institute of New Zealand.
It describes how to apply the PHI values calculated by Temprecord.
Microbes and meat
Meat at slaughter is sterile (Gill, 1979). Microbes that can cause food poisoning and/or spoilage begin
their activities after contaminating the exposed surfaces of meat. A typical organism often found
associated with meat is Escherichia coli. This organism is an important pathogen. It also has growth
characteristics that are similar to other mesophilic pathogens (viz. organisms that grow well in warm
environments) such as the salmonellae. Measuring the ability for E. coli to grow on meat is therefore a
useful indication of the potential for mesophilic pathogens to grow generally.
Bacterial growth
Bacteria grow and multiply on the meat surface at a rate determined by physiological capacity and the
availability of water, space and nutrients. Fresh meat provides a moist and nutritious environment for
bacteria to grow on. This means that bacterial growth will be effectively limited only by the cells
physiology. Having said this, meat surface drying is sometimes used to control growth. However, it is
difficult to prove effective application of drying on a non-uniform product such as fresh meat.
Furthermore, the effect of drying is difficult to quantify. It should be assumed then, unless proven
otherwise, that there will always be areas on the surface of meat that can allow unrestricted growth of
bacteria. Control is then best effected by manipulating the physiological growth capacity of the
organisms. This is best done using temperature.
Generally speaking, bacteria grow faster as the temperature rises. The faster they grow, the faster
they can reach numbers that can result in disease or spoilage. Thus, by minimizing initial bacterial
numbers (using hygienic processing techniques), cooling meat quickly, and maintaining low storage
temperatures food safety and storage potential will be maximized. To have confidence in the product
such techniques need to be ‘measured’. Initial bacterial numbers can be minimized by good
manufacturing practice and assessed by classical microbiological techniques. The ability for the
bacteria to grow during processing can be assessed by re-assaying meat at the process end. This is,
however, a slow process and does not give an indication as to how each processing step contributes
to the overall microbial bio-load. An alternative method uses predictive microbiology in the form of the
Process Hygiene Index (PHI).
The Process Hygiene Index
PHI is a means of assessing the potential growth of a microbial indicator organism during a process.
The PHI is a numerical value that is equivalent to the growth of a microbial indicator organism (E. coli)
over a process temperature history collected by an electronic data-logger. The higher the index value,
the greater the potential for E. coli growth. For example, an index of 0 (zero) indicates no growth
potential, 10 indicates a potential for 10 generations of growth (i.e. an E. coli cell has the potential to
reproduce 10 times).
Copyright 1992..2010 Temprecord International Ltd.
View Menu
101
The probe
A special probe is manufactured for use in PHI applications. The logger probe is tapered and
composed of Teflon. This allows easy insertion and retrieval from product (especially after freezing
when other materials may stick). Teflon also is a poor conductor of heat so the probe tip, which
contains the sensor, will allow a faithful measurement of the local temperature.
Positioning the probe
The probe is positioned to measure temperature at a site that reflects the process’s greatest ability to
allow bacterial growth. This means that the logger’s probe must be attached to the warmest meat
surface site (where bacterial contamination occurs) and the monitored meat must follow the process
through its warmest path. Deep tissue temperature, whilst warmer than the surface during the initial
carcass cooling phase, is NOT used because deep tissue is sterile and bacterial growth does not
therefore need to be considered. If the warmest path is not known, or is variable, a number of samples
(e.g. carcasses) are monitored that are representative of the load. For a carcass the slowest cooling
site is adjacent to the aitch-bone pocket (bovine) or within the cavity adjacent to the 5th and 6th lumbar
vertebrae (ovine). After cold boning, the probe should be placed on the surface of a small cut, which
has the ability to re-heat at the fastest rate. After warm/hot boning a large cut is used because it will
cool the slowest. After packaging (including offals) the probe is placed at the thermal centre of the load
(e.g. between two cuts at the centre of a box in the centre of the load). Further specifications can be
tailored for your own process or obtained from the appropriate regulatory literature.
Types of processes
Before calculating a process PHI an operator must decide what type of process they have monitored.
This involves two considerations. Firstly, is the process one or two-phase? Secondly, is the process
aerobic, anaerobic, or a mixture of the two?
One-phase or Two-phase?
Processes such as carcass cooling and offal cooling are termed ‘single phase’ processes because
they are composed of a single cooling period containing no periods where product is handled requiring
removal of the temperature logger. A temperature history is collected simply by attachment of the
probe to the slowest cooling site. For surface sites, the probe is inserted into a stainless steel disc
which is then pinned to the meat surface using a non-heat conducting (i.e. Teflon®) staple. The logger
should be placed with the product as soon as possible. There may be regulatory requirements relating
to your process describing when and where probes are placed. For carcass cooling, the surface
temperature should be above 25° C at the beginning of the process and below 7° C at the end (which
is the minimum temperature for E. coli growth). At the end of the process the logger is interrogated
and a PHI produced. Note that 2 models of disc are available - one for beef and one for mutton.
Temprecord expresses PHI values both with and without lag. This lag refers to the
period of time that bacteria need to adjust to a new environment before they can start to
grow. For use with fresh meat processing DO NOT USE VALUES EXPRESSED AS
‘WITH LAG’. This is because bacteria that contaminate meat are considered to have
resolved their lag phase by the time process monitoring is commenced.
When a single-phase process is followed by a second operation the overall process is termed ‘twophase’. An example is where a carcass is cooled (first phase), boned and the packaged cuts chilled
(second phase). During this operation the temperature logger is used to measure the first phase as
described for the single-phase operation. The logger is then removed for the boning operation and
then placed with the packaged product to continue the monitoring process. There may be a
regulatory limit on the maximum length of time the logger can be absent from the product between
the phases (e.g. one hour for carcass/cuts assessment). The PHI value for a two-phase process can
be calculated as follows:
Copyright 1992..2010 Temprecord International Ltd.
102
Temprecord Help
Remember that you must have the Statistics option 'Show Growth Statistics' checked in
order for Temprecord to display PHI statistics.
1. In Graph View, mark the start and end of the first phase of cooling. You can do this quickly by
positioning the sample cursor at the start of the first phase of cooling, and pressing F7. Then
position the cursor at the end of the first phase of cooling and press F8.
2. Switch to Statistics View. Temprecord will then show a value for the PHI for the first phase.
The expressed PHI will either be for aerobic growth (e.g. carcass cooling) or anaerobic growth (e.
g. offal cooling- although this will be a one-phase process only).
3. Repeat step 1. for the second phase of cooling.
4. Repeat step 2. for the second phase. The PHI will be either for anaerobic growth (e.g. warmboned bulk packed meat or vacuum packaged cuts) or aerobic growth (e.g. unwrapped cuts).
5. Manually calculate the potential for aerobic growth during the inter-phase period. This is done
by firstly choosing the maximum temperature occurring at either the end of the first phase or the
start of the second phase and then calculating the amount of potential aerobic growth for the interphase period using the following formula, used by the PHI software algorithm and presented in the
paper of Reichel et. al. (1991).
Y = (0.0513x - 0.17)2, when x is between 7 and 30°C
Y = (0.027x + 0.55)2, when x is between 30 and 40°C
Y = 2.66, when x is between 40 and 47°C and
Y = 0 when x is <7°C or >47°C
Example:
If the first phase ends at 7° C and the second phase starts 0.75 hr later at 12° C, you need to calculate
0.75 hours aerobic growth at 12° C.
((0.0513 x 12) -0.17)2 = 0.2 generations potential growth per hour.
The inter-phase PHI is therefore 0.75 x 0.2 = 0.15
6. The three PHI values (first phase, second phase and inter-phase) are then added together to
give a process PHI.
7. For two-phase processes that contain an aerobic first phase followed by an anaerobic second
phase, results that are marginally (e.g. within 0.2 generation) above specified upper limits for the
process, can be recalculated taking into consideration the short aerobic-to-anaerobic lag period
during which cells cease to grow while converting their metabolisms to anaerobic respiration. This
method is described in Reichel et al. It is a tedious process to accomplish manually and may not
significantly influence your result - however it is an option for those operators who want to keep
their results faithful with those generated by MIRINZ AP1 software (presently incompatible with
Temprecord loggers). A future release of Temprecord will produce a PHI value for a two-phase
process and will calculate the lag automatically.
Uses for PHI
In addition to establishing if a process allows a potential for E. coli proliferation that is within certain
guidelines the PHI technique can be used for:
Copyright 1992..2010 Temprecord International Ltd.
View Menu
103
comparing processes (e.g. chiller runs).
assessing the effect of process modifications on allowing microbial growth.
HACCP (Hazards Analysis Critical Control Points) applications.
Inappropriate applications of PHI
PHI is not a method to calculate actual bacterial growth on product. A PHI value reflects the maximum
potential for a process to allow the growth of E. coli and similar organisms. There may be reasons why
actual E. coli growth is lower. For example, some product may have a pH unfavorable for maximum
growth, some product may dry sufficiently to retard growth, while other product within the process may
not be contaminated with E. coli.
Further Notes (provided by MIRINZ - the Meat Industry Research Institute of New Zealand)
Growth of micro organisms is measured in the number of times they multiply. If they stop multiplying,
then they are considered to have stopped growing. If the part of the product where any E.coli are
located is below 7degC they will stop growing/multiplying. A PHI of 3.5 doesn't mean 3.5 Log per hour;
it means 3.5 generations/hour. A generation is a doubling, a Log is a factor of ten. So starting with one
cell, a generation of growth will give us 2 cells, whereas a Log growth will give us 10 cells.
The PHI only tells you the number of generations of growth that would occur if the product is at that
temperature for one hour. If the temp is changing with time then you have to work out the number of
generations of growth in separate time steps. For example, the first hour is 37degC so the PHI might
be 6 generations / hr for that hour, the second hour at 35degC so the PHI = 4.8 generations / hr for
that hour. If we add the two hours of growth together we get 10.8 generations (these PHI figures are
just made up).
We can extend this to minutes too: If at 37degC for 1 minute gives PHI of 6 generations / hr then must
be (6/60) = 0.1 generations / minute, then at 35degC for 1 minute gives PHI of 4.8 generations / hr
then must be (4.8/60) = 0.08 generations / minute. Hence in the two minutes we have 0.18 generations
of growth.
To convert generations to a straight multiplication factor, just multiply by 2 to the power of the number
of generations.
For example, 10 generations = 2 to the power of 10 = 1024. So the number of micro organisms has
increased by a factor of 1024. You can see that this is about the same as 3 Logs, 10 to the power of 3
= 1000.
The Future
MIRINZ and Temprecord International Ltd. are continuing to develop and improve software and
hardware for extending the scope of the PHI. In addition to pursuing this application of predictive
microbiology for food safety, they are also working on a similar application for predicting the growth of
spoilage organisms. This will allow processors to monitor and optimize storage processes to minimize
the growth of spoilage organisms and thus maximize the storage life of chilled product.
References/Further reading
· Gill CO, Intrinsic bacteria in meat. Journal of Applied Bacteriology 47, 367-78, 1979.
· Gill CO, Harrison JCL, Phillips DM. Use of a temperature function integration technique to assess
the hygienic adequacy of a beef carcass cooling process. Food Microbiology 8, 83 - 94, 1991.
· Jones RJ. The establishment of provisional quality assurance guidelines for assessing the hygienic
adequacy of the lamb carcass cooling process. New Zealand Veterinary Journal 41, 105-10, 1993.
· Jones RJ. Establishment of Provisional Quality Assurance Guidelines for Assessing the Hygienic
Adequacy of Beef Side Cooling Regimes. Meat Science, 43, 345-349, 1996.
Copyright 1992..2010 Temprecord International Ltd.
104
Temprecord Help
· Jones RJ, Phillips DM. A HACCP-based Process Control Plan using Predictive Microbiology.
Proceedings of the International Symposium of the Institute of Refrigeration, Quimper, France, 1997
(in press).
· Reichel MP, Phillips DM, Jones RJ, Gill CO. Assessment of the Hygienic Adequacy of a Commercial
Hot Boning Process for Beef by a Temperature Function Integration Technique. Intl. J. Food Micro.,
14, (1991), 27-42.
·
6.3.5
Refrigeration Index
Introduction
Temprecord can calculate and display Refrigeration Index values. The Refrigeration Index is
calculated from the start sample to the end sample, or over the whole sample record if these have not
been set. See Refrigeration Index Graph View for details.
The following text is based on a document supplied by Meat Livestock Australia. It describes how to
apply the RI values calculated by Temprecord.
Lag phase
A lag phase may occur when a bacterium moves from one environment to another, especially if it has
to adjust to a new environment. The hot boning work described above demonstrated a good
correlation when 5 generations of lag were introduced to the equation. 5 generations of growth (1.5 log
10) can be subtracted from the calculated refrigeration index in situations where a lag may occur.
The question ‘the starting temperature is hot’ determines whether a lag is applied. If the meat is hot or
warm, then it is assumed that E. coli has recently been introduced to the meat surface and a 5
generation lag is allowed. If the meat is cold, then it is assumed that E. coli may already be present on
the meat, has adjusted to the environment and is ready to grow as soon as the temperature rises.
The lag phase can be programmed from the RI options.
Temperature
Temperature is the only parameter that can be entered by the user. Temprecord uses the temperature
samples from the Start Sample and calculates the RI value cumulatively from then on until the end
sample is reached. If the temperature record cools to below 7C the RI value at this point is recorded
also.
The Predictive Model
The predictive model used in this calculator was developed by Dr Tom Ross and colleagues at the
University of Tasmania. The model has been published (Ref. 1 below).
An evaluation of the model against data in the literature has also been published (Ref. 2 below).
The use of these models in hot boning applications and validation data has been described in an MLA
publication that accompanies the Hot Boning Index Calculator CD ROM (Ref 3 below).
Remember that you must have the Statistics option 'Show Refrigeration Index Statistics'
checked in order for Temprecord to display RI statistics
.
References/Further reading
Copyright 1992..2010 Temprecord International Ltd.
View Menu
105
1. Ross, T., Ratkowsky, D. A., Mellefont, L. A. and T.A. McMeekin, T. A. (2003)
Modelling the effects of temperature, water activity, pH and lactic acid
concentration on the growth rate of Escherichia coli. Int.J.Food Microbiol. 82: 33-44.
2. Mellefont, L.A., McMeekin, T.A. and Ross, T. (2003) Performance evaluation of a model
describing the effects of temperature, water activity, pH and lactic acid concentration on the
growth of Escherichia coli. Int.J.Food Microbiol. 82: 45-58.
3. Meat & Livestock Australia (2004) Validation of the chilling of hot boned manufacturing meat
and primals. PRMS.020
6.3.6
Rate of Cooling
Rate of cooling statistics are a measure of the rate at which an environment or product cools after
reaching a peak value. Temprecord always calculates these statistics between the start (F7) and end
(F8) marker samples, in the following way:
The temperature record between the start and end samples is scanned for the maximum
value.
The interval between the maximum sample and the Zone 1 End temperature is called ‘Zone
1’ and is treated as the first rate of cooling interval.
The interval between the point at which the Zone 1 End temperature is reached, and the point
at which the Zone 2 End temperature is reached is called ‘Zone 2’ and is treated as the
second rate of cooling interval, and so on.
The statistics (duration, rate of cooling in degrees per hour) are calculated for each interval.
The statistics for these intervals are calculated until the end of the measurement period, which
is until the number of zones specified has been reached, until 5 zones have been done, or
until the end (F8) sample is reached.
Temprecord also prints and displays two total durations after the rate of cooling values.
The first total is the time taken from the maximum temperature till the end of the
measurement period. The second total is the time taken from the end of zone 1 (i.e.
from flag 2) until the end of the measurement period - i.e. it does not include zone 1
.
6.4
Values View
The temperature data in a Temprecord data window can be displayed in one of four view modes.
These are summary view, statistics view, values view, and graph view. The values view displays the
temperatures as a list of values in degrees C or degrees F, depending on the setting of the Units
option. You need to read the logged temperature data to see the values view of the logger. Using the
File/Query Logger function only reads the summary data.
The settings of the lower and upper limits affect how the values are displayed. See the topic how the
limits are used when Temprecord displays data for more information.
Copyright 1992..2010 Temprecord International Ltd.
106
Temprecord Help
In values view mode, temperatures that are above the upper limit or below the lower limit can be
displayed in a different color. You can change these colors with the values view options. By default,
these colors are set to red and blue respectively.
If you have Total Temperature Value (TTV) statistics enabled, then these limits determine the color
used to display the TTV values, rather than the lower and upper limits.
You can select the values view mode by opening the View menu and clicking on 'Values'.
If Humidity was logged instead, the values shown are for the humidity samples If both Humidity and
Temperature were logged, you can show the values for either or both. You can select between them
by using the View/Temperature, View/Humidity, and View/Temperature and Humidity menu
options.
You can also change the view mode from the pop-up menu that displays when you
press the right-hand mouse button.
See also:
Changing the view mode
Summary view
Statistics view
Graph view
6.5
Units
Changes the display units from degrees Celsius to degrees Fahrenheit, or vice-versa.
You can quickly swap between degrees C and F with the Ctrl-U key.
Don't confuse the display units with the Mon-T Logger Units. The Mon-T Logger Units determine
what units are used when programming the Mon-T - specific parameters (Minimum Temperature,
and Resolution). The display units determine how temperatures are displayed in the Temprecord
program
When a Mon-T logger is read, the display units are set to the Mon-T programmed
logger units. I.e. if you program a logger in Fahrenheit units and read the logger with
Temprecord set to display temperatures in Celsius, the display units will change to
Fahrenheit after you read the logger's temperature data.
6.6
Graph View
The temperature data in a Temprecord data window can be displayed in one of four view modes.
Copyright 1992..2010 Temprecord International Ltd.
View Menu
107
These are summary view, statistics view, values view, and graph view. The graph view displays the
temperatures as a graph of temperature (in degrees C or degrees F, depending on the setting of the
Units option) against time . You need to read the logged temperature data to see the graph view of
the logger. Using the File/Query Logger function only reads the summary data.
When you read the data from a logger, the view mode of the data window is switched to graph view.
In graph view mode, the upper limit is shown as a dotted red line, and the lower limit as a dotted blue
line, though you can change the colors used if desired. See the topic how the limits are used when
Temprecord displays data for more information.
A vertical solid red line indicates the position of the sample cursor. You can move the sample cursor
with the left and right arrow keys, or by clicking on the graph. See the sample cursor topic for more
information.
You can select the graph view mode by opening the View menu and clicking on 'Graph'.
If Humidity was logged instead, the trace shown will be for the humidity samples If both Humidity and
Temperature were logged, you can show the trace for either or both. You can select between them by
using the View/Temperature, View/Humidity, and View/Temperature and Humidity menu options.
If the Show Refrigeration Index Graph View is set
You can also change the view mode from the pop-up menu that displays when you
press the right-hand mouse button.
Temprecord provides a powerful set of zooming functions for displaying and printing
your temperature data as a graph. See the topic Zoom Functions for more information
.
Temprecord displays key points on the graph with flags:
start sample (set by F7)
end sample (set by F8)
minimum temperature (F4)
maximum temperature (F5)
user marker position
start of rate of cooling zone 1
start of rate of cooling zone 2
start of rate of cooling zone 3
start of rate of cooling zone 4
start of rate of cooling zone 5
end of rate of cooling zones
See also:
Copyright 1992..2010 Temprecord International Ltd.
108
Temprecord Help
Changing the view mode
Summary view
Statistics view
Values view
Zoom Functions
Using the Zoom Presets
Rate of Cooling
6.6.1
The Sample Cursor
The sample cursor is a vertical red line on the graph that you can position with the mouse, or any of
the Go To functions. At all times, the time and temperature at the sample cursor are displayed at the
top of the Temprecord data window.
The position of the sample cursor is also important when the zoom functions are used.
See the topic Zoom Functions for more information.
The following operations affect the sample cursor:
The left and right arrow keys. These move the cursor horizontally by one sample. If the sample
cursor reaches the edge of the window, the window will scroll horizontally. Note that at lower
horizontal zoom factors, more than one sample can be represented by a display pixel. In this
case, the arrow keys will change the sample under the cursor, but the cursor may not necessarily
move on the display.
Clicking on the graph. If the graph view window is clicked, the cursor sample is set to the closest
sample to the sample cursor. If the mouse button is held down, the sample cursor is ‘dragged’
along with the mouse cursor.
The Find Trace function. This function does not actually move the sample cursor from the sample
it is currently on, but instead shifts the trace vertically so that you are guaranteed of seeing the
trace. It is useful when you have ‘lost’ the trace at higher zoom factors.
The Go to First, Go to Last Sample functions. These move the sample cursor to the first and last
sample respectively of the logged temperatures. Note that if loop overwrite was enabled when the
logger was recording, the first sample in the sample record will not necessarily be the first one
taken by the logger.
You can also move quickly to the first sample with the Home key, and to the last
sample with the End key
The Go to Start, Go to End functions. These move the sample cursor to the start sample and end
sample respectively of the logged temperatures.
Copyright 1992..2010 Temprecord International Ltd.
View Menu
109
The start sample and end sample are set to the first and last sample when a logger or file is read,
but you can alter them to select a particular range of samples. See Using the start and end
markers for more information.
The start sample is marked on the graph with the
marked on the graph with the flag symbol.
flag symbol. The end sample is
The Go to Next, Go to Previous Marker functions. These move the sample cursor to the
next user marker in the record, or the previous user marker in the record, using the sample at the
cursor as the starting point. If there are no more markers from that point on, the cursor does not
change. User marker are those inserted into the sample record by pressing the button on the
logger. The allow markers parameter must be checked before markers can be inserted into the
sample record.
You can quickly move to the next marker by pressing the Ctrl-N key (hold the Ctrl key
down and press the ‘N’ key. You can also move quickly to the previous marker with
the Ctrl-P key.
The markers are shown on the graph with the
flag symbol.
The Go to Min, Go to Max Sample functions. These move the cursor to the minimum value
sample and maximum value sample respectively of the logged temperature and/or humidity
values.
The behaviour of these functions changes somewhat when both temperature and humidity traces
are displayed. If the cursor is not currently positioned at a minimum temperature or humidity
sample, then the Go to Min.function moves the cursor to minimum temperature sample. If the
cursor is already on the minimum temperature sample then the Go To Min function moves it to the
minimum humidity sample. If the cursor is already on the minimum humidity sample then the Go
To Min function moves it to the minimum temperature sample. Equivalent behaviour exists for
the Go To Max function.
The maximum and minimum are only calculated between the start and end samples.
When a file or logger is first read, the start and end sample are set to the first and last
sample respectively, so the minimum and maximum displayed are for the whole
sample record. If the start and/or end samples are altered however, the maximum
and minimum are recalculated. See Using the start and end markers for more
information.
The maximum and minimum are only calculated over the samples stored in the logger
Copyright 1992..2010 Temprecord International Ltd.
110
Temprecord Help
at the time the logger was read or saved to a file. If loop overwrite is enabled, there
may well be samples that have since been overwritten that would have been below the
minimum or above the maximum
.
You can move quickly to the minimum sample by pressing the F4 key, and to the
maximum sample by pressing the F5 key.
The maximum sample is marked on the graph with the
sample is marked on the graph with the flag symbol
6.6.2
flag symbol. The minimum
Setting the date and time format on graph view
When displaying the date on the horizontal axis of graph view, Temprecord uses the short date settings from the
computer's regional settings.
If your computer is running Windows 7 you may experience some problems getting the date to
display in the desired format. This is because Windows 7 does not correctly update this format
in the regional settings under some circumstances.
If you find that the date format displayed in graph view does not match your regional settings, the
following procedure should remedy the situation:
· Open your computer's Regional Settings by clicking on Start/Settings/Control Panel/
Regional and Language Options
· On the first tab, make sure that the drop-down shows your country/language (e.g. "English
(United States)").
· Click on the Customize button
· Select the Date tab
· Enter your desired date format for the graph view into the Short Date Format field.
· Click on OK
· Click on Apply
· (This step is required for Windows 7 users only). Select a different country/language to your
locale (e.g. German (Germany)).
· (This step is required for Windows 7 users only). Click on Apply
· (This step is required for Windows 7 users only). Select your correct country again.
· Click on OK
· Start Temprecord. The date should be shown in the correct format for your locale.
When displaying the time on the horizontal axis of graph view, Temprecord uses the time format settings from
the computer's regional settings, but will only display the seconds part of a time if they are significant.
6.6.3
Changing the view mode
The temperature data in a Temprecord data window can be displayed in one of four view modes.
Copyright 1992..2010 Temprecord International Ltd.
View Menu
111
These are summary view, statistics view, values view, and graph view.
You can change the view mode of a window by:
opening the view menu and clicking on the view mode you want to select.
opening the pop-up menu by clicking the right mouse button and clicking on the view mode
you want to select.
Using the File/Query Logger function. This always opens a data window and selects the
summary view mode.
Using the File/Read Logger function. This always opens a data window, reads the
Temprecord logged data, and selects the graph view mode.
6.6.4
How the limits are used when Temprecord displays data
The appearance of the values view, statistics view, and graph view is affected by the lower and upper
limits, but the behaviour differs slightly depending on whether the data was read from a Mk I
Temprecord logger or a Mk II or Mk III Temprecord logger. When using the lower and upper limit
temperature and/or humidity values you need to bear in mind the following:
Mk I Temprecord loggers do not have the facility to program the lower and upper temperature
limits. When you read a Mk I logger, or load a file that was created from data read from a Mk
I logger, the display lower and upper limits for that data window are set from the values in the
default options.
Mk II and Mk III Temprecord loggers have the facility to program the lower and upper
temperature limits. When you read a Mk II or Mk III logger, or load a file that was created
from data read from a Mk II or Mk III logger, the display lower and upper limits for that data
window are set from the values that were programmed in that logger.
Some Mk III Temprecord loggers also have the ability to log humidity. In this case
you can also program lower and upper humidity limits. When you read a Mk III humidity
logger, or load a file that was created from data read from a Mk III humidity logger, the display
lower and upper limits for that data window are set from the values that were programmed in
that logger.
If you adjust the lower and/or upper limits in a Temprecord data window the data in that
window is altered to reflect the new limit value.
When you alter the lower and/or upper limits in a Temprecord data window, that change is
'local' to that window. The limits programmed into the logger are not changed, and the limits
as set in the default options are not changed. The limits used to display the data in other
Temprecord data windows are not changed.
It is quite possible then to have a file opened in two different Temprecord data windows and to have
data from that file displayed in each, but with two different sets of lower and upper limits, and these
limits can be adjusted independently.
6.6.5
Viewing Temperature, Humidity, or Both
If the logger or file contains both temperature and humidity data, you can choose to display either
temperature, humidity, or both in the statistics view, values view, or graph view modes.
Copyright 1992..2010 Temprecord International Ltd.
112
Temprecord Help
To determine what is displayed, use the View/Temperature, View/Humidity, or View/Temperature and Humidity
menu functions. Alternatively, you can right-click in the window and select these functions from the pop-up
menu.
When humidity values are displayed on the graph, the Y axis in use for temperature is
also used for humidity. This means that a humidity value of 50%RH is shown at the
same vertical position on the graph as a temperature value of 50C if the display units
are set to Celsius, and is shown at the same vertical position on the graph as a
temperature value of 50F if the display units are set to Fahrenheit.
This means that the vertical position of the humidity trace will change according to the
setting of the display units.
6.6.6
Displaying the same file in 2 or more windows
It is sometimes useful to see the data from a file displayed as both a graph, and as a list of values, or
to see the statistical data along with the graph. You can switch from one view mode to another within
a window, but this does not allow you to see the two display modes at the same time.
To see a data file displayed twice, you simply open the same file again. You then have two windows
with the same data file loaded and you can change the view mode of either of them to whichever view
mode you require. There is no limit to the number of data files you can have open (other than the
amount of memory your computer has available).
When Temprecord opens another data window, it will normally be opened over the top
of any existing windows. To have Temprecord arrange the windows so that they do
not overlap, use the View/Tile Vertically or View/Tile Horizontallyfunctions. To have
Temprecord arrange all of the open windows as a cascade of overlapping windows,
use the View/Cascade function.
See also:
Tile Vertically
Tile Horizontally
Cascade
Zoom Functions
Using the Zoom Presets
Displaying data read from a logger in 2 or more windows
6.6.7
Displaying data read from a logger in 2 or more windows
It is sometimes useful to see the data read from a logger displayed as both a graph, and as a list of
values, or to see the statistical data along with the graph. You can switch from one view mode to
another within a window, but this does not allow you to see the two display modes at the same time.
Copyright 1992..2010 Temprecord International Ltd.
View Menu
113
To see the data read from a logger displayed in two different windows, you need to save the data
from one of them first as a file. This is because Temprecord will only ever allow one window to be
opened containing data from a logger.
These are the steps involved in displaying the data from 2 or more different loggers:
Use the File/Read Logger function to read the first logger. Temprecord will open a window (if
there is not already a window open with data read from a logger - if there is, this one will be
used) and display the temperature data as a graph.
Use the File/Save function to save the logger data to a disk file. You can use the filename
provided by Temprecord (which will be derived from the serial number of the logger), or you
can type in a new file name of your choice.
Use the File/Read Logger function to read the data from the second logger. This will open
another window and display the data from that logger in graph view.
These are the steps involved in displaying the data from the same logger in 2 windows:
Use the File/Read Logger function to read the first logger. Temprecord will open a window (if
there is not already a window open with data read from a logger - if there is, this one will be
used) and display the temperature data as a graph.
Use the File/Save function to save the logger data to a disk file. You can use the filename
provided by Temprecord (which will be derived from the serial number of the logger), or you
can type in a new file name of your choice.
Use the File/Open function to read the file again This will open another window and display
the data from that logger in graph view.
When Temprecord opens another data window, it will normally be opened over the top
of any existing windows. To have Temprecord arrange the windows so that they do
not overlap, use the View/Tile Vertically or View/Tile Horizontallyfunctions. To have
Temprecord arrange all of the open windows as a cascade or overlapping windows,
use the View/Cascade function.
See also:
Tile Vertically
Tile Horizontally
Cascade
Zoom Functions
Using the Zoom Presets
Displaying the same file in 2 or more windows
6.6.8
Go to Functions
Temprecord provides a comprehensive array of functions for moving quickly to important points on
the graph. You can access these functions from the view menu or from the pop-up menu that
displays when you click the right-mouse button.
Copyright 1992..2010 Temprecord International Ltd.
114
Temprecord Help
Go to Any Sample
Go to First, Go to Last Sample
Go to Start, Go to End
Go to Next, Go to Previous Marker
Go to Min, Go to Max Sample
Using the Start and End Markers
Using the Min and Max Markers
Using the User Markers
6.6.8.1
Find Trace
Use the View/Go To/Find Trace function to shift the vertical axis of the graph view so that the trace is
near the middle of the data window. This function is useful when you have ‘lost’ the trace at higher
zoom factors. The horizontal position, sample cursor position and zoom factor are not changed.
6.6.8.2
Go to Sample
Use the View/Go To/Sample to position the sample cursor at a sample specified by number. When
you use this function focus is transferred to the Goto Sample toolbar. If this toolbar is not visible it is
made visible and appears "floating" over the top of the Temprecord main window. You can enter a
sample number in this dialog and press Enter. Temprecord numbers samples starting from 1. If you
enter a sample number less than 1 or greater than the number of samples the cursor is positioned at
the first or last sample respectively.
After you have finished with it, the Goto sample toolbar can be closed, moved out of the way, or
"docked" on any of the 4 sides of the Temprecord main window.
You can also quickly open the Go To Sample dialog with the ^G key (Hold the Ctrl key
down and press the G key).
The View/Go To Sample function also works in values view mode, where it positions
the sample at the top of the window to be sample of interest.
You can leave the View/Go To Sample dialog open while you work and still access the
menus and open and close files etc. The Go To Sample function always operates on
the window that last had focus.
6.6.8.3
Go to First, Go to Last Sample
Use the View/Go To/First Sample and View/Go To/Last Sample to position the sample cursor at the
first sample and last sample in the sample record.
Copyright 1992..2010 Temprecord International Ltd.
View Menu
115
Don’t confuse the first and last samples with the start and end samples. The first and
last samples always refer to the first sample in the record and the last sample in the
record respectively. The start and end samples refer to the position of the start and
end markers, which are used in the calculation of statistical information.
You can also move quickly to the first sample with the Home key, and to the last
sample with the End key
The View/Go To/First Sample and View/Go To/Last Sample functions also work in
values view mode, where they position the sample at the top of the window to be the
first or last sample.
6.6.8.4
Go to Start, Go to End
Use the View/Go To/Start Sample and View/Go To/End Sample to position the sample cursor at the
start marker sample and end marker sample in the sample record.
Don’t confuse the first and last samples with the start end samples. The first and last
samples always refer to the first sample in the record and the last sample in the record
respectively. The start and end samples refer to the position of the start and end
markers, which are used in the calculation of statistical information.
You can also move quickly to the first sample with the Home key, and to the last
sample with the End key
The start sample is marked on the graph with the
marked on the graph with the flag symbol.
flag symbol. The end sample is
You can set the current sample under the cursor as the start sample with the F7 key,
and as the end sample with the F8 key.
Copyright 1992..2010 Temprecord International Ltd.
116
Temprecord Help
The View/Go To/Start Sample and View/Go To/End Sample functions also work in
values view mode, where they position the sample at the top of the window to be the
start or end sample.
6.6.8.5
Go to Next, Go to Previous Marker
Use the View/Go To/Next Marker and View/Go To/Previous Marker to position the sample cursor at
the next user marker or the previous user marker with reference to the current sample cursor
position.
You can also move quickly to the next user marker with the Ctrl-N key, and the
previous sample with the Ctrl-P key
The user markers are shown on the graph with the
flag symbol.
The View/Go To/Next Marker and View/Go To/Previous Marker functions also work in
values view mode, where they position the sample at the top of the window to be the
next or previous sample with a user marker.
6.6.8.6
Go to Min, Go to Max Sample
Use the View/Go To/Minimum and View/Go To/Maximum functions to position the sample cursor at
the maximum or minimum temperature between the start and end markers.
The behaviour of these functions changes somewhat when both temperature and humidity traces are
displayed. If the cursor is not currently positioned at a minimum temperature or humidity sample,
then the Go to Min function moves the cursor to minimum temperature sample. If the cursor is
already on the minimum temperature sample then the Go to Min function moves it to the minimum
humidity sample. If the cursor is already on the minimum humidity sample then the Go to Min
function moves it to the minimum temperature sample. Equivalent behaviour exists for the Go to
Max function.
The minimum and maximum functions only pertain to the samples between the start
and end markers. Be sure to set the start marker position to the first sample and the
end marker position to the last sample if you want to see statistical data for the whole
temperature record
Copyright 1992..2010 Temprecord International Ltd.
View Menu
117
You can move quickly to the minimum sample by pressing the F4 key, and to the
maximum sample by pressing the F5 key.
You can also move directly to the minimum sample by clicking on this speed button
on the toolbar displayed along the top of the Temprecord main window, or from
the pop-up menu that displays when you press the right-hand mouse button.
You can also move directly to the maximum sample by clicking on this speed button
on the toolbar displayed along the top of the Temprecord main window, or from
the pop-up menu that displays when you press the right-hand mouse button.
The maximum sample is marked on the graph with the
sample is marked on the graph with the flag symbol
flag symbol. The minimum
The View/Go To/Minimum and View/Go To/Maximum functions also work in values
view mode, where they position the sample at the top of the window to be the minimum
or maximum valued sample.
6.6.9
Select all samples
The Select all samples function sets the start and end markers to the beginning and end of the logged samples.
Use this function if you want to copy all the samples to the clipboard when the Copy function is used.
You can select all the samples by:
· Clicking on Select All speed button on the graph toolbar.
· Pressing the Ctrl-A key when in graph view.
· Right-clicking while in graph view and selecting Select All from the menu.
See also:
Copy to clipboard
Copy to Excel
6.6.10 Copy to Clipboard
When you are in Graph view, you can use the Copy function to place sample values into the clipboard. From
the clipboard the sample values can be transferred to other Windows applications such as word processors and
spreadsheets.
Copyright 1992..2010 Temprecord International Ltd.
118
Temprecord Help
The explanation below is for copying a range of samples to the Windows clipboard. This is of
general use when importing sample data into other applications. For the specific task of
importing samples into a Microsoft Excel spreadsheet, it is recommended you use the Copy to
Excel function. This creates a .XLS file directly and is much more convenient.
As an example, to copy a range of samples to a table in a Microsoft Word document, follow the steps below:
· In Graph view, select the start sample on the trace of the range you wish to transfer. Click on the sample,
and then press the F7 key.
· Now select the end sample of the range. Click on the sample, and press the F8 key. The range of
samples selected is shown on the graph in a different colored background.
· Open the Graph right-click menu by clicking the right-hand button on your mouse.
· Select Copy from the menu.
· Open the Microsoft Word document that contains the table you wish to copy the samples to.
· Select the column in the table where you want to paste the data (the entire column should show as black
when it is selected)
Copyright 1992..2010 Temprecord International Ltd.
View Menu
· Right-click on the mouse and select Paste from the right-click menu.
The data will be pasted into the table.
Copyright 1992..2010 Temprecord International Ltd.
119
120
Temprecord Help
· If you are displaying humidity data the humidity values will be copied instead. If both humidity
and temperature are displayed you will get two columns of values in the clipboard.
· You can also enable the include date in copy to clipboard option and the date and time will be
copied as well.
· You can also use the Ctrl-C key or the Copy to clipboard speed button
same result
to achieve the
· You don't need to close Temprecord after you copy the samples to the clipboard and before
you open Word. If you do close Temprecord, the samples you copied to the clipboard will still
be available on the clipboard to copy into other applications until they are replaced by another
copy operation.
See also:
Select all samples
Copy to Excel
Copy to Clipboard Options
6.6.11 Copy to Excel
When you are in Graph view, you can use the Copy to Excel function to create a new Excel spreadsheet and
place the selected sample values (samples between the start and end samples) into the spreadsheet. There
are options that allow you to:
· include or exclude the date column.
· prompt for the filename of the XLS file, or default to using a file with thee same name as the .TR file, but
with an extension of .XLS
· prompt before overwriting an existing XLS file of the same name.
· open the XLS file with Microsoft Excel after it is created (requires Excel to be installed on the computer).
The explanation below is for copying a range of samples directly to Excel. To copy a range of
times/samples to other applications, such as Microsoft Word, see the Copy to clipboard function.
To copy a range of samples to Excel, follow the steps below:
· In Graph view, select the start sample on the trace of the range you wish to transfer. Click on the sample,
and then press the F7 key.
· Now select the end sample of the range. Click on the sample, and press the F8 key. The range of
samples selected is shown on the graph in a different colored background.
· If you want to copy all the samples into the spreadsheet, type Ctrl-A to select all the samples.
· Open the Graph right-click menu by clicking the right-hand button on your mouse.
Copyright 1992..2010 Temprecord International Ltd.
View Menu
· Select Copy to Excel from the menu.
The data will be pasted into the spreadsheet as one to three columns:
1. The date and time of the sample. This column can be suppressed if required.
2. The temperature of the sample (in the selected display units) if temperature was logged.
3. The humidity of the sample, if humidity was logged.
The temperatures will be copied in the current display units (C or F).
Copyright 1992..2010 Temprecord International Ltd.
121
122
Temprecord Help
You can also use the Ctrl-E key or the Copy to Excel speed button
result
to achieve the same
When Temprecord copies your data to an Excel spreadsheet, it makes choices for you as to how
the data should be displayed. You can alter these formatting choices on your spreadsheet if you
wish but there should be no need to do so.
· When a temperature or humidity value is copied to the spreadsheet, the display format is
set to 2 decimal places. Temprecord uses a format specifier of "0.00" for these cells.
· When a date is copied to the spreadsheet, the display format is set to show the date
according to the users local regional settings short date format, and the time as a fixed
setting. Temprecord uses a format specifier of "<users short date format> hh:mm:ss
AM/PM" for these cells.
· When a duration is copied to the spreadsheet, the display format is set to show the
duration in hours, minutes and seconds, with the number of hours increasing past the
value of 24 as necessary. For example:
a duration of 4 hours will display as 4:00:00
a duration of 1 day will display as 24:00:00
a duration of 1 week will display as 168:00:00
Temprecord uses a format specifier of "[h]:mm:ss;@" for these cells.
· Any other field copied to the spreadsheet that is not one of the above formats is generally
a string (a collection of characters) and the display format is set to "general".
Note that dates and durations are represented within Excel as numbers, being the number of
days for durations, and the number of days since 31 December 1899 for dates. Although these
dates and durations are displayed in non-numeric formats, you can still reference the cell as a
Copyright 1992..2010 Temprecord International Ltd.
View Menu
123
value if you wish and use dates and durations in calculations.
See also:
Select all samples
Copy to Clipboard
Copy to Excel Options
6.6.12 Set as Start, End Markers
Enter topic text here.
6.6.12.1 Using the Start and End Markers
The start and end markers are provided as a convenient way of defining an area of interest of the
graph. The information presented in statistics view mode normally pertains to the sample record as a
whole, but if the start sample marker is not placed at the first sample, or the end sample marker is
not placed at the last sample, the same statistics are also presented for the samples defined between
the start and end samples.
The start sample is marked on the graph with the flag symbol. The end sample is marked on the
graph with the flag symbol. You can set any sample to be the start sample by positioning the graph
sample cursor at that sample, and using the View/Set as Start Sample, function or by pressing F7.
You can set any sample to be the end sample by positioning the graph sample cursor at that sample,
and using the View/Set as End Sample, function or by pressing F8.
6.6.12.2 Using the Min and Max Markers
The minimum and maximum markers displayed on the graph indicate the extremes of the
temperature between the start and end samples If you have just read a logger or file, the start and
end markers are set to the first and last samples, so the minimum and maximum pertain to the whole
sample record. If you move the start or end markers, the minimum and maximum positions will be
recalculated and displayed.
The sample corresponding to the maximum temperature is marked on the graph with the flag
symbol. The minimum sample is marked on the graph with the flag symbol. You can position the
graph sample cursor at the minimum value with the View/Go To/Minimum, function or by pressing F5.
You can position the graph sample cursor at the maximum value with the View/Go To/Maximum,
function or by pressing F6.
The behaviour of these functions changes somewhat when both temperature and humidity traces are
displayed. If the cursor is not currently positioned at a minimum temperature or humidity sample,
then the Go to Min.function moves the cursor to minimum temperature sample. If the cursor is
already on the minimum temperature sample then the Go To Min function moves it to the minimum
humidity sample. If the cursor is already on the minimum humidity sample then the Go To Min
function moves it to the minimum temperature sample. Equivalent behaviour exists for the Go To
Max function.
Copyright 1992..2010 Temprecord International Ltd.
124
Temprecord Help
6.6.12.3 Using the User Markers
The user markers are events recorded in the logger data record by the pressing of the button on the
front of the logger. These events are logged along with the temperature data, and each event takes
up the equivalent space of one logged sample.
When the graph is displayed, samples with user markers attached are displayed with the
symbol.
flag
You can use these markers to indicate when key events occurred while the logger was sampling, for
example when the logger was placed in a controlled environment, or to indicate when some
unexpected event was observed that you suspect might be influencing the temperature.
See also:
Using the buttons on the logger to mark an event
6.6.13 Zoom Functions
Temprecord provides various methods for changing the horizontal (time axis) and vertical
(temperature axis) zoom factors.
How zooming works
Horizontal Zoom
Vertical Zoom
Zoom Between Start and End markers
Zoom All
Zooming with the Mouse
Zoom Window to Presets
Zoom all Windows to Presets
Zoom All Windows To This One
Assign Presets from Window
Edit Presets
6.6.13.1 How zooming works
Temprecord provides a rich array of zooming functions to help you "drill down" into your data quickly
and accurately.
When a file or logger data is first read, the horizontal axis is scaled so that the entire sample record
occupies the width of the data window. Similarly, the vertical axis is scaled so that the height of the
data window corresponds to the span from the minimum temperature to the maximum temperature.
Horizontal zoom and vertical zoom with the view toolbar zoom speed buttons always work relative to
the sample cursor position. After a zoom operation, Temprecord always attempts to position the view
window so that the graph sample cursor is in approximately the same location in the window after the
window has been zoomed. Horizontal and vertical zoom can be changed independently.
Copyright 1992..2010 Temprecord International Ltd.
View Menu
125
Zooming is also possible with the mouse, by clicking and dragging to select an area of the graph, and
with the mouse wheel (if your mouse is fitted with one).
If you have data displayed in several windows from different loggers, the Zoom
Window to Presetsfunction is a useful way of displaying and printing the graphs for
comparison purposes. See the topic Using the Zoom Presets for more information.
See also
The Sample Cursor and Mouse Cursor
Zooming with the mouse
Zooming with the mousewheel
6.6.13.2 The Sample Cursor and Mouse Cursor
Temprecord uses the concept of two cursors when dealing with the graph view:
The sample cursor is a vertical red line the indicates a given sample. The sample cursor always remains
"attached" to a sample when the graph view is scrolled, unless an attempt is made to scroll it past the edge of
the screen, in which case it is constrained to the edge.
· The sample cursor is used whenever the Set as start sample and Set as end sample functions are used.
· When the Goto sample function is used, the sample cursor is always moved to the new sample position.
· When the horizontal and vertical zoom functions are used, the zoom operation always takes placed
centered on the graph position indicated by the intersection of the sample cursor and the graph trace.
The mouse cursor always indicates the current position on the screen of the mouse, and when the mouse is
positioned over the graph, the cursor changes to a cross-hair.
· The mouse cursor is used to mark out a rectangular area when zooming with the mouse is carried out.
· Whenever the left mouse button is clicked, the sample cursor is changed to the position of the mouse
cursor.
· When the mousewheel is used to zoom, the zoom is always carried out centered on the mouse cursor.
See also:
Zooming with the mouse
Zooming with the mousewheel
6.6.13.3 Zooming with the mouse
Using the mouse it is possible to zoom in about an arbitrary area of the graph.
Copyright 1992..2010 Temprecord International Ltd.
126
Temprecord Help
To zoom with the mouse:
· Click at the top-left corner position of the rectangular area on the graph you wish to zoom about. The
cursor will change from a cross-hair to
· Holding the mouse button down, "drag" the mouse cursor to the bottom-right corner position of the
desired zoom area. The active zoom area will be shown on the graph as a dotted rectangle.
· Release the mouse button. The graph view will change to show only that portion of the graph that you
marked out with the mouse.
You can quickly return the graph view to show all of the trace by pressing the F4 (Zoom All) key
or by clicking the Zoom All
speed button.
6.6.13.4 Zooming with the mousewheel
If your mouse has a "wheel" you can use this to quickly zoom about an arbitrary position on the graph. Normally
the mousewheel is used to scroll the graph vertically. To use it to zoom the graph view, hold the Ctrl key down.
When you press the Ctrl key, the mouse cursor will change to
Copyright 1992..2010 Temprecord International Ltd.
View Menu
127
· If the mouse wheel is moved away from you, the graph is "zoomed in" about the position of the mouse
cursor.
· If the mouse wheel is moved towards you, the graph is "zoomed out" about the position of the mouse
cursor.
Each click of the mousewheel results in a change of approximately 25% in the zoom factor. The zoom factor
cannot be increased or decreased past certain limits. When these limits are reached, turning the mousewheel
has no effect.
See also
Zooming with the mouse
How zooming works
6.6.13.5 Horizontal Zoom
In graph view mode, you can alter the horizontal zoom factor with the Shift-plus and Shift-minus keys
(hold the shift key down while you press the plus (+) and minus (-) keys).
You can also access the horizontal zoom functions from the view menu (View/Zoom/X+ and View/
Zoom/X-), or from the pop-up menu that displays when you click on the right-mouse button.
You can also zoom in horizontally (expand the time axis on your displayed graph) by
clicking on this speed button
Temprecord main window.
on the toolbar displayed along the top of the
You can also zoom out horizontally (compress the time axis on your displayed graph)
by clicking on this speed button
Temprecord main window.
on the toolbar displayed along the top of the
If you have data displayed in several windows from different loggers, the Zoom
Window to Presetsfunction is a useful way of displaying and printing the graphs for
comparison purposes. See the topic Using the Zoom Presets for more information.
On computers with reduced keyboards (such as notebook computers), use the equals
(=) key instead of the plus (+) key.
6.6.13.6 Vertical Zoom
In graph view mode, you can alter the vertical zoom factor with the plus and minus keys.
Copyright 1992..2010 Temprecord International Ltd.
128
Temprecord Help
You can also access the vertical zoom functions from the view menu (View/Zoom/Y+ and View/
Zoom/Y-), or from the pop-up menu that displays when you click on the right-mouse button.
You can also zoom in vertically (expand the temperature axis on your displayed graph)
by clicking on this speed button
Temprecord main window.
on the toolbar displayed along the top of the
You can also zoom out vertically (compress the temperature axis on your displayed
graph) by clicking on this speed button
on the toolbar displayed along
If you have data displayed in several windows from different loggers, the Zoom
Window to Presetsfunction is a useful way of displaying and printing the graphs for
comparison purposes. See the topic Using the Zoom Presets for more information.
the top of the Temprecord main window.
On computers with reduced keyboards (such as notebook computers), use the equals
(=) key instead of the plus (+) key.
6.6.13.7 Zoom Between Start and End markers
Use the View/Zoom/Between Start and End function to set the horizontal zoom factor so that the start
sample is at the left-hand side of the data window and the end sample is at the right-hand side. The
vertical zoom factor is not altered.
You can also zoom between start and end markers with the F9 key.
6.6.13.8 Zoom All
Use the View/Zoom/All function to adjust the zoom factors so that the trace exactly fills the data
window. This is equivalent to the setting of the horizontal and vertical zoom factors that takes place
when a new file is opened or a logger is read.
Copyright 1992..2010 Temprecord International Ltd.
View Menu
You can also perform the zoom all function by clicking on this speed button
toolbar displayed along the top of the Temprecord main window.
129
on the
You can also perform the ‘Zoom All’ function with the F4 key.
If you have data displayed in several windows from different loggers, the Zoom
Window to Presetsfunction is a useful way of displaying and printing the graphs for
comparison purposes. See the topic Using the Zoom Presets for more information.
6.6.13.9 Zooming with the Mouse
You can zoom about arbitrary areas of the trace by using the mouse. To do this:
Position the mouse cursor at the top-left corner of the area you wish to zoom about.
Press the left-hand mouse button and hold it down.
Drag the mouse cursor to the bottom right corner of the area you wish to zoom about and
release it.
The window will be zoomed so that the top-left corner of the data window is set to where you started
dragging from, and the bottom-right corner where you stopped dragging from (released the mouse
button).
You cannot extend the zoom about area past the window edges. If you try to drag the
mouse past the window edge with the shift key held down, the zoom area will be limited
to the window border.
The mouse zoom action is only carried out if the area marked is greater than a certain
size. This prevents accidental zooming when you were clicking on the trace to move
the graph sample cursor.
If you decide to abandon the mouse zoom operation after you have started dragging,
make the zoom rectangle as small as possible before you release the mouse button
and no zooming will occur.
If you have data displayed in several windows from different loggers, the Zoom
Window to Presetsfunction is a useful way of displaying and printing the graphs for
comparison purposes. See the topic Using the Zoom Presets for more information
Copyright 1992..2010 Temprecord International Ltd.
130
Temprecord Help
6.6.13.10 Zoom Window to Presets
Use the View/Zoom/Zoom Window to Presets function to set the horizontal and vertical graph axes for
the current Temprecord data window to the time and temperature span specified in the Graph View
Options settings.
When this function is used, the displayed graph will be scaled so that the temperature at the top and
bottom of the graph will be those specified in the Preset Zoom Y fields of the graph view options. The
span of the date and time across the displayed graph will be set to the dates and times specified in the
Preset Zoom X fields of the graph view options.
This function is very useful when you read the data from two or more loggers and wish to align them so
that the same temperature and time range is displayed for each. Provided the 'Visible Window'
printing option is selected, the printed graphs will also be similarly aligned in time and temperature.
This function has no effect unless a data file is loaded or data has been read from the logger.
You can also zoom to the presets by clicking on this speed button
displayed along the top of the Temprecord main window.
on the toolbar
The preset zoom function will not work unless the corresponding enables are checked
in the Graph View Options page. There are two enables, one for each of the X (time)
and Y (temperature) axes. If only the X zoom preset is enabled, using the zoom to
presets function causes the X axis span to be reset, but not the Y axis. If only the Y
zoom preset is enabled, using the zoom to presets function causes the Y axis span to
be reset, but not the X axis.
See the topic Using the Zoom Presets for more information.
6.6.13.11 Zoom all Windows to Presets
Use the View/Zoom/Zoom all Windows to Presets function to set the horizontal and vertical graph axes
for open Temprecord data windows to the time and temperature span specified in the Graph View
Options settings.
This function behaves the same as the Zoom Window to Presets function, except that all open
Temprecord data windows are zoomed. It provides a quick way of setting the horizontal and vertical
axes to the same values.
See the topic Using the Zoom Presets for more information.
Copyright 1992..2010 Temprecord International Ltd.
View Menu
131
6.6.13.12 Zoom All Windows To This One
Use this function to quickly change the X and/or Y limits of all the graphs that are open to the current
window. This function is the equivalent of the following sequence:
·
·
Use the Assign Presets From Window function in the window you wish to zoom all others to.
Then, use the Zoom all windows to Presets function.
This function is also available via the F10 key.
6.6.13.13 Assign Presets from Window
Use the View/Zoom/Assign Presets from Window function to set the horizontal and vertical graph axes
preset values from the current Temprecord data window.
This function is useful when you wish to align a second displayed or printed graph to the axes settings
of an existing graph.
You can also directly set the presets from the Graph View Options page.
See the topic Using the Zoom Presets for more information.
6.6.13.14 Using the Zoom Presets
The 'Zoom Presets' are a powerful tool for aligning and comparing your Temprecord data. It provides
a means of setting the horizontal (time and date) and vertical (temperature) axes of the displayed or
printed graph to match the axes in another window, or to set the axes to arbitrary values.
Example 1 - Displaying a fixed region of data
Assume you have data loaded from several loggers displayed in several Temprecord data windows.
The loggers all have data that covers the time and temperature range you are interested in, but the
loggers have differing sample periods and start times, and the temperature range recorded by each is
different. By default, when a logger's data is read, Temprecord will scale the graph of data from each
logger to fully occupy the window, so the scaling of the graph view will depend on the temperature
range of the data and the number of samples taken. The following procedure will align any or all
displayed windows to a set temperature and time range:
Select one of the Temprecord data windows and determine from the graph which date and
time and temperature range you wish to display.
Open the Graph View Options page.
Enter the date and time you wish to appear at the left-hand side of the graph into the Preset
Zoom Axis 'From' date and time fields.
Enter the date and time you wish to appear at the right-hand side of the graph into the Preset
Zoom Axis 'Until' date and time fields.
Enter the temperature you wish to appear at the top of the graph into the Preset Zoom Axis
'Upper Temperature' field.
Enter the temperature you wish to appear at the bottom of the graph into the Preset Zoom
Copyright 1992..2010 Temprecord International Ltd.
132
Temprecord Help
Axis 'Lower Temperature' field.
Click on 'OK'.
Select a Temprecord data window.
Select graph view mode.
Click on View/Zoom/Zoom Window to Presets.
The graph displayed in the window will be scaled to the values you entered into the graph view options
Preset Zoom fields. You can the last step for each remaining window, or you can force all windows to
be scaled to these preset settings at once by using the View/Zoom/Zoom all Windows to Presets
function.
Example 2 - Matching the axes of one graph to another.
The situation frequently arises where you have data from two or more loggers displayed and you wish
to compare them - either on-screen or as printed graphs. The following procedure will align two or
more displayed graphs to another displayed graph.
Select the first graph of interest.
Get the graph displaying the region you wish to compare. You can do this by using the normal
zoom functions, or by zooming with the mouse.
Click on View/Zoom/Assign Presets from Window. This function assigns the presets in the
graph view options page from the axes settings for the current Temprecord data window.
Once assigned, these presets are remembered until the assign function is used again.
Select another Temprecord data window.
Select graph view mode.
Click on View/Zoom/Zoom Window to Presets.
The graph displayed in the window will be scaled to the values you entered into the graph view options
Preset Zoom fields. You can force all windows to be scaled to these preset settings at once by using
the View/Zoom/Zoom all Windows to Presets function.
The zoom presets are also applied to the printed graph, but only if the 'Print Visible
Window' printing option is selected.
The preset zoom function will not work unless the corresponding enables are checked
in the Graph View Options page. There are two enables, one for each of the X (time)
and Y (temperature) axes. If only the X zoom preset is enabled, using the zoom to
presets function causes the X axis span to be reset, but not the Y axis. If only the Y
zoom preset is enabled, using the zoom to presets function causes the Y axis span to
be reset, but not the X axis.
To quickly zoom all windows to match one particular window, you can use the Zoom all Windows to
This One function.
6.6.14 Set as Start Sample
Use the View/Set as Start Sample function to make the start sample the same as the current sample
cursor sample.
Copyright 1992..2010 Temprecord International Ltd.
View Menu
133
The start sample is used in conjunction with the end sample to define an area of the sample record to
be used for calculation of statistical data such as the mean, maximum and minimum.
You can also set the start sample to the current sample cursor position with the F7 key.
The start sample is marked on the graph with the
flag symbol.
See also:
Using the start and end markers
6.6.15 Set as End Sample
Use the View/Set as End Sample function to make the end sample the same as the current sample
cursor sample.
The end sample is used in conjunction with the start sample to define an area of the sample record to
be used for calculation of statistical data such as the mean, maximum and minimum.
You can also set the end sample to the current sample cursor position with the F8 key.
The end sample is marked on the graph with the
flag symbol
.
See also:
Using the start and end markers
6.6.16 Tile Vertically
Use the View/Tile Vertically function to arrange the Temprecord data windows so that they do not
overlap and are tiled side-by-side.
See also:
Tile Horizontally
Cascade
Close
Copyright 1992..2010 Temprecord International Ltd.
134
Temprecord Help
6.6.17 Tile Horizontally
Use the View/Tile Horizontally function to arrange the Temprecord data windows so that they do not
overlap and are tiled one above the other.
See also:
Tile Vertically
Cascade
Close
6.6.18 Cascade
Use the View/Cascade function to arrange the Temprecord data windows so that they overlap and
are cascaded down the screen.
This function is useful because all the data window title bars are visible and you can click on
whichever one you want to examine.
See also:
Tile Horizontally
Tile Vertically
Close
6.6.19 Close
Use the View/Close function to close the currently selected Temprecord data window. If you have
read the data in the window from a logger and not yet saved it, or you have edited the comment fields
and not yet saved the data, you will be asked if you wish to save the data first.
See also:
Tile Horizontally
Tile Vertically
Cascade
6.6.20 View Info
If this menu entry is checked, the right-hand side of the Temprecord Window is used to display extra information
about the operation of Temprecord.
Email Queue
This tab indicates the state of the email queue.. When files are sent by SMTP, they are placed in a queue and
sent from the queue in the background, allowing you to continue working while the emails and their attached files
are sent. The queue contents are saved when you exit Temprecord, and sending of the queued items resumes
when Temprecord is next started.
Copyright 1992..2010 Temprecord International Ltd.
View Menu
135
Once an email has been sent, it remains in the queue until it is past a certain age, after which time it is removed.
Event Log
Temprecord records significant events and writes them to an event log. Such events as starting and exiting
Temprecord, sending email attachments etc. are logged.
Startup Log
As Temprecord starts up, information is written to the startup log recording the steps carried out. It can be useful
to examine the startup log when troubleshooting Temprecord operation.
The startup log is a text file (Startup Log.txt) and is normally written to the Windows temporary files folder.
You can quickly toggle the display of the extra information tabs with the Ctrl-I key.
6.6.21 Refrigeration Index Graph View
Temprecord can also calculate and display RI (Refrigeration Index) statistics. To enable this facility,
click on Options/Statistics, and make sure Show Refrigeration Index Statistics is checked. The RI
statistics are calculated between the start and end samples only. Remember that if a file has just been
loaded the start sample is set to the first sample and the end sample to the last sample.
The RI value is calculated for each sample and is cumulative. If the temperature falls below 7.0
degrees C the RI value at this point is reported. The RI value is also reported at the end sample,
regardless of whether the 7.0 degree C temperature was reached.
The time interval taken for the temperature to fall to 7.0 degrees C is also reported in the statistics
view.
The RI value displayed is a logarithmic value, and represents the base 10 log of the number of
generation increases over the time period.
The Y axis for the refrigeration index is shown on the right-hand edge of the graph view. It is always
scaled so that the trace occupies the whole graph.
You can change the colors of the refrigeration index graticule and trace in options.
See Also
Refrigeration Index in Statistics View
Options
7
Options Menu
The Options menu allows you to alter the settings that affect how Temprecord behaves, and
customize Temprecord to suit your own preferences.
How the Options work
General Options
COM Port Options
File Saving Options
Summary Options
Values Options
Statistics Options
Copyright 1992..2010 Temprecord International Ltd.
136
Temprecord Help
Graph Options
View Options
Printing Options
Export Options
Default Options
Email Options
Language Options
Comment Labels Options
Web Options
Auto Mode Options
Date Formatting Options
Web Options
System Options
7.1
How the Options work
The Options Menu consists of several tabbed ‘pages’. There are tabs for the following options:
Summary View
Values View
Statistics View
Graph View
Printing
Export
Default Parameters
Language
General Preferences
Comment Labels Options
Web Options
Auto Mode Options
You can select any one of the pages by clicking on the name of the page. You can make changes to
any of the fields on any page. When you click on ‘OK’, each page is checked and if an error is found,
that page will be displayed.
If you click on ‘Cancel’, the Options pages will close and no changes will be made.
Any changes you make are remembered the next time you start Temprecord. If you are running
Temprecord on a network, you can install Temprecord so that each network user has their own set of
options. See Installing Temprecord on Networks for more information.
7.2
Font Dialog
Select the font you wish to use to print or display text with.
If you are selecting the font for the summary view, statistics view, or values view, only the
fixed (non-proportional) fonts available are displayed.
If you are selecting the font for the graph view, you can choose from any of the screen fonts
installed on your computer.
Copyright 1992..2010 Temprecord International Ltd.
Options Menu
137
If you are selecting the font for the printed report text, you can choose from any of the fixed
(non-proportional) printer fonts installed on your computer.
If you are selecting the font for the printed report graph axis annotation, you can choose from
any of the printer fonts installed on your computer.
To use the new font you have selected, Click on the 'OK' button.
7.3
General Options
Use the Options/General page to set general preferences for Temprecord operation.
Prompt Before Starting
Check this option if you want Temprecord to confirm with you that you wish the logger to be started.
If this option is not checked, then using the Program/Start Logger function will start the logger without
any warning being displayed first
Prompt Before Stopping
Check this option if you want Temprecord to confirm with you that you wish the logger to be stopped.
If this option is not checked, then using the Program/Stop Logger function will stop the logger without
any warning being displayed first
Prompt Before Reusing
Check this option if you want Temprecord to confirm with you that you wish the logger to be reused.
If this option is not checked, then using the Program/Reuse Logger function will reuse the logger
without any warning being displayed first
Prompt Before Exiting Temprecord
Check this option if you want Temprecord to confirm with you that you wish to exit the Temprecord
program. If this option is not checked, then using the File/Exit Temprecord function will close the
Temprecord program without any warning being displayed first
If you have read a logger and not yet saved the data to a file, or edited the comment fieldsbut not yet
saved the file, you will still be given the opportunity to do this.
Prompt Before Overwriting TR Files
Check this option if you want Temprecord to confirm with you before an existing Temprecord data file
(a .TR file) is overwritten. If this option is not checked, any existing file of the same name will be
replaced without warning.
Prompt Before Overwriting Export Files
Check this option if you want Temprecord to confirm with you before an existing Temprecord
exported file is overwritten. If this option is not checked, any existing file of the same name will be
replaced without warning.
Prompt for Export Filename
Copyright 1992..2010 Temprecord International Ltd.
138
Temprecord Help
Check this option if you want Temprecord to prompt you for the name of the file to be exported. If
this option is not checked, Temprecord chooses a filename based on the Temprecord data filename
(or the logger serial number if the logger data has been read but not yet saved as a file) and appends
the ASCII filetype specified in the Export Options.
Check for Logger on Startup
Check this option if you want Temprecord to check for a logger when it first starts. If a logger is
found, the summary data will be read and a window opened with the summary data displayed. If this
option is not check, no attempt is made to check for a logger on startup. You can still check for a
logger by pressing the spacebar or using the File/Query Logger function.
Bluetooth Compatibility
It is possible to access Temprecord loggers over a Bluetooth interface. If your computer is fitted with
a Bluetooth-to-serial adapter, and you select this COM port with Temprecord, you will be able to
access a logger connected to another Bluetooth-to-serial adapter. Because of the timing
uncertainties of a Bluetooth connection, Temprecord needs to make changes to the way it
communicates with the logger. Setting this option will ensure that the communication is reliable.
Consult the documentation for the Bluetooth-to-serial adapter for details on configuration.
Fast Download
This option was present in previous versions of Temprecord, but is not available under 32-bit
Windows platforms. Faster download is automatically available on Mk3a loggers (firmware version
2.14 and above).
7.4
COM Port Options
Use the Options/COM Port page to set the COM port you want Temprecord to use. Most older
computers usually have at least two, and sometimes up to four COM ports available. Newer
computers may have one COM port.
If your computer is newer and has no available COM port, you can use a USB to serial adapter.
Use This COM Port
Select this option if your computer is fitted with standard COM ports, and/or you know the COM port
your Temprecord reader will be connected to. Choose the COM port from the drop down list (COM1
through COM255).
Look for USB Reader
Select this option if you have a Reader with a USB connector. Temprecord will then look for the
reader on the USB bus and find out what COM port it has been assigned to, and set that as the COM
port. If Temprecord is unable to find a compatible USB device, when trying to open the port, it will
use the COM port selected in Use this COM Port above.
If you experience difficulties, you can still select Use this COM Port, select a specific COM port from
the drop-down list and force Temprecord to use that COM port, even if you are using a USB-based
COM port or reader.
Copyright 1992..2010 Temprecord International Ltd.
Options Menu
139
Users with some older computer systems may experience difficulty with selection of the COM Port.
See the topic COM Port Conflicts for more information.
7.5
File Saving Options
IMPORTANT. The discussion below is necessarily detailed. TRW has a powerful filename and
folder naming facility that enables you to avoid virtually all of the drudgery and possibility of
errors when naming your data and report files. The good news is that we have arranged it so
that the installation defaults will most likely suit your needs. If you are feeling adventurous, you
can play with these settings, but in the first instance, the existing installed settings should be fine.
Introduction
The basic idea behind formatted file and folder names is that you can give your data and report files names
which convey information about when the file was created, and what logger it came from. You can similarly store
the files in folders that are organized by date or by logger serial number. Finally, you can incorporate numerous
other variables into your file and folder names, including such things as:
·
·
·
·
a unique sequence number
the timezone name
the timezone offset
the Windows logged-in user name
See the topic Using the File and Folder Templates for a full list of these formatting options and examples of their
use.
See also:
Default TR Filename
Folder for .TR Files
Default PDF Filename
Folder for .PDF Files
Using the File and Folder Templates
When are default filename and folders used?
File Saving Options - Web Files
File Saving Options - Encryption
File Saving Options - Date Formatting
7.5.1
File Saving Options - Web Files
These options determine the names automatically generated for files and folders when Temprecord data files
and PDF report files are stored on Temprecord's World-Wide Web servers.
In order to use this facility, you need to have a web account set up with Temprecord. Contact us for more
information.
The file saving options for web files work in much the same way as they do for files that you save on your
computer. See the topics Using the File and Folder Templates and When are default filename and folders
used? for more information.
There is no practical limit to the length of file and folder names, the number of folders, or the depth to which they
can be nested.
Copyright 1992..2010 Temprecord International Ltd.
140
Temprecord Help
Your Temprecord Web storage facility provides you with a single folder. All data files and folders you save will
be relative to the "root" of this folder. Any folders you specify with these options will be created at the time the
file is saved.
There is presently no facility for manually creating a folder or specifying a folder or filename.
See also:
Saving files to the Web
Loading files from the Web
File Saving Options
File Saving Options - Encryption
File Saving Options - Date formatting
Using the File and Folder Templates
When are default filename and folders used?
7.5.2
File Saving Options - Encryption
This help topic describes features of Temprecord products which are not implemented at the
release date of this version of the software.
Check this box if you want to encrypt your TRX Temprecord data files.
Specify the encryption key to use. The encryption key is case-sensitive, and can include spaces. You must
enter the same key in both the Encryption Key" and the "Confirm Key" fields.
WARNING! Do not forget your encryption key!
If you lose the key, there is no way your data can be recovered. Temprecord are unable to
recover keys or the data they have been used to encrypt.
See also:
File Saving Options
File Saving Options - Web Files
File Saving Options - Date formatting
Using the File and Folder Templates
When are default filename and folders used?
7.5.3
File Saving Options - Date Formatting
When Temprecord is saving a data file or a PDF report file and automatically generates a filename or a folder
name, a date and/or time can be specified.
This option determines whether the date and time used to format a file and folder name is:
· the current date and time (i.e. "now")
· the date and time of the earliest sample in the logger.
· the date and time of the most recent sample in the logger.
In addition to this, you can determine whether the time used is in the local timezone of your location (provided it
has been set correctly on your computer), or in UTC (Greenwich Mean Time).
See also:
Copyright 1992..2010 Temprecord International Ltd.
Options Menu
141
File Saving Options
File Saving Options - Web Files
File Saving Options - Encryption
Using the File and Folder Templates
When are default filename and folders used?
7.5.4
Using the File and Folder Templates
Under some circumstances when you save data and report files, Temprecord creates it's own name for the file,
and chooses a folder to save the file to. These circumstances are:
· when Temprecord data files are saved from an Auto Mode operation.
· when the option is selected to create a PDF report from the Print dialog.
· when the option is selected to send a PDF report as an email attachment file.
In addition, when you read data from a logger and save it to a file, the initial name chosen when the save dialog
displays is derived from the default TR filename.
Temprecord provides the ability to generate file names and folder names based on the date the data was read
from the logger, the logger serial number, the name of the currently logged in user, and a unique sequence
number that is increased by 1 each time it is used.
The format of these file and folder names is determined by templates which you can specify and alter. When
Temprecord is installed, these are set to sensible defaults, but your situation may call for a different file and older
naming convention, in which case you can modify them.
The most common use of this option is to provide filenames and/or folder names that identify the logger serial
number, date and time a logger was read, or the name of the operator using the computer at the time.
The following table shows how each of the special characters is used. Any other character or character group
not shown in the table below is currently used unchanged in the file or folder name, i.e it is not converted into
some other collection of characters.
Don't assume that a character not mentioned in the table below will never be used as a
formatting character. Temprecord reserves the right to define additional formatting characters in
the future. If you don't intend characters to be interpreted as formatting characters, it is good
practice to always include them in double quotes ("like this").
c
Displays the date using the format given by the Windows short date format, followed
by the time using the format given by the Windows long time format, as specified for
that computer in Windows Control Panel. The time is not displayed if the date-time
value indicates midnight precisely.
d
Displays the day as a number without a leading zero (1-31).
dd
Displays the day as a number with a leading zero (01-31).
ddd
Displays the day as an abbreviation (Sun-Sat).
dddd
Displays the day as a full name (Sunday-Saturday).
ddddd
Displays the date using the format given by the Windows short date format
(nominally M/d/yyyy in the US locale).
dddddd
Displays the date using the format given by the Windows long date format
(nominally dddd, MMMM dd, yyyy in the US locale)
e
Displays the year in the current period/era as a number without a leading zero
(Japanese, Korean and Taiwanese locales only).
Copyright 1992..2010 Temprecord International Ltd.
142
Temprecord Help
ee
Displays the year in the current period/era as a number with a leading zero
(Japanese, Korean and Taiwanese locales only).
g
Displays the period/era as an abbreviation (Japanese and Taiwanese locales only).
gg
Displays the period/era as a full name. (Japanese and Taiwanese locales only).
m
Displays the month as a number without a leading zero (1-12). If the m specifier
immediately follows an h or hh specifier, the minute rather than the month is
displayed.
mm
Displays the month as a number with a leading zero (01-12). If the mm specifier
immediately follows an h or hh specifier, the minute rather than the month is
displayed.
mmm
Displays the month as an abbreviation (Jan-Dec).
mmmm
Displays the month as a full name (January-December).
yy
Displays the year as a two-digit number (00-99).
yyyy
Displays the year as a four-digit number (0000-9999).
h
Displays the hour without a leading zero (0-23).
hh
Displays the hour with a leading zero (00-23).
n
Displays the minute without a leading zero (0-59). Note that this the 'n' character,
not the 'm' character.
nn
Displays the minute with a leading zero (00-59). Note that this the character string
'nn', not 'mm'.
s
Displays the second without a leading zero (0-59).
ss
Displays the second with a leading zero (00-59).
t
Displays the time using the format given by the Windows short time format
(nominally h:nn in the US locale).
tt
Displays the time using the format given by the Windows long time format
(nominally h:nn:ss in the US locale).
L
Displays the Logger serial number.
U
Displays the currently logged in Windows user
#
Displays a unique sequence number. The sequence number is stepped on each
time it is used to generate a file or folder name, and it remembered between
Temprecord sessions. It thus provides a convenient way of ensuring unique file or
folder names are generated.
z
Displays the current timezone name. The exact result of using this formatting
character is dependent on the date formatting options. Temprecord attempts to
make an abbreviation of the timezone name, for example in Rome during daylight
savings (2 hours ahead of GMT), this character formats as "CEST" (Central
European Summer Time). If UTC time is selected this formatting character will
always cause "UTC" to be displayed.
o
Displays the current timezone offset, in the format SNNNN, where "S" is either "+" or
"-", and "NNNN" is the timezone offset expressed relative to GMT in HHMM, for
example in Rome during daylight savings (2 hours ahead of GMT), this character
formats as "+0200". The exact result of using this formatting character is dependent
on the date formatting options. If UTC time is selected this formatting character will
always cause "+0000" to be displayed.
Copyright 1992..2010 Temprecord International Ltd.
Options Menu
143
If you don't want Temprecord to use these date formatting rules on the file or folder
name you specify, enclose the entire template in double quotes ("...").
Note that the specifier for "minutes" is "n" (not "m", which means "months").
Examples
Here are some examples of the filenames generated:
Filename Format Specified
Filename Generated
Feature Demonstrated
"data"
data.TR
No formatting
L
S1234567.TR
Logger serial number in
filename
"User" U "Logger" L
User Joe Bloggs Logger
S1234567.TR
Logged-in user and logger serial
number in filename
mmm dd yyyy L
Jan 31 2007 S1234567.TR
Date and logger serial number in
filename
mmm dd yyyy hh-mm
Jan 31 2007 12-34.TR
Date and time in filename
L yyyy-mmm-dd hh-mm z
S1234567 2007-Jan-31 12-34
CST.TR
Logger serial number, date and
time, timezone in filename.
L#
S1234567 678
Logger serial number and
sequence number in filename.
"Saved" dd mmm yy-#
Saved 31 Jan 07-679.TR
Date and sequence number in
filename
The same rules apply to the folder specifiers, and you can include path delimiters ("backslashes") in the
specifier. Some examples:
Folder Format Specified
Folder Name Generated
Feature Demonstrated
"My data\"
My Data\
No formatting
"My Data\"yyyy\mmm\
My Data\2009\Jun\
Folder tree organized by year,
then month
"Files from logger "L
Files from Logger S1234567\
Logger serial number in folder
name
"TR Files\"U
TR Files\Joe Bloggs\
Logged-in user in folder name
mmm dd yyyy L
Jan 31 2007 S1234567\
Date and logger serial number in
folder name
mmm dd yyyy hh-mm
Jan 31 2007 12-34\
Date and time in folder name
Once again, note the use of double quotes around any part of the file or folder name that you don't want to be
interpreted as a formatting character.
See also:
Default TR Filename
Copyright 1992..2010 Temprecord International Ltd.
144
Temprecord Help
Folder for .TR Files
Default PDF Filename
Folder for .PDF Files
When are default filename and folders used?
Date Formatting Options
7.5.5
When are default filename and folders used?
Temprecord has several rules it uses when saving TR data files and PDF report files.
Manually Saving a TR Data File
When you read data from a logger and try to save it, a save file dialog will display. The initial name chosen for
the filename is determined by the Default TR Filename. You can change the proposed filename at this
point. The destination folder defaults at installation to C:\Documents and Settings\Joe Bloggs\My
Documents\My Temprecord Files\. If you change the destination folder in the save dialog, Temprecord
remembers the new folder from then on.
Manually Saving a PDF Report File
When you try to save a logger's data manually to a PDF file, if the data has already been saved to a TR data file,
the initial name chosen for the PDF file is the name of the TR data file, but with a PDF extension You can
change the proposed filename at this point. The destination folder defaults at installation to C:
\Documents and Settings\Joe Bloggs\My Documents\My Temprecord Files\pdf\. If you change the
destination folder in the save dialog, Temprecord remembers the folder for you, independently of the
folder it last saved a TR data file to.
When you try to save a logger's data manually to a PDF file, and the data has not already been saved to a TR
data file, you will be prompted to save the TR data file first. The initial name chosen for the PDF file is the name
of the TR data file, but with a PDF extension You can change the proposed filename at this point. The
destination folder defaults at installation to C:\Documents and Settings\Joe Bloggs\My Documents\My
Temprecord Files\pdf\. If you change the destination folder in the save dialog, Temprecord remembers
the new folder for you, independently of the folder it last saved a TR data file to.
Auto-Saving a TR Data File
When you save a TR data file from Auto Mode, Temprecord will never prompt you for the filename. Instead, it
always uses the Default TR Filename format specifier to construct the filename, and the Folder for .TR
Files to determine the folder the file is store in. Also, you will never be prompted if an existing file is
about to be overwritten. It is important therefore that you arrange for these specifiers to always
produce a unique filename.
Auto-Saving a PDF Report File
When you save a PDF report file from , Temprecord will never prompt you for the filename. Instead, it always
uses the Default PDF Filename format specifier to construct the filename, and the Folder for .PDF Files
to determine the folder the file is store in. Also, you will never be prompted if an existing PDF file is
about to be overwritten. It is important therefore that you arrange for these specifiers to always
produce a unique filename.
Emailing TR Data Files From Auto Mode
Temprecord always automatically saves TR data files or PDF report files before emailing them in Auto Mode.
The TR data files are saved according to the Default TR Filename and the Folder for .TR Files. The PDF
report files are saved according to the Default PDF Filename and the Folder for .PDF Files. Temprecord
then makes temporary copies of the files and generates attachments for the email. After the email has been
sent the temporary files are deleted.
Copyright 1992..2010 Temprecord International Ltd.
Options Menu
145
Take care with formatted filenames and folders. If careful attention is not paid to how they are
used, one can unintentionally create a myriad of strangely-named files and folders!
See also:
Auto Mode
Default TR Filename
Folder for .TR Files
Default PDF Filename
Folder for .PDF Files
Using the File and Folder Templates
[****]
7.5.6
Default TR Filename
Default TR Filename
The default TR filename determines the form of the initial filename TRW chooses when the data from a logger is
saved to a TR file. It is important to note that what is specified here is a template for the filename, and the actual
filename will not usually be the same as what you enter here (though it can be if you want). When TRW chooses
the filename, it uses the default filename template, but treats several characters as having special meaning. For
example, the character L means "the logger serial number", and the characters yyyy mean "the current year".
For a detailed discussion and examples of the way file and folder formatting characters work, see
the topic Using the File and Folder Templates.
If you want to have characters in the filename but don’t want them to be interpreted by the above rules, they
must be enclosed in double-quotes ("..."), thus to use a filename of My Logger.tr, you must enclose the filename
in quotes, thus: “My Logger.tr".
You do not need to specify the file extension (.TR for Temprecord data files). If you
want a different extension you can enter it. Note also that you cannot use the
characters “:” (colon), “/” (slash) and “\” (backslash) in your filename. If TRW finds any
characters that are not valid in a filename, it will replace them with underscores ("_"). If
you want to specify a path as well as a filename, use the Folder for TR files option (see
below). If TRW finds a path component specified in the default filename, it will be
ignored.
The panel below the Default TR Filename field shows you what filename would be used for the given file name
format specifier. As you type your filename format specifier the filename sample is updated.
The installation default specifier for the default TR filename is L YYYY-MM-DD hh-nn-ss. This means that the
default filename for a datafile read from logger S1234567 at 12:34:56 on the 1st of June, 2009 would be
S1234567 2009-06-01 12-34-56.tr. Note that the .tr extension is added automatically. If you want a different
extension, you should enter it as part of the format specifier. For example a specifier of L YYYY-MM-DD
hh-nn-ss".dat" would result in a filename with the extension .dat. Note that the extension characters are
surrounded by double quote characters ("...") to prevent them being interpreted as formatting instructions. See
the topic When are default filename and folders used? for more information.
Take care with formatted filenames and folders. If careful attention is not paid to how they are
used, one can unintentionally create a myriad of strangely-named files and folders!
Copyright 1992..2010 Temprecord International Ltd.
146
Temprecord Help
See also:
Folder for .TR Files
Default PDF Filename
Folder for .PDF Files
Using the File and Folder Templates
When are default filename and folders used?
7.5.7
Folder for .TR Files
Folder for .TR Files
Enter the folder name or path where you want to save your data files. Whatever filename entered in the Default
TR Filename field is appended to this folder name. The folder name specified can be used directly if it is
enclosed in double quotes ("..."), or it can be treated as a format template using the same rules as for the default
TR filename. See the topic Using the File and Folder Templates for more information.
If you wish to save the files in a date-organized tree of folders the path should be specified here. You can also
use the specifiers for the logger serial number, and the sequence number in this field.
The panel below the Folder to save files to field shows you what folder would be used for the given file name
format specifier. As you type your folder format specifier the folder sample is updated.
Sometimes the folder name generated by the formatting is too long to fit in the display
panel underneath each field. In this case Temprecord shortens the displayed path
name so that the start and end characters are displayed, and a portion of the middle
part is replaced by an ellipsis (...). If you want to see the whole pathname, move the
cursor over the sample panel and a hint will display with the full pathname.
The installation default specifier for the default folder for .TR files is a blank string. This is a special case that
places the TR data files in folder C:\Documents and Settings\Joe Bloggs\My Documents\My Temprecord
Files\. If you were to enter a specifier of "Joes Files", the TR data files would be saved in folder C:\Documents
and Settings\Joe Bloggs\My Documents\My Temprecord Files\Joes Files\. Note that the specifier is
surrounded by double quote characters ("...") to prevent it being interpreted as formatting instructions. If Instead
Joe wanted to store his files organized by month, he could enter as the specifier "Joes Files for "mmmm yyyy.
In this case the TR data files would be saved in folder C:\Documents and Settings\Joe Bloggs\My Documents
\My Temprecord Files\Joes Files for June 2009\ for any logger he read in that month, Joes Files for July 2009
in the next month and so on. See the topic When are default filename and folders used? for more information.
When specifying the folder name used to save files, if you don't specify a path that
starts with an absolute pathname (one that includes a disk specifier such as C: or \
\Server\, Temprecord assumes a path starting from your Temprecord data files folder
(normally C:\Documents and Settings\Joe Bloggs\My Documents\My Temprecord Files\
).
Take care with formatted filenames and folders. If careful attention is not paid to how they are
used, one can unintentionally create a myriad of strangely-named files and folders!
See also:
Default TR Filename
Default PDF Filename
Folder for .PDF Files
Using the File and Folder Templates
When are default filename and folders used?
Copyright 1992..2010 Temprecord International Ltd.
Options Menu
7.5.8
147
Default PDF Filename
Default PDF Filename
The default PDF filename determines the form of the initial filename TRW chooses when How do I use the
formatted file and folder names?the data from a logger is saved to a TR file. It is important to note that what is
specified here is a template for the filename, and the actual filename will not usually be the same as what you
enter here (though it can be). When TRW chooses the filename, it uses the default filename template, but
treats several characters as having special meaning. For example, the character L means "the logger serial
number", and the characters yyyy mean "the current year".
For a detailed discussion and examples of the way file and folder formatting characters work, see
the topic Using the File and Folder Templates.
If you want to have characters in the filename but don’t want them to be interpreted by the above rules, they
must be enclosed in double-quotes ("..."), thus to use a filename of My Report.pdf, you must enclose the
filename in quotes, thus: “My Report.pdf".
You do not need to specify the file extension (.pdf). If you leave the extension off, ".pdf"
is appended to any filename generated. If you want a different extension you can enter
it. Note also that you cannot use the characters “:” (colon), “/” (slash) and “\
” (backslash) in your filename. If TRW finds any characters that are not valid in a
filename, it will replace them with underscores ("_"). If you want to specify a path as
well as a filename, use the Folder for PDF files option (see below). If TRW finds a path
component specified in the default PDF filename, it will be ignored.
The panel below the Default PDF Filename field shows you what filename would be used for the given file name
format specifier.
The installation default specifier for the default PDF filename is L YYYY-MM-DD hh-nn-ss. This means that the
default filename for a report printed from the data for logger S1234567 read at 12:34:56 on the 1st of June, 2009
would be S1234567 2009-06-01 12-34-56.pdf. Note that the .pdf extension is added automatically. If you want
a different extension, you should enter it as part of the format specifier. For example a specifier of L
YYYY-MM-DD hh-nn-ss".rep" would result in a filename with the extension .rep. Note that the extension
characters are surrounded by double quote characters ("...") to prevent them being interpreted as formatting
instructions. See the topic When are default filename and folders used? for more information.
Take care with formatted filenames and folders. If careful attention is not paid to how they are
used, one can unintentionally create a myriad of strangely-named files and folders!
See also:
Default TR Filename
Folder for .TR Files
Folder for .PDF Files
Using the File and Folder Templates
When are default filename and folders used?
7.5.9
Folder for .PDF Files
Folder for .PDF Files
Enter the folder name or path where you want to save your data files. Whatever filename entered in the Default
Copyright 1992..2010 Temprecord International Ltd.
148
Temprecord Help
TR Filename field is appended to this folder name. The folder name specified can be used directly if it is
enclosed in double quotes ("..."), or it can be treated as a format template using the same rules as for the default
TR filename. See the topic Using the File and Folder Templates for more information.
If you wish to save the files in a date-organized tree of folders the path should be specified here. You can also
use the specifiers for the logger serial number, and the sequence number in this field.
When specifying the folder name used to save files, if you don't specify a path that
starts with an absolute pathname (one that includes a disk specifier such as C: or \
\Server\, Temprecord assumes a path starting from your Temprecord data files folder
(normally C:\Documents and Settings\Joe Bloggs\My Documents\My Temprecord
Files\).
The panel below the Folder to save files to field shows you what folder would be used for the given folder name
format specifier.
Sometimes the folder name generated by the formatting is too long to fit in the display
panel underneath each field. In this case Temprecord shortens the displayed path
name so that the start and end characters are displayed, and a portion of the middle
part is replaced by an ellipsis (...). If you want to see the whole pathname, move the
cursor over the sample panel and a hint will display with the full pathname.
The installation default specifier for the default folder for .PDF files is "pdf". This places and PDF files in folder
C:\Documents and Settings\Joe Bloggs\My Documents\My Temprecord Files\pdf\. If you were to enter a
specifier of "pdf\Joes Reports", the PDF report files would be saved in folder C:\Documents and Settings
\Joe Bloggs\My Documents\My Temprecord Files\pdf\Joes Reports\. Note that the specifier is surrounded
by double quote characters ("...") to prevent it being interpreted as formatting instructions. If Instead Joe wanted
to store his reports organized by month, he could enter as the specifier "pdf\Joes Reports for "mmmm yyyy.
In this case the PDF report files would be saved in folder C:\Documents and Settings\Joe Bloggs\My
Documents\My Temprecord Files\pdf\Joes Reports for June 2009\ for any logger he read in that month,
Joes Reports for July 2009 in the next month and so on. See the topic When are default filename and folders
used? for more information.
Take care with formatted filenames and folders. If careful attention is not paid to how they are
used, one can unintentionally create a myriad of strangely-named files and folders!
See also:
Default TR Filename
Folder for .TR Files
Default PDF Filename
Using the File and Folder Templates
When are default filename and folders used?
7.6
Summary View Options
Use the 'Summary' tab of the options form to change the way the summary view is displayed.
Show Manufacture Date
Copyright 1992..2010 Temprecord International Ltd.
Options Menu
149
If this option is checked, Temprecord will display the approximate date of manufacture of the logger
in the summary view, and include it in any printed PDF reports that include the summary.
Show battery status
If this option is checked, Temprecord will display the approximate amount of battery capacity
remaining as a percentage of the new battery capacity in the summary view, and include it in any
printed PDF reports that include the summary..
When the remaining battery capacity falls below 25%, this icon will
show to the right of the displayed percentage.
When the remaining battery capacity falls below 5%, this icon will
show to the right of the displayed percentage.
When the remaining battery capacity falls below a level where the
logger cannot be expected to operate reliably, this icon will show to
the right of the displayed percentage.
Warn when battery exhausted
If this option is checked, Temprecord will display the warning dialog when any attempt is made to
reuse, program, or start a logger whose battery capacity remaining is less than 5%. This option has
no effect unless the Show battery status option is checked.
The remaining logger battery capacity is not measured directly, but is calculated using
Temprecord's knowledge of the past use of the logger. The figure arrived at is
conservative, i.e. you may well get more use out of the logger than the displayed
remaining battery capacity suggests. We do not recommend this, however, and a
logger with a battery that shows as exhausted should be removed from service.
Font
Use the 'Font' button to change the font Temprecord uses for the text in the summary view. You can
only choose from the fixed spacing fonts installed on your computer. Proportional fonts are not
available for the summary display.
Annotation Color
Use the 'Annotation Color' button to change the color used when displaying the annotation text - i.e.
the text on the left of the window that is the same each time.
Data Color
Use the 'Data Color' button to change the color used when displaying the summary data text - i.e. the
text on the right of the window that changes for each file or logger that is read.
Copyright 1992..2010 Temprecord International Ltd.
150
Temprecord Help
As an example, if you select blue as the annotation color and red as the data color, your summary
text would look like this:
Logger Type
Serial Number
: scientific
:
00001766
Be careful when changing these colors. If you select a color that is the same as the
background of the window, any text displayed in that color will be invisible
!
See also:
Show Mon-T - specific settings
Values view options
Statistics view options
Graph view options
7.7
Show Mon-T - specific settings
Enable this option if you want to be able to set the Minimum Temperature, Resolution, or Logger Units of Mon-T
loggers when programming the parameters. This option also displays those parameters on the summary display
when enabled.
See also:
Programming Mon-T parameters
7.8
Values View Options
Use the 'Values' tab of the options form to change the way the values view is displayed.
Units
Check this option if you want the units displayed as a single character (C or F) after temperature
values, or as %RH after humidity values.
Degrees
Check this option if you want the degrees symbol (°) displayed after temperature values.
Comma
Check this option if you want a comma displayed between each pair of temperature/humidity values.
This option has no effect if only one of temperature or humidity is displayed.
Parentheses
Check this option if you want left and right parentheses displayed around each pair of temperature/
humidity values. This option has no effect if only one of temperature or humidity is displayed.
Copyright 1992..2010 Temprecord International Ltd.
Options Menu
151
Preview
As you alter the above options, the three preview panels show the effect the current set of options has
on the display of each temperature value, humidity value, or temperature/humidity value pair.
Auto-wrap Columns
If you want Temprecord to display only as many values as will fit across the window, then 'Auto-wrap
columns' should be checked. If you want Temprecord to display a fixed number of columns across
the window, whether they would fit or not, the 'Auto-wrap columns' should be unchecked. You can
then change the number of columns in the 'Columns' field. This option is useful when you wish each
line of values to correspond to a particular time interval. If you specify a sample period of 5 minutes
for example, and you set the number of columns to 12, then each line will contain 1 hours worth of
samples.
Columns
The columns option sets the number of columns displayed across the window. This option is useful
when you wish each line of values to correspond to a particular time interval. If you specify a sample
period of 5 minutes for example, and you set the number of columns to 12, then each line will contain
1 hours worth of samples.
If you specify more columns here than will fit across the Temprecord data window, not
all of the temperature values will display. If you want all temperature values to be
visible, make sure the 'Auto-wrap columns' option is on.
Font
Use the 'Font' button to change the font Temprecord uses for the text in the values view. You can
only choose from the fixed spacing fonts installed on your computer. Proportional fonts are not
available for the values display.
Date/Time Color
Use the 'Date/Time Color' button to change the color used when displaying the date and time text in
the values view window.
Above Limits Color
Use the 'Above Limits Color' button to change the color used when displaying those samples that
exceed the upper limit. If you do not want these samples to appear differently from the other
samples, choose the same color as the 'In Range' color.
If you have Total Temperature Value statistics display enabled, this color is used if the temperature of
that sample exceeds the temperature for that TTV period.
In Range Color
Use the 'In Range Color' button to change the color used when displaying those samples that are
between the lower and upper limits.
Below Limits Color
Use the 'Below Limits Color' button to change the color used when displaying those samples that
are below the lower limit. If you do not want these samples to appear differently from the other
Copyright 1992..2010 Temprecord International Ltd.
152
Temprecord Help
samples, choose the same color as the 'In Range' color.
There are separate colors defined for both temperature and humidity values.
If you have Total Temperature Value statistics display enabled, this color is used if the temperature of
that sample is less than the temperature for that TTV period.
The display option Show upper and lower limits needs to be checked for Temprecord to show
values above the upper limit or below the lower limit in different colors.
Marker Samples Color
Use the 'Marker Samples Color' button to change the color used when displaying those samples
that have user markers associated with them. If you do not want these samples to appear differently
from the other samples, choose the same color as the 'In Range' color.
Be careful when changing these colors. If you select a color that is the same as the
background of the window, any text displayed in that color will be invisible!
See also:
Summary view options
Statistics view options
Graph view options
7.9
Statistics View Options
Use the 'Statistics' tab of the options form to change the way the statistics view is displayed.
Show General Statistics
If this option is checked, the general statistics (minimum, maximum, mean and standard deviation of samples,
time spent inside and outside limits) are shown in the display and the printed reports.
If the start sample is not set to the first sample in the logger or the end sample is not set to the
last sample, the statistics will also be shown for the samples between the start and end samples.
If the first visible sample displayed on the screen in graph view is not the same as the first
sample in the logger or the start sample, or the last visible sample displayed on the screen is not
the same as the last sample in the logger or end sample, the statistics will also be shown for the
samples displayed on screen.
PHI (Process Hygiene Index) Growth statistics
Shows the bacterial growth information in the displayed and printed statistics
Product Integrity Profile
Product Integrity Profile is a means of determining how effective refrigeration of a shipment has been. When
Copyright 1992..2010 Temprecord International Ltd.
Options Menu
153
enabled, the graph is annotated with the times taken to reach key points such as the minimum temperature, and
transitions of the upper and lower limits. The duration taken is also displayed. The statistics view also shows a
report from this data.
Product Cooling Alerts
When the product cooling alert function is enabled, the graph shows a flag when the temperature has risen a
certain amount above the minimum. The maximum temperature rise allowed before the alert is displayed can be
specified.
This function is often used to determine whether blood products have been maintained adequately in a controlled
environment
Show MKT Statistics
Check this box if you want the Mean Kinetic Temperature (MKT) statistics to be displayed and printed
as well as the normal statistical data.
This option must be checked in order for MKT statistics to be graphed, printed, or
exported.
MKT Options - Delta H value
Enter the value of Delta-H or activation energy for your product. The nominal value used for this is
83.14472 kJ/mol , which is suitable for most materials. The calculated value of MKT varies with the activation
energy entered here, but the variation is not great and you should not need to alter this parameter. If you
require very accurate MKT calculations, the value of Delta-H should be determined for your
monitored commodity. The activation energy for a particular commodity can be determined by a
procedure known as differential scanning calorimetry (DSC) analysis.
Font
Use the 'Font' button to change the font Temprecord uses for the text in the statistics view. You can
only choose from the fixed spacing fonts installed on your computer. Proportional fonts are not
available for the statistics display.
Annotation Color
Use the 'Annotation Color' button to change the color used when displaying the annotation text - i.e.
the text on the left of the window that is the same each time.
Data Color
Use the 'Data Color' button to change the color used when displaying the statistics data text - i.e. the
text on the right of the window that changes for each file or logger that is read.
As an example, if you select blue as the annotation color and red as the data color, your statistics text
would look like this:
Mean
Standard Deviation
Maximum
Minimum
Copyright 1992..2010 Temprecord International Ltd.
: 20.71
: 0.86
: 24.53
: 19.43
154
Temprecord Help
Be careful when changing these colors. If you select a color that is the same as the
background of the window, any text displayed in that color will be invisible!
See also:
TTV statistics options
Refrigeration index statistics options
Rate of cooling statistics options
Summary view options
Values view options
Graph view options
Printing Options
Export Options
Total Temperature Value (TTV)
Process Hygiene Index
Mean Kinetic Temperature
Refrigeration Index
7.10
Graph View Options
Use the 'Graph' tab of the options form to change the way the graph view is displayed, and to set the
axes values used for the zoom preset function.
Font
Use the 'Font' button to change the font Temprecord uses to display the axis annotation (the date
and time on the horizontal axis and the temperature on the vertical axis). You can choose from any
of the fonts installed on your computer.
Above Limits Color
Use the 'Above Limits Color' button to change the color used when displaying that part of the
temperature trace that exceeds the Upper limit. If you do not want the trace to appear differently
from that part of the trace that is within the limits, choose the same color as the 'In Range' color. The
color you choose here is also used to display the upper limit horizontal line.`
In Range Color
Use the 'In Range Color' button to change the color used when displaying that part of the
temperature trace that is between the Lower and Upper limits.
Below Limits Color
Use the 'Below Limits Color' button to change the color used when displaying those samples that
are below the Lower limit. If you do not want the trace to appear differently from that part of the trace
that is within the limits, choose the same color as the 'In Range' color. The color you choose here is
also used to display the lower limit horizontal line.
There are separate colors defined for both temperature and humidity values.
Copyright 1992..2010 Temprecord International Ltd.
Options Menu
155
If Show Limits is checked, and Show TTV Limits is not checked, the trace will display
in the ‘above limit’s color when the temperature is above the upper limit, and in the
‘below limit’s color when the temperature is below the lower limit. Otherwise, the trace
will display in the ‘in range’s color
If Show TTV Limits is checked the trace will display in the ‘above limit’s color when
the temperature is above the upper limit for the TTV period for that sample, and in the
‘below limit’s color when the temperature is below the lower limit for the TTV period of
that sample. Otherwise, (if the temperature is in range for that TTV period, or the
sample is prior to the first TTV period or past the last TTV period) the trace will display
in the ‘in range’s color. Note that you must also have Show TTV Statistics checked
for this to display.
Be careful when changing these colors. If you select a color that is the same as the
background of the window, any part of the trace displayed in that color will be invisible
Axis Color
Use the 'Axis Color' button to change the color used when displaying axis annotation (the time and
date, and temperature values displayed along the left-hand and bottom edge of the graph).
Graticule Color
Use the 'Graticule Color' button to change the color used when displaying the graticule lines on the
graph.
Cursor Color
Use the 'Cursor Color' button to change the color used when displaying the sample cursor.
See also:
Zoom and presets options
Copy to clipboard, Excel Options
Summary view options
Values view options
Statistics view options
Using the Zoom Presets
Printing Options
Export Options
Total Temperature Value (TTV)
7.10.1 Zoom and presets options
Preset Zoom X Axis
These fields set the date and time span that the X axis will be set to when the Zoom Window to
Presets function is used. The 'From' date and time fields determine the date at the left-hand side of
the graph, and the 'Until' fields determine the date and time at the right-hand side.
Copyright 1992..2010 Temprecord International Ltd.
156
Temprecord Help
The preset zoom X values are not used unless the 'Enable' box is checked. If you
want to zoom two or more traces to the same Y (temperature) span, but do not want to
alter the X axis (time) settings, make sure this box is unchecked before you use the
Zoom Window to Presets function.
Preset Zoom Y Axis
These fields set the temperature span that the Y axis will be set to when the Zoom Window to
Presets function is used. The 'Upper Temperature' field determines the temperature at the top of
the graph, and the 'Lower Temperature' field determines the temperature at the bottom.
The preset zoom Y values are not used unless the 'Enable' box is checked. If you
want to zoom two or more traces to the same X (time and date) span, but do not want
to alter the Y axis (temperature) settings, make sure this box is unchecked before you
use the Zoom Window to Presets function.
If you want the graph to be printed to the same settings as the displayed window, make
sure the 'Print Visible Window' printing option is selected
See the topic Using the Zoom Presets for more information.
7.11
View Options
The View options allow you to control what is displayed when Temprecord displays or prints the graph view or
statistics. If an option is enabled, the corresponding parameter will be shown on the graph, on the printed graph,
and in the statistics report if relevant.
TTV (Total Temperature Value)
statistics
Shows the TTV information on the displayed and
printed graph, and in the statistics.
This option also affects the display of
temperature values (values view
mode). If Show TTV limits is
enabled (and Show TTV statistics
is also enabled), the TTV limits for
the current TTV period determine
the color used for the values, rather
than the lower and upper limits.
Copyright 1992..2010 Temprecord International Ltd.
Options Menu
157
Brief TTV Only
Shows the TTV information in an abbreviated form.
PHI (Process Hygiene Index) Growth
statistics
Shows the bacterial growth information in the displayed
and printed statistics
ROC (Rate of Cooling) statistics
Shows the rate of cooling information on the displayed
and printed graph and statistics.
RI (Refrigeration Index) Statistics
Shows the refrigeration index data on the displayed and
printed graph and statistics. On the graph, the RI value
is shown as a separate trace with values indicated on
the right-hand axis. The RI value is calculated from the
start sample until the end sample.
Product Cooling Alerts
When the product cooling alert function is enabled, the
graph shows a flag when the temperature has risen a
certain amount above the minimum. The maximum
temperature rise allowed before the alert is displayed
can also be specified.
This function is often used to determine whether blood
products have been maintained adequately in a
controlled environment
MKT (Mean Kinetic Temperature)
Statistics
When MKT is enabled, the graph will show the value of
the mean kinetic temperature as a dotted horizontal
line.
Product Integrity Profile
Product Integrity Profile is a means of determining how
effective refrigeration of a shipment has been. When
enabled, the graph is annotated with the times taken to
reach key points such as the minimum temperature,
and transitions of the upper and lower limits. The
duration taken is also displayed. The statistics view
also shows a report from this data.
Upper and lower limits
When enabled, the lower and upper limits are shown on
the graph as horizontal dotted lines.
The display option Show upper and lower
limits also needs to be checked for
Temprecord to show or print values above
the upper limit or below the lower limit in
different colors.
Minimum and maximum flags
When enabled, flags display to indicate the minimum
and maximum value samples between the start and end
samples. If a logger has just been read or a file just
opened, the start and end samples are set to the first
and last samples respectively. The minimum sample
is shown on the graph with the flag symbol and
the maximum sample is shown on the graph with
the flag symbol.
Start and end flags
When enabled, the start and end samples are marked
with flags. The start sample is shown on the graph
with the flag symbol and the end sample is
shown on the graph with the flag symbol.
User marker flags
When enabled, any markers present in the sample
record are displayed on the graph. The user marker
samples are shown on the graph with the
symbol.
Copyright 1992..2010 Temprecord International Ltd.
flag
158
7.12
Temprecord Help
Mean temperature
When enabled, the mean temperature of the samples
between the start and end samples is shown as a
dotted horizontal line.
Comment fields
When enabled, the user comment lines are shown on
the printed report.
Export Options
Use the Options/Export page to set up the way ASCII files are saved. There are also options to
determine whether you are prompted for an export filename, and whether you are prompted before
an existing export file is overwritten. These options can be found with the general options.
Temprecord can also export directly to a Microsoft Excel spreadsheet. See the topic
Copying data to Clipboard and Excel for more information.
Field Delimiter
This determines the character used to separate items on each line when the file is written. You can
choose from a space, a comma, a tab character, or a semicolon. Choose whichever option suits the
application that will be reading the ASCII file. If you will be importing the file into a spreadsheet such
as Excel or Lotus 123, comma-separated values are normally used. If you will be importing data into
a Microsoft Word table, use tabs.
ASCII Filetype
Use this option to set the default filetype used when the temperature data is written to a file.
Columns
Use this option to specify how many columns are written to the ASCII file. If this value is set to 1, the
file will consist of a single column of values, one per line. If you do not want any line breaks in your
file, set this to 99999.
Averaging
Use this option to specify how many samples are averaged before a value is written to the ASCII file.
If this field is set to 1, no averaging is performed, and the 'raw' temperature values are written to the
file. If this field is set to (say) 10, then a set of 10 temperatures is averaged and the mean value
written to the file. In this case, there would be one tenth the number of values in the file as there
were samples.
Date Format
Use this option to specify how the date is written to the ASCII file, if at all. The format chosen will
depend on how your application requires date and time information to be formatted.
'No date' specifies that no time or date information is to be written. The temperature values
will be written to the file without any preceding time and date information.
'Use local setting' specifies that the date and time are to be written in the format as selected
with the 'International' settings in Windows' Control Panel.
'MM:SS' specifies that the time is written in that format, e.g. 12:34. The date is not written.
'HH:MM:SS' specifies that the time is written in that format, e.g. 11:12:34. The date is not
Copyright 1992..2010 Temprecord International Ltd.
Options Menu
159
written.
'Seconds since 1980' specifies that the time and date are written as an integer being the
number of seconds that have passed since midnight on January 1, 1980.
'Days since 1900' specifies that the time and date are written as an floating point value being
the number of days that have passed since midnight on January 1, 1900. The integer part of
this value gives the number of days, the fractional part gives the time as a fraction of a day.
This format is normally the one most suitable for exporting data to spreadsheets such as
Microsoft Excel or Lotus 123.
Quoted Text
Check this option if you want all text in written annotation to be surrounded by quotes. Some
applications require that text be differentiated from numerical data in this way when they import data.
Summary
Check this option if you want the summary written to the ASCII file as well. The summary includes
information such as the user data, the comment fields and their associated labels, the number of
samples etc.
Values
Check this option if you want the individual sample values to be exported. If this option is checked,
the sample values corresponding to the specified sample range are written to the file.
Turn this option off if you want the sample values and nothing else in the exported file.
Markers
Check this option if you want the those data values with associated markers to be indicated as such
when they are exported. If this option is checked, those samples with associated markers will be
written to the file with an appended ‘*’ character.
Turn this option off if the application you are using to analyse the exported data has trouble with the
extra characters appended to the sample values.
General Statistics
Check this option if you want the general statistics to be exported. The statistics exported always
pertain to those between the start and end samples. It is not affected by the sample range setting
described below.
TTV Statistics
Check this option if you want the results of the Total Temperature Value (TTV) statistics calculations
to be exported. If this option is checked, the TTV results as displayed in the statistics view are written
to the export file.
Turn this option off if you do not want the TTV statistics in the exported file.
Copyright 1992..2010 Temprecord International Ltd.
160
Temprecord Help
The ‘Show TTV Statistics’ option (on the Statistics Options tab) must be checked in
order for the TTV statistics to be exported.
When the field delimiter is set to a non-space character, extra delimiters are inserted
when the TTV totals are exported. This is so that the totals will align properly with the
individual TTV period data and column headers when the exported file is imported into
a spreadsheet
MS Access TTV Statistics
Check this option if you want the results of the Total Temperature Value (TTV) statistics calculations
to be exported in a format more suitable for importing into Microsoft Access or Microsoft Excel.. If
this option is checked, the TTV results as exported as a series of rows as shown in the following
example:
"Serial No","Sample Period","Start Sample","Start Sample DateTime","TTV Period","Periods
Specified","Periods Shown","Period Number","TTV Below","TTV Above"
"S2222849","60","1","4/03/1997 17:20:36","0.041667","5","5","1","0","186"
"S2222849","60","1","4/03/1997 17:20:36","0.041667","5","5","2","0","663"
"S2222849","60","1","4/03/1997 17:20:36","0.041667","5","5","3","10","0"
"S2222849","60","1","4/03/1997 17:20:36","0.041667","5","5","4","0","990"
"S2222849","60","1","4/03/1997 17:20:36","0.041667","5","5","5","0","861"
The first line is only exported if the Include Header Row option is checked. To import in MS Access
you should have a table defined with field names the same as those shown above. Each line will
then be imported as a single record in the table.
The ‘Show TTV Statistics’ option (on the Statistics Options tab) must be checked in
order for the MS Access TTV statistics to be exported, and the Show Brief TTV
Statistics option must not be checked.
PHI Statistics
Check this option if you want the results of the PHI (Process Hygiene Index) statistics calculations to
be exported. If this option is checked, the PHI results as displayed in the statistics view are written to
the export file.
The ‘Show Growth Statistics’ option must be checked in order for the PHI (Process
Hygiene Index) statistics to be exported.
Rate of Cooling Statistics
Check this option if you want the results of the Rate of Cooling (ROC) statistics calculations to be
exported. If this option is checked, the ROC results as displayed in the statistics view are written to the
export file.
Copyright 1992..2010 Temprecord International Ltd.
Options Menu
161
The ‘Show Rate of Cooling Statistics’ option must be checked in order for the ROC
statistics to be exported.
Sample Range
Use this option to specify what samples are written to the ASCII file. This option only has an effect
when the Values export option is checked.
'Entire Record' specifies that all samples read from the currently loaded Temprecord file or the
logger are to be written to the ASCII file (or averaged and then written to the file, if Averaging is
set to a value other than 1).
'Visible Window' specifies that only those samples displayed in the current Temprecord data
graph view window are to be written to the ASCII file (or averaged and then written to the file, if '
Averaging' is set to a value other than 1).
'From Start to End Markers' specifies that only those samples between the start and end
samples are to be written to the ASCII file (or averaged and then written to the file, if 'Averaging'
is set to a value other than 1).
See Also:
Graph view options
Statistics view options
Printing Options
Total Temperature Value (TTV)
7.12.1 Copy to Clipboard, Excel Options
Copying to the Clipboard
Temprecord can copy temperature data to the Windows clipboard. Once the data is in the clipboard it can be
pasted to other applications such as Microsoft Word or NotePad.
Include date in copy to clipboard
Check this option if you wish the date and time to be copied to the clipboard when the Copy to Clipboard function
is used. The date and time are formatted according to the local Control Panel settings for the display of date and
time.
Exporting to Excel
Temprecord can export temperature data directly to Microsoft Excel. This is useful where you have additional
data manipulation to carry out.
Include date in copy to Excel
Check this option if you wish the date and time to be copied to the clipboard or the Excel when the Copy to
Spreadsheet function is used. The date and time are formatted according to the local Control Panel settings for
the display of date and time.
Include "xxx" in copy to Excel
Check these other options if you wish the corresponding statistical data copied to the Excel when the Copy to
Spreadsheet function is used.
· If the copied data is a date and time the date and time are formatted according to the local Control Panel
settings for the display of date and time.
· If the copied data is a temperature value it is formatted with 2 decimal places.
· If the copied data is a duration it is formatted as a real number with 8 decimal places. The value of the real
number is the corresponding duration in days, which is how Excel represents date and time, thus a duration of
Copyright 1992..2010 Temprecord International Ltd.
162
Temprecord Help
6:00:00 hours will show as 0.25000000.
Named Ranges
When Temprecord exports spreadsheet data to an Excel file, it also sets up what are known as "named ranges".
For example, if the logger sample period is exported to the Excel file, a named range called "SamplePeriod" is
also defined. This allows you to reference the sample period in a formula by the name "SamplePeriod", rather
than by using an absolute cell reference such as "$B$3". Using named ranges instead of absolute cell
coordinates has the advantage that any calculations you set up that reference this cell's value will still be correct
if the position in the spreadsheet of the sample period changes.
As a rule, the exported parameters have named ranges defined that is the same as the annotation with the
characters such as spaces and periods (that are not permitted in Excel named ranges) removed. For example
the 2nd line of shipping data has the annotation "Shipping Data 2" and it's named range is "ShippingData2".
For the majority of named ranges, the defined range is just one cell, i.e. the named range for "SerialNumber"
might be the cell "B1". There are three named ranges defined that span a group of cells. These are called
"Date", "Temperature" and "Humidity", and are defined as the first entry to the last entry in the respective
column.
In order to see what the name of the named range is that Temprecord has assigned to a cell,
export your data to a spreadsheet and click in the cell of interest. If a named range has been
defined, it will appear in the top left of the Excel window.
In the example shown below, the cell containing the lower temperature limit has been selected,
and the named range for that cell is shown as "LowerTemperatureLimit".
Prompt for spreadsheet filename
Check this option if you wish to be prompted for the spreadsheet (.XLS file) name when the Copy to Spreadsheet
function is used. If this option is not checked, Temprecord will derive a name based on the current TR data
filename or if the current logger data has not yet been saved to a file, based on the settings for the default
filename.
Prompt before overwriting spreadsheet
Check this option if you wish Temprecord to prompt you when the spreadsheet file being saved already exists. If
this option is clear, an existing file of the same name will be overwritten with no warning.
Copyright 1992..2010 Temprecord International Ltd.
Options Menu
163
Open spreadsheet after copy
Check this option if you wish Temprecord to open the data saved to a spreadsheet with Excel after the save is
completed. Microsoft Excel must be installed on the machine.
See also:
Copy to Clipboard
Copy to Excel
7.13
Printing Options
Use the Options/Printing page to set up how your printed reports are formatted.
Summary
Check the 'Summary' option if you wish the summary to be printed. The information printed is the
same as that shown in the summary view window, except that there are options for independently
determining whether the comment lines and user data are printed.
User Data Lines
Specify the number of lines (zero through 5) of user data you wish to print.
Statistics
Check the 'Statistics' option if you wish the statistical data to be printed. The information printed is the
same as that shown in the statistics view window.
If the start and end samples are not set to the first and last sample, an additional set of statistical
information is printed for the samples between the start and end markers.
If the data visible in the graph view is less than the entire record, an additional set of statistical
information is printed for the samples visible on the graph.
If the checkbox On new page is checked, the statistics data starts printing on a fresh page.
Graph
Check the 'Graph' option if you want the temperature data to be shown as a graph. Temprecord can
allocate anything from 10% of the page (not very useful!) to the whole page for the graph of
temperature data (see the following option 'Graph Height'). If there is not this amount of space
remaining on the page after the printing of any the previous data, the graph will be printed on the next
page. The samples that are printed depend on the settings of the 'Sample Range' below.
If the checkbox On new page is checked, the graph data starts printing on a fresh page.
If the checkbox Full page landscape is checked, the graph will be sized to occupy the whole page,
and rotated so that it is in "landscape" view (with the longer edge of the paper horizontal). This option
forces the graph to start on a new page. If a PDF file is being produced or previewed and the PDF
orientation is set to portrait, it is switched to landscape for the page the graph is on, then returned to
portrait for any remaining pages. Similarly if the output is being sent to the printer and the printer
orientation is set to portrait, it is switched to landscape for the page the graph is on, then returned to
portrait for any remaining pages.
If the checkbox Serial Number is checked, the logger serial number is printed above the graph. If the
On new page option is checked, the new page is forced before the serial number is printed. This
option does not affect the printing of the serial number as part of the report summary.
Copyright 1992..2010 Temprecord International Ltd.
164
Temprecord Help
If the checkbox User Data is checked, the logger user data is printed above the graph. If the On new
page option is checked, the new page is forced before the user data is printed. This option does not
affect the printing of the user data as part of the report summary. The number of user data lines
printed is determined by the User Data Lines summary option described above.
The graph options Serial Number and User Data are intended for the production of
single-page reports where only the graph is required and serial number and the user
data.
Graph Height
Use this option to specify the height of the graph printed in the report. This option is only used if the '
Graph' option described above is also checked. The height is specified in terms of a percentage of
the available page height.
If you set the printer to Landscape orientation instead of Portrait, the graph height is
measured relative to the height of the landscape page
Sample Range
Use this option to specify what samples are shown in the graph and/or values in the printed and PDF
output. This option is only used if the 'Graph' and/or 'Values' options described above are also
checked.
'Entire Record' specifies that all samples read from the currently loaded Temprecord file or the logger
are to be printed.
'Visible Window' specifies that only those samples displayed in the current Temprecord data graph view
window are to be printed. If this option is used, the printed graph will have the same temperature and
sample span as the displayed graph view window, and the graticule positions will be the same.
'From Start to End Markers' specifies that only those samples between the start and end samples are to
be printed.
When the 'Visible Window' option is selected, the vertical and horizontal axes may not
display as they do on the screen. See the topic Why doesn't my printed graph look the
same as the one I see on screen? for more information.
Values
Check the 'Values' option if you want the sample values to be printed as a list of numerical values, i.e.
in tabular fashion.
The samples that are printed depend on the settings of the 'Sample Range' described above.
If the checkbox On new page is checked, the values data starts printing on a fresh page.
Only the samples between the start and end markers are included when you print the
values in tabular fashion. If you want all the samples to be printed, make sure all the
samples are selected (use the Select All function).
Copyright 1992..2010 Temprecord International Ltd.
Options Menu
165
Be careful when using this option. Depending on the settings of the text font, the
columns, and the sample range, you can generate a large amount of printout !
Auto-wrap Columns
If you want Temprecord to print only as many values as will fit across the page, then 'Auto-wrap
columns' should be checked. If you want Temprecord to print a fixed number of columns across the
page, whether they would fit or not, the 'Auto-wrap columns' should be unchecked. You can then
change the number of columns in the 'Columns' field.
Columns
The columns option sets the number of columns across the printed page when the temperature values
are printed. This option is useful when you wish each line of values to correspond to a particular time
interval. If you specify a sample period of 5 minutes for example, and you set the number of columns
to 12, then each line will contain 1 hours worth of samples.
If you specify more columns here than will fit across the printed page, not all of the
temperature values will print. If you want all temperature values to be visible, make sure
the 'Auto-wrap columns' option is on.
Show Date/Time
Check this option to cause the date and time to be written at the left of the page. The date and time
printed is that of the sample immediately following.
Show Day Transitions
Check this option to show the transitions from one day to the next to be shown as a new line. If this
option is checked, only the time is printed at the left-hand side of each line.
Units
Check this option if you want the units printed as a single character (C or F) after temperature values,
or as %RH after humidity values.
Degrees
Check this option if you want the degrees symbol (°) printed after temperature values.
Comma
Check this option if you want a comma printed between each pair of temperature/humidity values.
This option has no effect if only one of temperature or humidity is printed.
Parentheses
Check this option if you want left and right parentheses printed around each pair of temperature/
humidity values. This option has no effect if only one of temperature or humidity is printed.
Preview
Copyright 1992..2010 Temprecord International Ltd.
166
Temprecord Help
As you alter the above options, the three preview panels show the effect the current set of options has
on the printing of each of a temperature value, humidity value, or temperature/humidity value pair.
Set Print Colors
Click on this button to display or alter a matrix of the colors currently used in printed reports. See Set
Print Colors for more information.
Header and Footers, Paper Size
Click on this button to set the header and footers, and paper size and orientation used on the printed
reports. See Header and Footers, Paper Size for more information.
See Also:
Graph view options
Statistics view options
Export Options
Total Temperature Value (TTV)
Set Print Colors
Header and Footers, Paper Size
7.14
Set Print Colors
Some monochrome printers, particularly higher-resolution laser printers, will attempt to render colored
text as varying shades of gray, with the result that some graph features or text may not be readable.
Check the Monochrome Print option if you are printing on a black-and-white printer. Temprecord will
not send any color information to the printer. Any text or graphics which are non-white will be rendered
in black on the printer.
Check the Use gray-scale option if you want Temprecord to use shades of gray with approximately
the same density as the colors defined. This can make reports printed on a monochrome printer
easier to read.
You can also use these options if you have a color printer, but you do not want the printed output to be
in color.
Check the Use screen colors on printer output option if you want Temprecord to use the same
colors on the printed reports as are used for the on-screen display of Temprecord data. If this box is
checked then the color options on this options page have no effect and they are disabled.
7.15
Header and Footers, Paper Size
Page Format
Select the paper size and orientation to be selected whenever a PDF report file is created or
previewed.
Note that these settings will not apply to any reports printed directly from Temprecord. In this case the
page format is determined by the settings for the current printer.
If a PDF file is previewed and printed from the PDF viewer, the page size and format assumed is
determined by those of the PDF itself.
Copyright 1992..2010 Temprecord International Ltd.
Options Menu
167
Print Header and Print Footer Options
Check the Enable Print Header/Footer option if you want a page header/footer included with the PDF
reports or printed output.
Check the Use header/footer space for content option if you want the space on the page normally
occupied by the header/footer to be included in the body of the printed report. If this option is not
checked and the Enable Print Header/Footer option is also not checked, the header/footer will not
print, but the space normally occupied by the header/footer is left blank.
Fill in the three fields with the text you want displayed in the left-hand side, the center, and the righthand side respectively of the header/footer. The left hand text is aligned with the left margin. The
center text is centered between the left and right margins. The right-hand text is right-justified against
the right-hand margin.
Any of the text fields may overflow into the adjacent fields, and it is your responsibility to make sure
they do not overlap. Thus it is possible to have a left-hand header or footer that extends right across
the page, provided the corresponding center and right-hand header/footer are set to blank strings.
Meta-string Substitution
Header and footers may include "meta-strings". These strings are expanded (i.e. substituted by
another string) at the time of report generation.
Meta-string Use
Example
Output
%Page%'
current
page
Page %Page%
Page 1
%Pages%'
total
pages
Page %Page% of %Pages%
Page 1 of 4
%SN%
logger
serial
number
Logger %SN%
Logger S1234567
%User1..5% logger
%User4%
user data
<logger user data line 4 will be
displayed>
%Filename
%
filename
File S1234567.tr
%User%
logged in Printed by user %User%
Windows
user
File %Filename%
Printed by user Fred
%Computer computer Printed from PC "%Computer
%
name
%"
Printed from PC "Fred's
Computer"
%
Workgroup
%
computer This report is from the %
workgrou Workgroup% group
p
This report is from the
Administration group
%PrintDate
%
date and
time
report
printed
Printed on %PrintDate%
Printed on 1/2/2010 12:55:02
%StartDate
%
date and
time the
logger
was
started
Logger started on %StartDate
%
Logger started on 21/12/2009
15:00:56
Copyright 1992..2010 Temprecord International Ltd.
168
7.16
Temprecord Help
Parameter Defaults
Use the Options/Parameter Defaults page to set up your most common set of parameters. The fields
in this page are the same as those in the Program/Parameters form, apart from the password fields.
You cannot specify a default password.
Once you have set up your defaults, you can load them into the Program/Parameters form by clicking
on the Defaults button.
The start delay default value specified here is also used whenever a logger is re-used.
If you enter a value of (say) 00:02:00 in the default start delay field, the logger start
delay will be set to 2 minutes when the logger is reused. You can still change it before
starting the logger.
See the topic Programming a Logger's Parameters for more information about the fields on this
options page.
See also:
Programming a Logger's Parameters
Mon-T Parameter Defaults
7.16.1 Mon-T Parameter Defaults
The Mon-T parameter defaults allow you to specify the Mon-T - specific parameters used when assigning
default parameters in the Program Parameters dialog or when using the Load Parameters from Defaults function
in Auto Mode and a Mon-T logger is being processed.
Don't confuse the display units with the Mon-T Logger Units. The Mon-T Logger Units determine
what units are used when programming the Mon-T - specific parameters (Minimum Temperature,
and Resolution). The display units determine how temperatures are displayed in the Temprecord
program.
See also:
Parameter Defaults
Program Parameters dialog
Load Parameters from Defaults
Auto Mode
7.17
Email Options
The Email options are provided so that you can customize the email message that accompanies files when you
send them by email.
To:
Enter the email addresses of the recipients, separated by commas.
From:
Enter your name and email address, in the format Your Name <your email address>. This is not necessary,
except that when sending mail by the SMTP method, some mail servers require a valid "From:" address to be
Copyright 1992..2010 Temprecord International Ltd.
Options Menu
169
specified before they will accept the message.
Also, whatever you enter in this field is used to supply the data for the %Name% and %Email% metastrings. So if you have the From: field set as:
Joe Bloggs <[email protected]>
then you could have in the Message: field:
My name is %Name% and my email address is %Email%
and it would appear in the body of the email as:
My name is Joe Bloggs and my email address is [email protected]%
Subject:
Enter the subject line of the email. This is optional. You can use special formatting keywords in the subject.
These are replaced at the time the email is queued for sending by text according to the rules specified below in
the section "Formatting".
Message:
Enter the body of the email message. This is optional. You can use special formatting keywords in the subject.
These are replaced at the time the email is queued for sending by text according to the rules specified below in
the section "Formatting".
Email Method
Mail can be sent by two methods. SMTP (Simple Mail Transfer Protocol) requires no additional software to be
installed on your computer, but preview of the email before sending is not possible. MAPI (Messaging
Application Programming Interface) requires that the MAPI interface be installed on your computer. If you have
an a mail client such as Microsoft Outlook or Outlook Express this will generally be the case. When Temprecord
sends an email, the MAPI interface starts up your email client and uses that to send the email. In most cases,
this will not in fact send the email, but place a copy of it in your Outbox. With MAPI therefore, you have the
opportunity to review, edit, or delete the emails before they are sent.
Temprecord can send files via MAPI as long as your computer has the MAPI interface installed. No other
configuration should be required. If you need to send email via SMTP, the SMTP Email Options will need to be
configured.
Display message in email client before sending
(MAPI only) Check this option if you want to display the email in your email client before sending it. You then
have the option of editing the text of the email, attaching further files manually, adding or removing recipients,
etc.
If the above option is not checked (i.e. don't preview the message), some later versions of email
client software will detect that another program (i.e. Temprecord) is trying to use it to send email.
This behaviour is how some email viruses propagate themselves and the email client is
preventing it. You might find that you need to click on OK or Yes in a dialog before the email will
send.
Formatting
Temprecord looks for certain character combinations (called "meta-strings") in your email subject line and
message text and replaces them if they are found, as shown in the following table:
Copyright 1992..2010 Temprecord International Ltd.
170
Temprecord Help
String
Replaced By
Example
%To%
list of recipients
[email protected],
[email protected]
%From%
sender's name and email
address
Joe Bloggs <[email protected]>
%Name%
sender's name
Joe Bloggs
%Email%
sender's email address
[email protected]
%Files%
names of attached files,
separated by commas
Report1.pdf, Report2.pdf
%User%
logged in Windows user
joe
%
Workgroup
%
computer workgroup name
Admin
%Computer
%
computer name
Joes Dell 8400
See also:
SMTP Email Options
Options Menu
7.17.1 SMTP Email Options
In order to send emails by SMTP Temprecord needs to know some information about your email provider. This
information will normally be available from your IT support person or your ISP (Internet Service Provider). If your
email provider is Google (i.e. GMail), see the topic Emailing Files from Temprecord using GMail.
SMTP Server
Enter the name of your SMTP (Simple Mail Transfer Protocol) server. This will be a string in the form of smtp.
mycompany.com or smtp.myISP.com.
SMTP Port
Enter the SMTP port number. This will be set by your ISP and is normally 20.
Use SSL
Check this box if you want Temprecord to use SSL (Secure Sockets Layer) to transmit the emailed data. SSL is
a high level of encryption used to protect sensitive data from unauthorized eavesdropping. Your ISP may not
support SSL.
Authentication Required
Check this box if your ISP requires you to provide authentication information (a user name and password) before
you can use their SMTP server to send email.
SMTP User Name
Enter the user name provided by your ISP for access to their SMTP server if your ISP requires you to provide
authentication information.
SMTP Password
Enter the password corresponding to the above user name needed to access the SMTP server if your ISP
requires you to provide authentication information.
Copyright 1992..2010 Temprecord International Ltd.
Options Menu
171
See also:
Emailing Files from Temprecord using GMail
Error sending email
Email Options
Options Menu
7.17.2 Emailing Files from Temprecord using GMail
If your primary email service provider is GMail (Google), you will need to set up the SMTP options as follows:
SMTP Server
Port
Use SSL
Server Requires
Authentication
User ID
Password
7.18
smtp.gmail.com
587
checked
checked
your gmail username
your gmail password
Language Options
Use the Options/Language page to specify the language Temprecord will use. When it is first
installed, Temprecord will choose the language based on the language setting for your computer (this
is normally set through the Windows Control Panel). This corresponds to the Use regional settings
option. If you want Temprecord to always choose a particular one of the languages available,
regardless of the Windows settings for language, select that language here, instead of the Use
regional settings option.
Temprecord help will only be available in the selected language if that language’s help
file is installed. If Temprecord cannot find the help file, it will use the English language
help. If you want to become part of the Temprecord collaborative translation effort,
click here for more details.
7.19
Temprecord Foreign-language Translation
Temprecord is currently adding further foreign-language support to our products and we require
translators in all of the supported languages.
The translation is carried out by a collaborative web-based interface, and updated translations are
regularly incorporated into software releases of Temprecord.
· Translators need not be (and most likely will not be) the only person working on any given
foreign language.
· Translators are required for both the Temprecord software application, and the on-line help
system text.
· Translators are required for most of the Romance languages (currently Spanish, French,
Dutch, German, Portuguese, Italian, and Swedish).
Copyright 1992..2010 Temprecord International Ltd.
172
Temprecord Help
· Translators should have the target language, rather than English, as their first language.
· Translators must be technically conversant with the Temprecord range of temperature logging
products.
If you are interested in helping with this effort, please contact us at [email protected].
7.20
Comment Labels Options
Use the Option/Comment Labels page to change the text Temprecord displays to the left of the
comment fields when you are editing the comment fields for a Temprecord data file.
This feature only works with data files created with Temprecord, or Temprecord for
DOS from versions 1.15 onwards. You cannot use the comment labels feature on files
created with the earlier versions of Temprecord for DOS.
The comment field labels are assigned to a data set at the time the data is read from
the logger. From then on, the labels cannot be altered, but the text in the comment
fields themselves can be altered. For more information, see the topic Using the
comment fields.
7.21
Web Options
Use the Options/Web tab to set up Temprecord for transferring files to the web, and logging of logger
operations via the web. In order to use this facility you must have arranged the facility with
Temprecord.
Also see the topics Tracking, Proxy Settings, and Web Load and Save options for more details.
User Name
Enter the ID supplied to you by Temprecord, or by the administrator for your organization. Unless
there is a valid user name and password provided here, you will not be able to upload datafiles and
reports for storage on the web.
Password
Enter the password supplied to you by Temprecord., or by the administrator for your organization. The
password will not display as you type it. You only need enter the user name and password once.
Temprecord Web URL
This field normally contains the path to the Temprecord website. It is set at installation to the default
address of:
http://www.temprecord.com/
and unless you have been advised to do so, you must not alter this setting.
See also:
Tracking Options
Copyright 1992..2010 Temprecord International Ltd.
Options Menu
173
Proxy Settings Options
Web Load and Save Options
7.21.1 Tracking Options
Web Logger Tracking is a service provided by Temprecord to allow customers to track the use of their loggers
via the World-Wide Web.
Enable Logger Tracking
Check this box if you wish Temprecord to send tracking information to the web when logger operations such as
starting, stopping, and reading are carried out. You must have arranged this facility with Temprecord before
these functions can be used, and the computer used must be connected to the internet at least occasionally (if
tracking information cannot be sent immediately it is queued and sent when a web connection is available).
Site Identifier
Fill this field in with a unique string that will serve to identify the site the tracking information was sent from, for
example: "San Francisco Cold Store 7". The site identifier is included in all tracking entries recorded.
Advanced Tracking Options
You should not need to alter these settings unless directed by Temprecord.
Purge Tracking Queue Age (days)
When tracking entries cannot be sent because access to the Internet is not possible, they are queued and send
when the connection comes available. This parameter specifies how many days the queued entries are kept for.
If the tracking entries have not been sent by this time they are discarded.
Connect Timeout (sec)
This parameter specifies how long Temprecord will wait for a response from the web tracking server before
giving up on that attempt.
Max Send Attempts
This parameter specifies how many times Temprecord will try to send each web tracking entry before giving up
and discarding the entry. Note that Temprecord will not attempt to send tracking entries unless an internet
connection is detected.
Time Between Retries (minutes)
This parameter specifies how many minutes Temprecord will wait before trying again to send a web tracking
entry.
See also:
Web Options
Proxy Settings Options
Web Load and Save Options
7.21.2 Proxy Settings Options
If your organization uses a proxy server to access the Internet, you may need to enter the details here. You
should consult with your I.T. department before changing these settings.
No proxy
Select this option if your organization does not use a proxy server.
Copyright 1992..2010 Temprecord International Ltd.
174
Temprecord Help
Auto-detect proxy
Select this option if your organization does use a proxy server, and you want Temprecord to try to determine the
correct settings automatically..
Manual proxy
Select this option if your organization does use a proxy server, and you want to enter correct settings manually.
If you select this option you will need to find out the information required to fill in the parameters described below.
HTTP Proxy server
Specify the name of the proxy server, and the port number.
Proxy server requires password
Check this box if your proxy server requires authentication (username and password).
Username and Password
Enter the username and password for your proxy server.
See also:
Web Options
Tracking Options
Web Load and Save Options
7.21.3 Web Load and Save Options
Web List Folder - Connect Timeout (sec)
This parameter specifies how long Temprecord will wait for a response from the web server when requesting a
list of data files.
Web Load - Connect Timeout (sec)
This parameter specifies how long Temprecord will wait for a response from the web server when requesting the
data from the Temprecord data file or PDF report file.
Disable Saving to Web
Check this option if you do not want Temprecord to attempt to save the data files to the web. This option is
useful if you want to save the files to the web eventually but do not have web access at the time. The files will be
queued and sent when web access next becomes available.
Purge Web Save Queue Age (days)
When Temprecord data files cannot be sent because access to the Internet is not possible, they are queued and
send when the connection comes available. This parameter specifies how many days the queued entries are
kept for. If the web files have not been sent by this time they are discarded.
Connect Timeout (sec)
This parameter specifies how long Temprecord will wait for a response from the web server when saving a file
before giving up on that attempt.
Max Save Attempts
This parameter specifies how many times Temprecord will try to save each queued file before giving up and
discarding the file. Note that Temprecord will not attempt to save files to the web unless an internet connection
is detected.
Time Between Retries (minutes)
This parameter specifies how many minutes Temprecord will wait before trying to save a file again.
Copyright 1992..2010 Temprecord International Ltd.
Options Menu
175
See also:
Web Options
Tracking Options
Proxy Settings Options
7.22
Auto Mode Options
Use the Options/Auto Mode page to change the behaviour of Temprecord’s Auto Mode. Auto Mode
provides a means of rapidly processing a quantity of loggers, with little more user intervention than
inserting and removing the logger from a reader.
Timeout
This option sets the number of seconds before auto mode times out and exits when either waiting for
a logger or waiting for the logger to be removed after completion.
Stop Logger if necessary
Check this option if you want Temprecord Auto Mode to stop a logger that is logging. If the logger is
already stopped, no action is taken
Read Logger
Check this option if you want Temprecord Auto Mode to read the data from the logger.
Save TR File
Check this option if you want Temprecord Auto Mode to read the data from the logger and save it to a
disk file. The name used for the file is determined by the formatted filename option. The folder used
is determined by the folder to save TR files. If you select the Save TR File option, the Read Logger
option will be selected for you.
Email TR File
Check this option if you want Temprecord Auto Mode to email the TR file. If you select the Email TR
File option, the Read Logger option will be selected for you, and the data is automatically saved to a
TR file, regardless of the Save TR File auto mode option.
Save PDF File
Check this option if you want Temprecord Auto Mode to read the data from the logger and save it to a PDF file.
The name used for the file is determined by the formatted PDF filename option. The folder used is determined
by the folder to save PDF files. If you select the Save PDF File option, the Read Logger option will be
selected for you.
The contents of the PDF report (summary, graph, etc) are determined by the printing options. The
printed pages range option is ignored when generating the PDF. All pages of the report are generated
to the PDF, even if a page range was selected in the print to PDF dialog.
Email PDF File
Check this option if you want Temprecord Auto Mode to email the PDF report. If you select the
Email PDF File option, the Read Logger option will be selected for you, and the data is automatically
Copyright 1992..2010 Temprecord International Ltd.
176
Temprecord Help
saved to a PDF file, regardless of the Save PDF File auto mode option.
Print Report
Check this option if you want Temprecord Auto Mode to send the printed report to the printer. The
contents of the printed report (summary, graph, etc) are determined by the printing options. All pages
of the report are printed, even if a page range was selected in the print dialog. If you select the Print
Report option, the Read Logger option will be selected for you.
Reuse Logger
Check this option if you want Temprecord to reuse the logger. The logger must be stopped.
Remember that reusing a logger clears any logged data so you should use the Read Logger and
Save TR File options also.
Load Default Parameters
Check this option if you want Temprecord Auto Mode to program the Default Parameters into the
logger.
Note that if this function is used, whatever parameters are programmed into the logger
will be overwritten, including the shipping data, which may have been set explicitly for
the previous trip.
Start Logger
Check this option if you want Temprecord Auto Mode to start the logger.
See Also:
Auto Mode Operation
7.23
Date Formatting Options
When Temprecord generates a filename, either as a result of an Auto Mode save operation, or as the default
filename when you save data from a logger you have just read, the date and time can be used to format the file
and/or folder names.
These options affect how the date is used to affect the generated file and folder names.
Date and time to use when formatting file and folder names
This option sets what date and time is used to format the file and/or folder name.
· If Time file was saved is selected, the date and time at the instance the file is created is used.
· If Time of oldest sample in logger is selected, the date and time of the oldest sample in the logger or
file is used. Note that this will not necessarily be the date and time of the first sample taken by the logger
for that trip, if overwrite is enabled.
· If Time of newest sample in logger is selected, the date and time of the most recent sample taken in the
logger will be used.
Timezone to use when formatting file and folder names
This option determines what timezone is used when a date and time is used to generate a file or folder name.
Copyright 1992..2010 Temprecord International Ltd.
Options Menu
177
· If Use Local Time is selected, the local time as set on the computer currently running the Temprecord
program will be used. This is normally the date and time displayed in the bottom right-hand corner of the
screen. Note that this time is affected by the current status of any daylight savings time ("summer" time)
that may be in force. You can have the timezone name and offset as part of the file or folder name if you
wish. See using the file and folder templates for more information.
· If Use UTC Time is selected, the date and time used to format any file or folder names will be UTC or
GMT (Greenwich Mean Time). This option may be useful when the files need to be referred to in a
timezone other than that which the logger was deployed in.
7.24
System Options
This options page displays useful system information that may be of use the administrators who are trying to
diagnose problems with Temprecord software installation or operation.
Send Diagnostics Report
Click this button to send a diagnostics report to Temprecord. You may be asked to do this by Temprecord
personnel if you are experiencing difficulties with Temprecord software. See diagnostics reports for more
information.
7.25
Diagnostics Reports
You can request that a diagnostics report be generated and sent to Temprecord. To do this, open the Options
dialog and select the System page. Click on the button labeled Send.
The diagnostics report contains information about your computer system and can help Temprecord when
diagnosing problems you may be having.
The report contains information including:
·
·
·
·
·
The current settings of Temprecord, which are saved in a file called TRW.INI
A log of the events occurring as Temprecord was started up.
A log of previous Temprecord software installations.
An image of the screen contents when the report was requested.
Information about the computer system running the Temprecord program
No Temprecord data files or PDF report files are sent.
See also
Unexpected errors
8
Error and Warning Messages
·
·
·
·
·
·
·
·
·
·
·
Battery is exhausted
Battery is nearly exhausted
Confirm password is invalid
Data read from logger has not yet been saved. Save first ?
Datafile format error - probably not a Temprecord data file
Datafile format incorrect
Datafile format version error
Do you wish to exit Temprecord ?
Do you wish to re-use the Temprecord logger ?
Do you wish to start the Temprecord logger ?
Do you wish to stop the Temprecord logger ?
Copyright 1992..2010 Temprecord International Ltd.
178
Temprecord Help
·
·
·
·
·
·
·
·
·
·
·
·
·
·
·
·
·
·
·
·
·
·
·
·
·
·
·
·
·
·
·
·
·
·
·
·
·
·
·
·
·
·
·
·
Encryption key and confirm are different
Error carrying out command line functions
Error loading web file
Error opening web file
Error opening <filename>
Error reading file
Error printing to PDF file
Error previewing PDF file
Error viewing PDF File
Error writing file <filename>
Data is corrupted
Invalid limit delay count
Invalid lower temperature limit
Invalid password submitted
Invalid sample period
Invalid start date
Invalid start delay
Invalid start time
Invalid preset date or time
Invalid upper temperature limit
NOTE - This data logger remains within an accuracy of +/- 0.5C but for greater accuracy you
may choose to have it re-calibrated
Password and confirm are different
Password is invalid
Password is not verified
Password Specification Errors
Start time and date has already passed
Temprecord cannot be stopped until start delay expires
Temprecord failed to re-use
Temprecord failed to start
Temprecord failed to stop
Temprecord has already been re-used
Temprecord has not yet been started
Temprecord is already running
Temprecord is already started
Temprecord is already stopped
Temprecord must be re-used before starting
Temprecord must be stopped before re-use
Temprecord was unable to create your TRW.INI file
Temprecord was unable to find your TRW.INI file
Temprecord was unable to write to your TRW.INI file
The Auto Mode option to reuse the logger is set but no options have been set to save data,
Continue?
The comment fields for file <filename> have been edited but the changes have not yet been
saved. Save file ?
The comment fields for logger <serial number> have been edited but the data has not yet
been saved. Save logger data to file ?
The data from this logger has not yet been read. Do you wish to read the data and save it
before re-using the logger ?
· The recalibration period on this logger will expire in 12 weeks.
· This logger's recalibration is due in 2 weeks
· The Temprecord help file for the selected language <filename> was not found. English
language help will be used instead
Copyright 1992..2010 Temprecord International Ltd.
Error and Warning Messages
·
·
·
·
·
·
·
·
·
·
·
·
·
·
·
·
·
·
·
·
·
·
·
·
·
·
·
·
·
·
·
·
·
·
·
·
·
·
·
·
8.1
179
This model Temprecord cannot be re-used
This Temprecord can only be started by snapping off a tab
This Temprecord can only be stopped by snapping off a tab
Unable access parameters. Temprecord is probably faulty
Unable to access parameters. Temprecord has been started
Unable to access parameters. Temprecord has finished logging
Unable to access parameters. Temprecord must be re-used first
Unable to access Temprecord after re-use
Unable to access Temprecord after starting
Unable to access Temprecord after stopping
Unable to access Temprecord Logger
Unable to access Temprecord. Password is incorrect
Unable to create spreadsheet
Unable to create folder
Unable to delete file <filename>
Unable to load file - insufficient memory
Unable to open COMx
Unable to open dialog
Unable to open form
Unable to open spreadsheet
Unable to print
Unable to read. Temprecord has not yet been started
Unable to read. Temprecord is probably faulty
Unable to read. Temprecord start delay has not expired
Unable to reuse Temprecord. Unit is probably faulty
Unable to save file <filename>
Unable to save file for emailing
Unable to save Temprecord parameters
Unable to start Temprecord. Unit is probably faulty
Unable to stop Temprecord. Unit is probably faulty
Unable to update parameters as Temprecord is not in ''ready'' state
Unable to update parameters as Temprecord is of a different type
Unable to update parameters as Temprecord is of older type
Unable to update parameters as Temprecord is of newer type
Unable to update parameters as Temprecord protected with password
Unexpected end-of-file
Unknown command option
WARNING - File damaged. Data may not be correct
Web file not found
Unable access parameters. Temprecord is probably faulty
Bad address
Temprecord encountered an error while trying to communicate with the logger. These errors most often result
from problems with the reader or logger.
· The logger battery could be exhausted.
· The reader may not have sufficient voltage to operate properly. This can occur on some laptops that do not
implement the serial interface adequately.
See Also:
Copyright 1992..2010 Temprecord International Ltd.
180
Temprecord Help
Error and Warning Messages
8.2
Bad CRC
Temprecord encountered an error while trying to communicate with the logger. These errors most often result
from problems with the reader or logger.
· The logger battery could be exhausted.
· The reader may not have sufficient voltage to operate properly. This can occur on some laptops that do not
implement the serial interface adequately.
See Also:
Error and Warning Messages
8.3
Bad verify
Temprecord encountered an error while trying to communicate with the logger. These errors most often result
from problems with the reader or logger.
· The logger battery could be exhausted.
· The reader may not have sufficient voltage to operate properly. This can occur on some laptops that do not
implement the serial interface adequately.
8.4
Battery is exhausted
The logger battery is exhausted. You should not use the logger and replace it with another.
This message will display if any attempt is made to program, start, or reuse the logger when the estimated
battery capacity has reached zero.
The options Show battery status and Warn when battery exhausted must both be checked for this message to
display.
The remaining logger battery capacity is not measured directly, but is calculated using
Temprecord's knowledge of the past use of the logger. The figure arrived at is
conservative, i.e. you may well get more use out of the logger than the displayed
remaining battery capacity suggests. We do not recommend this, however, and a
logger with a battery that shows as exhausted should be removed from service.
8.5
Battery is nearly exhausted
The logger battery is almost exhausted. You can use the logger but should replace it with another as soon as
possible.
Copyright 1992..2010 Temprecord International Ltd.
Error and Warning Messages
181
This message will display if any attempt is made to program, start, or reuse the logger when the estimated
battery capacity has fallen below 5%.
The options Show battery status and Warn when battery exhausted must both be checked for this message to
display.
The remaining logger battery capacity is not measured directly, but is calculated using
Temprecord's knowledge of the past use of the logger. The figure arrived at is
conservative, i.e. you may well get more use out of the logger than the displayed
remaining battery capacity suggests. We do not recommend this, however, and a
logger with a battery that shows as exhausted should be removed from service.
8.6
Confirm password is invalid
When specifying a password for a logger, both the ‘Password’ and ‘Confirm’ fields must be filled in with
the same number. The number can be up to 8 digits. You cannot have other characters such as the
space character or alphabetic characters. The password will not display as you type it.
See Also:
Error and Warning Messages
8.7
Data is corrupted
The data read from the logger was found to be invalid or corrupted. The temperature or humidity values logged
are not reliable. The logger's battery may be exhausted or there may have been communication errors when the
data was read.
Try reading the logger again and if the problem persists return the logger to Temprecord for fault analysis.
See Also:
Error and Warning Messages
8.8
Data read from logger has not yet been saved. Save first ?
You have requested that Temprecord carry out an operation that will overwrite the data in the current
Temprecord Logger data window, and that data has not yet been saved.
If you want to have the opportunity to save the Temprecord data that is already in the
Temprecord data window, click the ‘Yes’ button.
If you do not wish to save the data, but you still want to proceed with the operation, click the
‘No’ button.
If you want to abandon the operation and continue working with the data already in the
Temprecord data window, click the ‘Cancel’ button.
See Also:
Error and Warning Messages
Copyright 1992..2010 Temprecord International Ltd.
182
8.9
Temprecord Help
Datafile format error - probably not a Temprecord data file
The file you have tried to load is not a Temprecord data file. The default filetype for Temprecord data
files is '.TR'.
You may have tried to load an ASCII data file instead. Temprecord cannot load ASCII files, it can only
create them.
See Also:
Error and Warning Messages
8.10
Datafile format incorrect
The file you have tried to load is possibly a Temprecord data file, but the file format is not compatible
with this version of the Temprecord program. The file is possibly damaged. You will need to read the
file with the same version of Temprecord that was used to produce the file.
See Also:
Error and Warning Messages
8.11
Datafile format version error
The file you have tried to load is a Temprecord data file, but the file format is not compatible with this
version of the Temprecord program. You will need to read the file with the same version of
Temprecord that was used to produce the file.
See Also:
Error and Warning Messages
8.12
Do you wish to exit Temprecord ?
You have asked to exit the Temprecord program.
If you wish to close the Temprecord program click the ‘Yes’ button. If you have read data
from a logger and not yet saved it, you will be asked if you wish to do so. If you have edited
the comment fields for a file and not yet saved the file, you will be asked if you wish to do so.
If you do not wish to exit Temprecord, click the ‘No’ button. You will be returned to the
Temprecord program.
If you do not wish to have this question displayed each time you exit Temprecord, open
the Options/General form and clear the ‘Prompt before exiting Temprecord’ check-box.
See Also:
Error and Warning Messages
8.13
Do you wish to re-use the Temprecord logger ?
You have asked to re-use the Temprecord logger. This will prepare it for another use. After you have
re-used it, you will be able to set program the parameters (such as the sample period, the Upper and
Copyright 1992..2010 Temprecord International Ltd.
Error and Warning Messages
183
Lower limits, etc).
If you wish to re-use the Temprecord logger click the ‘Yes’ button.
If you do not wish to re-use the Temprecord logger, click the ‘No’ button. You will be returned to
the Temprecord program.
If you do not wish to have this question displayed each time you exit Temprecord, open
the Options/General form and clear the ‘Prompt before re-using Temprecord’ checkbox.
See Also:
Error and Warning Messages
8.14
Do you wish to start the Temprecord logger ?
You have asked to start the Temprecord logger. This will start the start delay counting down, and
when the start delay has expired, the logger will begin recording temperature samples.
If you wish to start the Temprecord logger click the ‘Yes’ button.
If you do not wish to start the Temprecord logger, click the ‘No’ button. You will be returned to the
Temprecord program.
Once the logger has been started, you cannot alter any of the logger parameters, such
as the user data, start delay, sample period, etc. You also cannot stop the logger until
the start delay has expired and the logger has begun taking samples.
If you do not wish to have this question displayed each time you exit Temprecord, open
the Options/General form and clear the ‘Prompt before starting Temprecord’ check-box
See Also:
Error and Warning Messages
8.15
Do you wish to stop the Temprecord logger ?
You have asked to stop the Temprecord logger. This will stop the logger taking samples.
If you wish to stop the Temprecord logger click the ‘Yes’ button.
If you do not wish to stop the Temprecord logger, click the ‘No’ button. You will be returned to the
Temprecord program and the logger will continue to record samples (unless loop overwrite is
disabled and the logger has filled up).
If the loop overwrite option is turned on, once the logger is full, the oldest samples are
overwritten. In this case you should always ensure that the logger is stopped after you
have finished recording samples. If loop overwrite is turned off, the logger will stop
recording samples when it is filled anyway, so it is not necessary to stop it until you wish
to re-use it
Copyright 1992..2010 Temprecord International Ltd.
184
Temprecord Help
If you do not wish to have this question displayed each time you exit Temprecord, open
the Options/General form and clear the ‘Prompt before stopping Temprecord’ checkbox.
See Also:
Error and Warning Messages
8.16
Encryption key and confirm are different
This help topic describes features of Temprecord products which are not implemented at the
release date of this version of the software.
When specifying the key to be used to encrypt your data files, you have not entered the identical key in the
"Confirm" field.
· Either enter the same string in both fields, or bake sure that the Encryption checkbox is not checked.
WARNING! Do not forget your encryption key!
If you lose the key, there is no way your data can be recovered. Temprecord are unable to
recover keys or the data they have been used to encrypt.
See Also:
Encryption file saving options
Error and Warning Messages
8.17
Error carrying out command line functions
An error resulted from carrying out command line functions specified when Temprecord was started.
Temprecord has the ability to automatically carry out a sequence of operations when started. This is similar to
Auto Mode operation except that the operations occur once at startup of Temprecord, and Temprecord then
either started normally or exits again if the /EXIT command line option is also specified.
See Also:
Command line parameters
Auto Mode
Error and Warning Messages
8.18
Error opening <filename>
Temprecord could not open the named file.
Check the spelling of the filename.
If your computer is part of a network, check that the file is not held open by another user.
The file could be damaged. Run the ‘SCANDISK’ utility on your computer.
Copyright 1992..2010 Temprecord International Ltd.
Error and Warning Messages
185
You will also receive this error if the name of a non-existent file is specified on the Temprecord
command line.
See Also:
Error and Warning Messages
8.19
Error loading web file
Temprecord is unable to load the file from the web storage folder.
· Check that the correct username and password is entered in your web options
· Check that the file exists in your web folder. If you are attempting to open the file from the "recent files"
list and the file has meanwhile been deleted, moved, or renamed you will receive this error.
· You might have experienced a temporary internet error while trying to load the file. Try to load the file
again.
See also:
Error and warning messages
8.20
Error opening web file
Temprecord is unable to load the file from the web storage folder.
· Check that the correct username and password is entered in your web options
· Check that the file has a .TR or .PDF extension. If you are attempting to open any other type of file,
Temprecord tries to use the filetypes that Windows knows about, e.g. if the file is a Microsoft Excel
spreadsheet (.XLS), Temprecord will attempt to open it with Excel.
See also:
Error and warning messages
8.21
Error printing to PDF file
Temprecord is unable to create the print image for some reason. When Temprecord prints a report, a PDF file
image is created in memory. If an error results creating this image this error will be reported.
This error should not occur under normal circumstances.
Check that you have write-access permission to the folder used for temporary files.
See also:
Error and warning messages
8.22
Error previewing PDF file
Temprecord is unable to display the PDF preview for some reason. When Temprecord previews a PDF report or
a printed report, a temporary PDF file is created, and this temporary file is then opened with Adobe Acrobat
Reader.
· If any errors result creating this temporary file this error will be reported. Check that you have writeaccess permission to the folder used for temporary files.
Copyright 1992..2010 Temprecord International Ltd.
186
Temprecord Help
· If Temprecord is unable to start Adobe Acrobat this error will be reported. Check Adobe Acrobat is
installed on your computer. If you cannot open PDF files by double-clicking them in Windows Explorer,
Adobe Acrobat is not installed, or is incorrectly installed. Contact your system administrator.
· Temprecord places a limit of 30 PDF preview files open at any one time. If you receive this error when
you already have 30 PDF reports previewed, to can close some of the open files, and you will be able to
preview further files.
See also:
Error and warning messages
8.23
Error viewing PDF File
Temprecord is unable to display the PDF file for some reason.
· If Temprecord is unable to start Adobe Acrobat this error will be reported. Check Adobe Acrobat is
installed on your computer. If you cannot open PDF files by double-clicking them in Windows Explorer,
Adobe Acrobat is not installed, or is incorrectly installed. Contact your system administrator.
See also:
Error and warning messages
8.24
Error reading file
Temprecord could not read from the file.
If your computer is part of a network, check that the file is not held open by another user, and
that you have permission to read from the file.
The file could be damaged. Run the ‘SCANDISK’ utility on your computer.
See Also:
Error and Warning Messages
8.25
Error sending email
The following errors can result when you try to send files by SMTP (Simple Mail Transfer Protocol).
No email recipients specified'
You must enter a list of valid email addresses in the "To:" field on the Email Options tab.
No files to attach
Temprecord was unable to find the files specified.
SMTP options not set
Before you can send emails via SMTP, certain options need to be set. Click on Options/SMTP Email and specify
at least the SMTP server name. Normally this will be a string of the form smtp.internetserviceprovider.com or
smtp.yourcompanyname.com. You may need to refer to your IT administrator for this information.
Unable to queue mail for sending'
Temprecord was unable to queue the email for sending.
Unable to send mail (error xxx')
Copyright 1992..2010 Temprecord International Ltd.
Error and Warning Messages
187
If you receive an error of this for wham using MAPI to send emails, the error explanation ("xxx") will indicate the
error response returned from the MAPI interface. You may need to refer to your IT administrator for guidance on
fixing these errors.
See Also:
Error and Warning Messages
SMTP Email Options
8.26
Error writing file <filename>
Temprecord could not write to the named file.
If your computer is part of a network, check that the file is not held open by another user, and
that you have permission to write to the file.
Check that the file is not marked as read-only.
See Also:
Error and Warning Messages
8.27
Incorrect firmware
The logger you are trying to communicate with contains features that mean that this version of Temprecord is
incompatible with the logger. You will need to download an update from http://www.temprecord.com.
See also
Logger Firmware Revision 2.14
8.28
Invalid limit delay count
The permissible range for the limit delay parameter is 0 to 255. Enter a number in this range
See Also:
Error and Warning Messages
8.29
Invalid lower temperature limit
The permissible range for the lower temperature limit is from -327.68 to +327.67 degrees C. This
corresponds to a range of -557.8 to 621.8 degrees F. Enter a number in this range
See Also:
Error and Warning Messages
8.30
Invalid password submitted
This logger you have tried to access is protected by a password and the password you have specified
is not correct.
Re-enter the password. The number can be up to 8 digits. You cannot have other characters such as
the space character or alphabetic characters. The password will not display as you type it.
Copyright 1992..2010 Temprecord International Ltd.
188
Temprecord Help
See Also:
Error and Warning Messages
8.31
Invalid sample period
The sample period is the time that elapses between samples. Enter the sample period as hours,
minutes and seconds. The minimum sample period that can be entered is 0:00:02, or 2 seconds. You
can enter any value between 2 seconds and the upper limit of 24 hours, and the sample period must
be a multiple of 2 seconds.
See Also:
Error and Warning Messages
8.32
Invalid start date
The start date you have entered is not a valid date. Do not enter any separator characters such as ‘/’
or ‘-’ when you enter the date.
See Also:
Error and Warning Messages
8.33
Invalid start delay
The start delay is the time that elapses between when the logger is started and when it begins to
record samples. Enter the start delay as hours, minutes and seconds. The minimum start delay that
can be entered is 0:00:10, or 10 seconds. You can enter any value between 10 seconds and 24
hours.
See Also:
Error and Warning Messages
8.34
Invalid start time
The start time you have entered is not a valid time. Do not enter any separator characters such as ‘:’
when you enter the time.
See Also:
Error and Warning Messages
8.35
Invalid preset date or time
The date or time you have entered as one of the preset dates is not a valid date or time. Do not enter
any separator characters such as ‘:’ or '/' when you enter the date or time.
See Also:
Error and Warning Messages
Copyright 1992..2010 Temprecord International Ltd.
Error and Warning Messages
8.36
189
Invalid upper temperature limit
The permissible range for the upper temperature limit is from -327.68 to +327.67 degrees C. This
corresponds to a range of -557.8 to 621.8 degrees F. Enter a number in this range
See Also:
Error and Warning Messages
8.37
No wakeup from logger
Temprecord is unable to communicate with the logger.
Check that the COM port selected using the COM port options is the same port that has the Temprecord reader
connected to it.
Temprecord is always improving its products. Occasionally changes to the logger's specification
mean that earlier versions of Temprecord software are incompatible with newer loggers, as the
earlier software is not aware of the new features and cannot take advantage of them. Where a
logger requires a particular revision of software to operate correctly, the packaging will include a
warning to this effect.
See also Logger Firmware Revision 2.14
8.38
No response from logger
Temprecord is unable to communicate with the logger.
Check that the COM port selected using the COM port options is the same port that has the Temprecord reader
connected to it.
Temprecord is always improving its products. Occasionally changes to the logger's specification
mean that earlier versions of Temprecord software are incompatible with newer loggers, as the
earlier software is not aware of the new features and cannot take advantage of them. Where a
logger requires a particular revision of software to operate correctly, the packaging will include a
warning to this effect.
See also Logger Firmware Revision 2.14
8.39
Logger Firmware Revision 2.14
Temprecord released a newer version of the Mk III logger in 2009. This version, firmware revision 2.14,
implements greater reliability of communications with the logger and also faster (around ten times faster)
download times.
In order to take advantage of these faster download times, loggers with firmware version 2.14 (or greater) must
be used with Version 5.23 (or greater) of the Temprecord software (TRW). Newer loggers cannot be used with
earlier versions of TRW.
If you have Firmware version 2.14 loggers, you will need to upgrade Temprecord to program and
read these loggers. The Temprecord software can be downloaded from http://temprecord.com/
software.html.
Note that the converse does not apply - that is, the current version of Temprecord can program and read both
older and newer loggers, with no special action required by the user to swap between the two types of logger.
Copyright 1992..2010 Temprecord International Ltd.
190
8.40
Temprecord Help
Password and confirm are different
You have entered a password in the ‘Password’ field that differs from the one in the ‘Confirm’ field.
Re-enter both passwords.
See Also:
Error and Warning Messages
8.41
Password is invalid
The password you have entered is invalid.
Re-enter the password. The number can be up to 8 digits. You cannot have other characters such as
the space character or alphabetic characters. The password will not display as you type it.
See Also:
Error and Warning Messages
8.42
Password is not verified
You have entered the password in only one of the two Password and Confirm fields. You must fill in
both fields with the same password.
If you do not want the logger to have a password, enter the value zero into both fields. If you want to
leave the password unchanged, leave both fields blank.
See Also:
Error and Warning Messages
8.43
Password Specification Errors
The following error messages can result from not specifying the password correctly. Check the notes
below to determine the reason.
Invalid Password
A password must be a number in the range 0 to 99999999. You cannot specify characters other than
digits here. You can specify as many digits as you wish up to a maximum of 8
Password Not Verified
One of the password fields was left blank. You must fill in both password fields
Password and confirm are different
The password you specified in the first field does not match that in the verification field.
General Password Notes
Copyright 1992..2010 Temprecord International Ltd.
Error and Warning Messages
191
If you don't want the current password to be changed, leave both fields blank. If you want the
password feature to be disabled, enter zero (0) in both fields.
You do not need to specify all 8 digits for your password, though this will make it more secure. We
recommend 4 digits as sufficient.
Do not forget your password! If you do, you will be unable to alter the user data, and in the case of
the Multi-trip and Scientific models, you will be unable to re-use them.
See also:
Password
User data
Sample period
Start delay
Error and warning messages
8.44
Start time and date has already passed
You have enabled the ‘Start at Time and Date’ option for the logger, but the start time and date
specified has already passed.
Change the time and date to a future time and date.
See Also:
Error and Warning Messages
8.45
Temprecord cannot be stopped until start delay expires
You have attempted to stop the Temprecord logger while the start delay is still counting down. The
logger cannot be stopped until the start delay has expired and the logger has begun to take samples.
See Also:
Error and Warning Messages
8.46
Temprecord failed to re-use
Temprecord has not been able to verify that the logger reused correctly. The operation may have
been successful. Check the state of the logger by using the File/Query Logger function.
You may have removed the logger from the reader too quickly. Do not remove the
logger until the message window that opens has closed again
See Also:
Error and Warning Messages
Copyright 1992..2010 Temprecord International Ltd.
192
8.47
Temprecord Help
Temprecord failed to start
Temprecord has not been able to verify that the logger started correctly. The operation may have
been successful. Check the state of the logger by using the File/Query Logger function.
You may have removed the logger from the reader too quickly. Do not remove the
logger until the message window that opens has closed again
See Also:
Error and Warning Messages
8.48
Temprecord failed to stop
Temprecord has not been able to verify that the logger stopped correctly. The operation may have
been successful. Check the state of the logger by using the File/Query Logger function.
You may have removed the logger from the reader too quickly. Do not remove the
logger until the message window that opens has closed again
See Also:
Error and Warning Messages
8.49
Temprecord has already been re-used
You have tried to reuse a logger that has already been reused. You can now program the parameters
and start the logger.
See Also:
Error and Warning Messages
8.50
Temprecord has not yet been started
You have tried to read the data from a logger that has not yet been started. To have your logger take
samples:
Use the Program/Parameters function to set the logger up.
Use the Program/Start function to start the logger.
Place the logger in the environment you wish to monitor for a while.
Use the File/Read Logger function to read the samples taken so far.
See Also:
Error and Warning Messages
8.51
Temprecord is already running
You have tried to start the Temprecord program, but there is already a copy of Temprecord running on
your computer. Only one copy of Temprecord can run at any one time on a single computer.
Copyright 1992..2010 Temprecord International Ltd.
Error and Warning Messages
193
You can find the copy that is already running on your computer: Hold the Alt key down and press the
Tab key. Windows will display a panel with all the running programs shown as icons. Use the Tab key
to switch from one running program to the next. Repeat this until the Temprecord icon is selected.
Release the Alt key and you will be placed in the copy of Temprecord that is already running.
Alternatively, if the taskbar is displayed, click on the taskbar button that shows the Temprecord icon.
See Also:
Error and Warning Messages
8.52
Temprecord is already started
You have attempted to start the logger when it is already taking samples. If the logger status is shown
as 'holdoff', it means that the start delay is still counting down. The logger will begin to take samples
when the start delay counts down to zero.
See Also:
Error and Warning Messages
8.53
Temprecord is already stopped
You have attempted to stop the logger when it has already been stopped.
You can now read the logger and re-use it.
See Also:
Error and Warning Messages
8.54
Temprecord must be re-used before starting
You have attempted to start the logger but it has not yet been re-used.
Use the Program/Reuse function to reuse the logger.
Use the Program/Parameters function to set the logger up for the next use.
Use the Program/Start function to start the logger.
See Also:
Error and Warning Messages
8.55
Temprecord must be stopped before re-use
You have attempted to re-use the logger without stopping it first. The logger must be in the 'Stopped'
state before reuse.
Use the Program/Stop function to stop the logger
Use the File/Read Logger function to read the temperature data from the logger
Use the File/Save function to save the temperature data to a disk file.
Use the Program/Reuse function to reuse the logger.
Use the Program/Parameters function to set the logger up for the next use.
Copyright 1992..2010 Temprecord International Ltd.
194
Temprecord Help
Use the Program/Start function to start the logger.
See Also:
Error and Warning Messages
8.56
Temprecord was unable to create your TRW.INI file
An error has occurred when Temprecord tried to create your INI file. The INI file is used to remember
your preferences and settings between Temprecord sessions. You will still be able to run Temprecord,
but any changes you make to the options may not be remembered.
Check that your disk is not full.
Check that you have sufficient access rights to your computer's Windows directory. You may not have
full access if you are running on a network.
See Also:
Error and Warning Messages
8.57
Temprecord was unable to find your TRW.INI file
Temprecord could not find your TRW.INI file in the Windows subdirectory of your computer. The INI
file is used to remember your preferences and settings between Temprecord sessions. A new INI file
will be created with default settings for all the preferences.
You may receive this message if you install Temprecord for another user on your network. This is
normal and it just means that Temprecord is creating another separate preferences file for the new
user. The message should not appear again.
See Also:
Error and Warning Messages
8.58
Temprecord was unable to write to your TRW.INI file
An error has occurred when Temprecord tried to write your preferences to your INI file. The INI file is
used to remember your preferences and settings between Temprecord sessions. You will still be able
to run Temprecord, but any changes you have made to the options may not be remembered.
Check that your disk is not full.
Check that you have sufficient access rights to your computer's Windows directory. You may not have
full access if you are running on a network.
See Also:
Error andSee Also:
Error and Warning Messages Warning Messages
8.59
The Auto Mode option to reuse the logger is set
You have attempted to start Auto Mode but Temprecord has found that you have the option to reuse the logger
set, but you have no Auto Mode option set to read the logger and save the data.
If you continue, any data contained in the logger will be lost when the logger is reused. You should make sure
the data has been saved to disk at an earlier time before using auto mode with neither of the options to read the
logger and save the data enabled.
Copyright 1992..2010 Temprecord International Ltd.
Error and Warning Messages
195
If you do not want to be prompted for this question, and you understand the issues involved, make sure the
checkbox labeled "Don't ask me this again" is checked.
The state of this checkbox is only remembered for the current auto mode session. If you exit
auto mode, the prompt will be displayed the next time you start it. It is not possible to
permanently disable this warning.
See Also:
Error and Warning Messages
8.60
The comment fields for file <filename> have been edited but the changes
have not yet been saved. Save file ?
You have changed the comment fields for the named file but the data has not yet been saved to disk.
You should save the data to disk or your changes to the comment fields will be lost.
See Also:
Error and Warning Messages
8.61
The comment fields for logger <serial number> have been edited but the
data has not yet been saved. Save logger data to file ?
You have changed the comment fields for the data from the logger shown but the data has not yet
been saved to disk.
You should save the data to disk or your changes to the comment line will be lost.
Click the 'Yes' button if you want to save the changed comment information to a disk file.
Click the 'No' button if you do not want to save the edited comment information. Any changes you have
made will be lost.
Click the 'Cancel' button to abandon the operation.
See Also:
Error and Warning Messages
8.62
The data from this logger has not yet been read. Do you wish to read the
data and save it before re-using the logger ?
You have attempted to reuse the logger without first reading the data from the logger and saving it to
disk.
You should save the data to disk before reusing the logger you will lose the data stored in the logger.
Click the 'Yes' button if you want to read the logger data before reusing and save it to a disk file.
Click the 'No' button if you do not want to read the logger data before reusing the logger. The data in
the logger will be lost.
Click the 'Cancel' button to abandon the operation.
See Also:
Copyright 1992..2010 Temprecord International Ltd.
196
Temprecord Help
Error and Warning Messages
8.63
The factory calibration applied to this logger at manufacture can no longer
be guaranteed
The factory calibration applied to this logger at manufacture can no longer be guaranteed.
- The recorded temperature values will still be accurate to within 0.5°C.
- The typical RH-accuracy (at 25°C) for the recorded humidity values will still be within
±2.0% RH from 10% to 90% RH
- The typical RH-accuracy (at 25°C) outside this range will still be within ±4.0% RH
Please return this logger to the factory for calibration checking.
Some Mk III Temprecord loggers can contain additional calibration information to improve their
accuracy. If you receive the above message it indicates that this calibration information is possibly
invalid.
If this is the case, the temperatures and humidity values read from the logger are possibly less
accurate than they might be, but they will still be within the accuracy range stated above. You should
return the logger to Temprecord for recalibration.
Logger temperature and humidity accuracy can also be affected by the following factors:
· exposing the logger to temperatures outside the specified operating temperature range.
· exposing the logger to strong electromagnetic radiation sources, such as microwaves, high
voltage generators, or radio transmitters.
· immersing humidity loggers in liquids or exposing them to environments that might poison the
humidity sensor.
Contact Temprecord for more information.
See Also:
Error and Warning Messages
8.64
The recalibration period on this logger will expire in N weeks
'The recalibration period on this logger will expire in 12
weeks.
You will not be able to use the logger after 15 Jan 2010
This message will display when you save the parameters for a logger which has been programmed at the
Temprecord factory to prevent usage after a calibration expiry date. You will be able to start the logger on trips
until the expiry date shown.
See Also:
Error and Warning Messages
Copyright 1992..2010 Temprecord International Ltd.
Error and Warning Messages
8.65
197
The Temprecord help file for the selected language <filename> was not
found. English language help will be used instead
The selected language does not have an associated Help file. The English-language help file will be
used instead. See your distributor about obtaining a help file for the language you have selected.
You can select the language of the Temprecord program with the Options/Language function. By
default, this is set to 'use regional settings', which instructs Temprecord to look at your Windows
installation to see which language your computer is set up for. Temprecord will then try to choose a
language to suit your setting.
You can access the regional settings for your computer as follows:
Windows 3.1/3.11
Open the 'Main' program group.
Open 'Control Panel.
Open 'International'
You can now change the language by clicking on the 'Language' drop-down list box.
Click on 'OK'
Windows 95
Click on 'Start'
Select 'Settings'
Select 'Control Panel.
Open 'Regional Settings''
You can now change the language by clicking on the 'Language' drop-down list box.
Click on 'OK'
You can force Temprecord to ignore the regional settings by selecting one of the languages shown on
the Options/Language page instead of the 'use regional settings' selection.
Not all the languages shown on the Options/Language page are implemented. If you
choose one that is not yet implemented, Temprecord will use English language instead.
See Also:
Error and Warning Messages
8.66
This logger''s recalibration is due in N weeks
This logger's recalibration is due in 2 weeks.
You will not be able to use the logger after 15 Jan 2010
This message will display when you try to start a logger which has been programmed at the Temprecord factory
to prevent usage after a calibration expiry date. You will be able to start the logger on trips until the expiry date
shown.
Copyright 1992..2010 Temprecord International Ltd.
198
Temprecord Help
See Also:
Error and Warning Messages
8.67
This model Temprecord cannot be re-used
You have attempted to reuse a single-use (Inland or Export) logger. These models can only be used
once, after which they should be returned for recycling.
See Also:
Error and Warning Messages
8.68
This Temprecord can only be started by snapping off a tab
You have attempted to use the Temprecord program to start an inland or export logger. These cannot
be started with the program - they must be started by snapping off one of the tabs.
See Also:
Error and Warning Messages
8.69
This Temprecord can only be stopped by snapping off a tab
You have attempted to use the Temprecord program to stop an inland or export logger. These cannot
be stopped with the program - they must be stopped by snapping off the remaining tab.
See Also:
Error and Warning Messages
8.70
TX timeout
Temprecord is unable to communicate with the logger due to a problem with the serial COM port.
Check that the port is not in use by another application and is selected correctly using the COM port options.
8.71
Unable access parameters. Temprecord is probably faulty
You have attempted to program the parameters on a logger that reports as faulty. The logger's battery
may be exhausted.
See Also:
Error and Warning Messages
8.72
Unable to access parameters. Temprecord has been started
You have attempted to program the parameters on a logger has already been started. You cannot
alter the parameters on a logger unless it is in the 'ready' state.
See Also:
Error and Warning Messages
Copyright 1992..2010 Temprecord International Ltd.
Error and Warning Messages
8.73
199
Unable to access parameters. Temprecord has finished logging
You have attempted to program the parameters on an inland or export logger that has finished
logging. You can only alter the parameters on a logger before it is started.
See Also:
Error and Warning Messages
8.74
Unable to access parameters. Temprecord must be re-used first
You have attempted to program the parameters on a logger has finished logging. You cannot alter the
parameters on a logger unless it is in the 'ready' state.
Use the Program/Reuse function to reuse the logger.
Use the Program/Parameters function to set the logger parameters up for the next use.
Use the Program/Start function to start the logger.
See Also:
Error and Warning Messages
8.75
Unable to access Temprecord after re-use
The logger could not be accessed after reusing.
You may have removed the logger from the reader too quickly. Do not remove the
logger until the message window that opens has closed again
See Also:
Error and Warning Messages
8.76
Unable to access Temprecord after starting
The logger could not be accessed after starting.
You may have removed the logger from the reader too quickly. Do not remove the
logger until the message window that opens has closed again
See Also:
Error and Warning Messages
8.77
Unable to access Temprecord after stopping
The logger could not be accessed after stopping.
Copyright 1992..2010 Temprecord International Ltd.
200
Temprecord Help
You may have removed the logger from the reader too quickly. Do not remove the
logger until the message window that opens has closed again
See Also:
Error and Warning Messages
8.78
Unable to access Temprecord logger
This error is reported when the Temprecord program is unable to communicate with the logger. Of
all the problems you might encounter getting Temprecord operational, this is the most likely. The
reason for this could be because:
you do not have the reader interface plugged in.
you have it plugged in to a port different to that specified by the Options/COM Port setting.
there is no logger inserted in the reader interface, or the logger is not pushed far enough in.
you have inserted the logger the wrong way around. The logger must be inserted into the reader
interface with the hole visible and on the left. The logger types with snap-off tabs must be inserted with the
tab end visible.
the logger is faulty.
You may see other error messages if the logger cannot be accessed. See the topics:
Unknown logger response
TX timeout
No response from logger
No wakeup from logger
Bad CRC
Bad verify
Bad address
Incorrect firmware
for more information.
See also:
Unable to open COMx
Options/COM Port
Error and Warning Messages
8.79
Unable to delete file <filename>
Temprecord was unable to delete the named file. When this error occurs and you had selected more
than one file to delete, any further files you might have also selected are not deleted.
Check the speklling of the filename
Check that the file is not marked read-only
Check that the file is not held open by another network user.
See Also:
Copyright 1992..2010 Temprecord International Ltd.
Error and Warning Messages
201
Error and Warning Messages
8.80
Unable to access Temprecord. Password is incorrect
You have attempted to program the parameters on a Temprecord logger that is protected with a
password.
Enter the correct password.
See Also:
Error and Warning Messages
8.81
Unable to load file - insufficient memory
Temprecord will report this message if it cannot create another Temprecord data window to display the
data from a logger or a file. You are unlikely to see this error, but if it appears, you should try to make
more memory available on your computer, by closing some other applications, or fitting more memory.
See Also:
Error and Warning Messages
8.82
Unable to open COMx
This error is reported when the Temprecord program is unable to initialize the COM Port to
communicate with the logger. The message will indicate which COM port (COM1, COM2, COM3 or
COM4) it was attempting to use. This could be because:
the COM Port does not exist on your computer.
the COM Port is in use by another application.
Select Options/COM Port to investigate which COM Ports are available. The Options/COM Port
screen displays for each of COM1 to COM4, whether the port is in use by another application, in use
by Temprecord, or non-existent. You must choose a COM Port that is not in use and is fitted to your
computer.
Other devices which also use COM Ports are a mouse and a modem.
See also:
COM Port conflicts
Unable to access Temprecord Logger
Options/COM Port
Error and Warning Messages
8.83
Unable to open form
Temprecord will report this message if it cannot create a form. Forms or 'dialog boxes' are used by
Temprecord in order for you to enter information. Examples are:
Copyright 1992..2010 Temprecord International Ltd.
202
Temprecord Help
the Program/Parameters dialog
the Options dialog
the Edit Comments dialog
the Password dialog
the Print dialog
You are unlikely to see this error, but if it appears, you should try to make more memory available on
your computer, by closing some other applications, or fitting more memory.
See Also:
Error and Warning Messages
8.84
Unable to open PDF help file
Temprecord was unable to open the PDF help file. This is most likely to be because:
· The computer system you are using does not have Adobe Acrobat Reader installed. You can download
Adobe Acrobat Reader from http://get.adobe.com/reader/.
· The PDF help file was not installed when you installed Temprecord. The PDF file should have been
installed into the same folder as the Temprecord program. The PDF help file is called TRW_EN.PDF and
would normally be installed into C:\Program Files\TRW\.
See Also:
Error and Warning Messages
8.85
Unable to print
An error has occurred while Temprecord was trying to print.
Check that the selected printer is available to your computer.
Check that you have the latest printer driver for your printer and version of Windows.
Some earlier versions of the Windows 3.11 printer drivers for the HP LaserJet 5P printer
will give this error. If you are unable to get an updated printer driver for the LaserJet 5
that fixes the problem, try installing a printer driver for an earlier compatible printer, such
as the HP LaserJet III.
See Also:
Error and Warning Messages
8.86
Unable to read. Temprecord has not yet been started
You have attempted to read data from a Temprecord logger before it has been started.
Use the Program/Parameters function to set the logger parameters up for the next use.
Use the Program/Start function to start the logger.
See Also:
Error and Warning Messages
Copyright 1992..2010 Temprecord International Ltd.
Error and Warning Messages
8.87
203
Unable to read. Temprecord is probably faulty
You have attempted to read the logged data from a logger that reports as faulty. The logger's battery
may be exhausted.
See Also:
Error and Warning Messages
8.88
Unable to read. Temprecord start delay has not expired
You have attempted to read data from a Temprecord logger before the start delay has counted down
to zero. The logger will not begin to take samples until the start delay has expired.
See Also:
Error and Warning Messages
8.89
Unable to reuse Temprecord. Unit is probably faulty
You have attempted to reuse a logger that reports as faulty. The logger's battery may be exhausted.
See Also:
Error and Warning Messages
8.90
Unable to save file <filename>
Temprecord was unable to save the data to the named file.
Check the filename is valid
Check that the file is not already held open by another network user.
This error can also occur if you are trying to save a file that was created with an earlier
version of the Temprecord software. You can load these files and view and print the
data in them, but you cannot save them again.
See Also:
Error and Warning Messages
8.91
Unable to save Temprecord parameters
An error occurred when Temprecord tried to save the parameter data to the logger.
You may have removed the logger from the reader too quickly. Do not remove the
logger until the message window that opens has closed again
See Also:
Error and Warning Messages
Copyright 1992..2010 Temprecord International Ltd.
204
8.92
Temprecord Help
Unable to start Temprecord. Unit is probably faulty
You have attempted to start a logger that reports as faulty. The logger's battery may be exhausted.
See Also:
Error and Warning Messages
8.93
Unable to stop Temprecord. Unit is probably faulty
You have attempted to stop a logger that reports as faulty. The logger's battery may be exhausted.
See Also:
Error and Warning Messages
8.94
Unable to update parameters as Temprecord is not in ''ready'' state
Temprecord could not update the parameter data in the logger because the logger is not in the 'ready'
state.
This error can occur when you are using the 'Apply' button to set the parameters of several loggers in
succession and you accidentally insert a logger that has already started.
See Also:
Error and Warning Messages
8.95
Unable to update parameters as Temprecord is of a different type
Temprecord could not update the parameter data in the logger because the logger is of a type that is
different to the logger the parameters were originally read from.
This error can occur when you are using the 'Apply' button to set the parameters of several loggers in
succession and you accidentally insert a logger that is of a different type from the one the parameter
data was originally read from.
See Also:
Error and Warning Messages
8.96
Unable to update parameters as Temprecord is of older type
Temprecord could not update the parameter data in the logger because the logger in the reader
interface is of the older type, whereas the logger the parameters were originally read from is of the
newer type.
This error can occur when you are using the 'Apply' button to set the parameters of several loggers in
succession and you accidentally insert an older logger.
See Also:
Error and Warning Messages
Copyright 1992..2010 Temprecord International Ltd.
Error and Warning Messages
8.97
205
Unable to update parameters as Temprecord is of newer type
Temprecord could not update the parameter data in the logger because the logger in the reader
interface is of the newer type, whereas the logger the parameters were originally read from is of the
older type.
This error can occur when you are using the 'Apply' button to set the parameters of several loggers in
succession and you accidentally insert an newer logger.
See Also:
Error and Warning Messages
8.98
Unable to update parameters as Temprecord protected with password
Temprecord could not update the parameter data in the logger because the logger in the reader
interface is protected with a password, and the password is not the same as the password of the
logger the parameters were originally read from is of the newer type.
This error can occur when you are using the 'Apply' button to set the parameters of several loggers in
succession and you accidentally insert a logger protected with a password.
See Also:
Error and Warning Messages
8.99
Unable to create spreadsheet
Temprecord was unable to create the Microsoft Excel spreadsheet file when you carried out the Copy to Excel
function.
· The disk may be full.
· You may be trying to save the file to a folder that you do not have write-access permission for.
See Also:
Copy to Excel
Error and Warning Messages
8.100 Unable to create folder
Temprecord was unable to create the folder.
When you save a file, Temprecord has the ability to create a file and folder name using formatting characters, so
that the file or folder name includes such information as the logger serial number or the date.
· Your generated filename may contain characters that are not valid in a Windows file or folder name.
· The disk may be full.
· You may be trying to create the folder in a location that you do not have write-access permission for.
See Also:
Formatted file and folder names
Error and Warning Messages
Copyright 1992..2010 Temprecord International Ltd.
206
Temprecord Help
8.101 Unable to open spreadsheet
Temprecord was unable to open the Microsoft Excel spreadsheet file after you carried out the Copy to Excel
function.
In order for Temprecord to open the spreadsheet after you have copied data to the Excel file, your computer
must have Microsoft Excel or Open Office Calc installed.
See Also:
Copy to Excel
Error and Warning Messages
8.102 Unable to open dialog
Temprecord was unable to open the dialog you requested.
· Your computer may be low in memory. Try closing some other applications. If the problem persists, exit
Temprecord and start it again.
See Also:
Error and Warning Messages
8.103 Unable to save file for emailing
Temprecord was unable to save the Temprecord data file or PDF report file for emailing as an attachment.
· The disk may be full.
· You may be trying to save the file to a folder that you do not have write-access permission for.
See Also:
Emailing files
Error and Warning Messages
8.104 Unexpected end-of-file
Temprecord has found the end of a Temprecord data file before it expected do. This error should not
occur under normal operation.
Check that the file is a Temprecord data file.
The file may be damaged. Run a utility such as SCANDISK to try to repair the file.
See Also:
Error and Warning Messages
8.105 Unexpected errors
When unexpected errors occur in the Temprecord program, a diagnostics report is generated. The diagnostics
report contains information about your computer system and can help Temprecord when diagnosing problems
you may be having.
When an error occurs, you will see the following dialog:
Copyright 1992..2010 Temprecord International Ltd.
Error and Warning Messages
207
Click on the button Send diagnostics report to send the report to Temprecord.
The report contains information including:
·
·
·
·
The current settings of Temprecord, which are saved in a file called TRW.INI
A log of the events occurring as Temprecord was started up.
An image of the screen contents when the report was requested.
Information about the computer system running the Temprecord program
No Temprecord data files or PDF report files are sent
Click on the button Send diagnostics report to send the report to Temprecord.
Click on the button Show me what's in the report to if you want to inspect the report before it is sent.
After you have optionally sent the diagnostics report, you can choose what action you want Temprecord to take
to recover from the unexpected error.
Click on the Continue running Temprecord button to resume operation of Temprecord. Note that the
occurrence of the error may have introduced instability or cause further errors to occur.
Click on the Restart Temprecord button to abandon your current session and start operation of Temprecord.
Any unsaved data or settings will be lost. This might be necessary if the error is a serious one and you cannot
continue running Temprecord without further errors occurring.
Click on the Exit Temprecord button to abandon your session and close the Temprecord program. Any
unsaved data or settings will be lost. This might be necessary if the error is so serious that you cannot continue
running Temprecord without further errors occurring, and restarting Temprecord also results in an unexpected
error occurring.
You can also request that a diagnostics report be sent to Temprecord by clicking the button on the System tab in
the options dialog. Temprecord may request that you do this when trying to remedy problems you may be
having.
See also
Diagnostics reports
8.106 Unknown command option
The command-line parameter specified is invalid. Temprecord accepts parameters on the command
line. If a filename is specified for example, Temprecord will open that file when it starts. You can enter
several filenames if you wish, separated by spaces.
There are also command-line options that specify actions Temprecord is to perform when it starts. For
example, you can read a logger and save the data to a file. See Command-Line Parameters for more
information.
See Also:
Copyright 1992..2010 Temprecord International Ltd.
208
Temprecord Help
Error and Warning Messages
8.107 Unknown logger response
Temprecord encountered an error while trying to communicate with the logger. These errors can result from
problems with the reader, the logger, or the USB/serial interface.
Unplugging the USB reader interface from the computer's USB port while Temprecord is running
can have unpredictable effects and result in the loss of communication with the logger. It is best
to exit Temprecord before unplugging or plugging in the reader interface.
8.108 WARNING - File damaged. Data may not be correct
The Temprecord data file is possibly damaged. All Temprecord data files include error-checking
information to guard against tampering, and to detect damage to the files that might result in incorrect
information being displayed.
If the file was copied from some other source (e.g. a diskette, or from an e-mail attachment),
retrieve the file again.
See Also:
Error and Warning Messages
8.109 Web file not found
Temprecord is unable to load the file from the web storage folder.
· Check that the correct username and password is entered in your web options
· Check that the file exists in your web folder. If you are attempting to open the file from the "recent files"
list and the file has meanwhile been deleted, moved, or renamed you will receive this error.
· You might have experienced a temporary internet error while trying to load the file. Try to load the file
again.
See also:
Error and warning messages
Copyright 1992..2010 Temprecord International Ltd.
Index
Index
-B-
-%%Computer% - computer name (meta-string) 168
%Email% - sender's email address (meta-string)
168
%Files% - names of attached files (meta-string)
168
%From% - sender's name and email address
(meta-string) 168
%Name% - sender's name (meta-string) 168
%To% - list of recipients (meta-string) 168
%User% - logged in Windows user (meta-string)
168
%Workgroup% - computer workgroup name
(meta-string) 168
-116-bit versions of Windows
30
-Aabout Temprecord 27
Access exporting to 158
Accuracy 90, 196
Adbobe Acrobat 186
address - bad 179
Administrators 38
Adobe Acrobat 185
Alert - product cooling 152
All samples - selecting 117
allow markers 81
annotation 158
Anti-virus software 44
arrow keys 44
ASCII file save 60
ASCII files 68
ASCII filetype 158
assign presets from window 131
Auto mode 139, 141, 144, 145, 146, 147, 194
Auto mode operation 91
Auto Mode options 175
averaging 158
axes - appearance on printed report is different to
screen 57
Copyright 1992..2010 Temprecord International Ltd.
bad address 179
bad CRC 180
bad verify 180
Batch installation 38
battery 180
Battery capacity remaining - showing
beep when clicking on buttons 46
Blood cooling alert 152
Bluetooth 137, 138
button 81
buttons 15
buttons - not working 46
148
-CCalibration 196
Capacity - battery 148
Caring for humidity loggers 25
cascade 134
Celsius 106
changing logger parameters 90
changing the lower and upper limits 111
changing the view mode 110
checking for a logger 58
checking for a logger on startup 137
Clearing a password 77
Clipboard - copying data to 161
Clipboard - copying samples to 117
closing a file 65
closing a window 134, 181
Color - printing 163
colors 148, 150, 152, 154
COM Ports 49, 138, 201
comma 150, 158, 163
Command-line function errors 184
command-line options 207
command-line parameters 20
comment - editing 66
comment fields 27, 195
comment fields - using 67
comment labels 172
comments - editing 66
common problems 43
Confirm key 184
confirmation 190
confirmation of password 181
209
210
Temprecord Help
confirming a password 190
conflicts 49
contents 12
control panel 49, 171
Cool zone 98
Cooling - blood 152
Cooling - product 152
Cooling - rate of 105, 158
Copy samples to clipboard 117
Copy to Excel 120
Copying to the clipboard 161
Corrupted logger data 181
CRC - bad 180
cursor 44, 108
cursor functions 113, 114, 115, 116, 123, 124
Custom installation 38
-Ddamaged files 208
data - exporting 68
data printing 69
Data is corrupted 181
data windows 112
datafile format error 182
datafile format incorrect 182
datafile format version error 182
date - appearance on printed report is different to
screen 57
date format 110, 158
Date formatting - file saving options 140
Date formatting options 176
DB-25 25
DB-9 25
Default filenames 139, 141, 144, 147
Default folders 139, 141, 144, 145, 146, 147
defaults 168
Defaults - Mon-T logger parameters 168
degrees 150, 163
delete file dialog 63
deleting a file 63
deleting files 63, 200
delimiters 158
Delta H 152
Device Manager 49
Diagnostics report 177, 206
dialog - delete file 63
dialog - edit comment 66
dialog - open file 62
dialog - print 68
dialog - save file 60
Dialog - unable to open 206
dialogs 201
disk full 187
display of limits 111
displaying files in 2 windows 112
displaying two loggers 112
docking 15
Drying humidity logger sensors 25
duration 75
Durations - display format in Excel 120
Dust - humidity loggers 25
-Eedit comment dialog 66
editing a comment 66
editing comment fields 195
editing comments 195
Email 206
Email options 168, 170
Email queue 134
Emailing files 64
enable safe range 78
enables 81
Encryption 140
Encryption key and confirm are different 184
Encyption key 184
end marker 123
end sample 115, 128, 133
Error carrying out command line functions 184
Error loading web file 185
error Messages 177
error opening file 184
Error opening web file 185
Error printing 185
error reading file 186
error writing file 187
Errors - unexpected 206
errors reading a file 206
Event log 134
Excel 205, 206
Excel - copying samples to 120
Excel - display format of durations and dates 120
Excel - exporting data to 161
exhausted - battery 180
Copyright 1992..2010 Temprecord International Ltd.
Index
exiting 137
exiting Temprecord 70, 182
export 60, 158
exporting data 68
Exporting data to an Excel spreadsheet
161
211
Formatted filenames 139, 141, 144, 147
Formatted folder names 139, 141, 144, 145, 146,
147
Formatting options - date 176
forms 201
-F-
-G-
Fahrenheit 106
failed to reuse 191
failed to start 192
fast downloads 137
field delimiter 158
fields - edting 66
file - deleting 63
file comments - editing 66
file menu 58
file read error 186
File saving options - date formatting 140
File saving options - web files 139
file write error 187
Filenames 139, 141, 144, 147
Filenames - default 139, 141, 144, 147
files - closing 65
files - deleting 200
Files - emailing 64
Files - installation log 38
files - opening 61
files - opening recent 69
files - renaming 64
Files - saving 59, 139, 141, 144, 145, 146, 147
Files - Saving as PDF 147
Files - Saving TR data 145, 146
finding the trace 114
Firmware 187, 189
first sample 114
flags 106, 108
Flashes 87
Folder - unable to create 205
Folder names 139, 141, 144, 145, 146, 147
Folders - default 139, 141, 144, 145, 146, 147
fonts 136, 148, 150, 152, 154, 163
Footers 166
foreign languages 171
Format - page 166
format error 182
Format specifiers 139, 141, 144, 145, 146, 147
format version error 182
general options 137
getting started 13
GMT 176
go to 113
go to functions 115, 116, 123
Go to Sample 114
goto functions 114, 124
graph 106, 108, 114
graph - appearance on printed report is different to
screen 57
graph height 163
graph view - format of date and time 110
graph view options 154
grayed menu items 46
Growth Statistics 152
Copyright 1992..2010 Temprecord International Ltd.
-HHeaders 166
help files 197
help index 14
help menu 12
high-speed downloads 137
horizontal 127
horizontal zoom 127
how do I? 27
how to use help 14
how zooming works 124
humidity - limit delay and 80
humidity logging duration when logging 75
humidity resolution and accuracy 90
humidity sample period and 74
humidity unable menu items disabled 46
humidity unable to alter parameters 44
Humidity unable to program parameters 56
humidity upper and lower limits 79
Humidity - viewing 111
humidity data - exporting 68
humidity data - viewing 44
Humidity loggers 25
Humidity loggers - setting up 73
212
Temprecord Help
hygiene index
100
-II cant select the Humidity options when I program the
logger parameters 56
incompatible 187
incorrect datafile format 182
incorrect firmware 187
Info viewing 134
INI file 194
INI file - TRW 38
Installation 27, 30, 38
Installation - custom 38
Installation - log files 38
insufficient memory 201
Integrity profile 98
international settings 197
interrupts 49
invalid limit delay 187
invalid lower temperature limit 187
invalid password 190
invalid password submitted 187
invalid preset date or time 188
invalid sample period 188
invalid start date 188
invalid start delay 188
invalid start time 188
invalid upper temperature limit 189
IRQs 49
-KKey - encryption
Kiosk 92
140, 184
-Llabels - comment 67
Landscape 166
language 171
languages 197
LaserJet problems 202
last sample 114
LED's 87
limit delay 78, 80, 187
limits 27, 48, 79, 111
list of error messages 177
Load and Save - web options
174
locale - date format 110
Log - events 134
Log files - installation 38
Logged-in user name 141
logger - no response 189
logger - no wakeup 189
Logger firmware 189
logger parameters - changing 90
logger password 77
Logger response - unknown 208
Logger tracking 173
Loggers - humidity 25
logging duration 75
logging duration when logging both temperature and
humidity 75
Logging Temperature
or Both 73
loop overwrite 80
loop overwtite 48
lower and upper limits 111
lower limit 79, 187
-MManufacture date - showing 148
MAPI 168
markers 81, 116, 124, 128
maximum 116, 123
Maximum temperature 82
memory 201
menu items - grayed 46
menus 14
messages 177
meta-strings 168
Meta-strings in print headers and footers 166
Microsoft Access exporting to 158
Microsoft Excel 161
Microsoft Excel - copying samples to 120
minimum 116, 123
Minimum temperature 82
MKT Statistics 152
Mode - kiosk 92
Monochrome printing 163
Mon-T 82
Mon-T Logger 87
Mon-T logger - default parameters 168
mouse 129
MS Access exporting to 158
Copyright 1992..2010 Temprecord International Ltd.
Index
-Nnetworks 30
Neutrality - Zone of thermal 97
next marker 116
No color 163
No email recipients specified' 186
No files to attach 186
no response from logger 189
no wakeup 189
-Oopen file dialog 62
opening a file 61, 184
opening recent files 69
Operation - kiosk 92
options 135, 136, 137, 168, 171
options - Auto Mode 175
options - command-line 20
options - comment labels 172
Options - Date formatting 176
Options - email 168, 170
options - export 158
options - general 137
options - graph view 154
options - printing 163
Options - SMTP 170
options - statistics view 152
options - summary view 148
options - values view 150
options Web 172
Options - web load and save 174
overwriting 80, 137
-PPage format 166
Paper size 166
Parameter defaults - Mon-T logger 168
parameters 20, 44, 72, 74, 75, 168, 203
parameters - programming 71
parentheses 150, 163
password 77, 78, 187
passwords 181, 190, 201
PDF 186
PDF file - error 185
PDF files - emailing 64
Copyright 1992..2010 Temprecord International Ltd.
PDF files - saving 147
PDF temporary files - unable to create 185
PHI 100, 152, 163
PIP 98
plugging the reader in 25
popup menus 14
Portrait 166
preferences 137
presets 27, 130, 131, 188
preview 150, 163
previous marker 116
print all 69
print dialog 68
Print footers 166
Print headers 166
printer drivers 202
printer fonts 136
printing 45, 68, 202
printing data 69
printing options 68, 163
printing problems 45
problems 43
problems programming parameters 44
process hygiene index 100
Product cooling alert 152
Product integrity profile 98
profile - product integrity 98
program menu 71
programming a logger 203
programming parameters 72
programming user data 74
prompt on exit 182
prompt on reuse 182
prompt on starting 183
prompt on stopping 183
prompts 137
Proxy settings 173
-QQueue - email 134
quoted text 158
-RRange - temperature 82
Rate of cooling 105, 152, 158, 163
Rate of Cooling Statistics 152
reader 25
213
214
Temprecord Help
Reader - USB 49
reading a file 206
reading a logger 58, 195, 202, 203
read-only 187
recent files - opening 69
refrigeration index 104
Refrigeration Index Statistics 152
regional settings 110, 171, 197
Removing a password 77
renaming a file 64
Report - diagnostics 177, 206
resolution 82, 90
response - no 189
Response - unknown logger 208
Reuse logger 194
reusing 137
reusing a logger 87, 191, 192, 193, 198, 199, 203
reusing Temprecord loggers 182
RI 104
right mouse button 14
-Ssafe range 78
Sample - Go to 114
sample period 74, 188
sample range 158, 163
sample rate issues 91
Samples - copying to clipboard 117
Samples - selecting all 117
save file dialog 60
saving a file 59, 195, 203
saving data 27, 181
Saving Files 139, 141, 144, 145, 146, 147
ScanDisk 184, 186
searching for help 14
Select all samples 117
selecting a font 136
semicolon 158
Sending a diagnostics report to Temprecord 177
serial connector 25
Serial number - printing with the graph 163
serial port 138
Server - proxy 173
set as start sample 132
Setting a password 77
setting up a default set of parameters 84
Setting up humidity loggers 73
setting up several loggers 83
short date format 110
Show battery capacity remaining 148
Show manufacture date 148
SIze - paper 166
SMTP options 170
SMTP options not set 186
space 158
specification of passwords 190
Specifiers - format 139, 141, 144, 145, 146, 147
speed buttons 15
speed buttons - not working 46
SPOOL32 Error 45
Spreadsheet 205
Spreadsheet - exporting data to 161
Spreadsheet - copying samples to 120
Spreadsheet - unable to open 206
start date 188, 191
start delay 75, 188, 191, 203
start marker 123
start sample 115, 128, 132
start time 188, 191
start time and date already passed 191
starting 81, 137
starting a logger 85, 192, 193, 198, 202, 204
starting at a time and date 76
starting Temprecord loggers 183
statistics 94
Statistics - total temperature value 97
statistics view options 152
Stop Logger if necessary 175
stopping 81, 137
stopping a logger 86, 191, 193, 198, 199, 204
stopping Temprecord loggers 183
strings - subsitution of meta-strings 168
submitting a password 187
suggested filenames 137
summary 58, 93
summary view options 148
switcher 81
System administrators 38
-Ttab 158
tabs 198
tampering 208
temperature upper and lower limits
79
Copyright 1992..2010 Temprecord International Ltd.
Index
temperature axis 127
temperature axis - appearance on printed report is
different to screen 57
Temperature range 82
Temperature units 106
Templates - using 144, 145, 146, 147
Templates - using filename and folder 141
Temprecord 27
Temprecord - exiting 70
Temprecord already running 192
Temprecord already started 193
Temprecord already stopped 193
Temprecord must be reused 193
Temprecord must be stopped first 193
The temperature exceeded the limits but the
summary does not show this 56
Thermal neutrality - Zone 97
this model Temprecord cannot be reused 198
tile horizontally 134
tile vertically 133
time axis 127
time format 110
Time to cool 98
time to fill logger with samples 75
timeout - TX 198
Timezone 140, 176
toolbars 15
Total Temperature Value 97
TR data files - emailing 64
TR data files - saving 145, 146
trace 114
trace not visible 44
Tracking - logger 173
translation 171
TRW.INI 38, 194
TTV 97, 152, 163
TTV Options 152
TTV Statistics 152
two copies of Temprecord 192
TX timeout 198
-Uunable to access logger 198, 199, 200, 201
Unable to create folder 205
unable to create INI file 194
Unable to create spreadsheet 205
unable to delete file 200
unable to find INI file 194
Copyright 1992..2010 Temprecord International Ltd.
unable to load file 201
unable to open COM port 201
Unable to open dialog 206
unable to open form 201
Unable to open spreadsheet 206
unable to print 45, 202
Unable to queue mail for sending 186
unable to read logger 202, 203
unable to reuse logger 203
unable to save file 203
Unable to save file for emailing 206
unable to save parameters 203
unable to start logger 204
unable to stop logger 204
unable to update logger 204, 205
unable to write to INI file 194
undersampling 91
unexpected end-of-file 206
Unexpected errors 206
units 106, 150, 163
unknown command line option 207
Unknown logger response 208
upper limit 79, 189
USB Reader 49
user data 74
User data - printing with the graph 163
user markers 81, 124
Username 141
Using filename and folder templates 141
Using templates 144, 145, 146, 147
using the button on the logger to mark an event
using the button on the logger to start and stop
logging 89
using the comment fields 67
using the zoom presets 131
UTC 140, 176
-Vvalues 105
values - printing 49
values per line 158
values view options 150
verify - bad 180
vertical zoom 127
view 93, 94, 105, 106, 108, 110, 112
View info 134
view menu 92
215
88
216
Temprecord Help
viewing humidity data 44
Viewing Temperature, Humidity or Both
Virus checkers 44
111
-Wwakeup - no 189
warning messages 177
ways to open a file 61
We file - error loading 185
We file - error opening 185
Web file not found 208
Web files - file saving options 139
Web files - opening recent 69
Web Load and Save options 174
Web options 172
Web tracking 173
what the LEDs on the logger tell you 87
When the default filename and folders are used
144
Will not start - Temprecord 44
window 131
Windows 30
Windows 7 - problems with displayed date format
110
write-protected 187
-ZZone of thermal neutrality 97
zones - rate of cooling 105
zoom 127, 130, 131, 188
zoom all 128
zoom all windows to presets 130
Zoom All Windows To This One 131
zoom between markers 128
zoom functions 124
zoom window to presets 130
zooming 129
Copyright 1992..2010 Temprecord International Ltd.