1
ProStix Smartstore Training Manual Purchasing & Receipting
© 2014 Sterland Computing
Contents
3
Table of Contents
Purchasing and Receipting
4
1 Introduction to
...................................................................................................................................
Purchasing & Receipting
4
2 PreRequisites................................................................................................................................... 7
3 Purchasing ................................................................................................................................... 8
Standard Products
.......................................................................................................................................................... 8
Timber Tally .......................................................................................................................................................... 11
Timber Packs.......................................................................................................................................................... 12
Stock Re-Ordering
.......................................................................................................................................................... 13
Suggested
Stock Re-Order
.........................................................................................................................................................
13
Timber Re-Order
.........................................................................................................................................................
Report
16
Scheduled
.........................................................................................................................................................
Re-Ordering
17
Scheduled
.........................................................................................................................................................
Warehouse Re-Ordering
19
Stock Re-Order
.........................................................................................................................................................
Algorithm/Data Setup
20
Returns & Credit
..........................................................................................................................................................
Requests
27
Overview ......................................................................................................................................................... 27
New Return
......................................................................................................................................................... 28
Options
......................................................................................................................................... 31
Finding Returns
.........................................................................................................................................................
& Credit Requests
33
Credit Claims
......................................................................................................................................................... 34
4 Receipting ................................................................................................................................... 36
Standard Products
.......................................................................................................................................................... 41
Receipt Details
......................................................................................................................................................... 41
Update Stock
......................................................................................................................................................... 43
Timber Tally .......................................................................................................................................................... 46
Timber Packs.......................................................................................................................................................... 47
Receipting Linked
..........................................................................................................................................................
Sales Orders
48
© 2014 Sterland Computing
3
4
1
ProStix Smartstore Training Manual - Purchasing & Receipting
Introduction to Purchasing & Receipting
Controlling the flow of stock allows a business to take advantage of the savings associated
with fostering a working relationship with creditors as well as maintaining a healthy gross
profit.
Haphazard handling of the Purchasing and Receipting processes can result in an
understatement or overstatement of the value of inventory, the consequences of which
infiltrate right through a business.
For ProStix to work as designed, purchasing staff need to create purchase orders for the
required goods from the appropriate supplier. The goods receiving clerk then receives the
goods into stock as soon as they arrive - this adds the goods into the system and creates
entries in the Goods Receipts file, awaiting the arrival of the invoice from the supplier.
When the supplier invoice arrives it needs to be checked against the entry in the Goods
Receipt file. These invoices are processed through ProStix Creditors Invoice Approval
where built in/defined controls will reconcile the receipt value to the invoiced value. (Note
that invoices for non-stock non-receipted items (e.g office stationery supplies) are
processed through Accounts Payable - Transaction Processing where there is no
reconciliation between a stock receipt and the invoice.)
The Accounts Payable Clerk checks that the supplier invoice matches the goods that have
been receipted into stock and that the invoice total matches what was receipted. Once the
invoices have been added to the Invoice Batch, the batch is completed and posted to the
correct general ledger accounts and the invoices are tagged to be paid.
All that now remains is that these invoices are selected, either direct debits are processed
or cheques are drawn as payment to suppliers, cheque numbers allocated at the
appropriate time and then, the bank account is reconciled.
While these are the processes that should be followed, there are always situations that
occur to complicate procedures - purchase orders are created for the wrong supplier,
supplier costs can vary when a purchase order is raised or when an invoice is processed,
stock is incorrectly receipted, products need to be returned and credit notes need to be
processed.
These complications can be handled smoothly and efficiently if the original transaction is
correctly reversed and re-processed with enough detail provided to give a clear trail of the
reasons why certain actions have been taken.
The Purchasing and Receipting module covers the procedures for:
•
•
•
•
•
•
•
•
•
creating a purchase order
modifying or deleting an existing purchase order
order special products (usually to fill a customer order)
receipt a purchase order
process back orders for goods not received
process a stock return or adjustment to the receipted
process stock on consignment
approve creditors invoices for payment
enquire and report on purchase orders and stock receipts
The Purchasing & Receipting Module is broken into the following areas:
© 2014 Sterland Computing
Purchasing and Receipting
5
Purchase Order Processing to:
•
•
•
•
create purchase orders or modify/delete existing orders
download a purchase order that has been keyed into a PDE
create and track branch stock transfers
create purchase orders for a range of products i.e multi supplier order rather than a
range of suppliers
Stock Re-Ordering will use existing stocking information and generate a suggested
re-order report. Once this has been checked and adjusted, purchase orders can be
generated and processed
Returns & Credit Requests is used to process stock returns or adjustments to pricing,
requesting credit from a supplier for previously receipted stock, reversing the general
ledger entry that was performed when the stock was receipted.
Purchase Order Reports will generate the following reports:
•
•
•
•
•
•
Purchase Orders Outstanding
Purchase Cost Exceptions
Purchase Orders Below Minimum
Purchasing Analysis
Claims Summary Report
Outstanding Claims Detail Report
Stock Receipting is used to locate current orders and
•
•
•
•
•
•
show details of the order
receipt some or all of the order
close an order even if incomplete
link an order with another purchase order
link an order to a customer order
detail delivery problems
Stock Receipt Reports - the following reports are available:
•
•
•
•
•
•
•
•
•
Stock Received Report
Stock Received Variance Report
Stock Received for Customer Orders
Stock Received No Creditors Invoice
Invoice Approval Exception Report
Goods in Transit Report
Stock Received and Invoiced Report
Stock Purchases Report
Standard Cost Variation Report
Stock Receipt Enquiry is used to enquire and report on goods received for a specific
purchase order
Creditors Invoice Approval - will process a creditors invoice i.e checking it against the
stock receipt/s, accounting for any variation so that it can be prepared for payment. When
goods are receipted, the value of the receipt sits in the Purchases Clearing Account (PCA) when the invoice is approved, the value approved is transferred from the PCA to the
Creditors Control account.
Future Stock Commitments - a report that summarises future dated transactions
© 2014 Sterland Computing
6
ProStix Smartstore Training Manual - Purchasing & Receipting
dealing with stock.
Consignment Stock - a module that allows you to keep track of stock on consignment
and then purchase it when a customer purchases it from you.
Import Purchasing allows for the purchase of goods in foreign currencies and the
definition of shipping consignments, import charges & duties and costing worksheets.
© 2014 Sterland Computing
Purchasing and Receipting
2
7
PreRequisites
Before proceeding through this Purchasing & Receipting manual it is recommended that you
have completed:
• ProStix Basics - Character Mode (CHUI)
Or
• ProStix Basics - Graphical Mode (GUI)
© 2014 Sterland Computing
8
ProStix Smartstore Training Manual - Purchasing & Receipting
3
Purchasing
3.1
Standard Products
Goal:
In this lesson you will learn how to purchase standard products.
The process of ordering and receipting stock into your system starts with a purchase order
being raised. The purchase order is simply a list of products and their quantities that you
require from a supplier. Accurate costs and required dates should also be entered on the
purchase order so that any ProStix forecasting is accurate.
Steps:
1.
From the 'Main Menu' select options - 'Purchasing & Receipting' - 'Purchase
Order Processing' - 'New Order'.
2. Key the supplier number and branch number, <F3> (Search) is available if required.
Copy Order: key 'yes' to copy from another order or return.
Promotion: key the promotion to apply to the entire purchase order if appropriate.
<F3> (Search) is available if required. Later on, when you are adding products to the
order, if a product is not included in the nominated promotion, an error will be
displayed and you will not be permitted to add that particular product.
Source: key w=warehouse, d=direct or leave blank.
Addresses: If there are a number of addresses for the supplier recorded against their
account in ProStix, a list of these addresses will be displayed so you can select the
branch upon which you are placing the order.
Shipping Basis Code: key the shipping basis code, <F3> (Search) is available if
required. It can be left blank; otherwise must be valid. A shipping basis can be of
type Pick-Up or Delivery; the type will determine what data user can enter in this
screen. When a Purchase Order is created for a Supplier with a default 'Shipping Basis'
defined, the Shipping Details screen will default to the value entered against the
supplier for the Branch the Purchase Order is being raised for. This value may be
overridden by the user if required.
Key the date required and shipping instructions. The date required is used to
schedule your own delivery to customers and is taken into account when producing
many reports associated with Purchase Ordering and Goods Receipting. This date is
preserved as the Original Date Required, and can be viewed along with other Purchase
Order details.
3. Key in, or use <F3> to search, for the products to be ordered along with the
quantities required. On your product file, for a particular supplier, the pack qty to be
purchased and also the minimum order quantity can be defined. When keying the
particular product, you will then be warned if the quantity you are keying does not suit
the quantities defined. By setting either the system flag 'InvForcMnQ' or 'InvForcPkQ' to
'yes', the applicable warning will then stop you from continuing.
4. While in this product entry screen, the <Up Arrow> can be used to view the header
details such as address.
© 2014 Sterland Computing
Purchasing and Receipting
9
5. Ensure the costs are accurate, using <F8> to review and <F7> to make any necessary
changes. Any product entered onto the purchase order where the supplier record for
the product has a zero cost, and the system flag 'InvPOZeroC' is set to 'yes', will
require the authorisation of a purchasing supervisor.
6. It is possible to create and receipt purchase orders with negative quantities. This
enables the effective tracking of products that have been sent to other sites to have
work done on them once customers have ordered them, e.g. send out a plain timber
door (negative qty on order) and receive in a routed & stained door (positive qty on
order). You can enter a negative quantity only if you have set the 'POAllowNeg' flag to
'yes'.
7. If there are any volume discounts associated with the supplier details for this product,
the next available volume discount quantity will be displayed in the function bar in case
you want to increase the quantity of the order to take advantage of this discount. If you
process a volume discount, receipting will post the full value to the stock account with
the volume discount posting as a purchases gain i.e income.
8. If more than one UOM has been set up for a product, e.g. a stock/sell UOM and a
purchasing UOM, these will be displayed for you to select from. The nominated
suppliers UOM will be at the top of the list. The quantity order must relate to the
selected UOM e.g. if you selected bx, the quantity keyed must be a bx quantity.
9. Comments can be added to a product on a purchase order by pressing/clicking <F6> at
any time and noting the line number after which you would like the comment to appear.
Added comments will print at the specified position on a purchase order if:
• you respond 'yes' to the 'Print' field in the comments box and
• you respond 'yes' to the 'Print Comments' field when you select to send the purchase
order to print.
You can add a single comment to print in the order header by selecting the 'Update
Header' option once you have exited from the order detail screen.
10. If any products entered onto the purchase order have weight defined, their weights
will be accumulated and displayed at the bottom left of the screen. Pressing/clicking
<F8> and then the <right-arrow> key will reveal the weight of each individual order
line. If any items do not have weights defined, a footnote will appear indicating a
possible weight discrepancy.
11.When finished entering products, press/click <F4> to end. Enter in the freight charge
if applicable. If you add freight in error or need to change the $ value, you can go back
into the Order Detail and change/delete the freight product that will now appear on the
order. After you proceed past the supplier freight box, if the total of the order is below
any pre-defined Minimum Order value and the supplier has a penalty charge
pre-defined, a warning is displayed.
12. If you are using the future pricing module, the 'InvFPrice' flag is set to 'yes', and the
delivery date for the Purchase Order being keyed is equal to or greater than your future
price date, then the system will use the relevant future cost price.
The cost is determined by using the following hierarchy:
• If a future supplier cost exists – use it.
• If no future supplier cost, use the current supplier cost.
• If no supplier cost use any future branch cost.
• If no branch cost use current branch cost.
• If no branch cost use future standard.
© 2014 Sterland Computing
10
ProStix Smartstore Training Manual - Purchasing & Receipting
• If no future standard use current standard.
Future promotions will also be considered if the delivery date on the Purchase Order
falls within the duration of the promotion selected.
If future costs have been used on the future dated Purchase Order, the following
message will be displayed when exiting the Order Details screen.
'Future Costs have been used on this order based on the delivery date at time of entry.
Current delivery date is 99/99/99'.
13.When creating a purchase order, the system checks for excess stock at other branches
if the flag 'InvExBrStk' is set to 'yes'. If the Stock Data information (at other branch/es)
for the product has a mandatory Performance Category and there is excess stock at that
branch, the user must create a Branch Transfer instead of a Purchase Order. Stock
Performance Categories are setup in Miscellaneous Tables and marked as mandatory if
Inter Brn = 'yes'.
Review:
You can now:
• Raise Purchase Orders for Standard Products.
© 2014 Sterland Computing
Purchasing and Receipting
3.2
11
Timber Tally
Goal:
In this lesson you will learn how to purchase Timber Tally products.
Goal:
1. From the 'Main Menu' select options - 'Purchasing & Receipting' - 'Purchase Order
Processing' - 'New Order'.
2. Key the supplier number and branch number, <F3> (Search) is available if required.
Complete the next fields as for Standard Products.
3. Key in, or use <F3> to search, for the products to be ordered along with the
quantities required. When Timber Tally products (that have the tally flag set to 'yes'
on the Product Master File) are selected, a Piece Tally Entry screen is displayed.
4. Key in the quantities and the lengths, e.g. 10 at 1.2, 20 at 2.4. The system will total
these tallies when you press/click <F1> and are returned to the product entry screen.
5. If the product has the length validation flag set to 'yes' then you will only be warned if
you key an invalid length into the piece tally entry screen.
6. Complete the rest of the purchase order as for Standard Products.
Review:
You can now:
• Raise Purchase Orders for Timber Tally Products.
© 2014 Sterland Computing
12
3.3
ProStix Smartstore Training Manual - Purchasing & Receipting
Timber Packs
Goal:
In this lesson you will learn how to purchase Timber Packs.
Steps:
1. From the 'Main Menu' select options - 'Purchasing & Receipting' - 'Purchase Order
Processing' - 'New Order'.
2. Key the supplier number and branch number, <F3> (Search) is available if required.
Complete the next fields as for Standard Products.
3. Key in, or use <F3> to search, for the products to be ordered along with the
quantities required. When Timber Tally products (that have the tally flag set to 'yes'
on the Product Master File) are selected, a Piece Tally Entry screen is displayed.
4. Press/Click <F8> (Packs). A new screen will open up to allow you to enter pack details:
Production: key the production source for the pack, e.g. acm, hyne, as defined in
miscellaneous tables, i.e. you can use <F3> to search.
Pack Size: key the pack size.
Unit Price: key the unit price.
Line Price: key the line price.
Comment: key any relevant comment.
If you press/click <F8> on this screen you will be taken to the piece tally entry screen
to key tallies.
If your press/click<F1> on this screen you will be taken to the Pack tally entry screen.
Key the pack tallies then press/click <F1>.
5. You are then returned to the product entry screen. The pack product has the comments
'PACKS' and the production listed below it, then the tallies.
6. Complete the rest of the purchase order as for Standard Products.
Review:
You can now:
• Raise Purchase Orders for Timber Packs.
© 2014 Sterland Computing
Purchasing and Receipting
3.4
13
Stock Re-Ordering
The Stock Re-Ordering Menu option allows you to automatically generate purchase
orders for a variety of suppliers using a built-in stock re-order algorithm and
certain stocking information that has been stored against products in Inventory
Maintenance.
The Stock Re-Order process can be performed manually or, can be scheduled to run after
hours.
This topic covers the following lessons:
Suggested Stock Re-Order
Timber Re-Order Report
Scheduled Stock Re-Ordering
Scheduled Warehouse Re-Ordering
3.4.1
Suggested Stock Re-Order
Goal:
In this lesson you will learn how to purchase products using the automatic Stock ReOrder process.
Stock Re-Order Report
The first step in the reorder process is to create a report that will detail products that can have
purchase orders created for them according to the information that has been stored against
the product.
The report can then be reviewed so that changes, if any, can be made to the purchase order
that is generated in the second process - Stock Reorder.
Stock Re-Order can be performed for a supplier either for an individual branch or for many
branches. This topic covers the first scenario - re-order for an individual branch.
Steps:
1. From the 'Main Menu' select options - 'Purchasing & Receipting' - 'Stock
Re-Ordering' - 'Suggested Stock Re-Order'.
2. The Stock Reorder Report can be generated for a specific supplier or, for a
non-contiguous range of suppliers.
© 2014 Sterland Computing
14
ProStix Smartstore Training Manual - Purchasing & Receipting
3. To produce a report only, key 'yes' in the first field of the Suggested Stock Re-Order
option. If you have previously run the report and are happy with the results, key 'no' to
generate a purchase order from the reorder quantities detailed on the report.
4. To run the report for a single supplier, either key the supplier code or use <F3> Search
to find the correct code. Note that when the Re-Order is performed in the next process,
this field can be left blank and re-ordering can be performed for all suppliers.
5. To run the report for a range of non-contiguous suppliers, press/click <F9> to display a
list of all suppliers and then use your preferred search method to locate a supplier to
include in the report. Press the <Space-Bar> to select this supplier - you will notice
that an asterisk appears beside that supplier. Continue to select suppliers using this
method.
6. If you select a supplier in error, move the cursor back to that supplier and press the
<Space-Bar> again - the asterisk will be removed and the supplier deselected. You
must select at least one supplier or an error will be displayed.
7. Once the supplier range has been selected, press/click <F1> to open up all of the other
fields on the screen so that you can determine the range of products to include on the
report.
Reorder Cycle: key the reorder cycle, <F3> (Search) is available if required, or leave
blank for all. These codes can be stored in the product's Stock Data area.
From/To Product, Product Group, Location: these three areas will allow you to
customise the report to only include products within these ranges.
From/To Period: will default to the values (e.g. 3 months prior to this period) stored
in the Company setting for Stock Re-Order ('System Administration' - 'System
Set-up' - 'Define Companies' - 'Company Maintenance' - 'Purchasing') but can
be overridden to be any historical period range, e.g. the last 3 months or the next 3
months from last year. This date range is used in the calculation of Daily Sales
Average.
8. Once the input criteria have been determined, press/click <F1> to display more criteria
on the RHS of the screen. It is imperative that the selections made on this screen are
consistent with those chosen when the report was generated or the information may not
correlate:
Zero Orders: include products on the report where the suggested reorder quantity is
zero? Even if you exclude these products from the report, they will appear on the
actual Stock Reorder screen.
Include Daily Products: include products that have a re-order cycle set to 1 day?
Sort Sequence: sort the report by product (P) or location (L)?
Preferred Only: this field will open up if you nominate a single supplier. Do you only
want to include products on the report where the nominated supplier is the Preferred
Supplier? 'No' will include products for which the specified supplier may be an
Alternate Supplier.
Below Minimum: if 'no', consider all products in the specified range for re-ordering.
If 'yes', consider only those products in the specified range where the Quantity
Available is less than the Minimum Stock defined for the product.
Non-Stocked Items: should items with the Stock Data - Product Type value equal to
1 be considered as well as stocked items i.e. type 0?
Exclude Sales Promos: are sales of products on promotion to be included/excluded
© 2014 Sterland Computing
Purchasing and Receipting
15
from the calculation of Daily Sales Average?
Exclude Purch Promos: exclude current purchase orders with a promotion
nominated from the on-order figure and stock receipts with a promotion nominated
from the stock on hand figure. Note that turning this check on can add a significant
delay, say 400%. Use with caution or, after hours.
Stock Source: W = warehouse and D = direct i.e. stock source values stored in the
supplier details for a product. B is a third option that will ignore the stock source value
from the supplier details.
Outside Window: ignore orders due outside product lead-time window.
Order Days: 60 = Check for orders placed in last 60 days, Zero for all.
9. The following information for each product will be included on the report:
UM: the stock/sell uom
Current Stock Information:
All Brn: stock on hand across all branches
O/H
P/O
C/O
stock on hand at the nominated branch for this branch
qty of this product already on purchase orders for this branch
qty of this product required for customer orders for this branch
Avail: stock on hand plus purchase order quantities minus customer order
quantities for this branch
Max/Min:
the levels defined for this product for this supplier at this branch
Sales Data:
0101-0301 the period during which sales at this branch were considered
YTD:
the year to date sales at this branch
Day
the daily sales average at this branch over the period
Re-Order Information:
UM:
Pack:
Suggest:
Actual:
this spot
the suppliers purchase uom
the suppliers required inner pack quantity
the amount suggested for reorder
blank – when printed, the amount to be ordered can be written in
Stock Re-Order
Steps:
1. The actual Stock Re-Order is usually processed once the Stock Reorder Report has been
manually reviewed. To produce the re-order, simply run the same option but, change
the value of Report Only to 'no'.
2. The reorder process can be performed for all suppliers by leaving the supplier field
blank. Note that this can be time-consuming task and is best performed after-hours. A
warning will be issued if the supplier field is left blank.
© 2014 Sterland Computing
16
ProStix Smartstore Training Manual - Purchasing & Receipting
3. The input screens that follow contain the same fields that were keyed when the reorder
report was generated. The only difference is that the field 'Zero Orders' is protected on
the right-hand screen - zero quantities will appear on the stock re-order to check and
review the decision not to order any of these products.
4. These fields are all explained in the previous section. If you are creating the re-order
based on a previously run report, it is important that the input criteria match those
selected when the report was run.
5. If any products in the range do not have a Preferred Supplier defined, the following
warning will be displayed:
'Products require a preferred supplier to suggest a re-order quantity. About to list
products which were found to have no preferred supplier.
6. These products will not be included in the re-order so, a list of the products will then be
displayed to screen.
7. The suggested reorder quantities for products that fall within the selected criteria will
then be displayed to the screen. Note the functions available:
8. Delete - move the cursor to the required product and press/click <F5> to delete the
product from the re-order.
9. Add - will open up a line so that you can key a product number and the supplier against
whom a purchase order will be created.
10.Change - move the cursor to the required product and press/click <F7> to open up the
Supplier and the Order fields so that changes can be made.
11.Info - move the cursor to the required product and press/click <F8> to display
products information on the LHS of the screen and the Stock Enquiry options on the RHS
of the screen.
12.P/Order - once the correct order levels have been determined, press/click <F9> to
create purchase orders for all of the suppliers for all of the products for all of the
quantities displayed to screen.
13.If you press/click <F1> on any of the entries, the order header and order options will
be displayed.
14.The order can be viewed and any changes made to the order by selecting the first
option, Order Details.
Review:
You can now:
3.4.2
• Purchase products using the automatic Stock Re-order process.
Timber Re-Order Report
Goal:
In this lesson you will learn how to print a Timber Re-Order Report.
Steps:
1. From the 'Main Menu' select options - 'Purchasing & Receipting' - 'Stock
© 2014 Sterland Computing
Purchasing and Receipting
17
Re-Ordering' - 'Timber Re-Order Report'.
2. When you select this option, you are presented with the following selection criteria:
Branch: key the Branch code, <F3> (Search) is available if required.
From/To Product No: key the product number range, <F3> (Search) is available if
required.
Pack Pieces Only: key 'yes' for Pack Pieces on Hand, or 'no' for Loose Pieces on
Hand.
Review:
You can now:
3.4.3
• Print a Timber Re-Order Report.
Scheduled Re-Ordering
Goal:
In this lesson you will learn how to setup Stock Re-Ordering parameters for
background processing.
The scheduled re-order tasks process both externally and centrally ordered products and
produces the resultant order into the Multi Supplier Purchase Order areas of the software
as well as producing the associated re-order reports if so requested.
Steps:
1. From the 'Main Menu' select options - 'Purchasing & Receipting' - 'Stock
Re-Ordering' - 'Scheduled Stock Re-Ordering'.
2. When this option is selected, a screen will appear which lists all the defined re-order
Tasks. Press/Click <F6> to add a new task. If no re-order tasks exist, you will be
placed in add mode enabling you to define a new re-order task. You will be prompted
for a Task Id and Description, then be prompted for the following:
Branch Range: The branch range being processed by this re-order task.
Re-Order Cycle Code: The group of items being processed by this re-order task. Use
<F3> to search or leave blank for all.
Period Range: Key the range to be used for calculating average daily sales - defaults
to the last three months.
Exclude Sales Promos: Key 'yes' to exclude promotional sales from the outstanding
customer orders quantity.
Exclude Purchase Promos: Key 'yes' to exclude promotional purchase orders from
the purchase order component of the availability calculation.
Below Minimum: Key 'yes' to only re-order where the availability is below their
minimum stock level.
Outside Window: Key 'yes' to consider orders due outside the product lead-time
window.
© 2014 Sterland Computing
18
ProStix Smartstore Training Manual - Purchasing & Receipting
Print Output: Key 'yes' to print a report for each branch at the branch.
Specific Print Queue: Key the name of the printer you wish the report to print on.
Include Daily Products: A group of items could be assigned the re-order cycle code
that represents products that are ordered on a daily basis. Should those products be
included in this re-order task?
Sort by Supplier/Loc'n: Key 'yes' to sort the report by Supplier and Location.
3. Once the re-order parameters are completed, you will be prompted to define the
scheduling parameters.
4. When scheduling is complete, the re-order task has been fully defined and you will be
returned to the list of tasks with the completed task having a status of 'disabled'. You
then need to toggle the status to 'current' if you wish it to be enabled.
F5 Delete
The <F5> (Delete) function allows you to delete the selected re-order task.
F7 Change
The <F7> (Change) function allows you to update the re-order task. When <F7> (Change)
is selected, you can change the re-order description, ordering parameters or scheduling
parameters.
F8 Status
The <F8> (Status) function allows you to toggle the task status between 'disabled' &
'current'. Any disabled re-order tasks will not be passed from the Task Scheduler to the Job
Processor.
F12 Schedule
The <F12> (Schedule) function allows you to update the task schedule.
Reviewing Suggested Orders
CPF Products
The suggested order quantities for centrally ordered products can be reviewed and
processed within the CPF Requisition Maintenance program.
Externally Ordered Products
Any suggested orders for externally ordered products are loaded into the appropriate branch
list within the Multi-Supplier Order option of purchase order processing.
Review:
You can now:
• Setup Stock Re-Ordering parameters for background processing.
© 2014 Sterland Computing
Purchasing and Receipting
3.4.4
19
Scheduled Warehouse Re-Ordering
Goal:
In this lesson you will learn how to setup Warehouse Stock Re-Ordering
parameters for background processing.
The Scheduled Warehouse Re-Ordering module allows you to set up Stock
Re-Ordering parameters for background processing.
The reorder process considers the stock availability and sales of the individual branches
that the nominated warehouse services, the lead time and stock min/max values are to
come from the central warehouse branch stock data.
Steps:
1. From the 'Main Menu' select options - 'Purchasing & Receipting' - 'Stock
Re-Ordering' - 'Scheduled Warehouse Re-Ordering'.
2. When this option is selected, a screen will appear which lists all the defined warehouse
re-order Tasks. Press/Click <F6> to add a new task. If no re-order tasks exist, you will
be placed in add mode enabling you to define a new re-order task. You will be
prompted for a Task Id and Description, then be prompted for the following:
Warehouse Branch: The warehouse branch being processed by this re-order task.
Re-Order Cycle Code: The group of items being processed by this re-order task. Use
<F3> to search or leave blank for all.
Period Range: Key the range to be used for calculating average daily sales - defaults
to the last three months.
Exclude Sales Promos: Key 'yes' to exclude promotional sales from the outstanding
customer orders quantity.
Exclude Purchase Promos: Key 'yes' to exclude promotional purchase orders from
the purchase order component of the availability calculation.
Below Minimum: Key 'yes' to only re-order where the availability is below their
minimum stock level.
Outside Window: Key 'yes' to consider orders due outside the product lead-time
window.
Specific Print Queue: Key the name of the printer you wish the report to print on.
Include Daily Products: A group of items could be assigned the re-order cycle code
that represents products that are ordered on a daily basis. Should those products be
included in this re-order task?
Sort by Supplier: Key 'yes' to sort the report by Supplier and Location.
3. Once the re-order parameters are completed, you will be prompted to define the
scheduling parameters.
4. When scheduling is complete, the re-order task has been fully defined and you will be
returned to the list of tasks with the completed task having a status of 'disabled'. You
then need to toggle the status to 'current' if you wish it to be enabled.
© 2014 Sterland Computing
20
ProStix Smartstore Training Manual - Purchasing & Receipting
F5 Delete
The <F5> (Delete) function allows you to delete the selected re-order task.
F7 Change
The <F7> (Change) function allows you to update the re-order task. When <F7> (Change)
is selected, you can change the re-order description, ordering parameters or scheduling
parameters.
F8 Status
The <F8> (Status) function allows you to toggle the task status between 'disabled' &
'current'. Any disabled re-order tasks will not be passed from the Task Scheduler to the Job
Processor.
F12 Schedule
The <F12> (Schedule) function key allows you to update the task schedule.
Review:
You can now:
3.4.5
• Setup Warehouse Stock Re-Ordering parameters for background processing.
Stock Re-Order Algorithm/Data Setup
Goal:
In this lesson you will learn about the Stock Re-Order Algorithm.
The reorder algorithm is a mathematical equation that looks at stocking levels for a product
and calculates a suggested reorder quantity at a certain point in time so that required
stocking levels are maintained.
Certain mandatory product information is used in the stock reorder algorithm to determine
a suggester reorder quantity. This mandatory information is stored in two of the Product
Maintenance options for a product – Stock Data and Suppliers.
Stock requirements for system-generated stock re-ordering are calculated using the
following formula:
Quantity Available: Stock on Hand plus Outstanding Purchase Orders minus
Outstanding Customer Orders
Suggested Order Quantity: Average Daily Sales (promotions can be excluded)
multiplied by Lead Time in days minus Quantity Available plus Minimum Stock
If the Suggested Order Qty < Min Stock and Qty Available > 0, Then Suggested Order
Qty = Min Stock – Qty Available.
If the Suggested Order Qty < Min Stock and Qty Available < 0, Then Suggested Order
Qty = Min Stock.
The Suggested Order Quantity is rounded up to the relevant increment of the supplier
© 2014 Sterland Computing
Purchasing and Receipting
21
Pack Size unless the flag 'InvOrdPack' = 'yes' and the product is a slow mover, i.e.
sales for the previous six months are less than the supplier Pack Size. In this case,
there will be no rounding, so the Suggested Order Quantity will be for a broken pack
size, usually without any quantity break reduction in cost.
Then, if the Suggested Order Quantity is less than the supplier Minimum Order
Quantity, it is rounded up to the supplier Minimum Order Quantity unless the product is
a slow mover (refer above).
Then, if the Suggested Order Quantity exceeds the Maximum Stock, it is rounded down
to or below the Maximum Stock by increments of the Pack Size. (unless Maximum
Stock = 0 in which case – no change).
If the Suggested Order Qty < 0 set it to 0.
Once the re-order quantity has been calculated, it is then checked against the max stock value
set at the branch product level. If the calculated re-order quantity + stock available is greater
than the max then the re-order value is re-calculated as quantity max – quantity available.
Flags applicable to this feature:
• InvStkMin
Default for the Below Minimum field
• InvOrdPack For slow moving products, i.e. sales for the previous six months are less
than the Supplier Pack Size, the stock re-order algorithm will round up to the nearest
multiple of the supplier's pack quantity.
Product Details
The reorder algorithm is a mathematical equation that looks at stocking levels for a
product and calculates a suggested reorder quantity at a certain point in time so that
required stocking levels are maintained.
Certain mandatory product information is used in the stock reorder algorithm to determine
a suggester reorder quantity.
These suggested quantities can be reviewed and modified before a purchase order is
generated. Supplier information stored against a product is taken into consideration when
this purchase order is generated e.g the supplier’s minimum order quantity.
So, the mandatory information is stored in two of the Product Maintenance options for a
product – Stock Data and Suppliers.
Stock Data
Certain fields in the Stock Data option are mandatory to the working of the stock reorder
algorithm and for the creation of a purchase order:
Location Code: in the future, this code will print on the Stock Reorder Report so that
the product can be physically checked if required.
Min Stock: what is the minimum level of stock that is required on hand at any one
time? The reorder process uses this value in three areas – firstly, the reorder process
will prompt the user whether products with stock on hand Below Min are to be
considered – this is the value the reorder process is referring to. Secondly, this value is
used as part of the Quantity Available calculation. Thirdly, it is used when calculating
© 2014 Sterland Computing
22
ProStix Smartstore Training Manual - Purchasing & Receipting
the Suggested Order Quantity
Max Stock: what is an acceptable maximum stock level of this product? If the
Suggested Order Quantity exceeds the this value, it is rounded down to or below the
Maximum Stock by increments of the Pack Size
Lead Time: how long between generating the stock reorder and the delivery date of
the next order (not this order). Why - if stock is ordered weekly and the time
between ordering and delivery is 3 days, the stock on the purchase order will not be on
the shelves for 10 days. However, during the next 10 days, this stock will become
depleted. This figure is used in calculating the Suggested Order Quantity.
Product Type: the reorder process will prompt the user whether Non-Stocked items
are to be considered in the process. A product with a type of 1 is a non-stocked item.
Threshold: this value is used to determine the excess stock calculation required by
the flag 'InvExBrStk', i.e. before an order is placed, all other branches within this state
are checked for excess stock.
Branch Supplier: purchase orders generated during the stock reorder process for this
product, for this branch, will be generated for this supplier. If the nominated supplier
is not an existing preferred/alternate supplier for the product, it will be created as an
alternate supplier and pricing details should be keyed so that the correct information
can be used in the generation of the purchase order.
Performance Cat: used in conjunction with excess stock calculation and the
'InvExBrStk' flag. When performance categories are set up in 'System
Administration' - 'Configuration' - 'Miscellaneous Tables', each category has a
yes/no entry in the 'Inter Brn' column to indicate whether it must be transferred to
other branches when in excess.
Supplier Details
While there is a large amount of supplier detail that can be stored against products for the
preferred and any number of alternate suppliers, certain pieces of information are
mandatory in the stock reorder process.
Supplier details are keyed via the 'Suppliers' option within 'Product Maintenance'.
Inner Pack Qty: the Suggested Order Quantity is rounded up to the relevant
increment of this inner pack quantity when the automatic purchase order is generated
from the reorder process. This is generally the conversion factor between the
Stock/Sell UOM and the Purchasing UOM.
Minimum Order: if the Suggested Order Quantity is less than this supplier minimum,
the order quantity is rounded up to this minimum order quantity unless the product is a
slow mover.
Stock Source: applicable for the buying groups where this supplier’s product is
ordered/sent either from a warehouse (W) e.g Mitre 10 or directly (D) from the supplier
e.g. Ryobi. The reorder process will allow either W’s or D’s only to be included in the
reorder or both.
Scheduled Task for Stock Reordering:
The following details refer to the scheduled task:
The reorder algorithm is a mathematical equation that looks at stocking levels for a
product and calculates a suggested reorder quantity at a certain point in time so
© 2014 Sterland Computing
Purchasing and Receipting
23
that required stocking levels are maintained.
Certain mandatory product information is used in the stock reorder algorithm to
determine a suggester reorder quantity. This mandatory information is stored in two of
the Product Maintenance options for a product – Stock Data and Suppliers.
For the Report
The minimum and maximum values at the branch are not changed by the Scheduled
Stock Reordering task. The minimum and maximum used is the one available in Product
Maintenance - Stock Data for the branch you are reordering for at the time the task runs.
If you wish this to use the old values make sure the task runs and finishes before the
Stock Forecasting task. To use the latest figures schedule these two tasks so that the
Stock Forecasting will have updated the max and min values before the Stock Re-ordering
task starts.
Bypass the product if no stock, no orders and not sold for 6 months when not using the
system flag 'InvStkAct'.
Reorder quantity is calculated by:
Anything in Bold is a value stored in ProStix.
Anything underlined is calculated within this program.
The available quantity is calculated as per Stock Enquiry availability; Stock On Hand –
Customer Orders + Purchase Orders – Deferred Sales.
Calculate the number of days = the difference between the To Date and From Date.
Calculate the number of months = Divide the difference number of days by 30 to work out
the months.
If the number of months is zero use the company field Stock Re-order.
Calculate the total sales for the number of months using the month in the From Date as
the starting month.
If promotions are excluded the product invoice lines with promotions for the branch are
removed from the current sales total.
If purchase promotions are excluded the product purchase lines with promotions for the
branch are removed from the available quantity and the purchase order quantity.
Daily Average sales are calculated by dividing the total sales by the number of days. If the
To Date is the current system date then the total sales are divided by the number of
months less 1 multiplied by 30 plus the number of days into the current month.
Lead time will be from the stock data for the branch lead time or stock requisition
default lead time if a CDF order will also add in any CDF lead time.
The reorder quantity is the lead time multiplied by the average daily sales less the available
quantity plus the branch product minimum stock quantity.
Where the reorder quantity is less than the branch minimum then the reorder is changed
© 2014 Sterland Computing
24
ProStix Smartstore Training Manual - Purchasing & Receipting
to the stock minimum less the available quantity.
Where the available quantity is negative the branch minimum is used plus the available
quantity.
The reorder quantity is increased to be a pack quantity size.
The reorder quantity is then rounded down to the maximum quantity if the branch has a
maximum level and the reorder quantity plus the available quantity is greater than the
maximum quantity by subtracting the available quantity from the maximum quantity.
Where this value is negative the reorder value becomes 0.
Stock Re-Order Matrix
This describes the setup and background operation of the Stock Reorder Algorithm using the
Stock Reorder Matrix.
In order to use this function instead of the existing stock reorder algorithm, the 'InvStkMtx'
flag must be on. This determines 'Use stock re-order matrix when ordering stock'.
STOCK ORDERING OVERVIEW
Note: This example is based upon the Stock reorder number of months being 3 months.
This is keyed into the company setup.
• A six-month sale figure is determined from the sales of the item over the past three
months added to the projected sales over the next three months (taken from the
corresponding period the previous year, which allows for factors such as seasonal
variance to be factored in):
• The six-month sale figure is divided by twenty-six (26) weeks to obtain the mean
weekly sales rate.
Note: These breakdowns of the percentage ratings are only an example, the user can
designate whatever percentages they want.
Based on the sales performance over the defined six-month period, the stock lines are
assigned 'stock rankings' as follows:
• Lines corresponding to the top twenty (20) percent of sales by department and by
quantity (units).
• Lines corresponding to the intermediate sixty (60) percent of sales by department
and by quantity (units).
• Lines corresponding to the bottom twenty (20) percent of sales by department
by quantity (units).
and
Matrix Stock Performance Categories
These percentages are set up as follows:
'System Administration' – 'Configuration' – 'Miscellaneous Tables' - 'Matrix
Stock Performance Categories'.
© 2014 Sterland Computing
Purchasing and Receipting
25
The table has the following fields:
• Code
• Description
• Ranking %
Re-order Cycle codes
These will also need to be set up as follows.
'System Administration' – 'Configuration' – 'Miscellaneous Tables' - 'Re-Order
Cycle Codes'.
The table has the following fields:
•
•
•
•
Code
Description
Days
Batch Day
These cycle codes must then be set up against each product using 'Product Maintenance'.
Note: The following figures are only an example.
Based on the frequency with which stock lines are ordered from a particular supplier, the
stock lines are assigned an 'order cycle' as follows:
1: Items ordered on a weekly basis.
2-3: Items ordered according to a two-week cycle; '2' denoting the first week and '3'
the second week of the cycle.
4-6: Items ordered according to a three-week cycle; '4' denoting the first week, '5' the
intermediate week and '6' the final week of the cycle.
Reorder Matrix Codes
These must also be set up as follows.
'System Administration' – 'Configuration' – 'Miscellaneous Tables' - 'Re-Order
Matrix Codes'.
The table has the following fields:
• Code
• Description
• Days
These are determined by combining the Matrix Stock Performance Categories with the
Re-order Cycle Codes to form the Reorder Matrix Code.
Note: This is set up by the ideal number of days.
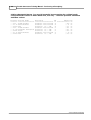
The ideal number of days stock to retain within the store is determined according to the
stock ranking and the order cycle, as set out in the following matrix:
© 2014 Sterland Computing
26
ProStix Smartstore Training Manual - Purchasing & Receipting
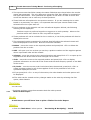
1------A:
B:
C:
2------42
28
21
3------63
42
35
4------63
42
35
5------70
49
49
6------70
49
49
70
49
49
For example, a line with a stock ranking of ‘B’ and an order cycle of ‘4’ would be ideally
stocked for 49 days (seven weeks), as taken from the corresponding entry in the week
holding matrix.
• A 'model stock' figure for the item is determined by multiplying the mean daily sales
figure by the ideal number of days stock to retain within the store.
• On performing a check of the stock balances, if the stock in balance is less than the
model stock figure, the number of items required to bring the balance up to the
model stock is determined and the purchase order generated accordingly.
The stock re-order option to use to generate suggested purchase orders is through
'Purchasing and Receipting' – 'Stock Reordering' (Stock Order option).
Goal:
You can now:
• Understand the Stock Re-Ordering Algorithm and the data setup for automatic Stock
Re-Ordering.
© 2014 Sterland Computing
Purchasing and Receipting
3.5
27
Returns & Credit Requests
This topic covers the following lessons:
Overview:
Requests.
gives you important background information about doing Returns and Credit
New Return: allows you to generate a new stock return/credit request for receipted
goods that are either returned to the supplier or a claim against a receipt where the
supplier cost varied from the cost on the original purchase order.
Current Returns: lists all current stock returns/credit requests in numerical sequence
Find By Supplier: allows you to nominate the supplier against whom stock
returns/credit requests have been processed. Once the supplier has been selected, a list
of all unposted stock returns/credit requests will be displayed
Find By Order Number: allows you to key the stock returns/credit request to view or
maintain the stock returns/credit request. The <F3> Search is not available as it is
assumed that you knows the reference number
Stock Receipting: takes you user into the Stock Receipting module.
3.5.1
Credit Claims: lists all credit claims that have not been processed through Creditors
Invoice Approval.
Overview
This option allows you to process stock returns and credit requests for previously
receipted stock.
When goods are receipted to stock, the General Ledger movement between the Stock and
Purchase Clearing accounts will reflect the value of goods receipted. This value is
determined by the cost of the products on the purchase order multiplied by the quantity
received. Stock on hand in the inventory file will also be adjusted to reflect this inward
movement of goods.
If some of these goods are to be returned to a supplier or if the cost on the supplier's
documentation differs from that on the purchase order, a Return/Credit Request must be
raised to reverse the affect of the receipt of these goods on the Stock and Purchase
Clearing accounts.
The Return/Credit Request is sent to the supplier who, in turn will issue you with a Credit
Note. The Credit Note will be processed through CIA depending upon your internal
procedures i.e. as soon as the Return/Request is processed or when the Credit Note is
received from the supplier.
ALL STOCK RECEIVED MUST BE RECEIPTED TO STOCK:
• even if it was not ordered,
• even if it arrives damaged and is to be returned to the supplier,
• even if it is the wrong colour and is to be returned to the supplier,
so that every transaction with a supplier can be audited.
© 2014 Sterland Computing
28
3.5.2
ProStix Smartstore Training Manual - Purchasing & Receipting
New Return
Goal:
In this lesson you will learn how to create a new return for receipted goods to be
sent back to a supplier or to process a credit for discrepancies between the
supplier cost and the purchase order cost of receipted products.
Steps:
1. From the 'Main Menu' take options - 'Purchasing & Receipting' - 'Returns &
Credit Requests' - 'New Return'.
Order No.: this is generated by the system and will be in the same sequence as
purchase orders. For security and auditing purposes, it is not advisable to
change the default number.
Supplier No.:
required.
key the ProStix supplier code. <F3> (Search) is available if
Reason For Claim: a list of reasons why the claim is being processed will then
be displayed.
Note that some reasons have the word RETURN beside them. This has very
definite implications in ProStix - when a claim is processed with one of these
reasons, it is implied that products will be returned to the supplier and stock
on hand will be updated when the return is Applied to Stock.
If the Reason Code does not include the word RETURN, it is assumed that you
are processing an Allowance, i.e. changing the amount owing to the supplier
because of an overcharge. There is no stock movement i.e. stock on hand will
not be updated when the return is Applied to Stock. The General Ledger
movement will adjust the Purchases Clearing Account to which the original
receipt was posted with the other side of the entry going to the Purchase Order
Variance account.
Both a Return and an Allowance reverse the General Ledger movement that
occurred when the costs being credited were processed through Stock Receipting
- the $ amount that was added to the Stock Account for these goods is reversed
and the $ amount that was credited to the Purchases Clearing Account is
reversed.
Hint - if a creditors invoice includes an under/overcharge, approve the invoice for
the amount shown and then raise a Return/Credit Request for the difference
selecting an 'allowance' reason for claim. Make sure the Return is processed
through Creditors Invoice Approval as a Credit Note to complete the reversal of
all General Ledger movements
2. If the selected supplier has a number of Branch Addresses in ProStix, these addresses
will be displayed for selection. You can change any of the address details after
selection, or press/click <F1> to accept.
3. The Shipping Details screen will then display, indicating where the returned products
and/or request is to be sent:
Instruction: key a brief message if there any special instructions about the return
© 2014 Sterland Computing
Purchasing and Receipting
29
of the goods specified in the claim. These instructions will print on the return.
Deliver To: displays the information held in the supplier file. Either accept or key
the name of the place that the goods and/or claim are to be sent.
Address: defaults to the information held in the supplier file. Either accept or key
the address to which goods and/or claim are to be sent.
Returned By: defaults to the user-id of the person logged onto the screen but can
be overridden if required. If this field is changed, the password for the new user
must be provided.
Original P/O: you must link this return to the original stock receipt. Key the
receipted purchase order number. <F3> will list all receipted purchase orders for
the nominated supplier. If more than one receipt has been processed for the same
order, a list of the processed receipts will be displayed for you to select from.
Entire P/O: are you returning/crediting all products from the original purchase
order? Hint - if you say 'yes', you can always use <F8> (Review) and then <F5>
(Delete)/<F7> (Change) to change details when you progress into the claim.
Comments: key any comments that you wish to make about this return. These
comments will print if you say 'yes' to Print Comments when you are
printing/faxing the claim.
4. For every stock return/credit raised, an associated Credit Claim can be generated so
that the value of the return/credit request is deducted from the supplier account in
advance of the supplier processing and forwarding a credit note. The next screen will
display information either generated by the system or keyed in previous screens and
then prompt for the details required to generate the Credit Claim:
Claim Number: is generated by the system and cannot be changed.
Claim Date: defaults to the current date.
Receipt Number: displays the original P/O nominated in Shipping Details.
Receipt Date: displays the receipted date for the original P/O.
Supplier Invoice Number: displays the supplier invoice number of the original
P/O when that purchase order was applied to stock.
Creditor: if the supplier has a creditor defined against their account in ProStix,
this 'supplier number' will be displayed. Otherwise, the supplier against whom the
original purchase order was generated will be displayed.
5. The following information is keyed by the user - the most important field is the first field
Credit AP Immediately - all other fields are 'information only'. If any details are
unknown when raising the claim, you can maintain the claim through 'Purchasing &
Receipting' - 'Returns & Credit Requests' - 'Credit Claims' at a later stage.
Credit AP Immediately:
YES - the claim will generate a credit in the supplier's account when the claim is
released, i.e. create and post an Accounts Payable batch with the batch post
printing to a text file - this posting immediately reduces the amount owing to
the supplier. The claim can be tracked and is completed via Creditors Invoice
Approval when the credit note is received from the supplier.
NO - the claim will be made ready for Creditors Invoice Approval. The claim
can be tracked but can only be completed via CIA.
© 2014 Sterland Computing
30
ProStix Smartstore Training Manual - Purchasing & Receipting
Supplier Contact: reference only and may be printed on the claim.
Approval Number: the supplier approval number to recognise that a claim has
been raised - reference only and may be printed on the claim.
Carrier Used: reference only and may be printed on the claim.
Consignment Note: reference only and may be printed on the claim.
Comments: reference only and may be printed on the claim.
6. On completion of the New Claim For Supplier screen, the user will move onto the
Product Details screen:
• if 'Entire P/O' was set to 'yes', all receipted products on the original purchase order
will be displayed.
• if 'Entire P/O' was set to 'no', no products will be displayed. Either key the product
or use <F7> (P/Order) to display all receipted products from the original purchase
order, move the cursor to the required product and press/click <F1> to add that
product. The following information will be required if you have not linked the
product number with the original receipt:
Quantity: key the quantity associated with the unit of measure for which credit
is required.
Cost: defaults to the cost price from the product or supplier file but may be
over-ridden.
U.M: refers to the purchasing unit of measure. If an alternate unit of measure
is applicable, you will have the option later to change.
Description: defaults to the description for the returned product.
Total: extended cost for this line of the return/credit claim. The total will be
calculated automatically and may not be over-ridden.
7. If you key a product that was not receipted on the original purchase order or a quantity
greater that the receipted quantity, the following warning will be displayed:
'You are crediting an item not on the original order'.
8. If you key a product that has been returned/credited previously, the following warning
will be displayed:
'Warning - previously credited - Ref Credit Note 9999999'.
9. In both cases, care should be taken if a warning is issued because you will be permitted
to proceed.
10.To process an Allowance (Value Claim), set the cost field to the amount per
unit that you are claiming a credit for.
11.Once all the product details have been keyed, use <F8> (Review) and then <F7> to
change the quantity, cost, etc. or <F5> to delete the selected line.
12.From within Review Mode, press/click <F4> to return to Add Mode. From within Add
Mode, either add more products or press/click <F4> again to exit from the Product
Details screen and display options available for this return/credit.
Goal:
You can now:
© 2014 Sterland Computing
Purchasing and Receipting
31
• Create a new return for receipted goods to be sent back to a supplier or to process a
credit for discrepancies between the supplier cost and the purchase order cost of
receipted products.
1.3.5.2.1 Options
Once you have keyed the product details for the return/credit and pressed/clicked <F4>,
the Return/Credit Request Header will be displayed on the LHS of the screen and a list of
OPTIONS will be displayed on the RHS of the screen:
Claim Details
Select this option to take you back to the product entry screen to make any changes to
the claim.
Update Header
Select this option to change any of the return header details.
Shipping Data
This option will allow you to change the delivery name and address.
Supplier Data
This option will display the name, address and other basic contact details for the
supplier of the original order. If the supplier has multiple addresses, you can use
<F9> from within this option to select a different address to send the return/credit to.
Print Return
Select this option if you want to print a copy of the selected return/credit. Make
changes to the defaults if necessary:
Show Prices: key 'yes' if you wish to print prices on the return/credit claim.
Send by Fax?: keying 'yes' will create a fax record in the path name that has
been specified for the device you are using. If 'no', a print options box will appear
once you have exited from this menu.
Print All Comments: key 'yes' and the product comments will be printed
regardless of the 'Print Comment Yes/No' flag on the product within the credit
request. If 'no' only those comments that have been flagged will print.
You will then be prompted with your printing/viewing options.
Confirm Order
The 'Confirmed' field is displayed in the return/credit header. This option will set the
value to 'yes' to indicate that the supplier accepts the return/credit with its pricing,
terms etc. Once a return has been confirmed, order details cannot be changed unless
you go back into the Update Header option and change the value back to 'no'.
© 2014 Sterland Computing
32
ProStix Smartstore Training Manual - Purchasing & Receipting
Release Claim
By selecting this option, the stock and/or general ledger movement that occurred
when the goods were receipted is reversed.
Note: Allowance (value only) credit requests should be released as soon
as they are raised whereas stock returns should be released when the
supplier's truck takes away the stock.
This option will allow you to update the stock return information which has been
entered for the selected return/credit claim, reducing stock values. Stock levels
will only be changed if the return reason is not an allowance.
Steps:
1. If you select the option and the Order Printed/Faxed/Sent flags are still 'no',
the following warning will be displayed:
'This order has not yet been printed, faxed or sent electronically'.
2. If 'Credit AP Immediately' was set to 'yes' when generating the claim, an
additional message 'Accounts Payable will be updated immediately' will appear
at the top of the screen. The data entry fields are as follows:
Processed by: defaults to the user-id but may be over-ridden if
required.
Stock Receipt Report?: do you want to print details all the stock
returned on this return/credit claim. It may then be used to verify that
the stock return details have been keyed correctly. If you choose to print
the report, a print options screen will appear.
G/L Posting Summary: do you want to print the general ledger
movement that occurs when the claim is released?
Print Claim?: do you want to print the claim to send to the supplier?
Stock Received
This option will display any stock which has been returned to the supplier.
Receipt Labels
Not applicable for returns/credit requests.
Stock Requisitions
Not applicable for returns/credit requests.
Customer Orders
Not applicable for returns/credit requests.
Stock Enquiry
This option loads the Stock Enquiry program.
© 2014 Sterland Computing
Purchasing and Receipting
33
Import Conf
This option imports confirmations from a data file.
Order Number: key the purchase order number to confirm or <F3> to
search. Defaults to the claim currently selected.
Location ID: key the input location to process the file from or <F3> to
search.
Import Filename: key the import filename or <F3> to search.
Archive?: key 'yes' to move the processed file to the location archive
directory.
Format ID: key the format ID for the import format or <F3> to search. This
format was created in EPC format definition.
Report Only: key 'yes' if you just want a report.
Shipping Consignment
Not applicable for returns/credit requests.
Next/Previous Order
Both of these options will toggle between the next/previous return/claim for this
supplier.
Delete Claim
3.5.3
This option will allow you to delete the return/claim as long as you have not released
it. You will be required to press/click <F5> to confirm or <F4> to back out of the
deletion. There is no 'undo', so take care before deleting.
Finding Returns & Credit Requests
From the 'Main Menu' select options - 'Purchasing & Receipting' - 'Returns & Credit
Requests'.
Current Returns
This option displays all the open or unreleased returns.
<F8> Sort
This function key gives you the ability to change the sort sequence of the records
displayed. Pressing this function key will toggle the browser to display records in
either ascending or descending order sequence.
Select the return you wish to work with. The Return & Credit Request Header &
Options screen will appear.
Find by Supplier
This option enables you find a particular Return/Credit Request by Supplier and
then make any necessary adjustments or enquiries as listed in the Header and
© 2014 Sterland Computing
34
ProStix Smartstore Training Manual - Purchasing & Receipting
Options screen.
The next screen lists suppliers for you to choose from.
A list of all the current open or incomplete Returns/Credit Requests for the selected
Supplier and branch will appear on the next screen. Select the required Return/Credit.
The Return & Credit Request Header & Options screen will then appear.
Find by Order No.
This option enables you find a particular Return/Credit Request by Return Number
and then make any necessary adjustments or enquiries as listed in the Header and
Options screen.
The next screen prompts you to key the purchase order number.
3.5.4
The Return & Credit Request Header & Options screen will then appear.
Credit Claims
The Credit Claims option displays the details and status of a claim for supplier
credit.
You will be prompted to select either the supplier and/or the claim number. <F3> Search
is available on both of these fields.
If a supplier is entered without entering a specific claim number, a list of all unposted
claims for that supplier will be displayed.
If you press/click <F9> (Inc Posted), all posted claims, i.e. those processed through
Creditors Invoice Approval will be included in the display. This key is used to toggle
between displaying posted and unposted claims.
Claim Date: the date the claim was created.
Claimed Against: displays the original purchase order number that the claim was
raised against.
Claim Transaction: displays the return order number raised as a result of the claim.
Status: there are four different status types:
• New:
claim not released to Stock or A/P, so 'Credit AP Immediately' =
yes/no.
• Rel-Stk: claim released to stock, so 'Credit AP Immediately' = no
• Rel-AP: claim released to Accounts Payable, so 'Credit AP Immediately' = 'yes'.
• Posted: processed through Creditors Invoice Approval.
Once a claim is selected the Claim Header screen will be displayed with the following three
options:
Claim Detail
This option allows you to view the products that have been entered on the return.
Claim Header
© 2014 Sterland Computing
Purchasing and Receipting
This option allows you to update the Supplier Contact, Approval Number, Carrier Used,
Consignment Note and Comments for any unposted Credit Claims.
Print
You may select to print the Credit Claim at any stage via this option.
© 2014 Sterland Computing
35
36
4
ProStix Smartstore Training Manual - Purchasing & Receipting
Receipting
This topic covers the following lessons:
Standard Products
Timber Tally
Timber Packs
Receipting Linked Sales Orders
Overview:
Once a supplier has received your purchase order, the goods usually arrive at the
requested destination with accompanying documentation such as a delivery docket and/or
an invoice, priced or not priced.
The number, colour, size and cost of the goods need to match up with the original
purchase order and the receipt of the order needs to be recorded in ProStix so the value of
your inventory file can be updated and any variation, gain or loss from what you expected
can be investigated.
General Ledger movement between Stock and a Clearing account happens when goods are
receipted, i.e. the Receipt To Stock screen has been completed.
From the 'Main Menu' select options - 'Purchasing & Receipting' - 'Stock Receipting'.
The Stock Receipting option of ProStix allows you to:
• display details of the original purchase order
• receipt some or all of the products on the purchase order
• change details of a stock receipt as long as the receipt has not been applied to stock
• close a purchase order so that it cannot be receipted
• view a linked customer order
• record details of any delivery problems
• process the return of goods to a supplier and claim a credit
Finding the Purchase Order
Current Orders
When you select this option, a numerical list of all unreceipted purchase orders will
display with the following information:
• the date that the order was created.
• whether or not the purchase order has been confirmed. Note that confirmed orders
cannot be amended.
• the supplier name.
• the type of order i.e purchase order or a stock return.
• whether or not the purchase order has been sent, printed or faxed - if you are about
to receipt an order that has not been sent to the supplier, how does the supplier
know what to supply?
© 2014 Sterland Computing
Purchasing and Receipting
37
• if the purchase order is linked to a sales order, the corresponding sales order
number is displayed.
<F8> Sort
This function gives you the ability to change the sort sequence of the records
displayed. Pressing this function key toggles the browser to display records in either
ascending or descending order sequence.
Find By Supplier
When this option is selected, a list of all suppliers is displayed. Once the supplier has
been found, the purchase orders raised for that supplier are listed in numerical order.
The <F8> Sort function (explained above) is also available for this option
Find By Order Number
When this option is selected, it is assumed that you know the purchase order number a box is displayed so you can key the number and locate the order without having to
search through a numerical list.
Returns/Credit Requests
This option takes you to Returns & Credit Requests.
Checking the Purchase Order
Once you have located the purchase order, the system checks whether the order has
been sent to the supplier. If the order has not been sent electronically, printed or
faxed, the following warning will be displayed:
'This order has not yet been printed, faxed or sent electronically'.
At this point, you should check the correct purchase order number has been selected
as this message indicates that the supplier has not been notified of the purchase
order.
You can proceed past this warning by pressing/clicking <F1>.
Receipt Options
A list of Receipt Options is then displayed on the RHS of the screen and the Stock
Receipt Header displayed on the LHS of the screen, with any comments or special
instructions that were keyed when the purchase order was created or modified:
• Receipt Details - allows you to receipt some or all of the products on the purchase
order by keying the quantity received. Stock will not be updated unless the Receive
to Stock details have been completed.
• Details from Scanner - allows you to receipt some or all of the products on the
purchase order by scanning the products into ProStix. Stock will not be updated
unless the Receive to Stock details have been completed.
• Update Stock - displays the Receive To Stock so the stock file and the General
Ledger can be updated.
Update Bar Codes
© 2014 Sterland Computing
38
ProStix Smartstore Training Manual - Purchasing & Receipting
This option allows you to maintain the supplier barcode for products on the current
purchase order.
Steps:
1. Products that are on the selected order will be displayed.
2. If you press/click <Enter> on a product, the next screen will allow you to scan or
key a barcode for that product.
3. This will effectively update the supplier barcode for that product. If the product
does not have a record for this particular supplier, the following message will be
displayed:
'No Item/Supplier record available'.
Open/Close Order
This option is used to close an order that has a status of 'Open' so no further purchase
order processes or stock receipting can be performed on that order.
Once this status is changed, this purchase order will not display on the list of Current
Orders from within Purchase Order Processing or Stock Receipting. To view any
receipted quantities, use the Stock Receipt Enquiry.
However, if you need to re-open the order within Stock Receipting, you can select Find
By Number and key the number.
Show Linked Receipts
If the current order has been partially receipted, this option will display details of that
receipt including the date that the receipt was processed, the docket or invoice
reference and any $ value that may have been keyed into the Receive To Stock screen.
No quantities will be displayed. You need to go back into the Receipt Details to obtain
this information.
Linked Customer Orders
When you first go into the stock receipting option for an order, if there are any linked
customer orders for this purchase order, there will be a message in the lower left hand
corner of the screen:
There are 'Linked Customer Orders'.
So, some or all of the products being receipted may need to be put aside and the sales
department made aware of their arrival so that the sales cycle can be completed.
Select this option to display customer orders linked to this purchase order:
By moving the cursor to a particular line on this enquiry screen, you can press/click
<Enter> to drill down on the customer order.
Import Details
© 2014 Sterland Computing
Purchasing and Receipting
39
If the stock receipt has been scanned into a PDE device, this option will download that
file into ProStix so that the receipt can be completed.
Steps:
1. When you first select this option you will be presented with a screen prompting you
to connect the PDE.
2. Connect the PDE device and download the file into a pre-defined location, ready to
import into ProStix.
3. Press any key to continue.
4. The pre-defined path will be displayed. Press/click <F1> to commence the
download.
5. When complete, you will need to go back to the Receipt Details option firstly to
check that the data looks as though it has imported correctly and, secondly to
update stock.
Creditor
This option will change the type of order to a direct order which means the goods will
be shipped directly from the supplier rather than the warehouse.
'Question - Specifying a Creditor on this Order will change it from a Standard to a
Direct Order. Are you sure you want to continue?
If you continue, you can key another valid ProStix supplier number into the Creditor
field on the left hand side of the screen. The goods will be sourced from the supplier
from whom the purchase order was sent but the invoice will be approved for the
supplier keyed into the creditor field.
Receipting, Credits, CIA G/L Movements
NON STANDARD COSTING ENVIRONMENT (InvStdCst = No):
Product has a std cost of $1 and a supplier cost of $0.75
Stock Receipt:
Account
───────
0001142
0001143
Account Name
──────────────────
Stock
PCA
Narrative
────────────────────
Stock Receipting 21/
Stock Receipting 21/
Pd
Amount Tp
── ────────────── ──
02
0.75 in
02
0.75- in
Stock Return – Credit A/P Immediately – emulates the GL movement as if CIA is
also being processed
Account Account Name
Narrative
Pd
│────────── ────────────────── ────────────────────
│0000001142 Stock
Stock Receipting 21/
│0000001143 PCA
Stock Receipting 21/
│0000001143 PCA
Claim No. 95000185
│0000001510 Trade Credit
Creditor Invoices Ba
│0000001602 GST Purchase
Creditor Invoices Ba
© 2014 Sterland Computing
Amount Tp
── ────────────── ──
02
0.75- in
02
0.75 in
02
0.75- ci
02
0.83 ci
02
0.08- ci
40
ProStix Smartstore Training Manual - Purchasing & Receipting
CIA for that Stock Return (you would normally be processing the original stock
receipt with this return in same batch but, I’m not) – reverses previous emulation
and then redoes:
Account
───────
0001510
0001602
0001143
0001510
0003098
0001142
0001602
0001143
Account Name
──────────────────
Trade Credit
GST Purchase
PCA
Trade Credit
Purchase Gains/Los
Stock
GST Purchase
PCA
Narrative
────────────────────
Creditor Invoices Ba
Creditor Invoices Ba
Claim No. 95000185
Creditor Invoices Ba
Claim No: 95000185
Claim No: 95000185
Creditor Invoices Ba
Claim No: 95000185
Pd
Amount Tp
── ────────────── ──
02
0.83- ci
02
0.08 ci
02
0.75 ci
01
0.83 ci
01
0.25 ci
01
0.25- ci
01
0.08- ci
01
0.75- ci
© 2014 Sterland Computing
Purchasing and Receipting
4.1
41
Standard Products
Goal:
In this lesson you will learn how to receipt stock for standard products into your
system.
The stock receipting process is simply the verification of products and quantities received
and ensuring those products/quantities are accurately recorded in ProStix.
Steps:
1. From the 'Main Menu' select options - 'Purchasing & Receipting' - 'Stock
Receipting'.
2. Find the order you should be receiving.
3. Check for any 'Linked Sales Orders' by selecting the appropriate option.
4. Select the 'Receipt Details' option to complete the received quantities.
5. Ensure the quantities are accurate, using <F6> to view any exceptions.
6. When finished entering product received quantities, press/click <F4> to end.
7. Complete the 'Receive to Stock' window and select the output destination for any
printouts that may be produced.
Review:
You can now:
4.1.1
• Receipt stock for standard products into your system.
Receipt Details
Goal:
In this lesson you will learn how to process the details of receipting stock for
standard products into your system.
Steps:
'Receipt Details' is used to receipt the order. When the option is selected, details of the
order are displayed as follows:
• the product number and the first line of the product description for all products on
the purchase order.
• the purchasing unit of measure - this value can have a huge impact in stock
levels/pricing and should be checked carefully – for example, if an EA appears on
the purchase order and the supplier sent a PK (pack of 5 eaches), the quantity
received is 5, not 1.
• the quantity ordered.
© 2014 Sterland Computing
42
ProStix Smartstore Training Manual - Purchasing & Receipting
• the quantity received to date - this quantity will have already been 'applied to stock'.
• any value received but not applied to stock, i.e. the 'Received This Delivery' column.
Normally this value will be zero and you key the receipted quantity. When applied
to stock, the value is accumulated into the 'Received To Date' column.
The following options are available:
• <F4> (Exit) will return you to the options screen. If you have changed any of the
'Received This Delivery' details before exiting, you will be prompted to 'Receive To
Stock'. If you have changed this value in error, you will need to go back into the
detail screen and use <F7> to change any incorrect entry back to zero.
• <F5> (Exceptions) will display any product where the 'Received To Date' quantity
does not equal the 'Ordered' quantity. Very handy if you have a large purchase
order that has been partially received. From within the exception screen, you can
use <F7> to receipt the balance, <F8> to view the purchase order or <F9> to print
the exceptions.
• <F6> (View) will display the unit cost, the extended cost on the purchase order
and all four lines of the product description for the selected product.
• <F7> (Change) is used to receipt the current line. For non-timber products,
the 'Received This Delivery' field will open and allow you record the quantity
received for the selected product. This is a method of partially receipting an order
(back-order).
• <F8> (Rec All) is used to receipt the balance of the entire order. This has
the effect of clearing the quantity in the 'Outstanding' column into the 'Received
This Delivery' column for every product on the order. It allows you to receipt all
the outstanding goods on the order in one keystroke. Notice that after you use this
key, the description of the <F8> function key changes to F8 UnRec All. So, if you
have pressed this key in error, you simply press/click <F8> again to undo the
previous keystroke.
• <F9> (Cost) allows you to view or maintain the purchase order cost or any future
pricing of the product:
Change PO Cost - opens up the Unit Cost field for the selected product. Note
that, if the cost on the purchase order was derived from the inventory file, i.e. the
standard cost and you change this, there will be General Ledger implications
when stock is updated from this stock receipt, i.e. gain or loss.
Update Future Pricing - a new supplier price may be indicated on the invoice.
This option can be used to change the standard cost of the product on the fly (if
you have the appropriate security). This runs the same program as the Future
Pricing module in Product Maintenance, i.e. any future prices must be applied
before they become effective, whereas a future price dated with the current date
will automatically apply immediately.
Show Receipted Costs - displays the unit cost and the line cost for any product
receipted on this purchase order. This is a display function and no maintenance
can be performed.
After you have keyed the quantity received, press/click <F1> to save the 'Received
This Del' value and continue to select products to receipt.
© 2014 Sterland Computing
Purchasing and Receipting
43
Once all products have been receipted, press/click <F4> to display the 'Receive To
Stock' screen and complete the transaction (see 'Completing the Receipt Process'
below).
Quantities Greater than Outstanding
Note that the system will allow you key a quantity that is greater than the
outstanding amount - it is not unreasonable that a supplier send more than ordered.
It is best to receipt the entire quantity and then process a Return/Credit Request for
the oversupply if any of the goods are being returned.
Negative Quantities
You can enter a negative value only if you have set the 'POAllowNeg' flag set to 'yes'
and the order line has a negative ordered quantity.
Completing the Receipt Process
Once the receipted quantities have been recorded, press/click <F4> (Exit) to complete
the receipt to stock. If any receipted products are flagged as lot controlled, the
Received Stock Lot Control window will prompt for their Lot numbers. For details
refer to the topic in the User Manual 'Receiving Lot Controlled Products'.
Otherwise, the 'Receive To Stock' screen allows you to complete the receipt, update
the stock on hand figures for all products receipted and invoke a General Ledger
movement between the stock account, any gain/loss accounts and the purchase
clearing account.
For more information on these fields, refer to the section on Updating Stock.
If you <F4> from this screen without completing the details, nothing will be receipted
and the values will remain in the 'Received This Del' column, waiting to be applied to
stock. This can be done at a later time by selecting the option 'Update Stock' from
within the purchase order options.
Review:
You can now:
4.1.2
• Process the details of receipting stock for standard products into your system.
Update Stock
Goal:
In this lesson you will learn how to update stock for receipting of standard
products into your system.
This option displays the 'Receive To Stock' screen so the Stock file and the General Ledger
can be updated.
Steps:
© 2014 Sterland Computing
44
ProStix Smartstore Training Manual - Purchasing & Receipting
1. Once all products to be receipted this delivery have been scanned or keyed, the Receive
To Stock screen will be displayed so that the new quantity can be added to the
inventory file and any purchasing gain/loss can be calculated and recorded in the
General Ledger:
Processed By:
defaults to the user logged on but can be overridden if required.
Docket/Invoice No: refers to any reference number on the supplier documentation
that accompanied the goods, e.g. delivery docket, invoice. Some sort of reference
number MUST be keyed.
Docket/Inv Amt: this is not a mandatory field and is generally left blank. Any value
keyed into this field will be displayed in the 'Invoice $ Amount' field when the receipt is
processed through Creditors Invoice Approval. This amount MUST NOT INCLUDE
GST. If it is company policy to allow receipting staff to key a value into this field, the
user processing the invoice must be diligent in double-checking that the value is
correct.
Accept Backorders: Do you want to leave this order open for any backordered stock
to come in at a later date. This will determine the value of the Status field in the order
header. When set to 'yes', will allow the order to be accessed, modified and further
receipting of back-ordered stock. When set to 'no', the order is closed, can no longer
be accessed and no further receipting of outstanding stock, i.e. you cannot back-order.
PDE Receipt: were the goods receipted by scanning? If this receipt has been
recorded on a Portable Data Entry device, the system can download the details from
the portable device.
Shelf Labels: do you want to print shelf labels for the quantity of goods receipted?
Product Labels: do you want to print product labels for the quantity of goods
receipted?
Receipt Labels: do you want to print receipt labels? The quantity of receipt labels
printed is stored in the 'Pack Qty for Labels' field in 'Product Maintenance' - 'Stock
Data' by branch. If this field is zero, one label is printed if you answer 'yes' to this
prompt. The default for this field can be set using the System Tailoring Flag
'InvRcptLab'. The format of the NuVu output is controlled by the Tailoring Integers
'NvuRctLblD' (the number of job labels down - per column) and 'NvuRctLblW' (the
number of job labels wide - per row).
Stock Receipts Report: do you want to print a Stock Receipt Report? The default
value is 'yes', but this can be overridden if required.
GL Posting Summary: the default is to print this summary but can be overridden if
required. If there is some doubt about the pricing on the order, it is handy to have this
report to fall back on.
Date Received: will default to the current date and cannot be changed.
2. To exit without updating stock, press/click <F4>. This screen can be accessed at a
later time through this option – the goods will not have been receipted and the stock will
not have been updated.
3. To exit and update stock, press/click <F1> and the following occurs:
• Stock On Hand is increased by the quantity received
• Value of Stock is increased (i.e. Stock Account is debited) with the cost x quantity
received.
© 2014 Sterland Computing
Purchasing and Receipting
• The Purchases Clearing Account is credited with the cost x quantity received.
Review:
You can now:
• Update stock for receipting of standard products into your system.
© 2014 Sterland Computing
45
46
4.2
ProStix Smartstore Training Manual - Purchasing & Receipting
Timber Tally
Goal:
In this lesson you will learn how to receipt timber products into your system.
Steps:
1. Process the stock receipt as for Standard Products.
2. If you <F7> (Change) on a timber product, a screen will allow you to receipt length by
length. Say 'no' to the question 'Receive as Pack Stock'.
3. The value in the 'Order' column is the number of lengths of the selected line. You can
partially receipt that length using <F7> (Change).
4. Alternatively, you can receipt the full value of every length using <F8> (Receipt All).
Once you have receipted all lengths for this product, press/click <F1> and then
press/click <F4> to return to the 'Receipt Details By Order' Line screen.
Review:
You can now:
• Receipt timber products into your system.
© 2014 Sterland Computing
Purchasing and Receipting
4.3
47
Timber Packs
Goal:
In this lesson you will learn how to receipt timber packs into your system.
Steps:
1. Process the stock receipt as for Standard Products.
2. If you <F7> (Change) on a timber product, a screen will allow you to receipt length by
length. Say 'yes' to the question 'Receive as Pack Stock'.
3. You are then prompted to key the pack number, pack marks and production, then
receive the stock by length. Multiple packs can be received.
4. When you have completed keying the details of the 'Packs Received This delivery' screen,
then press/click <F9> (Finished). If there is a variation from the quantity ordered you
will be issued with a warning.
5. You can then choose another order line to receive.
Review:
You can now:
• Receipt timber packs into your system.
© 2014 Sterland Computing
48
4.4
ProStix Smartstore Training Manual - Purchasing & Receipting
Receipting Linked Sales Orders
Goal:
In this lesson you will learn about receipting linked sales orders.
When you first go into the stock receipting option for an order, if there are any linked
customer orders for this purchase order, there will be a message in the lower left hand
corner of the screen:
'There are Linked Customer Orders'
So, some or all of the products being receipted may need to be put aside and the sales
department made aware of their arrival so that the sales cycle can be completed.
Steps:
1. From the 'Main Menu' select options - 'Purchasing & Receipting' - 'Stock
Receipting' - [select a P/O] - 'Linked Customer Orders'.
2. The system will display:
•
•
•
•
•
•
Order number
Customer
Product number
Quantity
Unit of measure
Description
3. By moving the cursor to a particular line on this enquiry screen, you can press
<Enter> to drill down to the customer order.
Review:
You can now:
• Receipt linked sales orders into your system.
© 2014 Sterland Computing
Index
Scheduled Warehouse Reordering 19
Standard Product Purchasing 8, 41
Stock Re-Ordering 13
Stock Re-Ordering Algorithm 20
Suggested Stock Re-order 13
Index
-CCredit Claims
-T-
34
Timber Pack Purchasing 12
Timber Pack Receipting 47
Timber Reorder Report 16
Timber Tally Product Purchasing
Timber Tally Product Receipting
-FFinding Returns & Credit Requests
33
-IIntroduction to Purchasing & Receipting
4
Update Stock
-LLinked Sales Orders - Receipting
48
-NNew Return/Credit Claim
-U-
28
-PPreRequisites for Purchasing & Receipting 7
Purchasing & Receipting - Introduction 4
Purchasing & Receipting PreRequisites 7
Purchasing Standard Products 8
Purchasing Timber Packs 12
Purchasing Timber Tally Products 11
-RReceipting 36
Receipting Linked Sales Orders 48
Receipting Standard Products 41
Receipting Timber Packs 47
Receipting Timber Tally Products 46
Returns & Credit Requests 27
Returns & Credit Requests - Finding 33
Returns & Credit Requests - Options 31
Returns & Credit Requests - Overview 27
-S-
© 2014 Sterland Computing
Sales Order receipting when Linked
Scheduled Re-Ordering 17
48
43
11
46
49
Back Cover