1
HP 50g Graphing Calculator Quick Start Guide
Edition 1
HP Part Number: F2229-90201
HP 50g Graphing Calculator Quick Start Guide
HP 50g Graphing Calculator Quick Start Guide
i
i
HP 50g Graphing Calculator
ii
HP 50g Graphing Calculator Quick Start Guide
ii
HP 50g Graphing Calculator Quick Start Guide
Keyboard Map Legend
Number
Feature
Number
Feature
1
Context-sensitive menu items
11
Numerical result
2
Tool menu
12
Units menu
3
Mode menu
13
Alphabetic entry
4
Next key
14
Backspace (delete and clear)
5
Tick key
15
EquationWriter
6
Numeric and Symbolic Solvers
16
Cursor keys
7
Shift keys
17
Context-sensitive menu keys
8
On/Off/Cancel keys
18
Graphing functions
9
Space key
19
Screen display
10
Enter key
20
Header area
The table above and the photo on the previous page illustrate just a few of the many features available on the HP 50g Graphing Calculator. These topics, as well as other features of the calculator, are discussed in the following quick start guide. For a complete list of features of the HP 50g Graphing Calculator, refer to the HP 50g Graphing Calculator User’s Manual, the HP 50g Graphing Calculator
User’s Guide, and the HP 50g/49g+/48gII Advanced User's Reference. These manuals are found on the HP website, www.hp.com.
HP 50g Graphing Calculator Quick Start Guide
HP 50g Graphing Calculator Quick Start Guide
iii
iii
Legal Notices
This manual and any examples contained herein are provided "as is" and are subject to change without notice. Hewlett-Packard Company makes no warranty of any kind with regard to this manual, including, but not limited to, the implied warranties of merchantability, non-infringement and fitness for a particular purpose.
Hewlett-Packard Company shall not be liable for any errors or for incidental or consequential damages in connection with the furnishing, performance, or
use of this manual or the examples contained herein.
Copyright © 2009 Hewlett-Packard Development Company, L.P.
Reproduction, adaptation, or translation of this manual is prohibited without prior written permission of Hewlett-Packard Company, except as allowed
under the copyright laws.
Hewlett-Packard Company
16399 West Bernardo Drive
MS 66M-785
San Diego, CA 92127-1899
USA
Printing History
Edition 1, July 2009
iv
iv
HP 50g Graphing Calculator Quick Start Guide
HP 50g Graphing Calculator Quick Start Guide
Table of Contents
HP 50g Graphing Calculator............................................................................................................................... ii
Keyboard Map Legend ...................................................................................................................................... iii
Legal Notices.................................................................................................................................................... iv
Welcome to your HP 50g Graphing Calculator .....................................................................................................1
Manual Conventions...........................................................................................................................................2
Keyboard, Menus, and Annunciators....................................................................................................................2
Basic Math ........................................................................................................................................................4
Using RPN.........................................................................................................................................................5
Working in Algebraic Mode from RPN Mode ........................................................................................................8
Using Equation Solvers .......................................................................................................................................9
Using Units ......................................................................................................................................................12
Memory Management ......................................................................................................................................14
Graphing Functions ..........................................................................................................................................16
Advanced Memory Management .......................................................................................................................19
Using the Computer Algebra System (CAS) – Approximate versus Exact..................................................................21
Factoring and Solving.......................................................................................................................................22
Simplification and Integration ............................................................................................................................24
CAS Troubleshooting ........................................................................................................................................24
Troubleshooting and FAQs ................................................................................................................................25
Basic Features, Customizing the Calculator, and Setting the Internal Clock ..............................................................28
Replacing the Batteries......................................................................................................................................33
Warranty and Contact Information .....................................................................................................................33
Product Regulatory & Environment Information .....................................................................................................37
Contents
i
i
ii
Contents
ii
1
Getting Started
Welcome to your HP 50g Graphing Calculator
Congratulations on the purchase of your new calculator! The 50g is a very powerful graphing calculator based on the HP-48 series of
calculators, which were designed specifically for engineers and mathematicians. Once you perform multiple calculations and work actual
engineering or math problems with the 50g, you will appreciate the variety of tools available and the many ways advanced problems can
be solved with this calculator.
Before getting into specifics about the operation of the calculator, you may wish to read through Table 1-1 on page 26 to familiarize yourself with some common questions associated with the using this calculator.
This quick start guide is intended to be read from start to finish, and it should take about an hour to complete. It will introduce you to the
most important features used for solving general math problems, show you many shortcuts, and identify common problems new users often
encounter. In addition, it will point you to locations where more detailed information can be found. In-depth explanations of operations
are not found here; a simple, step-by-step approach to problem solving is applied. As you proceed through the quick start guide, examples
use concepts, skills, and operations introduced in earlier sections. For example, at some point, you may be asked to work with an equation
that you stored in an earlier section. If you have not started from the beginning, you will not have this equation, and your results may vary.
Although it is tempting to jump through the manual to find interesting parts, every step and section in this booklet is designed to outline
important information and teach you useful techniques in a specific progression. Thus, it is highly recommended you take the time to
understand the concepts in the order in which they are introduced. With a little time and practice, you will be solving problems and
performing advanced calculations with ease.
For more detailed information about the 50g Graphing Calculator, refer to the HP 50g Graphing Calculator User’s Manual, the HP 50g
Graphing Calculator User’s Guide, and the HP 50g/49g+/48gII Advanced User's Reference. These manuals are found on the HP website,
www.hp.com, and are cited throughout this manual; it is highly recommended you refer to these manuals to thoroughly familiarize yourself
with the many features of your calculator.
The 50g is capable of performing operations in both Algebraic and Reverse Polish Notation (RPN) modes. Although Algebraic is the
default operating mode, it is highly recommended you take the time to learn RPN, as many of the 50g’s features work more efficiently when
performed in RPN. For more detailed information about RPN, visit www.hp.com/calculators.
Getting Started
Getting Started
1
1
Manual Conventions
This manual makes use of certain conventions with text to differentiate between key presses and on screen display options.
• Keyboard keys are represented by CAPITAL letters.
• The symbols ! and @ represent the left-shift and right-shift keys, respectively. These symbols, when followed by CAPITAL
letters or key symbols, indicate shifted functions of the keyboard keys.
• Menu items for menu keys are also spelled out in CAPITAL letters, followed by the term, menu key.
• Field names, choose box options, and other on screen text appear in BOLD.
• UP, DOWN, LEFT, RIGHT refer to the silver cursor keys.
• Letters of the alphabet are indicated by ] followed by the keyboard key on which the letter appears. For example, to type the
letter C, press ] F3(C).
• Numbered keys are represented simply by printed numbers: 1, 5, 123.35, etc.
Occasionally, symbols of the actual keys may be used for clarification in long command sequences. Some key commands require you to
press and hold a shift key while simultaneously pressing one or more keys. These commands are spelled out specifically in the text.
Keyboard, Menus, and Annunciators
1.
To begin, press ON. With the power on, the ON key becomes CANCEL. Press ON to cancel an operation and clear the screen
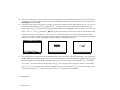
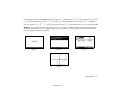
display. Press the TOOL key. Notice that there are six items at the bottom of the screen. These items make up a menu (see Figure 1).
To use a menu, press the key directly beneath the desired menu item. This menu will change as you use the calculator.
Figure 1
2.
2
Notice how there is both a white function and an orange function printed above most keys on the keyboard. There is also a yellow
character printed on the right side of most keys. Look at the orange function above ON. Press the orange right-shift, @, followed
by ON, and the unit powers off.
Getting Started
2
Getting Started
3.
Press ON to turn the calculator back on. Now hold down ON and simultaneously press the + key repeatedly. The screen
darkens. Notice the six symbols that appear at the very top of the screen. These symbols are called annunciators. The three on the
left indicate that a shift key, left, right, or Alpha, is active. Following the Alpha key annunciator is the low battery annunciator and
the busy annunciator, and the communication annunciator is at the far right. Press and hold the ON key. With ON pressed,
simultaneously press the - key repeatedly until the screen is at a contrast you prefer.
4.
If the calculator during operation is non-responsive, or seems locked up, press CANCEL a few times. If it doesn't respond, you may
reboot the machine by pressing and holding ON and simultaneously pressing the F3 key. Release the F3 key, followed by ON.
When you release the ON key, the calculator reboots. This is called a warmstart. To clear all your memory from RAM, press and
hold the ON, F1, and F6 keys simultaneously. Release F6, then F1, then ON. After a beep, the screen displays, Try to Recover
Memory?, with YES or NO menu key options. Press the NO menu key. If nothing happens, push any key. After the beep, press the
NO menu key.
The following steps in this manual assume you have cleared your memory, and you have no extra programs installed. If you have
not cleared the memory, results presented in the guide may vary from your own. Please clear all your memory as described in step
4 above before preceding.
Now that your 50g is ready to go, let’s look at the screen (see Figure 2). The top section is called the header. The header displays
important information about the status of the calculator: RAD XYZ HEX R= 'X' ALG and {HOME}. These groups of letters indicate the
calculator is set for radians, Cartesian coordinates, the Hexagesimal number base, real numbers with exact results, 'X' as the
default variable, and Algebraic operating mode. {HOME} means you are in the Home directory. As we work, note how the
information in the header changes. Don't worry what everything means right now.
5.
6.
Figure 2
Getting Started
Getting Started
3
3
7.
The main, or middle area of the screen is called the history, or the stack. This is where your numbers and equations appear as you
work. The bottom portion is where the edit, or entry line, and the menu appear. For more information on the keyboard, menus, and
the calculator display, see Chapter 1 of the HP 50g Graphing Calculator User’s Manual or the HP 50g Graphing Calculator User’s
Guide.
Basic Math
8.
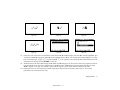
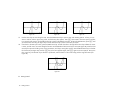
To begin, type 1+1. Notice the entry line and the blinking cursor. Press ENTER. The result, 2, is returned at the far right.
9.
Now press the UP cursor key twice to select 1+1. Press the EDIT menu key to open a tool called the EquationWriter. The
EquationWriter allows you to write complex equations very easily and see them exactly as they might appear on paper (see
Figure 3).
Figure 3
10.
With 1+1 highlighted, press the
/ key followed by the number 5. Notice how it is displayed just as you might write it out on
1+1
paper, ------------ , along with the blinking cursor. Press ENTER to return the equation to the editline, then ENTER once again to evaluate
5
2
it. The result is --- . What is going on here?
5
11.
4
Notice up in the header the R= symbol. Recall this means that the calculator is in exact mode. Keep your eye on that R=. While
holding down the @ key, simultaneously press ENTER. The R= toggles to R~. Do it a few times and see how it changes. Before
preceding to the next step, leave it set as R~.
Getting Started
4
Getting Started
12.
13.
Now press ! followed by HIST(CMD). A box called a choose box with your last four typed entries is shown. With (1+1)/5
selected, press the OK menu key followed by ENTER. This time, the result is .4. As a general rule, you can think of exact mode
solutions, R= , as combinations of fractions, integers, square roots, equations and values of PI. In approximate mode, R~,
everything is evaluated to a single, numerical answer.
Press the UP cursor key and observe how line two, above the highlight, now displays (1.+1.)/5., and line four displays (1+1)/5. The
extra periods after the numbers indicate approximate mode instead of exact mode. We will elaborate on this difference later. Press
CANCEL followed by the CLEAR menu key. Your stack is now cleared. For more information about creating and entering basic
expressions, see Chapter 2 of the HP 50g Graphing Calculator User’s Manual or the HP 50g Graphing Calculator User’s Guide.
Using RPN
The 50g comes from a history of calculators designed specifically for engineers and mathematicians. As such, it has very powerful tools
that permit you to enter, work with, and solve math problems quickly and efficiently. One of these tools is Reverse Polish Notation, (RPN).
RPN's greatest strength is that it lets you work out problems one small piece at a time. You don't have to type everything into a long equation and worry about using parentheses to set the order of operation. Because the 50g comes from a line of calculators that used RPN
exclusively, the calculator is easier to use and functions most effectively in RPN mode.
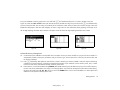
14. Let’s change a few settings on our unit and get into RPN mode. Press the MODE key. A screen called an Input Form appears. These
full screen forms are used for a variety of tasks. On this screen, titled, Calculator Modes, many basic settings are shown. To begin,
press the FLAGS menu key. Press the UP cursor key until you reach 117 CHOOSE boxes. Press the CHK menu key to toggle to Soft
Menu. Press ENTER to return to the input form.
15. Press the UP cursor key five times. Notice how the menu and help text directly above the menu changes as you select different fields.
Once back on the first field, see how Algebraic is selected. Press the CHOOS menu key and a Choose Box appears (see Figure 4).
Press the DOWN cursor key to select RPN, then press ENTER. RPN appears in the first field, and it now will be the active operating
mode when the input form is closed. Choose boxes in input forms can also be changed by pressing Wwith a field highlighted.
Press this key a few times and note how it toggles between RPN and Algebraic. With RPN selected, press ENTER again to save
your settings and exit the input form.
Getting Started
Getting Started
5
5
Figure 4
16.
17.
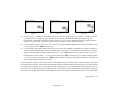
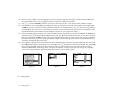
Upon exiting, you will notice that the left side of the screen has numbers from 1-7 (see Figure 5). Press the 2 key, followed by the
# key. Press the 3 # 4 keys, in that order, followed by ENTER. The three numbers appear on different levels of the stack,
numbered 1-7. The number 2. is on Level 3 of the stack, as it corresponds to the number 3: on the left. Also, check the header.
When the calculator is in RPN mode, the ALG annunciator is no longer displayed (see Figure 6).
Press ENTER again and notice how a copy is made of Level 1 on the stack (see Figure 7). This is a useful feature, as it allows you
to save your previous work. Let’s now multiply 4x4. Since 4 is already stored on both Level 1 and Level 2, simply press *. The
result, 16., is placed on the stack, and the other two numbers move down. You now should have, from top to bottom, 2., 3. and 16.
on the stack.
Figure 5
6
Getting Started
6
Getting Started
Figure 6
Figure 7
Figure 8
18.
Figure 9
Figure 10
Let's calculate 16/3. However, the numbers are in the wrong order on the stack for this operation. No problem, press the RIGHT
cursor key to swap their positions (see Figure 8). Now press / and 5.33 (repeating) appears. Let’s square that result by
pressing the RIGHT cursor key to swap Levels 1 and 2, followed by the
19.
Press
Qkey. The final result, 28.44 (repeating) appears.
@ followed by \ (BACKSPACE) to clear the stack.
20. Now let's work a more complex problem to show how RPN allows you to break down complex problems into simpler steps.
21.
Calculate: x =
( 8.33 ( 4 – 5.2 ) ) ÷ [ ( 8.33 – 7.46 )0.32 ] .
-----------------------------------------------------------------------------------------4.3 ( 3.15 – 2.75 ) – ( 1.71 ) ( 2.01 )
To work this problem using RPN, break the larger problem down into smaller pieces. As you work through this example, watch and
note how the more complex problem becomes a series of simple parts as you work it out. Start on the inside of the parentheses and
work outwards. Begin by solving the upper part of the equation inside the square root. Type 8.33 ENTER 4
# 5.2 followed by
-. See how the result is calculated with 8.33 and -1.2 on the stack. Press * and move on to the next group of numbers.
Type 8.33 # 7.46 followed by -. .87 appears on the stack. Type .32 followed by * to multiply those numbers. You
now have -9.996 and .2784 on the stack (see Figure 11). Press / to divide those numbers. You have now solved the upper half
of that equation. The intermediate result is -35.905...
Getting Started
Getting Started
7
7
Figure 11
22.
Moving on the lower half, type 4.3 ENTER 3.15
# 2.75 -, followed by *. 1.72 appears and you can move on to the
next part. Type 1.71 ENTER 2.01 followed by * to return 3.4371. Press - and you have now solved the lower part of the
equation. Press / to divide the top from the bottom, followed by Rto find the square root. The final result, 4.5727… is
returned. For more information about RPN, see Chapter 2 of the HP 50g Graphing Calculator User’s Manual or www.hp.com/
calculators.
Working in Algebraic Mode from RPN Mode
23. Let's now work the previous problem in Algebraic mode. You can actually use Algebraic mode with RPN set as the active operating
mode. Press the Tick key, ³, and note '' appears on the editline. Note how the ALG annunciator also returns to the header,
indicating Algebraic mode is now active. As an exercise, try to repeat the last example by typing the entire expression in as a
single equation.
24. The exact keystroke sequence after pressing
³ is: R!-8.33*!-45.2 RIGHT cursor /!-!-8.33-7.46 RIGHT cursor
*.32 RIGHT cursor /!-4.3*!-3.152.75 RIGHT cursor -1.71*2.01 ENTER. The equation should appear
as it might be written out on paper.
25. Press @ followed by ENTER(->NUM) to return the same numerical result, 4.5727… There are 66 keystrokes in Algebraic mode
compared to 61 with the RPN solution. However, you may have added some keystrokes with editing in order to get all the
parentheses in their correct locations. While RPN generally requires fewer keystrokes, having the ability to break problems into
smaller pieces helps you catch mistakes early on and avoid long, consecutive key sequences.
8
Getting Started
8
Getting Started
³ so '' appears on the editline.
You can now enter data just as you normally would in Algebraic mode. For example, with '' on the editline, type 2 + 2 *
4 Q 2 . When you are done, press ENTER and notice how your equation appears on the stack. Press ENTER to duplicate it,
and then @ followed by ENTER (->NUM) to return a final numerical result.
Another option for entering equations and expressions is the EquationWriter. Press @ followed by ³(EQW) to open the
EquationWriter (see Figure 12). Let's type in and solve a problem using the Pythagorean theorem. Type 14 Q2 followed by
RIGHT cursor + 20 Q2 then RIGHT cursor RIGHT cursor followed by R. You now have the equation entered into the
equation writer (see Figure 13). Now press the EVAL menu key, followed by @ then HIST (UNDO). The EVAL menu key
26. With RPN as the active operating mode, you can still use Algebraic mode at anytime. Press
27.
evaluates what is currently highlighted, and the UNDO command will undo your last command. Now with the whole equation
highlighted, as shown in Figure 13, press @ then VAR (COPY). We will use this later. Now press ENTER. Your equation is now
on the stack. Press @ then ENTER (->NUM) to evaluate your problem. The hypotenuse is ~24.413.
Figure 12
Figure 13
Figure 14
Using Equation Solvers
28. Let's say you have to work several problems involving the Pythagorean Theorem from the last example. Rather than typing them all
in individually, wouldn't it be nice to solve any part of the formula? The many built-in solving tools, including HP Solve, can help
you do this.
Getting Started
Getting Started
9
9
29.
30.
There are two major types of solvers on the 50g: numeric and symbolic. Let's examine the Numeric Solver first. Press @ followed
by 7(N.SLV). A choose box appears. Press 3 and note how the highlight jumps to the corresponding item. Press 1 to jump back to
Solve Equation and press ENTER.
A full screen solver appears (see Figure 15). To begin, we must enter an equation to solve. Rather than typing it all in at once, let's
use the EquationWriter again. Press @ followed by ³ (EQW). Now let's paste in the formula we copied from the last
example by pressing @ followed by L (PASTE). The whole expression is highlighted as shown in Figure 13. Let's rewrite this
2
2
2
to be A + B = C . Press
! followed by \ (DEL) to remove the square root function (see Figure 16). Now press the CURS
2
menu key and notice a cursor appears on a box around 14 . Use the cursor keys to move the cursor and the box around the
equation. As you move, note how you can select individual items, or groups of the whole expression. Use the RIGHT and DOWN
cursor keys so the box surrounds only the 20 and then press ENTER to select 20 (see Figure 17).
Figure 15
31.
Figure 16
Figure 17
Press the ] key to access the letters of the alphabet printed in yellow on the keys. Press ] followed by F1 (A) and note how
the 20 is replaced by a letter A (see Figure 18). Press the cursor keys as follows: UP UP LEFT DOWN to highlight the 14. Press ]
followed by F2 (B) to replace the 14 with a letter B (see Figure 19). Press the cursor keys, UP UP, followed by
2
cursor. The B term moves to the left (see Figure 20). Press
2
! then
2
reads A + B . Press UP until the entire expression is highlighted. Press
] followed by F3(C) Q 2. You now have the full
10 Getting Started
10 Getting Started
2
2
2
! then RIGHT
LEFT cursor and it moves back. Position it so the equation
@ followed by Wto insert an equals sign, =, then
A + B = C (see Figure 21). Press ENTER.
32.
Figure 18
Figure 19
Figure 20
Figure 21
Figure 22
Figure 23
Notice how your solver screen now has fields to enter values for A, B, and C (see Figure 22). Note A is currently highlighted. Type
10 and press ENTER. A now has the value 10, and the highlight moves to B. You can also type simple math problems in an input
2
form. For example, type 5 # 2 Q and press ENTER. 5 , or 25, appears as the value for B. Now with C selected, press the
SOLVE menu key. Shortly, the result 26.9258... is returned.
33. What if C remains the same, but A changes to 15? What should B change to? You don't have to rewrite your equation to find out.
Press the DOWN cursor key twice to select A. Type 15 ENTER and now with B selected, press the SOLVE menu key. The result,
22.36... appears. In this way, any variable in any part of the equation can be solved without re-entering all the data.
34. Numerical solvers can often return several results, especially for functions that are periodic, (SIN, COS), as well as many
polynomials. Let's examine how this works.
Getting Started
Getting Started
11
11
35.
Press DOWN and highlight C. Now type in 9 WV 30 so -9E30 is displayed, then press ENTER. A very large negative
number appears in C. Press UP to highlight C again. You have now entered an initial guess for the solver. Press the SOLVE menu key
and then press any other key other than CANCEL. You will see numbers rapidly converging down to a value. After a few moments,
2
2
note -26.9258... appears. Why? Because – 26.9528 is the same as 26.9528 . With many functions, setting a different initial guess
will determine which numerical solution appears. For more information about using solvers, see Chapter 6 of the HP 50g Graphing
Calculator User’s Manual or the HP 50g Graphing Calculator User’s Guide.
Using Units
In physics, engineering, and science calculations, units and unit conversions are often a critical part of problem solving. The 50g lets you
work without adding steps to your calculations when units and unit conversions are required. Let’s learn how to use them.
36. Imagine that your triangle from the previous problem now has units. We can solve using units as well. Press UP UP to select A. Now
Press 10
@-]! HIST (M) ENTER, followed by 85 @-]]!] F6 (F) COS (T) ENTER, then
1@-]]!] F3 (C) HIST (M) ENTER. You have now entered values with assigned units for A, B and C (see
Figure 24). It is necessary to assign units for all three variables so the 50g knows which units to use during the calculation, as the
50g won’t know which unit to assign to a variable without a unit. Note how the units are preceded by the underscore edit mark in
the key sequence above by pressing
37.
@-.
Now press UP to select C and press the SOLVE menu key. After a short wait, 2777.092.._cm is returned (see Figure 25). Type 3000
and press ENTER. Note the currently assigned unit is retained. Press DOWN to select A and press SOLVE. The result, 15.125..._m is
returned.
12 Getting Started
12 Getting Started
38.
Press ENTER to exit to the stack. You will see the variables you solved for labeled with units (see Figure 26). Let's convert the units
on Level 1. Press @ followed by 6 (UNITS) for the Units menu.
Figure 24
Figure 25
Figure 26
Figure 27
Figure 28
Figure 29
Notice the menu items change to TOOLS, LENG, etc., as shown in Figure 27. Press the LENG menu key and length units appear on
the menu. Press ! followed by the YD menu key and notice your length on Level 1 is changed to yards (see Figure 28). Press
L to see more length units. Press L again and then ! followed by the CHAIN menu key to convert from yards to chains.
Press L two more times to wrap around once again to your first menu page and press ! followed by the M menu key to
convert back to meters (see Figure 29).
39.
The 50g supports compound units as well, such as m/s. Many units are defined by combinations of other unit types. A well known
example is the Newton, a measure of force. Press 1 @ 6 L, the FORCE menu key, followed by the N menu key. 1 newton
Getting Started
Getting Started
13
13
is placed on the stack. Now press L, followed by the UNITS, TOOLS, and UBASE menu keys. The NEWTON is converted to 1
kg × mkg times meters divided by seconds squared, or 1 --------------.
2
s
40. The 50g supports many other unit capabilities such as prefixes (giga, kilo, centi, micro, etc.) and is an invaluable tool for physics
and engineering problems. Using the built-in unit tools, you can utilize units directly in your calculations and save yourself from
time-consuming conversions. Press @ followed by \ (CLEAR) to clean off your stack before the next section. For more
information about operations with units, see Chapter 3 of the HP 50g Graphing Calculator User’s Manual, or the HP 50g
Graphing Calculator User’s Guide.
Memory Management
41.
As we've worked, several variables have been created in the calculator’s memory. Press VAR and a menu with items stored in your
local memory appears. You will notice variables C, B, A and EQ are there. Press the C menu key and notice that your previous C
variable appears on the stack (see Figure 30).
42.
Press ] F3(C) then ENTER. The VALUE stored in C from the previous problem also appears (3000._cm). This is because by
typing C alone, the 50g looks in your memory, discovers a variable stored there named, C and uses it.
43.
Now press ³ followed by the C menu key and press ENTER. Notice how this time the C is not automatically evaluated. Placing
it inside tic marks (' ') has turned it into a variable name on the stack. Press 100 ENTER followed by RIGHT cursor (see Figure 32).
Now press STO to store 100 into variable C. How are we sure it was stored? Press ³, followed by ] then F3(C) to place
'C' on the stack. Press
Figure 30
14 Getting Started
14 Getting Started
! followed by STO (RCL) to recall the variable named 'C'; the value 100. appears on the stack.
Figure 31
Figure 32
Figure 33
Figure 34
Figure 35
2
44.
Now press @³(EQW) to open the EquationWriter. This time, type ] F3 (C) Q 2 ENTER. C appears on the stack
(see Figure 33). This is an Algebraic object. Press the UP cursor and you will see 'C^2' on the stack (see Figure 34). The
EquationWriter automatically surrounded the equation with ticks. In short, to prevent automatic execution of a variable, equation,
program or any other object, simply place it inside ticks. Press CANCEL to exit the interactive stack mode.
45.
Now press ENTER to make a second copy of C . Press @ followed by ENTER (->NUM) and the value of the variable C, 100,
is used, returning a result of 10000. (see Figure 35).
It can be tedious to type variable names every time. Since storing and using variables is essential for many complex calculations, a
quicker way is desired. Press VAR to show your variables again. This time, press @ followed by the C menu key. Just as if you
46.
2
typed 'C' and pressed RCL, the value is recalled. Type 2 then
followed by the C menu key. With C
2
/ and 50 appears. To save the value back into C, press !
on Level 1, (you may have to press \ once) now press @ ENTER (->NUM) to evaluate
2
C . Since 50 was used, the result this time is 2500. For more information on memory and memory management, see Chapter 26
of the HP 50g Graphing Calculator User’s Guide.
Closely related to the numerical solver we just explored is the HP Equation Library. The equation library contains hundreds of sorted equations organized into categories. These equations have detailed information about the equations, including pictures and variable information. Using the equation library, you can numerically solve, with full unit support, series of related equations quickly by entering a few of
the variables. Also included with the 50g is the HP Periodic Table of the Elements. The Periodic Table of the Elements displays a graphical
version of The Periodic Table of the Elements and 23 different properties for each element, plots elements in relation to one another based
Getting Started
Getting Started
15
15
on those properties, and calculates molecular weights for chemical formulas.
These tools come installed on your calculator, and you are encouraged to explore them after you complete this quick start guide. To
access these installed library programs, press APPS and scroll to the bottom of the list using the UP or DOWN cursor keys. If you do not
see the Equation Library or The Periodic Table of the Elements in that list, it has been deleted from Port 2 of your calculator. Feel free to
download and install it by visiting www.hp.com/calculators.
Graphing Functions
Let’s now create a simple function and graph it. To begin, clear the stack by pressing
47.
48.
49.
@ followed by \.
Above keys F1-F6 there are six labels printed in white used for plotting and graphing accessed by the ! key.
Remember in the last section how @-(variable) and !-(variable) recalls and stores. Because this key sequence performs the
recall and store features, in order to access the labels used for plotting and graphing, you will need to press and hold the !
key, then press and hold the F1-F6 keys so both keys are pressed simultaneously. Now press and hold ! and simultaneously
press and hold F4(2D/3D). Release the F4 key, then !.
The Plot Setup screen appears (see Figure 36). Press the CHOOS menu key and a list of plotting options appears (see Figure 37).
Ensure that Function is selected and press ENTER. Now press and hold ! and simultaneously press and hold F1(Y=) to open
the plot screen. Since the Function plot option was selected, the title of the page is, PLOT-FUNCTION (see Figure 38).
Figure 36
50.
Figure 37
Figure 38
Notice that the function we used earlier in the Numeric Solver has appeared in both the EQ: field on the Plot Setup page and on
the Plot-Function page. Since we don't want to plot that, press the DEL menu key to remove it. Now press the ADD menu key and
16 Getting Started
16 Getting Started
the EquationWriter appears with Y1(X)= (see Figure 39). Type 1 / 4 RIGHT cursor *x (the x key above the
8 key)
Q 3 followed by RIGHT cursor twice -x
(x key) Q 2 followed by RIGHT cursor twice then + 1 ENTER. You
1--- 3 2
have now entered Y1 ( x ) = 4 x – x + 1 (see Figure 40). Press and hold ! and F2 (WIN) to open up an input form titled, Plot
Window to check the window size (see Figure 41). In here, you can change your default horizontal and vertical window settings.
The default values should work fine, so press the ERASE menu key to remove any previous graphs, followed by the DRAW menu
key. The 50g graphs the plot (see Figure 42).
Figure 39
Figure 40
Figure 41
Figure 42
Getting Started
Getting Started
17
17
Figure 43
51.
52.
Figure 44
Figure 45
Use the cursor keys to move along the axes. Press the ZOOM menu key to open a menu with zooming options. In here, you can
zoom in and out, select a region using a box, and find many other options. Press L a few times to see more options. Feel free
to try several zoom options. Use the ZDFLT menu key to return to the default zoom size. To leave the ZOOM menu, press L until
you see the PICT menu key (see Figure 43). Press the PICT menu key to return to the main plot screen.
Once back to the main plot screen, press the TRACE menu key. A small white box to the right of the menu key indicates the tracer
is active, and the cursor now traces along the function. Use the RIGHT and LEFT cursor keys to move (see Figure 44). Press the FCN
menu key for options for finding roots, areas, intersections, and slope, among other options. Press the ROOT menu key to calculate
the closest root (see Figure 45). Press the L key so the menu appears again, then L again to see more options. Here, press
the F' menu key. The derivate of your function is performed, and then drawn on the screen along with the original function (see
Figure 46).
Figure 46
18 Getting Started
18 Getting Started
Now press CANCEL to exit the graph screen. Press and hold ! and simultaneously press F1 to return to the plot screen (see
Figure 47). Select the .25 3. X^2-2x function (the derivate) and press the DEL menu key. Now press and hold
! and simultaneously
press F6 to enter the table. You can easily see a table of your X and function values. Select an item in the X column and type 1.215. Press
ENTER. The table jumps to that value and redisplays, as shown in Figure 49. For more information about graphing, see Chapter 10 of
the HP 50g Graphing Calculator User’s Manual or Chapters 12 and 22 of the HP 50g Graphing Calculator User’s Guide.
Figure 47
Figure 48
Figure 49
Advanced Memory Management
53. Go ahead and press CANCEL to exit the table view. Press VAR to access your menu variables. As you plot, a function named Y1 is
automatically created to allow quick calculations with your function. Type -1.12 and press the Y1 menu key. The value is taken and
the function calculated.
54. Press ! followed by APPS (FILES) to open the Filer in order to examine your memory. HOME is where the objects used during
calculations are stored. Libraries, programs that extend the functionality of your calculator, can be stored in port 0, Port1, or Port2.
Port2 is the most secure, and libraries normally should be placed here.
55. Notice there is a tree under HOME showing CASDIR. With HOME selected, press the RIGHT cursor key to dive into that memory
location. Use the UP and DOWN cursor keys to scroll through objects. You should see the objects that have been created during
this quick start guide such as A, B, C, EQ, and so on. Notice the CASDIR folder is shown with a little folder icon. Other objects have
different icons to represent what they are as well.
Getting Started
Getting Started
19
19
56. Next, let’s create a folder to store and organize your previous equations and data. Press
key. Press DOWN cursor and then
57.
L and followed by the NEW menu
]] and type the letters for PYTHAG. Press ENTER.
Press W to check the Directory checkmark. Press the OK menu key to accept. A new directory titled, PYTHAG is created.
58. Use the DOWN cursor to highlight B. Press ENTER and notice a 1 is placed next to the left of the variable. Continue selecting C
and EQ by using the cursor keys and pressing ENTER until they also are numbered. Now press ! followed by L (PREV) to
move through the previous menu rows. With COPY as an option, press the COPY menu key and the memory tree appears. Select
the PYTHAG directory under HOME and press ENTER. Your objects are now copied to the directory.
59. Select the PYTHAG directory using the cursors and press RIGHT to dive into the folder. You should see the A, B, C , and EQ objects.
Select A and press L, followed by the PURGE and YES menu keys. A should be deleted. Press LEFT cursor to return out of that
folder. Now select B, C, and EQ like before, and press the PURGE menu key again. This time press the ALL menu key to delete all
the selected objects. Since you were planning to delete the objects instead of making copies of them, using the MOVE menu key
would have accomplished this with one step.
60. Press CANCEL to exit the filer. Press VAR and notice there is a PYTHA folder on the menu. Press the PYTAH menu key, and your B,
C, and EQ variables appear. Notice that there is no A variable. Press @ followed by 7, and then press ENTER. Your previous EQ
appears, along with A, B ,and C. Notice that even though there is no A in this folder, the 50g searches upwards in memory,
discovers an A variable in the directory above, and uses it. This behavior can often surprise new users who get an unexpected
answer when using the Computer Algebra System (CAS), because an old X variable is found.
Figure 50
20 Getting Started
20 Getting Started
Figure 51
Figure 52
Using the Computer Algebra System (CAS) – Approximate versus Exact
The Computer Algebra System (CAS) on the 50g is extremely flexible and powerful. It can do everything from simple factorizations
to advanced calculus. With a little experimentation, you'll quickly be able to calculate and solve a variety of problems. Throughout
this guide, we've mentioned the Exact and Approximate modes used during calculations. When using the CAS, be aware of all of
the calculator’s current settings by glancing at the header. If you do not verify the settings before calculations, the 50g may not
return expected results.
61.
The most important of these settings is Exact/Approximate mode. To begin, toggle back to Exact mode by pressing and holding
@ and simultaneously pressing ENTER. R= in the header indicates Exact mode is the active setting.
62.
Now type 100 and press ENTER. 100 appears on the stack (see Figure 53). Press
@ followed by SYMB (CAT) to access the
command catalog. Press @ followed by UP to jump to the top of the list and select the factorial command (!). Press ENTER.
Shortly, a very large number appears (see Figure 54). Press UP followed by the VIEW menu key. Press and hold the RIGHT cursor
key to scroll through the numbers. If you scroll to the end, you will have viewed all 158 digits in 100! Press CANCEL to exit to the
interactive stack, and then CANCEL again.
63. Now type 100. (with a decimal point) followed by ENTER. The dot (.) indicates that this is a real number. Numbers such as 2.35
and 0.33333333334 are also real numbers. 2 and 100 without a dot, are called integers and are exact symbolic objects. Open
the command catalog again, @ followed by SYMB (CAT), and then press ENTER. This time, a result of 9.3326215..E157 is
returned (see Figure 55). In other words, the full, exact precision was not used, but rather, a 12- digit decimal representation. Clear
the stack by pressing @ followed by \ before moving on. For more information on CAS settings, see Chapter 1 of the HP
50g Graphing Calculator User’s Manual or Chapter 1 or Appendix C of the HP 50g Graphing Calculator User’s Guide.
Figure 53
Figure 54
Figure 55
Getting Started
Getting Started
21
21
Factoring and Solving
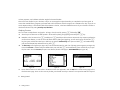
64. Another nice feature about RPN in Exact mode is you can build equations on the stack as you work. Press
x
(x key)
#2
Q 9 - (see Figure 56). Notice as you type the equation is built step-by-step in the display.
65. Press ENTER to duplicate the equation before we begin experimenting.
66. Press @ followed by 4 (ALG) and then press the FACTO menu key. This factors the equation (see Figure 57). Press the EXPAN
menu key to expand the equation back out. Now press DOWN cursor and the EquationWriter opens and is ready to edit your
expression. Press DOWN cursor RIGHT cursor followed by
return to the stack.
Figure 56
67.
W. The equation now reads
Figure 57
2
x + 9 (see Figure 58). Press ENTER to
Figure 58
Press the FACTO menu key again. This time, nothing happens to the equation. This is because without using complex numbers, the
equation can't be factored. Like the shortcut for the Exact/Approximate mode toggle, there is a Real/Complex toggle. Press and
hold ! and then press and hold TOOL (i) so both keys are pressed simultaneously. Release TOOl, then !. In the header,
note how the R= changes to C=, indicating that complex numbers are now being used (see Figure 59). Press the FACTO menu key
again. This time, the equation is factored out with the result, ( x + 3i ) ( x – 3i ) (see Figure 60). Press \ to remove the equation.
2
x – 9 should still be on the stack.
22 Getting Started
22 Getting Started
Figure 59
Figure 60
Figure 61
68. As you work with the CAS, it will automatically prompt you to change settings as needed. Sometimes a setting is active that can
cause problems with later calculations. To return the CAS to its default state, press @ followed by SYMB (CAT) ] F3(C)
DOWN cursor. With CASCFG selected (see Figure 61), press ENTER. This command resets the CAS to its default settings. Note how
the header annunciator has changed from complex, C=, back to real, R=.
69.
2
Now, let's solve for X. To begin, press ENTER to make a copy of your x – 9 . Press ³ followed by x (x key) and press
ENTER. Using 'X' instead of just X ensures that it remains a variable, and the calculator will not find and recall a number stored into
X (see Figure 62). Press L to locate the SOLVE menu key and press it. The result, { X= -3 X= 3 }, is returned (see Figure 63).
Press \ to delete the result. For more information, see Chapter 5 of the HP 50g Graphing Calculator User’s Manual or Chapter
5 of the HP 50g Graphing Calculator User’s Guide.
Figure 62
Figure 63
Getting Started
Getting Started
23
23
Simplification and Integration
70. Another characteristic of the 50g CAS is that it does not perform automatic simplification. It includes many commands that allow
you to rewrite expressions in other equivalent representations. For example, you can rewrite TAN(X) into SIN(X)/COS(X) using the
command TAN2SC (tangent to sin cosine). This allows you great flexibility in changing equations from one format into another.
71.
72.
2
Let’s use x – 9 from the previous example. Press ! followed by 4 (CALC). Notice the commands, DERVX and INTVX on the
menu (see Figure 64). The VX in the command name means that it will use your current default variable as the input. Up on the
header, note the 'X'. This means X is the current default variable.
Press the INTVX menu key four times. Watch as the symbolic integration proceeds. No simplification occurs as the command is run
(see Figure 65). Now press @ followed by 4 (ALG) to rewrite this expression. Press the EXPAN menu key expand all parts of the
expression. The result is a single expression. Now press the COLLE menu key to collect like-terms together. Press the FACTO menu
key and note how the factors are expanded out even further. Finally, press the PARTF menu key to split the expression into separate
terms (see Figure 66). For more information, see Chapter 11 of the HP 50g Graphing Calculator User’s Manual or Chapters 13 and
14 of the HP 50g Graphing Calculator User’s Guide.
Figure 64
Figure 65
Figure 66
CAS Troubleshooting
The 50g CAS has an incredible selection of tools that allows you to solve and manipulate symbolic vectors, matrices, and polynomials.
Again, as previously mentioned, this wide variety of tools and setting options means that sometimes results are returned in a form other
than expected. For example, solving an integral may get a strange result, because the calculator is set in cylindrical coordinate mode,
24 Getting Started
24 Getting Started
and the answer is returned in cylindrical form. There are four main problems new users often encounter while using the CAS:
• First, the CAS settings have been changed to something incorrect. Use the command CASCFG to reset the CAS settings back to the
defaults.
• Second, a variable is being found and used. Remember earlier when we saw how 'C' and C could behave differently? In a CAS
calculation, variables can be replaced by numerical values if they are found in memory.
• Third, Approximate versus Exact mode. X^2. And X^2 are different because of the period after the number (2.) versus (2). If there
are real numbers in an equation during a CAS command, the results generally will not be returned as expected.
• Fourth, the result is returned in a non-simplified, or a different form than expected. To solve this, the 50g allows the user to rewrite
the equations using many different tools. This allows you to explore mathematical relationships between various functions and lets
you decide on the desired form of the answer.
Troubleshooting and FAQs
The previous exercises and discussion were intended to familiarize you with some of the many functions available on the 50g. If you have
additional questions, or if you require more in-depth information, there are a wide range of resources available at www.hp.com/calculators. More information may be found on the CD that came with your calculator, the HP manuals cited throughout the previous text, and
learning tutorials available on the HP website, which will guide you through topics ranging from basic operation to advanced programming techniques.
In addition to these resources available on the HP Calculator website, www.hp.com/calculators, there is an HP-sponsored discussion
group accessible on the HP Calculators page where you can ask questions, get answers, and share information with other users in an HPsponsored Calculator Community. For more information, visit: www.hp.com/calculators. On the HP Calculators page, click on the Calculator support forum link under Calculator Community.
Getting Started
Getting Started
25
25
Table 1-1 Troubleshooting and FAQ's
Common Problem/Question
Solution
Why is my function
returning a wrong answer?
There may be an error in the function, but if everything appears correct, there is probably a number
stored in one of your variables. This variable may be in your current directory or in a higher directory on
your calculator. For example, if X^2 is evaluated while 0 is stored in variable X in a higher directory, the
function becomes 0^2 and returns an unexpected result. To fix the problem, delete the variable. Refer to
the section titled, Memory Management above.
Why is there a dot after my In approximate mode, whole numbers have a decimal to distinguish them from exact integers. Refer to the
number?
previous sections titled, Basic Math and Using the Computer Algebra System (CAS) - Approximate versus
Exact.
Why are my symbolic
solutions different than I
expect?
Please see the section titled, CAS Troubleshooting in this guide. Also, iff DERVX,INTVX, or
How do I integrate
functions?
Use the integration symbol for numeric integration and the command INTVX for symbolic integration.
Why does the solver only
give me one answer to my
polynomial?
The numeric solver uses an initial guess and finds the nearest solution. On polynomials and periodic
functions like sine or cosine, changing the initial guess returns a different solution. Refer to the section
titled, Using Equation Solvers in this guide for more information.
SOLVEVX are not working properly, check that the independent variable name (MODE CAS) is X. There is
a difference between X and x. The calculator is case sensitive.
Why do I see choose boxes The calculator offers both choose boxes and soft key menus. We recommend soft key menus. To turn these
instead of soft menus?
on press MODE, press the FLAGS menu key and set flag117 to use Soft menus.
What is the symbol above
my screen that won't go
away?
26 Getting Started
26 Getting Started
This is usually the low battery warning message, but it also can be one of five other status annunciators.
When the low battery annunciator appears, please change your AAA batteries. Refer to the sections
titled, The Keyboard, Menus, and Annunciators, and Replacing the Batteries (below).
Table 1-1 Troubleshooting and FAQ's
Common Problem/Question
Solution
How do I transfer files from You can use a USB cable and the accompanying connectivity kit, however, you will probably find that
using an SD card is the quickest and easiest way to transfer files. Everything you can do with the
my computer to my
connectivity kit you can also do with an SD card. For more information, see Chapter 26 of the HP 50g
calculator?
Graphing Calculator User's Guide.
Why isn't my SD card
working?
The calculator will accept any SD card smaller than 2GB. Anything larger is an SDHC card and will not
function. FAT is the best format to use on your card, because FAT32 causes a two second delay each time
you turn on your calculator. The filer may not display the full capacity on your SD card if it is larger than
1GB, but you can still use the full space available even if it is not displayed.
Why can't I transfer folders Your calculator's method of handling folders differs from the way your computer handles folders. You
between my calculator and cannot copy folders from the computer directly into your calculator, or folders in your calculator directly
into your computer. Instead, transfer individual files.
my computer?
Why can't I delete folders
on my SD card using my
calculator?
The calculator can access and save files in any location on the SD card, but it does not copy files
between folders or delete folders on the SD card. Use your computer to manage files on your SD card.
How do I install software?
There are two main program types - libraries and programs.
A program is usually a single object that performs a single function. These are placed in your HOME
directory and run using a menu key.
A library is a collection of many programs that integrates into your computer like a native function. Using
the filer, place libraries in port 0, 1, or 2. Port 2 is usually the best option. Refer to the section titled,
Advanced Memory Management above. Once installed, reboot the calculator by pressing and holding
ON and simultaneously pressing the F3 key.
Release the F3 key, followed by ON. To access library functions, press @ 2(LIB). All functions in a
library will also appear in the command catalog accessed by pressing @ SYMB (CAT). Please see the
program documentation for more information.
Getting Started
Getting Started
27
27
Table 1-1 Troubleshooting and FAQ's
Common Problem/Question
Solution
Which programs can I
install on my calculator?
Please see the program documentation for more information. If the program is written for the 49G, 48GII
49G+ or 50G, it will probably run on your calculator. Although some 48g programs will run, the majority
will not.
Where can I find a list of
every command in the
calculator?
The HP 50g/49g+/48gII Advanced User's Reference, available at www.hp.com/calculators, contains
an extensive list of every command and other usage information. In addition, it contains advanced
programming techniques, lists of possible error messages, usage information for the HP equation library,
and other topics. You may also look on the accompanying CD for more learning modules and
information.
Where can I get help with
other problems with my
calculator?
The quickest way is usually to visit our support forum. Visit: www.hp.com/calculators and click on the
Calculator support forum link under Calculator Community.
Basic Features, Customizing the Calculator, and Setting the Internal Clock
The following section provides you with additional information about the basic features of the calculator. Many of the concepts of this section were introduced in the sections above while working through the example problems and are explained in more detail here. This is
provided as an overview, and the pages of the HP 50g Graphing Calculator User’s Guide and the HP 50g Graphing Calculator User’s
Guide are included for reference. You are encouraged to consult these pages of the user’s guide for more information and detailed
descriptions. For useful key shortcuts for some of the tasks listed below, also refer to Appendix G of the HP 50g Graphing Calculator
User’s Guide.
28 Getting Started
28 Getting Started
Table 1-2 Basic Features, Customizing the Calculator, and Setting the Internal Clock
Functions
Turn calculator
on/off
Display/Description
To turn calculator on, press ON. Note ON is printed on the key. The calculator turns off automatically 10 minutes after
it was last used. To turn off, press @ ON. Note OFF is printed above the key to the right. For more information, see
Chapter 1 of the HP 50g Graphing Calculator User’s Manual or the HP 50g Graphing Calculator User’s Guide.
Display contrast To change the display contrast, press and hold ON followed by + or -. Each press of + increases the contrast slightly; each press of
- decreases the contrast slightly. For more information, see Chapter 1 of the HP 50g
Graphing Calculator User’s Manual or the HP 50g Graphing Calculator User’s Guide.
Cancel or
escape
Press the ON key (CANCL) when the calculator is powered up. Press
@ followed by the by the backspace key
\ (CLEAR) to clear the history (stack).
Return to the
HOME screen
To return to the {HOME} screen from within another menu, press the I key. For more information, see Chapter 1 of
Deleting an
entry
Use the backspace key to edit your entries. Each press of the backspace key deletes characters to the left of the cursor,
the HP 50g Graphing Calculator User’s Manual or the HP 50g Graphing Calculator User’s Guide.
one character at a time. Press ! followed by \ (DELETE) to delete highlighted entries on the entry line, or in the
EquationWriter. Within a highlighted area, the
! DEL key command deletes the latest entry, much like the back-
space key. For more information, see Chapter 2 of the HP 50g Graphing Calculator User’s Manual or Chapter 2 of the
HP 50g Graphing Calculator User’s Guide.
Clearing the
history or the
stack
Press
@ followed \ (CLEAR) to clear the history, or the stack, if in RPN mode. When used with the cursor keys
to highlight portions of expressions or equations, it also deletes highlighted entries in the EquationWriter. For more
information, see Chapter 2 of the HP 50g Graphing Calculator User’s Manual or the HP 50g Graphing Calculator
User’s Guide.
Getting Started
Getting Started
29
29
Table 1-2 Basic Features, Customizing the Calculator, and Setting the Internal Clock
Functions
Entering letters
with the ]
key
Display/Description
You can store and retrieve numerical data in the variables A through Z. But first, you have to know how to enter letters
of the alphabet. These letters appear near the bottom right corner of most of the keys on the keyboard, and are
] shift key first. When pressed, the Alpha annunciator appears in the display. For example, press ] followed by the F1 key to enter the letter A. You do not need to hold down the ] shift key - just
press and release it. You may also enter upper case or lower case letters. For lower case letters, press ] one time,
followed ! then the desired letter. For upper case, press the ] key two times followed by the desired letter. For
accessed by pressing the
more information, see Chapter 2 of the HP 50g Graphing Calculator User’s Manual or the HP 50g Graphing
Calculator User’s Guide.
Selecting Soft
menu keys or
CHOOSE
boxes
(Calculator
Modes menu)
5.
6.
To select Soft menu keys (keys below the display) or Choose boxes, press H to open the Calculator Modes
input form.
The default setting is Choose boxes. When Choose boxes are active, the CHOOS menu key appears as a label
within a menu. Press the CHOOS menu key to see the options within the fields in a menu.
To change the format in which menus are displayed, press the FLAGS menu key. System Flags is displayed at the
top of the screen. Note: a flag is a Boolean value, that can be set or cleared (true or false), that specifies a given
setting of the calculator or an option in a program. Flags in the calculator are identified by numbers. A flag is set
if you see a check mark in front of the flag number. Use the UP cursor key to highlight number 117.
Press CHK to toggle between CHOOSE boxes and Soft menu. Soft menu refers to using the function keys (F1-F6)
to see available options in a menu.
With Soft MENU displayed, press OK twice to return to the normal calculator display.
To see an example of the available labels of a menu using only soft keys (the six keys below the display), press
7.
@3. Press L to see all available functions of the Base menu.
Press H to return to the Calculator Modes menu and continue viewing/changing the settings. For more
1.
2.
3.
4.
information, see Chapter 1 of the HP 50g Graphing Calculator User’s Manual or Chapter 2 of the HP 50g
Graphing Calculator User’s Guide.
30 Getting Started
30 Getting Started
Table 1-2 Basic Features, Customizing the Calculator, and Setting the Internal Clock
Functions
Display/Description
Customize the 1.
number display,
change mode
settings, open 2.
the CAS Modes
3.
input form.
4.
5.
6.
Resetting the
Calculator
Use the Modes input form to set the modes and customize the number display for the Home view. Press the H
key to open the Calculator Modes input page. Press L to see the second page of the menu.
Use the cursor keys to move around the page.
With a field highlighted, press
W to view the available options. The displayed setting is the active setting.
Use the CHK menu key to select/deselect items with a check mark. Checked items are active.
Press L until the CAS menu key appears. Press it to access the CAS MODE input page. Press the OK menu
key or ENTER to save settings and return to the Calculator Modes page.
Press the OK menu key once again to return to the {HOME} view. For more information, see Chapter 1 of the HP
50g Graphing Calculator User’s Manual or the HP 50g Graphing Calculator User’s Guide.
If the calculator locks up and seems to be stuck, you can reset it using a keyboard reset. Resetting cancels certain operations, restores certain conditions, and clears the temporary memory locations. It does not erase stored data, such as
variables and programs. To reset:
1.
Press and hold the ON key and the third menu key from the left, F3, simultaneously for a second or two, then
release the F3 key first, followed by the ON key. If you are using an emulator, right-click the ON key to hold the
shift command and left-click the F3 key. Release the F3 key first by left-clicking, followed by the ON key.
To erase all memory and reset defaults. NOTE: this action erases everything you have stored and returns the calculator
to its default settings:
1.
Press and hold the ON key, the first menu key (F1), and the last menu key (F6) simultaneously for a second or
two, then release them one at a time, starting with the F6 key. If using the emulator, perform right-clicks on all the
keys to hold them simultaneously. Right-click to release them.
2.
If the calculator still does not turn on, try inserting the end of a straightened paper clip into the small hole on the
back of the calculator. Press gently for one second, then release. Press the ON key.
Getting Started
Getting Started
31
31
Table 1-2 Basic Features, Customizing the Calculator, and Setting the Internal Clock
Functions
Setting time
and date
Display/Description
1. To change the time and date, press
@
followed by
9
(TIME).
2. Using the cursor keys, higlight Set time, date..., or press 3. Note: you may also set and browse alarms, and use
Time tools from this menu. For a complete list of Time tools, see Chapter 25 of the HP 50g Graphing Calculator
User’s Guide.
3. Press the OK menu key.
4. Using the keyboard, key in number(s) for the current hour followed by ENTER.
5. With the last field to the right highlighted, press the
W to scroll through options for AM, PM, or 24-hour clock.
The option displayed option will become the active setting. Press the DOWN cursor key to highlight date format.
6. With the field highlighted, press W to select either M/D/Y (month-day-year) or D.M.Y (day-month-year) formats.
The displayed option will become the active setting.
7. Using the cursor keys, highlight the fields for day, month, and year.
8. Key in the numbers, followed by ENTER.
9. Once you have set the date and time fields, press the OK menu key or ENTER to exit the menu and save your
settings, or CANCL to cancel. For more information, see Chapter 1 of the HP 50g Graphing Calculator User’s
Manual or the HP 50g Graphing Calculator User’s Guide.
32 Getting Started
32 Getting Started
Replacing the Batteries
The HP 50g calculator takes 4 AAA (LR03) batteries as a main power source and one CR2032 lithium battery for memory backup. If the low battery symbol appears on the display of the HP 50g calculator, replace the batteries as soon as possible. However, to avoid loss of data, remove the backup battery
and main batteries at the same time. Have the new batteries readily at hand before opening the battery compartment. Once the batteries are removed,
replace them within two minutes to avoid losing stored information.
To install the main batteries:
1.
Turn off the calculator.
2.
Slide up the battery compartment cover.
3.
Remove the old batteries.
4.
Insert 4 new AAA (LR03) batteries into the main compartment.
5.
Make sure each battery is inserted in the indicated direction.
Follow these steps to install the new backup battery:
1.
Turn off the calculator.
2.
Remove the back cover of the battery compartment. The lithium battery is located underneath the small square cover located above the AAA
batteries.
3.
Carefully remove the cover by sliding the tabs forward to align with the slots and gently lift the cover off.
4.
Remove the old battery.
5.
Insert a new CR2032 lithium battery with its positive polarity facing up.
6.
Replace the back cover of the backup battery.
7.
Replace the cover to the battery compartment.
8.
Press ON to turn on the calculator.
Warranty and Contact Information
Warning! There is danger of explosion if the battery is incorrectly replaced. Replace only with the same or equivalent type recommended by the manufacturer. Dispose of used
batteries according to the manufacturer's instructions. Do not mutilate, puncture, or dispose of batteries in fire. The batteries can burst or explode, releasing hazardous
chemicals.
HP Limited Hardware Warranty and Customer Care
This HP Limited Warranty gives you, the end-user customer, express limited warranty rights from HP, the manufacturer. Please refer to HP's web site for an extensive description
of your limited warranty entitlements. In addition, you may also have other legal rights under applicable local law or special written agreement with HP.
Limited Hardware Warranty Period
Duration: 12 months total (may vary by region, please visit www.hp.com/support for latest information).
Getting Started
Getting Started
33
33
General Terms
EXCEPT FOR THE WARRANTIES SPECIFICALLY PROVIDED FOR IN SUBSEQUENT PARARGRAPHS OF THIS SECTION, HP MAKES NO OTHER EXPRESS WARRANTY OR
CONDITION WHETHER WRITTEN OR ORAL. TO THE EXTENT ALLOWED BY LOCAL LAW, ANY IMPLIED WARRANTY OR CONDITION OF MERCHANTABILITY,
SATISFACTORY QUALITY, OR FITNESS FOR A PARTICULAR PURPOSE IS LIMITED TO THE DURATION OF THE EXPRESS WARRANTY SET FORTH IN THE SUBSEQUENT
PARAGRAPHS OF THIS SECTION. Some countries, states or provinces do not allow limitations on the duration of an implied warranty, so the above limitation or exclusion might
not apply to you. This warranty gives you specific legal rights and you might also have other rights that vary from country to country, state to state, or province to province.
TO THE EXTENT ALLOWED BY LOCAL LAW, THE REMEDIES IN THIS WARRANTY STATEMENT ARE YOUR SOLE AND EXCLUSIVE REMEDIES. EXCEPT AS INDICATED ABOVE,
IN NO EVENT WILL HP OR ITS SUPPLIERS BE LIABLE FOR LOSS OF DATA OR FOR DIRECT, SPECIAL, INCIDENTAL, CONSEQUENTIAL (INCLUDING LOST PROFIT OR DATA),
OR OTHER DAMAGE, WHETHER BASED IN CONTRACT, TORT, OR OTHERWISE. Some countries, States or provinces do not allow the exclusion or limitation of incidental or
consequential damages, so the above limitation or exclusion may not apply to you.
FOR CONSUMER TRANSACTIONS IN AUSTRALIA AND NEW ZEALAND: THE WARRANTY TERMS CONTAINED IN THIS STATEMENT, EXCEPT TO THE EXTENT LAWFULLY
PERMITTED, DO NOT EXCLUDE, RESTRICT OR MODIFY AND ARE IN ADDITION TO THE MANDATORY STATUTORY RIGHTS APPLICABLE TO THE SALE OF THIS PRODUCT TO YOU.
Notwithstanding the above disclaimers, HP expressly warrants to you, the end-user customer, that HP hardware, accessories and supplies will be free from defects in materials
and workmanship after the date of purchase, for the period specified above. If HP receives notice of such defects during the warranty period, HP will, at its option, either repair
or replace products which prove to be defective. Replacement products may be either new or like-new.
HP also expressly warrants to you that HP software will not fail to execute its programming instructions after the date of purchase, for the period specified above, due to defects
in material and workmanship when properly installed and used. If HP receives notice of such defects during the warranty period, HP will replace software media which does not
execute its programming instructions due to such defects.
Exclusions
HP does not warrant that the operation of HP products will be uninterrupted or error free. If HP is unable, within a reasonable time, to repair or replace any product to a
condition as warranted, you will be entitled to a refund of the purchase price upon prompt return of the product with proof of purchase.
HP products may contain remanufactured parts equivalent to new in performance or may have been subject to incidental use.
Warranty does not apply to defects resulting from (a) improper or inadequate maintenance or calibration, (b) software, interfacing, parts or supplies not supplied by HP, (c)
unauthorized modification or misuse, (d) operation outside of the published environmental specifications for the product, or (e) improper site preparation or maintenance.
Customer Care
In addition to the one year hardware warranty your HP calculator also comes with one year of technical support. If you need assistance, HP customer care can be reached by
either email or telephone. Before calling please locate the call center nearest you from the list below. Have your proof of purchase and calculator serial number ready when you
call.
Telephone numbers are subject to change, and local and national telephone rates may apply. For more support information, please visit the web at: www.hp.com/support.
34 Getting Started
34 Getting Started
Table 1-3 Customer Care Information
Country
Hotline Phone
Country
Hotline Phone
Country
Hotline Phone
Country
Hotline Phone
Algeria
www.hp.com/
support
Anguila
1-800-711-2884
Antigua
1-800-711-2884
Argentina
0-800-555-5000
Aruba
800-8000 ; 800-7112884
Australia
1300-551-664
Austria
01 360 277 1203
Bahamas
1-800-711-2884
Barbados
1-800-711-2884
Belgium (English)
02 620 00 86
Belgium (French)
02 620 00 85
Bermuda
1-800-711-2884
Bolivia
800-100-193
Botswana
www.hp.com/
support
Brazil
0-800-709-7751
British Virgin Islands
1-800-711-2884
Bulgaria
www.hp.com/
support
Canada
800-HP-INVENT
Cayman Island
1-800-711-2884
Chile
800-360-999
China
800-820-9669
Columbia
01-8000-51-47468368 (01-8000-51HP INVENT)
Costa Rica
0-800-011-0524
Croatia
www.hp.com/
support
Curacao
001-800-872-2881 +
800-711-2884
Czech Republic
296 335 612
Denmark
82 33 28 44
Dominica
1-800-711-2884
Dominican
Republic
1-800-711-2884
Egypt
www.hp.com/
support
El Salvador
800-6160
Equador
1-999-119 ; 800-7112884 (Andinatel)
1-800-225-528; 800711-2884 (Pacifitel)
Estonia
www.hp.com/
support
French Guiana
0-800-990-011; 800711-2884
Deutschland
1-800-711-2884
Guadelupe
Grenada
Finland
09 8171 0281
France
01 4993 9006
French Antilles
0-800-990-011; 800711-2884
Germany
069 9530 7103
Ghana
www.hp.com/
support
Greece
210 969 6421
0-800-990-011; 800711-2884
Guatemala
1-800-999-5105
Guyana
159 ; 800-711-2884
Getting Started
Getting Started
35
35
Table 1-3 Customer Care Information
Country
Hotline Phone
Country
Hotline Phone
Country
Hotline Phone
Country
Hotline Phone
Haiti
183 ; 800-711-2884
Honduras
800-0-123 ; 800-7112884
Hong Kong
800-933011
Hungary
www.hp.com/
support
India
1-800-114772
Indonesia
(21)350-3408
Ireland
01 605 0356
Italy
02 754 19 782
Jamaica
1-800-711-2884
Japan
00531-86-0011
Kazakhstan
www.hp.com/
support
Latvia
www.hp.com/
support
Lebanon
www.hp.com/
support
Lithuania
www.hp.com/
support
Luxembourg
2730 2146
Malaysia
1800-88-8588
Martinica
0-800-990-011; 877219-8671
Mauritius
www.hp.com/
support
Mexico
01-800-474-68368
(800 HP INVENT)
Montenegro
www.hp.com/
support
Montserrat
1-800-711-2884
Morocco
www.hp.com/
support
Namibia
www.hp.com/
support
Netherlands
020 654 5301
Netherland
Antilles
001-800-872-2881 ;
800-711-2884
New Zealand
0800-551-664
Nicaragua
1-800-0164; 800-7112884
Norway
23500027
Panama
001-800-711-2884
Paraguay
(009) 800-541-0006
Peru
0-800-10111
Philippines
(2)-867-3351
Poland
www.hp.com/
support
Portugal
021 318 0093
Puerto Rico
1-877 232 0589
Romania
www.hp.com/
support
Russia
495-228-3050
Saudi Arabia
www.hp.com/
support
Serbia
www.hp.com/
support
Singapore
6272-5300
Slovakia
www.hp.com/
support
South Africa
0800980410
South Korea
00798-862-0305
Spain
913753382
St Kitts & Nevis
1-800-711-2884
St Lucia
1-800-478-4602
St Marteen
1-800-711-2884
St Vincent
01-800-711-2884
Suriname
156 ; 800-711-2884
Swaziland
www.hp.com/
support
Sweden
08 5199 2065
Switzerland
022 827 8780
36 Getting Started
36 Getting Started
España
Table 1-3 Customer Care Information
Country
Hotline Phone
Country
Hotline Phone
Country
Hotline Phone
Country
Hotline Phone
Switzerland
01 439 5358
Switzerland
022 567 5308
Switzerland
022 827 8780
Taiwan
00801-86-1047
(Italian)
(French)
Thailand
(2)-353-9000
Trinidad & Tobago
1-800-711-2884
Tunisia
www.hp.com/
support
Turkey
www.hp.com/
support
Turks & Caicos
01-800-711-2884
UAE
www.hp.com/
support
United Kingdom
0207 458 0161
Uruguay
0004-054-177
US Virgin Islands
1-800-711-2884
USA
800-HP INVENT
Venezuela
0-800-474-68368
(0-800 HP INVENT)
Vietnam
+65-6272-5300
Zambia
www.hp.com/
support
Product Regulatory & Environment Information
Federal Communications Commission Notice
This equipment has been tested and found to comply with the limits for a Class B digital device, pursuant to Part 15 of the FCC Rules. These limits are
designed to provide reasonable protection against harmful interference in a residential installation. This equipment generates, uses, and can radiate radio
frequency energy and, if not installed and used in accordance with the instructions, may cause harmful interference to radio communications. However,
there is no guarantee that interference will not occur in a particular installation. If this equipment does cause harmful interference to radio or television
reception, which can be determined by turning the equipment off and on, the user is encouraged to try to correct the interference by one or more of the
following measures:
•
•
•
•
Reorient or relocate the receiving antenna.
Increase the separation between the equipment and the receiver.
Connect the equipment into an outlet on a circuit different from that to which the receiver is connected.
Consult the dealer or an experienced radio or television technician for help.
Modifications
The FCC requires the user to be notified that any changes or modifications made to this device that are not expressly approved by Hewlett-Packard Company may void the user's
authority to operate the equipment.
Getting Started
Getting Started
37
37
Cables
Connections to this device must be made with shielded cables with metallic RFI/EMI connector hoods to maintain compliance with FCC rules and regulations. Applicable only
for products with connectivity to PC/laptop.
Declaration of Conformity for products Marked with FCC Logo, United States Only
This device complies with Part 15 of the FCC Rules. Operation is subject to the following two conditions: (1) this device may not cause harmful interference, and (2) this device
must accept any interference received, including interference that may cause undesired operation.
If you have questions about the product that are not related to this declaration, write to:
Hewlett-Packard Company
P.O. Box 692000, Mail Stop 530113
Houston, TX 77269-2000
For questions regarding this FCC declaration, write to:
Hewlett-Packard Company
P.O. Box 692000, Mail Stop 510101
Houston, TX 77269-2000
or call HP at 281-514-3333
To identify your product, refer to the part, series, or model number located on the product.
Canadian Notice
This Class B digital apparatus meets all requirements of the Canadian Interference-Causing Equipment Regulations.
Avis Canadien
Cet appareil numérique de la classe B respecte toutes les exigences du Règlement sur le matériel brouilleur du Canada.
European Union Regulatory Notice
This product complies with the following EU Directives:
• Low Voltage Directive 2006/95/EC
• EMC Directive 2004/108/EC
Compliance with these directives implies conformity to applicable harmonized European standards (European Norms) which are listed on the EU Declaration of Conformity
issued by Hewlett-Packard for this product or product family.
38 Getting Started
38 Getting Started
This compliance is indicated by the following conformity marking placed on the product:
This marking is valid for non-Telecom
products and EU harmonized Telecom
products (e.g. Bluetooth).
This marking is valid for EU nonharmonized Telecom products. *Notified
body number (used only if applicablerefer to the product label).
Hewlett-Packard GmbH, HQ-TRE, Herrenberger Strasse 140, 71034 Boeblingen, Germany
The official EU CE declaration of conformity for this device may be found at http://www.hp.com/go/certificates.
Japanese Notice
Korean Class Notice (Applicable only for products with connectivity to PC/laptop).
Getting Started
Getting Started
39
39
Disposal of Waste Equipment by Users in Private Household in the European Union
This symbol on the product or on its packaging indicates that this
product must not be disposed of with your other household
waste. Instead, it is your responsibility to dispose of your waste
equipment by handing it over to a designated collection point
for the recycling of waste electrical and electronic equipment.
The separate collection and recycling of your waste equipment
at the time of disposal will help to conserve natural resources
and ensure that it is recycled in a manner that protects human
health and the environment. For more information about where
you can drop off your waste equipment for recycling, please
contact your local city office, your household waste disposal
service or the shop where you purchased the product.
Chemical Substances
HP is committed to providing our customers with information about the chemical substances in our products as needed to comply with legal requirements such as REACH
(Regulation EC No 1907/2006 of the European Parliament and the Council). A chemical information report for this product can be found at:
http://www.hp.com/go/reach
Perchlorate Material - special handling may apply
This calculator's Memory Backup battery may contain perchlorate and may require special handling when recycled or disposed in California.
40 Getting Started
40 Getting Started
41
41