1
NAVAL POSTGRADUATE SCHOOL
Monterey, California
THESIS
ALTERNATIVES FOR DEVELOPING
USER DOCUMENTATION
FOR APPLICATIONS SOFTWARE
by
Nancy K. Clark
September, 1991
Thesis Advisor:
Approved
Norman F. Schneidewind
for public release; distribution is
unlimited
T257792
)
UNCLASSIFIED
SECURITY CLASSIFICATION OF THIS PAGE
REPORT DOCUMENTATION PAGE
REPORT SECURITY CLASSIFICATION
la
1b RESTRICTIVE
MARKINGS
UNCLASSIFIED
2a SECURITY CLASSIFICATION
AUTHORITY
DISTRIBUTION/AVAILABILITY OF REPORT
3
Approved
for public release; distribution is unlimited.
2b DECLASSIFICATION/DOWNGRADING SCHEDULE
4
PERFORMING ORGANIZATION REPORT NUMBER(S)
NAME OF PERFORMING ORGANIZATION
Naval Postgraduate School
6a
MONITORING ORGANIZATION REPORT NUMBER(S)
5
6b OFFICE
(//
SYMBOL
NAME OF MONITORING ORGANIZATION
7a
applicable)
Naval Postgraduate School
55
ADDRESS
6c
Monterey,
[City, State,
CA
Monterey,
8a NAME OF FUNDING/SPONSORING
ORGANIZATION
ADDRESS
8c
7b ADDRESS
and ZIP Code)
93943-5000
(C/ty, State,
8b OFFICE
(If
SYMBOL
{City, State,
CA
and ZIP Code)
93943 5000
PROCUREMENT INSTRUMENT IDENTIFICATION NUMBER
9
applicable)
and ZIP Code)
10
SOURCE OF FUNDING NUMBERS
Program tlement No
Project
Work
No
Unit Accession
Number
TITLE (Include Security Classification)
1 1
Alternatives for Developing User Documentation for Applications Software
PERSONAL AUTHOR(S) Nancy
12
(
U
K. Clark
13a TYPE OF REPORT
13b TIME
Master's Thesis
From
COVERED
14
DATE OF REPORT
(year,
month, day)
1991 September
To
15
PAGE COUNT
132
SUPPLEMENTARY NOTATION
16
The views expressed
Government.
17
are those of the author and do not reflect the
COSATI CODES
18 SUBJECT
GROUP
FIELD
19
in this thesis
ABSTRACT
SUBGROUP
(continue on reverse
if
necessary
TERMS
official policy or position of the
(continue on reverse
if
necessary
Department of Defense or the U.S.
and identify by block number)
Computer Documentation, User Documentation, Applications Documentation
and identify by block number)
of software documentation is an iterative process that involves research, analysis, design, and testing. The writer must have a
understanding of the technical aspects of the document being prepared, good writing skills, and, most important, an understanding of the
needs of the audience for whom the document is written. This thesis describes the theory and steps taken in developing software user
The preparation
solid
documentation for applications software. The final products are two prototypes of user's guides for applications software programs, specifically
WordPerfect 5.1 and dBase IV 1.1, installed on the networks in the Administrative Sciences/Information Systems Computer Laboratories at the
Naval Postgraduate School.
20 DISTRIBUTION/AVAILABILITY OF ABSTRACT
Ej
22a
UNCLASSIFIED/UNLIMITED
]
SAME AS REPORT
21
]
DTIC USERS
NAME OF
Norman
F.
DD FORM
22b TELEPHONE (Include Area code)
RESPONSIBLE INDIVIDUAL
Schneidewind
1473. 84
MAR
ABSTRACT SECURITY CLASSIFICATION
UNCLASSIFIED
22c OFFICE
SYMBOL
(408)646 2719
83
APR edition may
be used until exhausted
All other editions are obsolete
SECURITY CLASSIFICATION OF THIS PAGE
UNCLASSIFIED
Approved
for public release; distribution is unlimited.
Alternatives for Developing
User Documentation
for Applications
Software
by
Nancy K. Clark
Lieutenant Commander, United
B.S.,
States
Navy
Southern Methodist University
Submitted
in partial fulfillment
of the requirements for the degree of
MASTER OF SCIENCE IN COMPUTER SYSTEMS MANAGEMENT
from the
NAVAL POSTGRADUATE SCHOOL
September, 1991
ABSTRACT
The preparation of software documentation is an
iterative process that involves research, analysis, design,
and testing.
The writer must have a solid understanding of
the technical aspects of the document being prepared, good
writing skills, and, most important, an understanding of the
needs of the audience for whom the document is written.
This thesis describes the theory and steps taken in
developing software user documentation for applications
software.
The final products are two prototypes of user's
guides for applications software programs, specifically
WordPerfect 5.1 and dBase IV 1.1, installed on the networks
in the Administrative Sciences /Information Systems Computer
Laboratories at the Naval Postgraduate School.
111
/ AJC '2
6,1
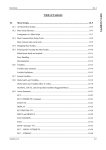
TABLE OF CONTENTS
I.
INTRODUCTION
1
A.
PROBLEM BACKGROUND AND DEFINITION
2
B.
OBJECTIVES
4
C.
THE RESEARCH QUESTION
5
D.
SCOPE
5
E.
LITERATURE REVIEW AND METHODOLOGY
6
F.
DEFINITIONS AND ABBREVIATIONS
9
G.
ORGANIZATION OF THIS STUDY
9
LITERATURE
II.
REVIEW
OF
USER
DOCUMENTATION
DEVELOPMENT
11
A.
OVERVIEW OF SOFTWARE DOCUMENTATION FOR USERS
.
11
B.
RHETORICAL ORIENTATION IN THE WRITING PROCESS
.
15
C.
SOFTWARE USER DOCUMENTATION PURPOSES
17
D.
TYPES OF SOFTWARE USER DOCUMENTATION
19
E.
PROBLEMS WITH SOFTWARE USER DOCUMENTATION
F.
CAUSES
OF
INADEQUATE
SOFTWARE
...
USER
DOCUMENTATION
G.
III.
22
23
SURVEY FINDINGS REGARDING PAPER DOCUMENTATION
FUNCTIONAL ANALYSIS AND DESIGN
IV
.
27
30
A.
COMPARISON
USER
OF
DOCUMENTATION
DEVELOPMENT
PROCESSES
B.
IV.
V.
COMPARISON
30
AND
SCREEN
OF
CATEGORIES
OF
PRINT
DESIGN
39
C.
DESIGN ISSUES
41
D.
AUDIENCE ANALYSIS
48
THE SOFTWARE USER DOCUMENTATION TEST PLAN
....
51
A.
TEST PURPOSE
51
B.
TEST OBJECTIVES
51
C.
TEST PLAN
52
D.
TEST ADMINISTRATION AND PROCEDURES
52
E.
RESULTS AND FINDINGS
53
CONCLUSION
55
APPENDIX A:
AS/IS Computer Labs Software Directory
APPENDIX B:
WordPerfect 5.1 Basic User's Guide
APPENDIX
dBASE IV
C:
1
.
1
Basic User's Guide
.
57
....
59
.
84
LIST OF REFERENCES
122
INITIAL DISTRIBUTION LIST
125
v
.
I
.
INTRODUCTION
There is little doubt that the impact of the computer age
We are being flooded with new
has affected many in society.
complex
computer
information
systems
become
has
in
which acquiring and retaining
increasingly
difficult.
The
technological innovations in the computer field have created
problems
for both
system designers
and educators.
System
designers are faced with the dilemma of trying to create user-
while educators
friendly interfaces for these new systems,
must
find
ways
of
teaching
complicated
information
to
potential users.
The
materialization of these problems has led to much
attention being paid recently to the field of user interface
design.
meet
No longer is it important to just design systems that
the market
demand,
but
systems must
be
presented so that it is alluring to the user.
designed and
As such, the
human- factors issue plays an enormous role in the design of
new computer systems
Along with the emergence of new systems,
software that
takes advantage of advanced technology must also be written
and documented.
When carefully developed, documentation can
be used as a supplemental effort to ease the transition and
enhance
the
[Schneiderman,
relationship
1986]
between
user
and
machine
.
Another contributor to the dilemma created by new computer
production is the system comprehension issue.
more
becomes
manuals
technical
complex,
As hardware
have
become
increasingly voluminous to accommodate pertinent facts.
While
enormous amounts of this information become available, more
efficient ways of absorbing its content must be developed.
Newly developed teaching aids must now encompass the technical
sophistication of computer systems in addition to addressing
the human- computer interface issues [Bradford, 1983]
.
Also,
training must address a more diverse audience that is not only
made up of data processing professionals but also clerical
workers and managers.
is
to
create
different
documentation that
user
levels
One way to meet these disparate needs
of
users
can be
incorporate
and
used by the
them
into
the
learning process.
A.
PROBLEM BACKGROUND AND DEFINITION
This is the age of the microcomputer.
continue to grow in numbers and use,
communication
among
As microcomputers
so does the need for
Spurred by the
them.
need to
hardware, software, and data, local area networks
share
(LANs)
are
expected to proliferate in this environment [Sachs, 1985]
Many offices
through
networks,
are
now sharing their computer resources
but
even
in
small
non-networked
office
environments, the potential for sharing computer resources is
present
and
the
move
towards
distributed
systems
is
This prediction is based on the assumption that
inevitable.
most personal computers do not operate in offices alone.
In
programs and data in offices are shared among
some cases,
machines and users via the exchanging of disks.
an organization grows,
computers,
larger
efficiency
in
sophisticated
does
so
storage
need for more powerful
its
more memory,
devices,
retrieval
the
peripheral
Normally as
and update
devices
data
of
[Luhn,
1985]
increased
and more
For
.
organizations who want to cut costs, one solution is to share
their equipment [Derfler, 1986]
This cost-cutting objective
.
can be achieved through the use of computer networks.
Networks
offer
effective,
an
applications and other resources.
way
efficient
to
share
However, users need to be
able to operate the software applications and access shared
hardware
resources
such
printers
as
To meet these demands,
environment.
this
in
type
of
adequate documentation
and training must be available.
Network
training
must
be
directed
toward
students,
clerical workers, managers, and other users of the computers.
These
target
audiences
have
varied
levels
of
computer
knowledge and experience, and often possess conflicting goals
and expectations.
Often,
user documentation
without regard for the audiences' needs.
have
the
same
learning
needs
or
is
developed
Since not all users
skill
levels,
documentation may be too technical or too simplistic,
specific
or
too
general
to
be
of
use.
Often,
one
the
too
all-
.
encompassing system documentation is created, intended to meet
all
the
result,
information needs of all the system users.
diverse
audiences
single
find the
As
a
"system manual"
contains the wrong kinds and levels of information [Chinell,
1990]
This
thesis
analyzes
the
functional
and design issues
associated with the development of software user documentation
for
one
of
management
produces
these
students
reference
the
information
systems
and
the Naval
Postgraduate
School,
and
audiences,
of
guides
for
applications
two
software
programs, WordPerfect 5.1 and dBase IV 1.1, as an end product.
The study is a report of the developmental process used to
design reference guides for applications software used in the
Administrative Sciences/Information Systems computer networks
at the Naval Postgraduate School.
B.
OBJECTIVES
The
software
primary
user
objective
of
documentation
this
for
project
two
was
to
develop
applications programs
resident in the networks (excluding the Apple networks) in the
Administrative
Sciences
and
Information
Systems
computer
laboratories which would be used and understood by users of
these laboratories.
.
C.
THE RESEARCH QUESTION
What
the
is
most
effective method
for
development
of
software documentation which will promote maximized use and
productivity
greater
enable
of
Administrative
the
Sciences/Information Systems (AS/IS) computer laboratories for
Postgraduate
Naval
management
and
information
systems
students?
D
SCOPE
problems
many
The
associated
with
designing
user
documentation are the variables upon which this paper focuses.
The
intent
of this
study was to investigate the variables
needed to produce effective software documentation for users
These variables were tested to
of the AS/IS laboratories.
and modifications then made
determine their effectiveness,
based on users' needs and recommendations.
1
.
Audience Description
These
audience
reference guides were designed to
represents
that
graduate student.
an
address
older-than-average
an
college
Most of these students have been trained in
or managerial
area in which they have been
working for a number of years.
Most will be pursuing advanced
some technical
degrees
in
the
administrative,
information systems area,
managerial
science,
or
and have limited amounts of free
time available because of constraints that course requirements
place on them.
Computer familiarity varies immensely, with
experience ranging from the novice to the dedicated computer
user
to
those with both
experience
job
and baccalaureate
degrees in the computer field.
2
.
Design Issues
Although knowing the audience you are addressing is of
paramount
importance,
technical
information
it
to
is
also
vital
include,
to
which
know
how much
information
to
include, and how to organize that information in a meaningful,
orderly fashion.
The most frequent complaints about computer
manuals are:
•
Poorly written manuals. Computer manuals are often
written by technicians who have no concept of how to
present information to users without using technical
jargon. The end product is a manual that is inadequate
and difficult to understand.
•
Important information is hard to find. Computer guides
that are not organized around user tasks are often
confusing.
Users have to expend extra time and effort
deciphering the layout scheme.
Considering the audience and issues involved, application
documentation developed for NPS users should be brief, task
oriented,
essential
and written in common English.
user
documentation
for
Two examples
application
software,
specifically WordPerfect 5.1 and dBase IV version 1.1,
included as Appendix B and
E.
of
are
C.
LITERATURE REVIEW AND METHODOLOGY
Much has been written to help professionals who write
computer documentation to produce better manuals/ however, few
address
development
the
perform
professionals
development
user
of
variety
a
such
settings,
documentation.
roles
of
system
as
and maintenance personnel,
operators,
These
software
in
designers,
and write
system
different
kinds of software documentation, such as design documentation,
documentation,
maintenance
documentation
is
understood
the
of
Automated
the
systems
available
such
producing
for
software
of
as
documentation.
standardized,
least
types
user
and
CASE
supported,
documentation
tools,
development
User
rapidly
and
and
noted.
becoming
maintenance
documentation, have not been developed for user documentation.
Development and maintenance documentation writers generally
well-developed
follow
standards
the
for
sequencing,
formatting, and content of manuals; not so for user manuals.
[Brockmann,
1990]
User documentation
is
the most
difficult
for
computer
professionals to write because it requires communication with
people who have widely different backgrounds.
type
of
writing that
translates
computer
It dictates a
operations
English that users will understand. [Brockmann, 1990]
into
Program
users need documentation as a tool to help them successfully
run and understand a program.
gives
them
the
They want documentation that
instructions,
information they need.
[Spear,
guidance,
and
reference
1984]
The template approach developed by Dorothy Walsh in 1969,
in
which
the
writers
merely
fill
in
set
templates
with
..
.
.
information peculiar to their own system, initially appeared
to
solve
problems
of
content
adequacy
and
organization.
However, it did not have the necessary flexibility of content
and organization required to cope with the variability in
audiences and purposes.
[Brockmann, 1984]
Replication of the
best procedures used by the best documentation writers, rather
than simple replication of document content, offers a method
to
prepare
comprehensive
accurate
and
documentation which
addresses and answers the needs of targeted audiences.
Using
such a structured methodological approach not only aids the
developer in organizing the documentation,
but is also the
primary determinant to producing a we 11 -developed and useful
guide
The procedures used to develop the user documentation for
applications
programs
installed
in
the
AS/IS
computer
laboratories are based on the Standard Documentation Process
(SDP)
described by R.
John Brockmann.
The nine
involved in the SDP include:
1.
Develop document specifications.
2.
Prototype the specification.
3.
Draft the document.
4
Edit the document
5
Review the document
6.
Field test the document.
7.
Produce and distribute the document.
8.
Review the documentation project.
8
(9)
steps
Maintain the document.
9.
F.
DEFINITIONS AND ABBREVIATIONS
Some
of
the
presented
concepts
definitions specific to this study.
used
acronyms
in
paper
the
are
working
require
here
Also, abbreviations and
defined
here
the
for
convenience of the reader.
AS/IS
DDP
-
SDP
-
-
Administrative Sciences/Information Systems
Documentation Development Process (Williams and Beason)
Standard Documentation Process (Brockmann)
Software Documentation
-
Unless otherwise specified, refers
to USER documentation rather than design, maintenance, or
other types of software documentation.
G.
ORGANIZATION OF THIS STUDY
The first chapter is the introductory chapter,
including
sections which present a general description of the problem,
background of the problem,
research question,
the
research
a
project,
methodology,
a
objectives of the research,
scope,
brief
and the
description
assumptions
of
the
of
the
research
list of definitions and abbreviations,
description of the organization of the study.
the
and a
An overview and
a review of research materials and literature relating to the
purposes, types, problems, and causes of problems of software
documentation, rhetorical orientation of writers, and survey
findings on paper documentation is included in chapter two.
Chapter three describes the methods used for executing the
research
design
comparing
comparing
processes,
and
documentation,
analysis.
,
The
screen
discussing
documentation
and
development
print
designs
issues
and
design
for
audience
fourth chapter discusses the test plan and
results and the fifth chapter draws this report together with
conclusions and some practical recommendations for developing
and maintaining software user documentation, as contained in
Appendixes
B
and C.
Appendix A is
a
matrix
of
software
programs installed on the server computers of the networks in
the AS/IS Computer Laboratories.
Appendix B is a basic users'
guide for WordPerfect 5.1 and Appendix C is a basic users'
guide for dBase IV 1.1.
10
LITERATURE REVIEW OF USER DOCUMENTATION DEVELOPMENT
II.
A.
OVERVIEW OF SOFTWARE DOCUMENTATION FOR USERS
The field of computer documentation is moving and changing
quite rapidly as some of the finest minds in the professions
and in academia turn to it as a field of study and research.
The industry already has moved beyond merely paper manuals.
It
is
in moving beyond paper that today's writers of paper
user manuals will be
able to enter the next
manual-less software in common use.
the
objective
of
the
Apple
century with
Manual-less software was
Computer's
Macintosh project.
Although they didn't fully succeed in being manual-less, the
direction in the software industry is to take much of the
paper documentation and make it either superfluous because of
improved interface design,
or put it online using such new
organizational devices as hypertext.
Manual-less software
will become possible as contemporary culture increases its
"intuitive" knowledge and sophistication concerning computers,
and as the software itself better communicates its purposes
and
controls
to
the
user.
Even
now,
user
writers are not just paper manual writers;
documentation
rather they are
communication specialists who have the necessary expertise to
design the communication elements
elements of the software:
of the
"user
interface"
the messages, the menus, the online
11
well
tutorials,
as
[Brockmann,
1990]
traditional
the
as
paper
manuals.
experience has shown that online documentation
However,
will not work unless it can be provided within the application
program at the point in the user's operation where help is
The methods and techniques of communication on paper
needed.
will not be lost in the transition to a new medium, but rather
become
more
important.
In
many
the
cases,
qualities
of
effective online documentation must be abstracted from the
qualities of effective paper documentation.
concept
that
multiple
effective
access
methods
online
of
For example, the
information must
getting to
allow
information
can
for
be
easily abstracted from a book's multiple access methods that
range from the "keyword searches" of an index, to a "top-down
hierarchical approach" of a table of contents,
to a page's
headings that allow access to information on a local level.
The
idea
"aliasing"
of
in
keywords
online
or
"links"
is
nothing more than the application of the concept of using
"See" and "See also" in paper book indexes.
The principle of
effective online documentation is that we have to move away
from effective paper documentation,
tricks
and techniques,
techniques
in
[Brockmann,
online
abstract from paper its
and then reinvent their tricks
documentation using different
and
tools.
1990]
Several documentation theories will be outlined in this
thesis.
Often,
the
best
solution
12
to
user
documentation
problems is an eclectic solution: a little from one writing
style,
little from a hypertext-linking philosophy,
a
Only
on.
one
methodological
as
many
sides
solutions
to
possible are presented.
constant
remains
and
the audience is always right.
unyielding across all theories:
Thus,
guide
and so
their
(and
[Brockmann,
defects)
as
1990]
More and more documenters are breaking out of the software
design
organizations
in
which they merely massage written
Now, documenters are getting
software design specifications.
information from such people as the design team of which they
are a member right from the beginning,
their
own
documentation
testing,
through
environments
specification
from actual users in
application
the
reviews
and
early
of
prototype
and from fellow documenters in documentation teams
and in structured documentation project reviews.
Getting more
information
means
negotiating,
from
people
listening,
than
and
from
books
getting
along
with
that
fellow
documentation team members, software designers, and users will
play much more of a role than ever in the past.
1990]
product
"Gone
was
are
the
complete
days when writing was
and
writers
were
specification and told to 'pubs it up!'
[Brockmann,
done
given
the
after
a
product
Today's information
developers must work as equal partners with other product
developers.
The
lines
between
hardware,
software,
and
information are getting blurred with the advent of interactive
programming, new input devices, and displayable manuals.
13
For
.
this reason cooperation and collaboration across disciplines
will
become
more
even
important
and
people
should
start
practicing it now." [Grice, 1988]
Computer documentation can be defined as communication
designed to ease interactions between computer software and
the
individuals who operate
documentation,
must
you
Thus,
it.
act
Inadequate
intermediary
as
computer software and its users.
to write
[Brockmann,
errors
computer systems.
the
1990]
Errors
Using
greatly
can
human
increase
between
user
Human
documentation
software
Computer Systems
in
Robert W.
an* wfthjn control of
BfiSB dwlpnora.
50%)
Bailey categorized the major
of tho»« within
factors
for human errors
computer
in
Three
systems
I
— environmental
categories
organizational
s
J
HSnwiew
by
documentation
Figure 1 Percentage of human
errors directly affected by the
documentation.
problems, personnel problems,
and
^^
\^
accuracy
factors-- accounted for 50% of all human errors and are beyond
the
control
software
the
of
computer
designers
and
The other 50% are within the control of the
documenters.
designers /documenters,
affected
or
by
quality
the
Training,
written
interface
are
documentation.
all
of
and,
of
the
[Bailey,
1983]
14
directly
documentation
efforts.
and
instructions,
affected
are
these,
by
the
60%
the
human- computer
quality
of
the
During the early years of
De<©nslv©
computers in the
1950s,
Programming
the
\
standard approach to making
Effective
Documentation
>
r
systems
computer
understandable was the users'
Early
own trial and error.
Training
Phone
Calls
users would have to try one
User
and
after
procedure
another,
realizing what was the right
approach
and
what
was
Figure 2
L
/
Trial
Error
f
Historical
n s * i 1 1
n g
f
trend
in
system
intelligibility.
n
the
wrong one by seeing how many vacuum tubes were blown because
of
different
Intelligibility
actions.
was
instilled
in
computer systems later by phone call support, training, and
effective
documentation.
represented
by
The
future
of
programming,
"defensive
"
computers
which
is
means
anticipating problems and coding to avoid errors before they
arise.
It includes such techniques as windows-icons-mouses-
and-pointers (WIMP).
B.
[Brockmann,
1990]
RHETORICAL ORIENTATION IN THE WRITING PROCESS
Communication
takes
place
in
a
context
called
the
rhetorical situation, which includes an encoder (writer) and
a
or
decoder (reader or user)
writing.
,
Communication
each having a purpose for reading
is
effective when the message
received by the decoder is nearly the same as the message sent
15
:
the
by
encoder.
[Pesante,
Rhetorical
1991]
.
orientation
includes such factors as [Sullivan and Porter, 1990]
•
the writer's model of communication—that is, the writer's
beliefs about the way discourse works, the way it ought to
be produced, and the way users ought to respond to it
•
the writer' s beliefs about priorities in writing--what are
important criteria and how do we measure writing
effectiveness?
•
the writer's attitudes toward authority—where will we
look for answers? what authorities should we call upon?
•
the writer's conviction to a specific document—to what
degree is the writer an advocate for the document? for the
system? for the user?
ambiguity,
effective
prevents
that
"Noise"
mistaken
assumptions,
communication
emotional
includes
reactions
to
a
topic or word choice, insensitivity of the writer to the needs
of the reader/user, overuse of passive voice, long, convoluted
sentences, and so on.
elements
the
all
of
To be effective, a writer must analyze
the
rhetorical
relationships among them: reader/user
matter,
and language.
It
is
situation
(s)
,
writer
(s),
and
the
subject
especially easy in technical
writing to concentrate on the subject matter and neglect the
other elements.
[Pesante,
1991]
Studies have shown that a writer'
s
use of information is
guided by that writer's rhetorical orientation, particularly
his/her view of the audience/user.
1990]
From
rhetoric,
precedent.
the
perspective
of
[Sullivan and Porter,
theories
of
writing
and
user-centeredness has a solid basis in historical
Rhetoricians have always been concerned with the
16
importance
of
occasion
in
USER(S)
defining the purposes or aims
of a piece of communication.
Placing the audience at the
center
of
production
has
been
also
and writing
a
of
feature
significant
rhetoric
discourse
study,
so user analysis is a logical
extension
of this
TASK/ACTION
WRITER(S)
F igu r © 3. The Communication
Triangle of a User-
Centered Rhetoric
research.
Modern composition theorists have drawn upon the traditional
communication triangle of encoder/decoder/reality to give a
conceptual image to the writer/reader/subject triangle.
rhetorical
framework
reconstructed in Figure
the
parameters
[Johnson,
C.
of
the
of
3,
user-centered
documentation
The
is
to give a clear, conceptual view of
discursive
territory
in
question.
1990]
SOFTWARE USER DOCUMENTATION PURPOSES
Some of the specific purposes of user documentation are to
improve efficiency, to overcome users' fears of equipment or
software, and to sell the product.
People need to understand the systems with which they are
working.
During usability testing of a desktop publishing
tutorial, the documentation writer discovered that persistent
problems users had with the tutorial were tied to conceptual
17
issues.
His verbal
software
program
processing,
as
explanations to the users of how the
works
well
as
it
differs
description
his
of
word
from
the
systematic
system on which the users were
computer
operation of the
how
and
working, generated interest in the users and resolved some of
[Sullivan and Porter, 1990]
their problems.
When users of new software confront a complicated and
poorly-organized
manuals
reference
of
set
as
their
introduction to a piece of software, they are apt to regret
their
introduction.
simplified tutorial
the
for
likely to forge ahead.
other
the
On
same
[Brockmann,
hand,
if
they
software,
1990]
they
see
a
more
are
The tutorial on
desktop publishing mentioned previously was developed as a
lock-step,
tone,
directional guide which maintained a consistent
style,
and
design
throughout.
Users
praised
the
simplicity and directive approach, particularly early on when
they were
least
confident.
Eighty percent
of
the
users
reported feeling good about what they had learned about the
software program, indicating that they felt confident enough
to try the program on their own in the future.
Porter, 1990]
to
successful
[Sullivan and
Successful software documentation, then, leads
first
encounters with software and hence to
greater acceptance and use.
[Brockmann,
1990]
Most people agree that the quality of documentation for
the
end-user
can make
the
difference between
failure for a new software product.
18
success
and
The manuals are what the
customer sees first and therefore they shape the perception of
entire
the
package.
[Brockmann,
research
Also,
1990]
indicates that documentation is the most important potential
point of difference between software producers.
products
perceived
are
documentation
can
change
documentation
difficult
fairly
as
customers'
off
When software
minds
user
or
to
use,
"User
not.
friendly
software;
together, they win customers and customer loyalty."
[Borland,
friendly
shows
1984]
D.
TYPES OF SOFTWARE USER DOCUMENTATION
User documentation can be classified in two ways:
it
can
tutorial
be
classified by
material--
documentation
and
and
content
second,
--reference material
by
environment
and
--external
Knowing
documentation.
internal
First,
the
different types of documentation will help to make decisions
on what to include in a documentation package in response to
the audience and the software.
[Brockmann,
1990]
Reference material is technical, detailed, comprehensive,
and usually organized like an encyclopedia or dictionary for
quick retrieval of information.
A reference manual should
explain what the software can do for the user rather than
comprehensively
describing
the
product.
An
emphasis
on
product capability in a reference manual allows the user to go
beyond the necessarily constrained steps of a tutorial, and
combine product features in creative ways.
19
The emphasis of
.
the former is on product capability as opposed to an emphasis
on
internal
product
[Brockmann,
construction,
as
with
the
latter.
1990]
Tutorial material selects from the comprehensive reference
material and presents information in a step-by-step fashion.
It is usually organized around user tasks or a hierarchy of
user needs.
[Brockmann,
1990]
A 15-year survey of users carried out by Control Data
Corporation, Scientific Data Systems, and Xerox Data Systems
resulted in two apparently contradictory findings.
Half the
users thought manuals had too little detail, and half thought
they had too much detail.
Two-part manuals, with a tutorial
and a reference section, were suggested as a compromise by the
survey takers.
By clearly segmenting the manual in two parts,
the user can choose the coverage of material appropriate for
his/her particular
situation.
[Brockmann,
Borland
1990]
described much diversity in views of documentation between
users with little computer experience and programmers with up
to twelve years experience.
one with a tutorial,
a
Borland's "solution manual" was
reference,
and a "cookbook"
(filled
with "recipes" to accomplish tasks and procedures for using
illustrations,
[Borland,
both
of
the
steps
and
of
the
result)
1984]
Selection
of
material
coverage
fox-
a
software
manual
should also be influenced by the "open-endedness" (how much it
can be customized, used, and viewed in different ways) of the
20
General database development packages,
software to the user.
for example, are open-ended to a greater extent than a spell-
checker;
the
thus,
material
probably be presented as
a
the
in
database manual
reference manual.
would
In a software
package which can be viewed or used in only one way, such as
the
spell-checker
presentation would likely be
more
the
software,
a
tutorial.
appropriate
manual
This is especially
true since tutorials tend to limit the users' conceptions of
the
of
uses
the
software
because
of
the
specificity
of
This may not be desirable for open-
directions and examples.
ended software packages.
External documentation is meant for audiences outside the
corporate
or
organizational
documentation is developed.
environment
in
which
the
It is usually a more expensive,
professional product,
being a marketing tool as well as an
operations tool.
is
It
filled with graphics.
usually attractively packaged and
[Brockmann,
1990]
Internal documentation is developed by an organization to
be used by people within that same organization.
the bulk of all documentation,
yet
it
It makes up
frequently fails to
receive the necessary time, money, and attention because it is
used only inside an organization and is not part of a product
to be marketed.
making.
Thus,
it is not directly related to profit
Also, internal documentation is not as well designed
as external documentation because the writers usually do not
seek or receive as much feedback.
21
[Brockmann, 1990]
However,
:
an internal manual that is targeted to a specific audience
could
be
superior
to
a
generalized
external
manual
with
respect to relevance, simplicity, and brevity.
PROBLEMS WITH SOFTWARE USER DOCUMENTATION
E.
There can be many problems with documentation that render
it inadequate or ineffective.
[Brockmann,
Some examples of problems are
1990]
•
Layout and Style Problems:
misprints, use of ordinary
prose, overuse or underuse of paragraph numbering, lack of
or poor highlighting scheme, style that is not conducive
to skimming and scanning
•
Organizational Problems:
not organized to aid the
reader's search for information, no preface telling the
who, what, and when behind the document, announced order
of presentation of material not followed,
order of
material not intuitive, not apparent, or not supported by
graphics, often-used commands not clearly separated,
summary of procedures not clearly set out at the beginning
•
Audience Analysis Problems: important information missing
or unimportant information cluttering explanations, lack
of graphics, figures, and other supporting information
•
Consistency Problems: programs, commands, functions not
having same name throughout, formats and layouts changing,
phraseology and wording not staying the same as much as
possible, numbering for sections and subsections not
consistent, transitions from topic to topic or screen to
screen not obvious
•
Poor Reference Aid Problems:
lack of or incorrect table
of contents or indexes, not enough level of detail in
table of contents, illustrations, figures, and tables not
numbered, titled, or listed
•
Update Problems:
used to update
•
Language Problems: words such as files and records used
without explanation, no glossary, inappropriate words
no plan for updating, handwritten notes
22
used, words used interchangeably which do not mean the
same thing, unclear or conflicting instructions
CAUSES OF INADEQUATE SOFTWARE USER DOCUMENTATION
F.
factors
Seven
contribute
to
the
causing
problems
the
production of poor user documentation.
centralization to
decentralization
•
The change from
computer systems
•
Institutional limitations
•
Inadequate design documentation
•
The techniques used in user documentation
•
Oversimplifying the writing task in many how-to books and
professional journals
•
Fighting against rather than harnessing
behaviors adults spontaneously adopt
•
Natural egoism
of
learning
the
Many writers have had difficulty adjusting to the change
in the place and function of user documentation.
through
early
the
198 0s,
computer
systems
In the 1950s
were
mostly
centralized and surrounded by software specialists who could
translate
understand.
any
user
documentation
that
users
did
With the shift toward decentralization,
microcomputers
and
workstations
stand
alone
not
where
throughout
organizations and geographic locales, software specialists are
not available to translate or train at each node.
documentation must also be able to stand alone.
Thus, user
Too many
writers continue writing in the centralized frame of mind.
[Brockmann,
1990]
23
when
Even
documenters
are
alert
to
the
documentation in a decentralized environment,
may
factors
still
prevent
computer documentation.
them
First,
lacking in many organizations.
from
needs
of
institutional
producing
effective
training and education are
company standards
Second,
which support and enhance good, effective documentation often
do
Similarly,
exist.
not
if
examples
documentation
of
formally presented in standard development methodologies or
informally circulated in an office are not examples of good
documentation, training and official company standards may go
for naught.
the
Finally, good, effective technological support of
documentation
documentation.
effort
enhances
the
likelihood
of
good
The various iterations of a document should be
completed as faultlessly and as quickly as possible.
Speed of
production is crucial because good documentation is the result
of continuous rewriting.
The longer and more laborious the
process, the less inclined documenters will be to redraft and
rewrite.
the hands
final
Hence, the more powerful the tools that are put in
of the documentation developers,
document
will
Underlying
be.
the better the
these
factors are management support and encouragement
institutional
.
Good or bad
documentation and the climate producing either are largely a
function of management.
[Brockmann,
1990]
To write an effective piece of computer documentation,
a
writer needs full and complete information on the design of
the system or the program.
Without a solid foundation of
24
:
complete, clear, and accurately-written design documentation,
user documentation writers must expend more time and effort in
interviews
with
designers,
making
repeatedly reviewing and rewriting.
The techniques
educated
guesses,
[Brockmann,
and
1990]
required for writing user documentation
differ radically from those required by essays or the like.
The basic difference is that between arranging information for
sequential
and
access
arranging
it
for
random
access.
Computer documentation must be able to be easily scanned and
skimmed.
[Brockmann,
1990]
Oversimplification occurs when documentation writers turn
for help to commercially published instructional texts which
adequately alert them to the effects that audience
do not
variations have on documentation projects and products.
As an
example, the use of templates, in which writers needed only to
fill in set templates with information peculiar to their own
system,
initially
appeared
to
adequacy and of organization.
solve
problems
of
content
As template use developed,
however, it essentially confused sophisticated data processing
users who had extensive prior knowledge with users who had no
such
knowledge
and
needed much
more.
[Brockmann,
1984]
Today, new problems may be caused with the advent of industrywide,
corporate-endorsed, research-based guidelines and user
interface standards.
These standards may cause problems in
four ways [Brockmann,
1990]
25
.
•
First, to be generally applicable, they often fail to be
sufficiently specific to the users' tasks
•
Second, they can foster a superficial consistency
•
research data are currently too incomplete to
support all the rules in these standards and so "best
guesses" are packaged indistinguishably with "soundly
researched principles"
•
Fourth,
and most important,
guidelines,
rules,
and
standards invite documenters to forgo testing with real
users
Third,
Some adults resist explicitly addressing themselves to new
learning.
motivation and assimilation,
Two paradoxes,
described as explanation
for
this
kind of behavior.
are
The
motivation paradox is the "production bias" people bring to
the task of learning and using computers.
throughput,
reducing
motivation
learning about the system;
so,
The chief goal is
spend
to
any
time
just
when situations occur that
could be more effectively handled by new procedures, people
are likely to stick with those they already know regardless of
their efficacy.
The assimilation paradox is that people apply
what they already know to interpret new situations.
Though
often helpful, irrelevant and misleading similarities between
the new and old information can blind learners to what they
are actually seeing and doing, leading them to draw erroneous
conclusions or preventing them from recognizing possibilities
for new functions.
[Carroll and Rosson, 1987]
of documentation that
focuses
on
takes the
"systems"
step-by-step procedures
26
in
In the design
approach,
which
which the reader is
expected to
be
passive
and
just
paradoxes can become problematic.
Natural
egoism is the final
affect documentation.
follow
these
along,
[Brockmann,
1990]
factor that
can
two
adversely
A writer will not be effective until
he/she is able to empathize with the readers and recognize
readers
the
that
approach
software
documentation
with
different backgrounds, expectations, training, and education.
[Brockmann,
G.
1990]
SURVEY FINDINGS REGARDING PAPER DOCUMENTATION
Table
1
summarizes the common recurring findings of the
four marketing surveys described in this section.
Major Consistent
Findings for
Paper
Documentation
Xerox,
AT&T
Microsoft
PC-User
Group
(1986)
(Borland,
1984)
(Wilton,
1985)
Control
Data,
Scientific
(Maynard,
1982)
More taskorientation
X
More tutorials
Improved
reference aids
X
X
X
X
X
X
X
X
X
More accuracy
X
More
illustrations
X
Table
1.
X
X
X
Recurring findings in user surveys of paper
documentation
The 15-year survey of users carried out by Xerox, Control
Data,
and
Scientific
Data
Systems
27
[Maynard,
1982]
and
a
parallel survey carried out with military users
Callamars,
1983]
[Beard and
showed the major complaints to be:
software-oriented
•
Manuals were
oriented
•
Manuals did not have enough examples
•
Manuals did not have enough reference aids
rather
than
function-
An independent market research firm conducted an external
documentation market survey for AT&T in 1986.
identified
dealers
software
features
thought
package
of
were
over
documentation
that
important
factors
another.
Major
in
The
both
survey
users
and
selecting
one
themes
were
that
information in AT&T manuals should be:
•
Easy to find: better reference aids were recommended
•
Easy to understand: not assume too much, have graphics,
and be task oriented
•
Complete, accurate, and current
•
Indexed: absence of an index was a definite reason to
avoid purchasing a software product
Microsoft Corporation conducted a documentation survey in
1984
[Borland,
1984] which found that end users wanted:
•
task-oriented tutorials.
•
screen illustrations and terms explained in glossaries.
•
reference cards which listed first all the commands and
then the tasks with commands used to complete them.
•
a
•
a task-oriented organization.
•
a
feature-oriented/command
oriented index.
index
as
well
as
a
task-
reference manual that comprehensively described all the
features of the product.
28
.
.
•
trouble-shooting guides.
A PC User Group conducted
owners [Wilton, 1985]
.
Table
a survey of 241
2
microcomputer
portrays the contrast between
what readers said they wanted and what was actually delivered.
Do you agree or disagree?
Agree
Manuals should accommodate all users
Disagree
86
7
Manuals do accommodate all users
16
58
Tutorials are usually helpful
66
12
vs
Many manuals omit tutorials
65
8
70
15
Illustrations are adequate in number
18
54
Information is easy to find
11
67
vs
Manuals bury important information
89
4
vs
Illustrations should substitute more
for text
vs
Table 2
.
Contrast between what users want and what users
get
29
.
FUNCTIONAL ANALYSIS AND DESIGN
III.
A.
COMPARISON OF USER DOCUMENTATION DEVELOPMENT PROCESSES
The software user documentation development process
is
defined and executed differently, depending on where you are
and who you talk to.
There seem to be as many processes as
there are organizations who develop software or authors who
write about developing software.
user
documentation
Brockmann
development
Weiss
[1990],
Three treatments of software
processes
[1985],
and
presented by
are
Williams
and
Beason
[1991]
Brockmann [1990] revised his original seven-step Standard
Documentation
accommodate
Process
the
documentation.
information
on
many
His
CASE
research on layout,
desktop
and
databases,
which
(SDP)
developments
nine-step
new
tools,
format,
electronic
SDP
came
in
out
the
2.0
programming
publishing,
198 6
area
version
typography,
in
of
now
to
user
gives
technologies,
and use of color,
new
documentation
and the effects of new techniques, technologies,
and ideas, such as team writing styles, document prototyping,
minimalist
devices
design philosophy,
like CD-ROM and magneto-optical
storage
and mass
hypertext,
The SDP
storage.
replicates many tried and tested procedures used by wellrespected, successful documentation writers.
30
Figure
4
and the
following list give an overview of what is involved in the
SDP.
[Brockmann,
Figure
4.
[Brockmann,
•
1990]
The Standard Documentation Process (Version 2.0)
1990]
Step 1. Develop Documentation Specifications.
In this
first step, planning the documentation occurs in two
passes.
The first pass is the development of a Library
Specification that contains a brief description of all the
documents involved with a particular software program or
system. This plan gives an opportunity to communicate the
"big picture" of the whole writing project to management
or clients.
The second pass is the development of the
Individual Document Specification. This second blueprint
follows the Library Specification and communicates the
specific plans for a single document to management,
clients, and users. Eleven activities are involved in the
creation of these blueprints:
breaking down the
documentation in the library by tasks, using minimalist
design principles, planning for an audience, analyzing the
purpose of the documentation, organizing the material,
developing
the
a
product
visualization,
picking
31
.
appropriate media, deciding on page format and layout,
planning for updating, considering the competition, and
estimating cost and time requirements.
•
Step 2. Prototype the Specification. Since the ultimate
test for paper or online documentation is usability,
document designers should iteratively test their pages and
Prototyping is repeatedly done with
screens with users.
a document as it is being developed, but it basically has
four steps: prepare for the test, instruct the testers,
run the test, and analyze and apply the results.
The
results of prototyping should give guidelines for depth of
coverage, vocabulary, readability, and organization.
•
Step 3. Draft the Document. Once the specifications have
been created, approved, and tested, it is time to draft
Seven activities make up this step:
the document.
overcoming internal and external writing blocks, using a
writing style that is designed to match adult reading
reader-based
writing
techniques,
behaviors,
using
developing effective graphics, creating reference aids,
developing the documentation packaging, and planning for
updates
•
Step 4.
drafted,
•
Step 5.
Review the Document.
drafted and edited, it is sent out
effective review, carefully choose
to review, show reviewers how to
feedback.
•
Now that the document is
Edit the Document.
it is revised so that it effectively and
efficiently gets its message across.
This is primarily
accomplished by using levels-of-edit techniques.
Once the document is
for review. To have an
reviewers and the time
review, and give them
Step 6.
Field Test the Document.
A part of every
document's review should be a field test of a draft of the
whole document
Where prototyping examined the pieces of
a manual or online document during their creation and
assembly, field testing examines how the document works as
a whole.
Accessibility, navigational problems, and
consistency are primary areas of concern here.
In
conducting a field test, carefully choose field testers
and the time to field test, run both an in-house
"controlled" field test and an external field test, and
provide feedback to field testers.
.
•
Step 7.
Produce and Distribute the Document.
Once the
document is drafted, revised, and reviewed, it is produced
in a form suitable for distribution.
With paper and
online publishing mechanisms ranging so widely, and
32
.
multimedia publishing becoming more and more prevalent,
preparing text via an SGML-like tagging system becomes
essential
•
•
Review the Documentation Project.
Once a
Step 8.
document is complete, and before beginning a new project,
analyze what went right and what went wrong during the
developing
the
documentation
process
of
so
that
improvements to the process can be implemented during the
project,
and
mistakes
and
problems
thereby
next
alleviated.
Step 9. Maintain the Document. Even when the document is
distributed, the task is still not completed because the
To do this effectively,
document must be updated.
responsibility for updating a document should be clearly
assigned. Distribution of the document should be tracked
so that one knows where to send updates and the changes in
the updates should be clearly indicated.
Weiss [1985] describes five phases of user documentation
in his Structured Process, all of which he believes necessary
for effective, usable documentation.
By structured, he refers
to a formal, top-down decomposition of the user documentation
development process into a development model which is designed
so the components of the process are interconnected in the
"best possible way."
[Weiss,
1985]
Figure 5 is a data flow
diagram of the five phases, showing the development flow for
user documentation.
A brief description of the five phases of
the Structured Process follows.
•
Phase 1.
Analysis.
Define just what manuals and other
information products the users and operators need.
The
earlier in the life of the system the analysis takes
place, the better.
Ideally, the documentation analysis,
which often culminates in a Publications Plan in large
projects, should occur as part of the original system
development plan, but it is never too late to analyze the
remaining documentation need.
•
Phase 2.
Design.
Prepare detailed outlines of each
manual or other information product.
This phase starts
33
.
Sys«m Bans
<F-9p«C9)
New Systom
Doc s* Mamo
")
a
Y-i
Haalgnmom of Roofers ft Manuals
Analysis
s^^
^Assembly
Editing
Flrvl
Dtfl
j
pu W .c«ton,/
Products
Figure 5. Data Flow Diagram for
Developing User Documentation using
A Structured Process. [Weiss, 1985]
•
with the preparing of conventional outlines, but then
proceeds to the creation of "structured outlines" and
"storyboards" -- working models of the documents that can
be tested and revised before the first draft is written.
The most difficult structural and organizational problems
must be corrected before the first draft is written.
•
Phase 3. Assembly. Convert the storyboard to a work plan
and write the first draft
In the structured approach to
documentation, writing the first draft is a little like
writing the code in a structured program:
that is, the
writers do little more than fill in missing details,
according to a strictly-followed plan, the "storyboard."
.
•
Phase 4.
Editing.
Test the first draft for clarity,
correctness, and readability. In this approach, questions
of language and style are more than matters of esthetics;
rather, the purpose of this phase is to apply principles
of editing that make the manual easier to use, and
therefore less likely to cause a "failure" (defined as
what occurs when an operator or reader us unable to work
the system because of a bug in the manual)
In many
cases, this phase culminates in a test with "live"
readers
.
•
Phase 5. Maintenance. Track what needs to be changed in
the information products and, when appropriate, make the
changes.
Because all manuals are flawed or out-of-date
34
.
(without exception, according to Weiss) the last phase of
documentation is to monitor what should be added, removed,
The craft of maintaining user
replaced, or repaired.
documents is knowing what changes must be made and being
able to distribute and incorporate those changes in a
manner that does not generate confusion and additional
errors
,
Williams
and
Beason
view
[1991]
projects as having nine phases.
Table
3.
software
These nine phases somewhat
User Documentation in the Software Development
Process. [Williams and Beason, 1991]
User Documentation
Phase
1
Feasibility
Analysis
2
Requirements
Definition
3
Alternatives
Analysis
4
Functional
Specifications
5
Preliminary
Design
Documentation plan
6
Detailed Design
and Construction
Outline (s) for user documentation
7
development
Verification
(alpha and beta
First draft
(s)
of users' manual (s)
First draft
(s)
of online help system
Reviews of first drafts
Usability tests of tutorials and procedures
guides
tests)
Review, linking, and testing of online systems
Final draft
(s)
of users' manual (s)
First and final drafts of quick reference pieces
6
Implementation
User documentation completed
9
Maintenance
Revisions and addenda
correlate
with the
Development
process
seven
from
phases
the
35
of
IEEE
the
Standard
Software
Software
Engineering
Standards reference
Implementation,
[1990]
Concept,
:
Requirements,
Installation
Testing,
Operation and Maintenance.
and
Design,
Checkout,
and
According to Williams and Beason,
the user documentation development process begins during phase
five
of
a
software
development
project
and
continues
throughout the remainder of the life cycle of the project.
Table
3
shows how Williams and Beason
documentation
process.
As
fits
into
you can
the
see,
overall
[1991]
software
believe user
development
their Documentation Development
Process generally comprises five phases, as follows:
•
Phase I.
Documentation Planning.
Locate and review
existing information and confer with team members. Decide
how many and what types of individual documents (manuals
or other printed pieces) and online materials are needed.
Decide on the goals of the documents. Write a profile of
the audience. Determine production methods, including the
means for creating illustrations, producing a final draft,
and reproducing or printing the required number of copies.
Describe the physical appearance of the document, put the
plan on paper, and get it approved. Draft a schedule and
get it approved.
Create a style guide.
•
Phase II. Outlining and First Drafts. Review information
in the documentation plan about readers and their needs,
and the goals of the document. Decide how to organize the
document.
Draft a preliminary or working outline of the
printed documents, including quick reference materials.
Draft a preliminary outline of the online materials.
Review the outlines and revise them if necessary. Get the
Write or
outlines approved.
Write the first draft.
review the first draft of the online materials.
Make a
preliminary list of illustrations.
Read and revise the
first draft. Update the list of illustrations. Send the
draft out for review.
•
Phase III.
Subsequent Drafts, Usability Testing, Final
Drafts.
Incorporate comments and corrections from the
review.
Do any necessary rewriting.
Make copies of
completed illustrations and insert them in the draft.
Proofread and correct the draft, covering both text and
illustrations. Send the draft out for review. Review and
36
Conduct usability tests of
correct online materials.
tutorials and procedures guides.
Review, link and test
online systems. Incorporate comments and corrections from
Read all text and review
the prior review of drafts.
for
flow,
illustrations,
checking
clarity,
and
completeness. Write quick reference materials. Get final
okays on changes from reviewers.
Have quick reference
materials reviewed and proofread.
Check text and
illustrations
for
consistency,
proofread
and
for
typographical, spelling, or placement errors.
Indicate
If necessary, mark headings,
spaces for illustrations.
words, or phrases that need special emphasis, and page
breaks.
Review online materials for the final time.
Correct quick reference materials.
•
Phase IV.
Production.
Produce the text by typewriter,
word processing software, or computerized typesetting.
Make up pages, merging text and
Proofread the text.
graphics.
Check for continuity and positioning of
illustrations.
Number the pages of the document if
needed.
Prepare the table of contents and index.
Proofread page numbers for the index and table of
contents.
If the document is being professionally
printed, check the blue line (sample of printed document)
for accuracy, consistency, and placement of text on pages.
Print or duplicate the required number of copies.
Assemble, bind, and distribute documents.
•
Phase V.
Maintenance.
Prepare,
incorporate,
and
distribute revisions and addenda on an ongoing basis as
necessary.
Although the number and definitions of the phases and
steps in each of these processes vary, all have commonalities
which
must
be
viewed
as
mandatory
documentation development process.
in
any
software
user
A comparison of the three
approaches to the documentation process is provided in Table
However the steps or phases are organized,
the actual
processes all contain the elements of planning,
designing,
4.
drafting,
rewriting,
testing,
producing,
distributing,
maintaining the software user documentation developed.
37
and
Table
4
.
Comparison of Software User Documentation
Development Processes.
SDF [Brockmmnn,
Structured Process
1990]
[Weiss,
Document Development
Process [Williams t Beeson,
1985]
1991]
Doc Specs
I.
Analysis
Prototype
II.
Design
Draft Doc
III. Assembly
4.
Edit
IV.
5
Review
1
.
2
.
3
.
.
6.
Field test
7
Produce/Distro
.
8.
Review Project
9.
Maintain
Since
.
Documentation
plan
II.
Editing
V.
the
Maintenance
development
decision
Outline
£
First Draft
(s)
III. Reviews, Tests, Final
Drafts
IV.
the
commonality,
I
Production
V. Maintenance
methods
on
which
studied
method
displayed
to
use
for
development of the user's guides for the AS/IS Computer Labs
at NPS was based on versatility,
applicability,
completeness, and currency of the method.
complexity,
This researcher was
looking for a method which has the following attributes:
1)
versatile enough that it could apply across most development
situations;
2)
easy to
understand;
sufficiently complete; and
students.
Also,
5)
3)
speedy assimilation;
4)
applicable to military graduate
this researcher desired a method which had
been developed or updated within the last couple of years so
that its techniques would incorporate industry advancements
and evolutions.
For these reasons, a combination of the SDP
formulated by R. John Brockmann [1990] and the Documentation
38
::
Development Process formulated by Williams and Beason [1991]
were selected as the guides for creating the user'
s
guides
contained in the appendixes of this paper.
COMPARISON OF SCREEN AND CATEGORIES OF PRINT DESIGN
B.
The
content-classified types
of
software documentation
(reference and tutorial) discussed in Chapter
categorized
Beason,
into
five
basic
2
classifications
can be further
[Williams
and
1991]
•
Tutorial:
Teaches basic program functions
controlled "lock-step" practice sessions
•
Explains and gives step-by-step
Procedures guide:
instructions about how to perform all the functions of the
program
•
Reference material:
Describes in detail commands,
functions, fields, key assignments, and/or messages
•
Quick reference piece:
Lists the most frequently used
commands, functions, or key assignments (may be a card,
keyboard template, small guide booklet, or single-page
document)
•
Online help system:
Displays information on the screen
while the program is running
through
The following chart aids selection decisions with regard
to the categories of documentation to produce
Beason,
1991]
39
[Williams and
TYPES
USE WHEN
ADVANTAGES
Tutorial
Users are novices
Builds confidence
Users must teach
themselves
practice
Users need to get
started quickly
Allows
quick,
user-friendly use
users
Lets
of
program
features
Program
complex
is
or
inter face
is
intimidating
Procedures guide
Users
have
some
experience
or
program is simple
Allows
users
choose
to
only
procedures
need
they
Information
complete
is
,
arranged in task-
oriented
groupings
Reference
material
Users know how to
use features and
are familiar with
the interface
Allows
quick
access to details
Allows
users to
approach
information from
many angles
Quick
piece
reference
Users
are
experienced with
the program
Quickly
reminds
users
which
commands
functions,
keys to use
Online
system
help
Users
need
information while
running
program
40
the
Allows
,
or
users to
assistance
looking
without
from
the
away
screen
get
The decision about which categories of documentation to
produce depends on the needs of the audience and on the budget
and
guide
procedures
may
programming language,
Generally
documenting
For
schedule.
speaking,
be
a
no
only
an
sufficient;
for
application,
a
documenting
a
reference manual may be
category
one
please all types of users.
adequate.
documentation
of
[Williams and Beason,
1991]
can
For
the purposes of this study, task-oriented procedures guides,
were selected for production,
also called a user's guides,
based
on
the
audience
analysis
limited
and
budget
and
schedule, and because effective, complete online documentation
was already available via the online HELP features offered by
both WordPerfect 5.1 and dBase IV 1.1.
C.
DESIGN ISSUES
Normally,
the first exposure a new user will have to a
system is through user's manuals.
Careful planning must be
devoted to the design of documentation since inadequate design
results
in
end-user
Readers
dissatisfaction.
only
use
documentation to get their job completed when it requires some
kind
of
computer
assistance.
Thus,
the
best
design
for
software documentation is the one that fits the users' methods
of working and requires the least attention and learning.
In
designing the user's guides
for
the AS/IS Computer
Labs, the researcher focused on organization, content, layout,
and language.
It is thought that these elements are the four
41
most
that
factors
impact
documentation design.
1
effectiveness
the
[Gleason,
of
the
1986]
Organization
.
Widely used in the industry until recently, a software-
orientation
internals
approach
documentation
to
design
concentrated on the structure and facilities of a program
rather than on the user'
s
use of that program.
This approach
received extensive criticism in the 15-year survey of users
carried
by
Scientific
Xerox,
Data,
and
Control
Data
Users almost always preferred task-oriented
corporations.
manuals because a software-internals orientation forces users
to center their business duties around the software rather
than vice versa and because users must know the structure of
the
software
[Maynard,
before being
able
to
On the other hand,
1982]
use
a
the
documentation.
task orientation is
based on an analysis of the user's use of the program and is
limited to what information is required to do a specific task
using the program.
to
the
users
[Brockmann, 1990]
Thus, the focus is turned from the system
using
the
system
in
their
daily
work.
"Having the user at the center ... allows for
concentrated efforts from diverse fields toward a common goal:
the development of usable documents for whatever medium may
come our way."
[Johnson,
1990]
The IEEE Standard for Software User Documentation
Std 1063-1987, 1988] states that:
42
[I
BEE
.
"Users of software need documents either to learn about
the software (instructional mode) or to refresh their
Instructional mode
memory about it (reference mode)
documents may be either information- or task-oriented.
Information-oriented documents give the reader information
needed to understand the computer software and its
functions; task-oriented documents show the reader how to
complete a task or reach a goal."
.
The
products
end
guides,
of
this
paper,
two
applications
user's
are more for reference than instruction, but contain
some general information about the application software and
its
The primary purpose
functions.
certain
students
NPS
supplement
to
on
their
instructional
own
of each was
if
or,
courses,
to
desired,
through
the
guide
as
a
basic
procedures of word processing (in the case of WordPerfect 5.1)
and working with a database management system (in the case of
dBase IV 1.1)
Thus, a task-oriented approach was adopted.
.
A task orientation,
in
which the
designer
selects
content and employs an organization appropriate to a user's
work needs, points to use of the minimalist design philosophy.
The
goal
of
a
minimalist
design philosophy
is
to present
material appropriately to the actual ways adult learners learn
rather than fighting against their natural tendencies the way
a "systems"
(e.g., software-internals) design philosophy does
[Brockmann, 1990]
Research has verified that adult learners:
•
Are impatient learners and want to get started quickly on
something productive
•
Skip around in manuals and online documents and rarely
read them fully
•
Make mistakes but learn most often from correcting such
mistakes
43
:
•
Are best motivated by self-initiated exploration
•
Are discouraged, not empowered, by large manuals with each
task decomposed into "irritating" subtask detail
The key idea is to present the smallest possible obstacle to
learners' efforts by providing less overt training structure.
[Carroll,
The minimalist design tips used in creating
1990]
in Appendix B and C
the user's guides
include
[Brockmann,
1990]
•
Minimize secondary features of manuals and online
documents (overviews, introductions, summaries, etc.).
•
Focus on what readers need to know to immediately apply it
to productive work.
•
Make it easy for the reader of a page to coordinate the
documentation with the screen information by grouping
instructions and cursor movement /navigation key tables
together by the screen to which they apply
•
Use what the readers already know by continuously linking
new information to it
The DDP exhorts designers to organize the guide and
group
procedures
program,
such
to
as
reflect
the
listing
the
way
users
procedures
will
use
for
entering
the
information before listing the procedures for editing that
information.
Additionally, designers should include all the
information needed to successfully complete each procedure.
Additionally,
each
procedure
module
should
internally, so the modules will be consistent.
Beason,
1991]
be
organized
[Williams and
In the user's guides appended to this paper,
for example, each procedure module contains a heading (name of
44
.
procedure)
,
brief introductory paragraph, and numbered steps
of the procedure.
Brockmann
[1990]
two
lists
primary
principles
of
organization, both of which were followed in organizing the
text material in the appended user's guides.
•
Make the organization of material apparent to readers.
Essentially, that means that with words, graphics, or
layout, "Tell the folks what you're going to tell 'em
before you tell 'em."
•
Organize documentation in ways expected by the readers.
Using general-to-specific and explanation-to-specific
conditions works effectively; that is, instructions state
a general procedure which is applied to the specific
context. Also, readers expect information to be presented
in chronological order, most-important-to-least-important
order, order of need, and order of difficultly.
The length of a user'
matter.
subject
This
s
guide varies depending on the
researcher
tried
to
limit
the
WordPerfect guide to fifteen pages of material, which would
adequately cover all basic functions to be performed by the
target audience.
is
generally
program,
the
so
Since a database management software program
much more
dBase
complex than
IV guide
a
word processing
required approximately thirty
pages to adequately cover the material needed by the target
users
2
.
Content
The content is the part of the manual that describes
operations.
It
focuses
on
commonly-used
tasks
and
its
productivity is measured in terms of relevancy to the user.
The key to selection of tasks to be covered was the "80-20
45
:
:
The 80-20 Rule is that the user's guide should cover
Rule."
the 20% of the tasks that are used 80% of the time.
An
overview of the project
information
should be
also
helps
Elements
included.
define
that
what
should be
considered are [Williams and Beason, 1991]
•
General purpose of the project
•
Intended users of the software
•
Features of the software
•
Features that are outstanding or that make it different
from other similar software
•
Operating system and other related software
•
Computer and other related hardware
•
Network or larger system the software may be part of
Only the content that the user needs should be included.
manual
should
be
as
brief
possible,
as
but
not
at
The
the
sacrifice of pertinent information.
3
Layout
.
A good layout can make
manual more readable and give
a
the writer the means for presenting information clearly and
A layout for
cleanly.
a software
manual must meet two goals:
to make it easy for users to absorb information on the first
reading
and
easy
for
them
to
locate
specific
information later when they may need them.
design
a
manual
which meets both these
writer must [Williams and Beason, 1991]
46
bits
of
Generally,
to
requirements,
the
.
.
•
Format the separate elements consistently so the readers
can identify them at a glance. All procedures should look
alike
•
Use a generous amount of white space (blank space) on the
Information stands out on a page with white space
page.
and the pages are less tiring to read.
•
Use headings to show the structure and hierarchy of the
information. Format them so they stand out from the text
and so the subordination is clear.
•
Make columns of text no wider than 65 to 70 characters per
Wider lines of type are hard to read.
line (4-5 inches)
.
Documents are usually made up of three major sections:
the front matter,
the main text,
and the back matter.
front matter includes all or some of the following:
The
title
copyright or acknowledgements page, table of contents,
page,
list of figures and/or tables, symbols and conventions page,
and installation and start-up guidelines.
The main text is
the introduction and main body of the document.
matter contains any appendixes needed,
index.
[Williams and Beason,
documents,
1991]
a
glossary,
For simple,
such as those created for this
The back
study,
and an
in-house
only the
parts considered absolutely essential are included.
4
.
Language
If you want users to get the most out of the program,
use language that is clear, strong, and direct.
Beason
[1991]
and Brockmann
[1991]
Williams and
provide many guidelines
which were considered when formulating the user's guides:
•
and
Use
nonsexist
language:
Use
generic titles
and
descriptions
chair instead of chairman)
(e.g.,
nonsexist pronouns and adjectives.
Some techniques to
help include addressing readers directly (e.g., You can.
.
47
;
.
instead of He can. .) use the plural form rather than the
singular (e.g., programmers keep their disks.
instead of
a programmer keeps his disk...); if the title must be
singular, substitute an article (a, an, the) for a pronoun
(e.g., the operator enters a password rather than the
operator enters his password) ; repeat the title of a
person rather than using a pronoun; if there's no other
way, use he/she or him/her.
.
;
.
.
•
Use plain language: Use short sentences predominantly and
plain one- and two-syllable words whenever possible.
•
Eliminate unnecessary words:
Avoid noun clusters (use
classroom instead of structured learning environment)
avoid prepositional phrases (use because instead of as a
result of)
avoid redundancies (use repeat instead of
repeat again) ; avoid wordy phrases (use truth instead of
plain, unvarnished truth)
;
D.
•
Use active verbs: Active verbs make your style forceful
and direct; passive verbs weaken your language and makes
it seem vague and lacking in authority.
•
Choose the proper tense:
Use the present tense most of
the time; it's easy to try to use the future tense, which
weakens your writing (e.g., To write a program... instead
of If you're going to write a program...).
AUDIENCE ANALYSIS
The IEEE Standard for Software User Documentation
[IEEE
Std 1063-1987, 1988] prescribes that a software user document
shall be keyed to its audience because the identified audience
dictates the document presentation style and level of detail.
The intended audience is to be identified and the different
ways the users interact with software are to be considered
when preparing user documents.
Williams and Beason
[1991]
offered an audience profile
description list which was useful in analyzing the anticipated
48
.
users of the user's guides being prepared for this study.
The
elements included were:
•
Level of computer expertise: The range for this audience
varied immensely, with experience extending from the
novice to the dedicated computer user to those with both
job experience and baccalaureate degrees in the computer
field.
Few are expected to have had experience on a
network.
•
Students in the AS Department at the Naval
Occupation:
Postgraduate School who are pursuing advanced degrees in
the administrative, managerial science, or information
systems area. Most have been trained in some technical or
managerial field in which they have been working for a
number of years.
•
Knowledge about the field and subject: Although many have
at least an idea of what word processing is about and have
even used such programs previously, most potential users
of the guide are presumed to have little experience with
WordPerfect 5.1.
Most potential users have not had any
experience with
a
database management
system or,
specifically, dBase IV 1.1.
•
Position in organization or field:
audience
is
students
and
faculty
institution (NPS)
The
at
prospective
academic
an
•
Level of education:
The prospective users have at least
a baccalaureate degree.
•
Age group: The students who will use the guides are older
than average for graduate students, but a variation in age
from mid-twenties to mid-forties is expected.
•
Reasons for using the program:
Students are expected to
use the WordPerfect program to create reports and research
papers; in some cases, to complete an introductory course
in WordPerfect 5.1; and to use the program in a variety of
courses.
They are expected to use dBase IV for
introductory courses in database management and dBase IV.
As the students progress in their curriculums and become
more
familiar
with
the
applications
programs,
WordPerfect, they will "grow" from novice
49
(or
especially
wherever they
.
started on the
scale
of
experience with the programs)
to
intermediate users who then become experienced users and so
on.
Thus, what pleases them in the beginning may not always
please them six months down the road.
Also, as they progress,
the more experienced users are graduating and leaving, and new
students are arriving.
Thus, a varied audience is guaranteed.
No single user's guide will be able to fill every student's
needs
50
THE SOFTWARE USER DOCUMENTATION TEST PLAN
IV.
A.
TEST PURPOSE
The best type of review of a user manual comes from the
users themselves.
by Brockmann
Beason [1991]
the
[1990]
.
and
and usability testing by Williams and
In field or usability testing,
documentation
effective
This step is referred to as field testing
can
try
using
stand
how to
a
document
alone.
improve
to
Testing
document
the users of
see
if
helps
it
is
provide
before
information
on
completed.
Changes can then be made and the guide retested
the
before the completed version is released.
it
is
This has long been
a standard method of testing computer systems and programs.
B.
TEST OBJECTIVES
The main objective is to identify problem areas in the
manual while it is still in the development stage.
Usability
testing is designed to help find problems in the manual's
wording,
flow,
and layout.
It
should indicate whether the
writing style used in the manual can be understood by the
intended audience,
help identify steps that may have been
inadvertently left out, and point out descriptions that do not
match tasks.
The testing can also provide information from
test subjects on what areas they would like to see covered in
the guide.
51
:
:
TEST PLAN
C.
This
researcher
usability test
followed
six
steps
[Williams and Beason,
1991]
in
planning
and
the
[Brockmann,
1990]
•
Step 1. Find volunteers who match your audience profile.
If this is not possible, simulation of a typical audience
is acceptable.
•
Step 2. Write an instruction sheet, listing simple tasks
for the testing subjects to perform; the tasks should use
basic and representative functions of the software.
•
Step 3. Decide on a reasonable length of time to give the
volunteers to complete each exercise.
•
Choose observers and brief them about your test
Step 4.
purpose, their role, and so on.
•
Make arrangements for the use of work areas for
Step 5.
Make sure they'll be
the day of the usability test.
properly equipped, not only with the relevant computer and
software but also with adequate lighting and desktop or
table space.
•
Step 6. Prepare copies of the documentation that include
a table of contents and an index.
After the test,
results
should be compared among the test
administrator and observers to see which areas consistently
caused confusion among the volunteers and which areas caused
the greatest degree of frustration.
TEST ADMINISTRATION AND PROCEDURES
D.
The tests were carried out using the preceding plan,
as
follows
•
Step 1. A total of seven NPS students were used to test
They were tested individually or in a
the documents.
group of three.
52
:
.
.
•
For the WordPerfect guide, a short letter was
Step 2.
invented for the testing subjects to type in a document,
For the dBase IV guide, a
save, retrieve, and print.
short database of names, addresses, and phone numbers was
provided so the subjects could build a database structure,
index it by last name, query it, and generate a quick
report
•
The WordPerfect test was expected to take
Step 3.
approximately one hour and the dBase IV test twice that
In fact, the WordPerfect test required one hour and ten
minutes while the dBase IV test was completed in one hour
and forty- five minutes.
•
Step 4. One observer was used. This observer was an NPS
student who served as a network laboratory assistant for
the AS/ IS Computer Labs and who also wrote a software user
document for one of the applications installed on the
AS/IS networks.
•
The tests were conducted in one of the AS/IS
Step 5.
Computer Labs, on the Token Ring network in 1-224.
All
resources needed for the testing (computers, printers,
programs, desks, etc.) were already set up.
The tests
were conducted on two consecutive weekends when the labs
were available and mostly empty.
•
Step 6.
Sufficient copies of the user's
available for each testing subject.
guides were
RESULTS AND FINDINGS
E.
The results of the usability tests focused primarily on
the user's guides' usefulness, success, and shortcomings.
The
primary benefit of the tests were in the improvements to the
document.
Participants
identified the
errors
•
typographical errors
•
factual mistakes
•
confusing layout and format
53
following types
of
Improvements to the manual were indeed beneficial.
The tests
helped to refine the design of poorly composed sections of the
user's guides.
After observing the subjects and receiving
their remarks upon completion of each of the tests, the guides
were corrected and reformatted.
The information gathered as a result of the testing does
not signify conclusive results due to "lack of rigor of the
test methodology."
[Zirinsky, 1986]
However, the information
was extremely useful in guiding the revision of the document
design.
The user's guides presented in Appendixes B and C are
only prototypes and can be further refined, but can be used
not to communicate with users at most levels of the audience
continuum.
Expert users of WordPerfect and dBase IV would
probably find the user's guides least useful.
54
V.
CONCLUSION
In concluding the results of this study,
this
it appears that
researcher's intention to create user-friendly user's
guides was achieved.
The iterative methodology of the project
development allowed the evaluation and refinement process to
uncover errors and unclear sections.
Changes were made that
improved the manuals and helped make them viable tools for
teaching and for reference.
The emphasis shifted during the study from creating guides
that the writer thought was relevant, to creating a guide that
revolved around user tasks.
Successful documentation requires
an ongoing dialogue between the documentation developer and
the users.
Much of the difficulty people experience in learning a new
computer system can be directly attributable to poor design.
The egocentric
style of designers must yield to humility, and
designs adjusted to accommodate the users'
and orientation.
[Schneiderman,
1986]
skills,
desires,
Designers need to
understand that their design efforts may not always produce
the desired effects for a particular audience, and be flexible
enough to accept redesigning a system when necessary.
The
techniques for producing quality documentation will be of no
use unless audience analysis is given high priority.
55
The ultimate test
of the user's guides will be
in the
computer labs themselves and the classes in which they will be
Refinements may still be required, corrections may have
used.
to
made,
be
more
and
material
may
have
be
to
added.
Additionally, no computer program remains static for long, and
trying to document the software has been likened to trying to
change a tire on a speeding car.
When new versions of the
programs are released, new versions of the documentation will
be required.
To ensure consistency within the user's guides
appended to this paper and among any future user'
lab
developed
manuals
researcher
provided
for
the
AS/ IS
specifications,
Computer
special
s
guides or
Labs,
graphics,
this
and
pertinent instructions with the AS/ IS Computer Labs manager.
In
conclusion,
it
can
be
said
that
the
principles
described and the findings noted in this study can be used by
all documentation writers to improve their documentation.
The
benefits gained from the testing and reviewing of software
documentation is a better understanding of user capabilities
and improvements in design strategy.
user
clearly
in
focus,
the
With the goals of the
production of higher quality,
useful documentation can be achieved.
The ultimate result is,
however, in the acceptance and use of the user's guides by the
people for whom it was designed.
56
APPENDIX A:
AS/IS Computer Labs Software Directory
57
AS/IS COMPUTER LABS SOFTWARE DIRECTORY
1-224
IBM
IBM
TOKEN
ROOM NUMBER:
NETWORK VENDOR &
PROTOCOL:
APPLICATION SOFTWARE
Hayes SMARTCOM II
SIMPC
IBM PC 3270 Emulation
Version
2.1
2.1 (c)
3.03
5.1
WordPerfect
WordPerfect
5.0
4.2
WordPerfect
PeachText 5000
2.10
2.01
LOTUS 1-2-3
2.6
STATGRAPHICS
dBASE III+
1.1
dBASE Administrator
1.0
dBASE IV
1.1
dBASE IV
INGRES /DBMS
5.0/02a
INGRES TUTOR
EZ RATE Tariff 500-H
Annualized Cost-ofLeaving Model (OSD)
1.0
Universal Knowledge
Management System
2.00.00
IBM Storyboard Plus
1.01
EtherMail
2.4
EtherMenu
2.5(c)
Microtek Int'l EyeStar
1.35
IBM Virus Scanning Pgm
1.0
Polaroid Palette
P SAVER
2.0
Polaroid Palette for
IBM PCs
3.1
1DIR
3.50
Force Analysis
Simulation Model (FASM)
9.9
Assembly
X
X
BASIC
Turbo PASCAL
Framework
GRAMMATIK II
Norton Utilities
X
4.0
X
X
X
SYSTEM SOFTWARE
IBM DOS
IBM DOS
IBM PC LAN O/S
3COM Etherseries
3.2
3.3
1.20
2.4
C
(Lattice)
RING
1-224
1-250
ETHERNET
BROADBND
3COM
ETHERNET (PC NET)
X
X
TN12,15
23,26-3 1
X
X
X
X
X
X
X
1-158
IBM
TOKEN
RING
X
X
X
X
X
X
X
X
X
X
X
X
X
X
X
X
X
X
X
X
X
X
X
X
X
TN25
X
X
X
X
X
X
TN
22M
X
X
X
X
X
X
X
X
X
58
X
X
APPENDIX
B:
WordPerfect 5.1 Basic User's Guide
59
A
Basic User's Guide
For use on the
Administrative Sciences/information Systems
(AS/IS)
Computer Laboratories
1-158, 1-224,
and 1-250
September 1991
A c&P Product
60
in
Table of Contents
Introduction to Local
Area Networks
2
Starting WordPerfect
4
Help
5
Retrieving a
Document
Creating a WordPerfect
5
Document
6
6
Moving the Cursor
Inserting Text into
Your Document
7
7
Deleting Text
Undeleting Text
8
Using the Typeover Feature
8
Function Keys
8
8
Alphabetical Listing
Sequential F-Key Listing
11
12
Block Operations
Printing
and Viewing a Document
13
Printing
13
Viewing
14
Saving a Document
14
Saving without Exiting
Saving and Exiting WordPerfect
15
/
Clearing the Screen
15
Bibliography
17
Index
18
61
I
ntroduction to Local Area Networks
A
same
area network (LAN)
local
is
a group of microcomputers or other workstation devices located
common
general area and connected by a
and other hardware,
terminals, minicomputers,
alternately with
A LAN
cable.
is
purpose
for the
designed
of
The most common reason
for
developing a
Databases can also be shared
savings
LAN
is
in
The
of
that multiple copies are not necessary.
flexibility
and cost
The server
a LAN are the server computer, the user computer(s), and the interconnecting
is
usually a microcomputer that
is
specifically
designated to act as the network
server performs only those functions required of a network server;
users through their user computers.
management,
printer
simplified
Server functions include repository
is
normally a microcomputer or terminal, and
schematic of a typical connection
is
shown
in
is
it
can only be accessed by
of software
and other peripheral device management, and database
The user computer
A
of
such a way that multiple microcomputers can have access to a single
This capacity for sharing hardware and software resources allows greater
cabling system.
system.
Networks allow the sharing
resource sharing.
the use of expensive computer peripherals and software.
The basic components
server.
microcomputers,
communicating among themselves and
and scanners. Application programs such as spreadsheets,
word processing, and communication packages can be shared so
database.
the
a host mainframe computer or public network.
peripheral devices such as hard drives, printers,
in
to interconnect
in
programs, network
repository.
connected to the server by a cabling
Figure
1.
One
server can support more
than one user computer, usually six to ten. The cabling system connecting the server and the users can be
PHONE LINE
PRINTER
USER
Figure
present
in
a number
optic cable.
of
1
:
LAN Schematic
forms and configurations. Cabling can be twisted pair wire, coaxial cable, and
Configurations include bus,
ring,
and
star.
62
fiber
Logging on to a
is
LAN as a user gives access
chosen, a copy of the software
executes the software
such as a
in
printer, is
like
is
to
downloaded
all
the software on the server.
to the user
computer
When
for execution.
a software package
The user computer
a standalone computer, not accessing the server again unless a peripheral device,
needed. Further information on these and other
local
area network topics can be found
the references listed below.
Suggested References
Berry, Paul, Operating the
Fitzgerald, J.,
IBM PC Networks, Sybex,
Inc.,
1986.
Business Data Communications. John Wiley and Sons,
Inc.,
1990.
Madron, Thomas W., Local Area Networks: The Second Generation, John Wiley
Schatt, S., Understanding Local Area Networks
,
and Sons, 1988.
Howard W. Sams and Company, 1990.
63
This guide
is
primarily for those of
you who are
either
new to WordPerfect
a network and need to get WordPerfect running so you can create that
first
and/or are
new
document.
If
to working
on
you have used
WordPerfect, or any other word processor, you are used to running the program from the subdirectory where
the program
file
server,
files
are stored.
On
WordPerfect subdirectory on the
and extremely
difficult to
need
subdirectory; they
WordPerfect
it
is
to
start-up
command
start-up screen,
server,
files.
it
would be
save
files to
will
be presented
line,
WordPerfect always
inch.
that are being
Codes window by
is
done by
first
figure out which
edit, delete,
file
or save
belonged
you
starts
in
used
in
off in
initial
(to
see your document as
will
it
WordPerfect start-up screen appears
with the
document screen. On
it,
the
which user
document
1
edit
be
The cursor always
on page
1,
and
your document,
printed,
you can
select the
briefly.
WP51
After that
initial
a default status line indicates the
same
time) as well as
starts out in the upper-left corner.
with top, bottom,
WordPerfect by pressing the function keys
to
to
files in
the WordPerfect
files in
WordPerfect, you can work on two documents at the
left,
and
right
at the top (or
margins of
left)
of your
combination with the <Ctrl>, <Shlft>, and <Alt> keys. To see the formatting
your document, you press Reveal
pressing <Alt-F3> again. (Note: <Alt-F3>
is
Codes
also an
pressing the <Alt> key and, while the <Alt> key
combination keystrokes are done
tarting
difficult to
As soon as you boot up the system and
feature.
horizontal cursor position.
You issue commands
keyboard, either alone or
codes
in (in
and
are stored on the
a floppy diskette.
View document
from the menu, an
you
the current page,
files
every network user stored document
Thus, users cannot
locate
The program
is different.
If
a text-oriented word processor, which means that as you create and
document window you are
It
file
users.
appears on your screen as ASCII-coded characters
select the WordPerfect
1
a network the procedure
where they are shared by other network
in this
is
(<Alt-F3>).
You
close this Reveal
example of a combination keystroke.
held down, pressing the
<F3>
key.
All
manner.)
WordPerfect
1. Turn on your computer and log onto the network (follow the instructions provided
your computer). You will see, for the various applications available on the network, the
1DIR menu with the batch file listings (files with .BAT extensions, that execute application
programs).
at
64
2.
the
Arrow-Down
Using the
<ENTER>
key,
(also called the
move
the select bar to the
(NOTE:
<Return>) key.
In
WP51.BAT file and press
1-250, you must have a
Drive A: before you can access WordPerfect. In 1-224,
you may use WordPerfect without your own disk; your work will be stored on
C:\DATA (Drive C: in the DATA subdirectory). However, you will want to copy your
work onto your floppy disk to keep with you since the files on the C: drive may be
formatted disk to insert
in
deleted at any time.)
3.
The WordPerfect document screen then appears.
if
a blank screen except for
you were looking at a blank sheet of paper
available
any time you are working with the program.
the status information noted earlier);
in
it
is
as
It
is
a typewriter.
H
e/p
WordPerfect's online help
is
To get help about the use of a particular function key or keystroke combination,
press <F3> (Help) and then press the key or keystroke combination to begin viewing the
1.
information.
2.
To
get help about a particular feature/command by name, press
name
the feature/command
<S>
<F3>
followed by
on Search).
again
When a letter has more
to display
another screen of entries. After locating the name of the feature on the Help screen,
press the function keys indicated under the keystrokes column to obtain information about
the feature's use.
the
initial
letter of
entries than
3.
WordPerfect's Help system
function,
4.
twice.
To
A
screen.
5.
R
to get help
it
when you
letter
are using a particular
by pressing <F3>.
<F3>
template of WordPerfect's function keys (Enhanced Layout) will appear on your
Press <1> and the IBM PC/XT (IBM Layout) will be displayed.
<ENTER>
etrieving a
To
context sensitive, so
you can get more information about
To
start
presented with
2.
(such as
on one screen, type the
fit
display a diagram of the function key assignments for WordPerfect, press
Press the
1.
is
will
key or <Space Bar> to
Help system.
Document
a
new document,
just
begin typing
at start-up.
retrieve
exit the
a document from a floppy
disk:
65
in
the
document screen you are
a.
Press Retrieve <Shift-F10>,
b.
Type
in
the drive, path, and document
name
(e.g.,
A:\work\document.doc), and
c.
3.
4.
If
Press
<ENTER>.
you do not remember the name
a.
Press <F5> (List Files),
b.
Type the appropriate
work subdirectory on
drive
of
your document:
and path
(e.g.,
document by using the arrow keys
c.
Highlight your
d.
Select the Retrieve option (type <1> or <R>).
List Files
see the
A:\work\*.*) to
files in
your
floppy Drive A:,
<F5> gives you an
and allows you
move, rename, print, and find.
specified directory
to
alphabetical listing of
move
all
the cursor bar, and
files
common maintenance
to perform
in
the current or
tasks: copy, delete,
5. If you retrieve a document while you are working on another document, you will see
the prompt Retrieve into current document?No(Yes). If you type <Y>, the document will
be retrieved
into the current
cursor position
reating a WordPerfect
in
the
document that
is
already on the screen.
Document
You can begin work immediately when you have the WordPerfect screen
displayed on your monitor. You do not have to press <ENTER> at the end of each line
since WordPerfect automatically word wraps for you. You do need to press <ENTER>
at the end of each paragraph.
Moving the Cursor
The cursor
is
normally a small, flashing underscore that indicates the position of each
some text, you have to move the
character you type to the screen. If you want to edit
cursor to the desired location in the document.
1. The four arrow keys on the right of the keyboard are the cursor movement keys.
These arrow keys are collocated with the numbered keys on the numeric keypad. Press
66
<Arrow-Up> key to move one line at a time up the page; the <Arrow-Down> key to
move down one line, the <Arrow-Left> key to move left one character at a time, and the
you press a key down and hold
<Arrow-Right> key to move right one character.
the
the
If
cursor
2.
will
move
To move
continuously
the cursor
in
one
it,
the direction of the arrow.
WORD
at
a time, press the <Ctrl> key and hold
it
down
while you press the <Arrow-Left> key or the < Ar row-Rig ht> key. Holding the <Ctrl> key
while pressing the <Arrow-Up> or <Arrow-Down> key will
beginning of the previous or next PARAGRAPH, respectively.
down
The <Page-Up> and <Page-Down> keys
previous or the next PAGE, respectively.
3.
will
move you
move
the cursor to the
to the beginning of the
The Minus key <-> on the right side of your keyboard adjacent to the numeric
keypad moves the cursor to the top of the SCREEN and the Plus key <+> next to the
numeric keypad moves the cursor to the bottom of the SCREEN.
4.
5.
Other cursor movement techniques are as follows:
To Move
<Key Sequence>
Home, Home, Arrow-Left
To
the beginning of a
To
the
To
the end of a line
End; or Home, Arrow-Right
To
cursor's prior position
Ctrl-Home, Ctrl-Home
To
the top of the page
Ctrl-Home, Arrow-Up
To
the bottom of the page
Ctrl-Home, Arrow-Down
To a
left
specified
To the top
To
edge
of
line
page (Go To) Ctrl-Home, {page number},
of the
the end of the
document
Editing a
ENTER
Home, Home, Arrow-Up
document Home, Home, Arrow-Down
Inserting Text Into Your
default Insert
Home, Arrow-Left
screen
Document
document often requires adding new text. WordPerfect starts off in the
mode. (If you see the word Typeover in the lower-left corner of your
67
screen, press the Insert <lns> key located on the right side of your keyboard to return
to the Insert
mode.)
where you want
1.
Position the cursor at the spot
2.
Press the <Arrow-Down> key and WordPerfect
to insert text.
will
adjust the text to the correct
margins.
Deleting Text
WordPerfect has many ways of deleting
To Delete
text,
many
of
which are defined here:
<Kev Sequence>
Character by character
Backspace
(deletes to
left
of cursor);
Delete <Del> (deletes character or space the cursor
Word by word
Ctrl-Backspace
Several words
= number
cursor) Ctrl-Backspace
From the
Home, Backspace
left
Escape <Esc> n
of the cursor
to the beginning of
a word
From the cursor right to the Home, Del
end of a word (including the
ending space)
To
the end of a line
Ctrl-End
To
the end of a page
Ctrl-PgDn
A sentence
Ctrl-F4, S,
D
A paragraph
Ctrl-F4, P,
D
A page
Ctrl-F4, A,
D
Undeleting Text
68
(n
of
words
to the
left
is
on).
of the
WordPerfect 5.1 can restore any of the last three deletions at the cursor's position.
WordPerfect is not carrying out a command, the Cancel key <F1> functions as the
Undelete key. The following prompt appears along with the most recently deleted text:
If
Restore; 2 Previous Deletion:
Choosing Restore <1> or <R> restores the displayed text to your document; choosing
Previous Deletion <2> or <P> displays the text that was deleted prior to that deletion.
The last three deletions can be displayed and restored. After the third most recently
deleted text is displayed, selecting Previous Deletion displays the first deletion again.
Selecting Restore restores the displayed deletion to your document.
Undelete:
1
Using the Typeover Feature
With the Typeover feature, you can enter replace existing text without pushing the rest
Press the Insert <lns> key until the Typeover prompt
of the sentence to the right.
appears in the lower-left corner of your screen. The Insert mode is now off.
unction Keys
The
function keys are listed here alphabetically
and sequentially by F-key.
Alphabetical Listing
Function
<Kev Sequence>
Brief Description
Block
Alt-F4
Defines a block of text on which you can
then perform any number of operations.
Bold
F6
Prints selected text in boldface or doublestrike.
Cancel/
Undelete
F1
Terminates almost any command being carried out/
Restores up to three previous deletions.
Center
Shift-F6
Centers text on a
Columns/
Alt-F7
Format your
Shift-F5
Inserts the current date as text or code/create
line
between
text using
left
&
right
margins.
columns/create tables.
Tables
Date/
outline of your
Outline
End
Field
F9
End
of field
69
document.
code
in
a record (used
in
merging)
an
Exit
F7
Quits WordPerfect or current screen.
Flush Right
Alt-F6
Aligns your text flush with the right margin setting.
Font
Ctrl-F8
Allows you to change the size or appearance of the
current fonts used in your document.
Footnote
Ctrl-F7
Allows you to add footnotes that appear at the bottom
of the page or endnotes that appear at a place of your
choice in the document.
Format
Shift-F8
Controls most aspects of the document format using 4
submenus: Line, Page, Document, and Other. Used to
set margins.
GoTo
Ctrl-Home
Moves
text
Graphics
Alt-F9
the cursor to a specific character, page, or
column, or to the previous cursor position.
Allows you to combine graphics created by other
programs with the text of your document or to draw
rules (lines) in the
document.
Hard Page
Ctrl-ENTER
Ends a page
Help
F3
Gives you on-line help about a function key, function,
or a WordPerfect command.
Indent
F4
at the discretion of the user.
Indent
Shlft-F4
List
F5
left margin and aligns
you press <ENTER>.
Sets a temporary
this indent until
all
text to
Sets temporary left and right margins and aligns
text to these indents until you press <ENTER>.
all
Displays an alphabetical listing of all files
the current directory; allows common
in
maintenance tasks: retrieve, delete,
move/rename, print, copy, text in, and look
Macro
Alt-F10
Executes a defined macro.
Macro
Ctrl-F10
Defines a macro (begins recording keystrokes which
can be replayed any time).
Define
70
Margin
Release
Shift-Tab
Moves the cursor one tab stop
Mark Text
Alt-F5
Compares documents, removes
to the
left.
and
redline markings
and creates automatic references,
master documents, indexes, lists, tables of
strikeout text,
authorities,
Merge
Codes
Shift-F9
Merge/Sort
Ctrl-F9
Designates a
merged
Move
Ctrl-F4
Print
Shift-F7
and tables
in
field
of contents.
from the secondary
the primary
to
file
be
file.
Performs a merge of data stored in lists in a
secondary document into the appropriate places
primary document.
in
a
Allows you to move, copy, or delete a sentence,
paragraph, or page. You can then move to another
place in the document and retrieve the text.
Allows you to print a document or page.
Also allows
other functions, such as view document.
Replace
Alt-F2
Allows you to select any sequence of characters or
codes and globally change
Retrieve
Shift-F10
it
to
something
else.
Retrieves a document on disk or the last text that
was
cut or copied.
Reveal
screen and allows you to see the hidden
codes, which instruct the printer on how to format text
and graphics in the document.
Alt-F3
Splits the
Save
F10
Saves a document on disk under the name you
Screen
Ctrl-F3
Allows you to draw straight lines and boxes in the
document, turn off/on automatic screen writing, and
split the document screen into two windows.
Search
F2
Codes
Locates the next occurrence
in
the
document
specified text or formatting codes.
Search
Shift-F2
Performs a backward (reverse) search.
71
assign.
of
Setup
Shift-F1
Allows you to change
many
of
WordPerfect's default
settings.
Shell
Ctrl-F1
Spell
Ctrl-F2
Allows you to exit temporarily to
DOS.
Allows you to check the spelling of a word, a block of
text,
or an entire document.
Style
Alt-F8
Allows you to store sets of formatting commands that
can be applied to various parts of your document.
Switch
Shift-F3
Converts defined block to all UPPERCASE or
lowercase letters. Switches between the Doc
Doc
Tab
Align
Ctrl-F6
all
1
and
2 editing screens.
Aligns text on or around the next tab stop using the
decimal/align character.
Text In/Out
Ctrl-F5
Allows you to retrieve a DOS text (ASCII) file into
WordPerfect; to save a document as a DOS text or
other formats (such as previous versions of
WordPerfect); to create document comments; and to
assign passwords to documents.
Thesaurus
Alt-F1
Allows you to look for synonyms for any word
your document.
in
text of
Underline
F8
Begins underlined text or underscores selected
portions of text.
Sequential F-Key Listing
<Key>
F1
<Alt>
<Shift>
<Ctrl>
Cancel
Thesaurus
Setup
GoTo DOS
>Search
Replace
<Search
Spell
hfTTTTTTTTTM
F2
Jttttttttt'k
72
the
F3
Help
Reveal Codes
Switch
Screen
>lndent
Block
>lndent<
Move
List
Mark Text
Date/Outline
Text In/Out
Bold
Flush Right
Center
Tab
Exit
Columns/Table
Print
Footnote
Underline
Style
End
Graphics
Merge Codes Merge/Sort
Macro
Retrieve
lamrannj
F4
t<ftTTTTTTTTNJ
F5
kflnnmrbJ
F6
Align
IfflTTTmTTM
F7
UftTTTTTTTlM
F8
Format
Font
ffillllllllSJ
F9
Field
anmmftsJ
10
Save
Macro Define
TTTTTTTTTNl
B
with
lock Operations
The Block command <Alt-F4> is used to highlight (mark) a
other WordPerfect commands. To mark a block of text:
1.
section of text for use
Position the cursor at the beginning of the block and press Block (<Alt-F4:»).
message Block on begins
blinking at the bottom-left of your screen.
73
The
2.
Position the cursor at the
text will
be
end
highlighted), then press
of the block (as you move the cursor, the included
Block (<Alt-F4>) again.
Select the operation you want applied to the block. You can choose from the menu
items at the bottom of the screen or use a function key or combination of function keys,
as summarized below:
3.
<Key Sequence>
Action with Block
F1 (Cancel)
Cancel block
Alt-F2 (Replace)
Replaces
Ctrl-F2 (Spell)
Checks block
Shift-F3 (Switch)
Changes block
Ctrl-F4 (Move)
Cuts, copies, or
in
On
block
to
all
uppercase or lowercase
moves
block; Cuts/copies
column or
rectangle
Alt-F5(Mark Text)
Marks
F6 (Bold)
Bolds block
Alt-F6 (Flush
Moves block
for
ToC,
list,
index, paragraph
flush with right margin
Right)
Shift-F6 (Center)
Centers block
Shlft-F7 (Print)
Prints block
F8 (Underline)
Underlines block
Shift-F8 (Format)
Protects block
Ctrl-F9 (Merge/
Sorts block
Sort)
F10(Save)
rinting
Saves block
in
a new
and Viewing a Document
74
file
numbering
From the screen, you can print the entire document, a single page, or a marked block of
It's a good idea to view your document before you print, though, to make sure
text.
to look; you will save costly printer paper and time by first
looks like you want
it
it
previewing your document.
Printing
The system boot
when you
workstation
and subsequently
1.
automatically captures a printer port for your
thereby ensuring that print jobs go to the file server queue
on network printers. You do not have to manually select a port.
disk provided
log
print
in,
Press the Print key (<Shift-F7>). WordPerfect presents you with a Print menu.
2. Press the <1> or <F> to print the entire document (the cursor may be placed
anywhere in the document to print the whole document), or the <2> or <P> to print one
page (it will print the page the cursor is on at the time). You are returned to your
document screen, and the print job goes to the file server print queue where waits its
turn to be printed. A separator page with the network operating system's name, your
login name, and the print job number will be printed first so you can identify your print job.
it
a block of text from the screen, move the cursor to the first character of the
block you want to print; press <Alt-F4> (Block). The message Block flashes in the lowerleft corner of the screen.
3.
To
print
4. Move the cursor to the character space immediately after the last character of the
block of text you want to print. Press <Shift-F7> (Print).
5.
Press <Y>
for
yes to the prompt Print block?
No
(Yes).
Viewing
document pages as they will appear when printed on paper,
including graphics, footnotes, page numbers, line numbers, headers, footers, and
justification. However, on the Token Ring network in I-224, three computers (TN12, TN15,
and TN23) will not allow you view without a few extra steps; that's because WordPerfect
is preset for EGA monitors whereas these three stations have CGA monitors.
For
You can view
instructions,
the
see the footnote
1
.
1
To be able to view your document from TN12, TN15, or
TN23 on the Token Ring network in 1-224, you need to reset the
default monitor selection by following these steps:
1) Press <Shift-Fl> (Setup);
2) Select <2> (Display) ; (continued next page)
75
;
1.
Put the cursor on the page you want to view.
2.
Press <Shift-F7> (Print) and select <6> or <V>
3.
View document).
(for
Press <1> (100%) to view the document at its actual size;
press <2> (200%) to view at twice its actual size;
press <3> (Full Page) to view the whole page at once;
press <4> (Facing Pages) to view the current page and its facing page
(even-numbered pages are shown on the
Press
document.
4.
5.
<PgUp>
or
<PgDn>
or
left,
odd-numbered pages on the
<Ctrl-Home> (GoTo)
to
right).
view other pages
in
the
Press <F7> (Exit) to return to the document screen.
aving a Document
Once you create or modify your document, you
You can save the document either while you
diskette.
to save it on your floppy
working on it or when you
however, a very good idea to
will
want
are
still
are finished with and are ready to exit WordPerfect. It is,
SAVE often!! It only takes a few seconds and can save HOURS of retyping.
Saving without Exiting
case there's a power surge
or failure affecting your workstation or the file server. If you leave your workstation for
any reason while working on a document, make it a habit to save your work first.
You should save your document every 10-15 minutes
1.
Press Save (<F10>).
screen:
Document
to
You
will
see
this
prompt
in
in
the lower-left corner of your
be Saved:.
you retrieved the document from your floppy diskette or saved
the file previously, WordPerfect will provide the drive, path, and
document name (e.g., A:\WORK\DOCUMENT.DOC) as a
a.
If
default.
Select <2> (Graphics Screen Type)
Select <2> (Auto-select);
Press <ENTER>;
Press <ENTER>, then follow the instructions for viewing in
the body of the guide.
3)
4)
5)
6)
76
To save the file under the same name, press <ENTER> and
respond <Y> to the prompt Replace A:\WORK\DOCUMENT.DOC?
No(Yes) to indicate that you do want to replace the original
version of the file with the edited version. The default setting is No, which allows
you to leave the existing file intact and save the new version under another
(1)
name.
If you want to rename the file in order to keep two versions
a document, press <ENTER> to accept the No setting. WordPerfect will allow
you to enter a new file name (including drive and path designations). Type the
new name or edit the existing name, then press <ENTER>.
(2)
of
you newly created the document and have not saved the file
previously, WordPerfect will prompt you for a file name. Type in a
drive and path designation, and a file name of up to eight
characters with an optional three-character extension (characters
after the dot); for example, A:\WORK\DOCUMENT.DOC. Then press
<ENTER>. The file will be saved on your floppy disk.
b.
2.
If
Once
the
document has been saved, you
will
be returned
to the
document screen.
Saving and Exiting WordPerfect / Clearing the Screen
When
latest
1.
you are finished with your word processing session, you
document and
exit
will
want
to
save your
WordPerfect.
Press <F7>, the Exit key.
see the prompt, Save document? Yes(No). Press <ENTER> or <Y> to
accept the default setting of Yes. If you want to abandon the document and any changes
you have made to it, press <N>. You can then exit without saving the document.
2.
You
3.
After
will
you have pressed <ENTER>, WordPerfect prompts you
for the
name
document.
If you have not saved the document before, type in the directory
path and document name and press <ENTER>. (Remember to save your
work to your formatted floppy disk before leaving.)
a.
b.
If
will
you have already saved the document
contain the directory path and
(1)
If
you want
to
save
it
at least
once, the prompt
document name.
under the same name, simply press
77
of the
<ENTER>. WordPerfect
respond with the prompt, Replace
A:\WORK\DOCUMENT. DOC?No(Yes). If you change your mind and
decide to rename the document, press <ENTER>. Otherwise, type <Y>
(2) If you want to save the document under a new name, type it in or
existing name and press <ENTER>.
4.
After the
a.
The
document
is
saved, you
default response
CLEAR THE SCREEN
document
will
will
see
this
for
Yes.
edit the
prompt, Exit WP?No(Ye$).
is No, so you can press <ENTER> or <N> to
and begin creating a new document or retrieve another
for editing.
If you decide you do not want to have your document cleared from the screen,
press Cancel (<F1>) to retain it and return to editing its text.
b.
c.
to
you answer Yes to exiting WordPerfect, you will be returned
select another application or log off the system.
If
78
to the
1DIR menu
Bibliography
Harvey, Greg and Nelson, Kay Yarborough, WordPerfect
Inc.,
5.1 Instant
1990.
Simpson, Alan, Mastering WordPerfect
5.1
,
Sybex,
79
Inc.,
1990.
Reference, Sybex,
Index
Arrow keys
6
Block 9, 11
operations 12
Bold 9, 12, 13
Cancel 9, 11, 16
block 12
Center 9, 12, 13
Clear the screen 16
Columns
tables
9
Columns/Table 12
Cursor movement 6
arrow keys 6
7
line
page
7
6,
screen 7
sentence 7
techniques 7
to
end
of
document
7
top of document 7
word at a time 6
Date
9,
12
Delete
by character 7
by word 7
page
8
paragraph
sentence
8
8
several words
text
8
7
word
to beginning of
to
to
to
end
end
end
of line
of
of
8
8
page
word
8
8
Editing screen
End
Exit
new
16
Field
9.
9,
12
12
Help system 5
Flush Right
9, 12,
13
80
Font 9, 12
Footnote 9, 12
Format
13
9, 12,
Functions, Function keys
alphabetical
listing
8
online help 5
Sequential
GoTo 9
GoTo DOS
11
Graphics
12
9,
listing
11
Hard page 9
Help 5, 9, 11
command
exiting
5
5
feature
5
function
5
function key
5
function key template
Hyphen,
Indent
soft
5
11
9, 11
Insert
date 9
document
mode
text
List
6
7, 8
7
12
List files
6,
9
Local area network 2
server 2
user 2
Lowercase block 12
Macro
define
execute
Margin
release
10, 12
10, 12
10
set 9
Mark Text 10, 12, 13
Merge 13
End Field 9
Merge Codes 10,
Merge/Sort
Move
12
12, 13
10, 11, 13
81
1
Outline
1
12
9,
Preview document
see view document 14
10, 12, 13
Print
block 13-14
document 13
one page 13
view document
Rename
Rename
10
16
15, 16
file
Replace 10-12, 15
Restoring text
Retrieve
8,
9
10, 12, 16
document (from
list files
while working
Reveal Codes 10,
Save
floppy)
5
6
another document 6
in
11
10, 12
and
15
exit
block
13
document
14
without exiting
Screen
15
1
automatic screen writing
10
boxes 10
lines
10
windows 10
Search 10
backward
forward
Server 2
Setup
10, 11
10, 11
11
Shell
GoTo DOS
Sort
1
13
Spell
11, 12
Start
document 6
new document
5,
16
WordPerfect 4
Style
Switch
Tab
11,
12
11
Align
11,
12
82
1
Tables 9
Text In/Out
1
11,12
document comments
DOS
text (save
generic
Undelete
8,
Underline
retrieve)
1
11
files
passwords
Thesaurus 11
Typeover 7, 8
&
11
1
9
11,
12
Uppercase block 12
User 2
View document 10, 14
on TR network in 1-224 (TN12, TN15, TN23)
Windows
screen
10, 11
switching screens
10, 11
83
14
APPENDIX
C:
dBASE
IV 1.1
84
Basic User's Guide
A
Basic User's Guide
For use on the
Administrative Sciences/Information Systems
(AS/IS)
Computer Laboratories
1-158, 1-224,
and 1-250
September 1991
A C&P Product
85
in
Table of Contents
Introduction to Local
Starting
The
dBase
Area Networks
3
IV
6
Control Center
The
The
The
The
The
6
Menu Bar
Catalog Line
File Panels
Current File Description Line
Navigation Line
6
7
7
8
8
Getting Help
8
Creating and Saving a Database Structure
Creating a Catalog
Defining Data Fields
Making Changes and Corrections
9
Saving the Database Structure
12
13
Working with the Database
Entering Data into Records
Editing a Record in the Edit Screen
Exiting the Edit Screen
Editing and Adding Records in the Browse Screen
Undoing an Edit
Memo
9
10
Fields
13
14
15
15
15
16
16
Viewing a List of Records
Marking Records for Deletion
Unmarking a Record for Deletion
Deleting Marked Records
16
16
17
17
Sorting a Database
18
Indexing
18
Sorts within Sorts
19
Activating
an Index
19
Searching a Database
Searching for Specific Records
Forward and Backward Searches
19
20
20
86
Index Searches
20
Querying the Database
The Query Design Screen
Saving a Query for Future Use
Activating a Saved Query
Changing a Query
Deactivating a Query
21
Reports
Creating a Custom Report
Saving Report Formats
Modifying Report Formats
24
Printing
28
22
23
23
23
24
24
27
27
Database Structure
Quick Report
Printing Customized Reports
Printing the
28
Printing a
28
Exiting
dBase
28
29
IV
Bibliography
30
Index
31
87
I
ntroduction to Local Area Networks
A
area network (LAN) is a group of microcomputers or other workstation
devices located in the same general area and connected by a common cable. A LAN is
designed to interconnect microcomputers, terminals, minicomputers, and other hardware,
for the purpose of communicating among themselves and alternately with a host
local
mainframe computer or public network.
The most common reason
developing a LAN is resource sharing. Networks allow
the sharing of peripheral devices such as hard drives, printers, and scanners. Application
programs such as spreadsheets, word processing, and communication packages can be
shared so that multiple copies are not necessary. Databases can also be shared in such
a way that multiple microcomputers can have access to a single database. This capacity
for sharing hardware and software resources allows greater flexibility and cost savings
in the use of expensive computer peripherals and software.
The basic components
of
for
a
LAN
are the server computer, the user computer(s), and
the interconnecting cabling system.
specifically
The server
is
designated to act as the network server.
functions required of a network server;
user computers.
management,
it
usually a microcomputer that
The server performs
is
only those
can only be accessed by users through
their
Server functions include repository of software programs, network
and other peripheral device management, and database repository.
printer
The user computer
normally a microcomputer or terminal, and is connected to the
server by a cabling system. A simplified schematic of a typical connection is shown in
Figure 1. One server can support more than one user computer, usually six to ten. The
cabling system connecting the server and the users can be present in a number of forms
is
PHONE LINE
PRINTER
USER
Figure
1:
LAN Schematic
88
and configurations. Cabling can be twisted
Configurations include bus, ring, and star.
pair wire, coaxial cable,
and
fiber optic cable.
Logging on to a LAN as a user gives access to all the software on the server. When
a software package is chosen, a copy of the software is downloaded to the user computer
for execution. The user computer executes the software like a standalone computer, not
accessing the server again unless a peripheral device, such as a printer, is needed.
Further information on these and other local area network topics can be found in the
references listed below.
Suggested References
Berry, Paul, Operating the
Fitzgerald,
J.,
IBM PC Networks, Sybex,
Inc., 1986.
Business Data Communications, John Wiley and Sons,
Madron, Thomas W., Local Area Networks:
Sons, 1988.
Schatt, S., Understanding Local
1990.
The Second Generation, John Wiley and
Area Networks, Howard W.
89
Inc.,
Sams and Company,
1990.
a database management system which lets you create many different
types of databases, make data additions and deletions, search for records with a variety
of search criteria, sort data into multiple formats, print mailing labels, generate reports,
and. if you work with numerical data, perform various mathematical computations. This
guide is designed to familiarize the beginning user of dBase IV with a few of the
program's basic operations. More comprehensive treatments are available which cover
more of the many features dBase IV offers.
dBase
IV
is
dBase
program is stored on the file server hard disk in
its own subdirectory. Database files which you create and work with should be stored on
your floppy disk or a class subdirectory, which your instructor will explain.
Like other applications, the
dBase
IV
which consist of records (or rows). Each
record is divided into separate fields (or columns). Figure 2 depicts a dBase IV database
file containing names and addresses.
Forms, such as the most basic Edit screen, are
used to gather information on the computer screen and that information is stored in the
database file. Reports are derived from
the information in the database and can
F lelda (columns;
be printed, in the format you specify, on
your computer screen or printer. dBase IV
41
i
I
can also pull together information from
LName
FName Address
City
Zip
separate database files into a single
Jones
Monterey 83840 <r
Edward
123 First St.
printed report. In managing a database,
SfTKth
Mary
321 A Av«.
Salinas
93933 4
you execute a few basic tasks:
-Record*
IV stores information
in
database
files
> '
- ADD new information
- CHANGE information
- DELETE old information
- SORT information into
some
93938
«-
24 Casa Verde
Monterey 93940
<-
680 Greer Rd.
Capltola
Clark
Ray
8475
Patrick
Pamela
Black
Gerald
Figure
2.
Third
A dBase
St
IV
Carmel
Database
useful order (like alphabetical
order)
-
SEARCH
for particular
types of information
90
(like
8391
a specific address
1
<-
File
(rows)
or
names
people with San Diego addresses)
totals, subtotals, counts, and averages
of
all
- CALCULATE
dBase IV offers an optional command-driven technique for managing databases,
where you type commands at a dot prompt screen rather than select options from pulldown menus. This guide does not deal with the command-driven technique. However,
you inadvertently get to the dot prompt, you can get back to the Control Center by
typing ASSIST and pressing Enter, or just pressing the F2 key.
if
tarting
dBase IV
1. Turn on your computer and log onto the network (follow the instructions
provided at your computer). You will see the 1DIR menu with the batch file (files with
.BAT extensions, that execute application programs) listings for the various applications
available on the network.
Using the Arrow-Down key, move the select bar to the
the Enter (also called the Return) key.
2.
DBASE4.BAT file and
press
3. The dBase IV logo and copyright notice appear on the screen, along with
message "Press Enter to assent to the License Agreement and begin dBase IV."
4.
Press Enter to
start the
program or wait a few moments and dBase IV
will
the
display
the Control Center.
he Control Center
After the dBase IV logo and copyright notice disappear, the Control Center
appears on your screen. The operations performed by dBase IV are initiated from the
Control Center. The Control Center provides a user interface based on pull-down menus,
commands, for interacting with dBase IV. It is the primary user-assistance
non-programmers in dBase IV. The five major parts of the Control Center are:
rather than
feature for
the
menu
navigation
menu
bar, the catalog line, the
line.
The
options and
pointer
files; to
is
file
panels, the current
a highlighted bar that
is
file
description
moved by
the
line,
and the
Arrow keys
to the
select an option from the Control Center, position the pointer
and press Enter.
The
Control Center displays the
names
of files in the current catalog in the panels,
which are labeled Data, Queries, Forms, Reports, Labels, and Applications. The names
of various files from other users may appear in these panels, but they will not affect your
work.
91
The Menu Bar
At the upper-left corner of the Control Center is the horizontal menu bar, which offers
the options Catalog, Tools, and Exit. Each option has a pull-down menu associated with
it.
Pull-down menus can be accessed by pressing the Menu key (F10) or by holding
down the Alt key and typing the first letter of the option you want.
a. Shaded options here are not available at the moment, usually because they make
no sense in the current situation.
1.
Bulleted options (those with arrows/right-pointing triangles) have
b.
submenus
associated with them.
2.
To leave the pull-down menus
at
any
time, press the
Esc key
until
the
menus
disappear.
The
some
following keys are
of
used
these keys to see
how
to navigate the
pull-down menus. You
KEY
EFFECT
Enter
Selects the currently highlighted option
Arrow-Left,
-Right
Moves
Arrow-Up,
Moves up
to
menu-bar
or
may want
to try
they work.
down
option on
left
or right
to next available
pull-down
menu
option
-Down
PgUp,
Home
PgDn, End
Moves
to first available
pull-down
menu
option
Moves
to last available
pull-down
menu
option
First letter of
any option
Selects that option
Esc
Backs up
to prior
menu
or Control Center
The Catalog Line
The catalog
displays the
line is
name
title of the Control Center screen, and
no catalog has been created, the catalog line
centered beneath the
of the current catalog.
If
92
read UNTITLED. CAT. A catalog is a grouping of related files in a database, such as
storing accounts receivable information in one catalog and inventory information in
will
another.
The
File
The
Panels
panels of the Control Center are the six vertical rectangles in the center of the
screen labelled Data, Queries, Forms, Reports, Labels, and Applications. They contain
the names of the various types of database files in the current catalog. For instance, the
Data panel holds the names of database files that contain data; the Forms, Reports, and
Labels panels hold the names of formats used to display forms and to print reports and
mailing labels; and the Queries and Applications panels hold the names of query files and
dBase IV application programs (dBase IV applications will not be covered by this manual).
Each panel also includes the option <create>, which allows you to create a new database
file, form, report, or query; it is placed into the current catalog.
file
The Current
File Description Line
and Description: section, just beneath the file panels, provide the name of
the currently selected file and a brief description of the file's contents. If <create> is
highlighted instead of a file name, this area displays "New file" and "Press ENTER on
The
File:
<create> to create a
new
file."
The Navigation Line
At the bottom of the screen
is
the navigation
available for the option currently selected.
at the Control
line.
It
displays the
commands
As an example the navigation
line
displayed
Center shows:
Help: F1
Pressing F1 always displays a Help screen
Use:
Use the
™
that are
highlighted item
Enter (Return)
Data: F2
Display data in Browse mode (Pressing F2 a second
time displays data in Edit mode)
Design: Shift-F2
Displays the Database Design screen
Quick Report: Shift-F9
Displays the Print menu.
Menus: F10
Activates the
93
menu
bar
G
etting Help
You can use the Help key (F1) at any time to get help with dBase IV. The help
screens are context sensitive, which means they provide help that is relevant to the
operation you are currently performing (whichever operation is currently highlighted).
After pressing F1 a help screen (or window) will appear on the screen. The navigation
line at the bottom of the screen will tell you the keys to use to navigate the help screens,
usually F4 for next screen and F3 for previous screen. The Arrow-Left and Arrow-Right
keys will move you among any help options offered in the help window.
,
The
help system's Table of Contents can be accessed by highlighting the
option and pressing Enter.
You'll
see a
list
of topics
concerning database
CONTENTS
files.
HELP OPTION
BRIEF DESCRIPTION
CONTENTS
Displays a table of contents for the current topic. When a table of
contents is displayed, you can use the F3 (More General) or F4
(More
Specific)
key to change to more general or more specific
tables of contents.
RELATED TOPICS
Displays a
BACKUP
Scrolls
there
PRINT
Prints
When you
the
Esc
is
list
back
of topics related to the current topic.
to the previous screen.
This option only appears
if
a previous screen.
a copy
of the current help
window.
are finished with the help system, return to the Control Center by pressing
key.
reating
and Saving a Database Structure
—
Each piece of raw data a phone number, name, street address, inventory code,
and so on is placed into its own field. Several fields of related data are grouped
together to create a record. Records are compiled into a database file, and related
—
database
files
are organized into a catalog.
Creating a Catalog
A
catalog
not included
name
is
a
DOS
because dBase
filename of up to eight letters or numbers. An extension
IV assigns the extension .CAT to all catalogs.
94
is
To open
1.
the Catalog menu, press F10, the
"Catalog" on the
menu
line,
Menu
The
key.
pointer
moves
to
and the Catalog menu drops down.
on the "Use a different catalog option. Press the Enter key. The
Catalog box appears in the upper-right corner of the screen. You may see a list of
previously created catalogs. You may select one of these and press Enter to display a
2.
list
The
pointer
is
of that catalog's files, or
3.
Place the pointer on <create> and press the Enter key to create a
new
catalog.
Type the name of your new catalog and press Enter. You are returned
Control Center, where the new catalog name will appear in the catalog line.
4.
to the
Defining Data Fields
A
data
field
contains one specific item of data.
field in your database structure.
The Database Design screen
is
where
you define each
The pointer should be positioned on <create> in the Data panel. Press the Enter
key. The Database Design screen appears. (Notice the message and navigation lines
at the bottom of the screen. dBase is prompting you to enter the first field name. Also,
a new line of highlighted information, called a status line, appears at the bottom of the
1.
screen.)
2.
To
define the fields you want to use
indicated by the six field panel headings:
in
your records, you must
Num,
Field
Name,
fill
in
the options
Field Type, Width, Dec, and
Index.
a.
Num: The Num column tells you the field number you are working
defined by dBase and cannot be specified.
b. Field
Name: You can enter any name
that
will identify
with.
It
is
the type of information to
be entered in that field, up to ten characters (either upper- or lower-case). It
can contain only letters, numbers, and underscores and the first character must
be a letter. Each field name in a database file must be unique.
c.
Here, you must specify what kind of information the field is going to
There are six options, which you can select by pressing the space bar until
your choice appears in the place where "Character" originally appears.
"Character" is the default setting since most database fields are of character
type. You can also type the first letter of a choice to select it. The six types are:
Field Type:
hold.
95
Character type: all letters, punctuation marks, special symbols, and any
numerals, like zip codes and phone numbers. (Mathematical calculations cannot
be performed on numbers in this field type.)
2) Numeric type: numbers that will later require mathematical calculation or that
have a fixed decimal point, such as dollar amounts.
3) Float type: numbers that have a floating decimal point, values that sometimes
require a decimal point and sometimes do not, and negative numbers.
4) Date type: dates such as 9/26/91.
5) Logical type: true/false or yes/no entries.
This field type can include large amounts of texts, such as
6) Memo type:
1)
comments, or lengthy descriptions.
Select the field type and press Enter.
abstracts,
d.
maximum number of letters, numbers, or other
characters that you plan to put into the field. The Logical, Memo, and Date fields
are automatically assigned a width by dBase IV, so you have to specify a width
only for Numeric, Float, and Character fields.
Width: Here you must specify the
Specify the
e.
f.
number
of characters, then press Enter.
Dec: If you entered N (for Numeric) as the field type, the cursor will stop in this
column. You must enter here the number of decimal places you want in the
field. For example, for monetary figures you would type 2 to indicate that you
want two decimal places.
Type in the number of decimal places and press Enter.
This column is used to control
or N(o) indicates whether or not the
Index:
how dBase orders your
records.
A
Y(es)
If this option is
field should be indexed.
assign
name
of
field
name
of the index
changed to Y, dBase
the
the
as the
and actually create the index when you save the database structure. For more
will
on indexing, see Indexing, page
Type Y or N and press Enter.
The cursor
now
13.
positioned to define the second
Following the procedure
described above, enter the remaining field information for your record and save this
database file structure as described in the "Saving the Database Structure" section below.
3.
is
field.
Making Changes and Corrections
At this point, if you notice an error in your file structure or wish to make a change, you
can use the keys described here, to change your database file structure. The keys won't
always work if you attempt to leave a field that has incomplete or invalid data. You may
96
experiment with several keys or type Ctrl-U to completely delete an incomplete
or invalid field to get the cursor moving in the direction you want.
have
to
KEY
EFFECT
Enter
Completes an entry and moves
Arrow-Left,
-Right
Moves cursor one character
Arrow-Up,
Moves
highlight
to the next
to the
left
column or row
or right
up or down one row
-Down
Home
Moves cursor
to the
first
column
in
the row
End
Moves cursor
to the last
column
in
the row
Ctrl-End
Saves changes and
Tab
Moves cursor one column
in
Shift-Tab
exits the
to the right (only
if
valid information
to the
left
(only
if
valid information
the present column)
Backspace
Moves cursor one space
F1 (Help)
Displays Help screen
F2 (Data)
Switch to browse or edit screen
Ctrl-N
Inserts a blank field
Ctrl-U
Deletes the current
Ctrl-W
Saves changes and
Shift-F2
Transfer to Query Design screen
back, erasing along the
between two
way
existing fields
field
exits the
Database Design screen
(Design)
Esc
is
already
the present column)
Moves cursor one column
in
Database Design screen
Exits without saving
changes and returns
97
to previous
screen
is
already
Saving the Database Structure
1.
From the Database Design screen,
pull
down
the Layout
menu by
pressing the F10
key.
2. Move the pointer
Save as: box appears.
to
to
name
to
Save
this
database
3.
Type
4.
To exit the Database Design screen and
The Layout menu pops down again but
fiie
structure.
Press the Enter key. The
(dBase IV will add the file extension .DBF
each database file) and press Enter. The database file structure is now saved, ready
be filled with the actual data for each record.
key.
in
the
of your
database
file
return to the Control Center, press the
F10
displays different options this time.
5. Press the Arrow-Right key to move the pointer to Exit. Notice how each menu box
pops down as the pointer moves from one menu item to another.
At the Exit menu, the pointer should be on the Save changes
the Enter key. You are returned to the Control Center.
6.
W
and exit option. Press
orking with the Database
Placing information
in
your database
files
entering data into the fields from the Edit screen.
The
begins with creating records and
The records can
also be edited on the
a single record and is useful
when you want to concentrate on one record at a time (custom forms can be created for
entering and editing data, but are not covered in this guide). You can move from field to
field using the following keys, which are useful in the Browse screen also:
Edit screen.
Edit screen looks like a blank form for
KEY
EFFECT
Enter
Completes entry and moves
Arrow-Left,
-Right
Moves
the cursor
Arrow-Up,
Moves
the cursor up or
left
to next field
or right
one character
down
-Down
PgUp, PgDn
Moves up
or
down one
record on Edit screen or one screenful on
Browse screen
98
Home
Moves
to
first filed
on Browse screen or
first
character
in
current field on Edit screen
Ctrl-Home
Moves from a memo-field marker
change a
End
Moves
on
into
an editing window
to last field
on Browse screen or end
screen
Edit
Saves changes and
Tab
Moves
to next field, or indents
Shift-Tab
Moves
to previous field, or outdents
Ins
Switches between Insert and Overwrite modes
Backspace
Moves
Del
Deletes one character over cursor
F1 (Help)
Displays help
F2 (Data)
Toggles between Browse and Edit screens
F3 (Prev)
Scrolls
F4 (Next)
Scrolls to next field
F10 (Menu)
Accesses pull-down menus
Ctrl-Y
Deletes
Shift-F8
Carries data from
Esc
add or
of current field
Ctrl-End
(Ditto)
to
memo
left
exits to previously
used screen
paragraph
in
word-wrap
paragraph
in
editor
word-wrap
editor
one character, erasing along the way
back
all
to previous field
characters to right of cursor
same
field in
previous record to current
record
Leaves current screen without saving changes
to last-edited record
Entering Data into Records
From the Control Center, place the pointer on the database
which you want to place information. Press the Enter key.
1.
in
99
file in
the Data panel
Move
2.
the pointer to Display data and press Enter.
database structure will appear on the screen. This
word Edit at the left end of the status line.
is
The
you created for your
the Edit screen as indicated by the
fields
each field with the appropriate data, pressing the Enter key after each entry.
you have filled in all the fields, you will have completed a record and dBase moves
3. Fill in
When
to the next blank record.
Editing a Record in the Edit Screen
press the PgUp key to move to a previous record.
To move to the field you want to edit, use the Arrow-Up and Arrow-Down keys. You
can type over existing text (to insert, press the Insert (Ins) key).
From the blank record you are
in,
Exiting the Edit Screen
1.
at the
Press the PgDn key until you reach the
bottom of the Edit screen:
=
last
record and see the following prompt
> Add new records?(Y/N)
Y and a blank
2.
Press
3.
Press the Enter key and you are returned to the Control Center.
Editing
set of fields appears.
and Adding Records
in the
Browse Screen
From the Control Center, press the F2 key. This is the Browse screen (see left end
of status line;
says Edit, press F2 once more). To edit an existing record, simply
move the cursor to the field that needs changing and type in the correct information.
1.
if
2.
at the
To add a
bottom
it
record, press the
=
of the
Arrow-Down key
the following
message appears
> Add new records?(Y/N)
3.
Press Y. The pointer moves to the
4.
Type
The keys
until
Browse screen:
in
the data
listed
in
the
fields,
on pages 12 and
13
first field
of the next blank record.
pressing Enter after each entry.
can be used
100
to navigate the
Browse screen.
Undoing an Edit
may change or erase a
a new record, you can undo an edit.
Occasionally, you
move
to
1.
Highlight the
2.
Select
field's
Records option on the menu
Undo Change
to
contents accidentally.
Before you
bar.
Record and the previous contents
of the record will
be
restored.
Memo
Fields
A memo
field
marker appears as a
Browse screens.
uppercase
1.
When
the
memo
highlight with the
field
word
memo
on the
contains information, the marker
is
Edit
and
shown
in
letters.
To open
the
memo
marker,
move
the cursor to
it
and press Ctrl-Home or F9
(Zoom).
2. After editing the memo field, save your work and return
by selecting Save Changes and Exit from the Exit pull-down
to the
form or Edit screen
menu
or by pressing Ctrl-
End
Viewing a List of Records
On the Edit screen you are limited to viewing one record
mode, however, you can view a screen full of records.
1.
From the Control Center, move the
at
a time. With the Browse
pointer to a database
file
name
in
the Data
panel.
Press the F2 key. The Browse screen should appear. If the Edit screen appears,
press F2 again. The records are listed down the screen and field columns are displayed
across the screen. If you see only one record, press the PgUp key to pull other records
into view. (Note: You may not see all the fields at once.
Use the Tab key to view
hidden columns.)
2.
Marking Records for Deletion
Before you delete a record it must be marked for deletion. From the Browse s;creen,
you can mark one or more records at a time using either of two different methods.
Method one:
101
Move the pointer to
Records menu appears.
1.
2.
Move
3.
The
the
the pointer to the
record
is
first field
of the record to
Mark record
now marked.
be deleted and press F10. The
for deletion option
and press the Enter
Notice the Del at the right end of the status
key.
line.
Method two:
1.
From the Browse screen, move the
pointer to the record to
be deleted, then press
Ctrl-U
2.
The record
is
now marked and Del
Unmarking a Record
is
displayed on the status
line.
for Deletion
There are two methods
to
unmark a record
for deletion.
Method one:
1. Place the pointer on the marked record and press the F10 key. The Records
appears.
2.
Move
3.
The Del on
the pointer to the Clear deletion
mark
menu
option and press the Enter key.
the status line disappears, indicating the record
is
no longer marked
for deletion.
Method two:
1.
Move
2.
The record
Deleting
the pointer to the record to be unmarked, then press Ctrl-U.
now unmarked and Del disappears from
the status
line.
Marked Records
When you
to
is
delete records from the database
file,
dBase
IV shifts the remaining records
occupy the space on the disk made vacant by the deleted records. This process
is
referred to as packing the database.
1.
From Control Center screen, press
Shift-F2.
and the Organize menu pops down.
102
The Database Design screen appears
Move
2.
the pointer to Erase
marked
records.
Press Enter.
A box pops
out with the question, Are you sure you want to erase all marked
records? Select Yes and the database is packed. You are returned to the Database
Design screen. The records have been deleted from the database.
3.
4.
To
exit,
press the F10 key,
move
to the Exit
menu, and press the Enter
key.
orting a Database
To
database in a useful order, such as alphabetically
two methods. The fastest and most efficient method
to make a sorted copy of a database file. This guide
sort the information in your
or zip-code order,
dBase
IV offers
by indexing. The second way is
indexing.
will only cover the first method
is
—
Indexing
A dBase
index,
IV index
dBase
is
a sorted
list
of items in
When you activate the
file.
the sort order specified by the index.
their original order; the index just "tells"
automatically displays the records
a database
in
The actual records in the database are still in
dBase the order in which to display information on the screen
use the index
to quickly locate
an item
of information in the
or printer. Also,
dBase can
database.
You can create or modify an index from the Database Design screen at any time,
whether or not the database contains records. You can create up to 47 indexes for any
given database. dBase IV stores all the indexes for a given database in a file with the
same name as the database, but with the extension .MDX. When you add, change, or
delete records, dBase updates the indexes automatically.
1.
2.
name in the Data panel of the Control Center and then press
invoke the Database Design screen.
Highlight the database
Shift-F2
to
Select Create
New
submenu appears asking
Index from the Organize pull-down
for information about the index.
menu and
press Enter.
A
Press Enter to select Name of Index. Type the index name (also called the tag)
You can assign any name to the index, following the same basic
guidelines as for creating field names (see Field Name, page 13).
3.
and press Enter.
4.
Now
select the Index Expression option
and press Enter.
expression> and press Enter. The index expression
index. You cannot index on logical or memo fields.
103
is
a single
field
Type the <index
name
for
a simple
5.
Select the Order of Index option (skip the
FOR
clause;
it
will
not be covered).
You
can choose Ascending (lowest to highest) or Descending (highest to lowest) by pressing
the
Space
6.
bar.
Press Ctrl-End to save your work (the
dBase
IV
will
create the index and
show
last entry will not
its
be covered
progress on the screen.
either).
When
it
is
done,
the Database Design screen reappears.
Sorts within Sorts
database on a single field is not sufficient, such as when you want to
sort records in last-name order and then in first-name order for those with identical last
names, you need to perform a sort within a sort. To do this, follow steps 1-6 above,
under indexing. However, use an index expression that lists the fields to sort on in priority
order with a plus sign (for character types) between each field (e.g., LASTNAME +
FIRSTNAME). The first field in the expression is the primary sort field, the second is the
secondary sort field, and so on.
If
sorting your
There are other sorting
possibilities but they are
beyond the scope
of this basic guide.
Activating an Index
To make dBase
IV use your index:
From the Database Design screen, select the Organize pull-down menu.
the Order Records by Index option and press Enter.
1.
2.
Highlight the desired option from the
submenu
listing
Highlight
index options and press Enter.
Press F2 to view the data in sorted order. If the Edit screen appears instead of the
Browse screen, press F2 again to switch. If necessary, press PgUp to scroll to the first
3.
record.
earching a Database
dBase
something
in
IV
can search a database
for
a specific record or grouping of records with
common.
Searching for Specific Records
104
Both the Browse screen and Edit screen menu bars include the Go To menu, which
provides options for basic searches. The first four options on the Go To menu let you
position the Edit or Browse screen highlight on a particular record, based on the record's
position
in
the database
file.
Forward and Backward Searches
The bottom
half of the
Go To menu on
displays the Forward Search and
the Edit and
Backward Search
Browse screen menu bars
options.
Browse or Edit screen, go to the position in the database you want to
search from (e.g., select Top Record from the Go To menu to go to the beginning of the
database), and move the highlight to the field you want to search.
1.
Bring up the
2.
Call
3.
When dBase
up the
Go To menu and
select
Forward
(or
Backward) Search.
displays the prompt Enter search string, type the text/numbers you
to search for and press Enter. To locate items that match a pattern rather than an
exact value, you can use the wildcard character ? to match a single character or the
wildcard character * to match any group of characters.
want
Index Searches
The index search searches
and
usually finds information in large databases more quickly than a forward or backward
search. The are two stages of an index search: First, using the Database Design screen,
you activate the index that contains the field you want to search. Second, using the
Browse or Edit screen, you perform the search.
1.
Highlight the database
the database index rather than the database
name
in
file
the Data panel of the Control Center and press
Shift-F2 (Design).
2.
From the Organize pull-down menu,
3.
From the submenu,
the sole
field
select
Order Records by Index.
select the desired index.
indexed on, or the
first field in
The
field
you search must be either
the index expression.
4.
Press F2 (Data) to go to the Browse or Edit screen to conduct your search.
5.
Select the Index
prompt Enter search
dBase displays
Key Search
string for <field
this to tell
you what
option from the
Go To menu. dBase
name>. This is the expression
field you currently can search.
105
presents the
for the current index;
Type the value to search on (including upper- and lower-case letters) and press
Enter. dBase will locate and display the first record that matches your search string.
6.
Q
uerying the Database
The process of selecting specific records from the database is called querying the
database. The technique you use is called query by example, abbreviated QBE. dBase
database
IV presents a skeleton of the
Keys used
to
of the kinds of
Queries are handled via the Query Design
to display.
design a database query are described below:
KEY
EFFECT
Enter
Completes an entry
Arrow-Left,
-Right
view skeleton
Arrow-Up,
Moves
Moves
and you give examples
use,
dBase
information you want
screen.
file in
in
the
file
or view skeleton
the cursor one character to the
highlight
up or down one row
or right
left
the
in
file
in
the
file
or
skeleton
-Down
PgUp, PgDn Moves
Ctrl-PgUp,
Moves
to the next or previous
to the top or
bottom
page
of the
of
file
file
skeletons
skeleton column
-PgDn
Home
Moves cursor
to the
the
file
or view skeleton
End
Moves cursor
to the last field in the
file
or view skeleton
Ctrl-End
Saves changes and
Tab
Moves
the cursor one
field to
the right
Shift-Tab
Moves
the cursor
one
field to
the
Backspace
Moves cursor one space
first field in
exits the
Query Design screen
in
left in
the
the
file
file
or view skeleton
or view skeleton
back, erasing along the way,
in
the
file
skeleton
Del
Deletes the character the cursor
F3 (Prev)
Moves back
is
on,
to the previous skeleton
106
in
the
file
or view skeleton
or view
F4 (Next)
Moves forward
F5
Deletes or reinserts
(Field)
to the next skeleton
all
fields in the
view skeleton
F6 (Select)
Highlights a group of adjacent fields
F7 (Move)
Moves selected
F9 (Zoom)
Expands and shrinks skeleton columns and condition boxes
Shift-F2
Brings up a Query Design screen for the selected database
text to
in
a new location
the view skeleton
in
the view skeleton
(Design)
row between two existing rows
Ctrl-N
Inserts a blank
Ctrl-U
Deletes the entire current row
Ctrl-W
Saves changes and
Ctrl-Y
Deletes the entire current row
Esc
Exits without saving
exits the
in
the
file
in
the
file
skeleton
skeleton or condition box
Query Design screen
in
the view skeleton
changes and returns
to the previously
used screen
The Query Design Screen
Before you can query a database, you must make sure that the database
and then you must get to the Query Design screen.
file is
open,
Press Shift-F2 (Design) from the Edit or Browse screen, or use the arrow keys to
Queries panel from the Control Center and press Enter. (After
you've viewed or worked with the results of a query, you can return to the Query Design
screen by selecting Transfer to Query Design from the Exit pull-down menu.) In addition
to the usual menu bar at the top of the screen and the status bar and navigation line at
the bottom, the Query Design screen includes a file skeleton and a view skeleton.
1.
highlight <create> in the
The file skeleton, near the top of the screen, displays the names of all fields in the
database; you will use it to specify search criteria. In the leftmost column is the name of
the database file that the skeleton represents. Each field name in the database is listed
in boxes to the right of the database name.
You can use the Home, End, Tab, and
Shift-Tab keys to scroll left and right through these field names and to view those that
are off the edge of the screen. (Although the Query Design screen initially contains only
one file skeleton, you can add as many as 7 more, enabling you to construct complex
queries involving several databases.)
107
2.
the
To
file
specify the records you want a query to display, you enter
skeleton.
You
put the
filter
"filter
conditions"
condition under the appropriate box (highlight the
in
field
box) and then press F2 (Data) to see the results.
If the Edit screen appears, press F2 again to switch to the Browse screen.
(You can
remove filter conditions using the file skeleton's navigation and editing keys.)
and enter the
filter
condition
in
the
field
Saving a Query for Future Use
1.
At the
Query Design screen,
the Layout option
in
the
menu
after creating
and
testing the query using F2, highlight
bar and select Edit Description of Query.
When
prompted,
type a description and press Enter.
Query iron) the Layout menu or Save Changes and Exit from the
Exit menu. When dBase displays the prompt Save as:, enter a valid DOS file name and
press Enter. dBase will automatically add the extension .QBE to the file name you
2.
Select
Save
This
provide.
Activating a
1.
Saved Query
name
At the Control Center, highlight the
of the
query
in
the Queries panel and
press F2.
be displayed: Use View, Modify Query, and Display Data.
Browse screen.
Selecting Use View puts the view name above the line in the Queries panel.
2.
Three options
will
Selecting Display Data activates the view and takes you to the Edit or
3.
When
Center.
still
finished, select Exit from the Exit
The view name
will
be above the
pull-down menu to return to the Control
the Queries panel, indicating that it is
line in
active.
Changing a Query
1.
Highlight
its
name
in
the Queries panel and press Shift-F2 (Design).
2. Modify the query using the same techniques used to create queries. You can see
the results by pressing F2 (Data). Return to the Query Design screen by pressing ShiftF2 (Design).
3.
When
Save Changes and Exit from the Exit pull-down menu
Center. The query name will still be accessible.
finished, select
return to the Control
Deactivating a Query
108
to
You must
Simply opening the database
database.
database name
R
remove
deactivate a query to
in
the Data panel and press
its
file
F2
effect
on your view
of the associated
deactivates the query.
Highlight the
(Data).
eports
Creating a
Custom Report
Only basic procedures
many more
features of
a report that
fits
for creating
dBase
a customized report are included here. There are
you may want to look into, to create
IV not covered that
your specific needs.
Ensure that the database is currently in use and, from the Control Center, highlight
in the Reports panel and press Enter. The Reports Design screen appears.
The ruler just beneath the menu bar on the Reports Design screen shows margins and
tab stops. The center of the screen is divided into five bands. Each band corresponds
to a section of the printed report. Anything that you place within a band is printed only
in the corresponding section of the report. The five bands are as follows:
a. Page header: printed once at the top of each page.
b. Report intro: printed once at the beginning of the report.
Typically, this section displays records from a
c. Detail: the body of the report.
database file.
d. Report summary: printed once at the end of the report and can be used to display
totals or closing information about the report.
e. Page footer: printed once at the bottom of each page and can be used to display
1.
<create>
page numbers or other
useful information.
Select Quick Layouts from the Layout menu. Select a layout from
options provided:
2.
a.
b.
c.
3.
Column Layout: columnar listings similar to the quick report.
Form Layout: forms using a format similar to the Edit screen
Mailmerge Layout: form
predetermined locations
letters with information
in
the
among
the three
for records.
from a database inserted
letter.
After selecting a general format for your report, select the margins.
on 8.5 x 11-inch paper, a right margin setting
and right margins on the printed page.
of
about 64
When
printing
give generally adequate
will
left
down the Words menu from the menu bar and select Modify Ruler.
Press Tab or Arrow-Right to move to the left-margin column, then type "[" to
mark the left-margin position. Then use Arrow-Right or Tab to position the
a. Pull
b.
into
cursor to the right-column margin, and type
109
"]"
to
mark the
right
margin.
c.
Press Ctrl-End to
b.
5.
modifying the ruler and record changes.
templates and text to your satisfaction.
To edit a band, move the cursor to the band border(which contains the band
name). If the band is closed (no blank space beneath the border), you need to
open it by pressing Enter and moving the cursor into the band.
Now you can enter and edit text, move fields around, and modify the contents of
the band using F5 to place fields in the band. You can close a band that you
are not using by moving the cursor to the band border and pressing Enter. Just
remember to reopen the band before printing because closed bands do not print.
4. Edit
a.
finish
the
field
A
report band can be modified using either the layout editor or the word-wrap
Only the layout editor will be discussed here. The layout editor lets you place
on the band, move them around, and add fields, boxes, and lines to the report.
a. Adding fields: Position the cursor where you want the leftmost character of the
field template to appear.
Either press F5 (Field) or select Add Field from the
Fields pull-down menu. Select a field, by positioning the highlight and pressing
Enter, from the submenu of possible fields:
1) database those fields available from the current database or query
editor.
fields
:
2) calculated
3)
display the results of
:
dBase
predefined those that dBase provides and handles automatically, including
:
and pageno (page number)
4) summary average, count, max, min, sum, std, and var
Press Ctrl-End to place the field and return to the design screen. A series of
Xs (or Hs or Vs) fills in a portion of the screen. These are the field template,
which show the max space that data will occupy on a printed page.
Moving and copying fields: Place the cursor in a corner of the area you want to
move and press F6 (Select). If you are moving only a field template, press
Enter. If you are moving more than a single template, use the arrow keys to
highlight the entire area that you want to move or copy and then press Enter.
Press either F7 (Move) or F8 (Copy). Move the highlight to the new location
and press Enter.
Deleting fields: Move the cursor to the field template and either press Del or
select Remove Field from the Fields menu. To delete an entire line, including
all fields and text, move the cursor to the appropriate line and press Ctrl-Y.
Adding and deleting text: To insert text into an existing format, position the cursor
where you want the new text to appear. Make sure that Insert mode is on and
then type your text. To change existing text, position the cursor on the text to
be changed and activate Overwrite mode (press Ins until the Ins indicator
disappears); when you type your changes, the new characters will replace
existing characters. To delete text from the format, position the cursor on the
character you want to delete and press Del. You can delete an entire section
of text and fields by using the Select key (F6) to highlight the area you want to
date, time, recno (record number),
:
b.
c.
d.
calculations
110
delete; after pressing Enter to complete the selection, press Del to delete the
entire highlighted block,
e.
Adding and deleting lines: To insert a new line on a report format, position the
cursor where you want the new line to appear and then press Ctrl-N, select Add
Line from the Words pull-down menu, or press Enter while in Insert mode. To
delete a line from a report format, move the cursor to the line and either press
Ctrl-Y or select Remove Line from the Words menu.
The keys
KEY
Enter
for editing report
EFFECT
If
mode
Insert
new
Arrow-Left,
formats are:
is off,
moves down one
row;
if
Insert
mode
is
on, inserts a
line
Moves
left
or right
one character or
to
end
of field template
-Right
Arrow-Up,
Moves up
or
down one row
-Down
PgUp, PgDn Moves
to top or
Home
Moves
to beginning of line
End
Moves
to
Tab
Moves
to next tab setting
Shift-Tab
Moves
to previous tab setting
Ins
Toggles
Backspace
Erases character
Del
Deletes character,
F1 (Help)
Provides help
F5
Adds a new
field
F6 (Select)
Selects
template or block
F7 (Move)
Moves
(Field)
end
Insert
field
field
bottom of screen
of line
mode
on/off
to the
field
left
template, or block selected with
F6
template or changes currently highlighted one
or block selected with
ill
F6
F8 (Copy)
Copies
Shift-F7
Changes
field
or block selected with
F6
size of currently selected field template
(Size)
a new
Ctrl-N
Inserts
Ctrl-T
Removes word
Ctrl-Y
Removes
Esc
Abandons
line
or field to right
entire line
current format without saving
changes
Saving Report Formats
Highlight Layout
1.
description
on the menu bar and select Edit Description of Report. Type a
and press Enter.
2. Pull down either the Layout or Exit menu and select Save This Report or Save
Changes and Exit, respectively. When dBase presents the prompt Save as:, type a valid
DOS file name and press Enter. After dBase has written a program for itself to print the
report later,
will return you to the Control Center where you'll see the new report name
it
in
the Reports panel.
Modifying Report Formats
name
Reports panel of the Control Center and
press Shift-F2 (Design). You can also press Enter and then select Modify Layout from
the submenu that appears.
1.
Highlight the
2.
You'll
be put
in
of the format in the
the report format design screen where you can
make
the changes
you desire.
save your work by selecting Save Changes and
you do not want to save your changes, select Abandon
Changes and Exit instead. You'll be returned to the Control Center.
After you've modified your format,
3.
Exit from the Exit
4.
If
file
If
save your modified format as a new file (leaving the original,
Save This Report iron) the Layout menu and provide a
name. Then select Abandon Changes and Exit from the Exit pull-down menu.
you want
unmodified format
new
menu.
to
intact), select
112
rinting
The
guide you through printing the database structure,
printing a quick report, and printing customized reports.
following sections
will
Printing the Database Structure
You can
1.
print
your database structure
Highlight the database
file
name
fairly
easily from the
Database Design screen.
the data panel and press the Shift-F2 key
in
(Design).
2.
Select Print Database Structure from the Layout pull-down menu.
3.
Select Begin printing.
4.
Select
Abandon Changes and
Exit from the Exit
menu
to return to the Control
Center.
Printing a Quick Report
dBase
1.
IV has a quick
Move
method
of printing out
the pointer to the database
Queries panel which you want to
print.
file
a report
name
in
of
a
file's
records.
the Data panel or the view
1.
the
Press Shift-F9. The Print box appears.
2. With the Begin printing option highlighted, press the Enter key.
sent to the network printer.
Printing
in
Your
print job is
Customized Reports
MaKe
sure the report format
name
is
highlighted
in
the appropriate panel of the
Control Center and press Enter.
2.
From the options
that appear, select Print Report.
3. From the Print menu that appears next, select either View Report on Screen (to see
a screen display only) or Begin Printing (to actually print the text). If you select Begin
Printing, your job is sent to the network printer immediately.
113
E
xiting
dBase IV
1.
Return to the Control Center.
2.
Press F10 and
3.
Move
to the
4.
DOS
If
move
the pointer to Quit to
prompt
in
menu.
to the Exit
the 1DIR
DOS and
menu
you accidentally select Quit
press the Enter key. You should be returned
of the network.
to
Dot Prompt, type "QUIT"
press Enter.
114
at the dot
prompt and
Bibliography
Cowart, Robert, The ABC's of
dBASE
IV 1.1
,
Sybex,
Inc., 1991.
Simpson, Alan,
dBASE
IV
Simpson, Alan,
dBASE
IV User's Instant Reference, Sybex, Inc., 1989.
Programmer's Instant Reference, Sybex,
Simpson, Alan, Understanding
dBASE
IV,
Sybex,
115
Inc.,
1989.
Inc.,
1989.
Index
saved query 21
Activating a
Activating an index
18
Adding records
from the Browse screen 14
from the Edit screen 12
Browse mode
Browse screen
15
adding records 14
editing records
14
16
exiting
navigating keys
14
undoing an edit
Catalog 7
14
9
9
9
Changing a query 21
Character type 10
Control Center 6
catalog line 7
creating
menu
name
current
file
description line
8
panels 7
items 6
file
menu
bar 6
navigating keys
8
<create> panel option 7, 8
Current File
<create> highlighted 8
description
name
Data
8
8
field
dec 10
defining
9
entering data
Field
Name
Field
Type
index
num
width
13
10
10
10
10
10
116
Database
entering data
12
12
structure
Database Design screen
16
16
exiting
field
9,
panels
indexing
10
17
Database structure
entering data
fields
12
13
making changes
printing
11
26
saving 12
Date type 10
Deactivating a query 22
Dec
10
Delete
all
all
characters
20
13
fields
block 24
character
13, 20,
current field
in
24
database structure
11
template 24
line 24
marking for deletion 15
records 16
row 20
text 24
Display data
13
Dot prompt
exiting to Control Center 6
exiting to DOS 26
Edit screen 12, 15
editing records 14
entering data 13
field
exiting
14
Editing records
from the Browse screen 14
from the Edit screen 14
Exit
Browse screen 16
Database Design screen
12, 16
dot prompt 6
117
Exit
(cont.)
Edit screen
14
help 9
pull-down menus 7
save changes 13
saving changes 20
without saving changes
Extension
12, 13, 20,
25
.BAT 6
.CAT 9
.DBF 12
.MDX
17
.QBE
21
Field
Name
Field
Type
File
10
10
skeleton 21
conditions
Filter
entering
21
removing 21
Float type
10
Help 8
exiting
9
navigation line
8
options 8
Table
of
Contents
Index 10, 16
Index expression
Indexing 16
activating
8
17
an index 18
data field 10
index expression
17
sorts within sorts
17
in
Insert
blank field 11
blank row 20
line 24
new line 25
text 23
toggle 13
Insert mode 14, 24
Layout editor 23
Local area network
server 3
3
118
1
user
3
Logical type
10
Marking records
Memo
Memo
15
15
field
type 10
Navigation keys
Browse screen 12, 14
Database File Structure
Edit screen
1
12
for designing a database query
pull-down menus 7
report formats 24
Navigation line (Control Center) 8
Numeric type 10
Panel
applications panel 7
data panel 1,9, 13
19
dec 10
Name
Field
field
10
panel
10
Type
10
Field
panels 7
forms panel 7
file
index
10
labels
7
num
10
queries panel
7
reports panel
7
width
10
Pointer 6
Printing
25
database structure 26
quick report 26
reports 26
Pull-down menus
accessing 6
bulleted options
exiting
7
7
navigating keys 7
shaded options 7
submenus
7
119
Query
activating
a saved query 21
changing 21
deactivating
22
saving 21
Query design keys 19
Query Design screen 12, 20
file
skeleton 21
Querying the database 19
Report
custom report 22
quick report 26
Reports 22
adding and deleting lines 24
adding and deleting text 23
adding fields 23
changing text 23
deleting a line 24
deleting fields 23
deleting text 24
editing bands 23
editing keys 24
inserting lines 24
inserting text 23
layout editor 23
layout options 22
margins 22
modifying formats 25
moving and copying fields 23
printing 26
Reports Design screen bands 22
saving formats 25
saving modified report formats 25
Reports Design screen 22
Save
database structure 12
index
17
memo
fields
15
modified report format 25
query
22
report formats 25
21,
Save changes and
exit
11-13,20
Searching a database 18
120
for specific records 18
forward and backward searches
index searches 18
Server 3
18
Sorting
16
Sorts within sorts
Starting
dBase
IV
17
6
Status line 9
Submenus
7
Typeover mode 14
Undoing an edit 14
Unmarking records for deletion 16
User 3
Viewing records
from the Browse screen 15
from the Edit screen 13
Width 10
121
LIST
OF REFERENCES
Adams, Kay A., Halasz, Ida M., and Adams, R. Jerry, Handbook
Computer User Manuals, D.C. Heath and Company, 1986.
Axelrod, C. Warren,
Computer
Human
Bailey, Robert W.,
Productivity,
Errors
in
John Wiley
Computer Systems,
&
Sons,
for
Developing
Inc.,
1982.
Prentice-Hall, 1983.
Beard, Richard E. and Callamars, Peter V., A Method for Designing Computer
Support Documentation, AFIT/LSH, September 1983.
Report on Some Users' Views of
Documentation", ACM S1GDOC Conference Proceedings Second International
Conference on Systems Documentation, The Association for Computing
Machinery, Inc., 1984: 11-15.
Borland, Russell
E.,
"Those
Silly
Bastards':
A
Computer Tutorials",
IEEE Professional Communication Society Conference Record IEEE Service
Bradford, Annette N., "Enhanced User Interface Through
,
Center, 1983:
131.
Brockmann, R. John, "Where Has the Template Tradition in Computer
Documentation Led Us?", ACM SIGDOC Conference Proceedings Second
International Conference on Systems Documentation
The Association for
Computing Machinery, Inc., 1984: 16-18.
,
Brockmann, R. John, Writing Better Computer User Documentation, John Wiley
and Sons, Inc., 1990.
Bryant,
Tom, "Good Operator Documentation
Support, February 1990:
Carroll,
of
is
Good
Business", Technical
79-82.
John M. and Rosson, Mary Beth, Interfacing Thought: Cognitive Aspects
Interaction, MIT Press, 1987: 83-111.
Human-Computer
Chinell,
Sons,
David
Inc.,
F.,
System Documentation: The In-Line Approach John Wiley and
1990:
Chorafas, Dimitris
,
7-78.
N.,
The Software Handbook,
122
Petrocelli
Books,
Inc.,
1984.
Software User Documentation, ANSI/IEEE Std 1063-1987, The
of Electrical and Electronics Engineers, Inc., 1988.
IEEE Standard
Institute
for
Linda C. and Glasgow, Mary R., "Good Software Demands Good
Documentation", IEEE Professional Communication Society Conference Record
IEEE Service Center, 1986.
Costa,
,
Derfler,
Frank,
December
J.
PC Magazine
"An Overview of Networking Options",
Jr.,
9, 1986:
,
141.
"A Standard Development Process for User Publications?", ACM SIGDOC
Conference Proceedings Second International Conference on Systems
Documentation, The Association for Computing Machinery, Inc., 1984.
Etz, D.,
Gleason, Jim, "Manual Dexterity - What Makes Instructional Manuals Usable?"
IEEE Professional Communication Society Conference Record IEEE Service
,
Center, 1986.
How
Glossbrenner, Alfred,
Grimm, Susan
J.,
How to
to
Look
Write
it
up Online,
St. Martin's
Computer Documentation
for
Press, 1987.
Users Van Nostrand
,
Reinhold Company, 1987.
Ghee, Roger
A., Text,
Context, and Hypertext,
MIT Press,
1988:
133-148.
Houghton-Alico, Doann, Creating Computer Software User Guides from Manuals
to Menus McGraw-Hill, Inc., 1985.
,
Johnson, Bob, "User-Centeredness, Situatedness, and Designing the Media
Computer Documentation", ACM, 1990: 55-60.
Krull,
Robert and Rubens,
Phillip,
of
"Online Information Content and Navigation",
IEEE Professional Communication Society Conference Record
Center, 1986.
Luhn, Robert, "The Organization LAN",
PC
,
IEEE Service
Magazine, February, 1985:
72.
Maynard, John, "A User-Driven Approach to Better User Manuals", IEEE
transactions on Professional Communication, March, 1982: 216-219.
McGrath, Richard
User's Manual
,
A.,
Where's the Manual? Preparing and Producing the Software
Van Nostrand Reinhold Company,
123
1991.
McNamara, John
Local Area Networks, Digital Press, 1985.
E.,
Pesante, Linda Hutz, "Integrating Writing
S1GCSE
Bulletin,
How
Price, Jonathan,
Publishing
Volume
Company,
23,
Number
to Write
1,
into
March
Computer Science Courses",
1991:
205-209.
a Computer Manual, The Benjamin/Cummings
1984.
Rosenbaum, Stephanie and Walters, R. Dennis, "Audience Diversity: A Major
Challenge in Computer Documentation", IEEE Professional Communication Society
Conference Record IEEE Service Center, 1986.
,
Ruben, Martin L, Documentation Standards and Procedures
Van Nostrand Reinhold Company,
for Online
Systems,
1979.
Rubens, Brenda K., "A Comparison of Hardcopy and Online Tutorials", IEEE
Professional Communication Society Conference Record, IEEE Service Center,
1986.
Sachs, Jonathan, "Six Leading LANs",
PC
World, February, 1985:
108.
Schneiderman, Ben, Designing the User Interface:
Strategies for Effective
Human-Computer Interaction Addison-Wesley Publishing Co., 1986: 358-390.
,
Stimely,
ACM,
Gwen
1990:
L.,
"A Stepwise Approach to Developing Software Documentation",
122-124.
and Porter, James E., "How Do Writers View Usability
Information? A Case Study of a Developing Documentation Writer", ACM, 1990:
Sullivan,
Patricia A.
29-35.
Weiss,
Edmond
H.,
How
to Write
a Usable User Manual,
ISI
Patricia A. and Beason, Pamela S., Writing
Documentation, Scott, Foresman and Company, 1990.
Williams,
Press, 1985.
Effective
Software
"What PC Owners Say About Documentation", Proceedings of
the International Technical Communications Conference, Society for Technical
Communication, 1985: RET-10 - RET-12.
Wilton, Judith A.,
Documentation", IEEE Professional
Communication Society Conference Record, IEEE Service Center, 1986: 25.
Zirinsky,
Mark,
"Usability
Testing
of
124
INITIAL DISTRIBUTION LIST
1.
Defense Technical Information Center
Cameron
Station
Alexandria, Virginia 22304-6145
2.
Superintendent
Code 0052
Naval Postgraduate School
Monterey, California 93943-5000
Attn:
3.
Library,
Commanding
Attn:
Officer
LCDR Nancy
K. Clark
FOSIF WESTPAC BOX
PSC 478H
FPO AP
4.
271
96313-1801
Professor
Norman
F.
Schneidewind
,
code as/ss
Administrative Sciences Department
Naval Postgraduate School
Monterey, California 93943-5000
5.
Professor
Myung W. Sun, Code as/Su
Administrative Sciences Department
Naval Postgraduate School
Monterey, California 93943-5000
125
Thesis
C48263
c.l
Thesis
C48263
c.l
Clark
Alternatives for developing user documentation for applications
software.
Clark
Alternatives for developing user documentation for applications
software.