1
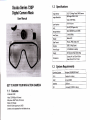
Scuba Series 720P
Digital Camera Mask
User Manual
1.2
Specifications
'l12.5" 5.0 Mega Pixels CMOS sensor
lmage Sensor
>u[ rmage: zcvz x
lmage Resolution
Video:720Pl3ohs
J.UMM
Lens Aperture
Lens
4G+lR(100 Degree Fov)
Storage Medium
Micro SD/SDHC(up to 32GB)
Lens Focus
1.2m to infinity
Displav
Status LCD
Data Format
Picture: JPEG, Video: AVI
lnterface
USB 2.0 High Speed
Power Supply
3.7Vl600MAH Li-Battery
Weight
306 (Camera 869, Mask 2209)
Dimensions
Camera:'l4.1cm'3.8cm*3.6cm
Mask: 1 9.5cm.8-7cm*7.ocm
1.3
System Requirements
Ooeratino SYstem
CPU
RAM
GET TO KNOWYOUR MINIACTION CAMERA
1.1
Features
Underuater: 30M
Video: 720Pl30fps, AVI format
Still picture: 2592-1944, JPG format
Status LCD Display
Micro SD Card support up to 32GB
Camera can be separated from the Mask and use.
lnterface
CD
LISB oort
4Y
snce., CD ROM or above
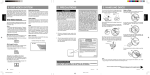
2.0
3.0
Functional Parts
@
tultlgtriESt
3.1
Set Up
Power On/Off
Power On:
LCOsffi
Press and hold the LEFT button for around 3 seconds, the €mera will vibrate and
the blue indicator on.
Power Off:
LEtrffi
EffiBl.,lM
uffiBre
Press and hold LEFT button for at least 2 seconds until the blue indicator off and
alert ended.
NOTE:
ED Fil h
Lishl
1. We suggest to use CLASS 6 (High speed) Micro SD card for smooth shooting
purpose.
Lower CLASS of Micro SD Card may cause video blur
2.
8ilM &
Ensure the emera is dry and powered off before taking out the Cap from the
GMEE.
Eds6
3. There is only one correct direction to insert the Micro SD erd
into the slot. Do
not force the card into the card slot, as it may damage both the
the l\4icro SD
4.
€mera and
erd.
A new Micro SD card should be fomatted before using.
NOTE: The DIGITAL CAMERA MASK will be returred to as the "CAMERA MASK'
and CAMERA" and "MASK" throughout this inslruction manual.
Disassemble and Assemble
3.2 Auto Power
Assemble; Pull the @mera towad along with the groove on top of the mask, and push
up, the blue indicator and red
indi€tor will
sprinkle slowly and altemately alam. Then, camera will auto power-off in about
Disassemble: Press and hold the lock button on top of the camera, pull the €meE
along the groove from the mask.
Off
1, When the built-in Li-battery used
10
2.
semnds.
When the memory is full, the camera will alarm and auto turn offwlhin about
1O
se@nds.
towards left.
3.
The Camera wjll auto off when on operation for 3 minutes.
While shooting/reording, do not take oul the TF card. Otheruise, lhe Gmem
will alarm and turn off.
Gharging
1. Charging by PC
Connect the cameE to the PC via USB @ble. The red indi€tor flickec and
the green light is on when charging is in prccess. When the battery is fully
charged, the indi€tor will ofi.
It
takes around
34
houB to fully charge lhe battery
2. Charglng by A/C adapter
Connect the camera to the A,/C adapter, The red indietorflickeB and the green
light is on when charging is in pro@ss. When lhe battery is tully charged, the
indietor will off. lt takes around 3 hours to fully charge the battery
lmportant Note:
The Gmera requires a specmcA,/C adapter to charge the battery please
consult your dealer and choose a @rectA,/C adapter to charge the emera.
lmproperA'/C adapter muld damage the @mera/battery
Mode Switch
When the camera is on, press LEFT button to switch between the
Video Mode and Single Picture Mode.
Video Mode;
The blue indi€t6r is on, remrdir\g i@n appeare on the LCD.
Single Picture Mode:
The red indicator on, shooting icon appeaE on the LCD.
LCD Display
On the upper area, the LCD displays the following symbols(from tefr to right):
"
single Photo' or "Video" (either one when selected ),
"Micro SD"
"Battery Level"
On the main area, the LCD displays:
I
E
l.
ln Video mode,4-digit numberappears. lt means maximum recording
capacity.
4.4 PC Camera
The Camera Gn be used as a PC GmeE (web€m)
The first 2-digit number indicates the'Minute'and the last 2-digit
1. Make sure to turn on the €mem before connecting to the @mputef,
2. The cmera will be detected and the ddver will be installed automati€lly
indicates the "second'For example "9960", it means the available time
is 99 minutes and 60 seconds.
2.
ln Single Picture mode,
number of picturc
€n
under Windows XPly'istar/ when the Gmera is @nnected to the omputer
via USB eble.
3,
4digit number appsE. lt means the maimum
be shot. The number will decrease one by one with
The actual number of re@rding time and Picture depends on the memory
4.5 Video/Picture Transferring
capacity.
Please copy the Video/Picture files into your PC for better playback.
The Camera can be used as a'Removable Disk" when it's connected
to PC.
4.0 Using the camera
4.1 Shooting Video
There are two ways to @py the Video/PictuE file to your PC
l.
Take out the Micro SD mrd. lrert Micro SD into a SD adapter and insert the
Grd into the SD slot of lhe @mputer Then, @py the files to the @mputer hard
drive.
When the camera is on and in Video mode, press RIGHT button to start
sh@ting video, the blue indictor will twinkle. Press RIGHT button again to
stop sh@ting, the blue indicator lights will be on.
2.
flickering. A "Removable Disk' icon will appear in "My Computer"
ofthe PC. All the Video/Piclure files can be transferred to the PC.
When the @mera is on and in Single Picture mode, press RIGHT button to
sh@t single picture.
5.0
GmeE separalely. lt may help
you to shoot the target accurately.
4.3
LED
When the camera is off, connect the camera to a PC via USB cable.
The camera will be detected by the PC and the "blue light" starts
4.2 Single Picture Shooting
You may open the Vewfinder when using lhe
€mera function is ready to
Note: A PC @mera program is needed to support this functjon.
each shooting.
Note:
Afrer the driver installation is completed, the PC
use.
1.
ry
with AV
€ble. Then tum
on the Camera.
Manual Playback
Press LIGHT or LEFT button to brcwse the Video or Pictures files.
fill in lights
The LED lights can be used to shoot video/single picture in dark area as
well as a flashlight.
Press the'LlGHT" button to lurn in on. Press the "LlcHT" button again
to turn it off.
Play on TV
Connect the Camera to the
Press RIGHT button to play Video or Pictures files
2.
Auto play
Press RIGHT button to play Video or Pictures files automatically.
For the pictures files, it
perfoms
slideshow by 5 seconds each picture.
3.
Psus
4.
Exit
Press RIGHT button to pause and
pl$
it again to
Select "OK. to EstoE lhe default sefling which st by the tactory
(The system time will not be rmt).
Selecl *Cancel" to exit without restoE the default setting.
ontinue.
8.
.
NOTICE
It may take a few seconds to start playing the large size of video file.
5.{
L Mdeo Tlme
Menu Setup
The video will be splited into differene fil6 by ihe Time Lenglh?setec{ed;
1 0Seconds;1 Minute;5Minules;1
0Minutes;Otr.
Connect the camera with AV cable, press and hold LEFT button for
around 3 seconds to enter anto TV mode. Press RIGHT button to enter into
'menu setting". Press LIGHT or LEFT button to select desired parameters.
Press and hold RIcHT buttm to confirm the parameters.
'1.
Resolution
Resolution decides the qualityofthe Mdeo.
There are four options: 1080R 7208 \ryVGA, QVGA
NOTICE : The higher resolutjon the more memory space needed.
Press and hold LEFT button for at ledst 2 ss@rds to exit.
For example, if you selec.t '5Minu16" l'ime Length, a 2oMinutes video wiil be splited
into 4 Mdeo Clips (sMinutes each Clip).
lf you select
'OFF , the vid@ will not be splited.
TimerDate
Press LIGHT or RIGHT button to slecl paEmeteE.
Press and hold RIGHT butttr to sve and exit.
10.
Auio Delete
Please select this function mrefully.
When 'ON' is slected, the €meE will auto delete the data stored in the Micro SD
when it is tull.
When "OFF" is selected, the cameE will auto tum offwhen the Micro SD is full_
Sound
TheE are four options of Gution:
2- Caution
Shake, Sound, Shake & Sound, OFF
'l'1. Data
3. Language Setup
There are 9 languages for choiG:
English,Deutsch, Frangais, Espaffol, ltaliano, Portugu6s,
ffi'lt#I
orE*iB.
4. Frequency
Select 50HZ or 60HZ to suit your lo@l elecldcity frequency.
5.
Tv Mode NTSC/PAL
Select the NTSC or PAL to suit your TV system.
6, Fomat
This is to format your Micro SD Card inside the @meE.
7. Default Setting
Print
When "ON" is selecled, the DATE will be stamped on Video/Picture.
When "OFF" is selected, no DATE will be stamped on Md@/Picture.
**4,
12. Vereion
It
shows Firmware Vereion infomalion.
6.0
Trouble Shooting
Probl€ms
1. LED Flickers
anc
cameaa turns off
2. Cannot turn
Solutims
Cauaes
on
the camera
Low battery /
l.Recharge the camera
No Micro SD
Card
2.lnsert a Micro SD card
)amera turns off
The micro S[ lransfer the files stored in the
lutomatimlly
card is full
)annot find removable
lisk after connecting
1e camera to the
omputer.
Connection
failure.
7.0
Micn
iD to other storage media.
.Make sure USB cable connections
rre secured and restart the computer
recessary.
l.
Try a different USB port.
Trademark lnformation
Micrsofr and Windore are U.S. registered trademarks of Microsoft
Corporalion.
Pentium is a registered trad emark of lntel CorpoElion.
iPhone, iPad, Macintosh is a trademark ofAppte tnc.
Micro SD TM is a tademark.
Other names and products may be trademarks or Ggistered trademarks oftheir
respective owneB.
\g
xl
I"1-d\